FME erk
-
Posts
518 -
Joined
-
Last visited
Recent Profile Visitors
4,083 profile views


-
Well I dont know if many of you realise but this particular Tamiya kit is over 50 years old and as I have two, part made, then I shall make a concerted effort to get them completed. I dont have any decals for these aircraft (individual squadron decals I am talking about) so will have to apply to a certain producers to see if I cant get them printed. I know many of you print your own but I neither have a printer or probably the correct font profiles to make use of. . . Anyhow, despite being ill over the xmas period (lots of it about in the UK), I manage to secure the bombs in place in one of the aircraft and attached the bomb doors but one of them came off . .. I have also painted the pieces appertaining to the turret internals so next will be their construction . . . . plus the masking etc for the turret framing Until the next posting . . . Ian

-
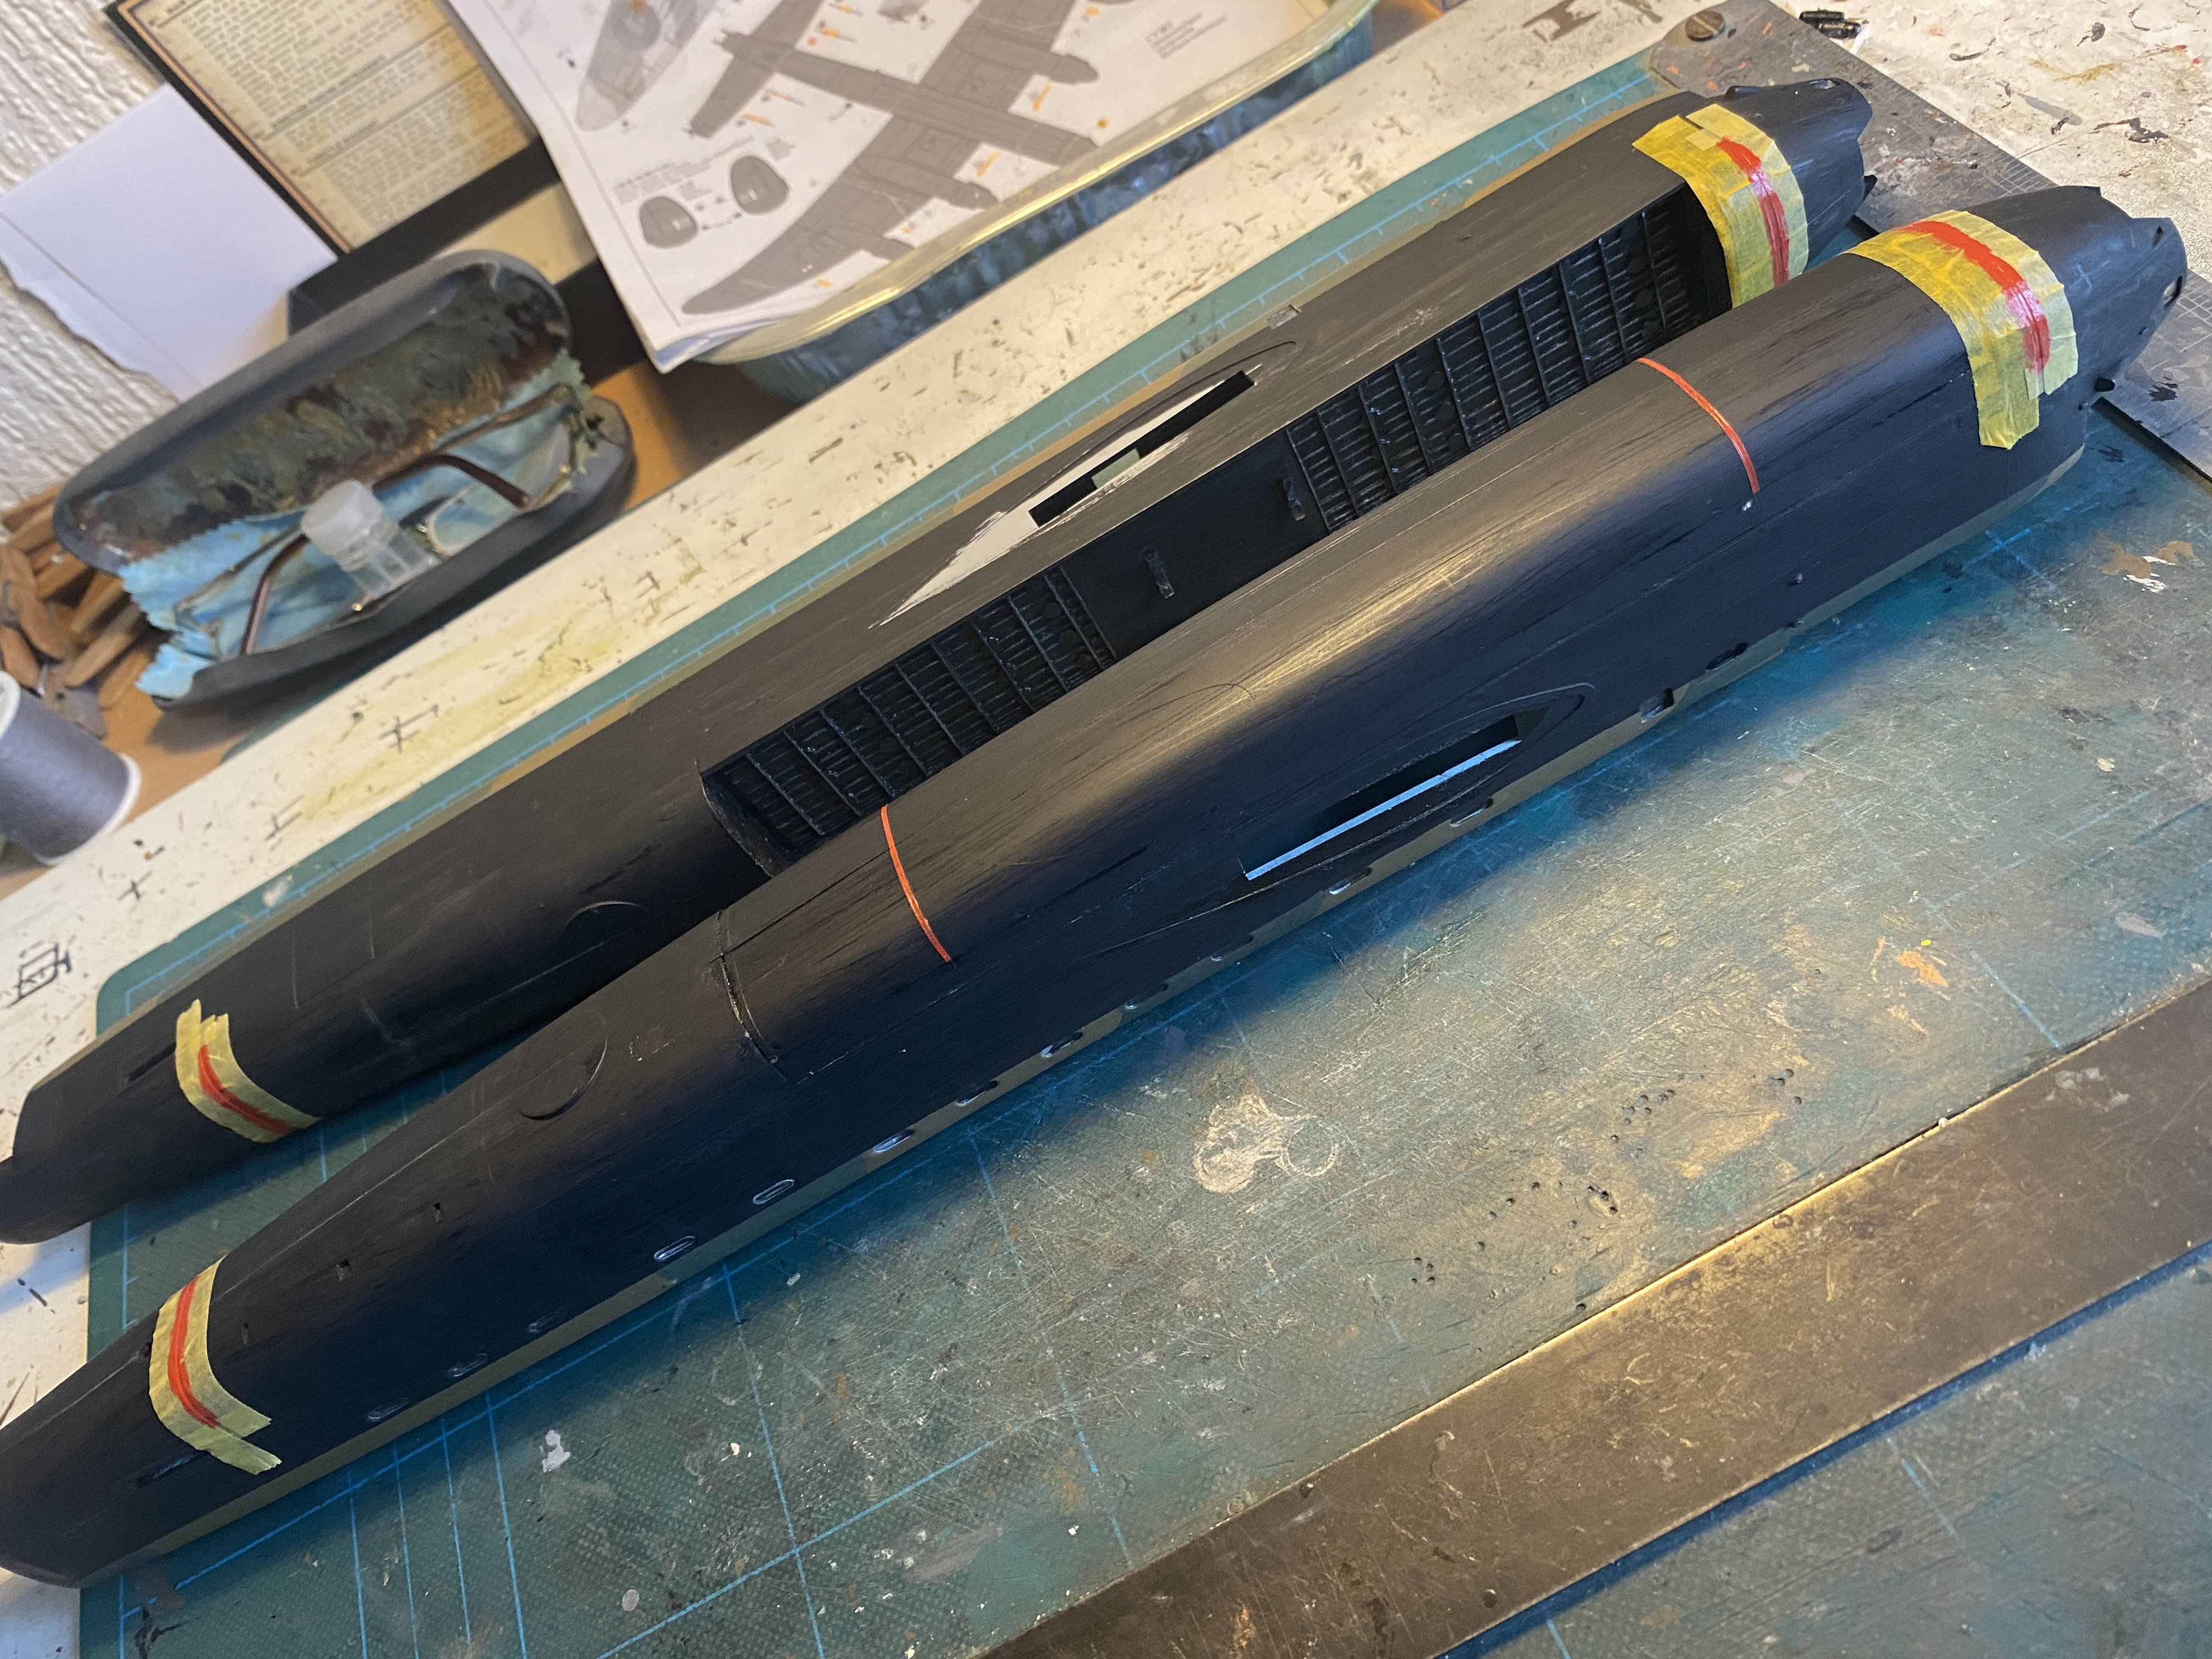
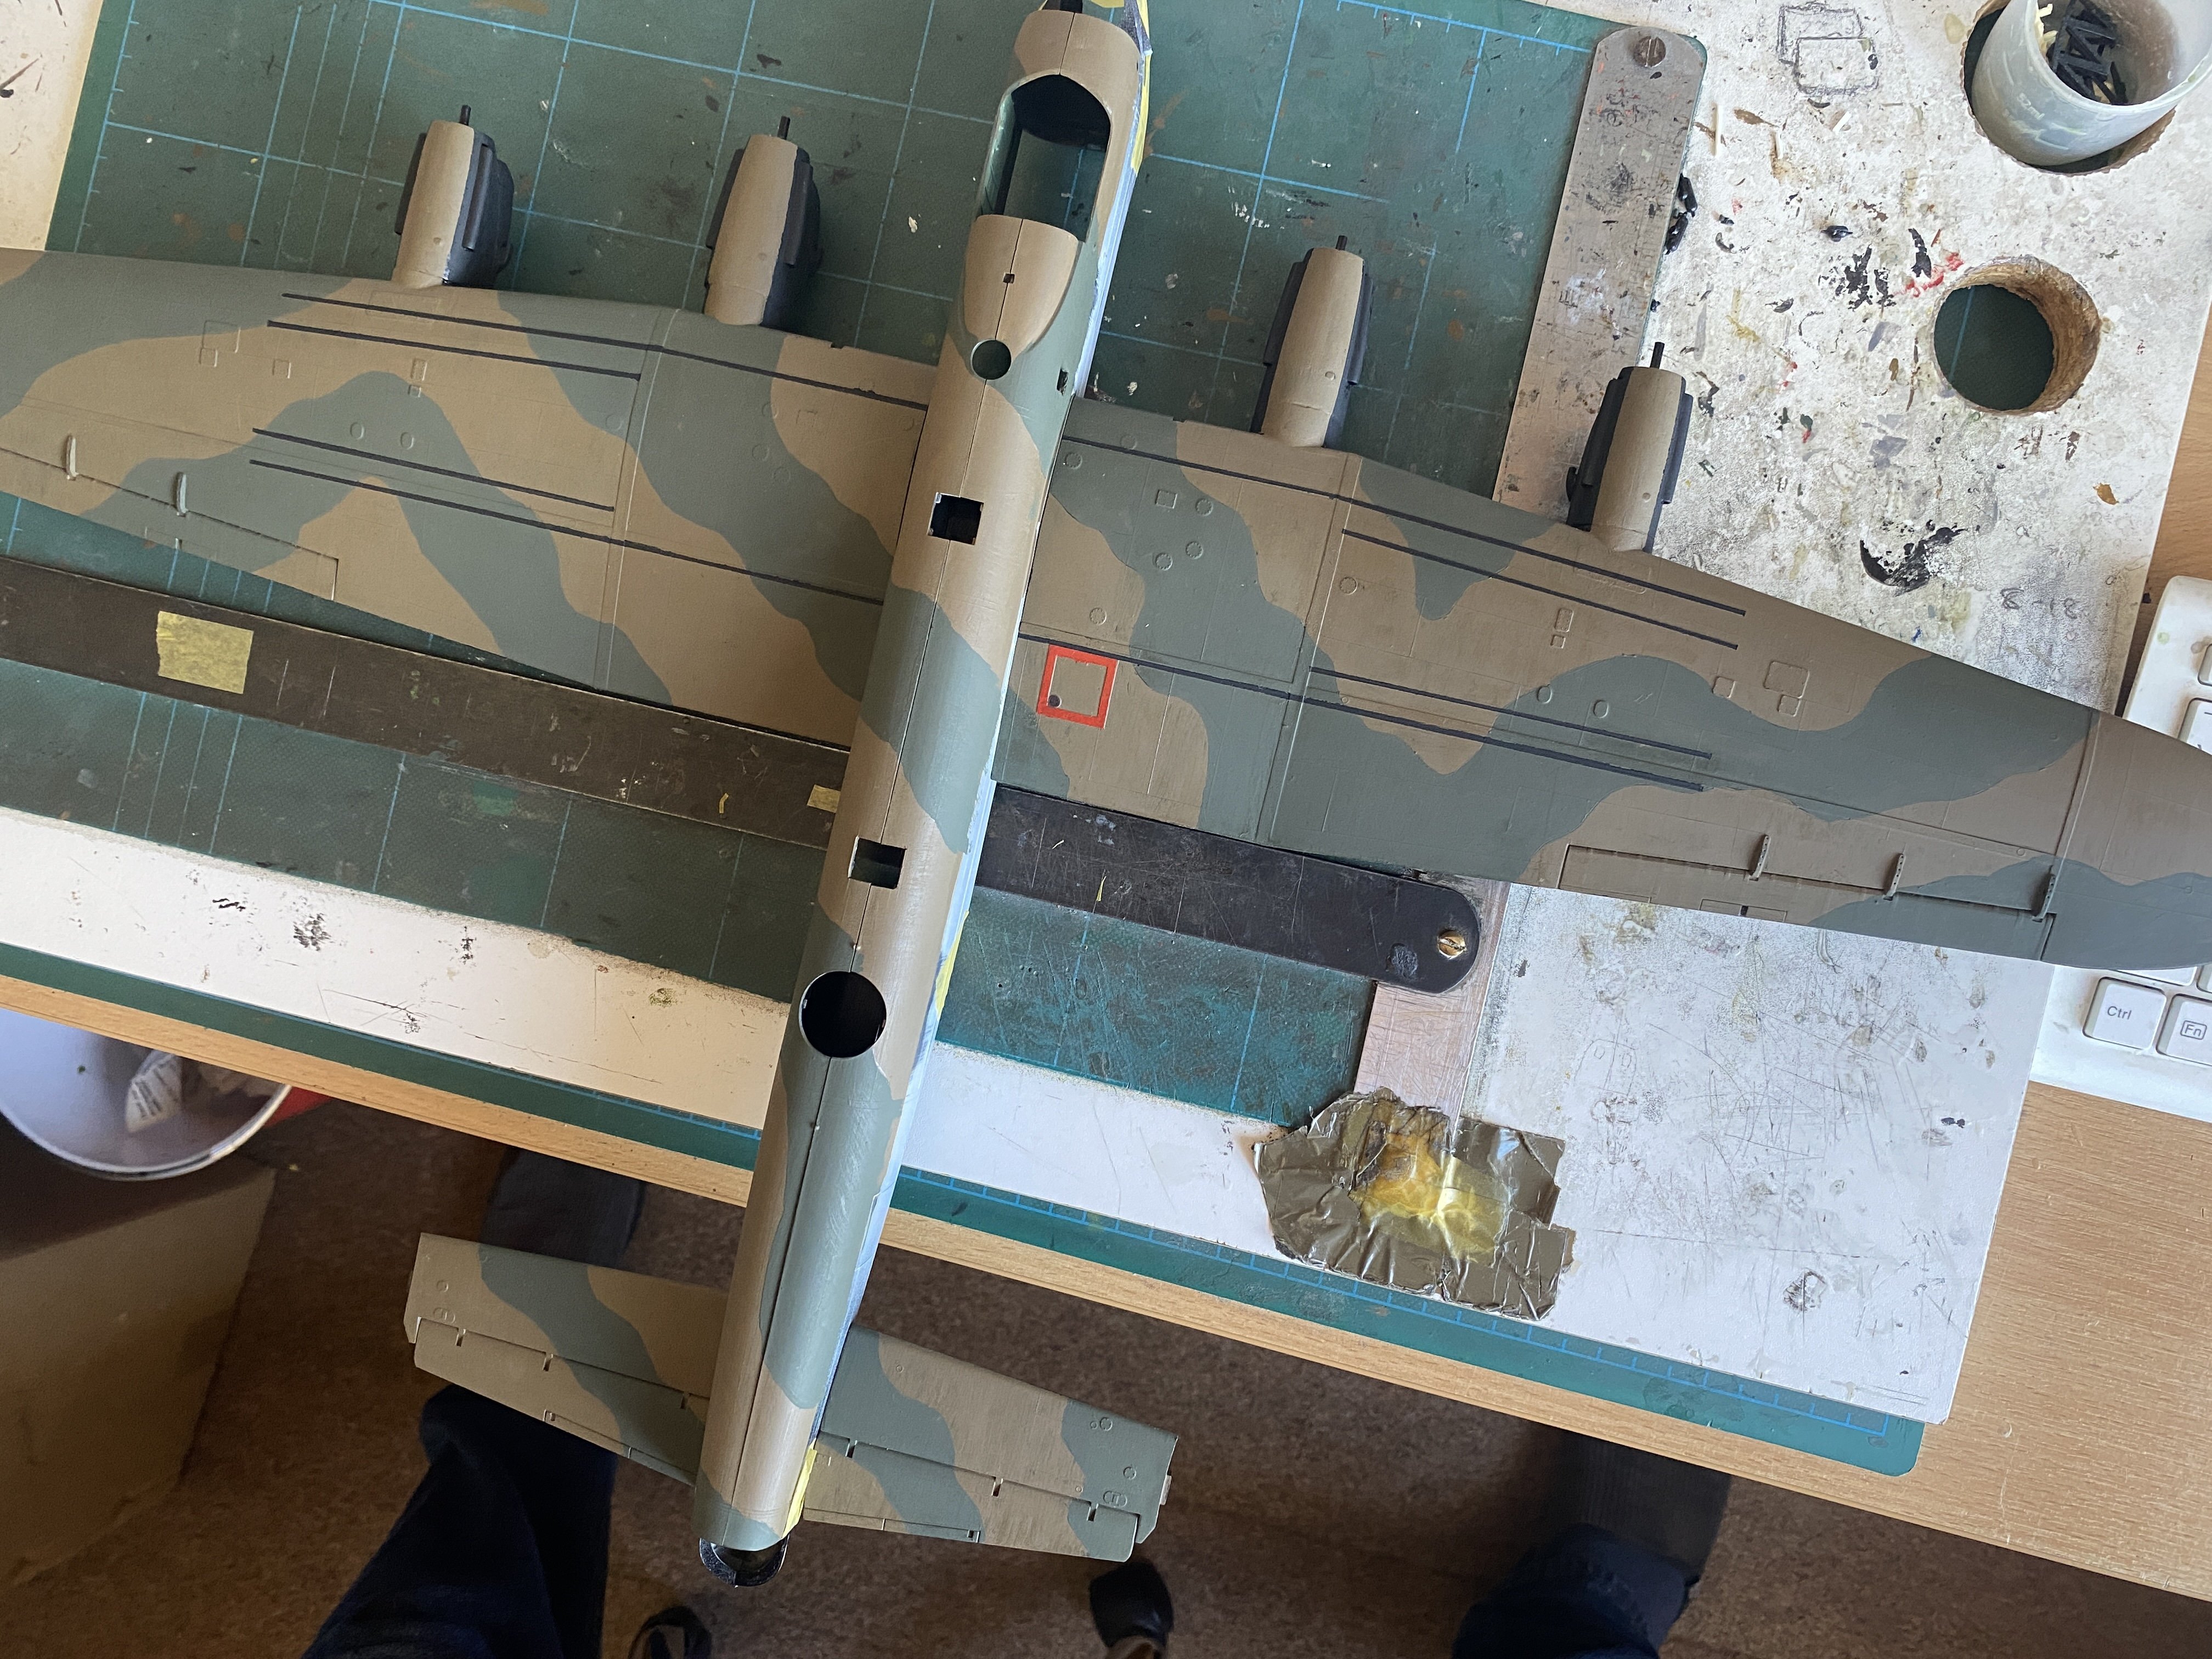
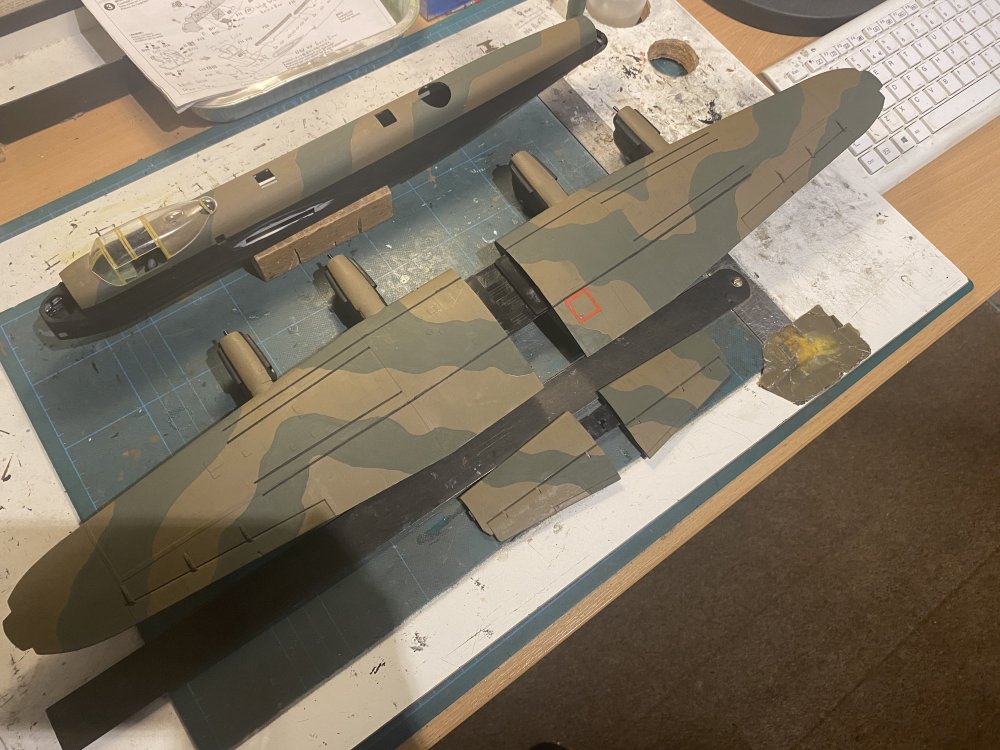
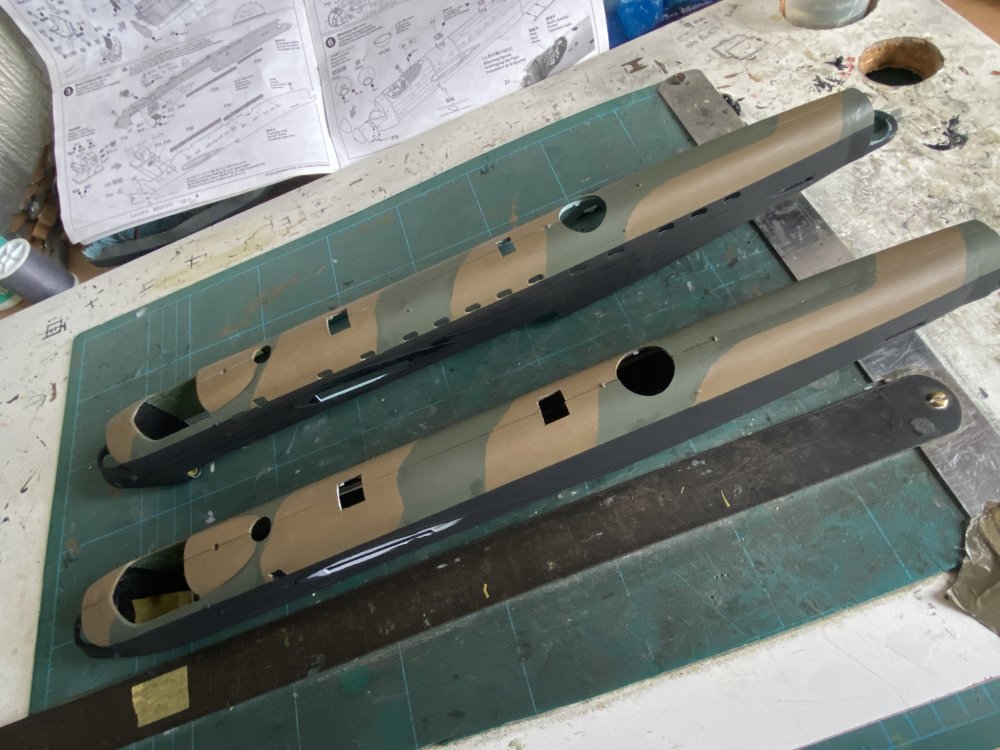
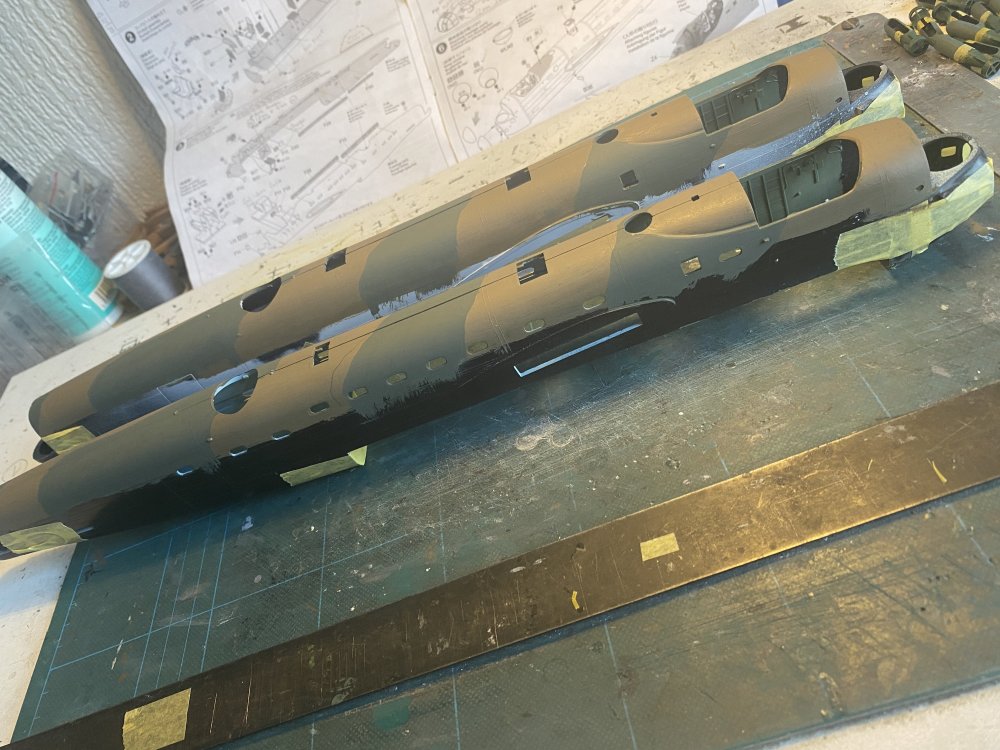
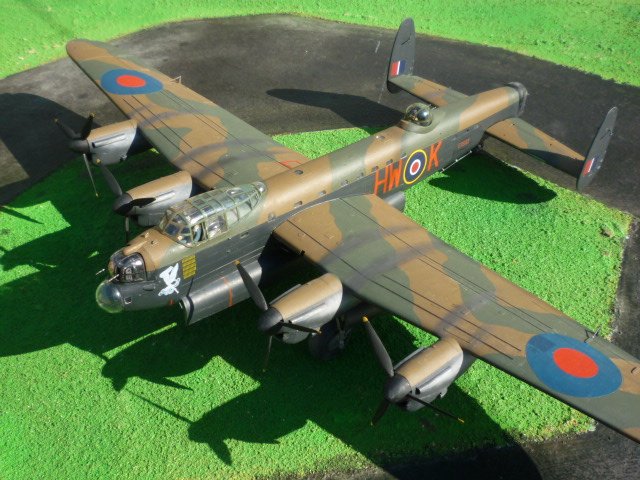
Thanks Dennis, yes it works for me on such a big aircraft, I have templates for the camouflage pattern so it will always match . . Something simple but it needed to be done . . You will note the in-perfect painting of the black . . . . I noticed that on the real aircraft there are streaks and odd marks due to weather conditions being flown through plus, the odd panel replaced due to flak damage; not something you see modeled so for me personally, its more authentic . . .

-
Finally took delivery of some glue so I now have the fuselage halves together, tried to eliminate the seam joint along the spine and it been given another coat of paint. Somebody mentions air-brushing the whole camouflage when done but I still brush paint and do sub-assemblies when I can. Next up will be all the turrets with a few additions such as the turret internals but also the cockpit canopy's need re-framing . . More to do as time passes by . . . Ian

-
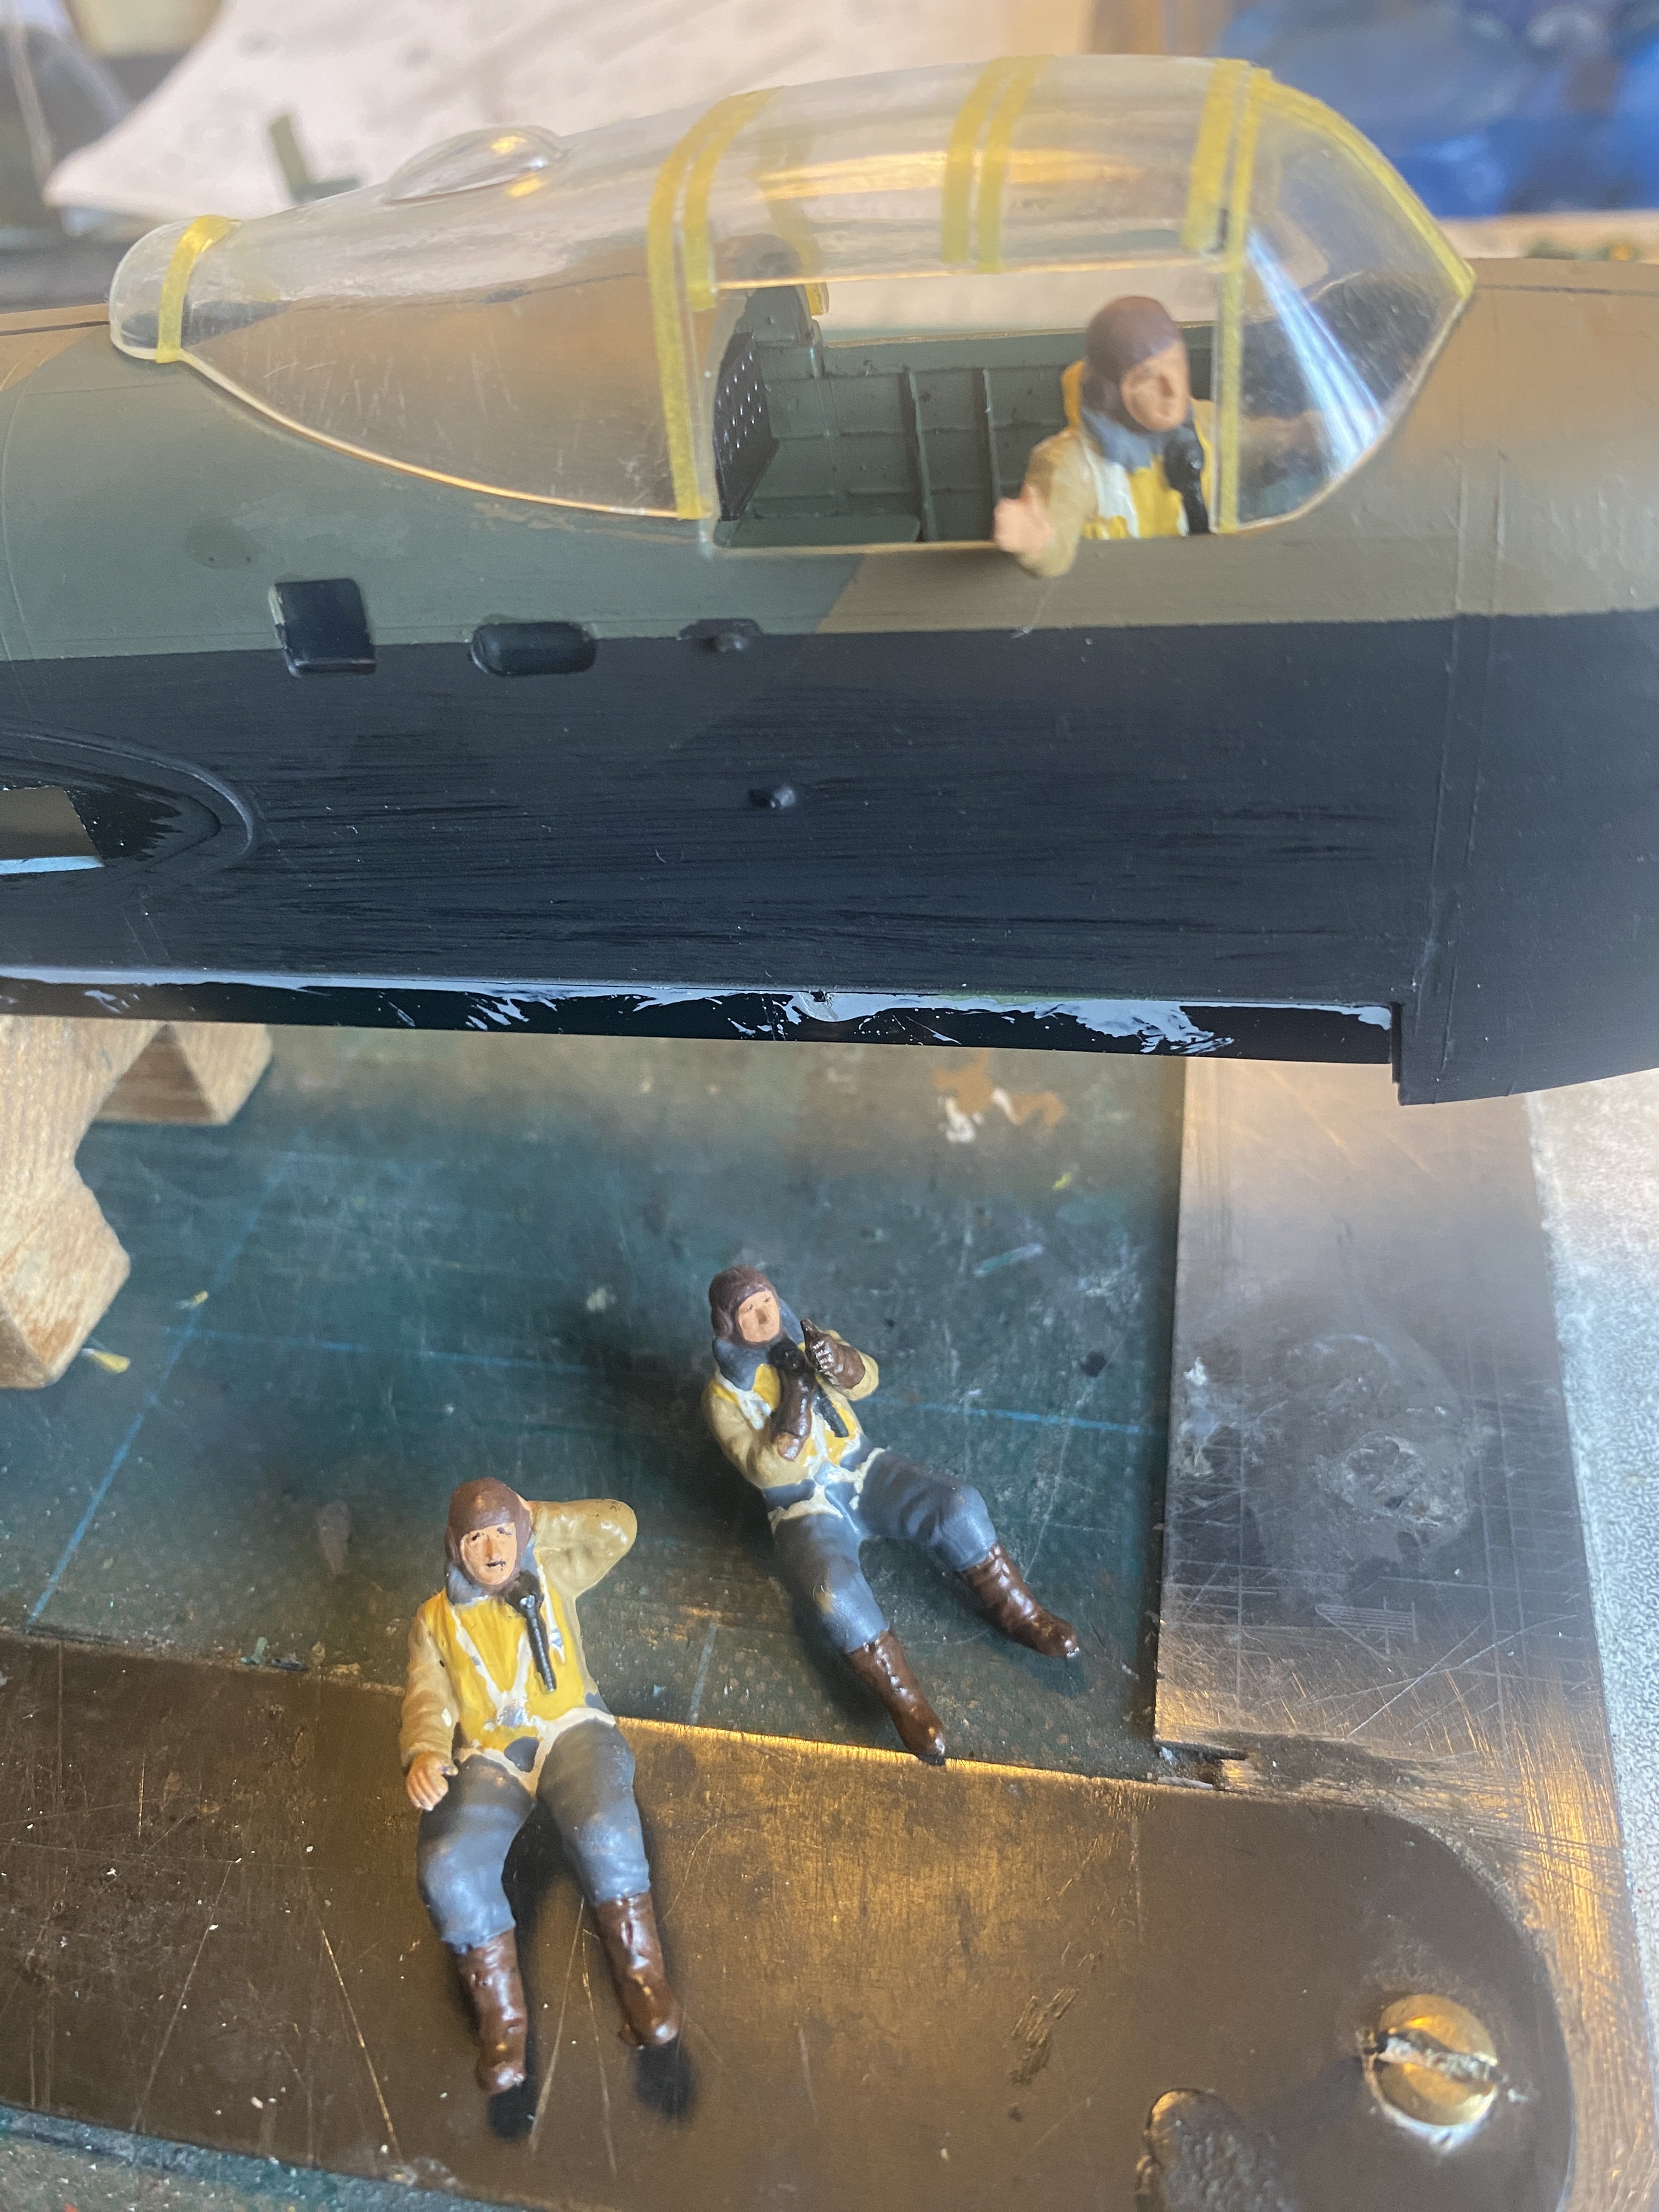
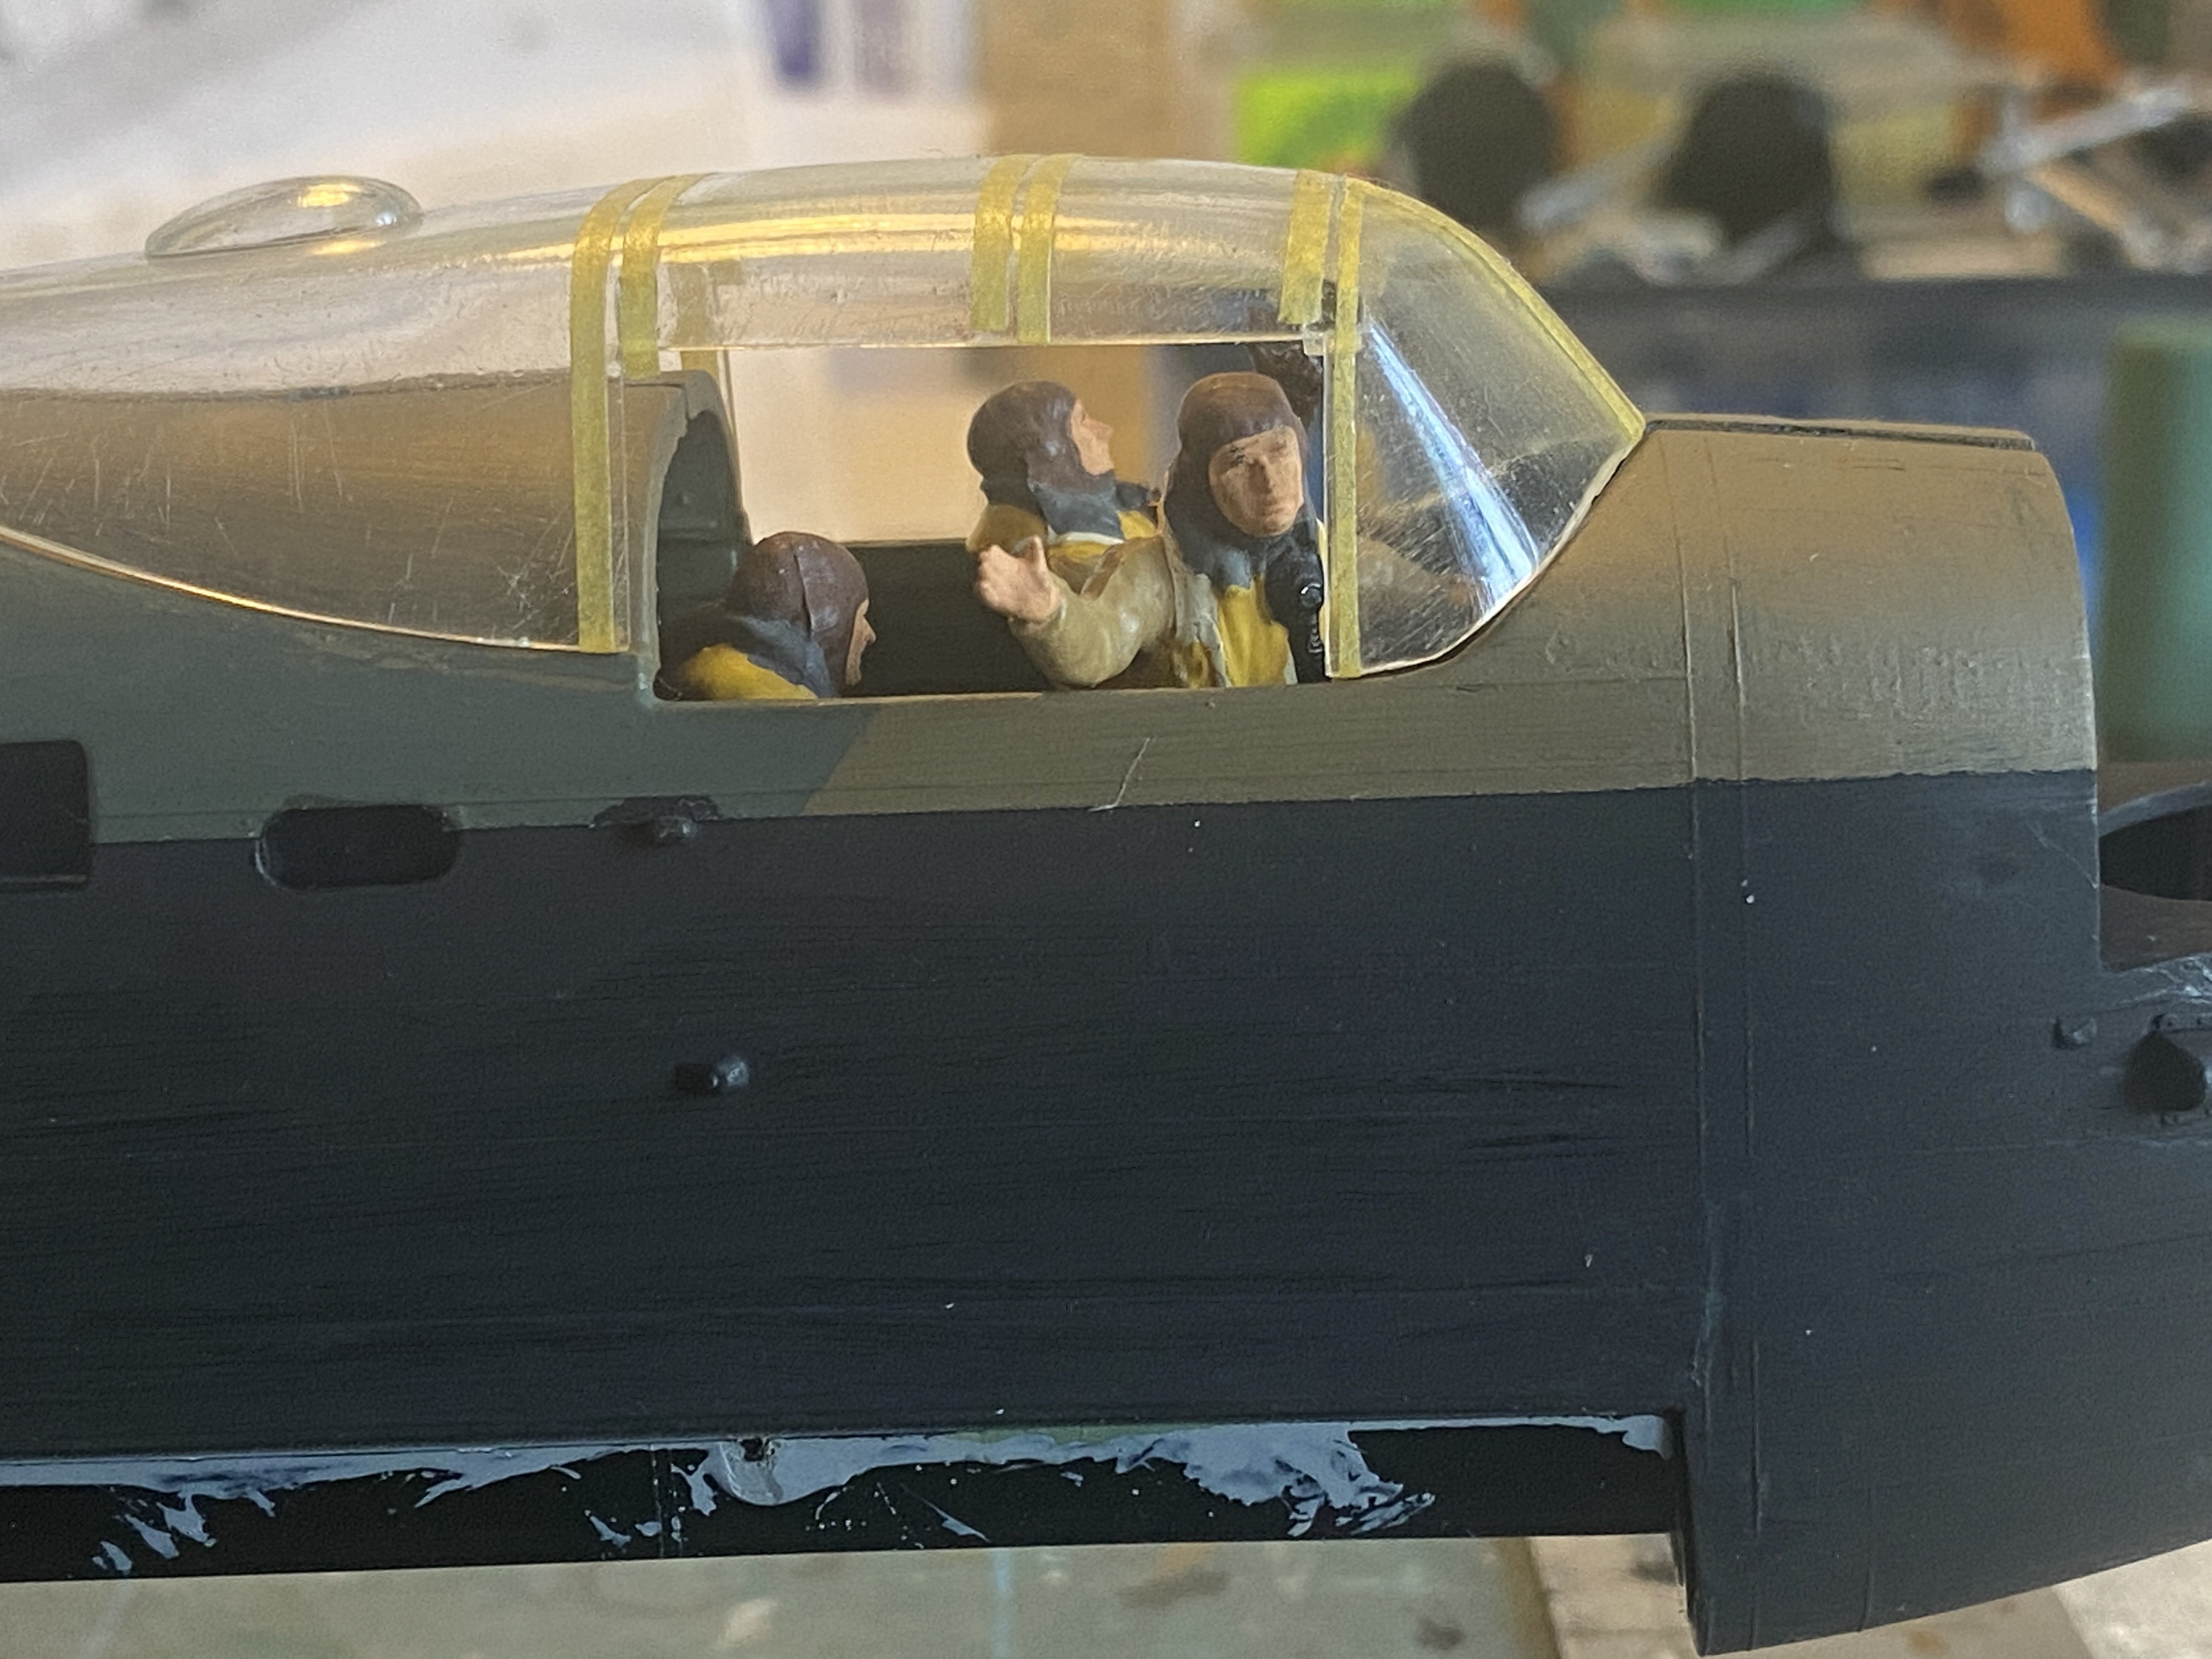
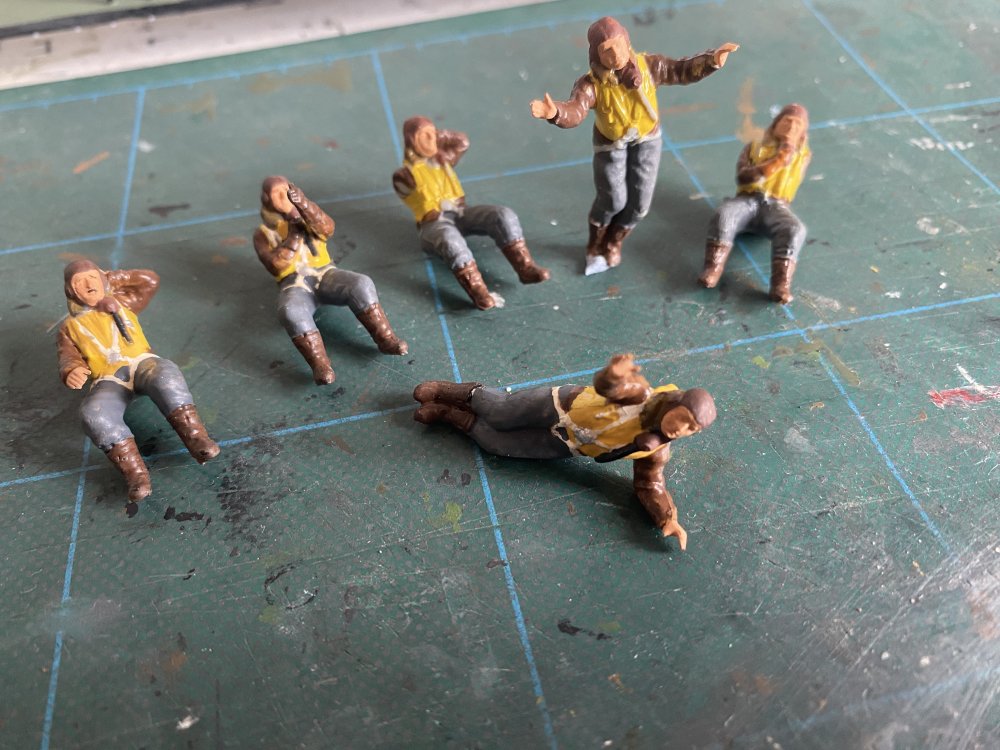
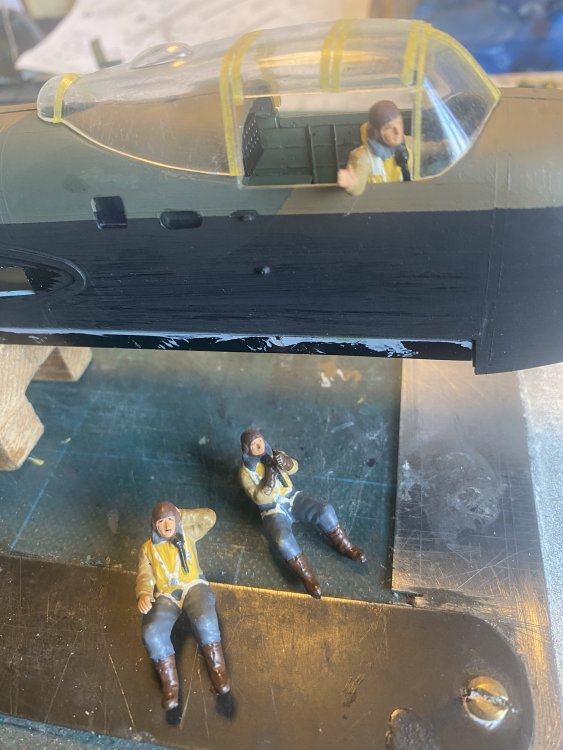
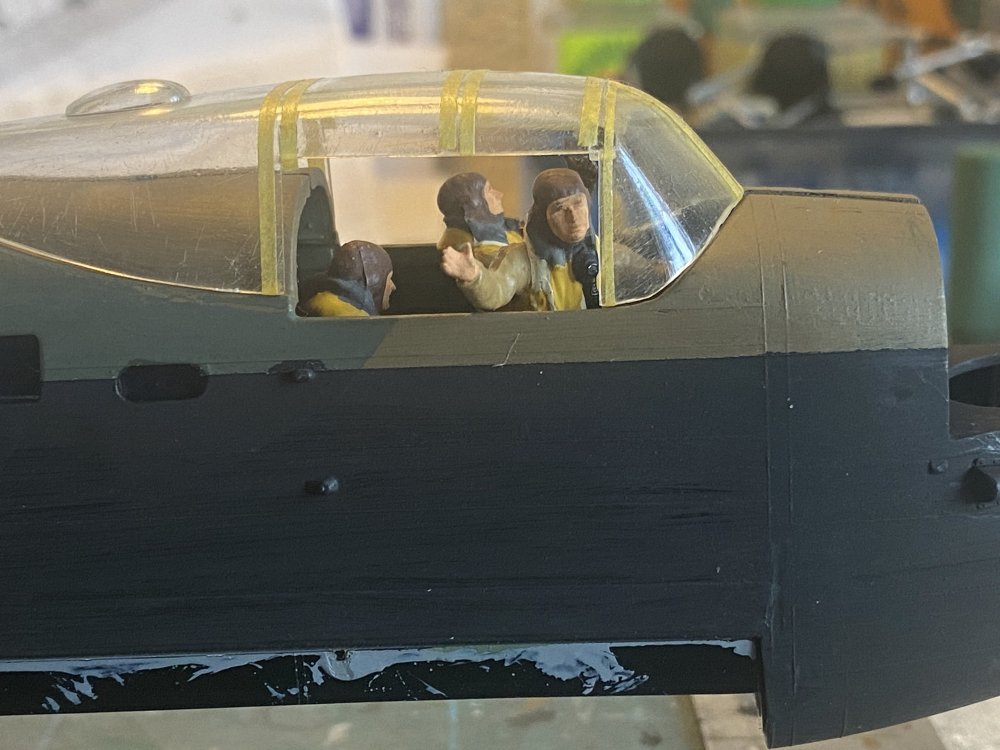
I have run out of Tamiya thin so have turned to painting the aircrew figures . . . Got a few tweaks to bring them up to the full dress code . . . Only six figures cos the W/op. cant be seen . . The 'standing figure' will be the flight engineer
-
Some progress . . .

-
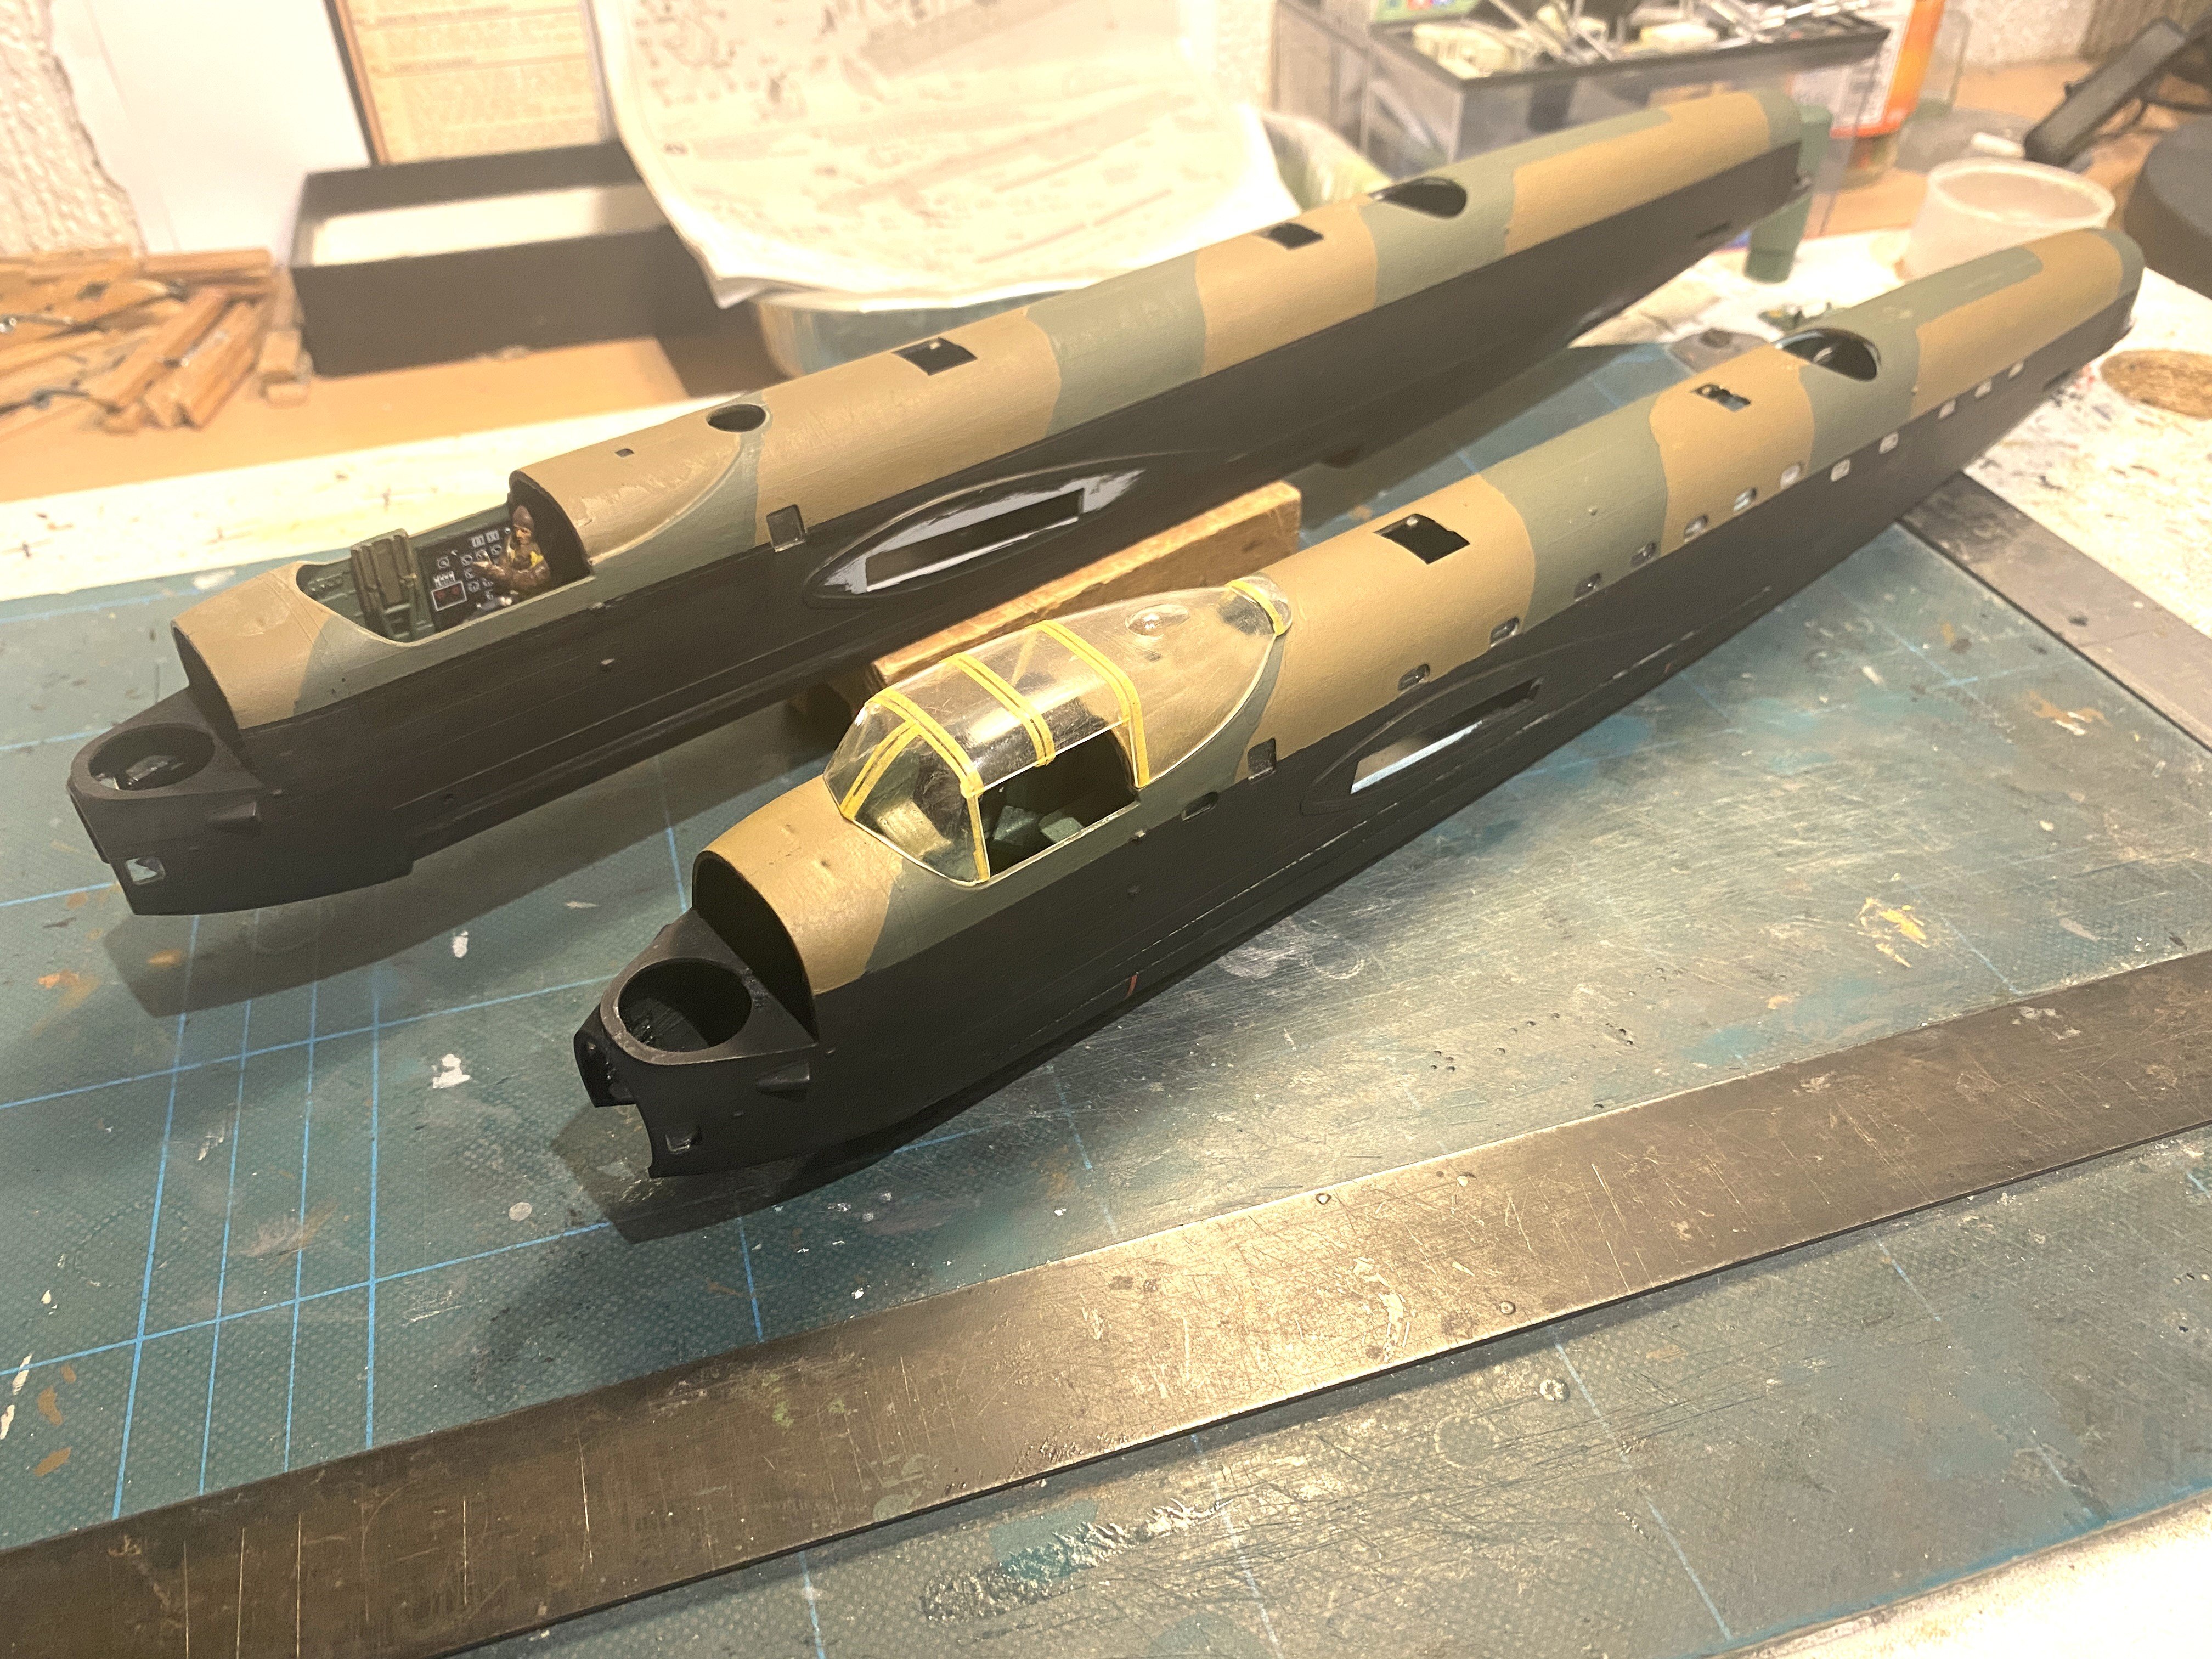
Fuselage of both aircraft painted so now I can install the fuselage windows as required. I will also start on the cockpit interiors and then close the fuselage(s) up and commence to eliminate the joint seams . .
-
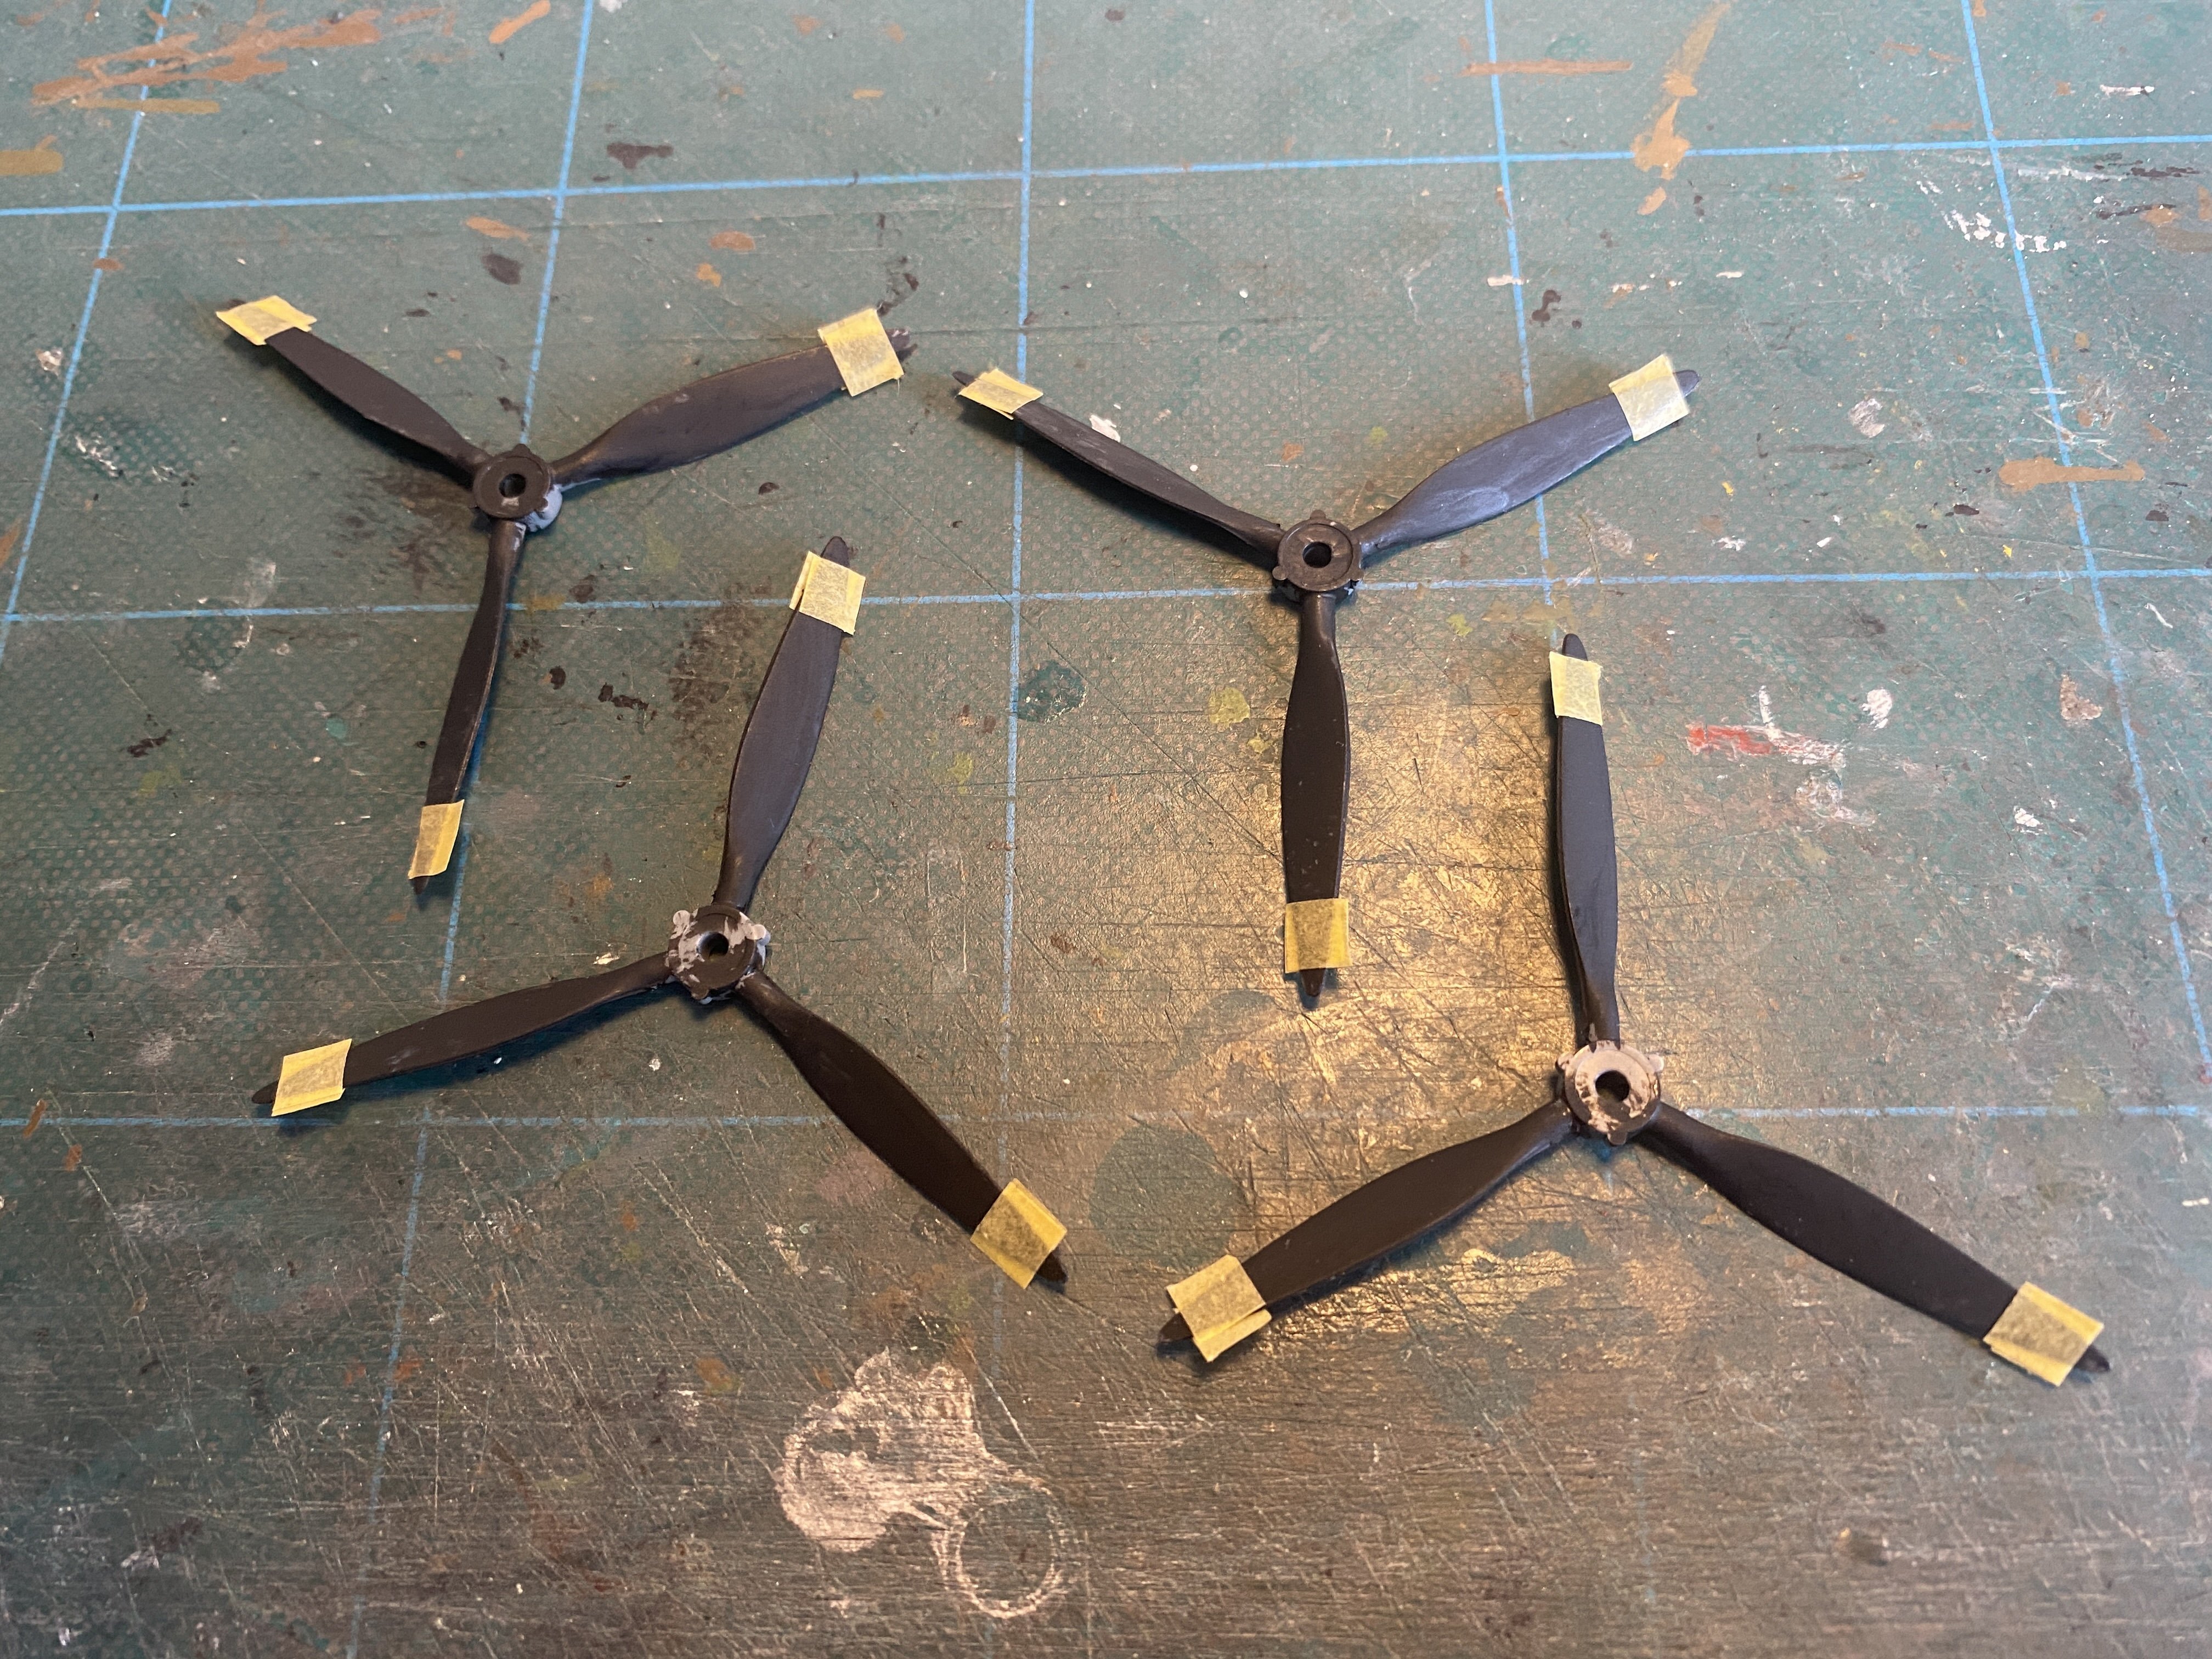
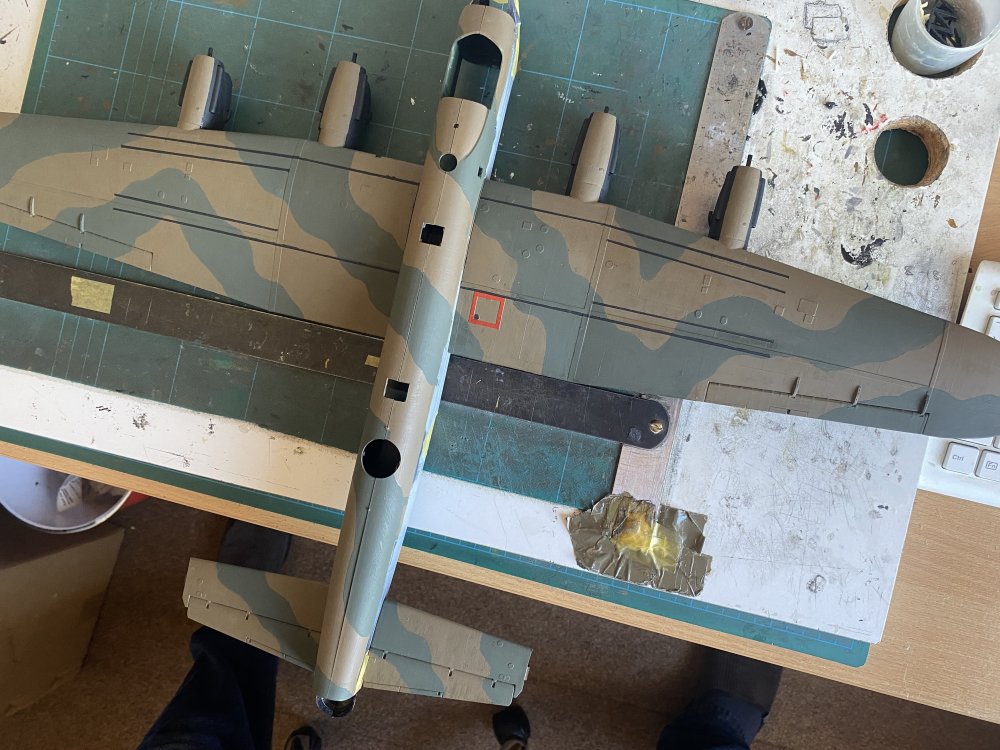
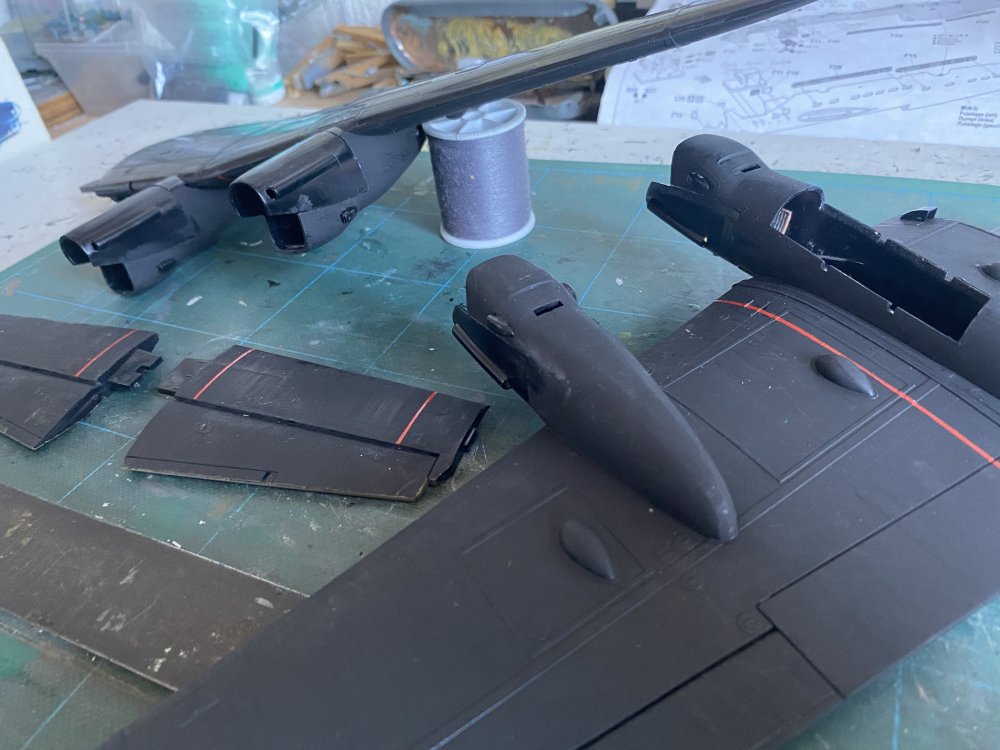
With a second Tamiya Lancaster aircraft found its my usual practice to paint around the fuselage windows before inserting the window glazing and joining up the fuselage halves; it saves an awful amount of time . . The second picture shows the engines fully fettled into the main wings. Now I shall concentrate on the turrets which I shall mod slightly to my required detailing . . .
-
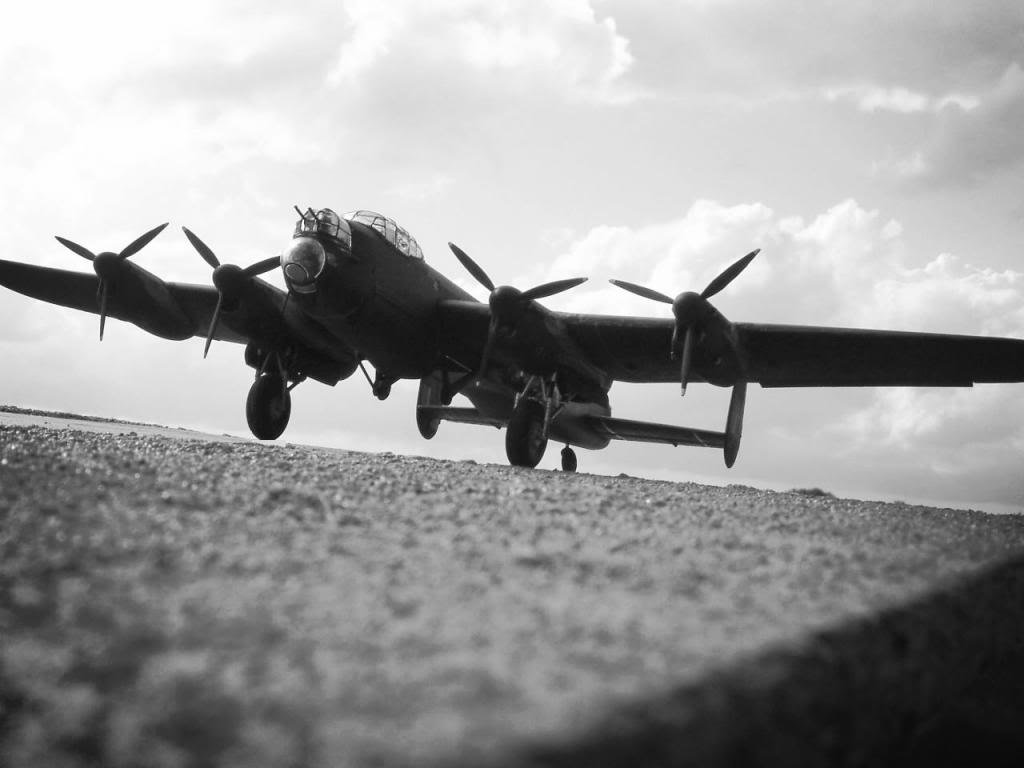
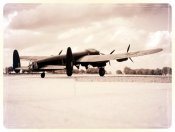
Lancaster ND644 in 32nd scale
FME erk replied to FME erk's topic in LSM 1/35 and Larger Work In Progress
Thank You for your kind words . . . -
Lancaster ND644 in 32nd scale
FME erk replied to FME erk's topic in LSM 1/35 and Larger Work In Progress
Hi to one and all, its been a while . . . I have recently started to build the old Tamiya Lancaster 48th kit and I am really enjoying getting back to modelling the larger stuff. I have been busy writing since the loss of my partner and recently had the book published. I am spurred on to pick up the HK 32nd Lancaster that has been 'out at dispersal' for quite some time . . .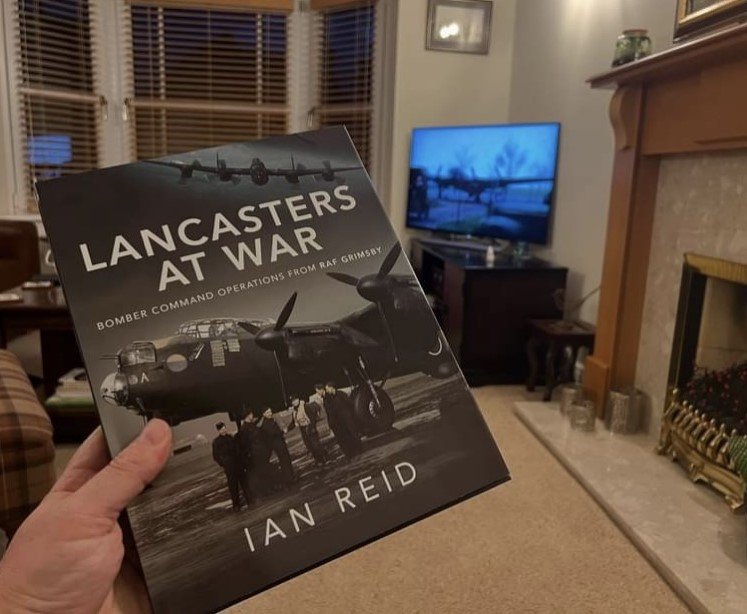
-
I love the weathering on the chassis but the condition of the vehicles cab for me, I find to be over done. These vehicles were not that old and to see what appears to be 'rust' on the base of the doors, I am not convinced. The rear body looks good with replacement planks quite possible. As to the load that could be virtually anything . . .
-
I was really enjoying following the build, the busy setting added lots of interest for me . . .
-
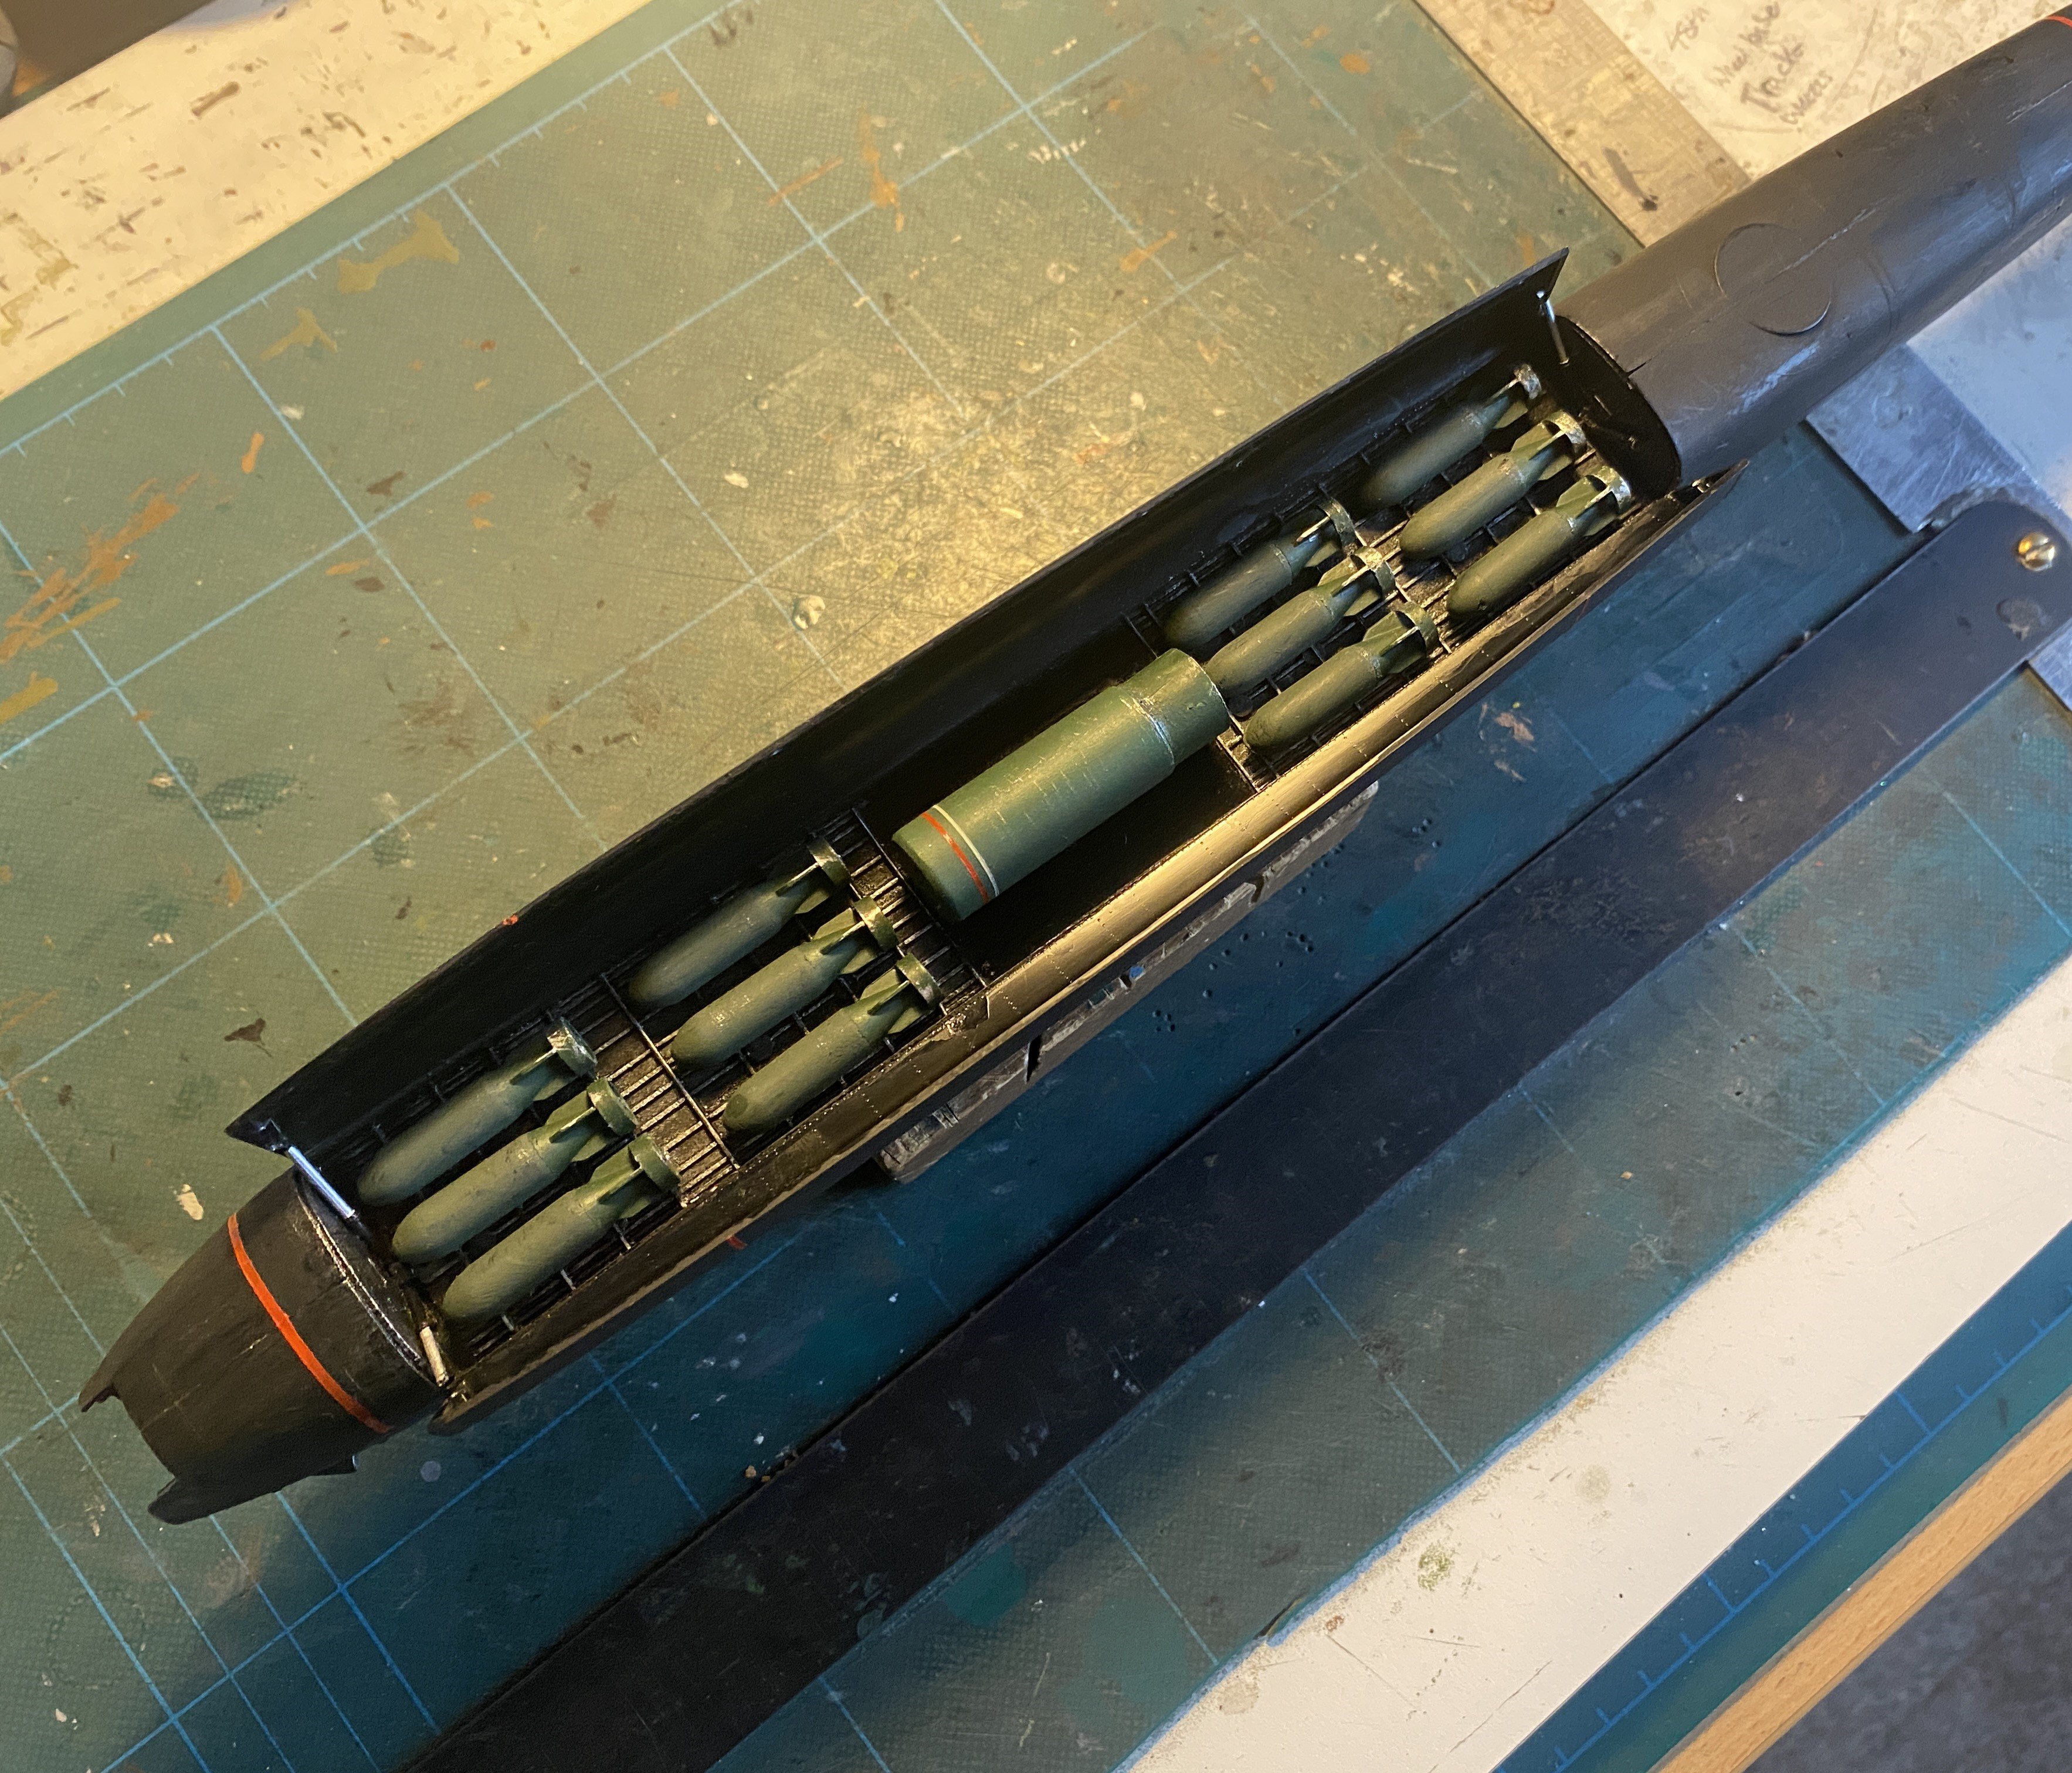
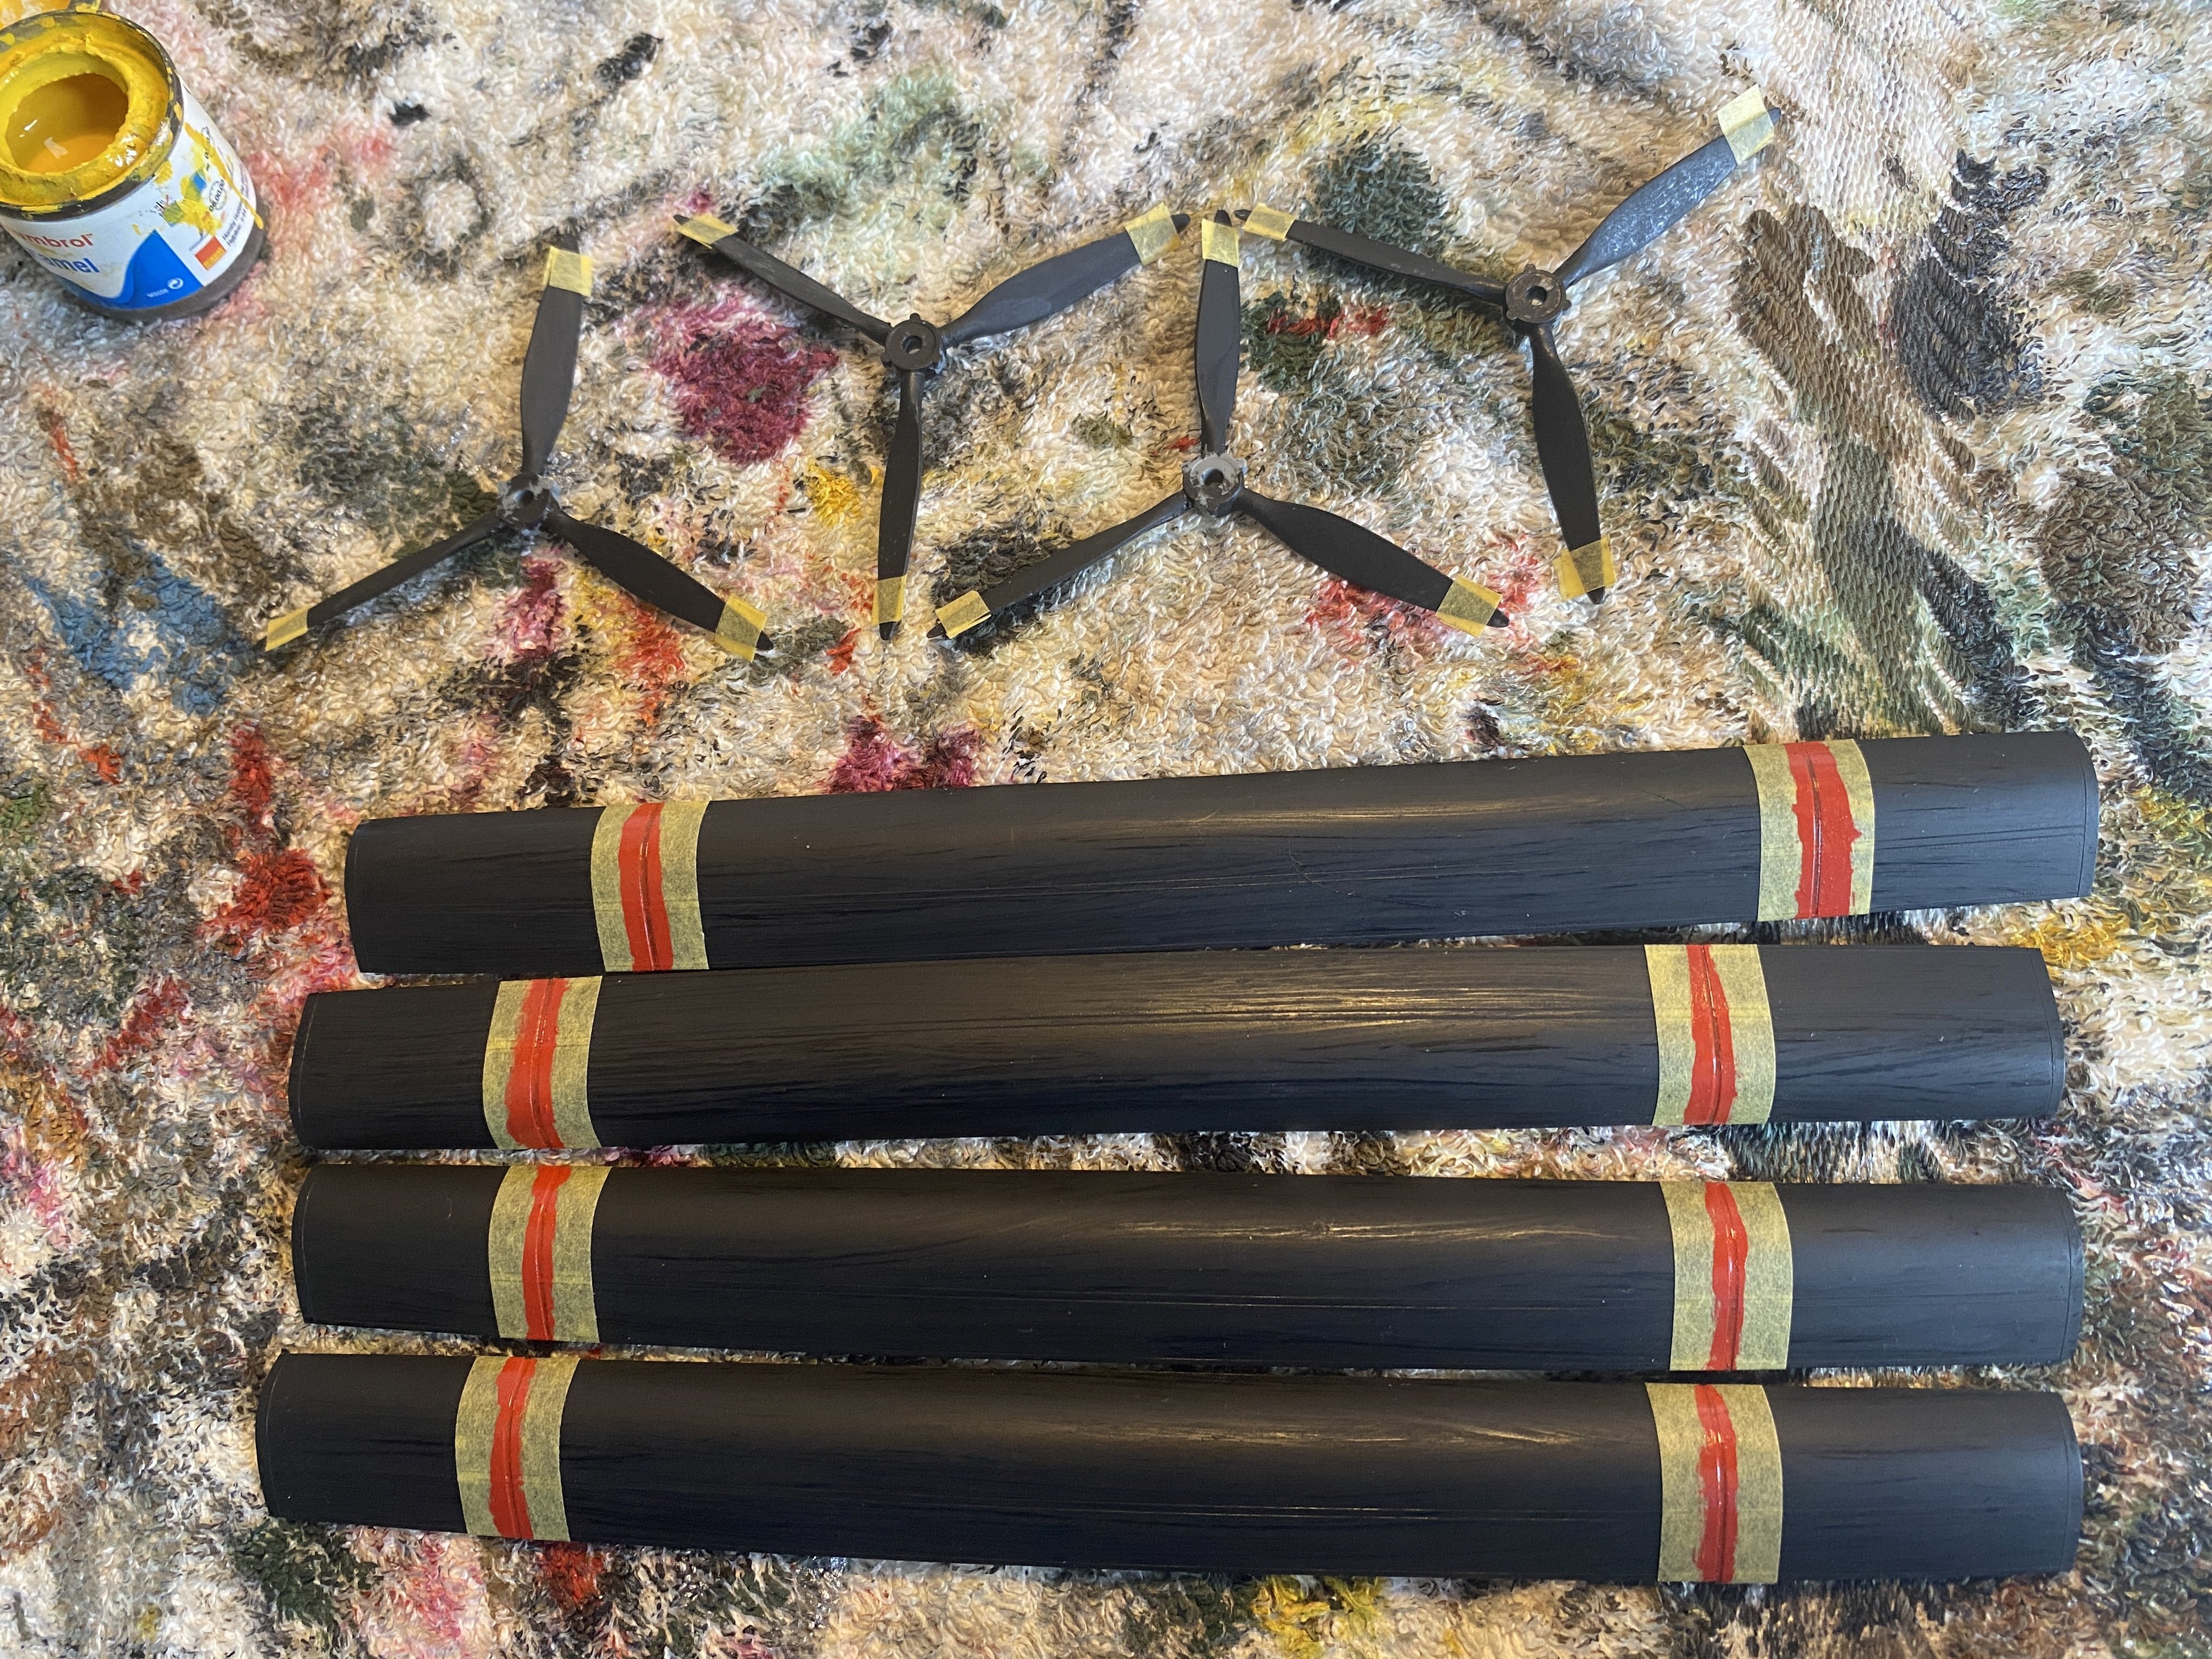
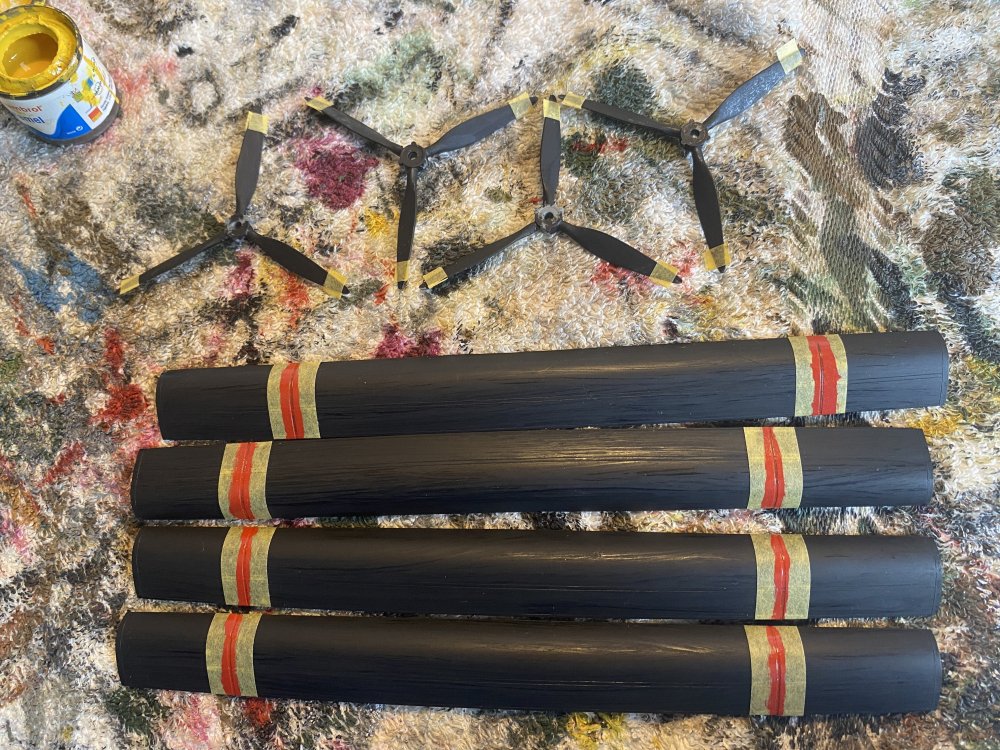
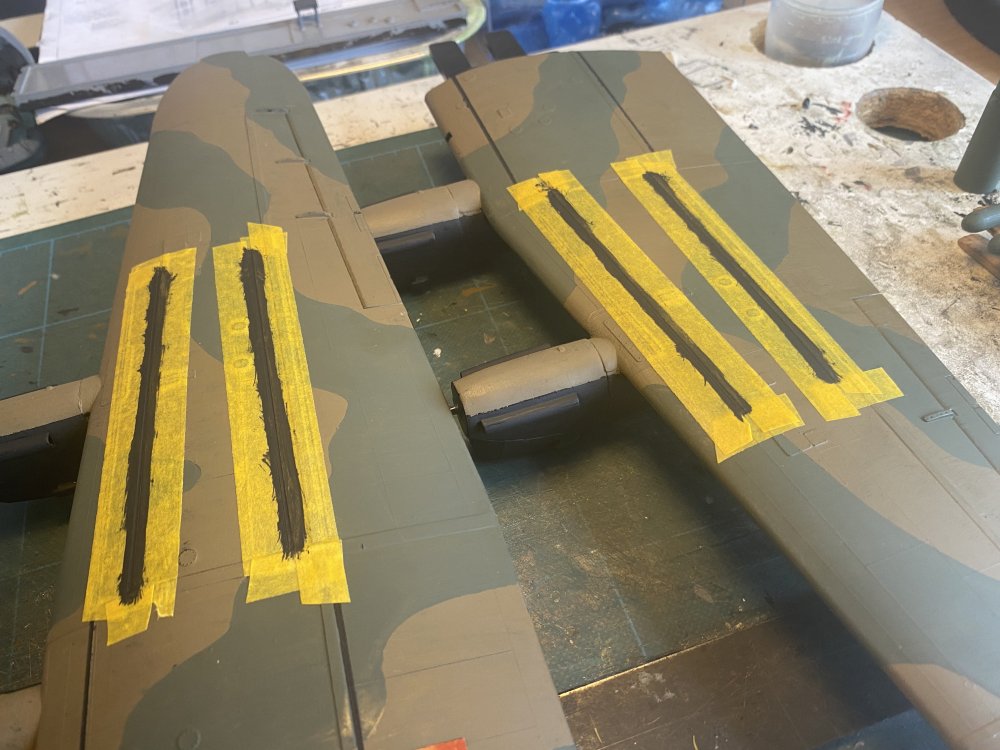
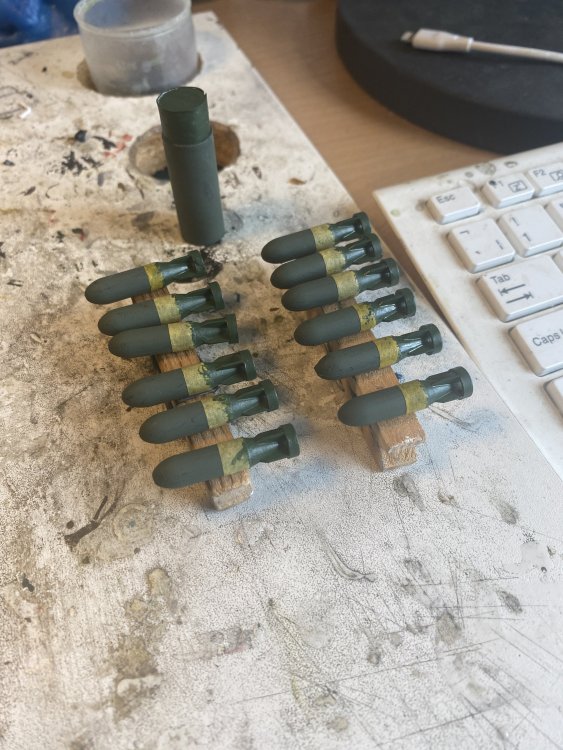
Some weekend painting: Walk way lines on the main wings . . . Took the time out to paint a number of 500Ib bombs and the 'new' 4000Ibs bomb
-
Trying to build up the engine nacelle fittings to minimise the amount of filler that shall be required . . .
-
Yes Dennis its a decent kit although there are a few things amiss with it. If one is prepared to make a number of alterations then it can become impressive. Wrongly or rightly HK have introduced a scale down version of their 32nd Lancaster into a 48th which I believe is far superior to the Tamiya 1974 release . . . ( I have two of their Lancaster kits in 48th) . . . I shall be pleased to display this example when finished in my coffee table along with the other Tamiya I finished some years back . .
-
Dedicated 1/72 catagory? Maybe, maybe not.......
FME erk replied to JohnB's topic in Problems? Suggestions? Tell us!
I only post the large stuff, even though I also build 72nd, cos I thought that was what THIS forum group is all about . .