CrankyCrafstman
-
Posts
1,358 -
Joined
-
Last visited
Content Type
Profiles
Forums
Events
Gallery
Everything posted by CrankyCrafstman
-
 Hey Anthony Don't worry about it, if you want it I'll hold on to it till you can buy it buddy. Ron G
 -
You to buddy hey Anthony you still interested in the 1/24 Beaver kit?
-
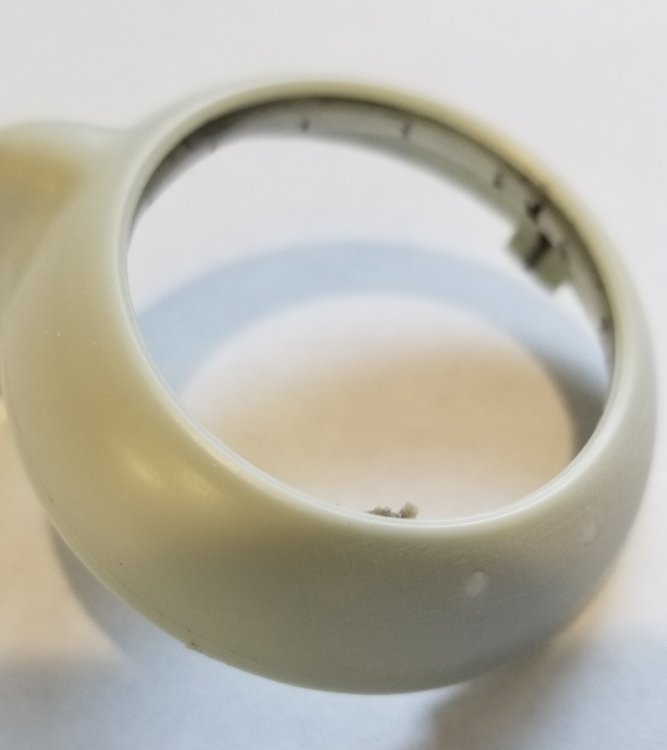
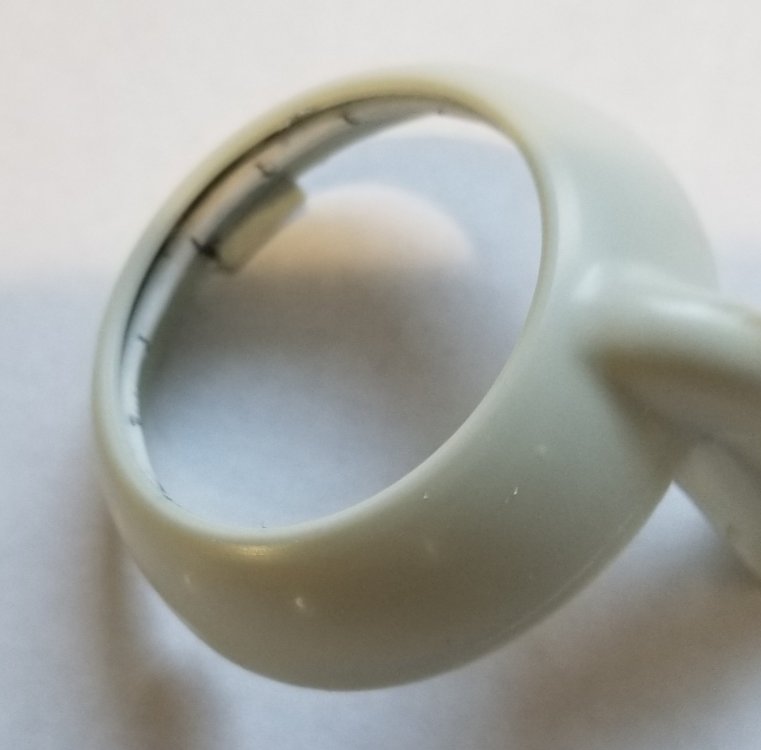
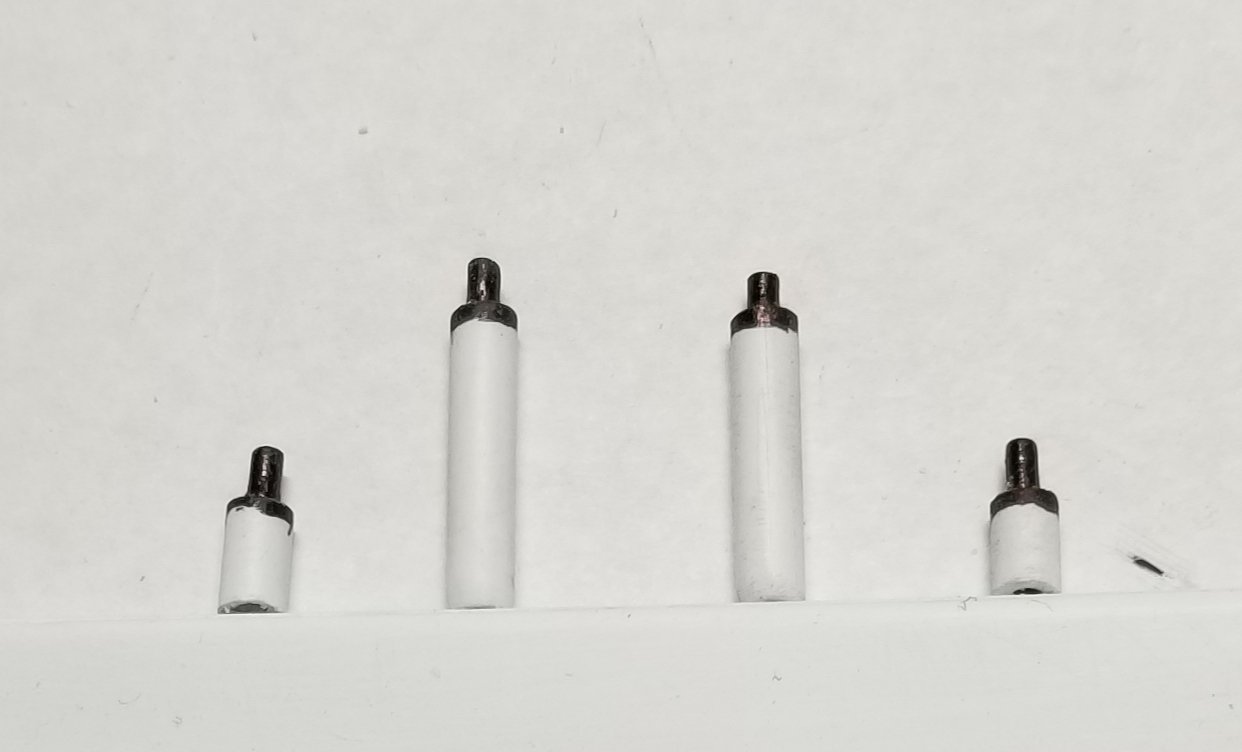
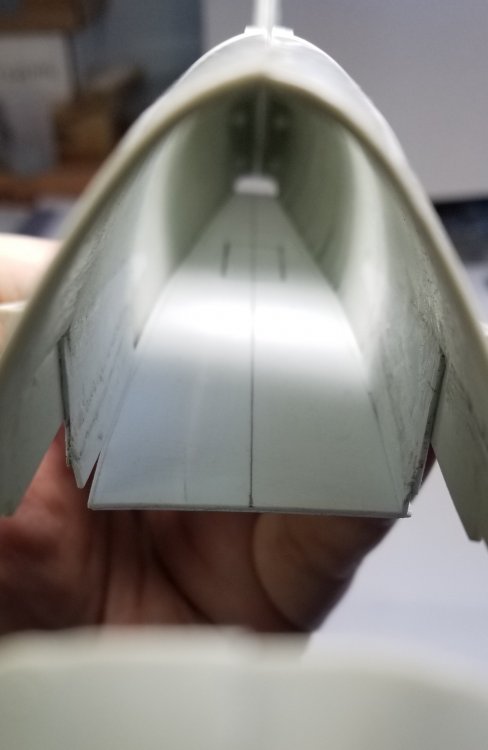
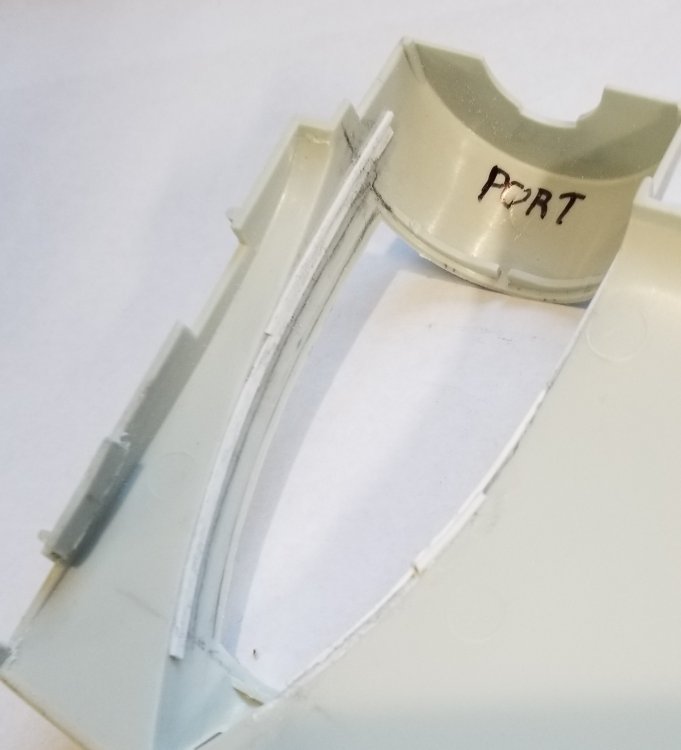
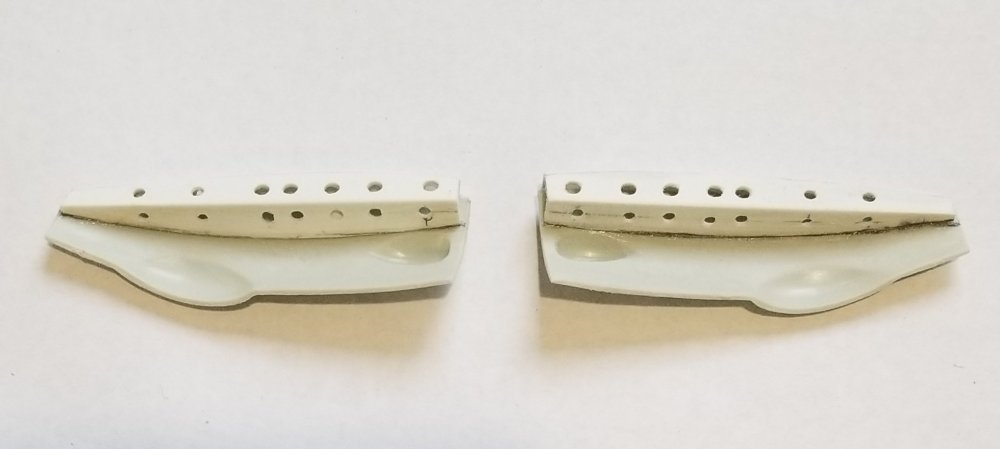
OH! I almost forgot. I took some pictures of the Model Monkey rear dihedral tail planes in place on the model and the fit is perfect just some minor sanding around the fillet area to blend everything together. starboard tail plane. view showing the 12.5° dihedral on the tail planes. view looking down on the starboard tail plane. view looking up at the bottom of the starboard tail plane. And yes that's a piece of tape holding the elevator on. Well that's it, I'll see you all in a little while with some more progress. Ron G


-
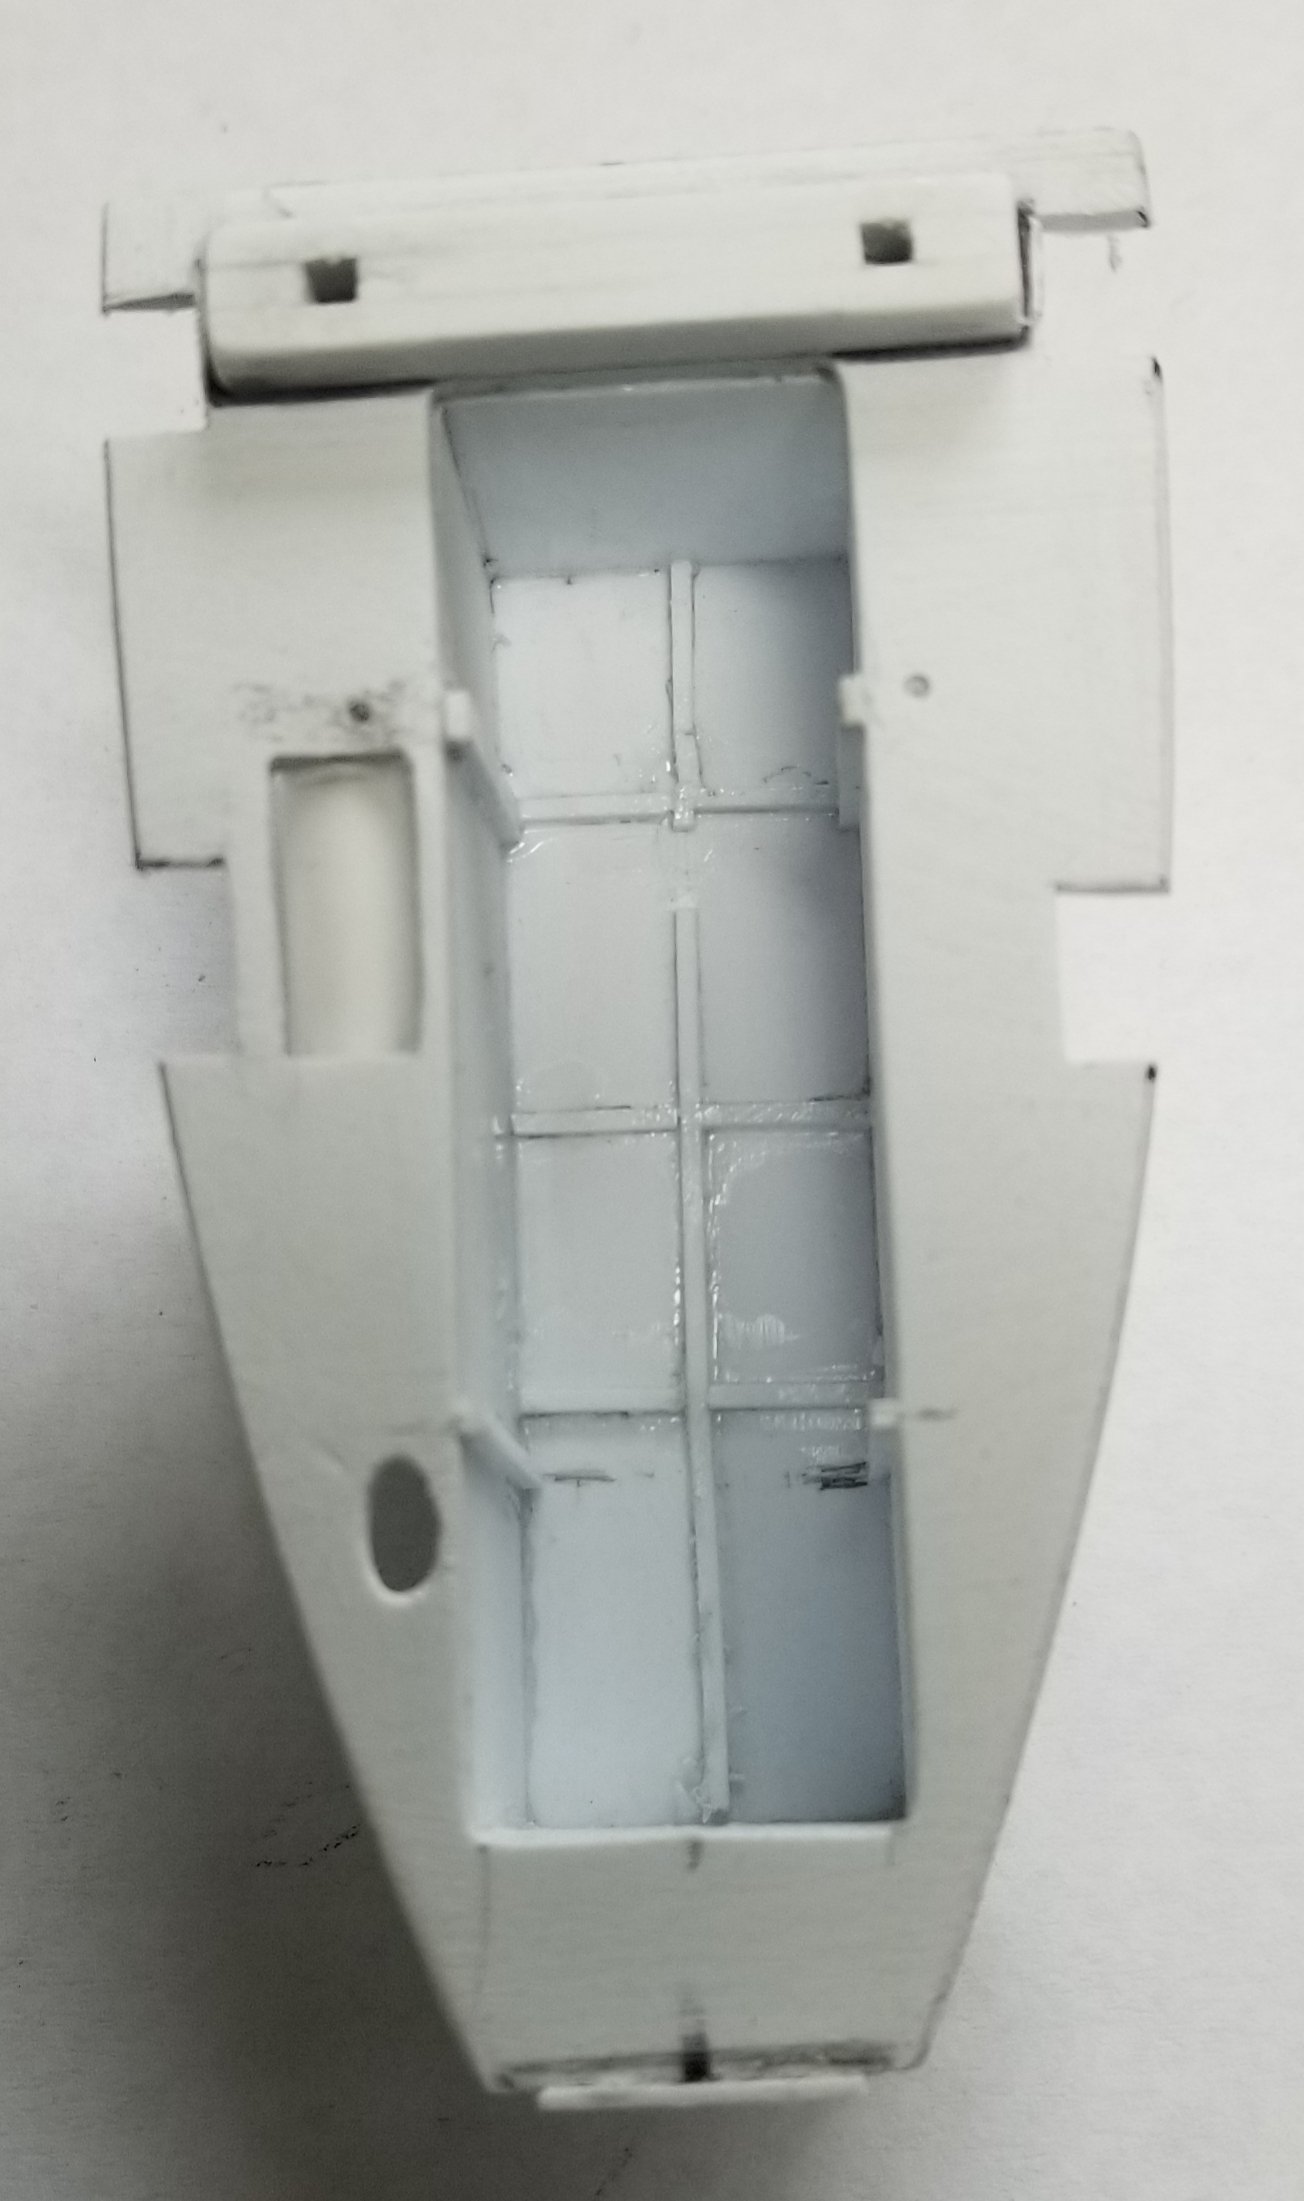
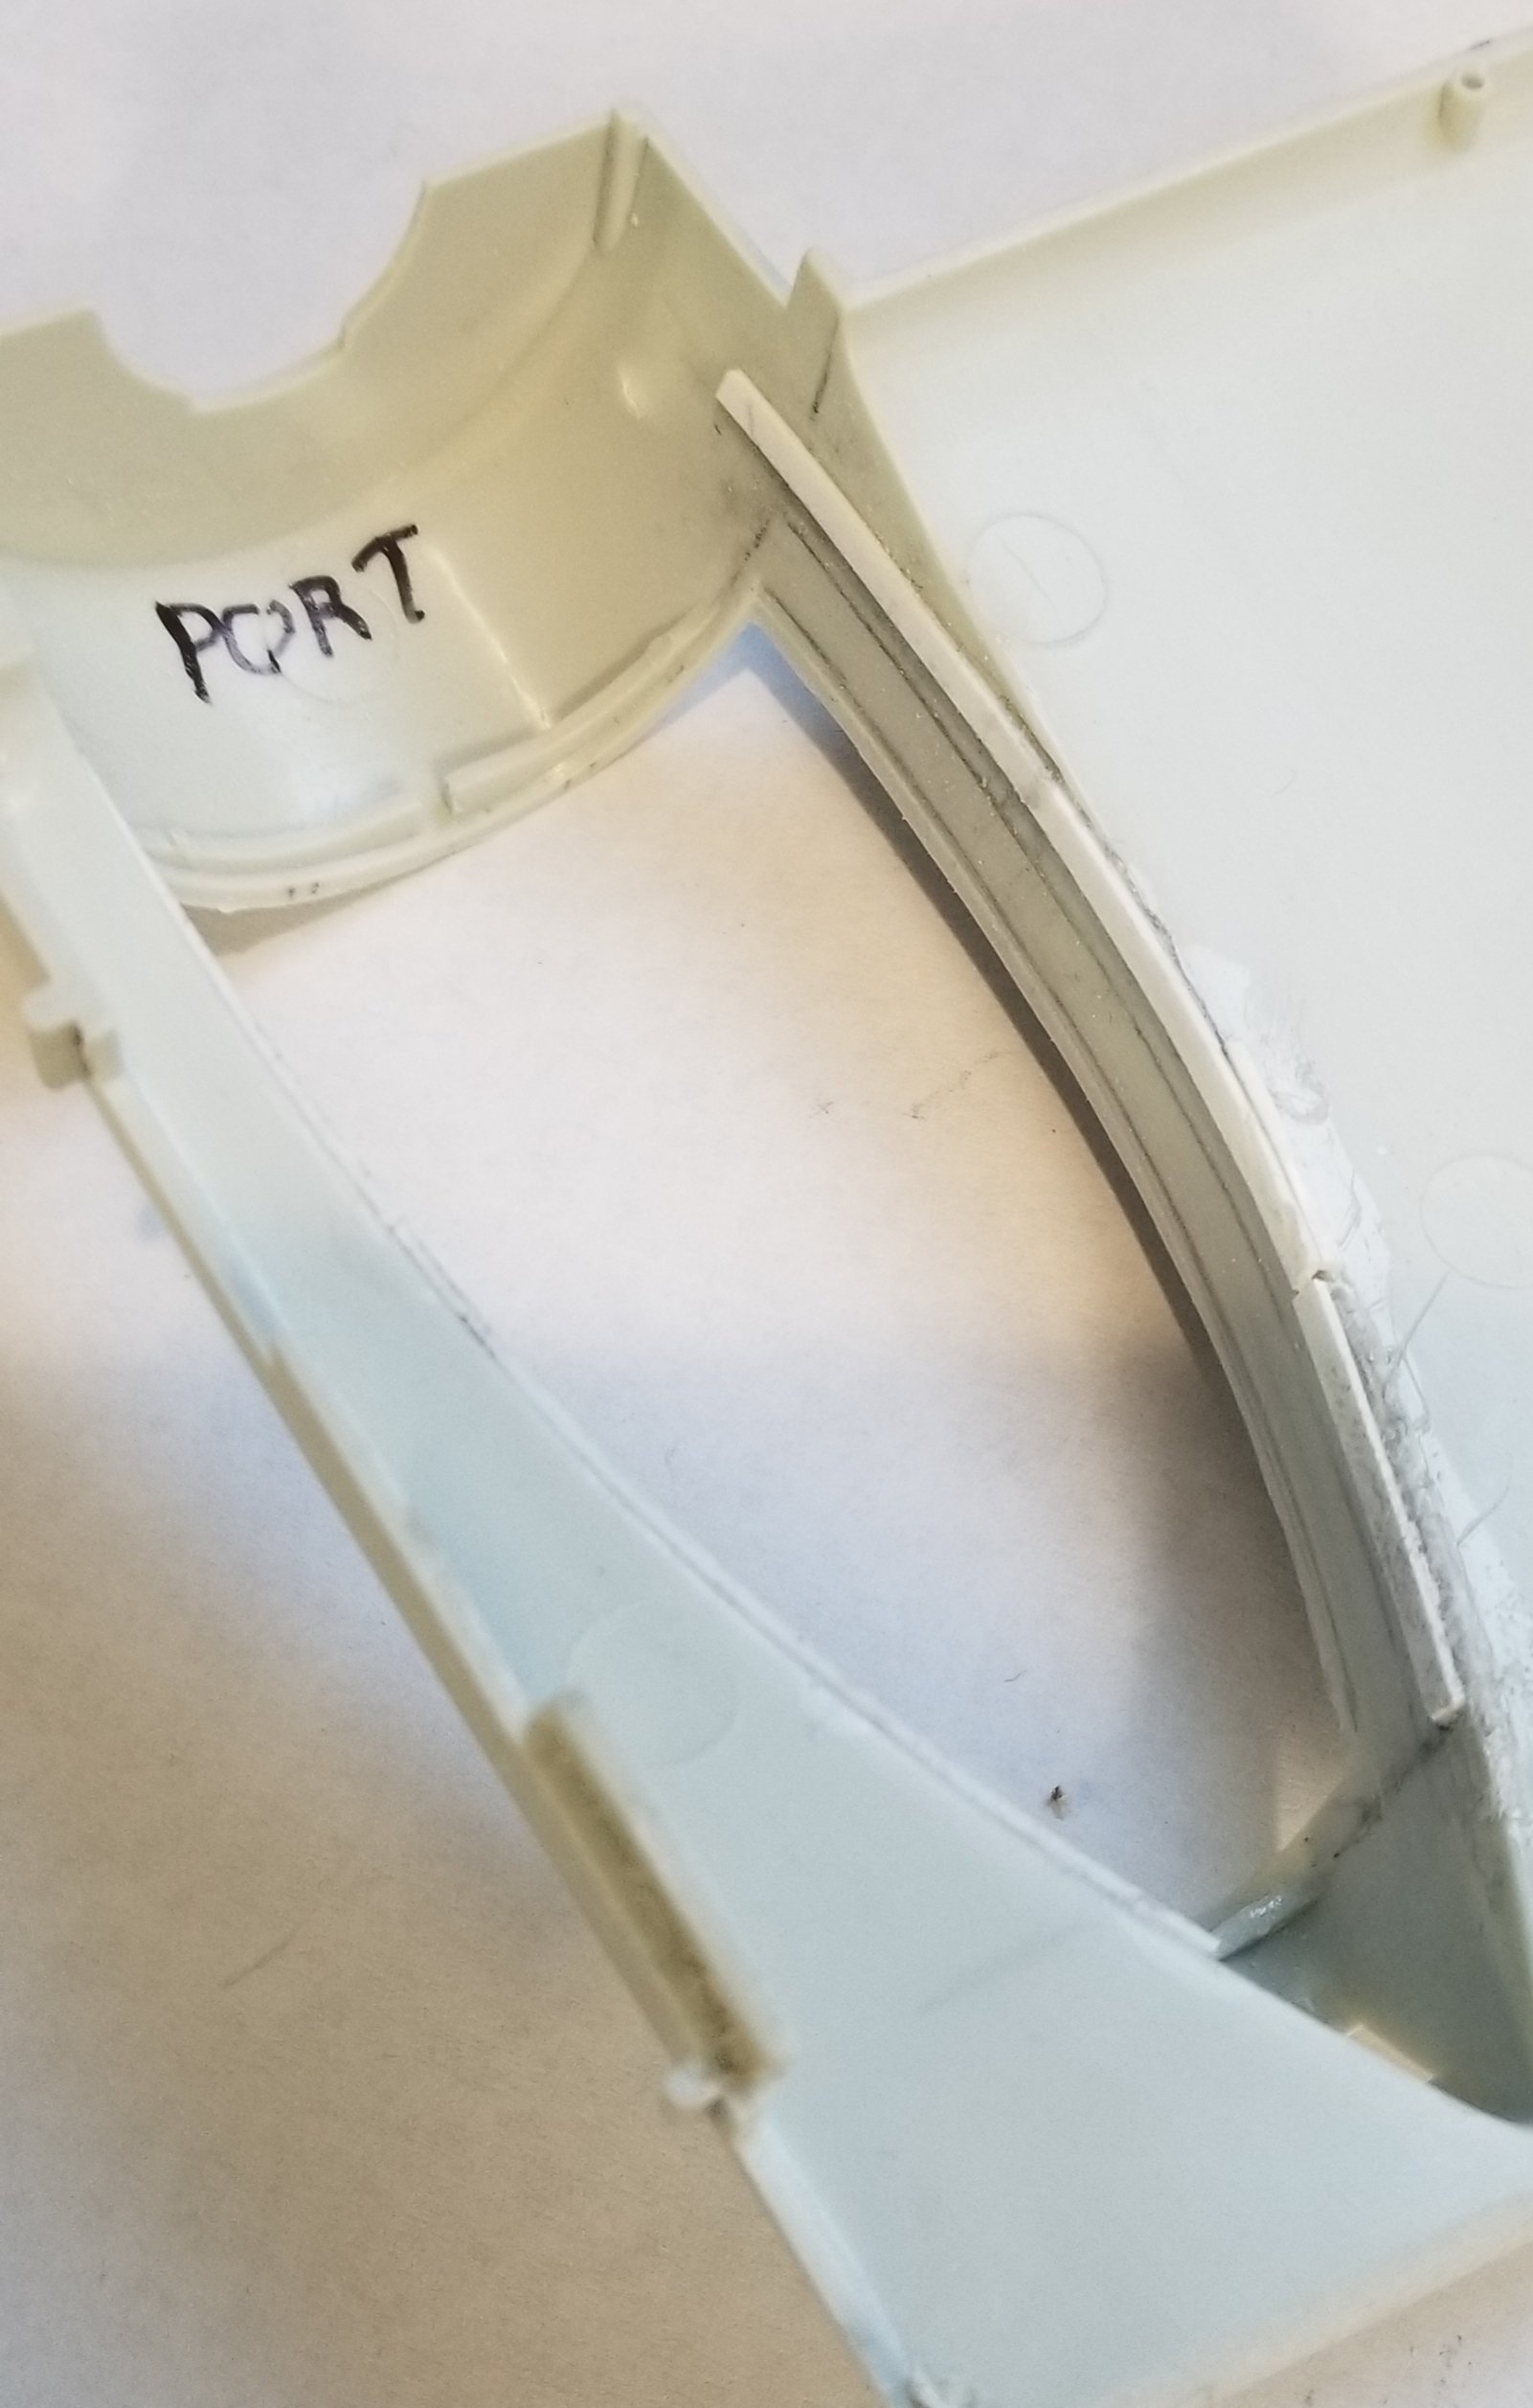
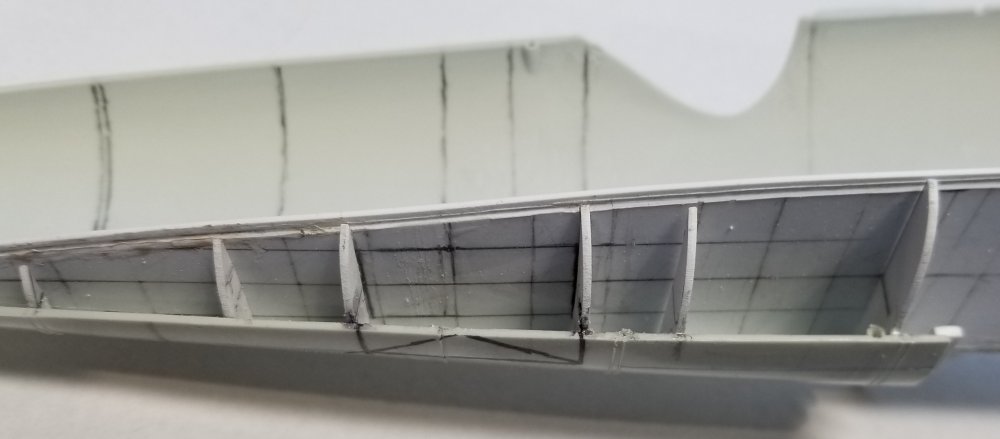
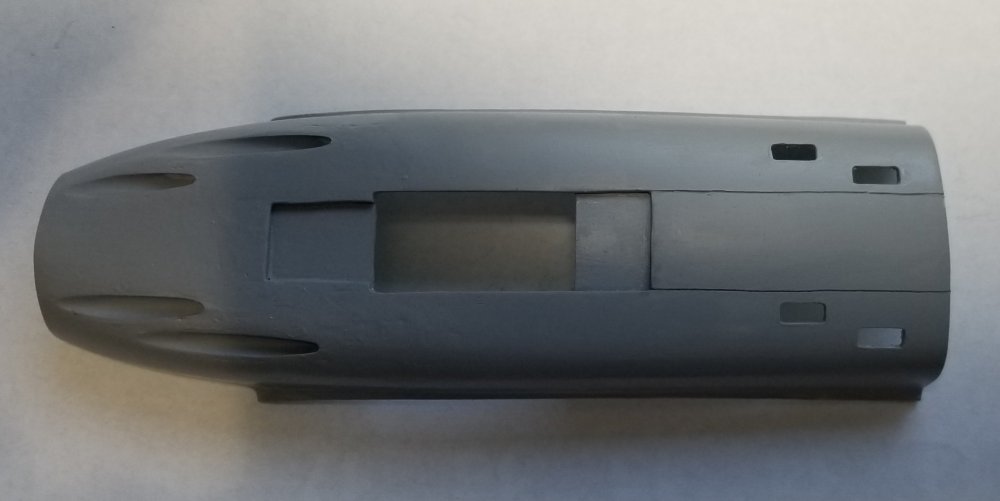
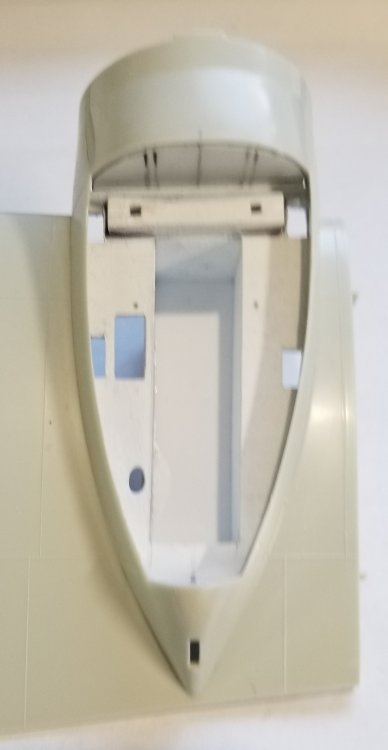
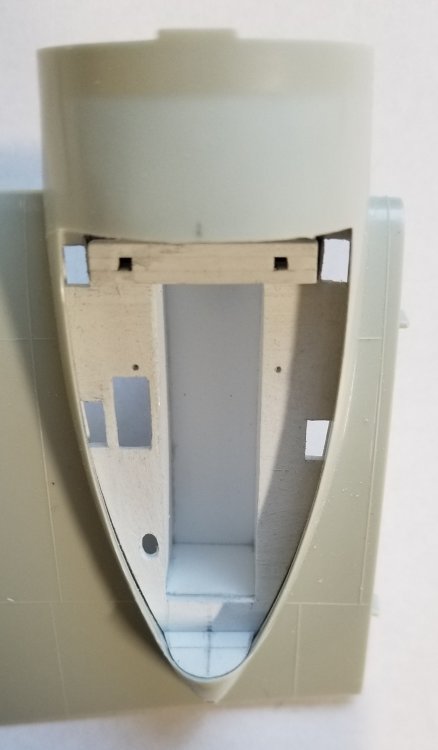
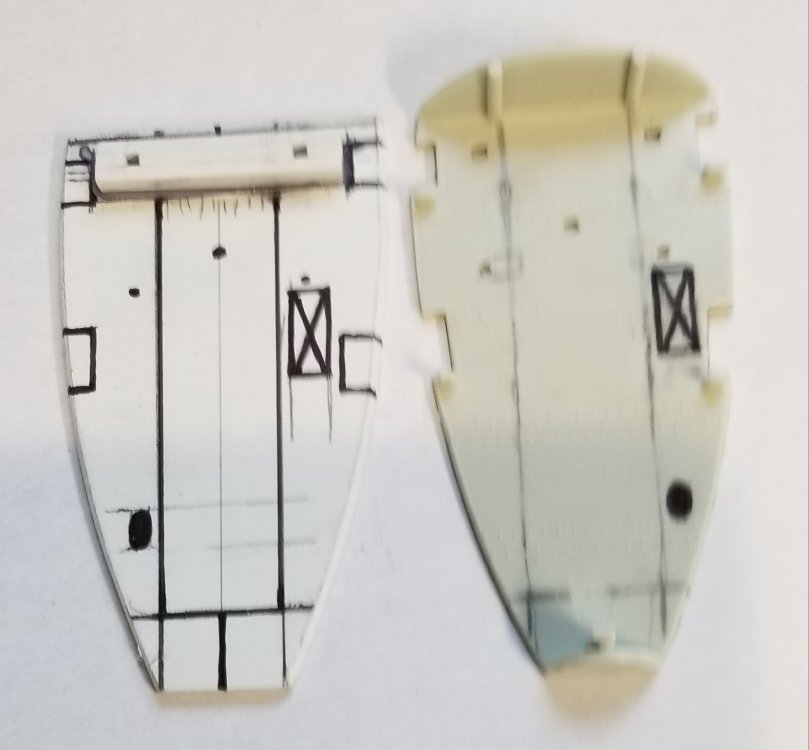
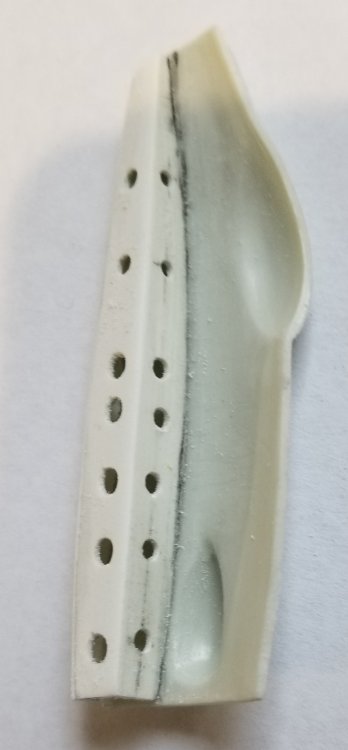
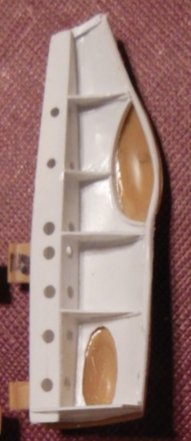
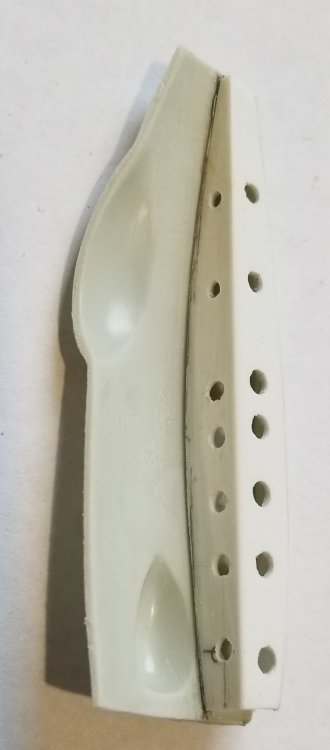
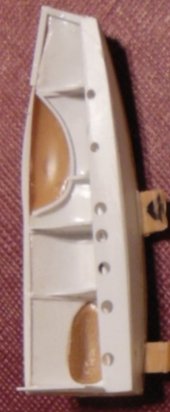
Hey all Ok I think I have the rear floor figured out, I still have to cutout the observer/gunner's escape hatch. Right now I'm in the process of getting the side wall ribbbing figured out and put in. I have pictures of other builds that did this, plus pictures of the real planes inner side walls. So here are some pictures for you to look at. view of port side of the fuselage showing the floor support ribs I scratch built. view of starboard side of the fuselage. view of the floor, with the rear hatch shown drawn on. view showing the floor sitting in place on the support ribs. view of the floor from underneath. view looking through the pilots opening at the floor in place. Right know all this has had a coat of Perfect Plastic Putty put on and after it dries I will sand it down smooth in preperation for the ribs. That's it for now. Ron G


-
Thank you very much Peter, coming from you that's quite a compliment. Ron G
-
WOW! thanks guys it's much appreciated. I spent today getting the fuselage insides smoothed out and ready for adding some inner rib structure, also I started on the rear floor, I hade to make this a couple of times trying to get it to fit to the fuselage sides. It will be attached to the port fuselage side, but will fit up to the starboard side when assembled, I hope. No pictures yet, I'll try to have some tomorrow. Ron G
-
Good to know Bill, I was a bit worried. Ron G
-
Hey all, just a small update. I think I have the wheel wells done, mostly. you can see the fuel vent pipes in the rear of both wells. It was tricky making four of them from scratch and getting them all the same. On the right you can see at the back of the well what looks like two oblong holes, the one on the right is wrong and needs to be filled in. The one on the left is were it is supposed to be. another view looking forward into the wells, There is a pipe that you can see that I drew on tge floor of the wells that needs to be added still, plus a few other bits and bobs. Ron G

-
Yeah Martin I know exactly how that feels, I have three on the shelf that I kinda lost interest in. Ron G
-
Thanks Martin, any progress on yours?
-
IBG models PZL P.11c. Finished
CrankyCrafstman replied to Clunkmeister's topic in LSM 1/35 and Larger Work In Progress
They are great. Hey Ernie they would have come in handy cutting all of the ejection nubs off of the HK Lancaster fuselage. huh!...lol Ron G -
Thanks guys, it's kinda a labor of love...lol Ron G
-
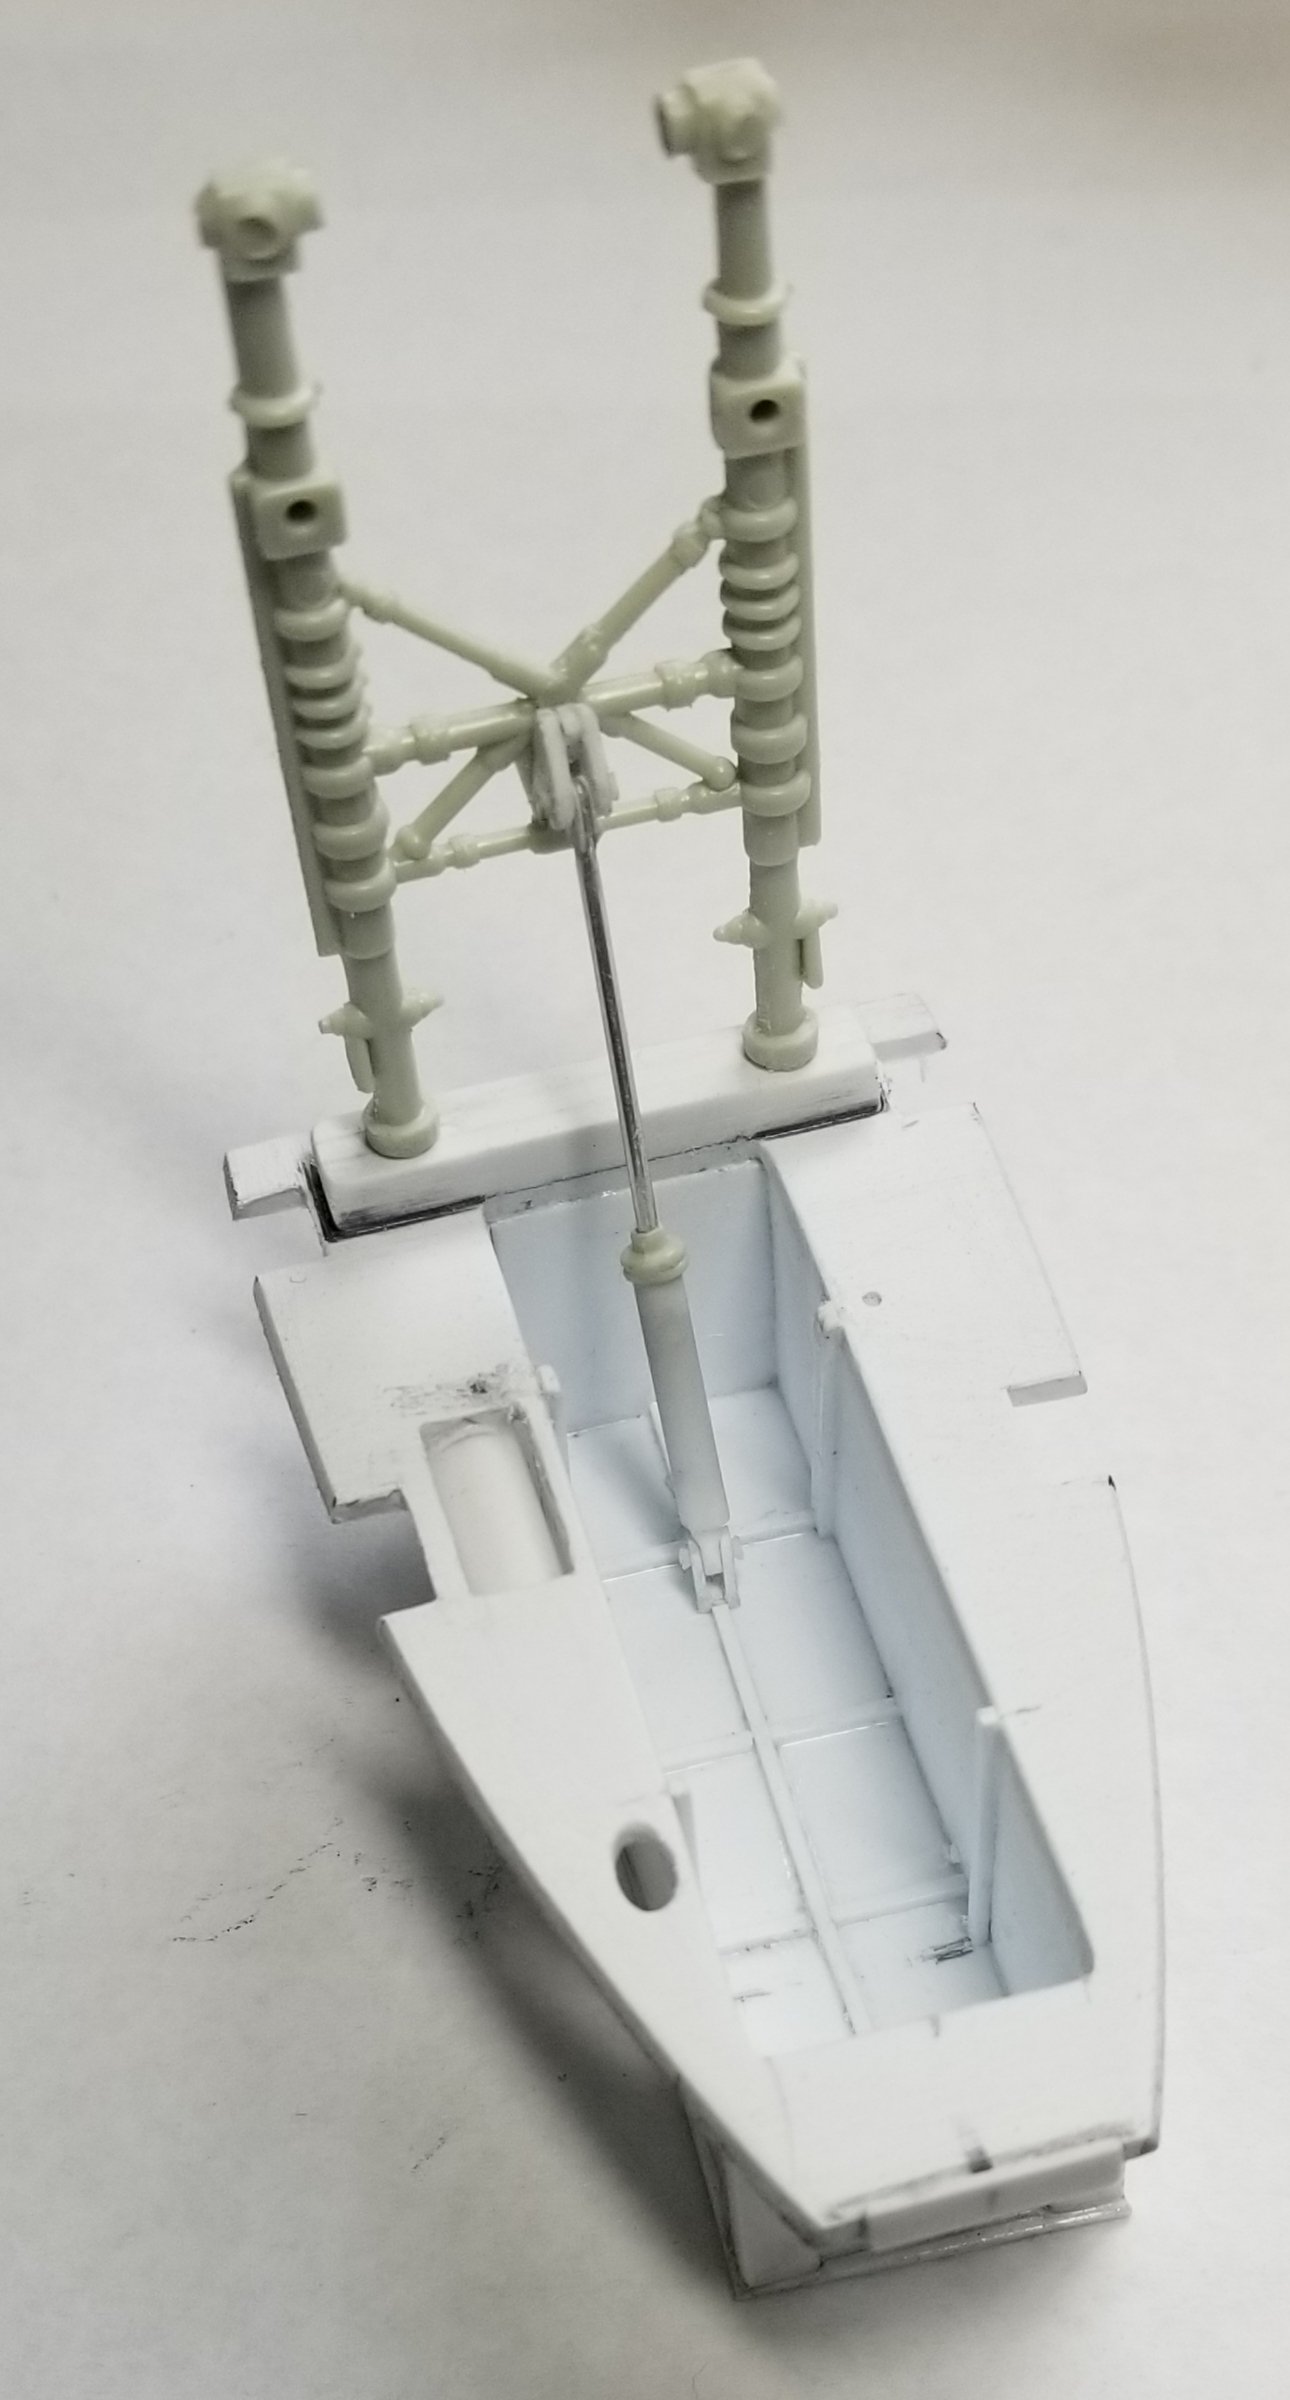
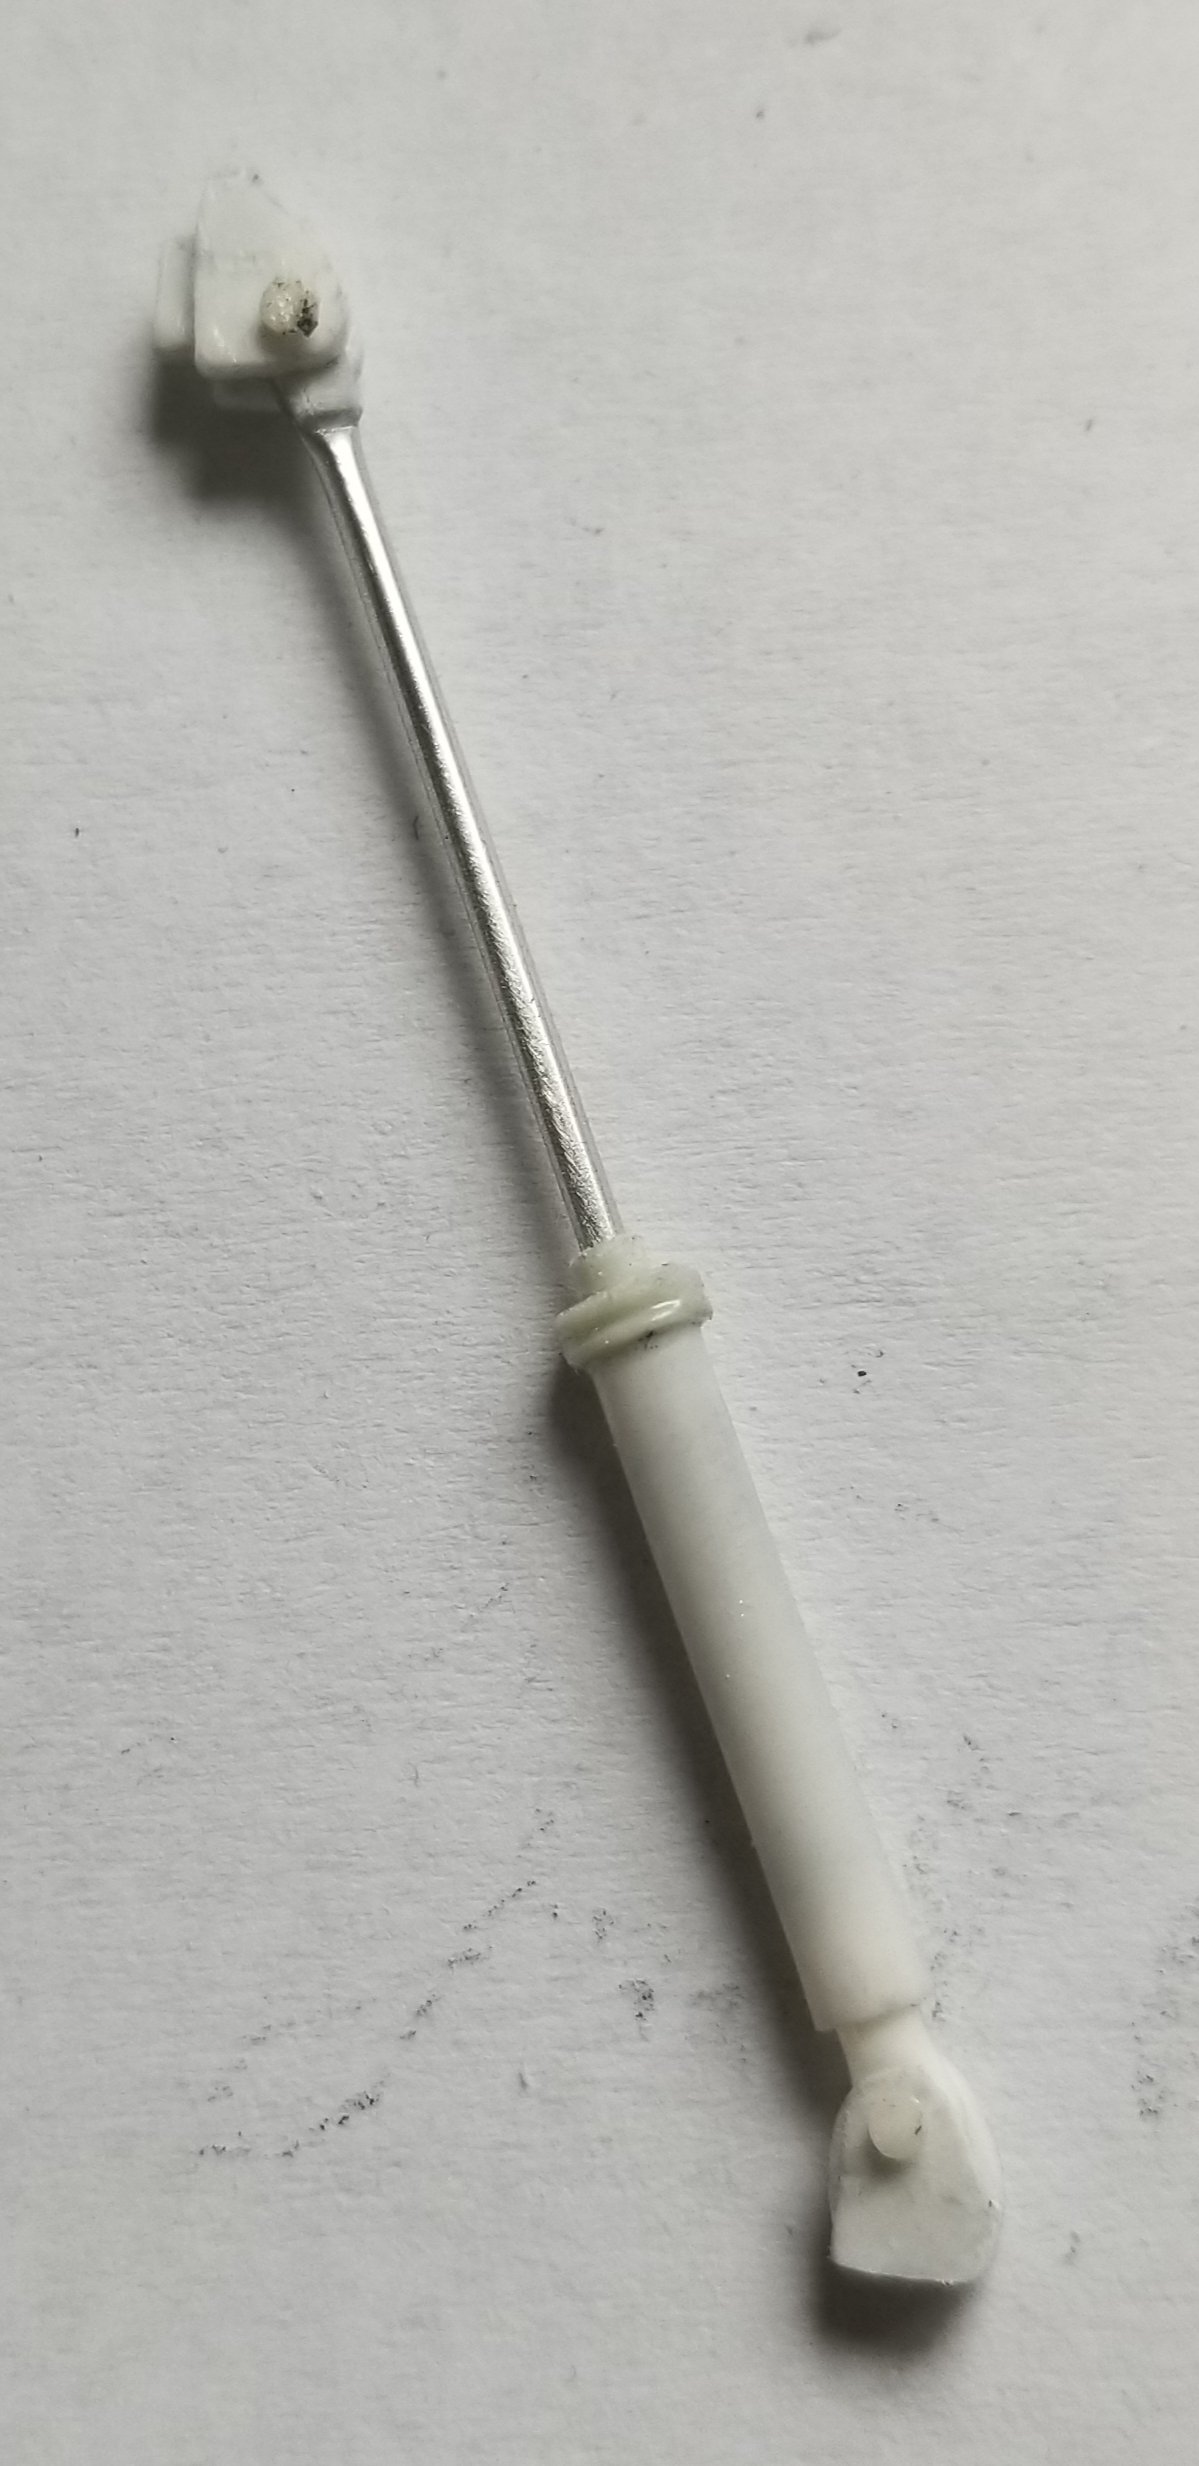
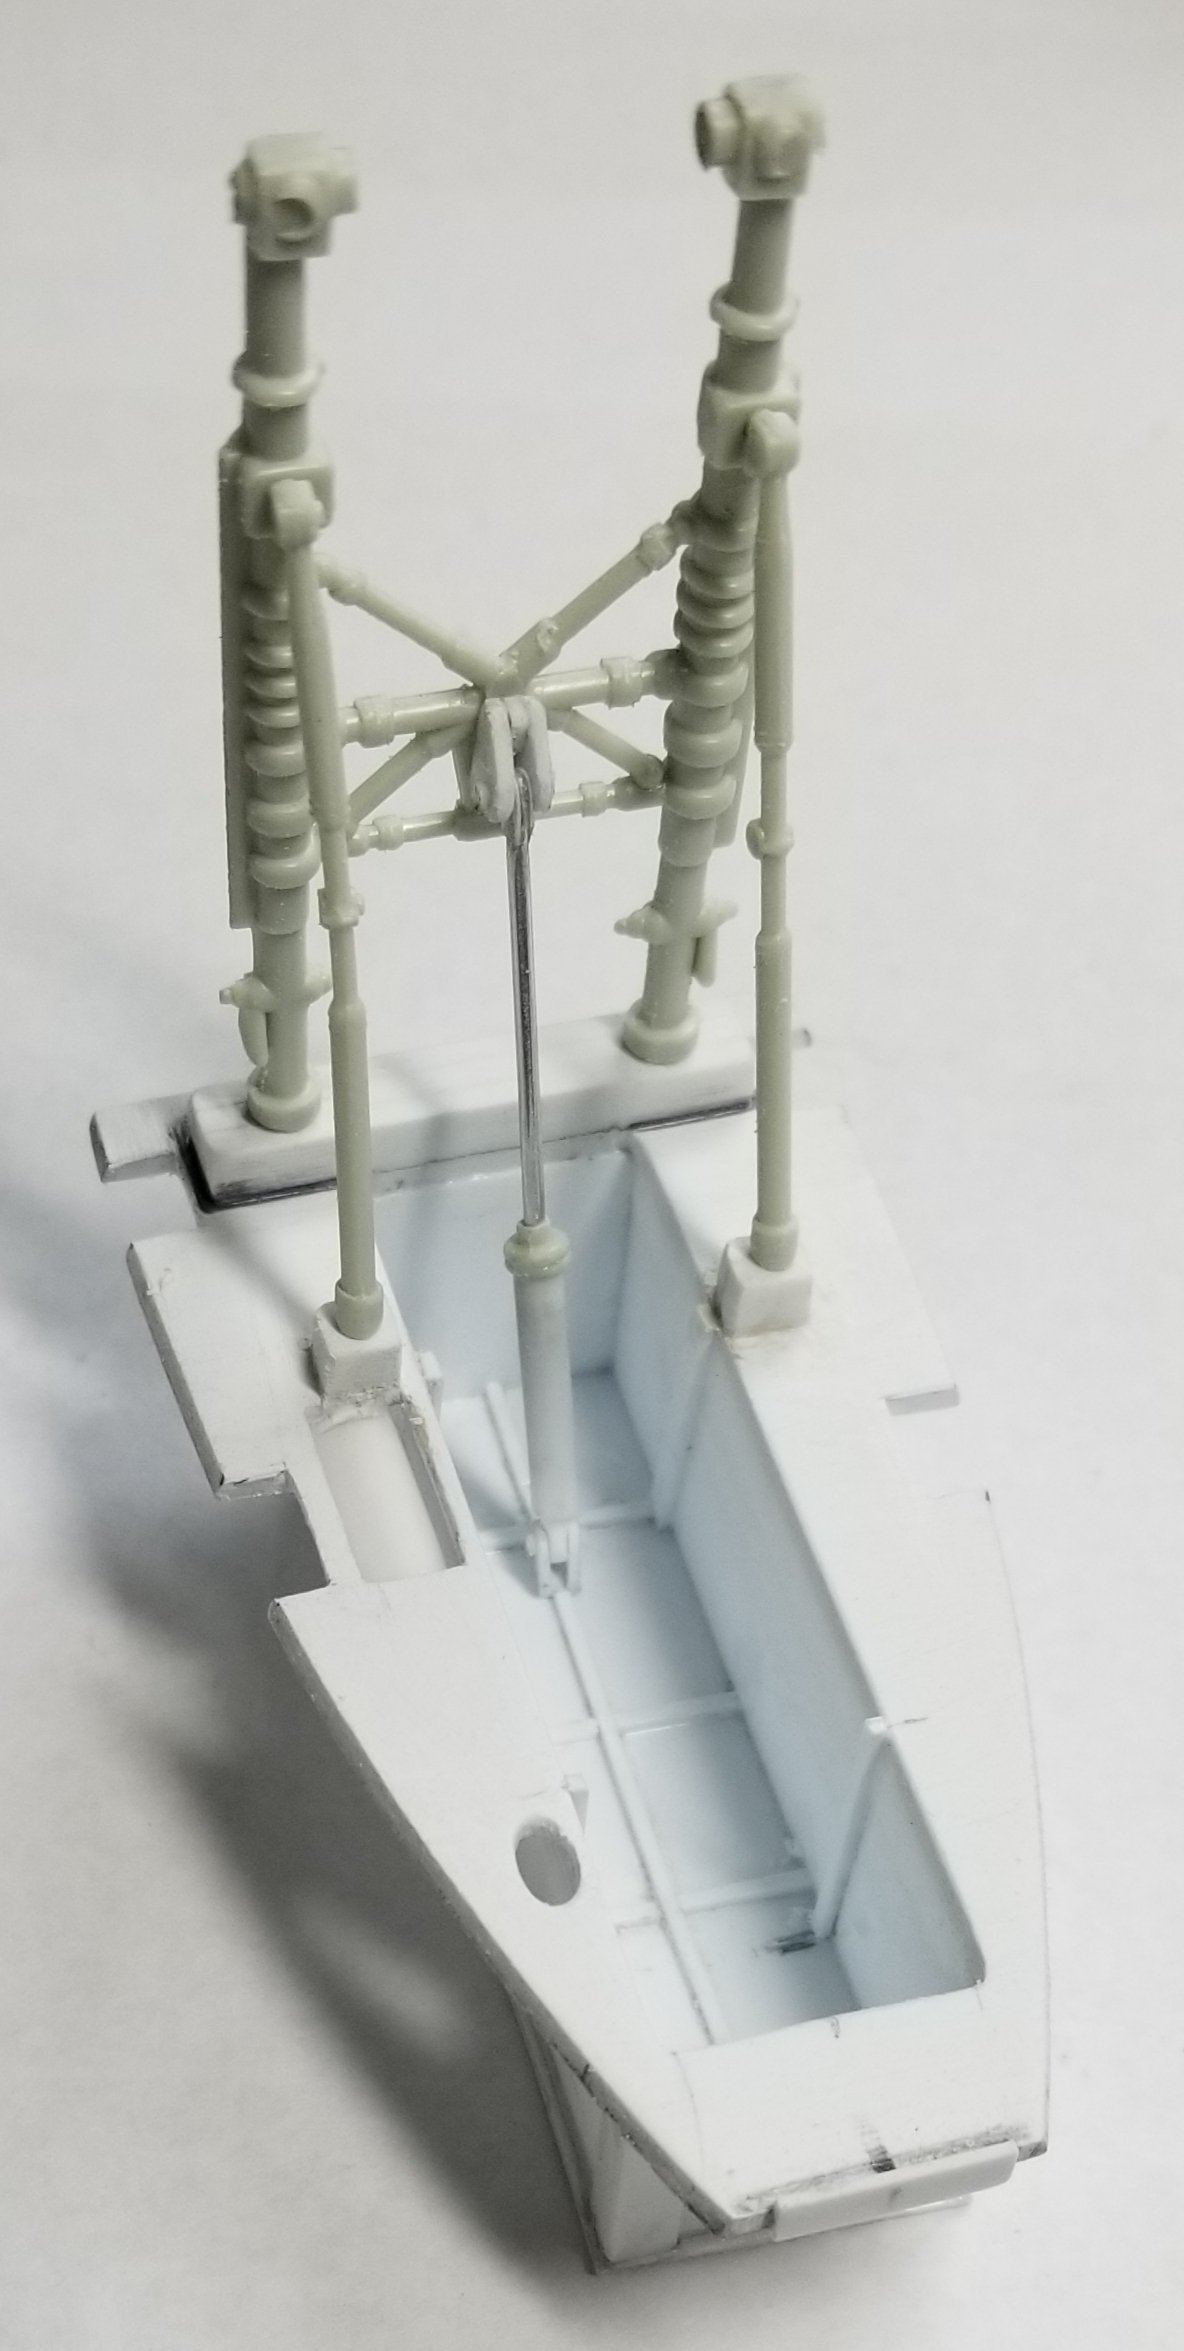
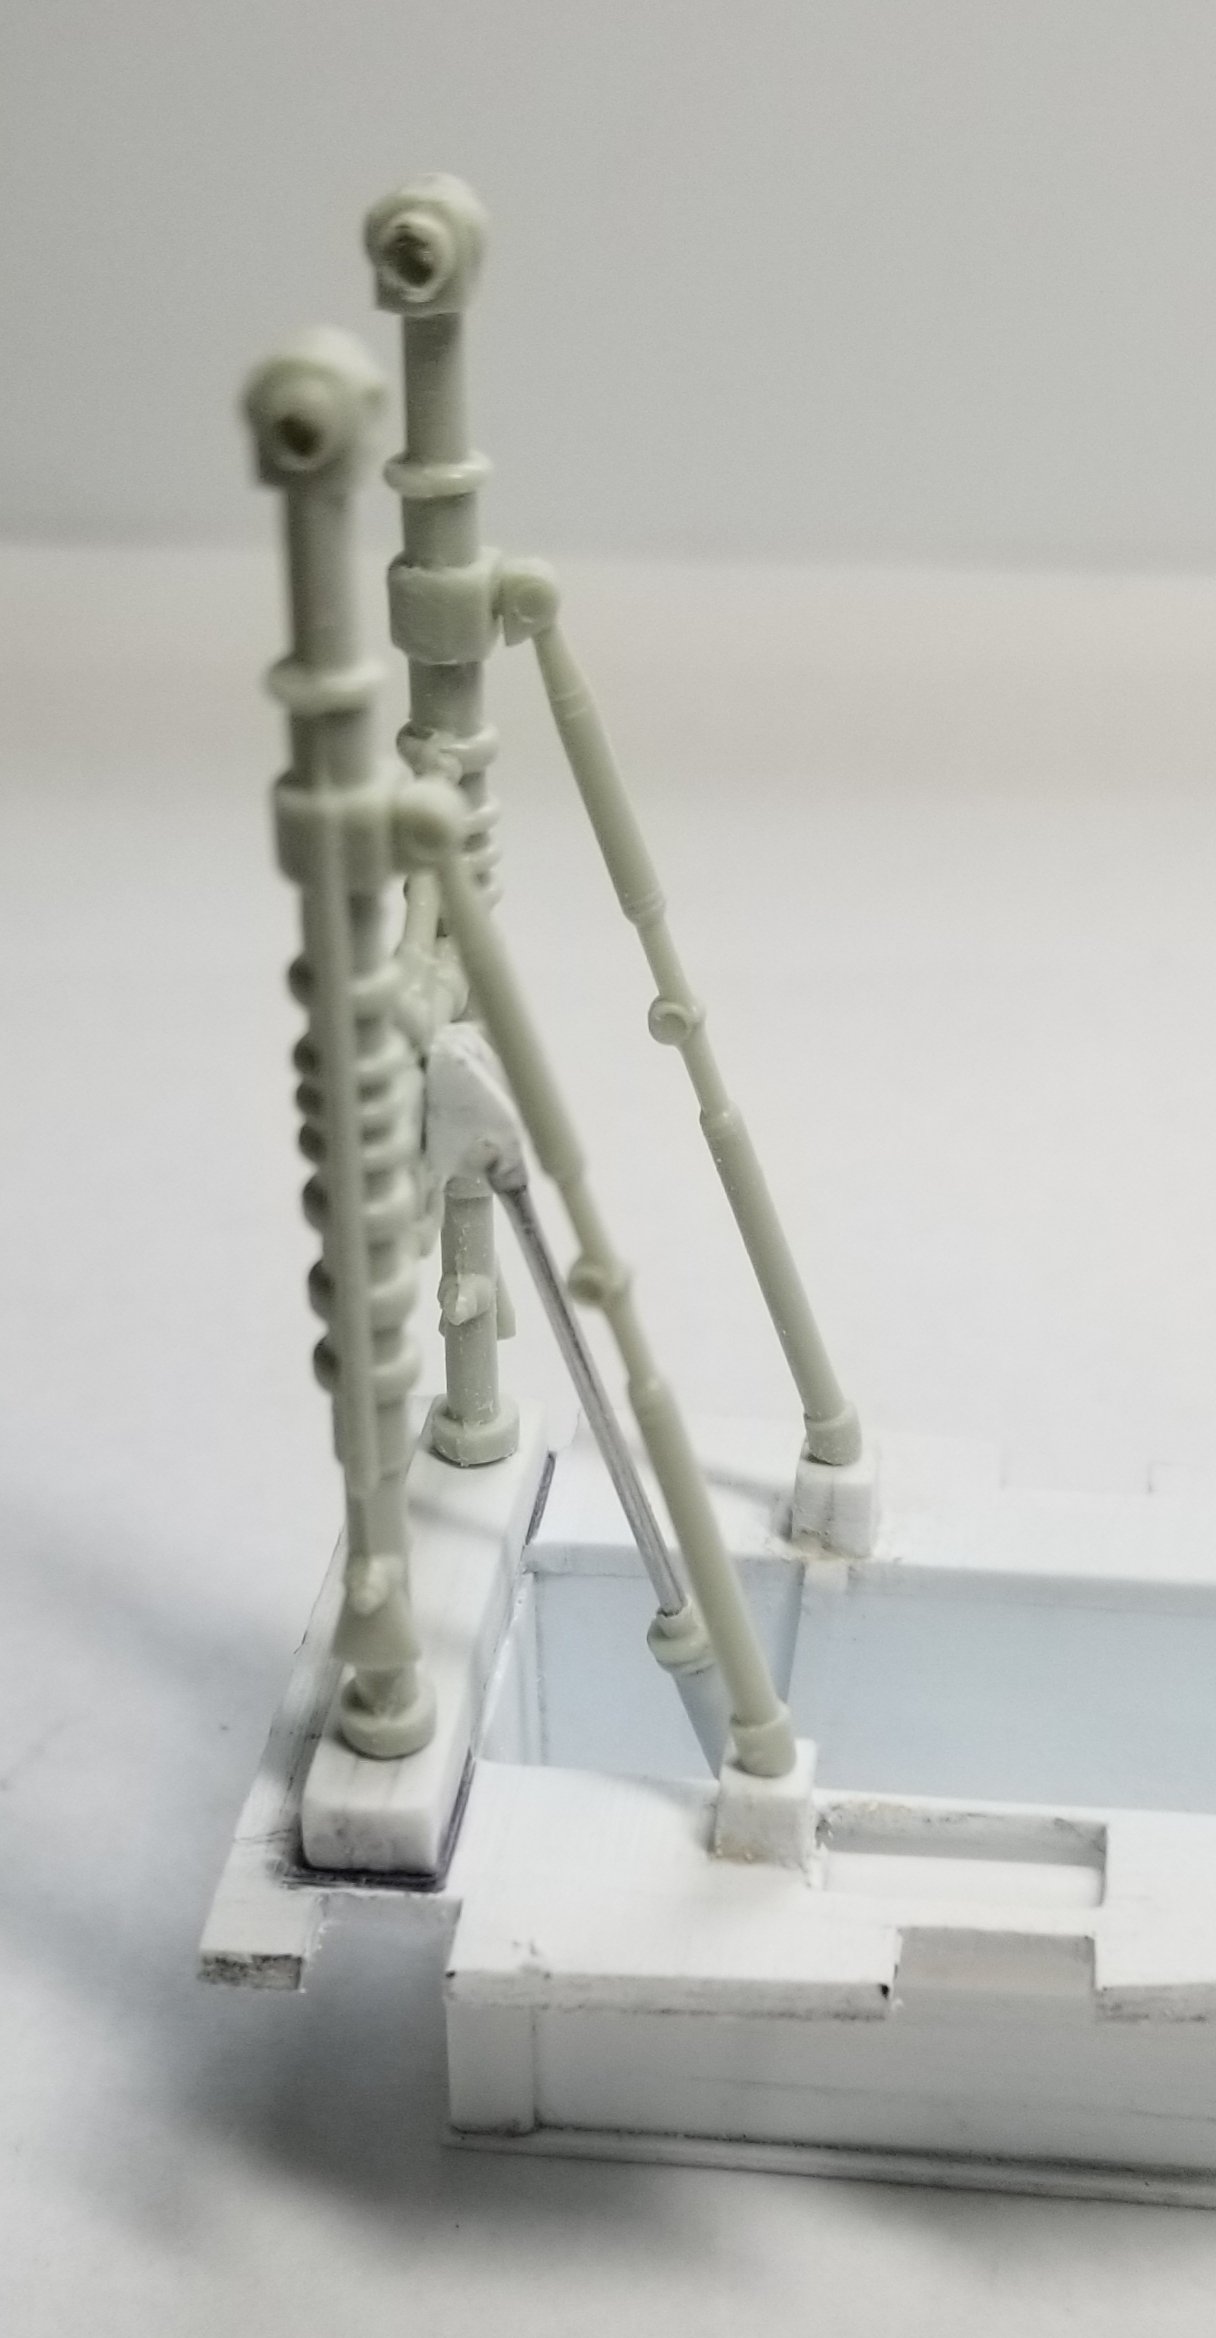
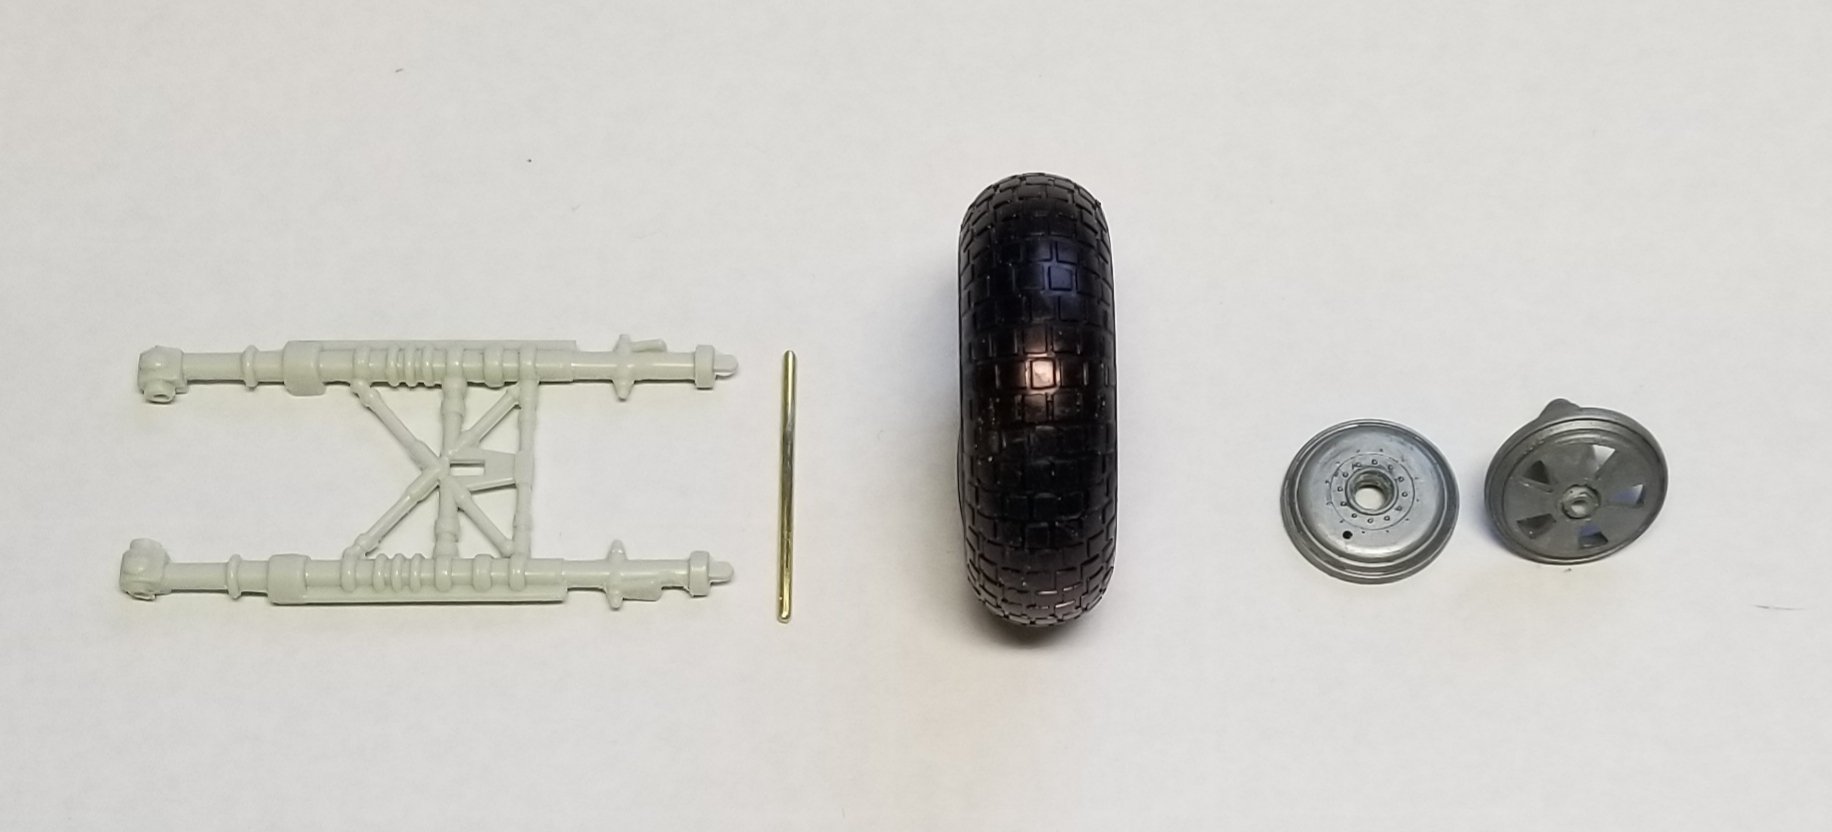
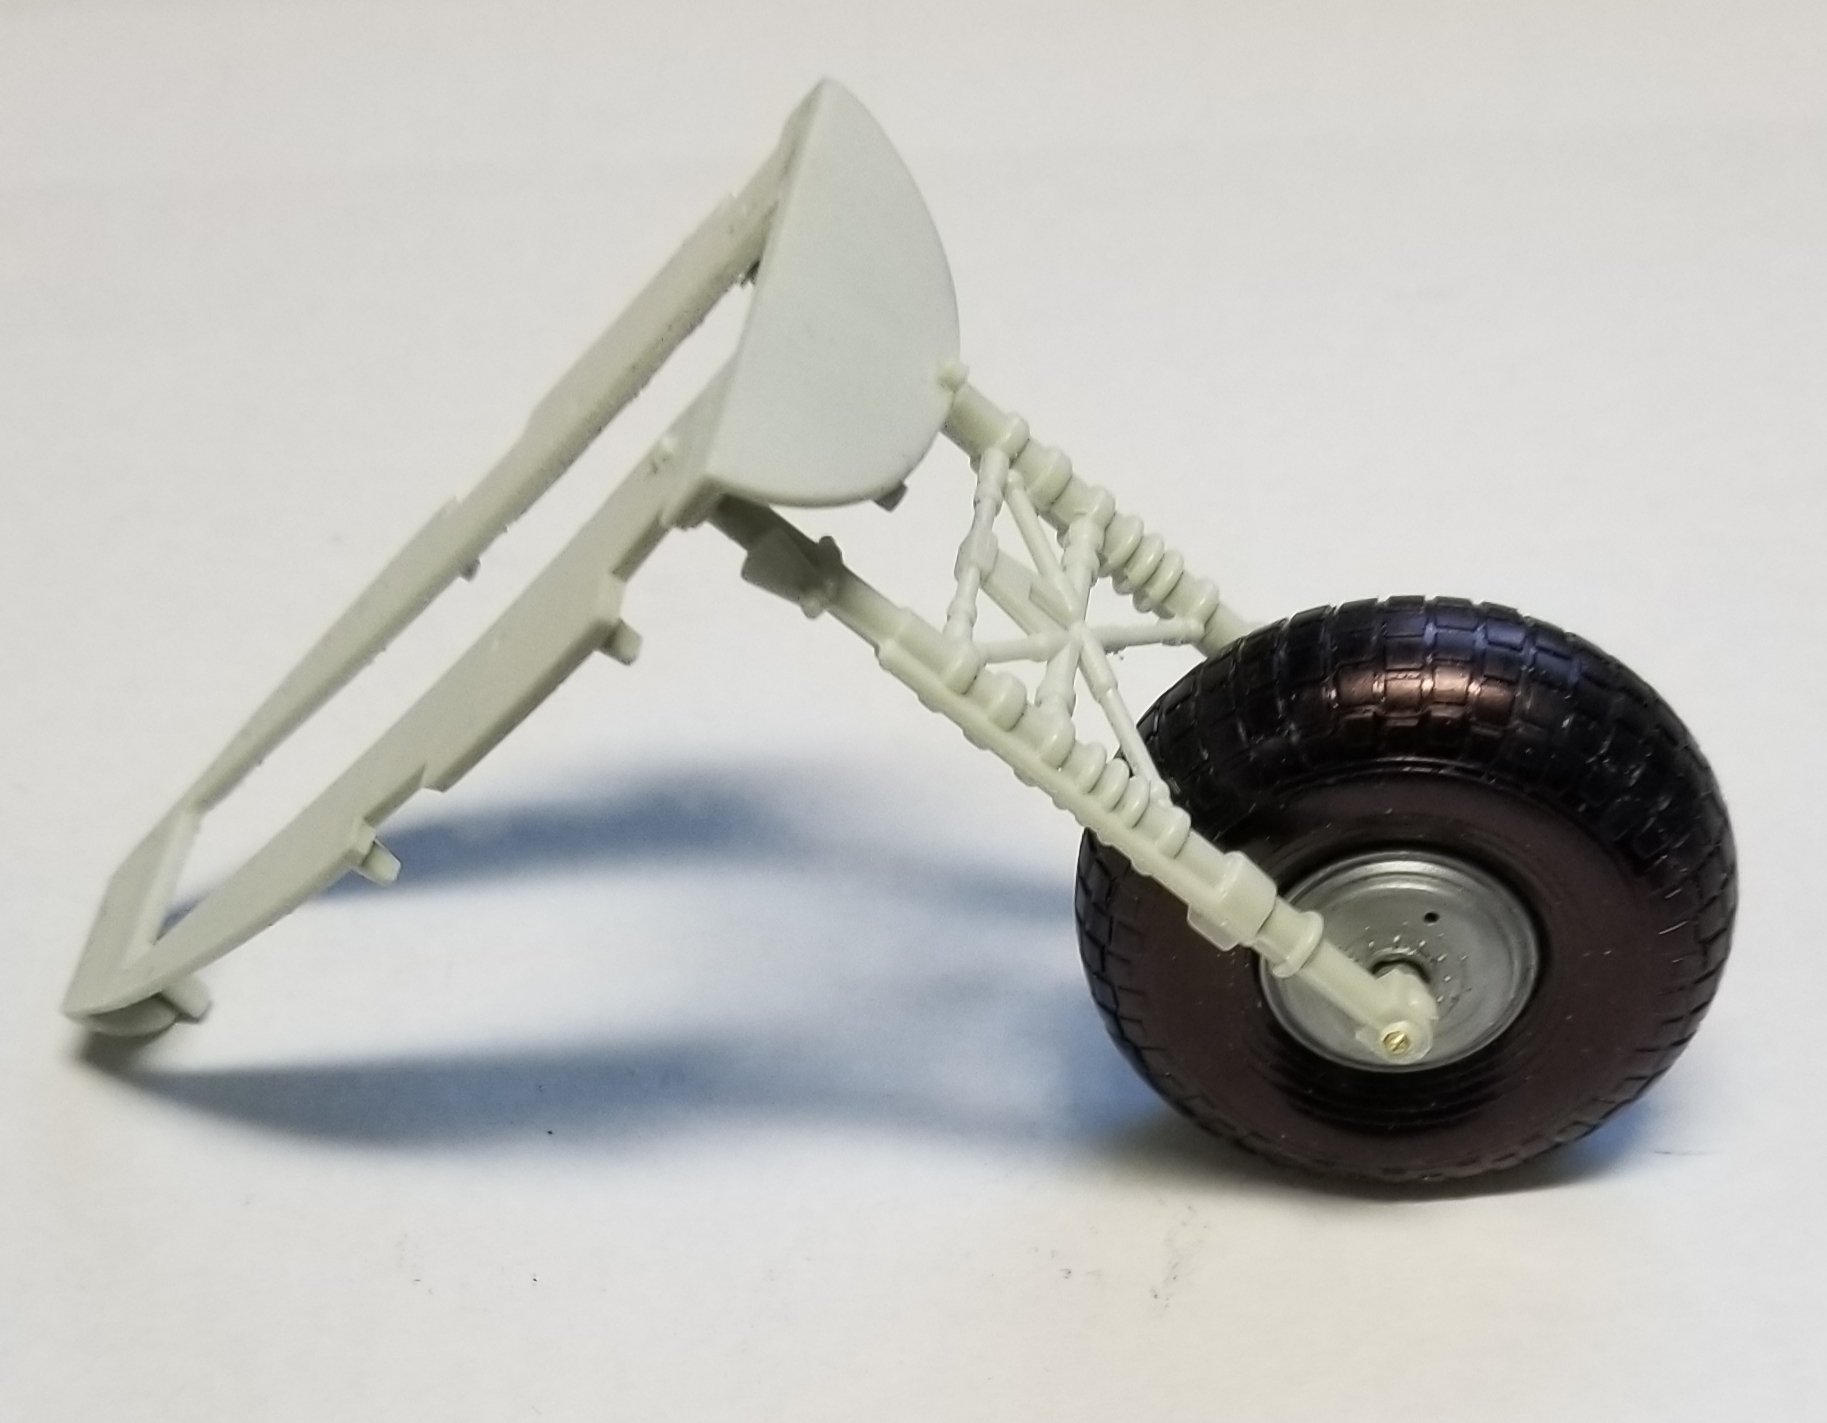
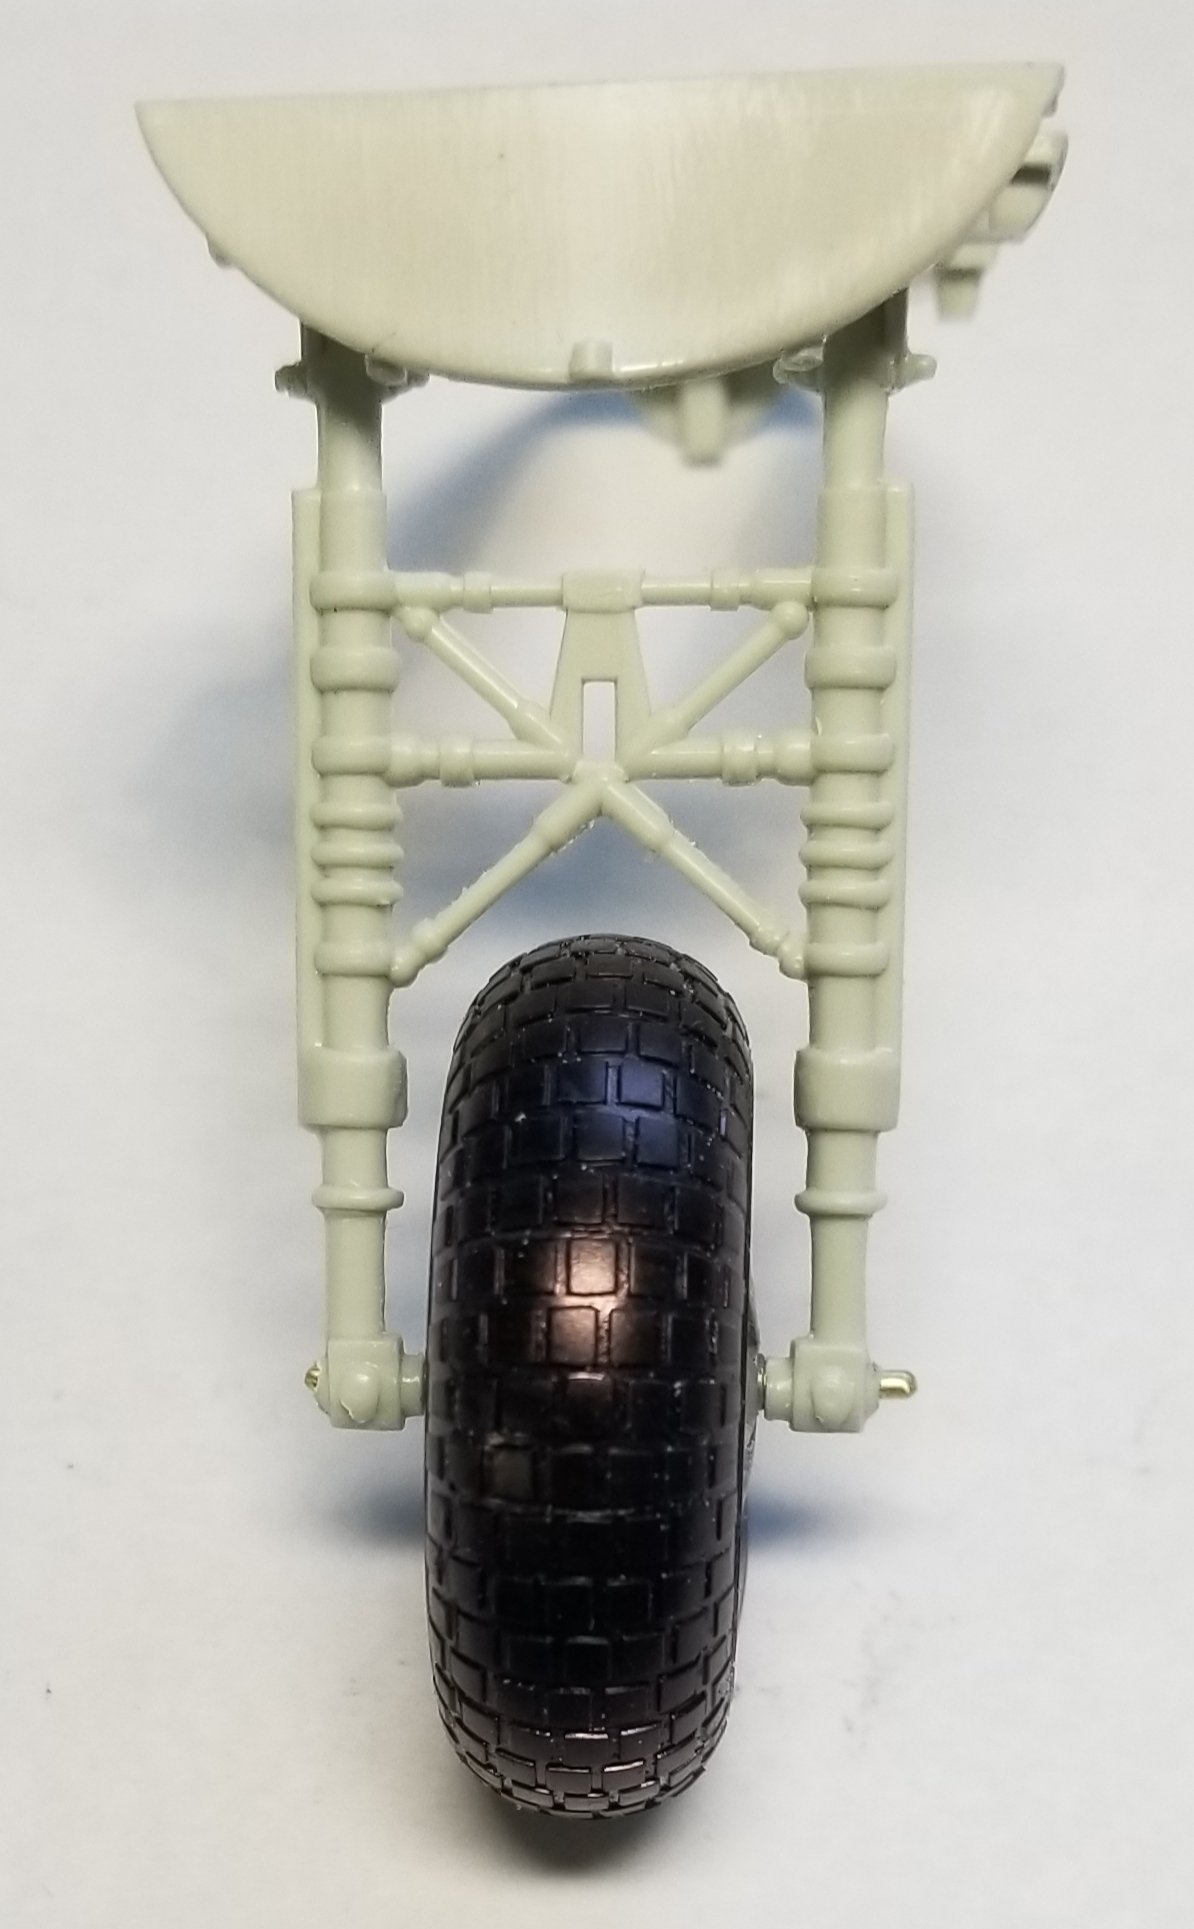
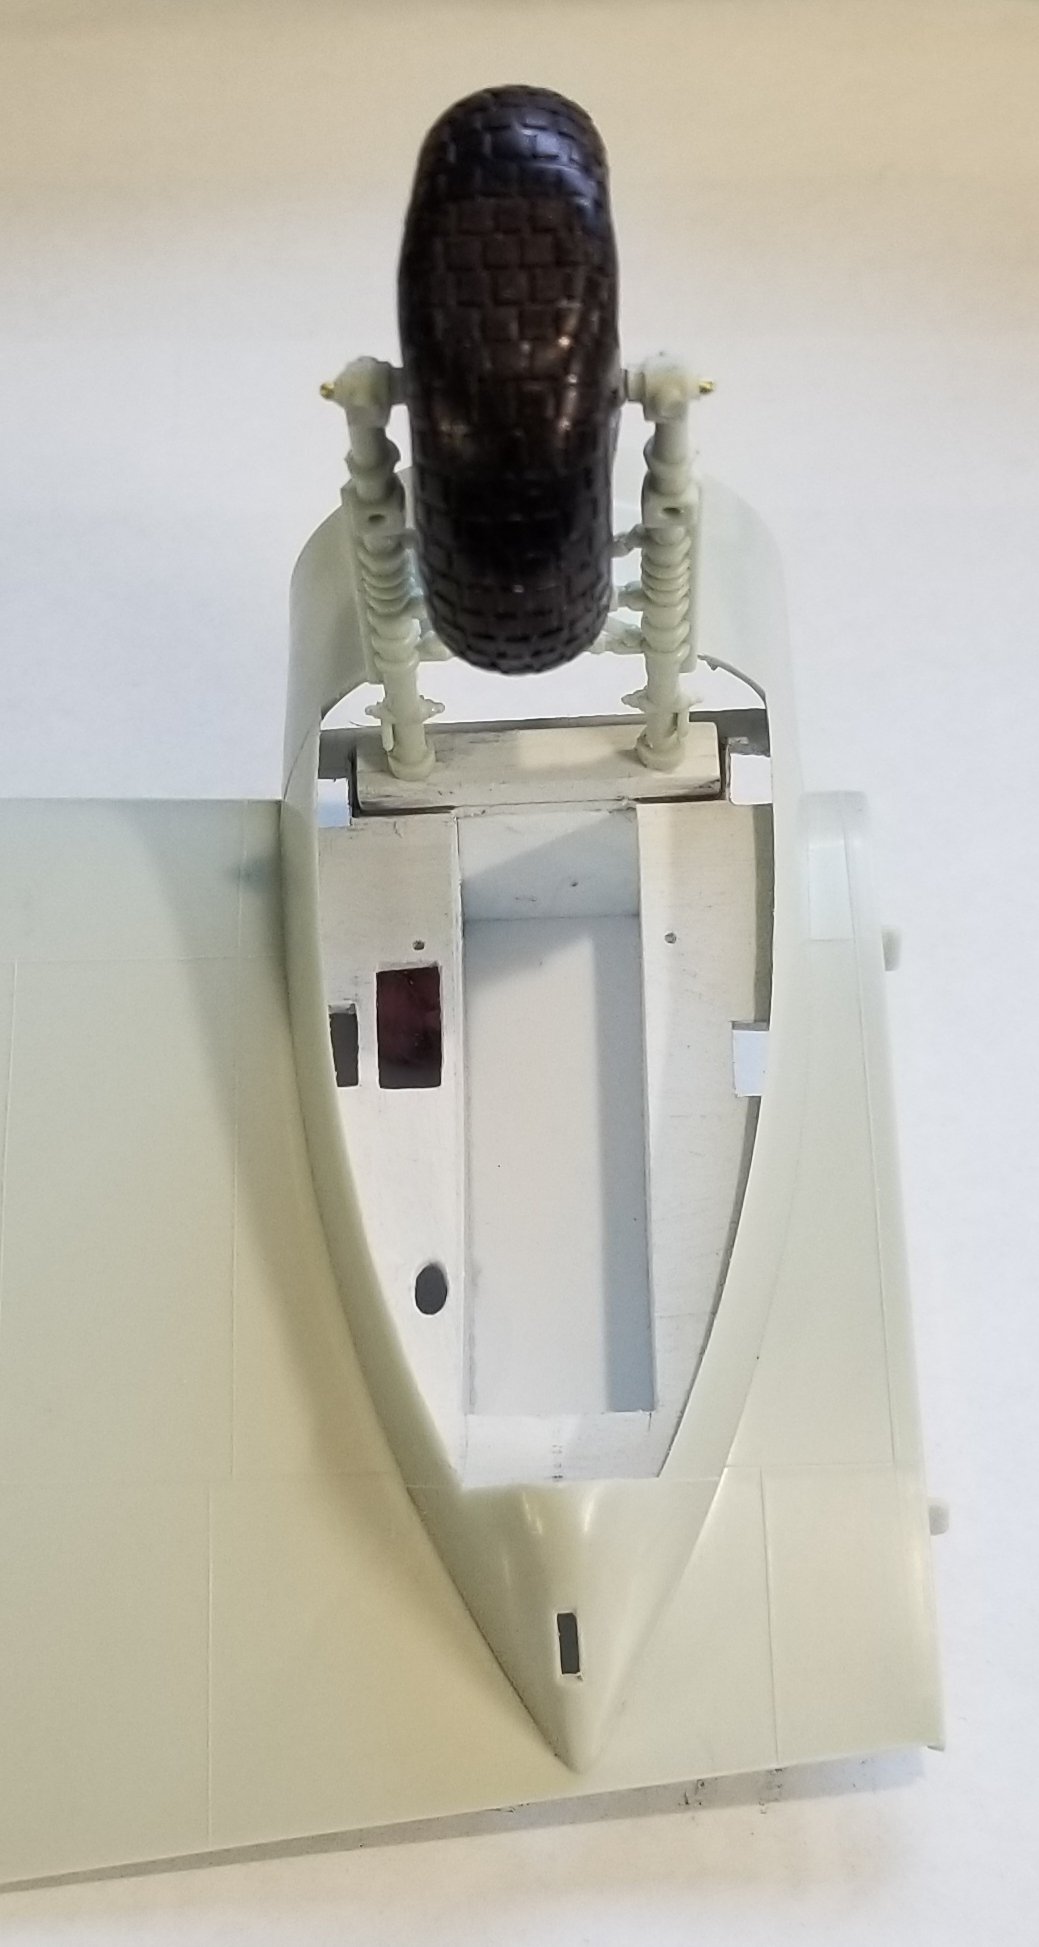
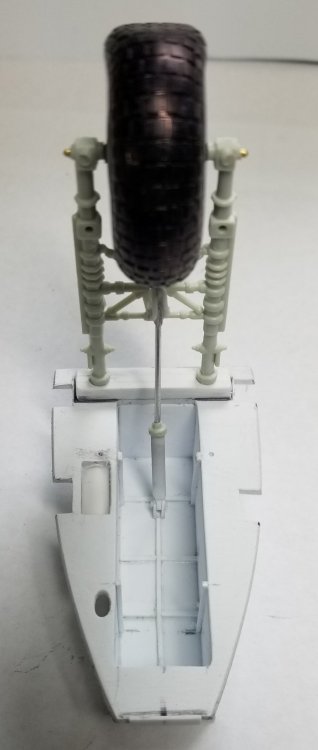
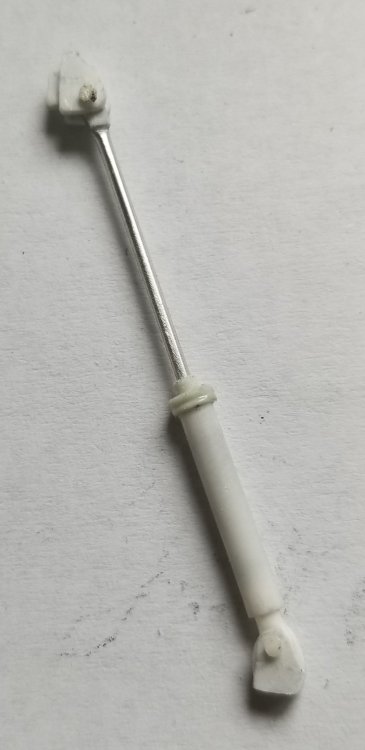
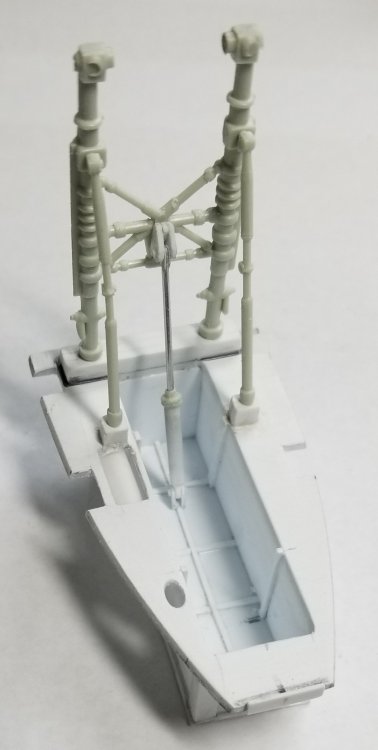
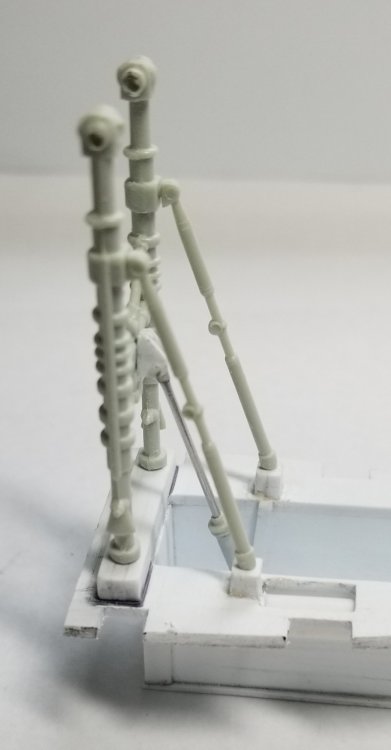
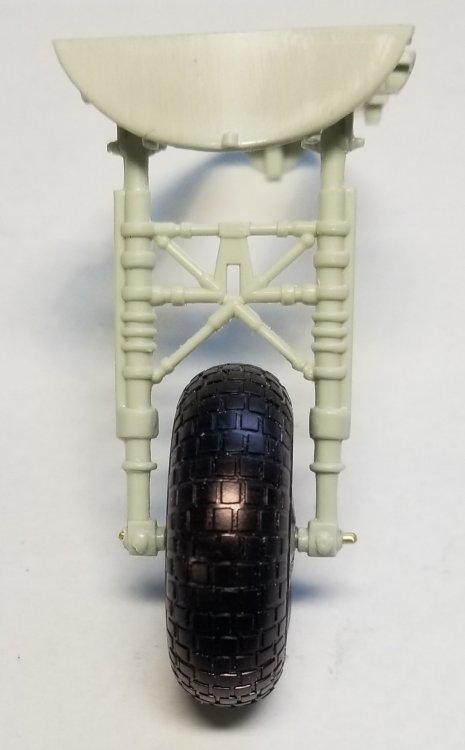
Ok I'm back. Did a little work on the landing gear and wheel wells. I really like working on this Beaufighter, but there is an inherent problem with doing twin engine aircraft and that is everything has to be done twice, by that I mean two complex wheel wells, two engines and more interior equipment. This in its self is not hard if you don't have to do much scratch building. This 1/32 Bristol Beaufighter has virtually no detail to it. Decent engines, but they are lacking a lot of stuff that is visible through the cowl opening. Absolute toy like wheel wells. The landing gear is not very strong (I'm hoping they will be alright, but I'm not that confident). There is alot of scratch building needed to bring this up to par, which I actually like, just ha0rder having to do it twice. Ok enough of me whinning! Here are some pictures for you to look at. view of landing gear struts temporarily installed with the scratch built extend/retract cylinder in place. same view with the wheel/tire temporarily installed. view of scratch built extend/retract cylinder. I made this from some 1/8" dia. Plastic tube, pieces of the kit part and a piece of 1mm dia. Albion aluminum tube. The two end mounting brackets are made from plastic card stock. view of braceing strips added to the wheel well. view of the landing gear, with it's support struts and extend/retract cylinder temporarily installed. another view of the landing gear. view of the port wheel well with the inner fuel vent pipe installed. I have to make the other side vent pipe, plus do the same thing for the starboard side wheel well. There are pipes and wires to be added, but thankfully there isn't much in the Beaufighter wheel wells. Thats it for now be back with more soon. Ron G


-
Thanks Sapper
-
Hasegawa BF109F-4- finished!
CrankyCrafstman replied to BlrwestSiR's topic in LSM 1/35 and Larger Work In Progress
Achtung! You is doin some fine workin der mein herr. Ron G -
IBG models PZL P.11c. Finished
CrankyCrafstman replied to Clunkmeister's topic in LSM 1/35 and Larger Work In Progress
This is a great build Ernie! You've done some fantastic work here. Not my cup a tea,but still following along to see your fantastic work. Ron G -
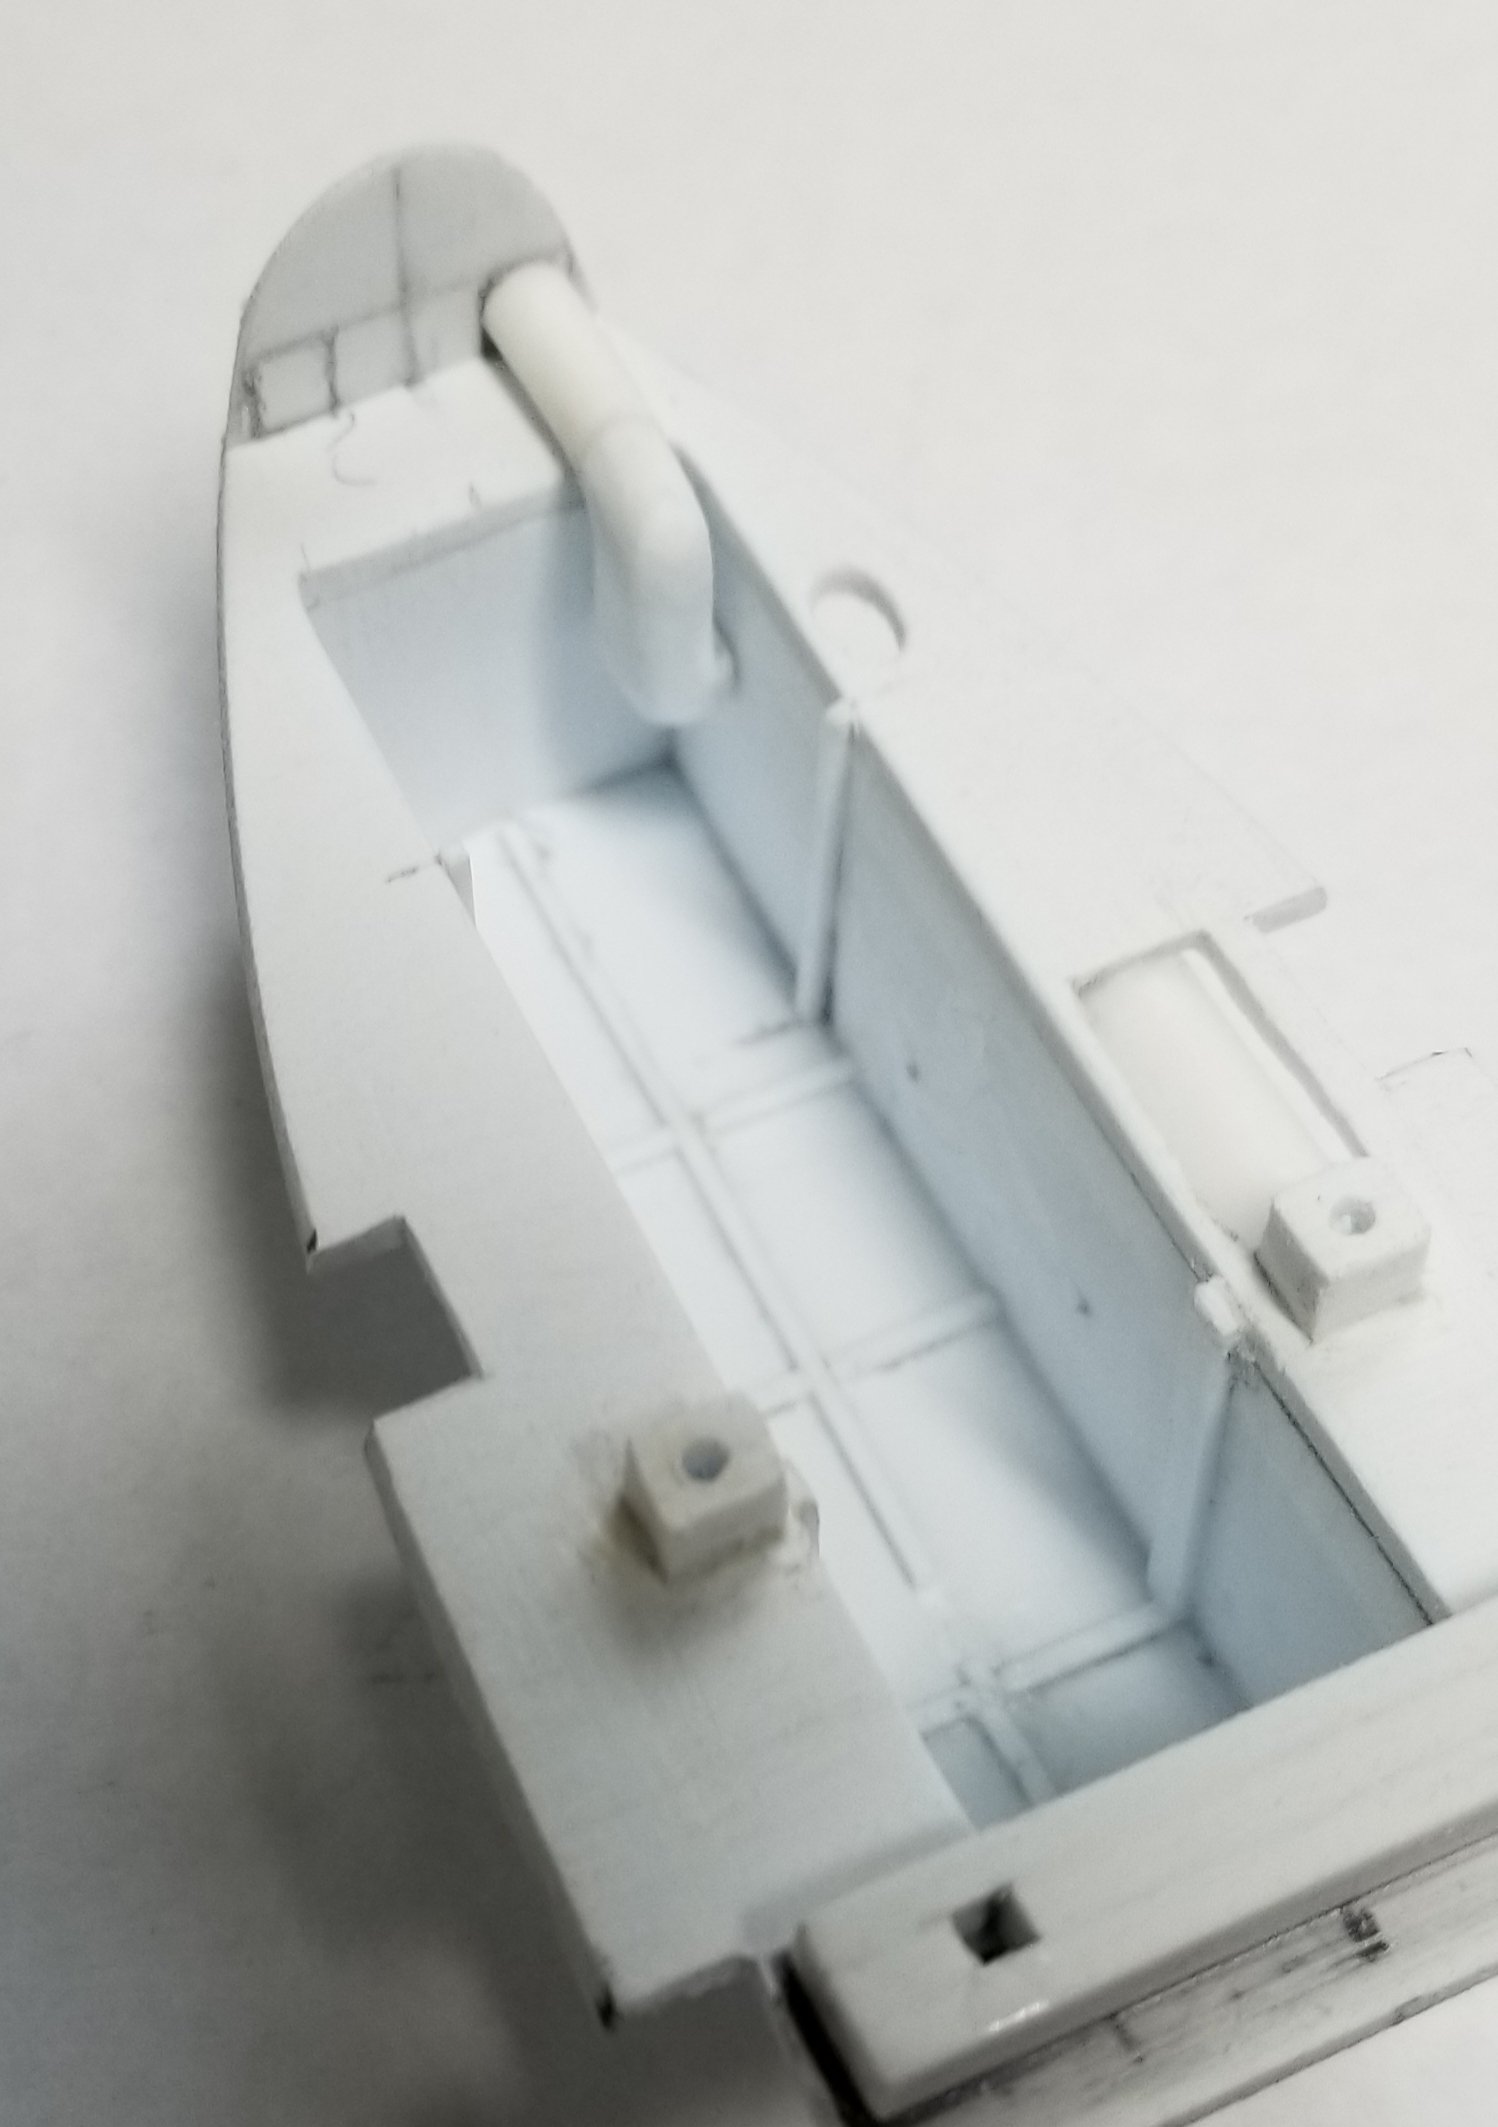
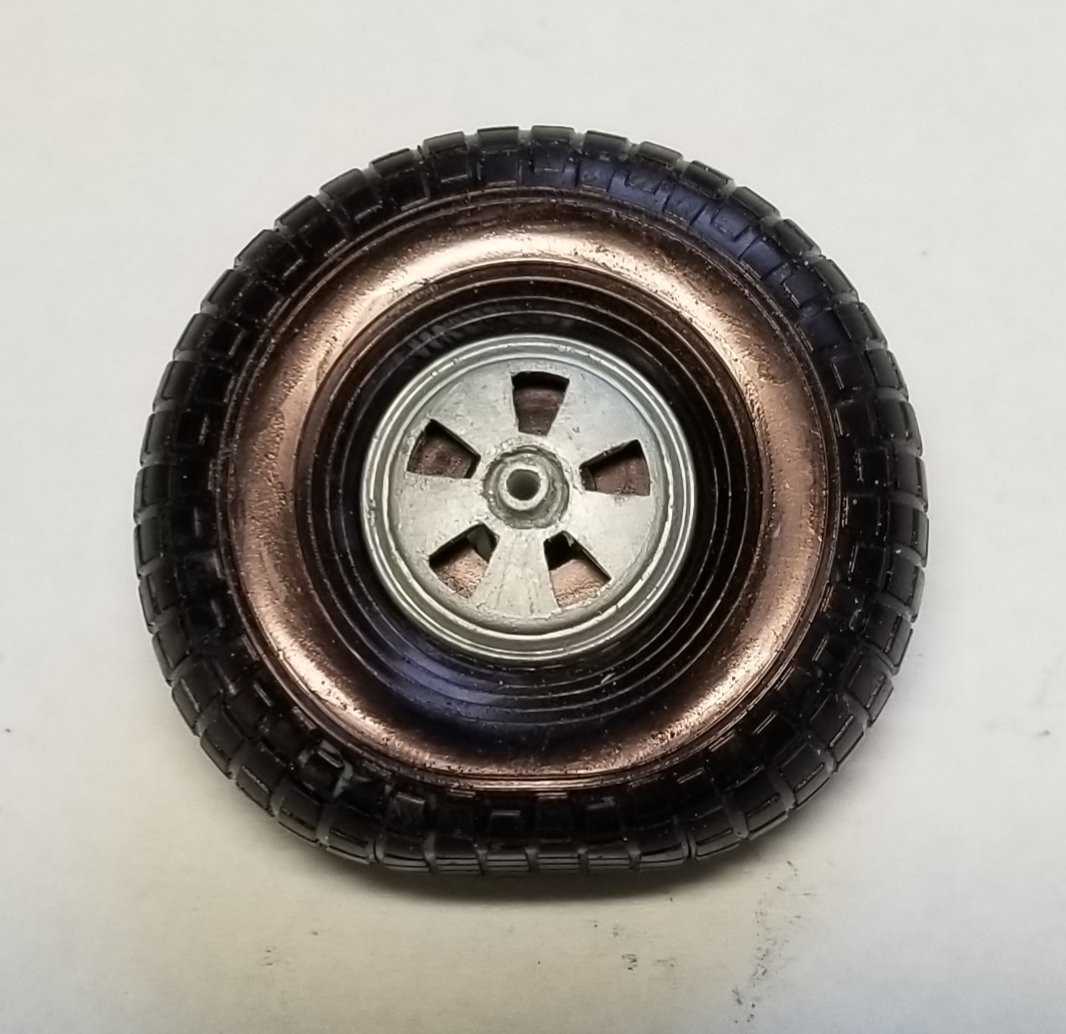
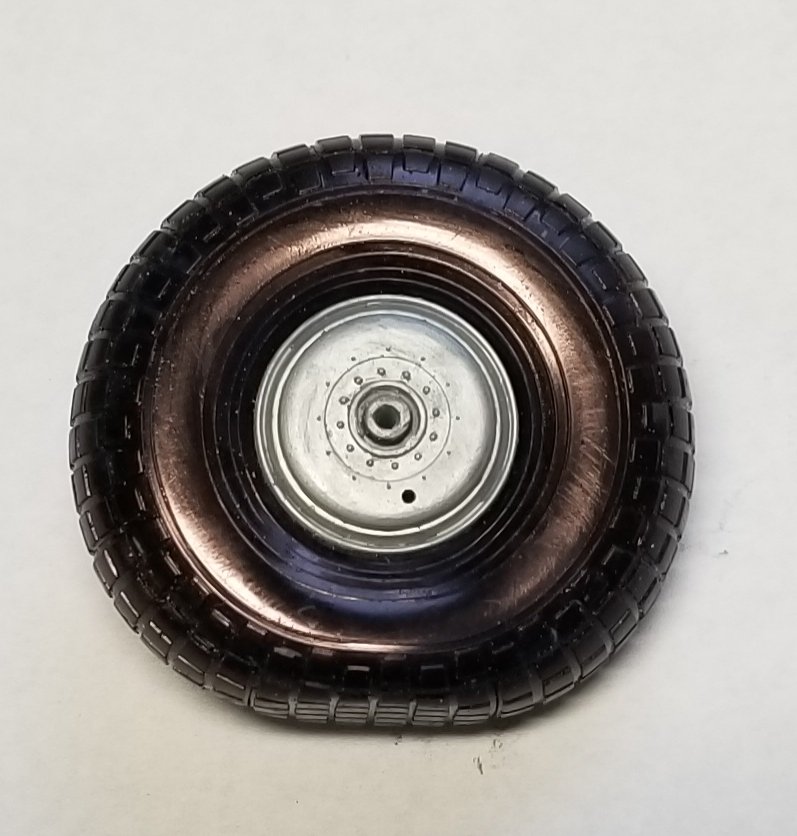
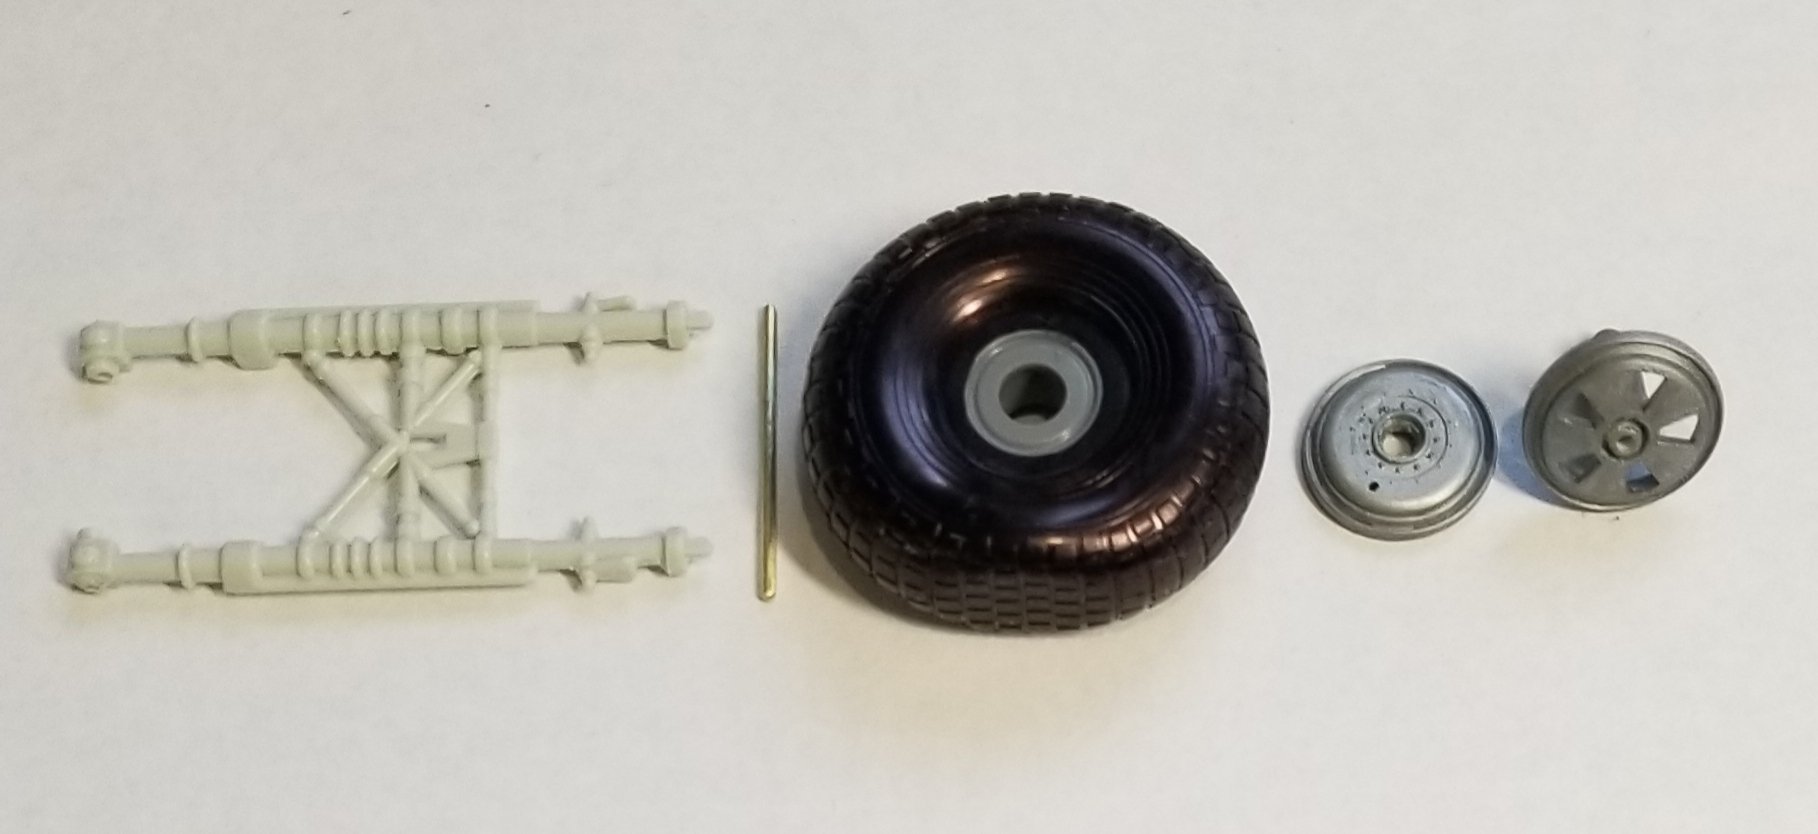
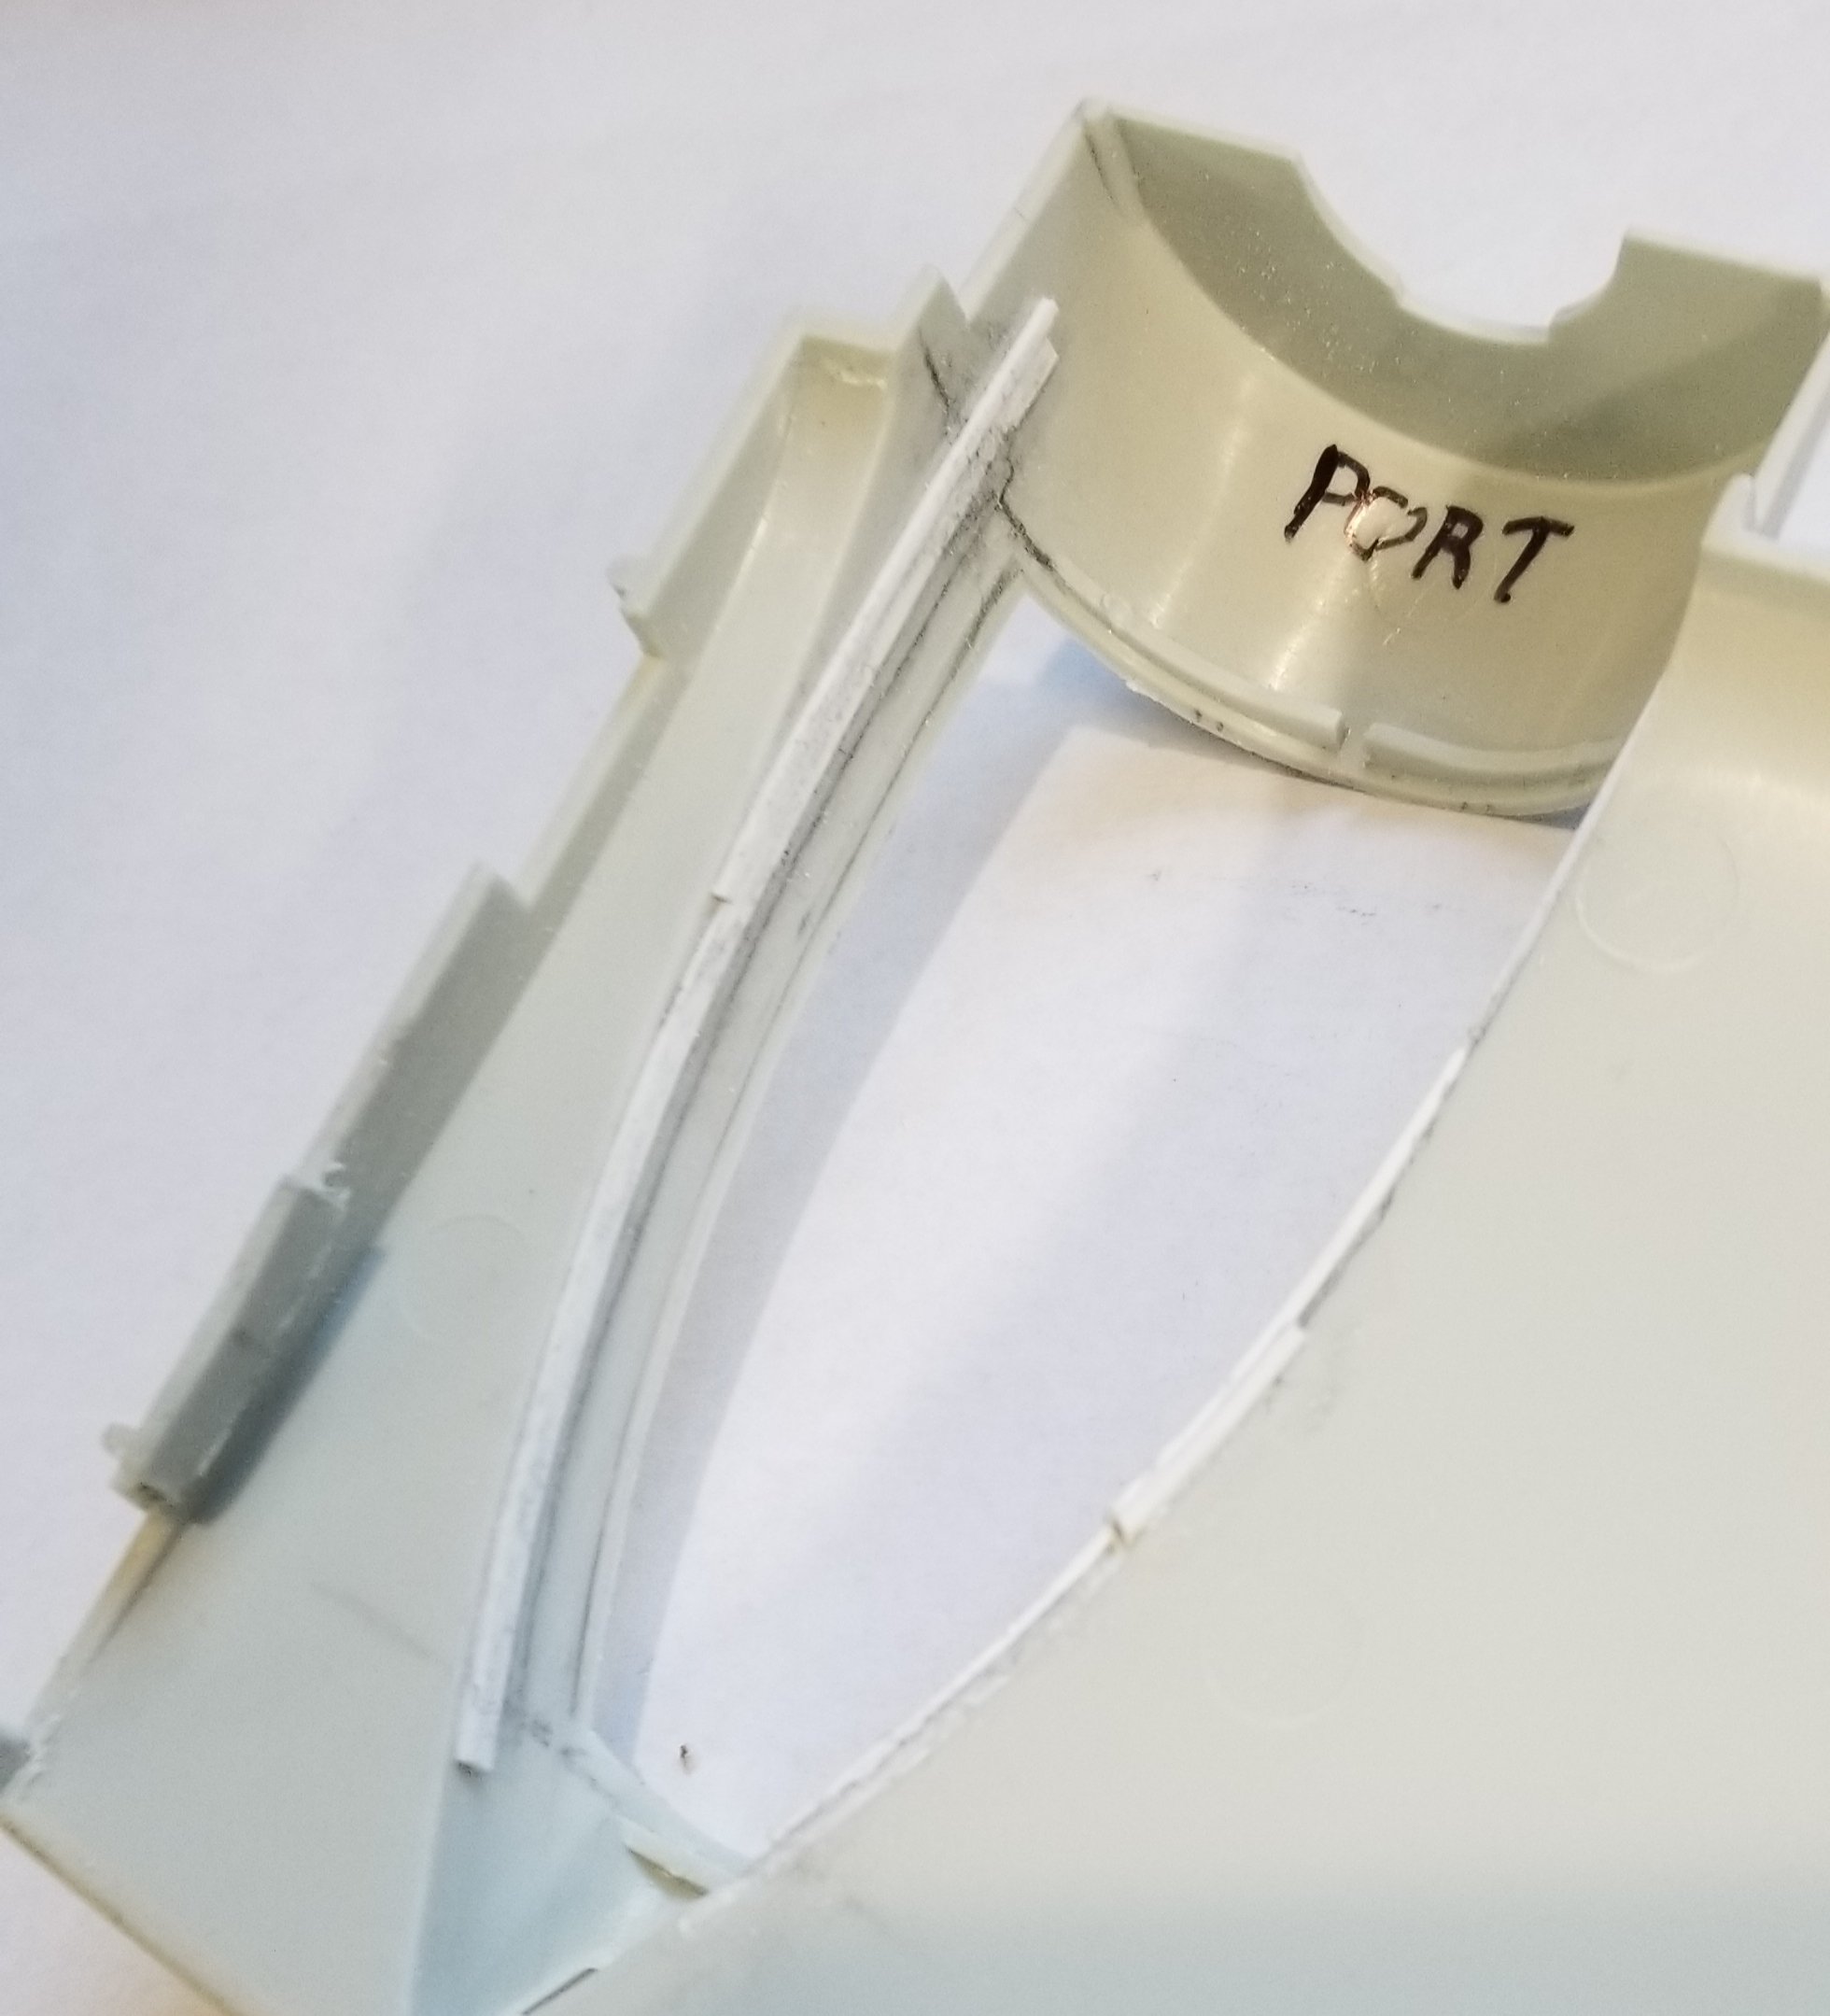
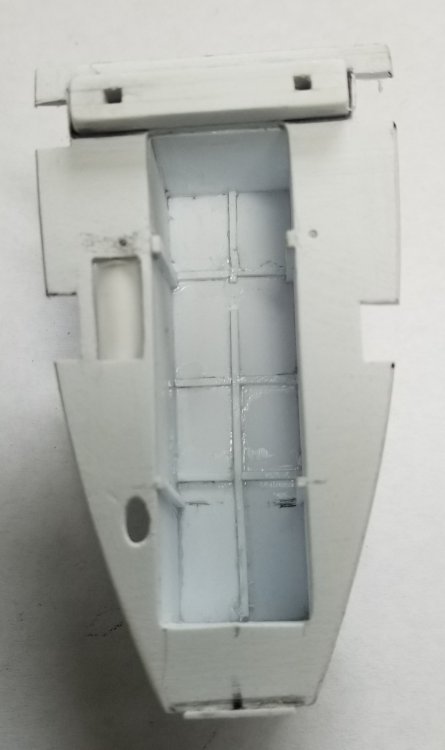
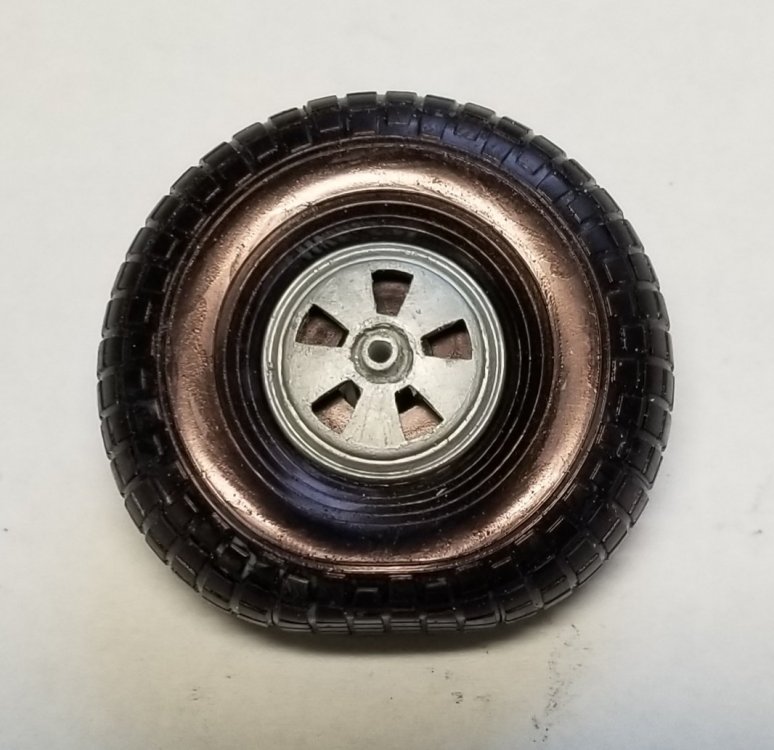
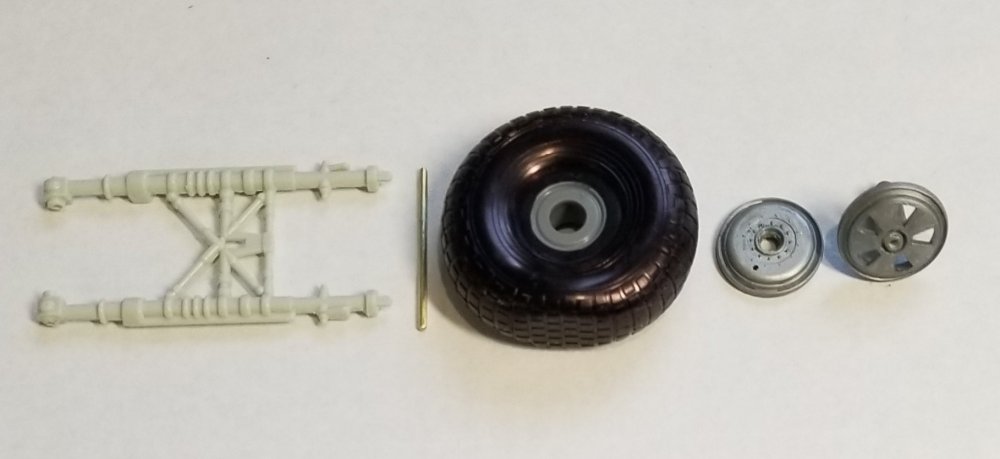
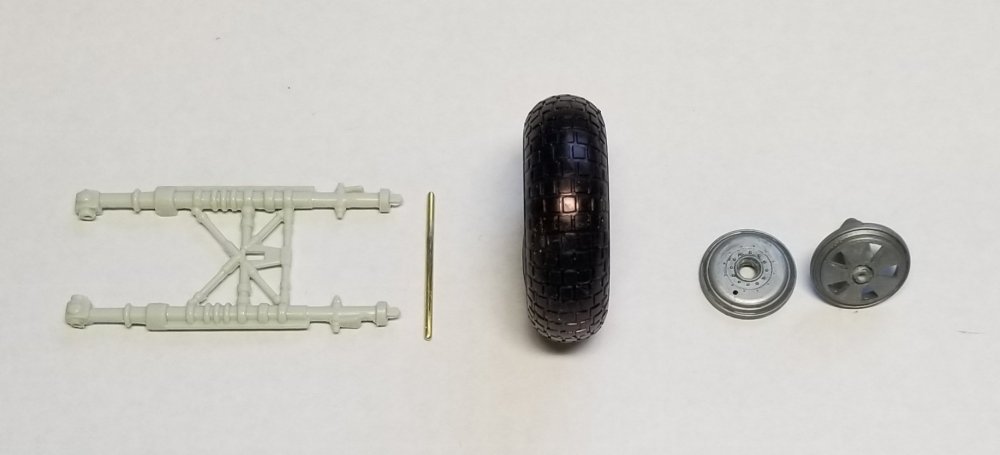
Ok I got some more done. I brushed on a coat of Mr surfacer 1000 onto the lower fuselage, first coat before sanding. I purchased a few weeks ago the spurs with the wheels and tires from the Tamiya Mosquito off of Ebay. They are a almost perfect fit for the Beau. so I did some modifications to them to fit the Beaufighter landing gear to them. I decided to completely remake the wheel wells in order for them to look more like the real thing. I did this out of various thicknesses of plastic card stock. I had to move the wheel well floor up into the nacelle about 3/16" which posed a problem with the kit landing gear, so I made a 1/8" thick block out of plastic stock to fit between the landing gear and the new floor of the wheel well, bringing the landing gear back to the correct position. I then cut out the center of the wheel well to create the actual wheel well. This I also made out of plastic card stock. So far I only have one partially done, but have the parts for the other one cut and ready. So here are some pictures for you to look over. lower fuselage with Mr surfacer 1000 applied. outer side of Tamiya Mosquito wheel/tire. I colored it with a black and silver sharpie. inner side of Tamiya Mosquito wheel/tire. these are the main parts for the landing gear. another view of landing gear. landing gear temporarily mounted to the kit wheel well floor. straight on view of landing gear. view looking forward into the port wheel well. view looking aft into the port wheel well. view of my scratch built wheel well floor on the left, kit part on the right for the starboard side. view of insde of port lower nacelle. another view of insde of port lower nacelle. this view shows the port wheel well with the landing gear and wheel assy. temporarily installed into the raised block I made. Well that's all for now be back soon with more updates. Ron G


-
Thanks guys I'm still working on it. I'll have some pics up in a while waiting for mr surfacer to dry. Ron G
-
1/32 HobbyBoss Invader A-26B (a Joke?)
CrankyCrafstman replied to Martinnfb's topic in Modelling Discussion
Yupp dem is supposed to be R-2800-71! Thats a big f-up!!! This is going to be worse then the B-24 And I'll bet you the props are not the 12' 7" dia. they are supposed to be either. Ron G -
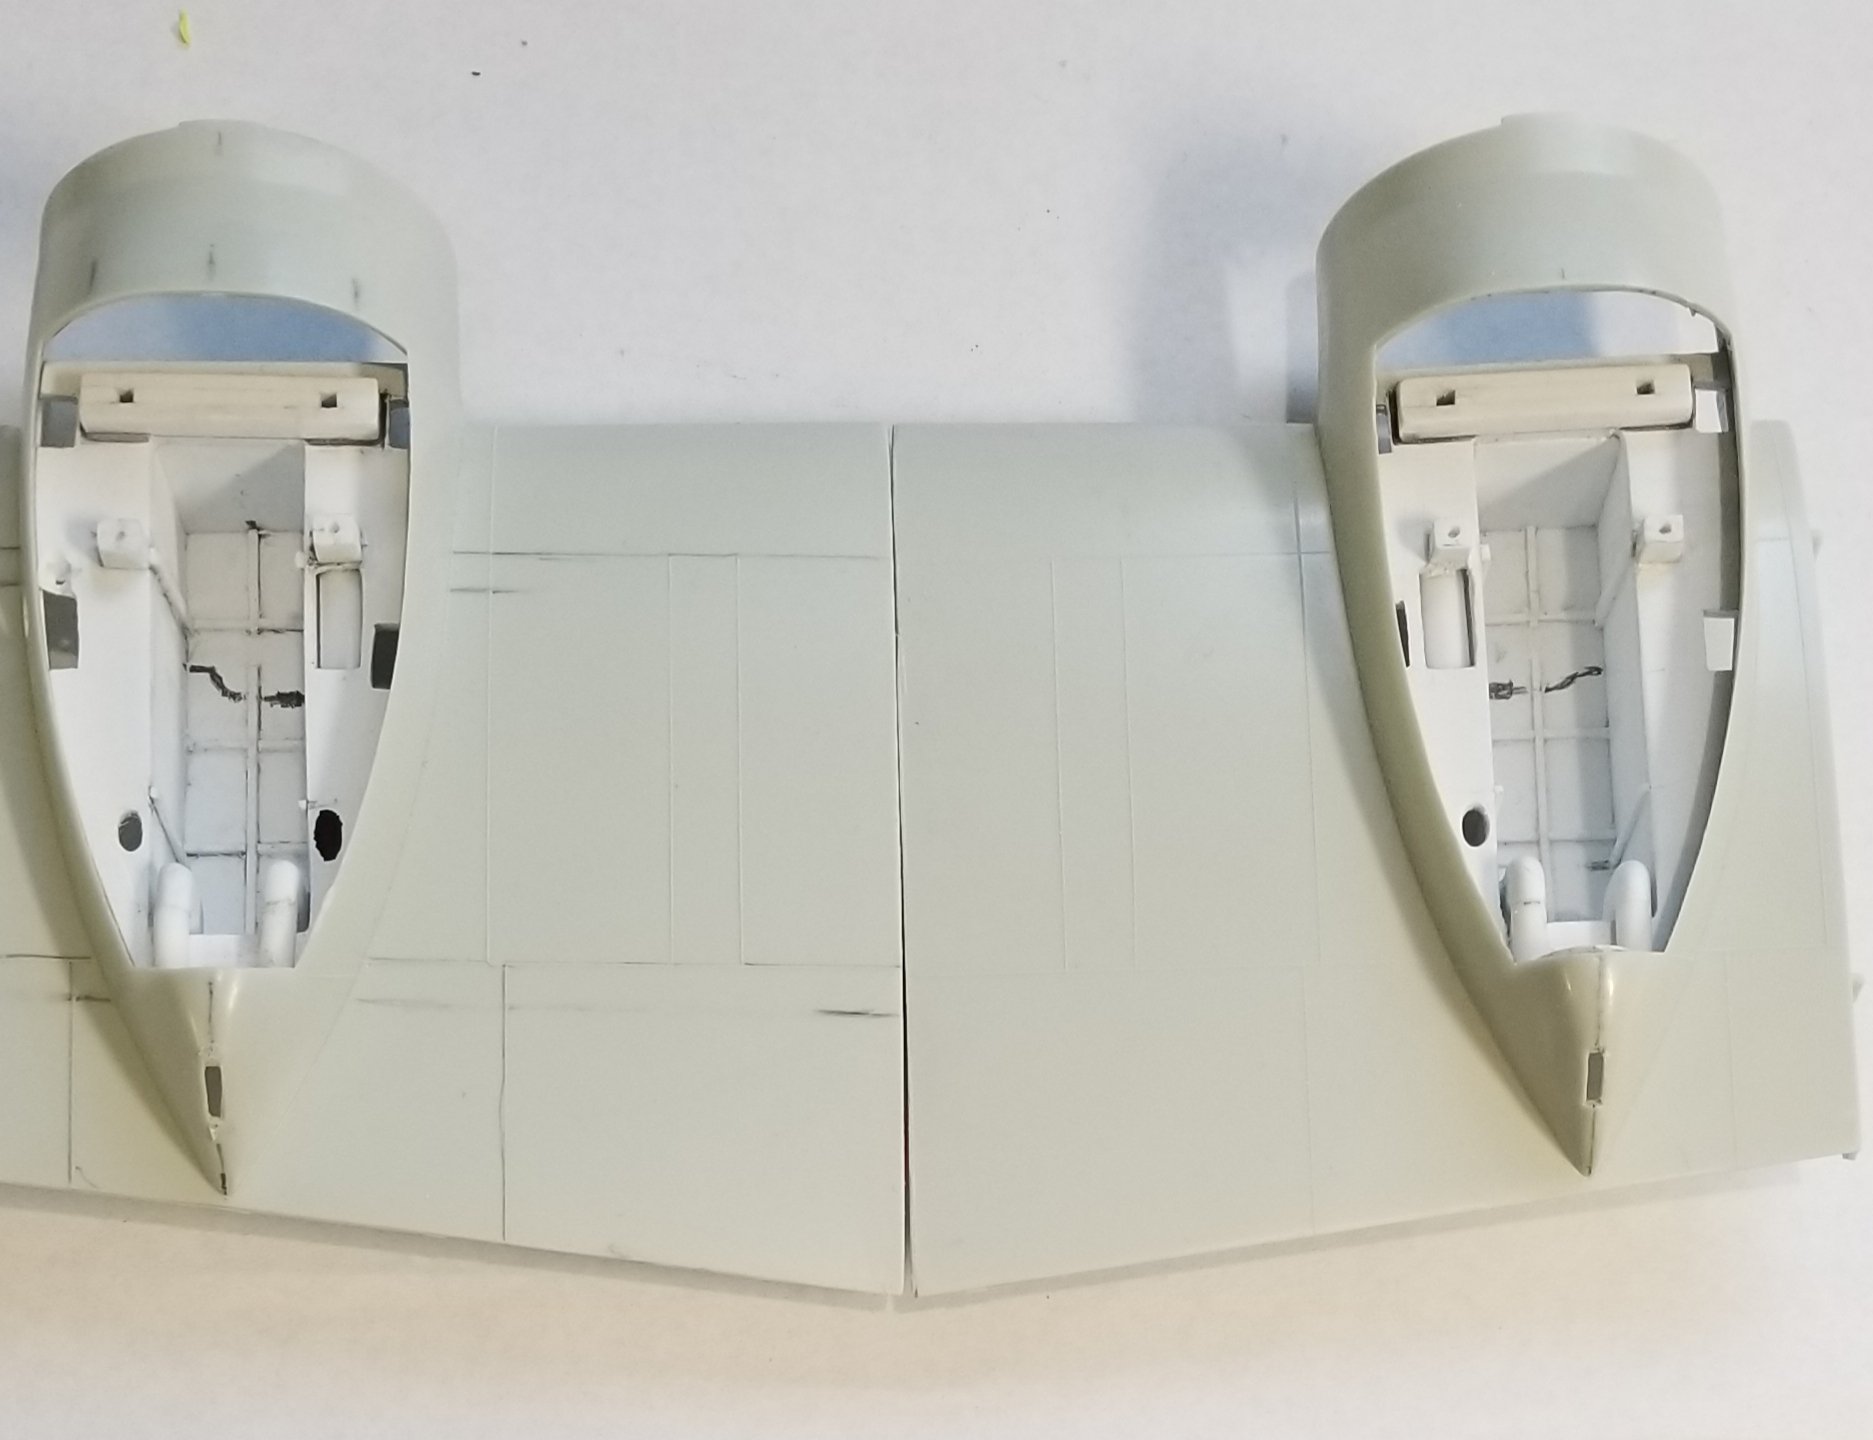
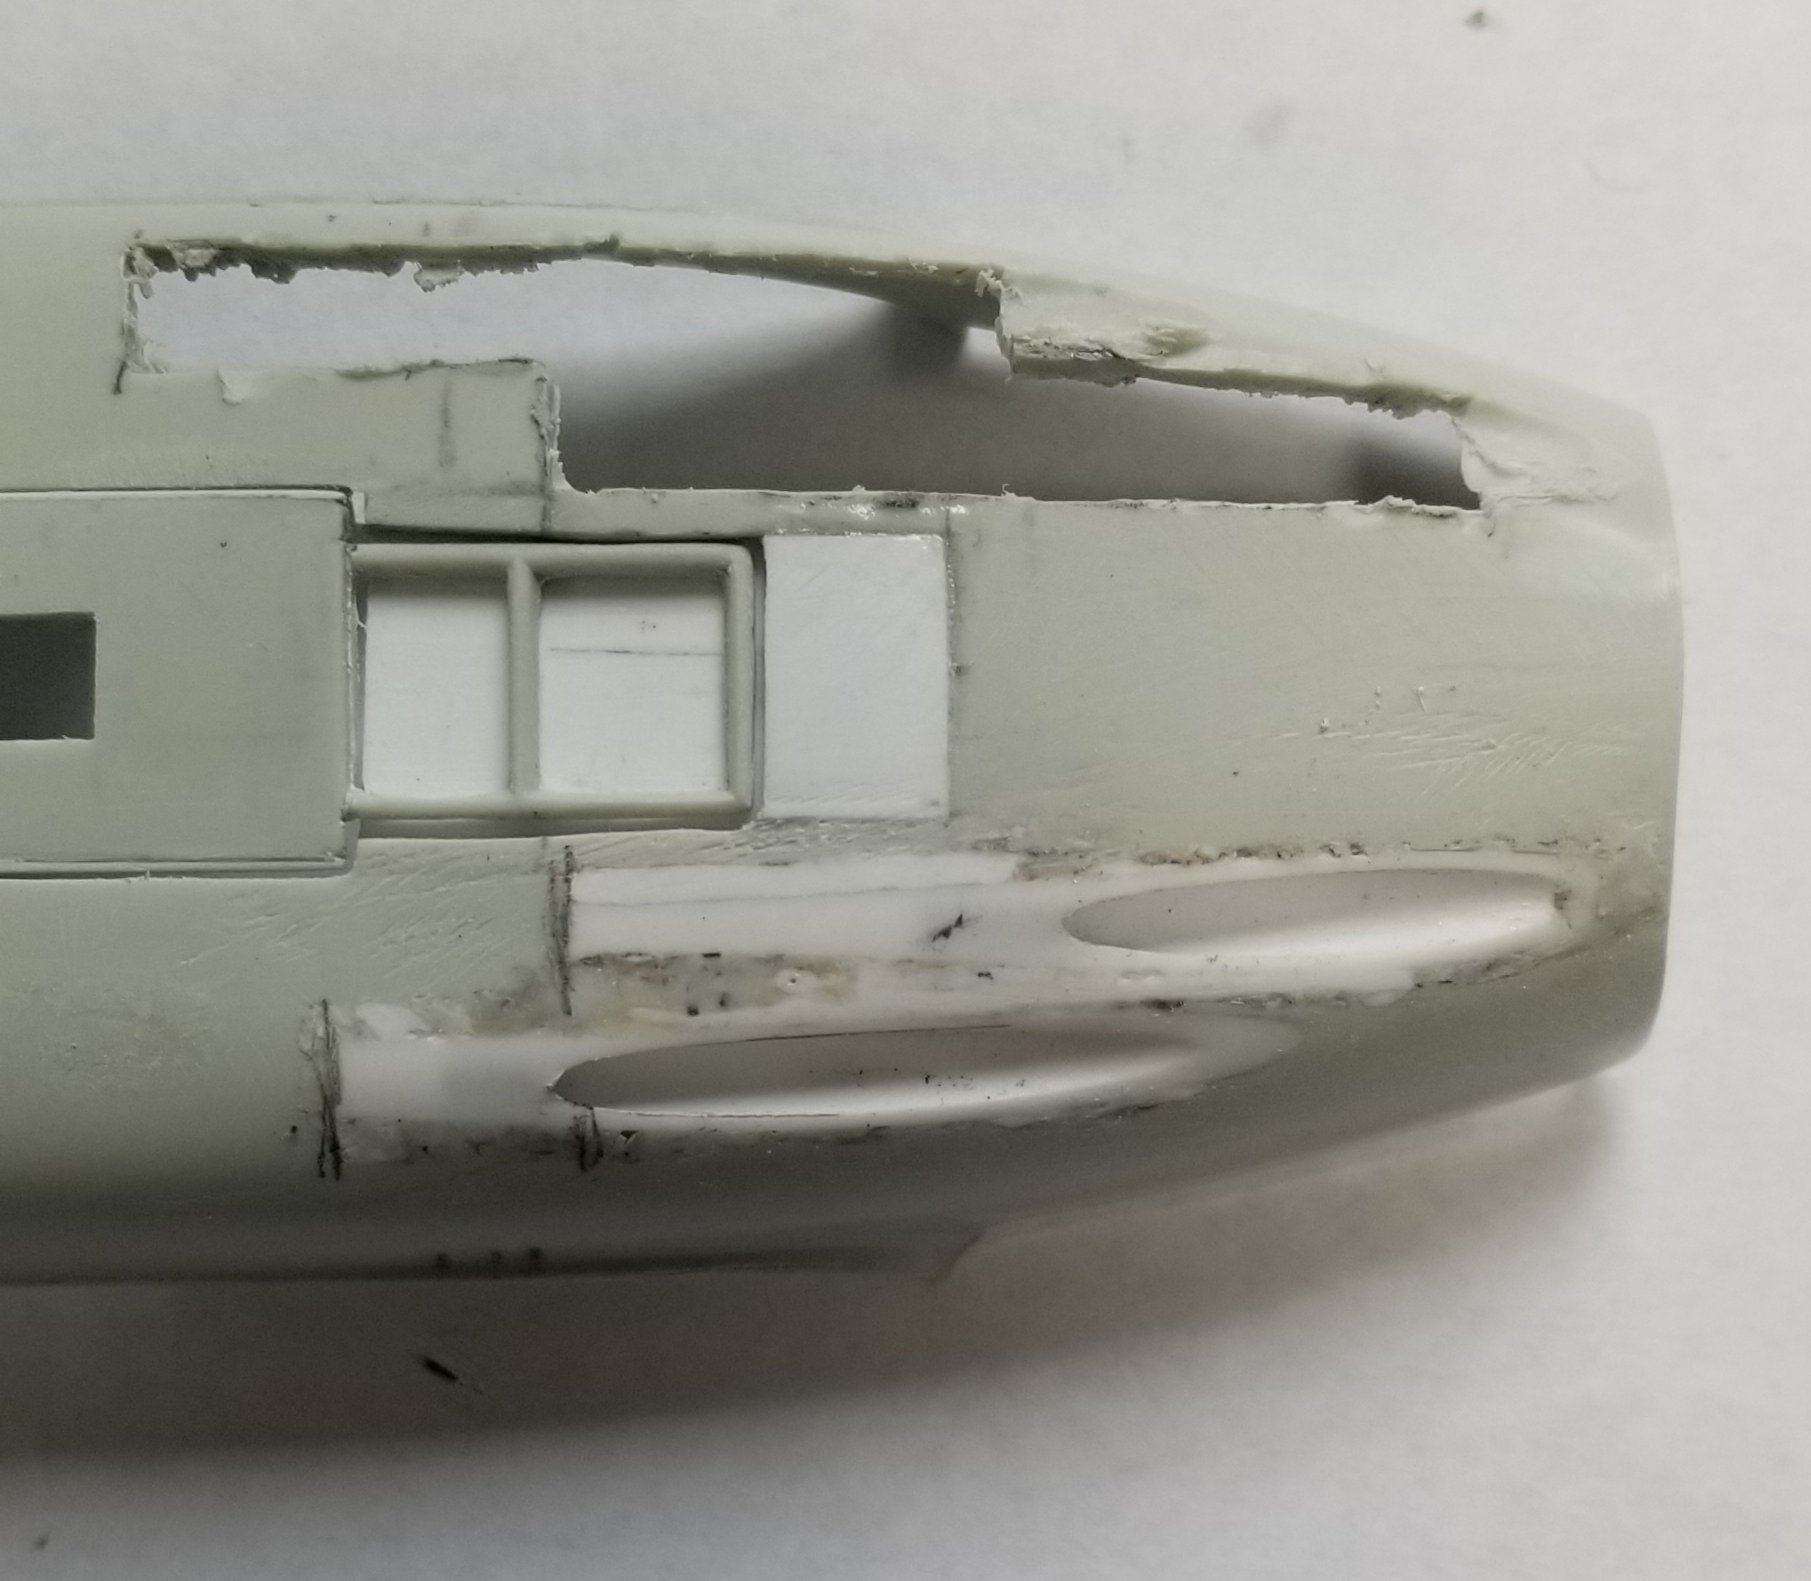
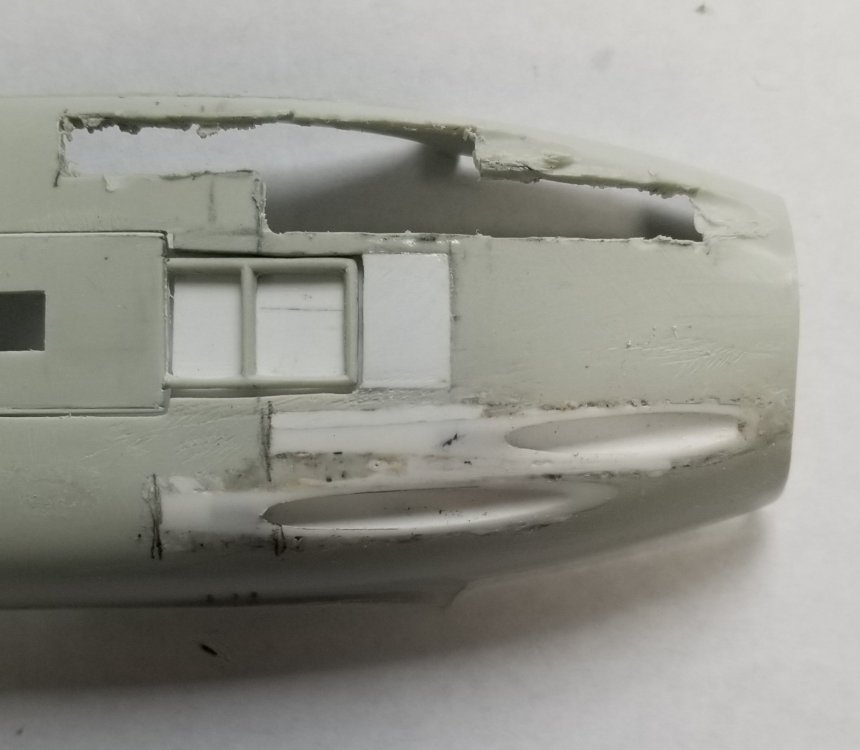
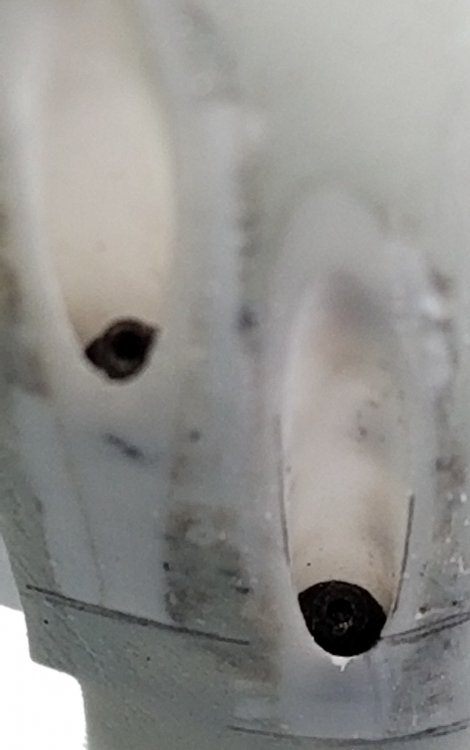
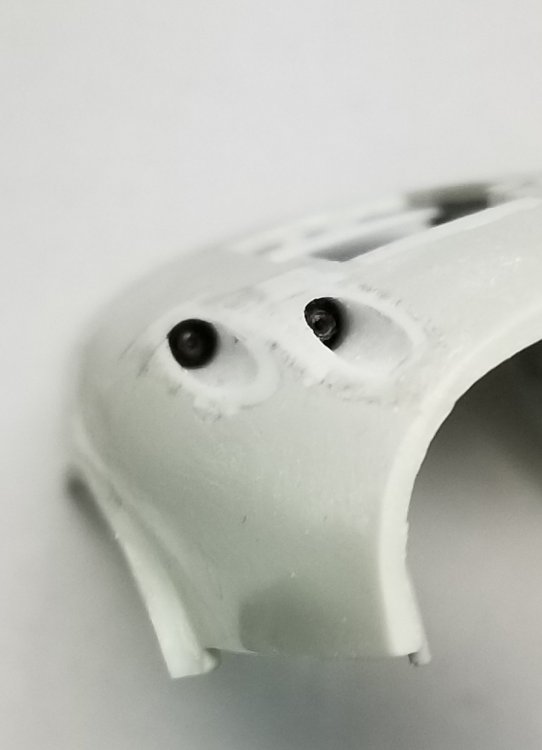
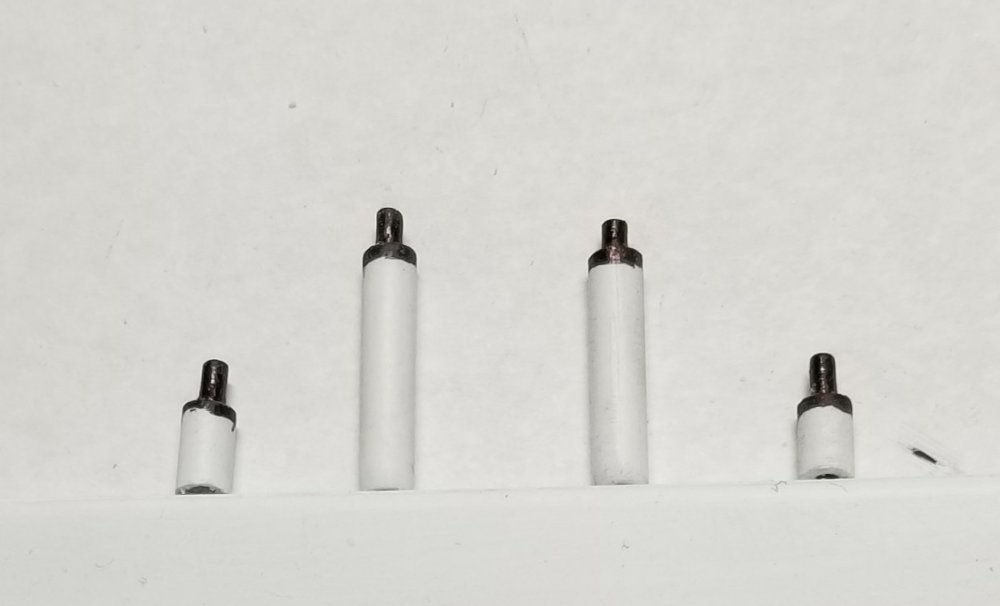
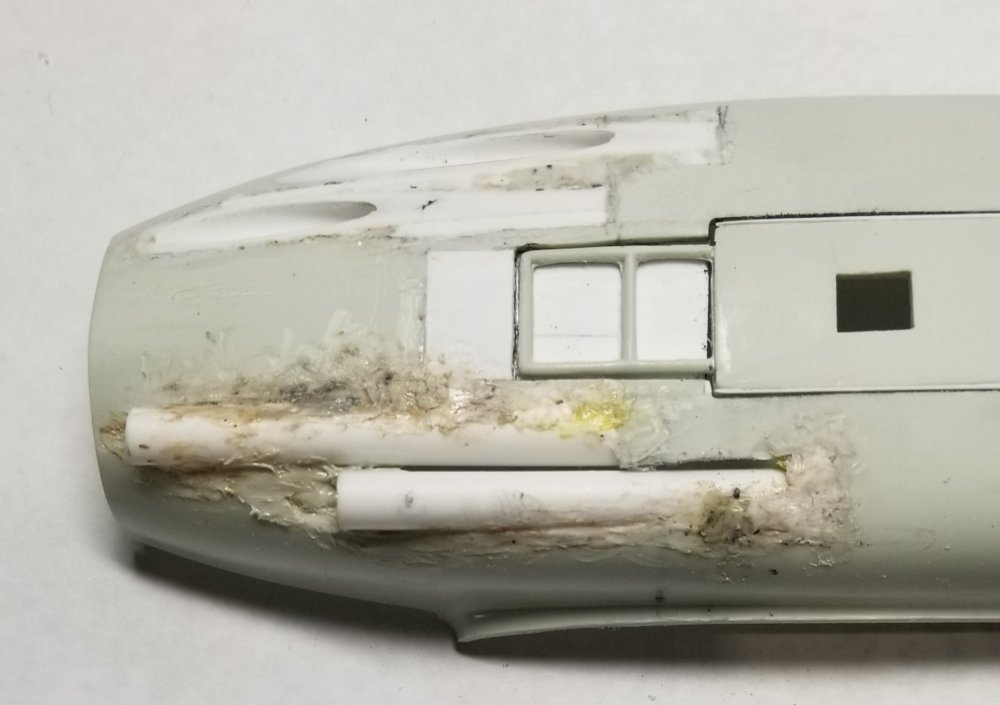
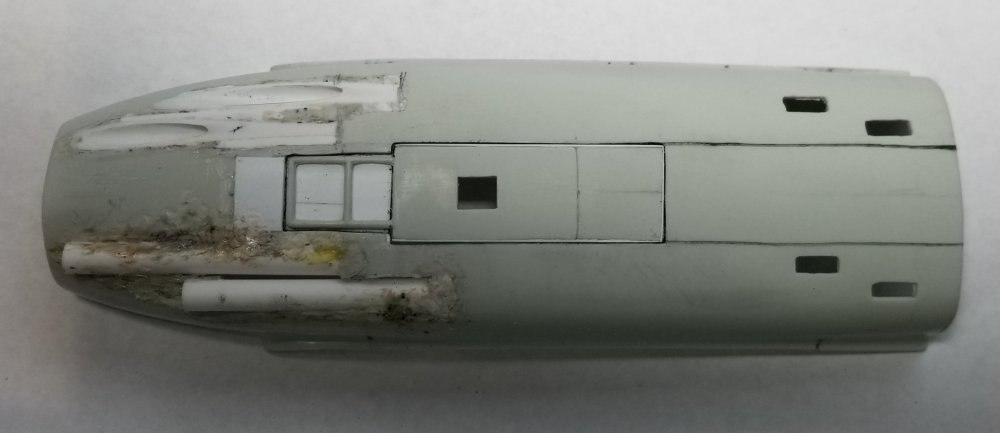
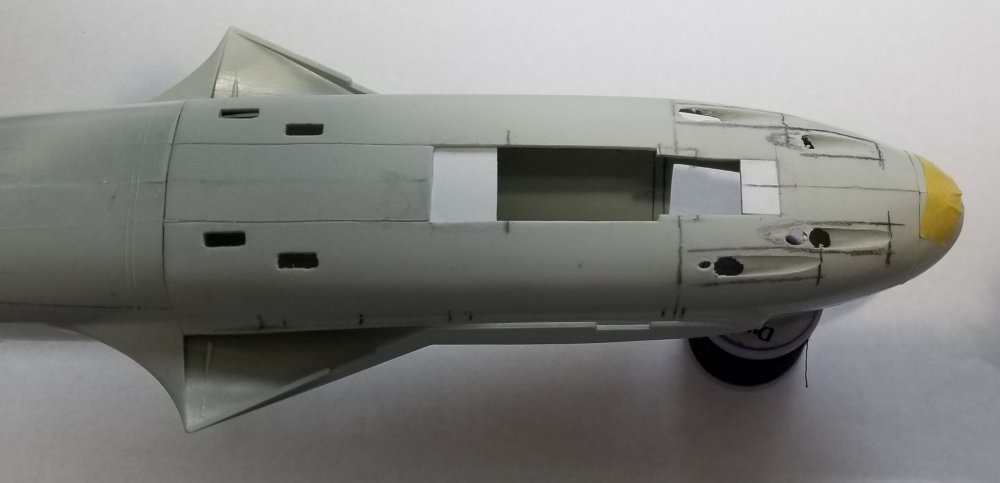
Hey all Here's another update for you all. I've been working on the cannon ports and the pilot hatch. Here are some pictures. view showing port side cannon ports in, filled and sanded. Starboard side cut out waiting for tubes to be installed. view of cannon port tubes from the inside of the fuselage. view showing cannon barrels temporarily installed. There hard to see but there in there. another view showing the cannon ports with the guns installed. view showing the cannon barrels. I made these from a piece of 1/16" dia. Brass tube, a piece of 1.2mm dia. Brass tube insde of the 1/16" tube and a piece of 0.9mm dia. Alum. Tube inside of that (last two are from Albion). I then cut them to the length I needed. I also used some 1/8" dia. Plastic tube from Evergreen cut to length, into this I inserted the brass tube assemblies with a portion sticking out to represent the cannon barrels. These slide down to the rear end of the 3/16" dia. Plastic tubes I used for the cannon ports. The 0.9mm tube was used because the inner diameter of it is the correct size for a 20.0mm cannon barrel in 1/32 scale. view showing the 3/16" dia. Plastic tubes installed on the starboard side. These still need to be filled in and sanded. view of the bottom of the fuselage showing the pilot hatch with the ladder area cut out and the foot step hole added. Well that's all for know time for dinner. Ron G

-
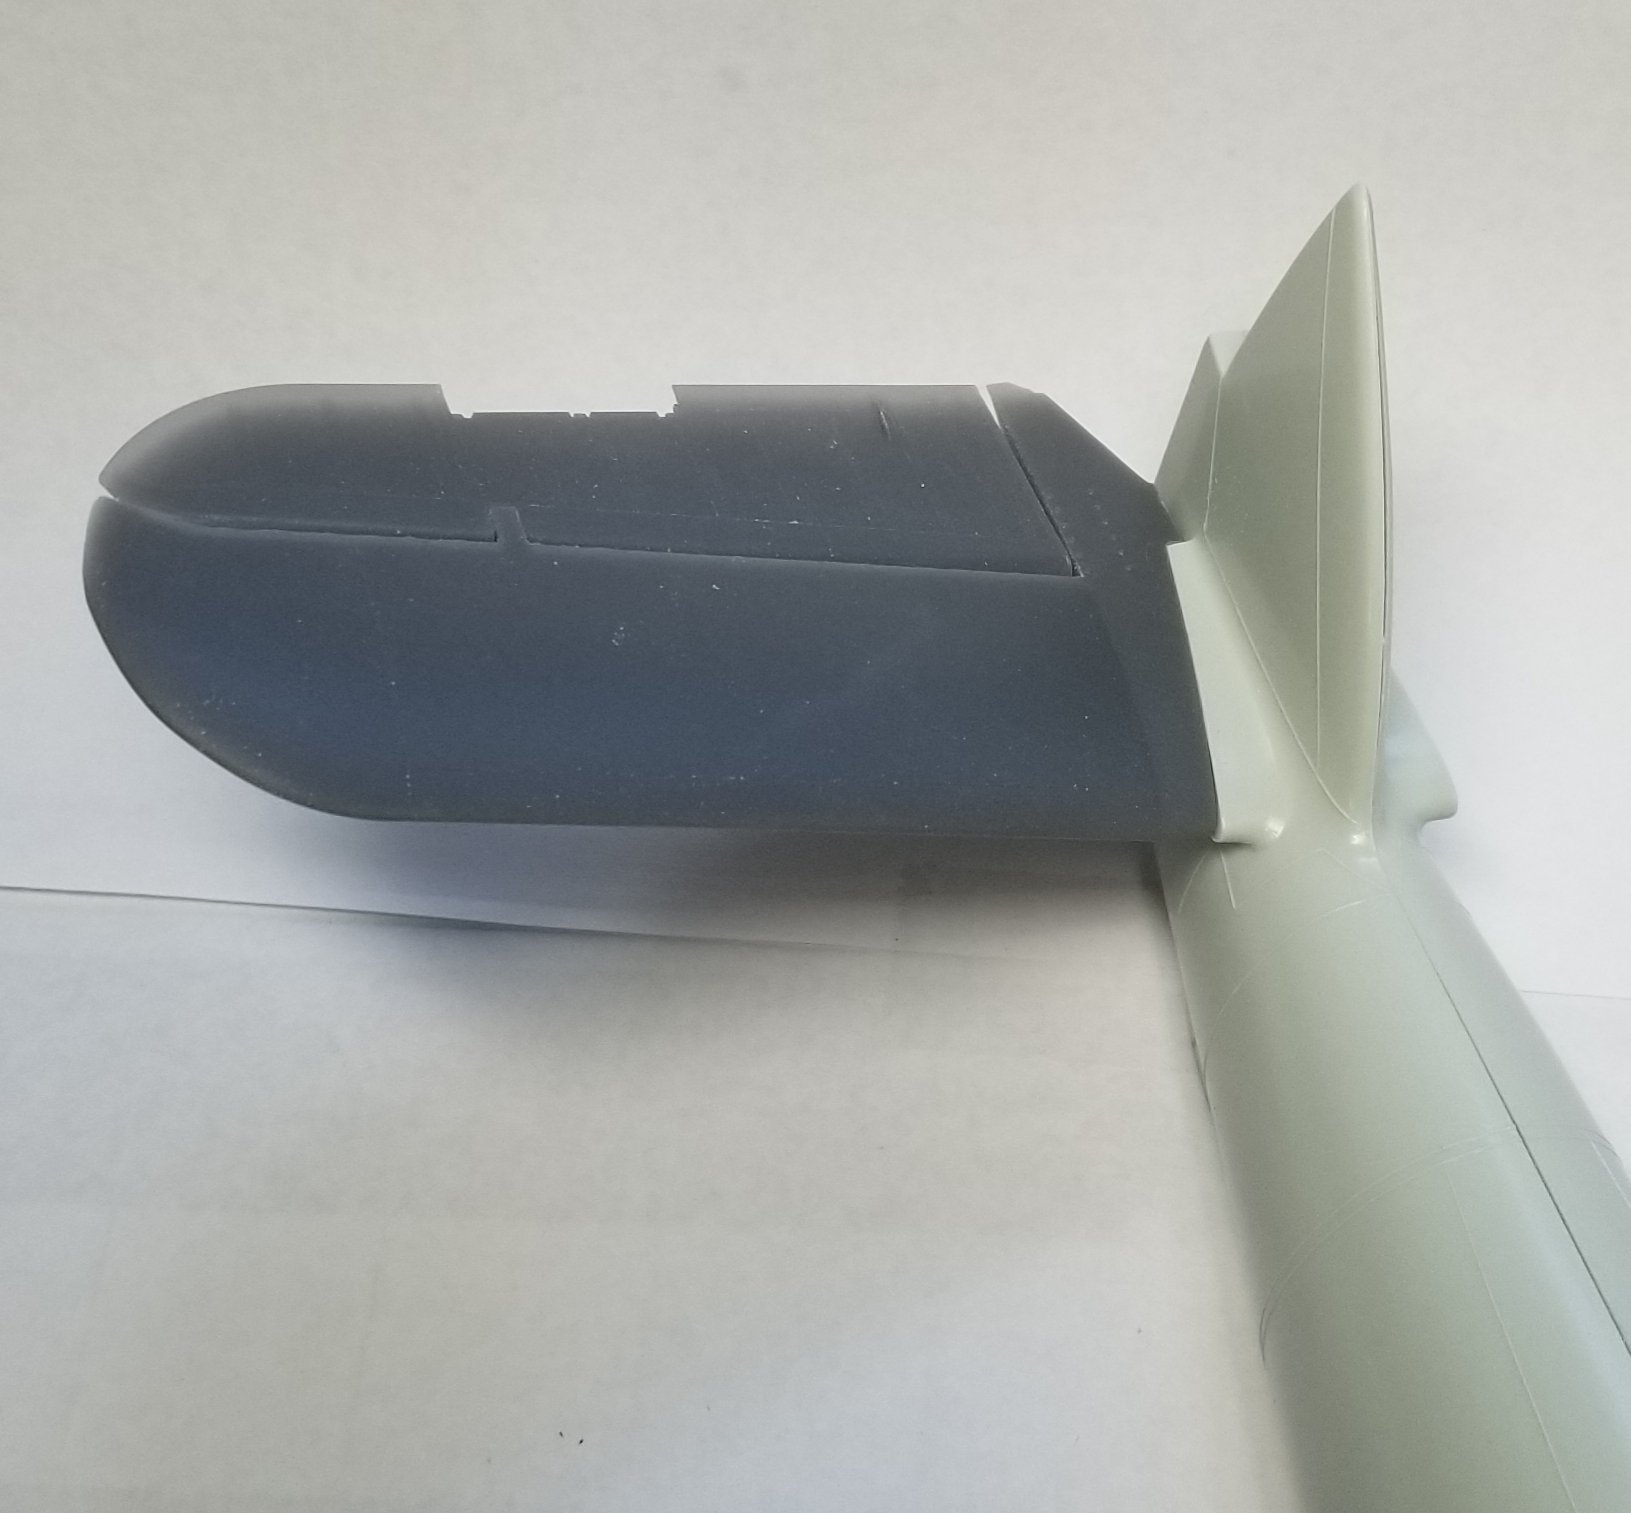
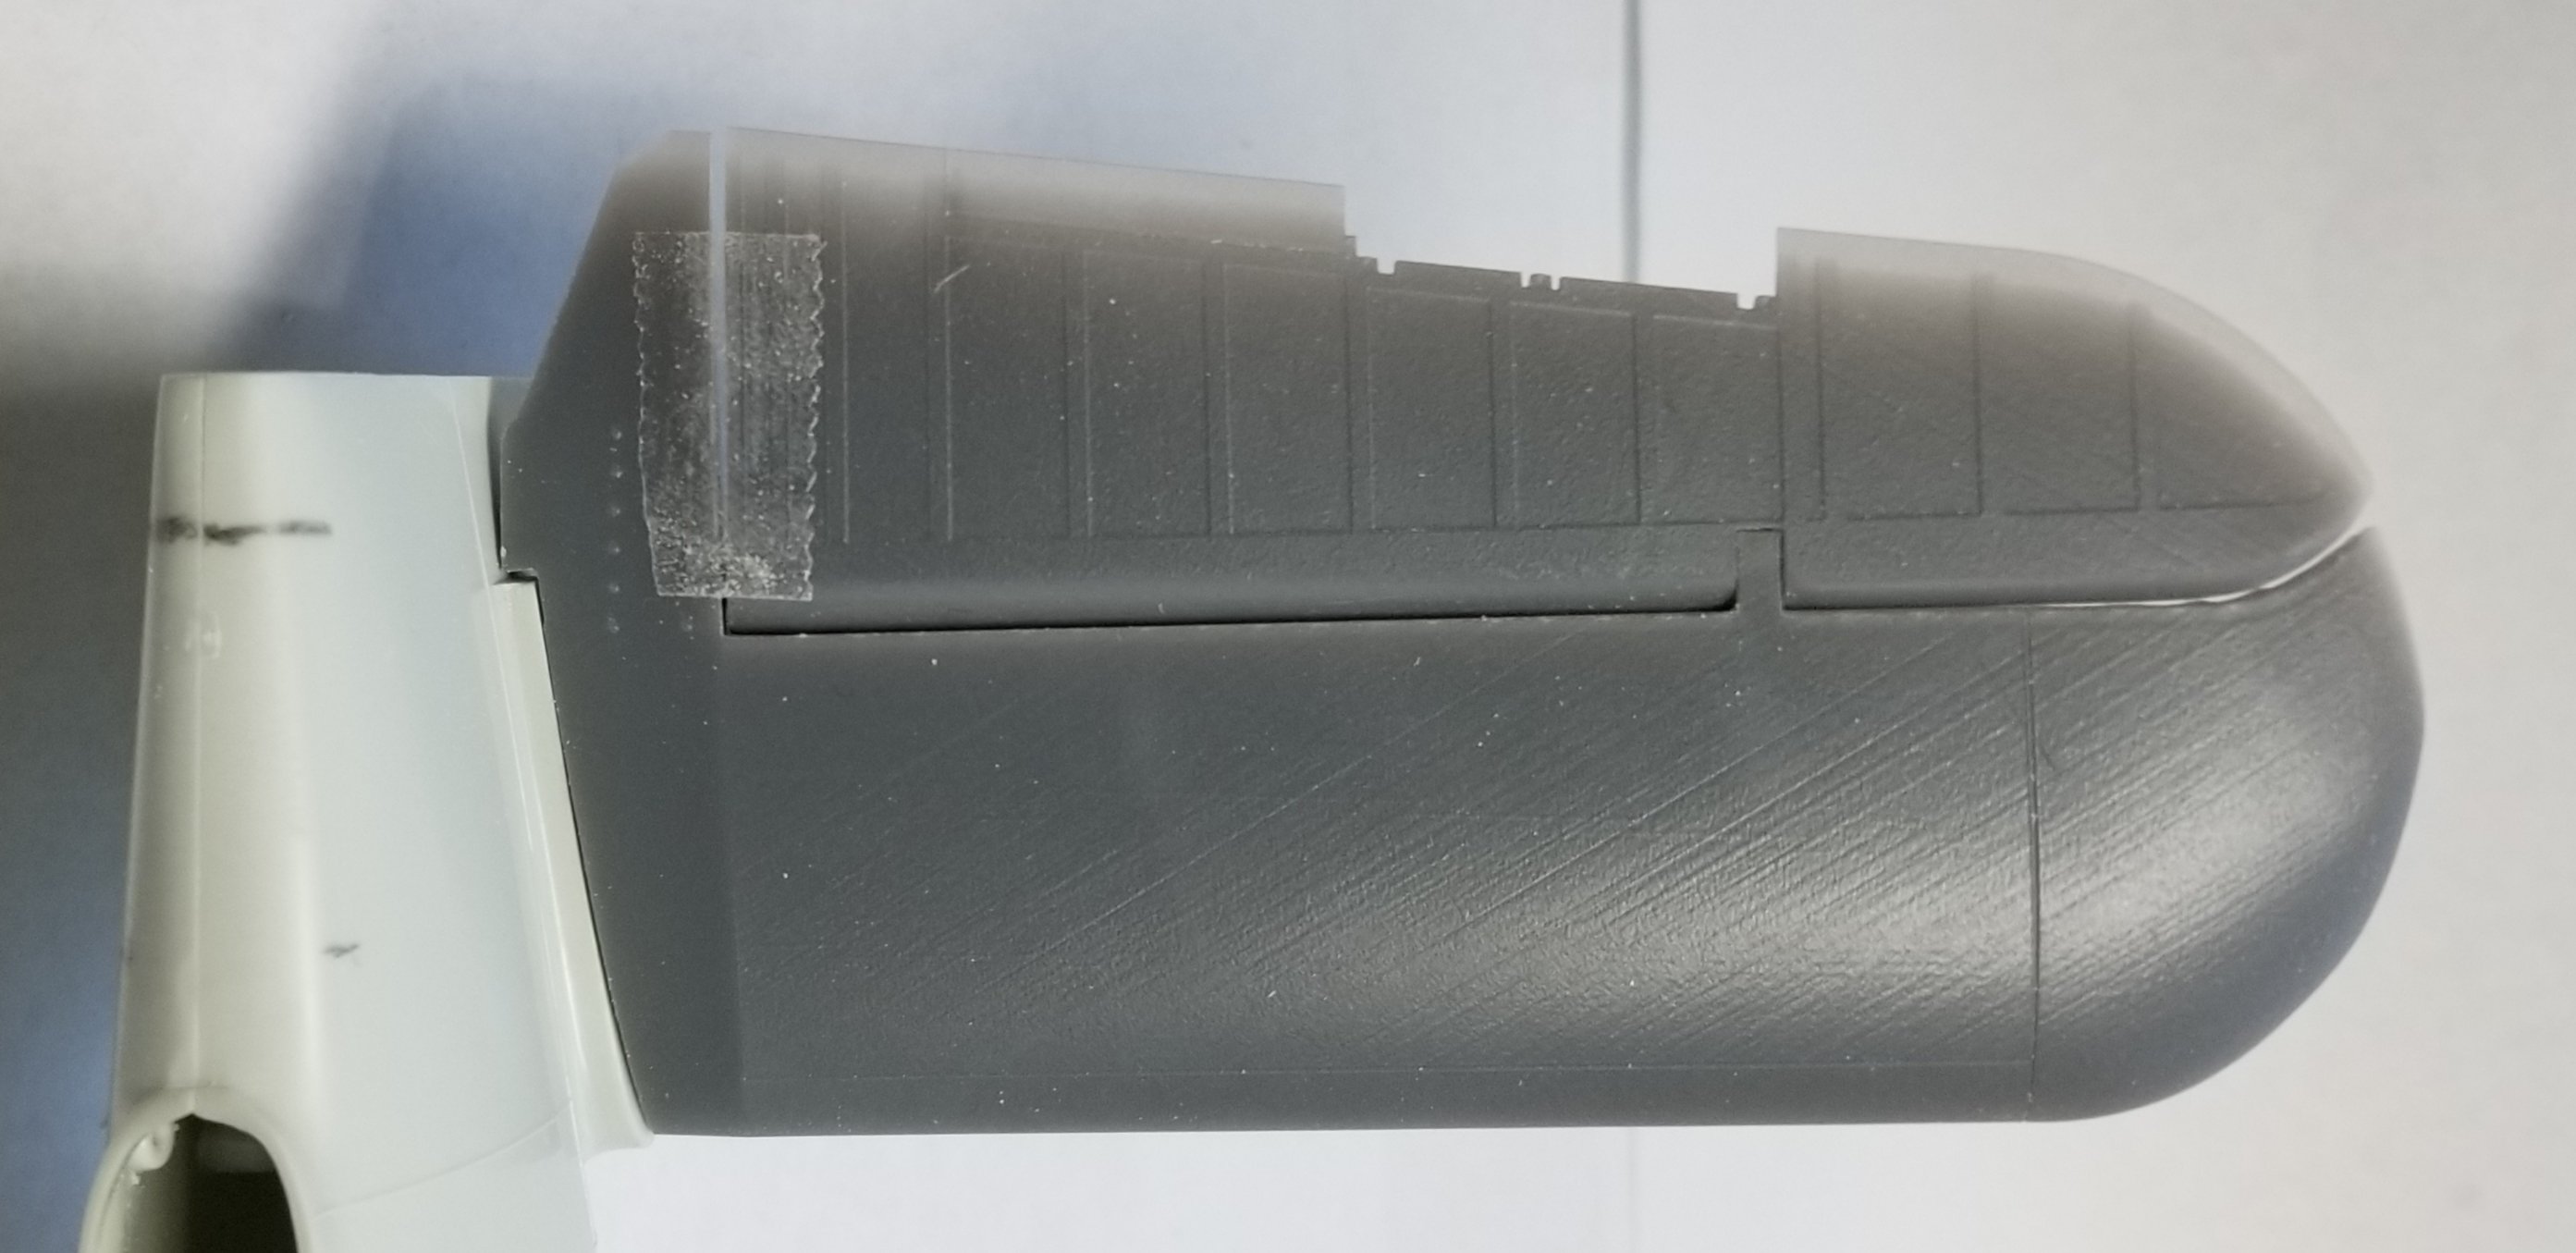
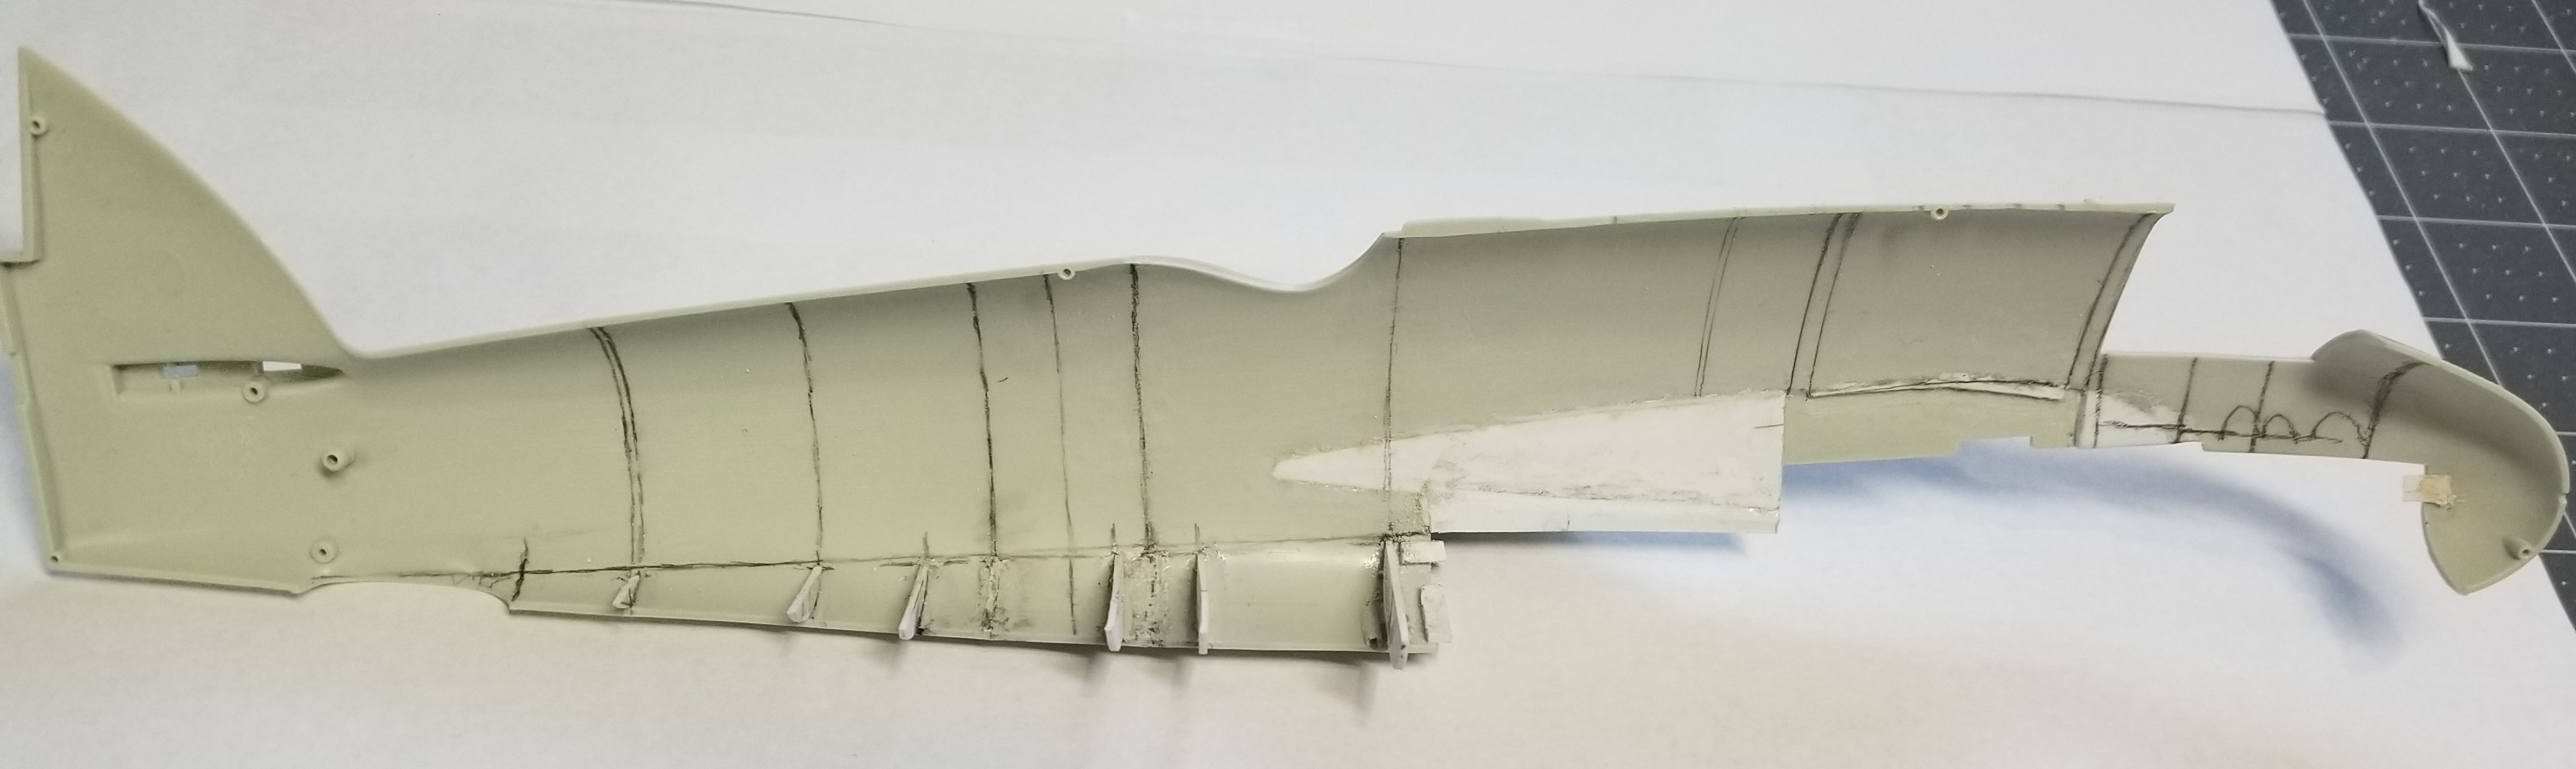
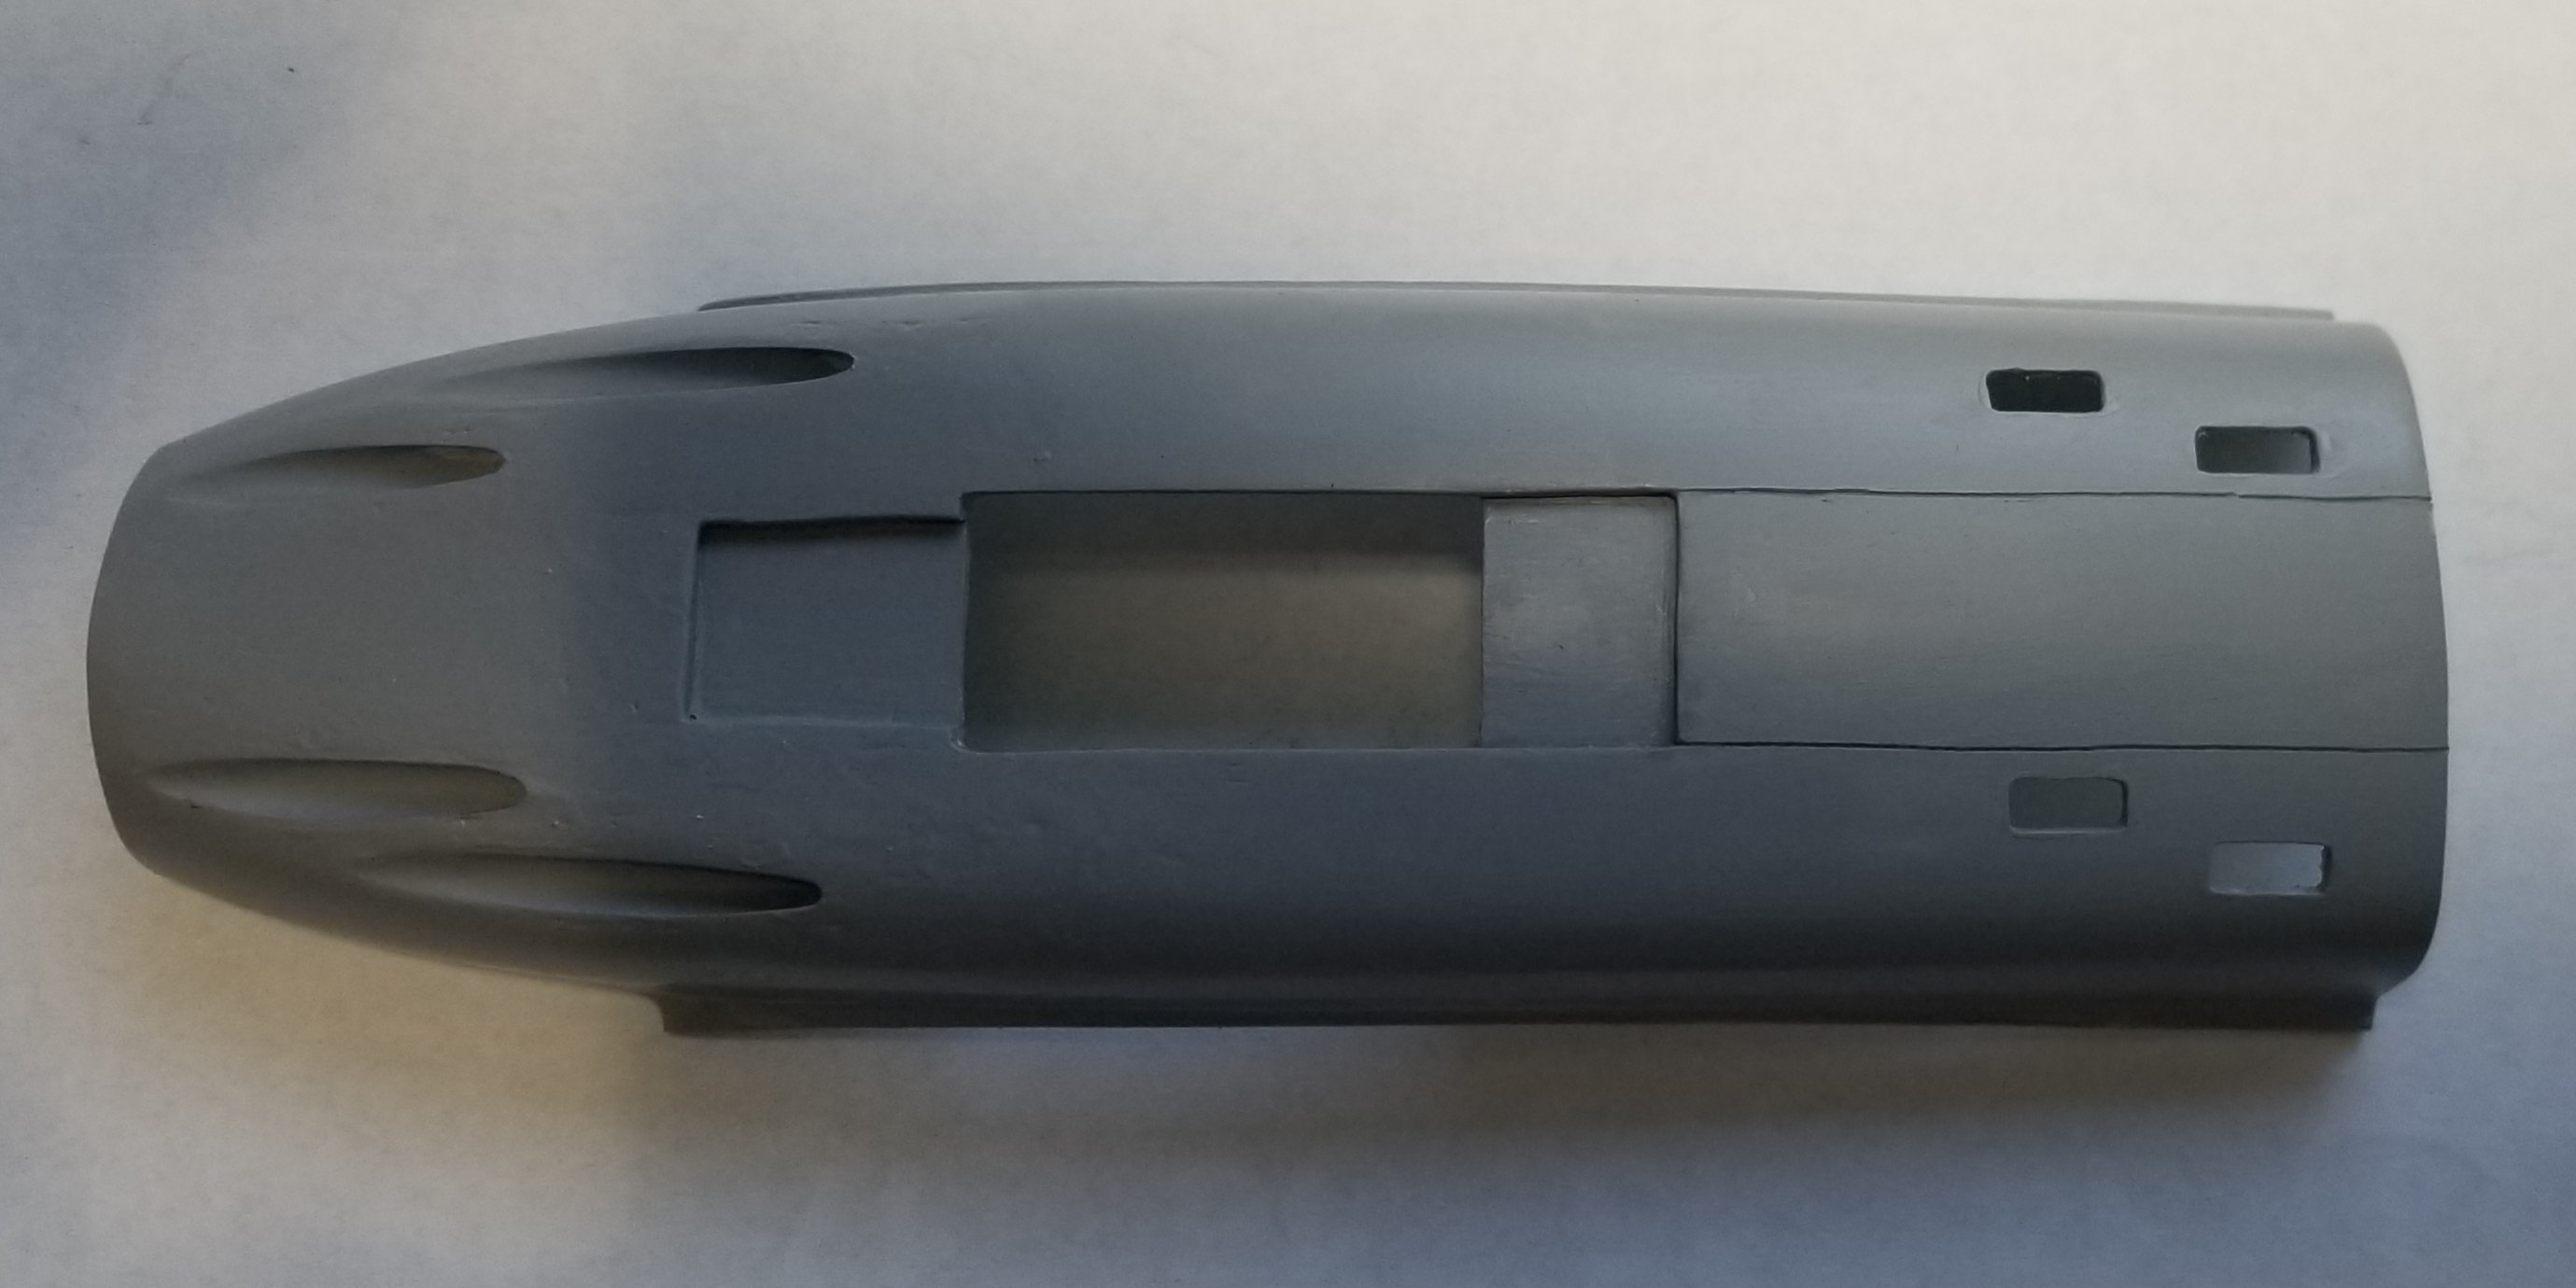
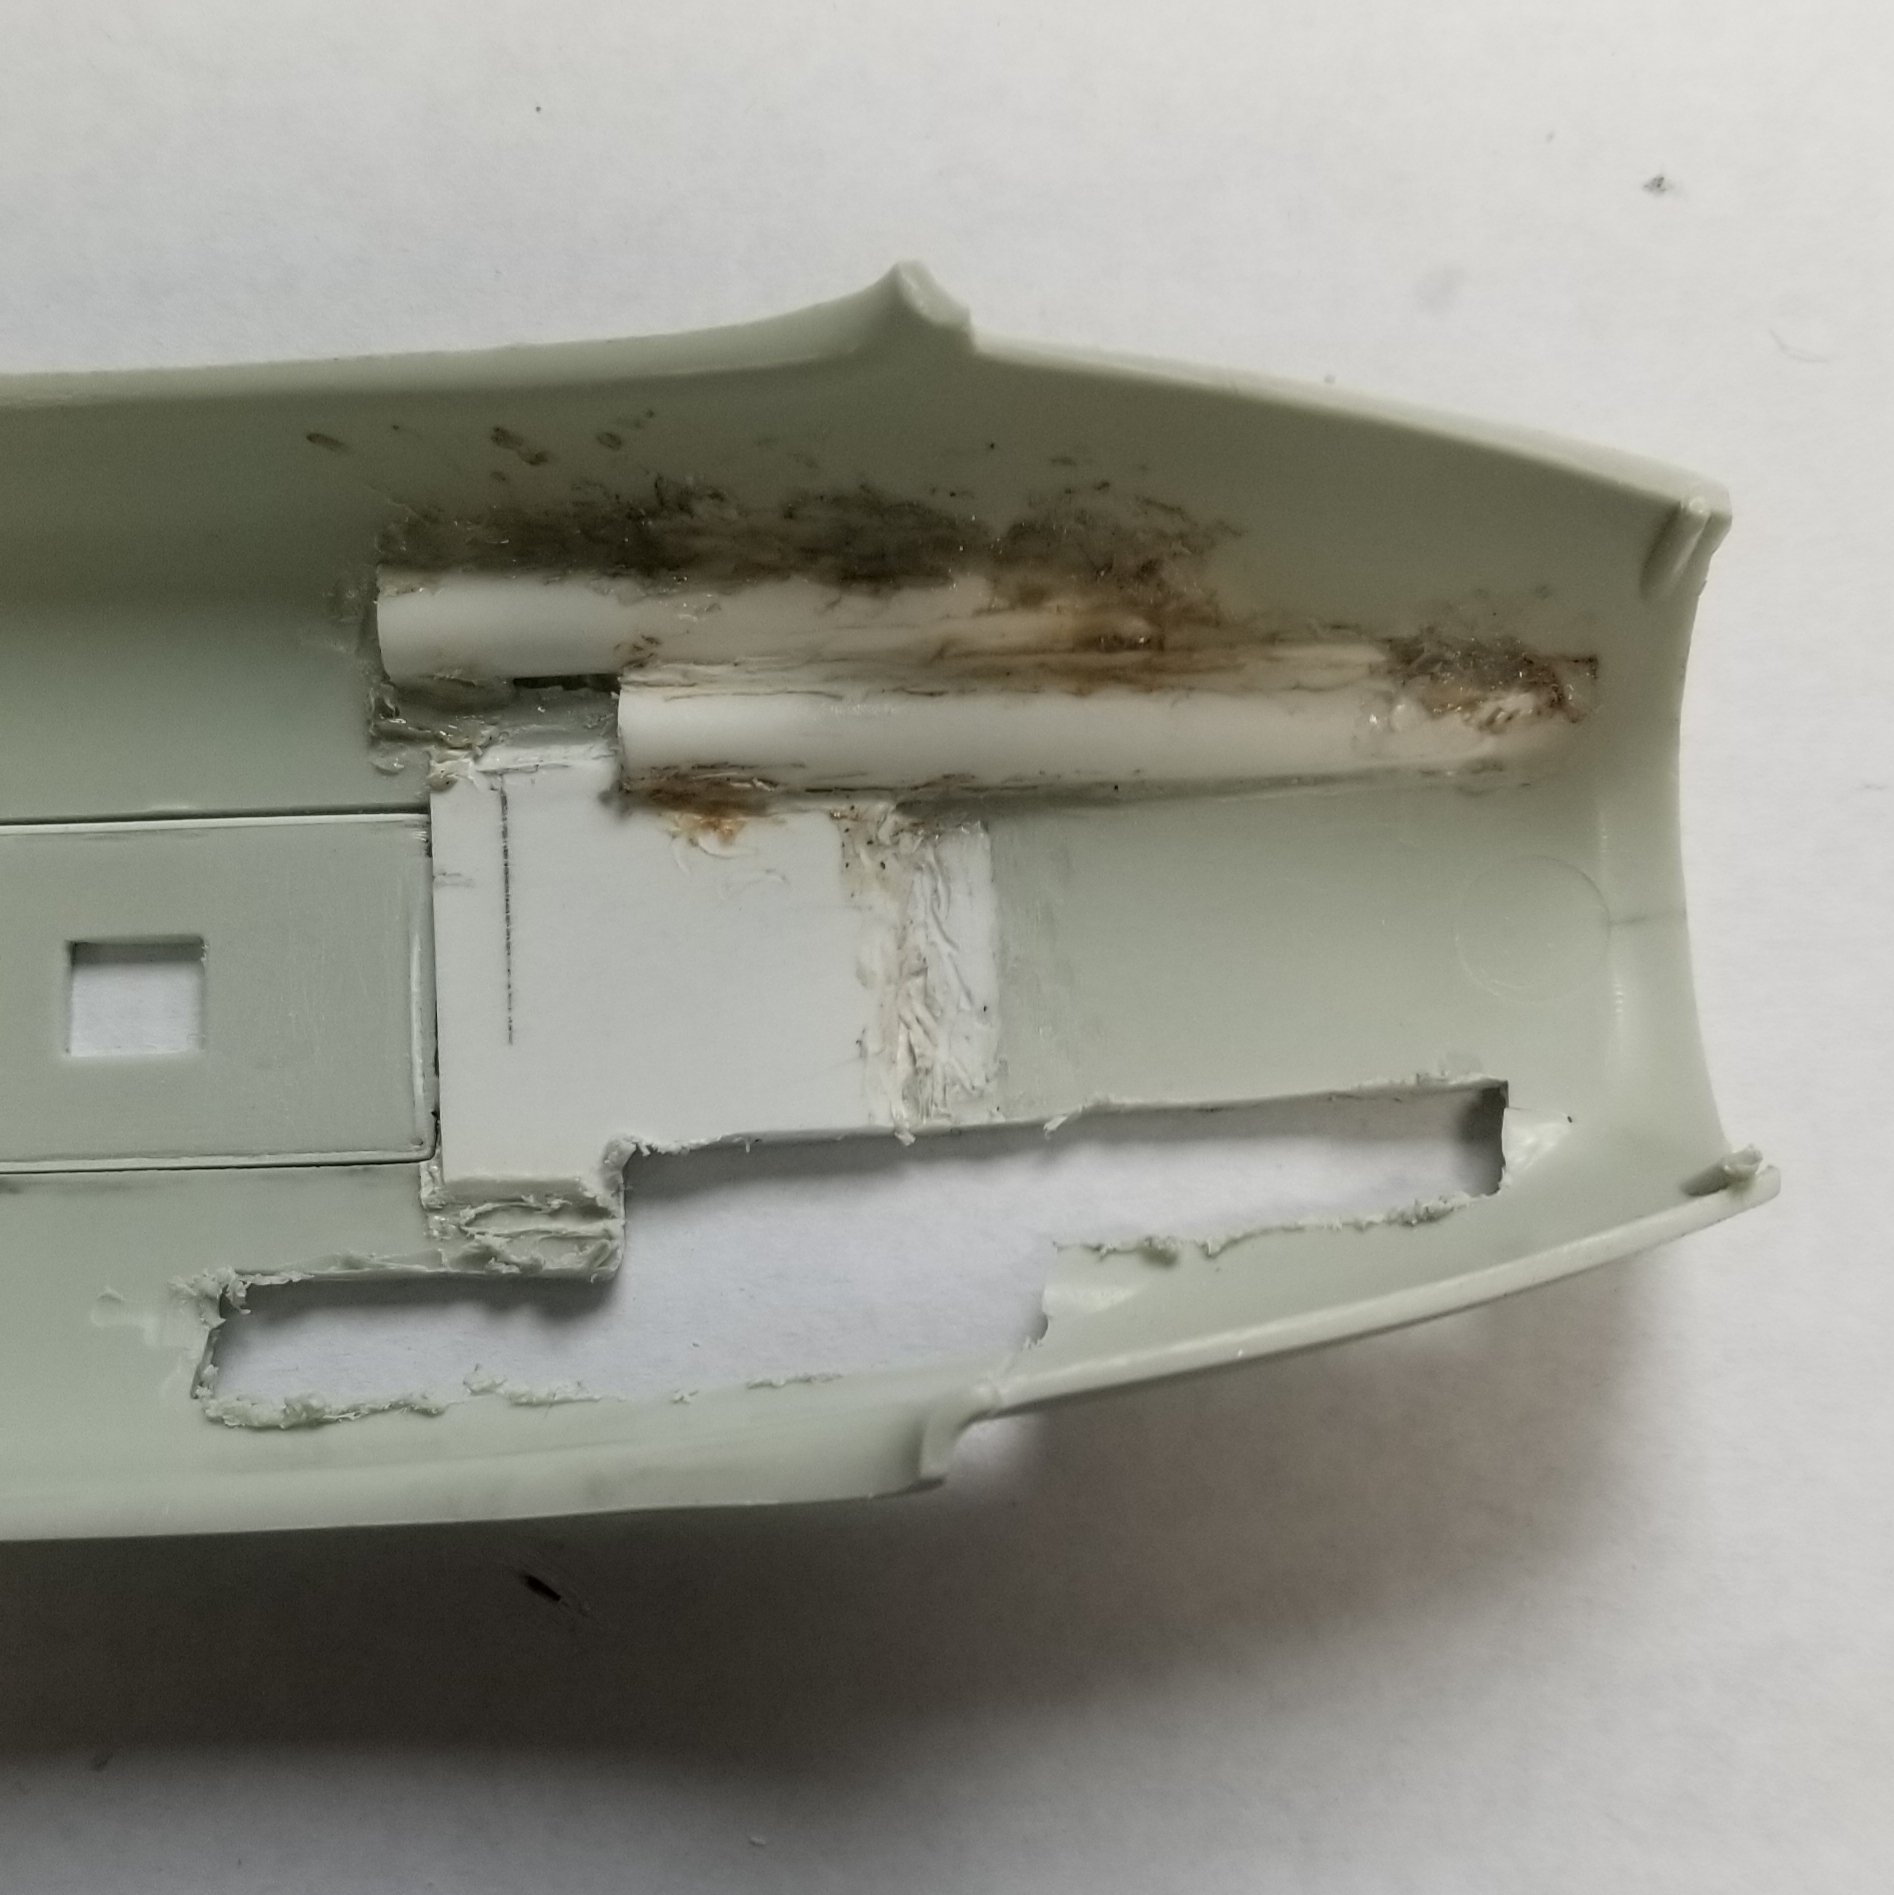
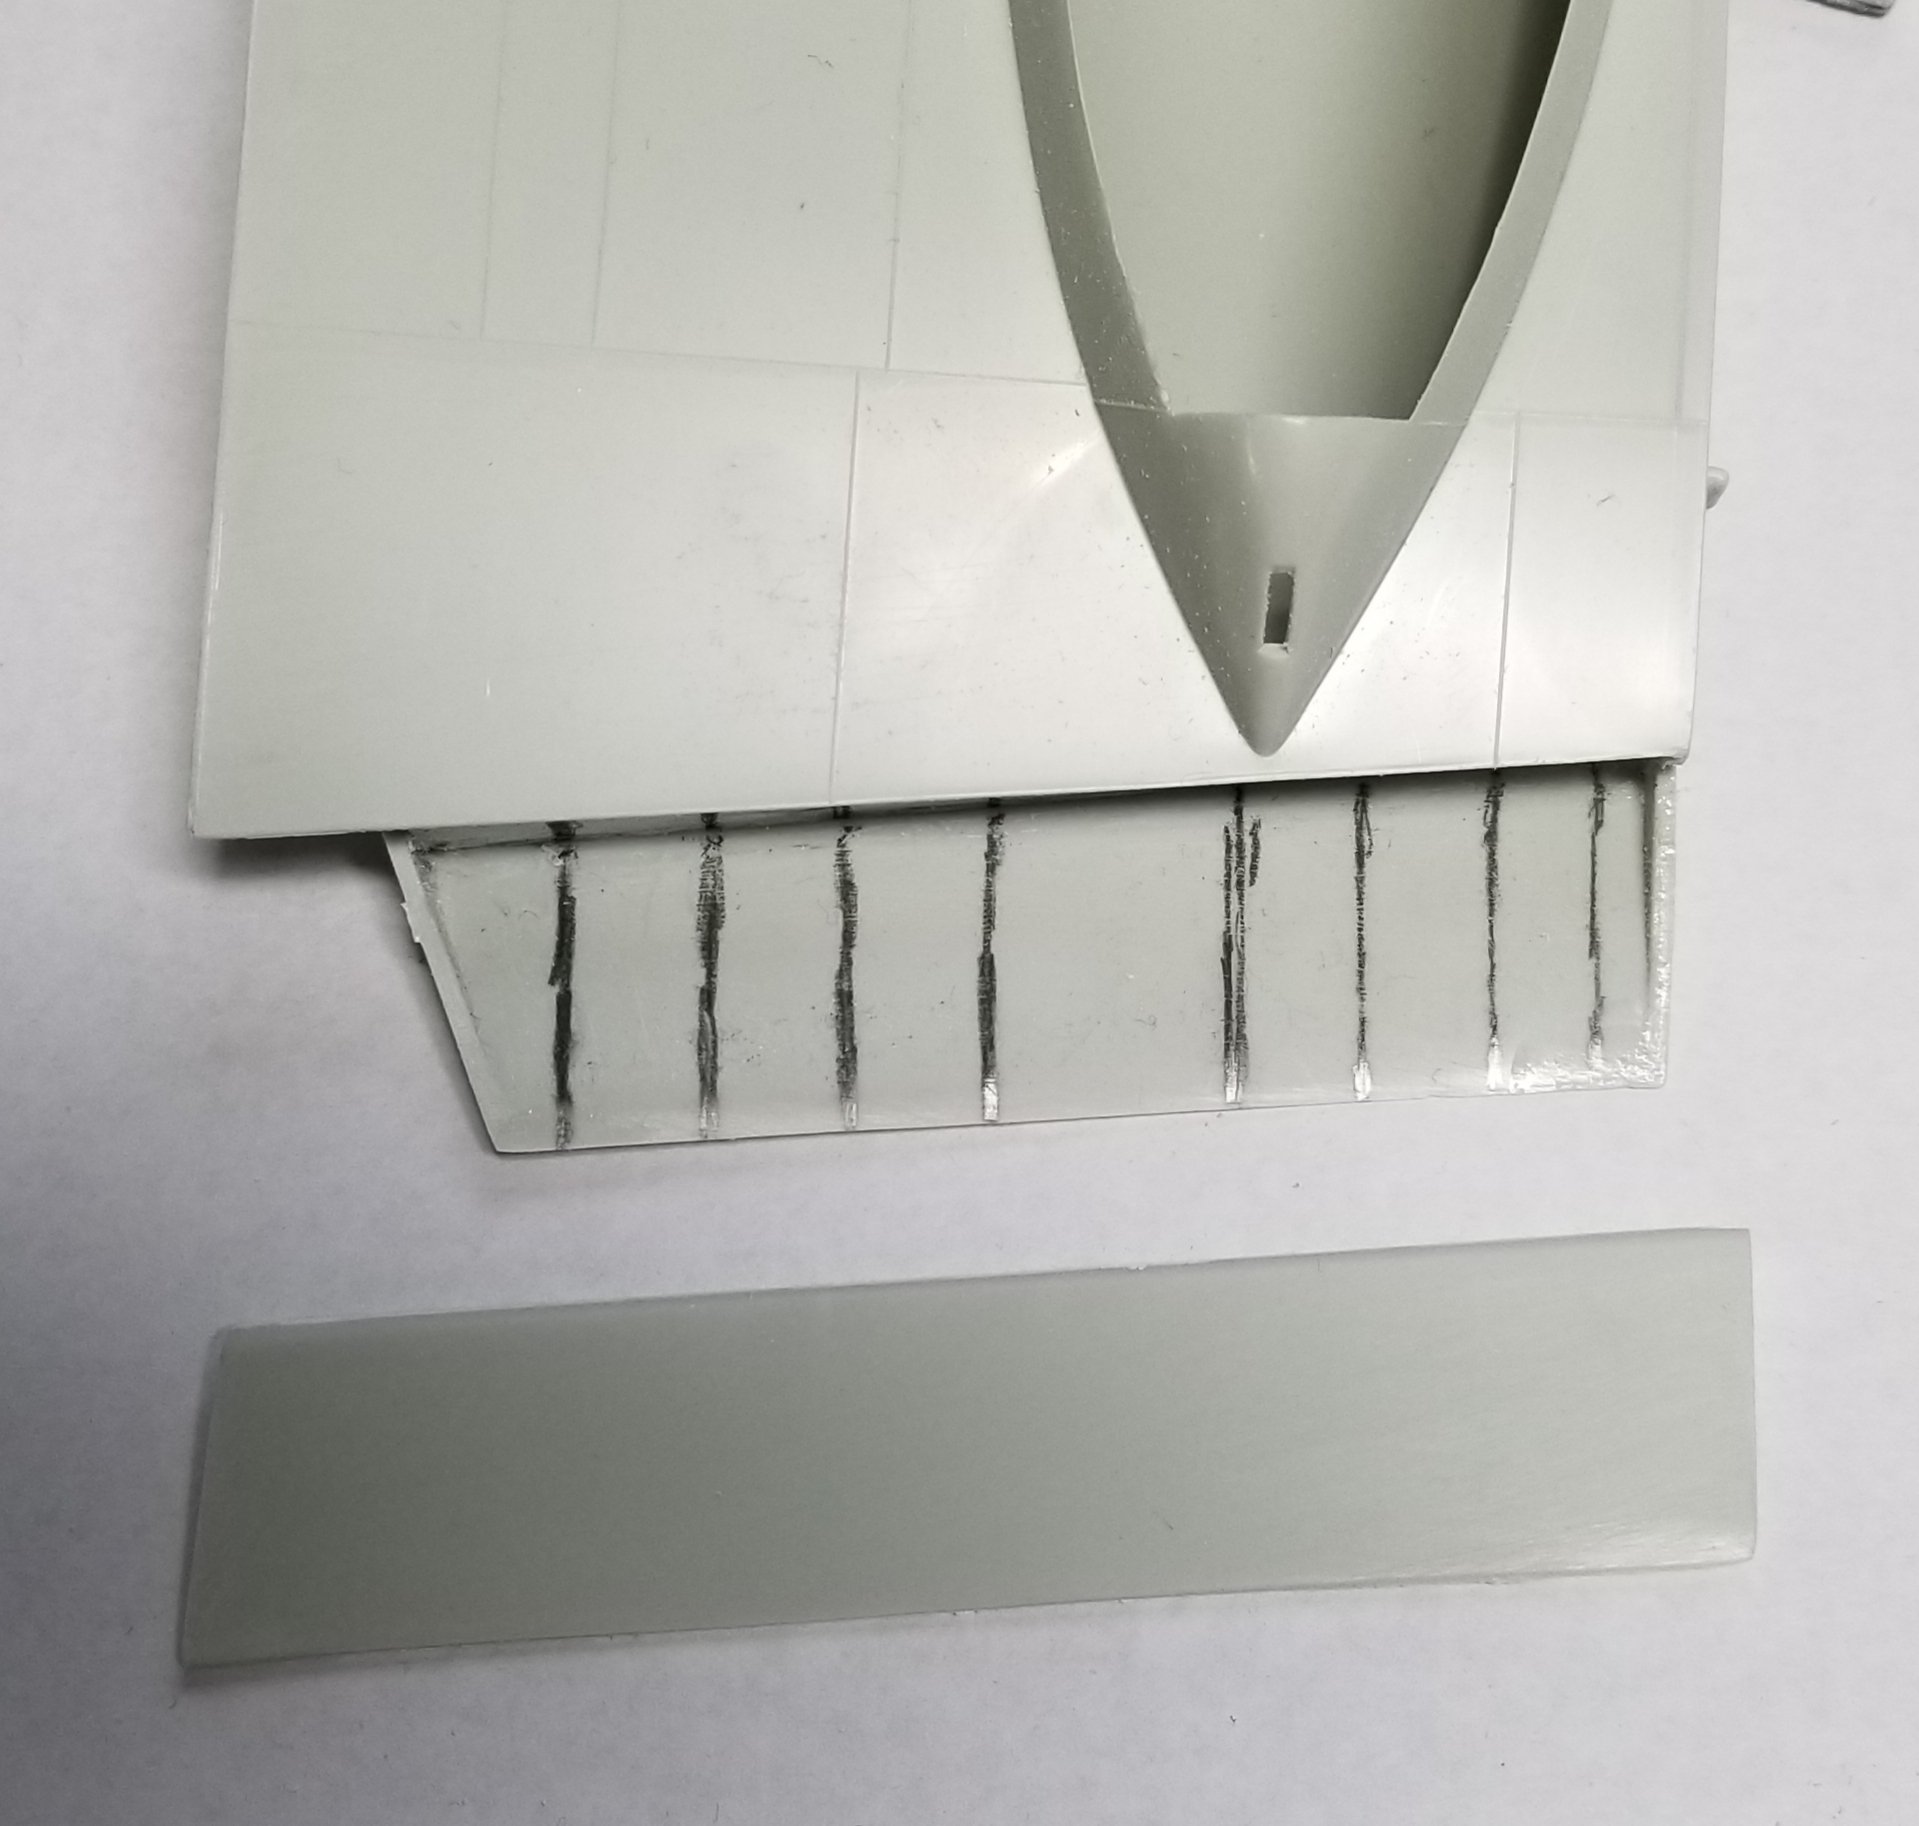
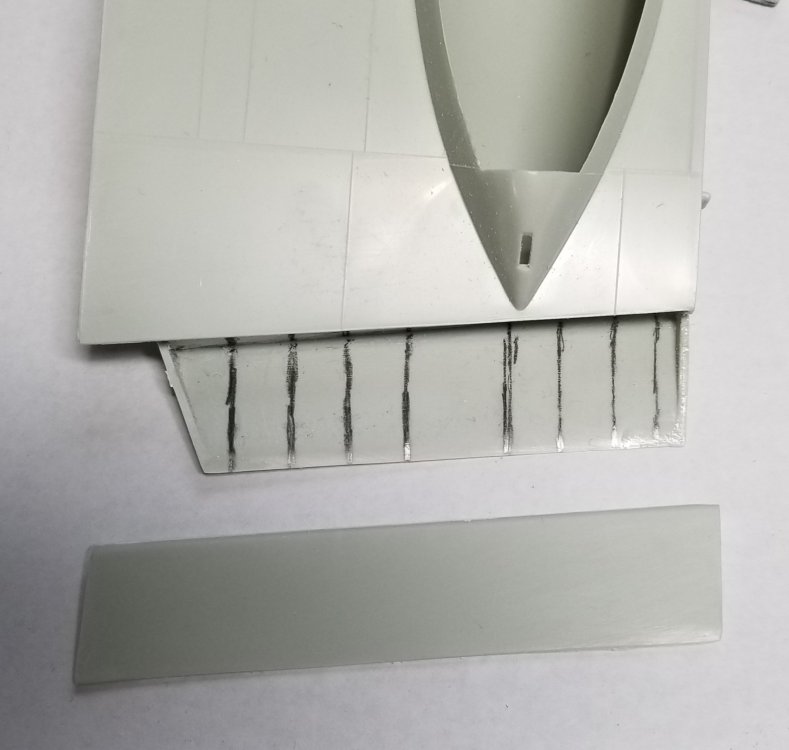
Hey all Some more work done. I'm jumping around on this to keep motivated. Here are some pictures. I cut the fuselage lower portion from the lower inner wings. I also started on opening up the cannon ports, also the shell ejection shuts and I incresed the pilot hatch opening this is the reworked pilot hatch still need to do more work on this. view of the inner surface of the inner flap. view of the inner flap area need to do more work on these. Thats all for know I'm getting more work done on my models because of the COVD-19 shut down, I can't watch TV cause all you see is doom and gloom. Ron G
-
Hey Martin any updates on this build? Ron G
-
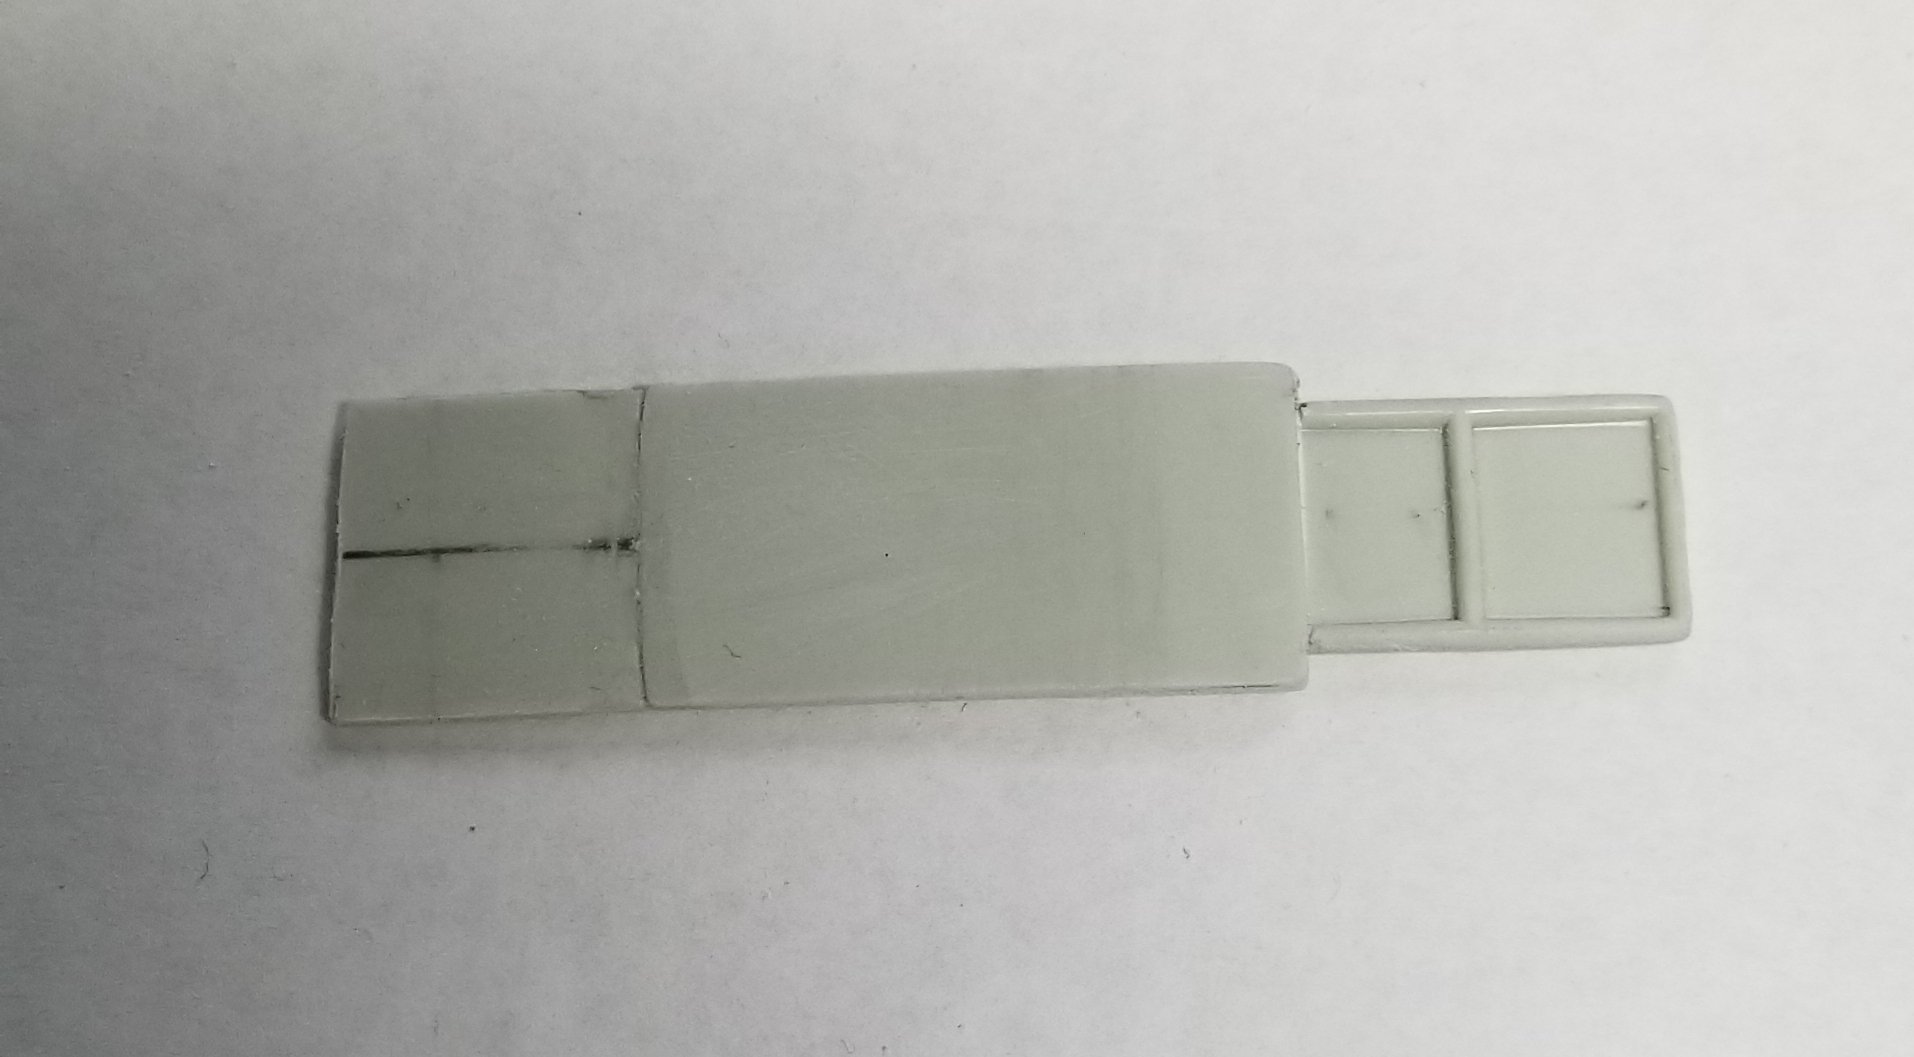
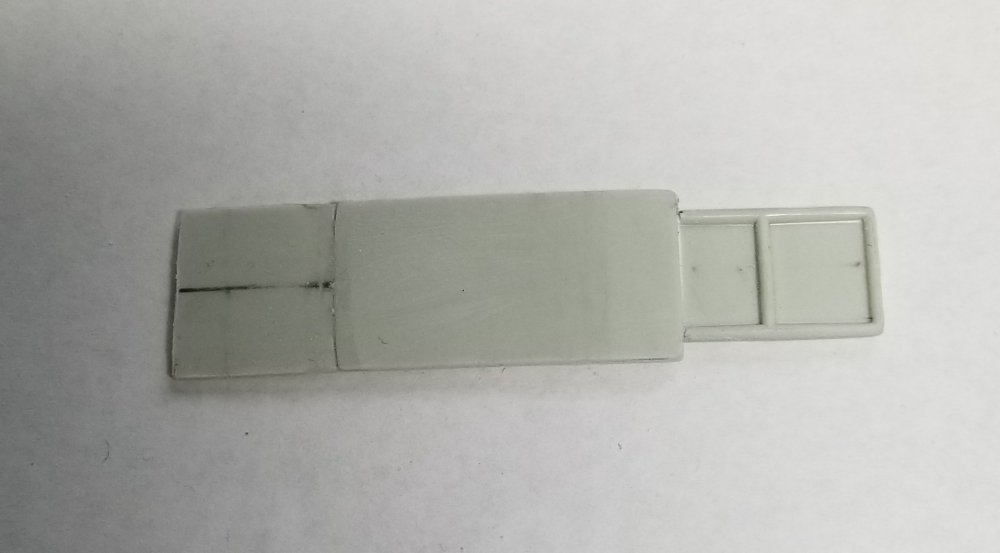
Hey all I did some work on the wheel bay doors. I still have along way to go on them, but here are some pictures to show how far I've gotten. I found these on Bill S. build on LSP. here are mine, I only have one pair started. view of my door inner side on top his inner door below. view of my outer door on top his outer door below. Well that's all for know. I'll be back with more soon. Ron G

-
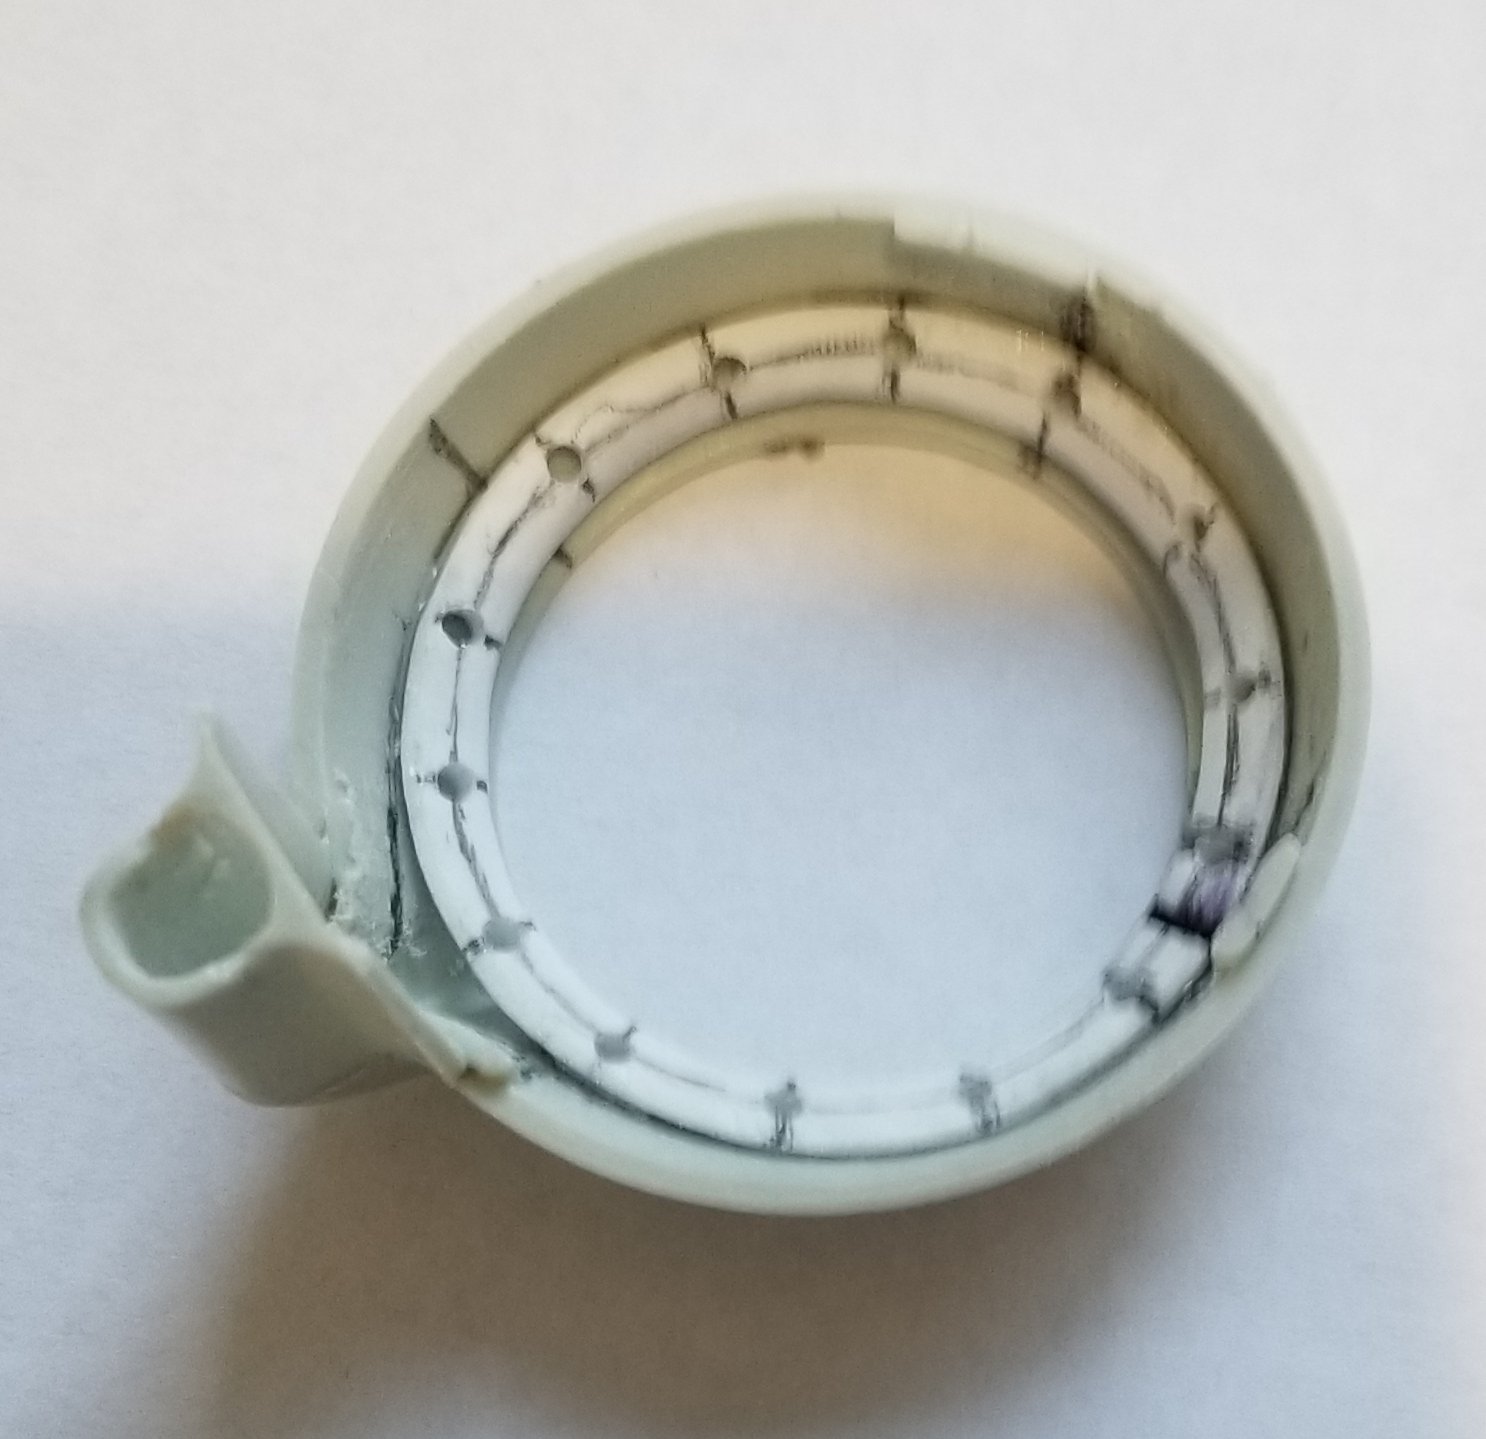
I believe you are correct Fidd88. 14 pipes on the townend ring connected to 14 dual pipes coming from the cylinders, of which there were two different types for the Hercules. The Pegasus had all 18 pipes, individually going to the ring. I'm no expert but I believe I'm correct. Ron G
-
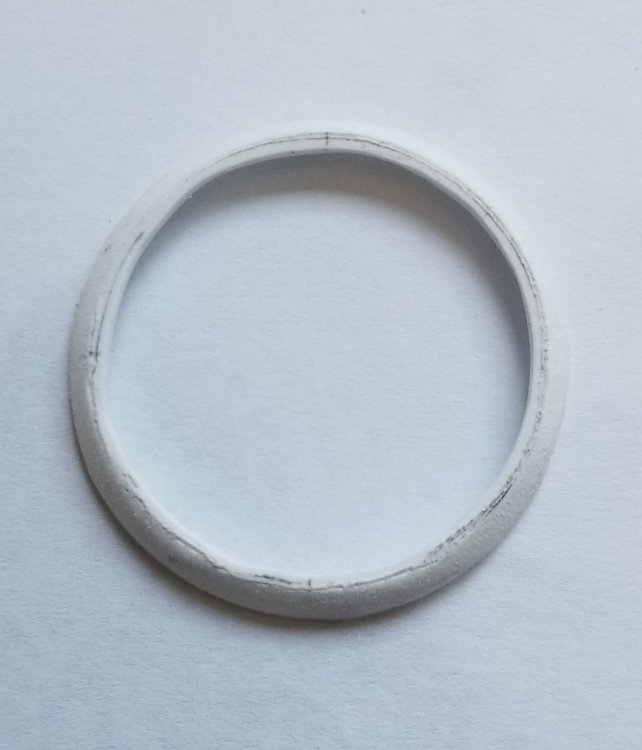
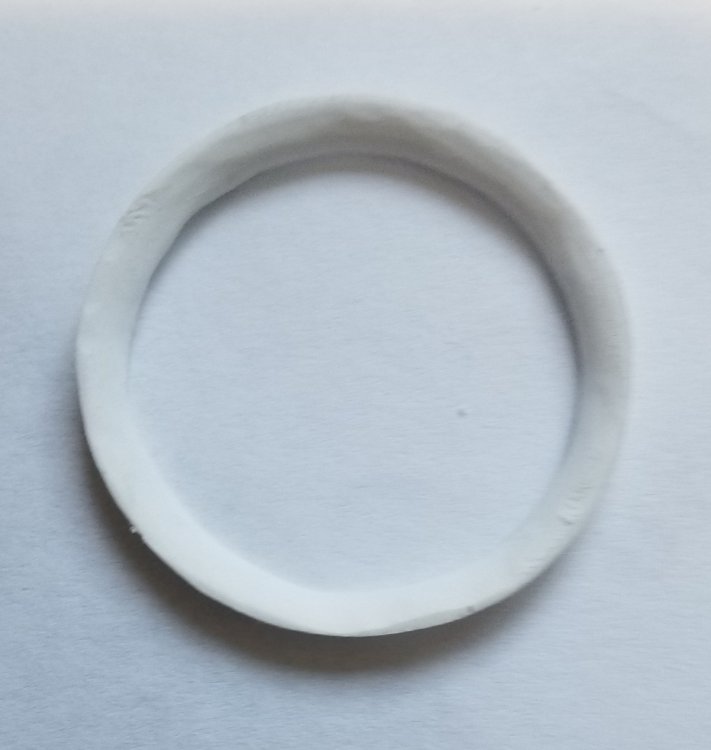
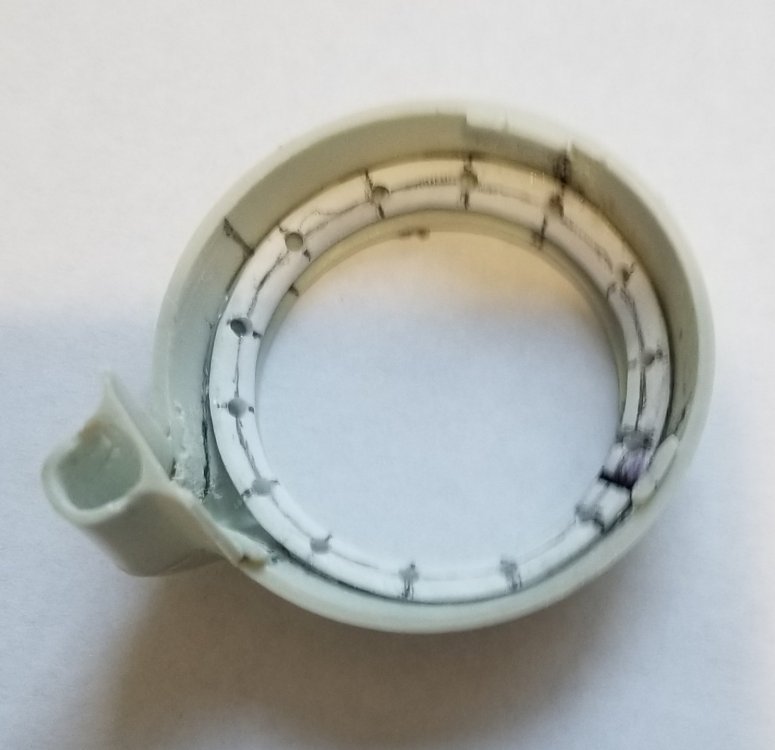
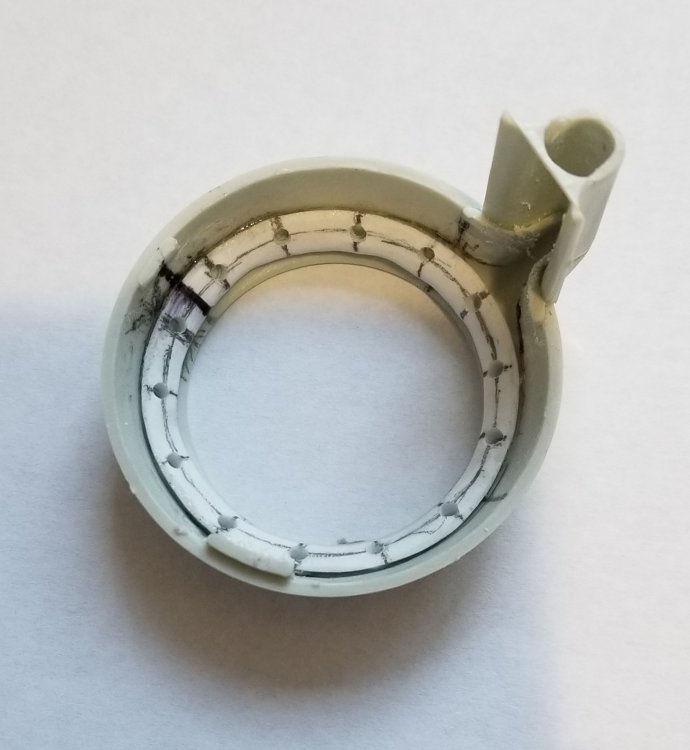
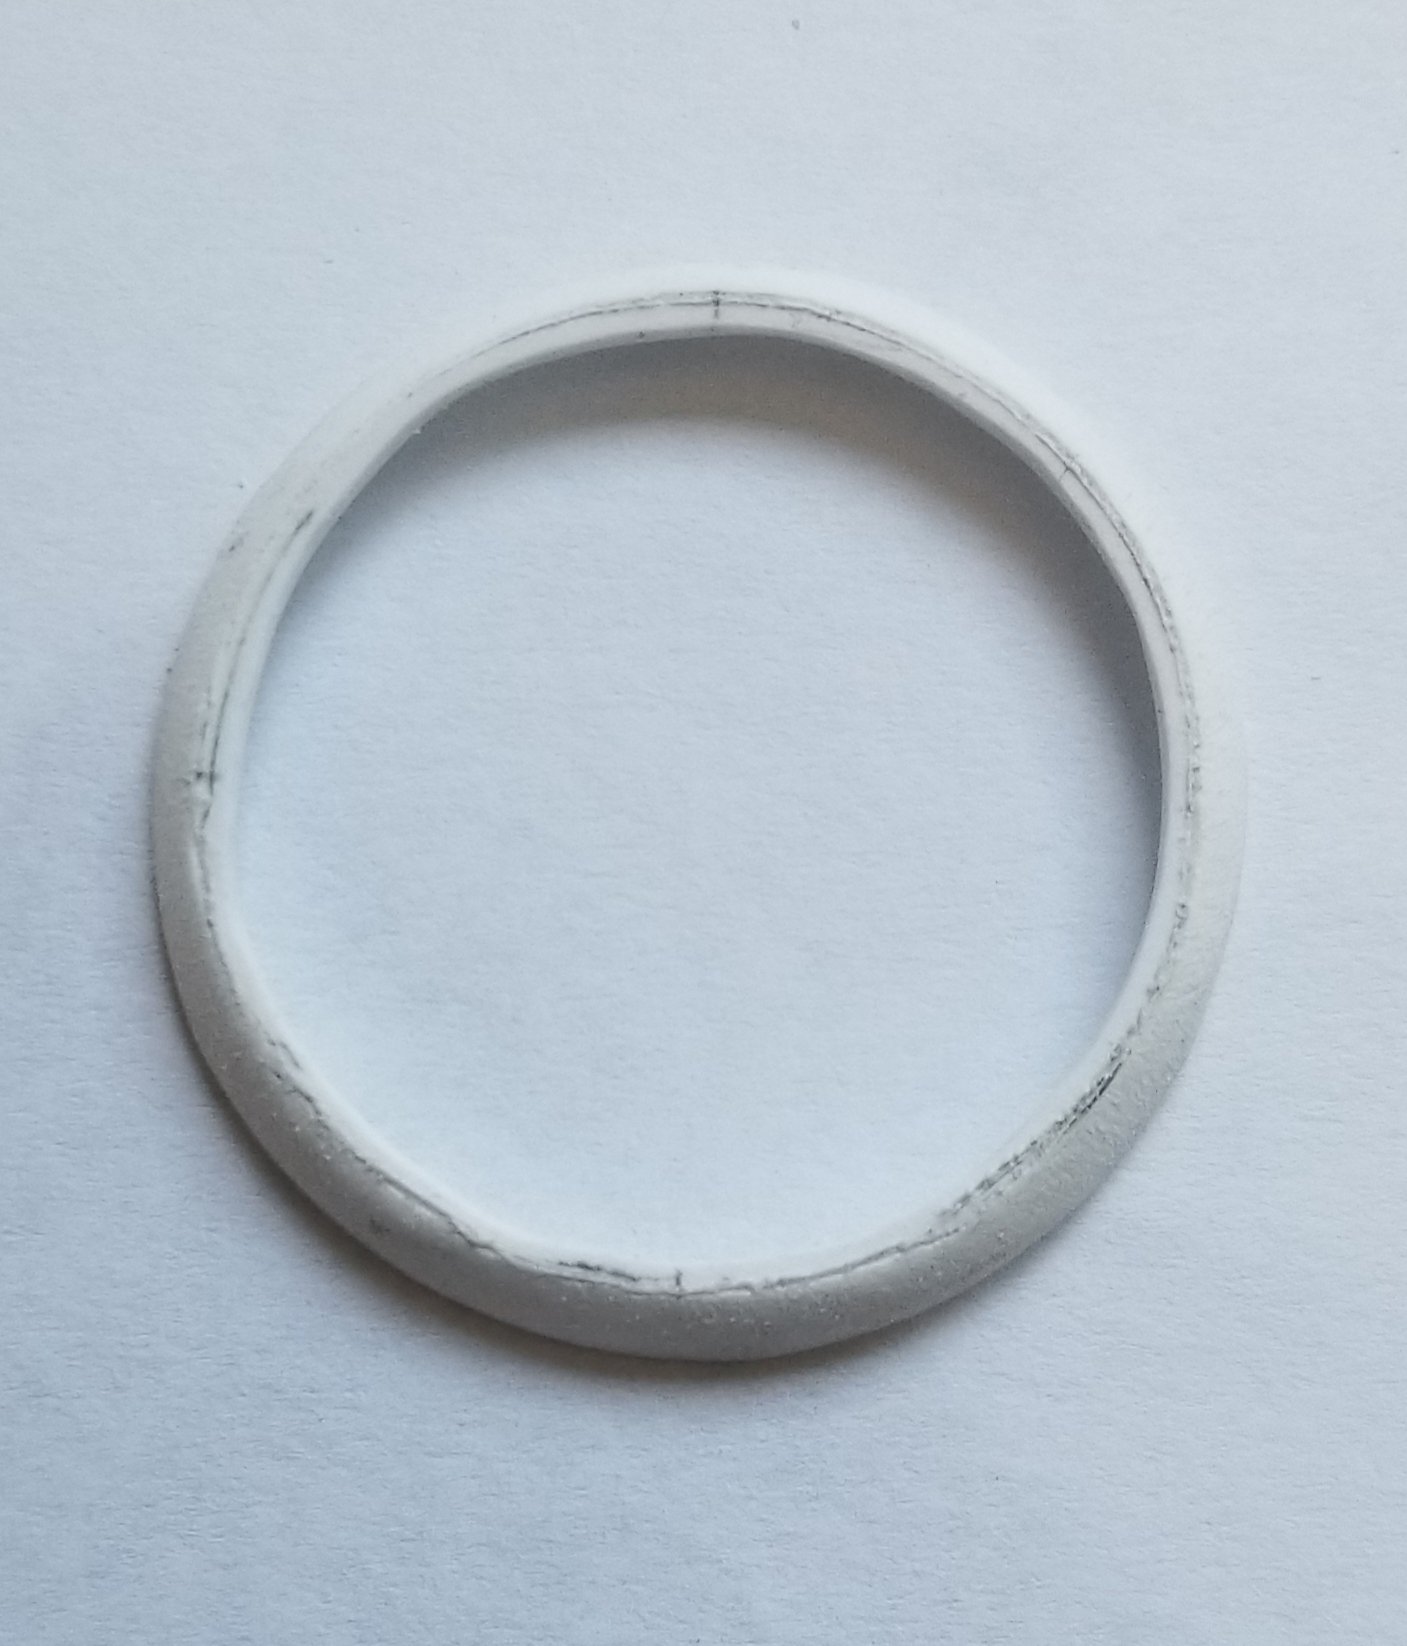
Speaking of "townend rings" I've been working on mine here's where I'm at. I took this piece of 1/8" thk. piece of plastic and made this. the beginnings of the "townend ring" view front to back. view of the ring from the rear. view showing the ring inside of the cowl with the 14 holes drilled out. another view of the ring. view of ring through the cowl. another view of the ring through the cowl. I still have alot of work to do on this plus create all the exhaust pipes times two. . Ron G