CrankyCrafstman
-
Posts
1,350 -
Joined
-
Last visited
Content Type
Profiles
Forums
Events
Gallery
Everything posted by CrankyCrafstman
-

HK Models Do-335 A-12
CrankyCrafstman replied to JeroenPeters's topic in LSM 1/35 and Larger Work In Progress
OHH YUMMY! I want to do one of these or the ZM one, not sure which... so I'm watching and takin notes Ron G -
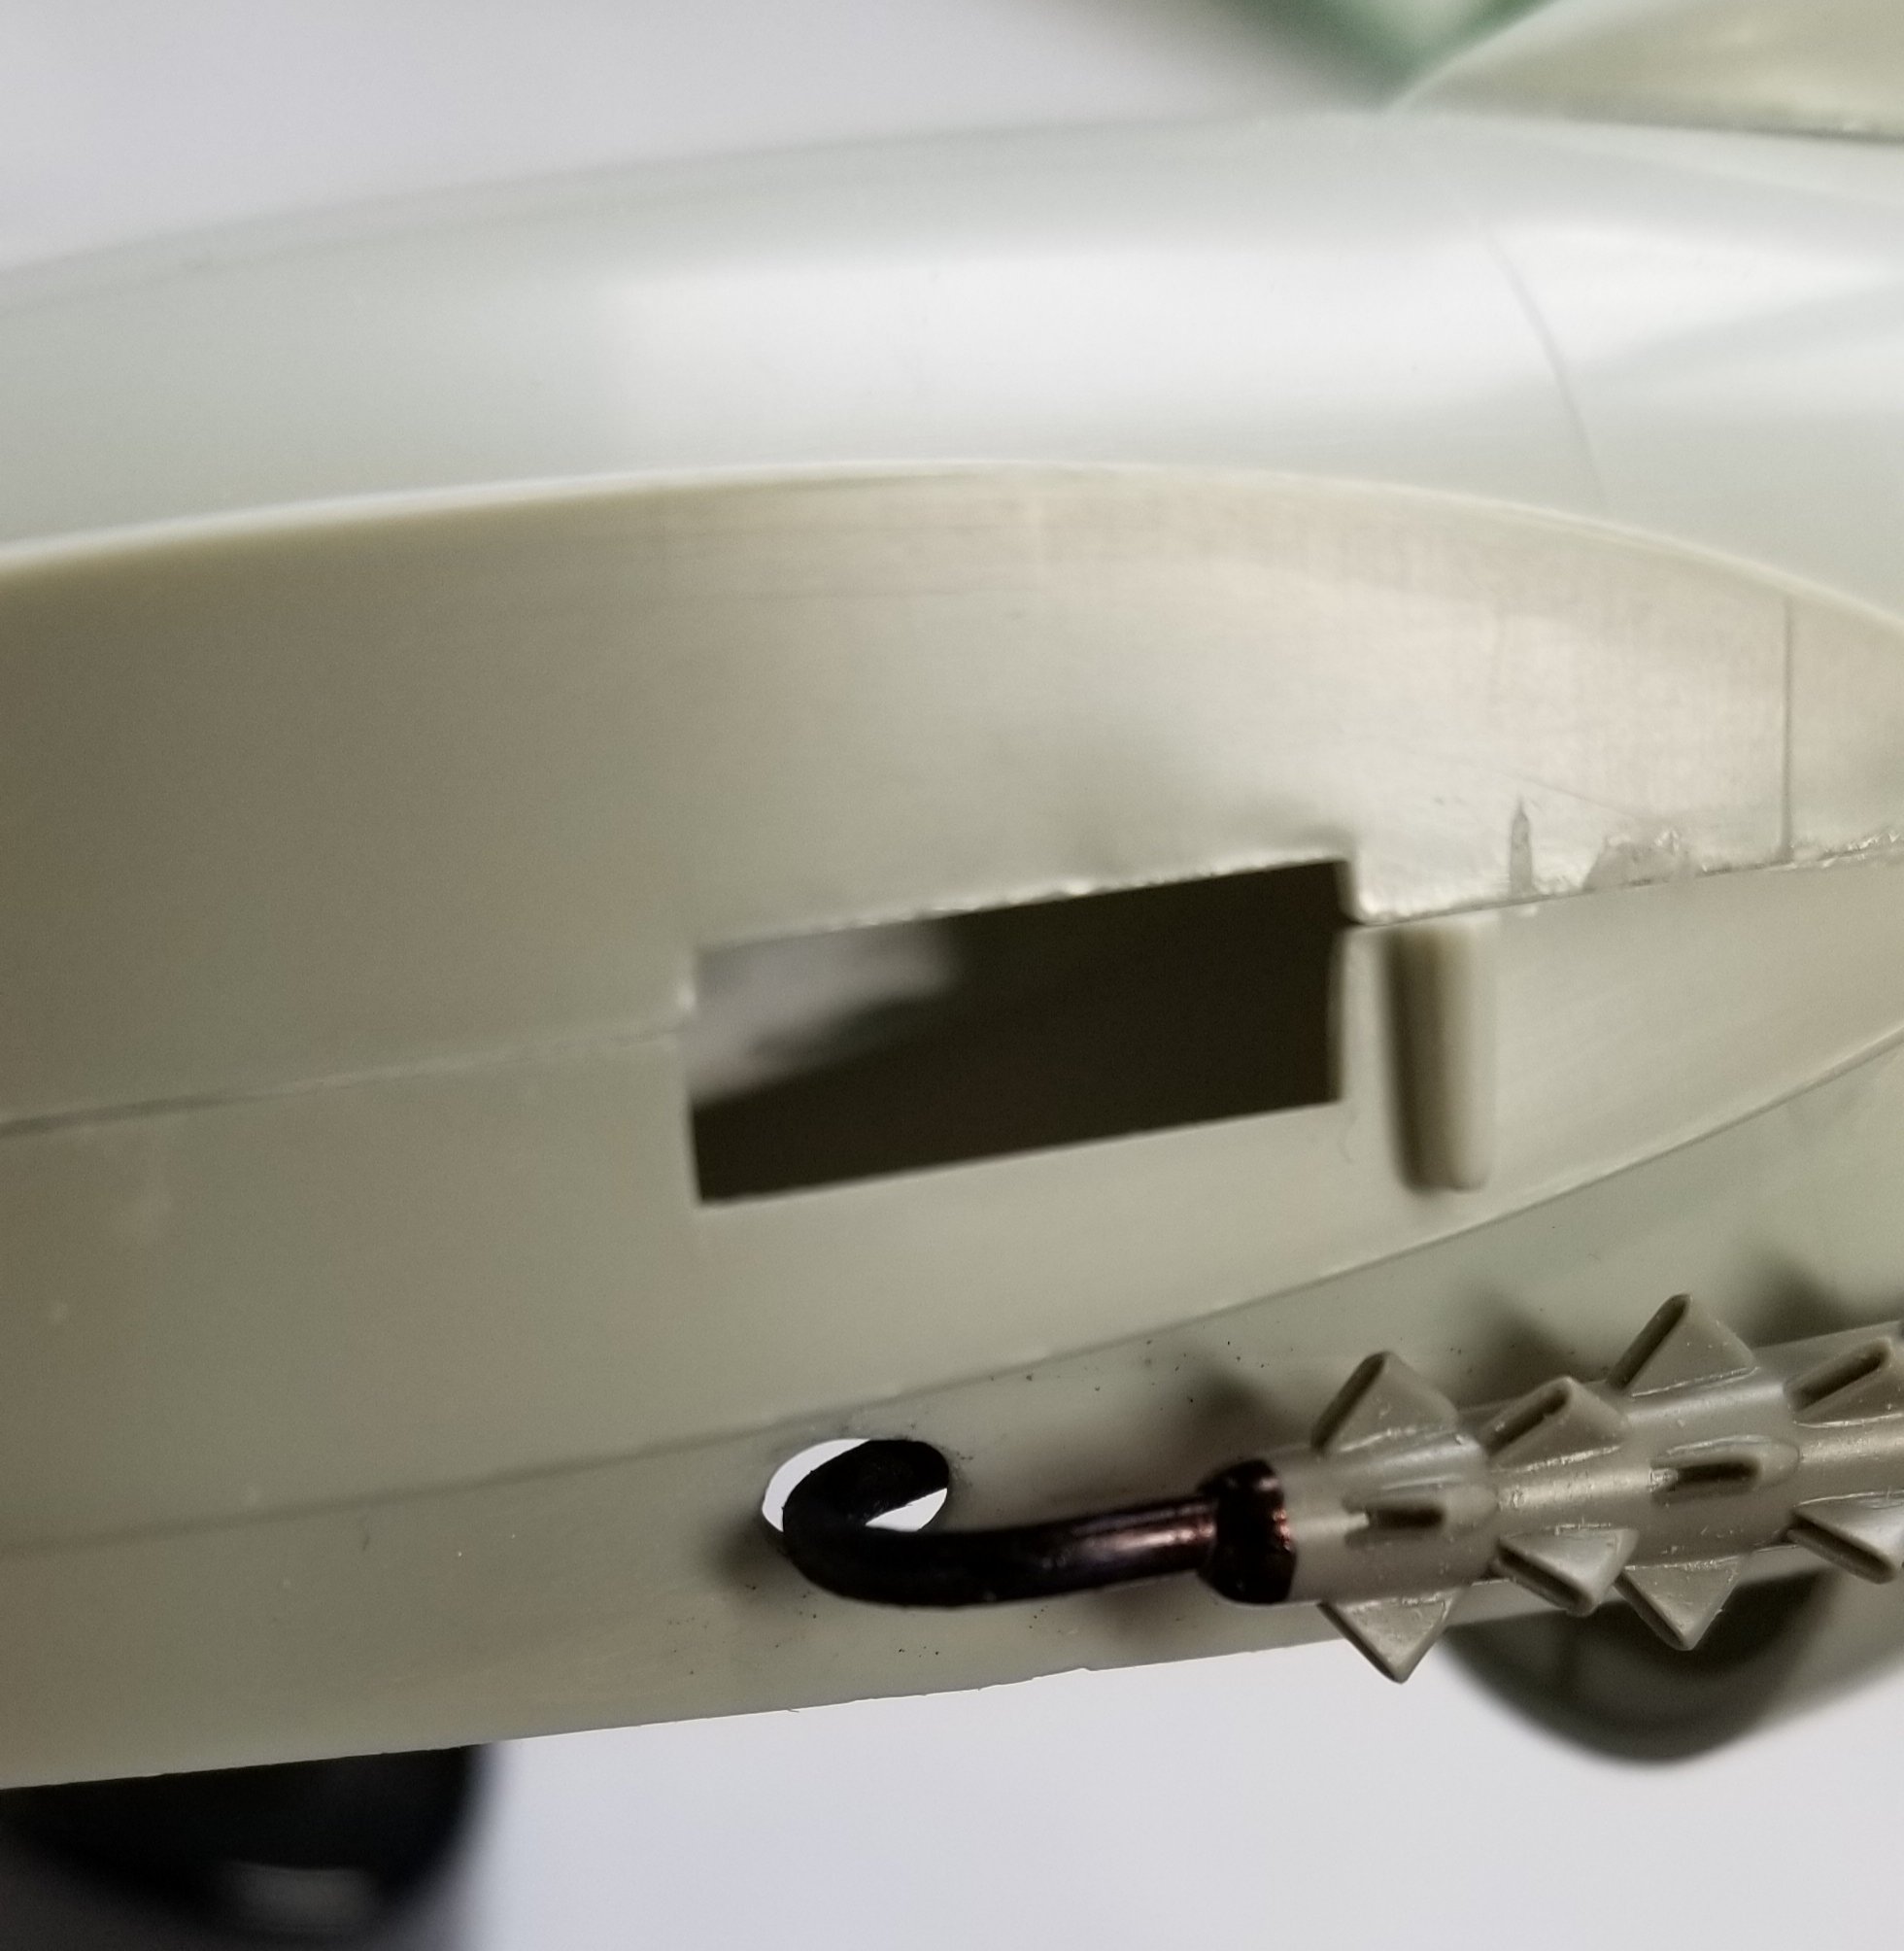
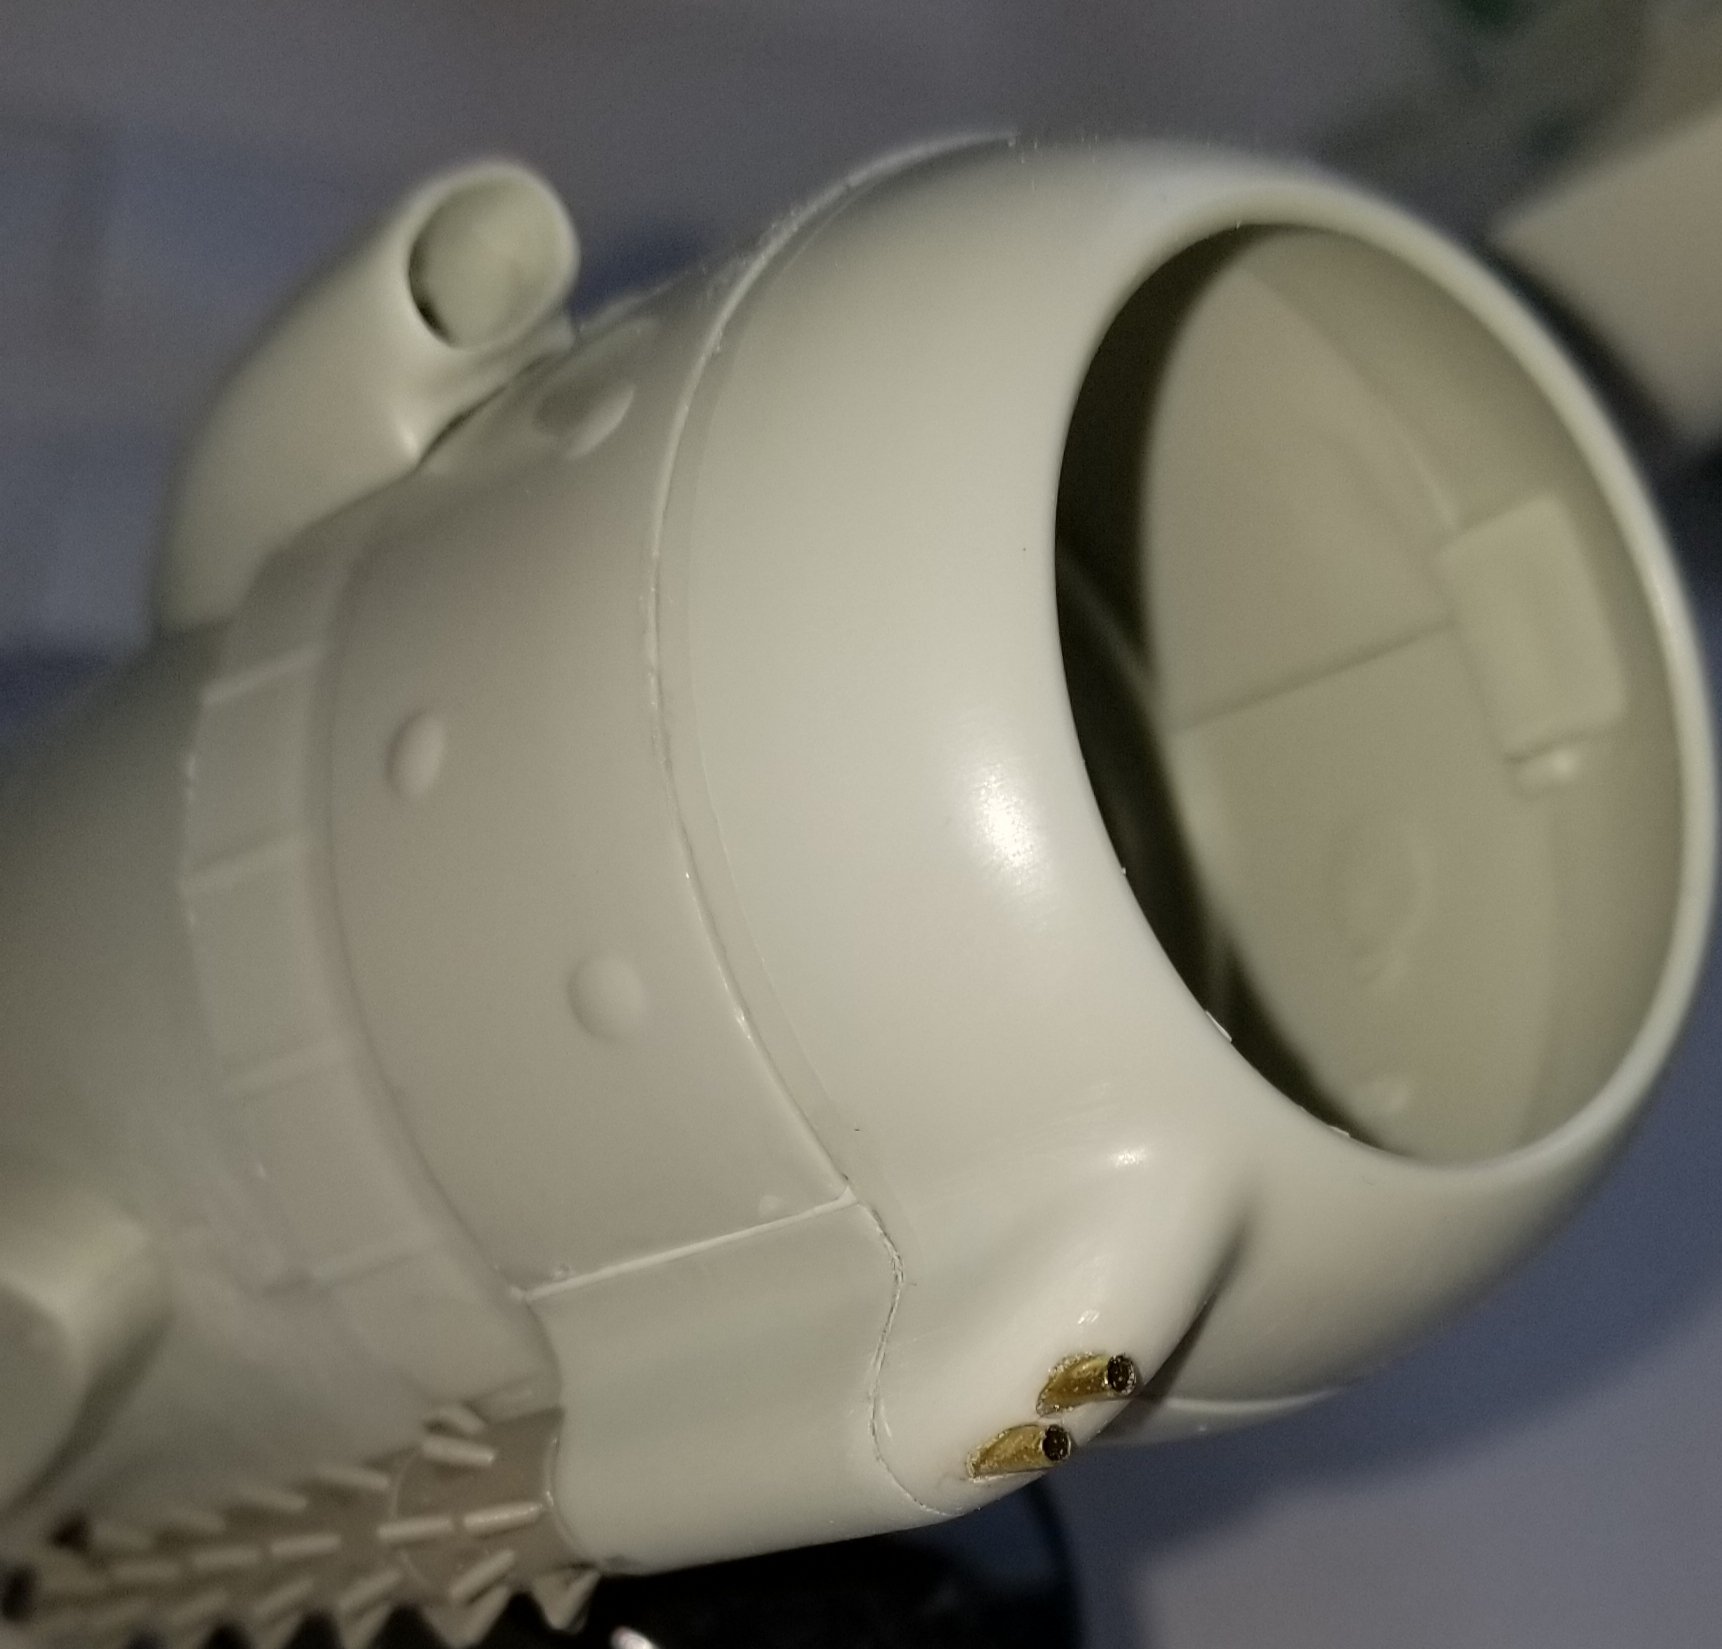
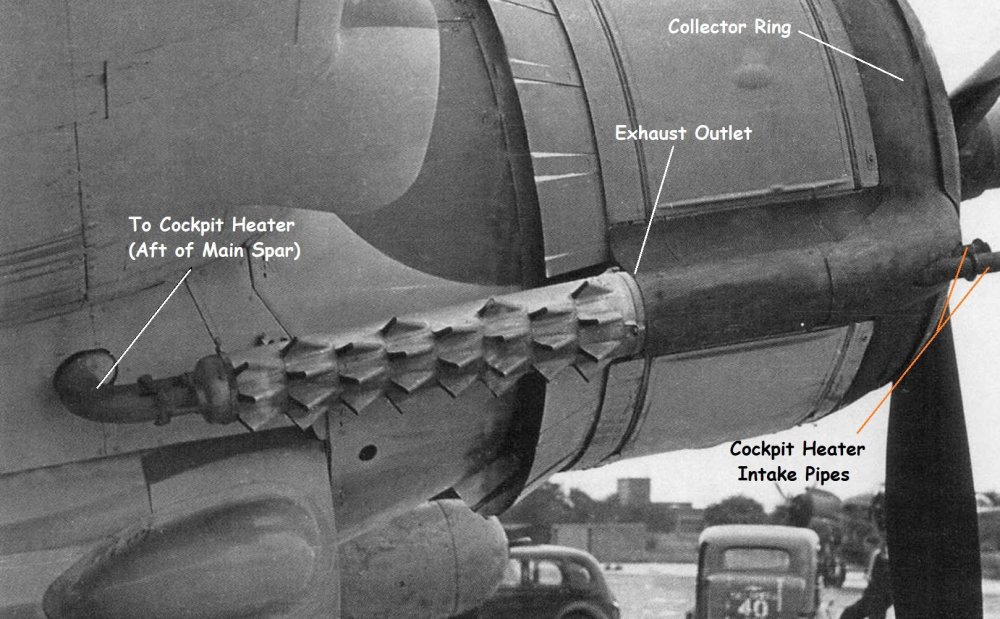
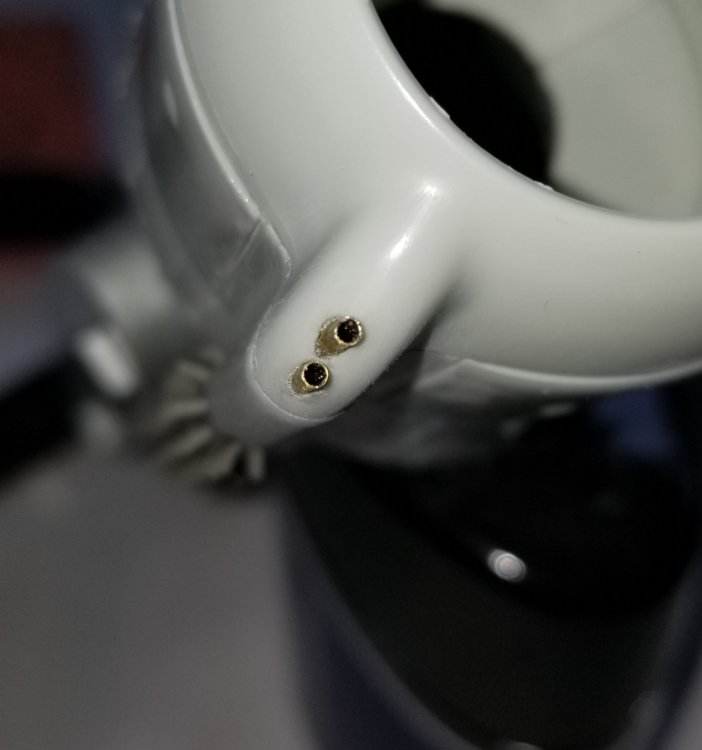
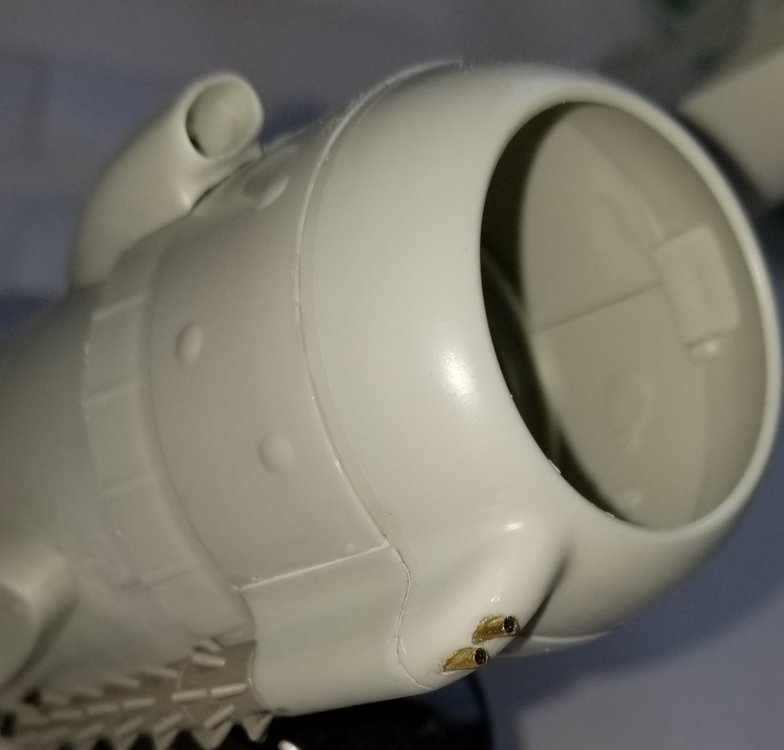
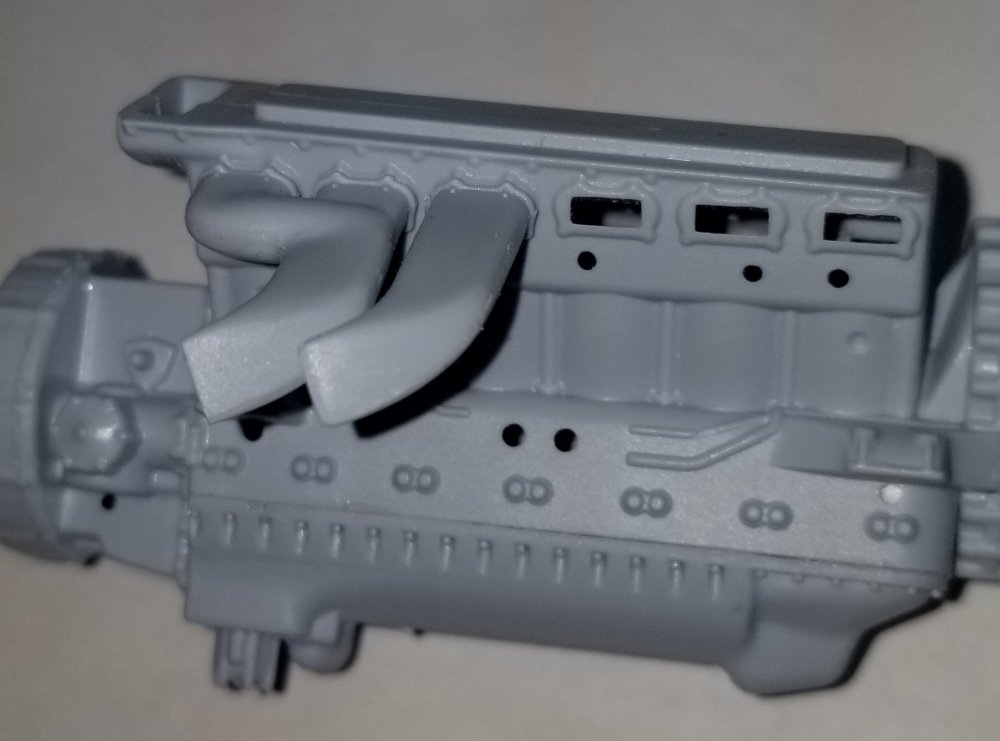
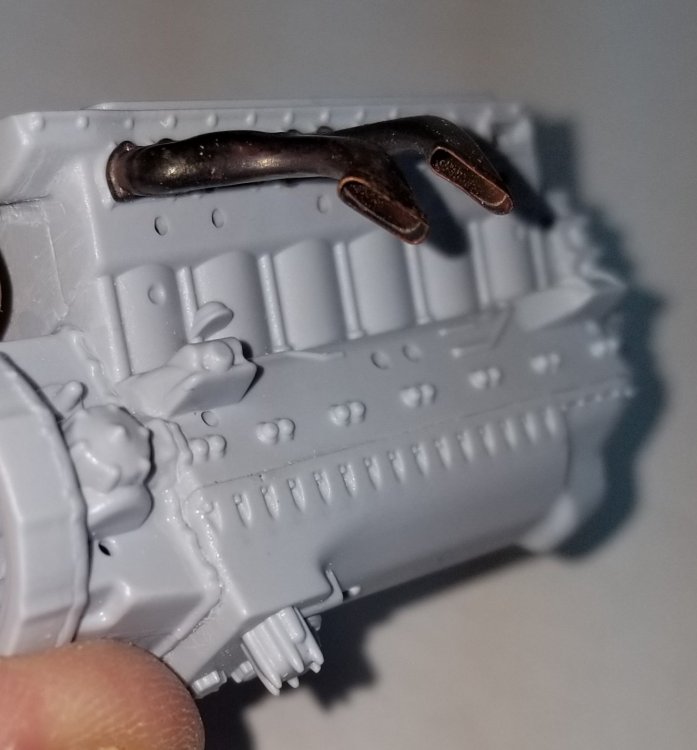
Hey guys Just a small update, some work on the nacelles and exhausts. view of the actual Beaufighter exhaust showing cockpit heater pipes. view showing Quickboost exhaust with scratch built heater pipe going into nacelle. another view of pipe going into nacelle. view of the two intake cooling pipes on cowl exhaust ring. close up view of the two pipes. All for now be back when I get more done. Ron G
-
Thanks Peter coming from you thats great praise. Ron G
-
Vacumforming canopys?????
CrankyCrafstman replied to CrankyCrafstman's topic in Modelling Discussion
Thanks Hubert Just bought the mattel vacuform machine of of Ebay. Need to make conopys for my 1/32 Beaufighter build. Ron G -
Hey all Anybody on here ever used a mattel vacuform machine to make canopys? Need help on deciding whether to buy one or not. Ron G
-
Thanks Anthony So far it's going ok but the hard stuff is yet to come...lol Ron G
-
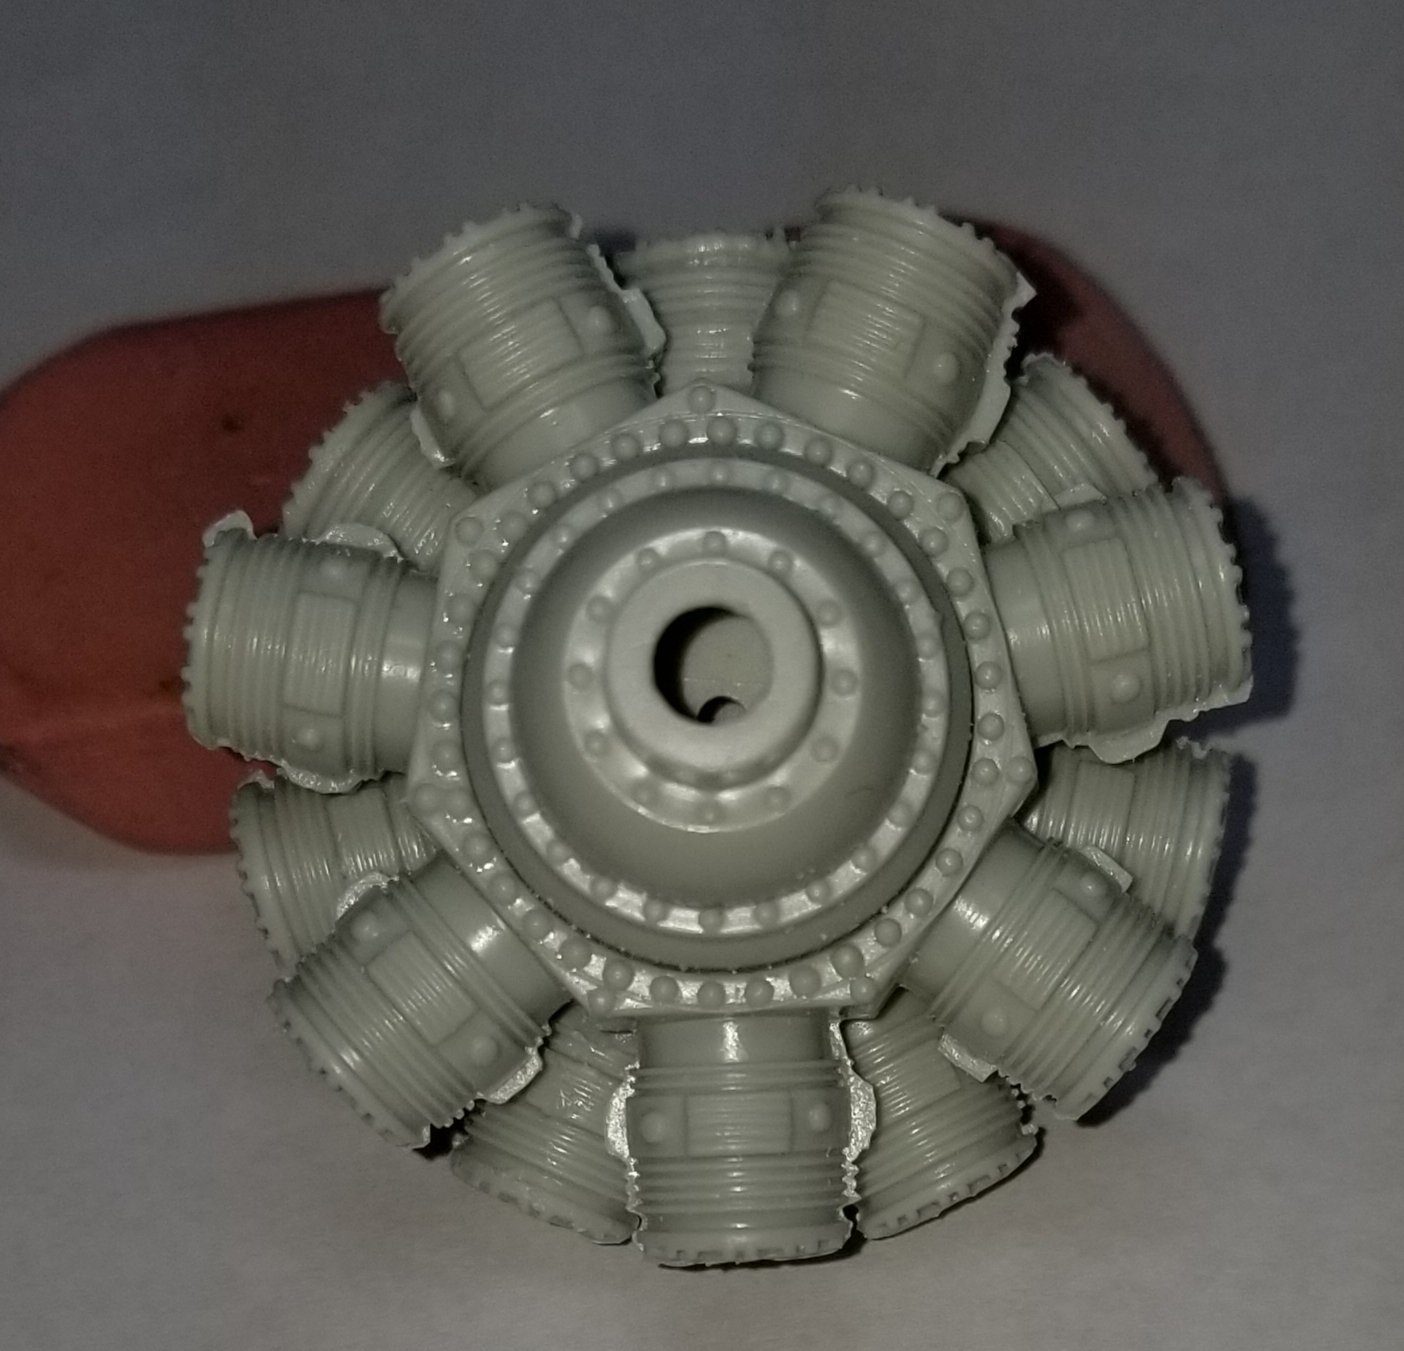
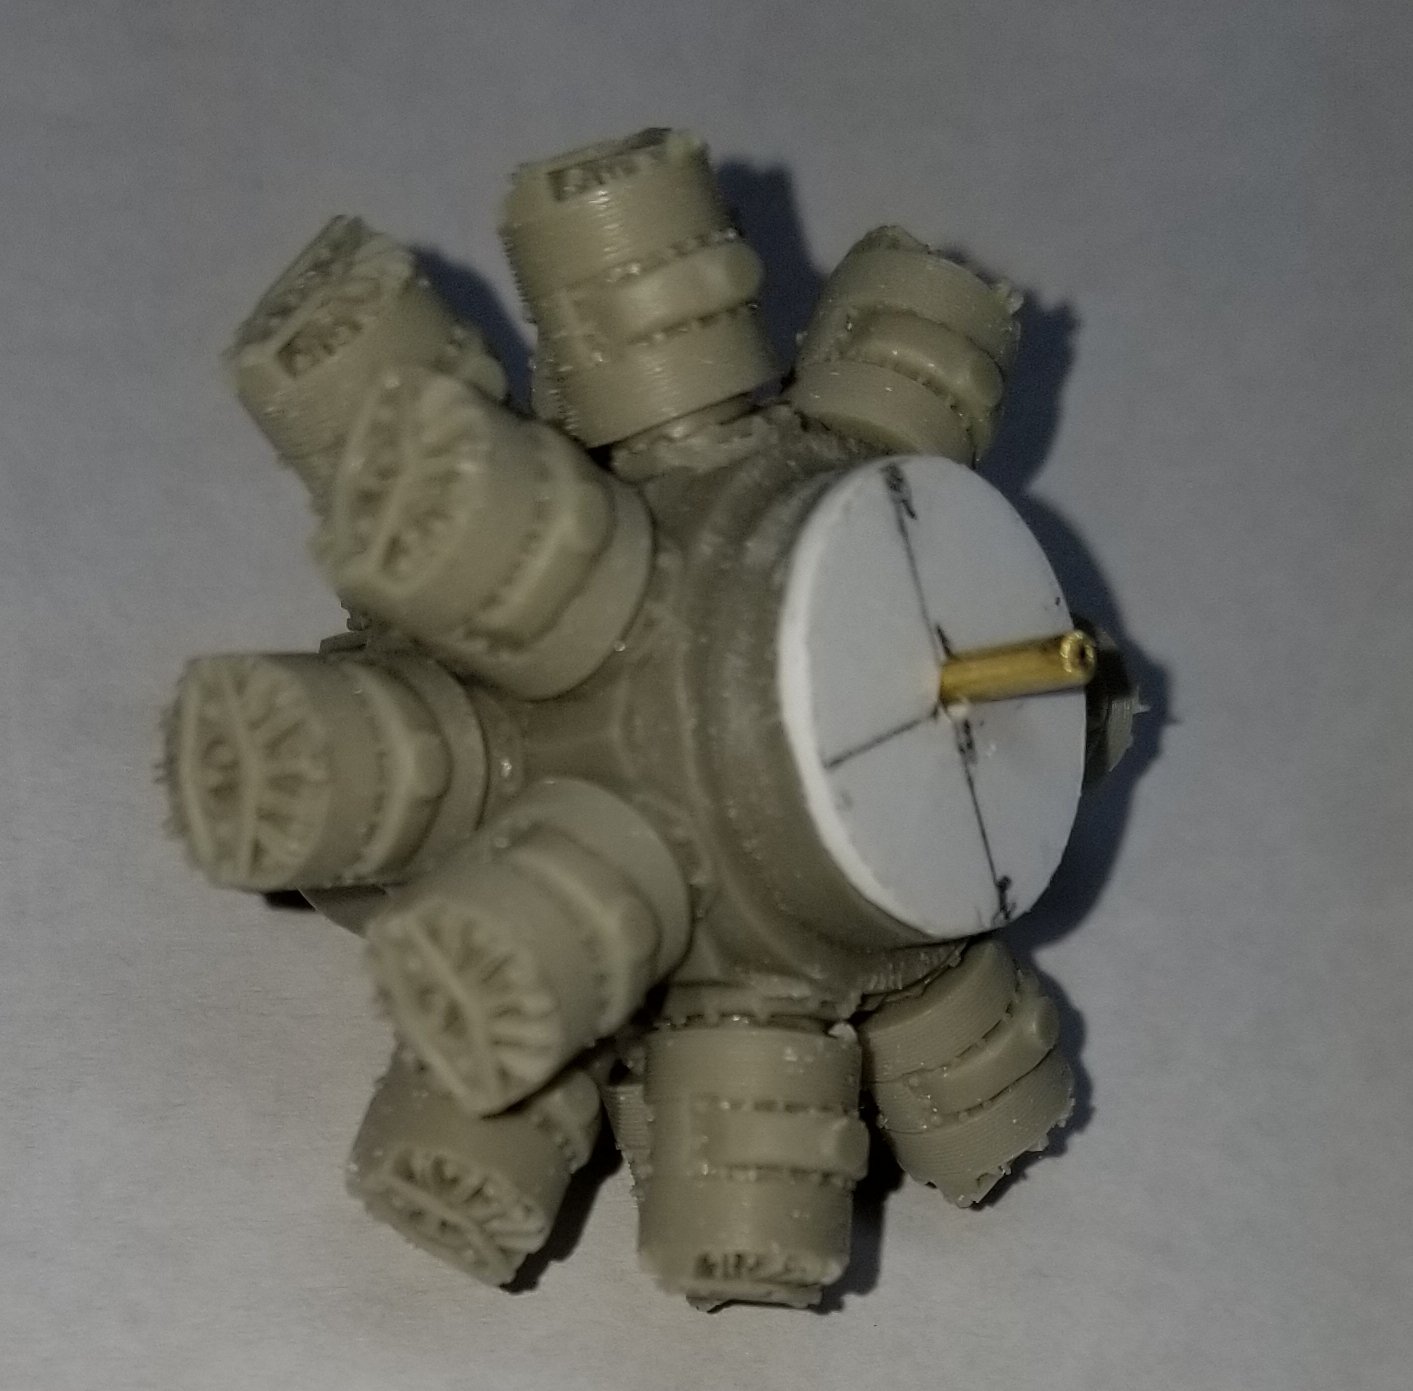
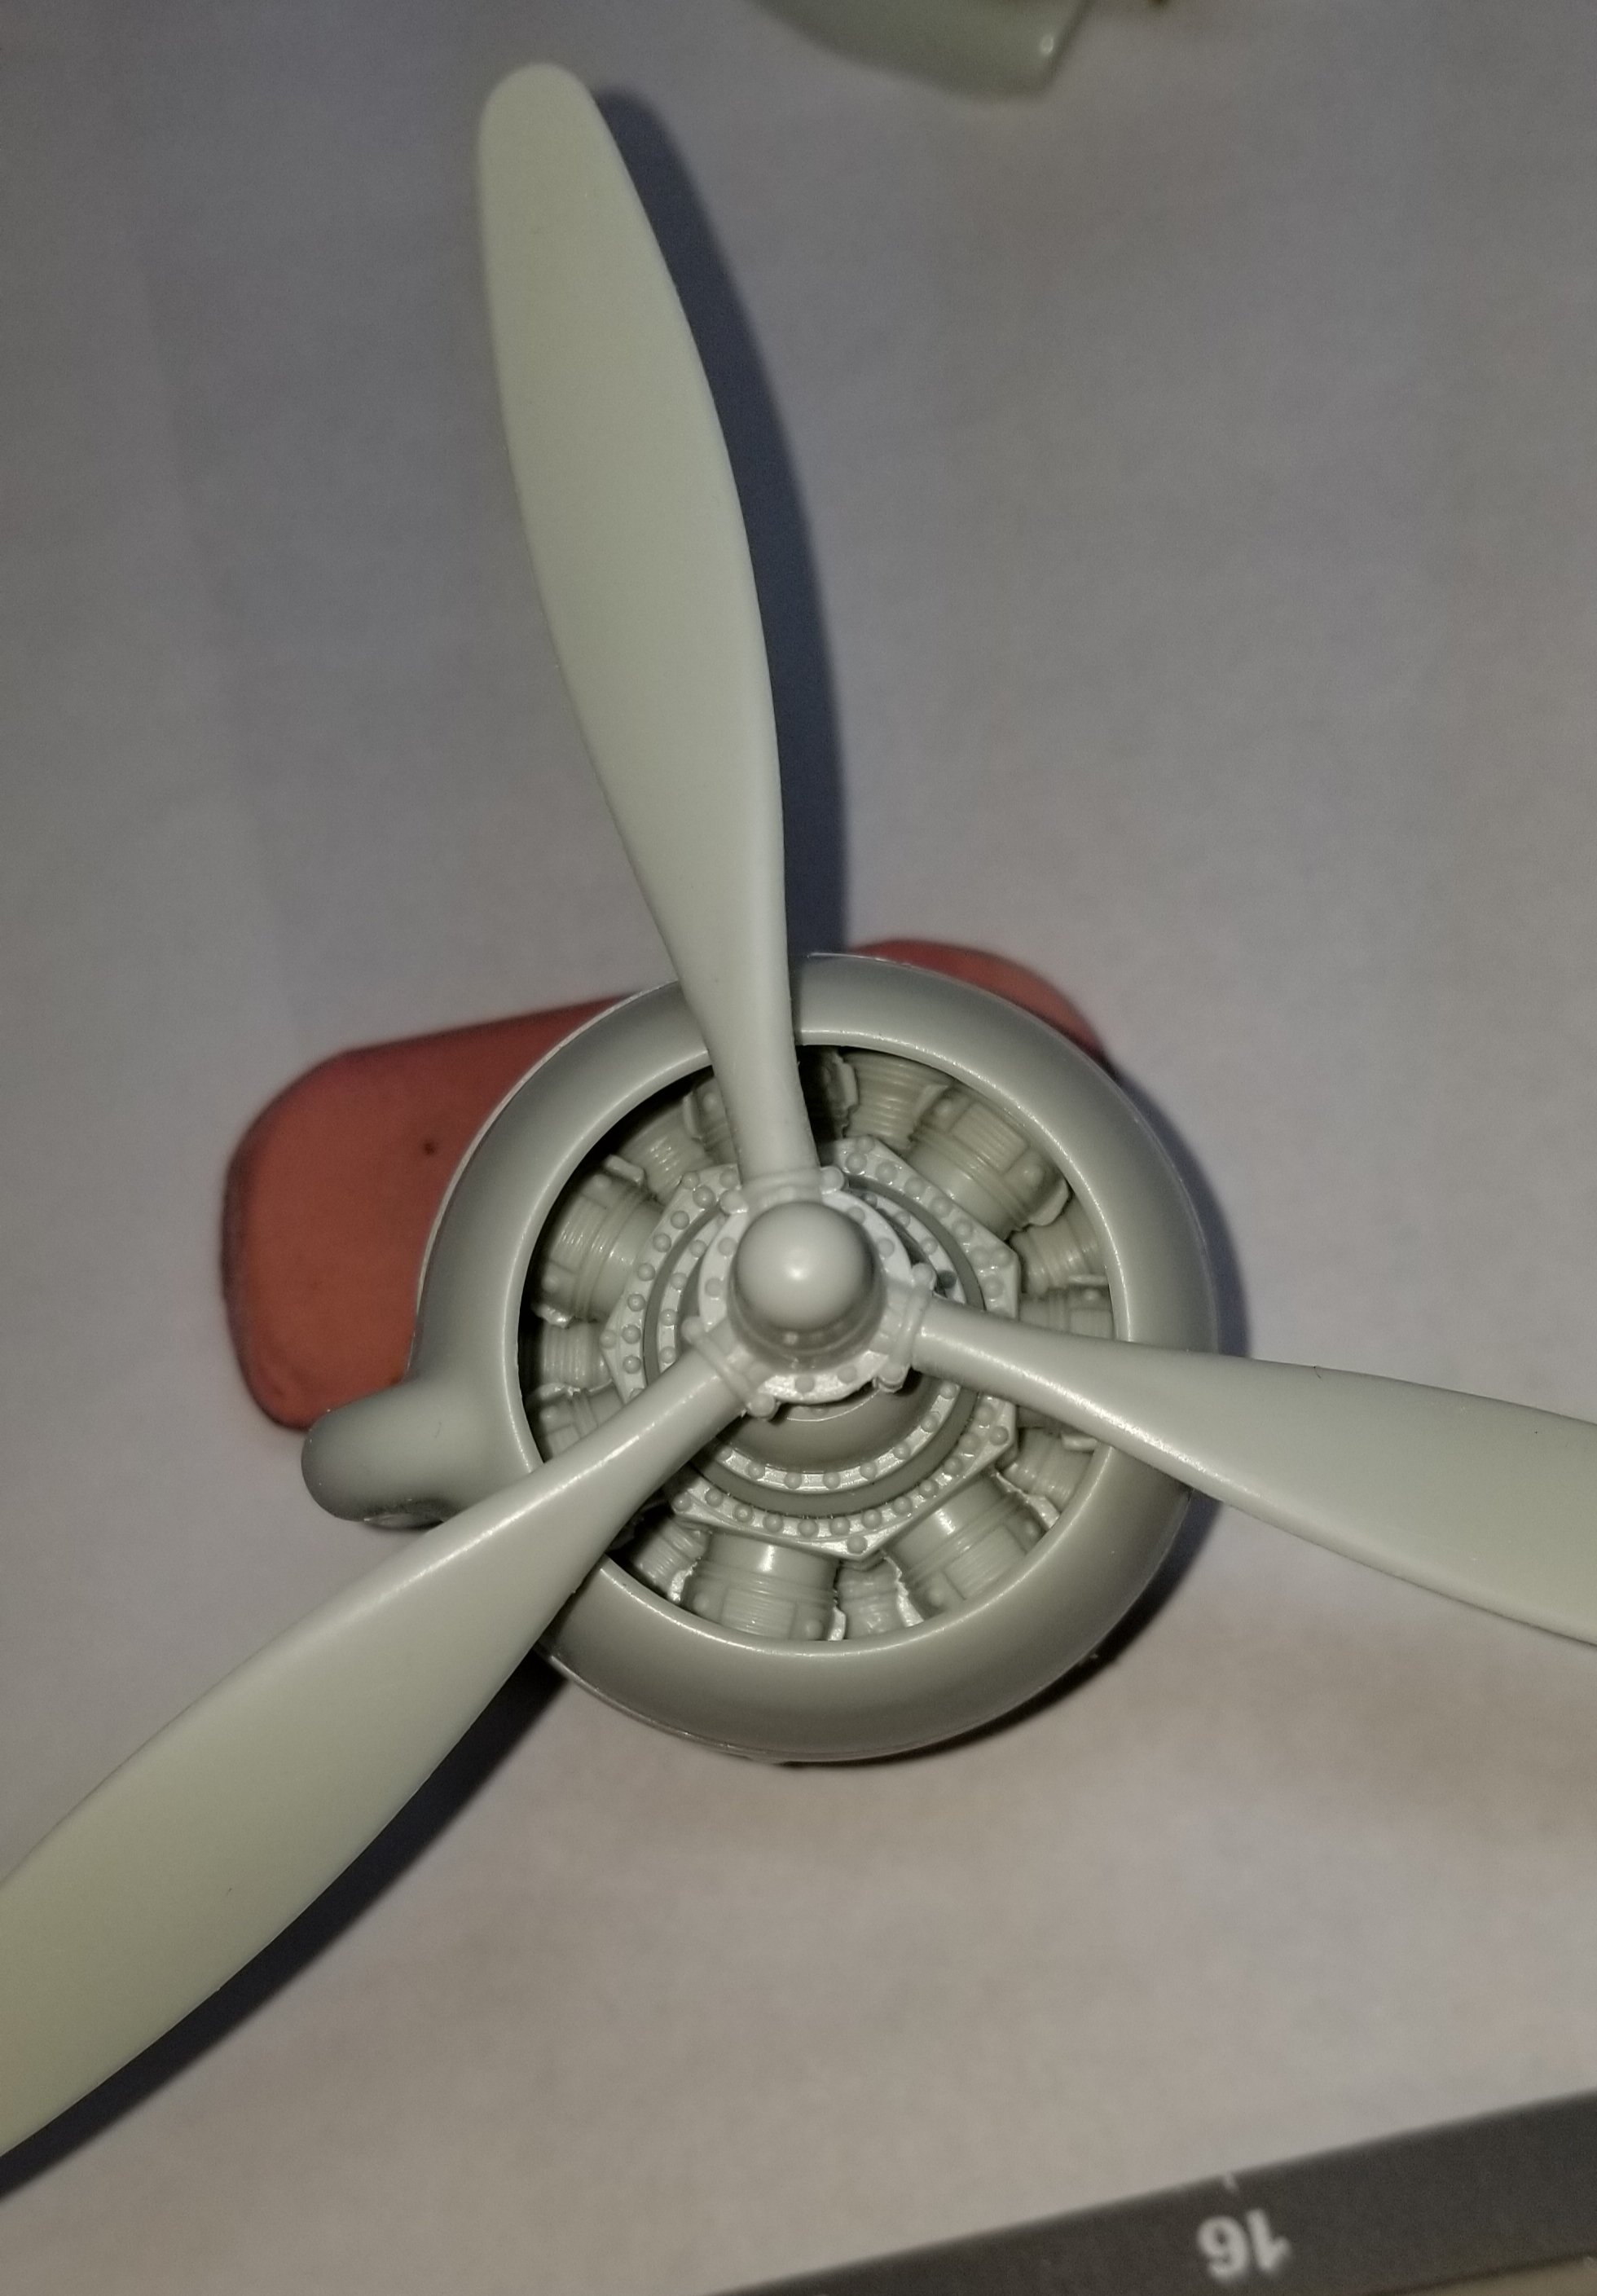
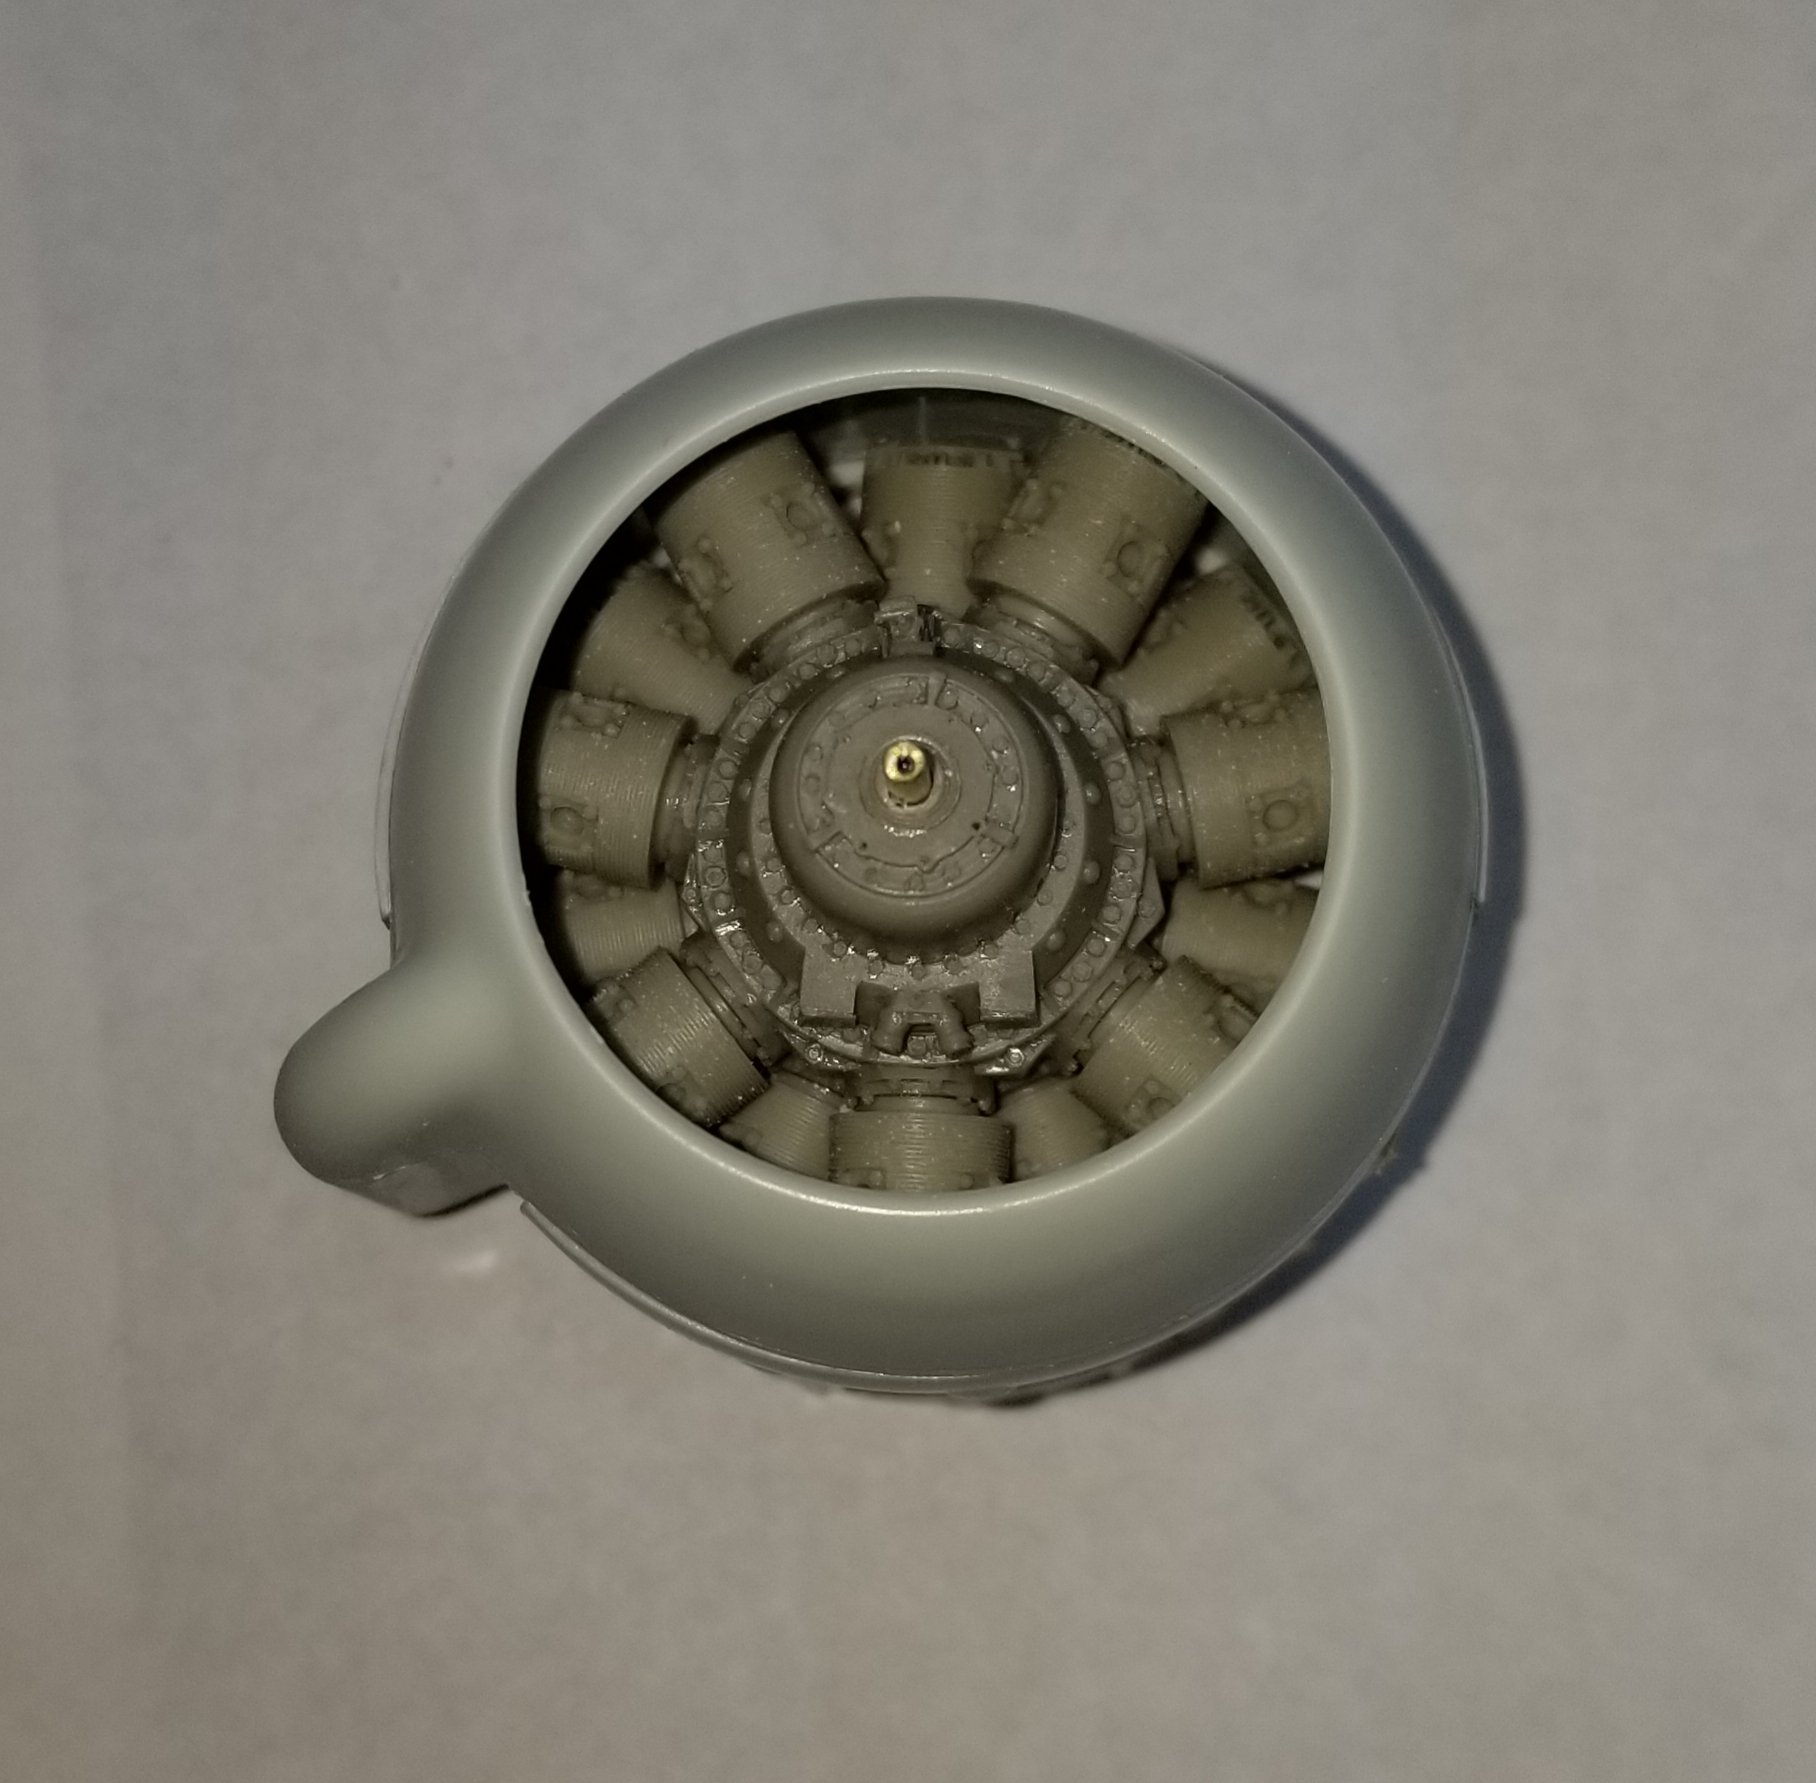
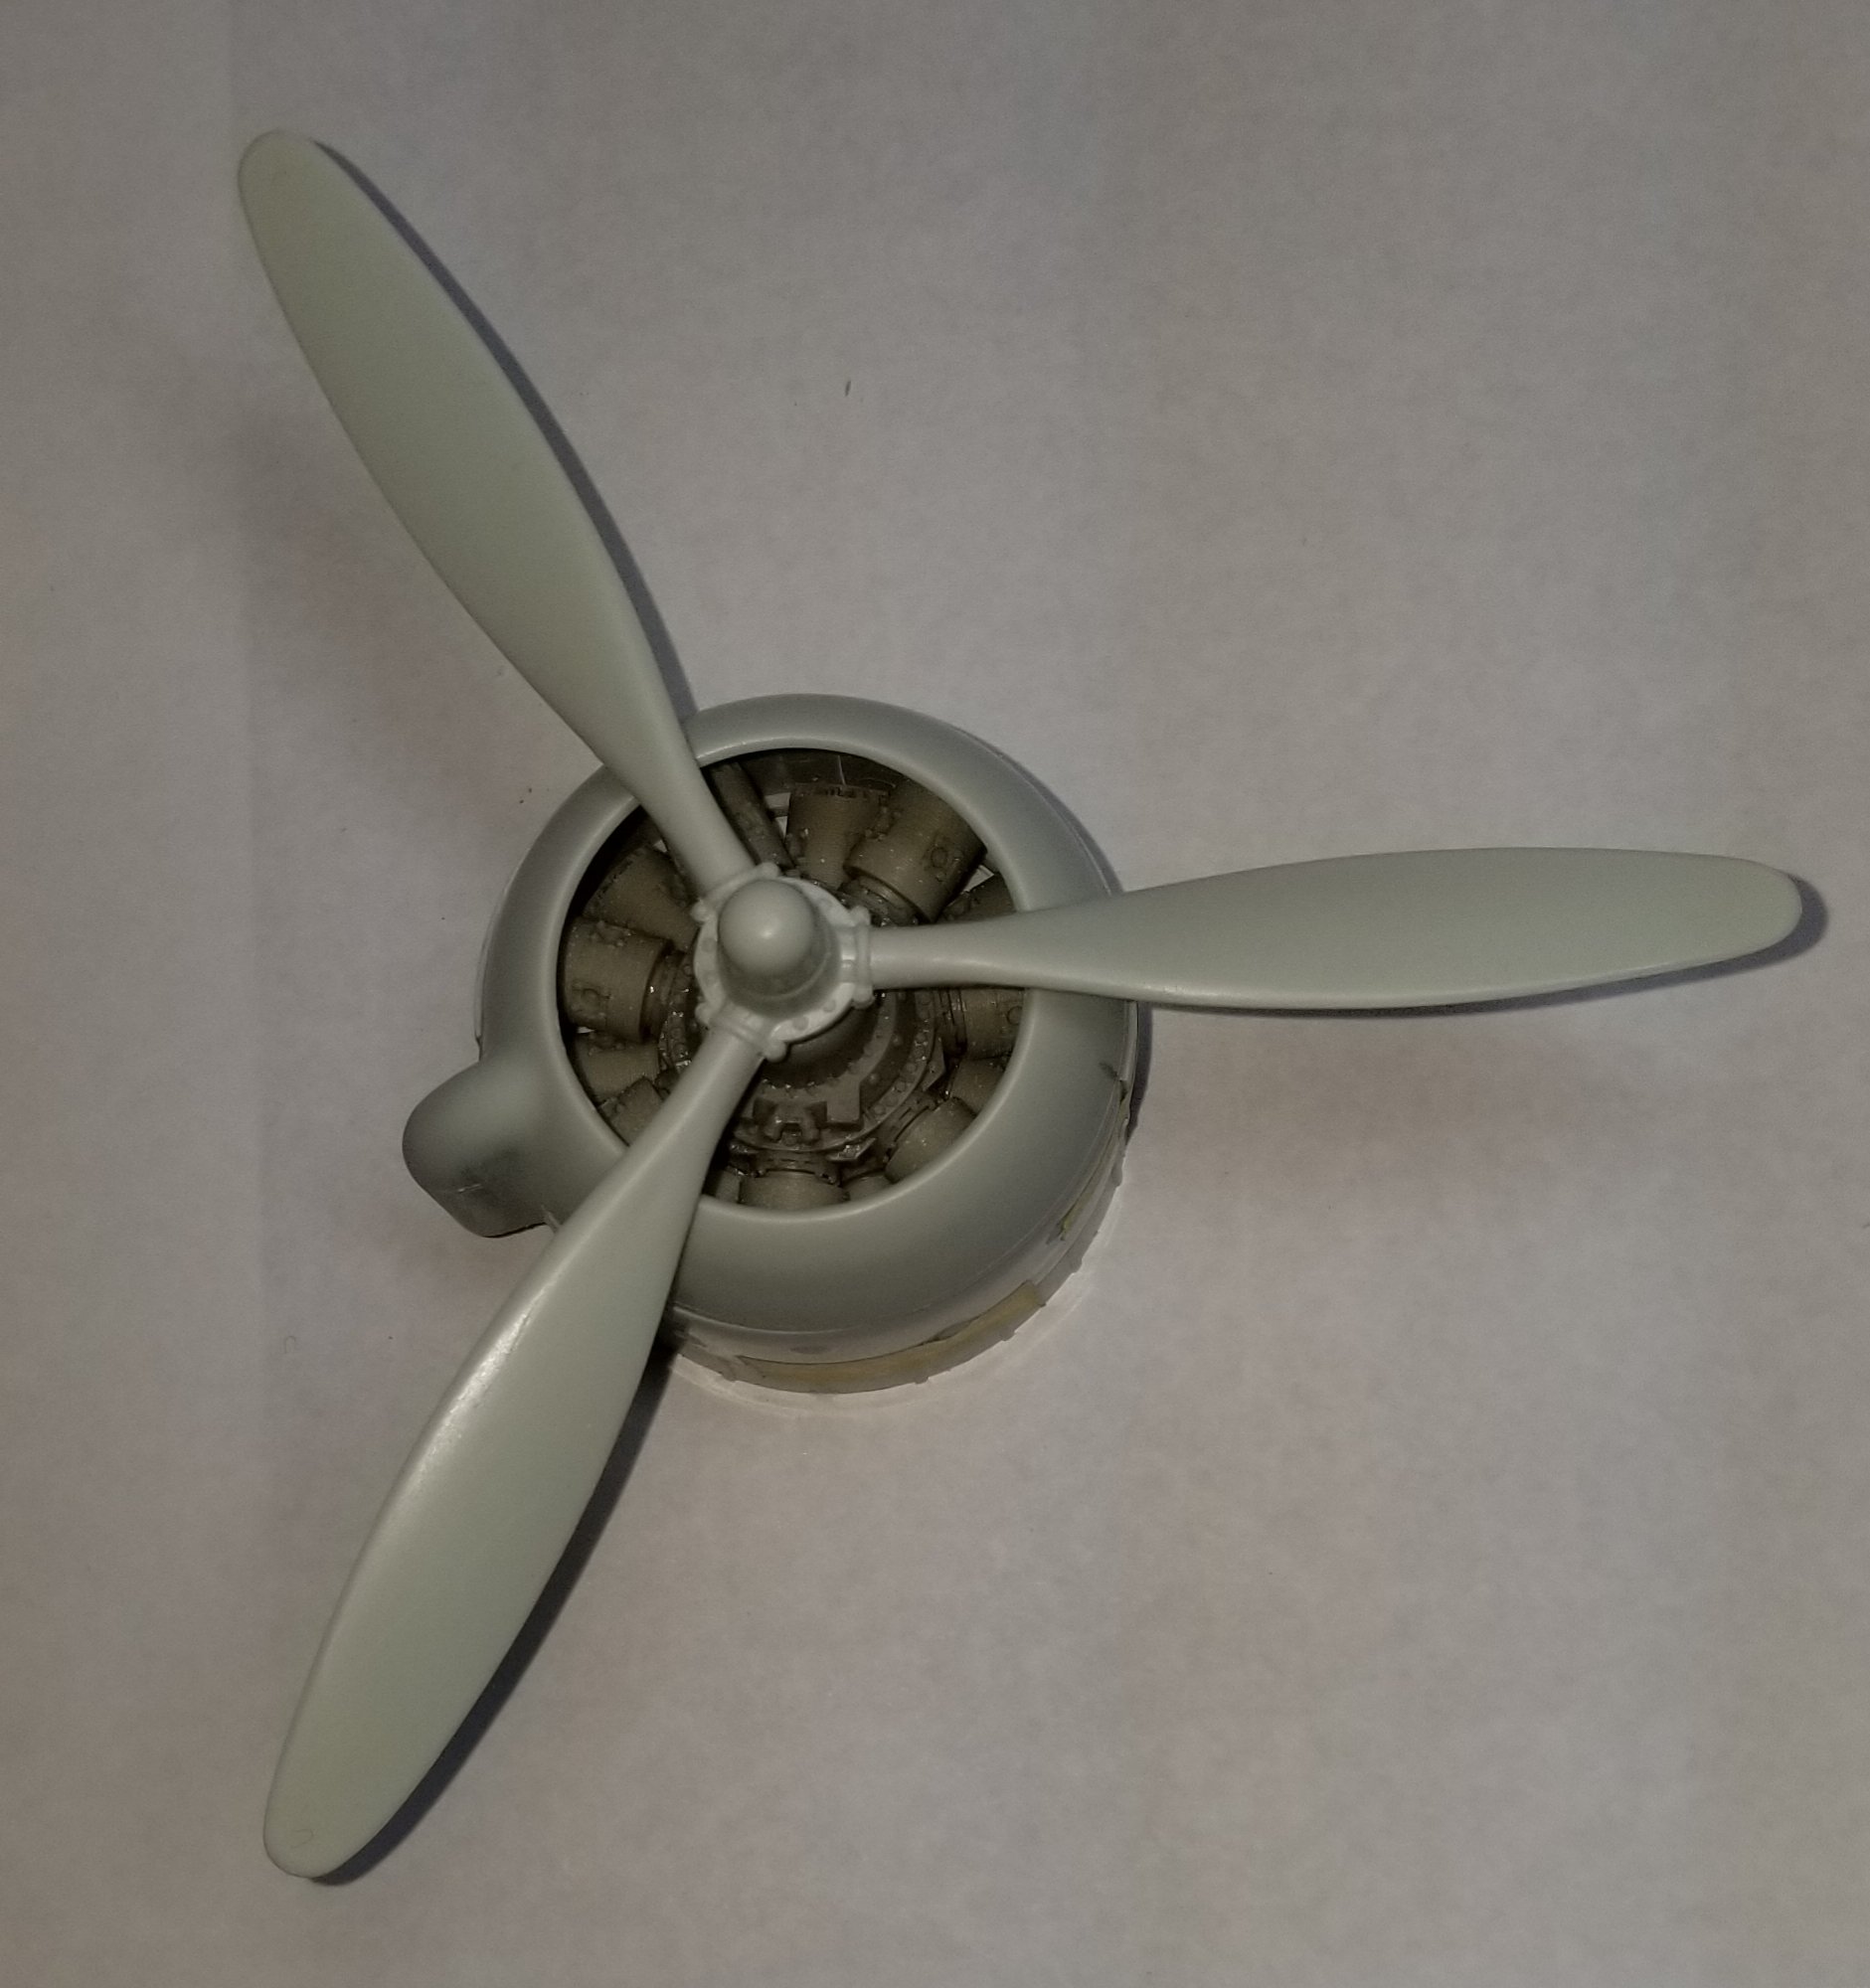
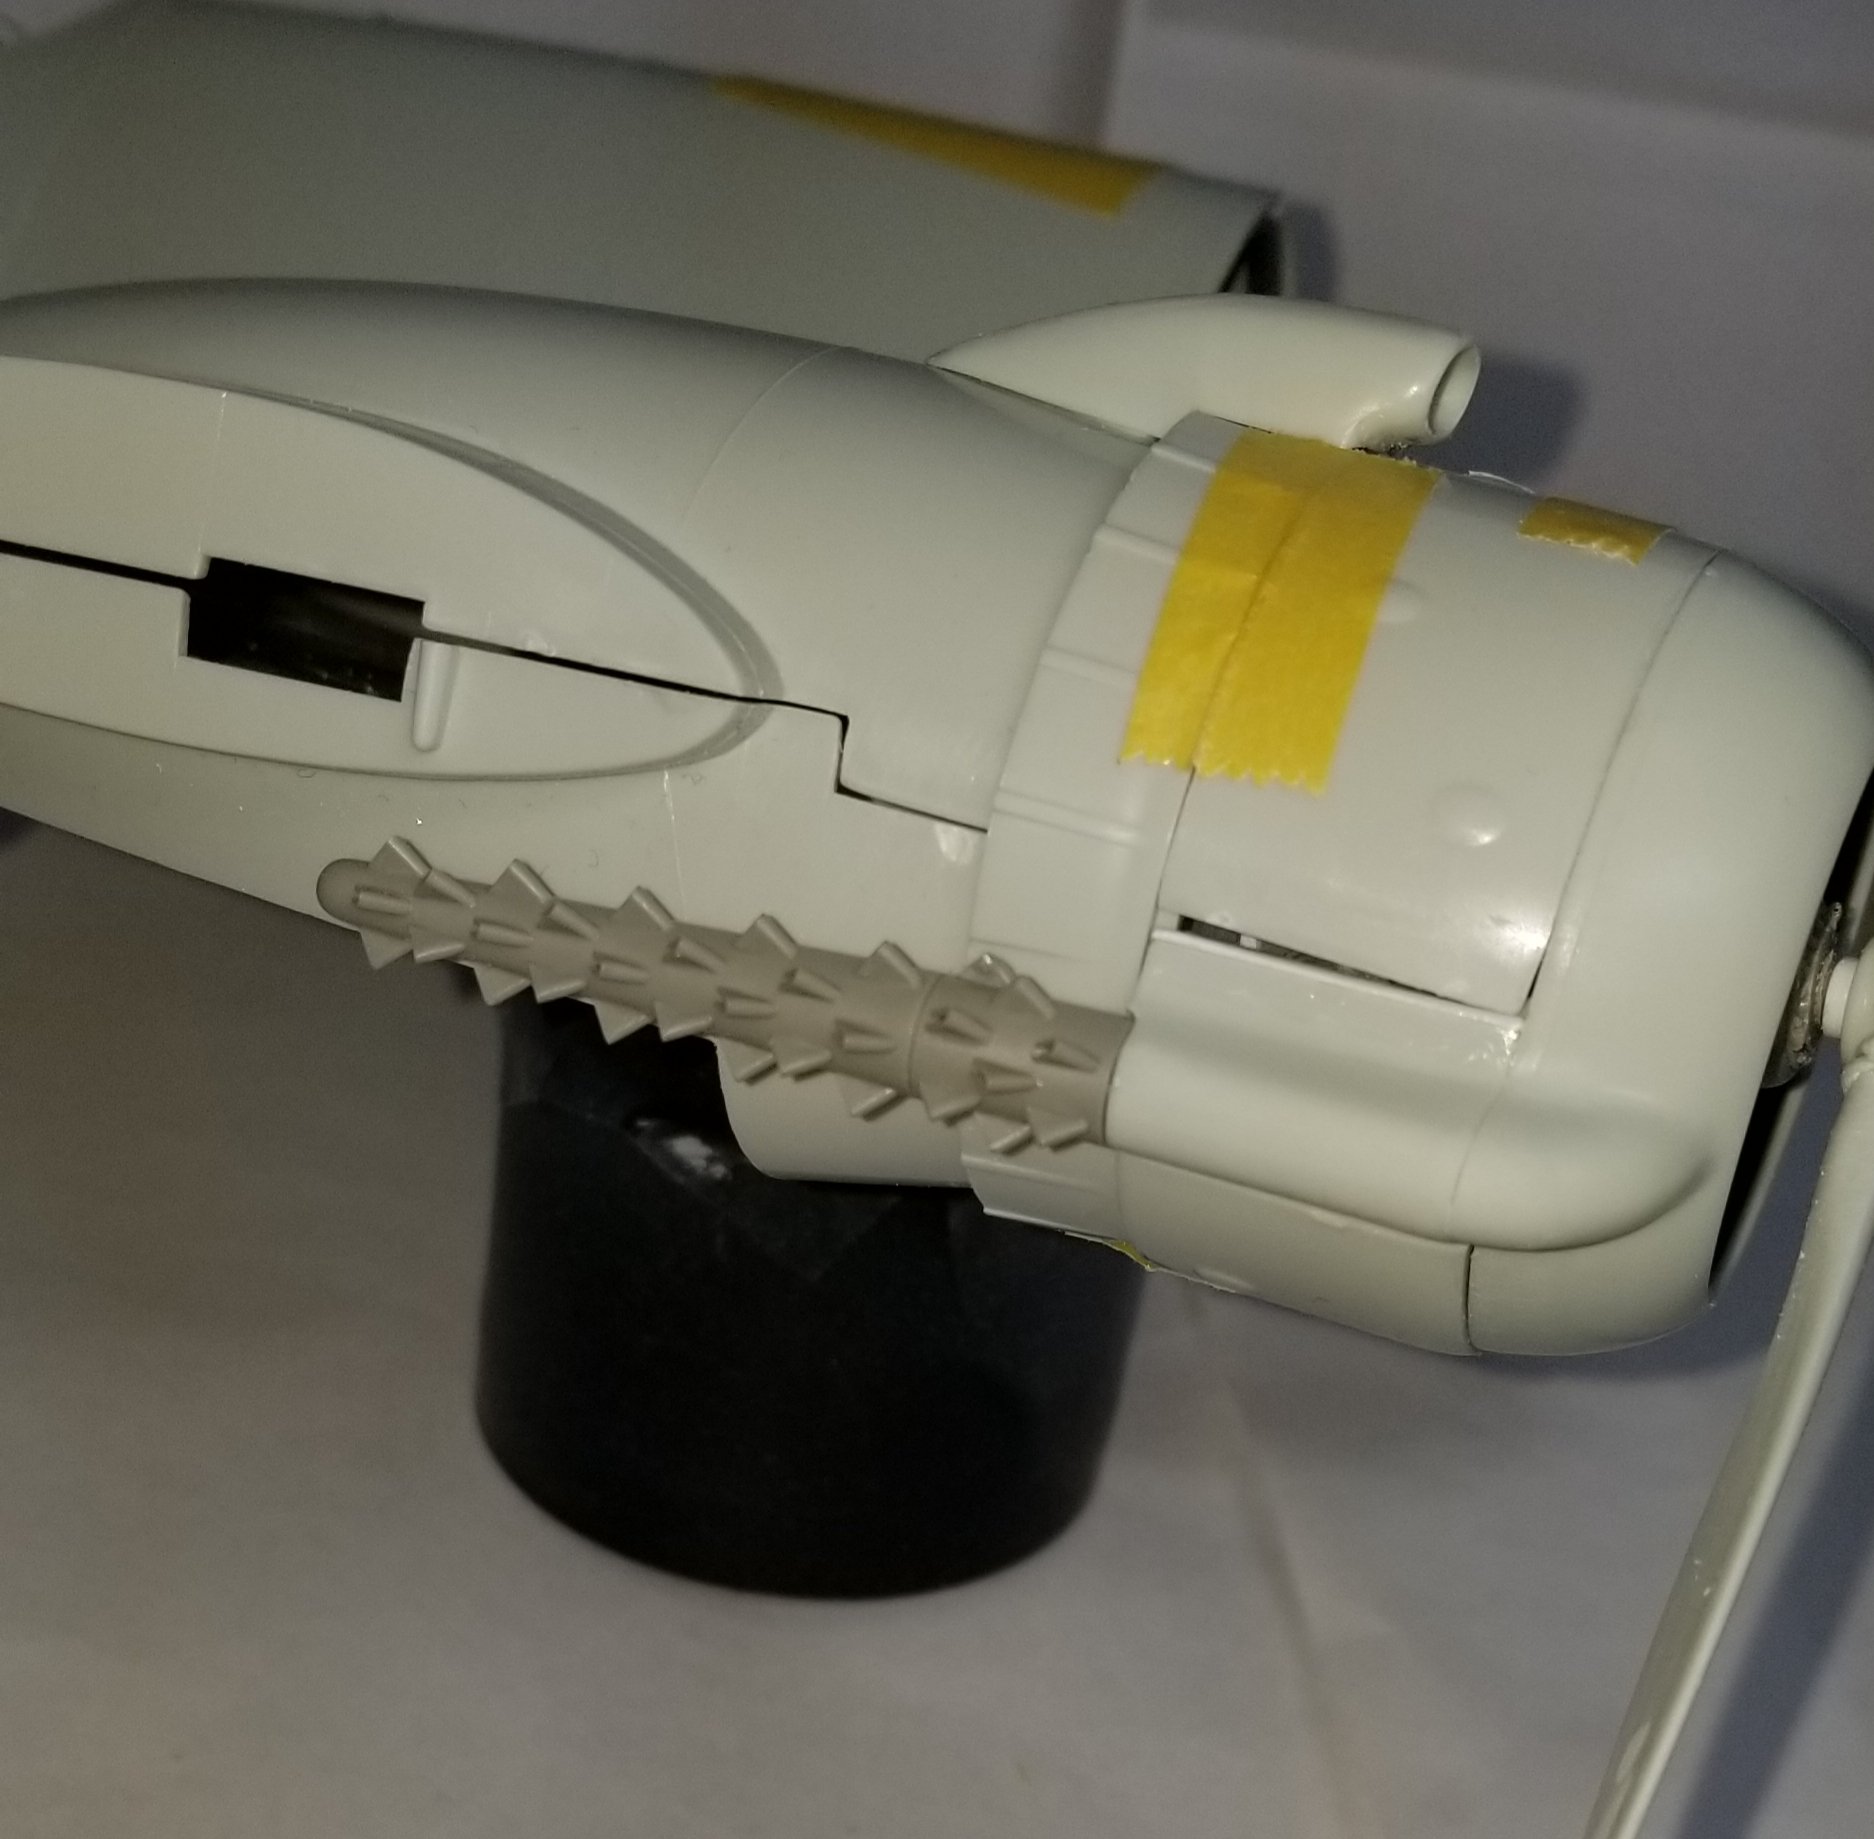
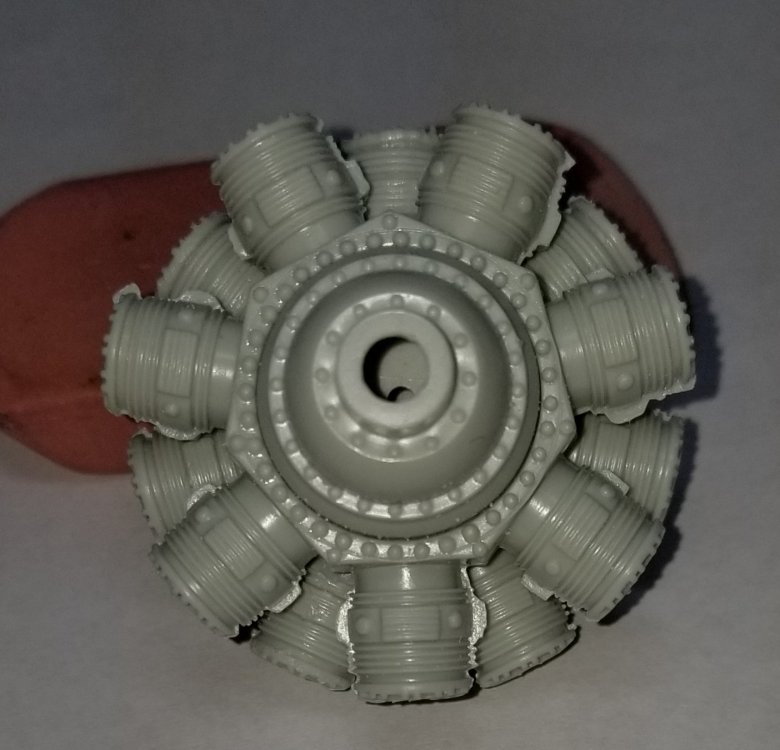
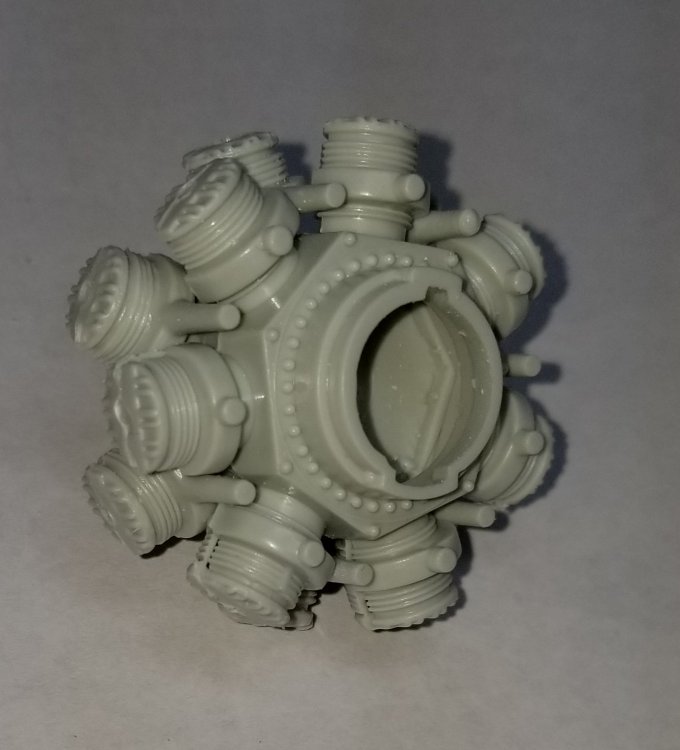
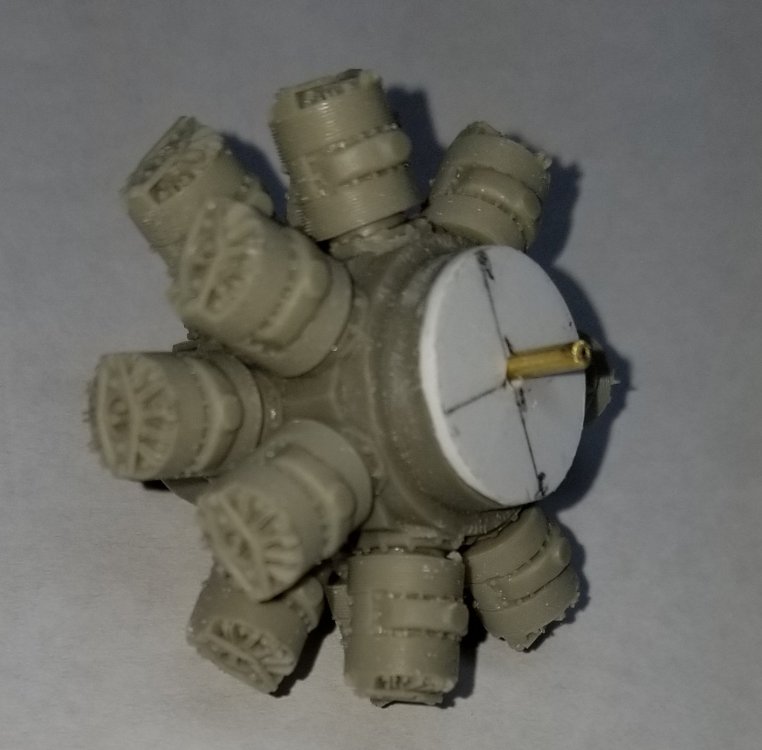
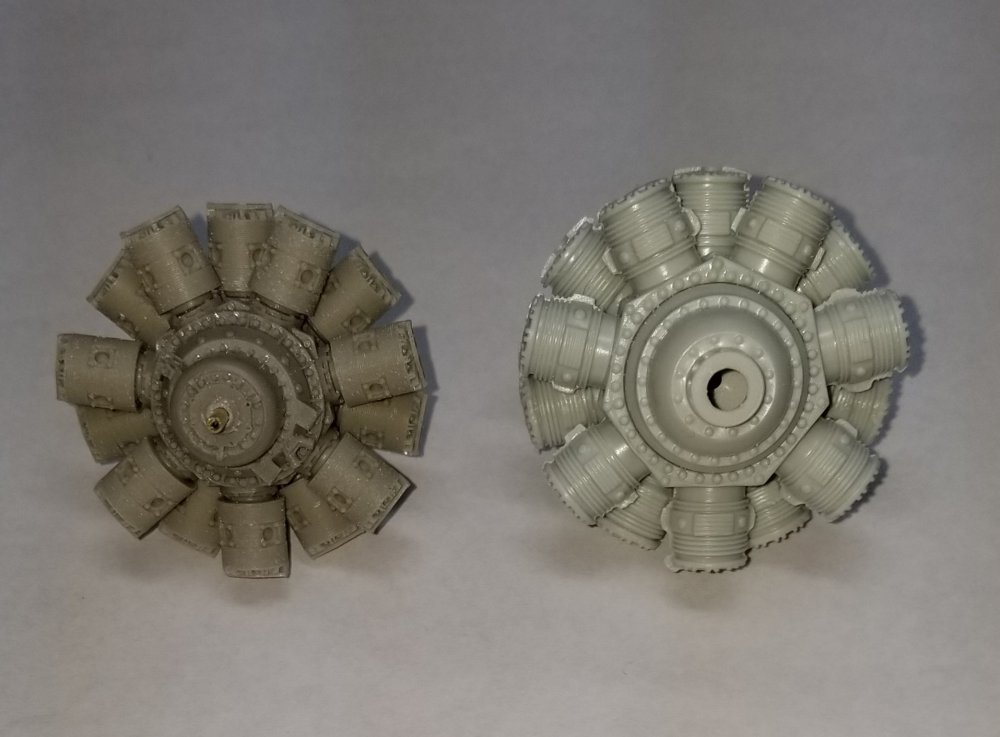
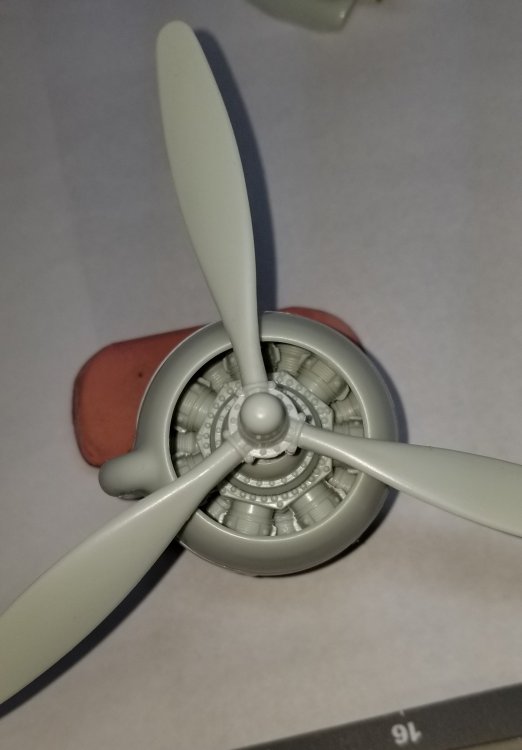
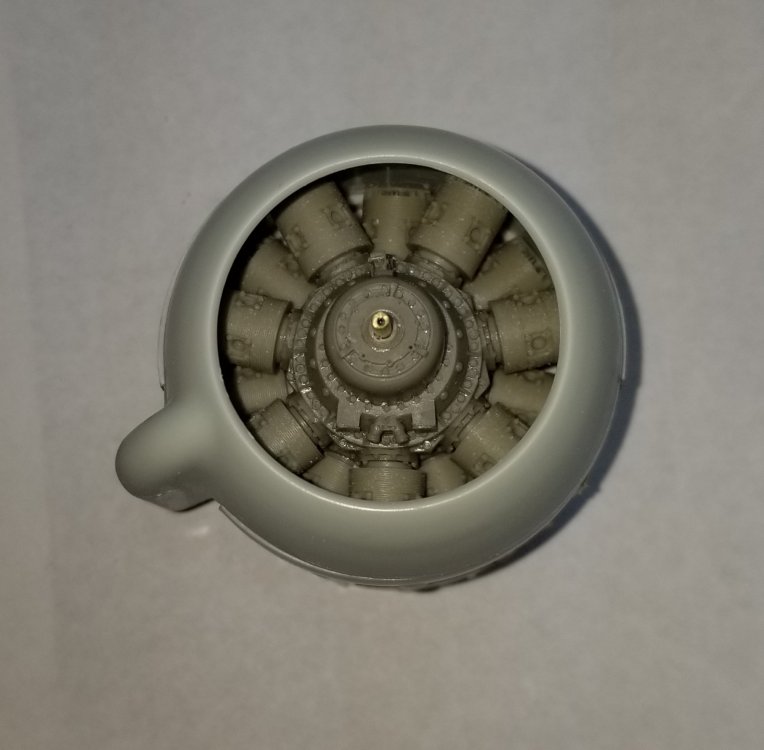
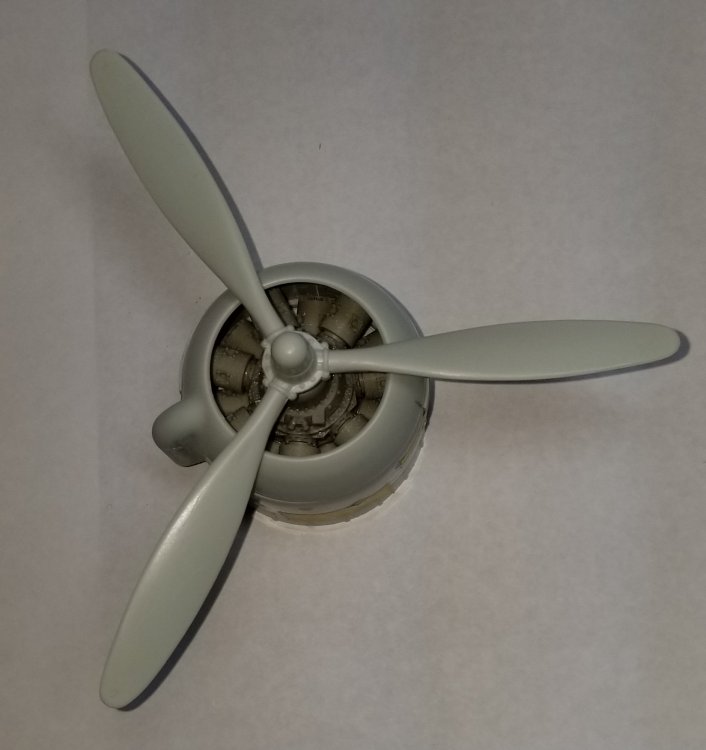
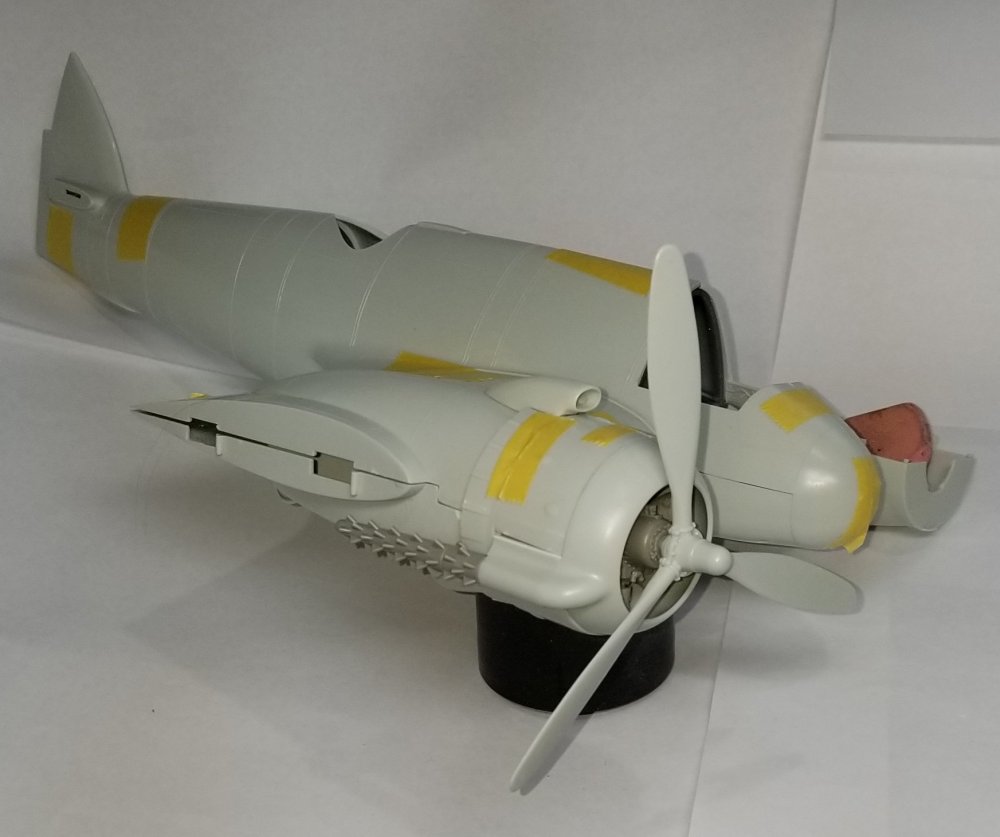
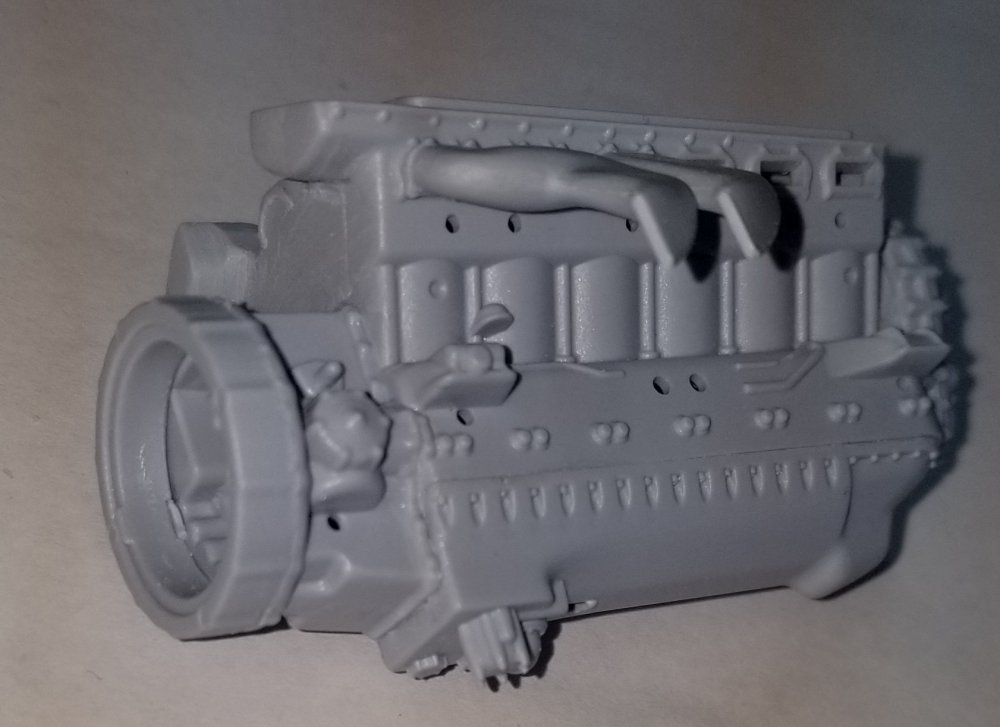
Hey guys Thanks for the comments. It's definitely a challenge, no cockpit or observer details raised panel lines no rivet detail, no wheel well detail wrong canopy and observer/gunner canopy, etc. I started some work on the engines, the kit engines are ok but I think the Vector resin engines are much better. The challenging part is creating from scratch the inner area of the exhaust cowl ring and the exhaust pipes from the cylinders to the ring, YIKES! Here are some pictures. front view of the kit engine. rear view of the kit engine. front view of the Vector resin Hercules engine. Much better detail of the front gear case. I cut off the resin prop shaft, thought it was too brittle. I made a new one out of brass tubing, and ran it through the center of the engine. Had to add a 1/16" (.0625") spacer to the rear to get the engine to sit in the right place. rear view of engine showing the spacer. resin engine on the left, kit engine on the right. kit engine, cowl and prop. kit cowl ring with resin engine. I made a circle out of plastic card to hold engine in the nacelle. I'll show a picture later forgot to take one, oopps! resin engine with prop. It looks off because it is just sitting together not finally attached yet. this is the whole thing temporarily assembled to show what it will look like. view of the Quickboost porcupine exhaust. Need to add the two pipes in the front of the cowl ring (they were used to bring cool air onto the exhaust) also the pipes coming out of the rear of the porcupine exhaust that go into the nacelle (these lead to the heating pipe in the cockpit. They were only connected to the interior on the starboard side but were on the port side too. These pictures are of the rear tail planes from Model Monkey. They are the latter version that were increased to 20 feet 5 inches, and giving them a dihedral of 12.5 degrees. these are really nice and will help turn this beast into a proper Beaufighter. Well that's it for know I'll have more later, but now it's time to get back to work. Ron G


-
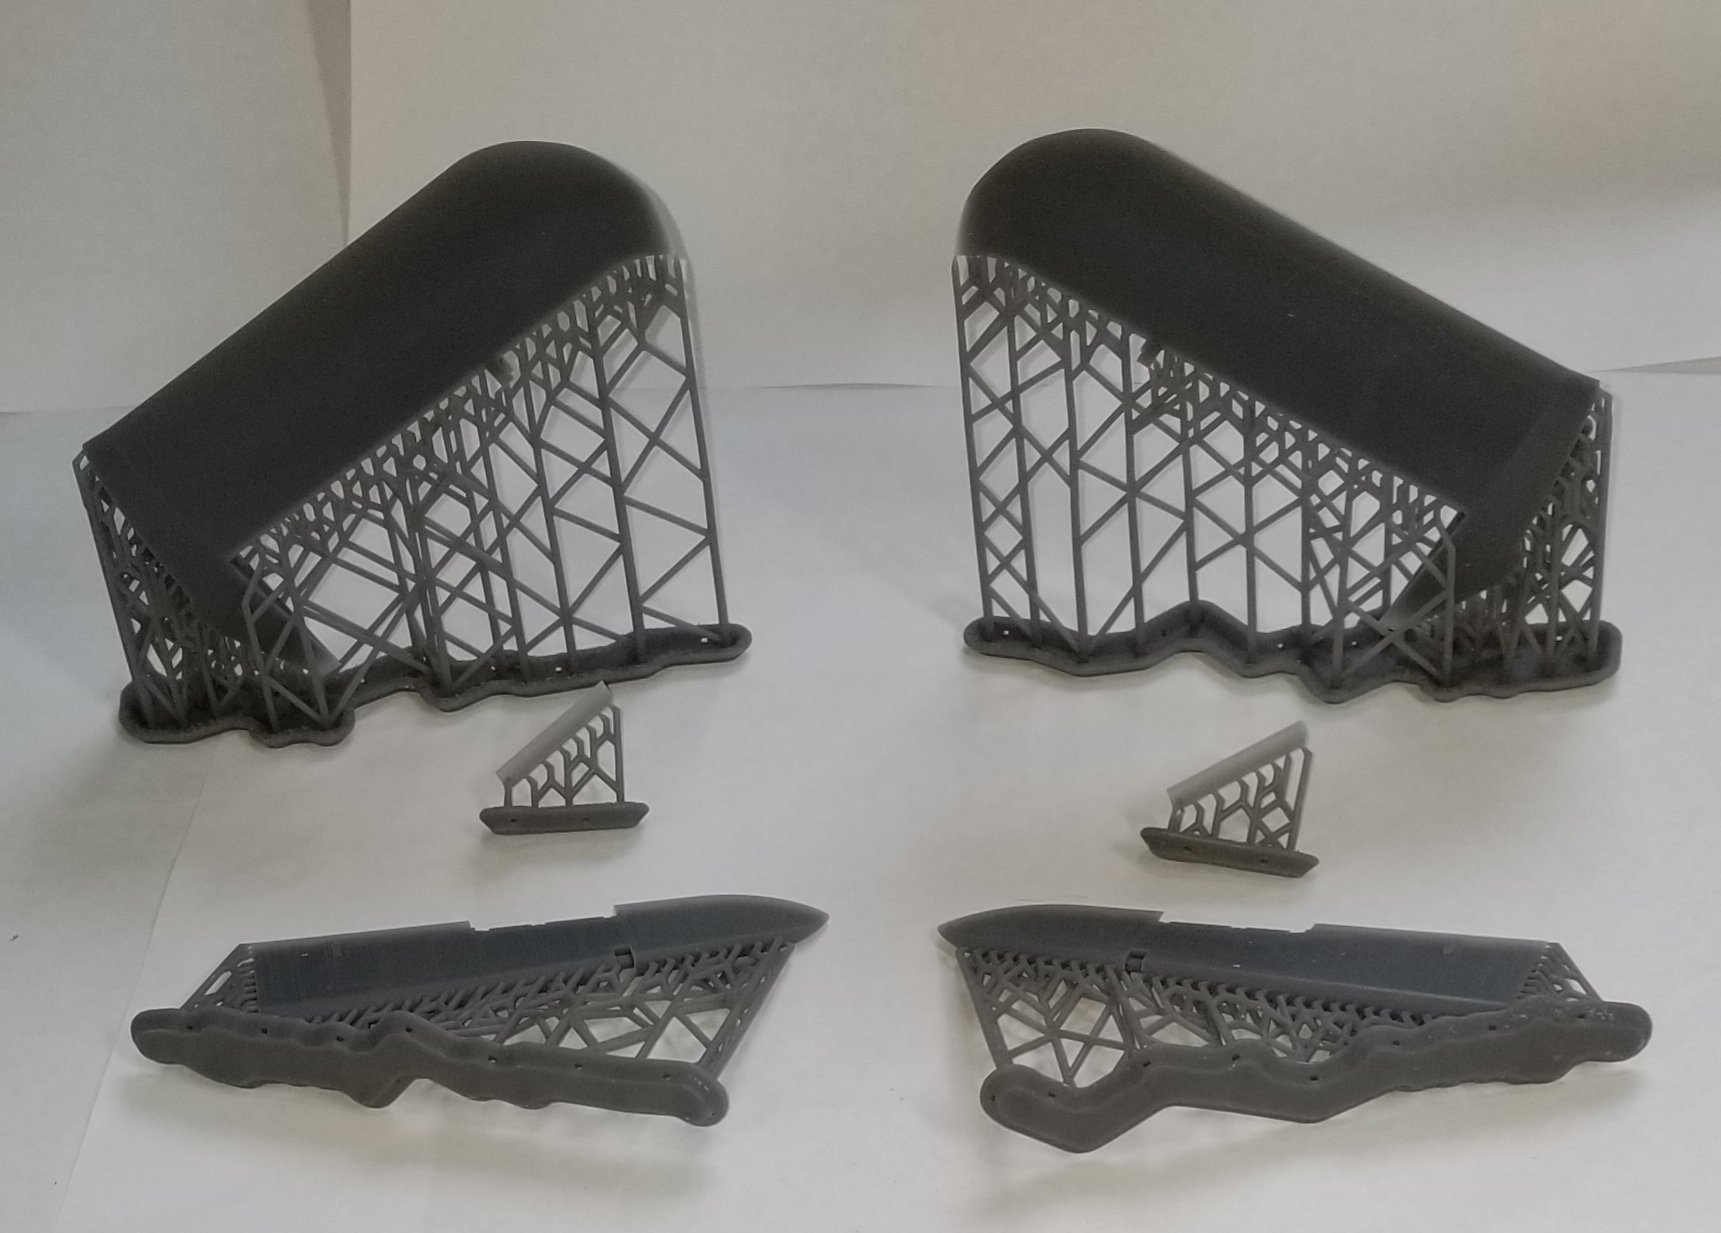
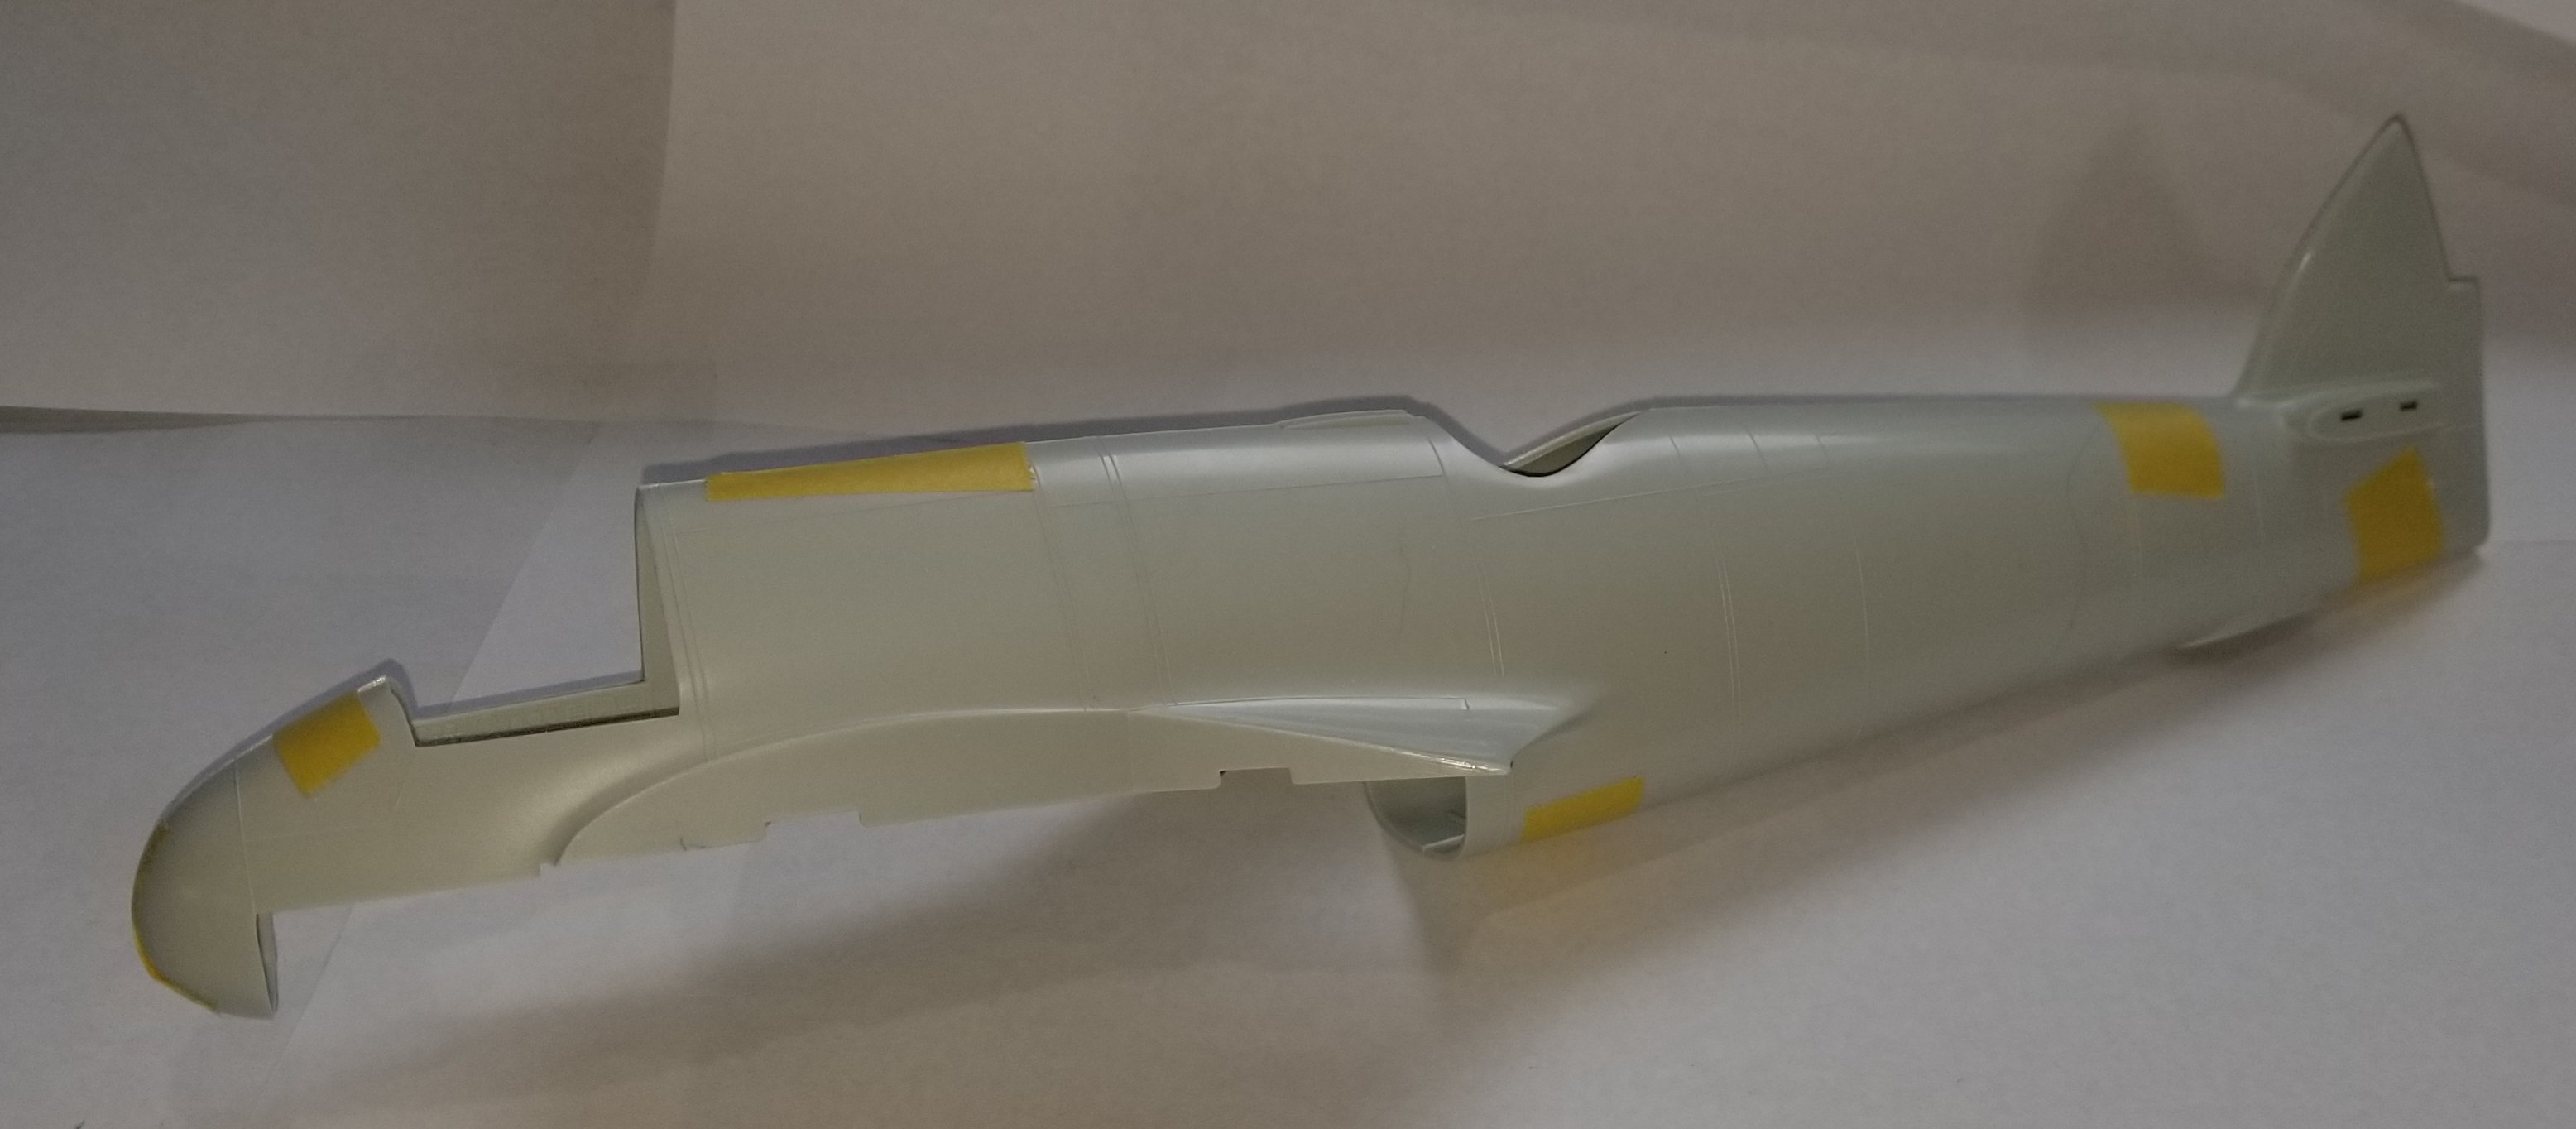
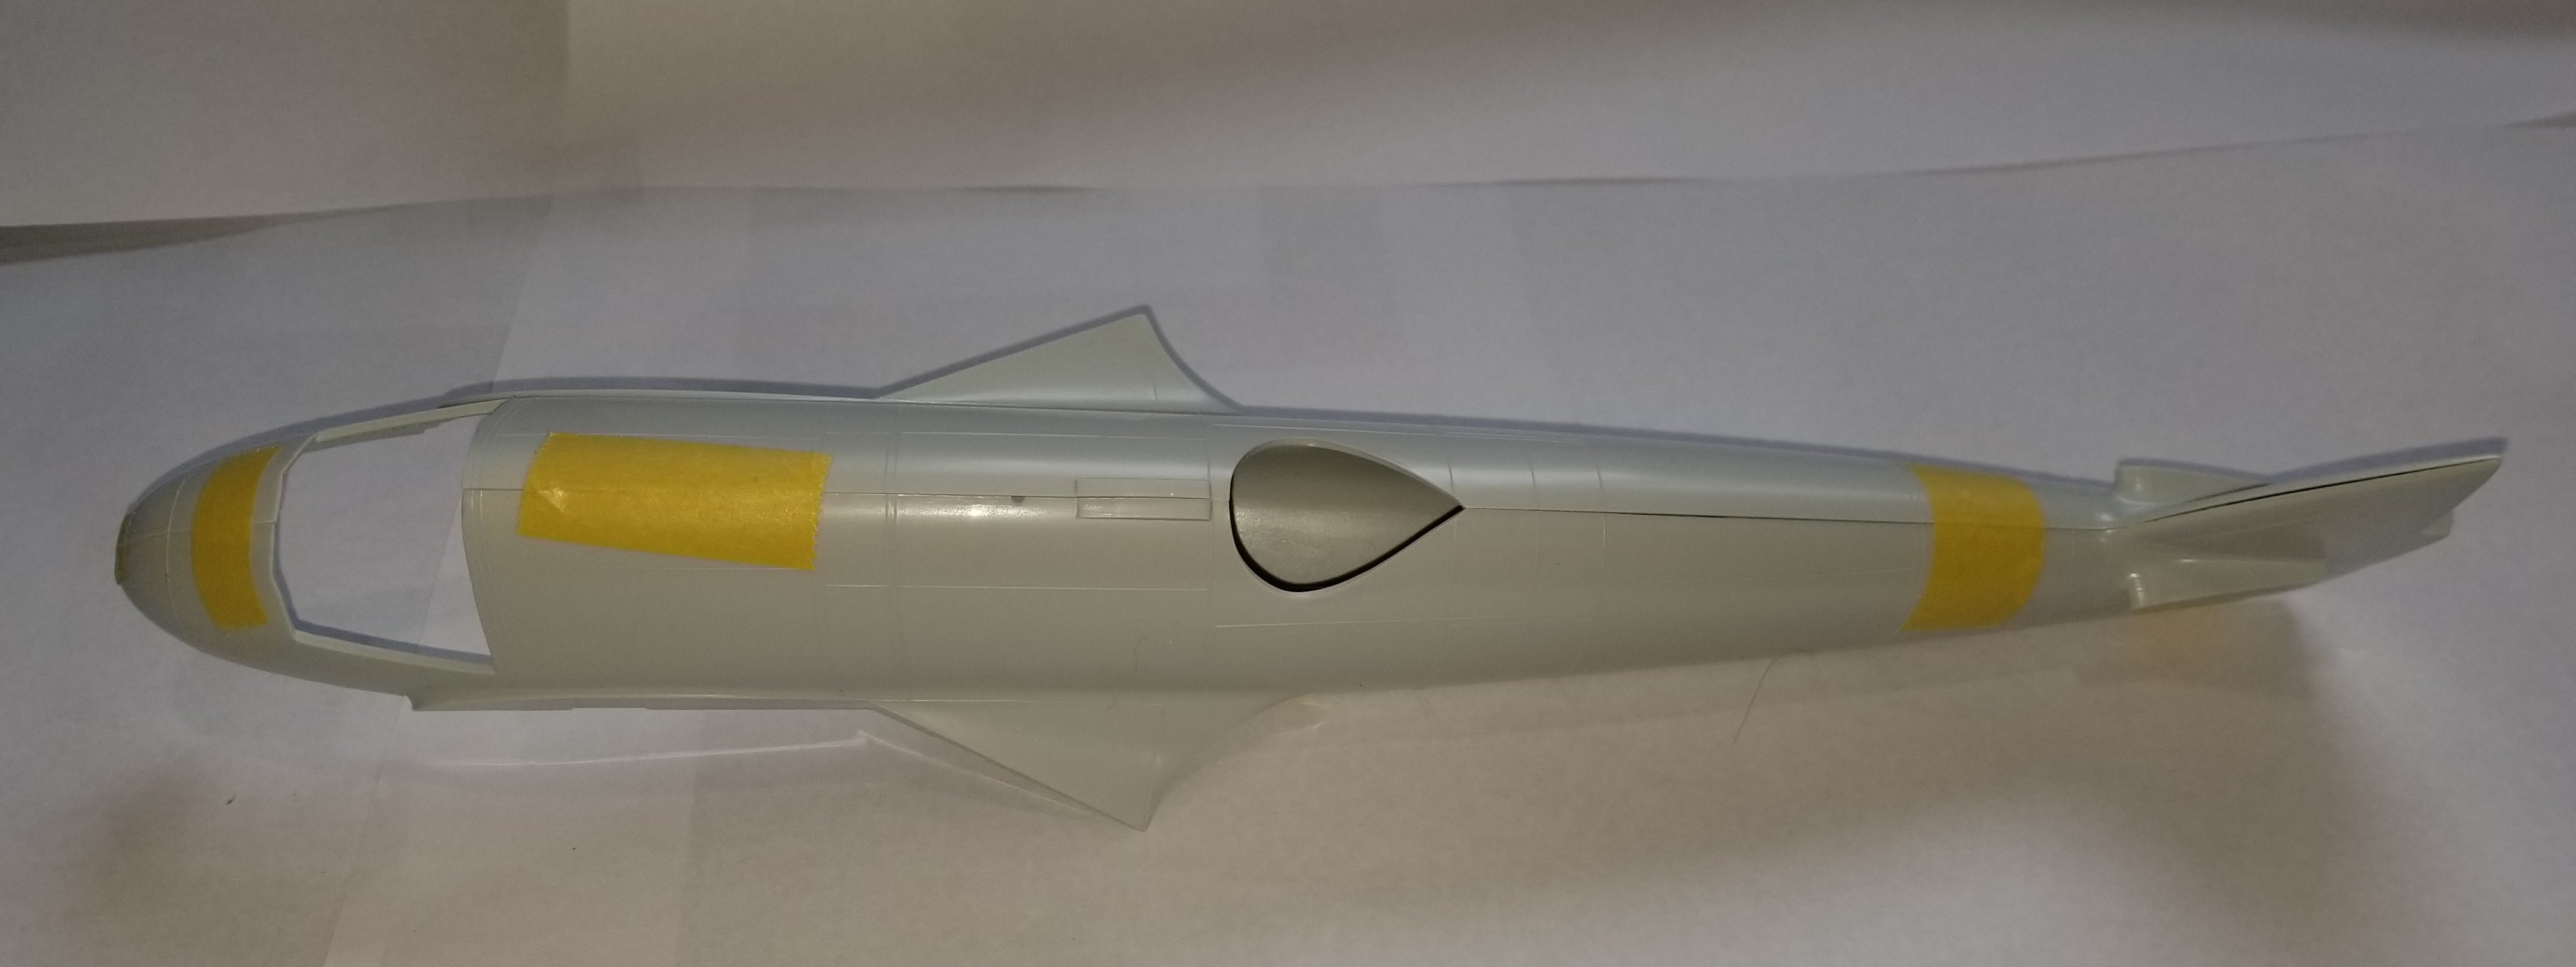
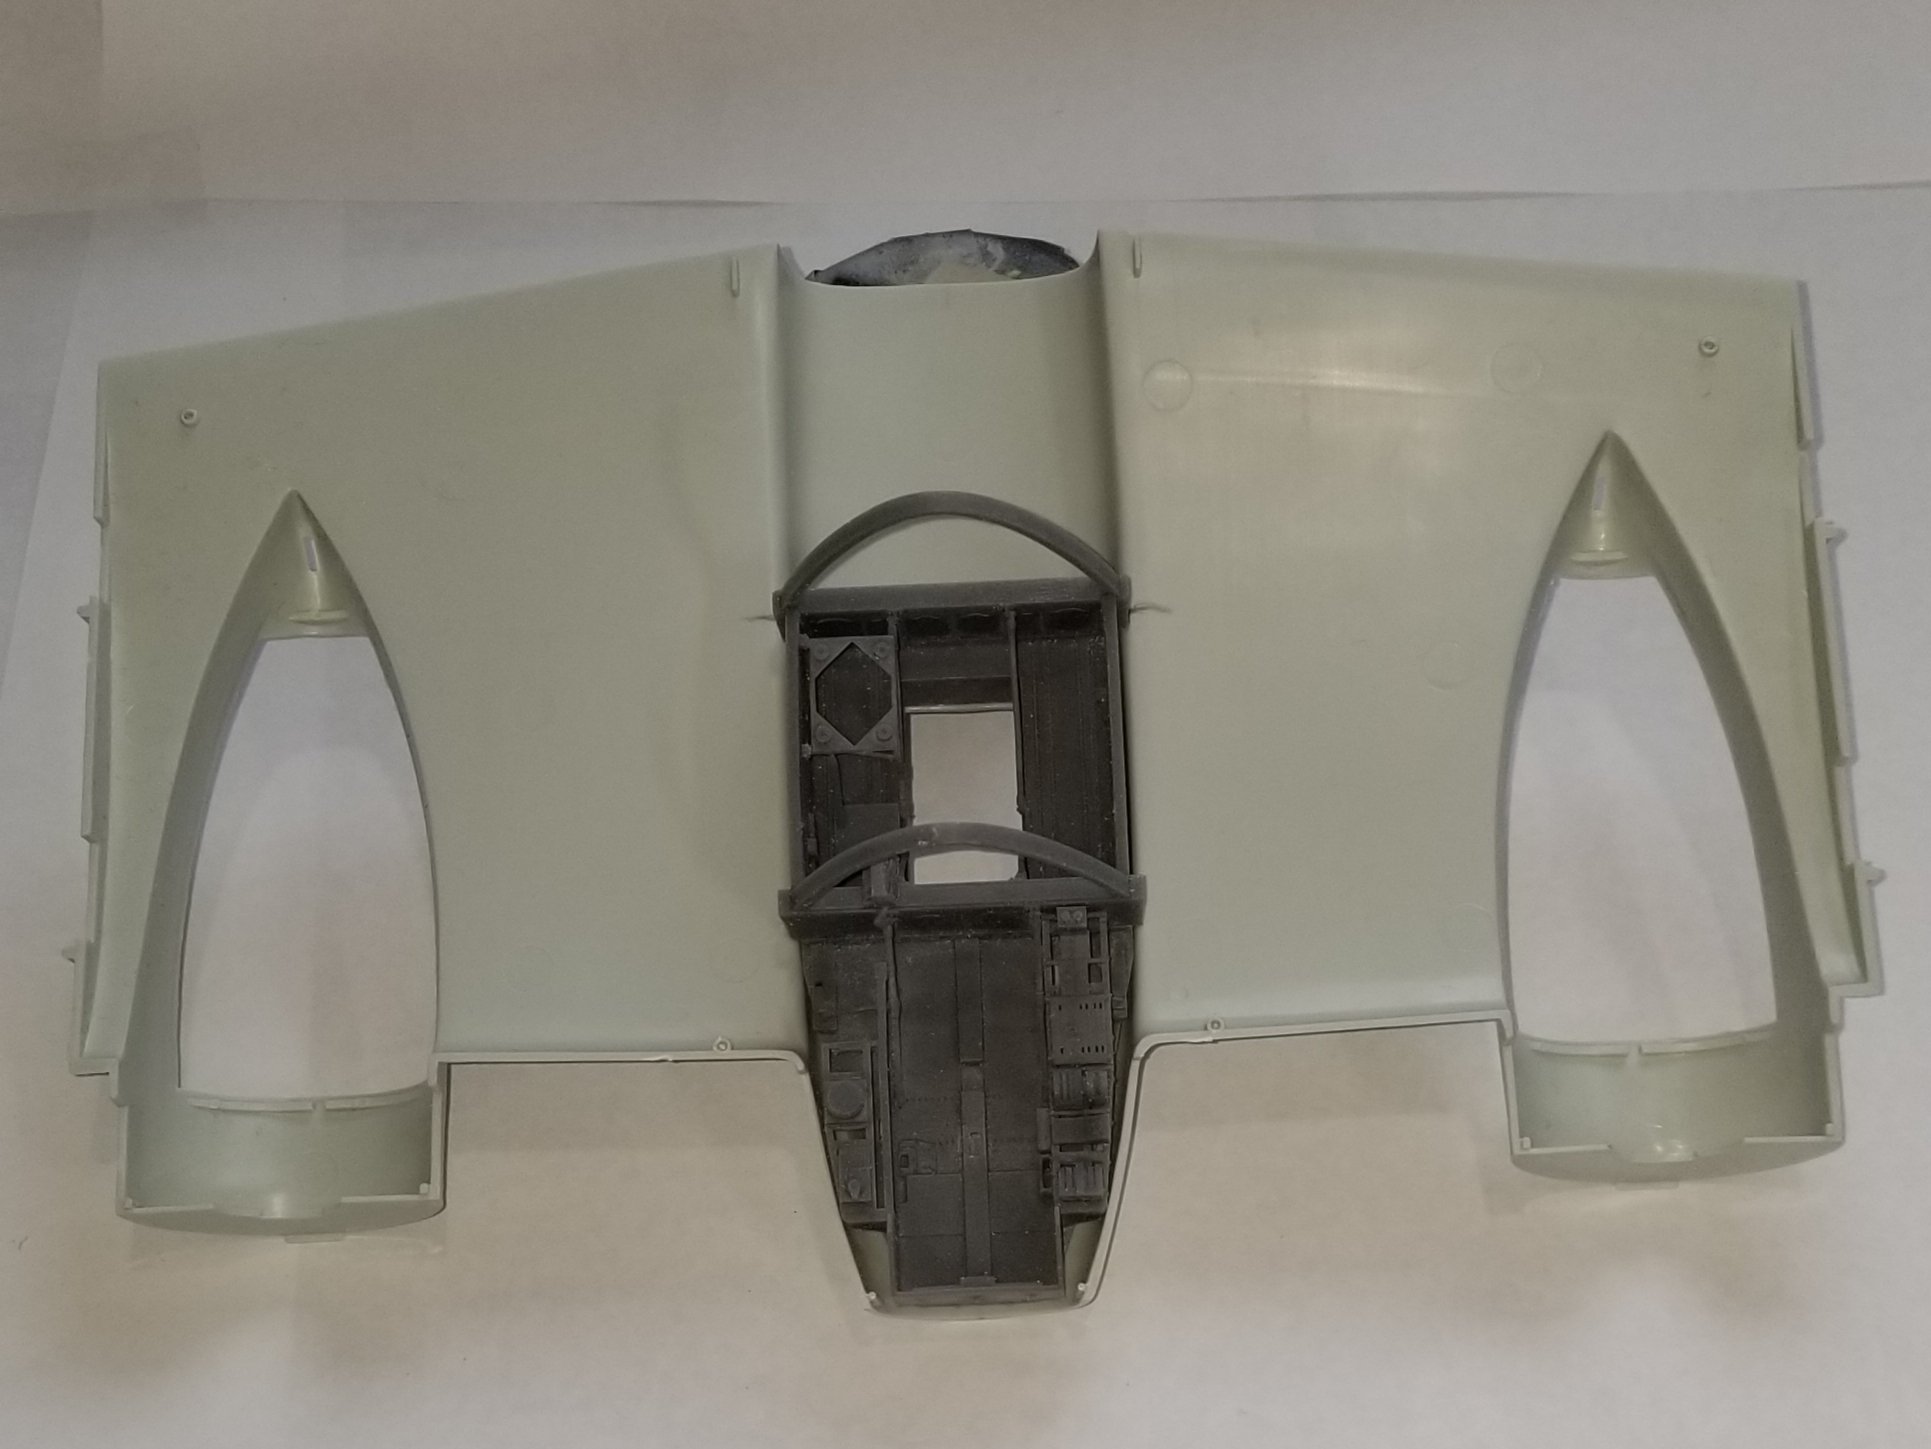
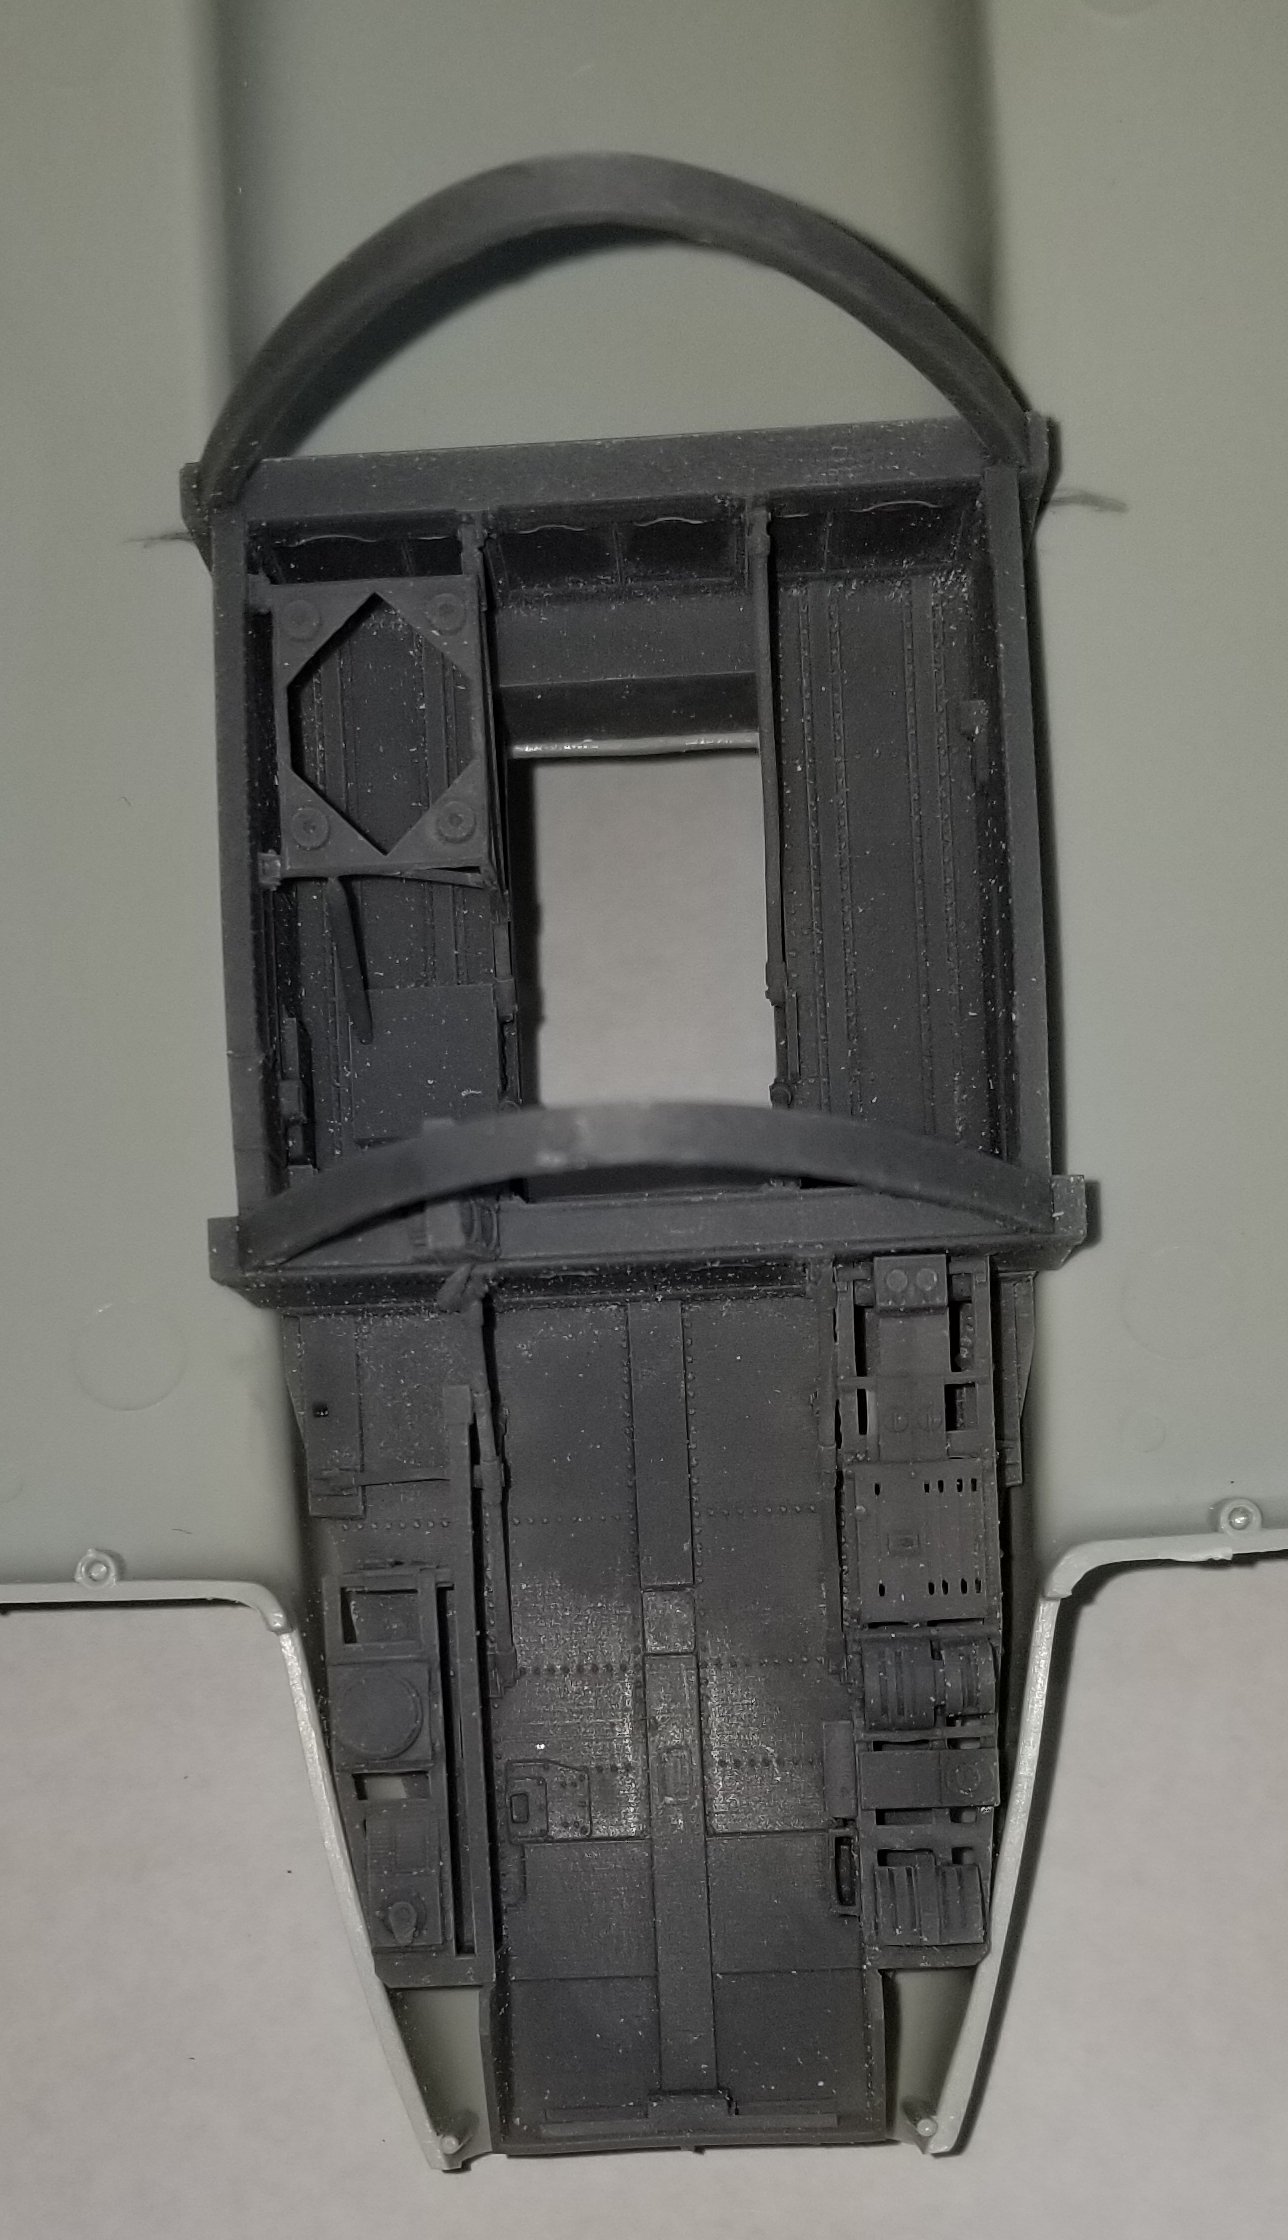
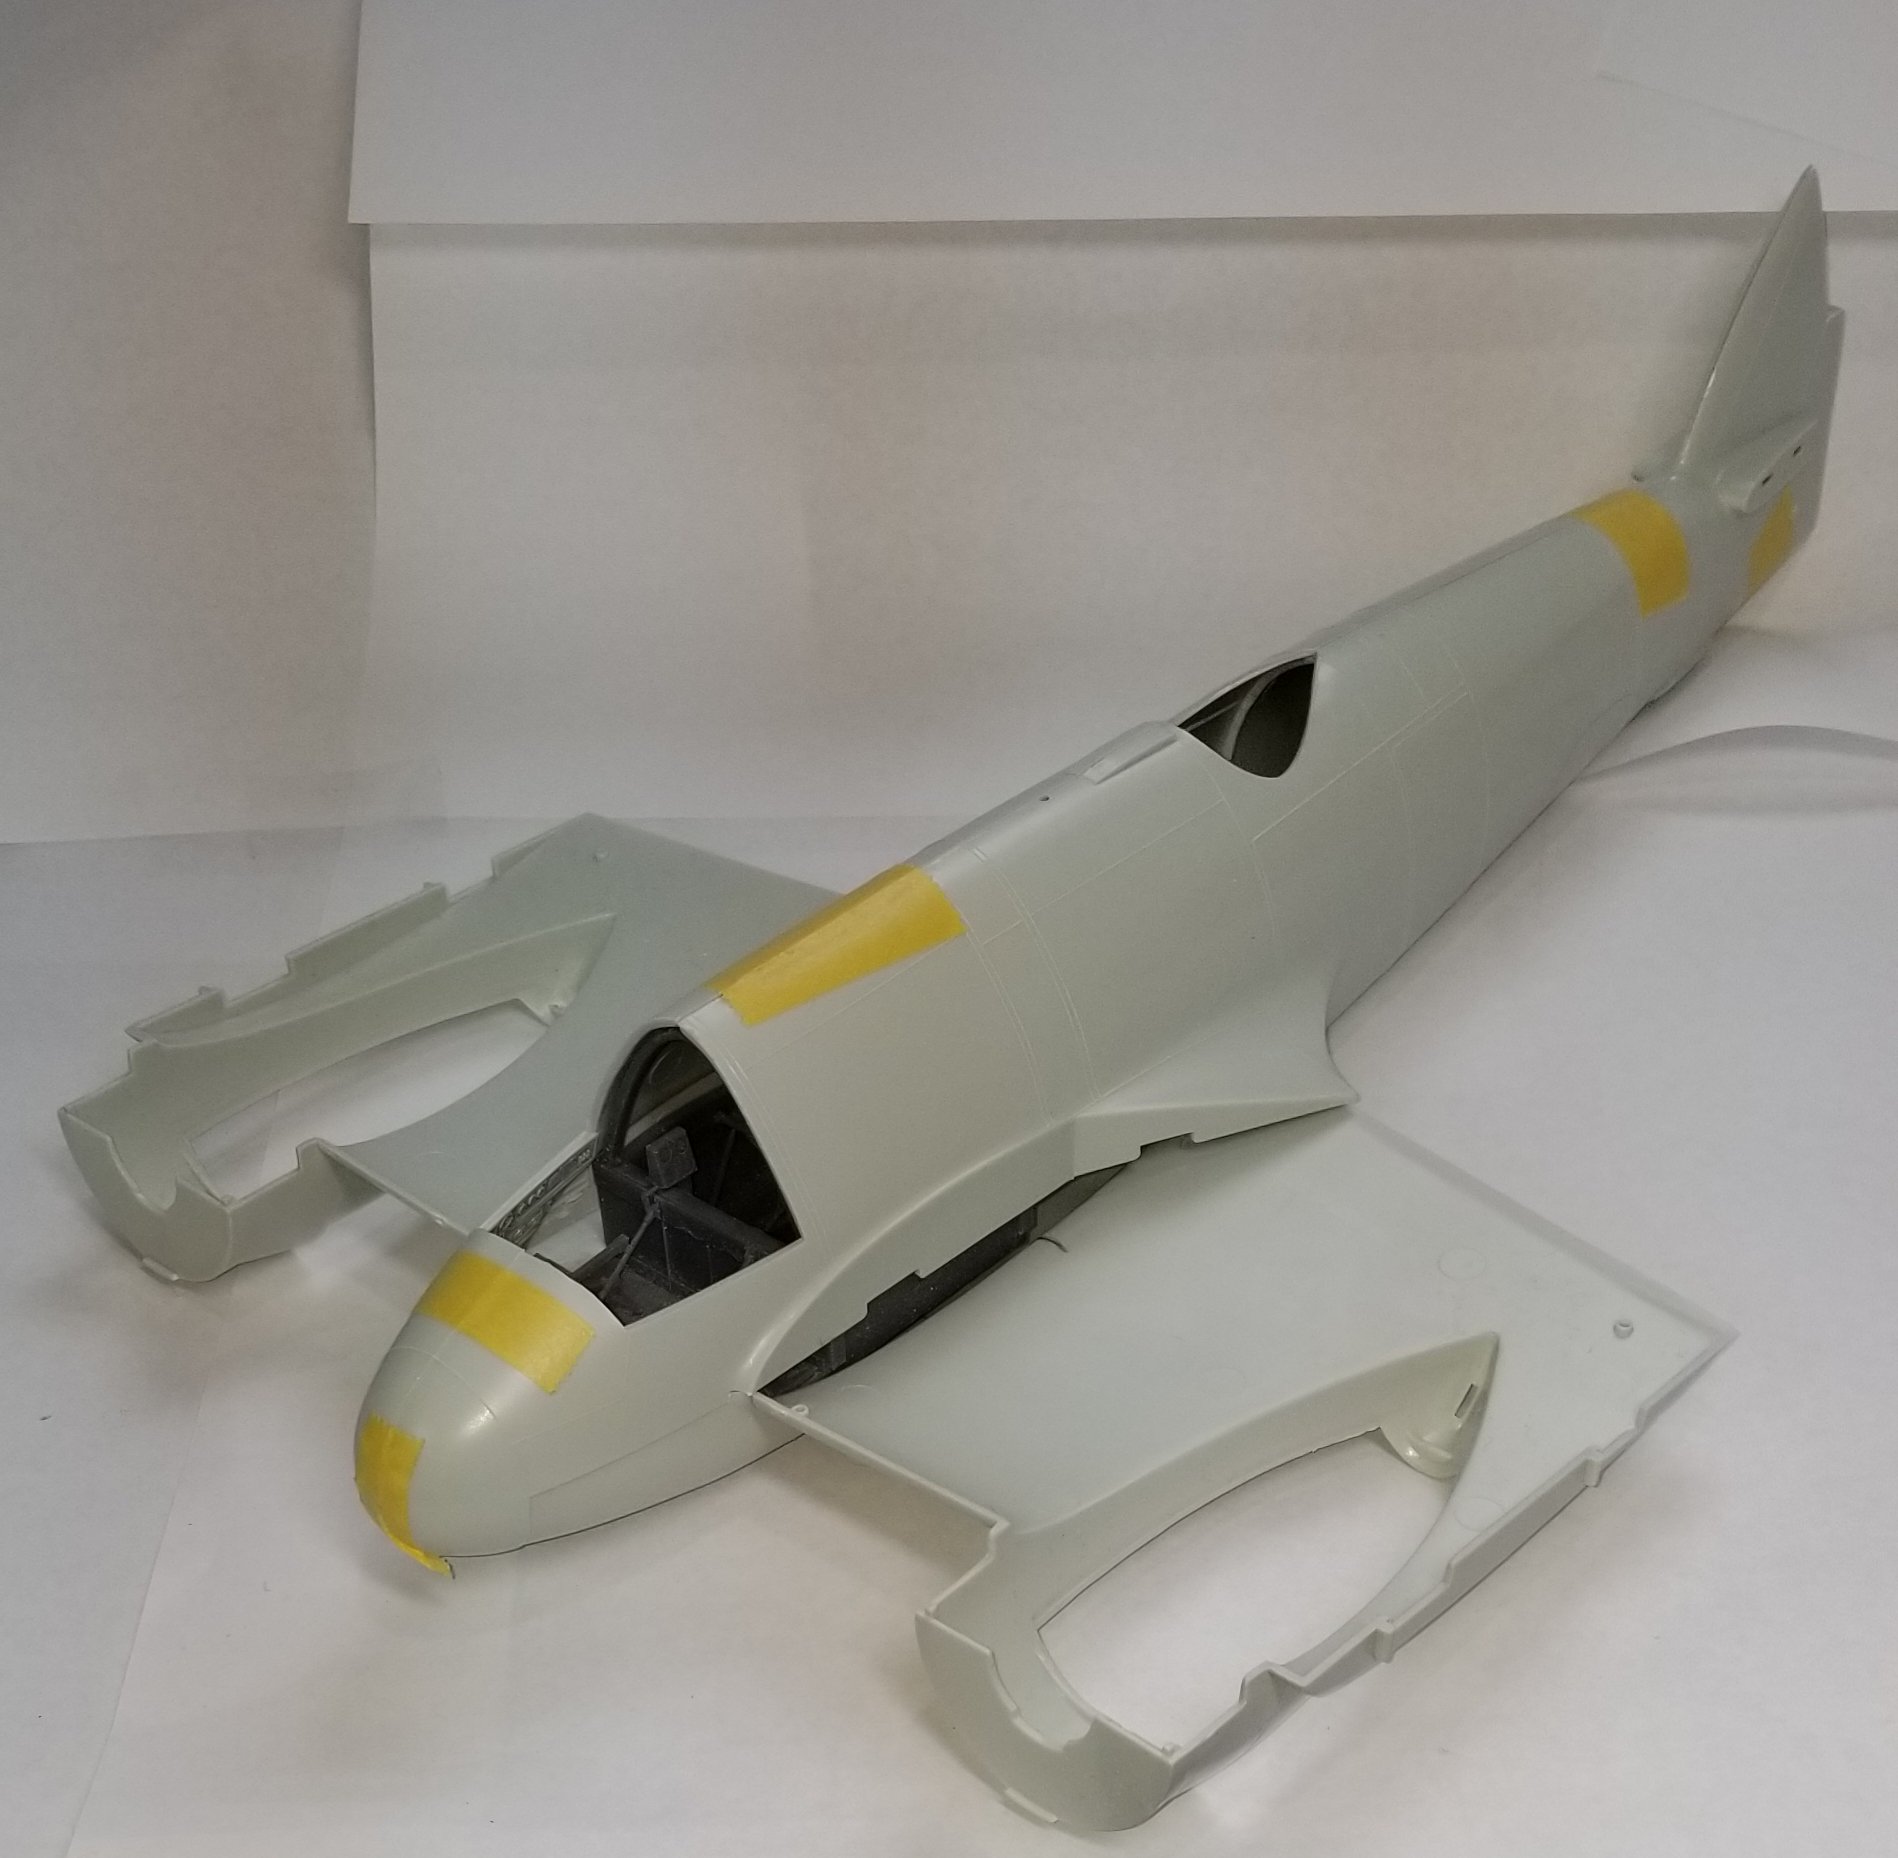
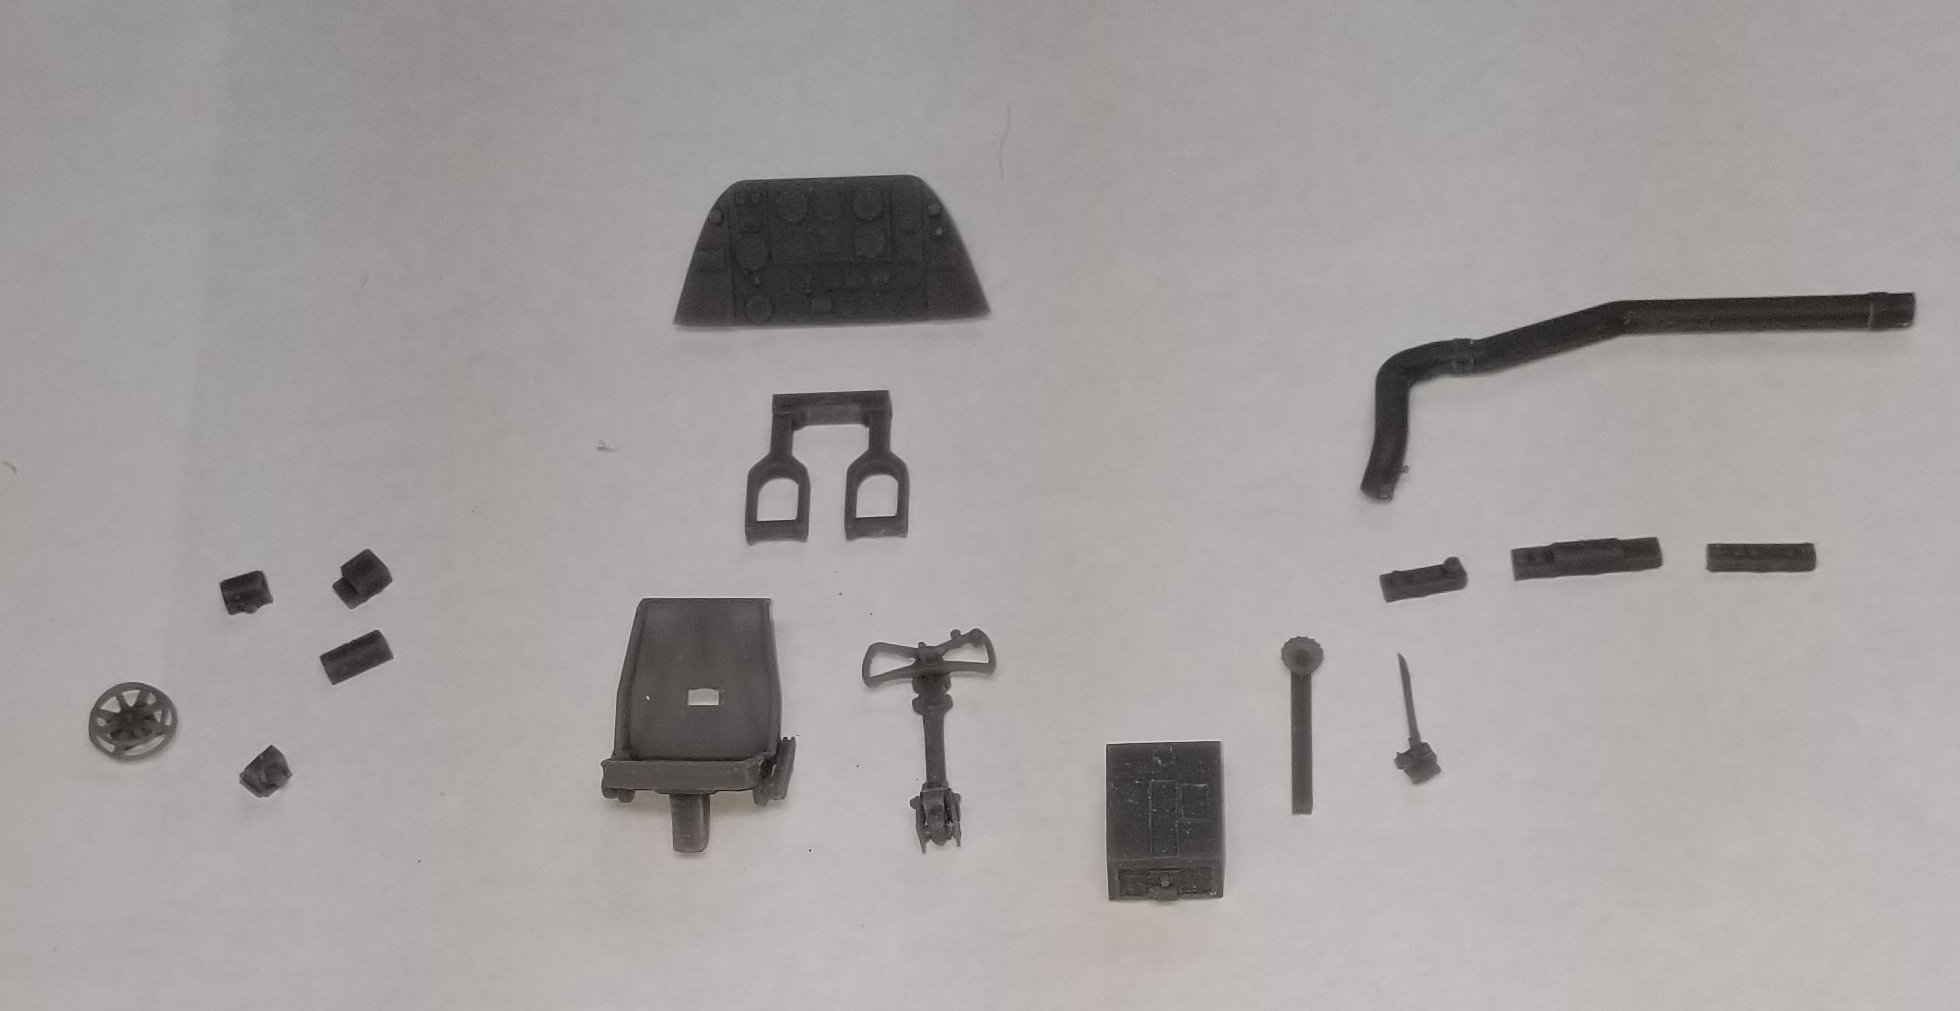
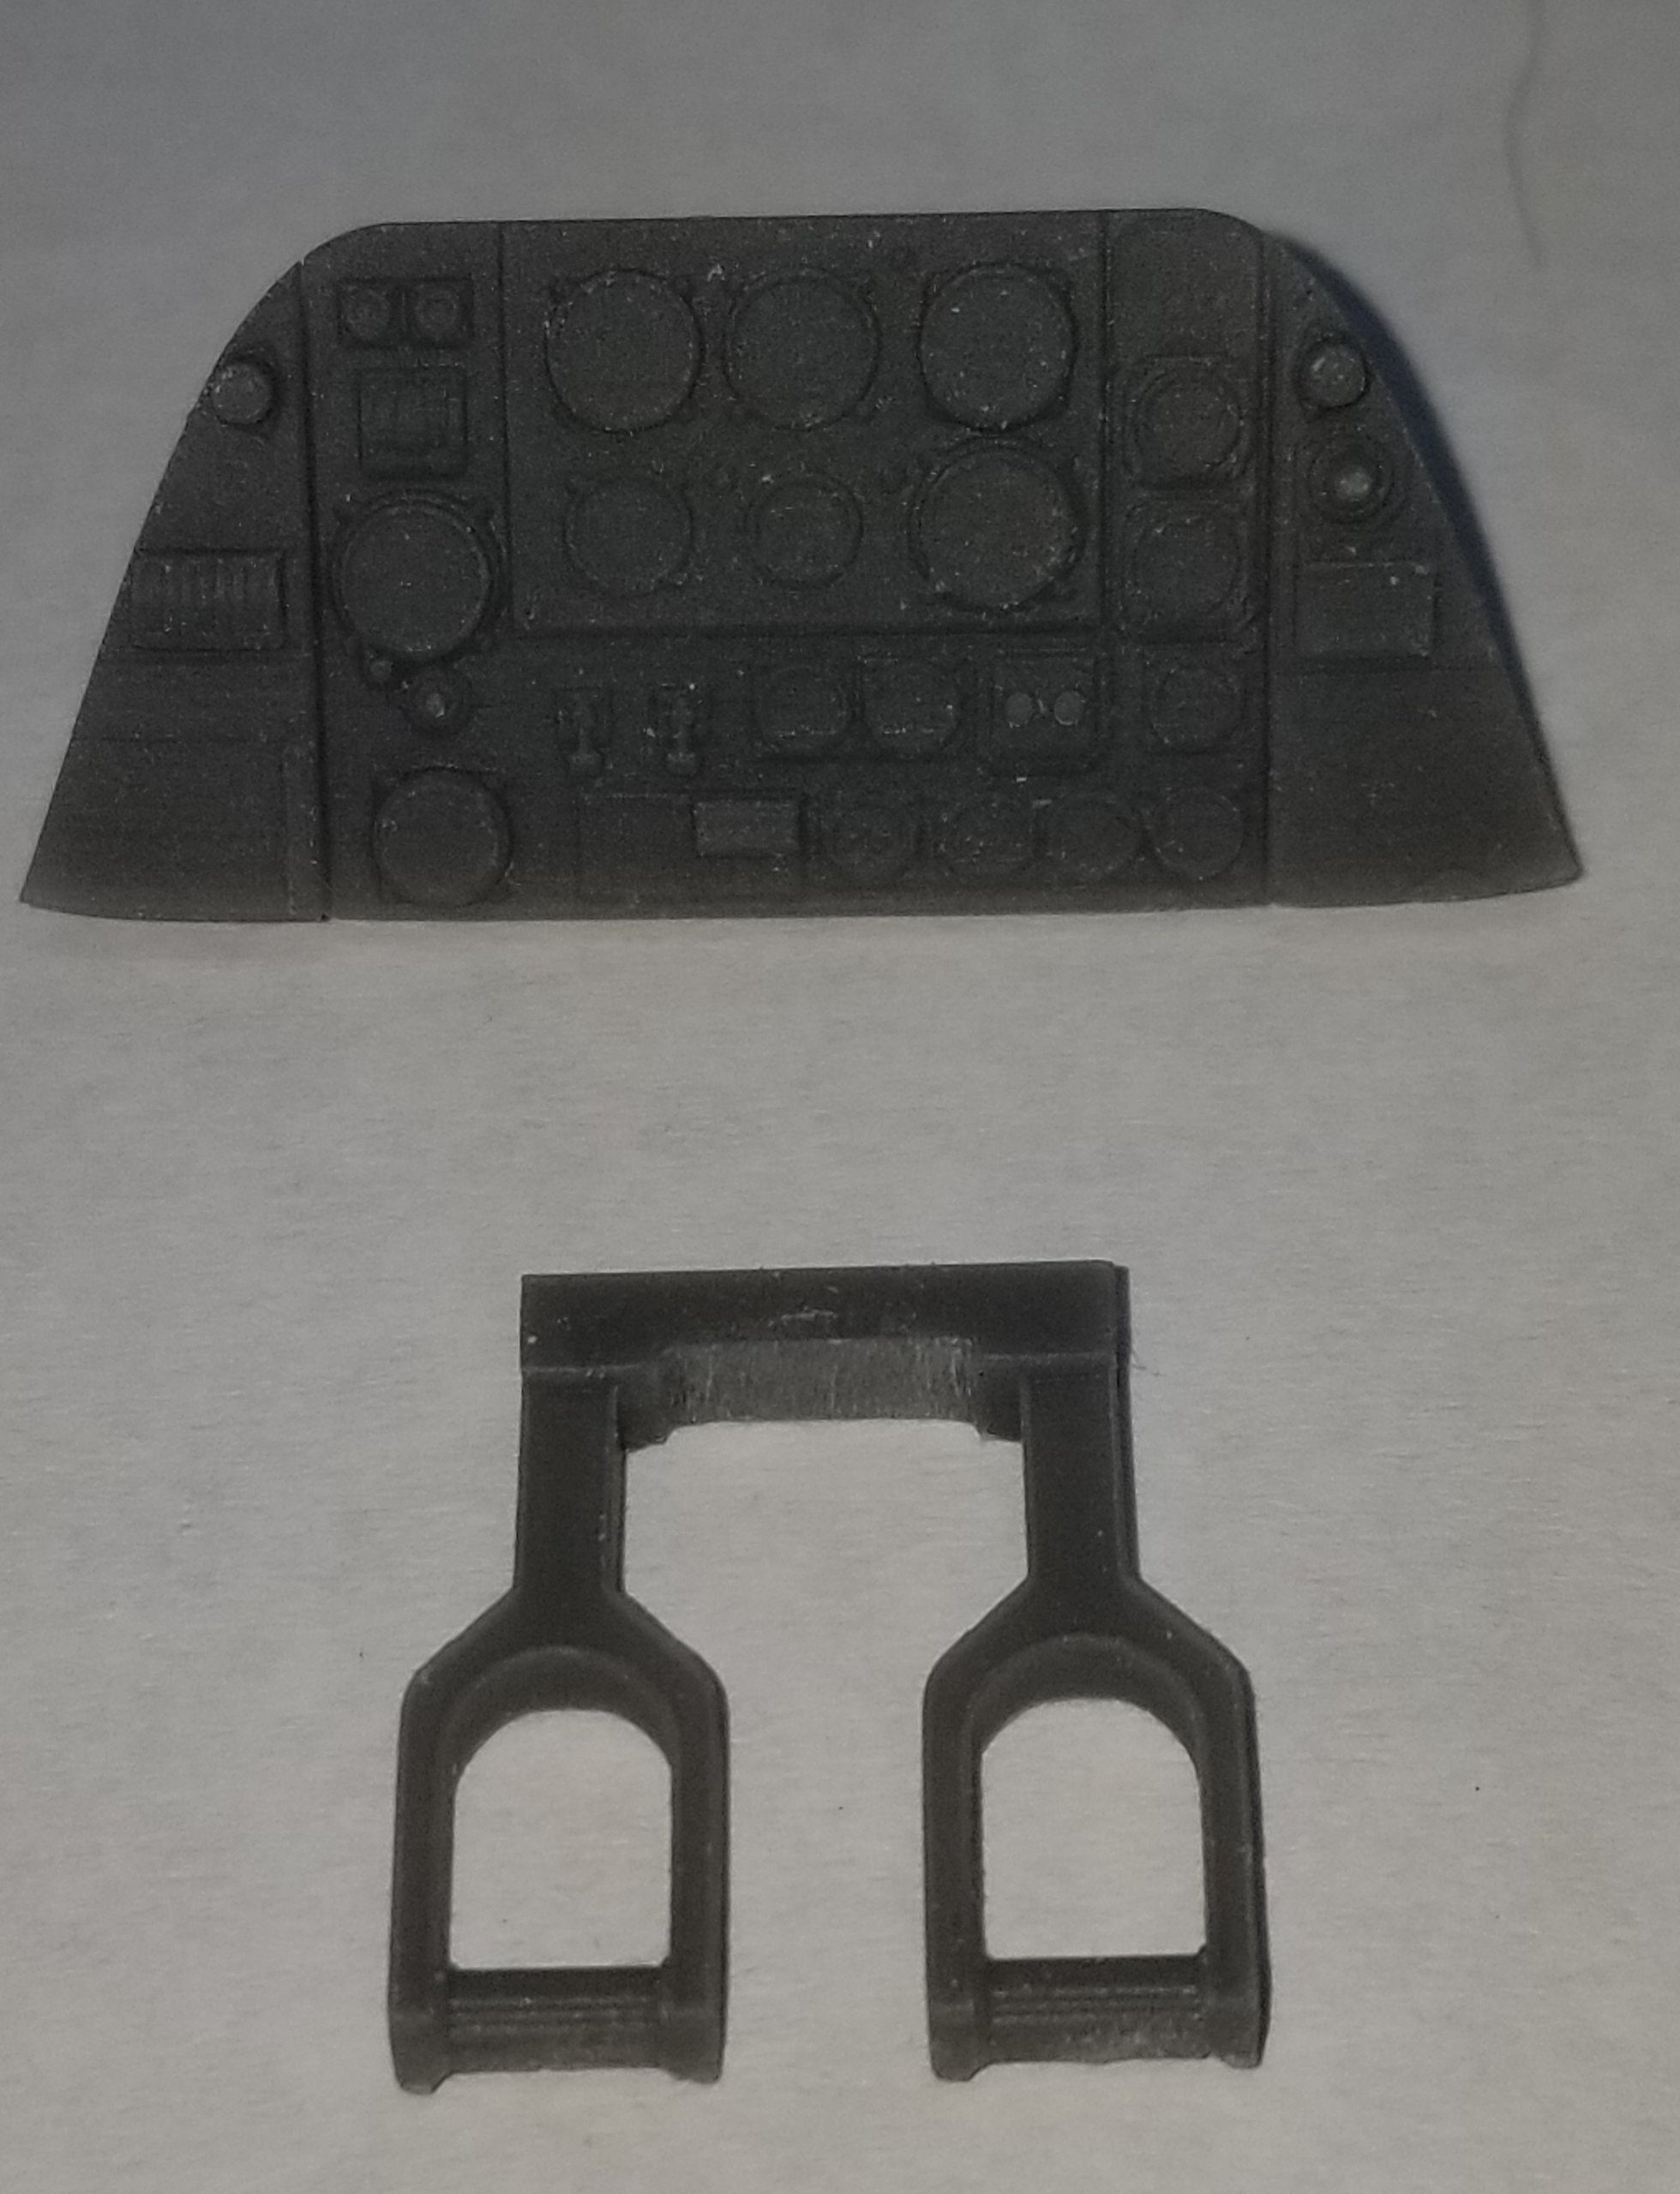
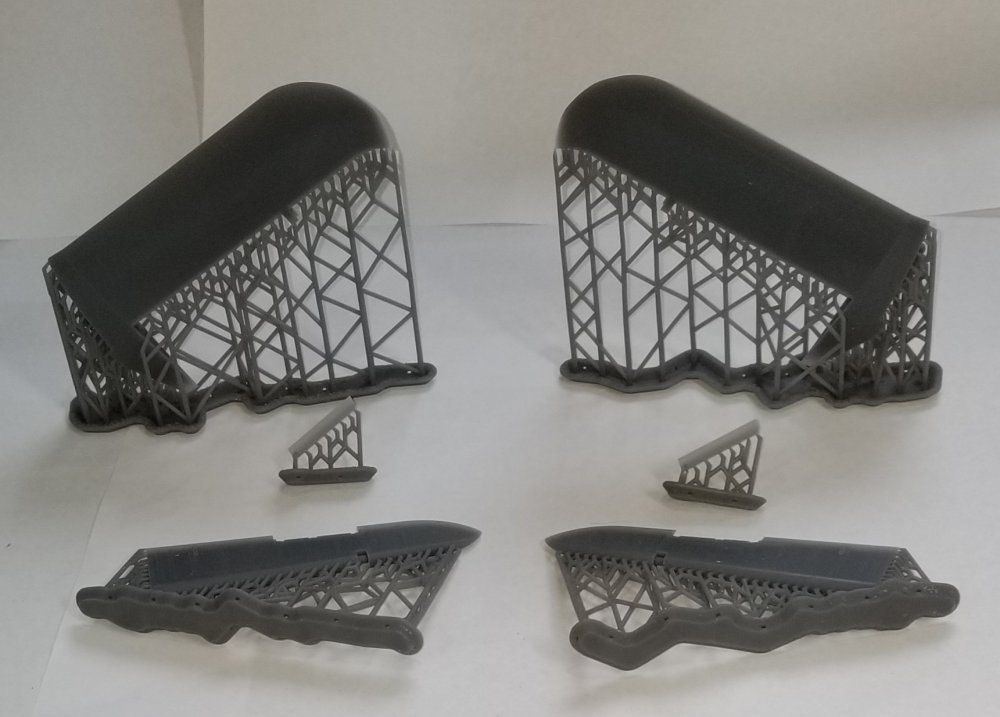
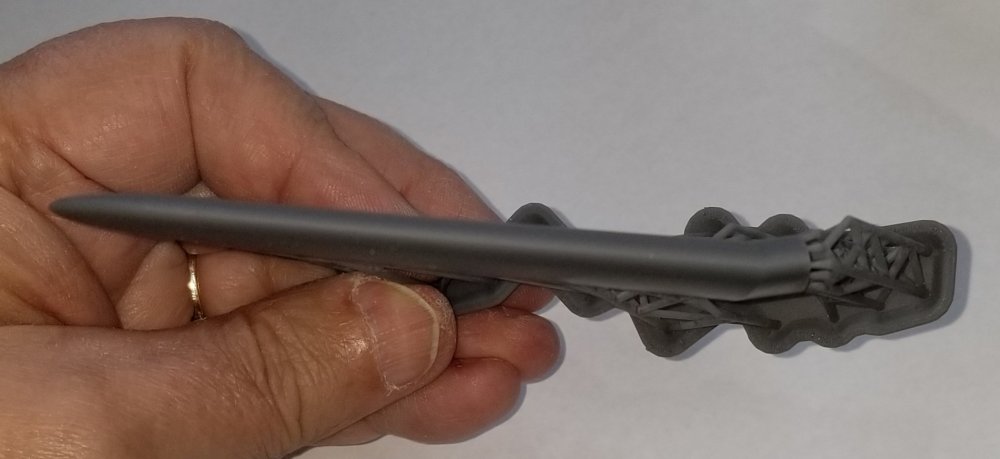
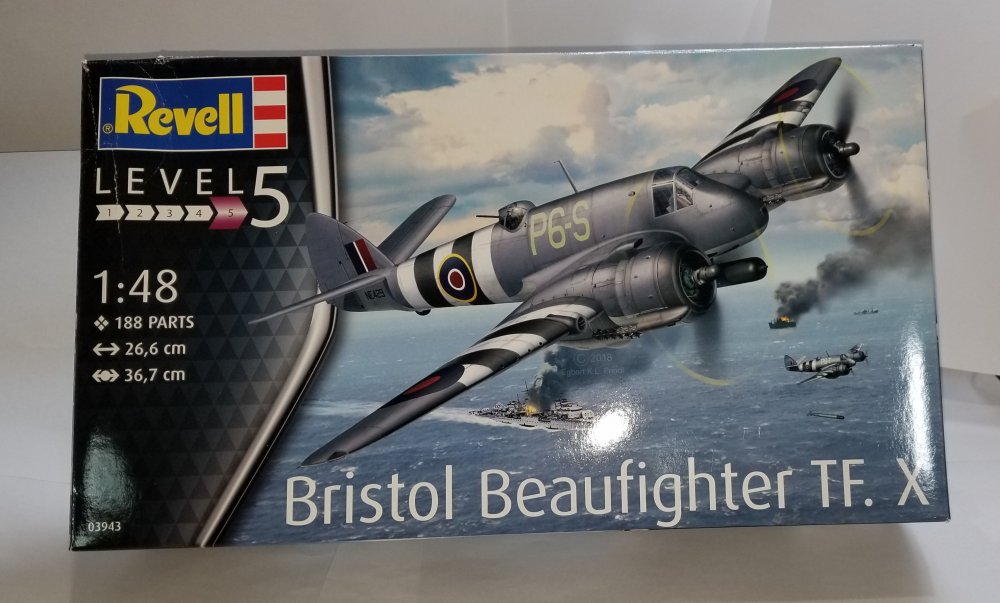
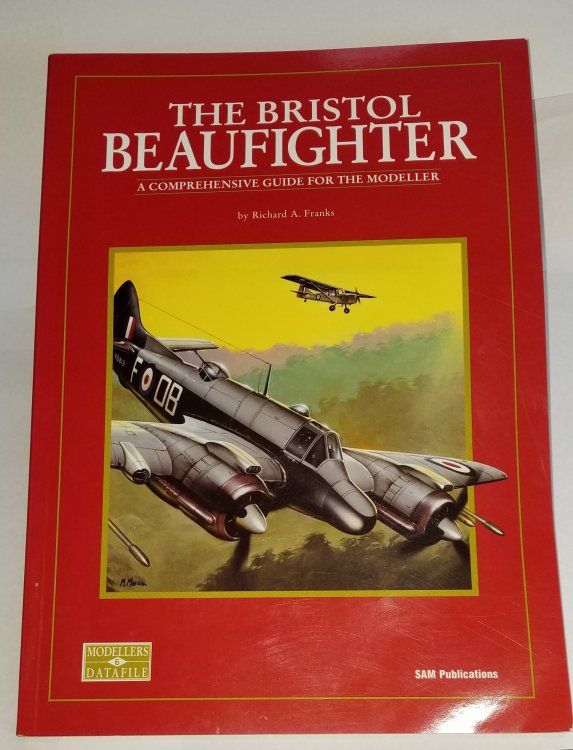
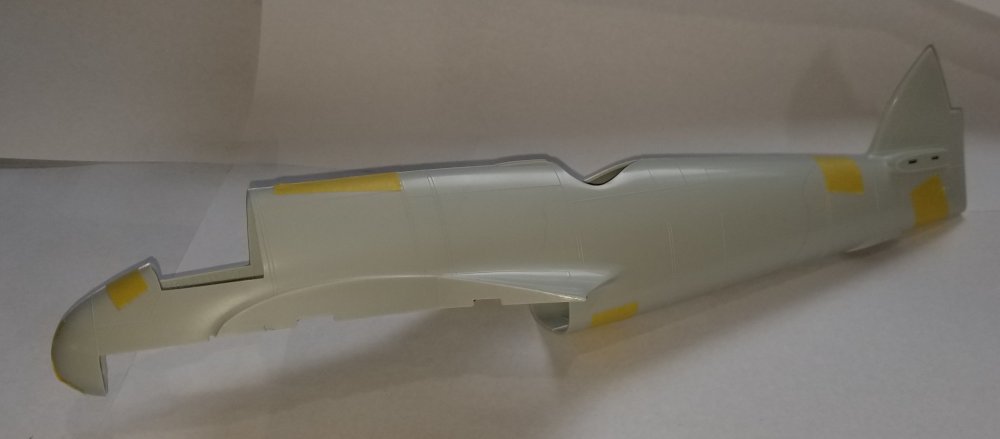
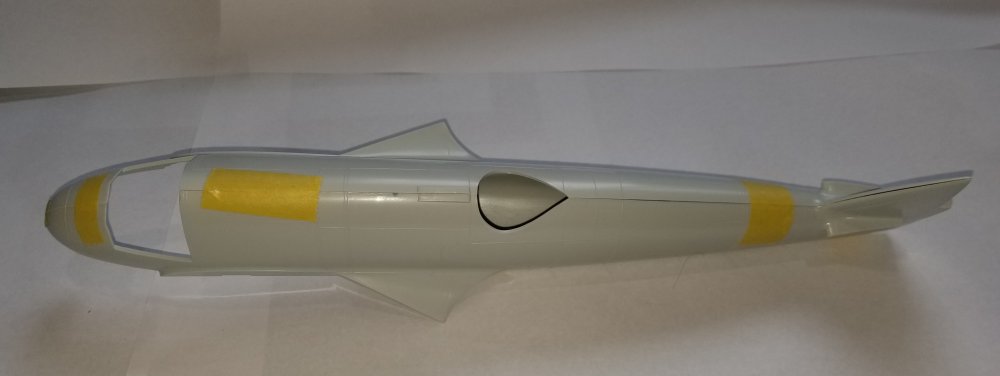
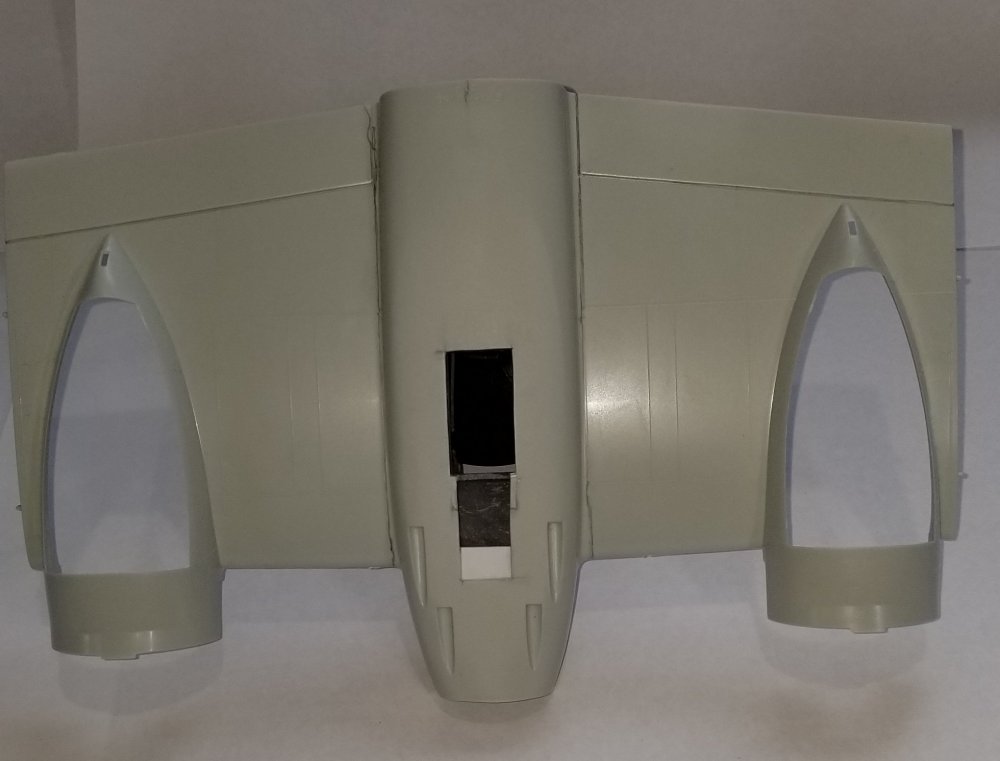
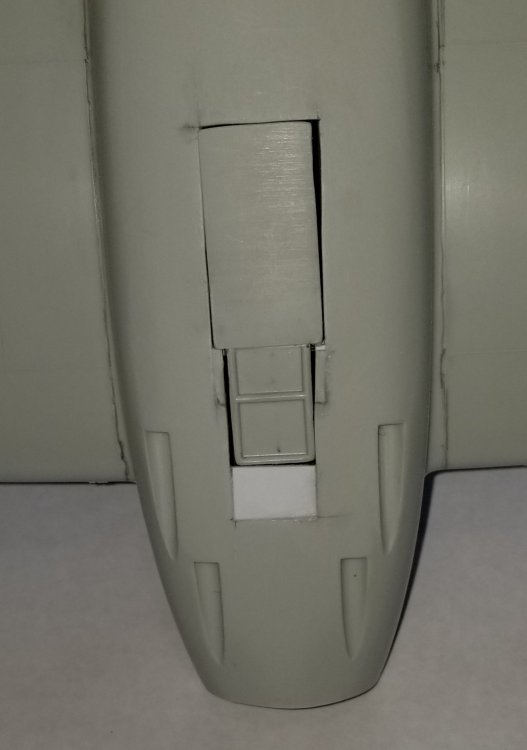
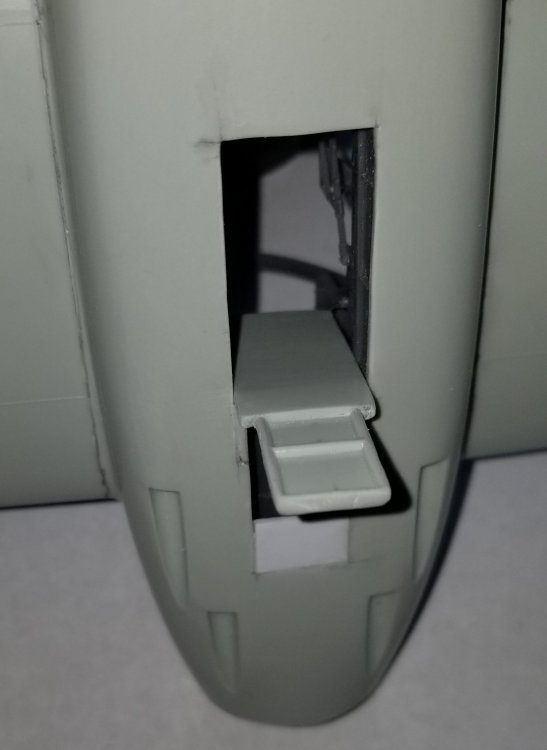
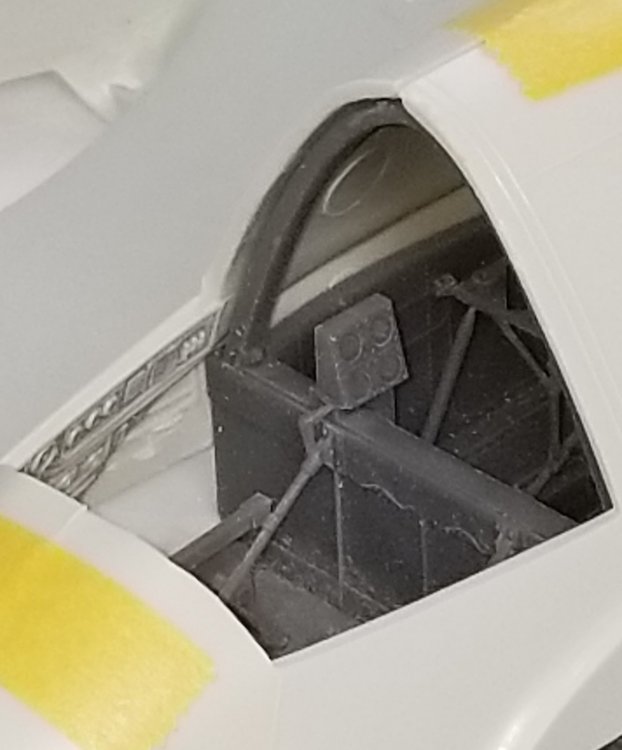
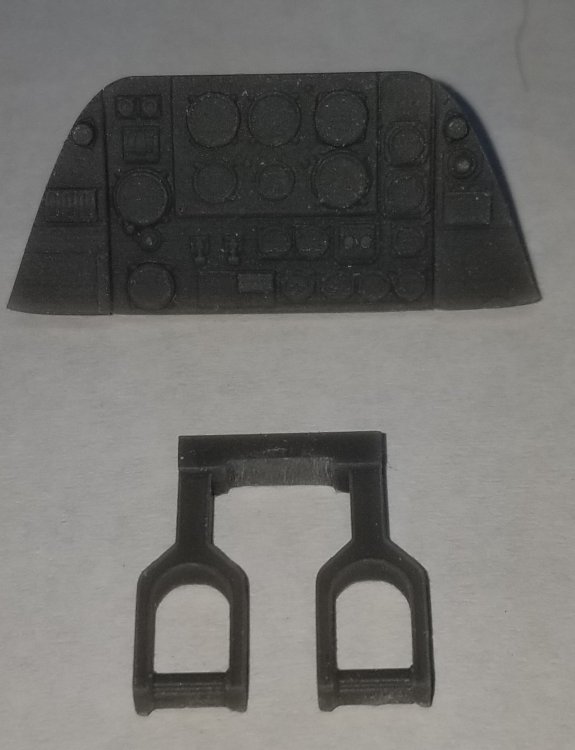
Hey all Here are some pictures of what I have for this build 1/32 Revell kit 1/48 Revell kit reference book So here's where I'm at so far on the build. fuselage fits together pretty good. No warps. Model Monkey cockpit set in lower wing center section. close up of cockpit set. view from underneath showing pilot entrance hatch. Had to modify this to line up with the Model Monkey cockpit. view showing hatch sitting in place, loosely. view showing hatch in the open position. view of fuselage and lower wing with cockpit set in place, loosely. there is alot more stuff that goes in here. Here are pictures of the rest of the M.M. cockpit set. lots of small pieces. This set is very delicate and tricky to remove from all the 3D printed support structures. I lost the brake lever on the control column but I may be able to scratch one up. instrument panel and rudder pedals. Well that's it for know, next I will show the engines and exhausts. I checked in my Tamiya Mosquito kit and found that the main wheels are a good fit for this Beaufighter. So now I have to go on Ebay and see if I can round up aset from another kit. Ron G


-
Hey all Well here I go again another challenging build. I'm going to try and build the old Revell Bristol Beaufighter using as many aftermarket items as I can find for it. So here's what I have so far. 1) Revell 1/32 Bristol Beaufighter kit # 04756 mk1F. Going to convert it to mk V1c RCAF. 2) Revell 1/48 Bristol Beaufighter [ going to use this to help on the 1/32 one] 3) Model Monkey cockpit set. 4) Model Monkey rear tail planes. 5) Vector Bristol Hercules resin engines (2) 6) Quickboost resin porcupine exhausts. 7) Aviaeology decal set of RCAF Beaufighter. TF.Xs of 404 squadron - early to late 1944. 8) Brengun models British landing lights,intake, grills and gun site. Model Monkey is supposed to be working on the rear observer/gunner's station but nothing as of yet. Ron G
-
Hey Martin Just found some 1/32 British landing lights from brengun models, also air intake grills and gun site for Beaufighter on Ebay. I got started on mine, it's going to be alot of work getting this old war horse up to todays standards. Please show as many pictures of the wheel wells as possible, thats one area I'm going to need help on. Your doing great work so far. Ron G
-
Great work Martin I just got my 1/32 Beaufighter about a week ago. I plan on doing a build along of it, so will be using some of your ideas on mine. Ron G
-
How Many Model Shows Will be Cancelled this Year?
CrankyCrafstman replied to GazzaS's topic in General Discussion
Yea Ernie I agree, wife went to Krogers (grocery store) at 3:00 am last night. She said there was absolutely no meat, milk, cheese, butter, snacks, cereal, toilet paper the shelfs were bare. People are hording food and supplies, not cool. I think theres too much talk about this on the news channels and they are panicking the people. Ron G -
Just won an Ebay bid for this. It's an oldie but I'm hoping a goodie by the time I fix all the missing stuff. I have two Vector resin Hercules engines, Model Monkey mk X cockpit set & late style tail planes with the correct dihedral angle coming in the mail. Hope to do a RAAF coastal command plane. So look for a work in progress on this one. Ron G

-
Modifications/Upgrades: 1/32 Revell Bristol Beaufighter!!
CrankyCrafstman replied to Artful69's topic in Modelling Discussion
Hey all I know that this is an old thread, but I'm interested in trying this on for size. I would like to do a FAA coastal command plane in the extra dark sea grey upper/ sky lower with invasion stripes, but I'm unsure which variant I need to do. I'm thinking a MK 1C or MK V1C. I know that Model Monkey has a cockpit kit ($60.00)and tail planes ($48.00). There are some decals and a stencil set (unsure of price). Victor makes 1/32 resin Hercules engines ($33.00 ea). Items still needed [guesstimated prices] : 1) correct canopy front & rear. ($15 - 30) 2) a good set of resin wheels and tires. ($15 -20) 3) machine guns ($30 - 35) 20mm cannon barrels ($18.50) 4) rear gunner/observer kit. ($40 - 60) Anything else I'm not sure about as I am not that familiar with this aircraft. Ron G -
Happy Birthday James
-
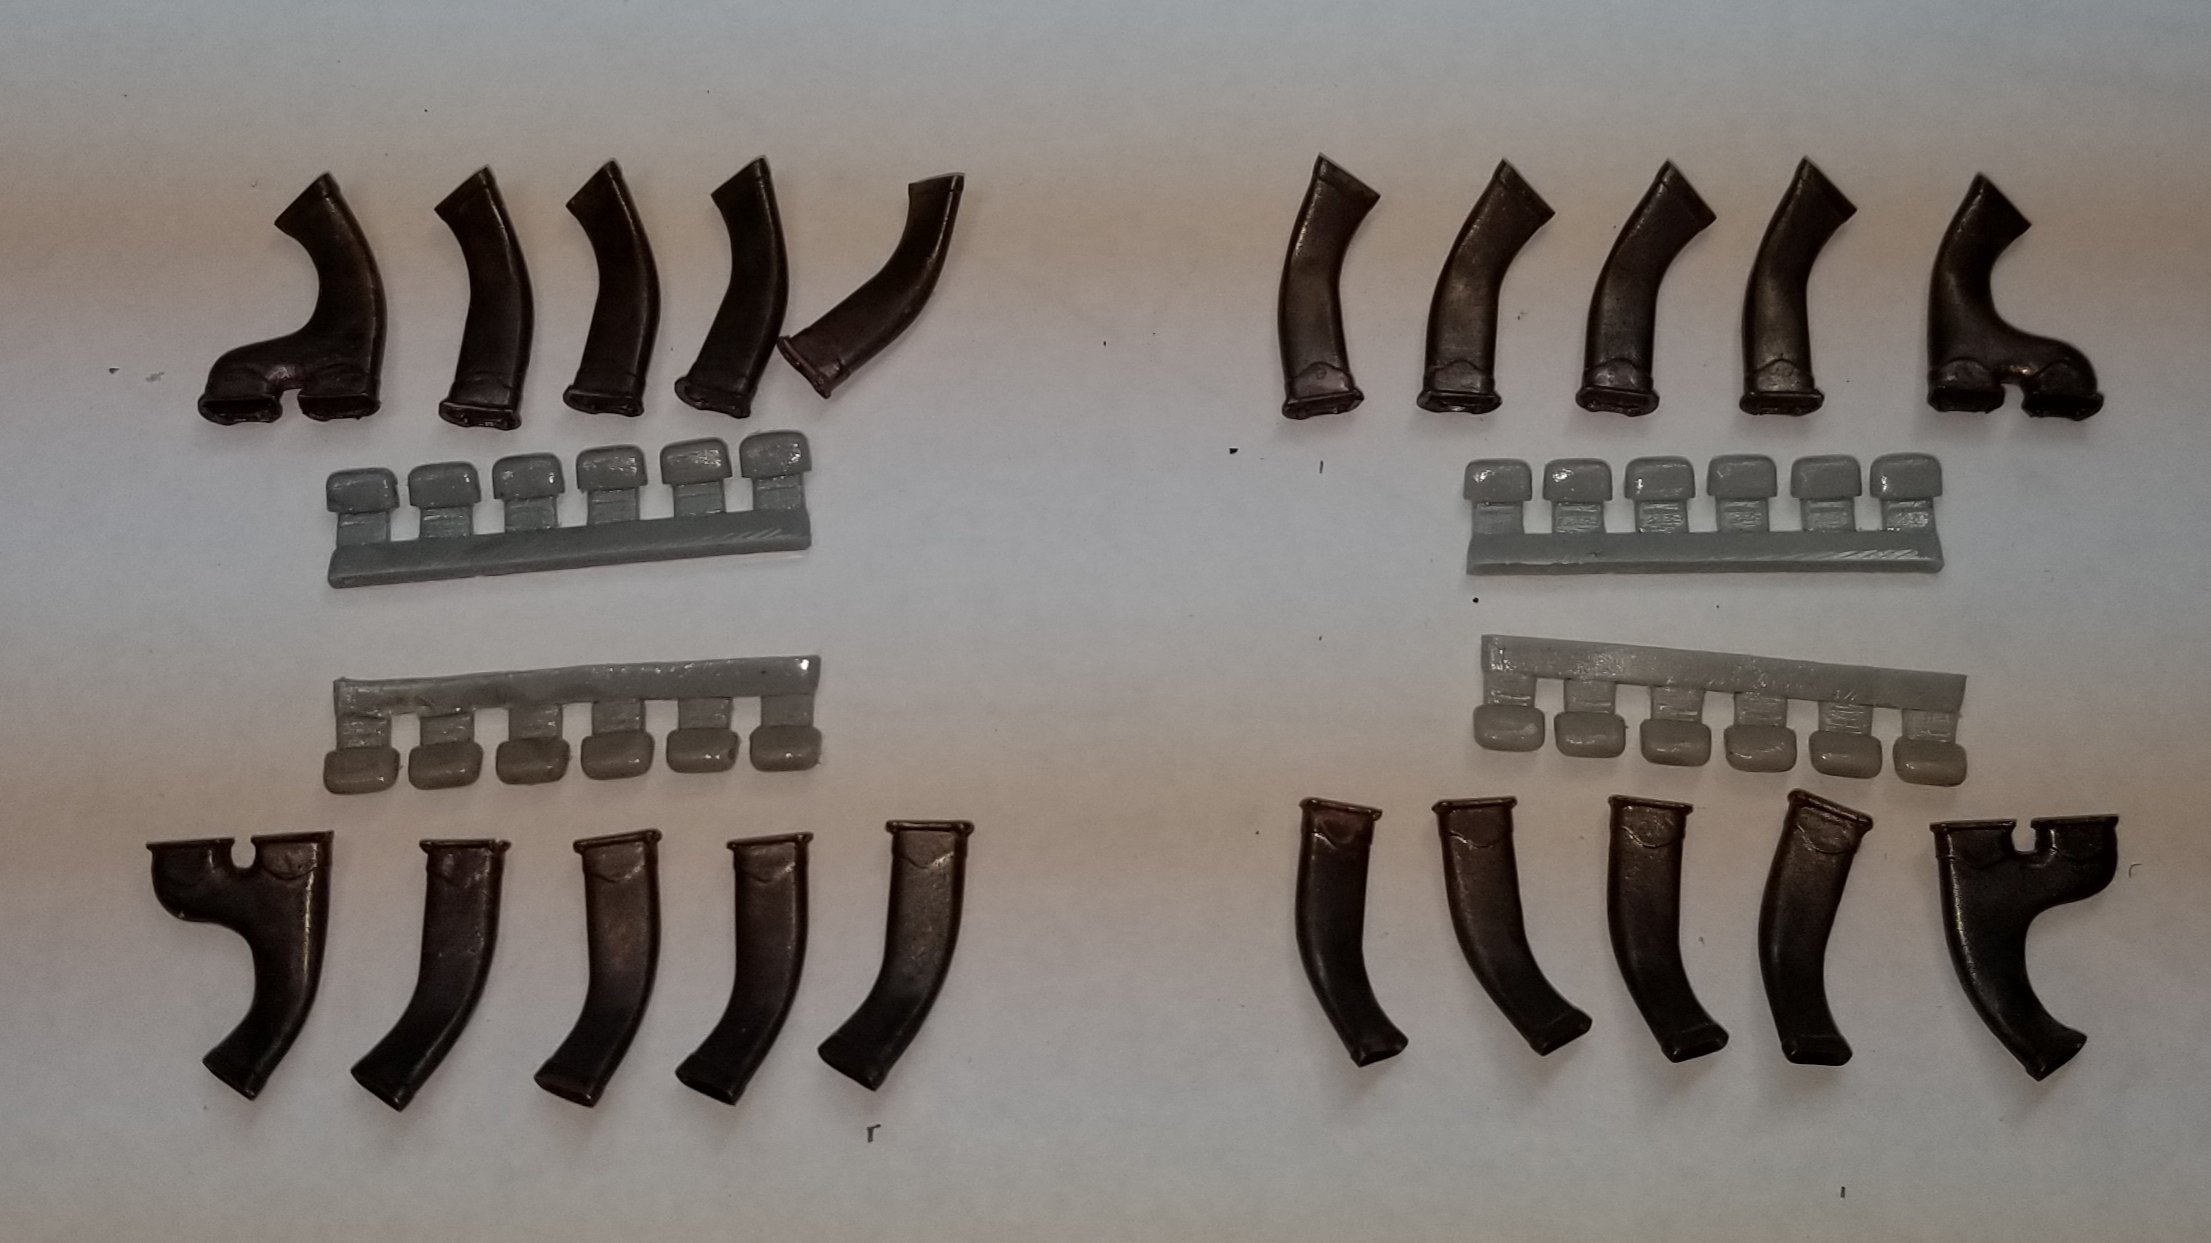
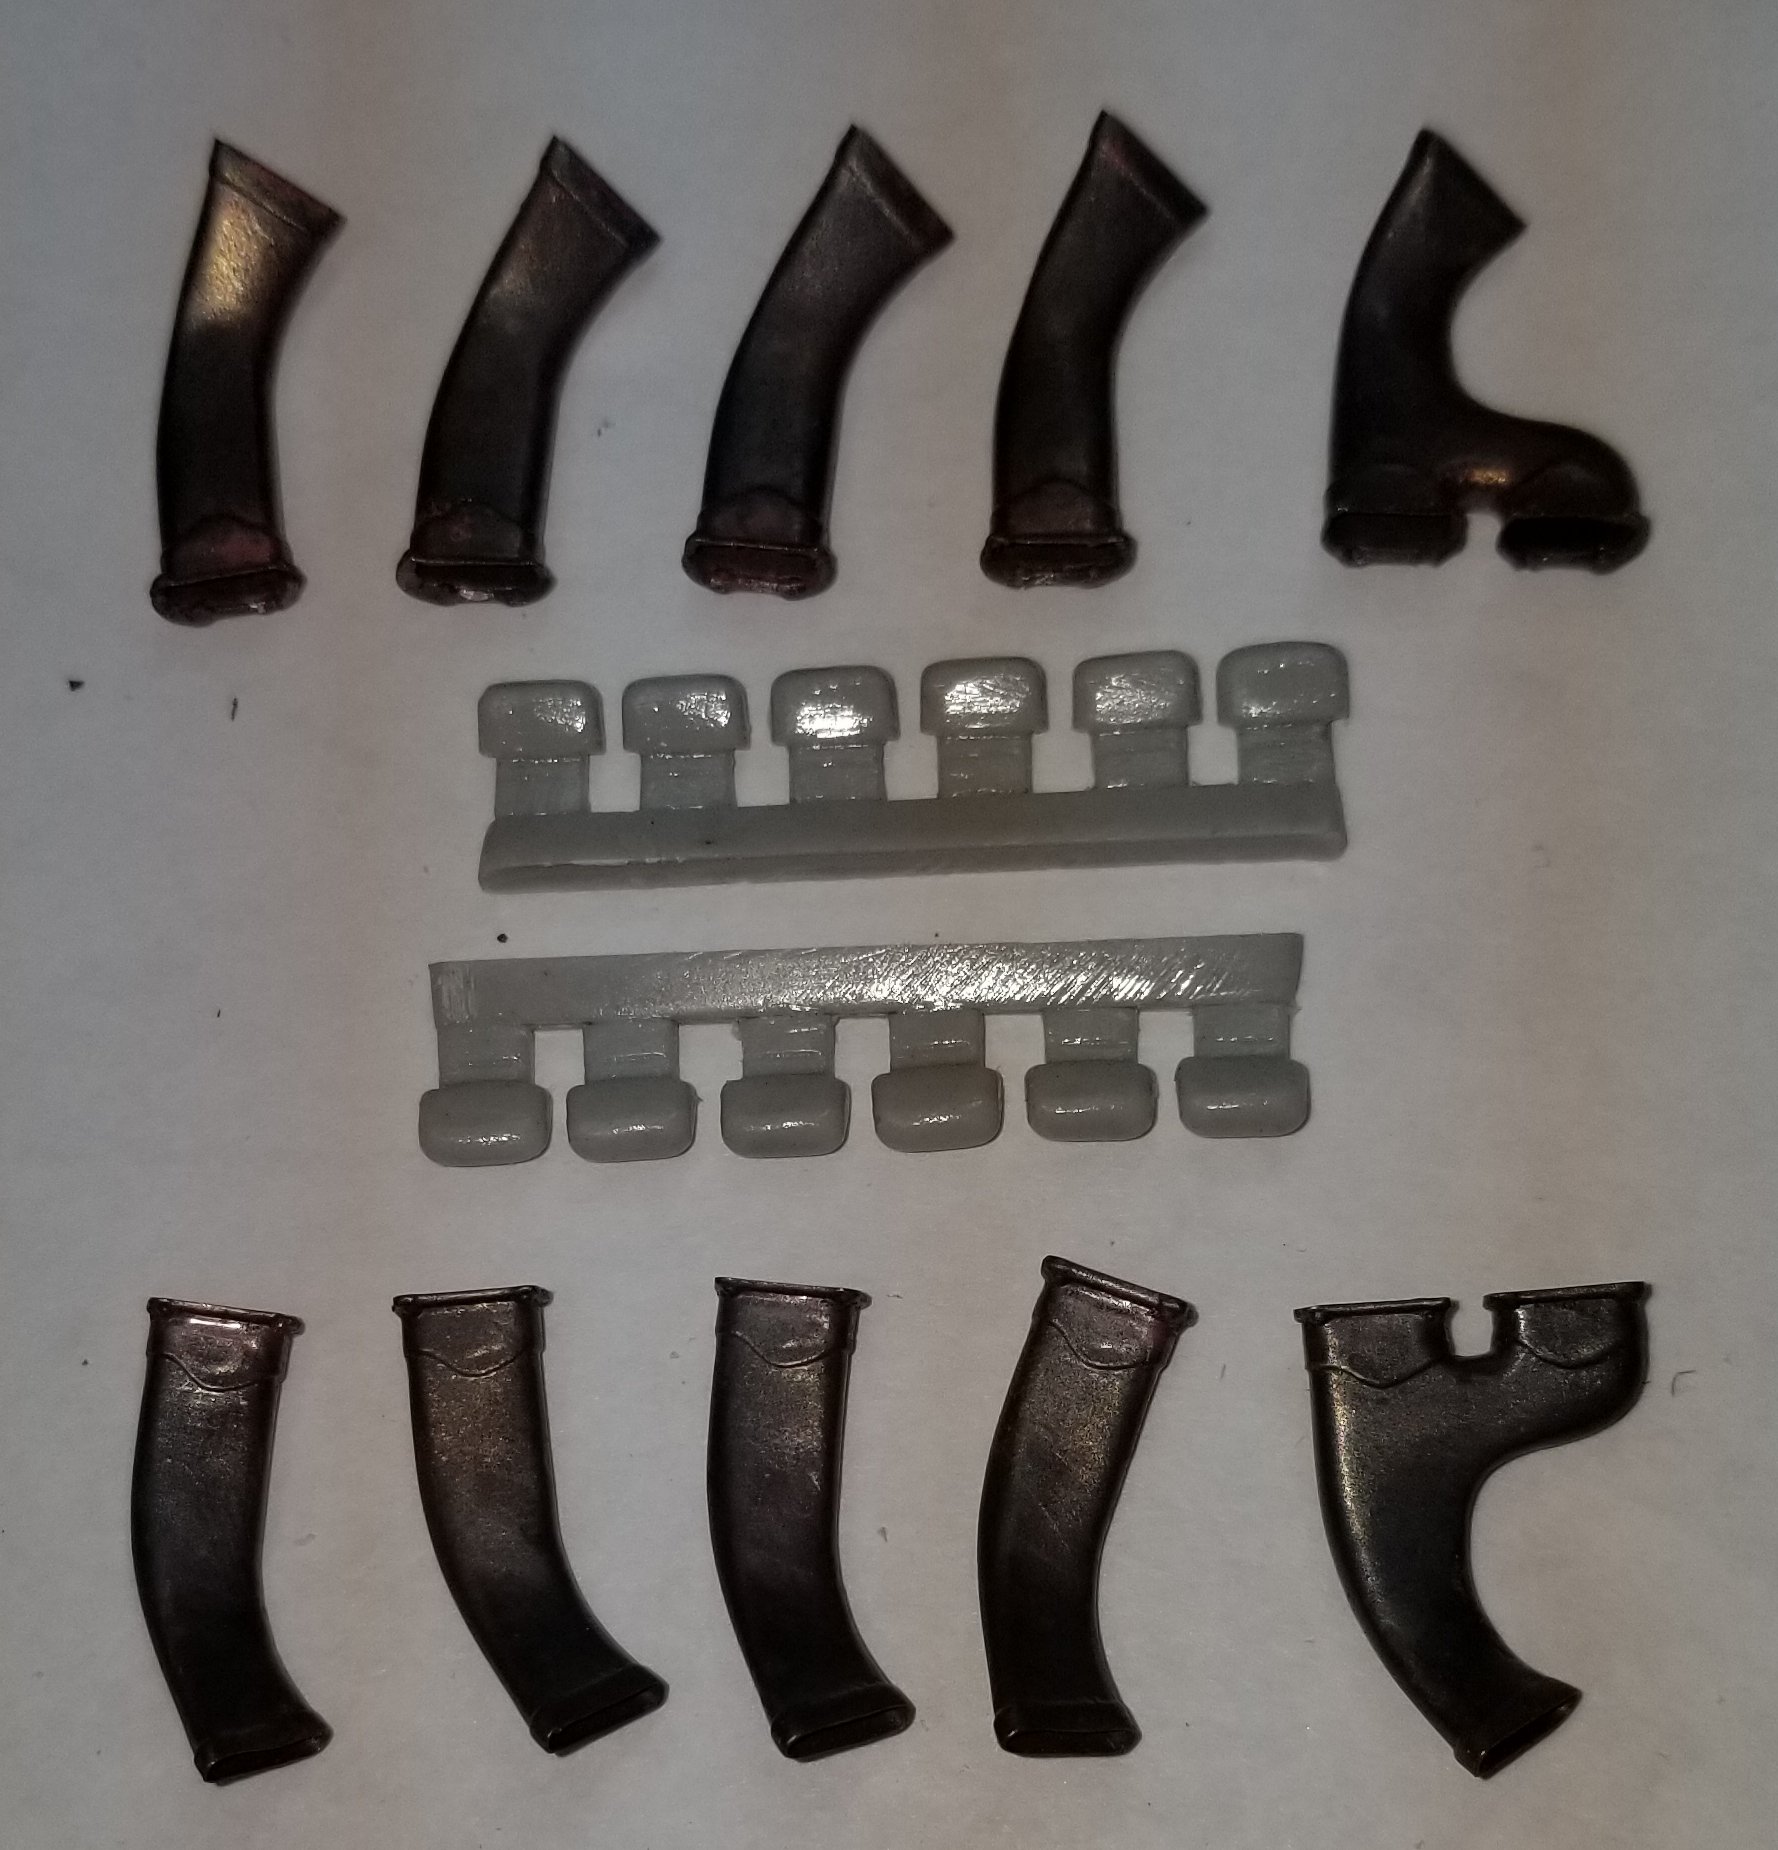
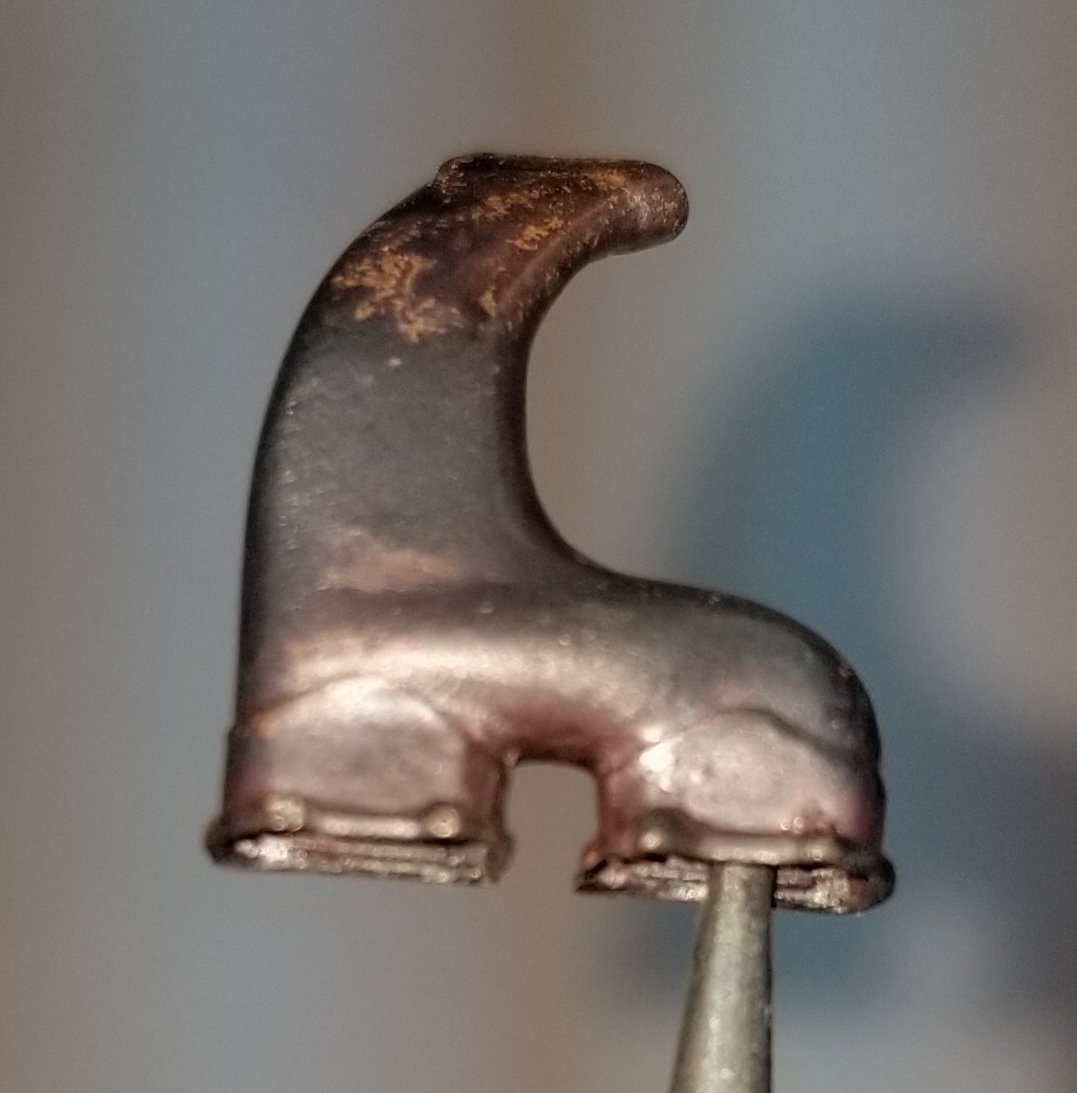
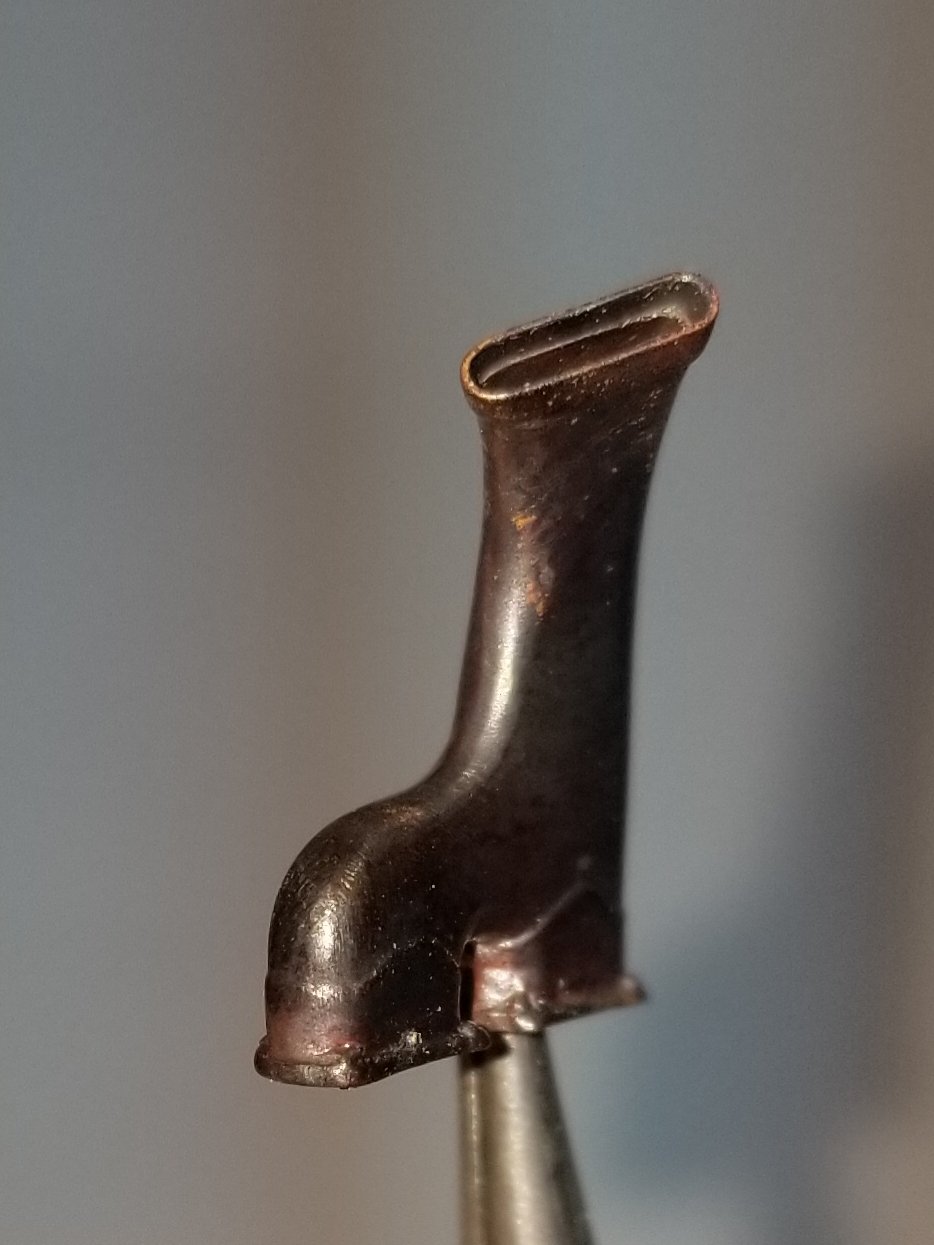
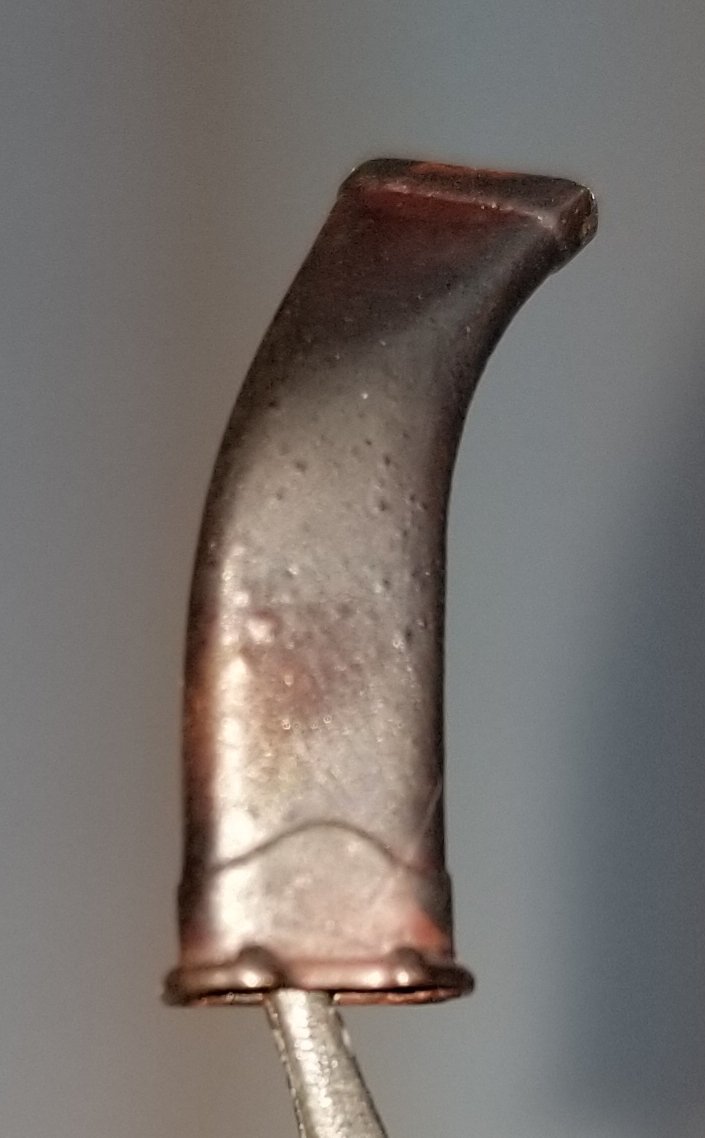
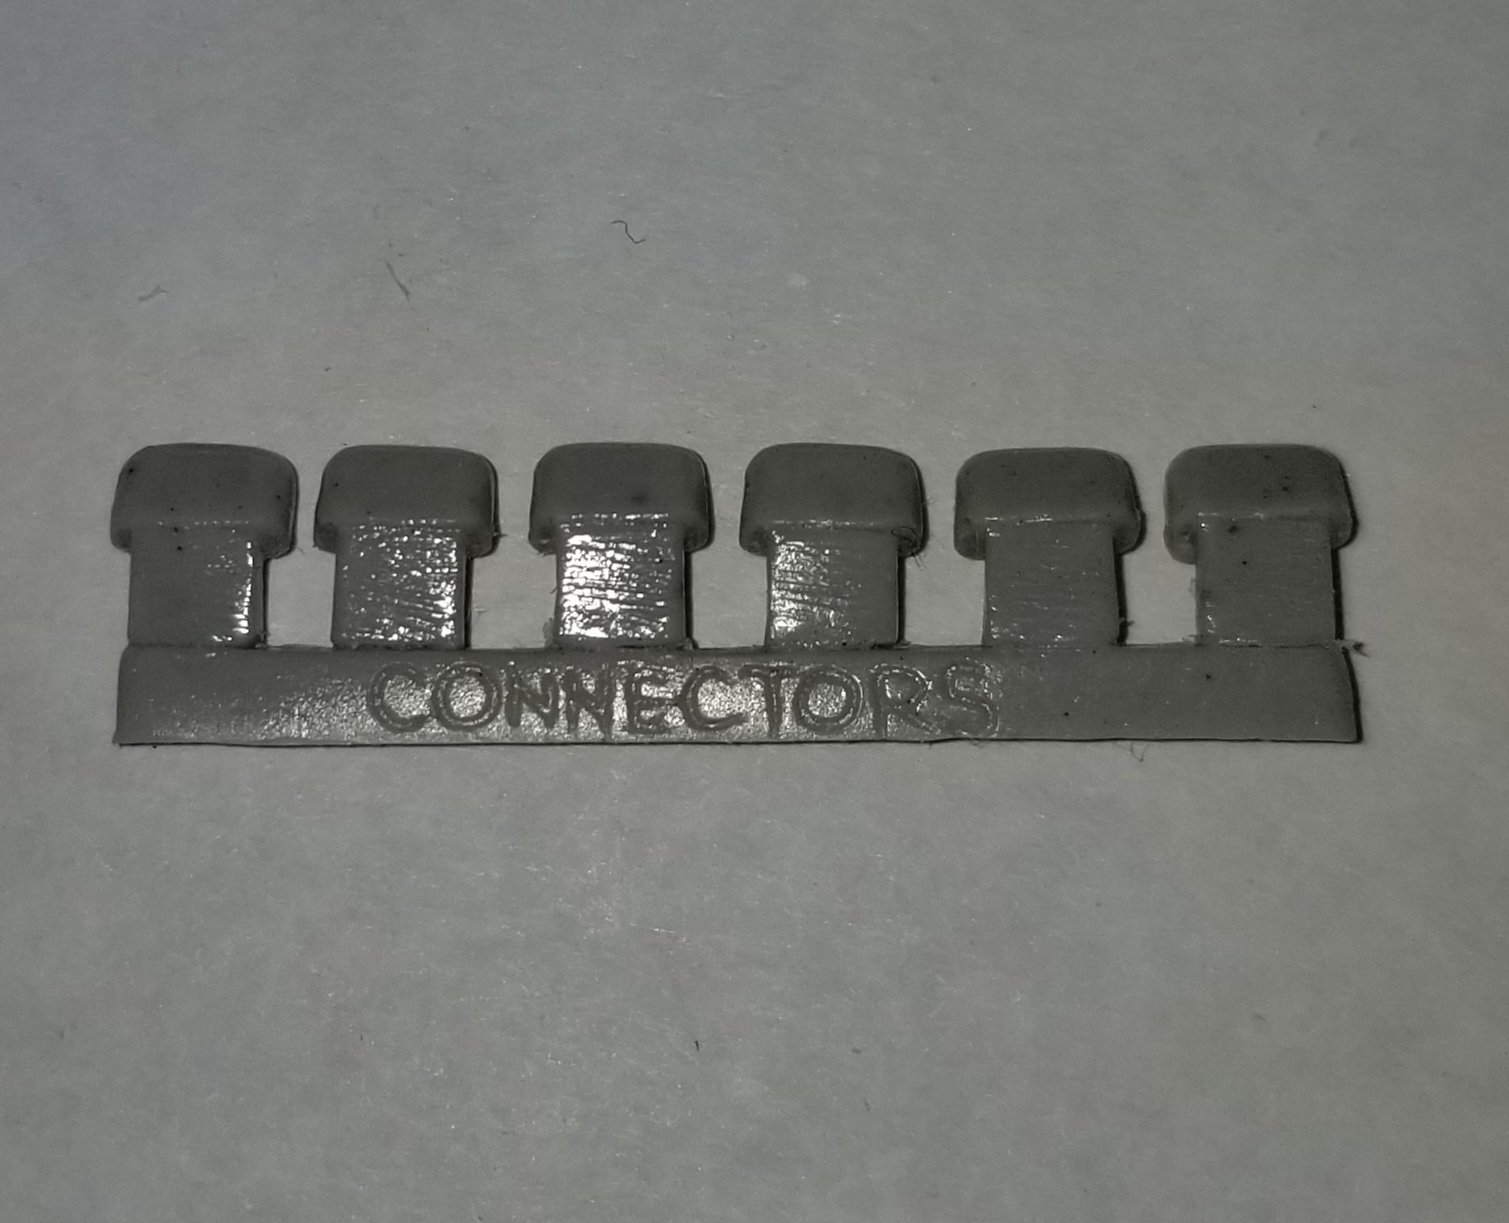
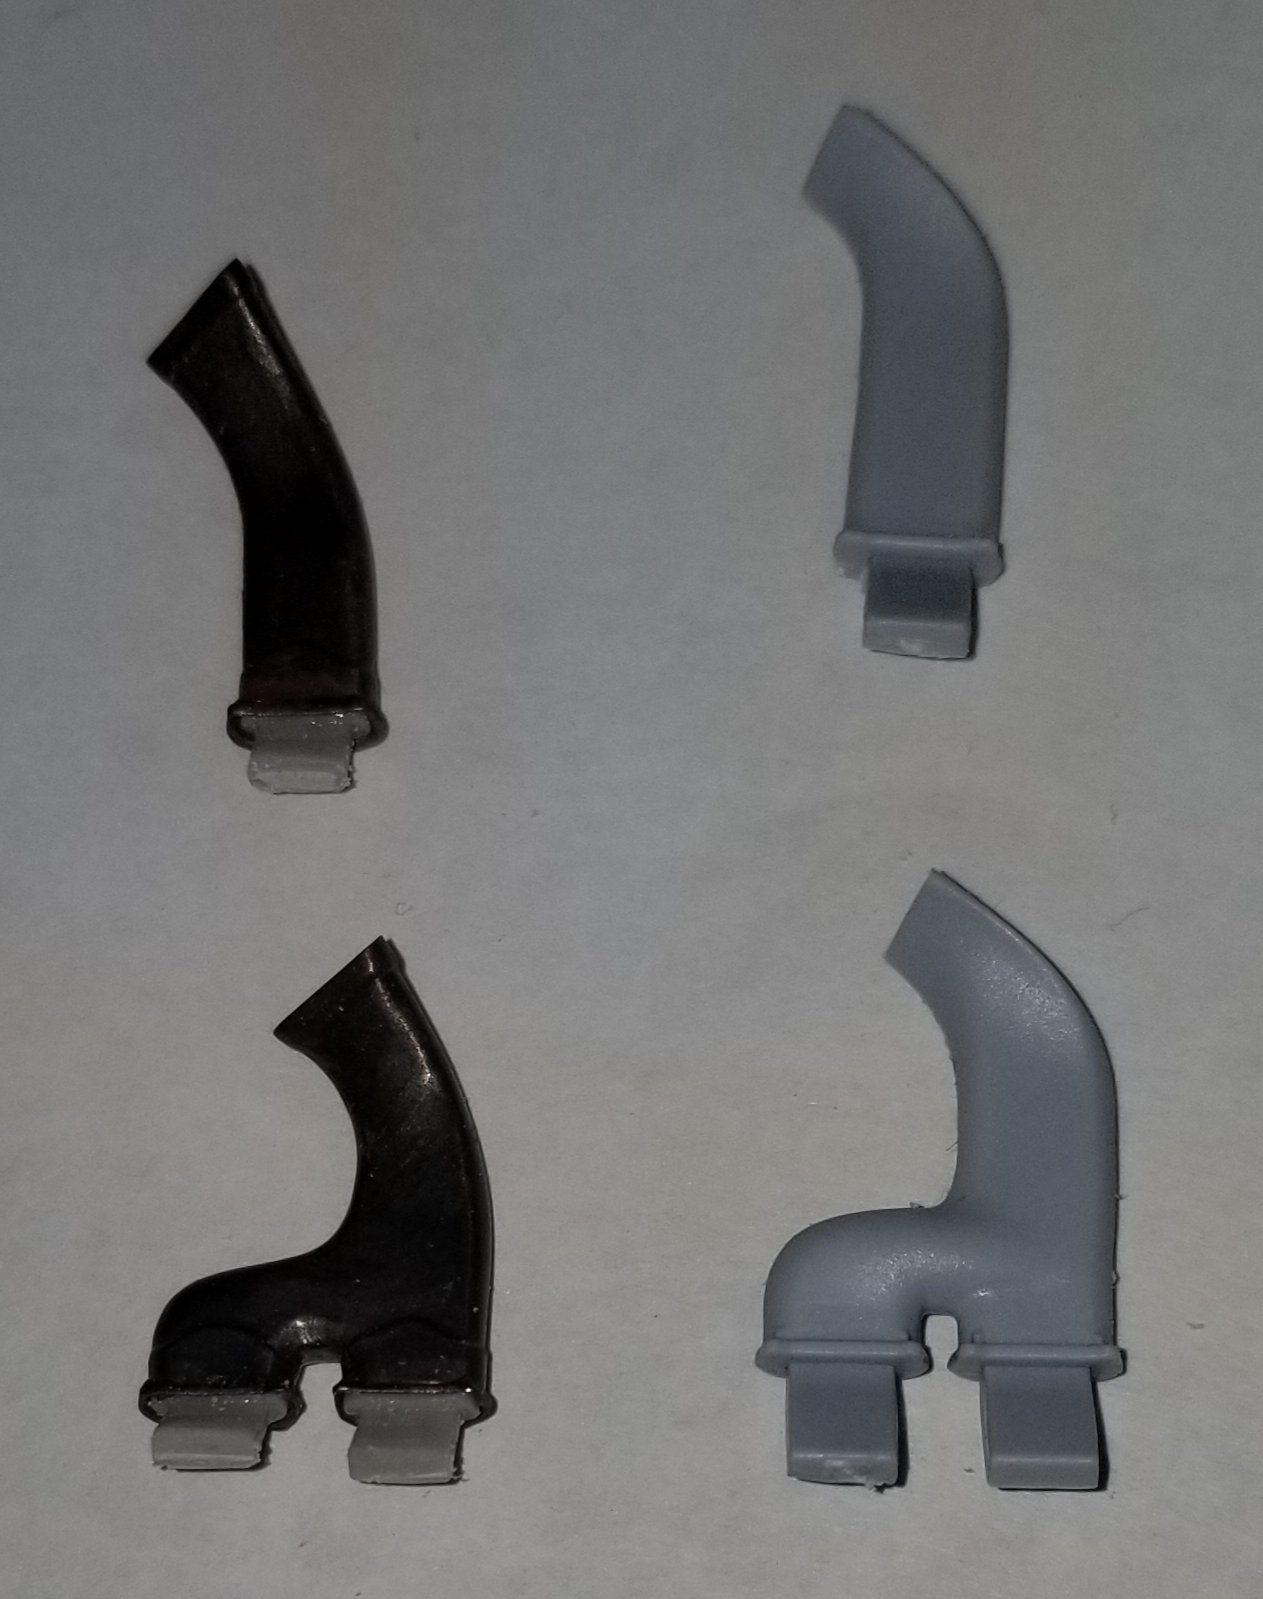
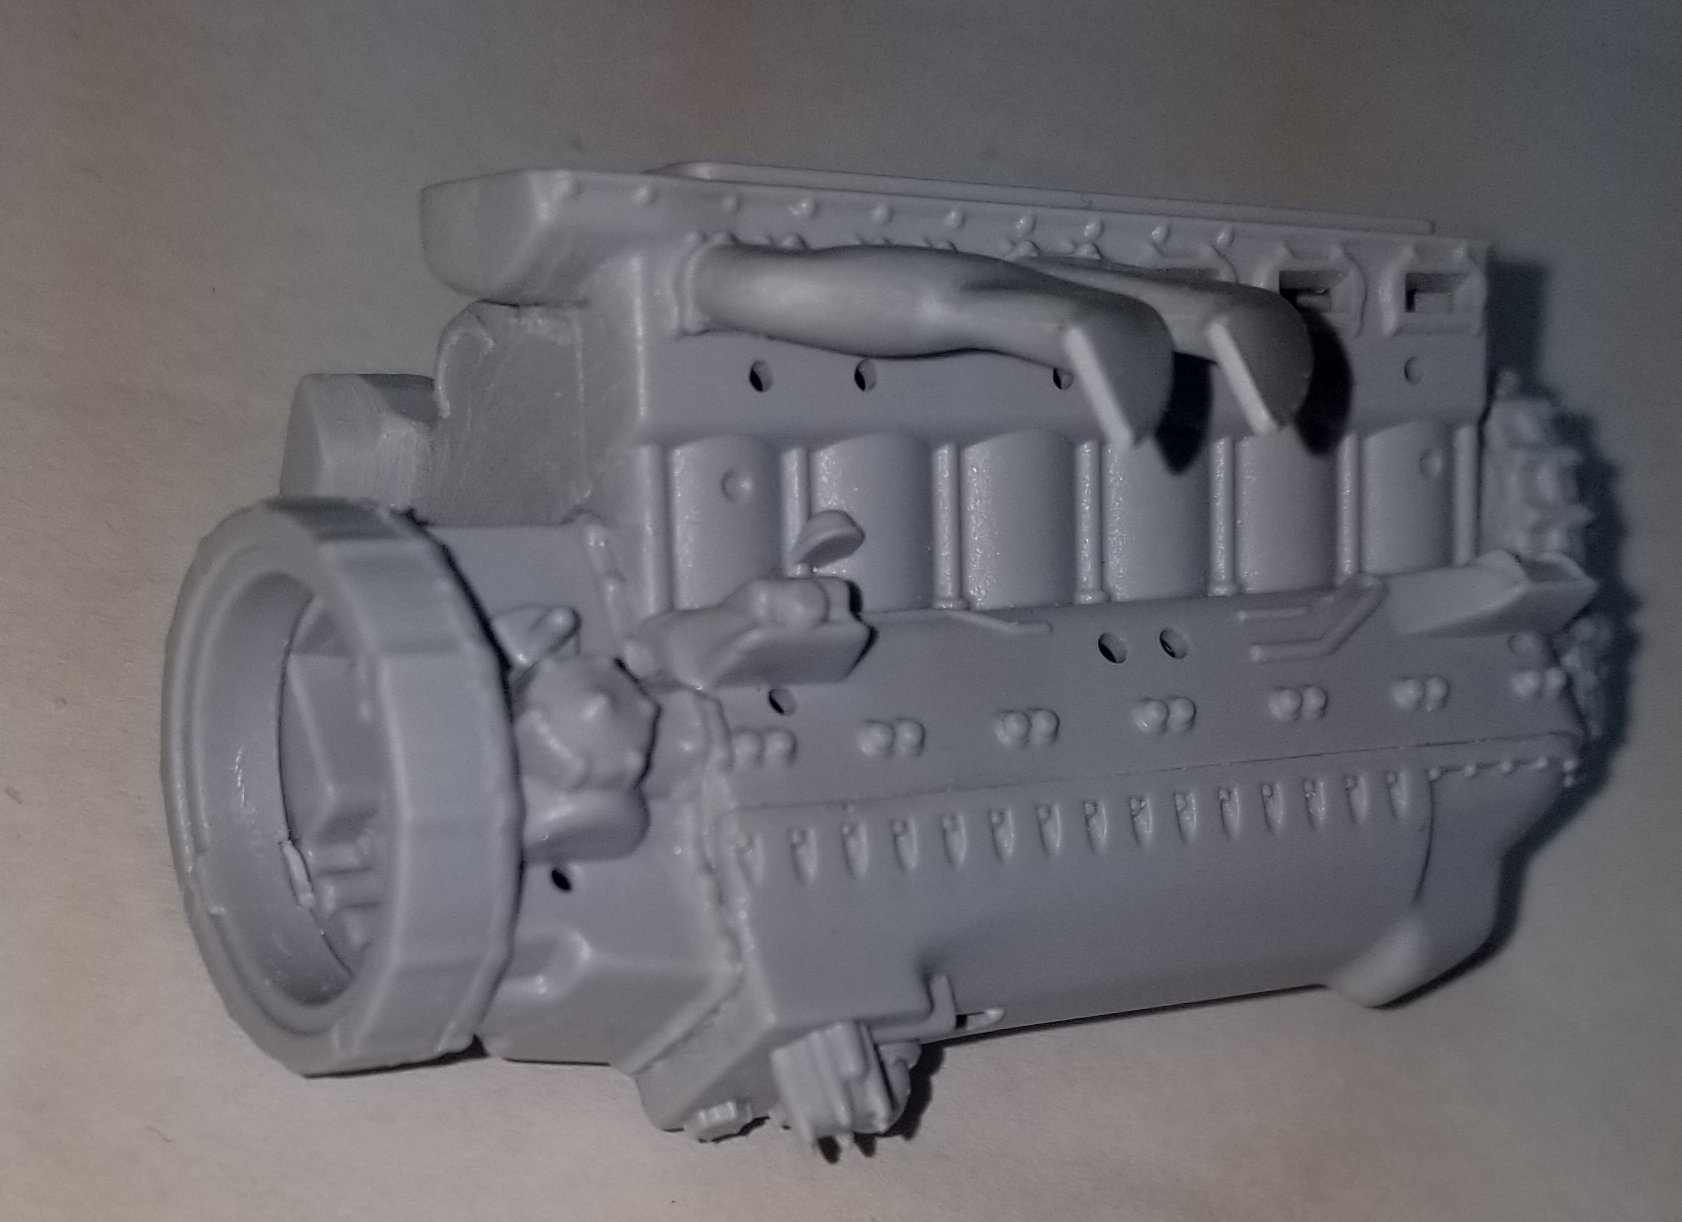
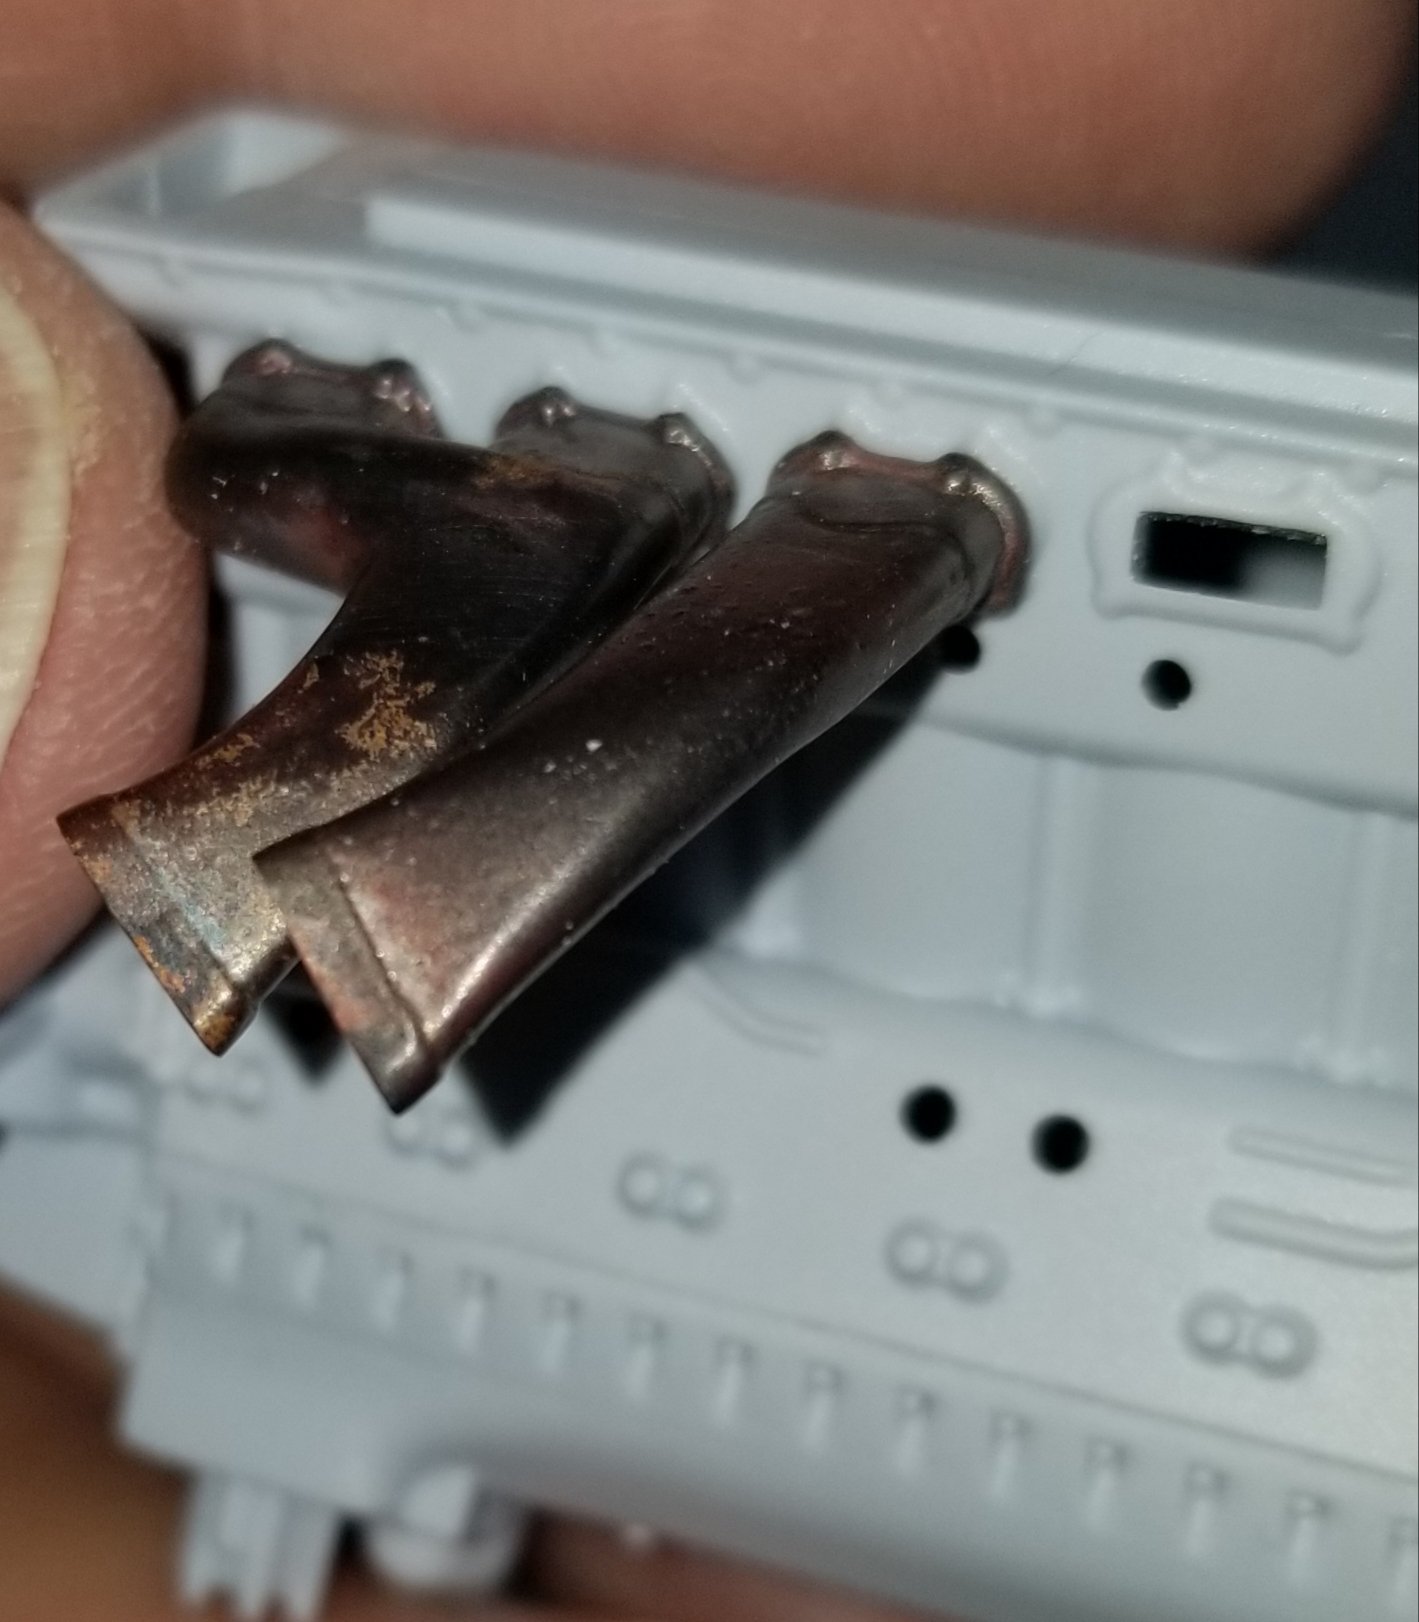
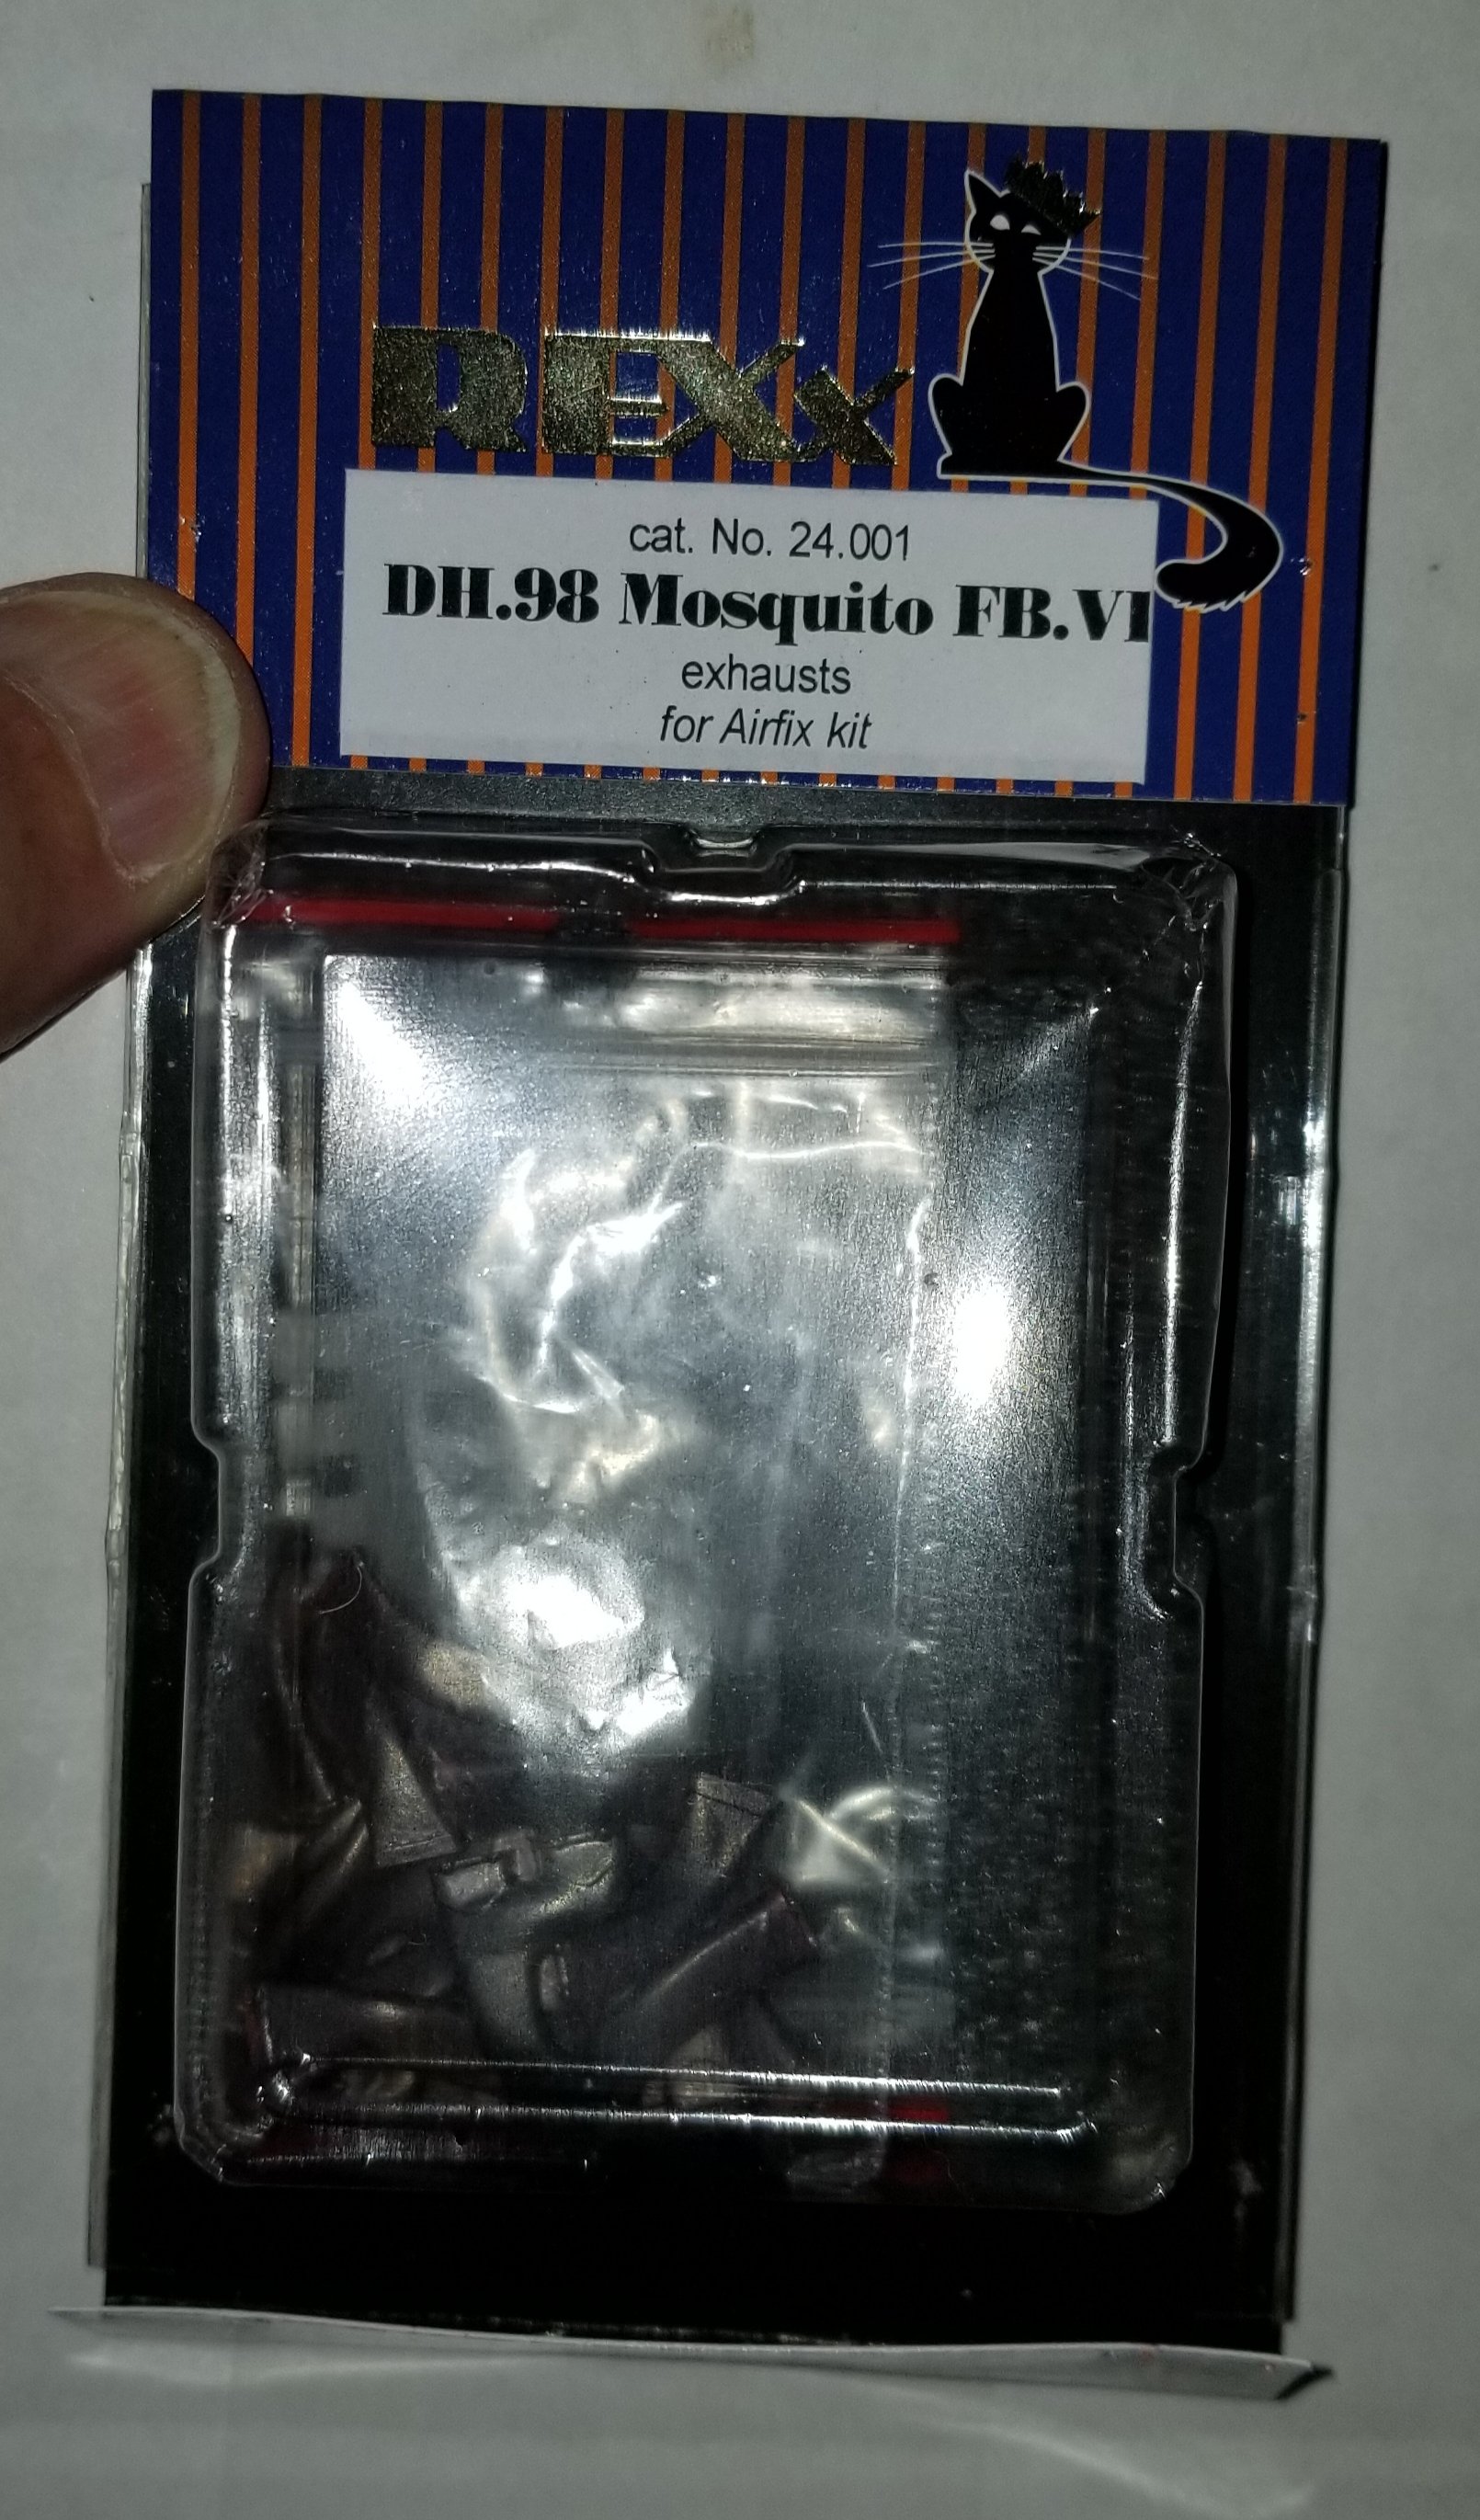
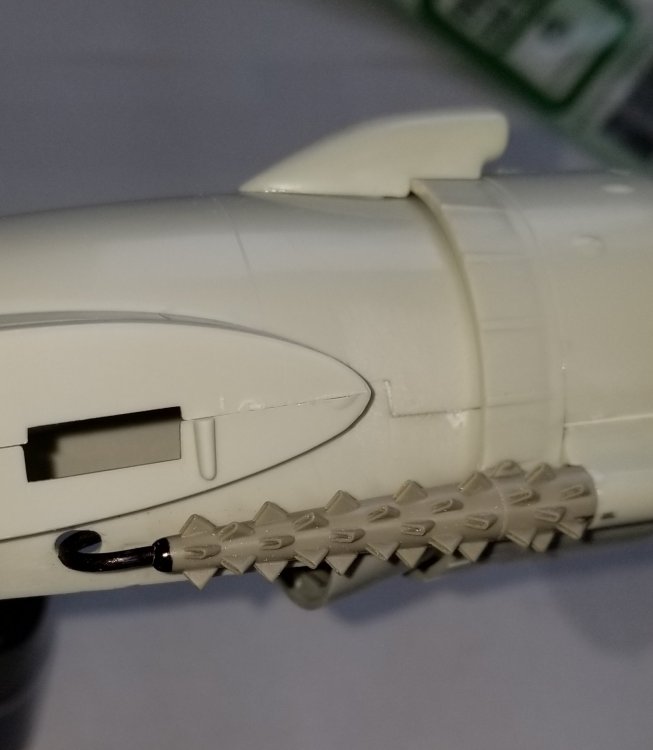
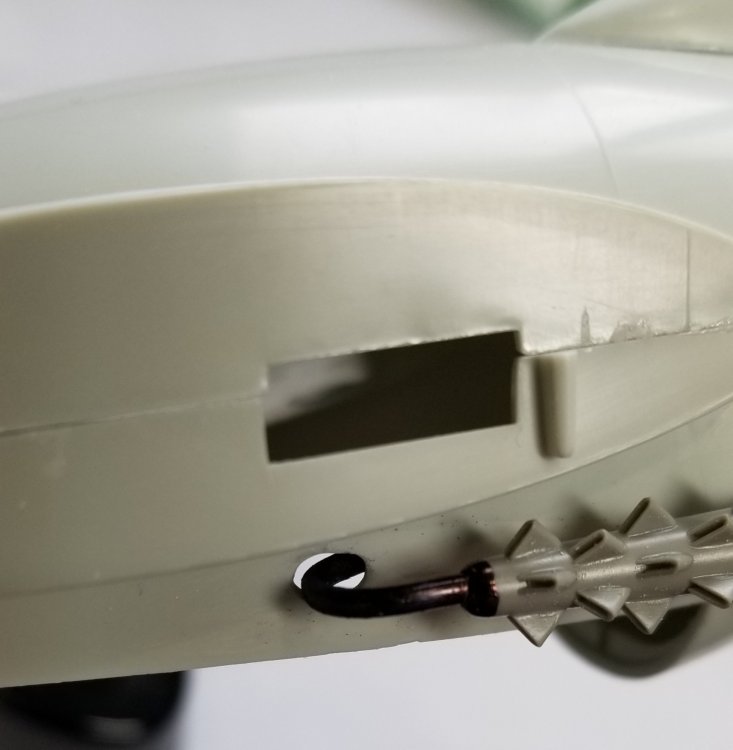
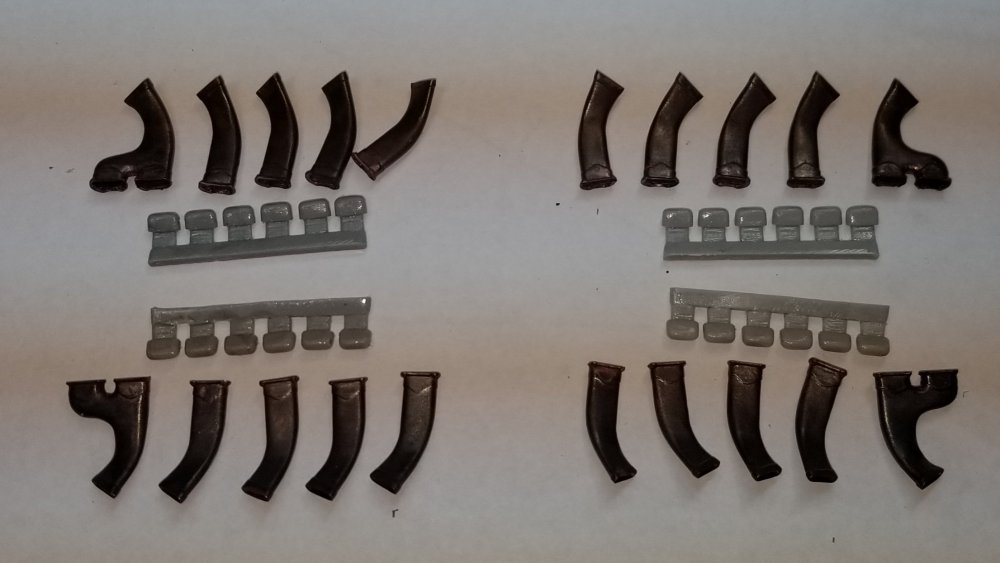
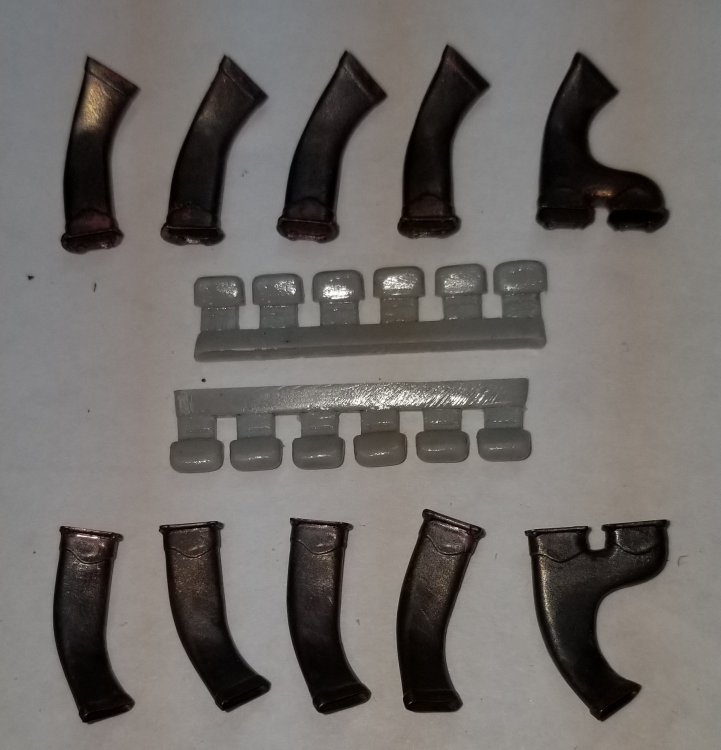
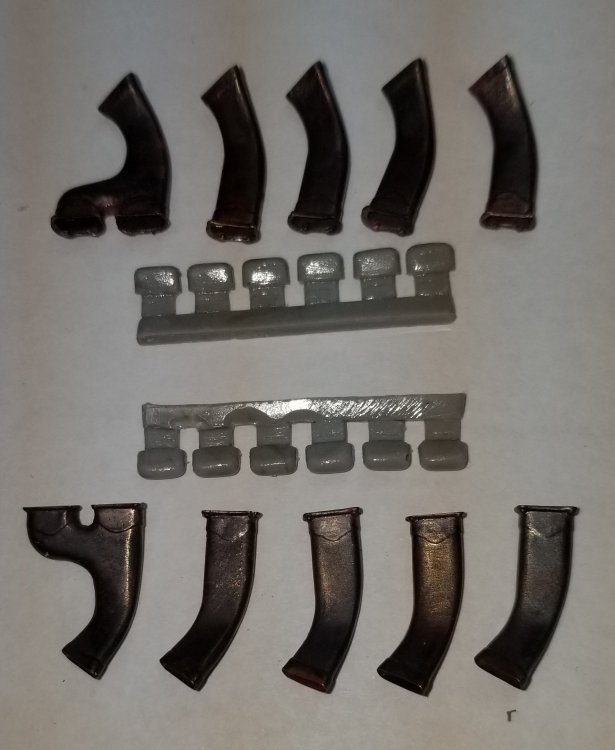
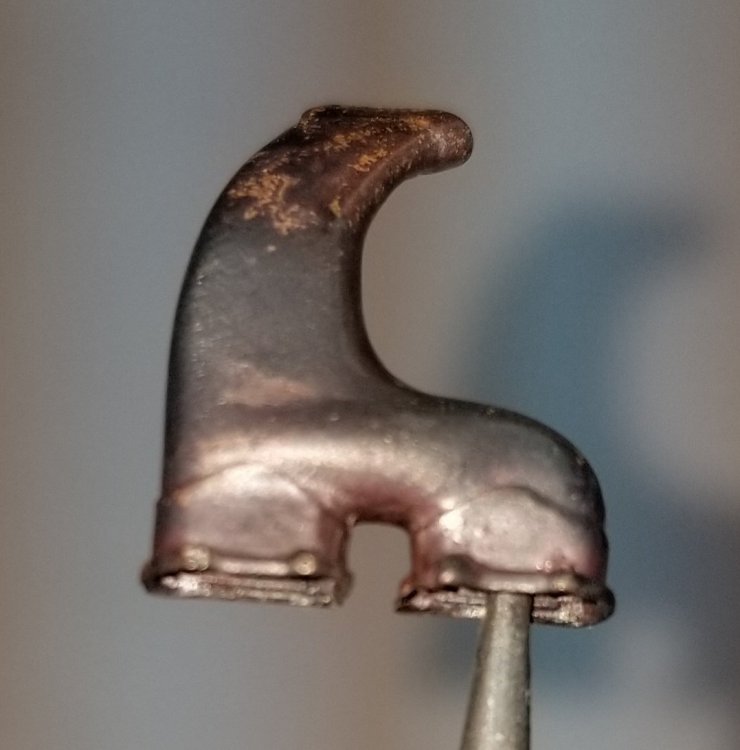
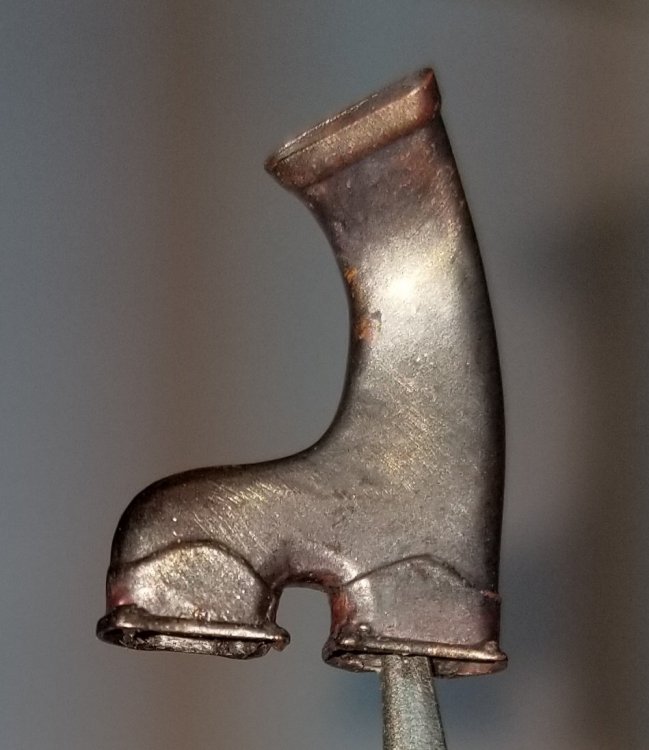
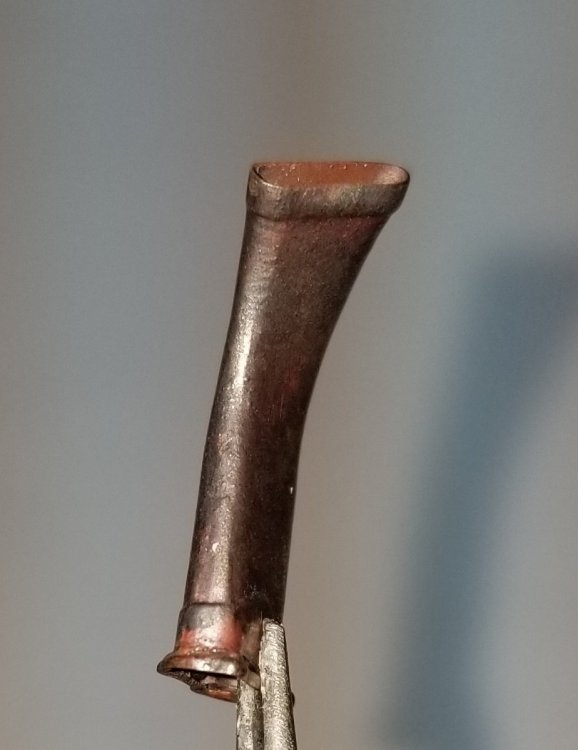
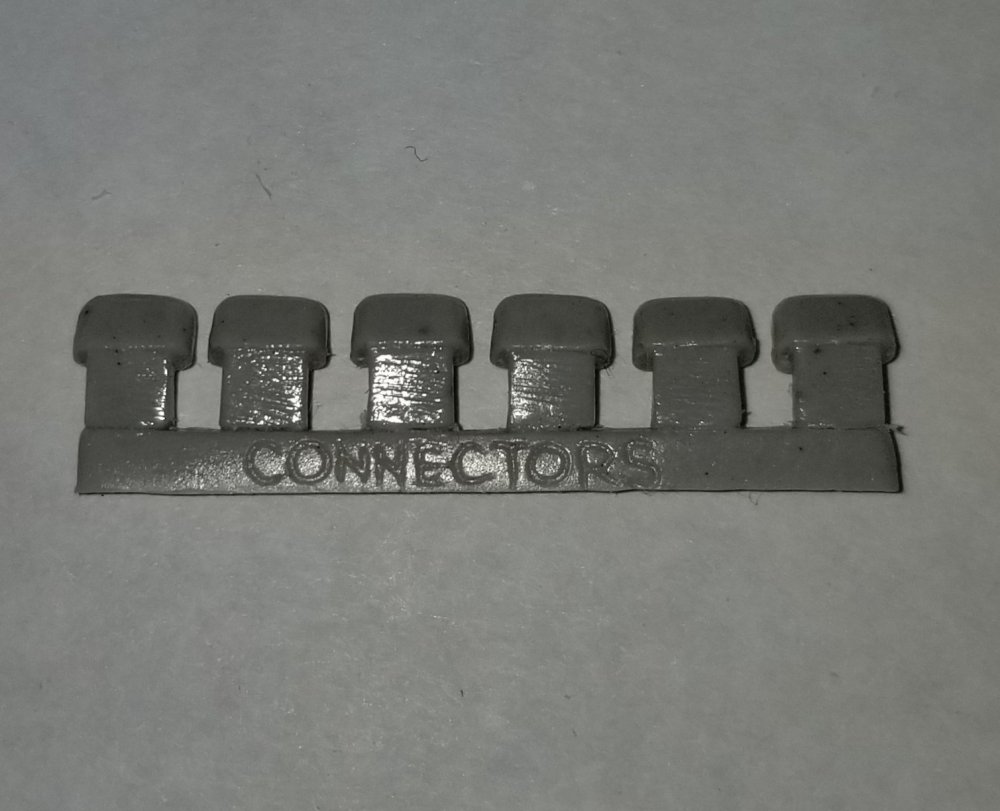
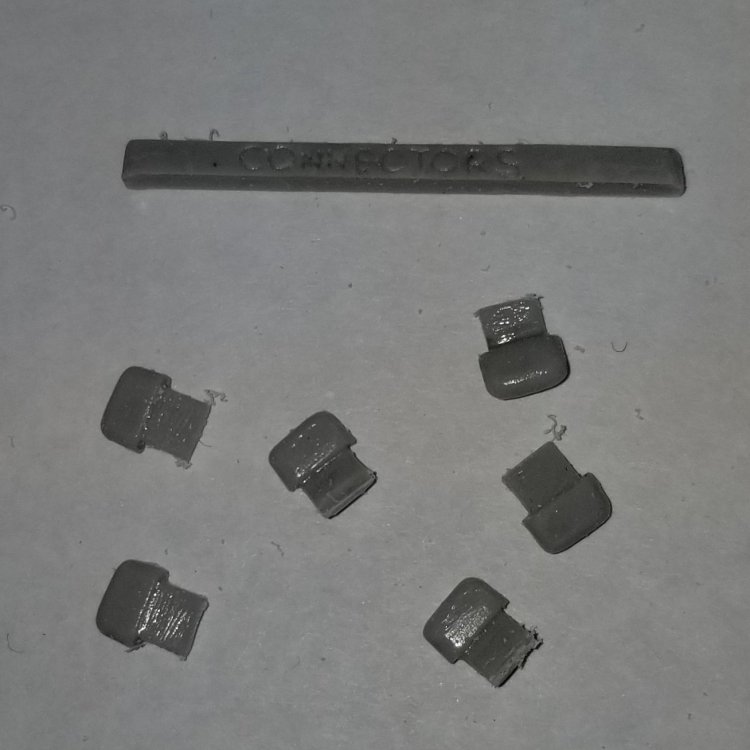
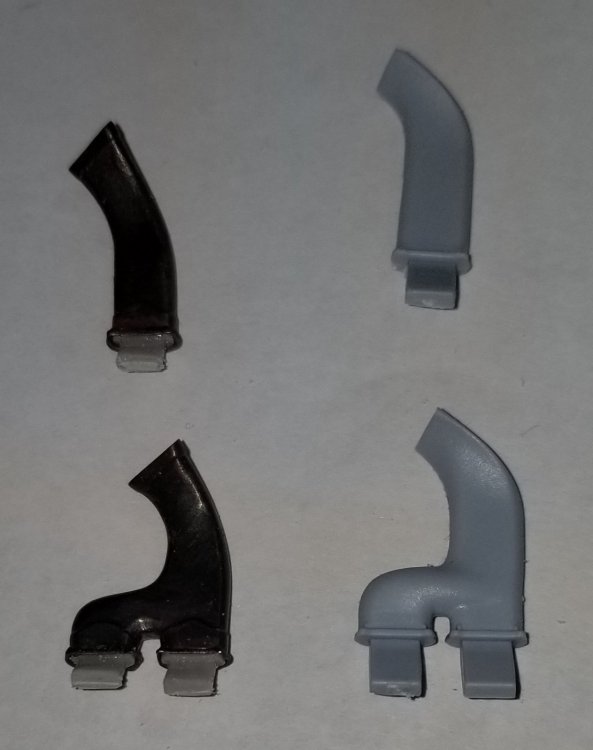
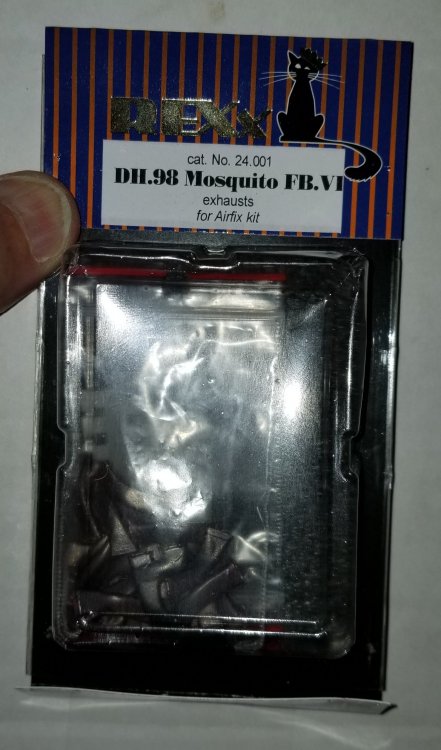
Hey all Well here they are, and like I said they are really nice! They are delicate, but not so much that you have to be afraid to handle them. Just be careful and patient and you will end up with what looks like some fantastic exhausts for your big Mossie. So lets take a look. this is what comes in the package. 20 individual metal exhaust pipes and 24 connector stubs to attach the exhausts to the engine. one complete engine. the other complete engine. this is the port engine outside rear double exhaust pipe. View from the top. view from bottom. this view shows the end of the exhaust pipe. this one of the port engine outside single exhaust pipes. view from the top. this is the stub connectors removed from the tree. this view shows the Rexx exhausts on the left and the stock kit parts on the right. Top view. this view shows the Rexx exhausts on the left and the stock kit parts on the right. Bottom view. this is one of the stub connector trees. view of the kit parts on the engine. View from the rear. view of the kit parts on the engine. View from the front. this view shows the Rexx exhausts on the engine. View from the front. this view shows the Rexx exhausts on the engine. View from the rear. As you can see they look great. Just a little rust and whitish aluminum stains on the ends and they will look just like the real thing. Actually they look great right out of the box. So get ahold of Bob at H&B Hobbies and order yourself a set. $39.95 US, part number RX24001 D. H. Mosquito MK VI. RON G


-
Hey Jeff I just got these in the mail From H&B Hobbies. There my 1/24 Mossie exhausts from Rexx exhausts. I'll do a write up in a while, I'm not at my work bench right now, but from what I've seen they are really nice, and come with small insert connectors to attach them to the engines. Ron G
-
Hasegawa BF109F-4- finished!
CrankyCrafstman replied to BlrwestSiR's topic in LSM 1/35 and Larger Work In Progress
I'll be keeping an eye on this one Carl. I have a trumpy BF-109-G2 trop in my stash and I will be using this build to help get mine right. Fine work so for Herr Hauptmann. Ron G -
What is on your bench right now ? Share a picture :)
CrankyCrafstman replied to Martinnfb's topic in Modelling Discussion
Vallejo acrylic paint doesn't work with alcohol because it is a true water based acrylic paint, not a lacquer based acrylic paint like tamiya or others. If you use anything other then there thinner or distilled water you will end up with a gooey mess. There flow improver and flow retarder work very well. I only use there retarder when brush painting, but there flow improver works great when you add a few drops to your airbrush when spraying. Ron G -
Where did Trumpeter go?????
CrankyCrafstman replied to CrankyCrafstman's topic in Modelling Discussion
Like wise -
Hey all anybody else notice that Trumpeters web site is gone? Anyone have a clue what's up? Ron G
-
They ain't cheap. Mine cost me $635.00 about 5 years ago, wife got it for me for Christmas. Ron G
-
I have the Dragon 1/6 Sherman, and YES it is humongous!!! I started it but want to make it into an M4A3 (76)W but I need a different turret and its fiberglass/resin and $250.00 dollars. It needs alot of other stuff to make it into a 76mm cannoned one, so saving my pennys for all the stuff to finish it. Actually it is a 1/35 scale Dragon Sherman scaled up to 1/6 scale. Ron G
-
Grumman Tracker LSM?
CrankyCrafstman replied to Sir Desmond Glazebrook's topic in Modelling Discussion
Id love a good styrene S2 tracker. I flew off my Carrier (USS Wasp CVS18) to Norfolk, VA. In one in 1970. My next door neighbor died in a crash in one in 1969 on the USS Wasp, he was coming in for a landing and the ship up rolled just as he was making his approach, he crashed into the fan tail killing all on board and two crew on the fan tail. He was newly married with a young infant son. Very sad, but that was the life of a navy pilot, landing on a carrier at sea is the most dangerous job there is. Anyway it would be nice to have the large rardar dome as an option. We had both on or ship plus the helios too. Ron G -
Hey Doc In that picture of the Infinity needle and nozzle the nozzle is clearly split. That should be replaced, other wise you will get a very bad spray pattern. Ron G