CrankyCrafstman
-
Posts
1,350 -
Joined
-
Last visited
Content Type
Profiles
Forums
Events
Gallery
Everything posted by CrankyCrafstman
-

Tamiya P-51D, easy bake & shake.
CrankyCrafstman replied to 1to1scale's topic in LSM 1/35 and Larger Work In Progress
Watching with much interest Ron G -
Thanks guys It's very appreciated.
-
Covid 19 LSM airshow static displays..props
CrankyCrafstman replied to smitty44's topic in General Discussion
You guys most have some really big display cabinets...lol Ron G -
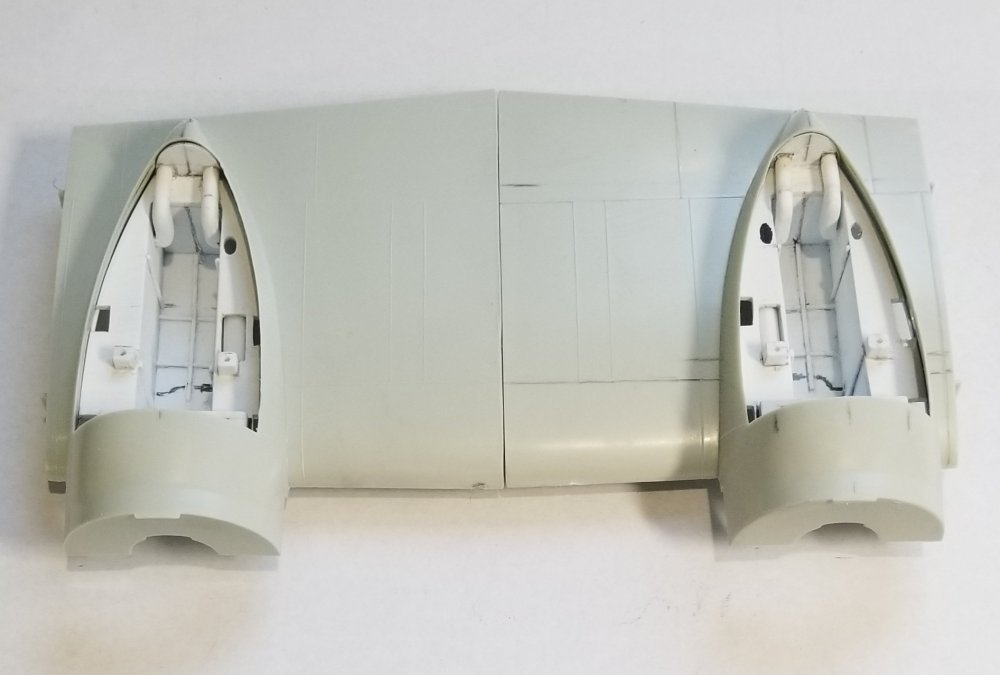
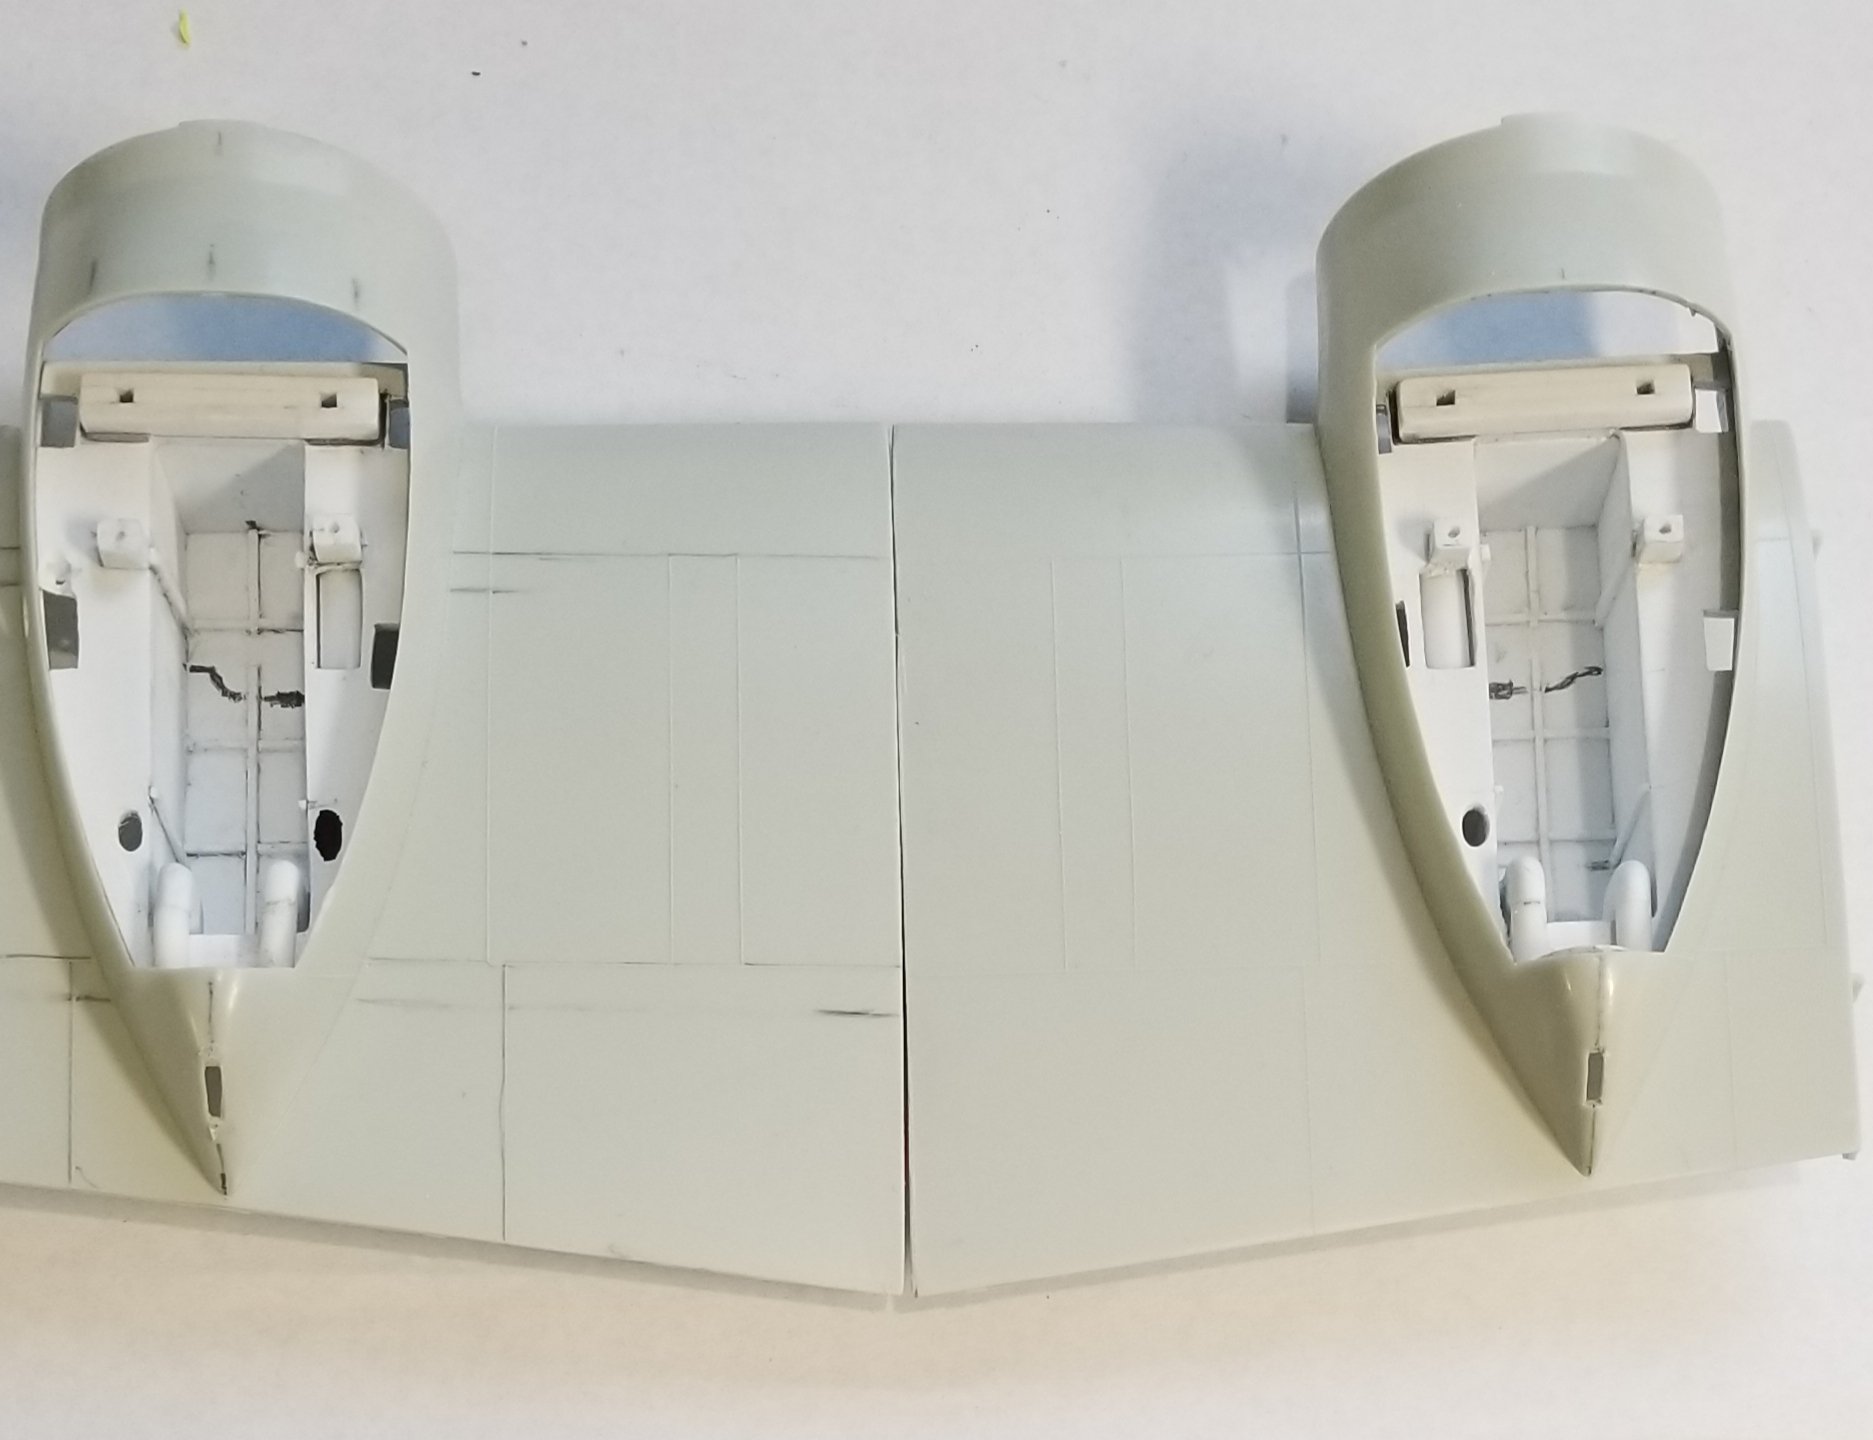
Small update while I wait for plastic stock to arrive. I have the wheel wells pretty much done and they are glued into the nacelles. Wow progress! So here are some pictures for you to look at. view of port on the right and starboard on the left wheel wells installed into the nacelles. view of port wheel well looking forward. view of starboard wheel well looking forward. view of port wheel well looking rearward. view of starboard wheel well looking rearward. I have some filler and touch ups to add ti both before paint, but there getting there. I know that they aren't 100% accurate but there close enough for me. Ron G
-
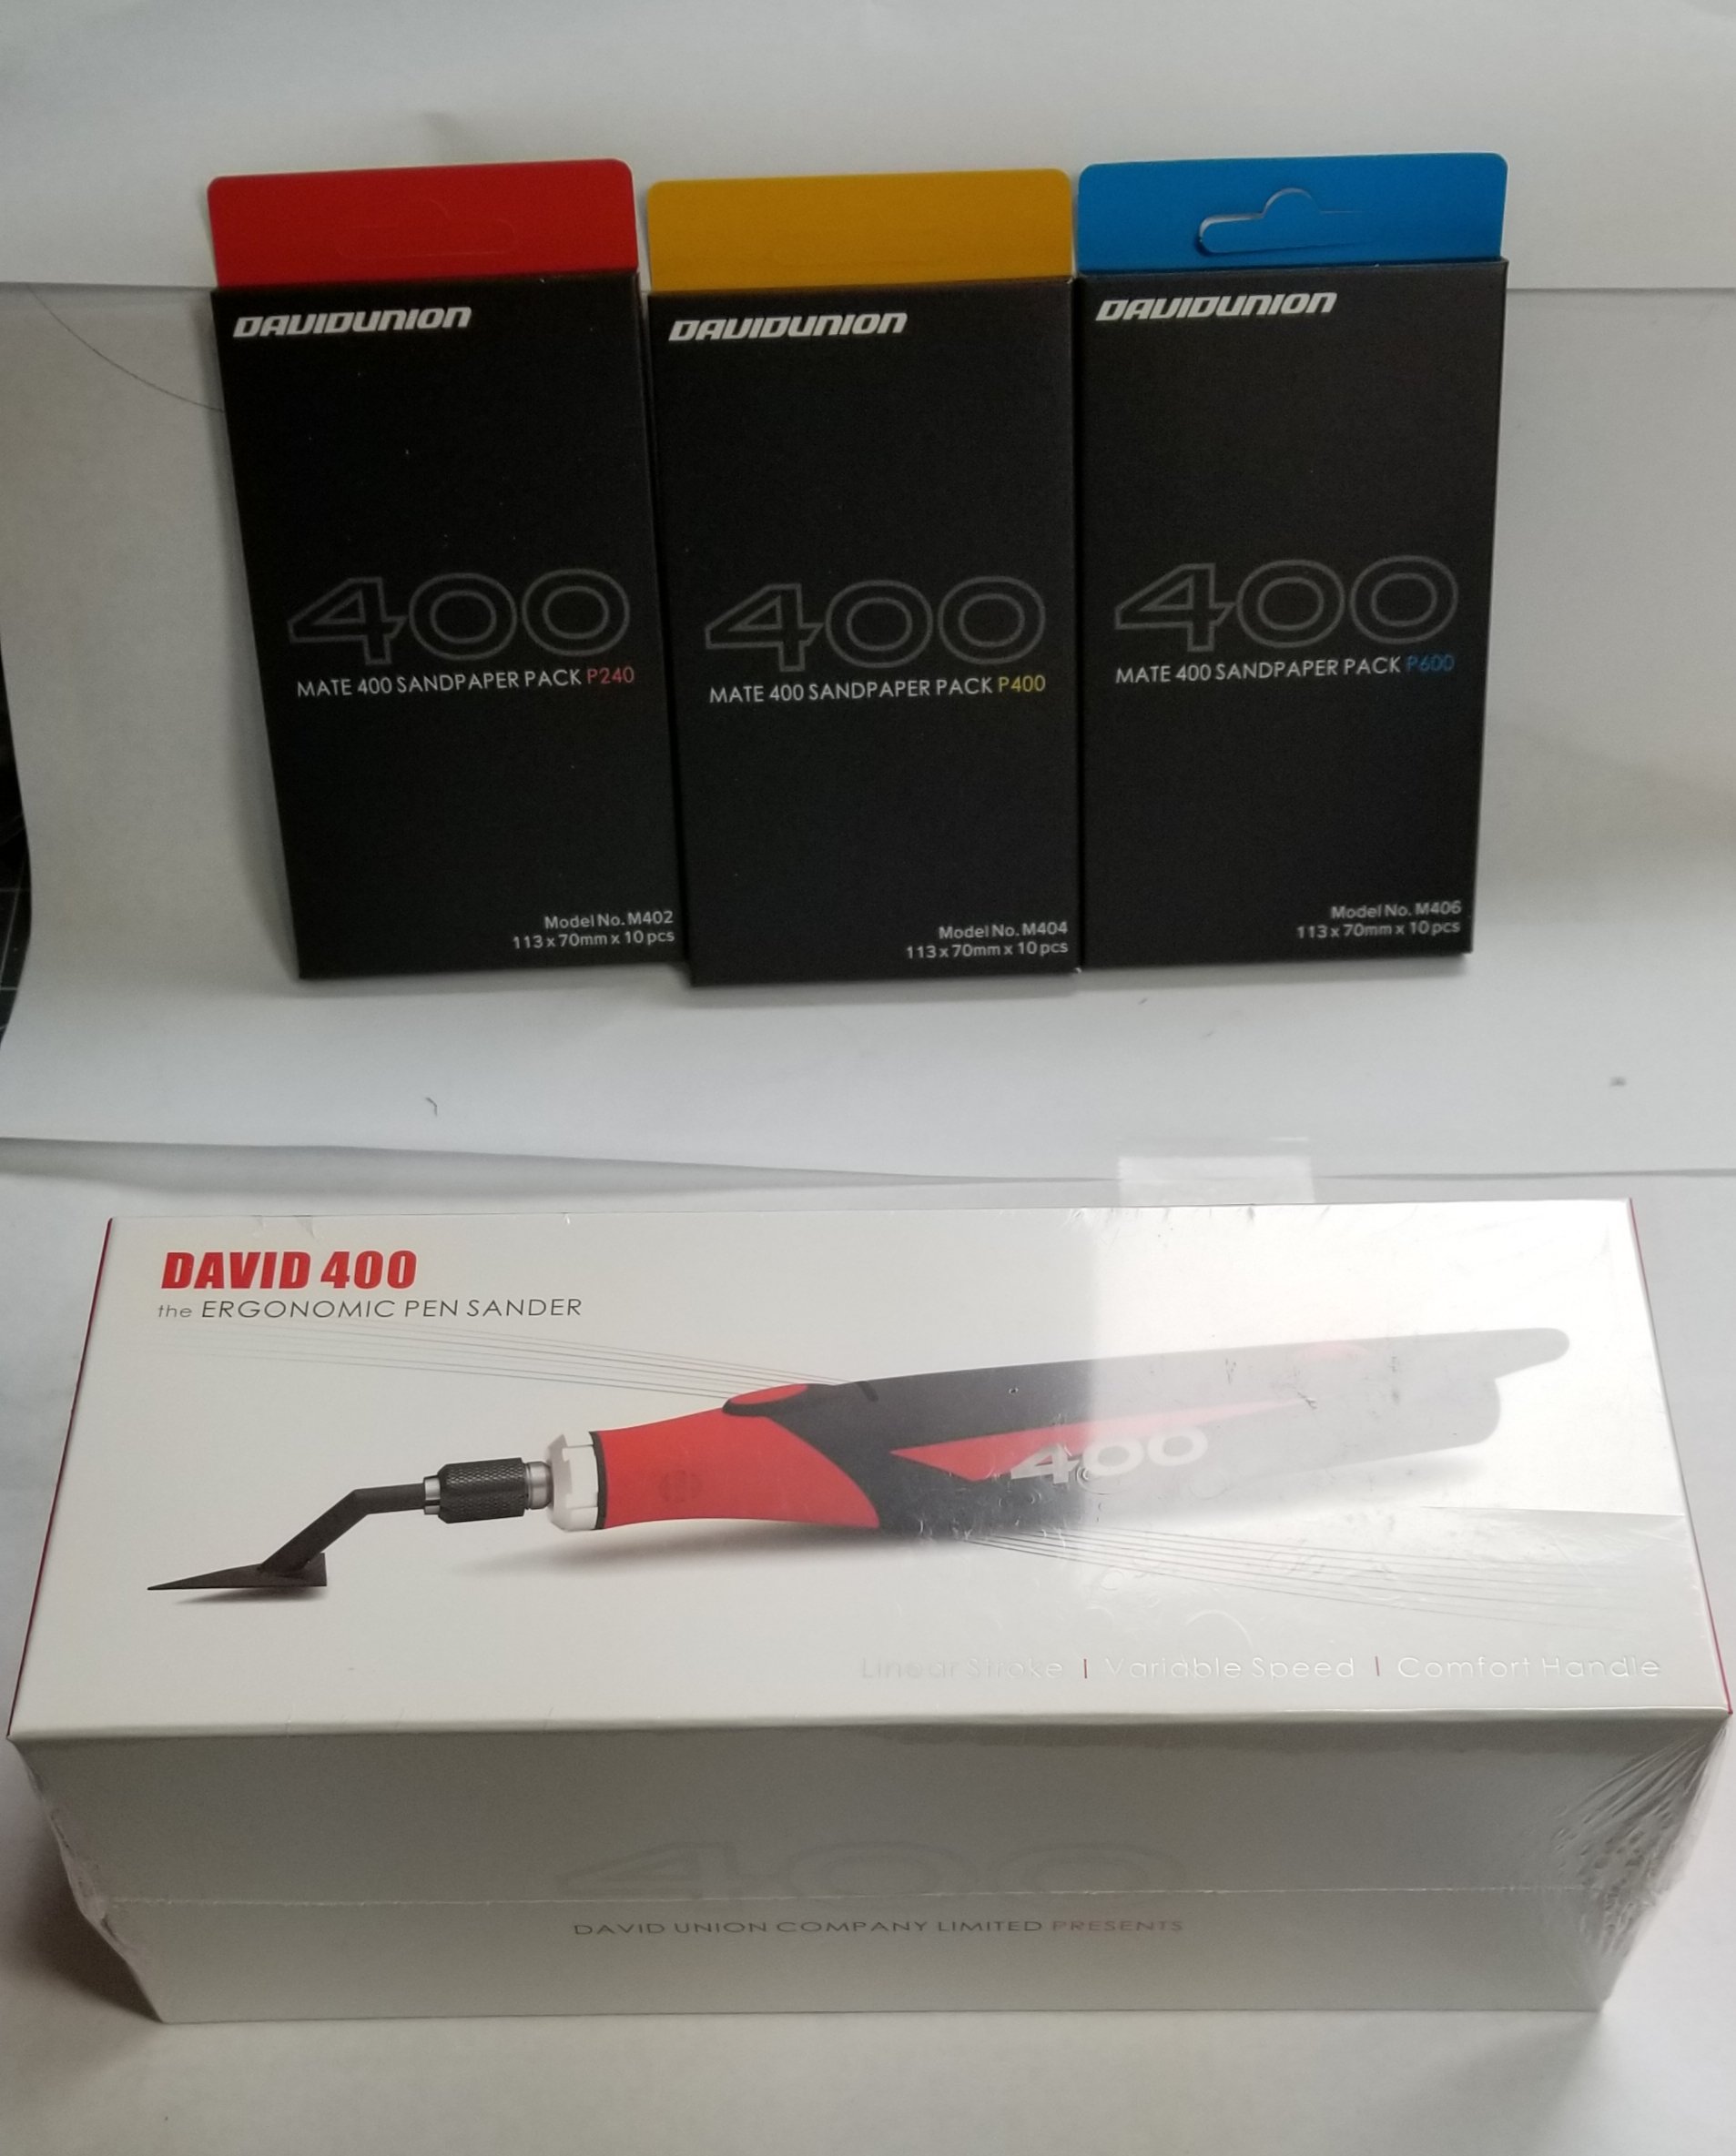
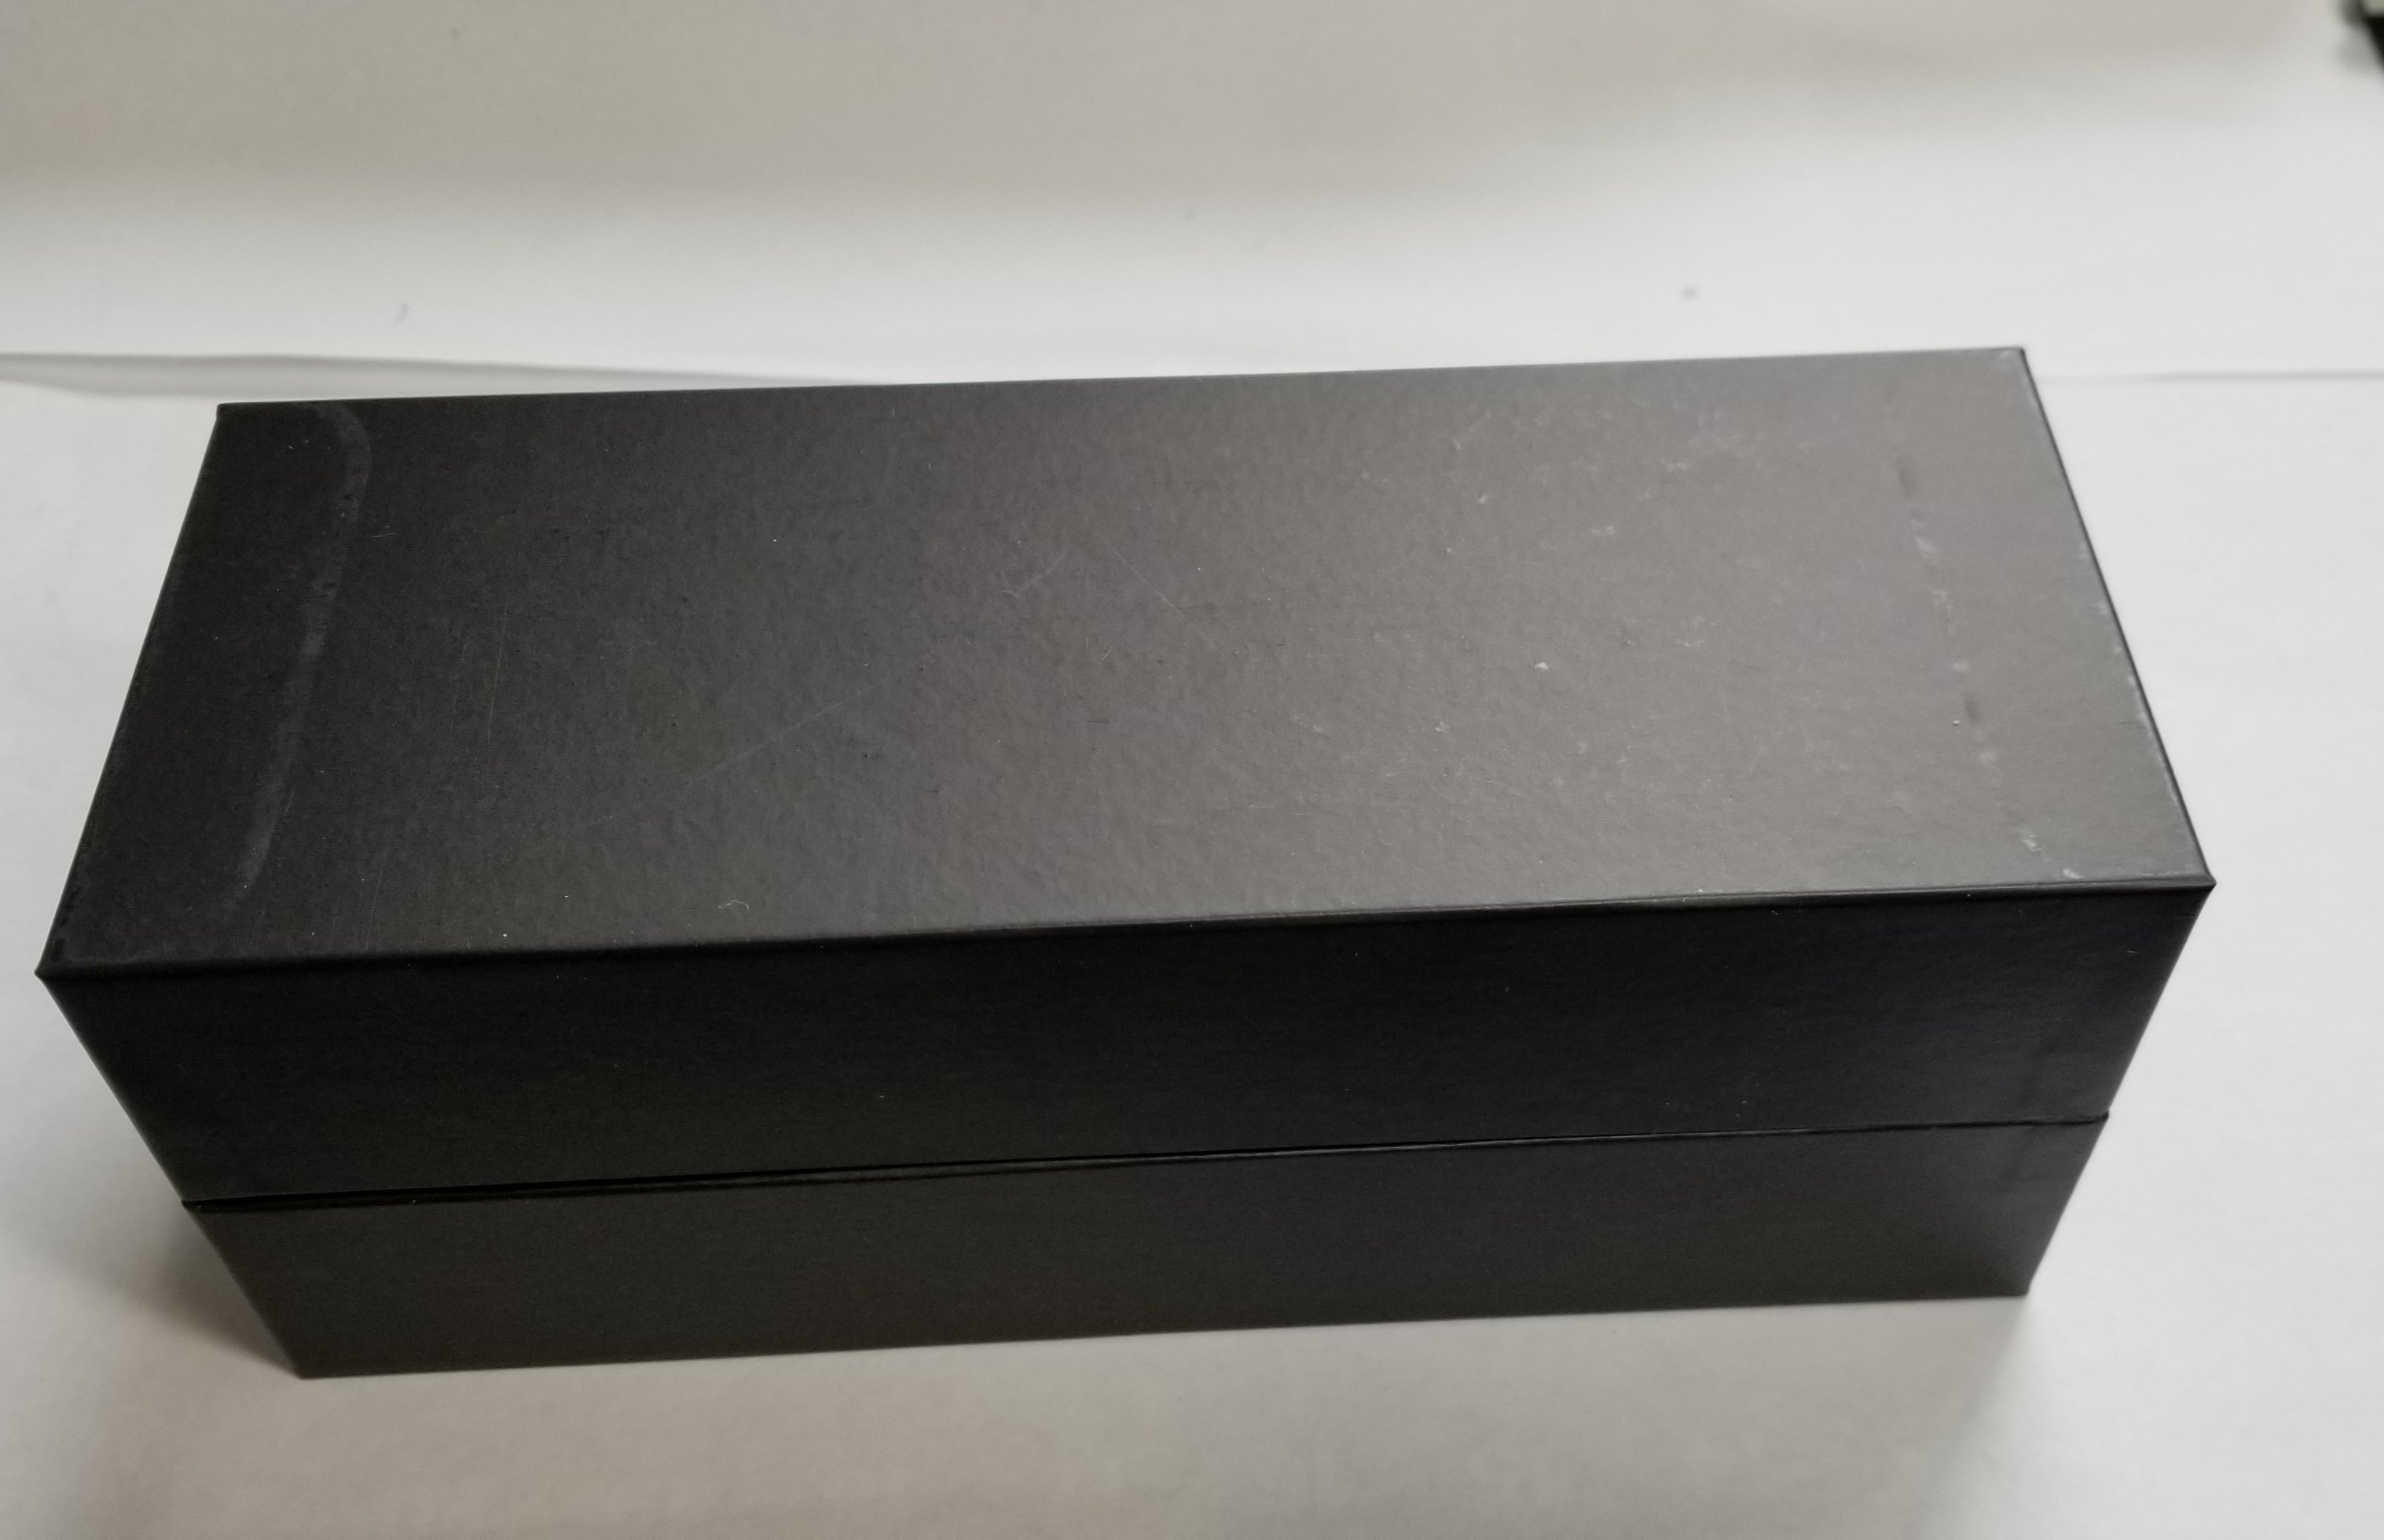
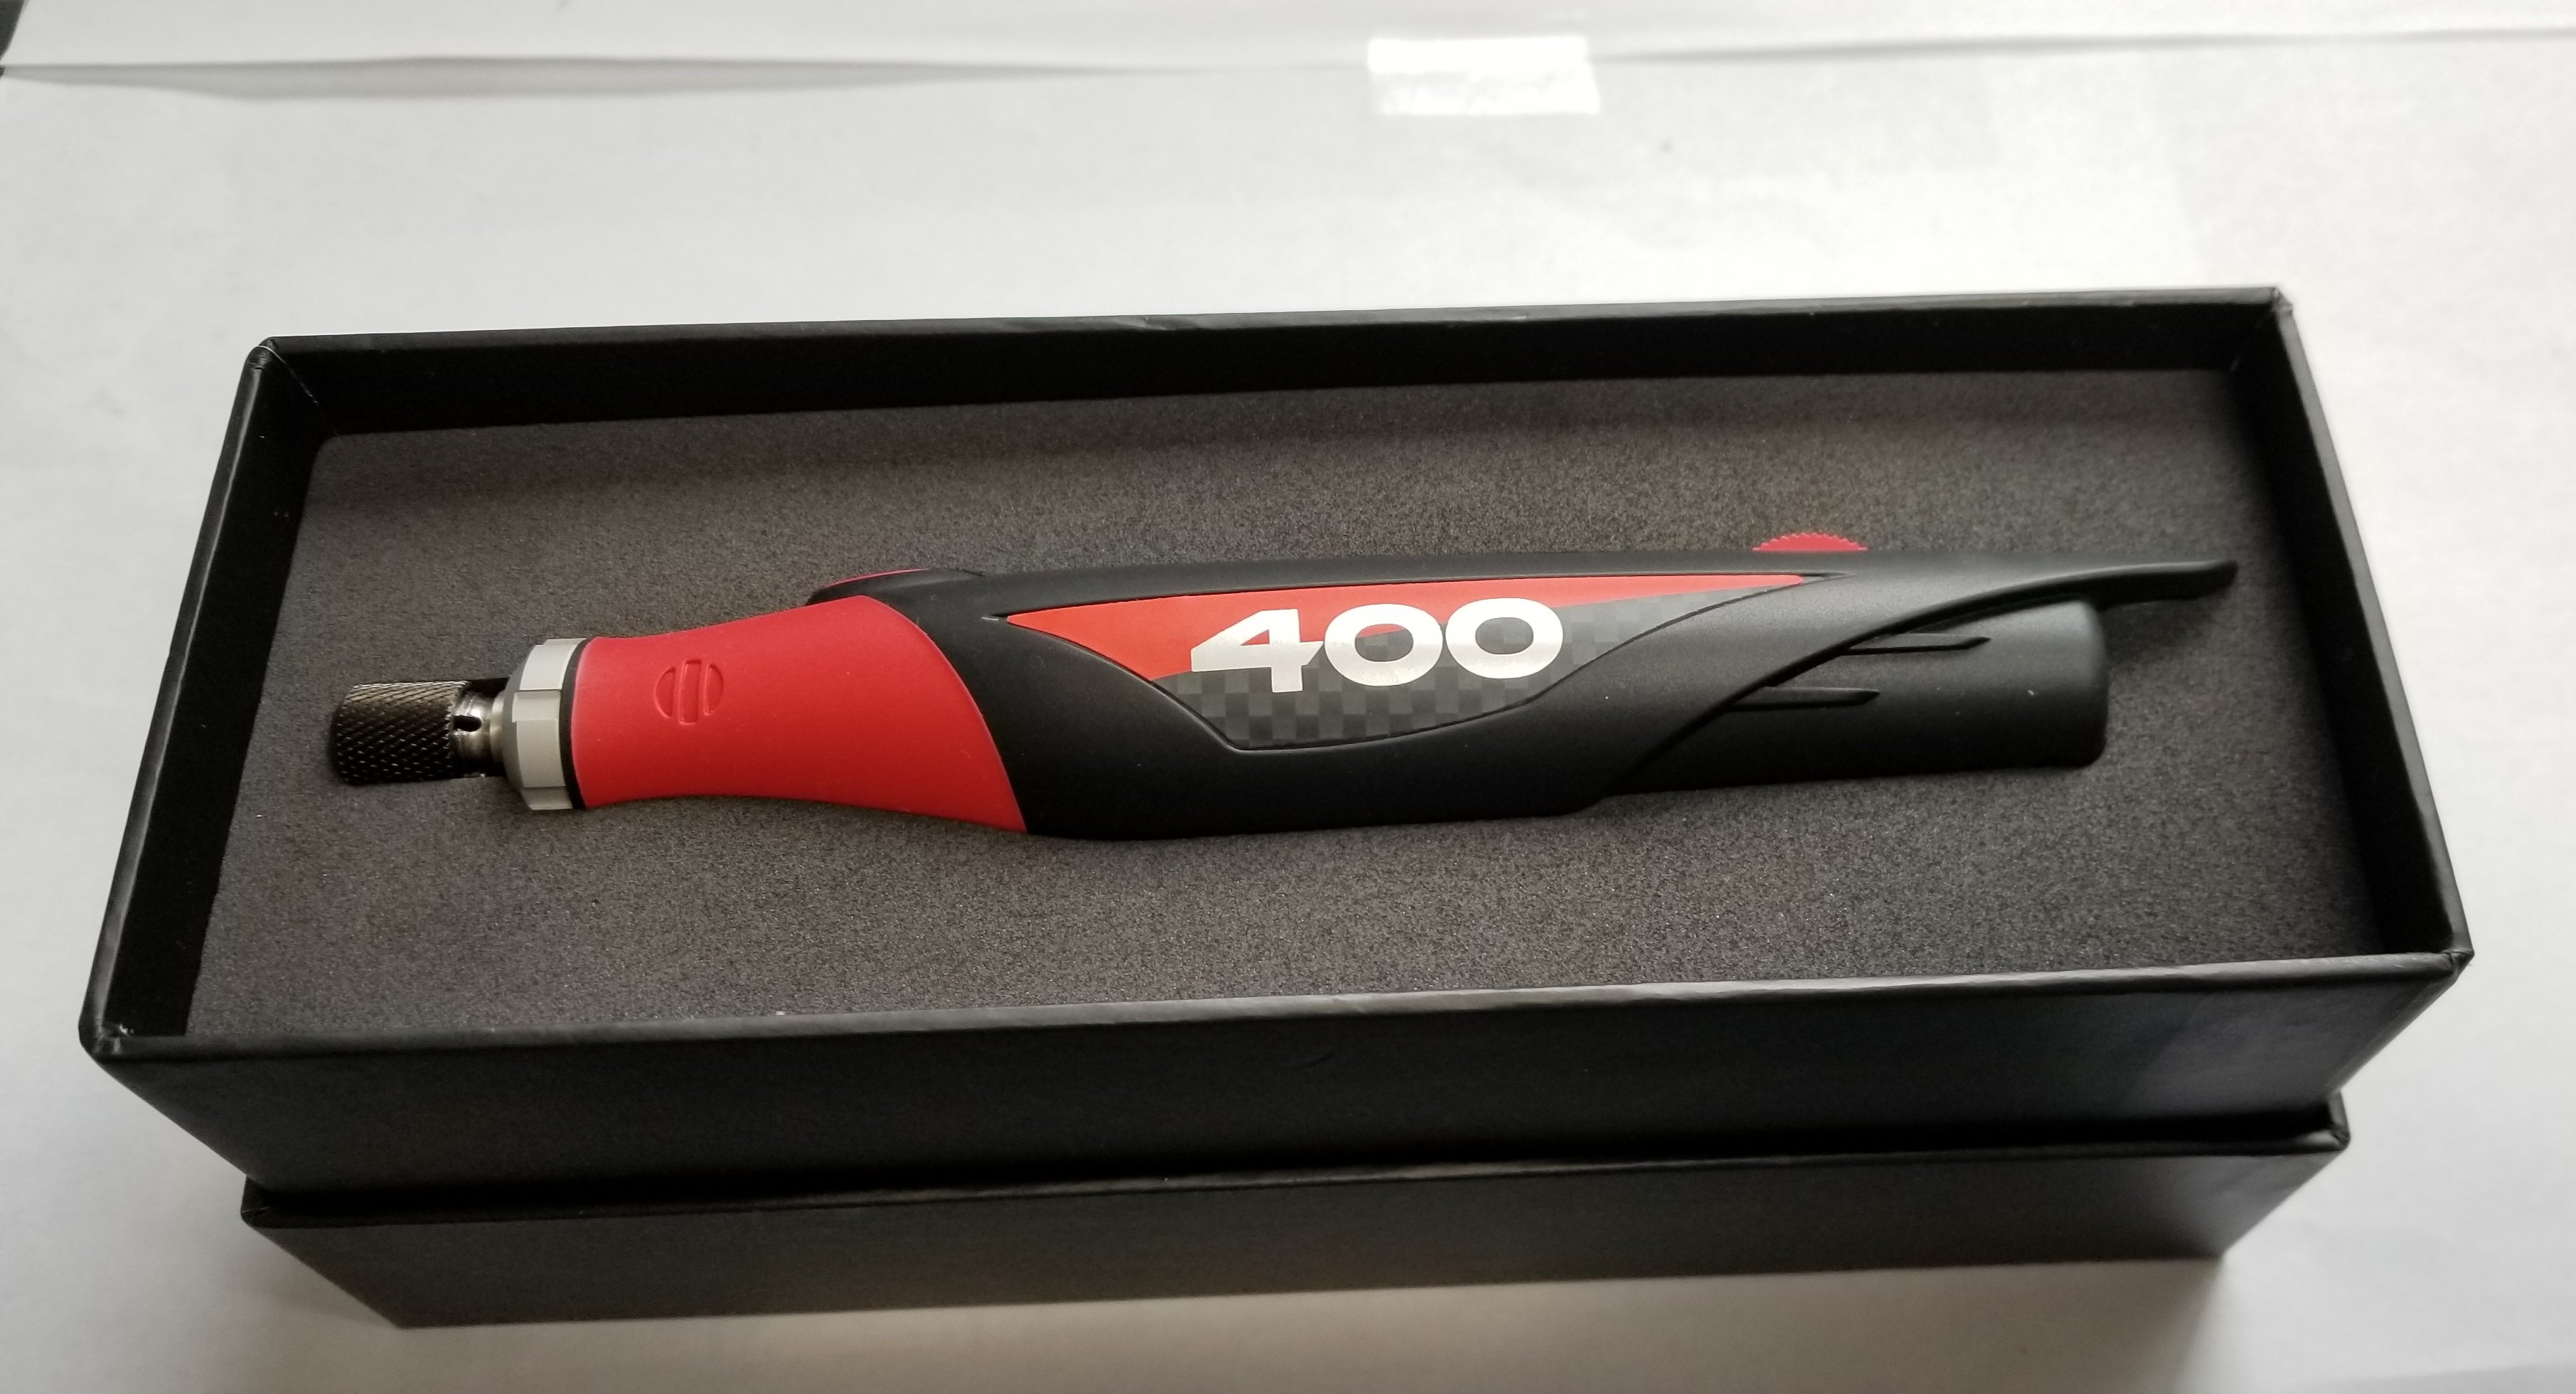
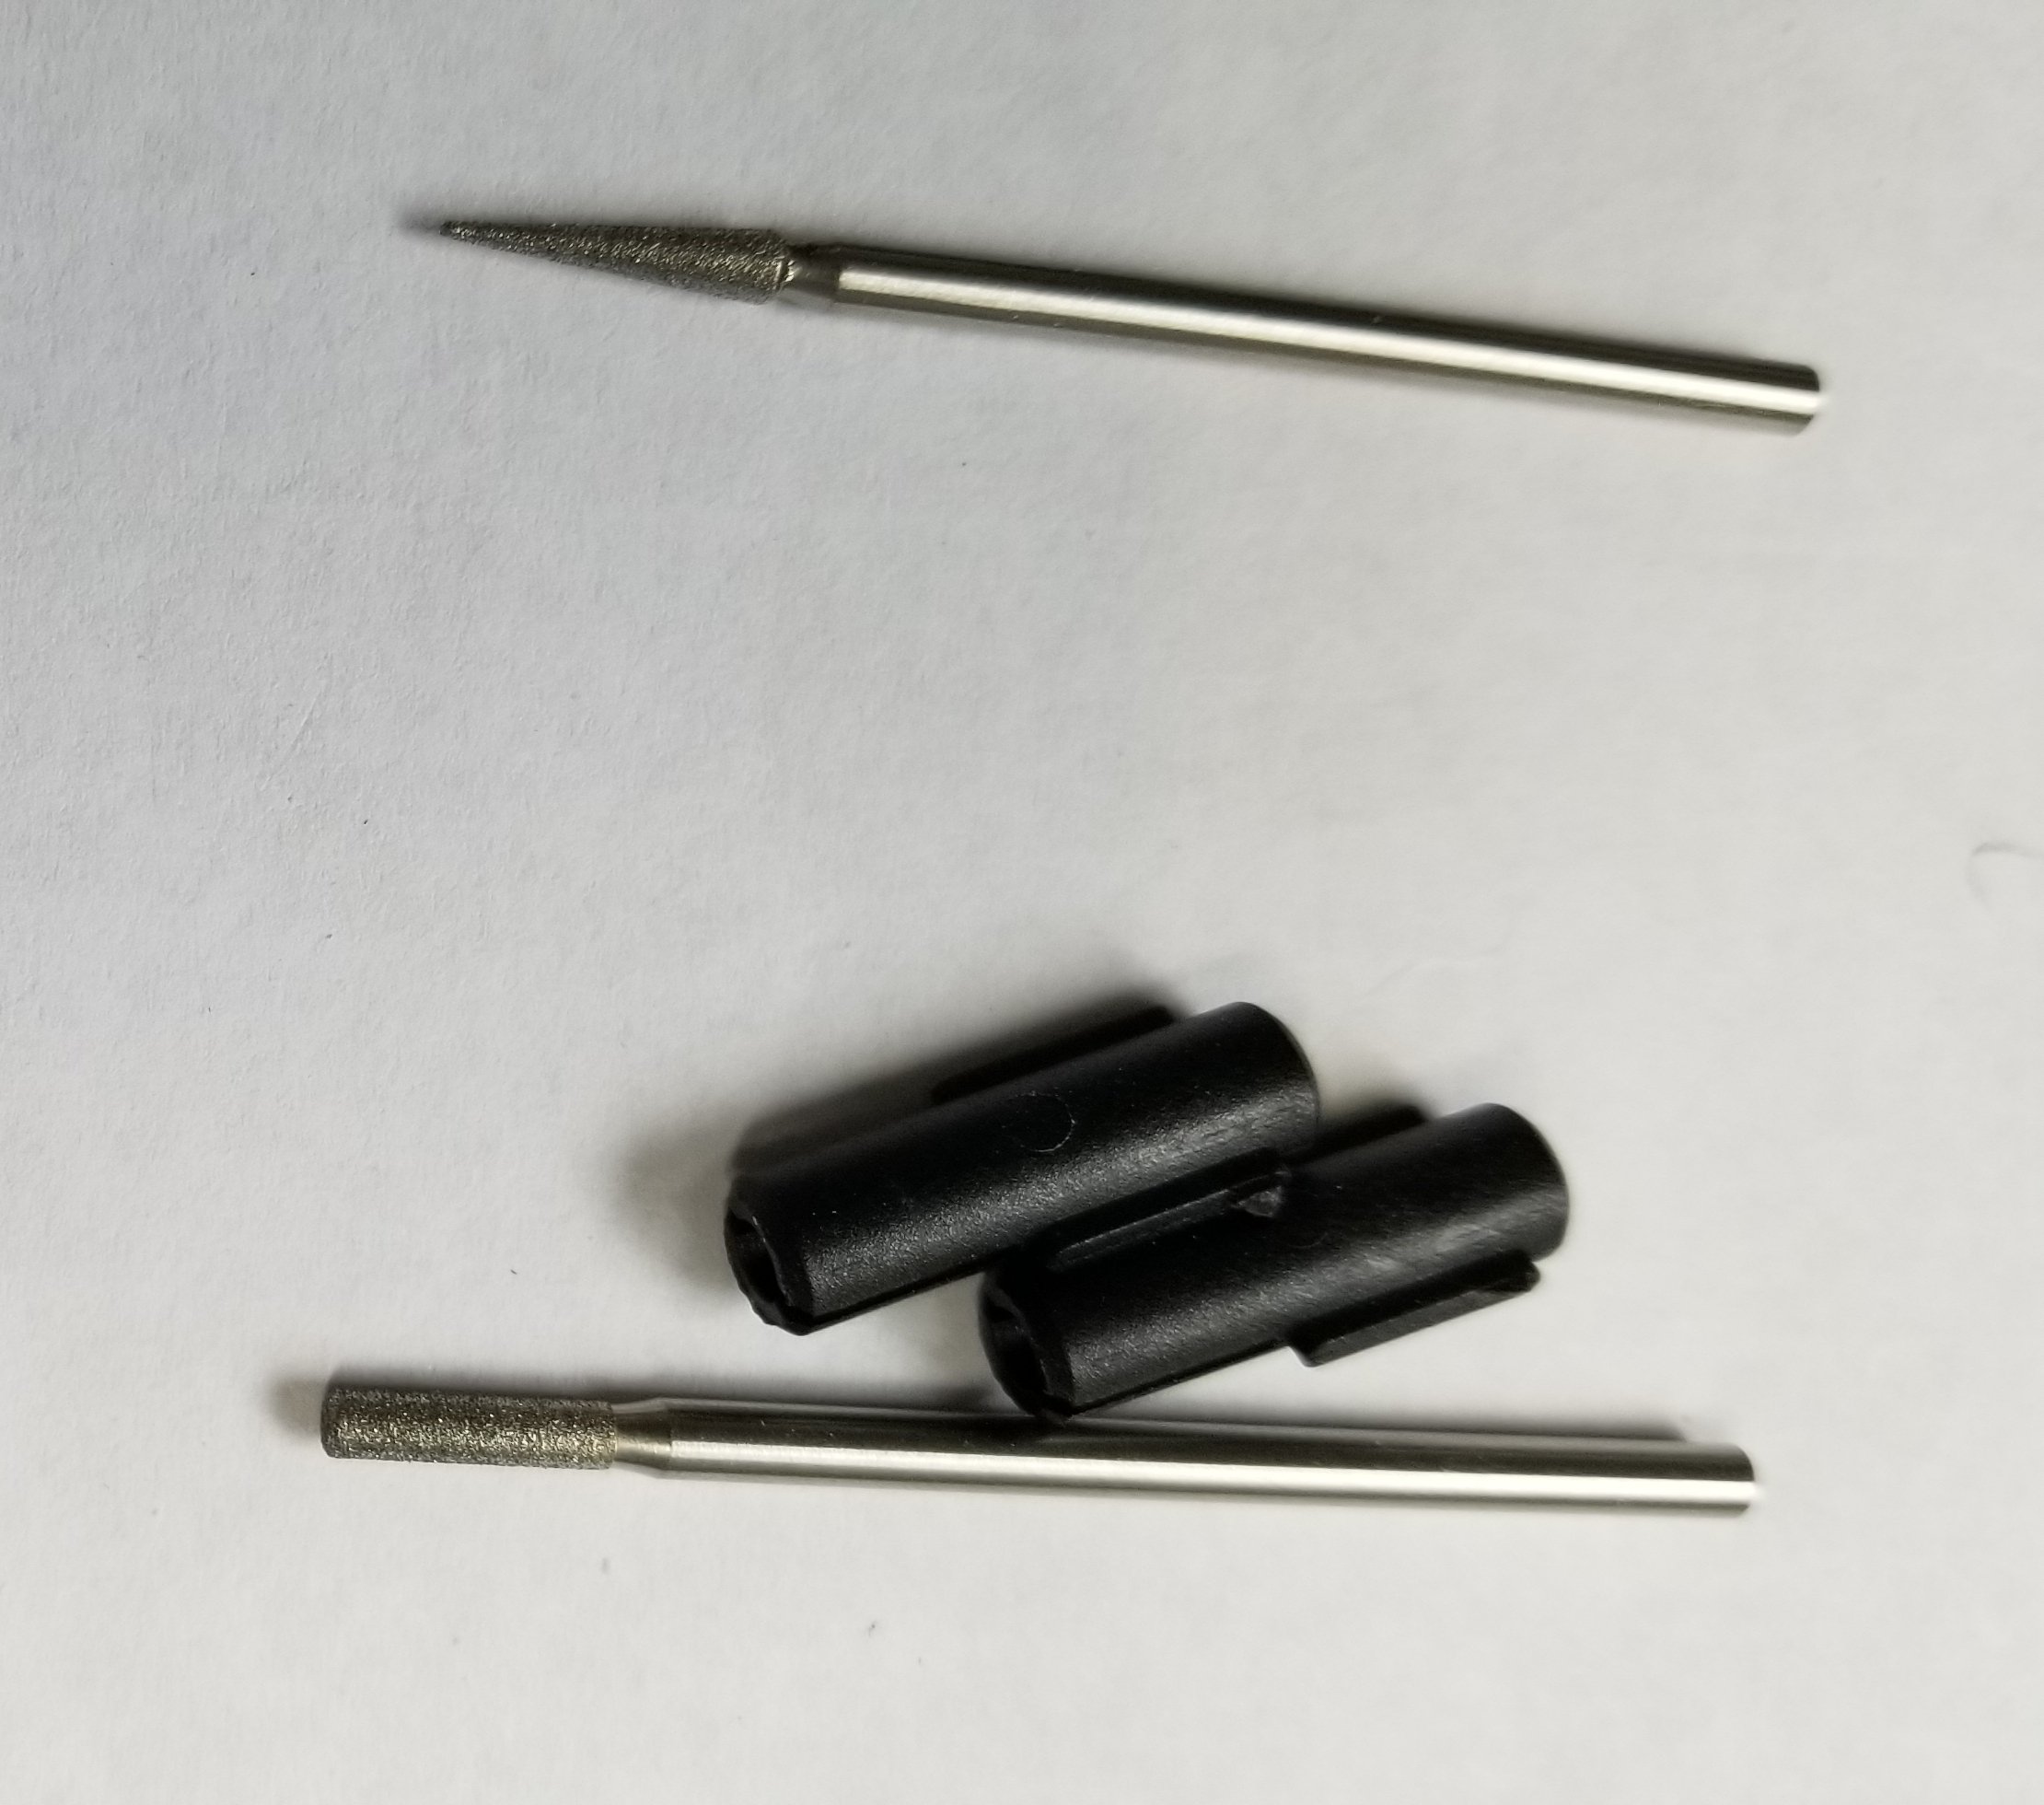
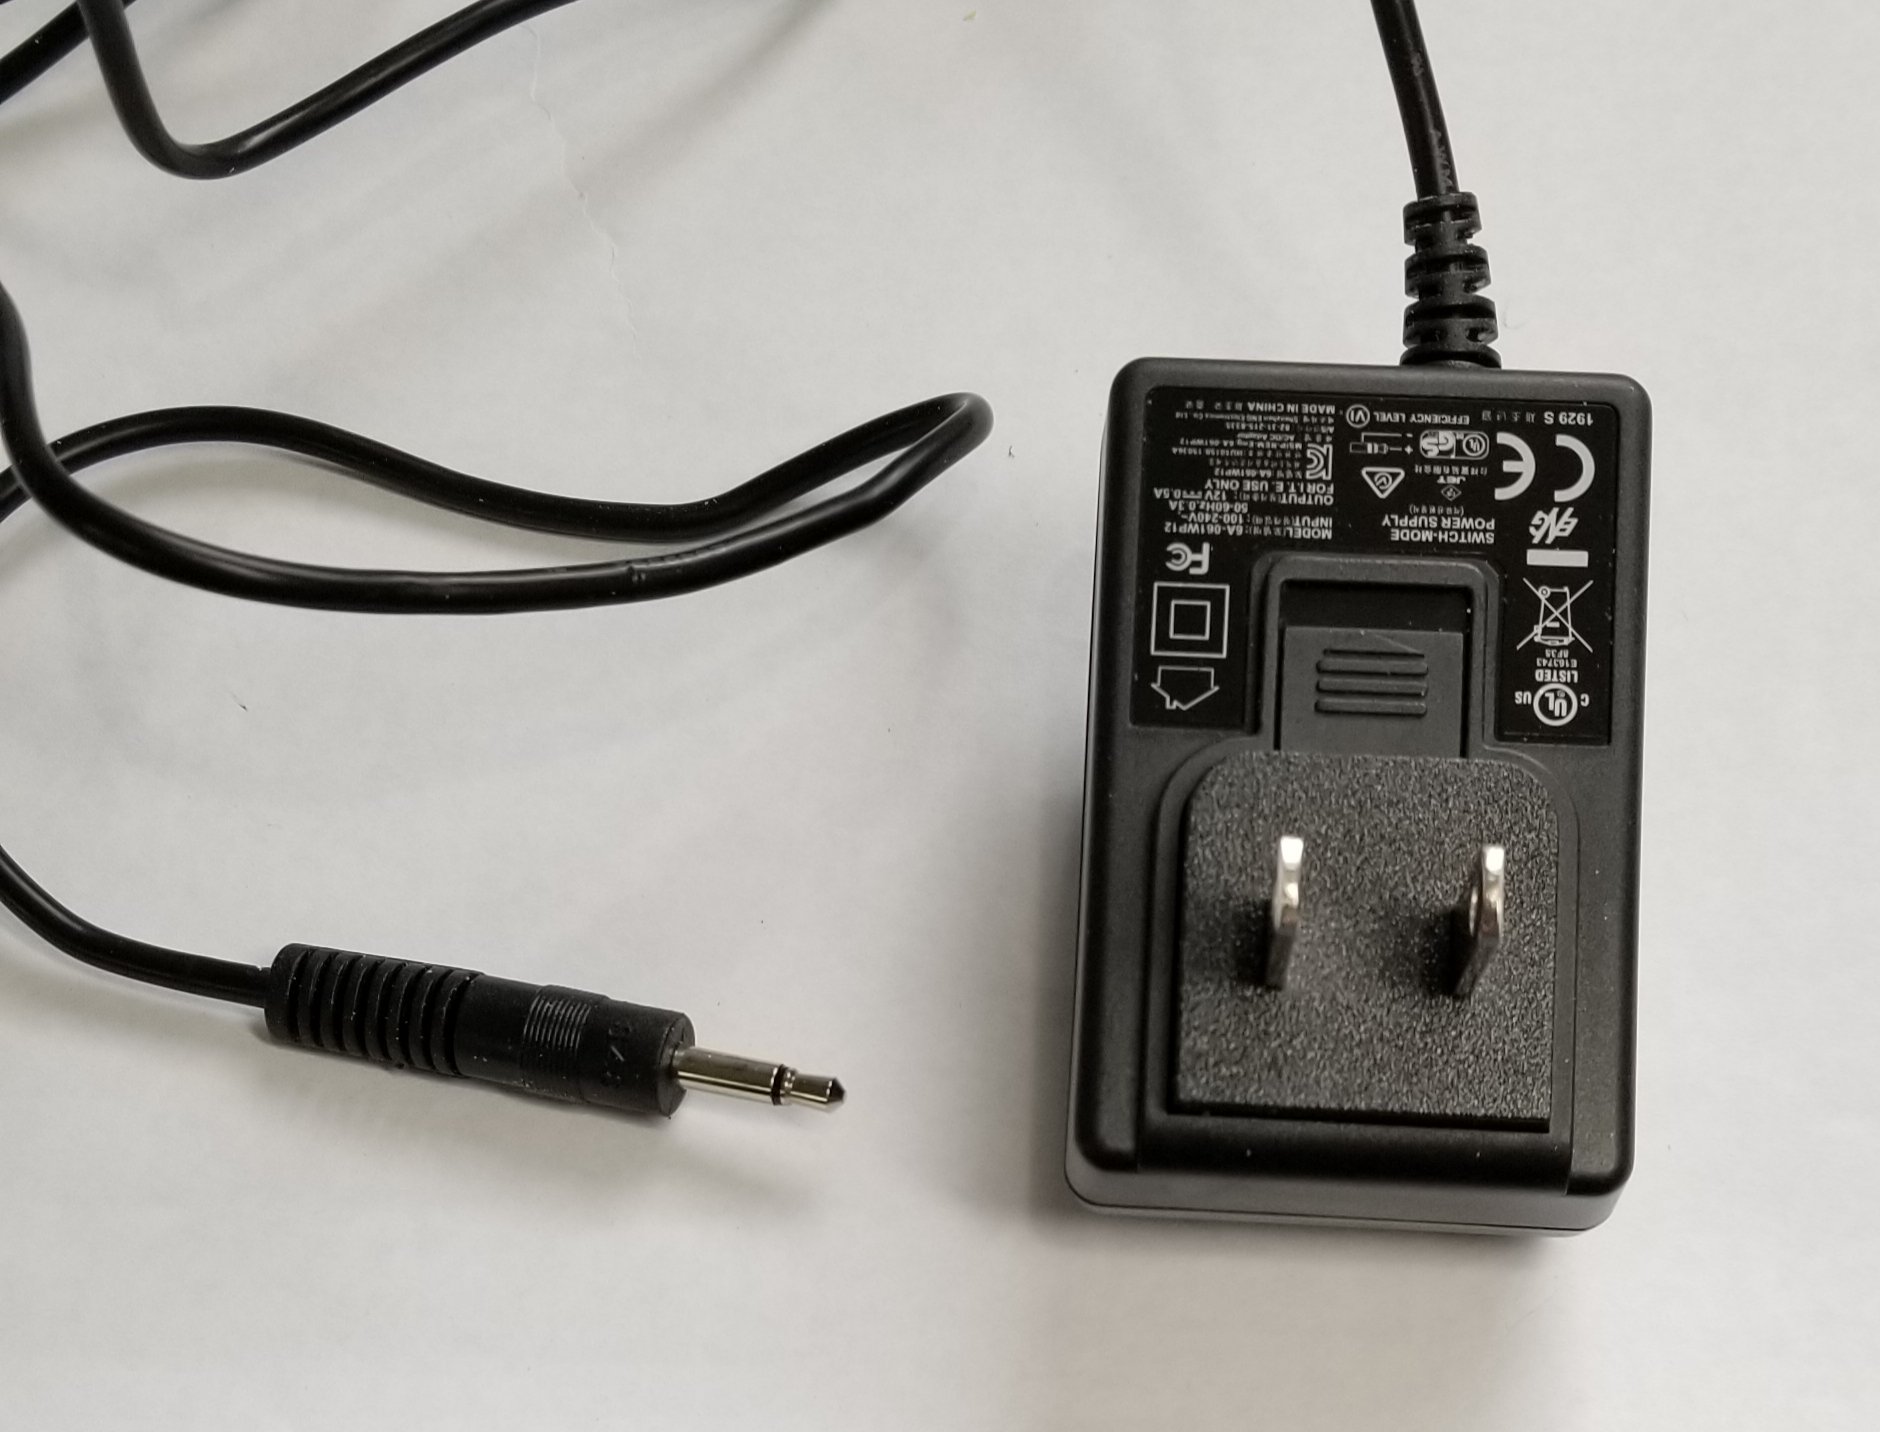
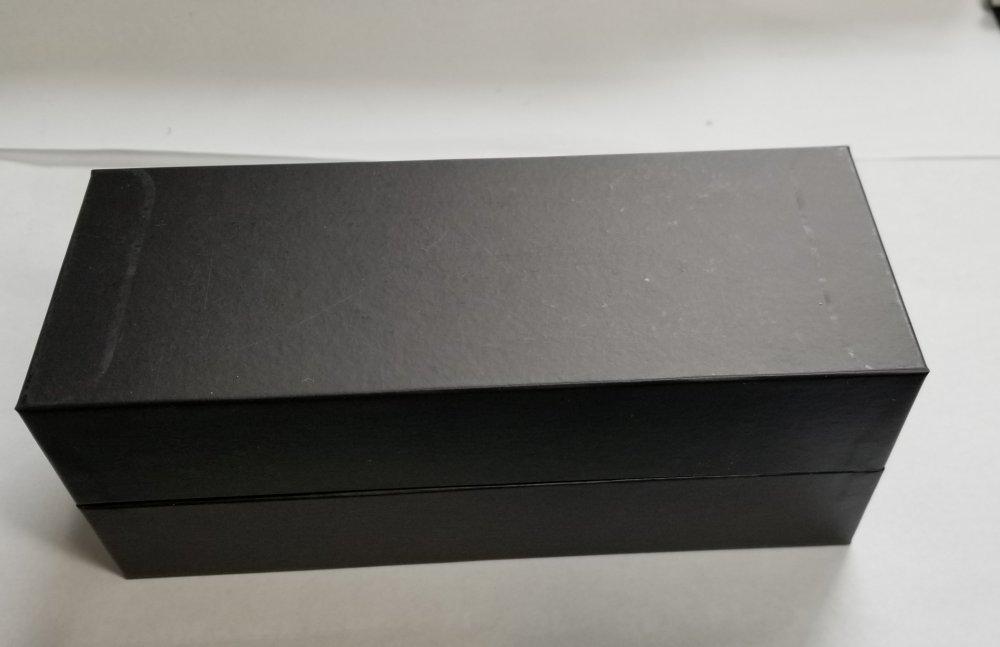
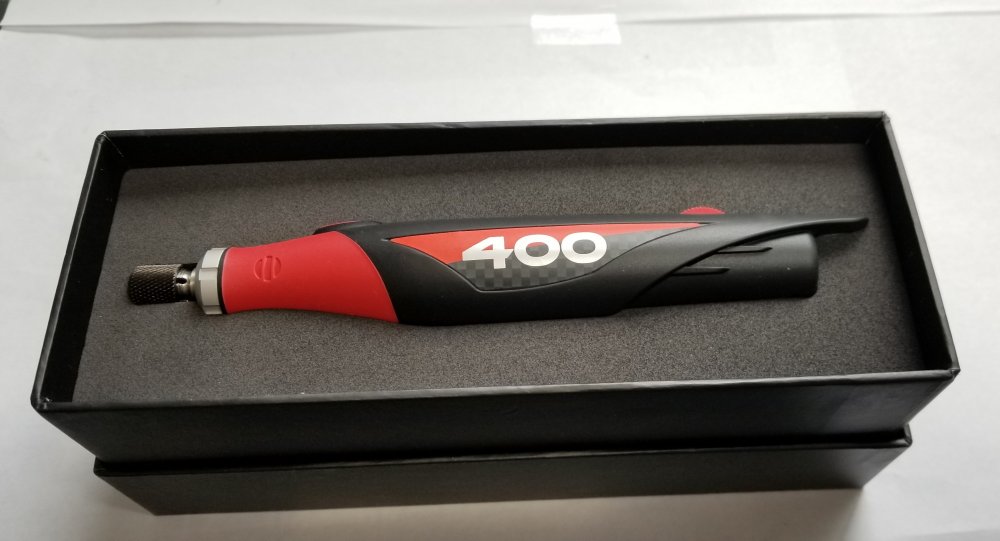
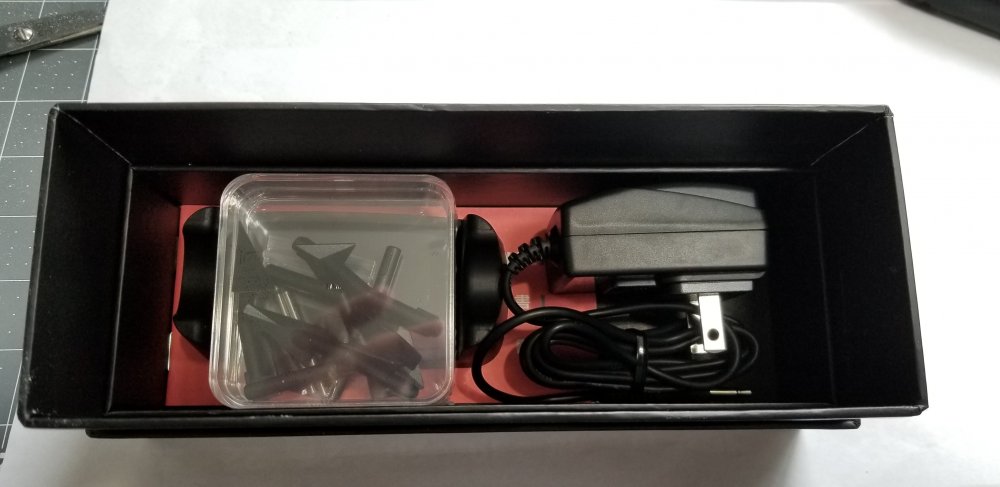
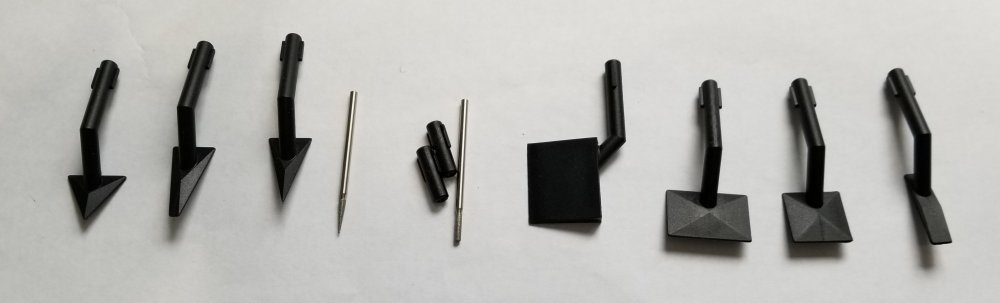
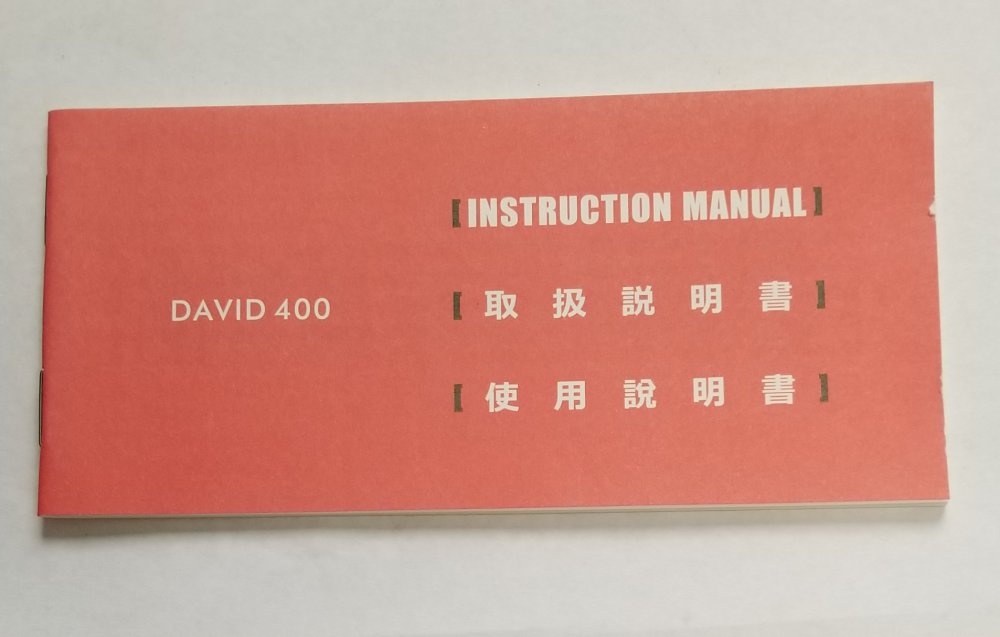
Hey all Here's a review of the David Union 400 detail sander. I got this from a friend on LSP (yeah that other place). It's made in Taiwan by David Union and its his model #400 with attachments and 3 different packs of self sticking sanding paper in grits #250, 400 & 600 (10) sht's. per pack plus a card board template for each type of accessory. I got it from Troy Molitor, who is the US importer who lives in California. It took two weeks to get to me in Michigan (damn Co-vid crap). The cost is $99.00 plus $15.25 for shipping. So here are some pictures. this is what came in the package from Troy. The sander and the three packs of self adhesive sand paper in grits #250, 400 and 600. this is what's inside of the white box. this is the sander. The small red wheel on the top is the on/off switch and variable speed control. It has a 3.5 mm stroke and speeds from 1,000 - 6,000 strokes per minute. these are the accessories. A stand, the plug/transformer and small clear plastic box to hold the all the bits. sander on it's work stand. view of all the attachments. These look like they could be modified to fit your situation, but not sure if you can get replacement bits I'll have to check with Troy. close up view of the two small diamond tip sanding bits and there holders. I believe these will hold small jewelers files, like the kind most of us have. I haven't tried it yet but I will and will let you know. view of the wall plug transformer 110/to 12v owners/instruction manual. Not much in here, but it does give the specs. If you go to LSP to the venders area you'll see a post on this and were you can order it from Troy. He's a great guy to work with and very prompt with answers. Its cheaper then the ones from MicroMark and Proxon, plus it has variable speeds. Thanks Ron G


-
- 2
-

-
Share how COVID-19 Quarantine has affected you.
CrankyCrafstman replied to 1to1scale's topic in General Discussion
Yeah right like the UN is actually going to do something, dream on. -
Bristol Beaufighter TF MK.X seat belts?
CrankyCrafstman replied to CrankyCrafstman's topic in Modelling Discussion
Thanks Martin -
Bristol Beaufighter TF MK.X seat belts?
CrankyCrafstman replied to CrankyCrafstman's topic in Modelling Discussion
Hey Martin Did they use the same belts front and rear? Ron G -
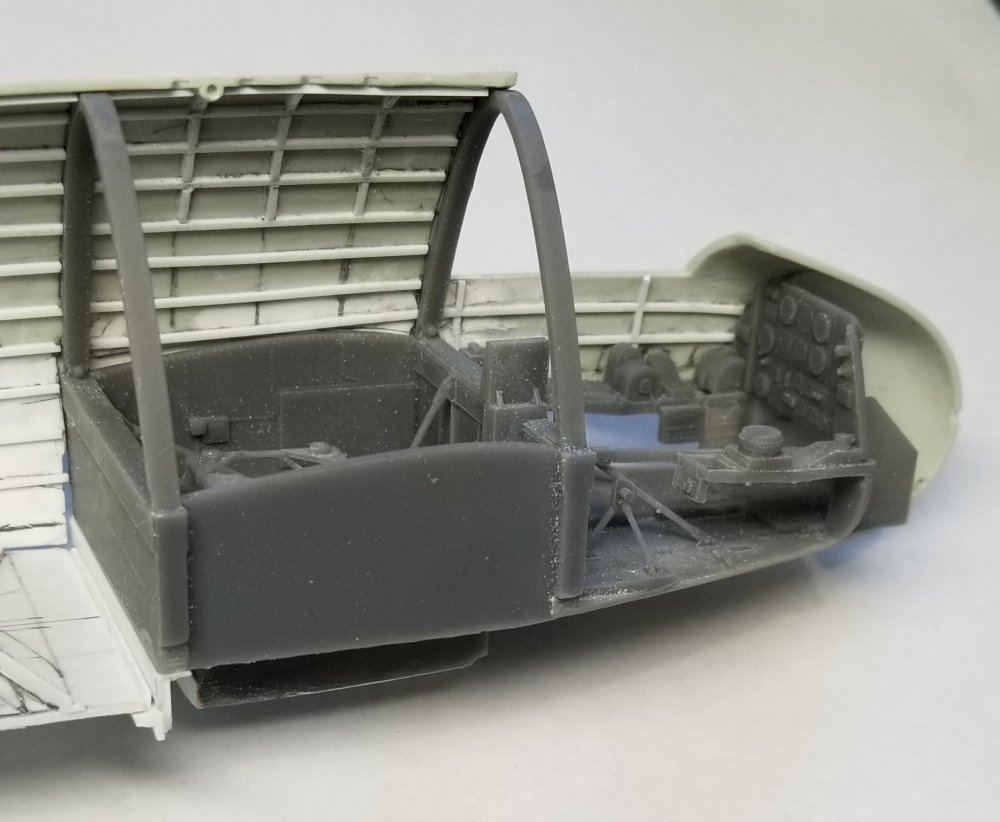
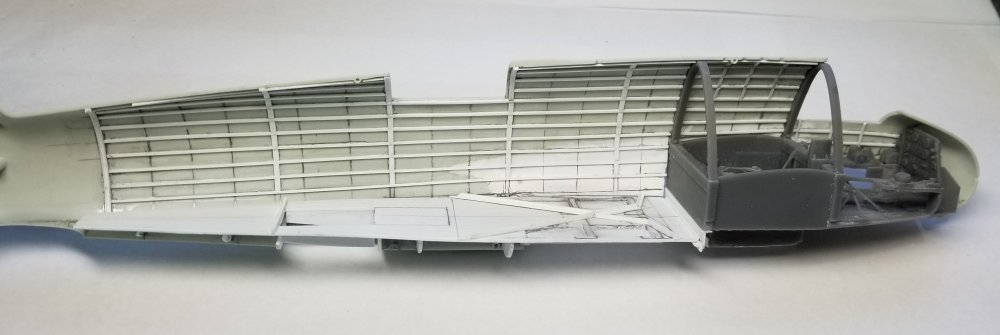
Hey all Small update. I got some of the ribs on, but I had to stop because I was going cross eyed . Plus I ran out of 1/32" x 1/32" plastic strips. I ordered some, so now I have to wait till they come in the mail. I like doing all this scratch building, but it can get very tedious after awhile. So here are some pictures for you to look at. view of the cockpit with the instrument panel in place. view of the port fuselage and floor. view of the floor. I added some detail to it by the area were the cannon ammo boxs go. Thats it for now be back soon with more. Ron G
-
Bristol Beaufighter TF MK.X seat belts?
CrankyCrafstman replied to CrankyCrafstman's topic in Modelling Discussion
Thank you Martin I thought that was the one, but wanted to verify it with some one on here. Ron G -
Bristol Beaufighter TF MK.X seat belts?
CrankyCrafstman replied to CrankyCrafstman's topic in Modelling Discussion
Yes Hubert, but which Sutton harness. -
Hey all As I'm not very familiar with this aircraft, could someone please let me know what type of seatbelts were used in the TF MK.X in coastal command. I need to order some from HGW for the build I'm doing on my 1/32 Revell Beaufighter, and need to know which ones to get. Thanks Ron G
-
Hey Carl I would but since I had a liver transplant 5 years ago I can't drink anymore. And I used to really like Guinness...bummer Ron G
-
I know Ernie, my bad I should have said cupboard.
-
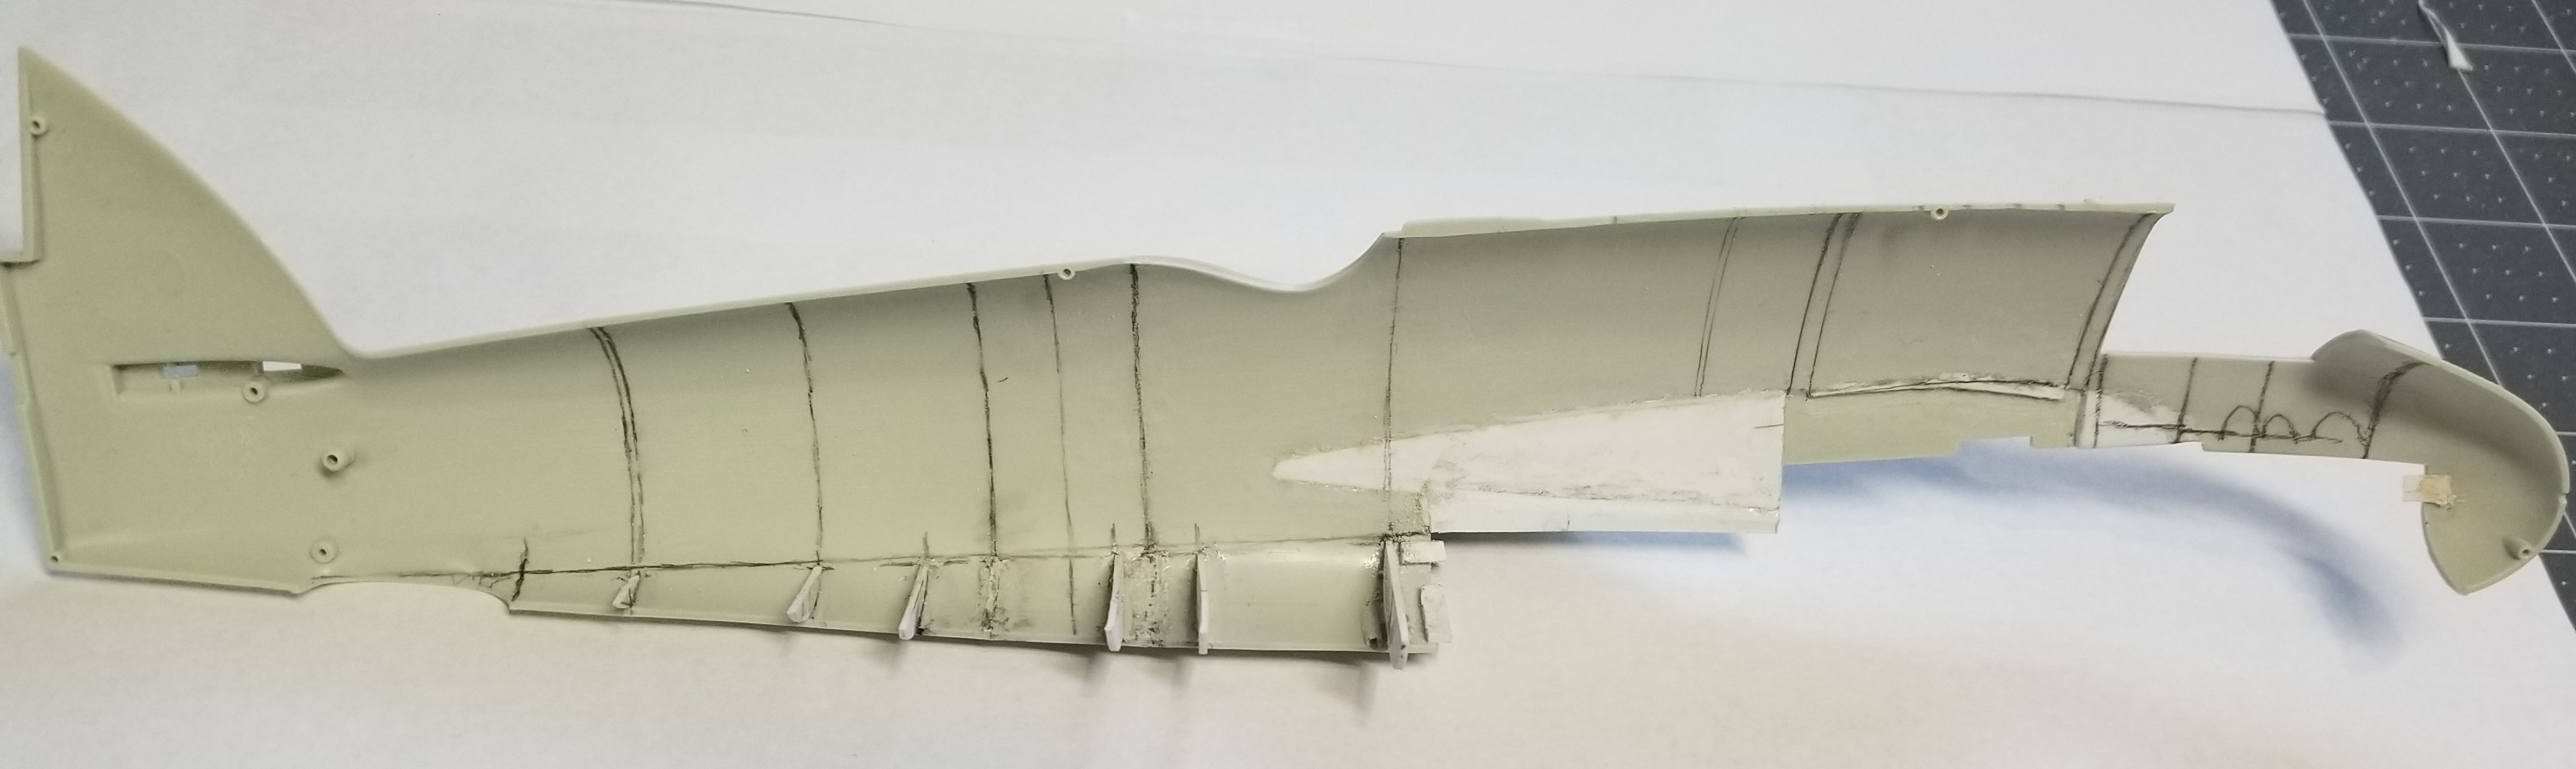
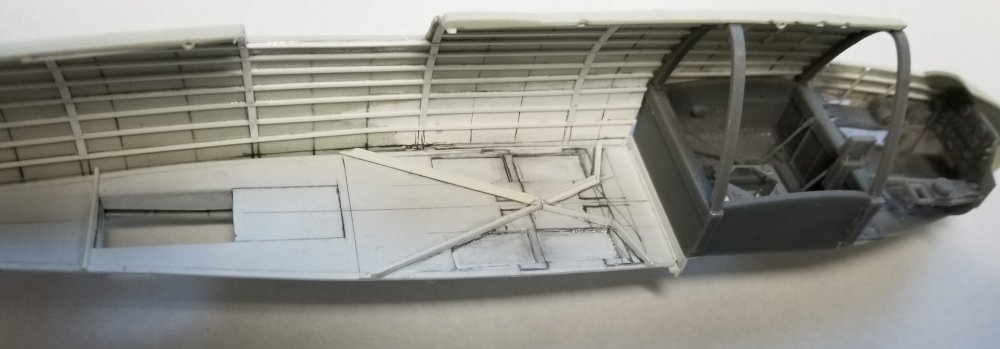
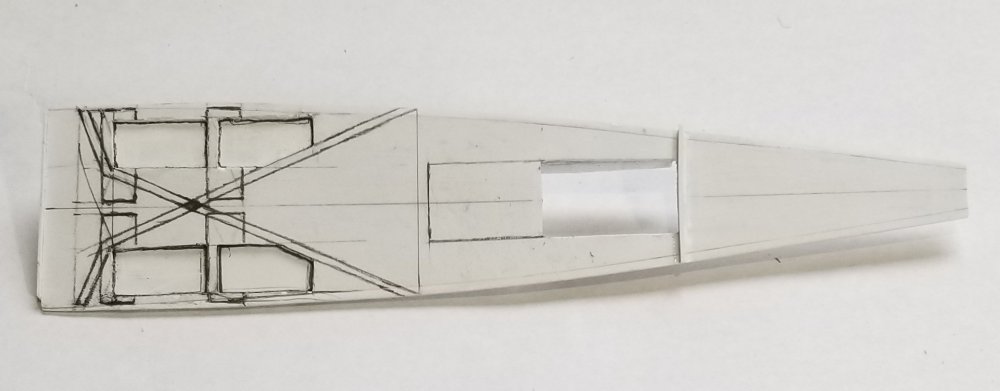
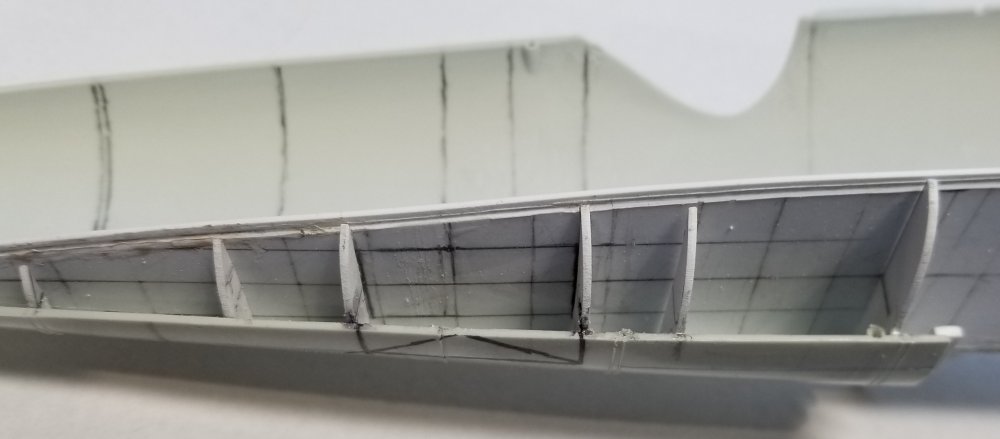
Ok here's today's update. I've got all the lines put on were the ribs go. I did some work on the floor, it's almost ready to install permanently. I still have to make the ammo boxs for the 20mm cannons. I'm going to upscale the ones that came in the 1/48 Revell Beaufighter. I'm glad I got that kit it has come in pretty handy on this build. Here are some pictures for you to look at. here's the floor the cut outs on the left are for the ammo feeds. The rear hatch is cut out now. lines for the ribs on the port fuselage. Also I cut out the observer/gunner's canopy opening in preperation for creating the rear bubble/canopy. lines for the ribs on the starboard fuselage. These will be covered with various pieces of plastic stock to simulate the ribs.view showing the floor and the cockpit in place. A lot of work that will be hidden, but I'll know it's there. There's a lot of detail to be added here. Boxs, pipes, tubes, wires, etc. etc. Ron G
-
Is he drinking a Guinness? If so he better not have gotten it out of my fridge! Ron G
-
Hey John Be aware there are quite a few issues with this kit. Wrong engines, wrong cowl, etc. etc. Ron G
-
Hey Anthony Don't worry about it, if you want it I'll hold on to it till you can buy it buddy. Ron G
-
You to buddy hey Anthony you still interested in the 1/24 Beaver kit?
-
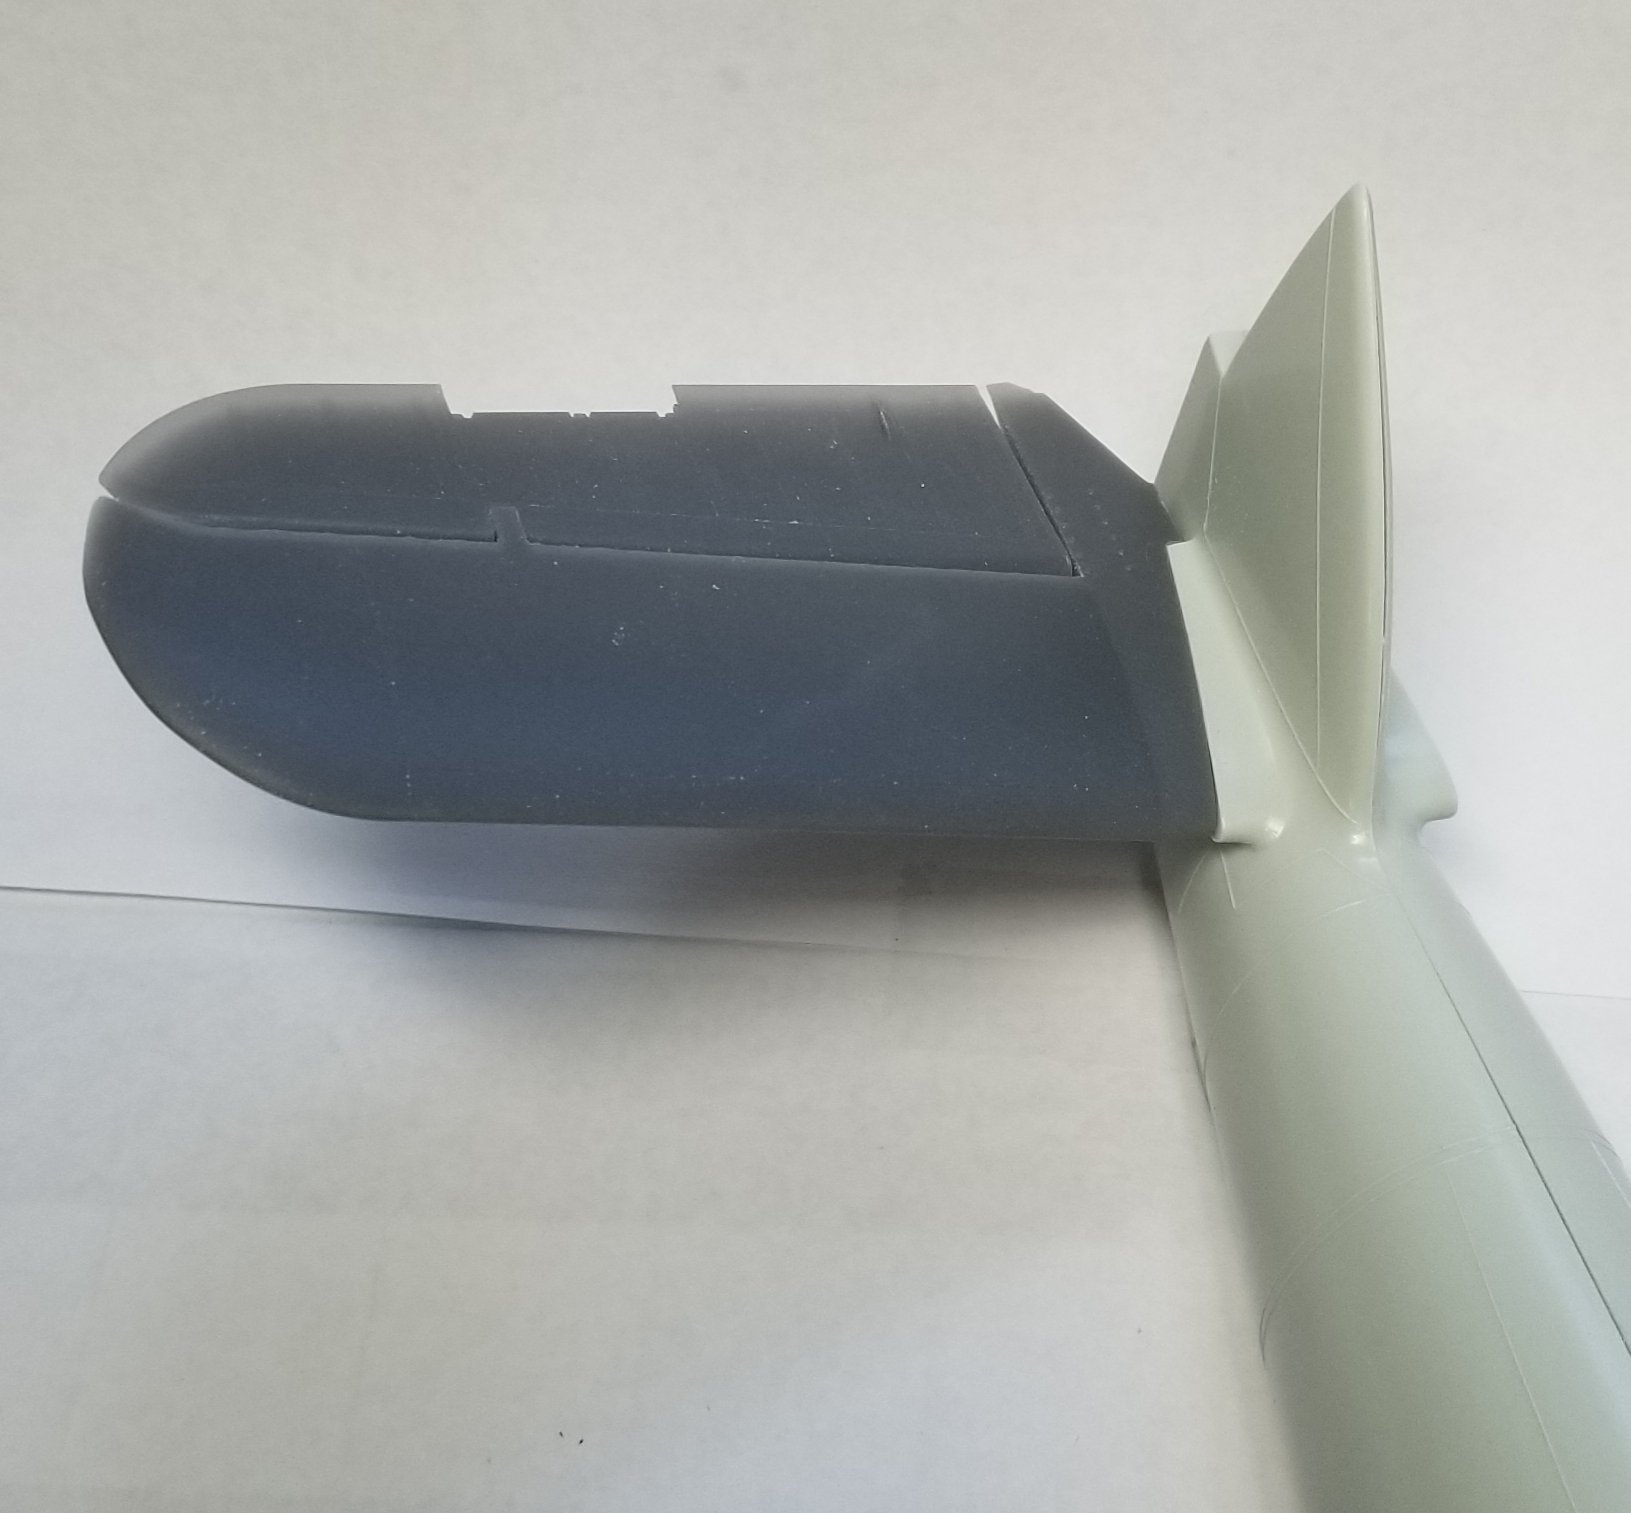
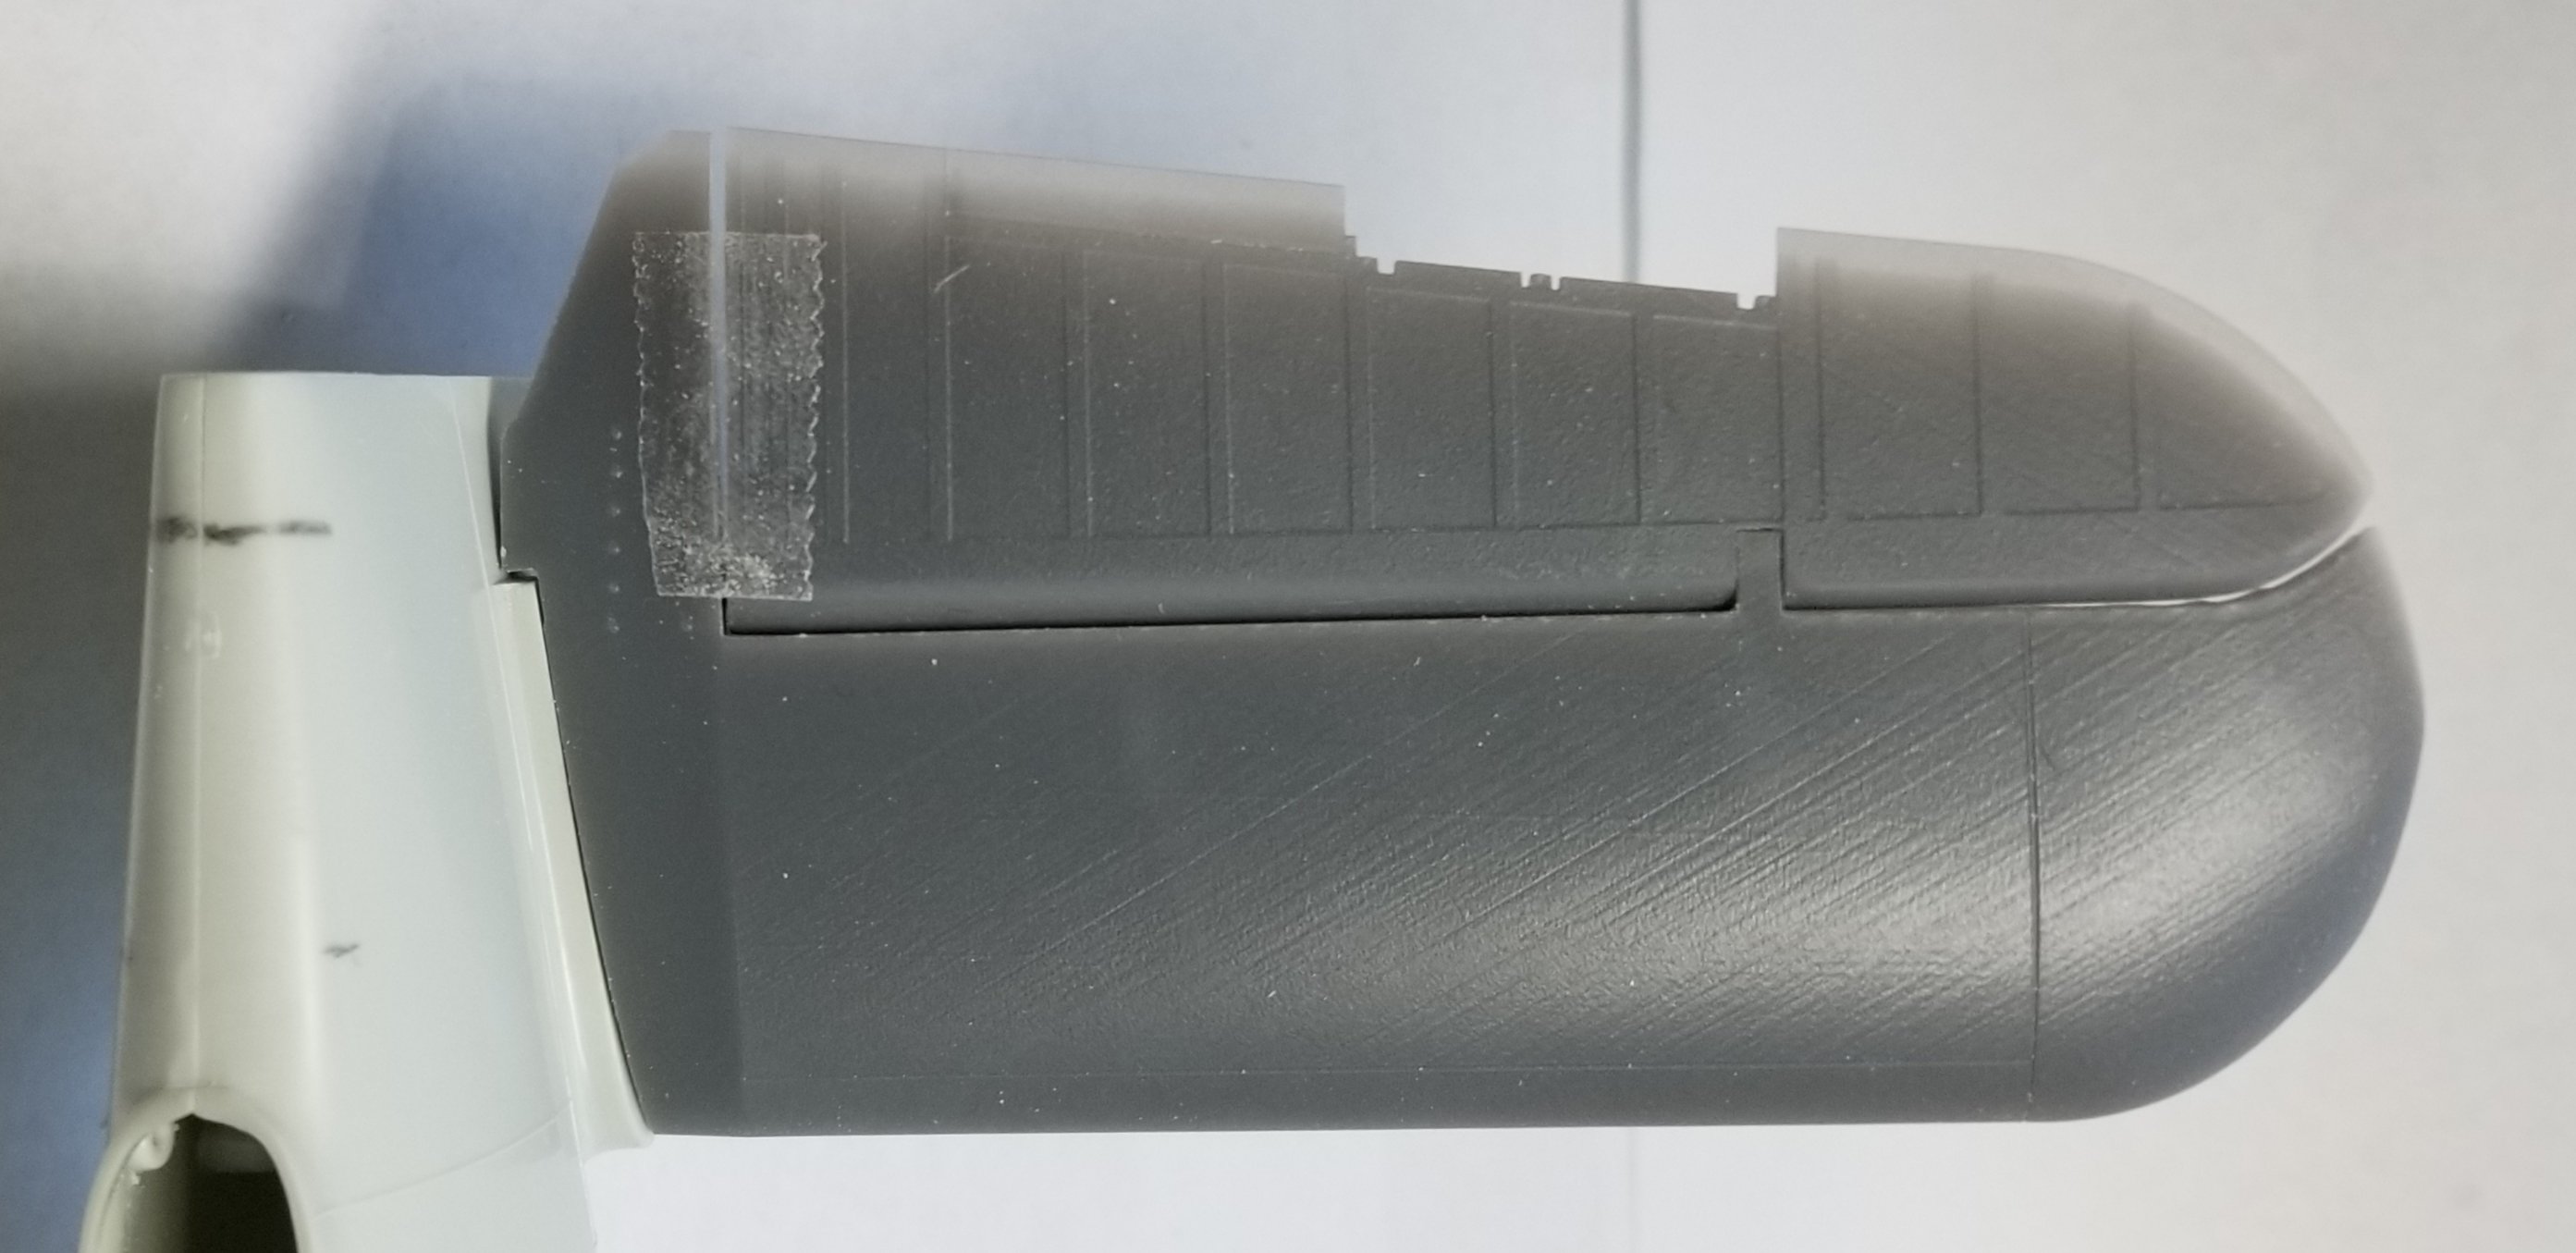
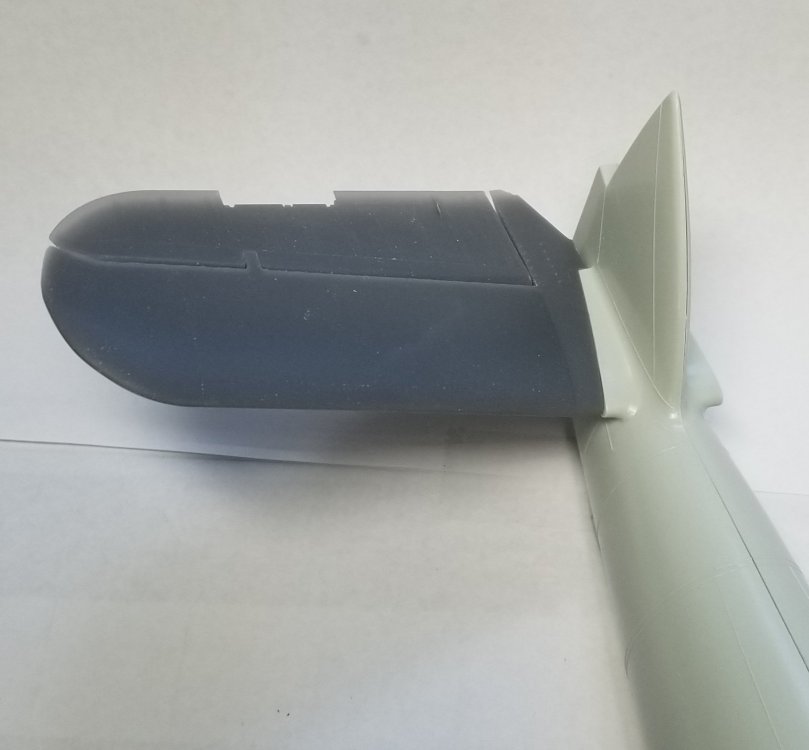
OH! I almost forgot. I took some pictures of the Model Monkey rear dihedral tail planes in place on the model and the fit is perfect just some minor sanding around the fillet area to blend everything together. starboard tail plane. view showing the 12.5° dihedral on the tail planes. view looking down on the starboard tail plane. view looking up at the bottom of the starboard tail plane. And yes that's a piece of tape holding the elevator on. Well that's it, I'll see you all in a little while with some more progress. Ron G


-
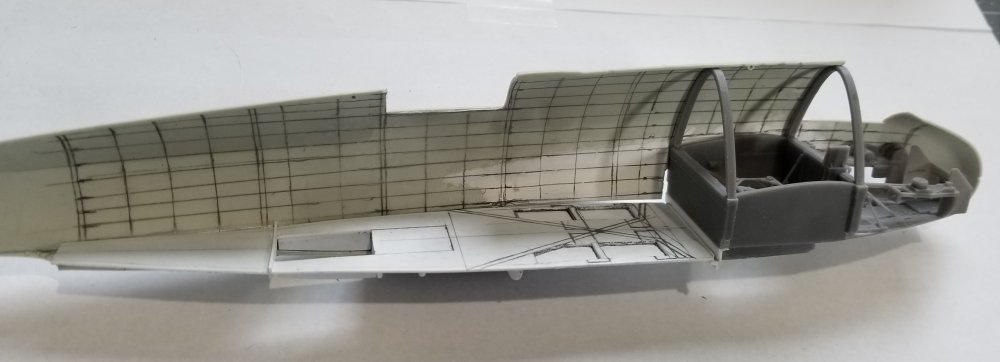
Hey all Ok I think I have the rear floor figured out, I still have to cutout the observer/gunner's escape hatch. Right now I'm in the process of getting the side wall ribbbing figured out and put in. I have pictures of other builds that did this, plus pictures of the real planes inner side walls. So here are some pictures for you to look at. view of port side of the fuselage showing the floor support ribs I scratch built. view of starboard side of the fuselage. view of the floor, with the rear hatch shown drawn on. view showing the floor sitting in place on the support ribs. view of the floor from underneath. view looking through the pilots opening at the floor in place. Right know all this has had a coat of Perfect Plastic Putty put on and after it dries I will sand it down smooth in preperation for the ribs. That's it for now. Ron G


-
Thank you very much Peter, coming from you that's quite a compliment. Ron G
-
WOW! thanks guys it's much appreciated. I spent today getting the fuselage insides smoothed out and ready for adding some inner rib structure, also I started on the rear floor, I hade to make this a couple of times trying to get it to fit to the fuselage sides. It will be attached to the port fuselage side, but will fit up to the starboard side when assembled, I hope. No pictures yet, I'll try to have some tomorrow. Ron G
-
Good to know Bill, I was a bit worried. Ron G
-
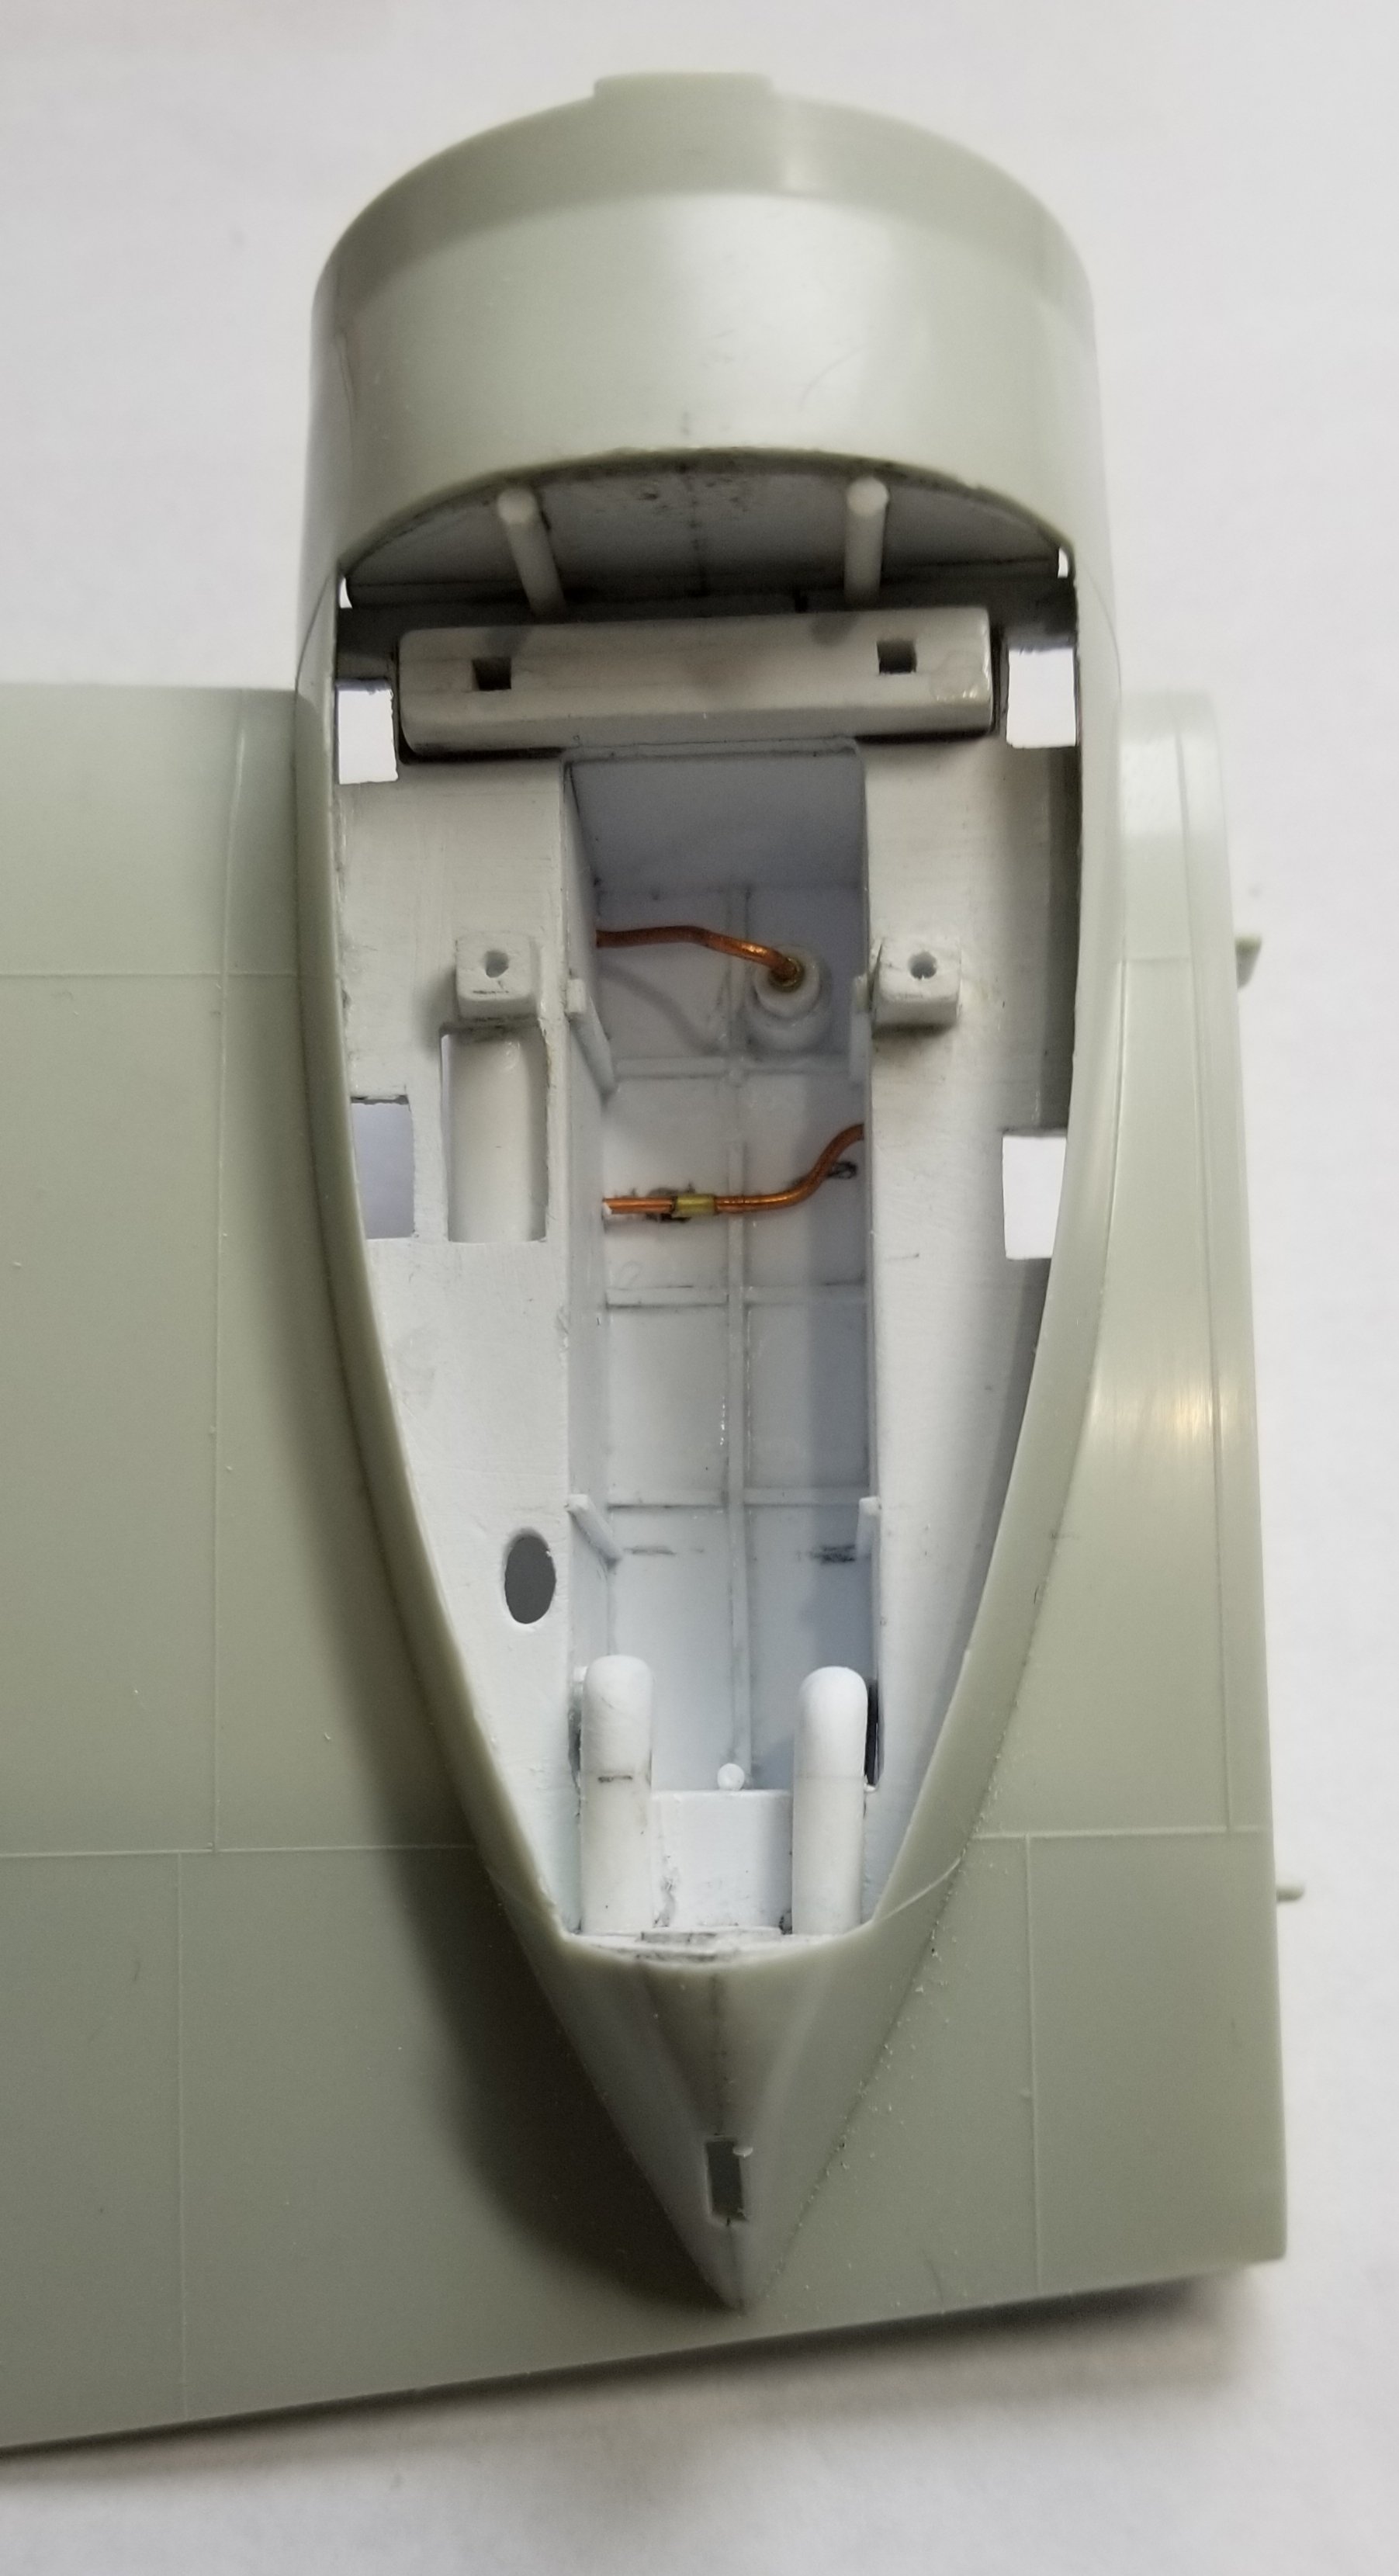
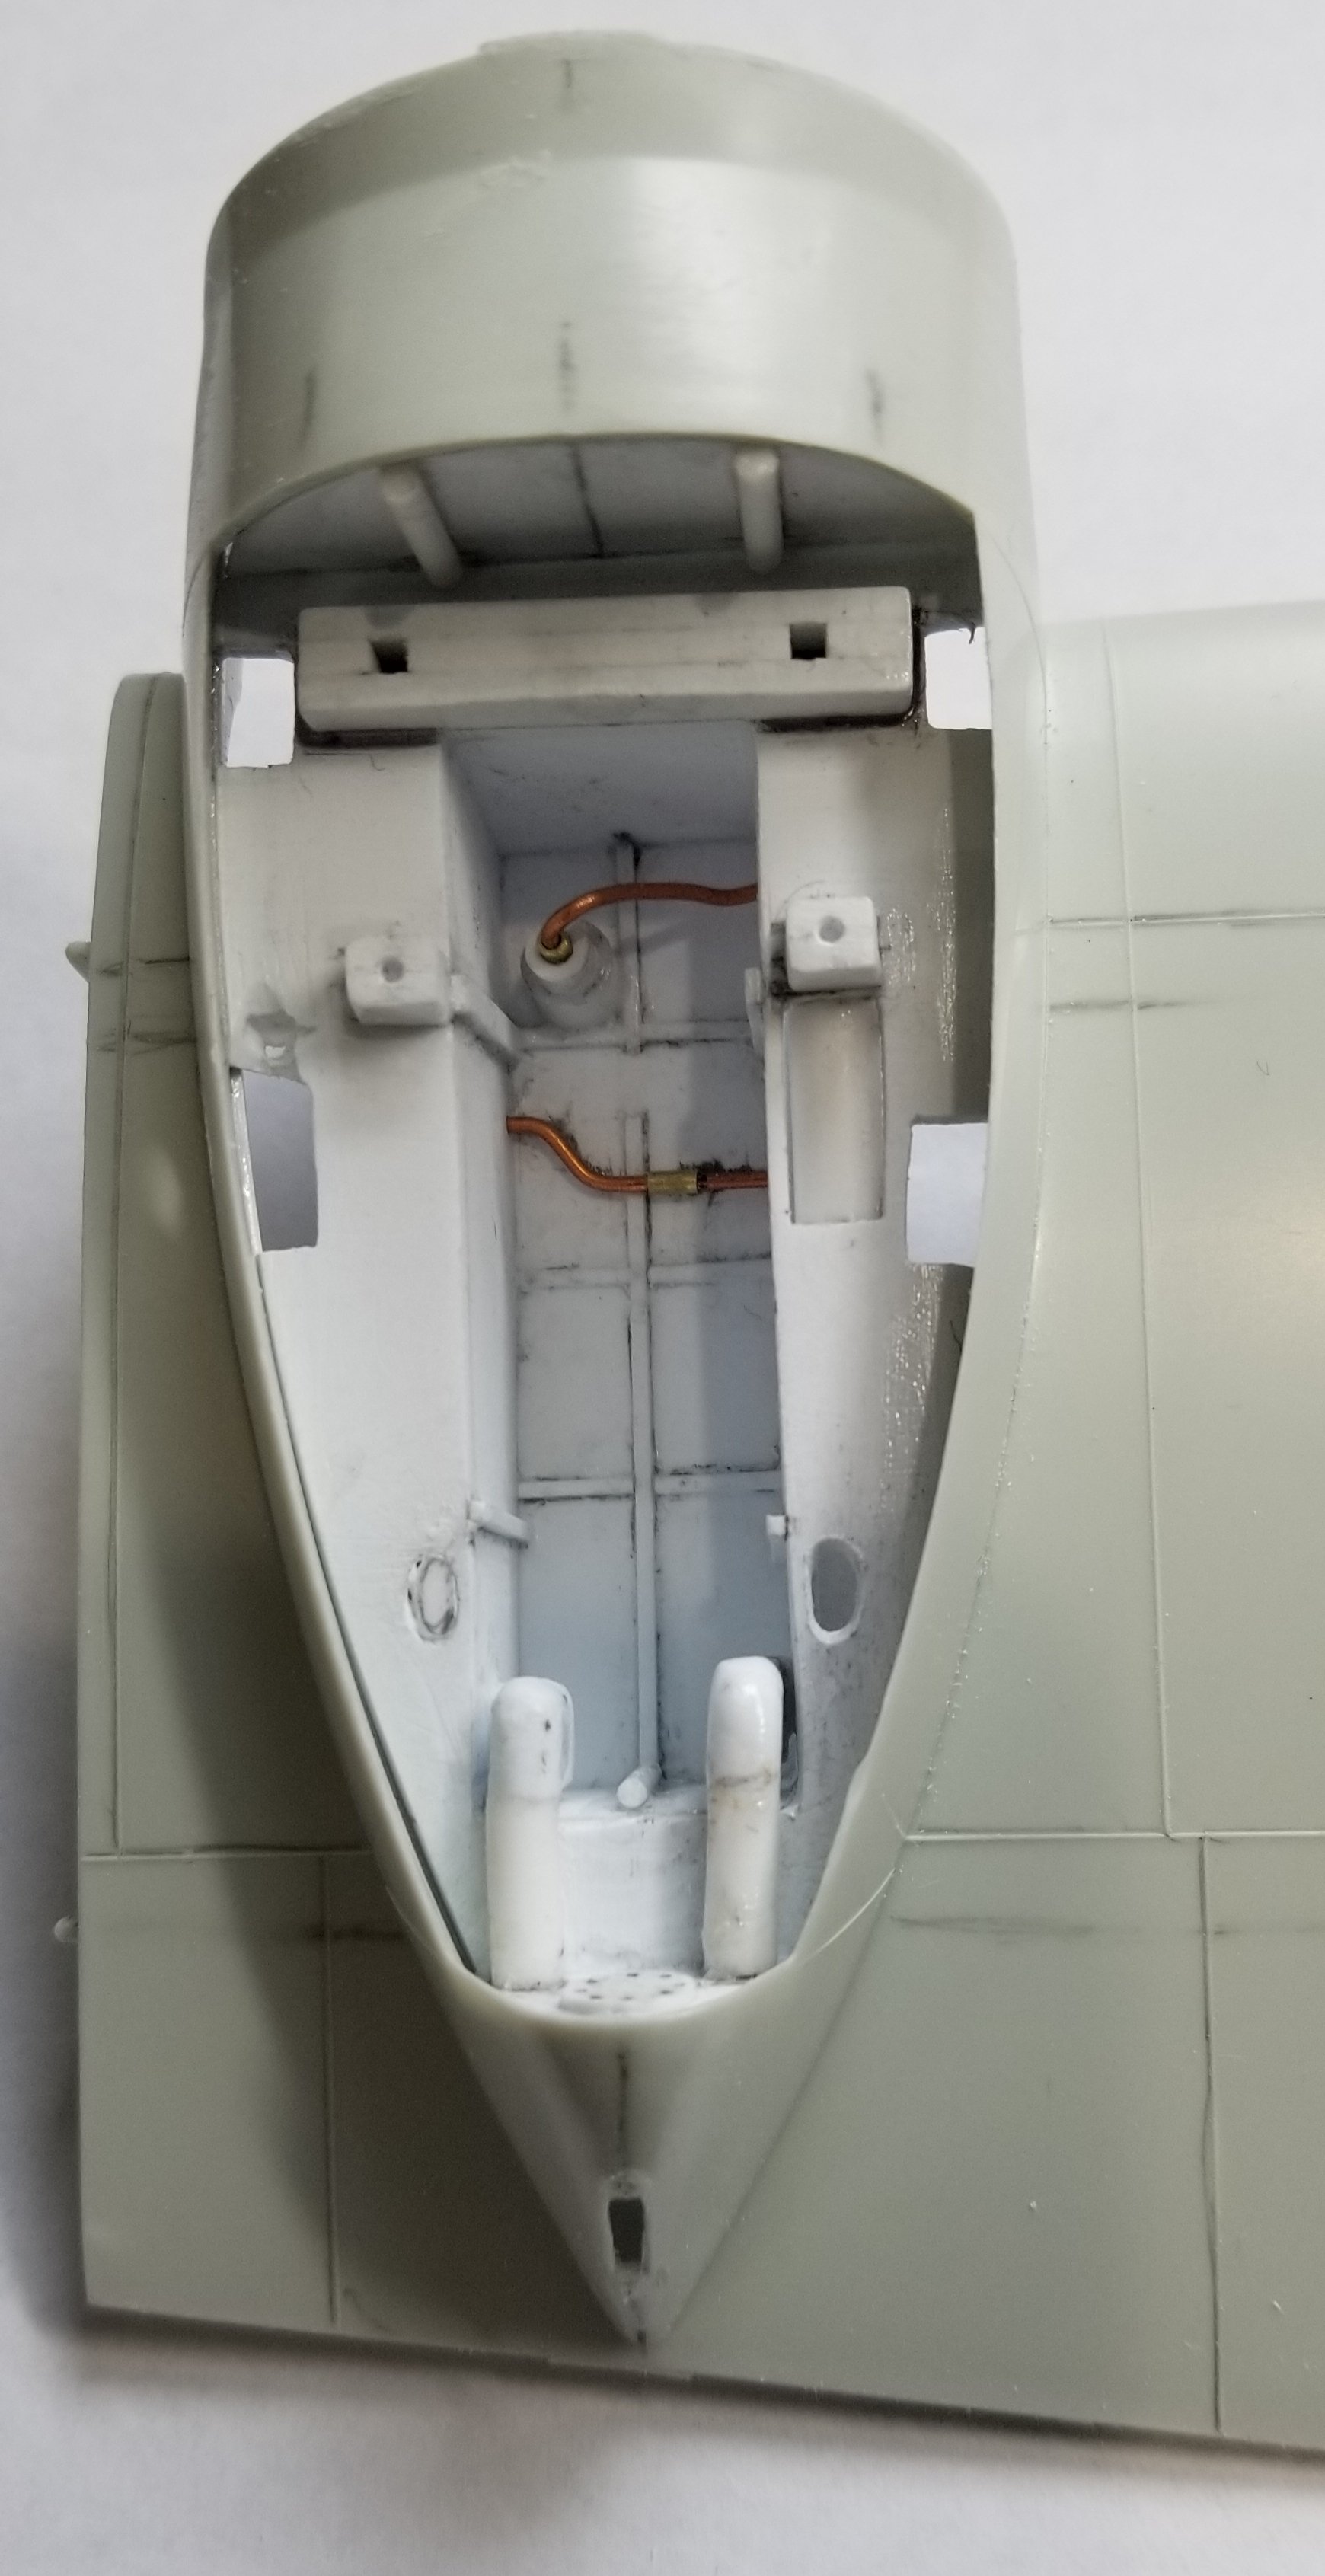
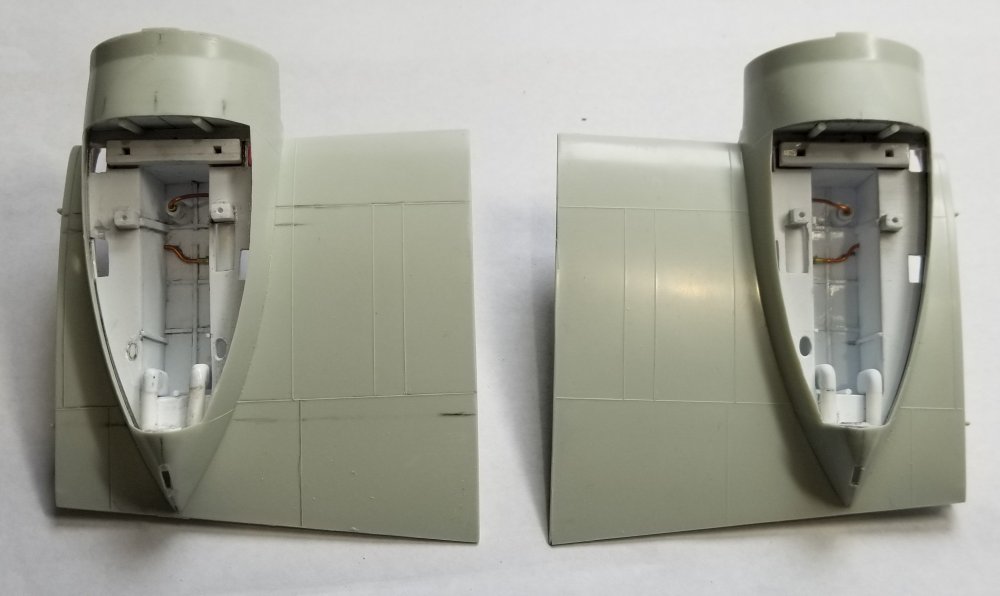
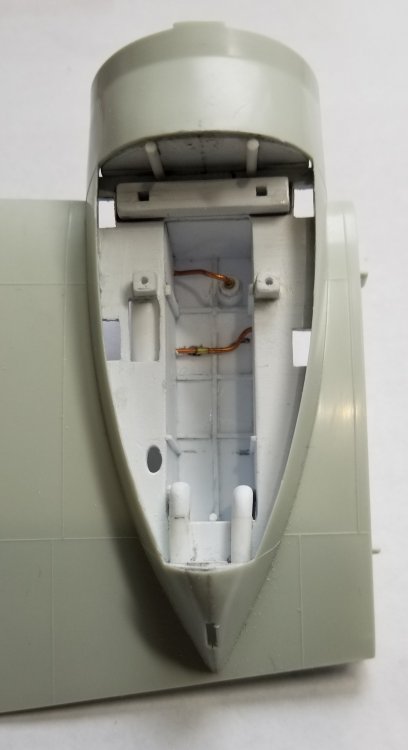
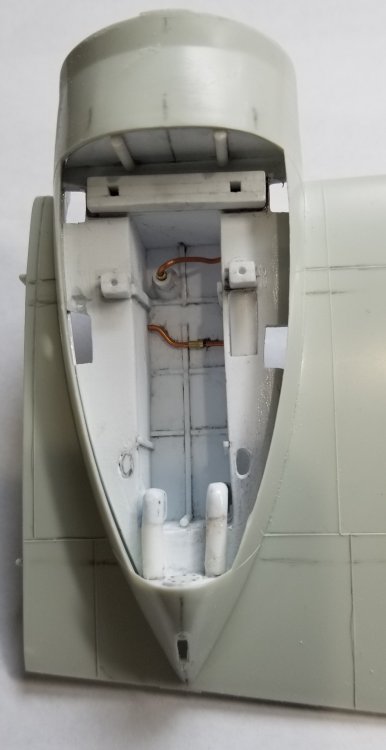
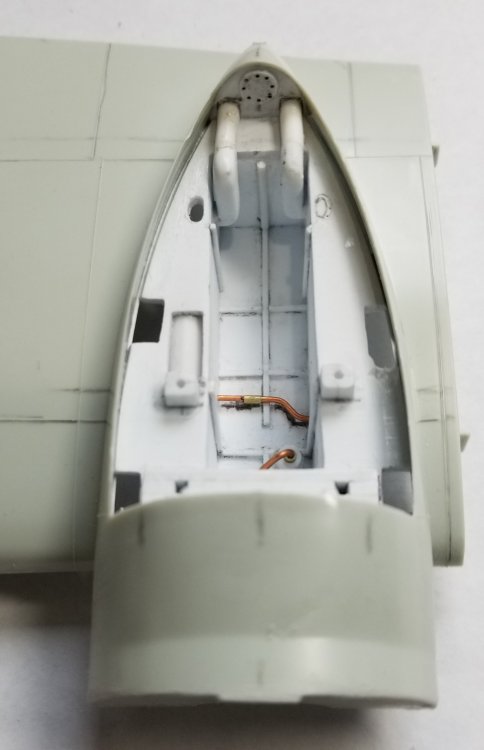
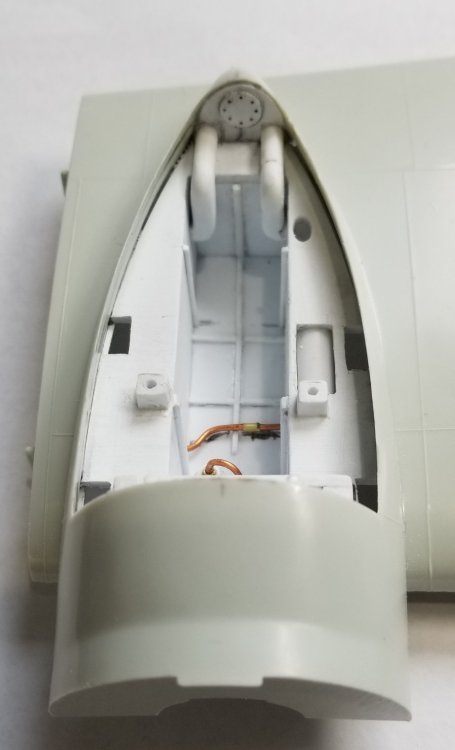
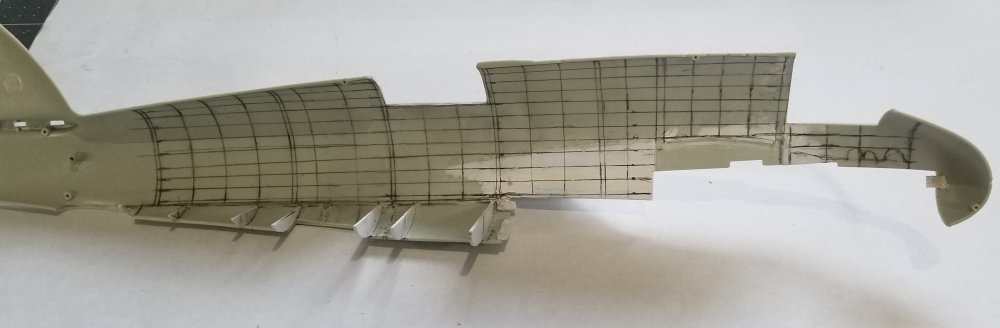
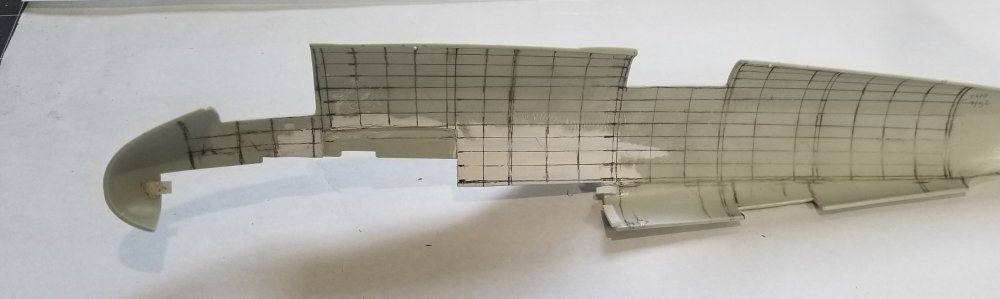
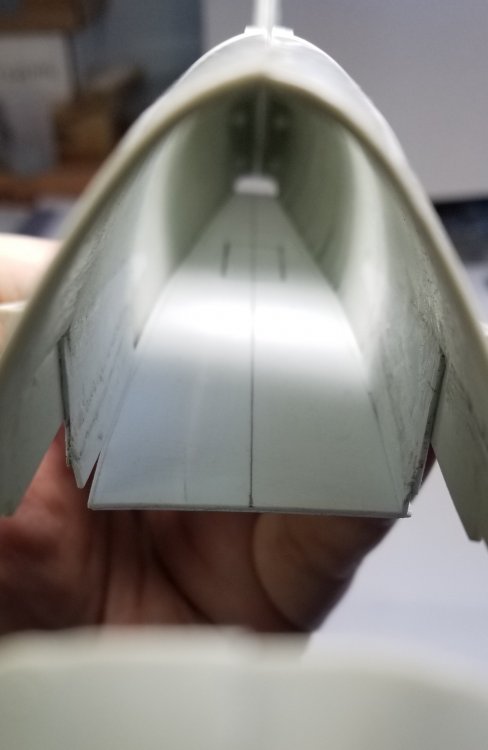
Hey all, just a small update. I think I have the wheel wells done, mostly. you can see the fuel vent pipes in the rear of both wells. It was tricky making four of them from scratch and getting them all the same. On the right you can see at the back of the well what looks like two oblong holes, the one on the right is wrong and needs to be filled in. The one on the left is were it is supposed to be. another view looking forward into the wells, There is a pipe that you can see that I drew on tge floor of the wells that needs to be added still, plus a few other bits and bobs. Ron G