CrankyCrafstman
-
Posts
1,350 -
Joined
-
Last visited
Content Type
Profiles
Forums
Events
Gallery
Everything posted by CrankyCrafstman
-
 Thanks Martin 1/16 is a great scale to use your scratch building skills. The only T-72 that I know of is the Trumpeter one. It can be pricey, in the $250 to $300 range. The Takom kits are a good buy in the $129 to $150 range. The classy hobby kits are nice also, about the same price range. If it has to be Russian, I'm afraid that Trumpeter is your only bet. Ron G
 -
Hey Hubert Translation please, I don't speak French.😁 Ron G
-
Thanks Irish Ok, but that means more scratch building to add all the detail to the roof interior...lol. I may do that, still debating, everybody let me know what I should do. Yes, add the roof detail and make it removable. No, just finish it and concentrate on the exterior. Ron G
-
Thanks Carl I'm kinda thinking about making the turret roof and hull roof removable. I'm just not sure it will look ok around the weld seams, still debating it. Ron G
-
Thanks Paul It's a llooonngg way from being done. Ron G
-
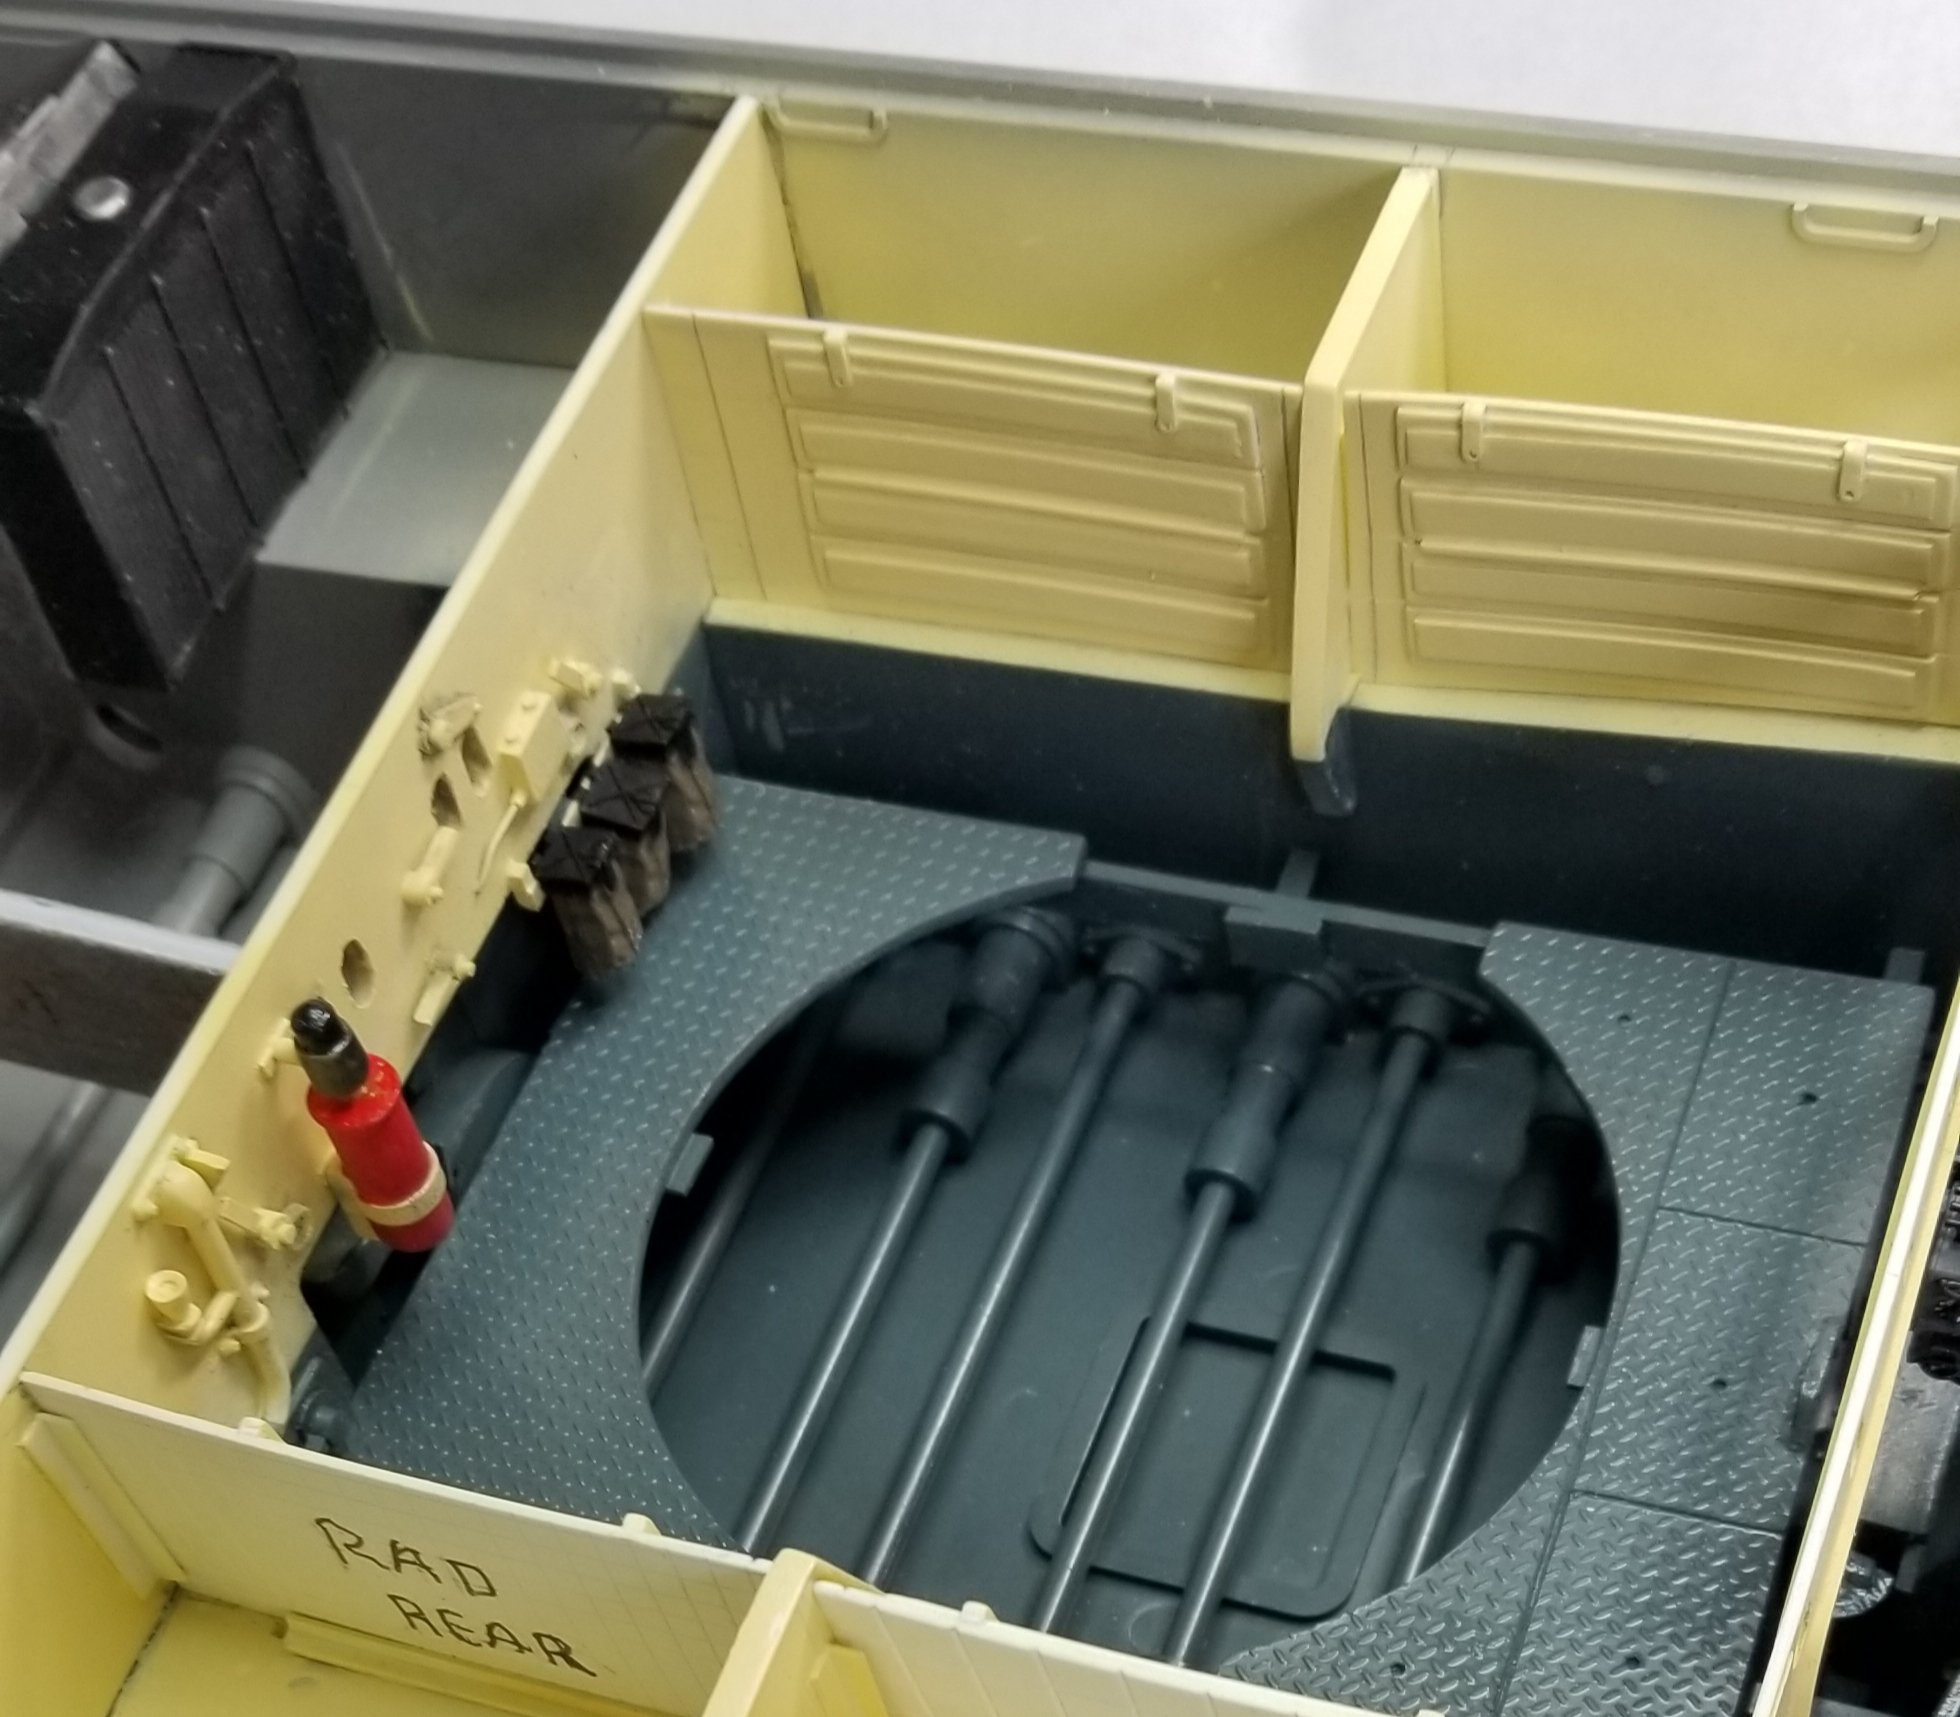
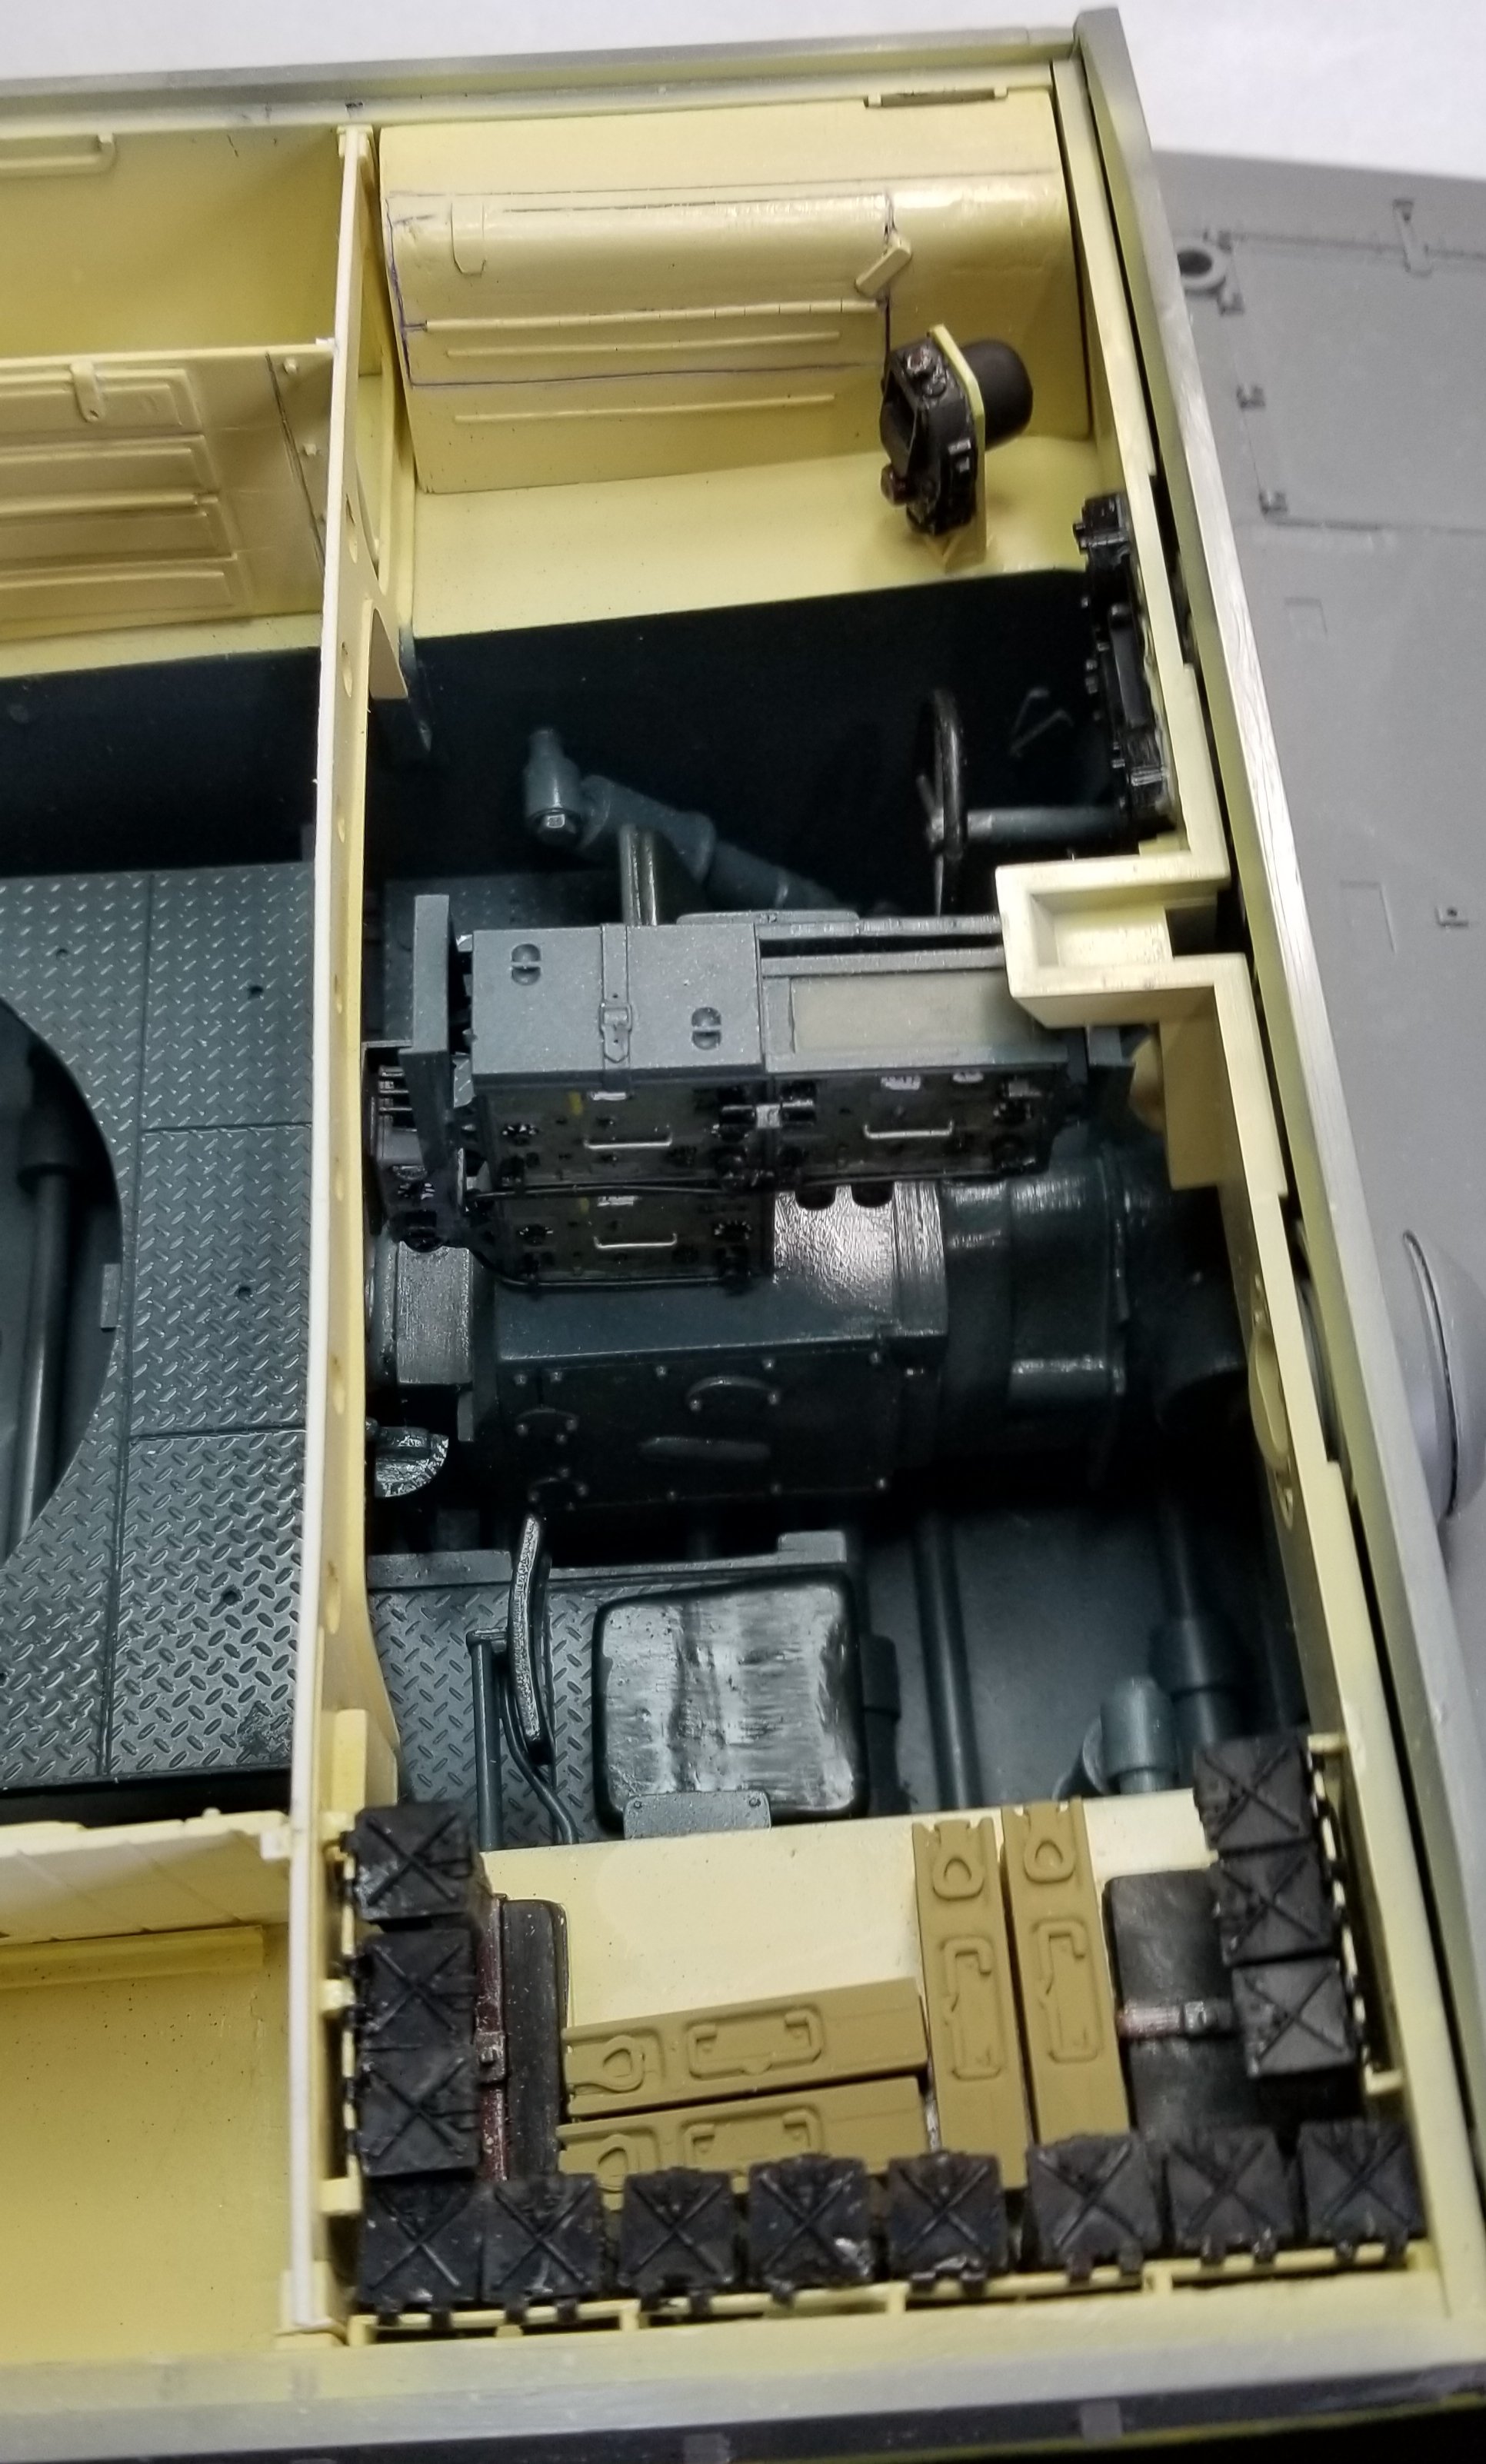
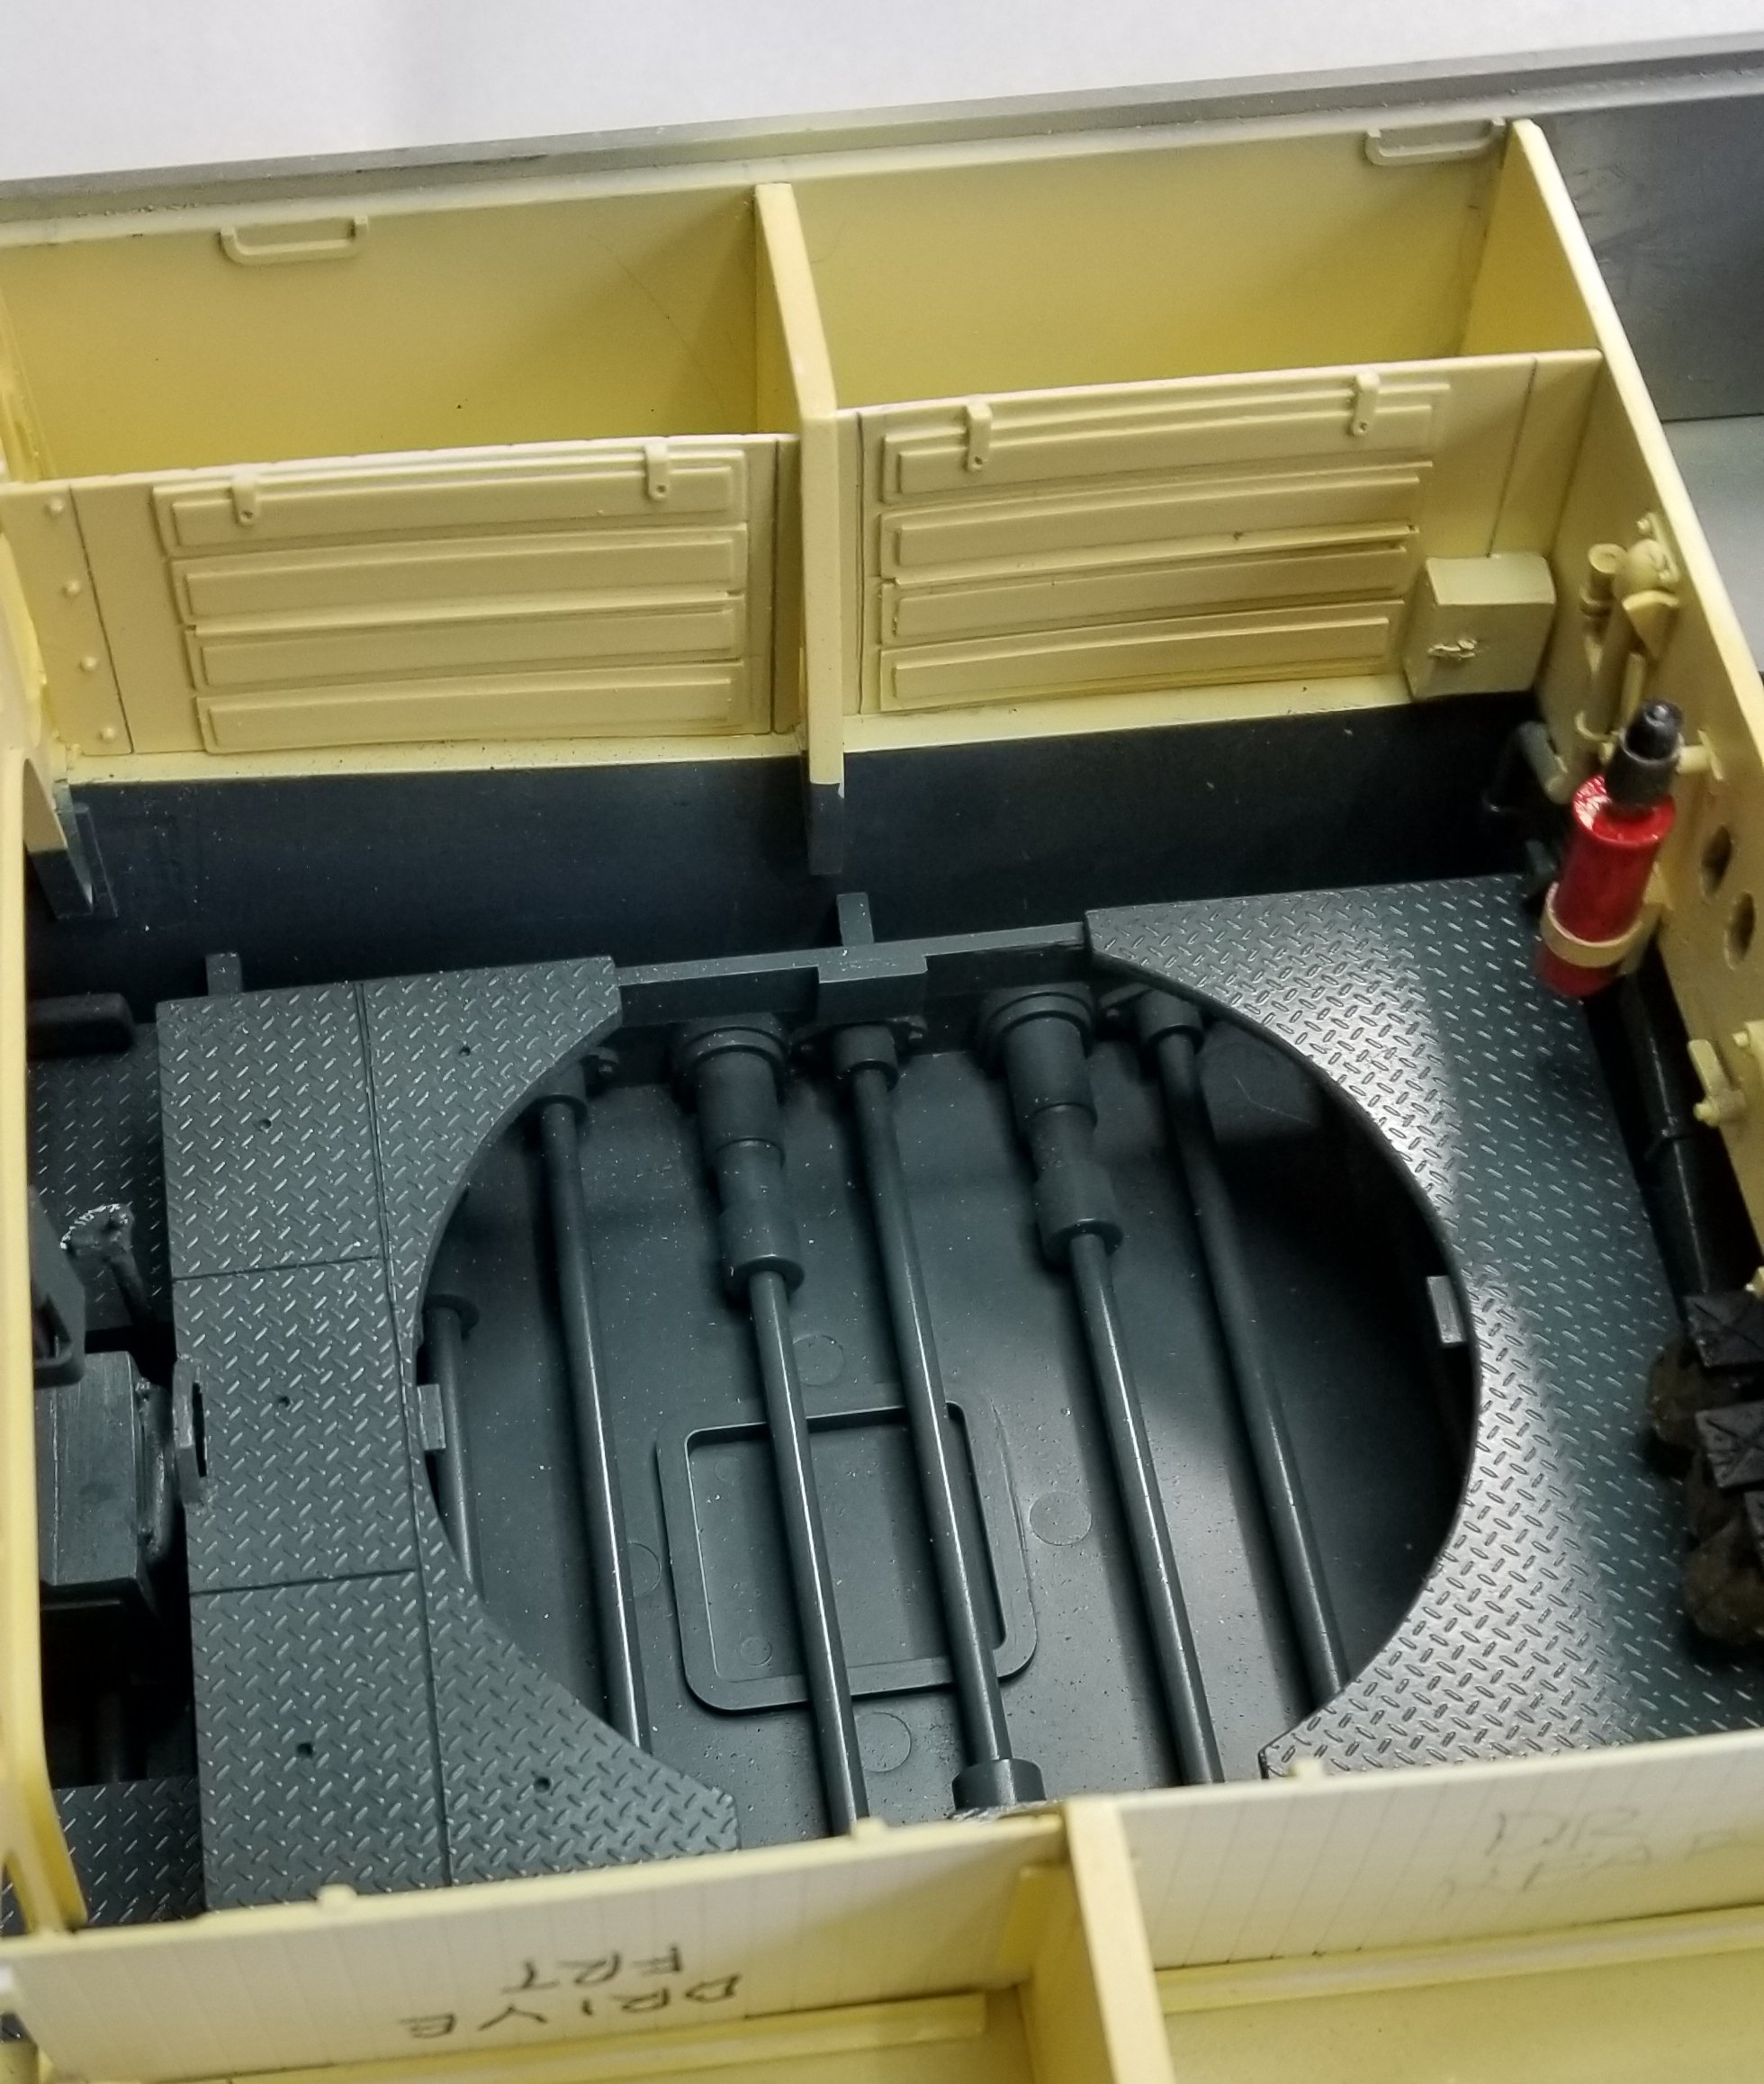
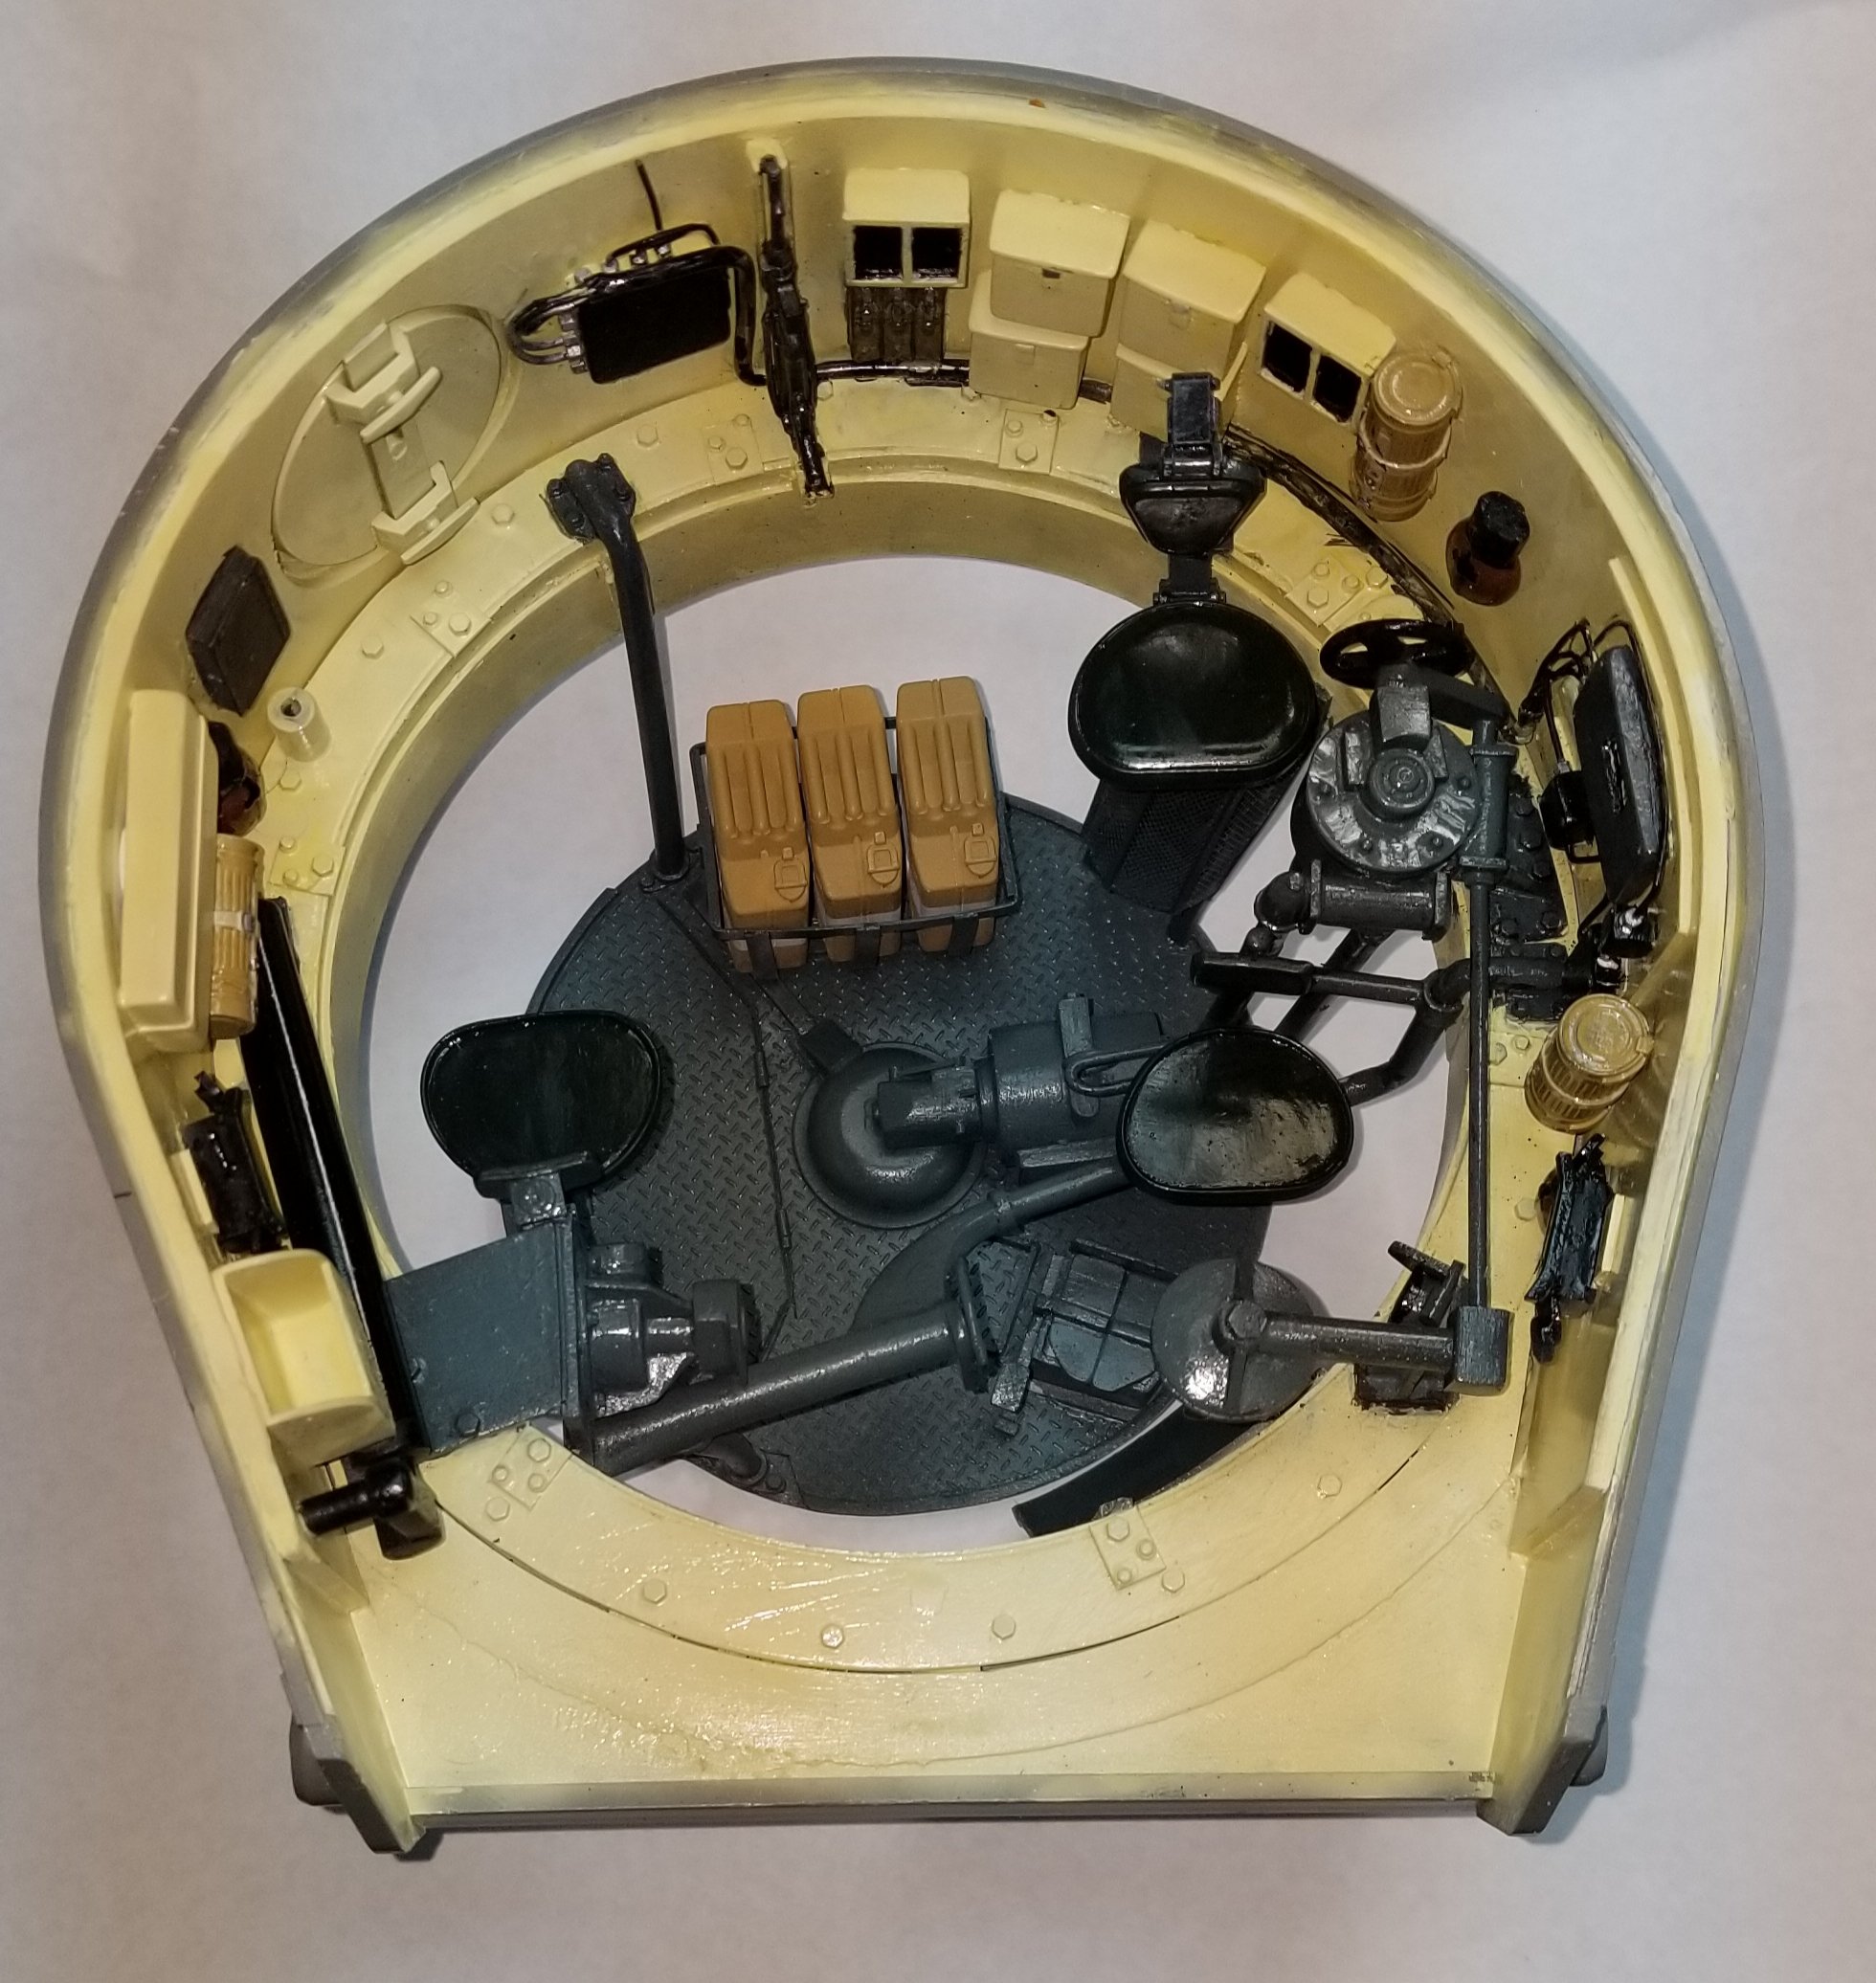
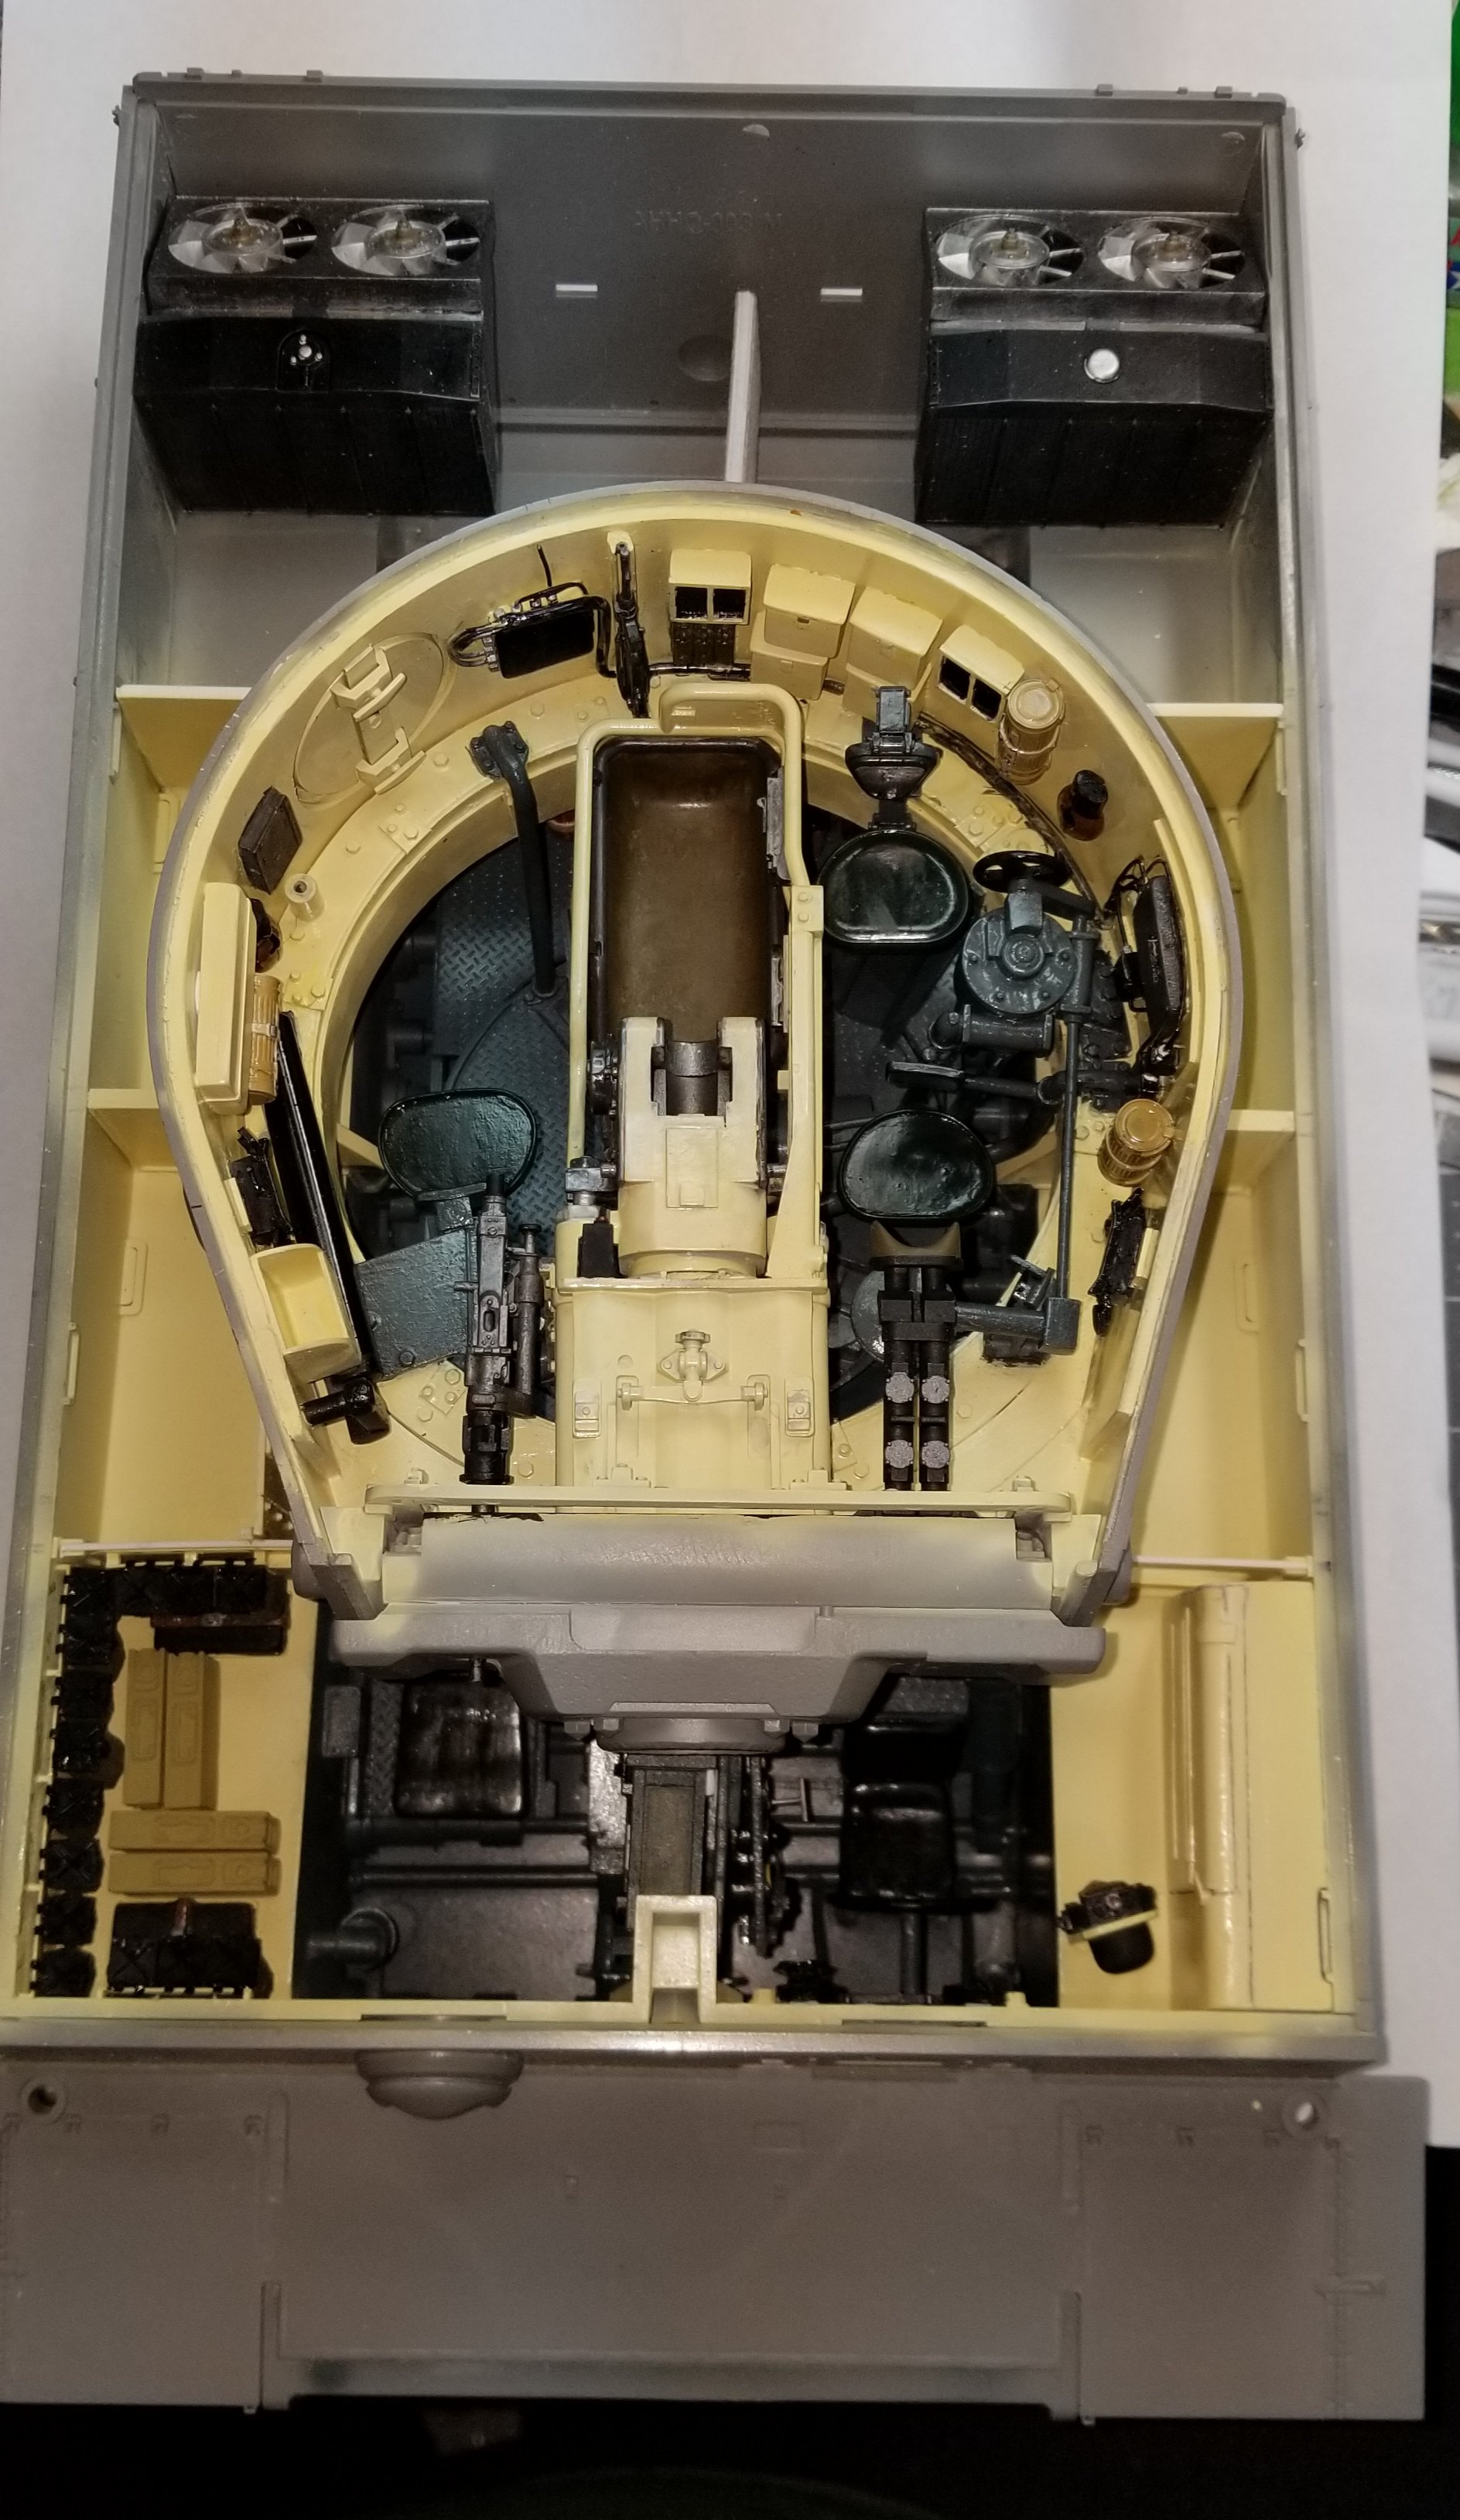
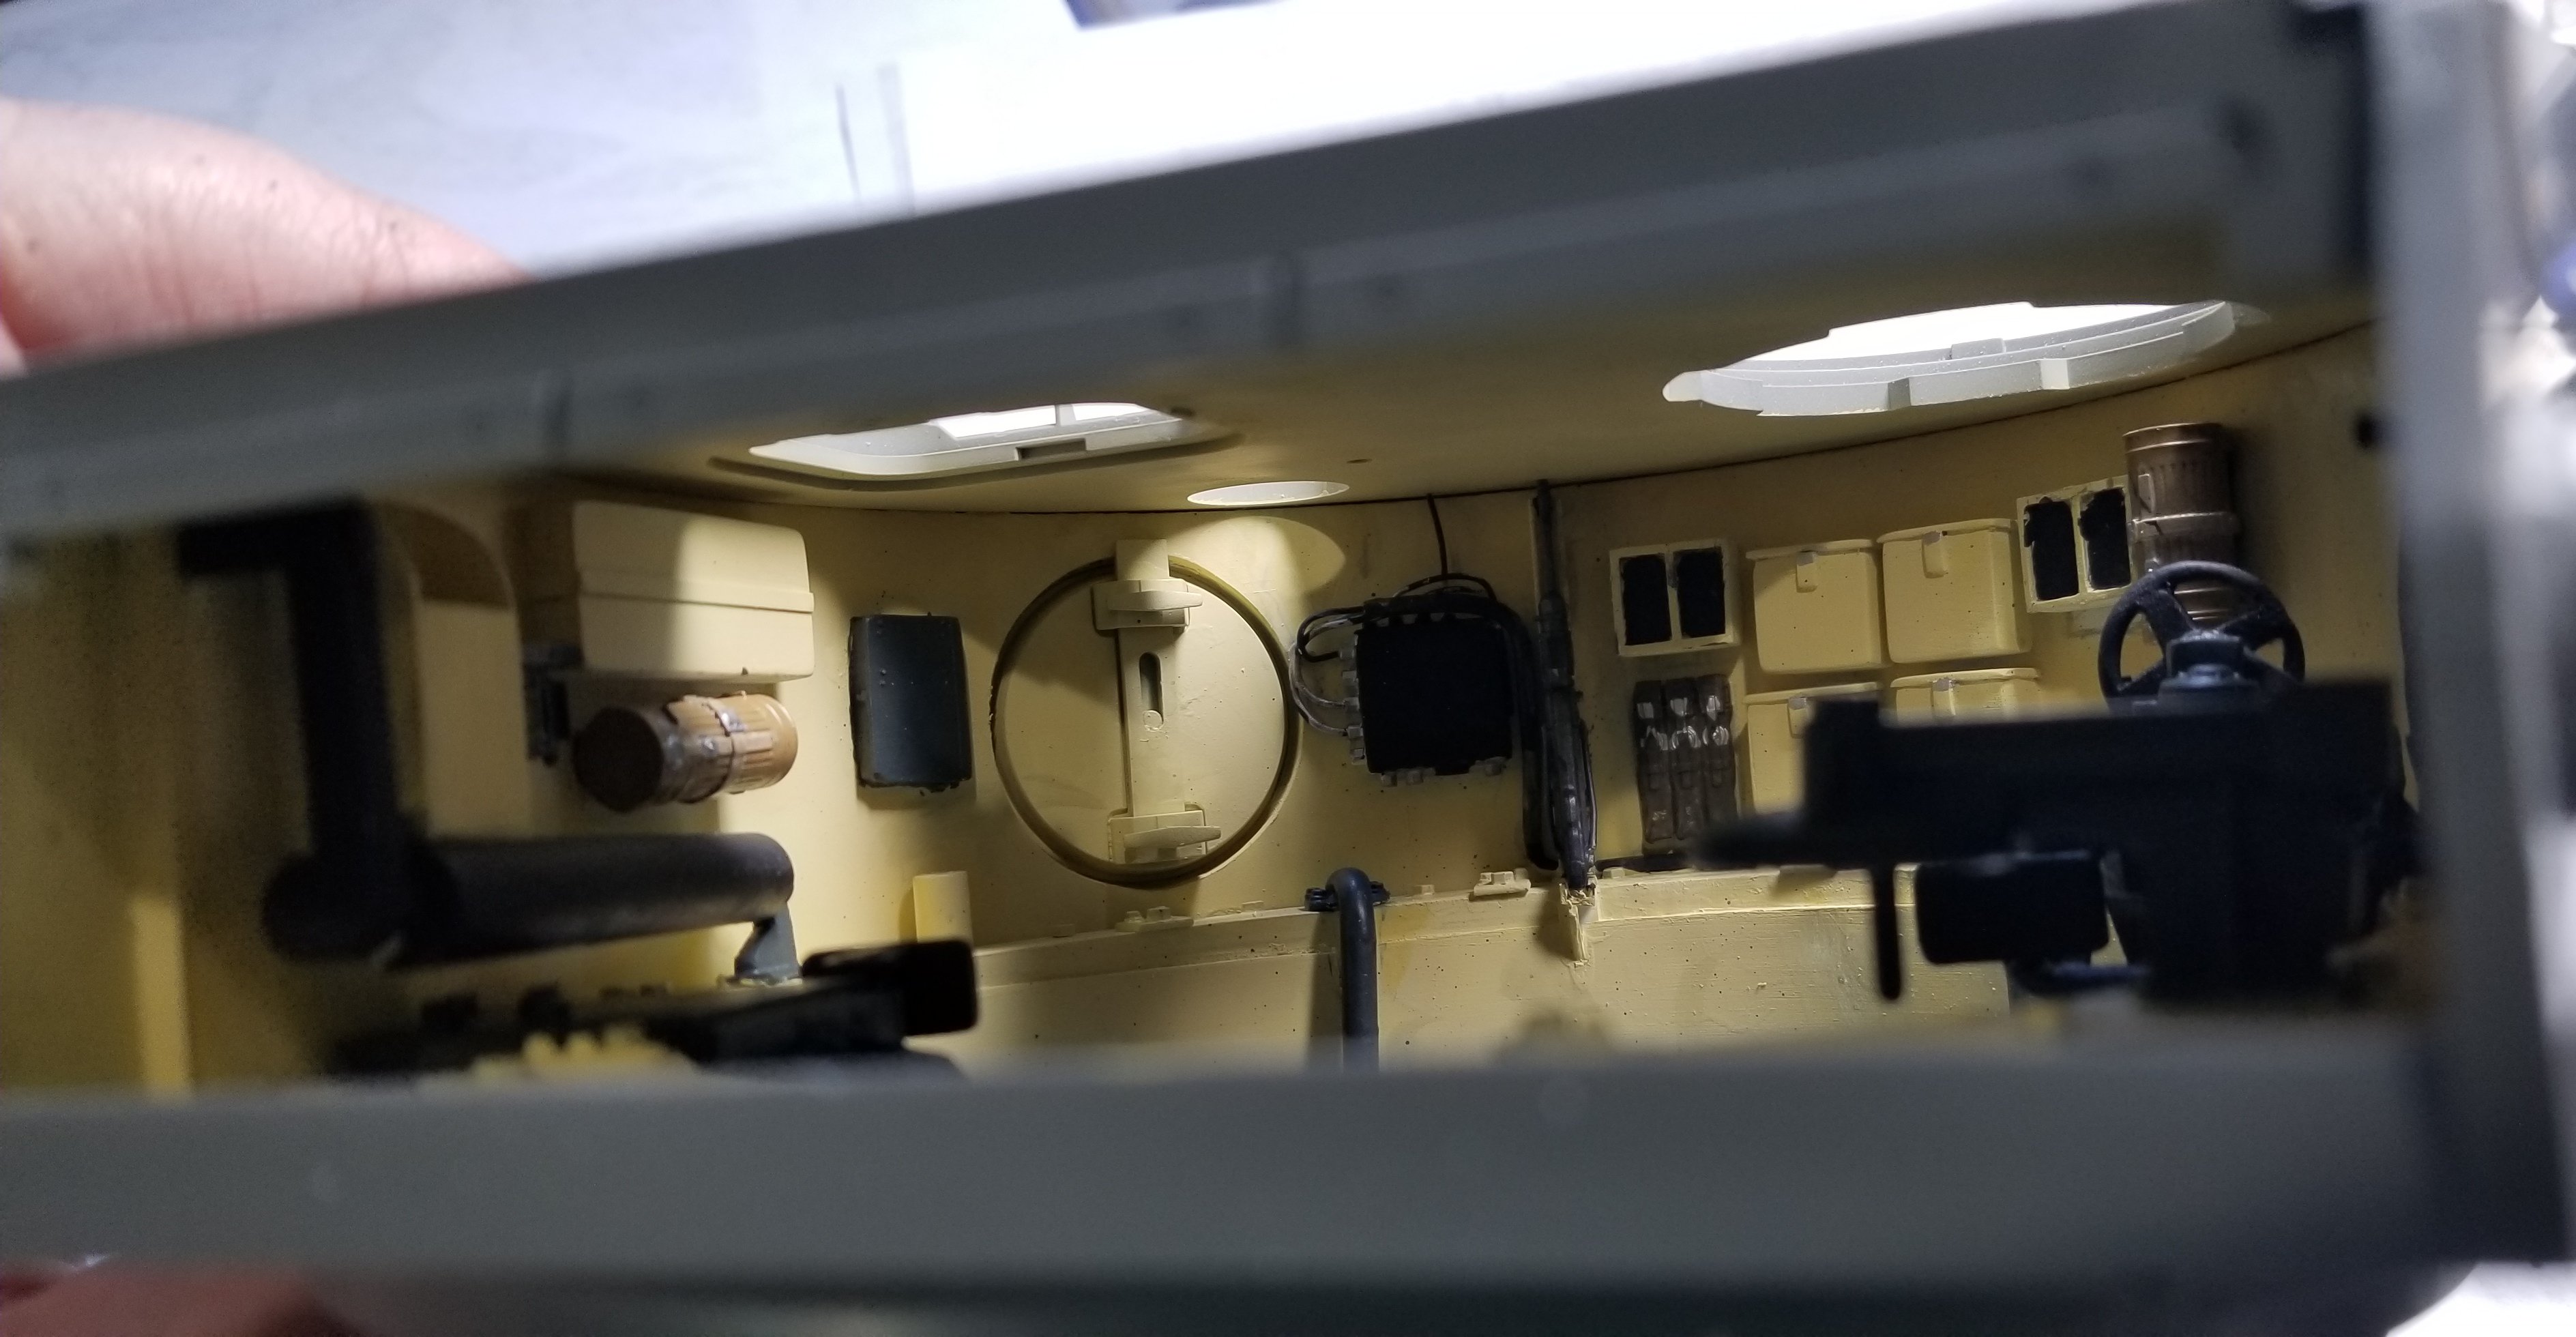
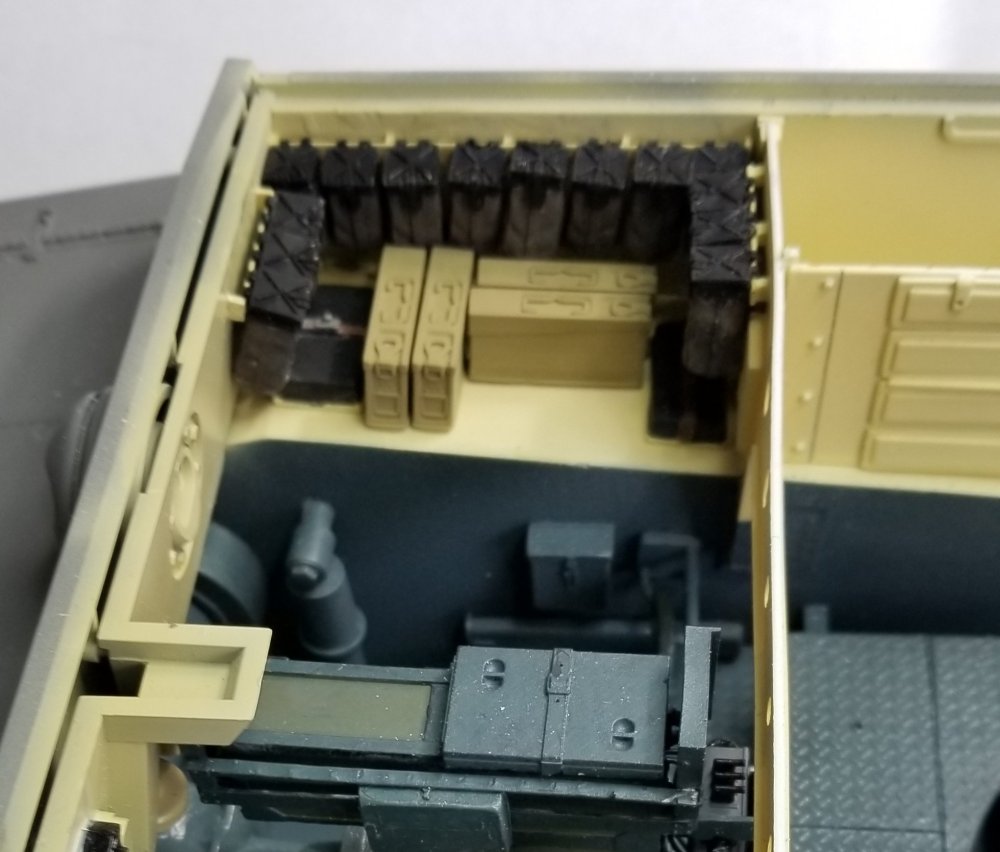
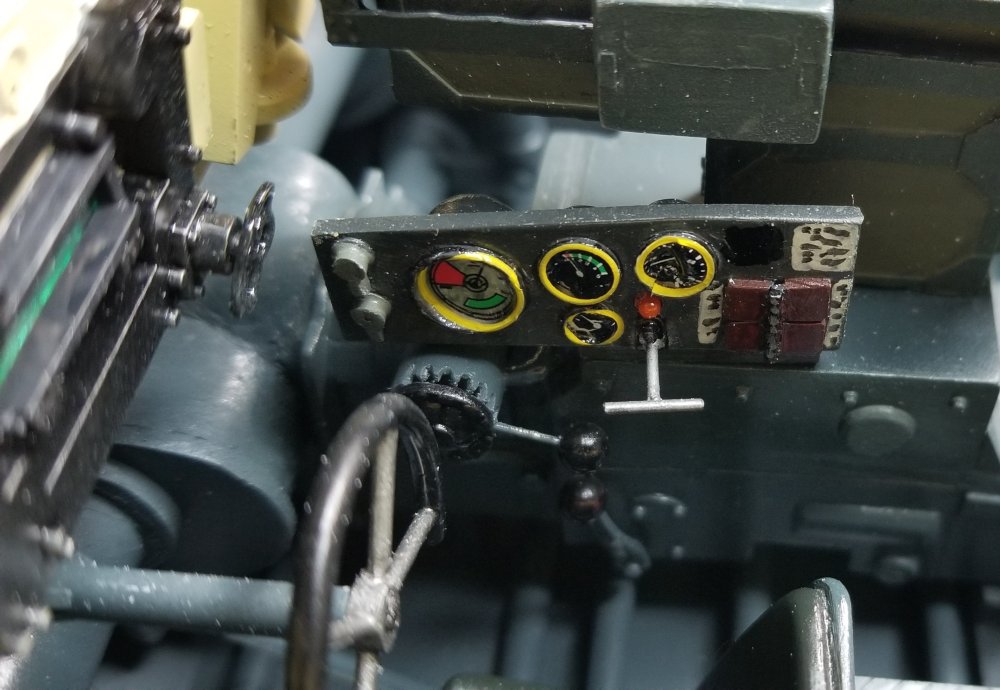
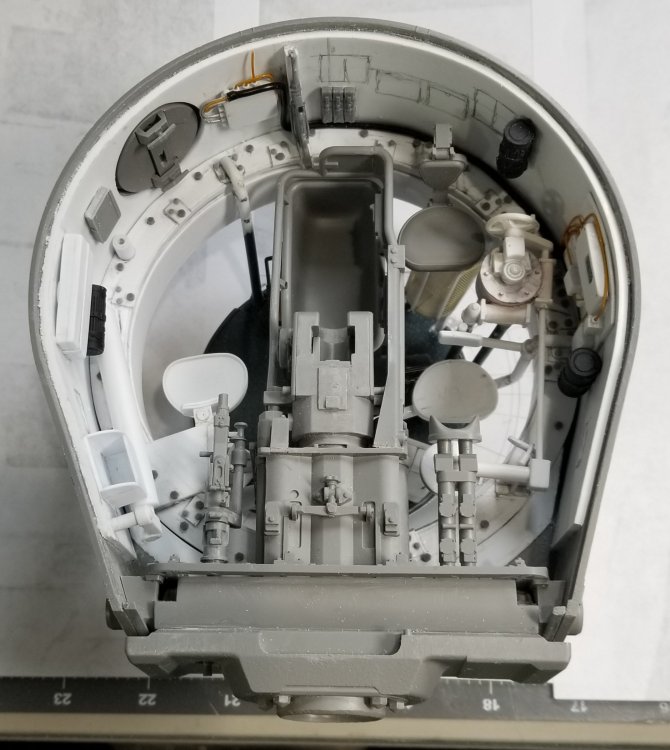
Hey all Ok, it's glued together turret and hull. I gave it a coat of Tamiya lacquer clear so it's ready for chipping and weathering. This view shows the ammo storage bins and gertzaks added. This view shows the front area. Another view of the ammo bins. This view shows the front radio operators position and all the gertzacks and ammo boxes added. This view shows the instrument panel and the gauge decals in place. This view shows the radios and some of the wiring. This view of the turret shows all of the details added. Another view of the Turret, but with the gun breach in place. This view is the turret sitting in place in the hull without the top deck. And this view shows all that you will be able to see after everything is assembled... Interiors do seem to be a waste of time. I'm the only one who will know what is in there...lol And what it will look like when done less paint. Well that's it for now be back with more updates soon. Ron G


-
NICE, Tom Oldies but goodies, what. Ron G
-
Thanks guys Yeah Ernie they were a real pain in the rectum, the guide horns should of had longer locating pins so that they could have more glue area to bond them to the track links, then they wouldn't keep falling off like they are prone to do. Ron G
-
Thanks Kevin
-
Thanks Carl
-
Hey all More work done on the Tiger today. Here are some pictures for you to look at. This is a view looking through the gun breach area. Another view of the same thing from a different angle. This is a view looking down into the turret. This is a view looking at the rear wall area. This is a view looking forward at the gun breach. Well that's it for now be back soon. Ron G

-
It wasn't easy, I kinda messed it up, I'll fix it when I do the second coat. Ron G
-
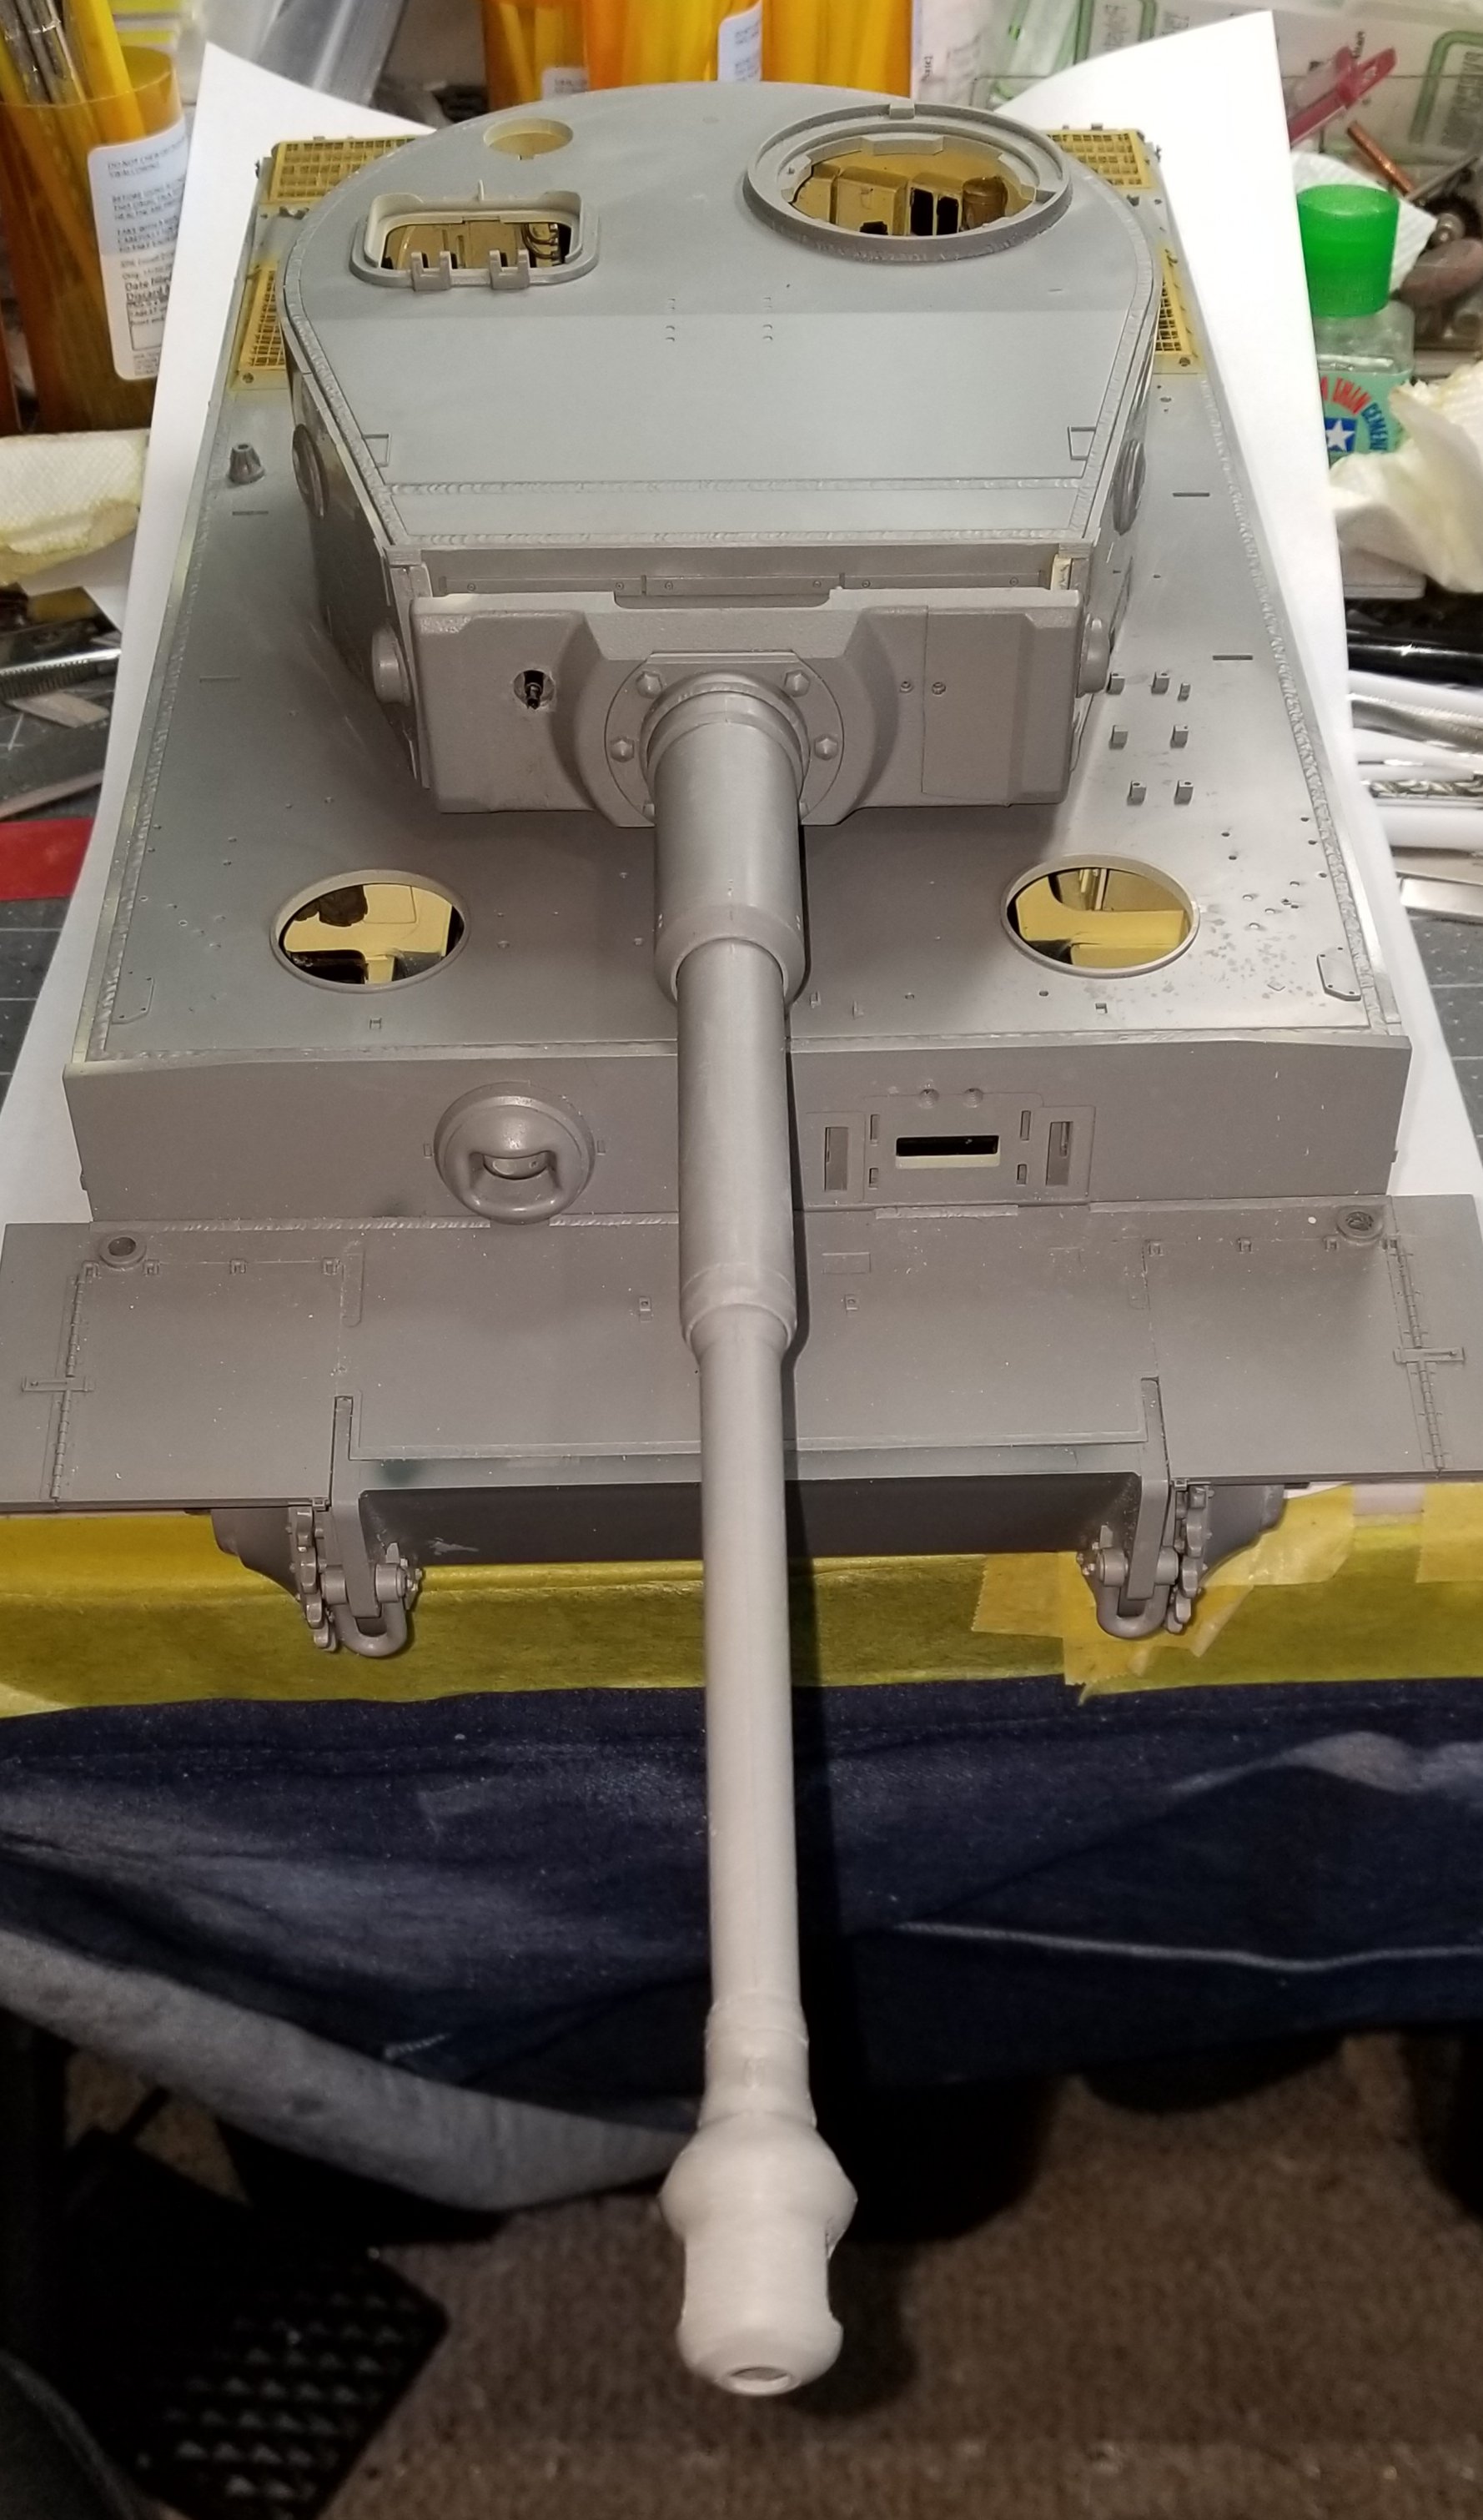
Hey all FINALLY...paint. Ok, I got some paint down. I know it's still to yellow, but I fixed it and the next coat will be whiter. This is just the first coat/primer I need to add some white to this and add the grey coat and touch up the details. Ron G
-
Thanks Carl, and it's Ron.
-
WOW! black and orange my favorite colors. Hey Ernie have you checked out my Tiger build recently I have the complete interior about 90% done and almost ready for paint. Ron G
-
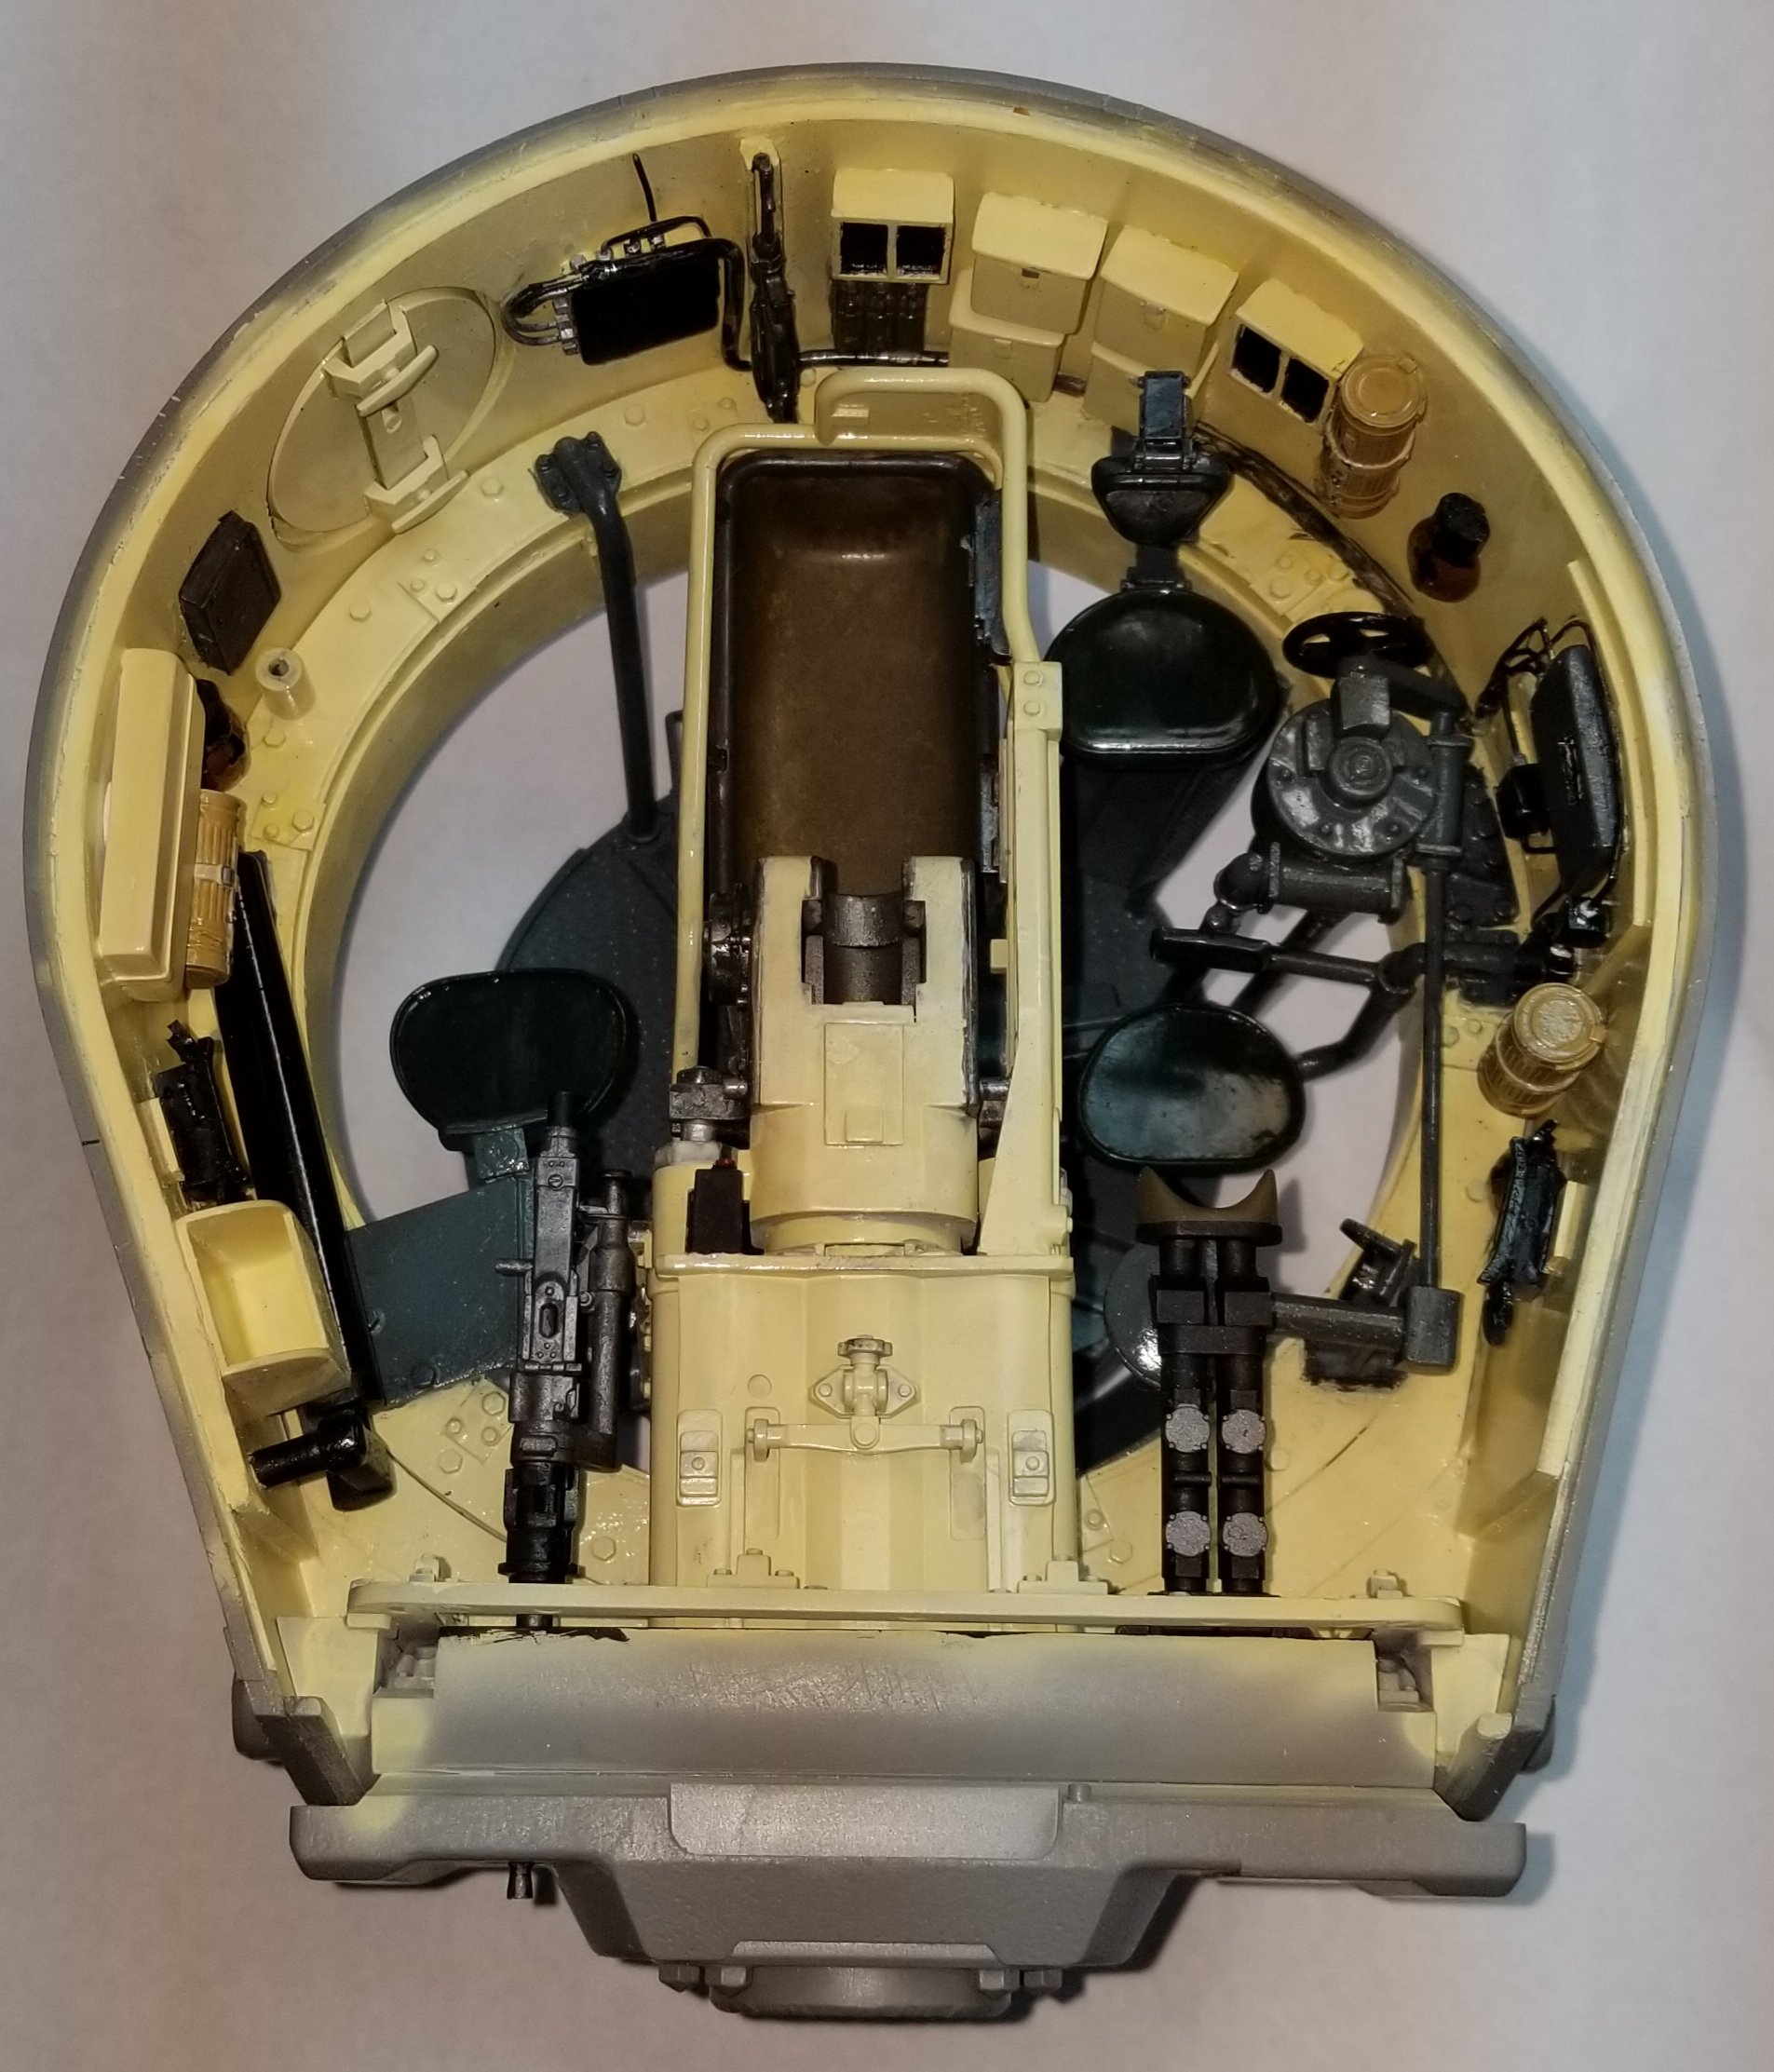
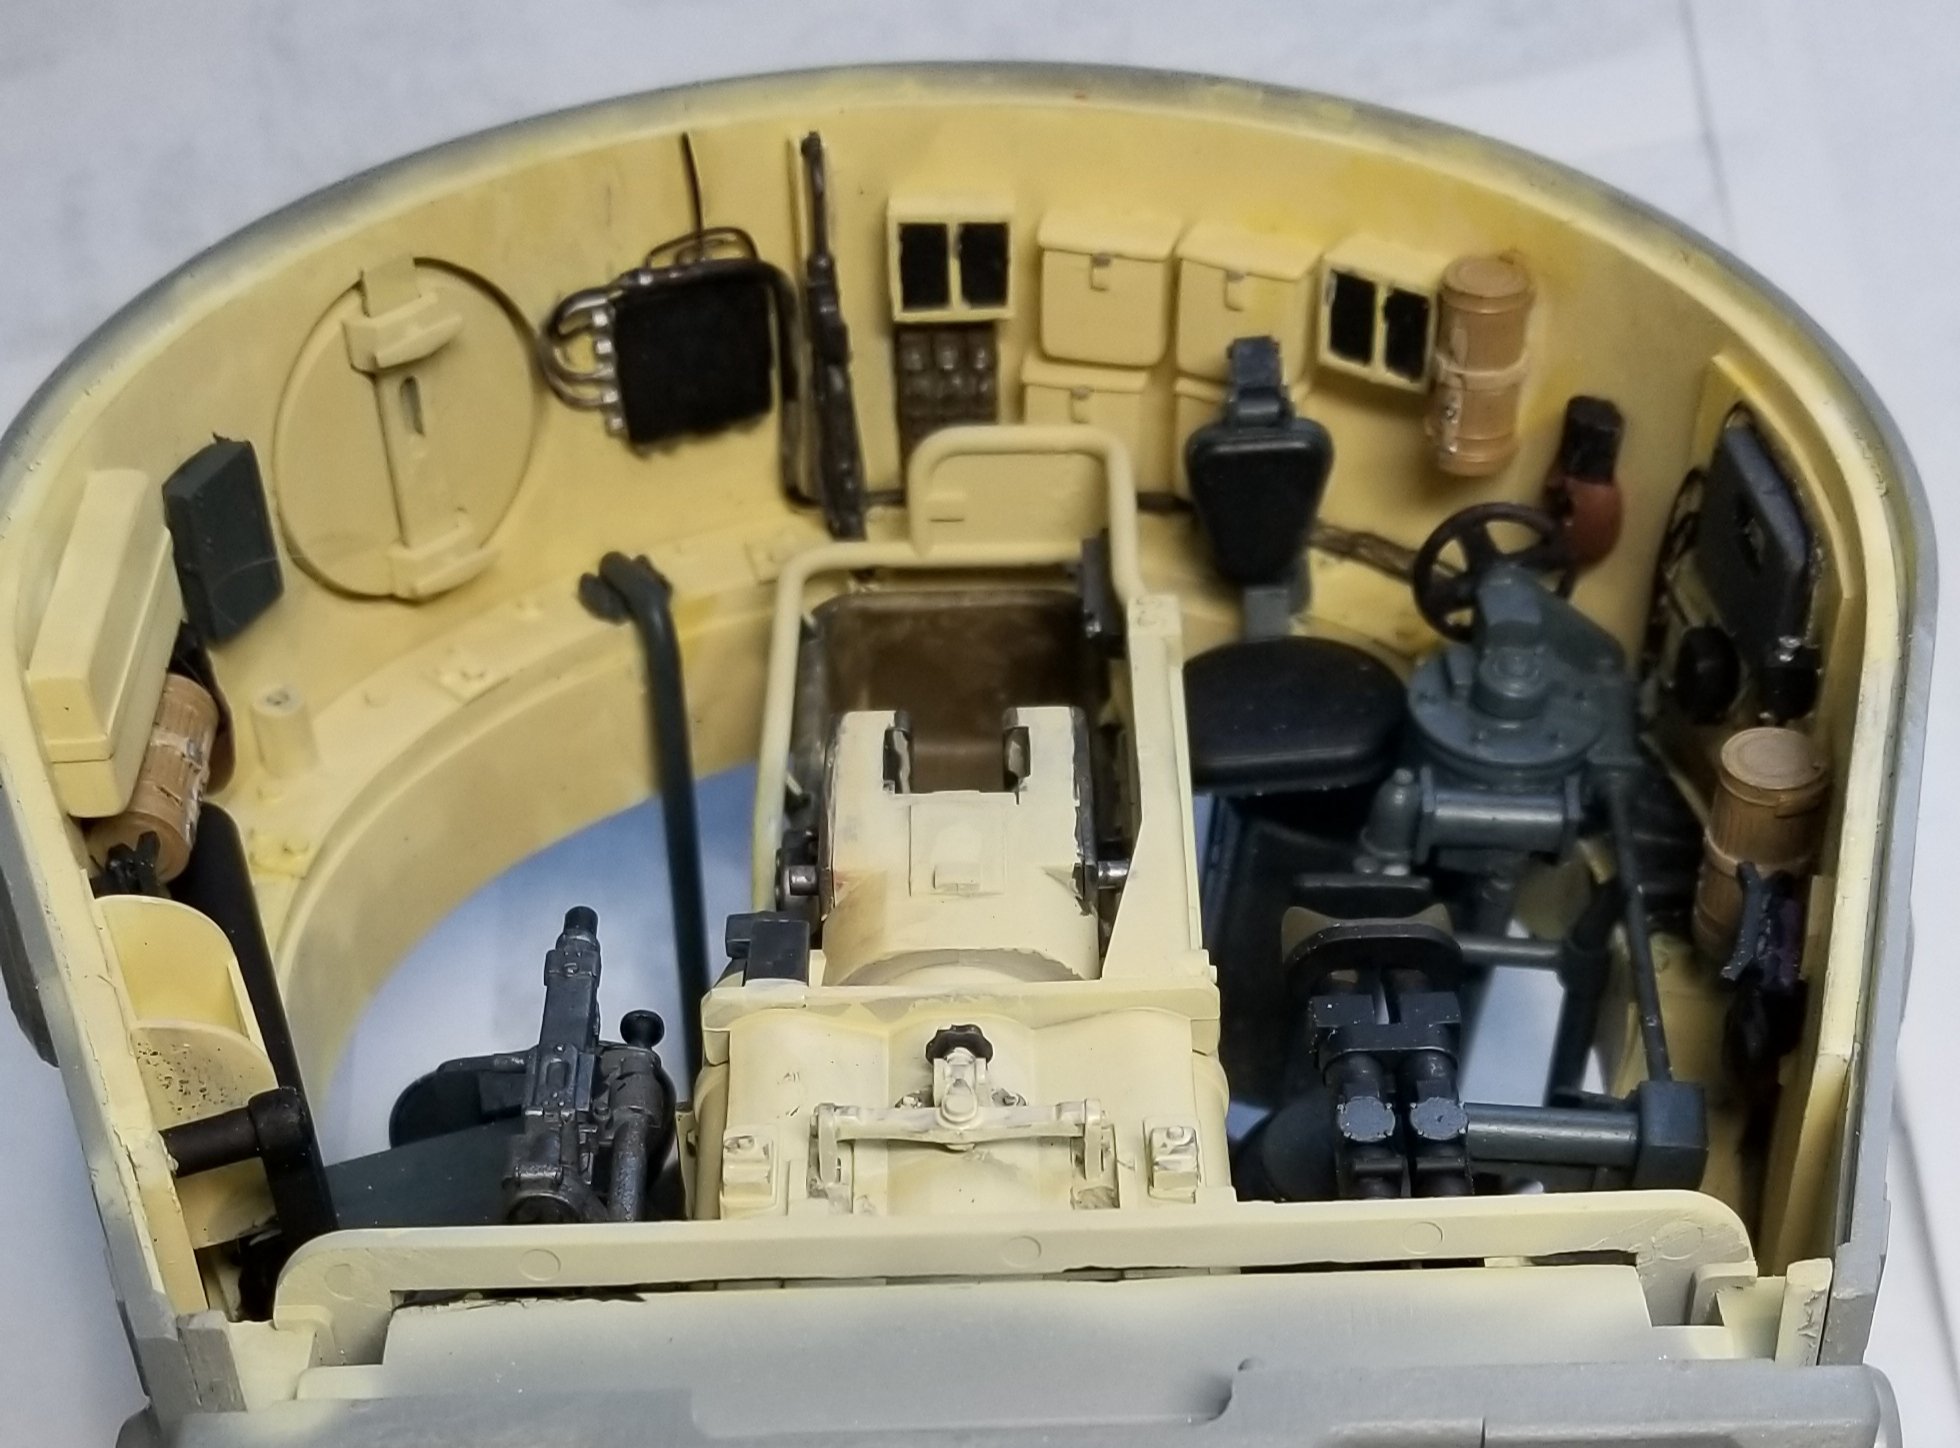
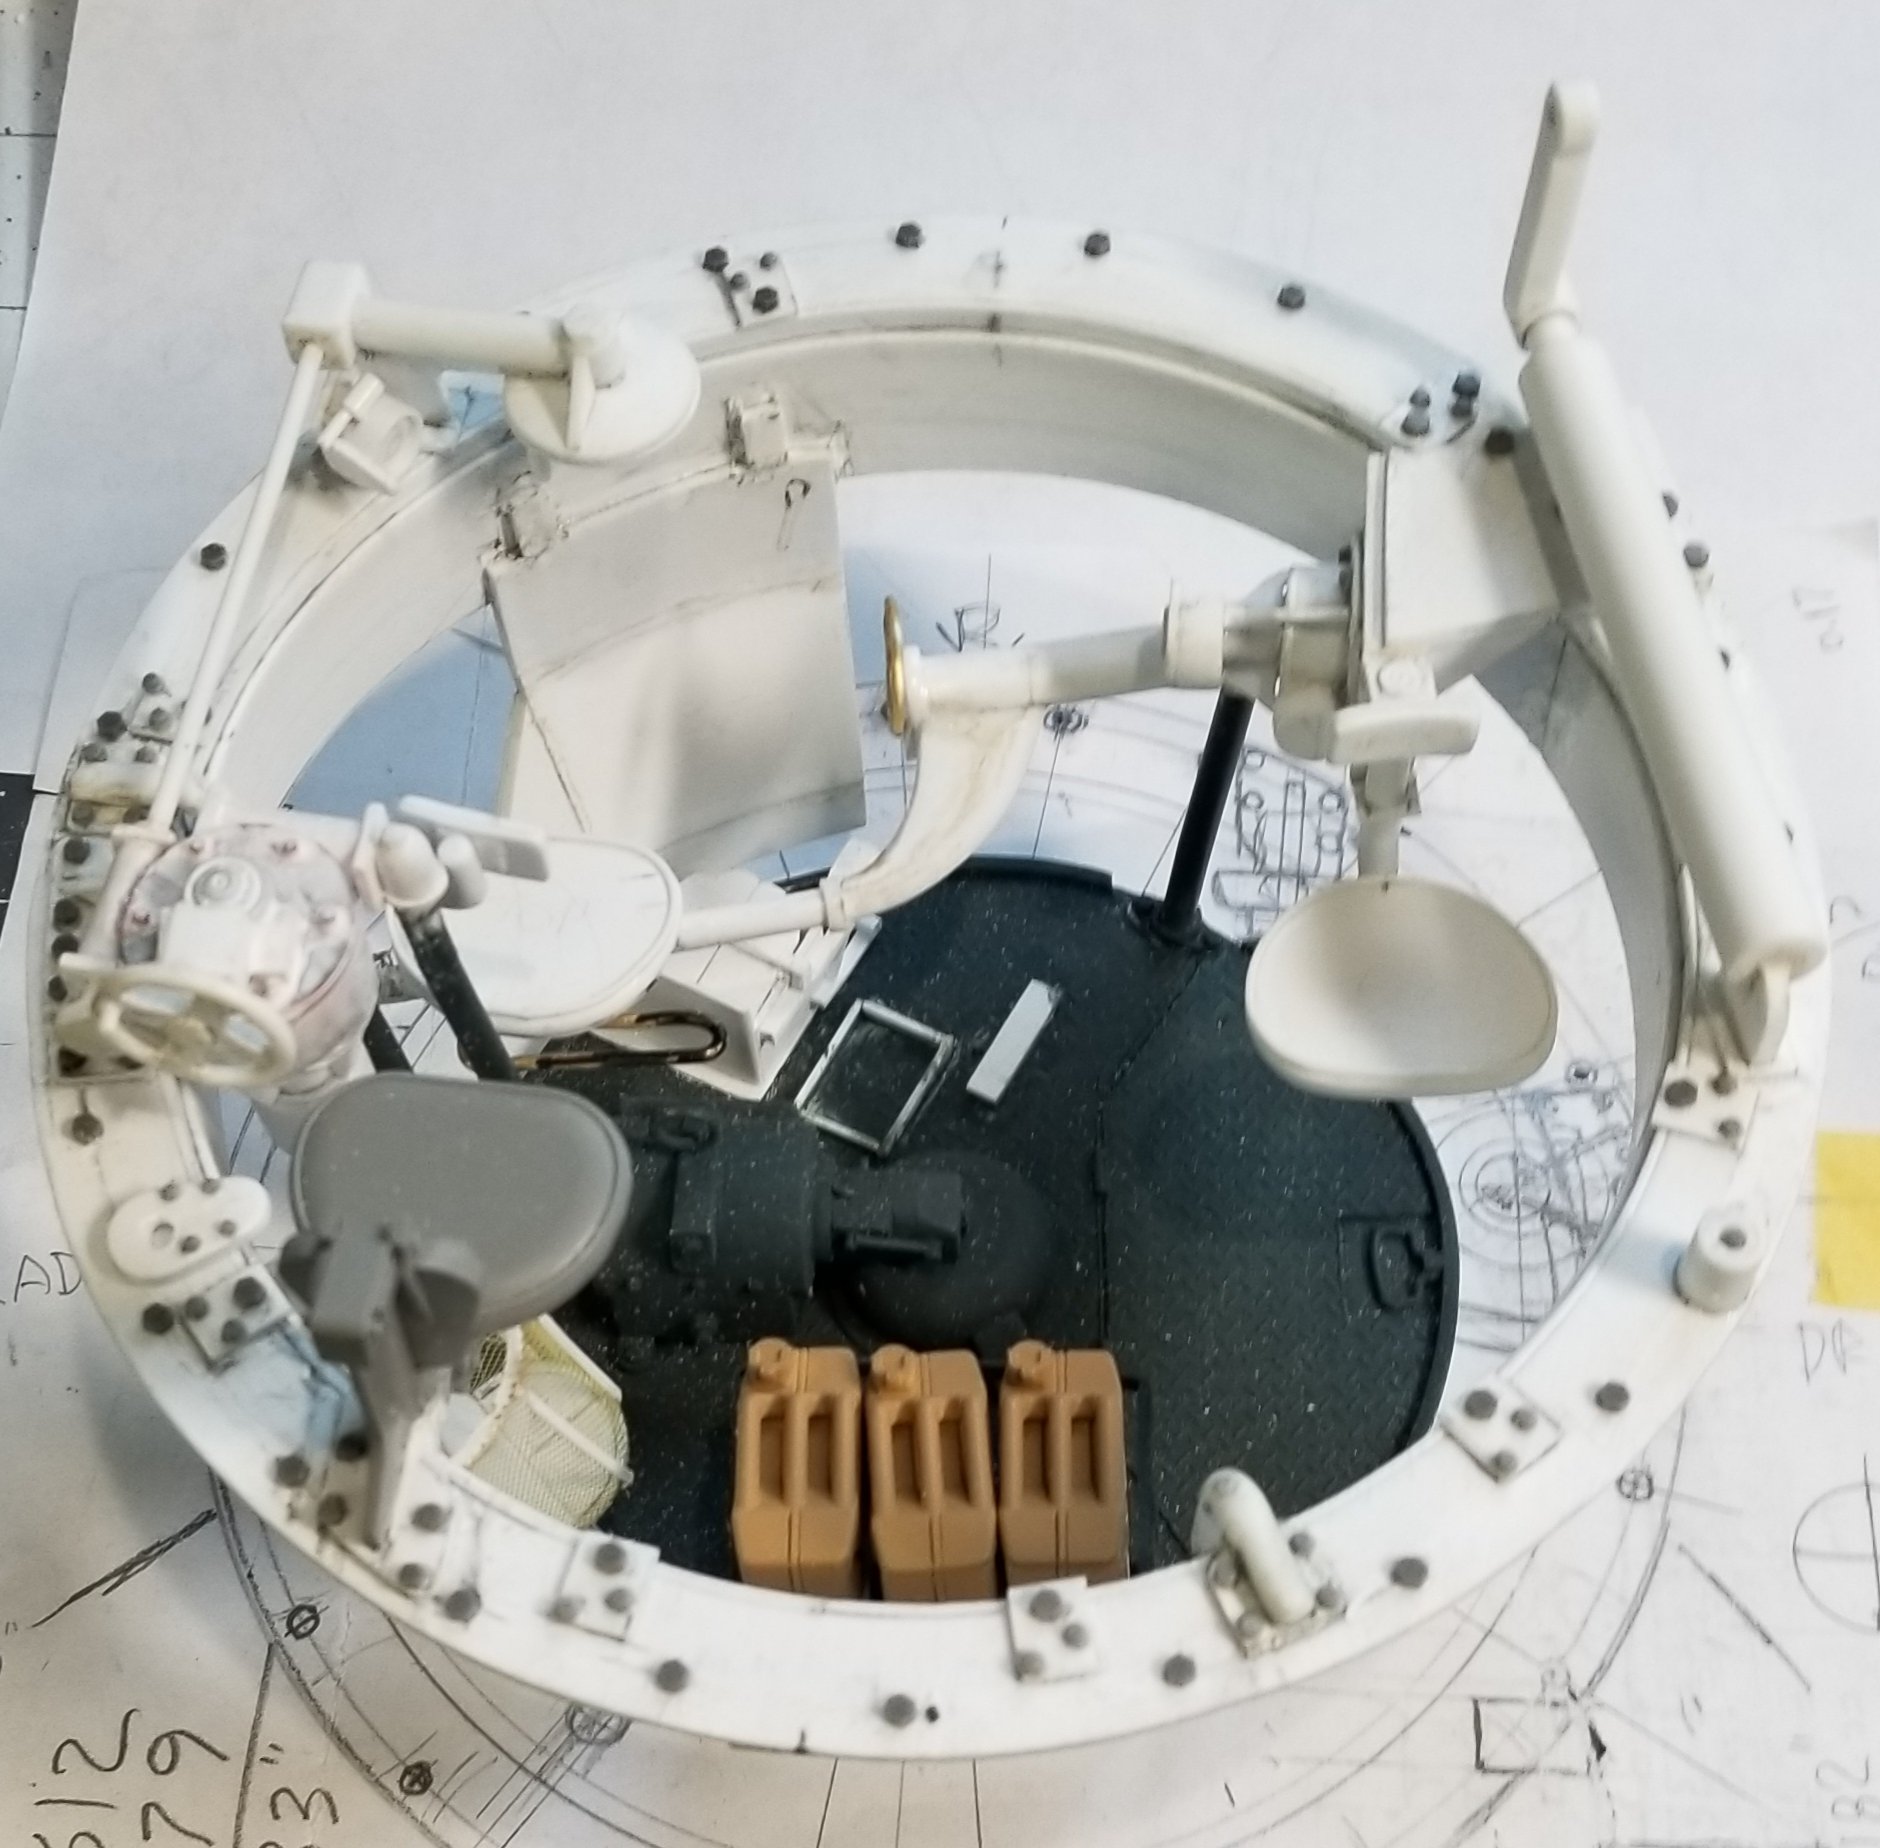
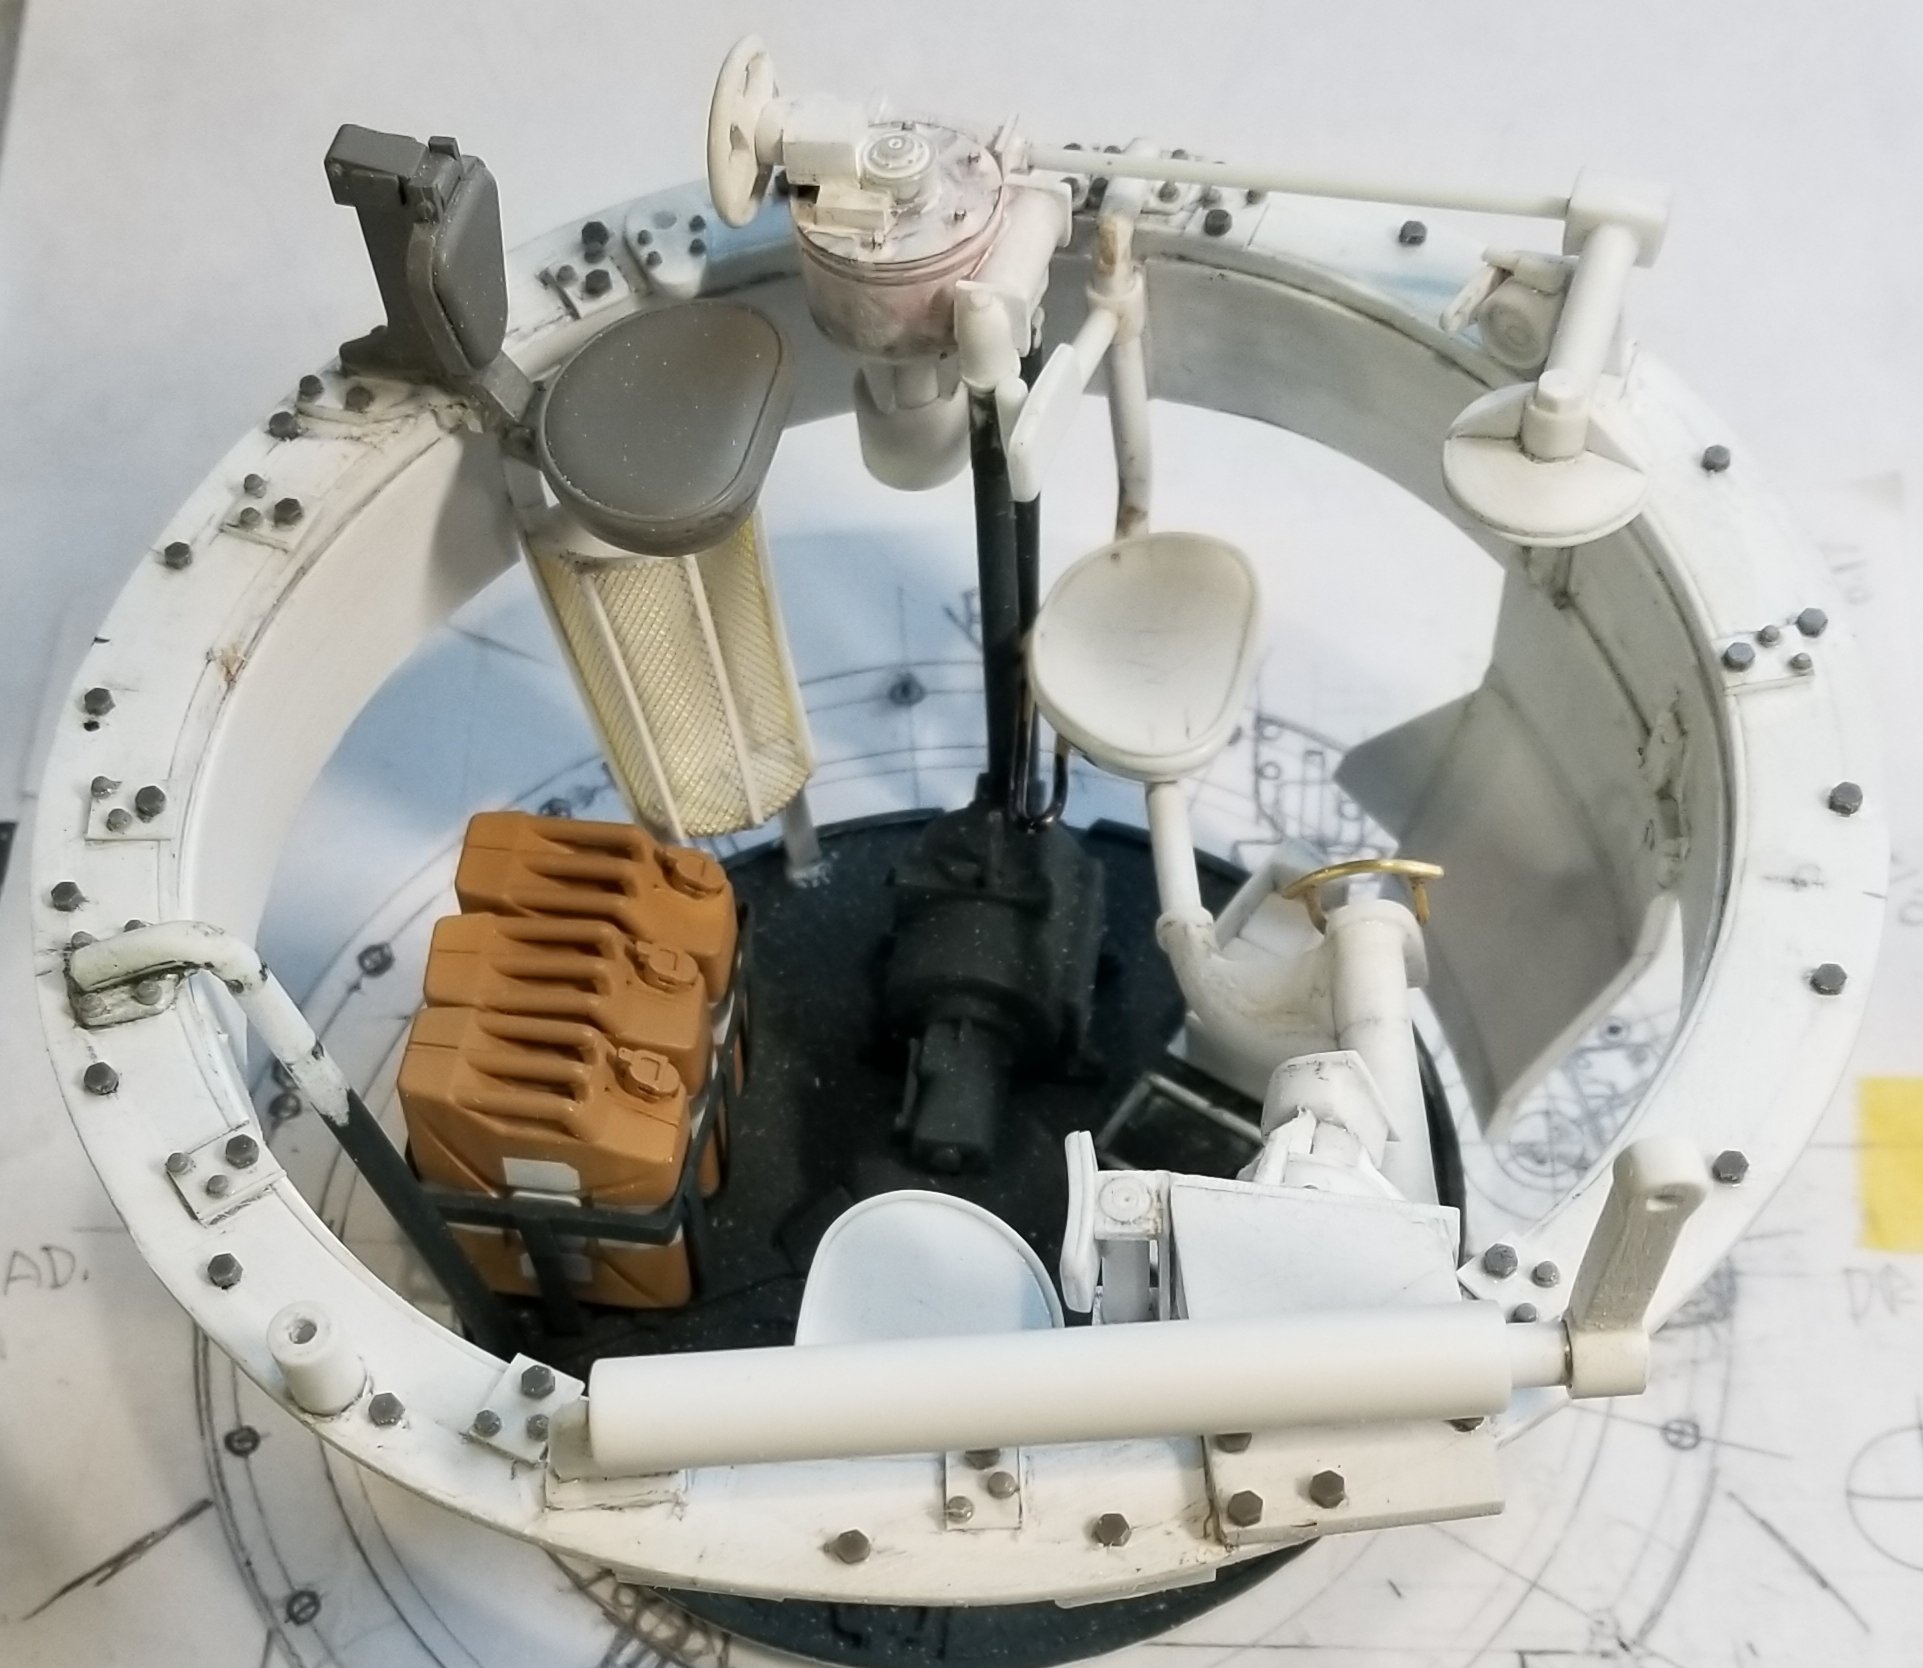
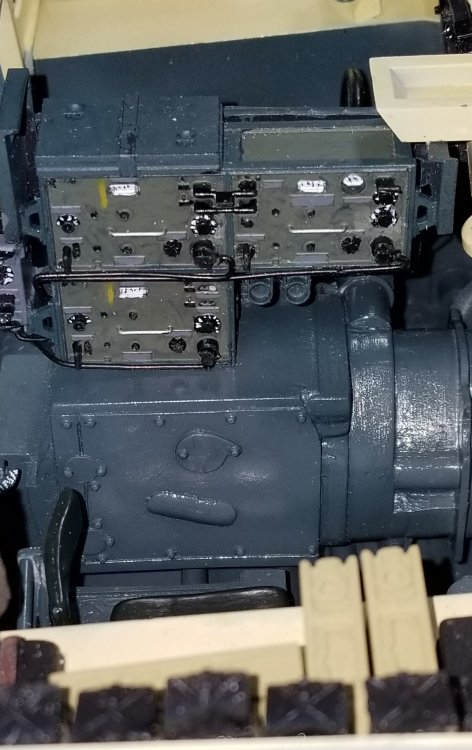
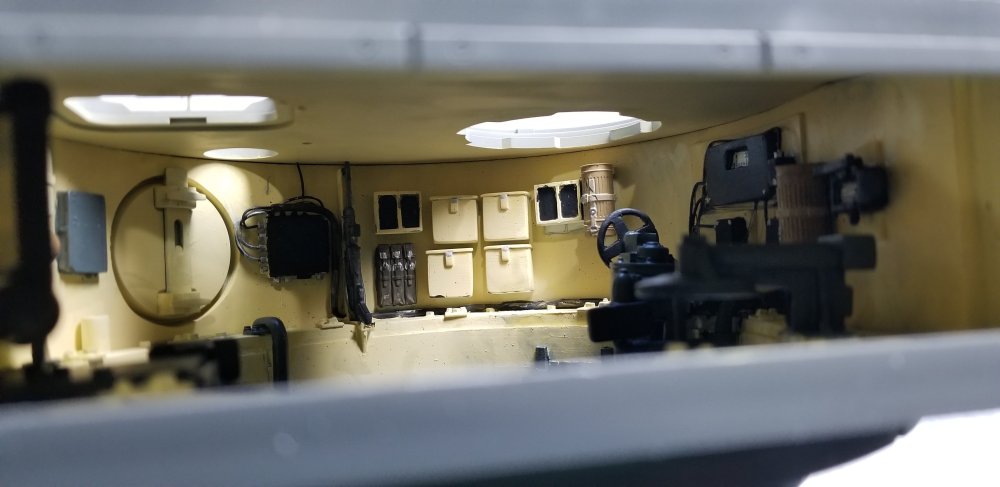
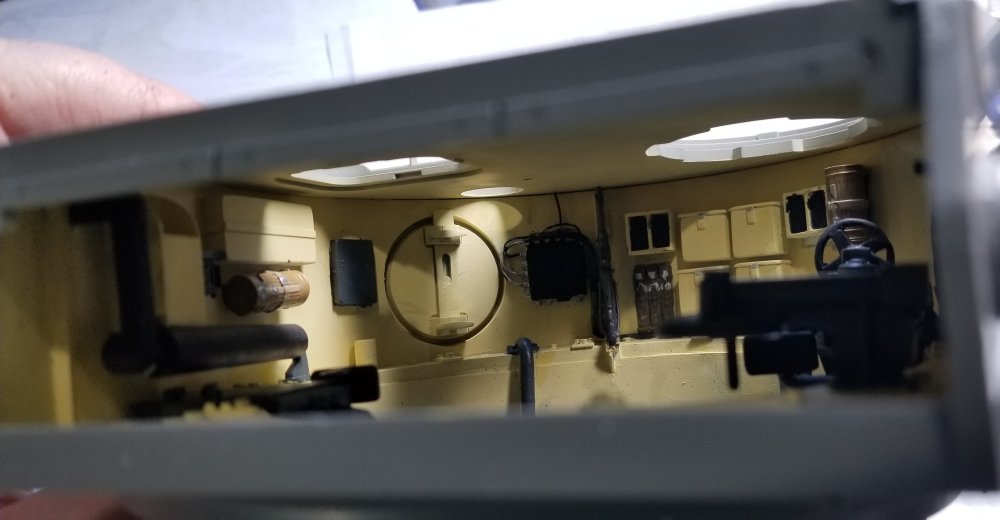
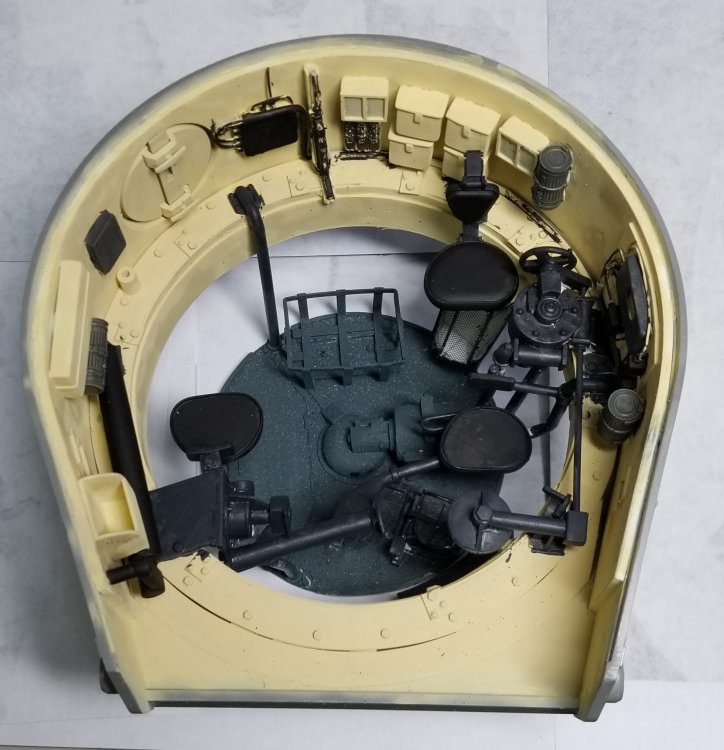
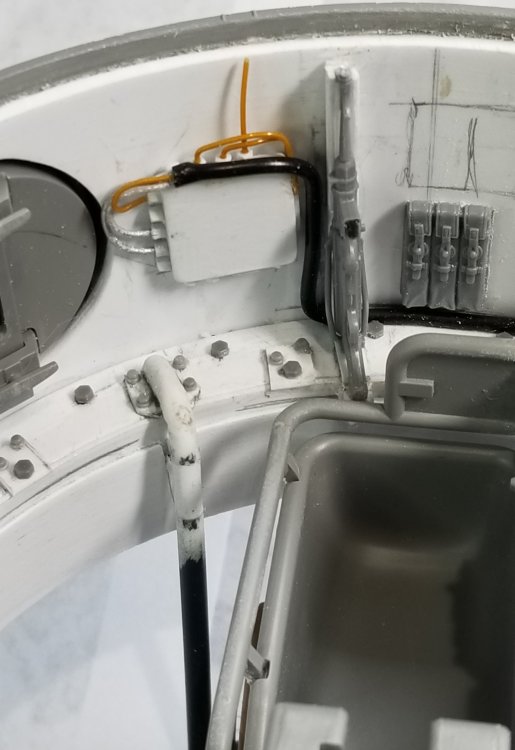
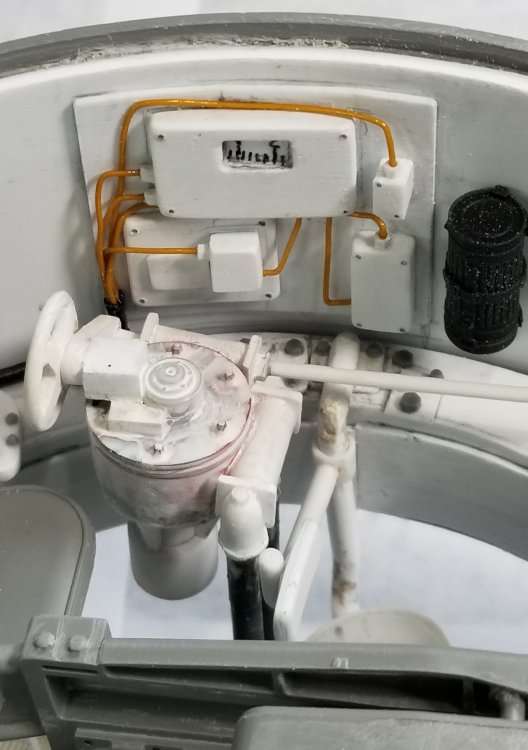
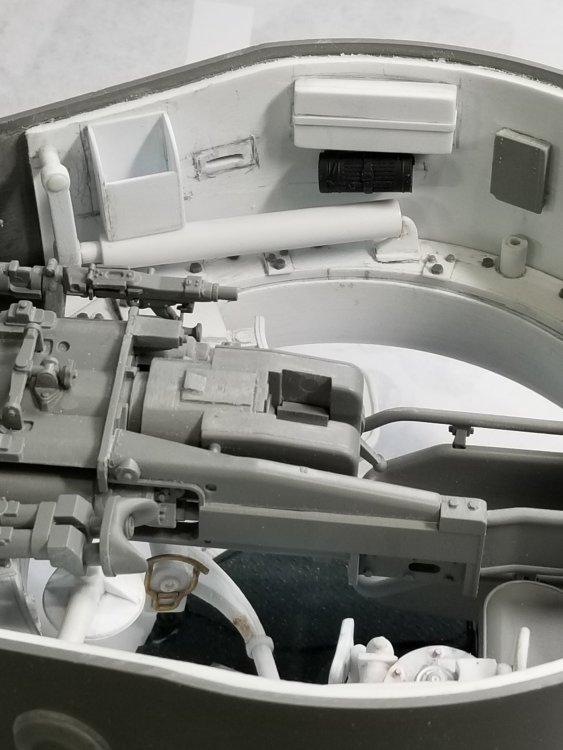
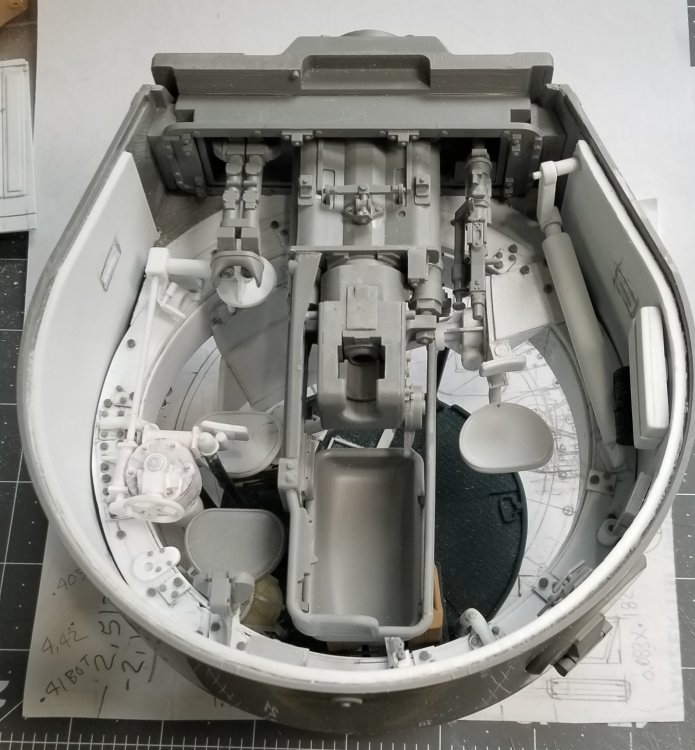
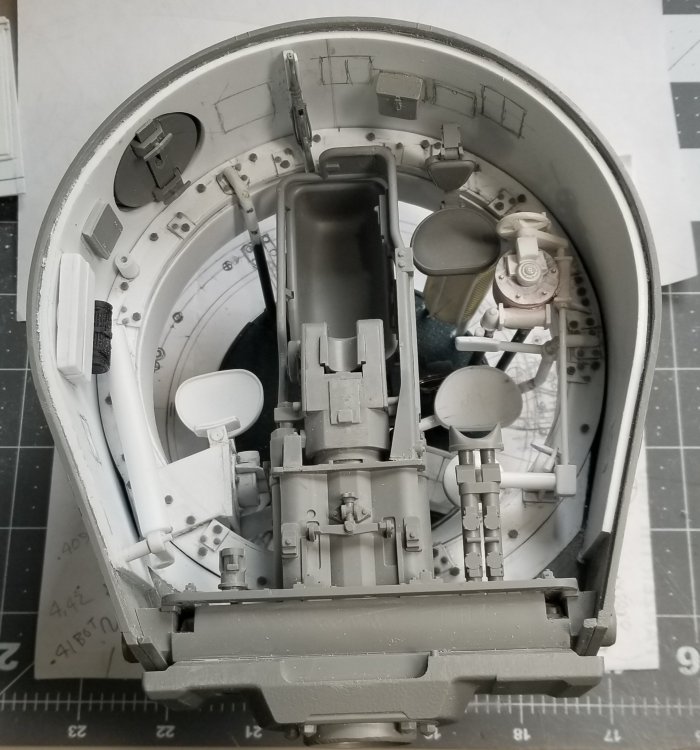
Sorry Carl, no paint yet. I do have most all of the turret details done except for five boxes that go on the rear wall. This picture shows the whole inside of the turret. This view shows the electrical junction box between the loading door and the MP40. I added three ammo pouches for tge MP40, there from the Tamiya Kubelwagon. This view shows the control board. I'm not sure what this is for/or if I even got it right, but it looks pretty convincing to me. This view shows the gun dampener cylinder and the open box above it. I still need to add the vision blocks to both sides. I took two of these from my 1/16 Panzer II Ausf F, I wont miss them because I'm not planning on having it have open hatches. Hopefully I can get the boxes done and installed so I can start painting...lol Ron G
-
You got it Carl I'll get on it right away...lol Ron G
-
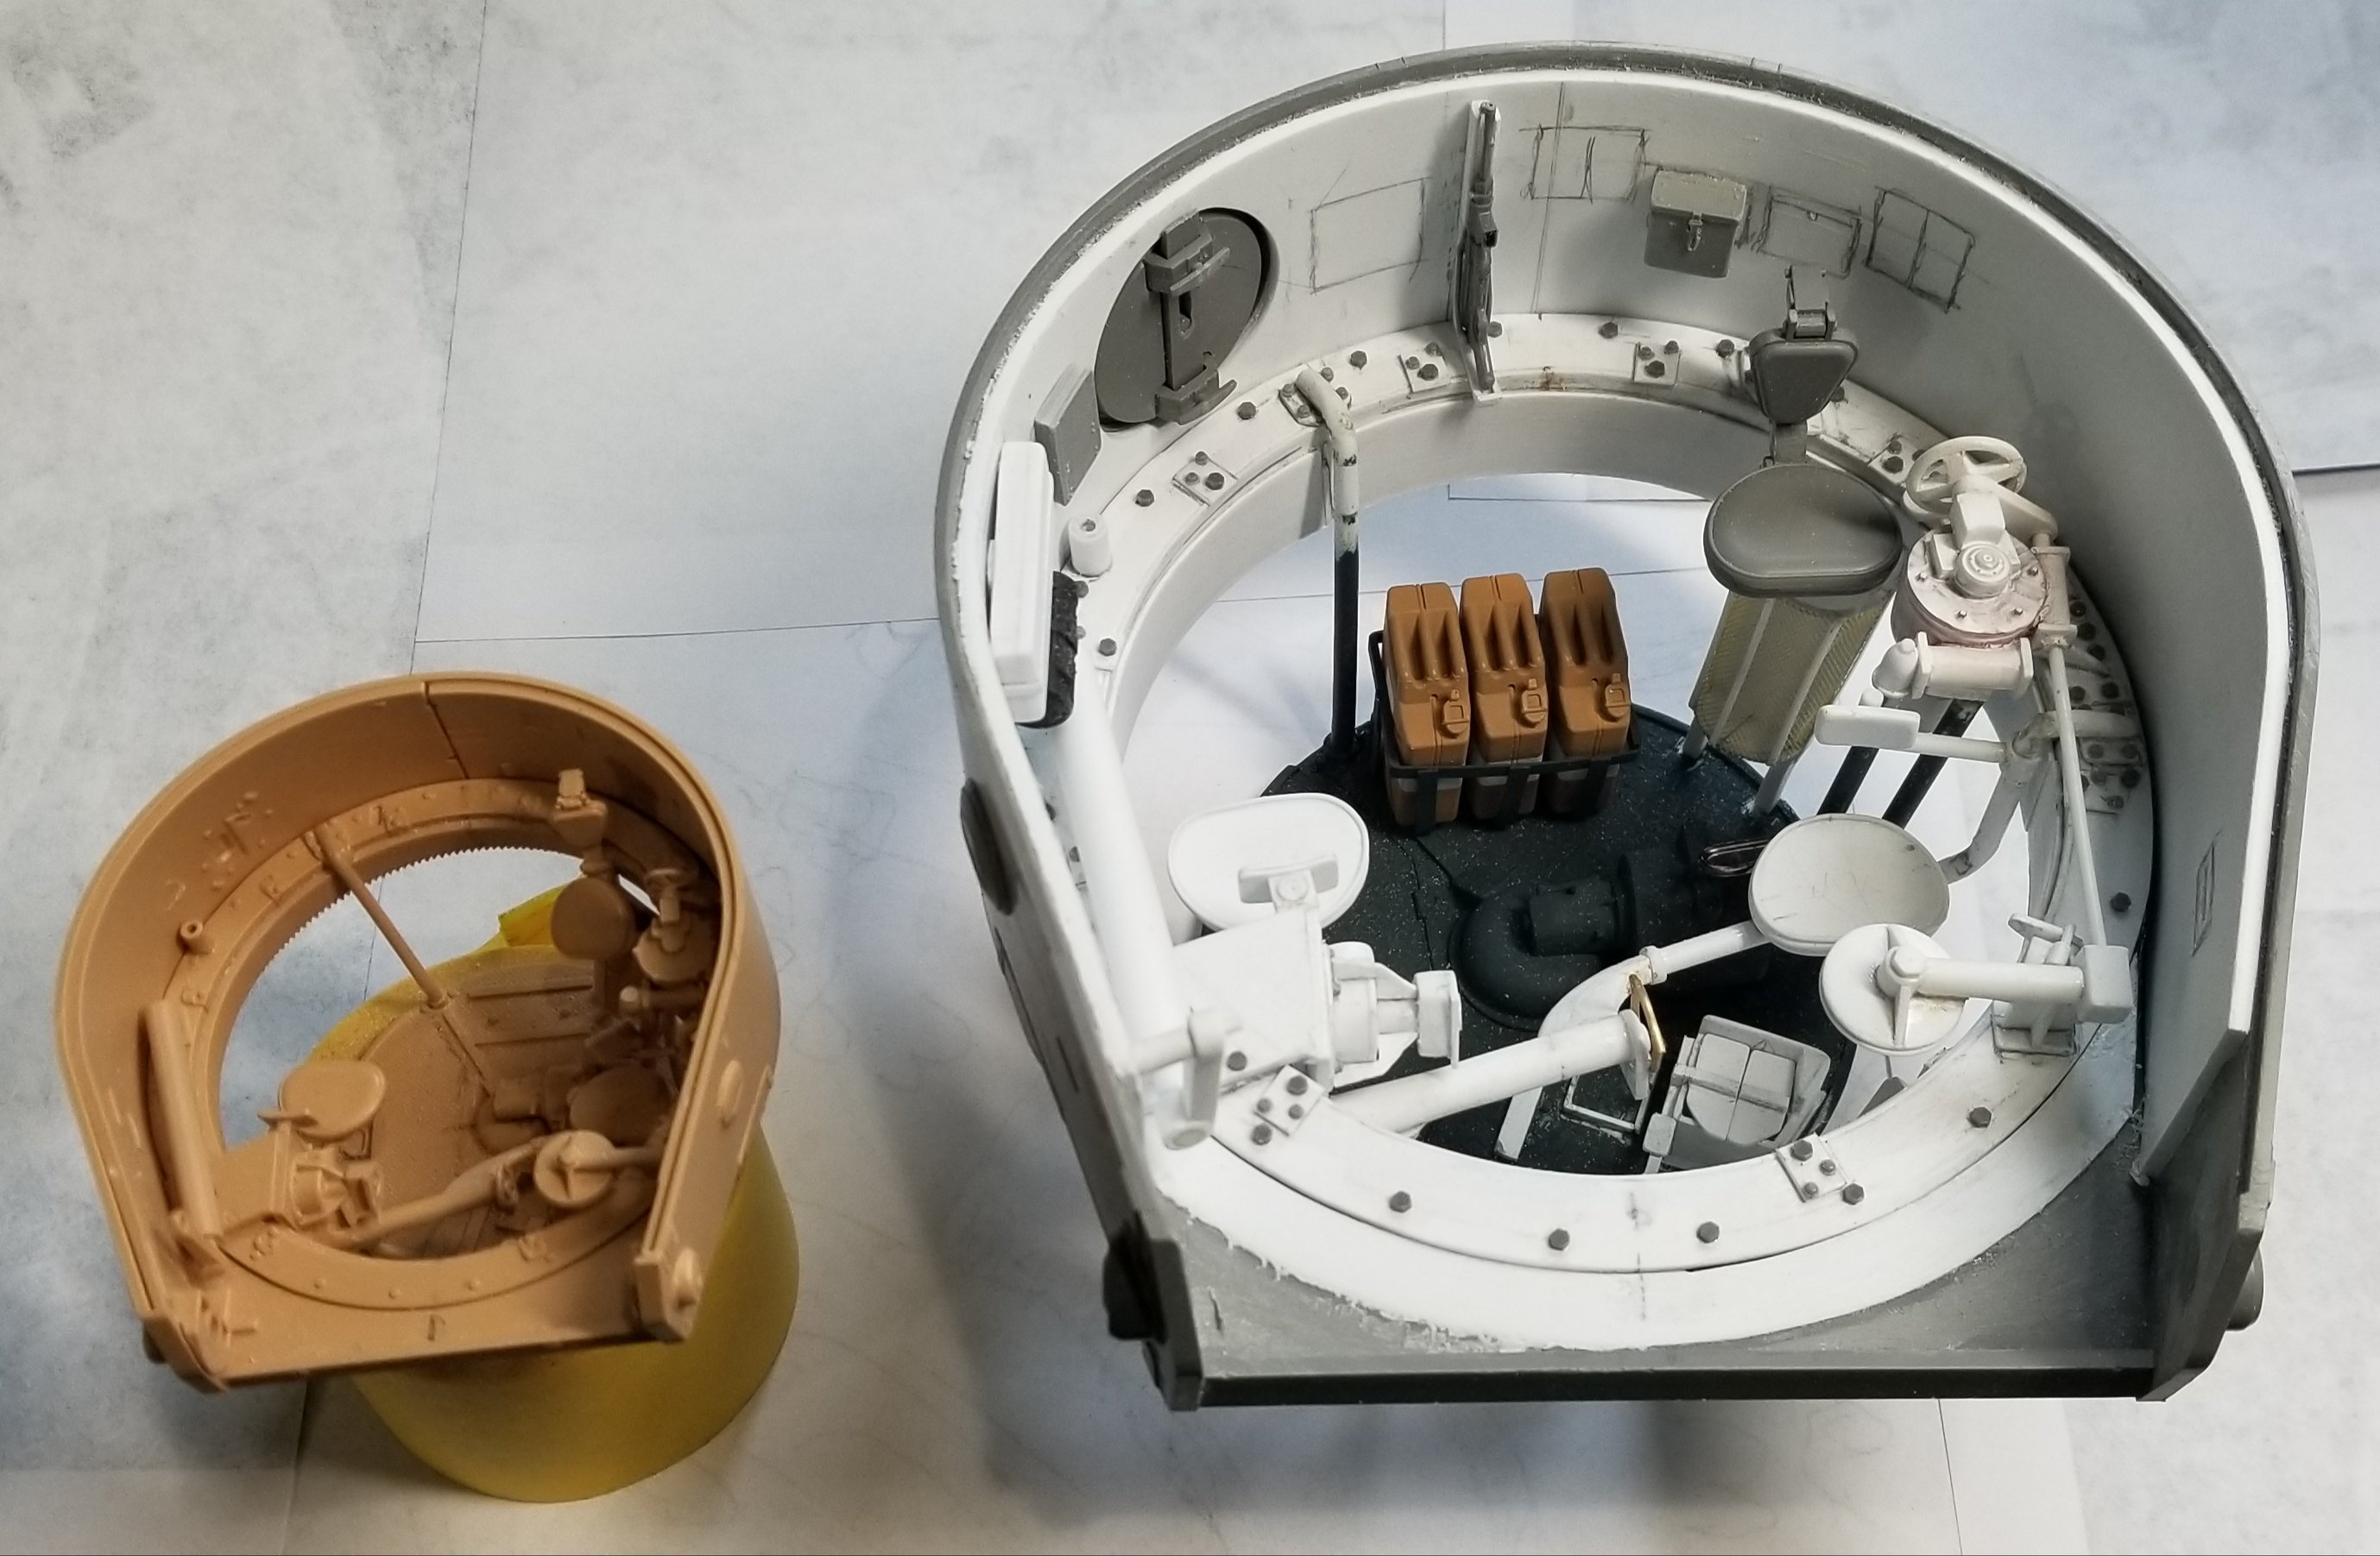
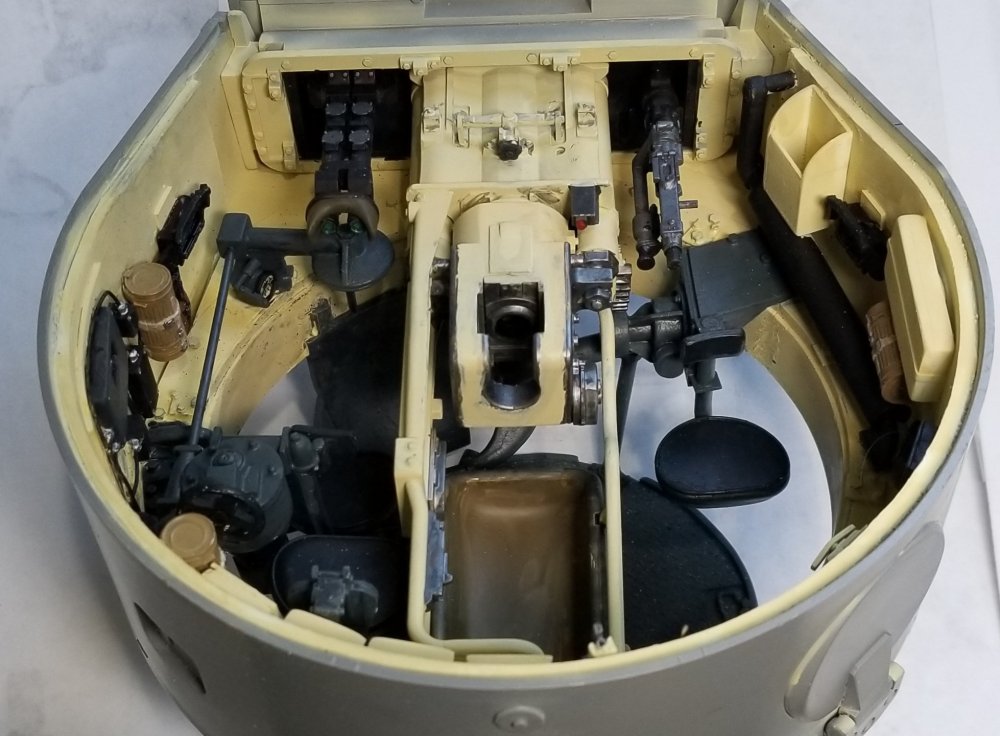
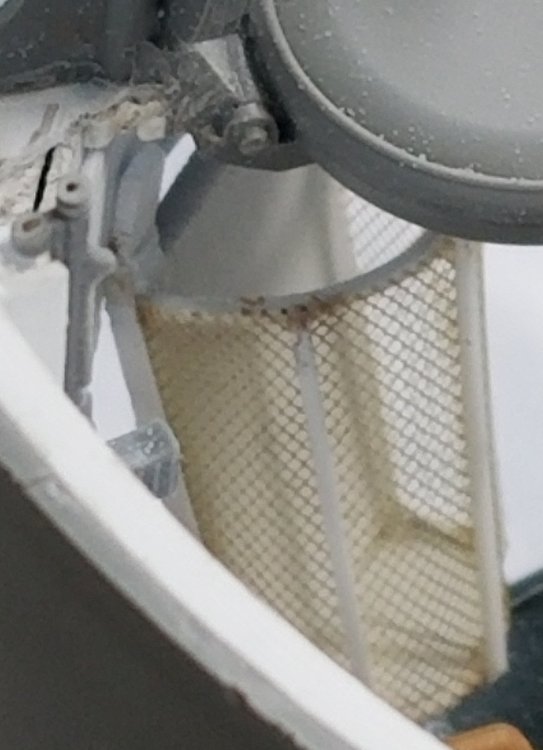
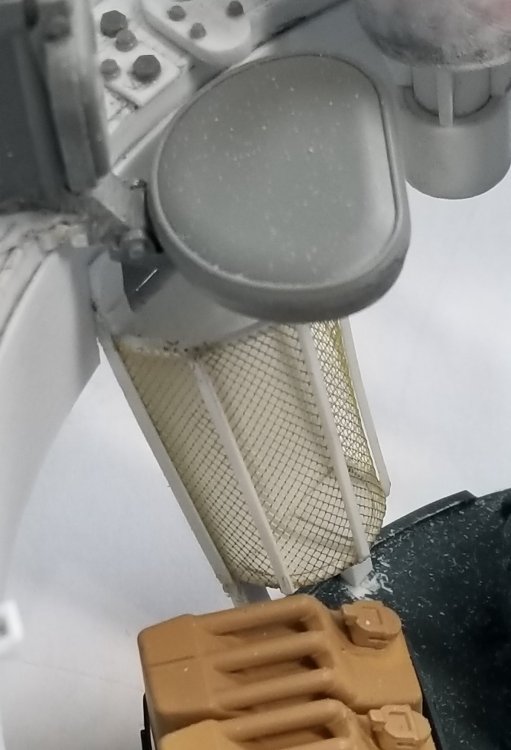
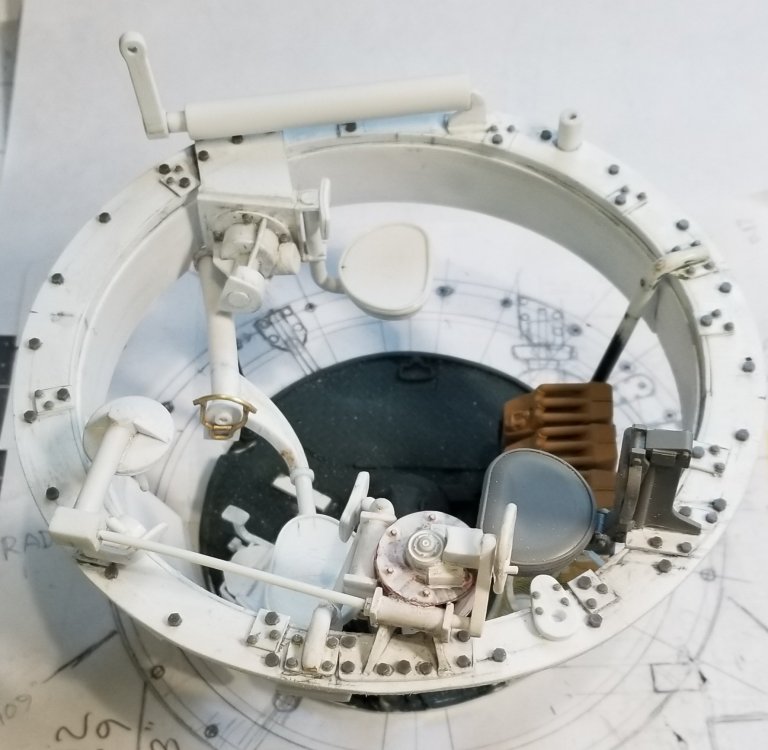
Hey all Ok, here's some more pictures for you to look at. this picture shows the comparison of the 1/35 scale on the left and the 1/16 scale on the right. I'm in the process of adding all the turret detail, boxes, gas masks, gertzacks, etc. This view shows the screen basket/chute I scratch built. The grey barrel sticking up on the left is from the MP40. This view is from the bottom up showing some of the basket details. Another view of the screen chute under the commanders seat. This view shows the turret from the back to the front. This view shows the turret from the front to the back. As soon as I get all of the turret details added I'll start painting again. Well that's it for now be back with more soon. Ron G


-
AHHQ did a build review on this kit, looked pretty cool to me Paul. Ron G
-
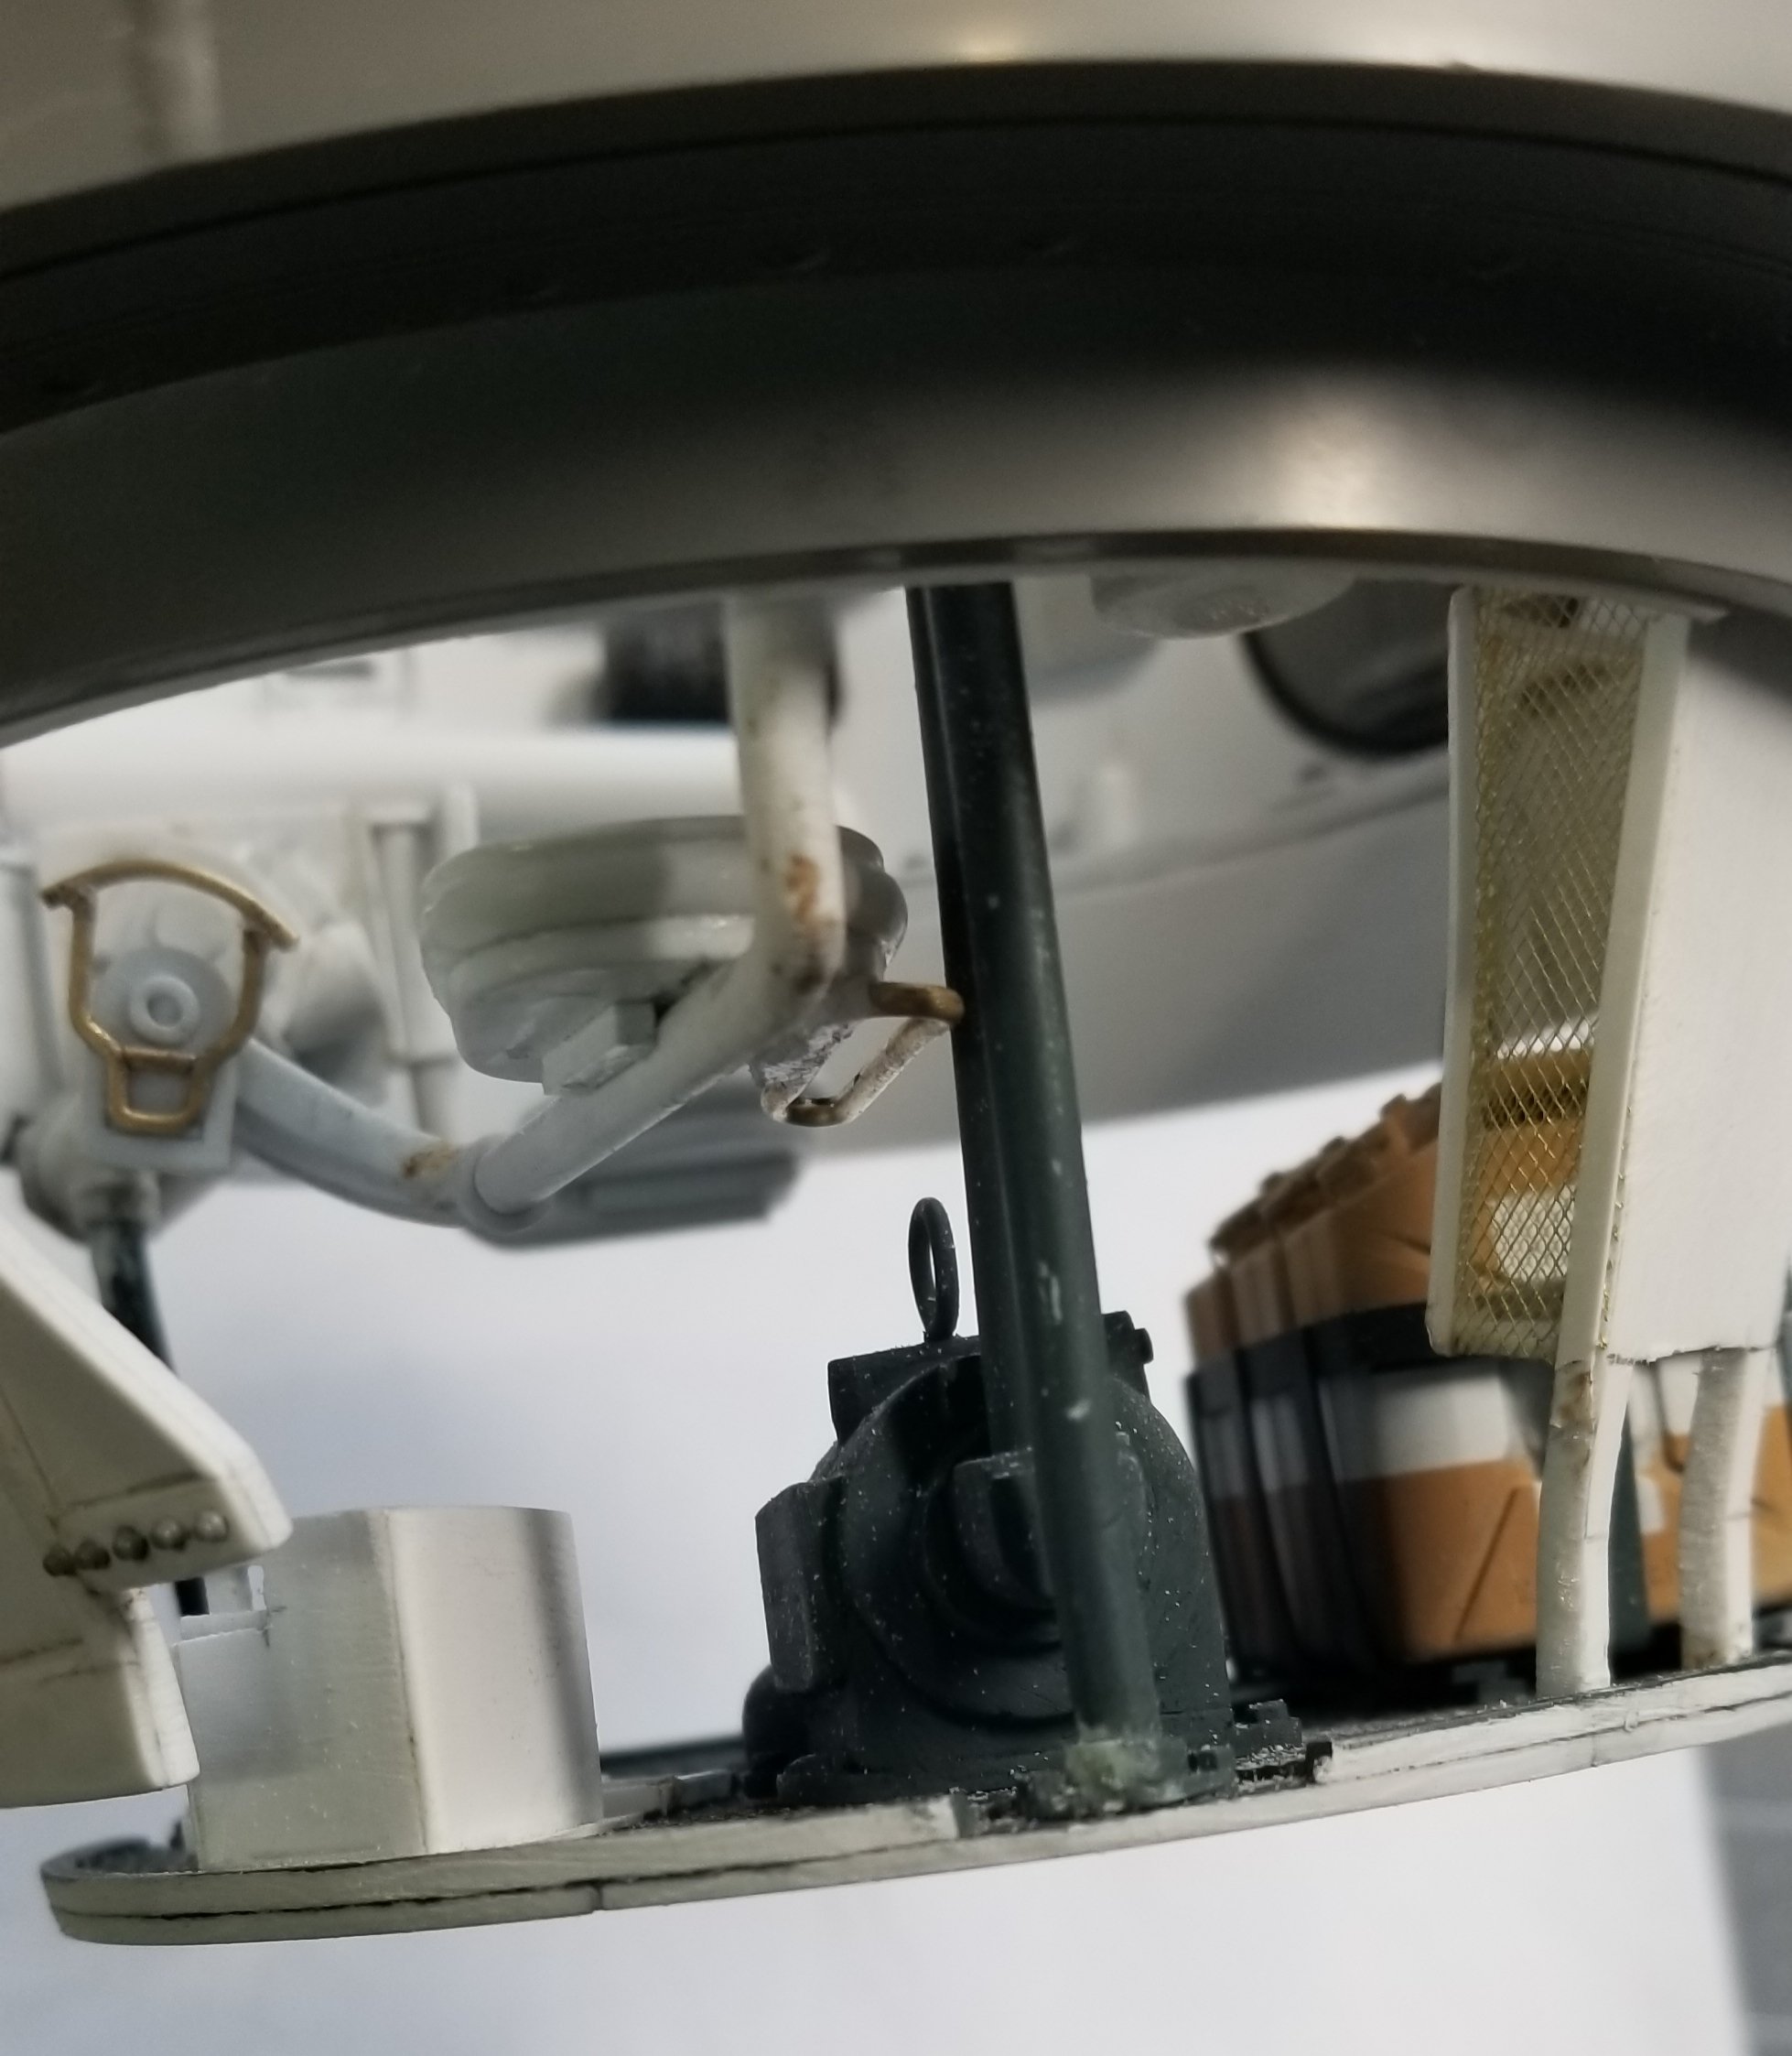
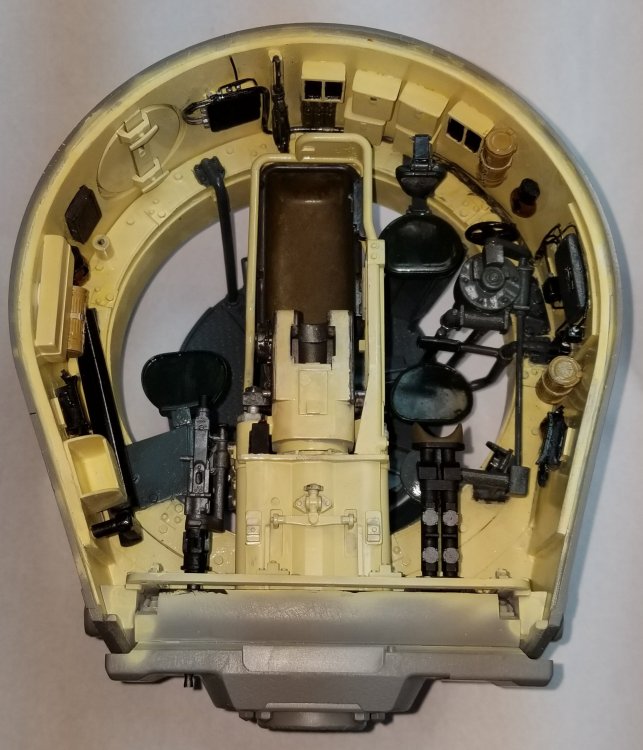
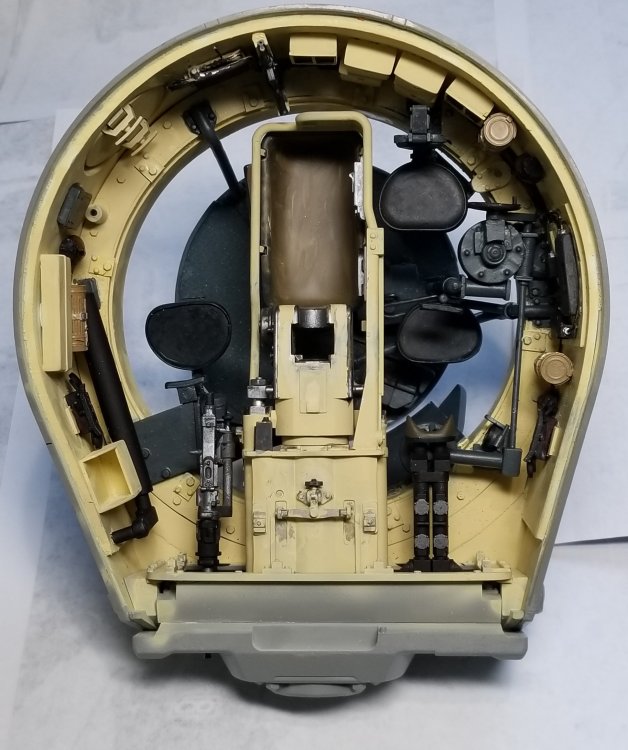
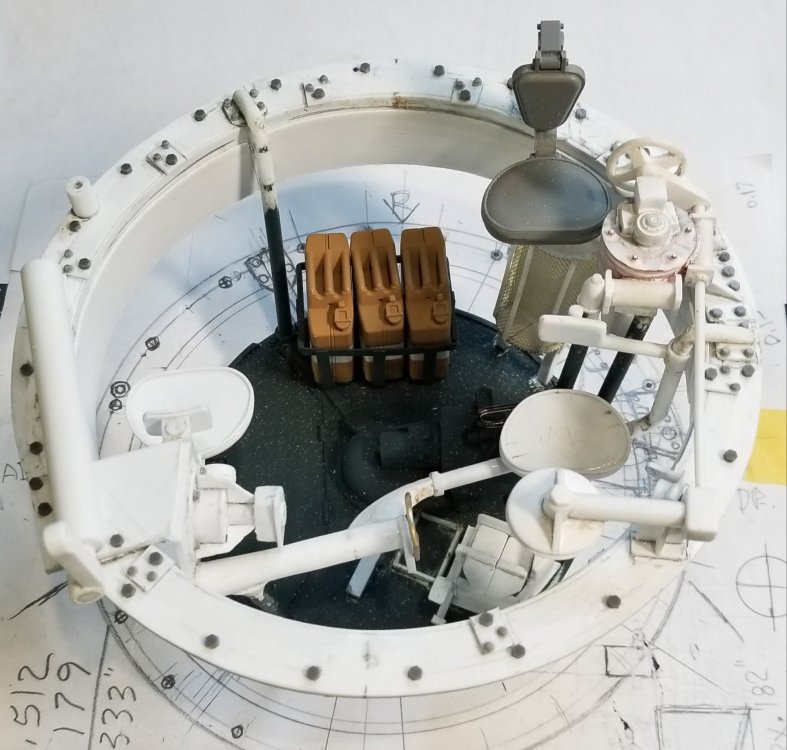
Hey all I finally have the turret basket done, I think. I have everything added that was in the 1/35 scale version down to the last nut and bolt, I hope. This view shows the turret basket looking from the front to the rear. You can see the seat backs that have been added. This view shows the dampener for the gun and all the nuts & bolts. This view shows the sheild and foot controls for the gun that have been added under the gunners seat. This view shows the screen basket/chute that I added under the commanders seat. I'm not sure what this is for, but it was in the 1/35 scale version. I was going to take more pictures but my phone died. I'll take some more Tomorrow. Well that's it for now be back soon. Ron G


-
COOL! Thanks Paul. Ron G
-
Hey Paul Isn't that the one with the full interior? If so I'd be very interested in it, please do a build thread, or at least a inbox review. Ron G
-
Thanks Carl I agree with you
-
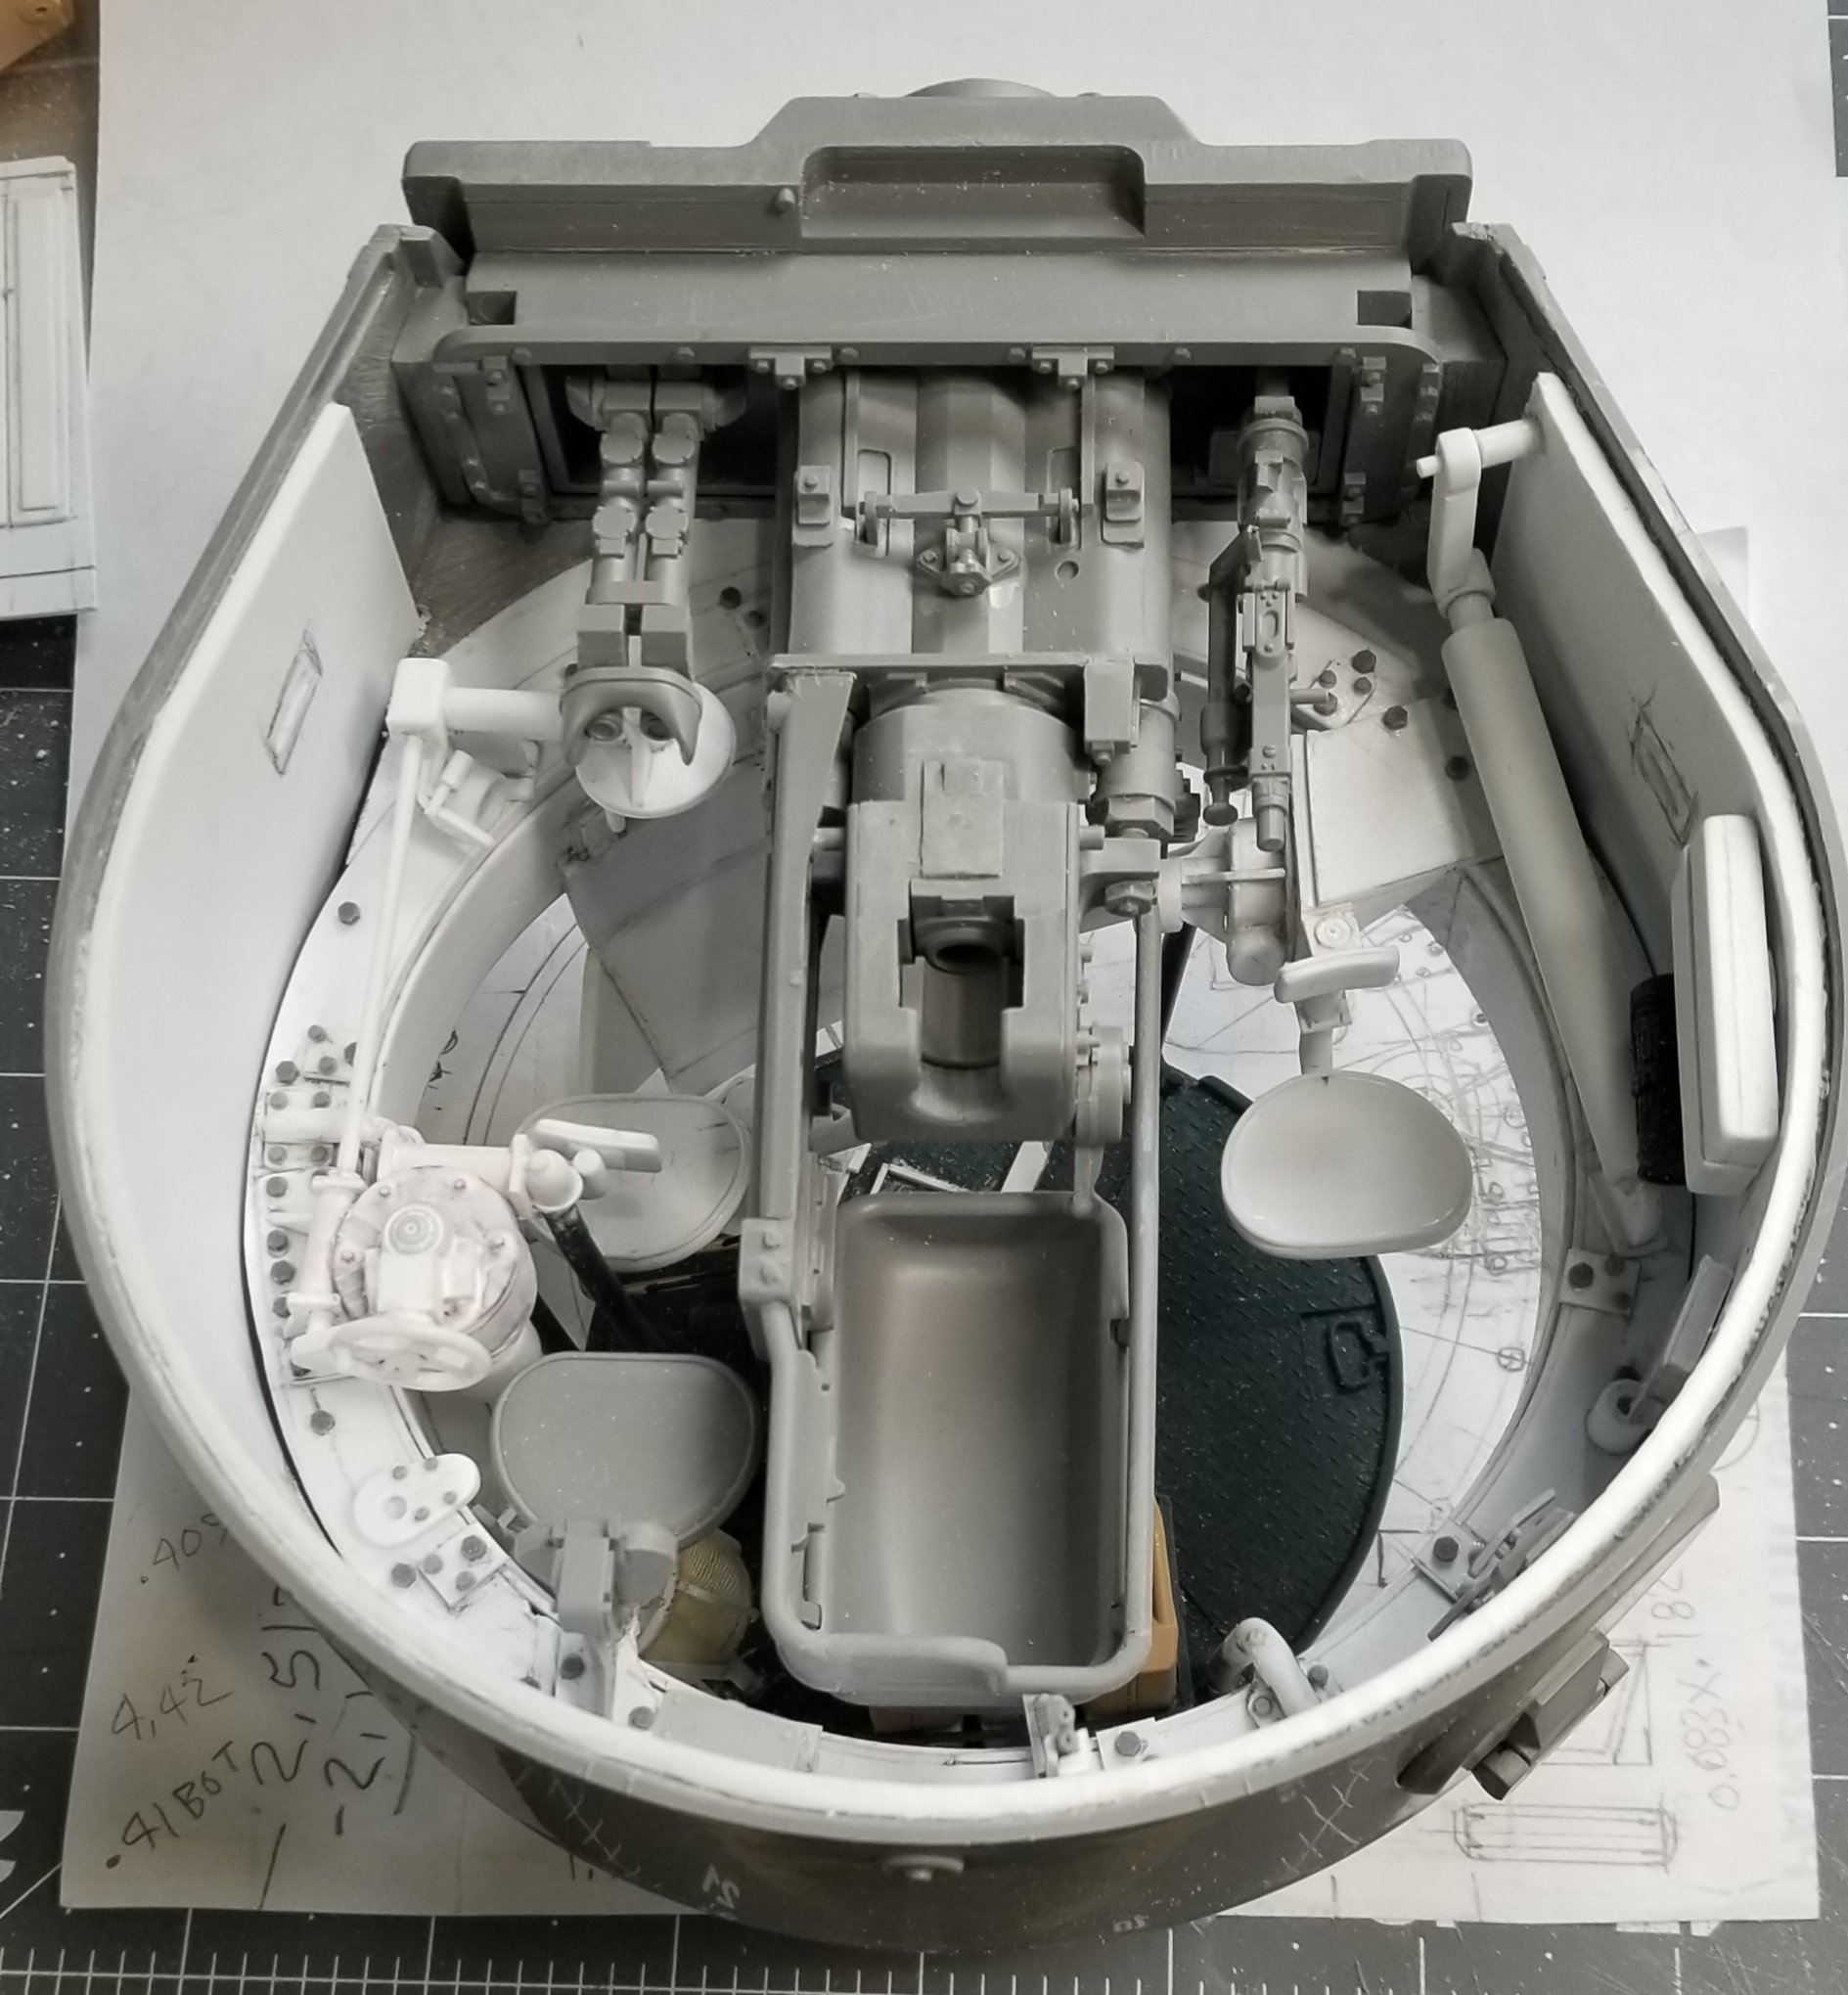
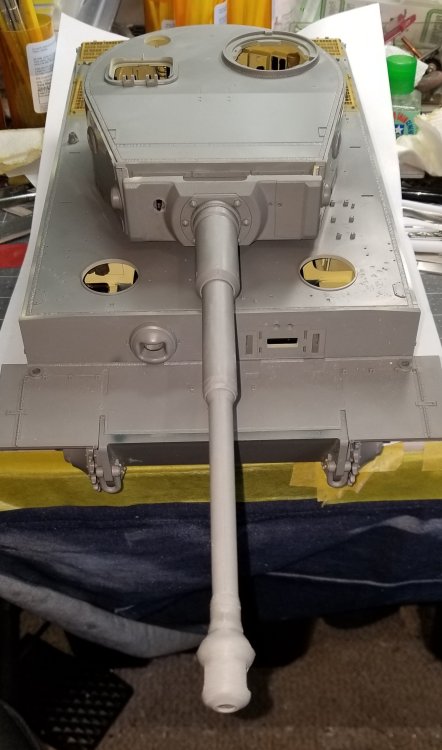
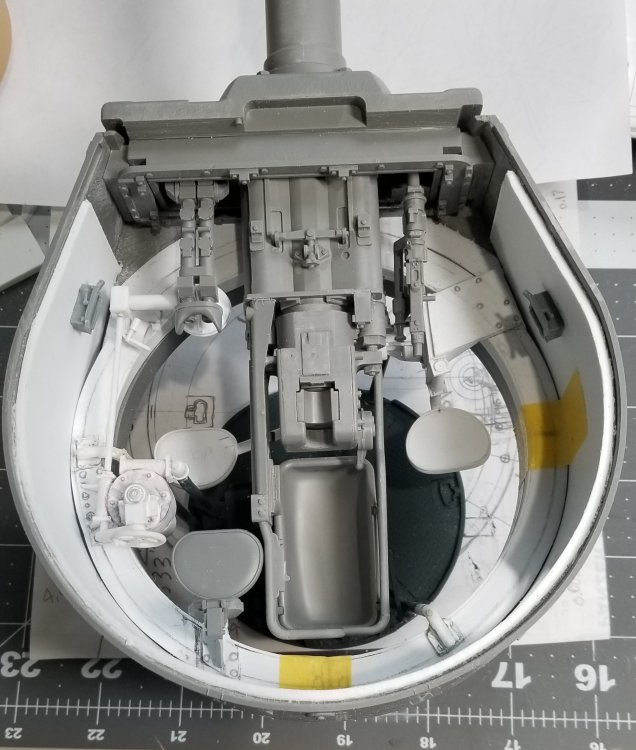
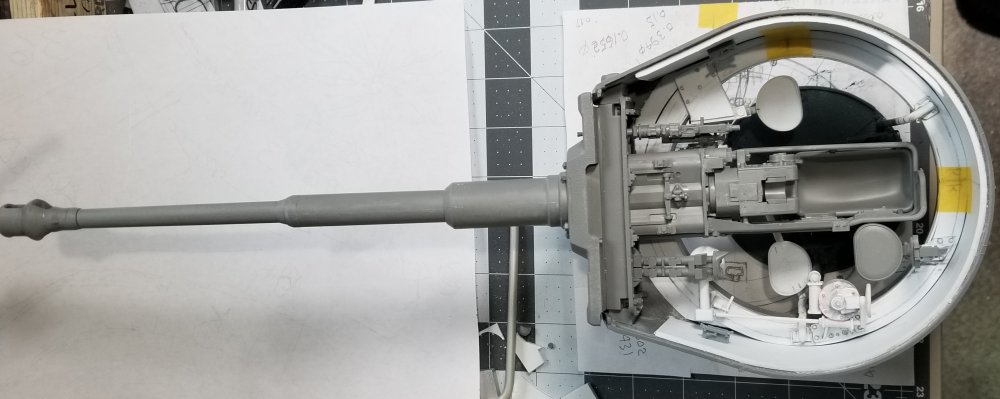
Hey all More work done on the turret. All the scratch building I've been doing on the turret had me a bit concerned about the overall fit. You start to create something, cut, sand, test fit, trim, refit, refit again so on and so on. This all takes a long time and all the time your not sure if everything will fit. I finally got to the point where I needed to build up the gun to see if it would fit. This view shows the gun breach in place in the turret and low and be hold! Every thing fit, almost. I need to move the commanders seat over about a 1/16th of a inch so it will clear the gun. Also I need to shave off some plastic on the gun elevation gear area so the gun will move easier. This view shows the turret with the gun barrel in place. This thing is huge. Well that's it for now be back soon with more updates. Ron G
-
Hey Phil Probably mainly do to cost. Look at the Trumpeter kits they can run up to $400 - $500 dollars. Most people don't really want to do the interiors you can't really see that much through the hatches, I'm just a little crazy I guess...lol. from what I could see in the AHHQ's video you get most of the interior for the fighting compartment, just no driver or co-driver area. What would be nice is more figures then just one. Ron G