BlrwestSiR
-
Posts
9,173 -
Joined
-
Last visited
Content Type
Profiles
Forums
Events
Gallery
Everything posted by BlrwestSiR
-
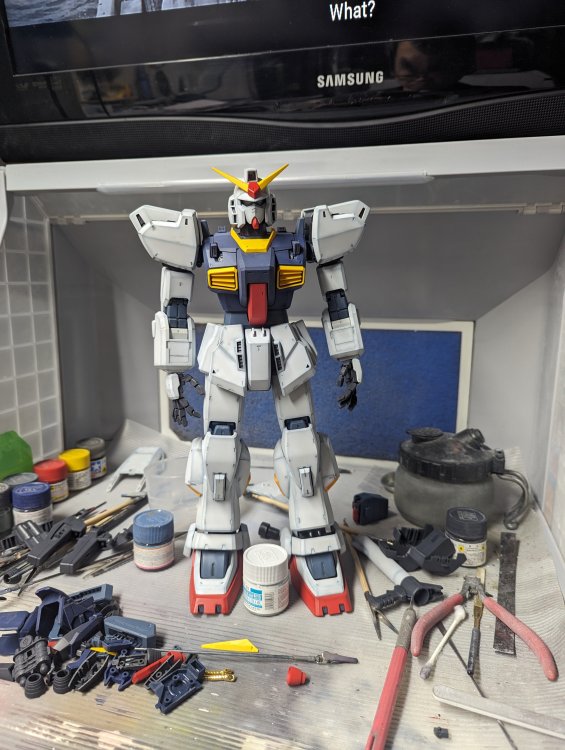
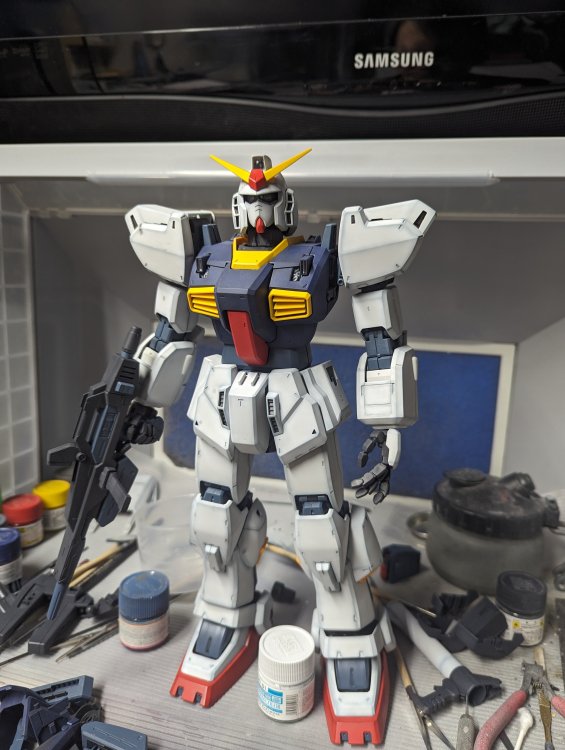
Next up is the waist section. Here's the metal.bit for the legs to attach to. This is then encased inside the waist assembly. The various pieces for the armoured skirt. Finally, joining the upper and lower sections. The paint bottles gives you a nice size comparison. With the beam rifle in place. I have the backpack, shield and bazooka to finish them decals/stickers.

-
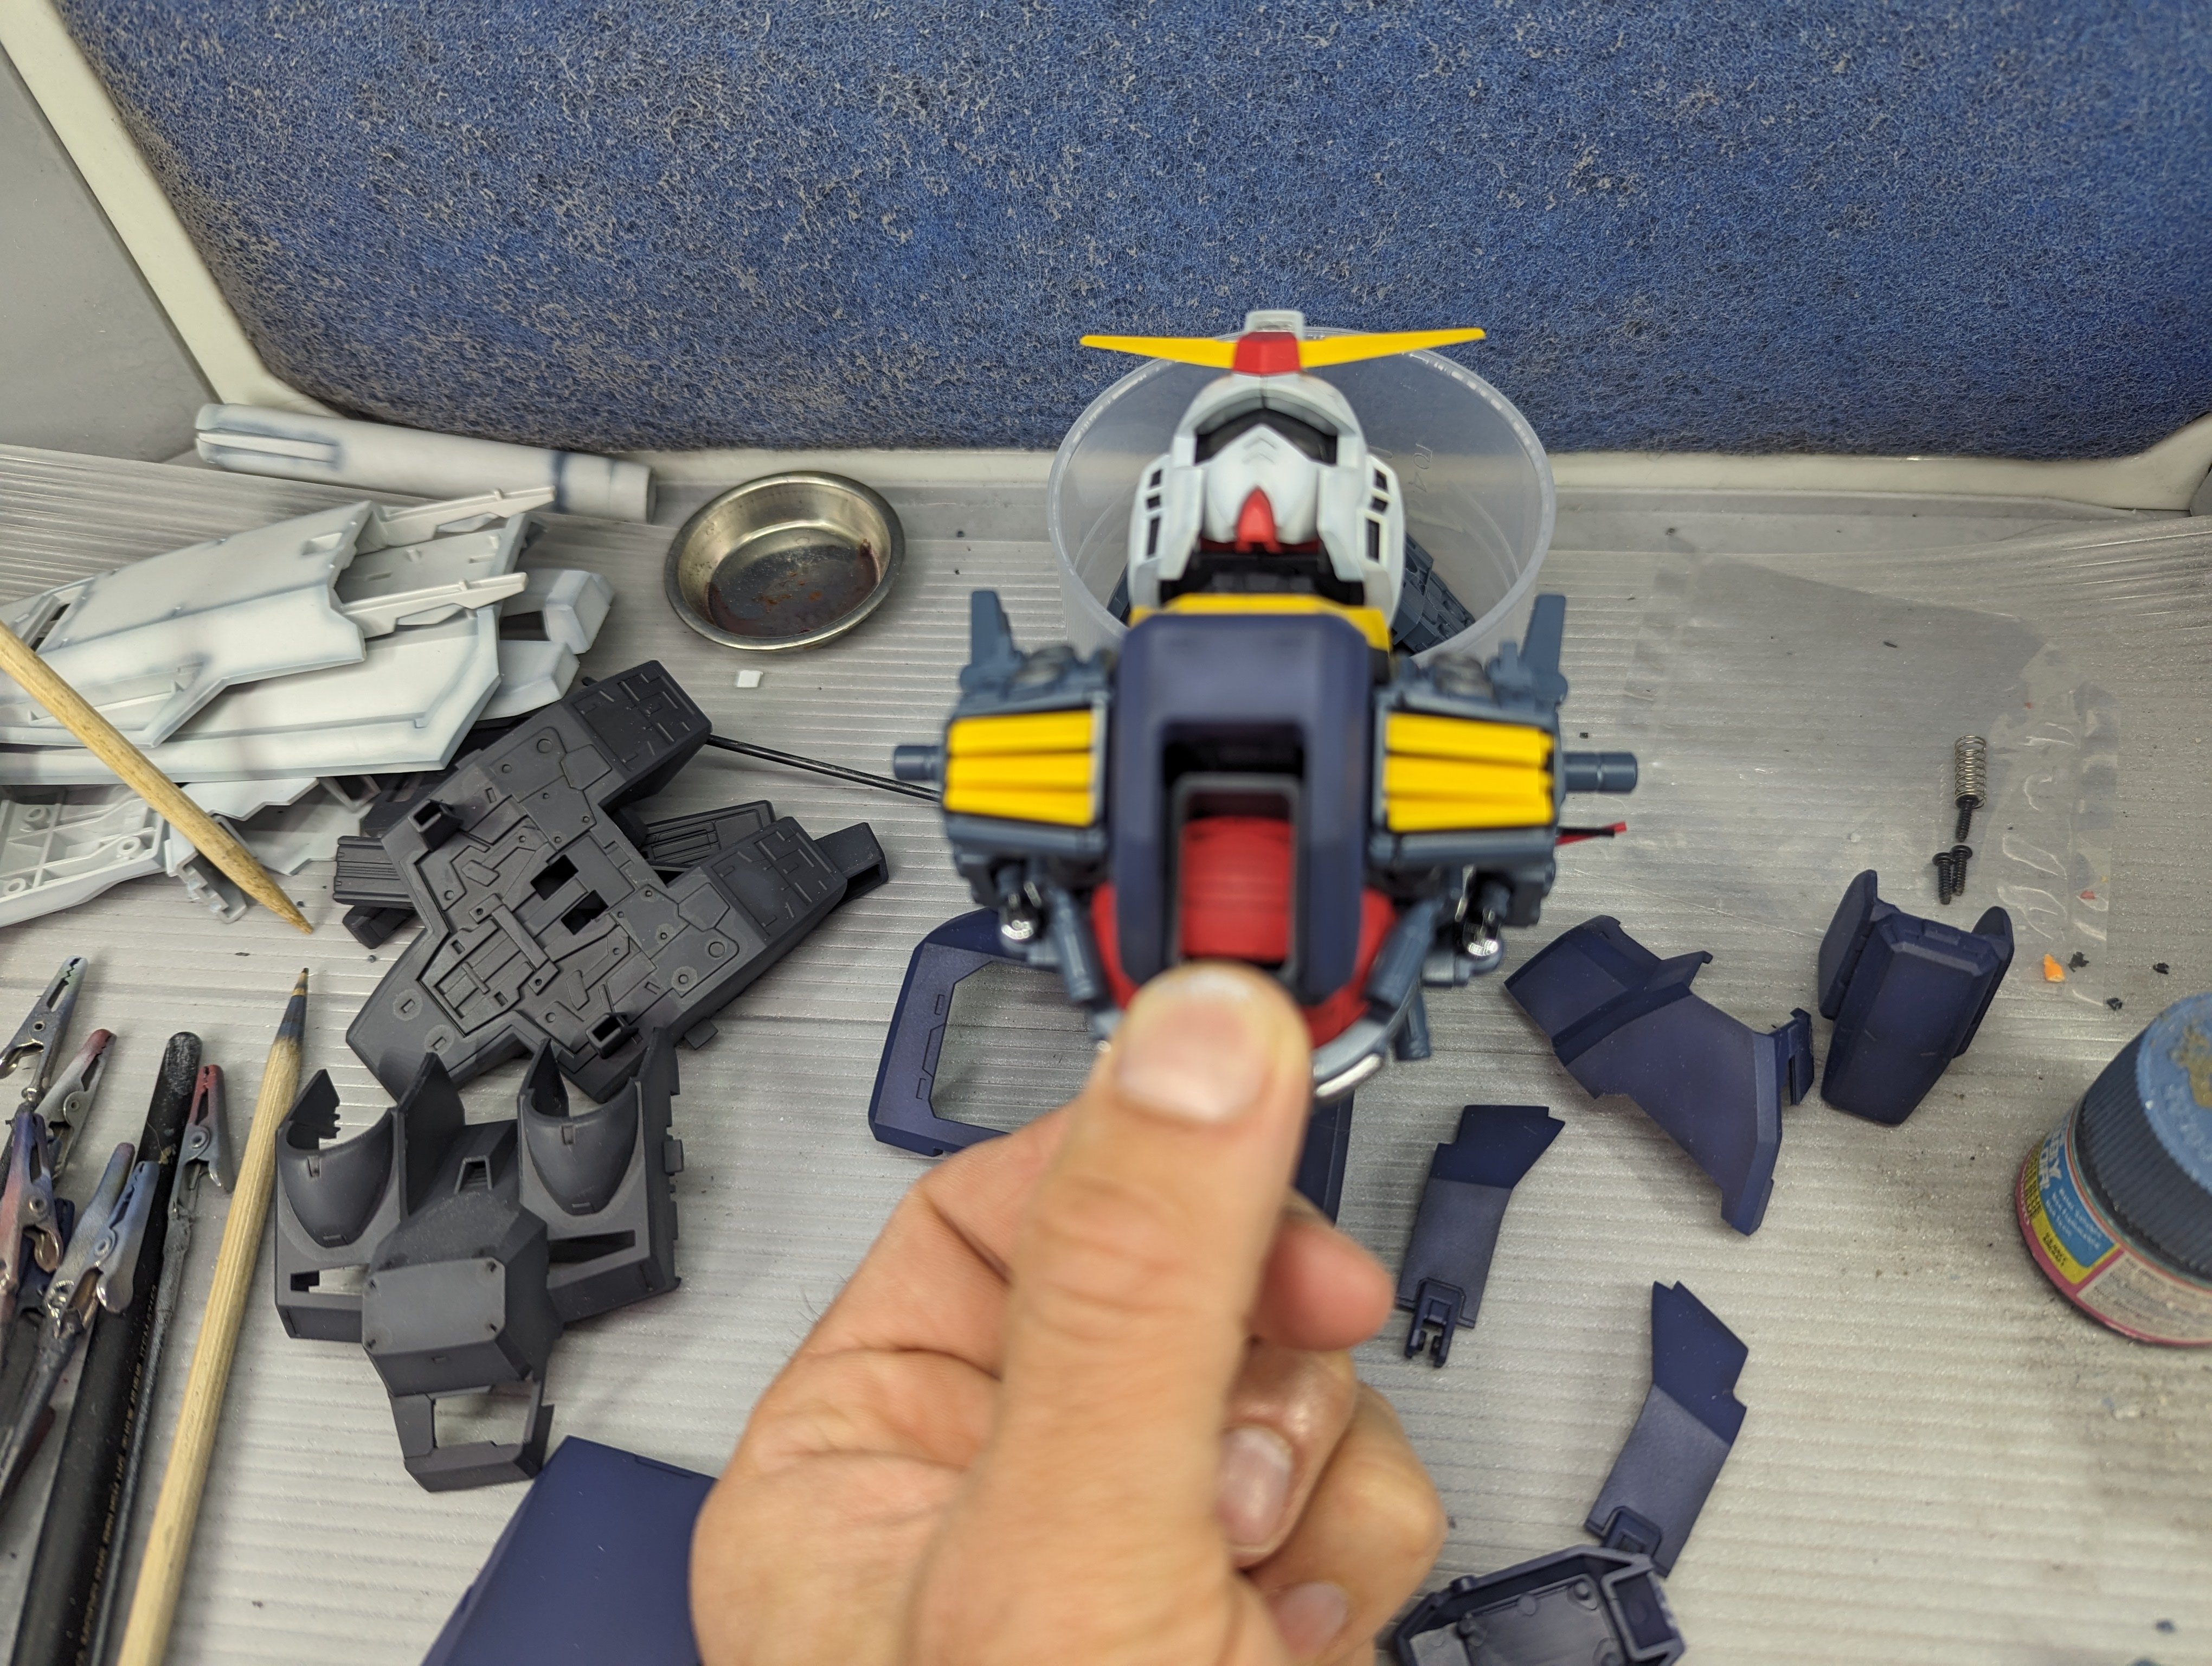
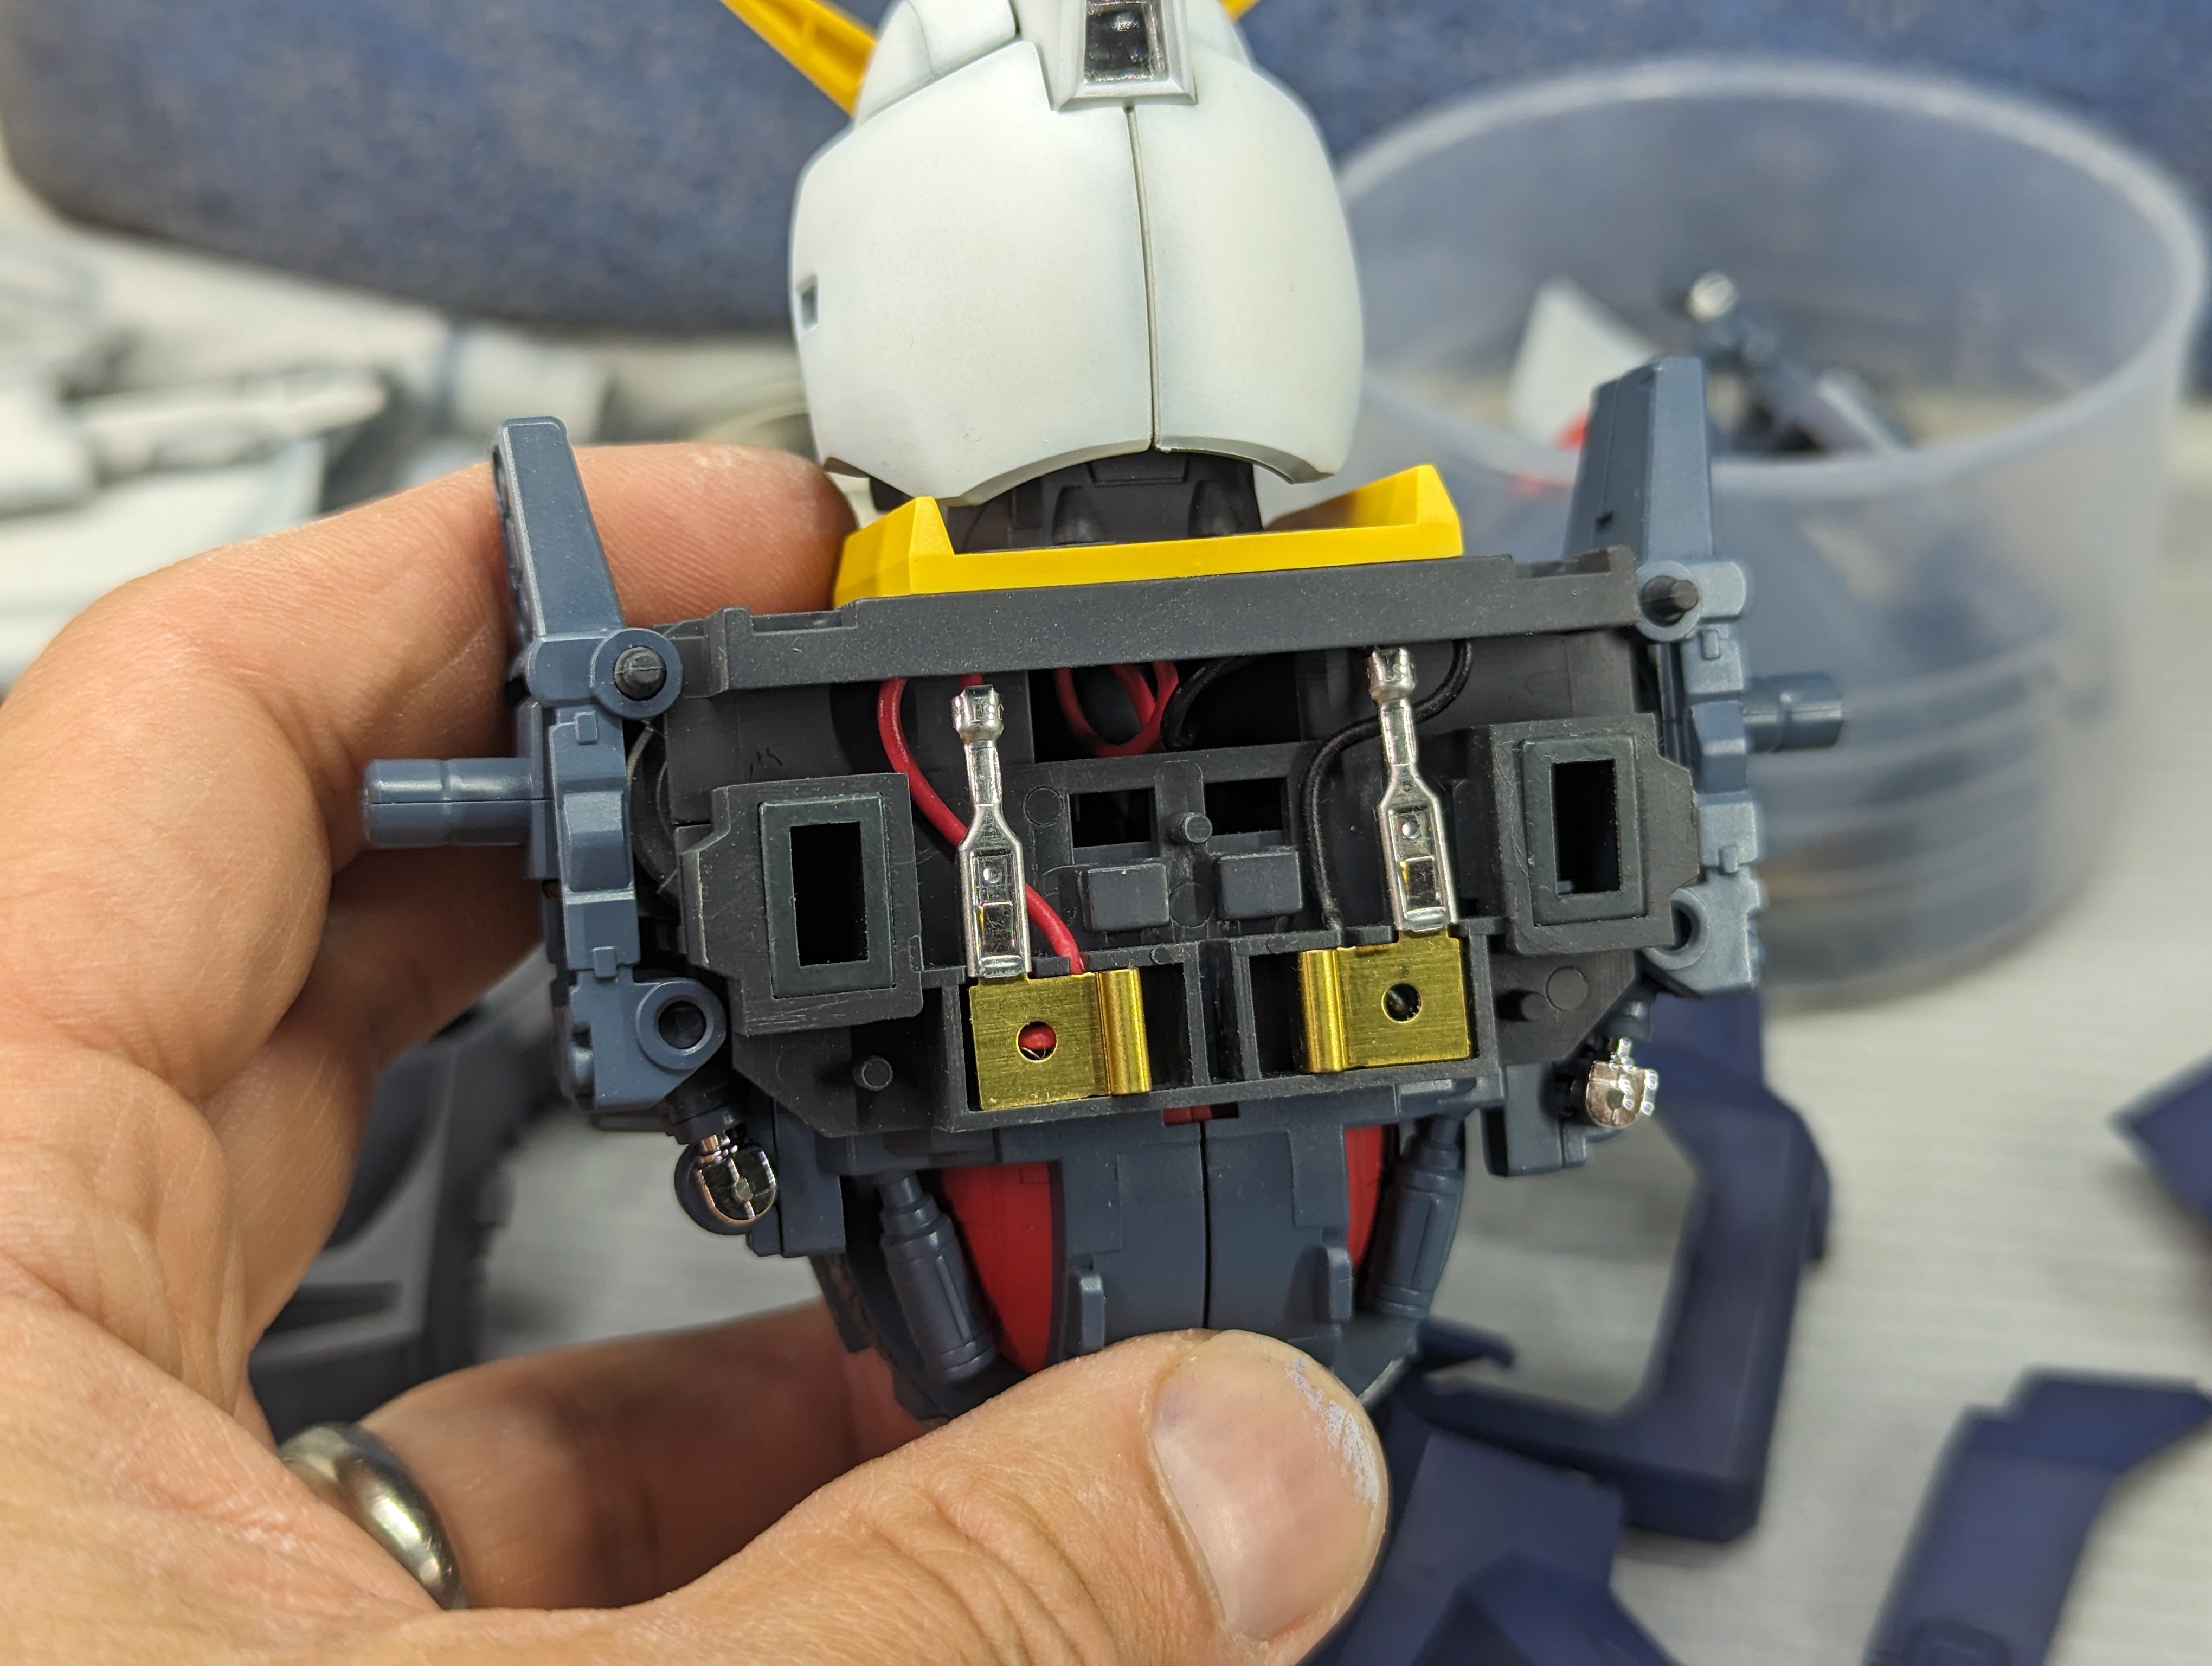
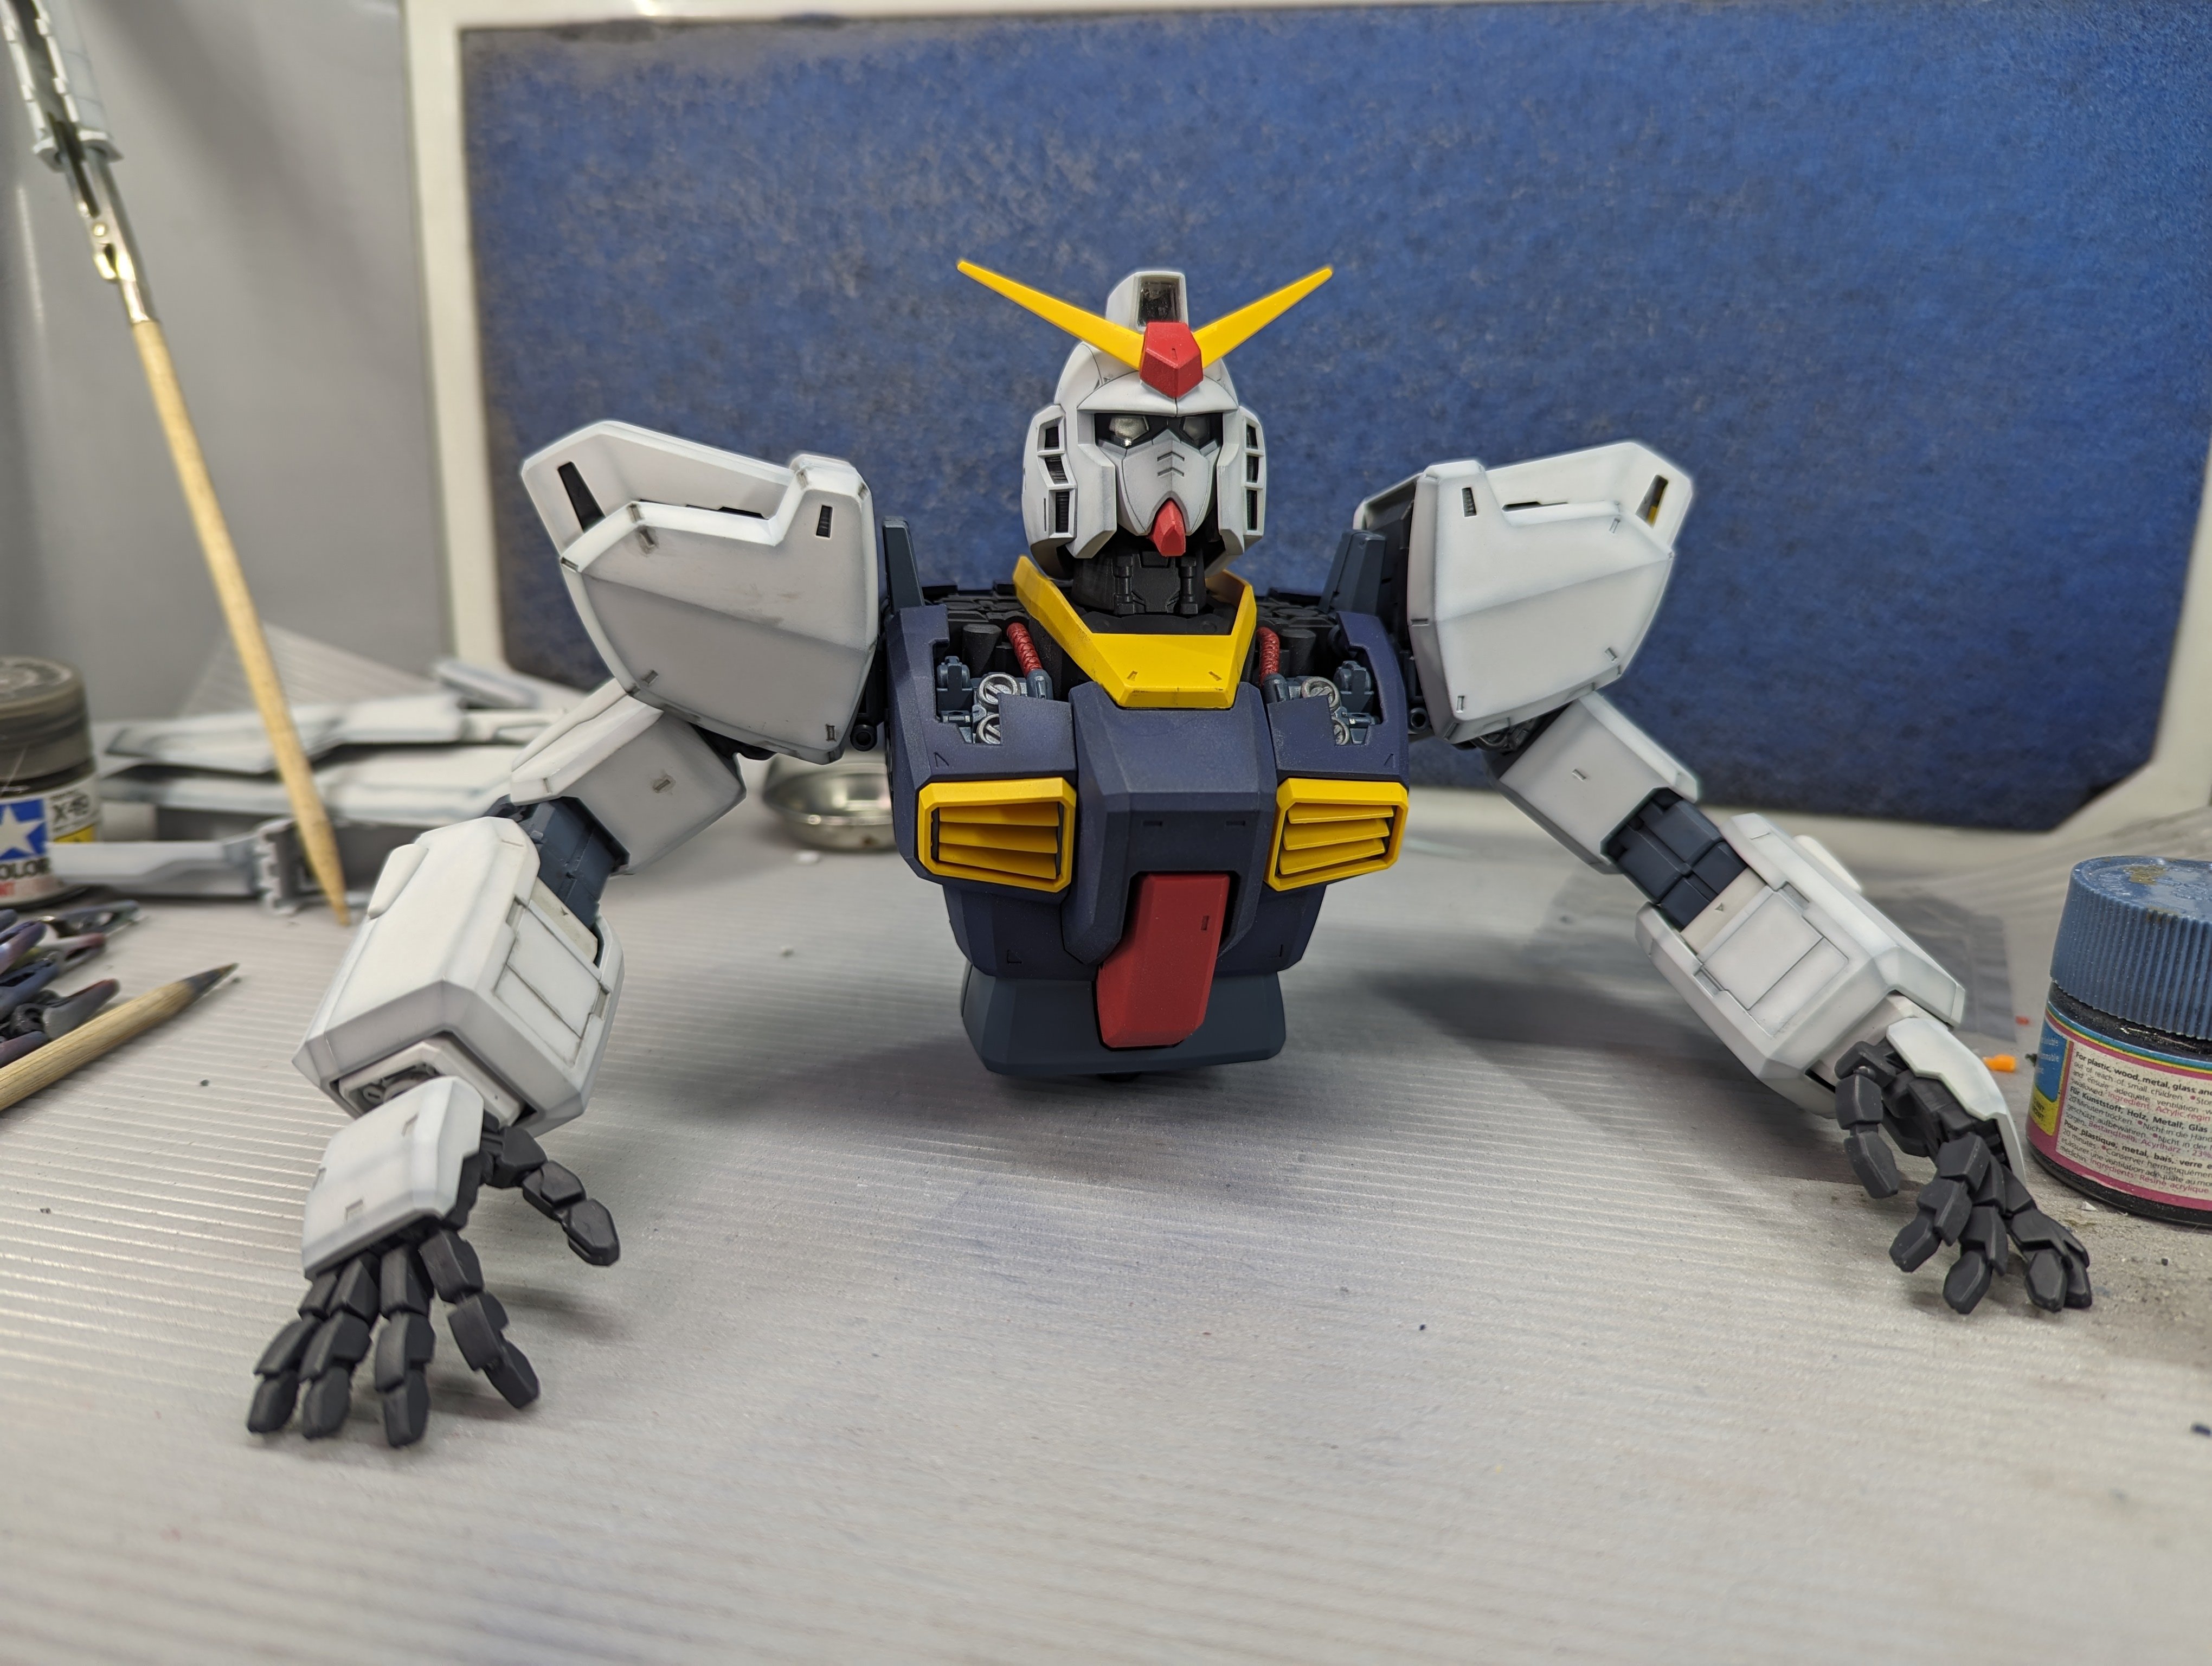
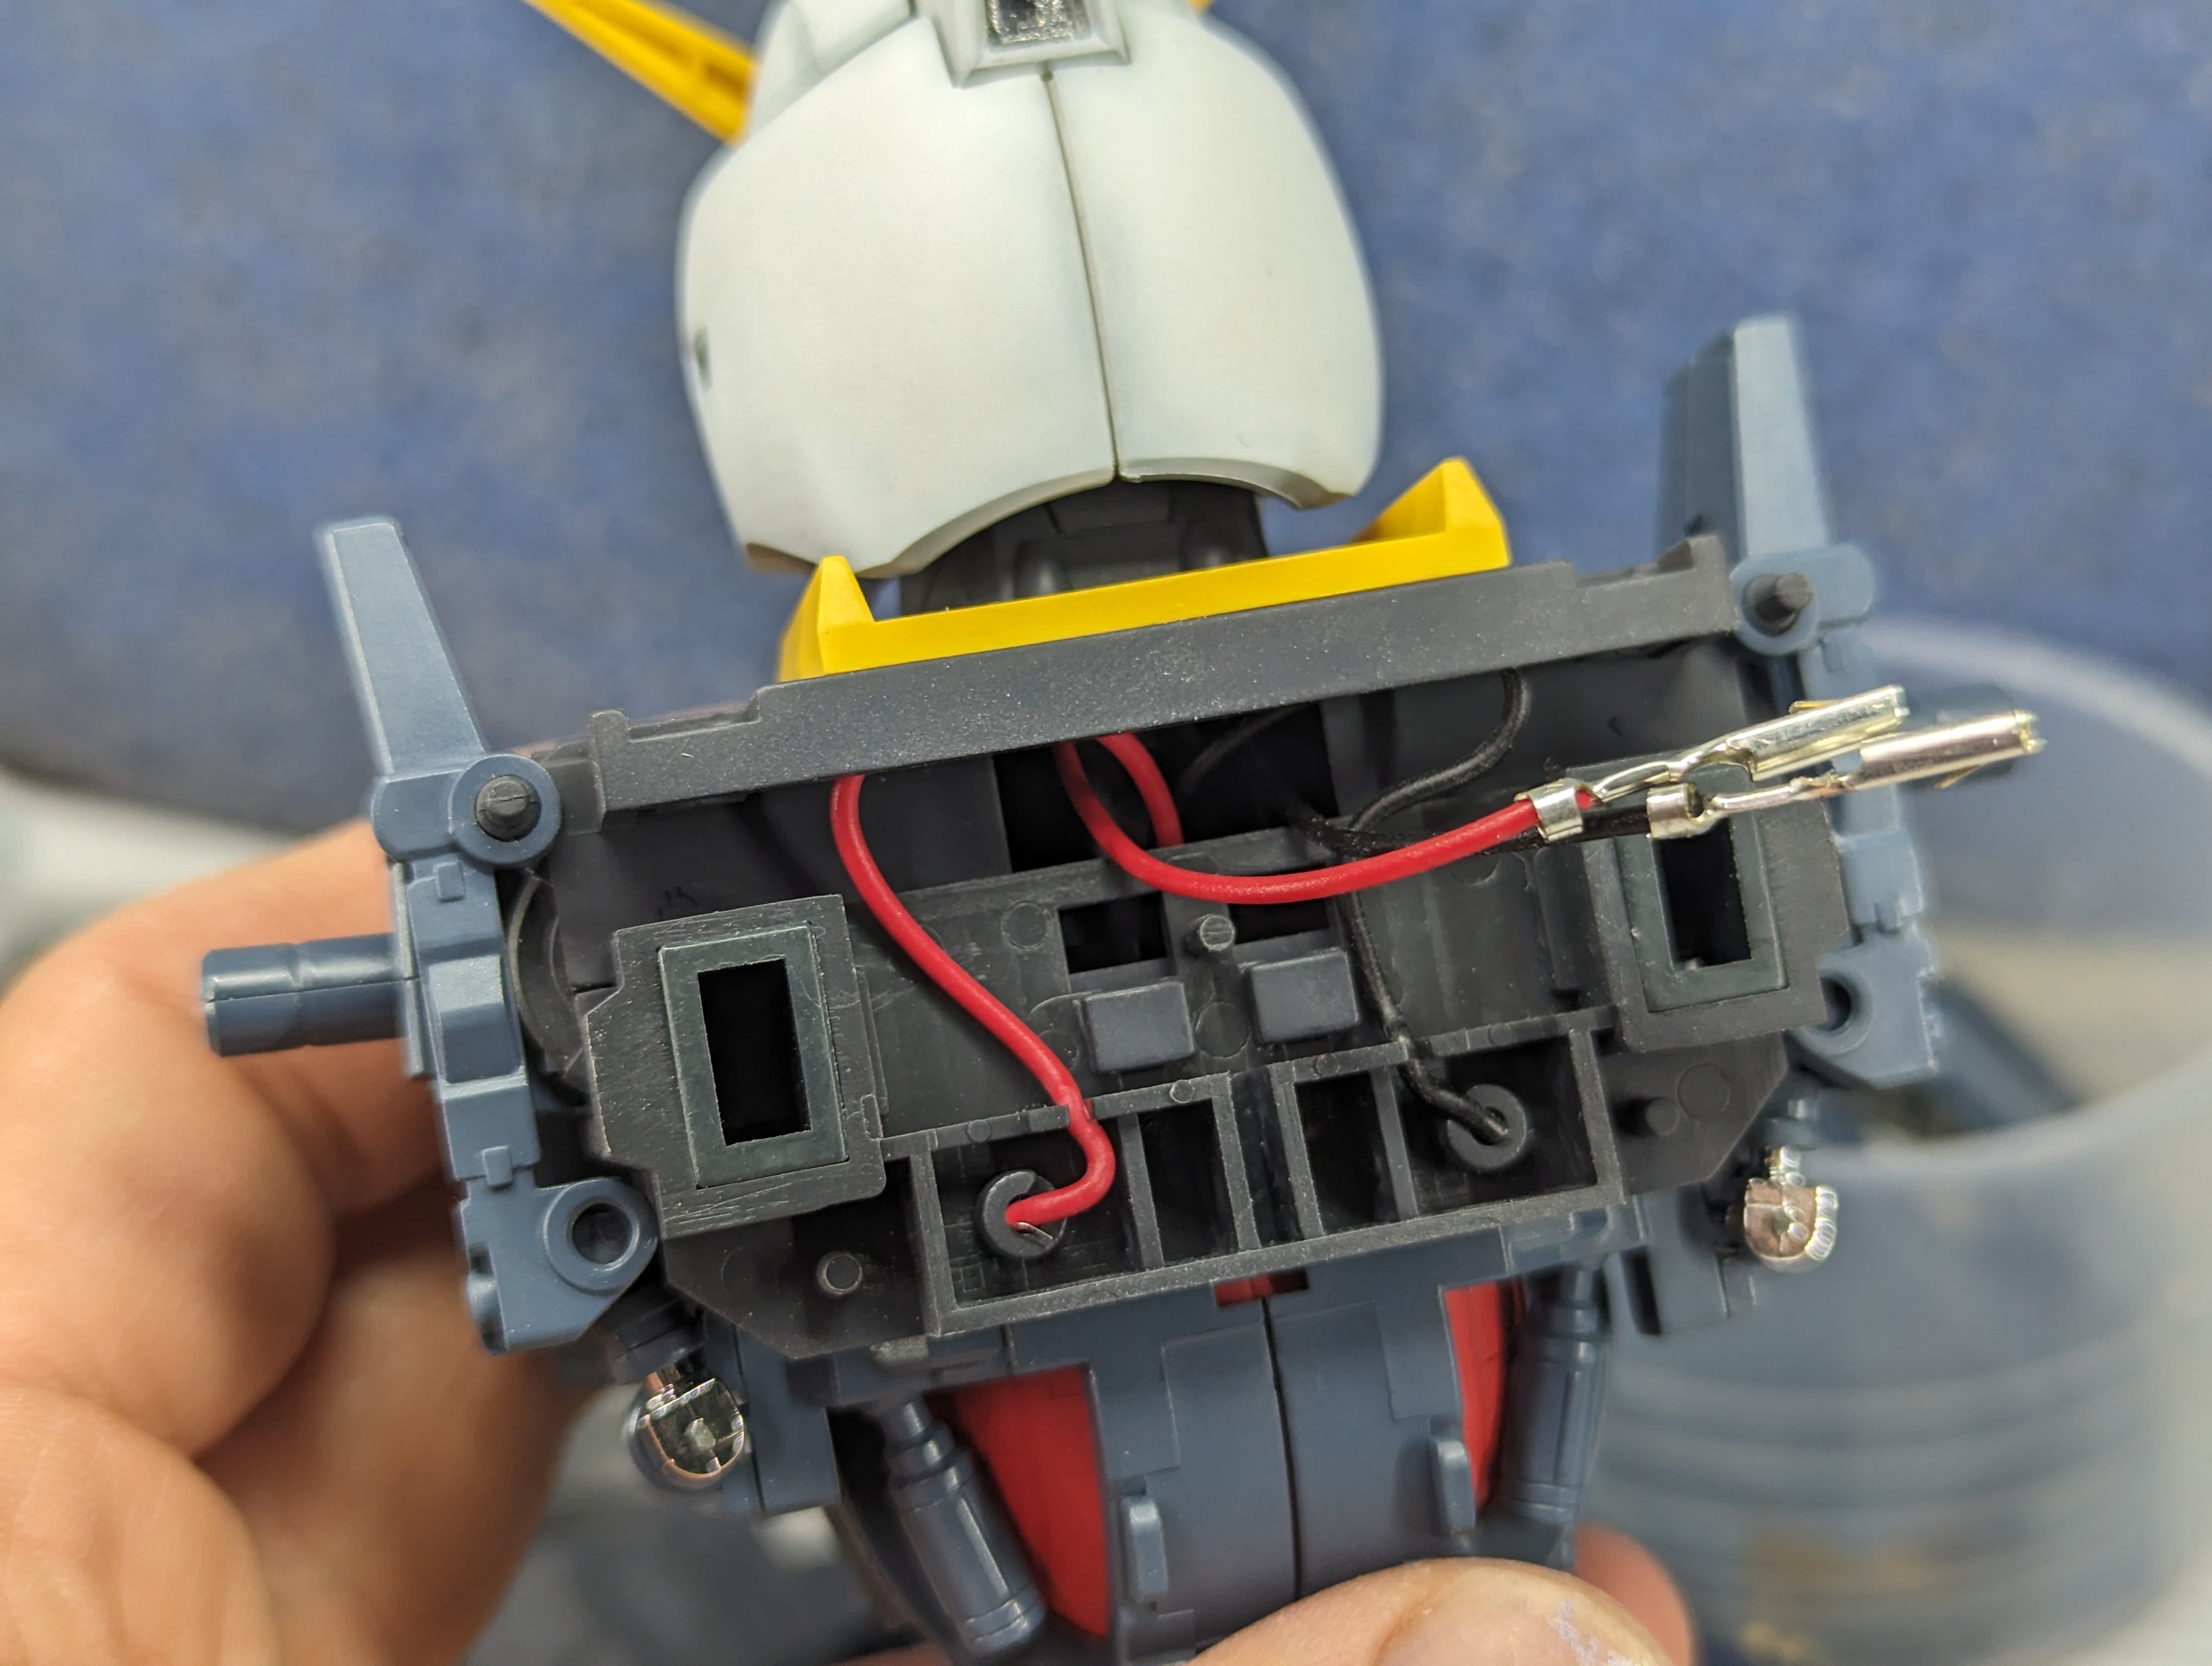
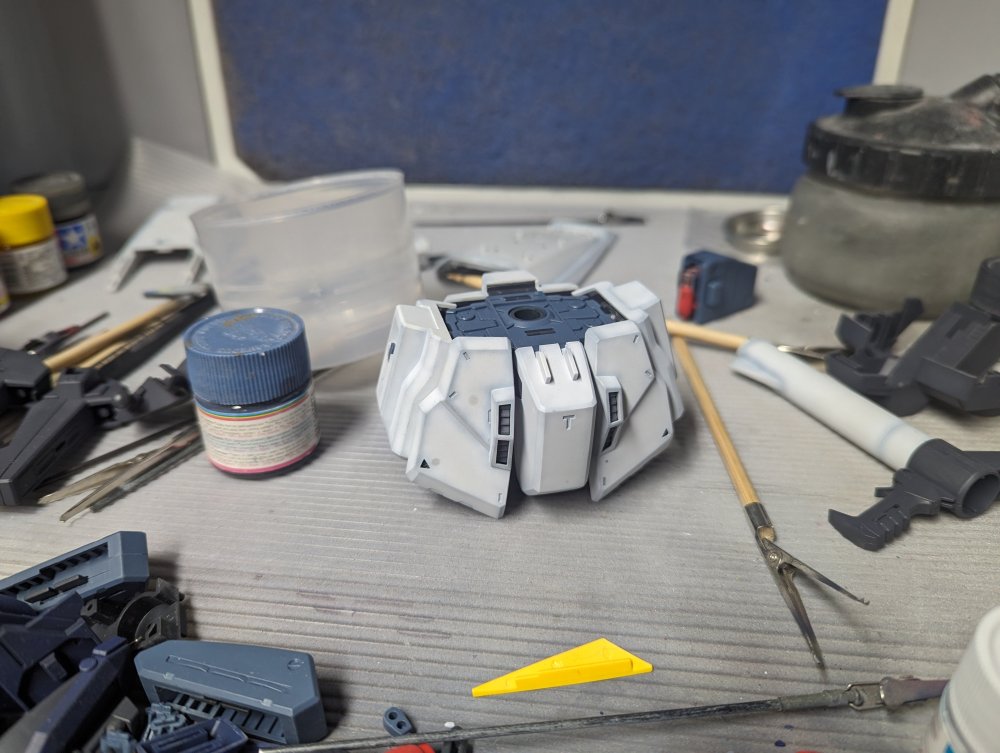
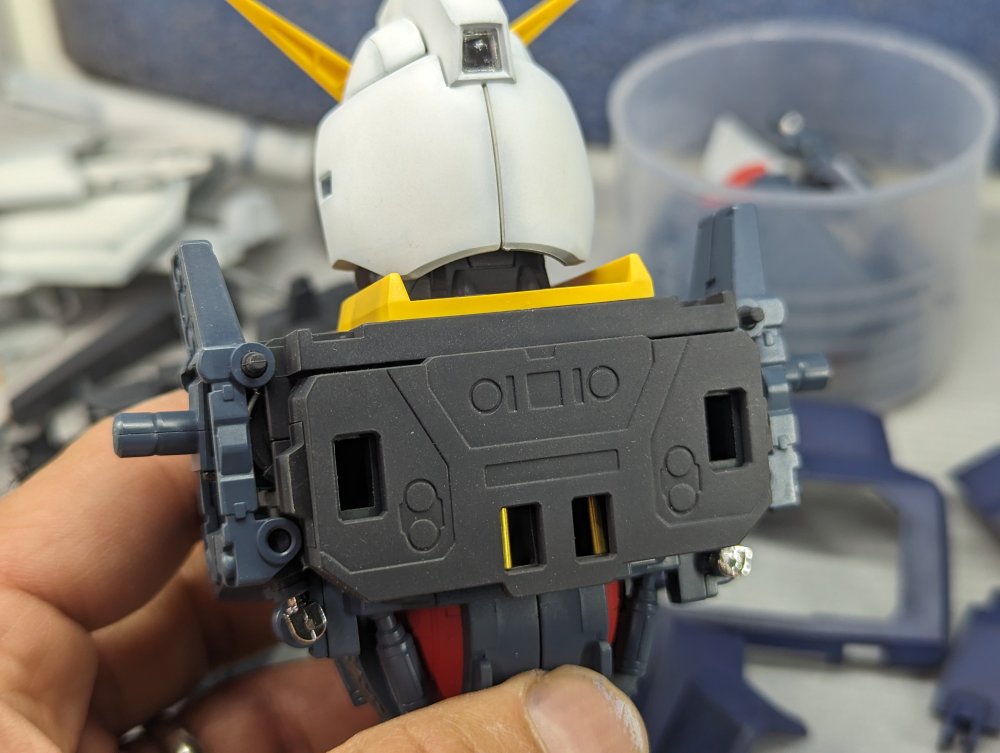
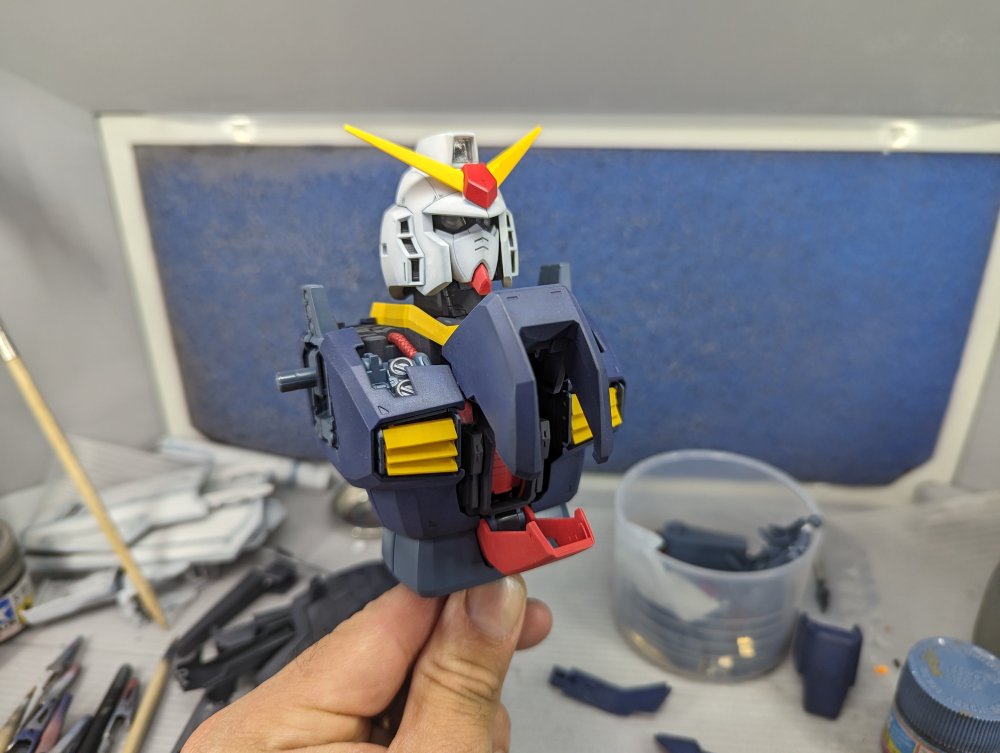
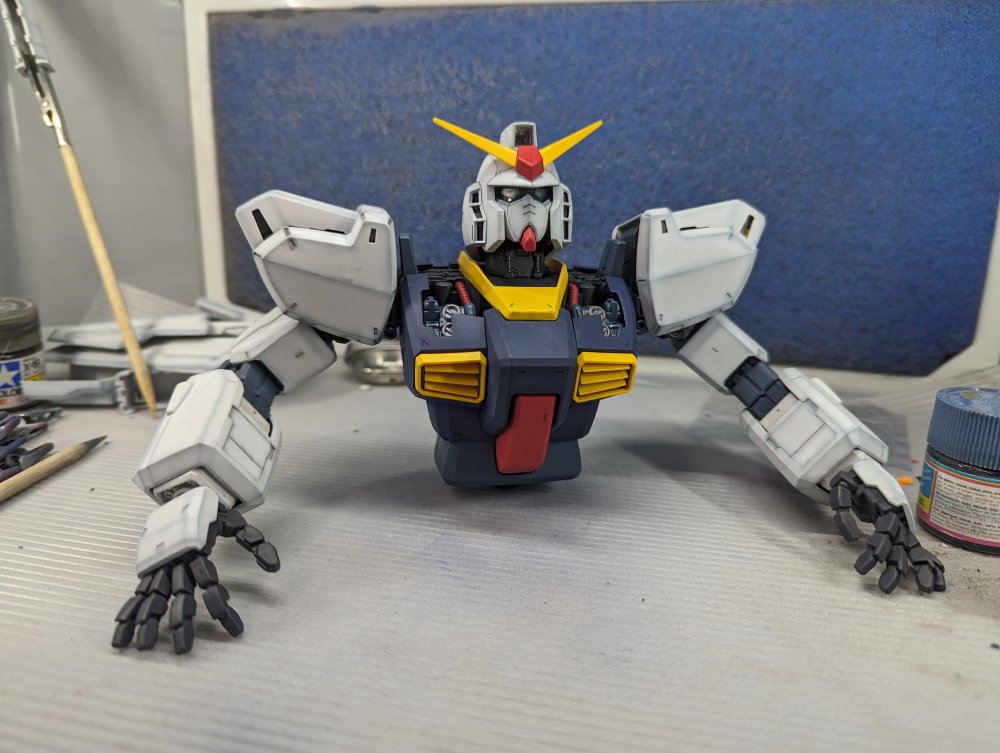
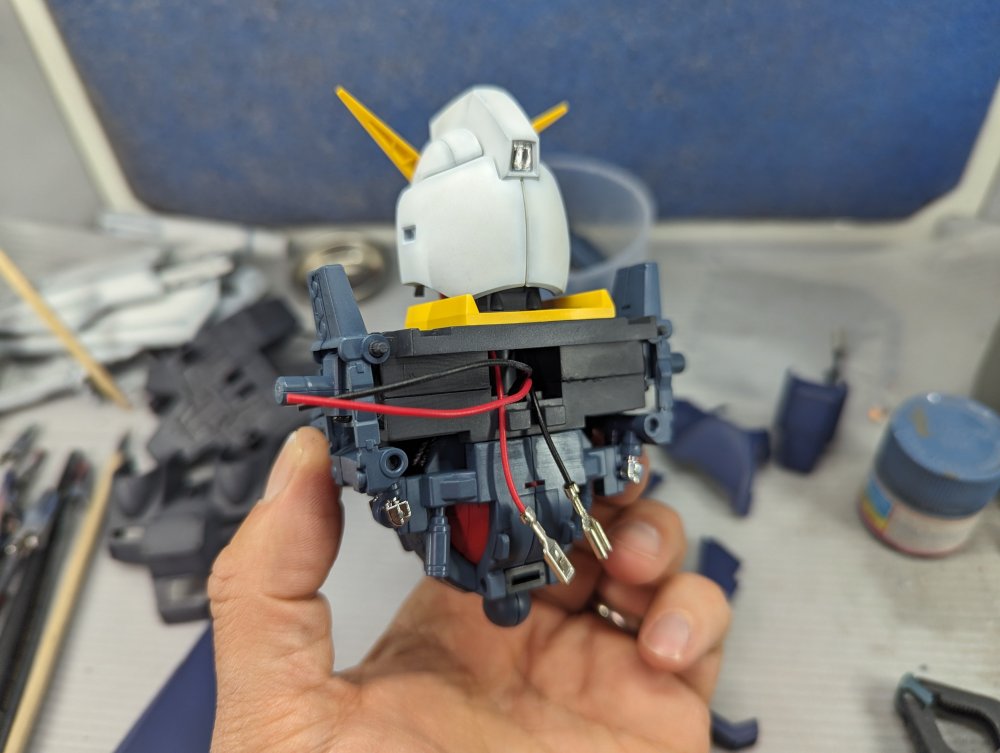
I got a lot more done on the Gundam. With the cockpit assembled, I could start on the rest of the main body. The upper waist section. The four legs will pivot and move with the waist. I was just working along so the progress is going to jump a bit. The upper body went together around the cockpit. The open cockpit hatches. The wiring for the head and cockpit runs out the back. They're them attached in place. This is all covered up by the backpack which will contain the batteries. At this point the arms go on.


-

The Scharnhorst 1/200 by Trumpter-Operation Paderborn
BlrwestSiR replied to KevinM's topic in Non LSM 'WIP
Very nice Fletcher DD there Kevin. I've only tried a couple ship models, both in 1/35. The first was the Bronco Type XXIII coasts sub and the second is the Italeri Vosper MTB which isn't finished yet. -
Reskit makes the ALQ-87 which is the one in the pic. https://reskit-models.com/index.php?route=product/product&product_id=5450 They have an early and a late so just need to narrow down which one.
-
Lots of great progress there Chris. For the load out, I think most USAF F-4s carried an ECM pod in one of the front Sparrow bays. You can see it in the pic you posted with the two F-4s banking. There should be one in the kit but AM ones are available.
-
Heads up F-16 fans…1/32 demo aircraft decals
BlrwestSiR replied to ScottsGT's topic in Modelling Discussion
Thanks Scott. Might just have get those. Along with another F-16 kit. -
Revell Me-262B up. Now down! Now up!!! LOL
BlrwestSiR replied to JohnB's topic in LSM 1/35 and Larger Work In Progress
Looks good John. Nice to see the fit issues seem to be behind you. -
The engine really looks the part. Quite the bit of wiring there.
-
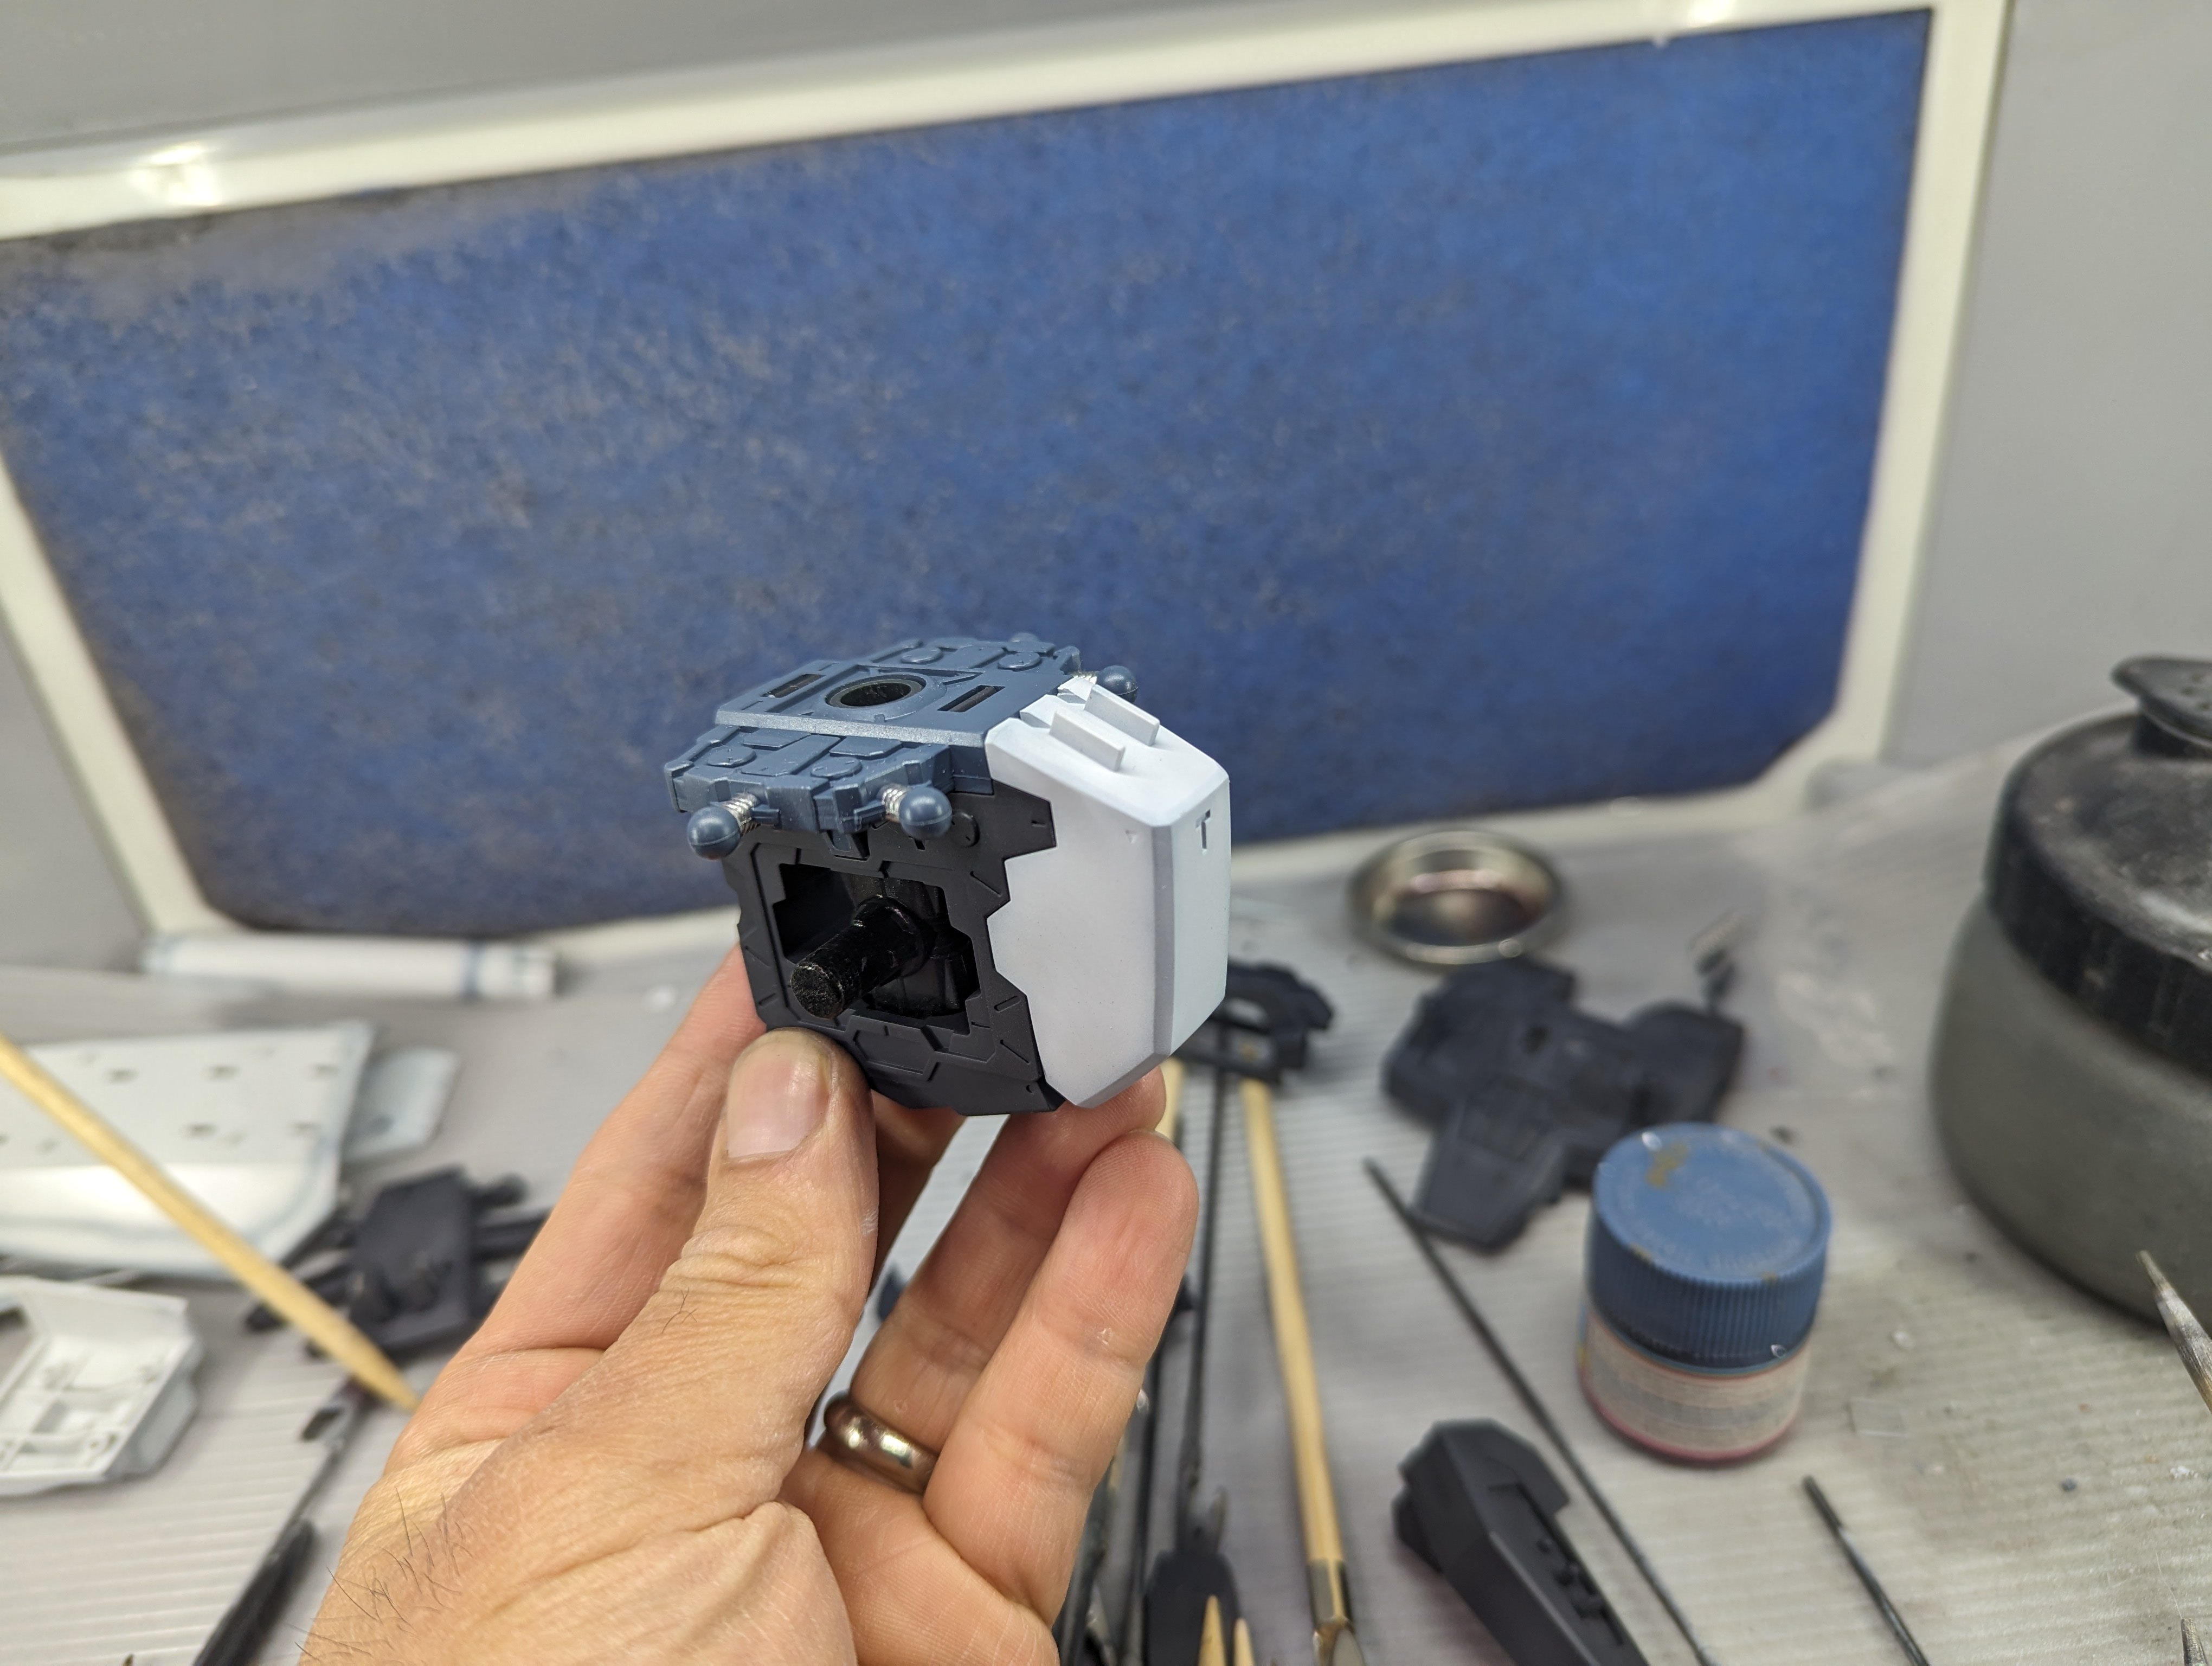
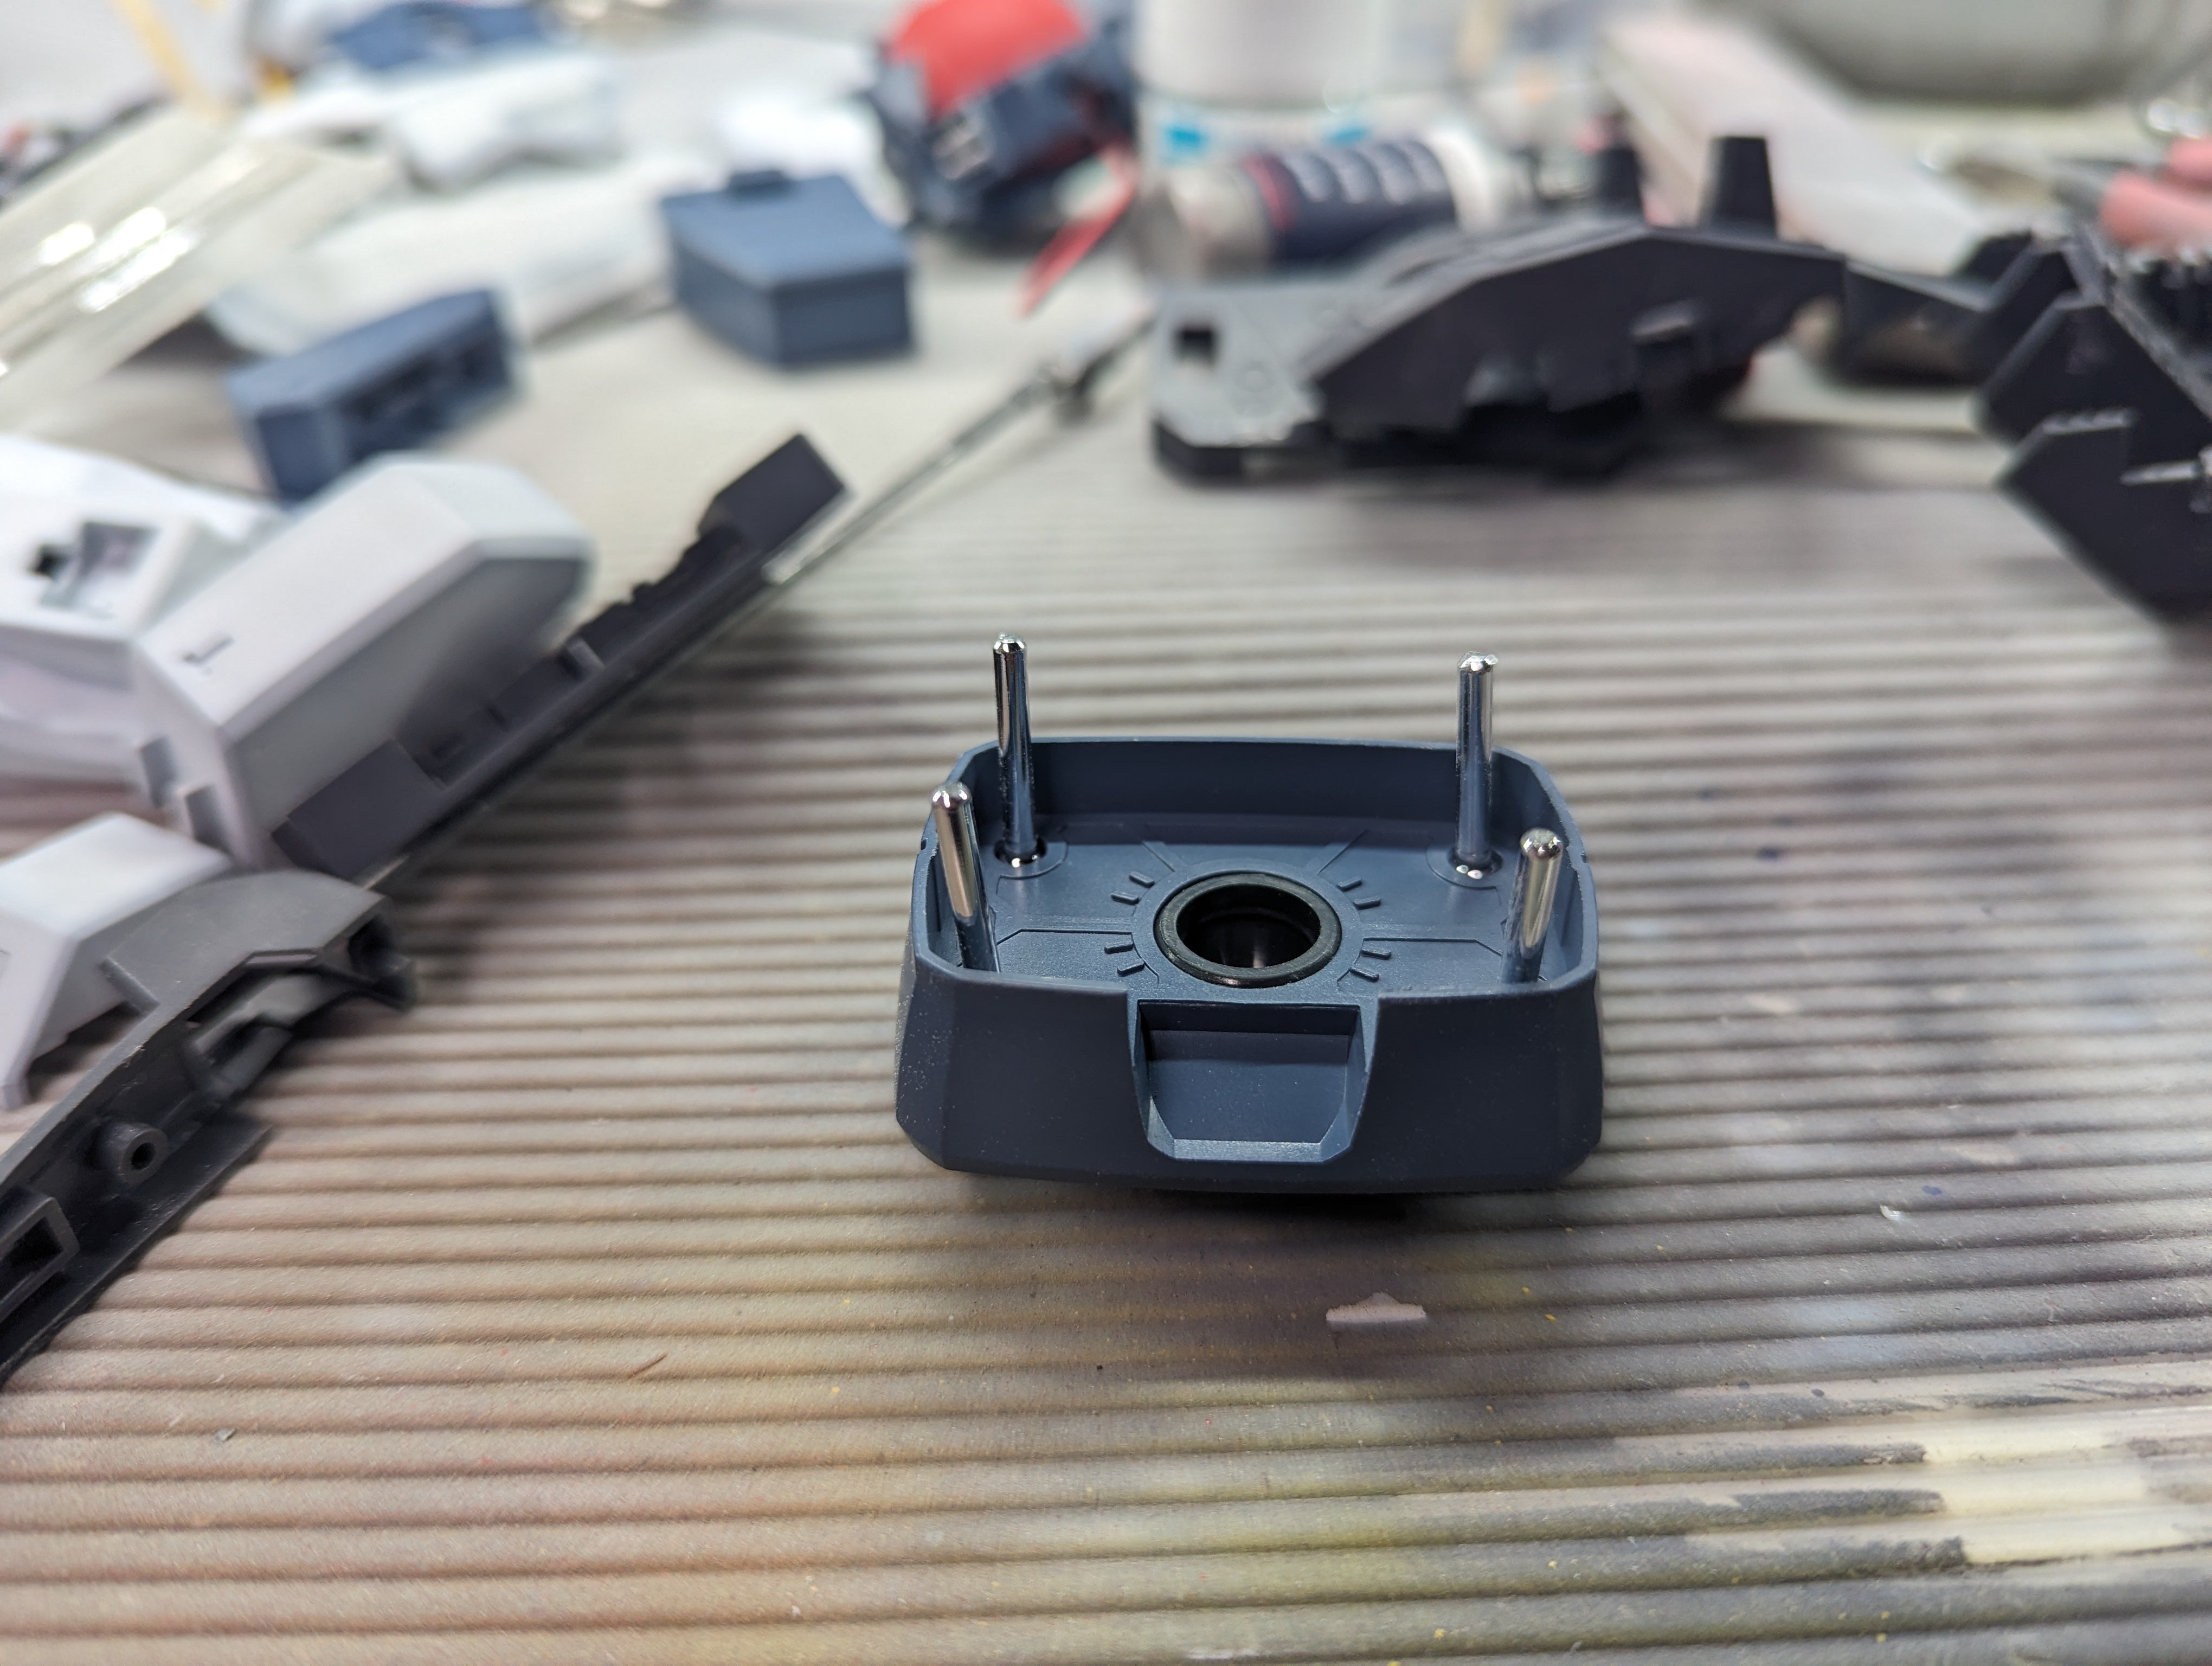
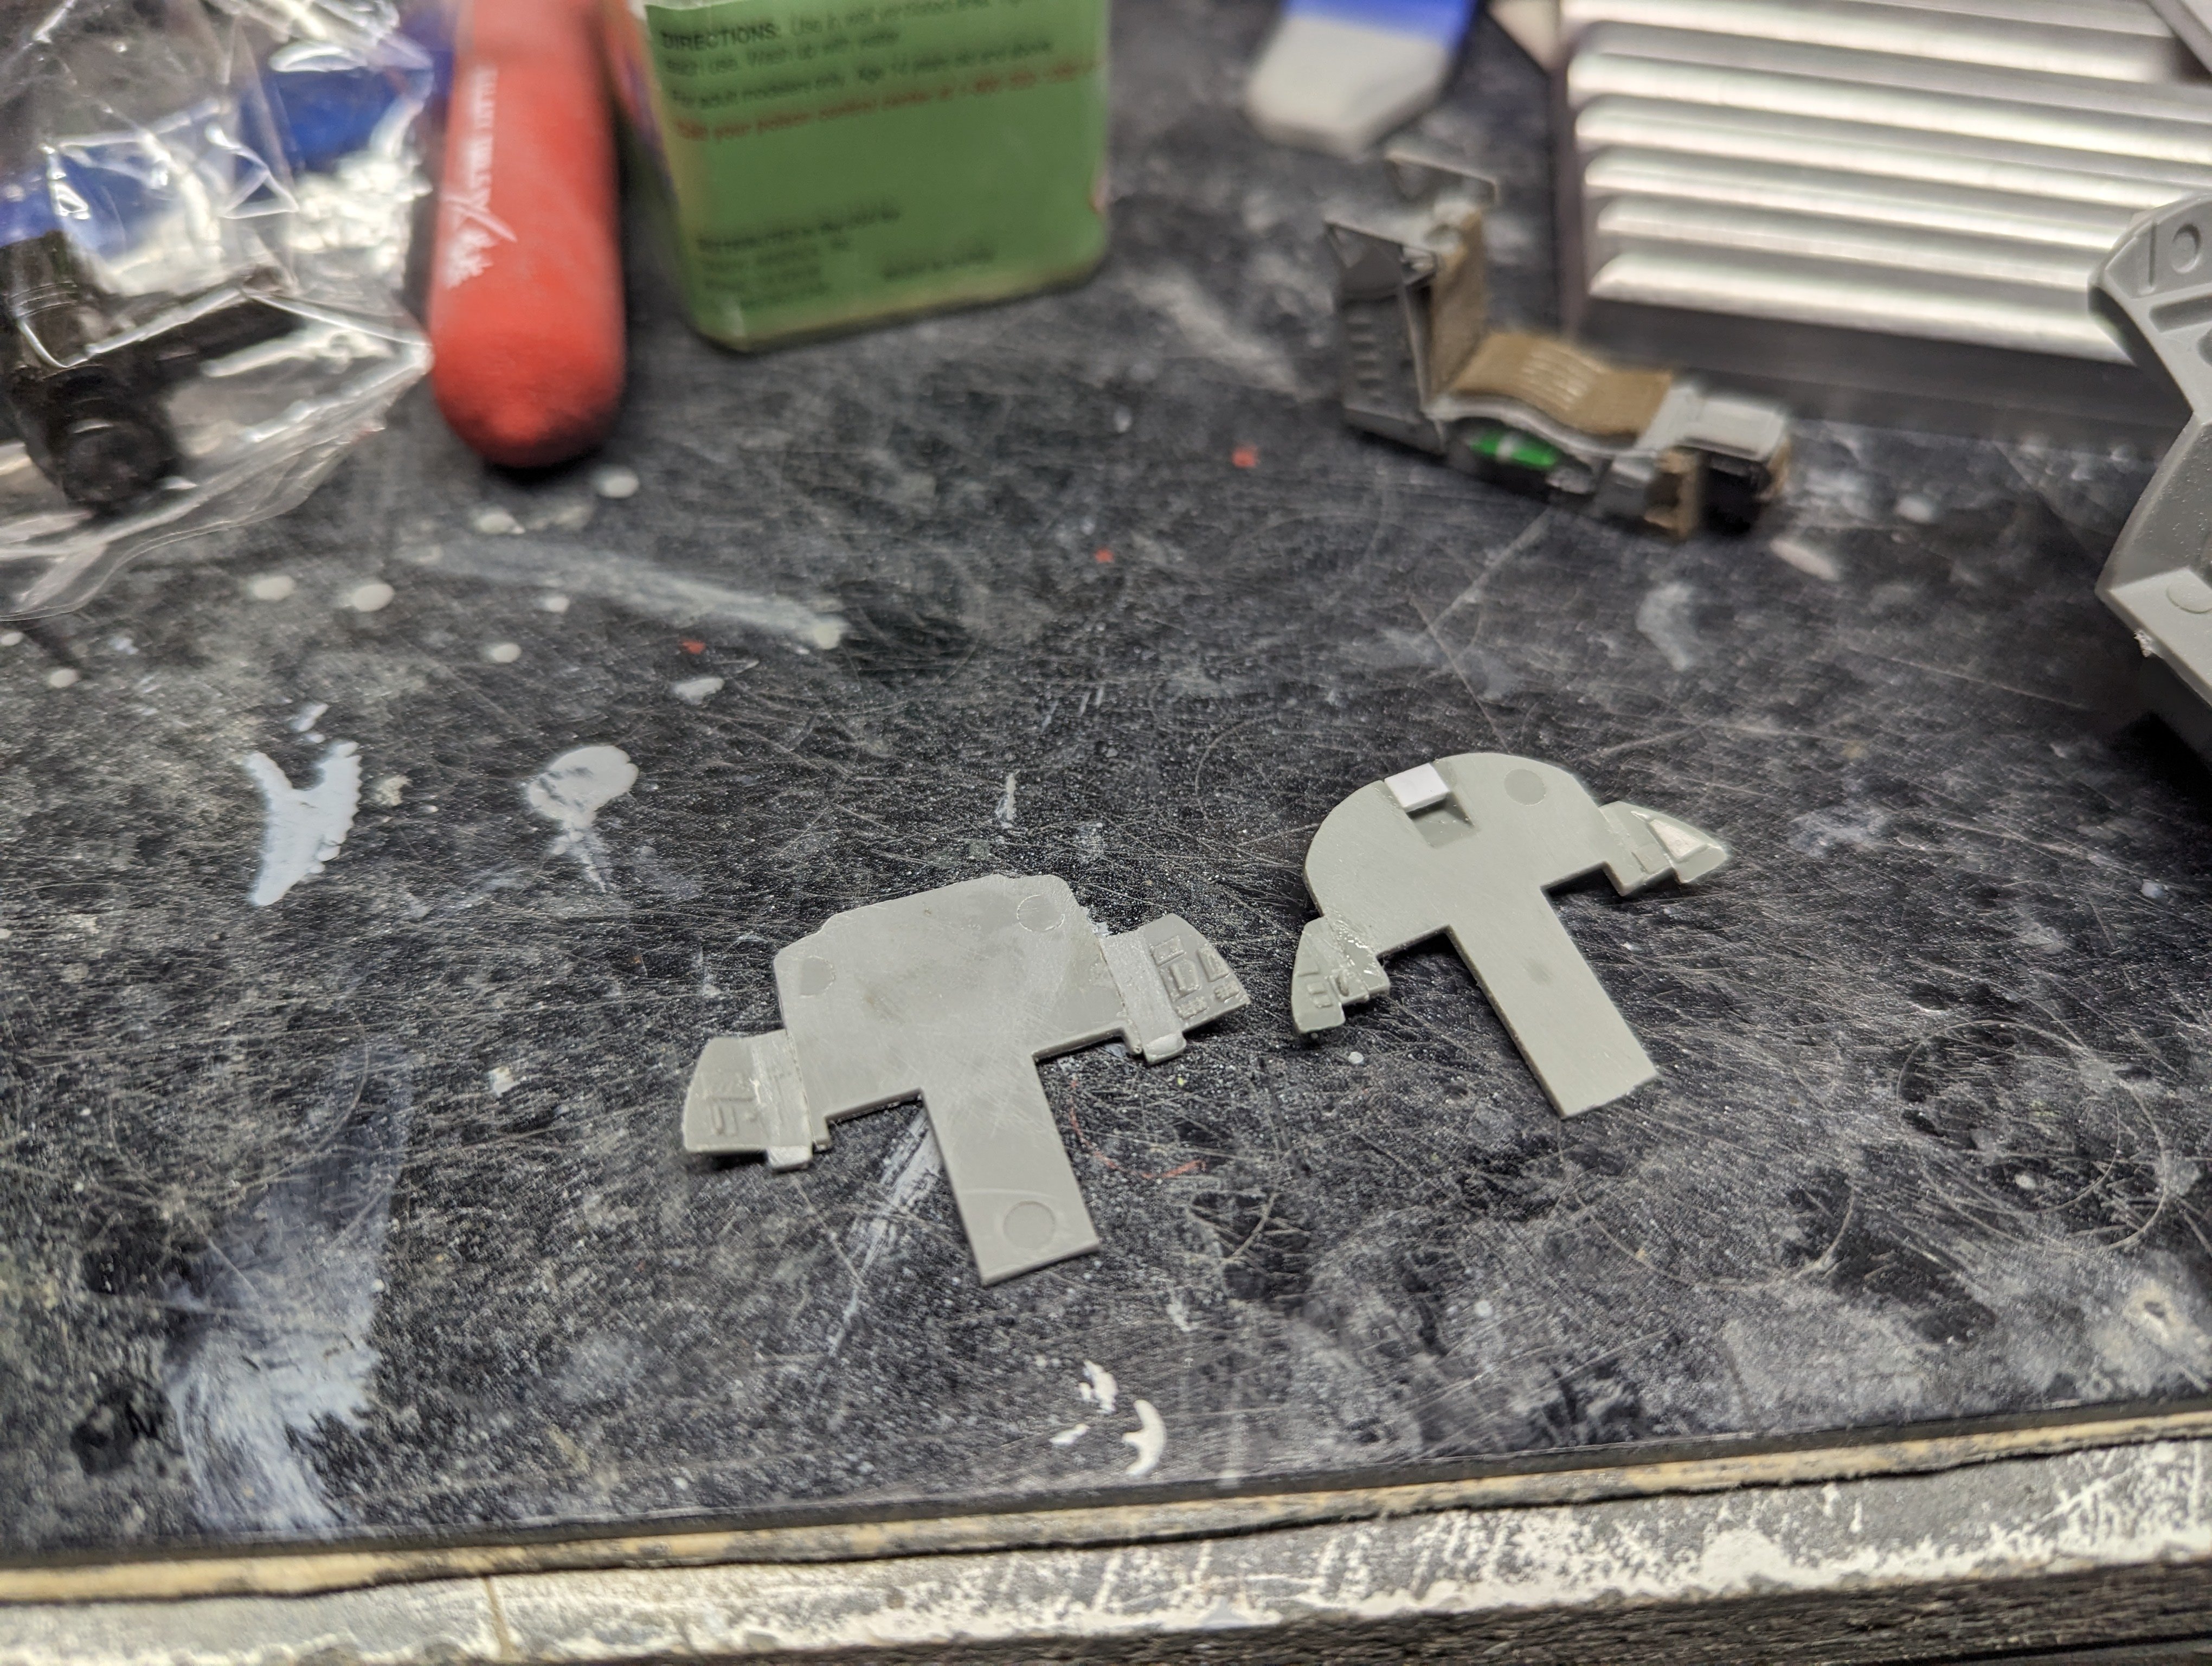
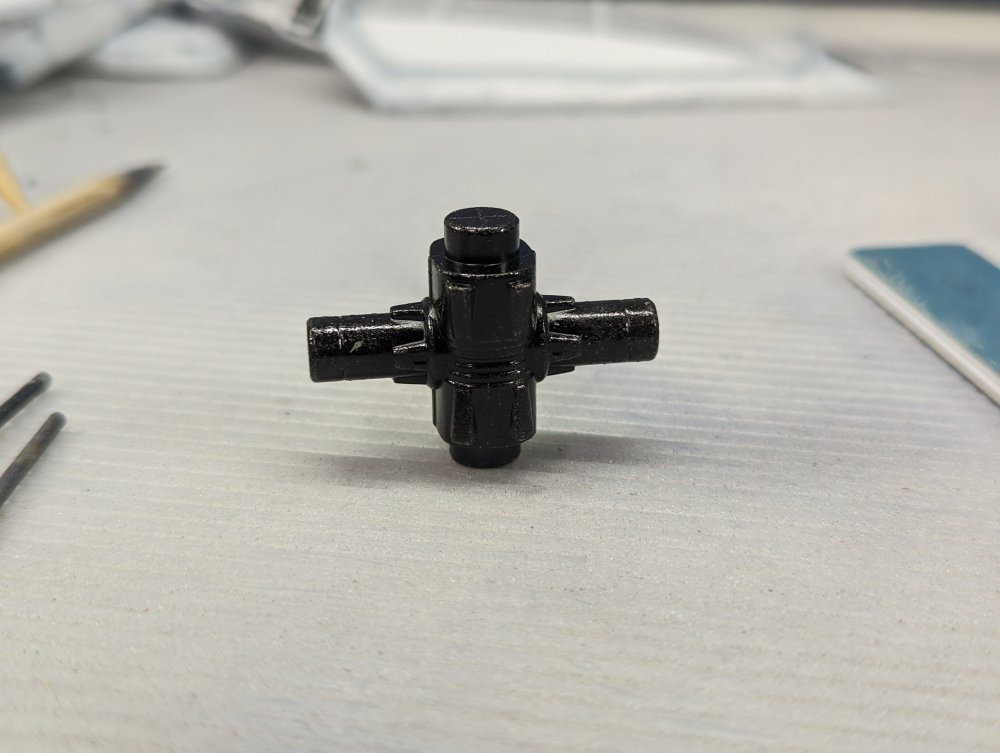
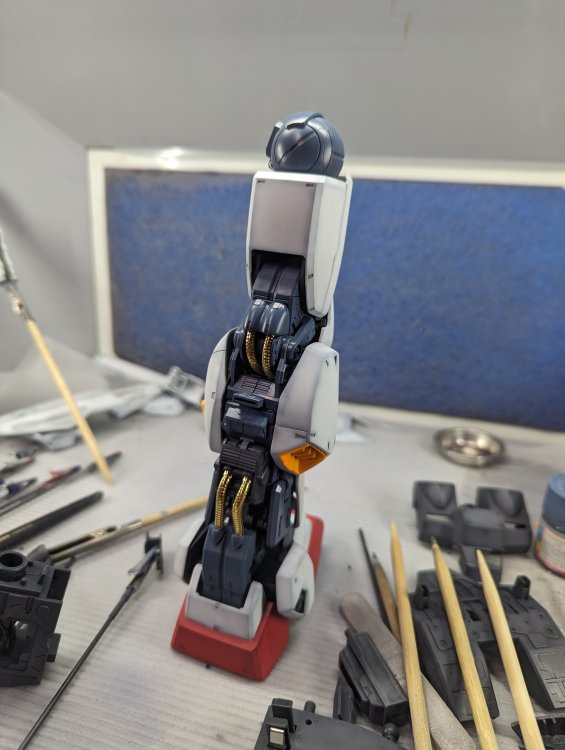
Those are the gold ones that are on the legs. 4 per leg. Two behind the knee and two more at the ankle. The last two are on the jet pack which I'm in the midst of building.
-
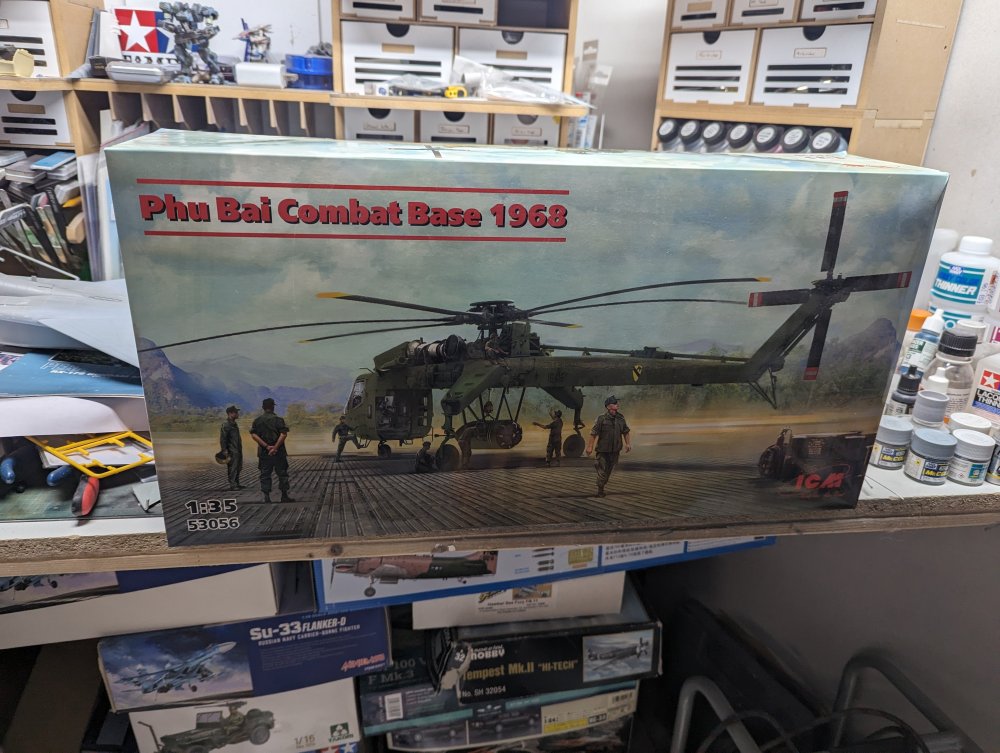
Sometimes it's just plain dangerous surfing the web, especially online hobby shops. Great Hobbies here in Canada is having a sale with 15% off ICM kits. I'm looking at their 1/48 Mig-25 kits when I see the CH-54 and before I know what's happened, I have one. @Fran just did a review on this release along with @Clunkmeister's review of the original version tells me it'll be as enjoyable a build as their AH-1 Cobra was. I'll have to get the rotor fold set from Reskit if I hope to have any chance of displaying it when I'm done.
-
Chris, according to the box, - 739 plastic parts on 32 sprues - 35 screws - 3 springs - 10 metal chains
-
Paul, most have cockpits in them. I don't think autonomous mechs have become a thing until much more recently.
-
F-15DJ Kai or Eagle Plus- Finished!
BlrwestSiR replied to BlrwestSiR's topic in The Great Twins Broup Bluild
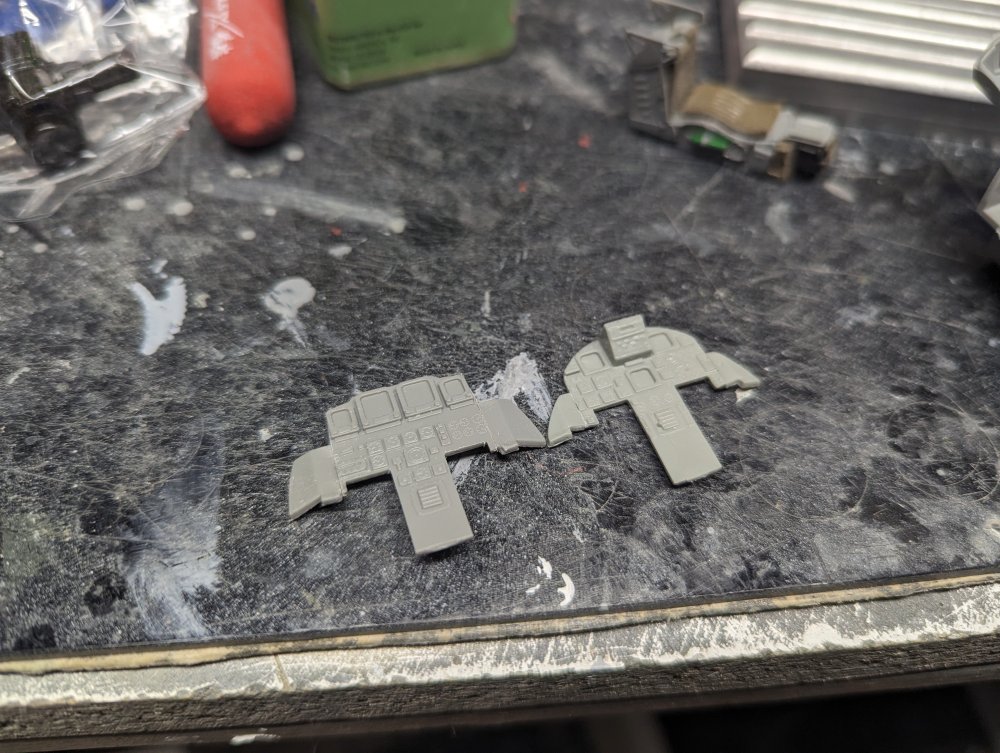
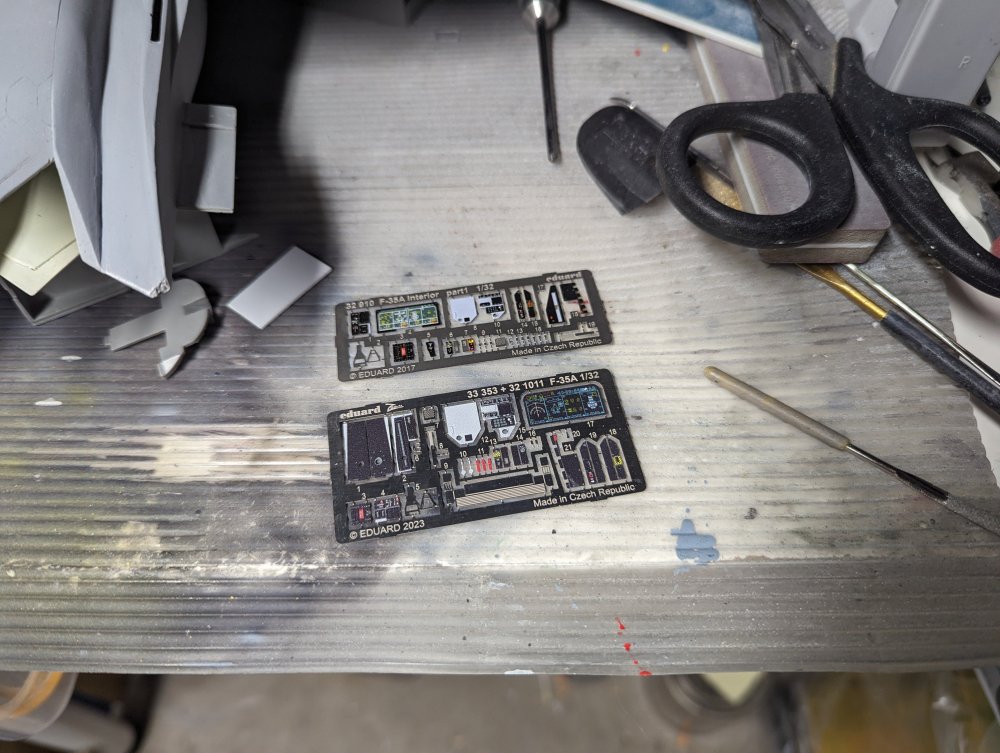
Alright time for an update even if it's a small one. I started on the cockpit finally. Guess I'm doing it backwards since most builds start with the 'pit but anyways One thing I decided to do was update the cockpit a bit. I'm using a couple sets of F-35A cockpit details from Eduard. One is for the Trumpy kit and the other one for Italeri. Notice the slight size difference. I'm going to use that to my advantage. First up was smoothing out the kit IP panels. I cheated a bit and simply flipped the panels over. The angled ends were cut off and glued back on to the opposite side. Voila, instant smooth IP. Close enough anyways. The "backside". Once dry, I can start painting.
-
Congratulations Jeff! Glad it was worth the trip out to our end of the country. Don't forget to stop by for some beer and BBQ before you fly back. Carl
-
How did we do it all when we were younger?
BlrwestSiR replied to ScottsGT's topic in General Discussion
That's always the way. -
How did we do it all when we were younger?
BlrwestSiR replied to ScottsGT's topic in General Discussion
Closest I can relate is my sister and her husband wanted to go for an evening. My mom offers to babysit their 6-8 month old daughter (I can't remember exactly how old she was). Not half an hour after my sis went out my mom calls me frantically for help. Thankfully I'm a 10 minute walk away so head over. Sure enough, my mom is like, this is more than I can handle. So l stayed over until my sis came back. Can't imagine what will happen when/if we get grandkids. As it is, Sue will 63 and I'll be 60 when our youngest finishes high school. -
1/32 Hobby Boss B-24D HALF PRICE at BNA
BlrwestSiR replied to CANicoll's topic in Modelling Discussion
Amazing price. -
That would be a pretty big pocket! I keep finding myself looking at the series of 1/200 kits and thankfully have resisted their siren's call.
-
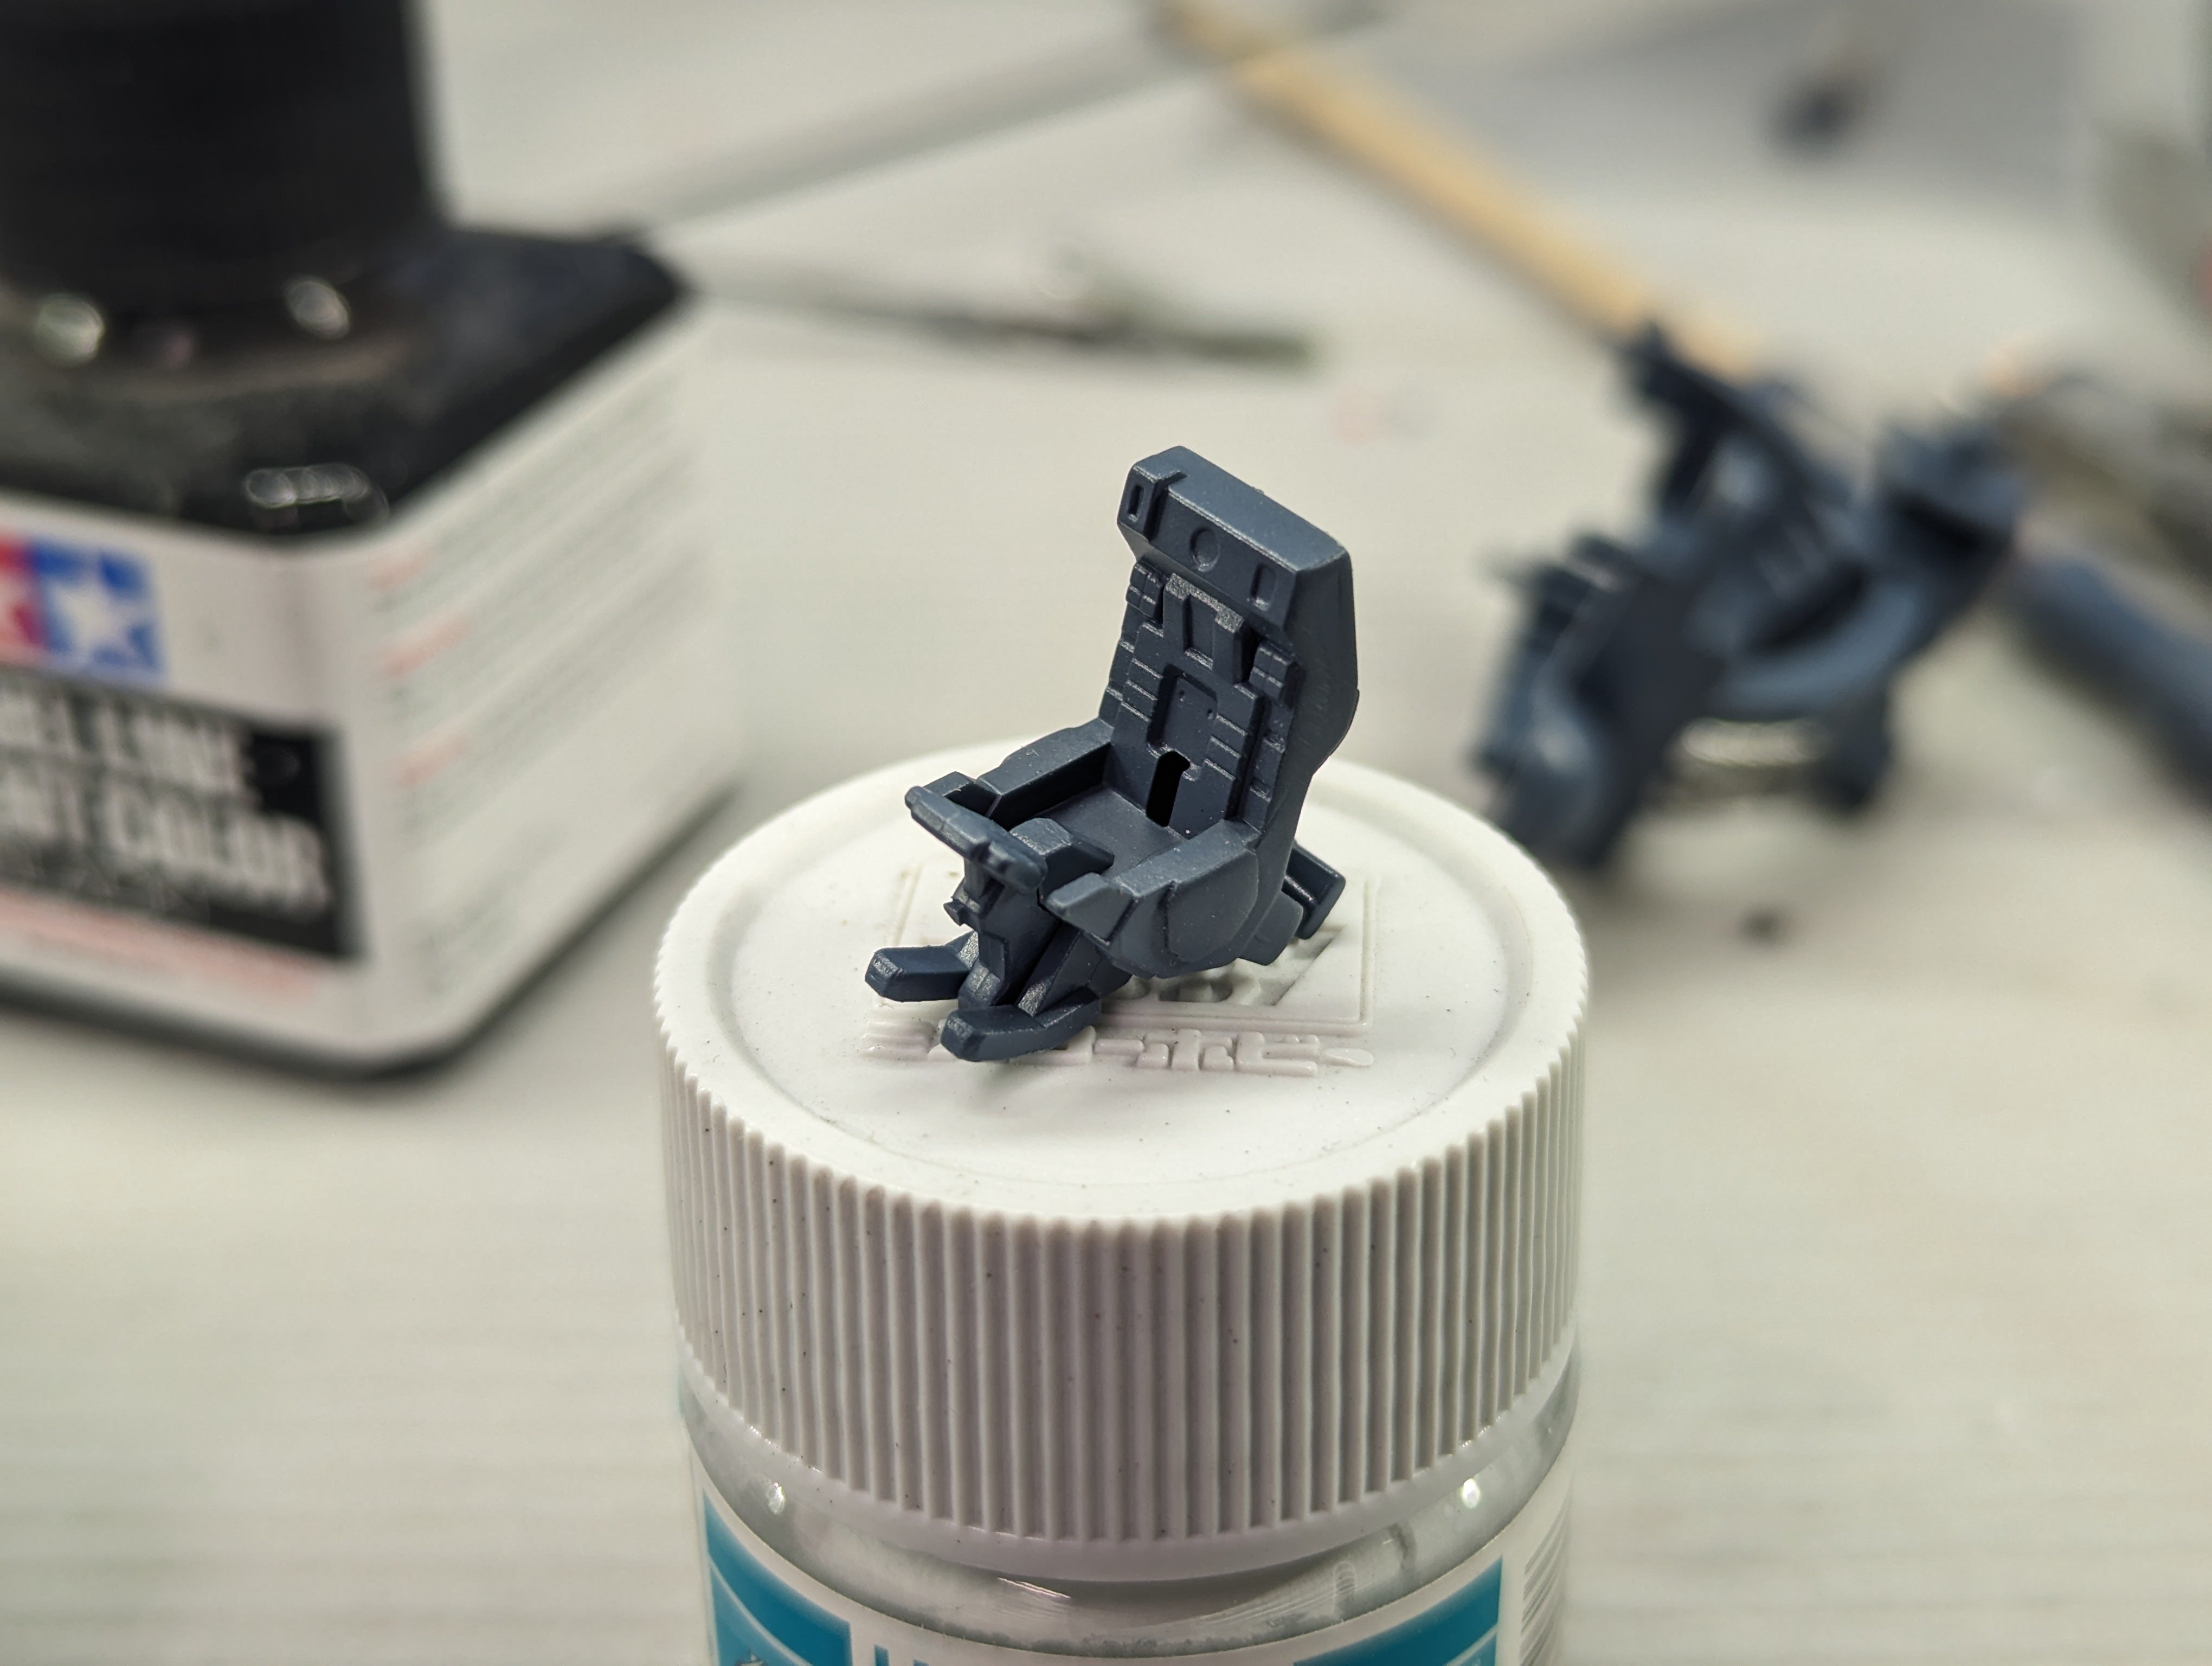
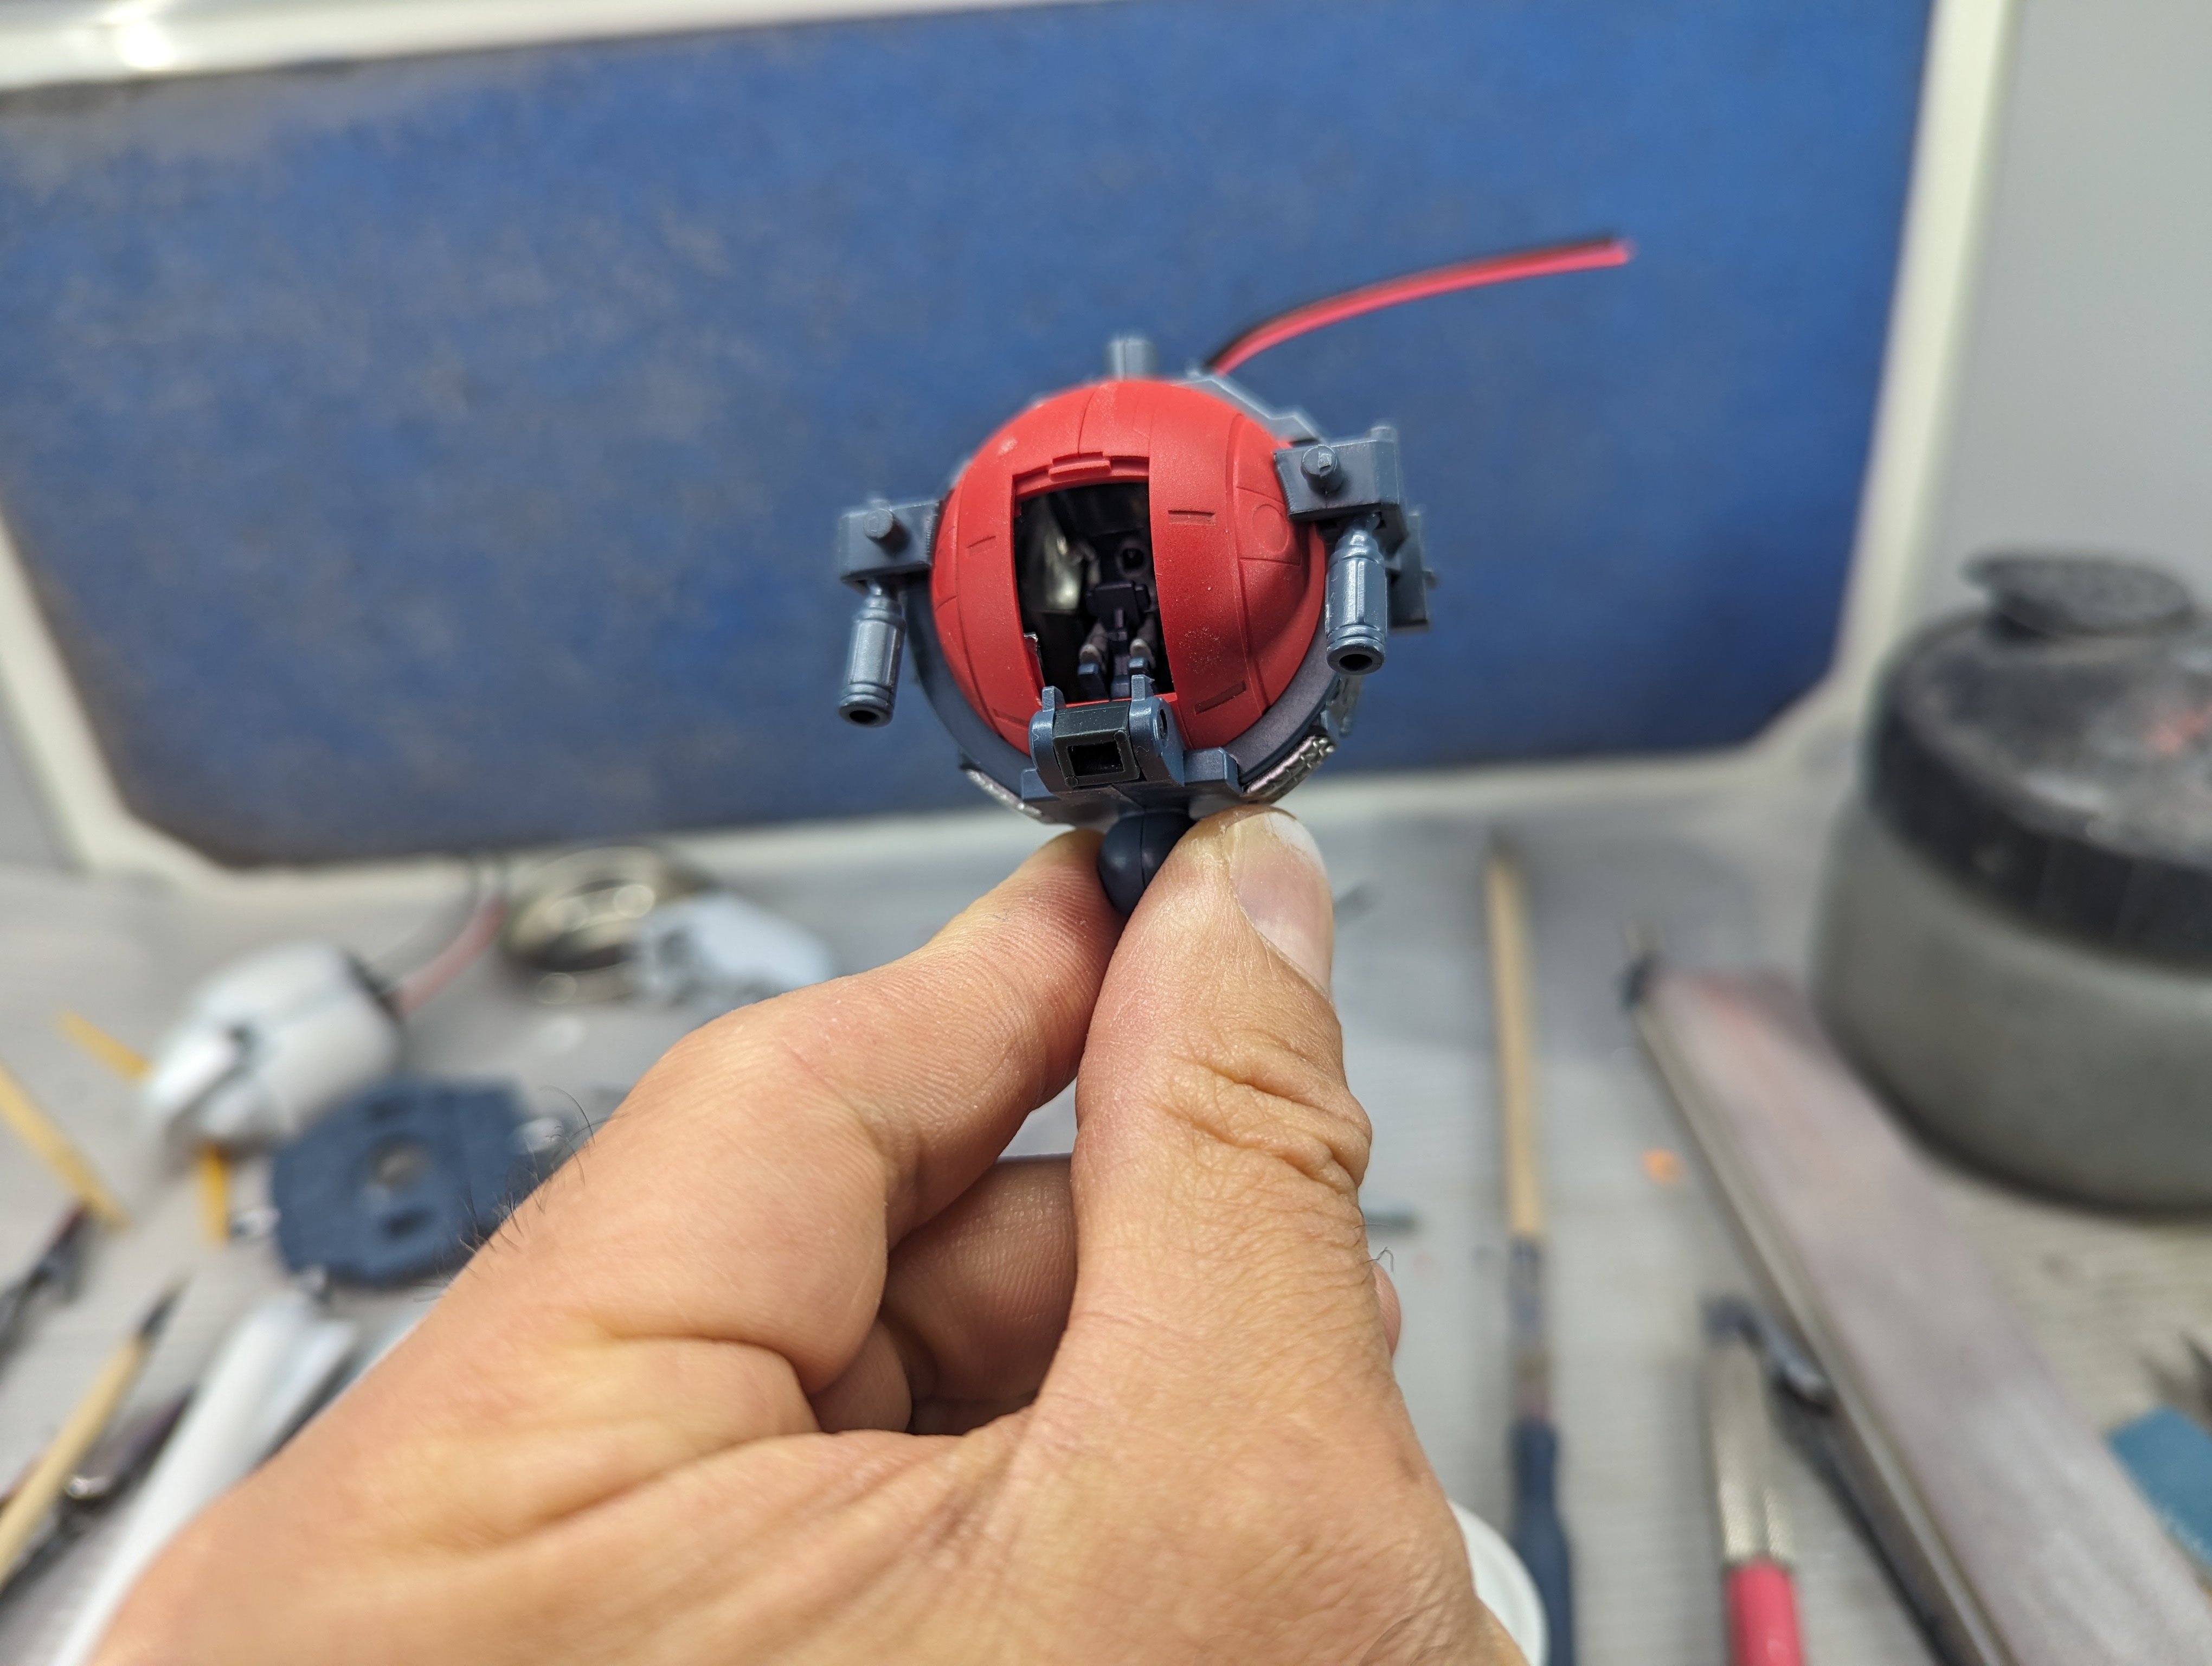
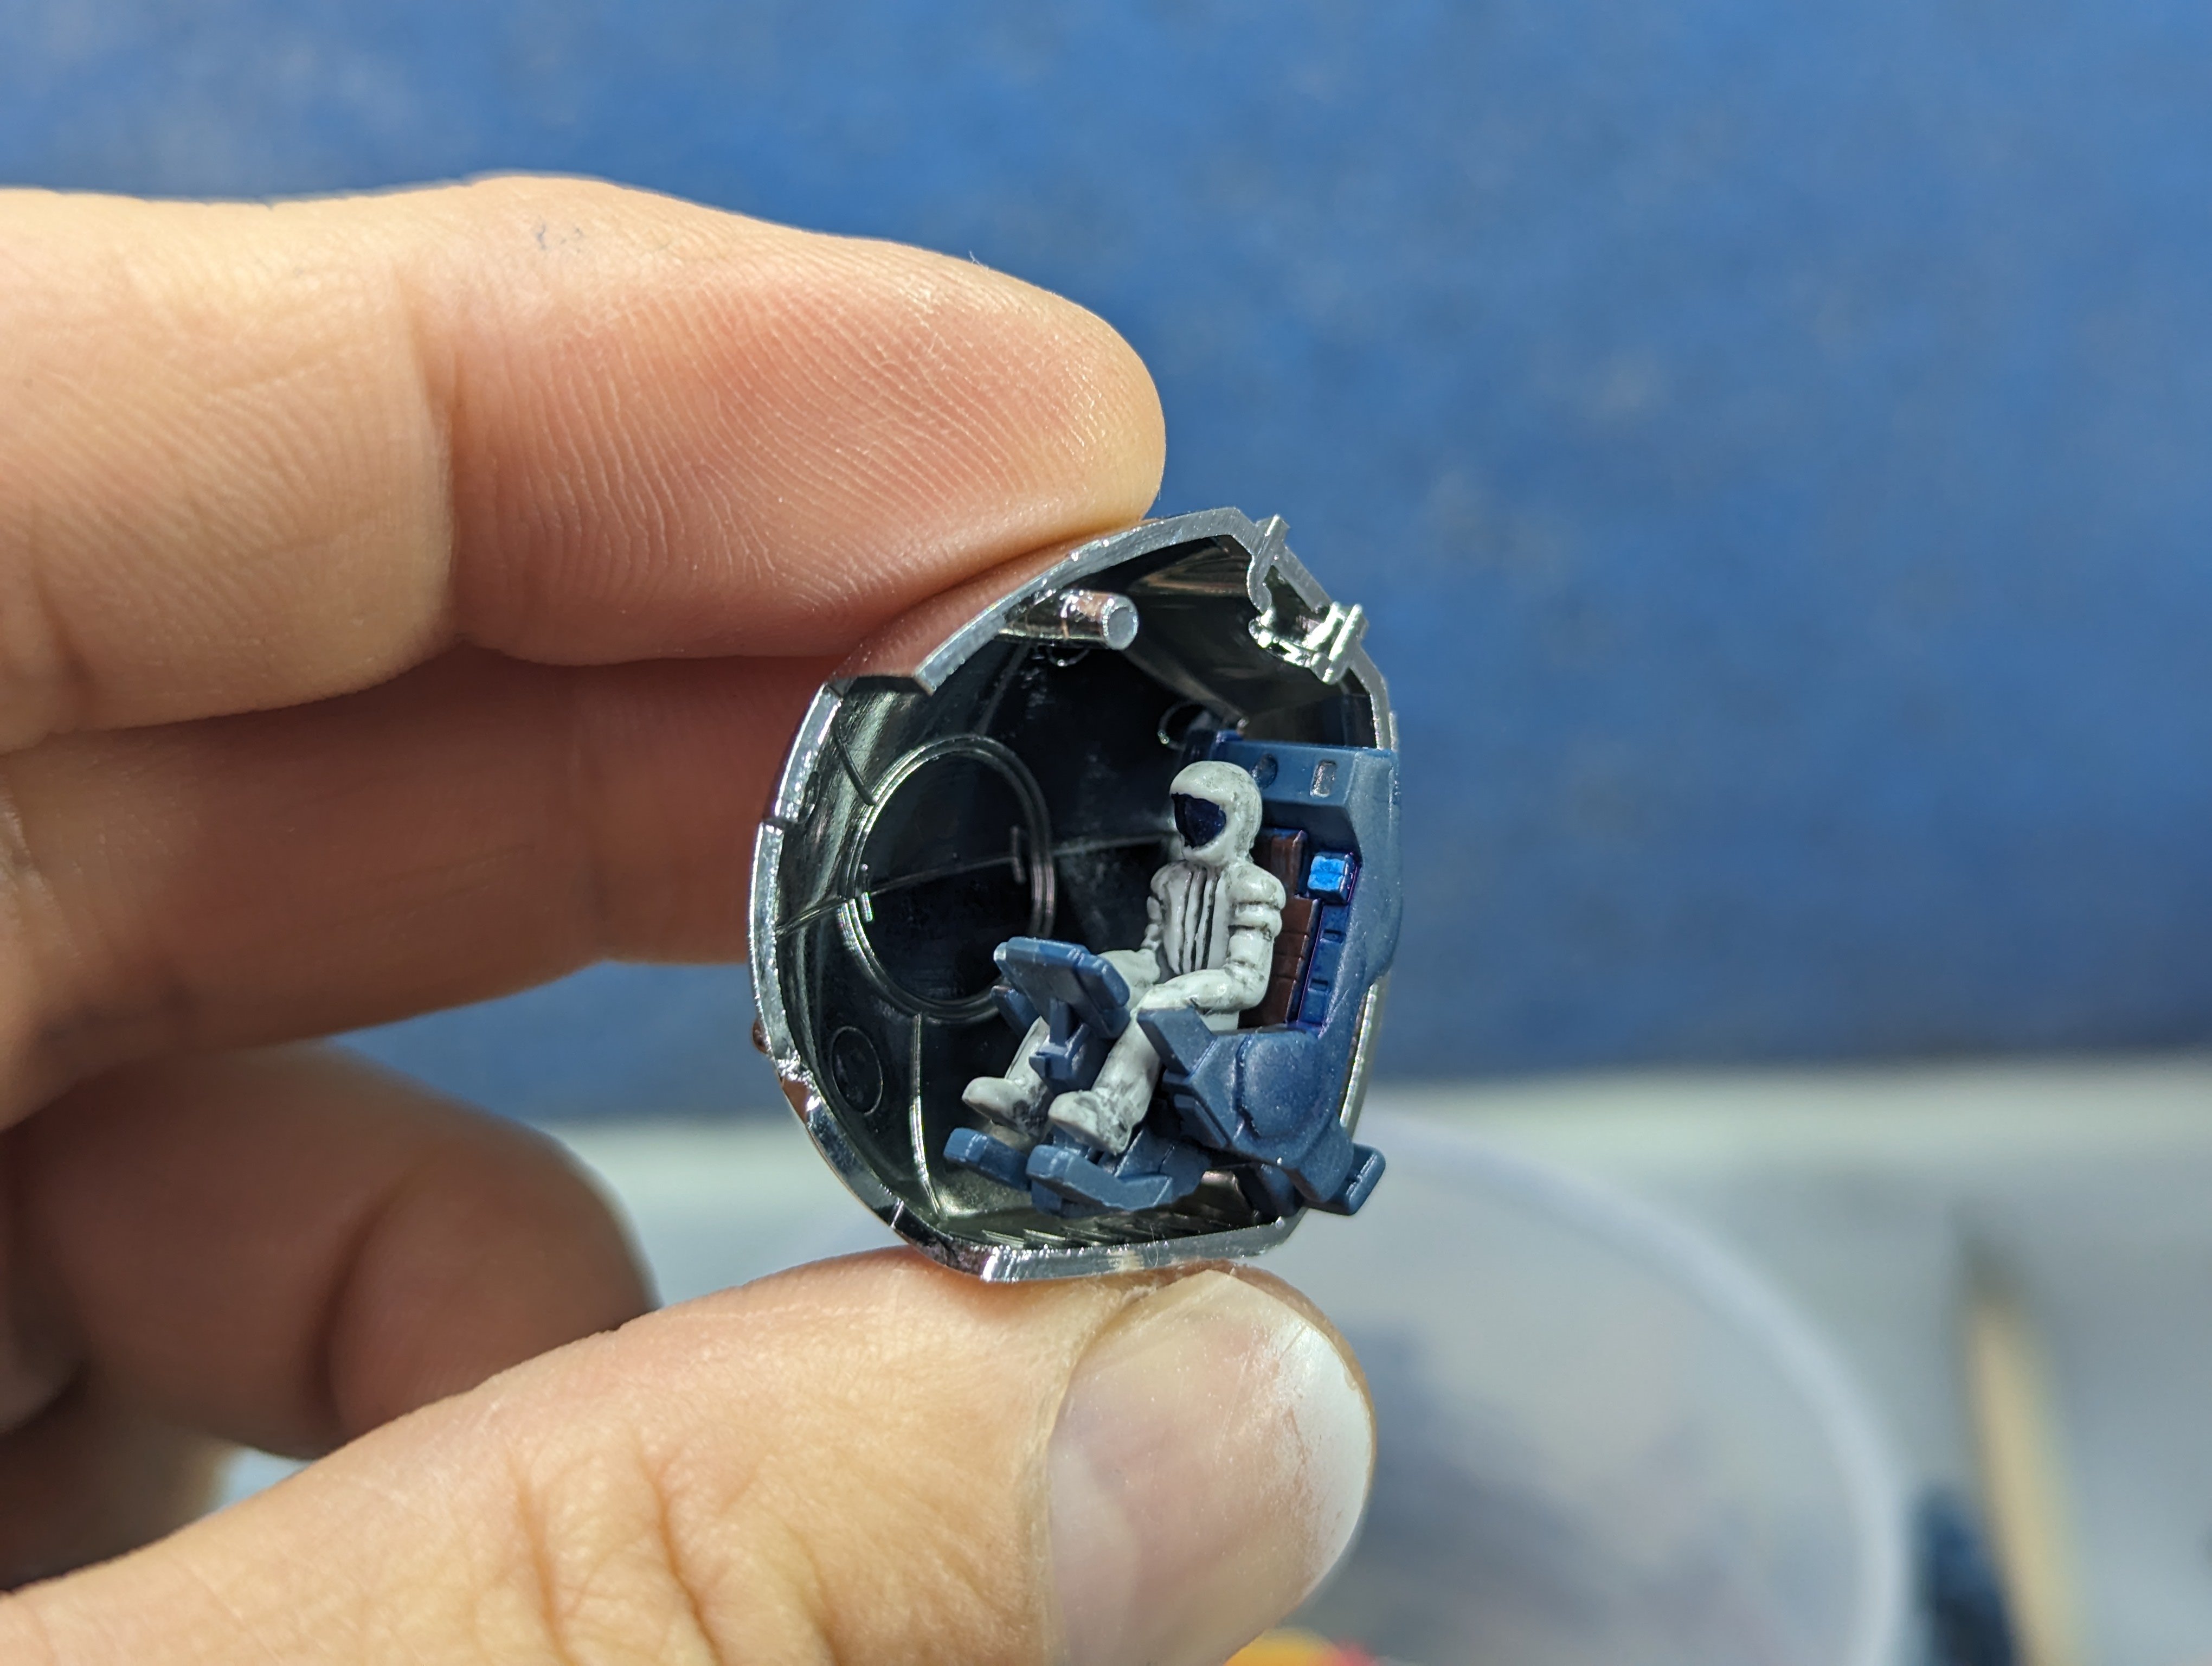
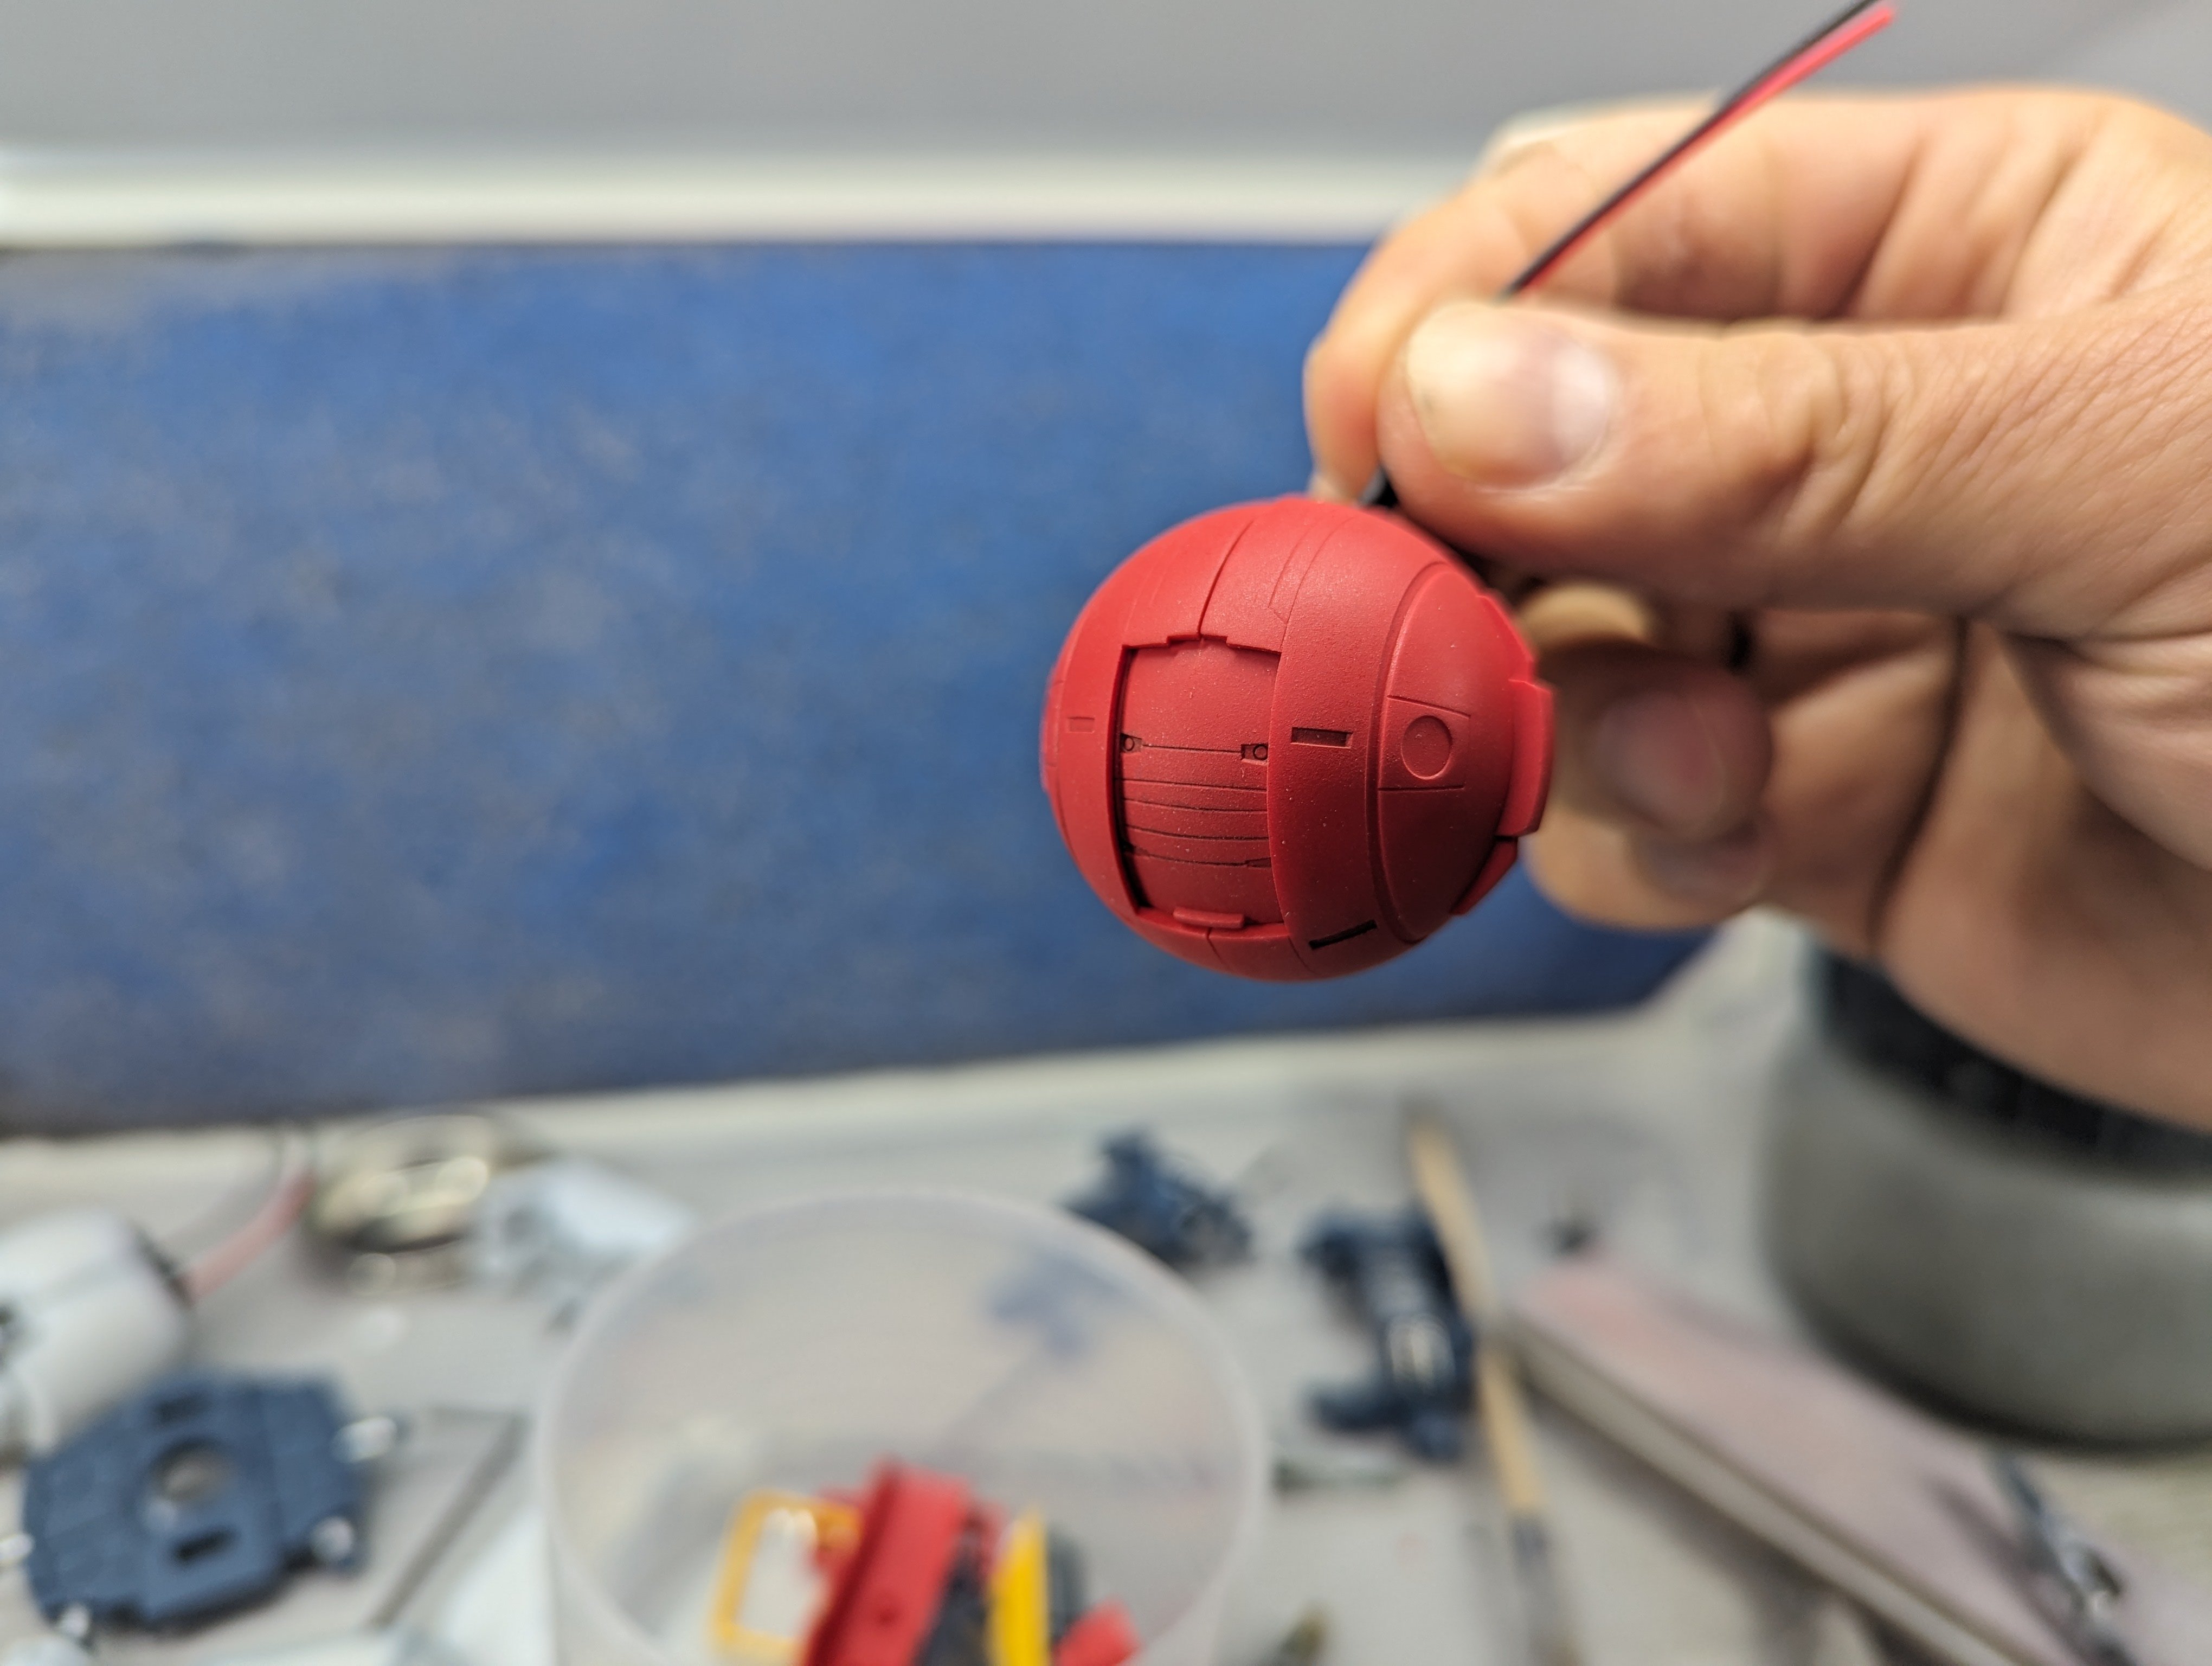
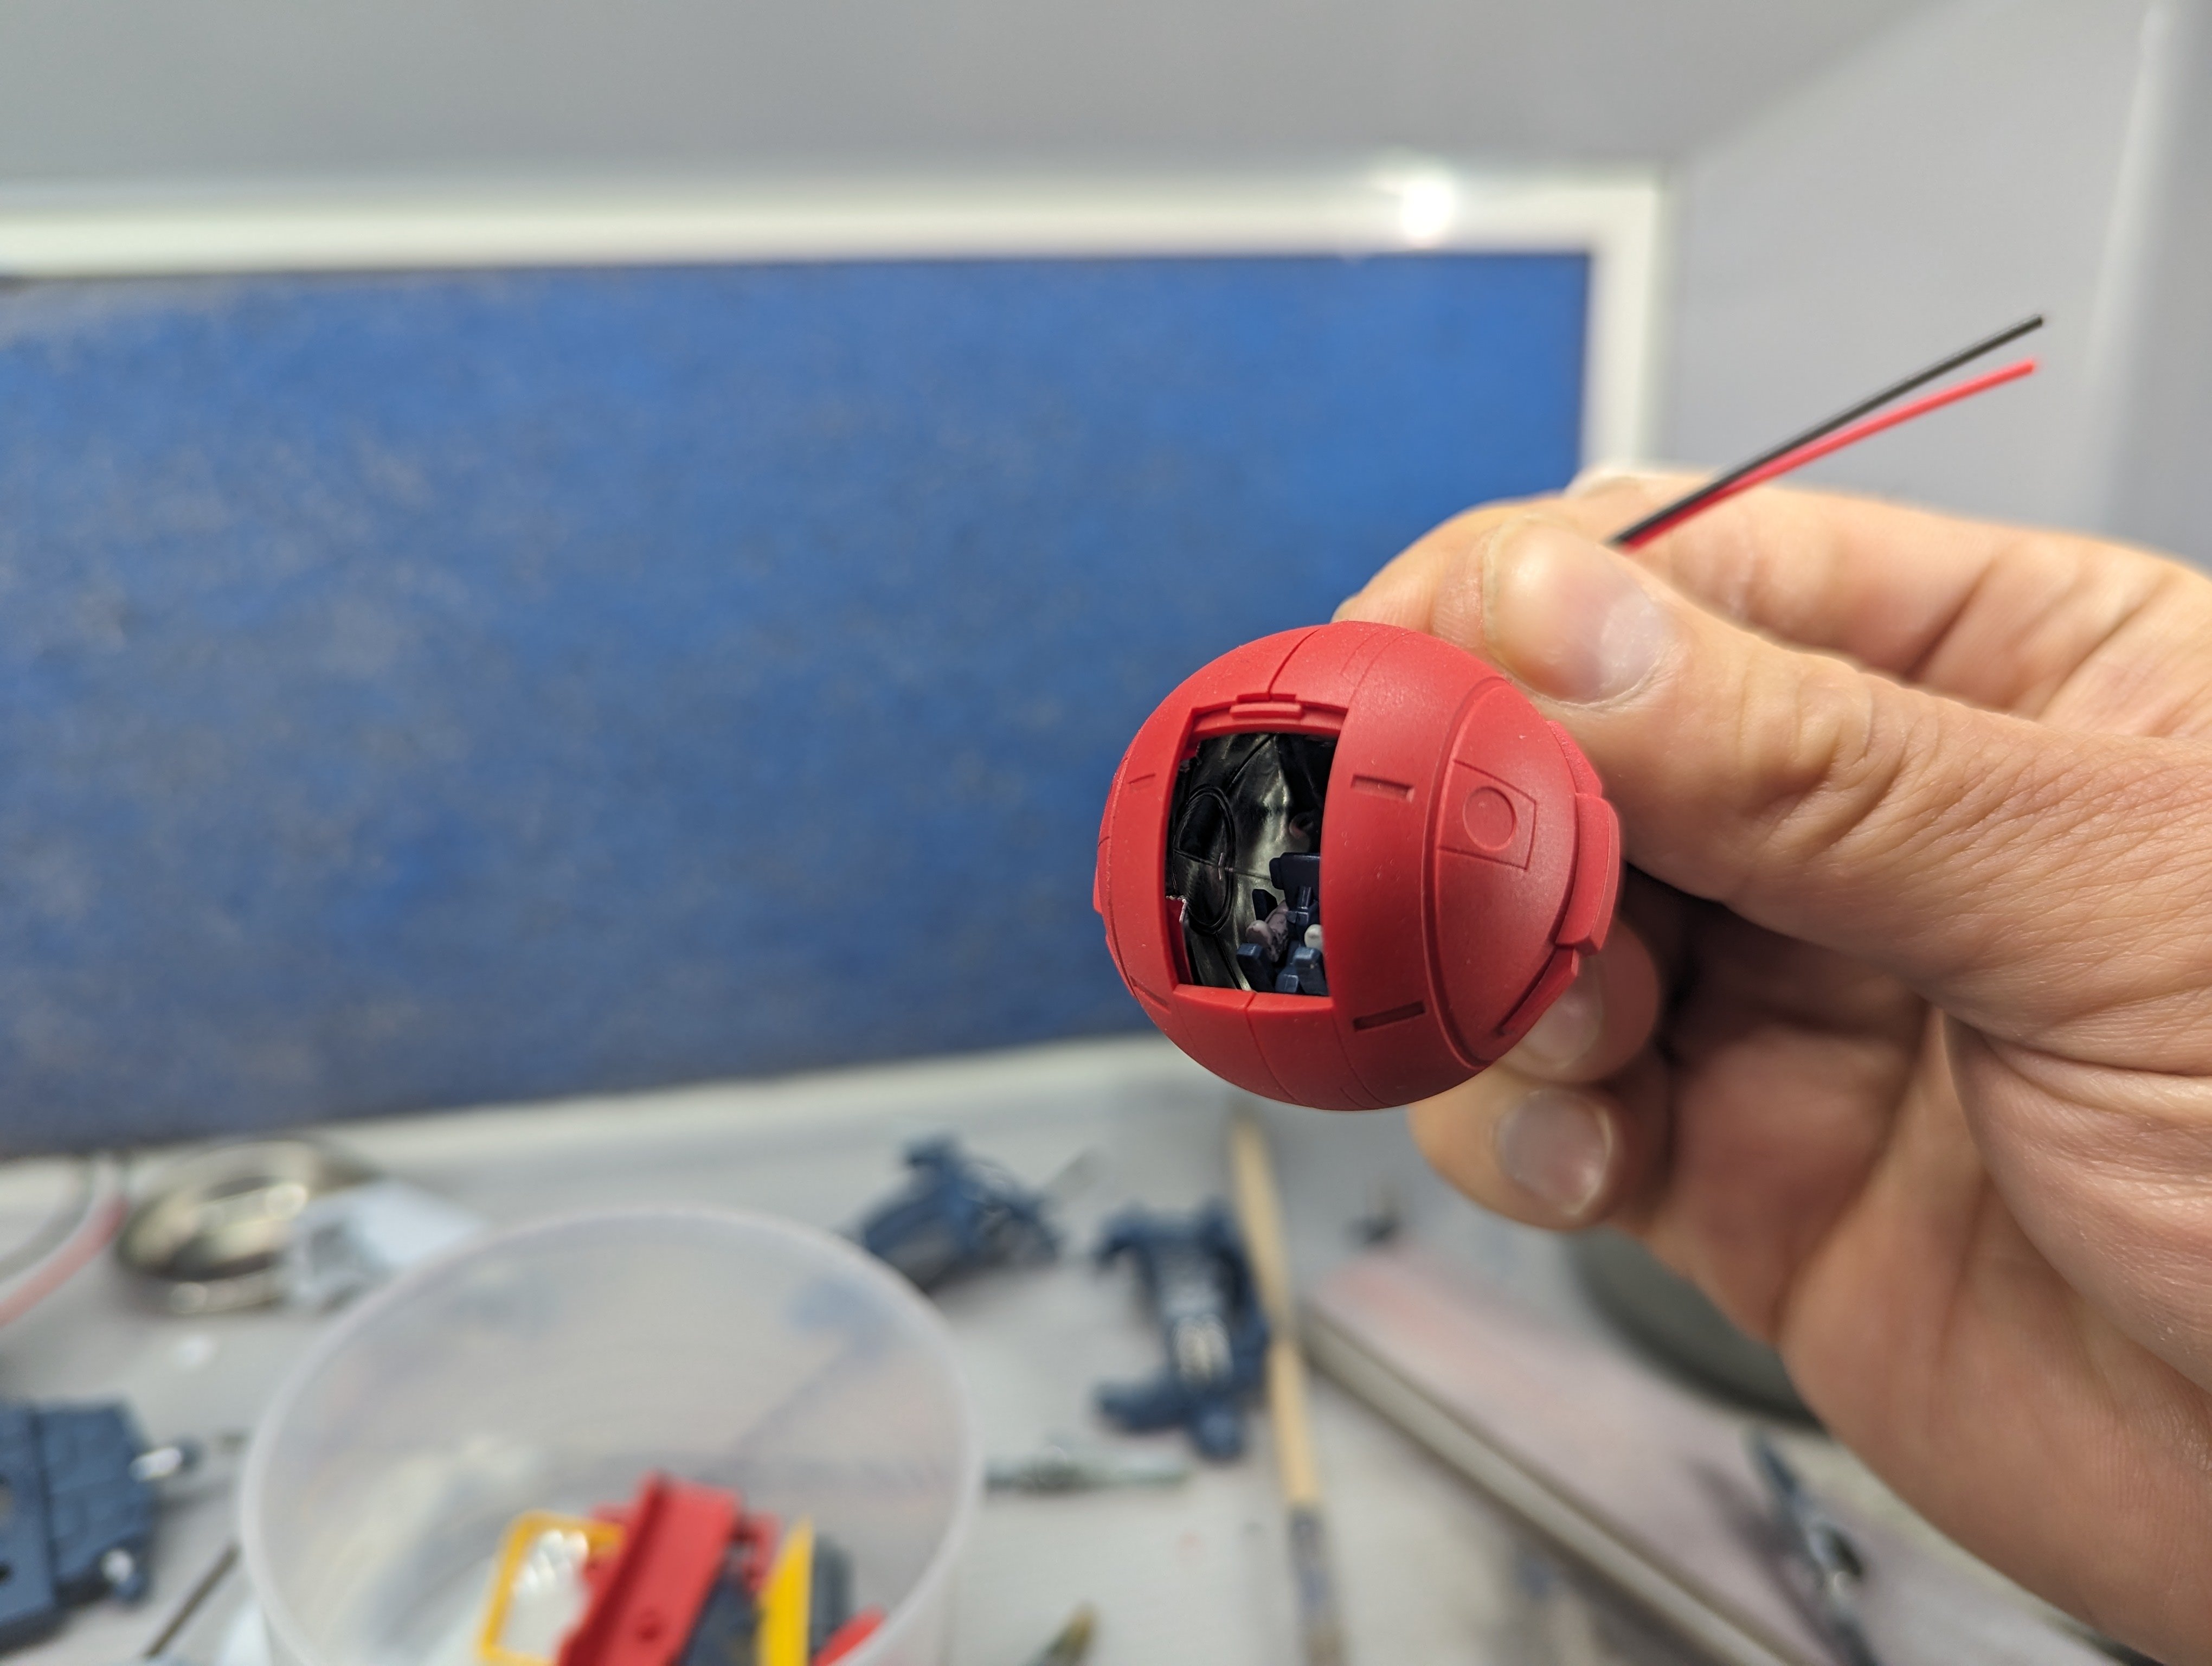
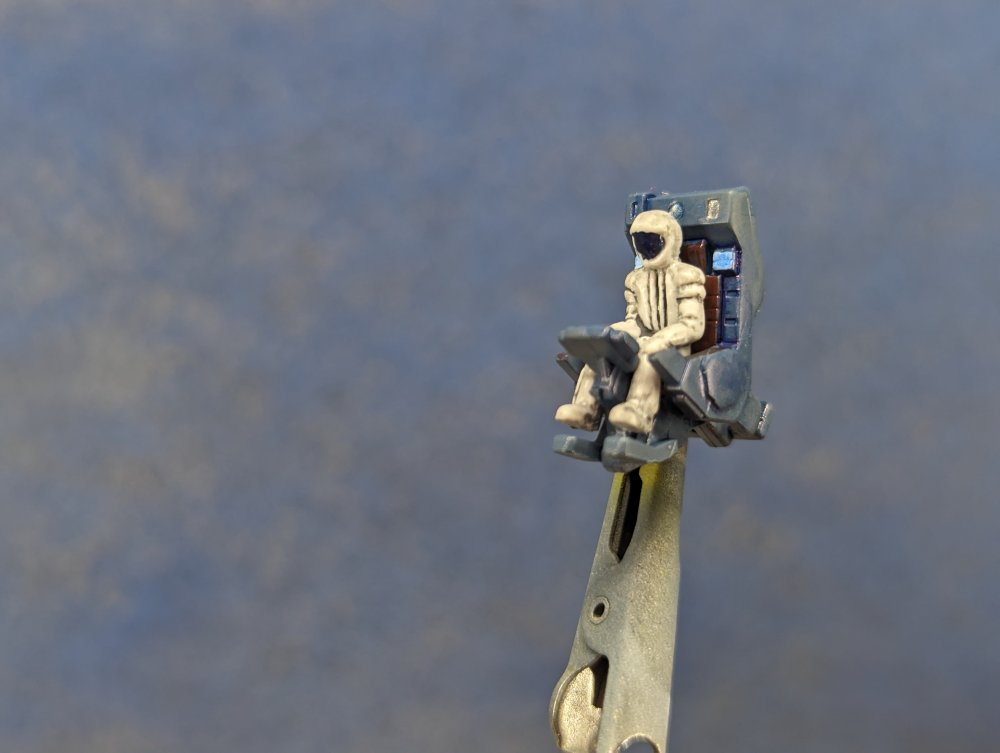
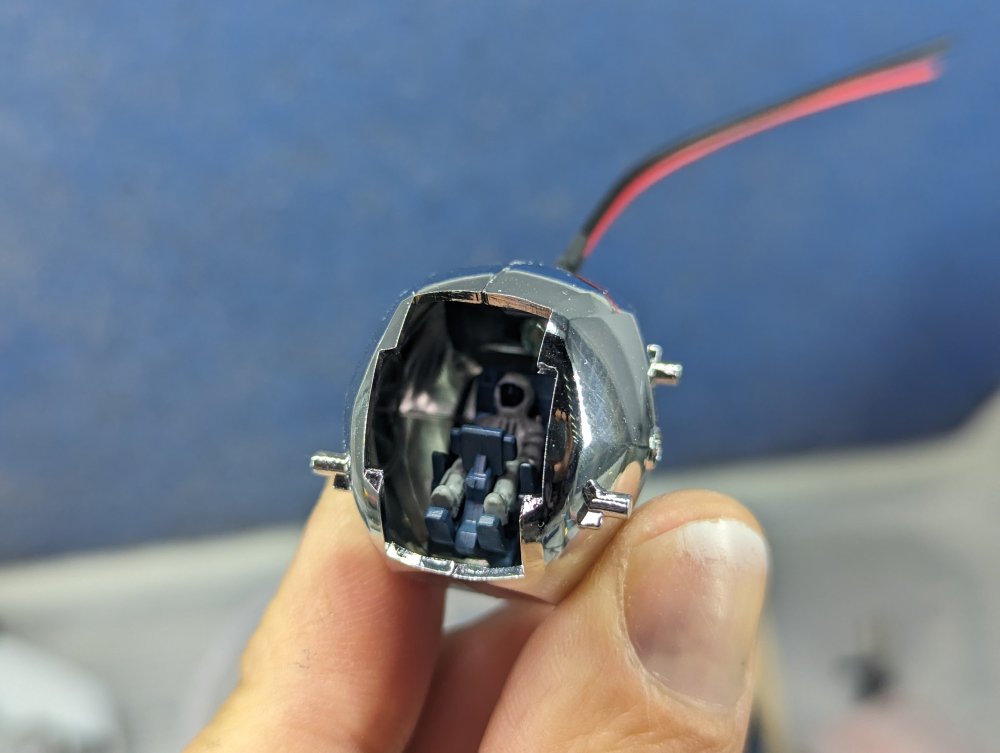
Cockpit time! Seat and controls first. With the pilot in place. Mounted to the inner cockpit ball. In the anime, the cockpit has a full 360° HUD. Outer walls in place. Hatch open. Cockpit in its frame. Fur back to her place of honour.


-
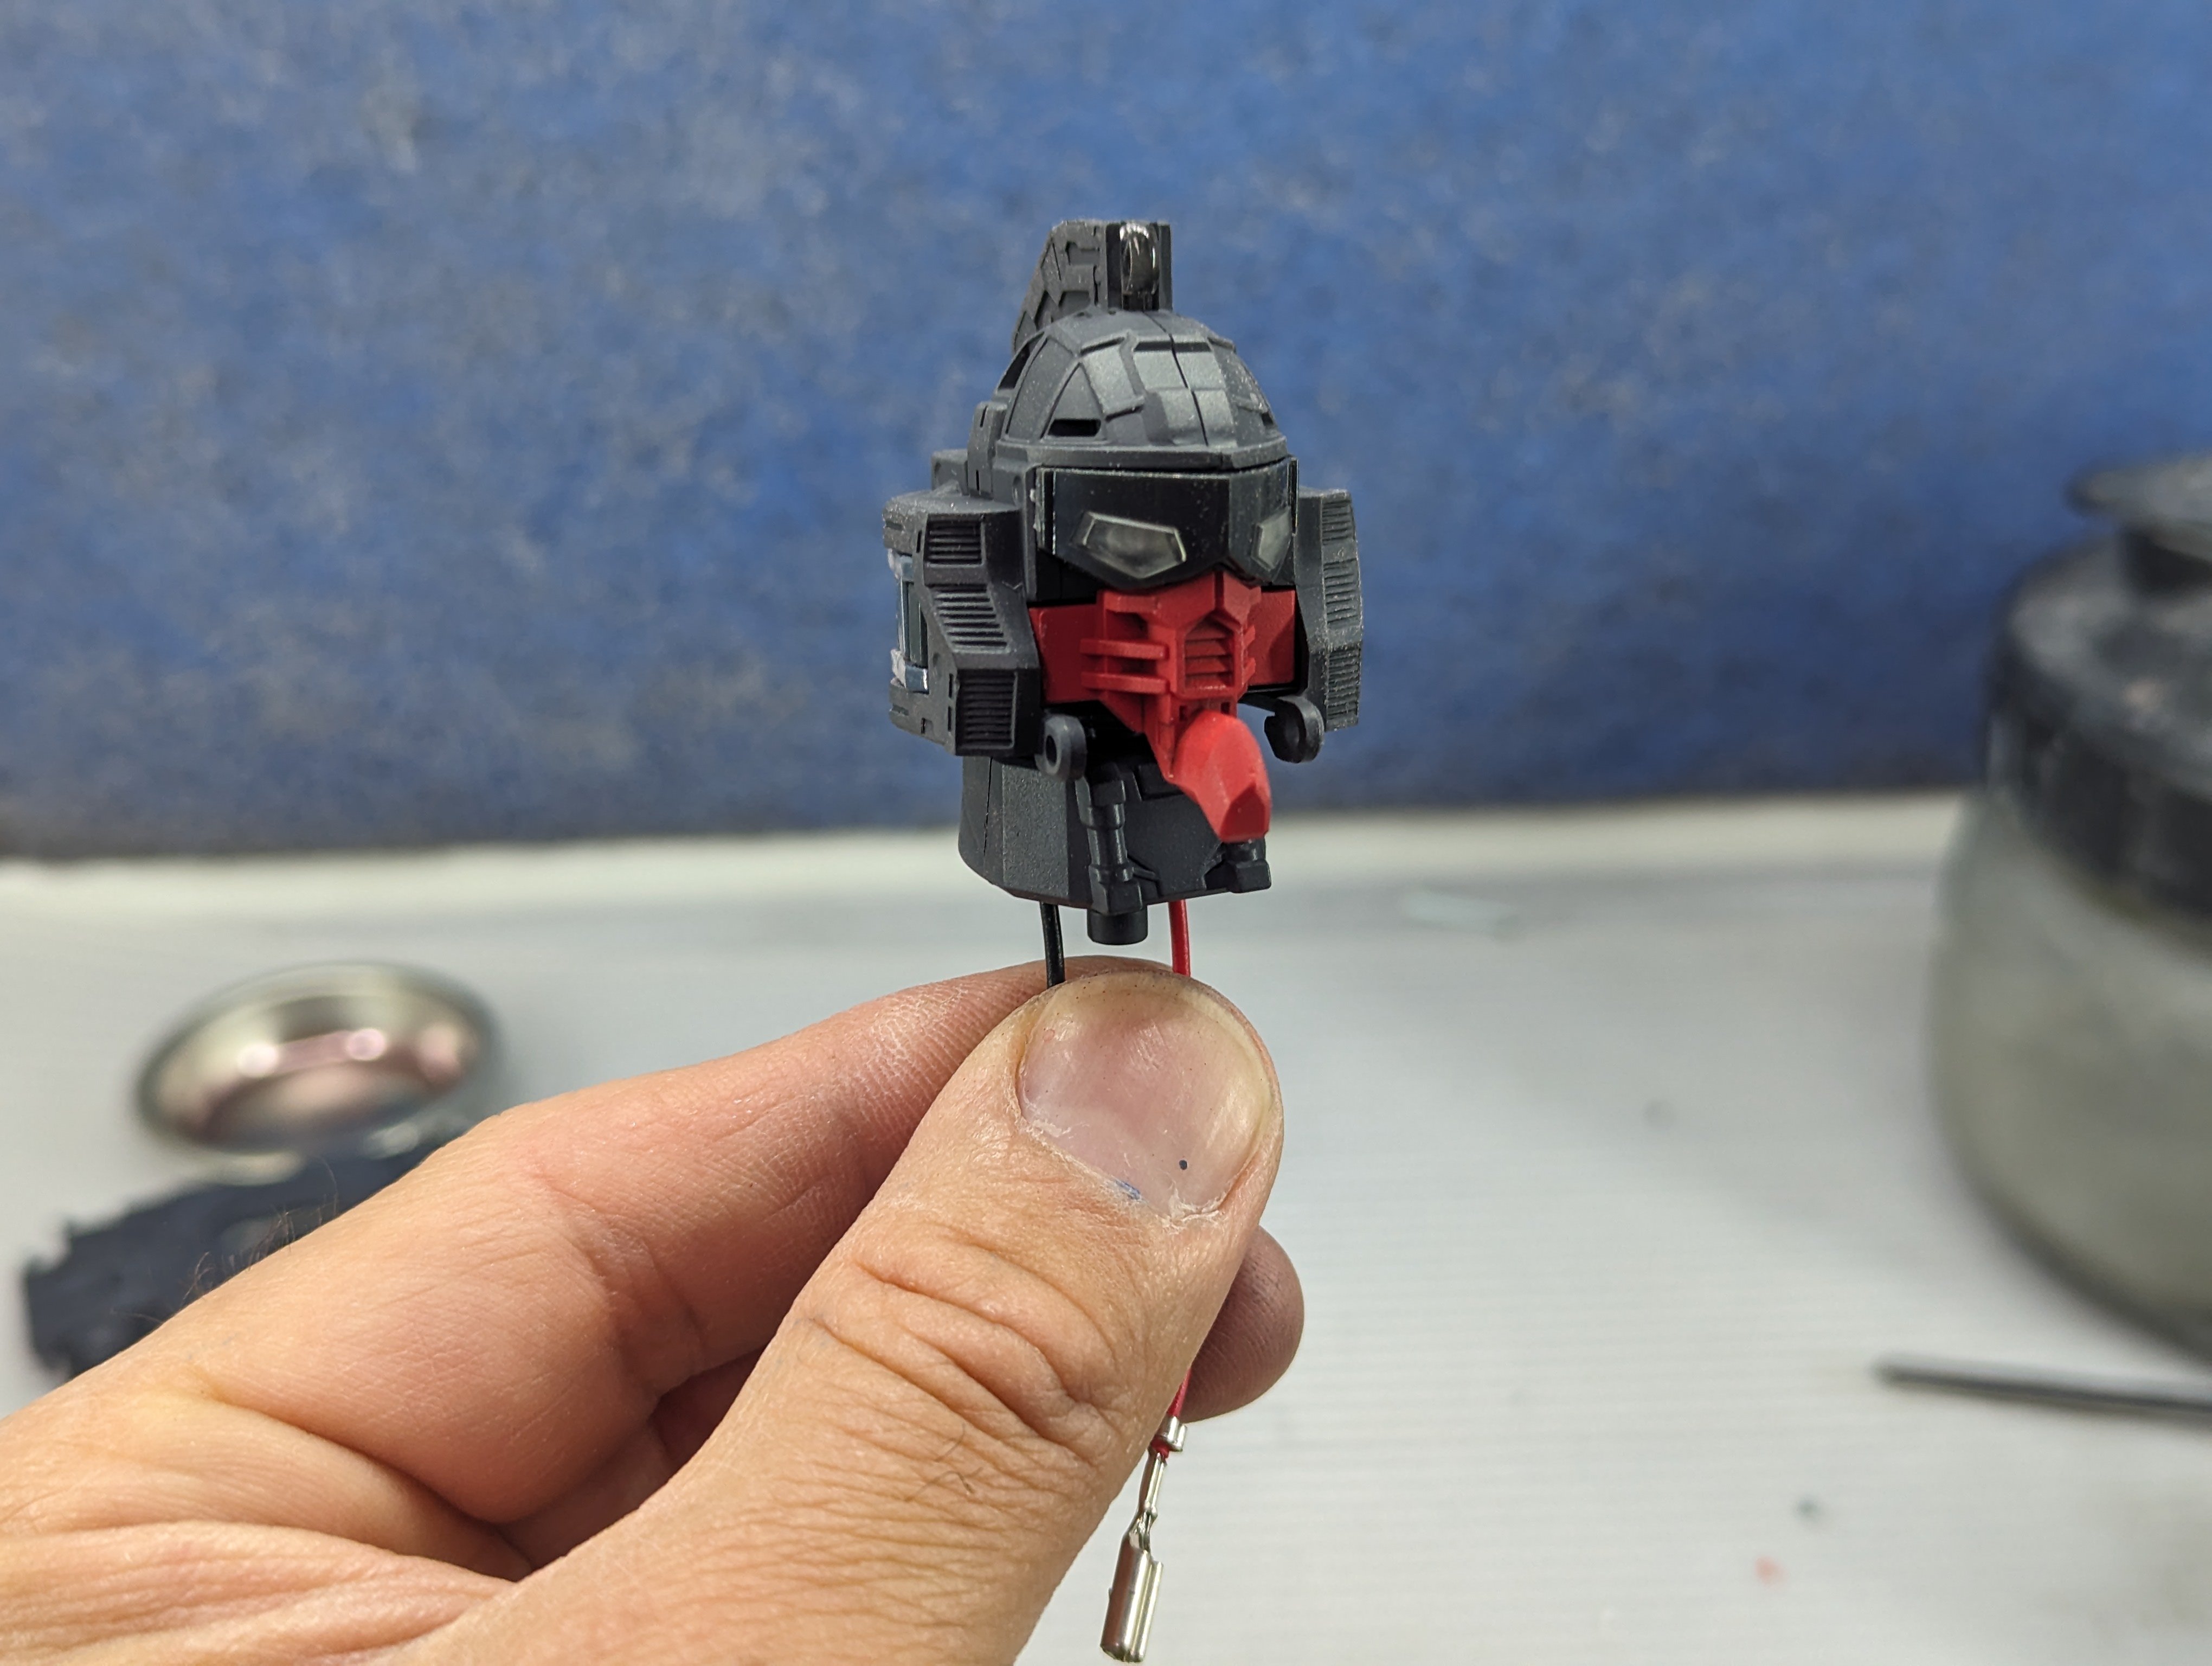
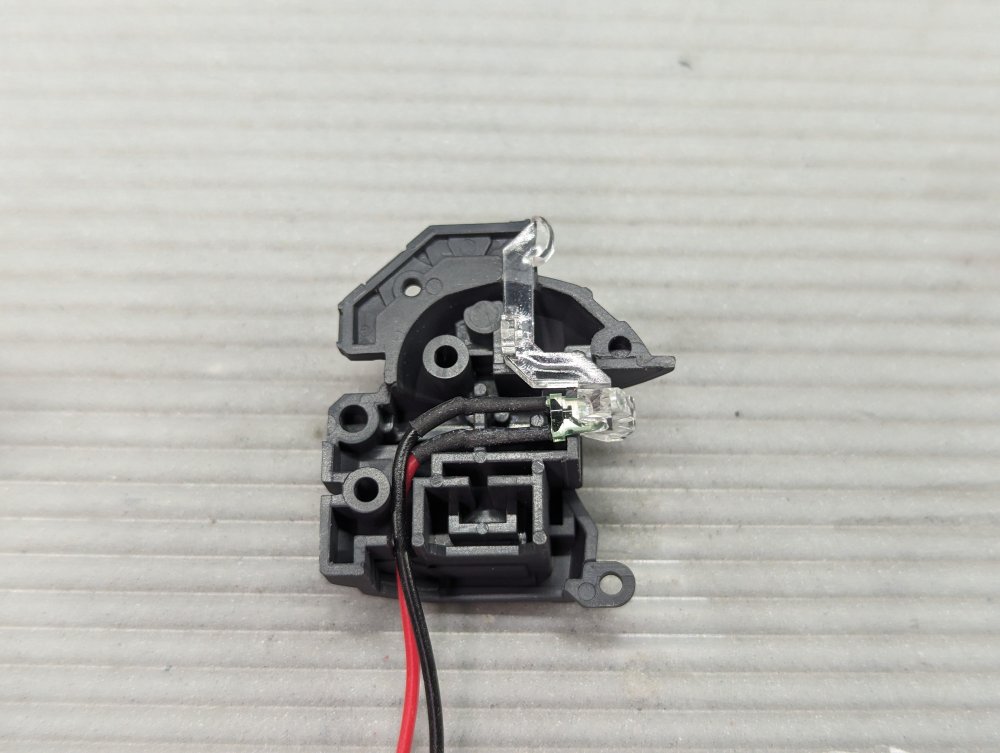
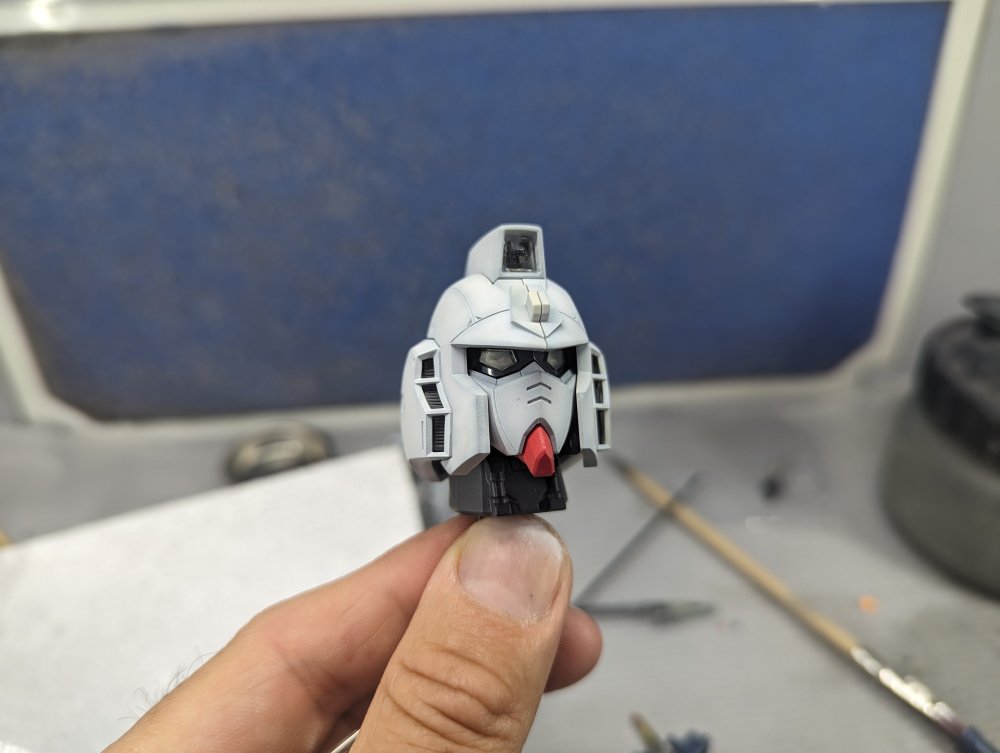
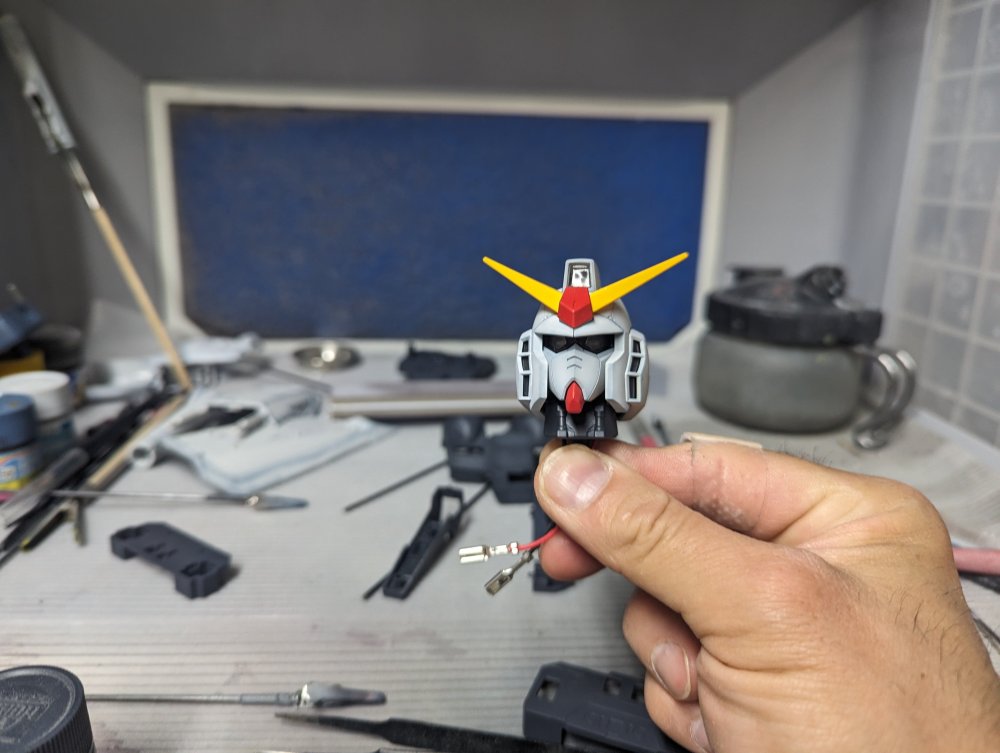
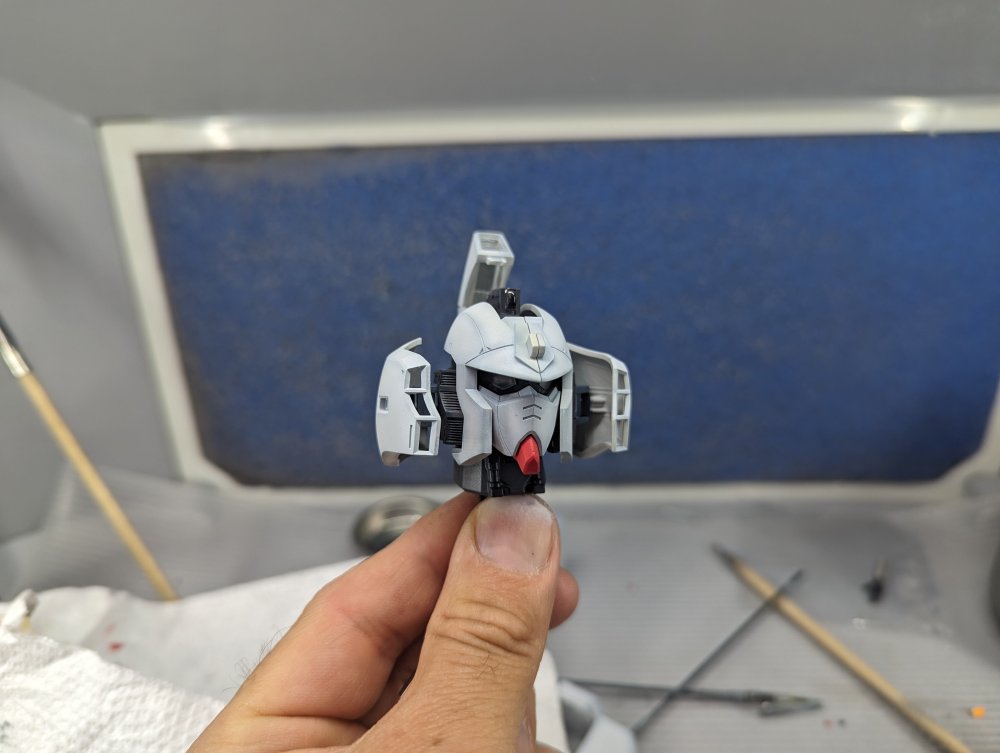
Time for an update. First up, I got the head all done. There's a clear bit to direct light from the LED to the eyes and the light on top. The "skull" I guess you'd call it. Outer panels in place. Opened up. And completed with the antenna in place.

-
Check out Lucky Model. They're having a huge sale. Minimum 20% off everything. In case you didn't know, Lucky Model is the parent company for Kinetic. They even have a UK warehouse so that should possibly circumvent any duties. https://www.luckymodel.com/scale.aspx?search=Y&q_brand=KIN&q_category=&q_scale=&q_item_no=&q_word=&q_show_instock_only=Y&q_whse=UK
-
The Scharnhorst 1/200 by Trumpter-Operation Paderborn
BlrwestSiR replied to KevinM's topic in Non LSM 'WIP
The Scharnhorst looks amazing. I'm still not sure if I'd be up to a ship build, so much to add. One thing I only recently learned about is the colours the Kriegsmarine used to paint their turrets for ID purposes. Really makes them stand out. -
Oh and the props go in the spares box for when the hair dryers crap out.
-
You should see it in 1/32 Phil. Here's mine standing on its tail tucked behind some other bench warmers which are also 1/32.

-
Ernie, glad to hear you're all safe. Tornados are truly scary and there's no rhyme or reason to where they want to go.