NigelR32
-
Posts
407 -
Joined
-
Last visited
Content Type
Profiles
Forums
Events
Gallery
Everything posted by NigelR32
-
In my opinion this will always be the case with injection moulded kits Ron. In reality the cowling around the engine would have been, say, 1.2mm max thickness sheet material. It would have fitted very tightly around the engine, so, if the kit engine were correct diameter and the cowling was correct, the plastic would need to be 1 1/2 thou thick in 1/32 scale. (Which begs the question... is the cowling on the F4-F too big outside)? Anyway, we now know that the kit engine is simple and too small and the cowling is mishapen. Great!! Good news all round then!!
-
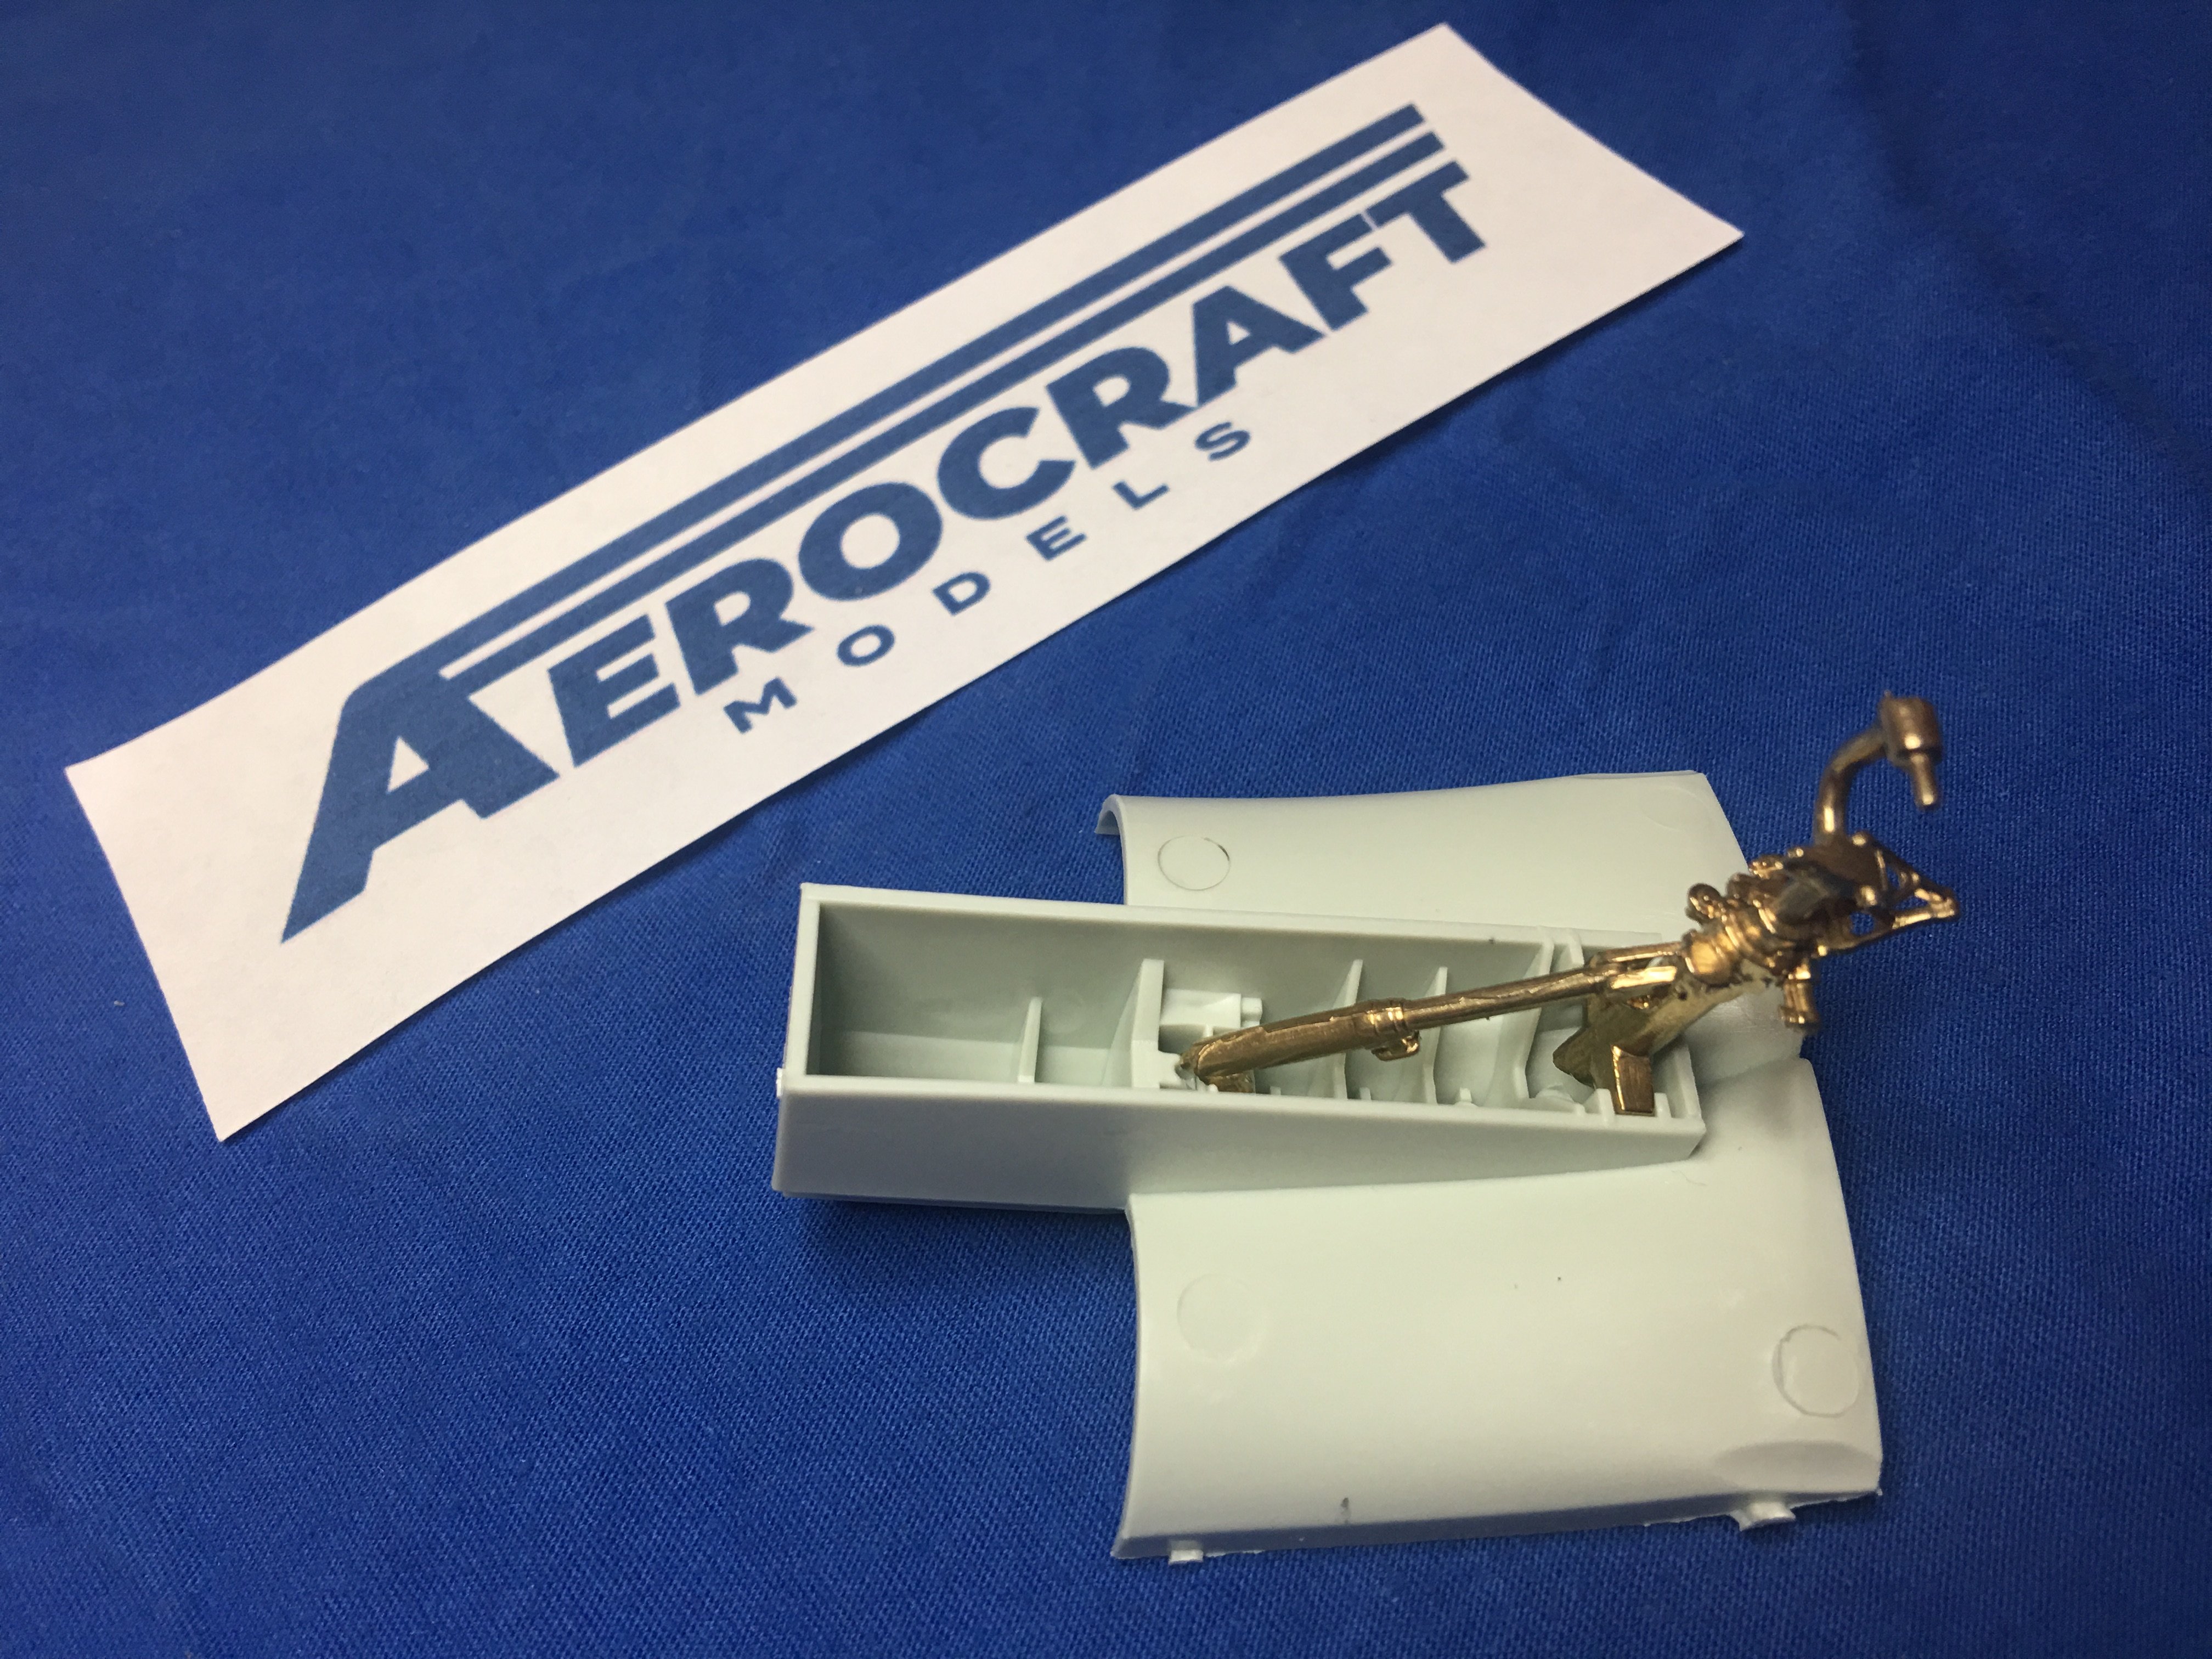
Hi everyone... Another undercarriage leg review today, and another great Brass product from Alistair over at Aeroscale. May I present to you, the Brass Nose Gear leg for the Revell 1/32 Eurofighter Typhoon.. This is a one piece, (rather than 6 plastic kit pieces), drop in addition to the kit which will not only give the model more rigidity on its legs, but also add detail, bettering the plastic part in many ways on detail. You can clearly see here the detail all over the part is vastly improved over the kit part, and for only £8, I feel this is a worthwhile addition. Here we can see it is a simple drop in fit.. a couple of drops of CA and hey presto, you're done. Add some wiring and brake lines and youi'll have a stunning feature on your 1/32 scale jet. Available from Aerocraft at https://aerocraftmodels.bigcartel.com/ I have also done a video review if you want to see this "moving before your very eyes"...

-
In this comparison are we assuming the diameter of the opening is correct on the model or is it oversized? If it is too big, that may give the illusion the outside is small?
-
I will speak to him tonight Ron. Watch this space.
-
Another B-24 upgrade video..
-
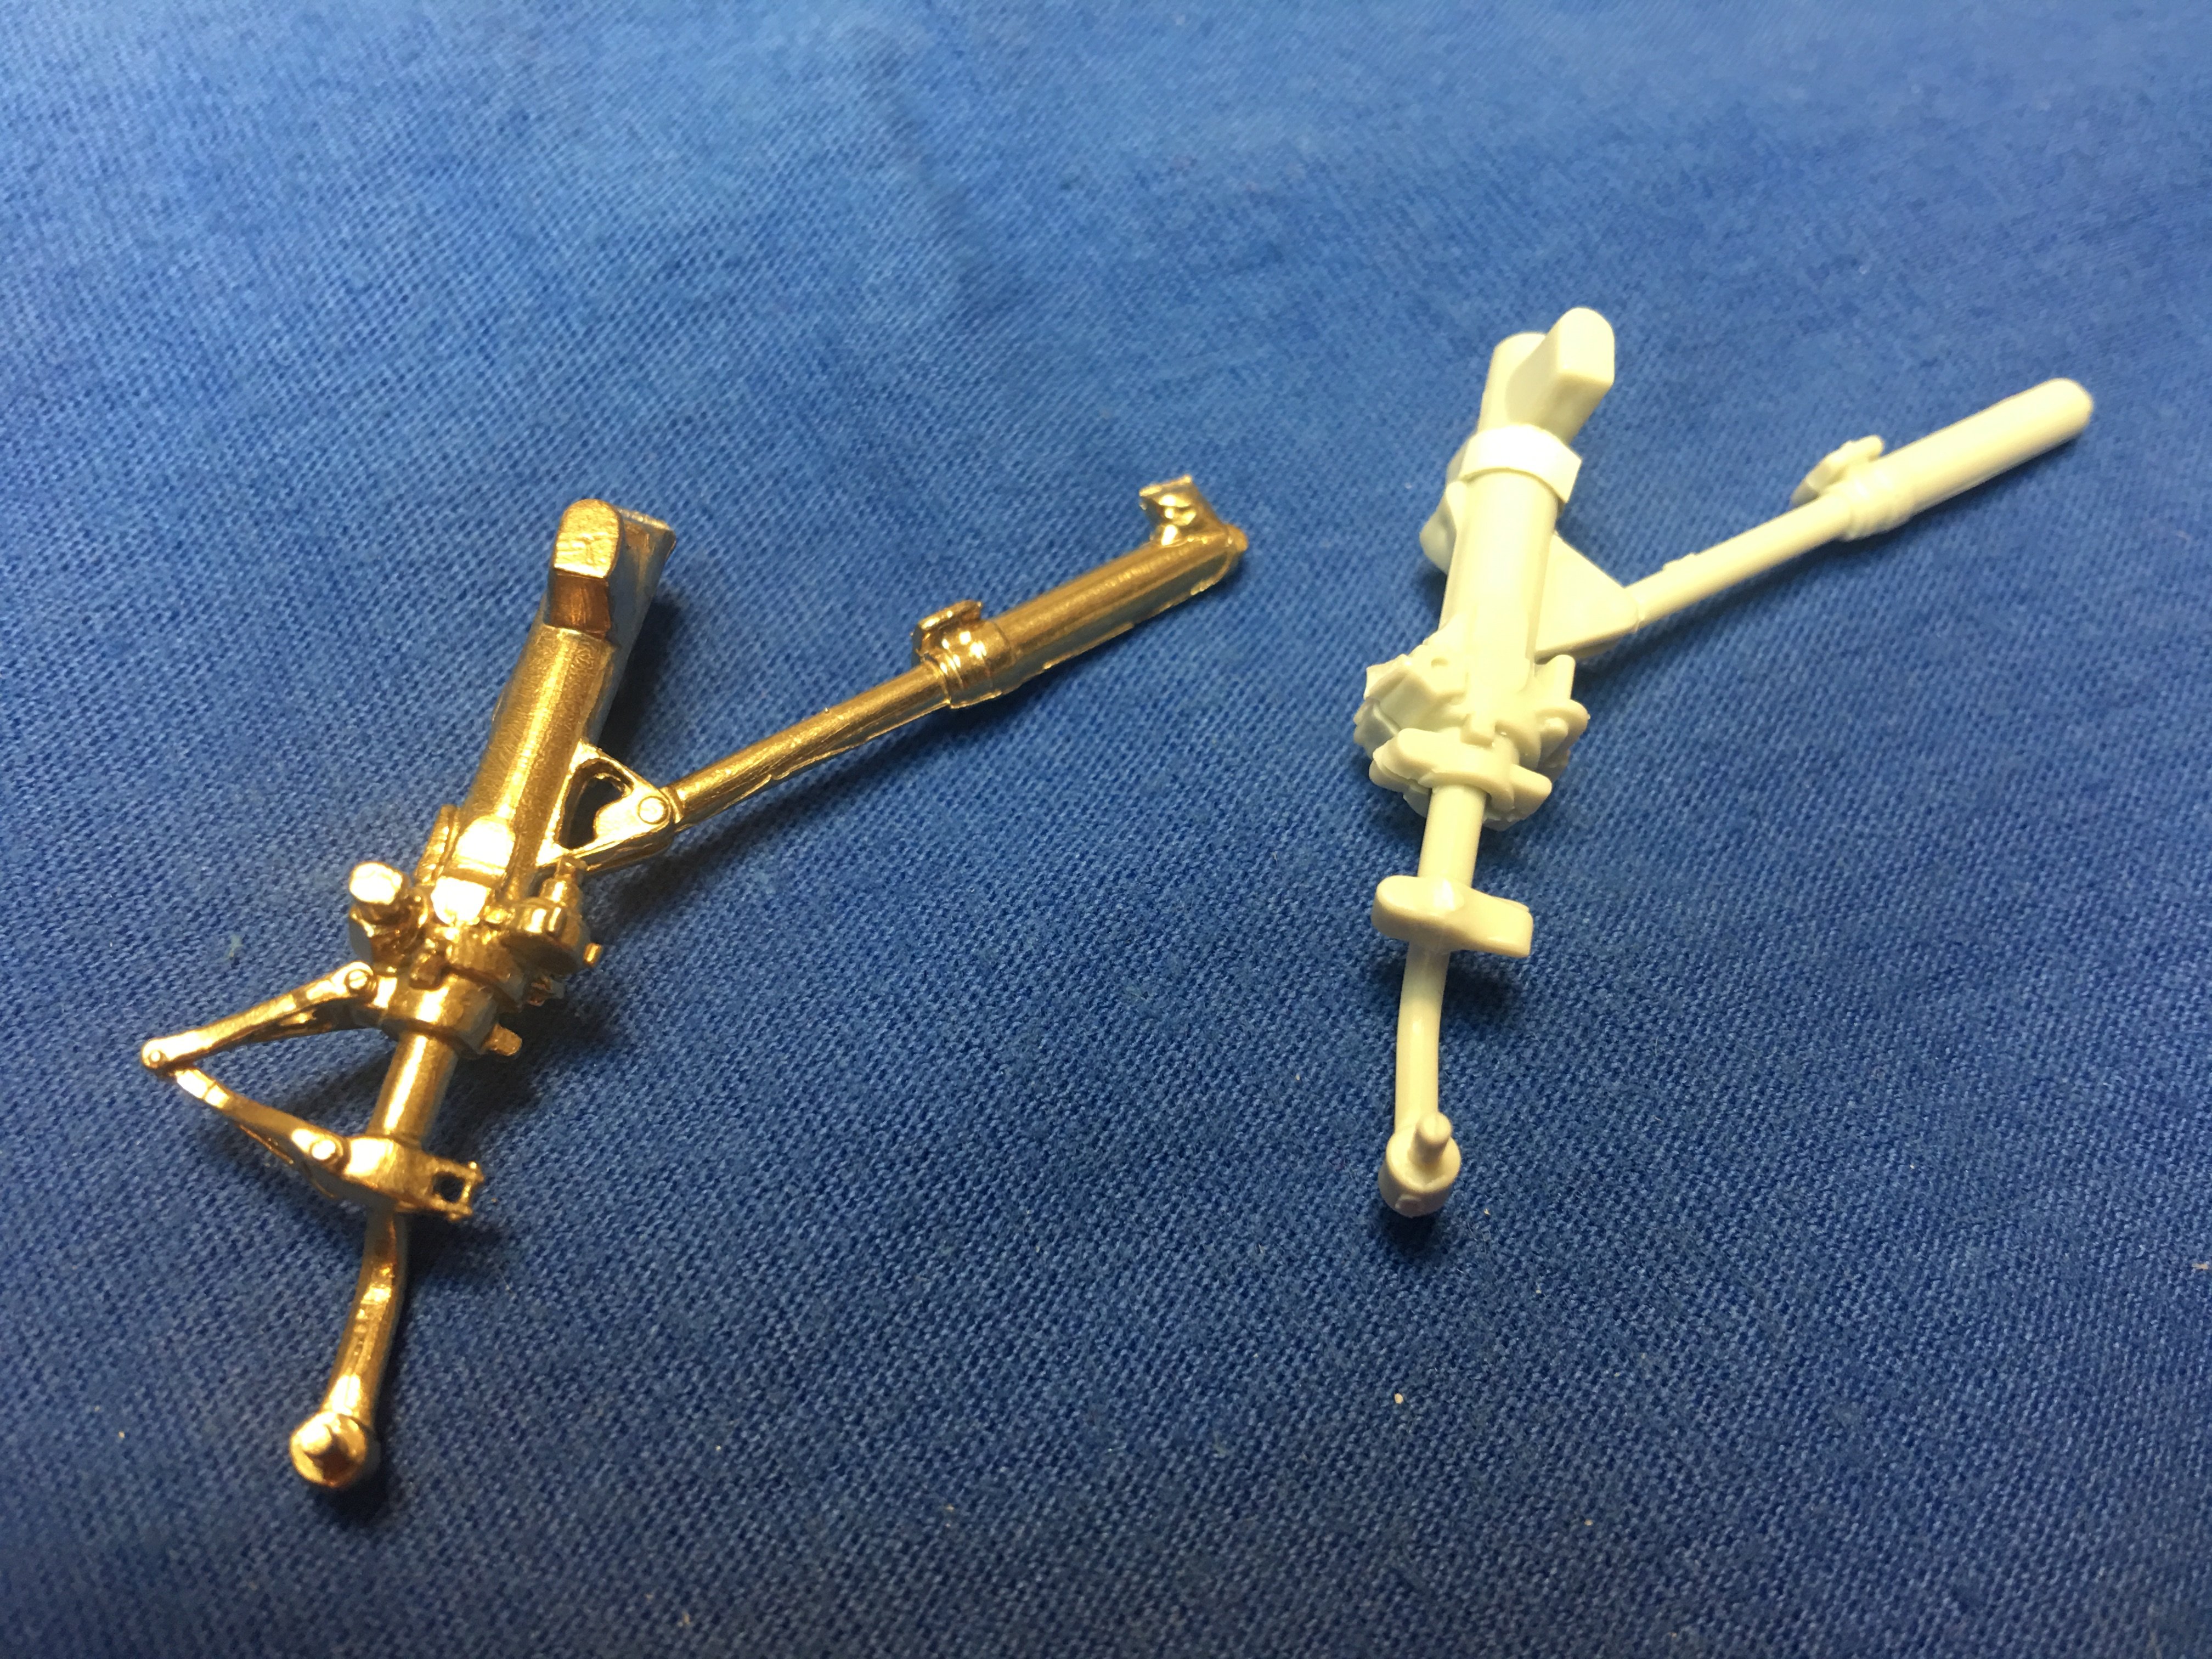
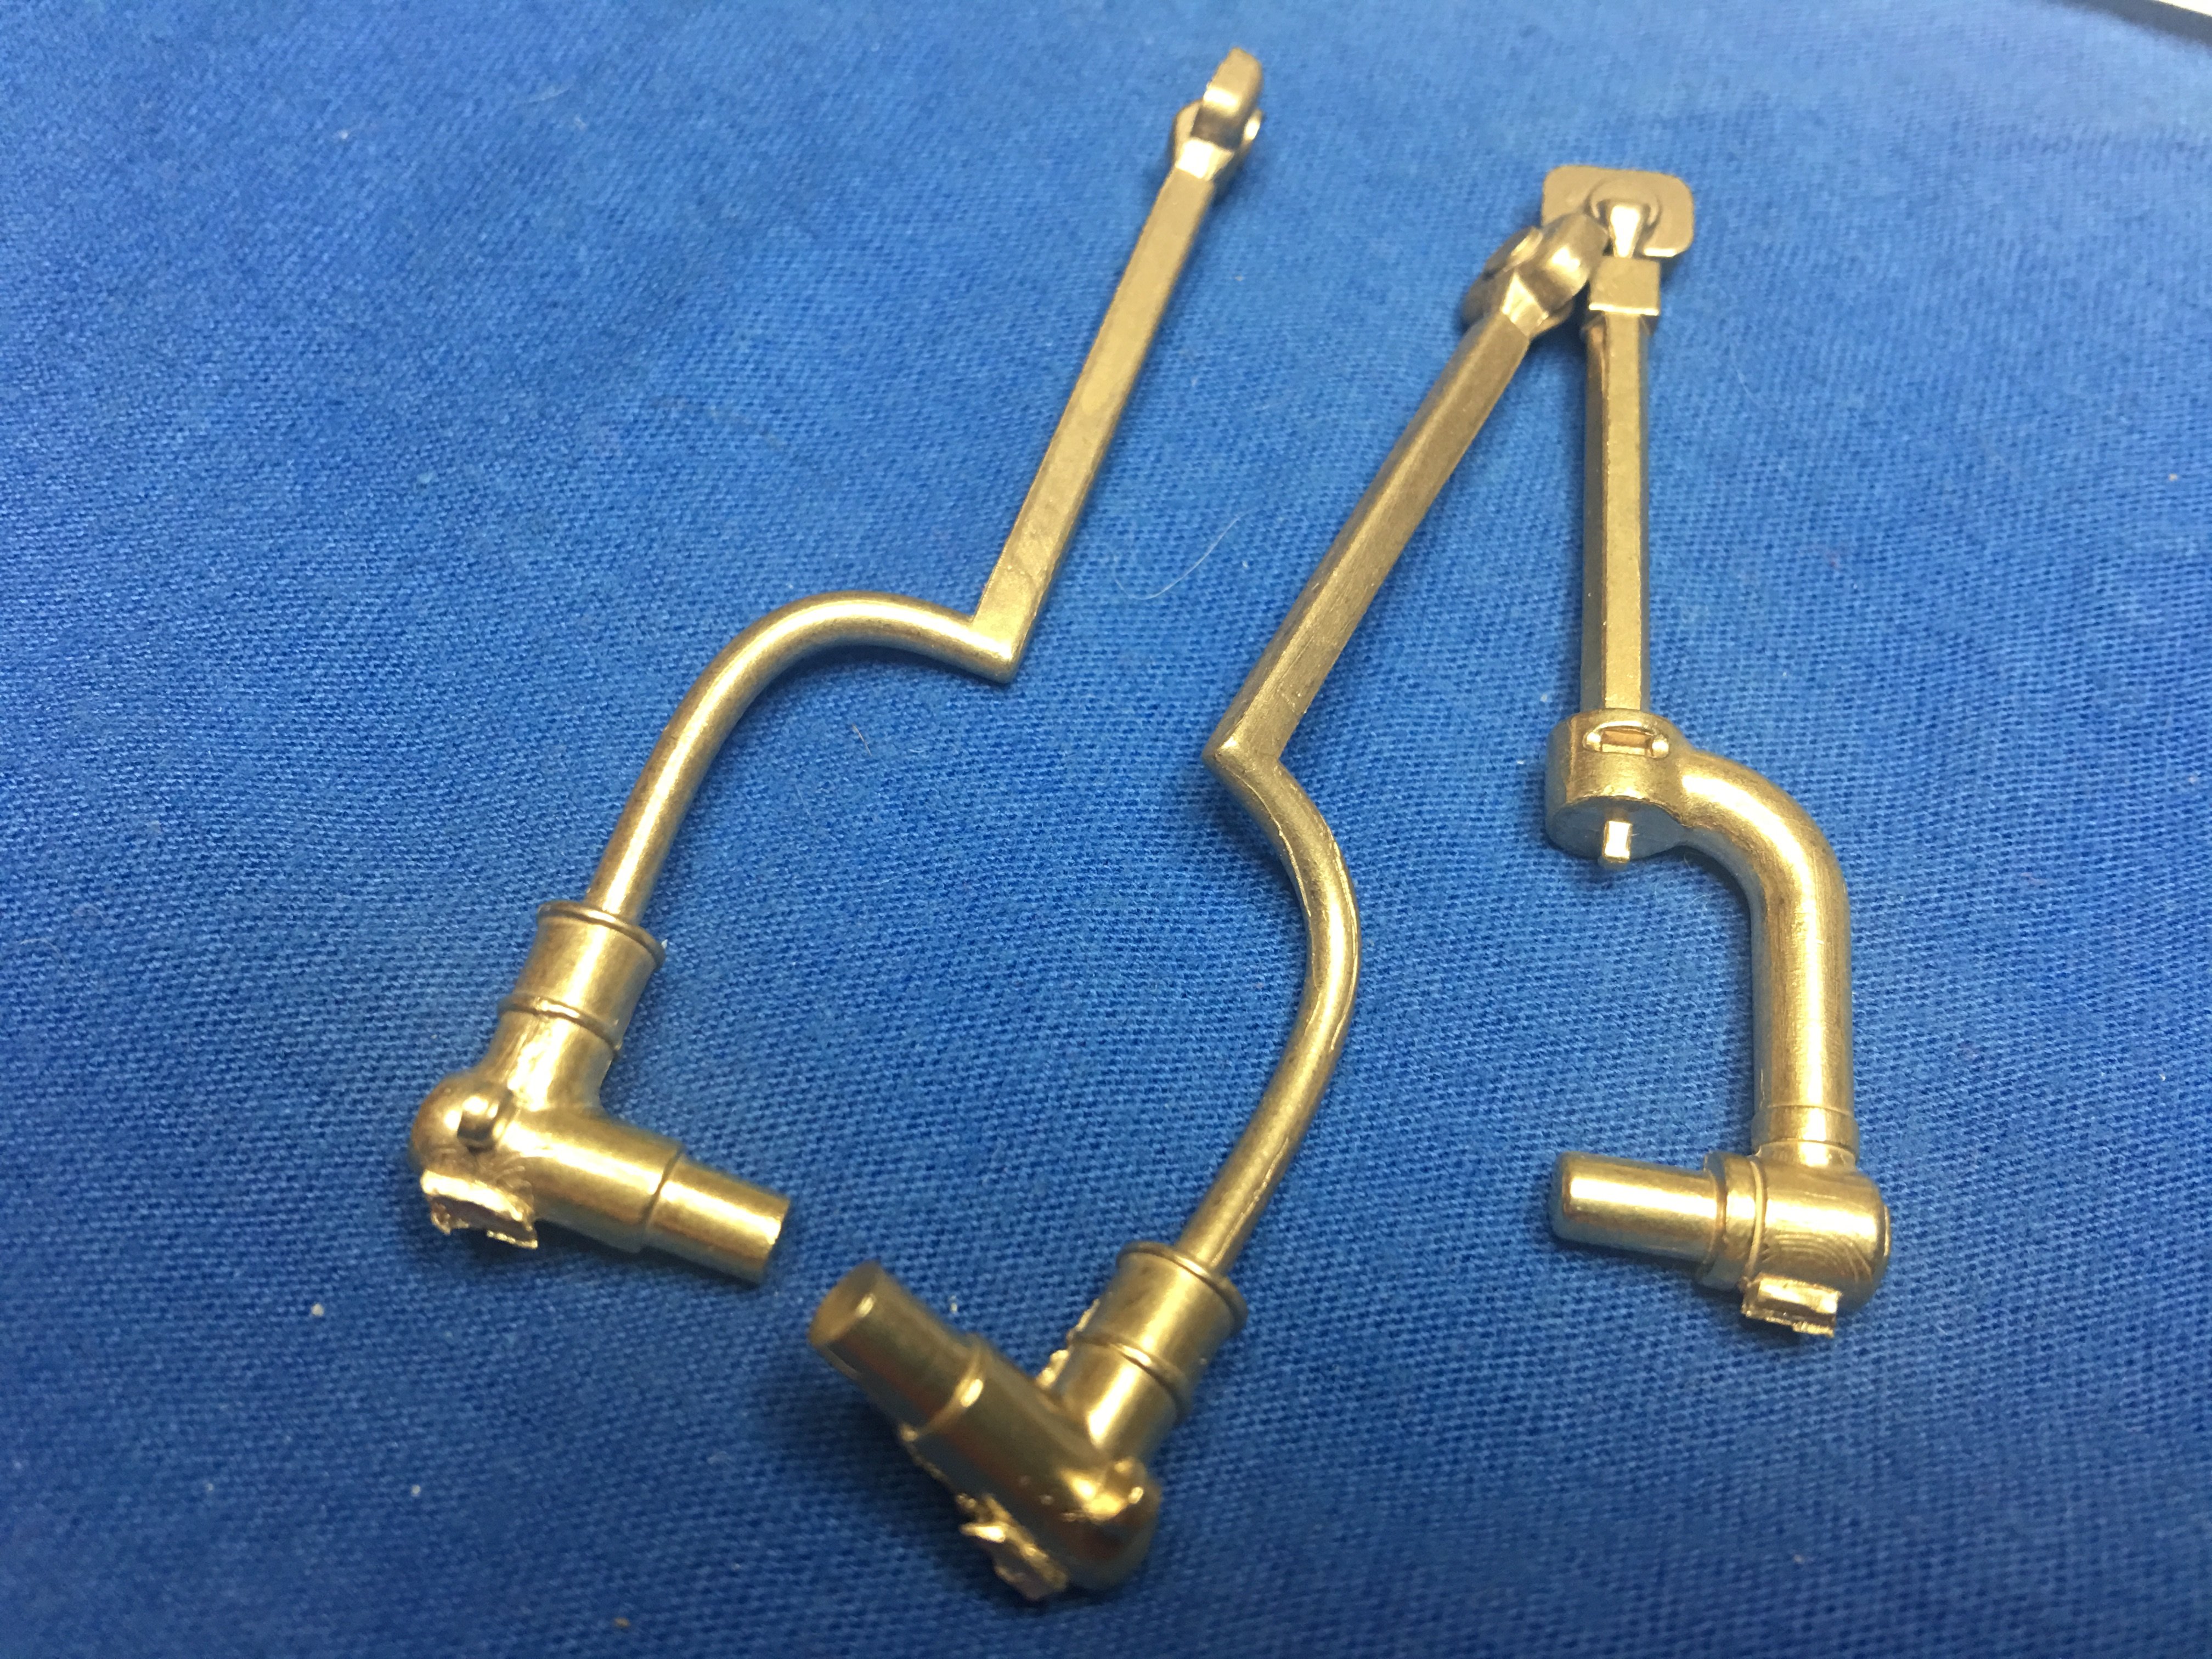
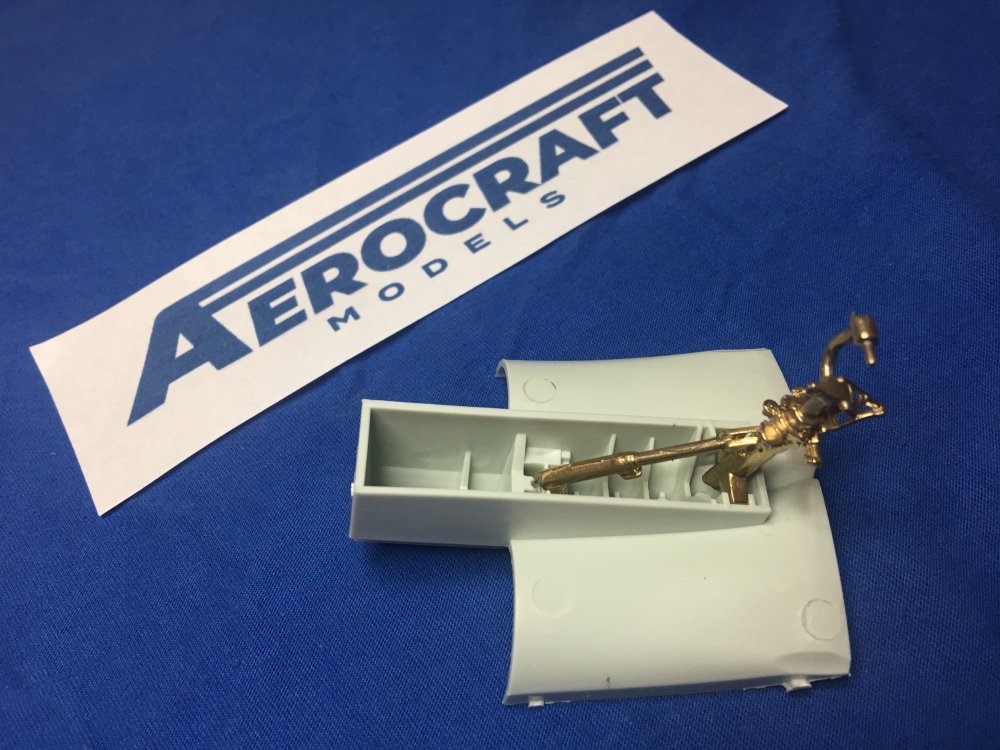
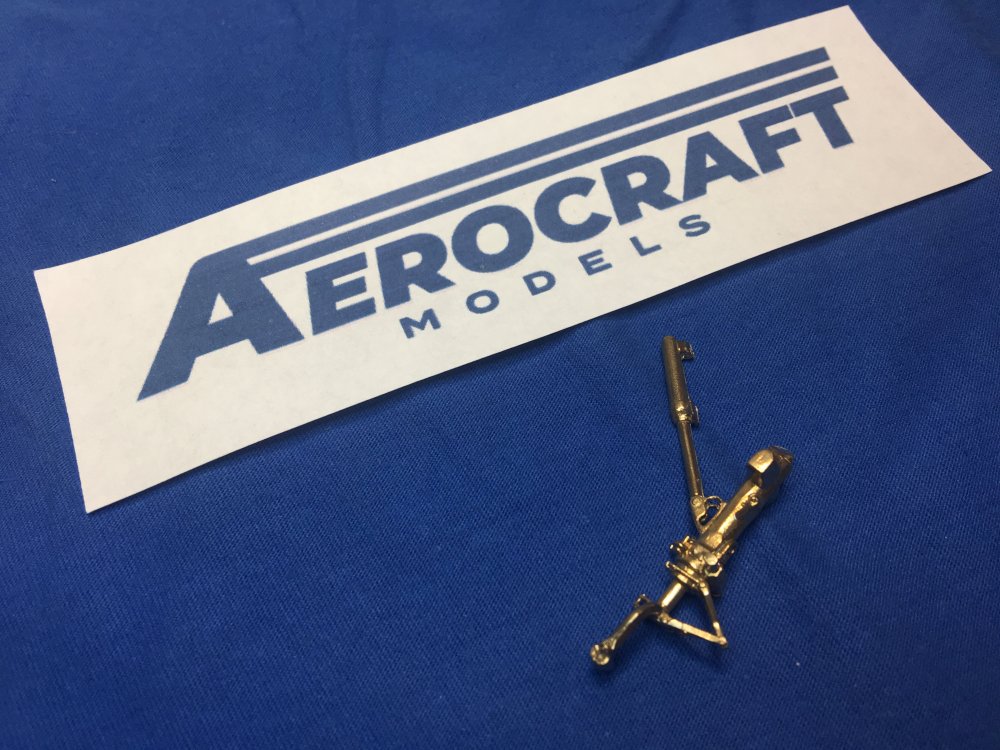
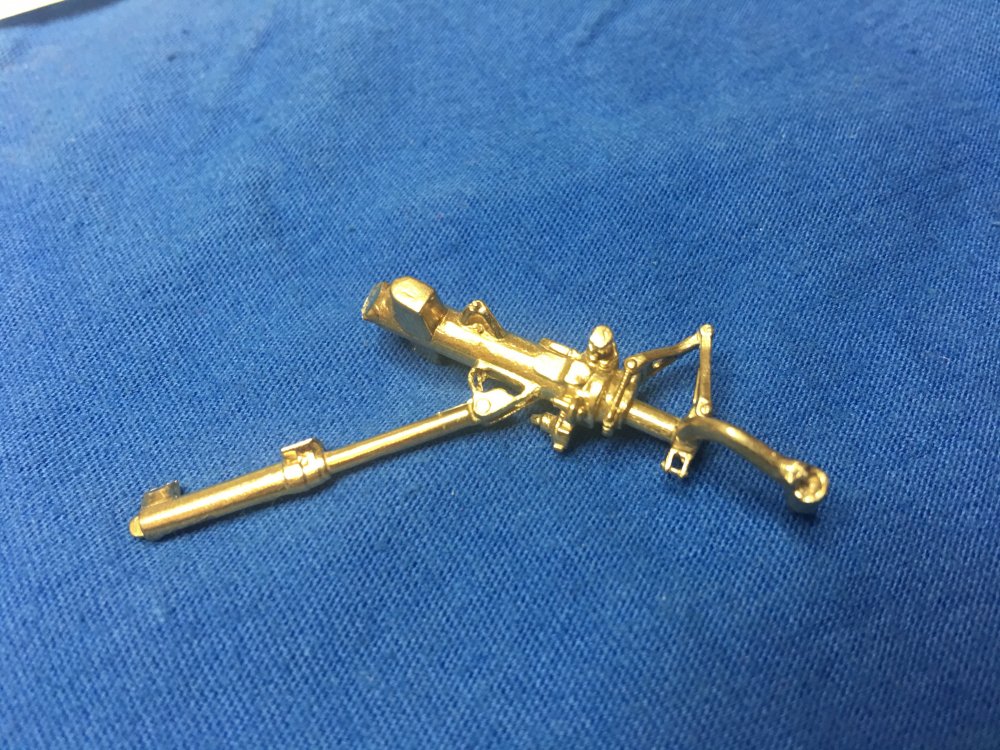
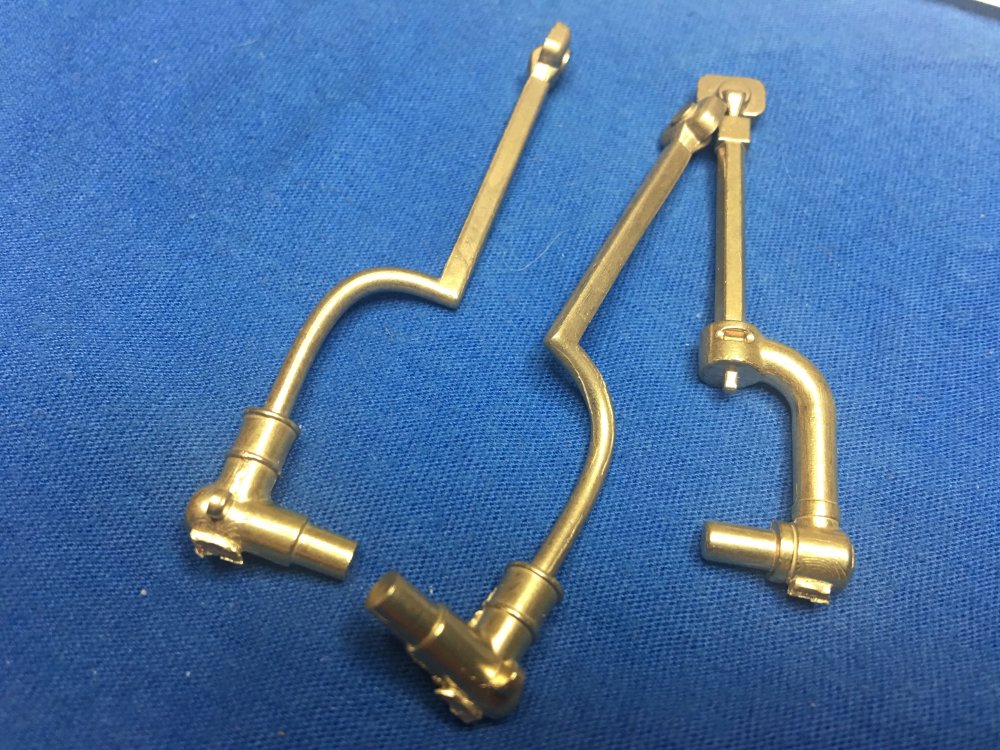
 Hello guys, I've been chatting with Alistair over at Aerocraft for a few days, he has kindly sent me some samples of his U/C legs in Brass. For this review we'll look at the Brass inserts for the HobbyBoss B-24. In my opinion these legs are a "must" for the model. It is already pretty heavy, and that's before the weight goes in the nose, I'm not sure the white metal legs out there would support this model over time? They fit with a tiny bit of clean up on the insides of the plastic parts, which require clean up anyway as they have ejector pin marks in them. These are available from Aerocraft at:- https://aerocraftmodels.bigcartel.com/ for the measly sum of only £20! As usual, I also did a video review... Regards Nige
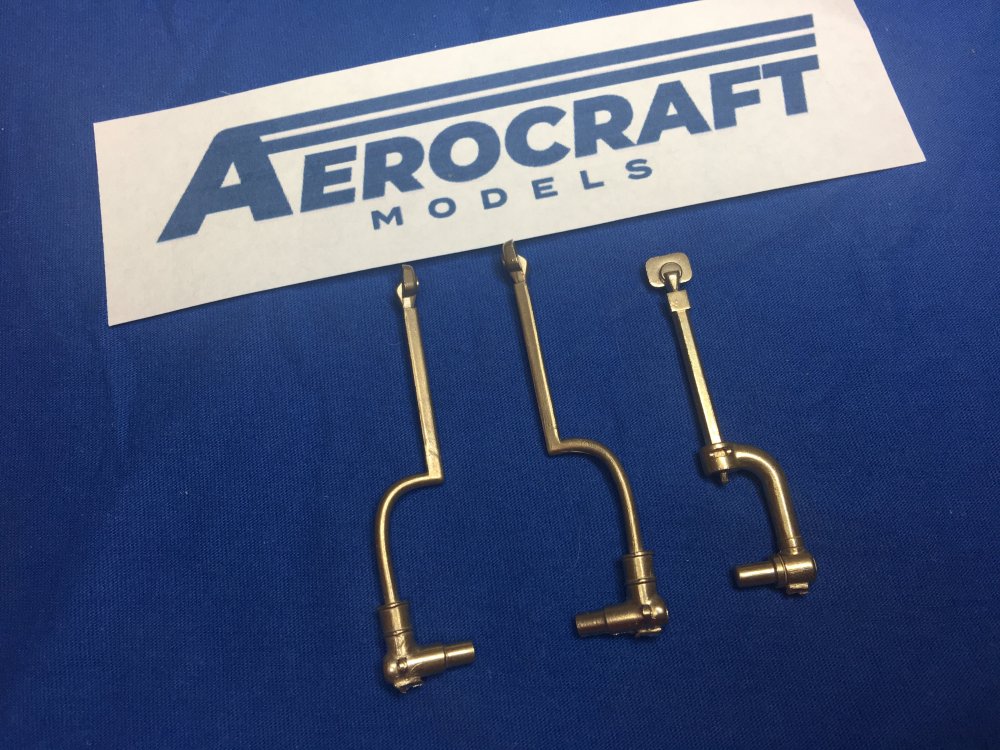
-
OS2U Kingfisher by Kitty Hawk
NigelR32 replied to BlrwestSiR's topic in LSM 1/35 and Larger Work In Progress
I LOVE this Aeroplane, but I am truly wary of KH. I have the Bronco, but it just looks so scary to build.. Is the PE you are using part of this kit or AM? You are making me think I want to build this.- 89 replies
-
- 4
-

-
- os2u
- kingfisher
- (and 2 more)
-
Hi Ron, I dont think that point on the U/C leg will be too weak. probably best do drill up the support and into the main leg and pin it with a piece of brass rod if it's a concern??
-
Did I read somewhere this is supposed to be a simple build?? Uh... I need to adjust my judgement.. I thought a simple build was something like the new Tamiya 1/48 spit??
-
New Airscale IP is out.. and I've put a review in the reviews section of this forum, and I made a video.. Thanks to Peter at Airscale for the review sample.. and for sending my bits back..
-
Here you go guys.. Here's my original review.. Next up we have the lates look at the "issues" Enjoy...
-
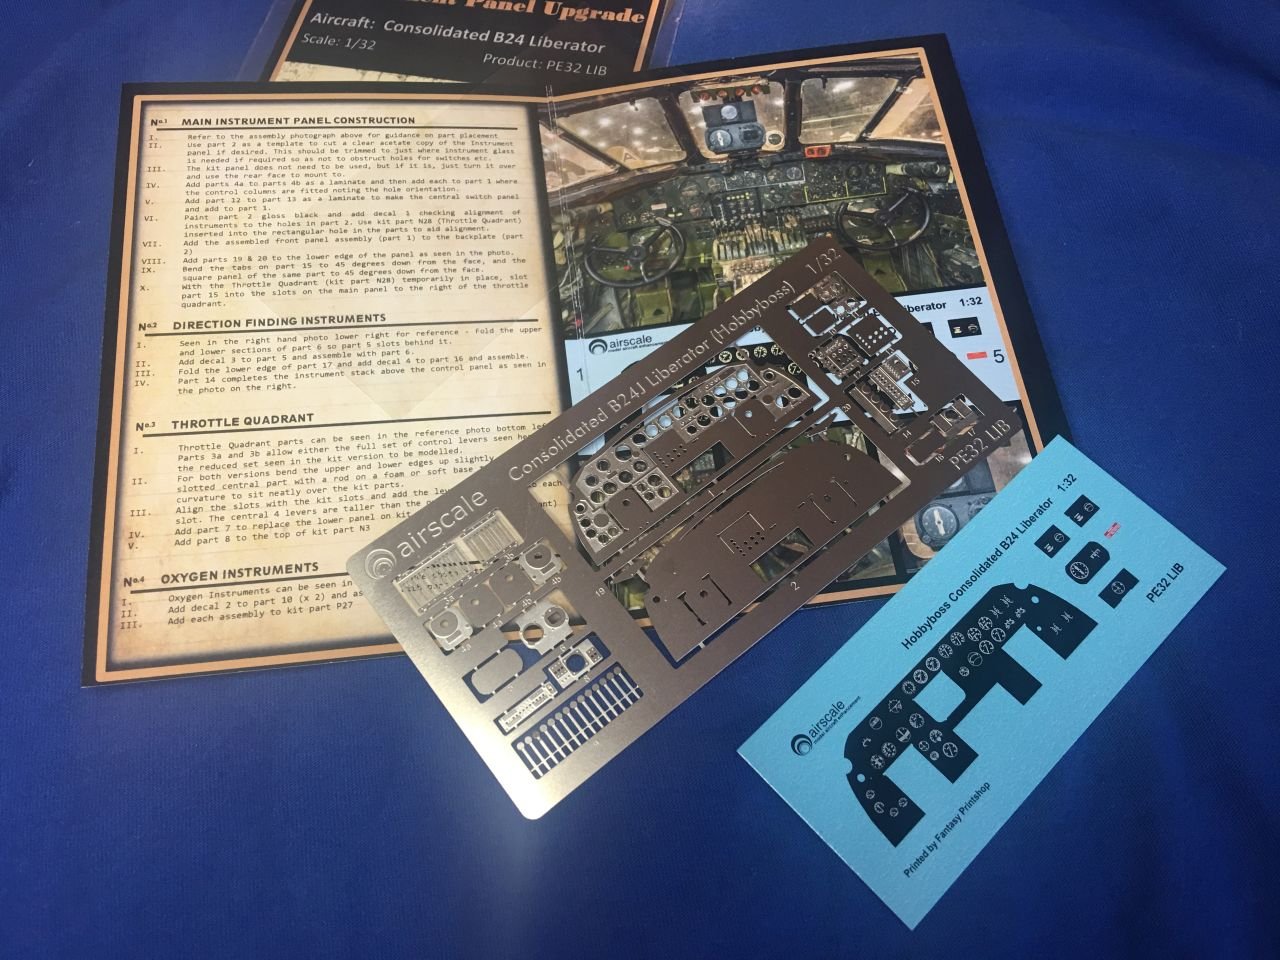
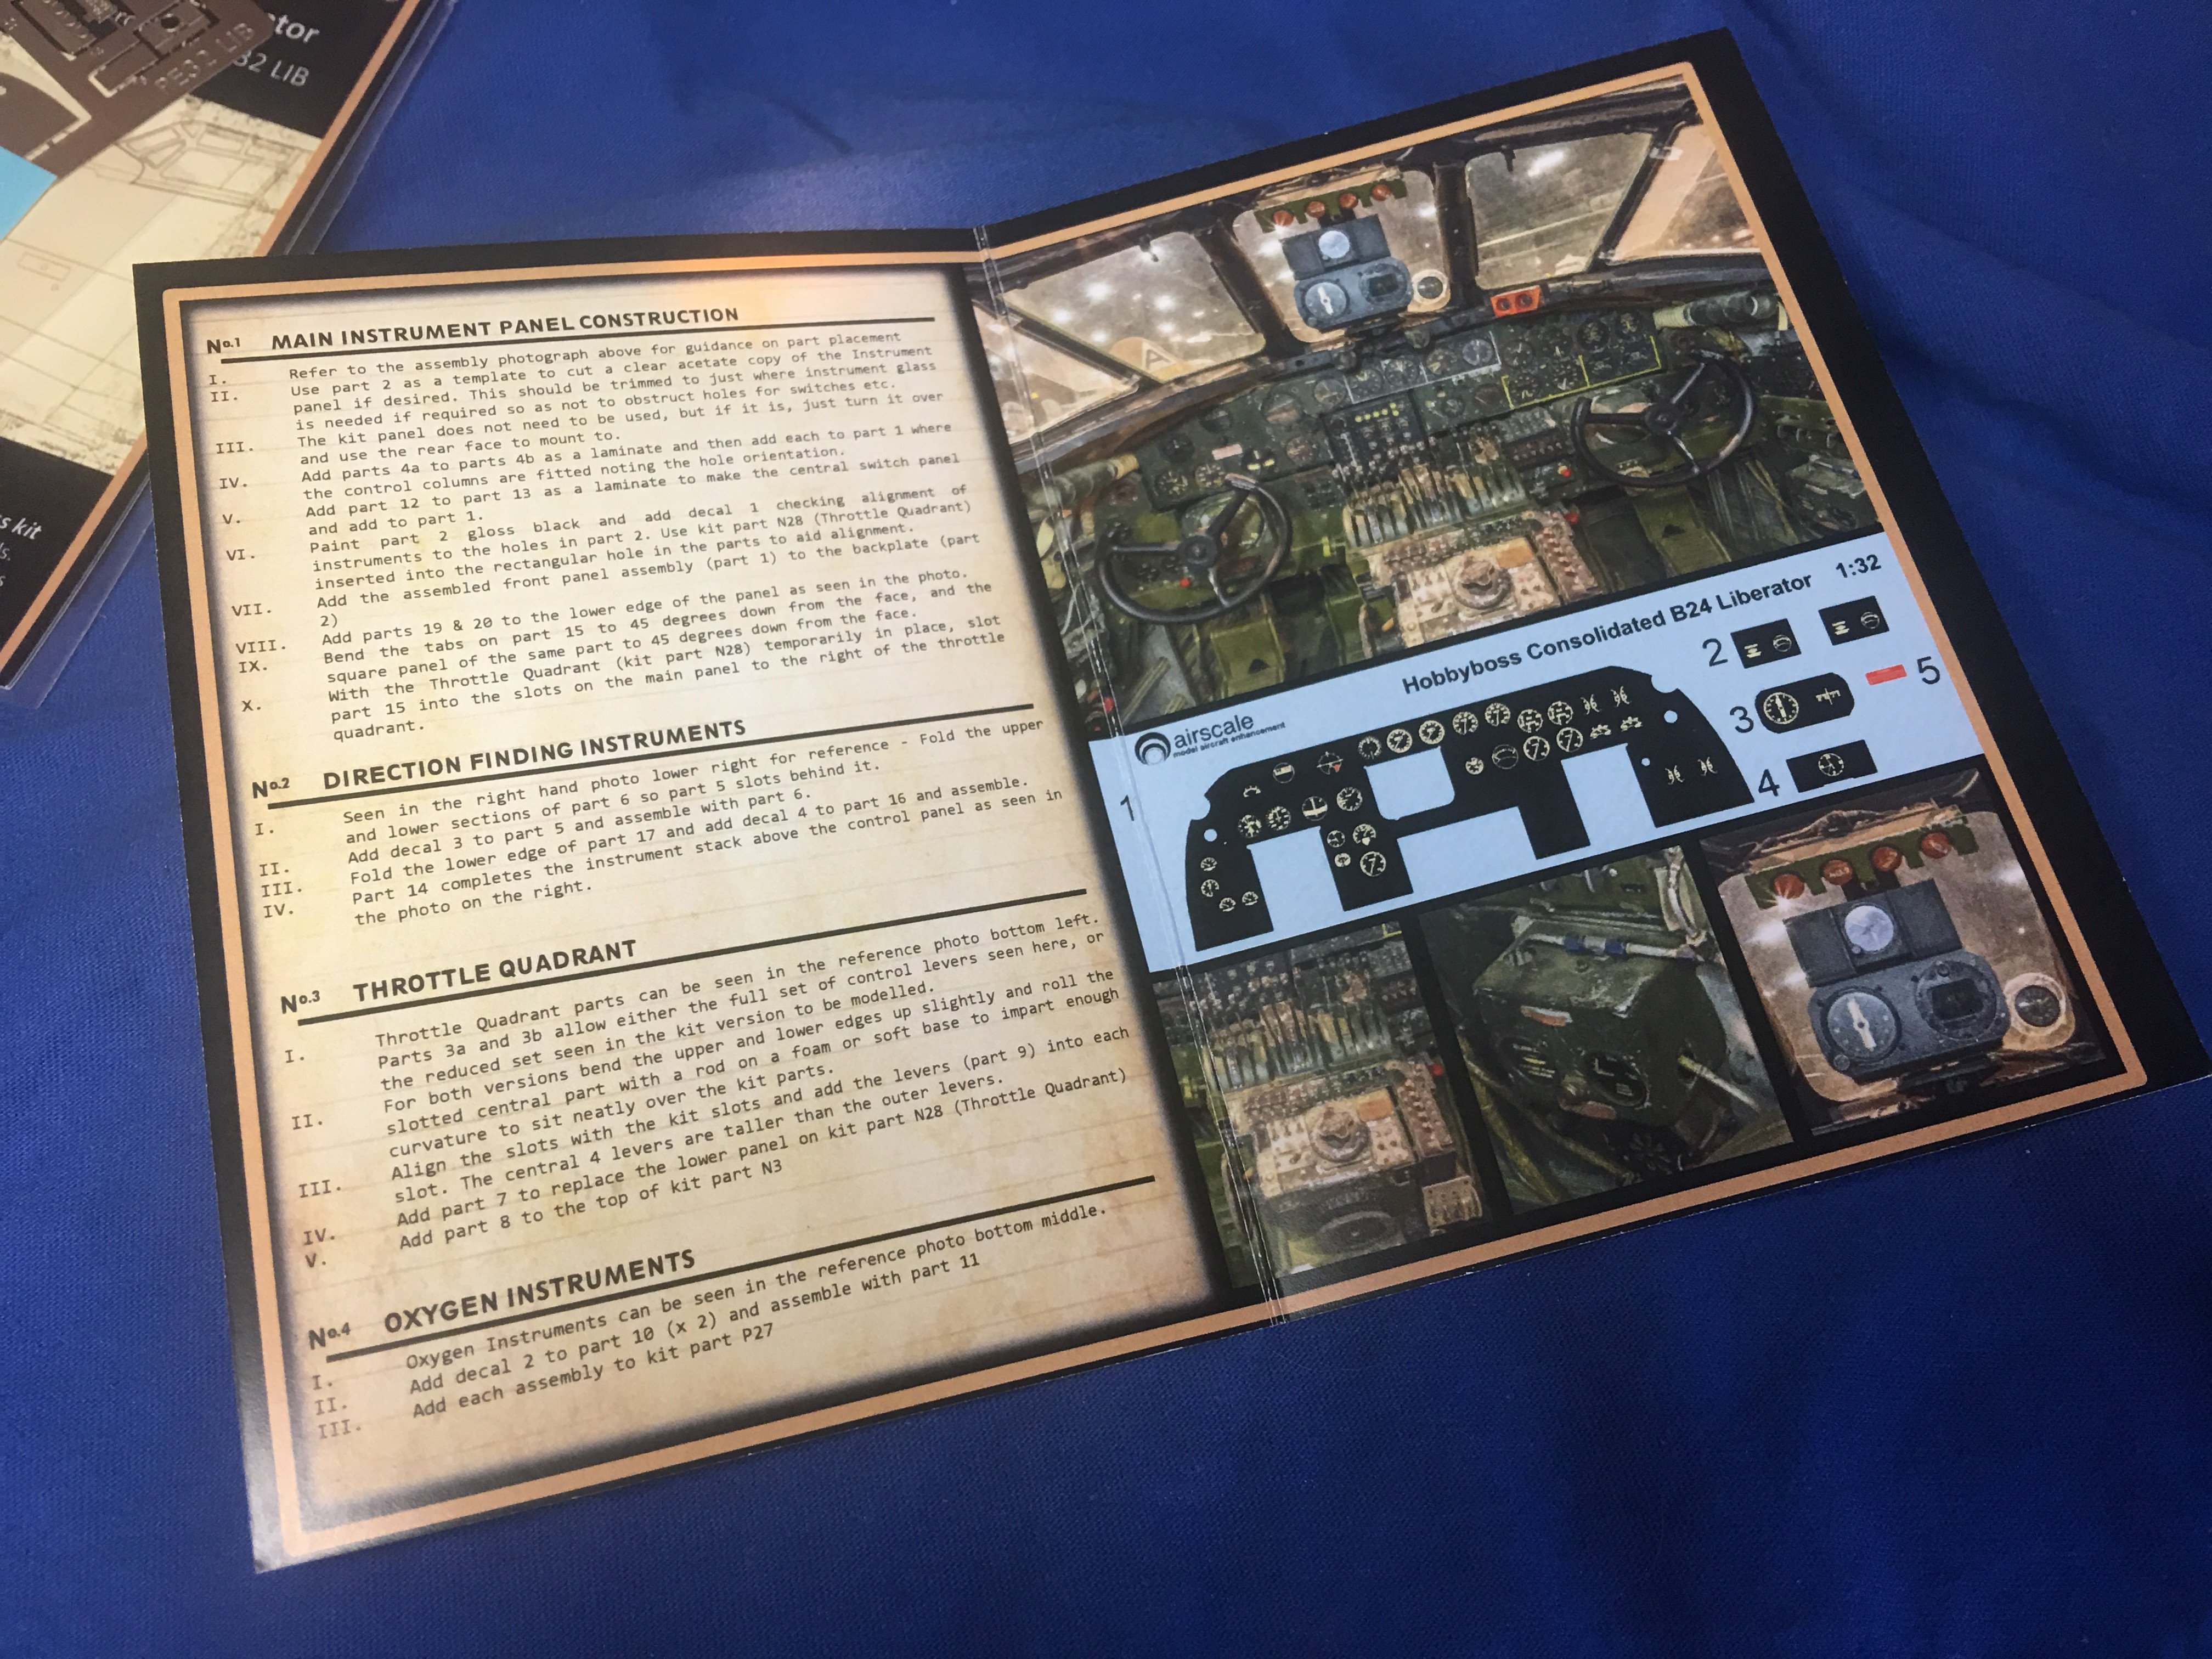
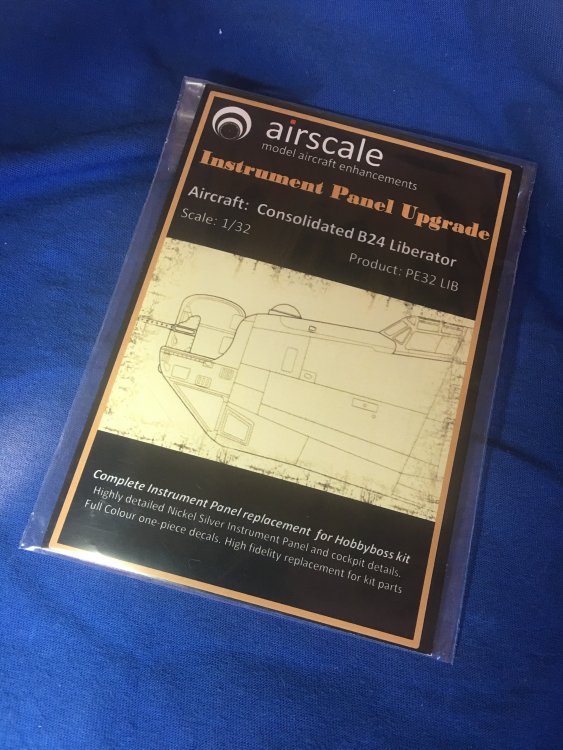
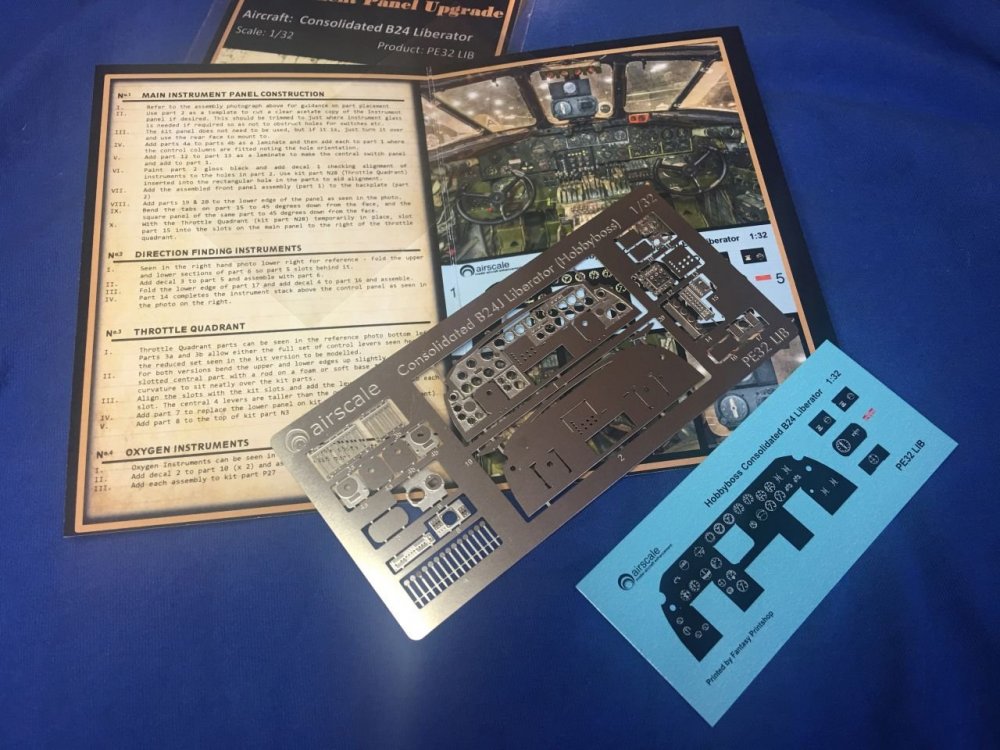
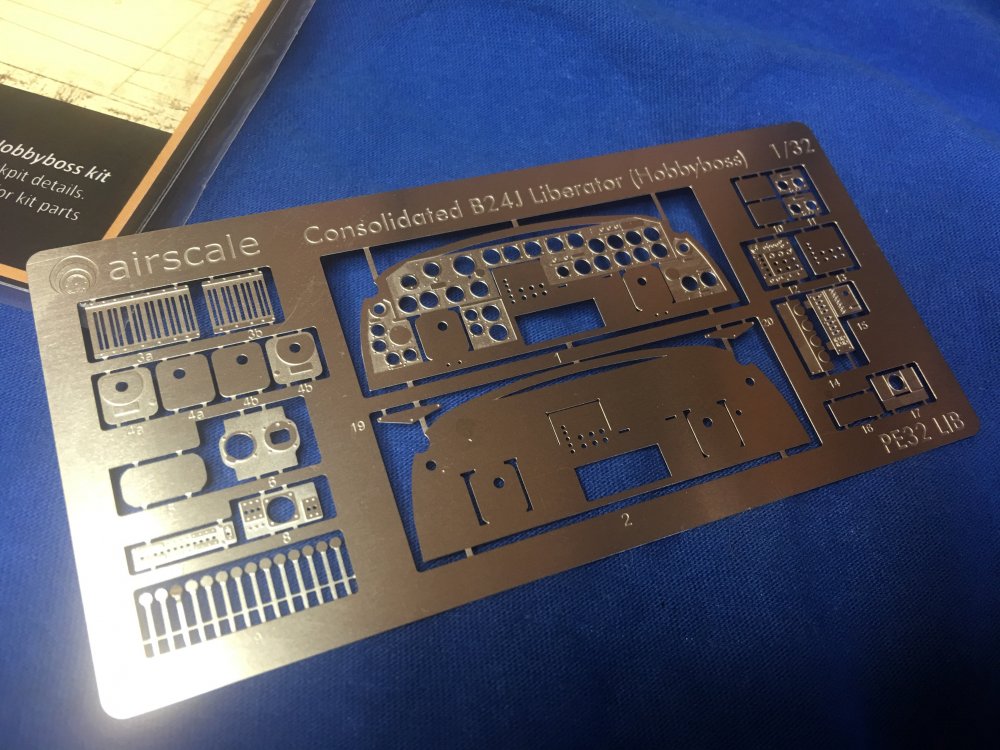
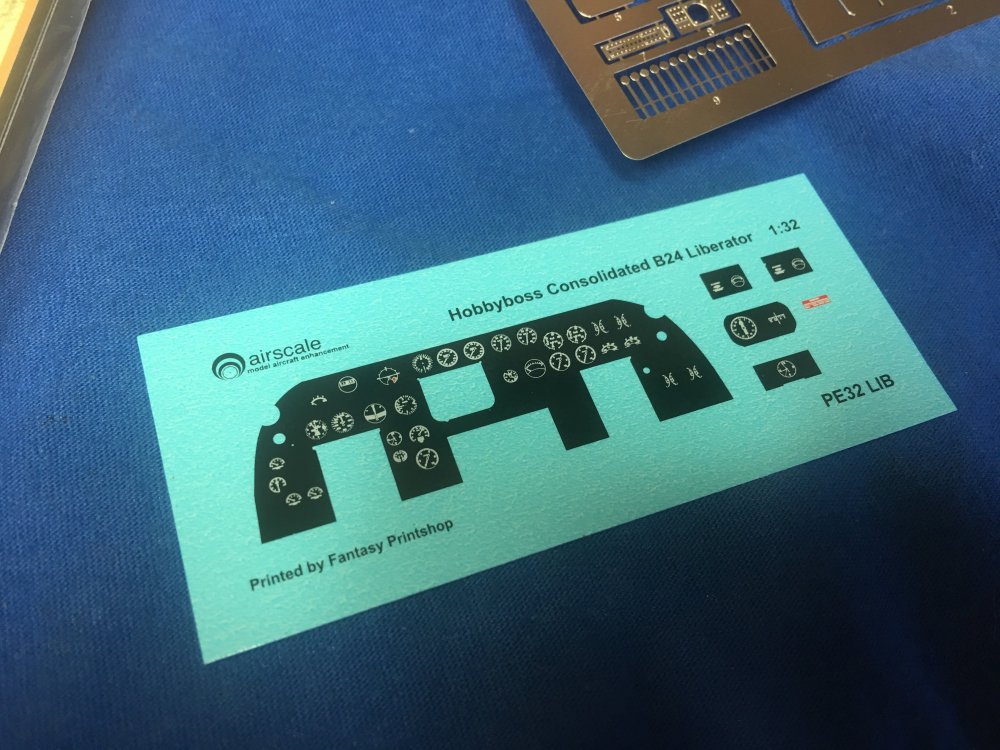
I received a surprise visit from the postman this morning.. this is what he brought... Yes, the brand new Airscale B-24 liberator IP set. You get a beautiful instruction card with images of the real aircraft and the built up unit. There's one sheet of Decals, one clear acetate piece and a beautiful PE etch fret. Beautifully printed instructions with actual images of the real thing! Beautifully printed glossy decals... And,, a lovely etch fret including the IP, Direction finders and oxygen regulator gauges. All in all this is a great upgrade for the B-24, and a must have in my opinion as it is so clearly visible through the cockpit glazing. Available from Peter at Airscale https://www.airscale.co.uk/ for only £18.95. Thanks to Peter for the review sample. Highly Recommended. I've also done a video review

-
Revell mould tool designer to boss.. "Boss, I'm gonna put panel lines and rivet detail in the wheel bays on our new Beaufighter kit, it'll be a beaut sir". Boss to mould tool designer.. "Great, careful where you put those Ejector pins mind".. Mould tool designer.. "Oh 8ollox"!!!!
-
Thank you so much for this info Martin. i have contected them. As soon as I hear anything I will post it here. I'm just putting together a new video on the B-24 to set straight some of the issues with the kit. Some people are totally missing the point about the issues. Please don't ask me to name anyone.. I won't.
-
I've just had a thought guys.. regarding the nose turret seam. If you grind away the clear plastic to remove the alignment pins and lugs, then thin the plastic to within an inch of it's life, will the seam become less visible?
-
Gorgeous!! That pilots hatch looks super flimsy?
-
1/32 Lancaster build and improvements
NigelR32 replied to NigelR32's topic in LSM 1/35 and Larger Work In Progress
Thanks very much. So, my hunch was right.. no Y section in the lights then. It's a shame that HK gave us this kit with simple circular panel lines to depict these lights.. even the Airfix and Revell 1/72 kits have clear parts sat over bowls!! They didnt even give us the correct shape on the surround!! -
Good move.. the Lanc set sold out twice in a few weeks I believe? Your set will more than likely be mailed by months end.
-
BTW, that's my kit parts in that pic...
-
This should be noted and stored in our memory banks guys. So, if we wanted to achieve this kind of finish, on say a very well worn F-100 headrest, we could easilt realise the cracked leather appearance from years in the sun. Only trouble is... if we wanted it to happen.. guess what!!
-
Be careful with some glues on the skin. I believe some contain Methylyne Chloride. That chemical soaks through the skin and rots your bones.
-
Hi Peter, Have you tried smelling Tamiya quick setting, that would kill a cactus. I find the EMA Plastic weld to be the least "smelly". As you say, if I spend a while at the bench my eyes get sore, especially with that QS stuff. May I ask, what thinner are you using with your new found golden paint?
-
HK Models 1/32 Lancaster Hints, Tweaks and Tips,
NigelR32 replied to NigelR32's topic in Modelling Discussion
Hi Yrjo, Thanks for your mega reply. I was just wondering how you did the riveting. I am Nige, the guy who started this thread and have put up a video all about sprue goo. With sprue goo, I always use the original plastic if I’m going to scribe or rivet as a mix of plastics can be softer or harder than the surrounding material and can make the scribing or riveting tool wander off. I have left my holes filled for nearly a week before rubbing them down. I’m ready to test with primer now and then get rivetting. Thanks again for your reply. -
HK Models 1/32 Lancaster Hints, Tweaks and Tips,
NigelR32 replied to NigelR32's topic in Modelling Discussion
Hi Yrjo I think you meant to say K4? Would you like to share how you did such a neat riveting jogb please? I was going to try rubbing pigments over a nearby area, then putting sellotape over it and peeling it off, leaving the rivet pattern on the tape. The tape could then be placed over the area to be riveted and punched trough with a point to make the rivet pattern in the correct pitch and in a straight line. The job you have done is some of the best riveting I've ever seen!! -
Nice build Gus, great to see a Hellenic bird on the bench. For me they always share the same amount of interest as the russian planes in the wild opportunities you have for weathering. Also, you have reminded me.. I have the Zacto full length intake, nose correction and canopy correction set somewhere??