NigelR32
-
Posts
407 -
Joined
-
Last visited
Content Type
Profiles
Forums
Events
Gallery
Everything posted by NigelR32
-

HK Models 1/32 Lancaster Hints, Tweaks and Tips,
NigelR32 replied to NigelR32's topic in Modelling Discussion
No.. I gave information for ME699 because thats what I was asked for. I also gave infornation for ME669 because that was the sqdn code given. KM-T is correct for 699, ZN-O is correct for 669 -
HK Models 1/32 Lancaster Hints, Tweaks and Tips,
NigelR32 replied to NigelR32's topic in Modelling Discussion
I can’t answer that for sure Ron. I’m pretty sure it would have had the larger nose blister and needle props. Under belly Radar is up to you? They were fitted randomly apparently. If I were you I’d build it as per the instructions as a B.1 but with the larger nose blister. It appears that by 1944 all Lancs had the larger blister? -
HK Models 1/32 Lancaster Hints, Tweaks and Tips,
NigelR32 replied to NigelR32's topic in Modelling Discussion
Hi Ron. ME699 was put into service on 15th March 1944. She was lost on 5th July 1944 at St Leo d Esserent. She was a Mk1 built by Metropolitan Vickers ltd. She flew with 44 Sqdn and carried code KM-T. Sgt NC Jackson, flight engineer was awarded the Victoria cross on 26/10/45 for action on 26/27 April 1944. He was aboard ME669. ME669 was first in service in Feb 1944. She was lost on 27 April 1944 in Schweinfurt. She carried code ZN-O. 106 Sqdn was based in Metheringham. ME669 was also built by Metropolitan Vickers and was a Mk1. Hope this helps -
Thank you so much Martin. I don't know why I didn't get the application guide with the set?? Especially considering I have two!!
-
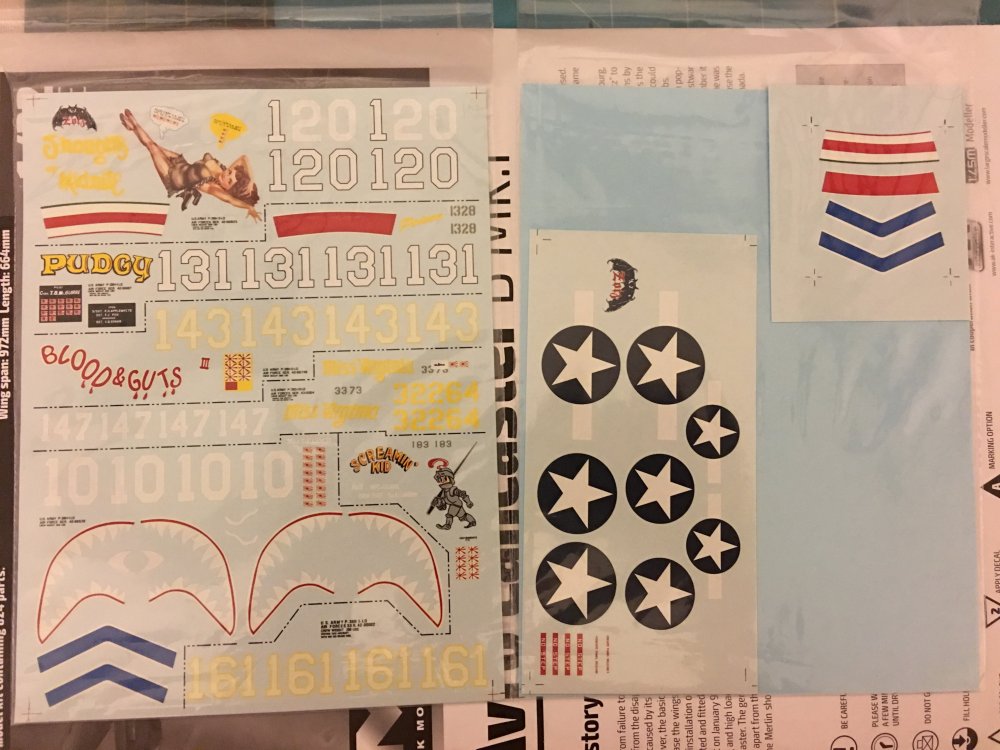
Hi everyone, I recently discovered I have two of these Decal sets for a P-38 G/H, ( picture shows both sides of decal sheet packs). I contacted Zotz, but they have not replied. I seem to remember getting these many years ago on LSP as a group buy?? Can anyone please help with a placement guide or references, should I ever decide to use them. I also found a lovely Resin conversion/backdate set for the Trumpy kit from Grey Matter Figures.
-
No Ron, I'm not. But.. I am not going to start a war of words on here by stating all the errors I feel are present on the HK Models B-17 line. To me, the most glaring issue is the nose shape and resultant windscreen shape. If you take a good long look at a few built models you can decide for yourself what "looks" right. Most people are happy with the kit OOB.
-
dn models DN Models Lancaster Paint Mask set (Numbers and Insignia)
NigelR32 replied to JeroenPeters's topic in Aircraft Reviews
Mitko has sent me a set of these masks for review on my channel. I look forward to using them on my Lanc and will review them as soon as they arrive. Just one point regarding the B-24. If the decals in the HB Spitfire MkVb are anything to go by, DO NOT USE THE KIT DECALS ON YOUR B-24. They are the worst decals I have ever used.. they make Tamiya decals seem like Cartograf in comparison. -
"Buggered up as the Lanc"? I wouldnt say the Lanc is that bad, it just has some silly errors that really shouldn't be there considering the reference material available and how readily available it is. In my humble opinion, of the two the B-17 is a better kit regarding detail, but the Lanc is better as far as overall shape is concerned. The toughest bit to correct on the Lanc will be the engine intakes and nacelles whereas the B-17 needs that nose sorted. As I say.. in my opinion.
-
hk models Lancaster B Mk.I, R5868, PO-S (S-Sugar)
NigelR32 replied to JayDee's topic in LSM 1/35 and Larger Work In Progress
Looking good James. -
Basically, if you want to build an injection moulded B-17 in 1/32 scale there is no other option. If you want to build it accurate you'll have a lot of work to do. As Drifter said, it'll look like a great big B-17, but I can't get around that nose and resultant windscreen shape. Each to his own...
-
1/32 Lancaster build and improvements
NigelR32 replied to NigelR32's topic in LSM 1/35 and Larger Work In Progress
Oh,OK.. Thanks Bill. I'll look into them. I'll need to try and find out how big they are though, the last time I used Brengun was on a 1/72 Valkyrie. The landing gear bay parts were like they were designed for a completely different model!! -
1/32 Lancaster build and improvements
NigelR32 replied to NigelR32's topic in LSM 1/35 and Larger Work In Progress
I dont think so? I'm not sure the Lanc had the "Y" over the glass??? Thanks for the link though.. -
1/32 Lancaster build and improvements
NigelR32 replied to NigelR32's topic in LSM 1/35 and Larger Work In Progress
After a prompt from yknu over on the Tweaks and tips thread I decided to get my wing surfaces corrected. Doing them now gives plenty of time to let them cure. I've put a video on my channel if you want to see moving pictures.. As for the correct landing lights, I plan on drilling them out and fitting some clear lenses or those AM headlights you can get from places like little-cars.co.uk The kit scribings depict lights of around 5.75mm diameter. I'm surprised and dissapointed that the kit doesnt have clear lenses for the lights, even the 1/72 kits have lenses and bowls the Airfix kit even offers the option of having the lights down with a little modifying.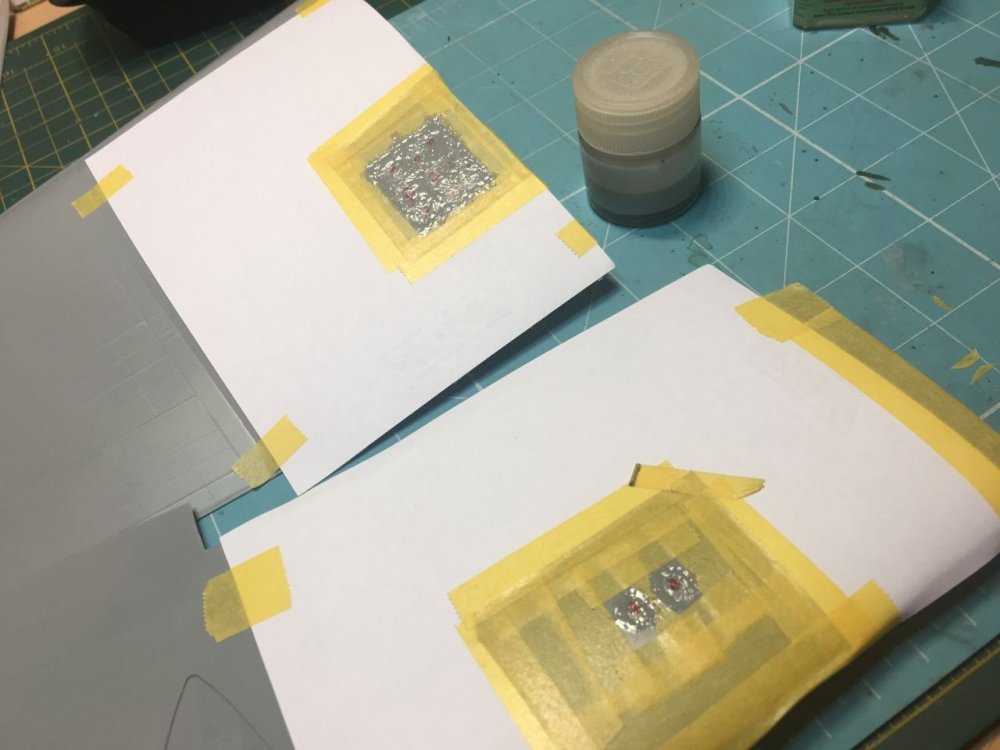
-
1/32 Lancaster build and improvements
NigelR32 replied to NigelR32's topic in LSM 1/35 and Larger Work In Progress
Thanks Robert, That sounds about right to me.. maybe I'll wait for the WNW kit and take a mould off that one? -
HK Models 1/32 Lancaster Hints, Tweaks and Tips,
NigelR32 replied to NigelR32's topic in Modelling Discussion
I concur with David here.. I cannot find a single image, sketch or drawing in my Modellers datafile that shows the wingtip as depicted by this kit. They all have the clear tip covers as depicted on the drawing below the tip in the image above. We musn't rely on drawings 100% mind you. For example, the B.III drawing I have depicts only one landing light. Another drawing i have depicts a Dinghy on each side!! -
HK Models 1/32 Lancaster Hints, Tweaks and Tips,
NigelR32 replied to NigelR32's topic in Modelling Discussion
Another tip I can offer here is to alter the assembly sequence. Dont glue the oil tank to the framework. Dpont glue the upper frame, F3 in the pics above and assemble and clamp until dry. This way you have a fully built frame that can be painted without the tank. Paint the tank seperately then insert it once the paint is dry. -
HK Models 1/32 Lancaster Hints, Tweaks and Tips,
NigelR32 replied to NigelR32's topic in Modelling Discussion
Guys, all the parts you need to build the model without engines are in the kit. Sprue Z has the parts for the exhausts and I assume you could use the engine front cover as the spindle? I have only just noticed, the kit doesnt provide parts to enable props to turn? -
Beautiful build Tony. Makes me wanna make a start on my B-25J
-
1/32 Trumpeter Avenger help needed
NigelR32 replied to jep1210's topic in LSM 1/35 and Larger Work In Progress
If you need anything else buddy, I have a pretty much complete spare kit less the engine. -
HK Models 1/32 Lancaster Hints, Tweaks and Tips,
NigelR32 replied to NigelR32's topic in Modelling Discussion
Sorry.. I think that's got Eduards name on it? -
1/32 Lancaster build and improvements
NigelR32 replied to NigelR32's topic in LSM 1/35 and Larger Work In Progress
Hi Robert, I would rather you posted your progress in your own thread or perhaps in the Lancaster Tweaks and Tips thread. It is not normal practice to post your work in someone elses build thread. I'm sure if you started your own thread on your digital work concerning the Lanc cockpit it would get a lot of interest. -
AK real color is my favourite for large areas by far!!
-
1/32 Lancaster build and improvements
NigelR32 replied to NigelR32's topic in LSM 1/35 and Larger Work In Progress
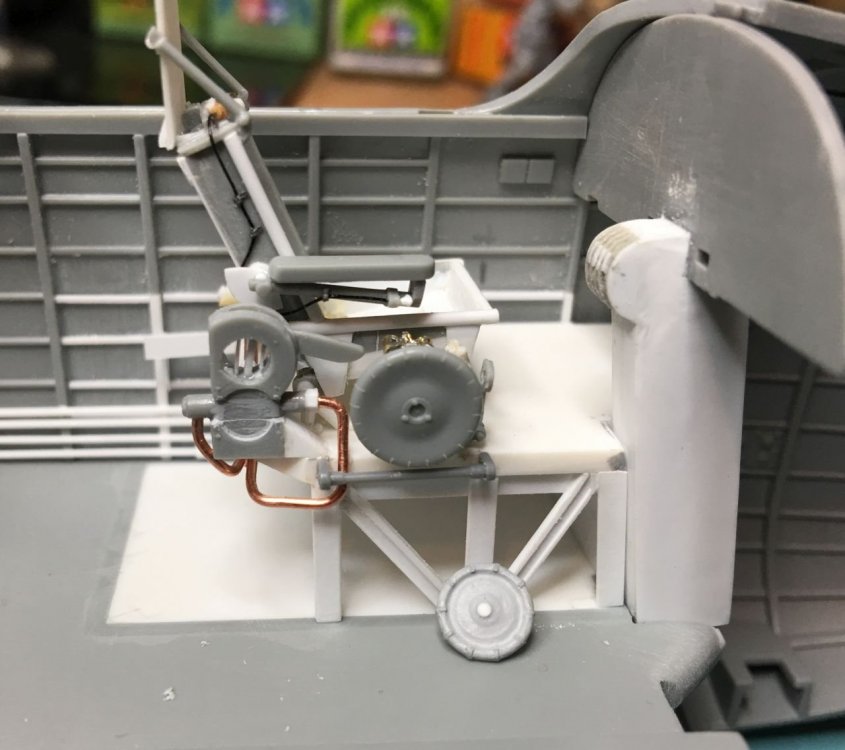
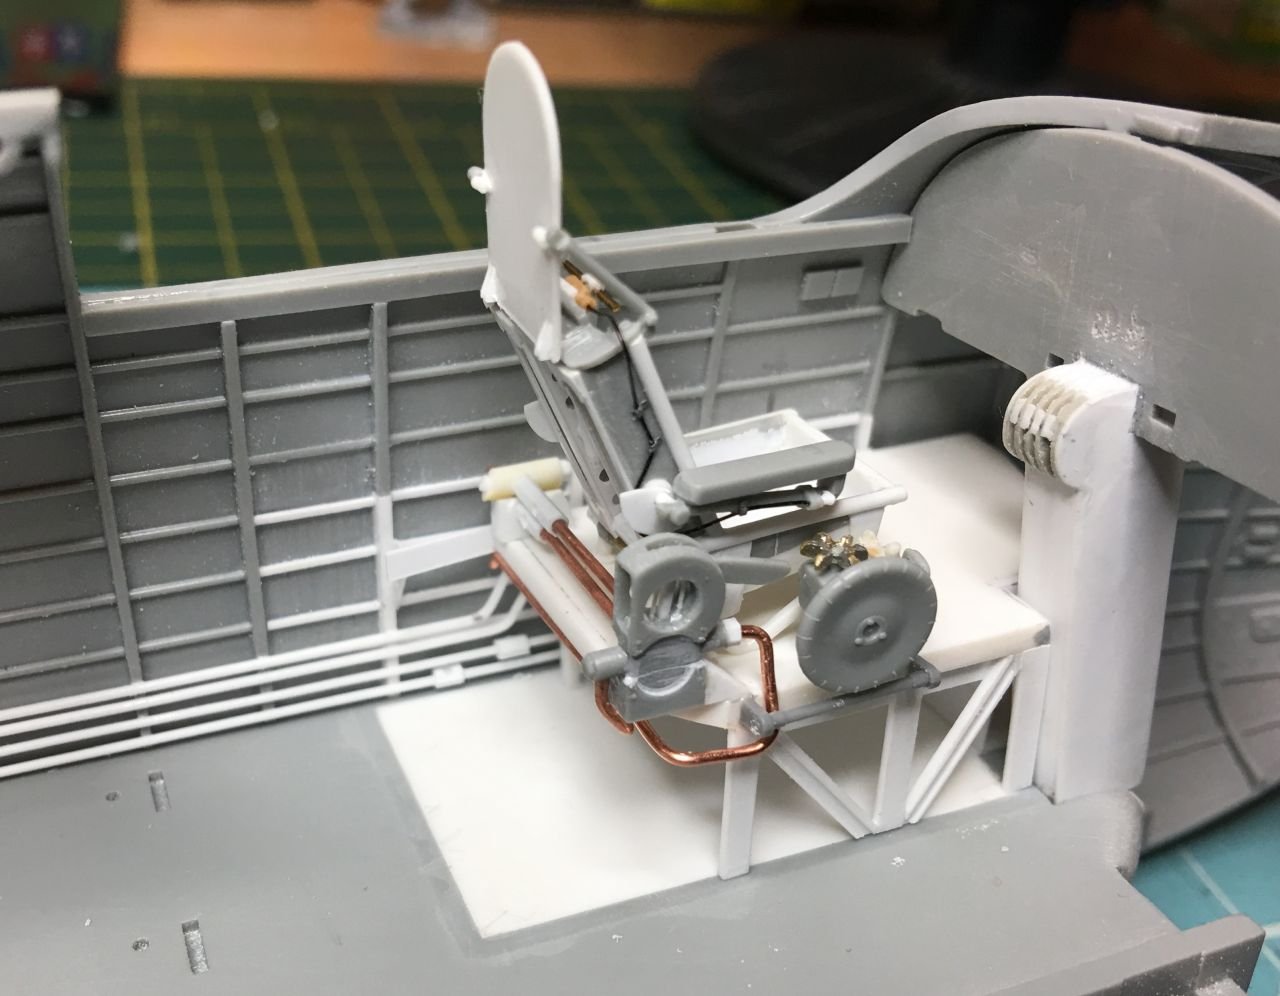
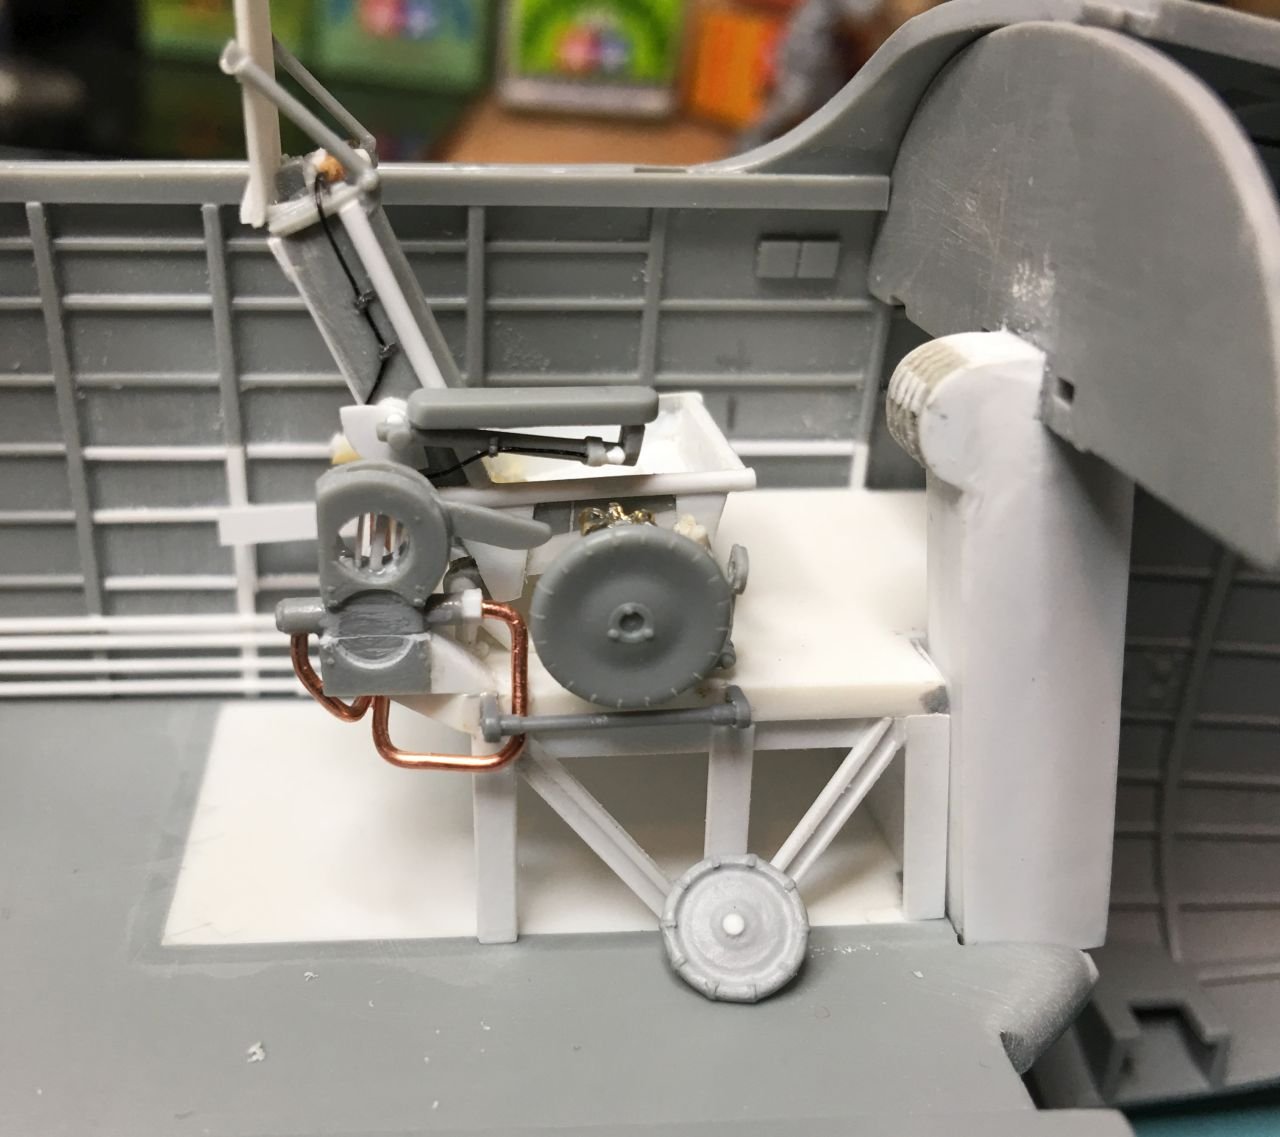
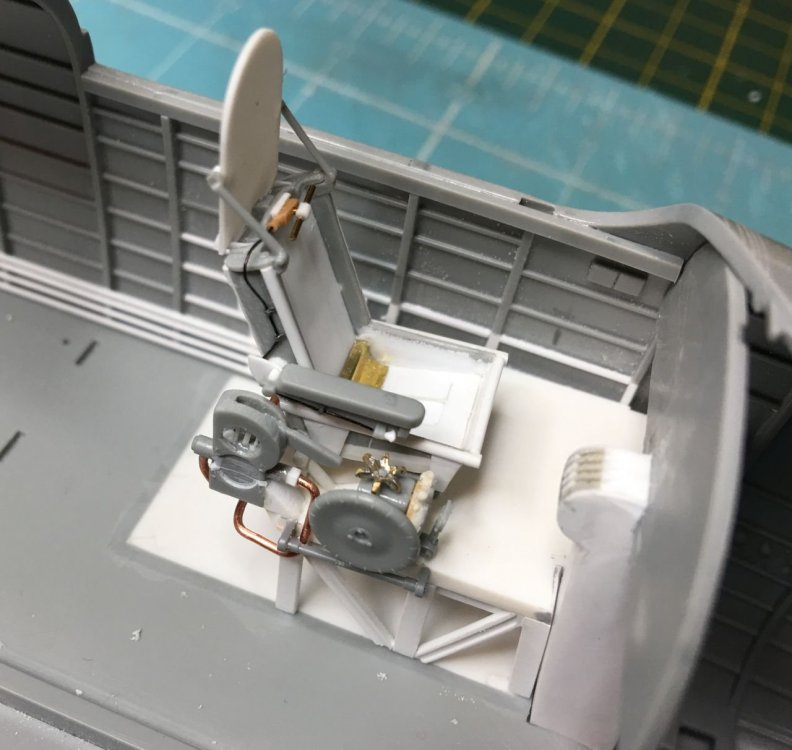
Still plugging away at the cockpit, in between other projects.. Note the hydraulic lines on the fuselage wall, with their floating fittings for two more lengths of copper to go into. The trim wheel on the top is made from bent PE and solder. The front wheel is made from scrap plastic bits. It's a little too big I think, but it's better than nothing!! In front of this wheel is the drilled out and twisted kit part for the flap operation. In front of that lever will be another vertical pull handle which is the manual Upkeep bomb release. Apparently a young lady managed to pull this lever on a parked and loaded aircraft back in 1943. The bomb dropped onto the ground and everyone around ran for their lives!! Some say the trim wheel is too large on the kit.. I'm not so sure.. at the bottom is a smaller one I scratch built and I don't think it's big enough?? Thanks for looking.. next time I should have the IP and levers done?

-
Wow!! looks great!! That wing camo pattern is unusual?? I need to do some learning on Luftwaffe camo patterns!!
-
HK Models 1/32 Lancaster Hints, Tweaks and Tips,
NigelR32 replied to NigelR32's topic in Modelling Discussion
Some say the trim wheel next to the pilots seat is over sized.. I'm not so sure??? I made a smaller one from a spare wheel, mr surfacer and some stretched sprue, but when I fitted it, it looks too small. More pics in my works in progress thread.