JeroenPeters
-
Posts
4,867 -
Joined
-
Last visited
Content Type
Profiles
Forums
Events
Gallery
Everything posted by JeroenPeters
-

Ho229 at the Udvar-Hazy Center
JeroenPeters replied to JeroenPeters's topic in LSM 1/35 and Larger Work In Progress
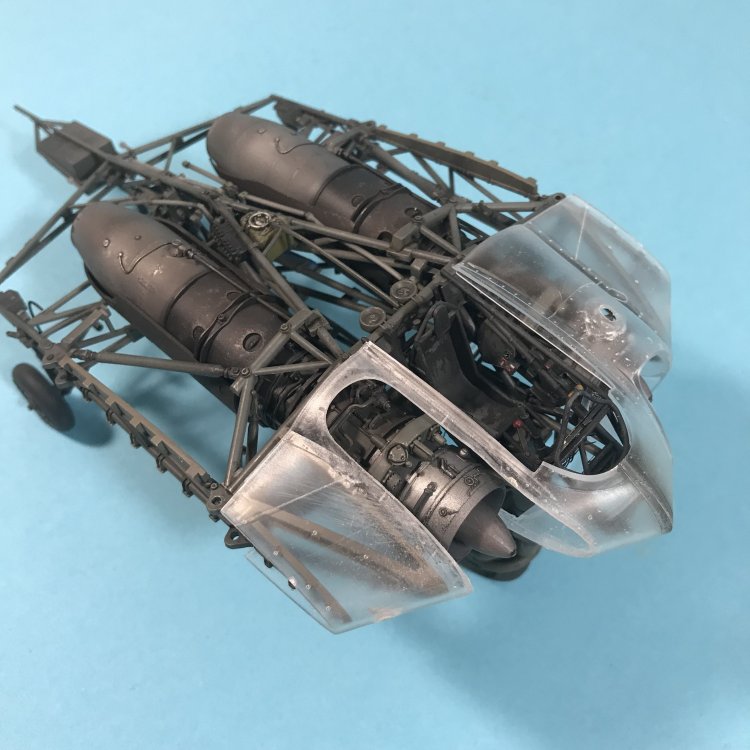
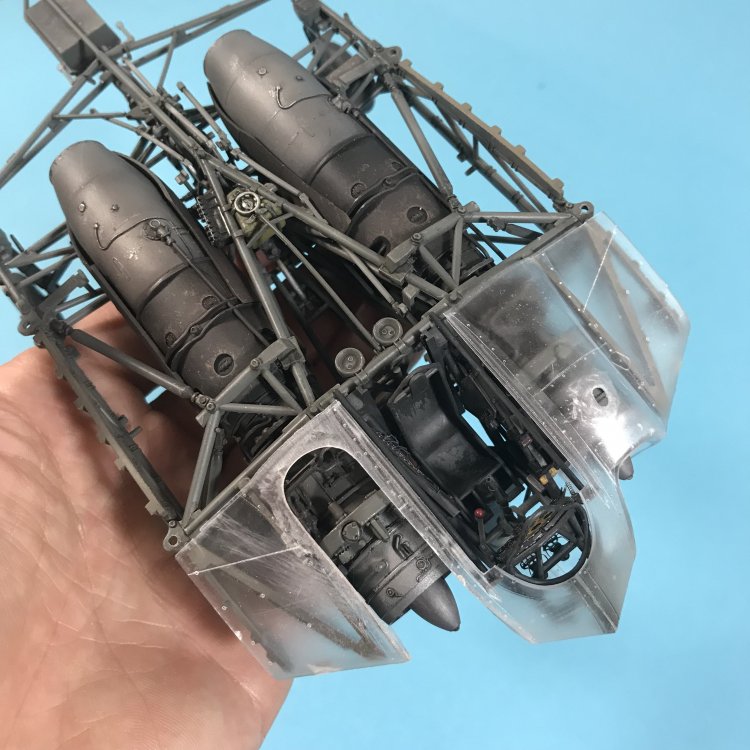
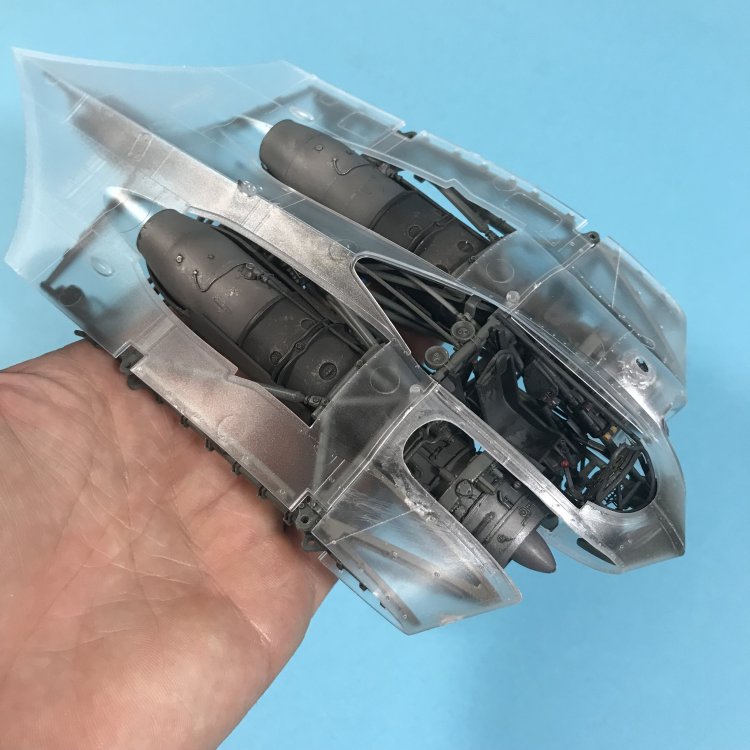
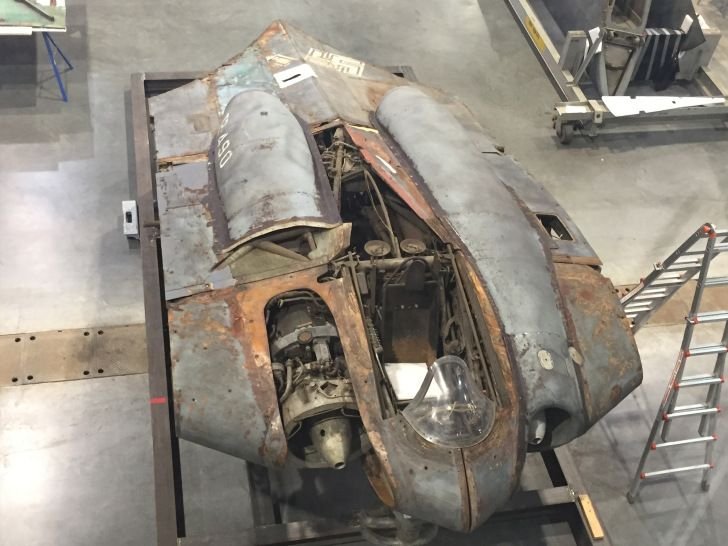
Cutting away the right engine nacelle cover. You can’t follow panel lines for this but need to study the photo reference. and as you can see i closed off the gun ports since the NASM example doesn’t have any.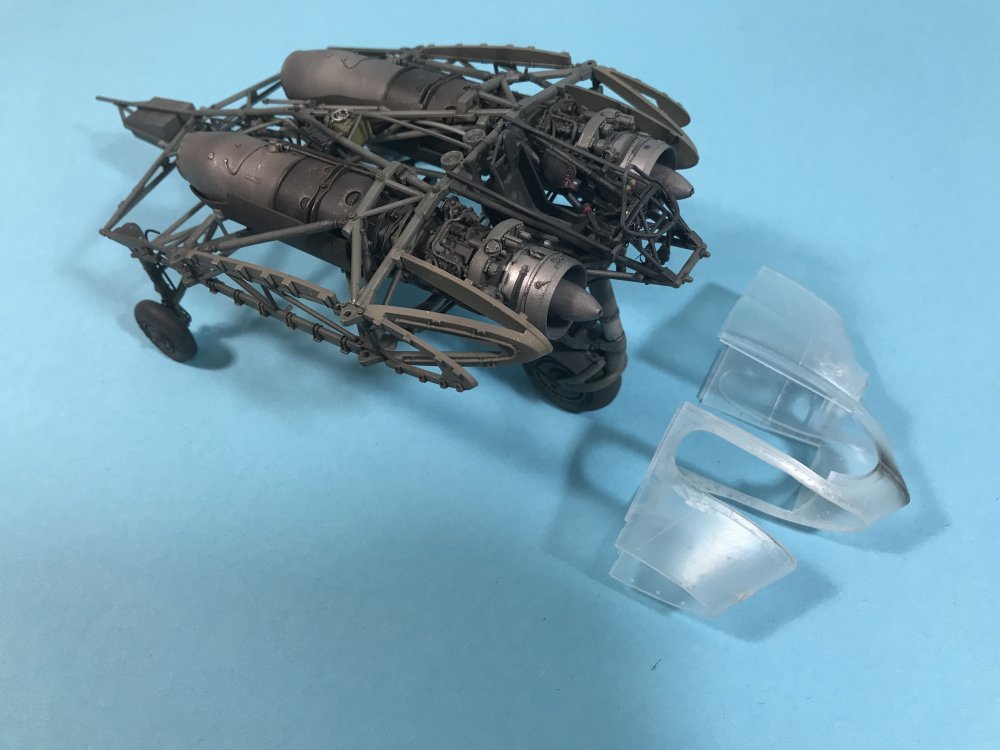

-
Ho229 at the Udvar-Hazy Center
JeroenPeters replied to JeroenPeters's topic in LSM 1/35 and Larger Work In Progress
Another matt coat and more pencil work:
-
RSO Radschlepper Ost - Having a Break
JeroenPeters replied to DocRob's topic in D-Day 75th Anniversary Group Build
When i read RSO i expected something different, but this is cool. I love Bravo 6 miniatures. Have the Fury crew by them. -
Ho229 at the Udvar-Hazy Center
JeroenPeters replied to JeroenPeters's topic in LSM 1/35 and Larger Work In Progress
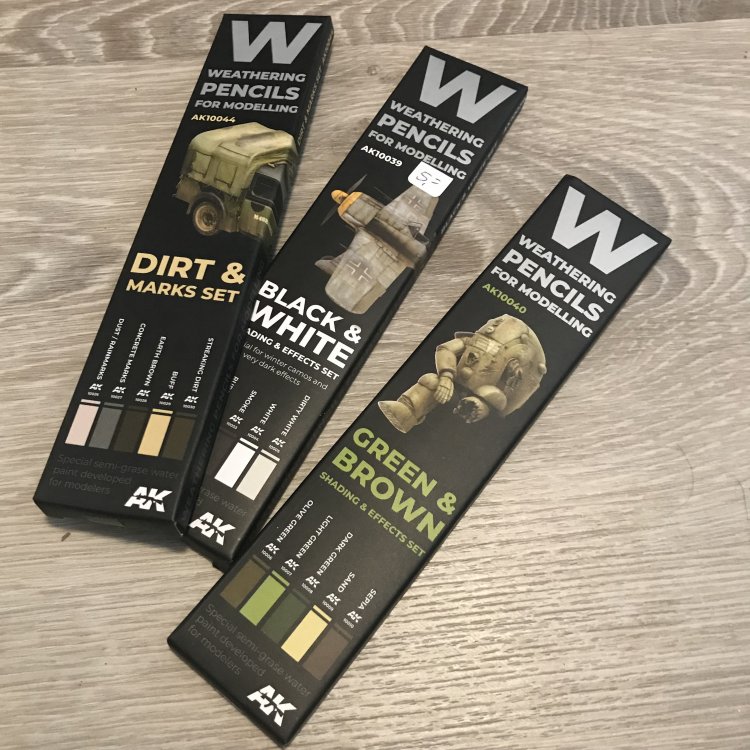
I normally use Prisma pencils or LYRA Super Ferby pencils. These are up there with them. They're supposed to react well to water as well, so I'll try that this weekend. The thing i really like are the colours. Many cool earth tones that work well with military colours and subjects. -
Dragon Stug III Ausf F, 142/1
JeroenPeters replied to Rodolfo Torres Vazquez's topic in LSM 1/35 and Larger Work In Progress
Gaat work on this kit. Lots of work! -
Ho229 at the Udvar-Hazy Center
JeroenPeters replied to JeroenPeters's topic in LSM 1/35 and Larger Work In Progress
Having fun with the AK pencils! great stuff.


-
Ho229 at the Udvar-Hazy Center
JeroenPeters replied to JeroenPeters's topic in LSM 1/35 and Larger Work In Progress
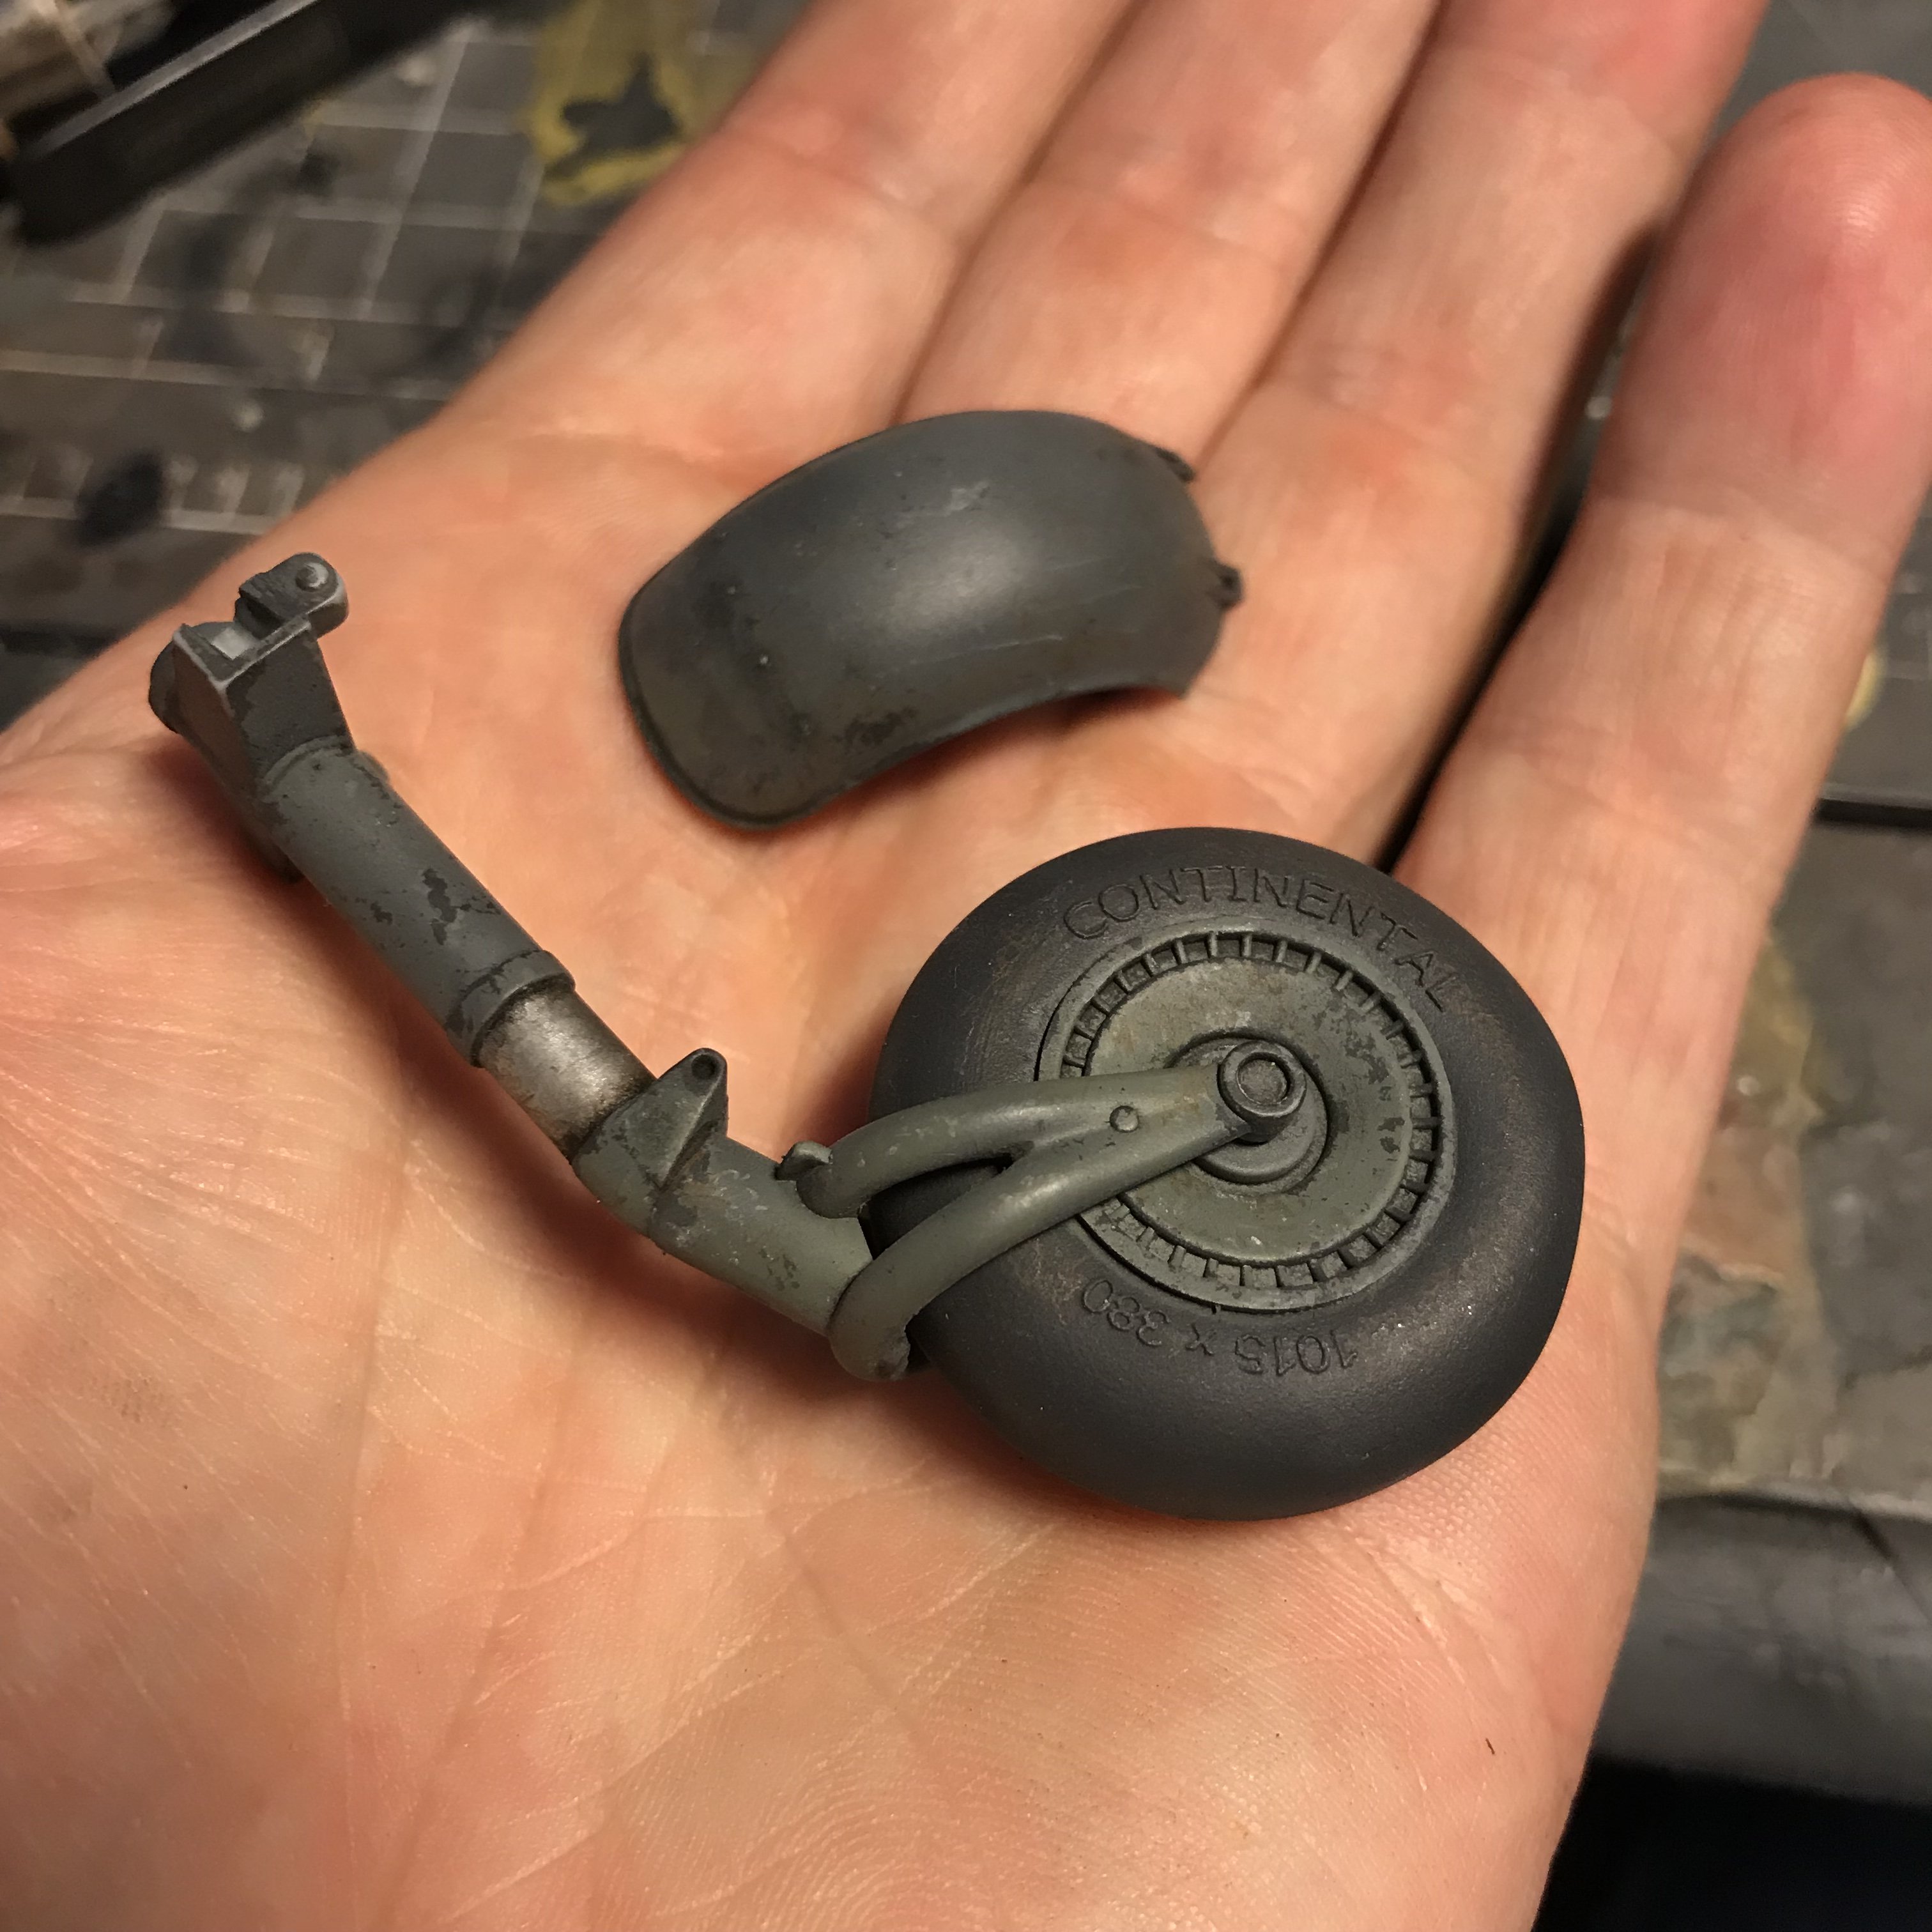
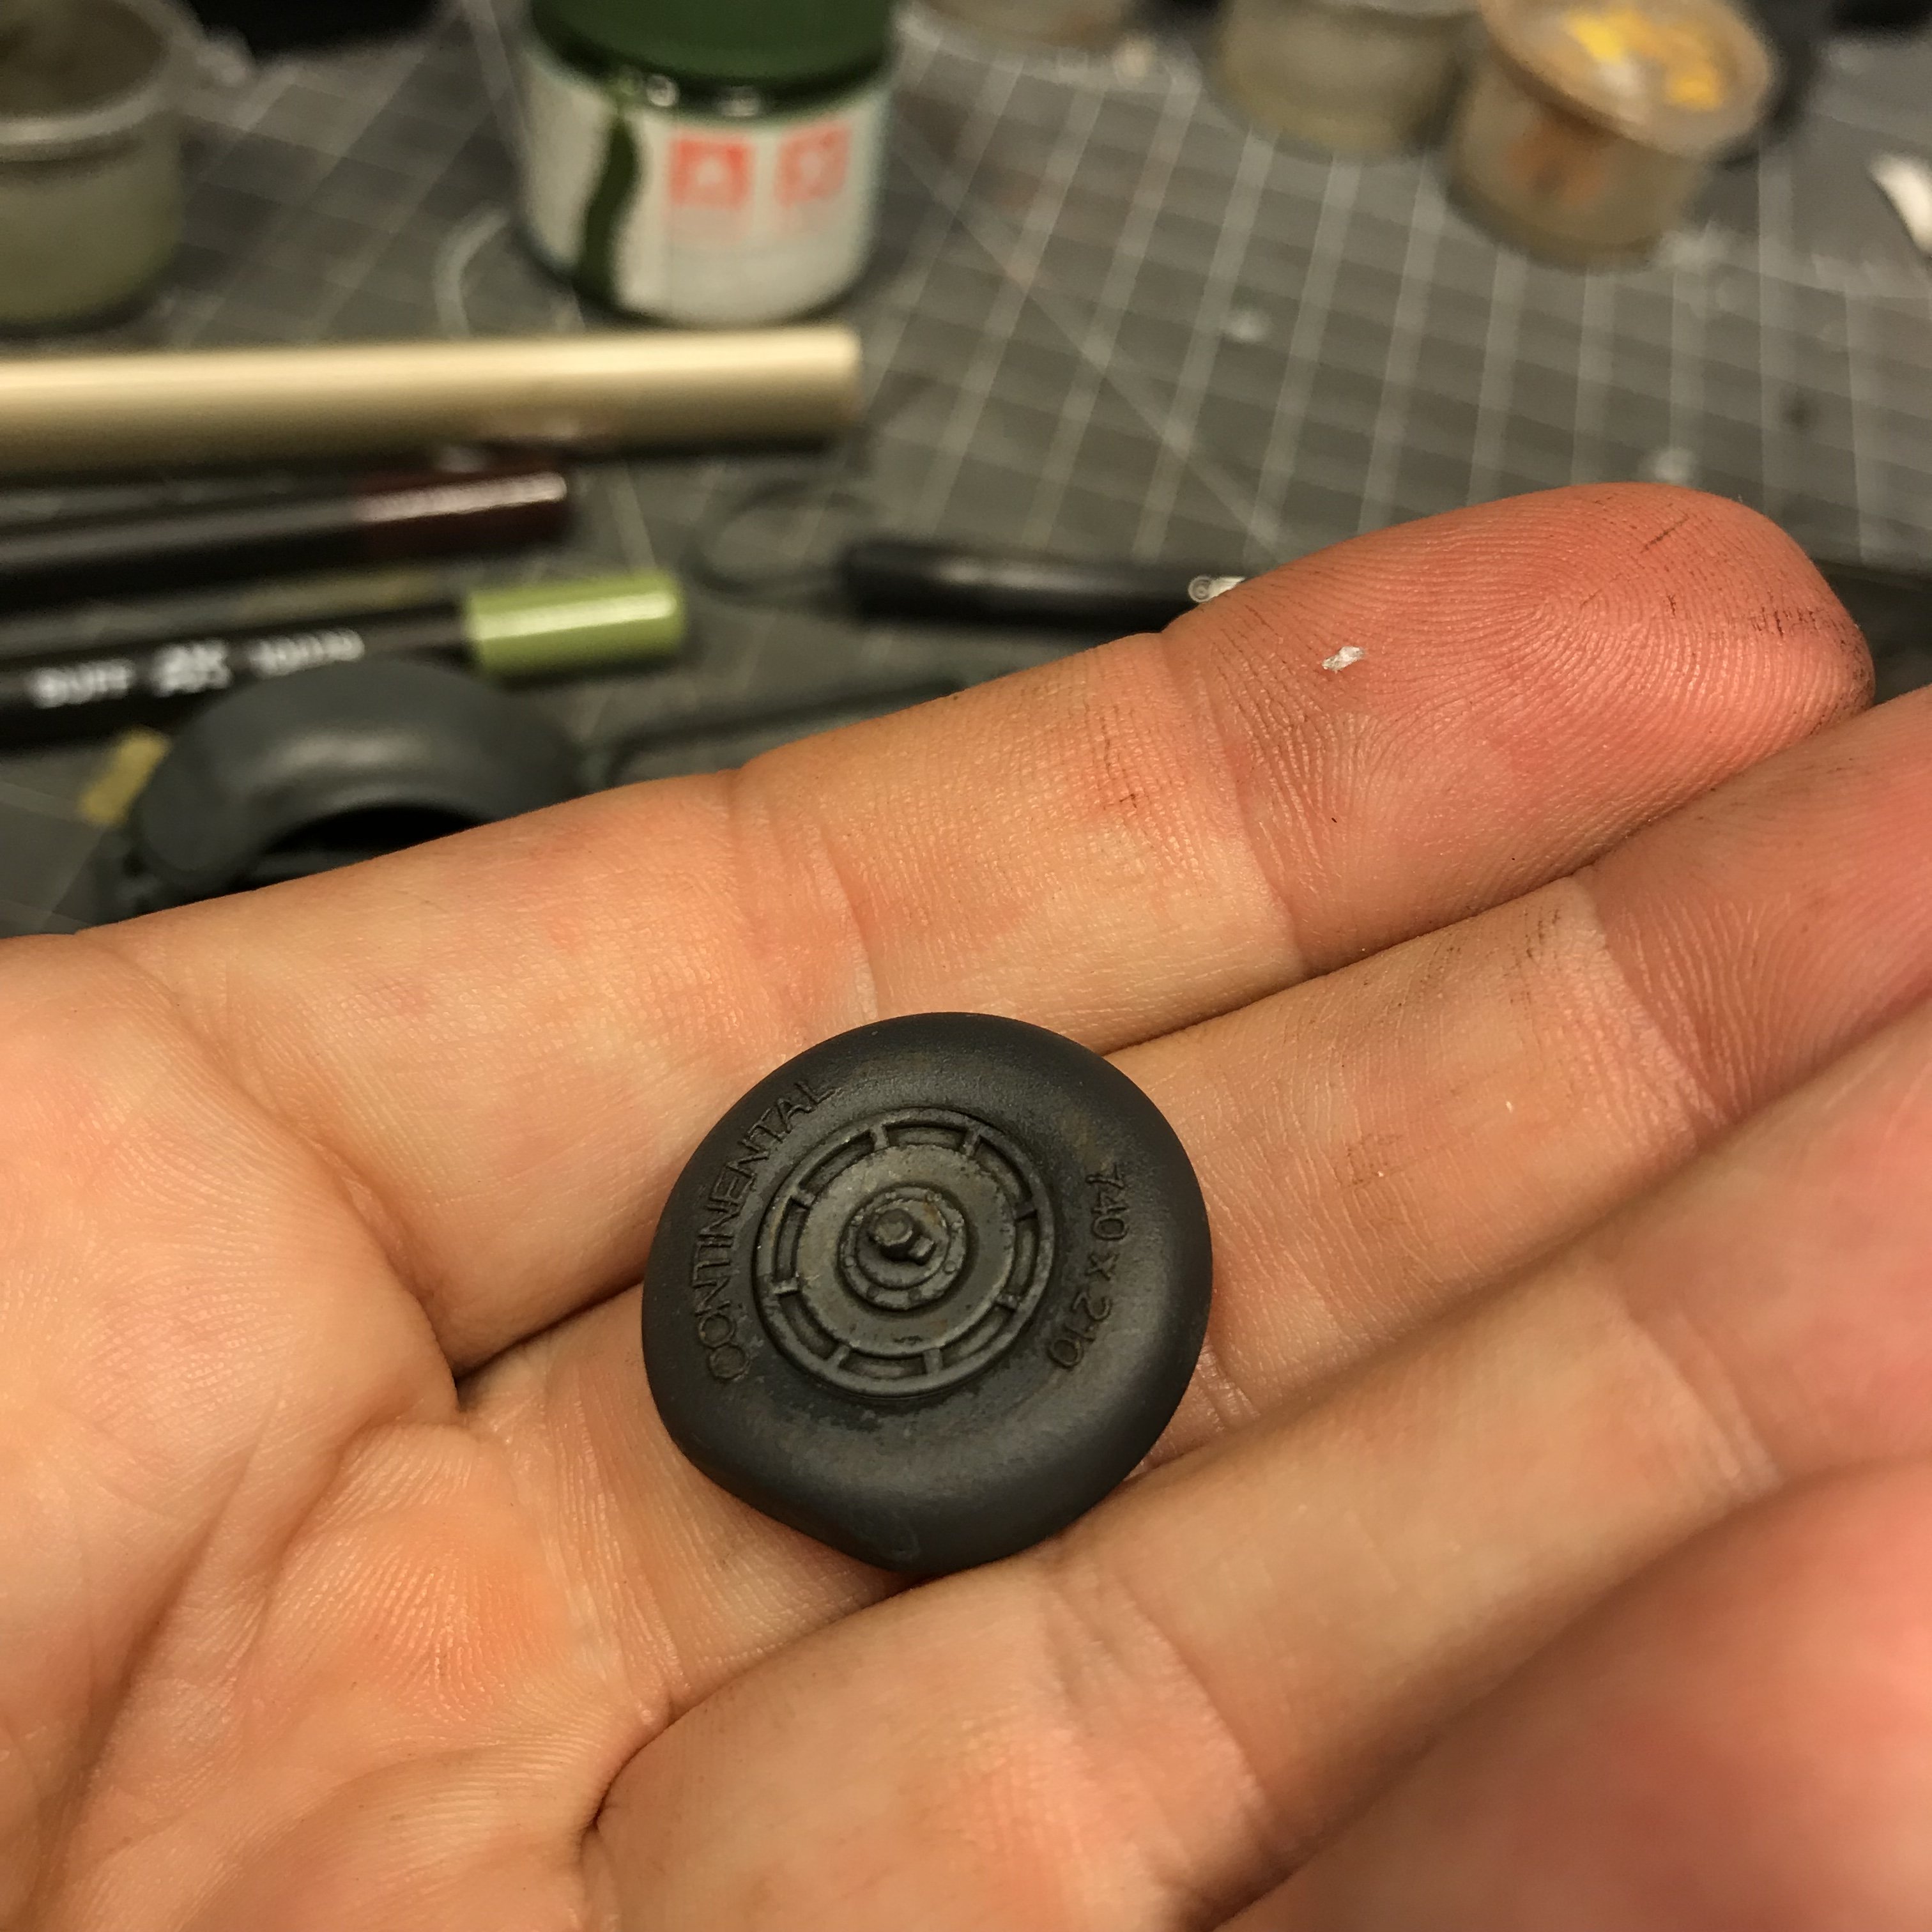
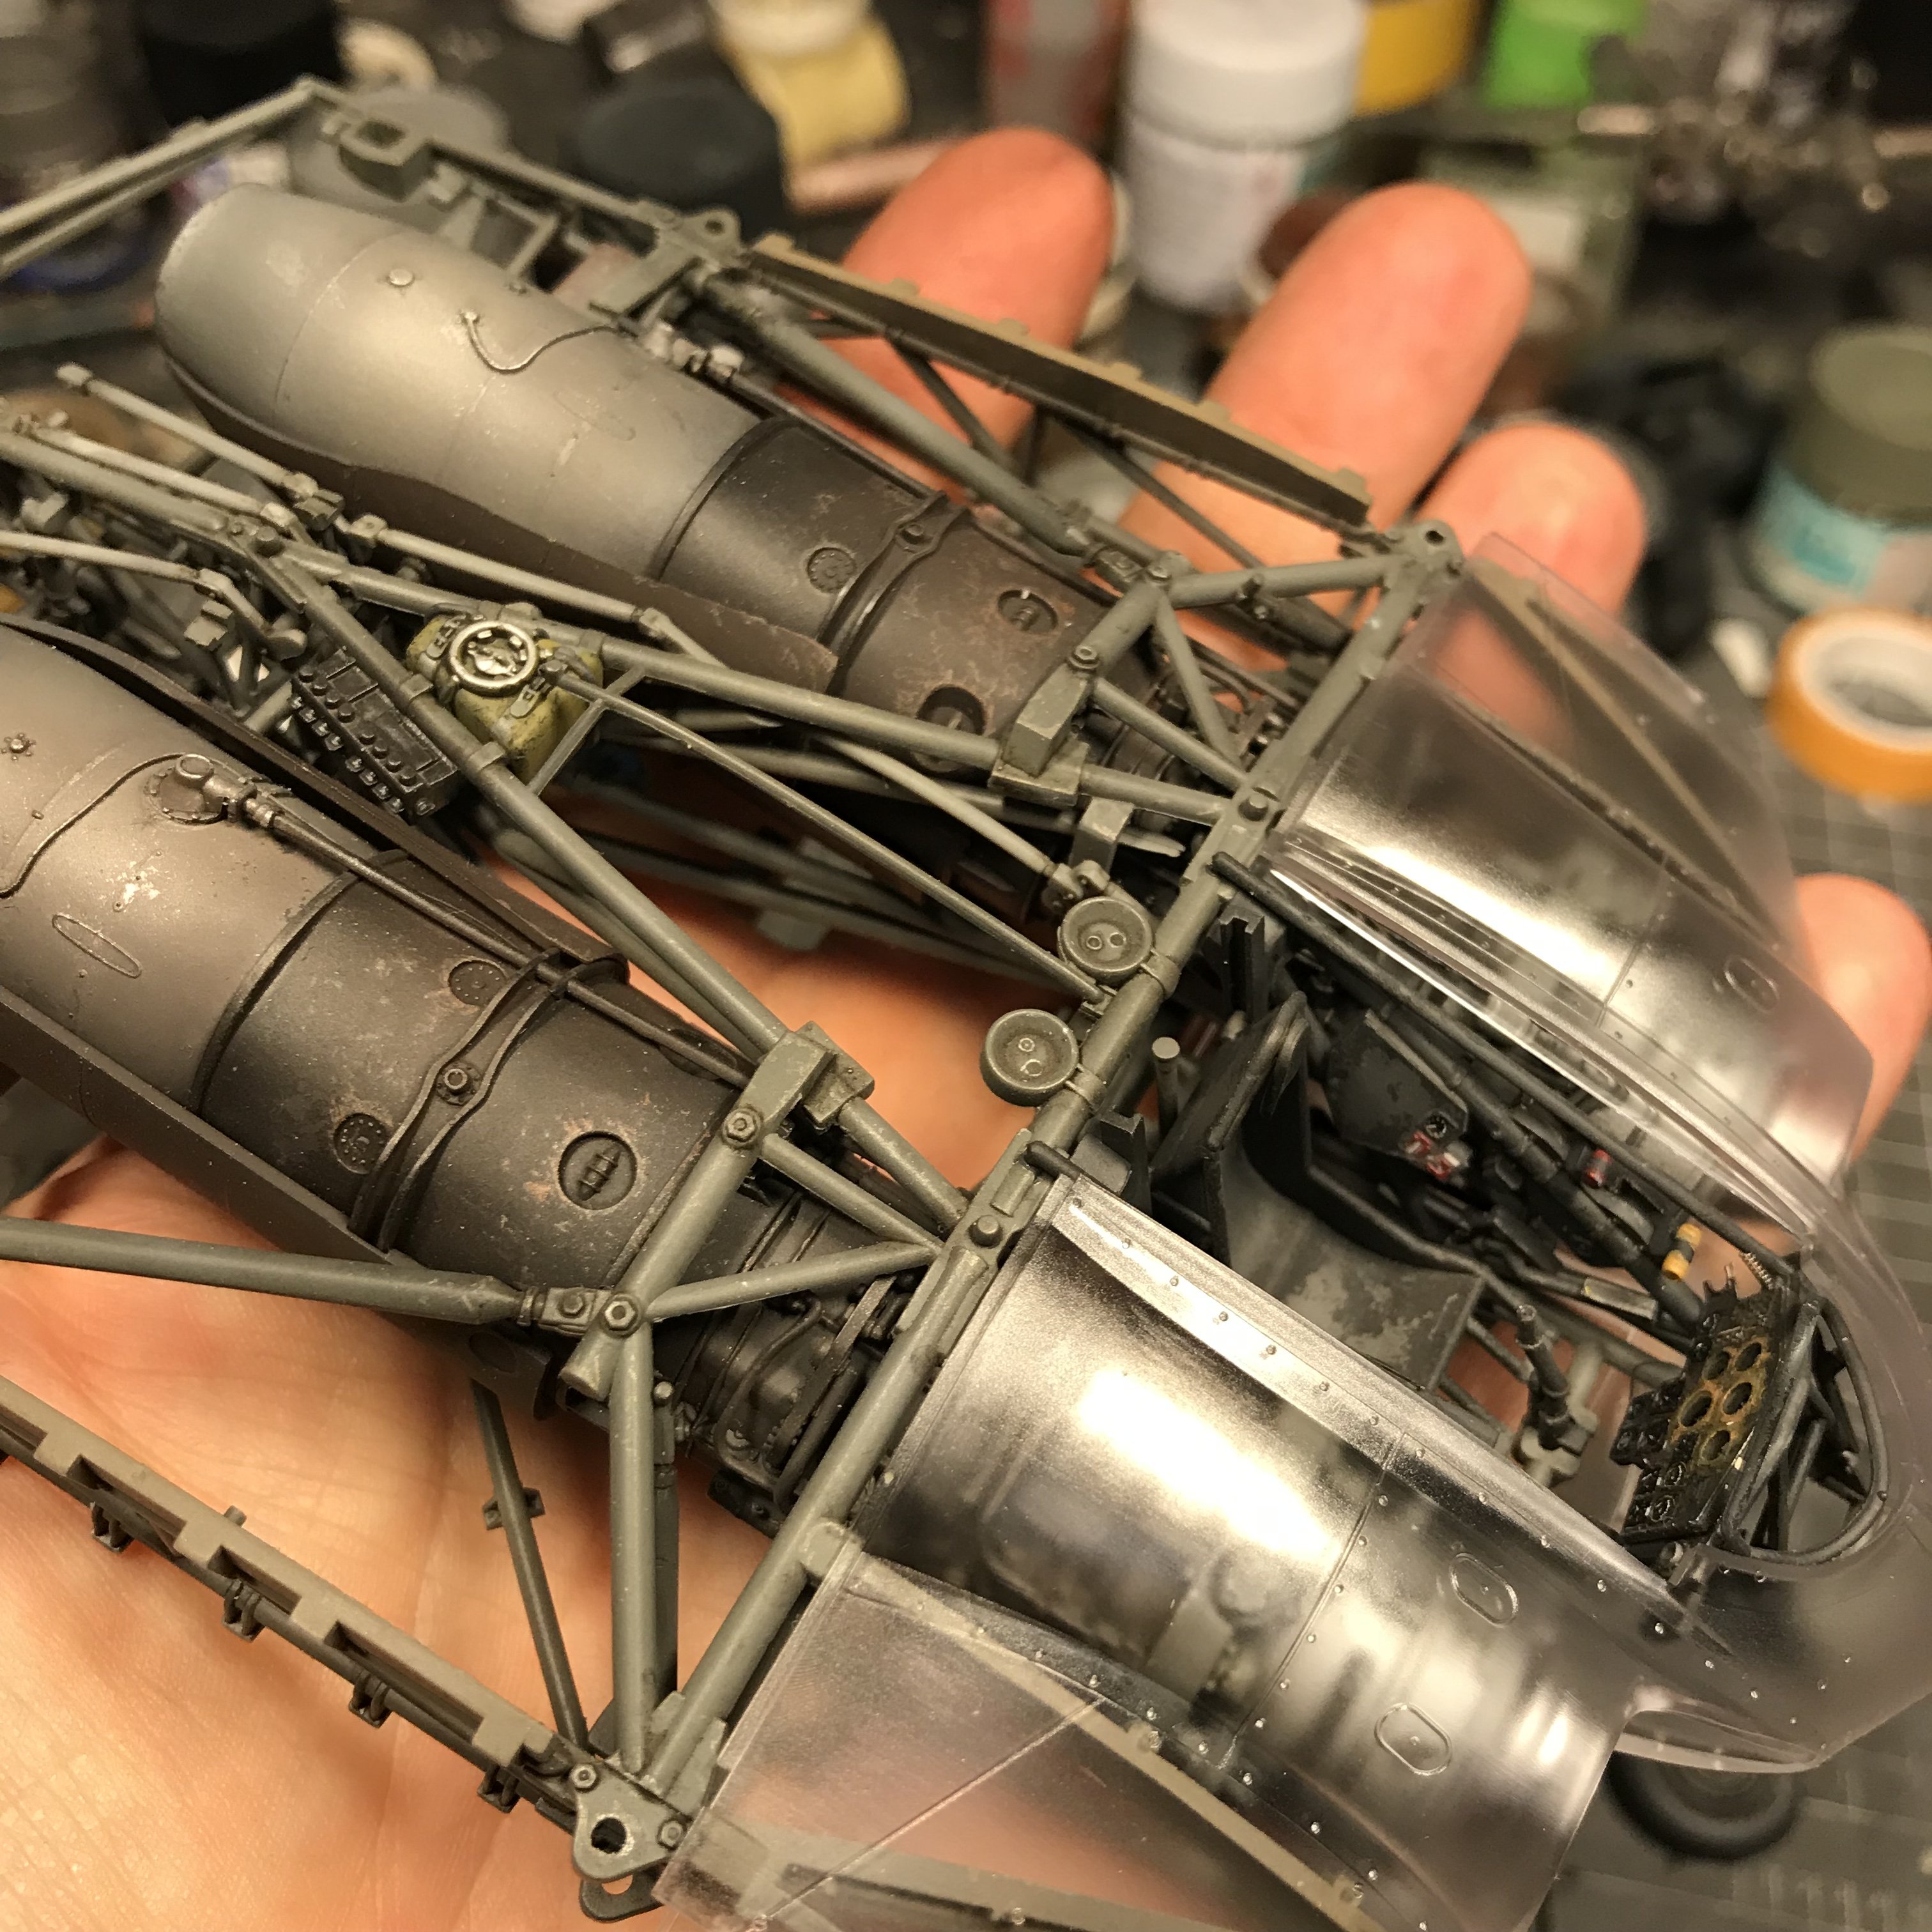
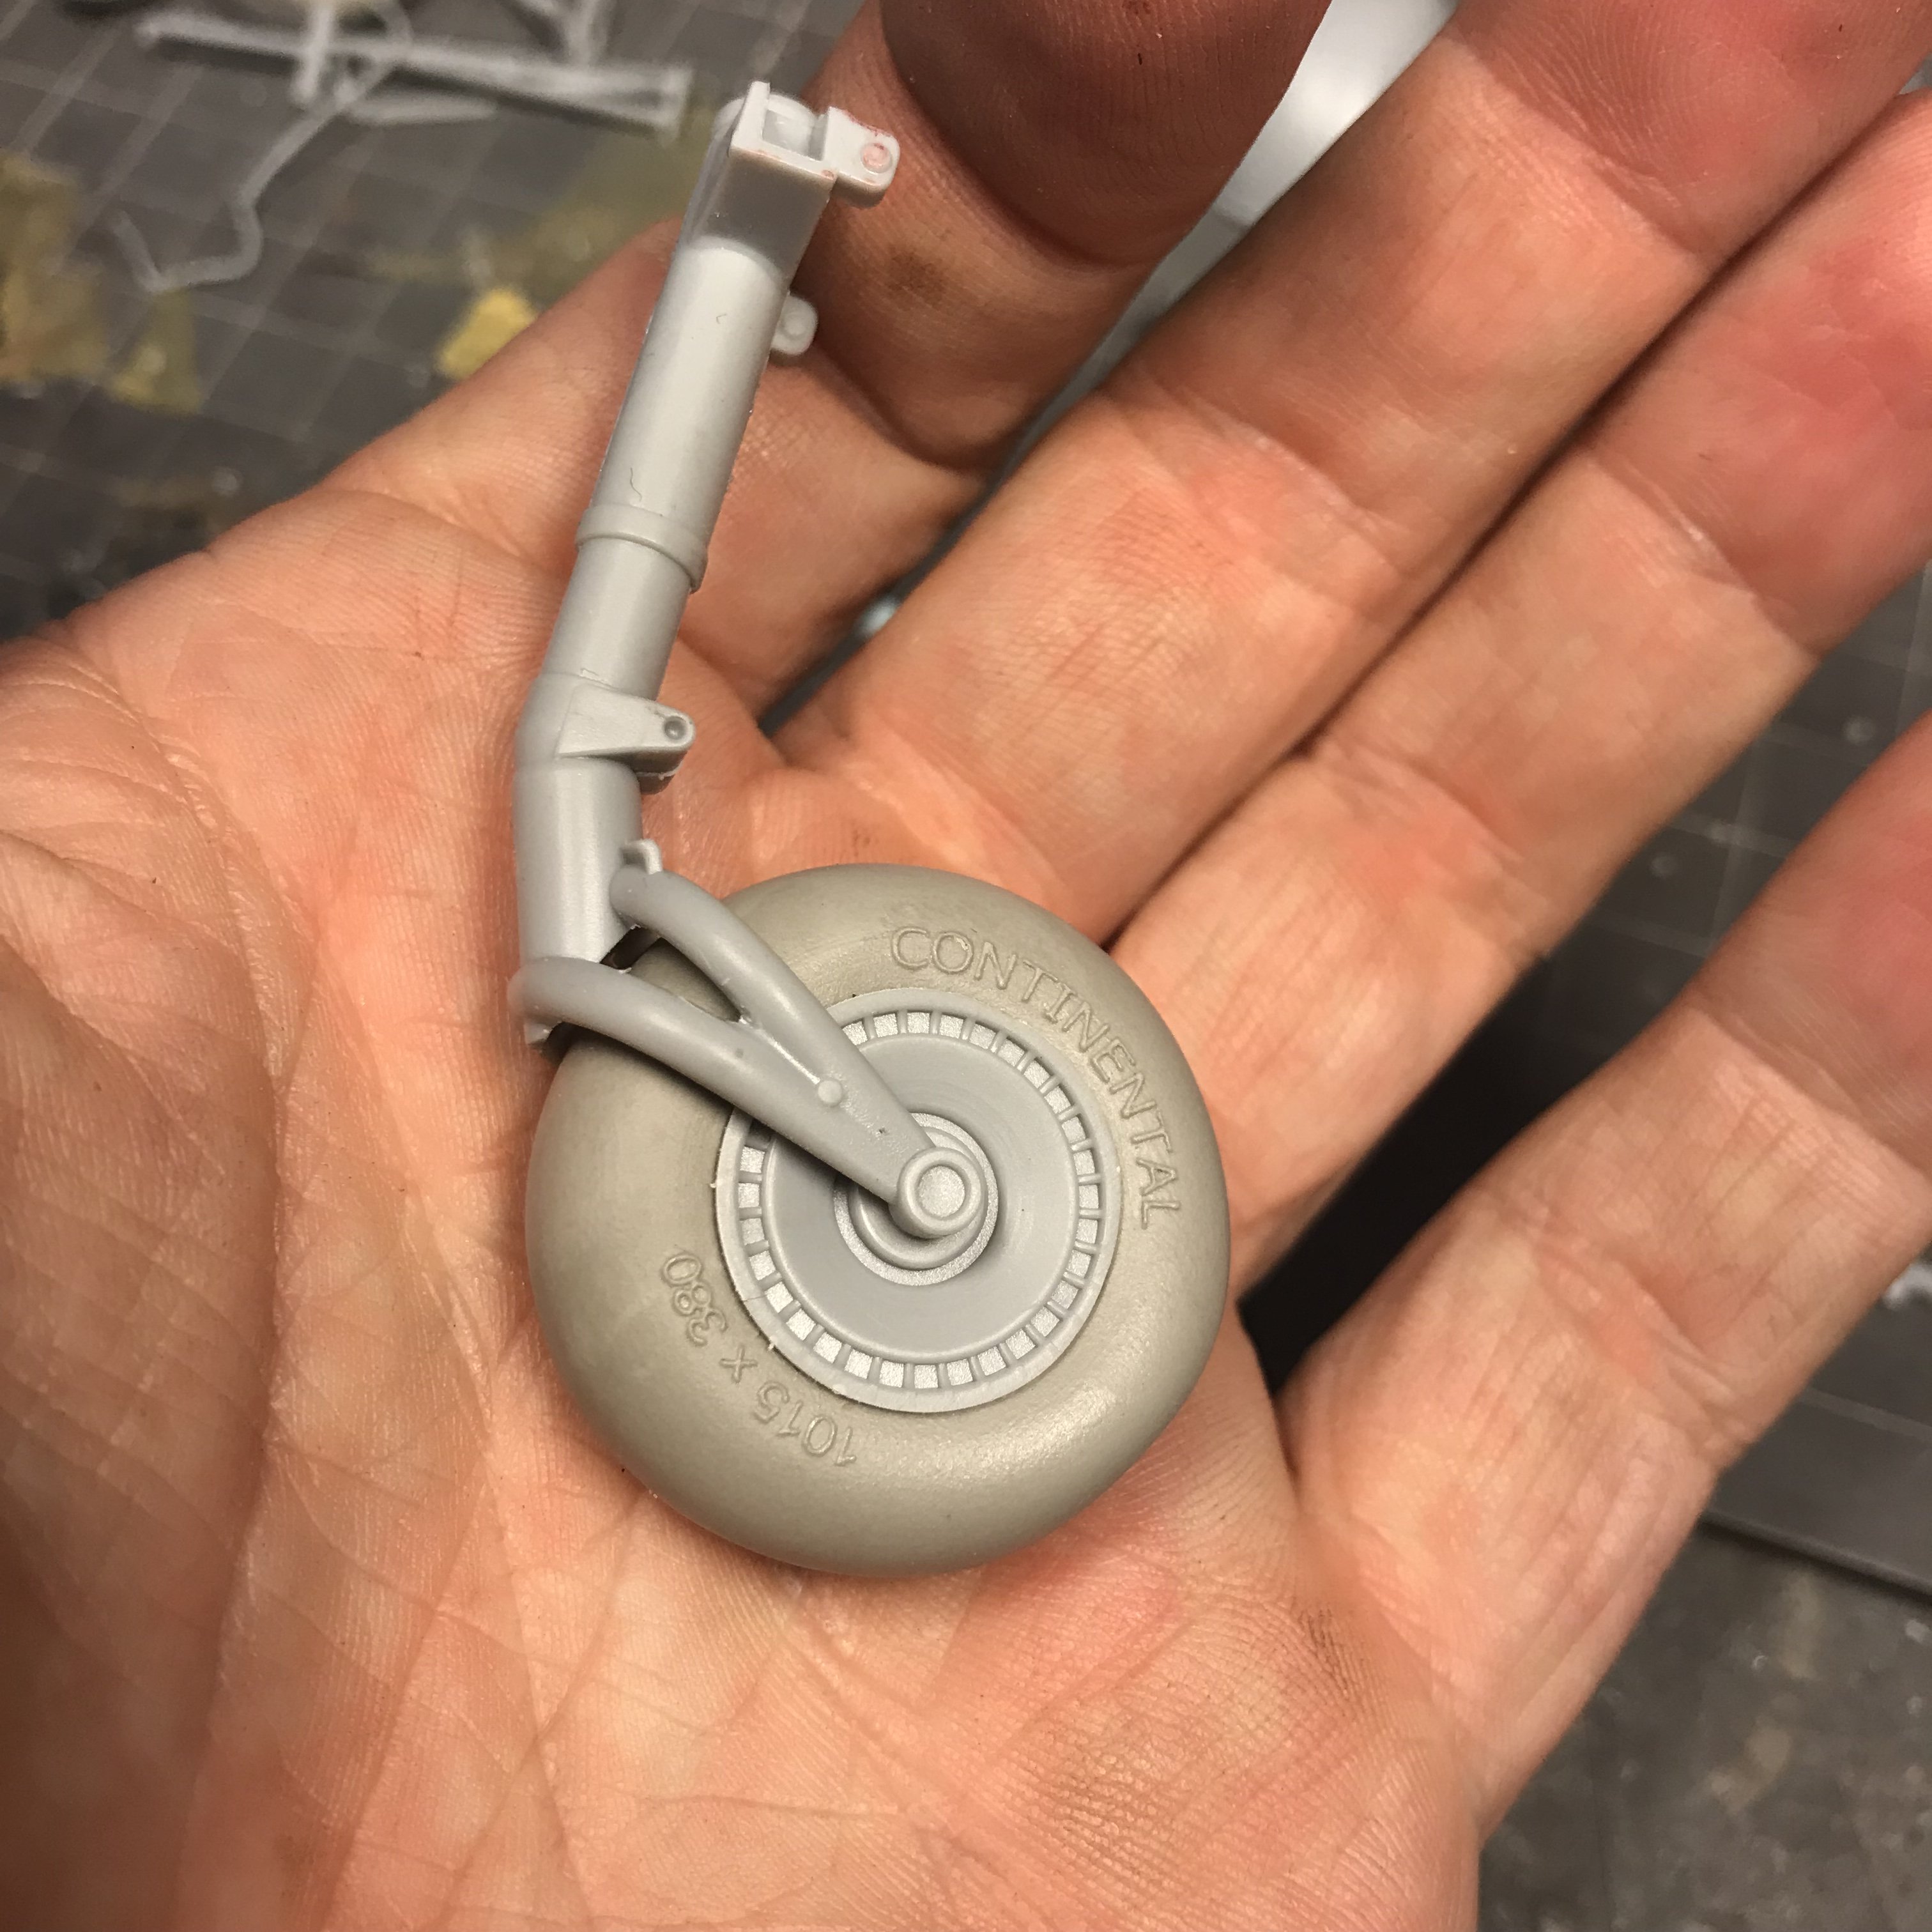
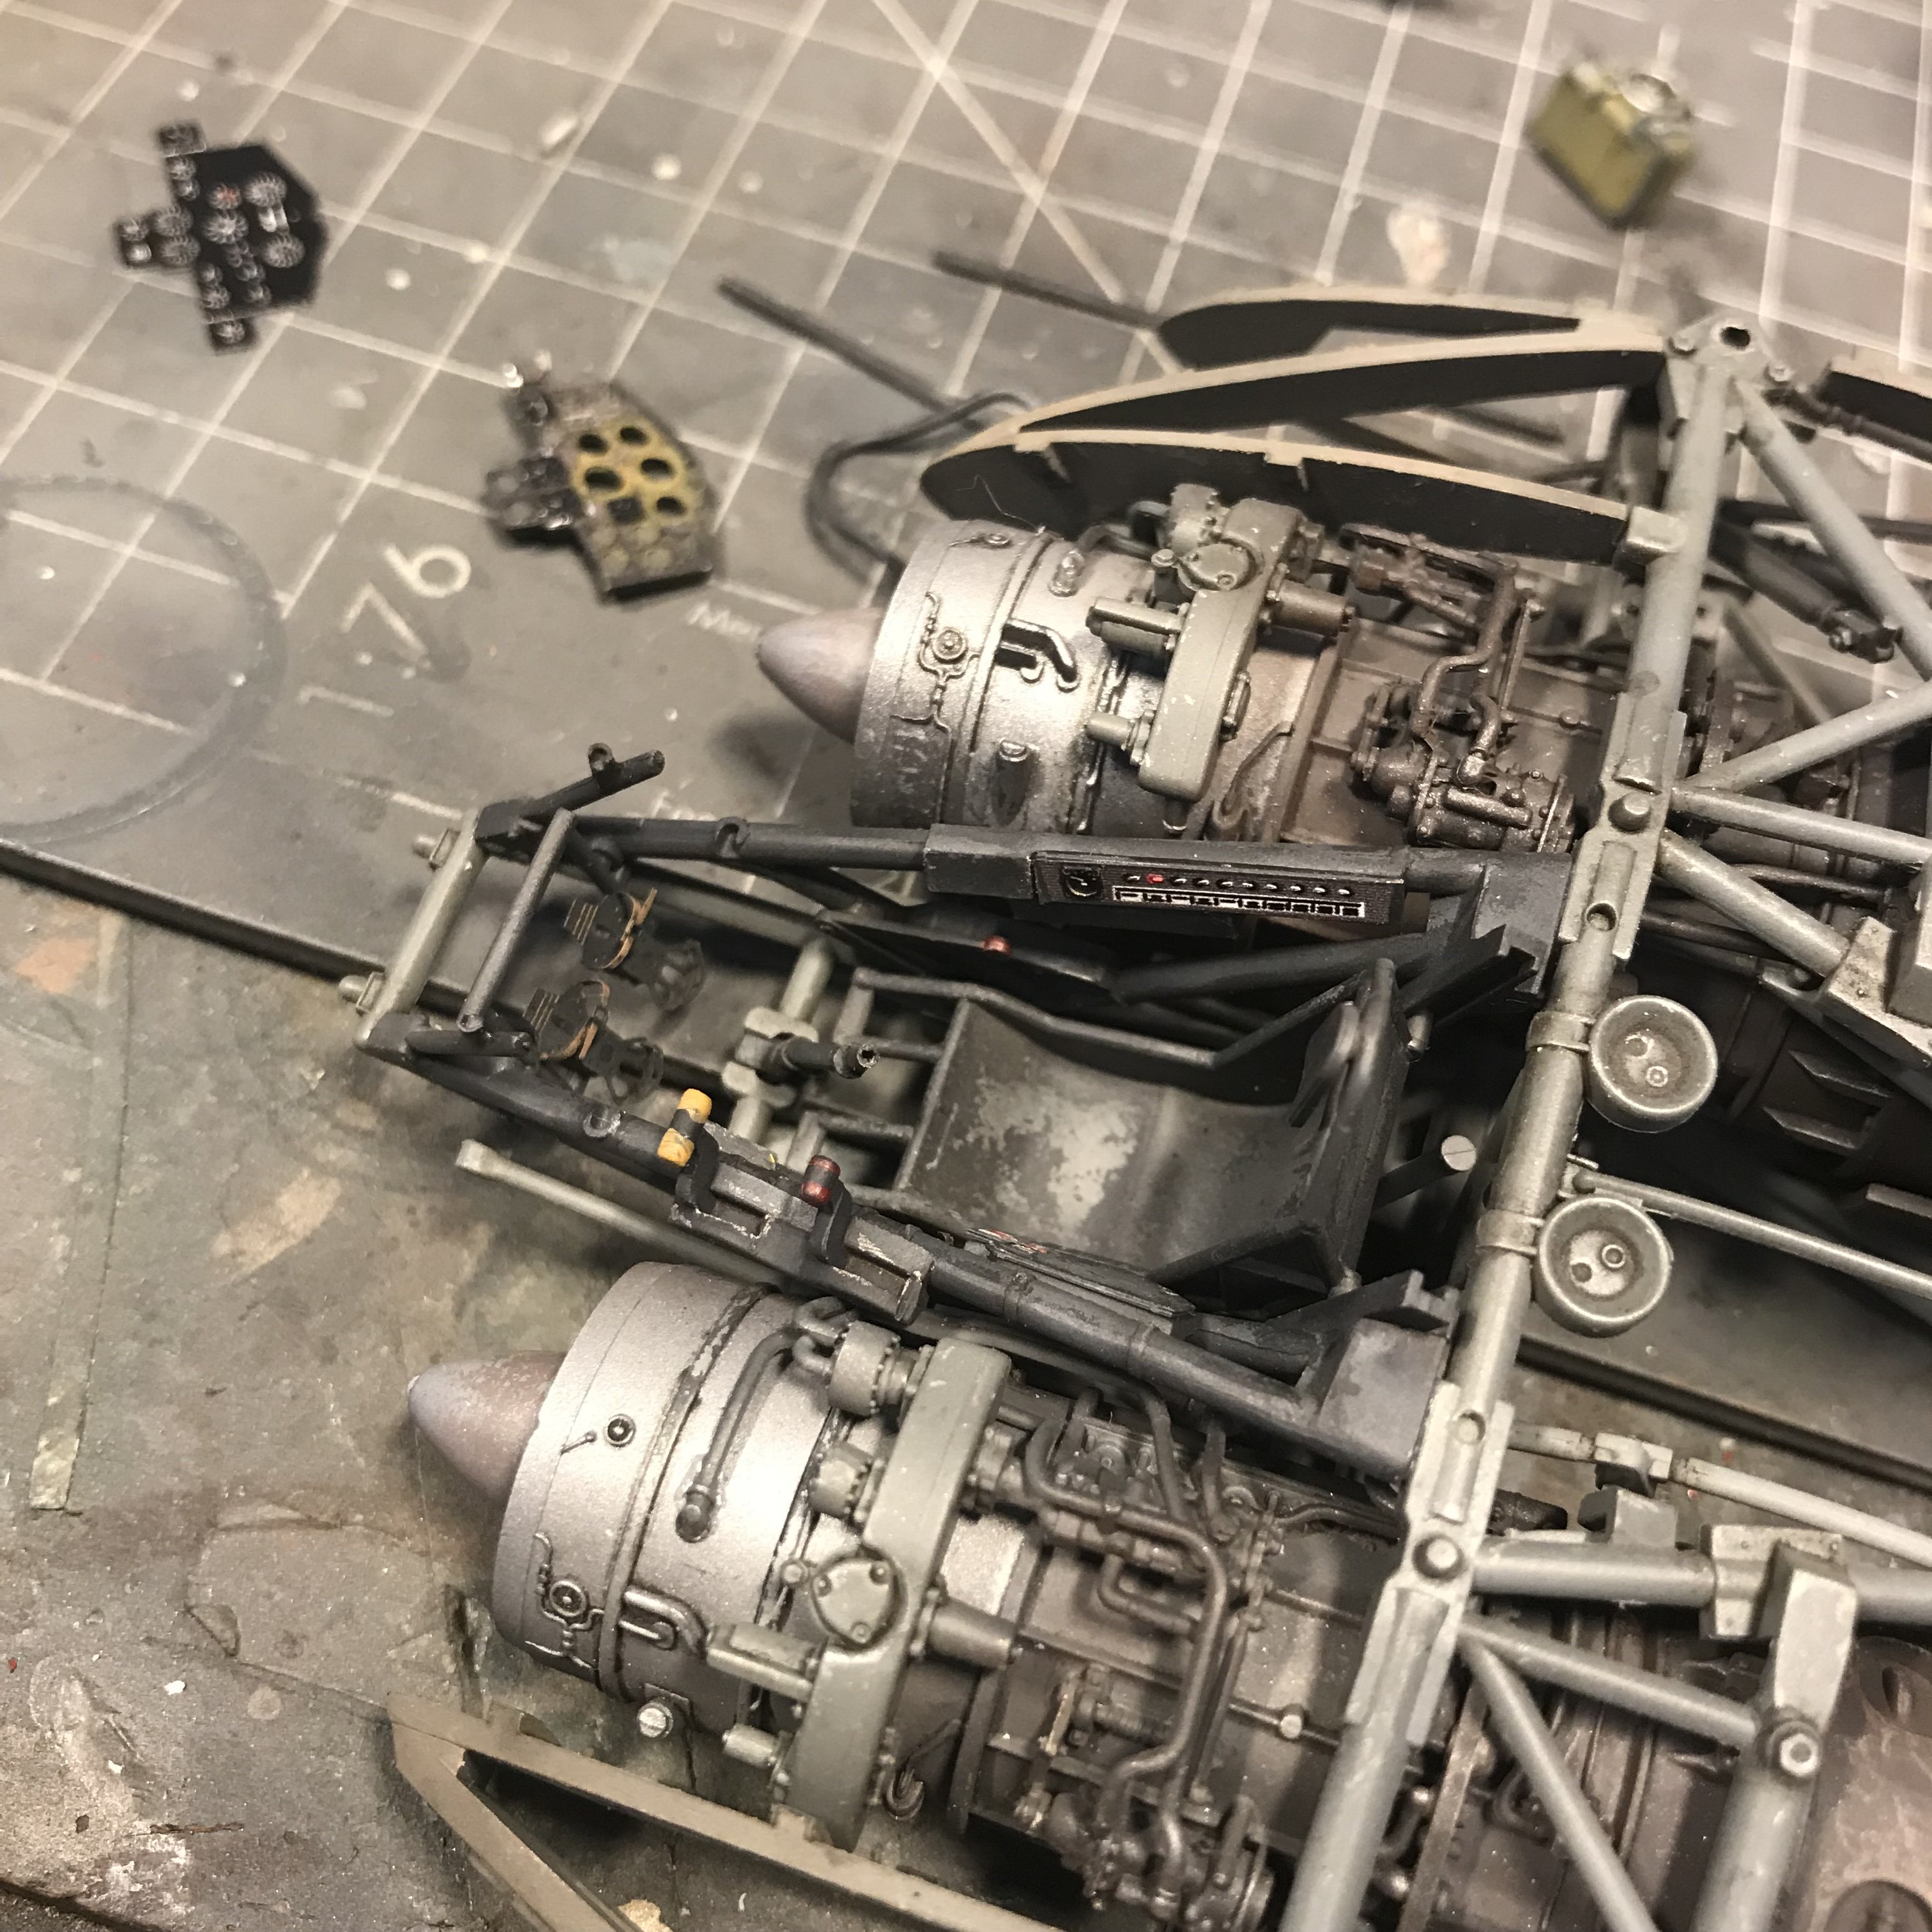
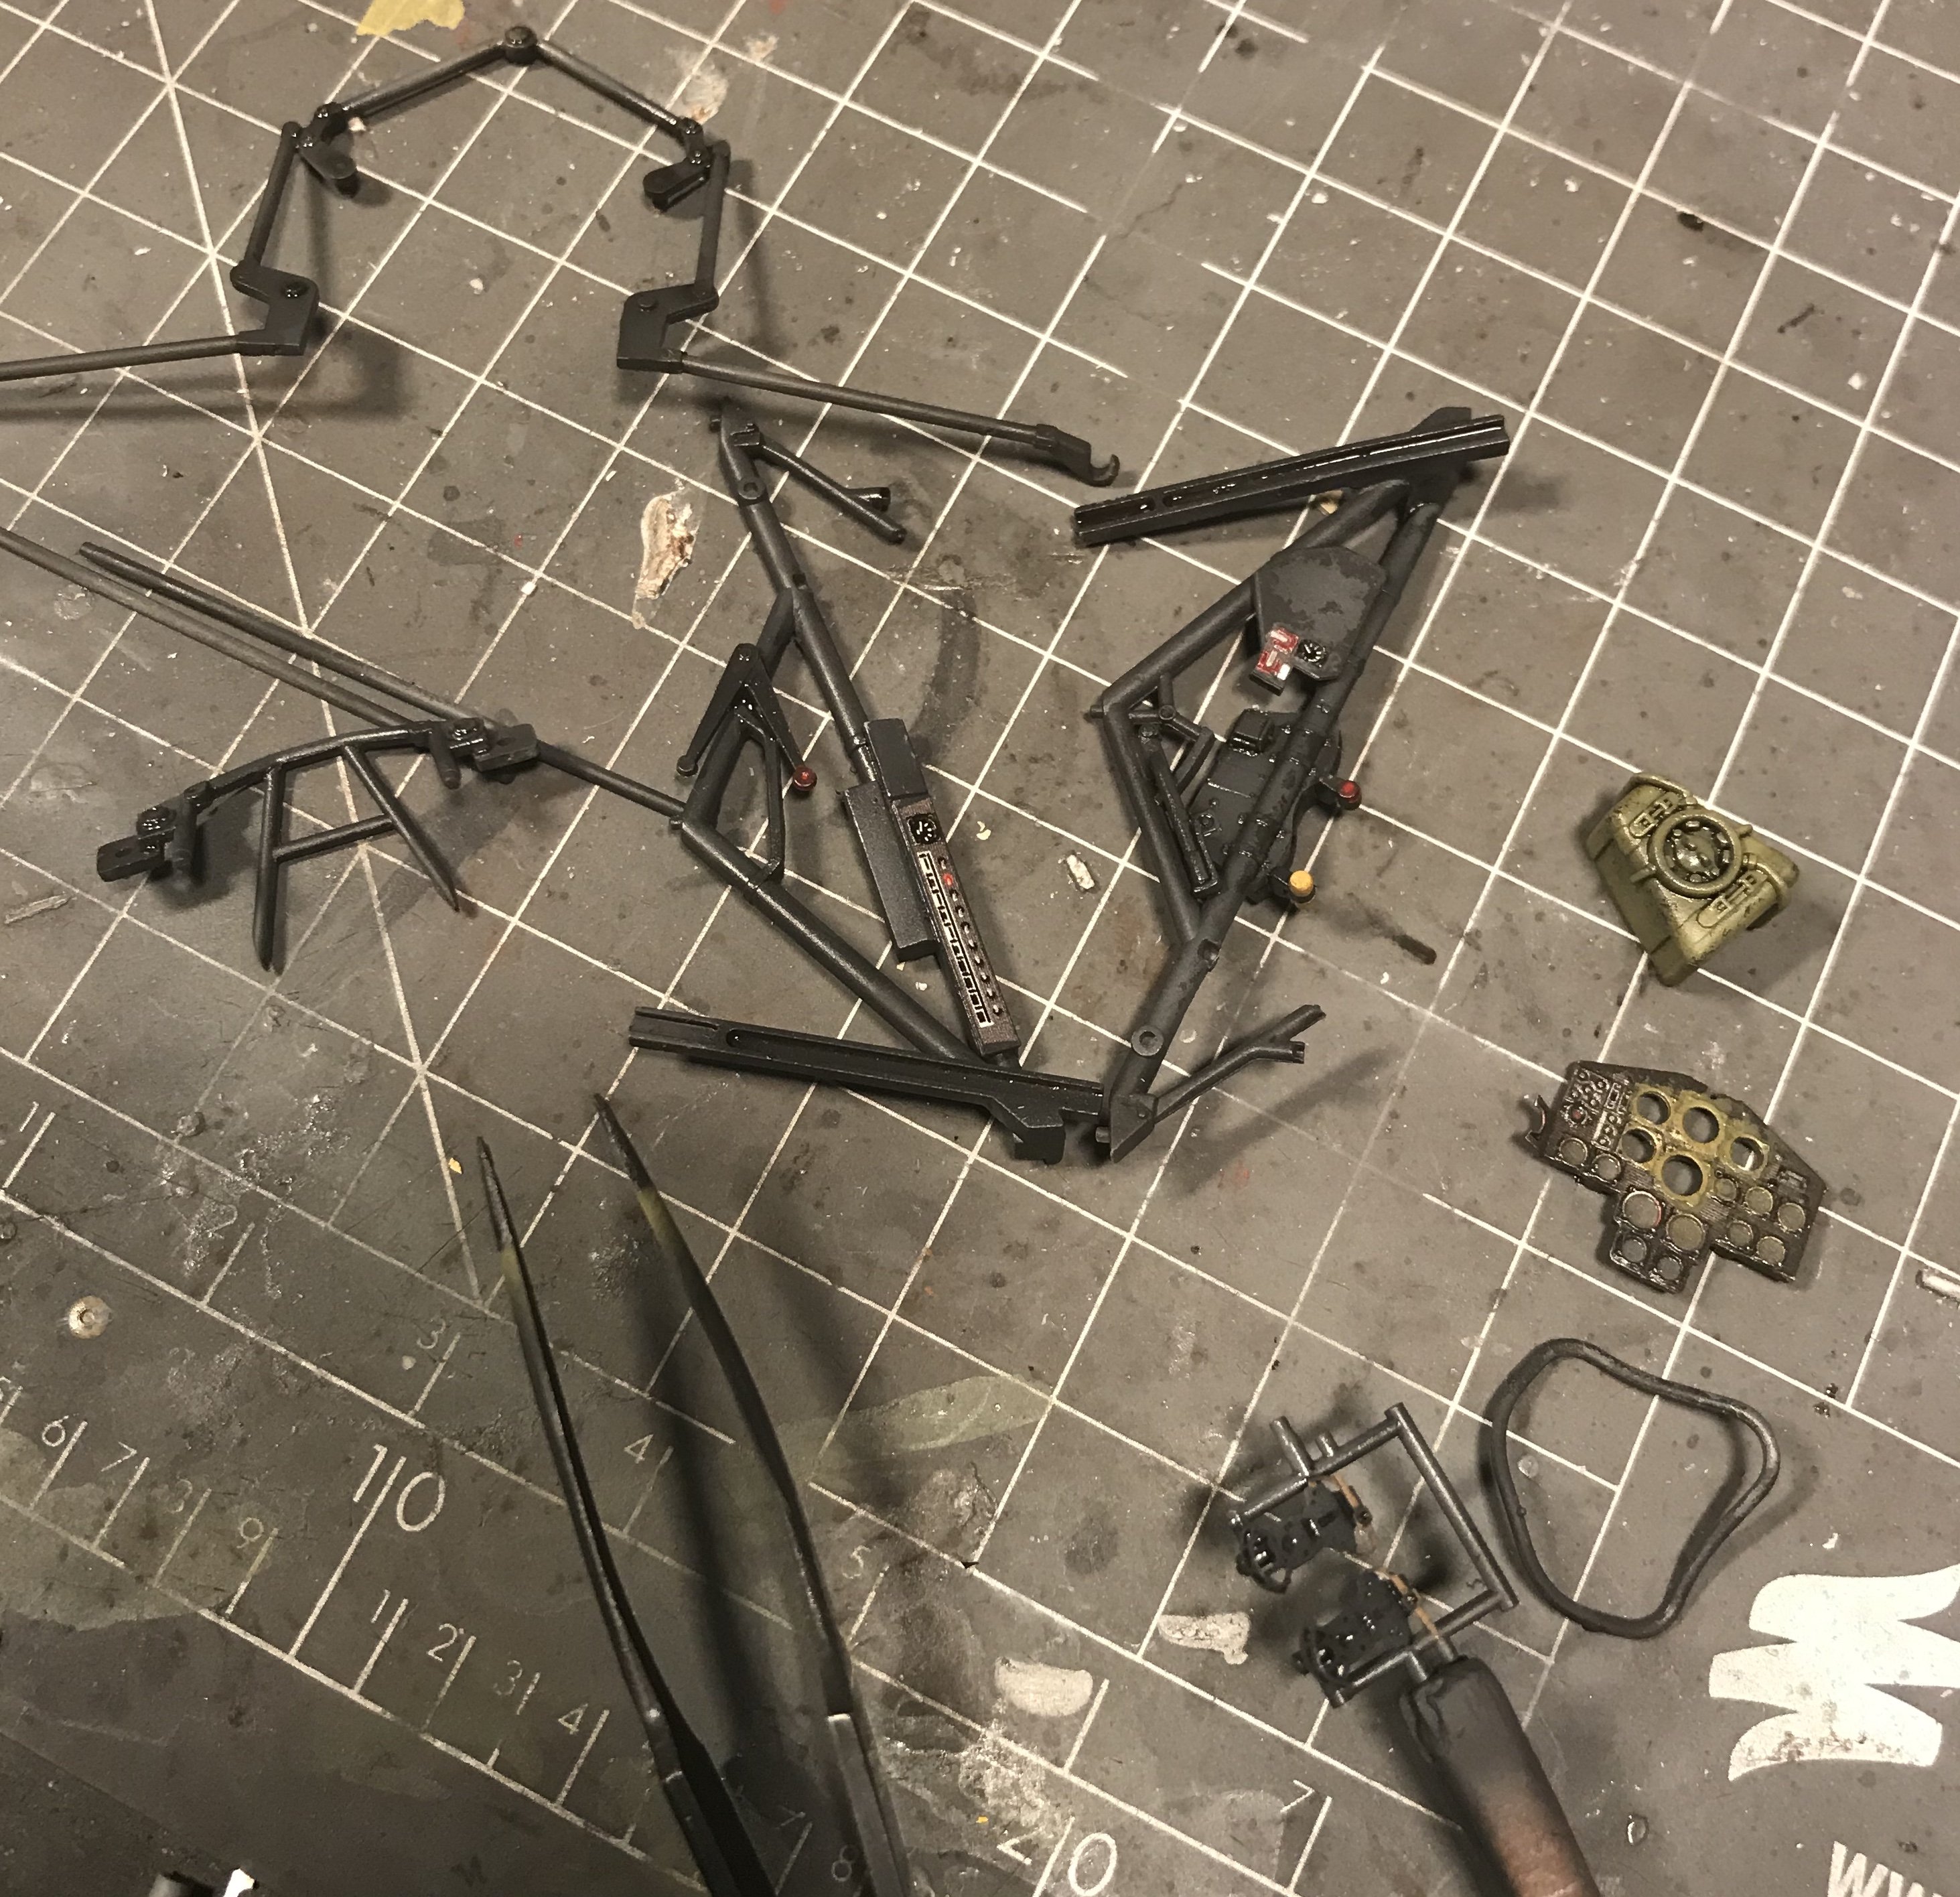
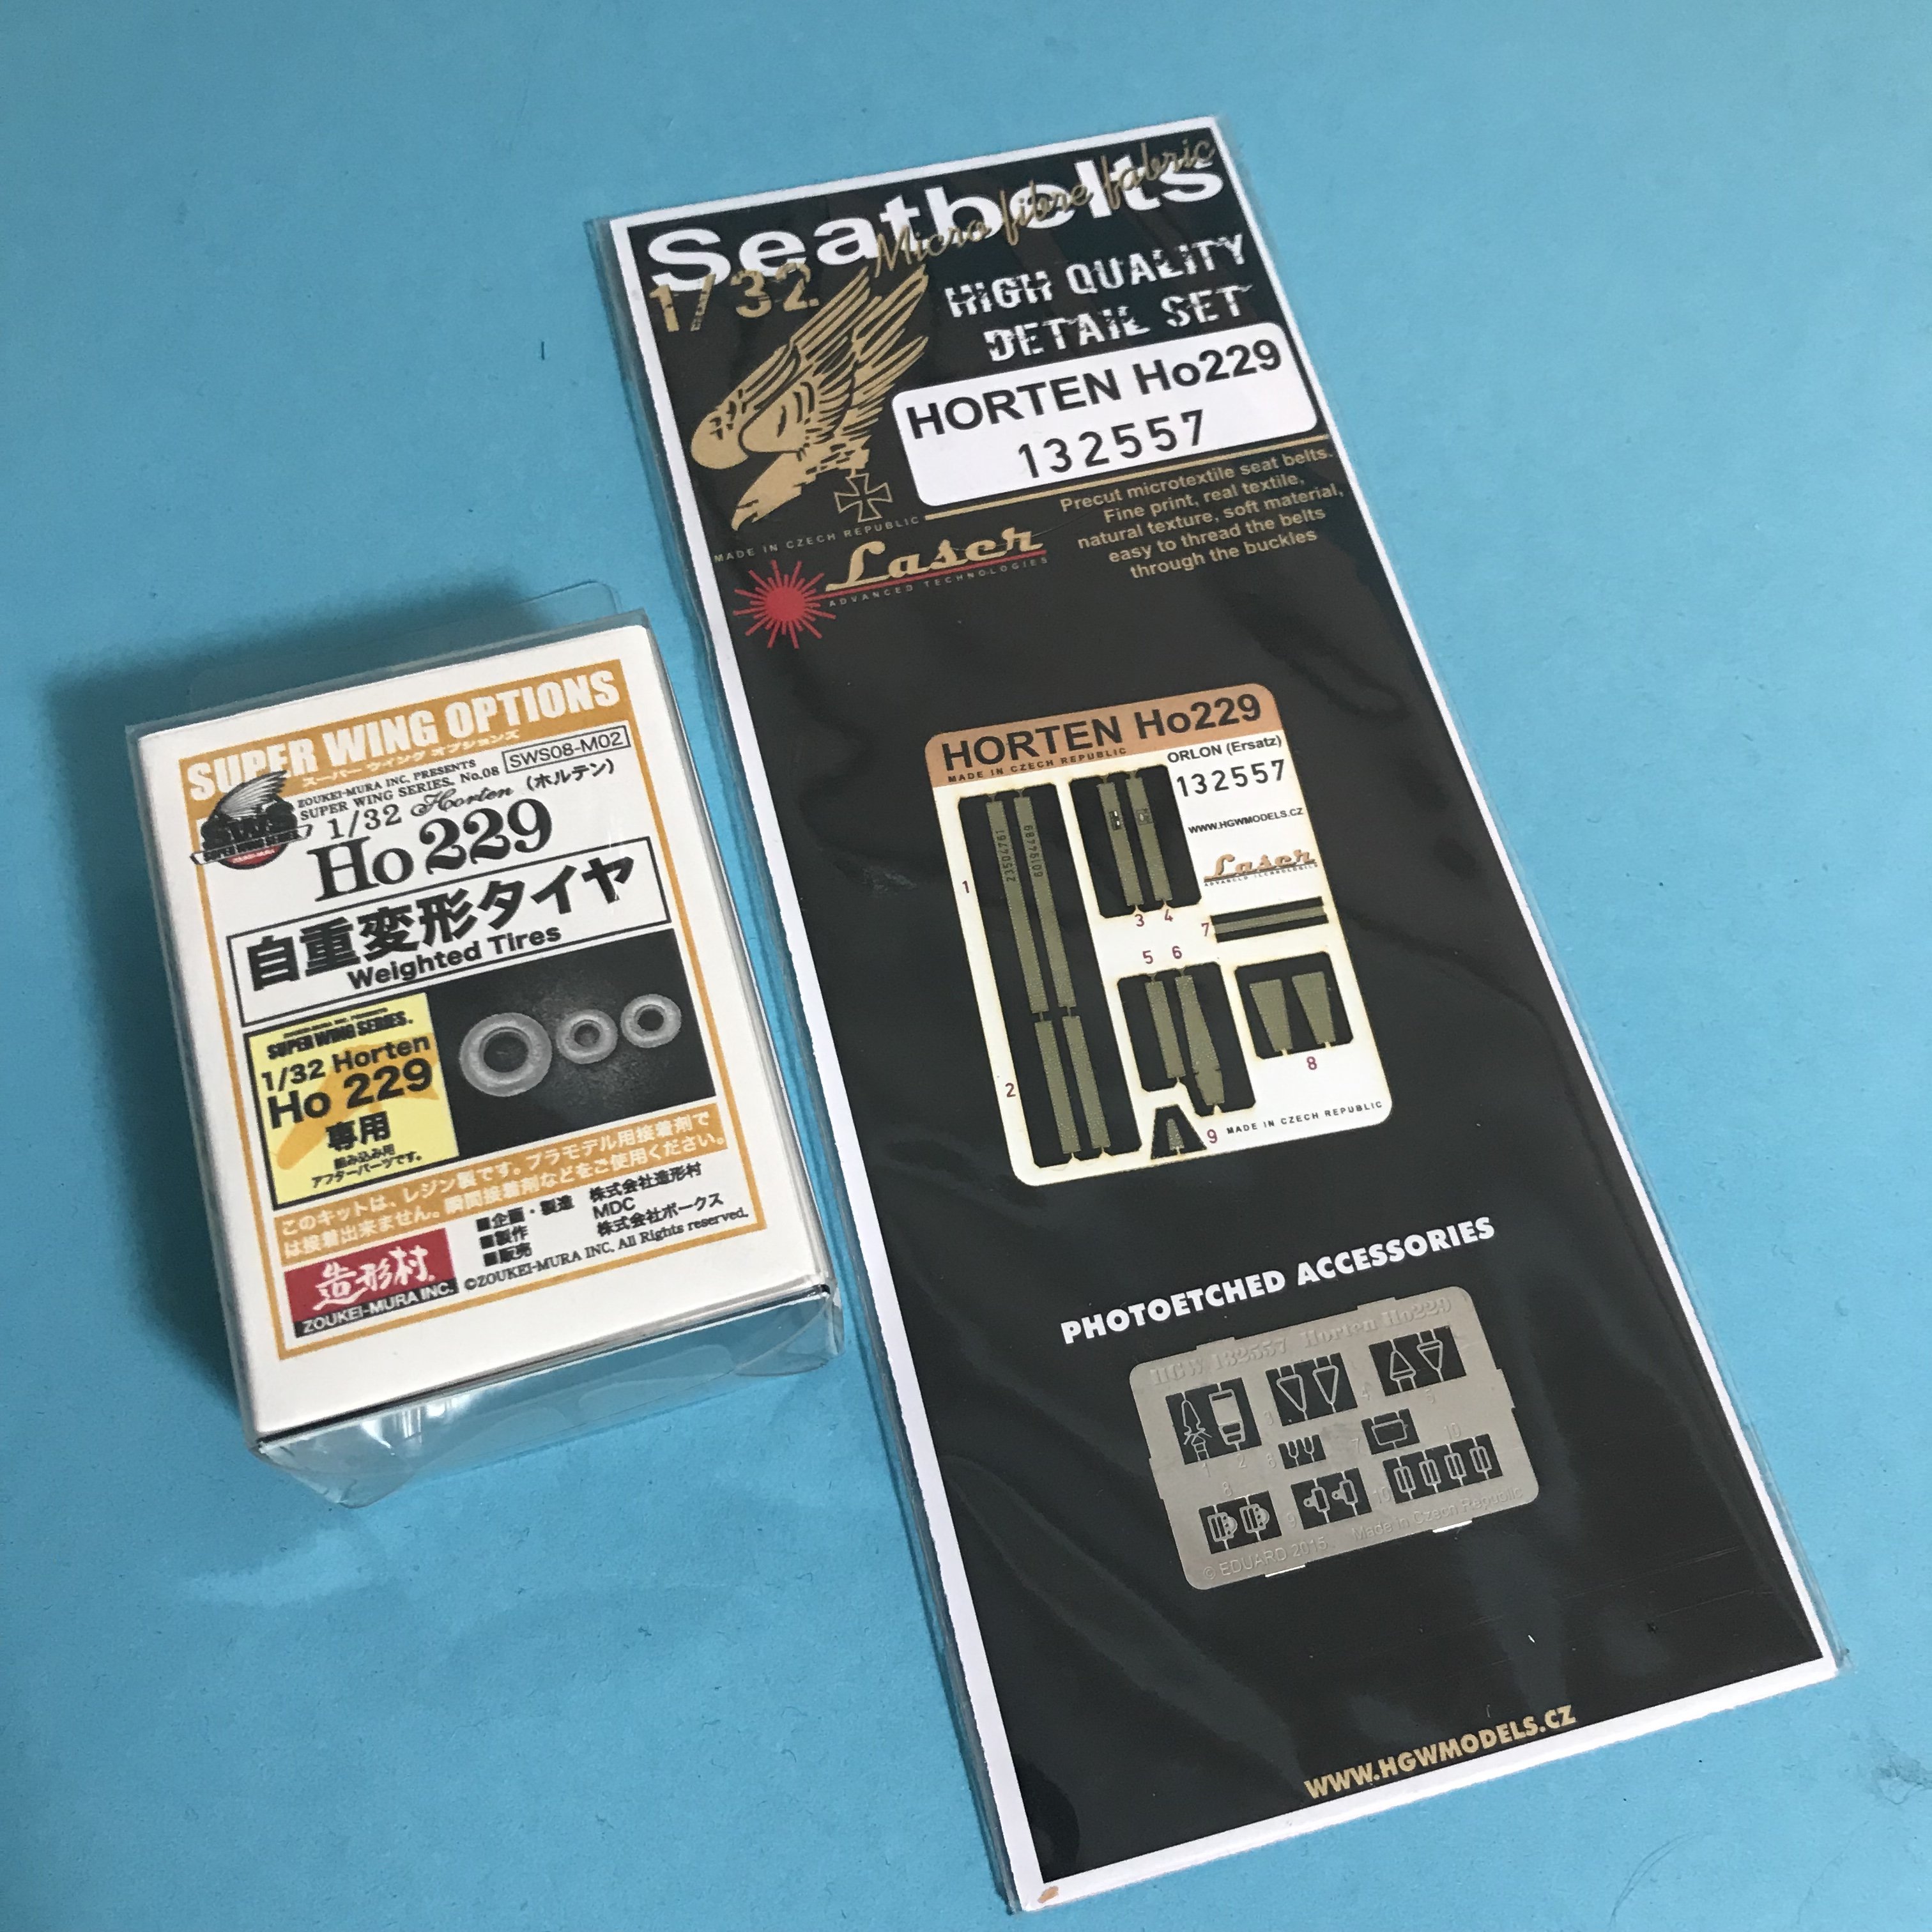
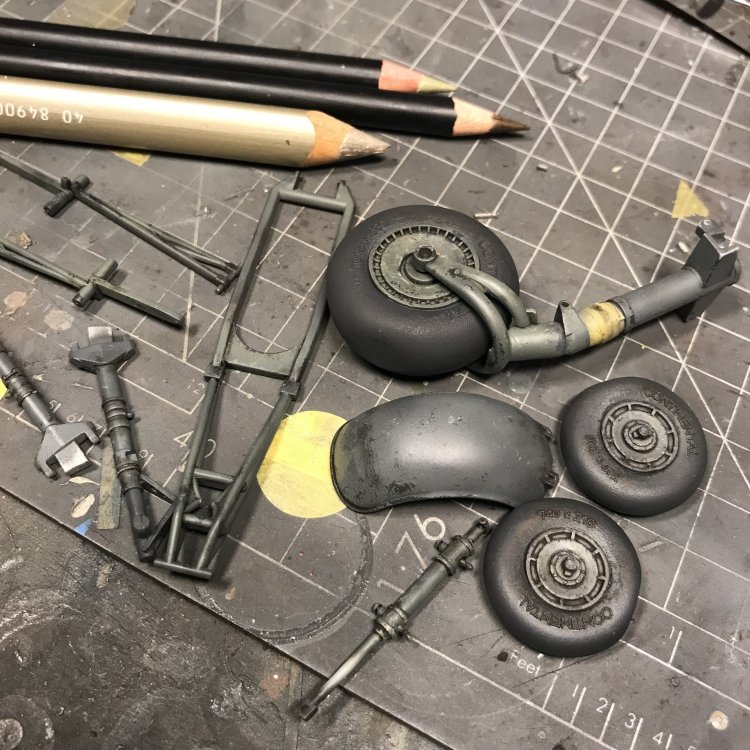
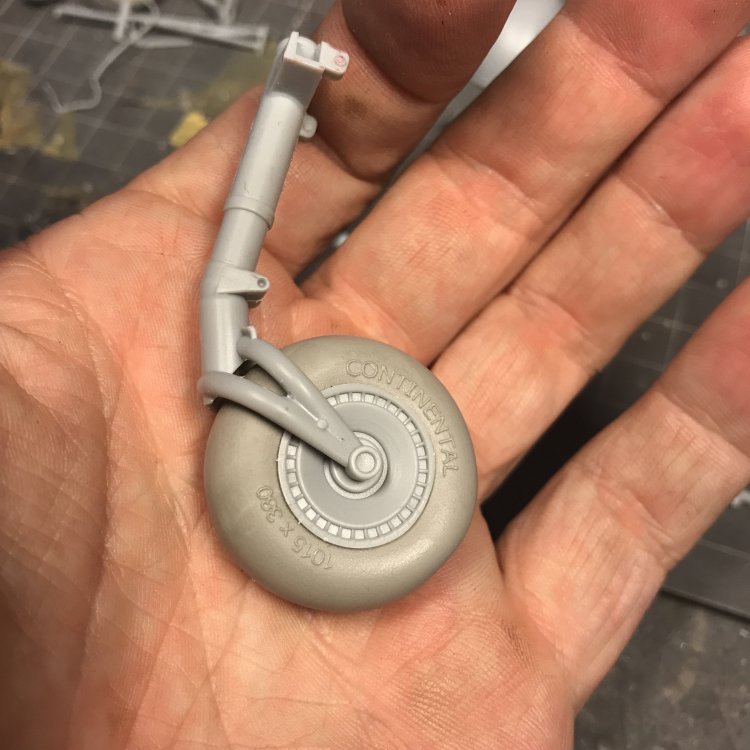
Thnx for all the reference guys! Almost finished up the pit. Only seatbelts and the canopy release lever to go. Started work on the gear. Cleanup up the parts and as you can see i got the resin flattened tyres. The NASM version does not have it’s wheels installed, but i will on mine. Also bought some new AK weathering pencils today and eager to try them out.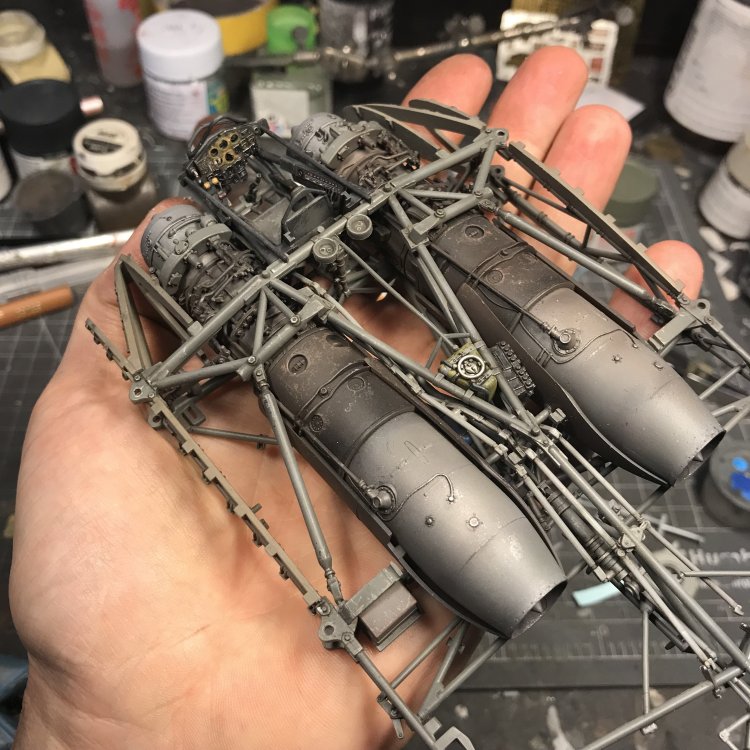
-
Really cool progress!! Wow... speechless...
-
Ho229 at the Udvar-Hazy Center
JeroenPeters replied to JeroenPeters's topic in LSM 1/35 and Larger Work In Progress

-
Ho229 at the Udvar-Hazy Center
JeroenPeters replied to JeroenPeters's topic in LSM 1/35 and Larger Work In Progress
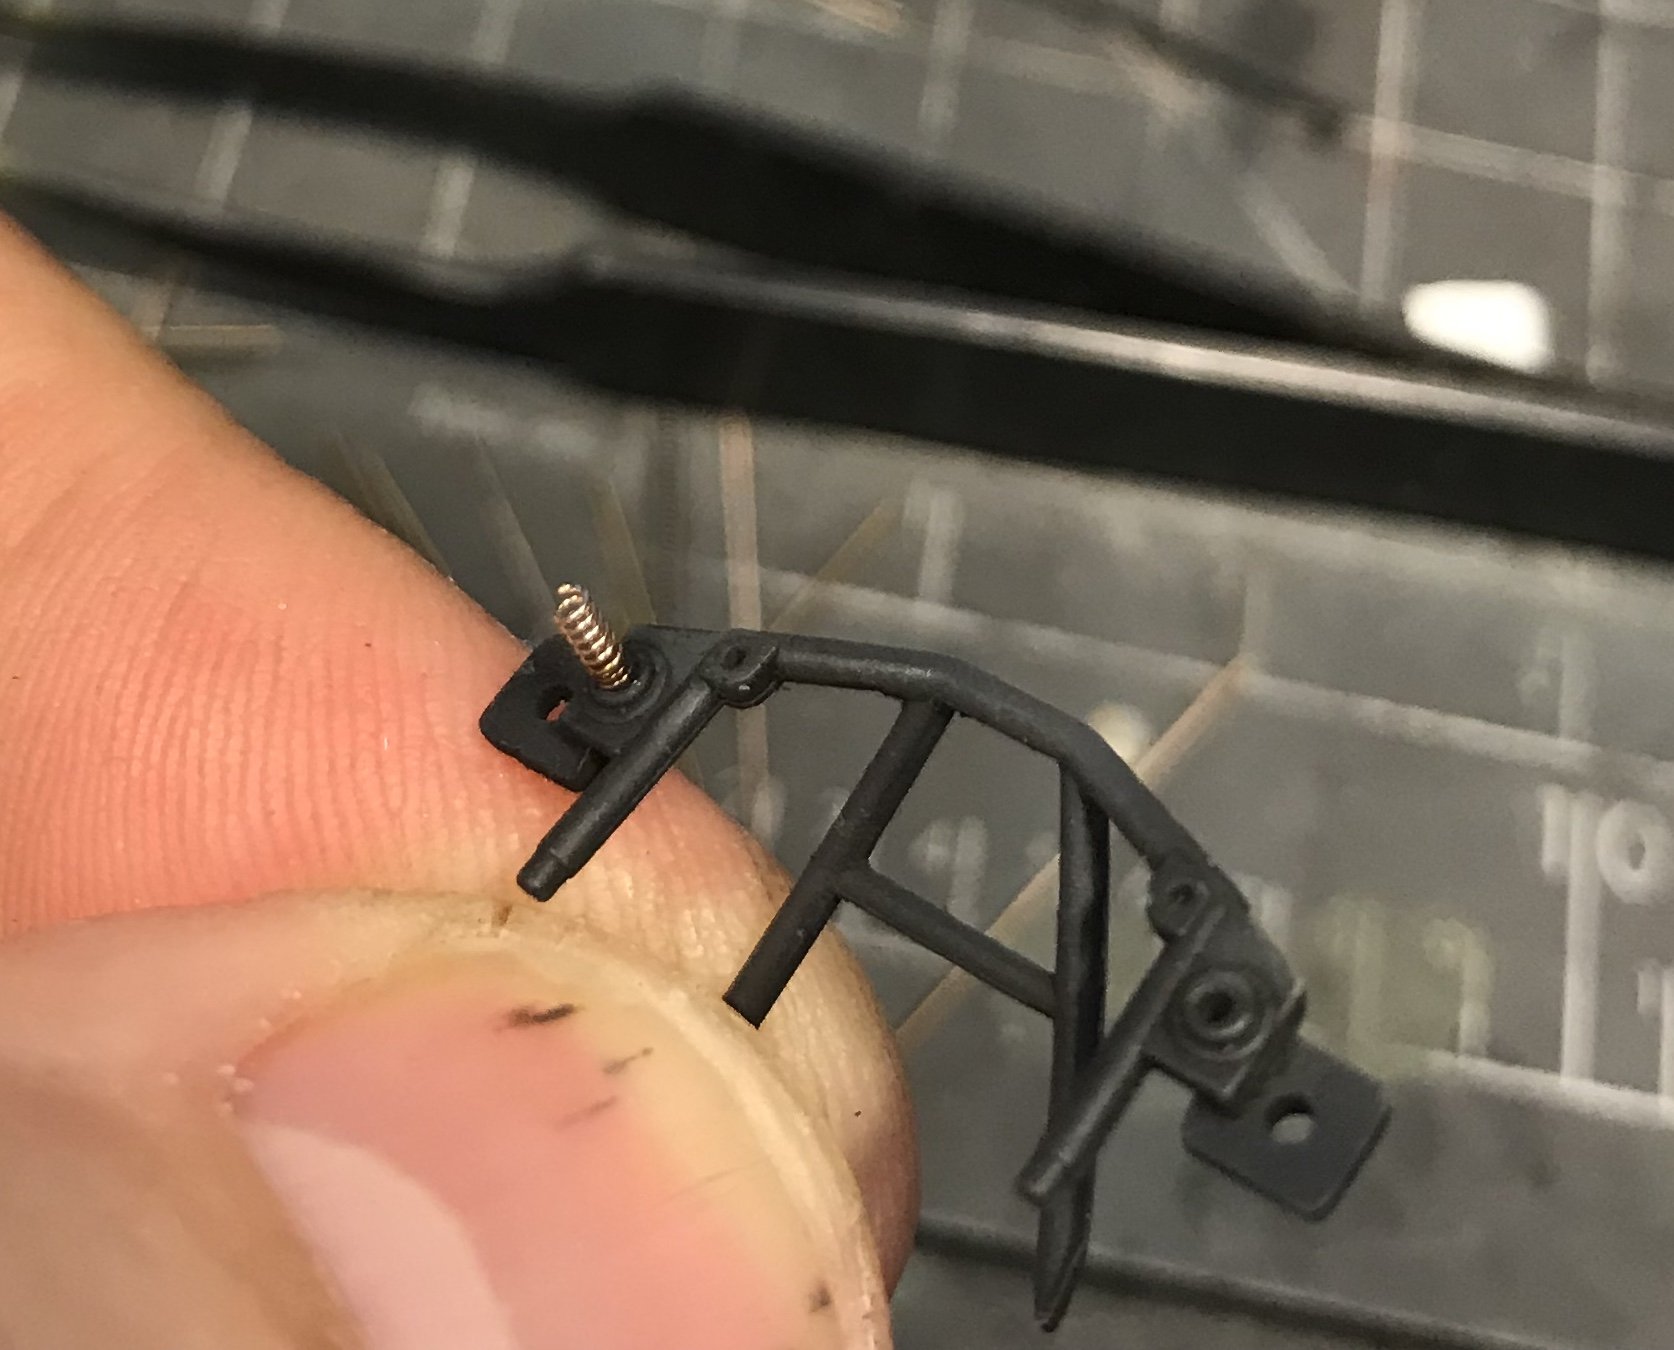
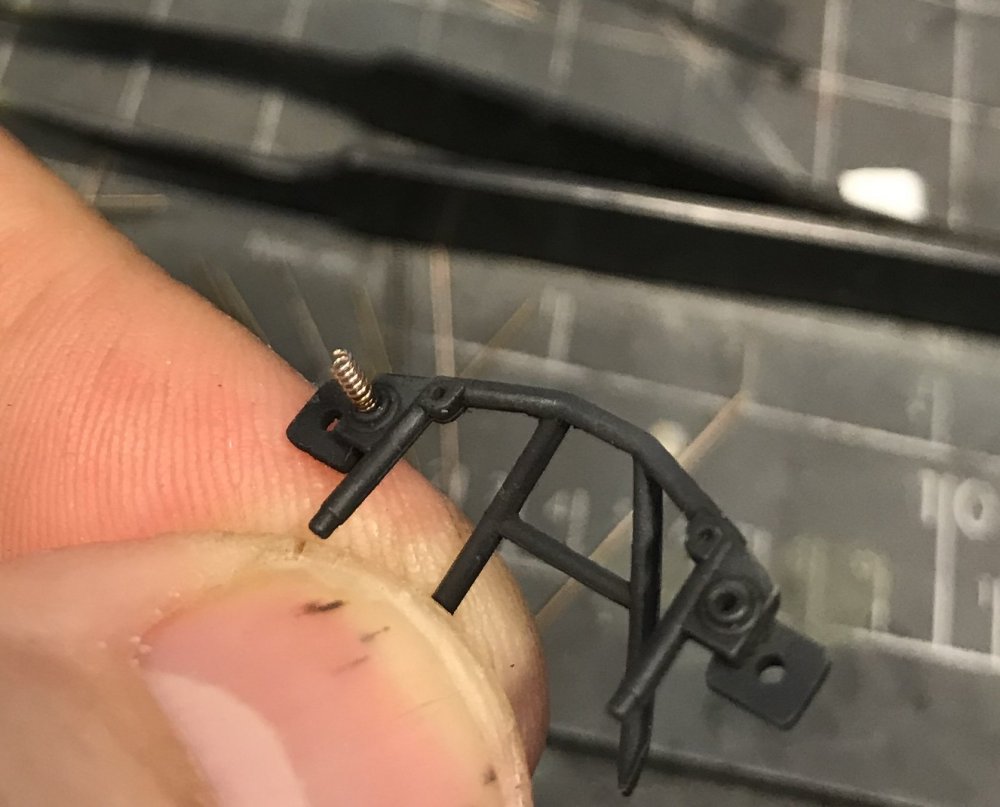
I have a selection of watch springs. Perfect to replicate the spring in the pit.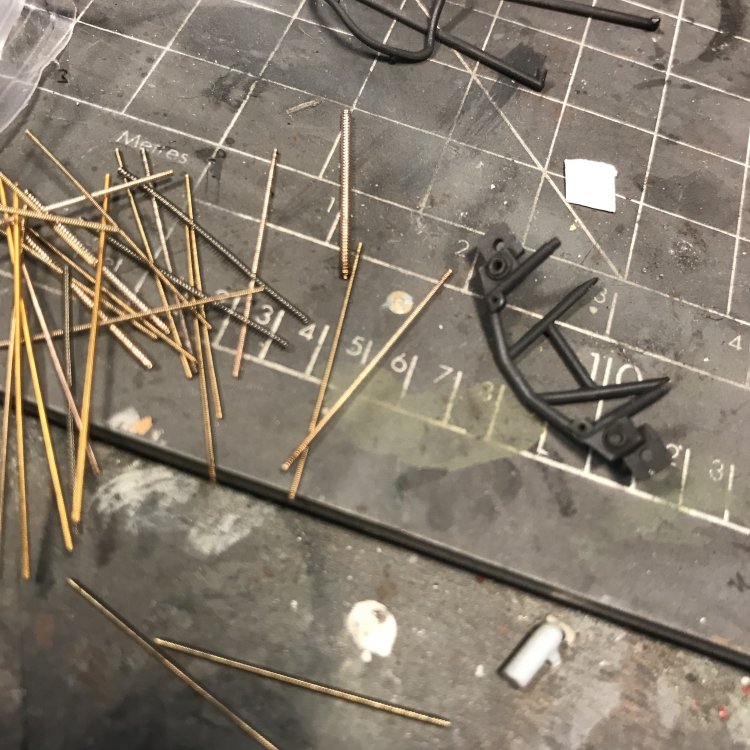
-
HO 229 Mysytery Ship build
JeroenPeters replied to harv's topic in LSM 1/35 and Larger Work In Progress
Haha! I broke the tail too!! -
Ho229 at the Udvar-Hazy Center
JeroenPeters replied to JeroenPeters's topic in LSM 1/35 and Larger Work In Progress
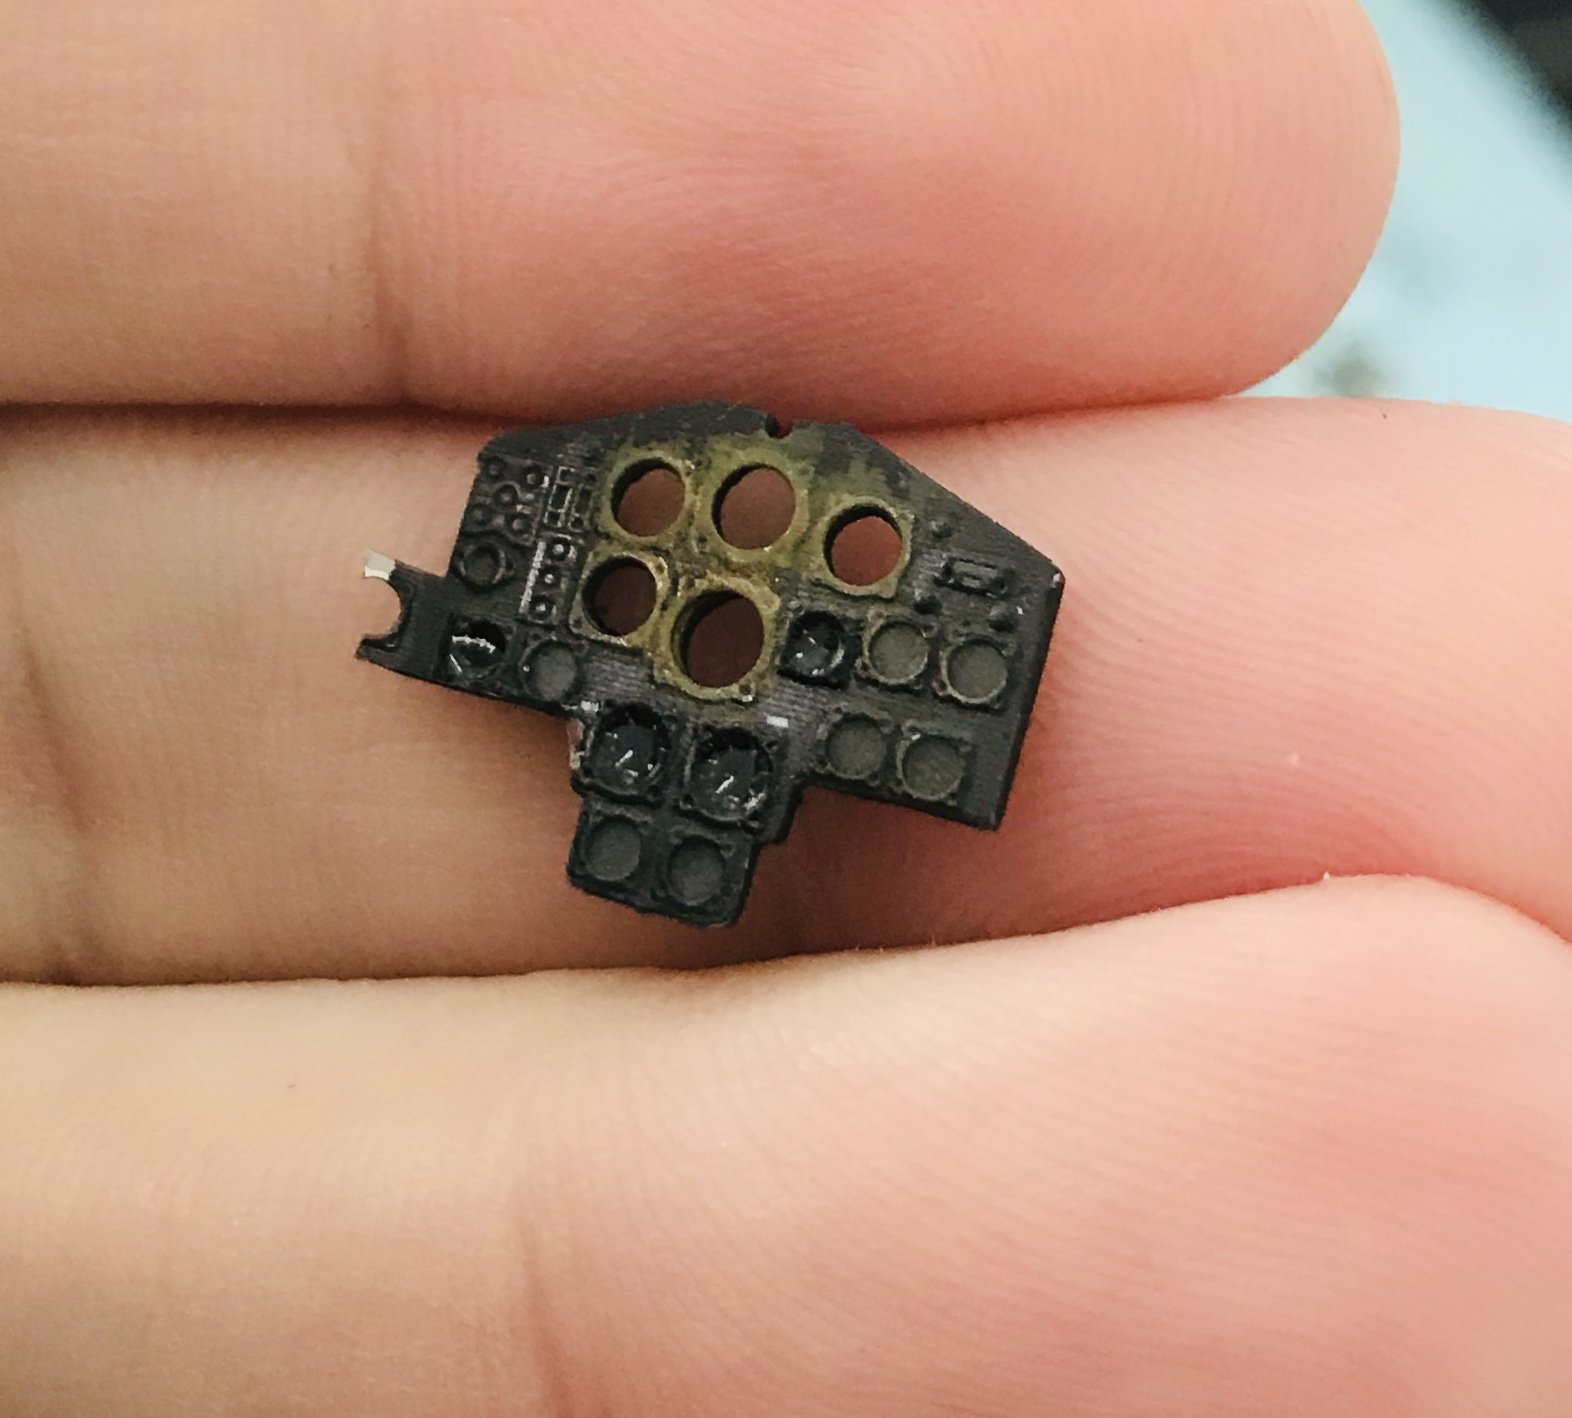
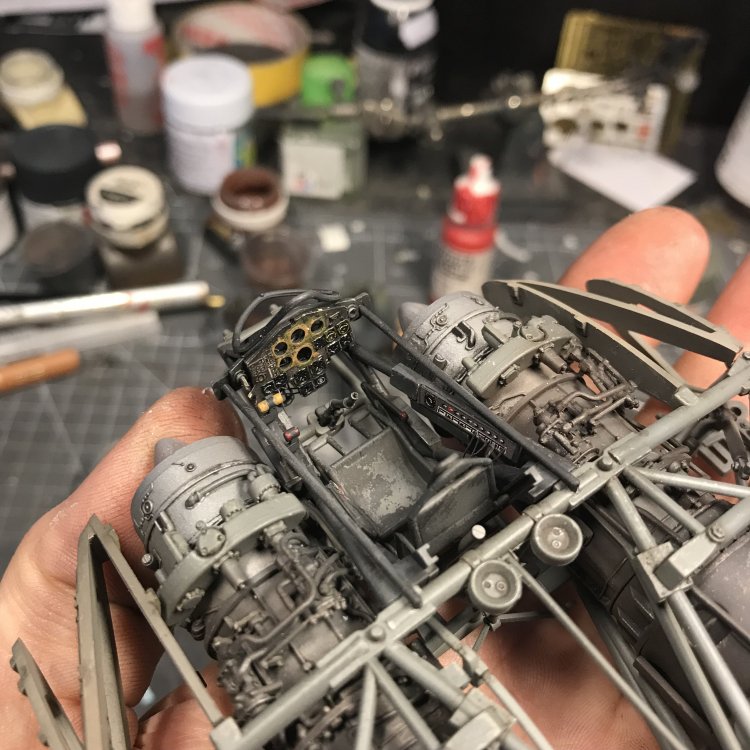
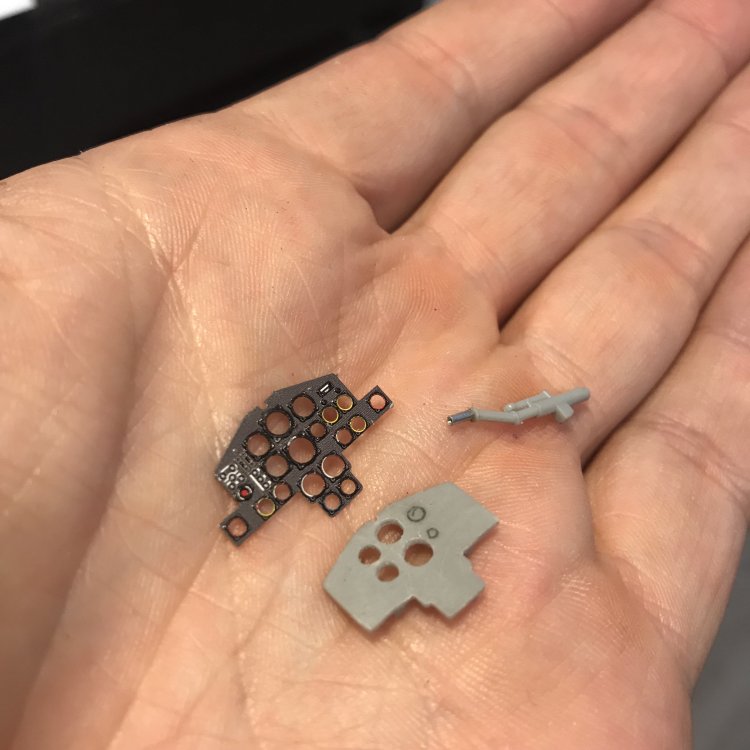
First i’m sorting the instrument panel. I’m using the kit part because of the nice instrument housings on the back and eduard Photo etch for the front. Drilled some instruments out and am now adding the kit decals to the remaining instruments.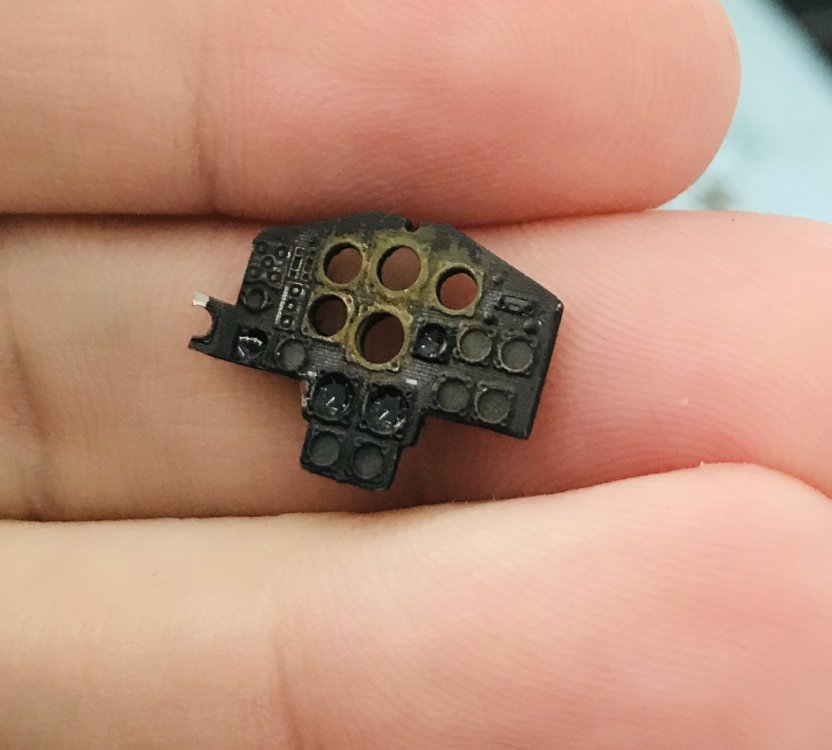
-
Ho229 at the Udvar-Hazy Center
JeroenPeters replied to JeroenPeters's topic in LSM 1/35 and Larger Work In Progress
I love that faded and patches effect and will add lots of wiring at the next stage.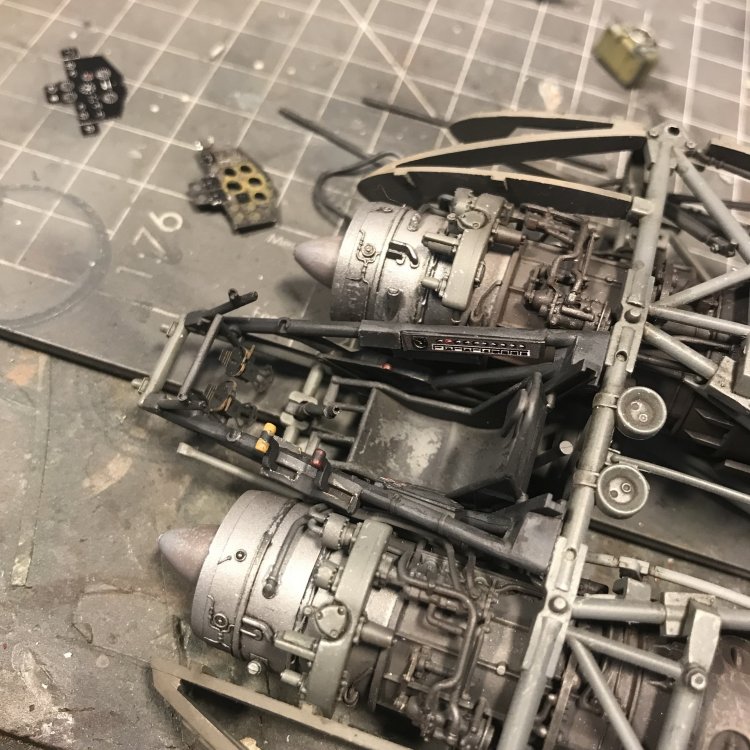

-
Ho229 at the Udvar-Hazy Center
JeroenPeters replied to JeroenPeters's topic in LSM 1/35 and Larger Work In Progress
Plugging away at the pit. First paint layers are on.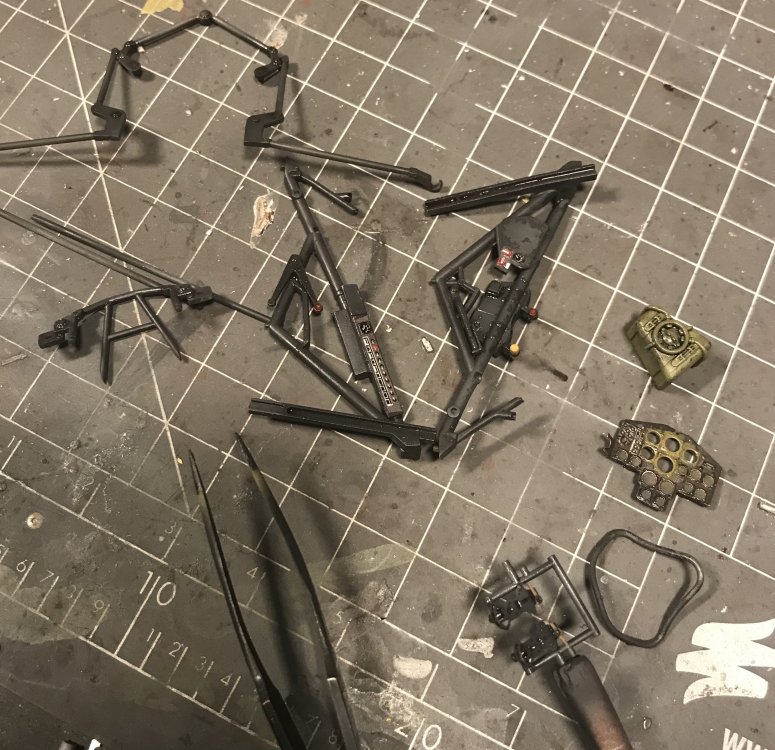
-
dambuster Hong Kong Models 1/32 Avro Lancaster Dambuster
JeroenPeters posted a topic in Aircraft Reviews
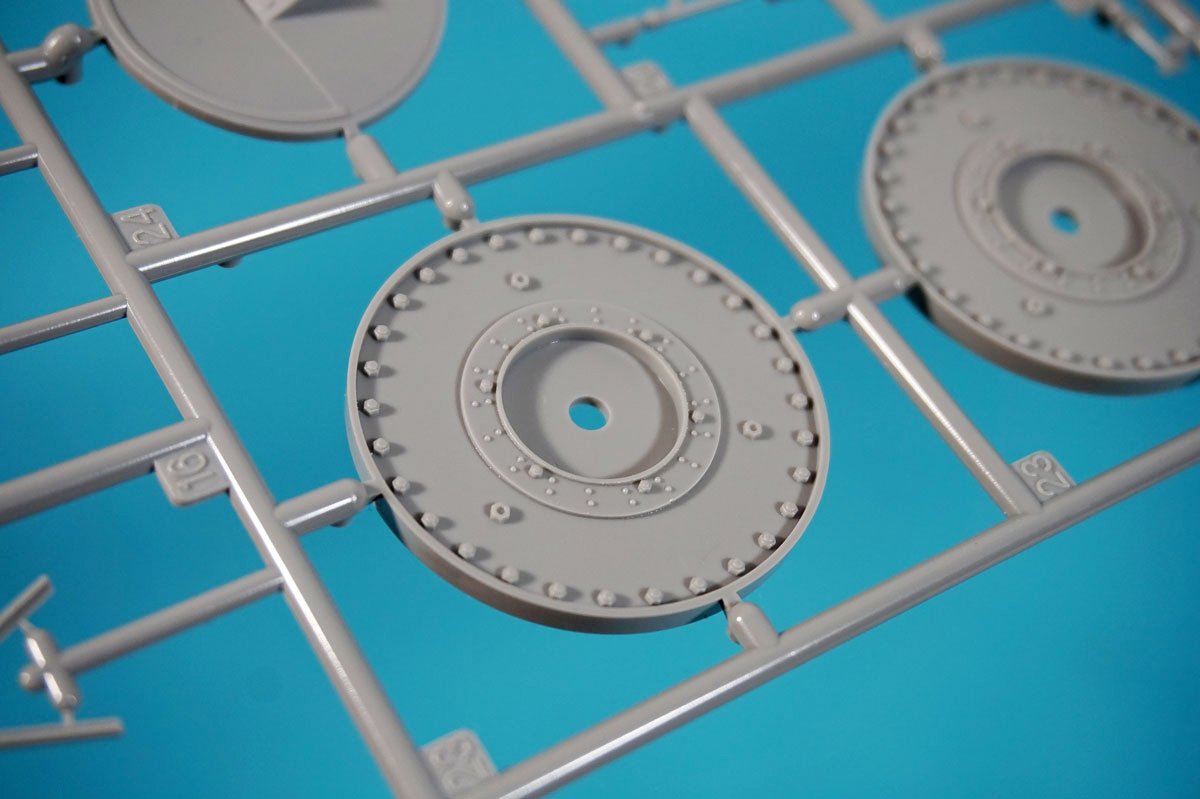
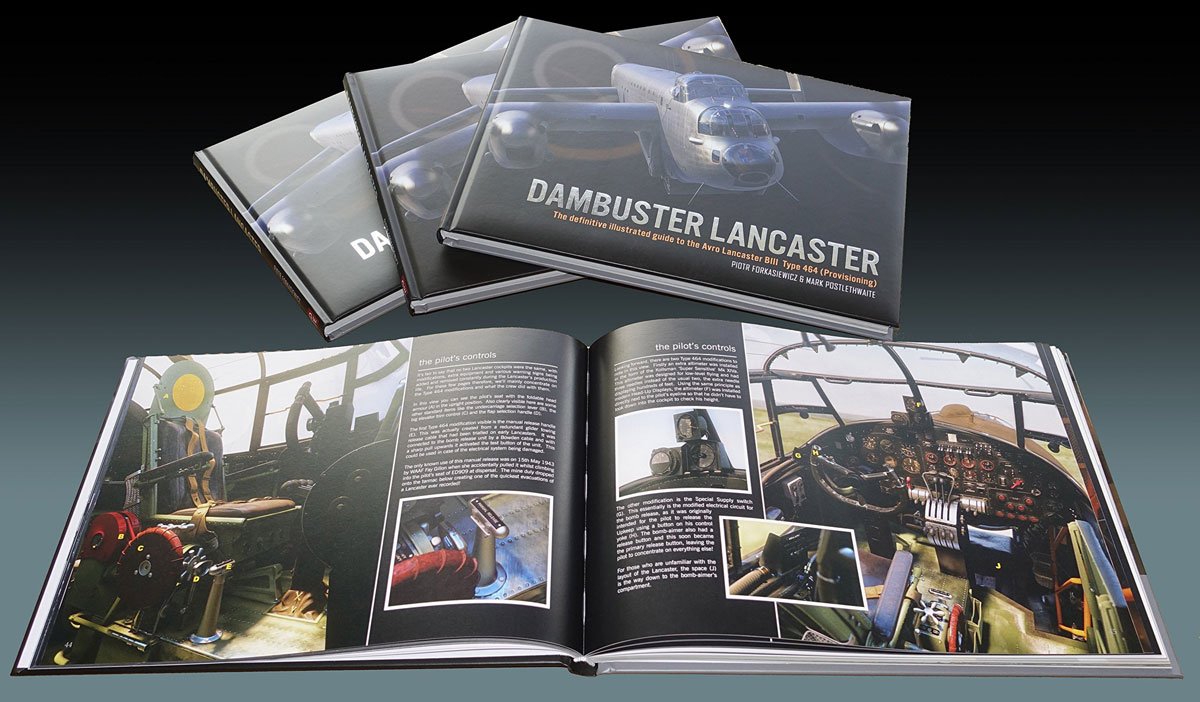
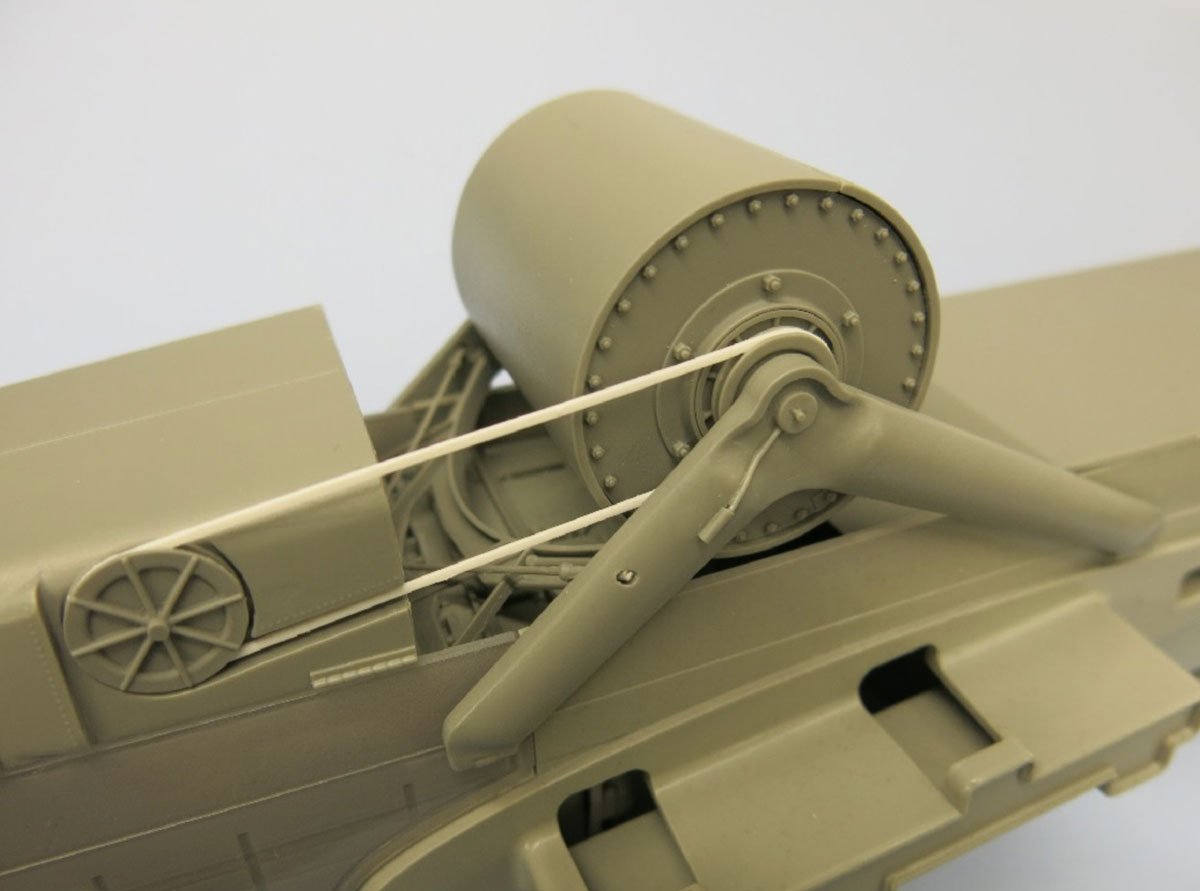
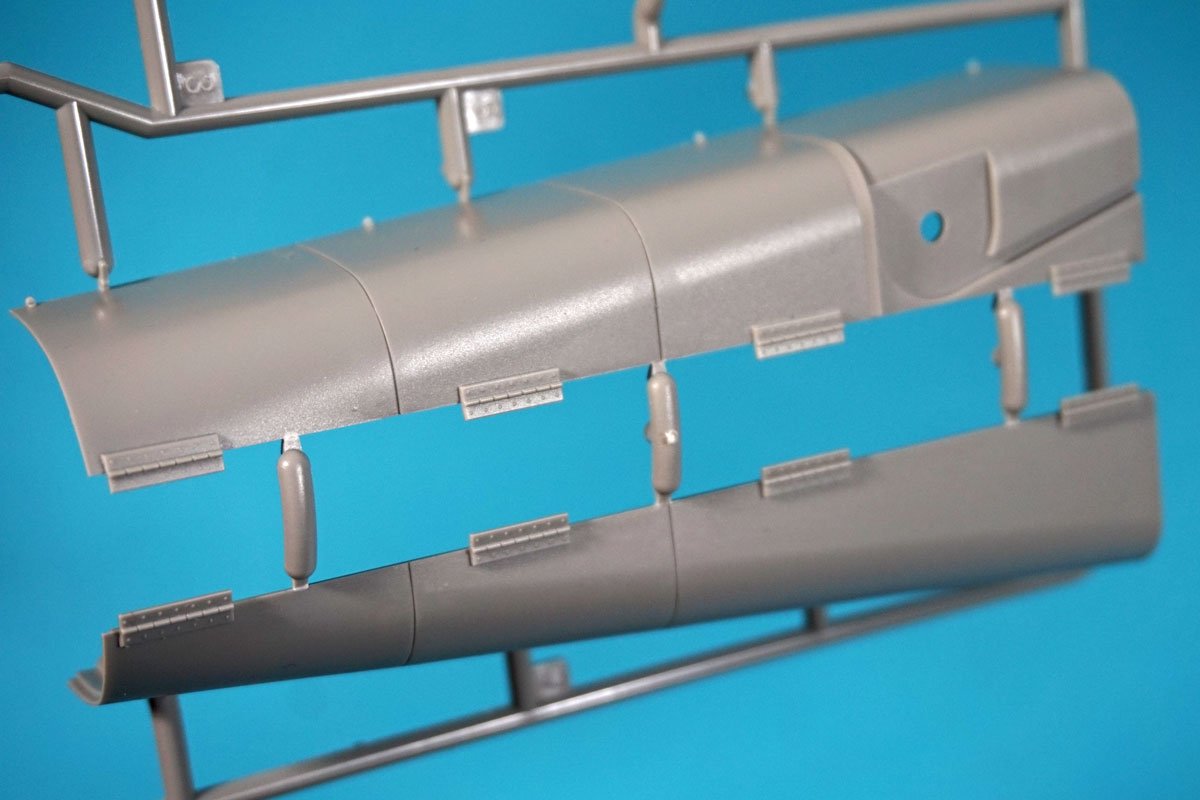
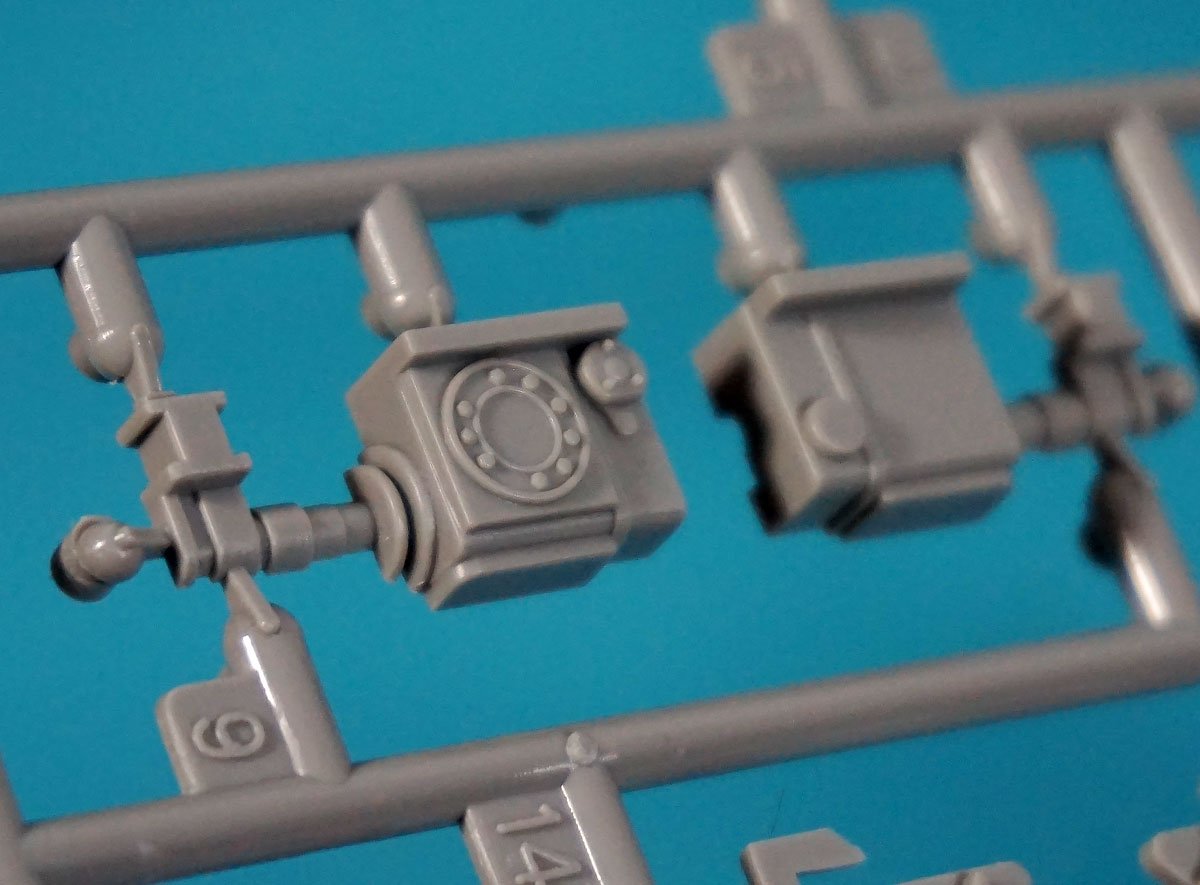
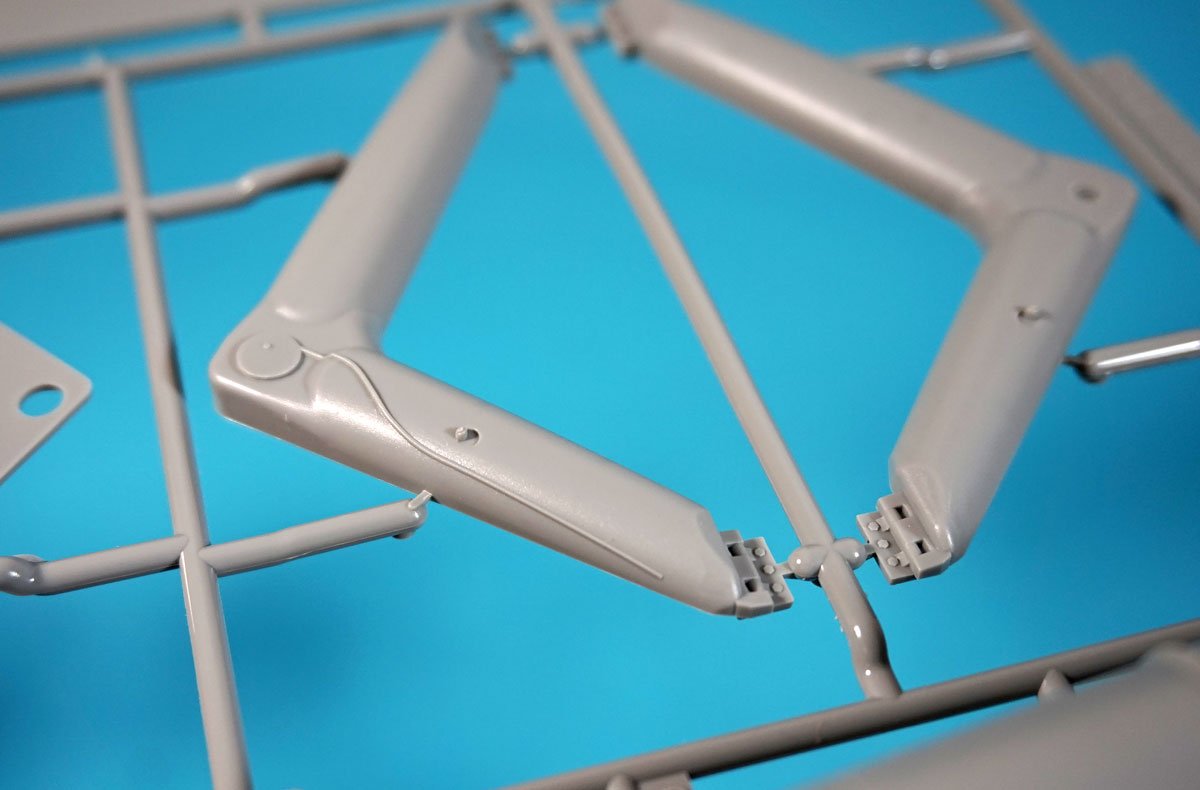
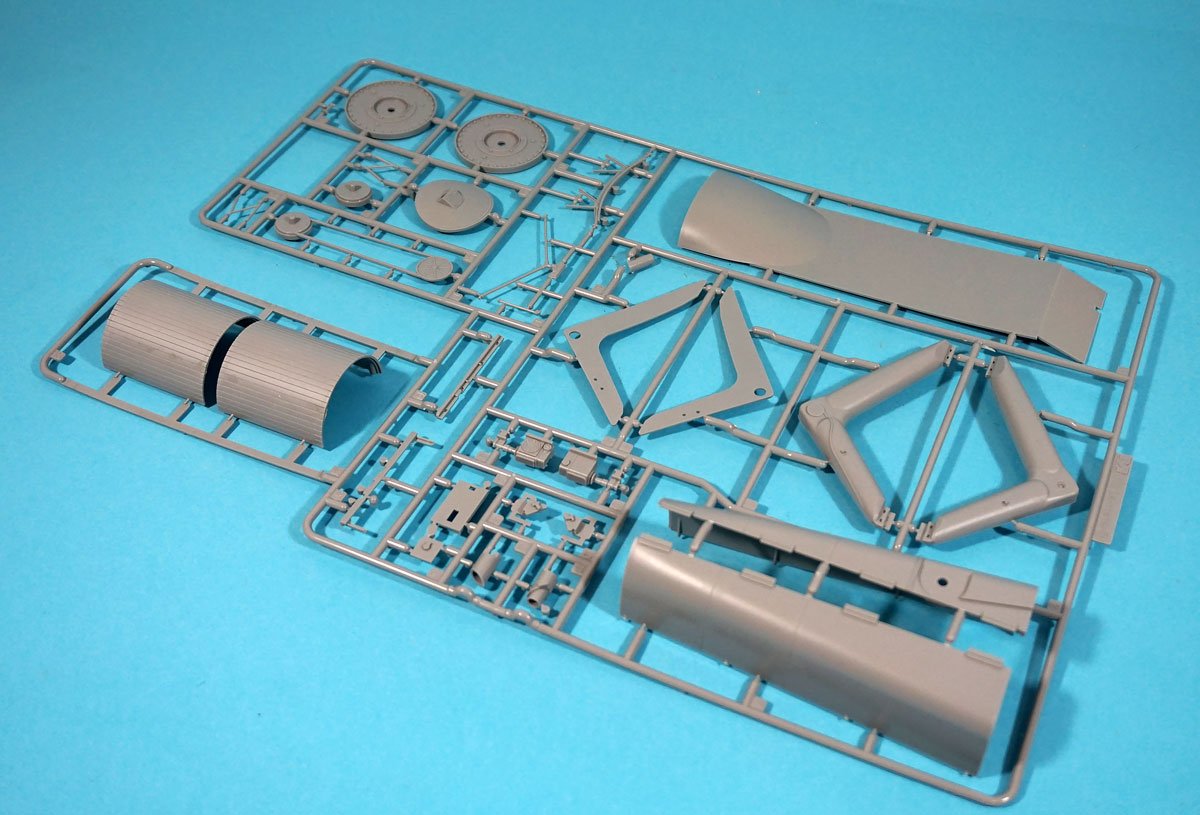
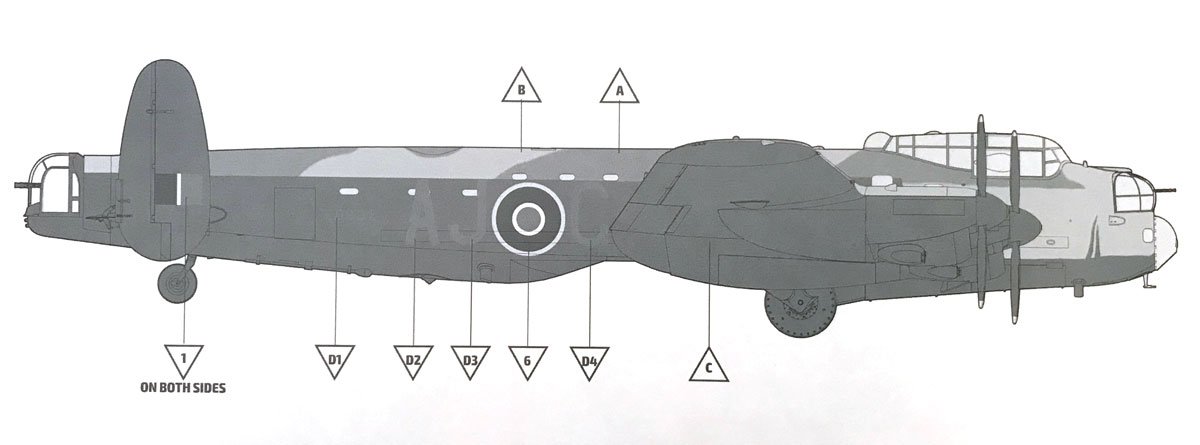
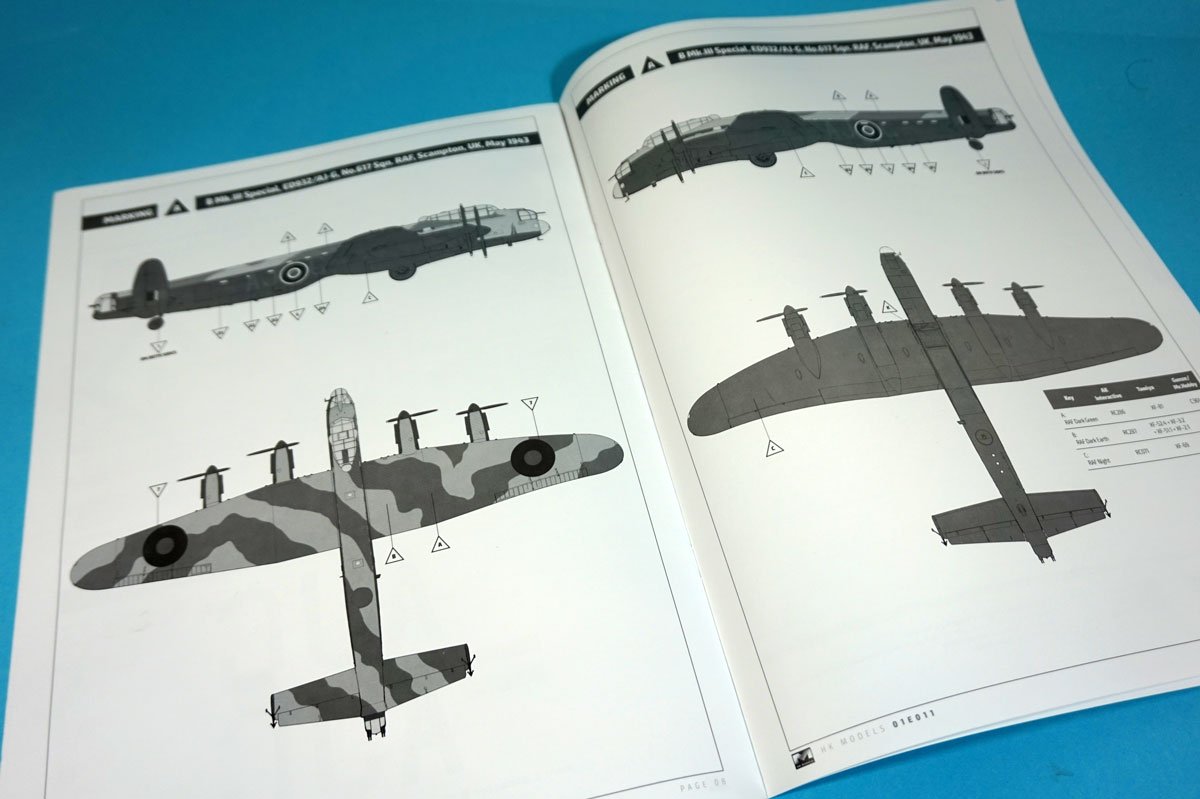
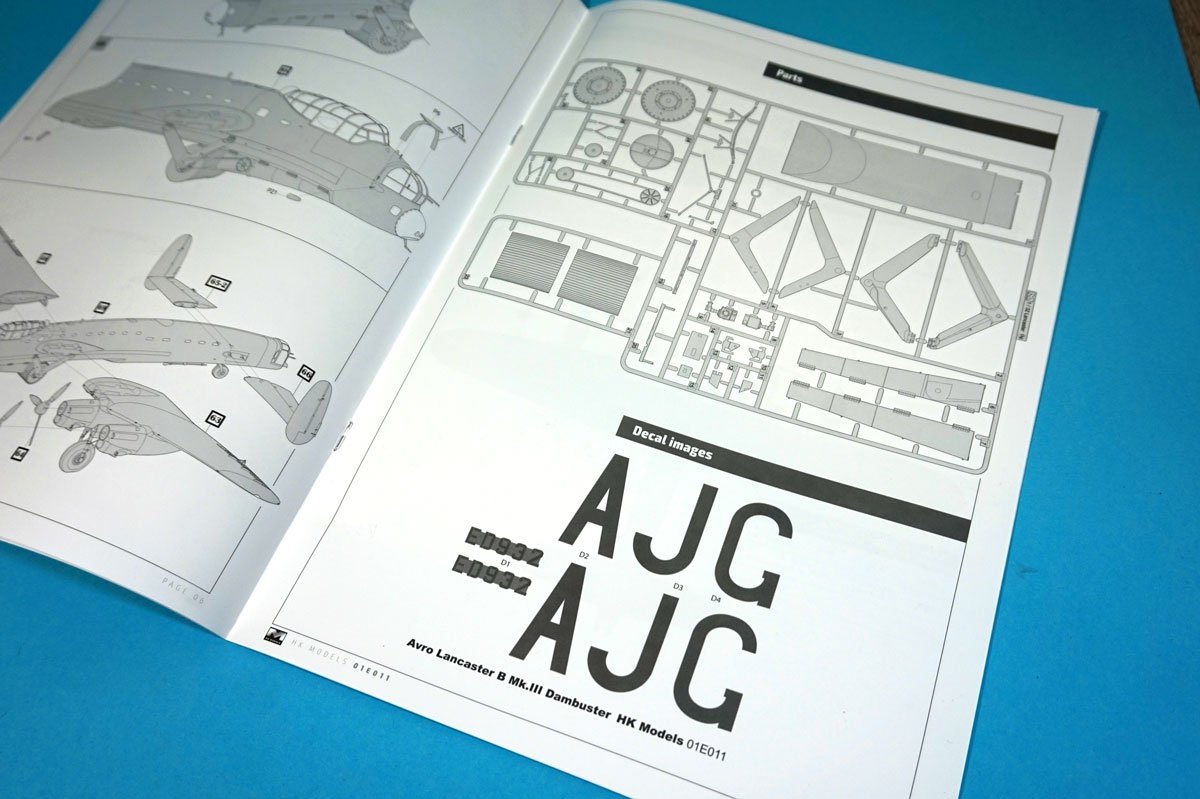
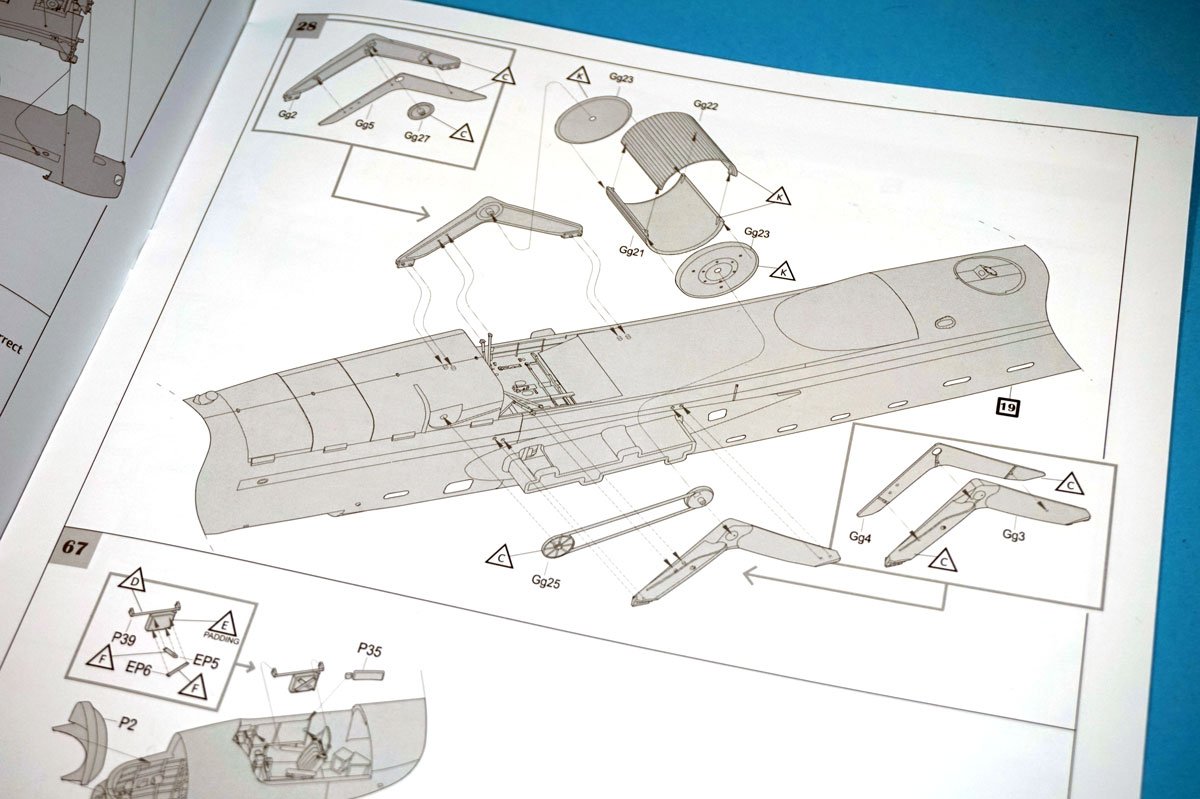
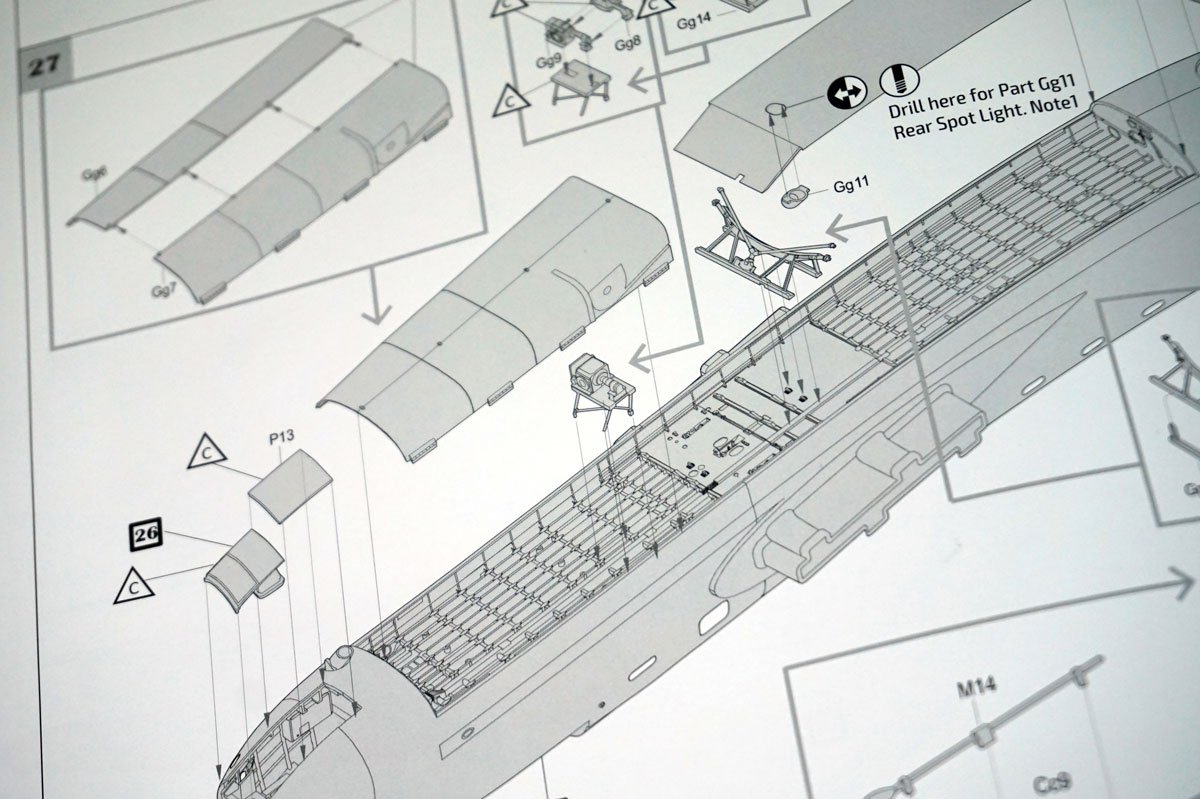
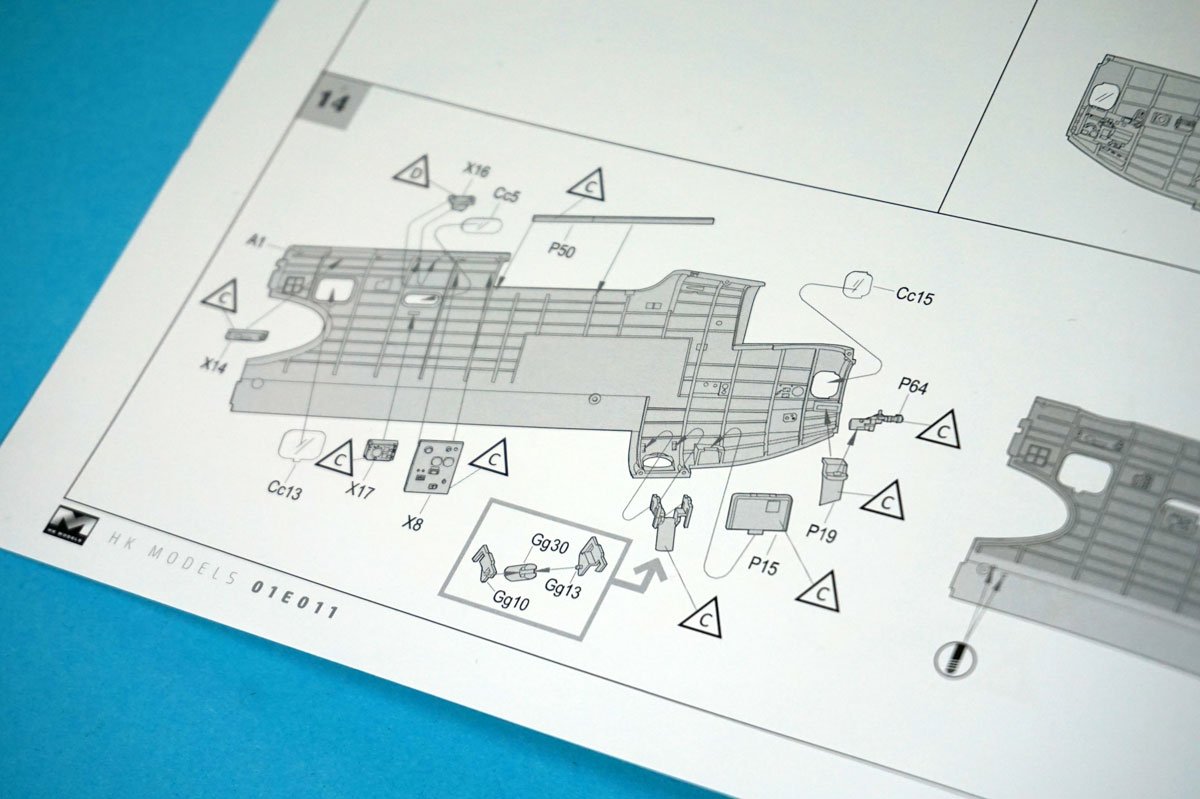
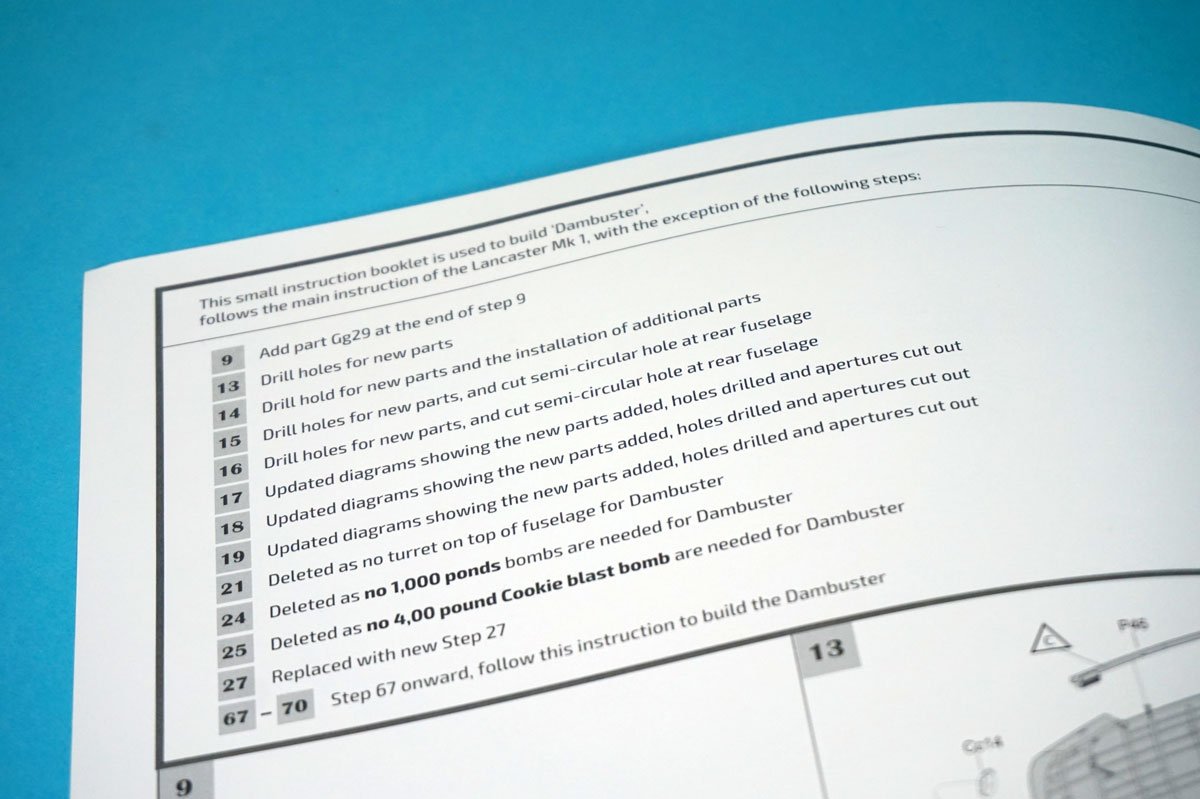
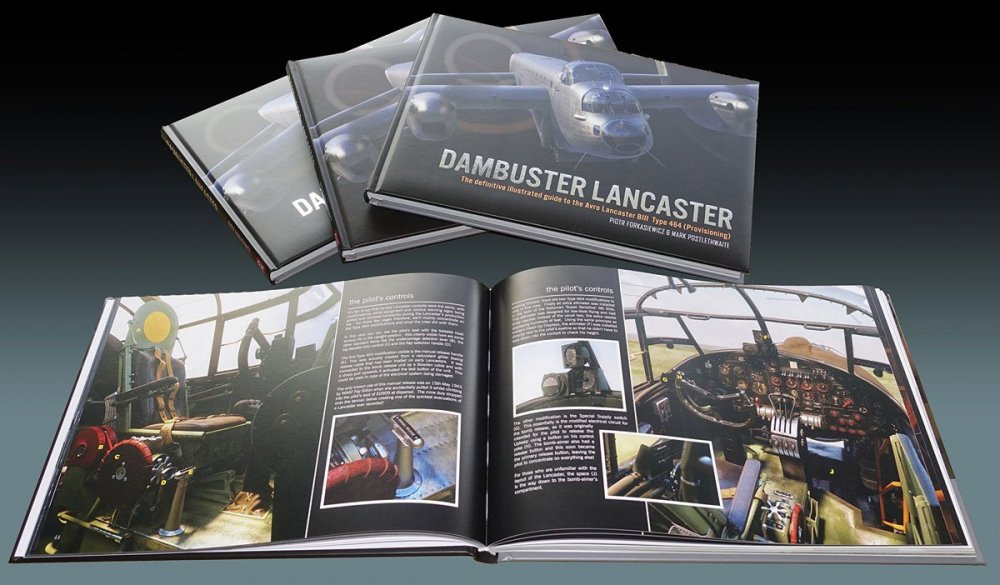
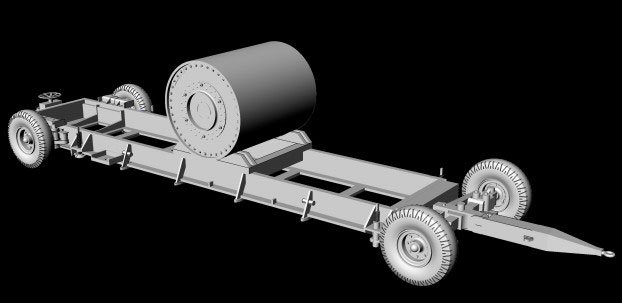
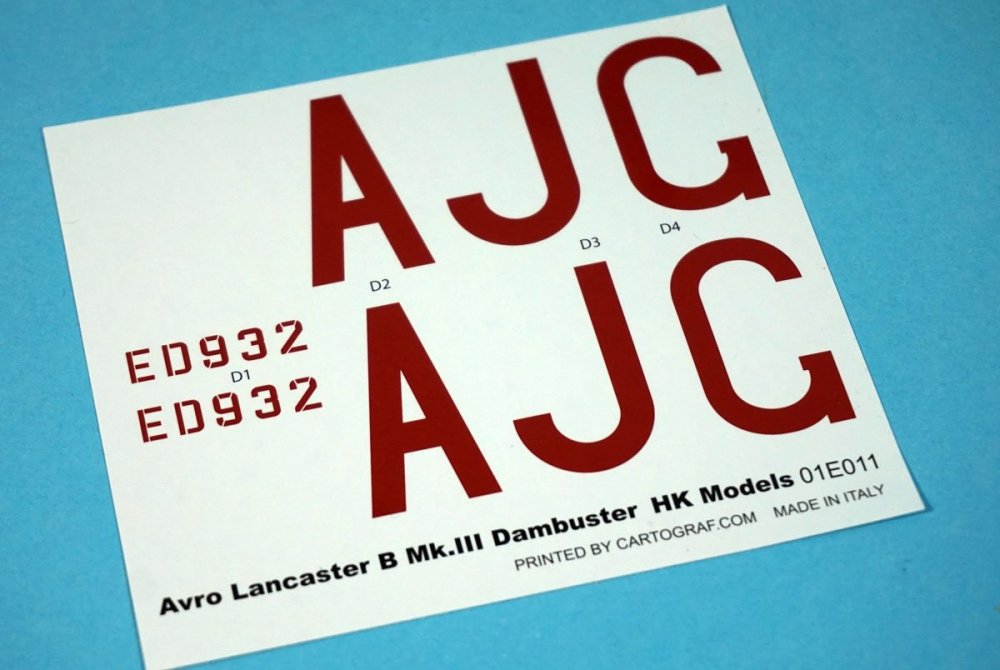
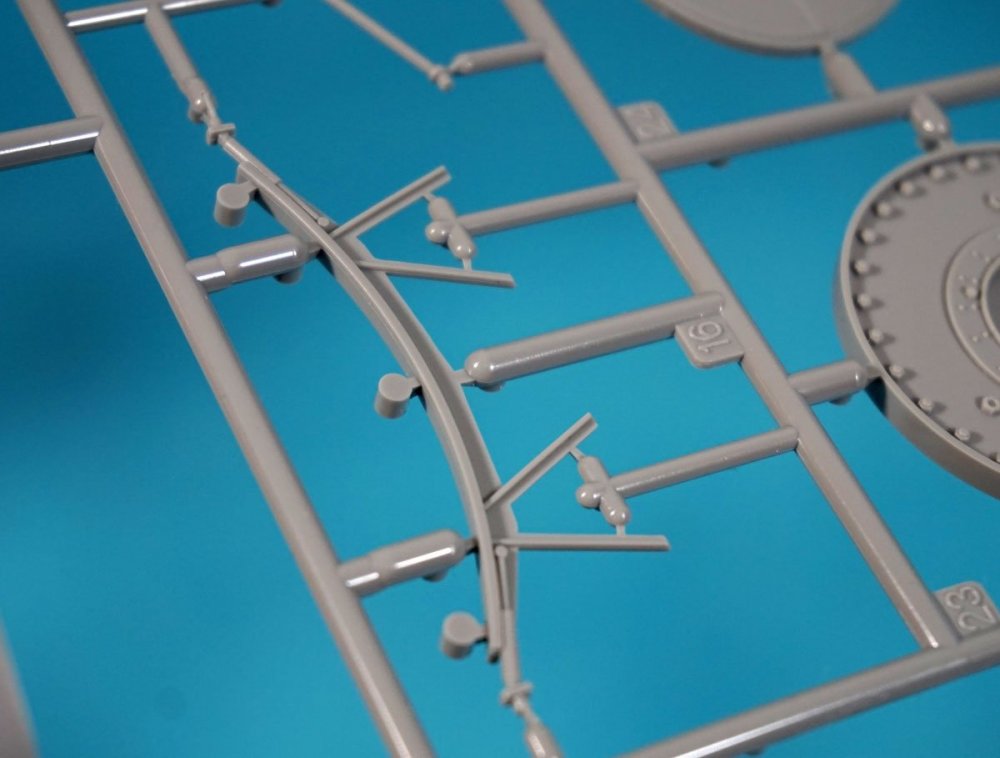
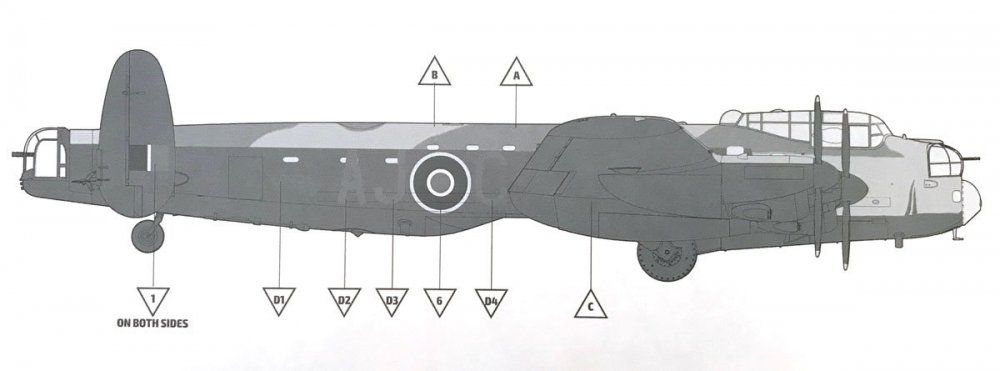
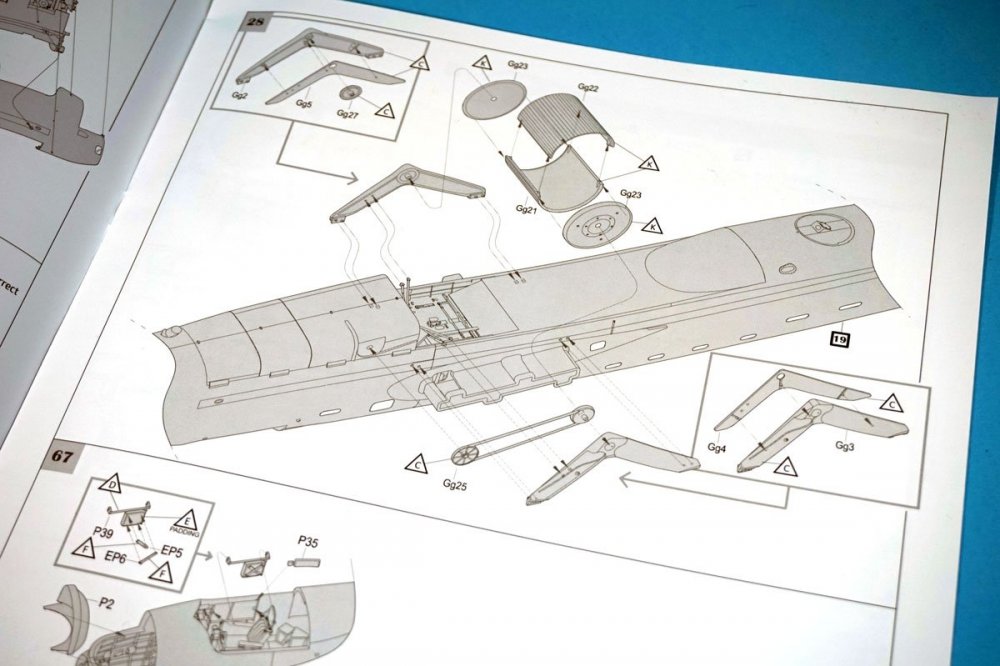
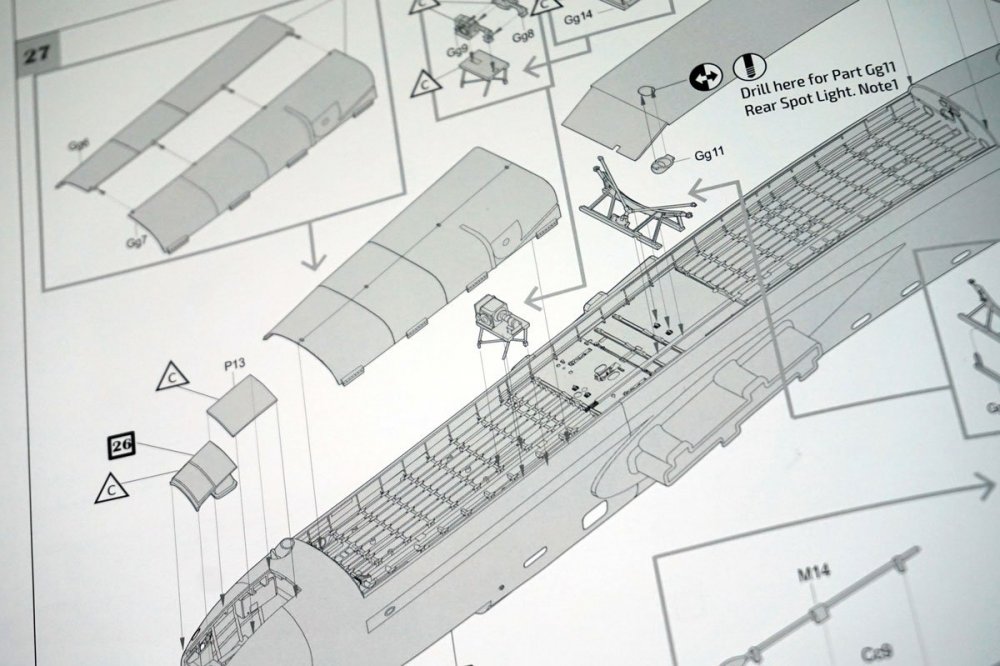
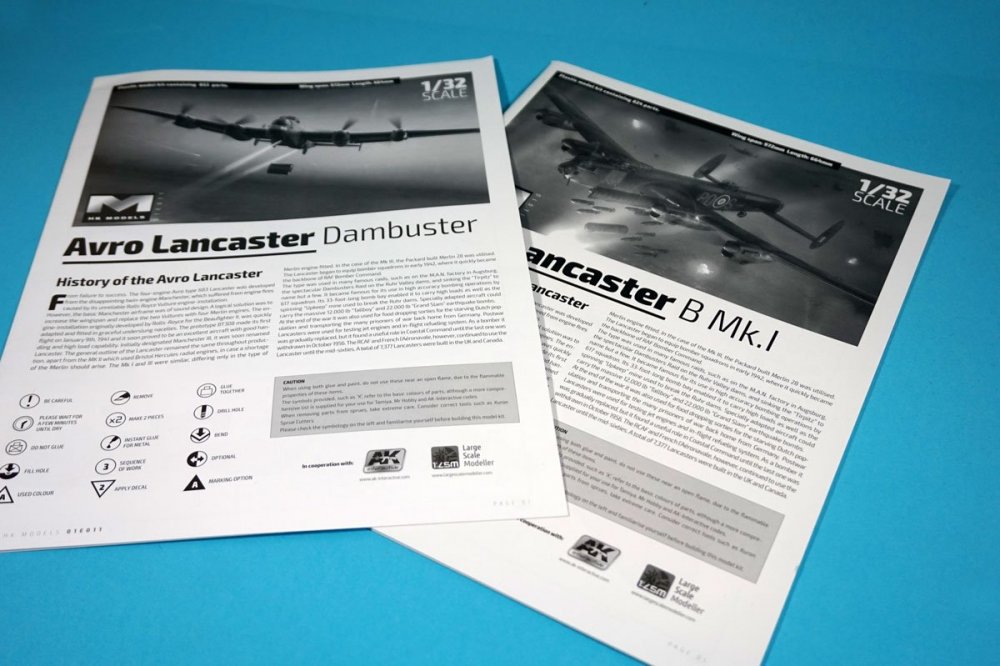
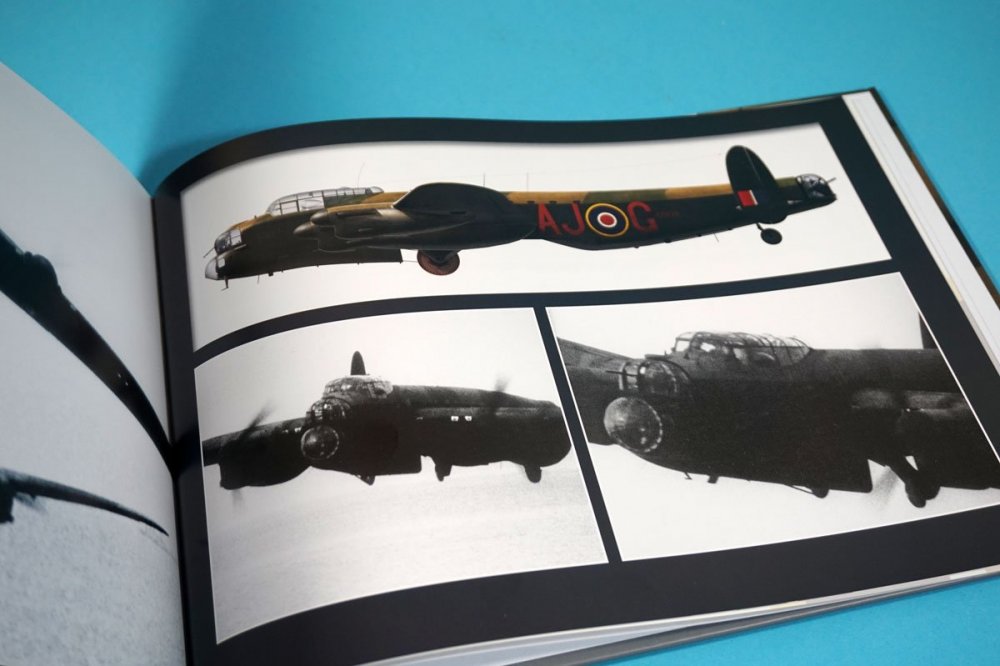
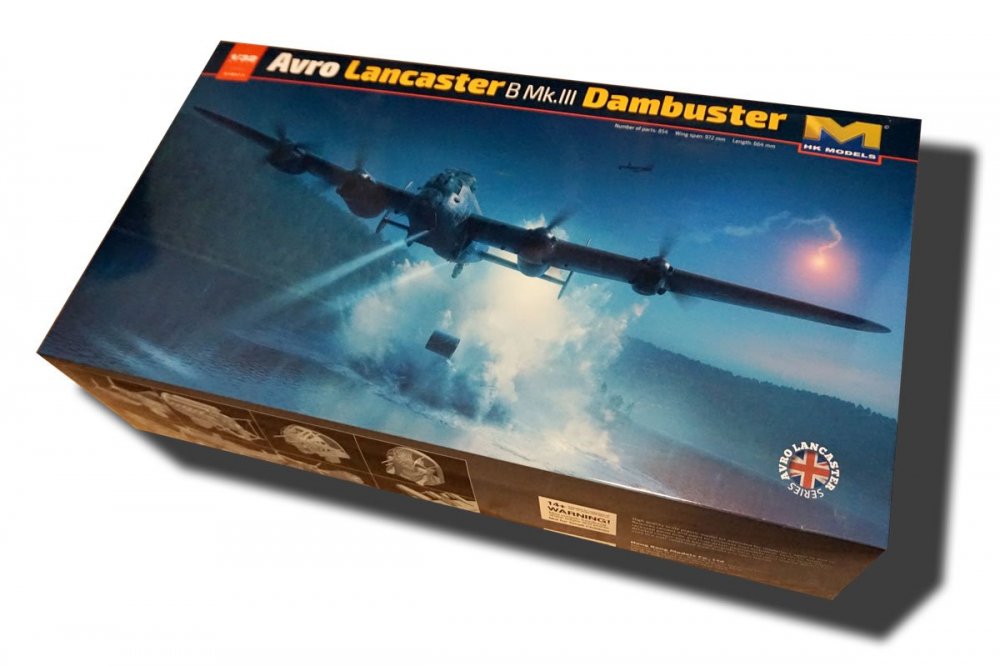
1:32 Avro Lancaster Dambuster Hong Kong Models Catalogue # 01E011 The ‘Lancaster Series’ sign on the box of the initial HK Models Lancaster release promised us more. And here it is. First off let me start by saying this is bad news for Iconicair. The company that recently released a resin Dambuster conversion for the Lancaster kit for 47,00 GBP. Available here. What might be useful for your diorama or display is the Iconicair Dambuster Bomb trolley for 39,50 GBP. Available here. This trolley contains a resin MkIII Upkeep mine with smooth service. The HK Models kit contains an Upkeep mine with ribbed service. More on this later… Iconicair's Dambuster conversion: Iconicair's bomb trolley: To understand how the release mechanism works, you shouls really check this video: https://www.youtube.com/watch?v=Xto6nQ9g_ss To understand it even better, I’d recommend Piotr Forkasiewicz and Mark Postlethwaite’s book: Dambuster Lancaster. It is filled with amazing 3D renderings of the mechanism, structure, profiles and history of the Dambuster. Available for 30 GBP. The kit With the amazing 3D rendered boxart of Piotr and the size (the same as the first Lancaster release) this box demands respect. Upon examining the contents, only a few things are different from the B.Mk.I. There’s one extra sprue, an extra instruction booklet and extra decals. The Gg sprue: The ribbed Upkeep surface. I myself will smoothen this out: The motor that spins the Upkeep mine: The extra booklet: As said there is an extra instruction booklet included to build the Dambuster version. When you start building just follow the B.Mk.1 instructions and keep the Dambuster booklet at hand. It tells you at which steps you need to use other parts or perform modifications. This starts at step 9, in the cockpit. It tells you to install part Gg29. This will be the manual release lever for the Upkeep mine. In reality it was taken from a glider where it was used as towing release lever. What you may want to add yourself is the extra altimeter the Dambuster had on top of the Direction finding indicator. At step 21 you are told to skip the turret on top of the fuselage since the Dambuster version did not carry one. At step 27 things get quite different. The bomb bay. Different doors and a special frame (Transverse frame) that is connected to the Upkeep carrying arms (caliper arms). And also the mechanism that spins the Upkeep mine before it was released. This consists out of a motor and flexible drive belt. Step 27 also tells you to install part Gg24. This is the rear spot light. The dambuster carried two spotlights. One at the front and one at the back. The beams were directed down / left. When the two beams lined up and created two dots next to eachother on the water, the plane was in the right position. The front spotlight was located in the camera port in the nose. The rear spotlight was situated aft of the bomb bay. Interestingly the hole and mount it was in, was already designed in earlier stages to house an extra Vickers gun. The instructions tell you there is lot of debate as per the location of the rear spotlight. Many believe it was housed aft of the bomb bay. And many believe it was mounted under the bomb bay, more forward in position. The instructions lets the modeler choose, but also tell you HK Models believe the aft position is correct. Piotr believes the aft position is also correct, since the lamp would have been much easier to adjust. Step 28 shows how to construct the caliper arms and Upkeep mine. Whereas I really love the detail on the caliper arms (hinges and wiring) and overall shape, I was a bit concerned with the Upkeep mine. The sides represent the Mk.III upkeep mine, but I had questions about the planked, ribbed outer surface. The Dambuster book shows a fairly rough surface. On the other hand I know earlier test version of the Upkeep mine were cladded in wood, but I couldn’t find this same ribbed effect. Neil is convinced this is right. I myself will smoothen the Upkeep. You decide! Schemes This kit contains one scheme. This is Guy Gibson’s ED932 / AJ-G from 617 squadron. RAF, Scampton, UK, May 1943. I would have loved to see a bit more options in this department. A publicity shot of Richard Todd ,who played Guy Gibson's in the Dambusters film, in front of one of the Mk VII's used for the film: The extra Dambuster decals: The AJ-G profile in the Dambuster book: Verdict This kit appears pretty well researched and is a welcome addition to the Lancaster line-up that is slowly being created. The spotlights, caliper arms, bomb bay and decals are nicely done. I myself would have loved to see an additional option for a smooth Upkeep mine surface and maybe more decal options. On the other hand: I would never use a decal on a model this big, and will order my paint masks from Maketar. This will allow me to build any scheme I like anyway. My advice: buy the Dambuster book. Dig in and have some big fun with this kit! Kind regards, Jeroen Peters A Special thank you to Hong Kong Models for the review sample.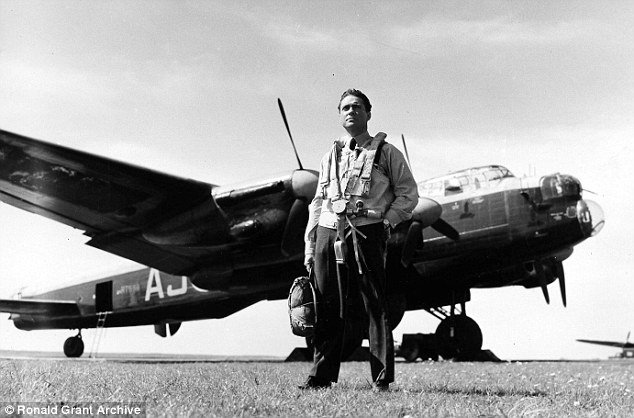


-
D-Day 75th Anniversary GB interest thread
JeroenPeters replied to Mikester's topic in Modelling Discussion
I'd be in with a Sherman! Fury Sherman. -
Sometimes i get the impression that almost anyone can turn a Tamiya Corsair into a silk purse. I have loads more respect for a really well made Special Hobby kit.
-
Ho229 at the Udvar-Hazy Center
JeroenPeters replied to JeroenPeters's topic in LSM 1/35 and Larger Work In Progress
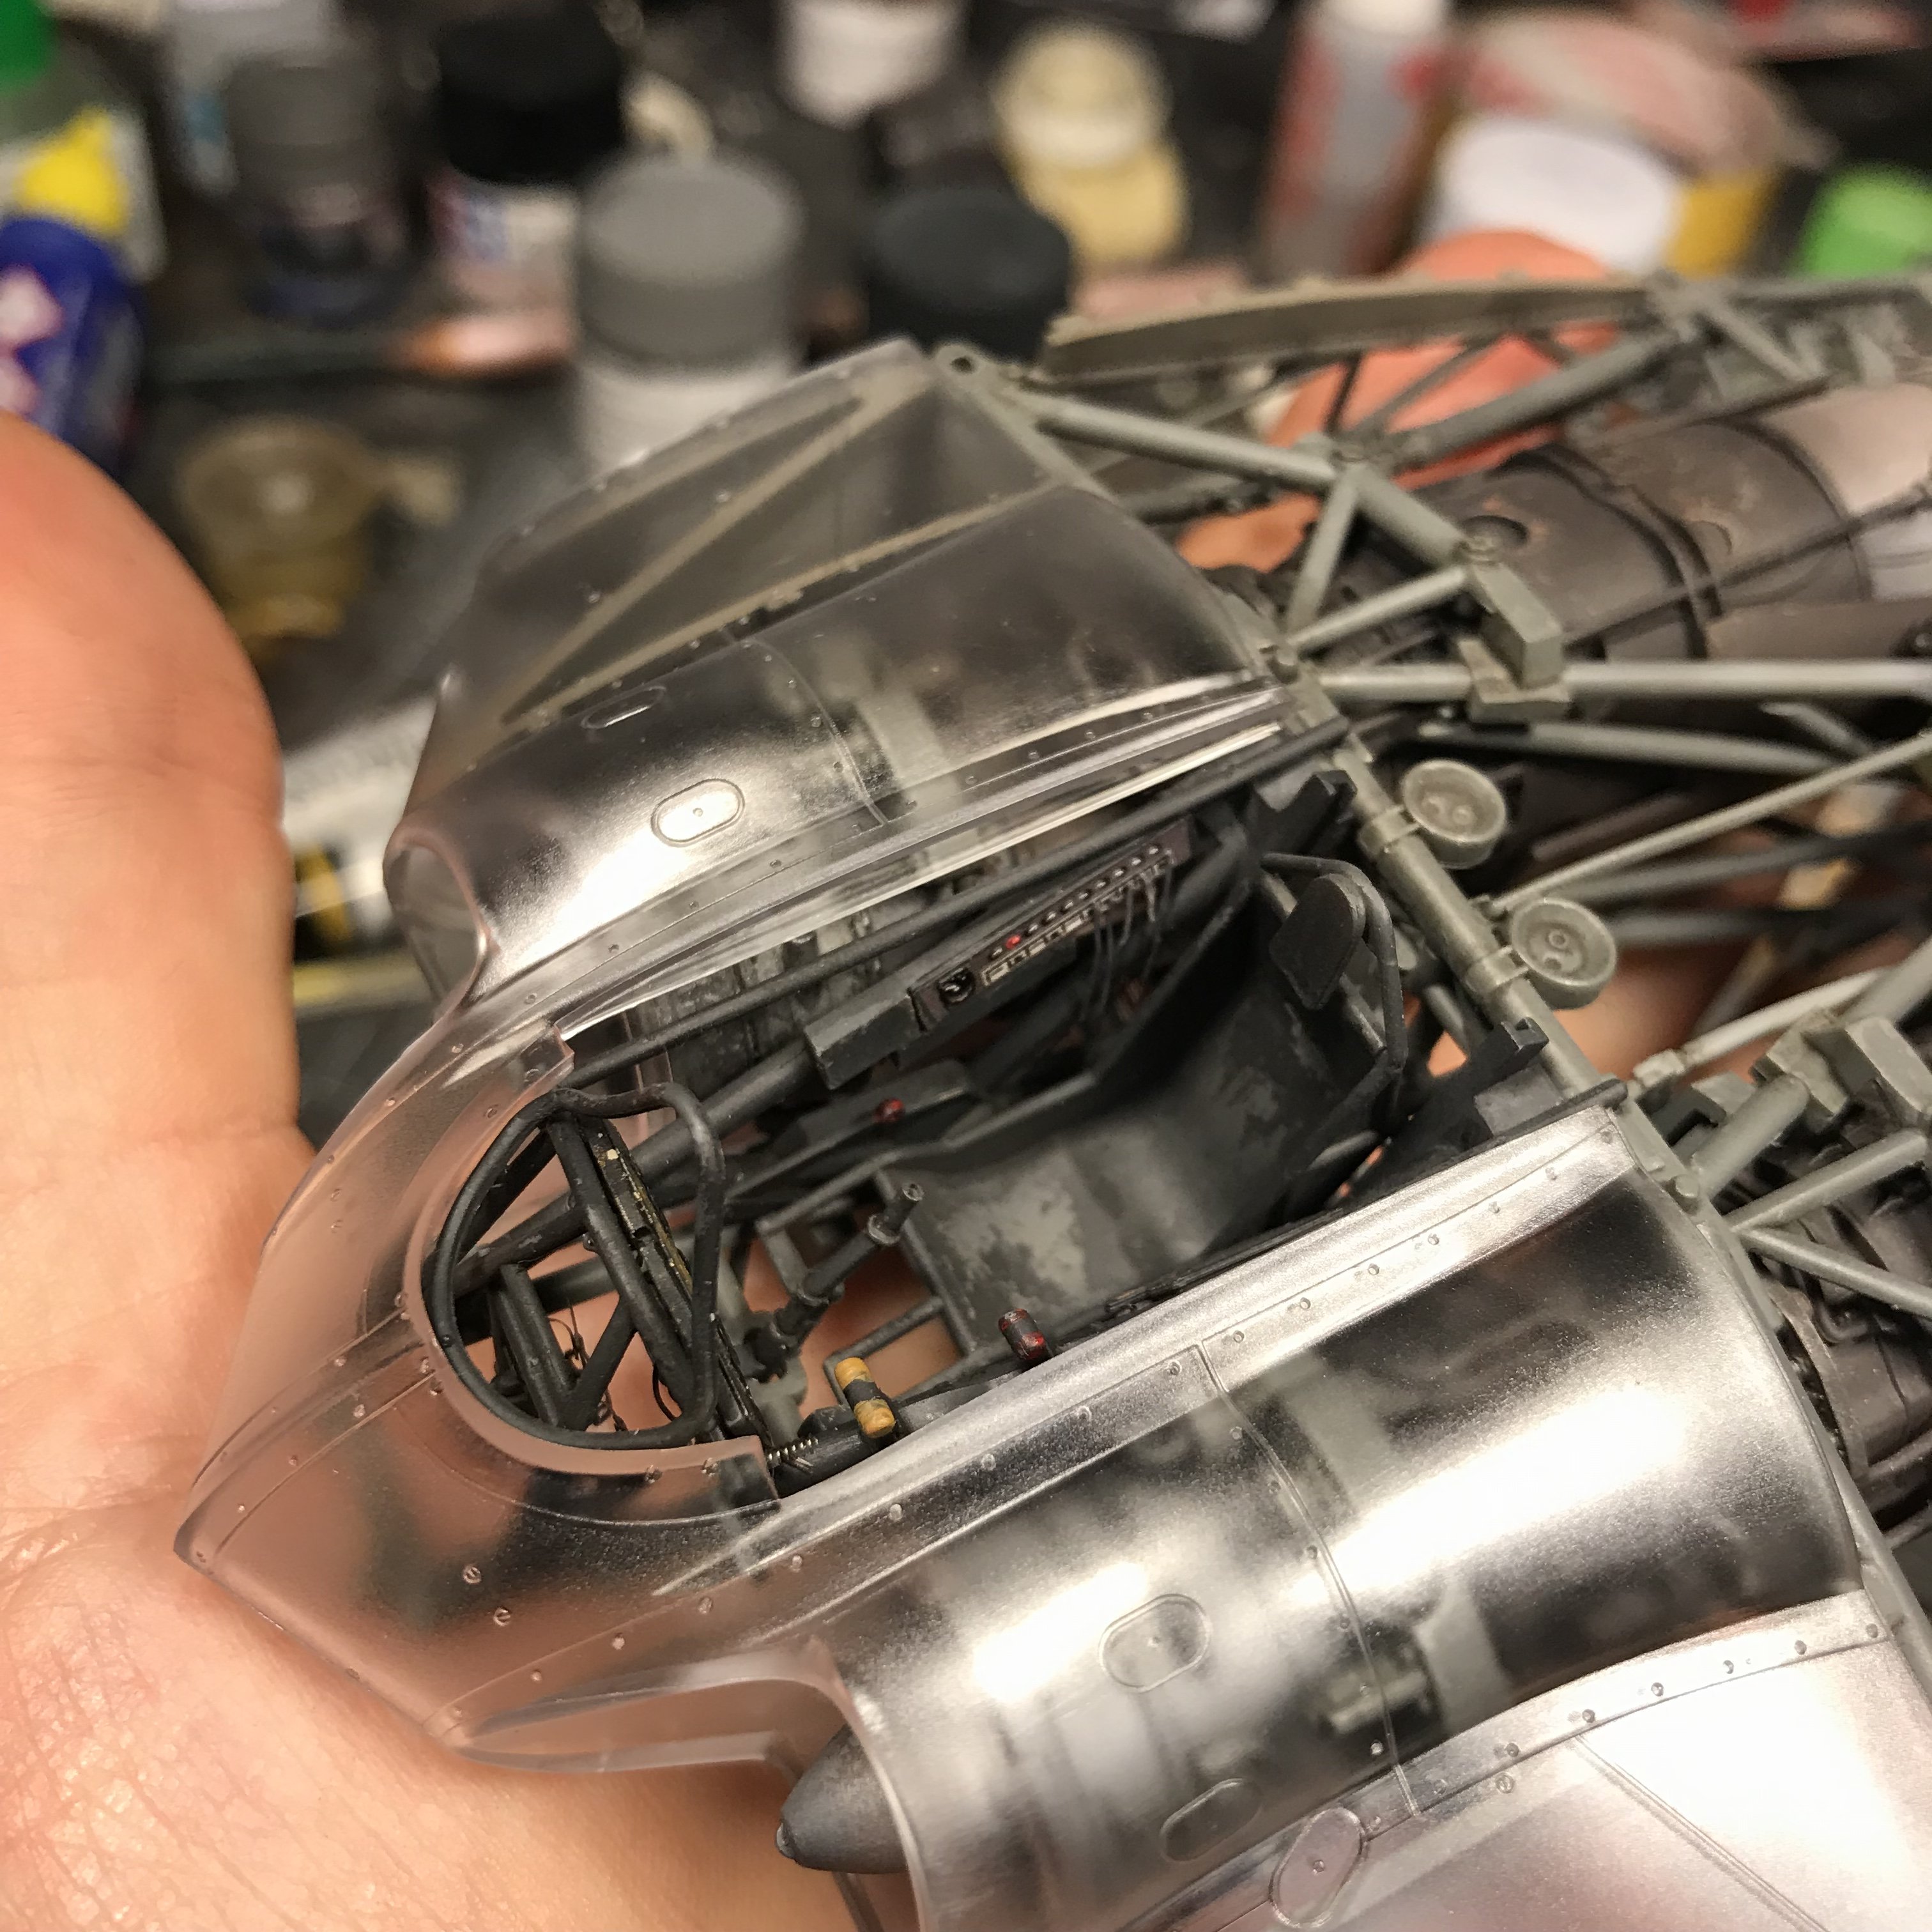
More work done today! On to the cockpit. took off half of the control stick (as is the case in the NASM one) , replaced it with metal tube and drilling out instruments. Not all the ones’ that are missing in the real thing, but enough to make it look interesting:

-
Ho229 at the Udvar-Hazy Center
JeroenPeters replied to JeroenPeters's topic in LSM 1/35 and Larger Work In Progress
Got some more stuff for this build today. Flattened tyres and seatbelts. The NASM machine does not have seatbelts installed but this is where my artistic liberty kicks in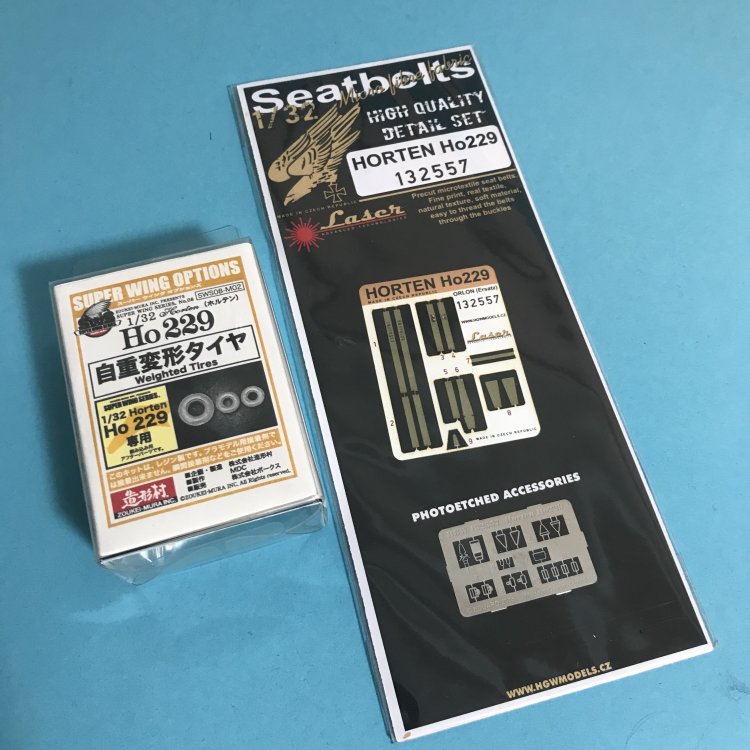
-
Ho229 at the Udvar-Hazy Center
JeroenPeters replied to JeroenPeters's topic in LSM 1/35 and Larger Work In Progress
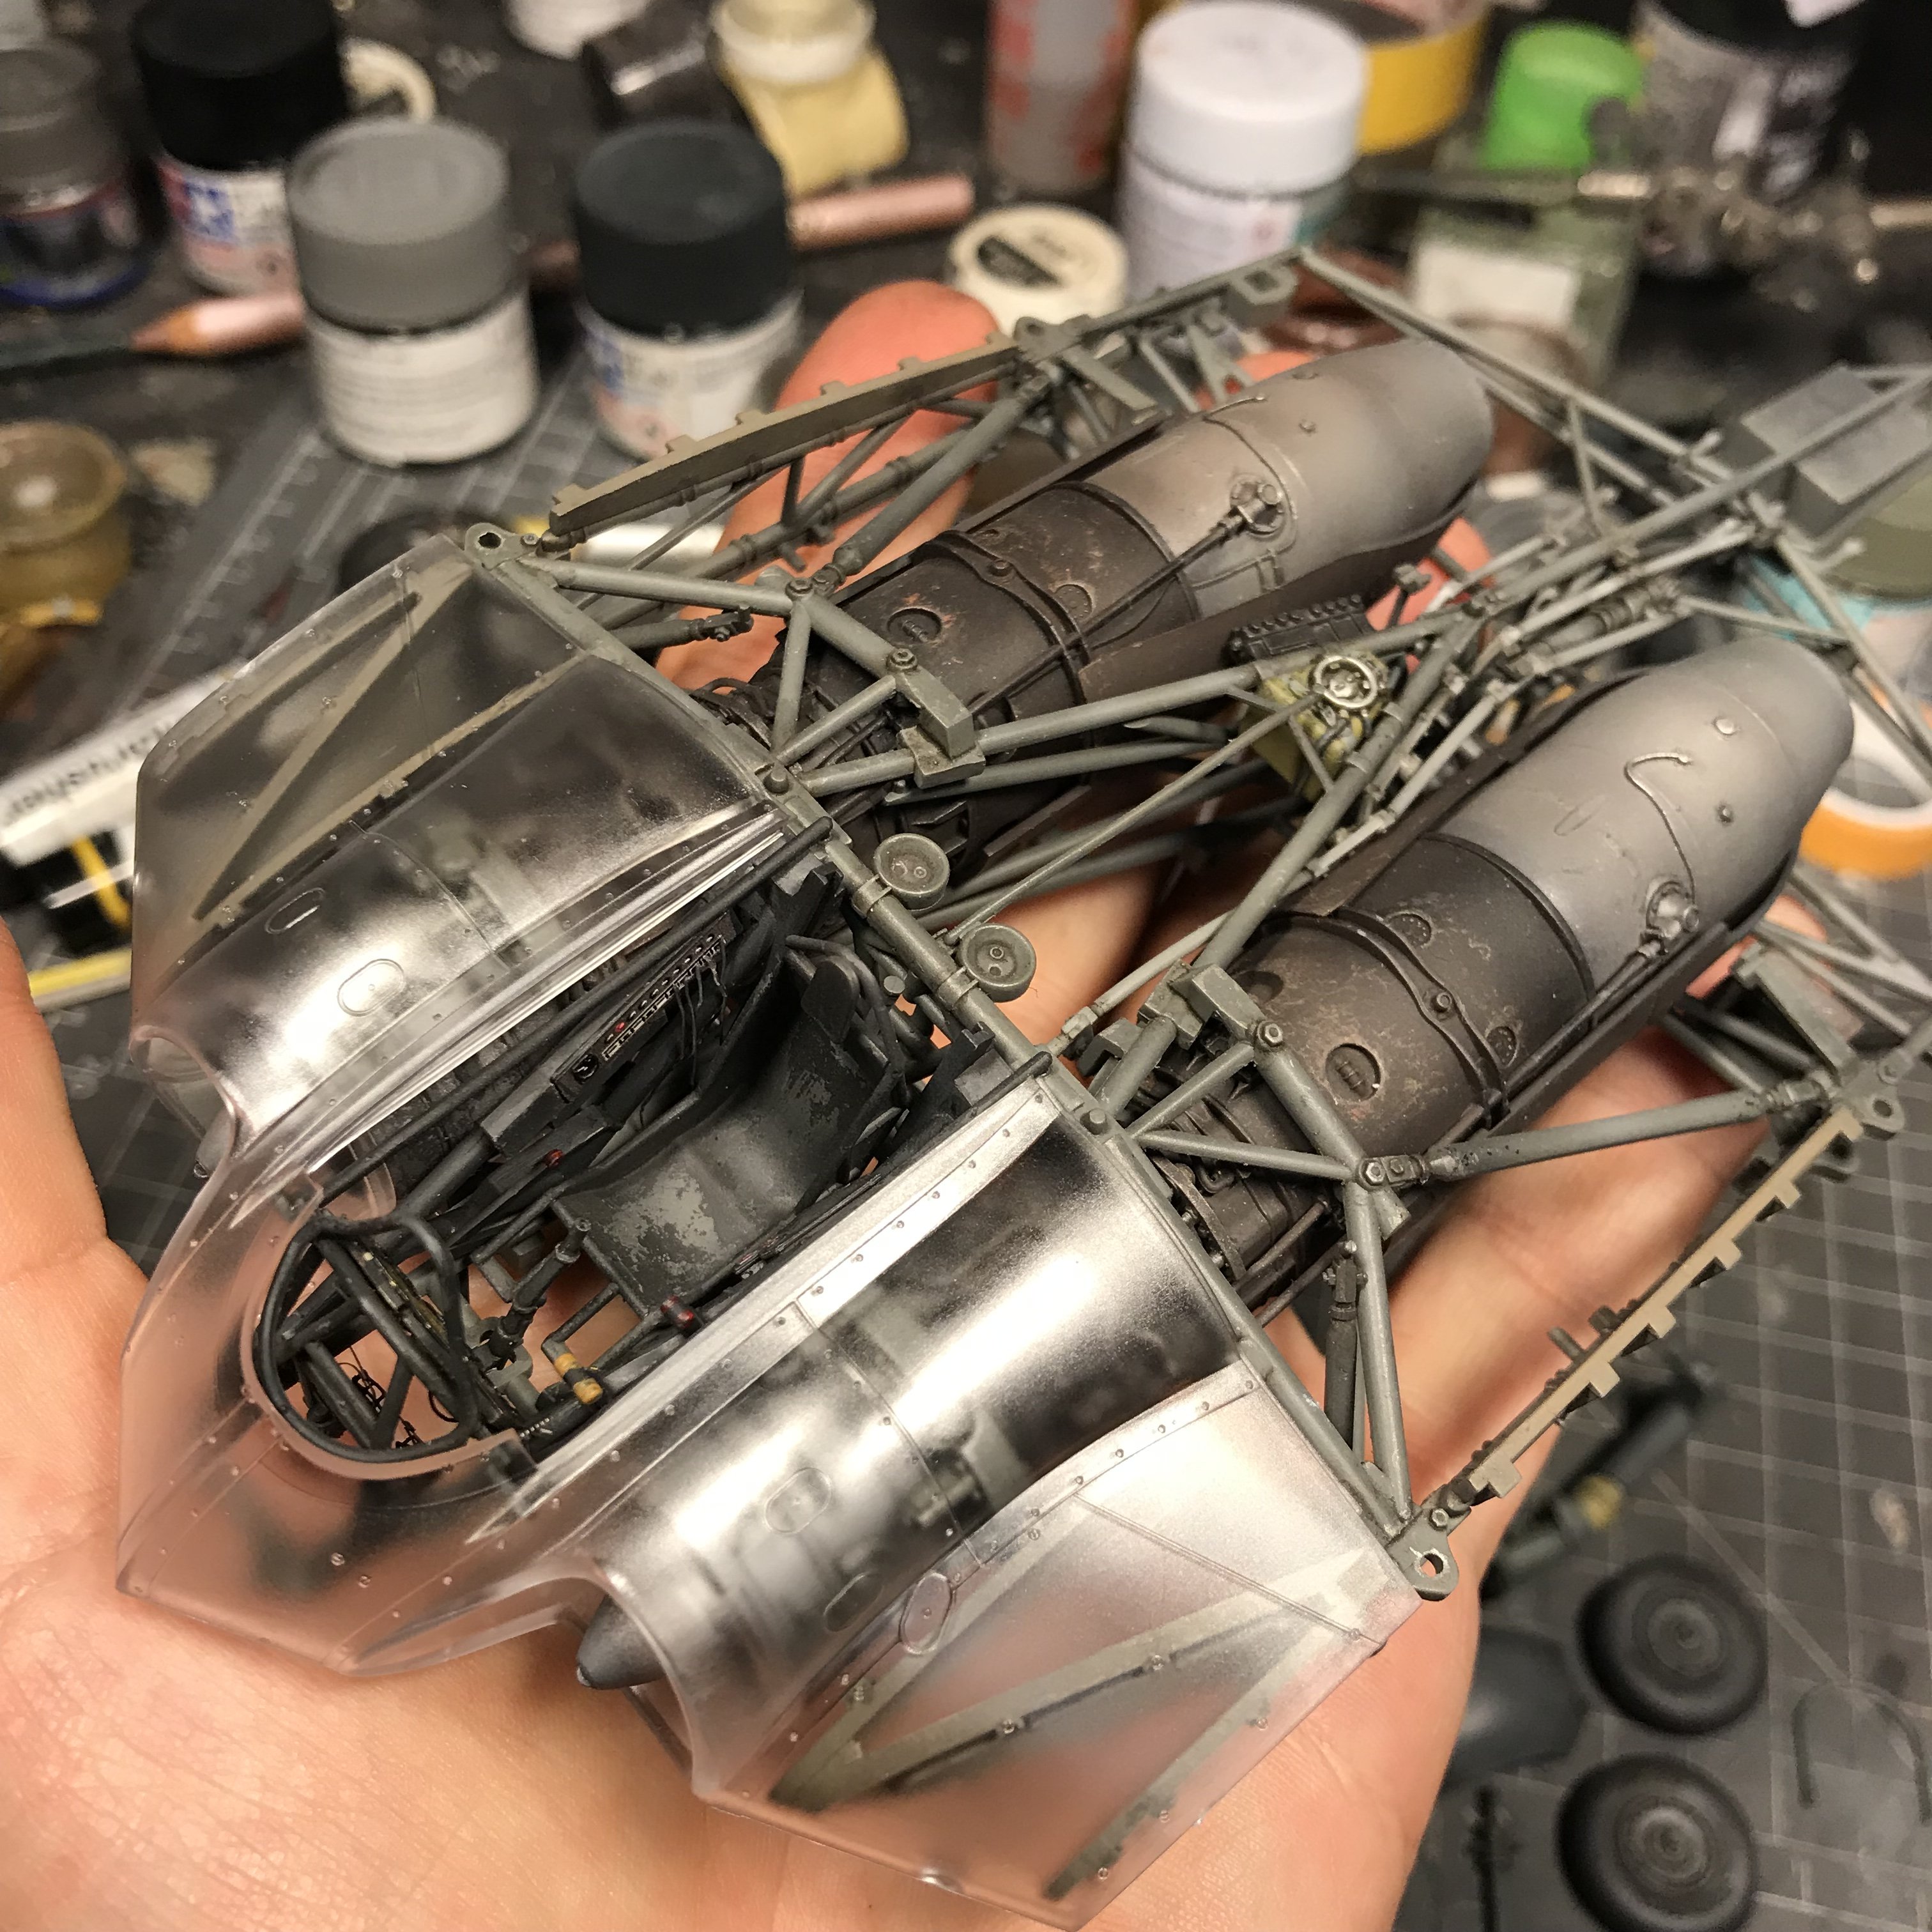
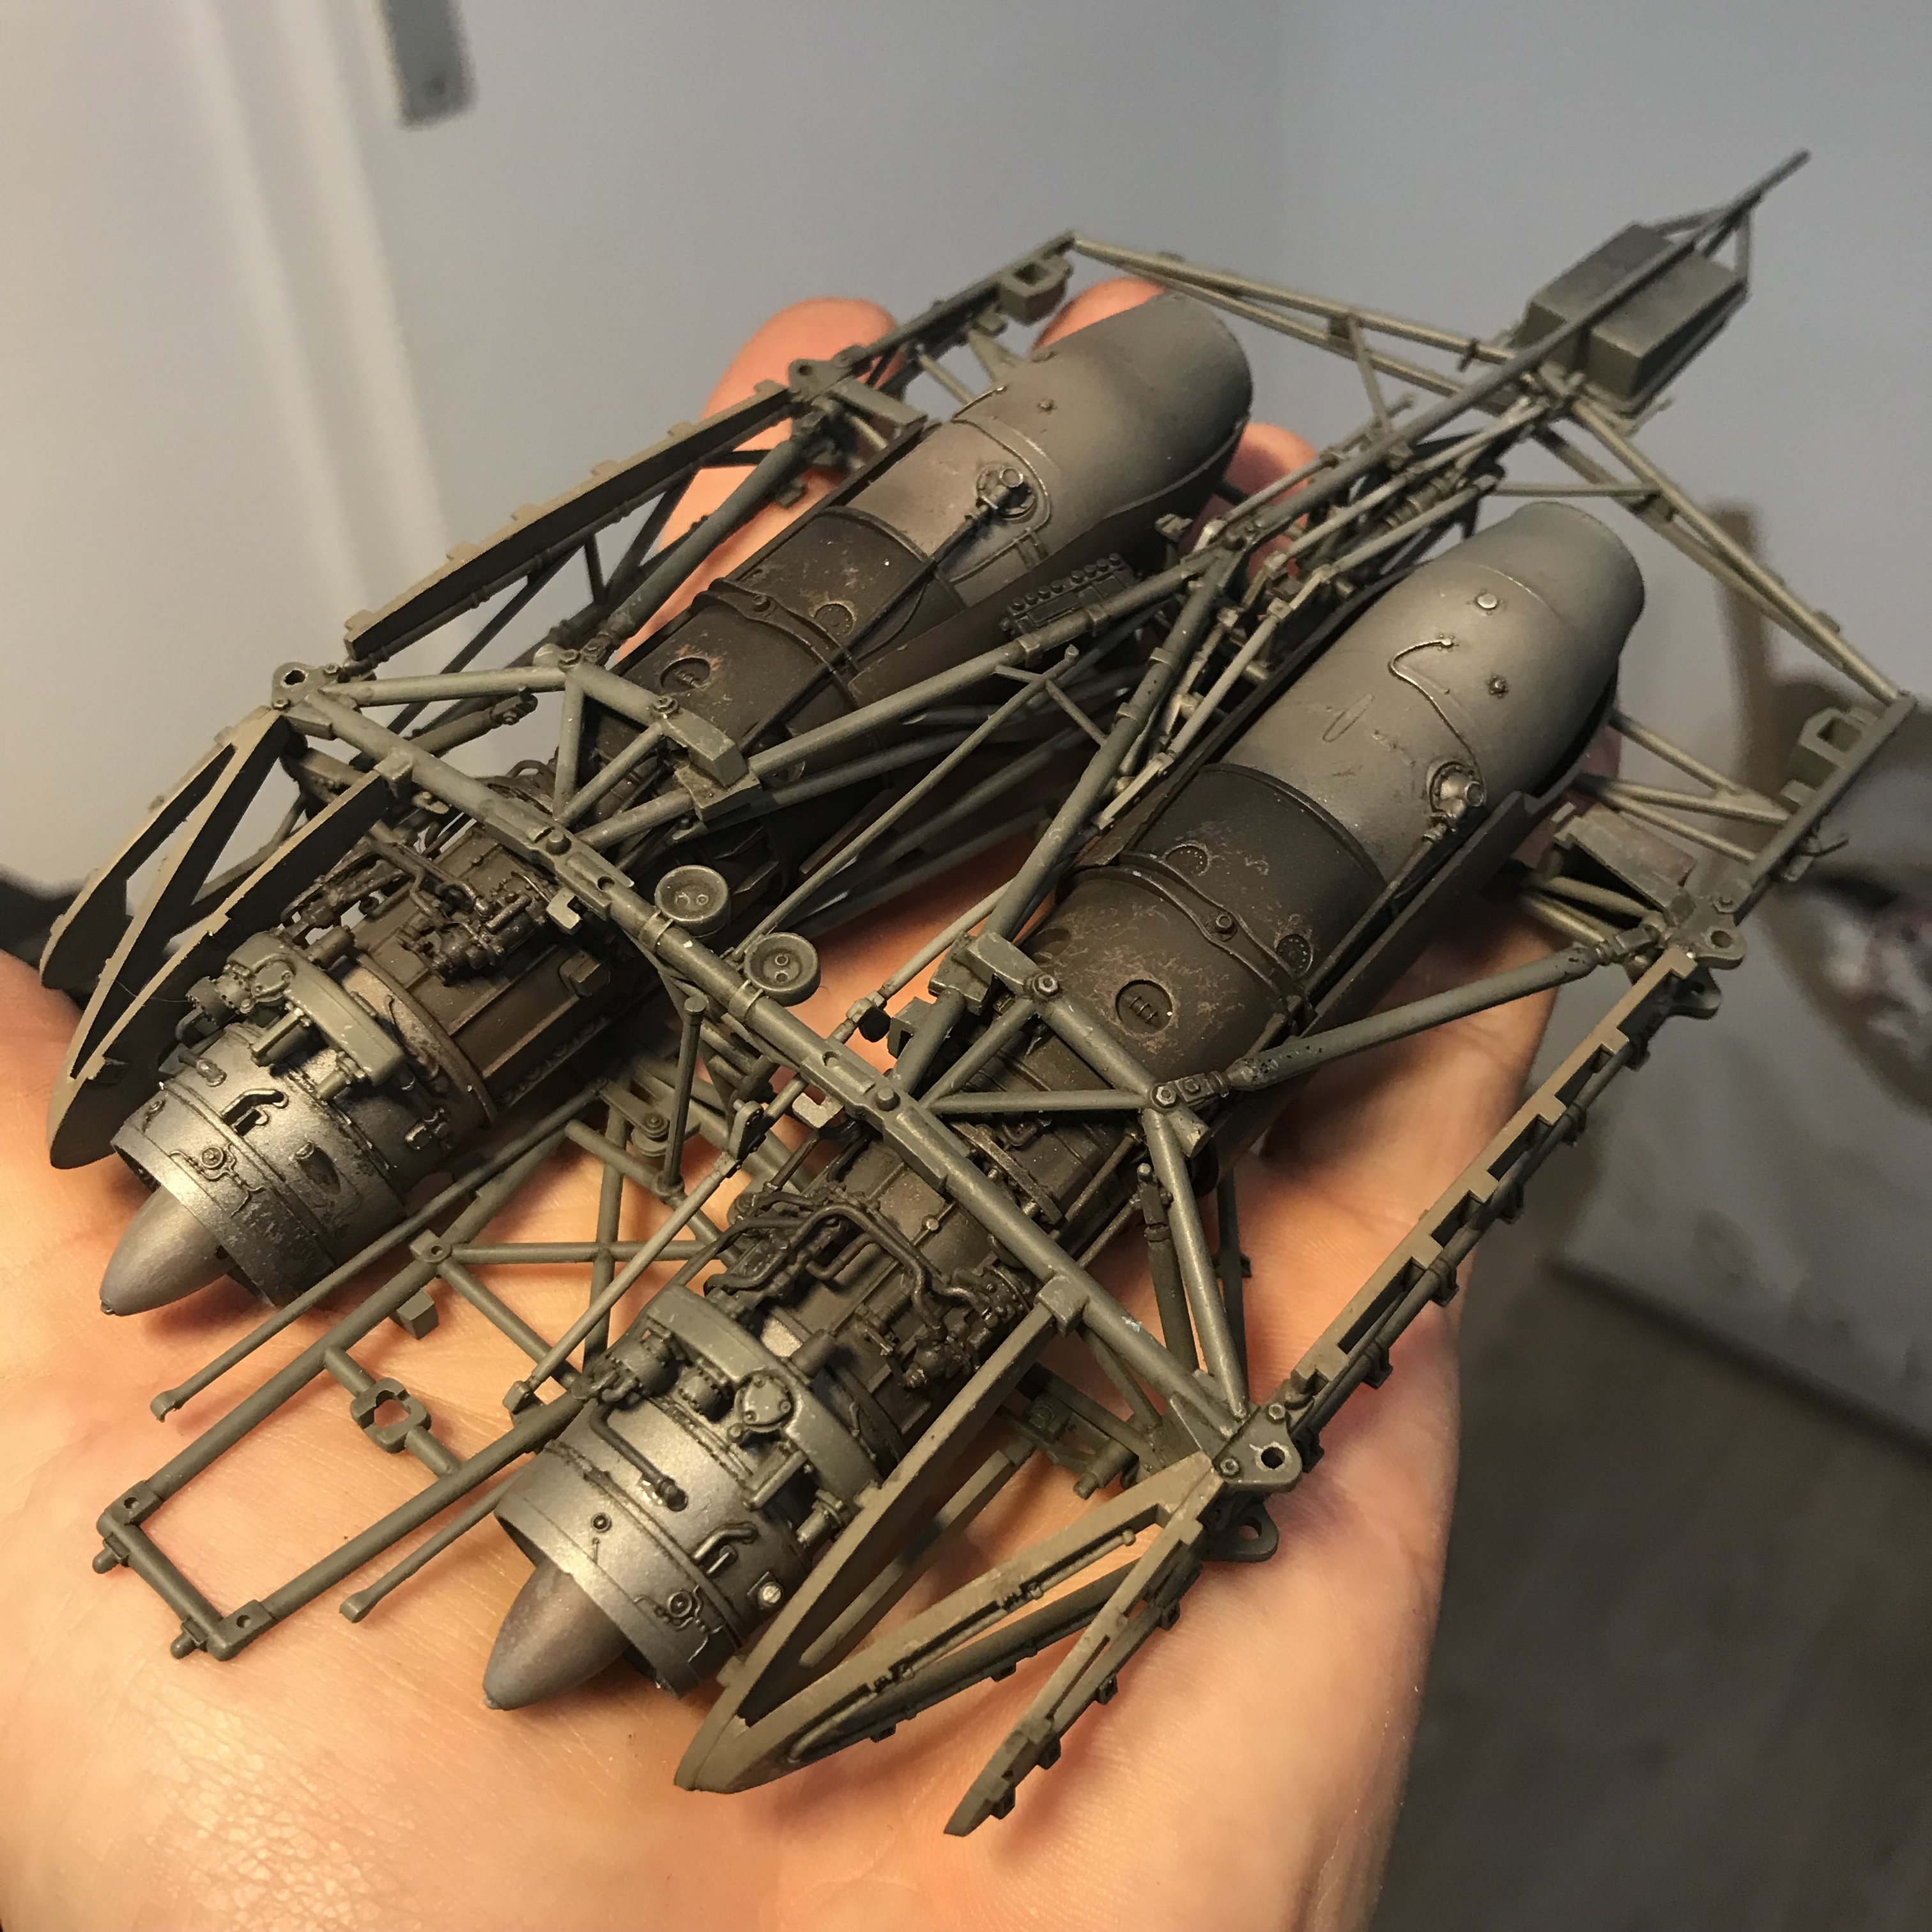
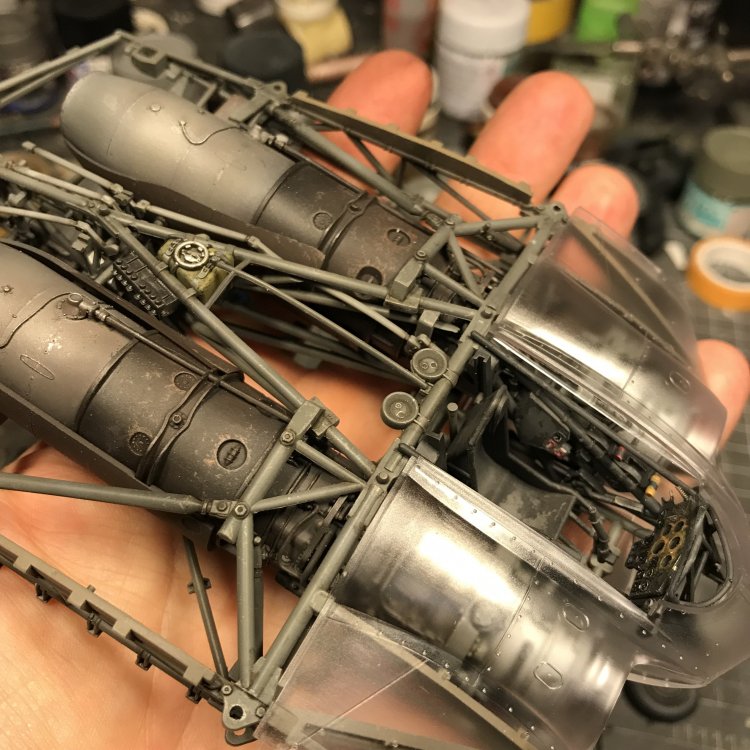
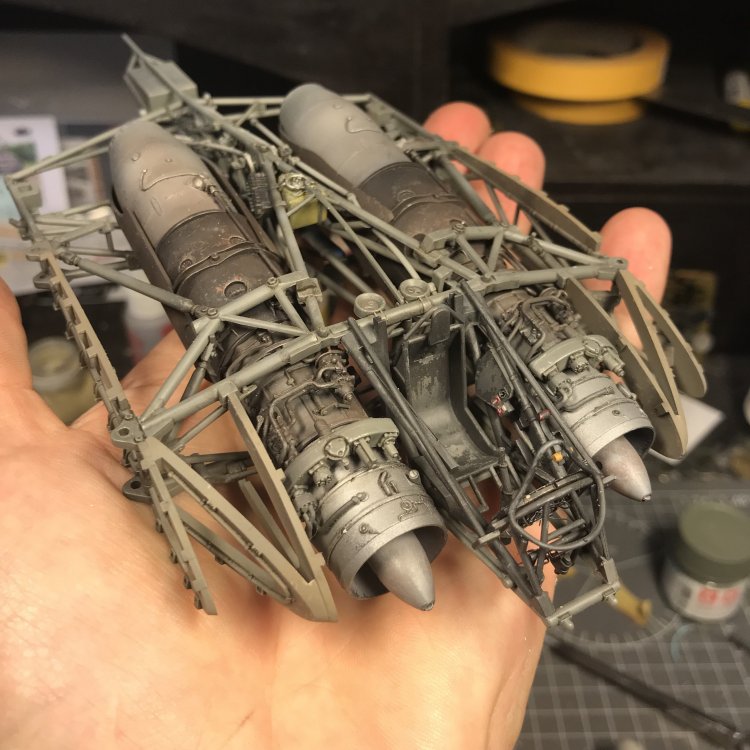
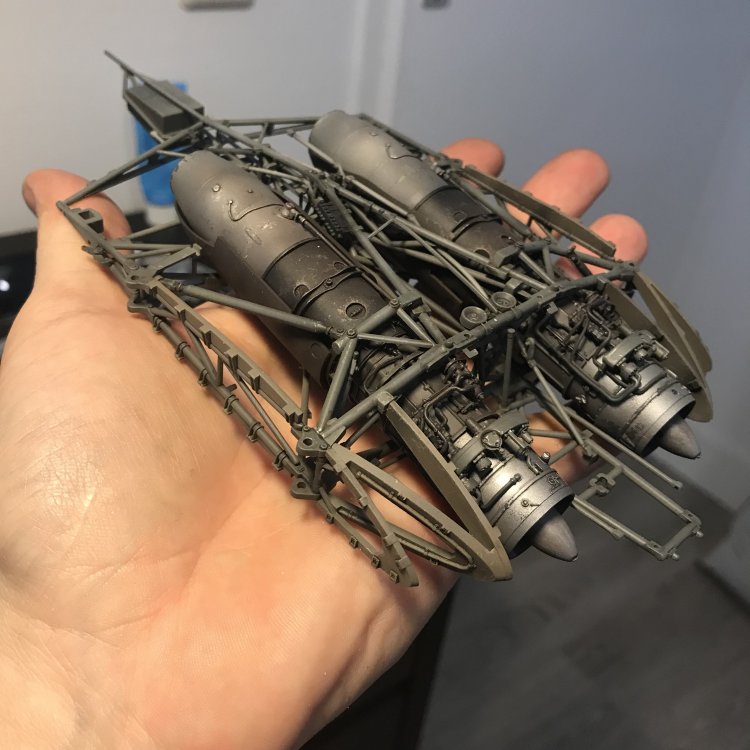
Some progress. Base colours on the frame.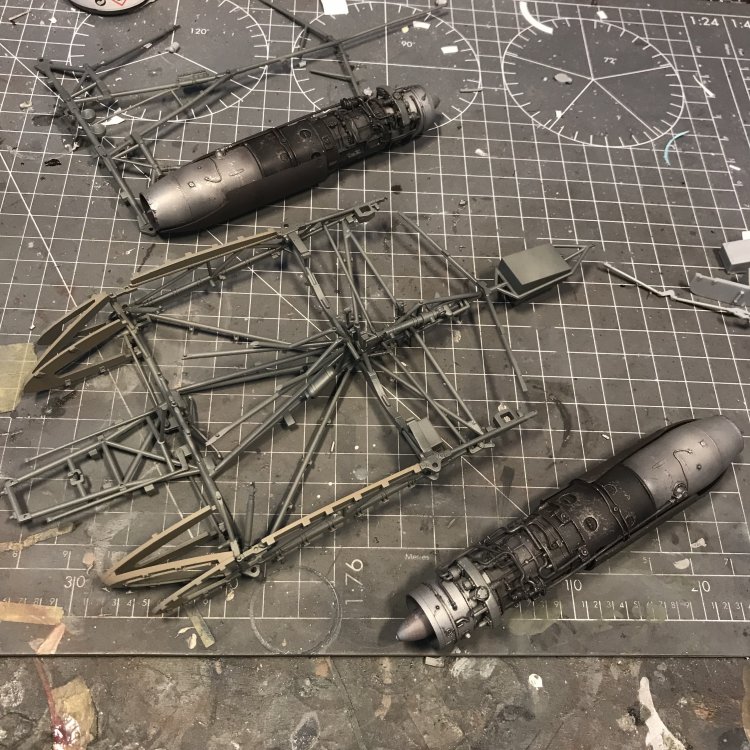
-
Hobby Boss B-24 Liberator
JeroenPeters replied to RAF Liberators's topic in LSM 1/32 and Larger Aircraft Ready for Inspection
Lovely result. I believe this is the first finished example I've seen. Great work and thnx for sharing! -
Ho229 at the Udvar-Hazy Center
JeroenPeters replied to JeroenPeters's topic in LSM 1/35 and Larger Work In Progress
I will attach the wings, but i will pose the mk103 guns seperately on a metal stand. -
Ho229 at the Udvar-Hazy Center
JeroenPeters replied to JeroenPeters's topic in LSM 1/35 and Larger Work In Progress

-
Ho229 at the Udvar-Hazy Center
JeroenPeters replied to JeroenPeters's topic in LSM 1/35 and Larger Work In Progress
Yes i do. And i have all the ‘needed’ AM. Will post a few pics later. -
Ho229 at the Udvar-Hazy Center
JeroenPeters replied to JeroenPeters's topic in LSM 1/35 and Larger Work In Progress
Pffff! This model was done by Sampson Yu ;)