JeroenPeters
-
Posts
4,867 -
Joined
-
Last visited
Content Type
Profiles
Forums
Events
Gallery
Everything posted by JeroenPeters
-

1/32 Westland Whirlwind
JeroenPeters replied to JeroenPeters's topic in LSM 1/35 and Larger Work In Progress
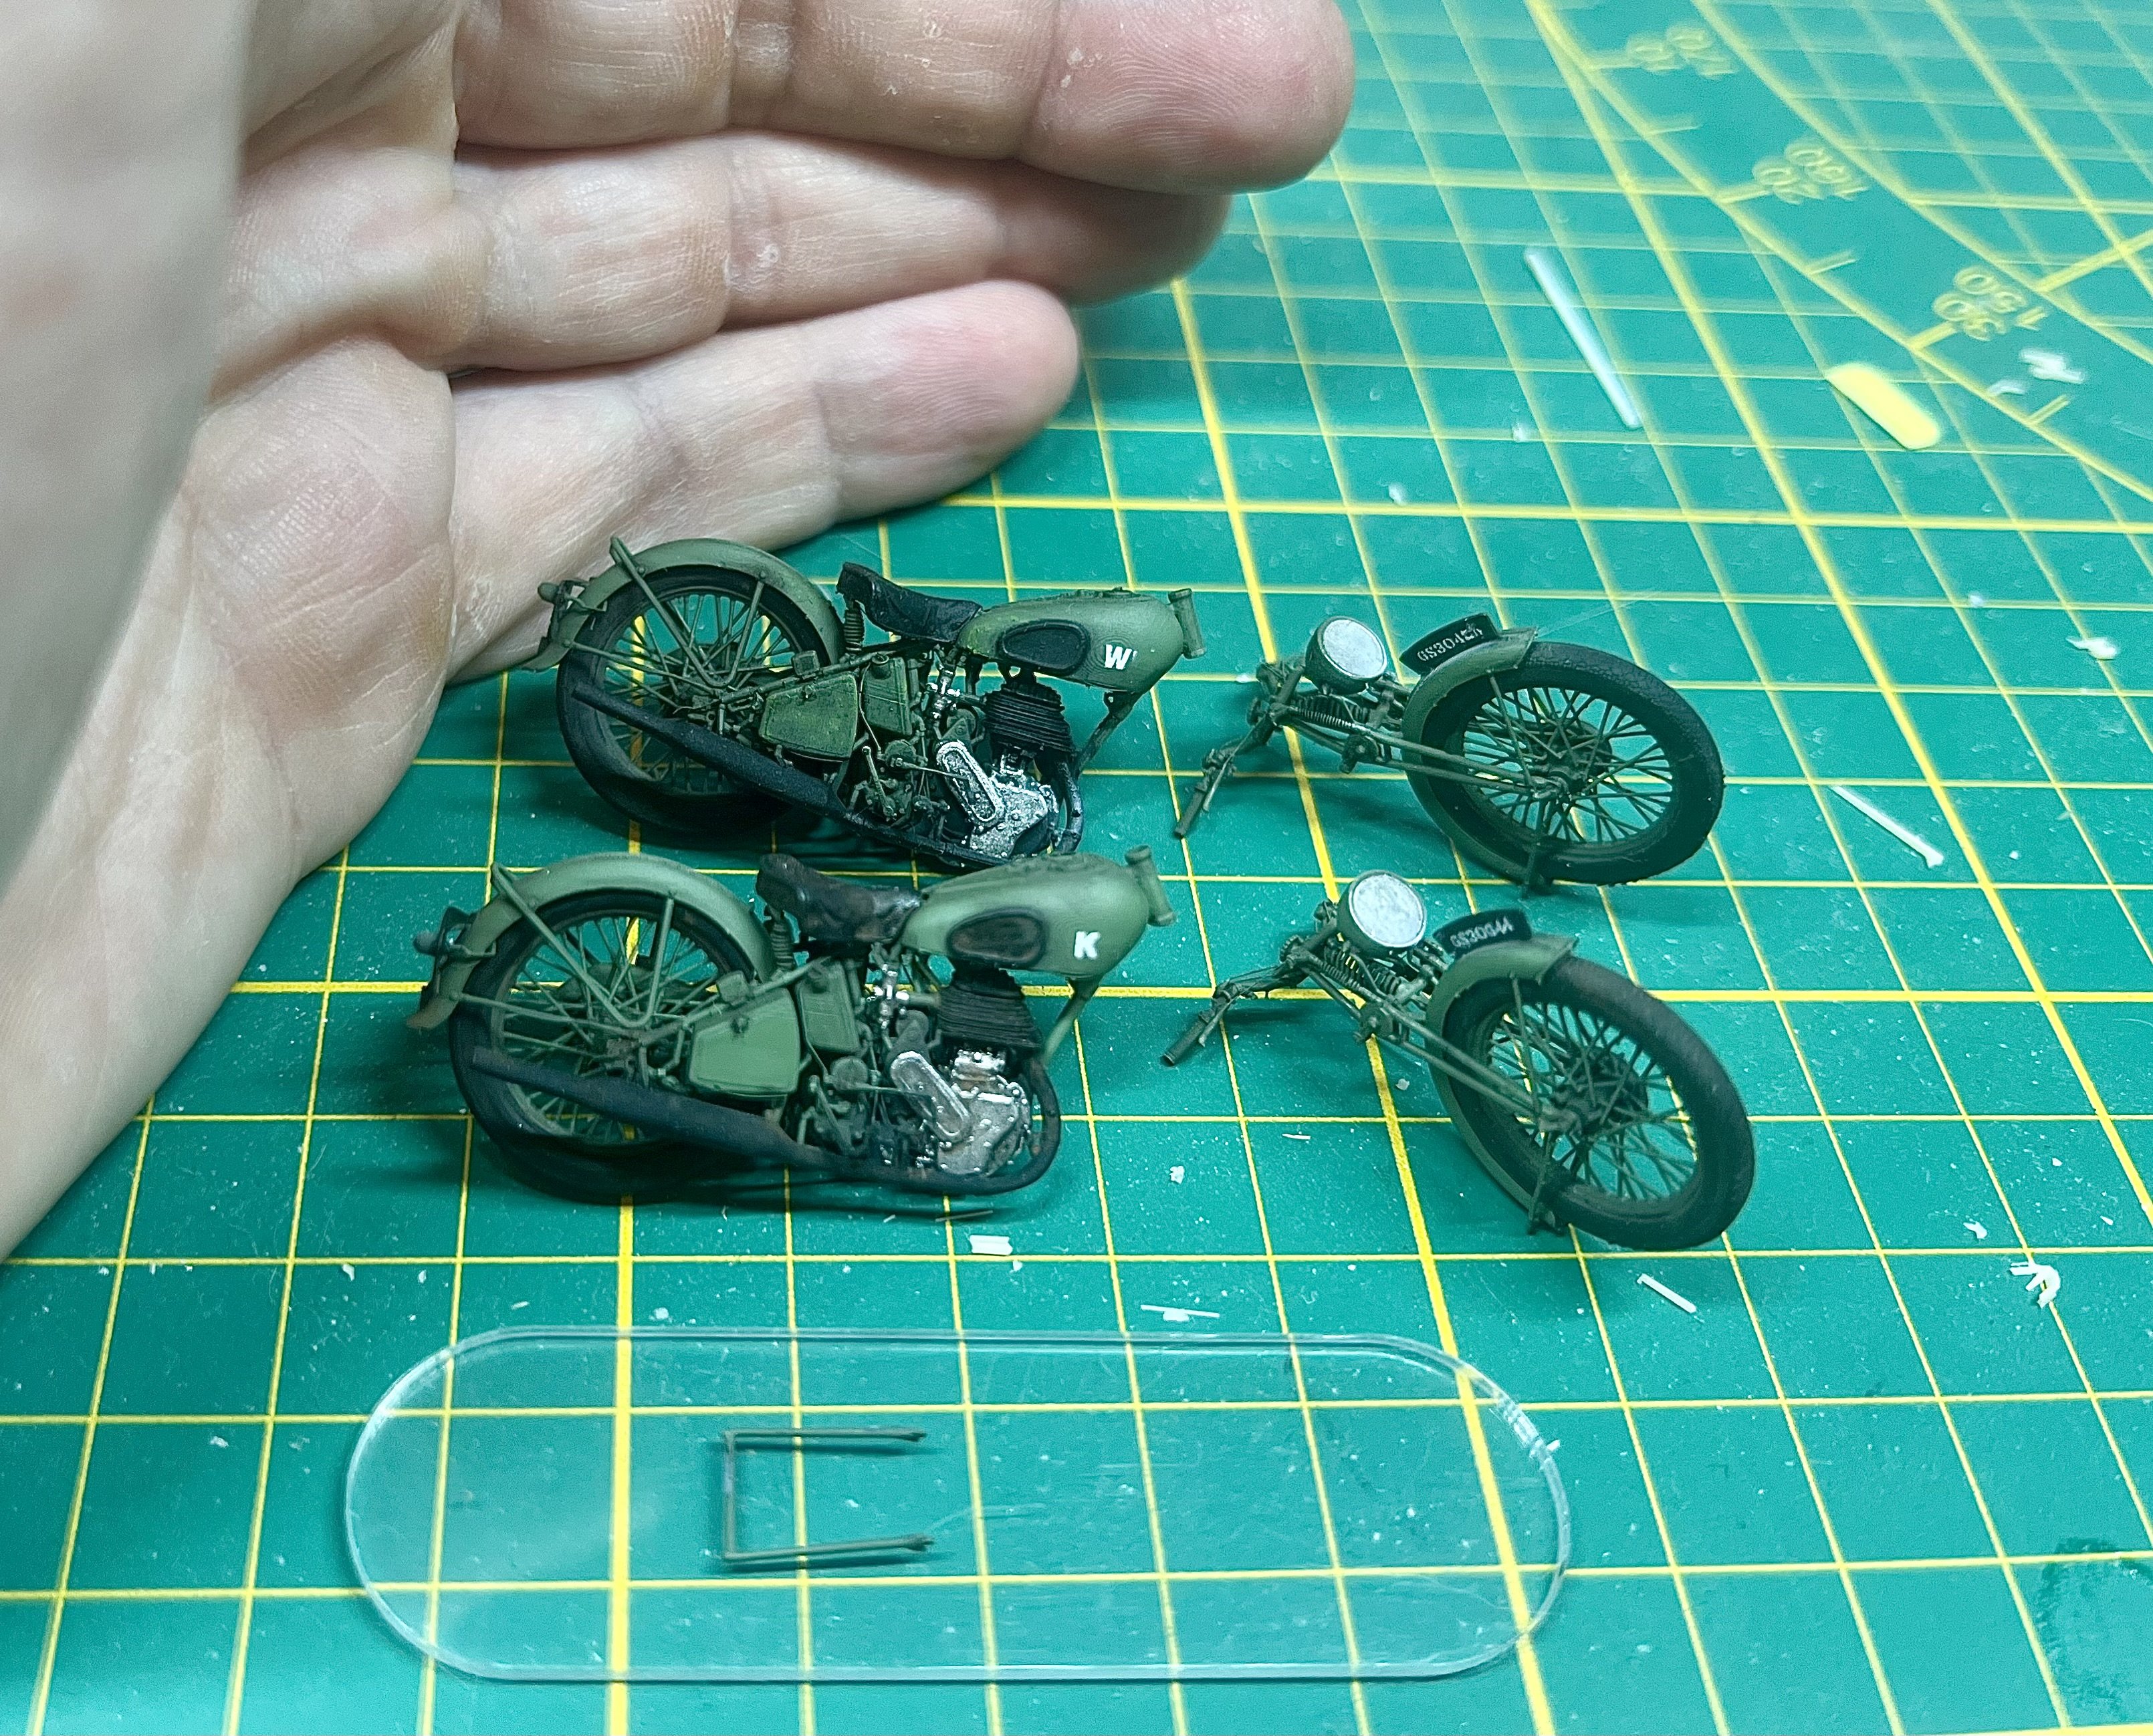
Here’s one of the two bikes. Still needs way more paint and weathering. Only needs the kick stand and it’s ready.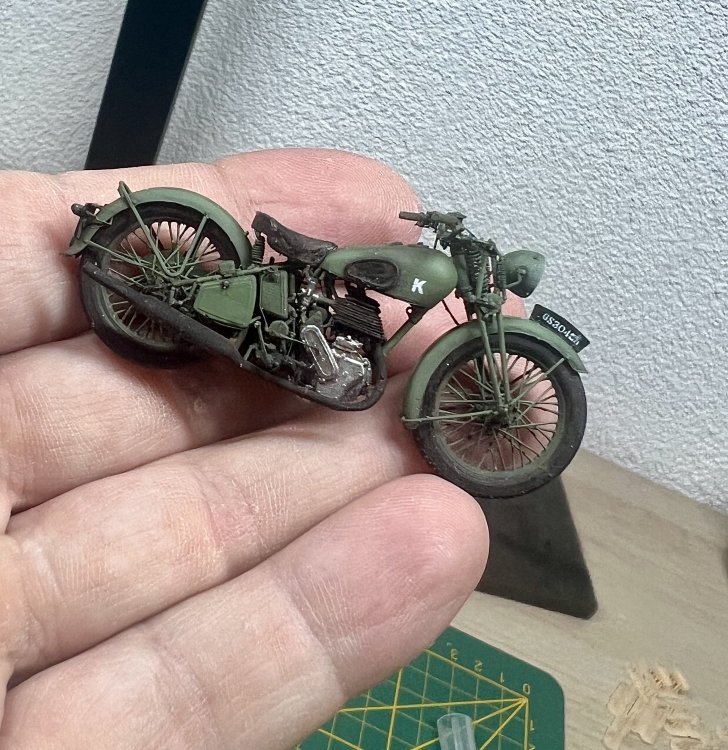
-
1/32 Lippisch P.13a / 3d printed
JeroenPeters replied to JeroenPeters's topic in LSM 1/35 and Larger Work In Progress
Glued the two halves together since there’s enough access from the bottom for pit detailing. This Lippisch will be in flight, cutting off a lanc nose section with crew.
-
1/32 Lippisch P.13a / 3d printed
JeroenPeters replied to JeroenPeters's topic in LSM 1/35 and Larger Work In Progress
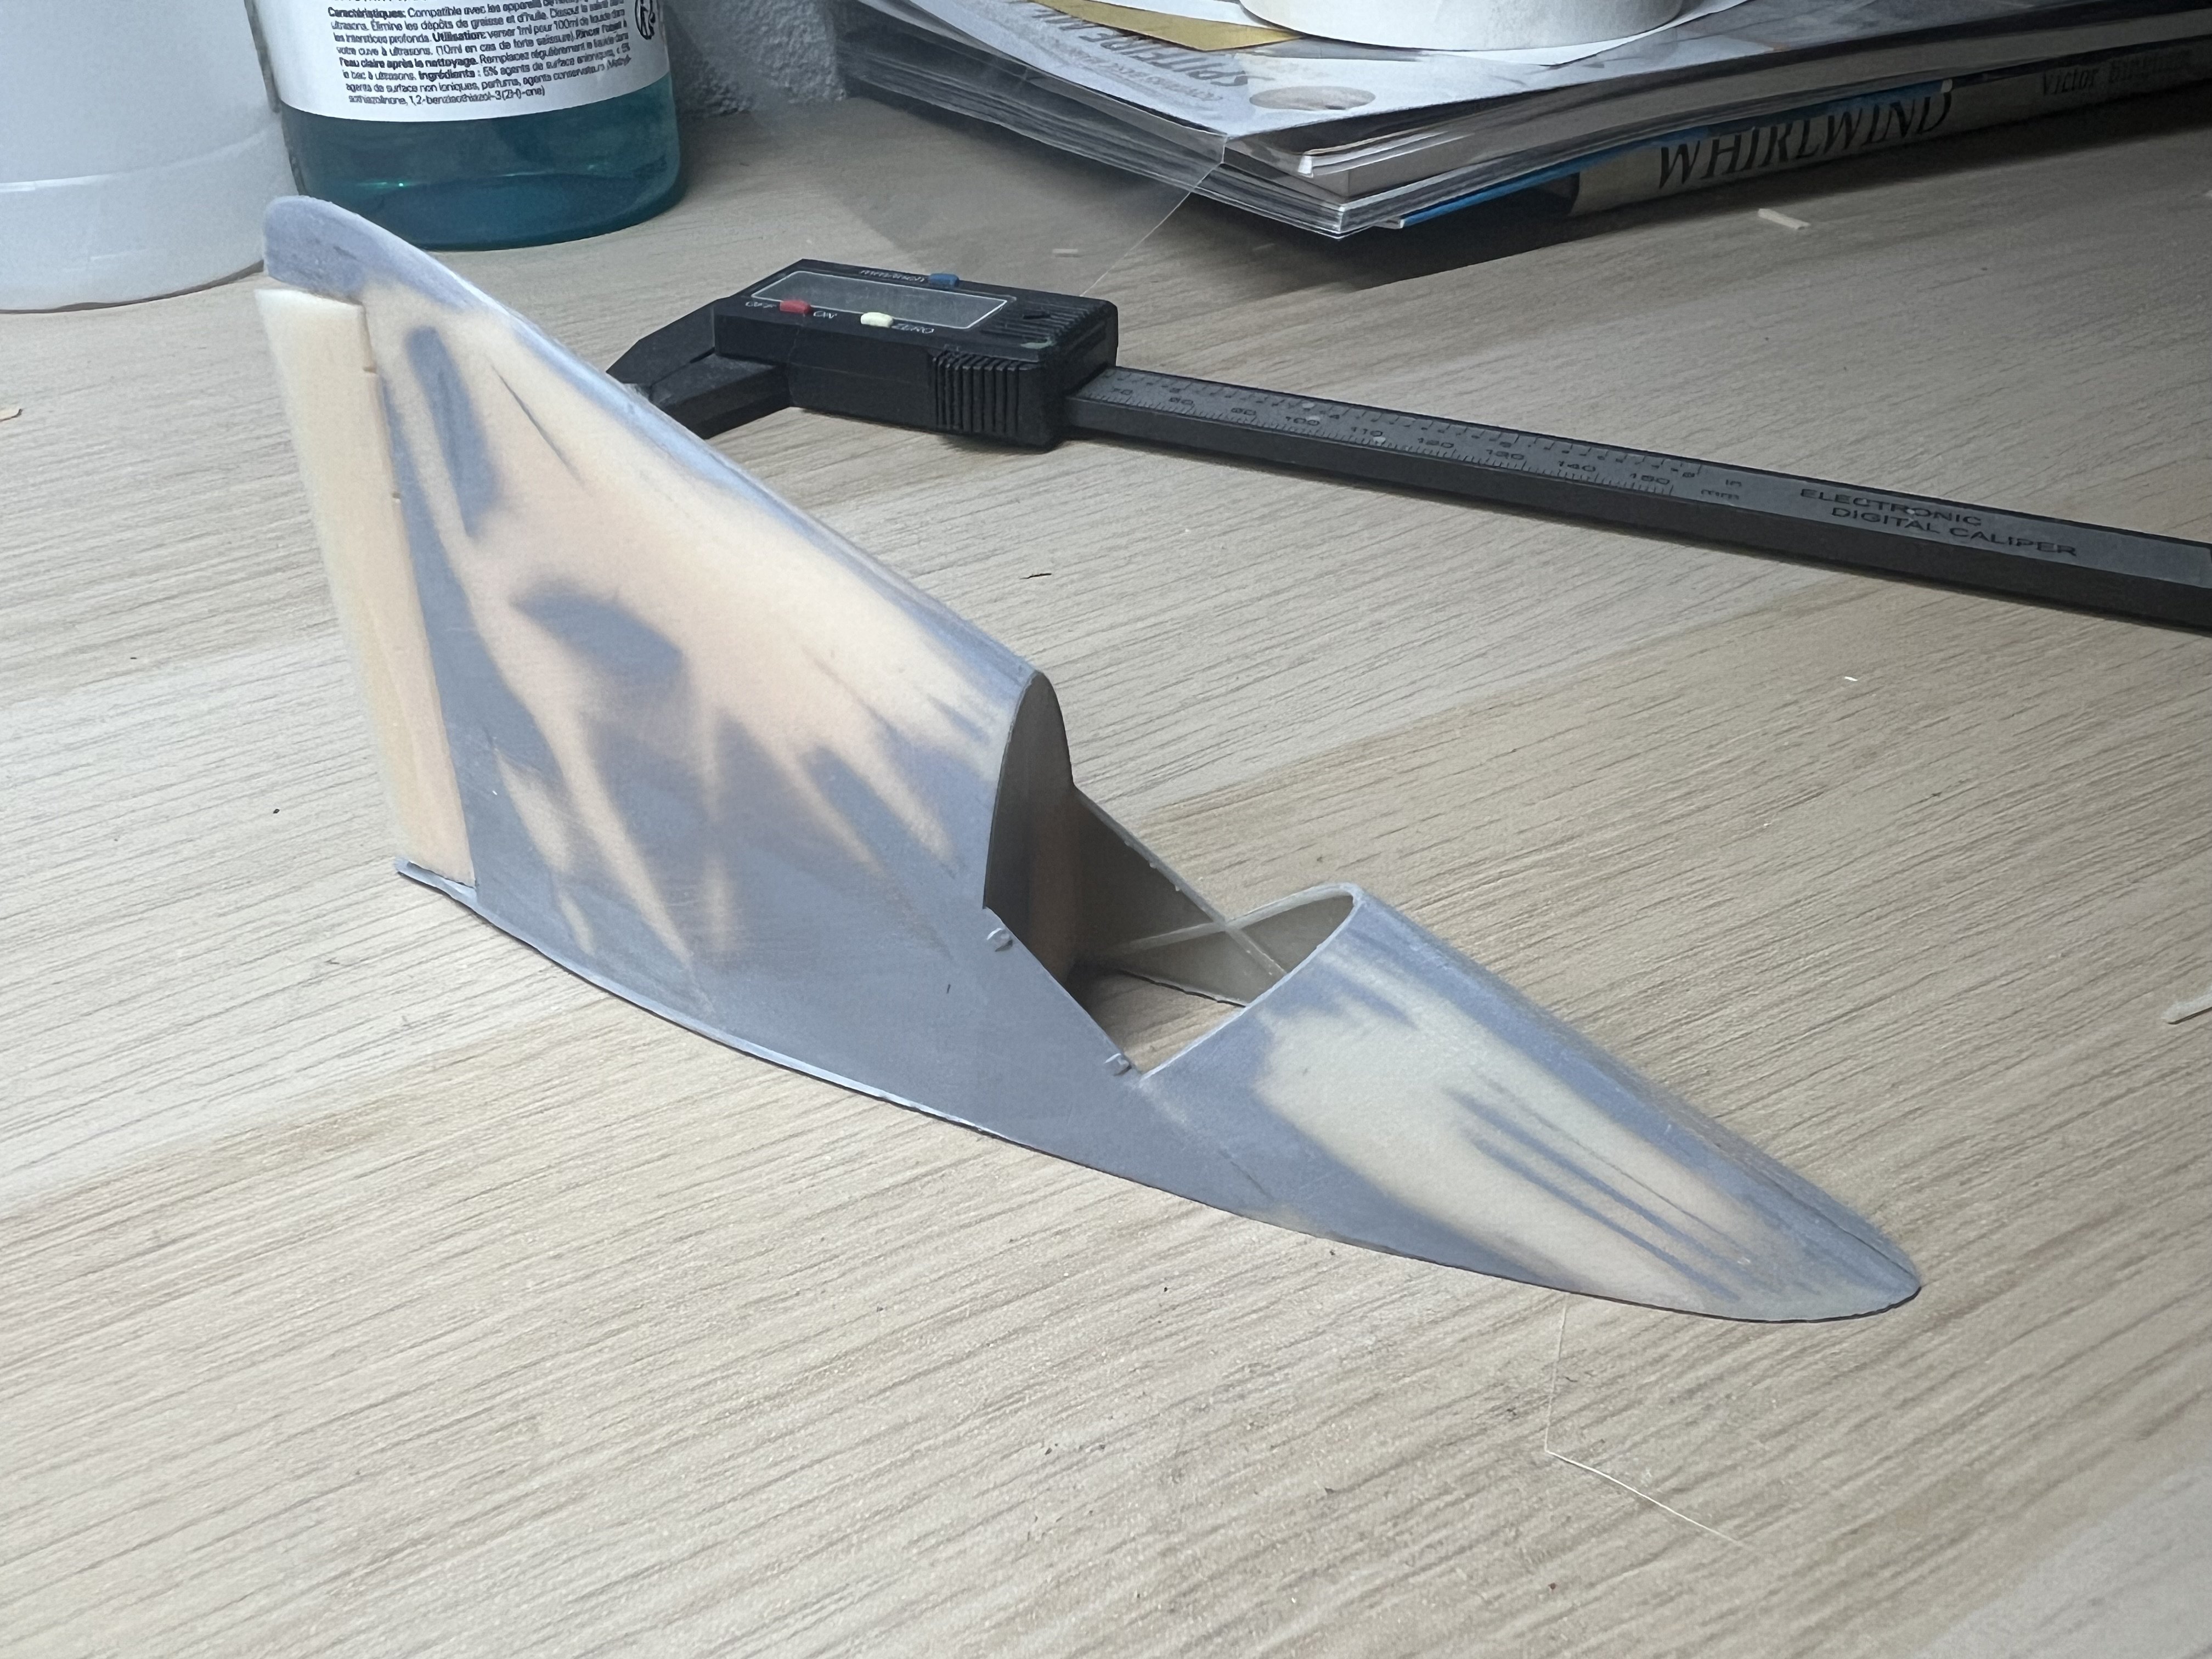
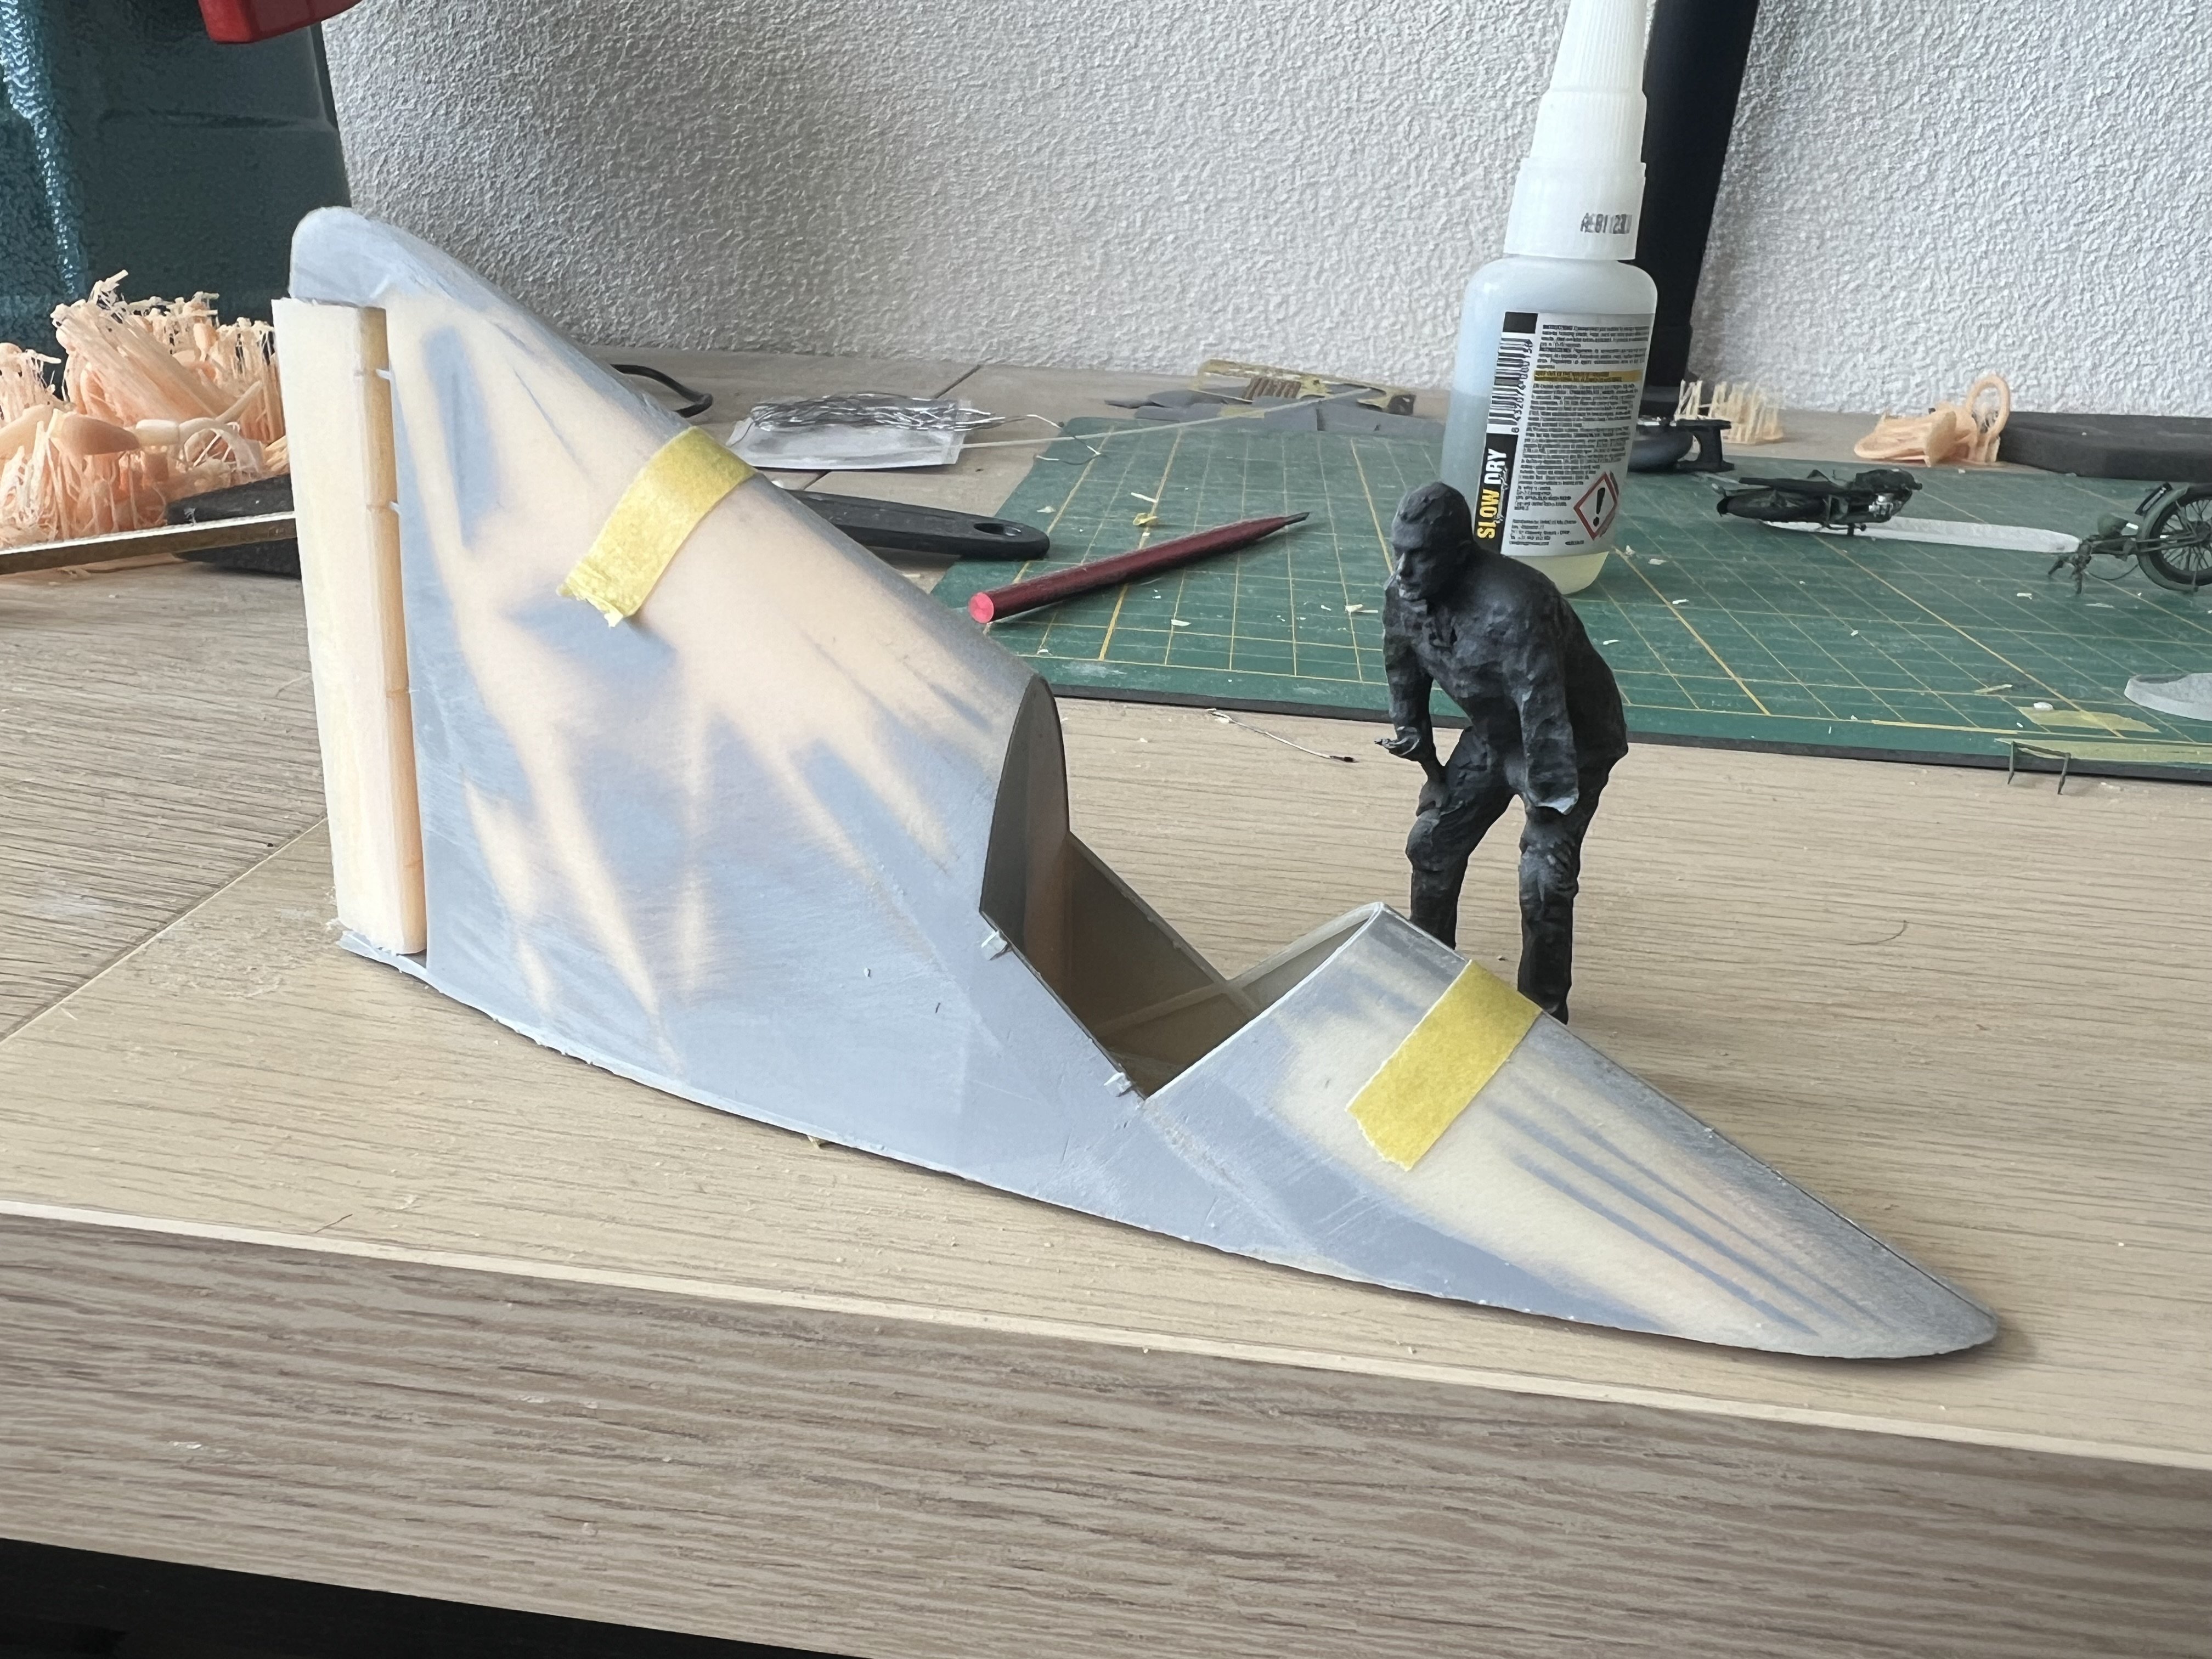
Next big parts... I have a pretty large print bed, but this one only barely fits.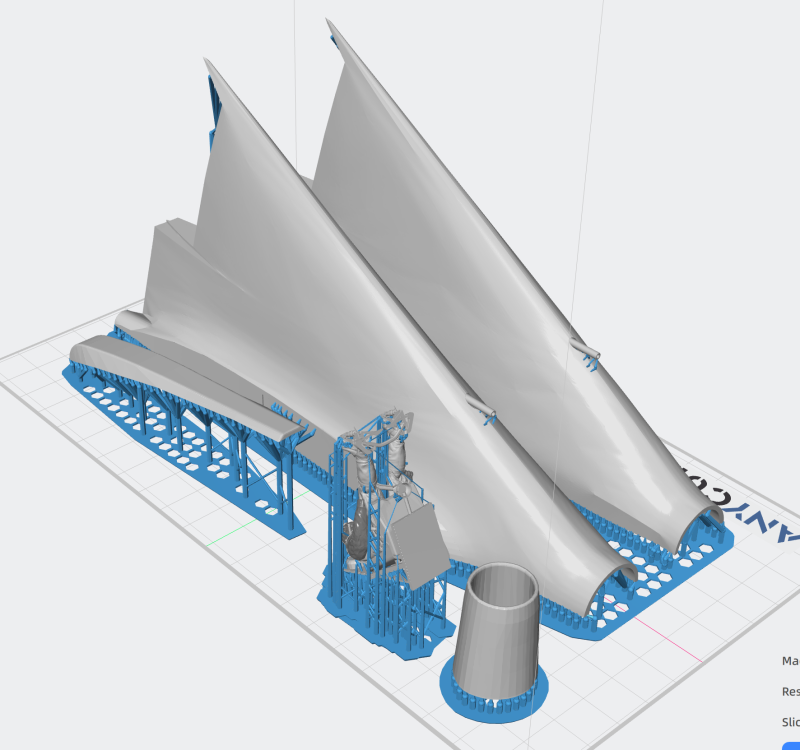
-
1/32 Lippisch P.13a / 3d printed
JeroenPeters replied to JeroenPeters's topic in LSM 1/35 and Larger Work In Progress
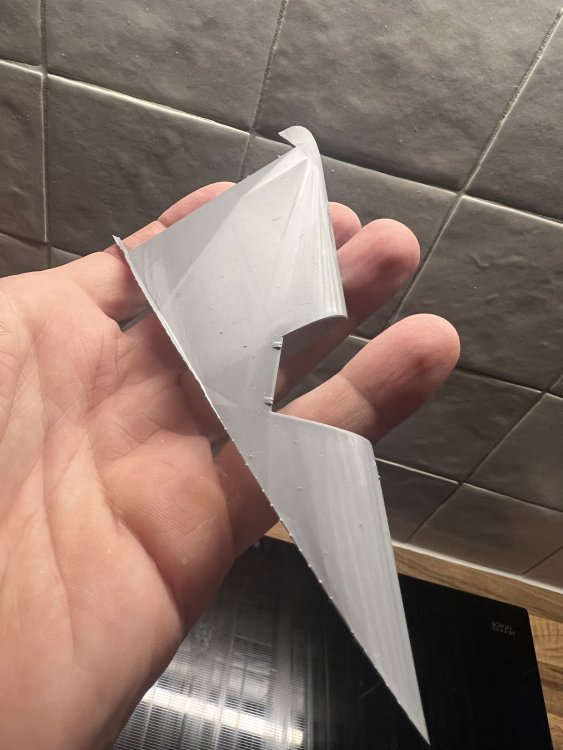
This beige resin luckily sands well. Almost a smooth serface now. I hope it scribes well for panellines too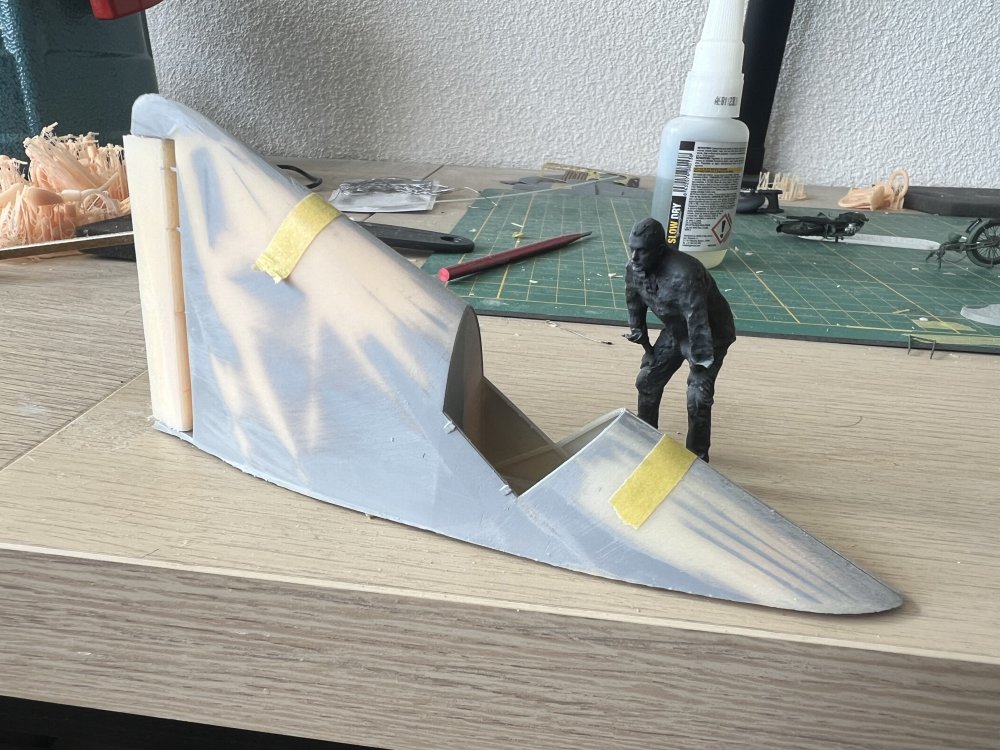
-
1/32 Lippisch P.13a / 3d printed
JeroenPeters replied to JeroenPeters's topic in LSM 1/35 and Larger Work In Progress
There are a lot of 3d polygons or facets on the print. I couldnt get it more detailed. So i hit the sides with mr surfacer and see if i can sand the thing smooth. Otherwise i need to try and smooth the 3d modeL

-
1/32 Lippisch P.13a / 3d printed
JeroenPeters replied to JeroenPeters's topic in LSM 1/35 and Larger Work In Progress
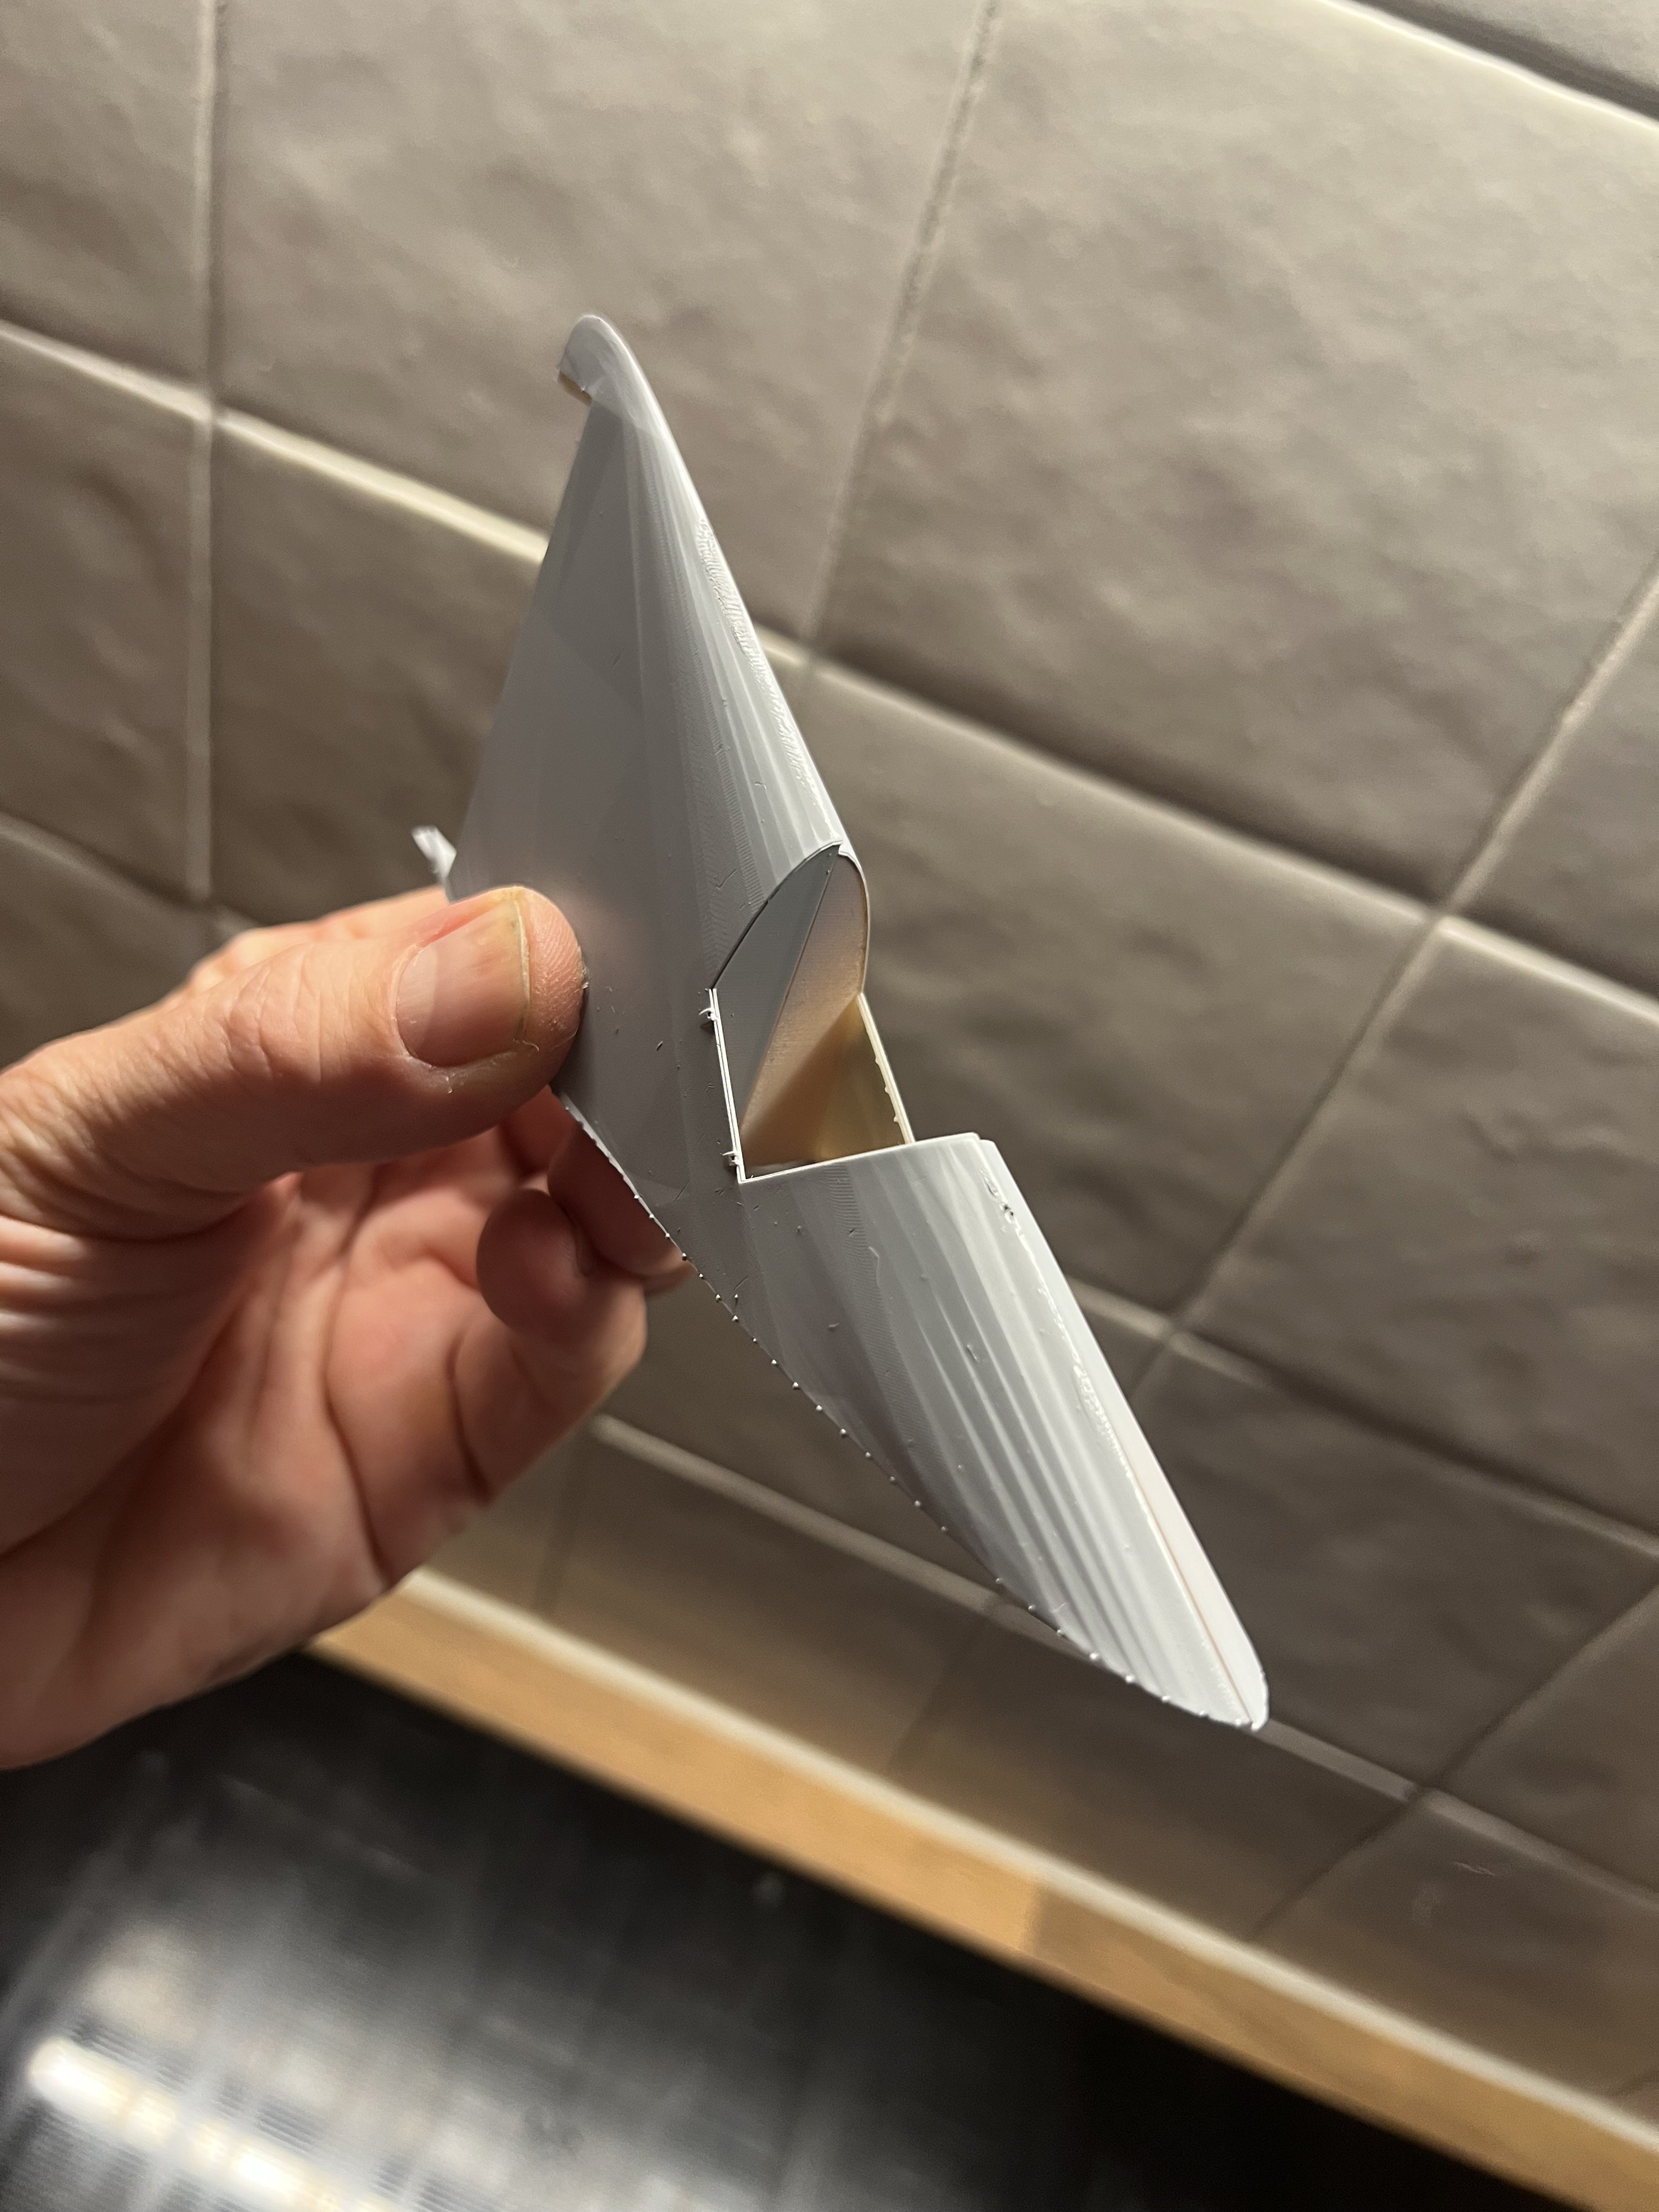
First test print


-
1/32 Lippisch P.13a / 3d printed
JeroenPeters replied to JeroenPeters's topic in LSM 1/35 and Larger Work In Progress
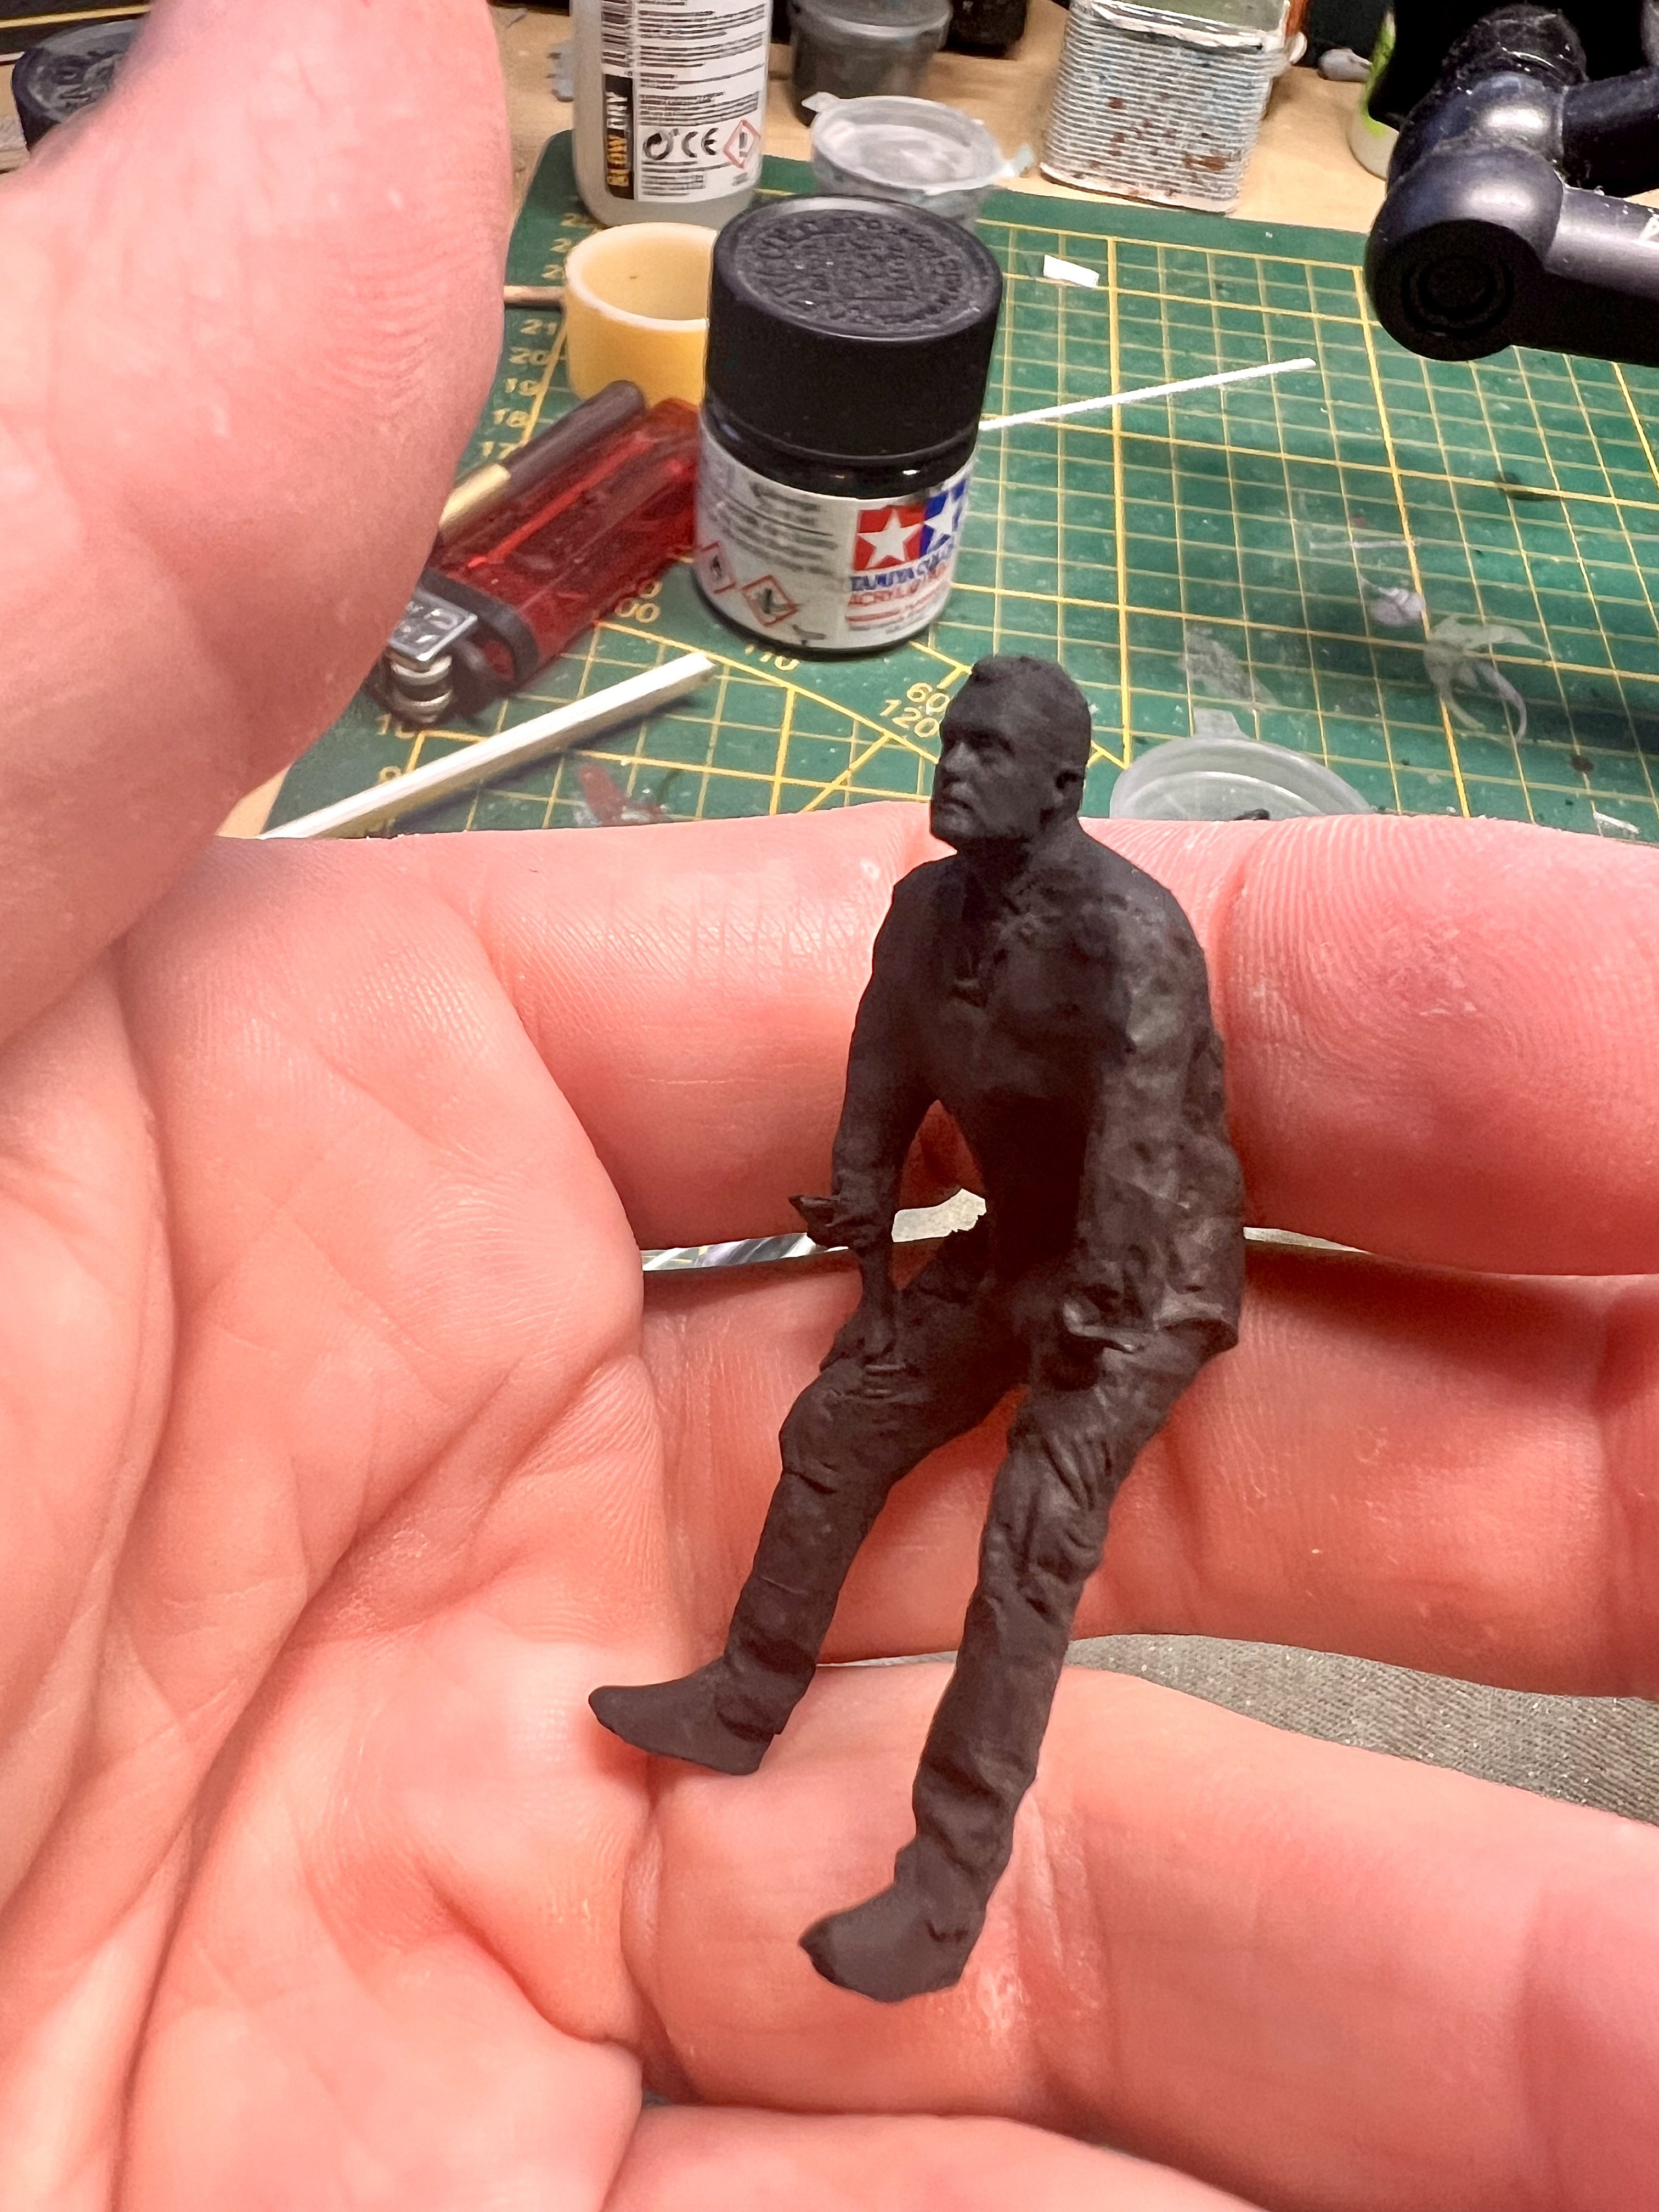
Here's the pilot.
-
1/32 Lippisch P.13a / 3d printed
JeroenPeters replied to JeroenPeters's topic in LSM 1/35 and Larger Work In Progress
Splitted the upper deck. We'll see how far I'll get with this one. The trickiest part is to use the right resin that allows you to make proper panel lines.
-
1/32 Lippisch P.13a / 3d printed
JeroenPeters posted a topic in LSM 1/35 and Larger Work In Progress
To be able to continue modelling, even when I don't have any bench time, I like to plug away at 3D models, hoping to one day print them. Downloaded a 3d model from Render Hub of the P13a and started to cut it up. Clean it up and add detail. The idea is to build it flying and whistling past the nose of a HK Lancaster nose art kit. All mounted to my wall. We'll see... Started adding and modifying a pilot. When working on the model I discovered this is by no means a small plane! Almost 21cm long! Never knew that... 6.7meters long in reality.


-
1/32 Westland Whirlwind
JeroenPeters replied to JeroenPeters's topic in LSM 1/35 and Larger Work In Progress
Sprayed the registration codes on the fender and license plates.
-
1/32 Westland Whirlwind
JeroenPeters replied to JeroenPeters's topic in LSM 1/35 and Larger Work In Progress
And here’s little ol’ me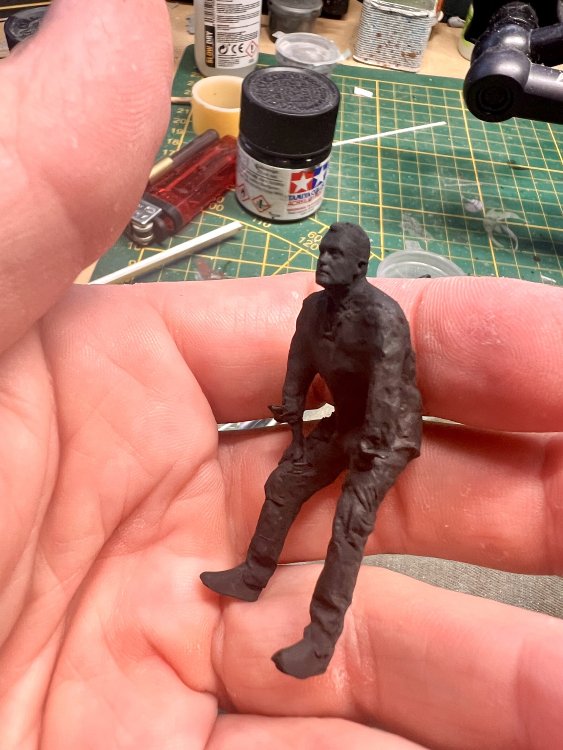
-
1/32 Westland Whirlwind
JeroenPeters replied to JeroenPeters's topic in LSM 1/35 and Larger Work In Progress
Getting there! i had 2mm transparent bases cut for the bikes.
-
1/32 Westland Whirlwind
JeroenPeters replied to JeroenPeters's topic in LSM 1/35 and Larger Work In Progress
Here is one segment: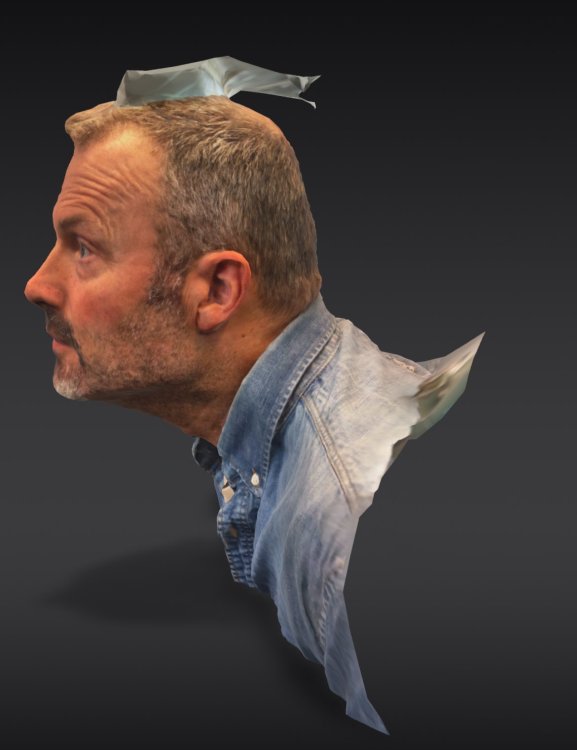
-
1/32 Westland Whirlwind
JeroenPeters replied to JeroenPeters's topic in LSM 1/35 and Larger Work In Progress
Sure. With the iphone. I used the app Sapling. Perfect for scanning smaller object, but when you want to scan an entire person, you need to do it in segments since the polygon count per scan is limited. -
1/32 Westland Whirlwind
JeroenPeters replied to JeroenPeters's topic in LSM 1/35 and Larger Work In Progress
Made a new effort to scan myself and print myself in 32nd scale. The stance depicts me spotting mistakes in my own work. Should be fun...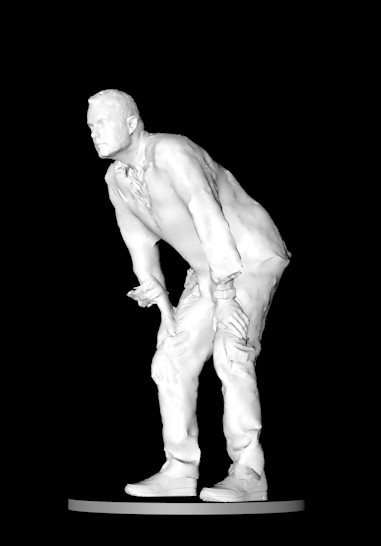
-
1/32 Westland Whirlwind
JeroenPeters replied to JeroenPeters's topic in LSM 1/35 and Larger Work In Progress
New test with different settings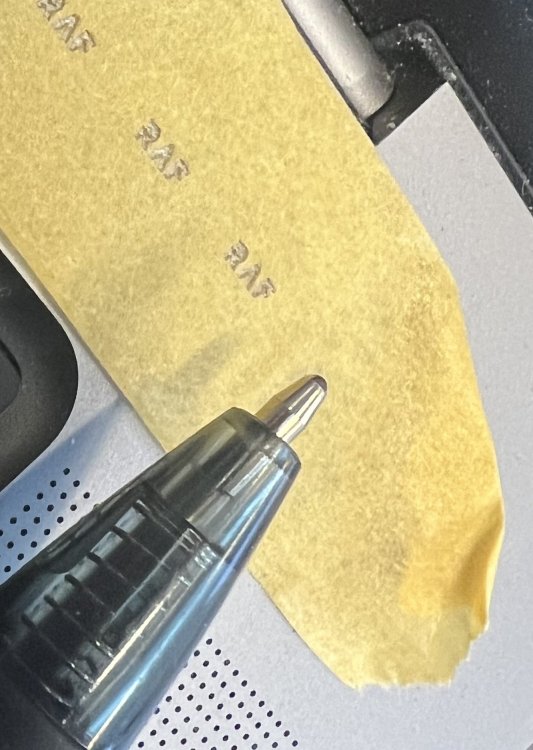
-
1/32 Westland Whirlwind
JeroenPeters replied to JeroenPeters's topic in LSM 1/35 and Larger Work In Progress
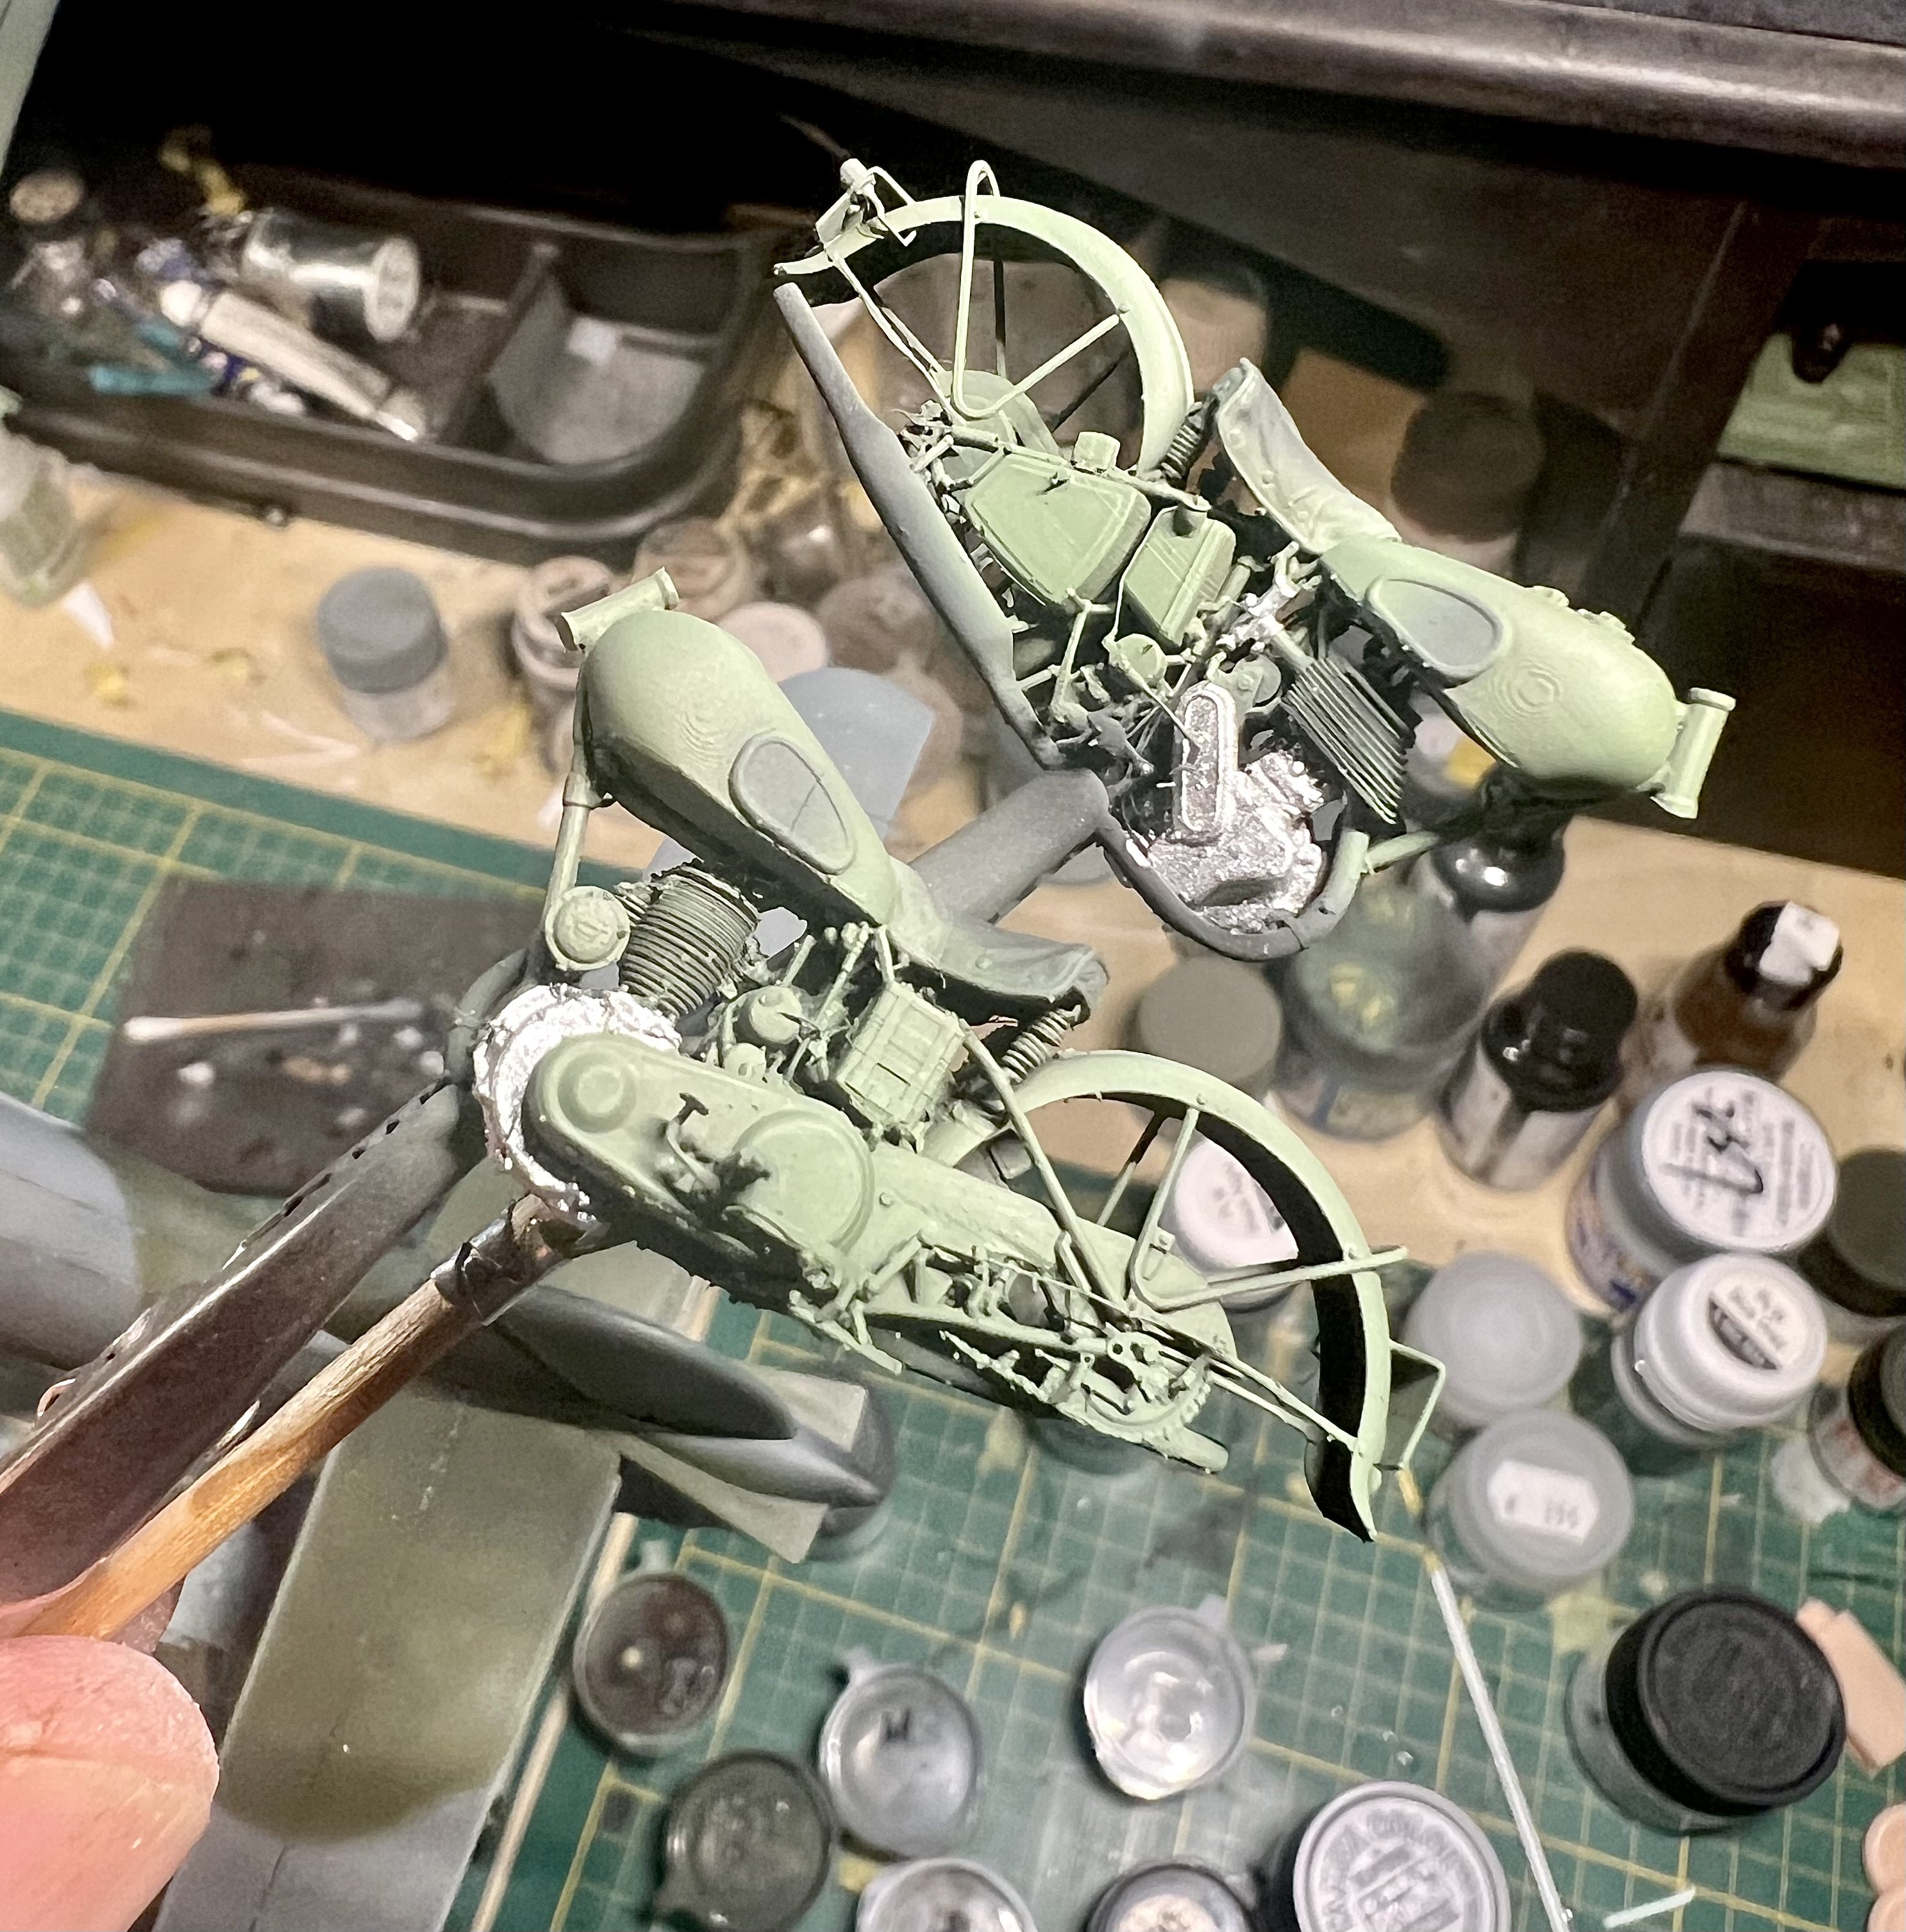
Tests with the masks show more laser force is needed to get rid of all the tiny fibers that now seem to block paint. Trial and error. First painting steps on the bikes.
-
1/32 Westland Whirlwind
JeroenPeters replied to JeroenPeters's topic in LSM 1/35 and Larger Work In Progress
The Norton bikes need codes on the tank and license plates. I put some tape under my laser machine and managed to cut the codes! I guess now i can really cut all my masks and even stencils. Need to do a little more tweaking but almost there.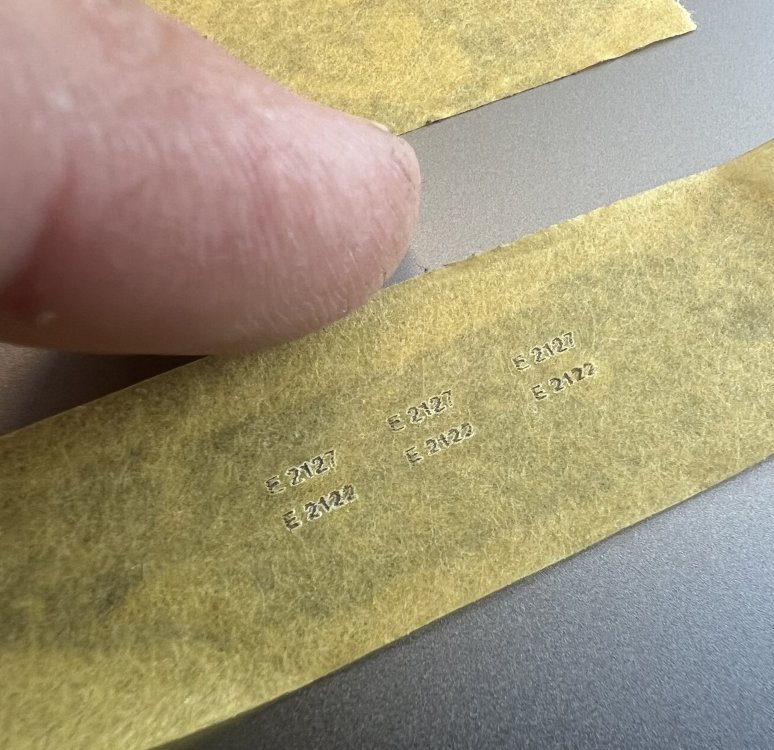
-
1/32 Westland Whirlwind
JeroenPeters replied to JeroenPeters's topic in LSM 1/35 and Larger Work In Progress
Small steps!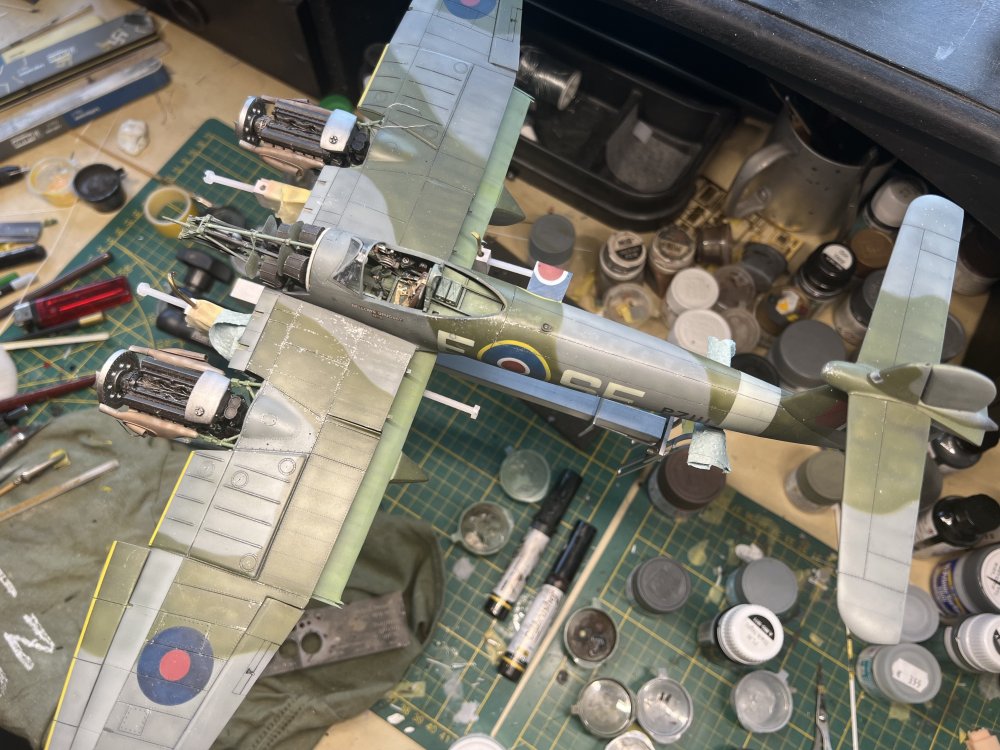
-
1/32 Westland Whirlwind
JeroenPeters replied to JeroenPeters's topic in LSM 1/35 and Larger Work In Progress
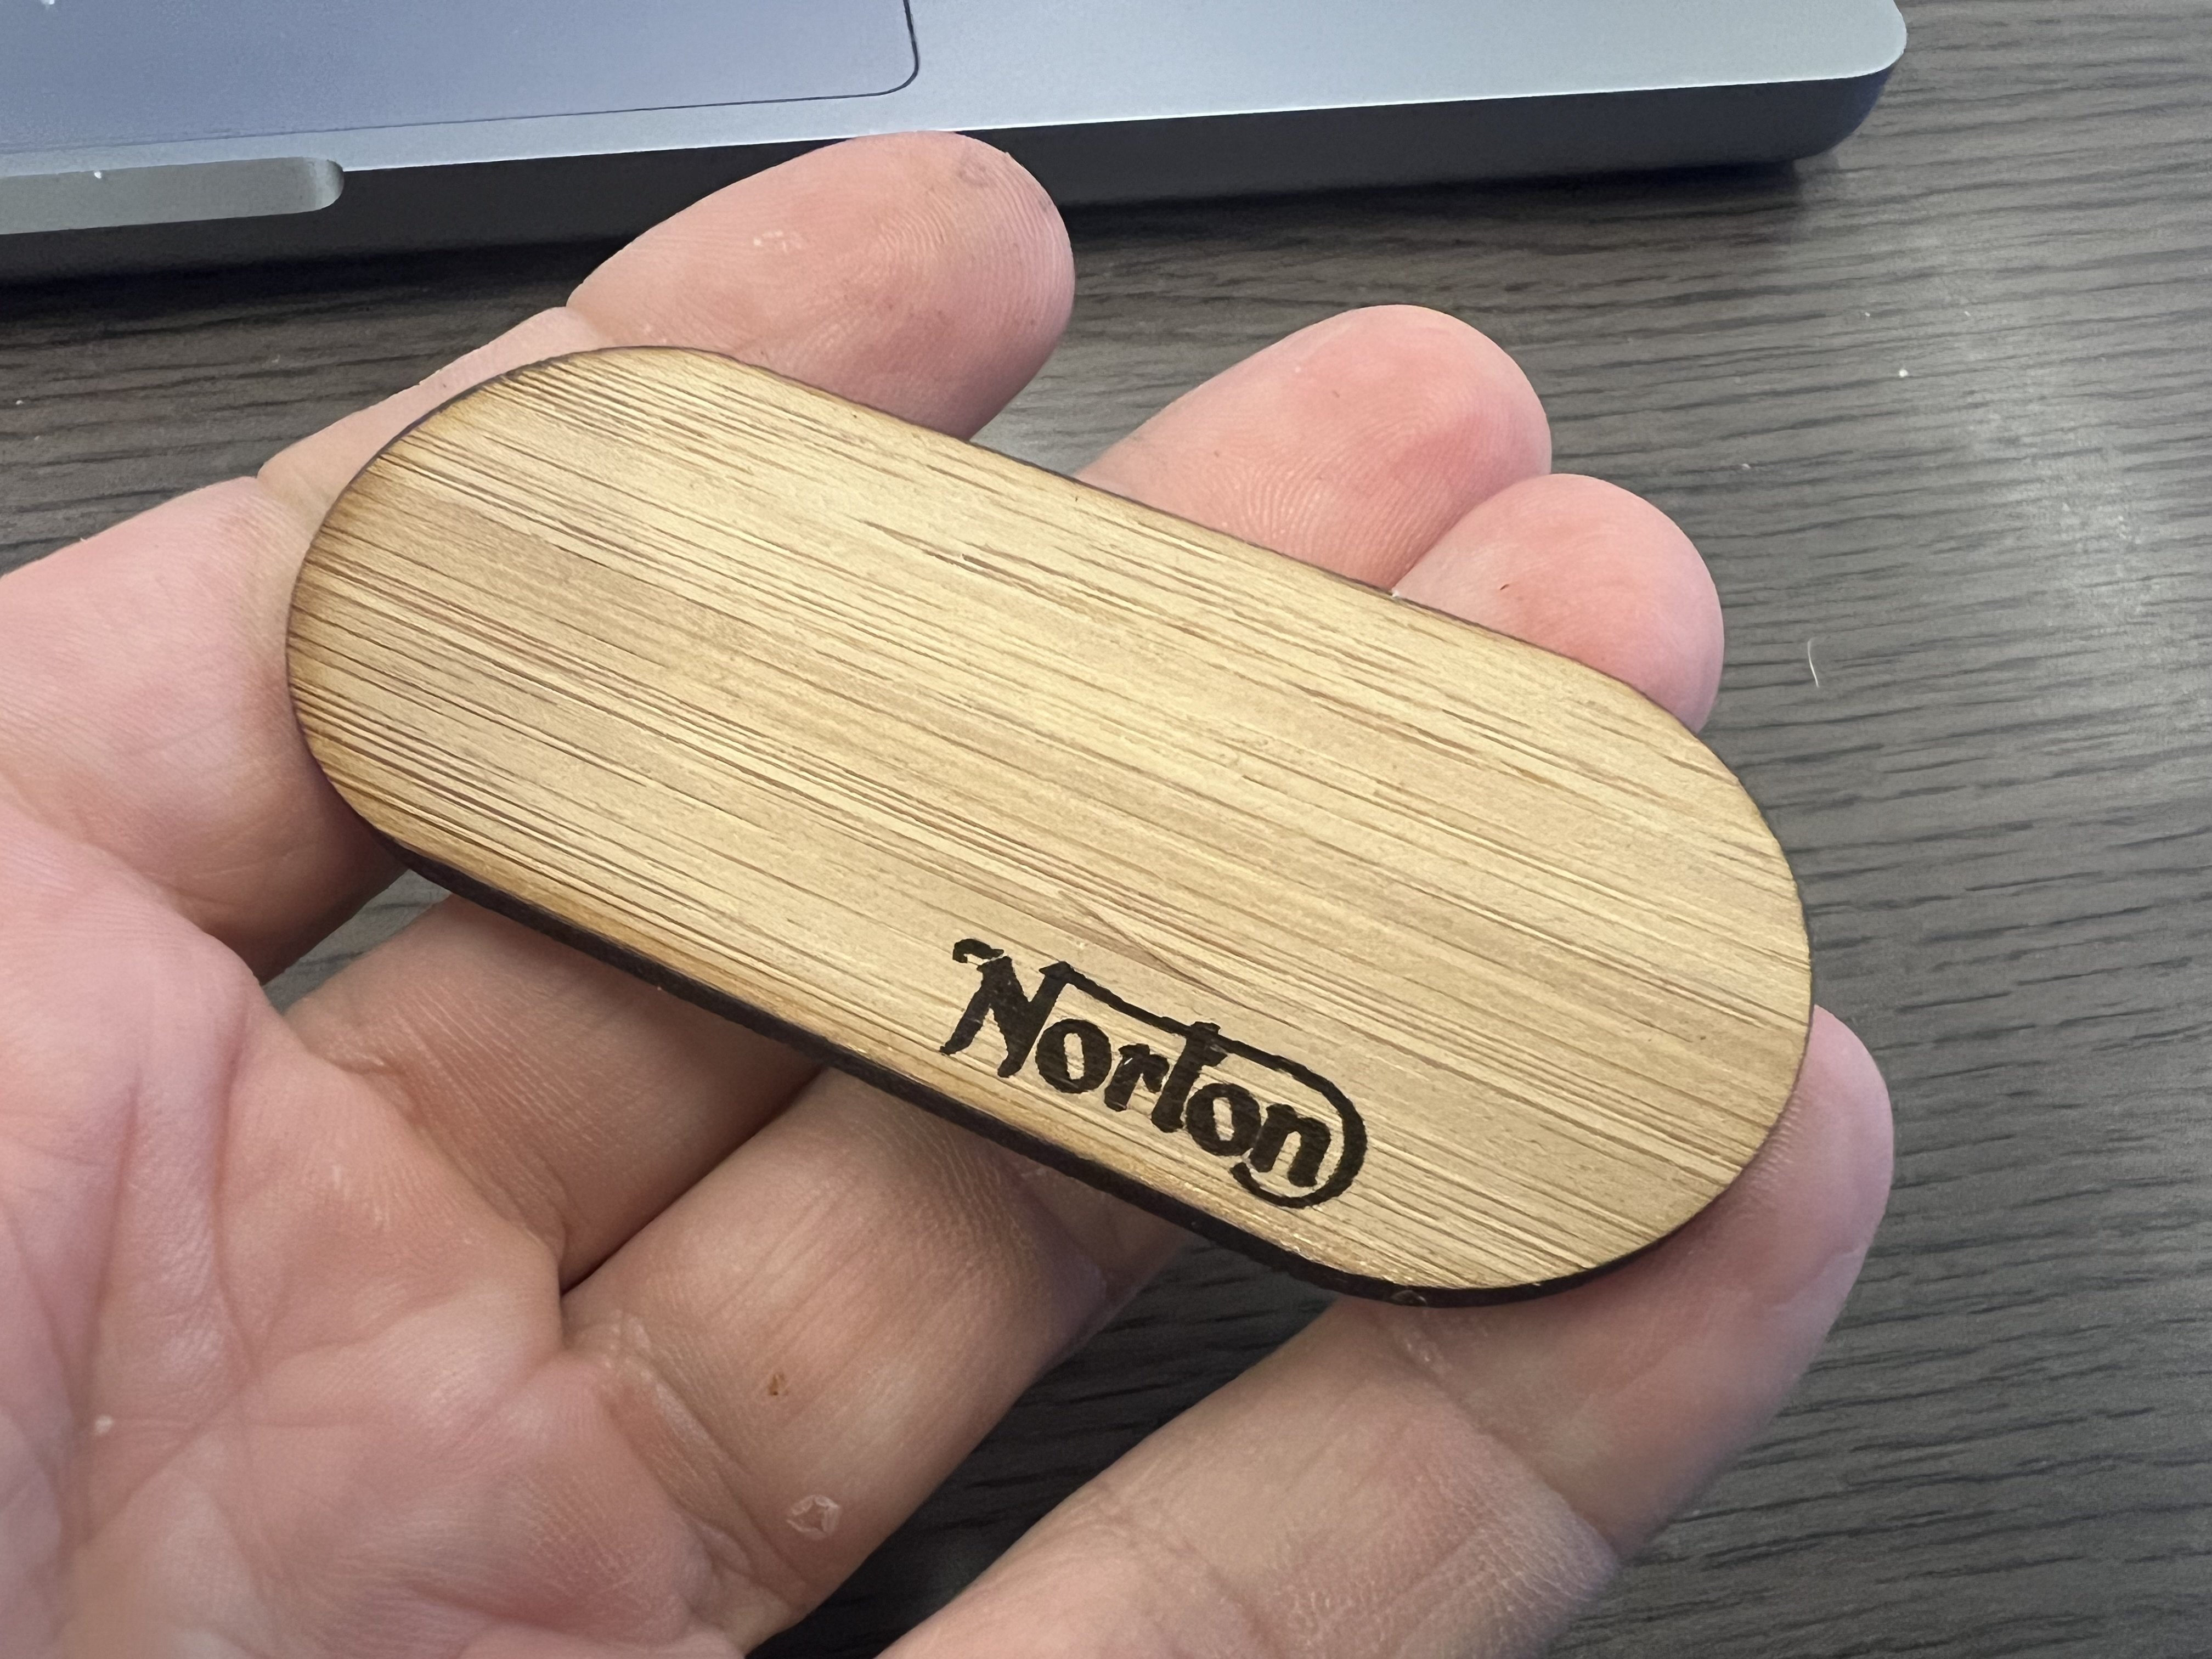
Haven’t been able to do much lately, bit just lasered this small wooden base for the Norton.
-
I've always loved the look of this huge Do335 with the US soldiers gazing at it and swarming around it like ants. For the base I used a very high res US map from 1945 that I had printed on canvas and then... cut it up. No decals were used. All masks. Lots of Eduard and Master upgrades and a Tamiya Jeep with Alpine figures. I could have gone all out on the weathering, but I didn't.


-
1/32 Westland Whirlwind
JeroenPeters replied to JeroenPeters's topic in LSM 1/35 and Larger Work In Progress
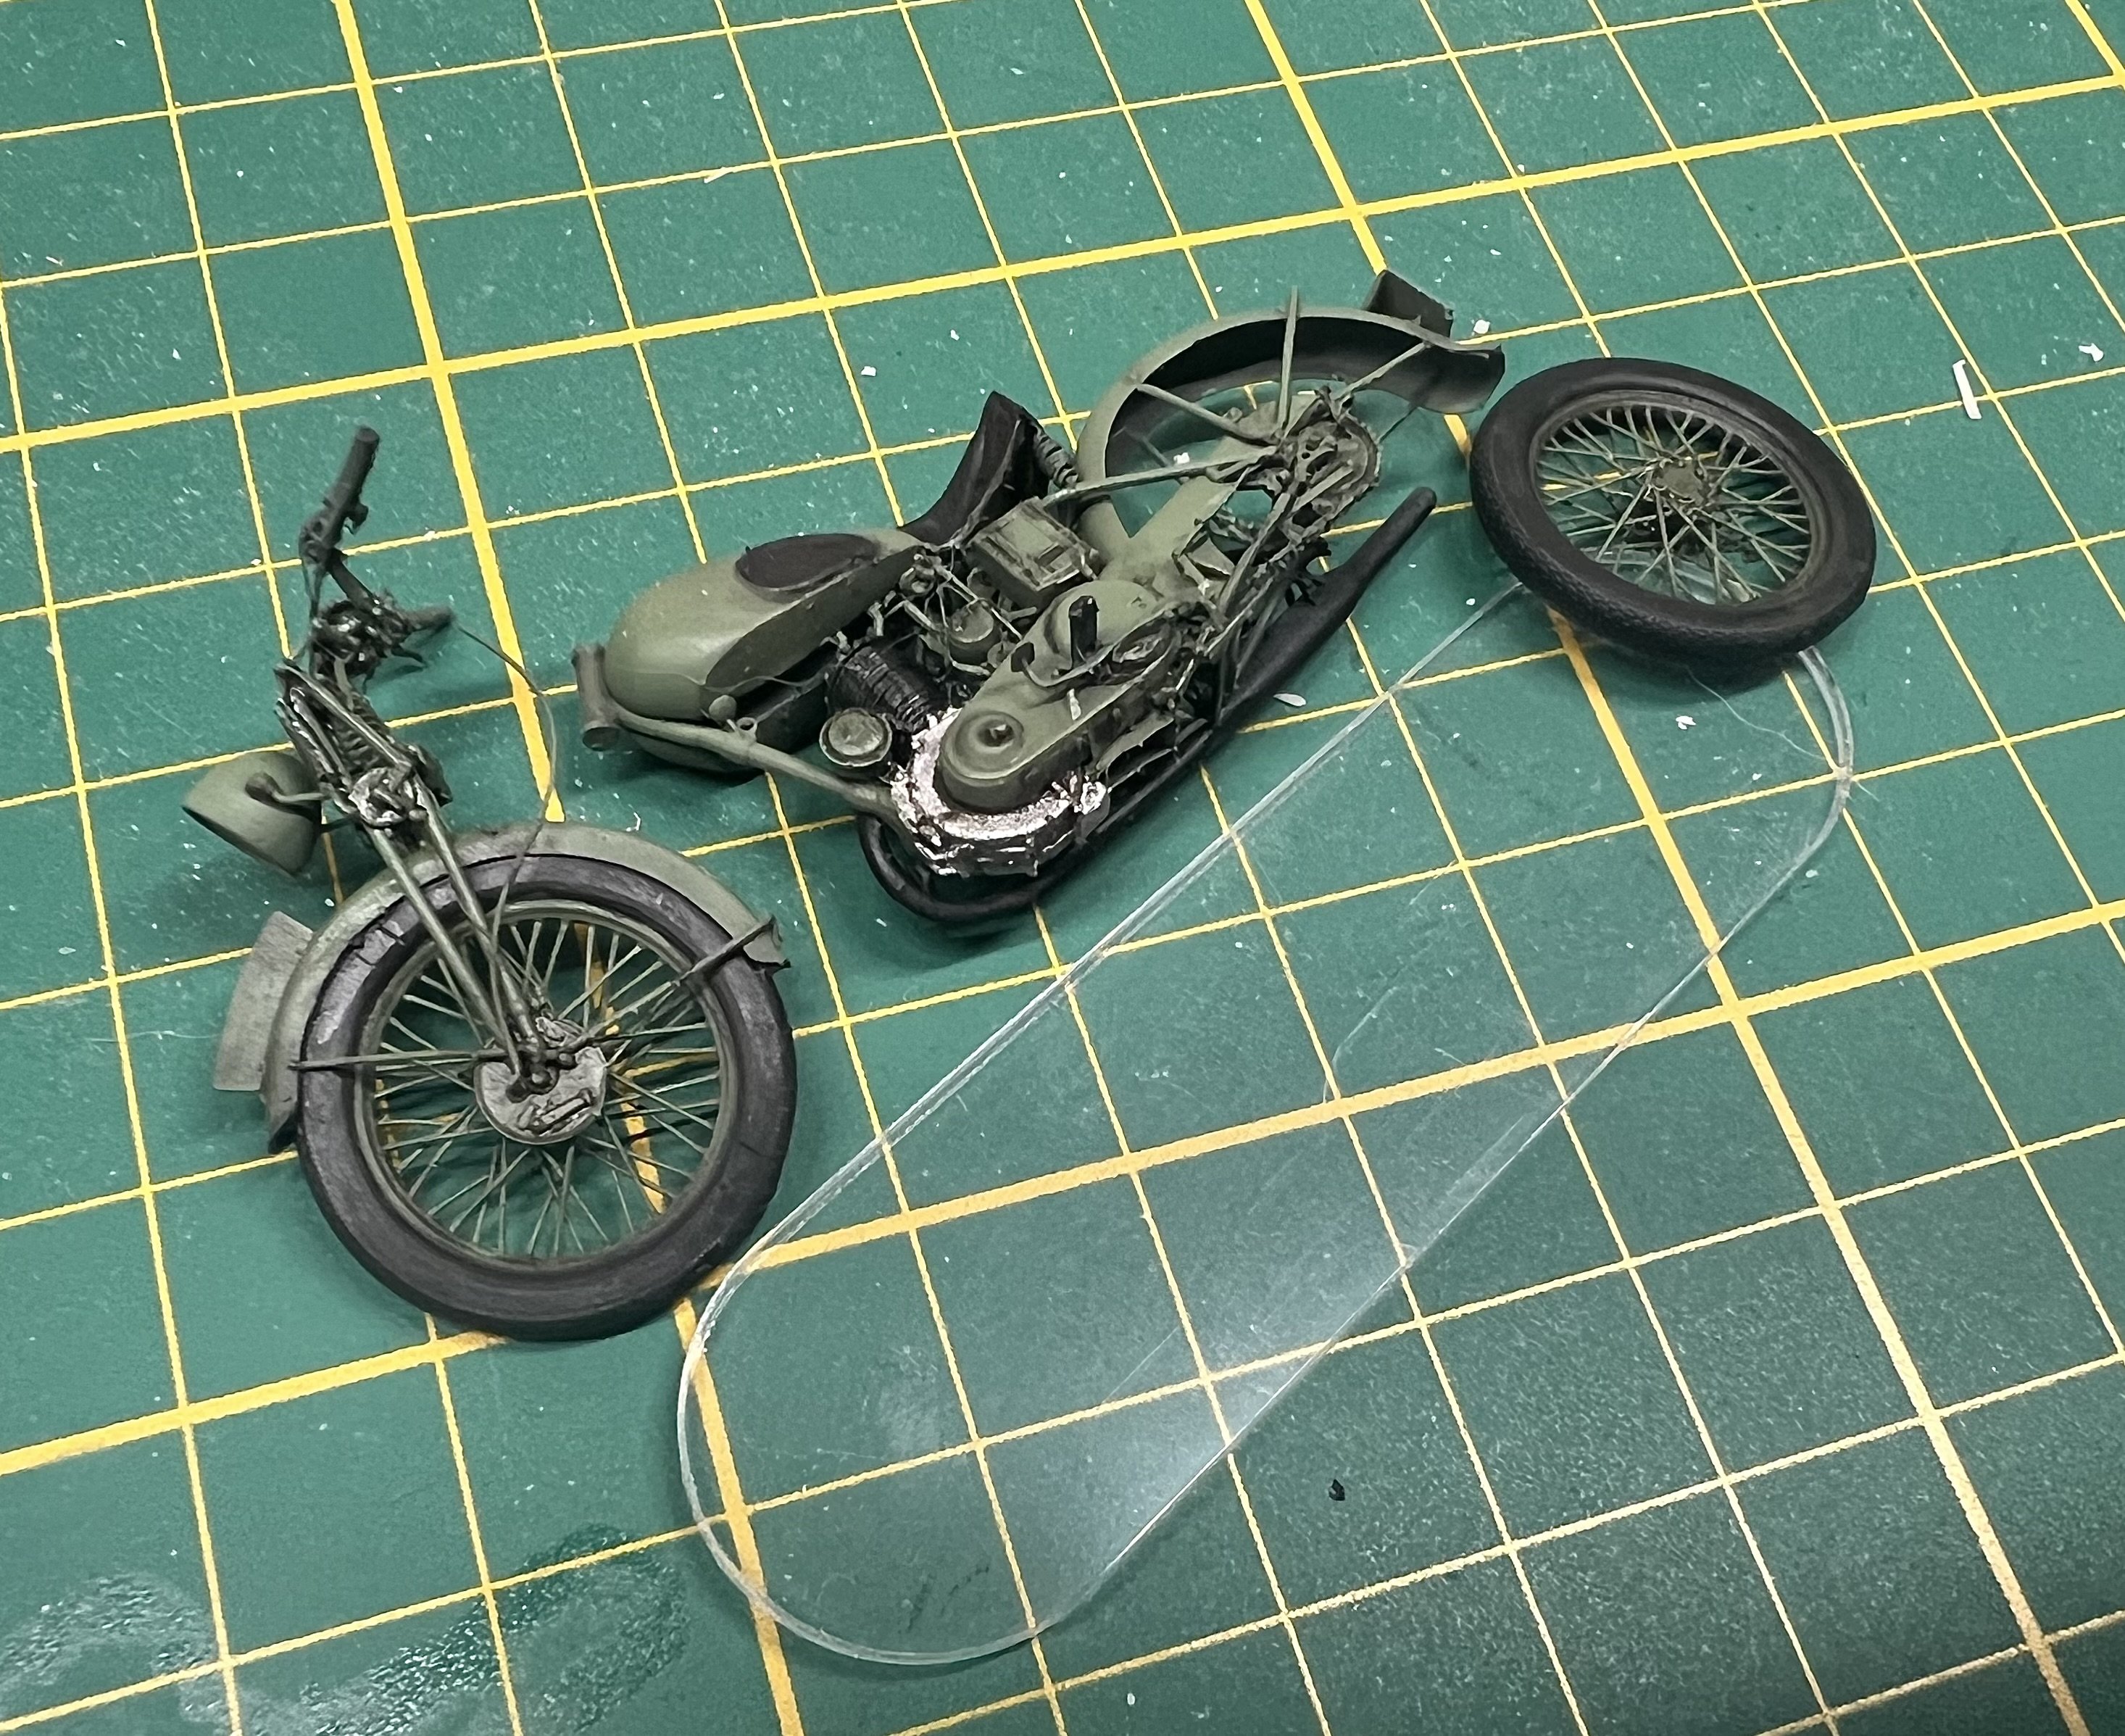
Not neglecting the Norton bikes. I printed dozens and loose about 3/4 if the print botching them during cleanup. The connectors and parts are just too dekicate. I only need 2 complete and intact prints! Almost there and then ready for primer.


- 439 replies
-
- 11
-

-
1/32 Westland Whirlwind
JeroenPeters replied to JeroenPeters's topic in LSM 1/35 and Larger Work In Progress
Things are getting lined up. Be it painstakingly slow… My hands are itching to get back to some other builds, but this will be finished first!

-
1/32 Westland Whirlwind
JeroenPeters replied to JeroenPeters's topic in LSM 1/35 and Larger Work In Progress
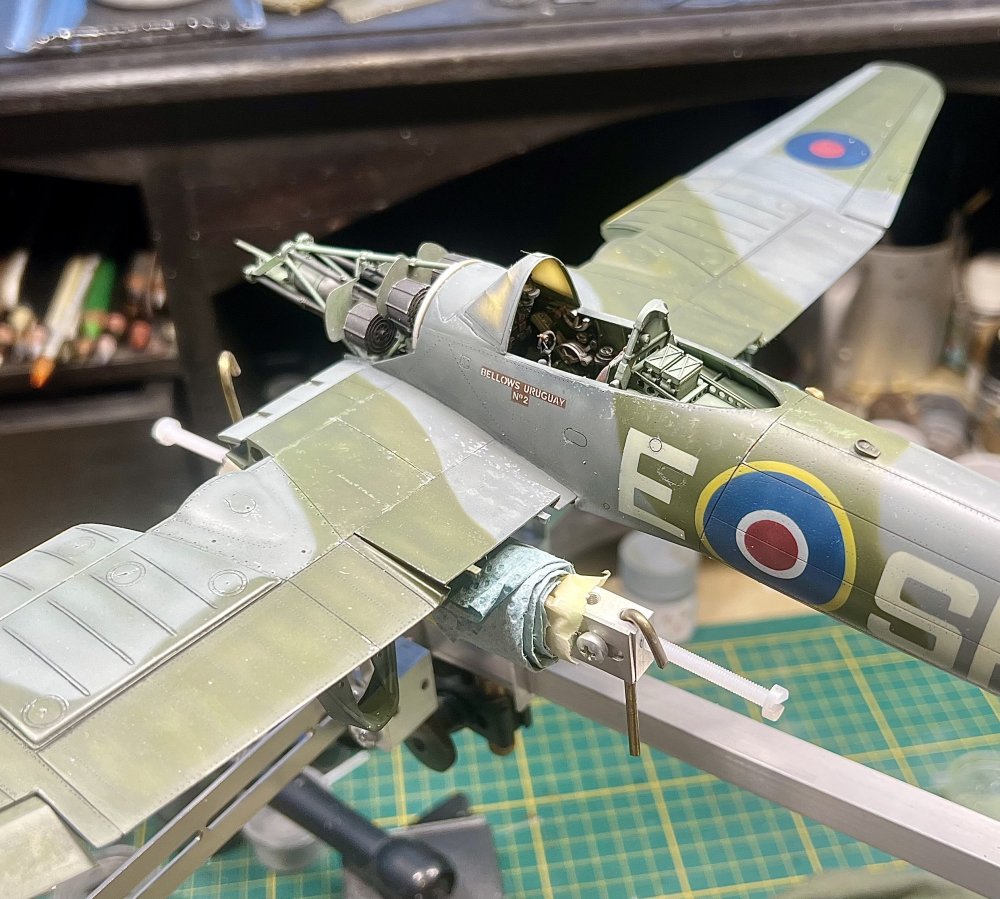
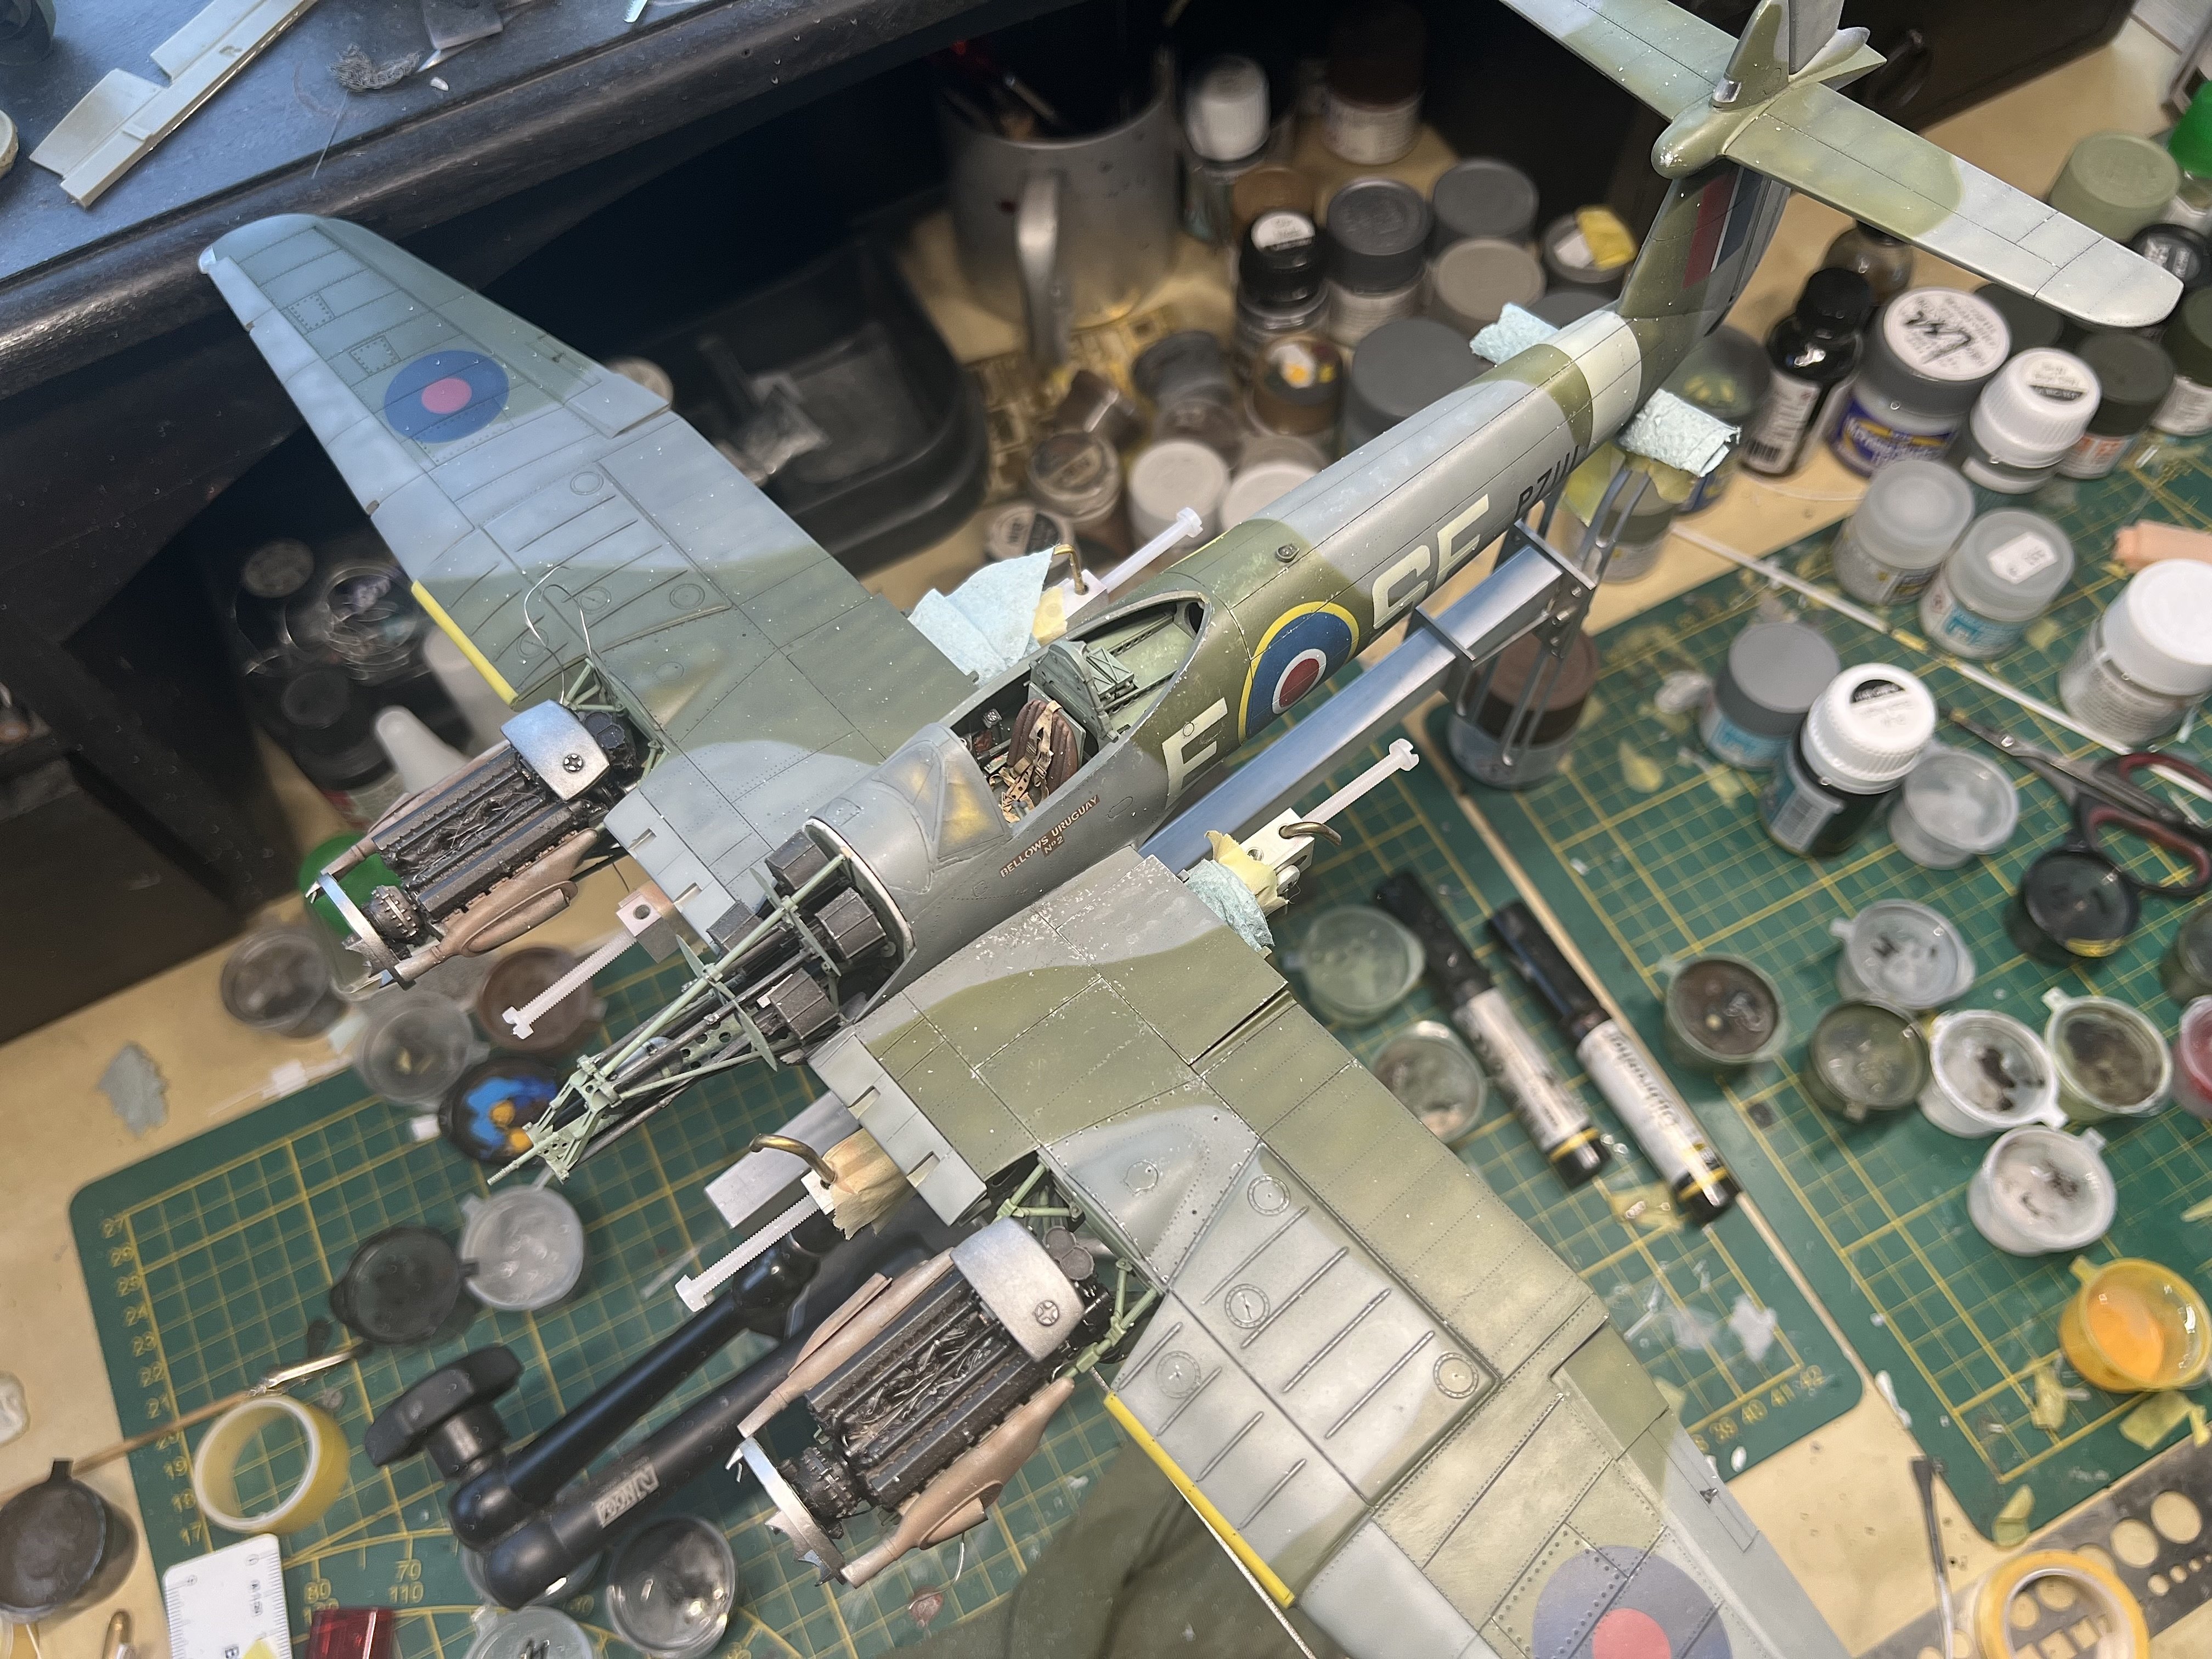
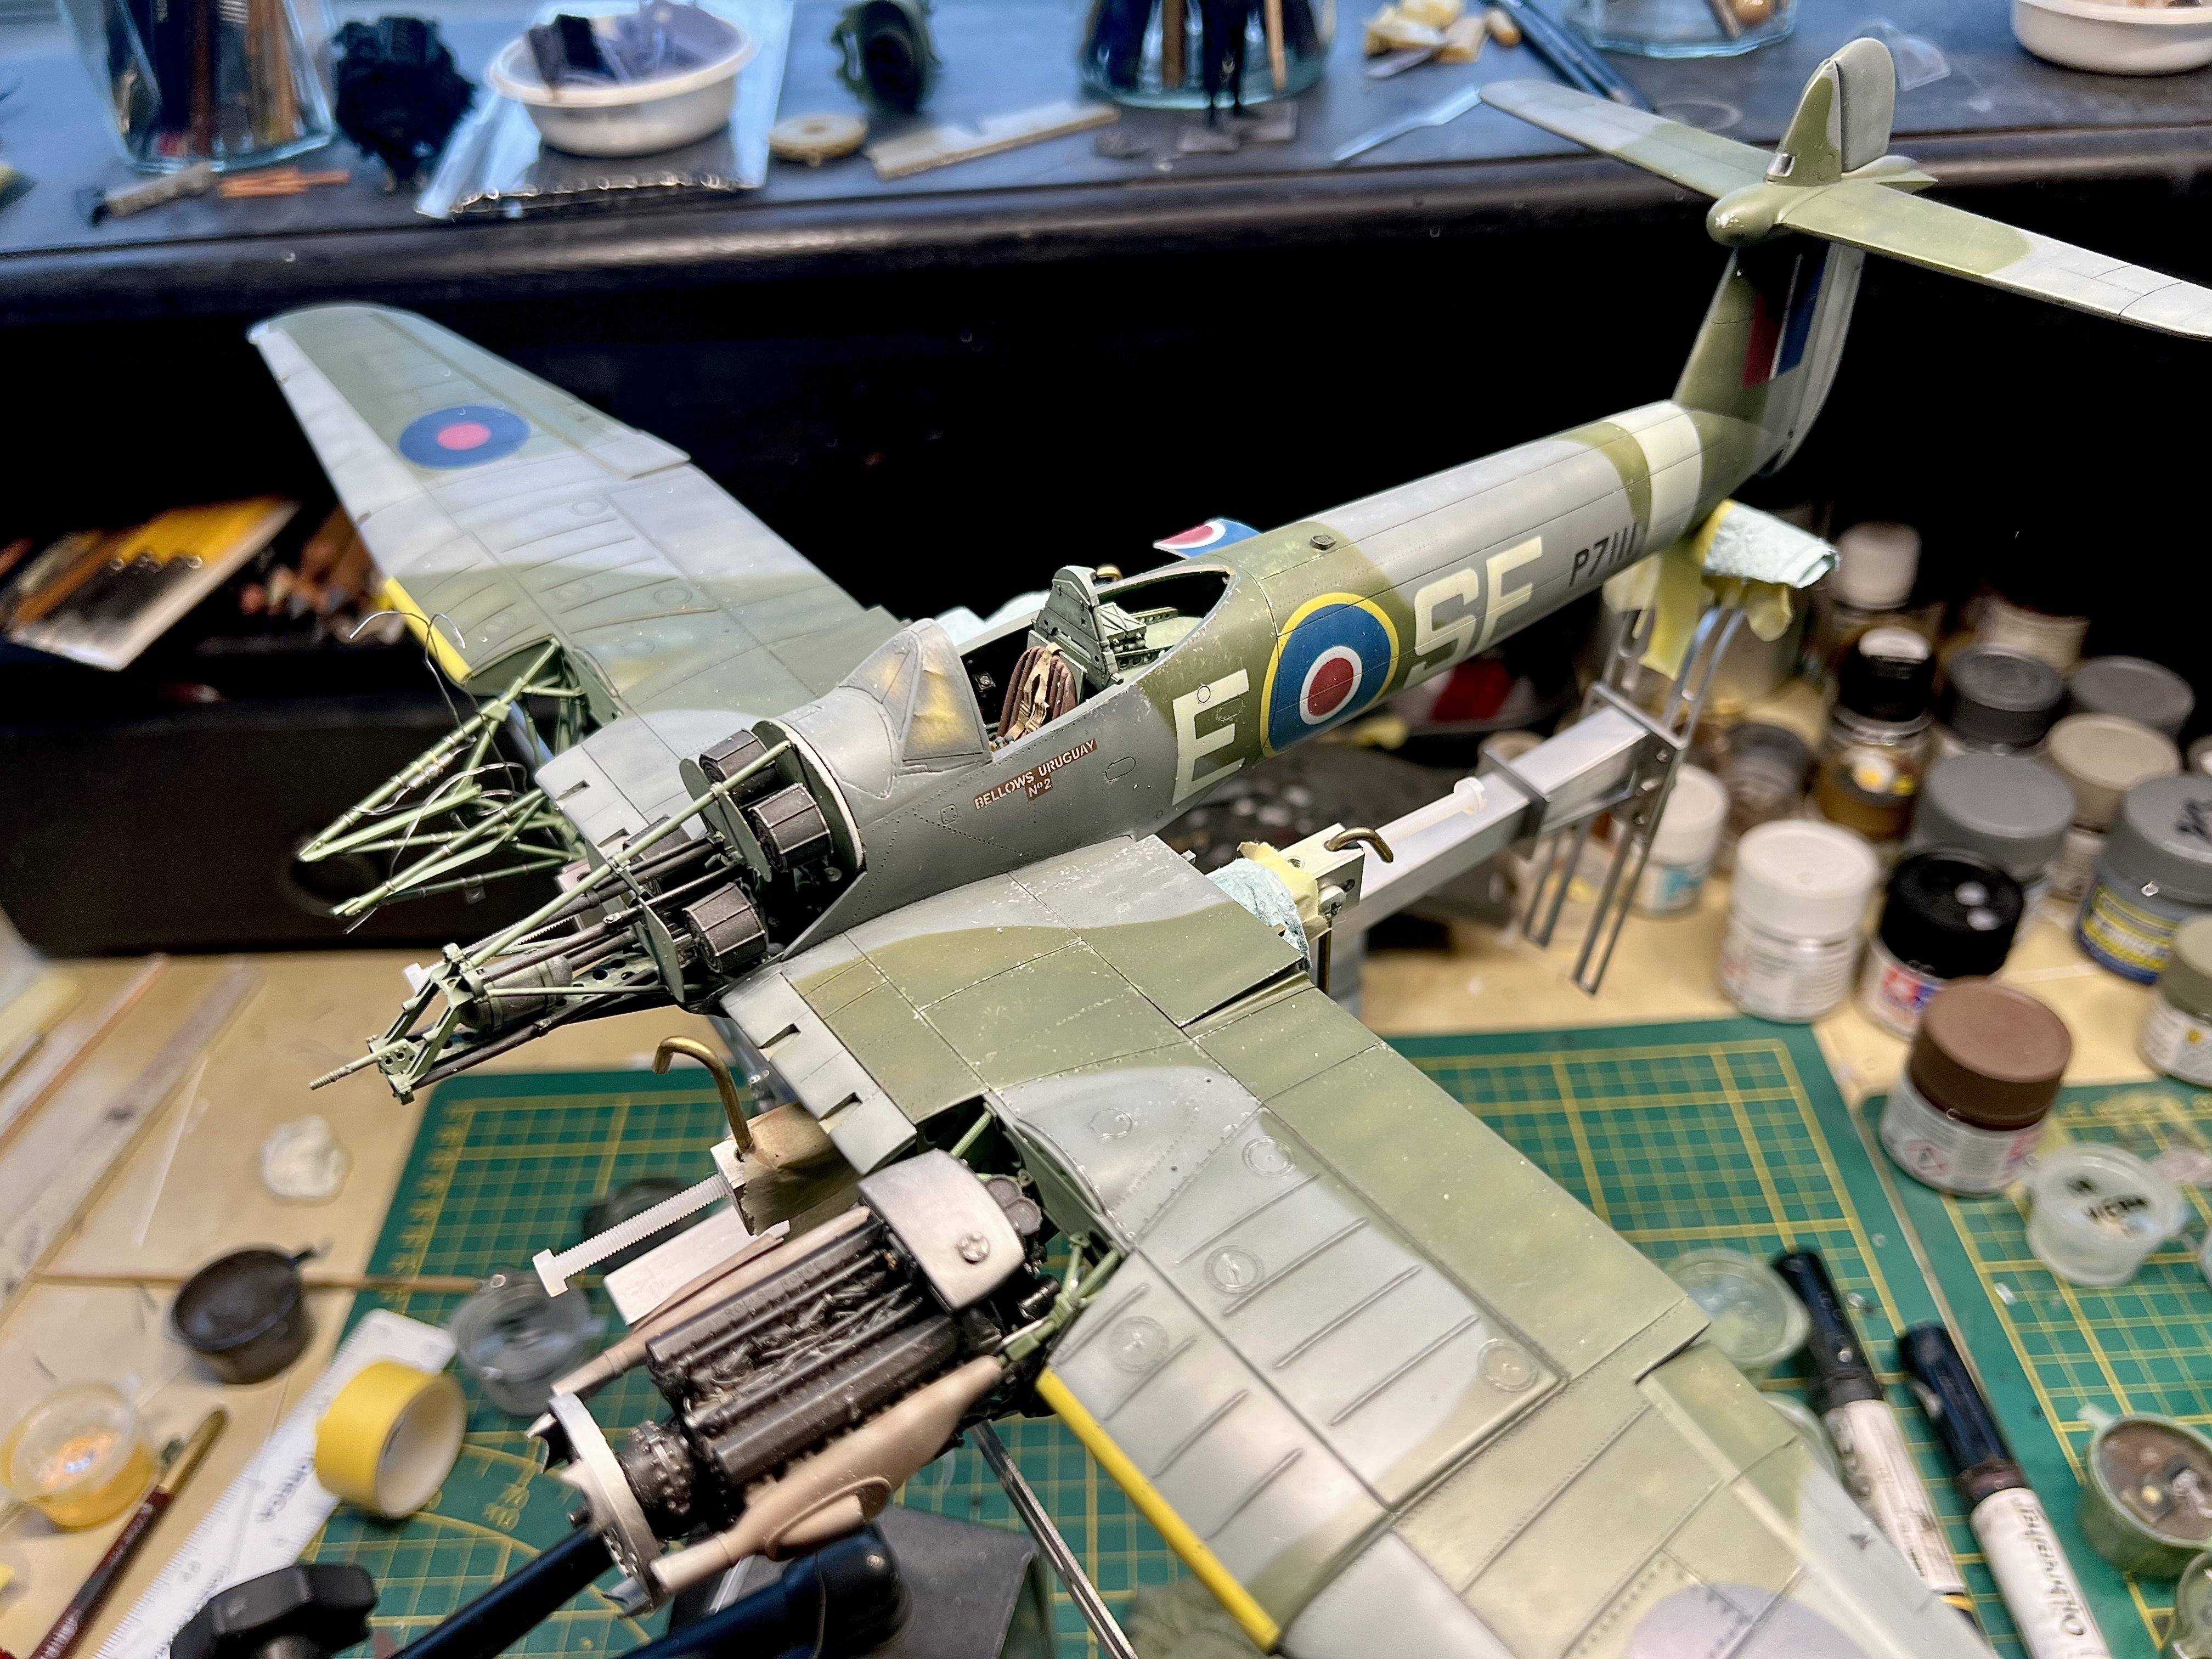
Installing the engine bearers. Still fiddling with the nose gun section in order to get the right angle. Almost there.
-
1/32 Westland Whirlwind
JeroenPeters replied to JeroenPeters's topic in LSM 1/35 and Larger Work In Progress
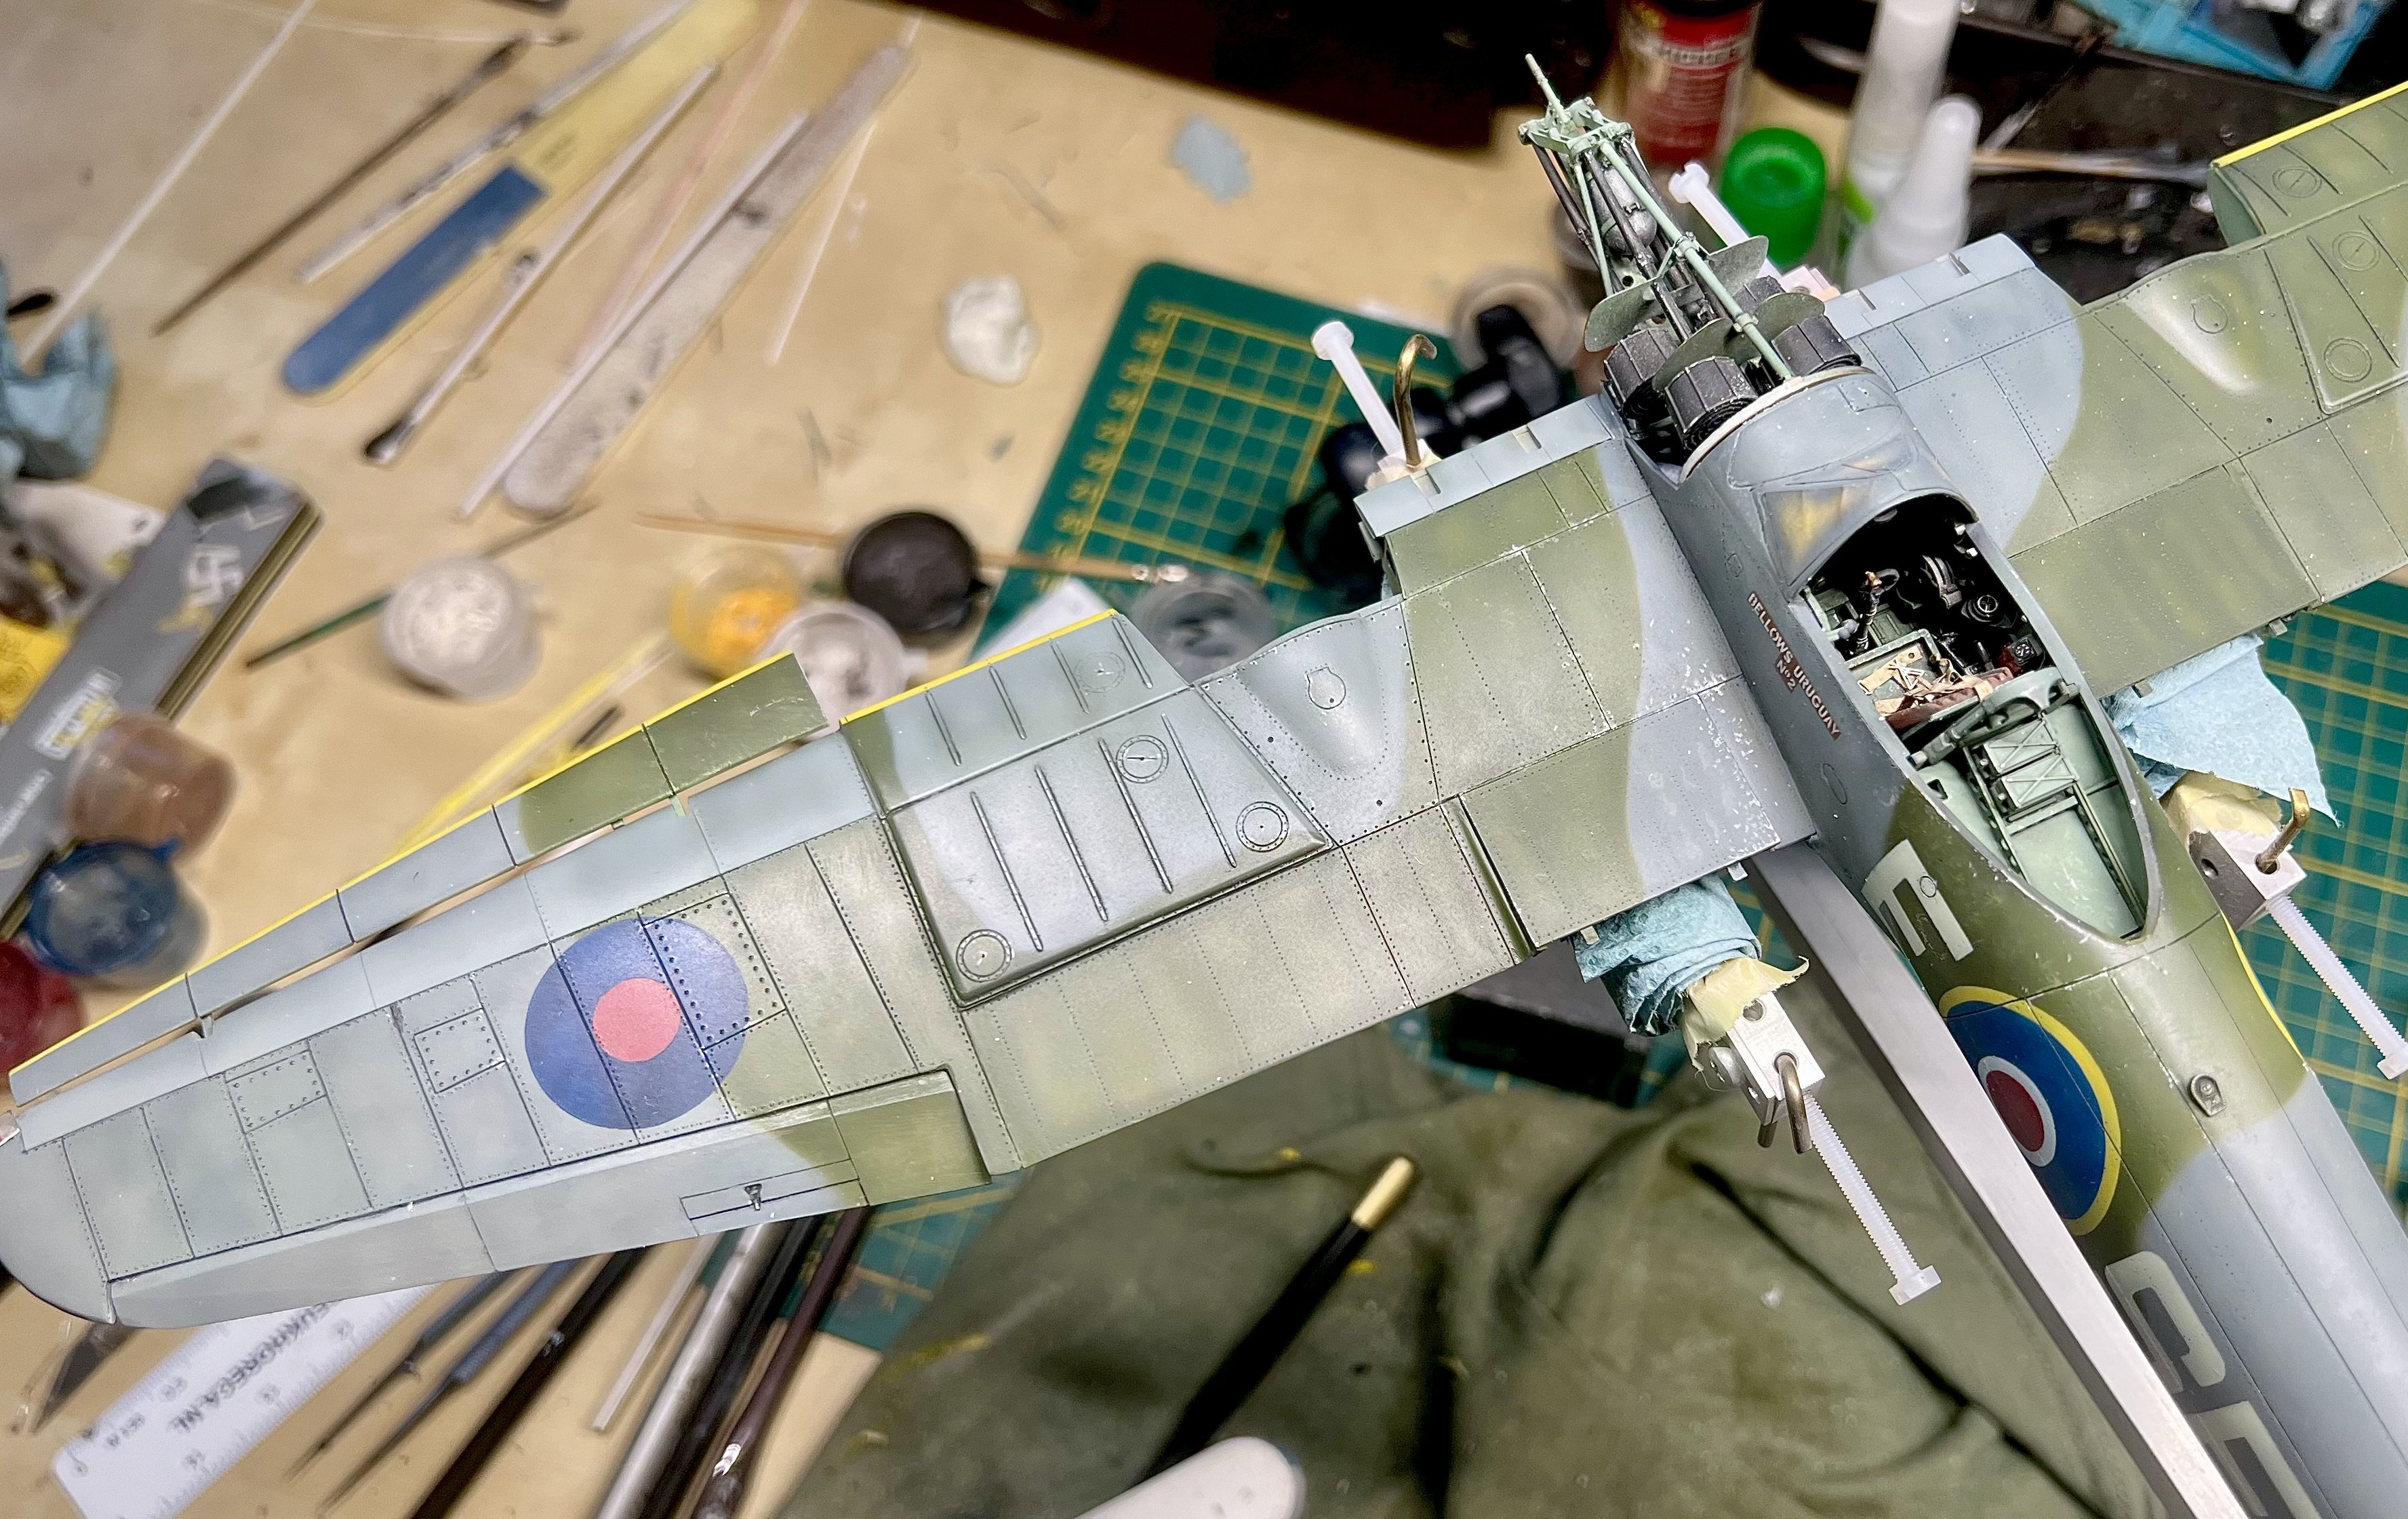
Back from a short holiday and returned to the bench. Matt coat is on and started adding scratches and blotches. This will take a while. Also added a lighter ocean grey under the slats.