JayDee
-
Posts
3,272 -
Joined
-
Last visited
Content Type
Profiles
Forums
Events
Gallery
Everything posted by JayDee
-
It's actually now allowed in the regular LSM build areas as it's a LARGE model, irrespective of scale!
-
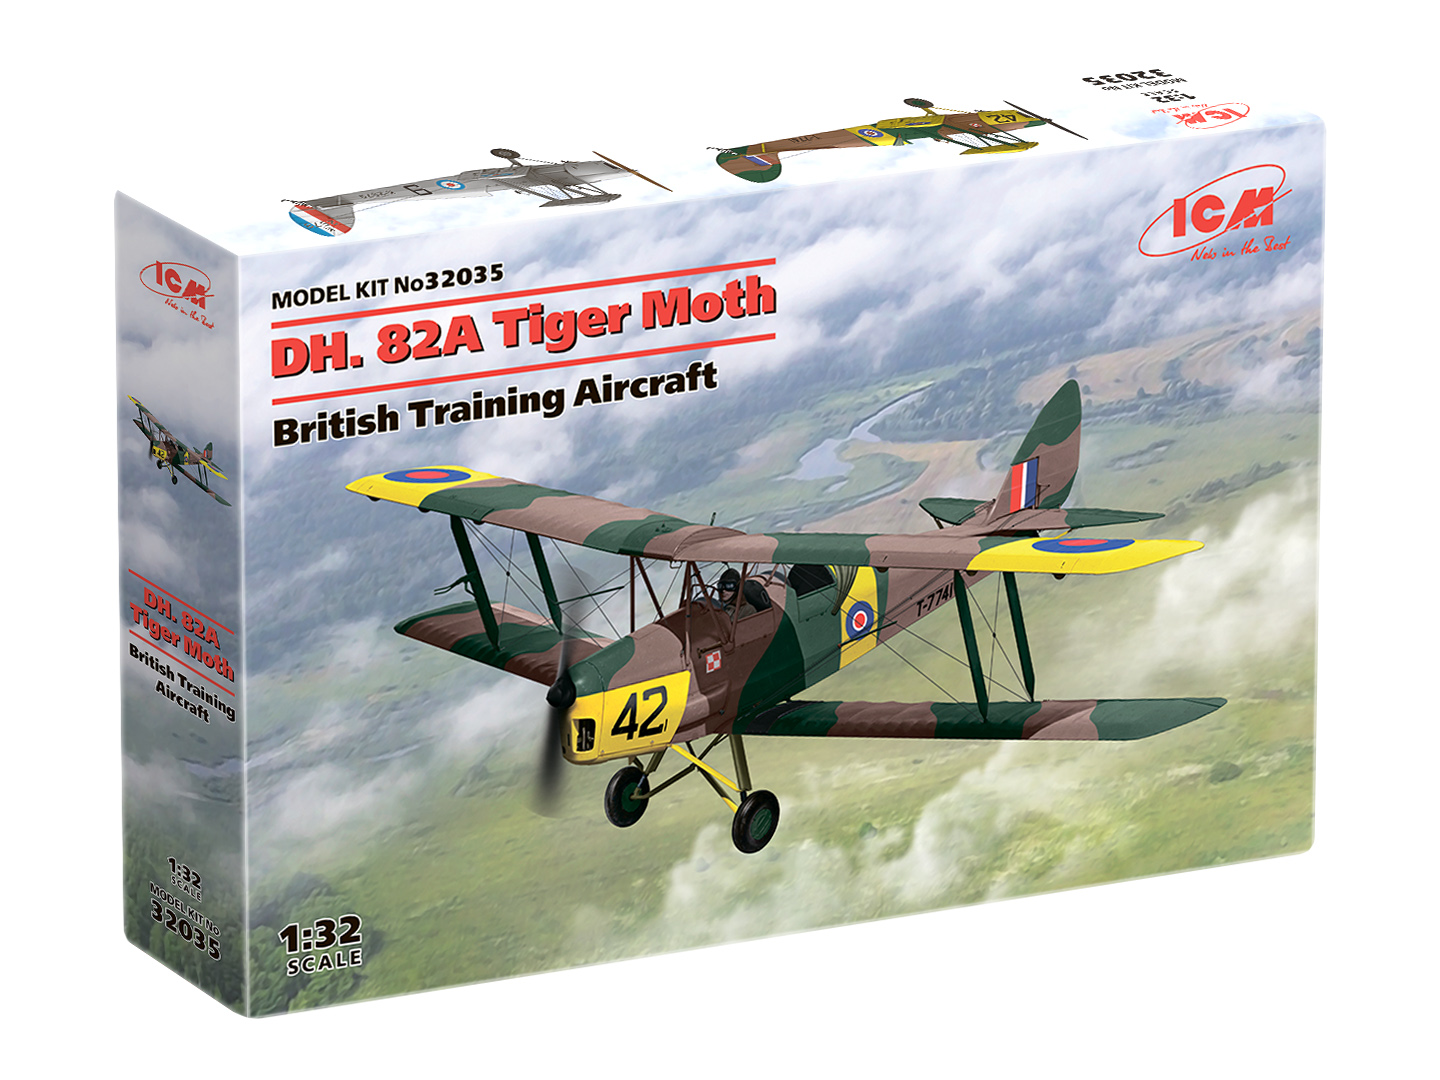
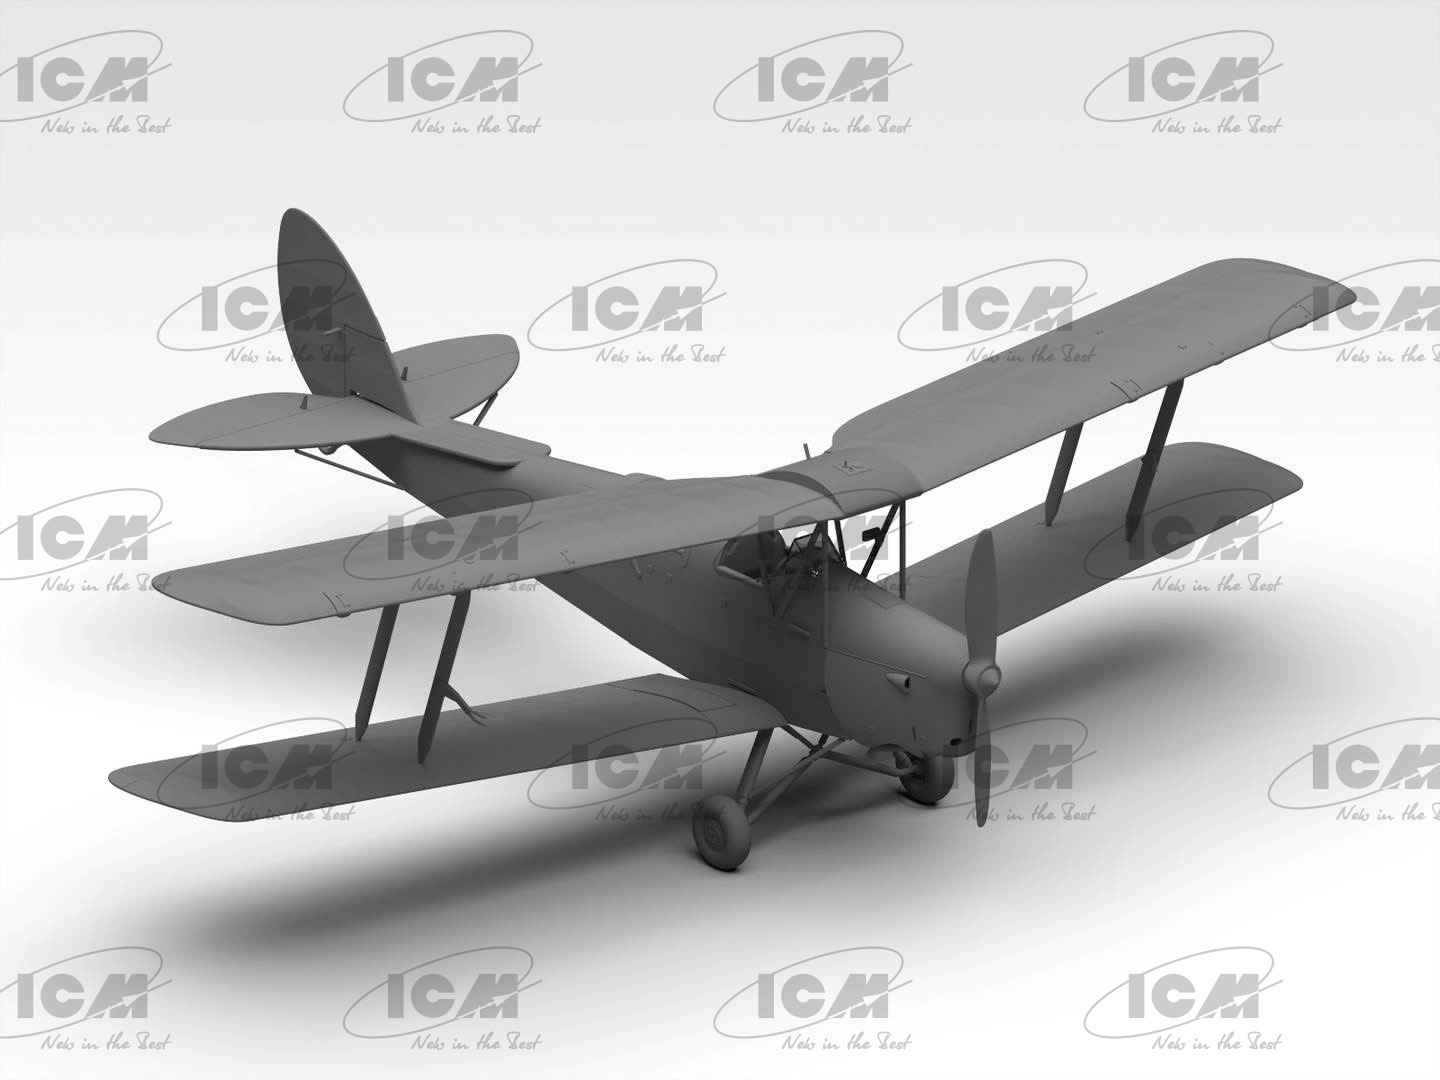
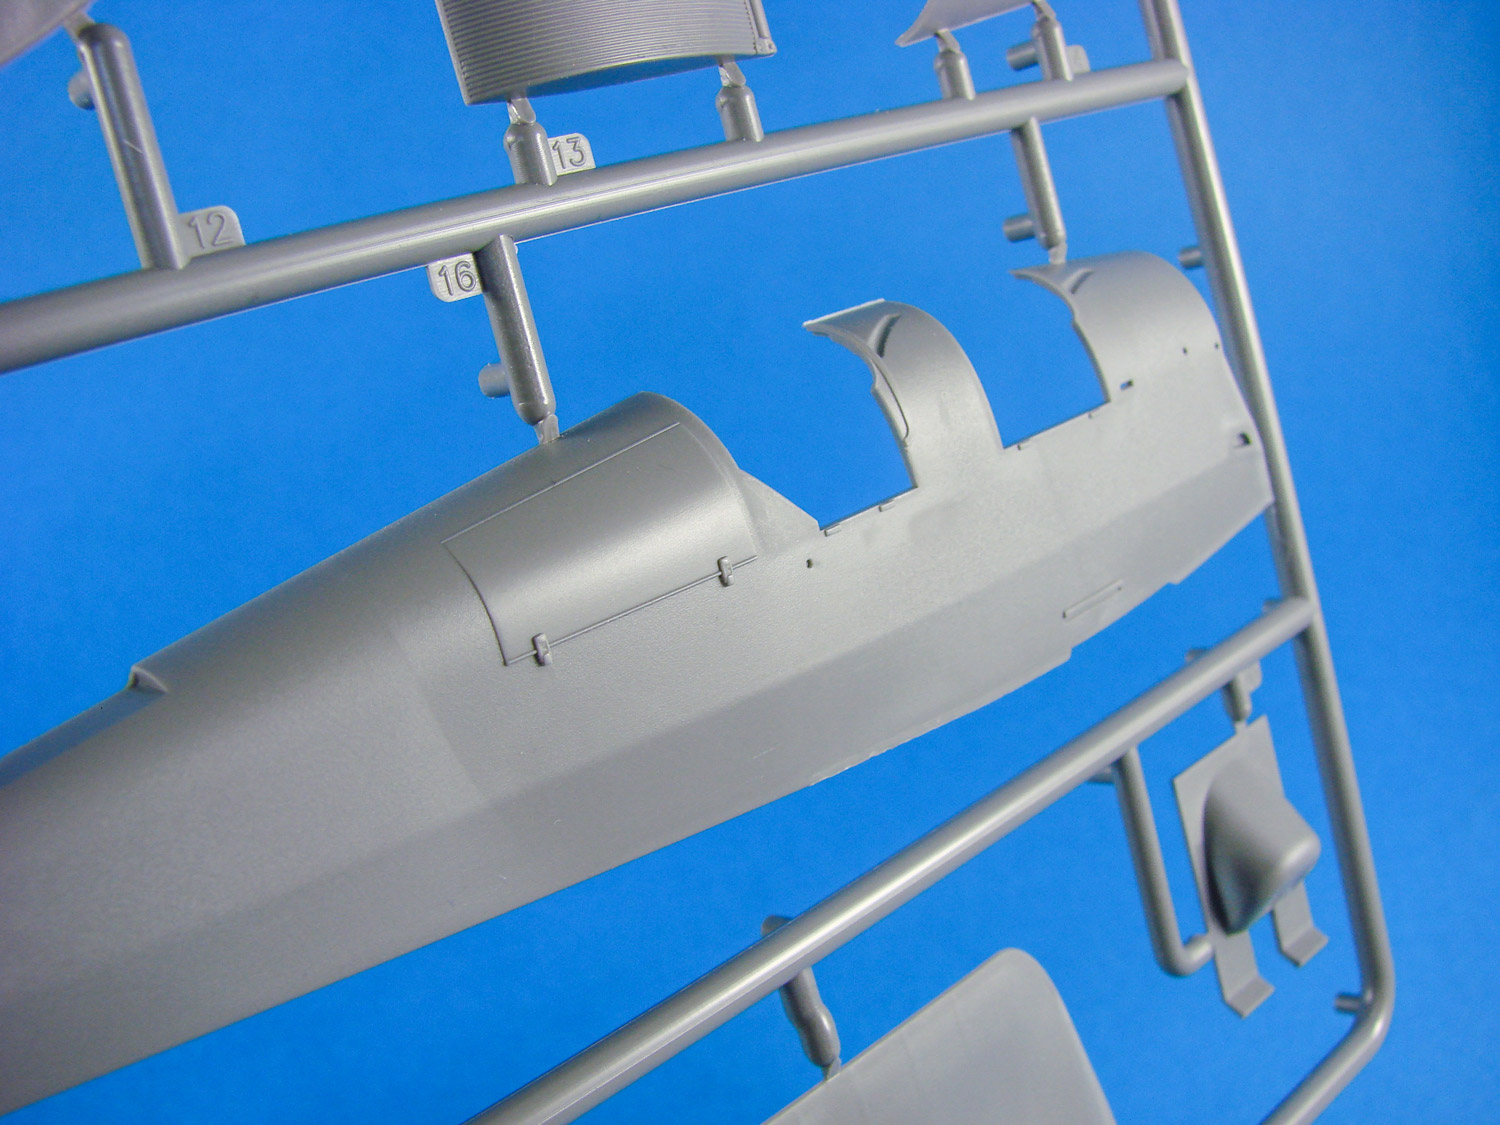
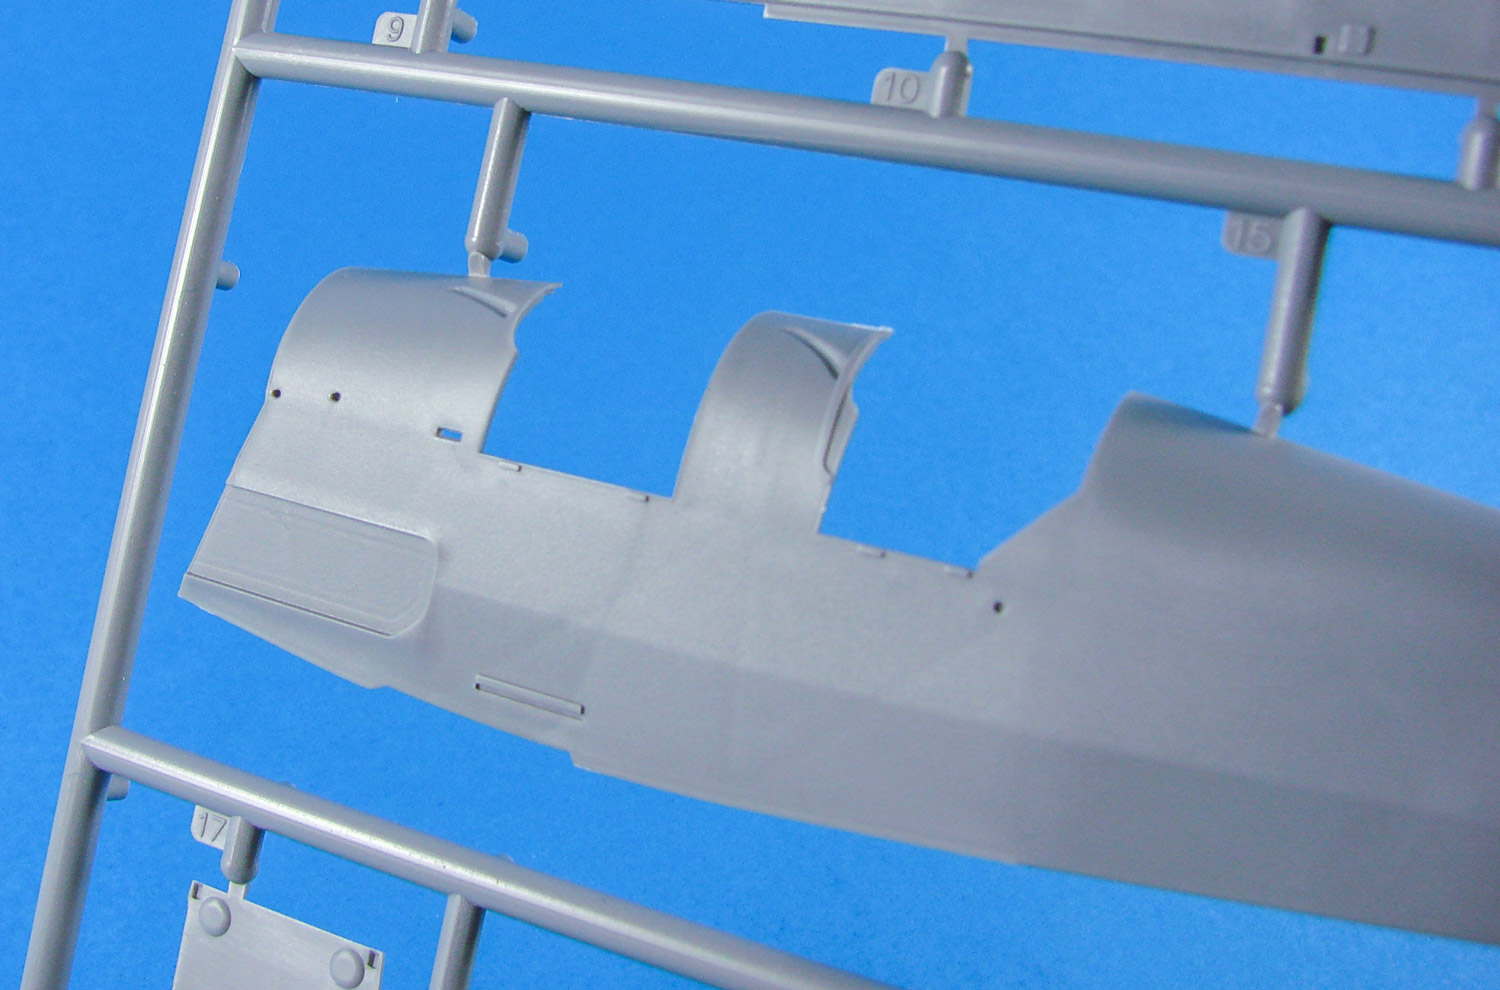
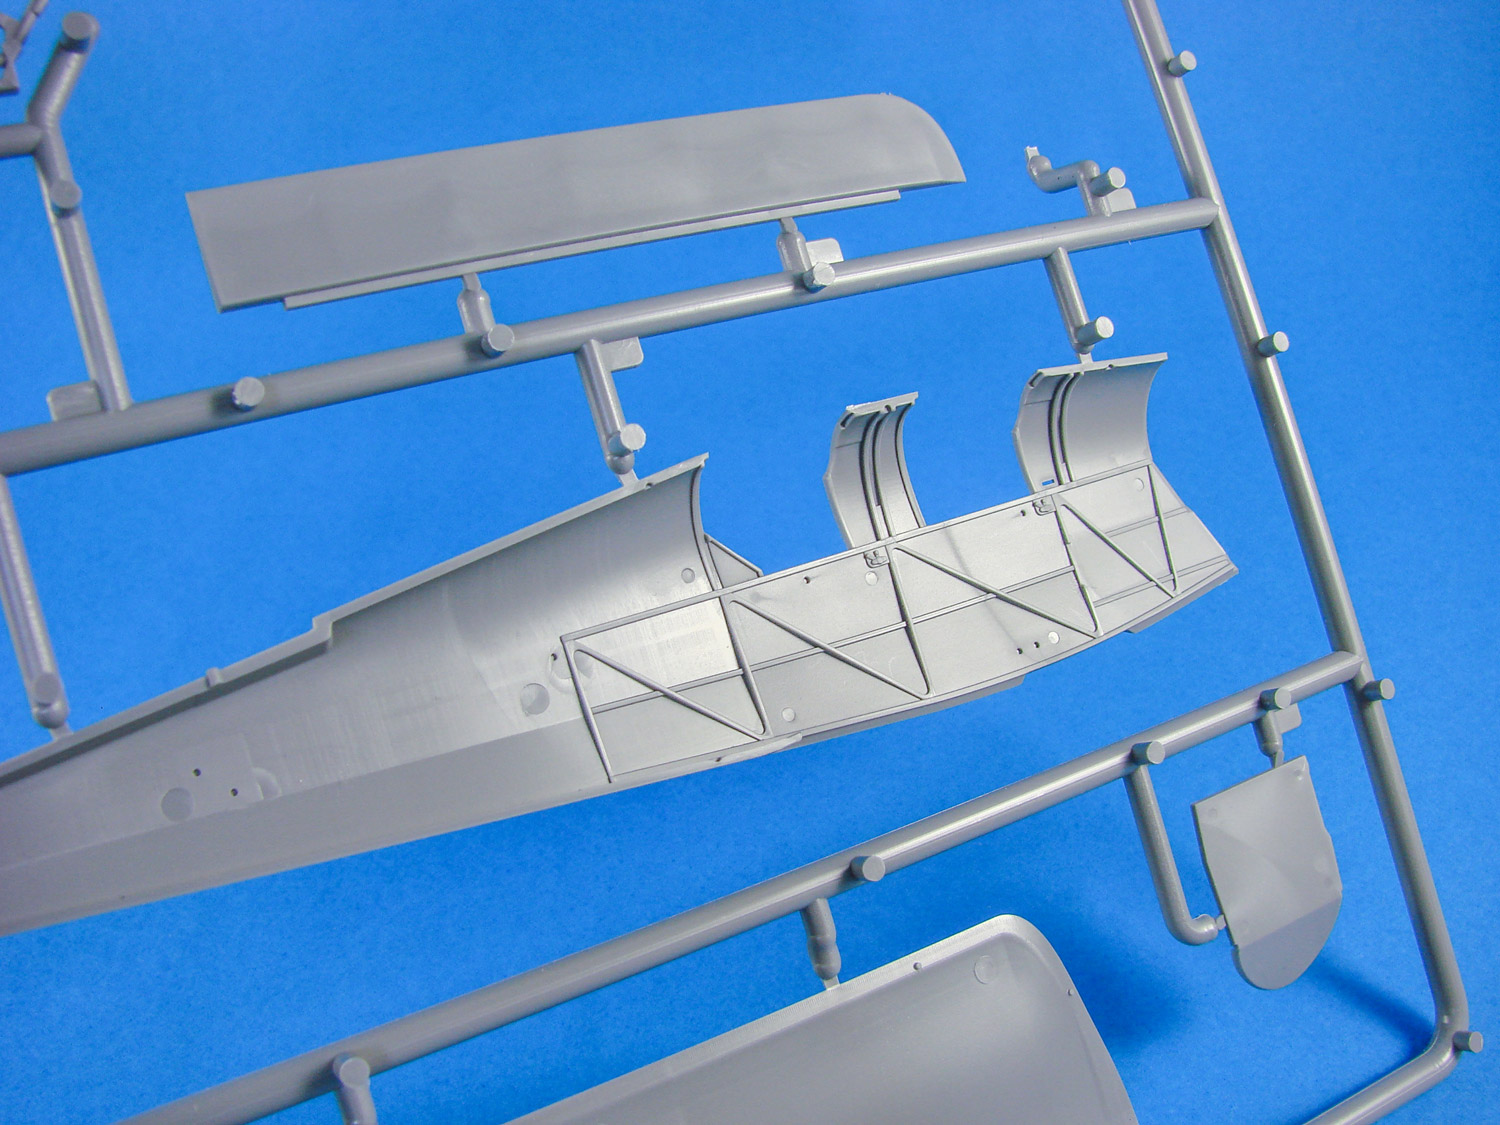
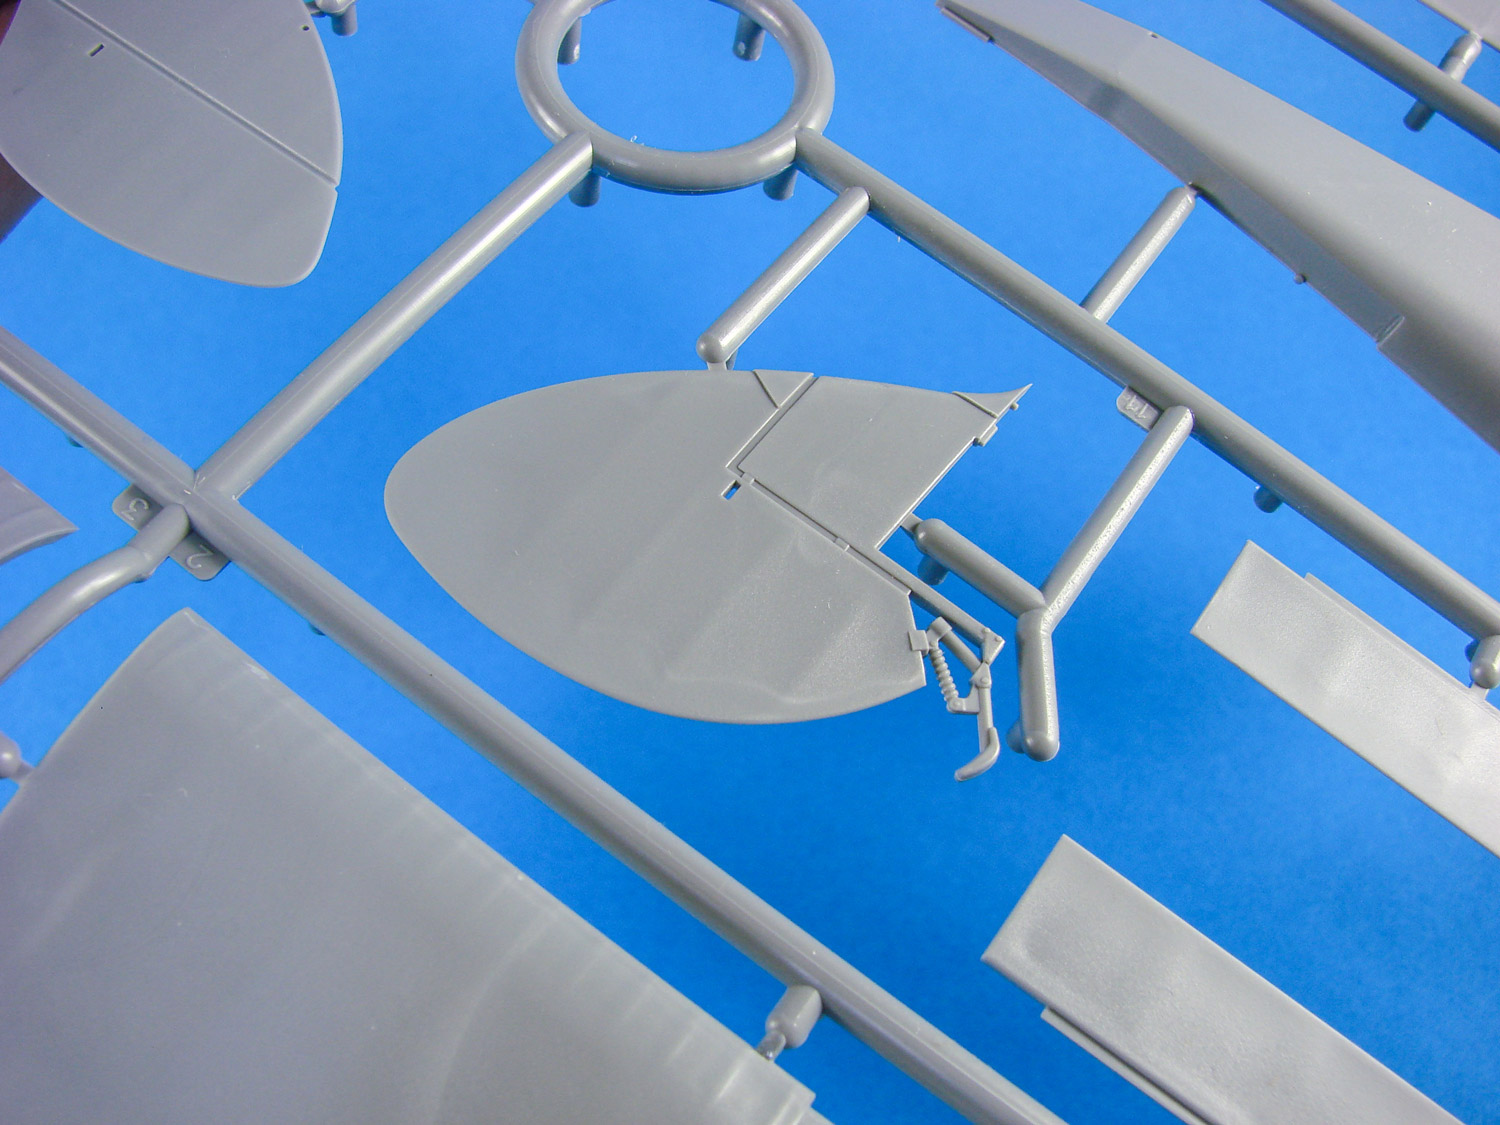
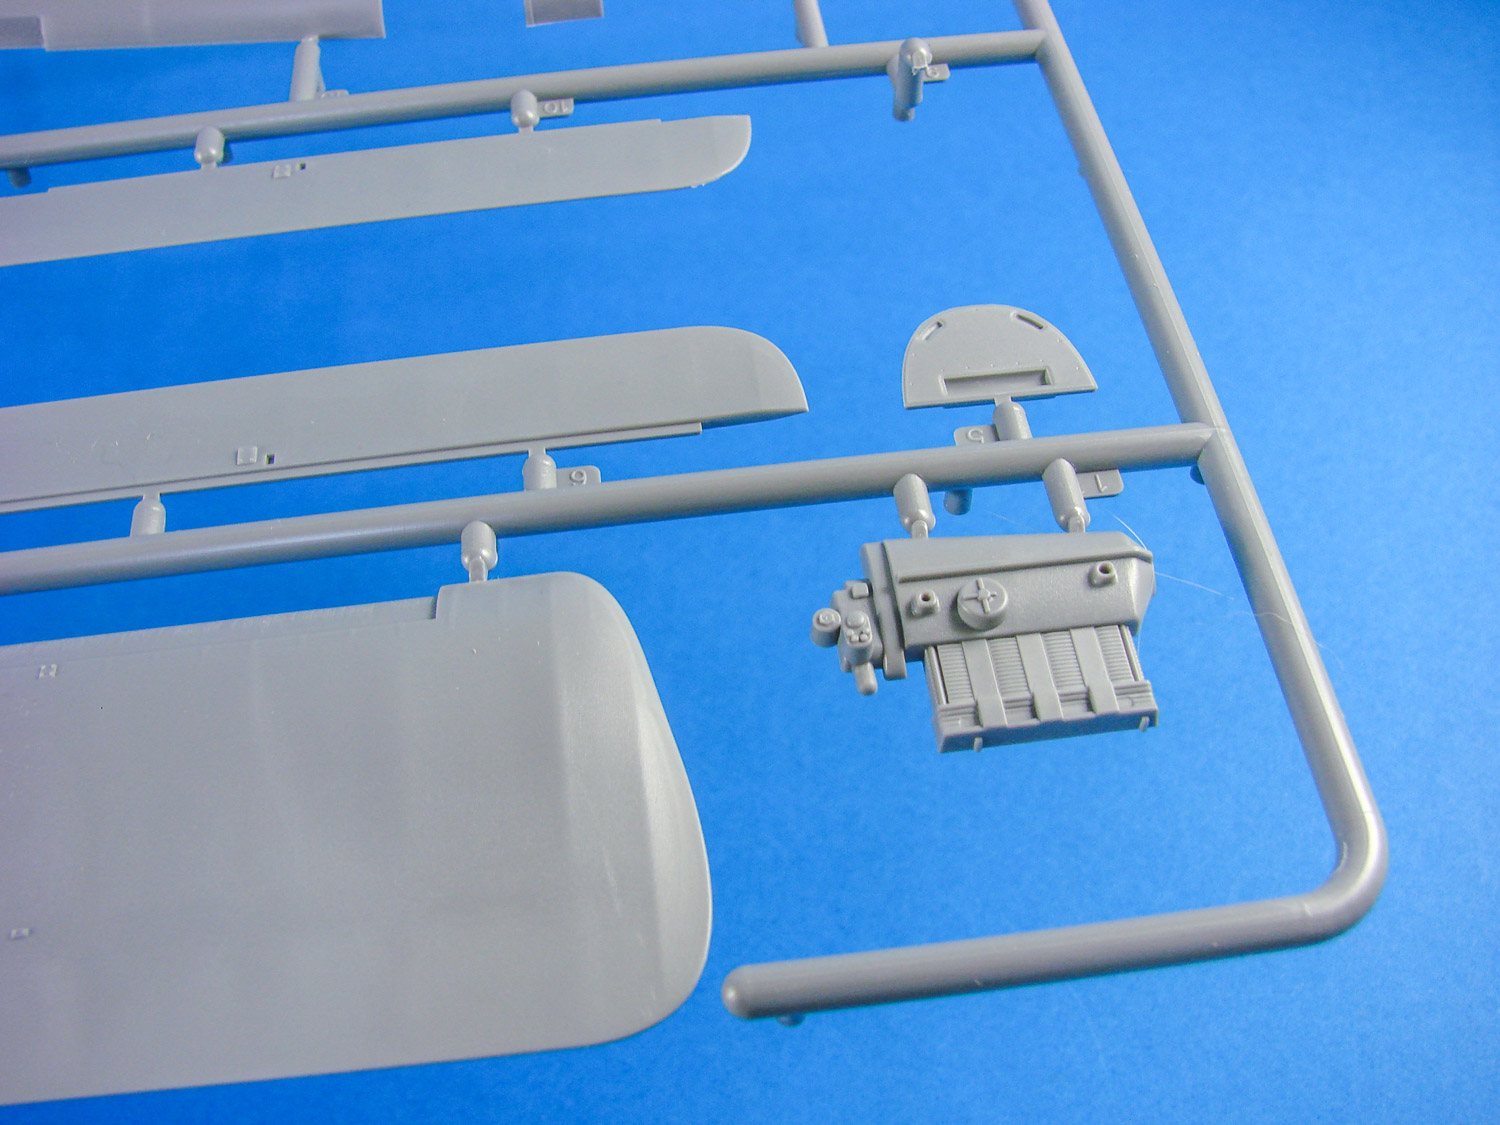
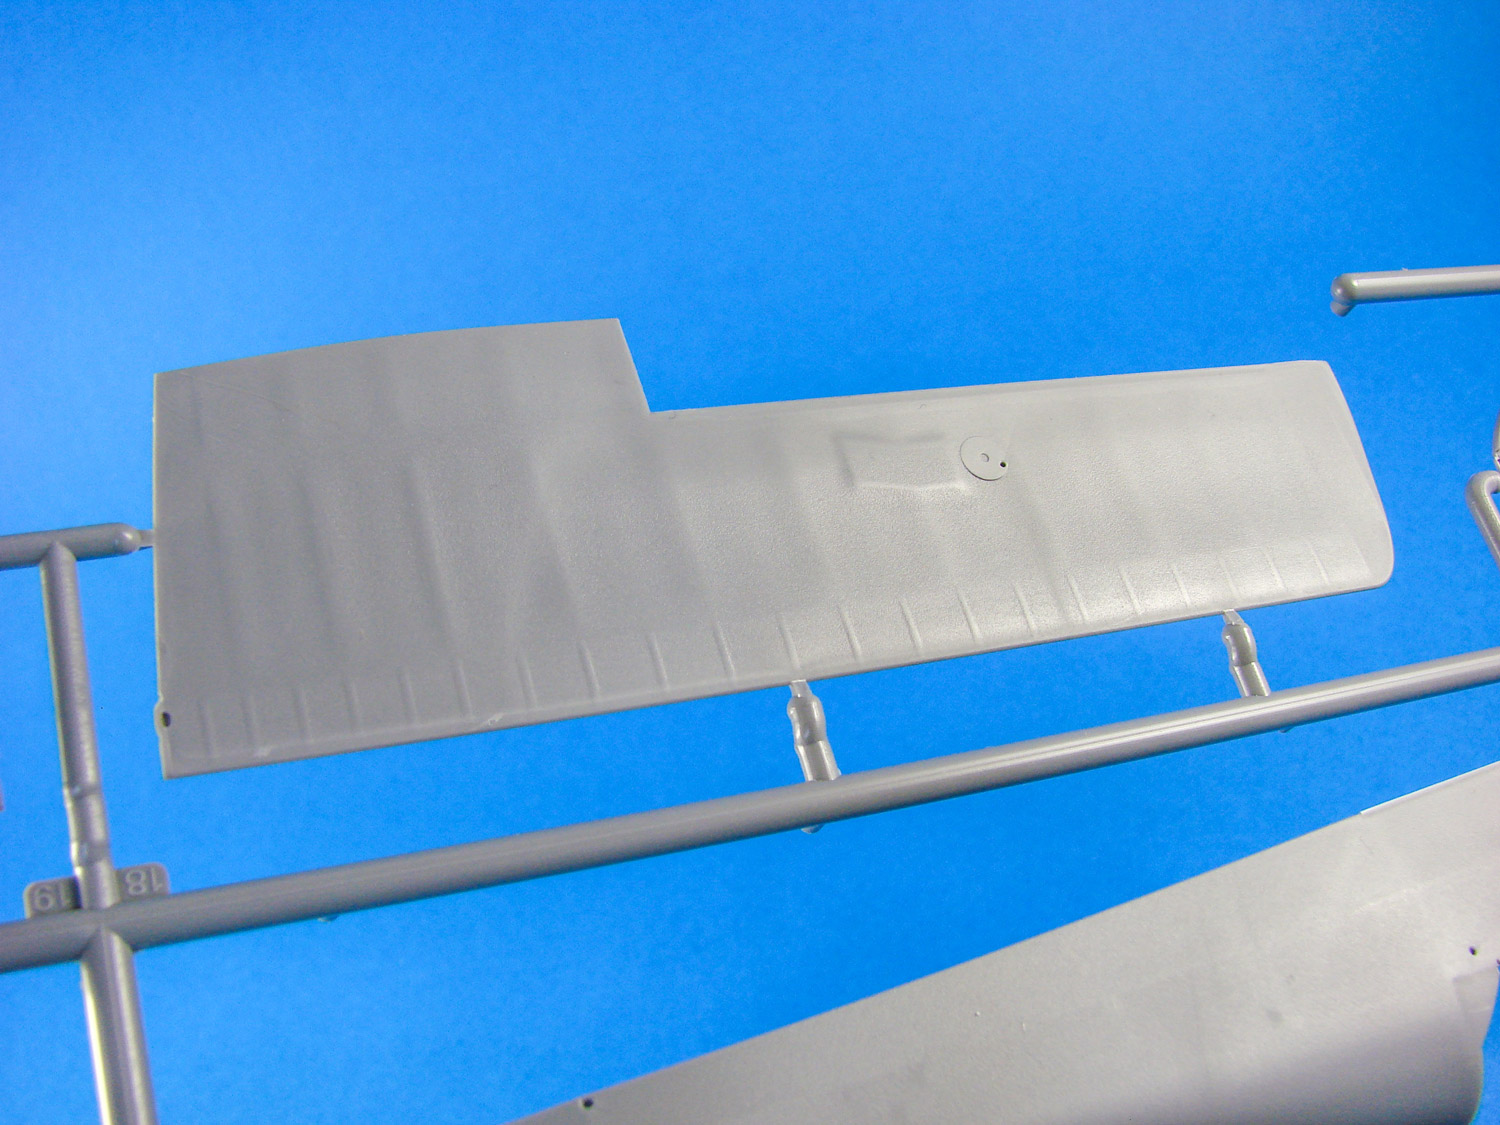
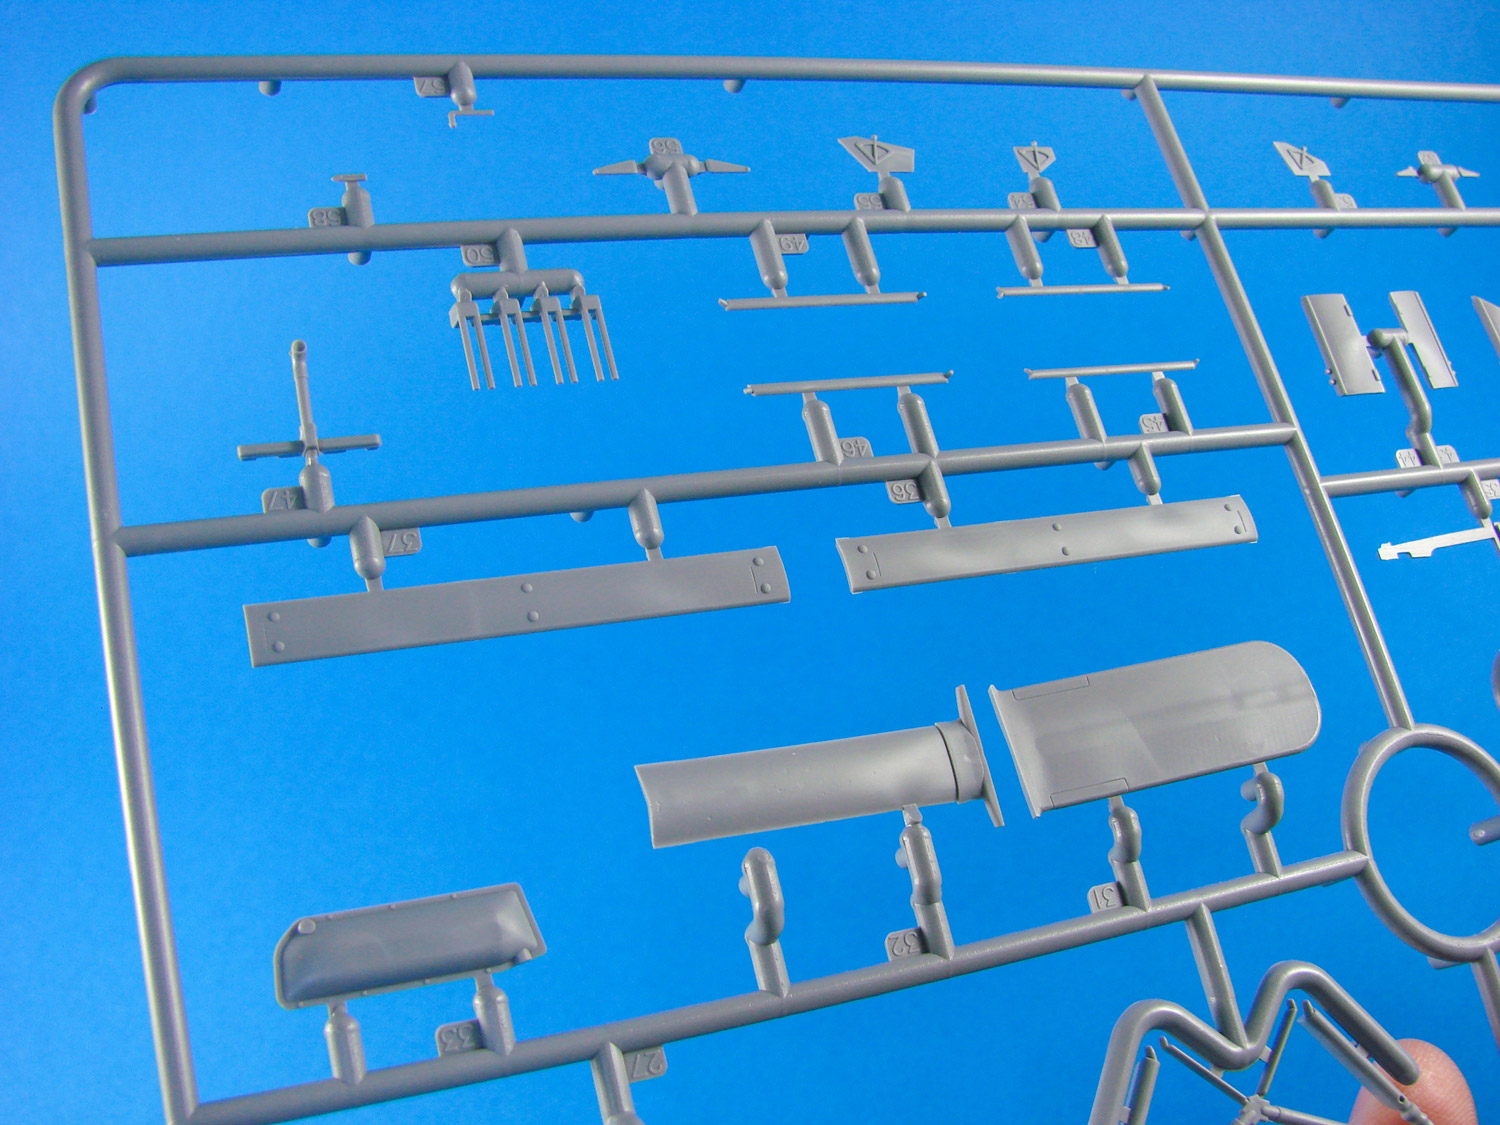
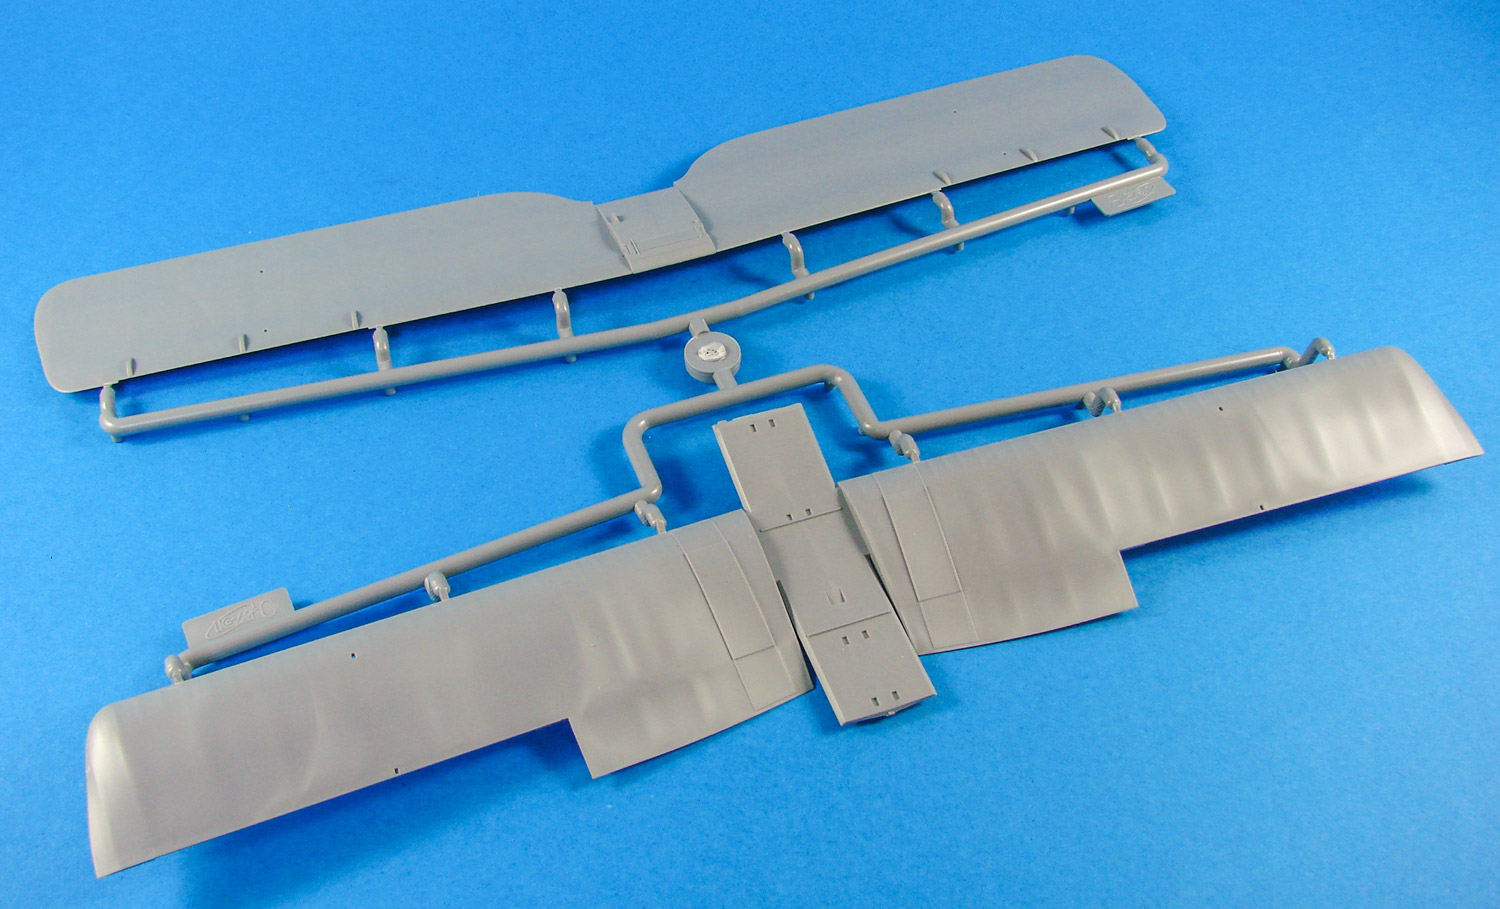
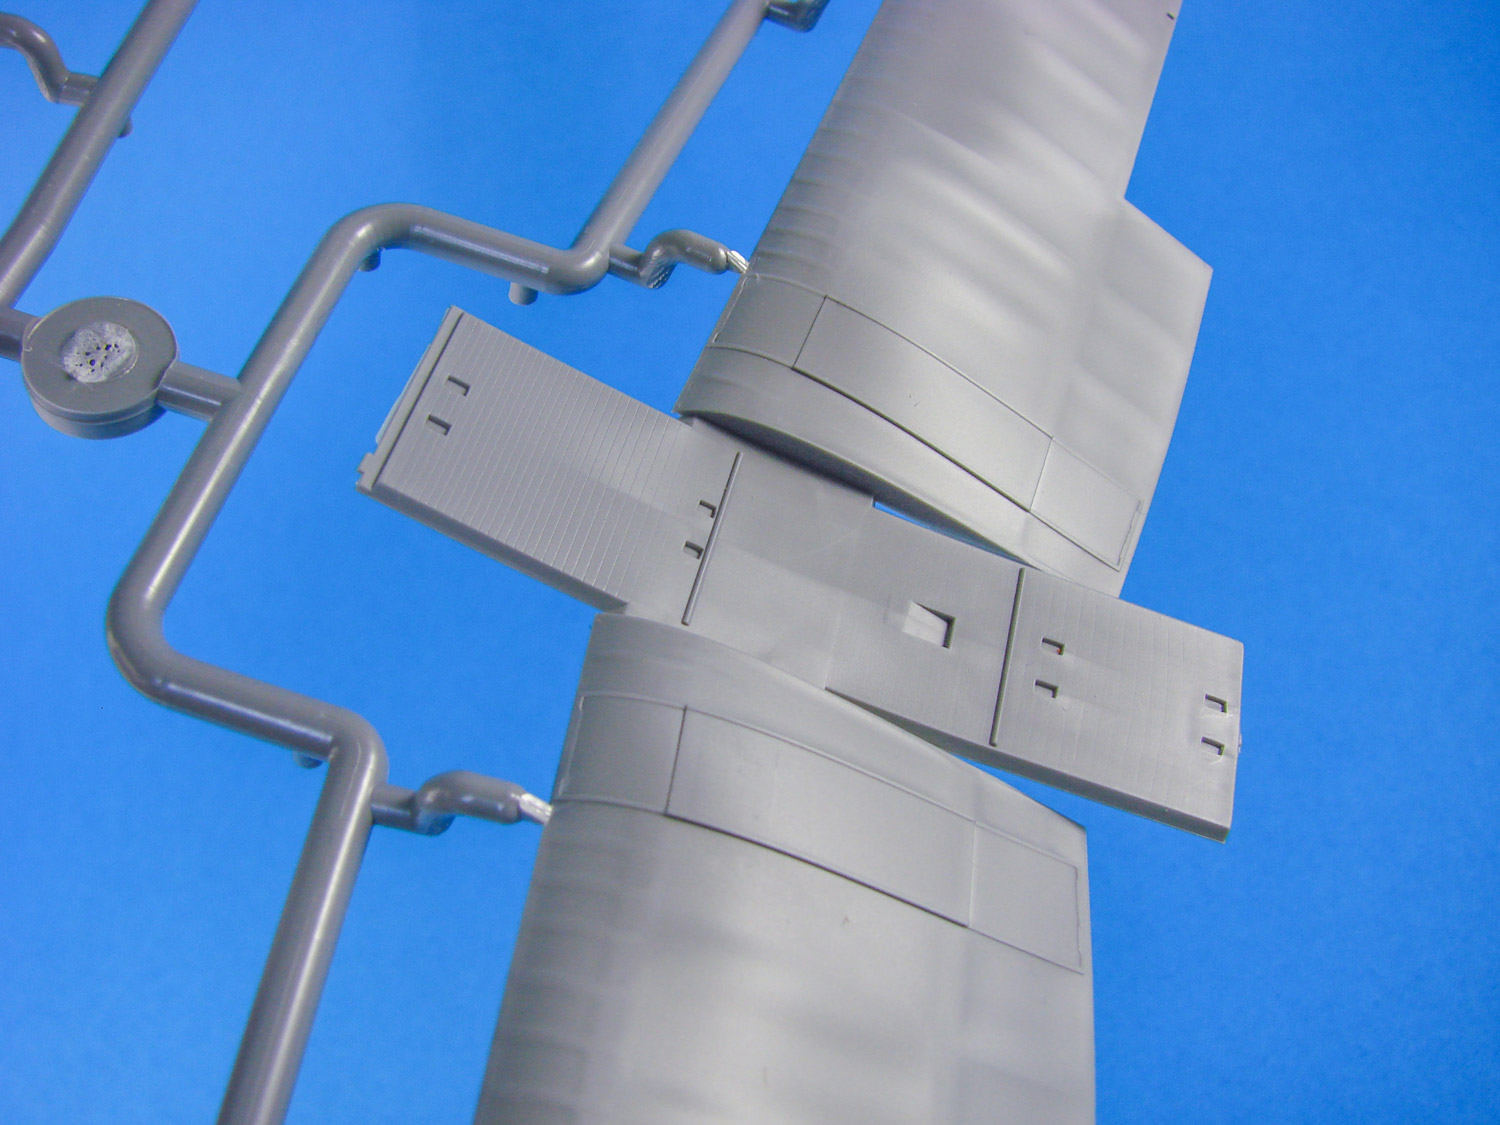
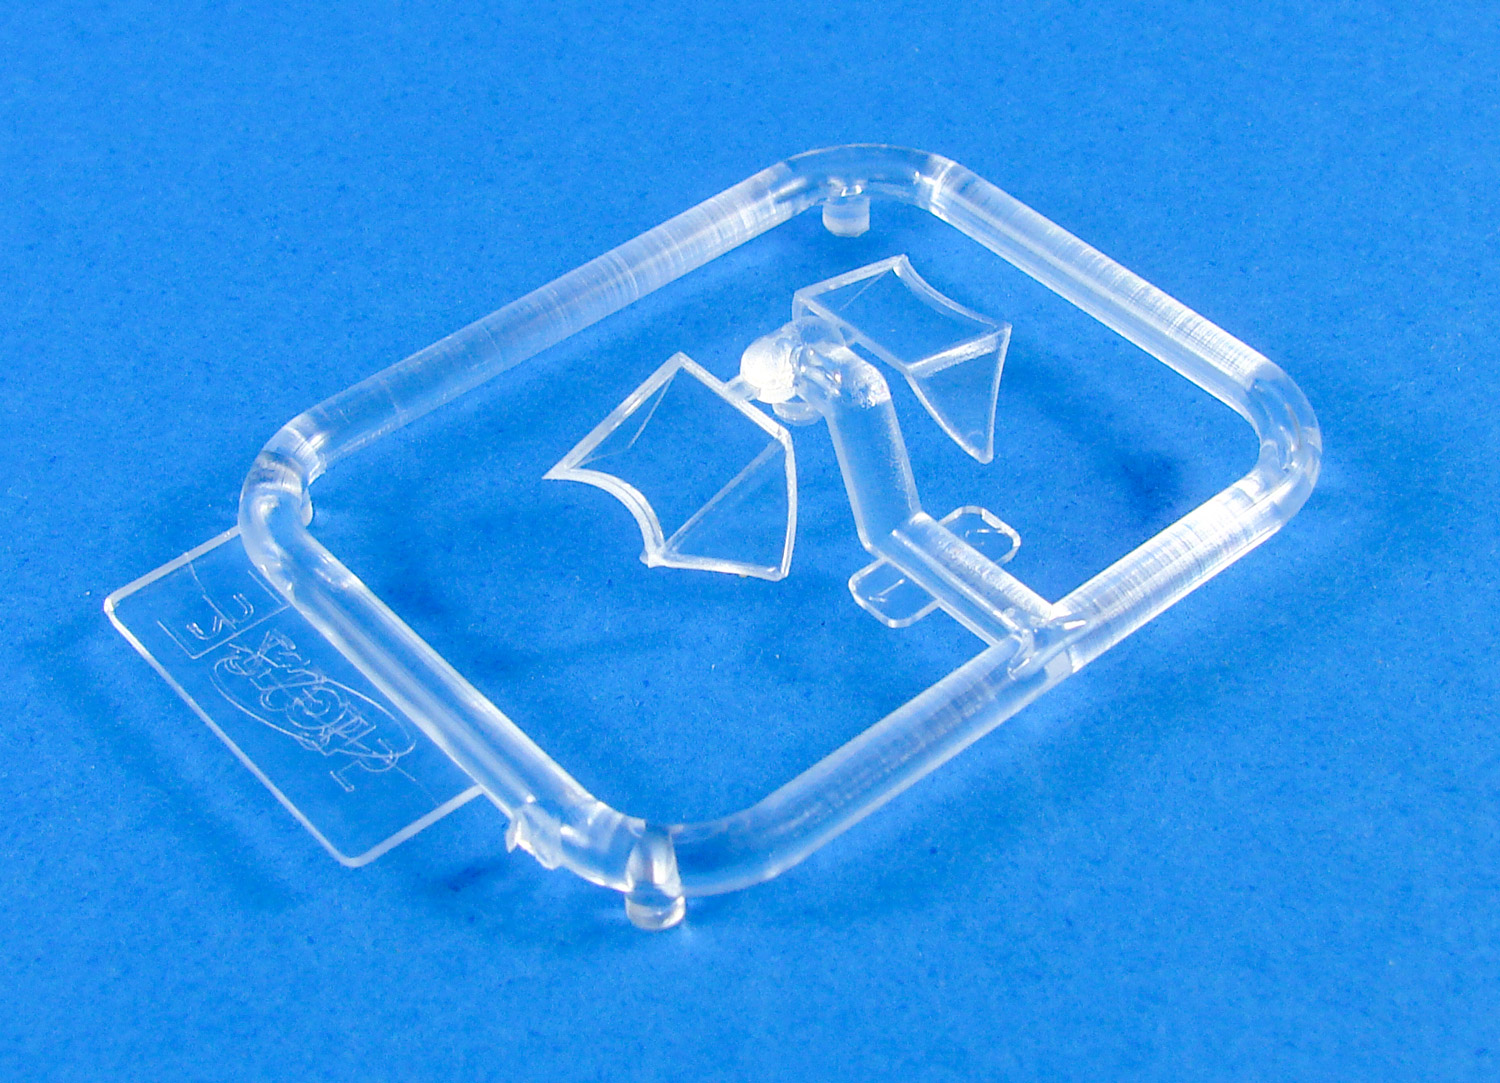
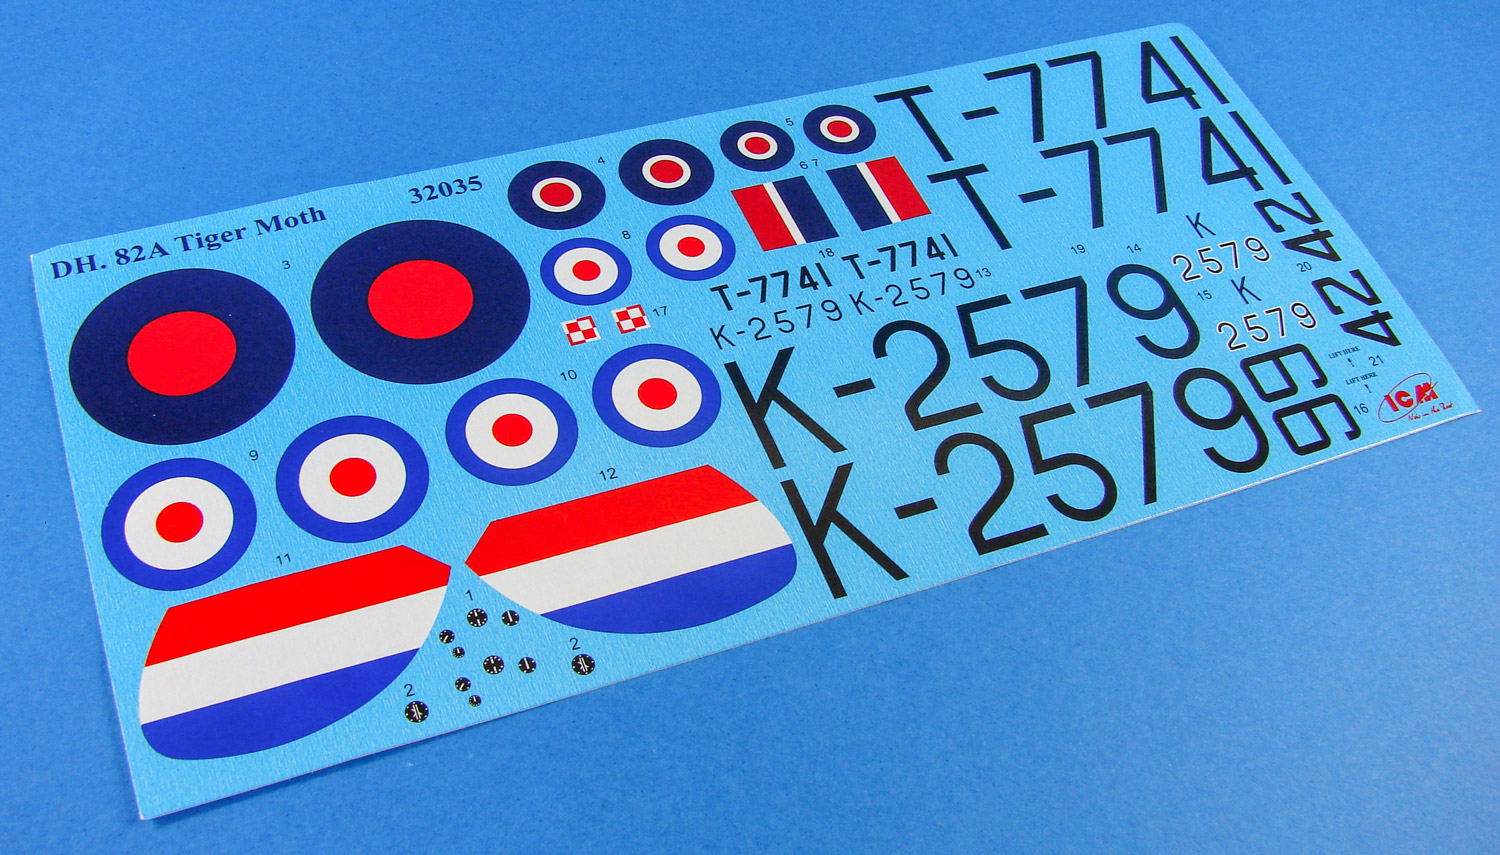
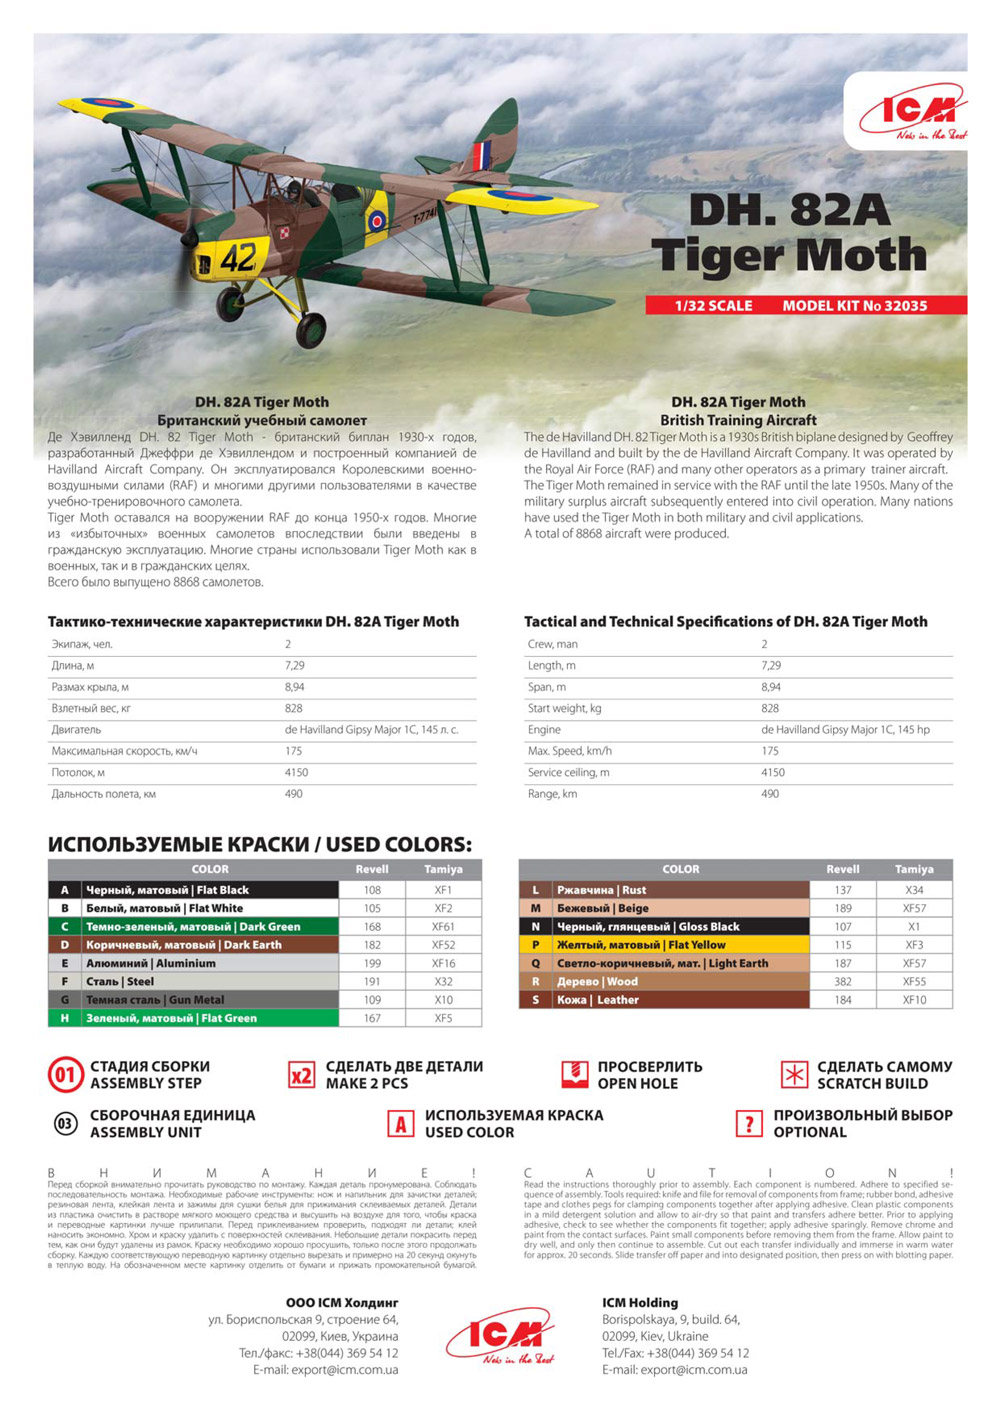
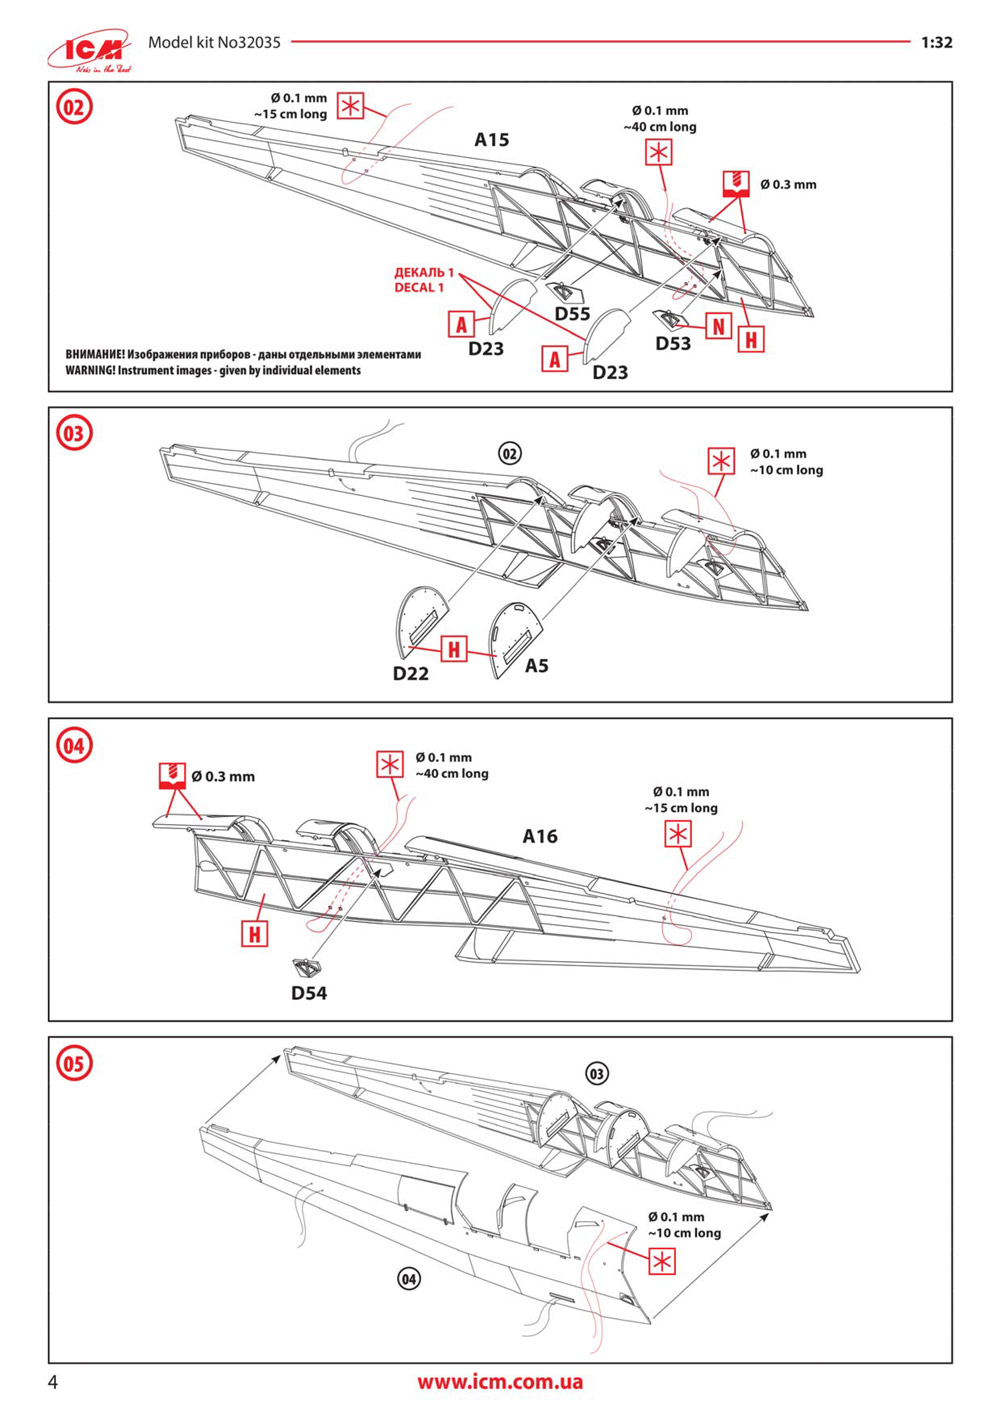
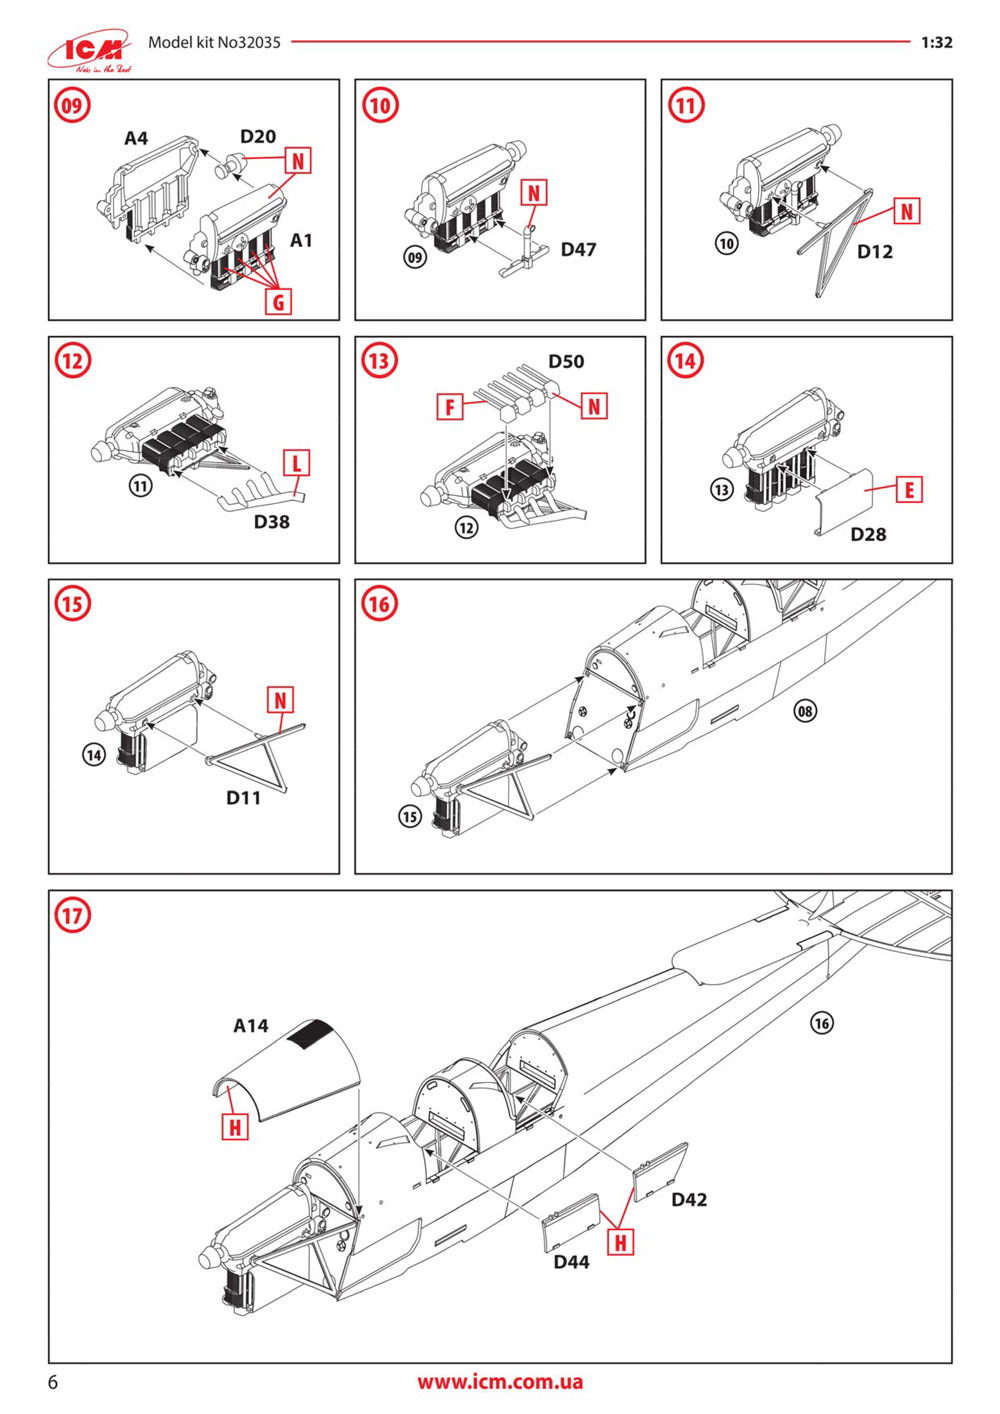
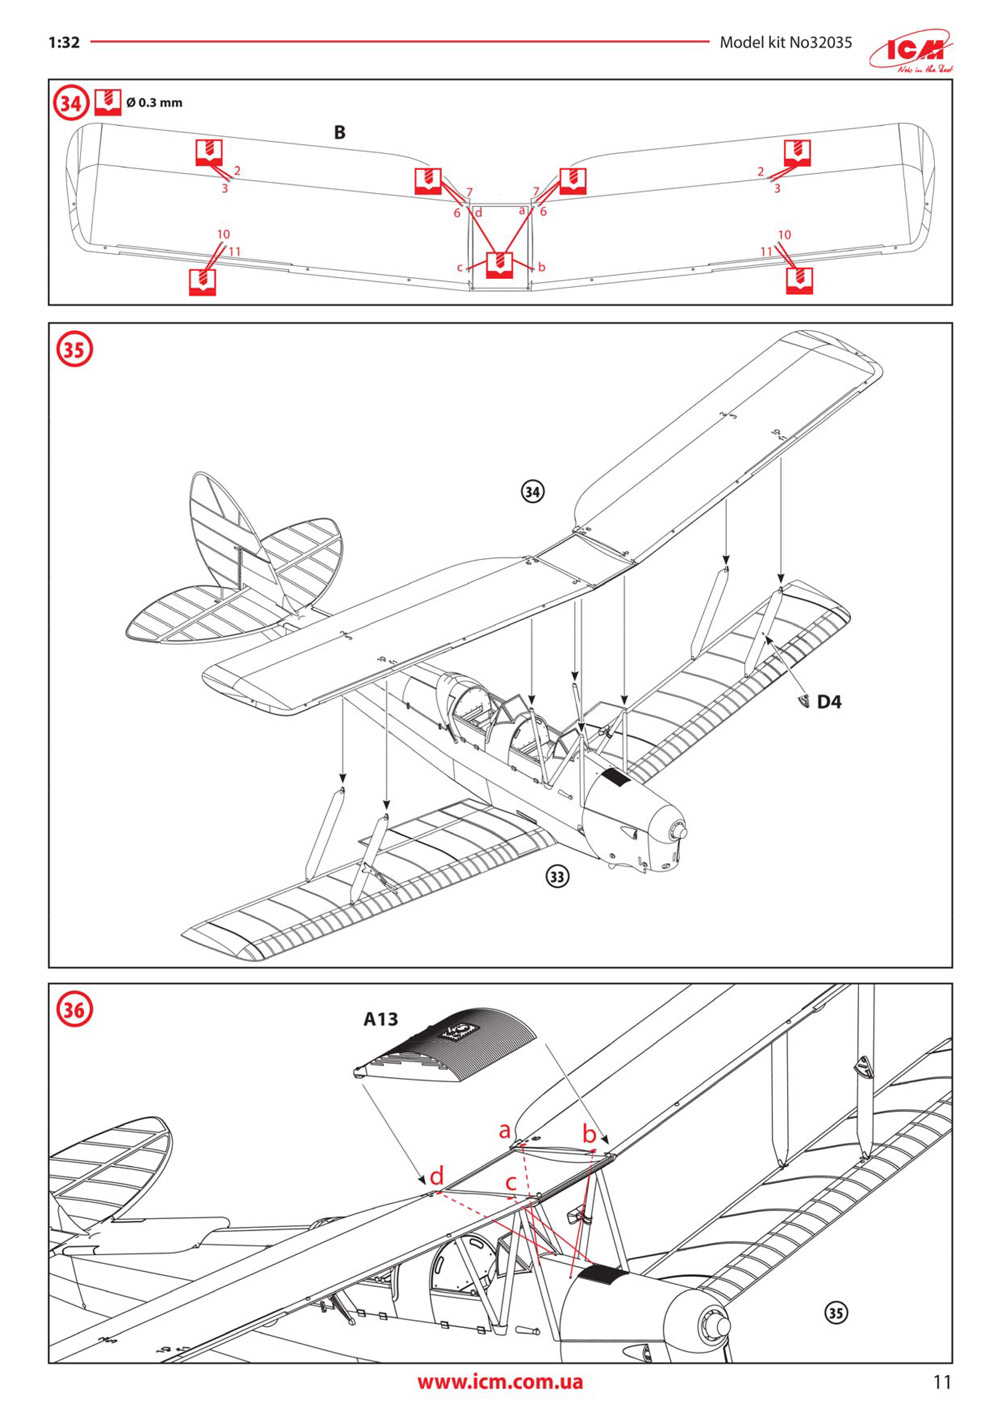
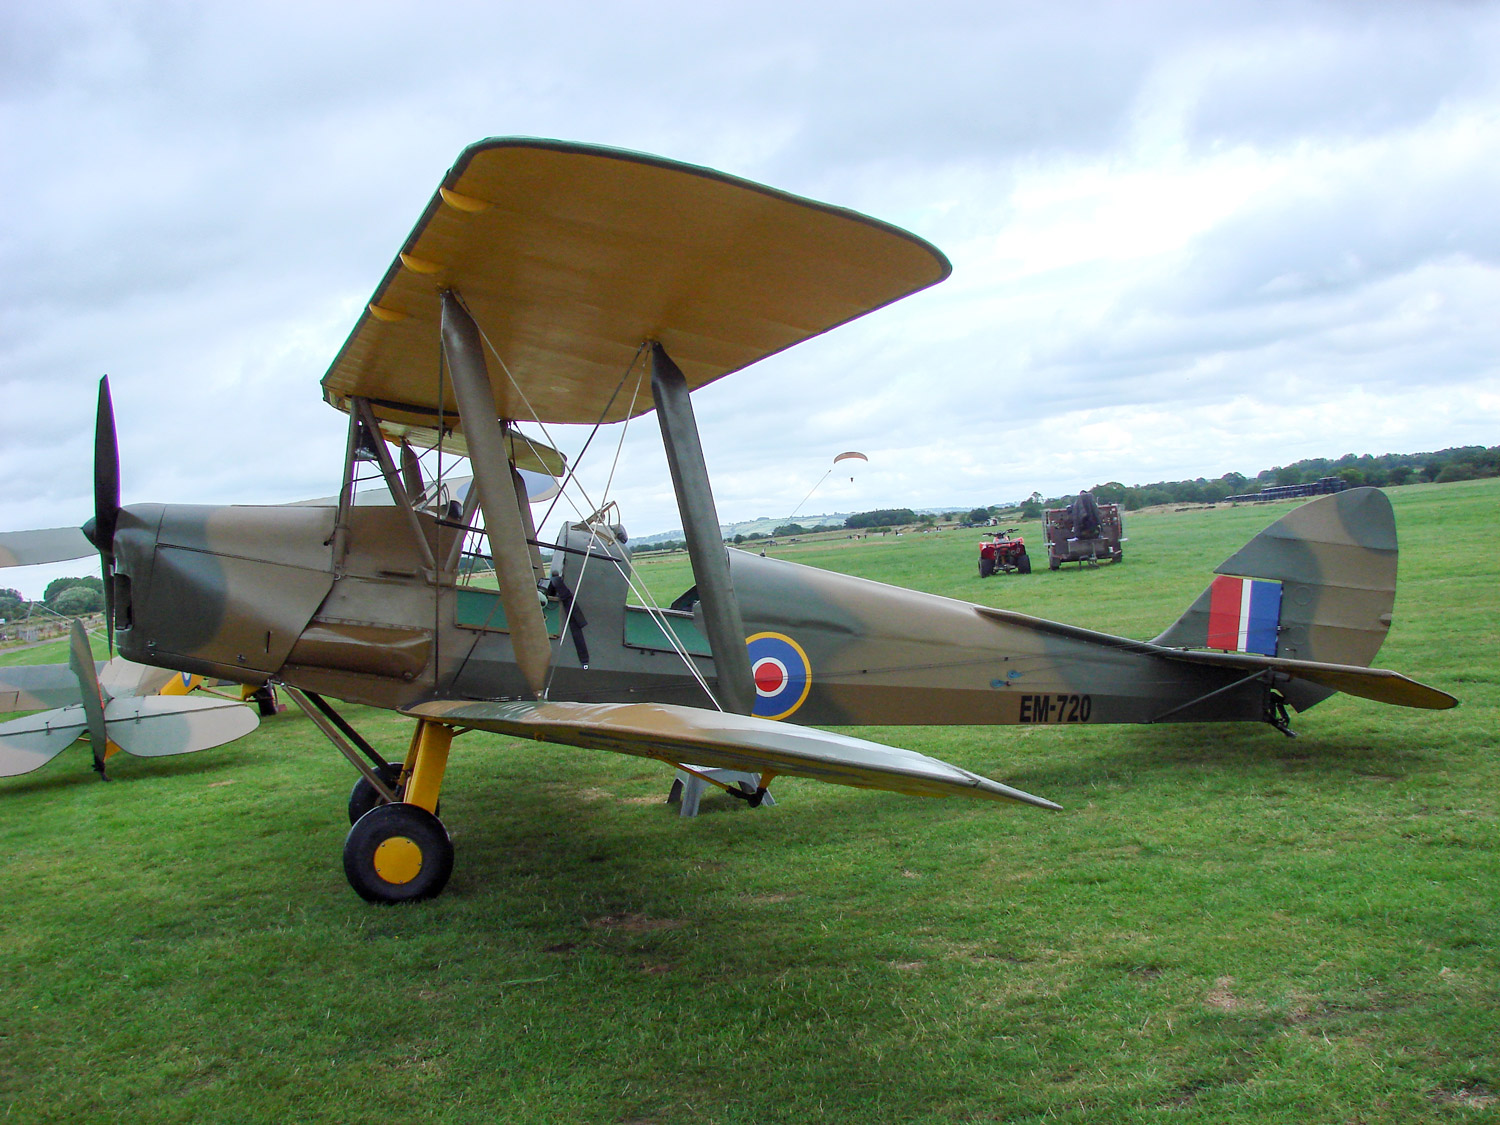
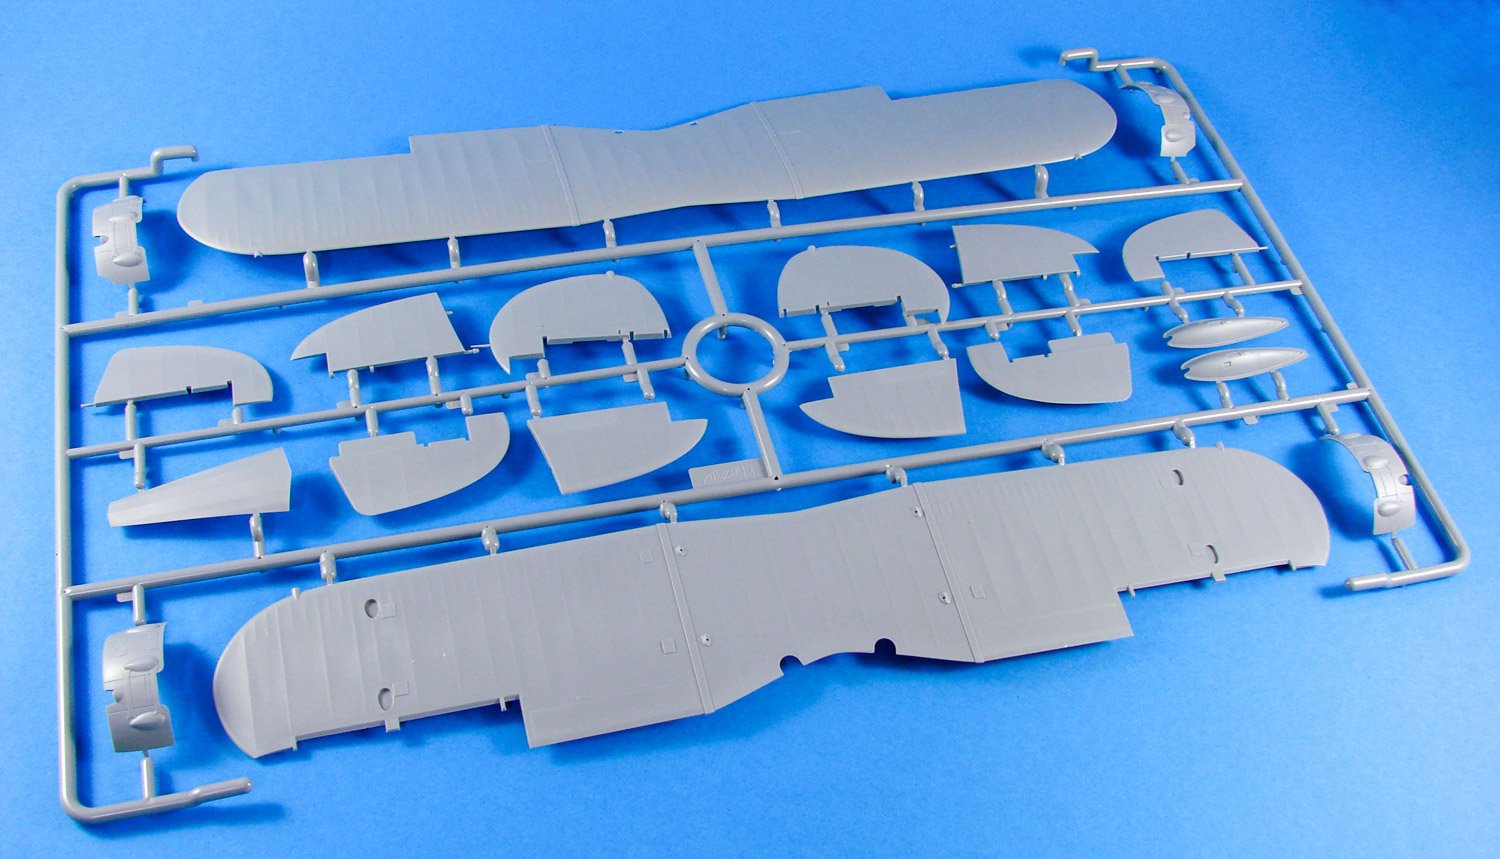
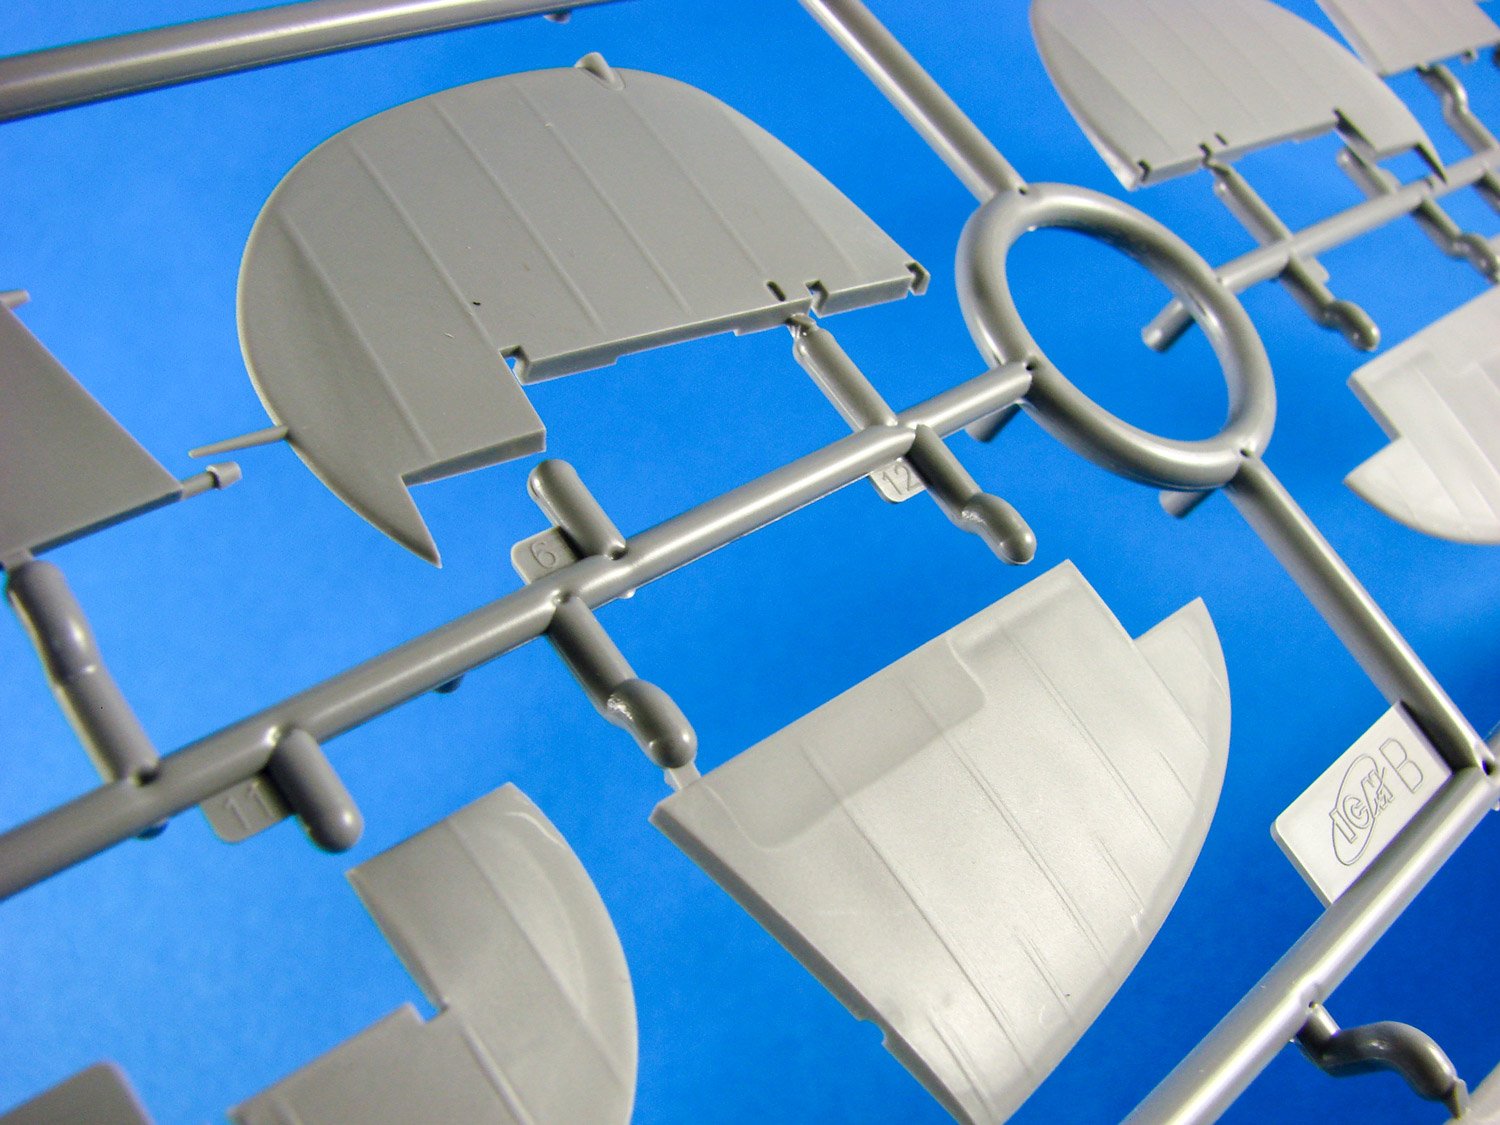
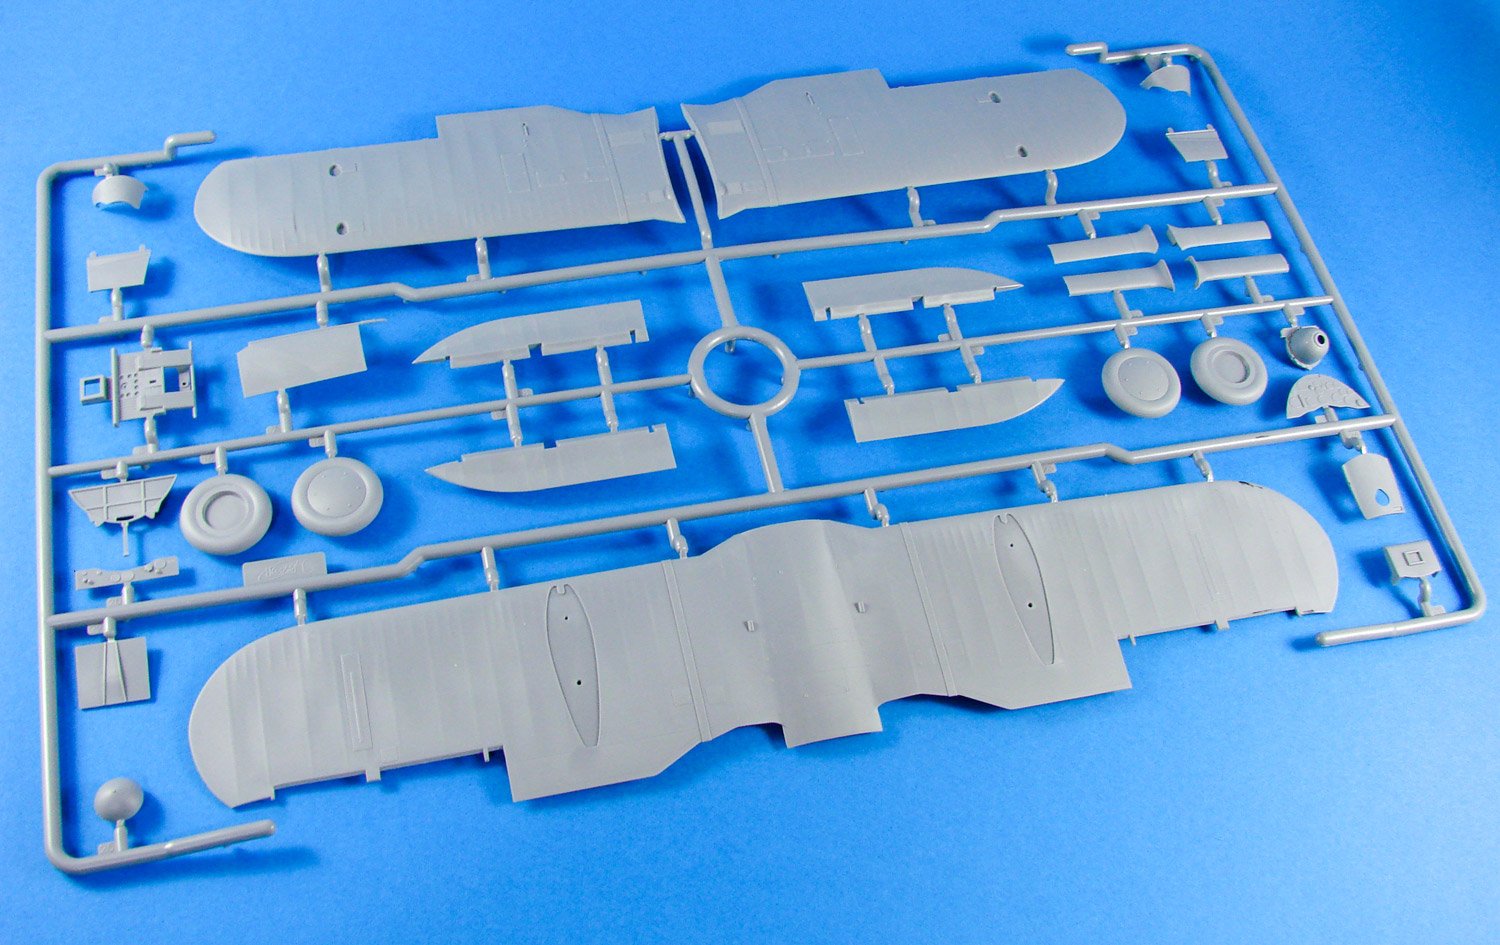
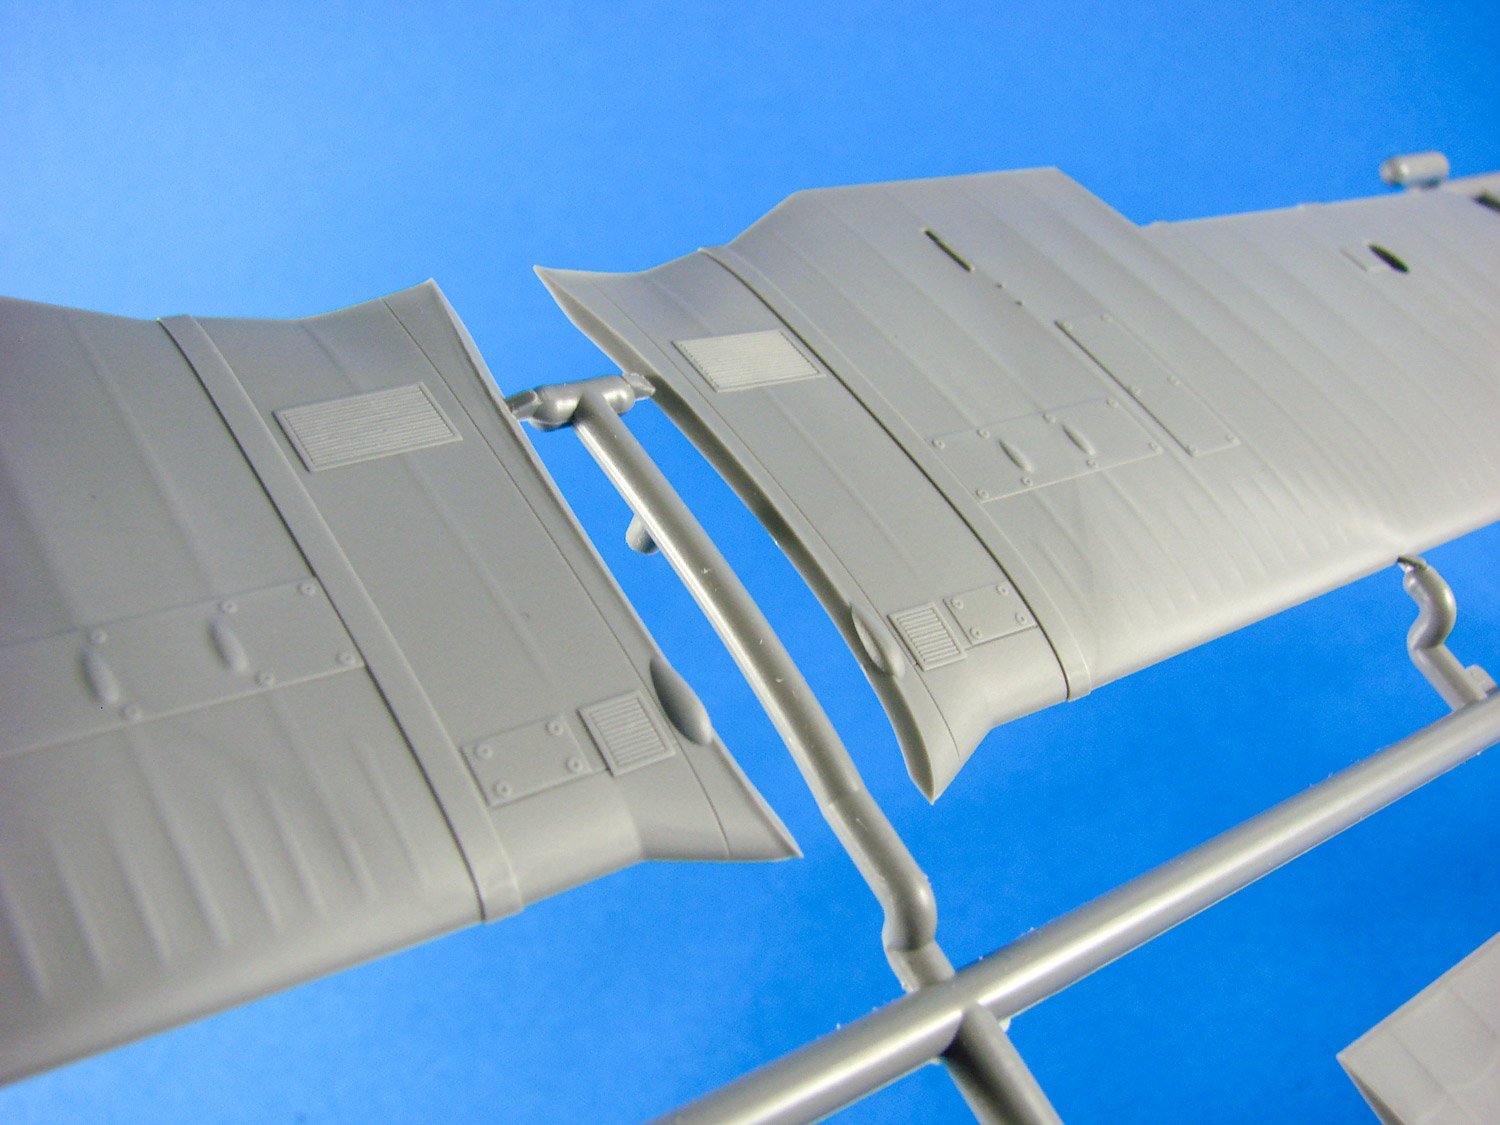
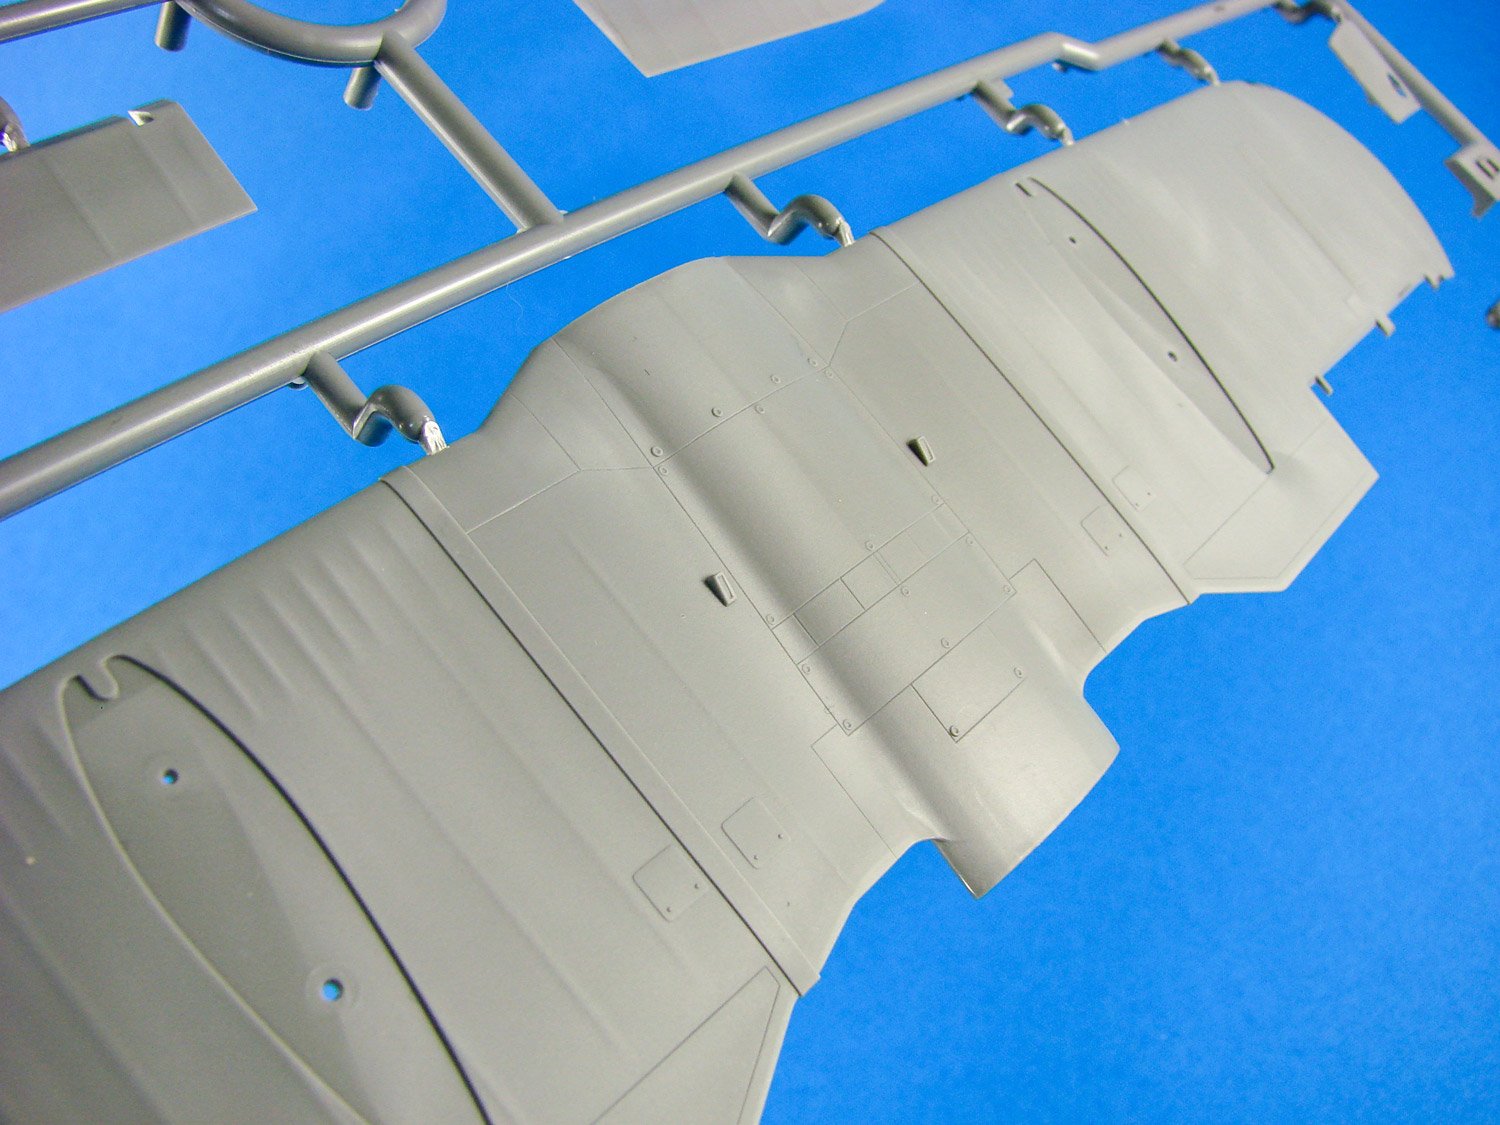
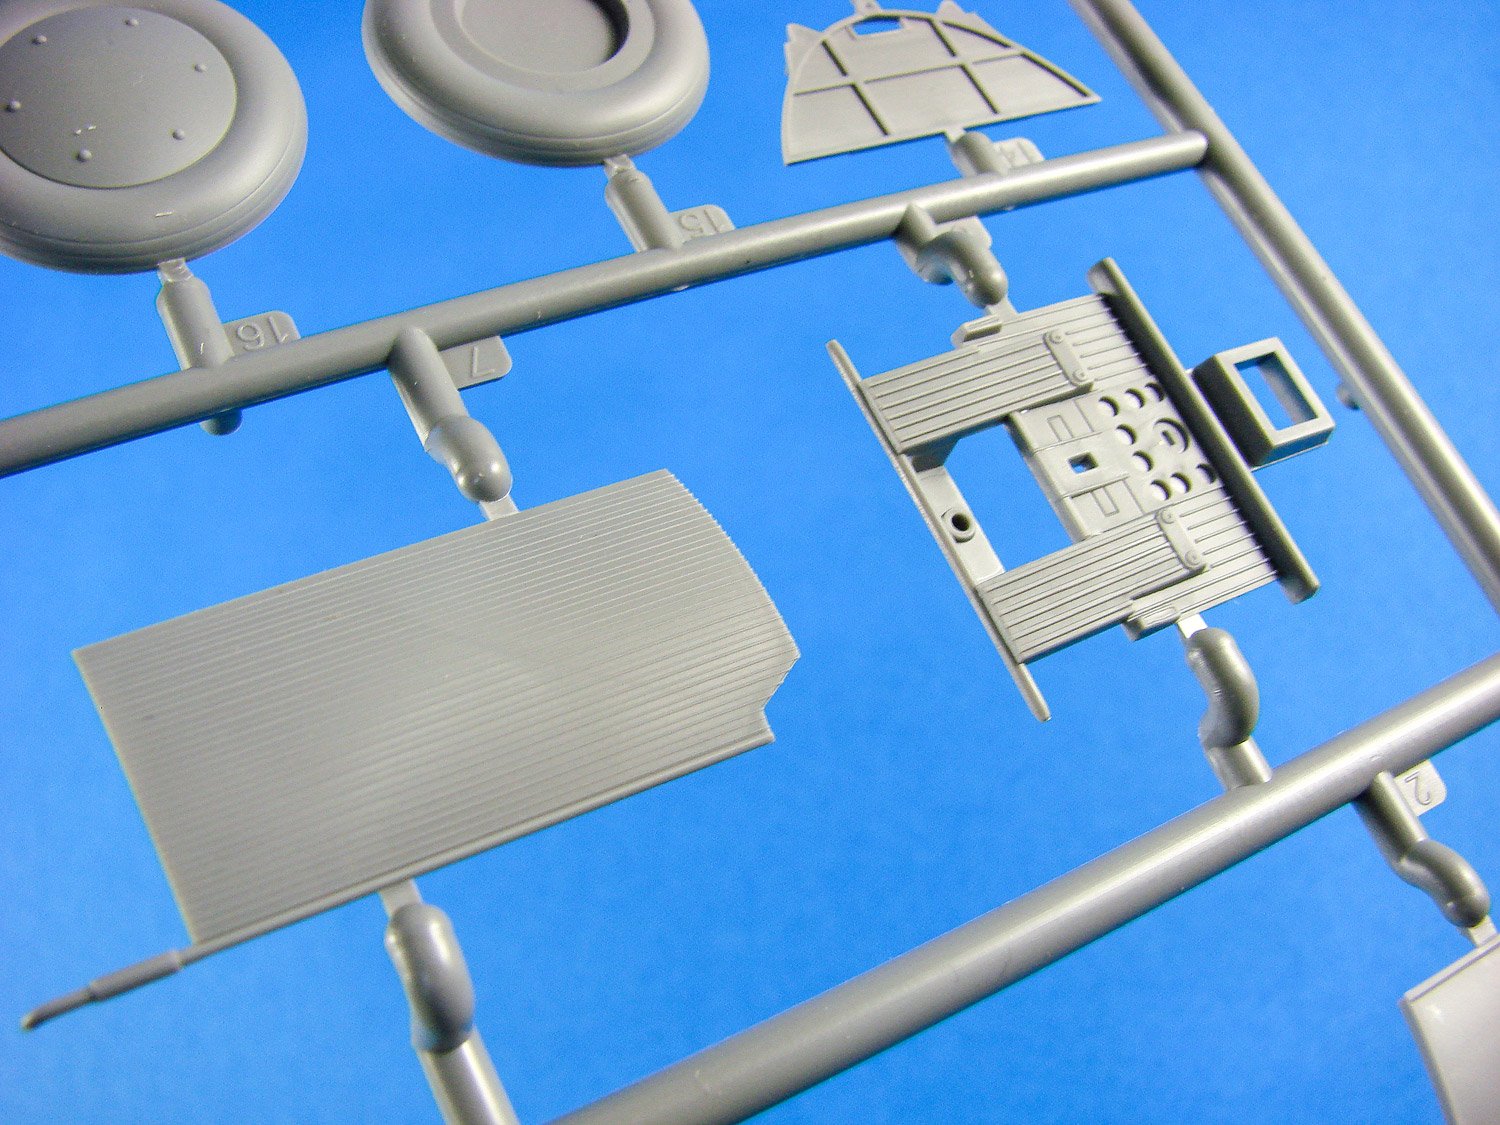
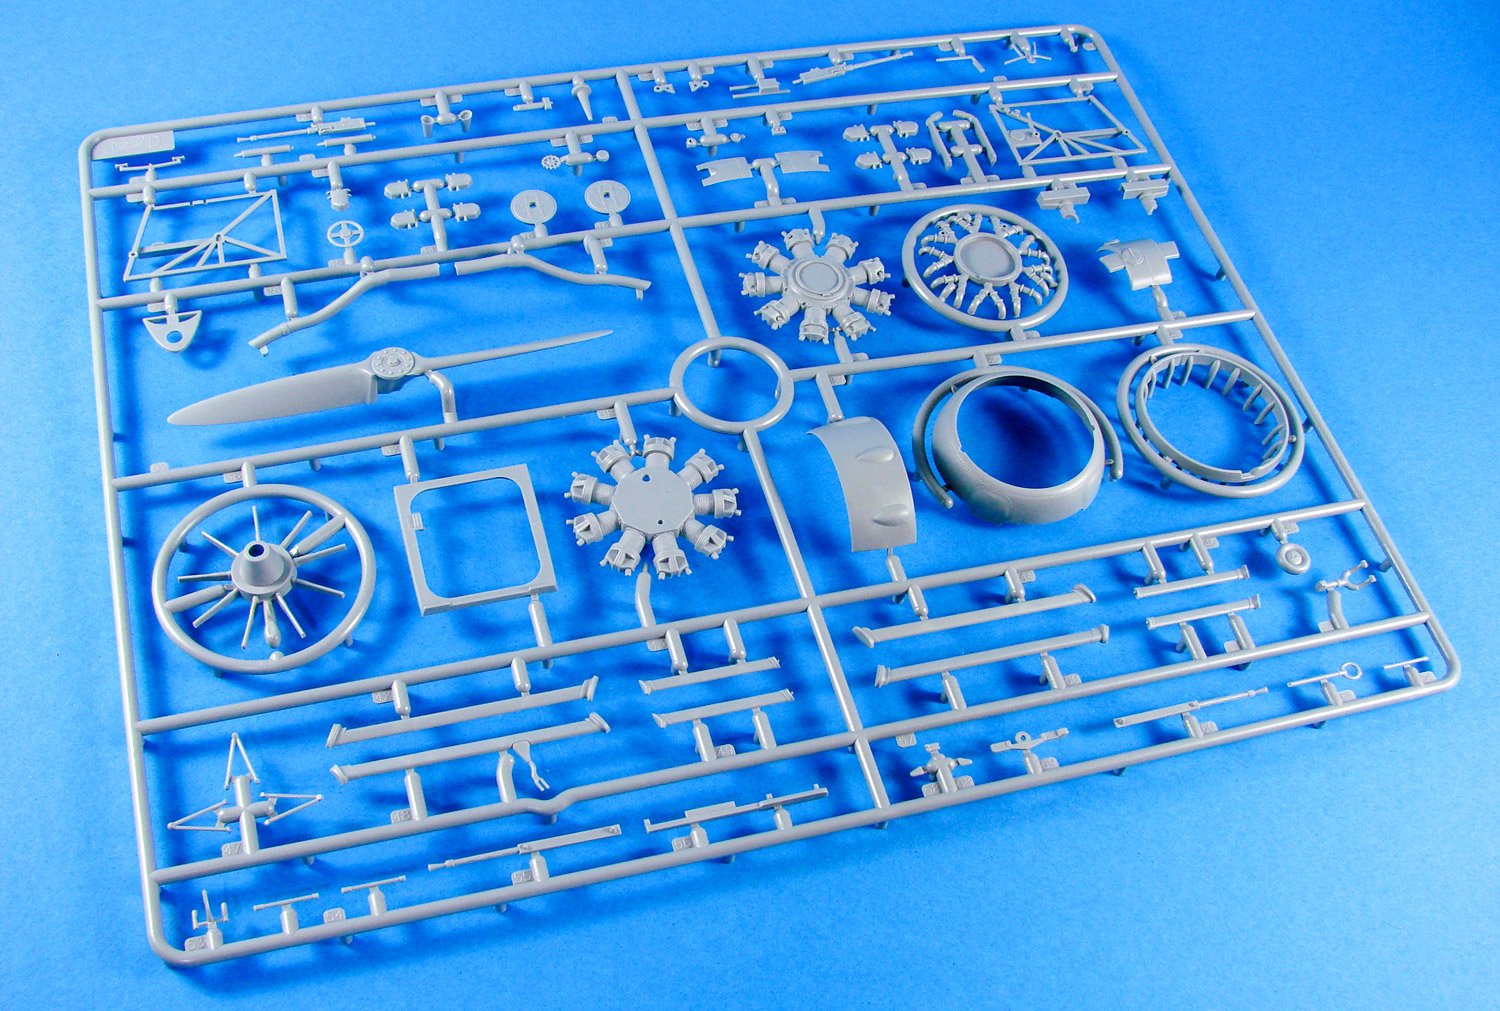
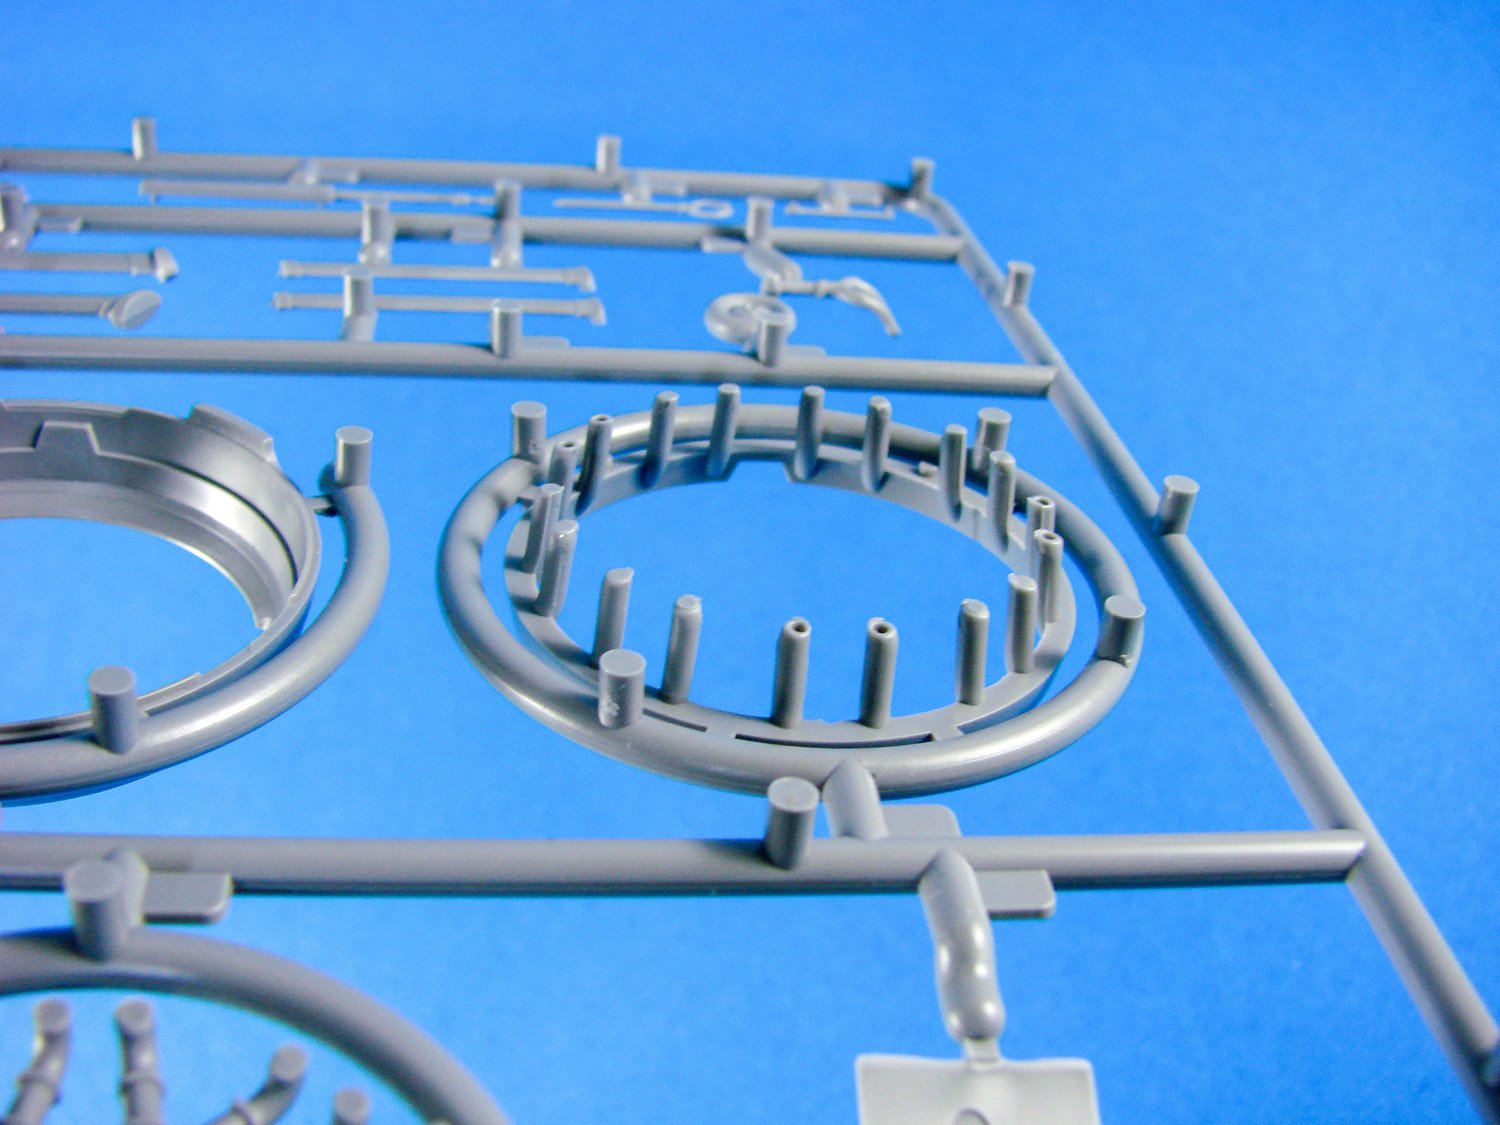
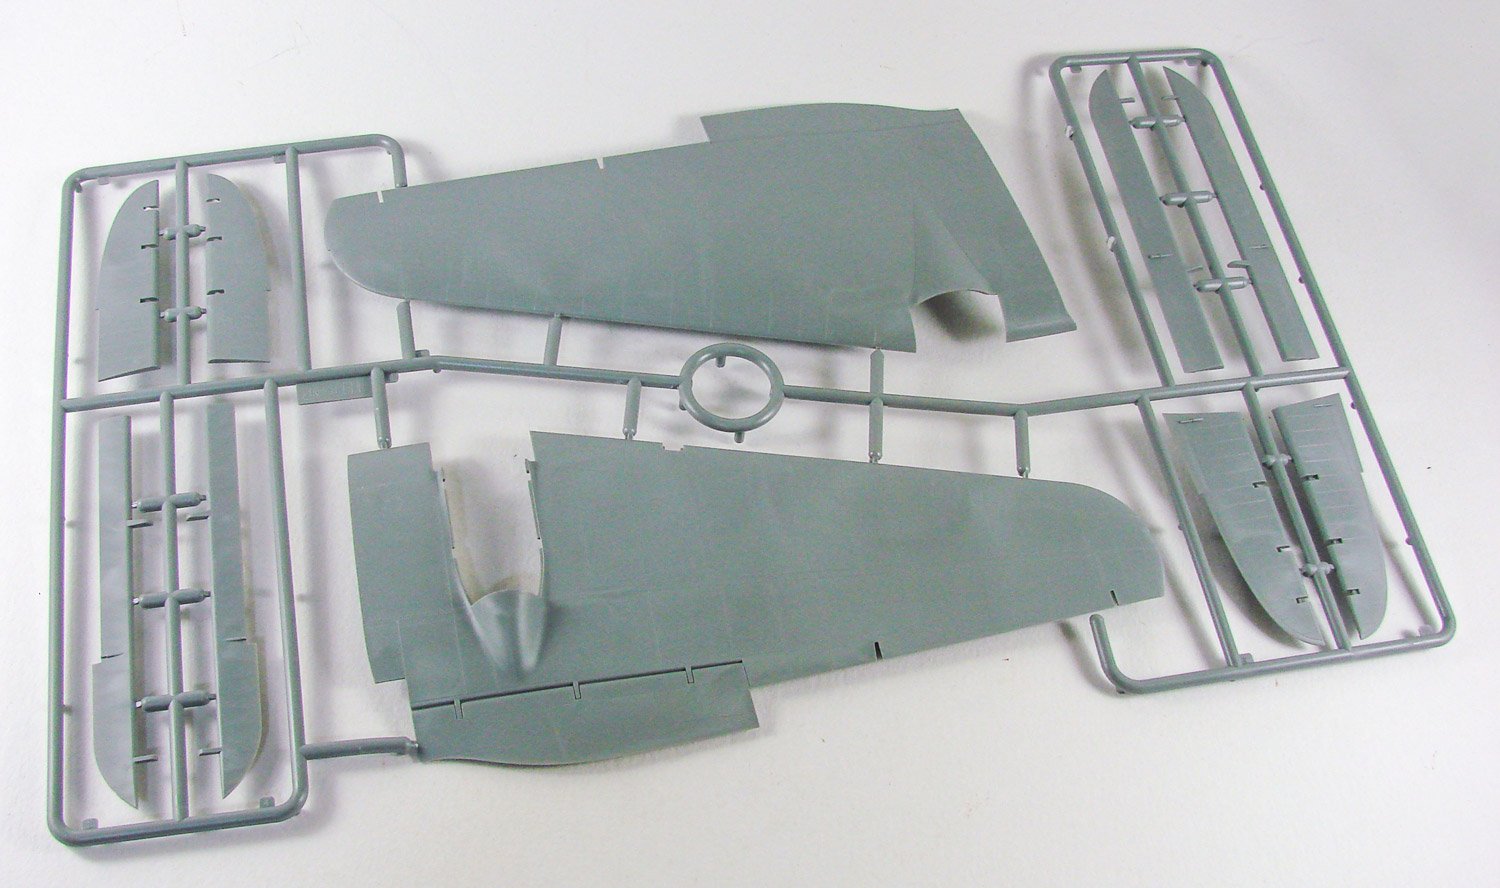
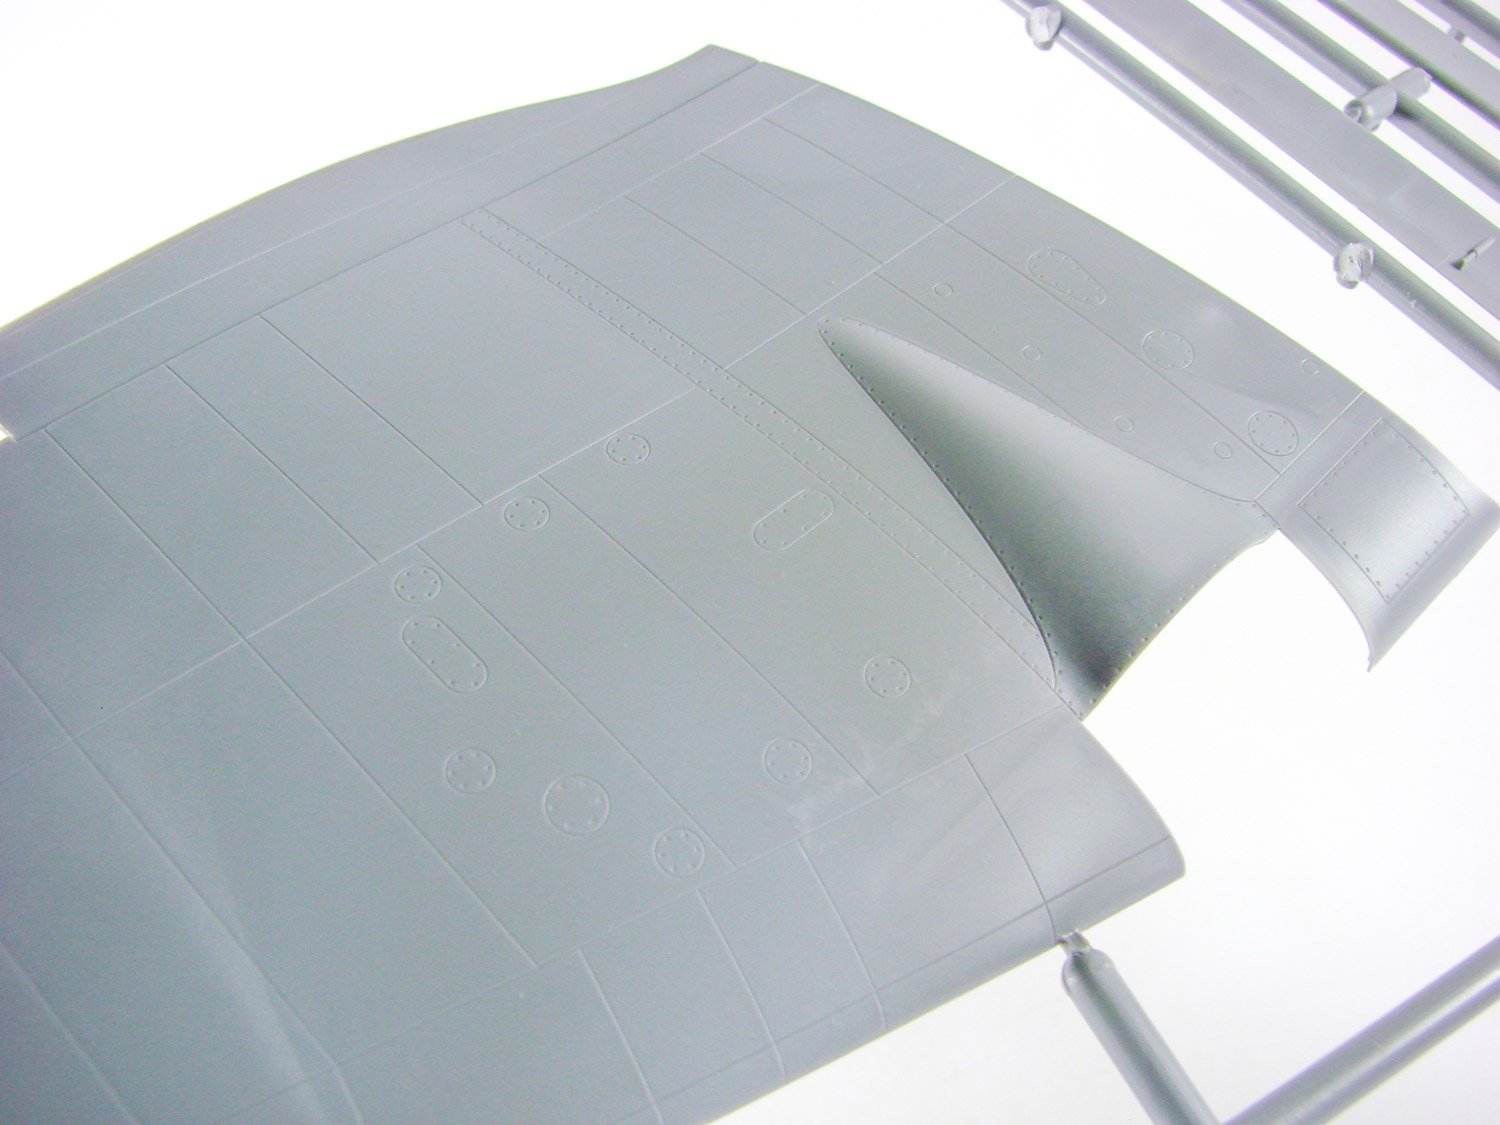
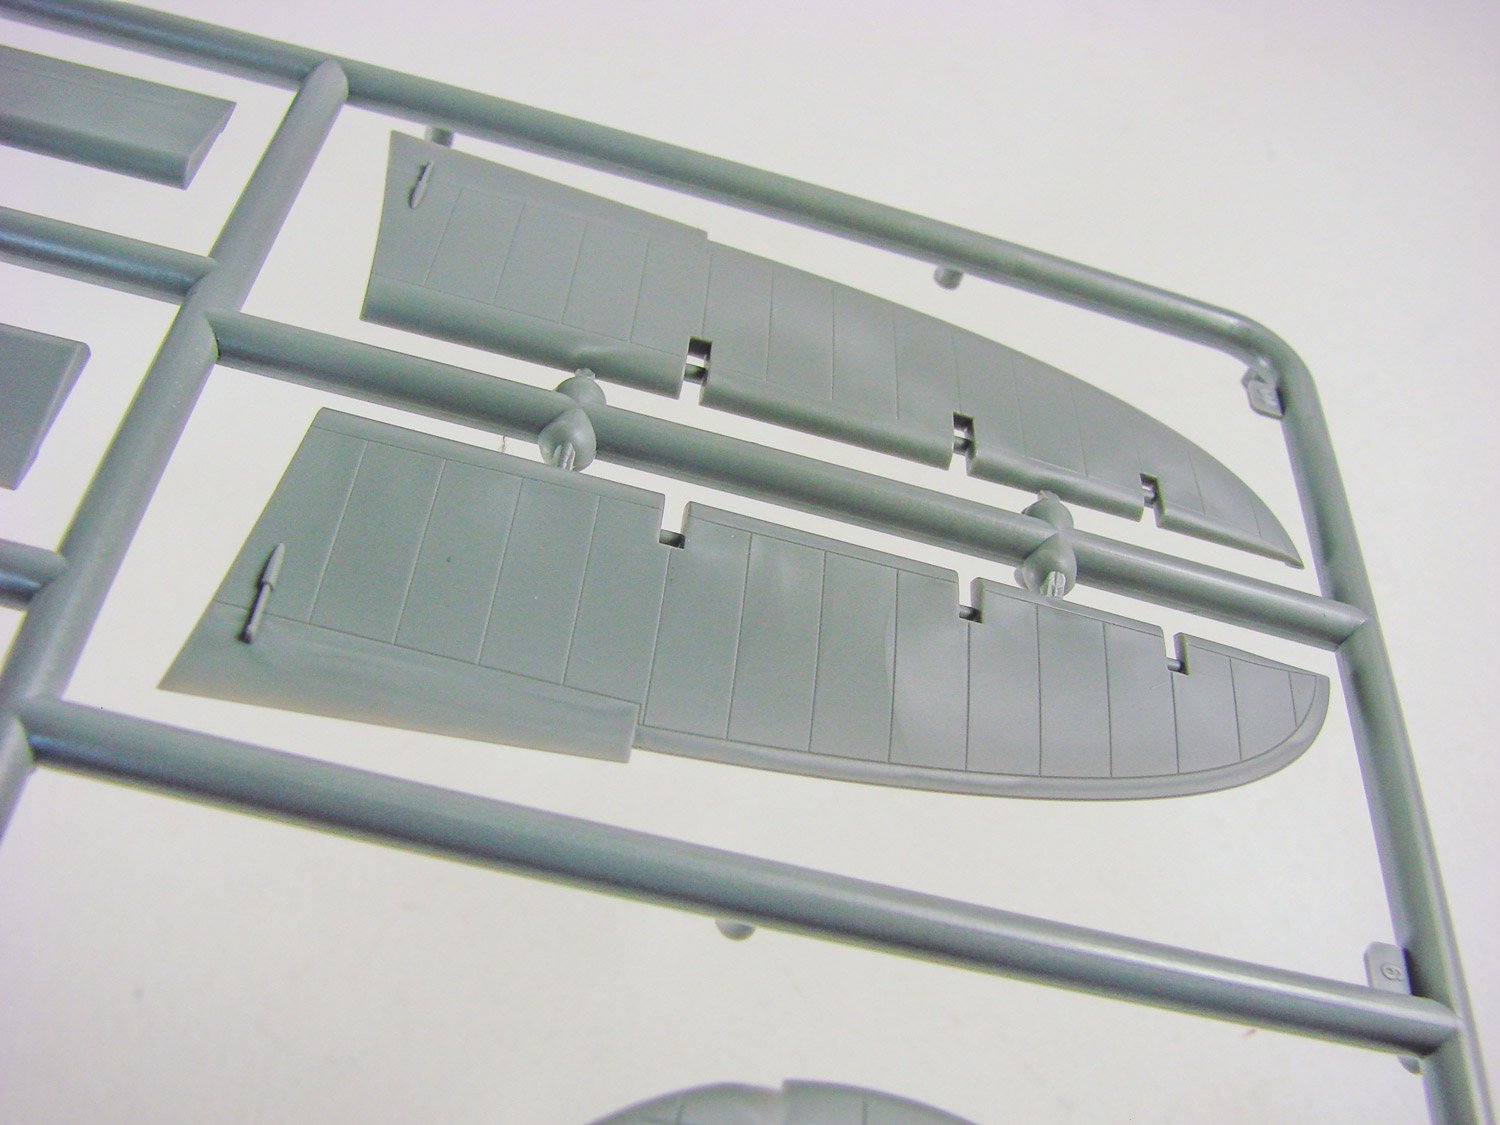
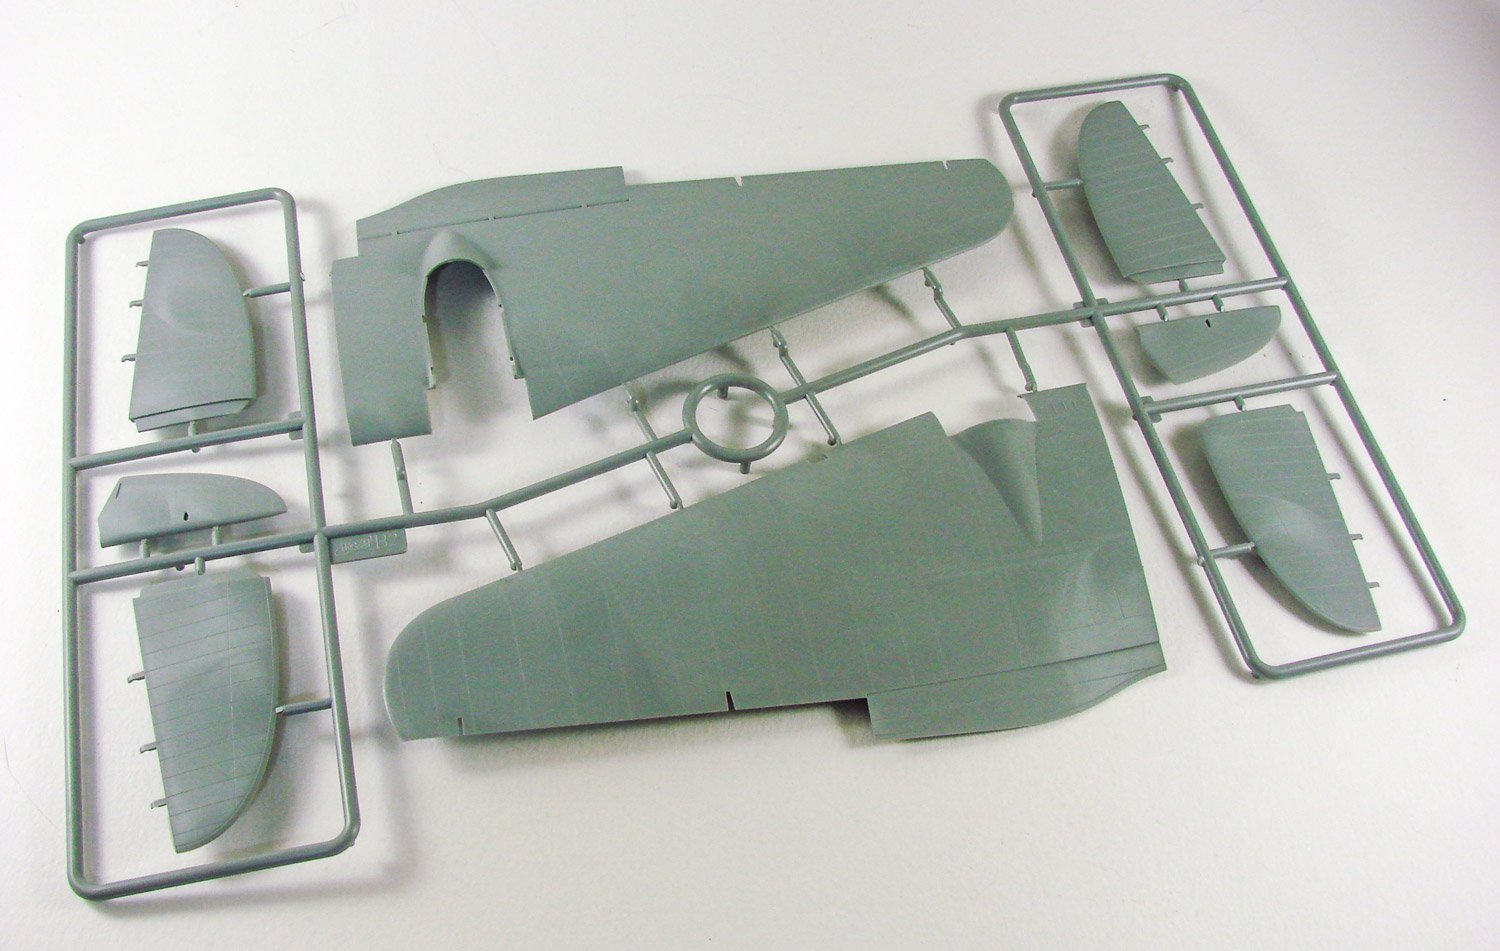
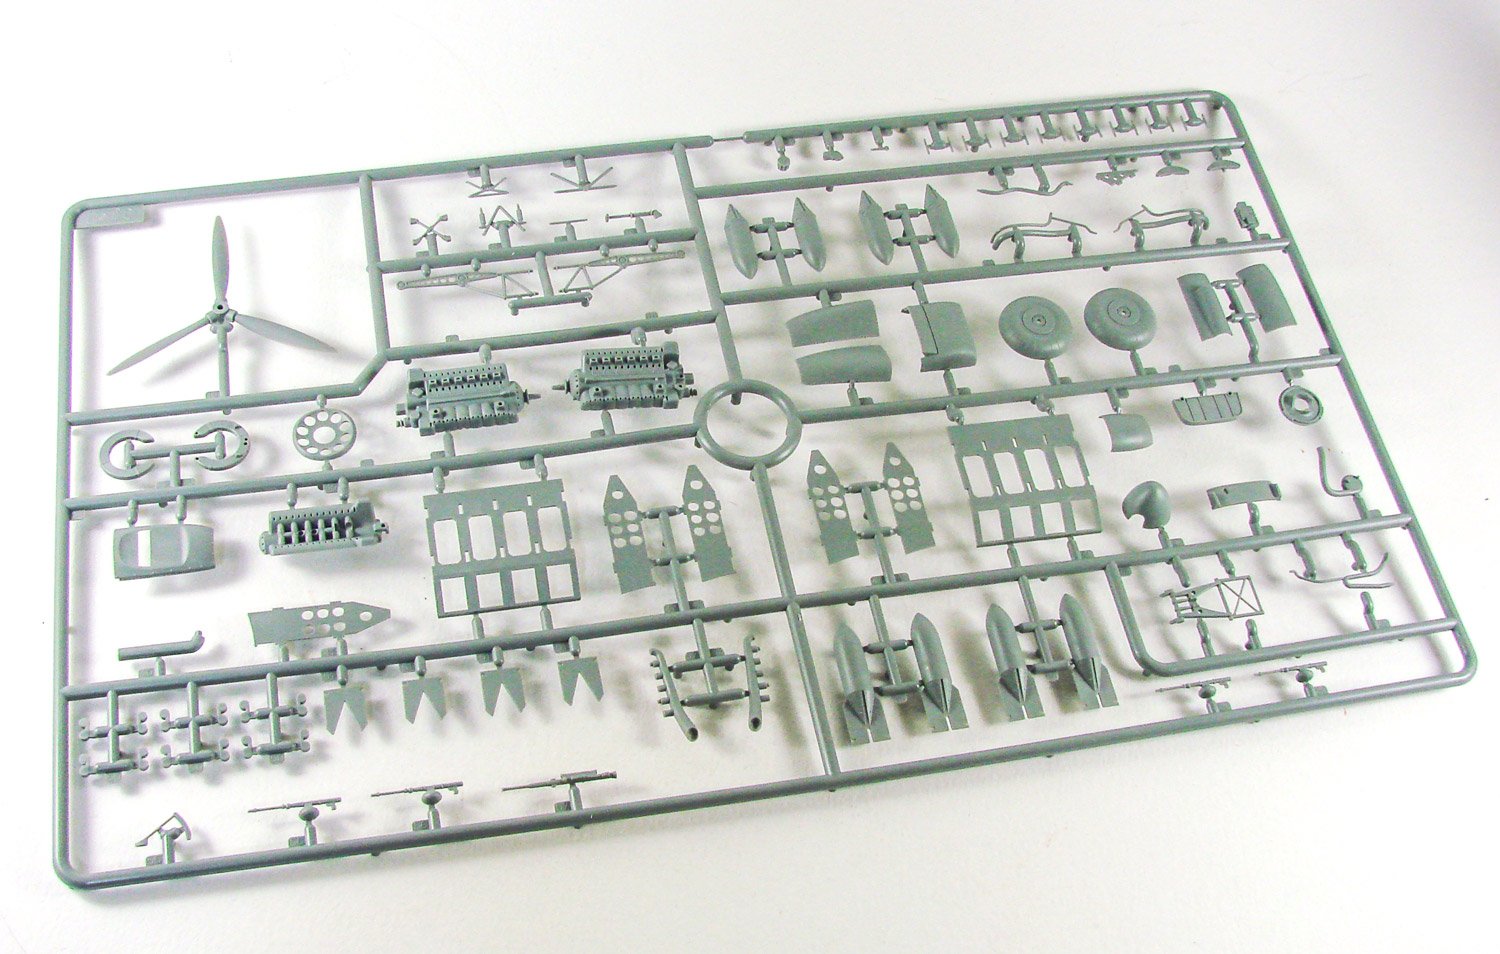
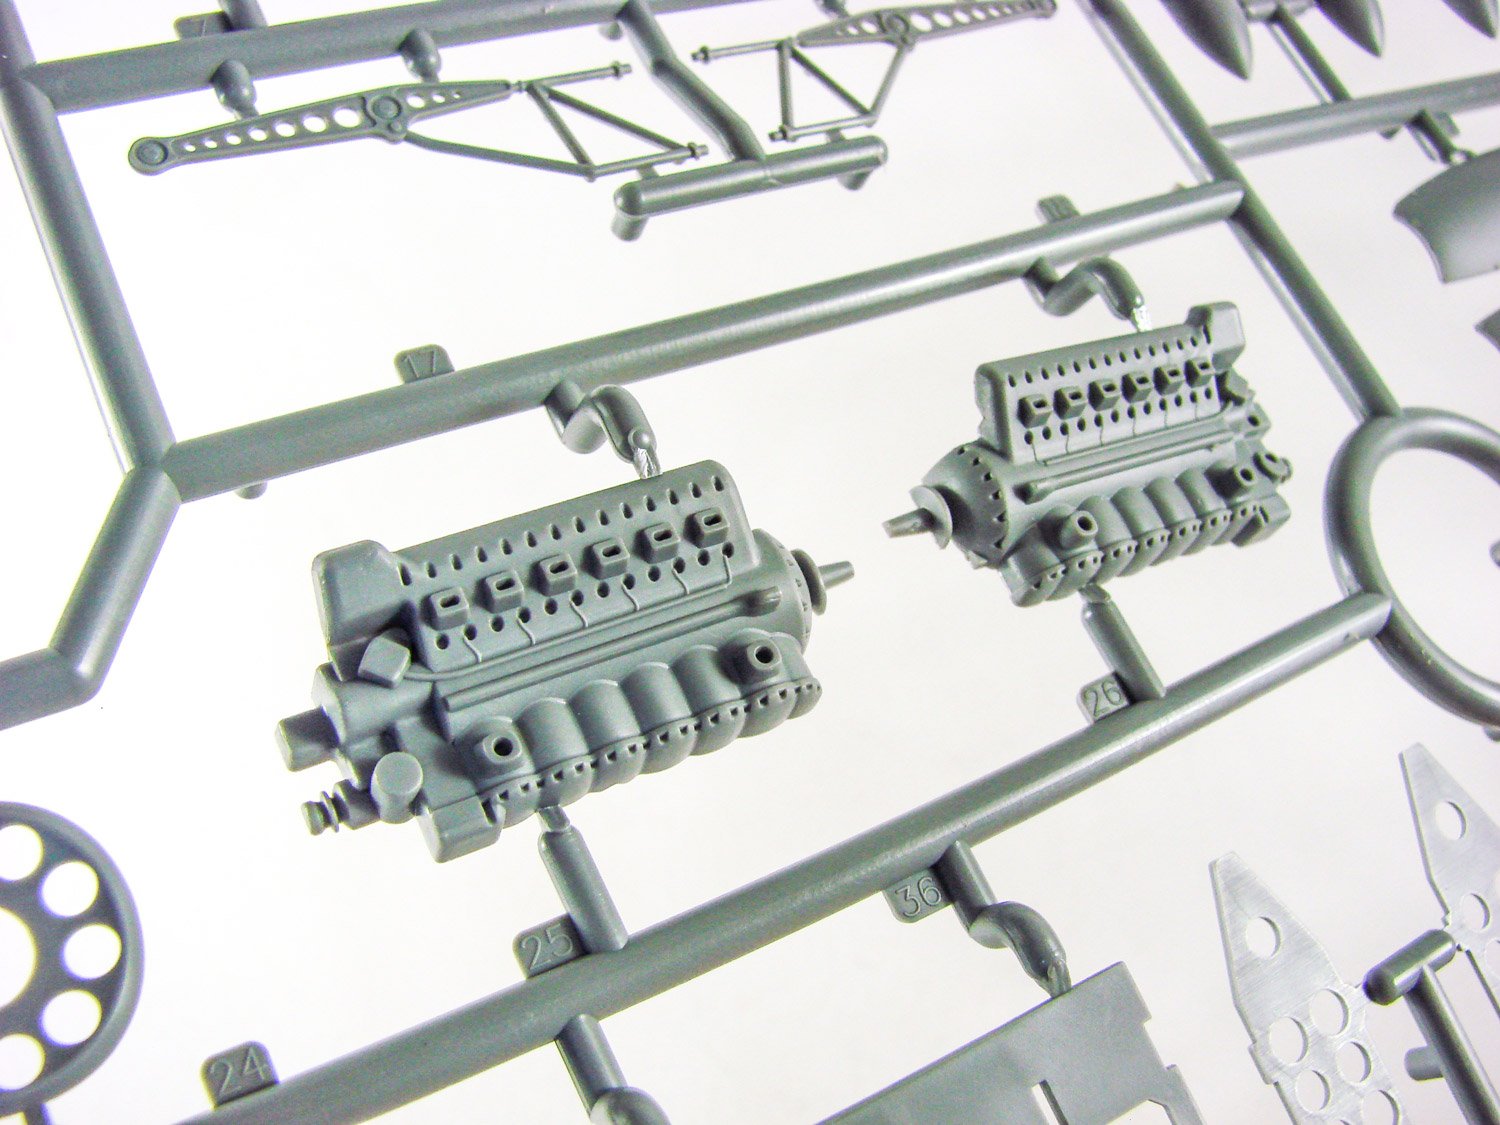
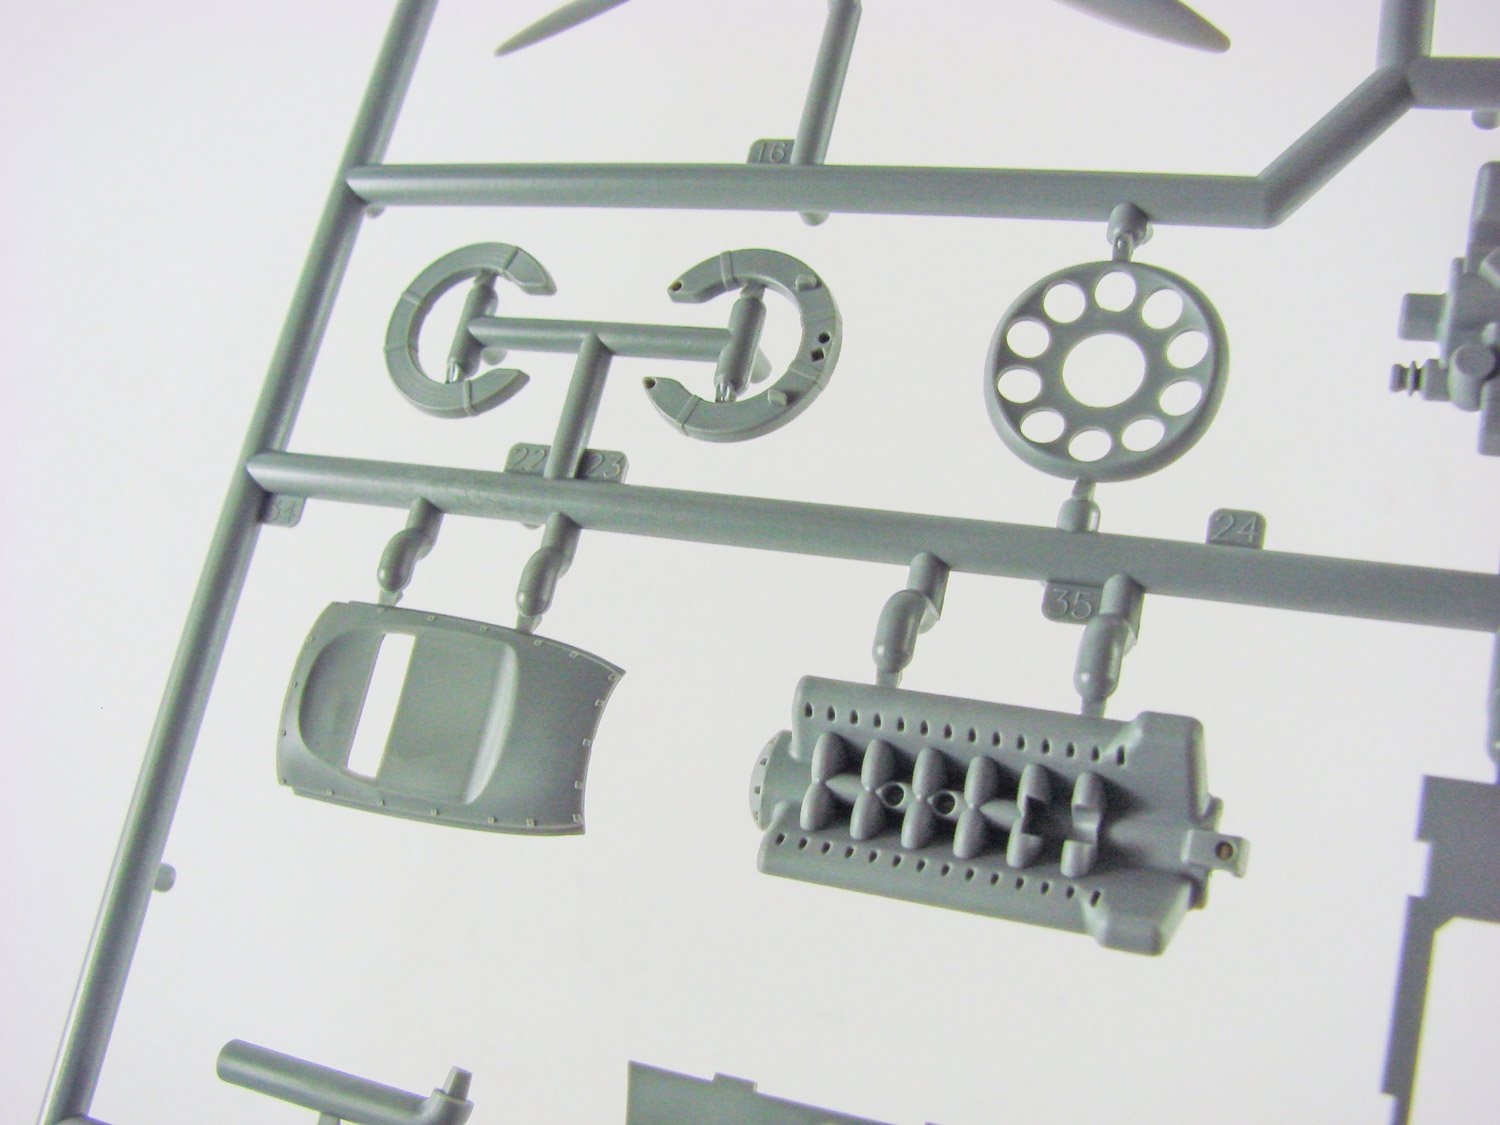
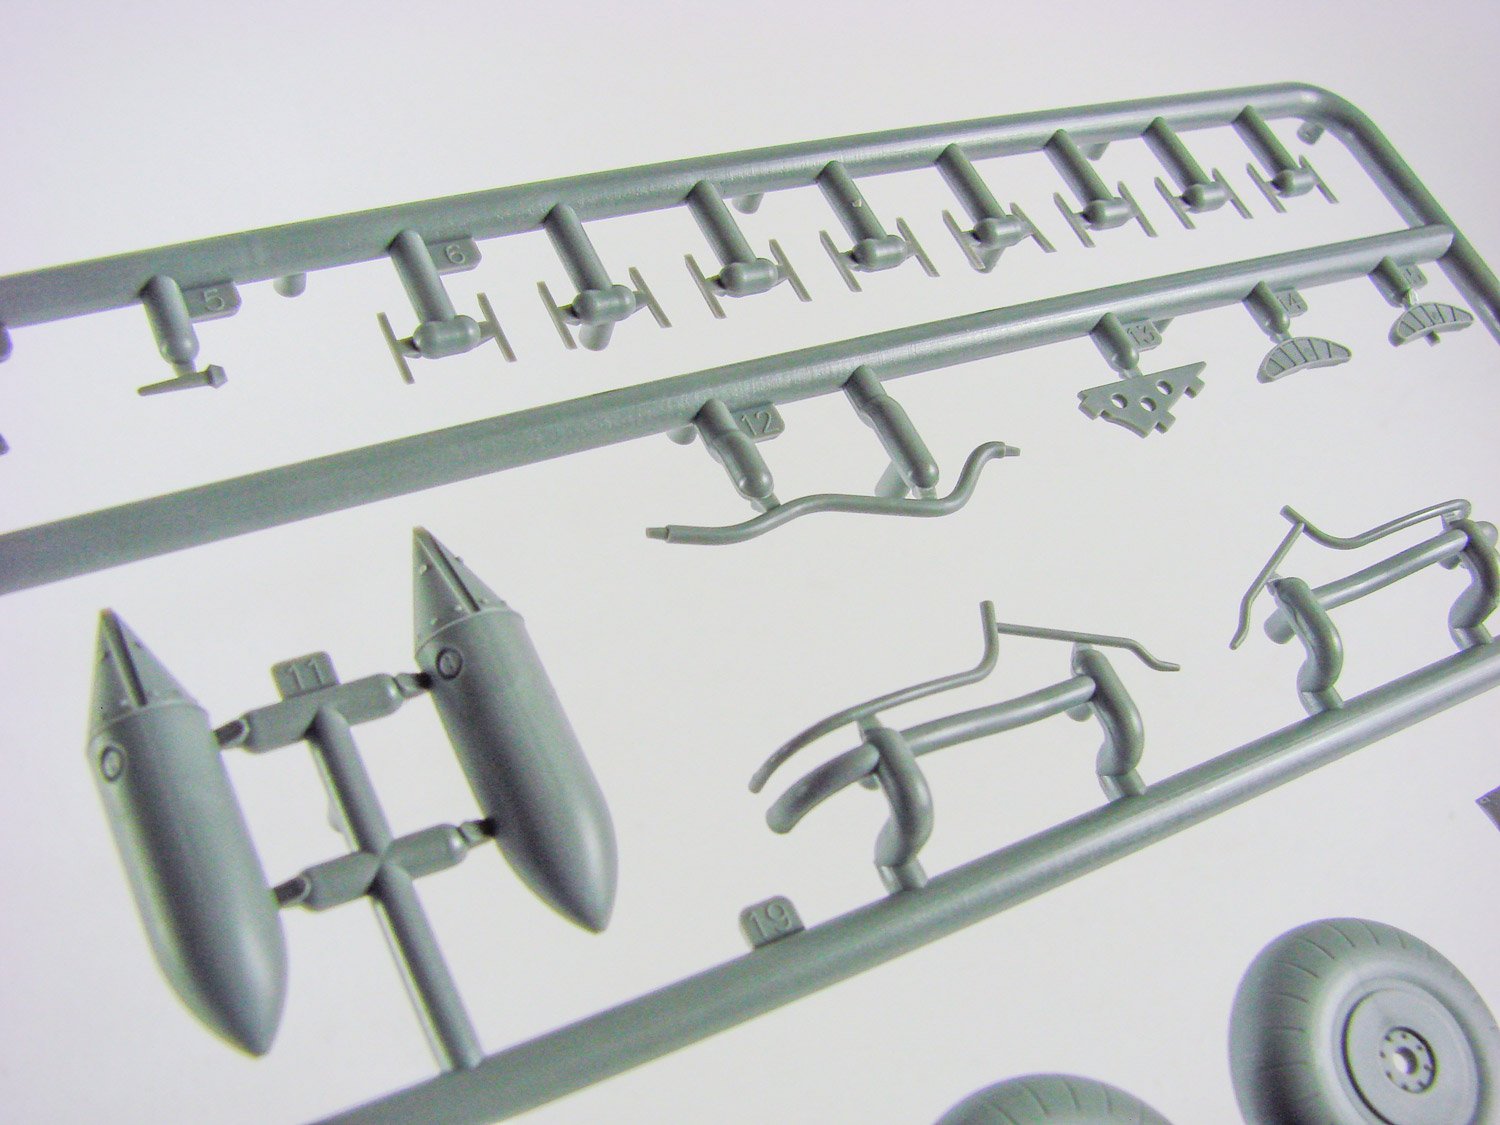
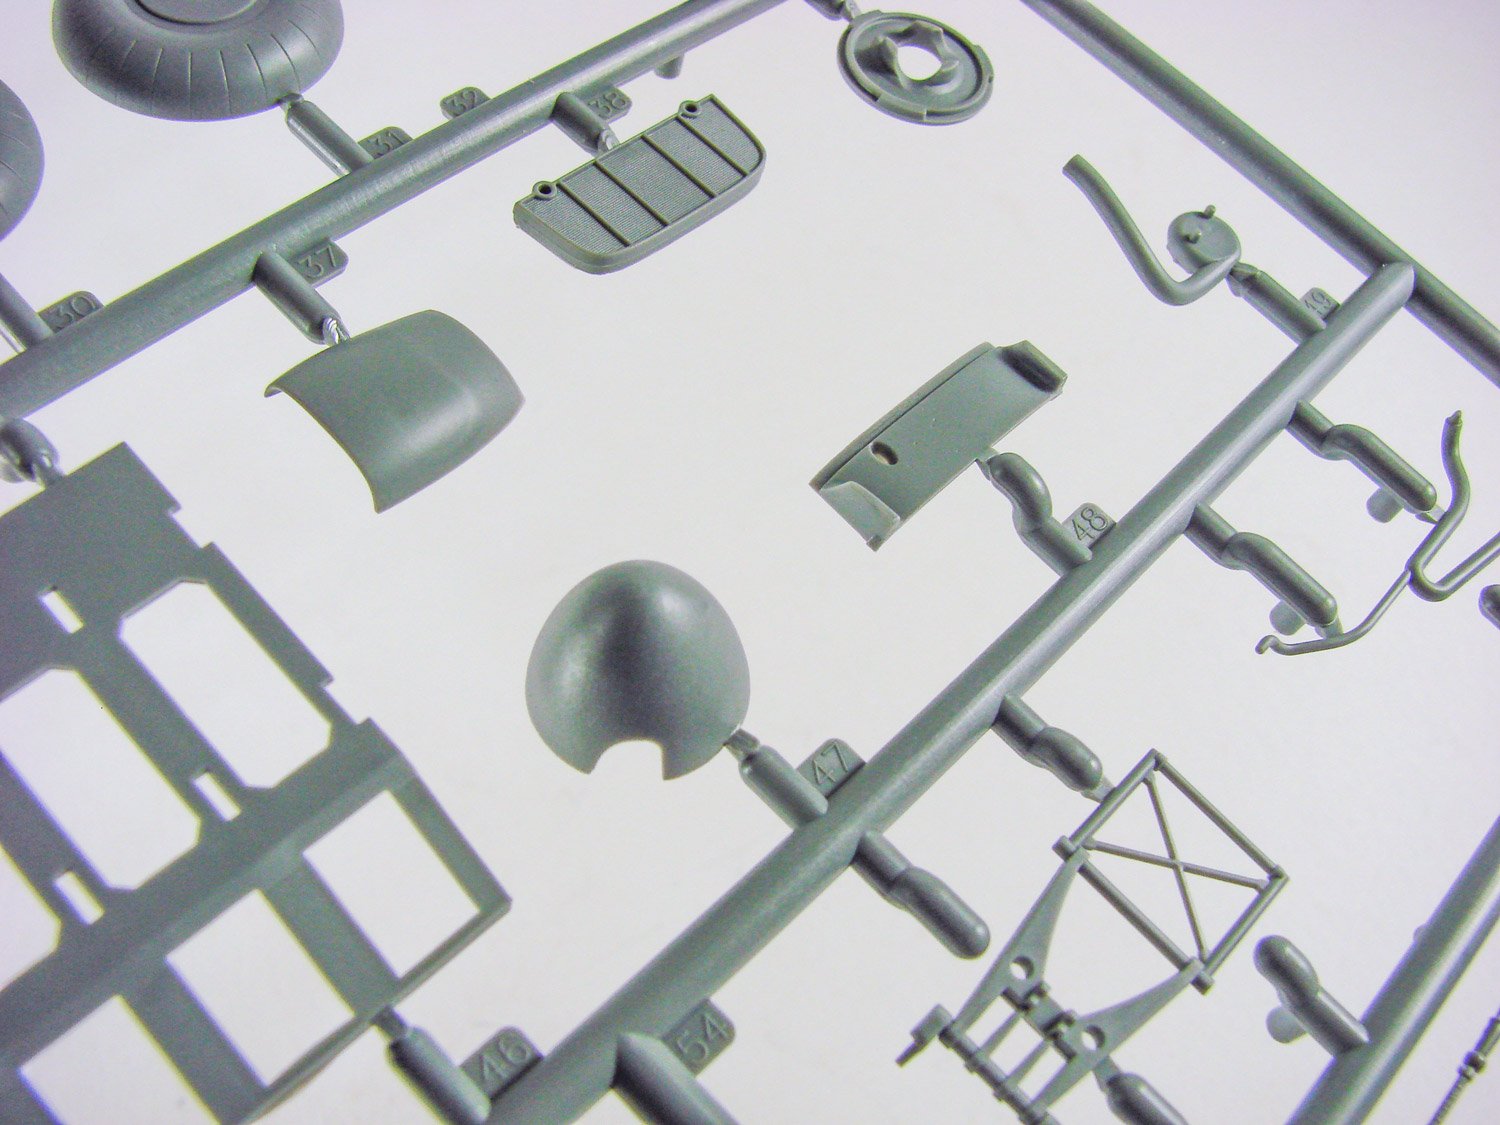
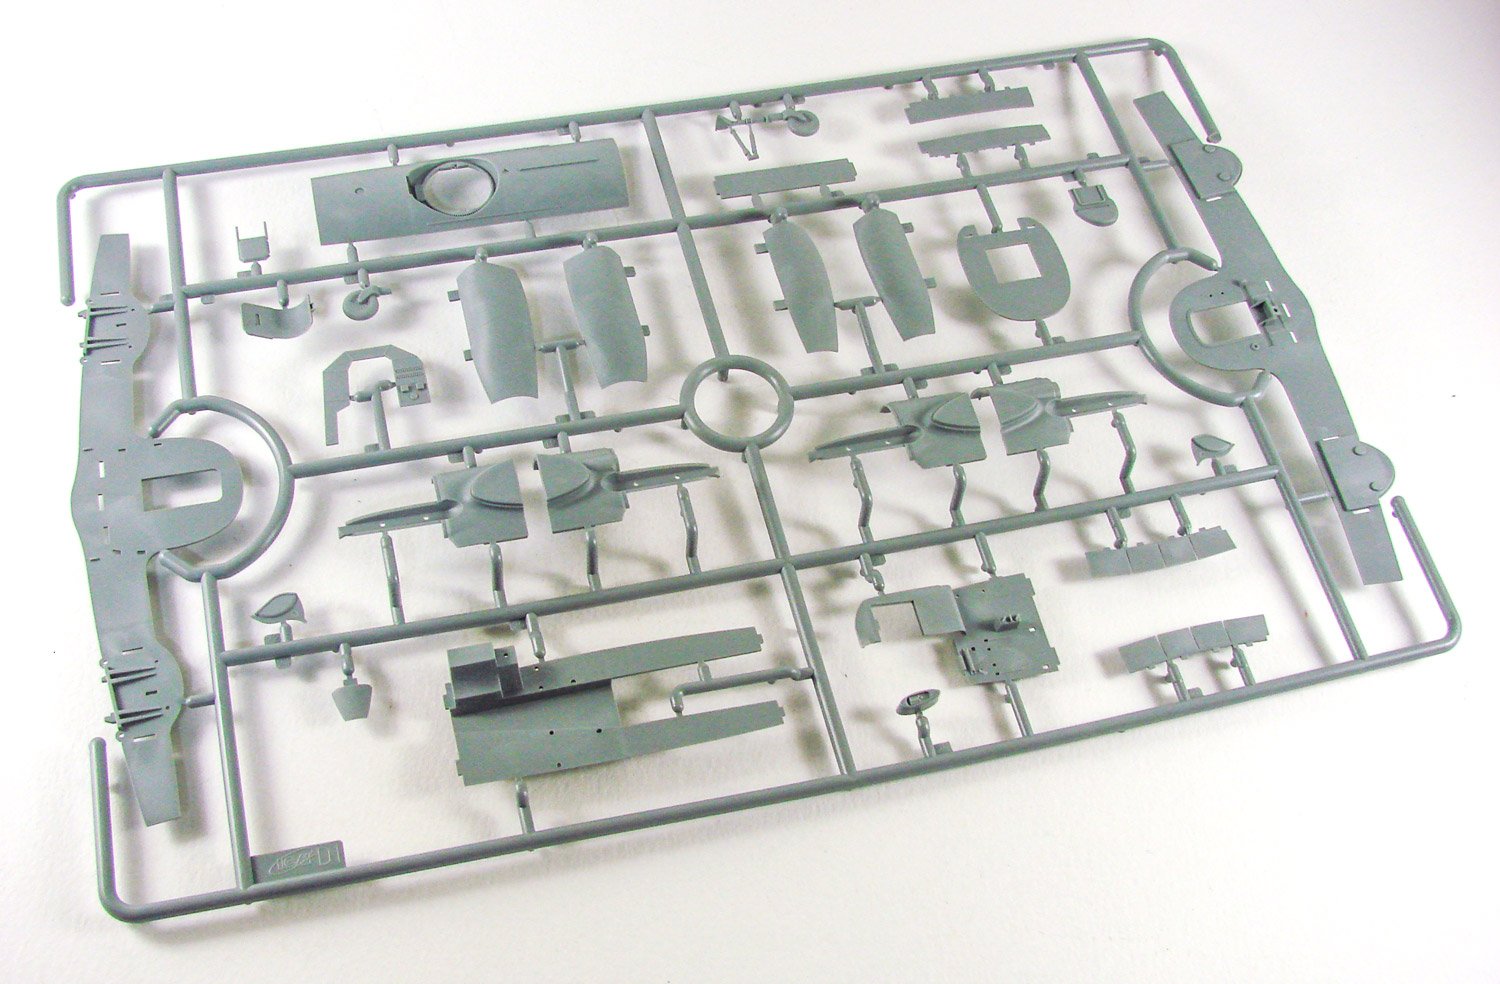
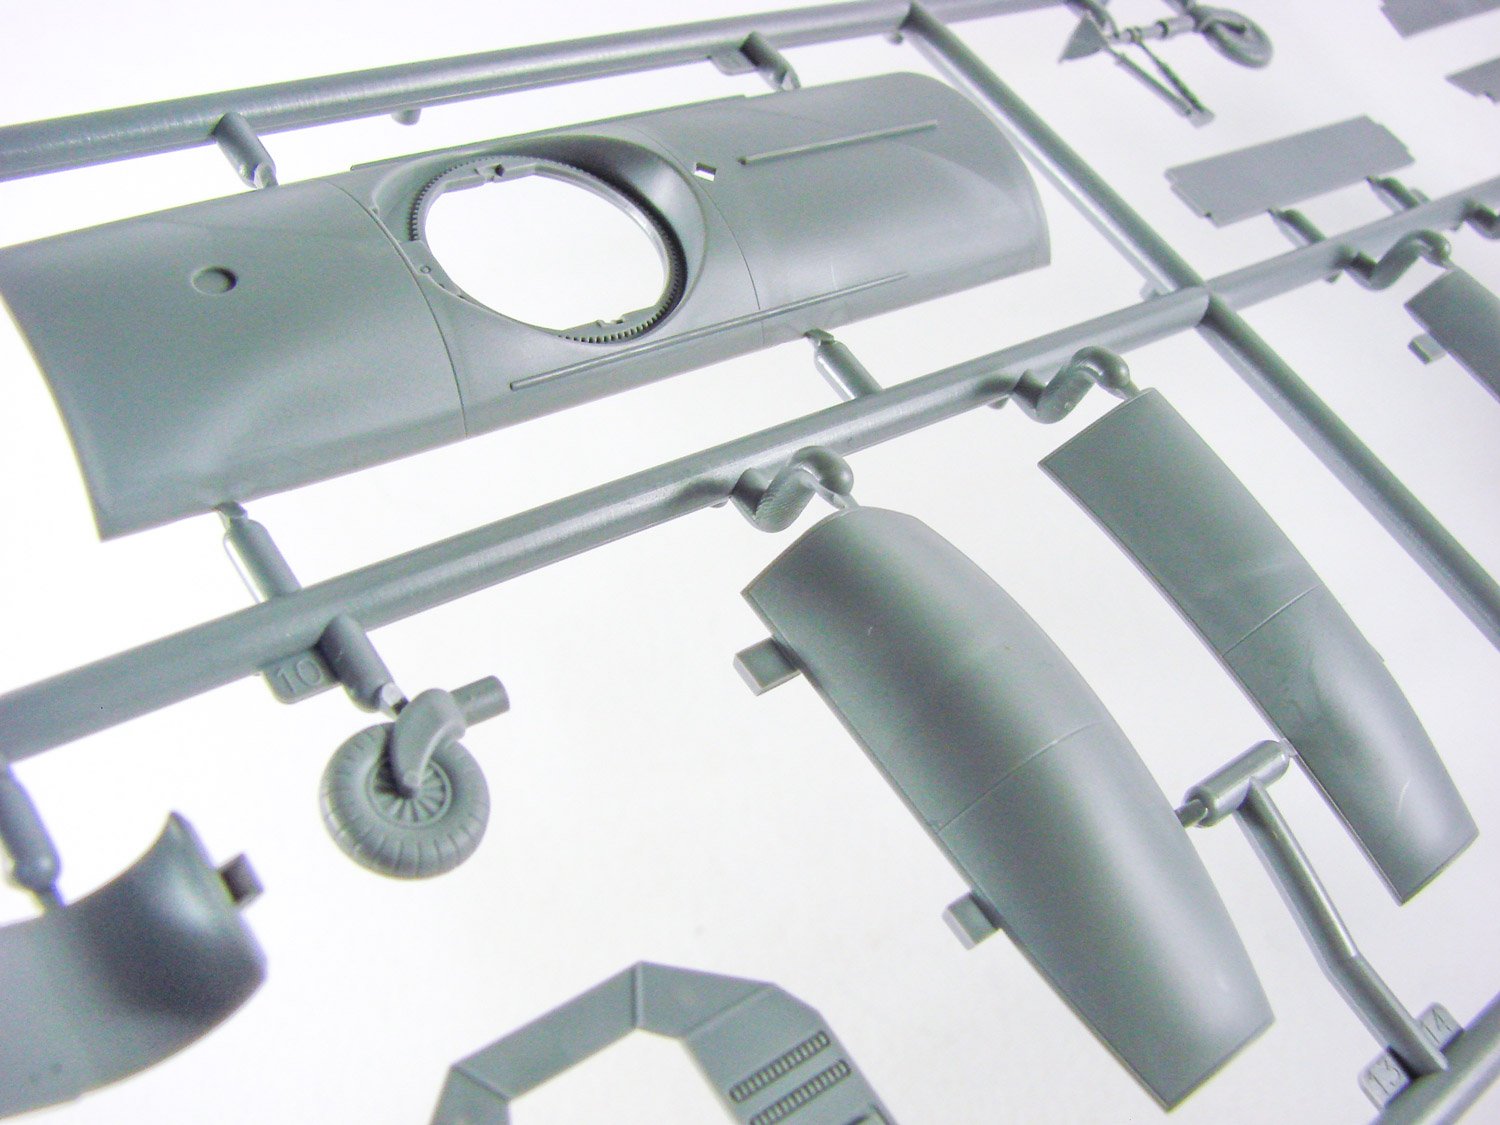
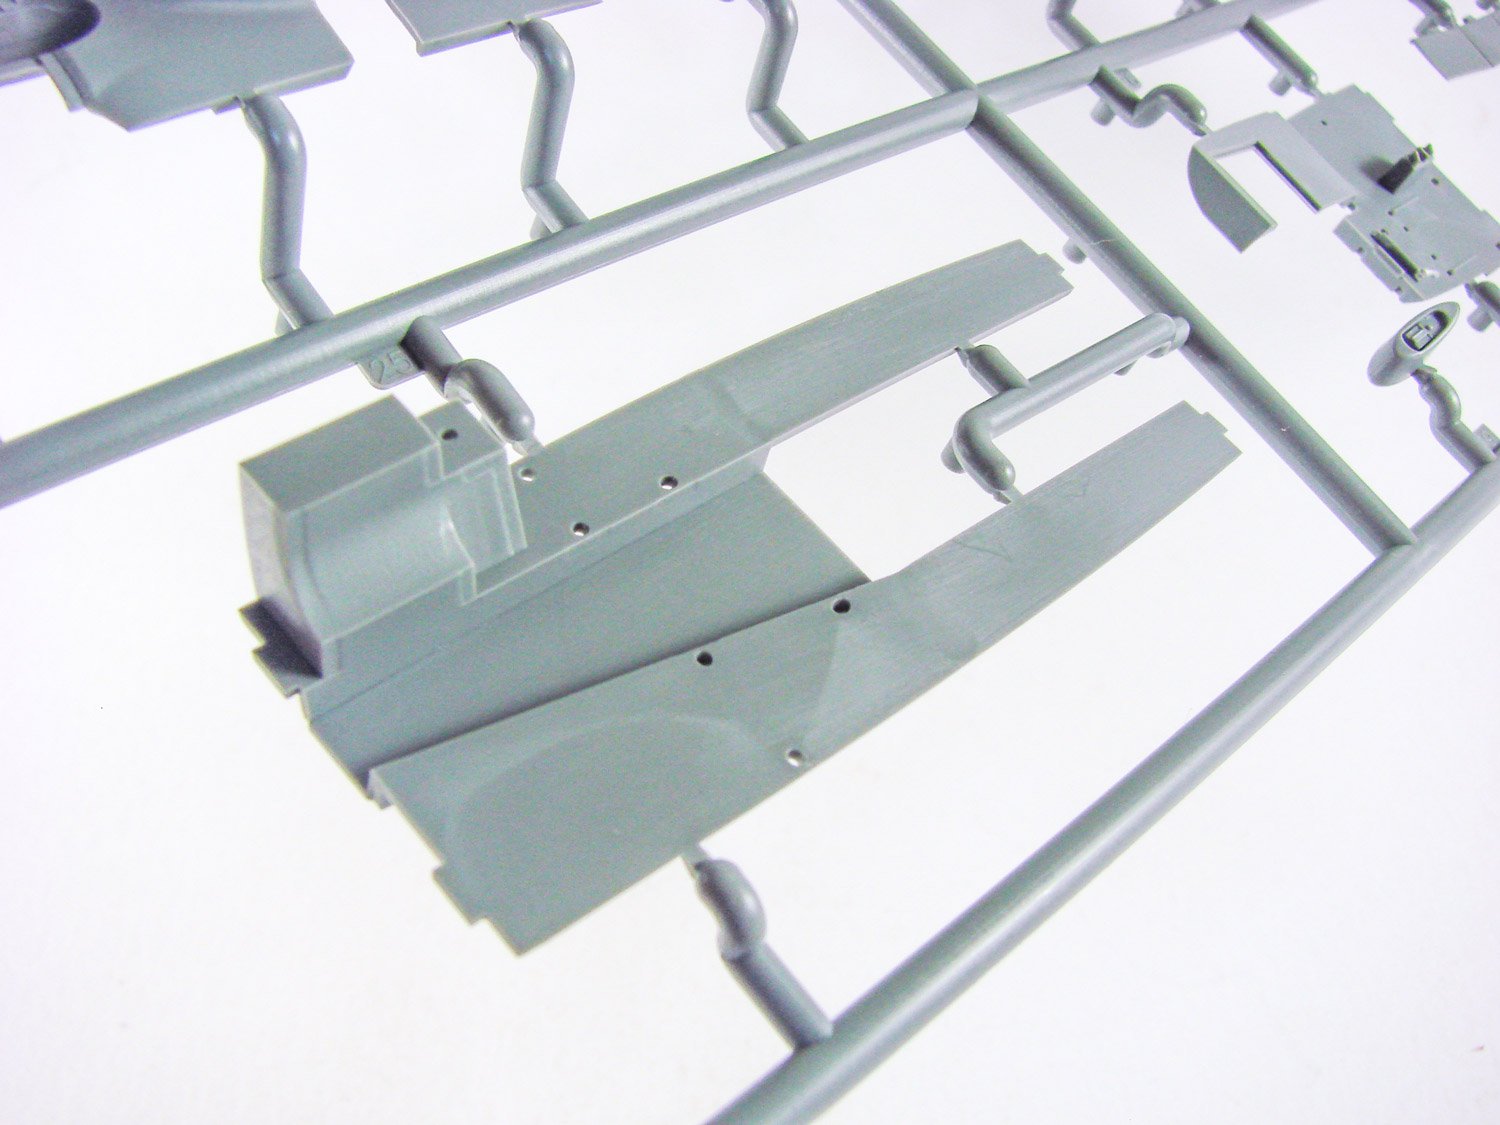
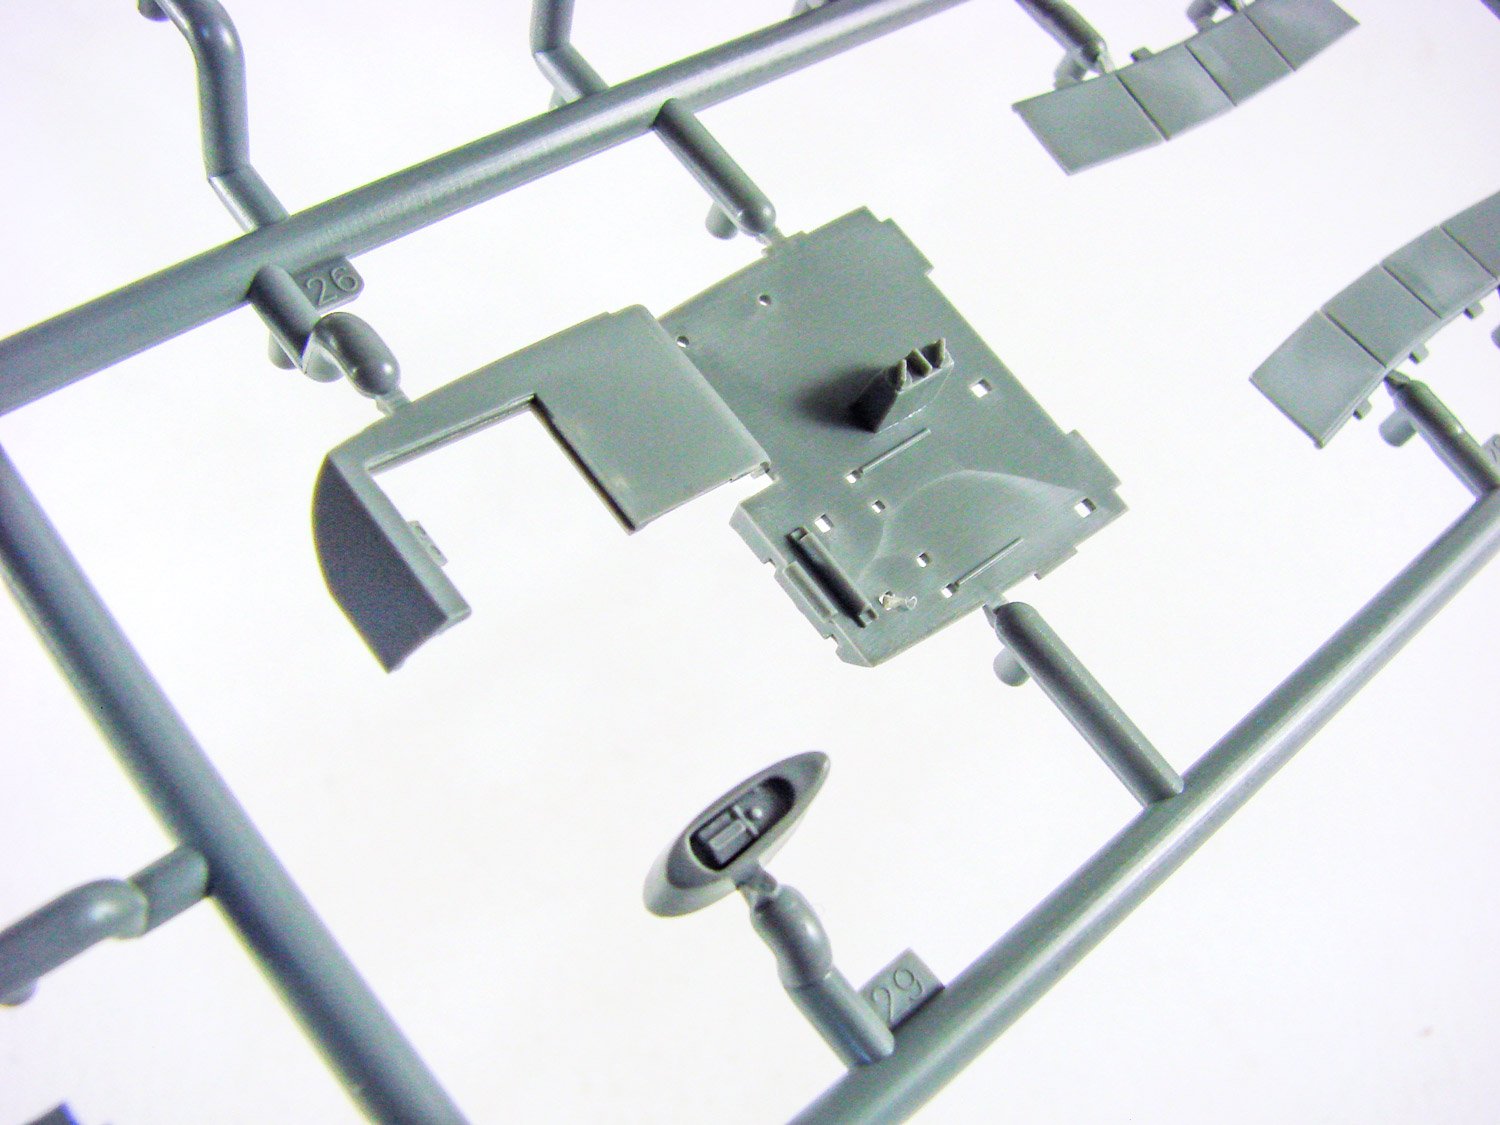
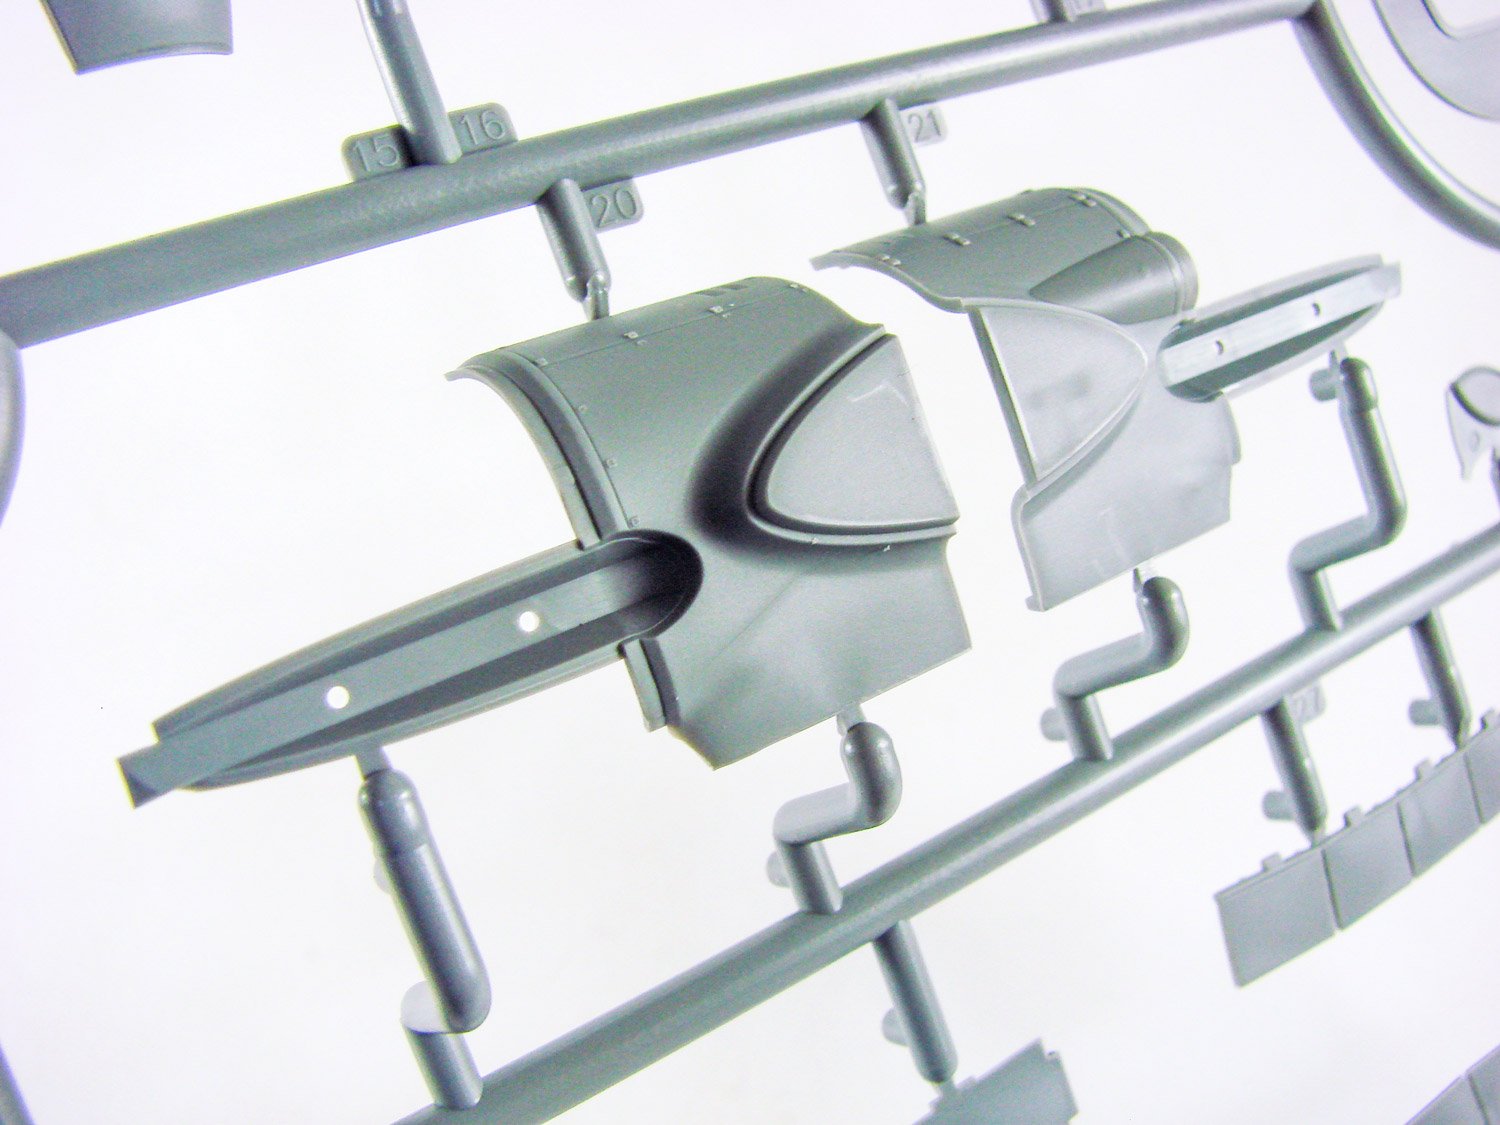
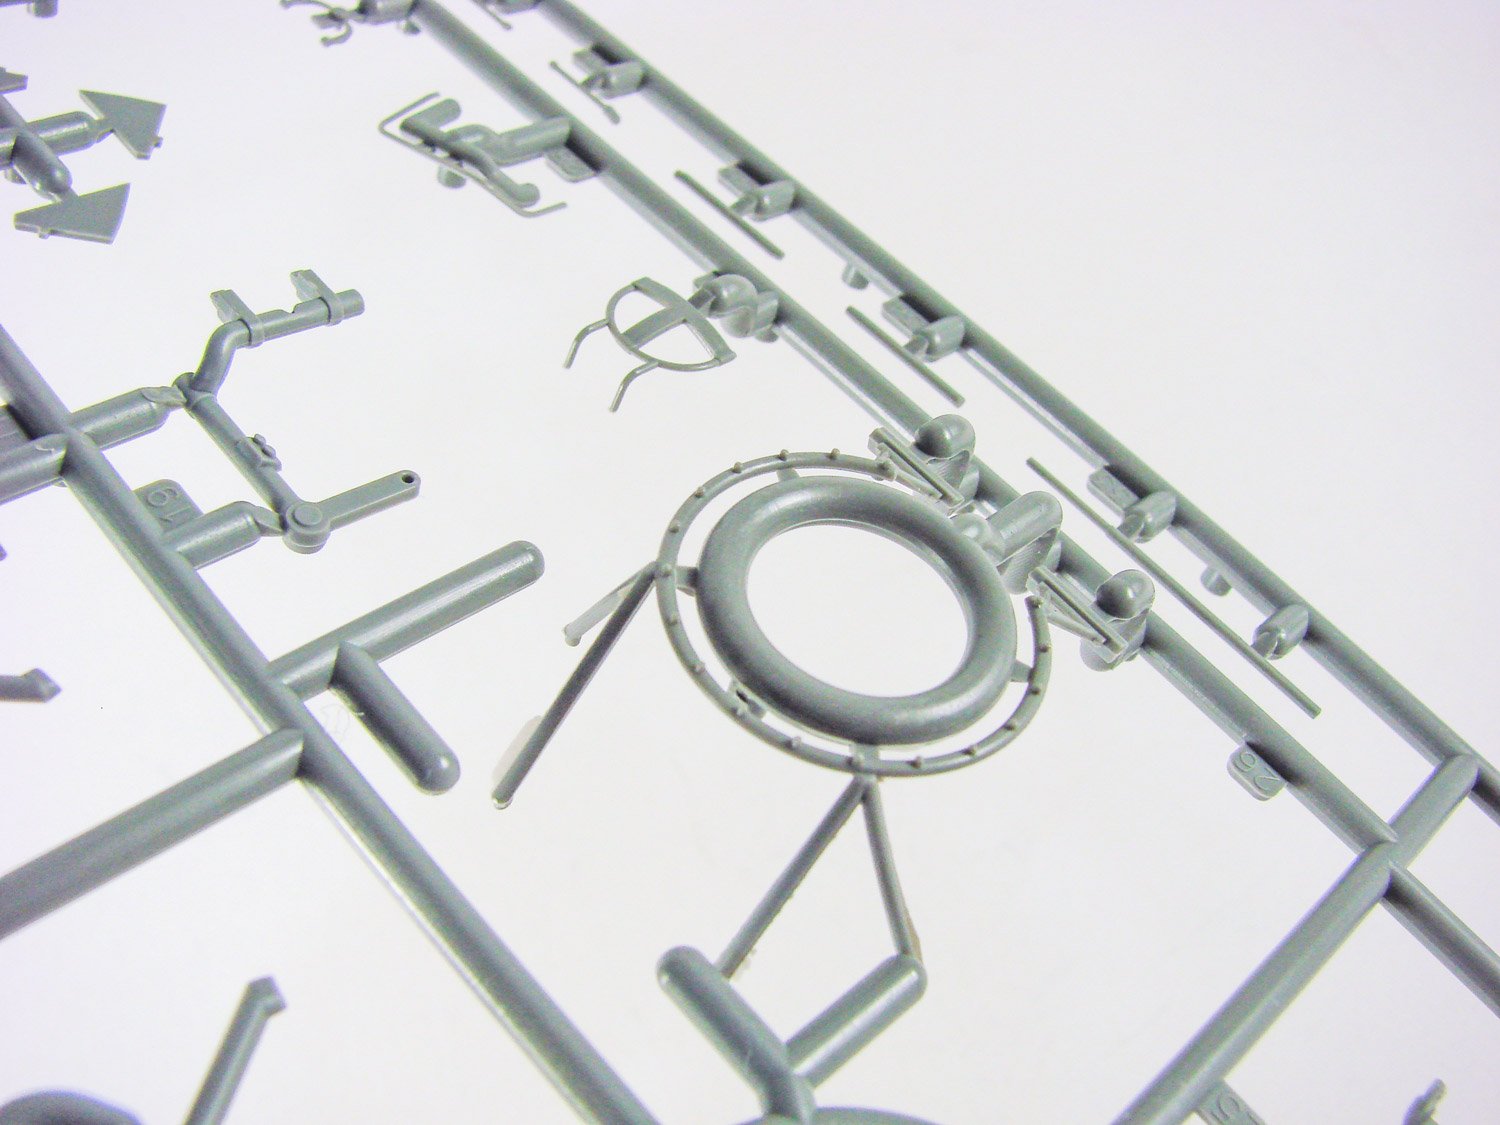
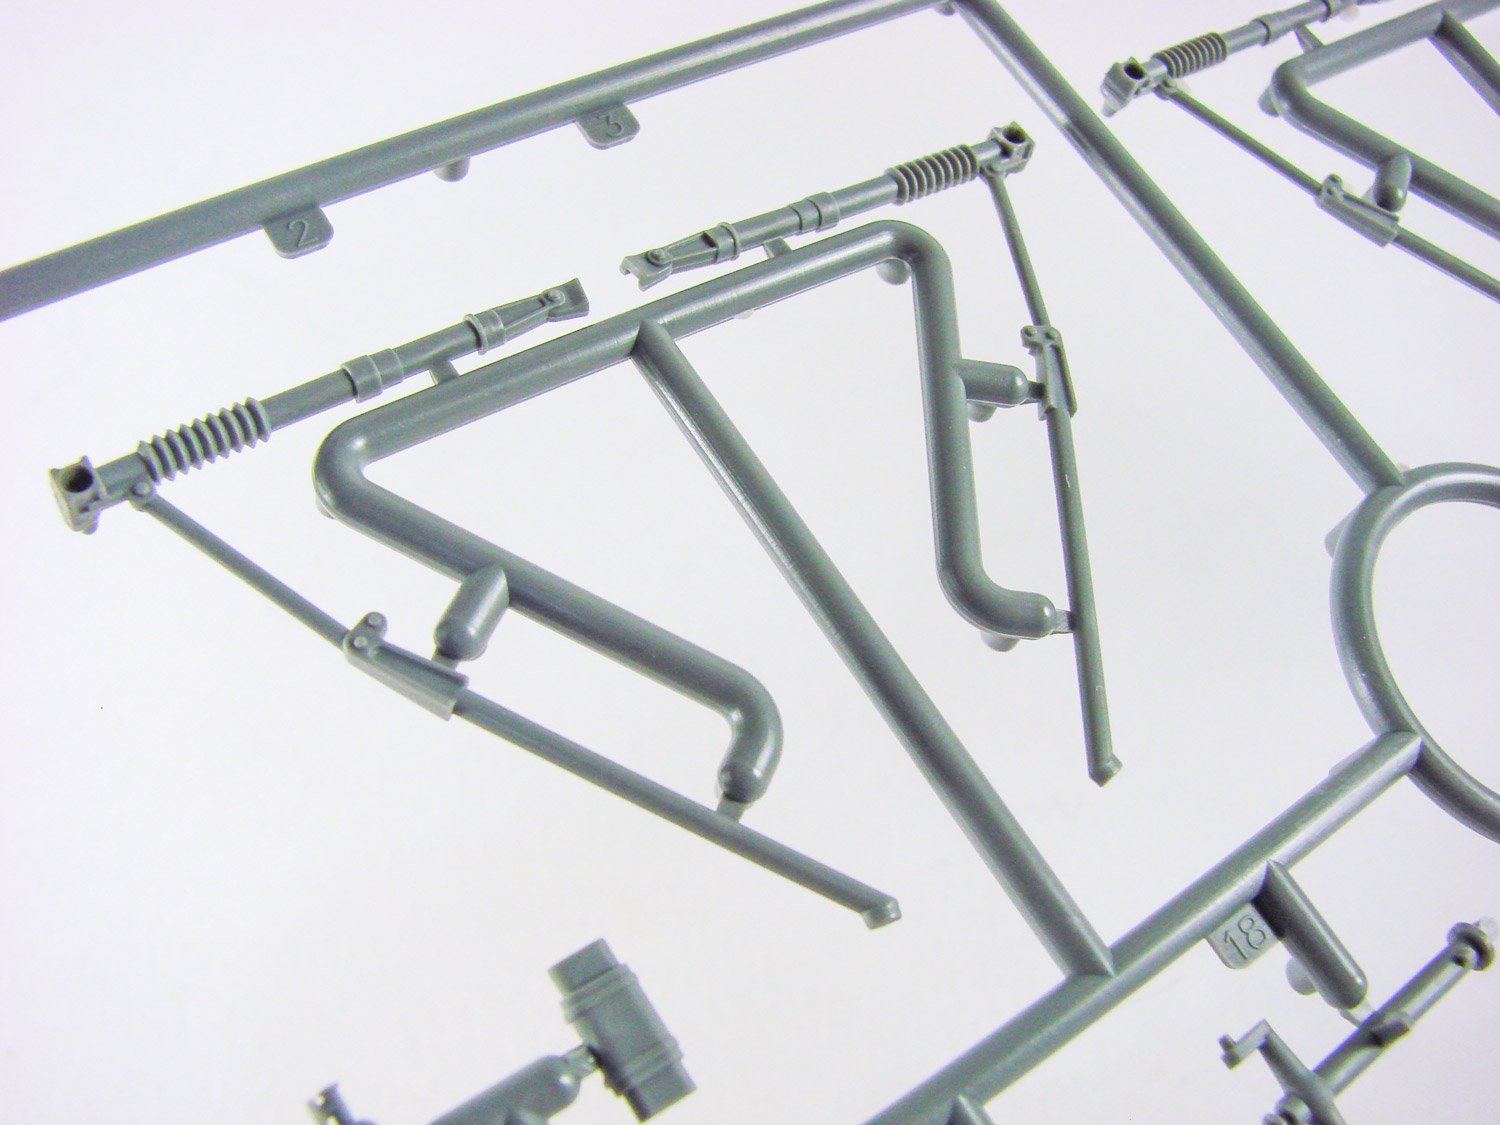
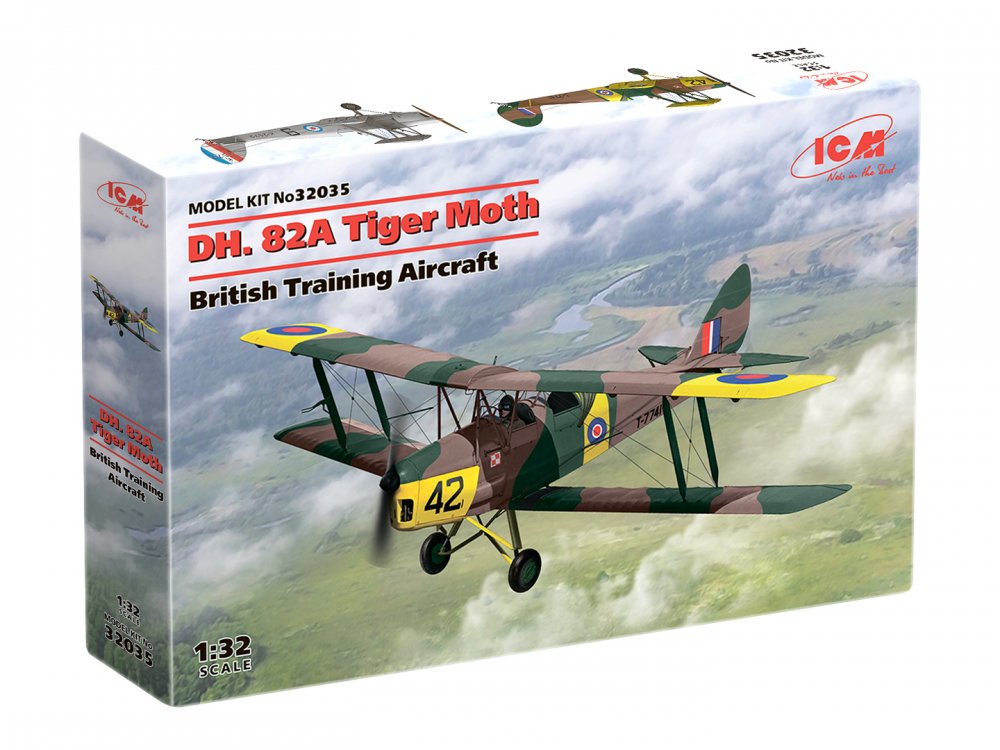
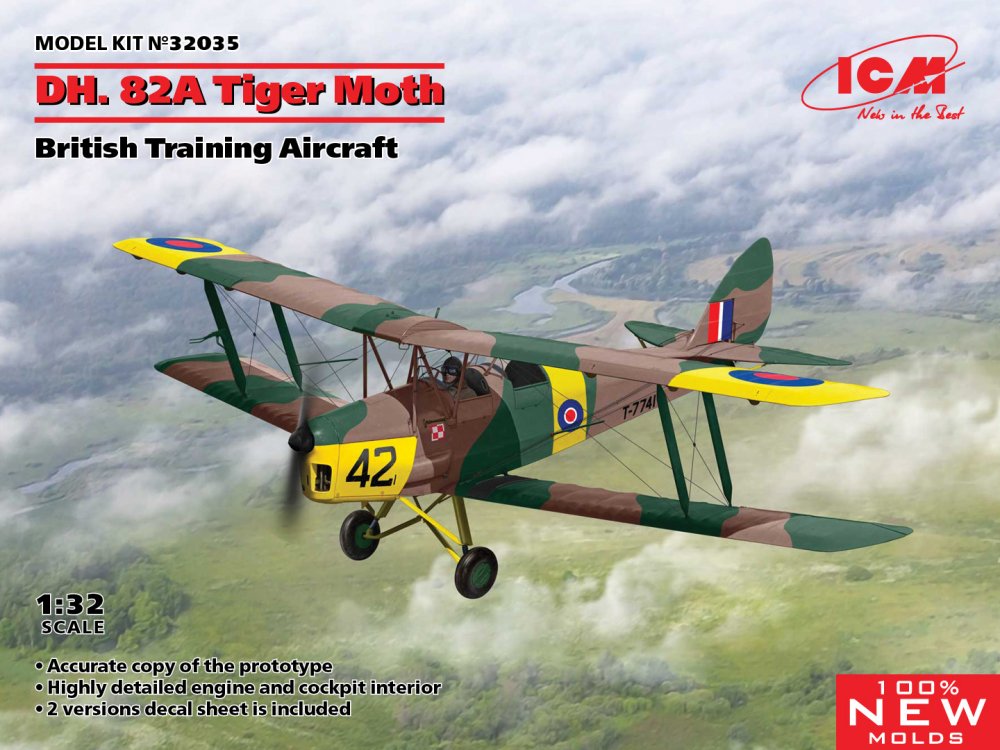
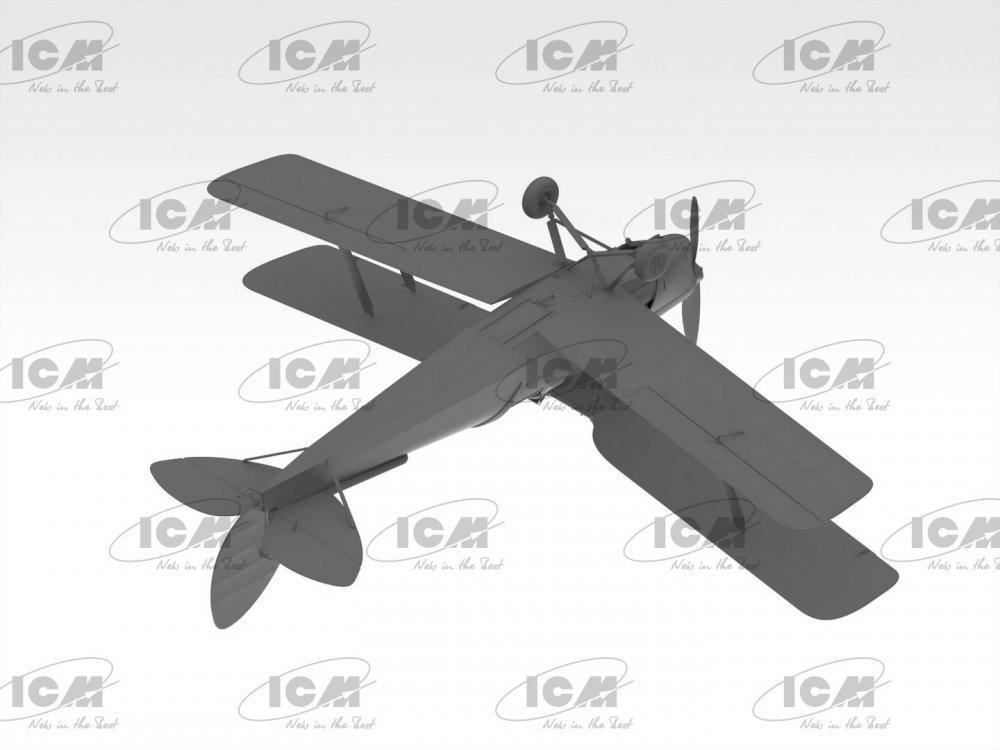
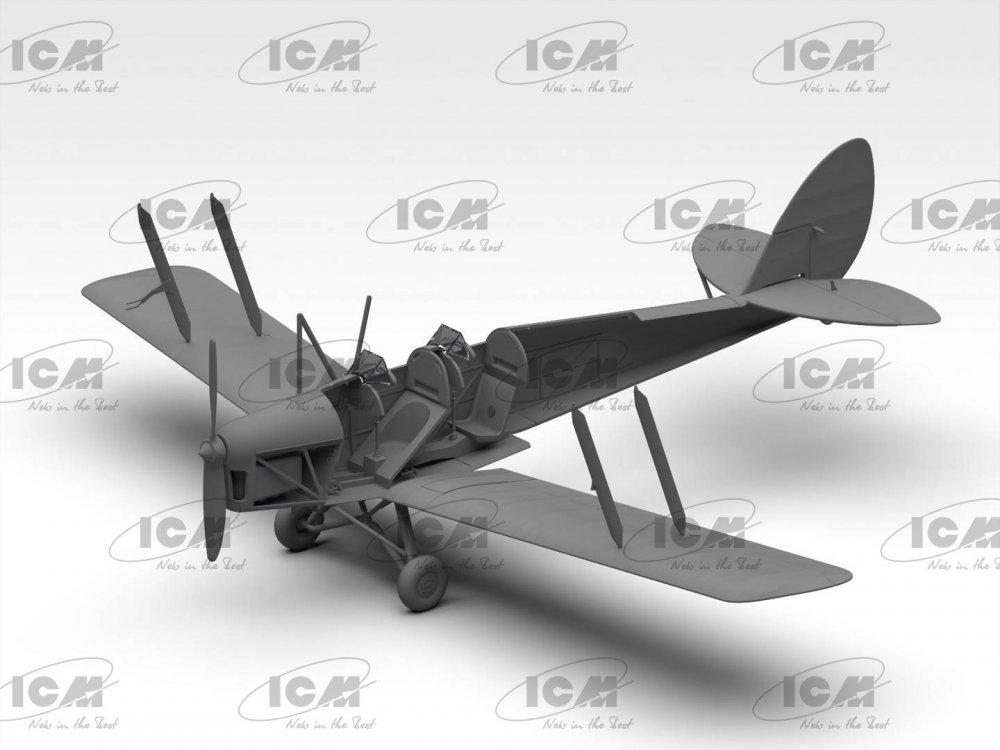
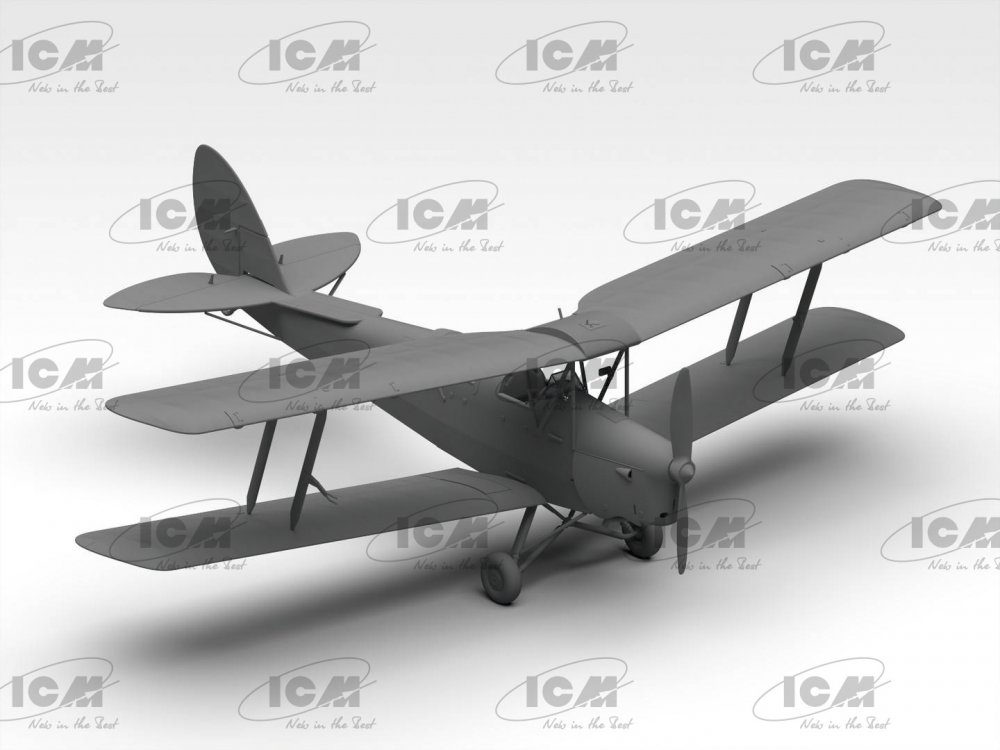
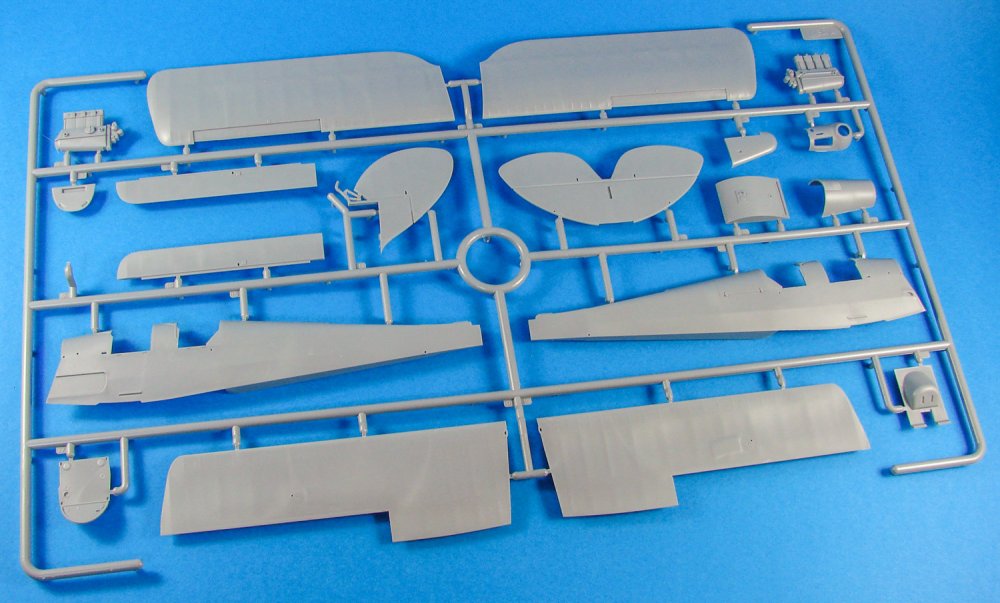
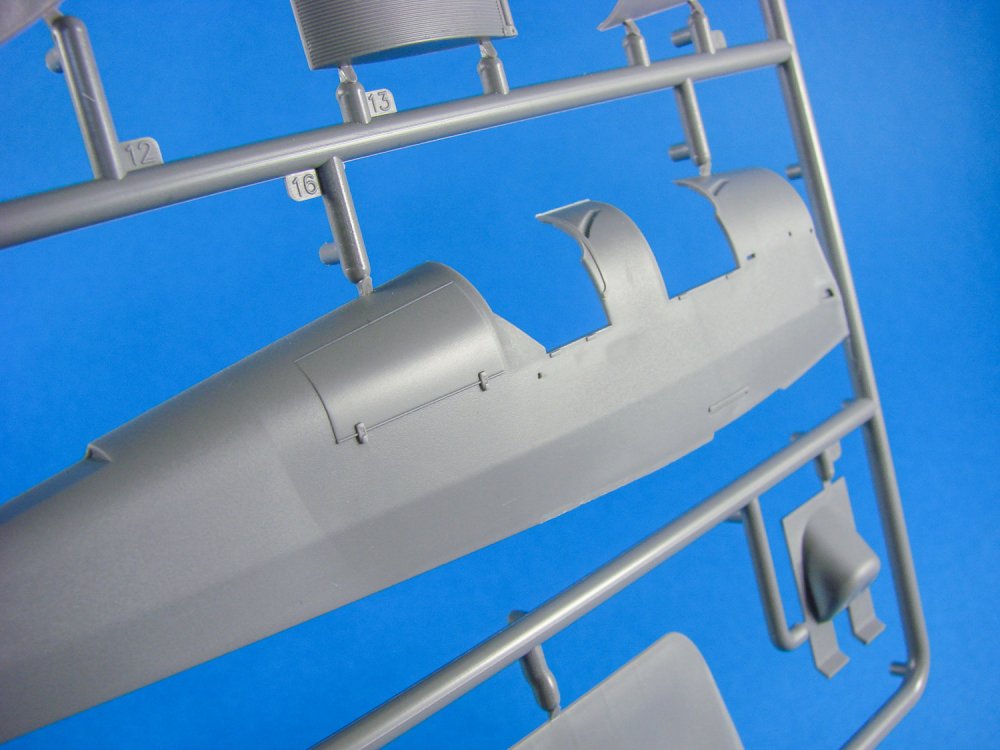
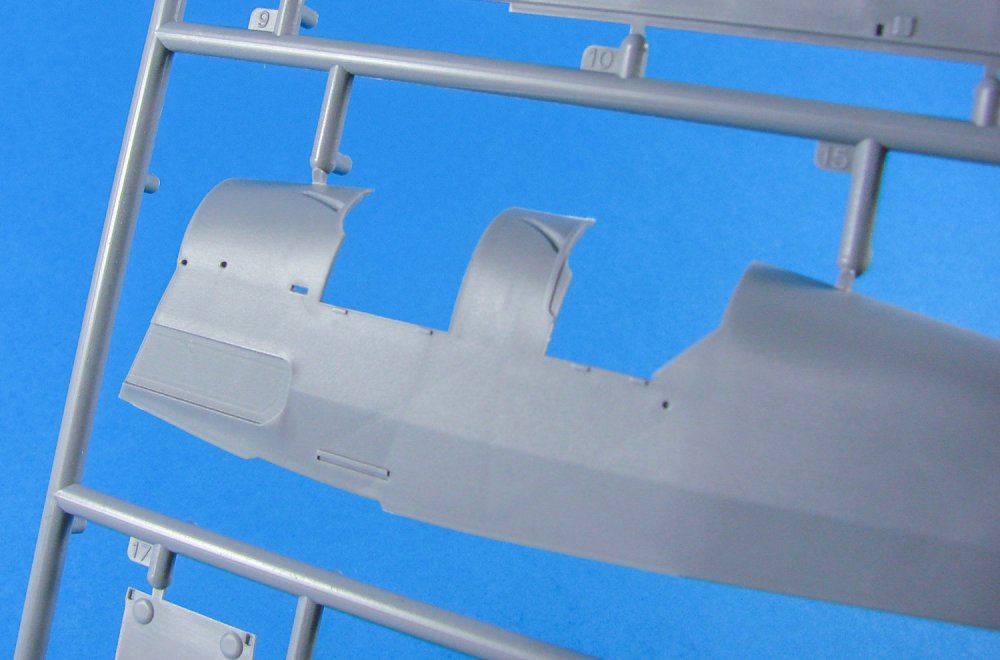
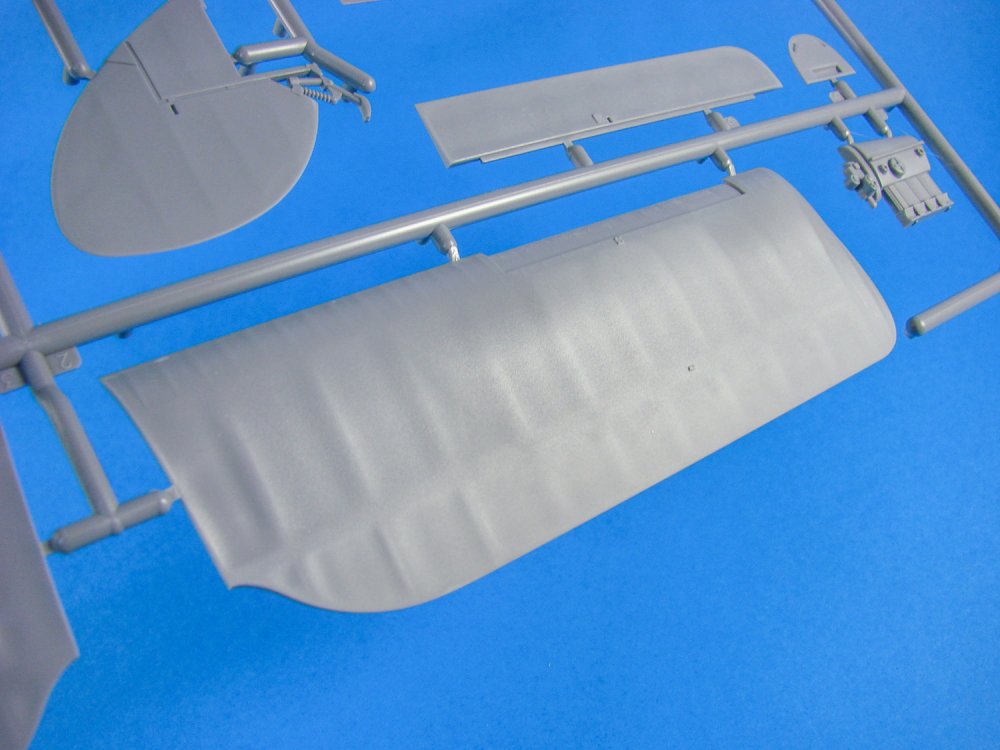
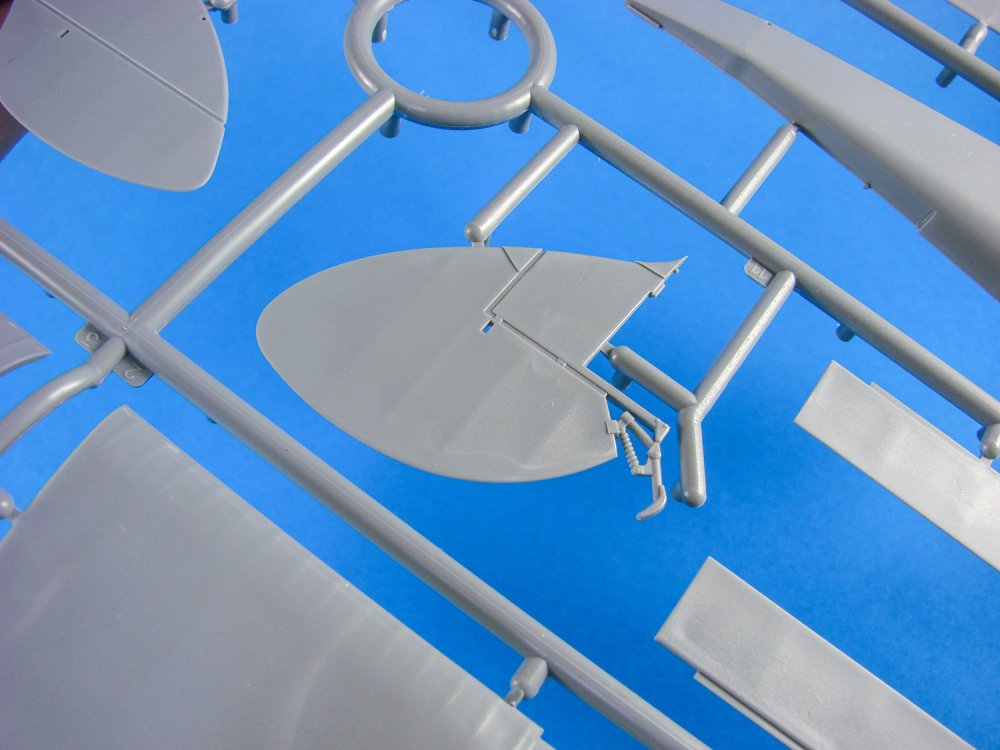
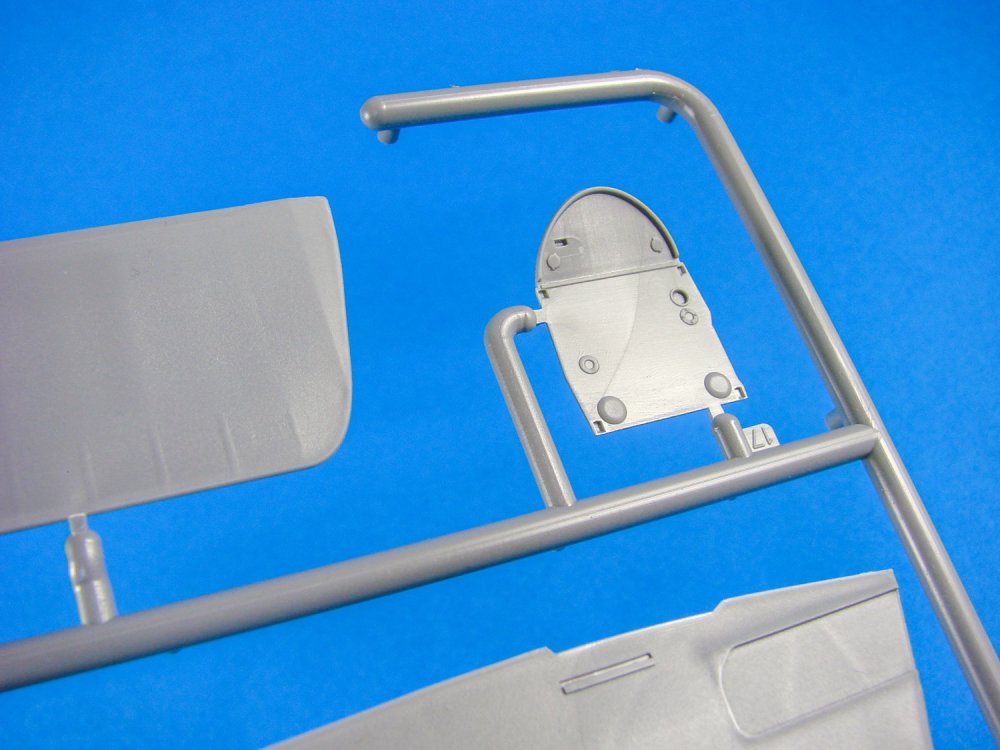
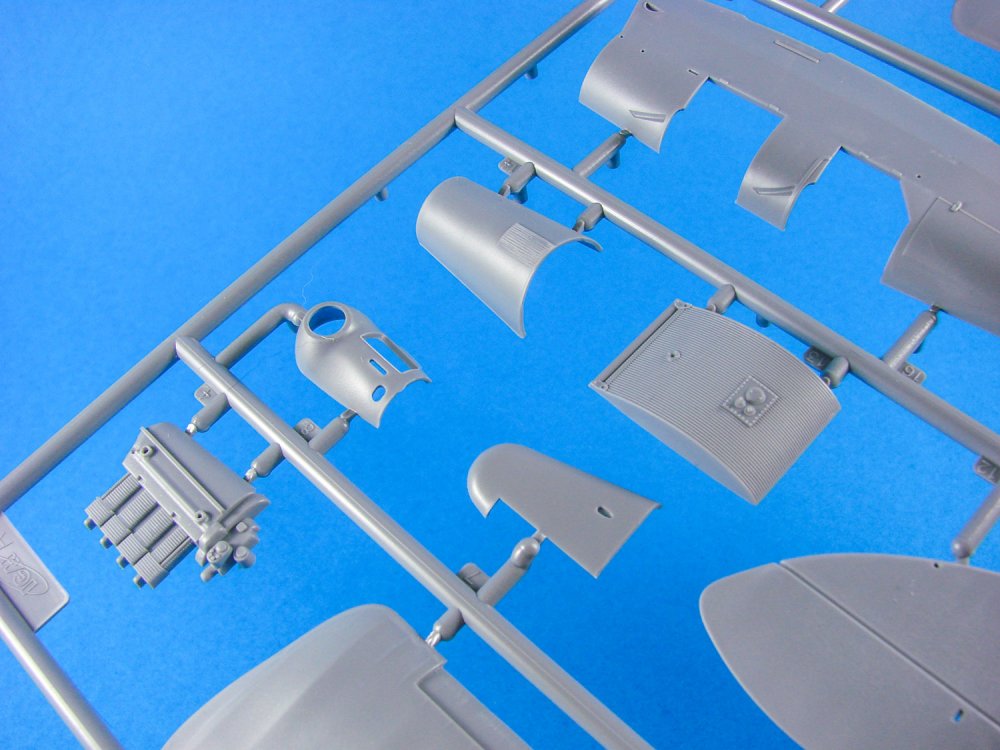
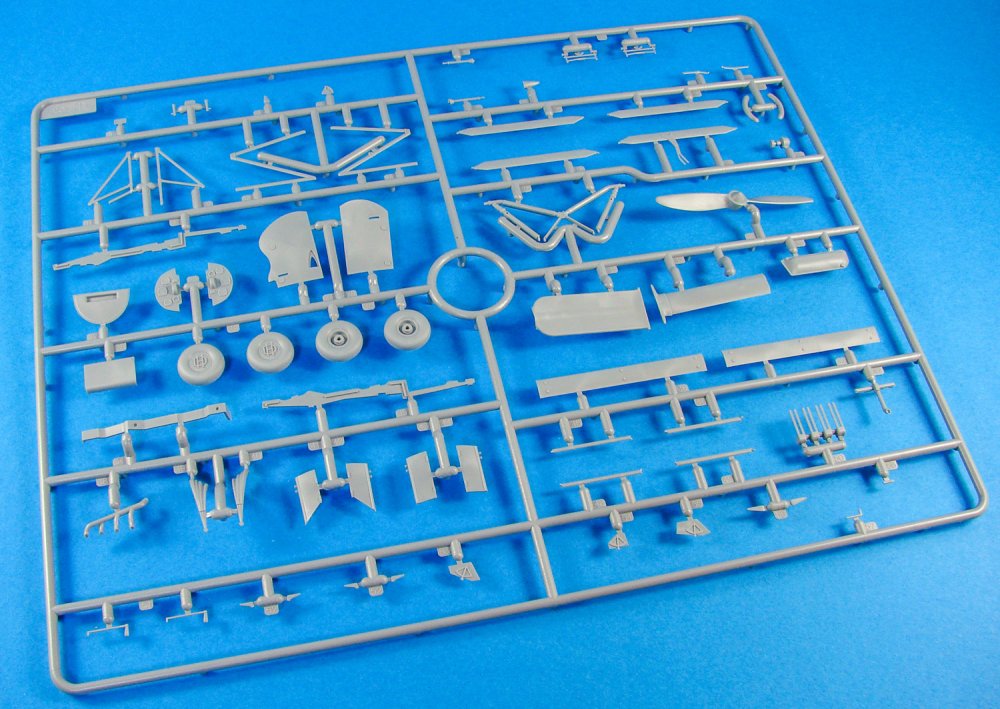
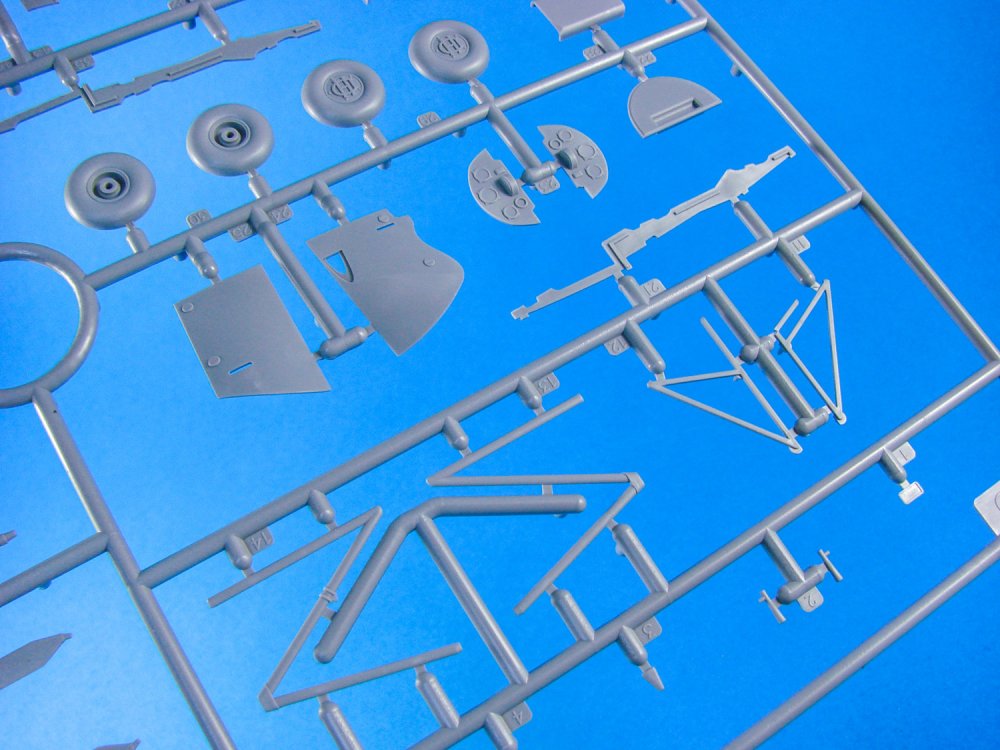
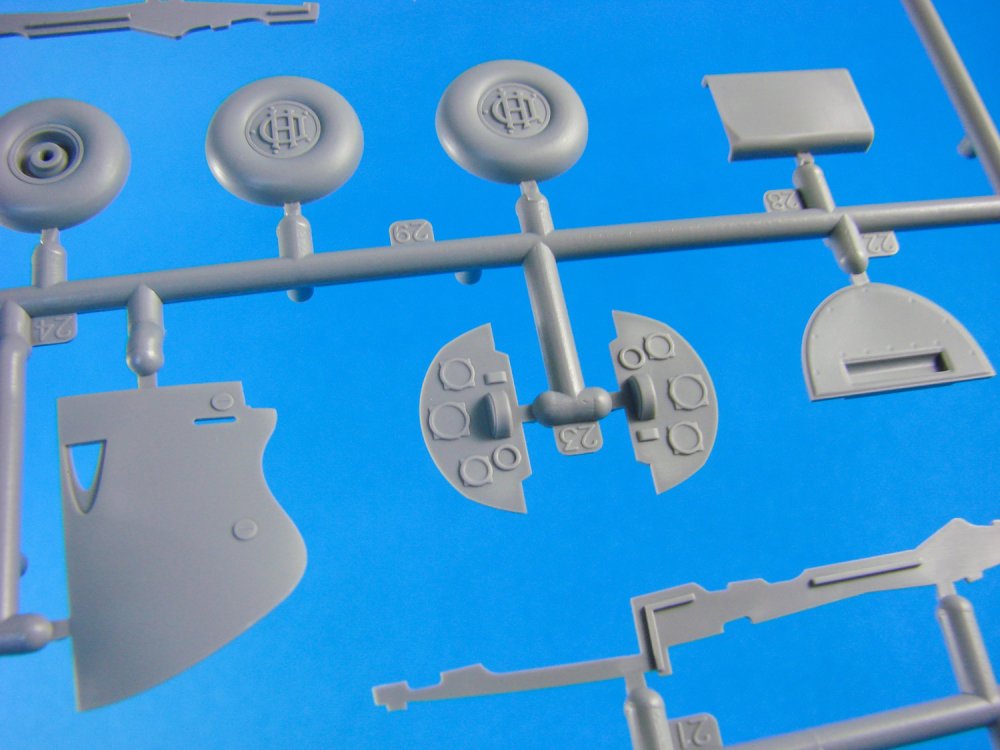
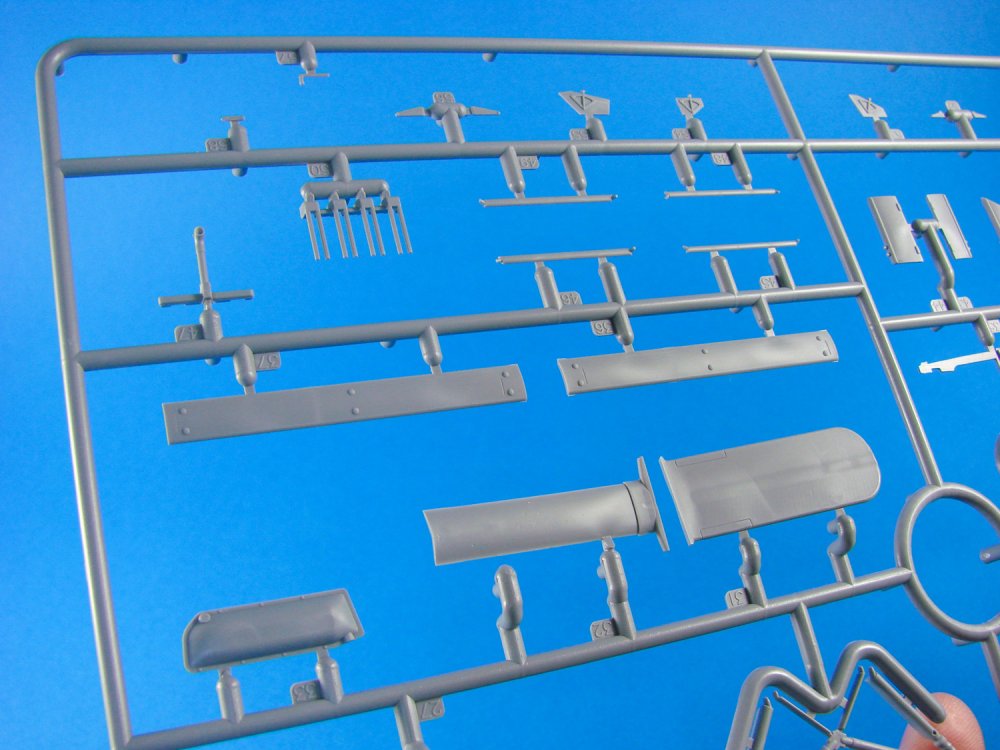
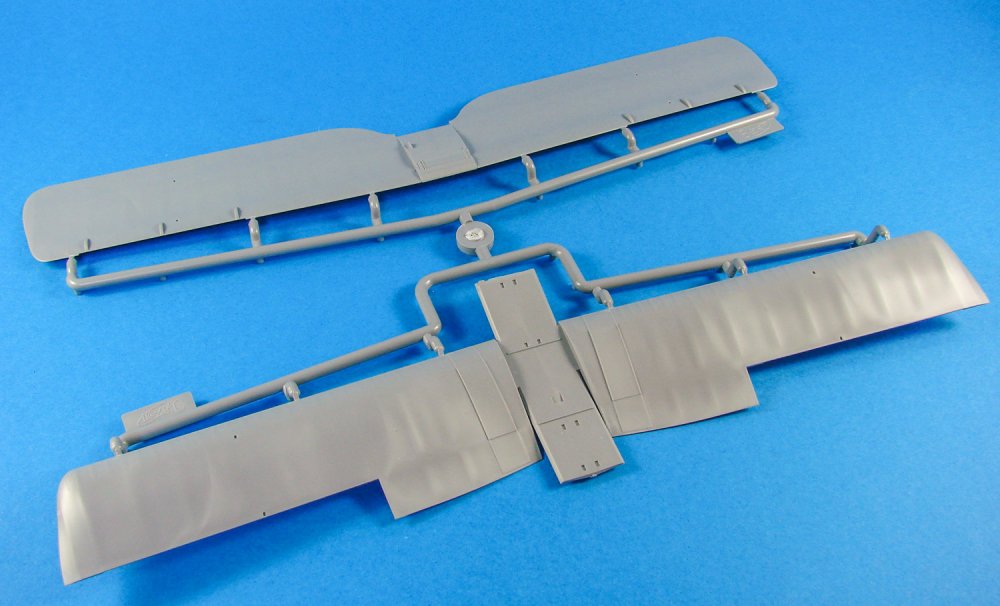
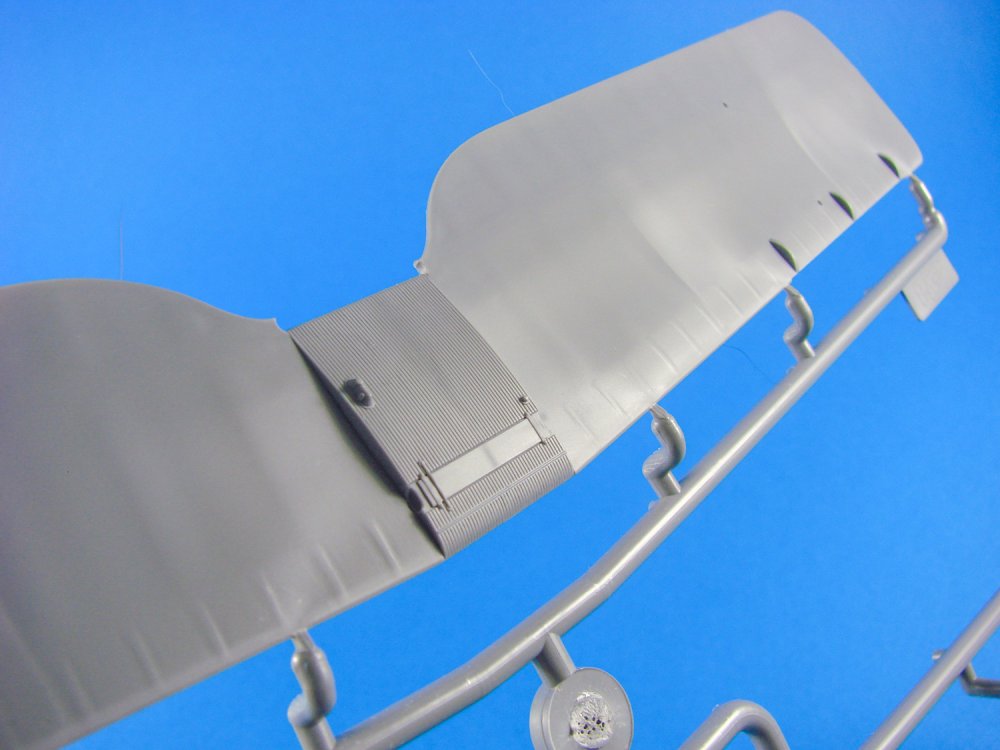
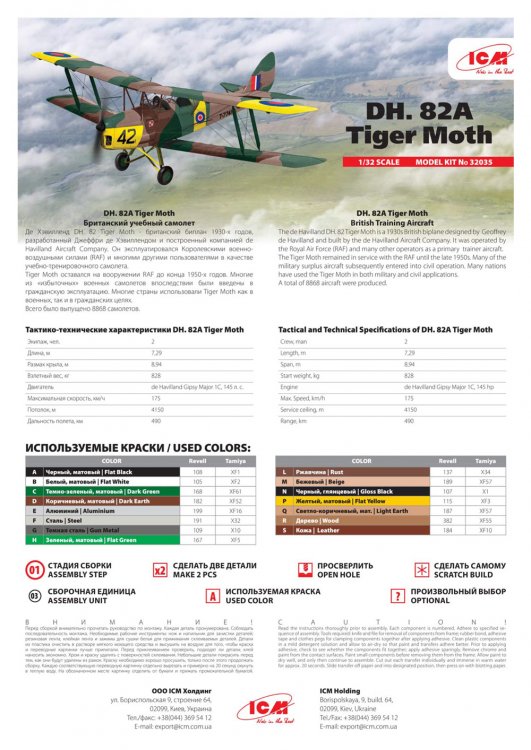
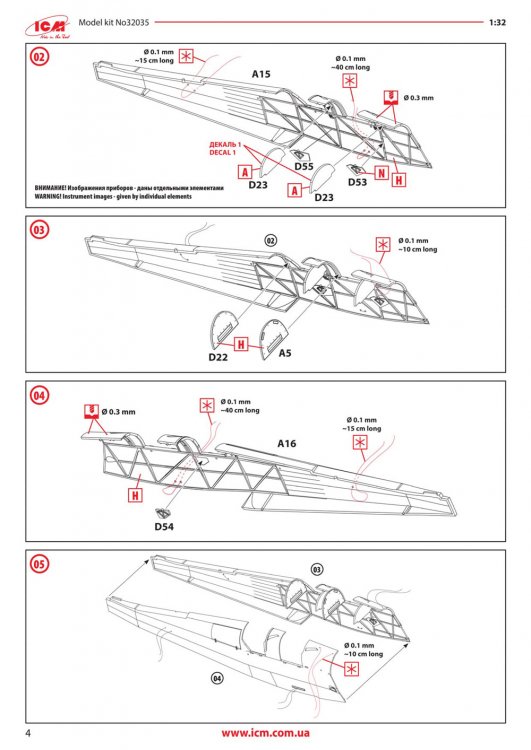
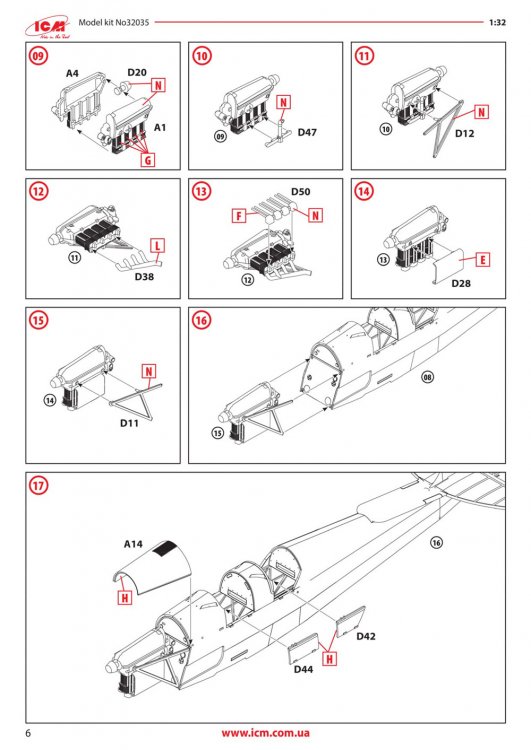
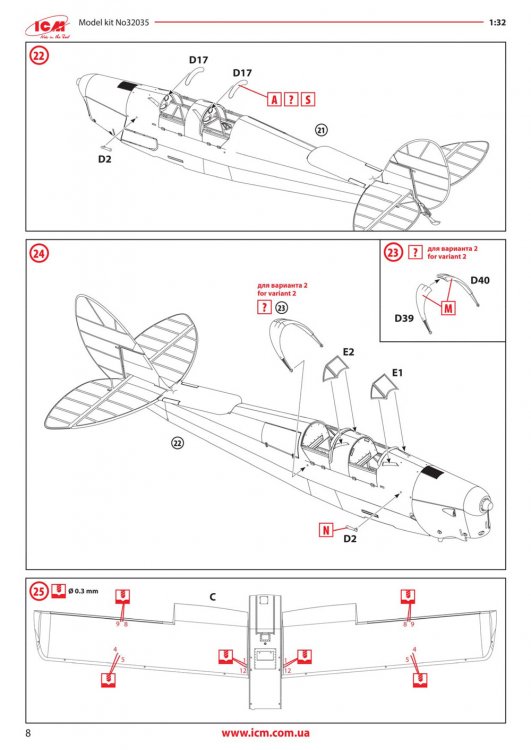
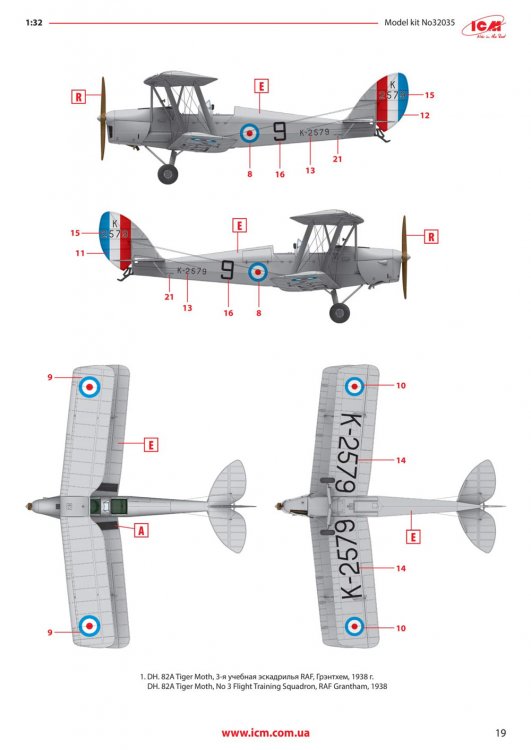
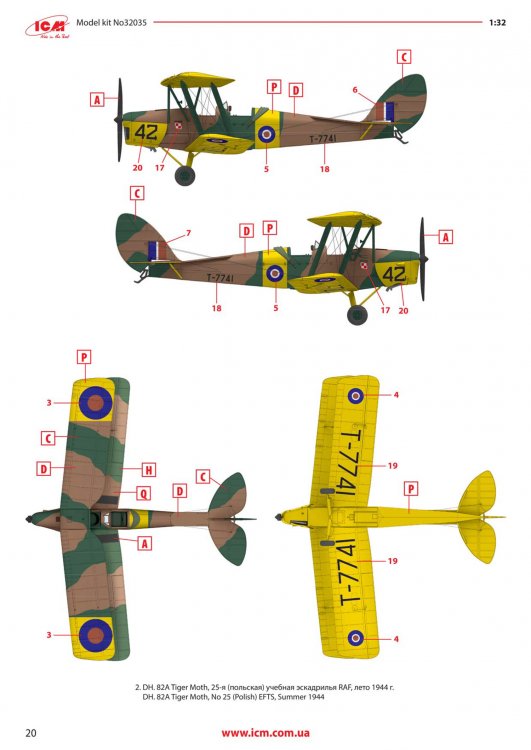
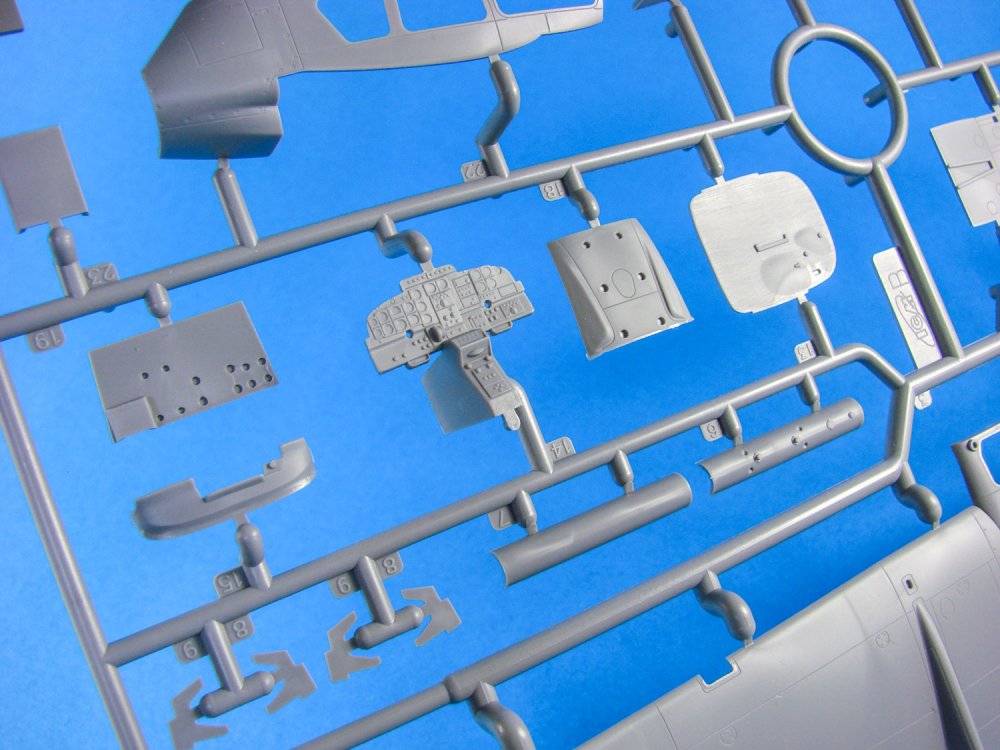
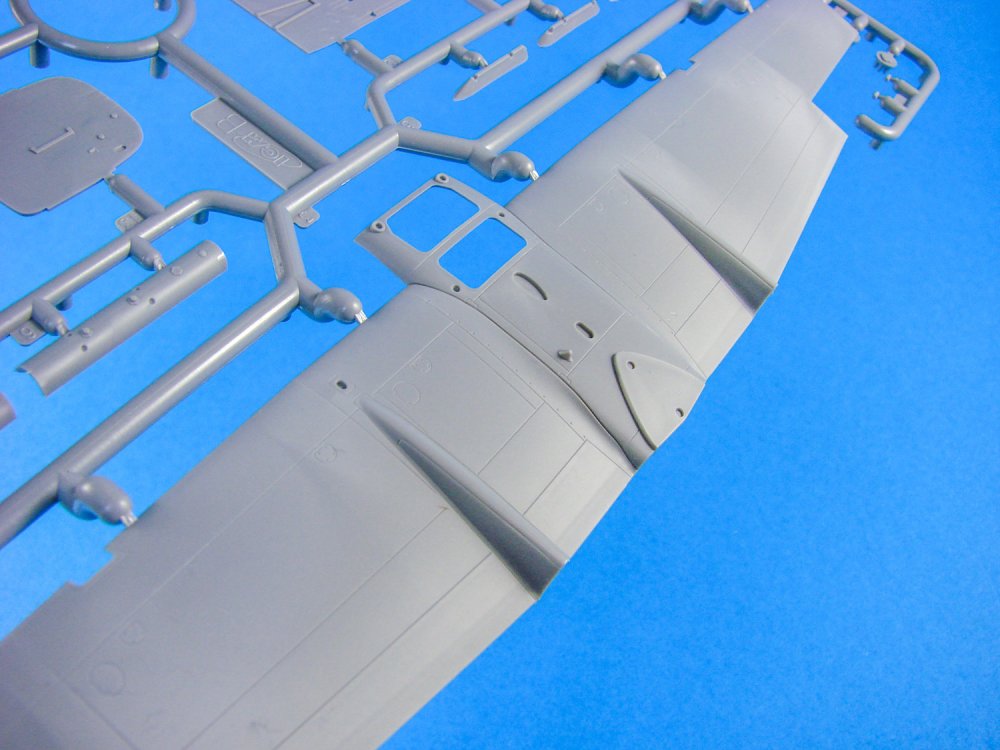
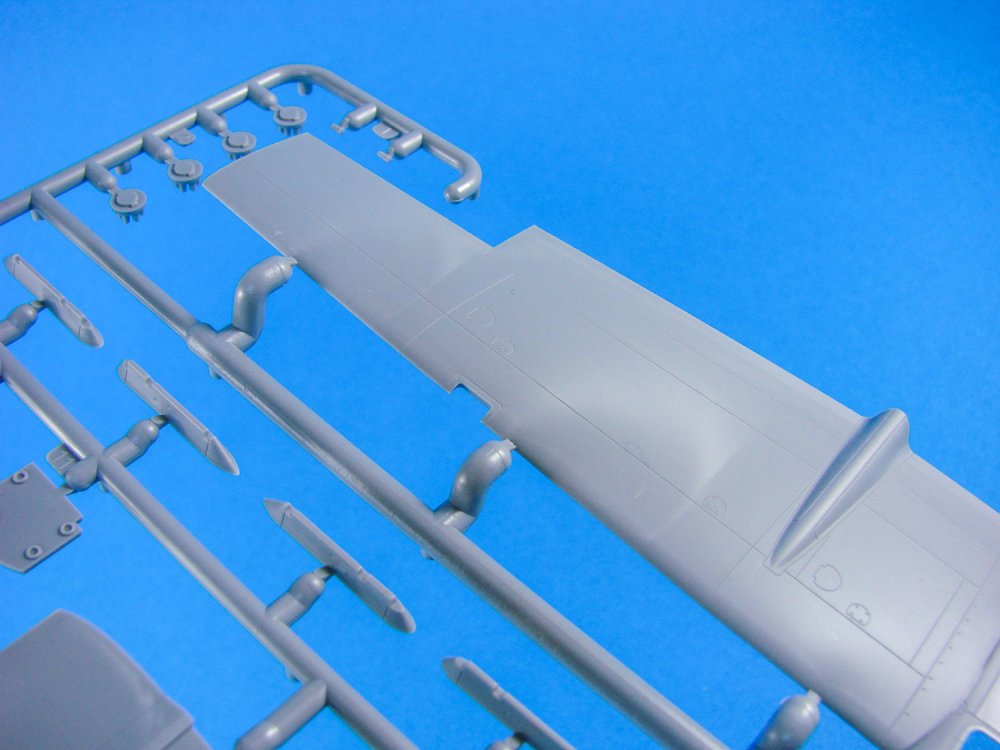
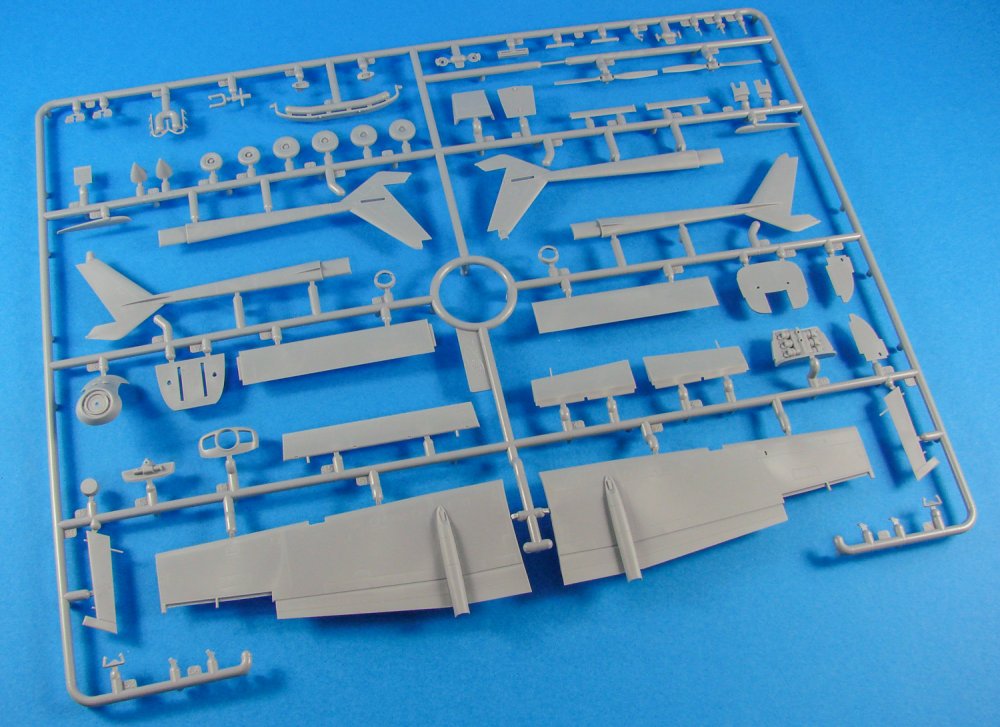
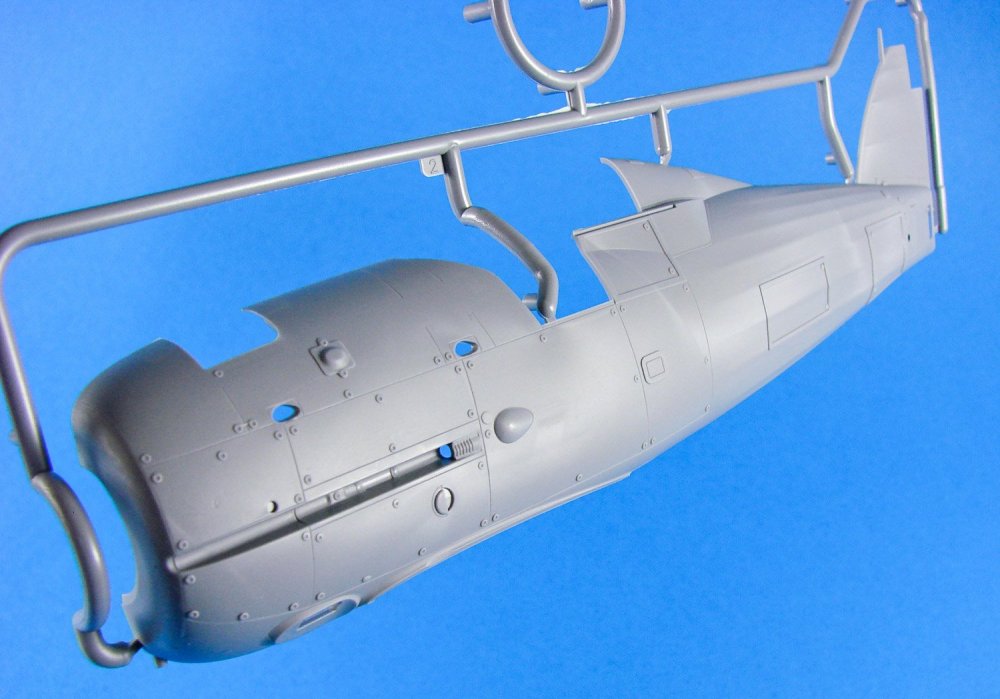
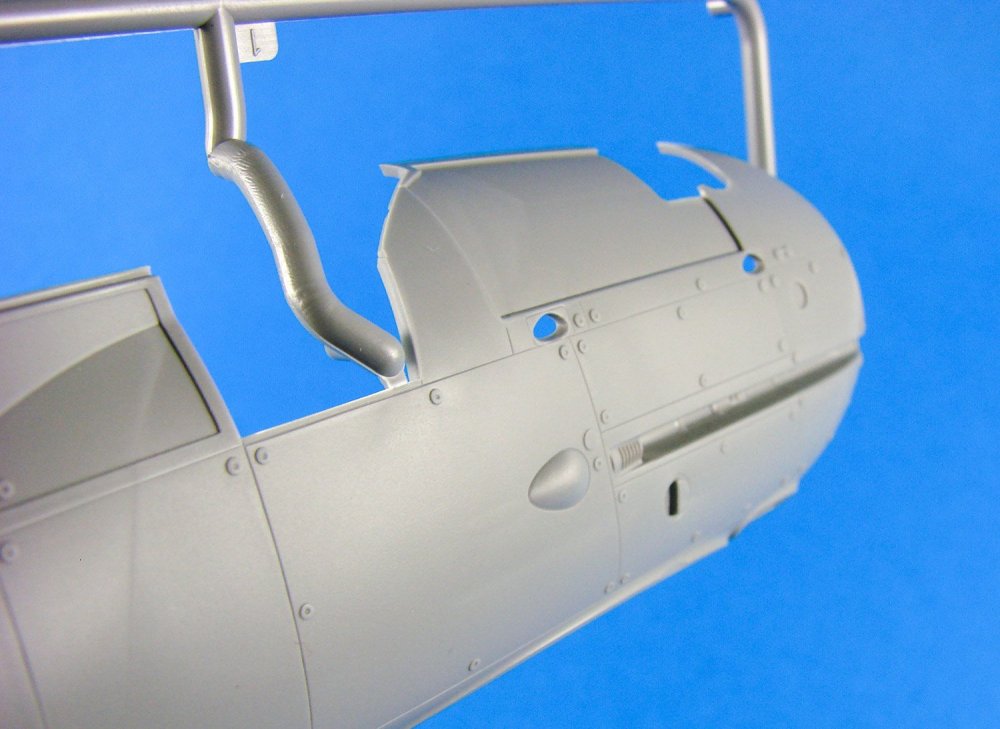
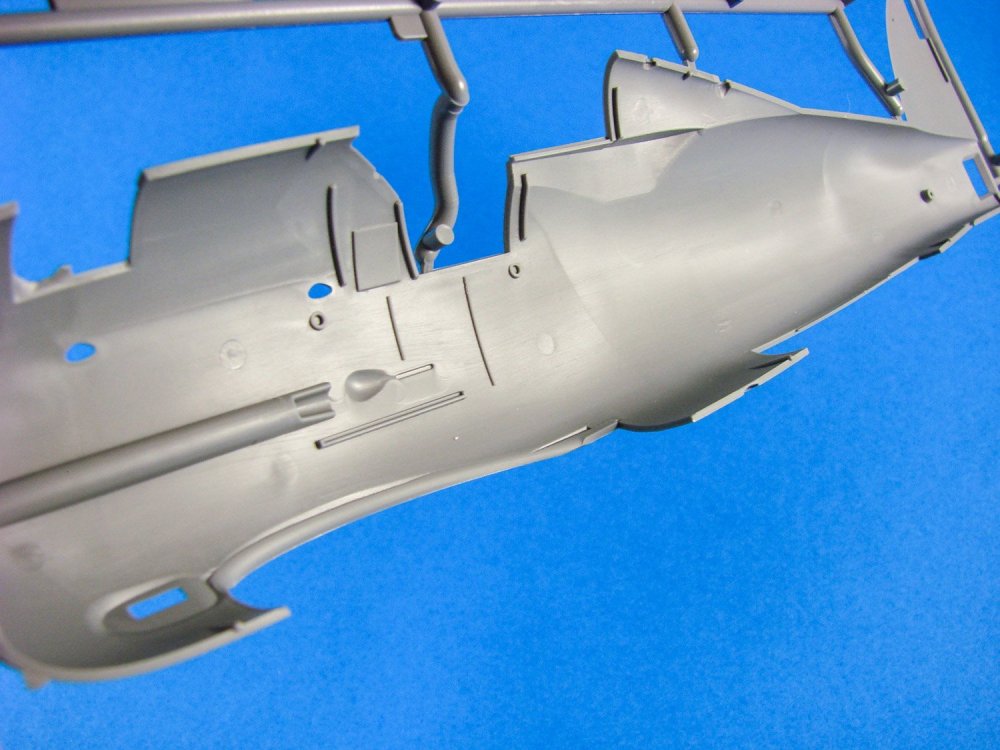
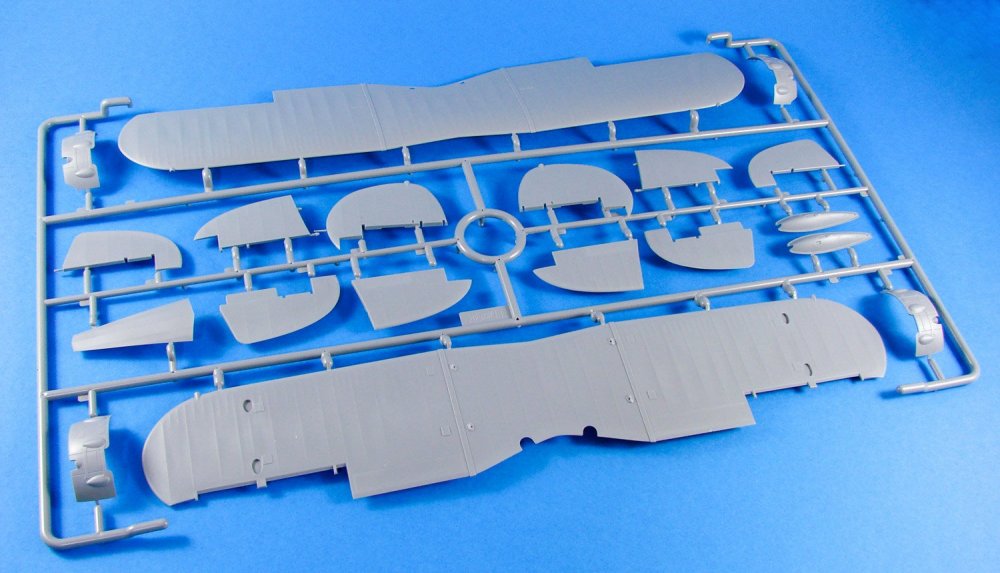
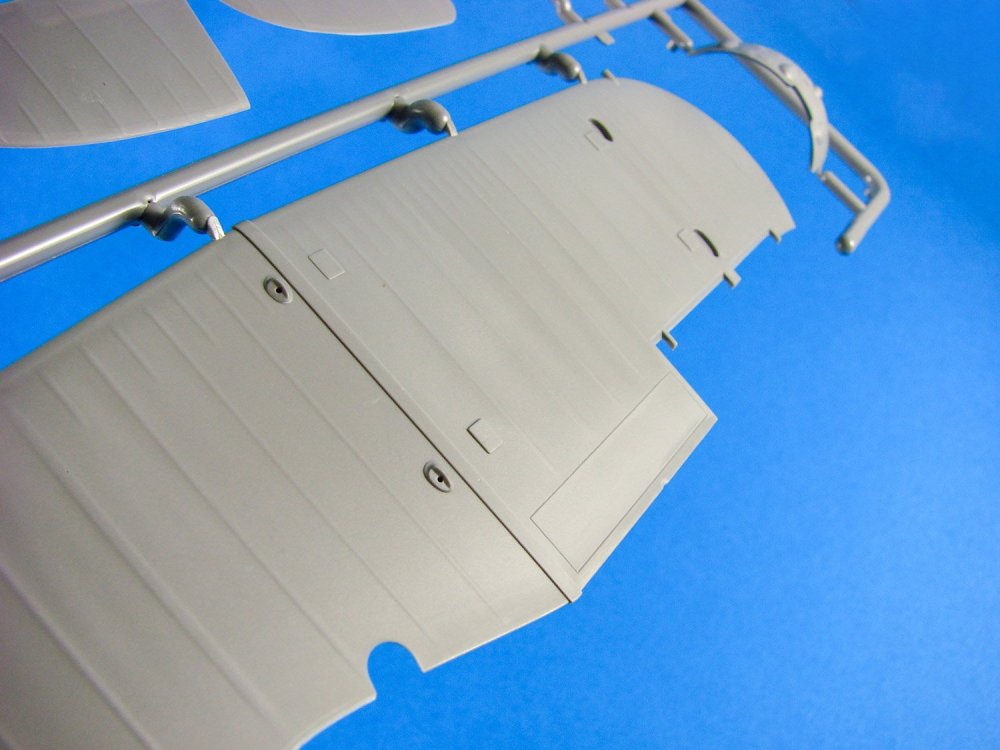
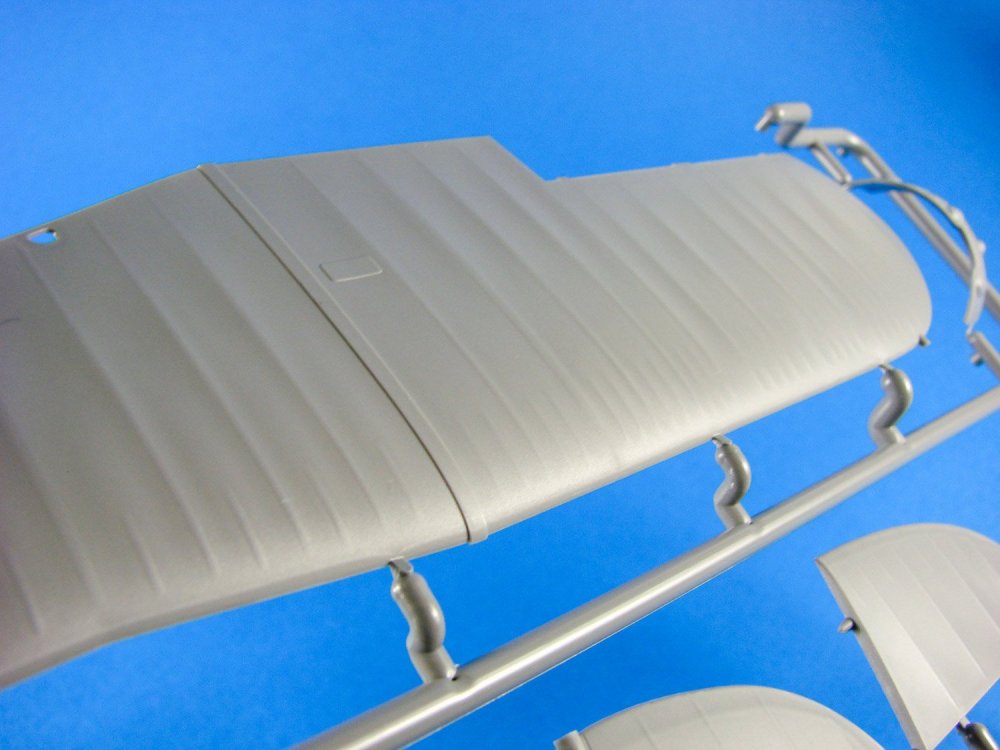
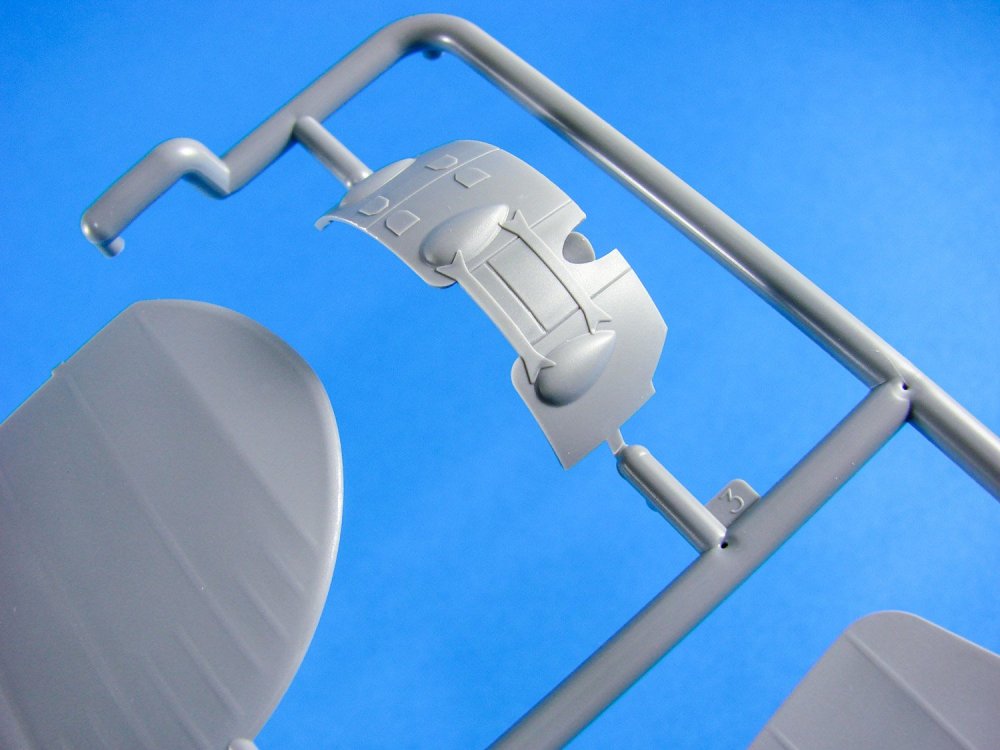
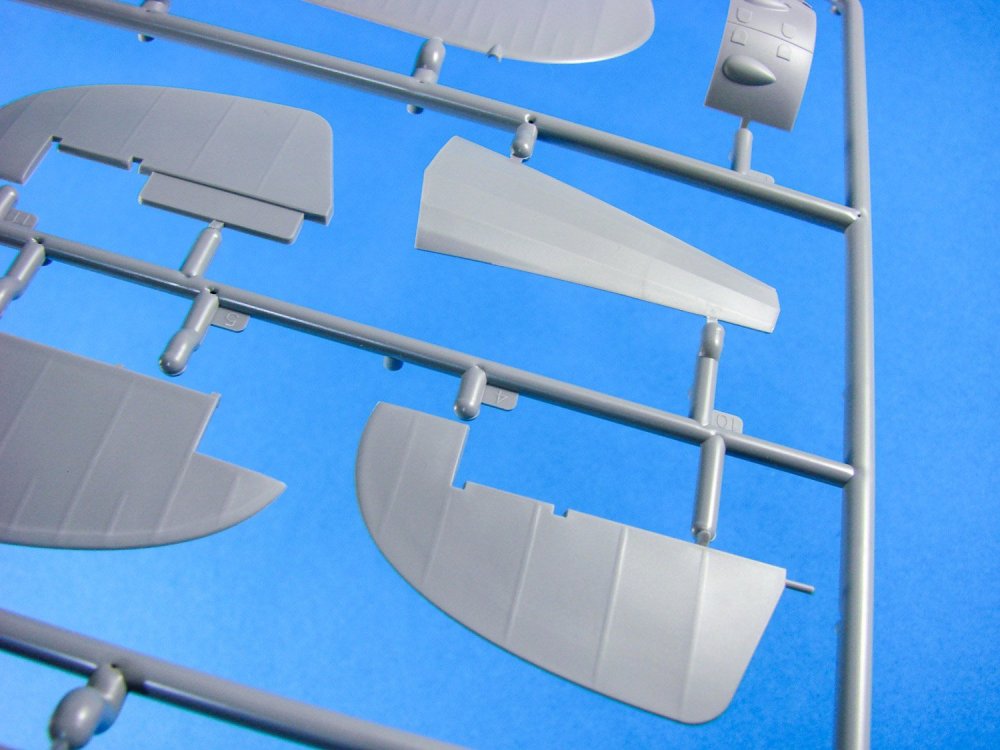
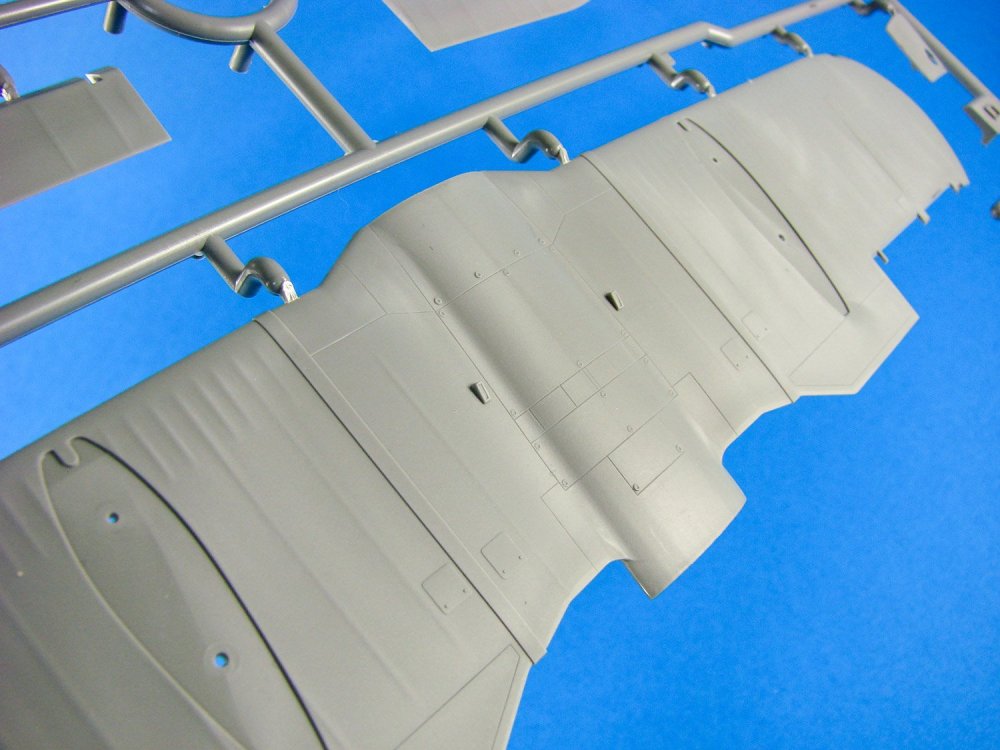
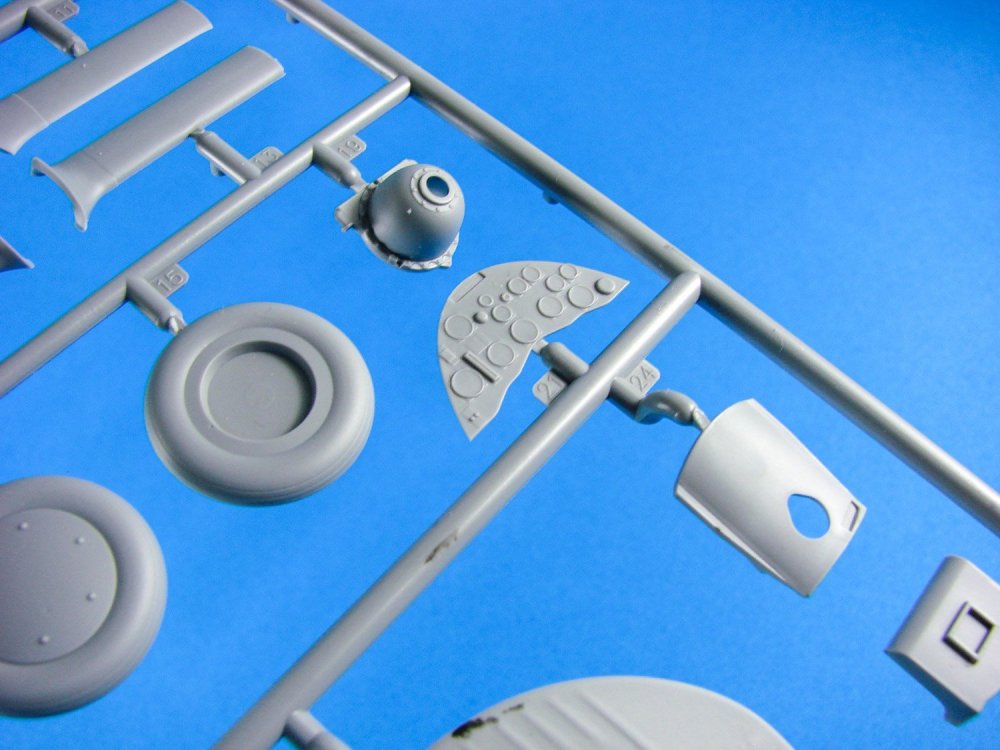
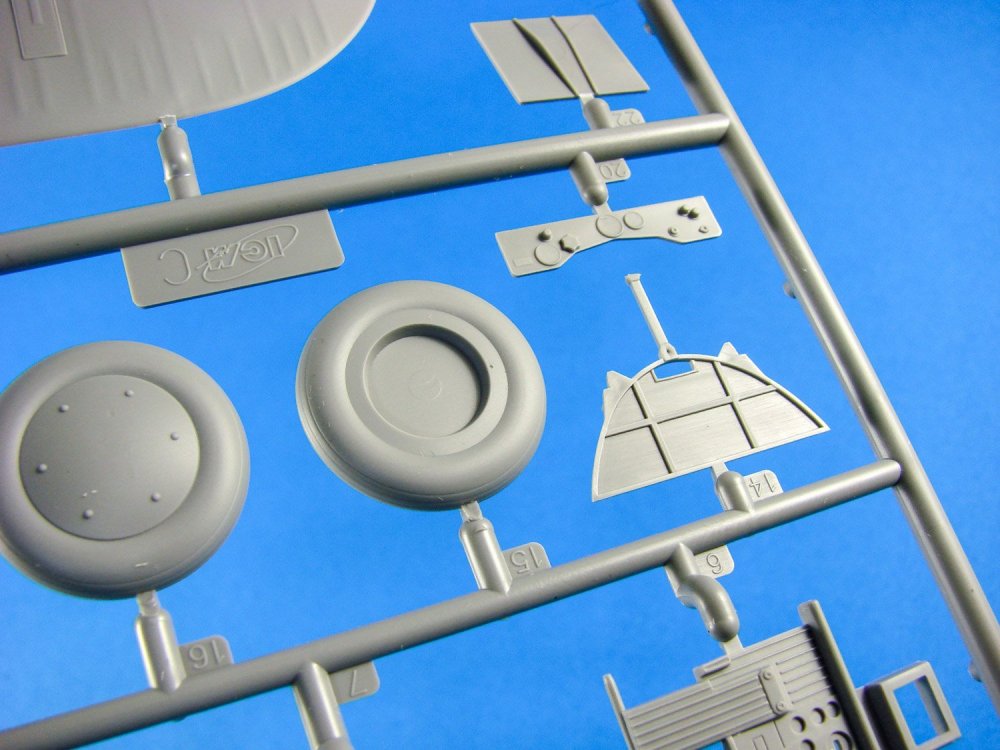
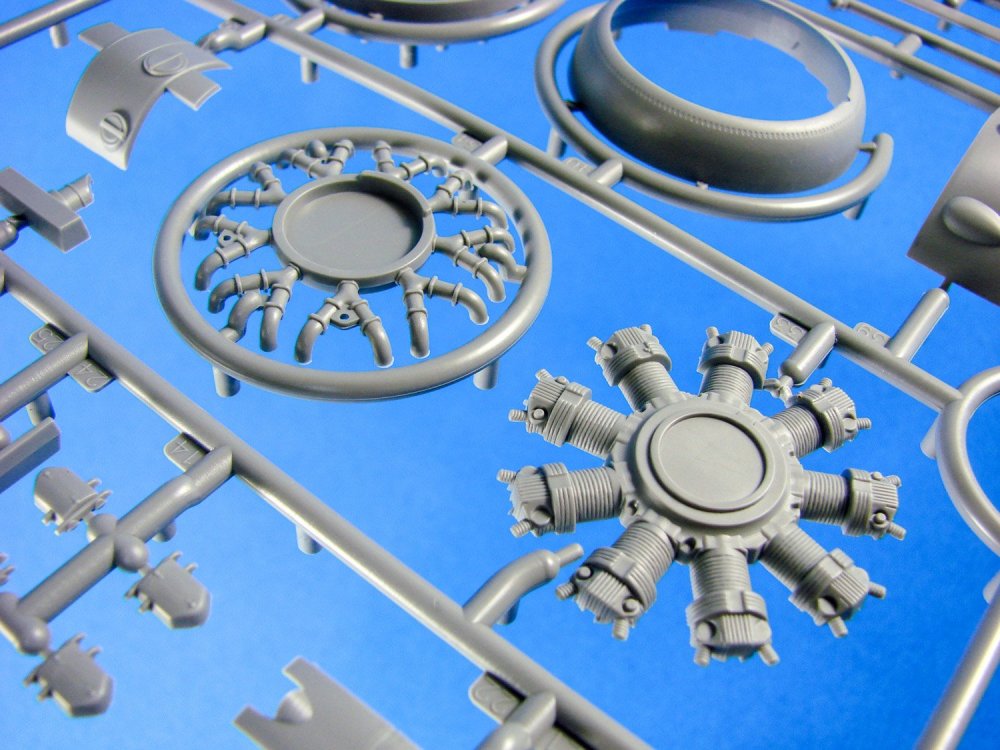
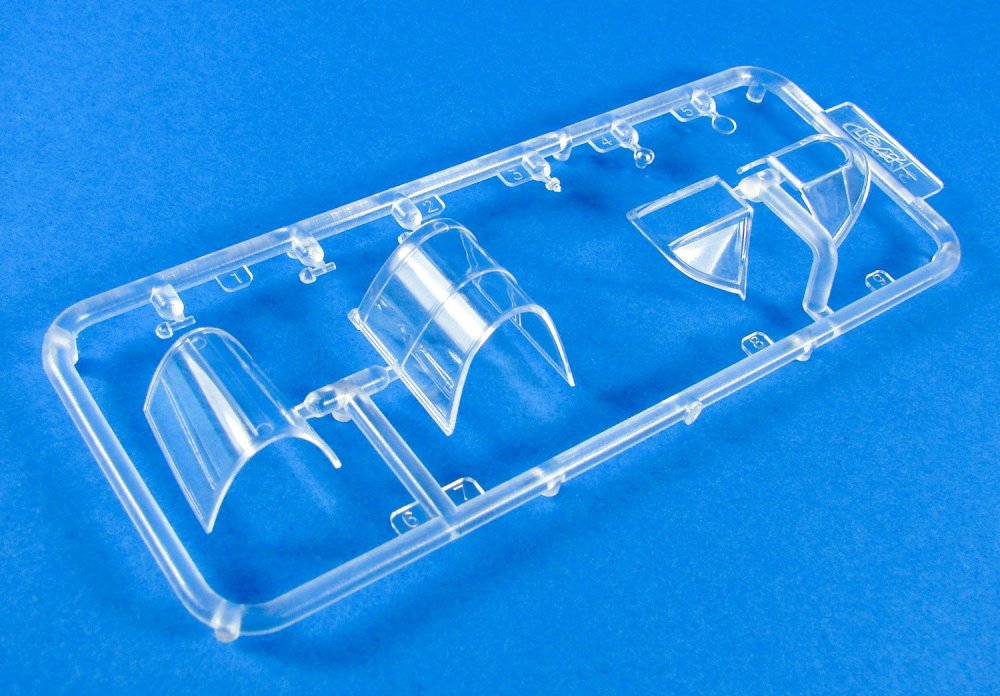
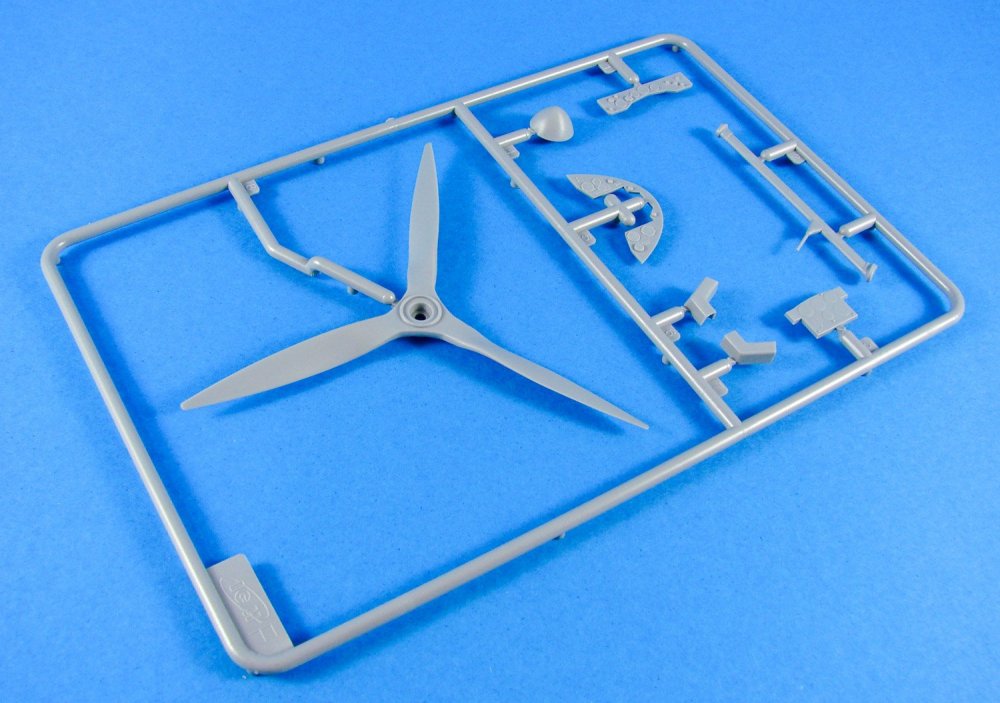
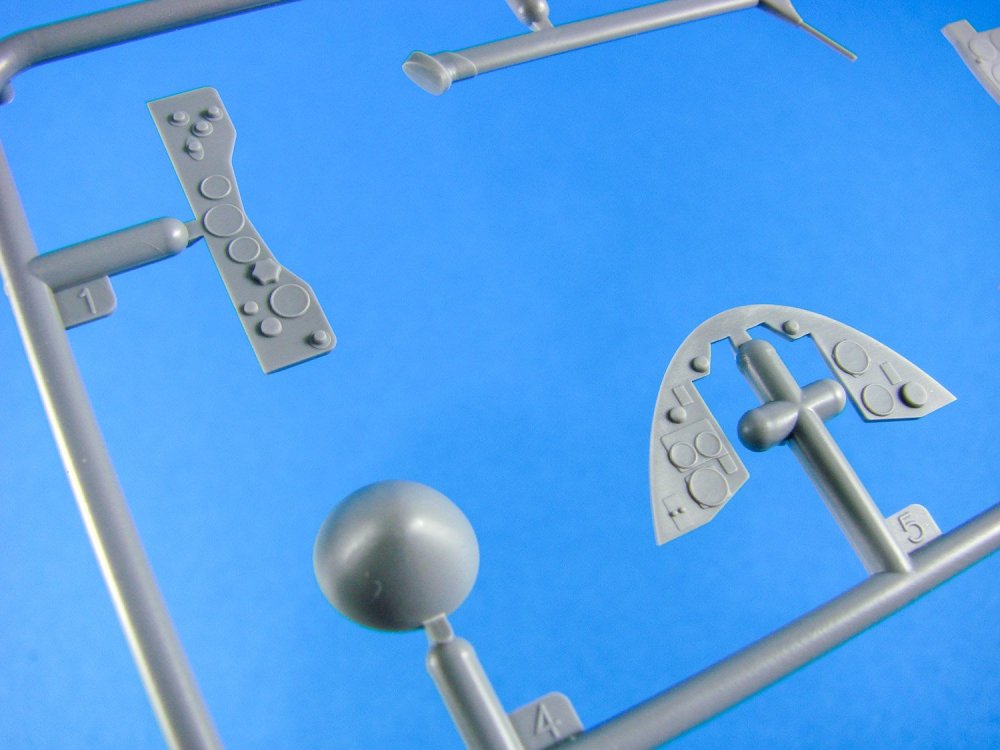
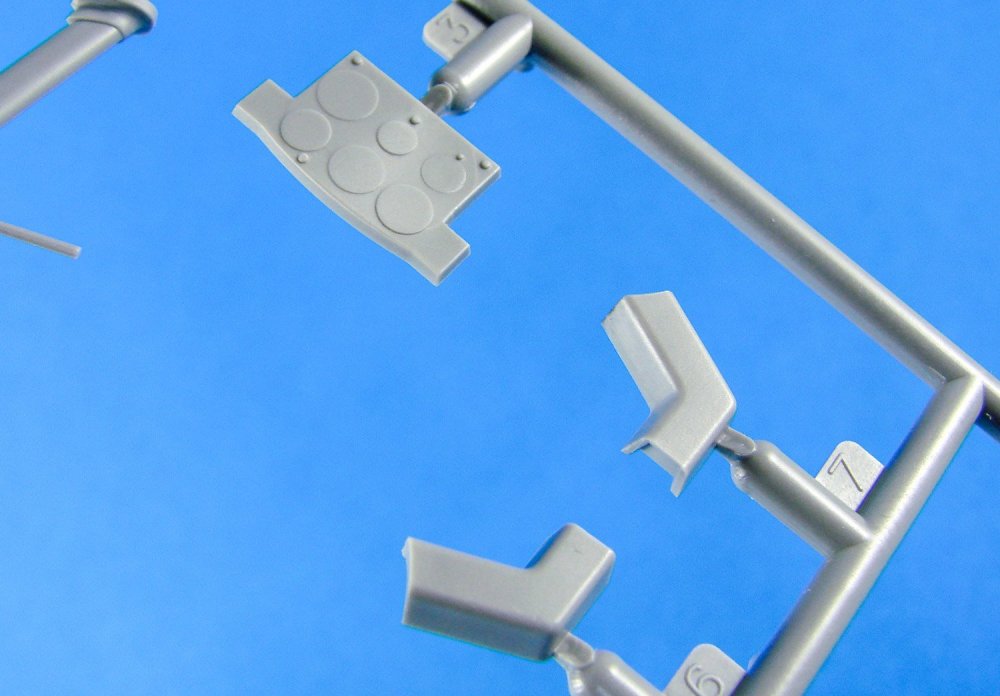
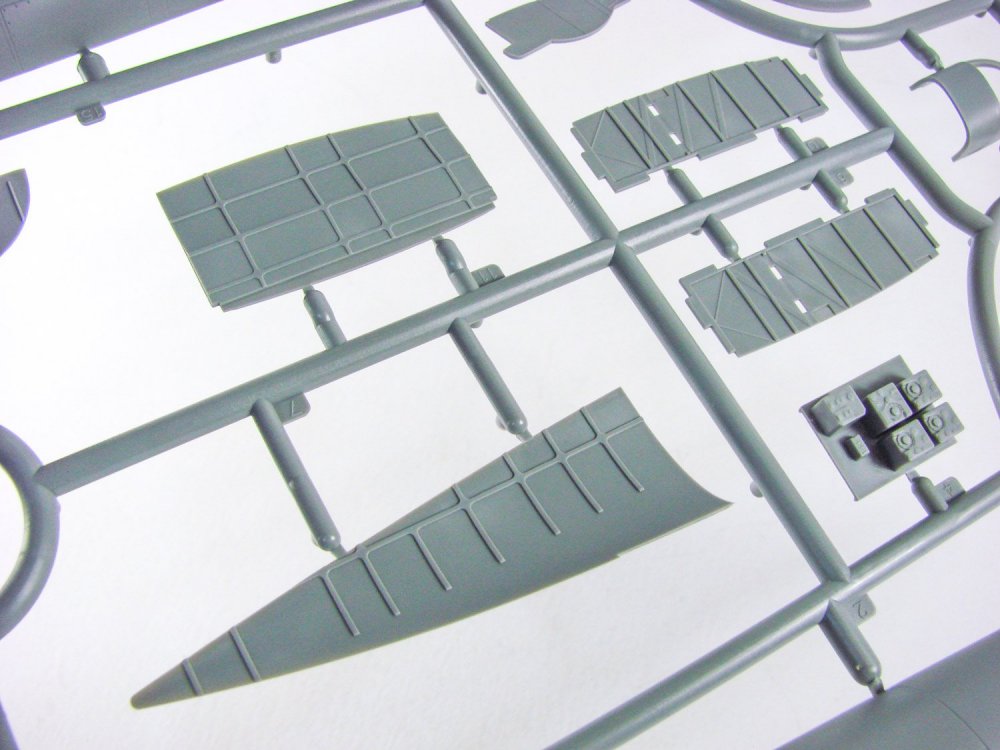
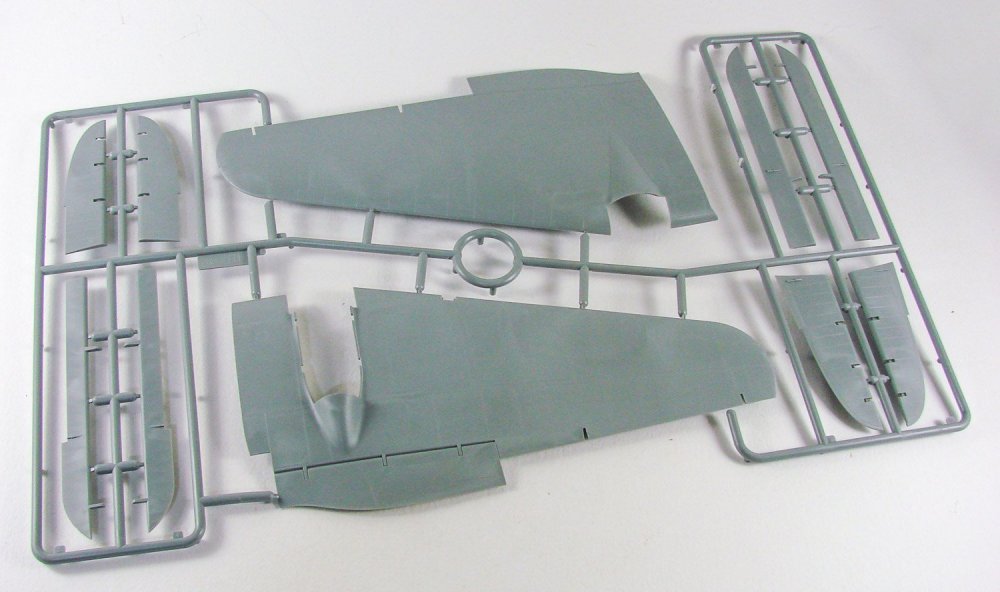
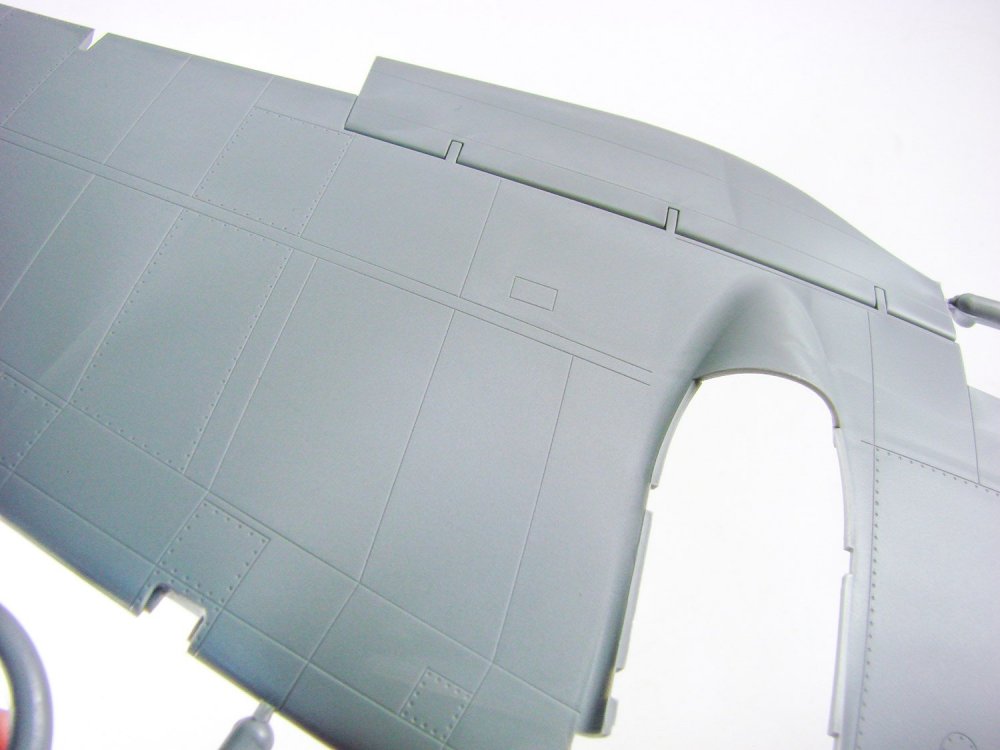
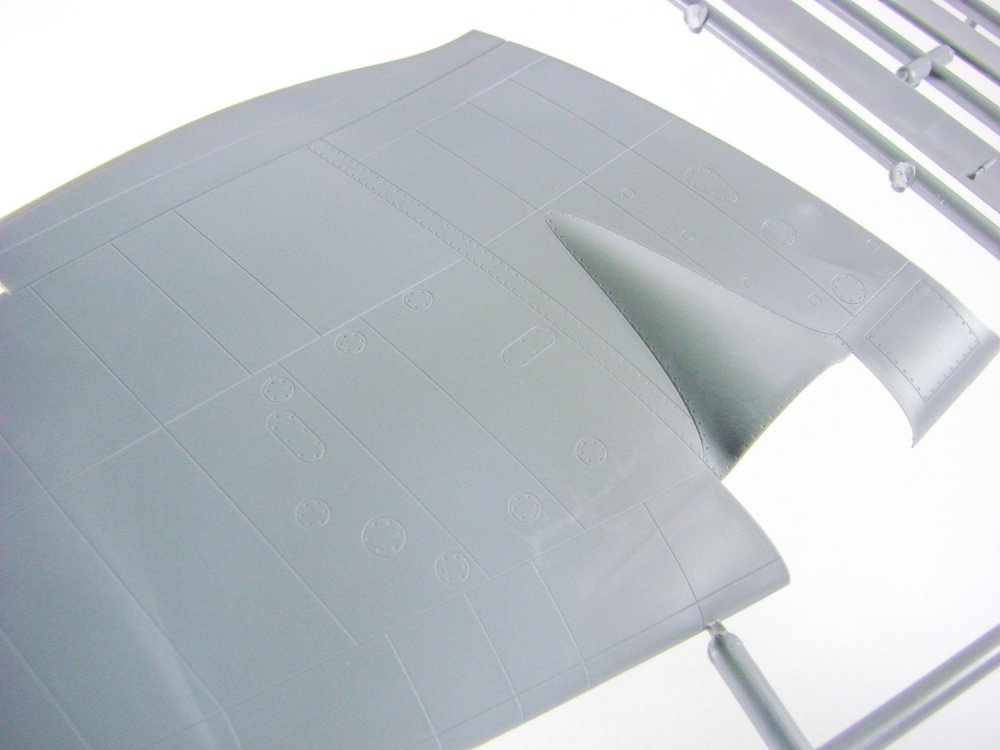
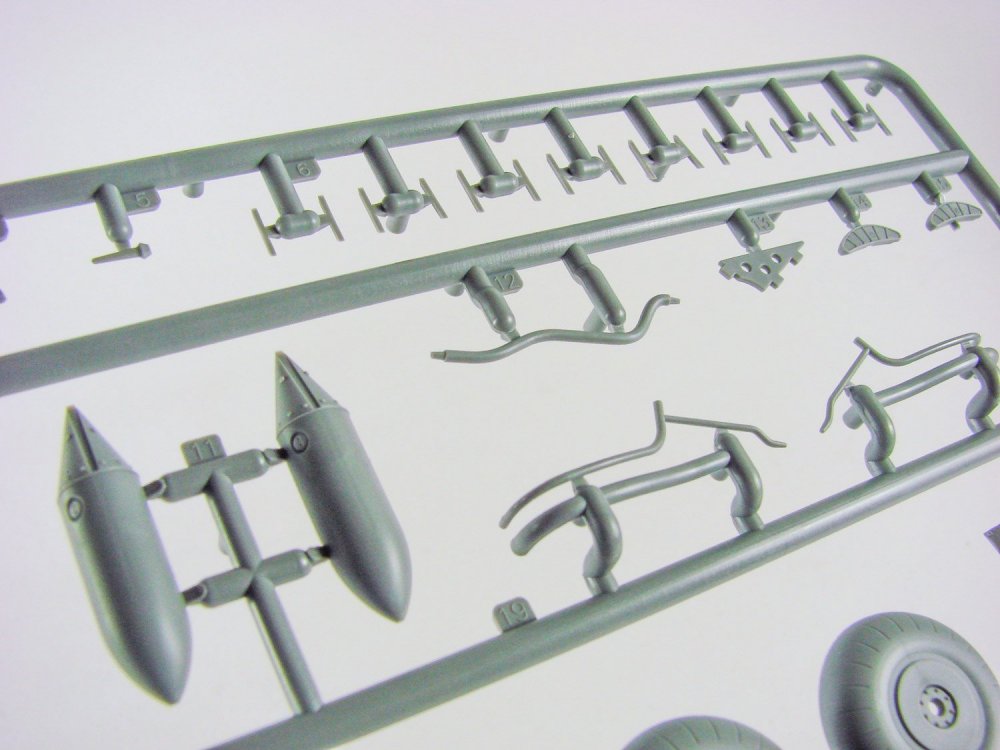
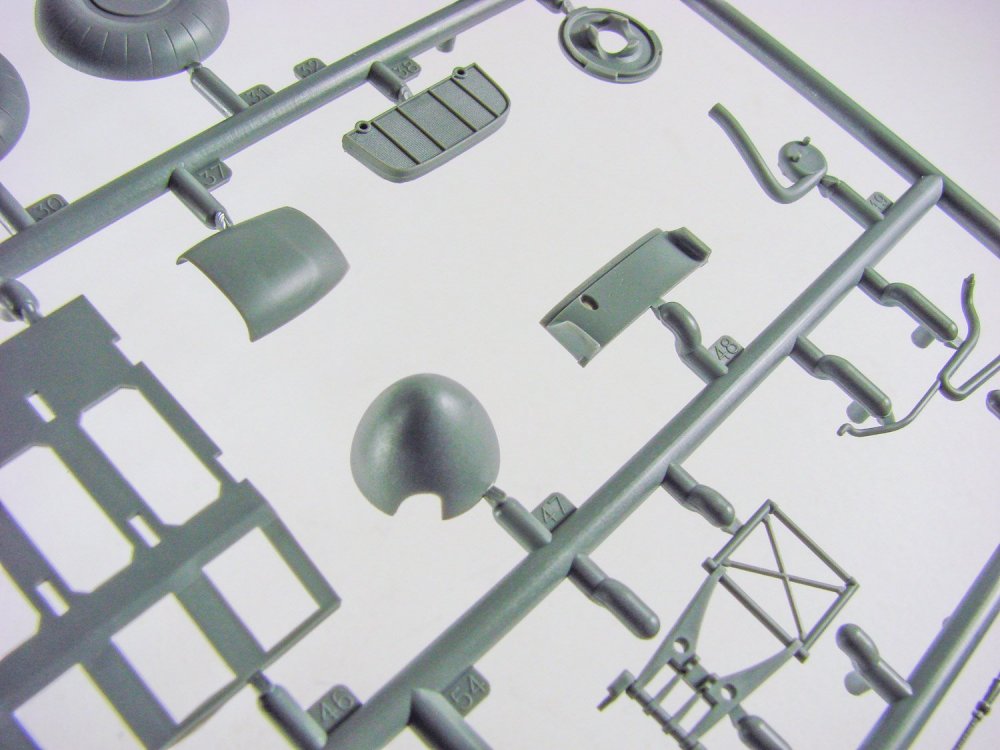
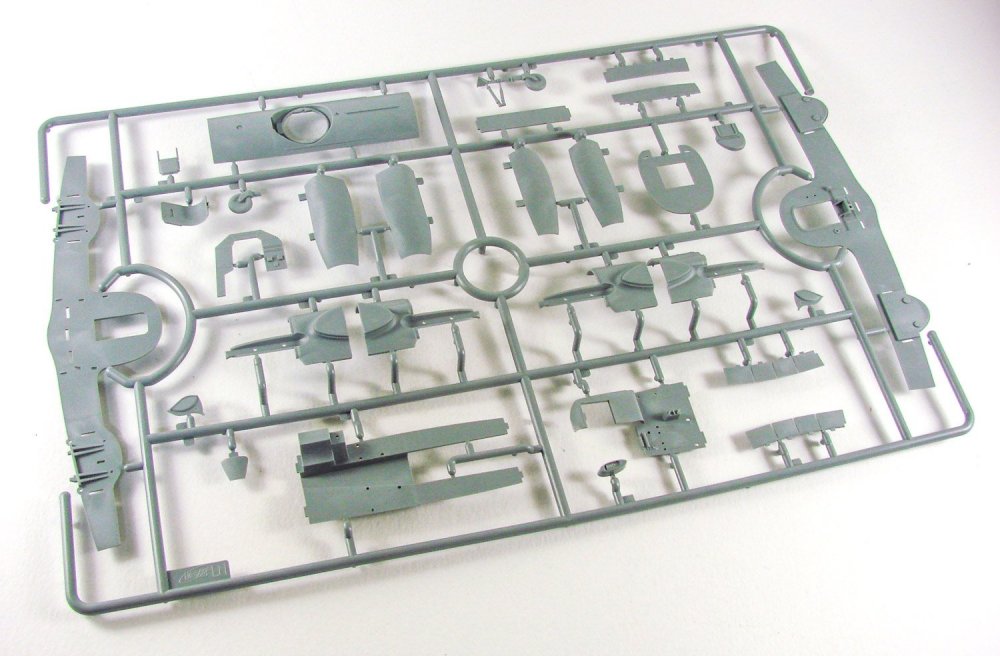
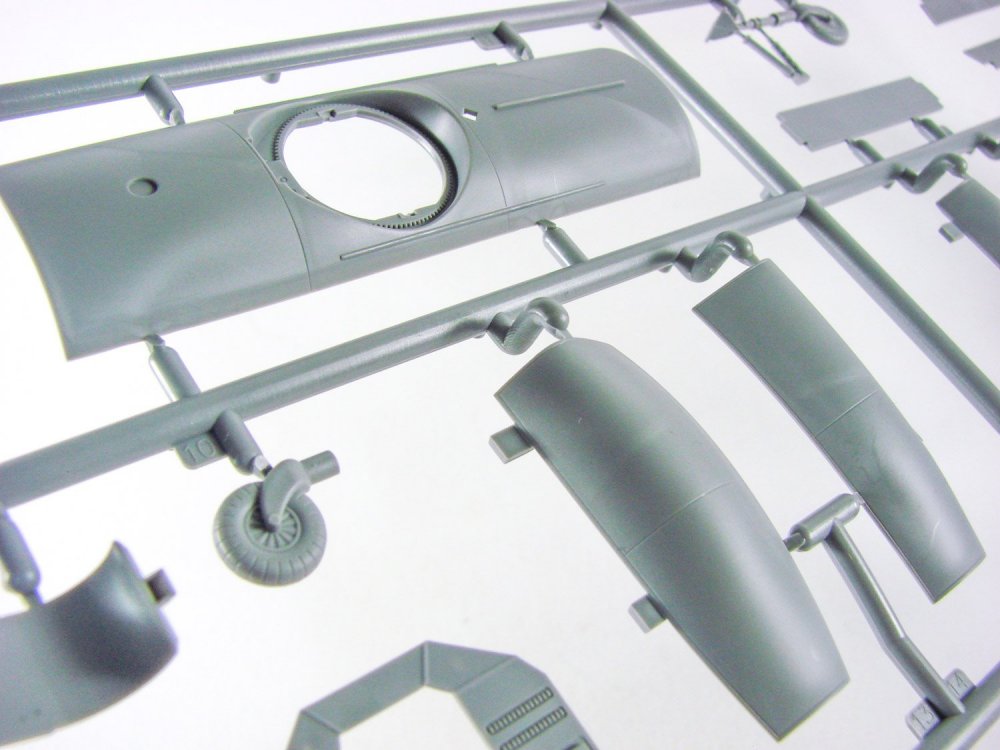
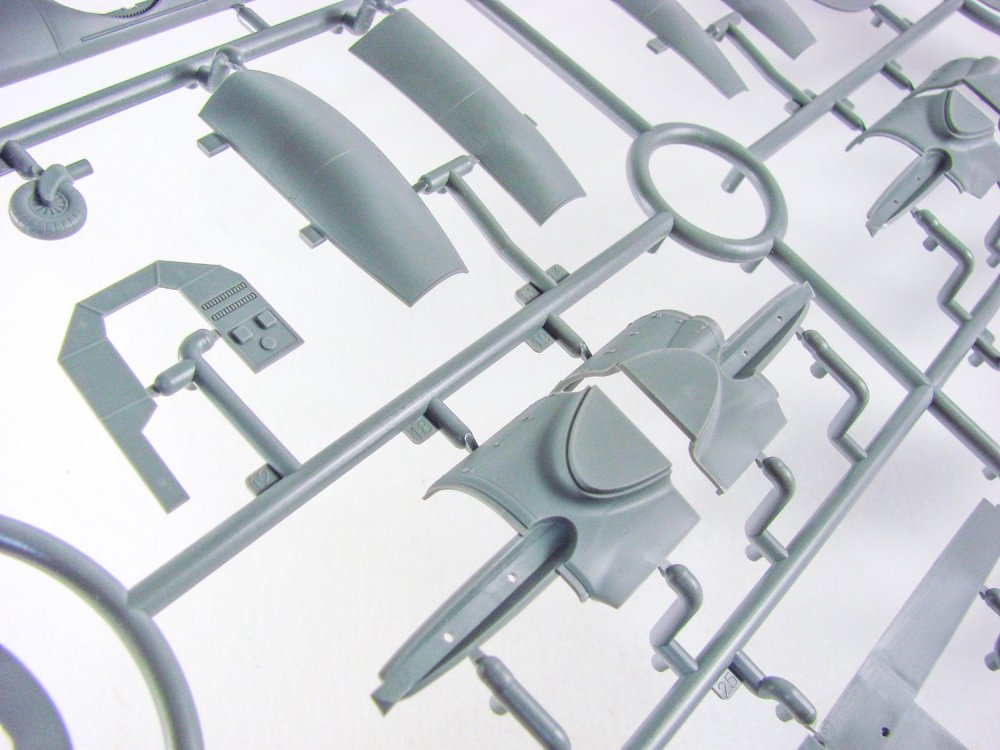
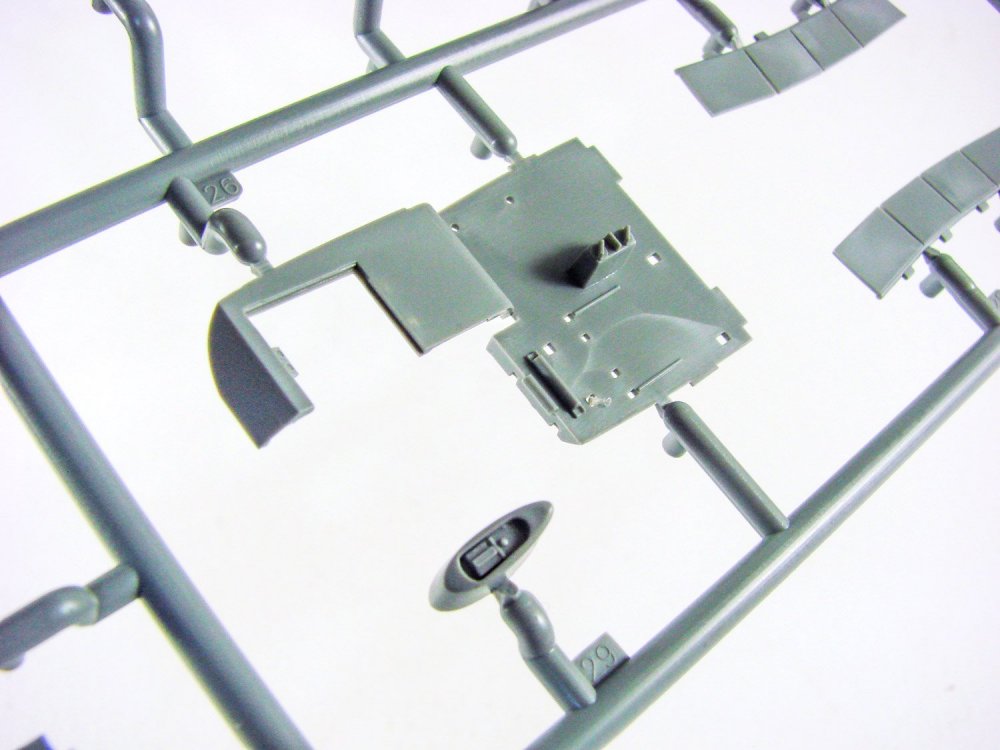
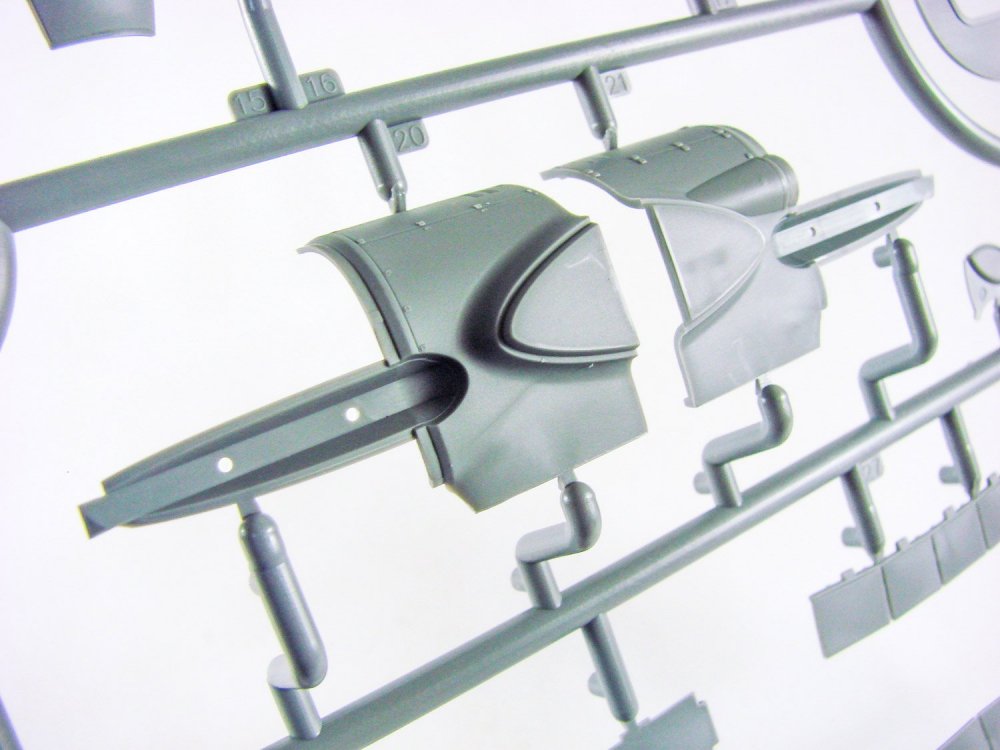
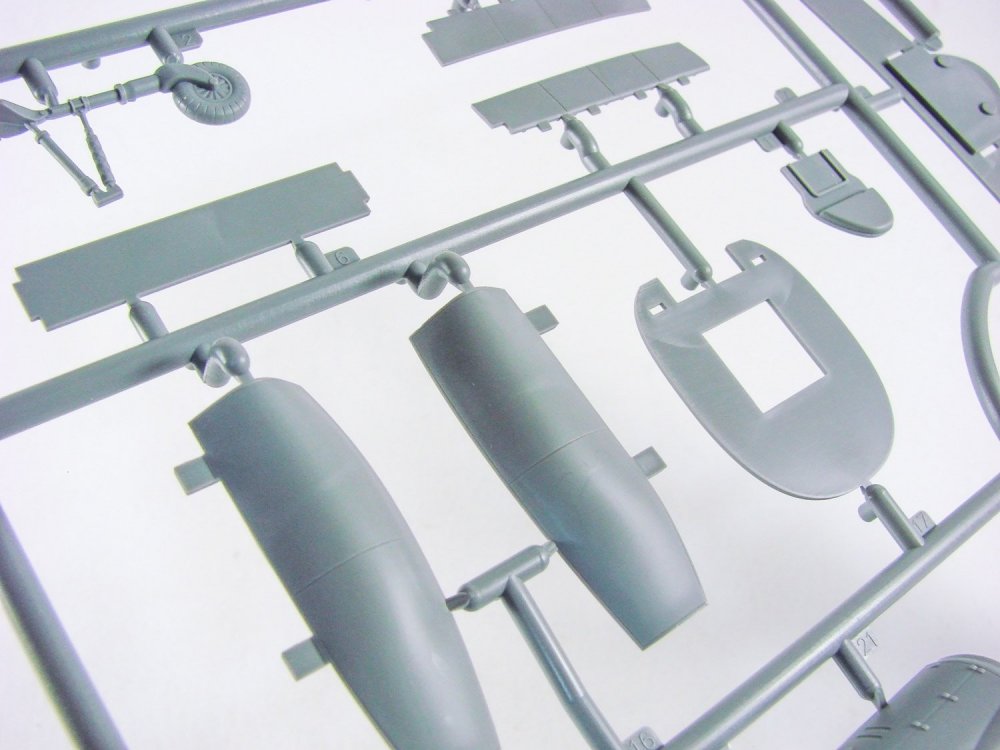
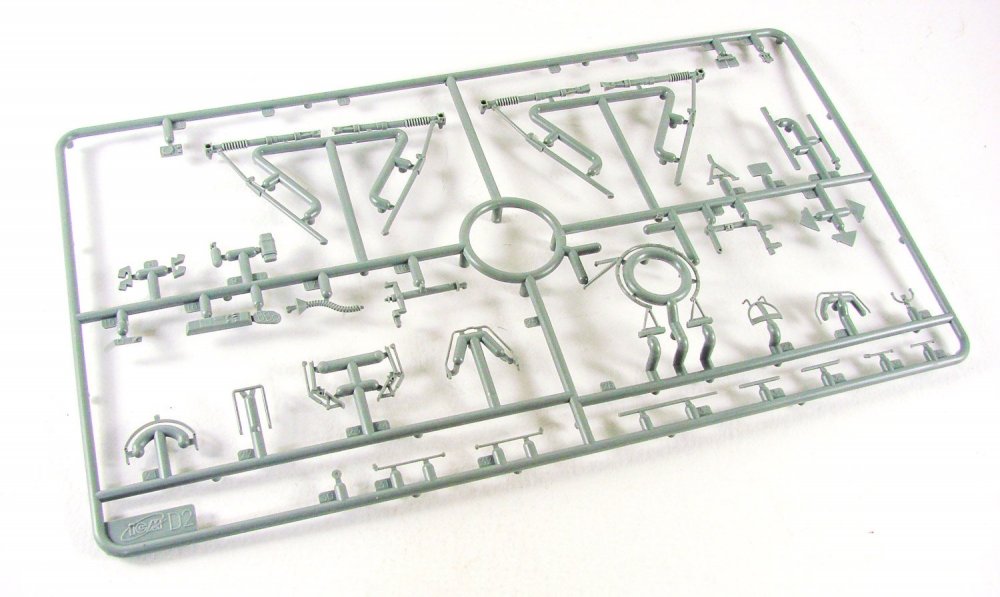
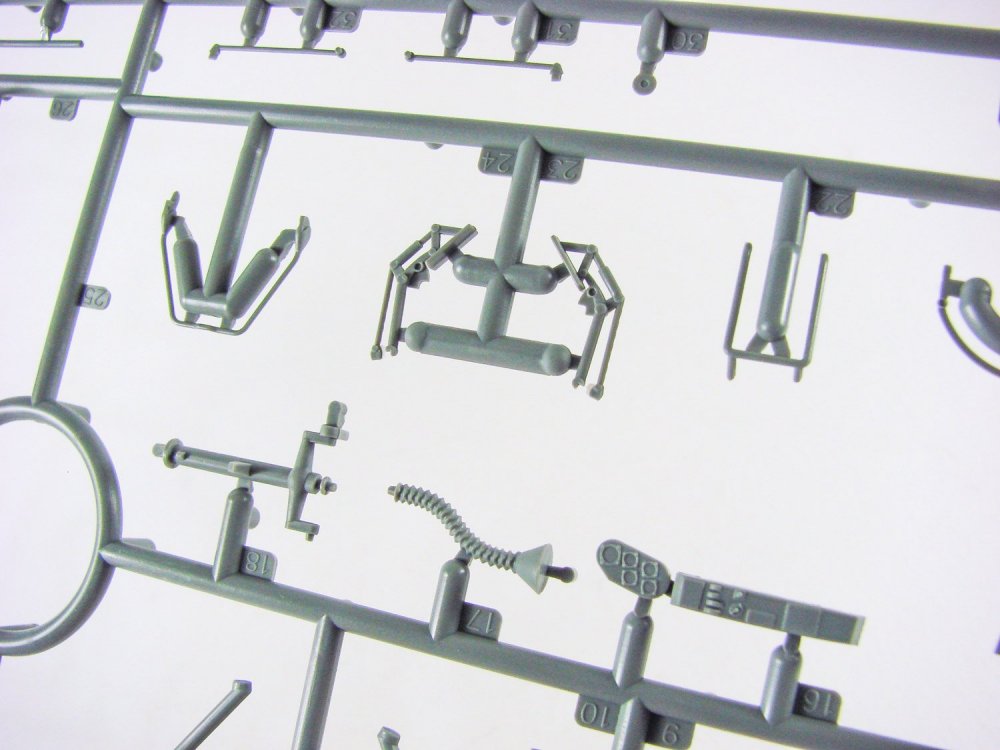
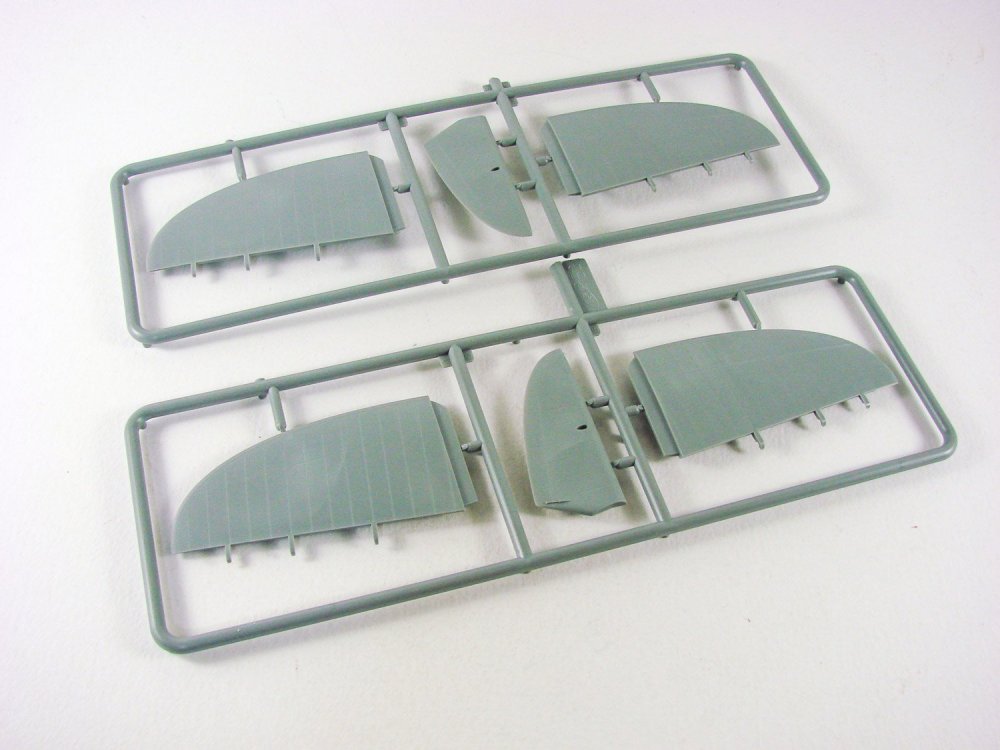
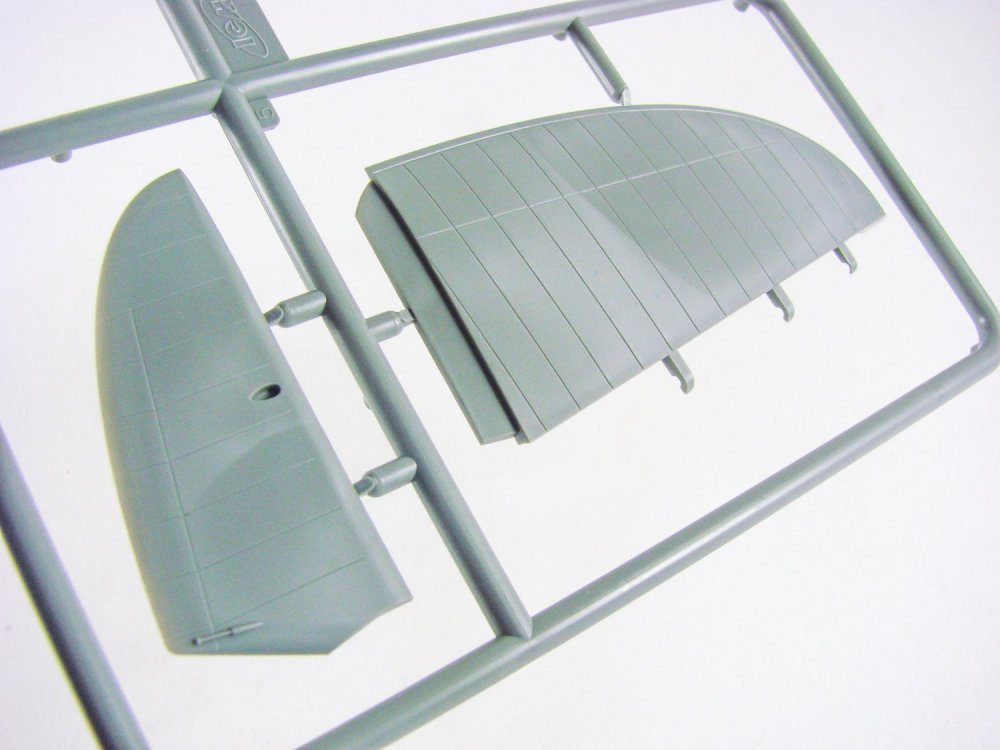
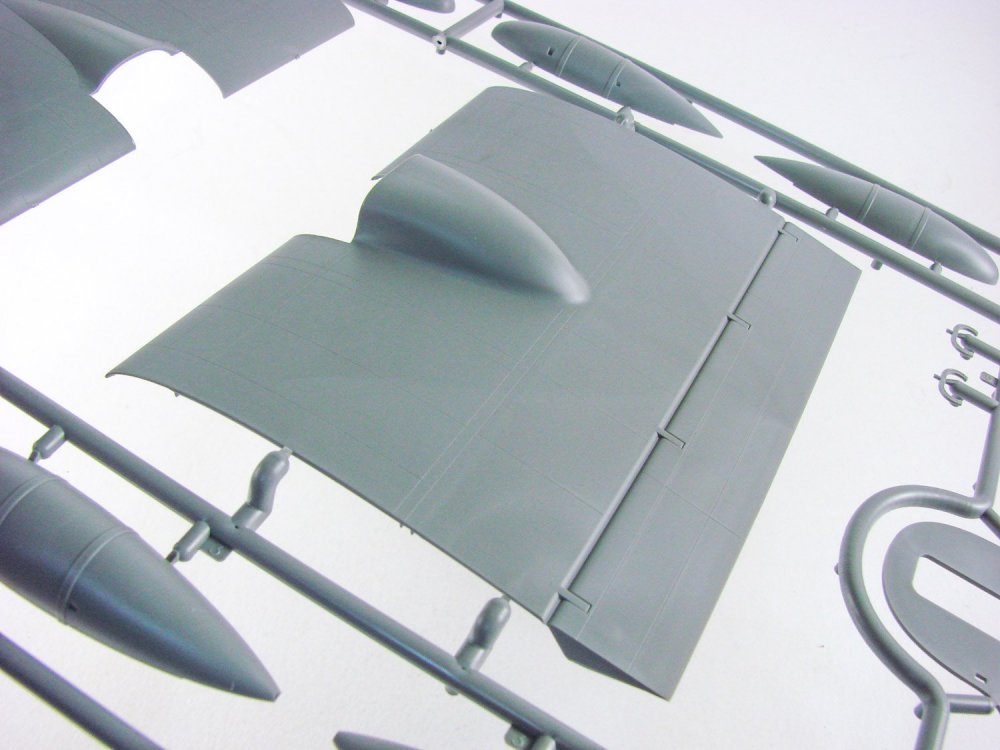
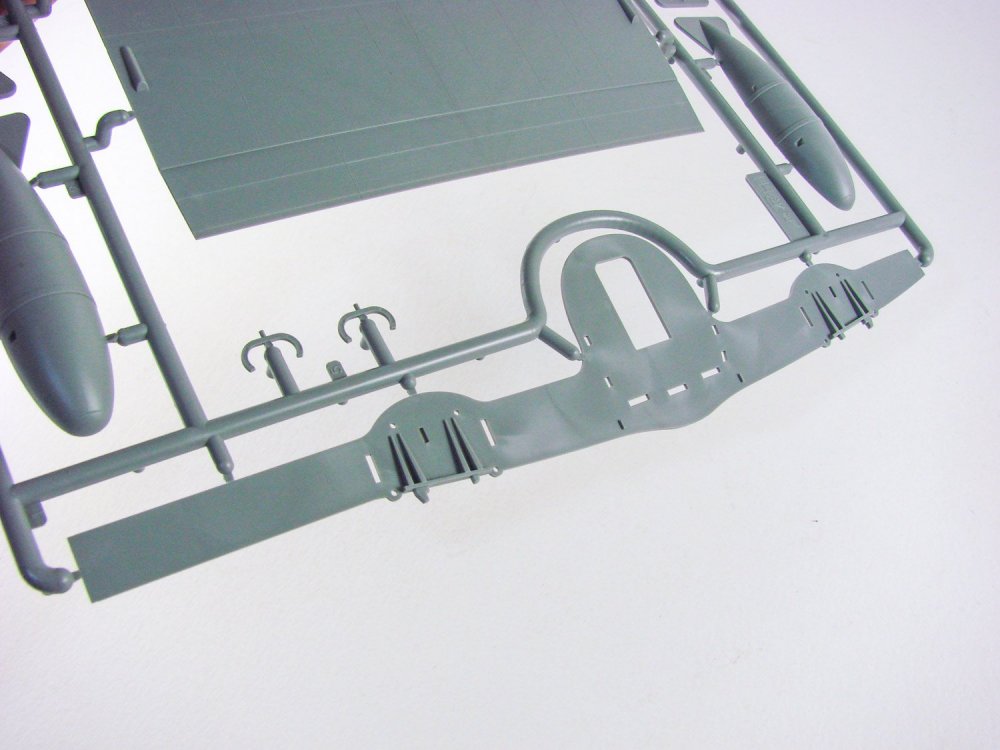
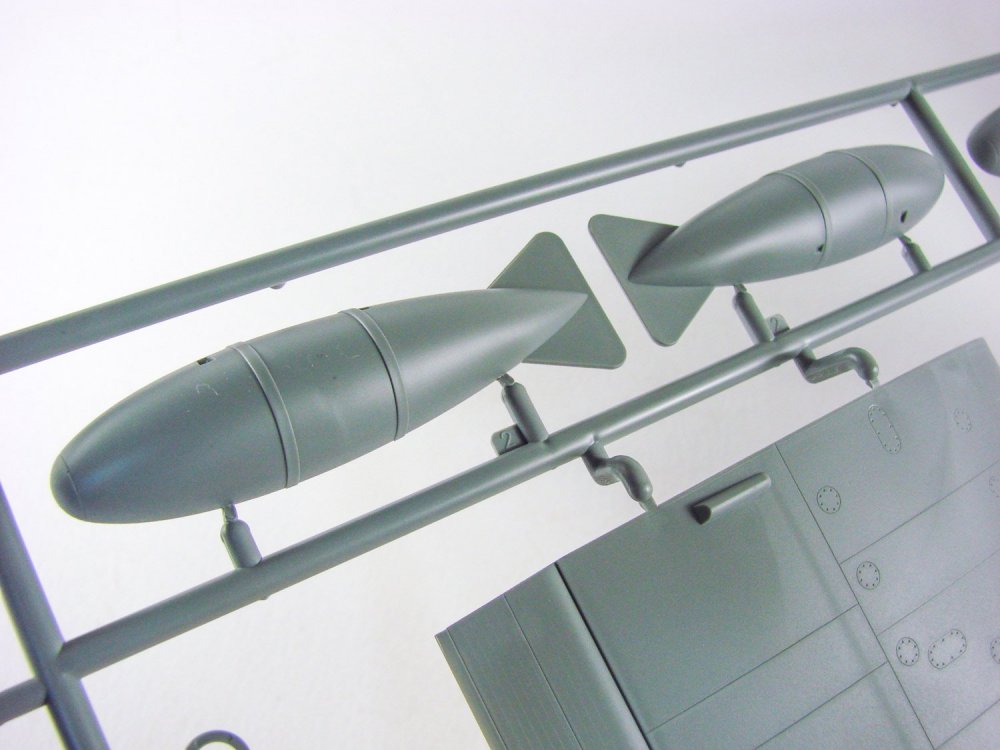
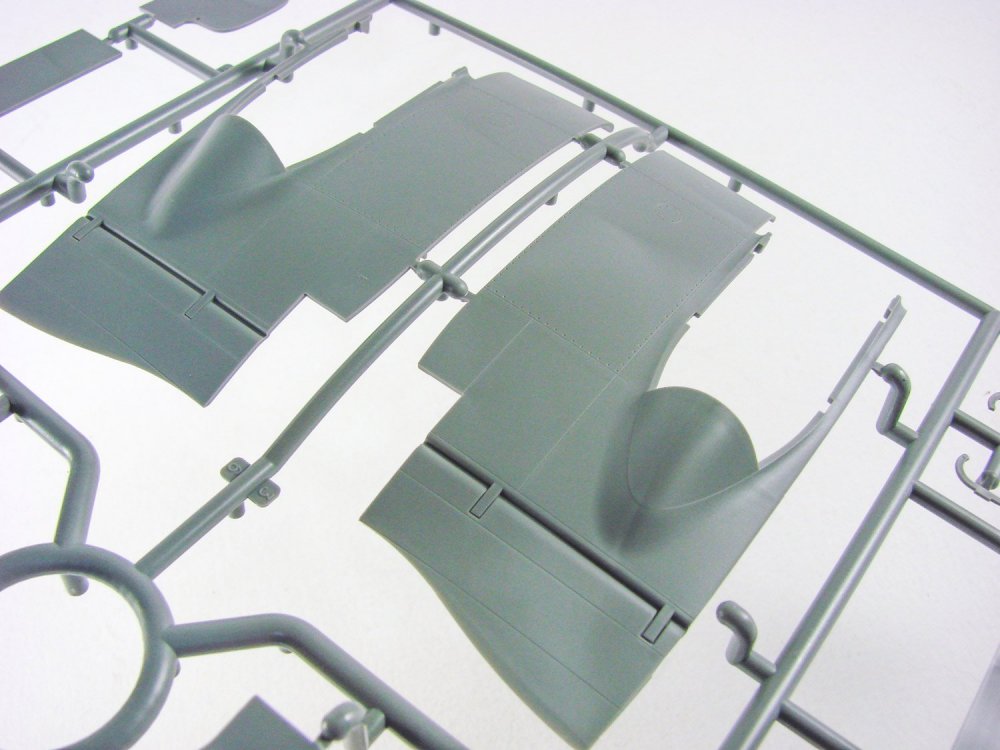
1:32 DH.82a Tiger Moth ICM Catalogue # 32035 The de Havilland DH.82 Tiger Moth is a 1930s British biplane designed by Geoffrey de Havilland and built by the de Havilland Aircraft Company. It was operated by the Royal Air Force (RAF) and many other operators as a primary trainer aircraft. In addition to the type's principal use for ab-initio training, the Second World War saw RAF Tiger Moths operating in other capacities, including maritime surveillance and defensive anti-invasion preparations; some aircraft were even outfitted to function as armed light bombers. Photo by Jim Hatch The Tiger Moth remained in service with the RAF until it was succeeded and replaced by the de Havilland Chipmunk during the early 1950s. Many of the military surplus aircraft subsequently entered into civil operation. Many nations have used the Tiger Moth in both military and civil applications, and it remains in widespread use as a recreational aircraft in several countries. It is still occasionally used as a primary training aircraft, particularly for those pilots wanting to gain experience before moving on to other tailwheel aircraft. Many Tiger Moths are now employed by various companies offering trial lesson experiences. The kit ICM’s new Tiger Moth kit is the first fully new-tool 1:32 injection moulded kit since Matchbox released theirs, back in 1978. I actually loved that kit so much that I built it several times in the different incarnations it offered, such as floatplane etc. In fact, I still have an unbuilt kit from that time. Revell have also re-boxed that kit a couple of times over the last years, but it’s getting a little tricky to find now. To say I was pleased when this was released, was an understatement. As with ICM kits generally, this is packed into a bomb-proof, rigid corrugated card box with an integral folding lid. This is all then covered with a high gloss product sleeve showing a military training machine riding high over the English countryside. Got to love some evocative art! This scheme is actually one of two offered in this kit. More on that later. Inside the box, there are THREE light grey styrene sprues packed into a single clear, resealable plastic sleeve, and a single clear sprue in its own sleeve that’s then popped into the main one. With this release, all parts within are slated for use. A quick scan of the instructions also shows you that a series of small holes for rigging cables, needs to be first opened up on the fuselage before any work really begins. I’m always forgetting to do this, even on my current project. Work starts in the cockpit area, as tends to be standard. Here’s where this kit is immediately different to the old Matchbox, in that it doesn’t actually have a fairly reasonable interior. The inside cockpit walls have the various constructional formers and stringers moulded in situ, onto which various other details are then glued, such as the instrument panels, throttle etc. The cockpit floor is actually built onto the centre section of the lower wing and doesn’t fit into the fuselage until after the latter is closed up. There are more details than the old Matchbox kit, admittedly, but I still think there’s more that should be in the cockpit than is provided here, having flown in a Tiger Moth myself, and also having built the 1:48 Airfix with the CMK internals. However, it’s definitely a starting position from which to add more if you wish. One real omission here are seatbelts, but that’s fairly common to ICM kits, and if you’re like me, you’ll try to find something suitable, such as fabric belts anyway. The fuselage is moulded with separate entry doors on both port and starboard, so those can be posed in any position you want, and a fairly reasonable engine is also supplied. A little lead wire and some TLC, and that should look really neat. Engine cowl panels can also be posed too, but you’ll need a short length of plastic rod to act as a panel prop. ICM has moulded both the stabiliser and elevator, and the fin and rudder, as single piece units, but this should be easy to fix if you wanted to pose them dynamically. The tail skid is also moulded to the rudder, as is correct. A nice touch is also the inclusion of the anti-spin panel that was fitted to the Tiger Moth from 1942 onwards, and typically retrofitted. The original section without this is also included. Despite the Moth having such thin wings, ICM has managed to mould them as traditional upper and lower sections, with the lower top, and upper bottom full-span sections. More holes will need to be drilled out for rigging points, and these are clearly shown on the instructions. ICM also suggest the lower top wing is fitted to the airframe before the upper panels themselves are attached, and the same for the lower bottom panels. I’m not too keen on that idea as I don’t want to be removing seams etc. on a model where that wing is just connected via a few struts. I’m pretty sure it can be built conventionally. It appears the only reason for this is fitting rigging wires (and perhaps tying them off within the wing itself). Surface details are really very nice, such as the rib and fabric, and the simple fuselage effect. Wings are also moulded with separate leading-edge slats. I also think the DH logo on the outer wheel hubs is also superbly done. There is no option not to have that, so if you wished to model a different machine to the supplied decals, then you’ll have to remove that. Whilst no masks are supplied for the two windscreens, templates are included to help you make these. Plastic moulding quality is excellent, with no real issue with ejector pin marks and flash etc. and the clear parts are super-clear with nice framing. Decals A single decal sheet is included in this release. I feel this is either printed in-house or locally to ICM. Quality looks perfectly ok to me, with nice, thin printing, colour density and register. Carrier film is also minimal too. Instructions A 20-page manual is included, with colour-printed illustrations for the TWO schemes, printed at the back of the book. All drawings are easy to follow and reference both Revell and Tamiya colours throughout. The Moth is broken down into 50 easy to follow stages, and rigging is explained in the simplest of terms for those who may be wary of it. Two schemes are included: DH.82a Tiger Moth, No.3 Flight Training Squadron, RAF Grantham, 1938 DH.82a Tiger Moth, No.25 (Polish) EFTS, Summer 1944 Conclusion It’s certainly good to see another injection moulded Tiger Moth after all these years, and this does fit the bull nicely. I do feel that seatbelts could’ve been included and maybe the cockpit a little busier too, but in all, it’s a very nice release and not too expensive either. ICM certainly appears to have captured the lines of this beautiful aircraft, and doubtless it will look superb once done. Dig out a little reference and tart up that cockpit a little, and all should be good. My sincere thanks to ICM for the review sample seen here. EXTRA IMAGES


-
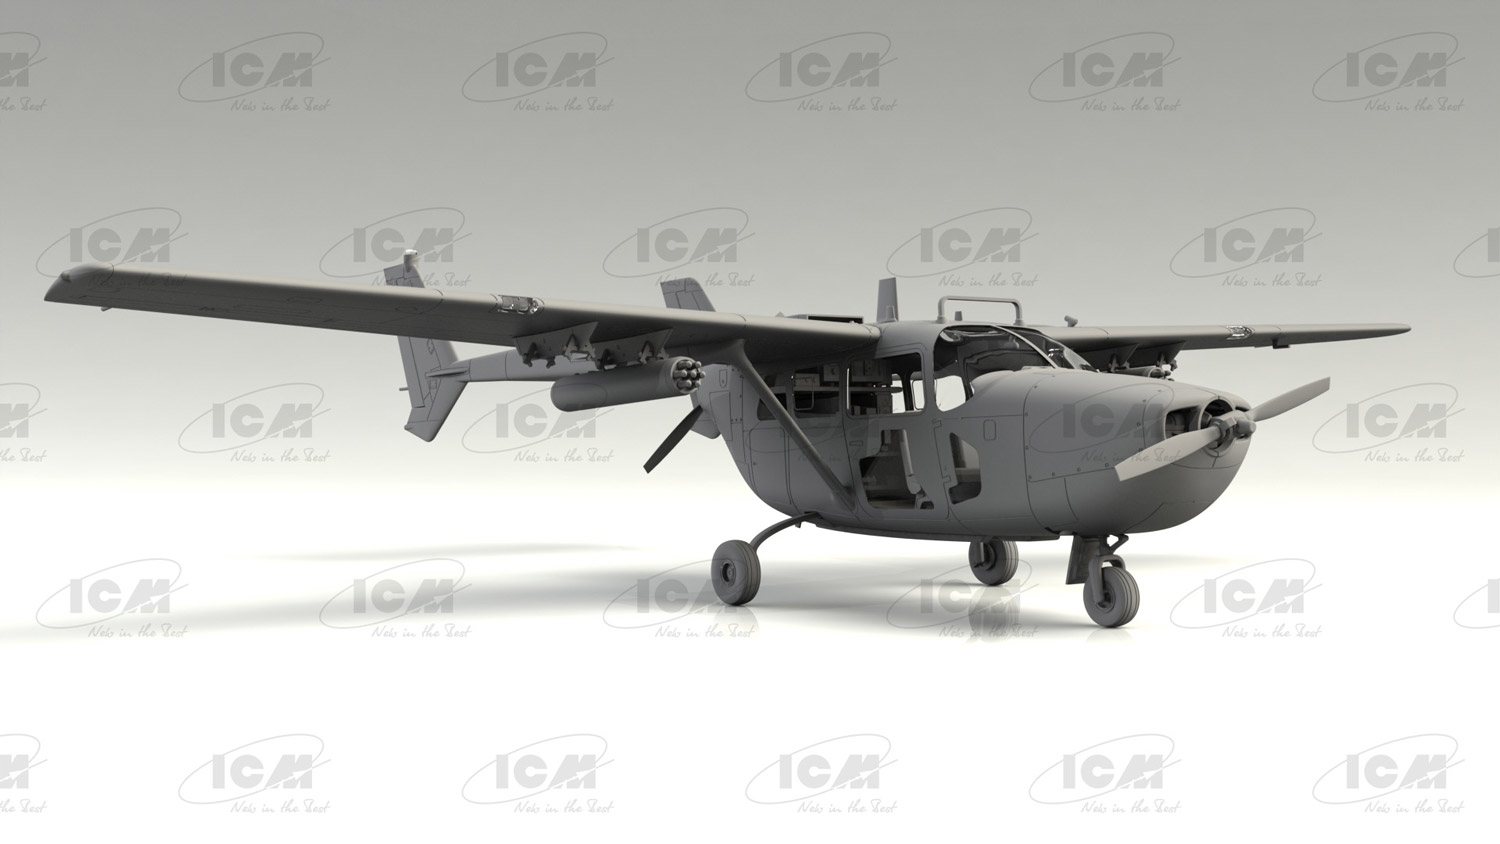
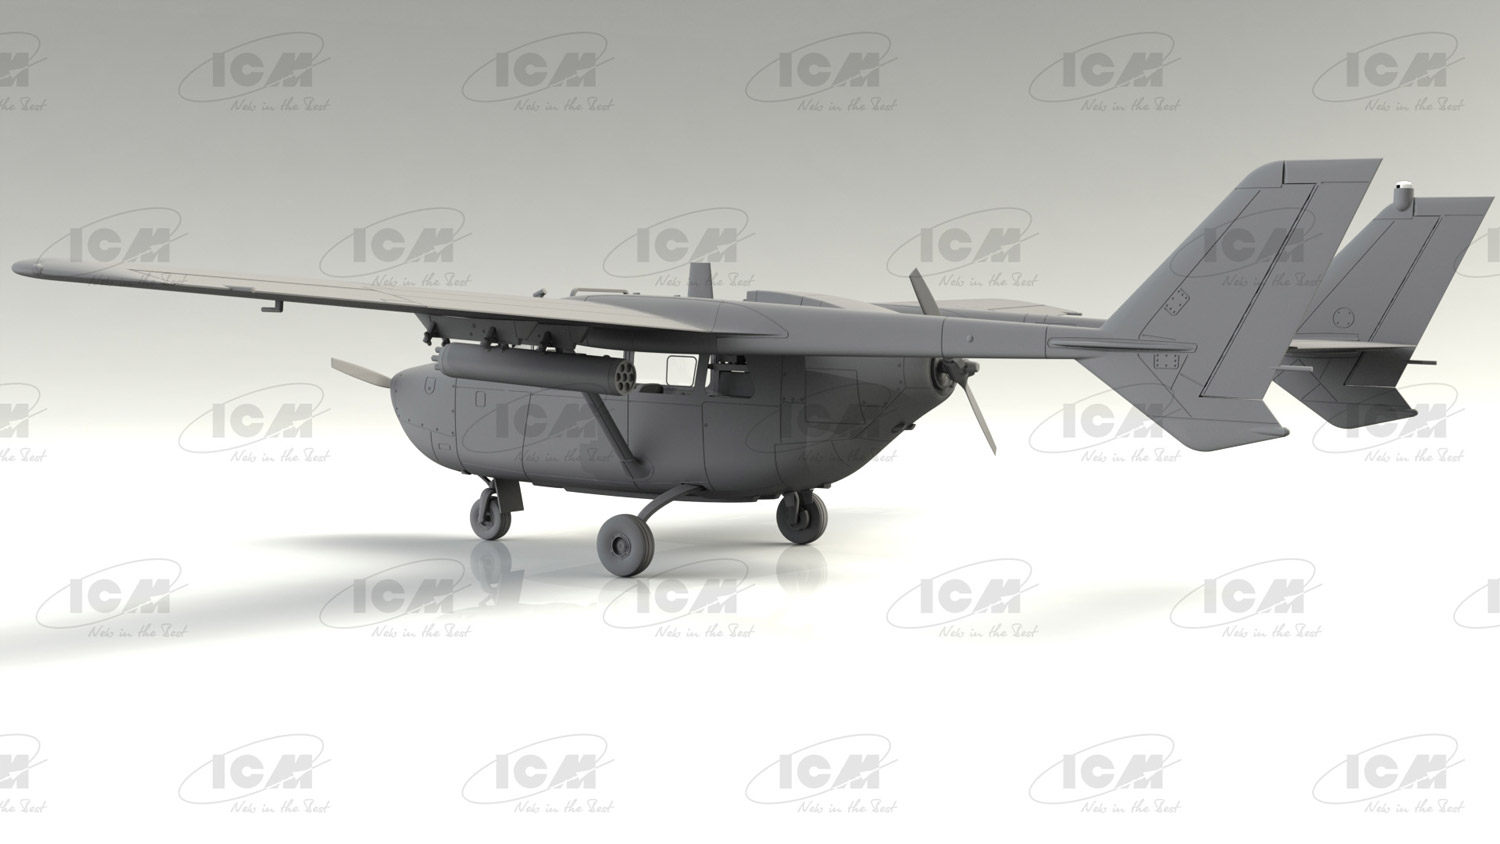
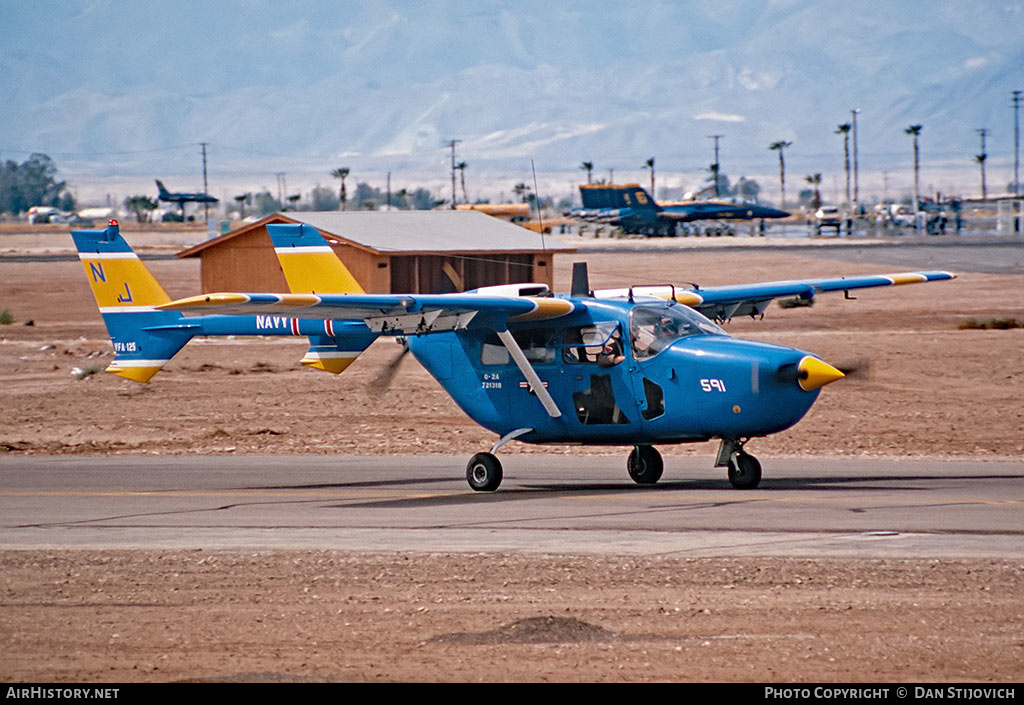
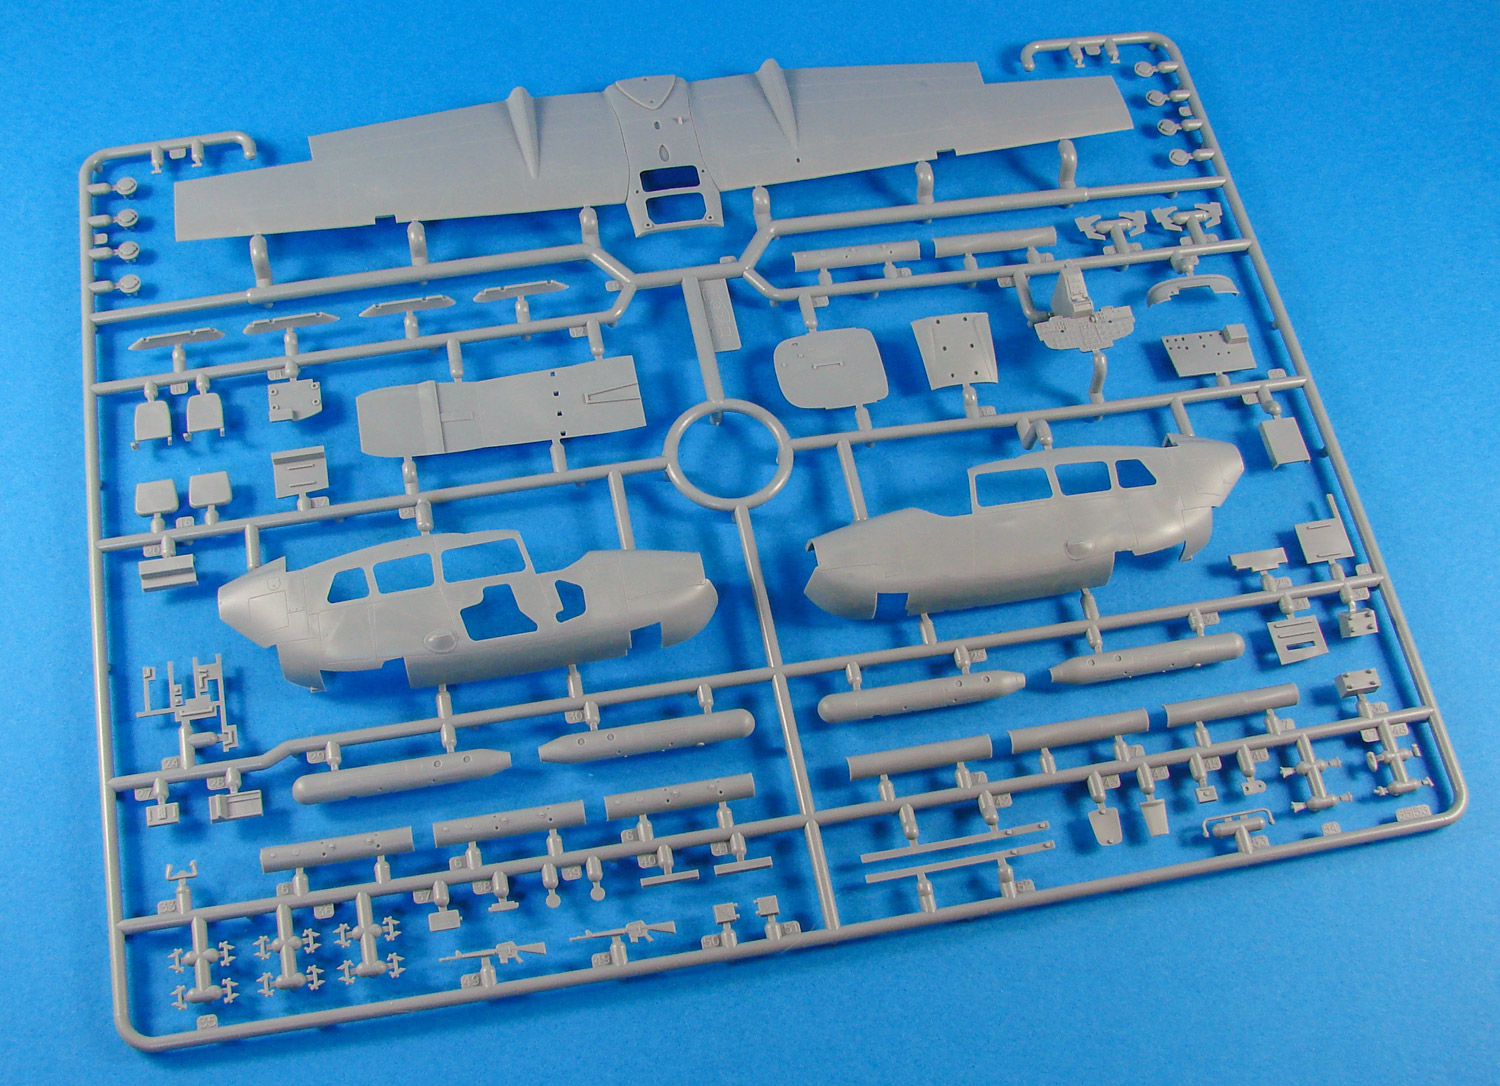
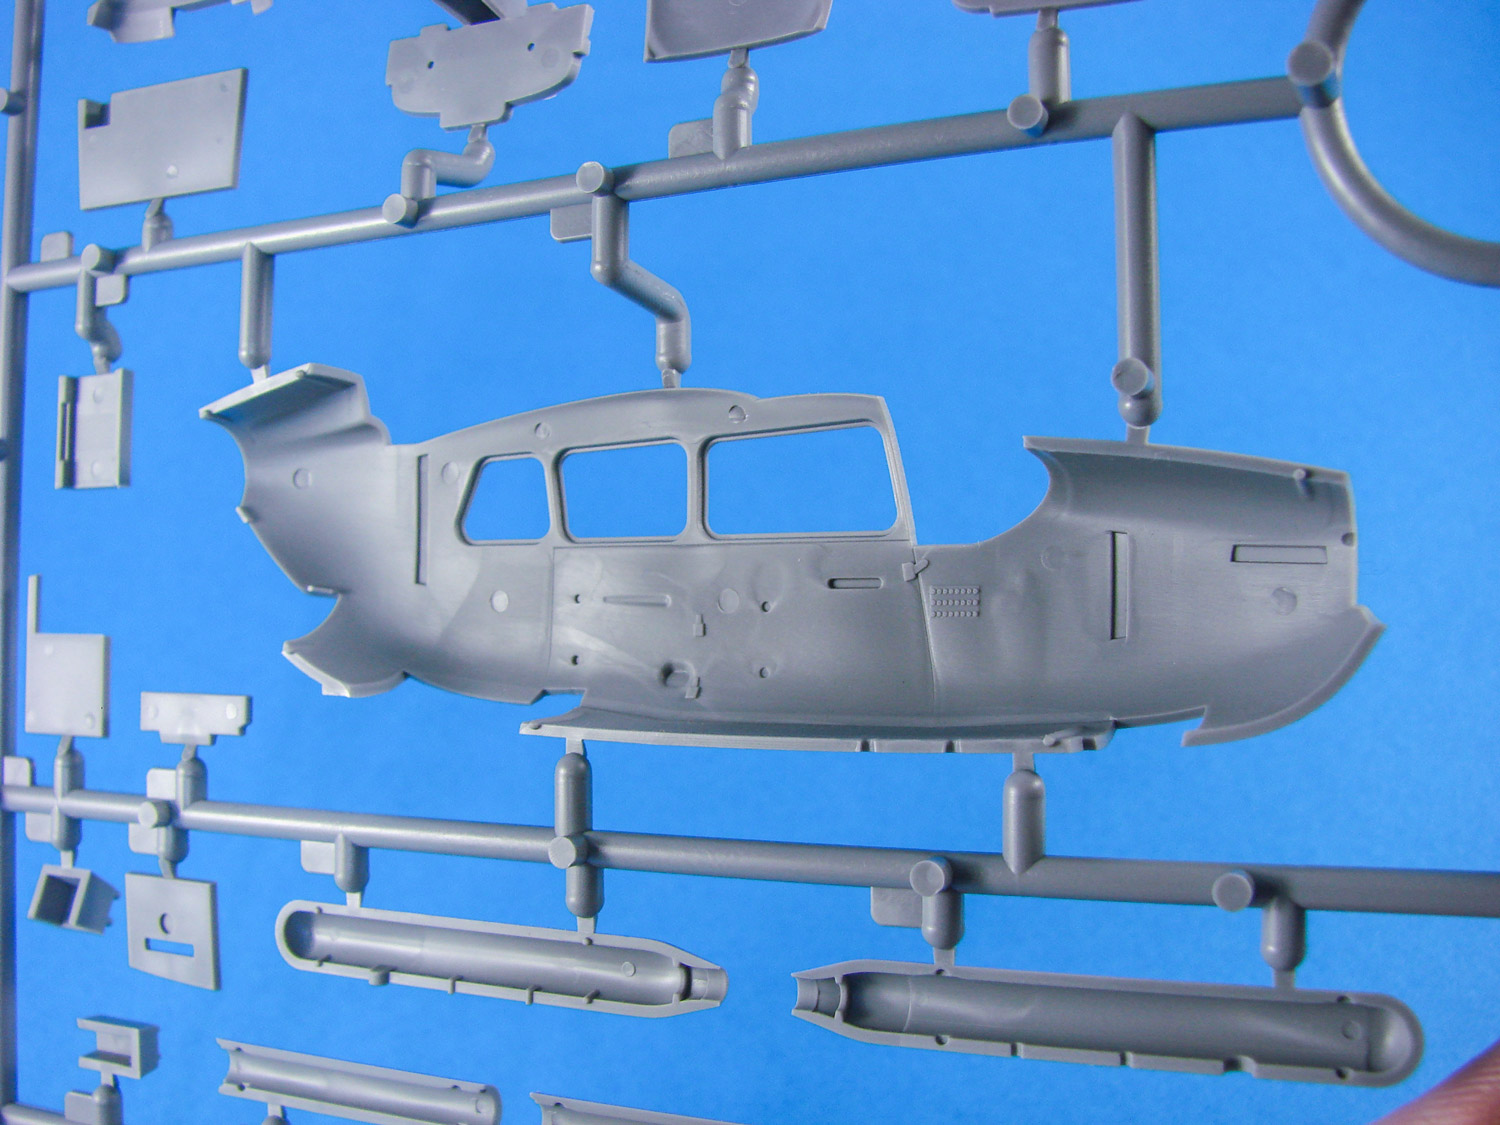
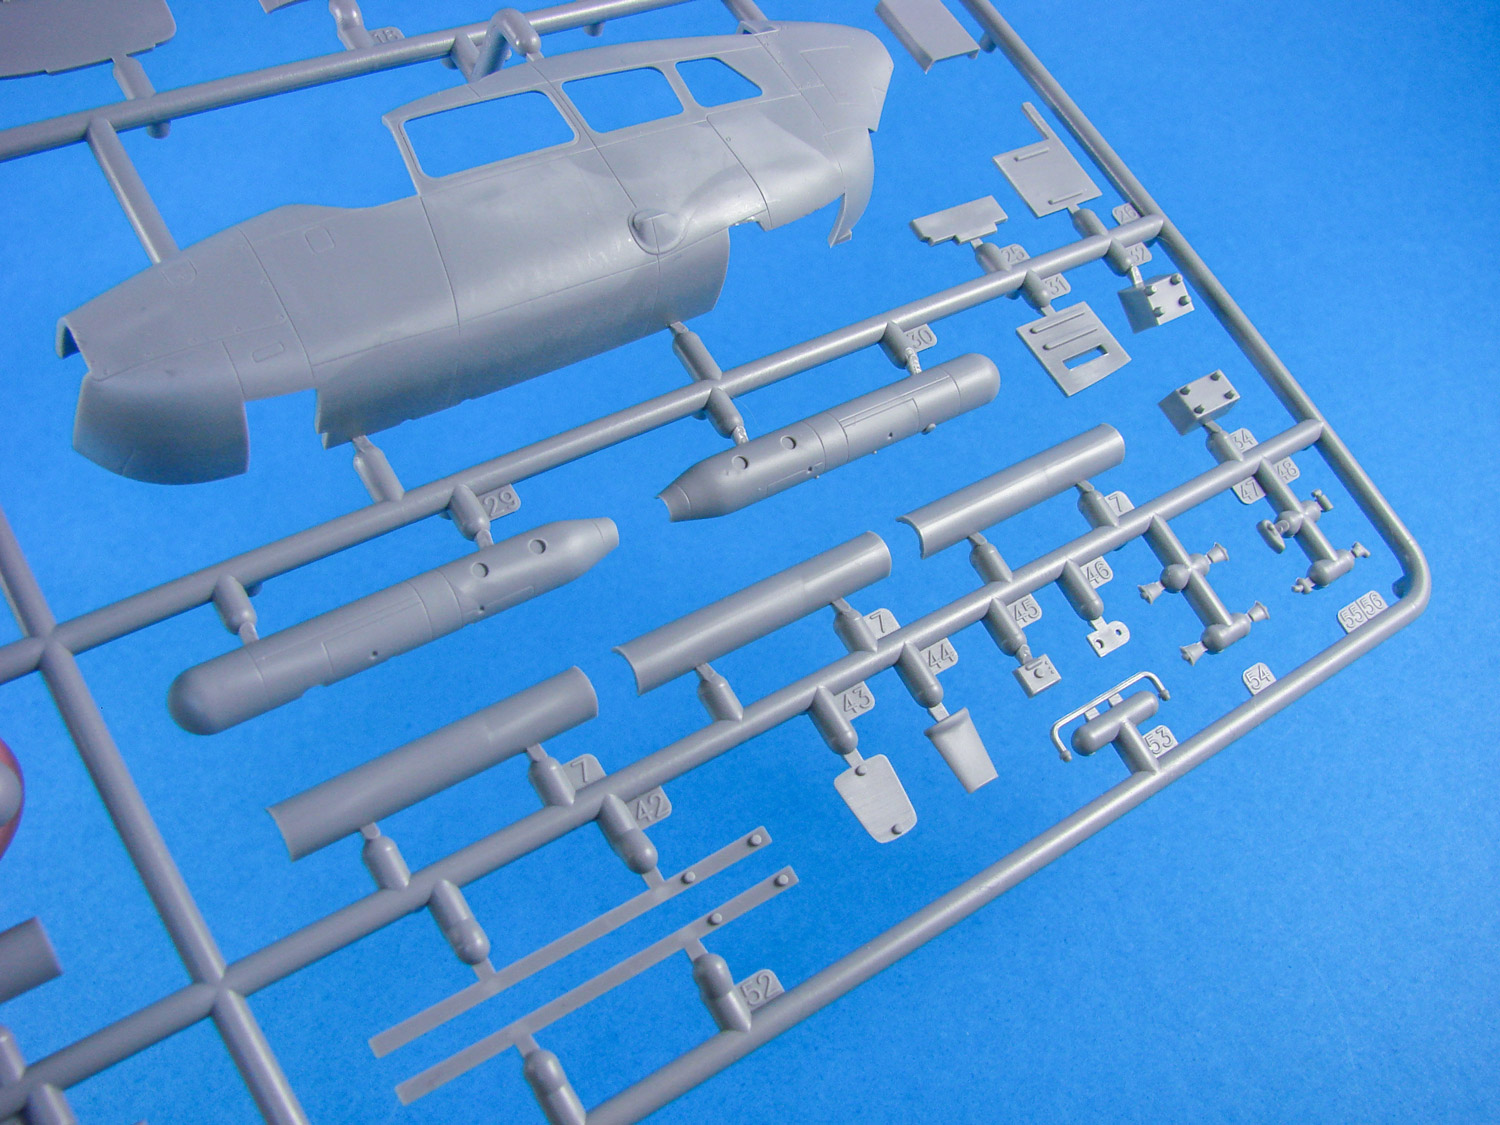
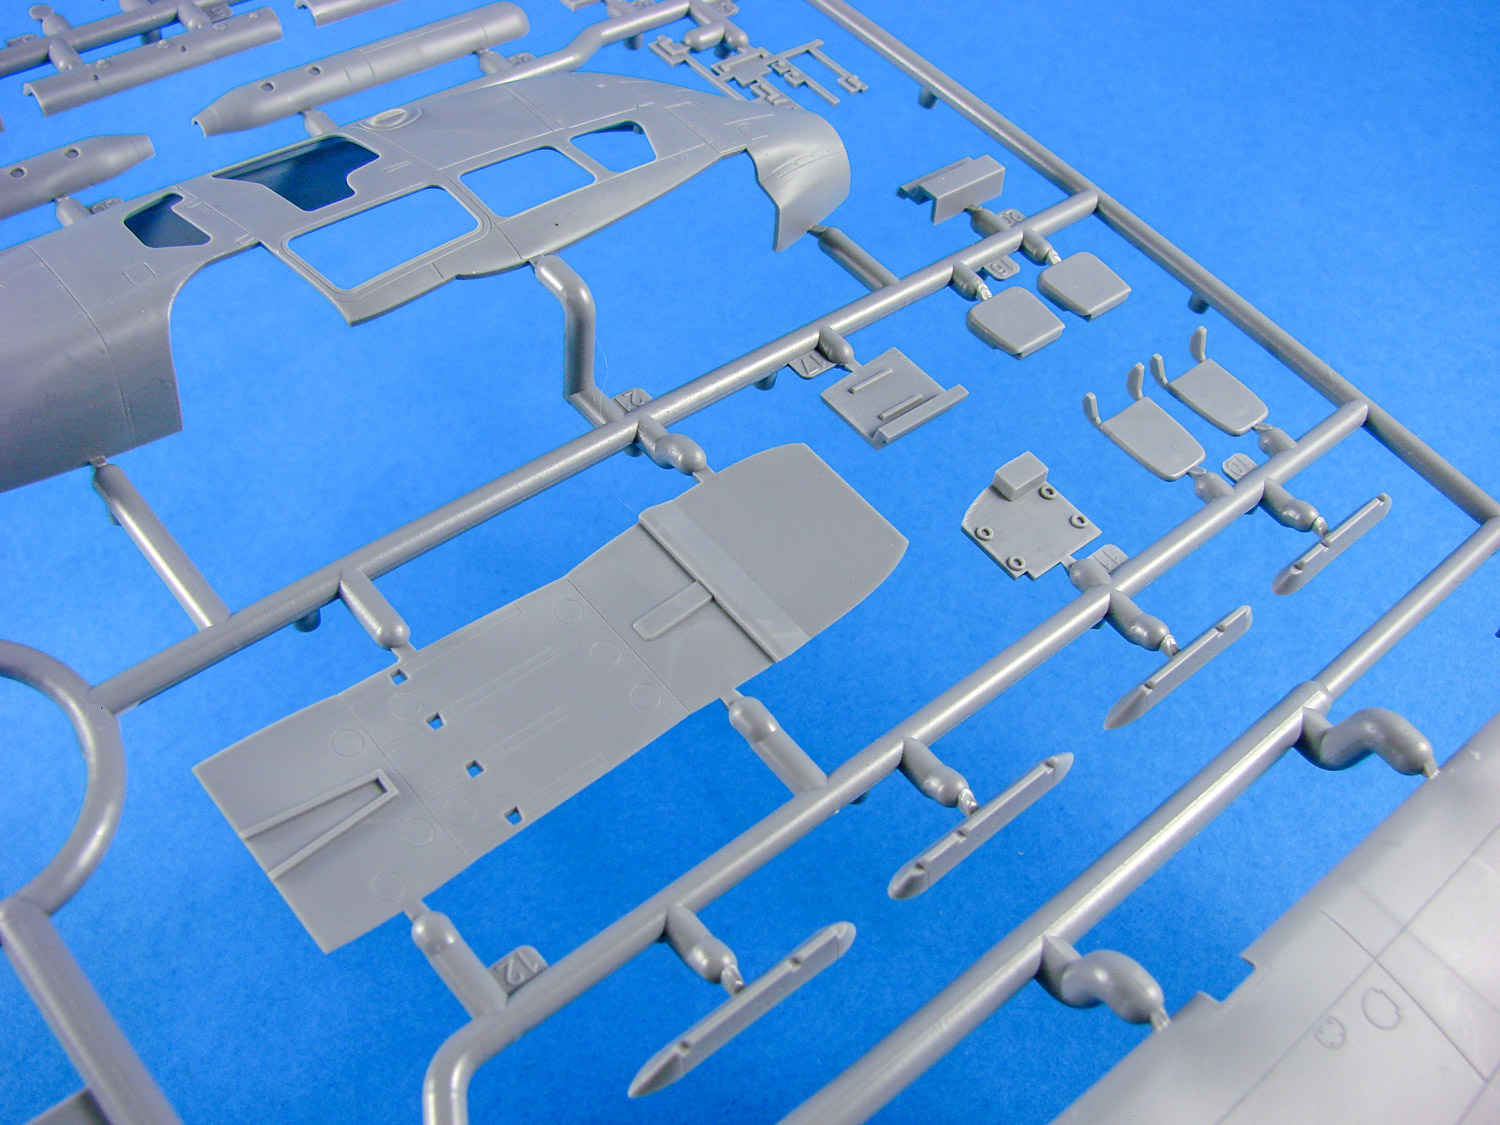
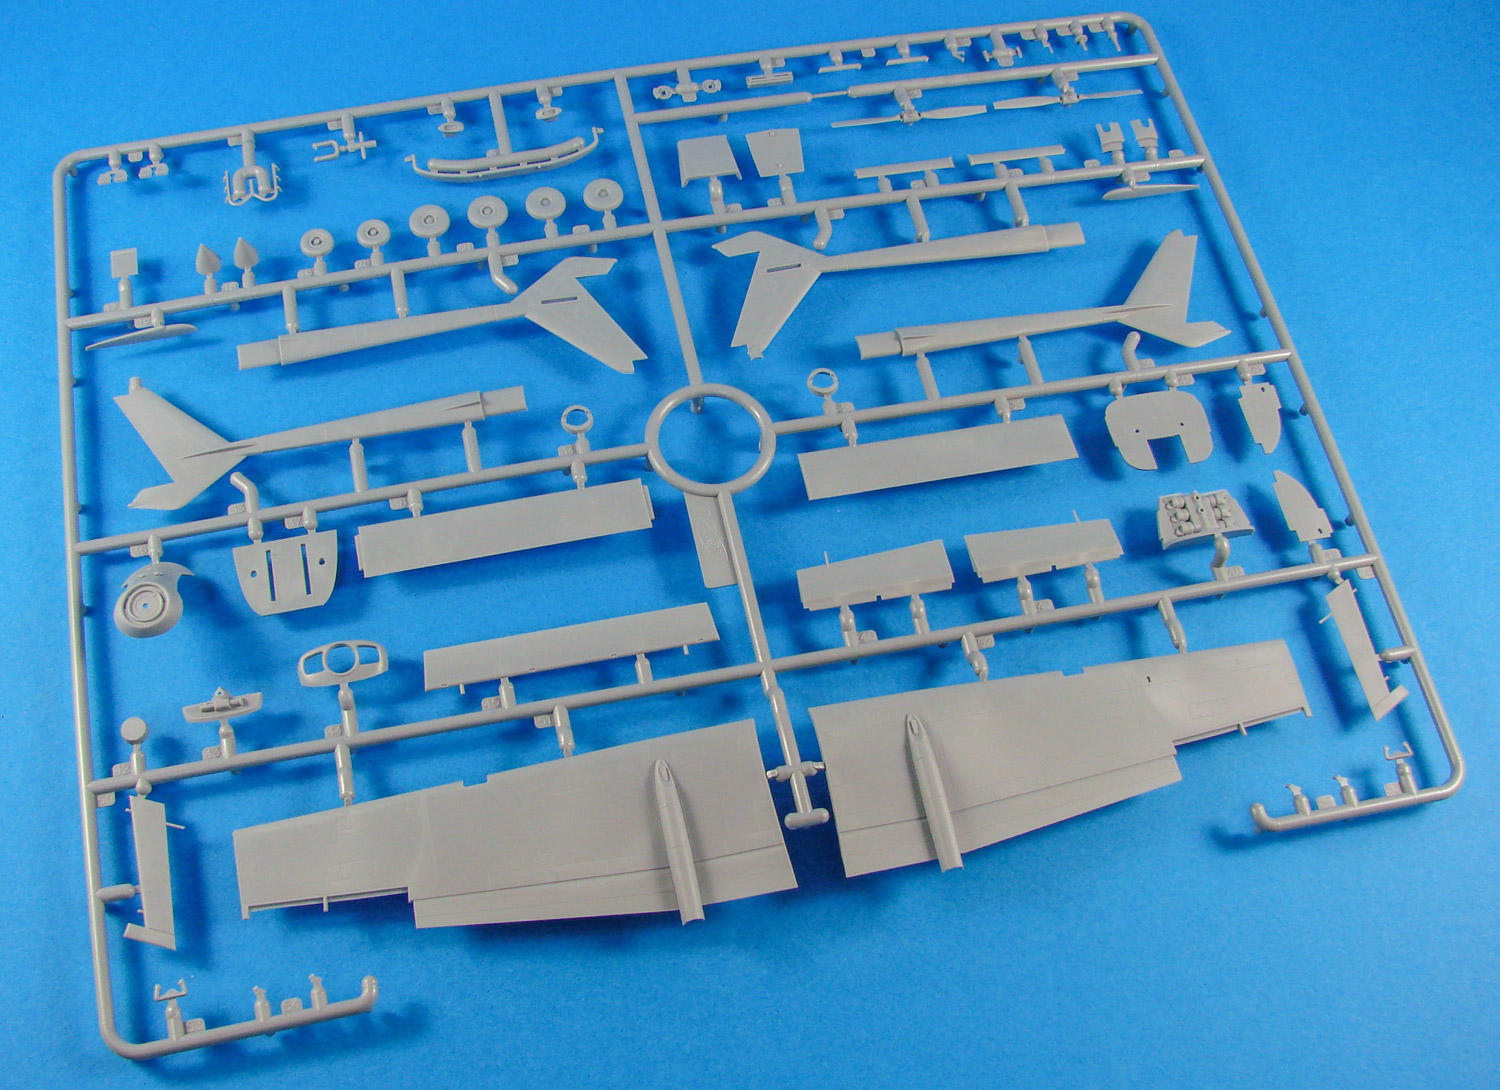
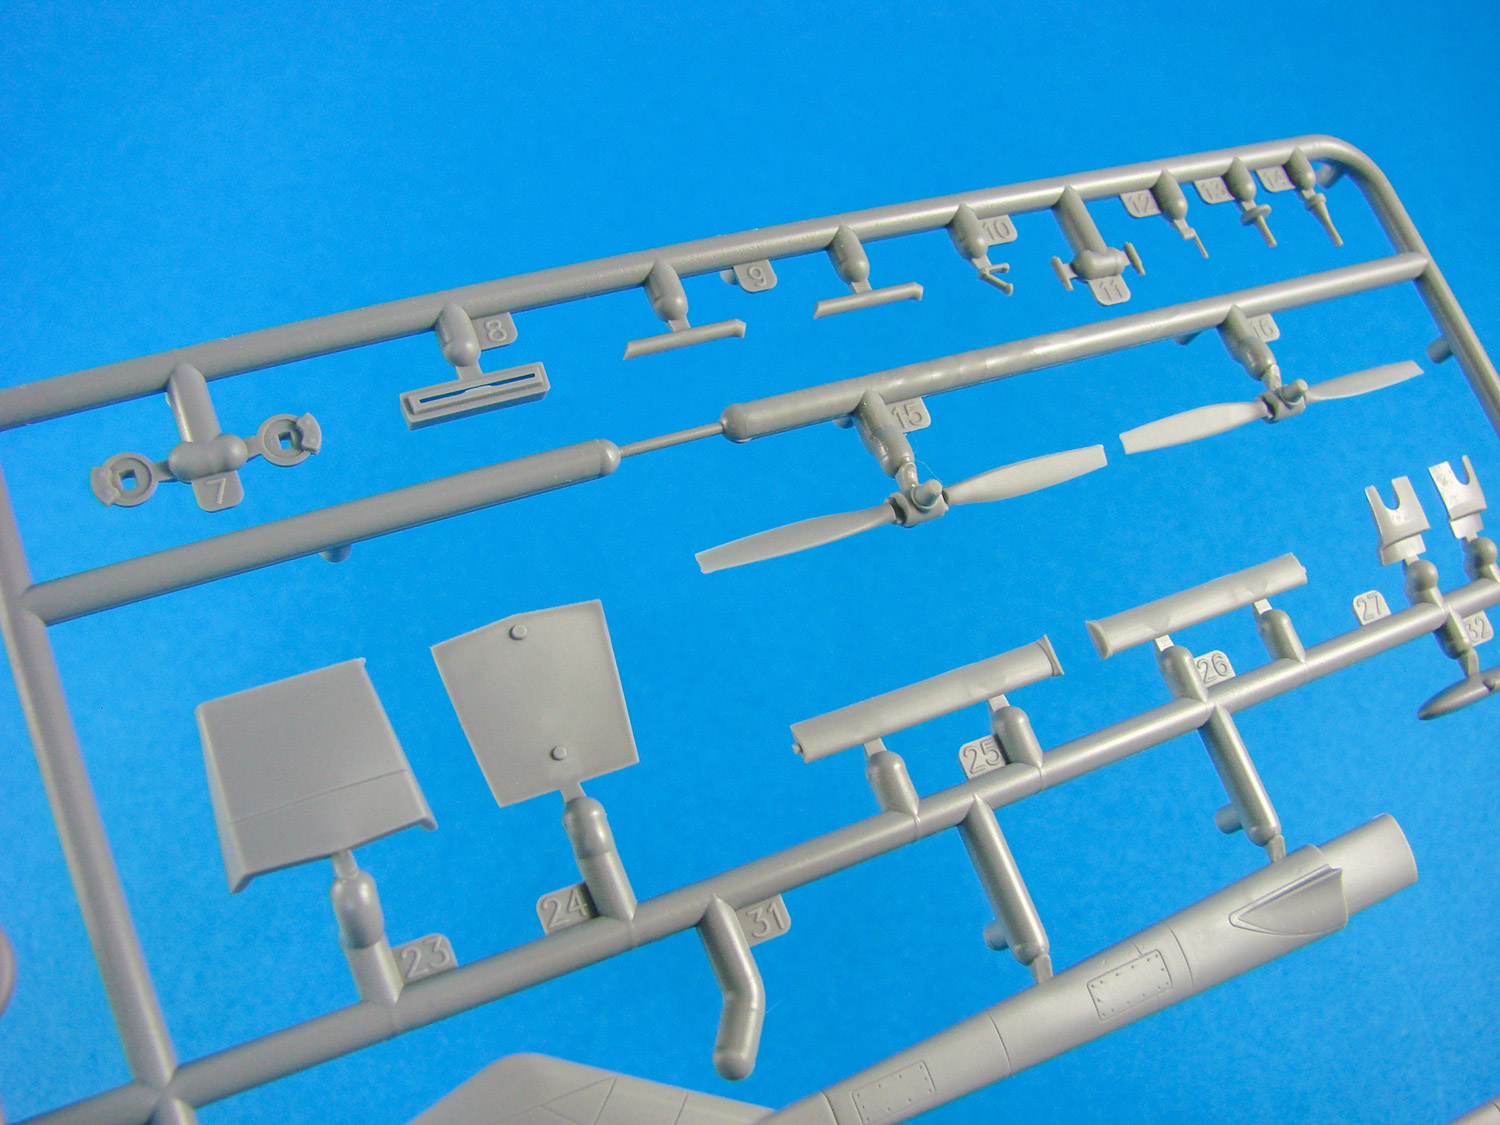
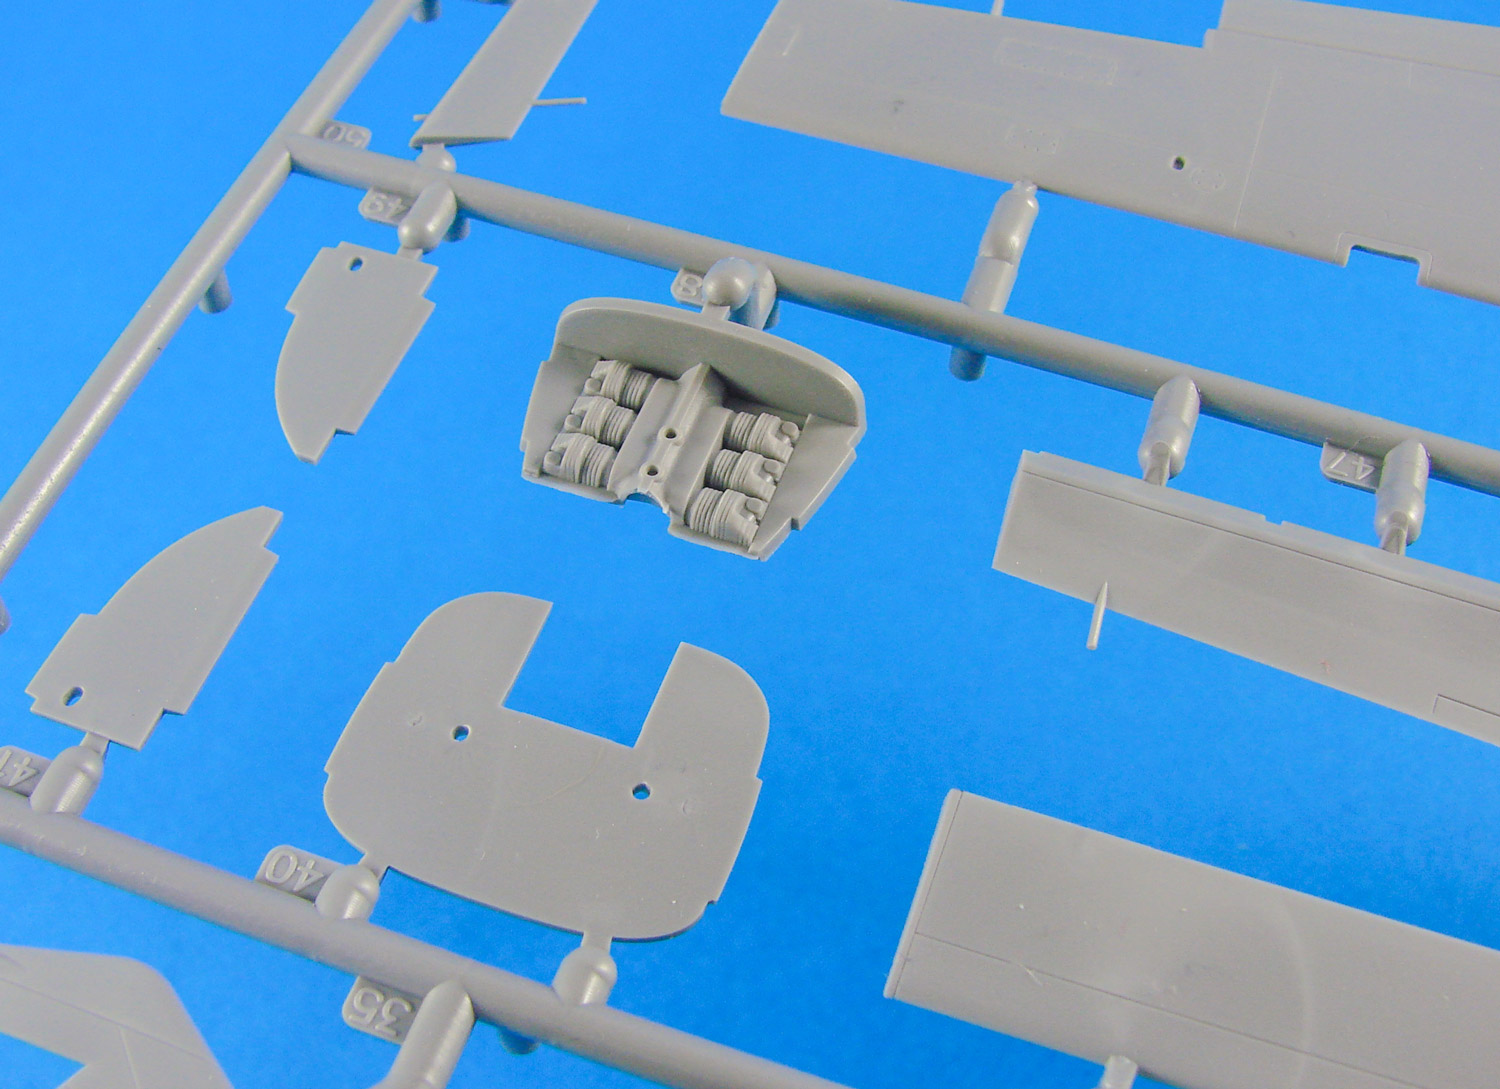
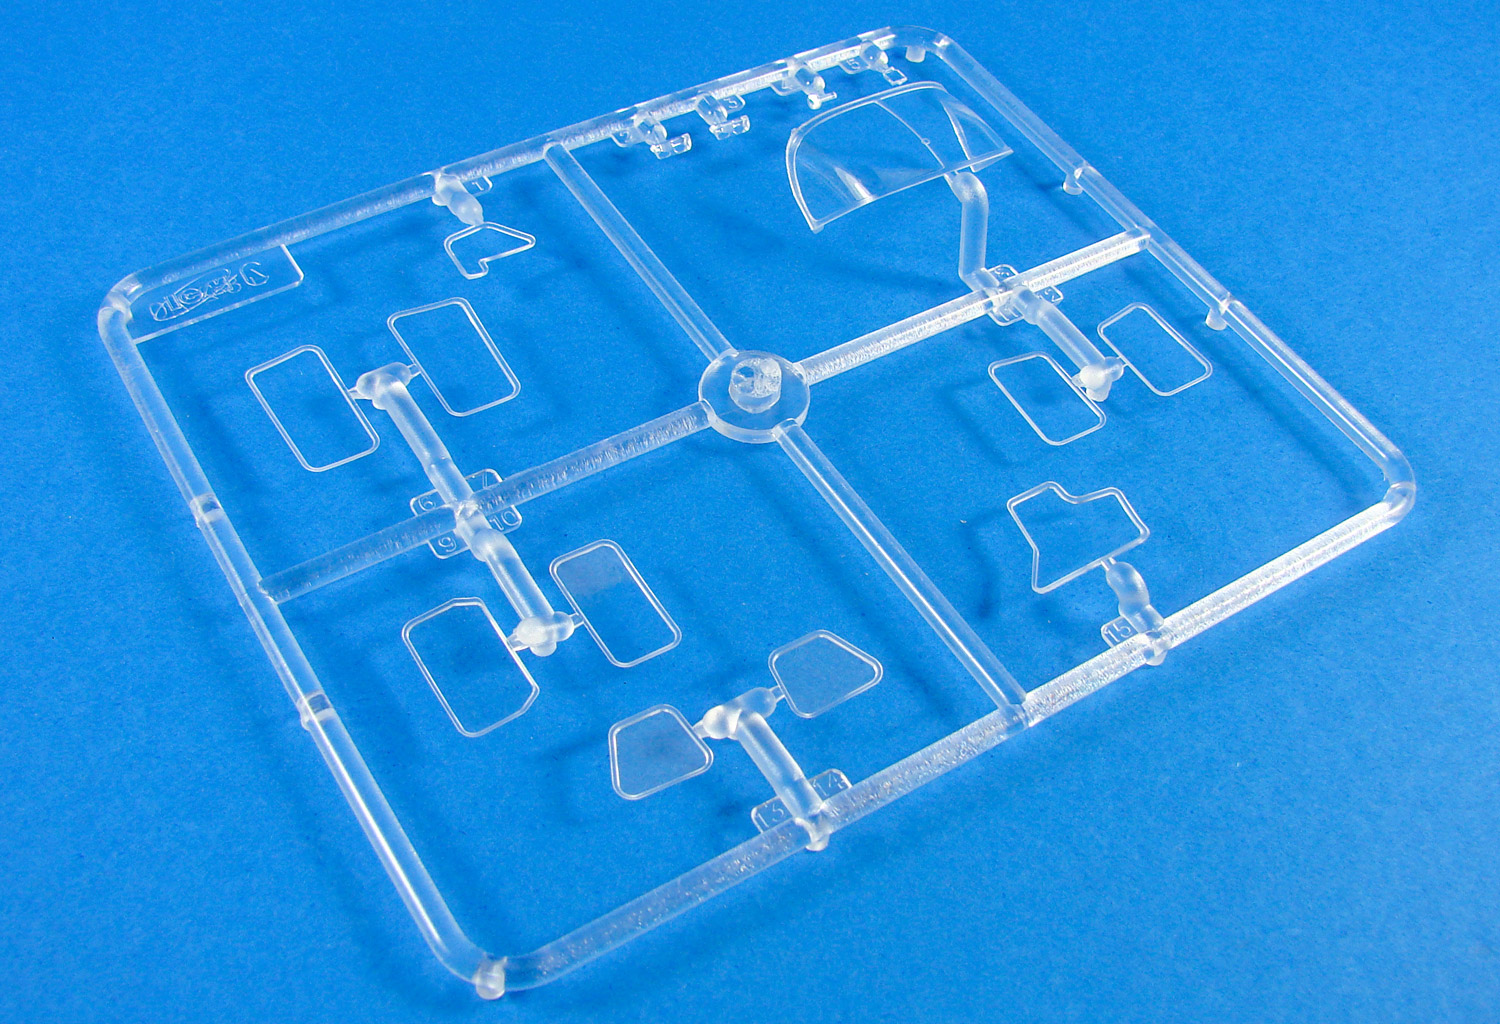
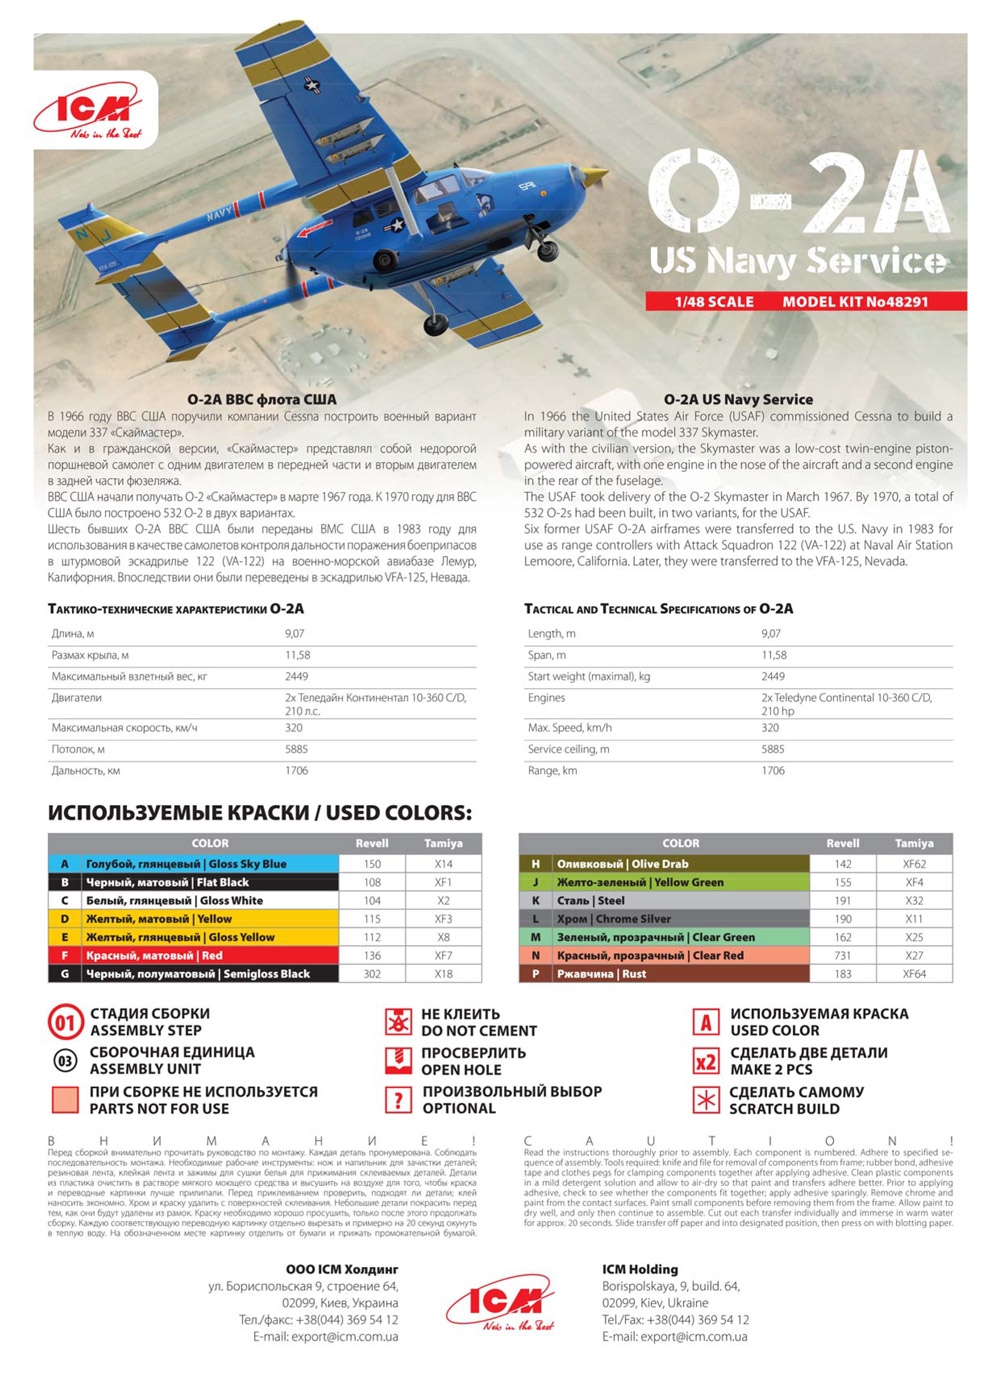
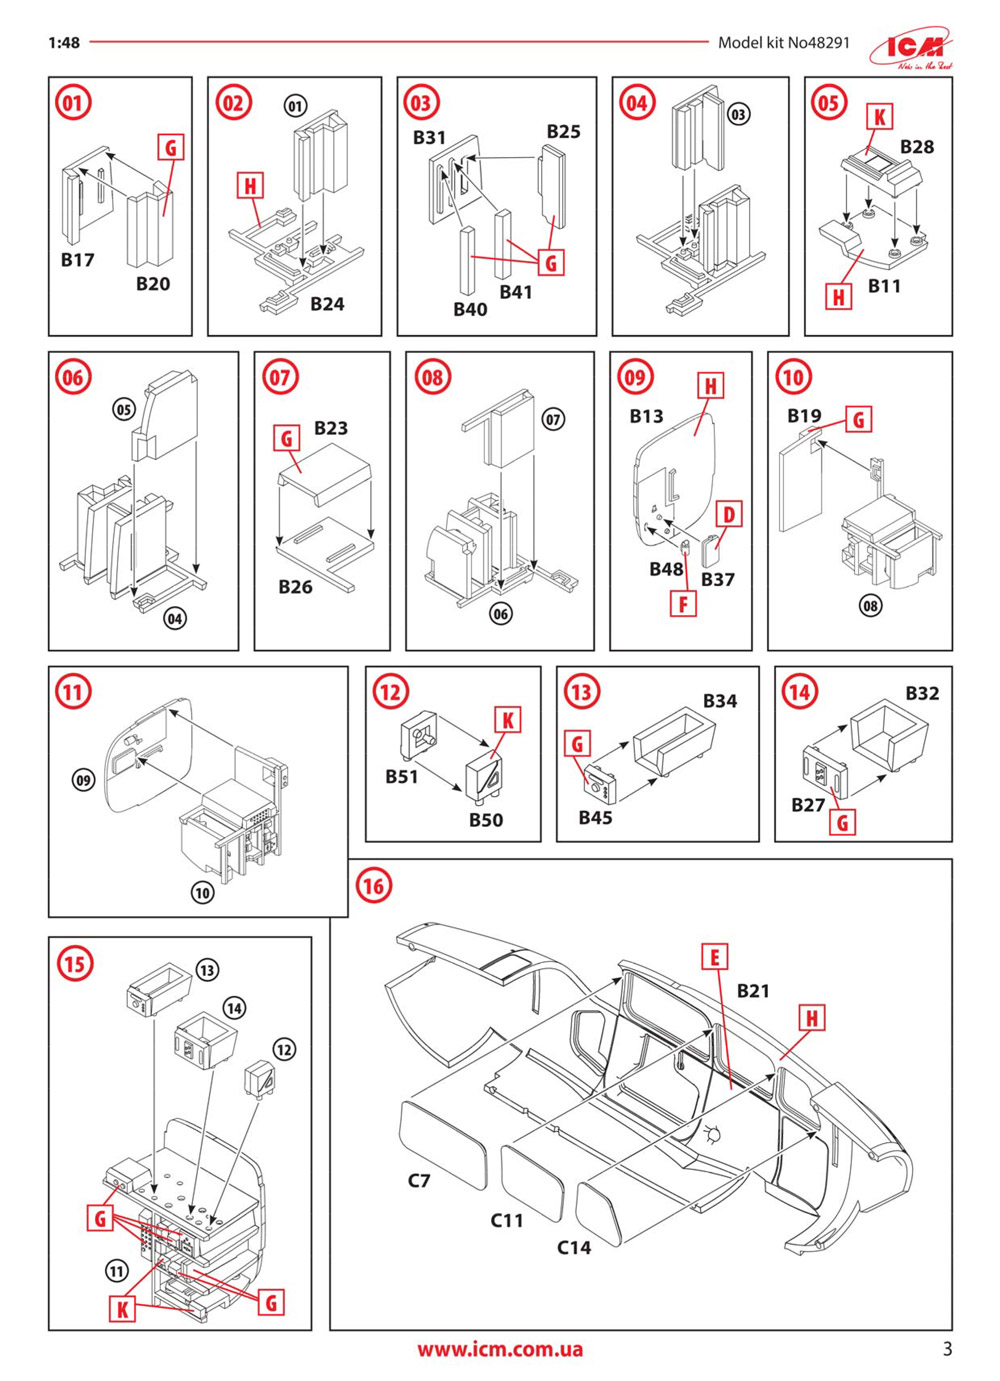
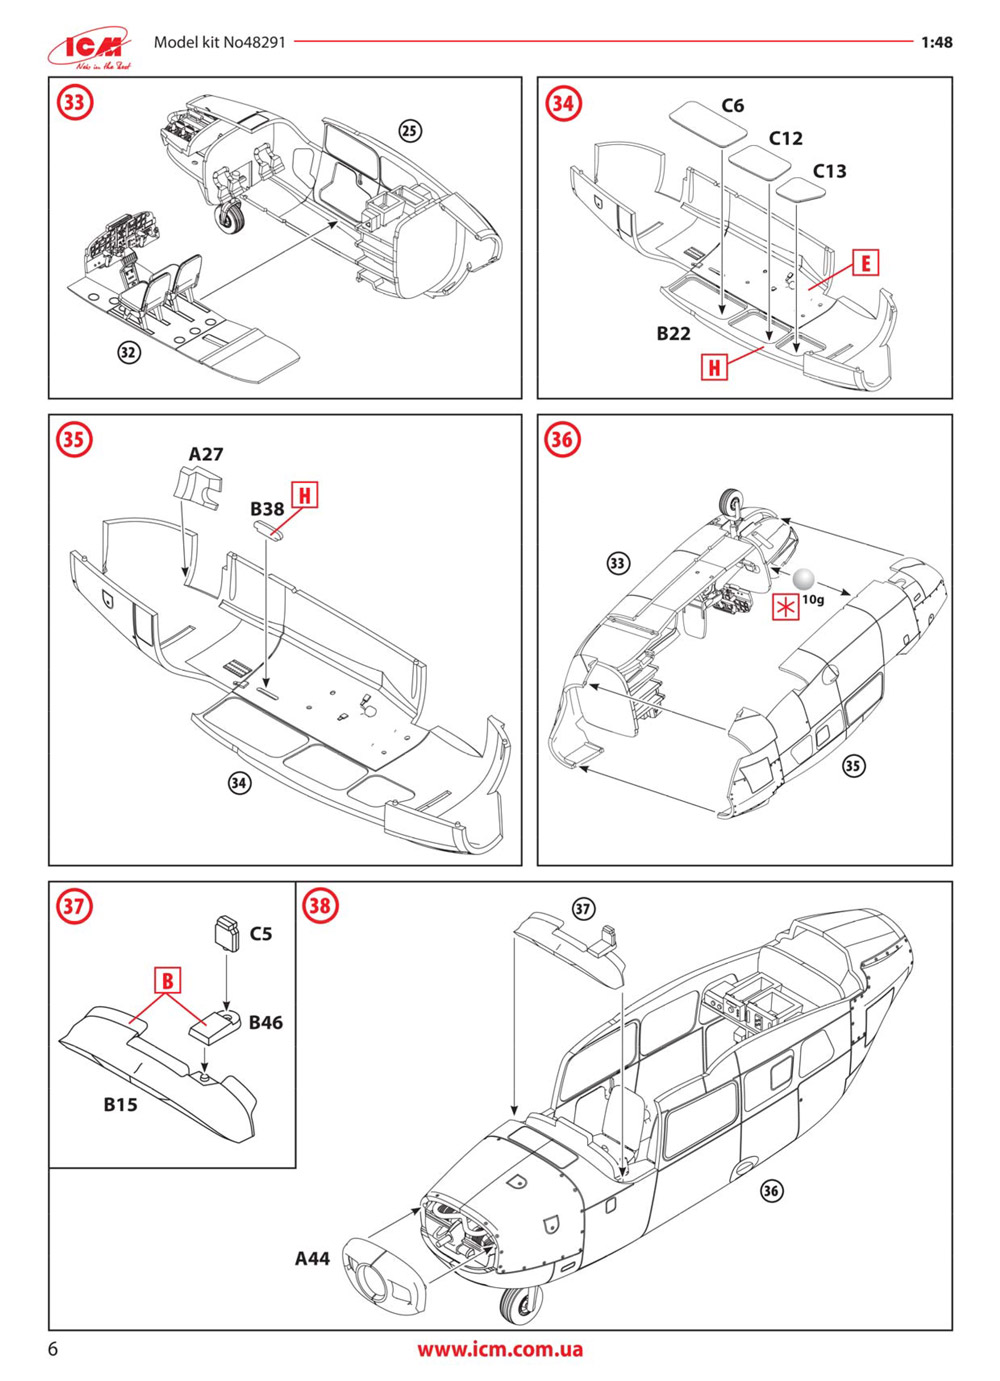
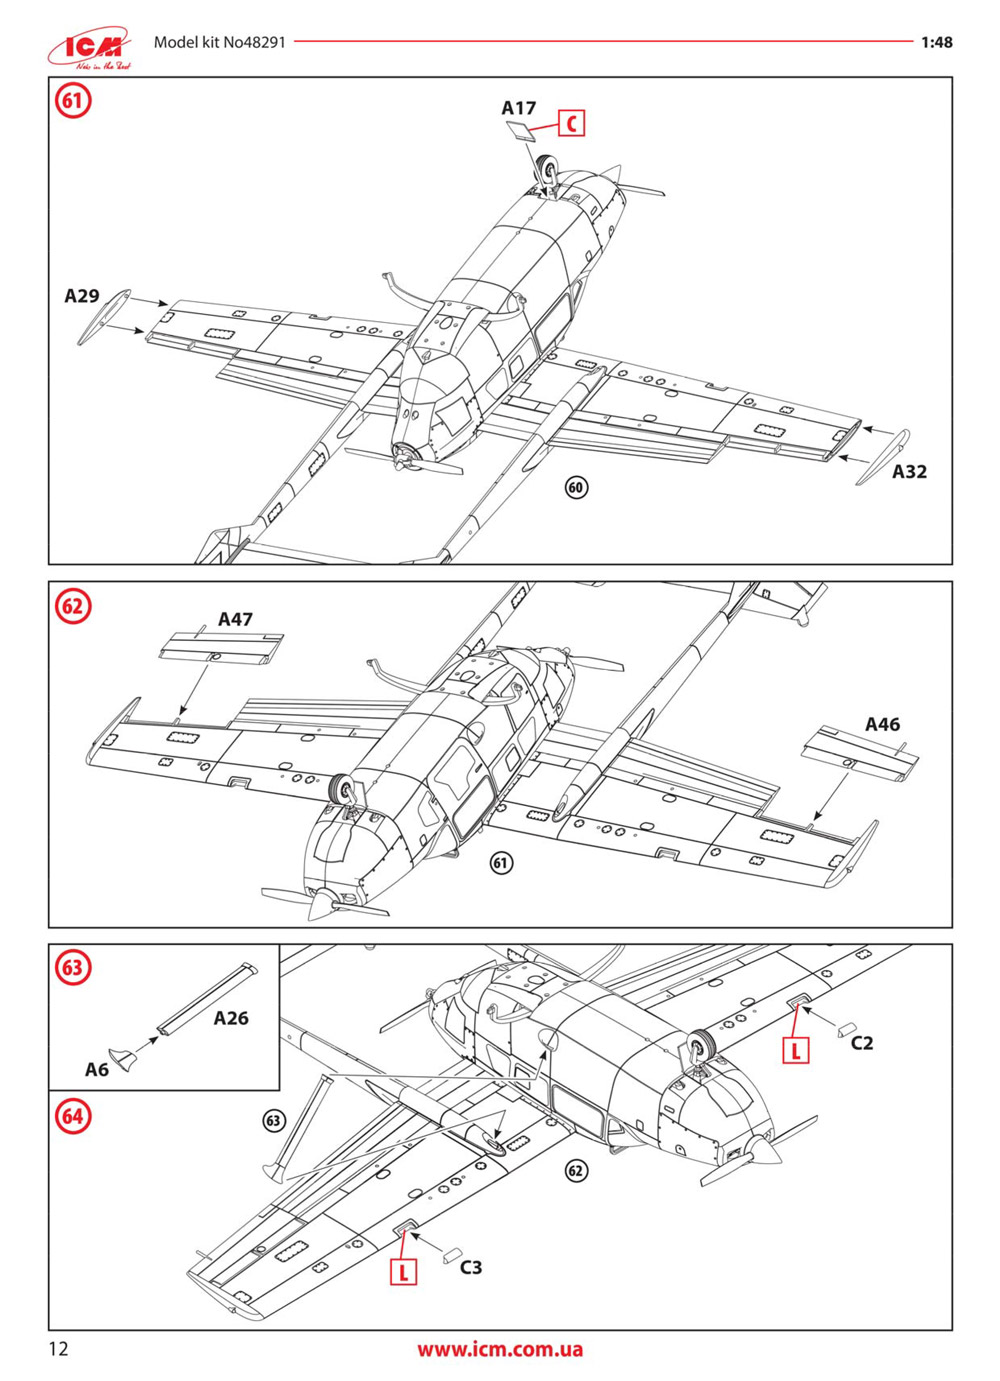
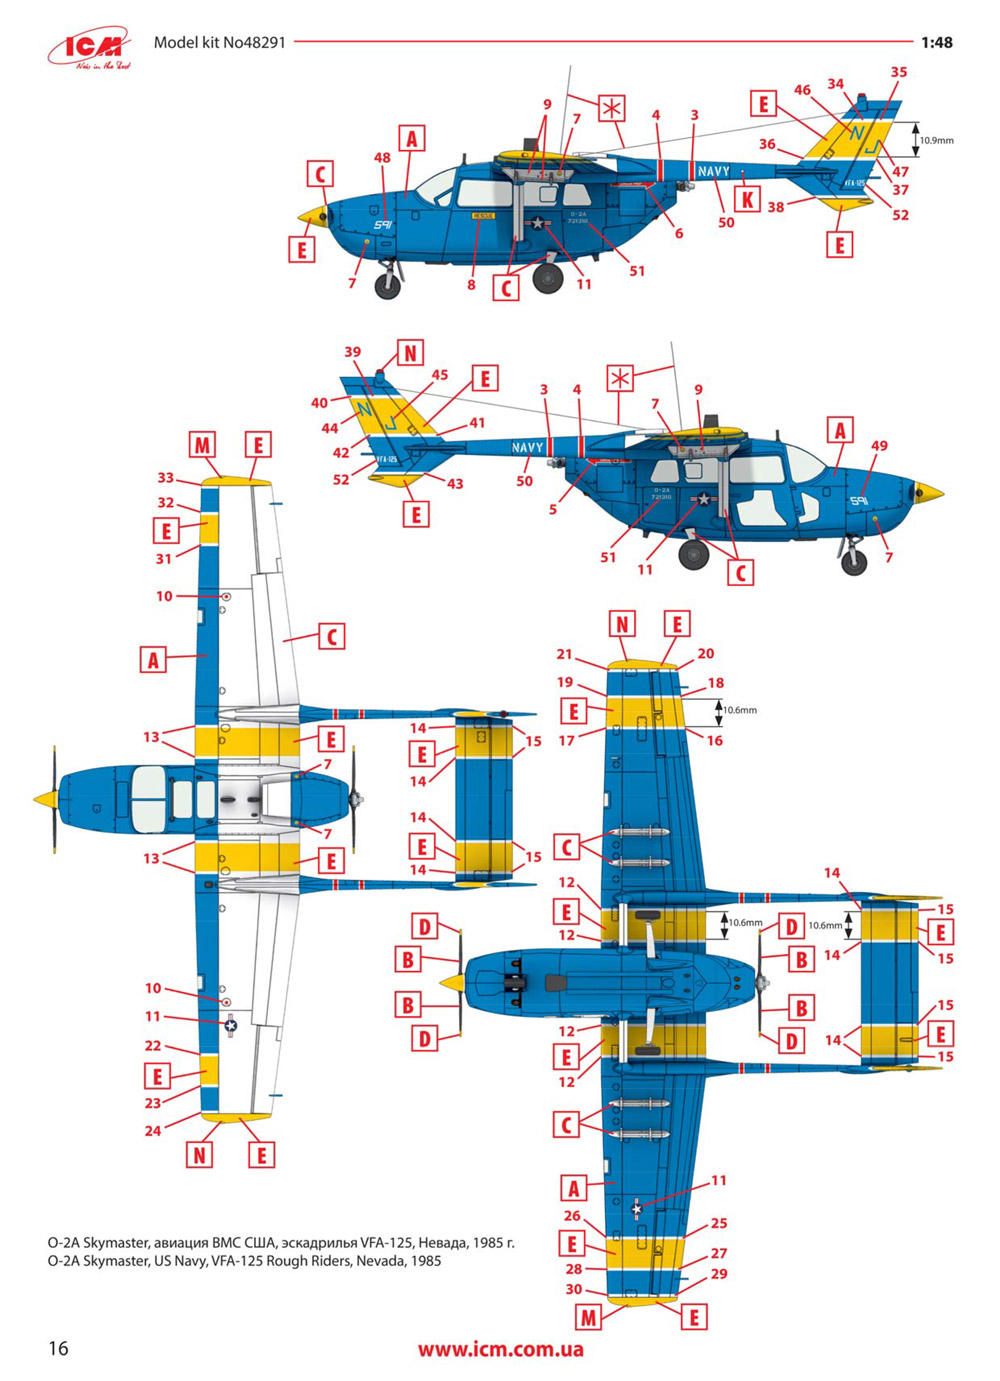
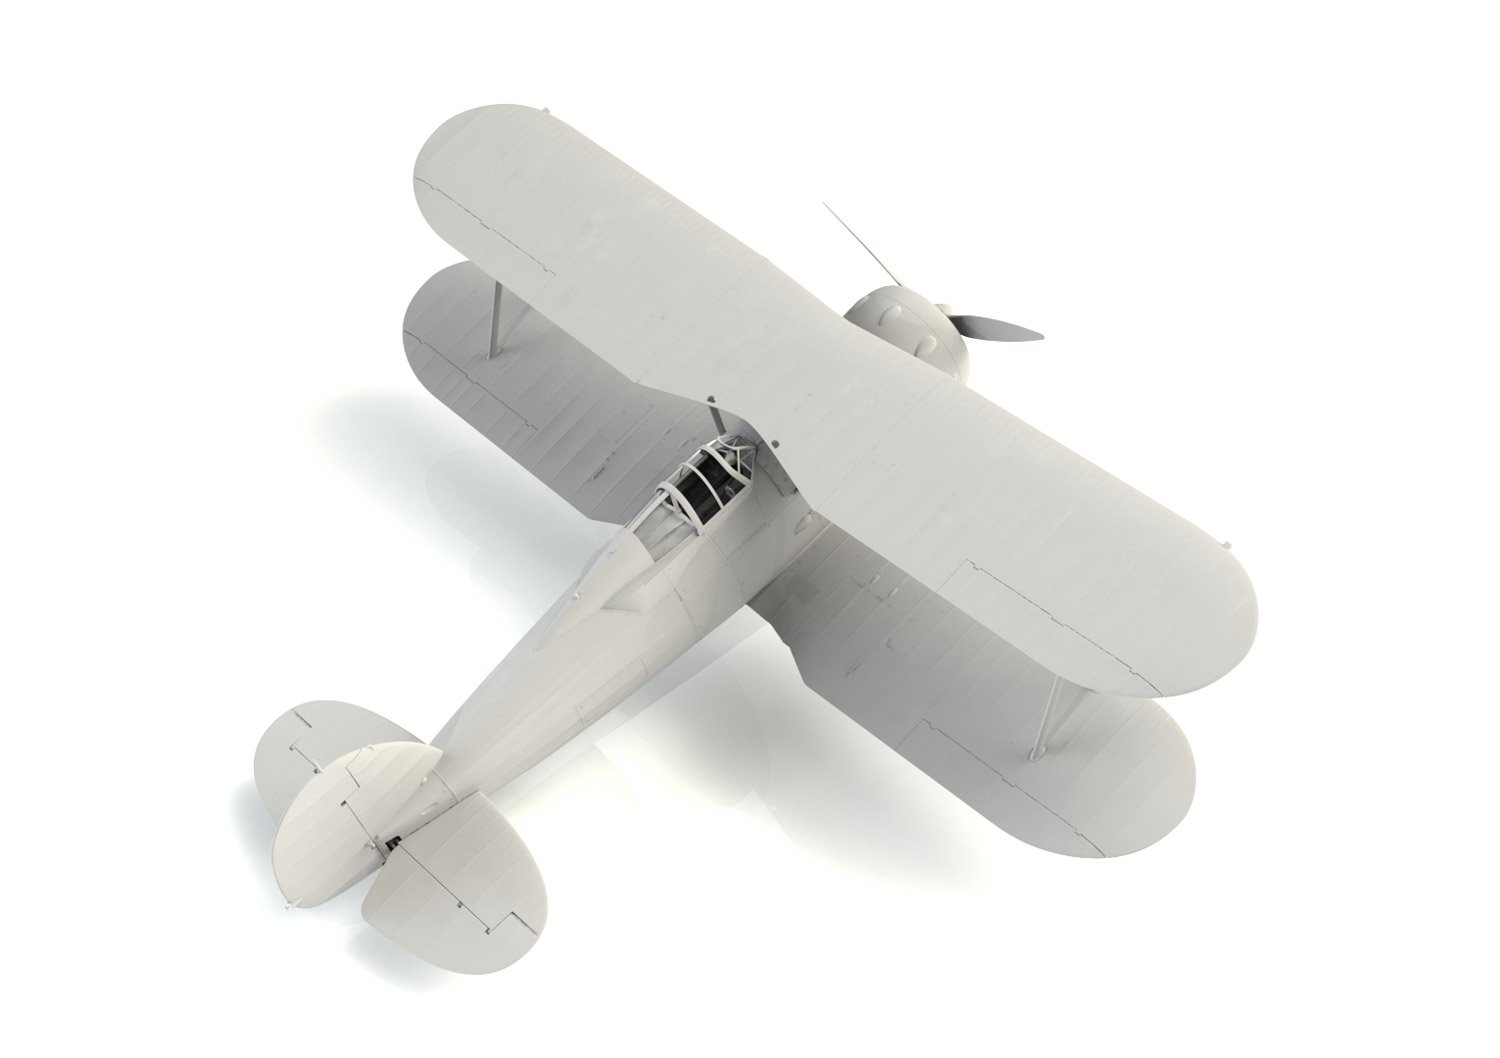
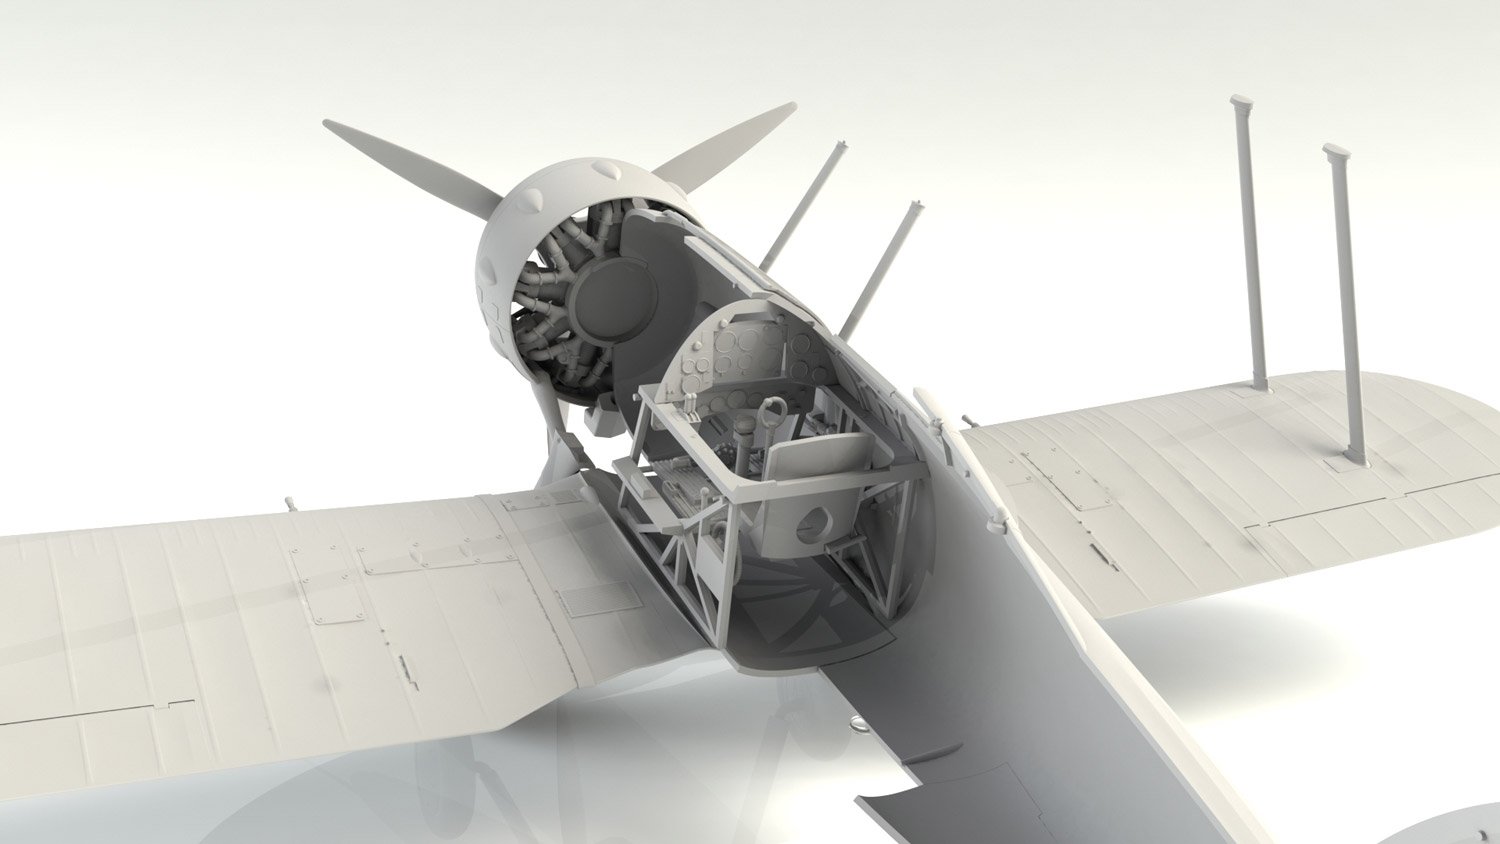
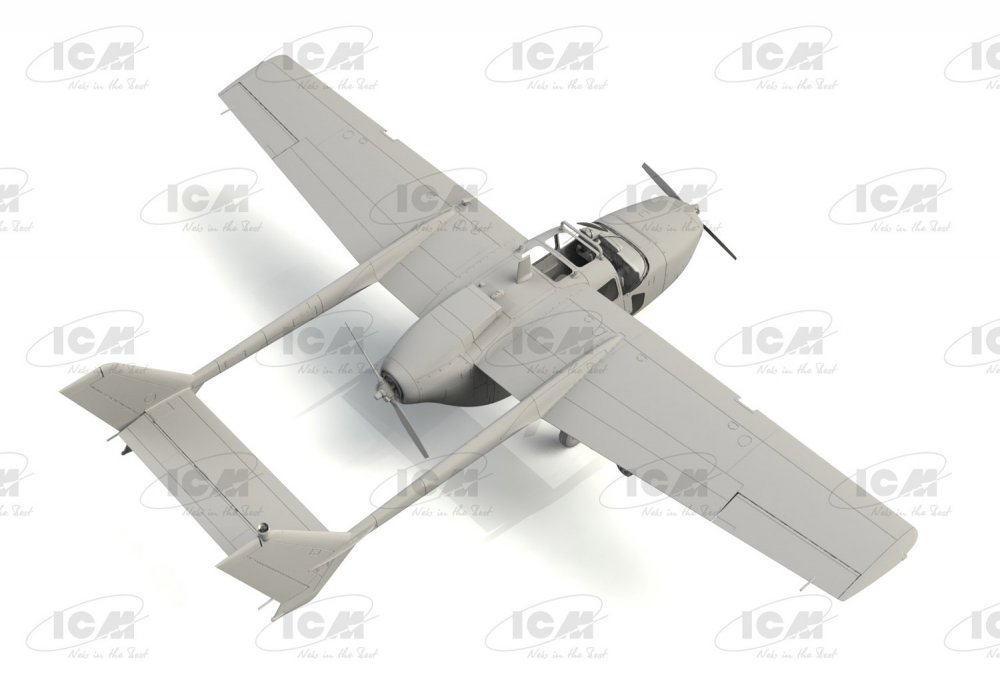
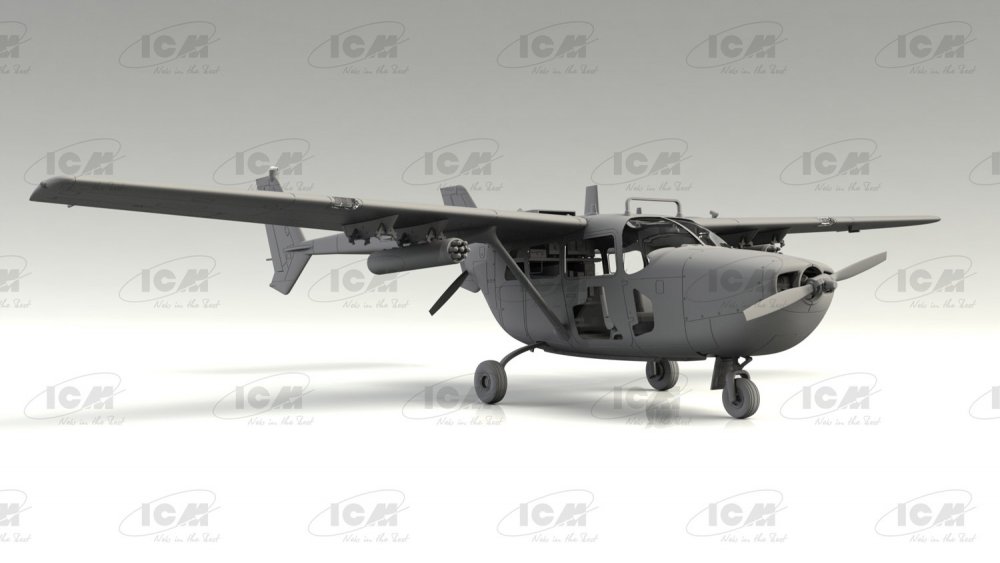
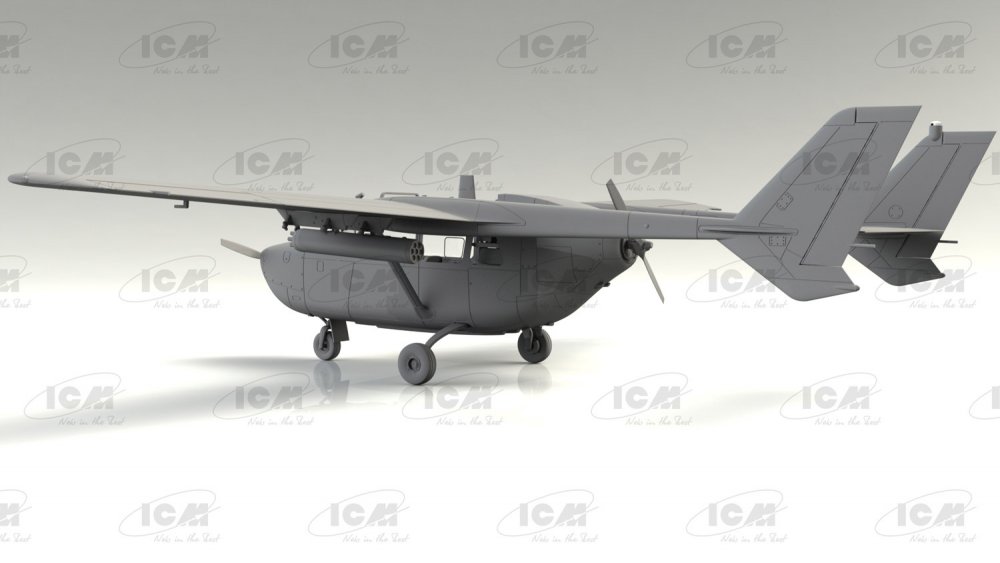
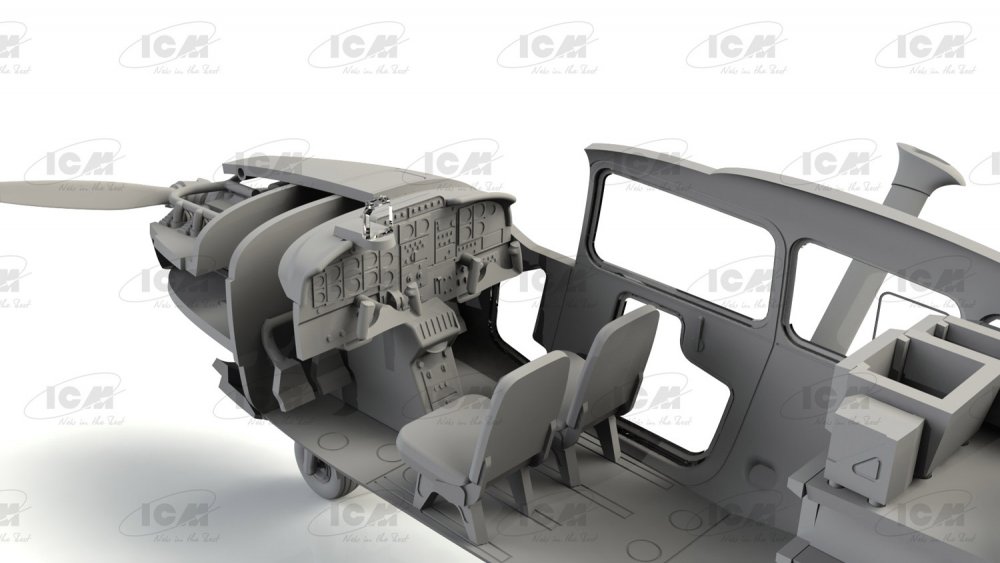
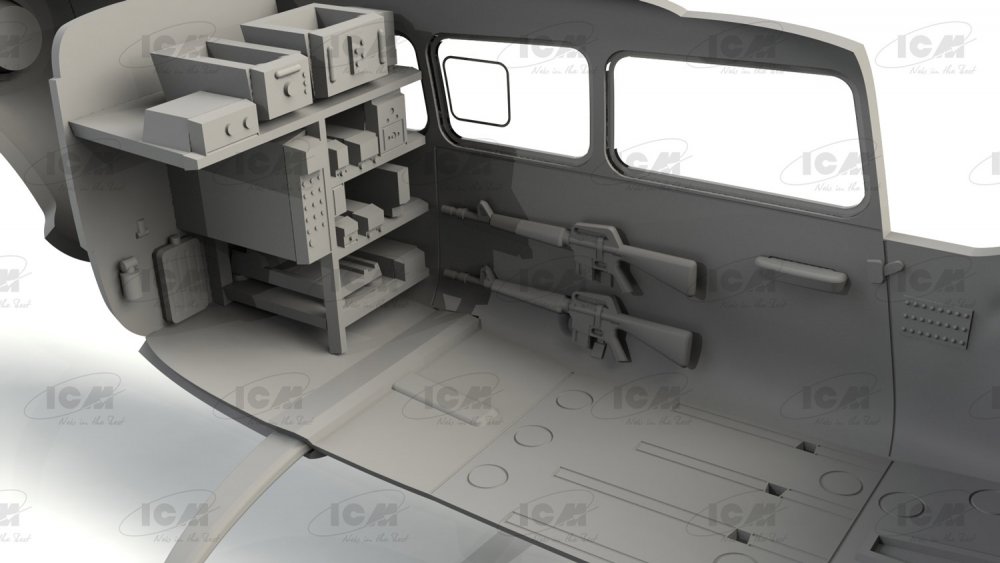
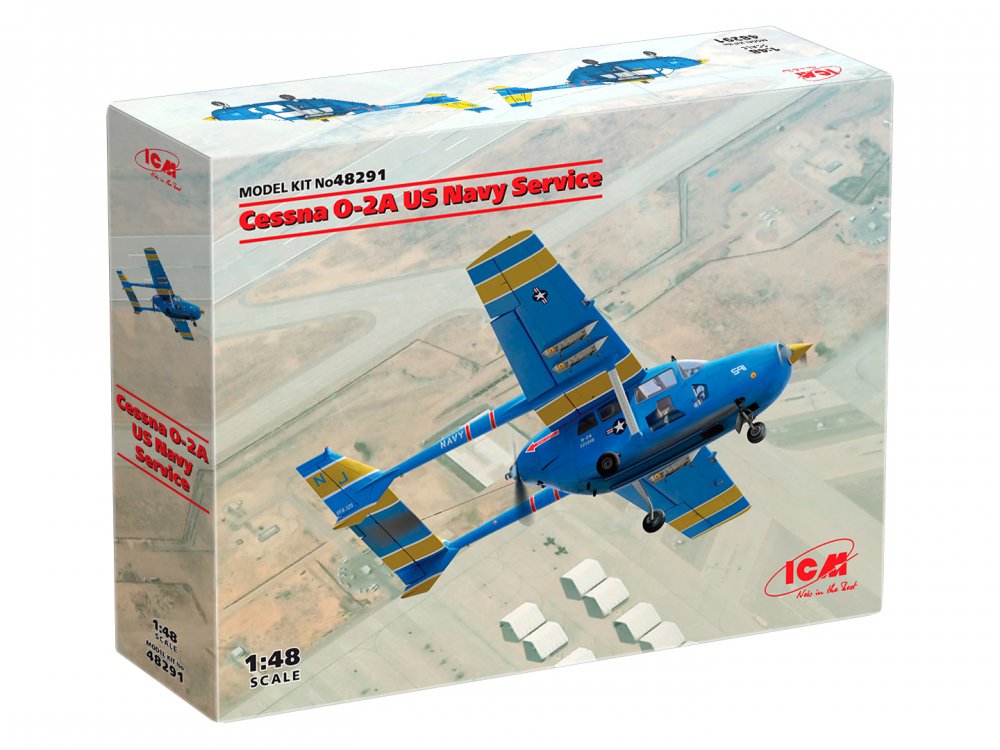
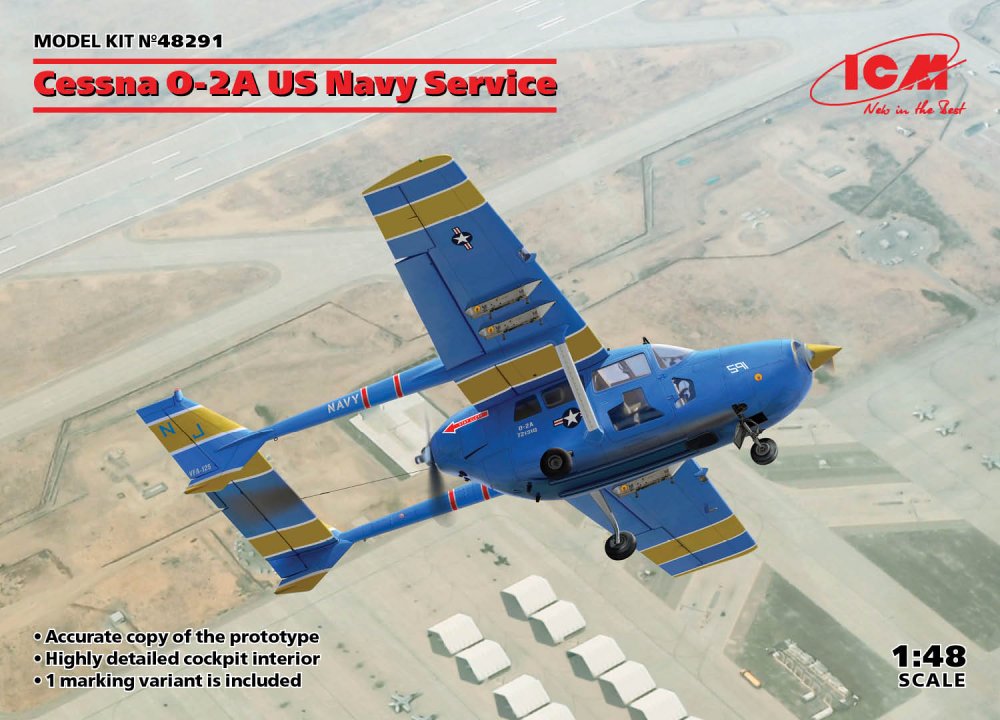
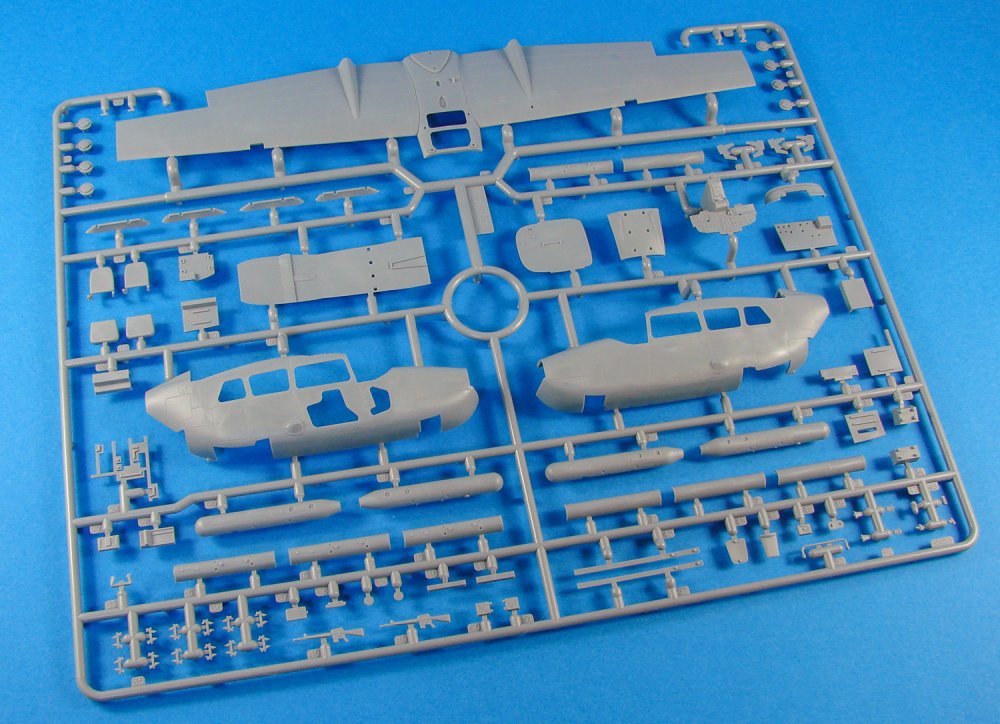
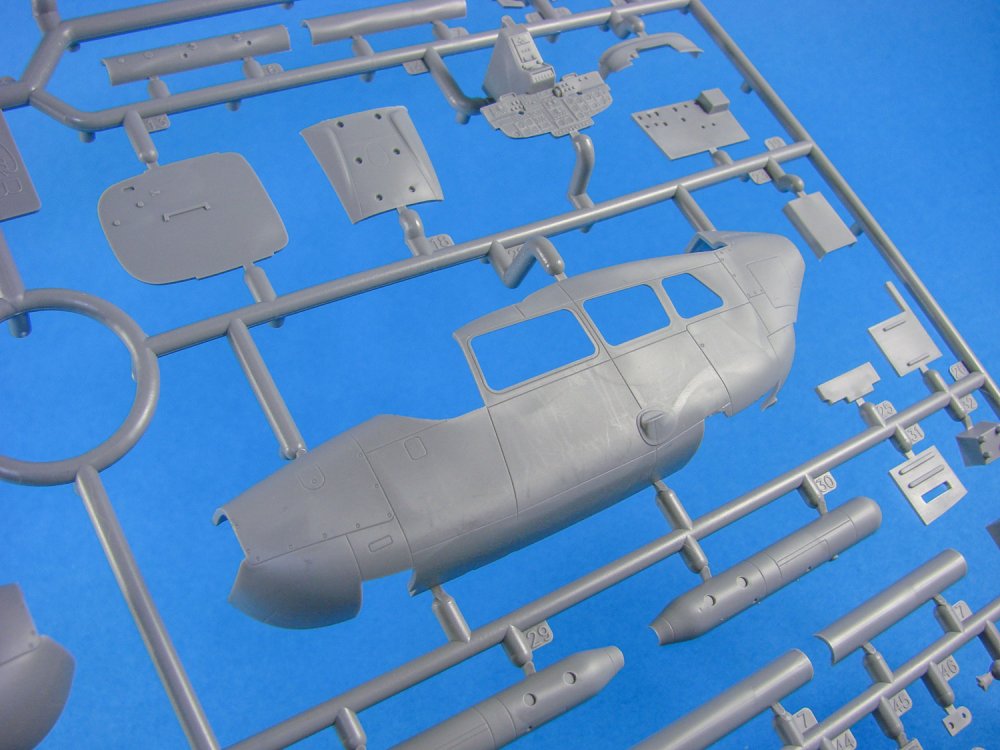
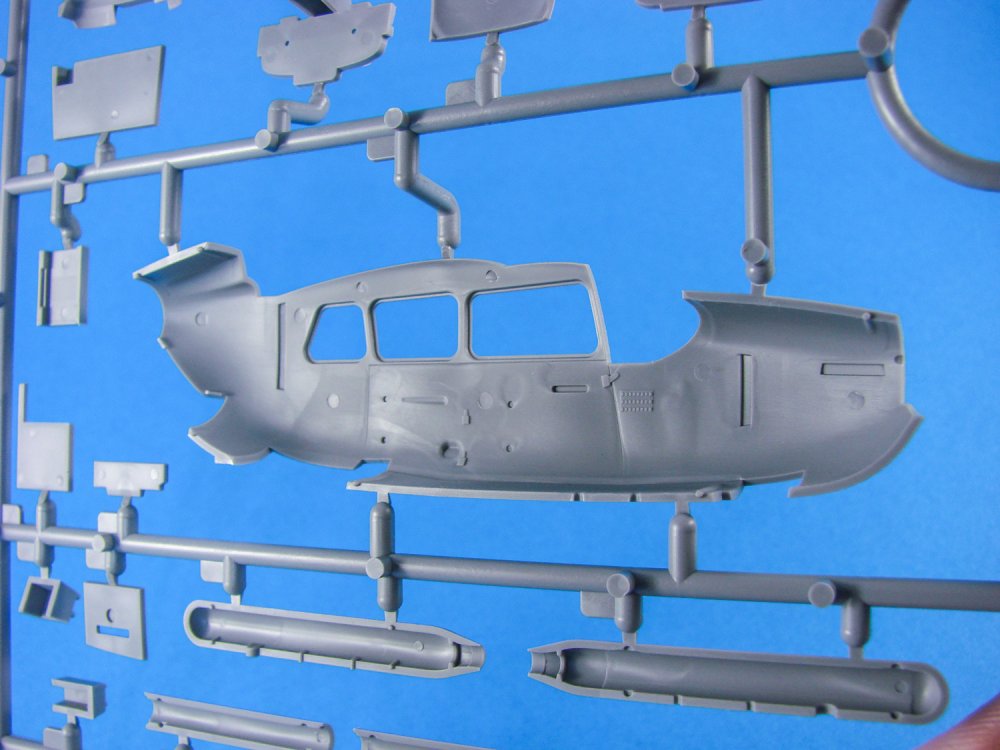
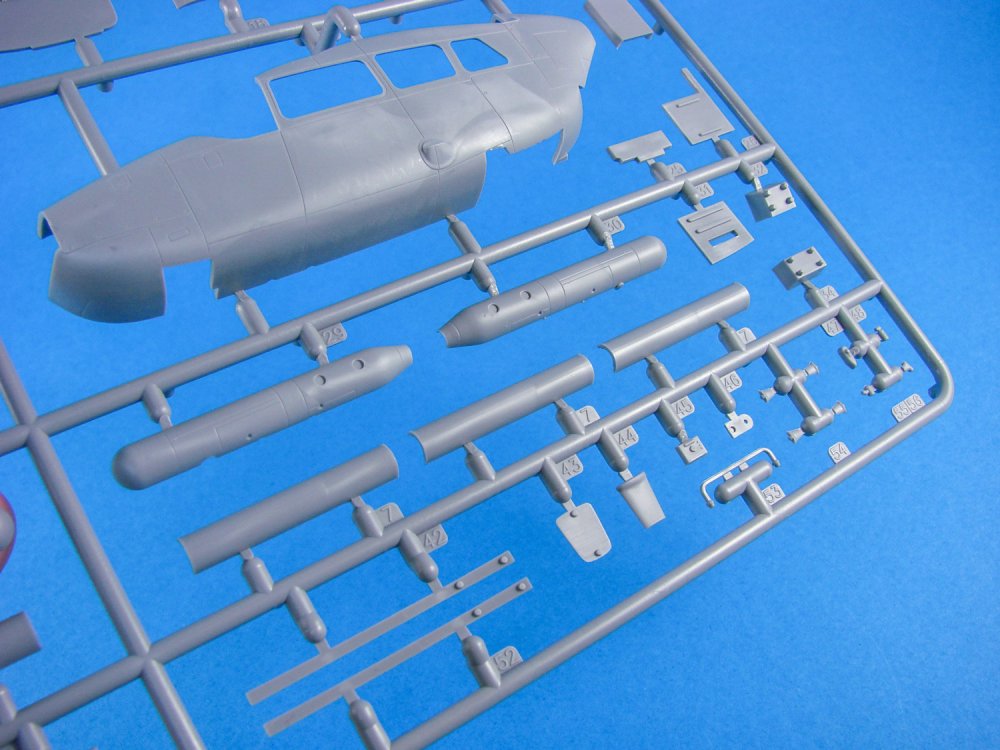
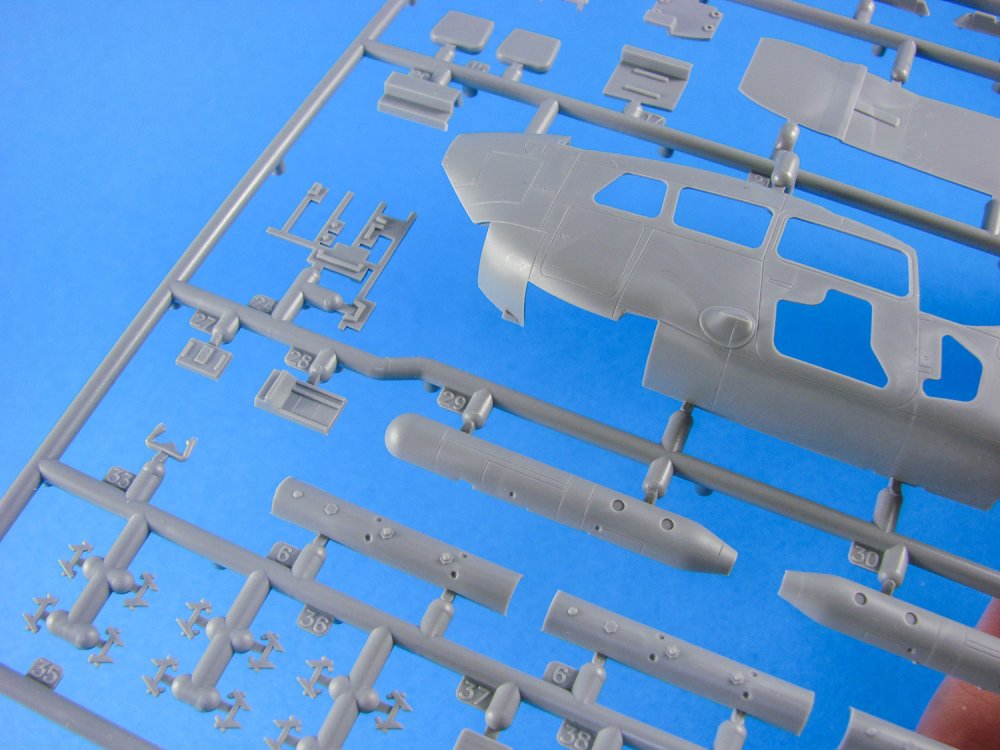
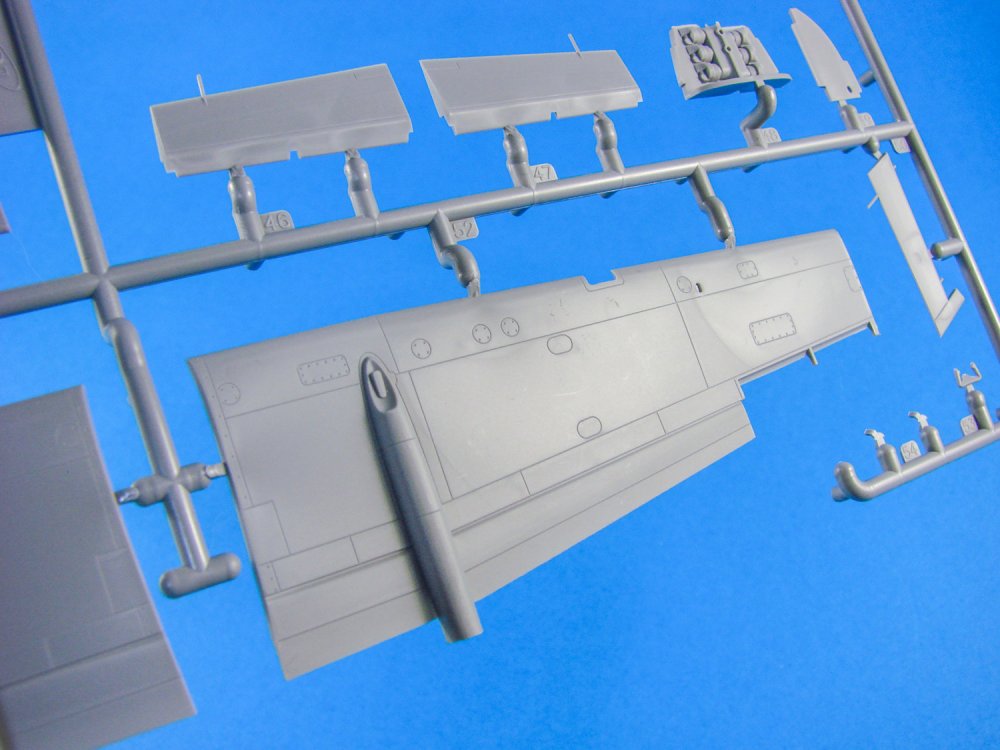
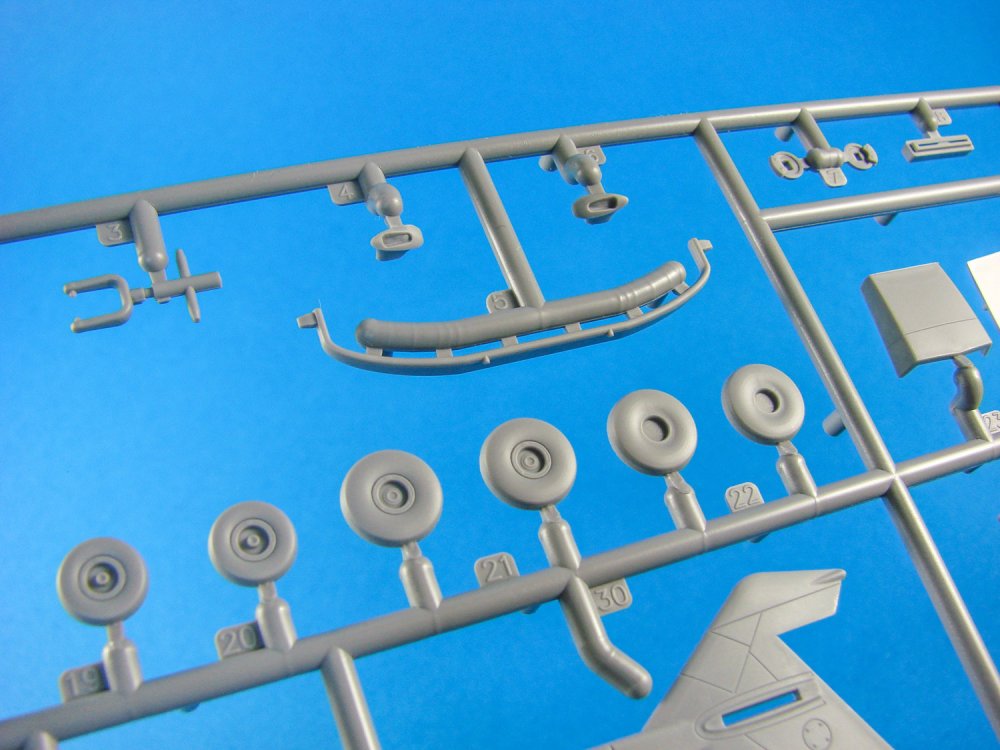
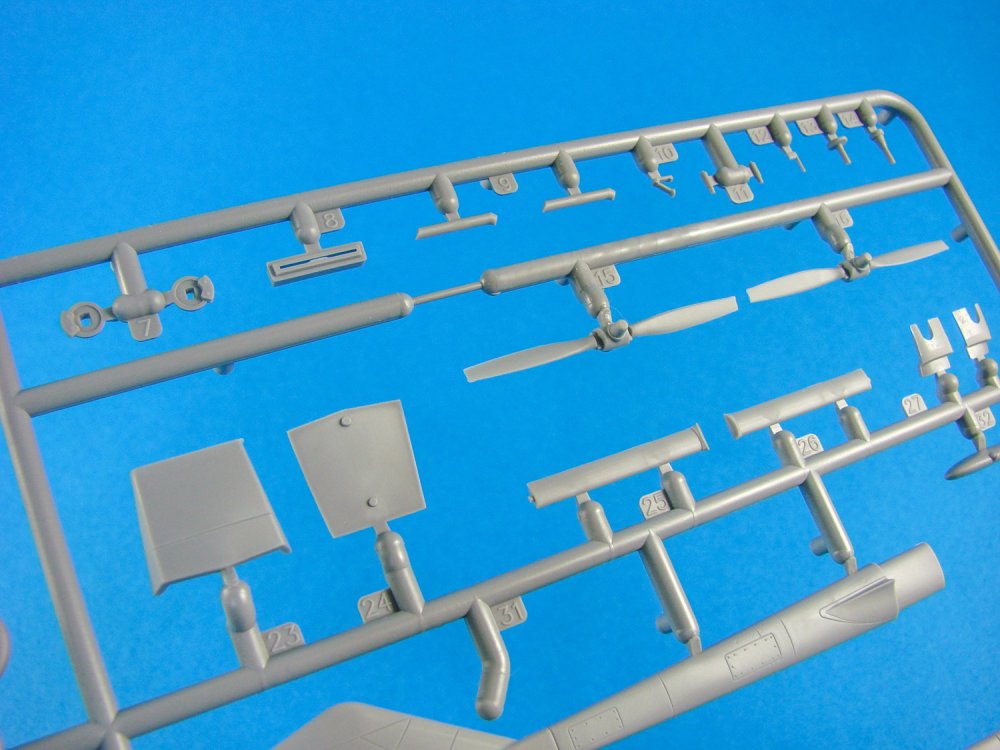
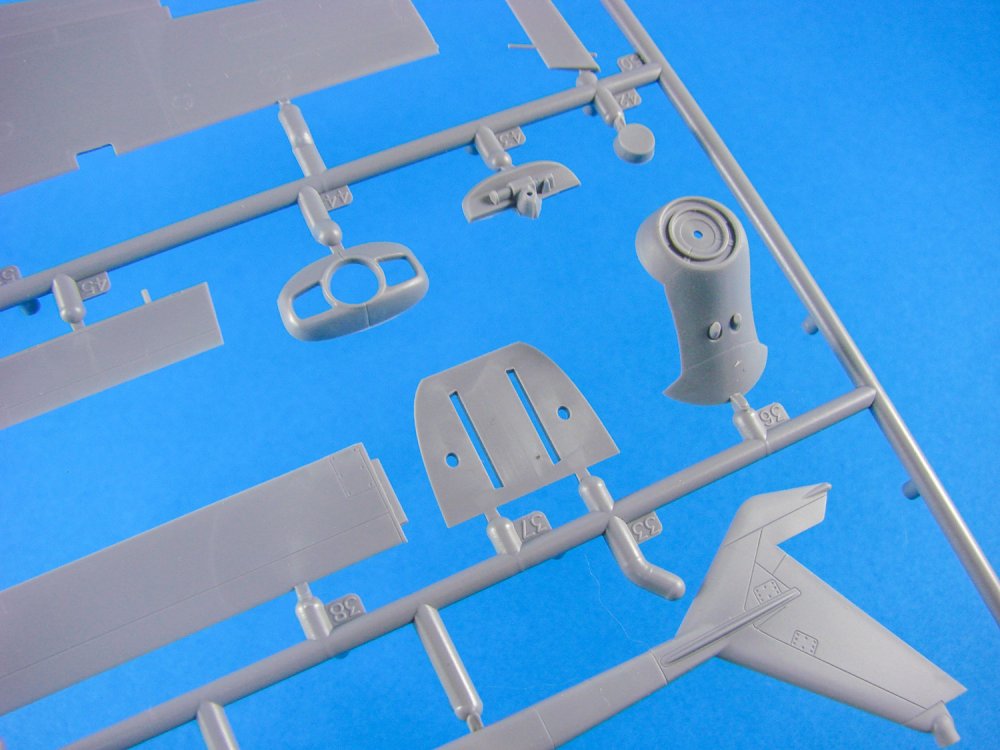
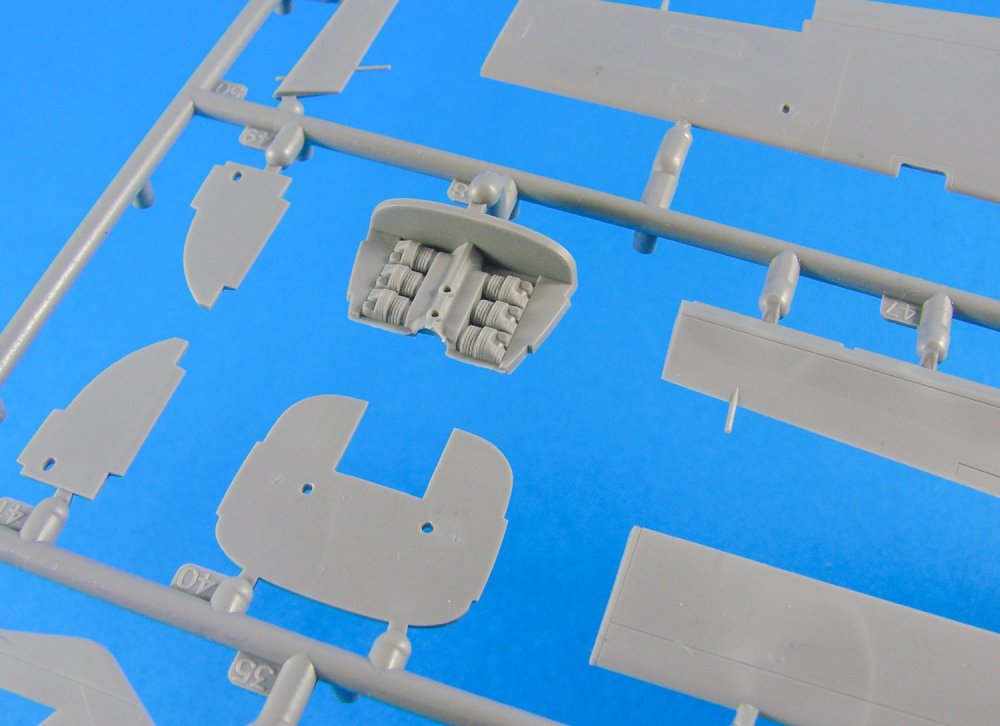
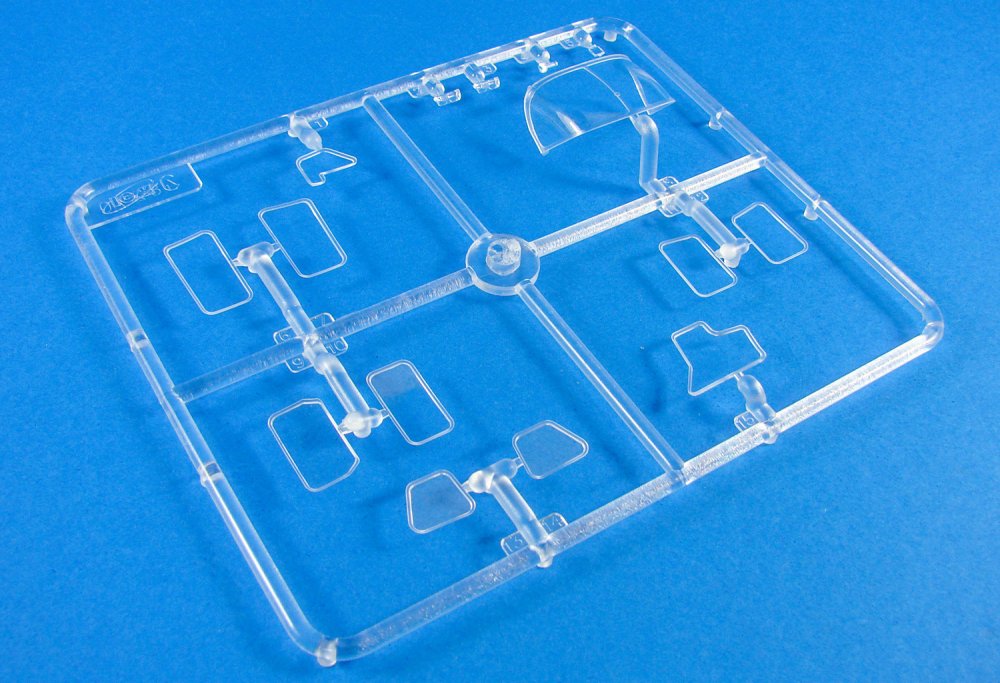
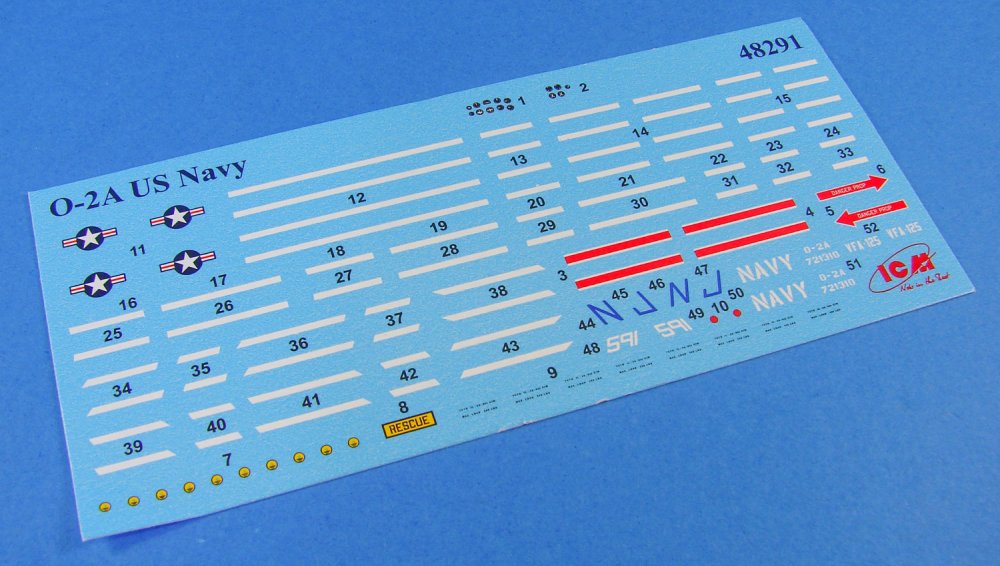
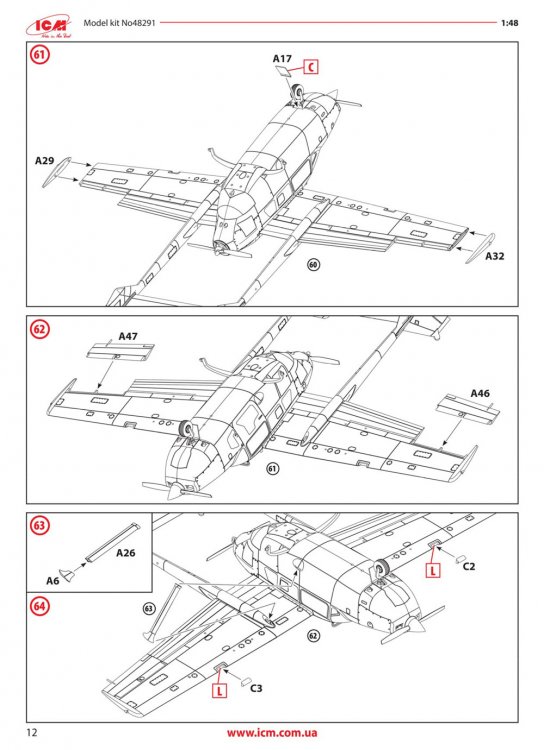
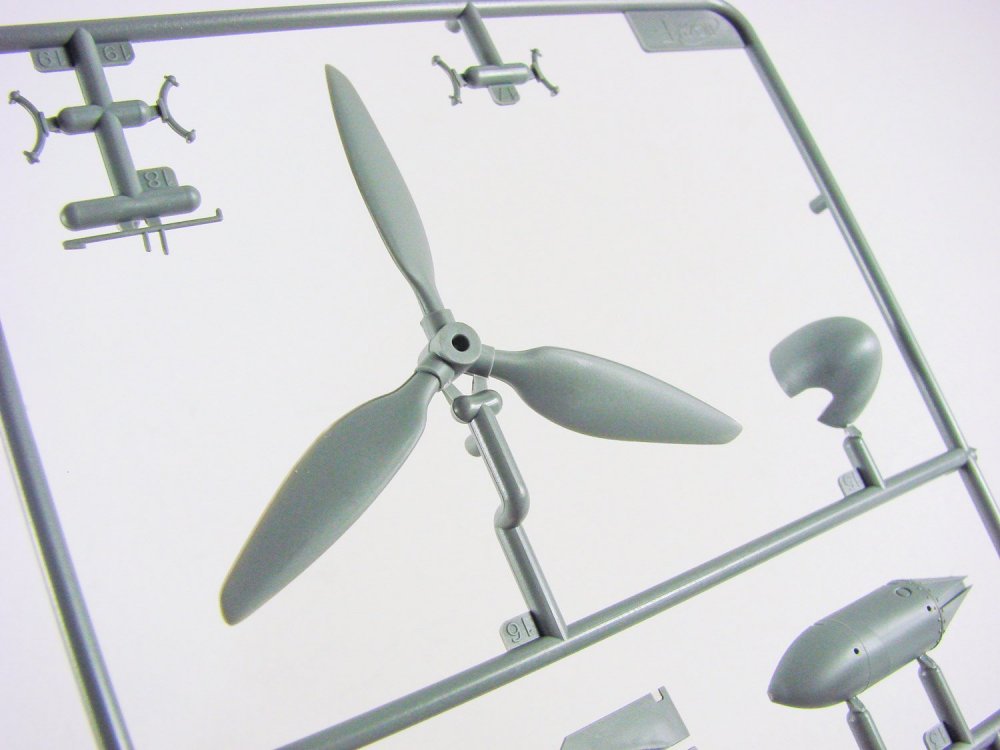
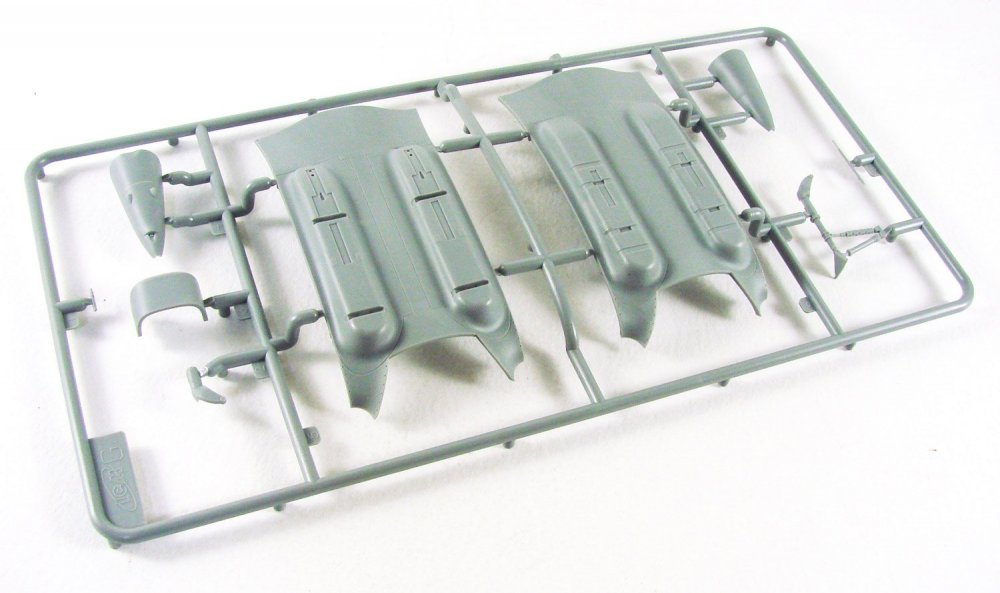
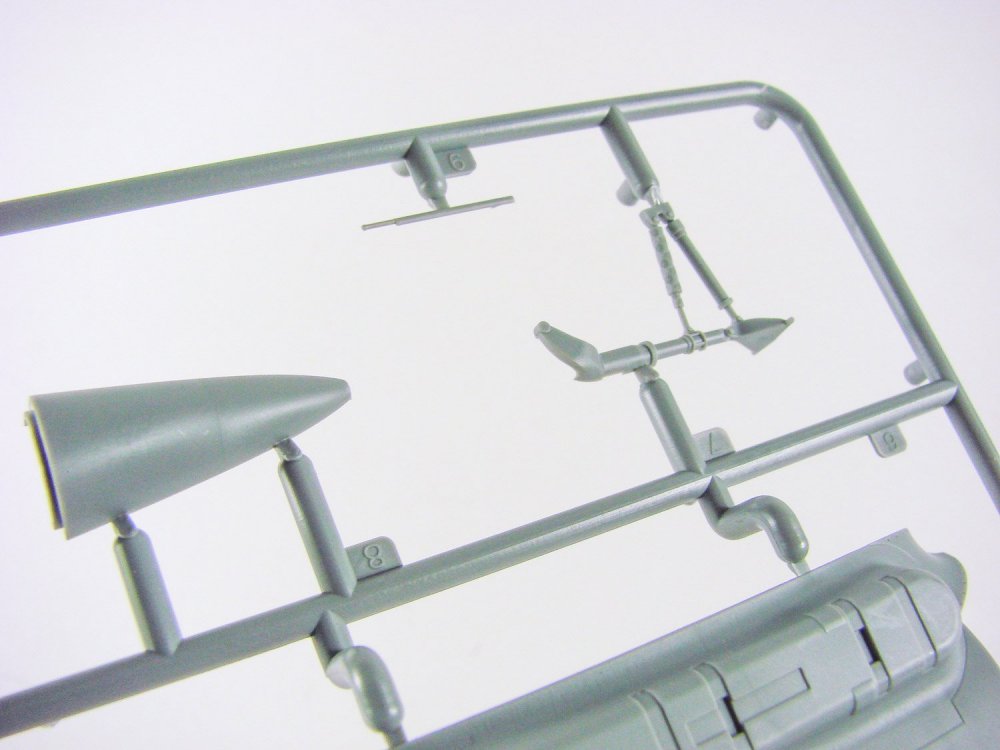
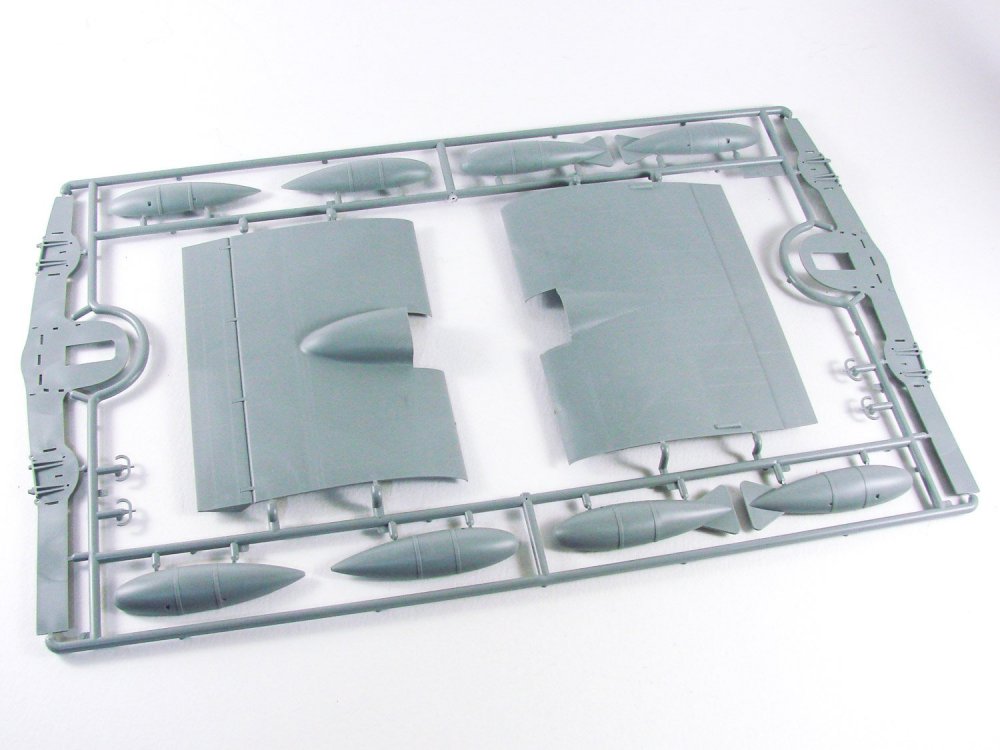
1:48 Cessna O-2A US Navy Service ICM Catalogue # 48291 The Cessna O-2 Skymaster (nicknamed "Oscar Deuce") is a military version of the Cessna 337 Super Skymaster, used for forward air control (FAC) and psychological operations (PSYOPS) by the US military between 1967 and 2010. In 1966 the United States Air Force (USAF) commissioned Cessna to build a military variant of the Skymaster to replace the O-1 Bird Dog. As with the civilian version, the Skymaster was a low-cost twin-engine piston-powered aircraft, with one engine in the nose of the aircraft and a second engine in the rear of the fuselage. The push-pull configuration meant a simpler single-engine operating procedure due to centreline thrust compared to the common low-wing mounting of most twin-engine light planes, and also allowed for a high wing, providing clear observation below and behind the aircraft. Modifications made for the military configuration included installation of single seating fore and aft (i.e. two tandem seats available for pilot and observer, vs. 6 seats available in the civilian version); installation of view panels in the doors (for improved ground observation); installation of flame-retardant foam in the wing-mounted fuel tanks (slight increase in empty vehicle weight; 3% reduction in available fuel capacity); installation of military communication and navigation equipment in lieu of available civilian equipment and antennas; deletion of propeller spinners; increased gross weight (5,400 lb vs. 4,400 lb in civilian version), with component strengthening as required to support the increase; and deletion of interior upholstery. Photo from AirHistory.net The first O-2 flew in January 1967 and the plane went into production shortly thereafter. Performance (especially at cruising altitudes) was degraded due to the added antennas and significant weight increase but was considered sufficient for the anticipated low-level operation. The O-2A version was designed for use in forward air control missions, featuring underwing ordnance hard points to hold rockets, gun pods or flares. 513 were delivered. The kit ICM’s O-2A was released last year, but we definitely thought this quirky little subject was worthy of a look, here on LSM. One thing ICM can’t be faulted for are the strength of their packages! As tends to be the case, this is packaged into a shallow but rigid corrugated card box with an integral folding lid. Over this is slipped the glossy product lid which shows the O-2A in its only scheme supplied in this release…and quite striking it is, clearly showing the underwing ordnance mounting points, which still look quite odd on a Cessna! Inside the box, there are TWO sprues of light grey styrene which are carefully packed into a single resealable clear sleeve. Within there also is a smaller sleeve containing one sprue of crystal-clear plastic parts. As there is another boxing of this kit, the instructions clearly show which parts are not for use in this specific release. The fuselage pod is where the fun starts on this kit, and this is almost fully featured. The plastic parts include an excellent avionics mounting rack for the rear cockpit wall, containing superb detail on those mounted units, as does the instrument panel with its dual yokes, and the two pilot seats. For the instrument panel, decals are also supplied. Of note here is the lack of supplied crew seatbelts in any form, whether moulded or PE. This model doesn’t actually have any PE at all, which isn’t unusual for ICM, so you will need to fashion something for yourself to suit this, as I can’t see anything on Eduard’s site which is specific. That moulded cockpit detail also spills out onto the interior walls of the fuselage, into which glazing recesses are clearly seen, meaning you will need to install those delicate parts quite early on in assembly. That shouldn’t be a problem though as any masking can be removed last, before the upper wing is fitted, which will then protect the interior from damage. Whilst there are no masks included for the windows, a cutting template is printed in the manual. I think I’d just prefer to tackle this myself though. The glazing sprue is superb…both neatly moulded, and super-clear, as well as suitably thin. Whilst the O-2A doesn’t have any engine representation for the rear pusher installation, it does have for the forward, which will be clearly seen through the engine cowl. ICM have recreated the bare bones of what will be seen through there, and it’s certainly more than enough for this subject. The engine is built as a pod which sandwiches between the fuselage halves, as is another pod for the nose gear assembly, incorporating the pilot rudder pedals on its rear wall. With the fuselage pod closed up, the rather fragile main gear legs can be fitted as a single piece. This looks ever so weak, so I would opt for a metal replacement such as THIS inexpensive brass set from Aerocraft Models. The wing is supplied as a full-span unit, with separately moulded ailerons. Before the lower panels are fitted, the full span part is fitted to the fuselage. Both boom units are then built and joined with a stabiliser (and separate elevator), and then offered up to the airframe. Those lower wing panels are then fitted. An unusual way of doing things, but I can see how this allows for more tweaking and alignment etc. should it be needed. The lower wing panels first need to have ordnance mounting point location holes opened up with a 1mm drill bit. Unusually, whilst the model is fitted with those hard points, nothing is supplied to fit to them, so you’ll need to do some research and a sift through your spares box to fulfil that possible requirement. All plastic parts are superbly moulded, with nice thin external panel lines etc. and internal detail standards are commensurate with what is expected in a modern tooling. Decals One sheet of decals is included, presumably printed in-house at ICM, or by a local vendor. Quality is very good, with nice colour density and definition, as well as registration. Carrier film is minimal too. Instructions A 16-page colour instruction manual is supplied, showing the O-2A spread out over 70 constructional sequences, in clear line drawing illustration. Drawings also also supplied which show the location of the masking sections from their template drawing. The scheme is printed in full colour and really shows just how pretty this machine is with its white, blue and yellow bands/panels. The single scheme is for: O-2A Skymaster, US Navy, VFA-125 Rough Riders, Nevada, 1985 Conclusion This is such a sweet little kit which has lots of excellent internal and external detail. The main gear legs definitely should be replaced, and apart from the absence of seatbelts, this really does hit the mark, as far as subject matter goes. It’s also quite an inexpensive kit too and would make a definite change from what we usually have on the bench. My sincere thanks to ICM for the review sample seen here. EXTRA PHOTOS/CAD:


-
- 2
-

-
Artscale have asked me to mention that they are wanting a US distributor. There has been talk with UMM and Sprue Brothers, but nothing has come from this, which is a real shame.
-

Fw190A-8 3/JG1 crash Vreeland
JayDee replied to JeroenPeters's topic in LSM 1/35 and Larger Work In Progress
I'll put the He 162 back in the attic then -
ASK Razor Saw holders (straight and asymmetric) Artscale See article for codes, links and prices I’m a sucker for nice tools, and one that is used most frequently in my arsenal is my trusty razor saw. I use this for all sorts of materials, including plastic, resin and now also wood. You sort of instinctively know when you need to get it from the tool rack, for those jobs where a knife would be too challenging, or cutters would be too destructive. They are great for making fine and precise cuts that remove an absolute bare minimum of material, unlike a regular saw. I also use mine to gently re-scribe any shallow and fine panel lines on plastic. Razor saws can be particularly good for that task and they don’t leave ridges of material behind like many regular scribers. Artscale recently sent me their two new razor saw releases to see what I thought, and it provided a useful comparison to the brand I currently use. That latter brand is actually very good and has blades and mount which are made from photo-etch stainless steel. For a handle, the tool is mounted in a regular X-Acto style handle. Two slightly different razor saws have been sent for evaluation. These are: Razor saw – Universal (200-T0020), €14,95 Razor saw – Asymmetric (200-T0021), €16.95 The ‘Universal’ style has a straight blade mounting system, whilst the ‘Asymmetric’ has an offset blade mount which is very useful for those awkward cuts, or for those where you want maximum visibility of the material being cut, without your own hand getting in the way. The razor saws sent for evaluation are complete tools and need no third-party handle. Black ABS plastic is used for the handles on these, and the whole tool is nicely balanced in the hand as well as being comfortable when gripped. The blades are also more rigid than the brand I currently use whilst looking every bit as thin…exactly the remit of a razor saw. In fact, these blades are 0.12mm thick). Both of the supplied saws are fitted with the same blade (ultra-smooth and extra smooth asymmetric – two different tooth/pitch sizes). That single blade is also that is provided in each of the saw packs, with replacements and different types being available both individually or in multi-packs. Both saws have a beautifully designed system of blade change which also doubles up to provide reinforcement to the blade itself. It’s also a single-tool system for changing the blade too, with a hex-head key provided. There are two hex screws which drop through a reinforcement plate and the blade, before screwing into a threaded reinforcement plate on the rear. This is handy as my current brand requires a small wrench and a screwdriver to change the blade. The blade mounting holes are also central to the blade, meaning each cutting edge can be used without having to reposition the blade in the handle. In use, the blade stays nicely straight without any awkward flexing, and it’s super sharp too. There is also a certain amount of freedom in positioning the blade in the tool, in case you want to set it to a certain depth of cut. Razor saw blades Artscale also included packets of the blades they currently supply for use with their new razor saw. I have the individual packets, although you can buy these in multiples on their website. Ultra-Smooth (symmetric) - €1,90 Ultra & Extra Smooth Radius (asymmetric) - €2,60 Extra Smooth (symmetric) - €1,90 Ultra & Extra Smooth - €1,90 Conclusion I’ve been after something to replace my current razor saw as the blades in that are way too easy to bend and buckle without the utmost care. Artscale’s new tools seem to answer that need perfectly, and the blade options are very useful too, depending on application. These new razor saws and very nicely made and feel right in the hand. They are also super sharp too! If you are in the market for a new razor saw, whether a replacement or your first, these would be a very good option to consider. Here’s the tool data sheet with more technical information for you. ASK-Handle-saw-pdf.pdf Sincere thanks to Artscale for sending these tools out for evaluation on LSM. To buy directly, click the links in the article.
-
Das Werk 1/72 S.M Unterseeboot U9
JayDee replied to JeroenPeters's topic in LSM-Related Reviews (military figures etc)
That looks a very cool kit. Weathering it will be fun -
HK Lancaster Dambuster finished
JayDee replied to Kaireckstadt's topic in LSM 1/32 and Larger Aircraft Ready for Inspection
Absolutely outstanding! Loving the finish on the black surfaces. How did you paint those? -
1/32 Scottish Fishing Boat.
JayDee replied to BigDan's topic in LSM 1/35 and Larger Work In Progress
Is that the Amati Fifie? -
I'd rather live a quiet life than in a bitch-fest like a certain site seems to often descend into.
-
I've never had anything borked in a WNW kit apart from some duff cabane struts on a D.VII. Those were so fragile. I must've reviewed dozens of different WNW and not seen anything like on this Mengnut kit.
-
Glad I steered clear of this. Banana wings, bent undercarriage and wing struts and bent Spandau. Thick decals. Some of the stuff I've heard about this kit.

-
It does, but that was more to bring reviews to the site and generate some traffic. We run on a dedicated server which uses SSD drives, plus we have software/renewal, theme and theme renewal costs, domains with privacy additions (GDPR put the price up for us with our domain host). Our little chunk of this with hosting comes out to around $300/yr. Since 2013, I've been pretty much paying the costs myself with the exception of HobbyZone who made a one-off donation to help out. Many thanks to those who have contributed. Everybody is free to use LSM without any donation, but many thanks to those that have so far.
-
1/32 Whirlwind - 3D cockpit rendered images
JayDee replied to petr@specialhobby's topic in Special Hobby
If anything will tempt me to do a little plastic again, it'll be this. I've arranged for LSM to review this as soon as possible. -
It's legit. At the moment, I am supporting the costs of LSM, solely, so anything to help contribute will certainly be welcome for our running costs. Many thanks to those that have helped so far.
-
Das Werk 1/32 Ju-126 "Elli"/ Ju-127 "Walli"
JayDee replied to JeroenPeters's topic in Aircraft Reviews
Out-frickin-standing! -
Major update. If you follow topics, check your settings to make sure they default to 'unread content'.
-
New HK Models Release: Lancaster Nose Section
JayDee replied to JeroenPeters's topic in Aircraft Reviews
Just wonderful, eh? -
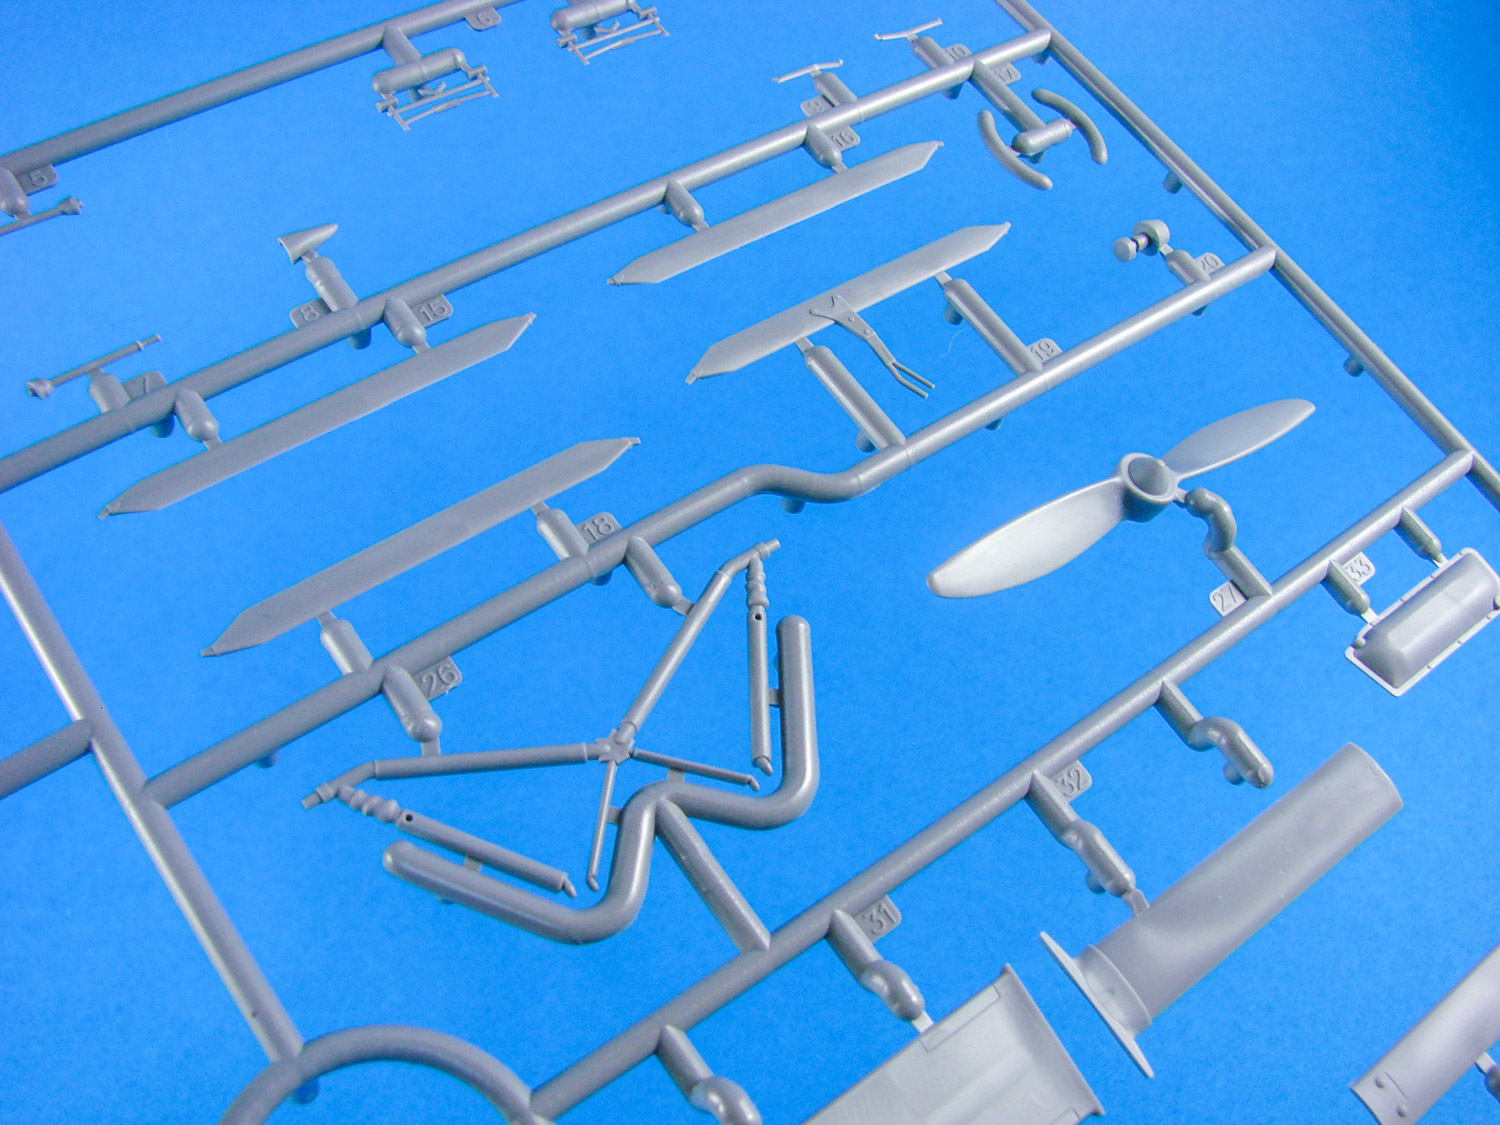
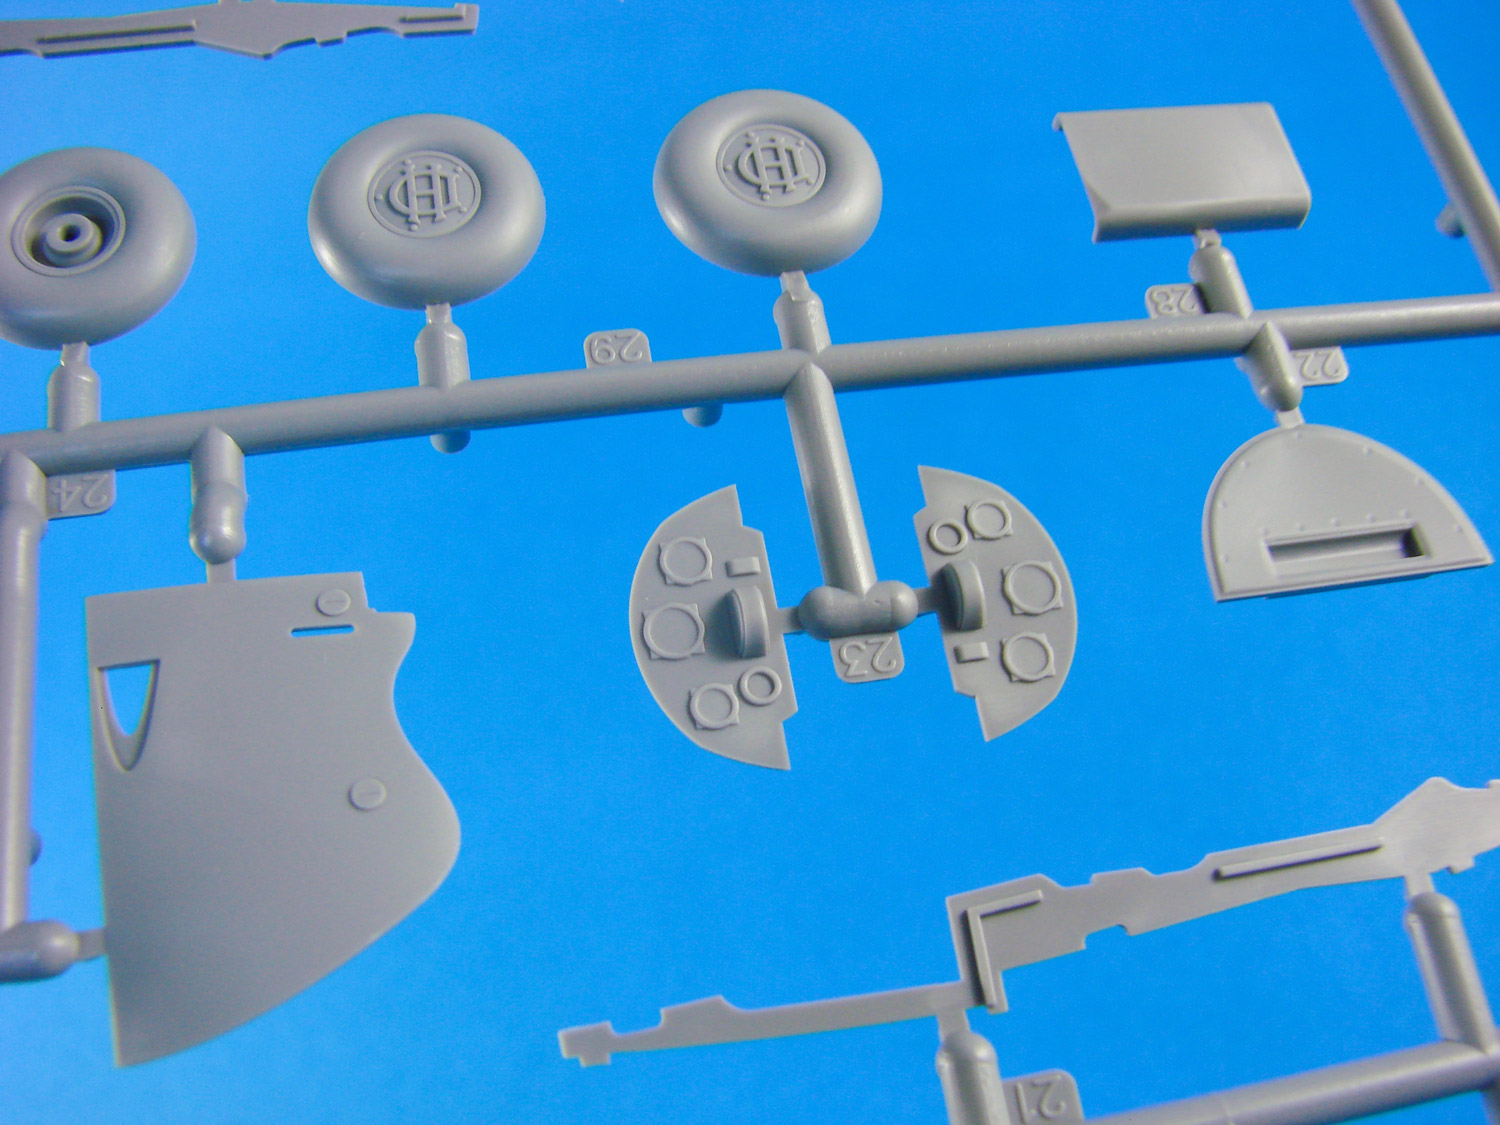
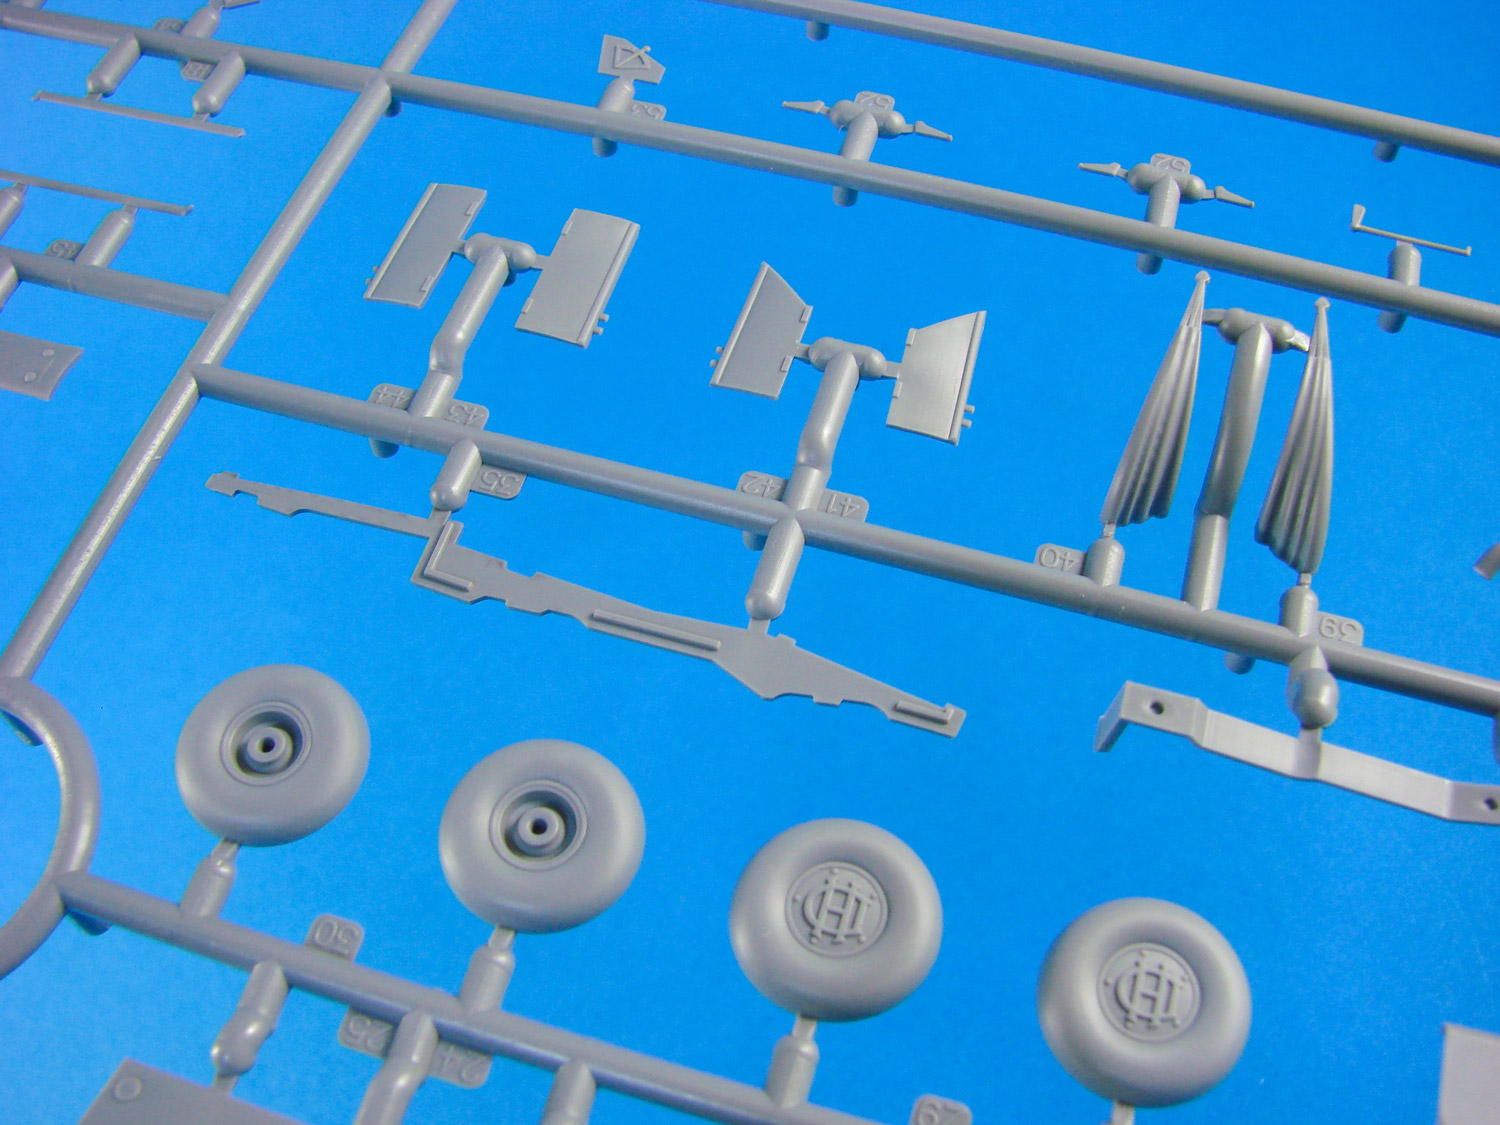
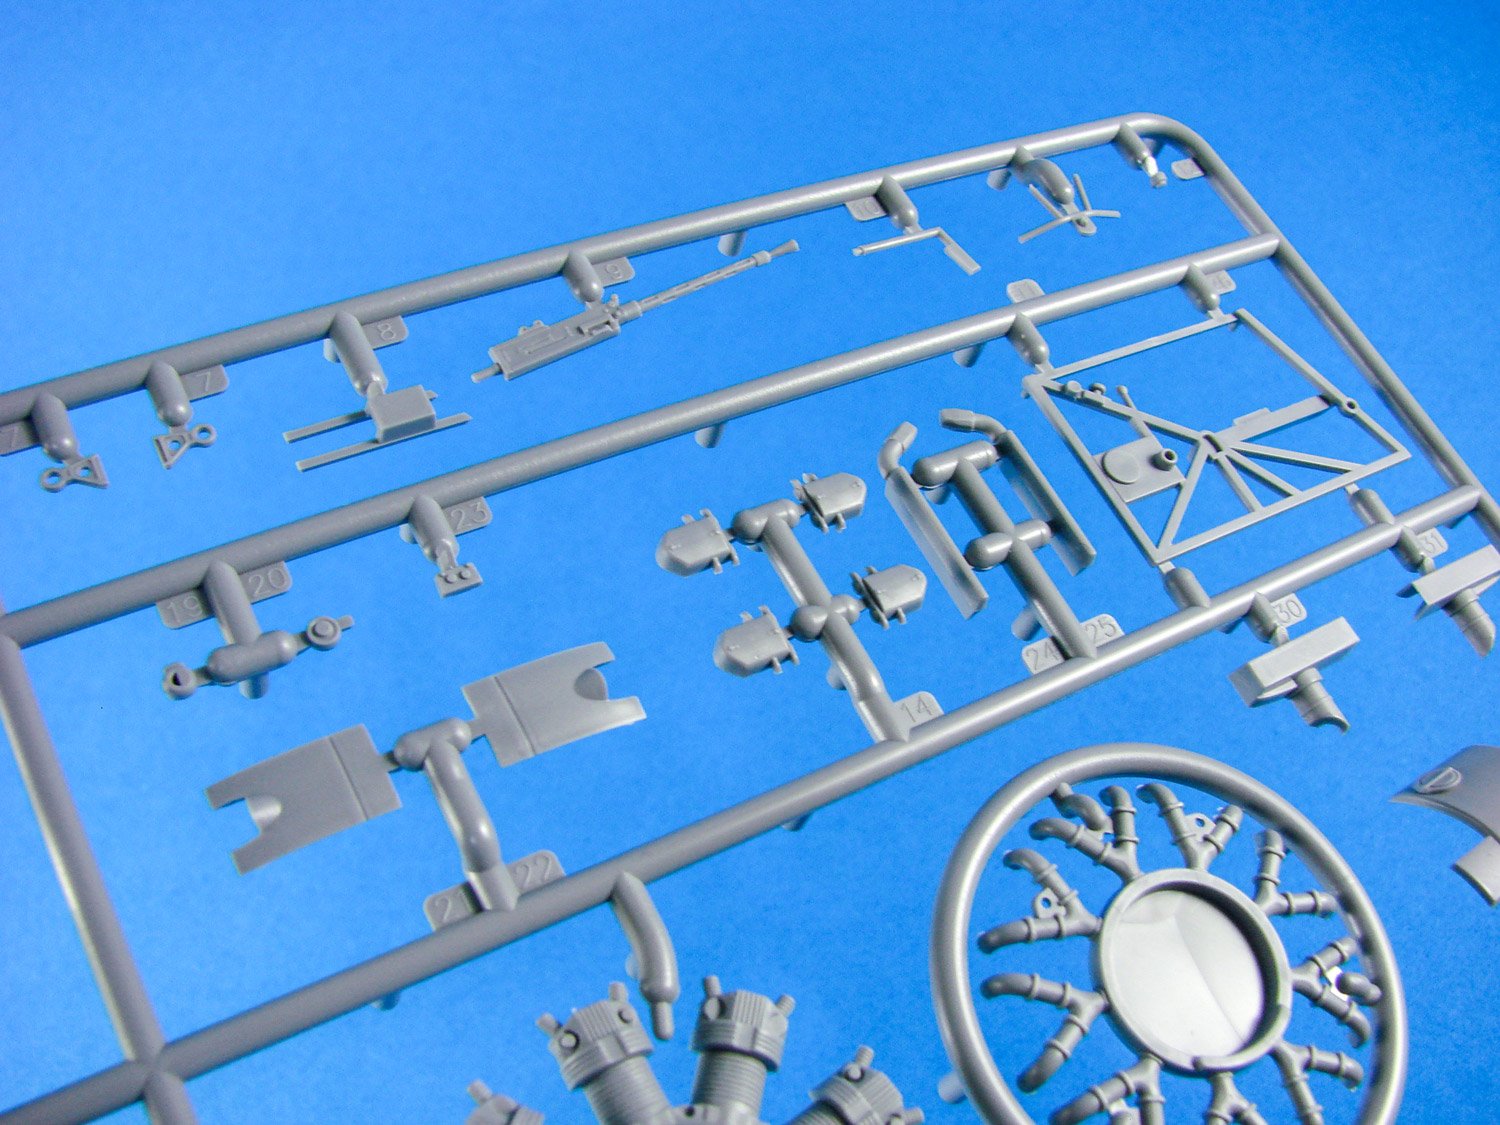
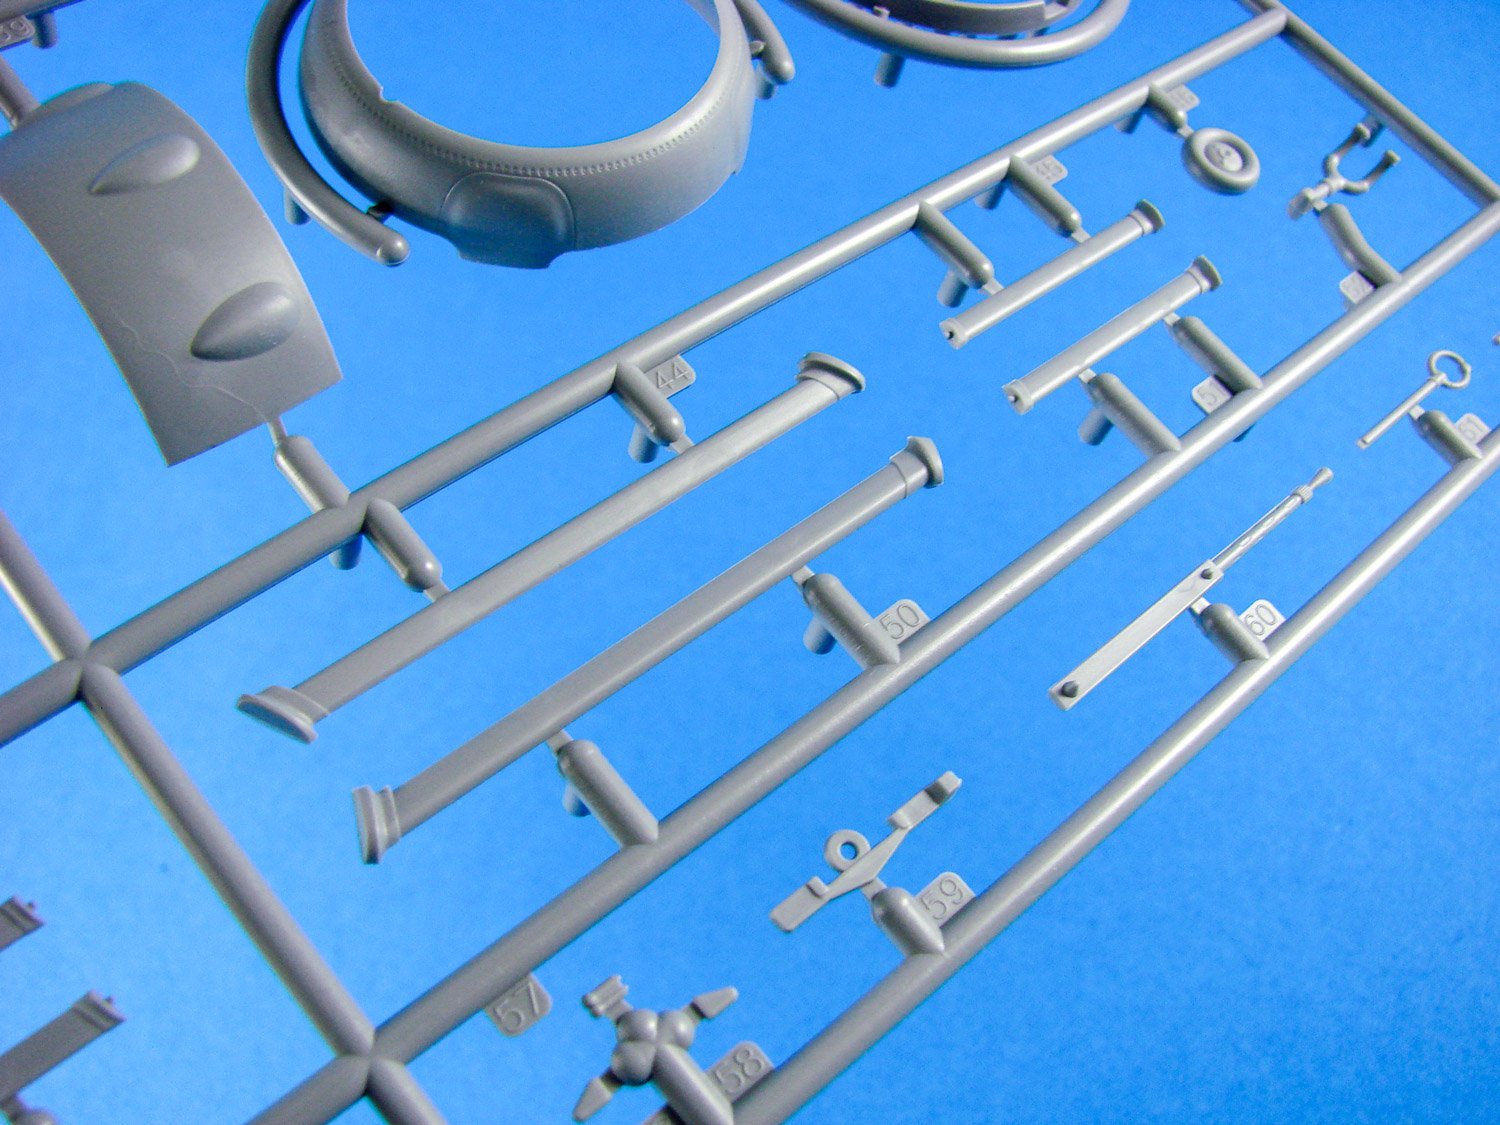
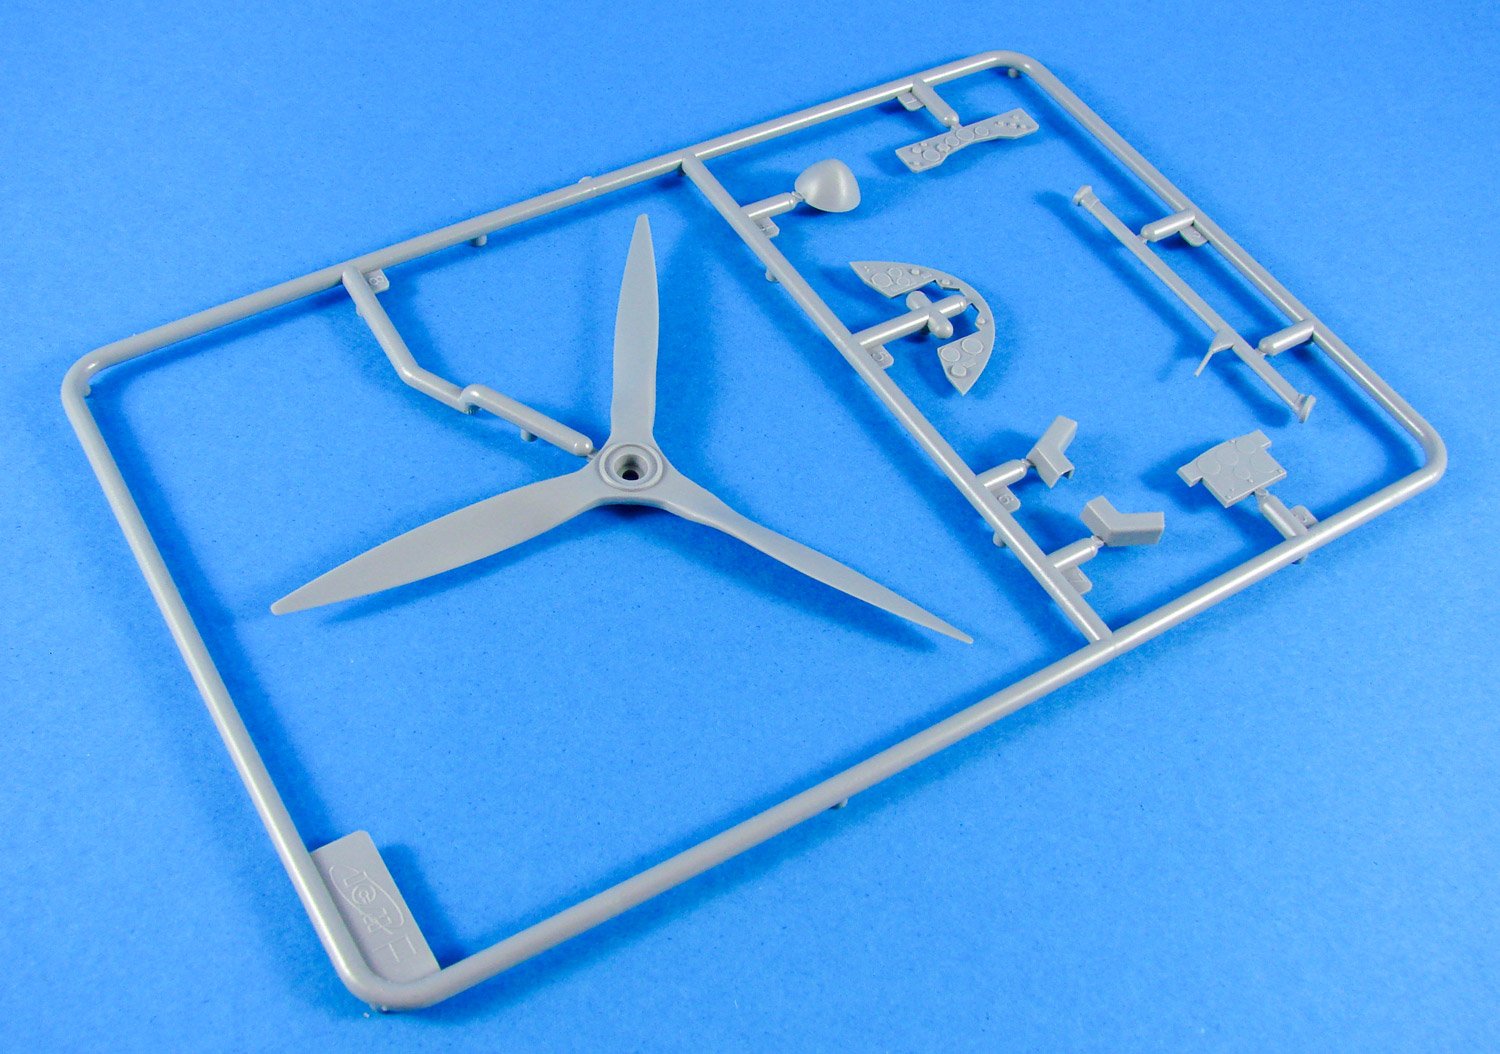
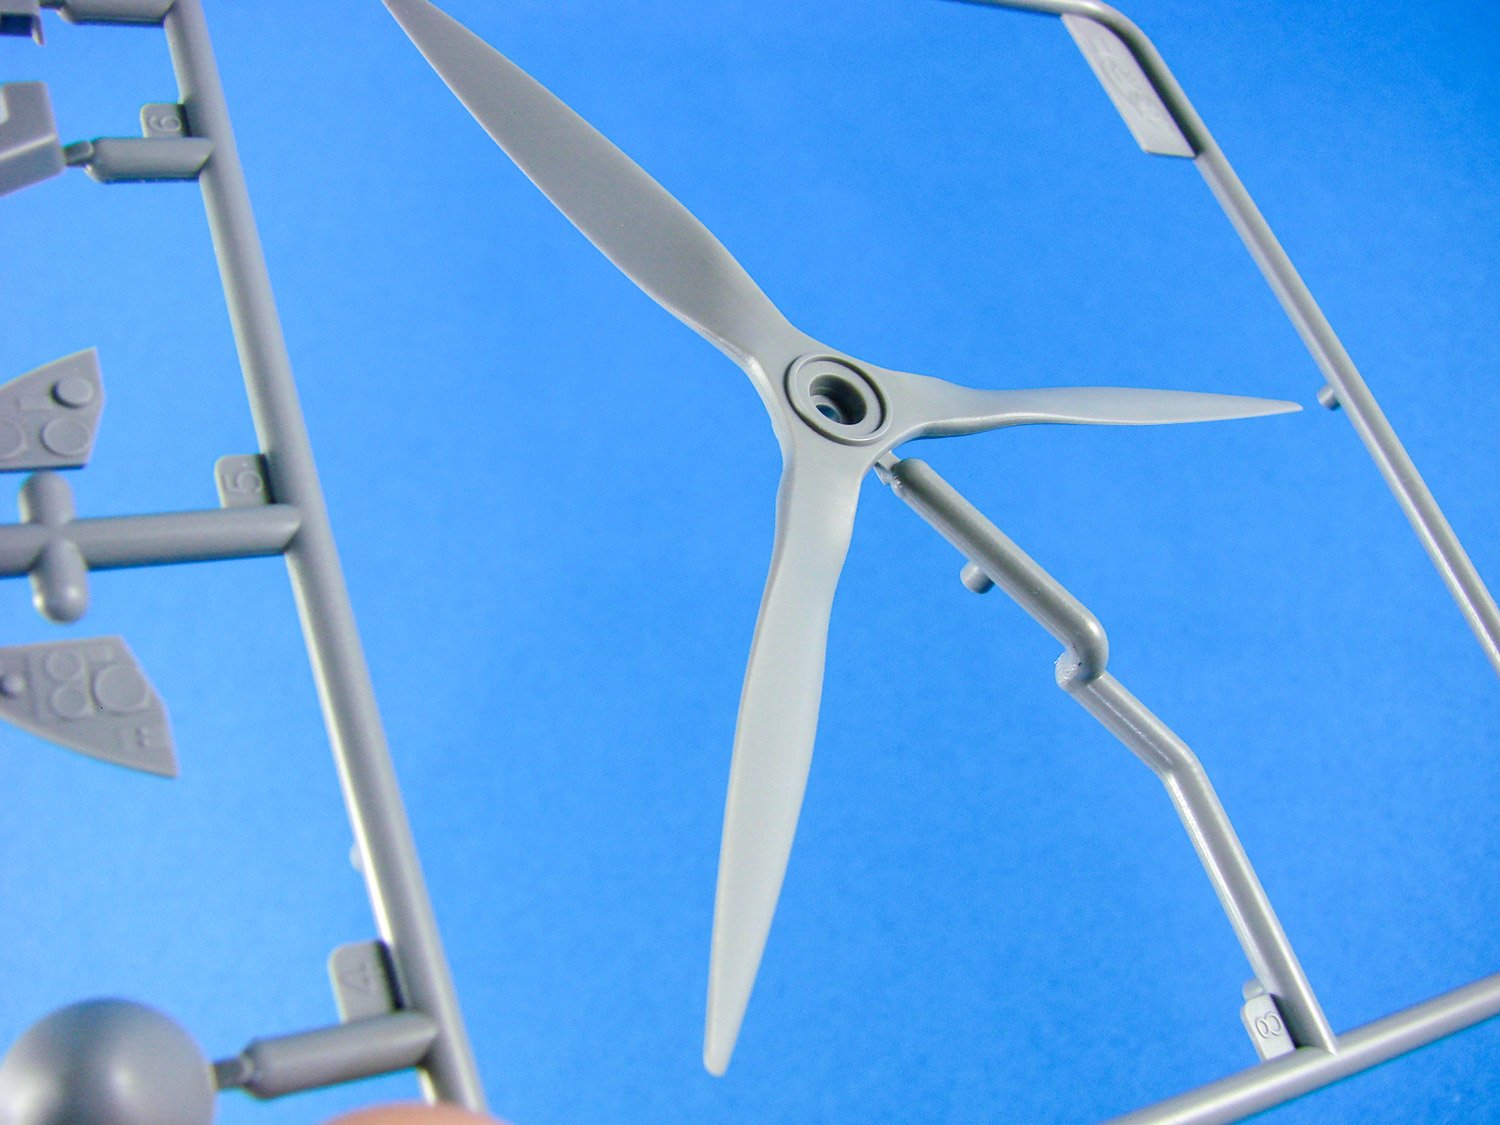
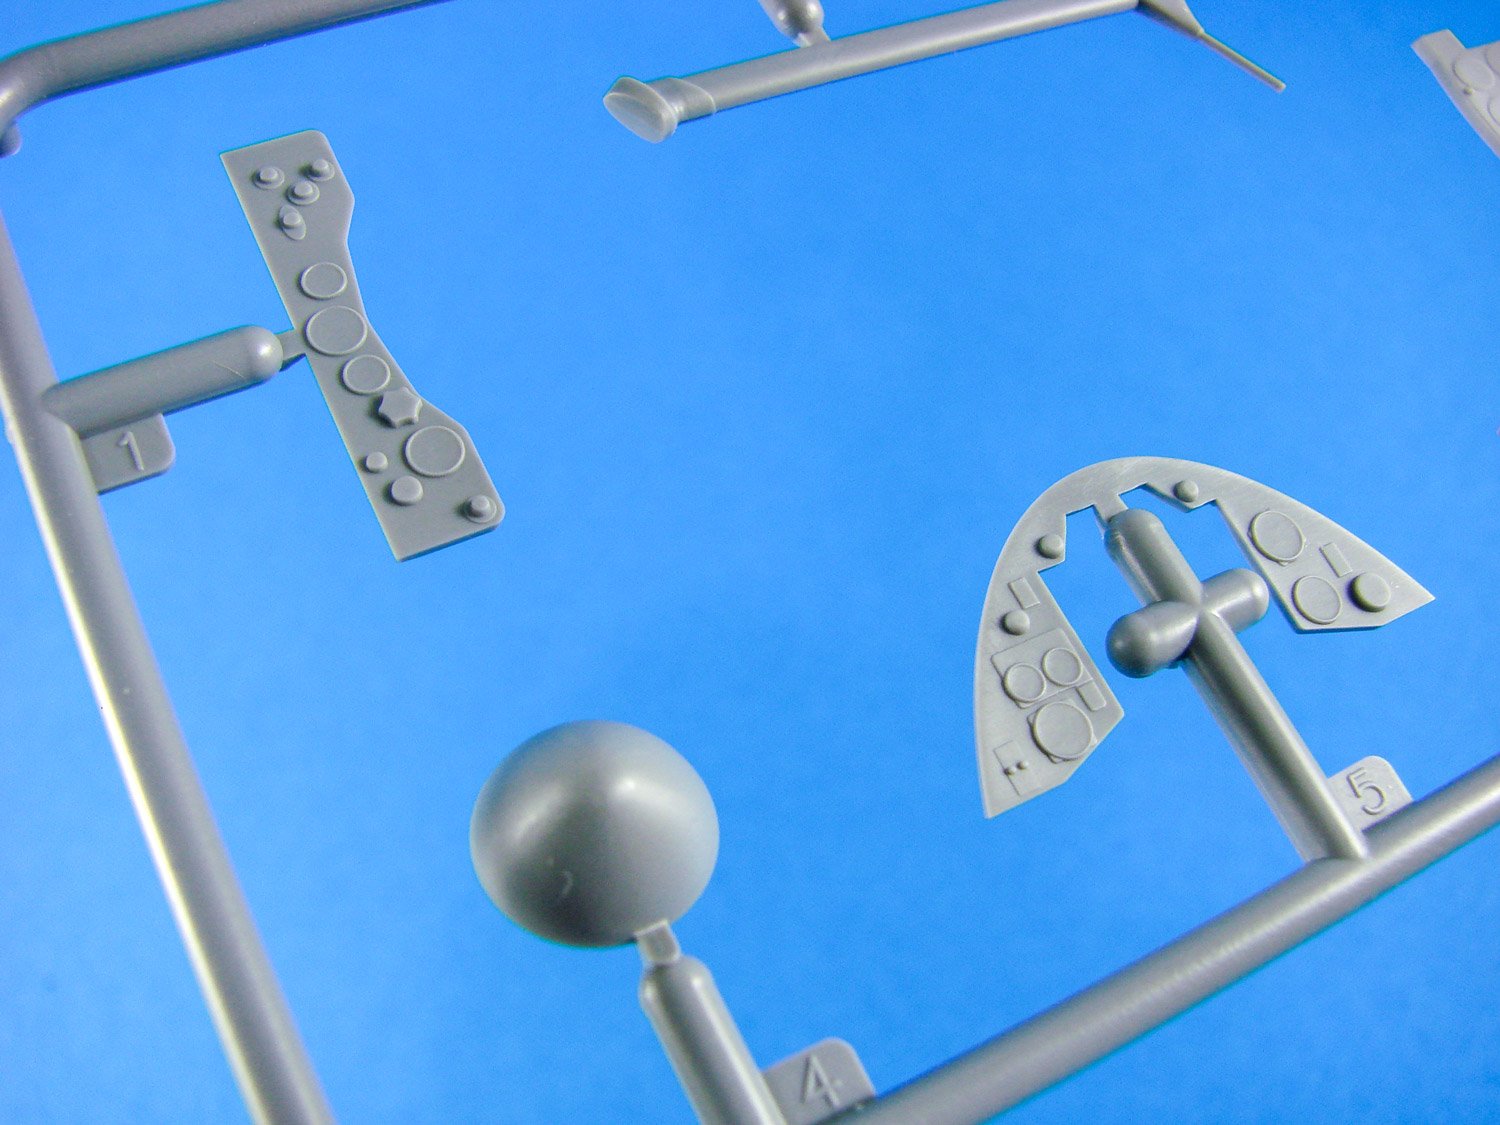
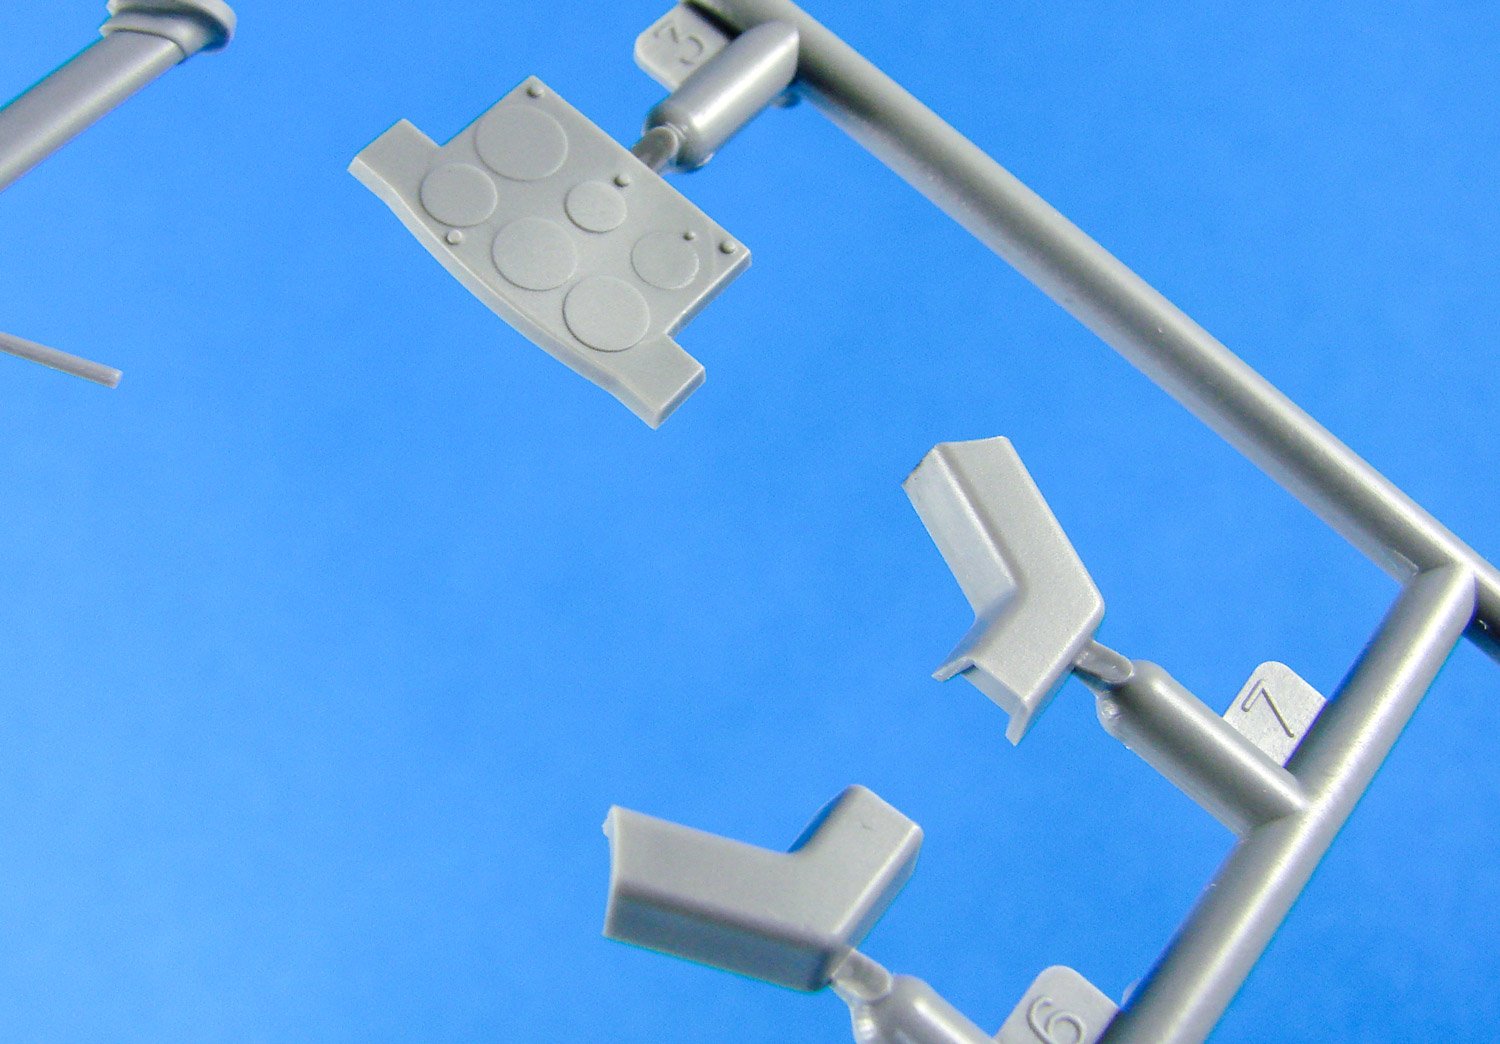
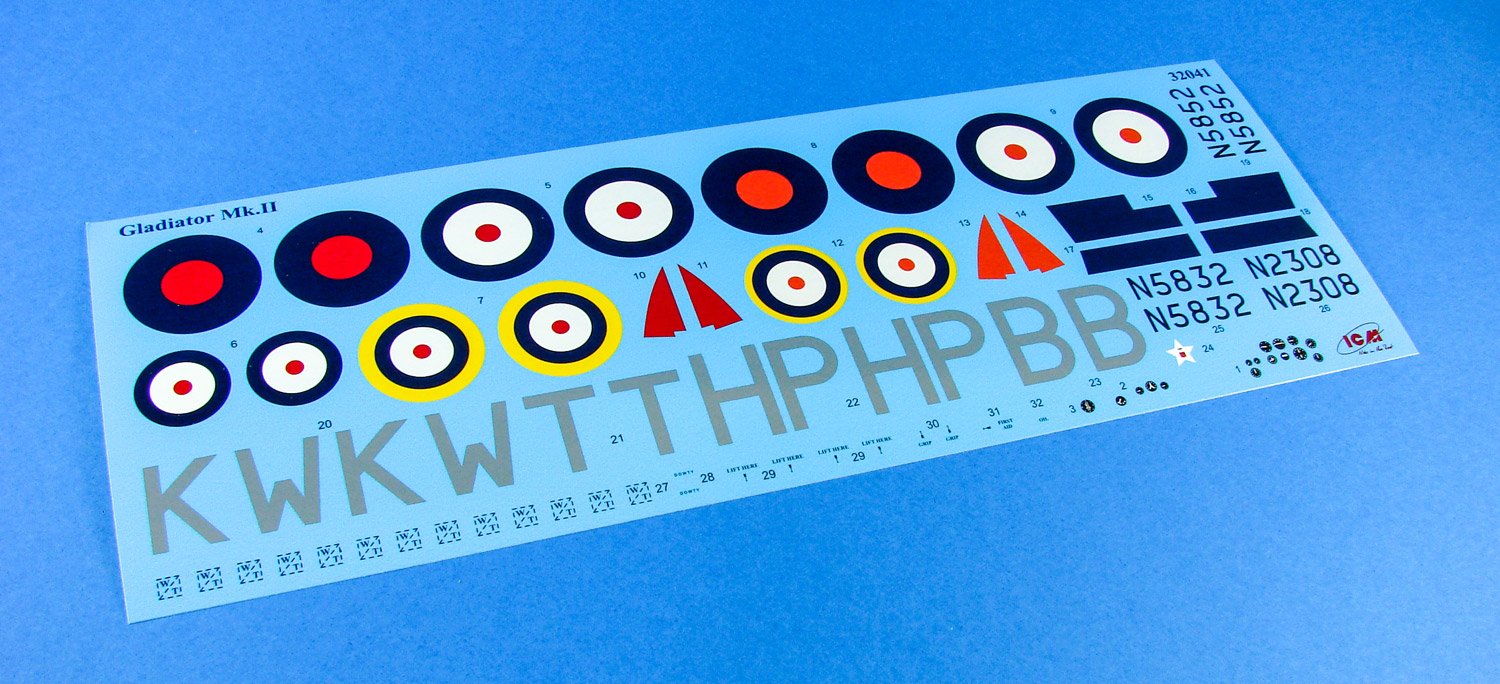
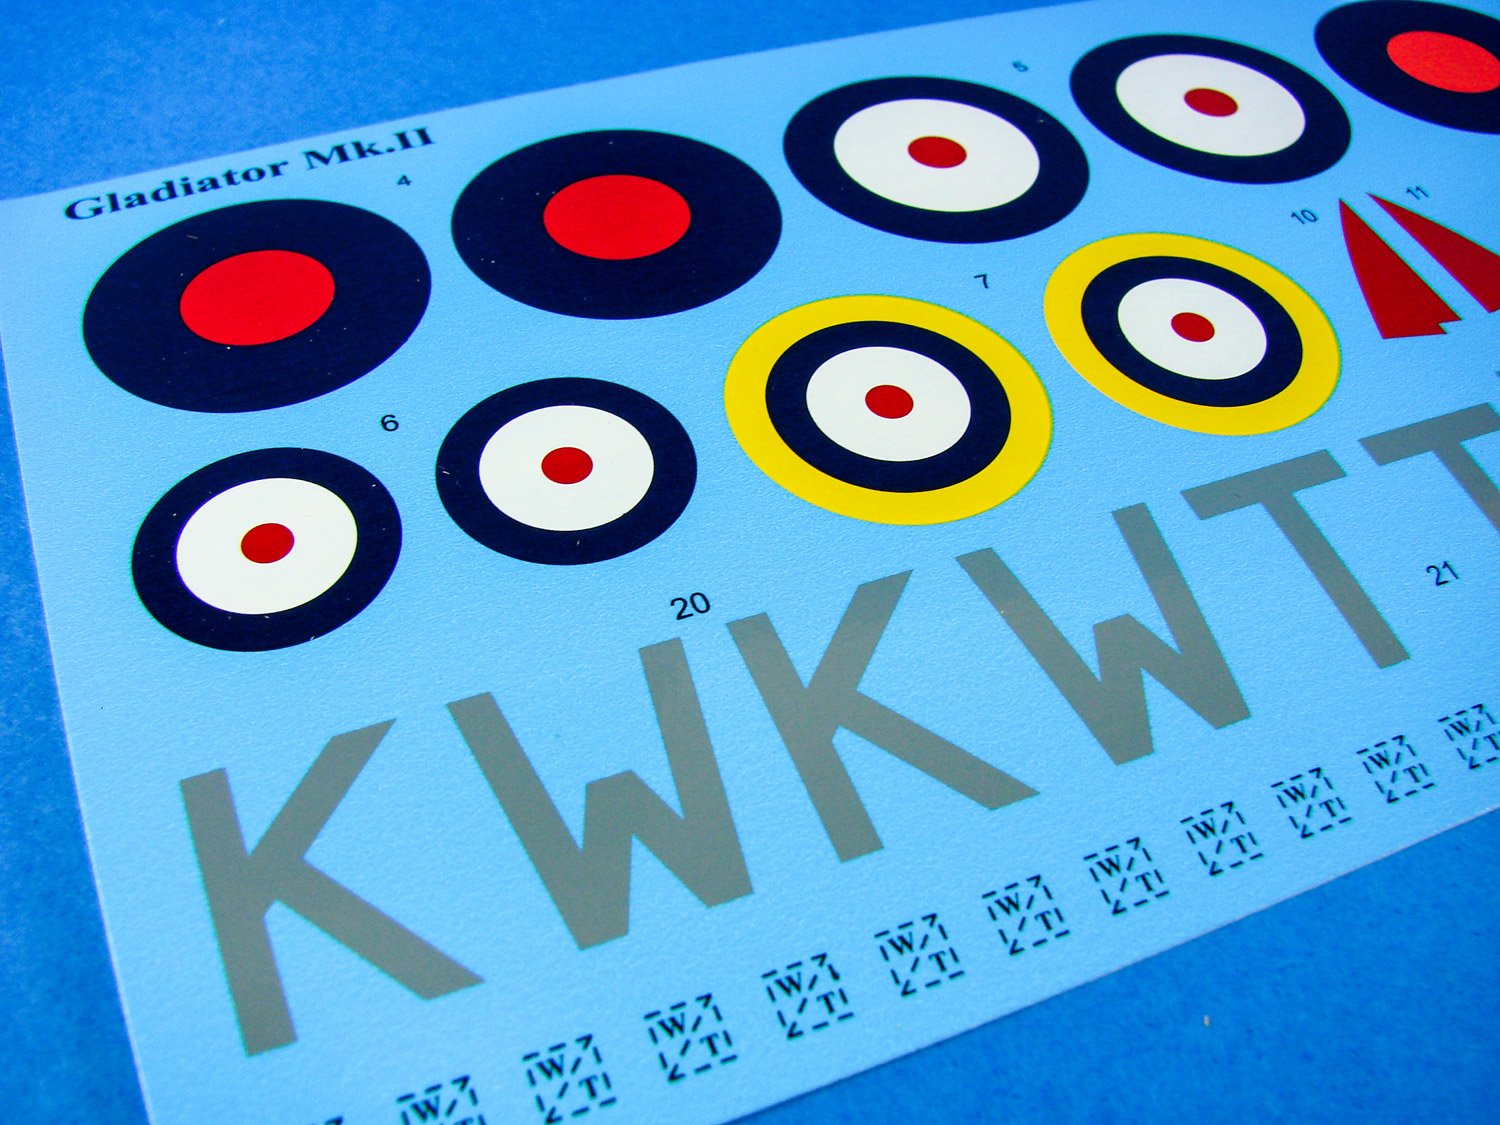
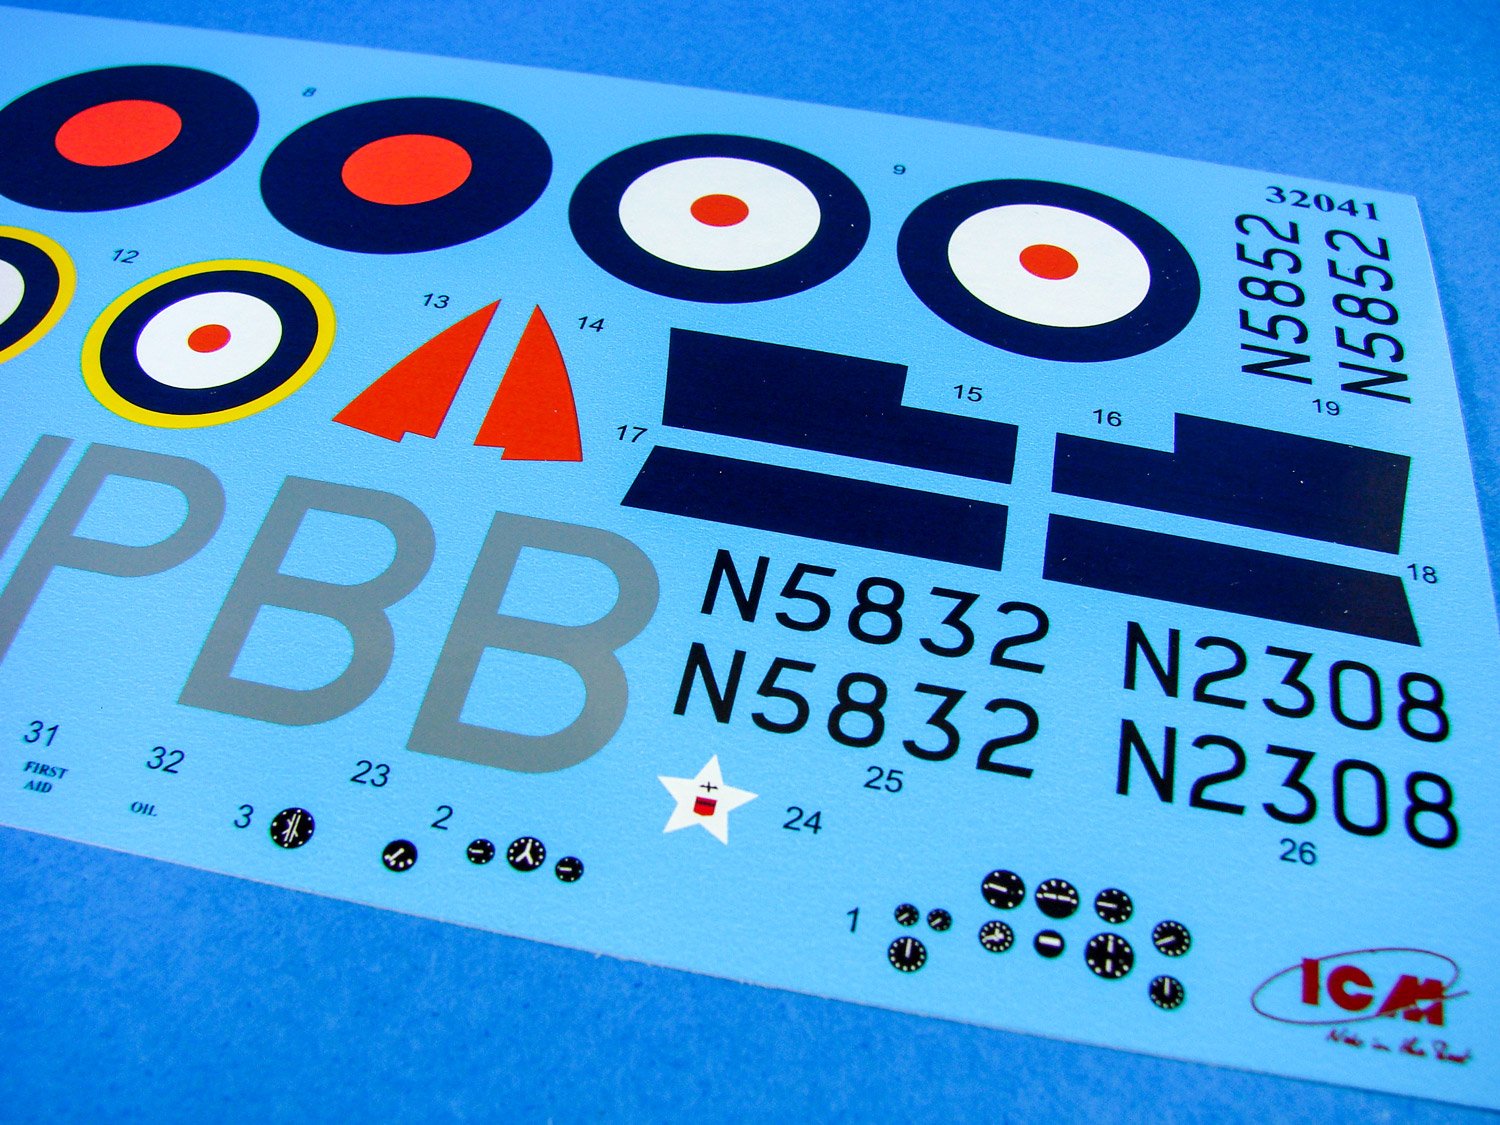
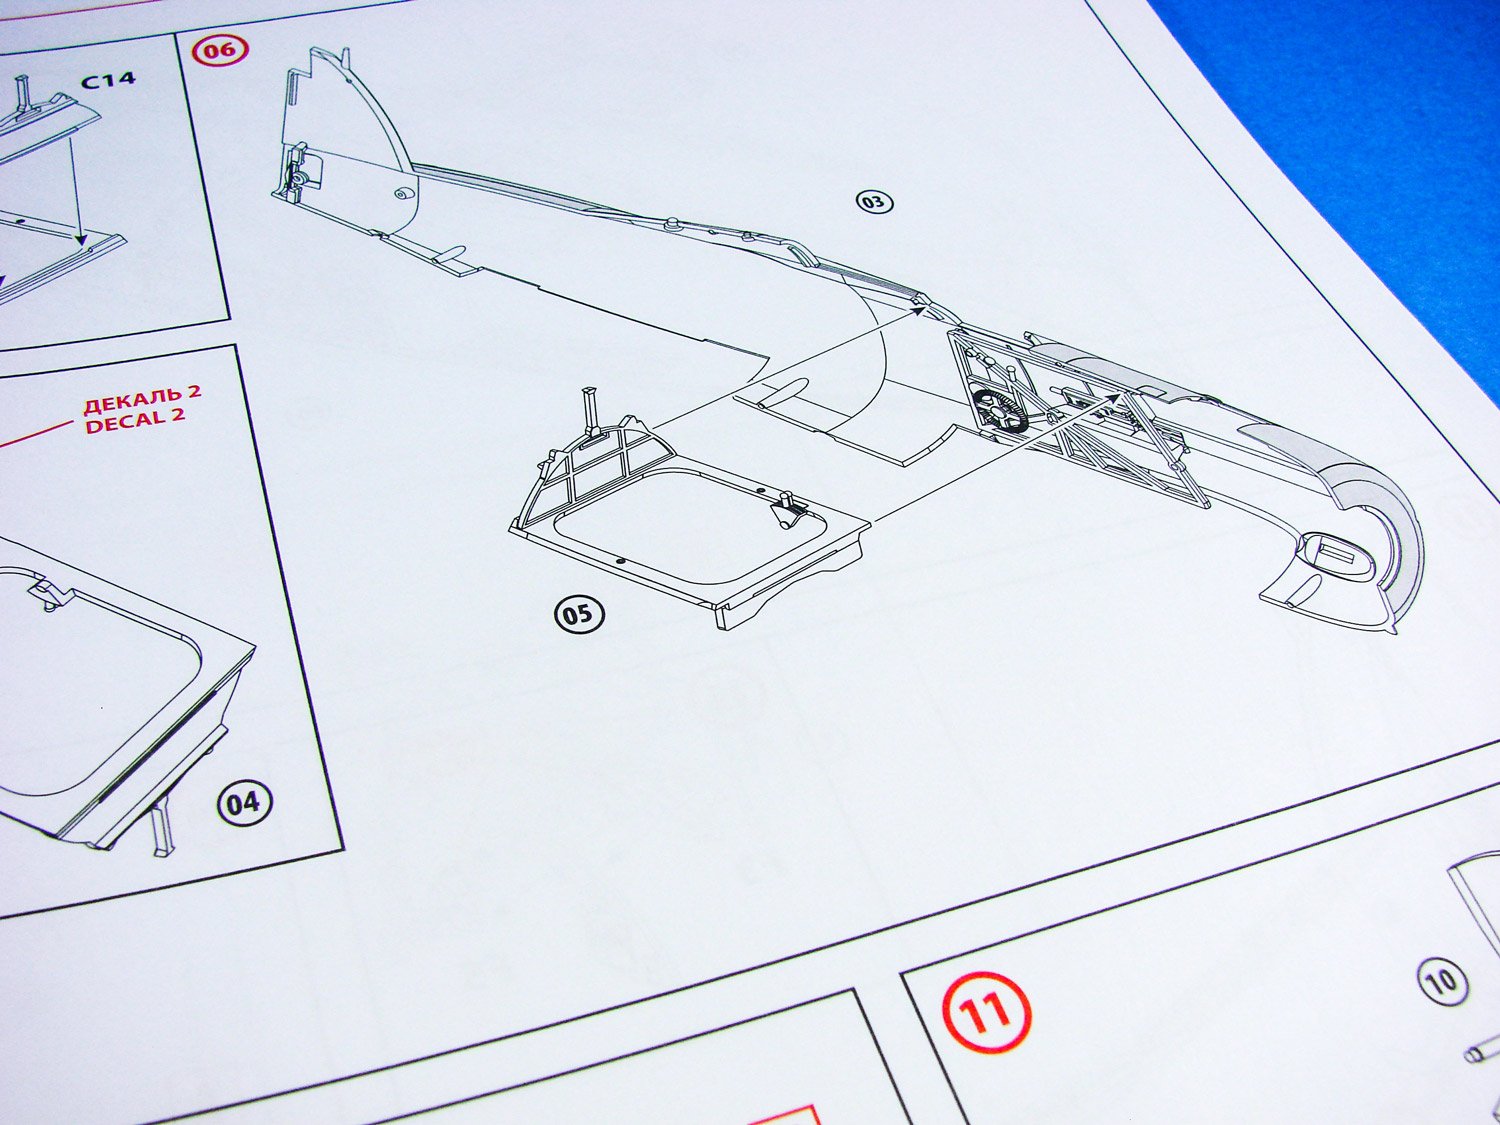
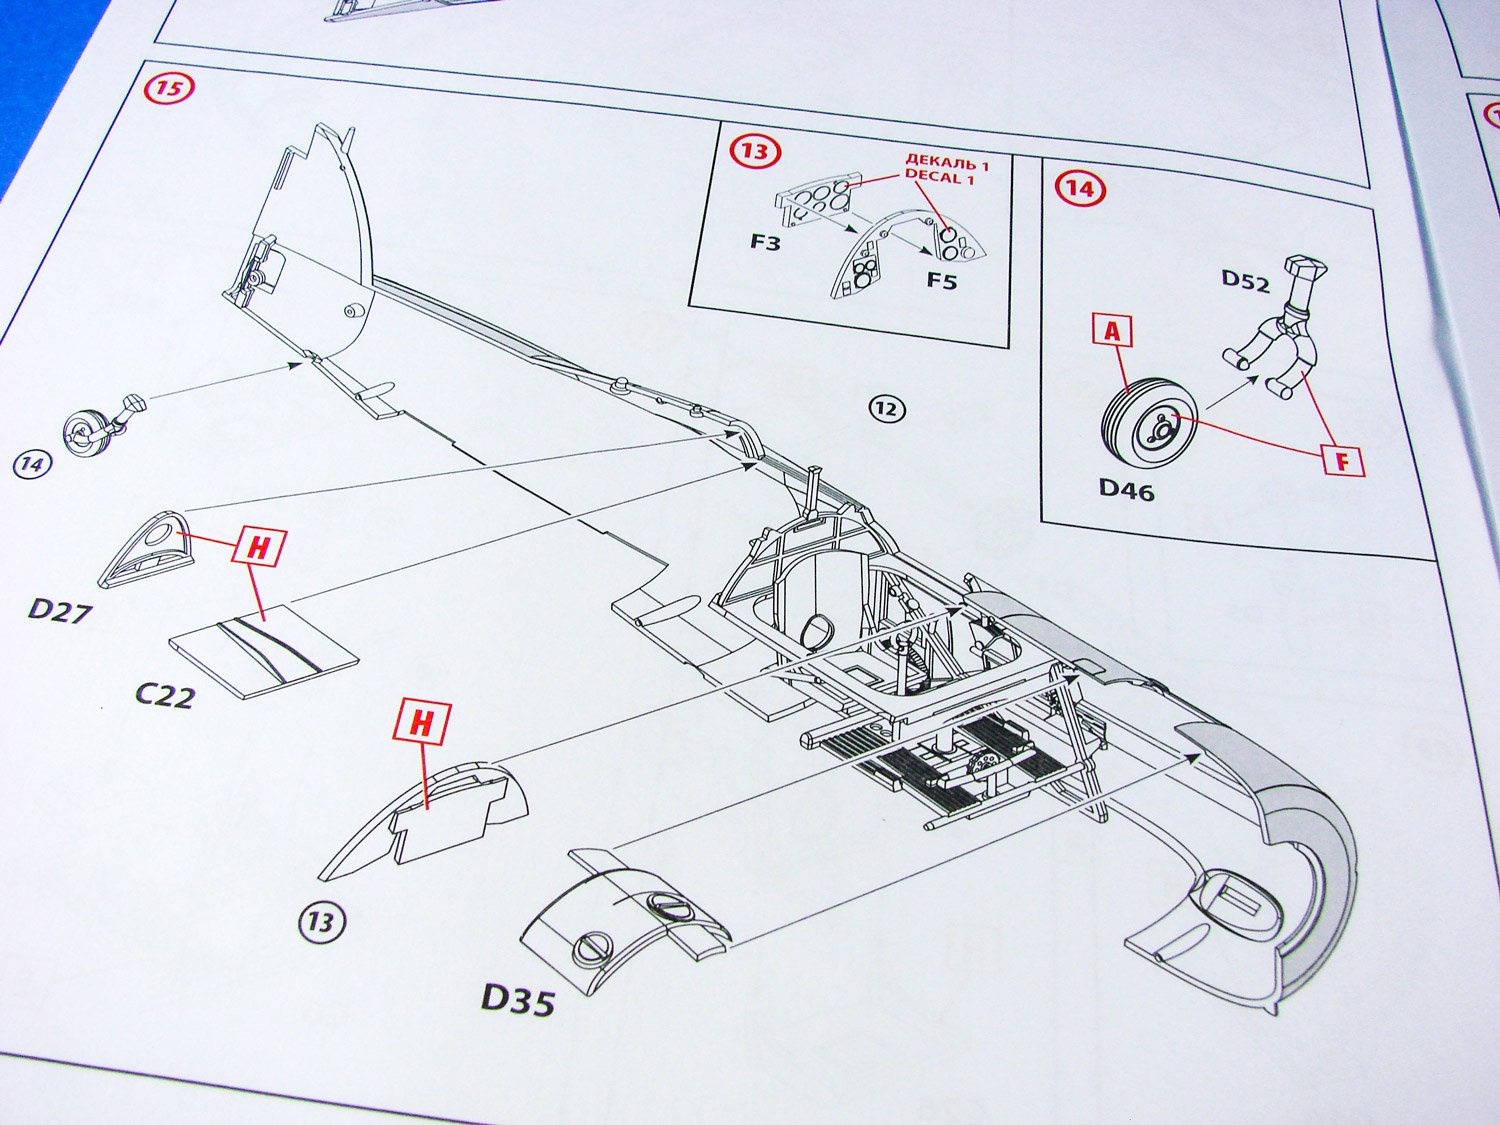
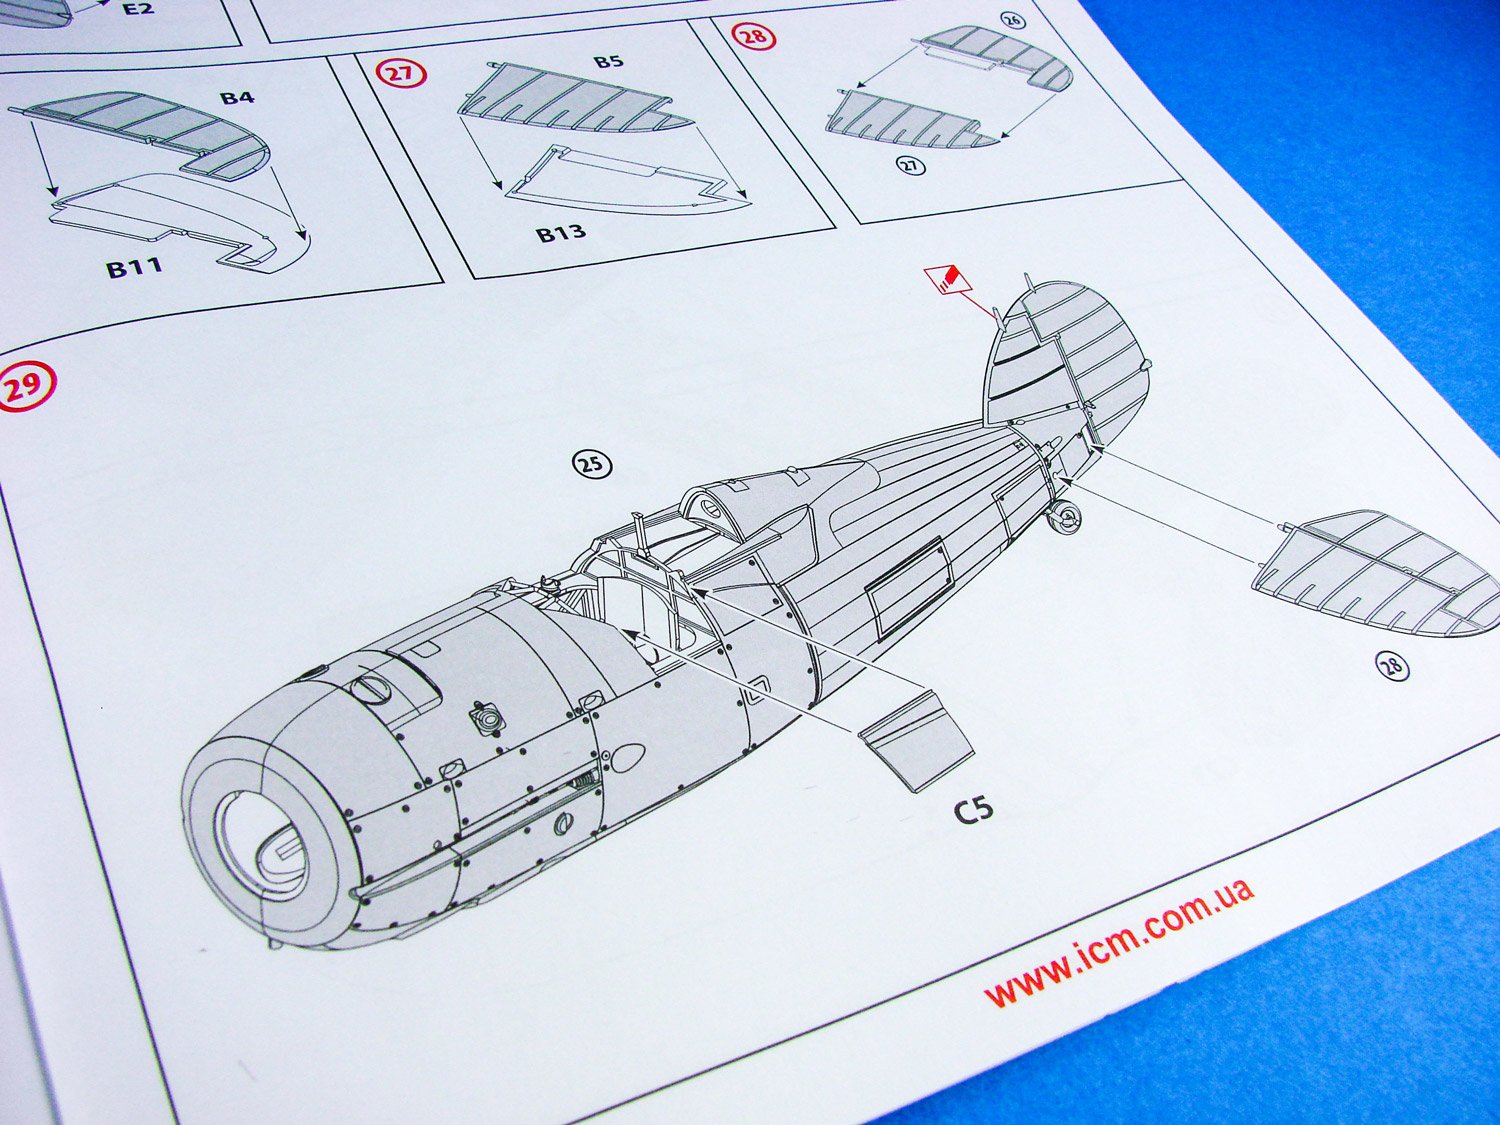
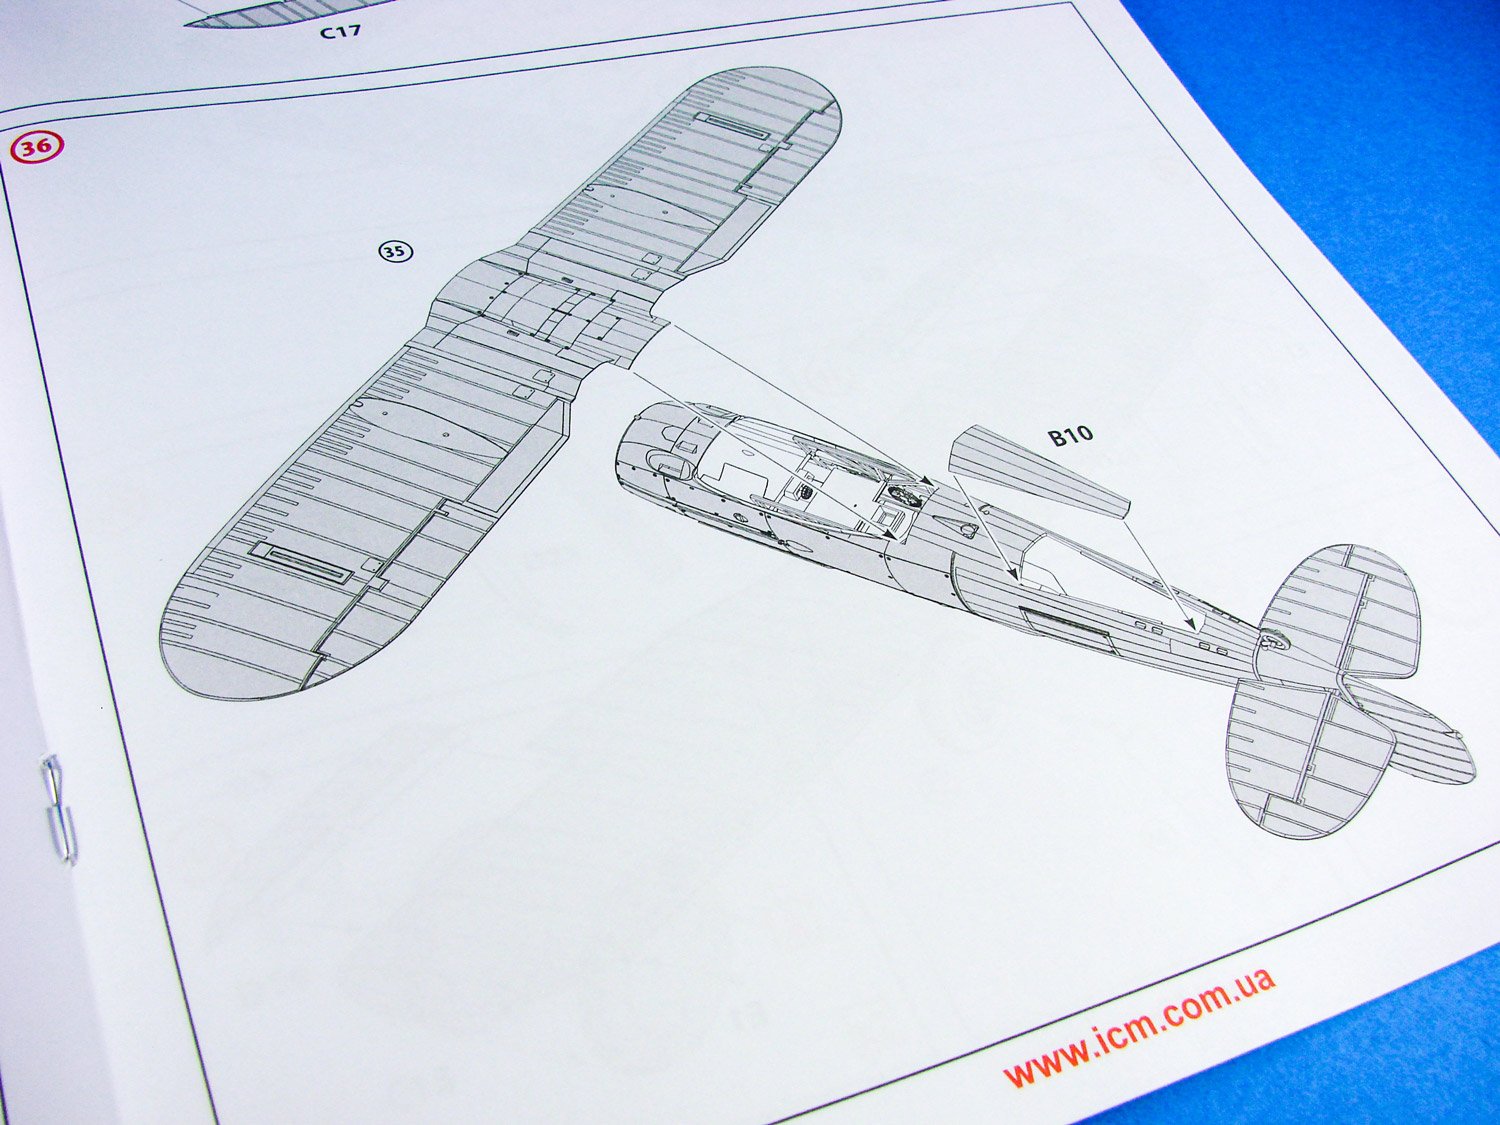
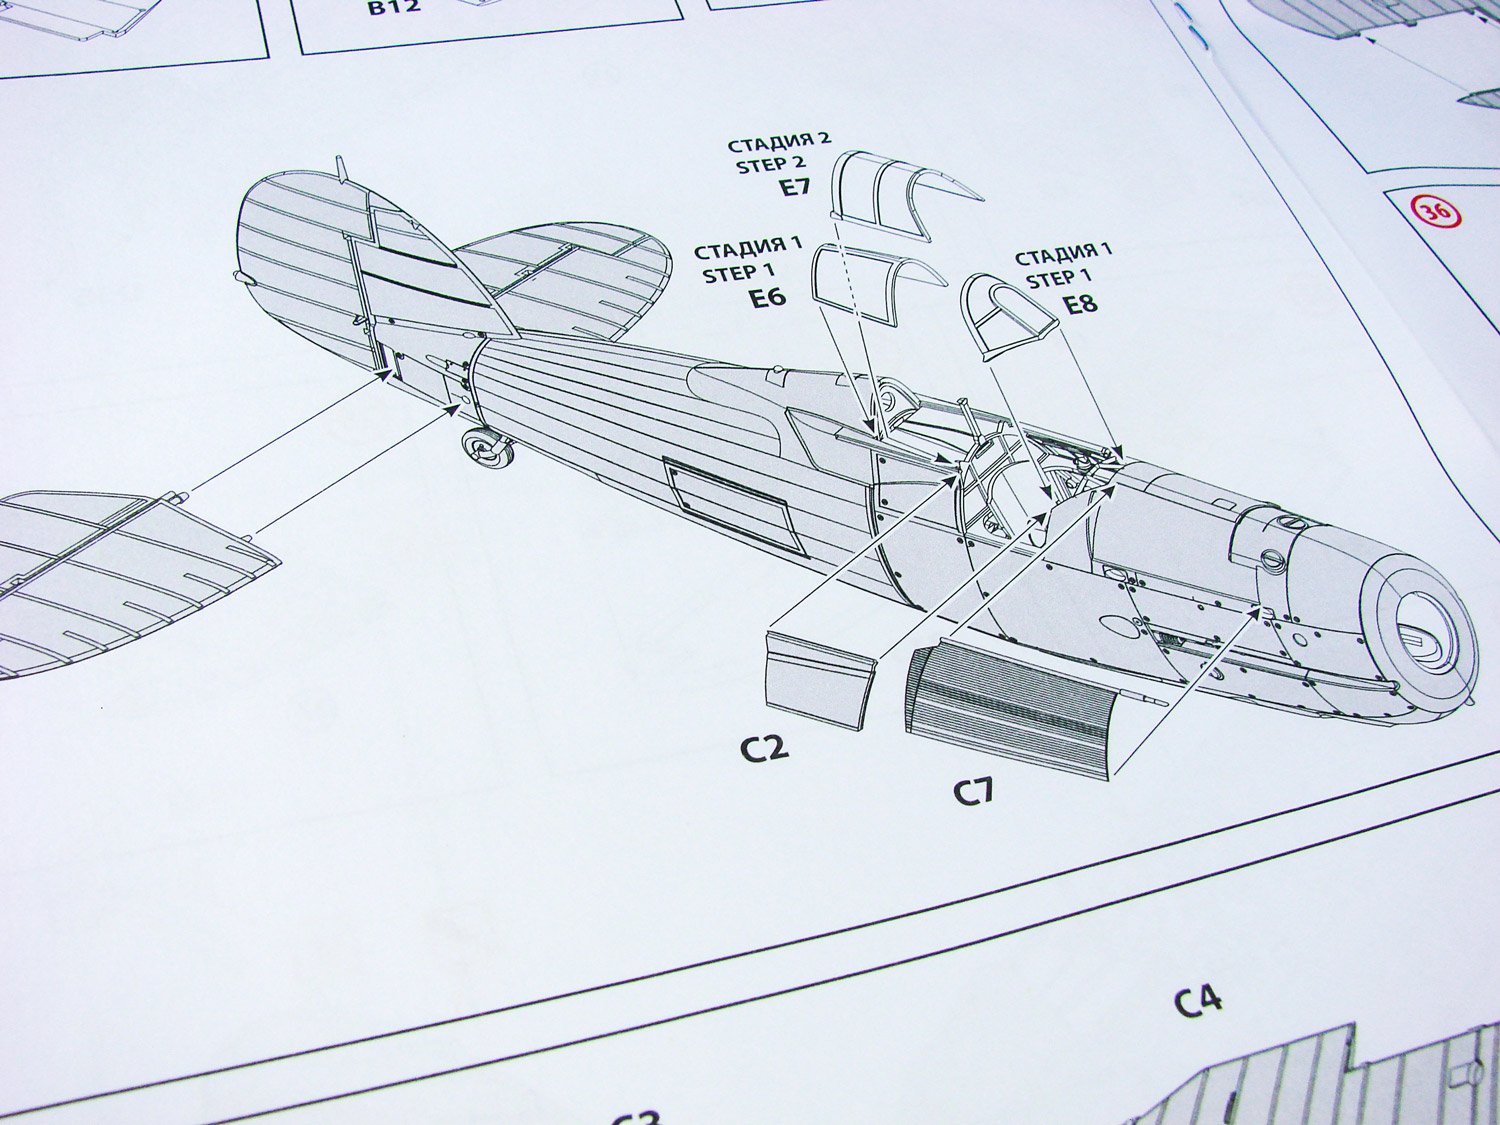
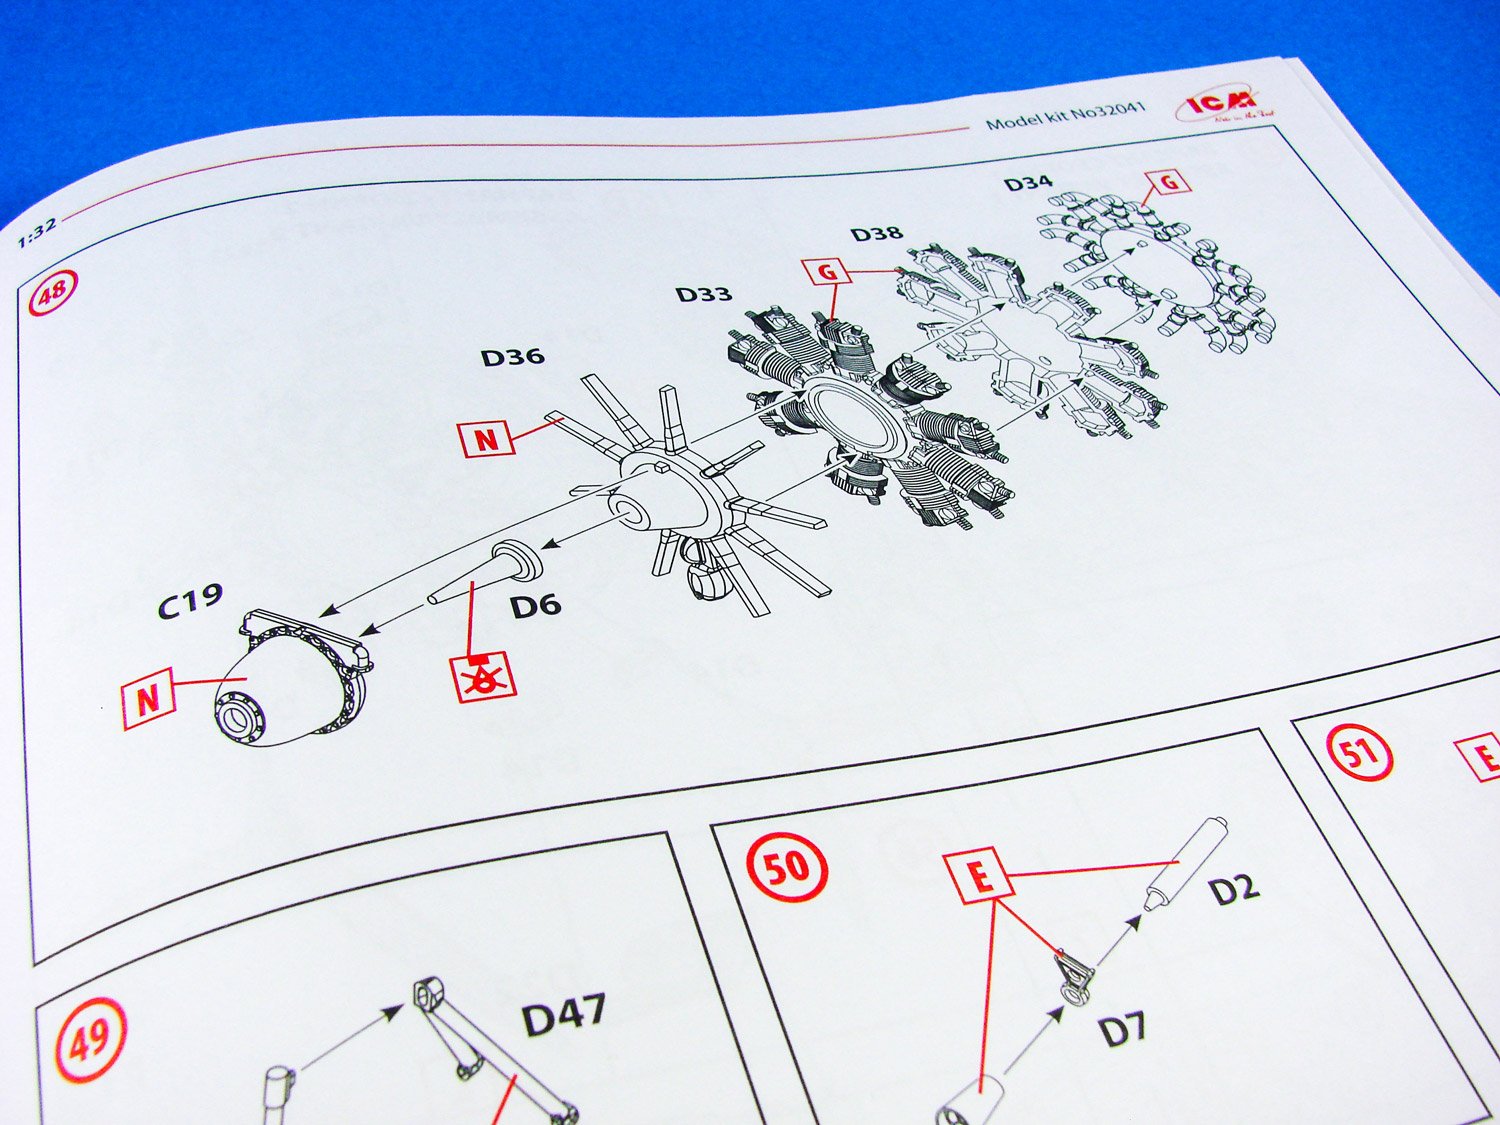
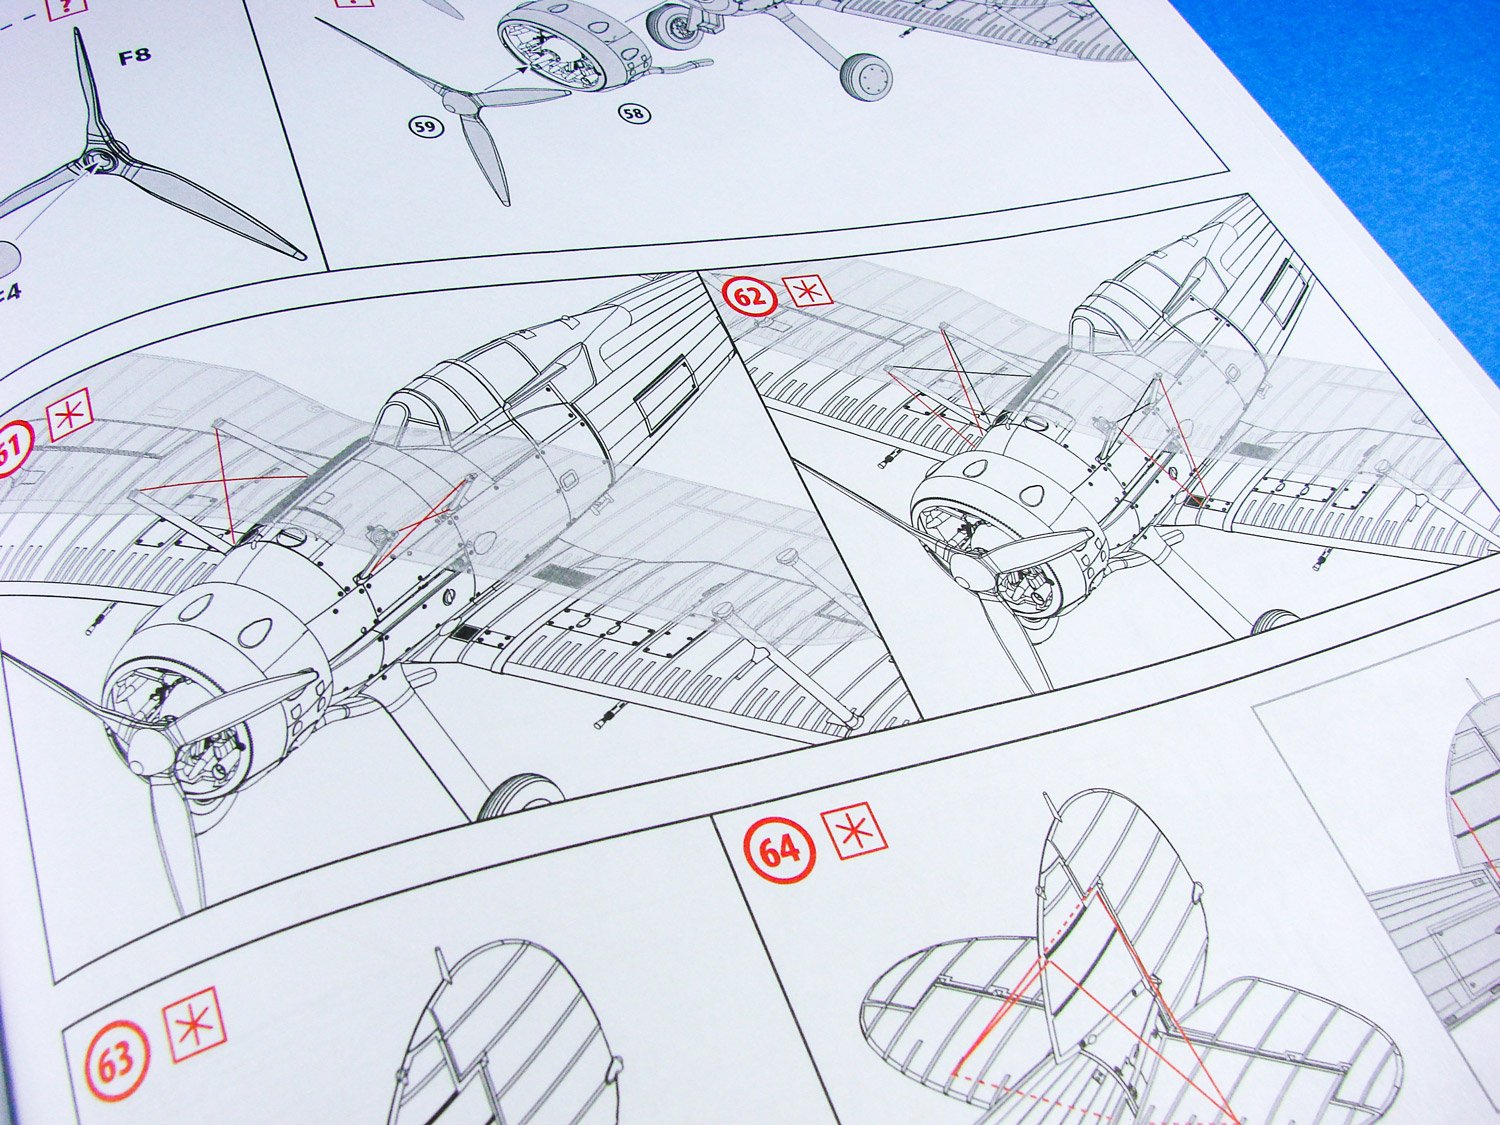
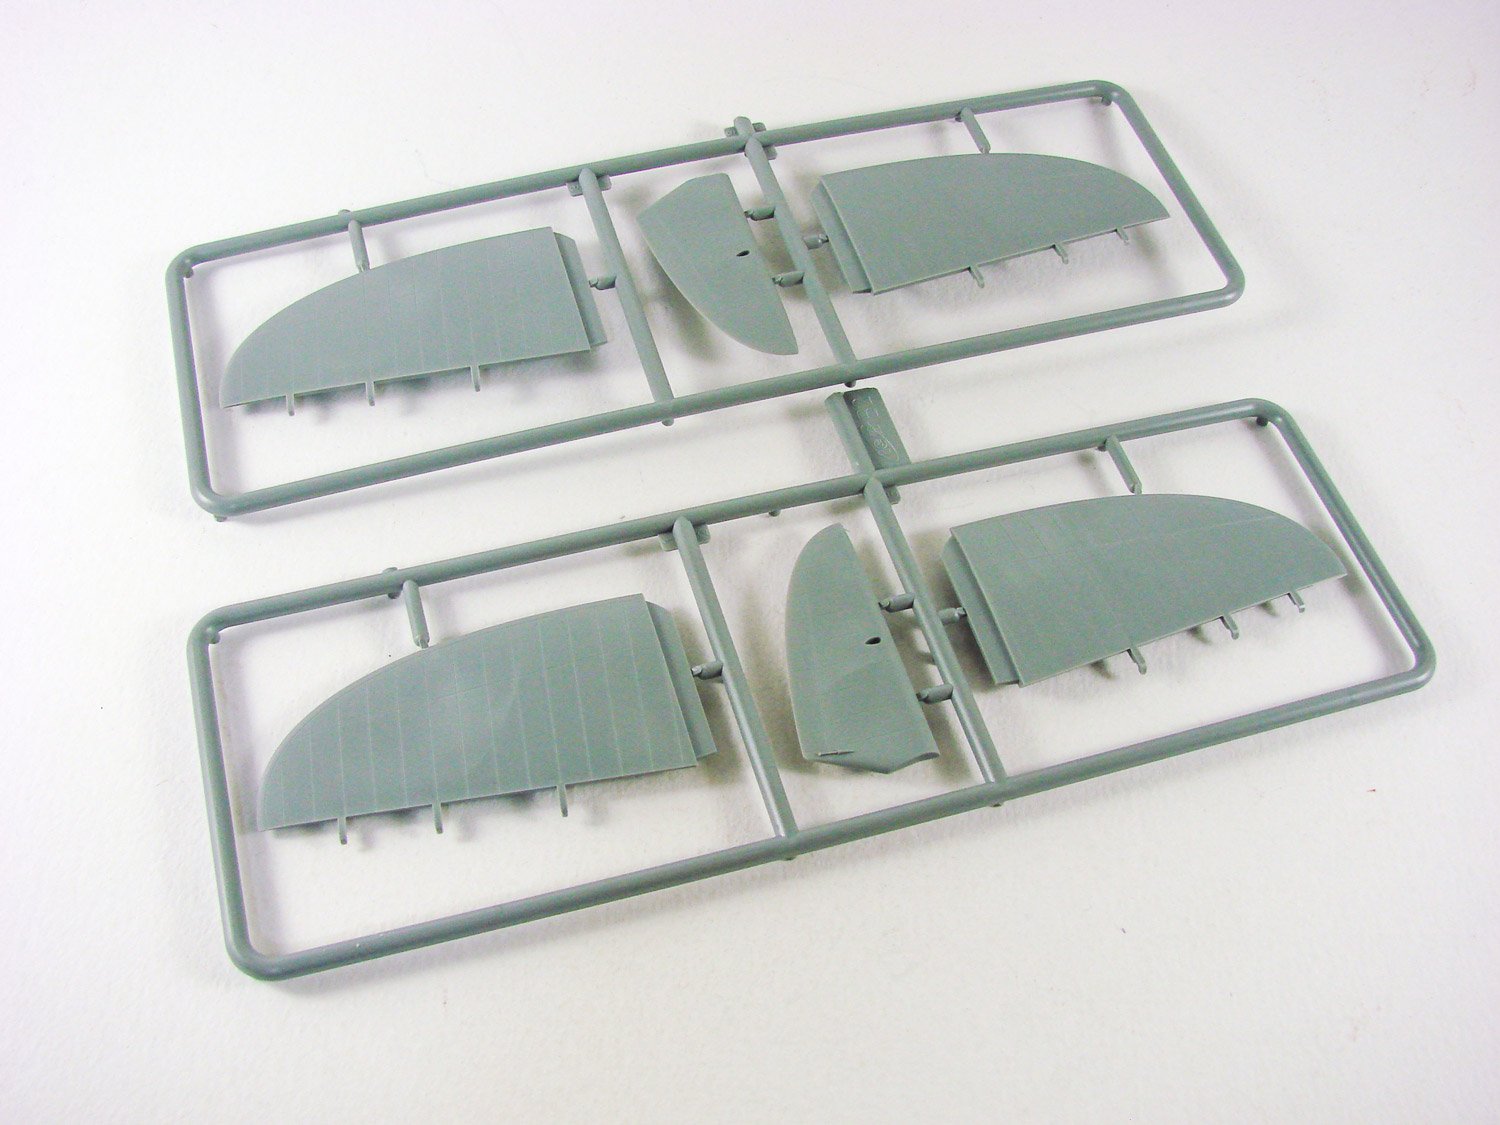
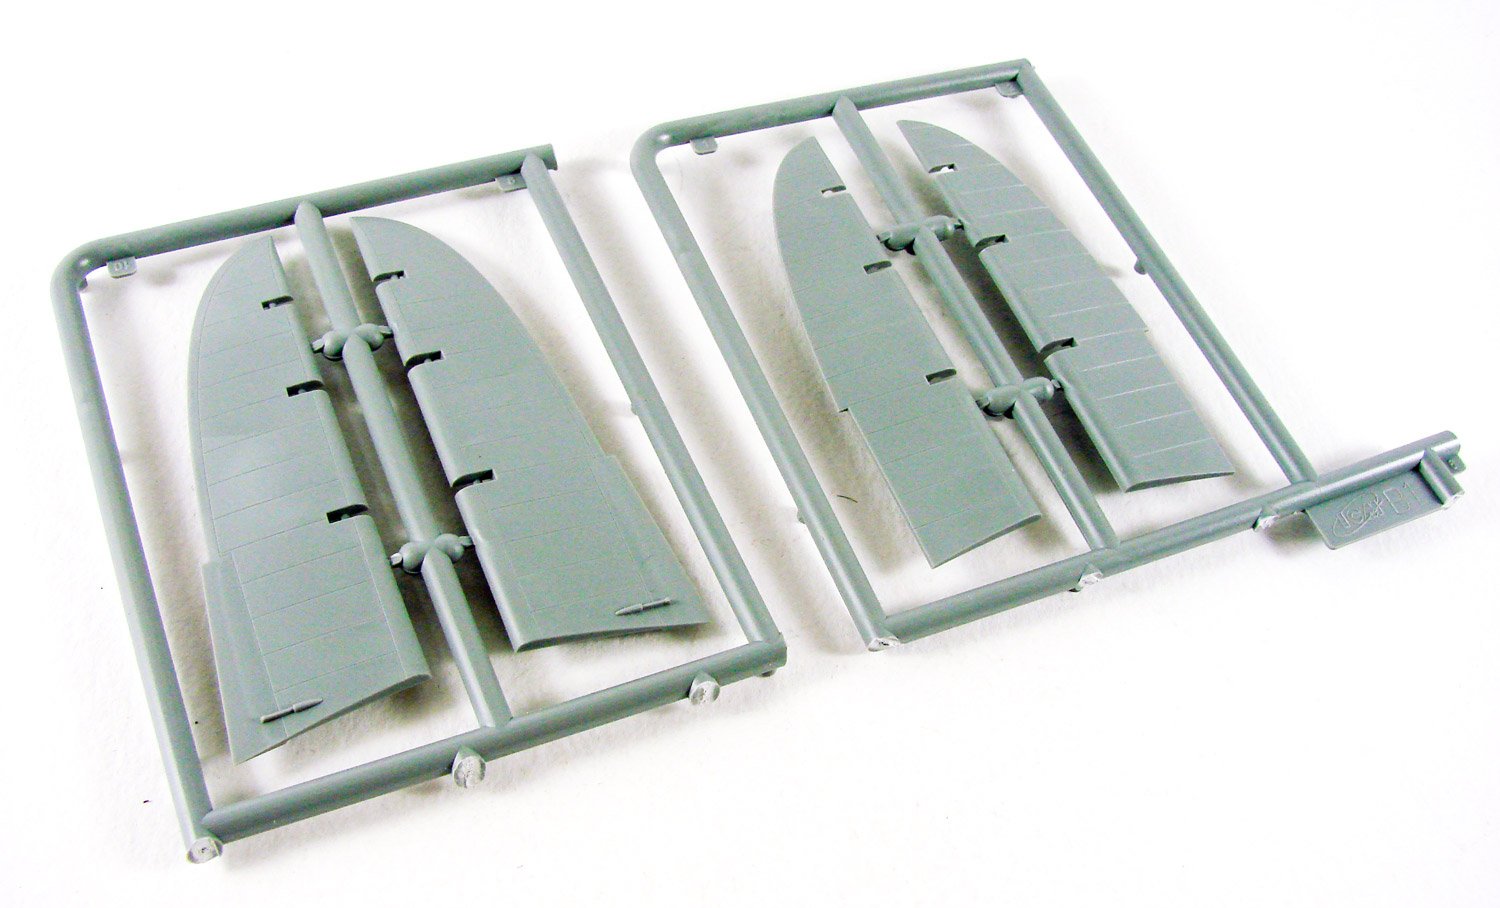
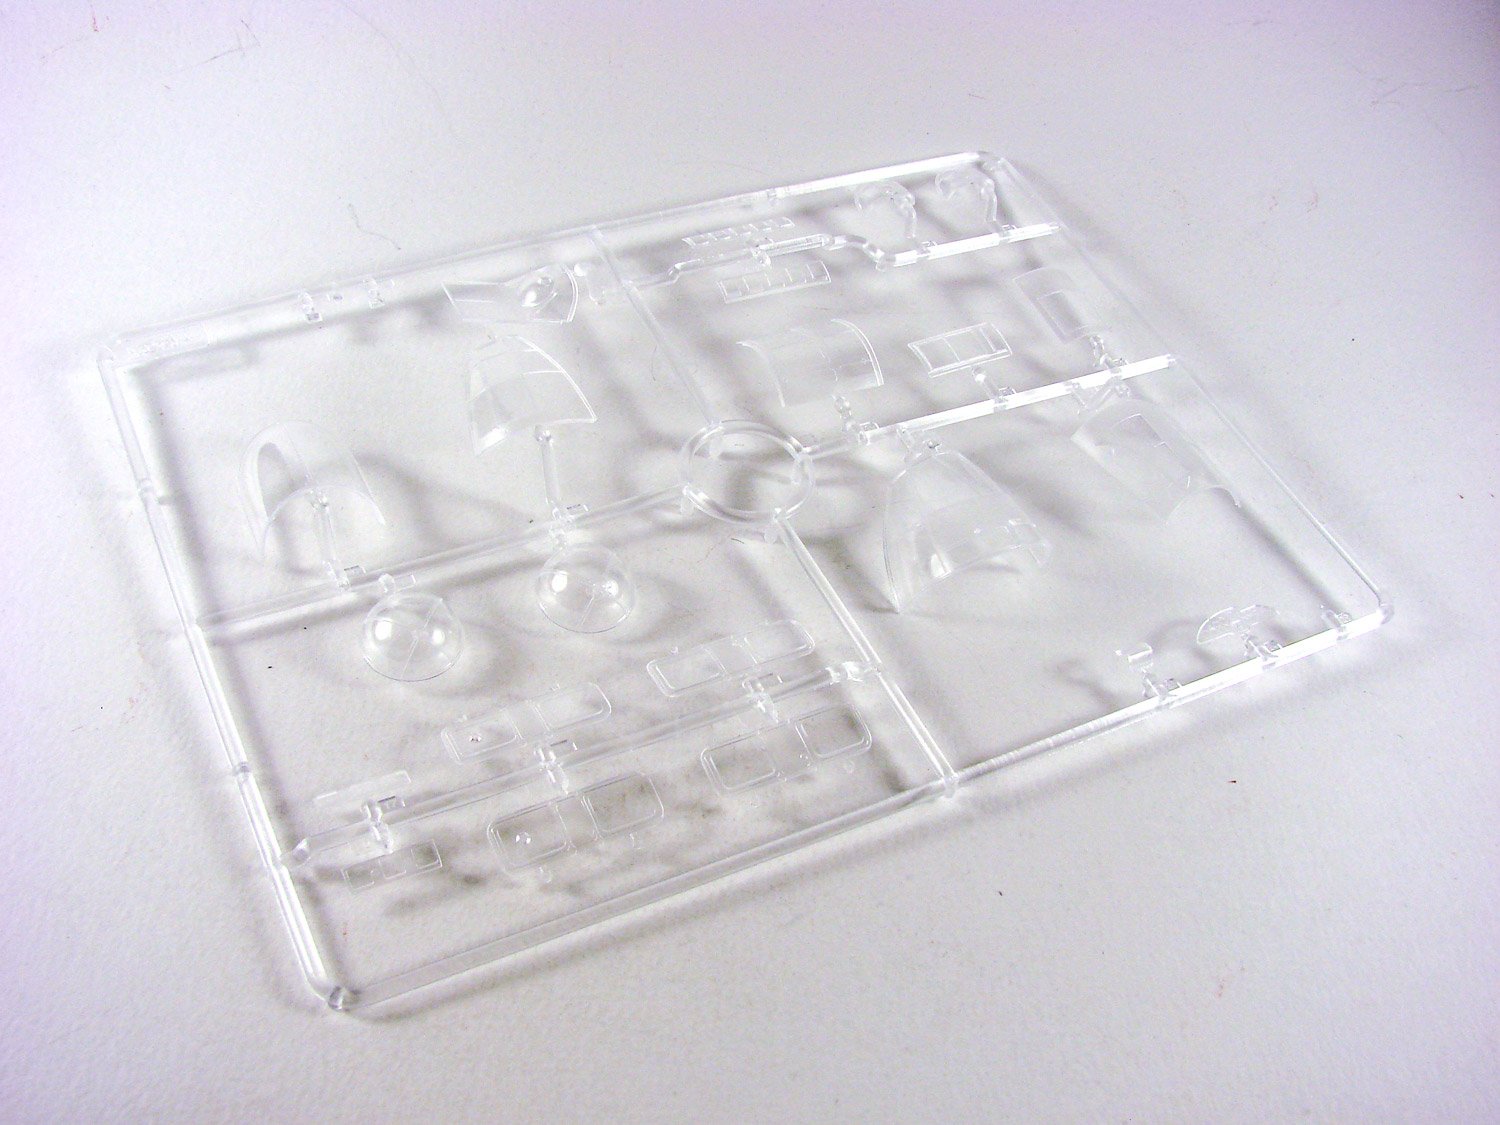
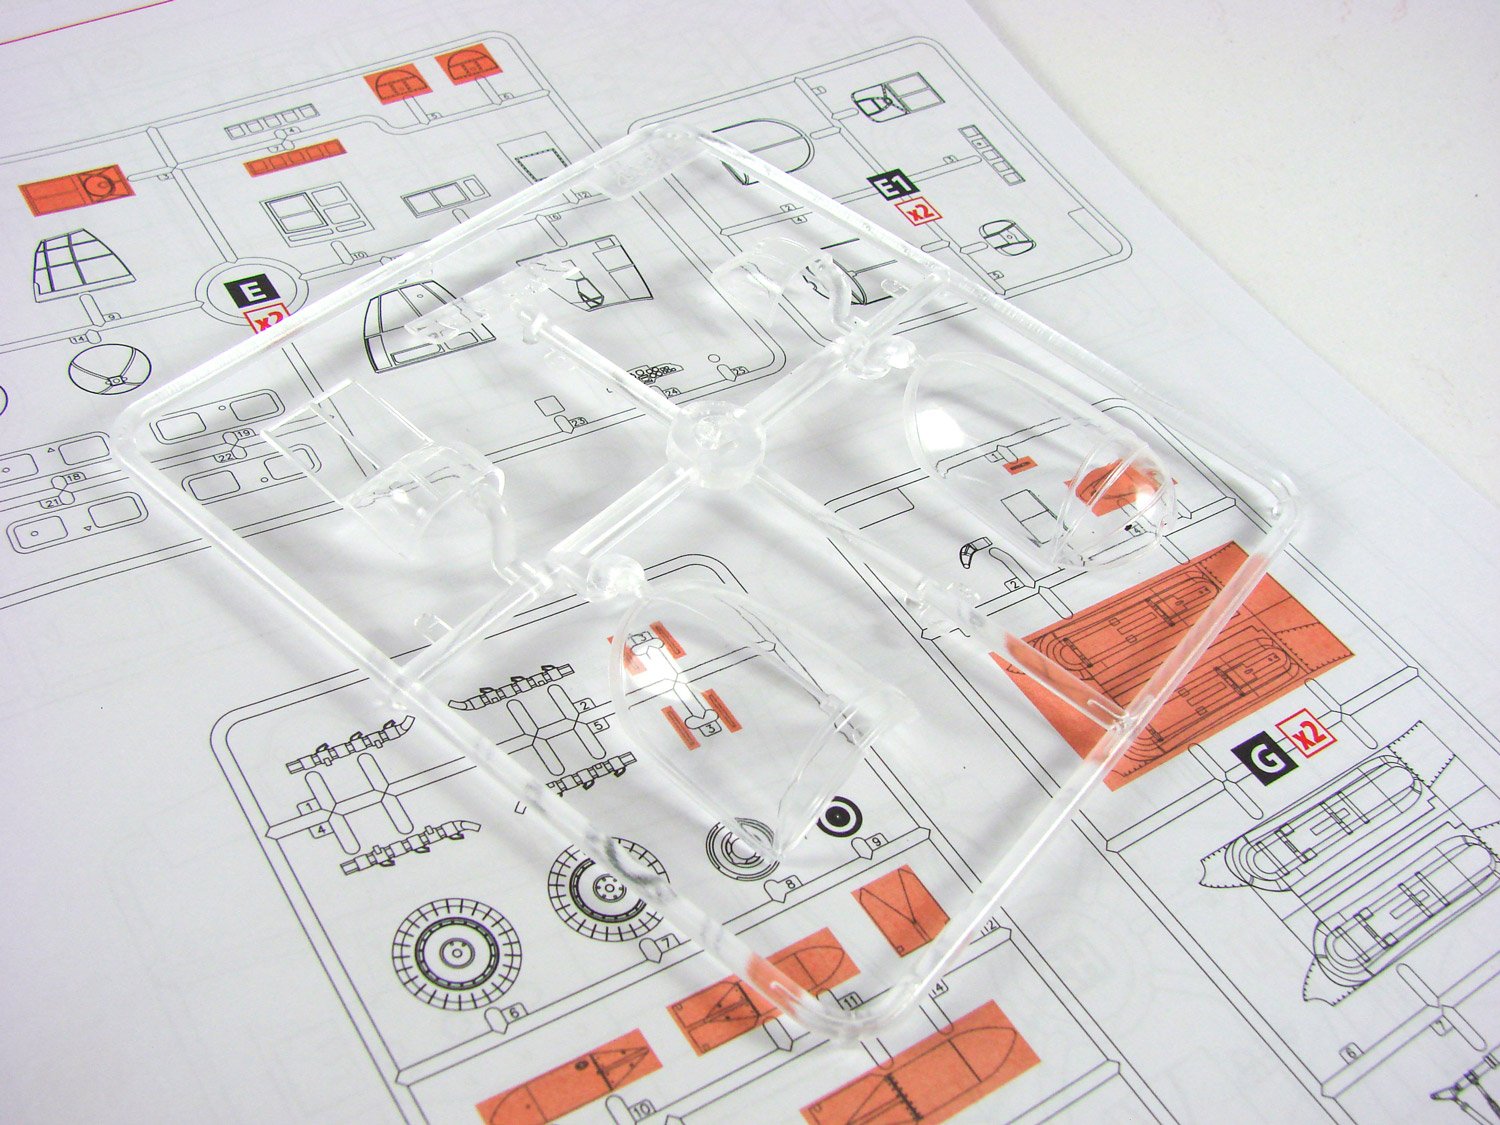
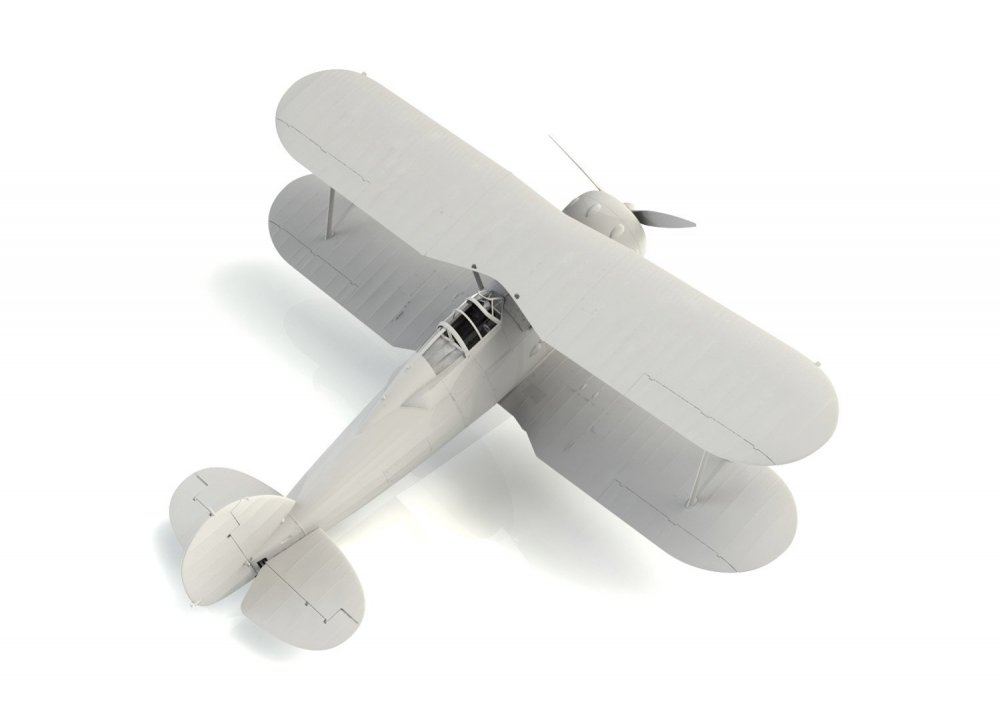
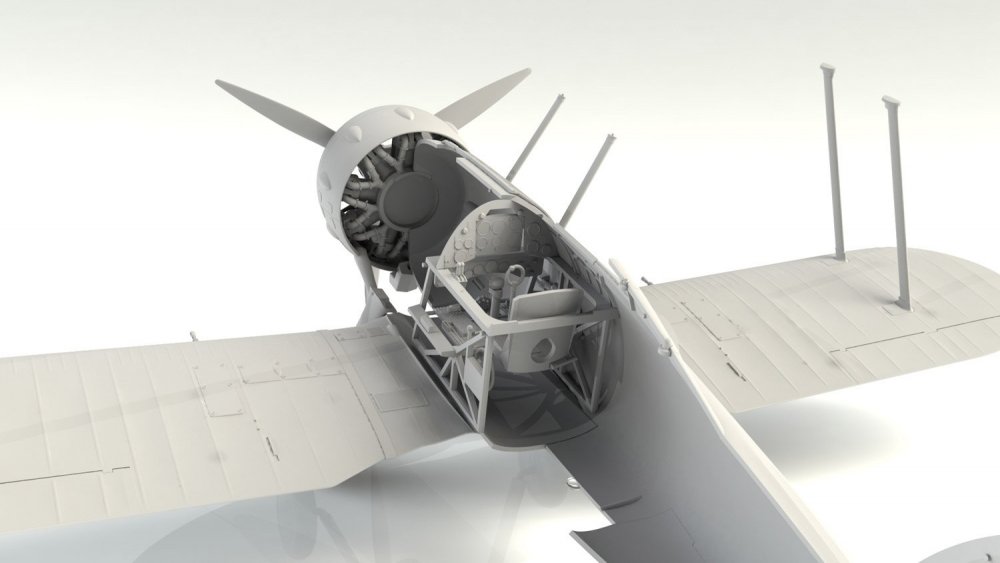
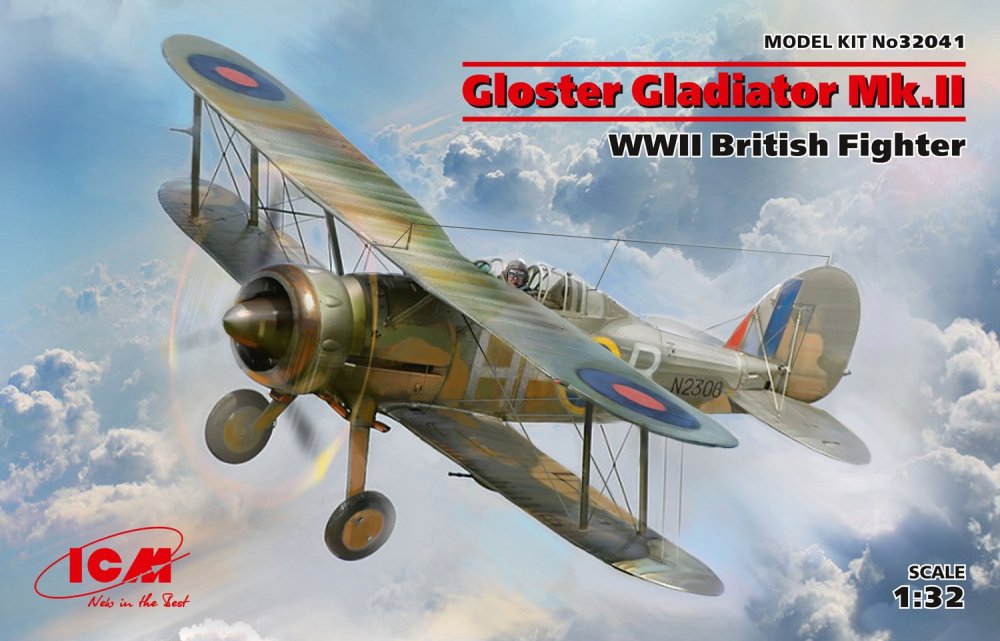
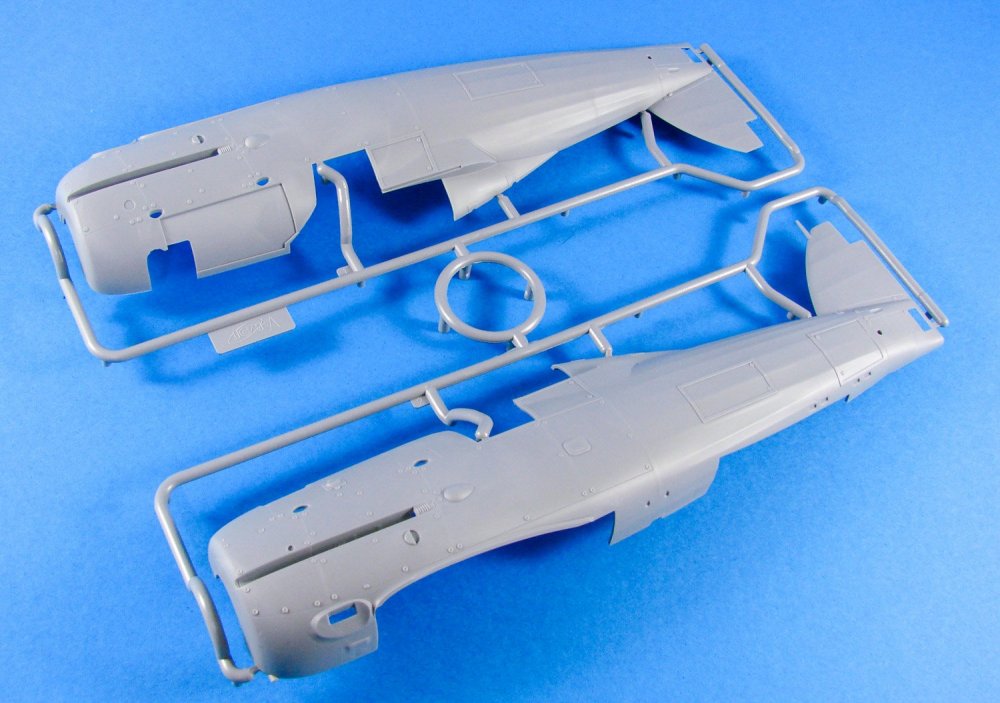
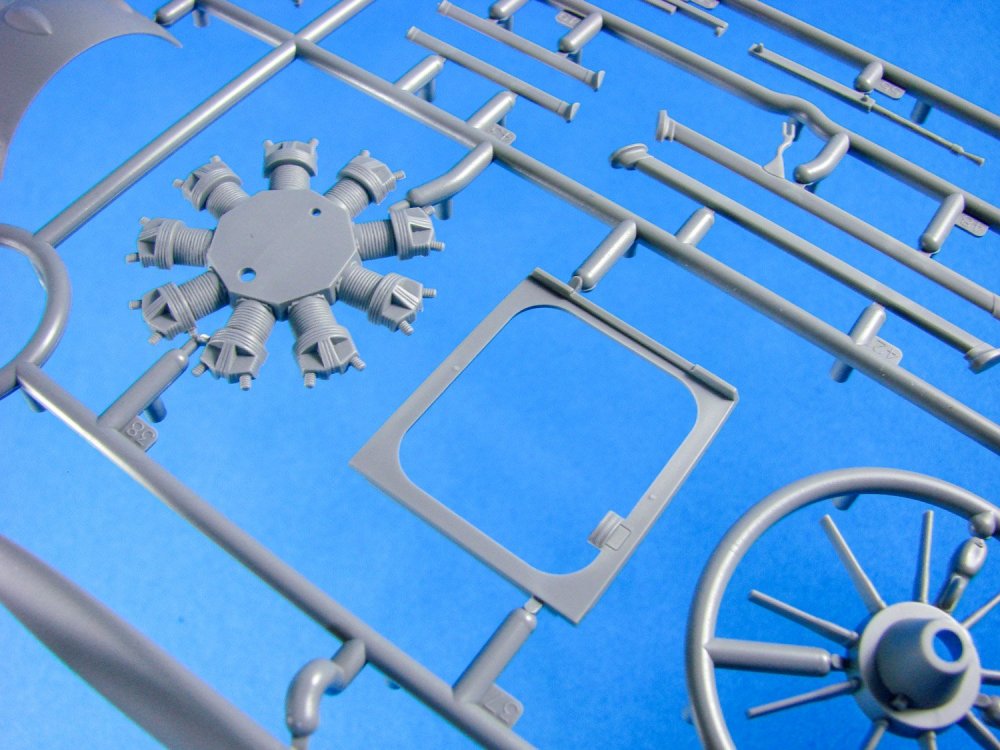
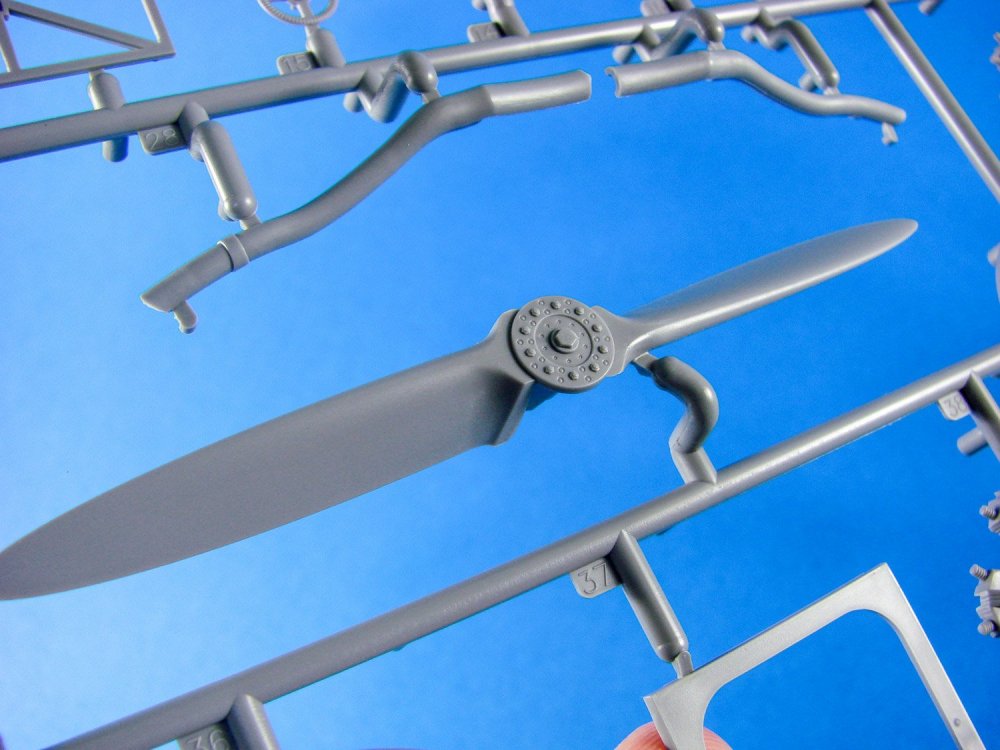
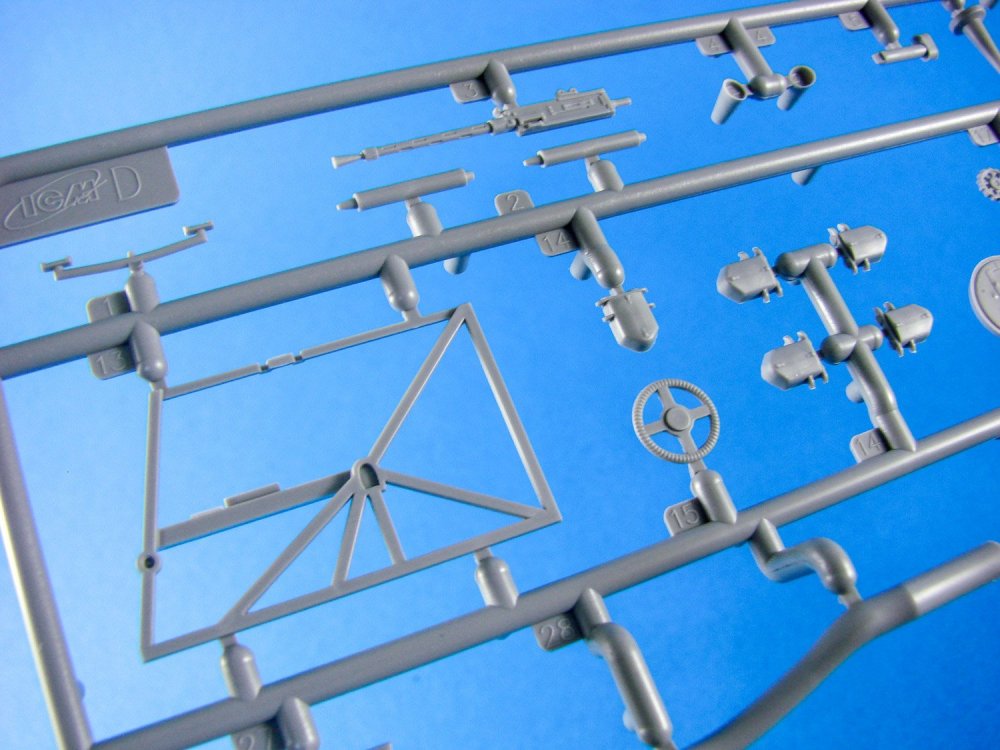
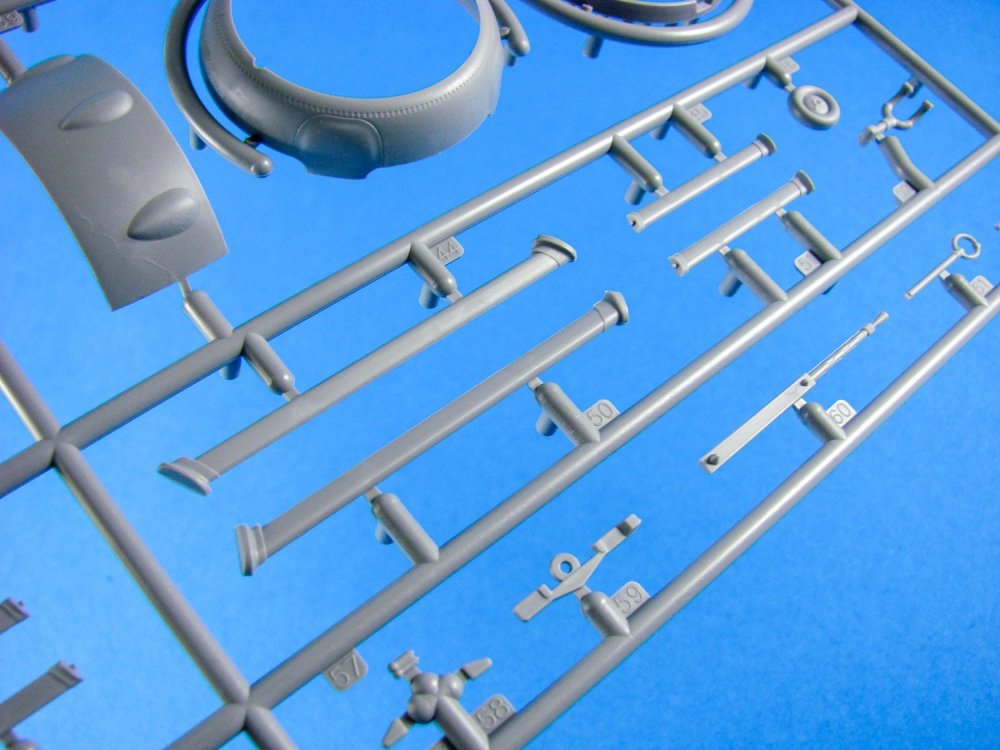
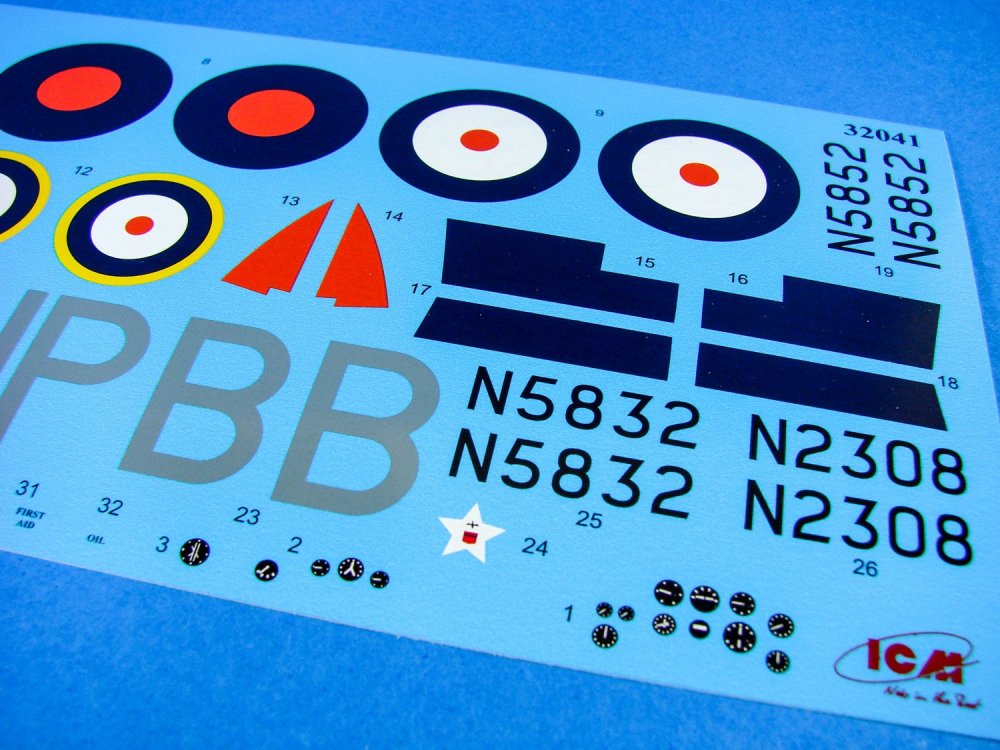
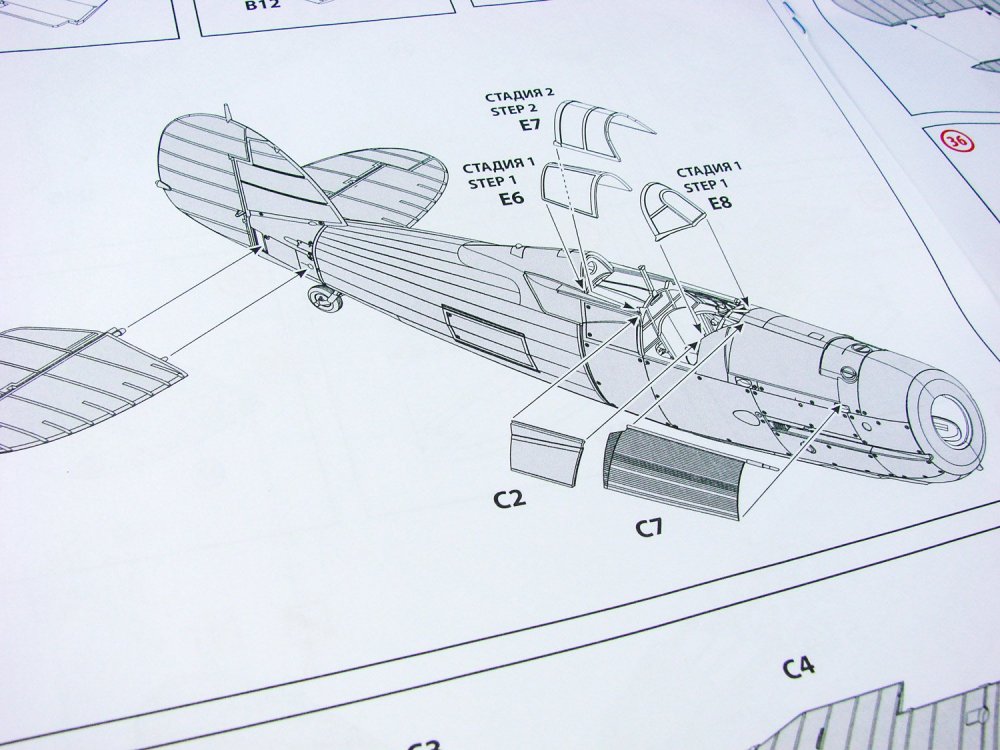
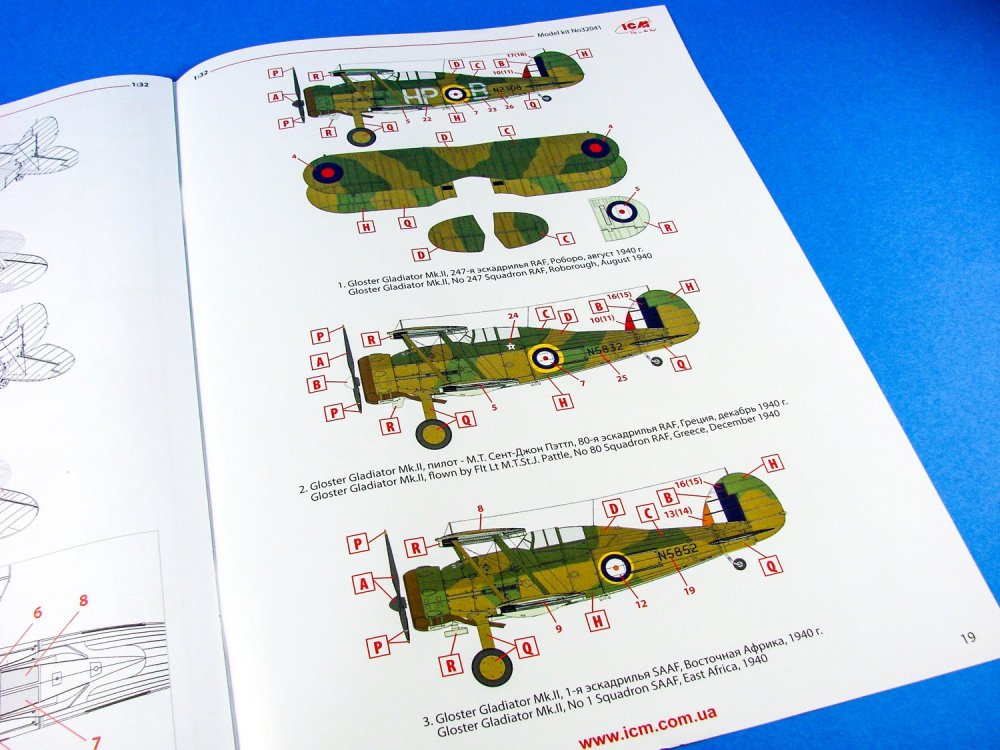
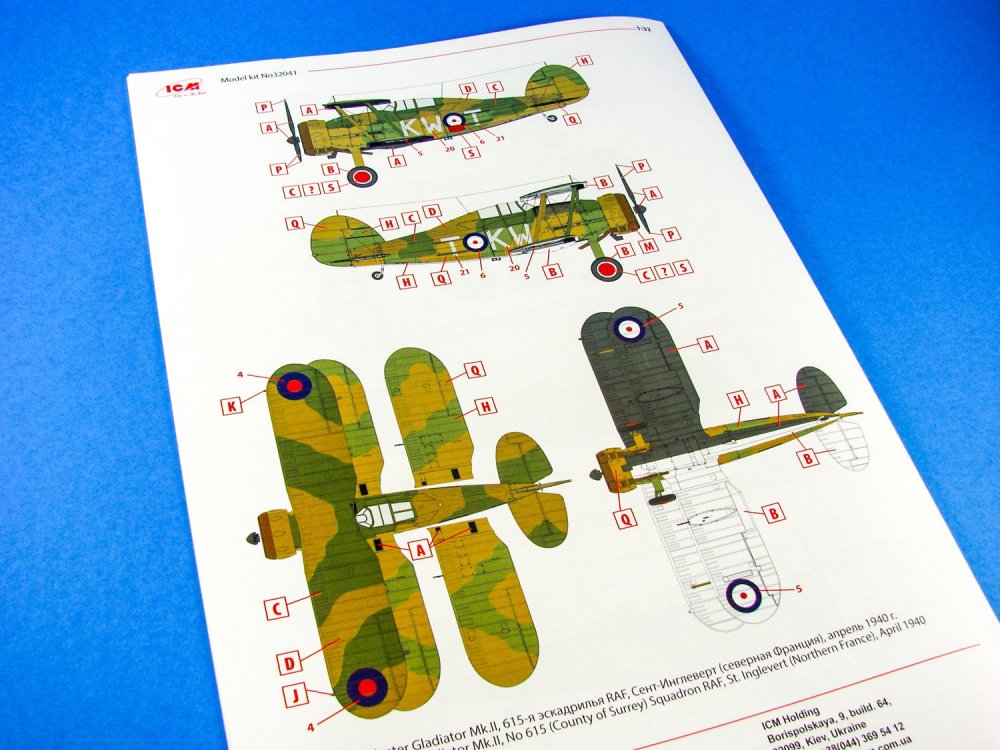
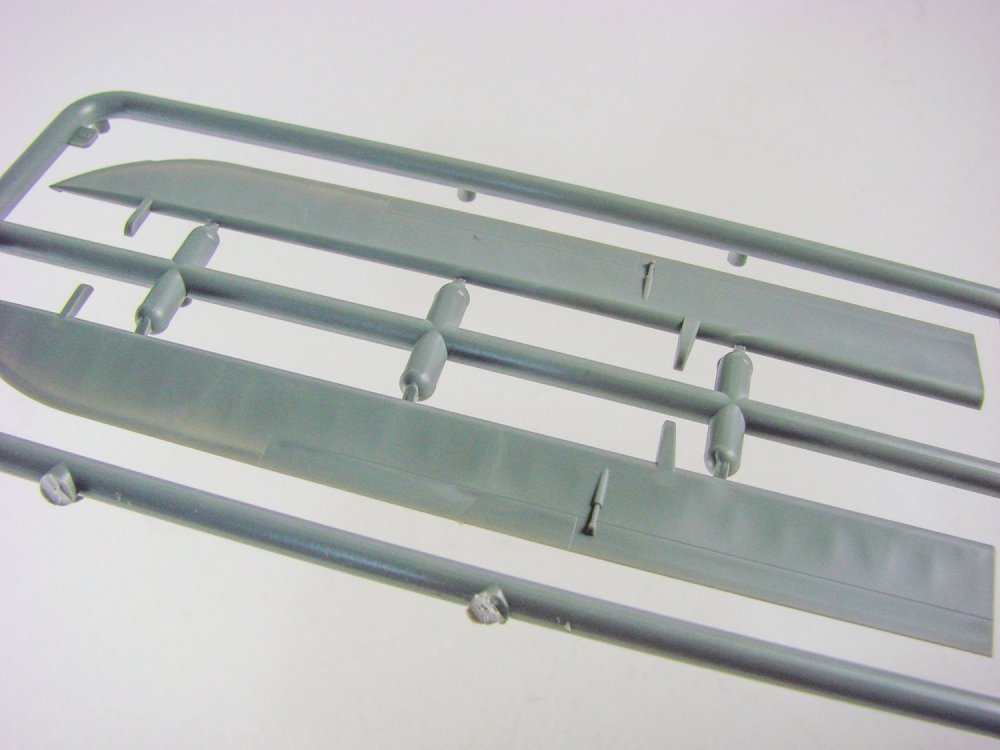
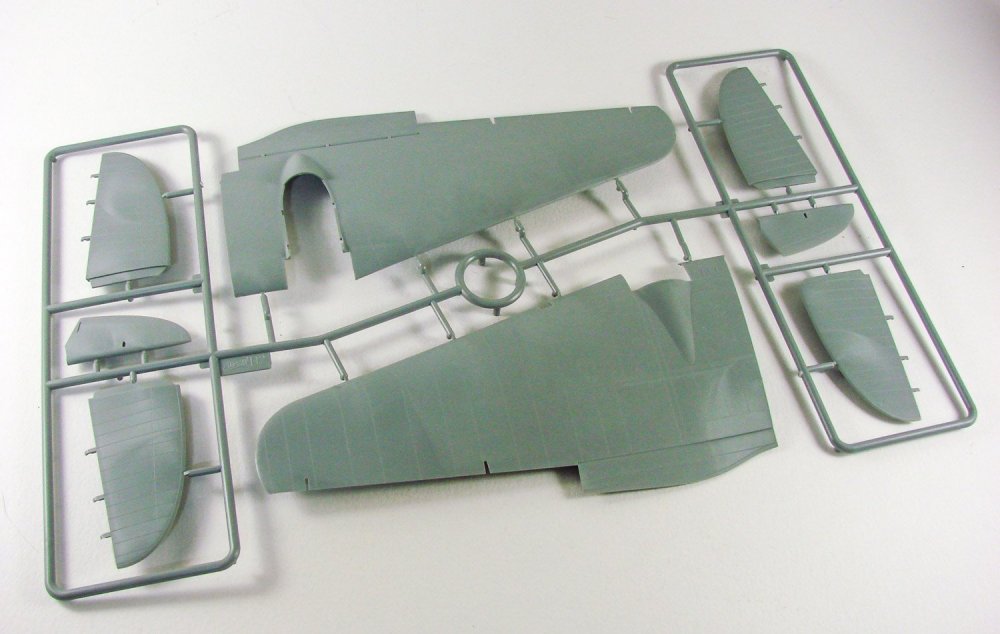
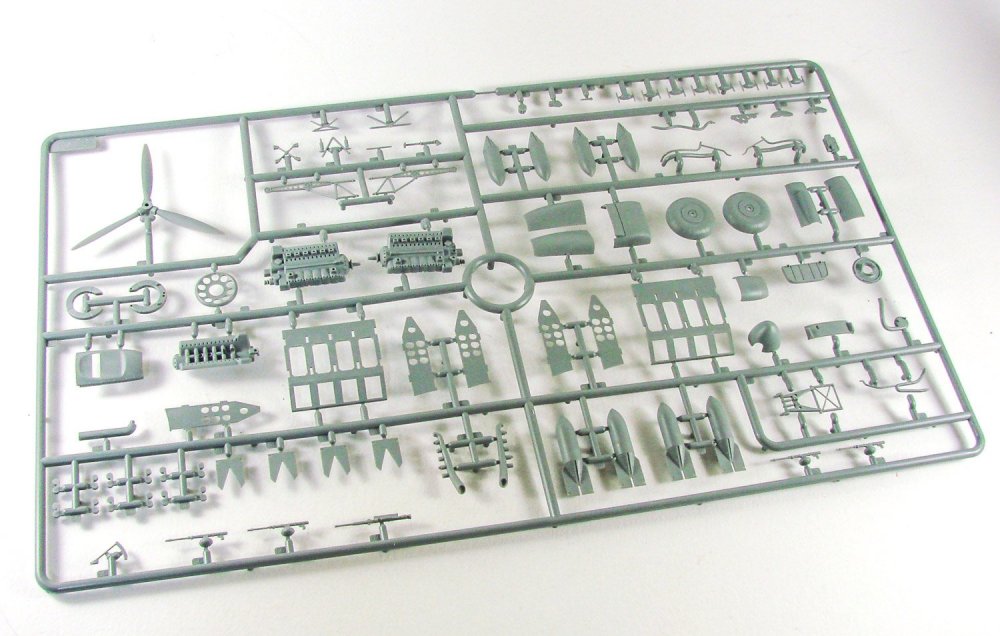
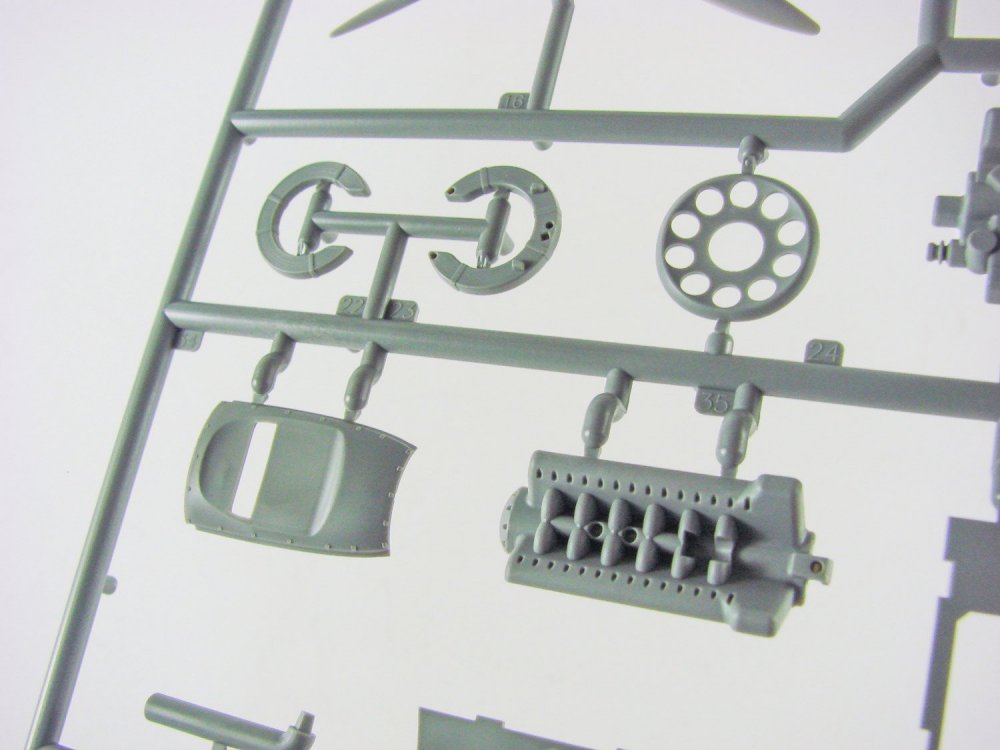
1:32 Gloster Gladiator Mk.II ICM Catalogue # 32041 The Gloster Gladiator was a British-built biplane fighter. It was used by the Royal Air Force (RAF) and the Fleet Air Arm (FAA) (as the Sea Gladiator variant) and was exported to a number of other air forces during the late 1930s. Developed privately as the Gloster SS.37, it was the RAF's last biplane fighter aircraft and was rendered obsolete by newer monoplane designs even as it was being introduced. Though often pitted against more formidable foes during the early days of the Second World War, it acquitted itself reasonably well in combat. The Gladiator saw action in almost all theatres during the Second World War, with a large number of air forces, some of them on the Axis side. The RAF used it in France, Norway, Greece, the defence of Malta, the Middle East, and the brief Anglo-Iraqi War (during which the Royal Iraqi Air Force was similarly equipped). Other countries deploying the Gladiator included China against Japan, beginning in 1938; Finland (along with Swedish volunteers) against the Soviet Union in the Winter War and the Continuation War; Sweden as a neutral non-combatant (although Swedish volunteers fought for Finland against USSR as stated above); and Norway, Belgium, and Greece resisting Axis invasion of their respective lands. The Gladiator II, the type depicted in this kit, was the version that was powered by a single Bristol Mercury VIIIA air-cooled radial piston engine. The kit As far as I’m aware, ICM’s Gladiator is the first injection moulded kit of its type in 1:32, giving those who don’t fancy a vac or resin kit, a real chance to create this iconic bird in their favoured large scale. This specific kit, released early in 2020, is one of three Gladiator kits from ICM, with the Mk.I being released only last year, and the Sea Gladiator following the current release by a couple of months. ICM’s Gladiator is packed into a fairly typical and reasonably large box with a folding lid, then covered with the glossy box artwork lid. I quite like this approach as the package is far sturdier and more protective than usual kit boxes from other manufacturers. All sprues inside are bagged into a single sleeve, except for the clear parts that are further bagged to prevent any scuffing etc. There are a total of FIVE light grey sprues, and ONE clear set of parts. A single decal sheet contains the markings for four subjects. Sprue A Just the two fuselage halves on this sprue. These are moulded with separate engine cowls (obviously) and also a separate rudder. Surface detail is very good with some subtle fabric/structure rendering, and also the heavy metal panel fasteners. Side cockpit doors are also separate parts, allowing the modeller to pose these in the open position. There isn’t any riveting on any of the panels, but there wouldn’t have been too much anyway, and you could also get Rosie out if you wanted to fix that. Internally, detailing is very minimal, with most of that coming from the cockpit tub and other associated parts. Sprue B The upper wing is provided here in full-span upper and lower panels. The ailerons are also separate parts, so you can pose those too. Rib and fabric detail really is beautifully represented, as are the various stiffening strips, strut locations for the cabane, and control cable access panels. With similar external details are also found the rudder, stabiliser and separate elevator parts, moulded as traditional halves. Other parts seen here are the blistered engine cowl sections and lower wing gun pod fairings. As the fuselage of this kit is common to all the current Gladiator variants, a panel is included for the lower, rear fuselage. The Sea Gladiator variant will have the arrestor hook in this position, but we blank that off, of course. Sprue C As with the upper wing, the lower wing is also full span for the lower panel, with the port and starboard upper panels being separate, and with separate ailerons also. Those ailerons are provided as whole units, thus maintaining their fine trailing edge. The wings are also moulded with the recesses to mount the gun pods. Also on this sprue are the main gear struts and wheels, as well as the engine hub, various key cockpit elements (floor, bulkheads), etc. Note two instrument panel sections. These won’t be used for the Mk.II, however. Sprue D This is our main details sprue, containing all of the parts for the Bristol Mercury engine, cowl parts and main cowl ring, struts, main wheel mounting lugs, cockpit parts, guns, and the optional (and much nicer) two-blade propeller option. Sprue E All parts are to be used here except for one windscreen option. The canopy can of course be posed in an open position. Clarity is excellent and the framing is very well defined, so it should be very easy to mask these parts for painting. Sprue F The last sprue contains the odd (but correct!) looking three-blade prop option, and also the new instrument panel and strut with pitot. Decals A single decal sheet contains the markings for all four schemes. I don’t know who prints these, but the printing is superbly thin, with minimal carrier film, good colour density and excellent register. Decals are supplied for the instrument dials, but I would suggest punching these from the sheet for a perfect fit the various cockpit gauges. Instructions A 20-page A4 manual is included which starts with a very brief history of the type, along with paint codes for both Revell and Tamiya paints. After two pages which offer a parts map, the construction of the Gladiator is then broken down into 66 stages, including the latter rigging stages. All illustration is in line drawing format which is clear and easy to follow, with very good annotation for paint, parts options and decals (where applicable). Also included is a cut-out mask template for the canopy masks, but to be fair, you’re better off doing this yourself or availing yourself of the Eduard masking set. The last pages of the manual are taken over with colour profiles of the FOUR schemes provided. All are very similar in paint application, with the decals presenting the variation. The four schemes are: Gloster Gladiator Mk.II, No. 247 Squadron RAF, Roborough, August 1940 Gloster Gladiator Mk.II, flown by Flt. Lt. M.T.St.J. Pattle, No. 80 Squadron RAF, Greece, December 1940 Gloster Gladiator Mk.II, No.1 Squadron SAAF, East Africa, 1940 Gloster Gladiator Mk.II, No.615 (County of Surrey) Squadron RAF, St. Inglevert (Northern France), April 1940 Conclusion This is my first time seeing any of the new ICM releases and I’m very taken with how they’ve recreated this subject. The model itself is fairly easy to build yet displays some wonderful details both internally and externally. A really lovely and well-engineered model that can be taken to yet another stage with Eduard’s suite of aftermarket goodies. So, it’s now time to have a go at building the very last biplane to enter RAF service. My sincere thanks to ICM for the review sample seen in this review.


-
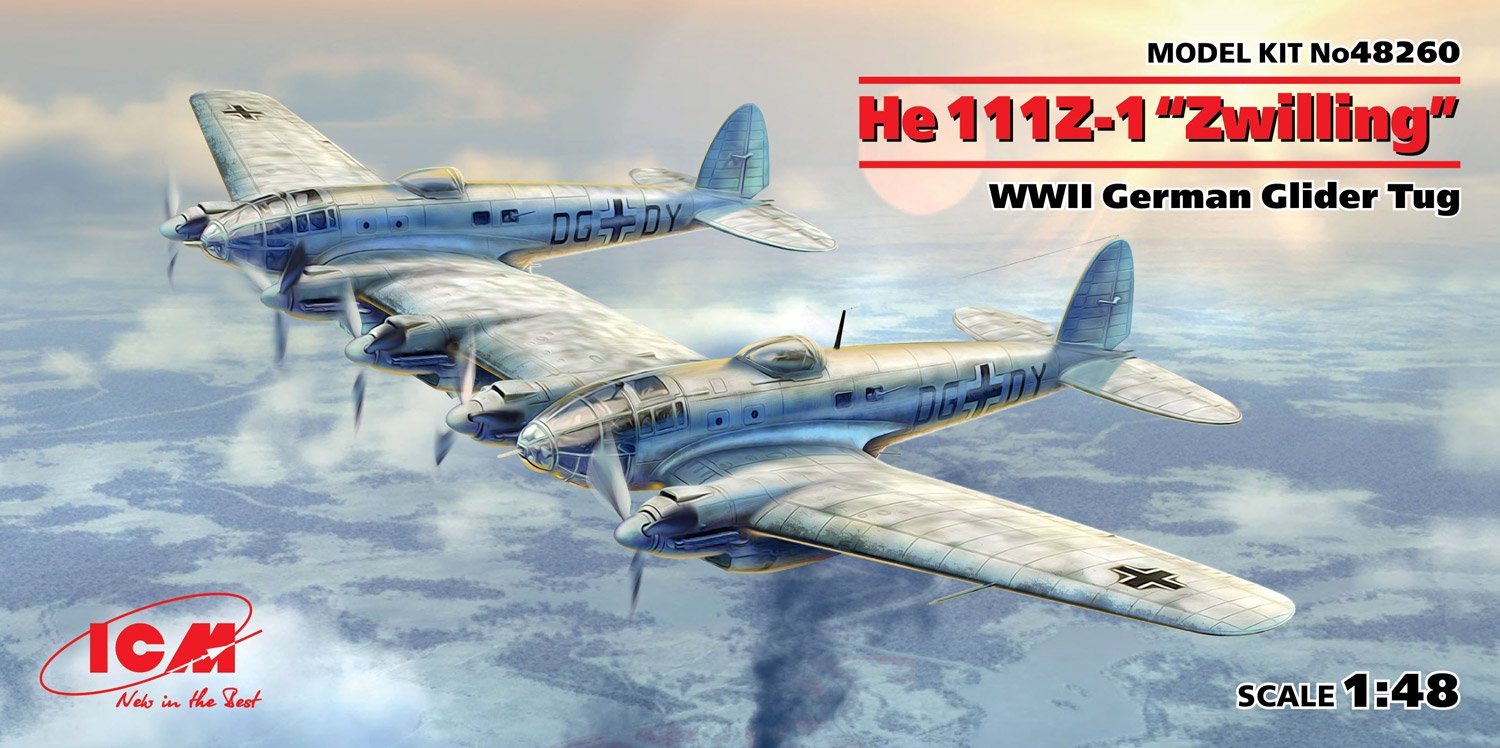
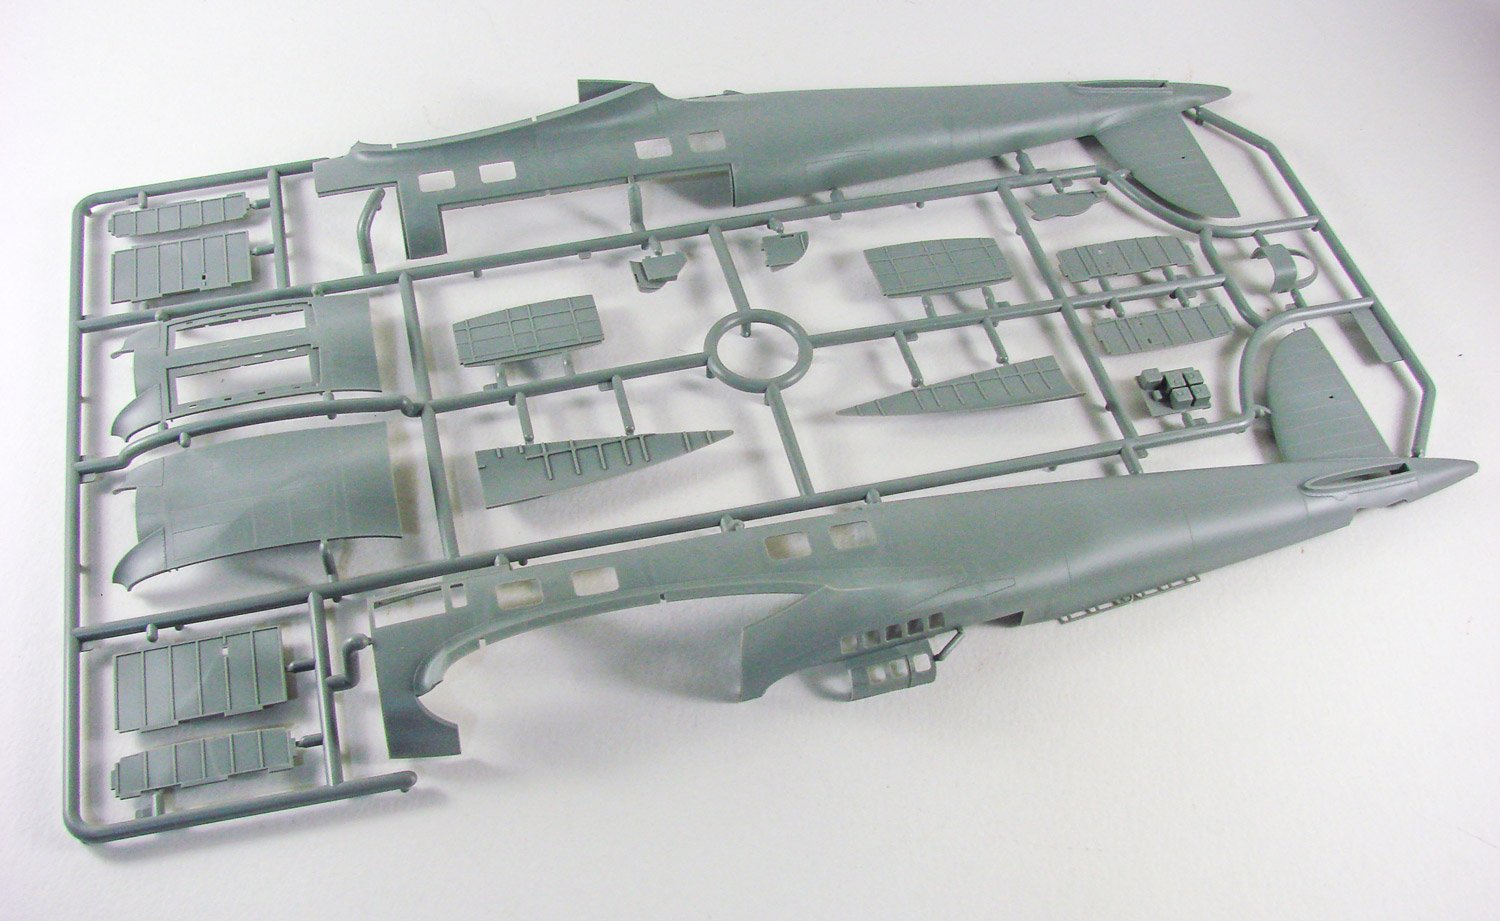
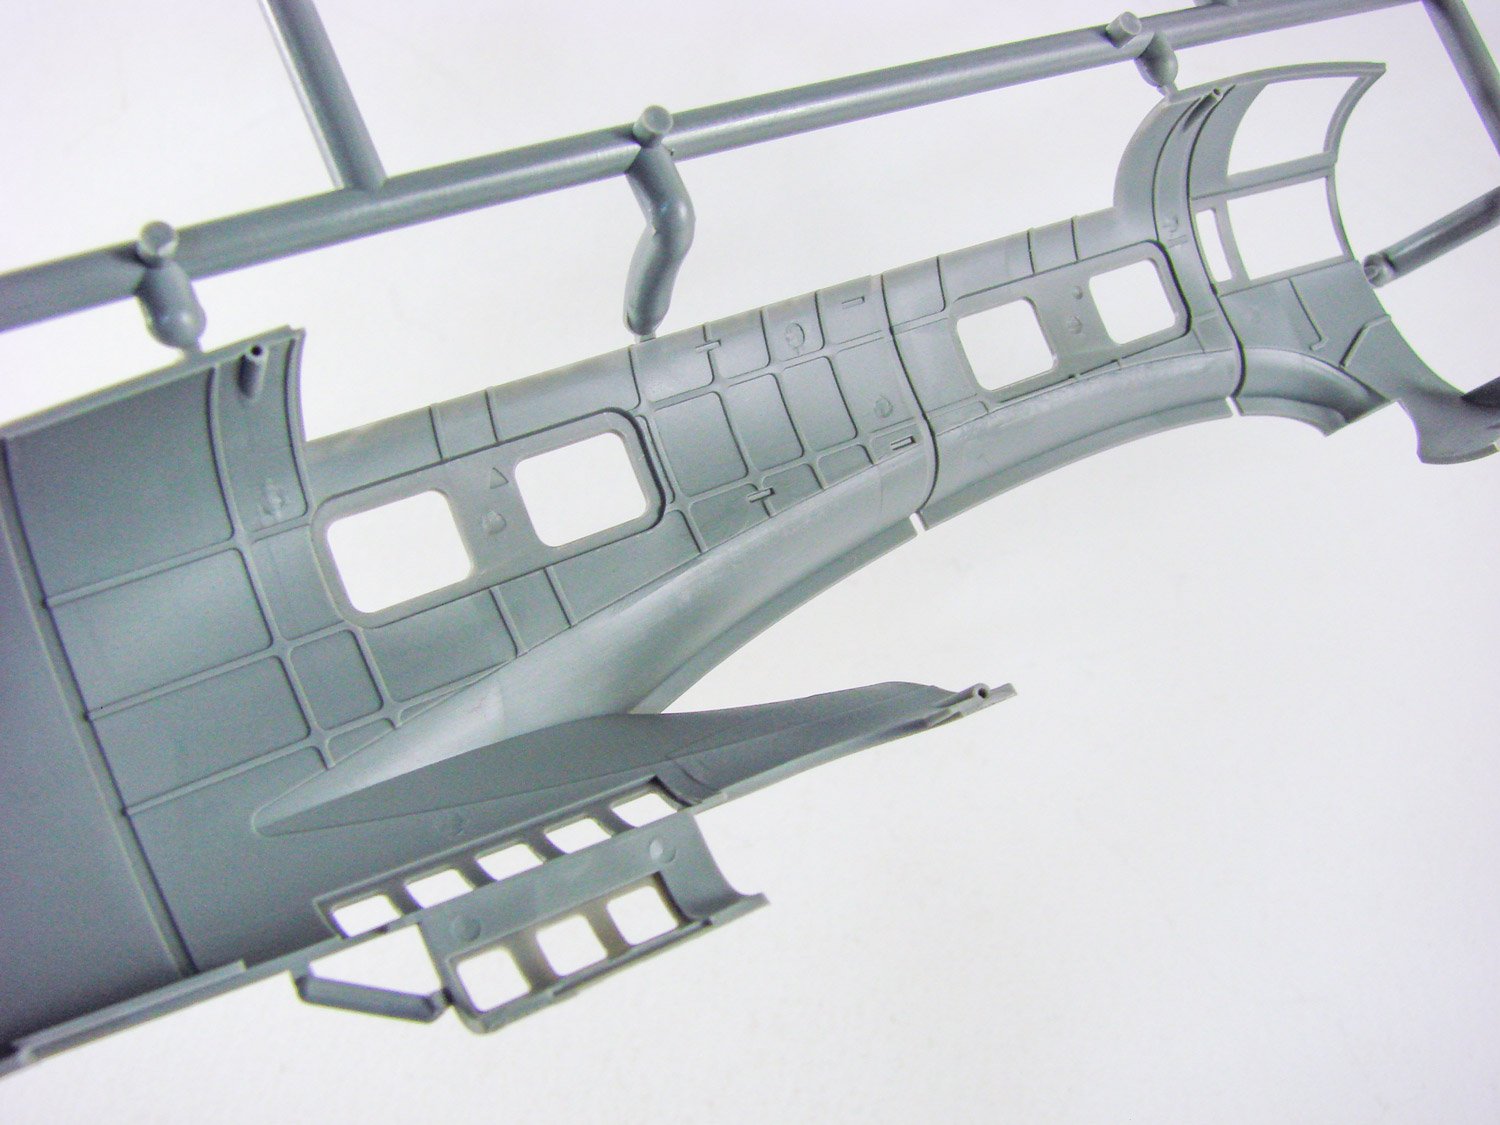
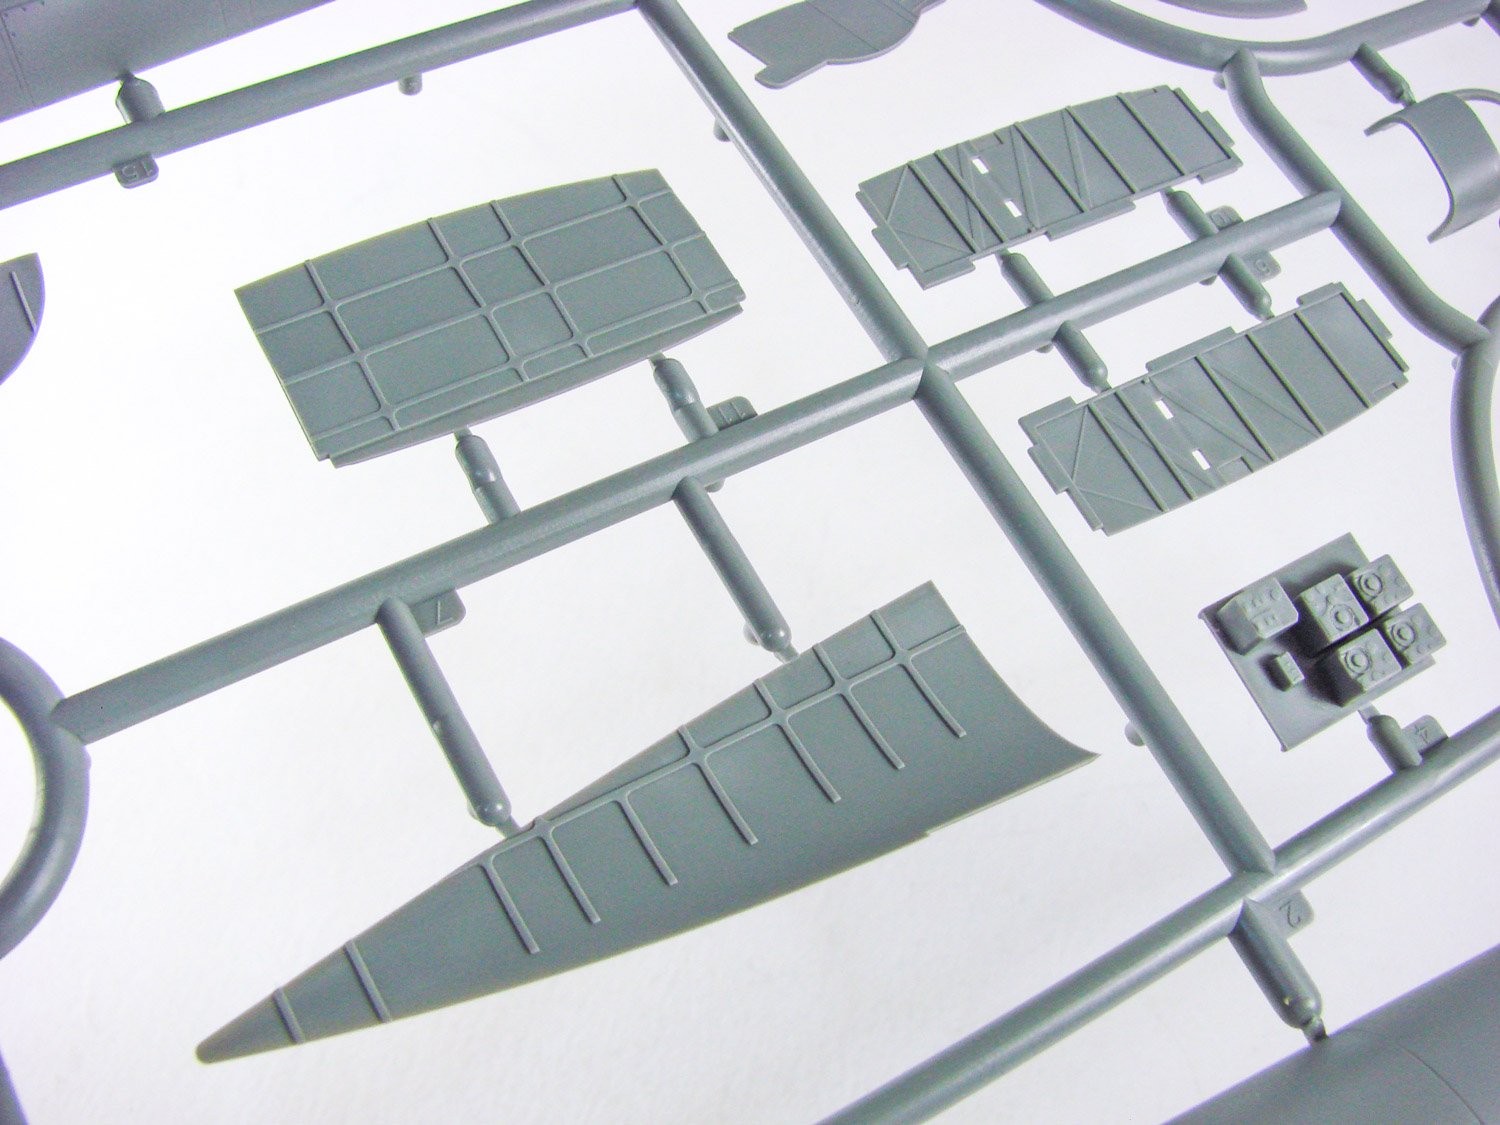
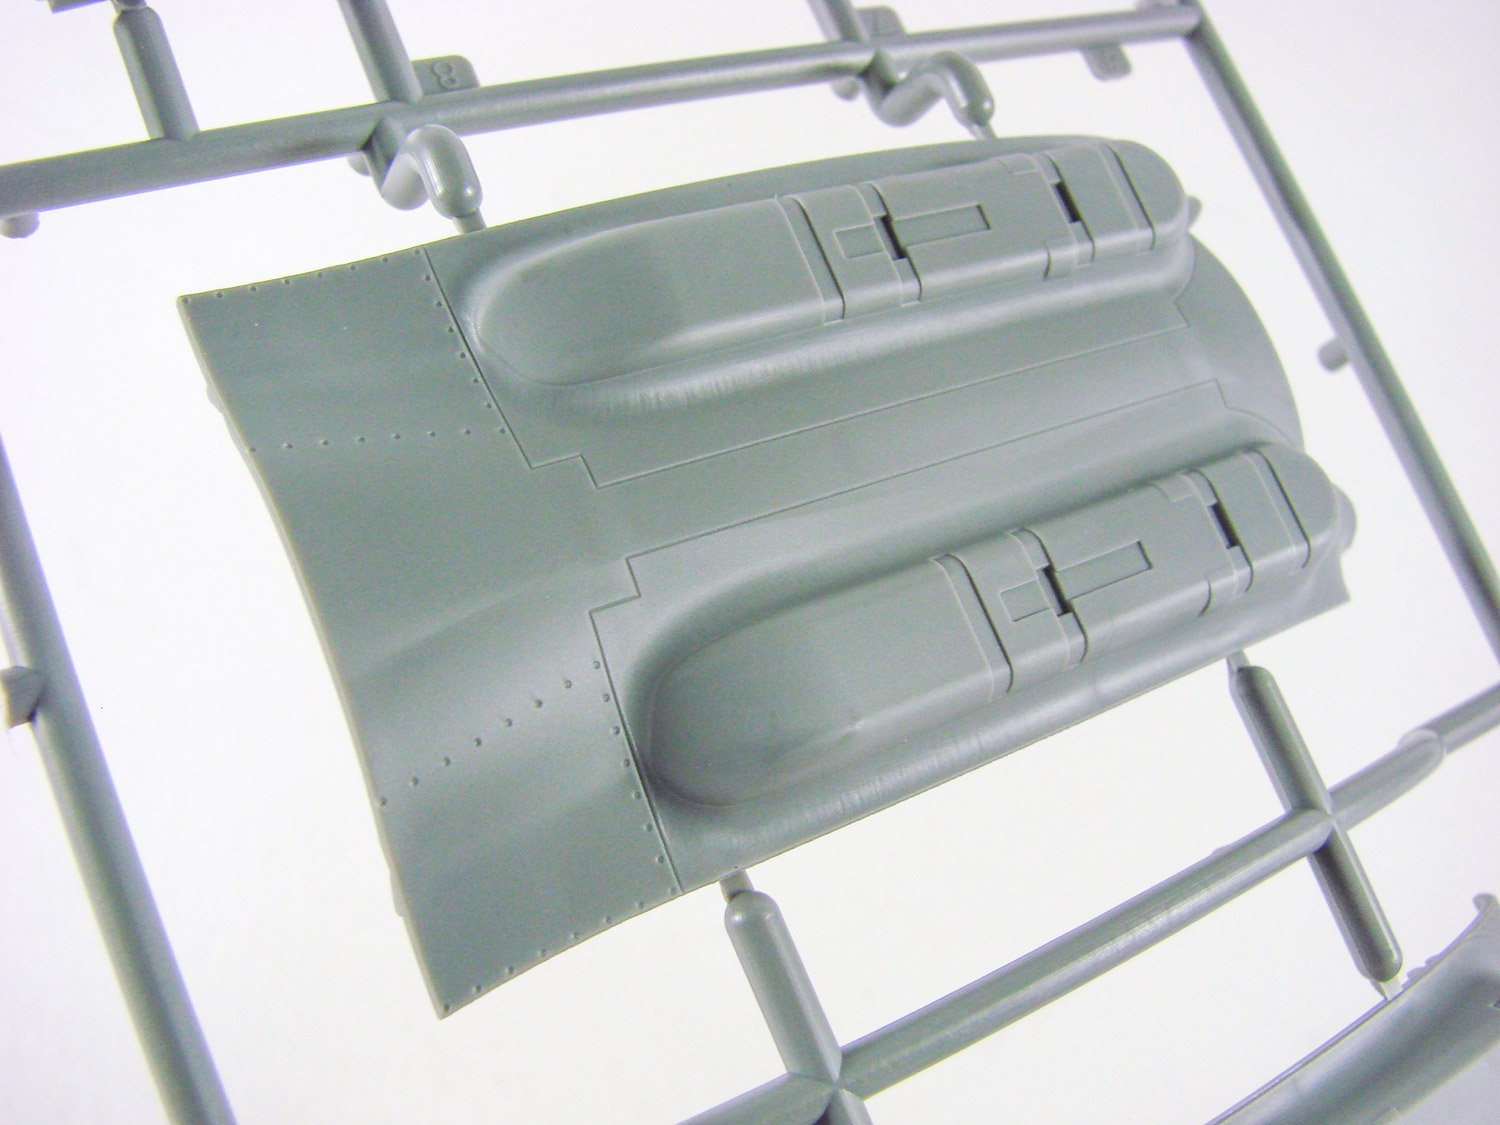
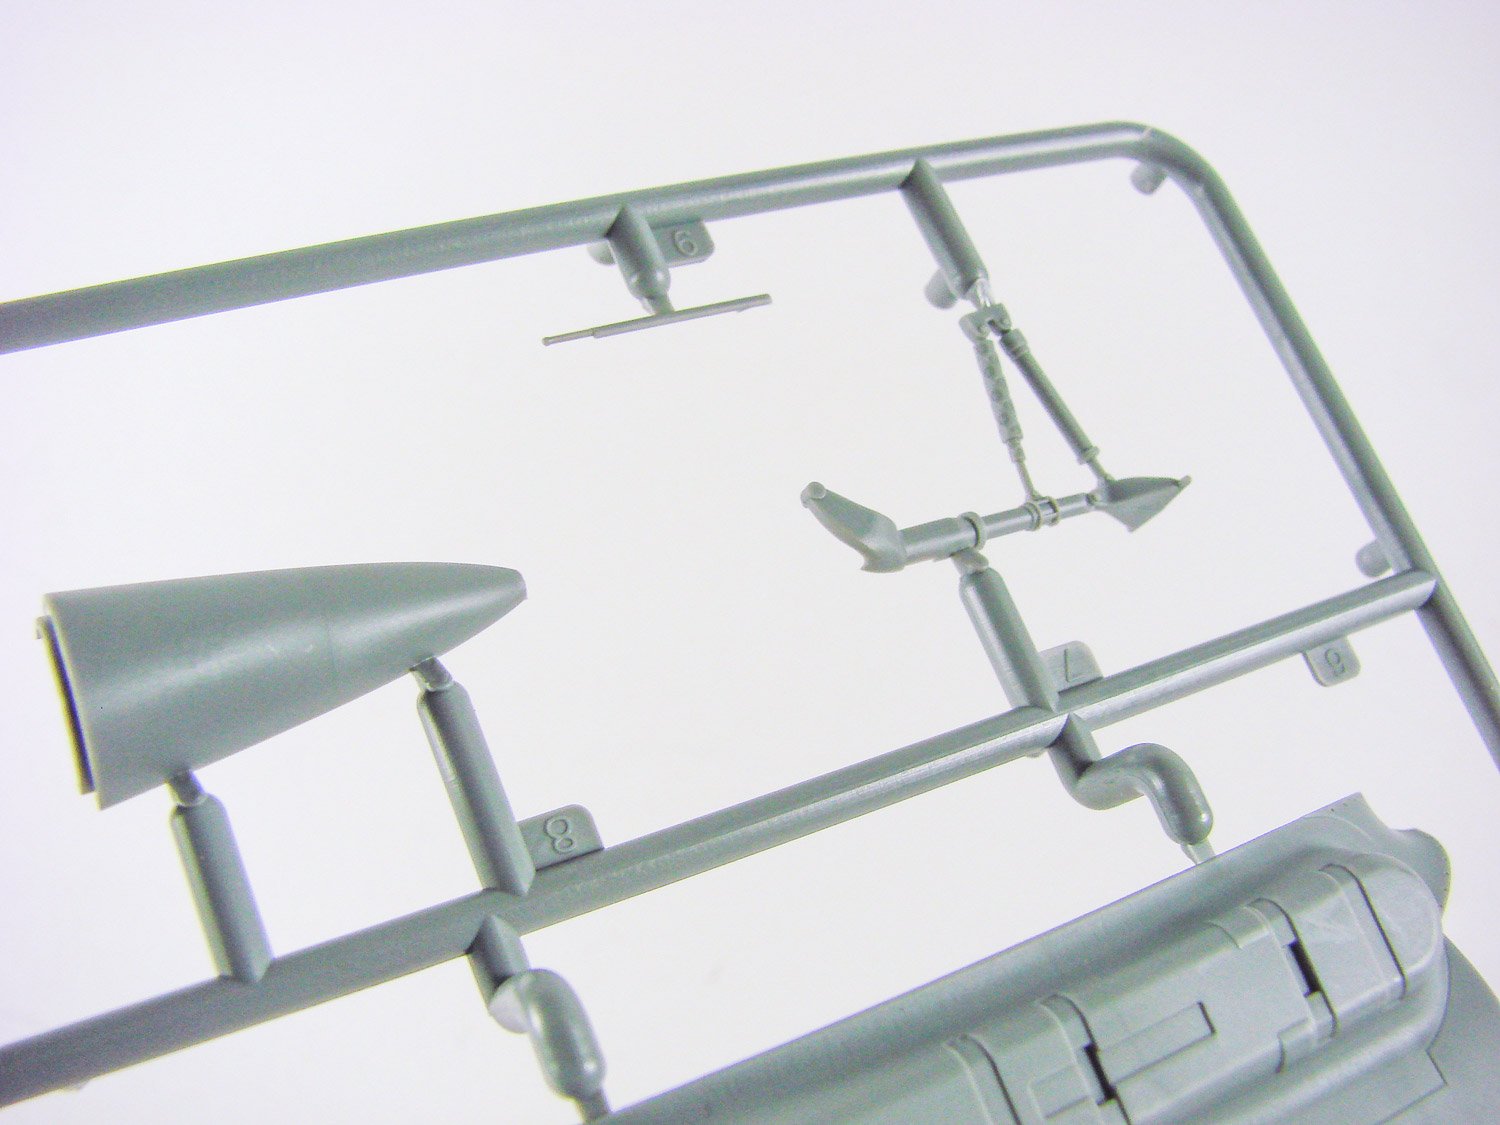
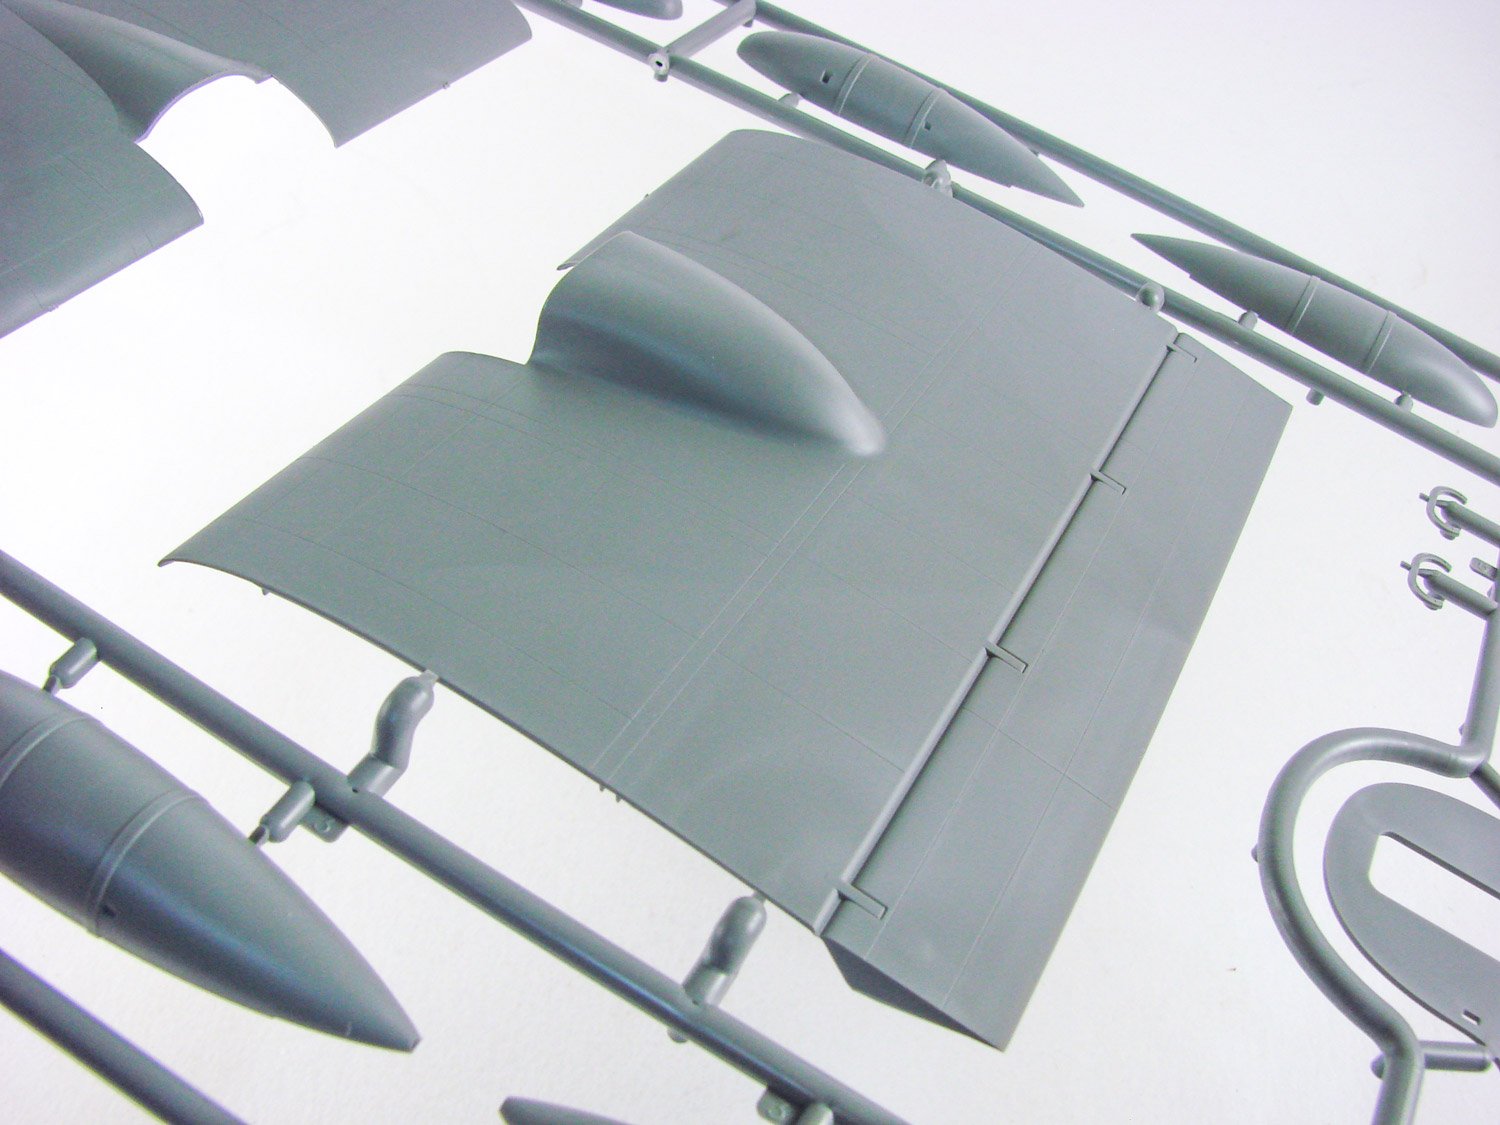
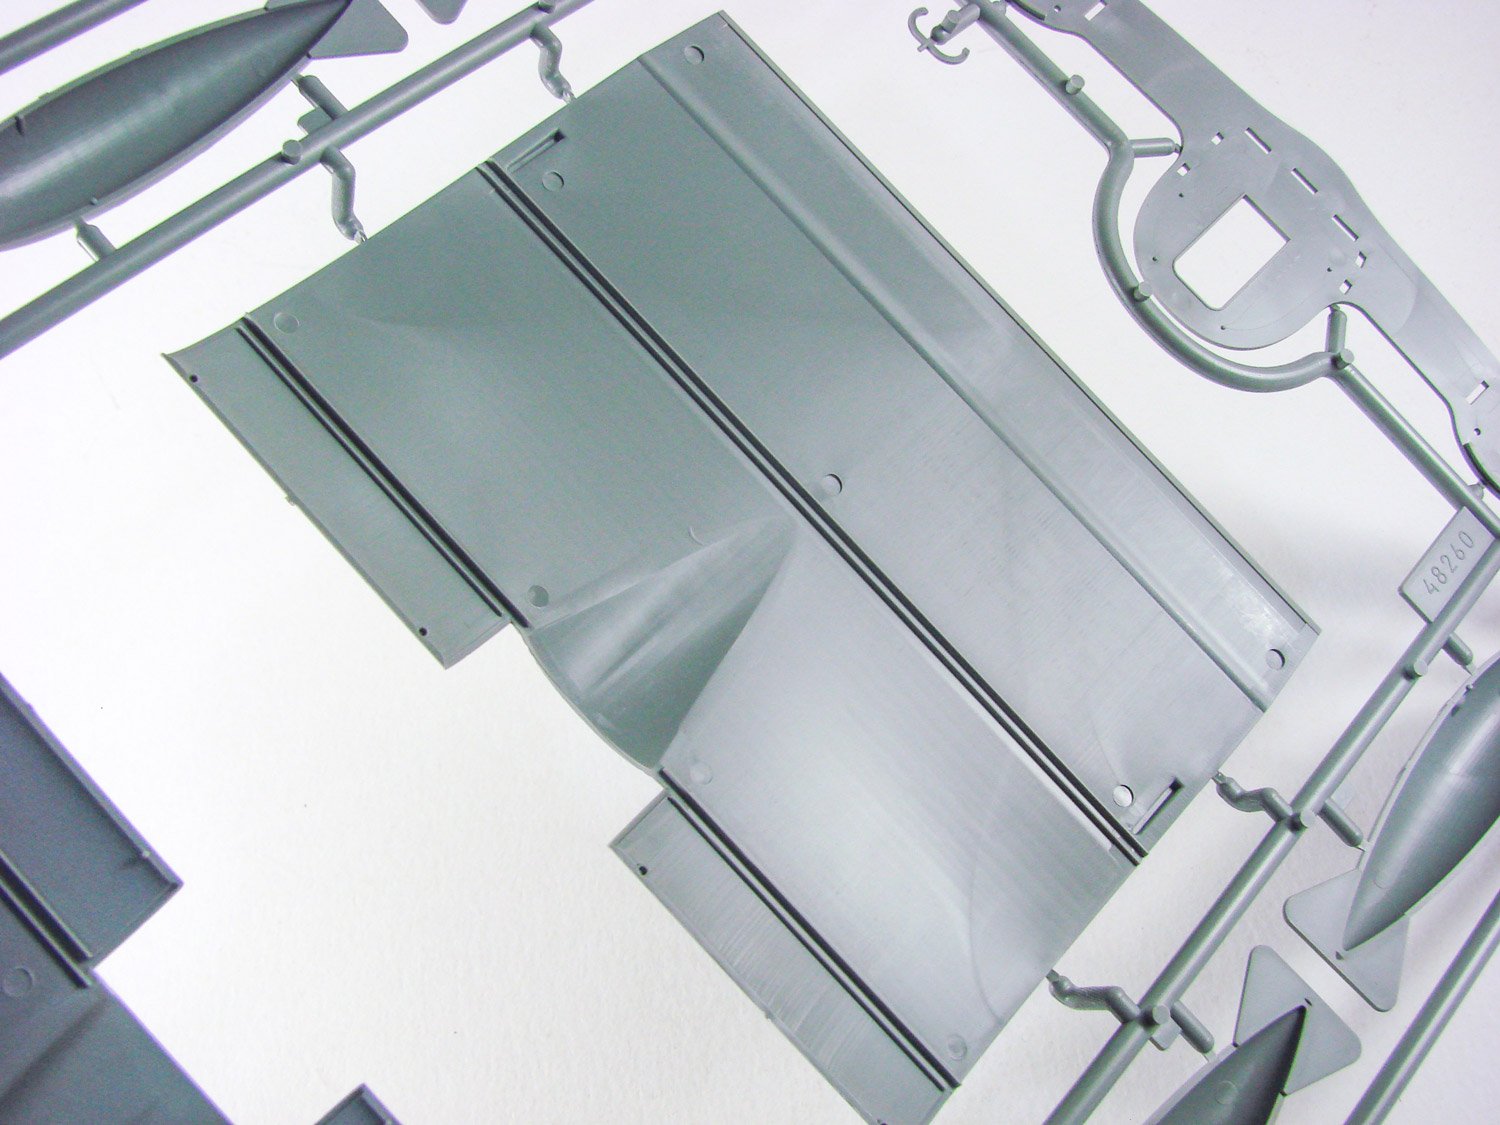
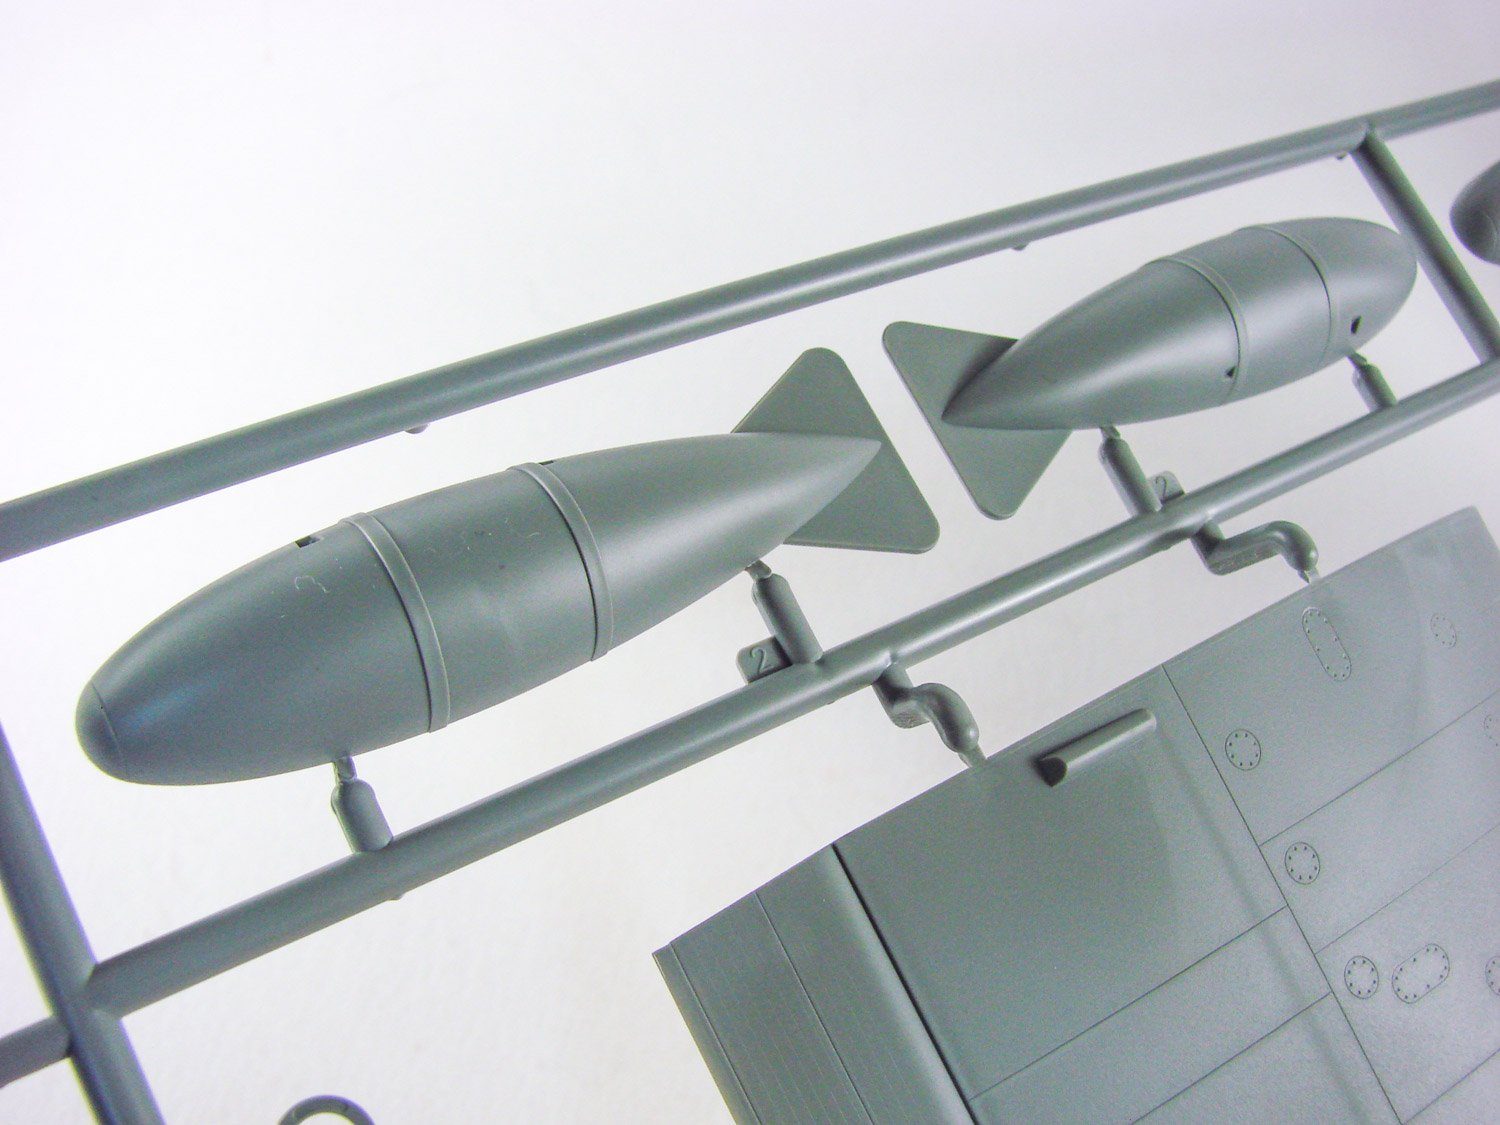
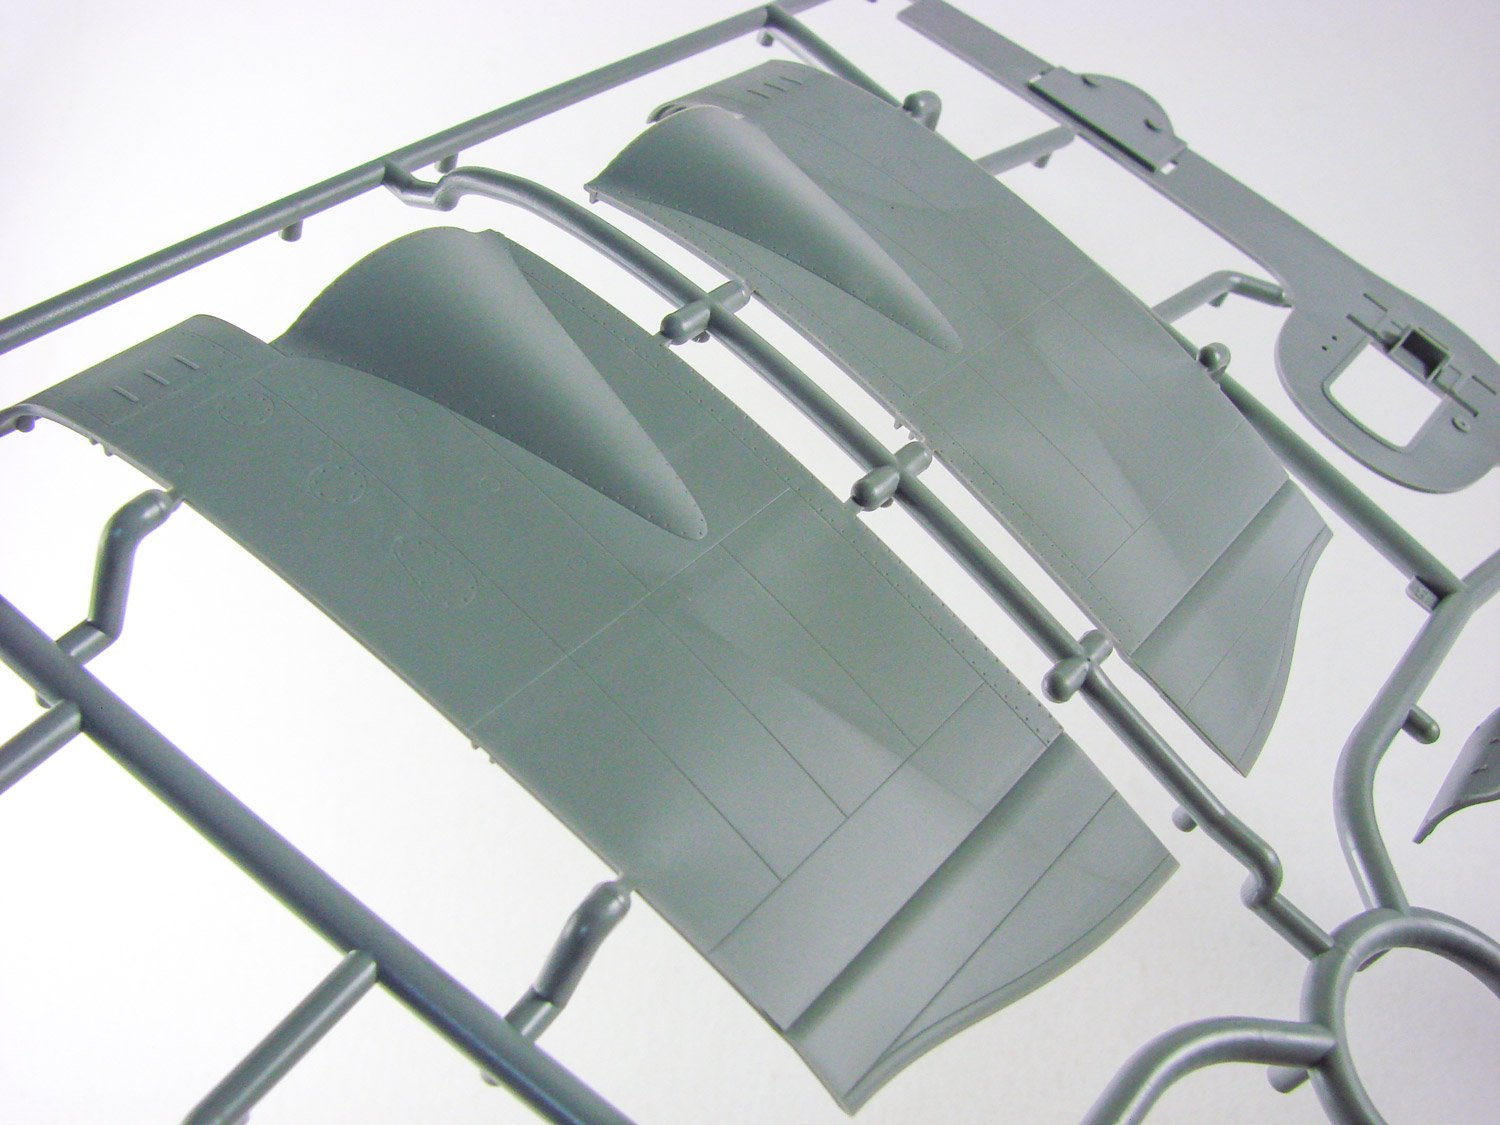
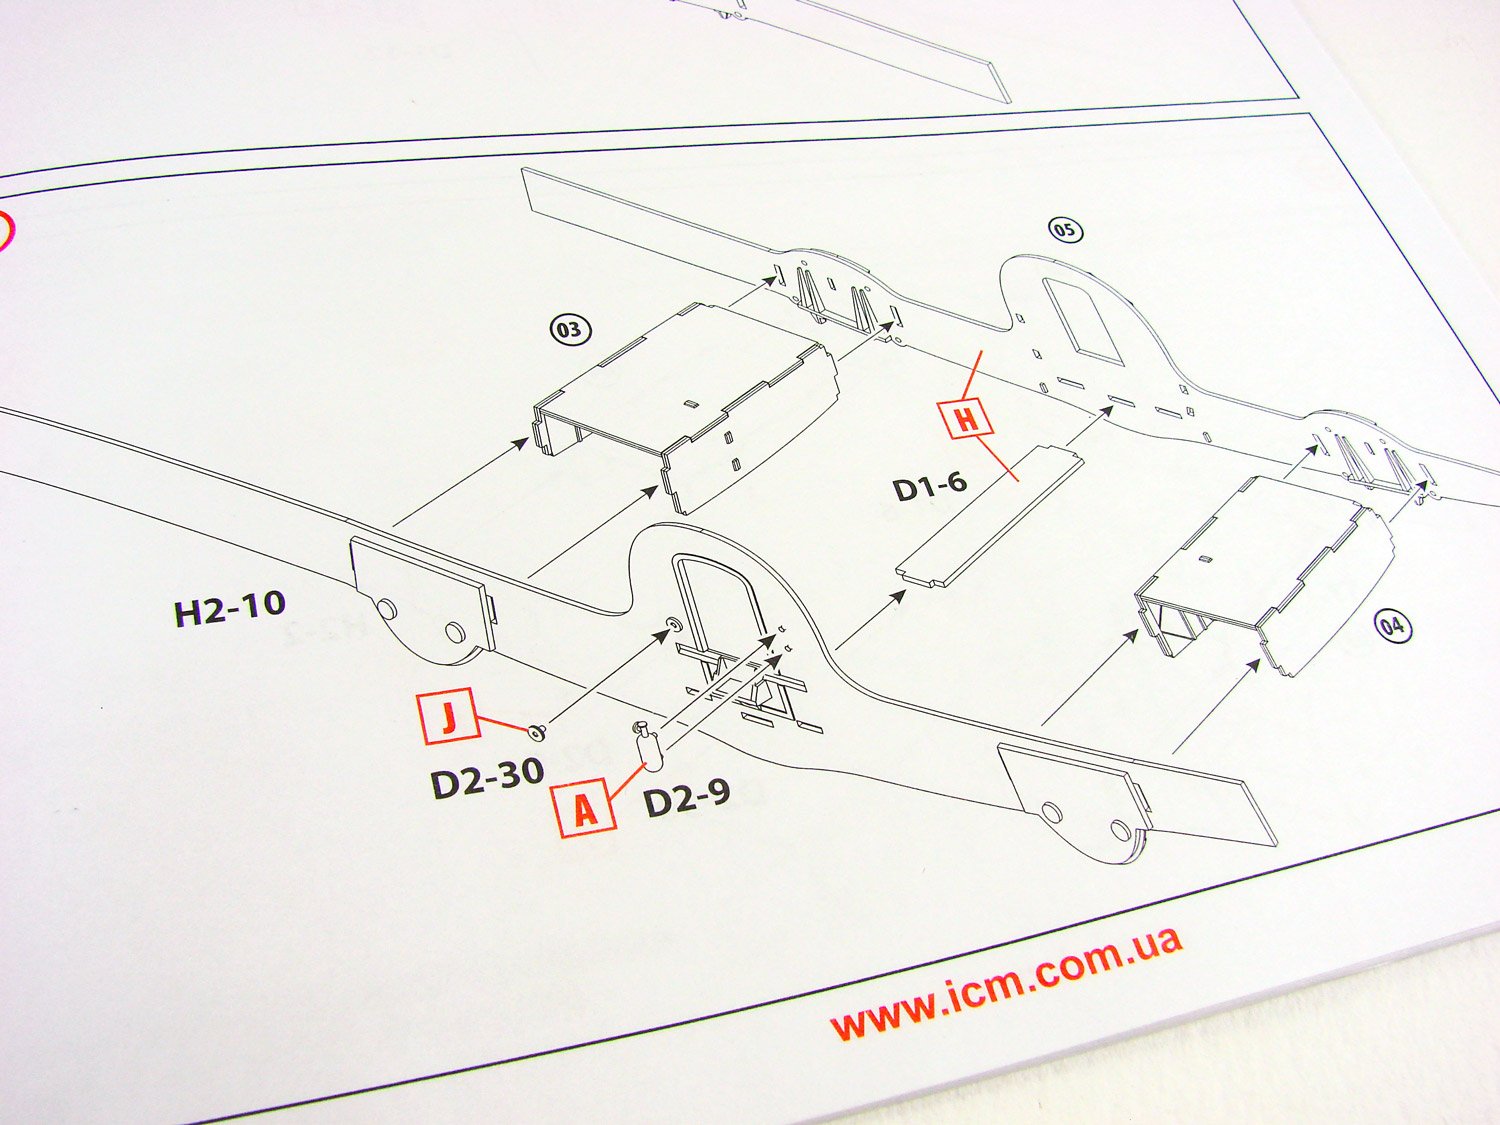
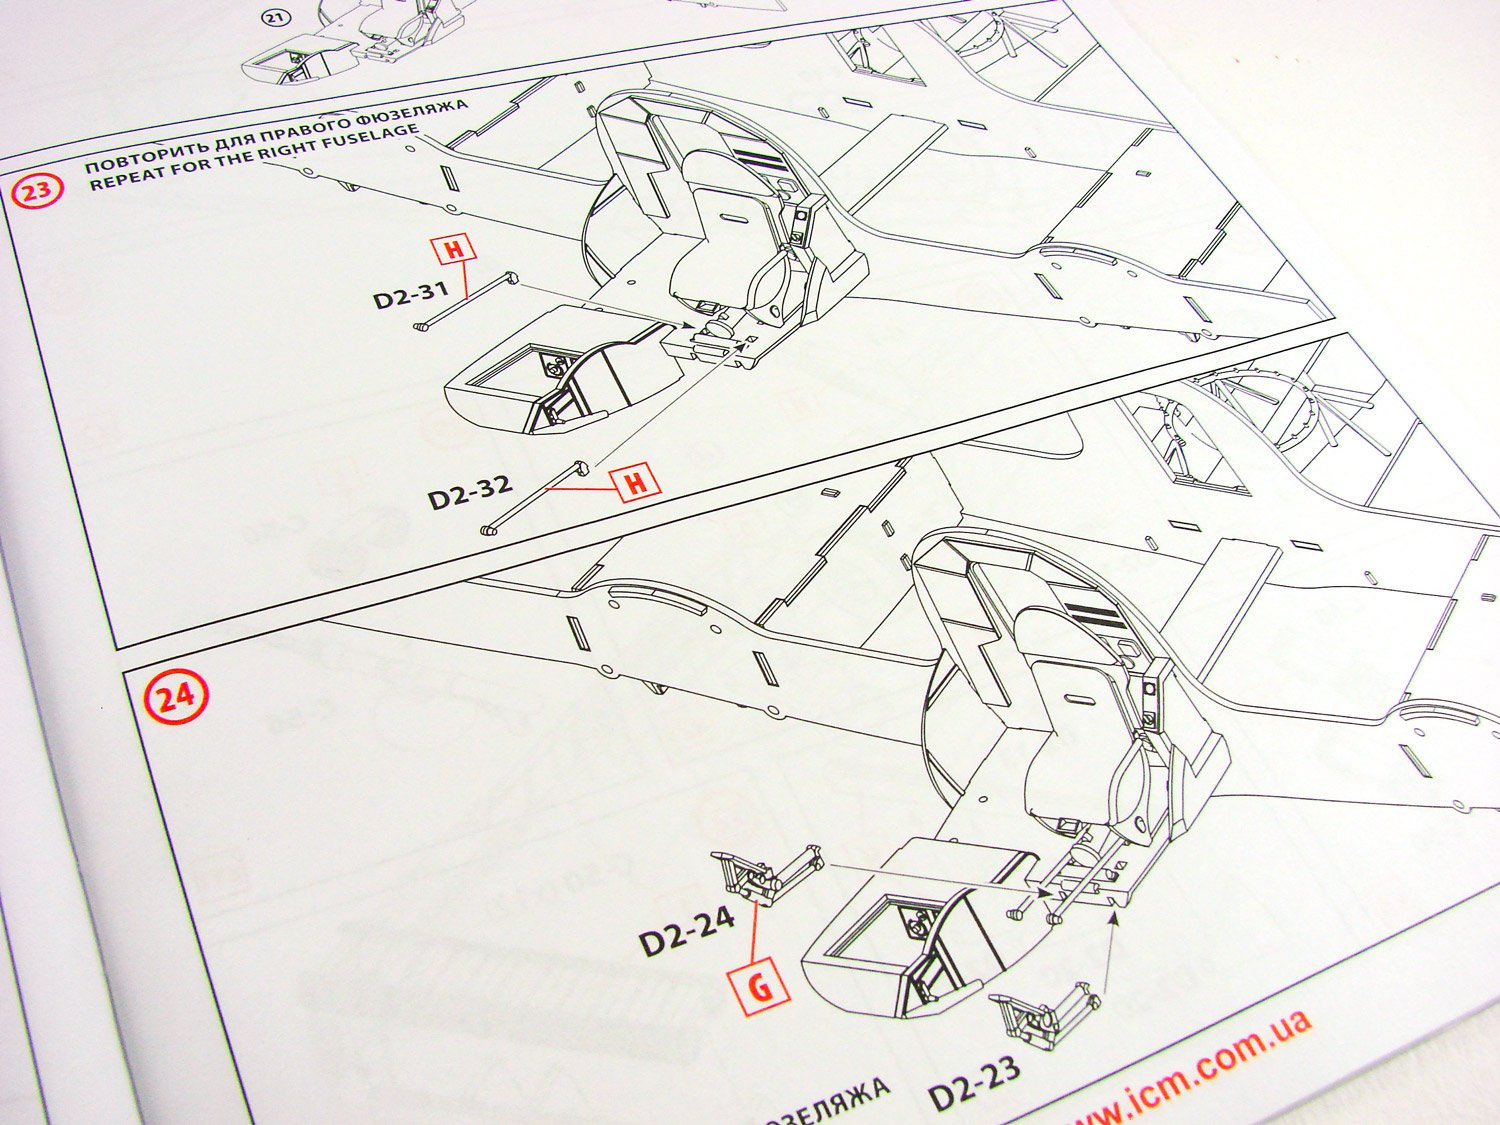
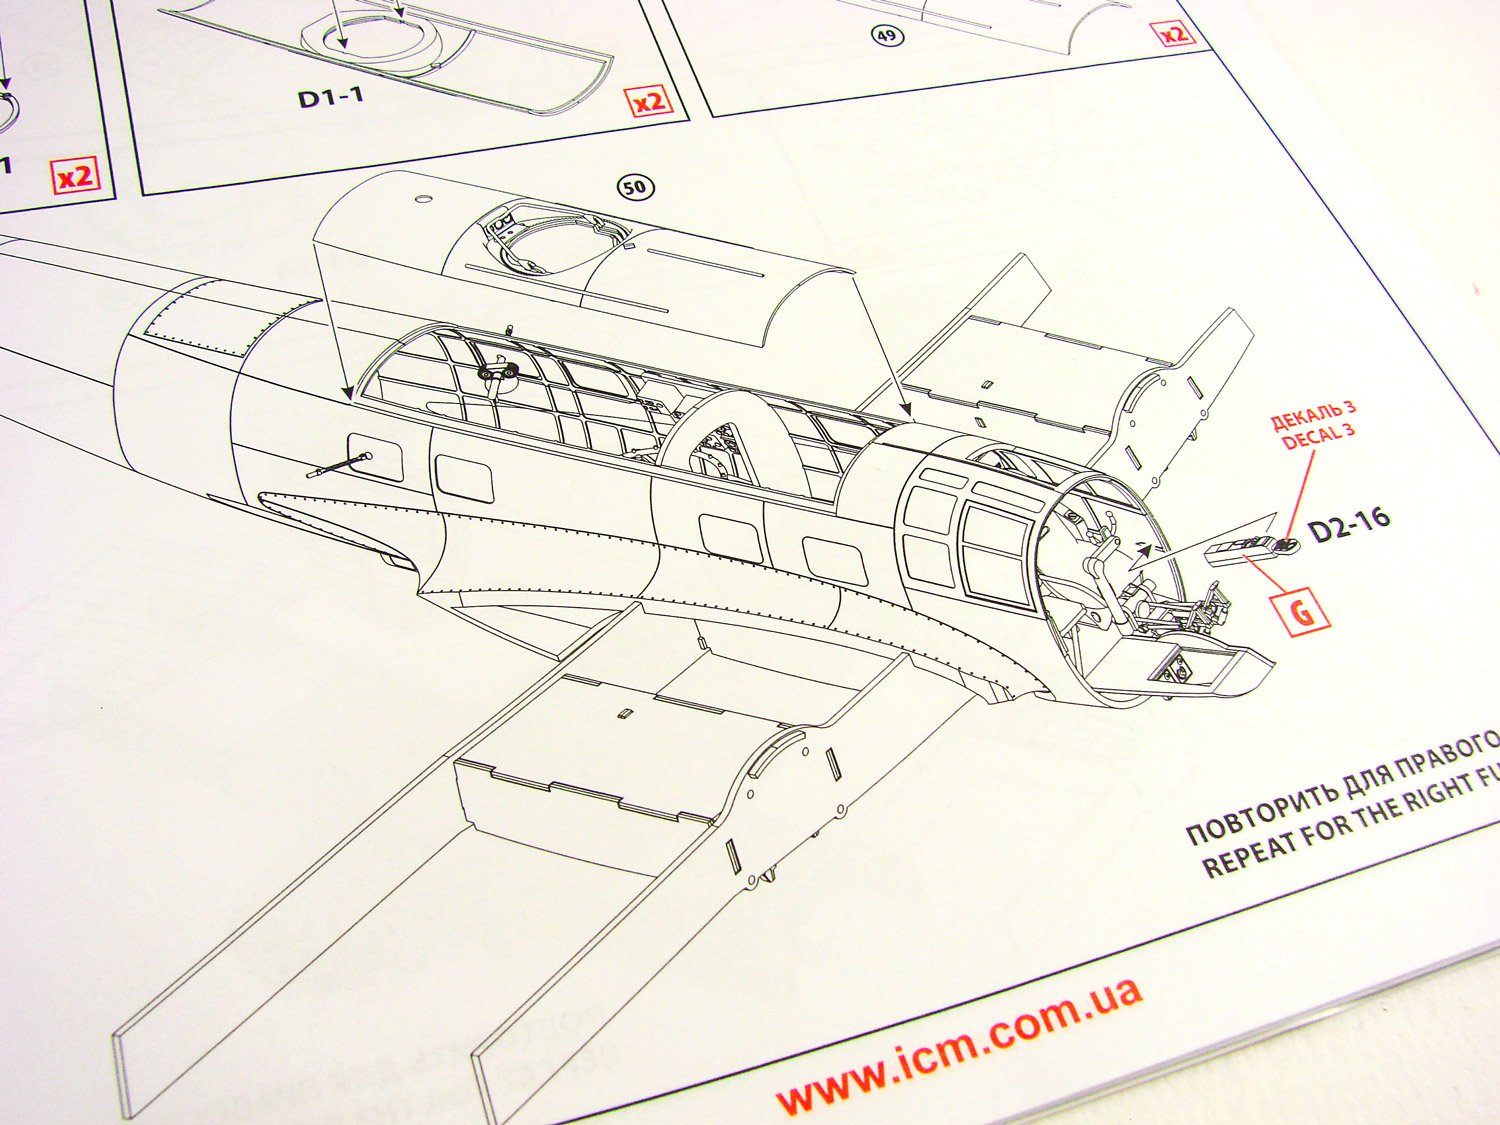
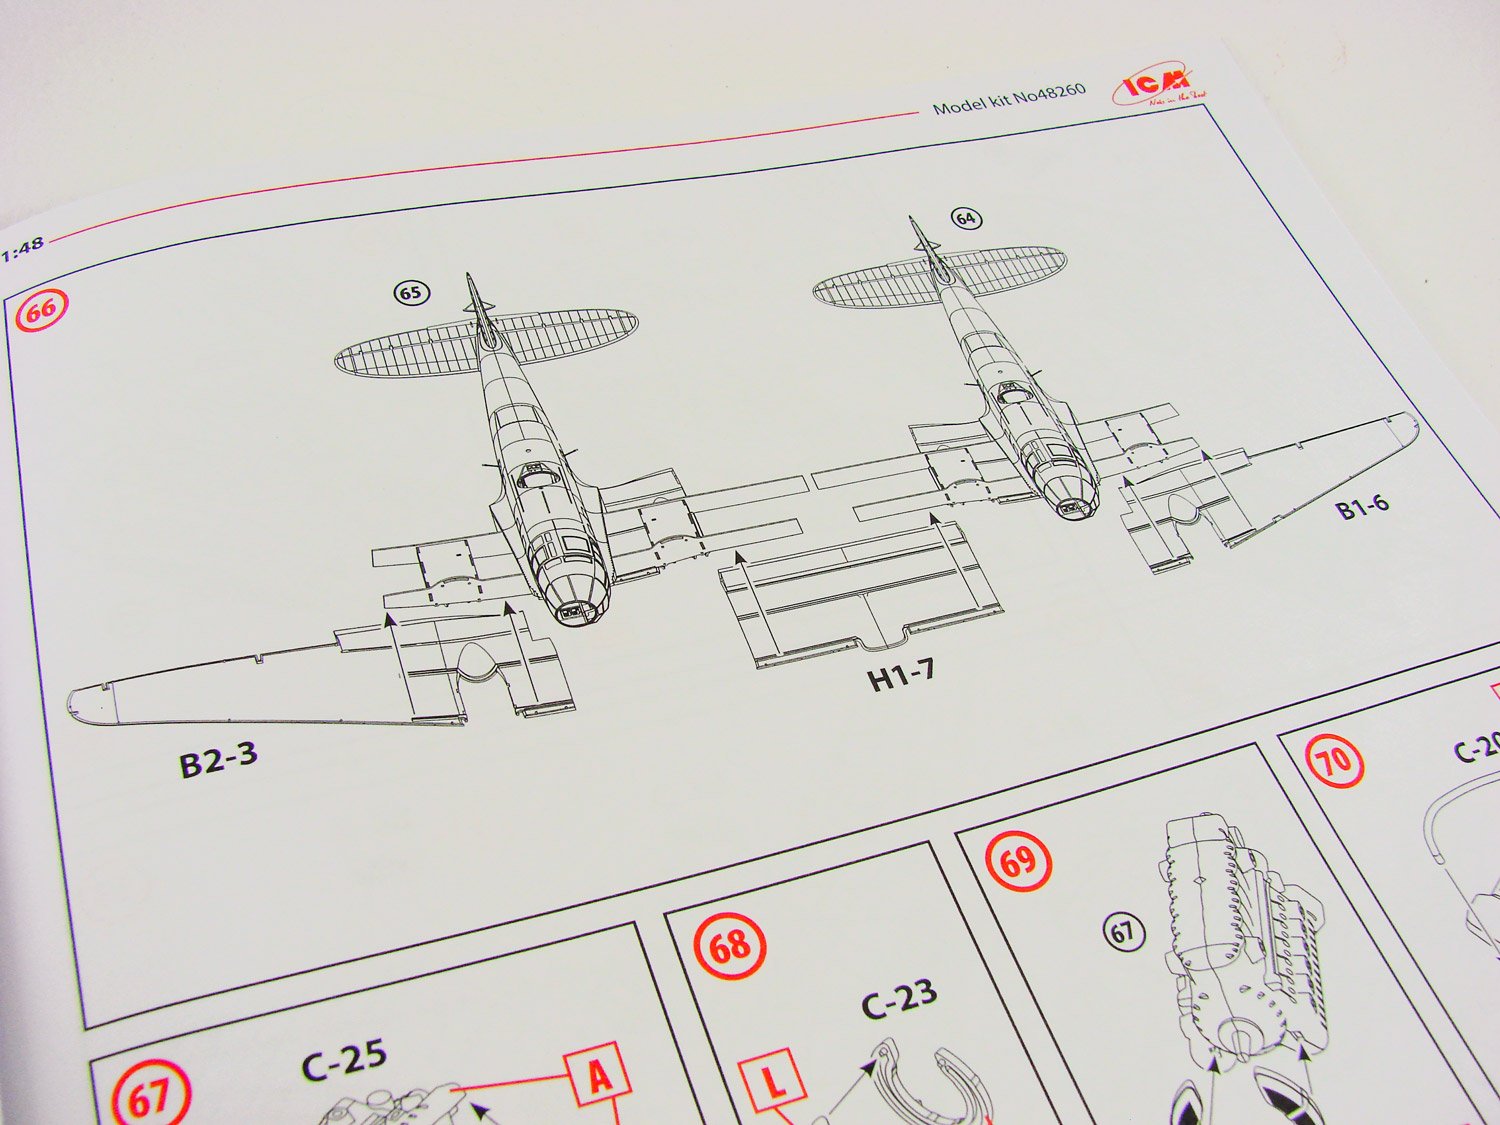
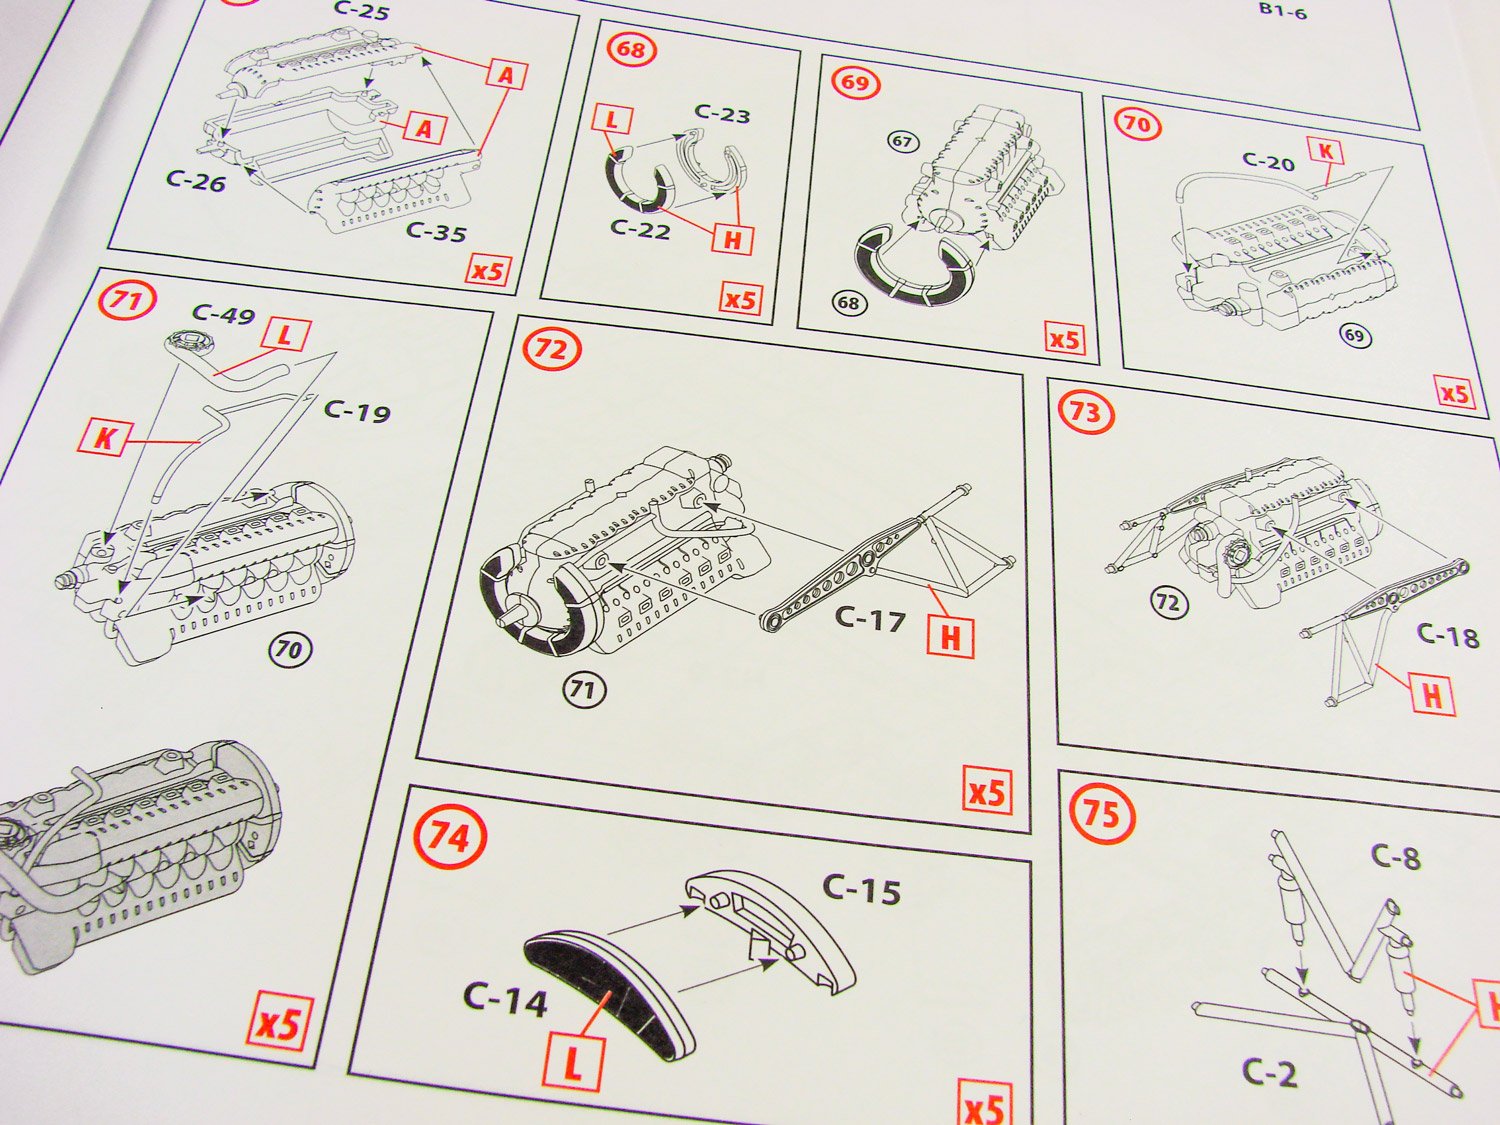
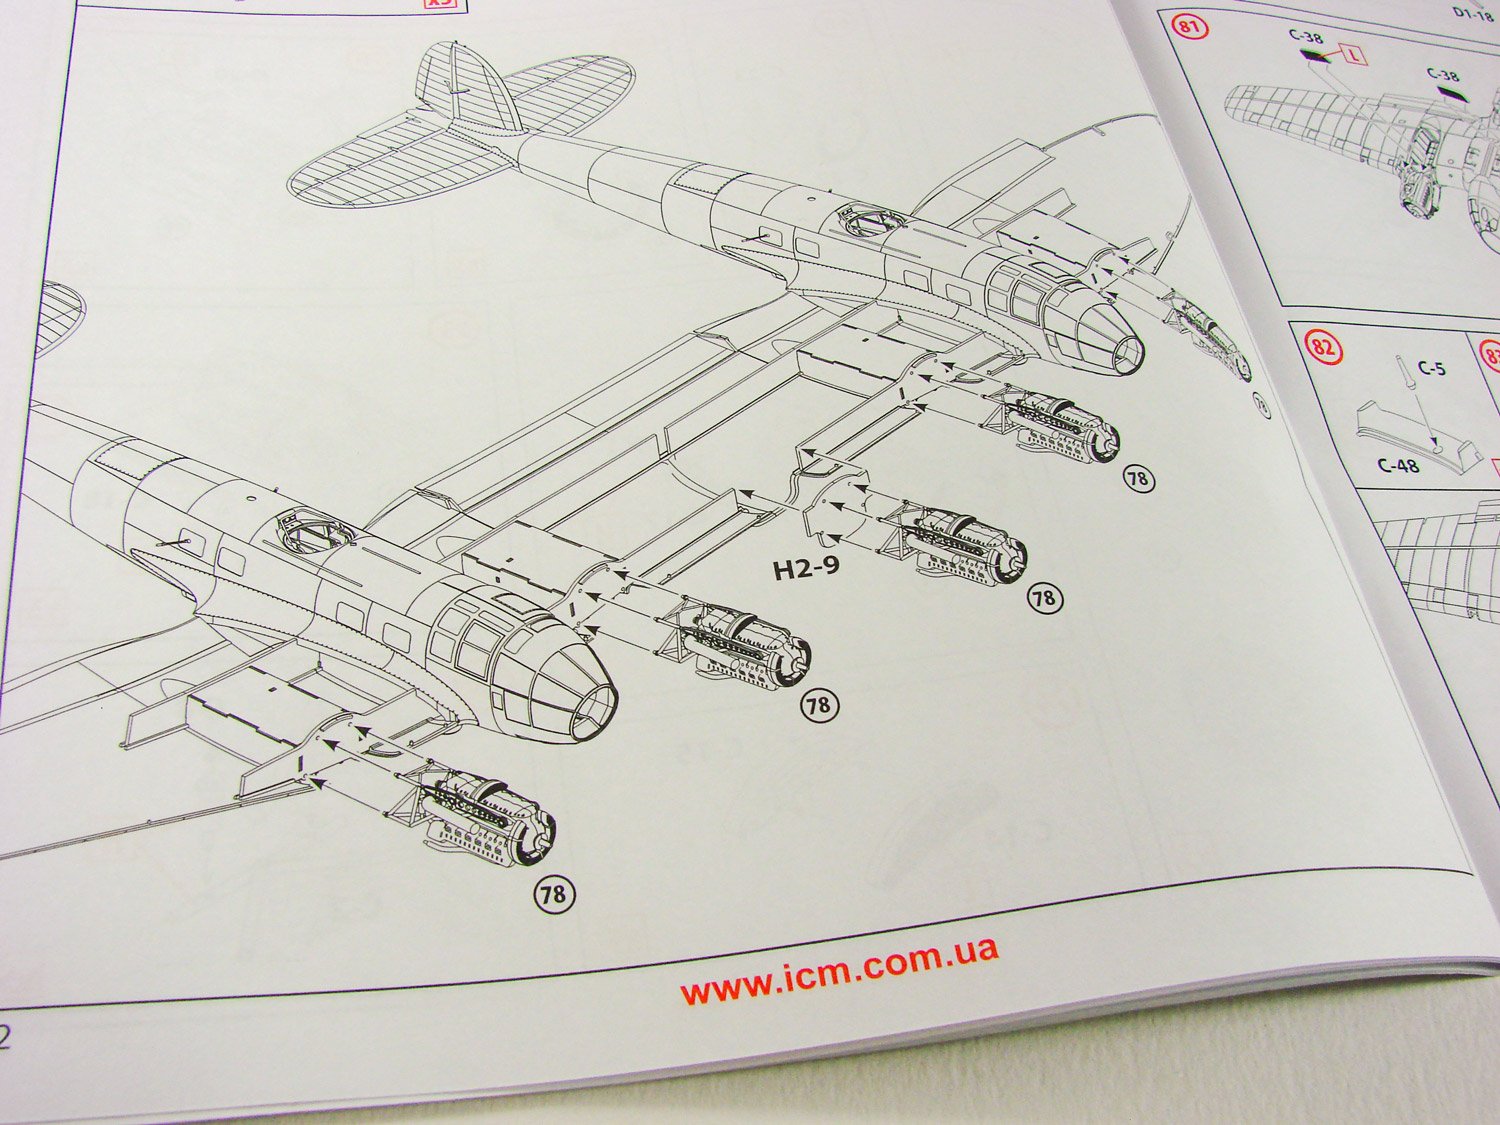
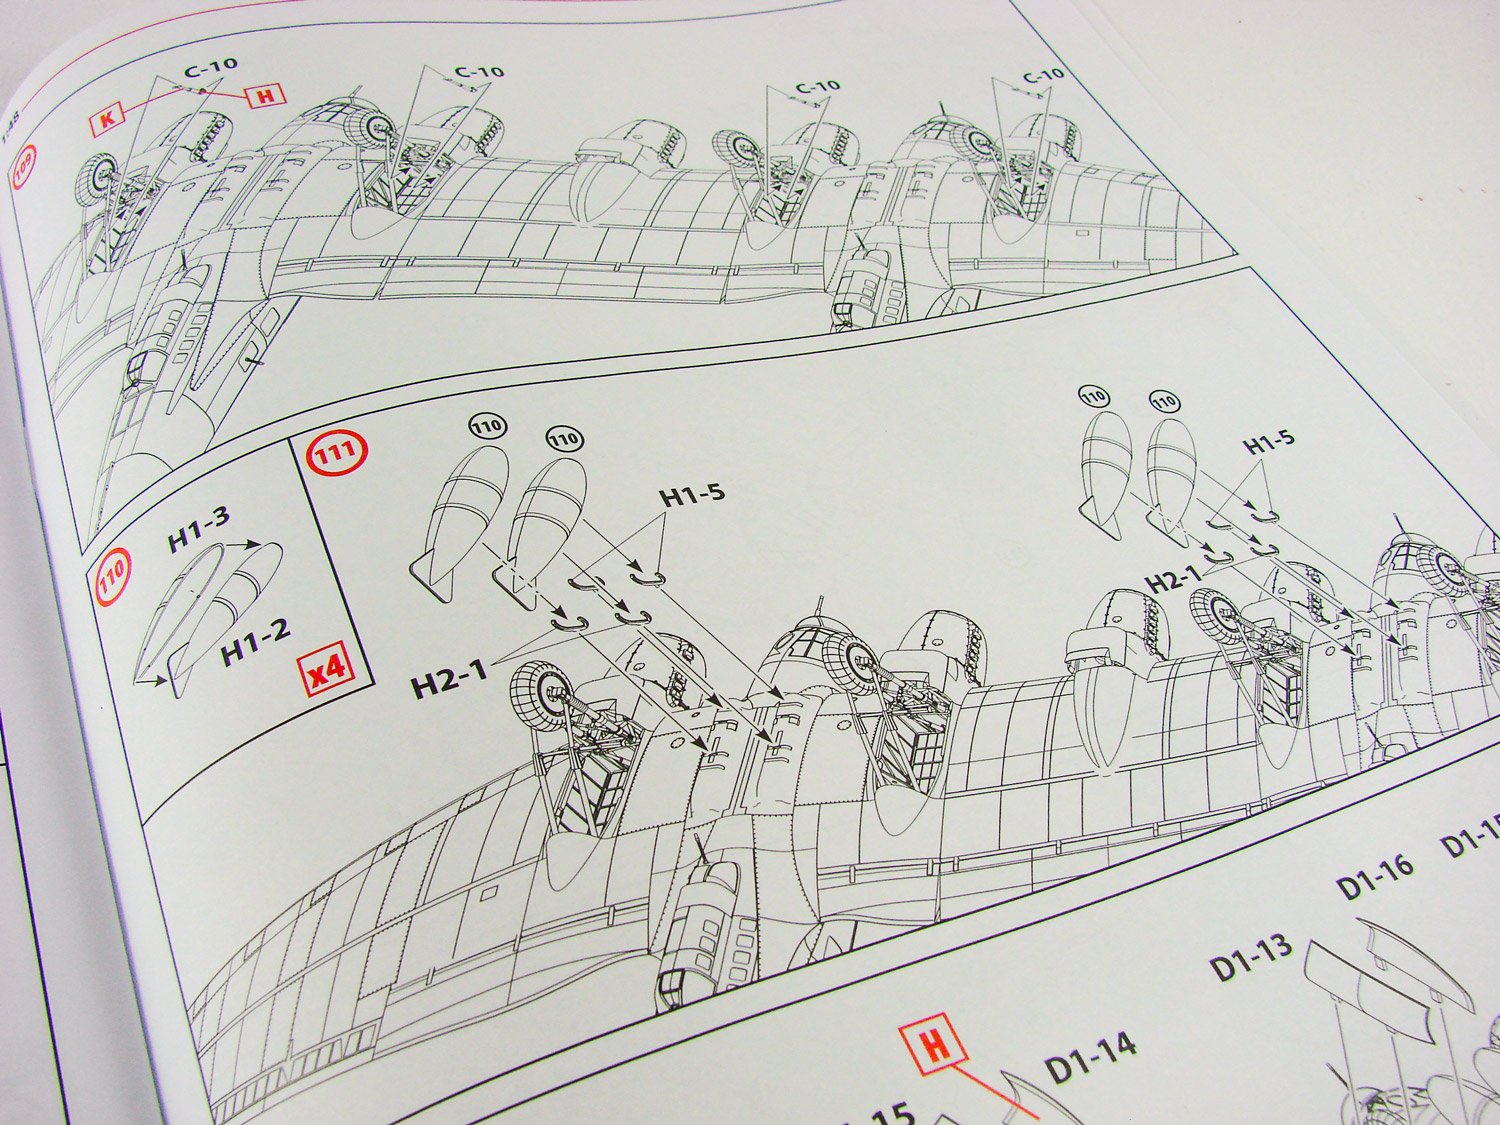
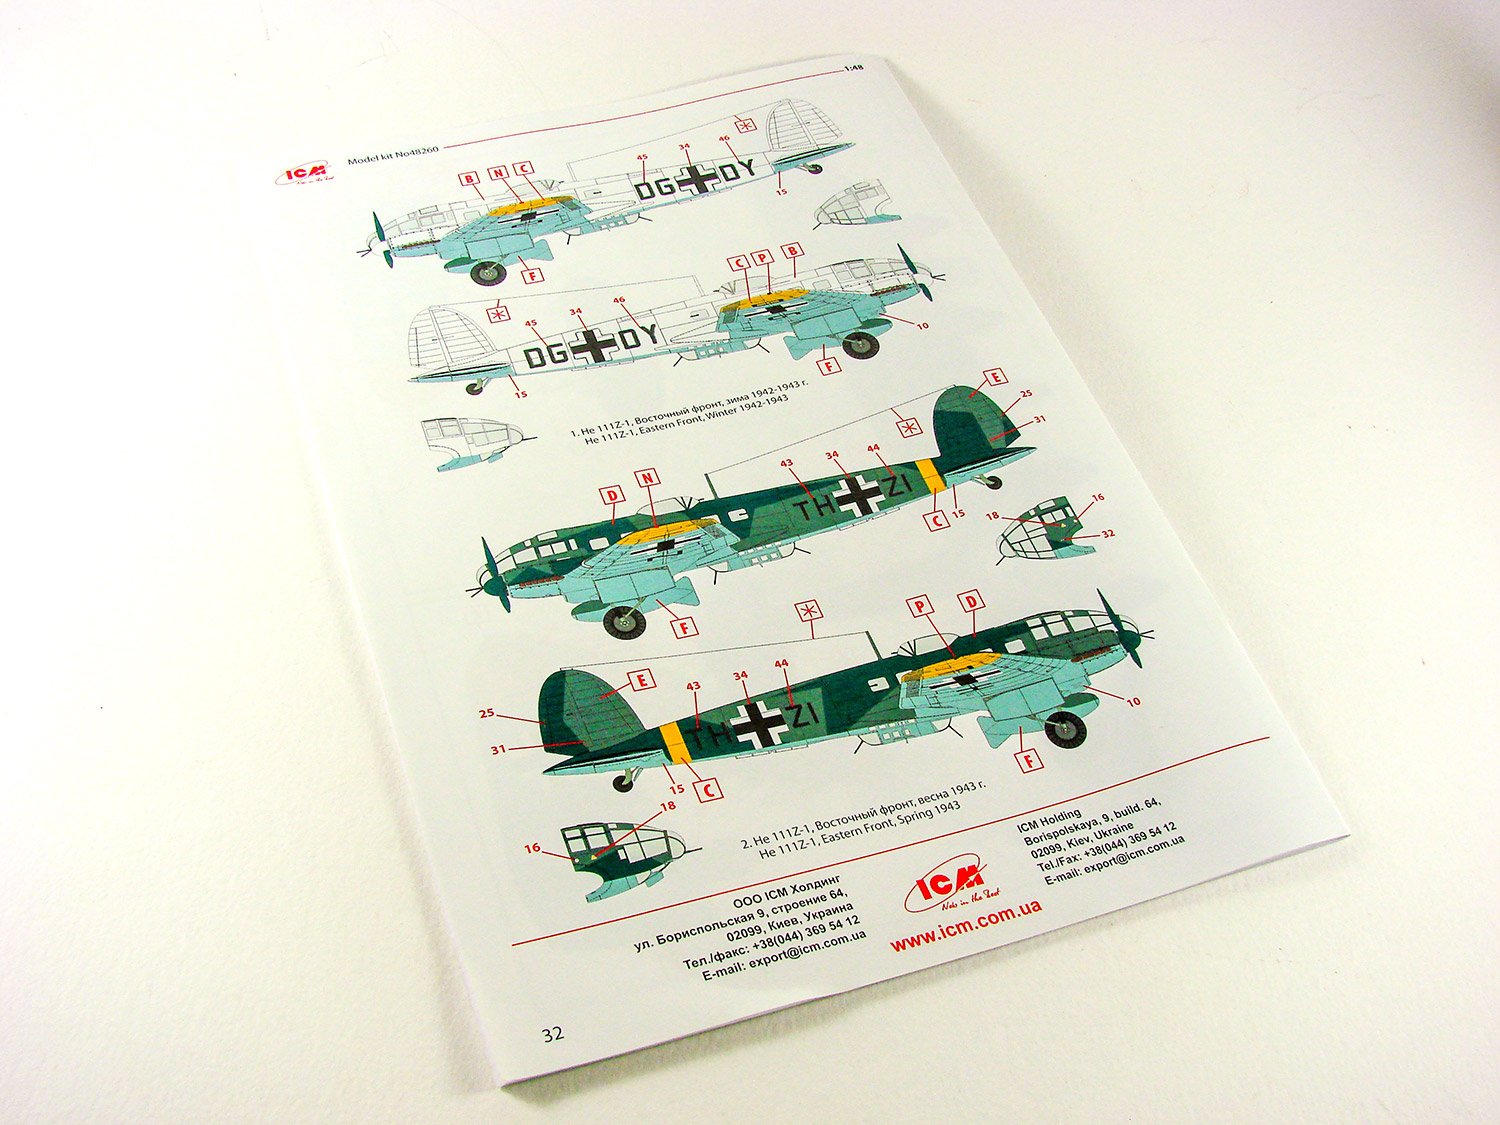
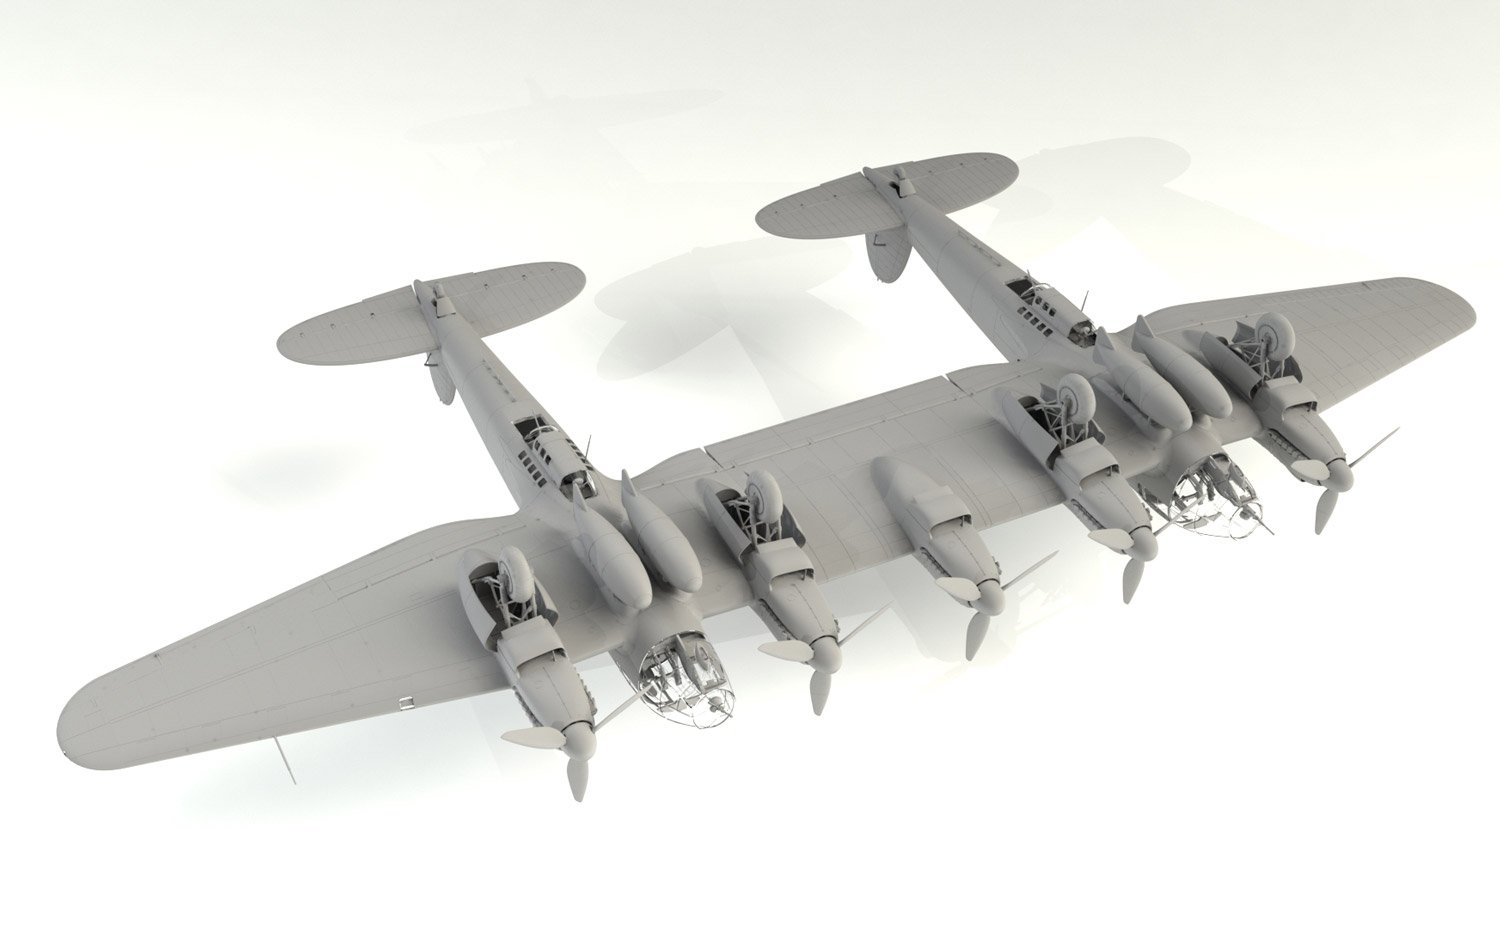
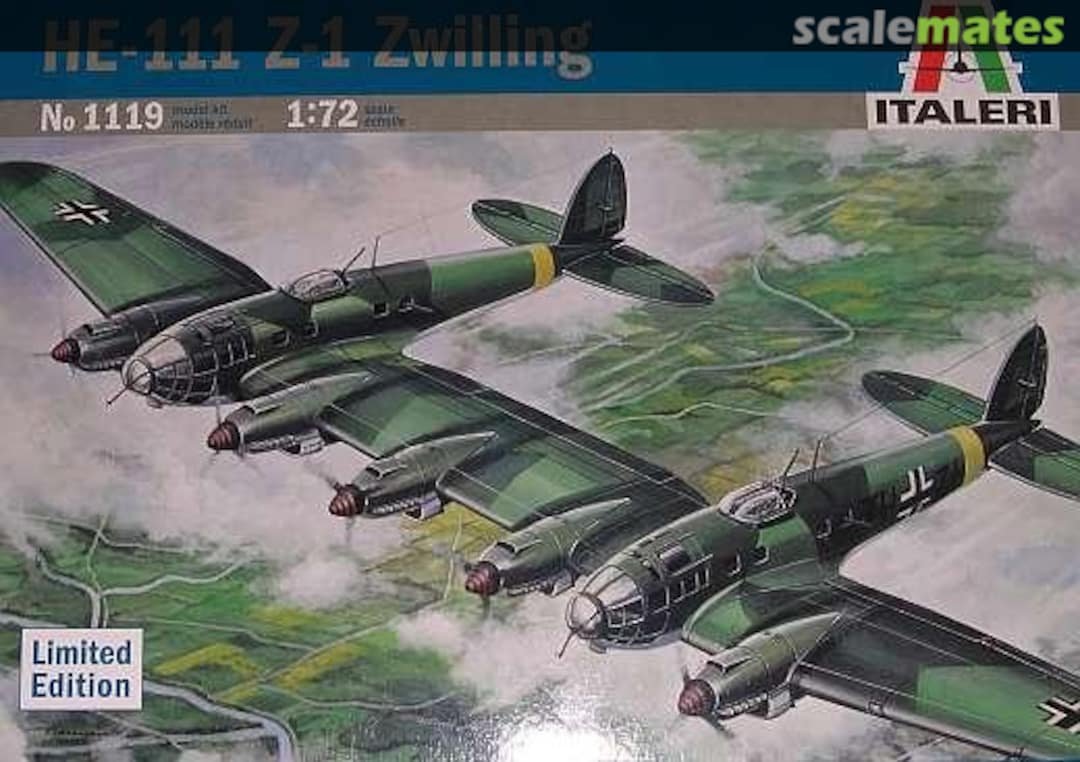
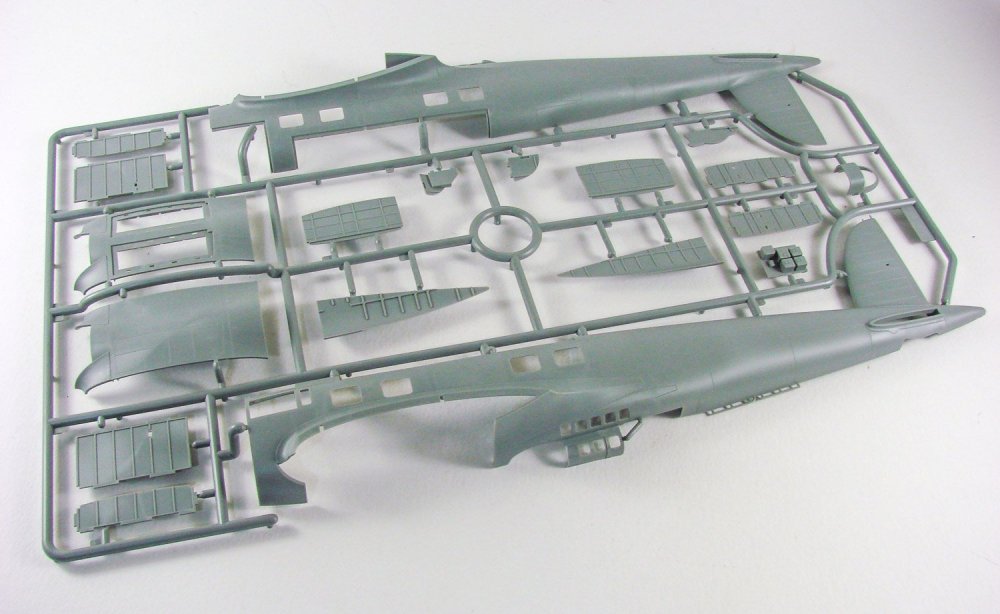
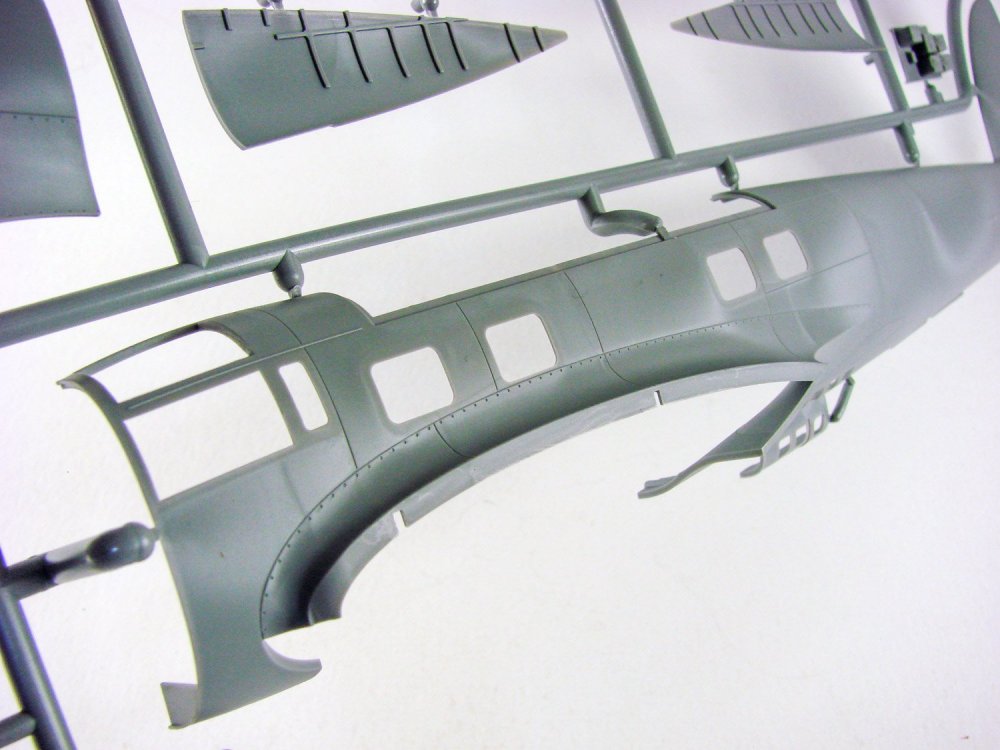
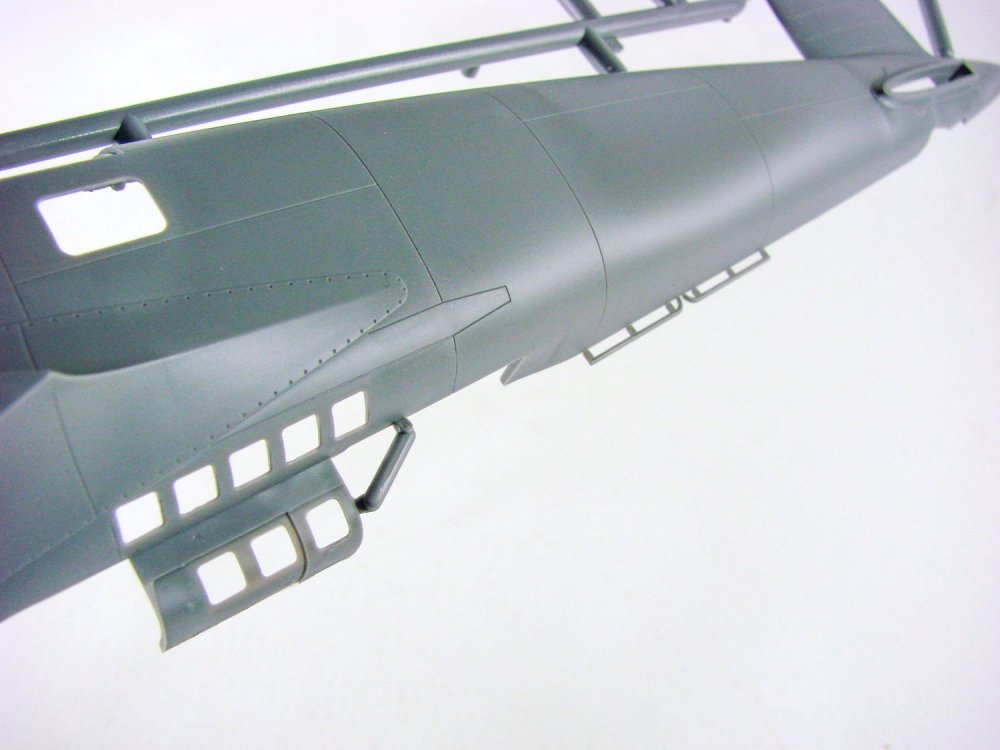
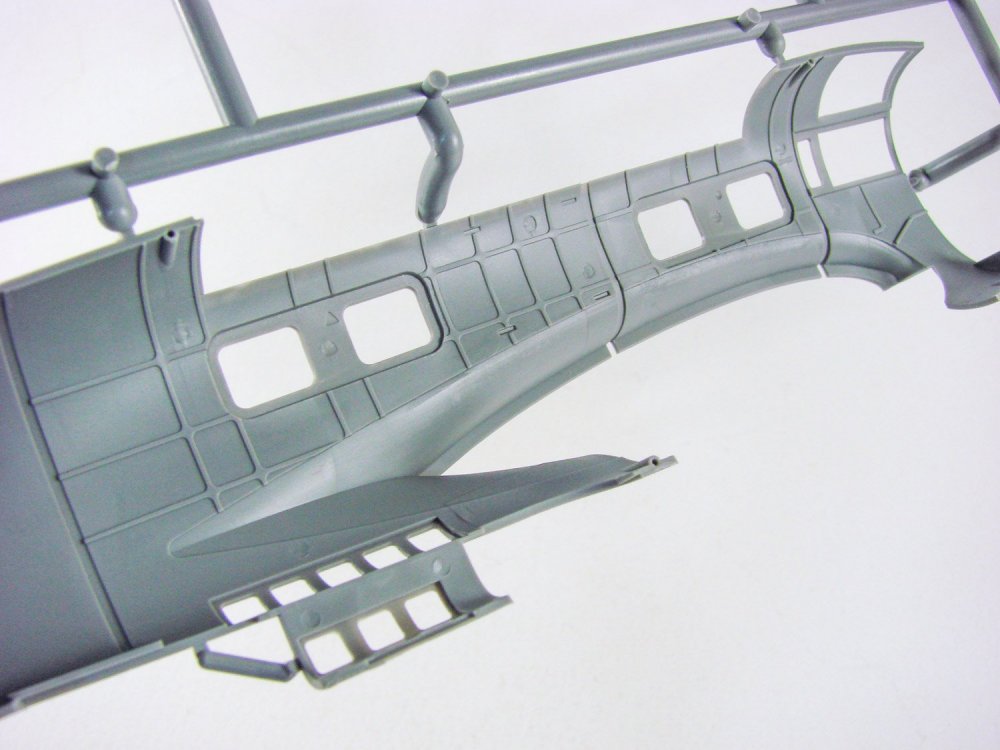
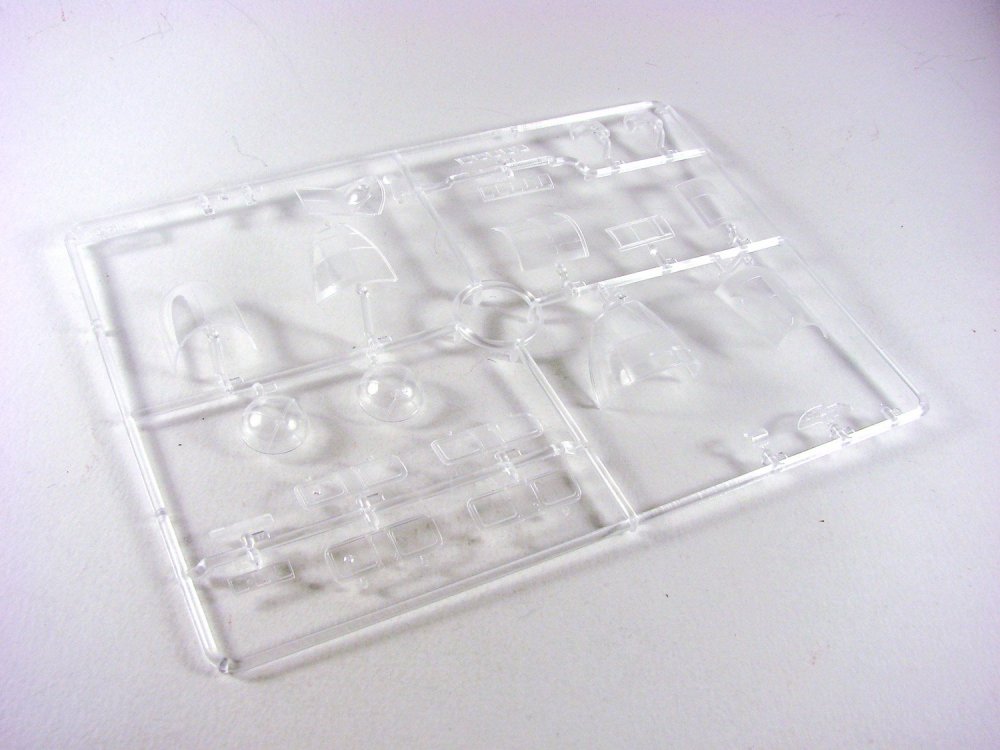
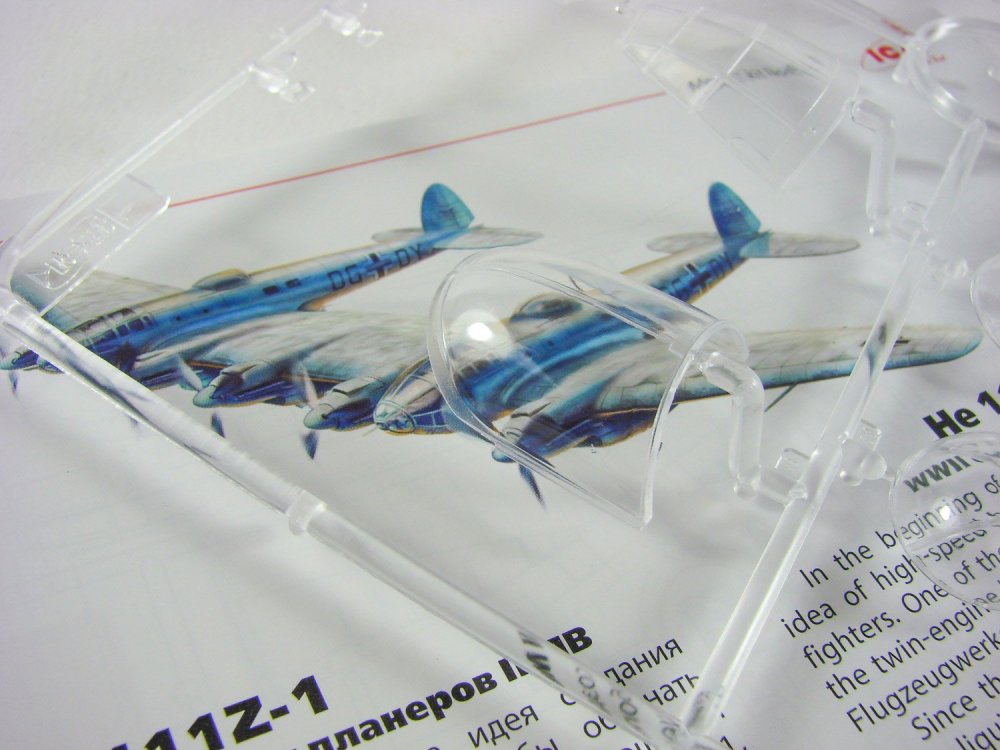
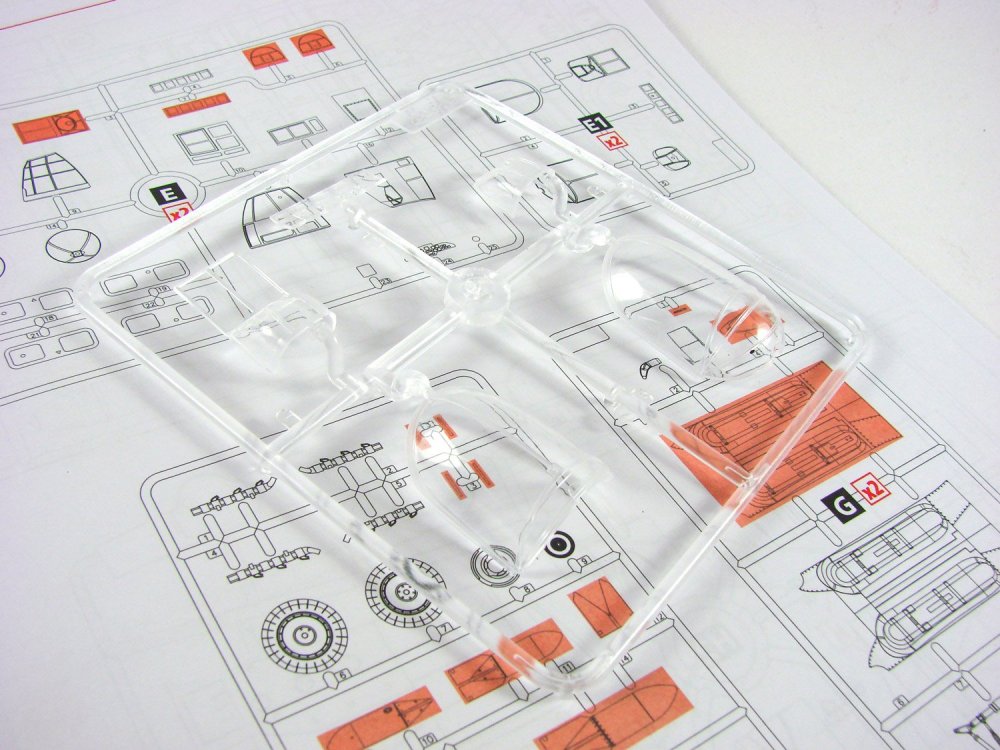
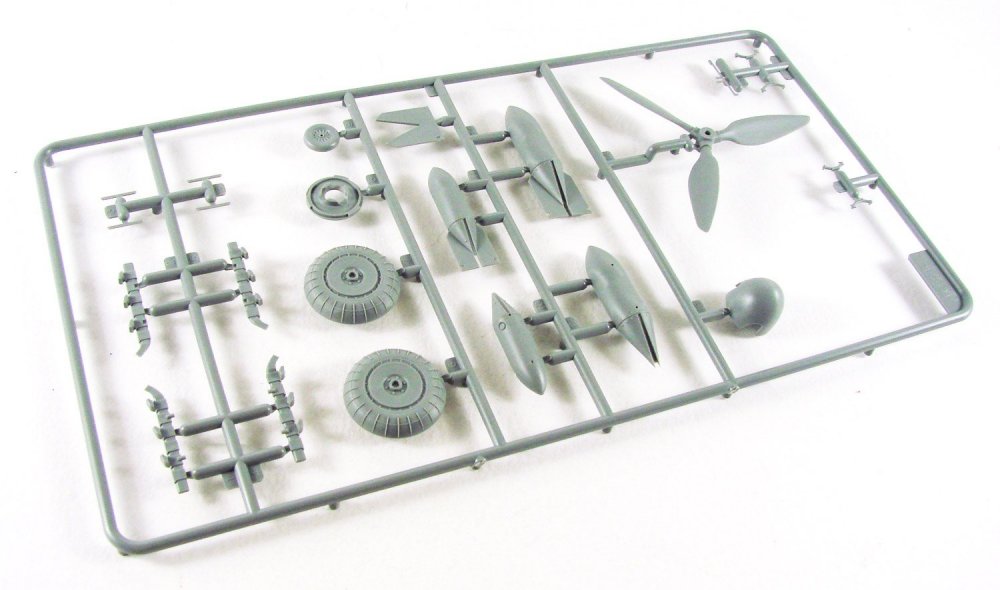
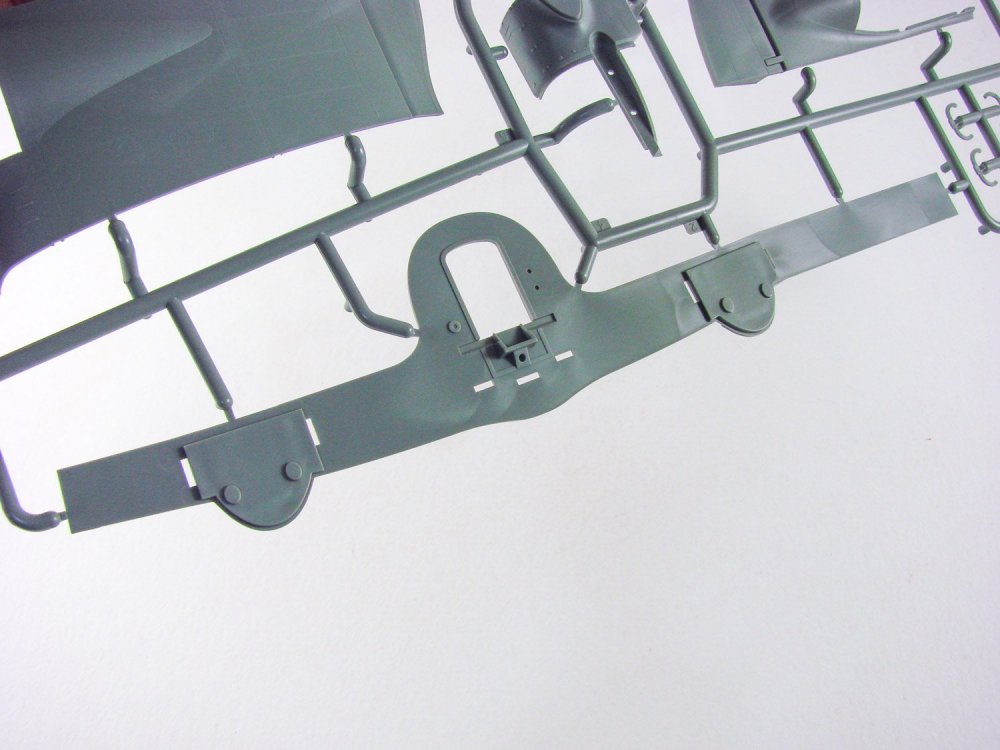
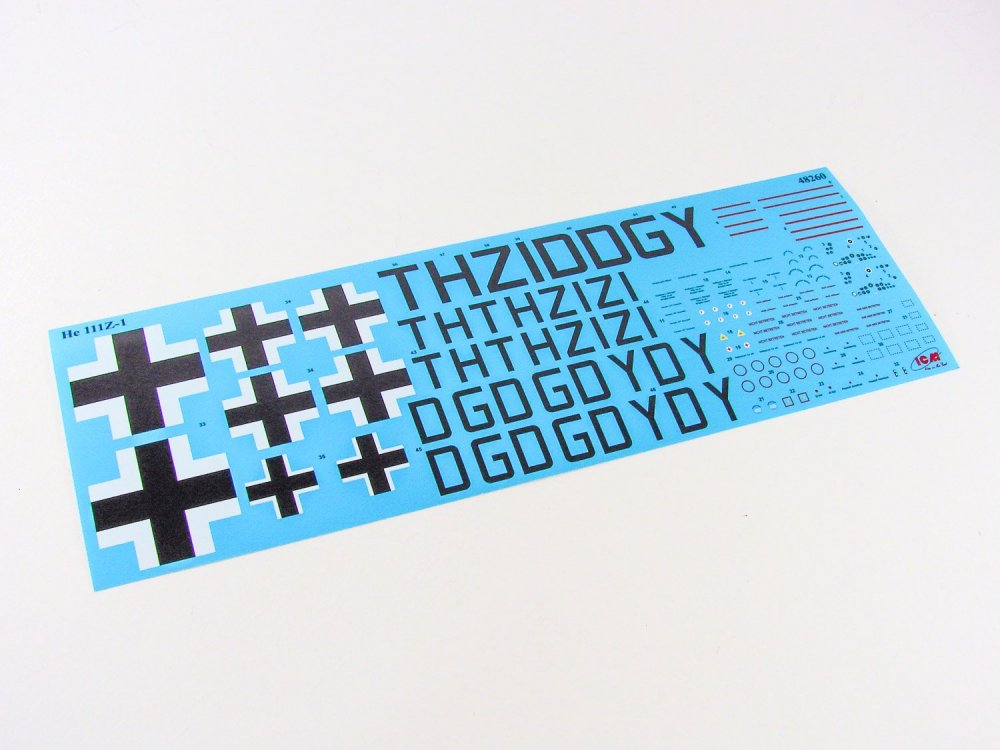
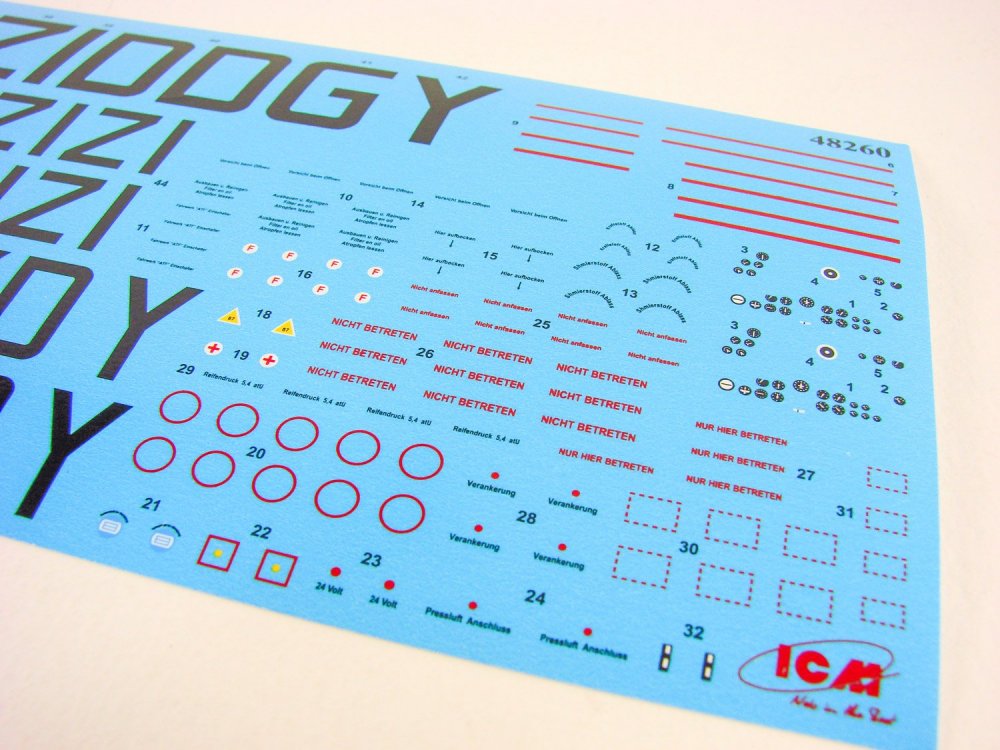
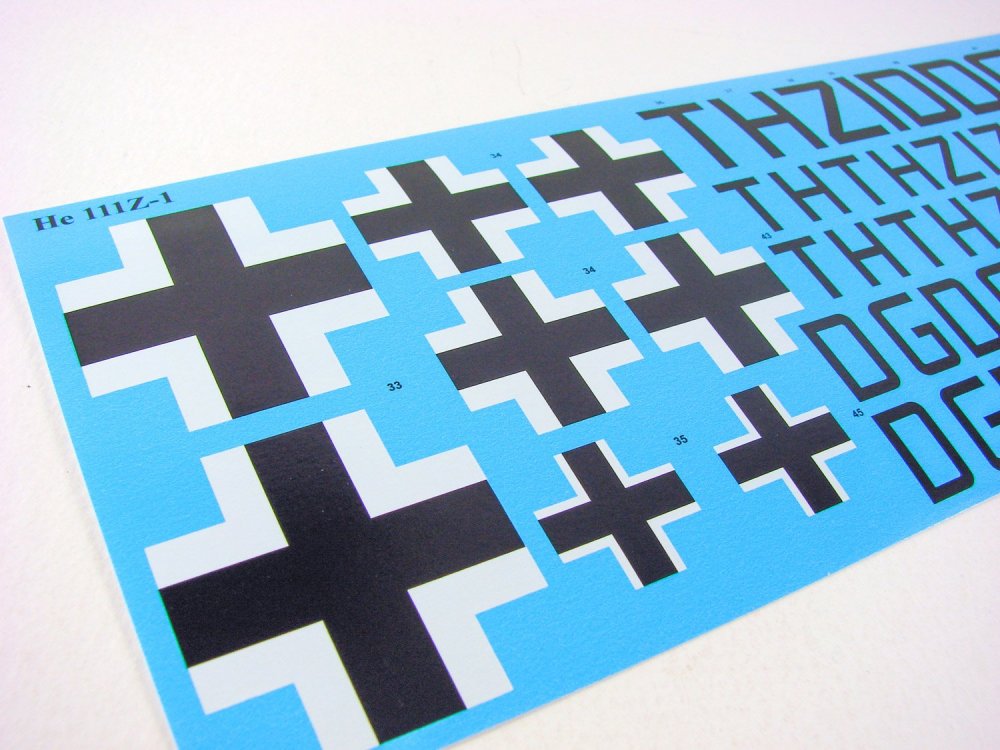
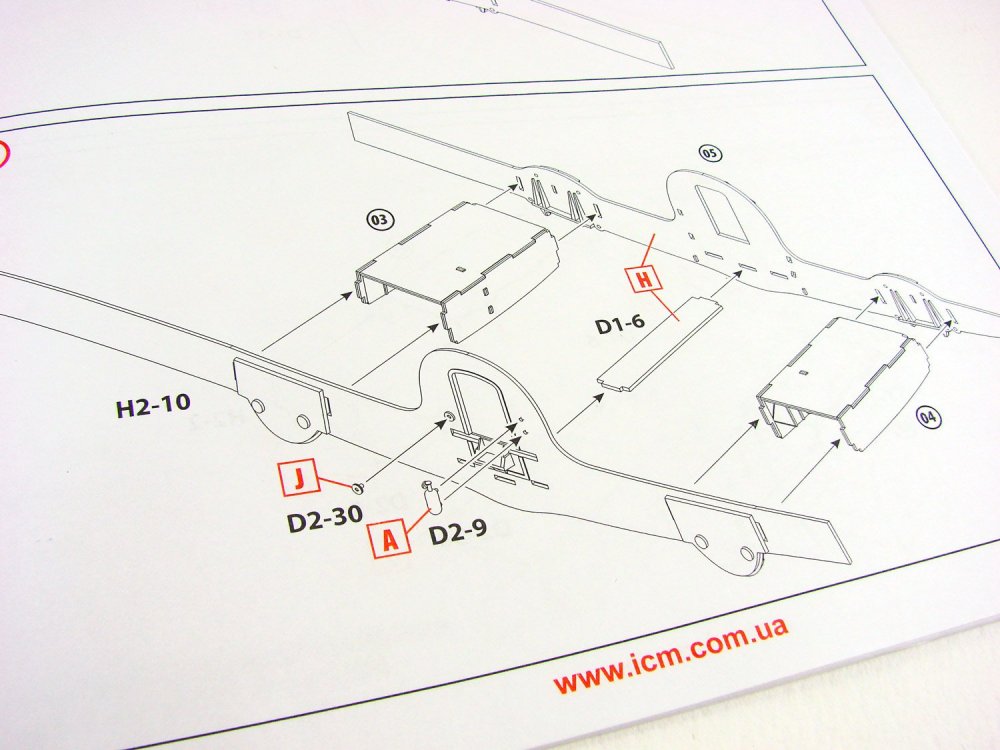
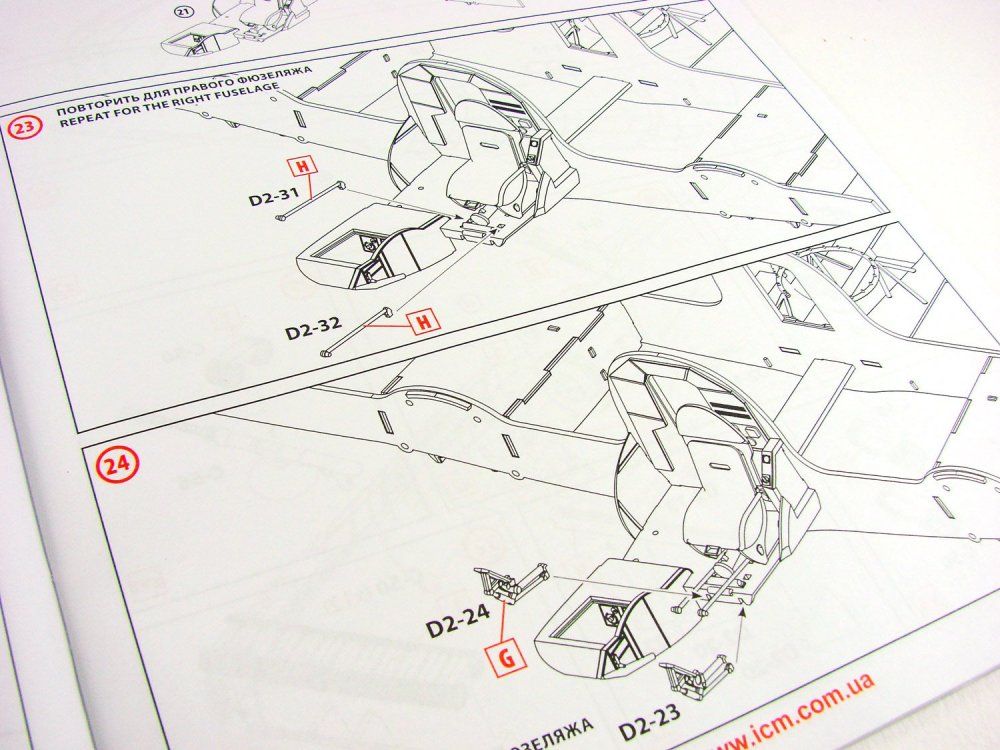
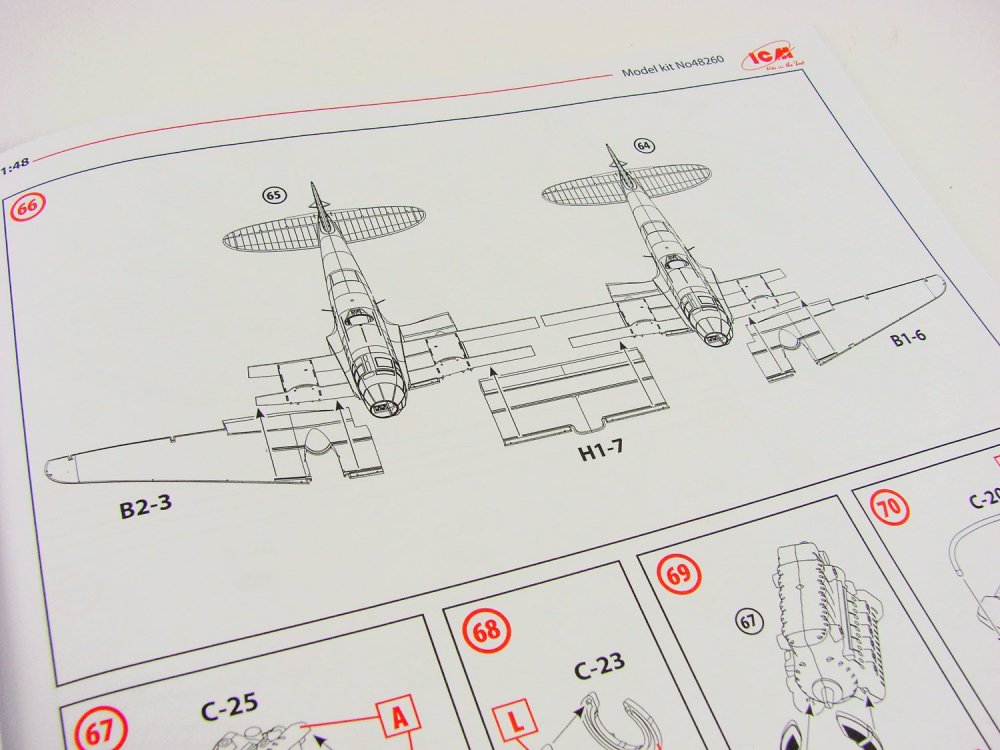
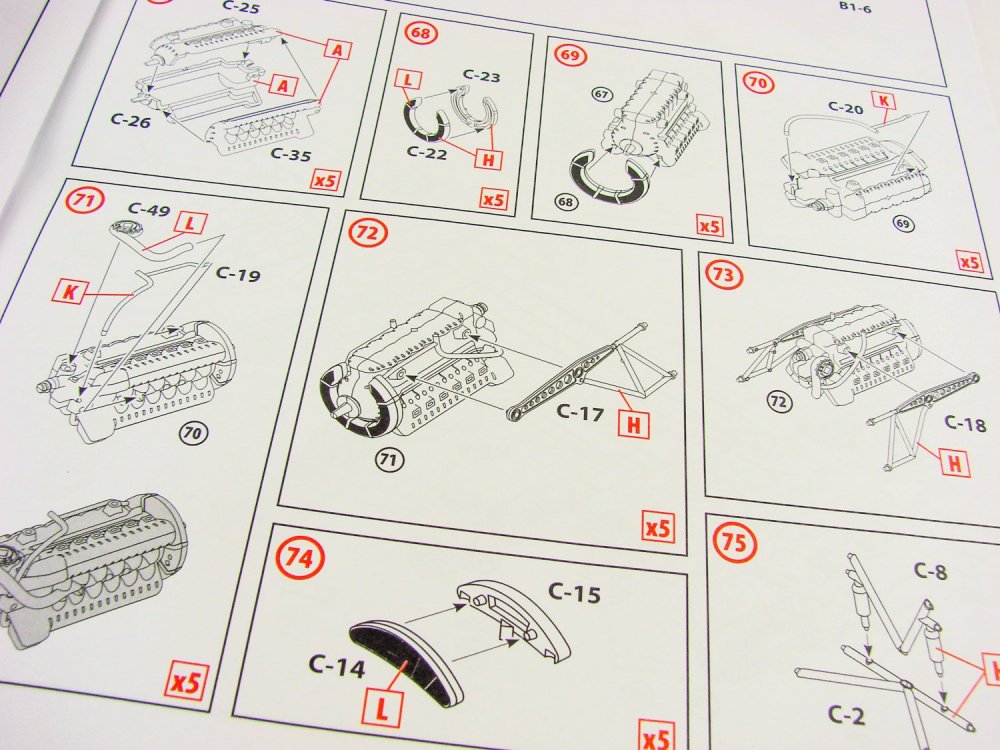
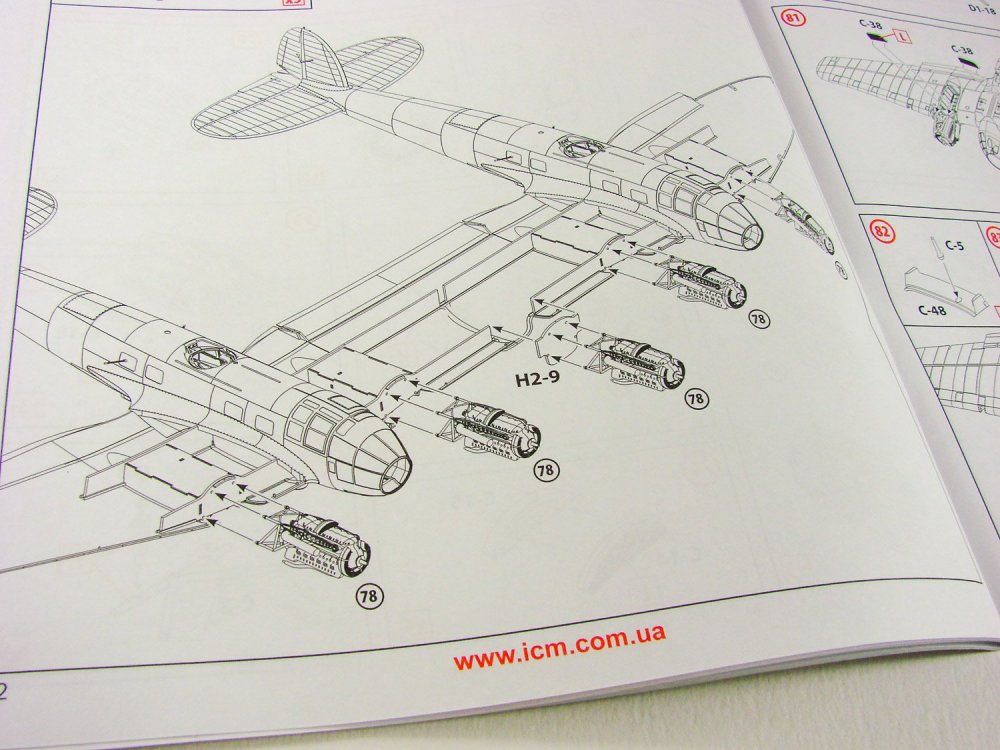
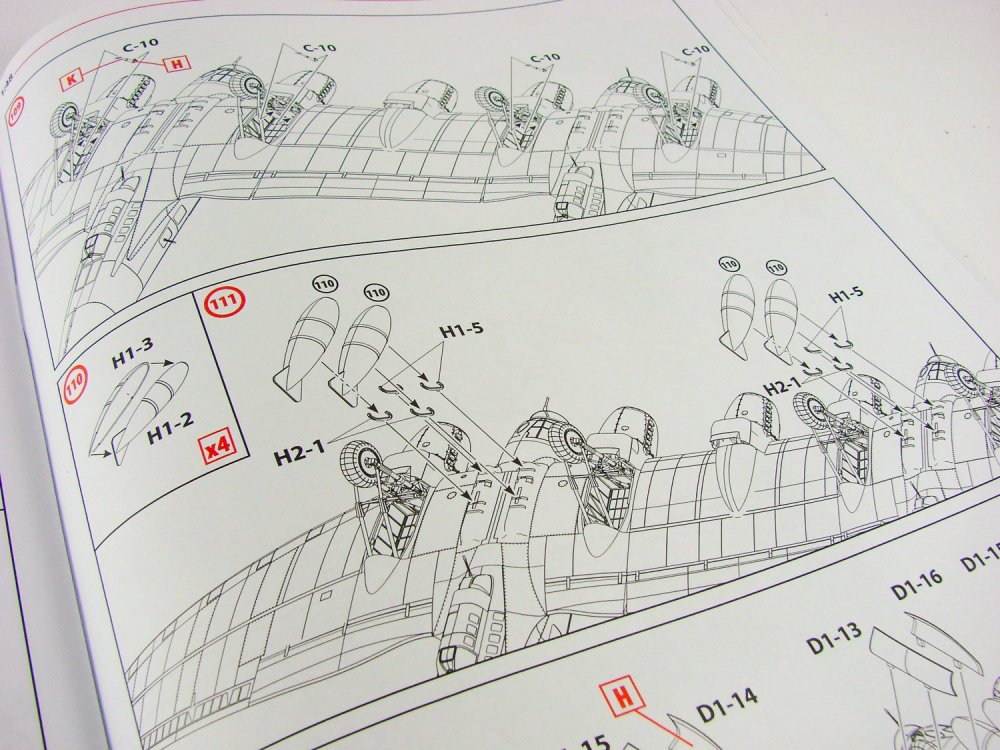
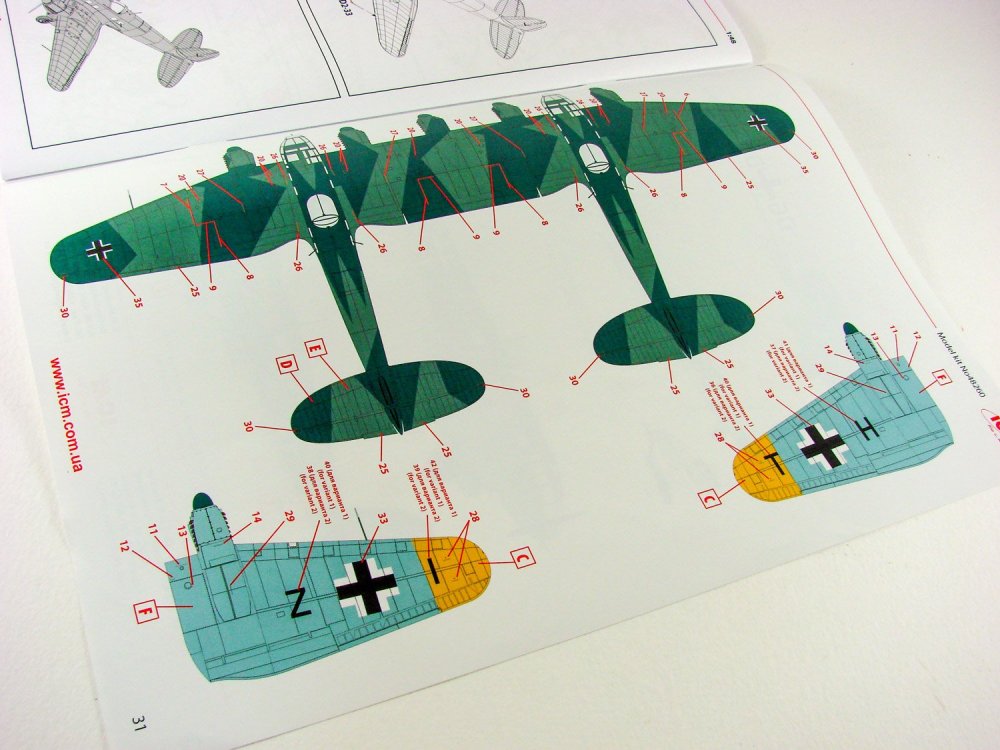
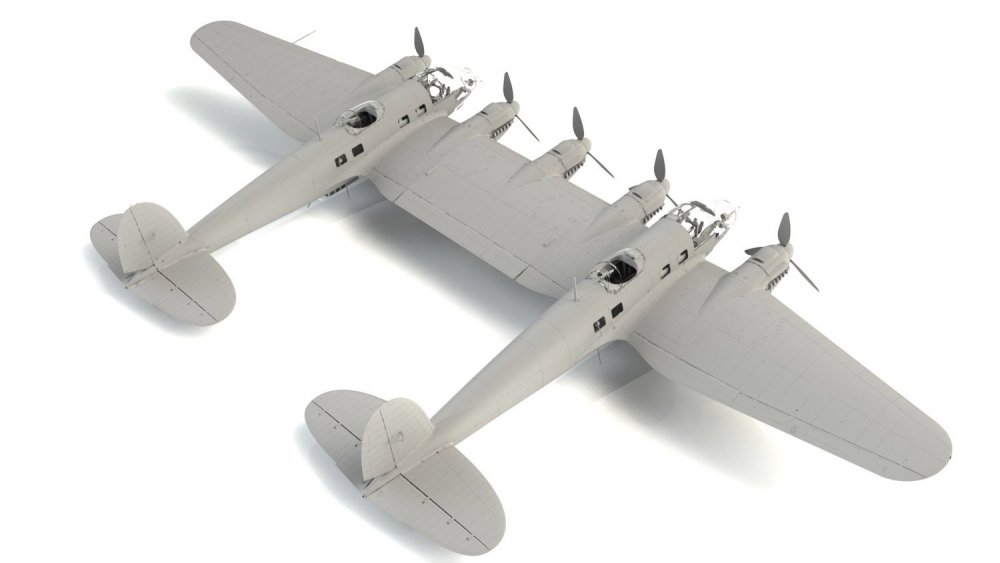
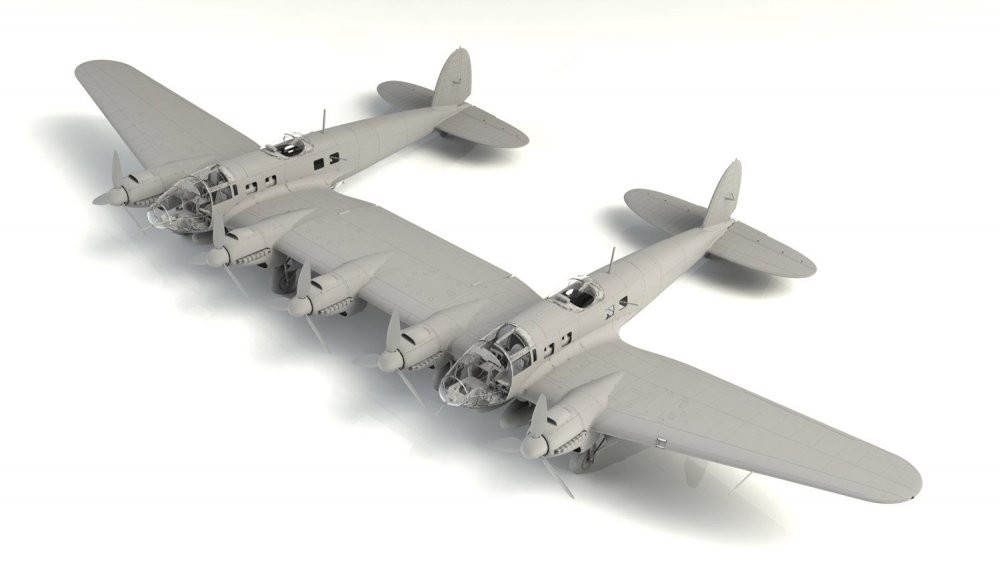
1:48 Heinkel He 111Z-1 ‘Zwilling’ ICM Catalogue # 48260 The Heinkel He 111 was a German bomber aircraft designed by Siegfried and Walter Günter at Heinkel Flugzeugwerke in 1934. Through development it was described as a "wolf in sheep's clothing". Due to restrictions placed on Germany after the First World War prohibiting bombers, it masqueraded as a civil airliner, although from conception the design was intended to provide the nascent Luftwaffe with a fast, medium bomber. Perhaps the best-recognised German bomber due to the distinctive, extensively glazed "greenhouse" nose of later versions, the Heinkel He 111 was the most numerous Luftwaffe bomber during the early stages of World War II. The bomber fared well until the Battle of Britain, when its weak defensive armament was exposed. The He 111Z Zwilling (English: Twin) was a design that entailed the mating of two He 111s. The design was originally conceived to tow the Messerschmitt Me 321 glider. Initially, four He 111 H-6s were modified. This resulted in an aircraft with twin fuselages and five engines. They were tested at Rechlin in 1941, and the pilots rated them highly. A batch of 10 were produced and five were built from existing H-6s. The machines were joined by a centre wing formed by two sections 6.15 m (20 ft) in length. The powerplants were five Junkers Jumo 211F engines producing 1,000 kW (1,340 hp) each. Total fuel capacity was 8,570 litres. This was increased by adding of four 600 litre drop tanks. The He111Z could tow a Gotha Go 242 glider or Me 321 for up to 10 hours at cruising speed. It could also remain airborne if the three central powerplants failed. The He 111 Z-2 and Z-3 were also planned as heavy bombers carrying 1,800 kg of bombs and having a range of 2500 miles. During operations, the He 111Z did not have enough power to lift a fully loaded Me 321. Some He 111s were supplemented by rocket pods for extra take-off thrust, but this was not a fleet-wide action. Two rockets were mounted beneath each fuselage and one underneath each wing. The pods were then released by parachute after take-off. The kit I must’ve been about 12yrs old when I saw my first He 111Z model kit. That was the wonderful (at the time) Italeri kit from 1976, in 1:72, and I just had to save up for it, and remember then just how large the model was, even in that diminutive scale. Since then, I’ve had a fixation with twin-fuselage aircraft, such as the F-82 Twin Mustang. Just imagine what a Do 335Z would’ve looked like with a prop in each corner! When ICM rocked up with their own, new-tool He 111Z in 1:48, I was blown away! I know how good their series of 1:48 He 111 kits are, so to see them tool this as a twin was something I just had to see. The first ICM He 111 kit was released in 2017, with some superb detail such as fully detailed cockpit and bomb bay, plus two fully detailed Jumo engines. Since then, there have been six further incarnations of this kit in various marques, plus a re-box from Revell. For me, however, the He 111Z signifies what must surely be the ultimate version of this kit. The box for this is very large and deep, with a wonderful artwork of a He 111Z in a winter whitewash scheme, flying over the Eastern Front. ICM use little clear tabs to secure the lids to the box. When these are cut through, not one, but TWO boxes drop out! The wingspan of this completed behemoth comes out at around 750mm or thereabouts, and there are around 550 parts. There will be some parts redundancy in the kit as some components still remain for the single-fuselage types, such as the old symmetrical wing spar/bulkhead arrangement, plus some parts which aren’t destined for this type. This kit contains TWENTY-EIGHT sprues in light grey styrene, plus FOUR in clear. A single decal sheet (no swastikas) is included for the two schemes, plus a thirty-two page instruction manual with some colour illustration. Now, onto the kit! Sprue A (x2) Both fuselages in this kit are fully detailed throughout. Our first two sprues brings us two of the main parts; namely the fuselage halves. It’s impossible to ignore these, so I’ll look at them first. These are very similar to how Revell went about their 1/32 kit, in that the upper forward fuselage is a separate piece, that can of course be an indication of other variants coming our way. Externally, detail is superb and very refined, with evenly and neatly recessed, narrow panel lines and a slightly proud wing root fairing with rivet fasteners. Elsewhere, however, no rivets are depicted. I quite like the difference that a riveted surface creates with a finished project, so will add these myself with a beading tool. The rudder is moulded separately, as is the belly. Several belly parts are provided with this release, but only one option will be used for this highly unusual aircraft. Internally, I think ICM have made a very reasonable job of recreating the structural elements of this aircraft, with such detail extending from the nose, back to just aft of the belly gondola. There are some ejector pin marks though, but these are generally shallow enough to simply rub them away with a fibreglass pen, or other lightly abrasive tool. You will note that due to moulding limitations, ICM has had to produce a wing root insert to glue into position within the fuselage, and you might want to blend this into the surrounding detail. Similar inserts exist for the lower bomb bay walls, but these sit primarily between the two main spar and bulkhead parts that form the basis of the construction. Note also the port and starboard wheel well walls, as well as the ceiling for this area. Fore and aft walls are moulded to the main spars. These walls will provide basic constructional elements and could/should be enhanced further by the modeller, with a little plasticard and wire. I’m not going to really criticise this due to the price of the kit, and the area providing a far more than adequate basis for detailing further. Sprues B1 & B2 and Separate sprues for rudders, elevators and stabilisers (x2) Due to the airframe configuration, extra rudder, elevator and aileron parts are included. Both of these have the wing upper and lower panels as their main components, moulded with integral landing flaps. I would quite have liked to have seen these separate, and it will take some work for the modeller to achieve. However, the ailerons are separate items, moulded as halves on one of these sprues. As per the fuselage, external wing detail is very refined, with superbly thin and even panel lines and port access details. No rivets here again, except for key lines and those around fuel tank panels and upper nacelle fairings. Internally, positive channels are moulded for the main wing spars, creating what looks to be a very sturdy and unambiguous assembly. Going back to the ailerons, these have very subtle rib and fabric details, and shouldn’t need any toning down. Sprue C (x5) Yes, a whole FIVE of these! Where there are generally multiples of specific components, then these are the sprues on which you will find them. This model is equipped with five complete Junkers Jumo 211 A-3 engines, comprising of almost 20 parts each. I really am very impressed with the detail on these, and they certainly convincing against my reference material, including personal photographs of the 211. As with the wheel bays, just a little lead wiring should be all that’s needed to bring these to life. Unusually, the prop shafts are moulded into the main engine halves, instead of having a separate, captive pin that will allow the props to rotate. A lot of parts for the bomb bays are also included here, but you won’t need them at all for the Zwilling. Plenty for your spares box. You also won’t need the propellers that are included on these sprues. Other parts on this sprue include the numerous engine cowl parts, and the forward cowl ring with its characteristic lightening holes. The wheels on this sprue aren't to be used though. Parts on another sprue will fulfil that role. Parts you won’t need to use are the tailwheel and bomb bay doors. Sprue D1 (x2) These particular sprues contains two chunky main spars, but you’ll NOT be using these! Those are for the regular He 111 types. ICM has designed a rather tidy main cockpit, that is generally spread over both this sprue and D2, and should look great as it is, out of box. Decals are provided for enhancing the cockpit further, and these are clearly labelled on the instructions sheet. Internal parts on this sprue include the rear cockpit wall, cockpit floor, multi-part pilot seat with head armour, ammunition racks etc. Sprue D2 (x2) Someone at ICM had the foresight to include most of this kit’s more fragile and smaller parts on this sprue, meaning you can safely stash this to one side during the course of building. On here you will find the undercarriage struts and braces, ammunition rack components, rudder pedals and linkages, smaller cockpit components, control yoke and torsion tube, bomb aimer/co-pilot seat, MG mounts, etc. Sprue E (x2) This sprue of generic He 111 parts contains many of the clear components. These include side windows, half of the glazed nose, the gondola access/gun mount position, and also the redundant upper sliding gunner windshield. Where the varying items have sections that aren’t a part of a window etc. then these are frosted. Framing is pretty good, and this shouldn’t be too difficult to mask up for airbrushing. Even easier if using Eduard’s masks for this kit, as they now sell the Zwilling set, with both internal and external masks. In a previous release, I thought there was a little waviness in the clear parts, but this release seems perfectly ok. The He 111’s famous glazed nose is comprised of three parts. Care will definitely be needed in assembling these. Note that the instrument panel is moulded here too. I’ve never seen the point of clear IPs, but that might only be my mileage. Instrument decals are supplied for this and other cockpit areas, but you may choose to punch out the individual dials and apply them separately. It certainly makes for a cleaner finish. The lower and upper gondola parts aren’t to be used on this version. Sprue E1 (x2) Another sprue of clear parts, but just containing the options for the upper gun position and some new gondola glass. Transparency is excellent. Sprue F (x5) These sprues are supplementary to the engine sprues, and contain the new propellers, wheels, spinners, and exhausts. Sprue G (x2) This contains two belly option, but only one will be utilised for the Zwilling. Other parts to be found here include the new tailwheel assemblies. Sprue H1 This sprue is definitely very specific to the Zwilling release and contains two of the new asymmetric wing spars that also incorporate a fuselage bulkhead and a section of the main rear gear bays. You also get a chance to see those hefty drop tanks that gave this fuel-hungry monster the ability to stay in the air for many, many hours. These are built up from traditional halves. You can’t help but also notice that new wing centre section that contains the position for the extra, fifth engine. Surface detail is commensurate with that of the original He 111 releases so will blend in perfectly. Sprue H2 Another Zwilling-specific sprue with the two forward asymmetric wing spars that incorporate the rear cockpit bulkhead and the forward main gear bay walls. Also found here are the inboard wing sections that blend to the new centre section, plus the extra engine rear side cowls. Decals This is a fairly small sheet, but then, there are only two schemes provided for this. Printing is excellent, with nice thin inking, perfect register and nice colour density. Cockpit decals are included, as are a very respectable number of external airframe stencils. The two schemes are: He 111Z-1 Eastern Front, Winter 1942 - 1943 He 111Z-1 Eastern Front, Spring 1943 Instructions I quite like ICM’s approach to the assembly manual, with the result being totally clean in approach and fuss-free. Starting with a history of the type, plus a colour chart for both Revell and Tamiya paints, a full parts plan is then printed, and then 114 constructional sequences. Assembly illustration is very clear, with colour annotation and selective use of shading to make some drawings clearer, such as where the 3D could mess with your mind! The last pages are taken over with the two colour profiles sets for the supplied schemes. Decal placement and paint application is clear. Conclusion For me personally, this is a contender for kit of the year, not only because it’s one of my all-time favourite subjects, but also because ICM carried it off with aplomb with this beautifully detailed rendition. A stunning and stunningly large model of what must surely be one of the most bizarre types to ever have graced the skies. Kit quality is excellent with sprues bagged to limit any parts damage either in transit or with a clumsy modeller. If you have a hankering for the weird, then shell out on this beauty! Very highly recommended! My thanks to ICM for the review sample seen here.


-
I fast every day, between meals and snacks. Religiously.
-
Yes, LSM allows member photo uploads. We have some pretty robust systems in place here to protect the software and server, and besides.....we don't want you folk to get stung by another Photofucket style ransom demand again
-
News to me... But I am now 50, so perhaps memory is starting to fail.
-
Alles kaputt! Time to move on.