Wingco57
-
Posts
3,925 -
Joined
-
Last visited
Content Type
Profiles
Forums
Events
Gallery
Everything posted by Wingco57
-

Hasegawa P-40E bringing back that mojo!
Wingco57 replied to Wingco57's topic in LSM 1/35 and Larger Work In Progress
Made some nice progress this weekend.
-
Special Hobby 1/32 Hawker Tempest Mk.V (SH32049)
Wingco57 replied to petr@specialhobby's topic in Special Hobby
Beautiful, can that be used on the new Typhoon too? -
Hasegawa P-40E bringing back that mojo!
Wingco57 replied to Wingco57's topic in LSM 1/35 and Larger Work In Progress
Indeed David, I hated the movie but the P-40 action was very nice, including Joh Belushi taxying up to the gasstation. Jeroen, those Revell colours really are good for mixing and thinning, as soon as you have a milky consistency it sprays great. -
Hasegawa P-40E bringing back that mojo!
Wingco57 replied to Wingco57's topic in LSM 1/35 and Larger Work In Progress
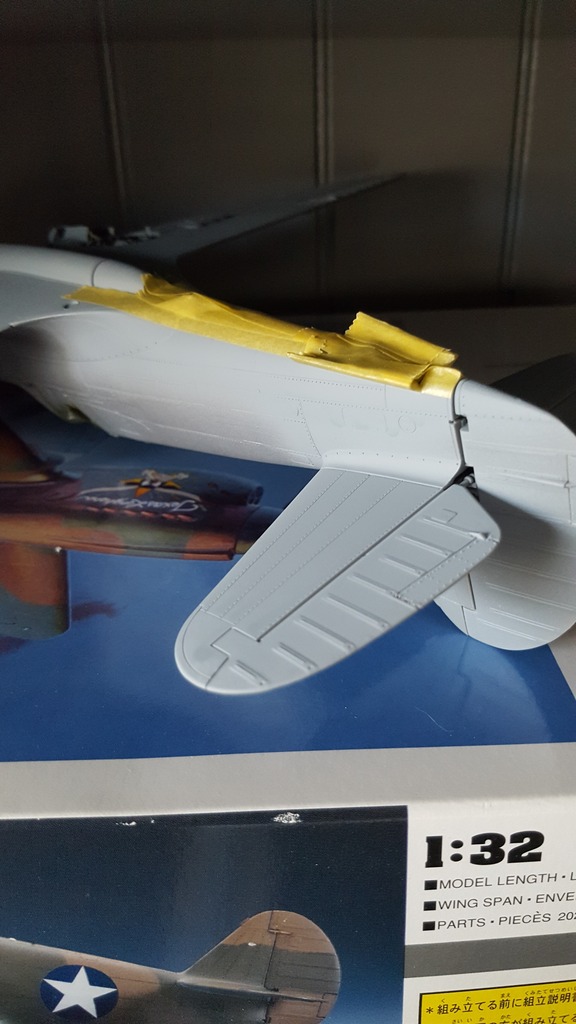
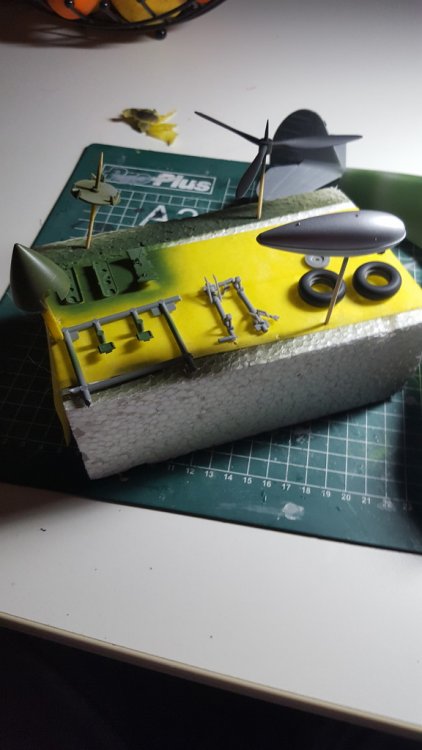
Hasegawa did a real good job here. Yesterday I airbrushed the undersides and wheel doors Neutral Gray and the Spinner Olive Drab, getting up to speed now. Also practiced with the airbrush to get a better understanding of the thing. And fun too while listening to the album Catch as catch can (guess). Pics to follow later. -
Yet another Tamiya Corsair Birdcage 1/32
Wingco57 replied to spliffsecond's topic in LSM 1/35 and Larger Work In Progress
That Corsair is coming together very nicely, I like you weathering style. About that canopy, as Jeroen mentioned, give it a try. Cees -
Here's the pic showing the navigator seat in place (in the shadows), the radio boxes have been fitted to a new bulkhead as the previous one was not wide enough and the panelling protecting the wiring looms on the startboard side have been fitted as well as the base for the flight engineers panels just above it. Interior is a mix of Manchester and Lancaster as details of it's older sister are difficult to find and as the early Lancasters were converted Manchester, well... you know what I mean.
-
Hasegawa P-40E bringing back that mojo!
Wingco57 replied to Wingco57's topic in LSM 1/35 and Larger Work In Progress
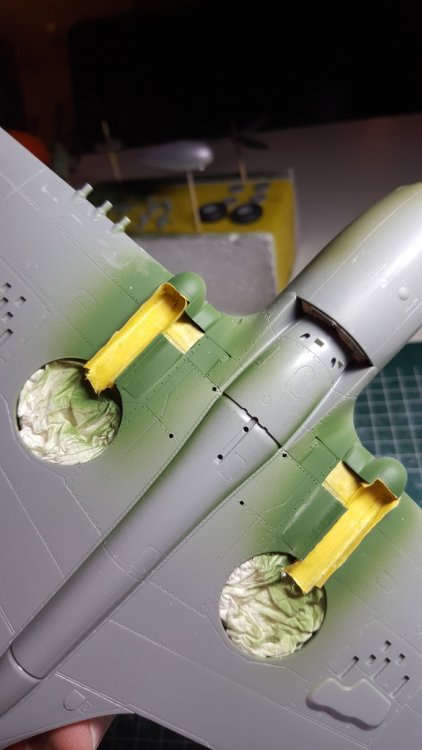
Some more "old" progress as Photobucket is behaving terribly at the moment. But the new forum set up has a plan B. Painting has begun, the interior green has been sprayed on the outside and some of the other bits such as wheels, prop etc. have been sprayed as well. Areas of the undercarriage bays have been sprayed green as well and then were masked off.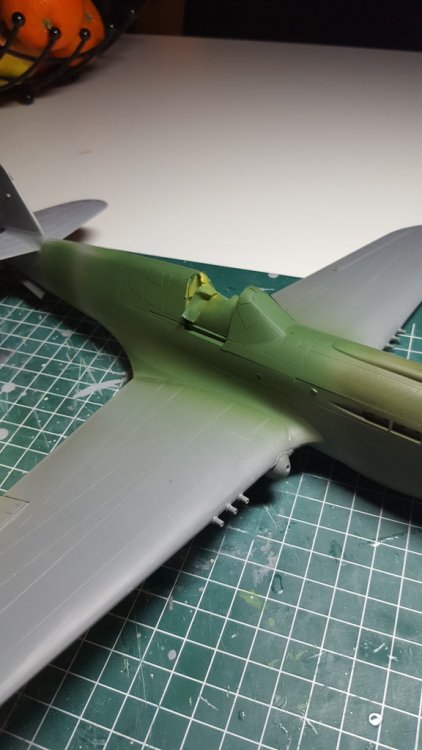
-
Chaps, We have been in touch with Neil Yan from HK Models regarding the frequent questions about missing or damaged parts. Send an e-mail to info@hk-models.com Cheers Cees
-
Ta-152H-0 awaiting restoration at the NASM
Wingco57 replied to JeroenPeters's topic in LSM 1/35 and Larger Work In Progress
The artist formerly known as J. Peters. -
Not to mention banging yourself on the head repeatedly with it. You didn't make it easy for yourself fitting the outer wings already Tom. But it looks fantastic.
-
Ta-152H-0 awaiting restoration at the NASM
Wingco57 replied to JeroenPeters's topic in LSM 1/35 and Larger Work In Progress
Tjeezz what sloppy paintwork, make up your mind man! Just kiiiiiiidding, great work, I like the red painted area on the tail. Looks very much having been in storage and abused for ages. -
Small update without pic (yet). Today I managed to make some more progress on scratchbuilding the interior during the IPMS modelling afternoon which is organised on a regular scale. Great possibilities to keep the interest going. Pics soon.
-
Hasegawa P-40E bringing back that mojo!
Wingco57 replied to Wingco57's topic in LSM 1/35 and Larger Work In Progress
Thanks, what a nice pic. I have seen several cockpit pfoto's of mostly restored aircraft with many subtle differences. Airframe is ready for spraying the interior colour over the glazing and after that an aluminium coat. -
Very nice, you don't see many corsairs with the radome.
-
Hi Michael, You are a machine with so many models on the go at the same time. Looking forward how your Mossie will shape up.
-
Scratch built B-25H nose
Wingco57 replied to Padubon's topic in LSM 1/35 and Larger Work In Progress
Wow, i like that very much. -
Hasegawa P-40E bringing back that mojo!
Wingco57 replied to Wingco57's topic in LSM 1/35 and Larger Work In Progress
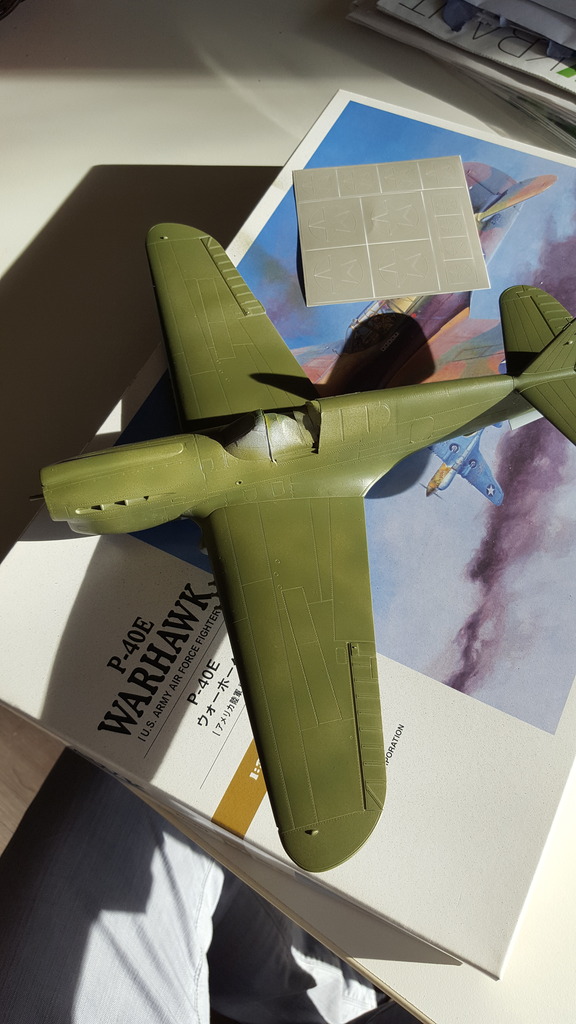
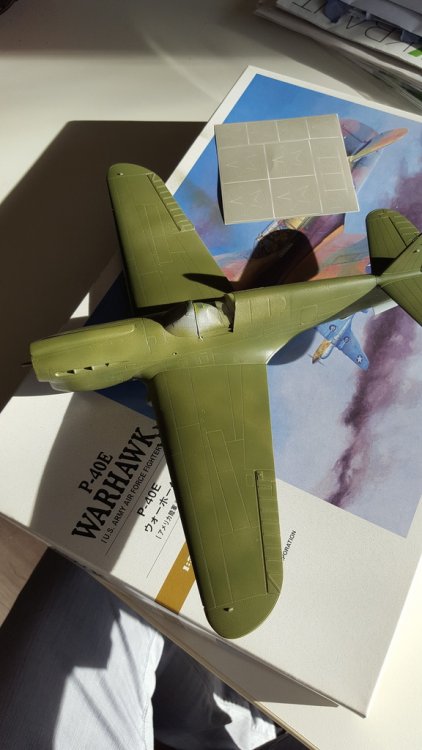
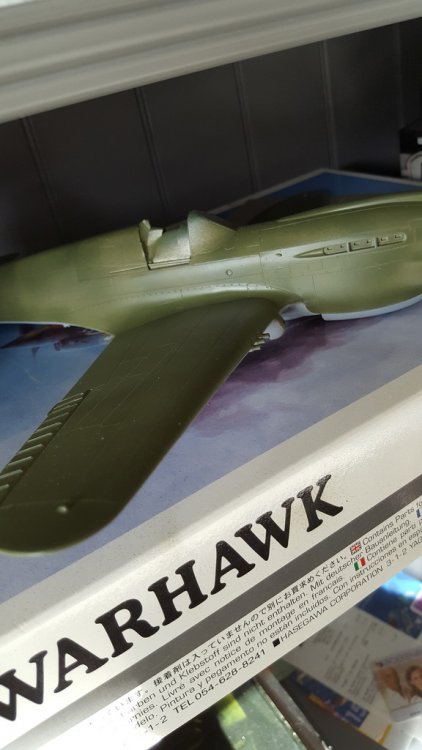
Yes it does, the kit is very modular as Hasegawa wanted to make the most out of one mould. The wings have seperate parts for the gunports and as you can see in the pics the area behind the pilot has several options for the N-version as well and there are seperate inserts for the exhaust pipes, breather panel in front of these and the carburettor and inlet bits. The fit of the tail is reasonable but just that and the best way is to fit the tail and fuselage parts togehter to get one full fuselage half and then join them in the same style as a "normal" kit. But in general the fit is great and it's only the tail and winginserts that need some fettling to get them right. Apart from a small area that needs cleaning up the model has all openings plugged ready for the main paintjob. It was fun sofar and the real fun is about to begin. -
Hasegawa P-40E bringing back that mojo!
Wingco57 replied to Wingco57's topic in LSM 1/35 and Larger Work In Progress
Hi Danny, I planned to but as I couldn't source the Eduard masks, so had to make my own. The rear panels are quite simple but the windscreen wasn't, and the inside is even more difficult so I chickend out. I will spray the frames with the interior colour first though so it looks like the inside frames are painted. Next model I will go the whole way. -
Hasegawa P-40E bringing back that mojo!
Wingco57 replied to Wingco57's topic in LSM 1/35 and Larger Work In Progress
Bit more progress. The windshield has been dipped in Parket + (futureish brand) and masked. After fitting and painting the gunsight the windscreen was fitted. The exterior painting stage is getting nearer. Need some gaps to attend to near the rear glazing as well. -
Hasegawa P-40E bringing back that mojo!
Wingco57 replied to Wingco57's topic in LSM 1/35 and Larger Work In Progress
Made some progress on the canopy parts. The kit windscreen has an extra frame the E didn't have so that one had to go. I always am very nervous sanding clear parts but with some elbow grease it's relatively painless. The fuselage part that hides behind the rear sections had to be sprayed first after the clear parts were fitted very carefully to avoid vingerprints or gluestains. Hasegawa really made some very nice fitting parts here, with the exeption of the guninserts, those needed quite a bit of sanding and Mr Surfacer but the joins are invisble now. -
Hasegawa P-40E bringing back that mojo!
Wingco57 replied to Wingco57's topic in LSM 1/35 and Larger Work In Progress
Danny, Partly the model partly me. It's a nice kit but still a shortrun with lots of cleaning up to do and the resin was very brittle. I lost interest fast on that one. -
Hasegawa P-40E bringing back that mojo!
Wingco57 replied to Wingco57's topic in LSM 1/35 and Larger Work In Progress
Here's a pic of the cockpit oob with the Eduard interior set. The panel is much darker than in this pic where it looks blue. The windscreen has the extra window frame which the E did not have, so will have to sand that away. I think this will be the first of my models with the hood open. -
Ta-152H-0 awaiting restoration at the NASM
Wingco57 replied to JeroenPeters's topic in LSM 1/35 and Larger Work In Progress
Something similar to buffing up the rearend? -
Hasegawa P-40E bringing back that mojo!
Wingco57 replied to Wingco57's topic in LSM 1/35 and Larger Work In Progress
That's the reason for the P-40, when it's finished the motivation to delve into something complicated is revived. Don't worry, the Manchester is never far away and sometimes it's nice to figure out how to tackle the engines or cockpit detail while looking behind my eyelids. -
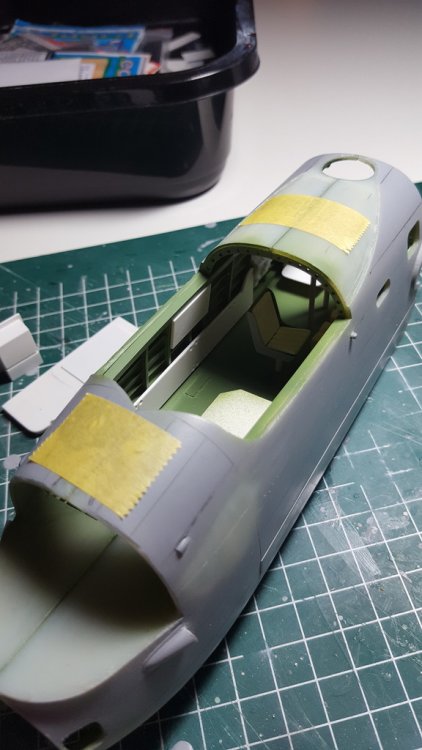
As mentioned in Danny's P-47 thread I had a serious lack of modelling enjoyment after doing long drawn projects without any chance of finishing within a reasonable timeframe. The last model I finished was two years ago. I had started the Fly Hurricane earlier this year but that one ended up in the bin. I needed help..... . So I went out to look for a simple kit of a subject that I liked (Dutch livery or RAF) but not too complicated such as twin engines etc. So it had to be a fighter. I found the Hasegawa P-40E Warhawk a very nice subject so this is intended to be a no frills model. I also kept it from LSM for a while and just concentrated on myself:rolleyes:. Here are some pics to show the progress so far two weeks after I started. I can say the pleasure has returned and I have enjoyed building up and painting the cockpit using only the Eduard interior set. Cheers Cees