DocRob
-
Posts
7,127 -
Joined
-
Last visited
Content Type
Profiles
Forums
Events
Gallery
Everything posted by DocRob
-
That's maybe so, but No. 49085 a generic Luftwaffe set is still available. The steel ones aren't bad either. The later ones are ultra thin and bend easily. Not to say there is a set (No. 48085), including an IP for the Tamiya ME-262. Personally, I wouldn't leave seat belts out in 48 scale like Gary, but before struggling with the HGW belts, I would choose simpler options. For 32 scale it's another story, nothing beats HGW here and I build up a lot of them. Cheers Rob
-
Coming together nicely Bill. I hope your tail fix will works and you continue to cruise with the build. I think, you maxed out the possibilities with the IP, but the plastic itself looks soft and toyish to my eye . Cheers Rob
-

1:32nd scale Lloyd C.V
DocRob replied to sandbagger's topic in LSM 1/32 and Larger Aircraft Ready for Inspection
Again absolute flawless work. Plane and setting are beautifully rendered to your usual high quality. The plane is a beauty and you rendered the materials perfectly, specially wood and canvas. Cheers Rob -
Nice work Sasha, I will follow closely as I have the Royal Class 109G boxing from Eduard in my stash. You can build anything out of this box from G2 to G14 and there are some really uncommon paint schemes included. I was thinking about option I for one of the two planes, monochrome as well. Bez názvu - 1 (eduard.com) Cheers Rob
-
Very nice progres with the innards of the Schwalbe, Chris. I like the cockpit detailing and gun area, but couldn't live with the IP. I have to build a 262 (I have two in stash) but I imagine that the bubble canopy allows a nice view inside. If you use the pilot figure you can skip the seat belts. HGW belts are a bit fiddly to assemble specially in 48 scale, but there are easier options, Eduard has different kind of belts in their program in etched and printed steel and Superfabric. All easier to build up and sufficcient for 48 scale. Cheers Rob
-
Very interesting Gary. I can't wait to see all the riveting and masked control surfaces under some paint. Cheers Rob
-
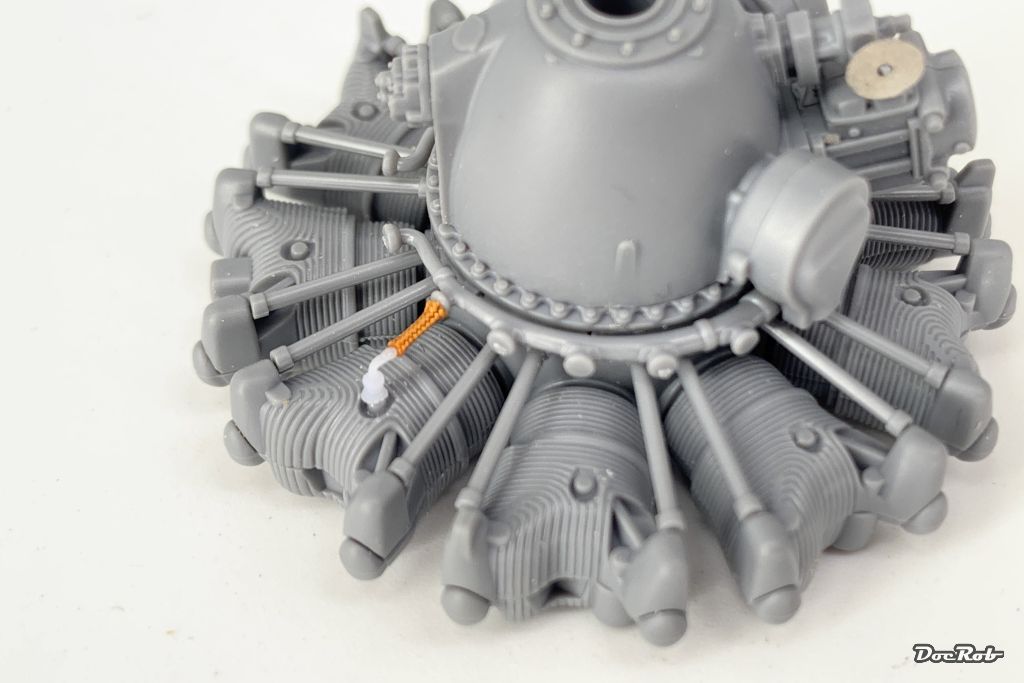
They are only glued to each side using CA, Carl. That should hold up. First I thought about threading thin wire through the braided thread, but that would enhance the diameter too much. My Anyz thread is labeled as 0,5mm diameter. I don't know if they have thinner variants. Cheers Rob
-
Thank you Mike, the bad thing about Tamiya kits, you have to deliver. They are so good, that fail is inacceptable and everybody news that . The good news, the kits are so well designed and sharply detailed, that fail is very unlikely with only a bit of effort. Still nursing the plague, but I hope that will become better the next days. Cheers Rob
-
P-51D Bardahl Special 2022 finished
DocRob replied to JohnB's topic in LSM 1/32 and Larger Aircraft Ready for Inspection
Oh, great, the rivets / fasteners didn't show that well on the other pics, but look great on the last one, perfect. Cheers Rob -
Many moons ago, I built the Birdcage Corsair as my first plane build re-entering the hobby and added the Brassin engine with a PE wiring harness, which was not so much easier to make look right. I pre-painted it in clear orange, which had the flexibility not to break while bending, but it always looked too flat for me. The benefit is, to have the cables at the right length along their connectors for each two cables. Cheers Rob
-
Still in checking mode . I like to be prepared, when it comes to detailing, so I made a test with the Anyz spark plug and Anyz braided line. The thread is a bit on the thick side and the plugs seem a bit oversized too, but I may use them anyway, as many pictures of the real thing show the braided ignition wiring. The butt ends of the spark plugs have a diameter of 1mm, too big to drill into the spots onto the cylinders, so I cut them flush and glued them on. Cheers Rob

-
1:32nd scale Sopwith Dolphin
DocRob replied to sandbagger's topic in LSM 1/35 and Larger Work In Progress
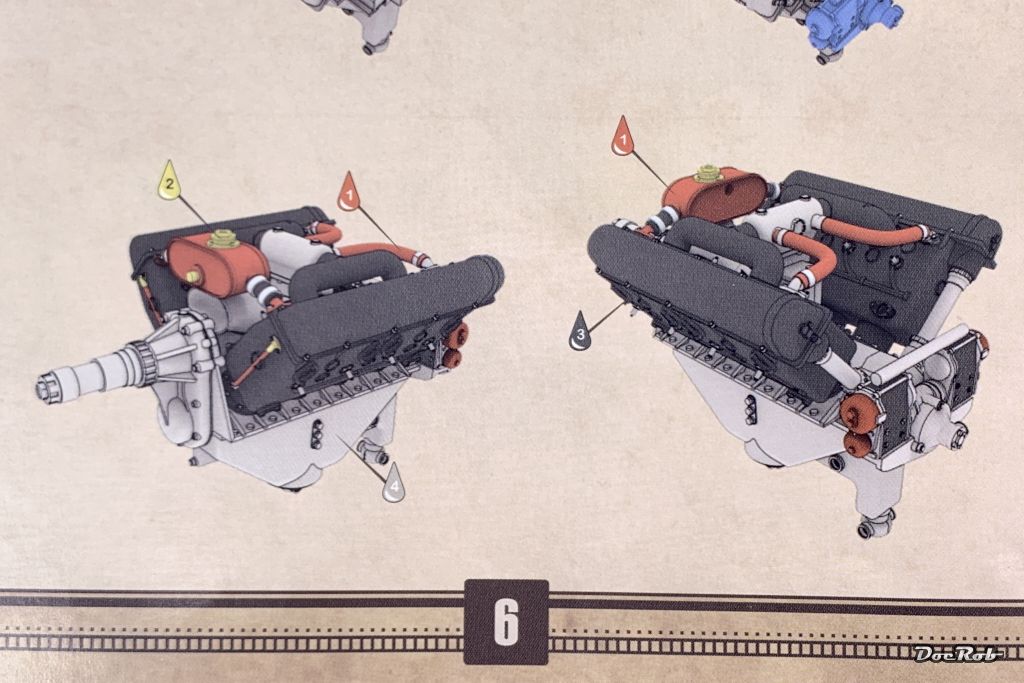
Nice work on the engine Mike. I have only the Copper State Model Dolphin in 48 scale in stash. I took a pic from the manual to show their interpretation of colors for the engine. Cheers Rob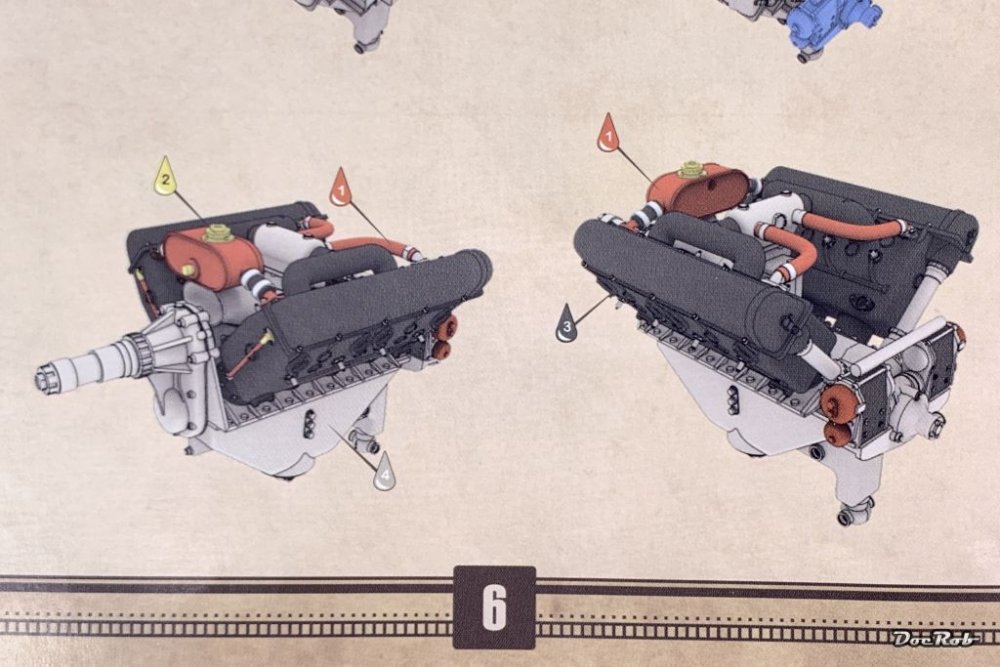
-
The designers of the Corsair made it a little easier for us modelers to show off, with recognizing, there had to be cooling involved. Most of the detail can be seen from the front side, so ignition wiring and spark plugs are not completely wasted. The designer of the FW 190 (was it Tank?) was not so generous to us modelers with his fan cowling obscuring the front view. Cheers Rob
-
Thank you telepatu, you should give the Tamiya Corsair a chance, it's one of the best engineered and designed kits, I ever had in my hands. Concerning hobby stores in Berlin, my old home town, I can recommend two, I have visited during my trip. I had no time to look for others or see, if old ones still exist. Werken Spielen Schenken in Steglitz has been there forever. As a teen, I bought kits there and they are still there. The shop ( modelling is in the basement) is a bit crammed, but there are lots of plastic kits and some wooden kits. They have a special area for railroad modelling. They don't sell online. Startseite - Werken Spielen Schenken in Berlin (werken-spielen-schenken.de) The other one is Berliner Zinnfiguren. They do have a lot of plastic modelling but are specialized into figures, paints and literature. In the moment you can only visit the front room, where only some plastic models are, but you can ask for everything. They do sell online through their shop, which is a good orientation to see what's available. You can reserve goods via phone or mail and pick them up when you are in Berlin. That's what I did. Berliner Zinnfiguren | Home page | Berliner Zinnfiguren - Online Shop Hope that helps Cheers Rob
-
P-51D Bardahl Special 2022 finished
DocRob replied to JohnB's topic in LSM 1/32 and Larger Aircraft Ready for Inspection
These Bardahl racers look indeed special John. The P-51 is such a nice airframe and the racer livery make them look speedy. Nice work with the gloss white finish, where I may have added some panel wash for enhancing the rivets, like in your firs pic of the real thing. Cheers Rob -
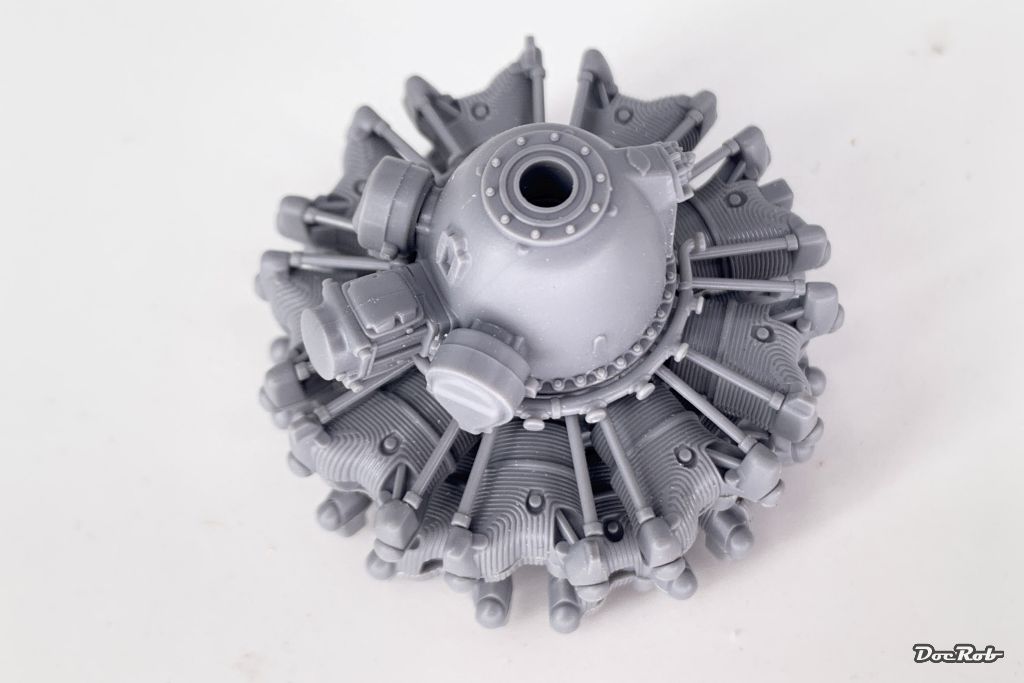
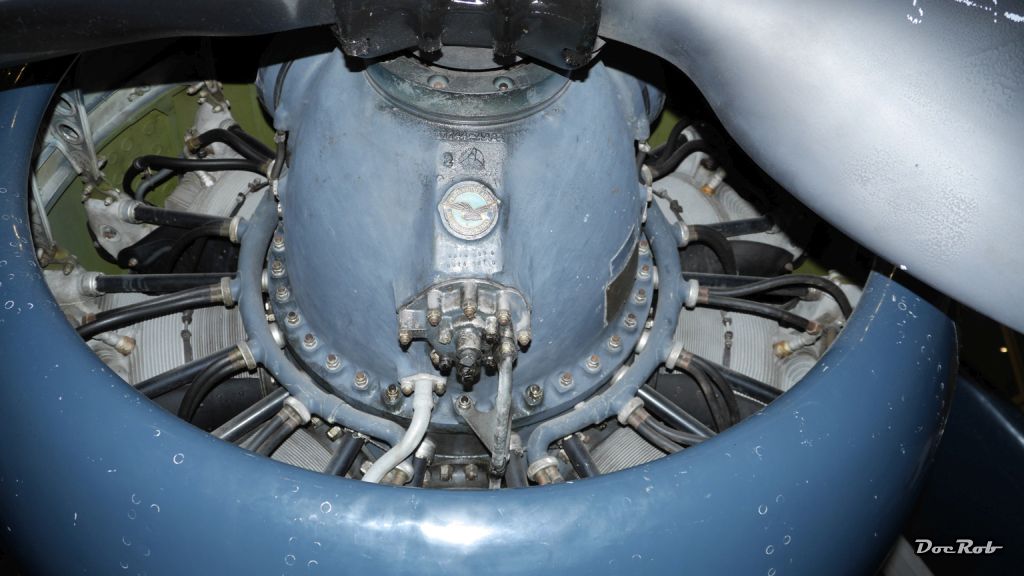
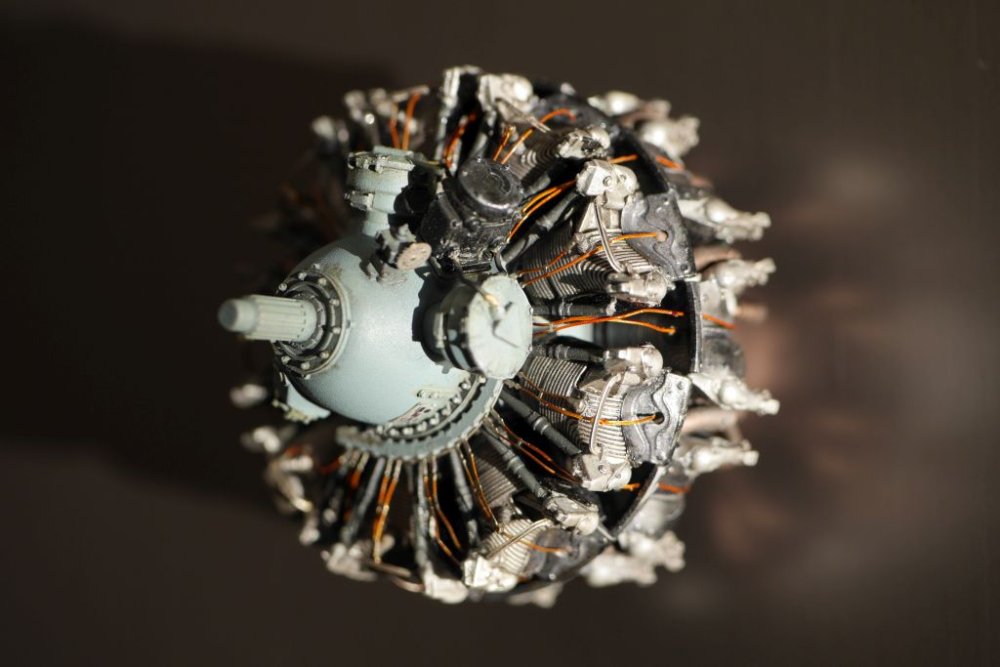
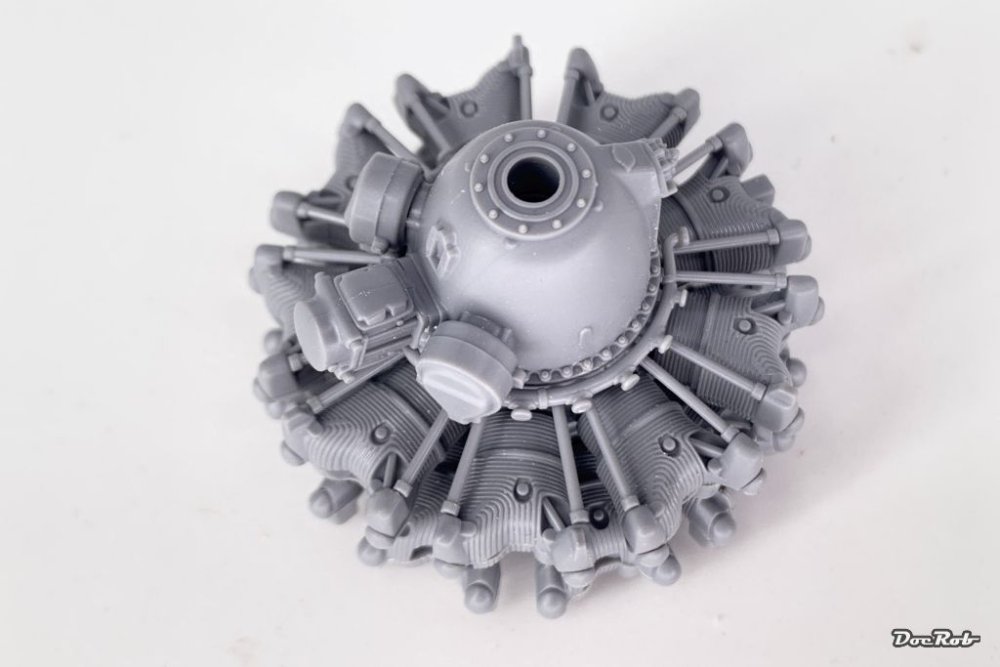
Long time no progress. I was in my old hometown of Berlin for some time and brought a dose of covid back from there, so bench time is limited through lame brainess because of the f***ing virus. I cleaned all the engine and exhaust parts and try to figure how to paint them best. there will be a lot of masking necessary. I built the Brassin engine many moons ago and there were single cylinders to add to the core. I would have preferred that from the Tamiya kit too. I also noticed, that Tamiya skipped the black metal fairings around the cylinders, which can be seen on the pic of the real thing. The Brassin engine had the fairings present. I'm planning to add ignition wiring and spark plugs from Anyz. Generally, I tend to build the Corsair with one wing folded and the other in flight position, what do you think about that? Cheers Rob All is unglued, it's only a mockup picture. Level of detail is great for a non-resin engine. Here is the real thing with the black fairings visible.

-
What is on your bench right now ? Share a picture :)
DocRob replied to Martinnfb's topic in Modelling Discussion
That's a cool looking finish Carl, more pics please when done. Cheers Rob -
Pz.Kpfw.I Ausf A - Dragon 6356 - 1/35
DocRob replied to Bomber_County's topic in LSM 1/35 and Larger Work In Progress
Looking great Phil, the Panzer I looks like 72 scale compared to the Halbkette. Cheers Rob -
The better the kit design and engineering, the uglier the subject. This seems to be a near perfect kit of one of the un-sexiest flying things ever made. Not for my stash unfortunately, as much as I like to have a snap fit kit. Cheers Rob
-
Nice and clean build, maybe a bit too clean for my liking, but that's just me. The Valentine looks interesting in Russian livery even without a red star. Cheers Rob
-
Very nice and convincing finish. The riveting enhances the look especially on the black cowling. I also like the slight shine in the black cowling, which gives it a more 'metallic' appearance. Cheers Rob
-
Don't know, if it was mentioned here, but Border seems to develop a detailed kit of the FW-190 A6 in 35 scale . Bashing time . Cheers Rob The Modelling News: Preview: More details of Border Model's Fw 190A6 in 35th scale...
-
Ah, a slow roller am I and never watched Top Gear. I guess you can build him as I believe there is a Simpson helmet included. But there is also a classic 80ies helmet and an Alain Prost head included. Cheers Rob
-
Thanks Gary, but what's a stig? My C-ed brain is too dizzy to catch the meaning . Cheers Rob
-
Nice progress with the 109 Gary, I have to say, I decided against riveting on some builds and raise my hat to your courage. It seems manageable, so maybe,.... I liked the figure option one better, the others look so depressed with their hunched appearance. The Bravo 6 photographer would have been my choice, as I thought more than once about buying one. Cheers Rob