DocRob
-
Posts
7,122 -
Joined
-
Last visited
Content Type
Profiles
Forums
Events
Gallery
Everything posted by DocRob
-

Dragon Jagdpanzer IV 70 (A) Kit 6015 COMPLETE
DocRob replied to GazzaS's topic in LSM 1/35 and Larger Work In Progress
That turned out pretty bad Gary, sorry to see that. Your not un delicate solution could maybe work, but if your mesh is made from brass, it will weaken through the soldering process. I think, I would use only CA for the Schürzen. Another option might be, to sell the 45$ kit and to buy a newer one with the Thoma Schürzen like mine, pre cut steel mesh with PE framing. I guess, that should work relatively easy, but haven't tried. If you need more info about my Thoma's let me know. Cheers Rob -
Great story Bill. I was eleven and probably ruining a glue smeared cockpit of an Airfix F-4. Cheers Rob
-
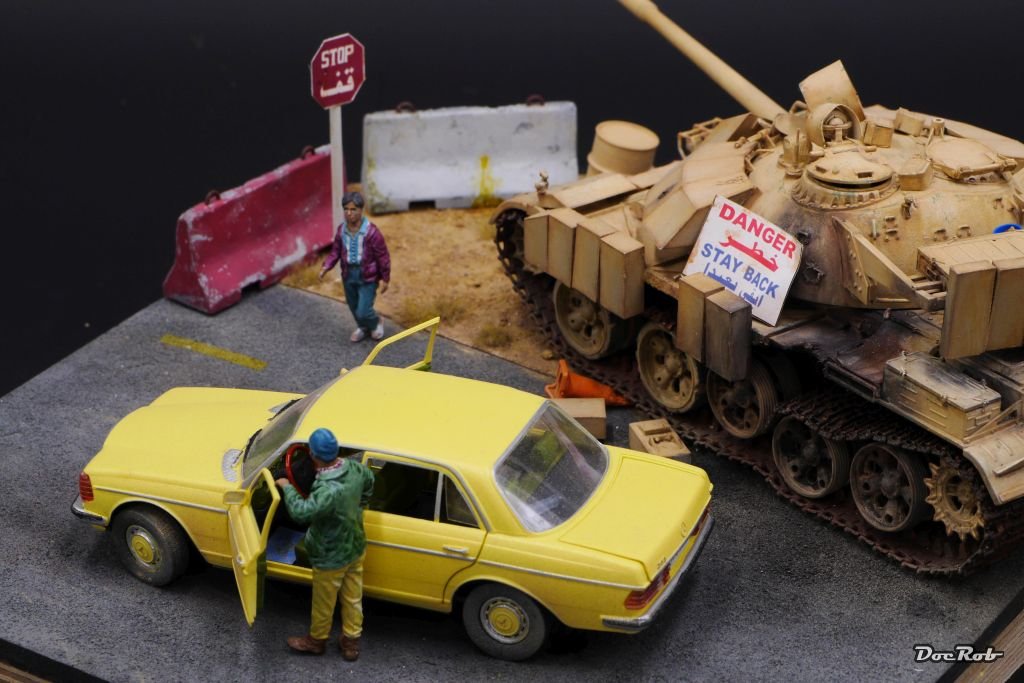
A fantastic and easy to build kit. I did one many moons ago, added resin ERA and wheels and lots of Voyager PE, along a metal barrel and Friul's, only to destroy it later, to show how simple human needs show in the grotesque scenery of war. Cheers Rob

-
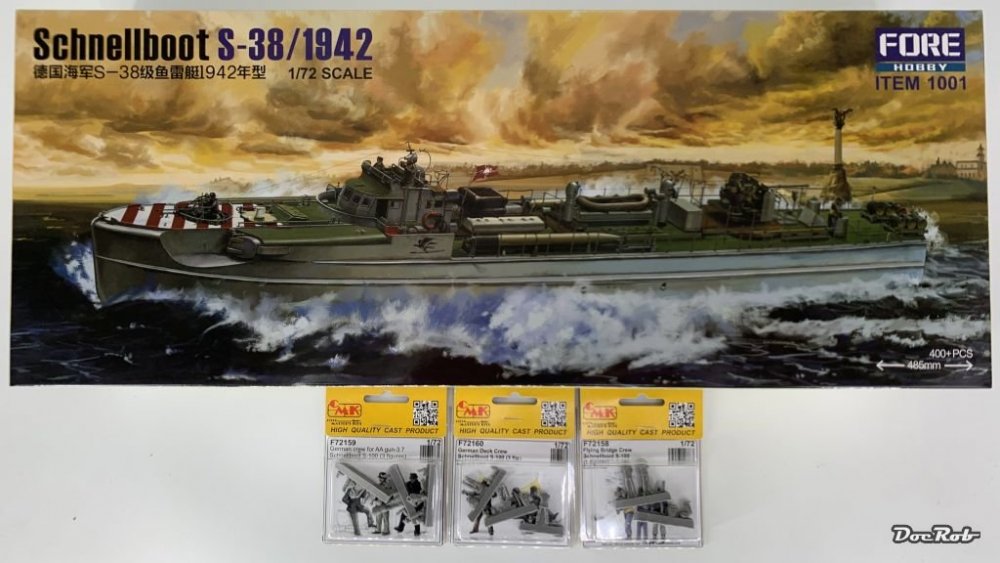
After three month of shipping, which is nobody's fault but mine, because I opted for the slowest, cheapest shipping method, this great kit arrived from Japan today. I really like the Schnellboots appearance with the old style bridge, which later was changed to the armored version. The kit has a halved hull of approximately 50 cm length, nice and crisp looking plastic parts, Some sheets of PE, metal barrels and some rope for the railings. Hasta la vista Revell and Airfix, there is a new player in the pond. The nine crew members are from three CMK sets. Cheers Rob
-
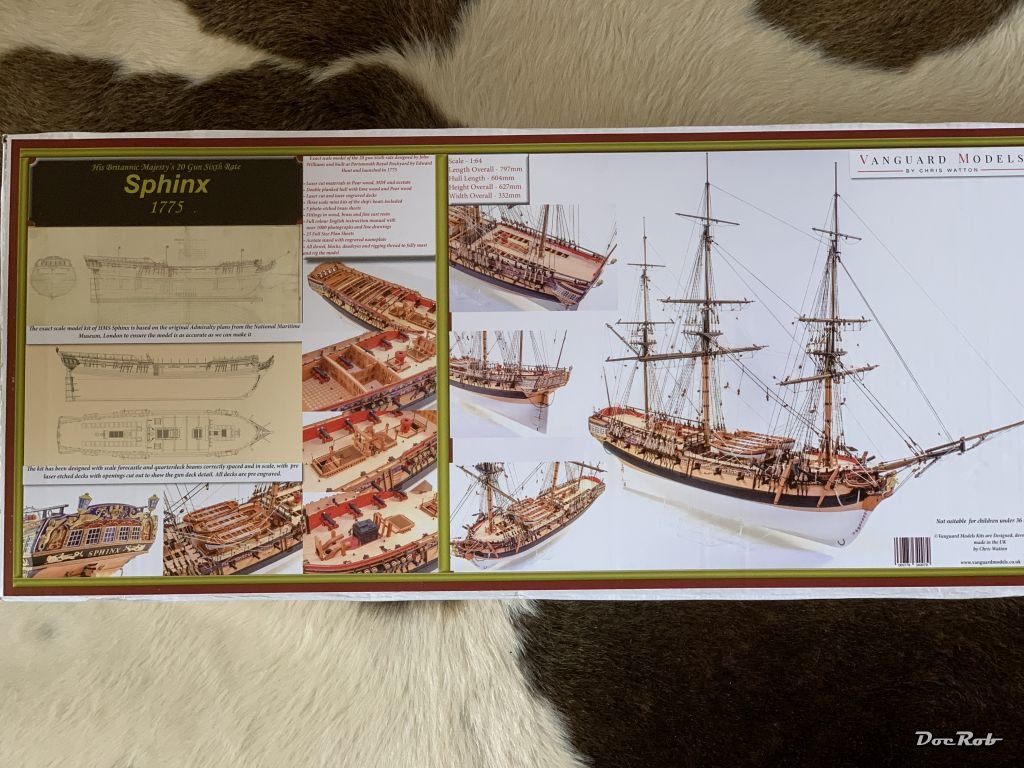
Thank you Phil and Bill, the Sphinx kit was really a great surprise to me. After having a great birthday, yesterday I savoured the contents of the well packed box. Definitely another league compared with the Duchess of Kingston and I'm lucky that I build her first. Only seeing that there are THREE wooden boats to ad gives me the shivers . Cheers Rob
-
If in doubt, I would always chose the Kabuki variant if available. I had very mixed results with different types of vinyl masks. They are not as flexible, do not adhere as well, tend to shrink more, than Kabuki. I used masks from Maketar on several builds and they were perfect. The circular masks, Carl recommended are really very helpful. Cheers Rob
-
Love it Peter the Ford looks almost ready to race. Thanks for the explaining your method of applying decals onto the tyres. I have to do that soon and the last time, I added markings and logos to a models tyre was in my twens with a clumsy brush painting effort . Cheers Rob
-
Tamiya F-14 VF-2 Bounty Hunters
DocRob replied to Bill_S's topic in LSM 1/35 and Larger Work In Progress
You seem to build this beautiful Tomcat as fast as it flew Bill. The cockpit detailing looks beautiful and I will buckle in as I plan do do a -D version, albeit in 48 scale. Cheers Rob -
Let us know about the results. I forgot to recommend double planking. It's much easier to get the outer decorative planking right, with a structural lower planking under it. Cheers Rob
-
That's hard to say, there are many thoughts to consider. As a beginner the most important aspect to me is a well designed and documented kit. It's also helpful to chose a popular kit, as there are many build logs to learn from. Good materials, being it wood, resin, metal and yarn are helpful. I once started with an Artesania Latina kit of the Cutter Le Renard many years ago, but haven't finished, because now I'm in a phase with the build, where you have to drill, sand, align, ... the gunports. It's not undoable, but difficult to get right and boring. With my actual build the Duchess of Kingston, it's completely different. Good materials, a well designed kit with many prepared parts makes live so easy, that I overlooked my goal to build smaller vessels in larger scales preferable. In her case the gunports, to stay with that example are laser cut and the three layers of bulwark fit perfectly even after the necessary bending. The later added decorations are fitting also perfect, so only a little cleanup is needed. I can highly recommend the kits from Chris Wattons Vanguard models. Another option is to build a fishing boat or a tug boat, which spares the rigging. I eyed the Fifie fishing boat from Amati for my purpose, as it's well designed (Chris Wattons work too) and is in 32 scale. I will buy the kit for sure and may build it in a used and weathered look, not seen too often in wooden ship models. These are only some thoughts about the subject, which I hope where of a little help. Cheers Rob
-
RCAF Liberator GR Mk VI
DocRob replied to BlrwestSiR's topic in LSM 1/35 and Larger Work In Progress
It's very helpful, that you can spray the wings apart from the fuselage. Your camo looks great. Do you buy your paints in gallons Carl? Cheers Rob -
The chassis is looking great and very realistic to my eye. What I can't spot on the pics, are oil residues, which can be seen on every rail bound vehicle. I often add them to mechanical parts with a gloss finish in contrast to the duller parts. The short wheelbase in relation to the long chassis looks interesting, clearly allowing to follow curved rails better. Cheers Rob
-
The sales will tell, if Border made the right decision. You are absolutely right about the size difference of the seemingly close appearing scales, but what are we talking about? There are two kits, well represented by other companies in 32 scale and there are some builders out there, who think about dio possibilities with 35 scale gear and figures. I have to admit, I'm one of them, but until now, the right idea for a setting had not struck me. Cheers Rob
-
Thank you Gary, I had a great day and yes, receiving a model kit from my wife was very special to me. Cheers Rob
-
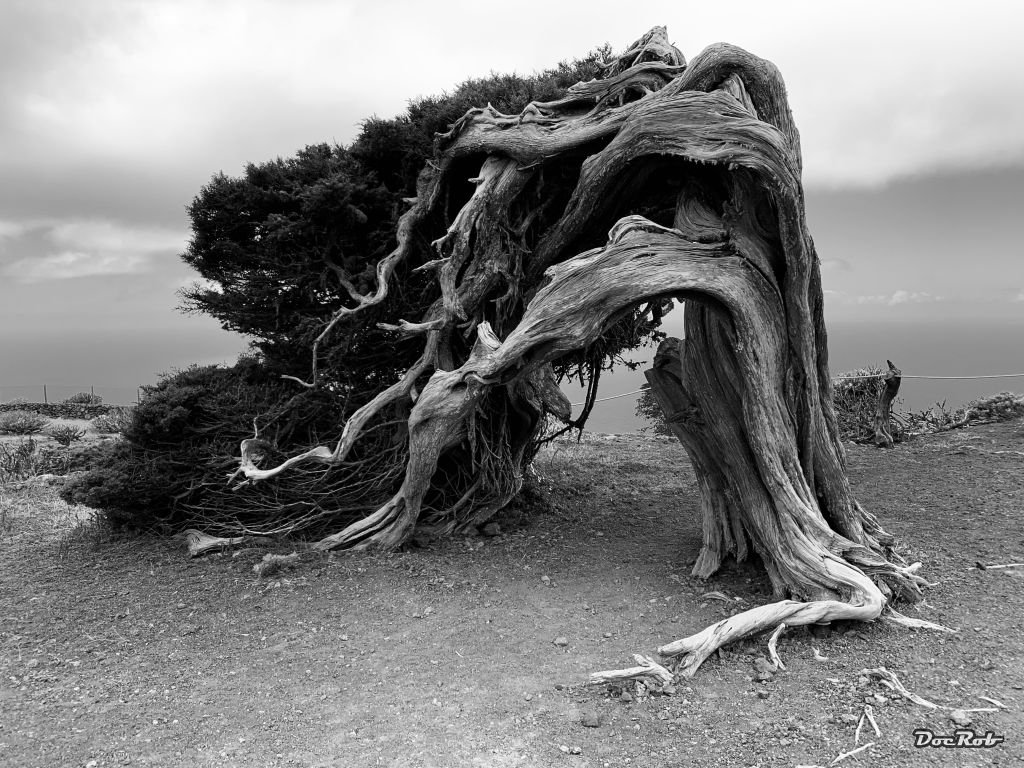
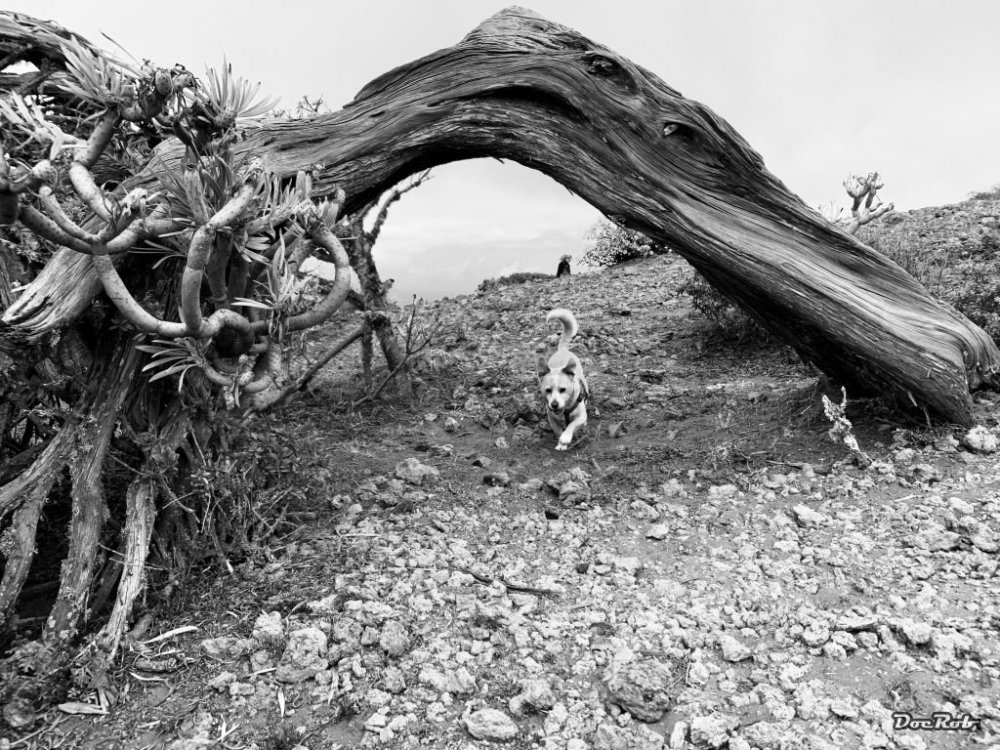
Yup, this is a windy part of my often windy island. We have two landmark trees here, one is set in a natural stone pool in the mountains and reflects the old technique to sample and collect water from the clouds, which was vital on my island, as there are no natural sources. The one on the picture represents the strength of nature and people here to resist bad conditions. The wind shaped form of these trees made them un useful for ship building purposes luckily. Cheers Rob
-
Thank you Mark, you should try a wooden ship. With your abilities and patience you will easily adopt. Wood is a great material to work with, lots of fun guaranteed. Thank yo Carl, the best about it was indeed the change of mind by my wife, priceless. Thank you Peter my friend, indeed the HMS Sphinx will make me Captain when finished. Until know, I'm deeply impressed how much bigger and well filled the box is. This will be a lot bigger workload than the DoK, I guess. The way to a post can't be too easy . Thank you Fran, I had indeed a great one . Cheers Rob
-
Trumpeter F4F-3 Late - 1/32nd
DocRob replied to Bomber_County's topic in LSM 1/35 and Larger Work In Progress
A Wildcat should give a little wild fight, shouldn't it? You've done great with the assembly Phil, and I can't wait to see some colors on the cat. Cheers Rob -
I second Hubert, what a beautiful result after all the struggles, Peter. I never would have thought, that decals for windows would look the part, but with this scale, they seem to be the better choice, even allowing fine framing. If you later decide to gloss coat the Embrarer, you should mist on a very light coat first and let it dry thoroughly, before really glossing her. This way, the often aggressive component of the gloss, have less time to interact with the decals.
-
Muchas gracias, amigos, I had a great day yesterday, exploring the deserted parts of our island with the open topped Jeep, having a picnic in the wilderness and a great dinner in the night. I will make a WIP about Sphinx, but first I have to finish the Duchess of Kingston and then some other kits. Maybe next winter will be a good time to start. With such a project, it's good to have some coherent time, at least until in the groove with the build. Cheers Rob A landmark of my island, visited yesterday ...and a happy dog with us.

-
Today is a perfect day, not only because I have birthday, but my much loved wife made me a very special present, The HMS Sphinx kit from Vanguard models. Why is that so extremely special, besides from the fantastic kit? My wife approves my modelling hobby, but she doesn't support it in any way. It's an absolute first, that I received a model related present from her. What's to say, I'm a happy man and after finishing the Duchess of Kingston as a modelling midshipman, this will be my 'post' ship build with ranks. Cheers Rob

-
Duchess of Kingston - Beauty of the Seas - Wooden Sailing Ship 1/64
DocRob replied to DocRob's topic in Non LSM 'WIP
I built up the the Duchess of Kingston, hull and decks complete with all the decorations during a three month period and needed almost two weeks for planking the cutter. I have to admit, the little bugger took a bit of wind out of my sail, but I'm stubborn enough to want the boat having finished somehow. I'm really happy, that I wouldn't have to use the cutter in real live, as it's planking job is far away from being watertight and even if it was, it wouldn't row straigth at all. My second planking job was somewhat harder than with DoK. That's it in full ugliness, before sanding After a bit of sanding it looked a bit smoother. I wouldn't go to far with sanding, as the planks thickness is only 0,5 mm. I will use some filler next, liberally applied which will not disturb, because I plan to paint the outside of the hull. Cheers Rob -
Peter, if the yellow strip is the main problem, you may should 're'-spray it on. While masking with Kabuki,, you can put some paper under one side of the tape, to hinder it sticking to the blue decal area. My very wise wife always says: 'leave it, love it or change it' . I had some builds lately with positive experiences while decaling. Aviattic decals worked great on my Fokker and SSW's, Zoukei's Cartograph decals were also formidable on my Kai Phantom and Tamiya's Ducati decals were good to work with, but other than that, it's mostly a painful act, to get the decals right. I often use masks to get around decaling and tried different products, like HGW's wet transfers, with very mixed results. Not to mention all the risks involved with preparation, sealing and weathering. As you can see, I fear the decaling stage as an error prone possibly project ending phase of a build. Cheers Rob
-
That looks amazing Sasha, the added detail brings the plane to live. Cheers Rob
-
Nice work on the Halbkette Phil. Lots of detail and I'm peeking at your staged painting approach. Dragon instructions, well, they are a test sometimes. i hate these blue gray painting instructions, that's so 80's. The prices for Dragon kits are raising more than with other companies. I haven't bought Dragon for a while, but have many in stash. I think not one of them was a full price purchase, albeit new. Dragon kits often are available for a reduced price. Cheers Rob
-
Dragon Jagdpanzer IV 70 (A) Kit 6015 COMPLETE
DocRob replied to GazzaS's topic in LSM 1/35 and Larger Work In Progress
Looking very good Gary. Using Extra Thin for PE sounds interesting, I will definitely try this out. Cheers Rob