DocRob
-
Posts
7,041 -
Joined
-
Last visited
Content Type
Profiles
Forums
Events
Gallery
Everything posted by DocRob
-

617 Sqn Tornado Dambuster 70th
DocRob replied to Kaireckstadt's topic in LSM 1/35 and Larger Work In Progress
Very cool build with the lighting Kai. It is always a demanding task, to add lighting to a kit and prevent stray light and the usual installation probs. Seems to work out well with your build. I added lighting to kit only once, but it enhanced the appearance of the build a lot. Cheers Rob -
Duchess of Kingston - Beauty of the Seas - Wooden Sailing Ship 1/64
DocRob replied to DocRob's topic in Non LSM 'WIP
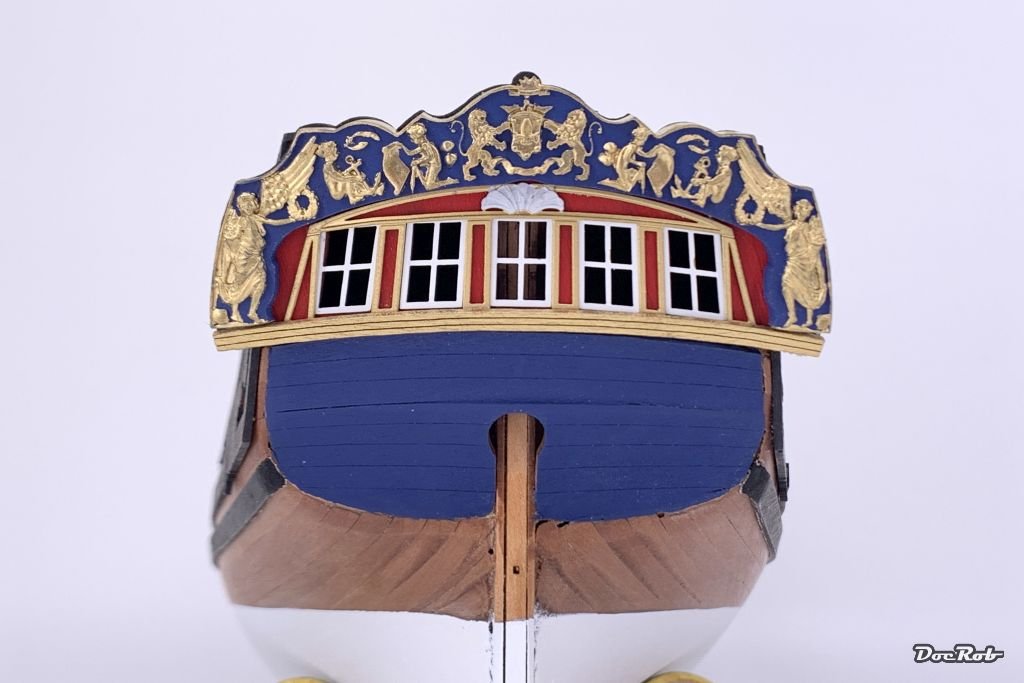
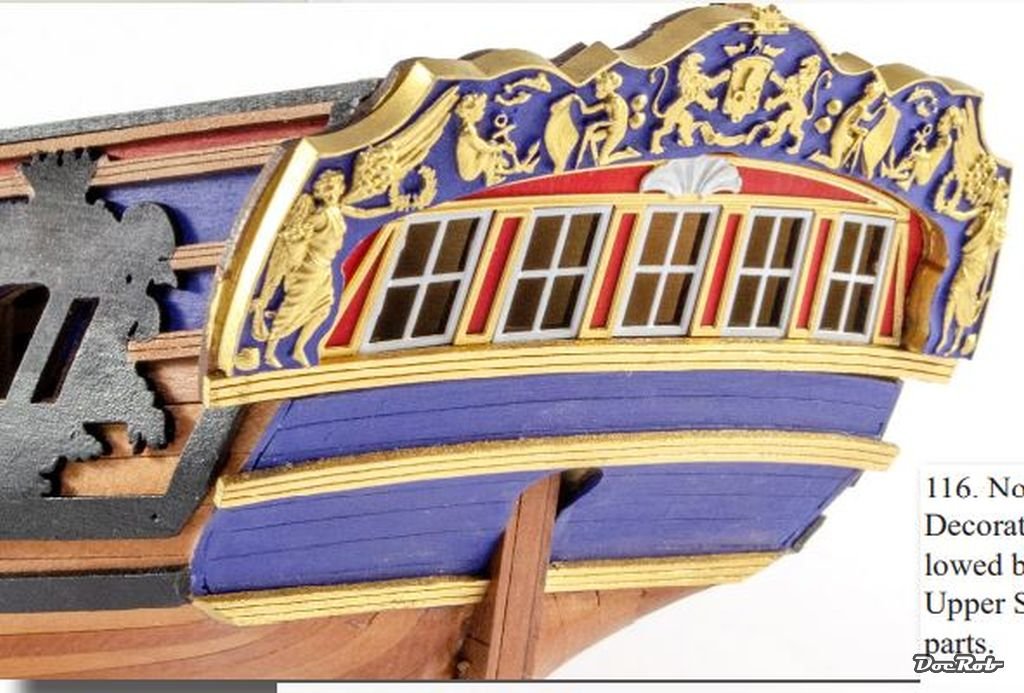
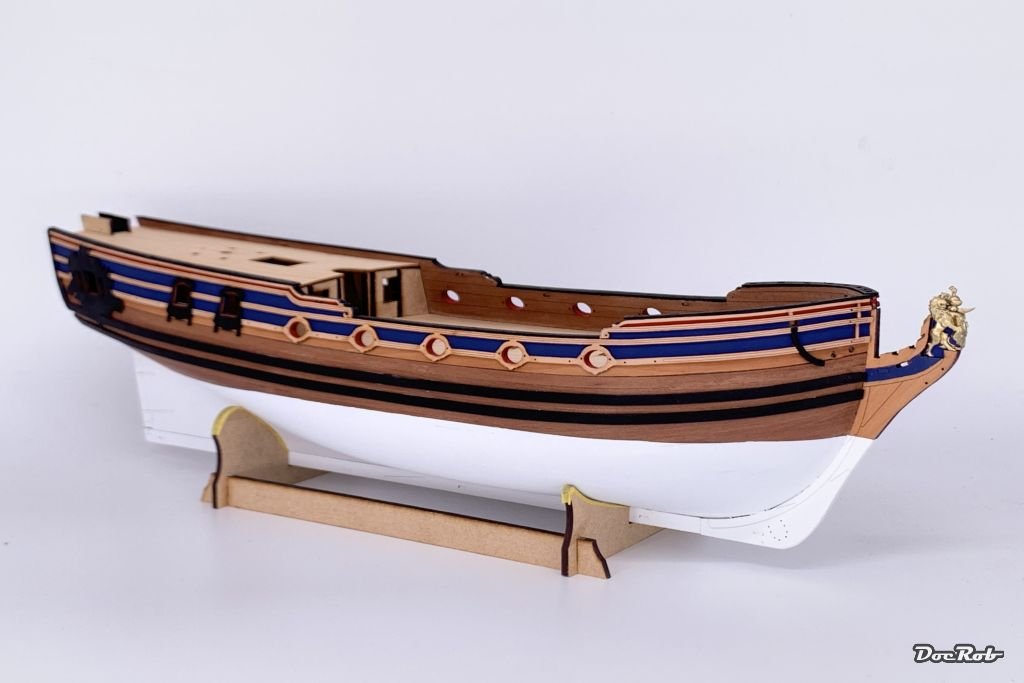
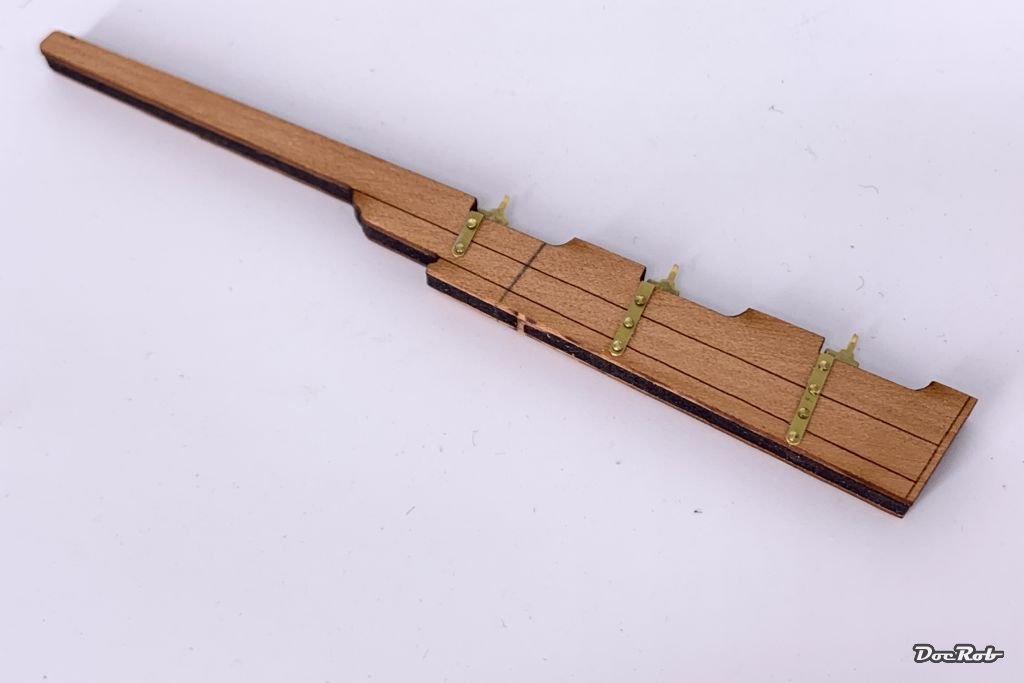
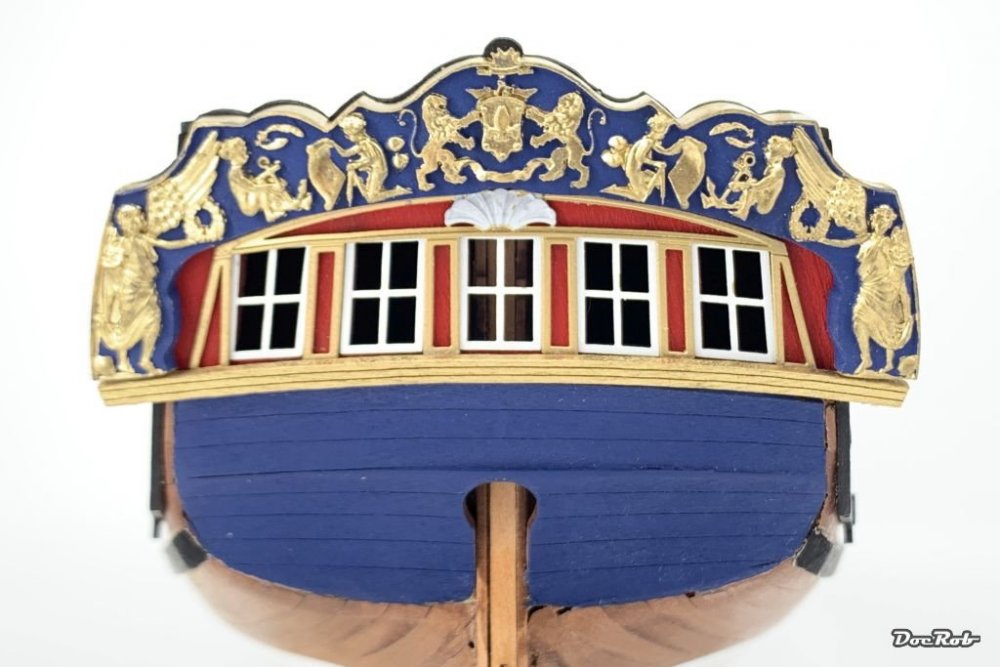
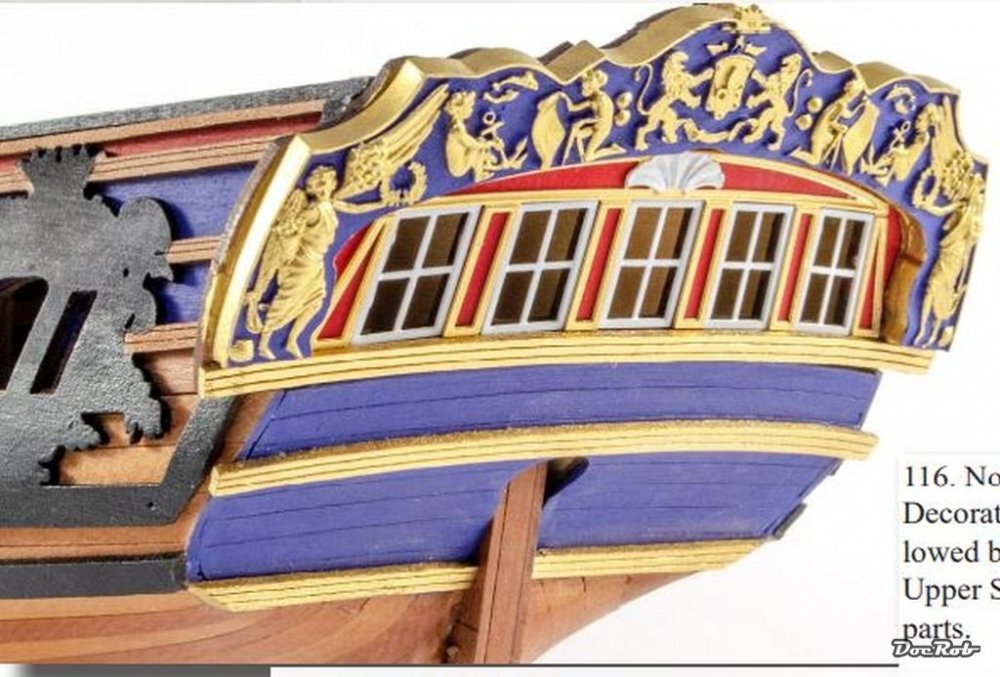
After all that self inflicted stress, some relief finally. The stern fascia's glue hold up, even some wiggling couldn't pry it loose, phew. I added the ready painted PE-window frames and the gold PE decoration between the windows with CA. A few touch ups later, I added the wooden rail under the windows and could make it fit without a gap under resin decoration. I'd seen gaps there on other builds and didn't like the look and tried everything to let these parts meet closely. The kit supplies two more protruding golden rails under the stern fascia, like shown in this manual pic, but I'm not sure if I like them at all. If I decide to add them, they will be in natural wood, as I don't want to have golden decorations below a certain level. I prepared the lower halved ones yesterday and blue tacked them on and still am not sure, if the look benefits with these. Cheers Rob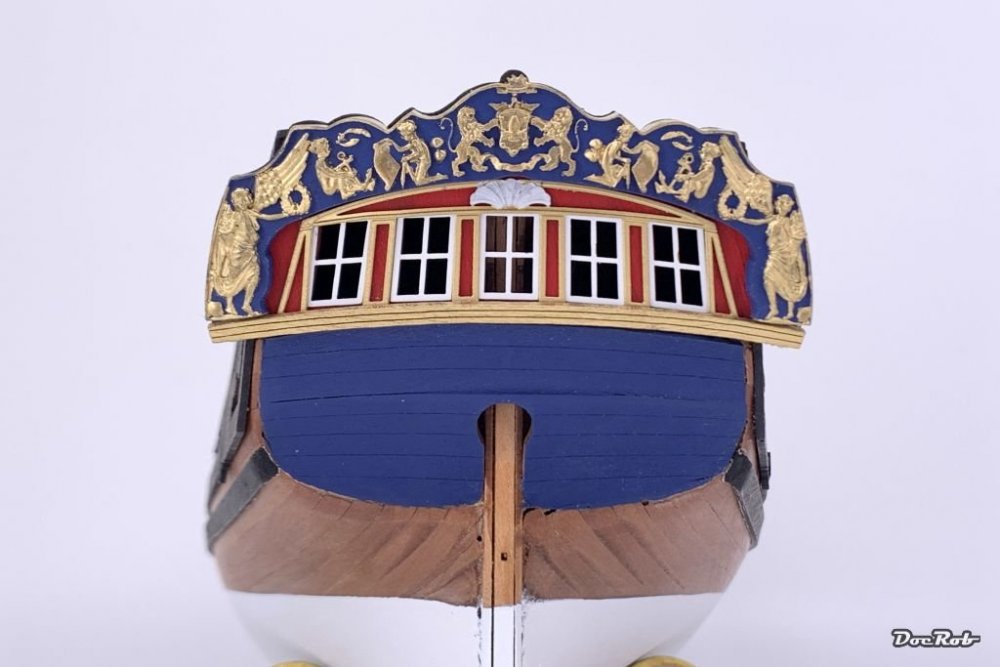
-
Duchess of Kingston - Beauty of the Seas - Wooden Sailing Ship 1/64
DocRob replied to DocRob's topic in Non LSM 'WIP
Thanks Gary the stern piece is a true shape shifter, I will go to my cave now and check, not without a cloud full of thoughts in my head . Cheers Rob -
Dragon Jagdpanzer IV 70 (A) Kit 6015 COMPLETE
DocRob replied to GazzaS's topic in LSM 1/35 and Larger Work In Progress
Nice Gary, I also have a soft spot for these machines, outdated, absurdly improvised with more and more add on modifications, which lead to even more modifications, because of the increasing weight. I will follow your build, as I have a similar boxing in my stash and it's on top of my to build tanks list. Mine has metal wire mesh combined with PE for the Thoma Schürzen and a supplied tool for bending them correctly along Magic tracks and represents the late version. Cheers Rob -
Very nice choice of subject, Hubert. Leipzig in Saxony has also blue and yellow painted trams. You may find some pics in the net from some old trams, like the MiniArt kit. Will you include the passengers? Cheers Rob
-
Duchess of Kingston - Beauty of the Seas - Wooden Sailing Ship 1/64
DocRob replied to DocRob's topic in Non LSM 'WIP
Thank you Gentlemen, I hope the stern solution works out, an area which I dreaded since two weeks. Hopefully the glue will be strong enough. Cheers Rob -
Duchess of Kingston - Beauty of the Seas - Wooden Sailing Ship 1/64
DocRob replied to DocRob's topic in Non LSM 'WIP
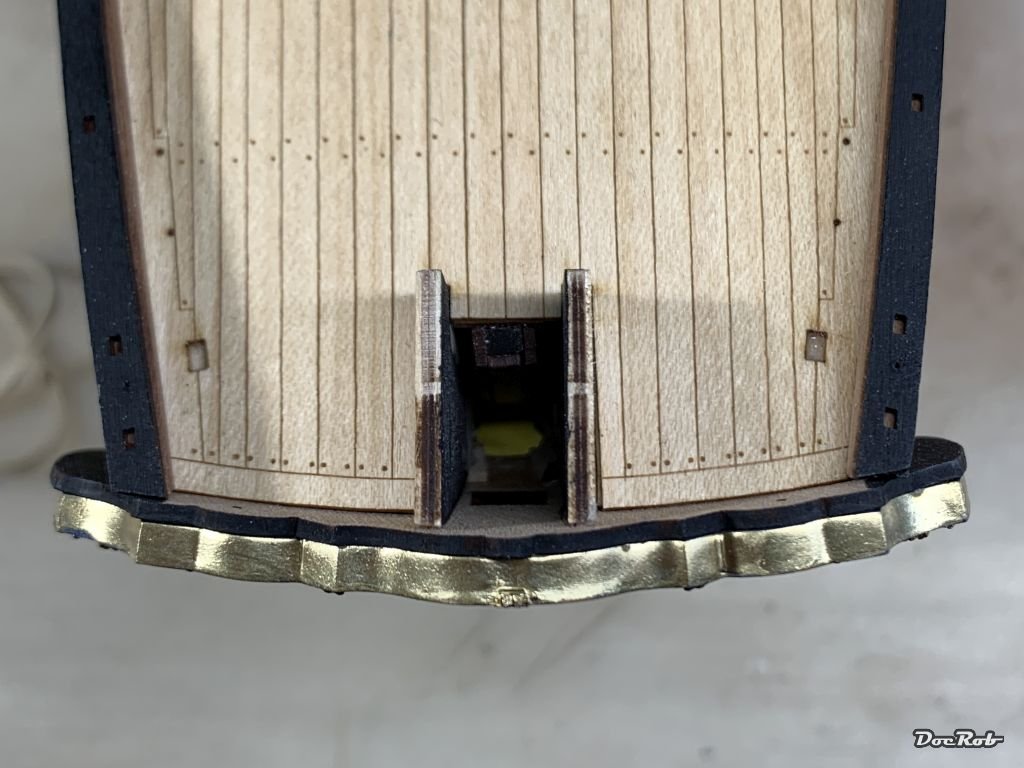
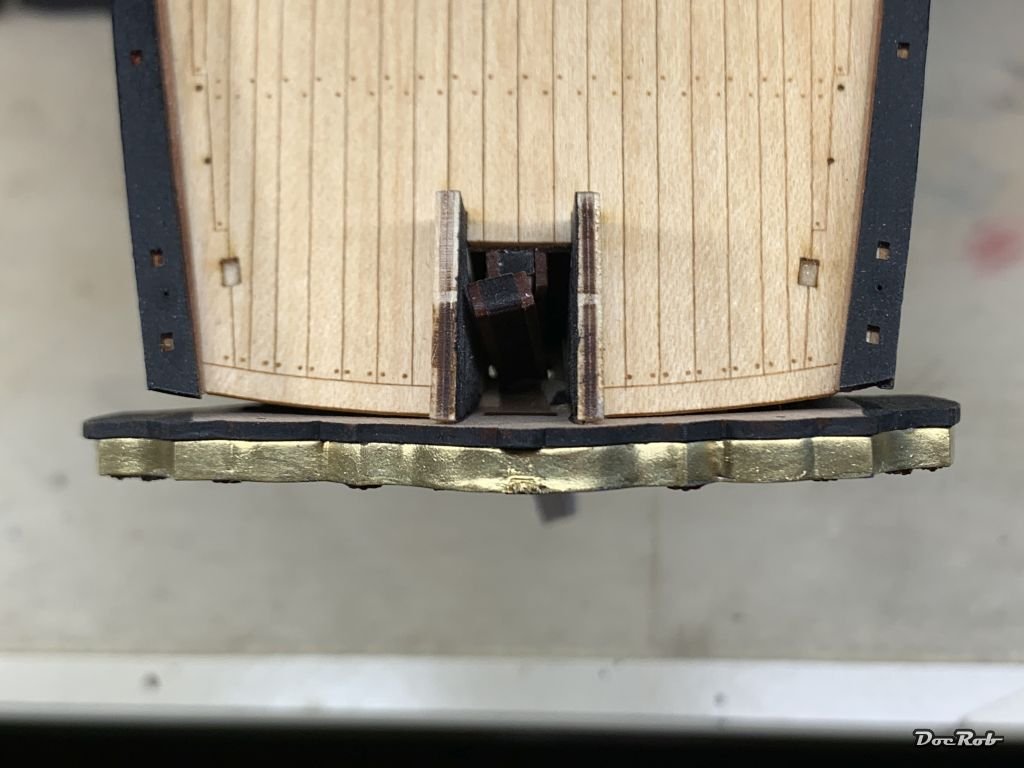
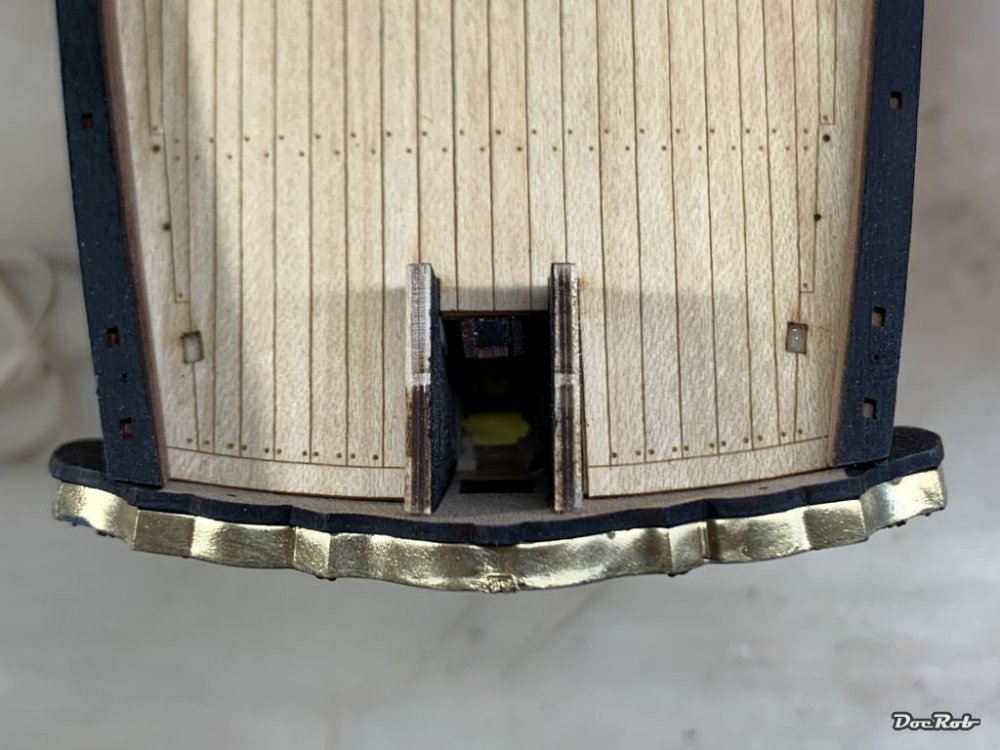
After a calming breakfast, I decided to give the stern another try. I set the DoK in the lately rarely seen sun and let her sunbath for an hour, to dry the wood and be able to glue the stern fascia again. After I removed the rubber bands it looked like this, almost perfect, bummer that there is no more space to get some glue in between . I then applied some CA, wherever possible and now hope, that tomorrow everything will be good, but somehow have my doubts. Cheers Rob
-
Duchess of Kingston - Beauty of the Seas - Wooden Sailing Ship 1/64
DocRob replied to DocRob's topic in Non LSM 'WIP
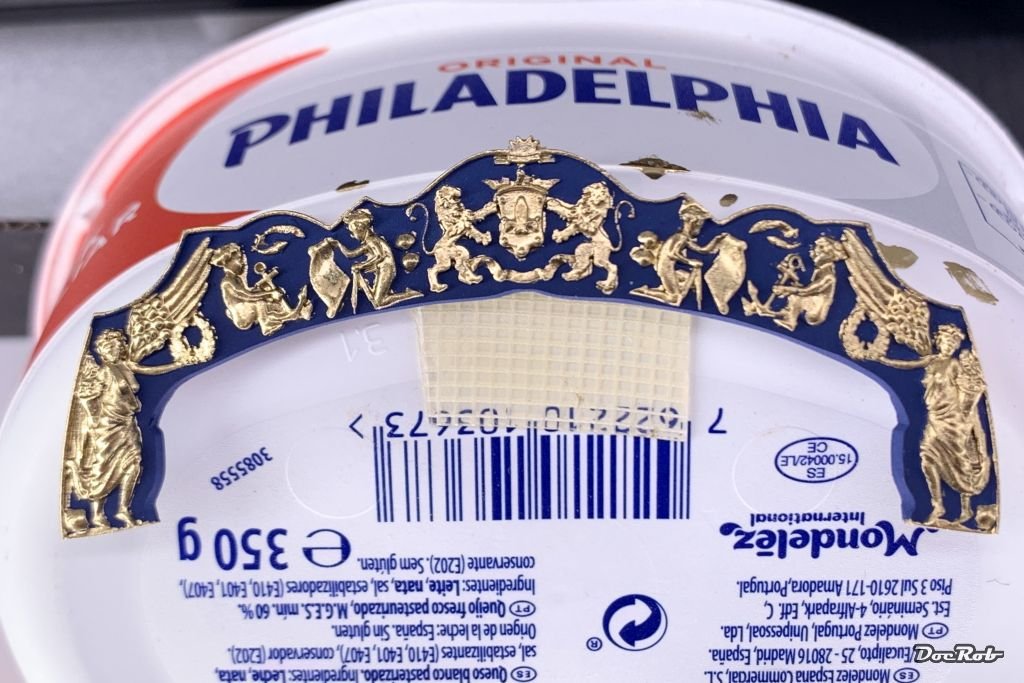
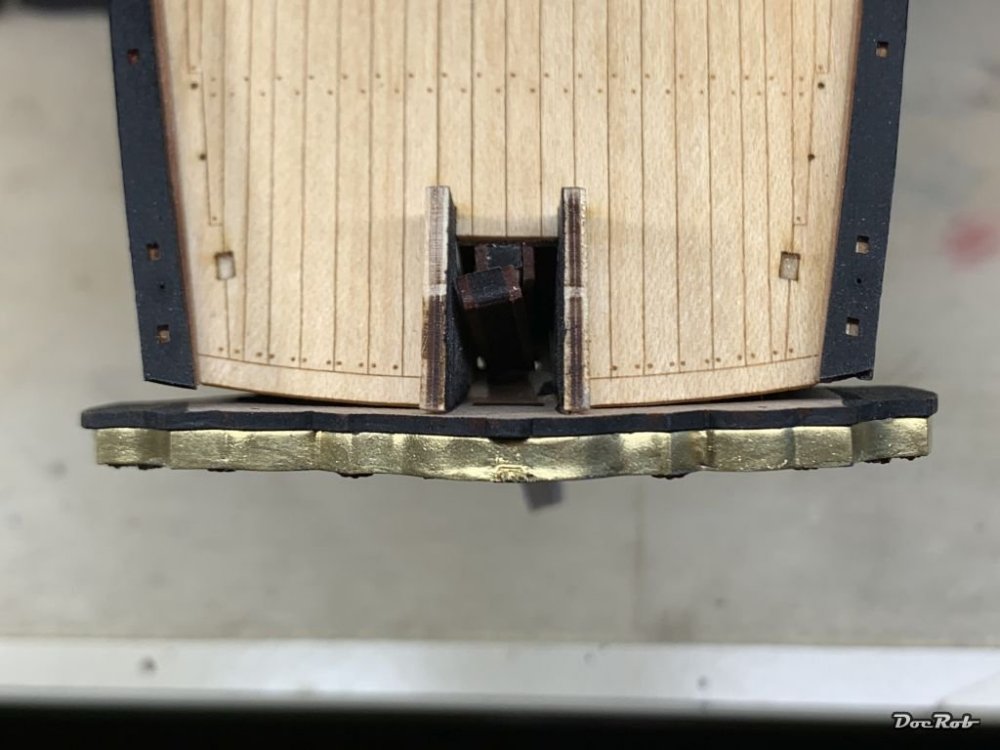
I ran into the first real trouble with the DoK and I expected it to be troublesome since I addressed the stern fascia for the first time, two weeks ago. The wooden part was soaked then and clamped to dry on a corresponding tin, to have the right curve for the stern. The next day, I had exactly the right curve, but found that the part got 1 cm wider, even after the drying time. I never could have imagined such an expansion. I tried to further dry the wood with a hairdryer, which helped a bit, but something was always wrong in the end, curvature or width. This is even more problematic, as there are the resin and PE-decorations to fit precisely. If you ever build the DoK, be warned, NEVER soak the stern fascia, this will invite trouble all along. The resin decoration were pre bent by me, using a hairdryer and had the perfect curvature. Yesterday, I prepared the wooden part, which was bended correctly, but was again oversized, as it seems to expanse through humidity in the air after the initial soaking. I used a hairdryer again and got the size issue solved and instantly glued the resin decorations on, while the wood was still warm. After curing, everything looked good and both parts had the right curvature. Then I glued the parts to the hull with white glue and secured everything with rubber bands. Everything looked perfect. In the morning, I checke, how my method had worked and found the whole stern assembly absolutely straight, no curve at all, pure horror. I don't know what to do now. I will carefully try to soak the wood again from the inside and try to bend it again with some force and glue it again, but have no idea if this works out. I may add two or four pins as support. The worst option would be to fill the gaps somehow and live with a straight stern, which would look absolutely silly. Cheers Rob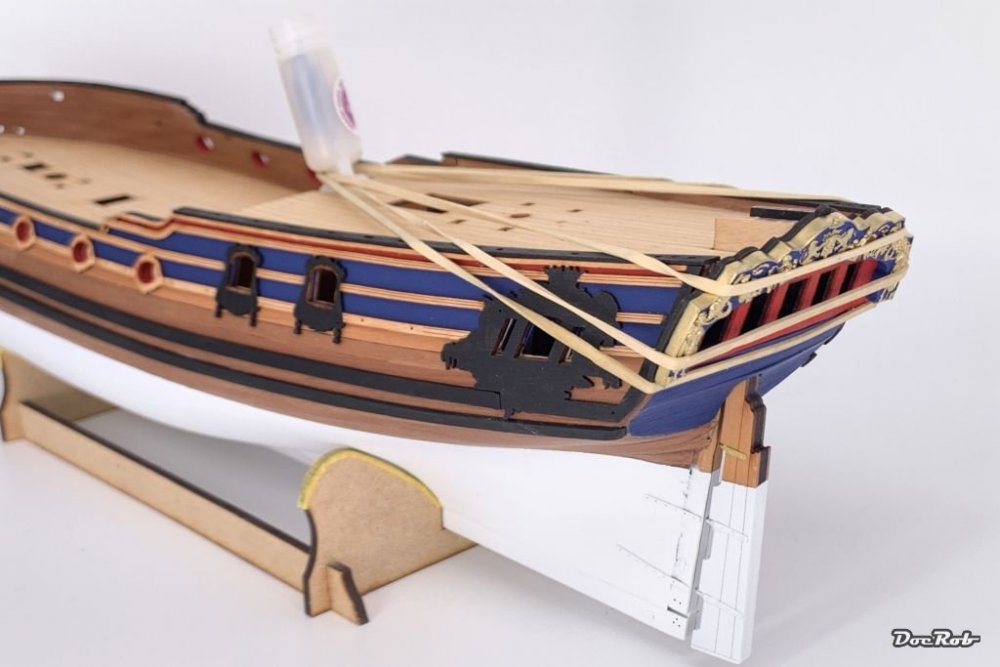
-
Thanks for showing the rubber brushes, I will try them with pigments, as I can see the benefits. But mostly they could be a tool, I was looking for since a long time, for applying decals. Should be comfy to push on decals with these, to get rid of water or air bubbles, trapped under the decal. BTW, I love the Skoda turtle, such a nice, steam punk like design, but the camo will be a challenge. Cheers Rob
-
Duchess of Kingston - Beauty of the Seas - Wooden Sailing Ship 1/64
DocRob replied to DocRob's topic in Non LSM 'WIP
Thanks Phil, easy may not be the right term, but the well designed kit helps a lot. There are tough tasks to fulfill, but the build is so rewarding and somehow, there are no real dealbreakers. I built so many kits and some ended on the SOD, but with the Duchess of Kingston, I never had that feeling. Thank you Gary, I like the look too. Other than plastic kits, it's somehow more sensual to work with wood. It looks good, when it feels good, in the sense of being smooth and well finished. Thank you, the whole idea of my search for a good gold color was, it needed to be brush- and airbrushable. I wanted to have the same gold shine on all the parts. I tested some, from Tamiya , from Gunze (Super Metalic Colours II Super Rich Gold) better but not good, Scale 75's Elven Gold (good to brush, but not very good to spray) AK's phenomenal to spray Extreme Metallics gold (Too thin for brushpainting) and considered without testing AK's metallic waxes. The Vallejo Liquid Gold can be thinned (and cleaned) with Alcohol (white spirit). I thinned it only while testing, but used it decanted from the jar with a synthetic brush and sprayed it with my Infinity airbrush through a 0,2 mm nozzle without problems. The result of airbrushing is difficult to capture in a photo, but it came out decent, I think. Cheers Rob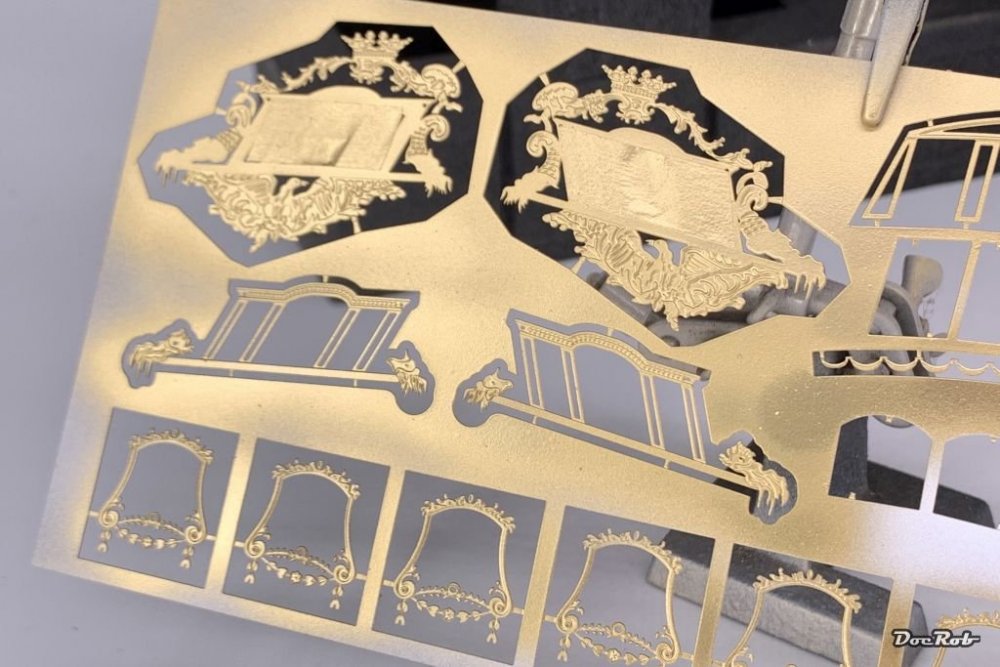
-
Duchess of Kingston - Beauty of the Seas - Wooden Sailing Ship 1/64
DocRob replied to DocRob's topic in Non LSM 'WIP
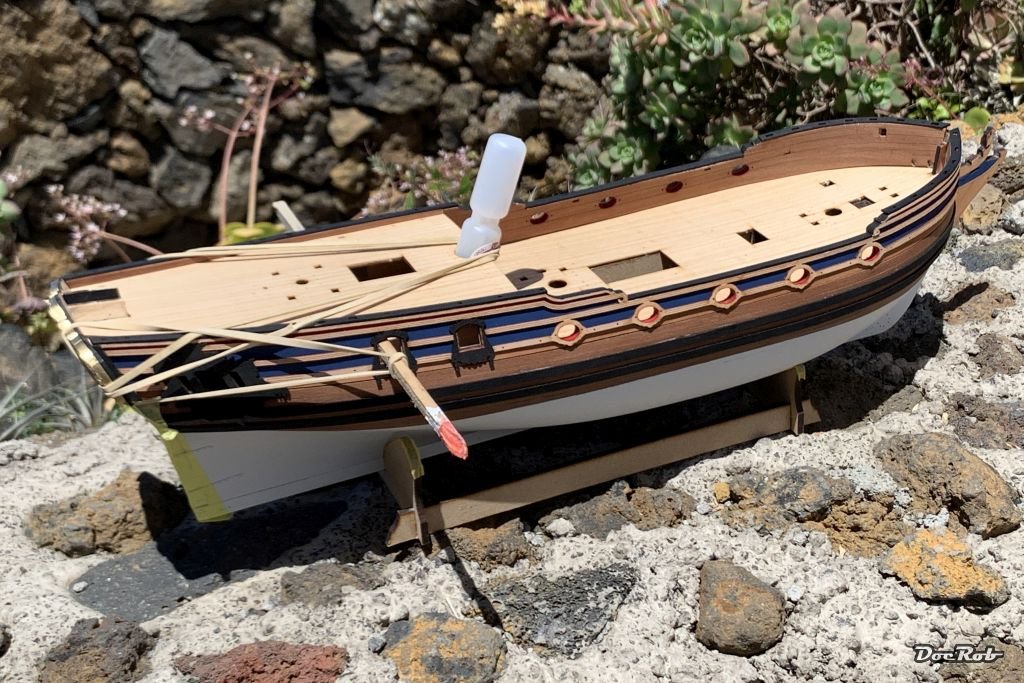
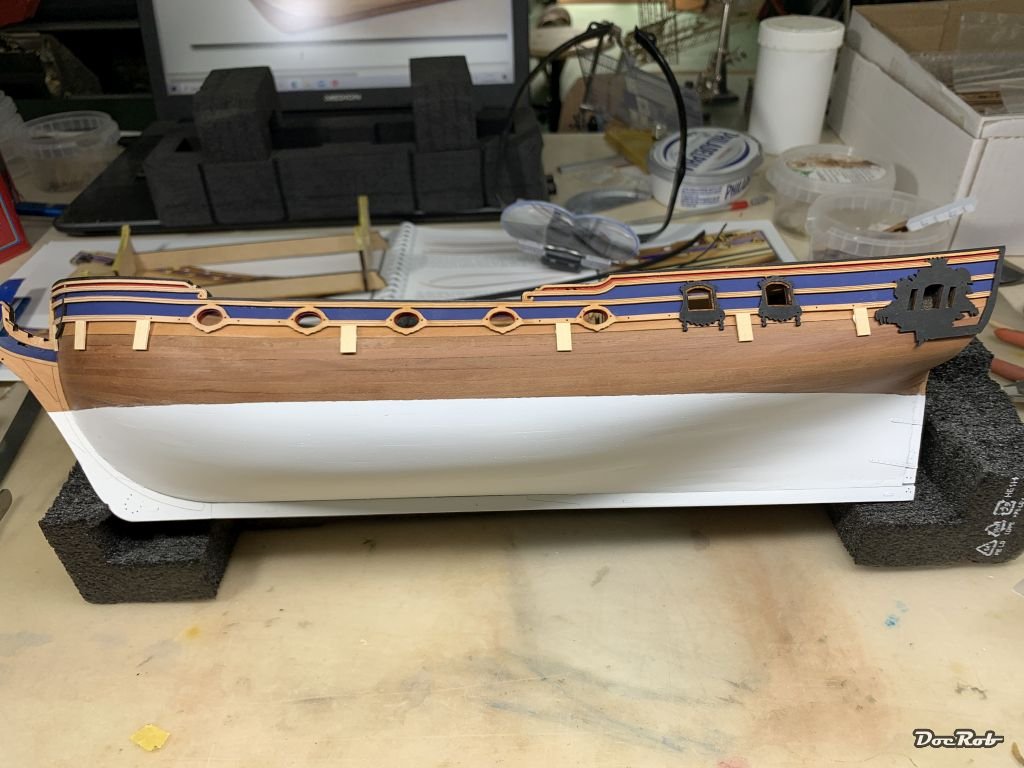
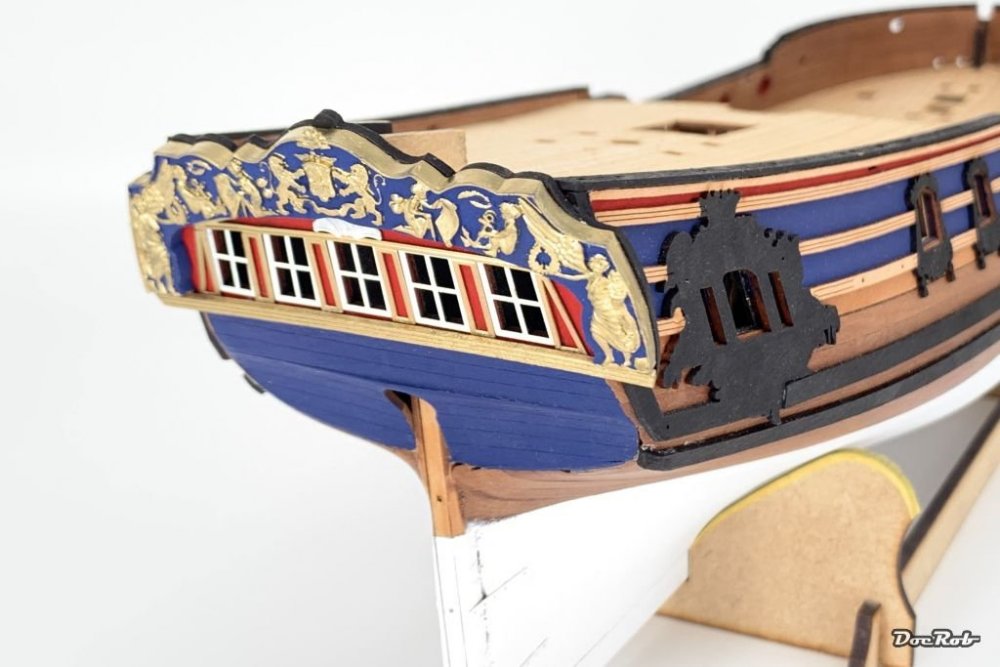
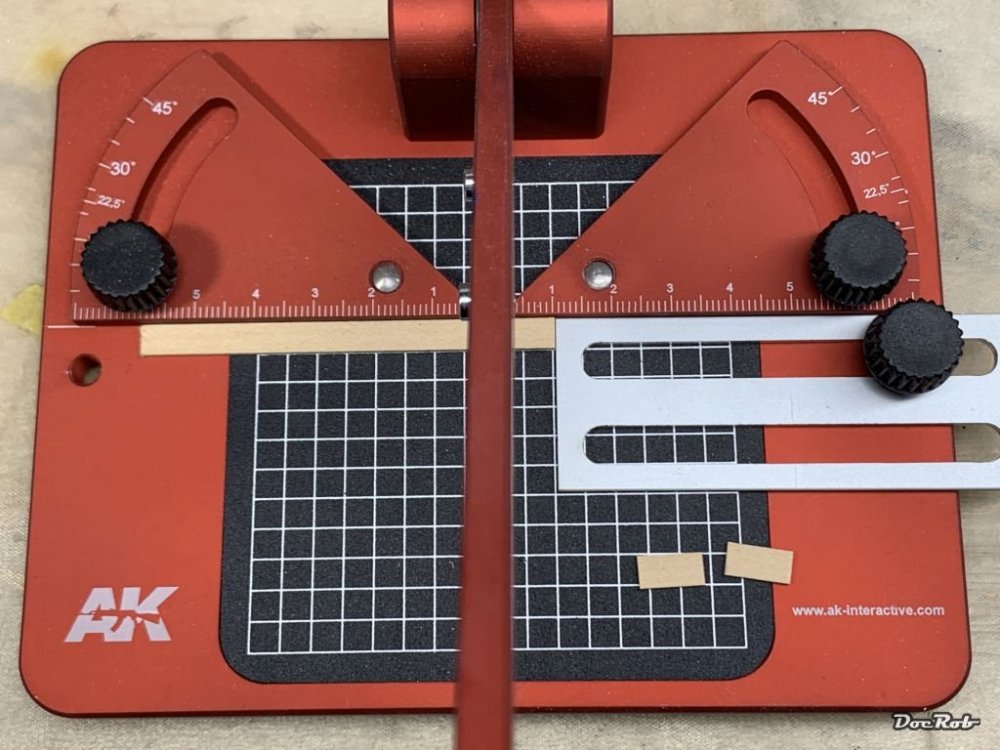
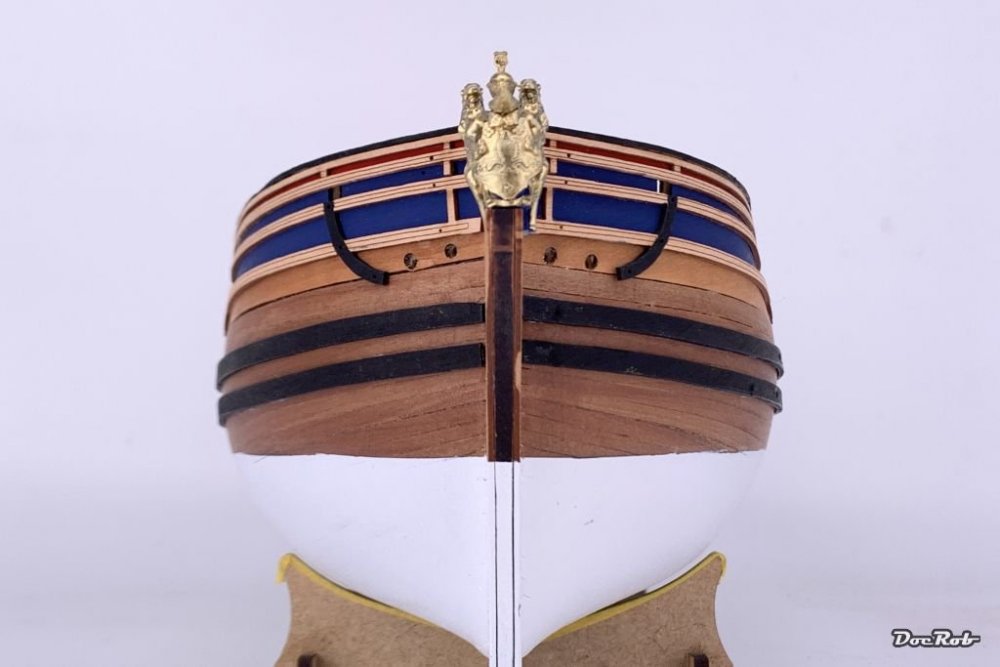
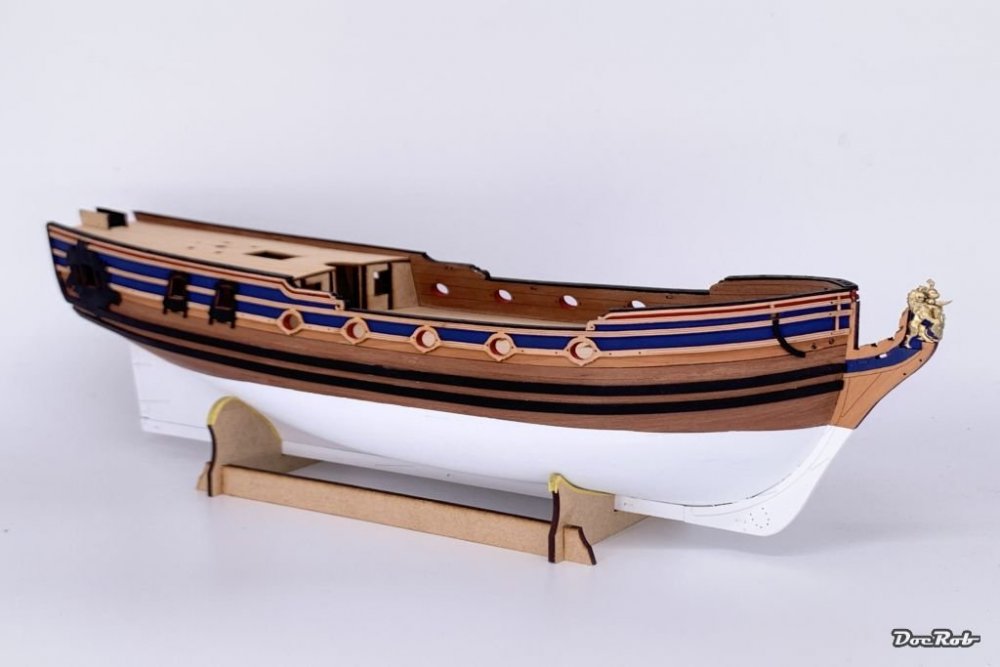
Today I found the courage to add the two black strips (main wales) to the hull, a task, I dreaded, because there was so much potential to smear glue on the finished hull. The pieces come pre cut and fit like a glove lengthwise. The upper one fits into a nook in the back window decoration, which defines the distance to the bulwark pattern, like the manual claimed correctly at 10,5 mm. I cut some spacers of the size from plank residues and added them to the hull sides with tiny bits of blue tack. My precise cutter came in handy for the task. Then I glued the wale in position, using CA and that proved to be quite demanding. I glued in four steps and found the twisting in the bow area hard to compensate, pushing on the wale with my fingers until they got numb. As a security, I pushed in some brass nails, where I painted the heads black afterwards. I cut spacers again, this time three millimeter wide and used small cuts of tape to glue them to the finished upper wale. Then I glued on the second wale, which needed to be shortened at the stern. On the other side of the hull, I repeated the procedure, but found out, that the wood would fit more easily in the problematic bow area, when I twist it between my fingers centimeter by centimeter, which seems to soften the composure of the wood a bit and made it way easier to lay it flat to the hull. That's where I ended up, without causing bigger damage. I sanded the stern endings of the wales to fit and puttied a wee bit, where they lay on the hull. I touched up the sanded and filled parts along the pin heads and some imperfections on the gunwales. The figurehead is only loosely added for vanity reasons Cheers Rob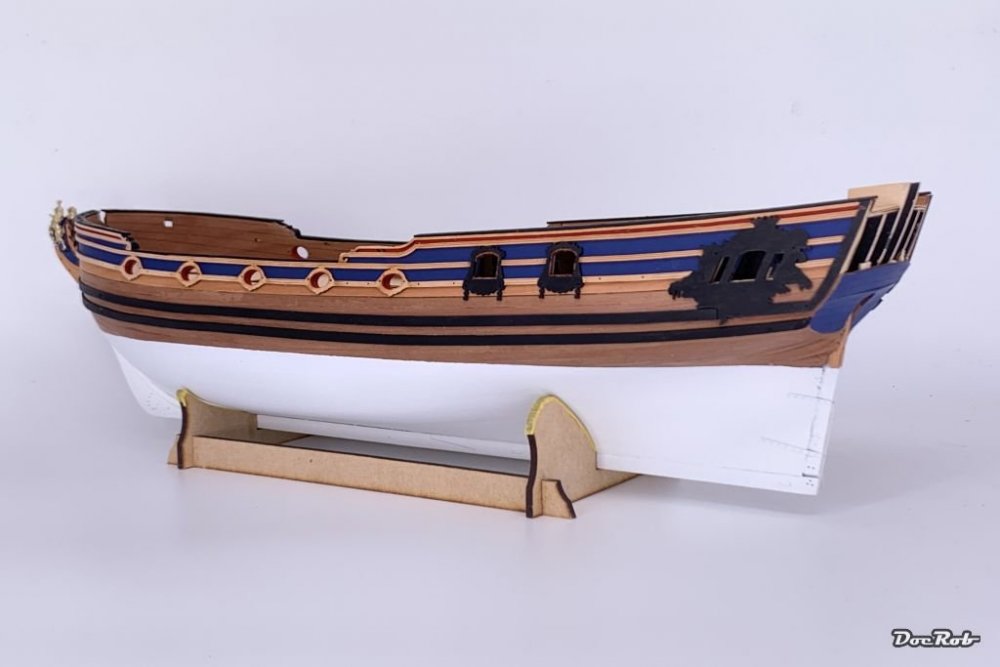


-
Duchess of Kingston - Beauty of the Seas - Wooden Sailing Ship 1/64
DocRob replied to DocRob's topic in Non LSM 'WIP
Thank you Gary, it was an eye straining task and due to the very thin character of the paint, there are some touch ups left to do. Cheers Rob P.S. Here is a stern mock up without the window frames.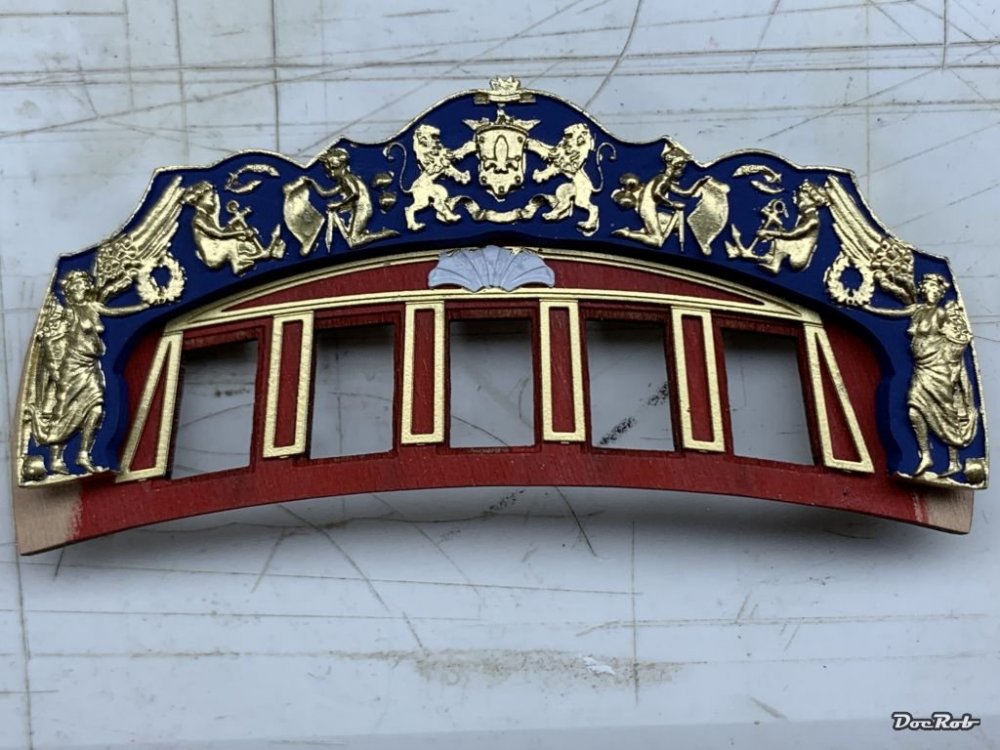
-
Duchess of Kingston - Beauty of the Seas - Wooden Sailing Ship 1/64
DocRob replied to DocRob's topic in Non LSM 'WIP
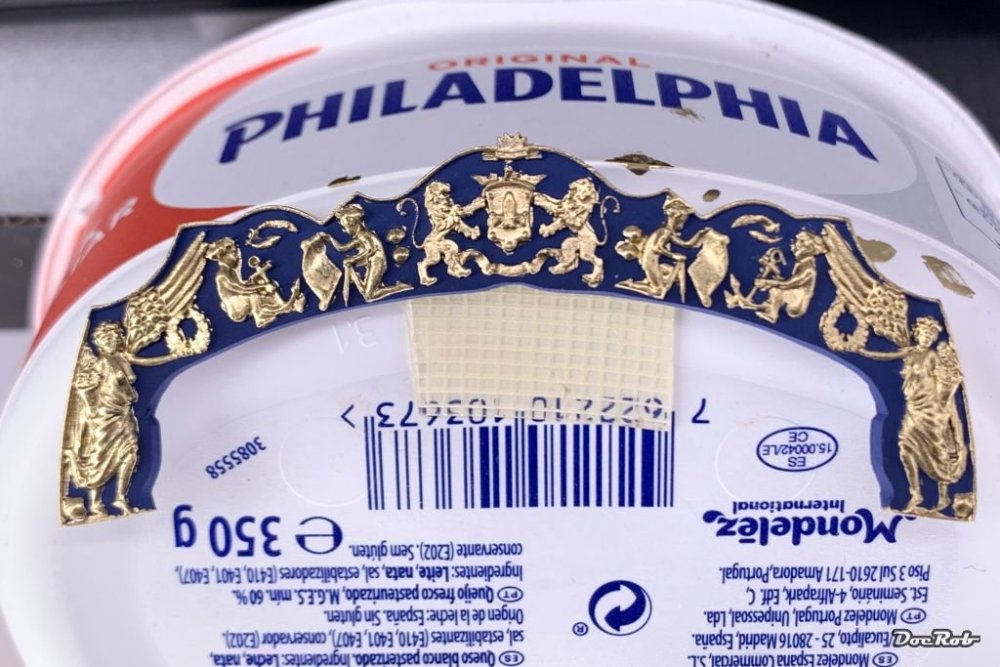
Thank you Hubert, why not 'Philadelphia', by the time Elisabeth Chudleigh christened the ship to 'Duchess of Kingston' she wasn't the Duchess of Kingston anymore as her dead 'husband', the Duke of Kingston, officially was not anymore her husband, due to a bigamy verdict (Elisabeth married another man very young, but didn't accept the marriage as legal, later) in England. The ship's name was a kind of retaliation to the process, which Elisabeth felt injustice and alienated her to her mother country. Only to be exact about the color, it's this one among the many Vallejo colors. It can be thinned with alcohol (white spirit), but this was not necessary in my case. I followed the recommendations to use a synthetic brush and to decant what I needed from the jar. Cheers Rob
-
Duchess of Kingston - Beauty of the Seas - Wooden Sailing Ship 1/64
DocRob replied to DocRob's topic in Non LSM 'WIP
Muchas gracias, this gold color is my new go to for shining gold, you could paint an Oscar with it or some fake gold ingots in Fort Knox. It's even more shiny, than it looks in the pics. It is very thin and you have to be careful, while painting. Some people claimed, that it's very hard to use, but I found that not true. I used a synthetic brush, not too small, to hold some color, but with a good tip for details. I have to make some touchups with the blue base color, but I like the result. The Vallejo liquid gold was mentioned in the manual by Chris (and James), another hint of the quality of it mentioning even the best chosen colors. I tested all my stashed gold colors before and found none, which was good to hand brush and to airbrush sufficiently and the worst of all, was Tamiya's gold leave, where the pigments are as big as some details on my stern decoration. Cheers Rob -
WNW Fokker D.VllF Ukrainian Galician Army 1919
DocRob replied to Clunkmeister's topic in Everything Ukraine Group Build
Nice Ernie, a bit scuffed, which is beautifully rendered. I wasn't aware, that the IP is so oversized for just the two instruments and some levers on the Fokker. Cheers Rob -
Beautiful rendition of that aggressive looking snake. The OD came out great, near matte with just a little bit of shine. It looks like the killer bee it was. Cheers Rob
-
Duchess of Kingston - Beauty of the Seas - Wooden Sailing Ship 1/64
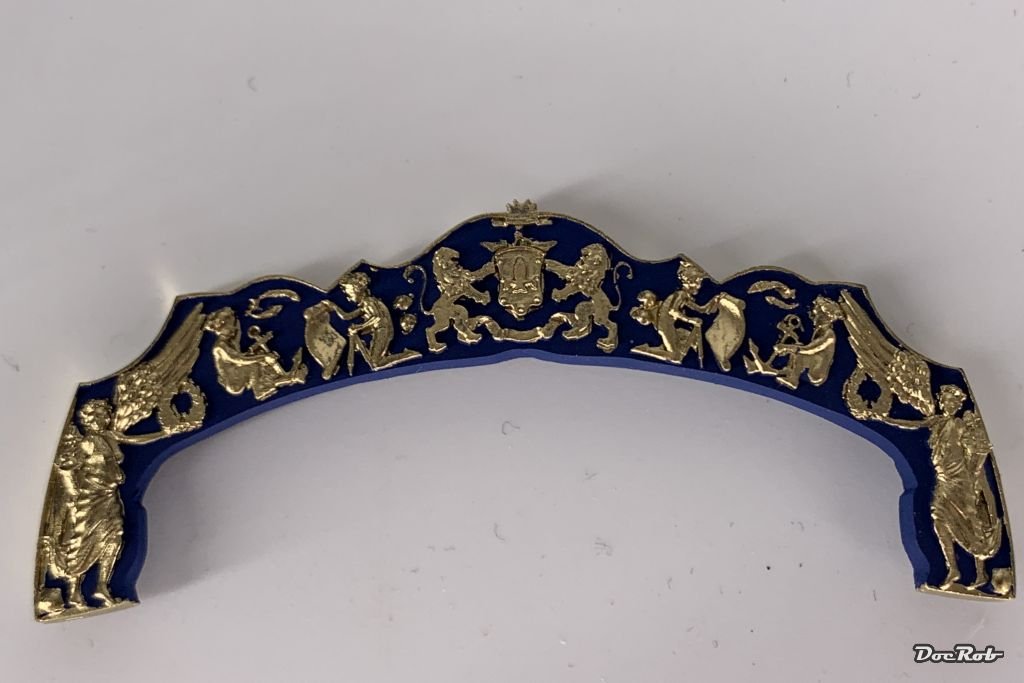
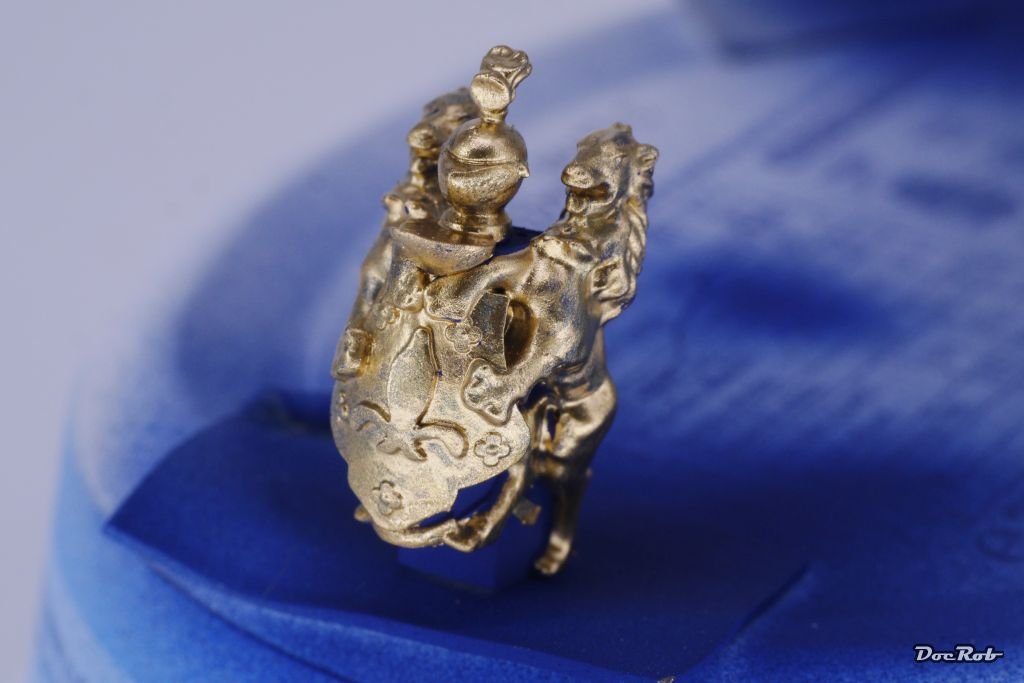
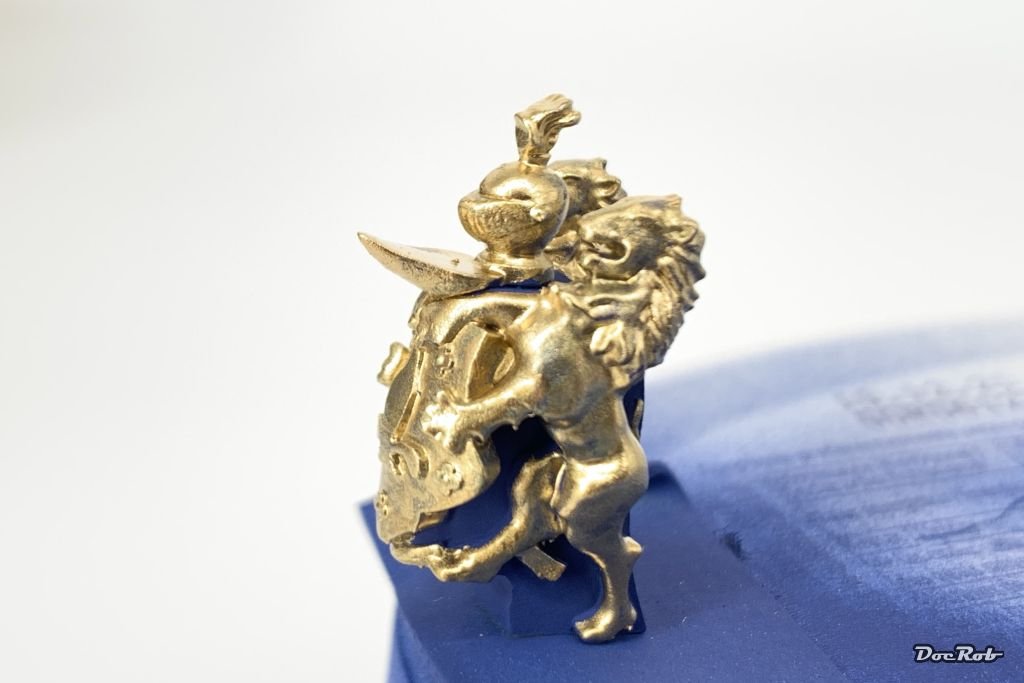
DocRob replied to DocRob's topic in Non LSM 'WIP
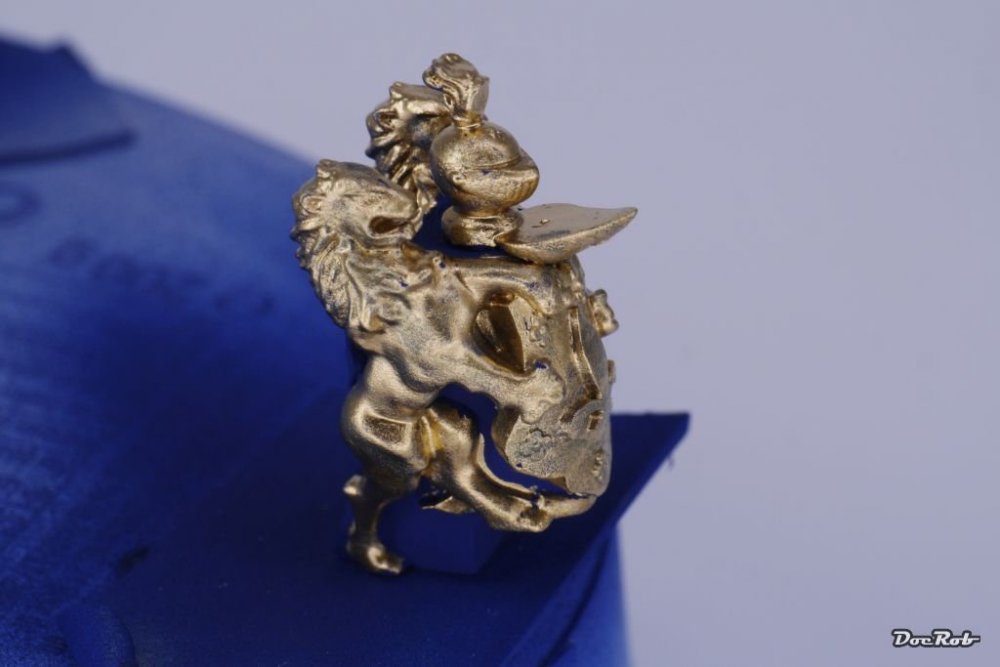
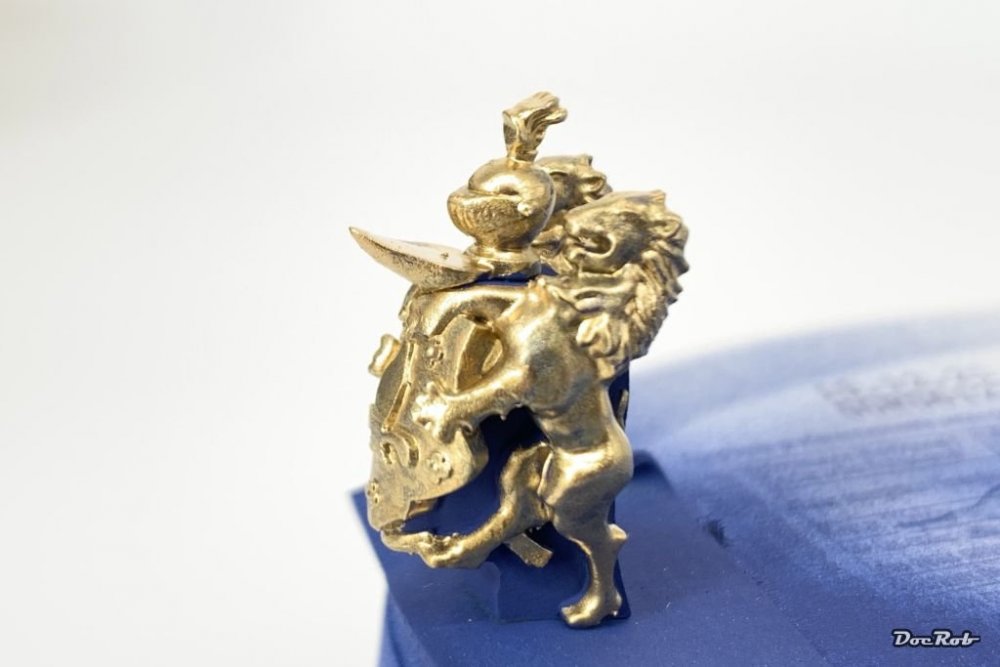
Gold, gold, gold,... Today was a, you probably guessed it, golden day. I sprayed all the golden PE-decorations and then painted the figurehead and stern decoration. Vallejo's liquid gold are exactly this. It's a phenomenal color and can be brush painted and airbrushed. There is no grain and the reflectiveness is unbelivable. Even harder than detail painting is taking pictures of golden objects, which look very different with only slightly varying lighting conditions. Figurehead Stern decoration ...and PE Cheers Rob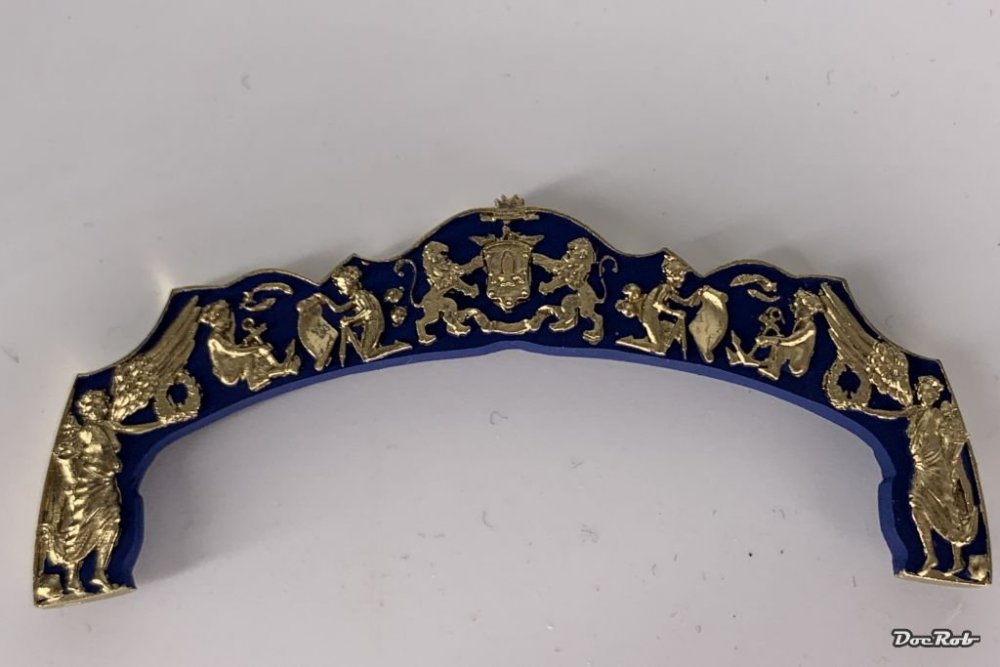


-
Trumpeter F4F-3 Late - 1/32nd
DocRob replied to Bomber_County's topic in LSM 1/35 and Larger Work In Progress
I can't see anything painful on the pic, Phil. The flaps look great. Once you mastered them, you forget the torturous work and have achieved something special. Cheers Rob -
Ernie, in case you haven't noticed, there is the wrong manual lying under your bird. Will this become a FokMug in the end? Cheers Rob
-
Very nice and fast build, Carl, makes me almost want to start mine . Cheers Rob
-
Te engine looks very nice. These 3D printed ones are really hard to paint, you mastered that beautifully. Cheers Rob
-
Duchess of Kingston - Beauty of the Seas - Wooden Sailing Ship 1/64
DocRob replied to DocRob's topic in Non LSM 'WIP
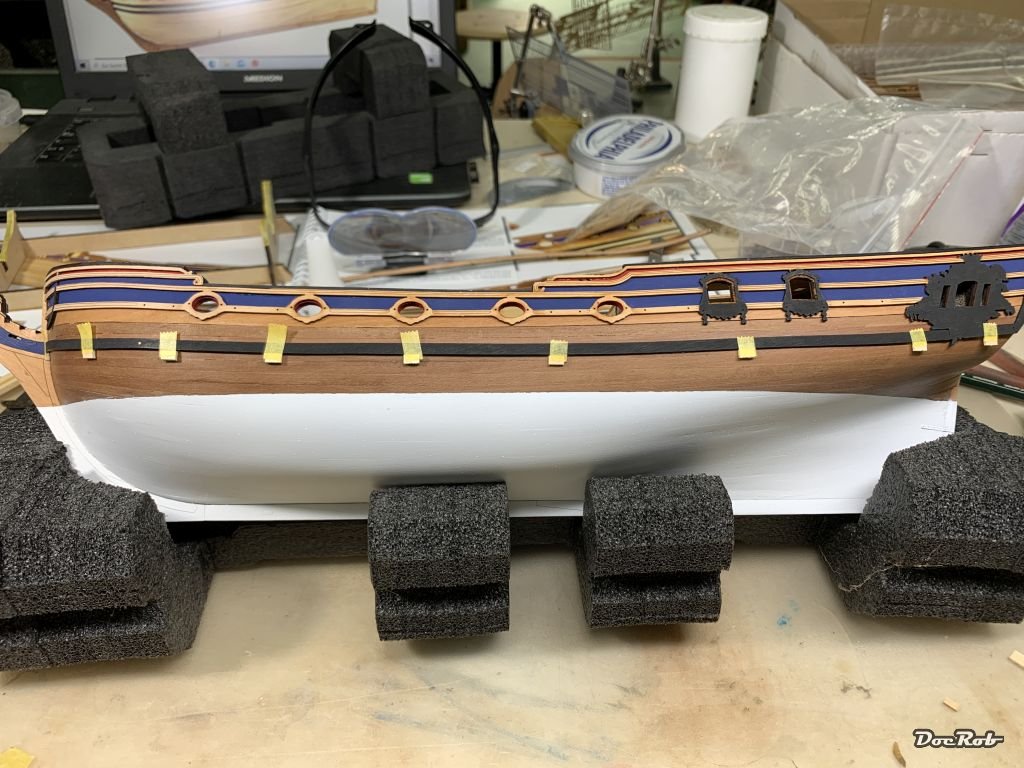
Some more color onto the hull. After marking the waterline, I masked off the whole ship, to avoid overspray and primed with light gray Mr. Surfacer 1200. Then I sprayed on some coats of Tamiya XF-flat white and carefully removed the masking, as I prefer to do so, when the color hasn't completely dried. The same procedure was used for the rudder and the opulent PE sheets, which will later be masked and painted red occasionally and more so in gold color. Cheers Rob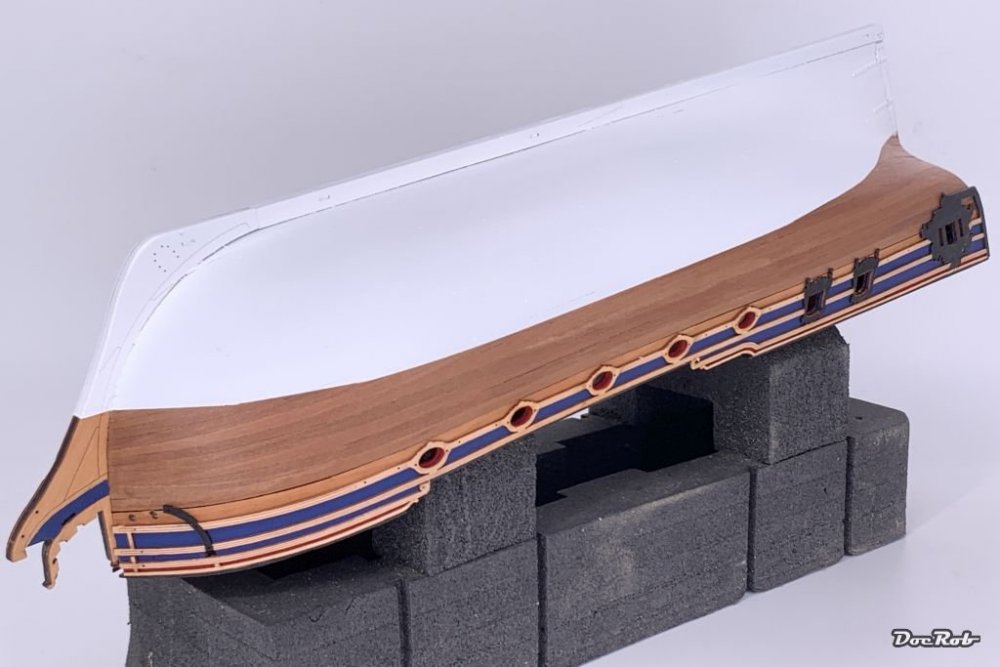
-
Duchess of Kingston - Beauty of the Seas - Wooden Sailing Ship 1/64
DocRob replied to DocRob's topic in Non LSM 'WIP
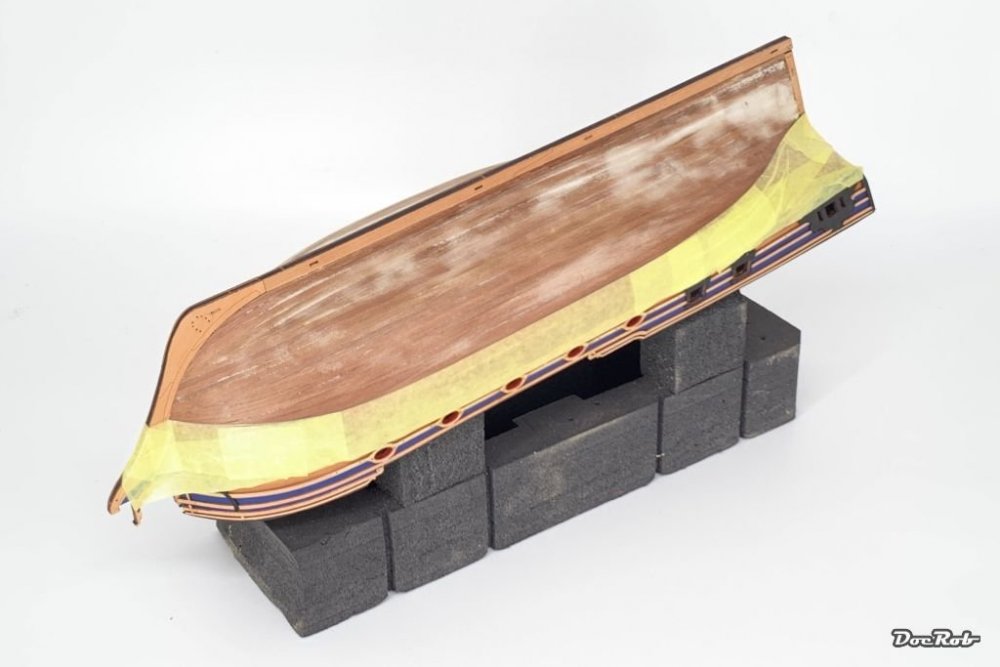
Slight change of plans, following the manual, next would have been adding two black wales on each side to the hull. I pre-bended these, but as I saw, how close they were to the waterline, I decided to first paint the underwater area of the hull in matte white, after priming. I again marked the waterline with a pencil and used Kabuki tape for demarcation. As the rudder has an underwater area, painted white , as the hull, I prepared the rudder with PE fittings, which were pinned to fit with tiny brass nails. The fit again was exceptional with the pre drilled holes to the etched fittings. You can see the pencil marked waterline on the side. Cheers Rob
-
Phew, this kit seems to be a lot of extra work, I admire your patience. This along with the Hustler are fantastic (in the words sense) airframes, which inspired my thoughts in their time, design wise and technically. Please keep on fighting the plastic, for a great result Bill. Cheers Rob
-
Very nice sharp edged camo Phil, not easy to achieve with that masking putty. When I use it, it always flows over time and ruins the hard edges. I use it only on flat objects anymore and try to keep it cold. Cheers Rob