DocRob
-
Posts
7,048 -
Joined
-
Last visited
Content Type
Profiles
Forums
Events
Gallery
Everything posted by DocRob
-
Whatever a 'D' is, it seems, that you are not very fond of your build and I don't understand why. I like the paintjob a lot and the way, the figures interact, make the scene believable and interesting. Cheers Rob
-

My finished models this year, 2020 in review.
DocRob replied to 1to1scale's topic in Modelling Discussion
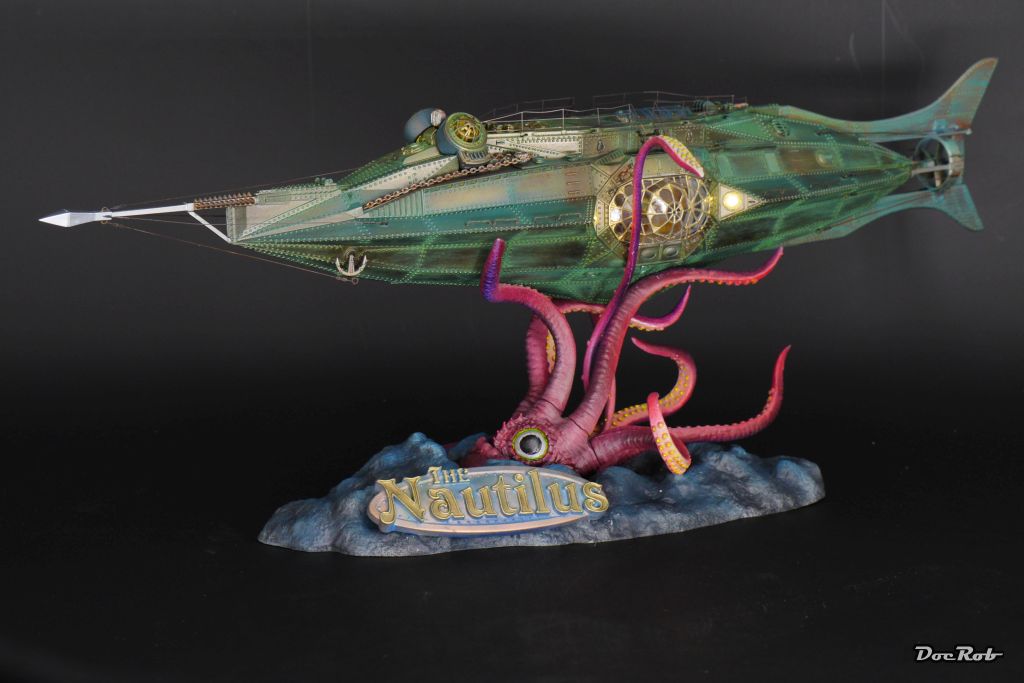
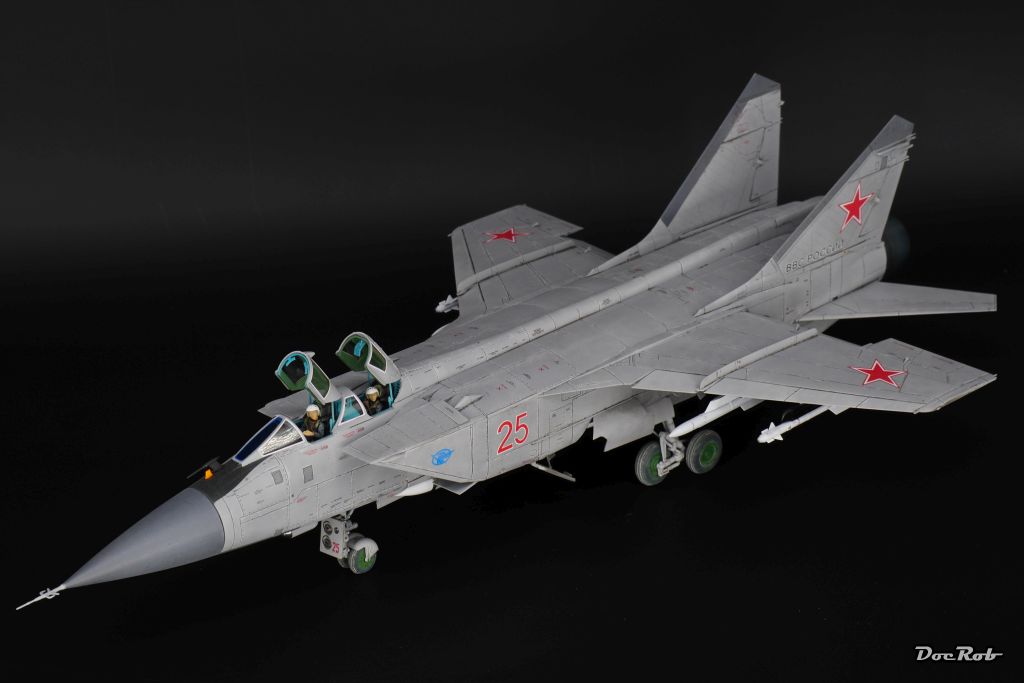
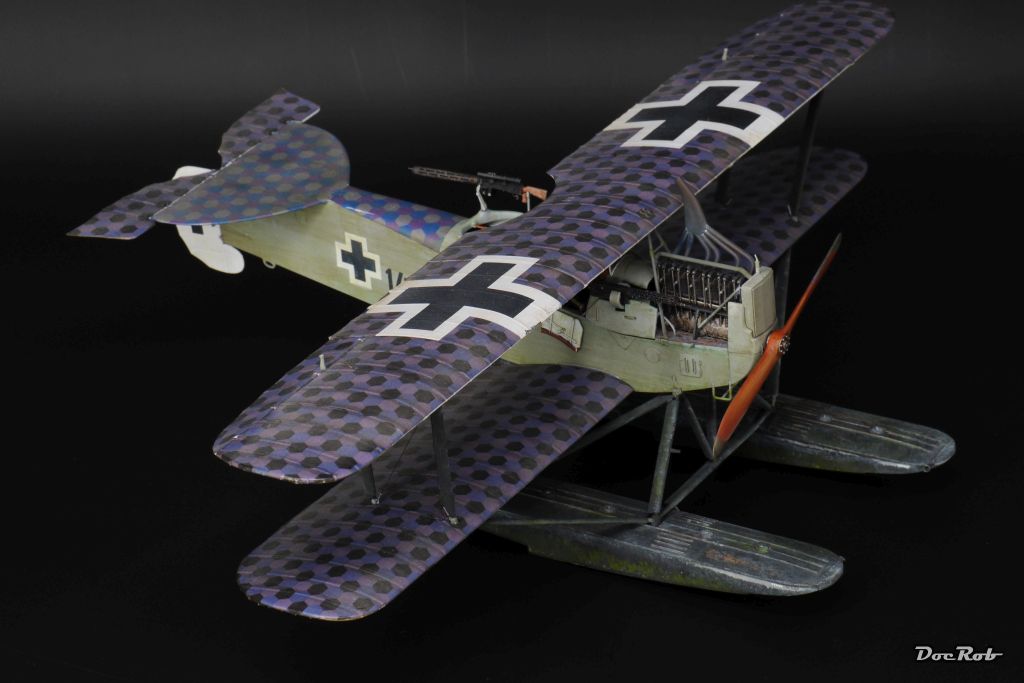
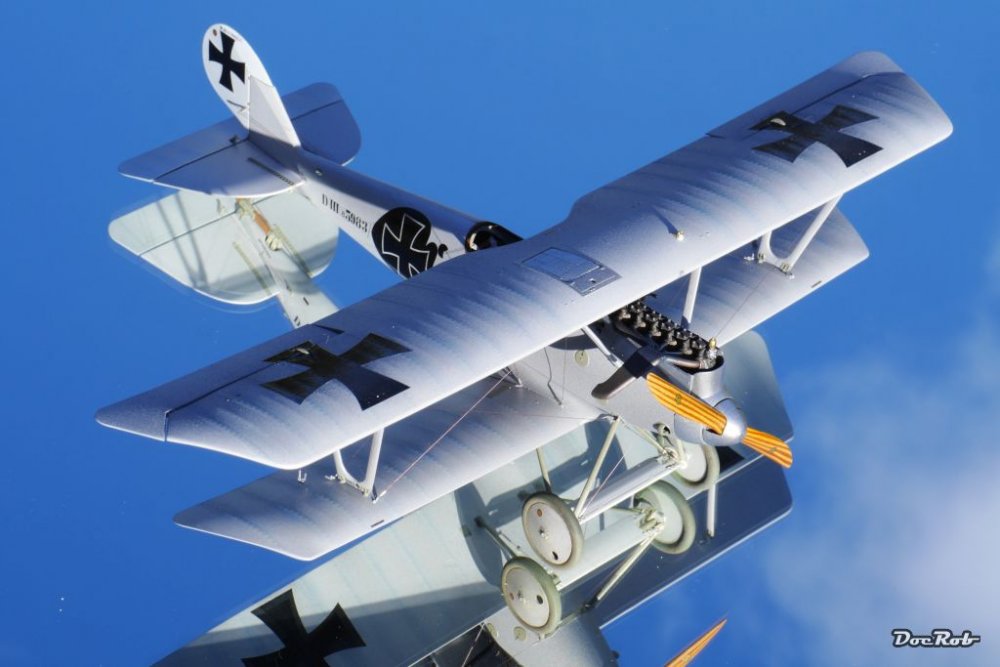
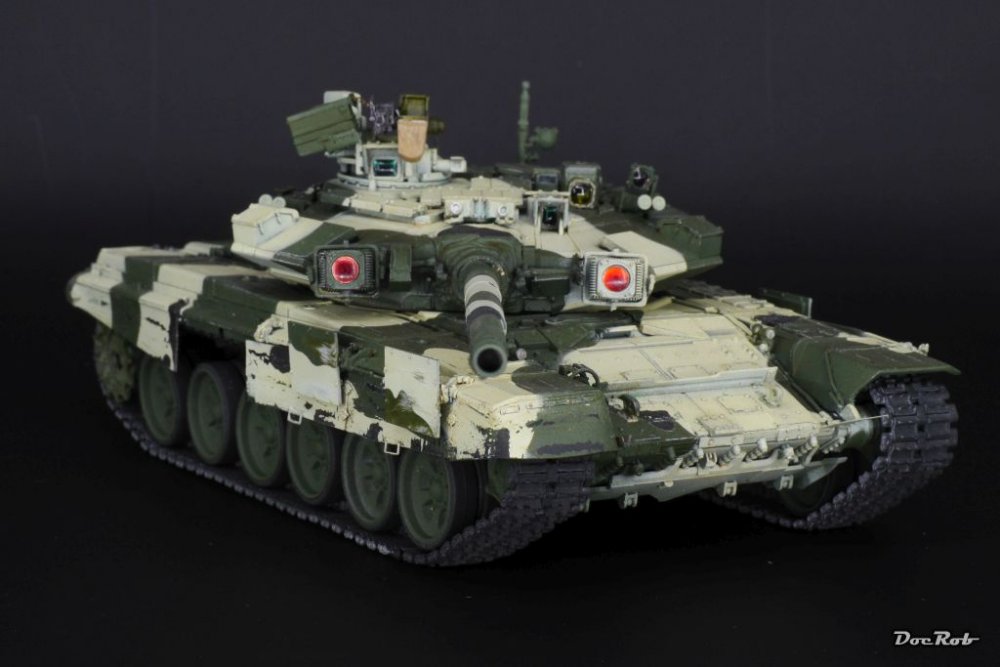
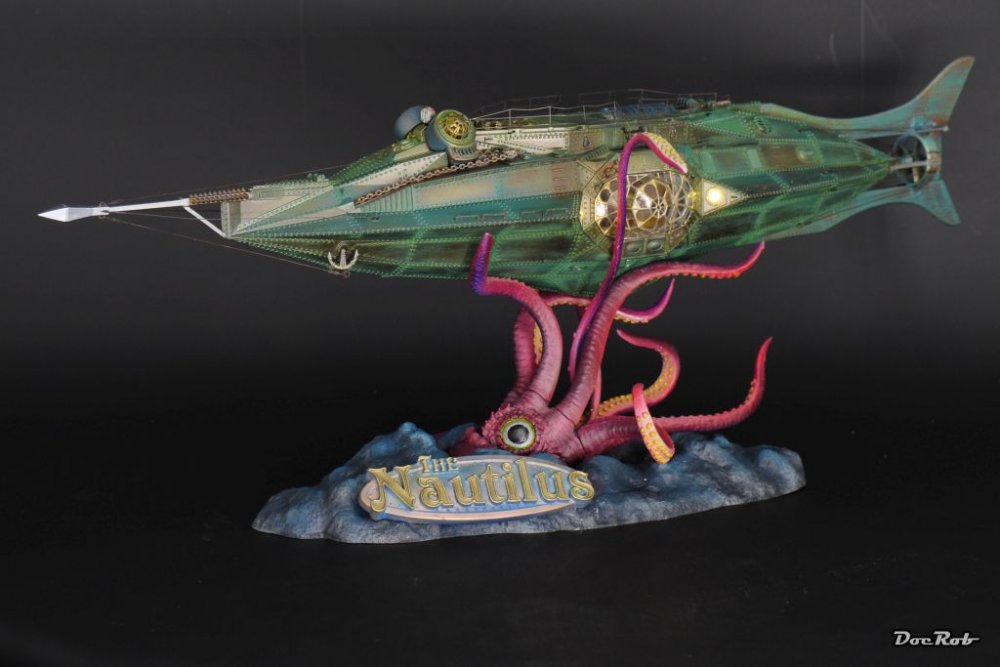
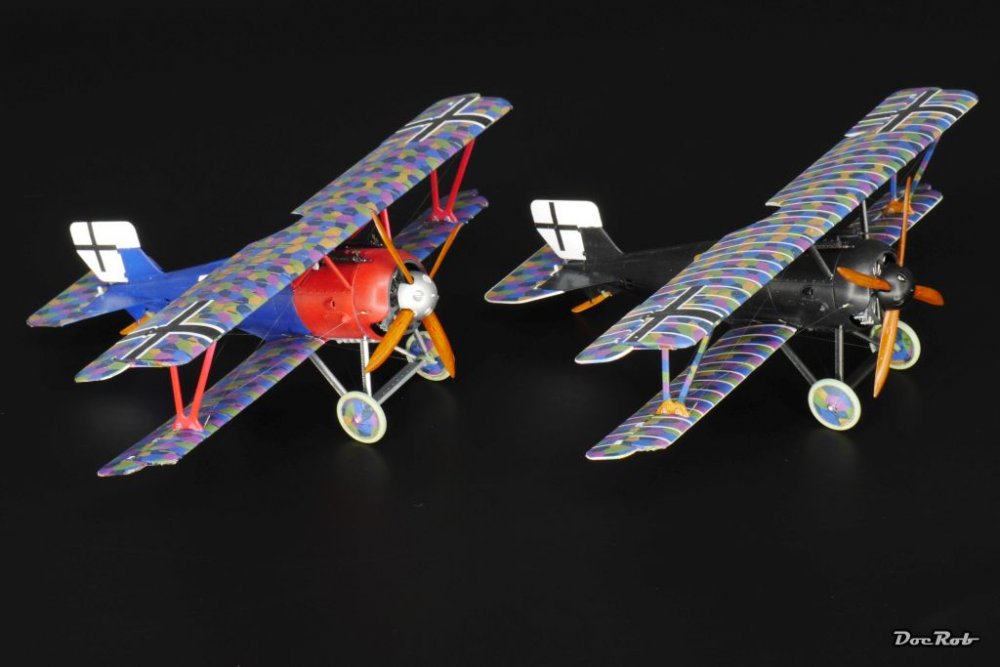
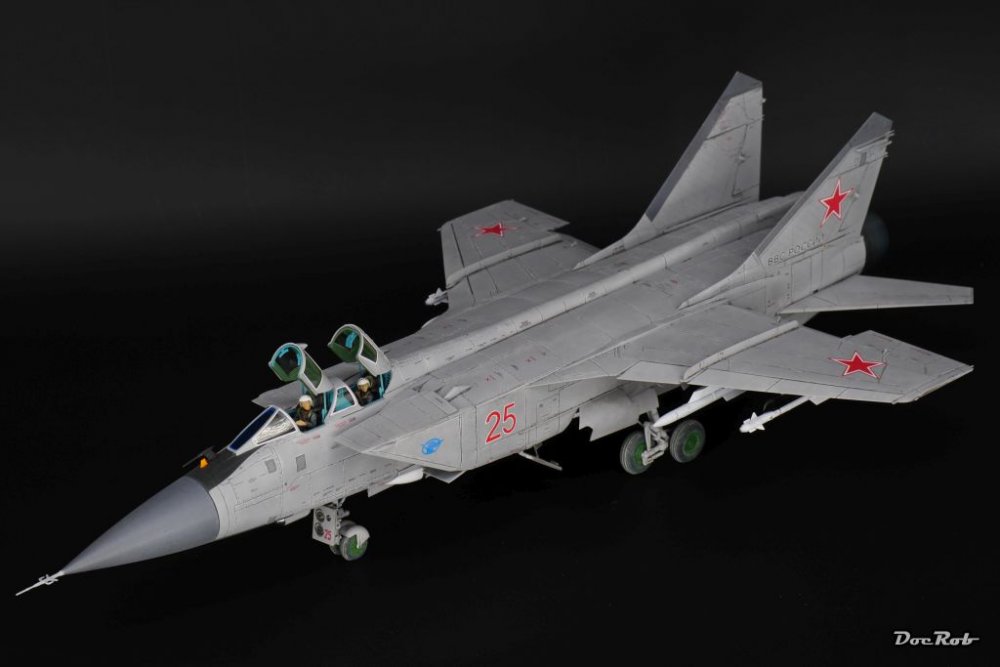
My 2020 output was not bad quantity wise. I'm usually not a fast builder and to me it was a year full of distractions. Beside the finished models, I spent lots of time on other long term projects, which had some progress to show for and maybe some RFI to follow soon. I learned many new techniques this year, throwing me purposely into projects, which needed to adapt lots of new stuff and broadened my modelling skills more than other years. You will notice, that I'm biased a little towards WWI planes in the moment, but I like the variety in my output this year. Not all the builds were LS and quality wise you will be the judge... Cheers Rob T-90 from Meng Pfalz D.III Wingnut Wings Nautilus in 1/144 from Pegasus My Eduard SSW twins in 1/48 AMK Mig-31 in 1/48 Hansa Brandenburg W.12 Wingnut Wings Lada Niva 1/35 from Balaton Models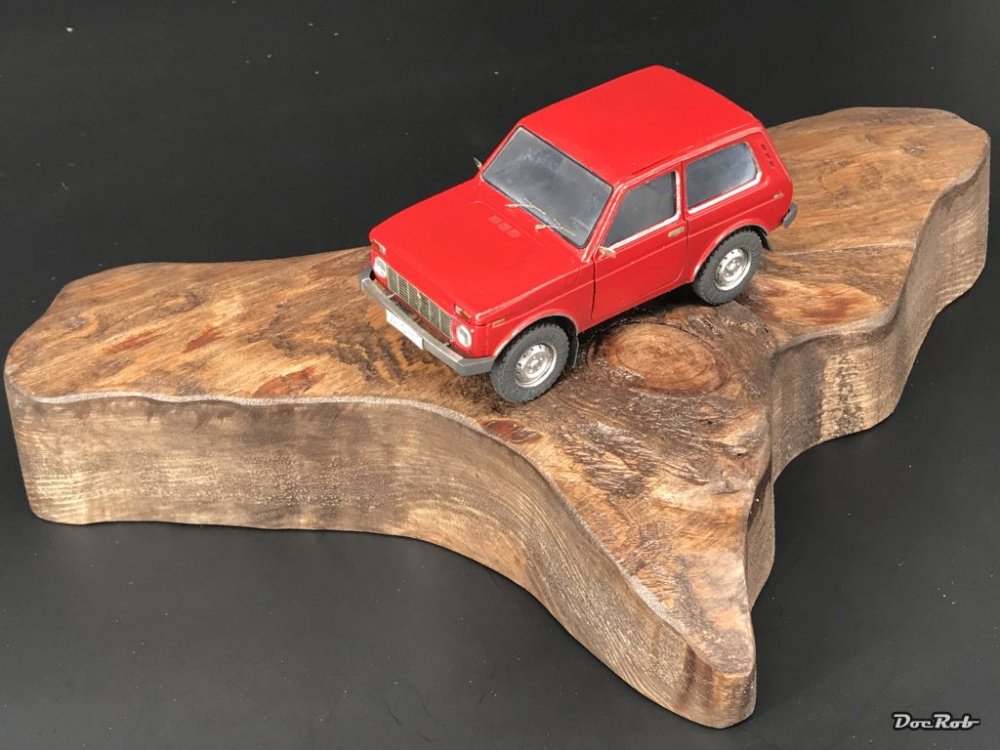
- 9 replies
-
- 11
-

-

-
My finished models this year, 2020 in review.
DocRob replied to 1to1scale's topic in Modelling Discussion
Quality builds all around, but I have to say, I like the Mig best, which had a wird painting phase, hen I remember it right. Nice output in a crazy year. Cheers Rob -
PCM Focke Wulf FW 190 A-1/A-2/A-3
DocRob replied to GazzaS's topic in LSM 1/35 and Larger Work In Progress
Thank you Gaz, that's priceless, I never heard about this method before. Our dental care will be in jeopardy now, I know about this . Your method seems easier controllable, than to work with grinding bits on a micro drill, where it is so easy to ruin the surrounding areas and I always found it hard to work with, without having a melting effect on the plastic, even with the lowest rpm setting. Cheers Rob -
1:32nd scale Nieuport 28C.1
DocRob replied to sandbagger's topic in LSM 1/32 and Larger Aircraft Ready for Inspection
An interesting and different looking plane. The psychedelic cowling is an eye catcher and the relaxed fellow leaning on it adds to the atmosphere of the scene. Cheers Rob -
1/32 Revell Fw190 F8 converted to G8
DocRob replied to AlanG's topic in LSM 1/35 and Larger Work In Progress
The engine looks great, love the exhaust colour and the wires. Cheers Rob -
Nice work. It's a sweet little kit and I like, what you have done with it. To me the best thing on the kit itself is the resin figure. I will try some new painting techniques on this big scale guy. Cheers Rob
-
PCM Focke Wulf FW 190 A-1/A-2/A-3
DocRob replied to GazzaS's topic in LSM 1/35 and Larger Work In Progress
Nice engineering on the Würger, I mean your work, not the plastic . I have to build one in the near future, I have only a TA-152 to show for, which is partly untrue, because I gave it to a friend. Could you enlighten us, how your electric toothbrush sanding device works, as a tool nerd, I really like to know. Cheers Rob -
Nice progress with the pit Harv. Cheers Rob
-
Are you sure about the dark colour of the bombs. I haven't done any research, but found some pics of a Gotha G.V in night Lozenge with a light colour (looks like grey) for the bombs. Cheers Rob
-
Merry Christmas Amigos, we were surfing yesterday in brutal storm waves. Not much fun, but very exhausting and gave the right appetite for a BIG fondue. Cheers Rob
-
Nice and sandy look, well done, sometimes there is a lot of fun in these little projects. Cheers Rob
-
Fokker E.V / D.VIII Parasol Mikro Mir 1/32
DocRob replied to DocRob's topic in LSM 1/35 and Larger Work In Progress
Thanks Gaz, Albion has the so called slide-fit sets, with three tubes of different diameter included, that's a good way to start, as you don't need a lot of tube for some wheelstruts. I took the measurements from the plastic. The larger struts are 2,00 mm wide in plastic, which equals to a 1,5 mm tube flattened. Thanks Kai? I think the struts on a DR.I are way stronger and shorter in plastic and there is no real need to replicate these in brass. If I remember it right, the DR.I struts have a curved conture, where they connect to the wing. This will be hard to replicate. Thanks, definitely a kit, which needs some extra work here and there . Cheers Rob -
Oh, I found a small box with intriguing box art in my stash. It's a 2020 release and has to be mentioned here, albeit it is in 1/72 It's the Grumman FM-2 Wildcat from Arma Hobby, a well designed kit, with masks and PE in the box, amongst several decal variants. Cheers Rob
-
1:32 scale Ansaldo A.1 'Balilla'
DocRob replied to sandbagger's topic in LSM 1/35 and Larger Work In Progress
Wow, looking great, like Harv, I especially like the worn look of the leather on the seat. Cheers Rob -
Fokker E.V / D.VIII Parasol Mikro Mir 1/32
DocRob replied to DocRob's topic in LSM 1/35 and Larger Work In Progress
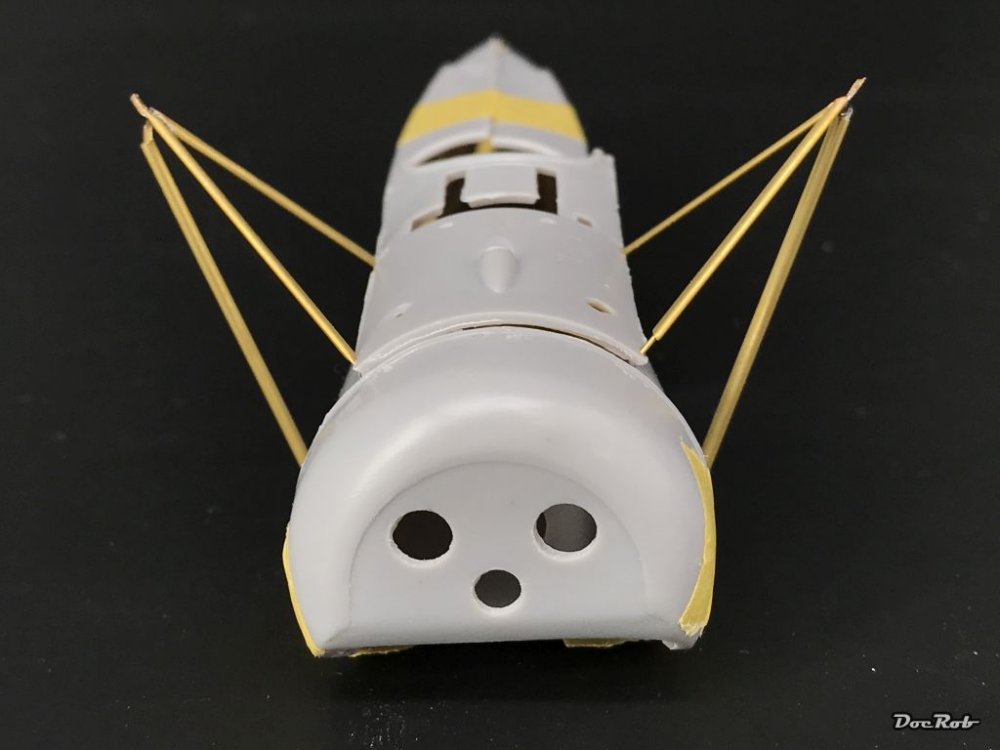
De nada Señhor, and yes, I had to have the solution for the struts first and then get everything started. The results are rewarding and the way I realized it, will help to solve another problem area on the Fokker. The side panels of the fuselage are bended inward, where they meet the upper front part of the fuselage. As I drilled the holes for the strut attachments into the side fuselage panels, the struts will help to bend these fuselage parts in shape. Only dry fitted Cheers Rob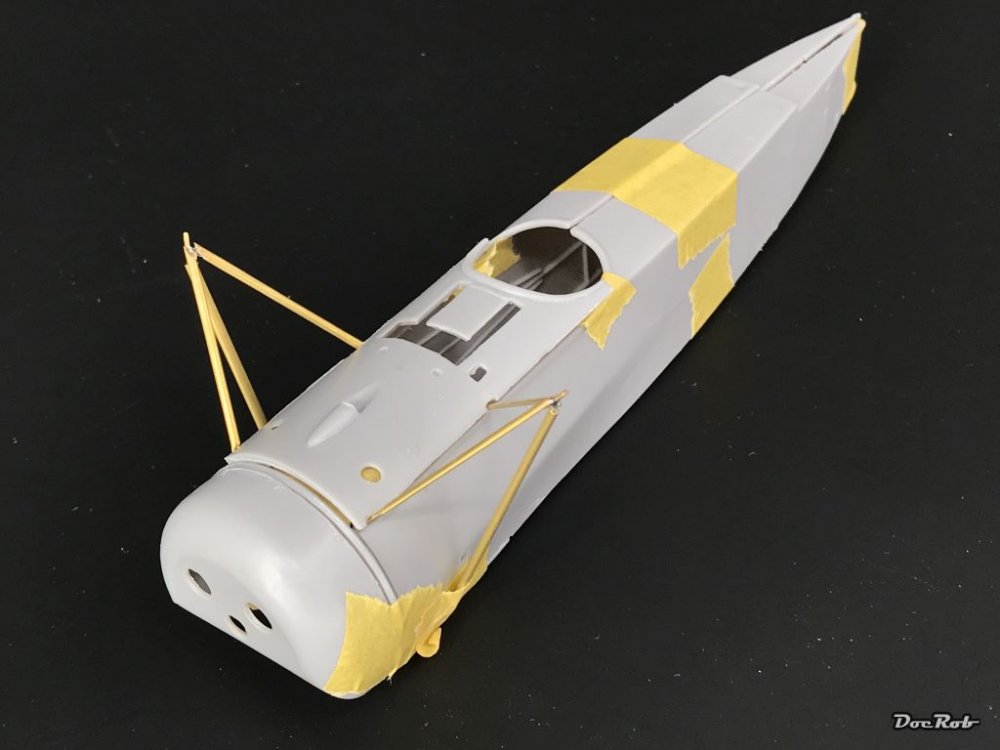
-
Fokker E.V / D.VIII Parasol Mikro Mir 1/32
DocRob replied to DocRob's topic in LSM 1/35 and Larger Work In Progress
More or less , but Im sure, this kind of kit will throw some other obstacles at me, without me expecting them. Cheers Rob -
Fokker E.V / D.VIII Parasol Mikro Mir 1/32
DocRob replied to DocRob's topic in LSM 1/35 and Larger Work In Progress
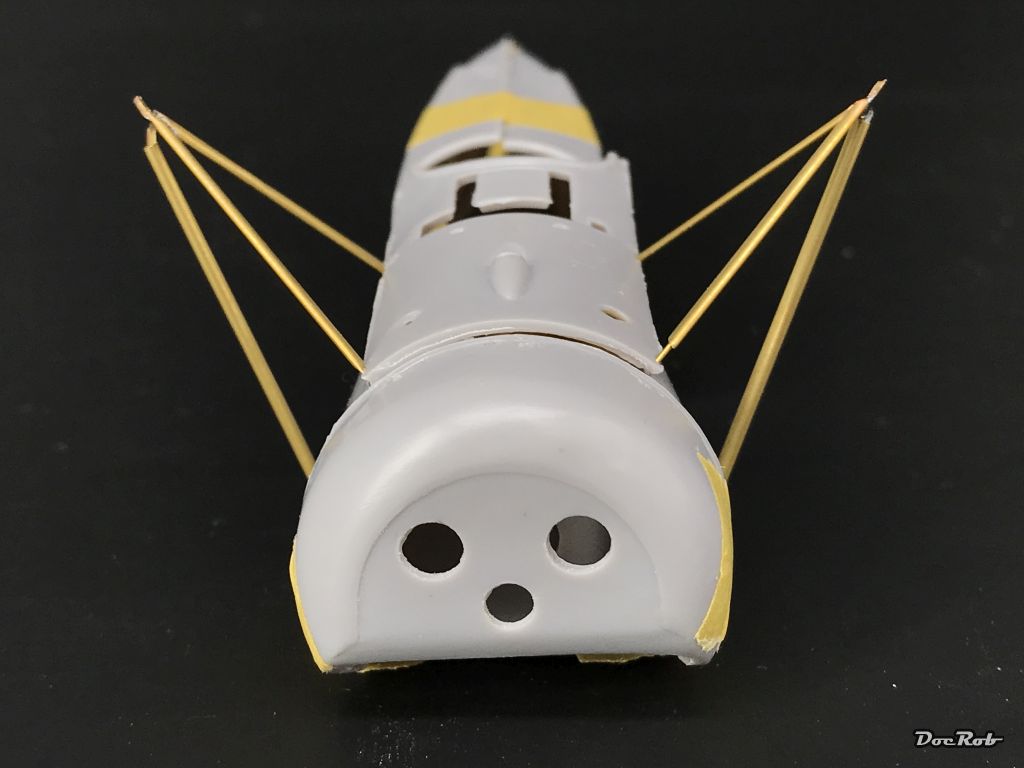
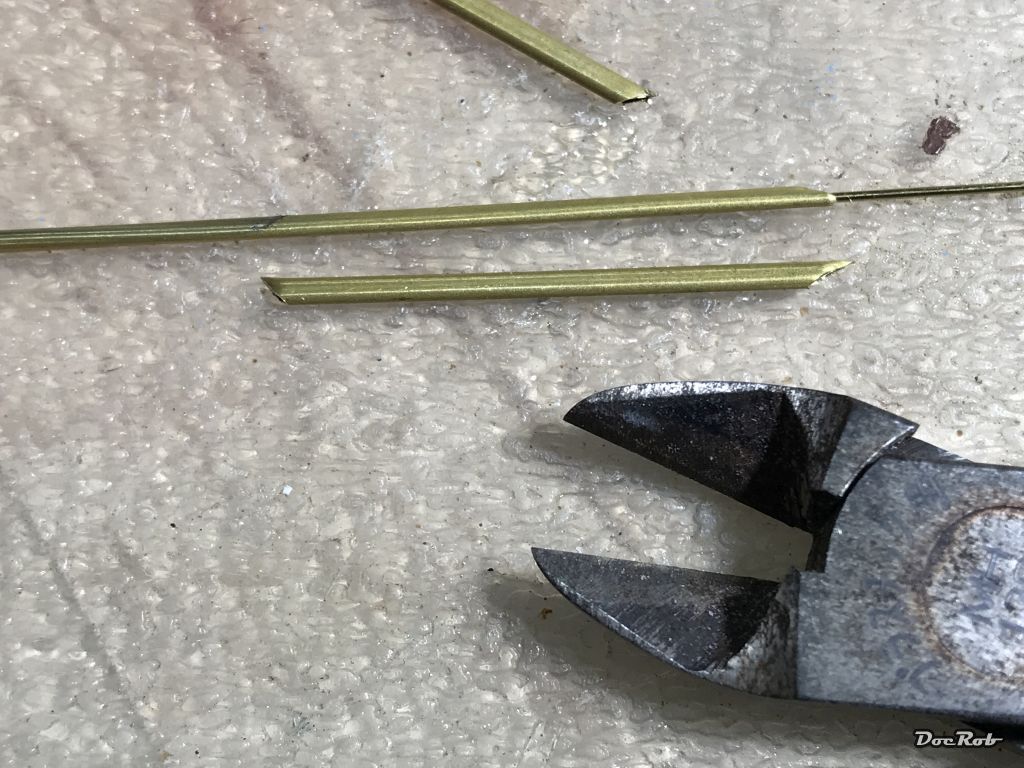
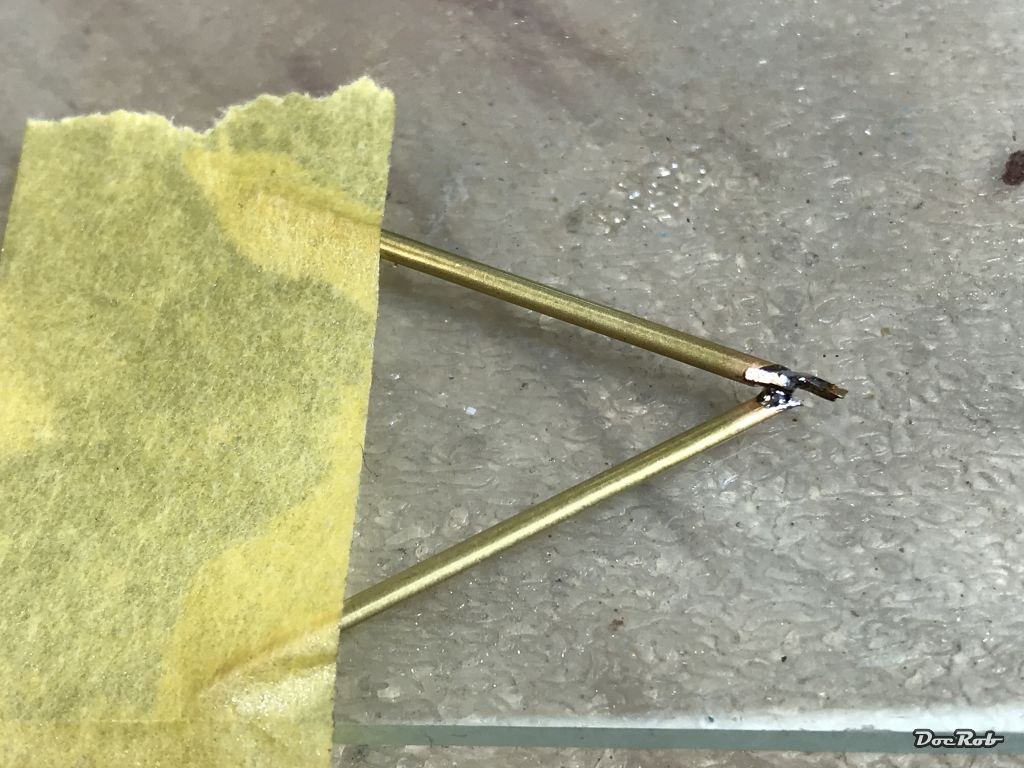
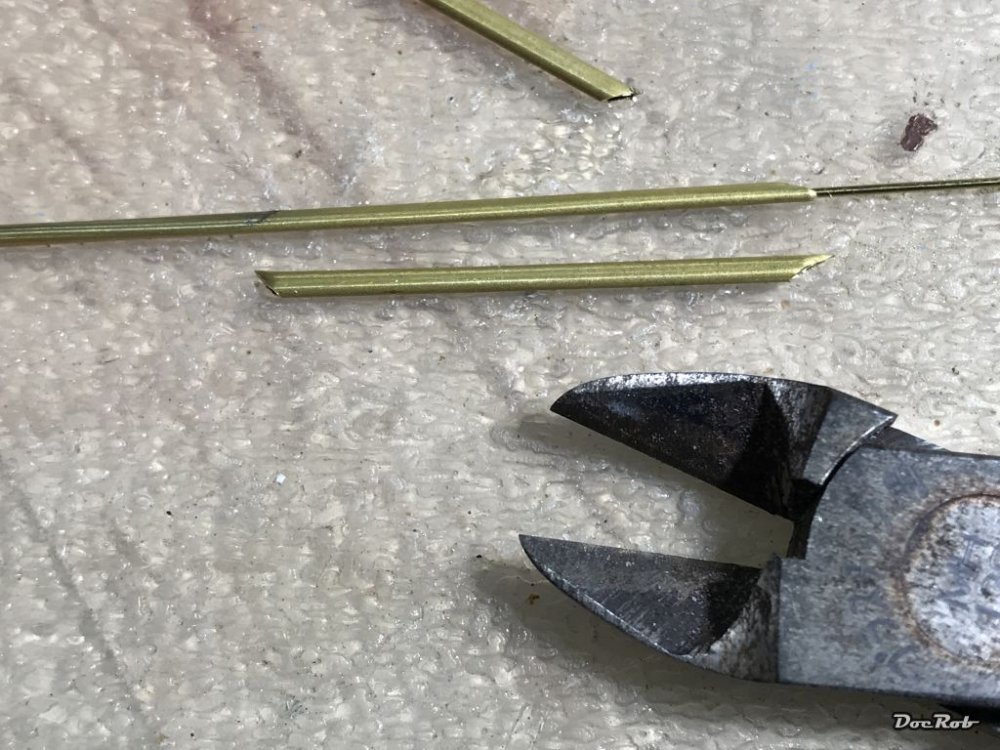
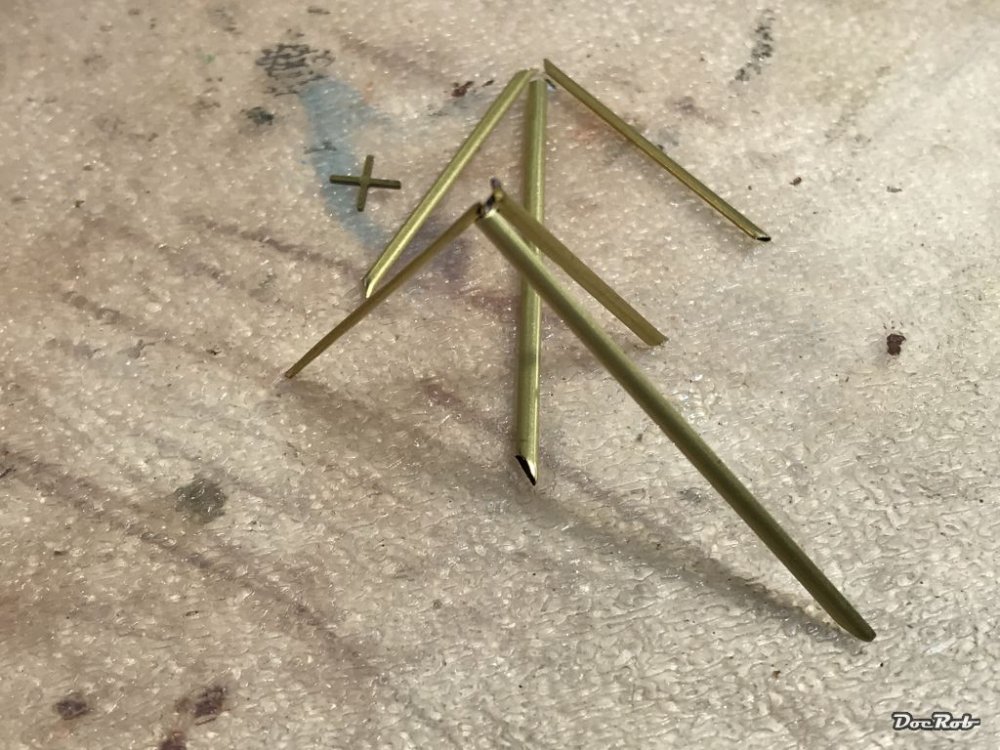
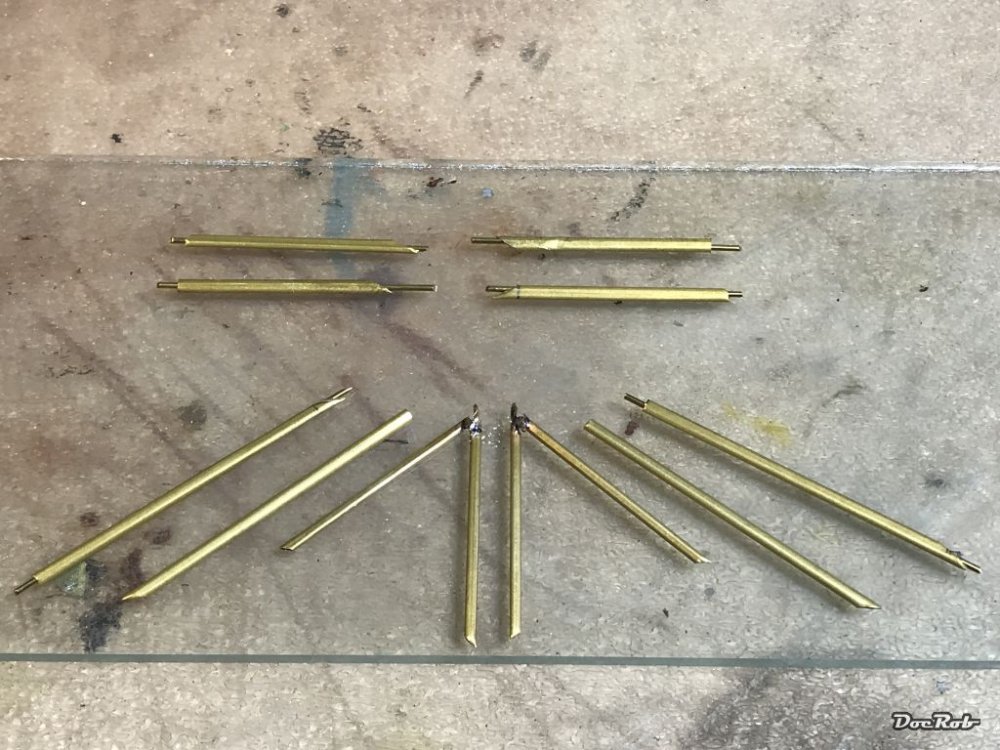
The upfront coward I am, I started with my most feared parts of the build, besides the fuselage fit, the struts. I decided to substitute all by self made brass ones in two different sizes. I wanted an elliptical shape of the tubes and used wooden brackets in a wise to flatten the tubes, which worked to my satisfaction. To avoid flattening the tubes completely , I inserted brass rods into the tube. I manufactured two different sized type of raw strut from 1,5 mm tube with a 1 mm rod inserted for the wheel struts and the large wing struts and 1,2 mm tube with 0,5 mm rod for the smaller V-shaped struts. Normally I cut the tubes with a scalpel, which didn't work with the oval ones. As I had no superfine saw, I first used a file, but then tried my trusty Tamiya nipper, which worked good, as long as you insert some rod into the tube while cutting. The V-struts needed to be soldered and there will be another bigger third strut added later, when everything will be assembled to the fuselage. This construction needed a connection into four directions, two for the V, another for the larger main strut and one to fix the wing. I used Albion Connecto connectors which I bent in shape and then soldered in. These were the parts After soldering the V on a glass pane Here are all the pre manufactured brass parts. The inserted rods will be cut to length, while assembling and will be glued into pre drilled holes in the fuselage and wing. Cheers Rob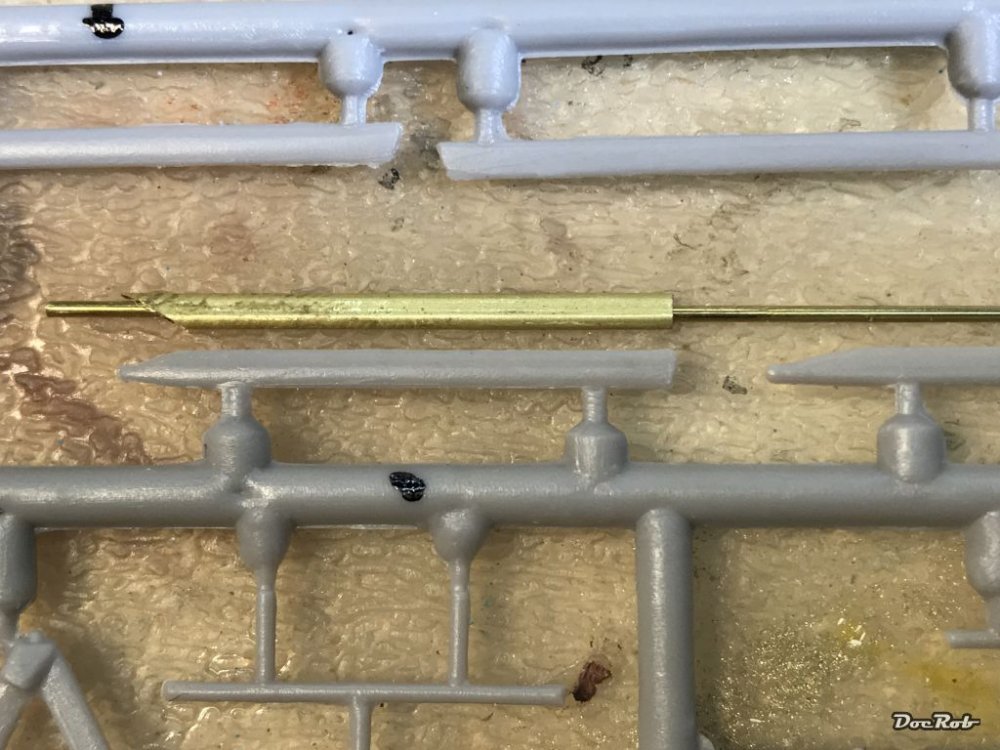

- 217 replies
-
- 11
-
-
-
Fokker E.V / D.VIII Parasol Mikro Mir 1/32
DocRob replied to DocRob's topic in LSM 1/35 and Larger Work In Progress
The initially problem with the Fokker E.V were not the wing struts, but the parasol wing itself, which collapsed midair on several occasions. That seemed to be caused, by bad coating of the wood, which led to water seeping in. Other sources claim, that there were changes in the wooden material itself and in the construction from the original plans. With the made changes, the plane got it's new designation D.VIII and the initial problems seem to have been solved. Thanks Harv Down the alley, it seems . Thanks mate Cheers Rob -
Don't build that crap and be lucky that the plane is not spinning around the engine on the cover . In earnest, you will like the kit, I hop, albeit there are some flaws in it. Cheers Rob
-
I second Ernie with the PZL. The only other highlight in 2020 was the repop of the AZ/Hippo Gotha G.V from Aviattic, which I count as a 2020 kit, because of the added goodies like included cookie cut night Lozenge and specially downsized bombs by Lukgraph. When I let my eye wander over my stash, I found only these kits as a 2020 release and after browsing Scalemates for 2020 kits, I have to say, there were not many great new kits this year . A special mention, alas I didn't got me one may ba the Me-108 Taifun by Eduard. Cheers Rob
-
Fokker E.V / D.VIII Parasol Mikro Mir 1/32
DocRob replied to DocRob's topic in LSM 1/35 and Larger Work In Progress
Good to have you with me. When time comes, I know, I will benefit from your knowledge . Until then, be my guest. Like Carl, it's one of my favorite planes of the era, at least among single engine fighter, so I hope, I can pull a reasonable result out of this build. Cheers Rob -
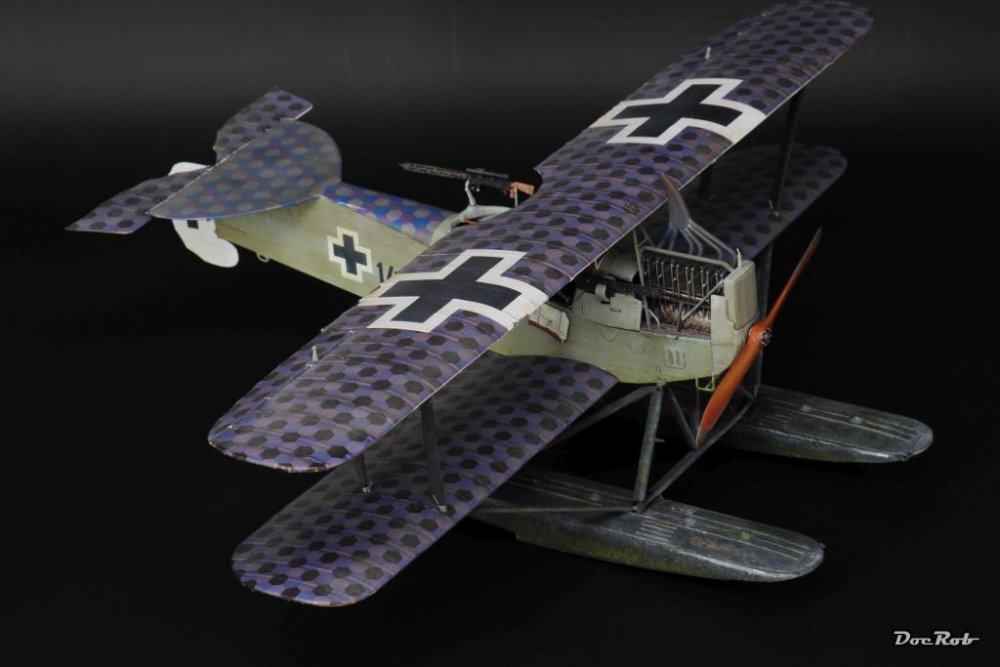
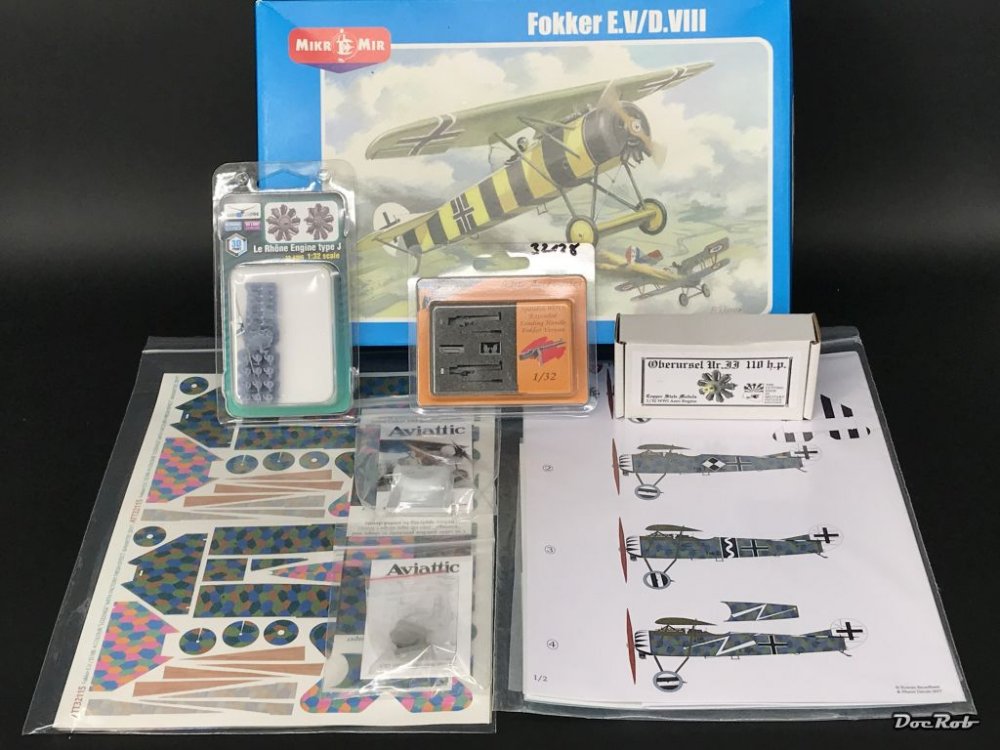
Ladies and Gentlemen, it's official, I will do a WIP about the Fokker E.V / D.VIII. It's a late WWI monoplane with a parasol wing design. I liked the sleek design of the Fokker and when I spotted the Mikro Mir kit, I decided, I have to build one in Lozenge finish. It took my some tries to find solutions for the biggest obstacles I saw, until I felt save enough, to call it seriously a project. I'm kind of an up front coward , when I evaluate a non Tamiya kit, I look for the most difficult steps in the build that I can see and only if I have the feeling, that I can solve these, I really start. In my evaluation phase there often goes a lot of effort in learning new techniques and prepare myself for whatever will thrown in my way. The kit plastic is not up to modern standards, there are flaws in the cast, flash and soft details, but what bothered me most, was the flimsy struts for the wings and undercarriage and the bad fitting fuselage. The benefit of the planes design, is that there is nearly no rigging to be done, but I would have changed some riggings for some better plastic, now that I have some routine. I will use a lot of AM: - Lukgraph Le Rhone engine or CSM Oberursel, depending which fits better under the cowling. - Aviattic engine cowling - Aviattic pilot seat - Aviattic PE-set for the firewall, engine hatch and other details - Some Eduard or Airscale decals for the IP - Gaspatch 08/15 MG's - Lozenge decals from Aviattic - Decalsheet including jig from Pheon - Seatbelts from the spare box - Albion brass tubes and rods and Albion Connecto connectors Cheers Rob
-
1/32 Scottish Fishing Boat.
DocRob replied to BigDan's topic in LSM 1/35 and Larger Work In Progress
Welcome Dan, nice to see you add some wooden boats to our plastic heavy niche. Your Fifie is exceptionally nicely done and it seems also weathered a bit, rarely seen on wooden ships. Cheers Rob -
Ju-87G Tankbuster
DocRob replied to Kaireckstadt's topic in LSM 1/32 and Larger Aircraft Ready for Inspection
Very nice, all around congratulations. There are so many details to make the eye wander. The dog is great, as well as the bicycle, not easy to build with lots of etched parts. Cheers Rob