DocRob
-
Posts
7,048 -
Joined
-
Last visited
Content Type
Profiles
Forums
Events
Gallery
Everything posted by DocRob
-

1:32 scale Ansaldo 'Baby'
DocRob replied to sandbagger's topic in LSM 1/35 and Larger Work In Progress
The engine looks great, and seems to build up good. I considered buying one for my Clerget Camel or one of my Fokkers. Cheers Rob -
Scammell tractor/trailer with M3 Grant
DocRob replied to BlrwestSiR's topic in LSM 1/35 and Larger Work In Progress
Nice looking engine and great progress. Do the resin tires look so much better? By the time I bought my Scammell artillery tractor, I looked at the kit ones without building them up and decided against resin, because I found no information about a bulge in the tires to indicate load. The pics don't show it clearly either. I really like figures from the bodi range. These here are not specially for your purpose, but have great poses and add some drama. I got the guy with the helmet in the Hand for a future SAS dio. https://thebodi.eu/model/TB-35162/souvenir-hunters-ww-ii--desert-rat---australian- Another one, where the driver might fit with some surgery https://thebodi.eu/model/TB-35114/british-driver---tommy-western-desert-ww-ii And these two are priceless https://thebodi.eu/model/TB-35097/british-nco---scottish-highlander-western-desert-ww-ii Cheers Rob -
Tamiya Spitfire XVI done
DocRob replied to JohnB's topic in LSM 1/32 and Larger Aircraft Ready for Inspection
Very beautiful Spitfire John ,I like the paintjob. Very tempted to build a XVI in 1/32 as well. Cheers Rob -
Sounds a little like 'Den Teufel mit dem Beelzebub austreiben'. I know you like German sayings, but that might proof tricky to translate . Cheers Rob
-
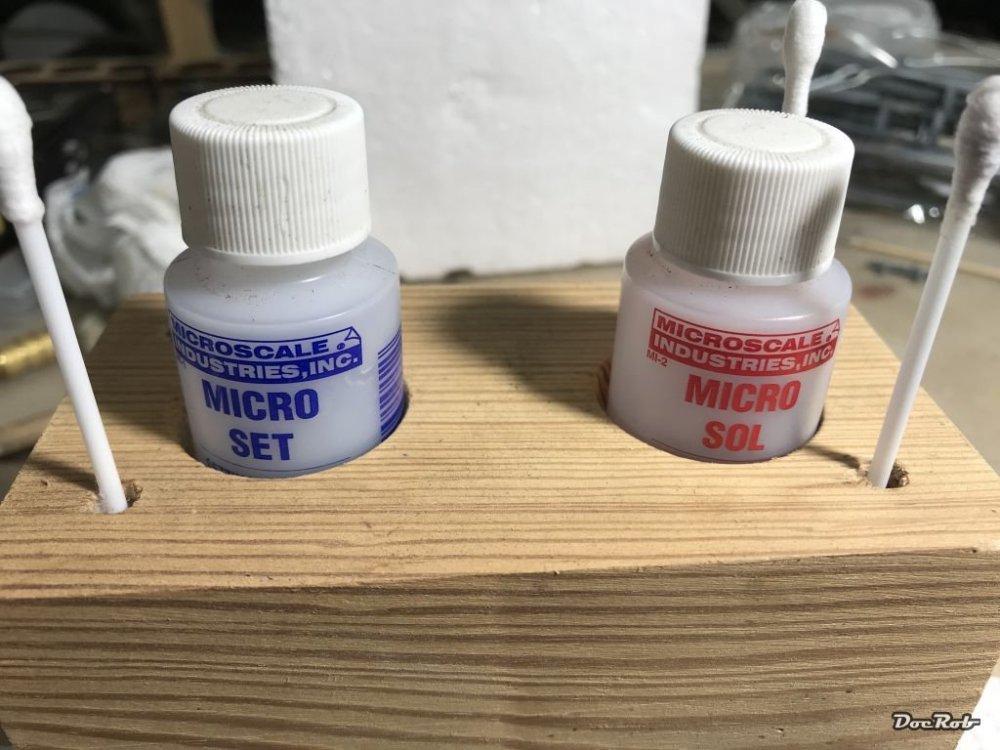
Thanks for your experiences Gaz, but your idea is to use the most possible culprit to solve the problem, if I understand it right. Mr. Mark Softer is the equivalent of Micro Sol, which I suppose is responsible for the clouding. Not in the least, it's good to broaden the perspective. We work with a lot of different chemicals, so i's really helpful, to understand what happens here. I never hear about the problems concerning AK' Real Colours and decal solutions. On the Mig I have used Real Colours for the first time, so maybe my Pledge coat was not thick or dry enough and the Sol got through somehow and reacted with the colour. That would explain, why I didn't ran into this problem before. For the HGW stencils, I used only warm water with one drop of dishwasher to break the surface tension. It seemed to have worked well, but I noticed, that I had to wait the suggested drying time of at least 6 hours to not pull off the stencil, while removing the carrier film. In your great 'How -To' about HGW wet transfers you experienced faster drying times, maybe because of the use of setting solvent. I think you have a point here Graham. As I never ran into these problems before, I applied both Set and Sol in 'large' amounts, let's say little pools on the planes surface. With future (no pun intended) use of Sol, I will dab the decal only a little with the solvent and redo it as often as necessary. Your theory about the white block drying though, I believe is not applying in my case. Maybe five minutes after I applied the Sol, I saw the first clouding and immediately rinsed the said areas with tap water. By that time the Sol was not dried, so the cause of the clouding seems to be a reaction with underlying layers. Honestly, I wouldn't try the X20 on Pledge/Klear/Future, without trying on a dummy. The kit decals I've used were relatively thin and good to handle. I try to avoid the Tamiya / Hasegawa thickies where I can @ All, thank you for your great input and telling me about your experiences. In the last weeks, I had the feeling that there is not that much modelling discussion happening here. Sure it's a forum and had happened before and after a while there are new discussions, great WIP's and new faces. Your taking part in this discussion about the nightmares, decals could develop into though, showed me again, that you are a great knowingly bunch, willing to share their experiences and that makes me feel proud of you lads. Cheers Rob
-
Thanks Phil, but there is always a way, which includes the bin as ultima ratio, but that's how it is. Exactly my thoughts Steve, first some Klear onto the areas, then the heavy treatment. Cheers Rob
-
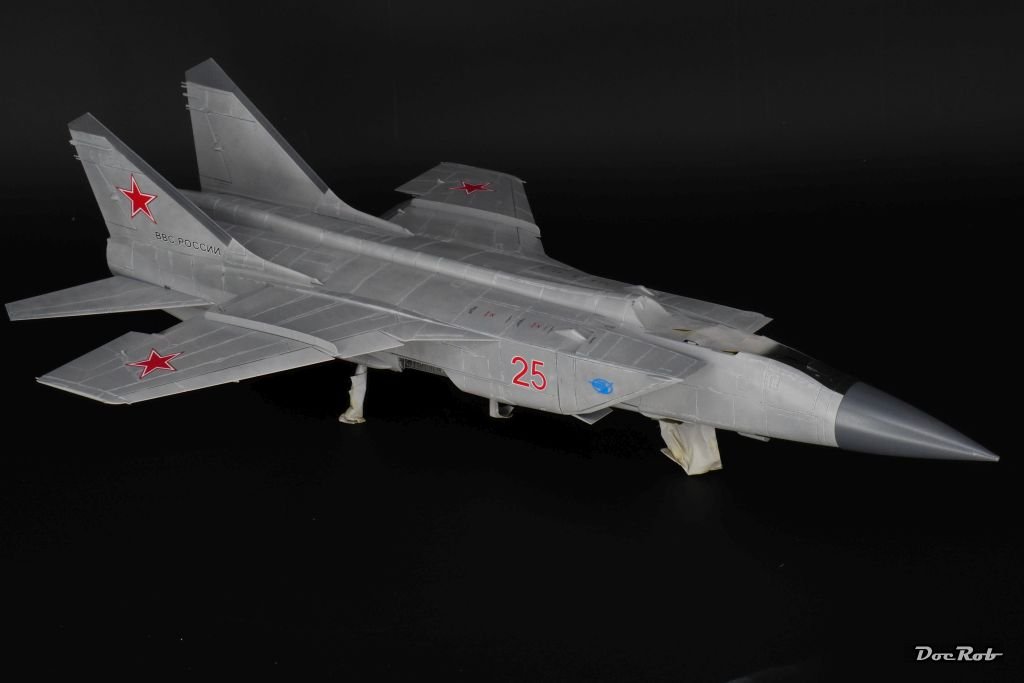
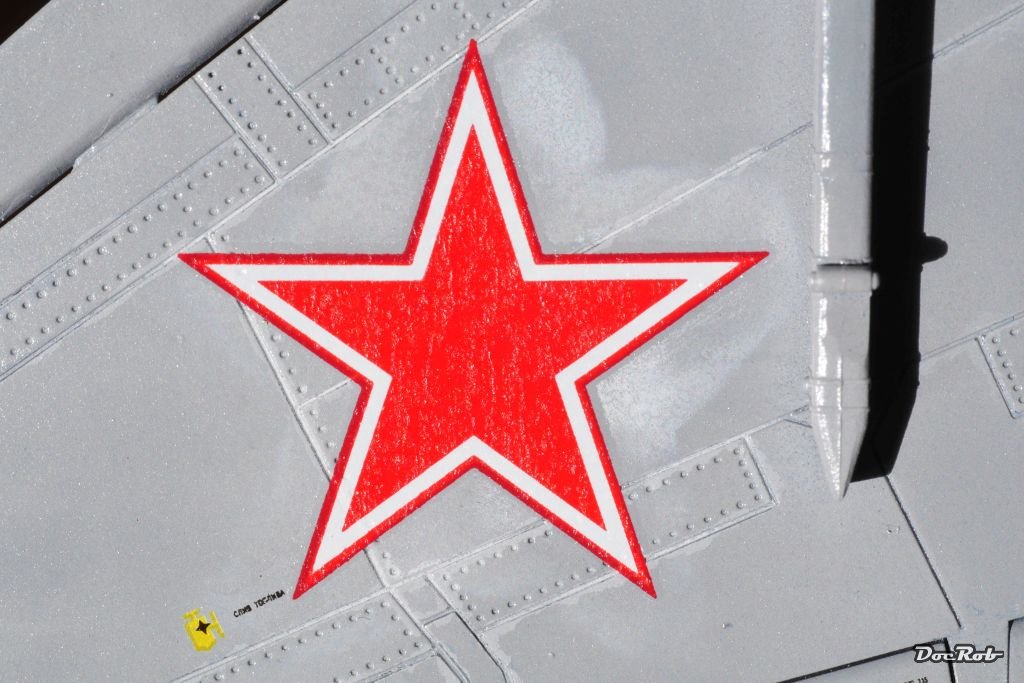
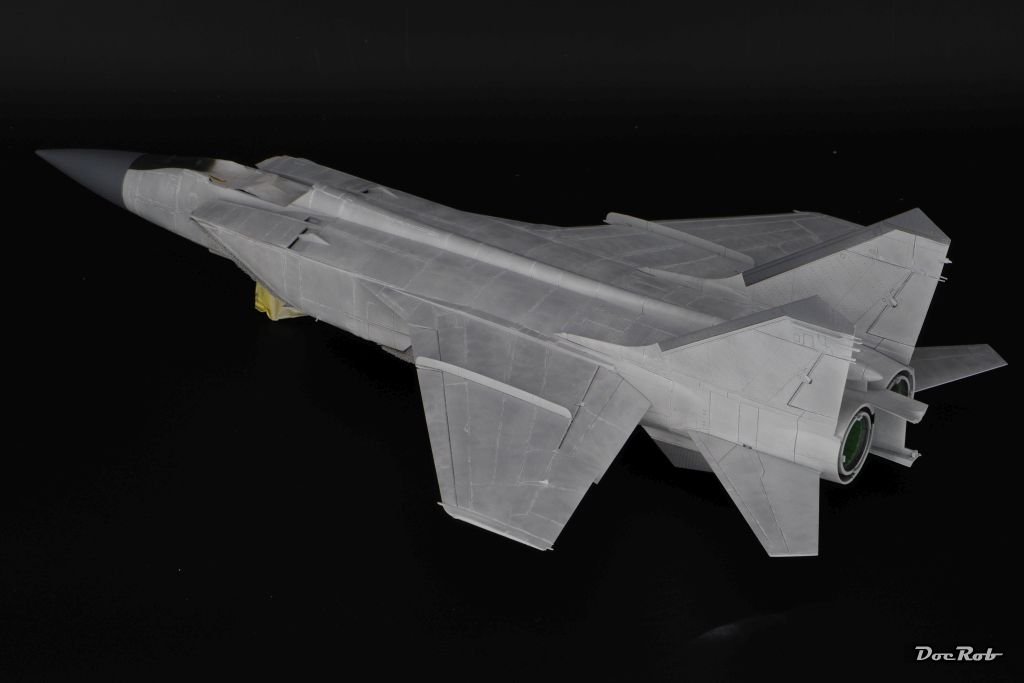
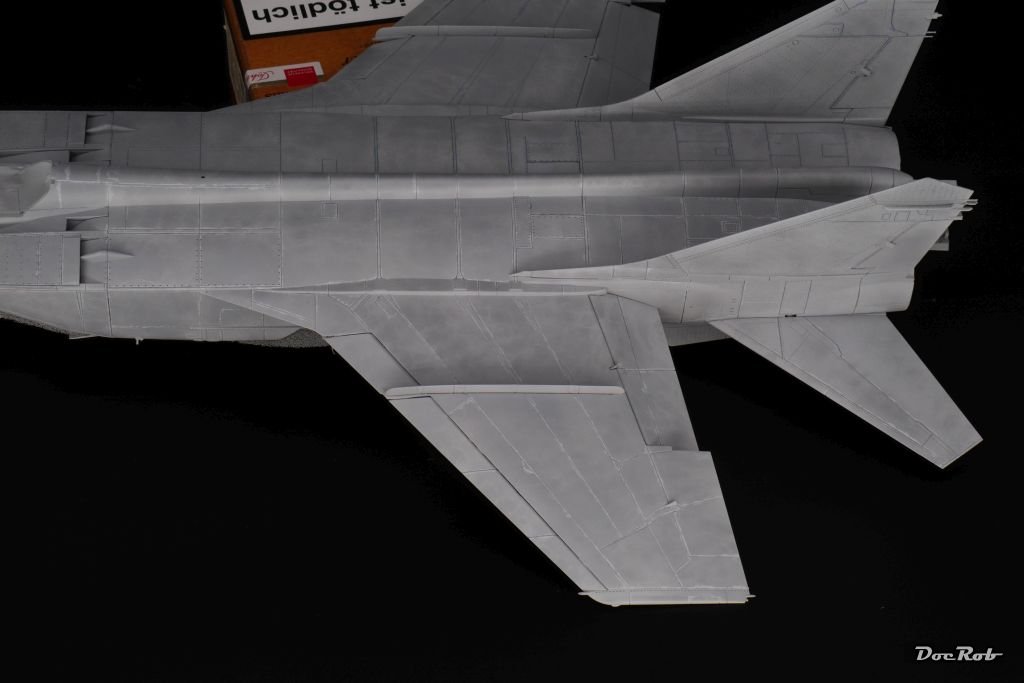
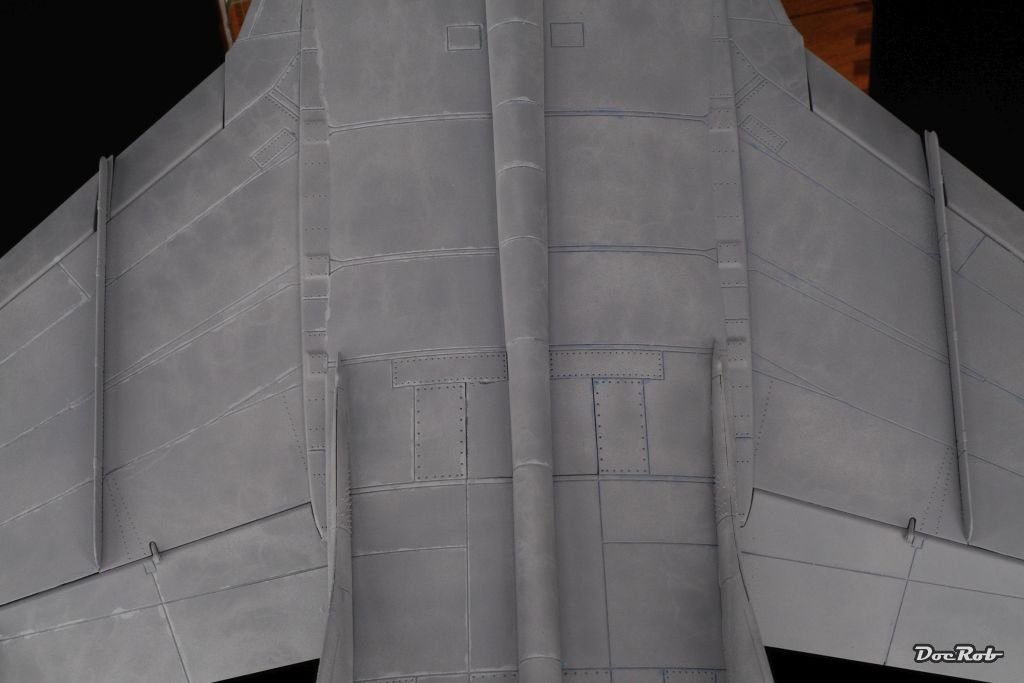
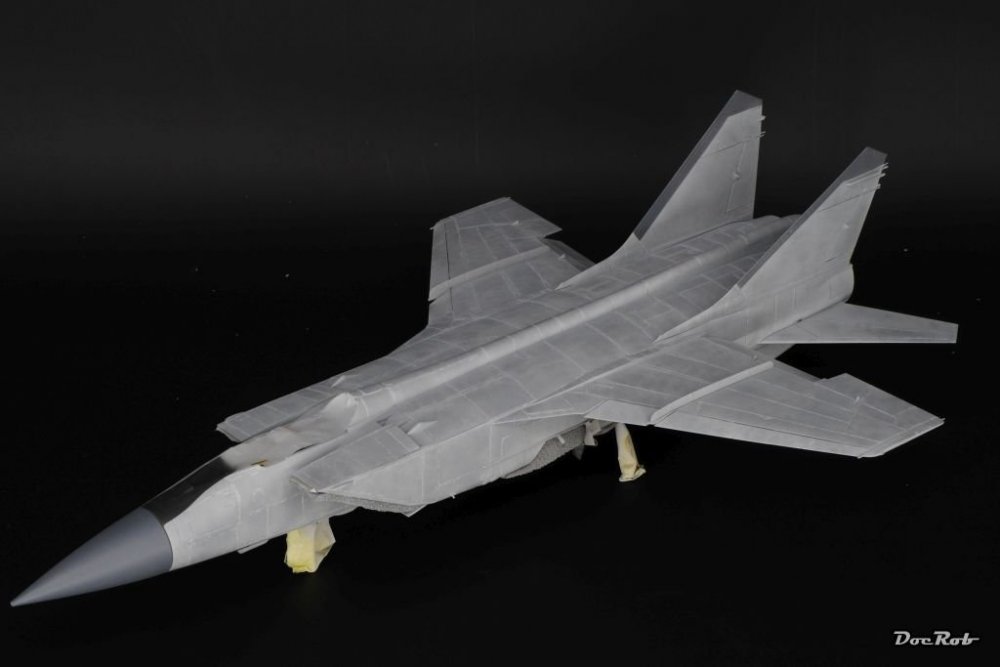
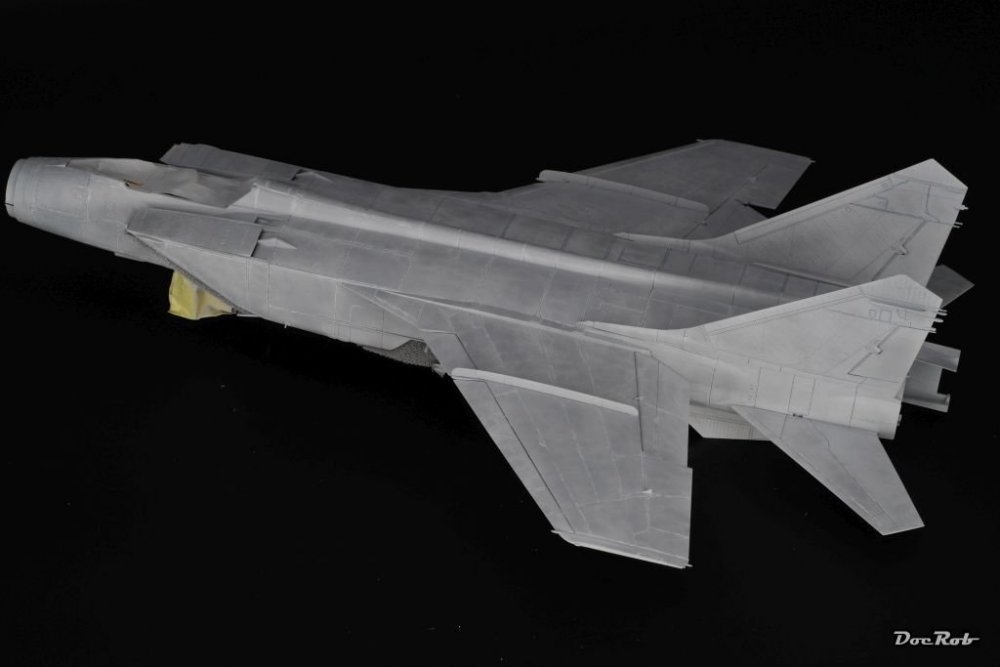
After running into the problem that seemingly my Micro-Sol clouded my Klear coat, I managed to get the decals on. The kit ones behave ok are thin and good to work with, but I use only the stars and some bigger markings, as I use the wonderful HGW wet transfers for the stenciling. They have no silvering, no protruding decal borders, a matte finish, which seems to be tattooed into the surface. Basically, I don't understand, why the crews couldn't learn their manuals on these modern jets, otherwise, there would be no stencils . On the Mig there are hundreds. I don't need a lot of stencils on my car or on my turntable. Luckily the worst of the decals are on the underside, so that's how the big bird looks now from far.

-
The sunbath was fine for me, but not for the Mig, It seems, that everything was completely dry before. Look for that stencil there, these HGW wet transfers are great, no silvering at all, no surrounding decal sheet and no reflection, even in the brightest sun. I have one set for my F4 kit, but has to check for my planned Mig-21 builds If I ever do a heavy stenciled jet again, I would look in advance if there is a set of wet transfers available, because I ever ran in trouble with decals, one way or another. Cheers Rob

-
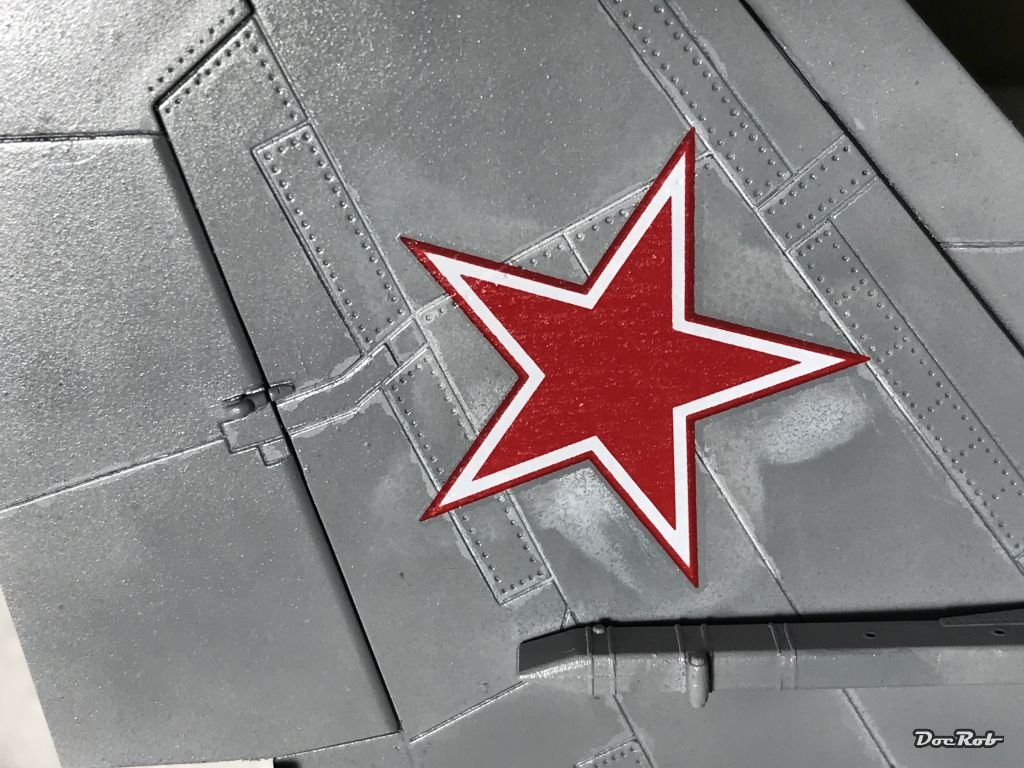
Thanks gentlemen, you're a great bunch, helpful and reassuring, even funny, I like to fail here on LSM . For the moment, I will stay with option 1-3 , before I will go nuking the stars with heavy ordonance . We have a humidity here at about 85% today, so this maybe is a factor too. The sun is out since an hour, so out with the Mig under the open skies. Cheers Rob
-
I never had these issues before, but your theory about the chemics may be right. In a day or two, i will give it a slight coat of Klear and see how that works, if not, I make a mask and mist some base colour on. If that isn't succesful, lets see how far a Mig can fly. Now there is another solution, some of Smittys IPA's and I don't see the clouding anymore. But tomorrow is another day and can't stay boozed for the rest of my life . Cheers Rob
-
Thanks, I will give that a try, the harder, the better. Cheers Rob After 24 hours nothing went away on mine, before I do anything, there will be another day, but I don't think it will self cure. No CO2 in my Klear , be it IPA or not, but for apres modelling... Cheers Rob
-
Thanks a lot, nice wording with the c/Klear . I will try to dab on some Klear in a hidden area for testing and will prepare some test parts soon, which will receive a heavy dose of Micro-Sol, after waiting longer for the Klear to cure. Cheers Rob
-
I used warm water for the stencils and it seemed to have worked with the HGW wet transfers, puh, there are thousands of them abd til now, I applied only the bottom ones. For bigger decals, which have to follow contours of panel lines, don't put lots of Micro-Sol on, just dab a little bit onto the decal, avoiding the paintjob, this will work. If they are not laid down enough, it's better to repeat the application. I haven't done so, because I never ran into this problem before, lessons learned. Cheers Rob
-
Ha-1112 K1L Tripala ‘Der Stern von Afrika’
DocRob replied to JeroenPeters's topic in LSM 1/35 and Larger Work In Progress
Have you ever tried them dampened, that is an area, where I like them even more, than in dry use. You can work with them like a multi colored wash, amazing. Cheers Rob -
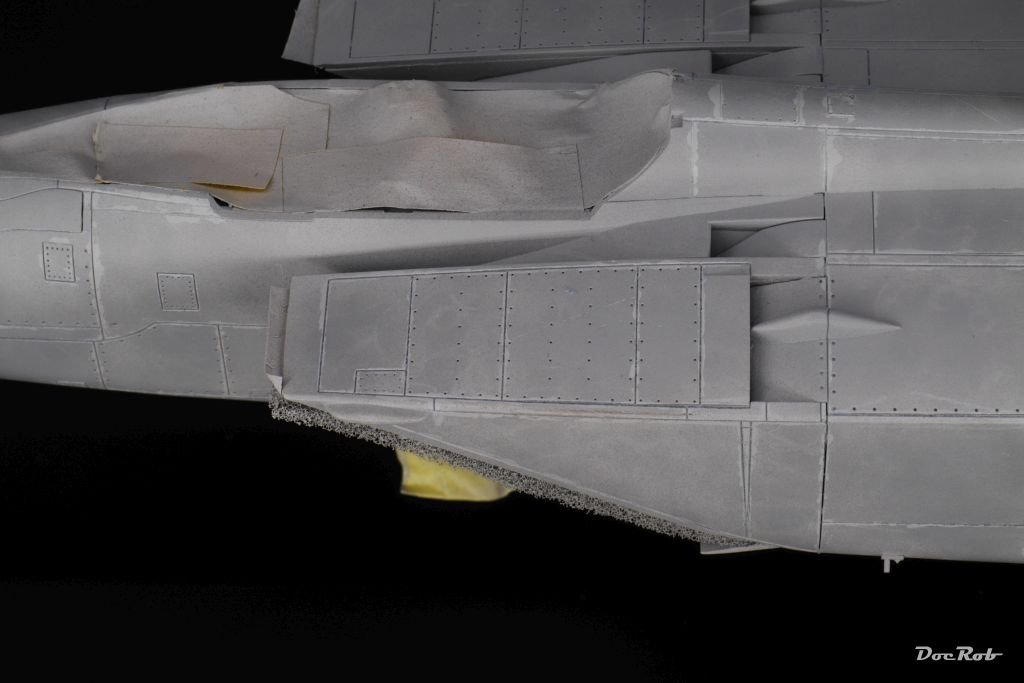
Hola Señhores, I need your help. Yesterday I decaled my Mig-31 and after dabbing off the residues of Micro Set and Sol got some white clouding in the clear coat around the decals, which are still there after cleaning everything again with clear water and let it dry over night. The gloss coat under it is Klear, which should be similar to Future and left to dry 24 hours before decaling. I suspect, it's more the Sol's application, as I applied some stencils only with Set and can't find any irritations there. My Mig nearly did the dart stunt, but I hope there are suggestions, about what to do from you. I'm considering to try to apply some Klear on the said areas, but am not sure about that. Cheers Rob Here is the worst decal And these are the culprits

-
I can even see, that there are some exhausts missing , second best thing after the invention of the wheel John. Now we will see the fastest quality builds in Hi-Res. Cheers Rob
-
The Mig is not a tailsitter anymore . I managed to get the rest of the liquid mask off the Mig, a terrible task, as the Micro mask tends to get harder to remove as longer it's applied. I sprayed the dark grey parts on the tail and the nose cone and some black patches around the canopy and now it starts to look like a big ugly Mig. Cheers Rob

-
1:32 scale - Siemens-Schuckert D.III
DocRob replied to sandbagger's topic in LSM 1/35 and Larger Work In Progress
Thank you Mike for taking us on the ride. Like always it was a pleasure to follow your build, with all the reference and skillful scratching/modelling of yours. This time was different to me, because I built a pair of 1/48 SSW's parallel to your build. It was coincidence, because mine were more testbeds to learn new techniques, than your artful masterpiece, but I learned a lot, not only building wise, but about the original too. When I'm grown up, I may build a 1/32 SSW as well, because I simply like the design of the plane and the colourful paintjobs. Cheers Rob -
With normal liquid mask, there are a lot of options, like you said. I tested some of them with my Micro-Mask stuff and it didn't work. It is really hard to remove, but for my purpose it's ok. The stuff is thinner than Maskol and easier to apply in very fine patterns. There is no way around the toothpick method and for small residues I use a stiff flat brush. Cheers Rob
-
Thanks for the pic Martin, It looks like they made that bird looking like mine , but they finished panel lining and decaling. Cheers Rob
-
Thanks Martin, I don't try to replicate something from pictures with this build, instead, I use my imagination and I have no idea, how the Mig will look in the end. By reviewing the pictures, the beast looks a little like made out of marble, or something lying underwater , but I hope, in the end, I will have a convincing finish. Cheers Rob
-
Thanks Gus, one way or another the unwanted scratches will be addressed. I hope the later to apply wash will not be to harsh contrast wise, the panel lines are very well accentuated on the Mig. Cheers Rob
-
Scammell tractor/trailer with M3 Grant
DocRob replied to BlrwestSiR's topic in LSM 1/35 and Larger Work In Progress
Nice, I will follow your progress with the Scammell. I have the Artillery tow Scammell in stash and will do it in a sinister fantasy circus wagon version, when I think, I'm able to paint the lansquenet figures, I've planned for my dio. Cheers Rob -
After four hours of scratching away the masking fluid out of the panel lines, I have to make a break. The way, I wanted to get the finish, turned out to be a painful and time consuming way, but the results are worth it, I think. One half is done, the other is for tomorrow . As you can see; I got some unwanted scratchmarks as well, but these will be addressed later. First I thought about dabbing on some paint very carefully, but then decided, that I will try to sand these areas with a very fine sanding sponge in the direction of the airflow. Cheers Rob


-
Ha-1112 K1L Tripala ‘Der Stern von Afrika’
DocRob replied to JeroenPeters's topic in LSM 1/35 and Larger Work In Progress
The pre shading makes the otherwise dull grey coating look interesting, great job with the painting. Cheers Rob