DocRob
-
Posts
7,137 -
Joined
-
Last visited
Content Type
Profiles
Forums
Events
Gallery
Everything posted by DocRob
-
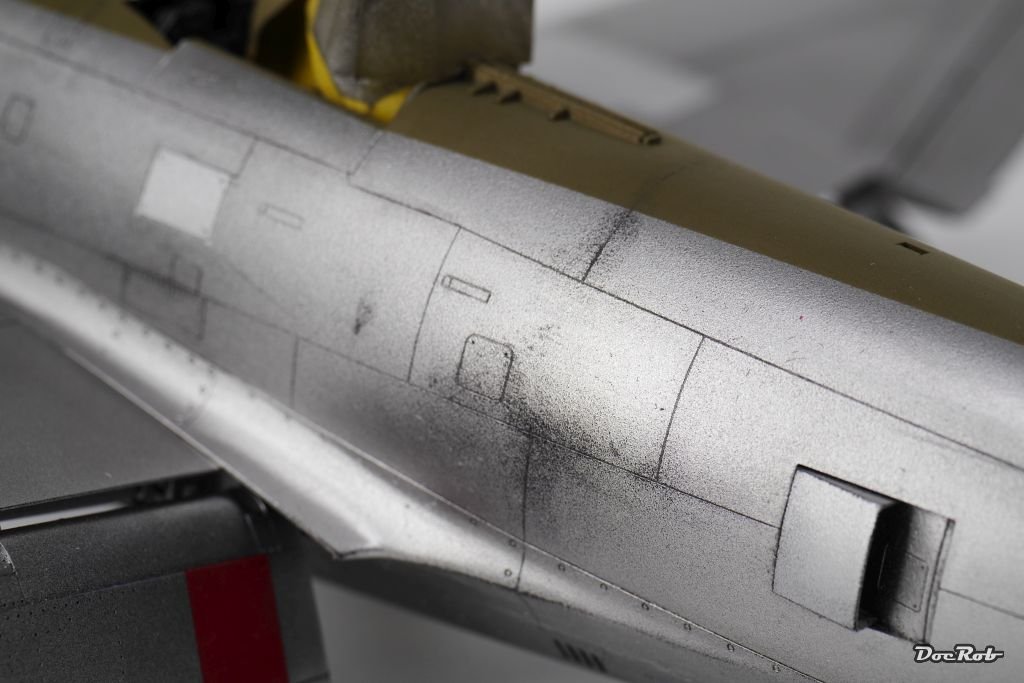
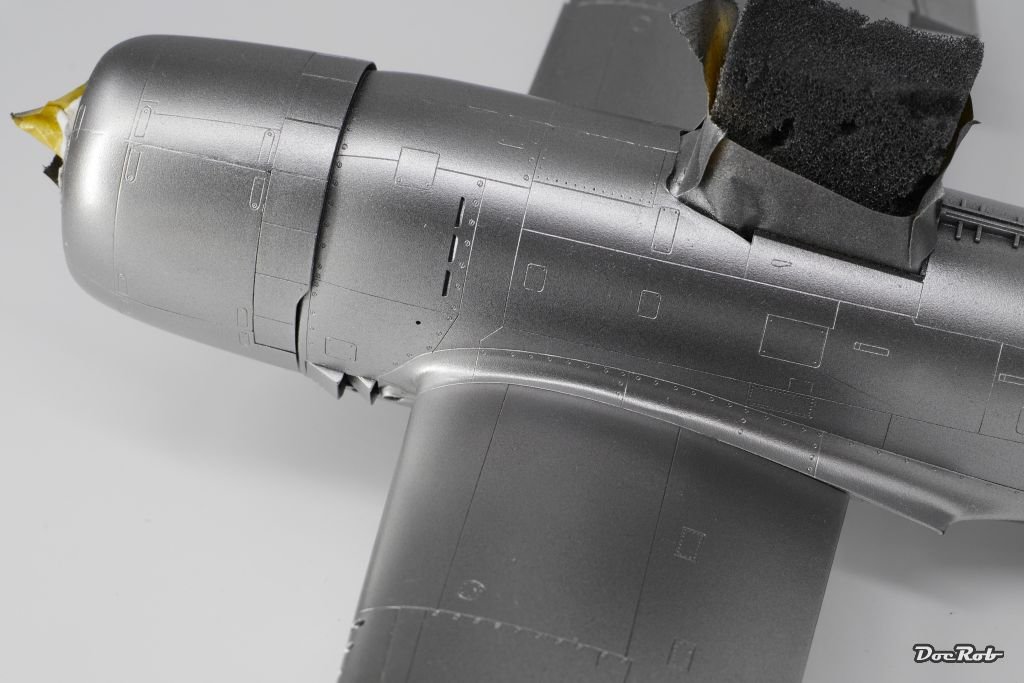
If you'd have asked me which step I feared most before beginning this build, the answer would have been panel lining on NMF and you don't have to be prophets to guess where desaster struck with that otherwise pleasant build. Yeah, could have thrown her out of the window, but resisted for now. I don't know what actually happened, but some very visible parts resisted being cleaned with a paper towel and after adding just a hint of alcohol (the paper was not even damp at all) it seems like I got a free look back onto the primer. It doesn't feel like I rubbed off the Colour and Future coat, but what else could it be? It looks terribly dirty and is definitely not the finish, I was looking for. I've tested everything before on some dummy parts and encountered no such problems. I'm not sure what of three things I do with Dottie, there is still the window option, leave it and hope with decals and refinement the problem doesn't show that much, or to mist a little bit of polished Aluminium onto the worst areas. As I don't really like any of these options, I'm open for ideas and suggestions. Cheers Rob


-

My First Heartbreak 27/Jan/19
DocRob replied to GazzaS's topic in LSM 1/35 and Larger Work In Progress
Wow, that's big trouble with the Colour lifting. Did you rub the plastic with alcohol before priming. Normally Alclad Primer was pretty strong and adhered well, when I used it. Paint is looking great now, so no way to stop you, right ? Cheers Rob -
Thanks guys, Dotty is already sealed with Future without any problems. Nothing better than use a rainy day for airbrushing, there is no dust at all in the air. Cheers Rob
-
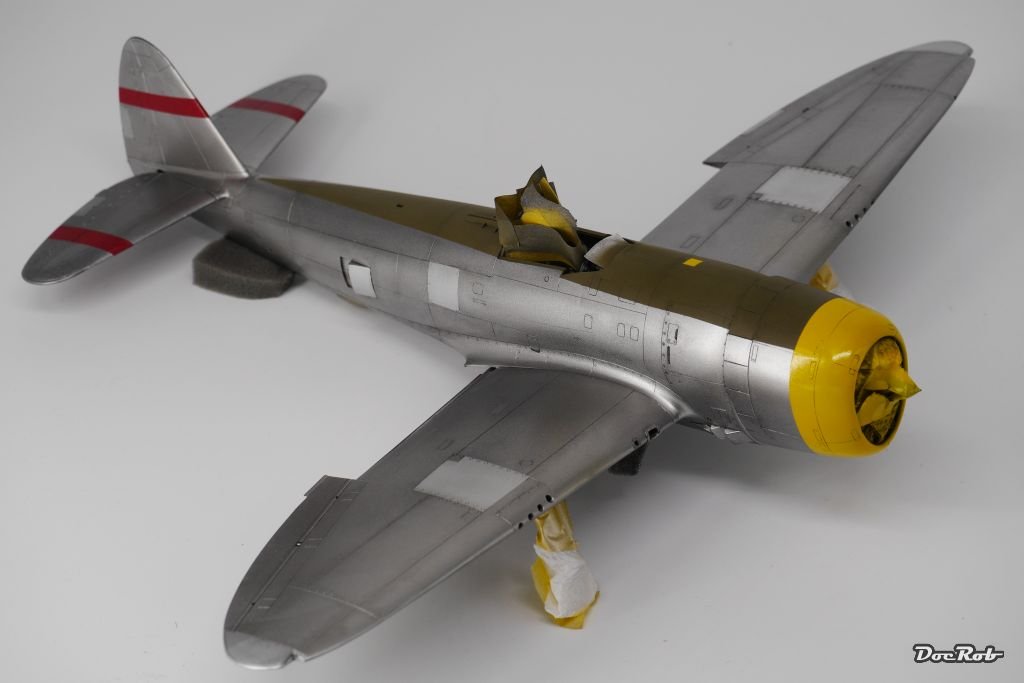
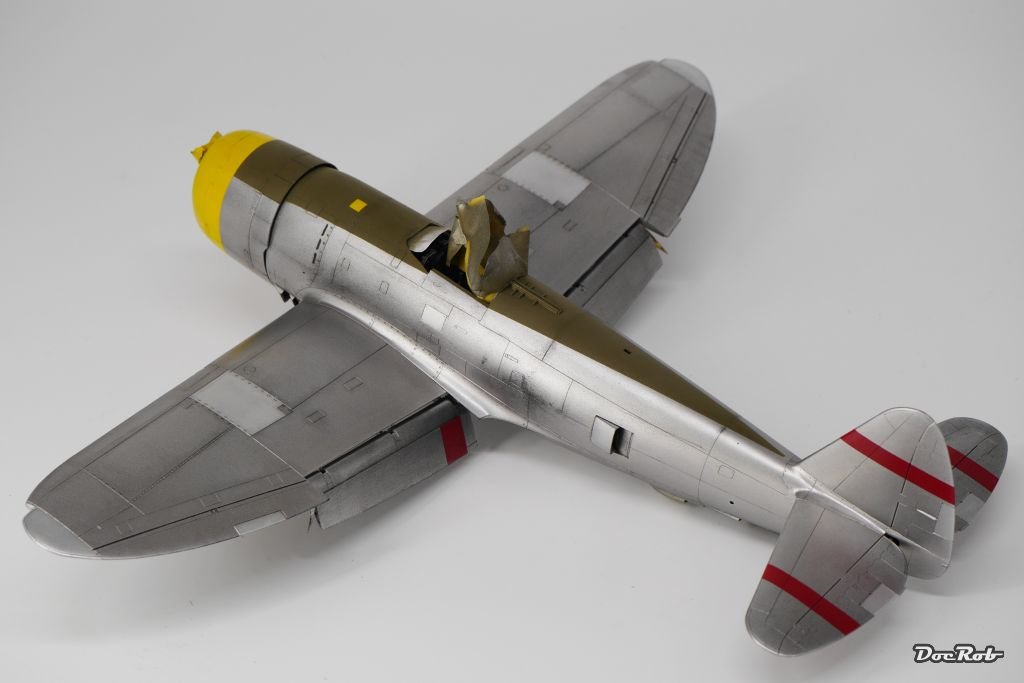
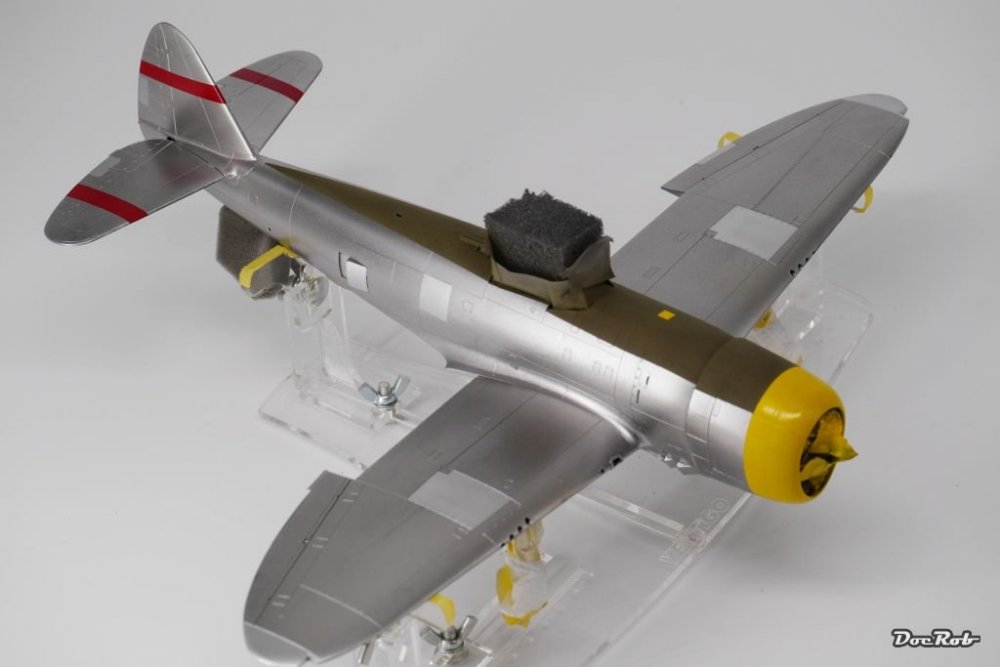
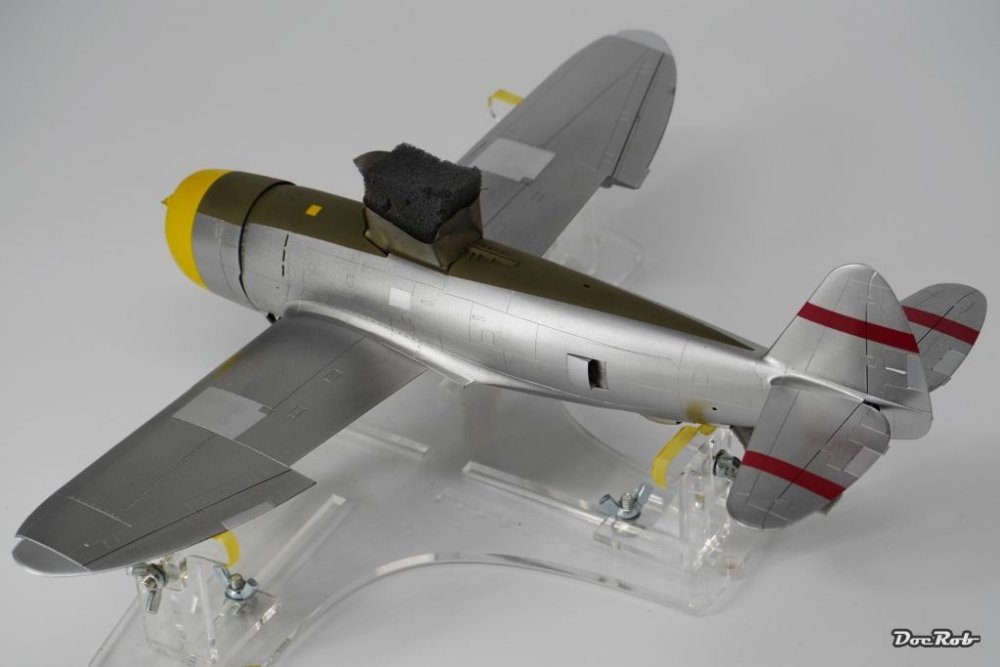
Thanks Harv. Dottie got OD'd. Olive Drab as anti glare went on smooth and fine as always with Lifecolour. The next step will be a little scary as I will see how Future reacts with AK's Xtreme metal. I've tested on a dummy without problems or losing shininess. So far I have to say, Xtreme metal Colours are really durable. There is not the least bit of paint residue on the pulled off masking tape, definitely better than Alclad that way. Some of you will notice the lack of black markings on the tail and the slightly wider sized and longer anti glare area with the small yellow panel of the Dottie Mae. I show the Jug after restoration and these changes have been made since. Cheers Rob
-
Airfix 1/24 Bubble top Typhoon
DocRob replied to Grizly's topic in LSM 1/32 and Larger Aircraft Ready for Inspection
Welcome to the Large scale nuts Grizly. Your start couldn't be more large scale and beautiful. Your Typhoon looks great and lively. Which Radu IP did you use, early or late? Cheers Rob -
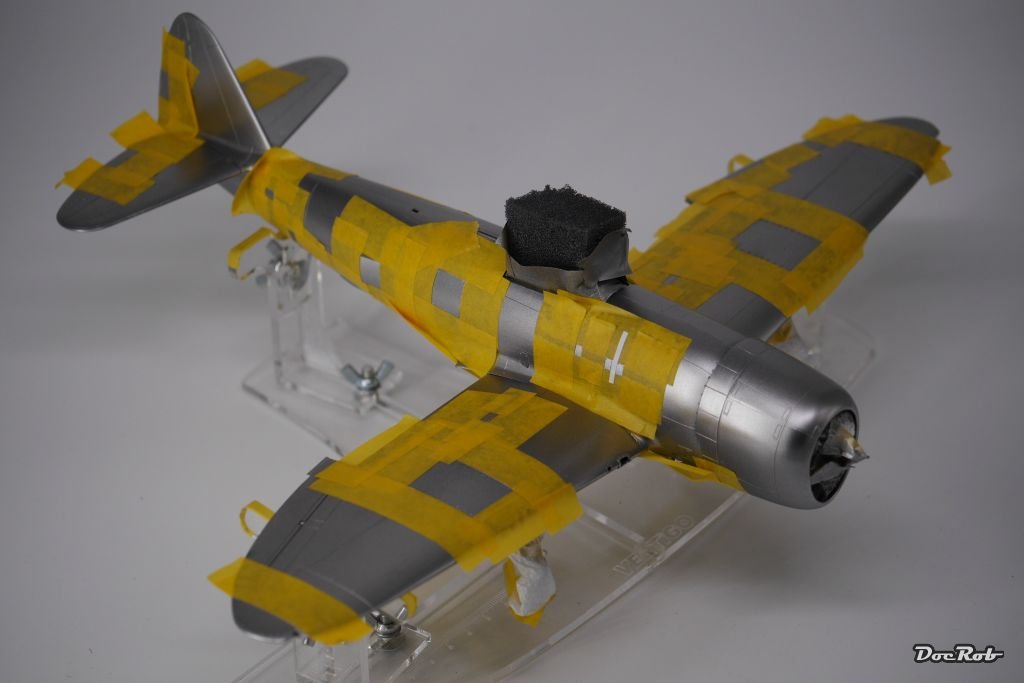
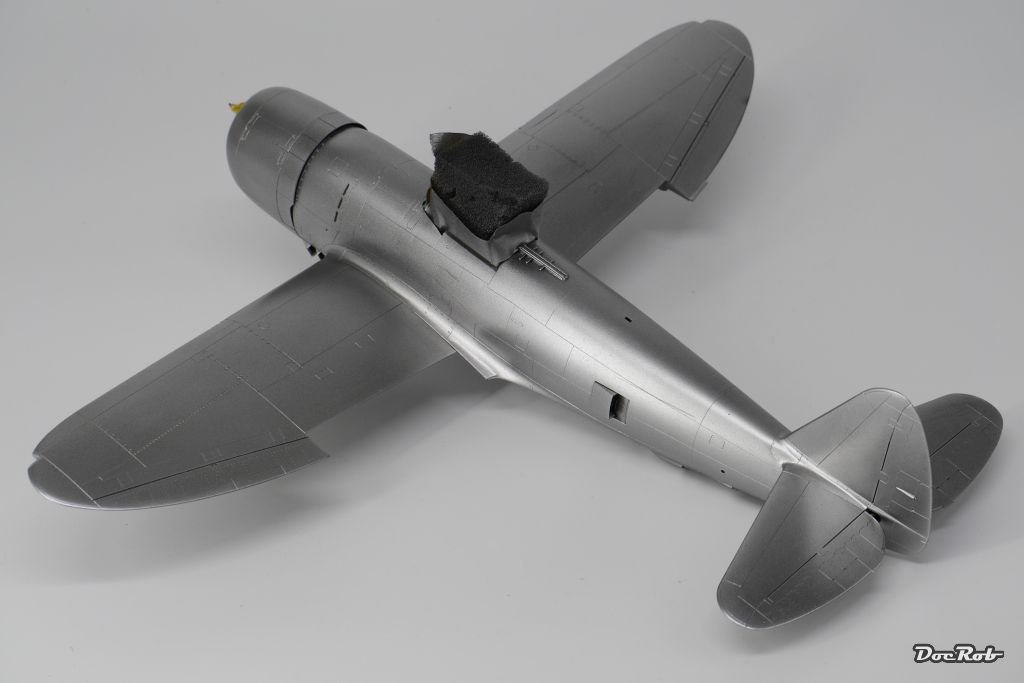
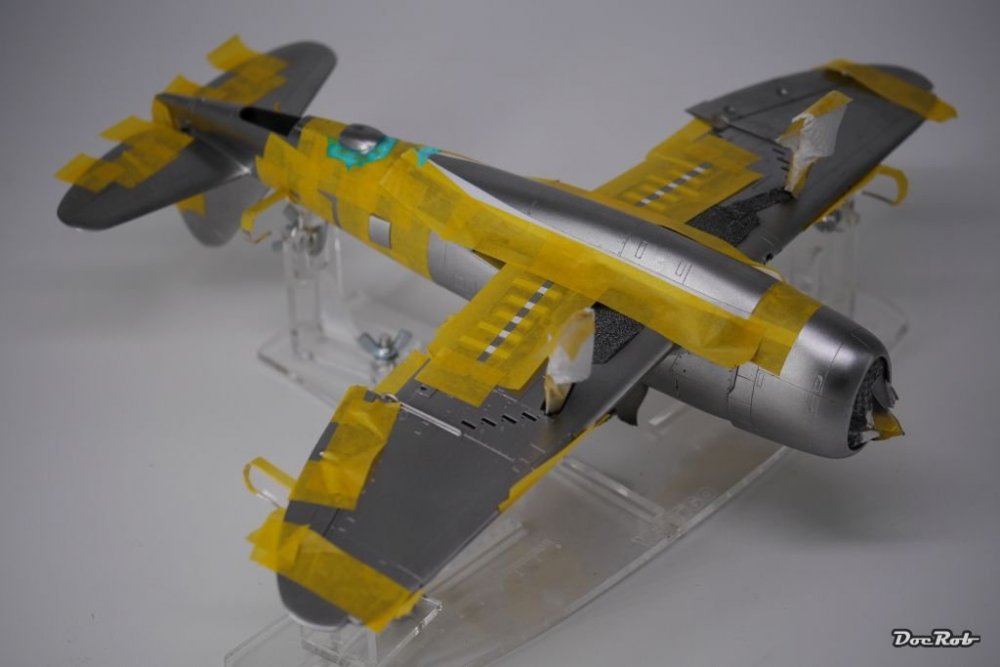
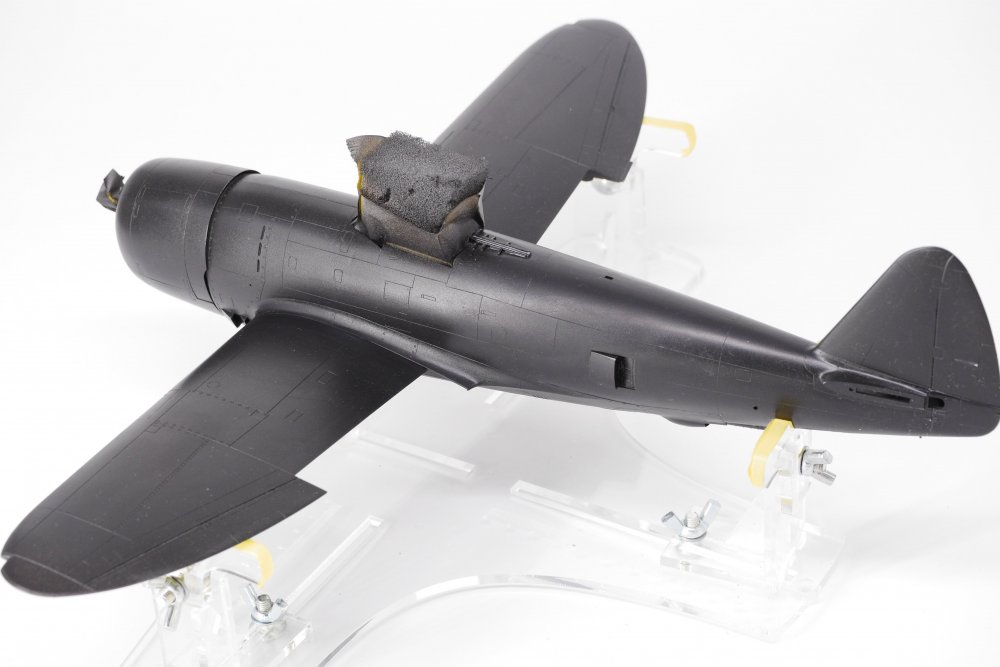
Thanx Martin, It rains outside so what better to do than continue with the Jug. Actually she is in the state of Dottification . I sprayed some panels with different shades of AK's Xtreme Aluminium (pale, dark and only Aluminium) and some Titanium from Alclad for the Turbo hood. Dark Aluminium has nearly no contrast to the polished Aluminium base. In the bottle and on my unprimed dummy it looked quite different, it seems to be effected by a little tranlucency of the black primer. Next there was Colour , I used Tamiya gloss yellow and red, which sprayed better than feared. I somehow hate to spray red white and yellow, as these Colours clog more in the airbrush than others. Cheers Rob
-
Hola Señhoras e Senhores, after a week of family business, it's back to the bench. The Jug gets near mummyfied for spraying some panels and openings with different Aluminium tones. The tape is detacked (ouch) and the liquid mask was tested on a prepared dummy before applying. AK's Xtreme metal Colours seem to be less fragile than Alclad. Cheers Rob
-
Nice mottling, can't wait to see the Uhu with contrasting markings. Cheers Rob
-
Welcome Ryan, it seems you found the right place to let us have a look at your skills. Love the woodwork on the WW1 birds and your photographic skills do your builds/WIPS justice. Cheers Rob
-
Hi Mark, the manual of the Eduard/Hasegawa P-47D I'm actually working on is calling for 90% Zinc Chromatic Green plus 10% Flat Black for the Cockpit, which is slightly darker than the bright pit Colour of other American birds. I used AK's Interior Green which to my eye represents that perfectly. Wheel wells and firewalls are Chromate Yellow, but the inside of the engine cowlings and the air cooling channels under the engine seem to have different Colours on different planes. Some of the air ducts are Chromate Yellow, some are light gray and some are like the P-47D from Chino left in natural Aluminium. Cheers Rob
-
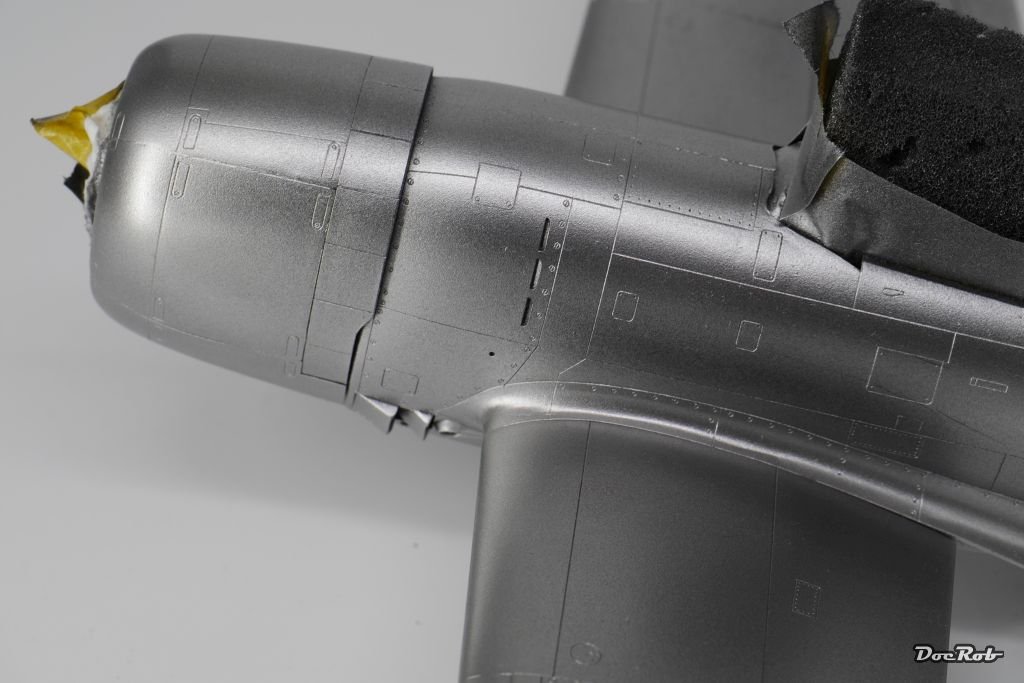
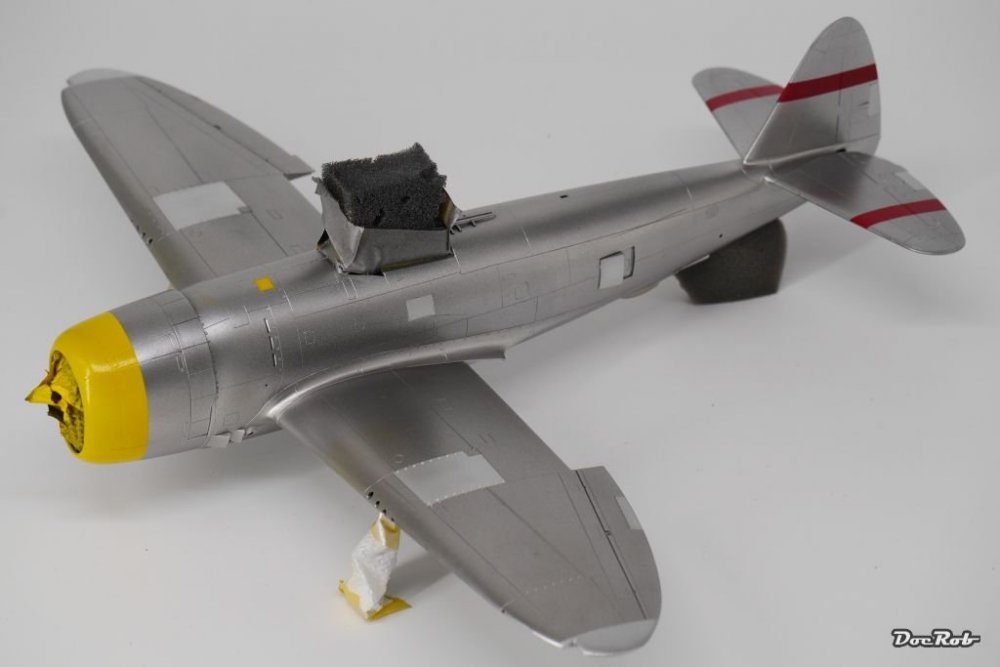
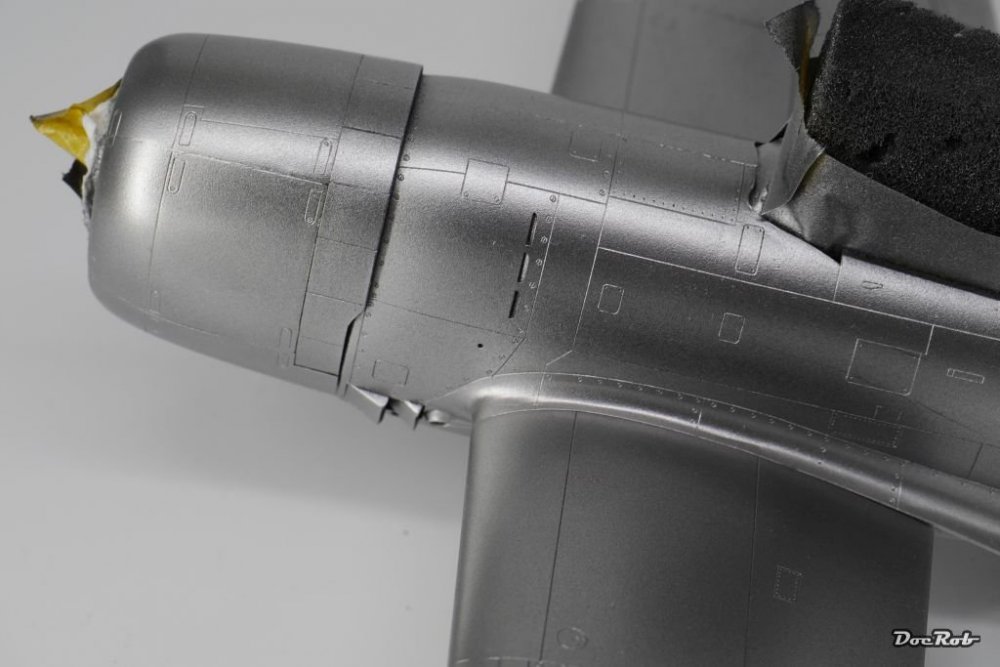
Thanks Peter, and very helpful informations about your experiences with NMF. After finishing this build, I will dig a little deeper into NMF, using Alclad or AK Xtreme metal. I think both products are capable, but AK is easier to use and to work with after application. Alclad tends to be very delicate, if using masks or washes, etc.. Like you mentioned preparation is the key, surfaces have to be flawless, dust and fat free. I wanted to achieve a durable result with masking, decaling and panel lining ahead and went for Tamiya rattle can primer for judging the surfaces and after that Alclads gloss black primer for enhanced shinyness (Next time I will use AK's gloss black primer and like you suggested Mr. Color gloss black). In the case of my Jug I think the main factor for not perfect shinyness is the grain/pigments of the Colour. The behaviour of the polished Aluminium color was a little strange while applying. The first layer went on relatively smooth, but with slightly visible grain. I took some minutes and I notice a kind of self levelling effect of the Colour with a finer surface and less visible grain than before. After the second and the third layer I got the feeling, that while drying the saturation with grain rose to that point you see in the pictures . The AK-Colour didn't respond well to the test of drying the surface with the airbrush and went grainy in the test area. Well, for future tests I will try to find out if priming is necessary, if yes, which primer works best and are the results durable enough for 'post processing'. The application of Aluminium color will be main focus concerning pressure and layering vs. 'flooding' techniques. Cheers Rob
-
That were exactly my thoughts about foiling. It seems, if you want a real reflective Aluminium look you have to use foil. Colours always have a little grain in it and are not mirroring. Maybe it would be possible to use polishable Colours, but even if they look good, you have the problems with masks, weathering, decals and protective coatings, like you have with foil too. The difficulties you described, lead me to the rule out foil for me I will try to refine my process of painting to get a better and durable result. I might buy some cheap 1/72 planes for testing what might be possible with paint. Cheers Rob
-
My First Heartbreak 27/Jan/19
DocRob replied to GazzaS's topic in LSM 1/35 and Larger Work In Progress
Love every bit of it, but my biggest smile came with you mentioning the Master barrels on that build, priceless , advanced nostalgia in a way. Cheers Rob -
amati 1:32 Fifie – The Scottish Motor Fishing Vessel
DocRob replied to JayDee's topic in Non-LSM Reviews
Love it, great review, thanks for that, I might consider to build one of those. twenty years ago, I built a fisherman from Billing Boats and liked the kit a lot. The Fifie though has a really elegant shape for a fishing tug. Cheers Rob -
Barker's Camel B6313 - 1:32 scale
DocRob replied to sandbagger's topic in LSM 1/35 and Larger Work In Progress
Great result to that point, the appearance of the different materials, wood, fabric and metal is very well rendered. Cheers Rob -
Thanks Gaz, and this NMF-job decades ago let you to the 'easy' way of foiling ? Before I go this way, I will experiment a lot with Xtreme metal. I have the feeling, that I could do better. The preparation was good, with a very smooth primer coat, but I have the feeling, I rushed the layering a bit. Finer coats with more time to dry in between might work better. Cheers Rob
-
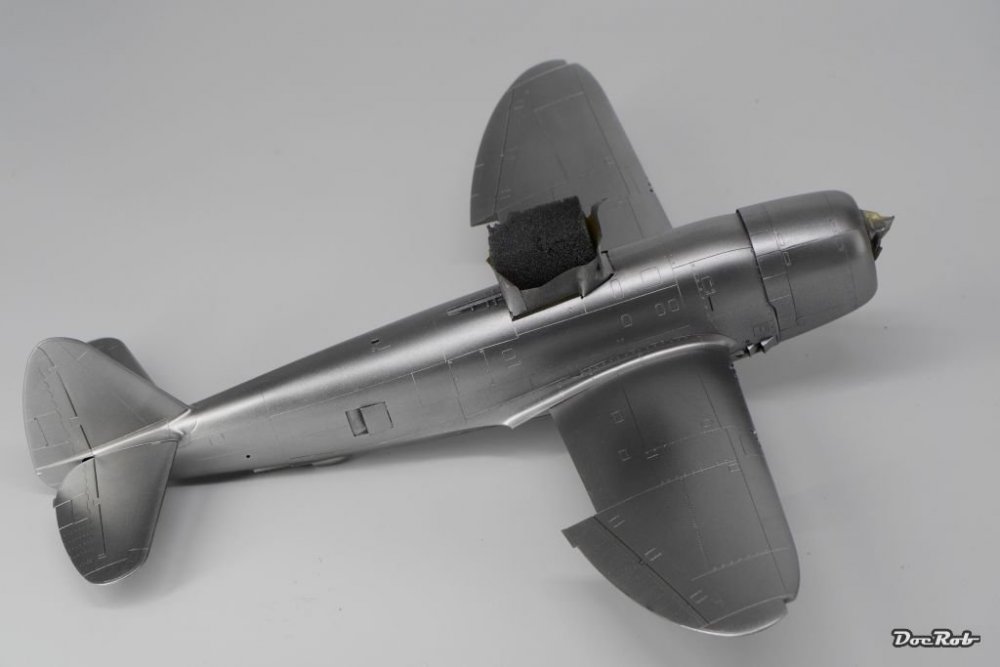
Thank you Senhores, I'm not totally disappointed with the result but also not completely satisfied. The shininess is good, but the grain is a little to prominent. I did my first NMF some years ago on a tiny 1/72 Mig 15 UTI with Alclads and if I remember right, the Aluminium was finer sprayed, I have to look if I still have that kit for comparison. To take some air out of the soso NMF-drama I have to say , that it looks better to the eye than to my unforgiving macro lens. Cheers Rob
-
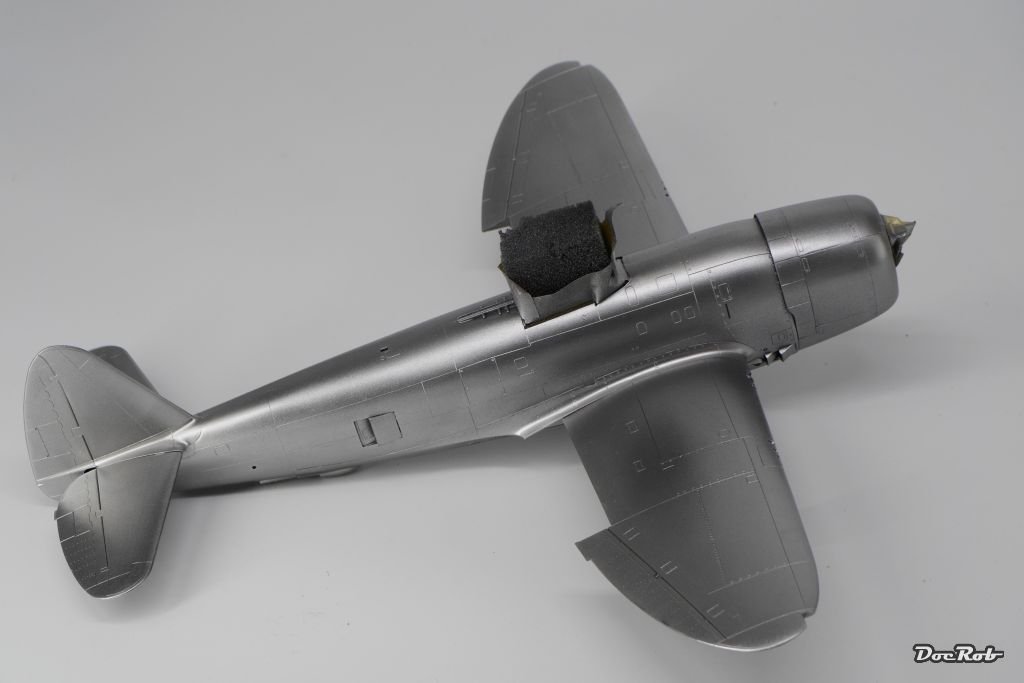
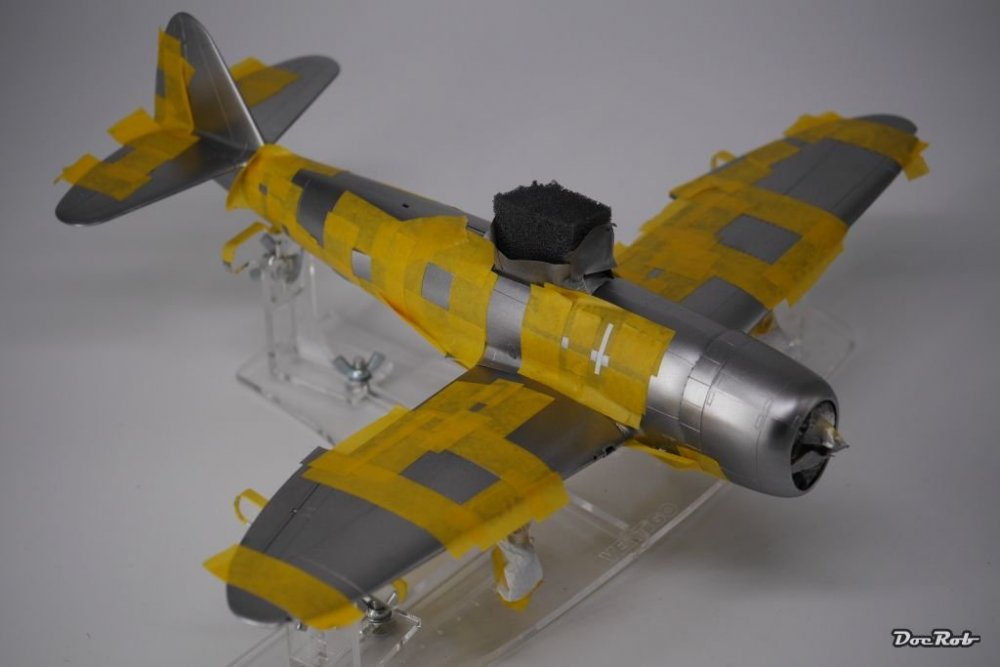
Dottie got her metal outfit. AK's Xtreme metal went on fine and seems to be hard as nails. Pigments show a little bit to much for my liking, but I will try to do something about it. I will try to polish a little and will try a coat of Future as well. In the beginning of the spraying process, there was nearly no visible grain, but the black primer still showed. I worked in layers, but maybe not fine enough. I will do some testing with the polished metal on different primers, different pressures, different techniques (layer to flooding) and final coating. Cheers Rob


-
That is good to hear, it's a first for me and I'm hoping for the best, as I have to do a lot of masking (detacked of course). Cheers Rob
-
Thanks Gaz, but it will be AK's Xtreme Metals not Alclad for a test and definitely no foil, I'm not up to it . Cheers Rob
-
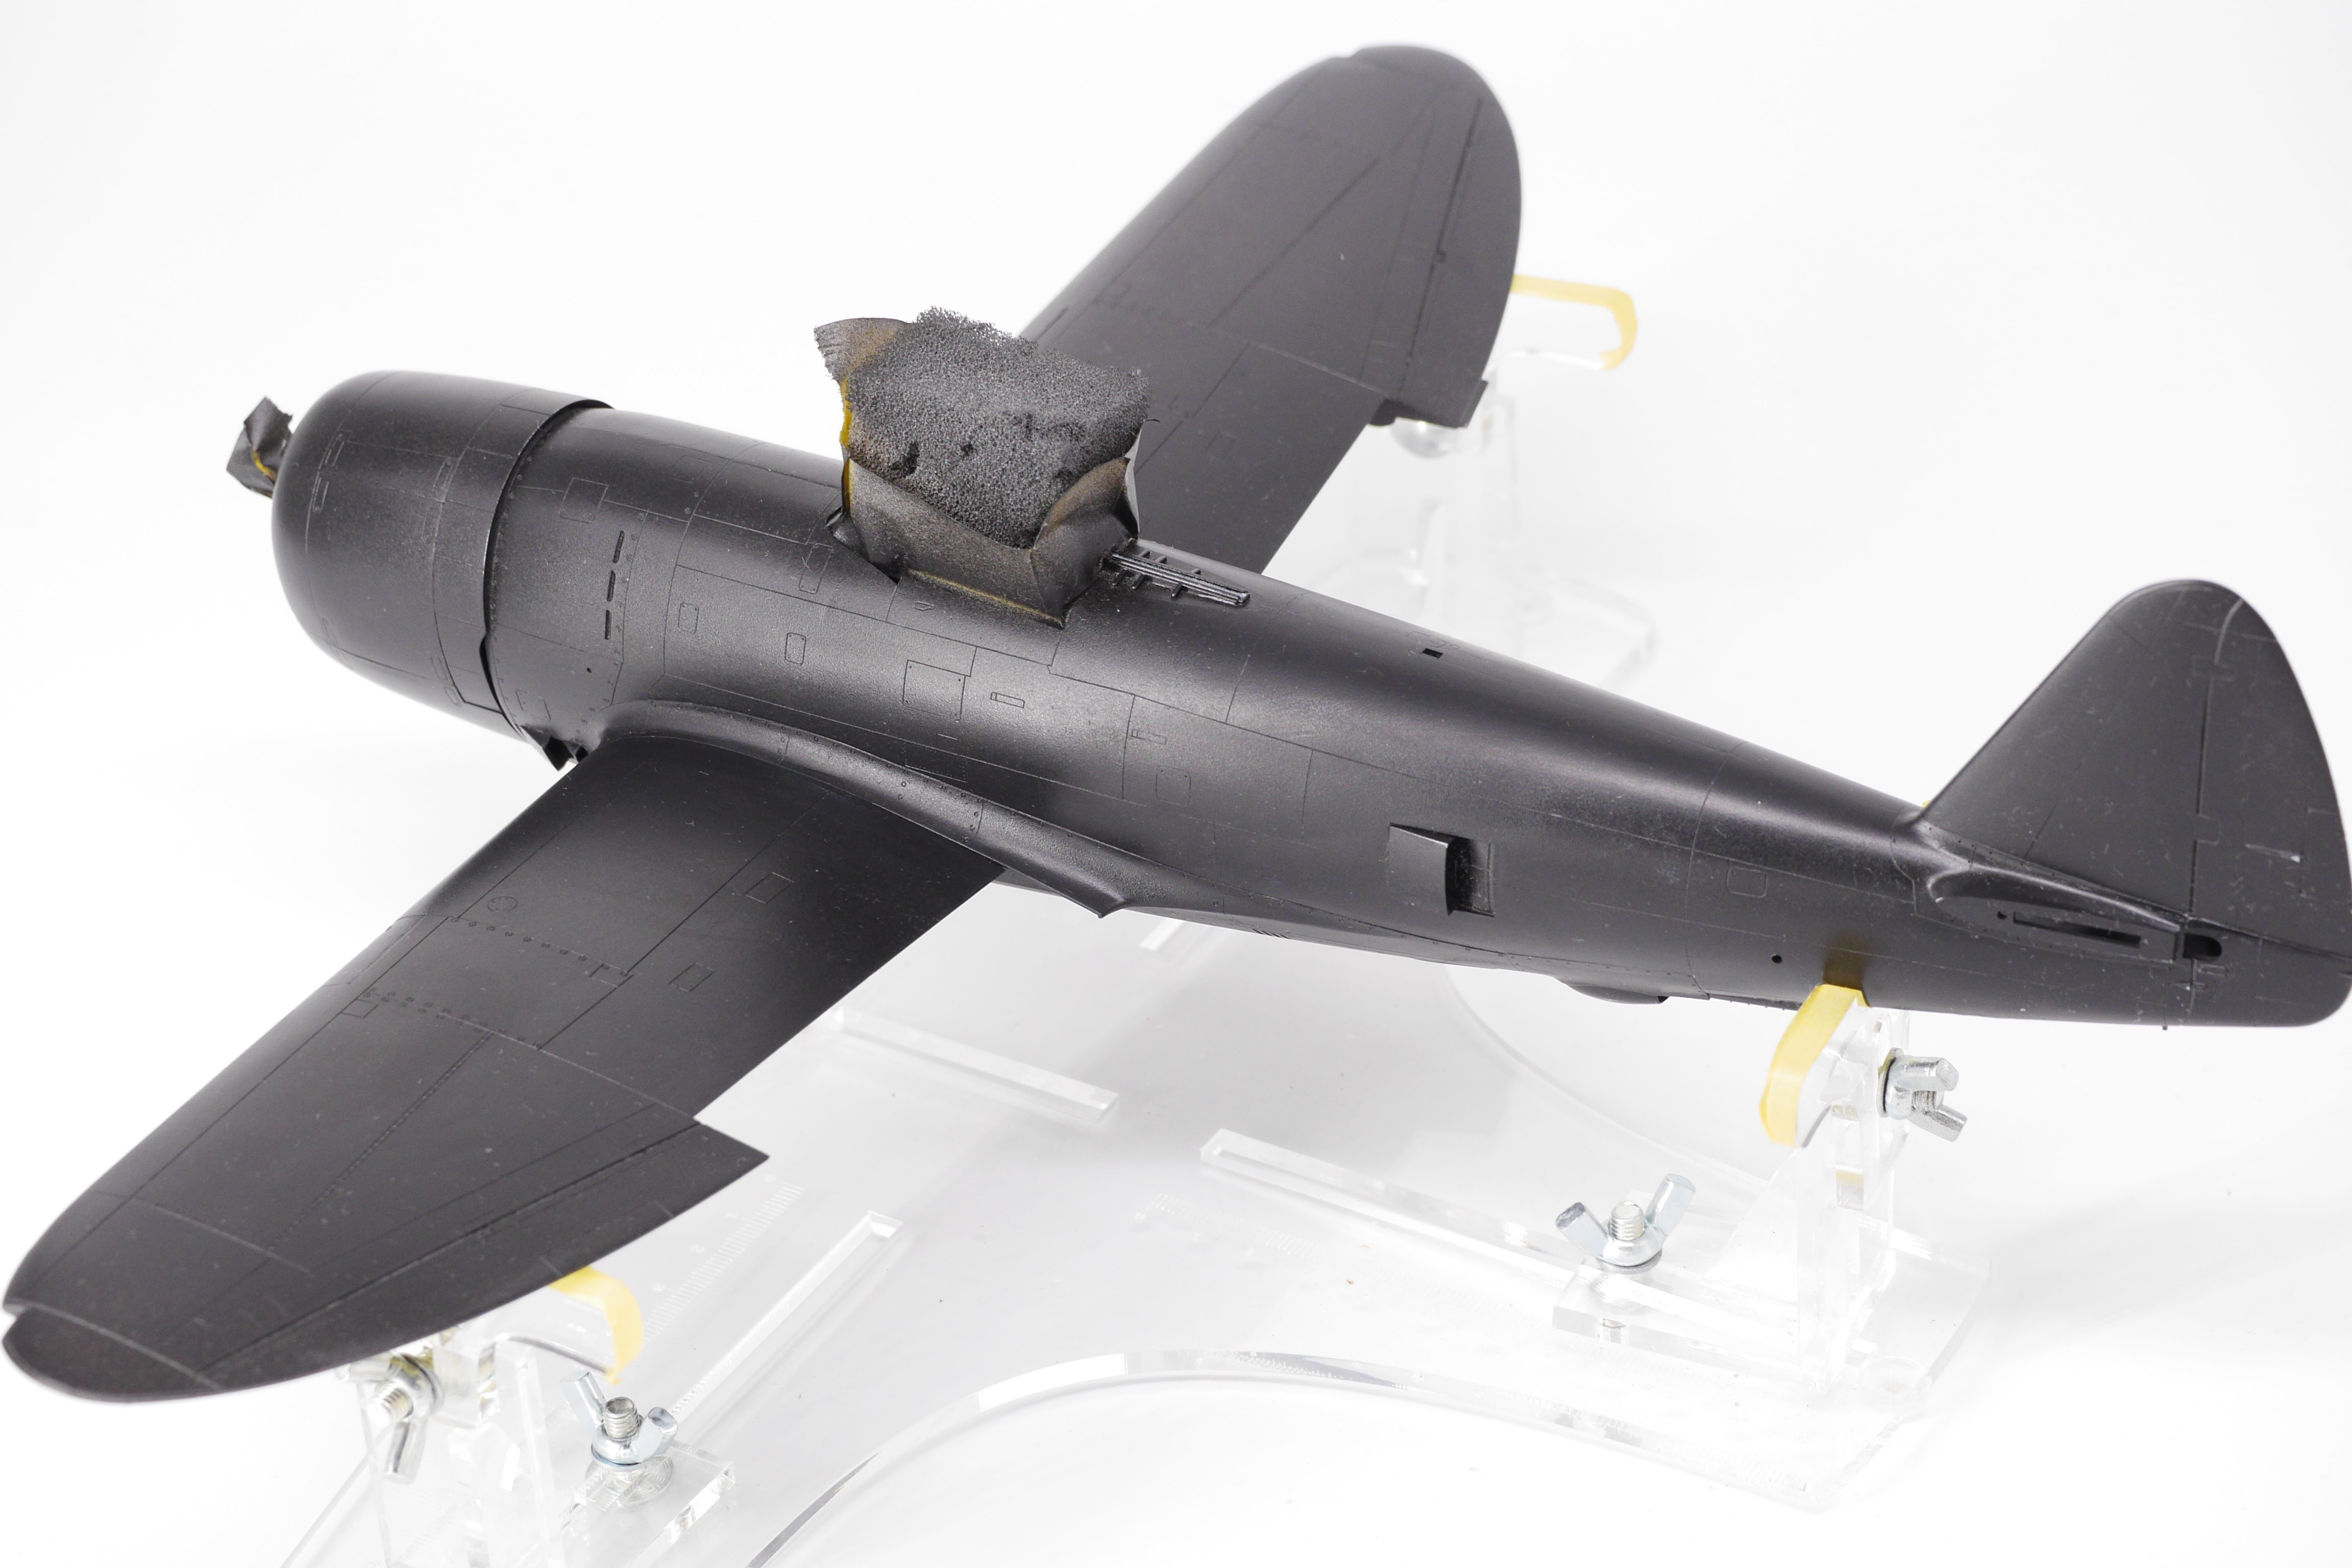
The Lady in the Lake changed to Lady in Black temporarily. To get the full shininess of polished metal, I honed the primed surface with 12000 grid pads and after a rub with an alcoholized piece of cotton I primed again with Alclad shiny black primer. After redo the honing and the rubbing, I now have the surface I'm looking for to prepare the NMF. After that much alcohol for the lady it's my turn now to get some liquor into my system Cheers Rob
-
Hey Gaz, at least the wash camouflaged the smoke rings , just joking. In the end she came out good, so what the heck. It's a thing about modelling, that you always try to do new techniques and not all of them work to perfection. On the other hand you get two benefits out of that, you learn to get a fine result despite the difficulties (like you did here) and you gain a lot of experience for the next build. Cheers Rob
-
Great progress with the cockpit and IP. Never heard about those seat belts, but they do look good. I like the early war RLM 02 interior colour, because it has more contrast and enhances details better than the dull late war RLM 66 caves. Cheers Rob
-
Short Sunderland MkII
DocRob replied to ThomasProbert's topic in LSM 1/35 and Larger Work In Progress
Wow, courageous project. Seeing the thread the first time I thought it must be a non LSM build. I will follow for sure. Cheers Rob -
You are absolutely right about the magneto. Trusted the Colour callout in the manual and didn't even check my own photos, dear me . I will try to correct that after painting the fuselage and get rid of the masking. Thanks Ernie, to hear that from you makes me proud. After starting the build I decided to choose the Dottie Mae design instead of another one and give the whole bird a newish look, like the original lady from the lake after restauration. Because of that late decision, I even have to repaint the wheel coverings, which I weathered to much. Cheers Rob