DocRob
-
Posts
7,048 -
Joined
-
Last visited
Content Type
Profiles
Forums
Events
Gallery
Everything posted by DocRob
-
Hi Gaz, looking mighty good so far. I like the design of the 410. How do you like the kit, where there any major problems in the build? I have the exact same version in my shelf with some AM for the cockpit, prop and spinners. Yeah Martin, nice pics, truly motivating. Cheers Rob
-
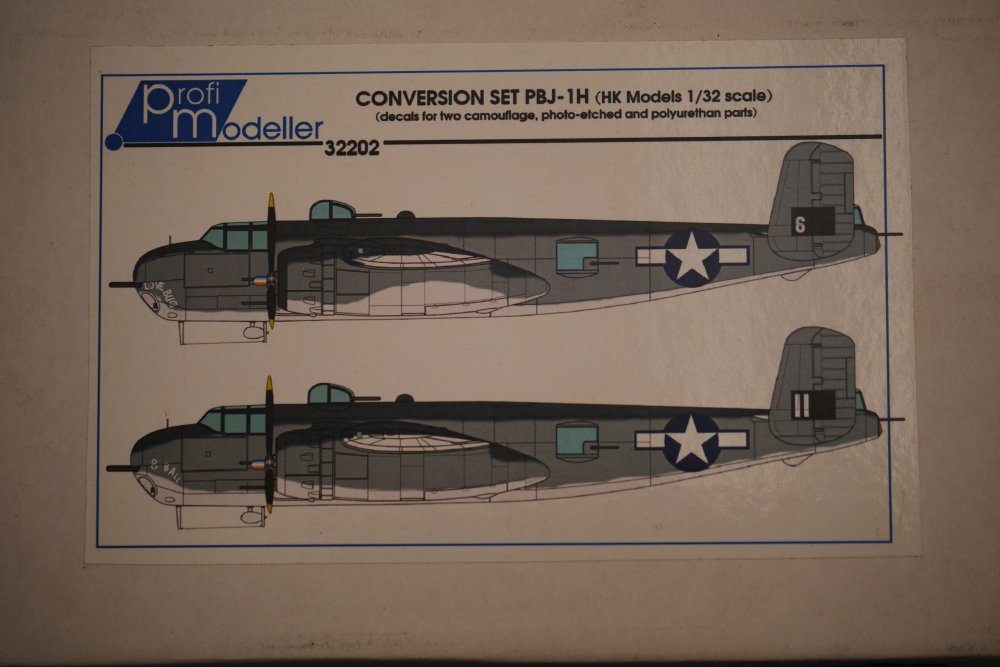
Hi Ernie, great question. I got these from Aires for my Tamiya Mossie, but am not sure if I use them. Three different heads are included in the set. Like you I will convert my B-25 to PBJ and so I'm interested in opinions about the rockets and the starting racks as well. I'm sure you know about the Profi Modeller conversion set for the PBJ. It contains parts necessary for converting the cockpit area, the radar pod and some decals., but no rockets are included. The decals don't look too promising, so for me it will be masks. Sorry for the bad -on the fly- photo quality. If you start your PBJ, I will be following for sure. Cheers Rob

-

1/24 Airfix Scale Mosquito build
DocRob replied to PeteF's topic in LSM 1/35 and Larger Work In Progress
Nice recovery, In the end it will be "only" you to see that canopy area with that level of critizism. All the others will see, like Drifter said, the best BIG Mossie out there. Cheers Rob -
Hi Rich, splendid work here again. With your love for corroded metals, I don't want to see your real car . Keep it coming, your ugly frog is a clinic in scratch building and heavy weathering. Whatever may happen to metal, you show it in your builds . Cheers Rob
-
Chapeau, everything blends in perfectly. It was a pleasure to follow and store some ideas for my 1/24 Typhoon. Cheers Rob
- 96 replies
-
- 2
-

-
- 1/32
- special hobby
- (and 1 more)
-
Hi Phil, I used Vallejo on different occasions and in different Colours (black, white and red-brown) and have to say that I'm not very impressed with the way they behave. The finish looks smooth, but adherence is not overall trustworthy, specially with mixed materials like PE or resin. After lots of tries I abandoned the idea of using acrylic primers on my builds. Priming to me is one of the most important steps in painting models and if the primer fails to adhere, the whole paintjob will be in trouble. Working with sticky masks, using different chemicals for painting, weathering, chipping and coating cries for a solid primed model and I don't want to have the thought in the back of my head, that with a late mask to peel of, I might ruin the whole work done. for me the primer of choice is Tamiya rattle can stuff. Yeah, it's expensive, but it adheres well, sprays fine (with some training) and you don't have to clean the airbrush I can only repeat myself here, a primer that doesn't stink is no good for the job, just my two cents . Cheers Rob
-
1/24 Airfix Scale Mosquito build
DocRob replied to PeteF's topic in LSM 1/35 and Larger Work In Progress
I started to use burnishing fluid from Uschi, but since it's a small bottle and I also use that bluish liquid for blackening white metal tracks for tanks, I found that stuff in a store for tiffany lamps for some Euros per liter. That will last for years . Cheers Rob -
1/18 P51C Mustang "Lopes Hope 3rd"
DocRob replied to airscale's topic in LSM 1/35 and Larger Work In Progress
Wow Peter, great skills and craftmanship. I will follow your outstanding build closely. Cheers Rob -
1/24 Airfix Scale Mosquito build
DocRob replied to PeteF's topic in LSM 1/35 and Larger Work In Progress
Hi Drifter, you don't have to paint the barrels necessarily. If you use burnishing fluid on the cleaned and grease free brass barrels you get a blackening effect, which is controllable and matte in finish. The other good thing about that process is, that you don't add the thickness of Colour to the surface and the details maintain. Cheers Rob -
SBD-3 clear Edition Trumpeter OOB
DocRob replied to Martinnfb's topic in LSM 1/35 and Larger Work In Progress
Hi Martin, it seems you chose a great subject for extensive fading and weathering and yeah, the engine could use some maintenance. Nice pics, I will store them for my, oops, did I say 1/48, SBD with lots of AM. Cheers Rob -
hk models Lancaster B Mk.I, R5868, PO-S (S-Sugar)
DocRob replied to JayDee's topic in LSM 1/35 and Larger Work In Progress
Use PE or just thin it . Yeah James, that adds some realistic touch, nice (and clean) work. Cheers Rob -
Can't get enough of these Corsairs, specially when they look that great. The finish looks nice and supersmooth a clear winner. I have to get me a second one after building the Birdcage some years ago. I tried to convince me that one is enough, because I prefer the three tone camo, but when I see yours, I have do a late one with folded wings for a change. Cheers Rob
-
Can't see the foil on top of your bottle, you should try another whisky, with your's you get only headaches and corks . Great job with the foil, gives your Liberator a great touch. Cheers Rob
-
1/24 Airfix Scale Mosquito build
DocRob replied to PeteF's topic in LSM 1/35 and Larger Work In Progress
Hi Pete, I often use Vallejo Model Air on my planes and tanks and get very mixed results while spraying. Clogging is an issue, but it seems to build up slower if you spray more continous. To me reducing the pressure is another way of reducing the clogging effect, because less particles of the paint dry on the needle with less air flowing by. Flow improver (also Vallejo) never did the trick for me. But back to the star of the show, your Mossie is looking great and I like the enhancements of the originalr kit, made by you. I more than once locked my eye on my Tamiya Mossie while reading this. Cheers Rob -
The Big Weasel, Trumpeter 1/32 F105g
DocRob replied to WattsNZ's topic in LSM 1/32 and Larger Aircraft Ready for Inspection
Nice, great finish and attention to detail. Looks like the fighter it is. Cheers Rob -
Yeah Michael, with these tracks I can see that it will be a fast build . Workable tracks are best being assembled under influence of spiriting liquids to dampen the boring side of AFV-modelling. Cheers Rob
-
Looking great and closing in to completion. Cheers Rob
- 96 replies
-
- 2
-
-
- 1/32
- special hobby
- (and 1 more)
-
It's not Punk related and its not by Disturbed, but quite disturbing and as a cover superseeds the original by far and gives it a new sinister meaning. Sadly not in my otherwise well assorted vinyl shelf. Cheers Rob
-
If you look at a finished model and nothing is sticking out and everything is blending in perfectly you know you are speaking about a winner. This is a truly magnificent build and the techniques involved where used with great skill. Cheers Rob
-
Nice build and nice setting. I like the addition of the pilot figure. Is it from Quing Yi Miniatures? Cheers Rob
-
Coming together greatly Whatever Elmer's is, I like the idea of masking to be cemented areas while painting, simple, but I haven't heard of before. I'm always scratching with a blade after painting with the risk of ruining something, so thanks for the idea. Cheers Rob
-
1/24 Airfix Scale Mosquito build
DocRob replied to PeteF's topic in LSM 1/35 and Larger Work In Progress
Cool idea with the aluminum tape, I will store that on my 'in brain hard drive' After playing around with different acrylic based primers, I went back to my tustworthy Tamiya rattle can pimer, especially while using different materials like PE-metal and resin with the plastic. Live is to short to stay in constant fear of ruining a paintjob, because you peeled everything off with some piece of masking tape. I don't use that formula for paints, but for a primer my saying is if it stinks terrible it's the right stuff . Cheers Rob -
I didn't do the substances, only some spiriting liquids , so not all rememberance is lost, but anyway it was a good time. I lived in the area of Berlin by that time where the Caves and Bowies and Pops lived, among lots of Berlin bands like Neubauten and Malaria and Ideal. Cheers Rob
-
SAAB J35J Draken, F10 Ängelholm, 1995. Hasegawa (1/48)
DocRob replied to Ivan Ivanovich's topic in Non LSM 'WIP
Nice job on the Draken, you un-dulled the monochrome paintjob greatly. I've never built one of theese Swedish jets, but have been tempted lots of times. There is clearly an openeing for some new 1/32 material. I'm not with you with the ABBA thing , but remember a friend driving an old Saab 900 in the eighties and the interior looked like the same design team of the Jets-division did the job. You even had a 'Fasten Seat Belts' sign illuminated on the dash, in a time when lots of people refused to use safety belts at all. The ignition was in the middle console and you had to hope that the key would'nt break, because the SAAB had one of the firs immobilizers on board. Got carried away, but yeah, a decent Tunnan would do it for me, because i'm afraid of the splinter camo of a Viggen. Cheers Rob -
Not weather related either, I remember some events from my early days in the 80's in Berlin, when Nick Cave didn't look like the Nick Cave you mentioned, but theese wher the bad hours of the night after concerts and exhausted from lack of sleep and whatever liquids and substances where involved. Yeah, it was the place to be young and wild, good to be remembered. Cheers Rob