DocRob
-
Posts
7,053 -
Joined
-
Last visited
Content Type
Profiles
Forums
Events
Gallery
Everything posted by DocRob
-

A Wee Project: 1/24 Cardoor Tiffie
DocRob replied to Uncarina's topic in LSM 1/32 and Larger Aircraft Ready for Inspection
Great build, great result. The finish is exceptional and mouth watering. Have to open the box of mine, juuuust open... Cheers Rob -
Guys you're killing me and my provision from big T , I wonder what you have in mind when I recommend their great magnifying glasses . Cheers Rob
-
Hi David, like your car top set up a lot and the results are good too. The Lanc is looking great with that light of the setting sun, very natural and the shadows look convincing. The second has a bit too much foreground for my liking and the colours are fading a little to the gray side. It has it's atmosphere, but a little more colour saturation wood enhance the picture, maybe with the help of some spot metering. I as a nearly livelong available light and landscape photographer found it really hard to adopt to modelling photography. I still haven't mastered to get good photos and because of that I'm toying with the thought to start a thread for those of you who want to enhance your photo skills with the critique of the fellow LSM crowd. It should not be about the quality of the model, but the image. But I have to think about the concept a little further. I use a Lumix as well, combined with lots of different lenses, but my main piece of glass is a 90 mm (45mm in Micro 4/3) macro lens, because you get pretty (ugly in times) close and the focal angle is almost distortion free. Cheers Rob
-
Watch out Ernie, we had quiet some Kalima (Hot storm from the African desert with lots of sand in it) the last three days and lost some trees in the garden, but I had a great surf with my son, because of the big waves. Stay safe and avoid flying obsacles. Cheers Rob
-
Quite a year you had, nice output and nice photos too. Compared to you I seem to be to easy to distract from the workbench. Cheers Rob
-
Our son visited us for Christmas on our tiny island and that meant surfing in a fat southeast swell the last two days. I'm broken as I'm not 23 anymore like him. You see Carl, it seemingly never stops with that (positive) stress with the children. But right now we bring him to the airport and that's not so easy too. Cheers Rob
-
Feliz Navidad, you are a great bunch of guys and I wish you all the best for you and your families and the plastic as well. Cheers Rob
-
With some thoughtful use of this https://ak-interactive.com/product/oil-and-grease-stain-mixture-75ml/ you will achieve masterful results. Cheers Rob
-
Popcorn time, I love your project Kent. Some month ago I thought about something similar but shied back because I questioned my ability and stored the idea in a very remote area of my brain. Cheers Rob
-
If you haven’t yet, then BUY THIS TOOL!
DocRob replied to Clunkmeister's topic in Modelling Discussion
Thanks, looks good to my eye, I gonna place an order and be a member of the RBiveters . Cheers Rob -
Kitty Hawk F-5F done.
DocRob replied to Clunkmeister's topic in LSM 1/35 and Larger Work In Progress
Nice save Ernie, are these the RB riveting results? Looks good to me. Cheers Rob -
Brummbär! I beg your pardon! 27/Dec/18
DocRob replied to GazzaS's topic in LSM 1/35 and Larger Work In Progress
Nice Zim-job, can't wait to see the big Bär painted. Cheers Rob -
If you haven’t yet, then BUY THIS TOOL!
DocRob replied to Clunkmeister's topic in Modelling Discussion
Nice Ernie, but it would be good to show some of the results. I'd like to compare them to my cheap Trumpy riveter. Maybe you make me a believer too and it's the beginning of a new cult . Cheers Rob -
Frohe Weihnachten, Meri Kirihimete, Merry Xmas...
DocRob replied to Ivan Ivanovich's topic in General Discussion
Feliz Navidad Ivan, to complete the picture with my adopted Spanish heritage. Tons of luck for move to the other side of the world. Cheers Rob -
Great result with that low silhouetted hunter. Nice paintjob and weathering. Have to build one of my IV derivates, but have the not so low variant in my stash. Cheers Rob
-
A Wee Side Project: the Airfix Car Door Tiffie
DocRob replied to Uncarina's topic in LSM 1/35 and Larger Work In Progress
Epic, love the car door for better visibility of the working place. Nice and subtle weathered finish. Cheers Rob -
Nice progress, can't wait to see how yours turns out in the end. I have the ZM one and after what I experienced with their TA-152, the 219 has to wait a bit more. Cheers Rob
-
Wow , a beauty Barry. The finish looks perfect. As you mention, it's definitely not for the beginners, at least not the front half , but you mastered that. Cheers Rob
-
Nice Danny, and these check flags lead the eye to the interesting points. Cheers Rob
-
Kitty Hawk F-5F done.
DocRob replied to Clunkmeister's topic in LSM 1/35 and Larger Work In Progress
I have made me one for the decal solvents, because it is so easy to topple these small bottles while moving the kit and will manufacture me one for my cement bottle as well after reading this. https://forum.largescalemodeller.com/topic/5494-fear-no-more-decaling-worst-nightmare-solved/ Cheers Rob -
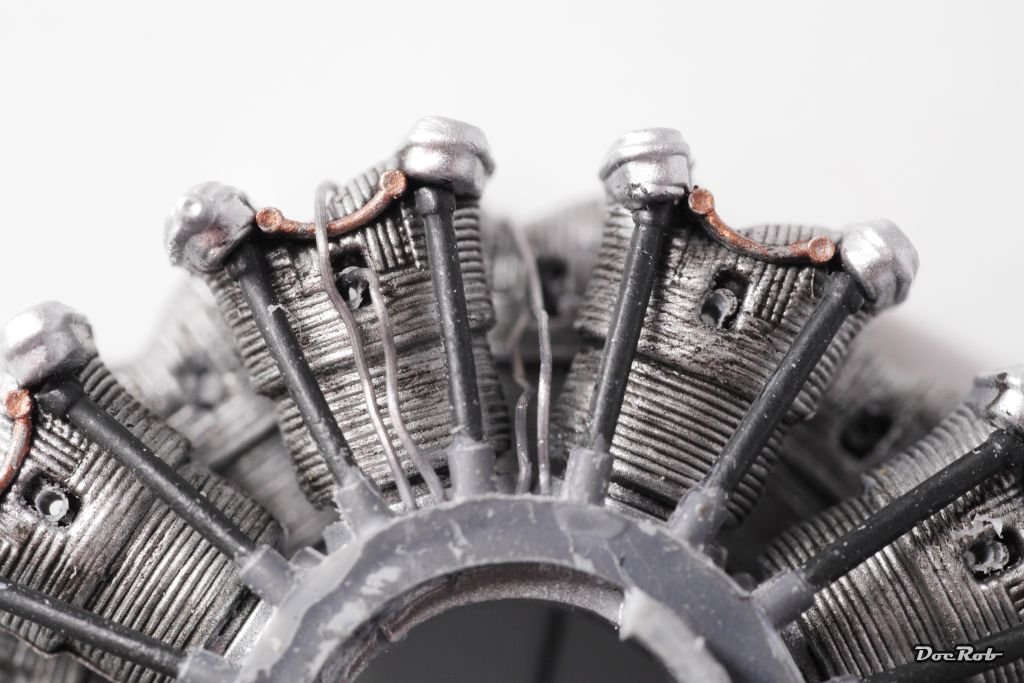
Two out of eighteen . That is my first attempt of wiring a n engine with lead wire. Decided against the flat PE and it seems to work. I drilled out the holes for the spark plugs with a 0,4 mm drill and inserted pre cutted pieces of PlusModel lead wire with 0,3 mm diameter. The wires will be fine-tuned with tweezers when all are applied. Cheers Rob

-
Nah, not my color, and with my 0,2 mm nozzle it's to demanding to repaint that tracked bar of chocolate Cheers Rob
-
Was it a long strike or is that the normal haul ? Cheers Rob
-
Kitty Hawk F-5F done.
DocRob replied to Clunkmeister's topic in LSM 1/35 and Larger Work In Progress
Oh dear, sorry to hear that. The quick build starts to slow a little caused by feline desasters. We own only a small dog and it's way easier to keep things out of his reach. One of my other hobbies is my huge collection of vinyls and three turntables, so definitly a no cat house. Cheers Rob -
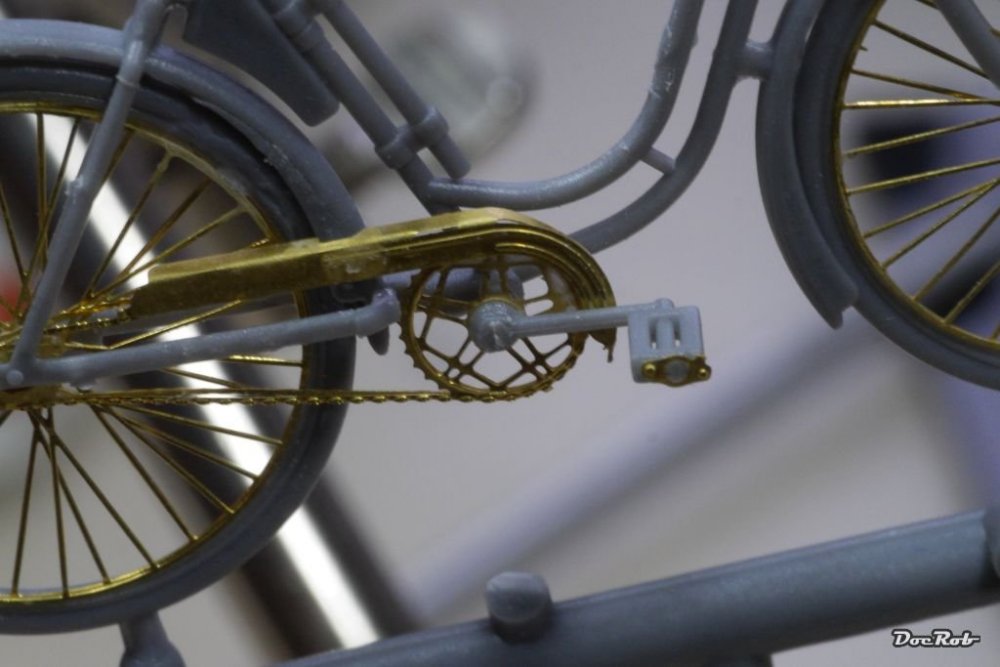
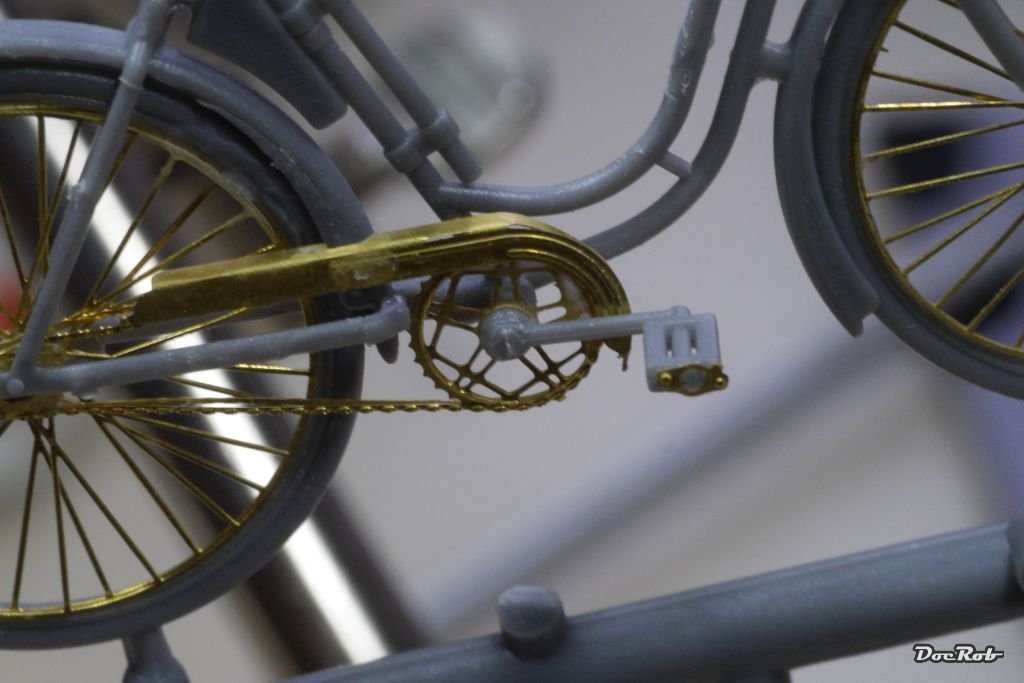
1/35 Harley Davidson WLA
DocRob replied to JeroenPeters's topic in LSM 1/35 and Larger Work In Progress
These two wheeled MINIatures can be challenging in times, but hey you're a master modeller, so I'm quite confident you will master that . Cheers Rob P.S. I know the feeling