DocRob
-
Posts
7,132 -
Joined
-
Last visited
Content Type
Profiles
Forums
Events
Gallery
Everything posted by DocRob
-
With the pic of your furry predator I wonder that there is only one hair in your splendid paintjob. The good thing on my little dog is that he is more earthbound . Love your mouth watering build. Until I followed it, I never thought about building a 110, but that might change... Cheers Rob
-

Renault Char B1 - French heavy Hitter
DocRob replied to DocRob's topic in LSM 1/35 and Larger Work In Progress
Thank you guys, Sometimes I did, sometimes I don't . For example on my recent P-47 Dottie Mae build I used steel pigments from Uschi for the wheel struts. These pigments are among the finest (grain and quality) and after rubbing them to shine thoroughly they adhere well. A coat of Future didn't change the appearance of the pigments at all. On other occasions I applied no protective coating, specially, if I wanted to achieve a grainy surface like on heavily burnt metal. Pigments which are not perfectly rubbed onto the material will alter with protective coatings. Here is an example of non protected pigments on an old built of mine. https://forum.largescalemodeller.com/topic/5256-take-a-brake-leak-t-55-enigma-mb-220/ I'm not entirely decided on 'mudding' the Char heavily, but if I do, I will use pigment fixer to protect the result, but I have to account for a little darkening effect of the fixer. I can't really comment on durability, as I normal loose interest in a build after finishing, but the above mentioned T-55 is still ok after some years and others are as well. Cheers Rob -
Thank you Danny, we can do a little 'then and now' dio with our Dotties of different times . Cheers Rob
-
Renault Char B1 - French heavy Hitter
DocRob replied to DocRob's topic in LSM 1/35 and Larger Work In Progress
Thank you, it's pure fun, just dabbing three different shades of acrylics onto the parts in random pattern, then three shades of rust pigments and last but not least some steel/iron pigments and black pigments for smoke. The main thing is awareness of how corrosion builds up. In my case it is more spread and intense on the tubes and only on the hottest part, the upper part of the sheet metal coverings, where also the possibility of tear is the greatest. Cheers Rob -
Renault Char B1 - French heavy Hitter
DocRob replied to DocRob's topic in LSM 1/35 and Larger Work In Progress
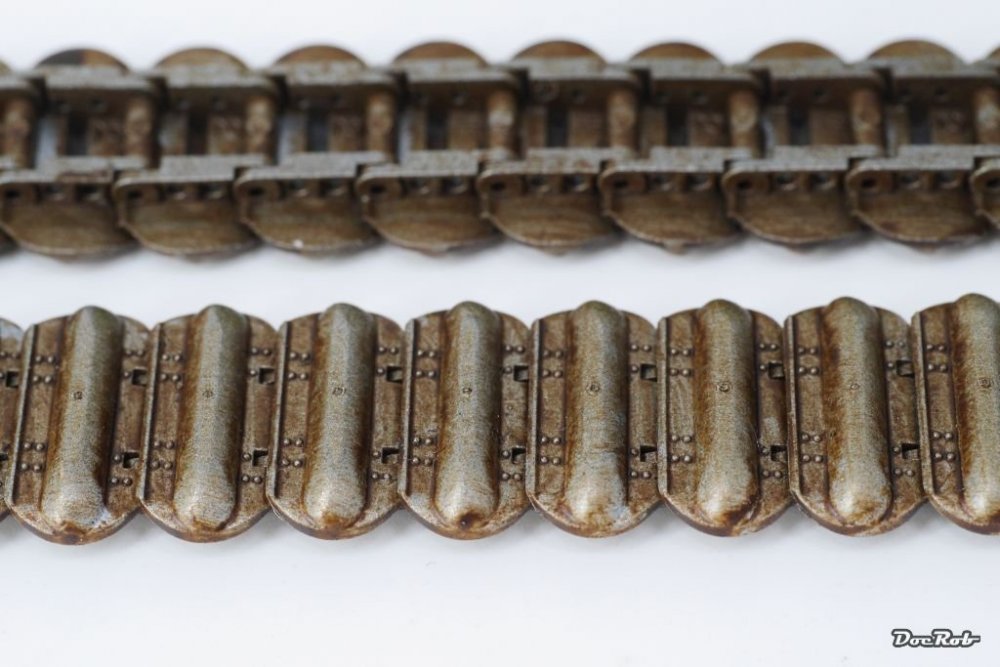
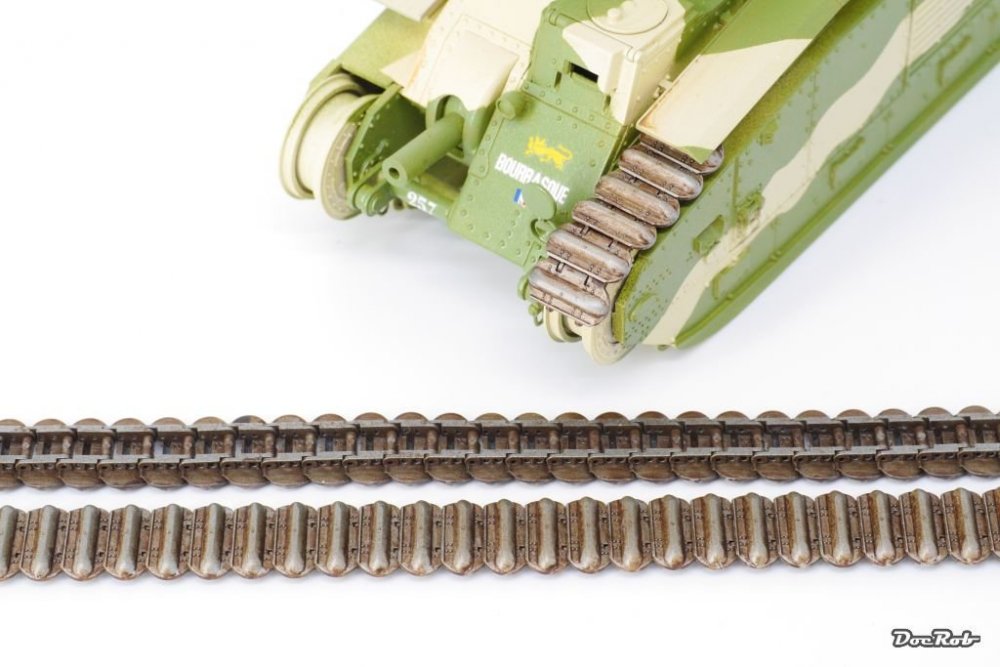
The rearside of the beast got some attention. I fiddled the chain around the hooks, which is greatly explained in the manual. The chain was primed before and treated with iron paste from AK and with rust and iron pigments by AK and Uschi. I have to admit, I'm a pigment addict, specially when it comes to metals, they look so real if they are applied correct. Don't worry, I don't sniff them, at least not on purpose , but look for that fat bolts holding the eyelets for the chain, some of Uschis iron pigments applied with a big flat brush and whoosh, it looks metal. Sure, it's nothing else than good old drybrushing, but it is way easier and finer in the result. Cheers Rob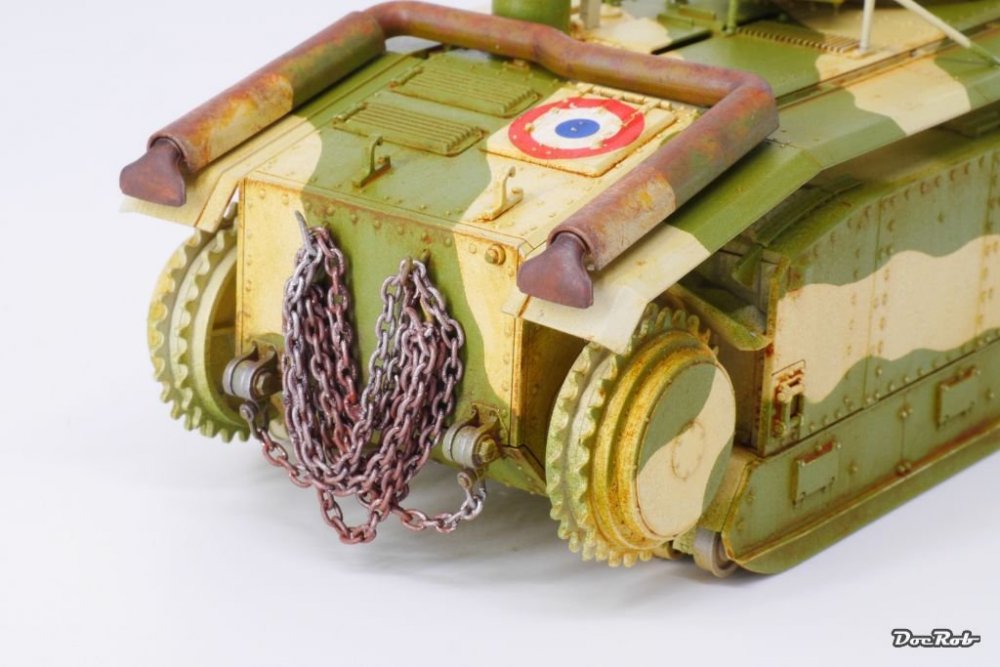
-
Renault Char B1 - French heavy Hitter
DocRob replied to DocRob's topic in LSM 1/35 and Larger Work In Progress
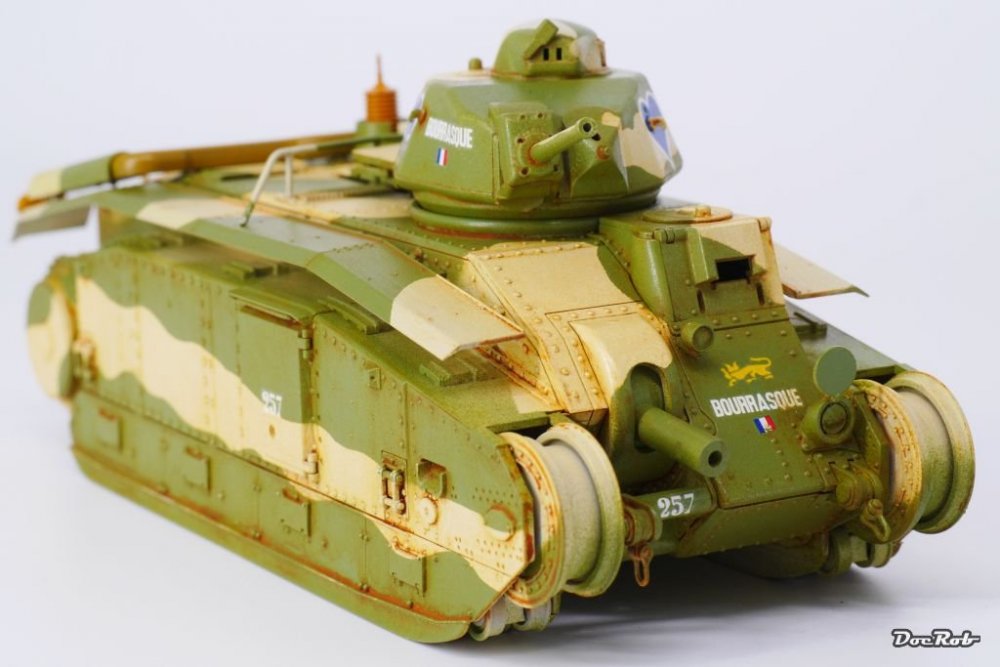
The fun part is starting, get the beast used an dirty. A first layer of weathering is applied. I used a brown wash from AK. After drying I used my Lifecolour rust set to get some heat inflicted corrosion onto the exhausts. These were added with black smoke pigments and some iron powder from Uschi. Cheers Rob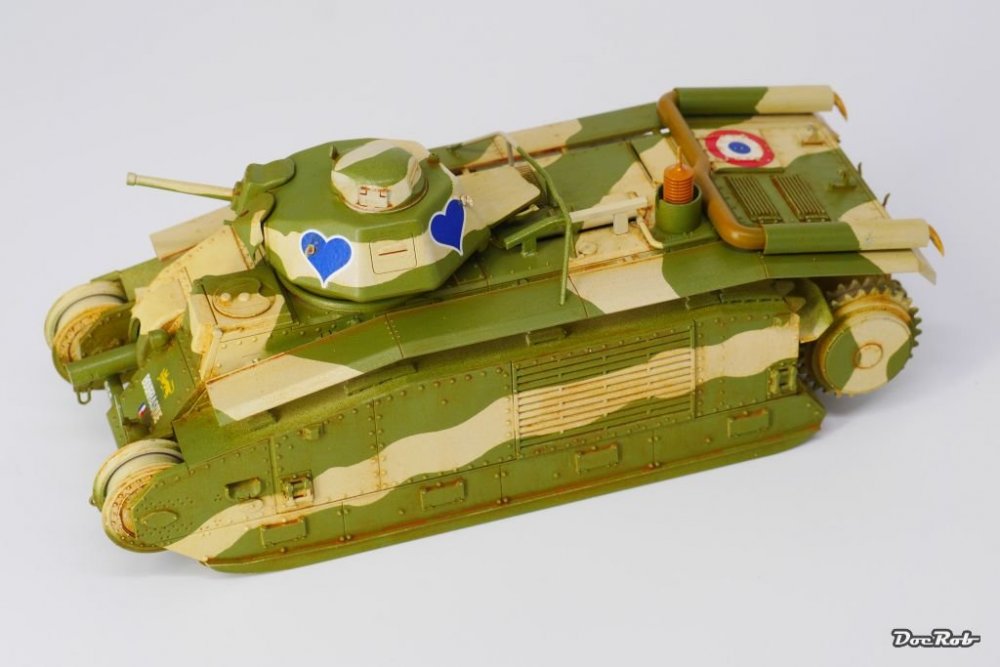


-
Renault Char B1 - French heavy Hitter
DocRob replied to DocRob's topic in LSM 1/35 and Larger Work In Progress
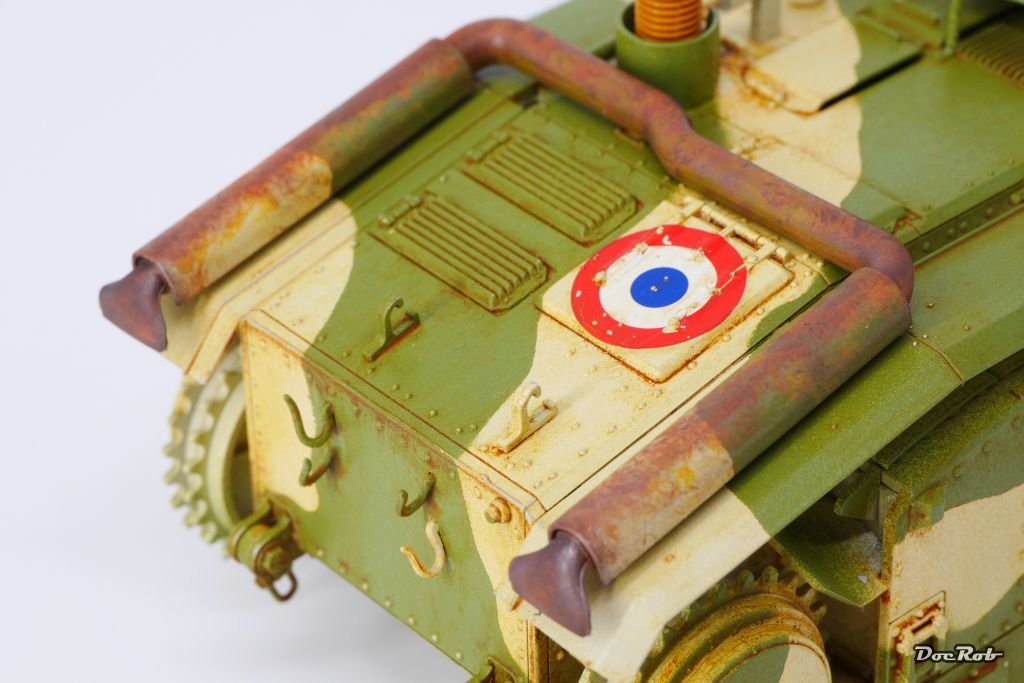
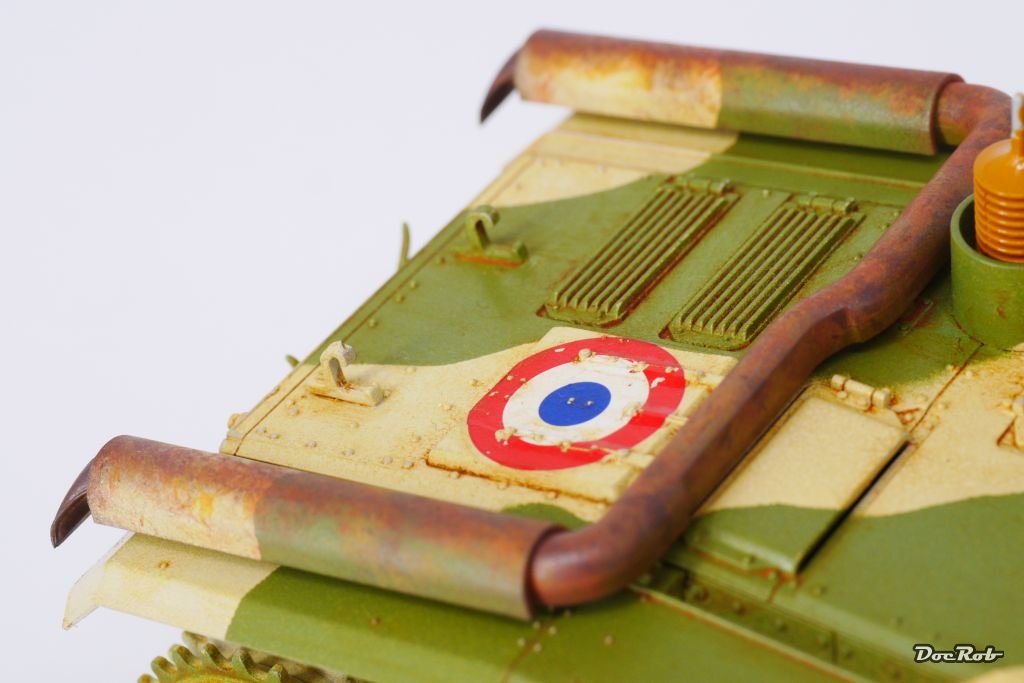
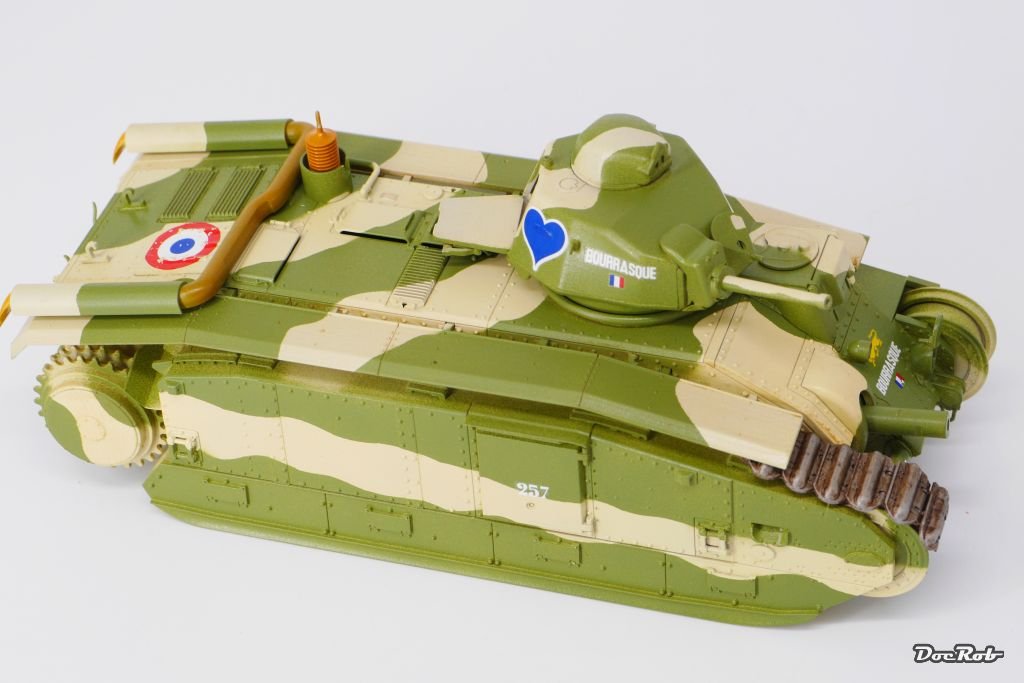
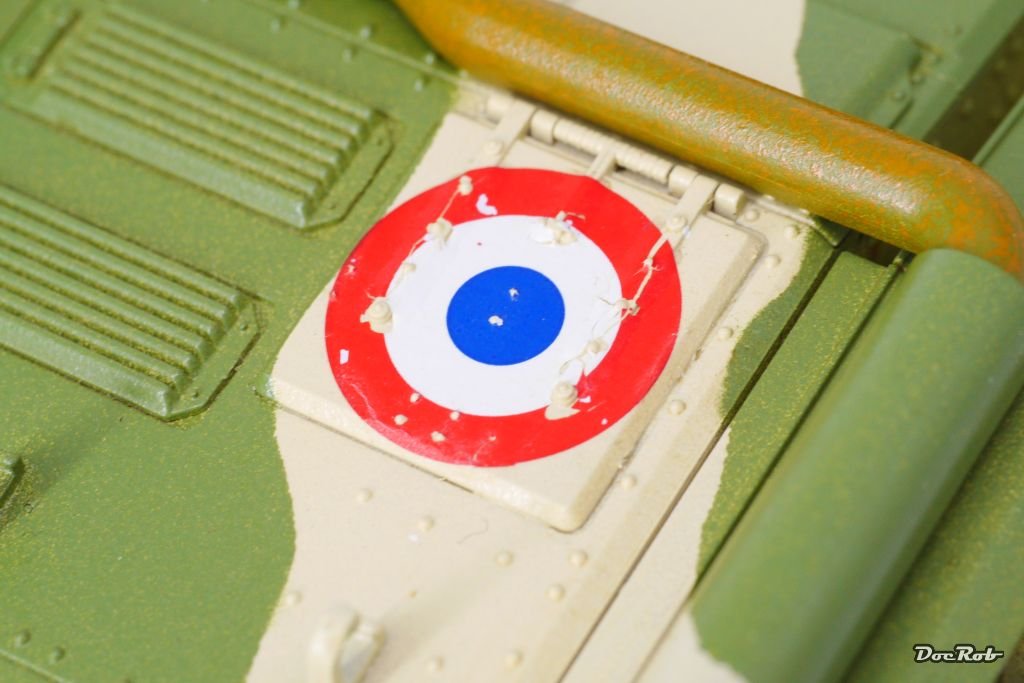
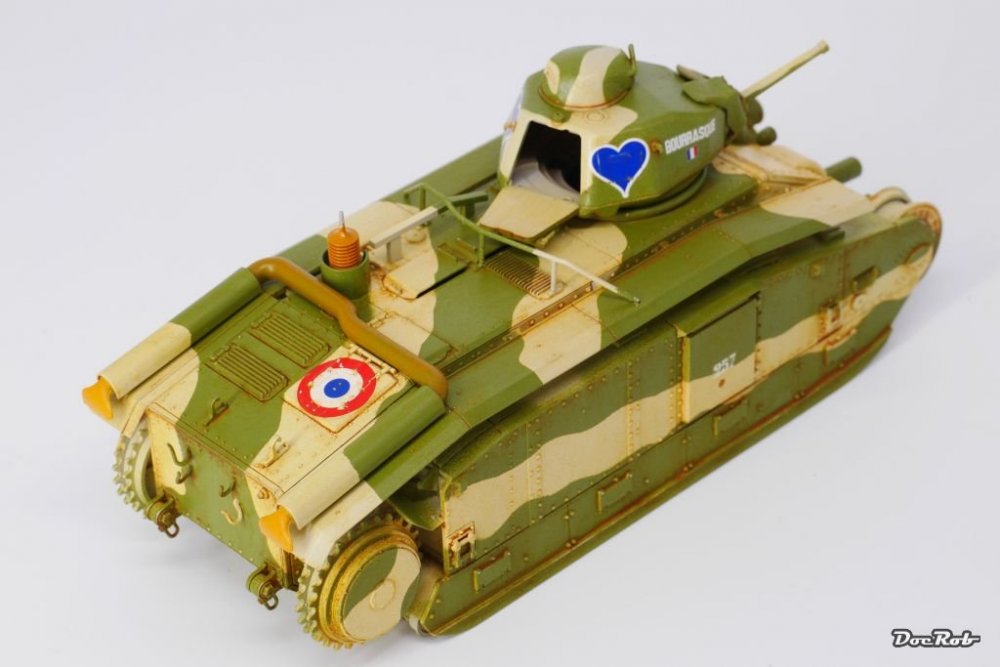
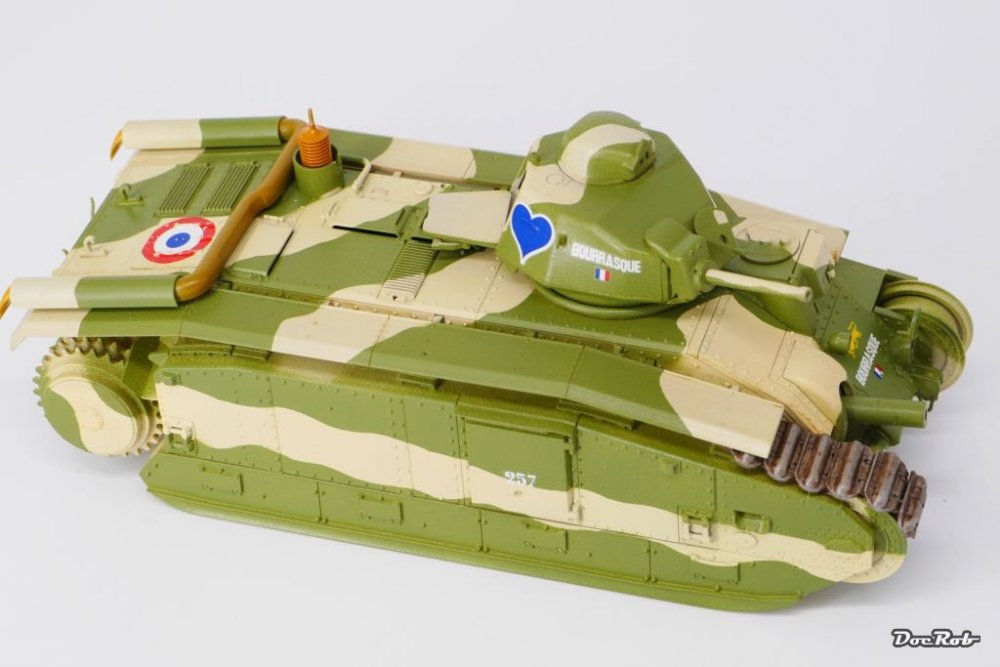
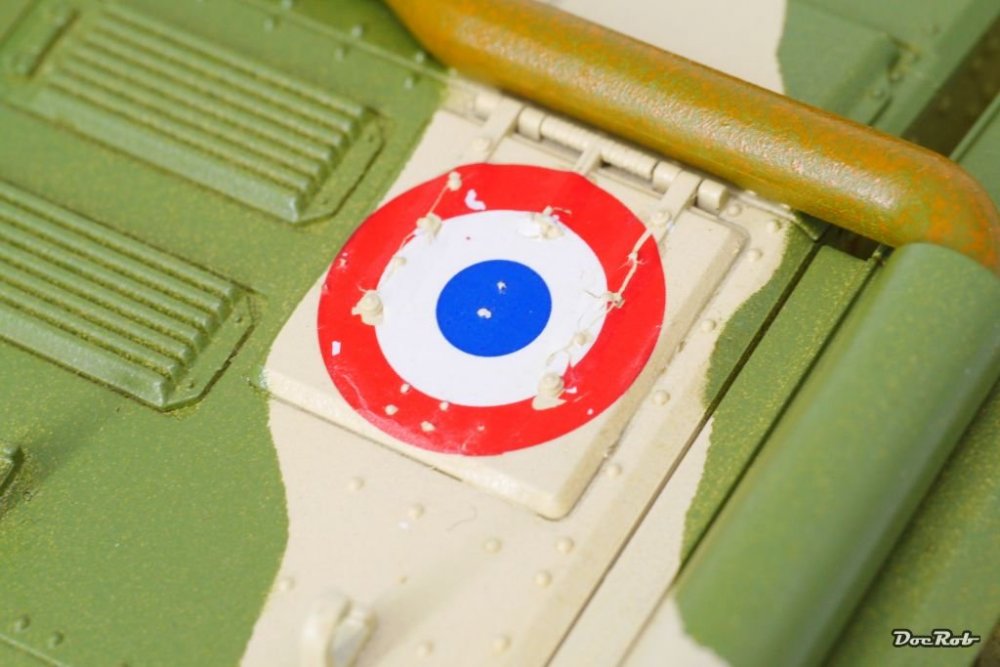
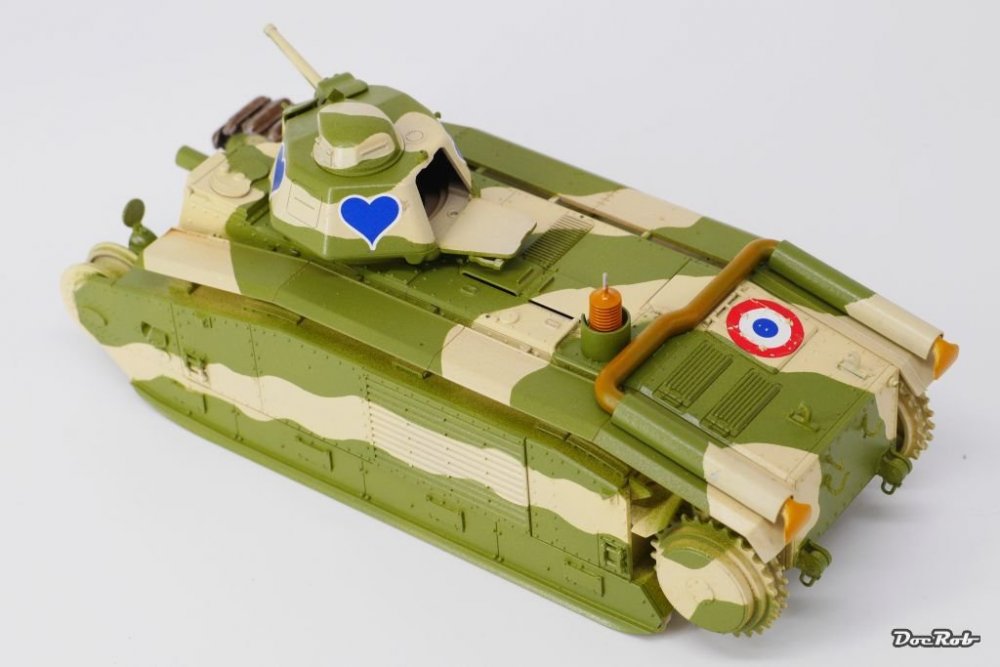
Salut les messieurs, the beast got Futurized before applying the decals. These were not easy to handle and got very brittle with my setting liquid. The cockade broke completely and I had no spare or want for cutting masks. I will add some Colour touchups to repair it a bit and the rest is gone by boot wear on that hinge bars. Next was two coats of brownish filter from MIG to get the camo-colours better blended. If you have ever heard the Dude say 'That rug tied the room together' in the Big Lebowsky, you can imagine the effect on a tank, its simple, but it's magic as well. The Antenna was sprayed in what I hope is the right Colour and the same went on to the mufflers as a base for corroded heat exposed pars. The tracks were sprayed with Tamiya gun metal and then coated with a heavy dose of AK's track wash. After some minutes of drying, I rubbed a little off the exposed parts. Cheers Rob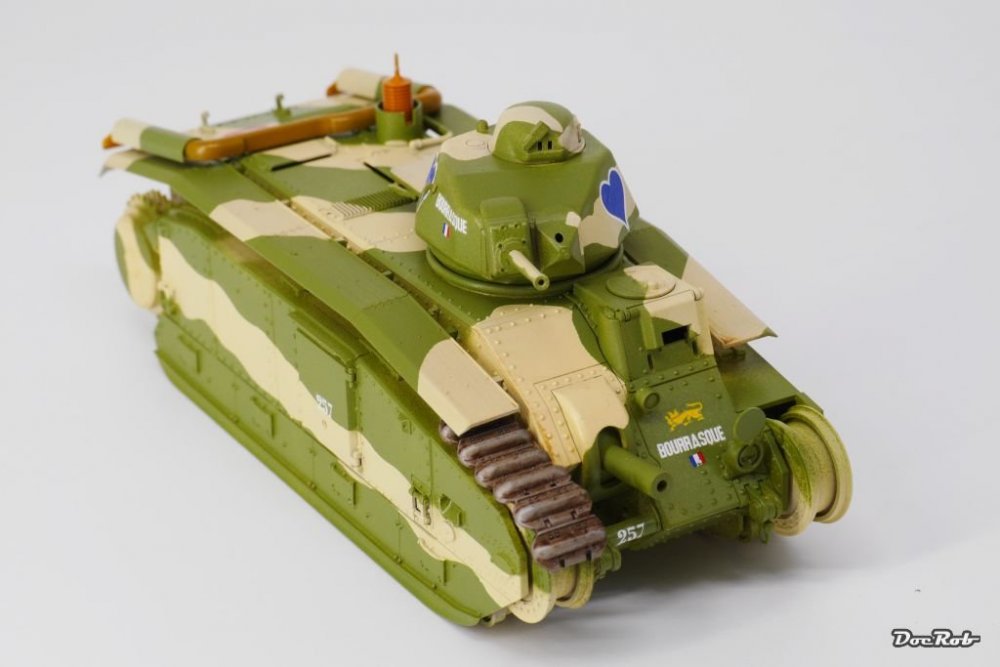
-
Looking great Ernie. The F5 is not one of my favorites, but it was a pure pleasure ride to accompany you while building her. I like the result, everything blends in perfectly. Sometimes it's good to build one oob, and ask yourself, why did I use that much AM on my last build. Cheers Rob
-
Oh, there was a T34 in that picture, must have slipped my attention ,
-
Some are really chained to a subject .
-
Nice grimy result Gus. The multi colored background pays off greatly. With the contrast of markings, wheels, etc. this will look great. Cheers Rob
-
A little pause with Xtreme metal in the moment, Gus. There is a French heavyweight occupying my bench time. Today I painted the tracks, another bare metal theme, but It turned out, that I forgot to buy Gun Metal from AK, instead I had to use Tamiya stuff, but that's another story, written in another chapter. Cheers Rob
-
Renault Char B1 - French heavy Hitter
DocRob replied to DocRob's topic in LSM 1/35 and Larger Work In Progress
Thanks Peter, made some progress the last two days, but no pics yet. After a coat of Future I applied the decals, which where extremely fragile. I broke the French insignia and had no spare in my stash. I decided to leave it like this and see how it will look with some weathering. After another protective coat of Future, hull and turret are left to dry. I sprayed the primed tracks with Tamiya gunmetal as a base and also primed the figures for some in between painting. The antenna was sprayed in a brownish orange tone and I hope this is correct. The only Colour pic of an antenna I saw is showing a kind of that tone. I wonder what kind of material it is, maybe Bakelit. The Tamiya manual calls for bright orange, which I doubt. Having that Colour in the airbrush, I used it for pre painting the rust areas on the muffler. Cheers Rob -
Kitty Hawk F-5F done.
DocRob replied to Clunkmeister's topic in LSM 1/35 and Larger Work In Progress
And I always took your name for Martin, anyway it starts with the same letters . Cheers Rob -
Renault Char B1 - French heavy Hitter
DocRob replied to DocRob's topic in LSM 1/35 and Larger Work In Progress
@Martinnfb Thanks for the great pics, your archive seems endless. Interesting trailer, I will store it in my brain HD for later. It seems, that you can't go wrong with oil stains and whatever causes stains on these tanks. That clearly stretches the definition of weathering to my eye , great picture though. Cheers Rob -
Renault Char B1 - French heavy Hitter
DocRob replied to DocRob's topic in LSM 1/35 and Larger Work In Progress
Hehe, you fake Frenchie , bien huilé fonctionne mieux. Cheers Rob -
Thanks Gus, grain (or better no visible grain) is always a key to a new looking NMF. I believe that is almost possible with these Xtreme metal Colours, but I have to find a way to get a better result. While working with those Colours sometimes the grain seem to be less prominent than in the end, that leads me to the conclusion, that it is all about the way you apply. I will perform some test if the tendency is more about 'flooding' the surface or better work in very thin layers. I believe here is the key to a ungrainy NMF. Thanks Joeg, but please enlighten me, what is an 'ac' Cheers Rob
-
Renault Char B1 - French heavy Hitter
DocRob replied to DocRob's topic in LSM 1/35 and Larger Work In Progress
Actually I have to admit, that I didn't spent a single thought on the tracks , beside that they are clickable and quite nice in plastic. I will consult some pictures, but would like to put some grease on the monster with some oily shininess as a contrast to the matte mud. Cheers Rob -
Renault Char B1 - French heavy Hitter
DocRob replied to DocRob's topic in LSM 1/35 and Larger Work In Progress
I think it is a mean looking machine, like a dinosaur on the prowl. The bonus of this one is that you only have to paint the idler and the road wheel, all the tiny ones are hidden. After the camo, the beast looks very clean, but this will alter. I guess with that track layout, there must have been a lot of grease and oil involved and mud splatters everywhere. Cheers Rob -
OS2U Kingfisher by Kitty Hawk
DocRob replied to BlrwestSiR's topic in LSM 1/35 and Larger Work In Progress
Bring it on Carl. I have a weak spot for naval planes specially with floats and the Kingfisher is one of my favorites. Can't wait to see your magic working. Salt and sun are not only for surfers, but also great for weathering effects. Cheers Rob- 89 replies
-
- 5
-

-
- os2u
- kingfisher
- (and 2 more)
-
Thank you Carl, these Xtreme metal Colours make life a little easier with NMF. The durability is a clear plus against Alclads. As I'm not prepared to foil a kit at the moment, it has to be airbrush and Colour. To make a well worn NMF is not a big deal, but a high shine reflective one is hard to achieve. I will do further testing in the future and may try it on a P-38. Cheers Rob
-
Looking great, I like the newish, but used look, not easy to achieve. New is relatively easy, abused too, but the way you did it is the hard way. Me like. Cheers Rob
-
Without your hand it would almost look real or is that hand of yours out of scale? Cheers Rob
-
Renault Char B1 - French heavy Hitter
DocRob replied to DocRob's topic in LSM 1/35 and Larger Work In Progress
Hehe, haven't thought about Indy. What I had in front of my imaginary eye was the Char sans tracks as a kind of gondola for a steam powered Zeppelin. The whole thing would have been made of copper and brass with lots of patina. And then there were these tempting French camo styles... Cheers Rob -
Thank you Senhores, some kits make it easier to achieve a good result and Dottie is definitely one of them. Cheers Rob