DocRob
-
Posts
7,048 -
Joined
-
Last visited
Content Type
Profiles
Forums
Events
Gallery
Everything posted by DocRob
-

TA-152 Zoukei Moura 1/32, My First ZM
DocRob replied to DocRob's topic in LSM 1/35 and Larger Work In Progress
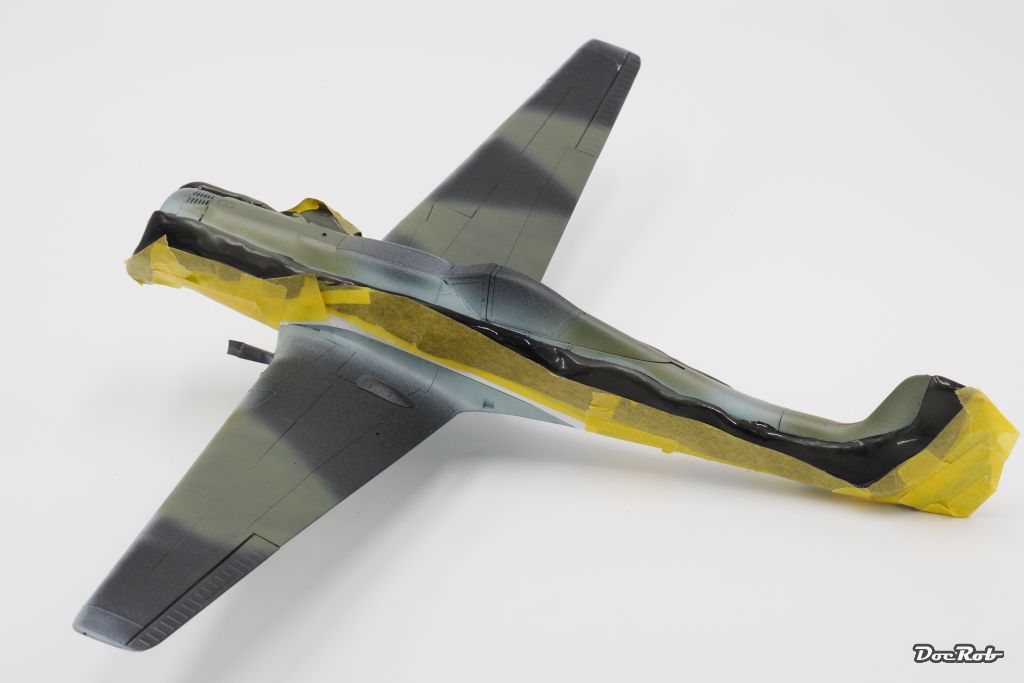
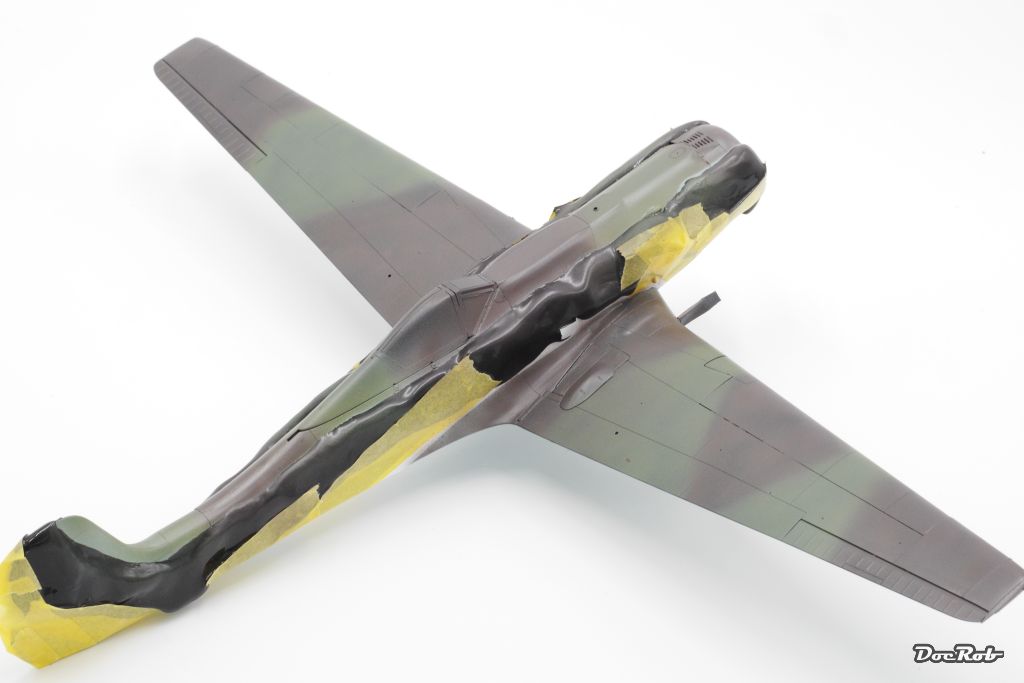
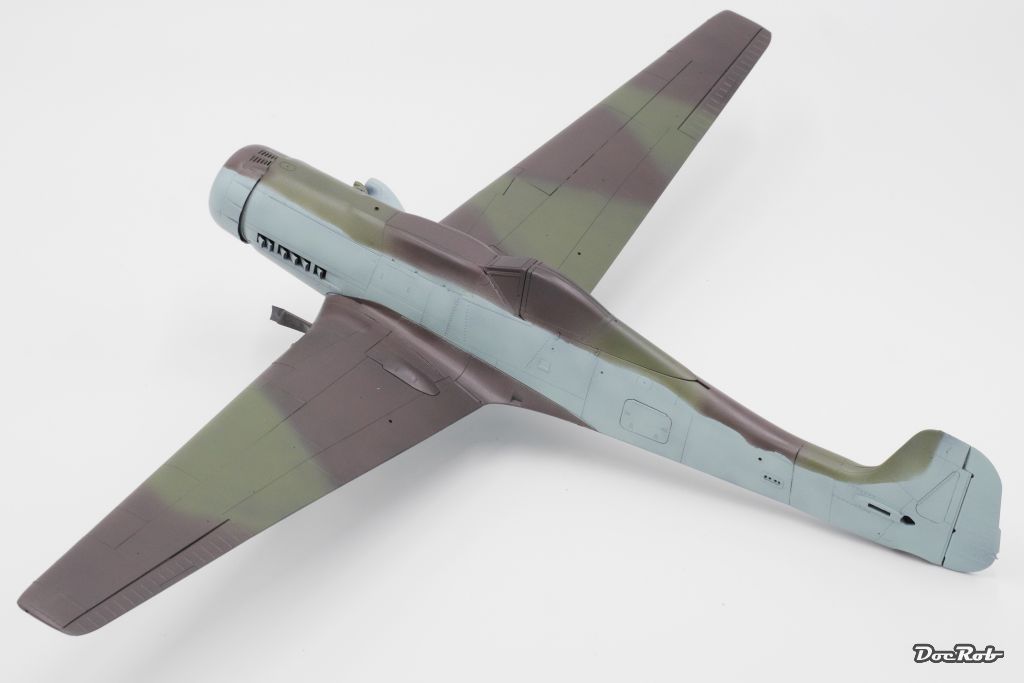
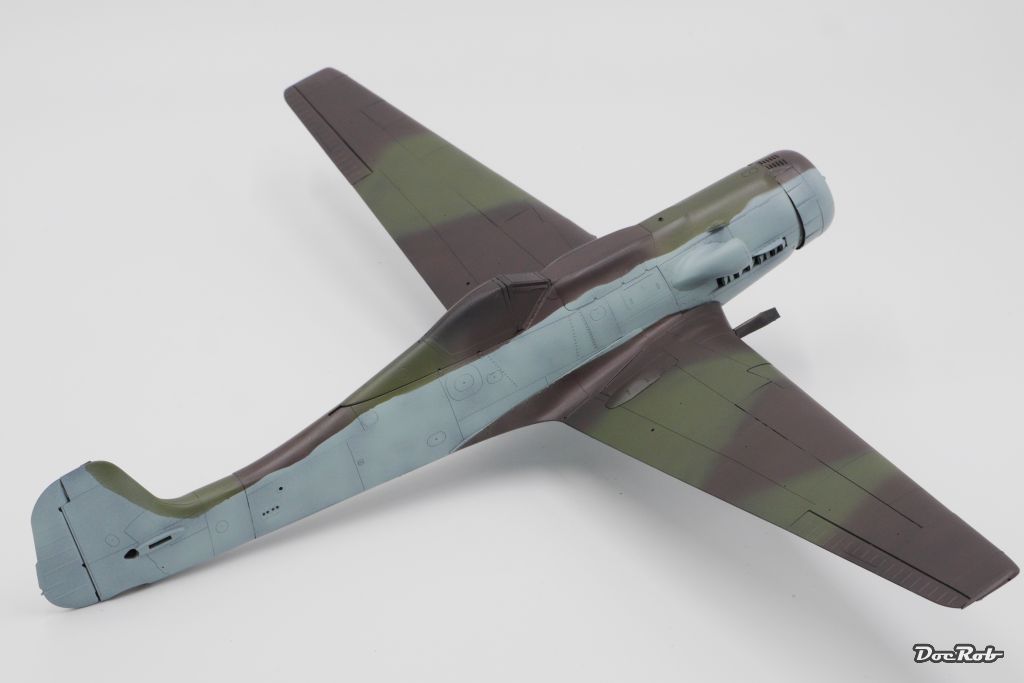
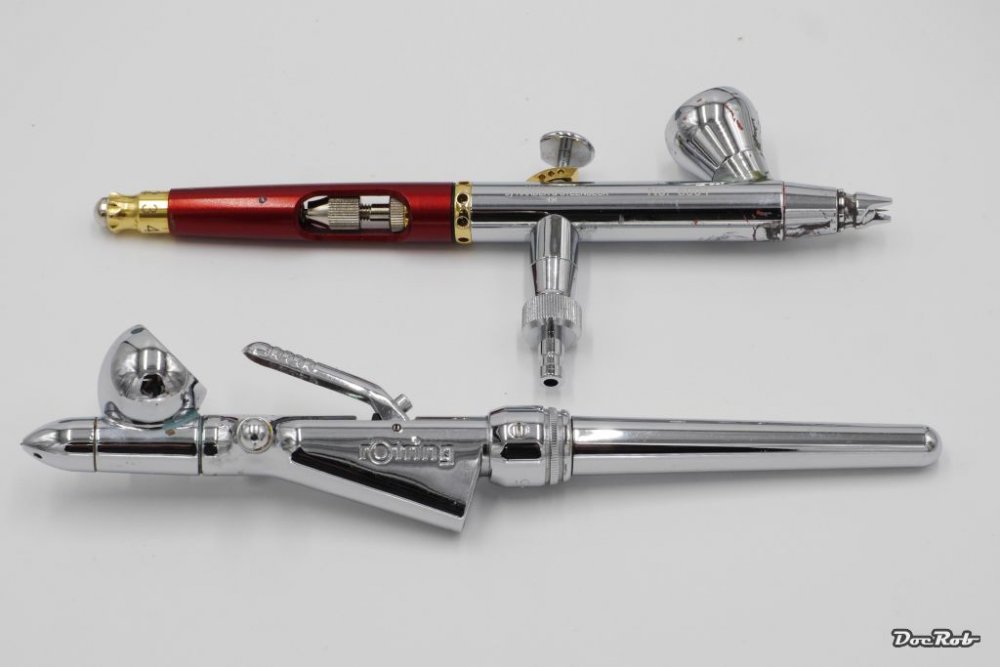
Hola Muchachos, starting with my first german camo, I used AK Colors for RLM 81 and 82 and with the idea of getting a soft cornered fuselage camo, I used black masking putty. I always have problems with soft bordered paintjobs and these continued here. The masking putty was used, because it dosen't adhere very strong and I didn't want to peel my primer off the bird. One of it's drawbacks is, that it if flowing with the gravity, that means the needed upper corner gets sharp after some minutes, but hey, that will be corrected while mottling. The wings were not masked and were airbruhed freehand. The whole camo is painted in tiny translucent dots in different layers. The plane shouldn't look new, but also not overused. First layer of RLM 82 light green Adding the first layer of RLM 81 brown violet The result after removing the masks I'm a little afraid of the following mottling. I used the H&S Infinity (the upper one) with a 0.2 nozzle for the upper camo and it tends to clog a lot, even with the colours thinned, the pigments build up in seconds at the needle. One of my old treasures is my set of two Rotring (lower one, you guessed it) airbrushes. They are perfect for working with inks and other non pigmented colours. Clogging was an issue with these while using acrylics, but heavily dilluted it might work. I will give it a try because removing clogged paint is done by useing the fingertip on the tip of the needle and last but not least, because it is a single action airbrush (one and a half to be correct) with the possibility to preadjust the amount of colour very finely. Cheers Rob


-
TA-152 Zoukei Moura 1/32, My First ZM
DocRob replied to DocRob's topic in LSM 1/35 and Larger Work In Progress
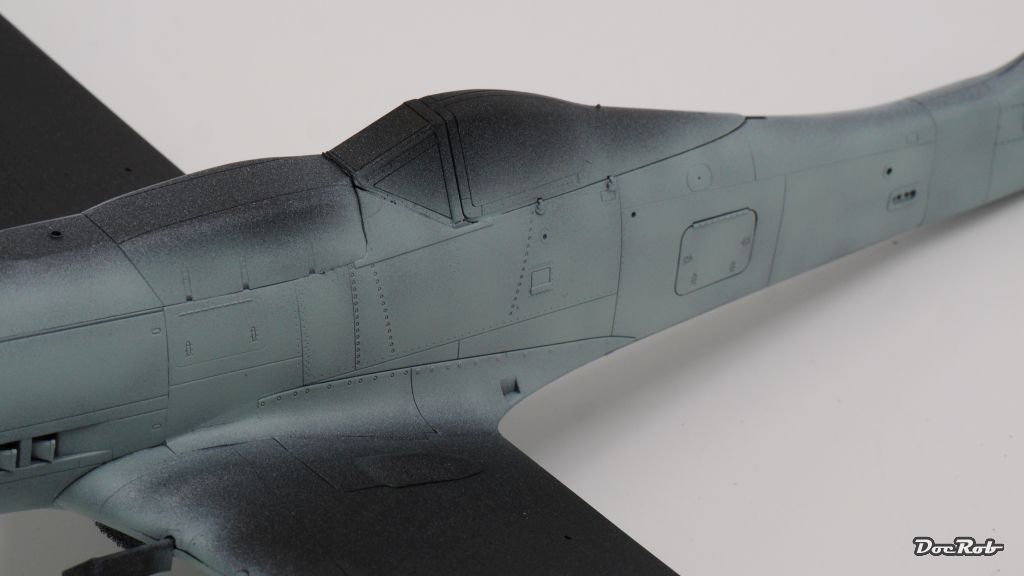
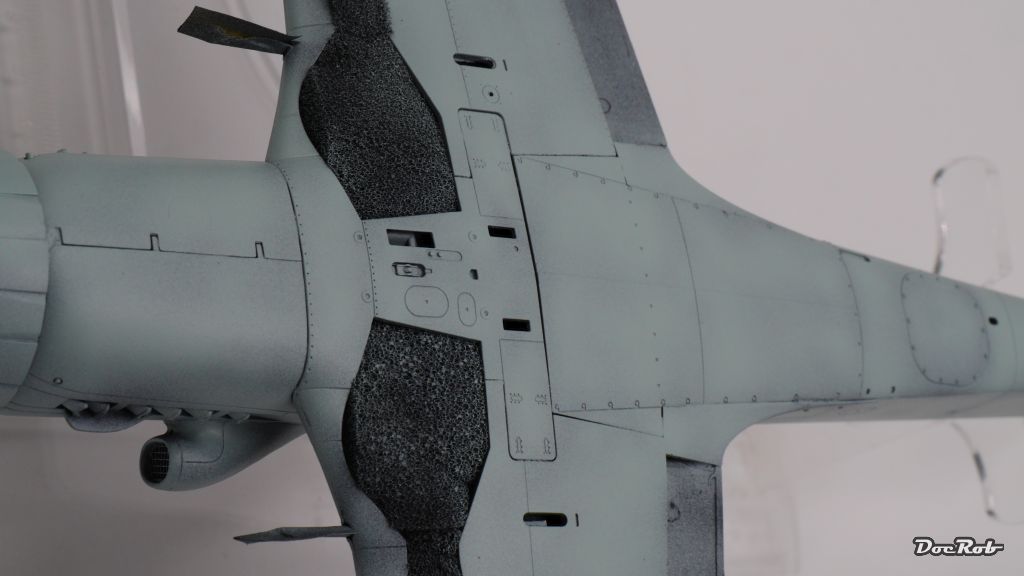
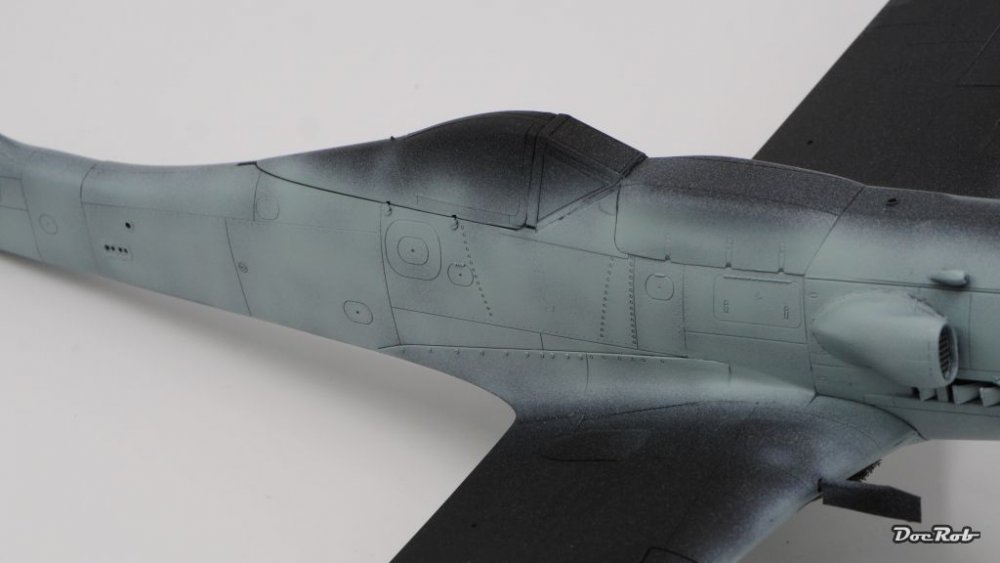
Thanks Jeroen, I hope I've seen the worst know and can now concentrate on painting and finishing. After letting the Black Acrylic Primer from Vallejo dry for two days, i testet the adhesion with masking tape and parts of primer came off. Never trust a primer which dosen't smell funny . The whole plane was cleaned in advance with alcohol and a piece of cloth, a precaution I normally skip on pure plastic planes, but used this time because of the sometimes brutal handling (my normally dry fingers got sweaty) while building. It didn't help, so i changed some more planned steps for the TA-152. I will paint as much freehanded as posssible and will only use Panzer-Putty and paper as masks. The Insignia and fuselage ring will be decaled, instead of masked with adhering masks . Finally I sprayed the sides and underside with AK's RLM 75 and used a technique I call Inverse Preshading. Having used the black primer gives the possibility to work with thin translucent layers of RLM 75. I emphazised the panels a little and used less paint on the connection seams between different fuselage parts. This creates a little depth in the monochrome areas. This is done with dilluted paint and low pressure. After doing so, I gently sprayed some RLM 75 over the whole area, to blend everything in. I'm happy with the result and will soon start with the upper camo. Cheers Rob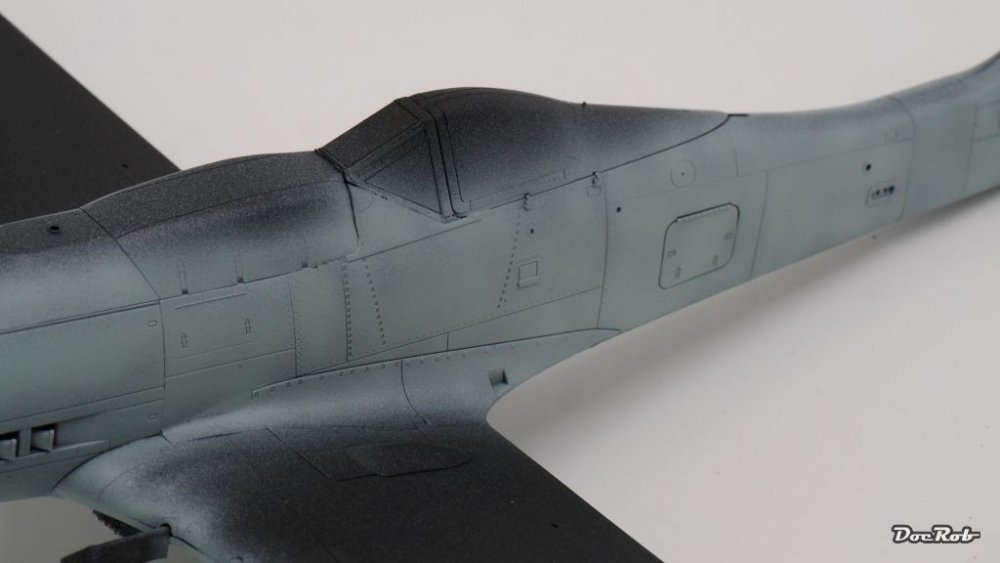
-
Wow, what a beast you created there. I think your final task will be to design an enormous cloud of fume from the exhausts. This one looks like it has seen a lot of hard use over some decades in Siberian conditions. Sorry to hear about your problems concerning the windows. Every modelling projekt seems to have a backbreaker episode, but with your epic build it would be a shame not to continue. Sometimes it is good to lean back, have a beer or a whiskey and some no bench time to clear the head and then back to work with a fresh CTRL-ALT-DEL . For an unknown reason I am able to open your Thread today, did you reduce the picture size? My net isn't accelerated by now, but will be in the future. I hope the best, because I like to see how you finish this Russian Bear. Cheers Rob
-
1/48 Wellington Mk.X (He727 NA-K)
DocRob replied to JeroenPeters's topic in LSM 1/35 and Larger Work In Progress
Thanx Jeroen, never tried Future for PE. I think it is only possible to glue flat surfaces with that, not the tiny contact points, some PE parts have. In one of my future builds I will try soldering techniques, because half the kit is PE and I distrust CA-glue to give enough bond for complex constructions like half a SD.KFZ 251. Cheers Rob- 304 replies
-
- 1
-

-
- wilnis crash
- trumpeter
- (and 1 more)
-
1/48 Wellington Mk.X (He727 NA-K)
DocRob replied to JeroenPeters's topic in LSM 1/35 and Larger Work In Progress
Bend but don't break . Nice, I love these PE-orgies and fear them at the same moment. Are you soldering or why appear the colours changed? Cheers Rob- 304 replies
-
- 1
-
-
- wilnis crash
- trumpeter
- (and 1 more)
-
TA-152 Zoukei Moura 1/32, My First ZM
DocRob replied to DocRob's topic in LSM 1/35 and Larger Work In Progress
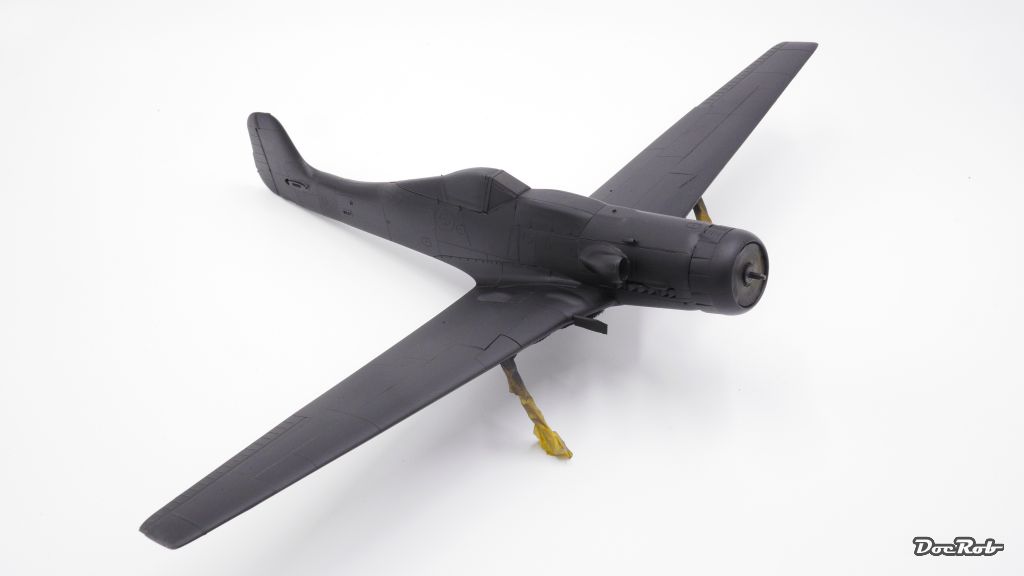
It's not a Batwing, it's not a SR-71 Blackbird, you will discover the silhouette of my loved and hated TA-152 covered in black primer. I use that Vallejo stuff for the first time and hope it will adhere well. The detail which can be seen after application looks really good. The reason I changed from my trusty Tamiya rattle can primer is, that I will try to apply the "Black Basing/Marbling technique" from rkranias aka Rick mentioned here: https://forum.largescalemodeller.com/topic/5000-trumpeter-p40b/?page= I will use the black primer as a preshading while working with RLM 65 in a marbling/translucent way to add a little depth to the underside of the plane. Cheers Rob
-
That's the way to come back from a bad back. Nice M10 with lots of eye catching detail. Can't wait to see the setting with figures painted. Cheers Rob @GusMac It seems to be about bats and balls. My back got better after finishing my 25 year lasting baseball "career". Surfing, swimming and moumtainbiking is definitely better for the back.
-
Thanx for enlightening me mikester, I wasn't aware of that, meaning I didn't do my research to well . Cheers Rob
-
Thanx mikester, great job with that "Grünherz" (green heart) and the photos. I like that scheme with subtle contrasts which differs from the standard a lot. What is the idea behind the faded tips of the propeller? Cheers Rob
-
Nice mikester, I like that matte finish, you produced here, nice looking Würger in an unusual camo. I would have liked another view from above. The effect of the yellow stripe, disrupted by the opened canopy adds a nice touch. Cheers Rob
-
TA-152 Zoukei Moura 1/32, My First ZM
DocRob replied to DocRob's topic in LSM 1/35 and Larger Work In Progress
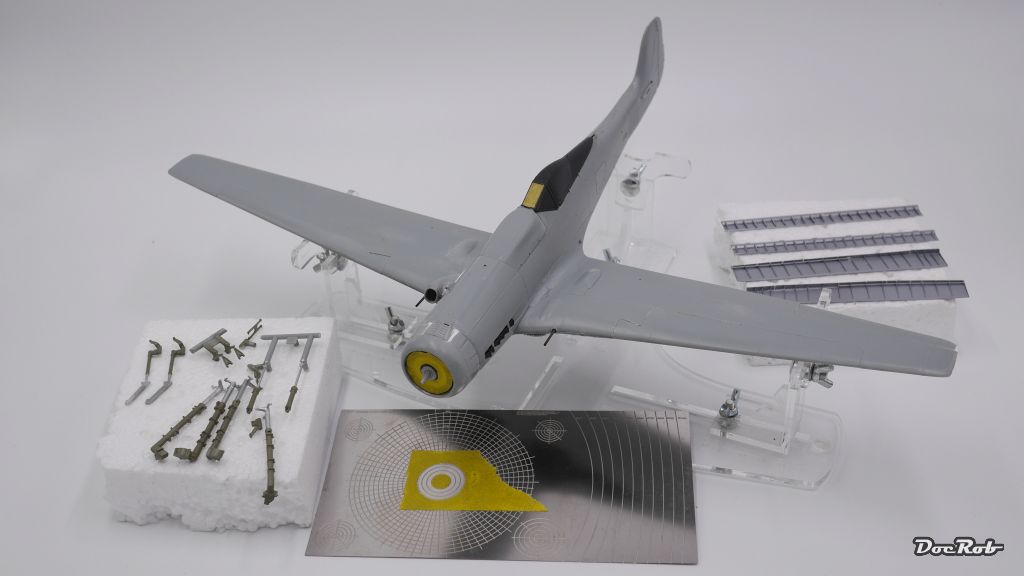
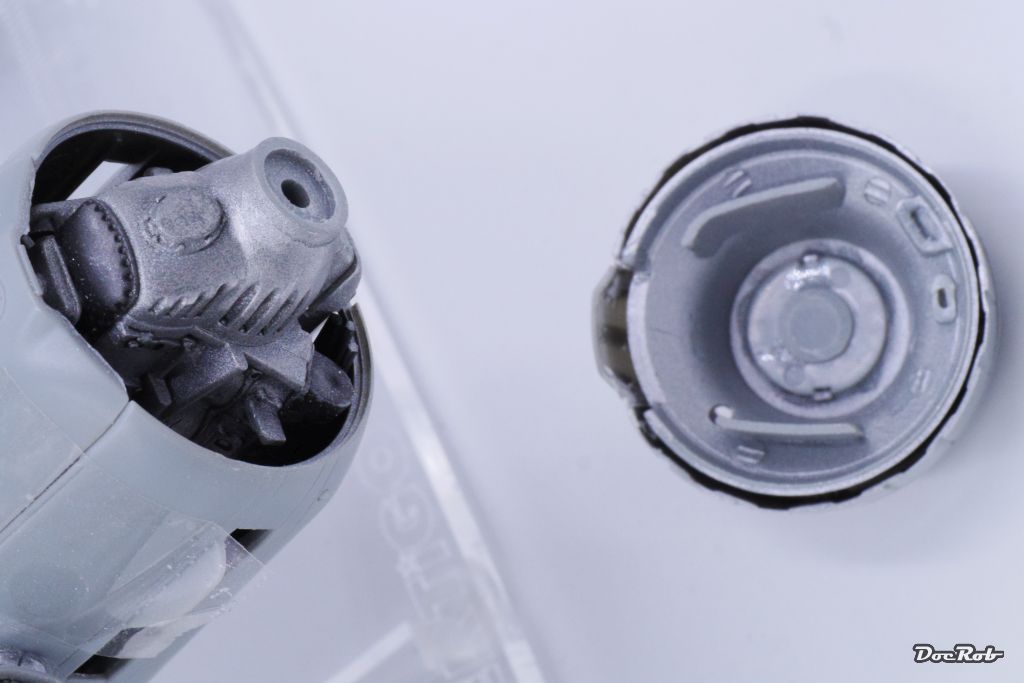
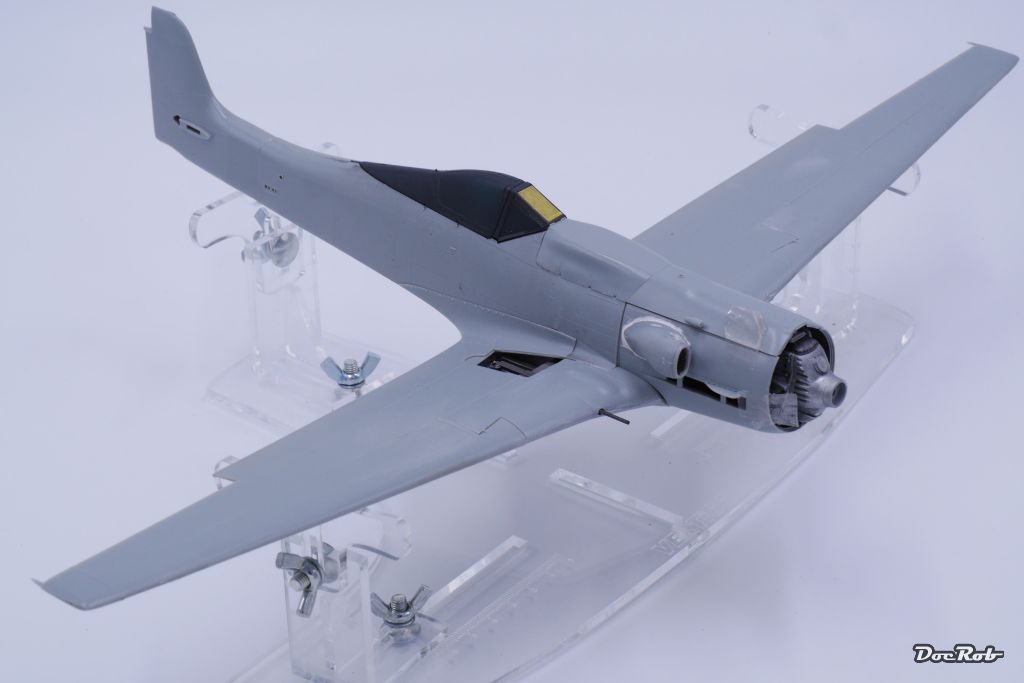
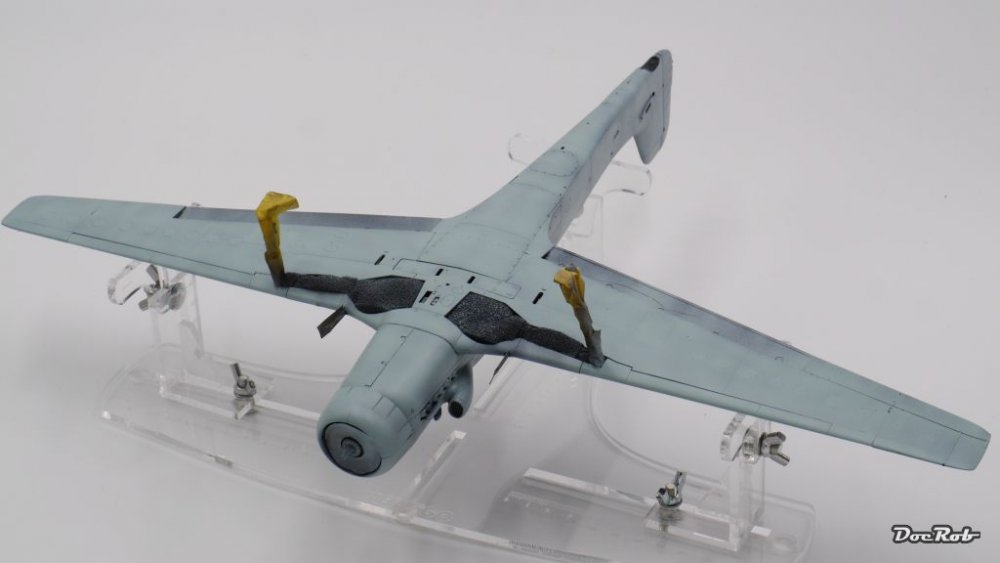
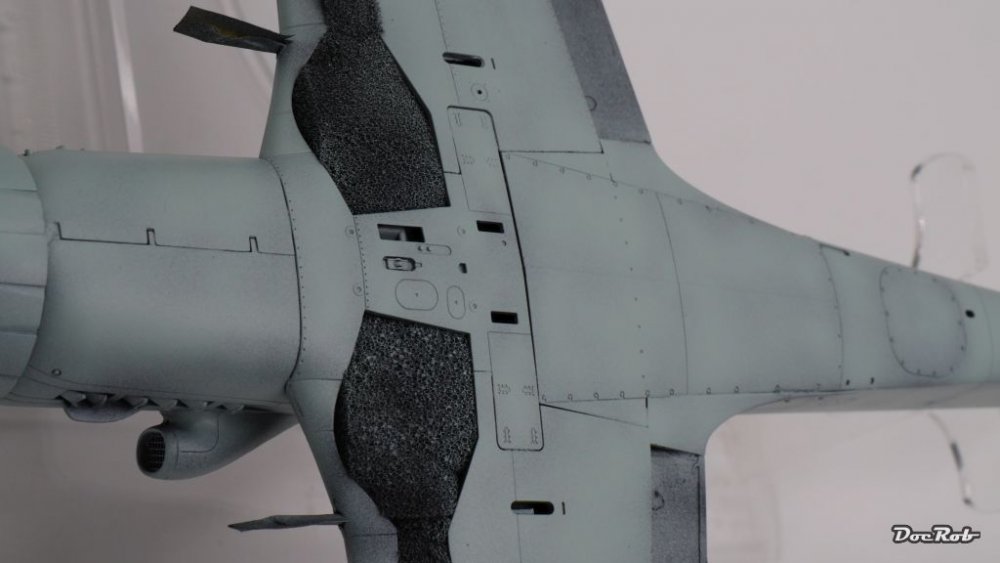
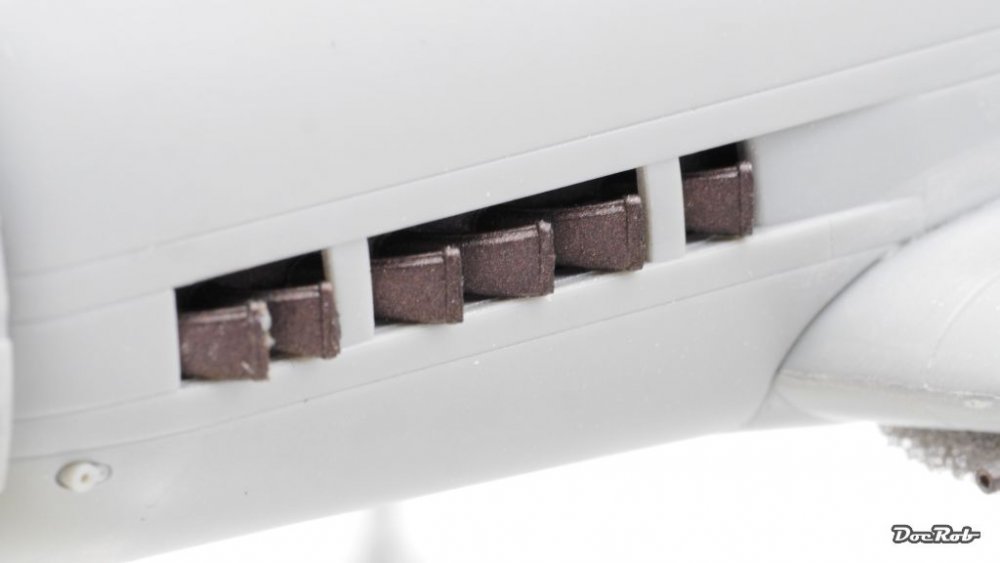
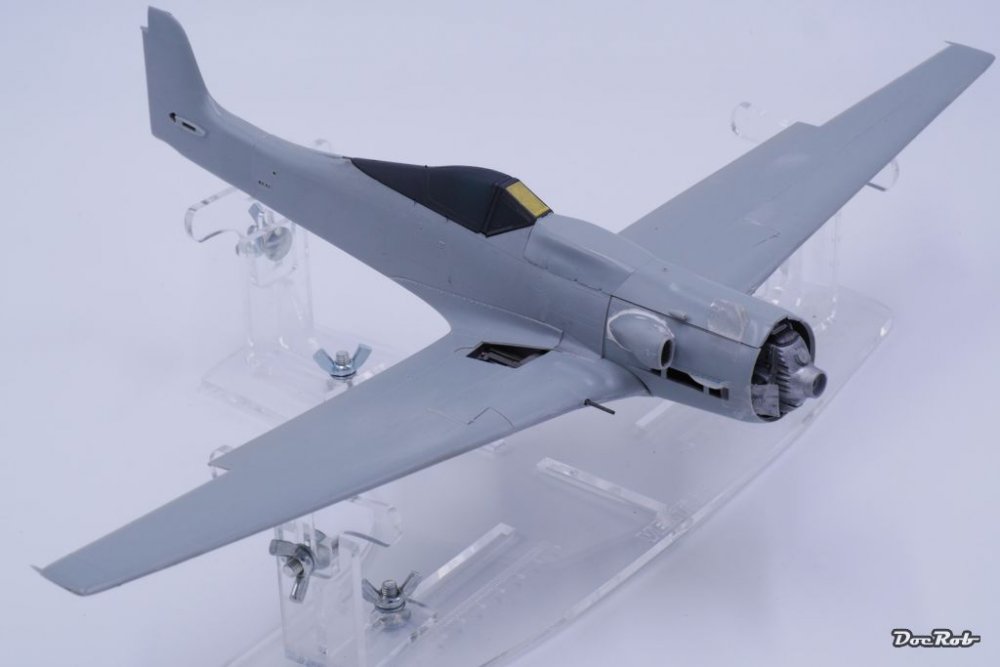
Hi All, almost there, the last days with little benchtime were filled with final preparations for the paintjob. All cowlings are glued shut and the canopy is closed and secured. I used a Voyager circle-cutter-template for the first time to get some protection for the front cowling and it worked out well. The PE-flaps were primed and sprayed Alclad Aluminium, but will be added after the paintjob of the plane, because I don't want to mask the fiddely flaps with adhesive tape. The wheelstruts are painted and are waiting for weathering and final assembly with wheels and brake lines. If the sharp-eyed of you wonder, why there are four struts, it is because I purchased extra cast metal ones. My initial plan was to let the engine cowlings be removeable, but that was skipped due to the delicate multipart construction and corresponding alignment problems. With the cowlings glued in position I tried to find a method of masking the exhausts, but couldn't find a comfortable way. In the end I decieded to spray them over with the camo and repaint them after finishing the plane. This way the masking is much easier. If you have another manageable idea, you are welcome to share it with me. Cheers Rob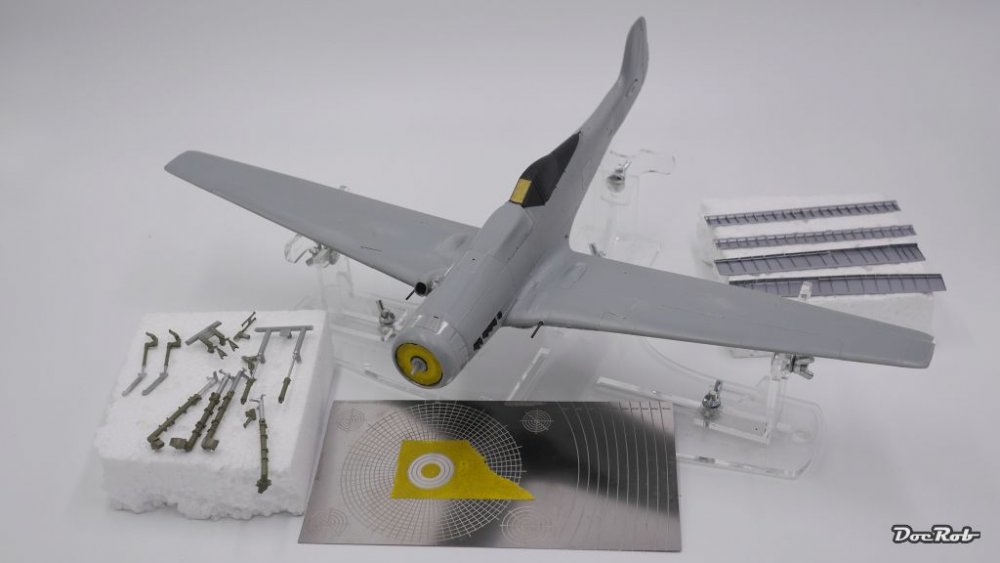
-
Hi Gus, I built that F4 Corsair and it was a pure pleasure, I can highly recommend that kit. The only issues arose by using aftermarket stuff from Brassin which looked great, but caused some trouble. The Spit you are building was also on my wish list but I could resist, but have no idea for how long. My excuse for not getting one is that I'm uncertain, if I should take the iconic IX or the XVI with the bubble top. I fiddled a set of HGW-belts together without knowing about your tip and it worked, but I can imagine that leaving the parts connected will make it a lot easier. We also have huge storms on my island, but without snow. but other than you, my benchtime is shortend by that, because there are power failures and lots of things to repair in the house and garden. The rest of the day is filled with trips to different shores and watching (and photographing) enormous waves, I definitely don't want to surf. But it is a spectacle I don't want to miss. The TA-152 got little attention but is more or less prepared for painting. Poco a poco (little by little) like my spanish fellows used to say. Cheers Rob
-
hong kong models Dornier Do 335A-12 Trainer
DocRob replied to JayDee's topic in LSM 1/35 and Larger Work In Progress
Interesting version, this hunchback Ameisenbär. I can understand your troubles with closing up all cowlings and not ruin the shape vs. open up and show everything. Sometimes I'm thinking of building two identical kits at the same time in different ways of presentation. Cheers Rob -
Now that is what you had hidden from us . Well done. These Tamiya kits are really great, you can fully concentrate on painting and weathering. While labouring with my TA-152, I tend do daydream of these shake and bake kits. Thanx for sharing the HGW-buckle tipp, sounds real helpful with the fiddely construction of the belts. Cheers Rob
-
planet models 1/32 Focke-Wulf Fw 190C (V18) Känguru
DocRob replied to JayDee's topic in Aircraft Reviews
Würger goes Mustang with some extra exhausts, a real Frankenstein creation . Now that is an interesting conversion, thanx for the review. Cheers Rob -
Error - double post
DocRob replied to sandbagger's topic in LSM 1/32 and Larger Aircraft Ready for Inspection
A real beauty you built there. Nice painting and weathering effects and all the materials look like the real counterparts, impressive. Cheers Rob -
Hi Rick, never tried black primer, but I like what I see from your experiences. Combined with that marbling effect you create a great depth to the following paintjob. You can hit Homeruns even on Curveballs . Cheers Rob
-
TA-152 Zoukei Moura 1/32, My First ZM
DocRob replied to DocRob's topic in LSM 1/35 and Larger Work In Progress
Yeah thanx, it is not frustrating anymore, it's a struggle, but i will not quit. Sometimes you are tempted to throw a kit in the garbage can, but with this one it got kind of personal, I like the subject to much to get rid of it, so there has to be found a way. i heard many good things about the Vallejo Metals from the dealer of my neighbour island. I might try them in the future, but not until my Alclads run empty, because i like them a lot. Everything is perfect about them, but the smell . Cheers Rob -
TA-152 Zoukei Moura 1/32, My First ZM
DocRob replied to DocRob's topic in LSM 1/35 and Larger Work In Progress
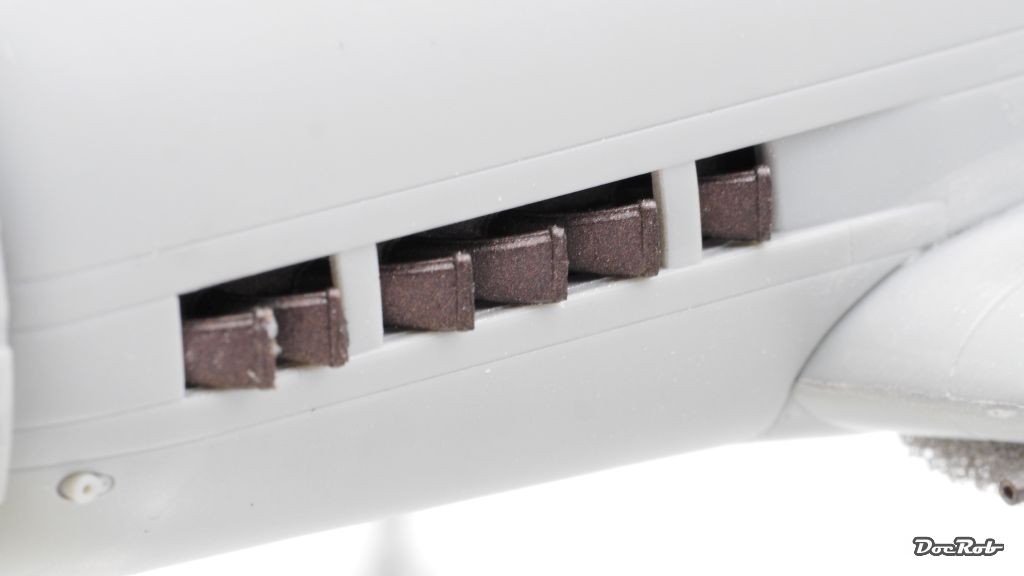
Not much to show this time, but not only because of laziness. My struggles with the fitting of the 152 continue. I had to saw off two milimetres of the engine block (front) and remove some correspondent plastic from inside the cowling and the prop-shaft to get a propper alignment of the front cowling ring and the other cowling parts. More hours of grinding and cutting were necessary for the preparation of the installment of the PE-flaps. You have to hand ZM that if everything is glued together the static of the TA is enormous, otherways there could have happened serious damage while working with the heavy tools. The PE-flaps are primed and airbrushed with Alclad Aluminium, the insides of all covers and the metal wheelstruts were primed and airbrushed aluminium, as well as other parts like the prop and the wheelhubs. I used Alclad Chrome for the unpainted rods of the wheelstruts. Last but not least I painted the prepared exhausts first with Alclad Jet Exhaust and than a light partial coat of Alclad manifold. After some pigment treatment they should look fine. As on former experiences all used Alclad colors performed perfectly on Tamiyas grey rattlecan primer, my all purpose primer if PE or other metal parts or resin is involved. The Alclads spray perfectly even and have nearly no visible grain on the painted surface. My former experiences with metal acrylics like Tamiyas Chrome Silver or Aluminum where much worse in every grade of thinning. Without removing lots of plastic there would have been a 2mm gap between the front ring and the cowlings Cheers Rob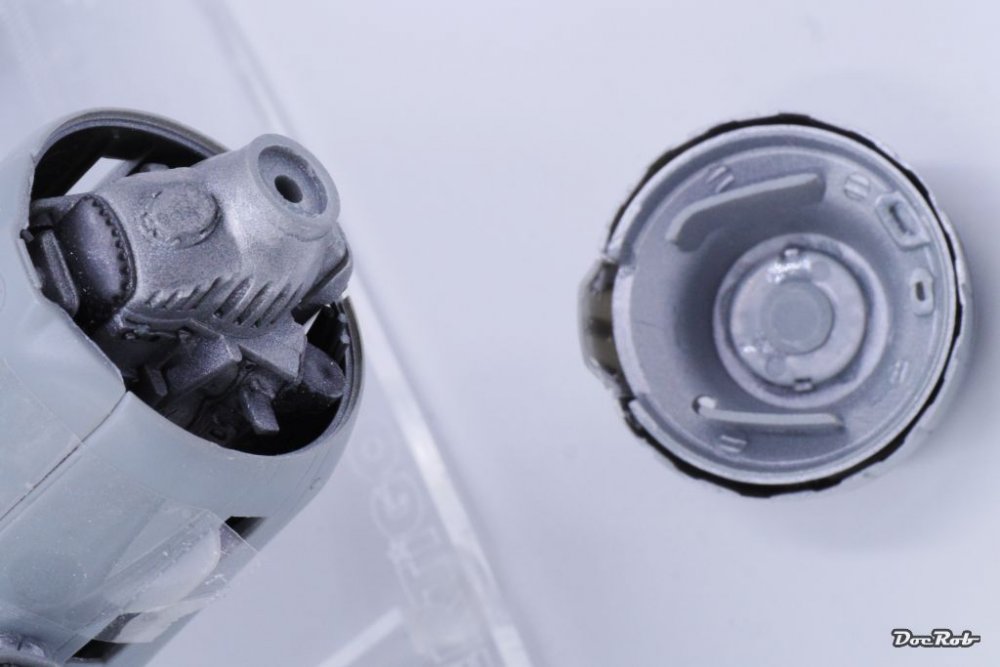
-
1:5 Scale P-51D
DocRob replied to David Glen's topic in LSM 1/32 and Larger Aircraft Ready for Inspection
Wow, that is nearly looking more real than a real one. The attention to detail is amazing, a league of it's own. Cheers Rob -
TA-152 Zoukei Moura 1/32, My First ZM
DocRob replied to DocRob's topic in LSM 1/35 and Larger Work In Progress
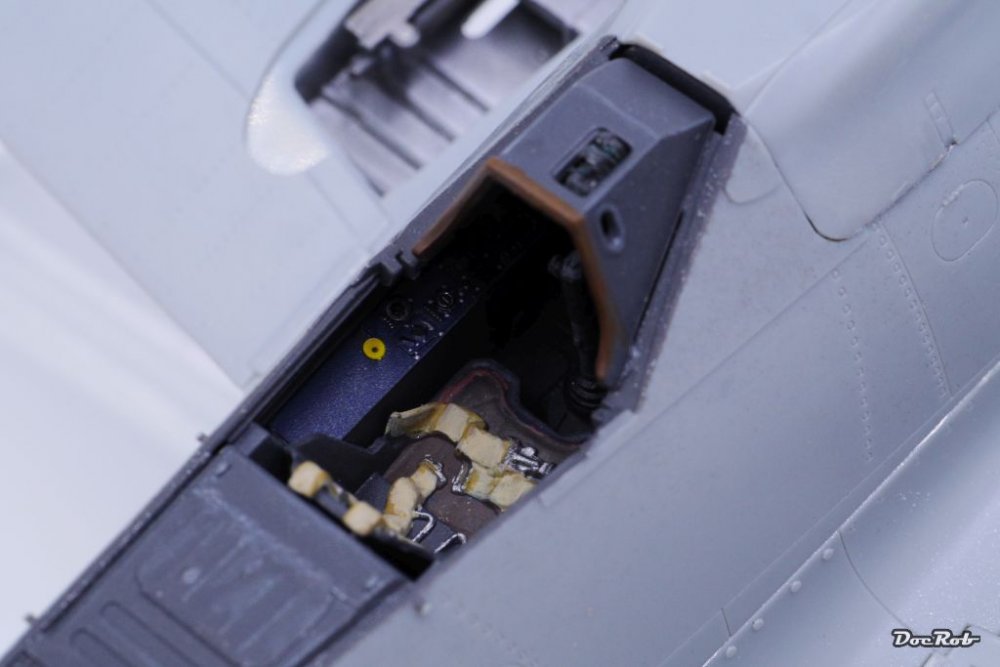
Only some small updates today, but painting will follow soon. I painted the canopy cockpit grey (RLM66 from AK) after attaching the precut masks, added the anti glare dashboard cover and the gunsight, a clear part, which I sprayed after masking the optics with liquid mask. Some final weathering and highlighting was added to the cockpit parts and the headrest and lether cushioning were painted. The last views, before botteling up. Nearly ready for painting now Cheers Rob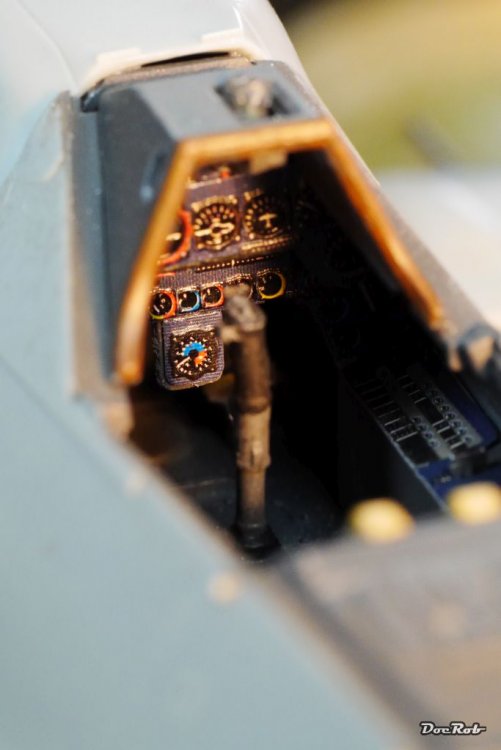
-
TA-152 Zoukei Moura 1/32, My First ZM
DocRob replied to DocRob's topic in LSM 1/35 and Larger Work In Progress
Thanx Paul, the point of no return on that TA-152 was the bending and glueing of the flaps, nothing is gonna stop me now from finishing this one. As it is my first ZM-kit the difficulties caught me by surprise, I was expecting something more refined. All in all there are no problems which can't be solved, but I was looking for a quick build and was willing to concentrate on my first German paintjob with all the RLM things and mottling and so on. I have that same P-51K in my stash and hoped it would be better. Lets wait and see what this one will bring up. I just don't understand the philosophy of ZM. I like the idea of opening the cowlings for engines and weapons, but the way ZM realised this is not sufficient to me. Some of the inner assemblies do not look the part, they seem toyish. My first thought was to show everything of the 152, but after I started the build that changed to "I don't open up, I don't bend PE-hinges for the cowlings, who cares about the already painted engine, ... Usually i have a fixed picture of an actual build in my mind. Minor changes are possible, but this one changed a lot, since I started. Cheers Rob -
TA-152 Zoukei Moura 1/32, My First ZM
DocRob replied to DocRob's topic in LSM 1/35 and Larger Work In Progress
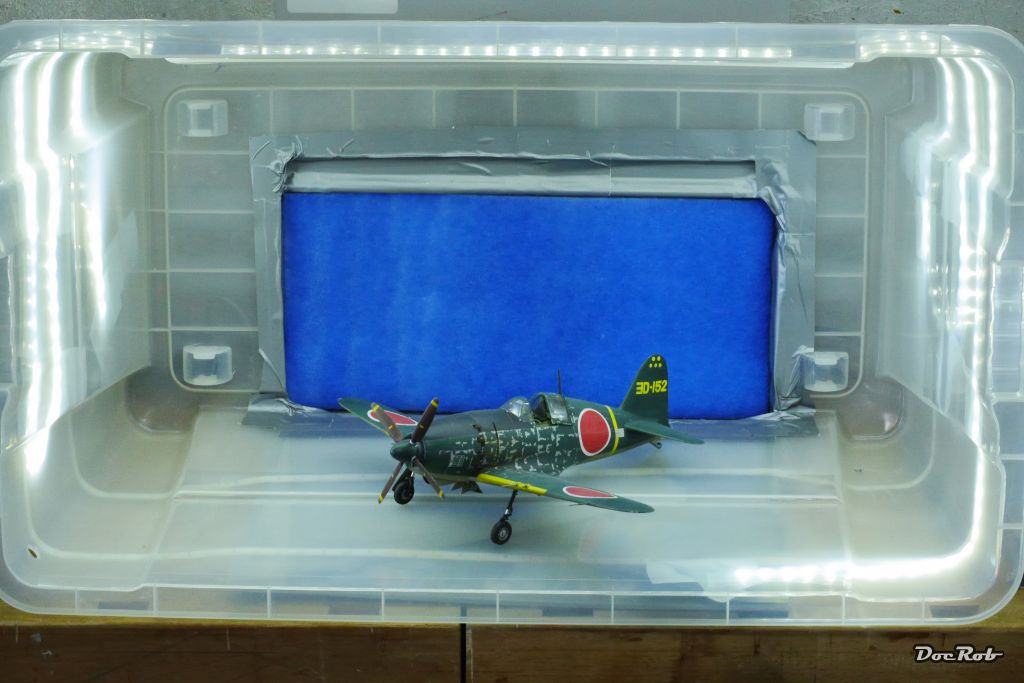
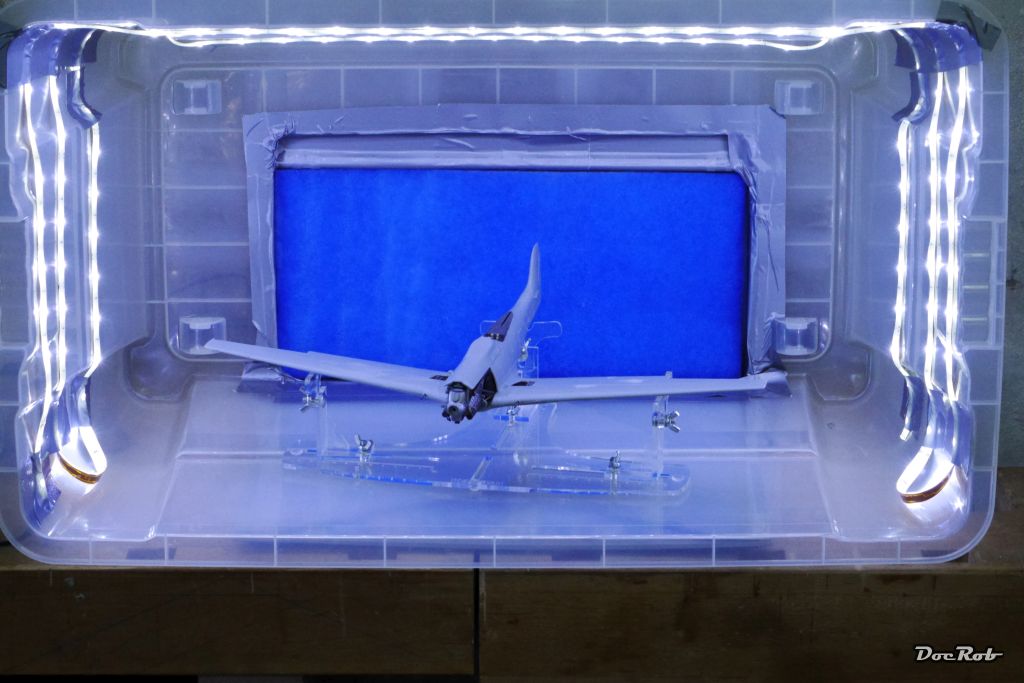
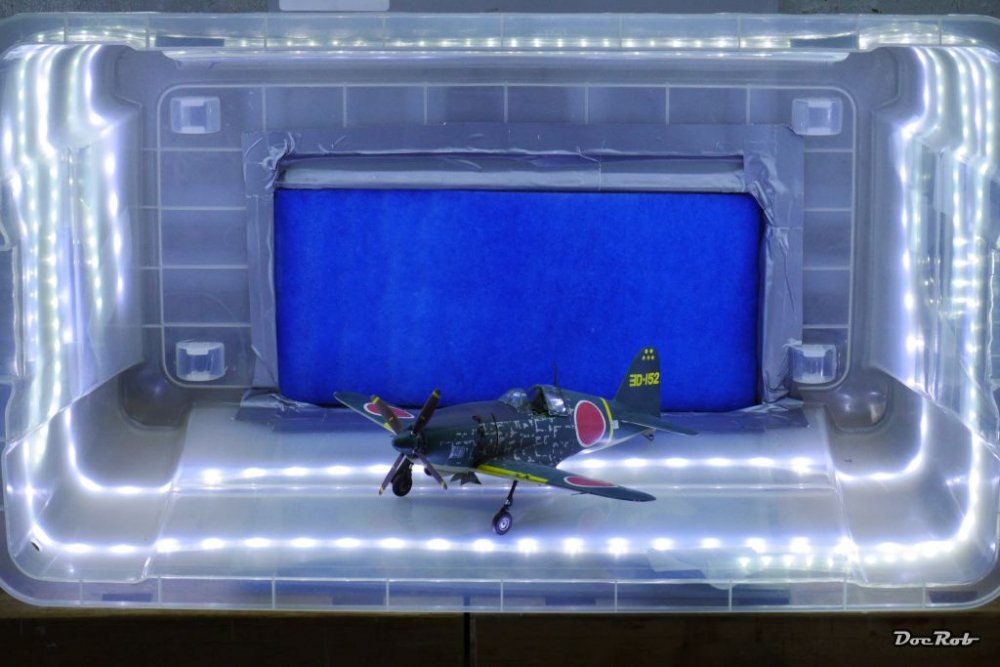
Not even ready and promptly discovered room for improvement. I removed the inwards LED's and duct-taped them outwards for easier cleaning of the booth and added a second strip, because the emitted light was too cold. It's hard to see, but the first picture is only warm light, the second one is a combination of cold and warm light together and much brighter if needed. Everything needed for the booth construction was found in the house, so the spent total equals nada . But now, get away Raiden and back to the TA-152 again. Cheers Rob
-
I'm not sure if I will get me one, but other than Danny I think that the choice of subject is an interesting one. This plane may not have great significance as a fighter in WW1, but the way it is constructed and engineered shows the development of a new kind of planes. You can easily see the familarity with a JU-52 for example. That there is nearly no rigging involved is not only a nice touch for the WW1-kit-coward, it is also a sign of that new era of plane constructions after the war. On the other hand will the corrugated Aluminum make the task of masking not to easy. Looking at the instuctions, I love the option of showing the wings seperated from the fuselage with internal detail supplied. I guess this will tempt some of you . Looking at the paint schemes nearly gets me convinced that I will buy one, because there is one placed in Adlershof, a suburb of my old home town of Berlin. Cheers Rob
-
TA-152 Zoukei Moura 1/32, My First ZM
DocRob replied to DocRob's topic in LSM 1/35 and Larger Work In Progress
My cheapo enlargement project for my spraying booth is finished. I cut the plastic box, glued some flexible LED-Strip in and attached everything to my existing spraybox with Duct-Tape, so the foldable design of the old one will be kept if needed. There is enough space now for even more than the 46 cm wingspan of the TA-152. Cheers Rob