DocRob
-
Posts
7,118 -
Joined
-
Last visited
Content Type
Profiles
Forums
Events
Gallery
Everything posted by DocRob
-
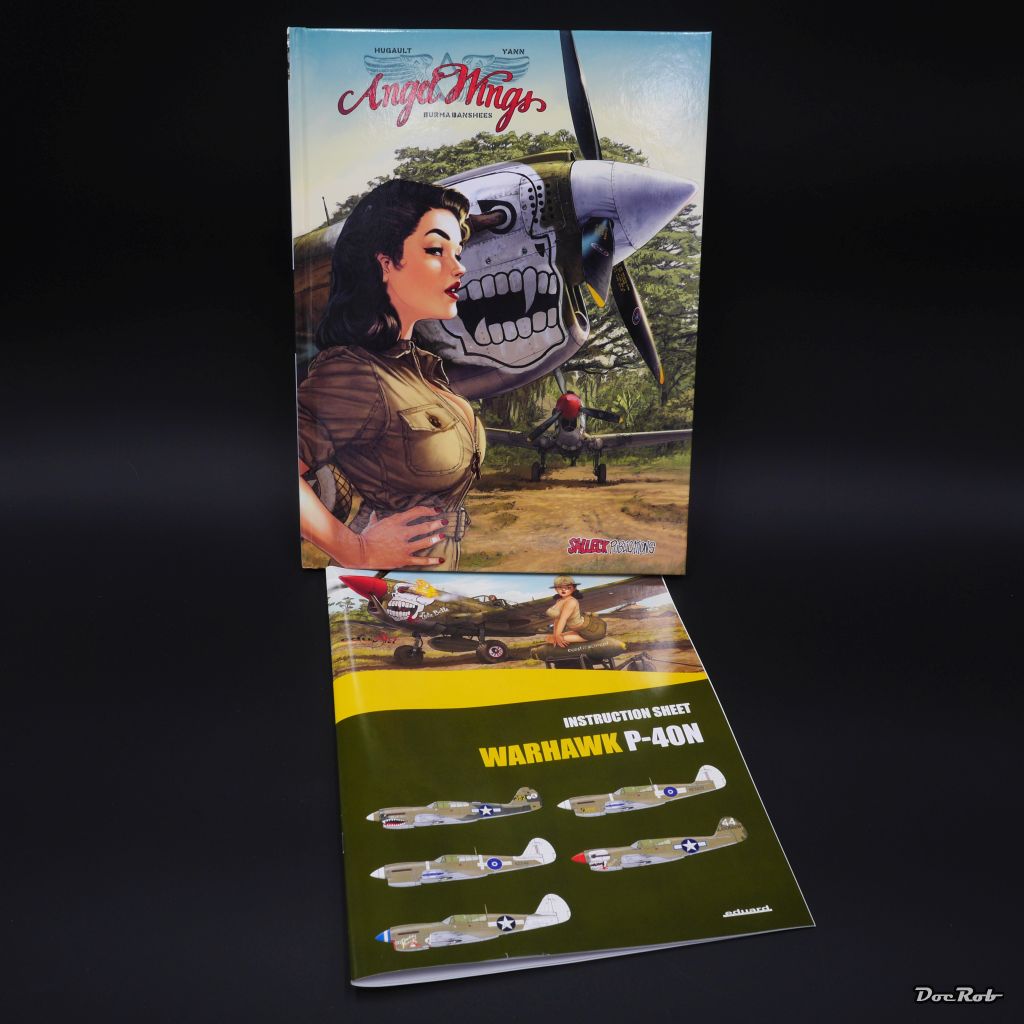
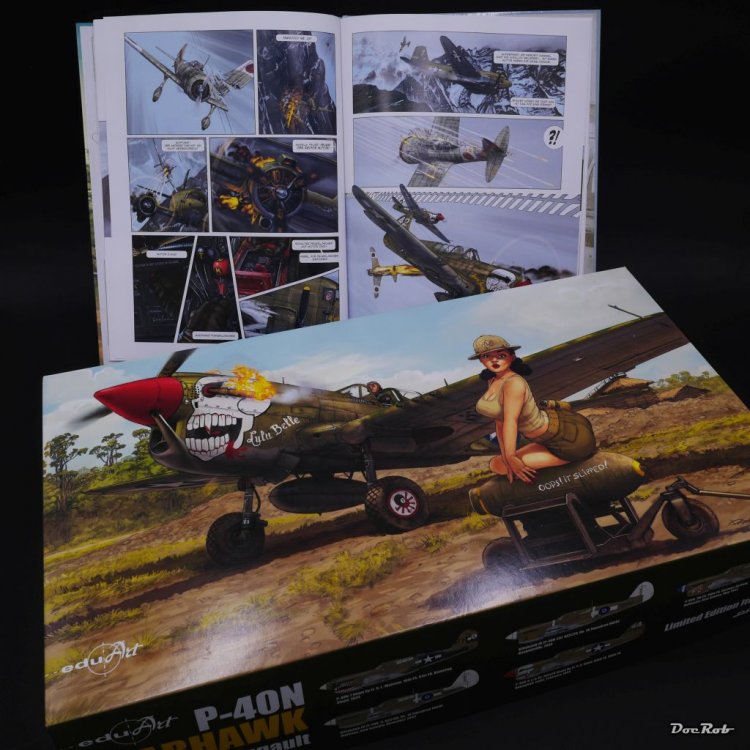
Hola (the few) Ladies and Gentlemen, not much time for modeling or even the forum in the last two weeks, but I have to share that scoop. I got the Eduard P-40N and the graphic novel by Hugault and Yann called "Angel Wings" on the same day. You might guess which version I will build. One little advise for others who purchase the kit. Remove the nice embossed metal print at first thing, because it is heavy and you have to hope that there is no damage done to the sprues. On my one the windscreen was loose from the sprue, but not scratched, phew, I hate polishing clear parts . Cheers Rob

-
Sorry, double post due to slow island net. Cheers Rob
-

Airfix hawker typhoon Mk.1B 1/24
DocRob replied to coolboxx's topic in LSM 1/35 and Larger Work In Progress
Hi Darren, I will follow closely as I have one with a heavy dose of AM in my stash. Nice work on the subassemblys. Is the armament oob or Aftermarket? When I see your good work my fingers are itching, should I start mine, .... . No not right now, to many other started builds. Can't wait to see your table bursting once you attach the wings . Cheers Rob -
Hi Kent, thank you for describing your very effective but seemingly painful approach. It sounds a little similar to the way many historic ship modellers apply the underwater copper sheets to their vessels. I think I'm not up to that task, but I'd like to try the effect using a Dremel micro drill with abrasive head after "masking" the surronding areas with Dyno-Tape and rivet afterwards. Cheers Rob
-
Must be a ton of work to get that "Stressed Skin" effect, but it pays off clearly. It enhances the appearance of the Lanc after painting a lot. Did you use a micro drill with an abrasive head? It would be nice to learn more about how you achieved the effect. Cheers Rob
-
I don't know about the radium, Cees. There are no yellow dots used in other cockpits. For greater comfort there is a better link to the Virtual Tour and the Cockpits. http://www.navalaviationmuseum.org/nnam/virtualtour/?s=pano701 Cheers Rob
-
Profimodeller Fi103 V1
DocRob replied to JeroenPeters's topic in LSM 1/35 and Larger Work In Progress
The lighter shade looks much better, maybe the often mentioned "scale effect" Cheers Rob -
Hola Amigos, If you are building mainly US Naval Planes maybe you know of the existance of that really cool feature on the Website of the Naval Aviation Museum in Pensacola, FL. Just follow the link and scroll down to "Cockpit Panorama". There are more than the P-40. http://www.navalaviationmuseum.org/attractions/aircraft-exhibits/item/?item=p-40b_tomahawk Cheers Rob
-
Nakajima Ki-84 "Hayate" - Hasegawa 1:32
DocRob replied to Ayrton's topic in LSM 1/32 and Larger Aircraft Ready for Inspection
I'm a littlle frightened. If that is your first build, what will the future bring to us. I think I stop modelling right here , to much talent on your side. I finished a beaten and worn Raiden just recently and I had a lot of fun with the wear and tear, you seem even more fun orientated with your heavily beaten KI-84. Chapeau Rob -
Profimodeller Fi103 V1
DocRob replied to JeroenPeters's topic in LSM 1/35 and Larger Work In Progress
Nice Job on the Schlepper, i got carried away... Cheers Rob -
Nice and clean piece of work. I like the decision about the wings. moveable mostly means less detailed or other compromises. Cheers Rob
-
Take a brake (leak) T-55 Enigma, MB-220
DocRob replied to DocRob's topic in LSM Armour Finished Work
Thanx Maru, it was my first Dio and I have a lot to learn, specially on figure painting. Cheers Rob -
Holy cow, a Gotha is a mosquito compared th that thing. I wish you patience, lots of space and a never running out supply of Evergreen. Cheers Rob
-
Hey Rich, another Like from me. I gess your team are the Seattle Seahawks. If so, tons of luck against the Packers, I will watch. My favourite Team is openeing against the Giants, Gooooool Dak go Cheers Rob
-
There is likable work out there, please, please, please Admins... Cheers Rob
-
1:32 DFW T28 'Floh' (Flea)
DocRob replied to sandbagger's topic in LSM 1/32 and Larger Aircraft Ready for Inspection
This one is truly uniqe, must be one of the first planes with a streamlined design. I can see a direct line from the Floh to the ME-163 Komet and finally the Super Guppy . Both of the guys in the picture seem to think "strange thing, is it really flying?". I like the design of the bird and the job you have done. The pale grey makes it easier to recognise the strange shape. Cheers Rob -
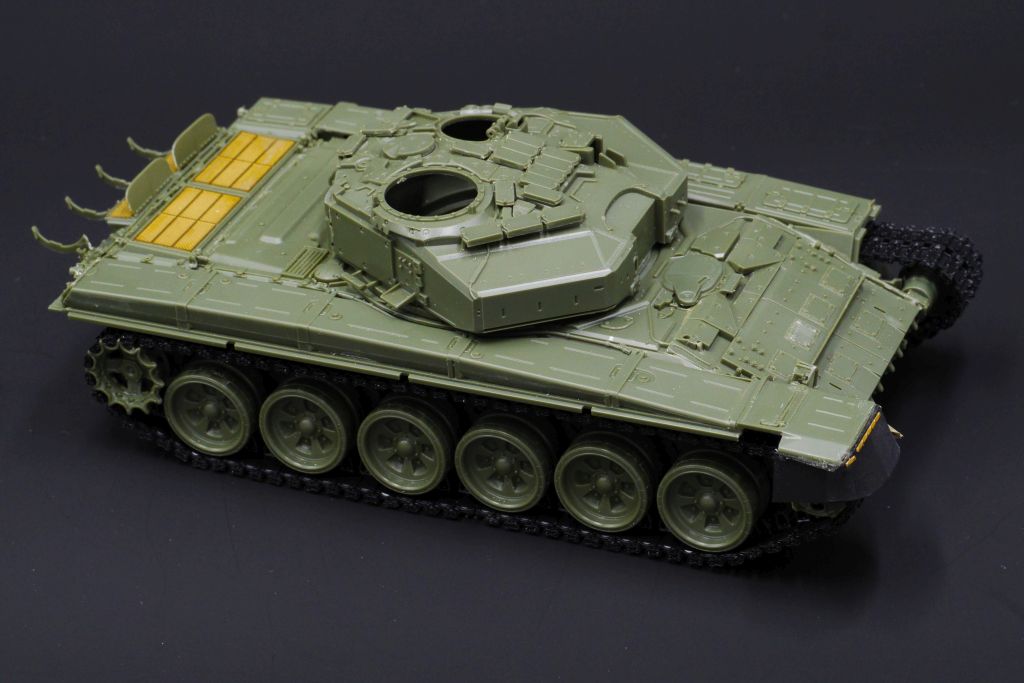
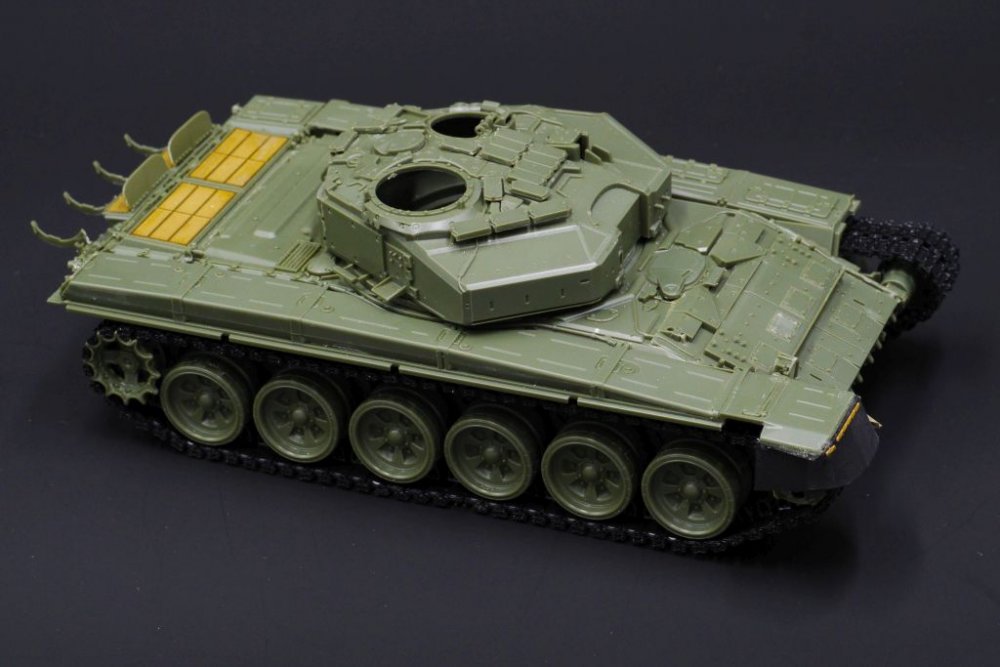
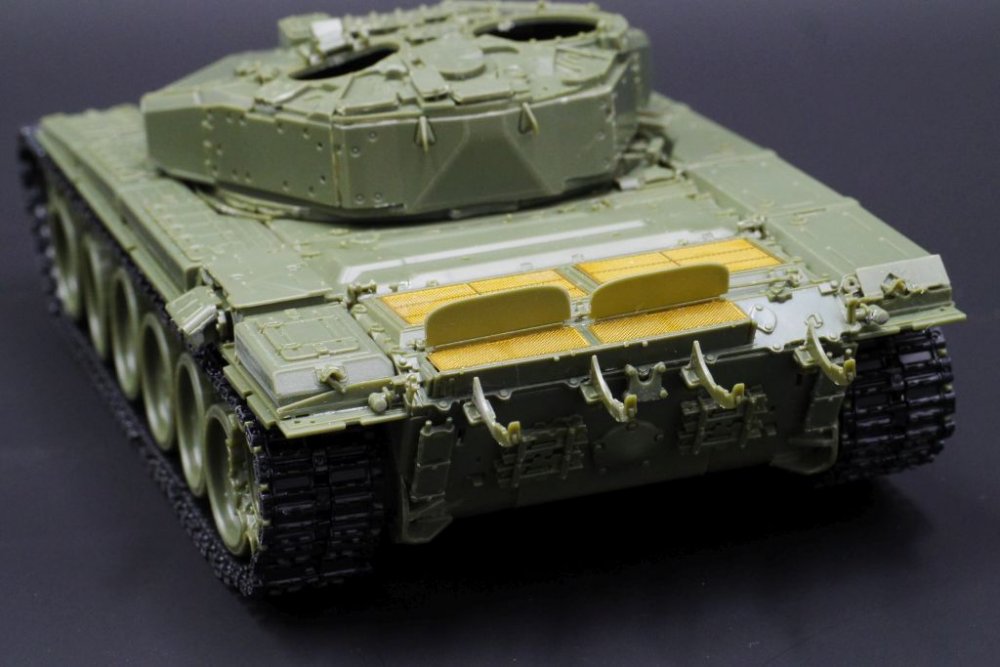
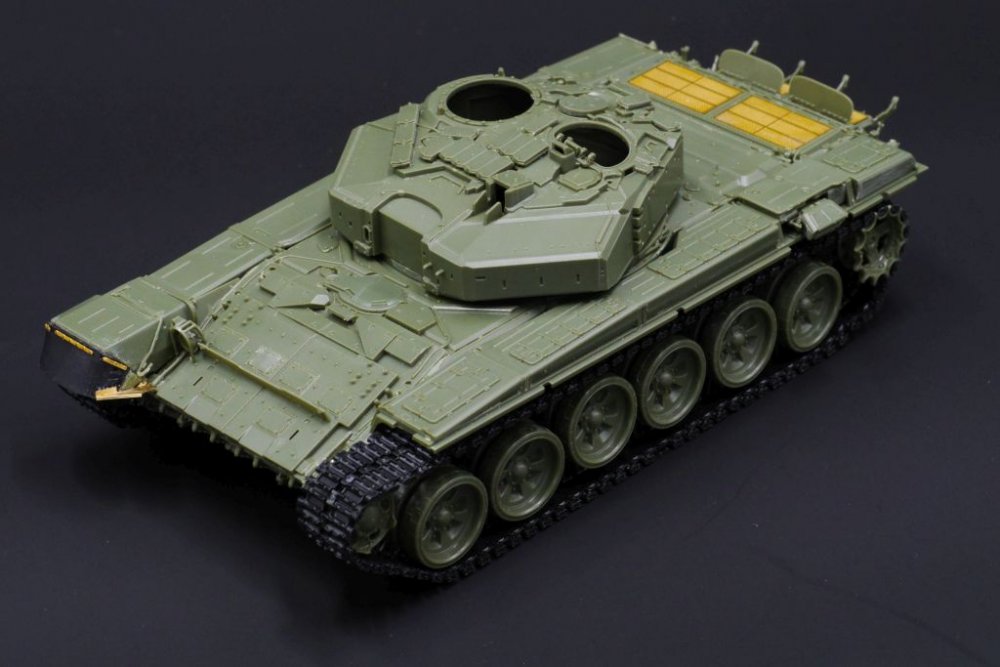
The beast is two thirds completed, a good time for a little conclusion. What you get is a huge part count and a great attention to detail. I have seen sharper details on other kits, but the T-90 is clearly above average. The fit is good on most parts and there are some realy clever constructed subassemblies. The tracks are among the best I have seen molded in plastic, but a time consuming pain to build. The kit seems over engineered in parts, which raises the parts count and makes it somewhat fiddly in certain sections, for example, it is possible to mount the engine cover openable (good), but you have to rely on tiny multy part hinges that may break at the first try (bad). One thing I really dislike about Meng Kits (I saw it on the Doobie too) are the big and numerous connection points from the parts to the sprues. You will need a really sharp cutter to minimize damage. Some of the connectors are not only on the sides of parts, they are (hard to explain) connecting the parts in two dimensions (Meng style) and there is a lot of cleanup necessary. The manual is ok, sometimes it is not easy to see how and where the parts belong, so a lot of test fitting is needed. All in all a nice kit with a lot of pros and just some minor letdowns. It is not for the beginner or the impatient. Cheers Rob
-
Take a brake (leak) T-55 Enigma, MB-220
DocRob replied to DocRob's topic in LSM Armour Finished Work
Thanks CB, I have no schedule for the 251 ,but I will find lots of excuses not to start that soon, you know, the sun is shining the Figs have to be harvested, the waves are nice for a little surf, the dog has to be walked with, the NFL season opens next week and there are so maaaany other kits to be built . Cheers Rob P.S. And I'm a PE-coward -
Ah thank you, I understand. It's strange sometimes, how colors behave, and how easy they can be affected by whatever. Chees Rob
-
Both planes have the same light brown color painted on the frame of the cockpit glas and this shade dosen't fit to the colors of the planes, so maybe it is typically for those Macchis for whatever reason. Cheers Rob
-
Nice elegant airframe, and your paintjob really enhances the appearance. You need a lot of confidence in your hand and airbrush to get the camo evenly on, chapeau. Is that stange colored canopy frame a standard feature of the Macchi? Cheers Rob
-
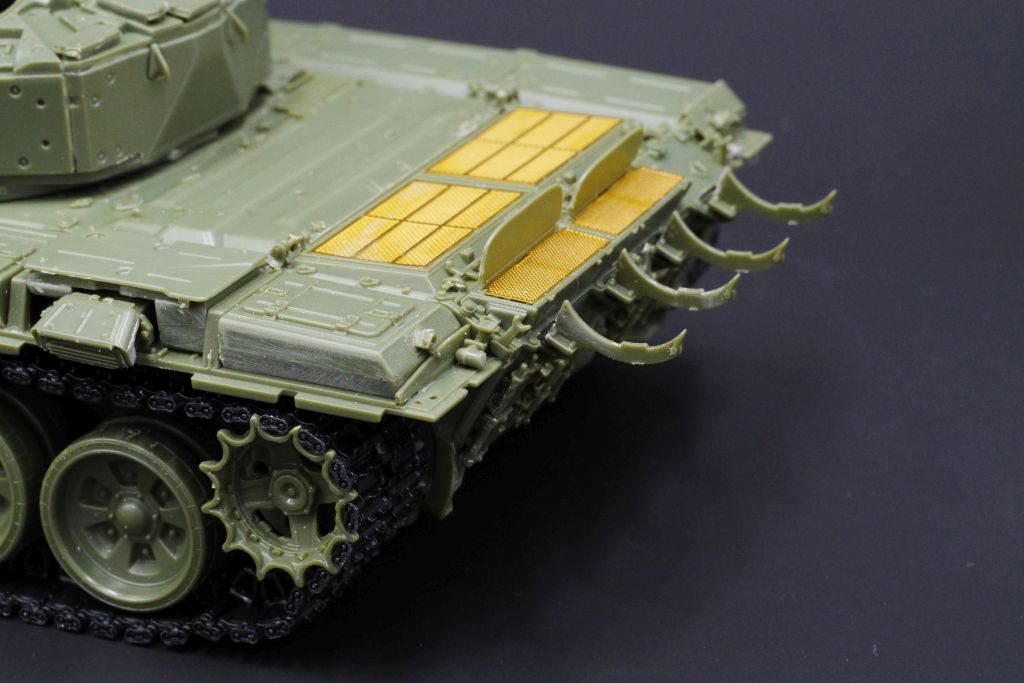
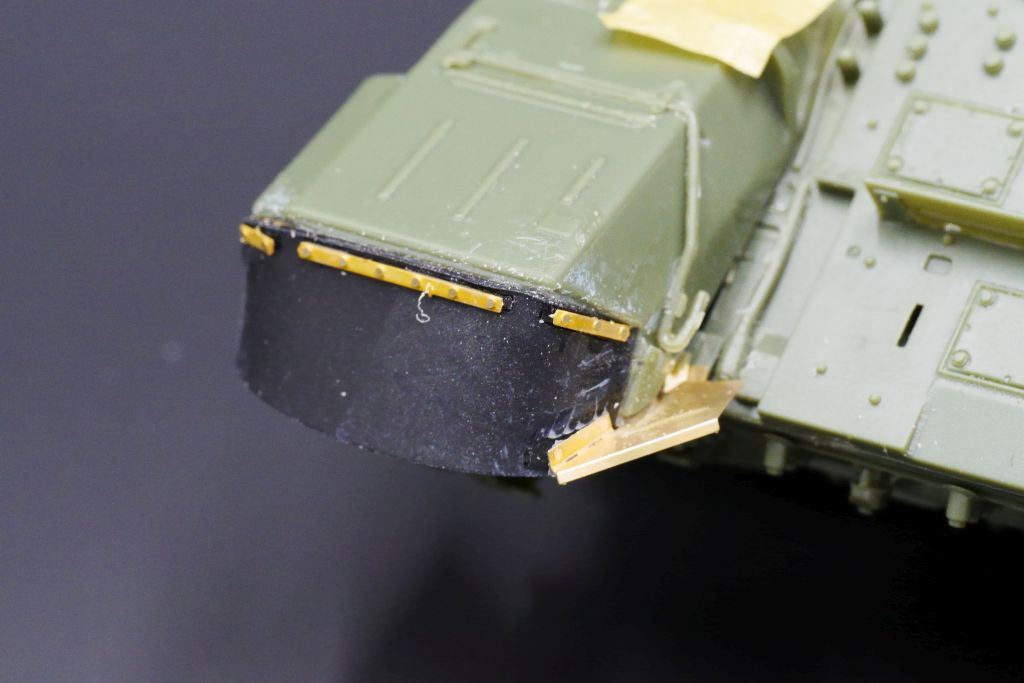
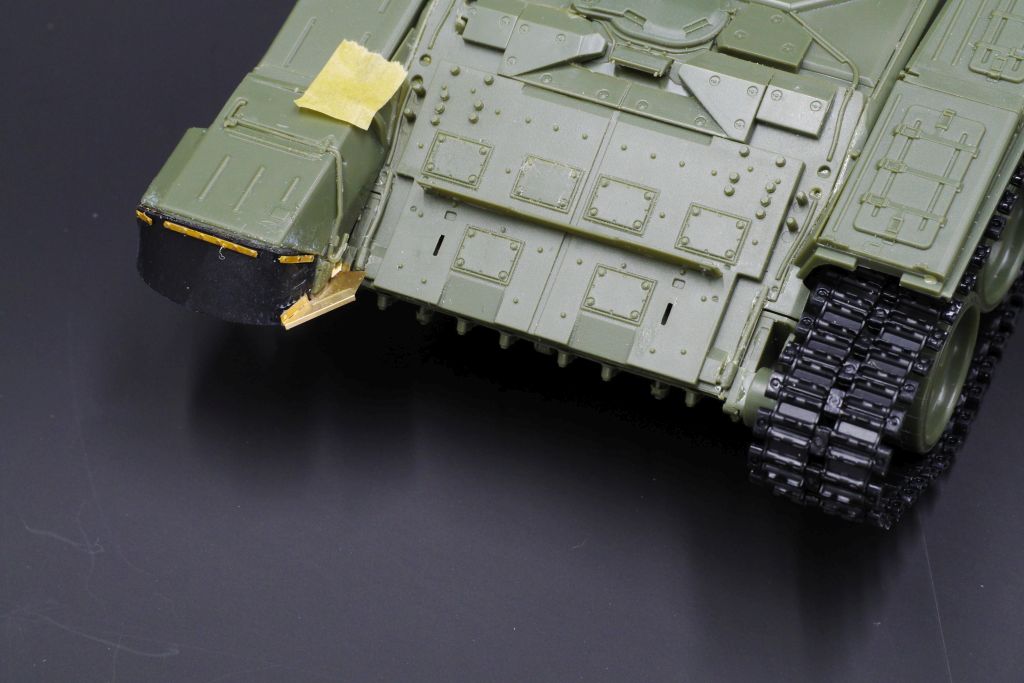
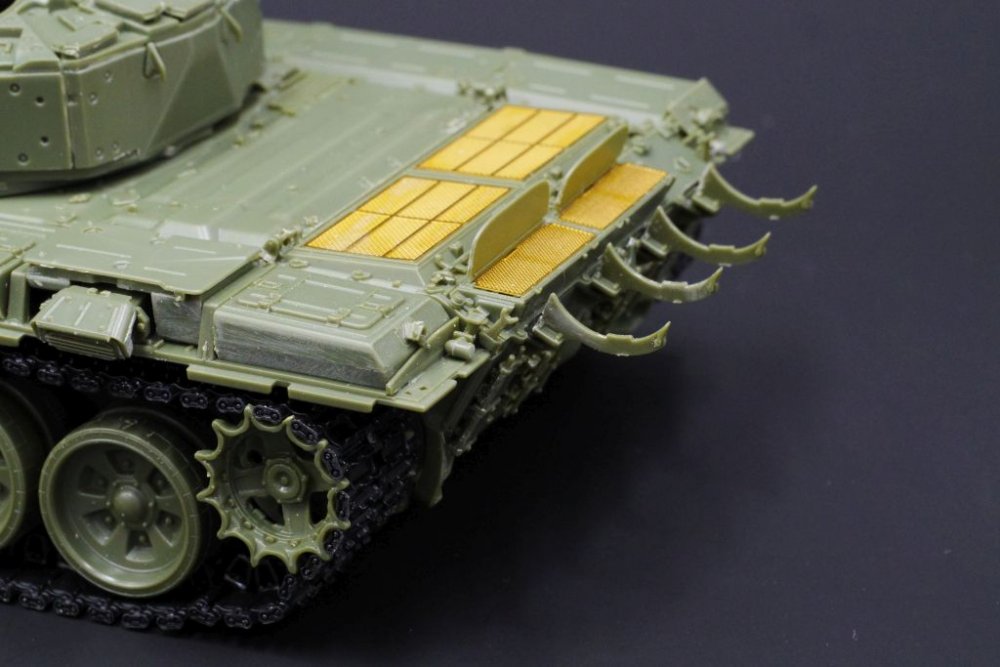
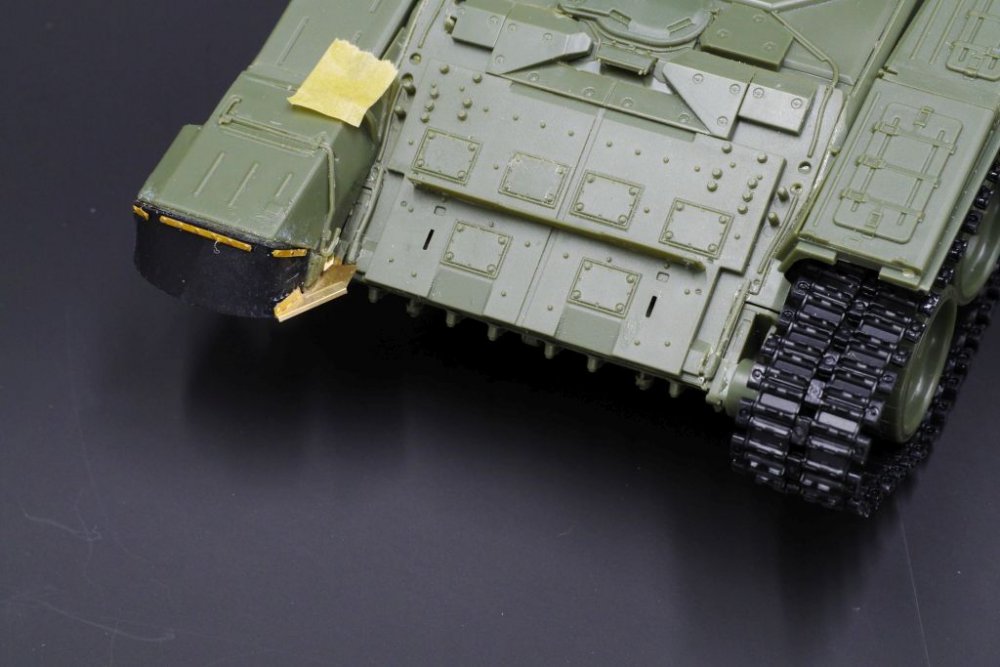
Only little progress for today. I spent a lot of thinking on the skirts of the beast and prepared the first parts. I cutted the plastic parts and substituted them with the rubber skirts of the Tetra works set. To get the right shape, there is a strip of PE glued on the inside of the rubber. I plan to leave some of the rubber parts away and rub the camo-paint off the left ones two show their dirty rubberish material. What looks most like rubber, rubber indeed. It's a lot of extra work, but I hope it will show in the end. Cheers Rob

-
Hi Gus, if I look at the picture in the beginning of the thread, I think you will not be succesfull with that Tamiya flex-tape. It is not useful for tight curves like on the tailfin. I bought that stuff and found it useful on wide curved masking. Maybe reducing the pressure and adjust the thinning of the colors will be more promising. What i found difficult about the blue-tack method, is that you have to spray in a right angle all the time, sometimes diiificult on an airframe. Another method is to spray on the contours of the camo with low pressure very finely and then fill in the rest the normal way. The secret is in subtle layering and giving the color enough time to dry. Cheers Rob
-
If you want to have better photos without much fuzz, take her out. If it is overcast it's perfect, the colors are right and the shadows aren't too harsh. If the sun is burning hot and bright, fix a cool drink, enjoy a good book and wait for some clouds. Cheers Rob
-
Hi Gus, can't wait to see the camo finished. The black is the leftout brown I guess, no need for black camouflage in desert like surroundings . I love that ball bearing stirrers so much, I added them to almost all my paints, if there is a shortage of ball bearings in the world, you know where you have to point your finger. Cheers Rob