DocRob
-
Posts
7,043 -
Joined
-
Last visited
Content Type
Profiles
Forums
Events
Gallery
Everything posted by DocRob
-

1/350 Trumpeter Narvik Class Zerstorer Z30 RFI
DocRob replied to PanzerWomble's topic in Archived GB's Sub Forum
I like your Zerstörer PW, the display is very dynamic with the figures, weathering and water base. It's good to see some ship build around here lately and I think, you have all the tools to dig deeper into that pond. Cheers Rob -
What is on your bench right now ? Share a picture :)
DocRob replied to Martinnfb's topic in Modelling Discussion
The IP' came out great. The F4's are where ZM really shines. I built mine a while ago and decided against AM parts for the Instrument panels, as the decaled kit ones looked good. If only they would provide seat belts. Cheers Rob -
Caudron C.561 French Racing Plane - Resin - 1/48 - S.B.S.
DocRob replied to DocRob's topic in LSM 1/48 Work in Progress
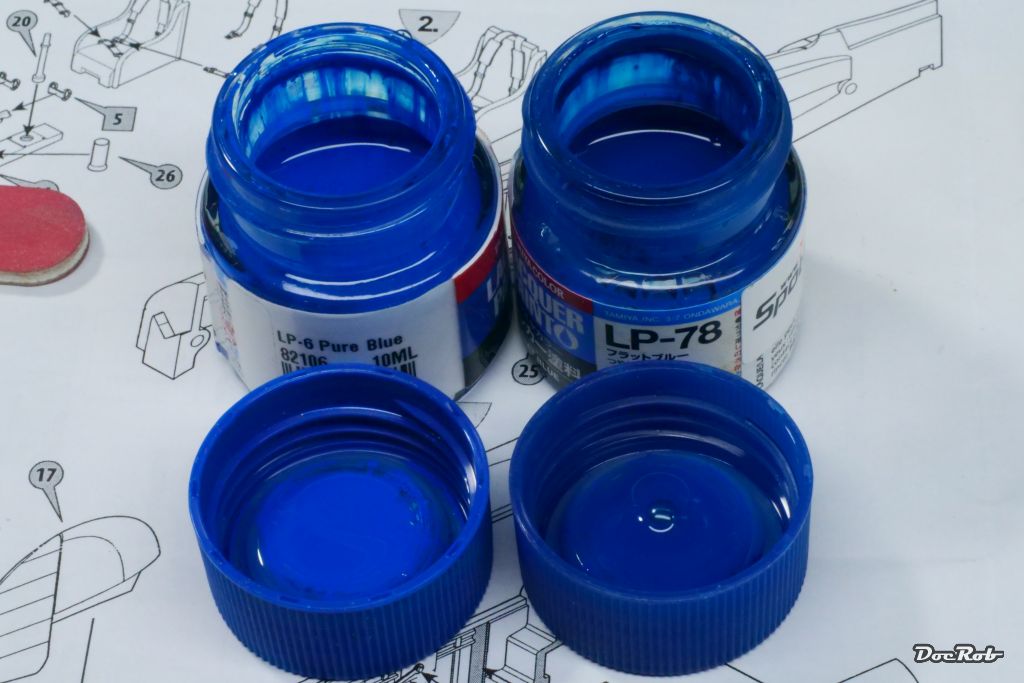
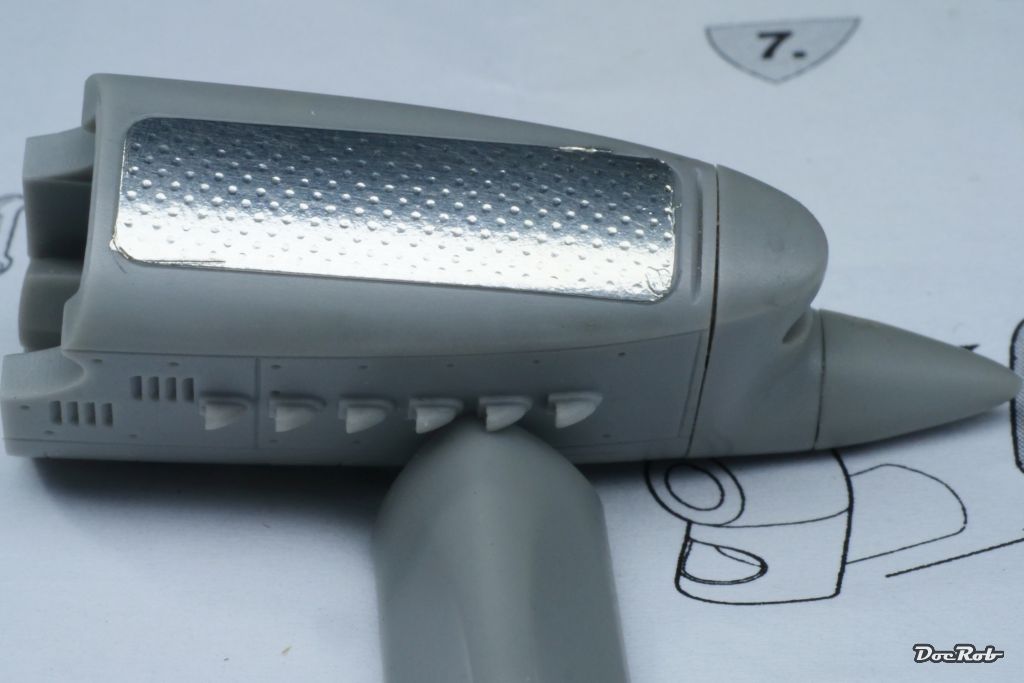
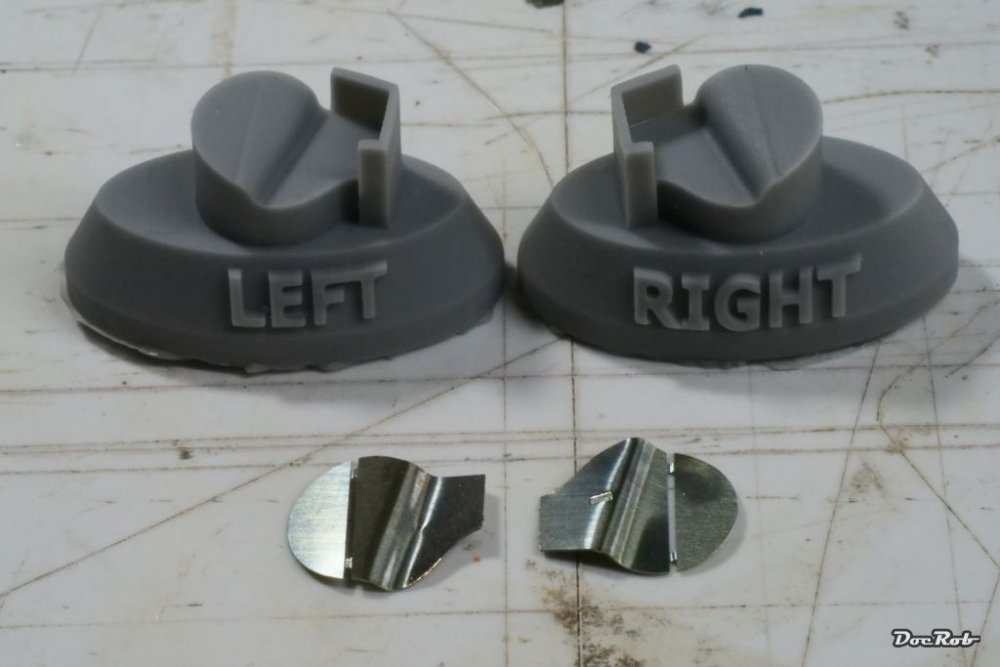
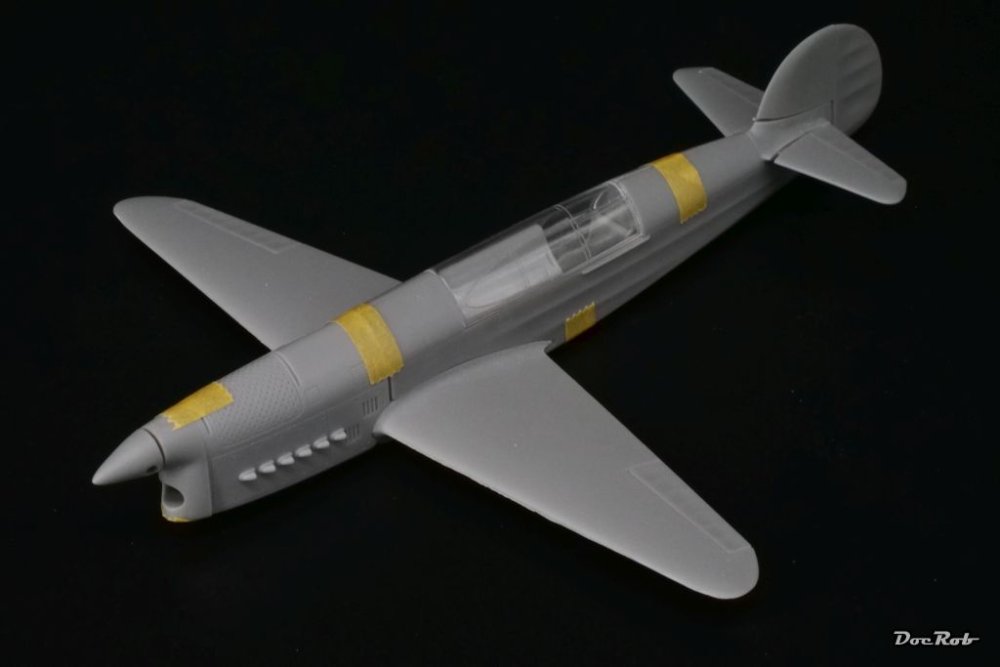
With lots of my project, I try to emphasize the possible difficult to solve problems, before I'm at the actual stage of the build. Having the how-to's in my head, helps to keep a clear sight. I considered masking the polished aluminum covers, after spraying them with chrome or polished aluminum following a gloss lack primer. Then I remembered, I once bought a sheet of Bare Metal foil and tried it onto one engine cover. It's not perfect in the pic, but I hope, I can do better after the blue color has been sprayed on. For now it's peeled off again. Speaking of blue, I almost decided to use the left one, Tamiya LP-6 gloss Pure Blue, but will try the darker LP-78 Flat Blue also on a piece of scrap. Lastly, I detailed the cockpit with some tiny PE parts and added the futurized canopy, to see , which insights could be expected. The canopy holds only through friction and I think, I will leave it off for painting, because I had some slight fogging issues with polystyrol canopies and lacquer paints, lately. Cheers Rob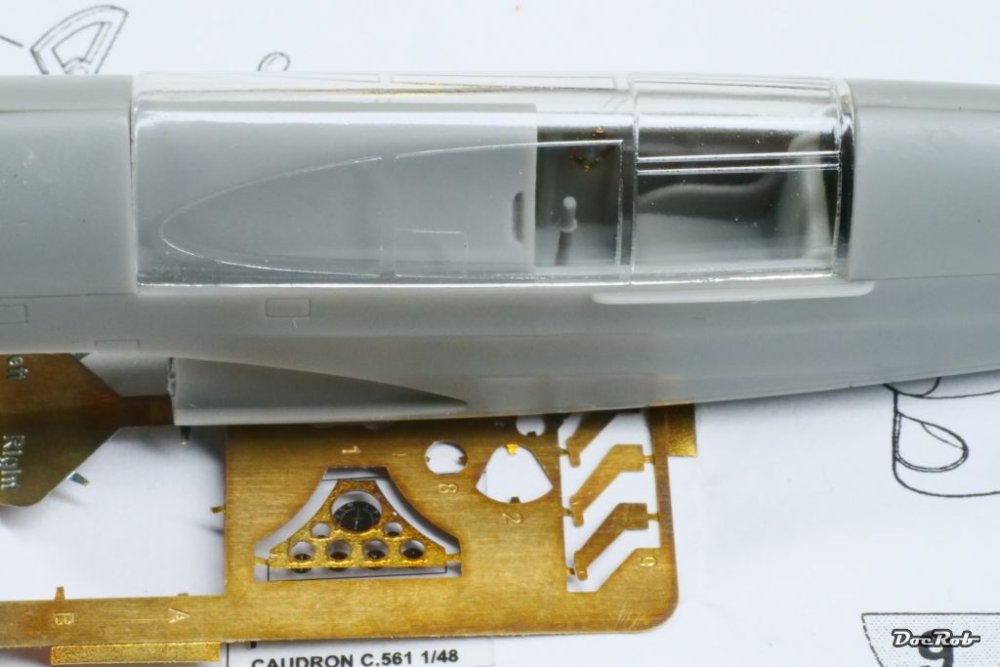


-
Very interesting and stored for later, Thanks Martin Cheers Rob
-
Camo looks great Peter, I think the way you separated colors on the wings is close to the 10cm zig-zagged contour mentioned in Martin's drawing. Cheers Rob
-
Caudron C.561 French Racing Plane - Resin - 1/48 - S.B.S.
DocRob replied to DocRob's topic in LSM 1/48 Work in Progress
Peter, the Caudrons were initially built to take part in the third 'Coupe Deutsch de la Meurthe', were the rules were the following: In 1931 Suzanne Deutsch de la Meurthe initiated a new competition for the Coupe, which was contested for the first time on 29 May 1933.[12] The trial was to be run in two 1,000km stages separated by a 90 minutes refuelling stop, and was limited to aircraft with an engine capacity of less than eight litres. The starting point of the race was still at the aerodrome at Étampes. Suzanne Deutsch de la Meurthe was offering one million Francs, and the Ministère de l'Air (Air Ministry) offered another three million in prize money.[13] The course was over 100 km (62 miles), from Etampes aerodrome to Chartres Bonce and back. The race itself was in two stages, each of 1,000 km (625 miles). (Wikipedia) I guess with that configuration, there was a lot of straight flying. It seems, only one Caudron C.561 was built for the participation of the last edition of the Coupe Deutsch de la Meurthe in 1936, but was not contending due to technical difficulties. Cheers Rob -
Caudron C.561 French Racing Plane - Resin - 1/48 - S.B.S.
DocRob replied to DocRob's topic in LSM 1/48 Work in Progress
Thank you Hubert, the C.460 replica seems to have an aluminum interior, like you mentioned and a wooden floor panel. For my C.561, I couldn't find any conclusive pictures. The side view photos of the time are hard to read, because of the canopies reflections. Cheers Rob -
LSM Modelling News 2023 merged Fran and Artful69’s threads
DocRob replied to Fran's topic in Modelling Discussion
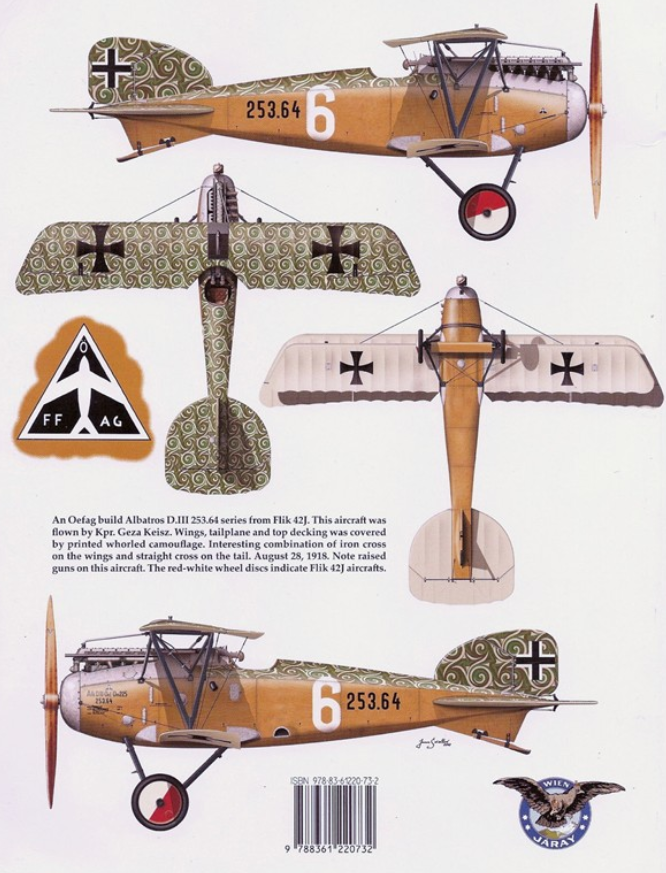
Well Gary, uncreative is one thing, boring another . I like some of the Oeffags schemes, some are relatively colorful, even with wooden fuselages and the strange camos appeal me. Some more schemes from my Eduard boxing. 8242AlbatrosDIII_OEFFAG_253_1c_KB.cdr (eduard.com) Cheers Rob -
To my eye, this discussion is a bit superfluous, as every modeler has the choice to take the easy path or not. I chose my subjects by attraction or fascination for the subject mostly, the kit's quality is not the determining factor of choice. Many aspects of the article are true though, but also obviously. I like to challenge myself with builds and there are some projects, I made, where, like mentioned, the build was more or less super easy. One example for that might be my Tamiya 1/12 Ducati Panigale-S, a near perfect kit, but the main goal was to replicate the various types of used metals, needed for the construction of a modern bike. That wouldn't have been possible with the same quality, 40 years ago and still is challenging. Our hobby changed a lot and will do in the future as well. I'm not among the solo brush painting on vintage kit people, maybe, because the time gap between modeling as a kid and reentering the hobby, maybe 15 years ago was too big. I take what's needed to fulfill the picture I have in my mind of a subject, be it kit-, technique-, skill- or aftermarket- wise. Every hobby has it's time frame and there will be always be products, that will make life easier. Color printed PE, followed by Acrylic 3D interior decals and next, possibly colored 3D print? It's the modeler himself, who defines his hobby and the level of difficulty within. Cheers Rob
-
LSM Modelling News 2023 merged Fran and Artful69’s threads
DocRob replied to Fran's topic in Modelling Discussion
That will be my choice for the Eduard 1/48 Oeffag 253, I have. The wings will be decaled with Aviattic's Sworl camo and the fuselage will either be decaled or wood finished with oil colors, boring? Naaaahhhh Cheers Rob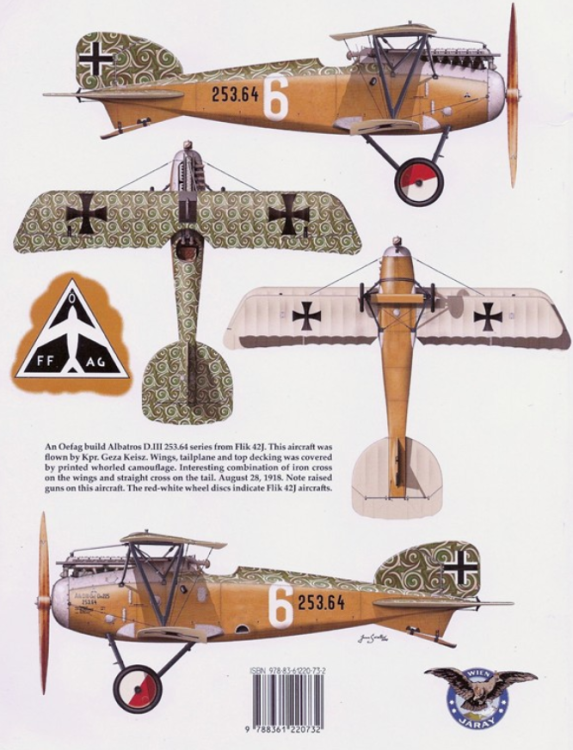
-
Italeri 1/35 Elco 80' Torpedo Boat PT-596
DocRob replied to Bomber_County's topic in Let’s Get Wet Group Build.
I'm with Gary, I think the rope is bueno for that scale. Can't wait to see more progress, Phil. -
Caudron C.561 French Racing Plane - Resin - 1/48 - S.B.S.
DocRob replied to DocRob's topic in LSM 1/48 Work in Progress
The fuselage color seems to be discussed relatively often for such a rarely build plane. It varies from Bugatti blue to dark blue and I will stay on the darker end of this discussion. Even more difficult is to determine the interior color. My best guess is natural aluminum, to reduce weight, but light grey would be an option too. Does anybody have an opinion or even facts about this? Cheers Rob -
Caudron C.561 French Racing Plane - Resin - 1/48 - S.B.S.
DocRob replied to DocRob's topic in LSM 1/48 Work in Progress
Thank you Peter and Mike, it is indeed a very appealing aircraft with it's unique shapes. There is a limited front view, with the indentions in front of the pilot, covered by the clear canopy, but I guess, the Caudron was not easy to fly. Cheers Rob -
Caudron C.561 French Racing Plane - Resin - 1/48 - S.B.S.
DocRob replied to DocRob's topic in LSM 1/48 Work in Progress
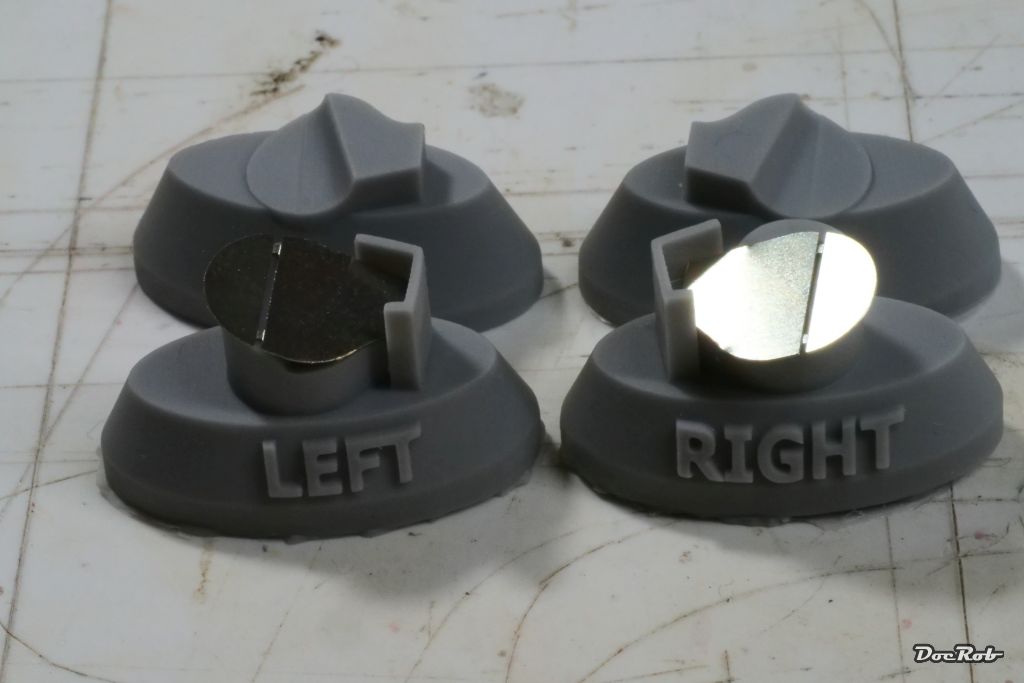
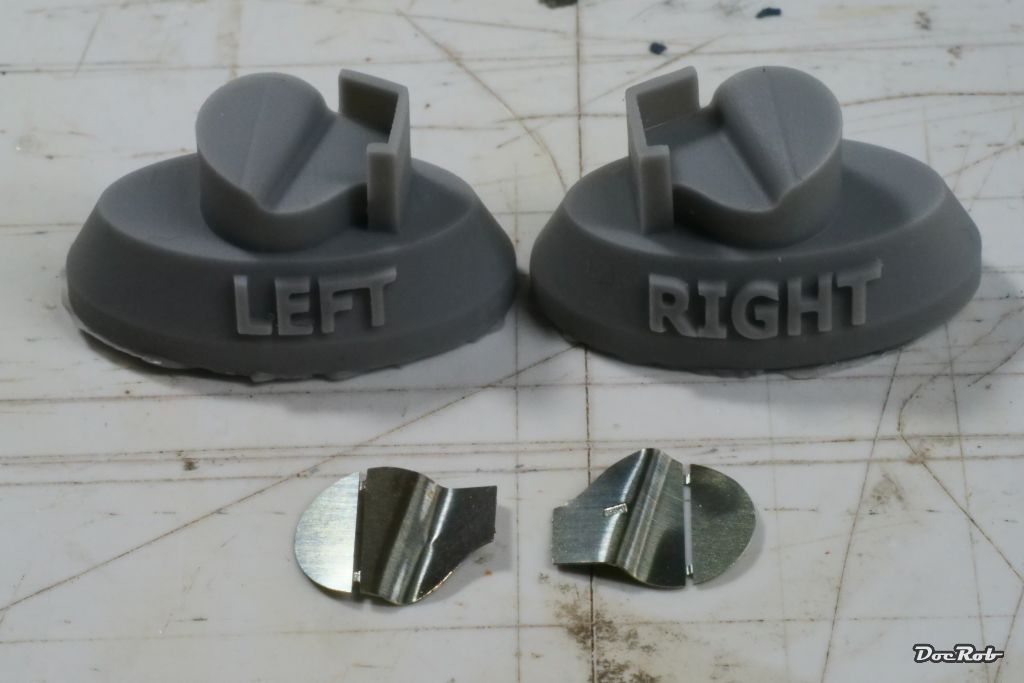
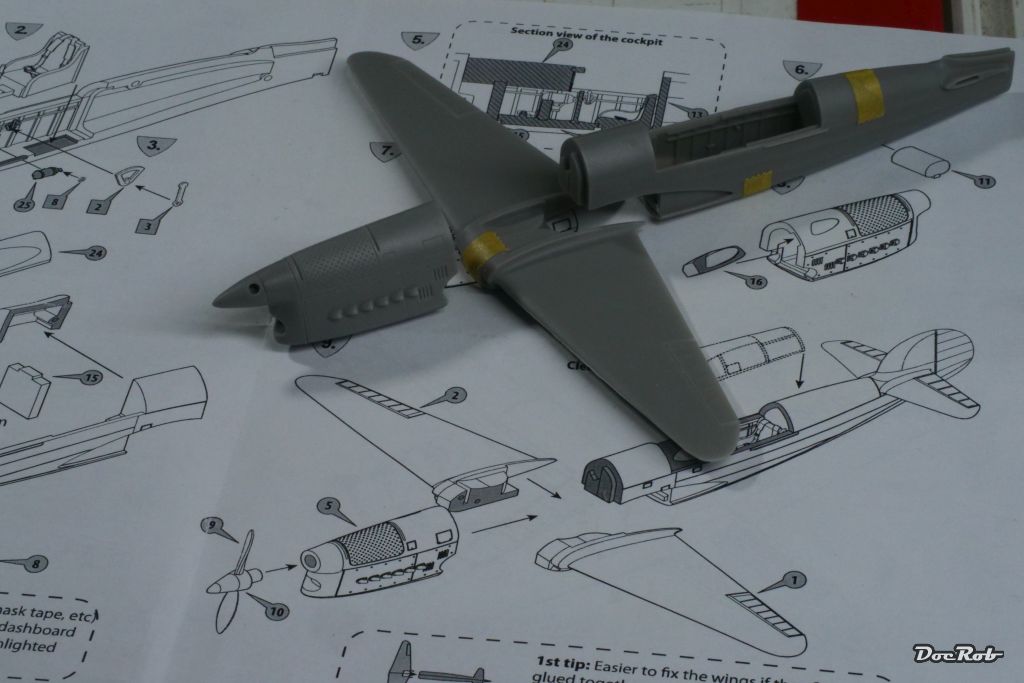
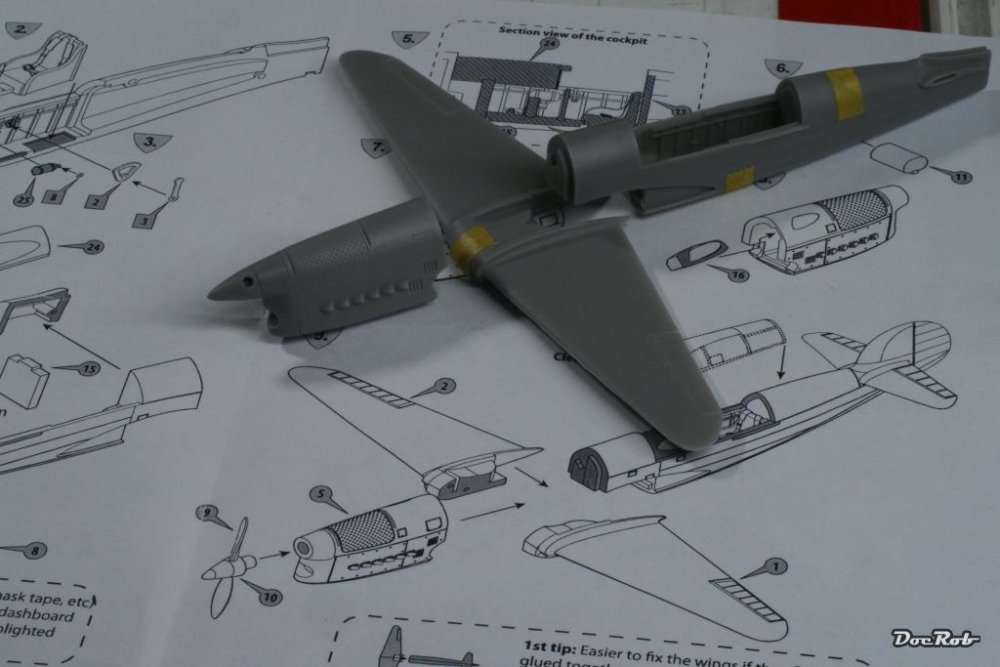
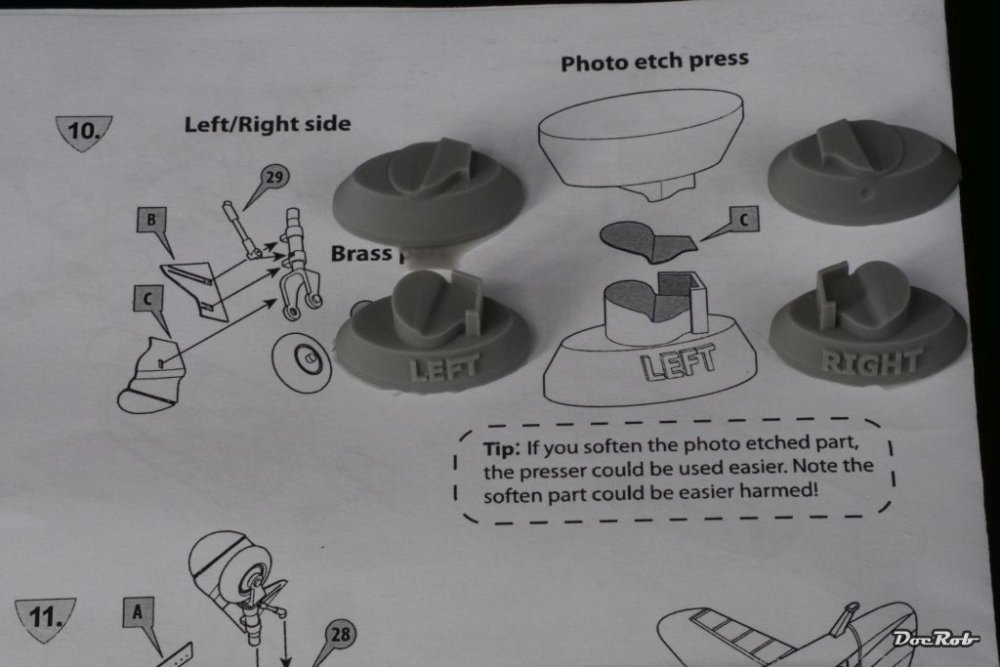
Not with racer's pace, but with little steps the Caudron build continued. After some fine tuning for the fitting of the main components, I wanted to try, if the punch press method for the wheel covers works. I annealed the PE parts, until they changed to a bluish tint and then punched. ...and it worked. I may have gotten the PE-brass a bit softer with more heat, but due to the two narrow connection point wouldn't risk it. Here is an example for the clever design of the kit, all main component key into each other, do you hear that Zoukei Moura ? Finally, I cleaned all the resin parts thoroughly in soap water, Future dipped the canopy for enhanced clarity and started with the interior assembly. The front section was assembled and here again, the ingenuity shows, because the air intake in front and one on the cowling have an insert, which is cast to exact measure, to be used as a guiding element. Cheers Rob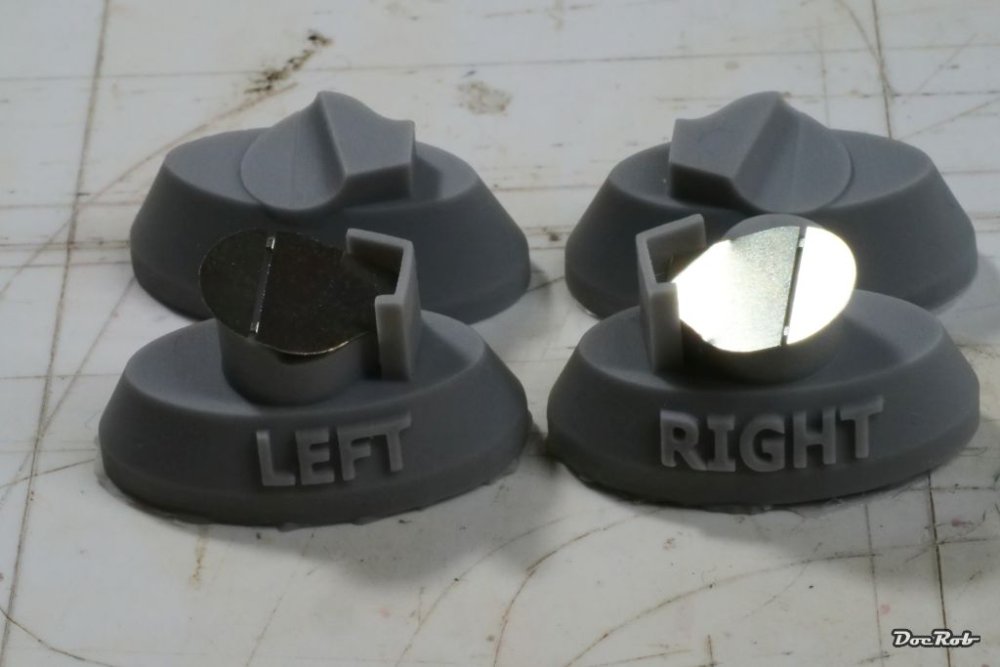
-
Caudron C.561 French Racing Plane - Resin - 1/48 - S.B.S.
DocRob replied to DocRob's topic in LSM 1/48 Work in Progress
In a successful racer you only look backwards, Gary , but you are right, I can't believe, that flying the Caudron gave you a feel for safety. The predecessor, the C.450 had a tiny windshield, but with the long fuselage, the view must have been obstructed too. I hope, the forming of the wheel well covers works like planned. I like the idea too and this is not the only place, where ingenuity shines. The wings have a casted mid section with locator pins, to connect star- and port side, then you slide them into the fuselage and finally, the engine cowling is added, intersecting with the front profile of the wings. Cheers Rob -
Caudron C.561 French Racing Plane - Resin - 1/48 - S.B.S.
DocRob replied to DocRob's topic in LSM 1/48 Work in Progress
I was aware of the existence of a 1/32 version of the Caudron, but the thread about the development of the kit here was before my time. Thanks for mentioning Hubert, there is some great information and I already 'borrowed' some ideas from my first quick scroll through. I don't like the Bugatti blue too much and I think, I will paint mine a bit darker. I'm truly sorry for the itch I caused, but you know there is only one way to get rid of it. The C.561 would be a strange subject for a mini-GB , but why not. You're aware, that S.B.S. also produces a Caudron C.450 among others. Cheers Rob -
Thanks Kevin, good to know. Who needs flags, when they have radio . Cheers Rob
- 329 replies
-
- 2
-

-
- uss arizona
- eduard
- (and 1 more)
-
Honestly, I prefer rigging a WWI kite to this Peter. Very thin elastic threads, sometimes intersecting and it's so easy to destroy the finished work with clumsy hands, while doing so. Cheers Rob
- 329 replies
-
- 1
-
-
- uss arizona
- eduard
- (and 1 more)
-
Bummer with the detailing kit for the Mercedes engine. Was it a Taurus one, hard to come by, after he ceased business. Rigging, hmm, you put the heat on me Gary, subtle, but hey, I noticed , but I have to tell you, I am nuts , so nothing to gain, nothing to loose. Cheers Rob
- 329 replies
-
- 2
-
-

-
- uss arizona
- eduard
- (and 1 more)
-
With what Kevin, I have left my microscope down in the basement and can't see a thing . Your tiny Japanese vessel looks amazing, but I'm not sure, if the implication is to scare me off rigging or encourage me . Cheers Rob
- 329 replies
-
- 3
-
-
-
- uss arizona
- eduard
- (and 1 more)
-
Six Kevin? I count a lot more and I'm not so sure if these are really flag lines. I will lean back for some days and then decide about rigging. Cheers Rob
- 329 replies
-
- 2
-
-
- uss arizona
- eduard
- (and 1 more)
-
Do you use this little gem in your civilian PZL build? The IBG supplied one wasn't too bad, given the limited visibility, but this one cries for being shown unobstructed. Cheers Rob
-
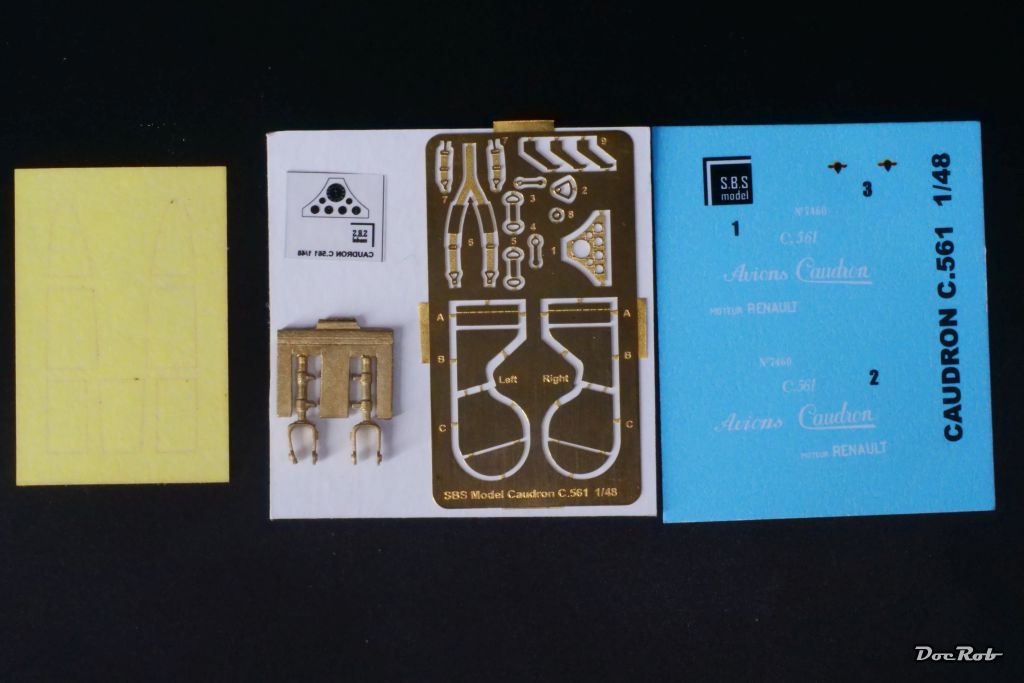
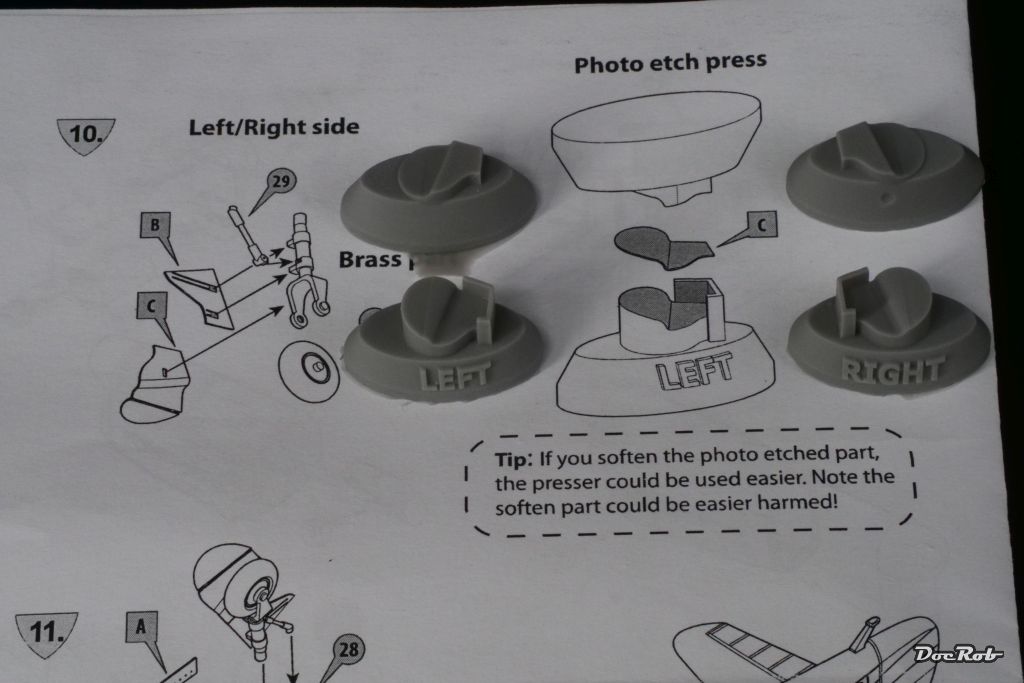
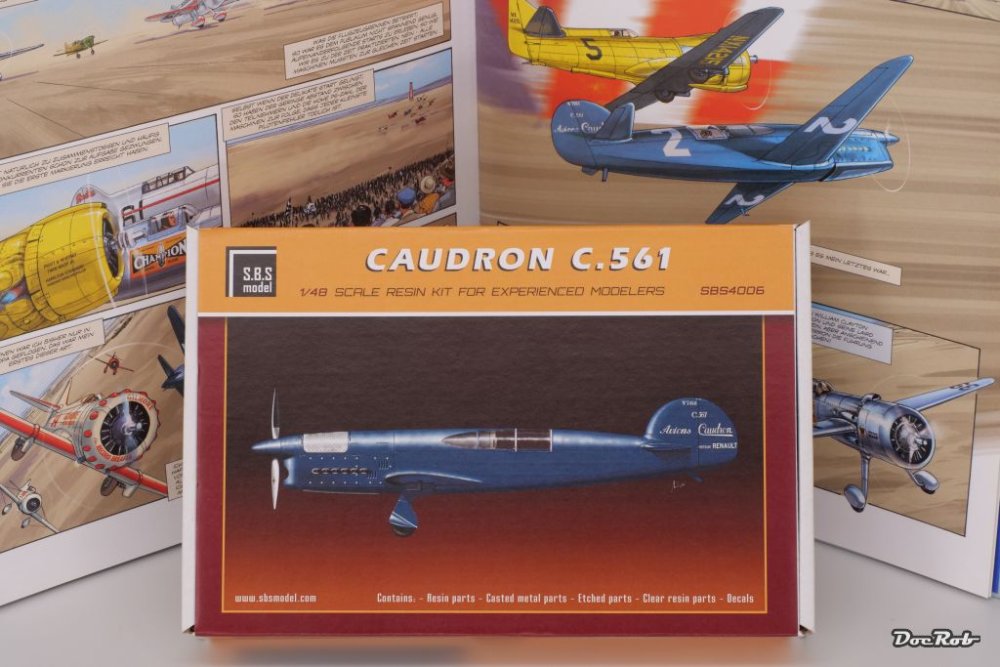
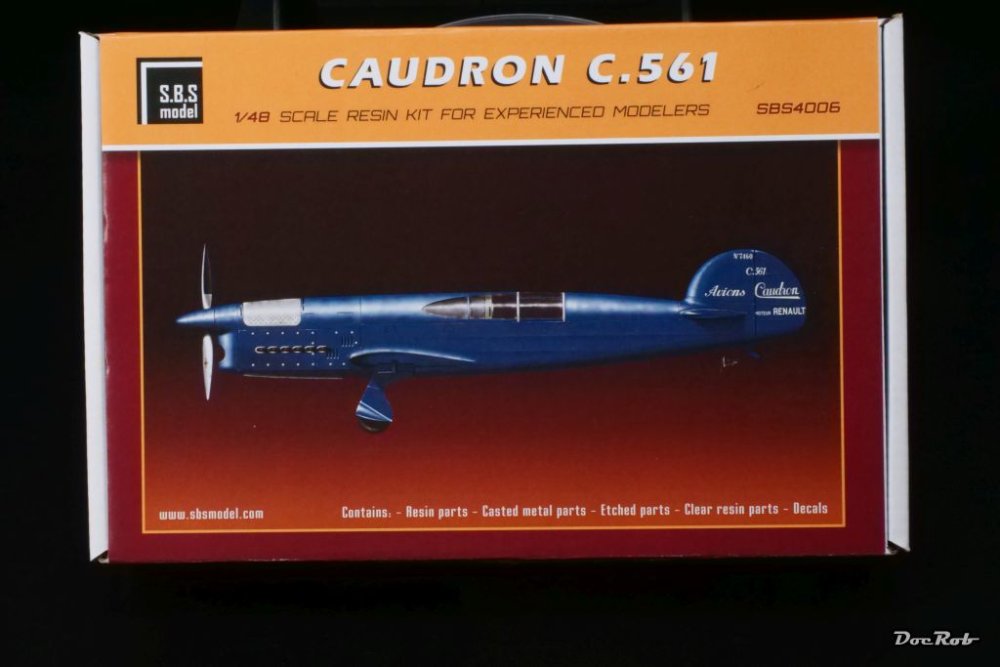
Très cool was my first impression when I've first seen the Caudron C.561, what a design, completely different than other race planes of it's time. The design was not so much max power orientated, than sleek and aerodynamic. My last contact with the whacky racer were Hugault's paintings in the German version of the comic book 'Au-dela des nuages T1'. I bought the kit a while ago, initially after I stumbled over it somewhere in the net, I couldn't resist the magnetizing box art. The producing company is from Hungary and they produce resin planes and accessories in 1/48 and 1/72 mainly. When I opened the sturdy and beautiful designed box, I was up to my next wow. Securely packed where the grey resin parts for the airframe, including a quite detailed interior, along with a clear (and I mean clear) resin canopy, metal casted wheel struts, a PE-fret, including seatbelts, a dashboard, wheel covers and other detail parts, Kabuki canopy masks, decals, a manual and a separate four side color print. The quality of the resin is perfect, there are no bubbles or blemishes, the whole kit oozes a 'build me' type of quality and as it is my first full resin plane build, I have to confess, all my fear was gone, after inspecting the kit contents. Yesterday, with my USS Arizona build more or less in the books, I decided to use a good spare hour for removing the cast blocks (easy) and do some test fitting. What's to say, the first impression didn't exaggerate, the fit is almost perfect and it seems, filler will only be needed in small quantities on the bottom seam of the fuselage. The parts design is absolutely clever, especially around the wing root to fuselage to engine cowling area and even includes guiding pegs, Chapeau S.B.S. Another example for smart design are the wheel well covers, which are made from PE, which should be annealed and then press formed between the included resin punches. This kit is a true gem, it doesn't happen very often to me, that I'm totally enthusiastic from first of the kit, through opening and inspecting the box and dry fitting and getting a grip for the kit. Cheers Rob


-
1:32nd scale Bristol Scout C
DocRob replied to sandbagger's topic in LSM 1/35 and Larger Work In Progress
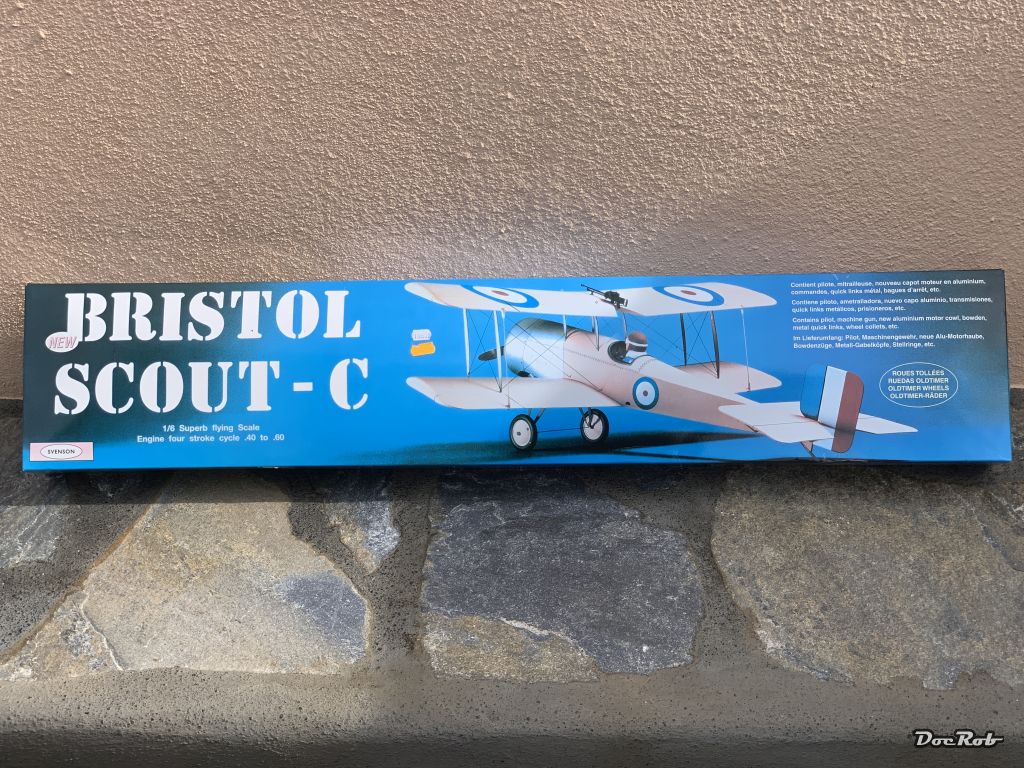
Nice choice Mike, I will order the Scout soon and look forward to the build. I will have a blueprint then, with your great logs. I may do a twin build, as I have this huge fellow in my stash. Cheers Rob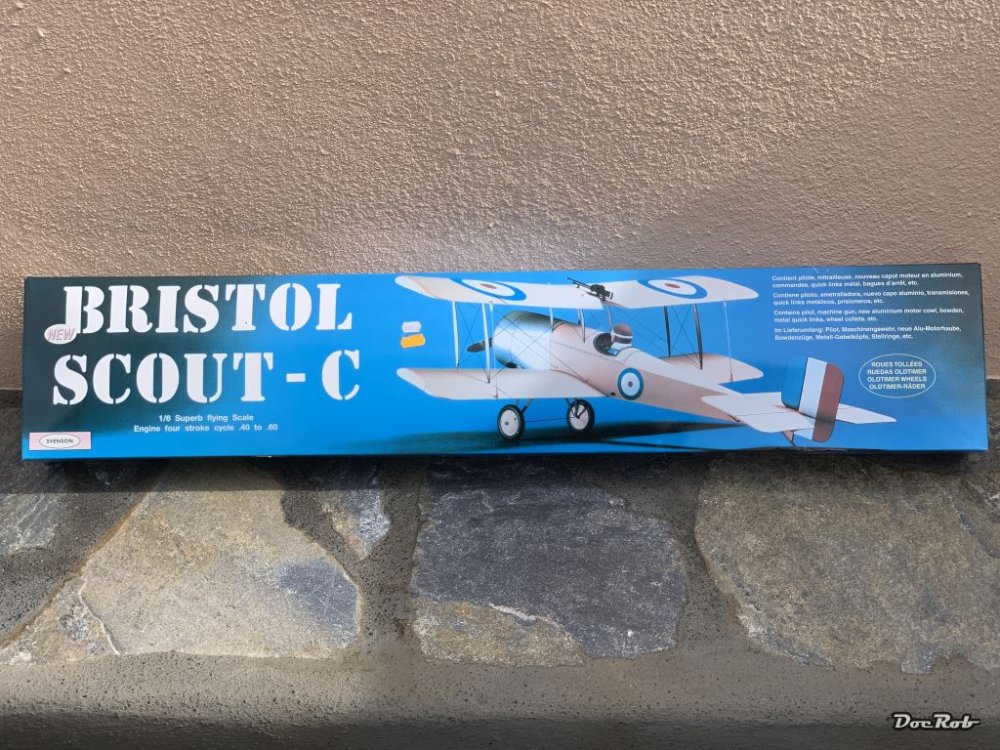
-
Very nice, I guess the paddles on the Kettenkrad's tracks are not helpful during the assembly. The Henschel looks great and as a compensation for the tedious track work, you have a twin engine design, which avoids Zoukei Mouras back breaker, the engine to fuselage to wing mount on the single engined ones. Cheers Rob