GazzaS
-
Posts
6,396 -
Joined
-
Last visited
Content Type
Profiles
Forums
Events
Gallery
Everything posted by GazzaS
-
Thank you, Sir! Thank you, Kai! Getting the itch to to build WWI, yet? Thank you, Rob. I'm much happier with the propeller boss, too. Thank you, Peter!
-
Great job!
-
The interior looks great,Peter! I'm very glad that modelling has helped improve your manual dexterity. ...I'll tell you a story: We had to go to a family birthday party. They had some drinking games and one was like this: The idea is to move the hook around the guy without hitting him and setting off a buzzer. While sober, everyone tried it and none of them made it half way around without setting it off. I consider myself shaky, so had no expectation of beating anyone. But... because of this modelling thing... I did it first time around without setting off the buzzer. Nobody wanted to play it after that. My wife said: "See, your modelling is useful for something after all."
- 162 replies
-
- 12
-

-

-
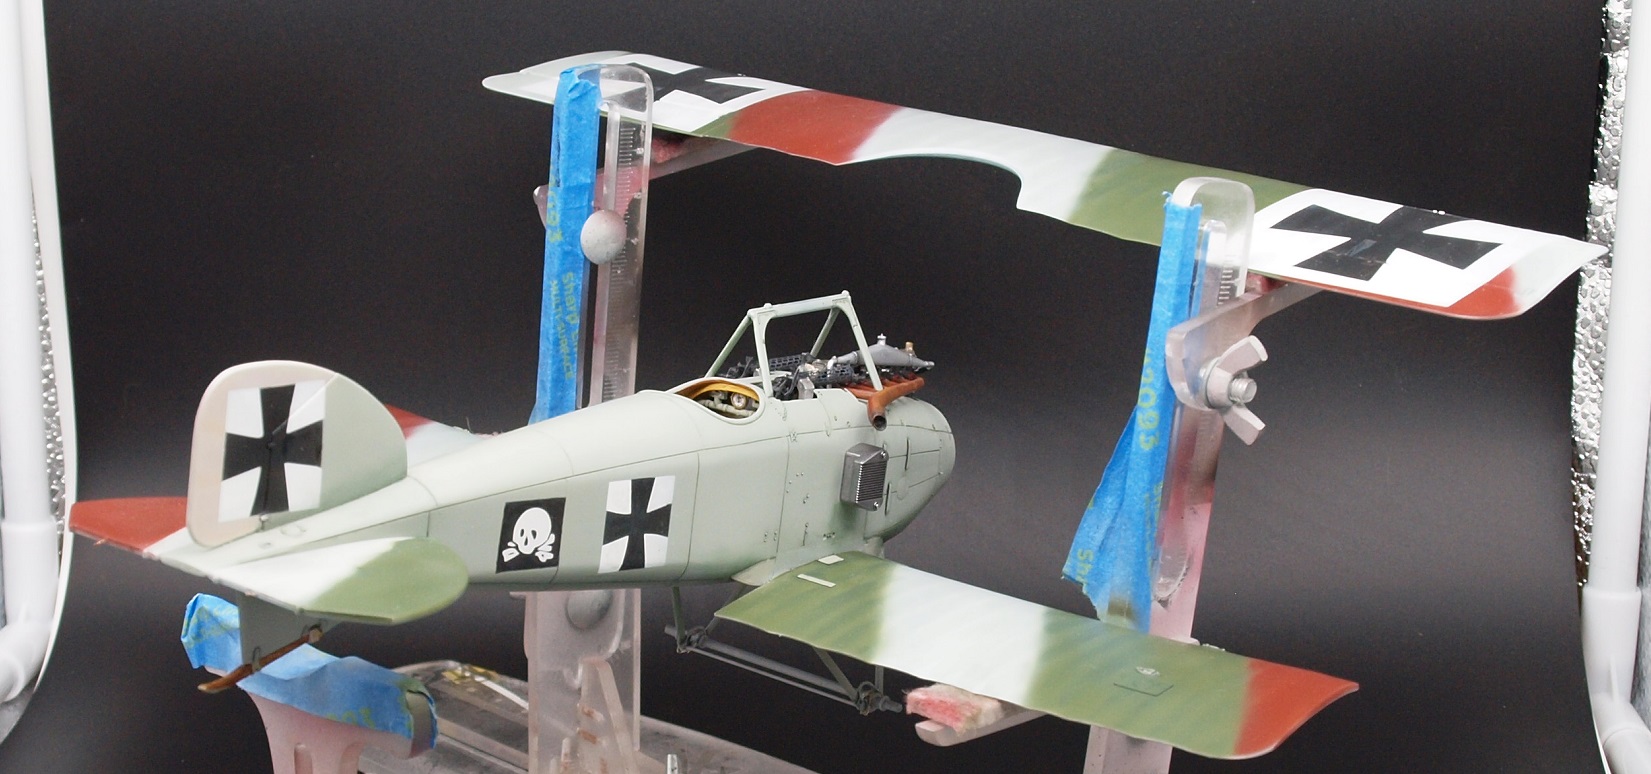
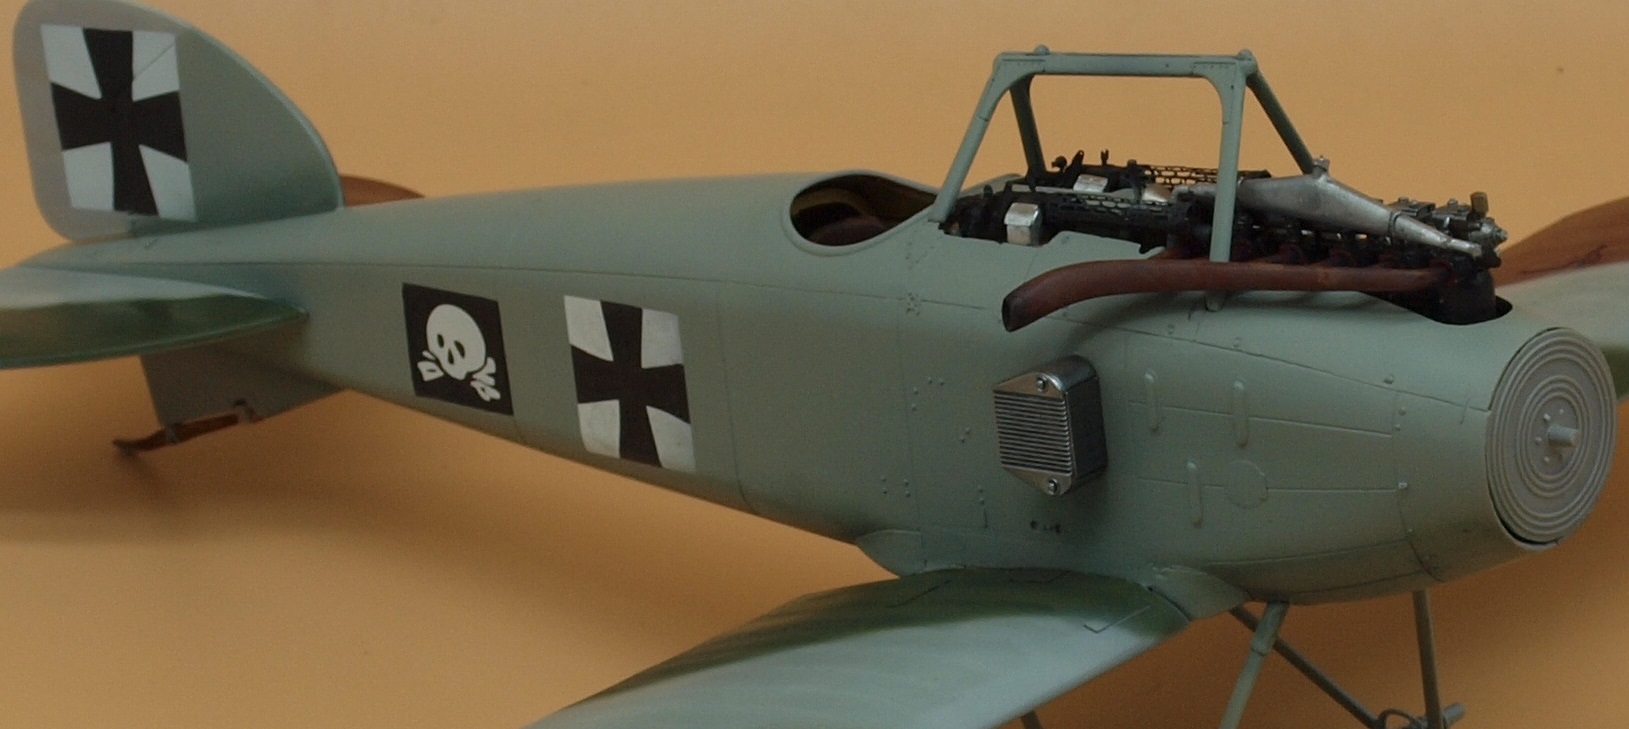
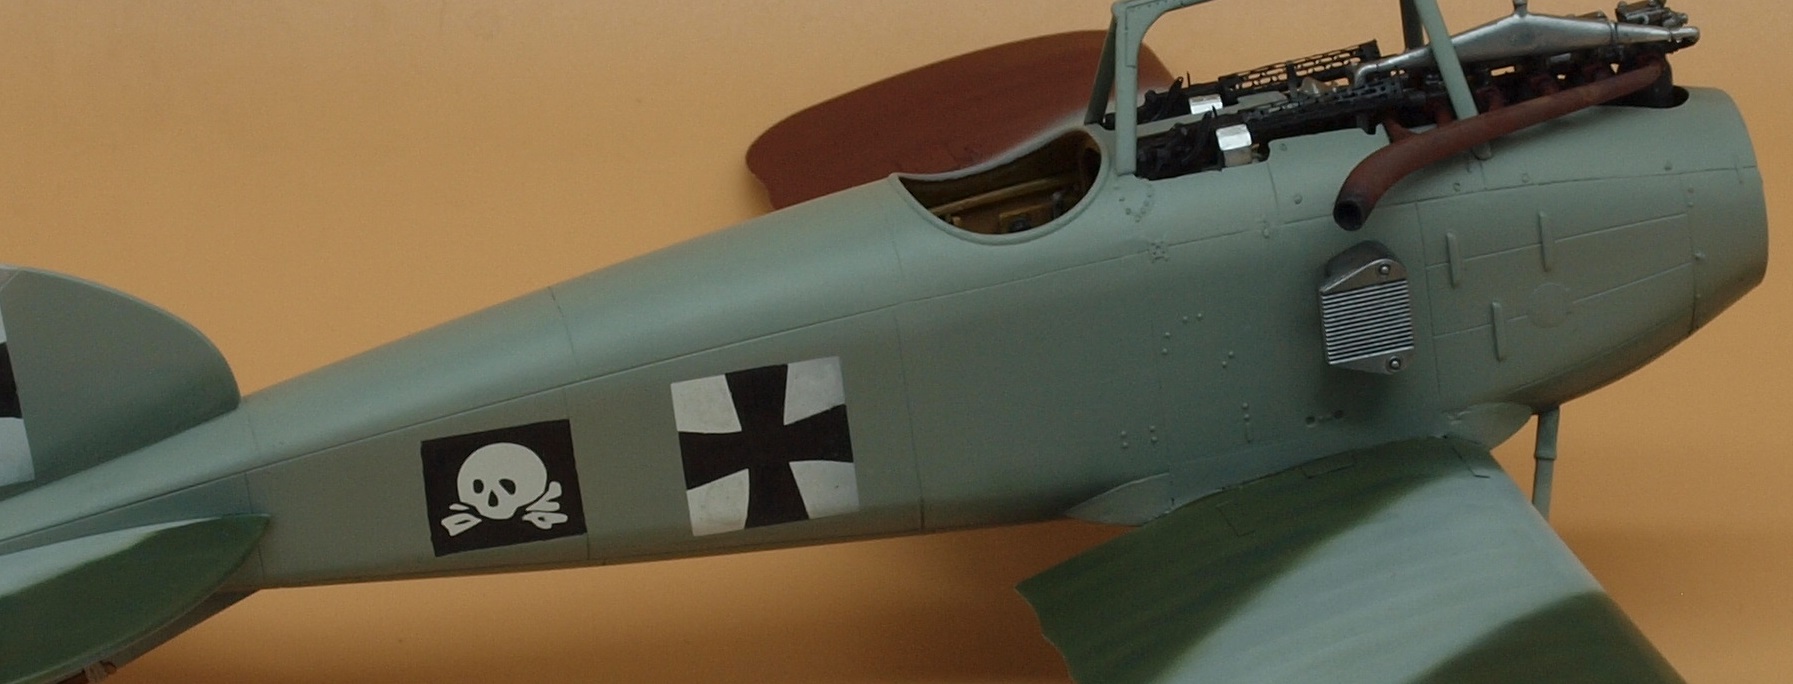
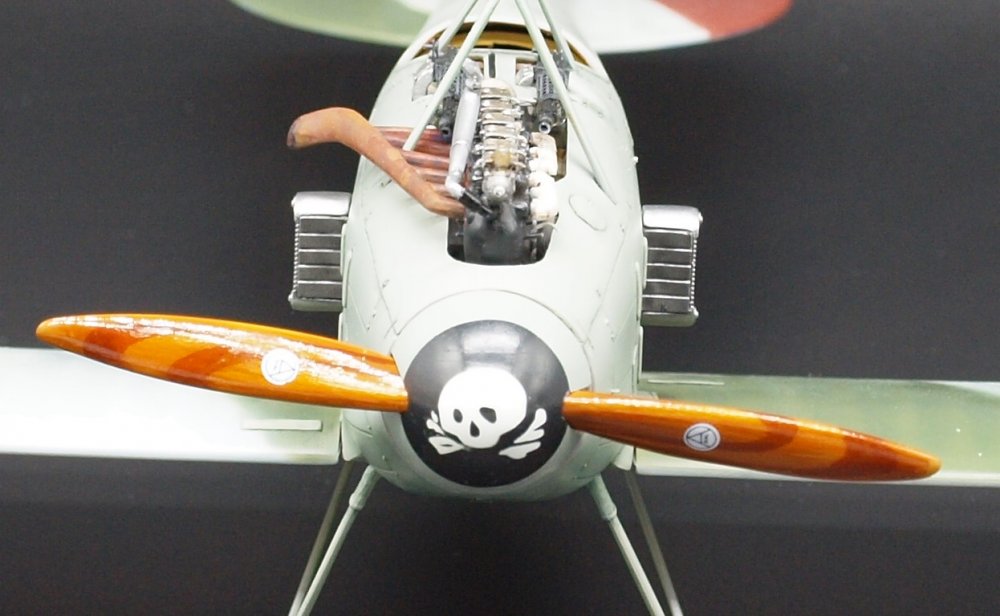
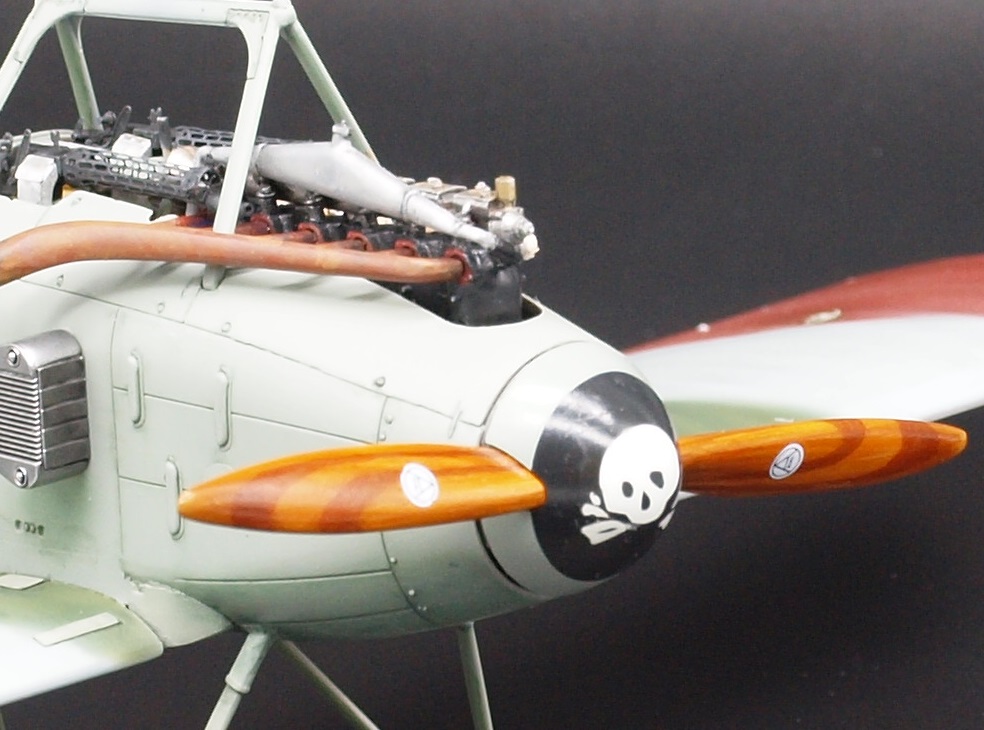
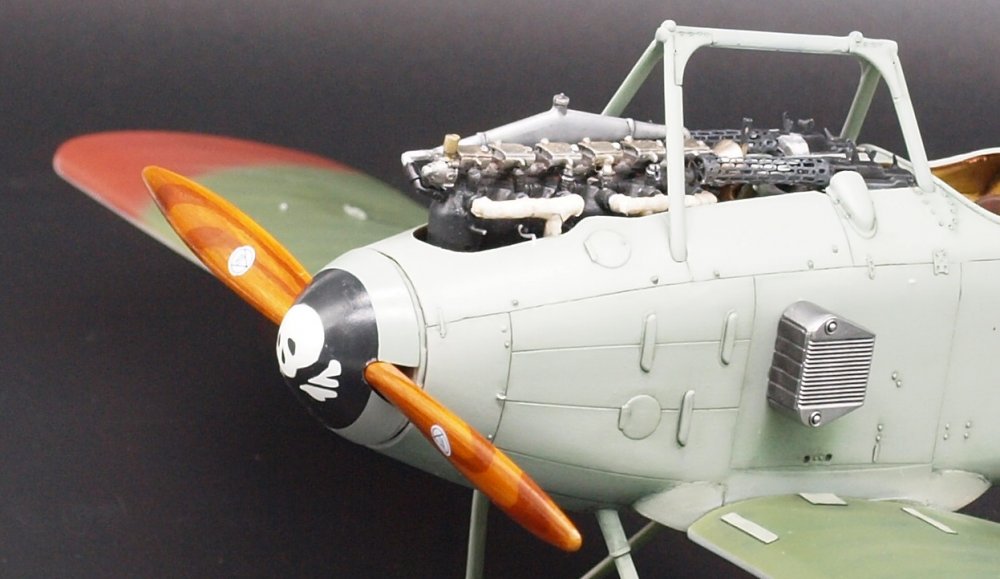
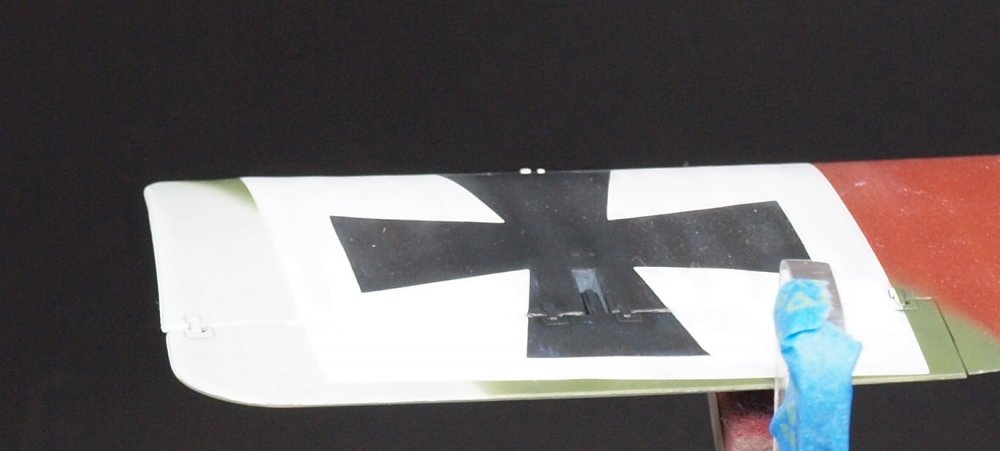
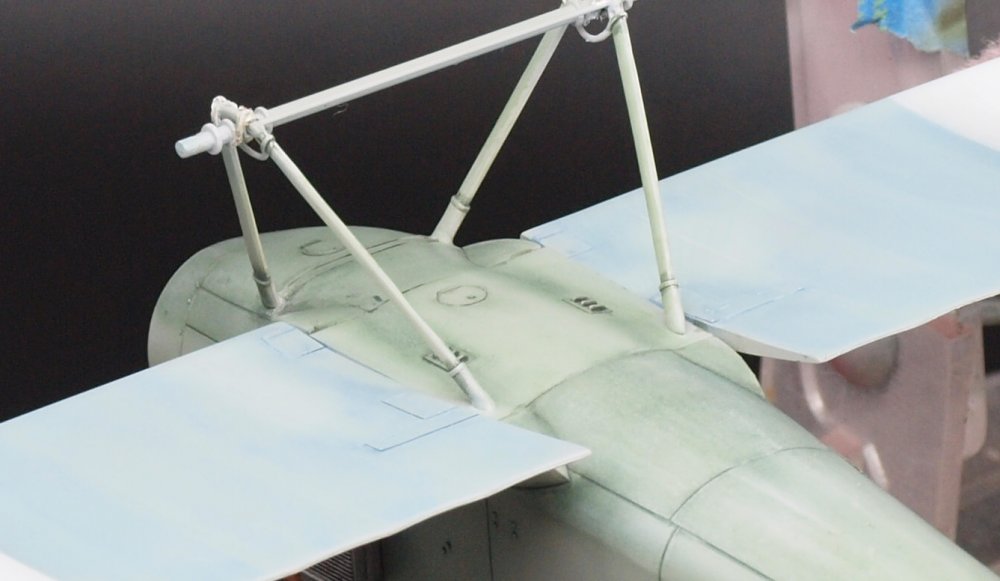
Hi everyone, Not a huge update as I'm allowing the oils time to dry and harden. I've finally dealt with the propeller boss question:
-

What is on your bench right now ? Share a picture :)
GazzaS replied to Martinnfb's topic in Modelling Discussion
That looks quite nice, Rob! -
Ouch! How long was the dog in the Subaru?
-
I've got two large dogs here. But they get real bones every day. Either beef neck bones or beef marrow bones. Except for a few of my wife's shoes, nothings been chewed since my youngest was a pup... six years ago.
-
ZM kits look like a bit more than I want to bite off and chew. But I think I will make an exception for these two.
-
Looks good, Phil. I always get extra nervous on twin boom kits, expecting bad things.
-
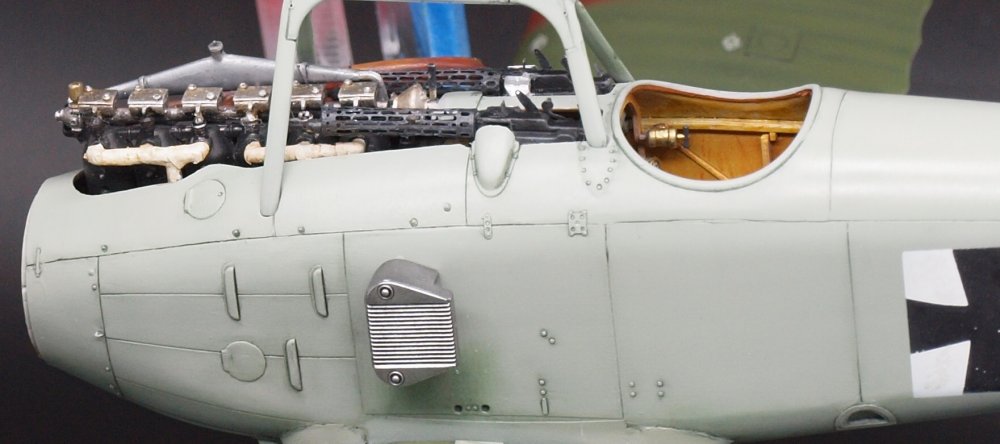
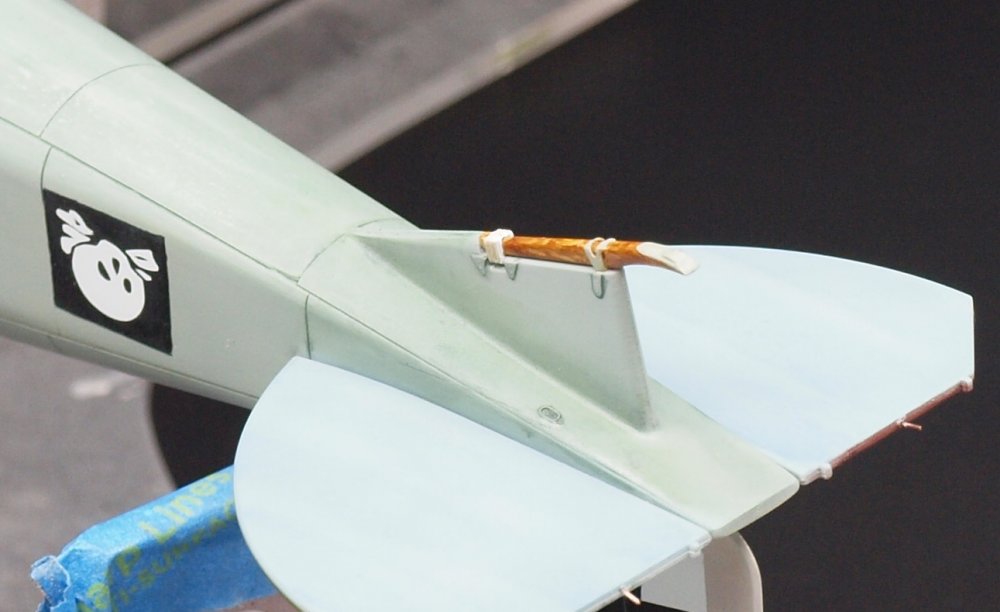
Thank you Kai. The finishing steps are quite few... but I still won't finish this weekend. Paint the combing around the cockpit. Give oils a few days to dry. Seal the paint with clears. Add windscreen. ...then I can prepare for rigging. I'm not sure I'm going to use turnbuckles. The real thing are so thin IRL that I might just use a little paint.
-
Thank you, Peter!
-
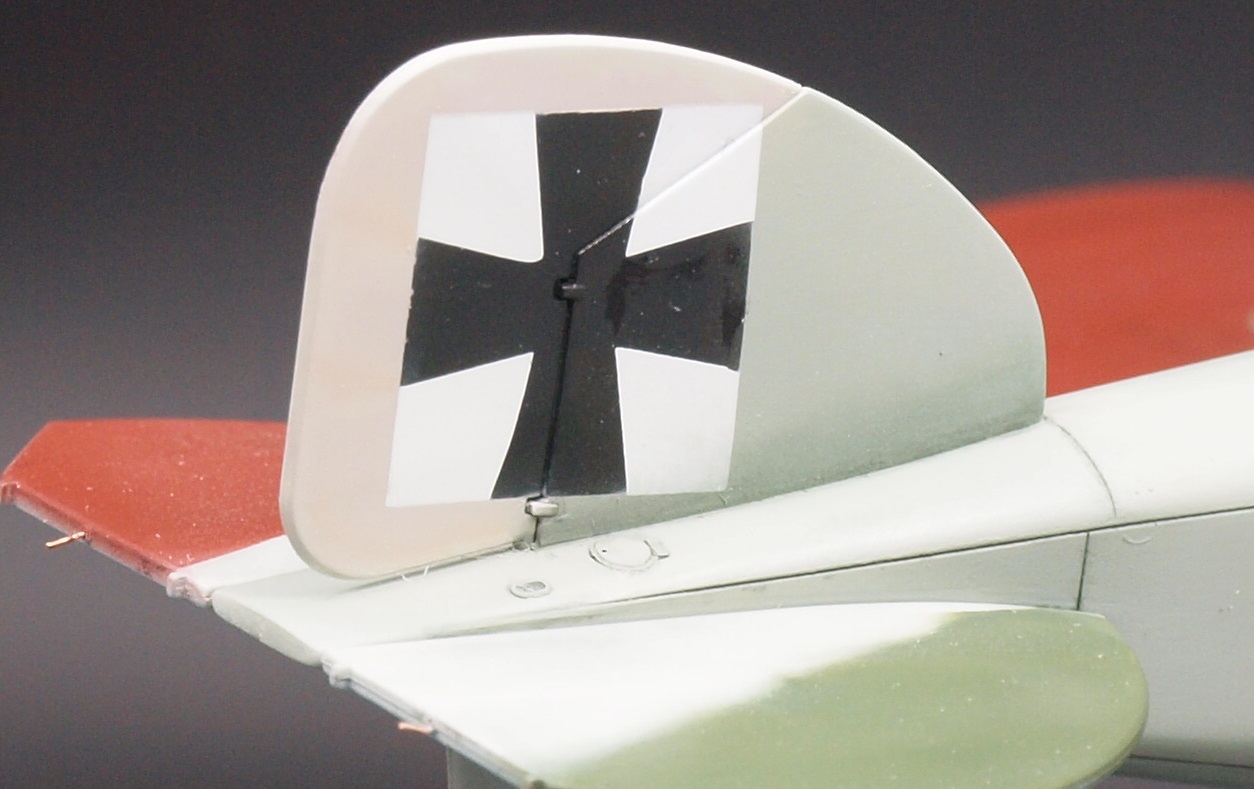
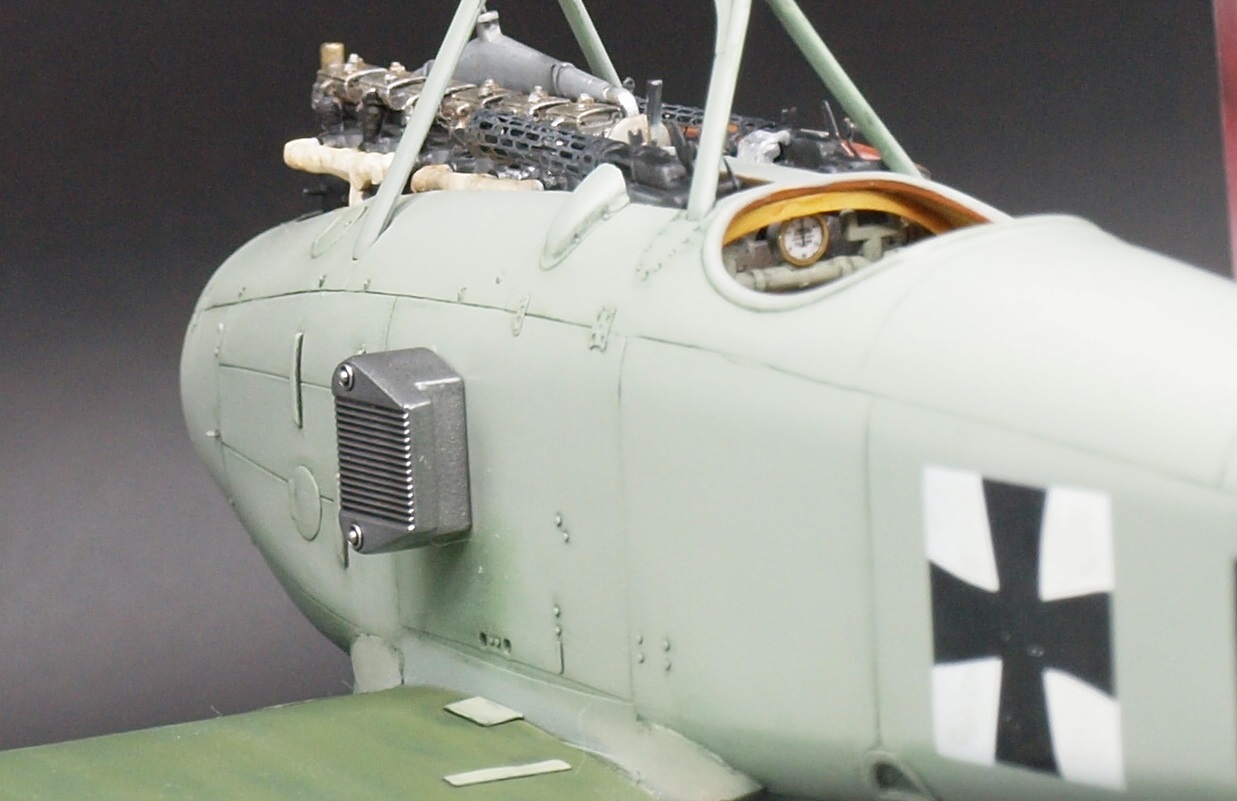
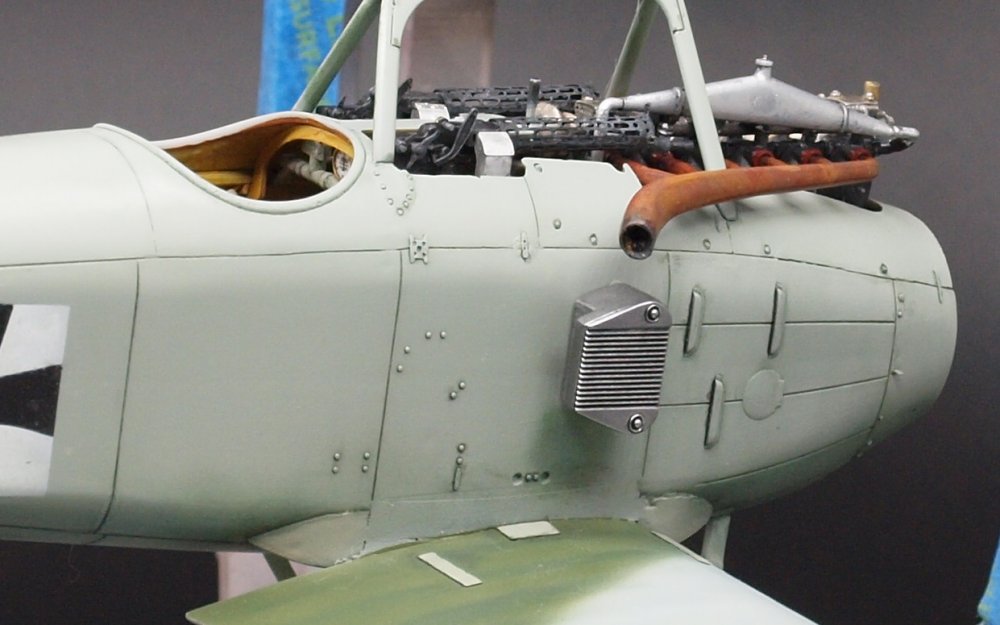
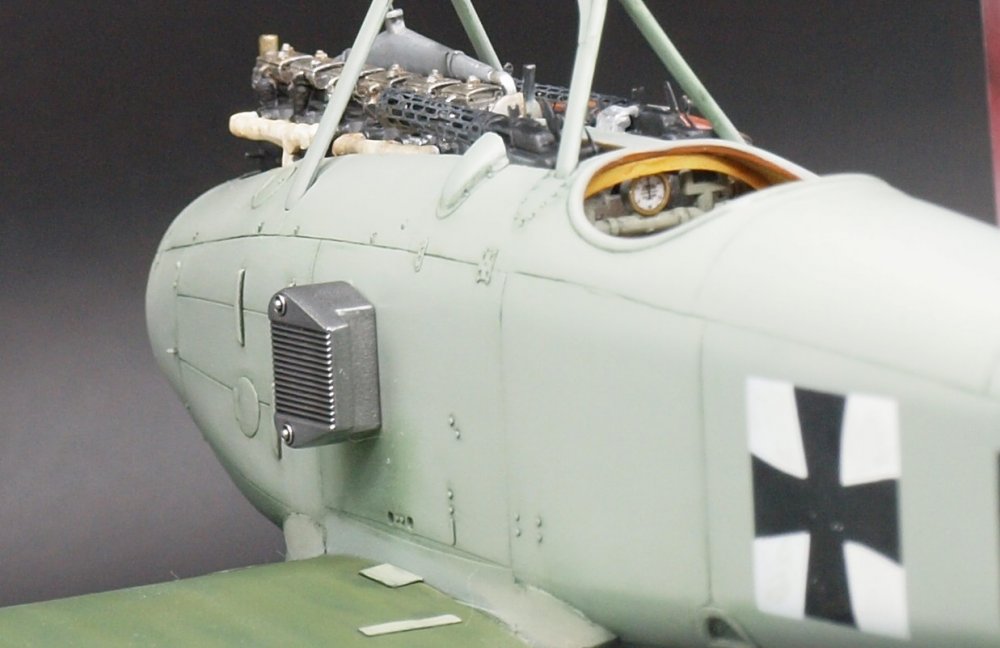
Hello friends, Finally the pin wash is done. To keep it short, instead of using one color for the entire plane, I used shades of each color zone to keep things fron contrasting too unrealistically. The exclusion to this is the louvres on both sides of the engine and under the fuselage where I used black to illustrate an open space. Anyway... pics!


-
Israeli Mirage III C with Atar9C
GazzaS replied to Kaireckstadt's topic in LSM 1/35 and Larger Work In Progress
Looks great! -
Atlas Cheetah E Scaleworx Conversion
GazzaS replied to GusMac's topic in LSM 1/35 and Larger Work In Progress
That will be an eye-catcher for certain! -
Wow! Fantastic job!
-
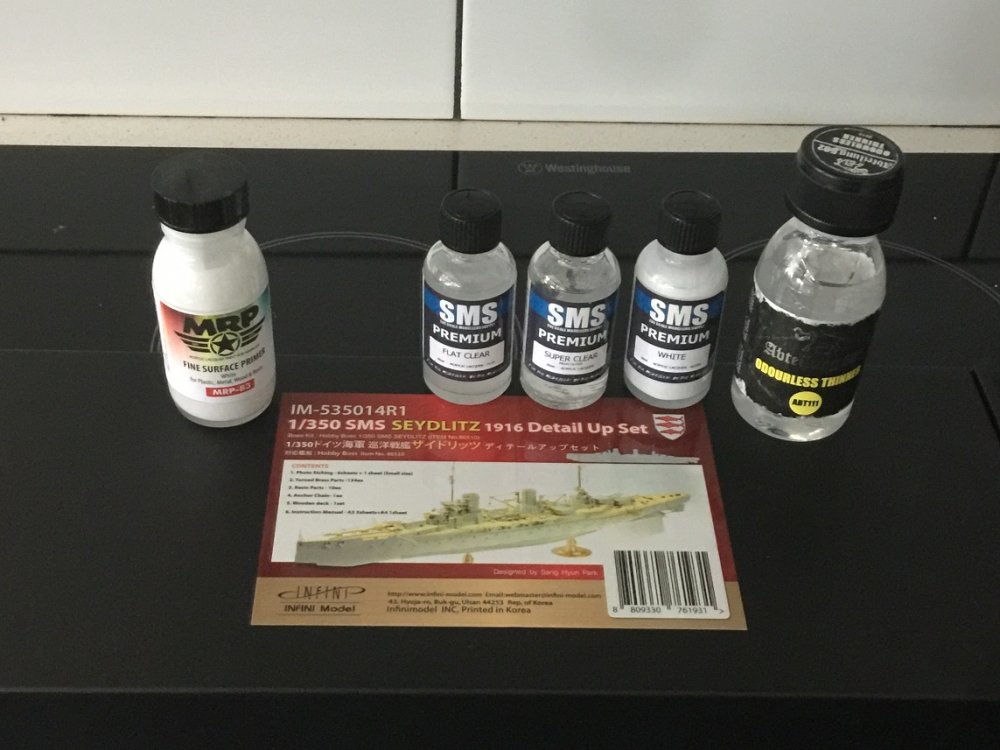
Some paints, thinner and a really expensive detail set for the Hobby Boss Seydlitz from the ever reliable BNA Model World. It's got everything.... and then some! I'm not ready to build it... but I didn't want the set to be gone when I finally got around 2 it.... and I wanted free shipping.
-
Takom Panzerkampfwagen I 1/16 scale... with figure
GazzaS replied to GazzaS's topic in LSM 1/35 and Larger Work In Progress
Thanks Kai. There's nothing set up for RC work. Though, the tracks are workable, and with enough work it could be done as it's a large hull tub with nothing in the way. -
Takom Panzerkampfwagen I 1/16 scale... with figure
GazzaS replied to GazzaS's topic in LSM 1/35 and Larger Work In Progress
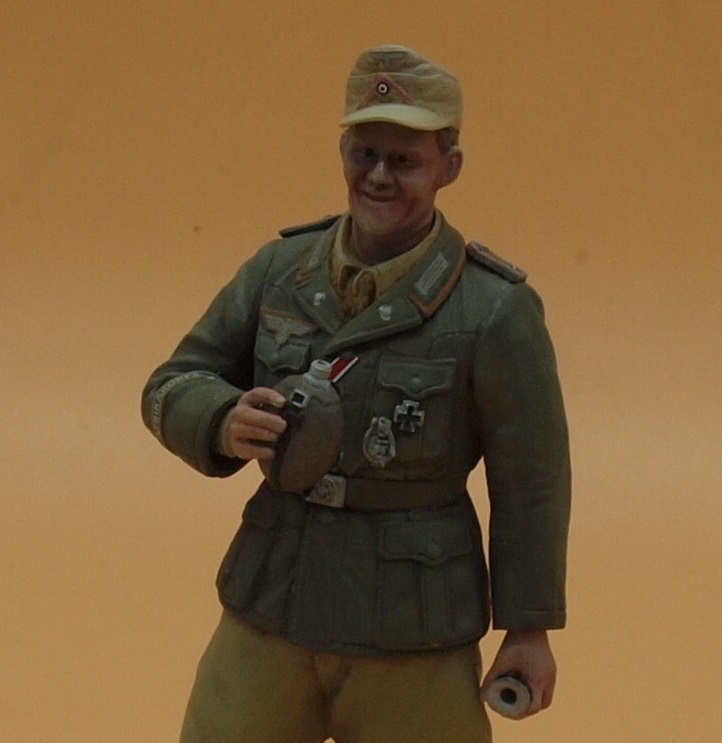
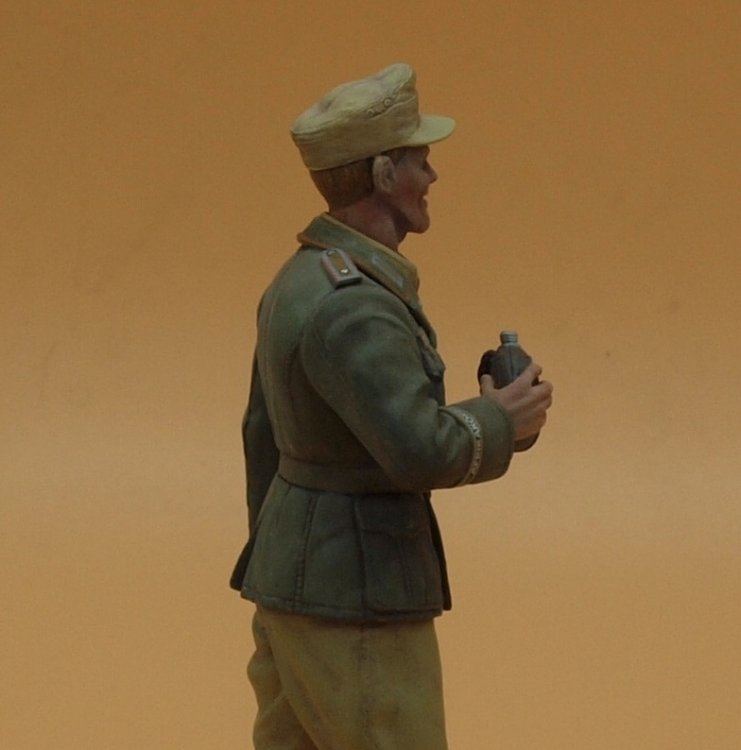
From reading, I know the Germans at the front weren't often put through the same crap a peacetime US soldier today might get regarding shaving. But a full beard is pretty rare. -
Takom Panzerkampfwagen I 1/16 scale... with figure
GazzaS replied to GazzaS's topic in LSM 1/35 and Larger Work In Progress
Unfortunately Covid has made ordering from Korea problematical. I actually had an order with them when Covid hit. It took almost a year to get it. Those were 1/35 figs. Their 1/16 figs aren;t cheap. -
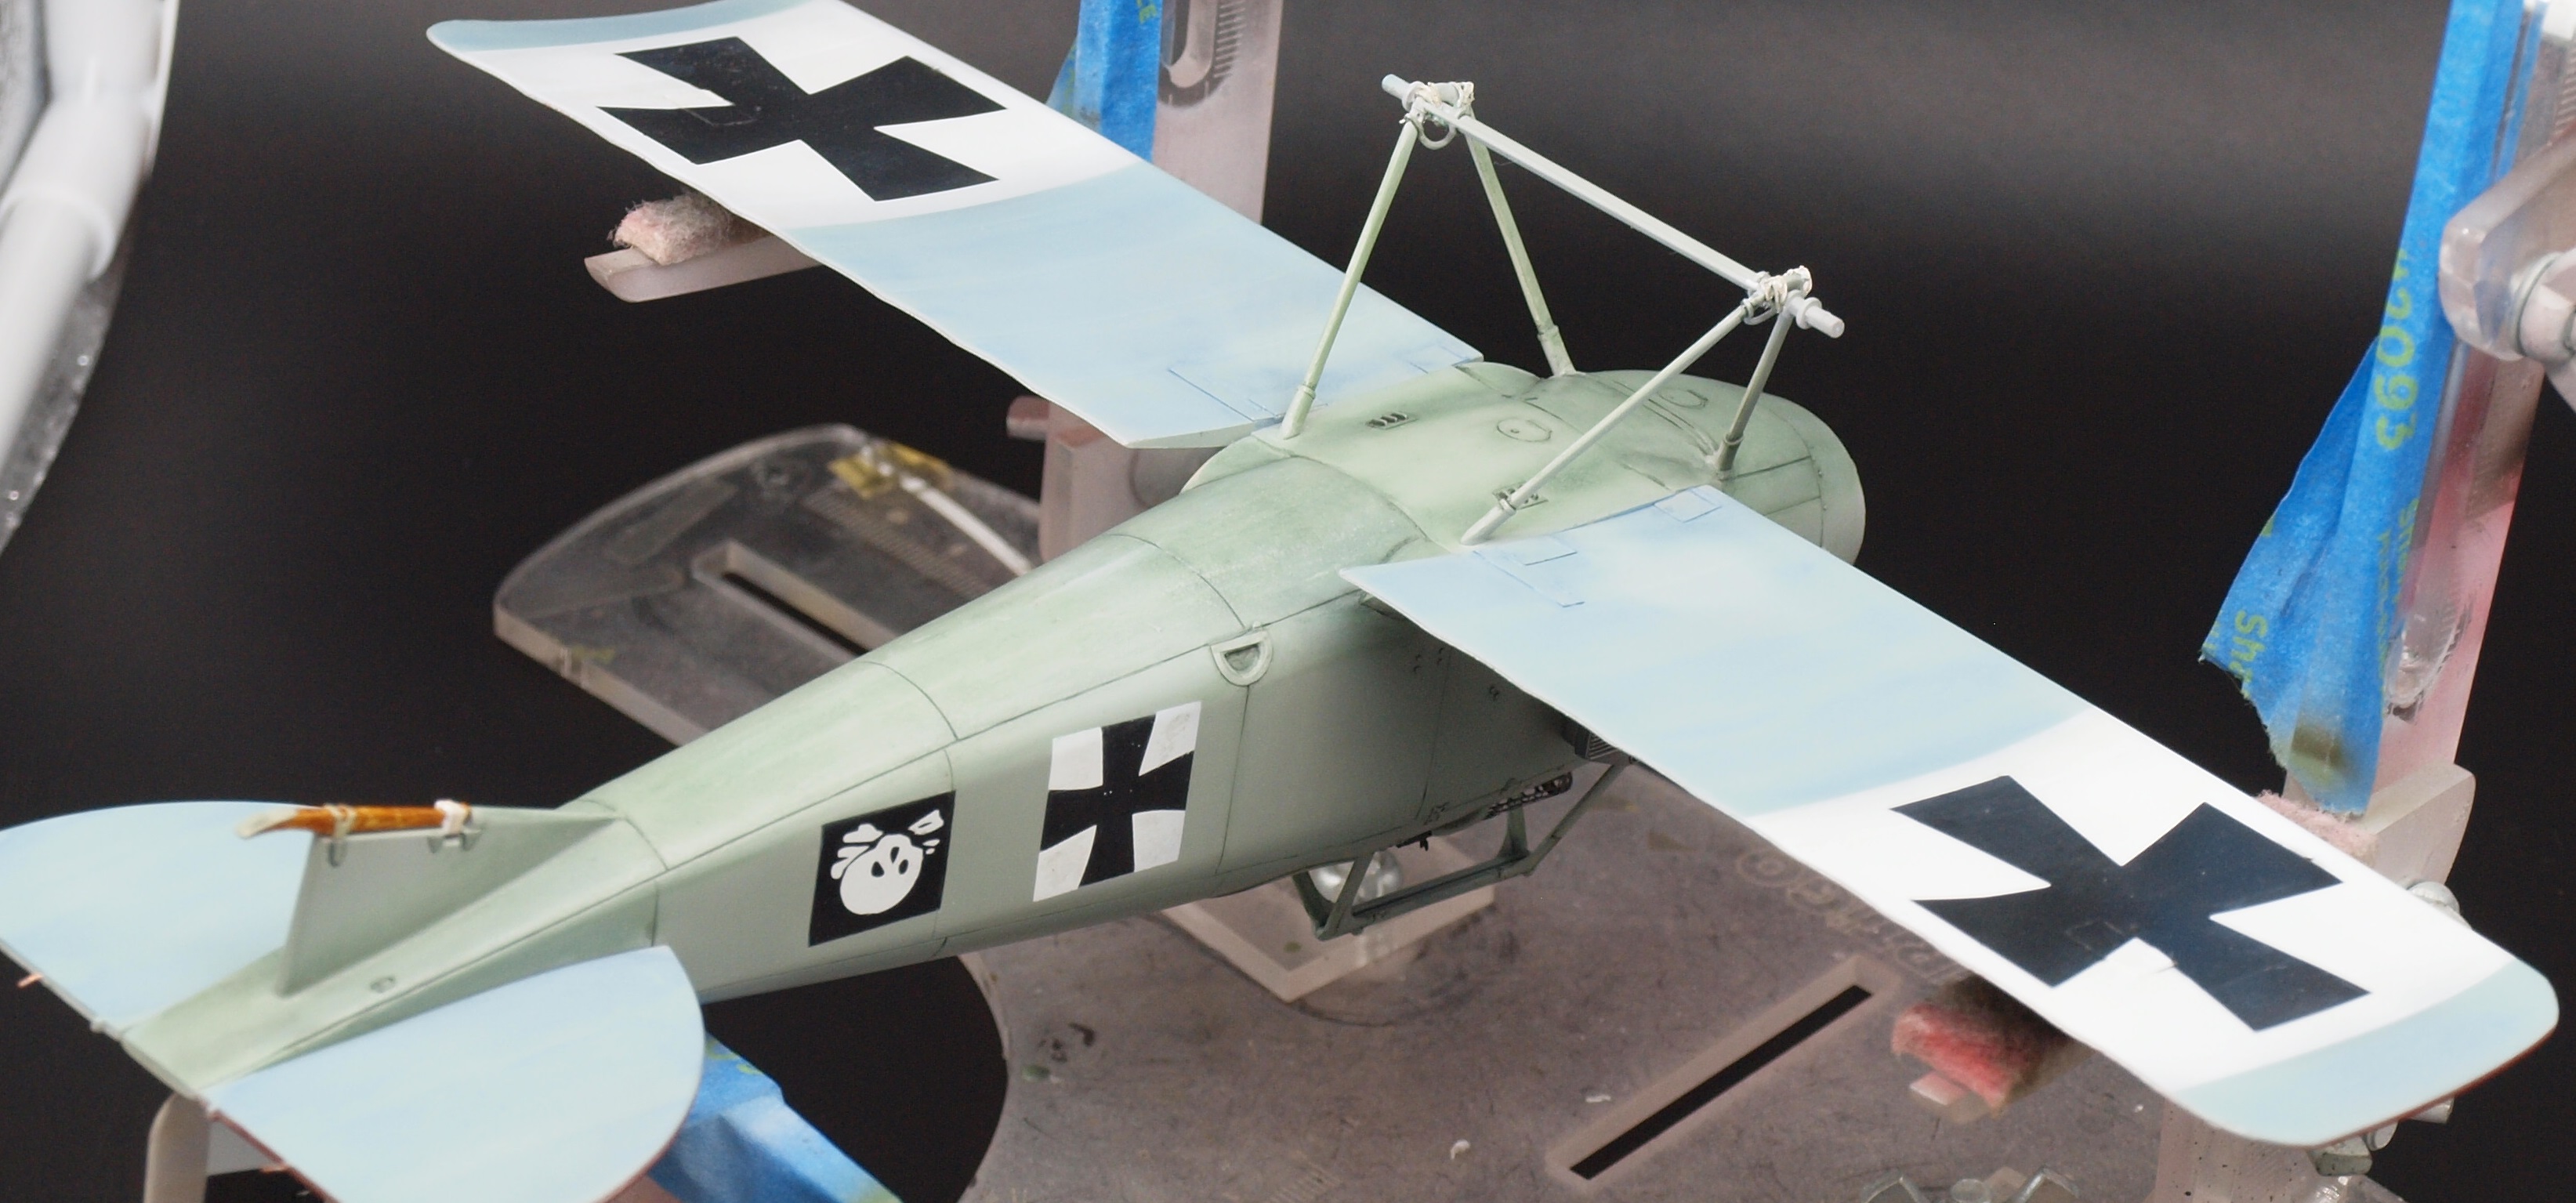
Unfortunately, Rob.... The green was eating at me. Like a mustache on the Mona Lisa. I'm still experimenting with my light box.
-
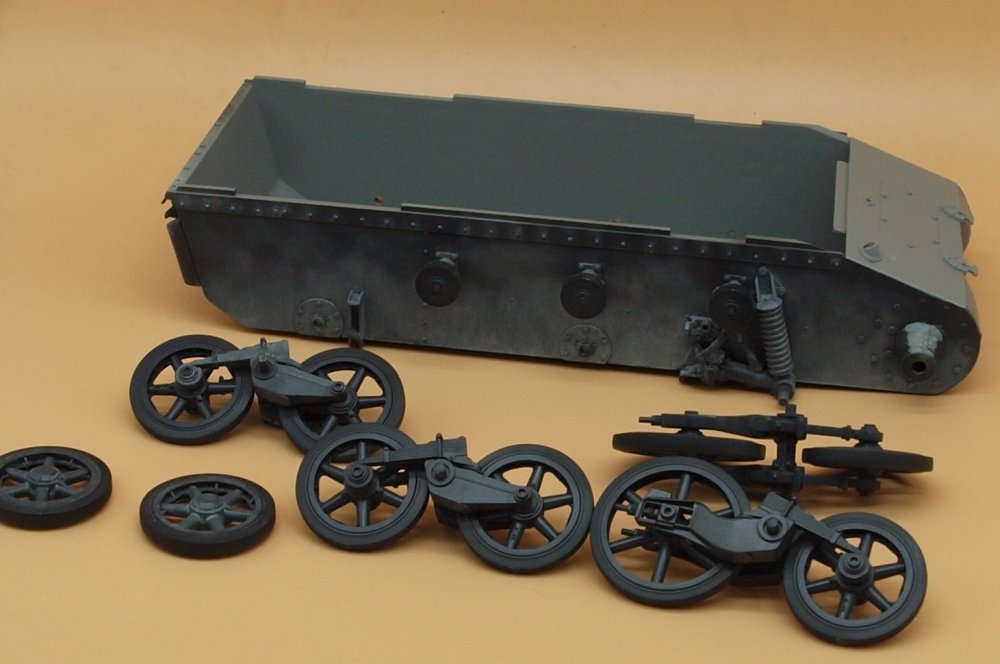
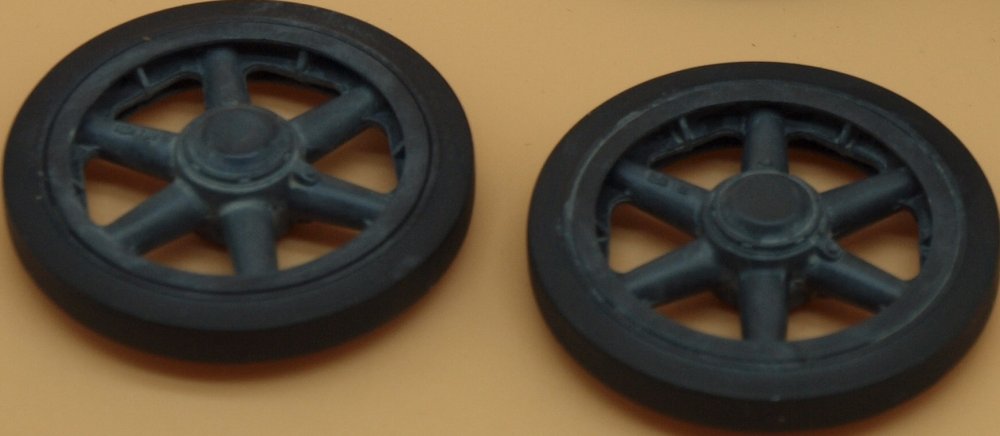
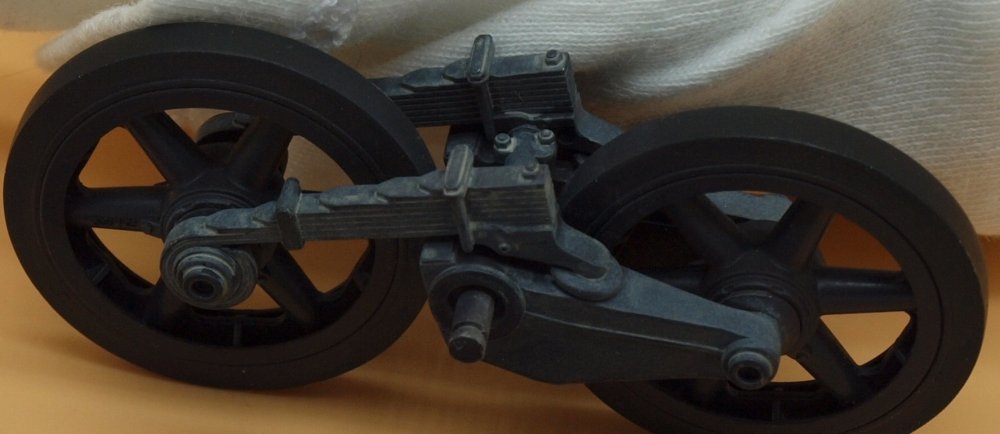
When the Takom Pz I came out, I ordered one straight away. But.... looking for figures cooled my ardor for the scale. Jeff Shiu makes great figures... but they ain't cheap, and the the cost of shipping from the US... raises the cost into the realm of not-gonna-happen. So, anyway I settled on the Tamiya guy. I thought "how bad could it possibly be?" After assembling him, I thought something was wrong. Mid way through painting, I realized what it was. His head is not to scale. And... instead of getting him a new head, all they did was extended the chin to almost double what would be proportionally correct. Anyway... despite his Frankenstein face... he's with us for the duration. So... yeah... I started this one a while ago painting the hull tub and assembling some of the suspension, and it's been sitting in a relatively dust free space while I built lots of other stuff. But, with the Albatros in a state of drying, and a cardboard palette full of paints I decided to restart the PZ I and dust up it's chassis and suspension with oil paints... this is another new thing to learn. Here are some pics... feedback and advice... always appreciated. Happy Modelling!
-
After adding a gray layer to the hitherto green area, I think it looks a little better. Though I may have overdone it on the vertical stab.


-
Israeli Mirage III C with Atar9C
GazzaS replied to Kaireckstadt's topic in LSM 1/35 and Larger Work In Progress
Very nice looking painting of the nozzle, Kai. I can see a sooty appearance already beginning. -
Atlas Cheetah E Scaleworx Conversion
GazzaS replied to GusMac's topic in LSM 1/35 and Larger Work In Progress
All of that resin looks great! Can;t wait to see it painted. -
Thank you, Hubert.