GazzaS
-
Posts
6,396 -
Joined
-
Last visited
Content Type
Profiles
Forums
Events
Gallery
Everything posted by GazzaS
-

Bronco 1/35 Type XXIII U-boot
GazzaS replied to BlrwestSiR's topic in LSM 1/35 and Larger Work In Progress
Any plans for a figurine or some dock works? -
Wingnut wings Hansa Brandenburg w.12 1/32
GazzaS replied to Mihailo1994's topic in LSM 1/35 and Larger Work In Progress
VEry nice woodwork! -
HASEGAWA HELLCAT
GazzaS replied to k5ikl's topic in LSM 1/32 and Larger Aircraft Ready for Inspection
Nice! -
Takom Panzerkampfwagen I 1/16 scale... with figure
GazzaS replied to GazzaS's topic in LSM 1/35 and Larger Work In Progress
Oh... sorry. All the pics I have are black and white and don't show the difference between the two colors. It's one of those things that is widely accepted as being true but not visible. -
Takom Panzerkampfwagen I 1/16 scale... with figure
GazzaS replied to GazzaS's topic in LSM 1/35 and Larger Work In Progress
Oh... you can count on it. But that's a ways away yet as the sunlight is fading and my paint booth is outside. -
Takom Panzerkampfwagen I 1/16 scale... with figure
GazzaS replied to GazzaS's topic in LSM 1/35 and Larger Work In Progress
Ok... lets compare your Mirage and a Sturmgeschutze. You can make broad, long strokes with your hand and sanding material without hitting anything in many areas on the Mirage. Whereas in a 1/35 scale StuG, the longest distance between details (excluding the barrel) is a mere 2cm.... in many places shorter. So, it's not feasible to sand the StuG any more than absolutely necessary. Now... I wet sanded my FW 190. So, water and the sanding debris ran following the direction of gravity and I wiped it off with a soft cloth. But with a StuG...that debris is going to find a crevice to get into. Moreover...it's easy to accidentally sand away a raised detail or paint on it. So... I can't really beat up on a painted tank like I can a painted aircraft. My technique for aircraft is to use multiple tints of the surface color and then sand them to get a worn look. But on tanks...and on the Albatros...I did everything with oil paints. Hopefully this helps. -
Takom Panzerkampfwagen I 1/16 scale... with figure
GazzaS replied to GazzaS's topic in LSM 1/35 and Larger Work In Progress
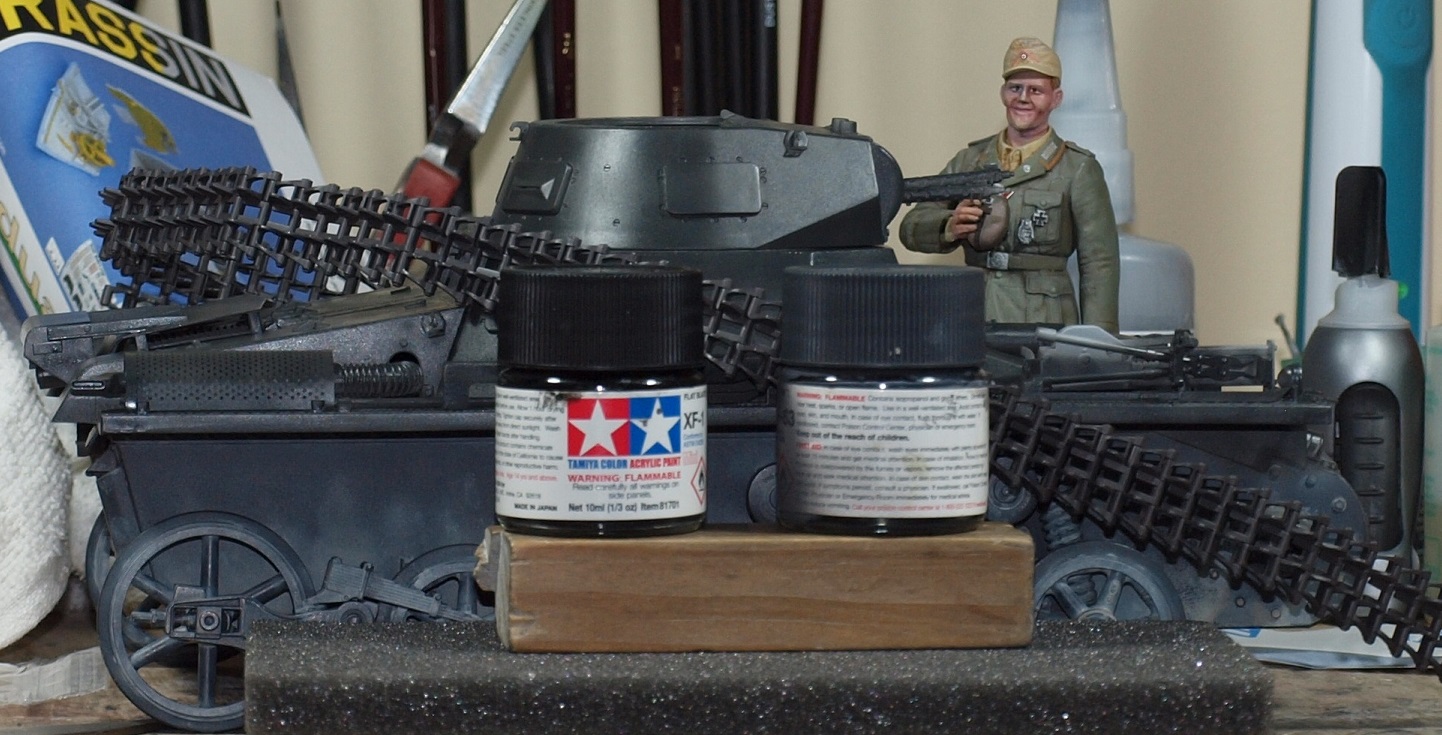
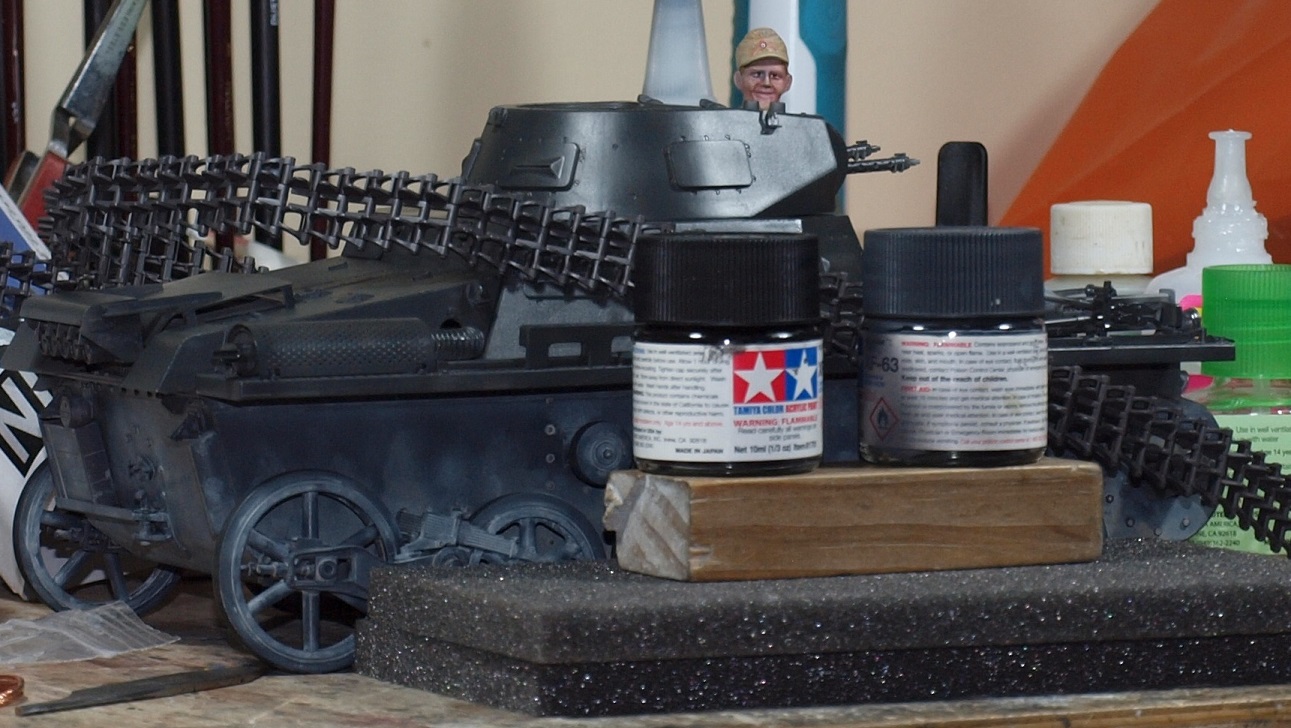
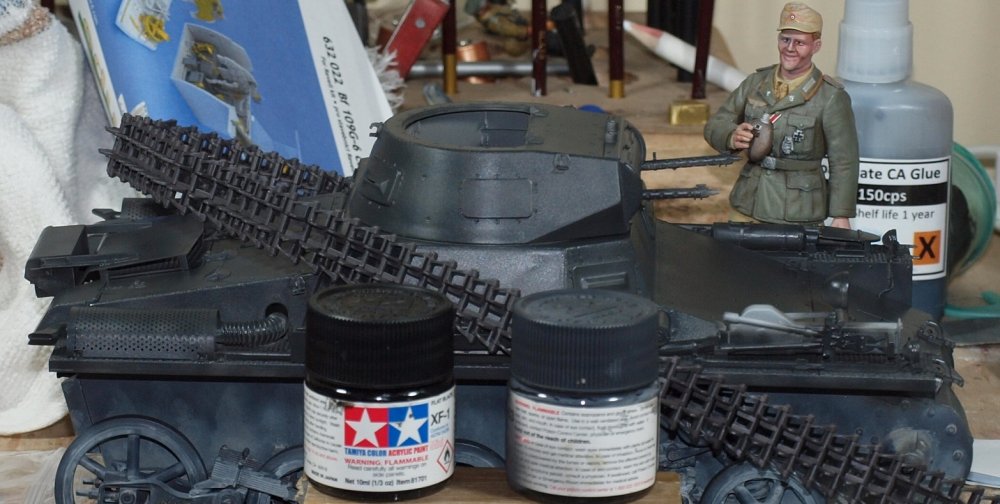
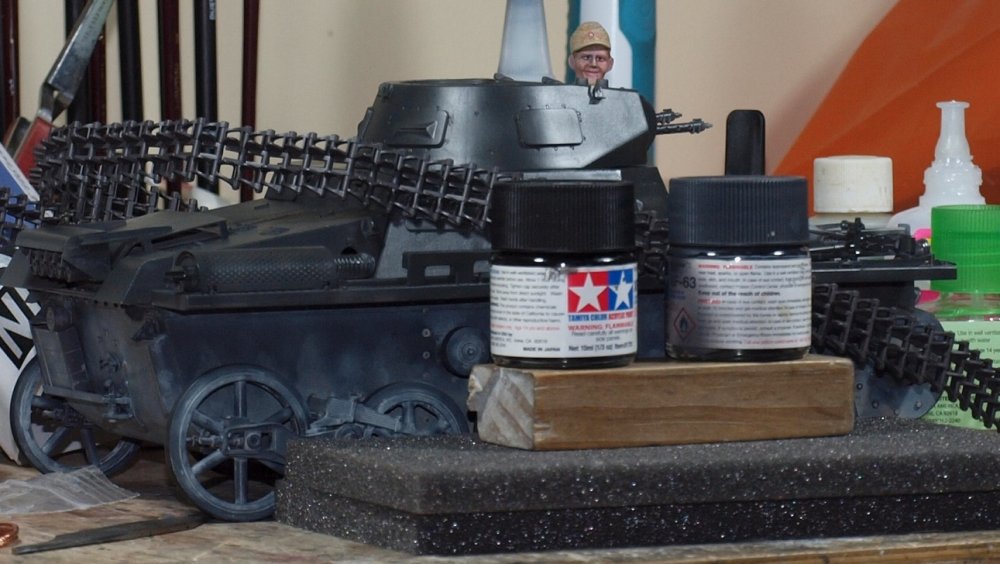
It's dark! Very dark! I've painted the upper half with SMS Premium German Gray RAL 7021. For your comparative pleasure, I've placed a bottle of Tamiya flat black, and a bottle of Tamiya Panzer Gray near the tank. And taken pics from three separate angles to allow for lighting. I've also laid the tracks across because I think the color I made for 'track brown' is actually a very nice match for Dunkelbraun #45. I used about 1/4 of the bottle of SMS paint just to do everything above the return rollers. It's a big model. Happy modelling!
-
Israeli Mirage III C with Atar9C
GazzaS replied to Kaireckstadt's topic in LSM 1/35 and Larger Work In Progress
Yay! Finally onto the good stuff! Congratulations! -
Bronco 1/35 Type XXIII U-boot
GazzaS replied to BlrwestSiR's topic in LSM 1/35 and Larger Work In Progress
Looks great, Carl! -
Takom Panzerkampfwagen I 1/16 scale... with figure
GazzaS replied to GazzaS's topic in LSM 1/35 and Larger Work In Progress
Kai, thank you for your faith. There are some major differences between painting an armor model and painting a streamlined airframe. Even the Albatros I just did... I had to treat as an armored model instead of an aircraft. -
Takom Panzerkampfwagen I 1/16 scale... with figure
GazzaS replied to GazzaS's topic in LSM 1/35 and Larger Work In Progress
Thanks Peter. I wouldn't say it's flawless... but the extra effort certainly takes a lot more time than my teenage method of twisting the parts from the sprue and gluing them together without a hint of dry-fitting. -
Takom Panzerkampfwagen I 1/16 scale... with figure
GazzaS replied to GazzaS's topic in LSM 1/35 and Larger Work In Progress
Thanks, Kai. I'm curious about how it will look, too. I've never done Dunkelbraun over Dunkelgrau. So... it will all be new for me. -
Takom Panzerkampfwagen I 1/16 scale... with figure
GazzaS replied to GazzaS's topic in LSM 1/35 and Larger Work In Progress
Thanks Rob... tiny, yet very important. The Pz I made up more than half of German Panzer strength during operations in Poland. -
Bronco 1/35 Type XXIII U-boot
GazzaS replied to BlrwestSiR's topic in LSM 1/35 and Larger Work In Progress
Great start! -
Short Sunderland MkII
GazzaS replied to ThomasProbert's topic in LSM 1/35 and Larger Work In Progress
Lovely scribing! Definitely brings that huge hull to life. -
Takom Panzerkampfwagen I 1/16 scale... with figure
GazzaS replied to GazzaS's topic in LSM 1/35 and Larger Work In Progress
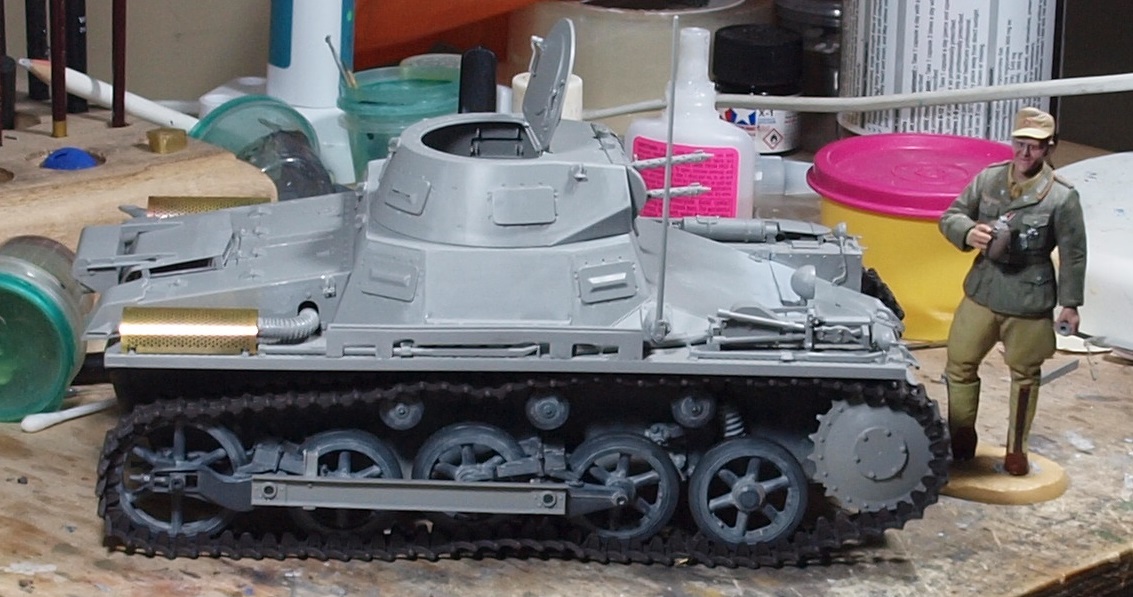
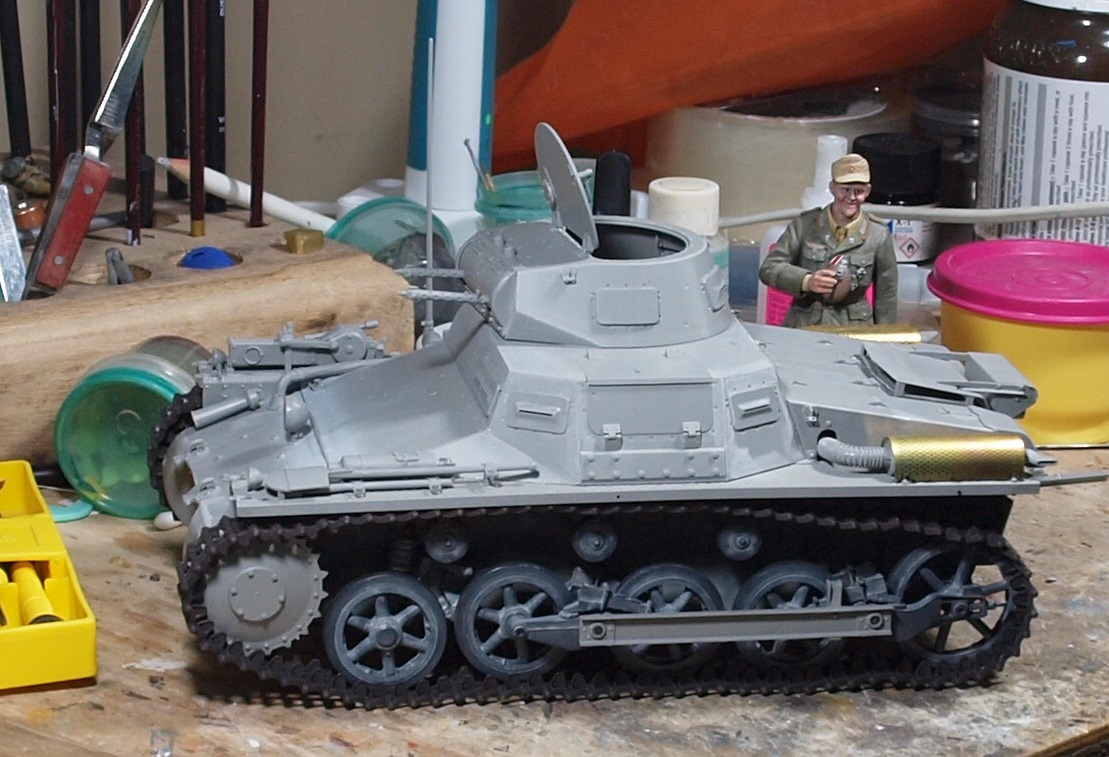
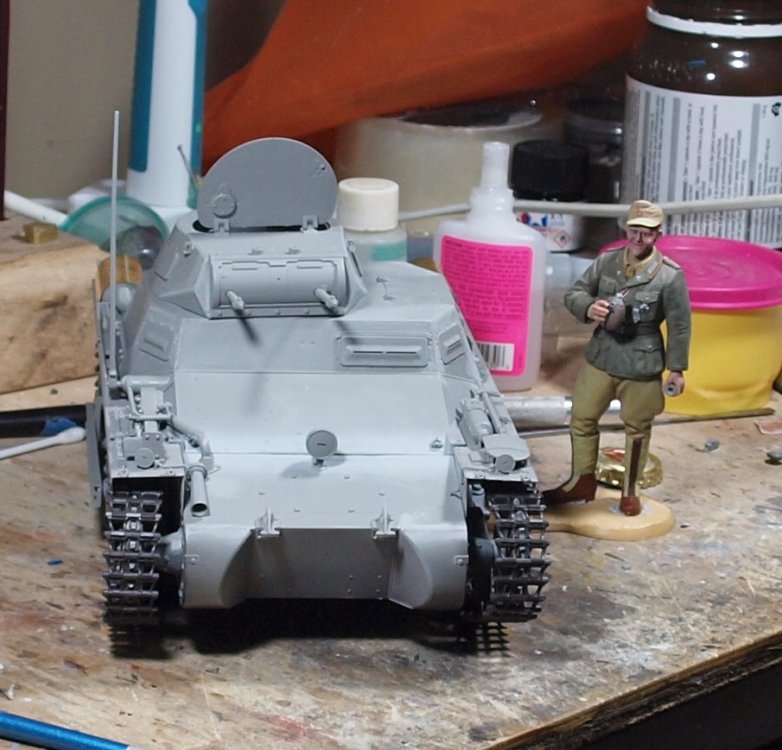
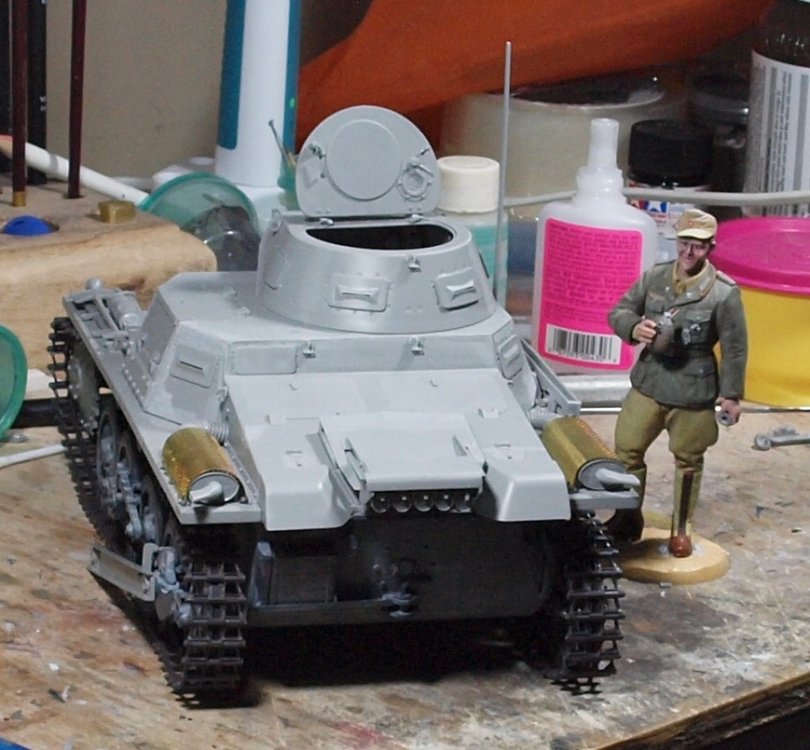
Thank you Peter... And here we are... with all of the pre-paint gluing done. All of the unpainted, loose parts are either dry fitted, held on by blutack, or in the case of the tracks, joined by brass pins. Happy modelling!

-
-
Short Sunderland MkII
GazzaS replied to ThomasProbert's topic in LSM 1/35 and Larger Work In Progress
Nice work... though it looks more like an alien saucer than a weapon system. -
Israeli Mirage III C with Atar9C
GazzaS replied to Kaireckstadt's topic in LSM 1/35 and Larger Work In Progress
Yes, fixing all of those booboo' s is a PITA ... Is there a German phrase or colloquialism for that? Anyway... still hanging for that first splash of color. -
Share how COVID-19 Quarantine has affected you.
GazzaS replied to 1to1scale's topic in General Discussion
Can;t say I blame anyone avoiding the AZ. -
That is some impressive spaghetti!
-
Bronco 1/35 Type XXIII U-boot
GazzaS replied to BlrwestSiR's topic in LSM 1/35 and Larger Work In Progress
OOh... this will be cool! A very interesting vessel. -
Good solution, John! sometimes we must find our own method even if it is contrary to the instructions.
-
So the move is coming a little slower than expected.....
GazzaS replied to ScottsGT's topic in General Discussion
Once the wife was partially pacified, my bench would be set up and ready to go. Priorities, man! -
Takom Panzerkampfwagen I 1/16 scale... with figure
GazzaS replied to GazzaS's topic in LSM 1/35 and Larger Work In Progress
Thank you, Phil. This will be the end of my 1/16 scale soiree. It's all about cost really. The only person making great 1/16 figures if Jeff Shiu. But due to shipping costs I'd be looking at well over 100$ just for a figure.