GazzaS
-
Posts
6,396 -
Joined
-
Last visited
Content Type
Profiles
Forums
Events
Gallery
Everything posted by GazzaS
-
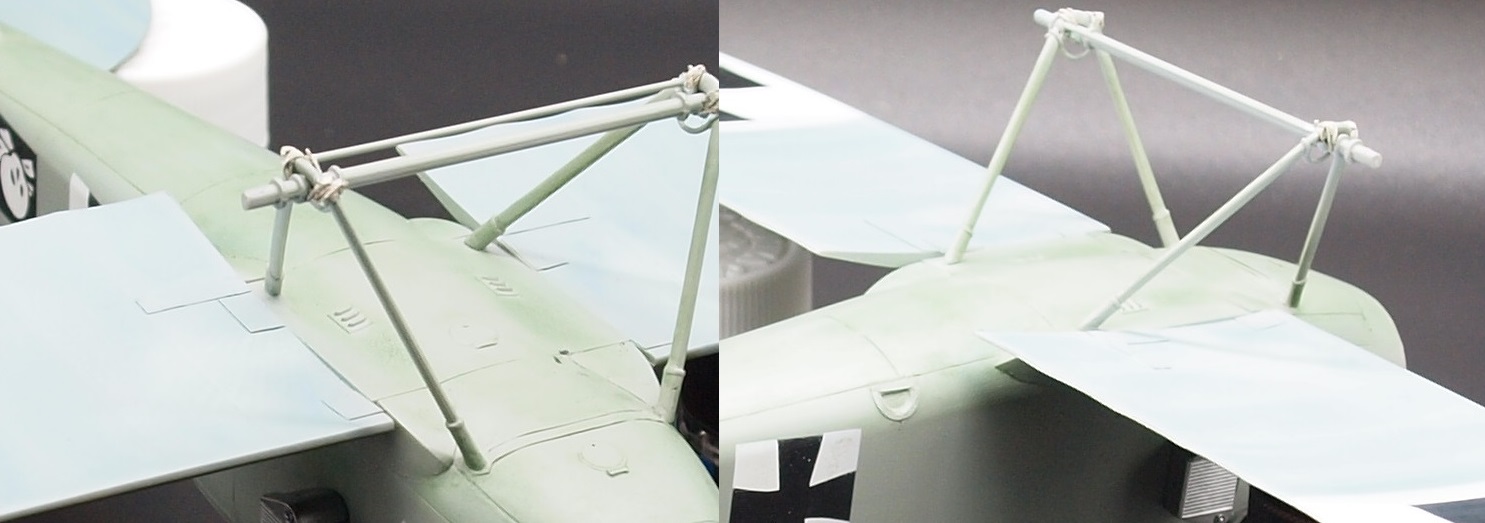
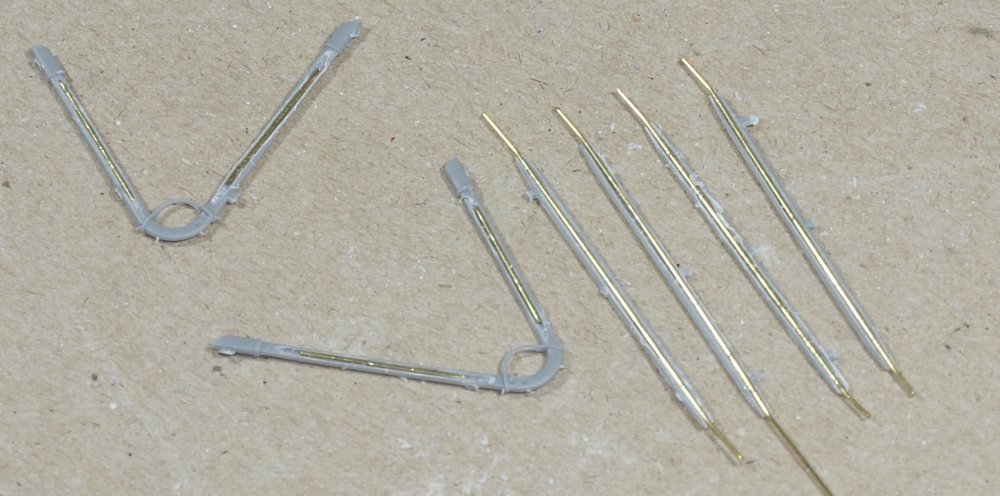
Jeff, avoid that SAC stuff. As Hubert says.... it's crap. Basically all the guy has done is to mold the original part and cast it in a soft, fragile metal that is weaker than the kit part. This is what I did back on the first page: My landing gear struts are now rock solid. Take your time, and use your scribing tools and a razor saw to slowly and gently make a trench. Once you have made a recess big enough for the wire, drop in the wire, and fill it with CA... and sand it smooth as soon as it's dry. Don't wait overnight as the CA will reach diamond hardness. If you have a cheap electric sanding device, you can make finer, quicker motions than you can with your hand. Since I converted an electric toothbrush into a power-sander, my sanding time has probably been reduced by 60%, and the damage done to surface detail has also been reduced.
-
Thank you Kai. I was definitely happier with the top result than the bottom. I may blend in some gray to soften the impact of the green. The buff area isn;t really a shadow, it's more an effect of more light catching the upper areas.
-
Thank you Peter!
-
Thanks, Rob. I appreciate your input. False shadows seem part-and-parcel of modelling nowadays. It's basically what is often done with a pin wash. Creating a shadow around a detail to bring it to the fore. I've always been fascinated by artwork where a color is illustrated without that color even being used.
-
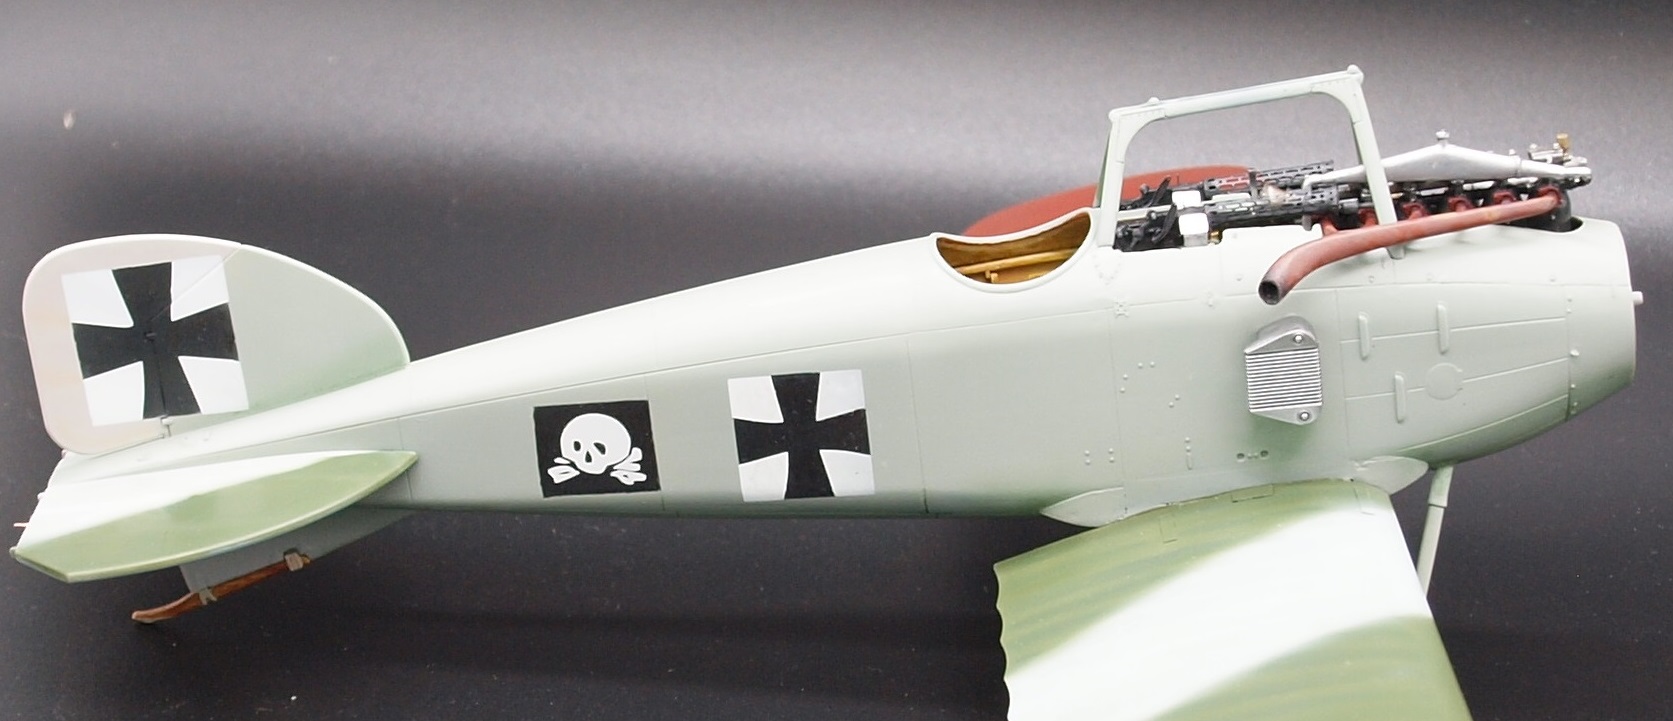
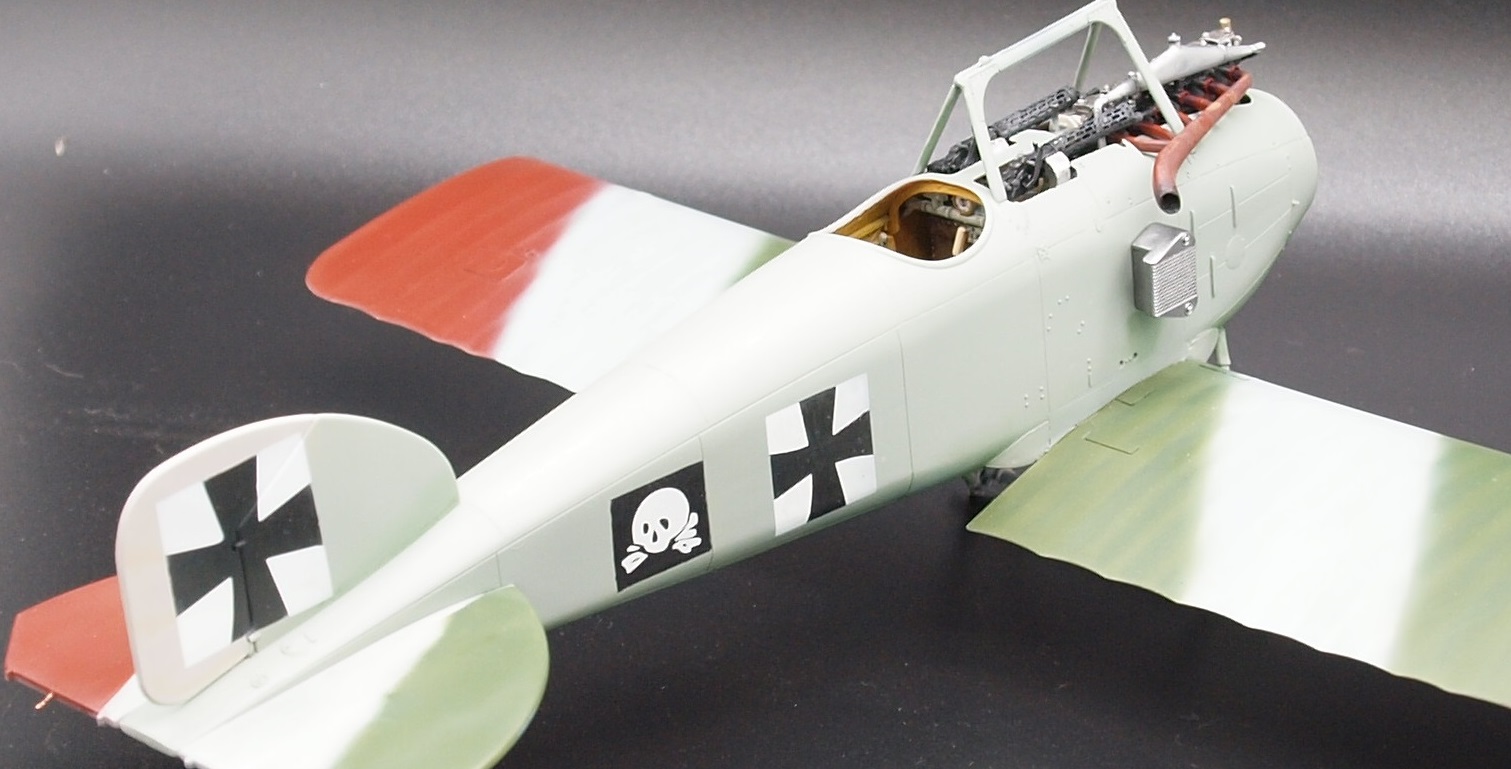
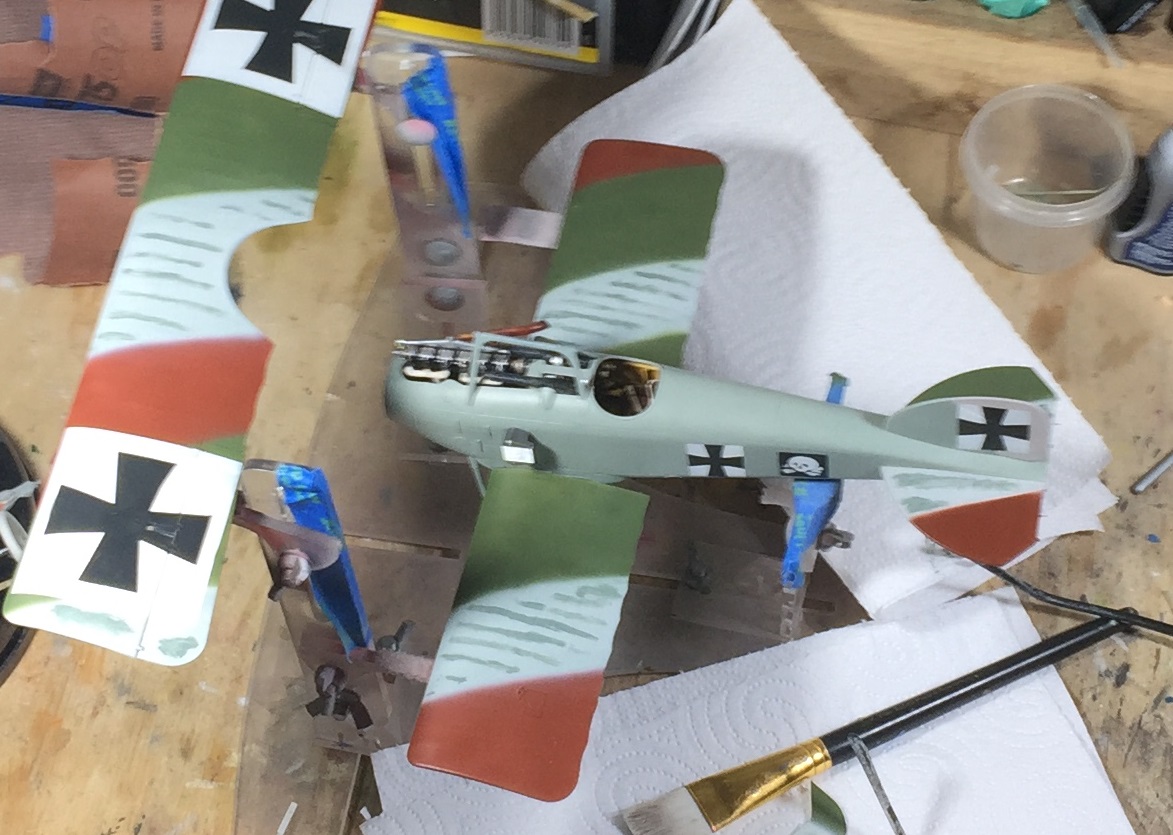
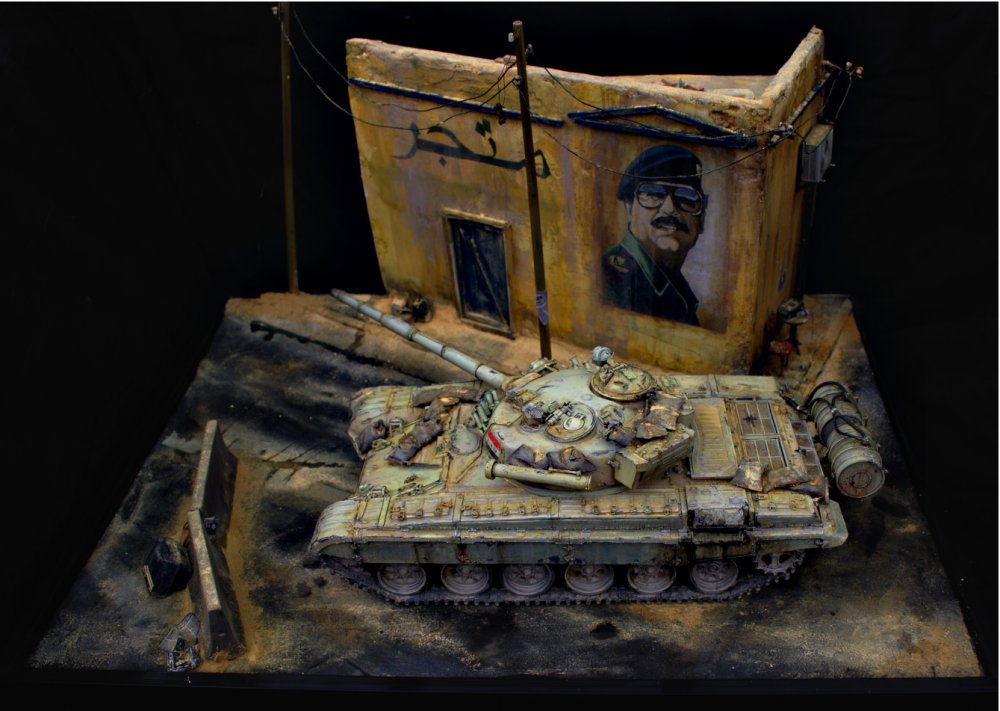
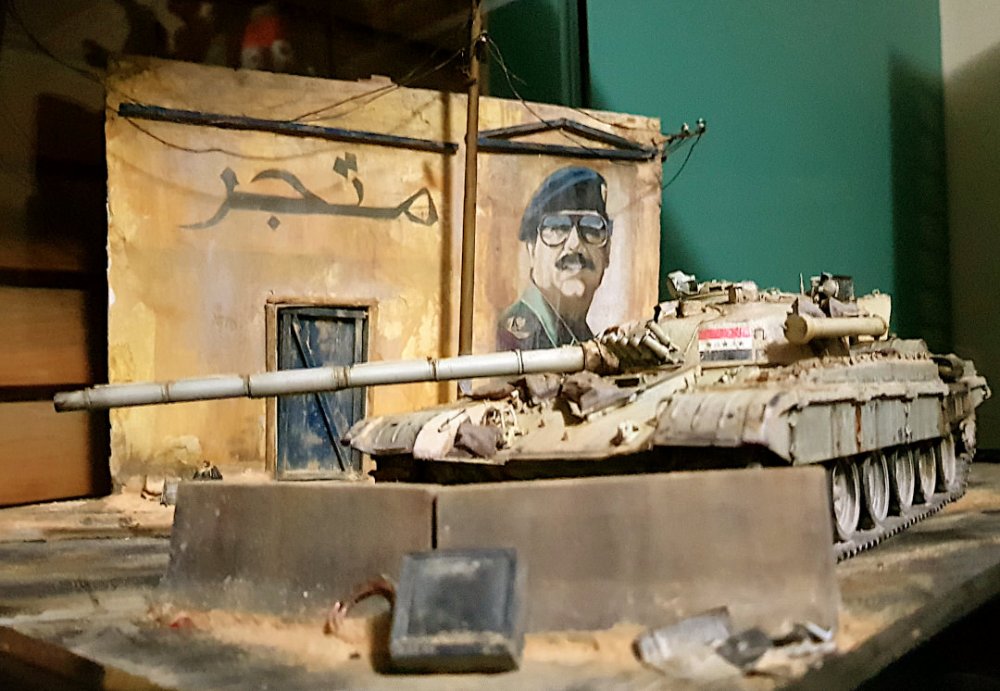
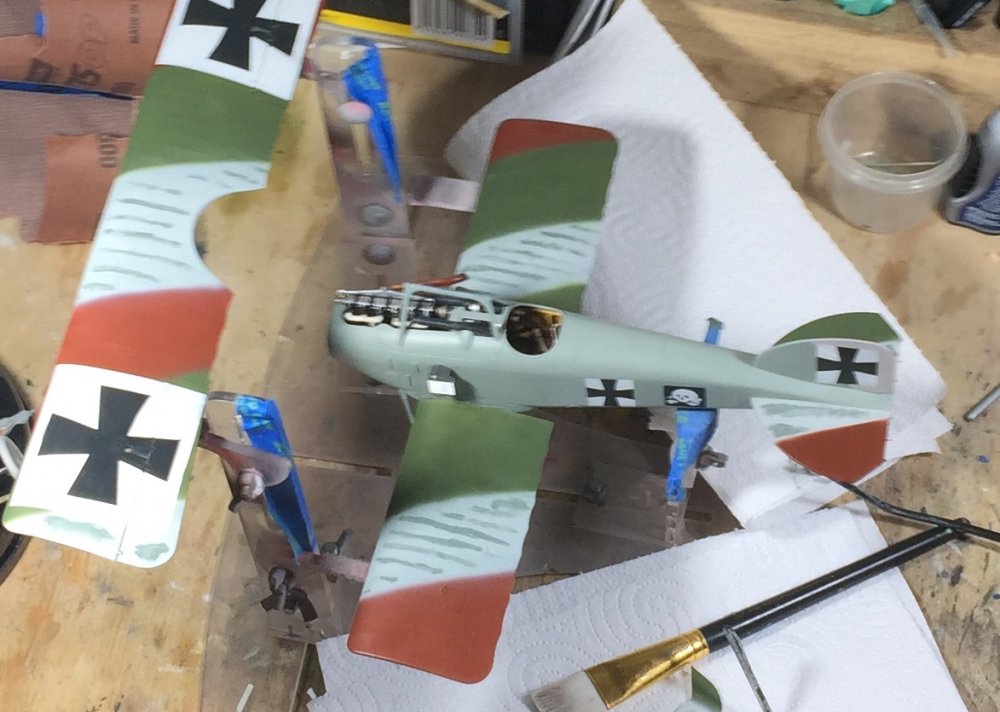
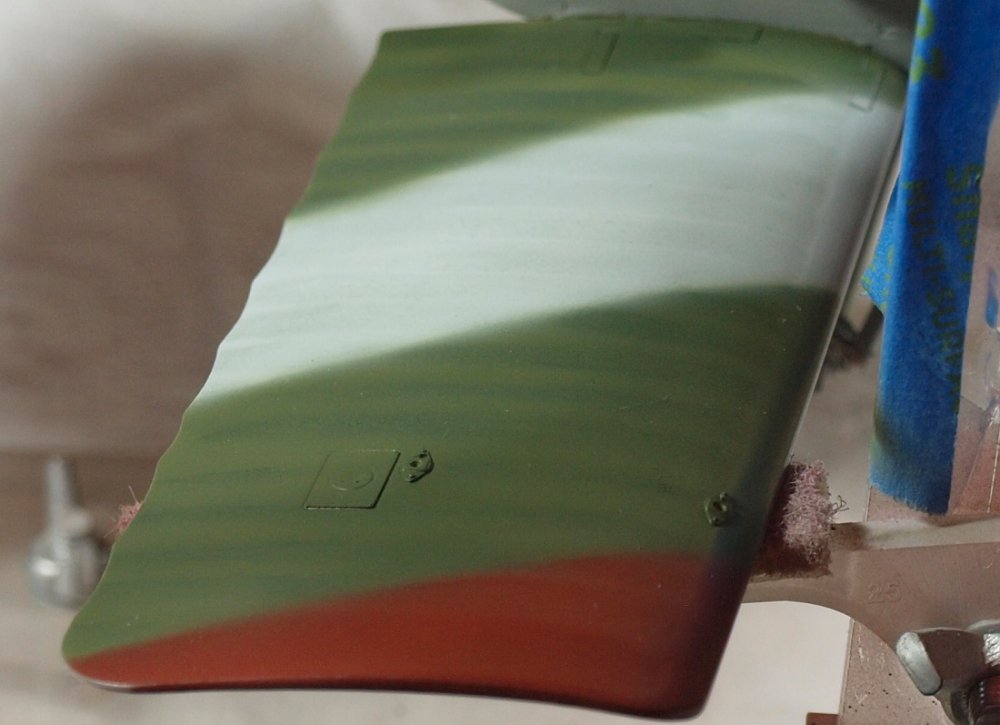
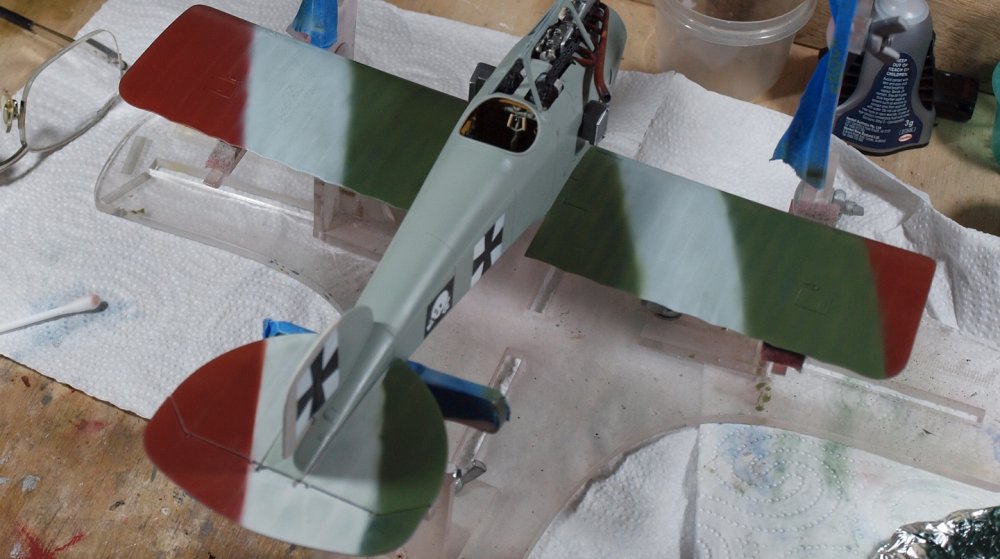
Welcome back hombres! AS promised... another update. Every once in a while you meet someone in the modelling world who rocks your modelling conceptions to their very foundations. One day I met this guy named Steve over at Armorama. Another Aussie, he did things far and away different from the old standards of dot filters, and pre-shading. He would do fantastic things with armor models, and you wouldn't even realize how he reached spectacular finishes unless he told you. Though I've lost contact with him, with each model I try to find ways to do things like he might have. For instance... in the below photo... He used a pink filter in places on this T-72 This color rich tableau has has inspired me to move beyond the more traditional weathering steps. I know I haven't reached his level, yet. But I hope to someday. So....here's what I've been up to. On the ventral curved surfaces, at the base of the vertical stabilizer, and at selected areas of the struts, I used green oil paint to add shadow. I don't really know if I'm sold on the green. I'm hoping you guys will offer some insight if I've failed. On the curved dorsal surfaces, the top of the vertical stabilizer and selected areas on the struts, I've used a buff colored mixture in oils to lighten and highlight the line between the slab sides and the arched top. In this photo the dark shade at the bottom of the vertical stabilizer is lightly more prominent... I've also made small shadows under the 'ear' radiators and under horizontal stabilizers. In this final photo, there isn't much worthy of remark except for a couple of smudges I used between the wings to add shape that normally isn't picked up by the camera. Happy modelling!


-
Thank you, Kevin!
-
Thank you, Peter! Thank you Kai. There's no way it will be done Thursday, as much as that would be nice. Tonite, I hope to paint the dorsal fuselage with oils and set it to dry. Then if dry tomorrow, I will clear coat the fuselage. After that, the pin wash. Yes... still gotta have a pinwash. Though I'm still debating the colors. Thankfully, the other D.I's I posted on the previous page show that neither black nor brown is the right color for the job. I will mostly use a darker shade of the fuselage color. Anyway, the oils for tonite are seeping linseed oil into some rough cardboard and hopefully I'll find time tonite to do the area I want.
-
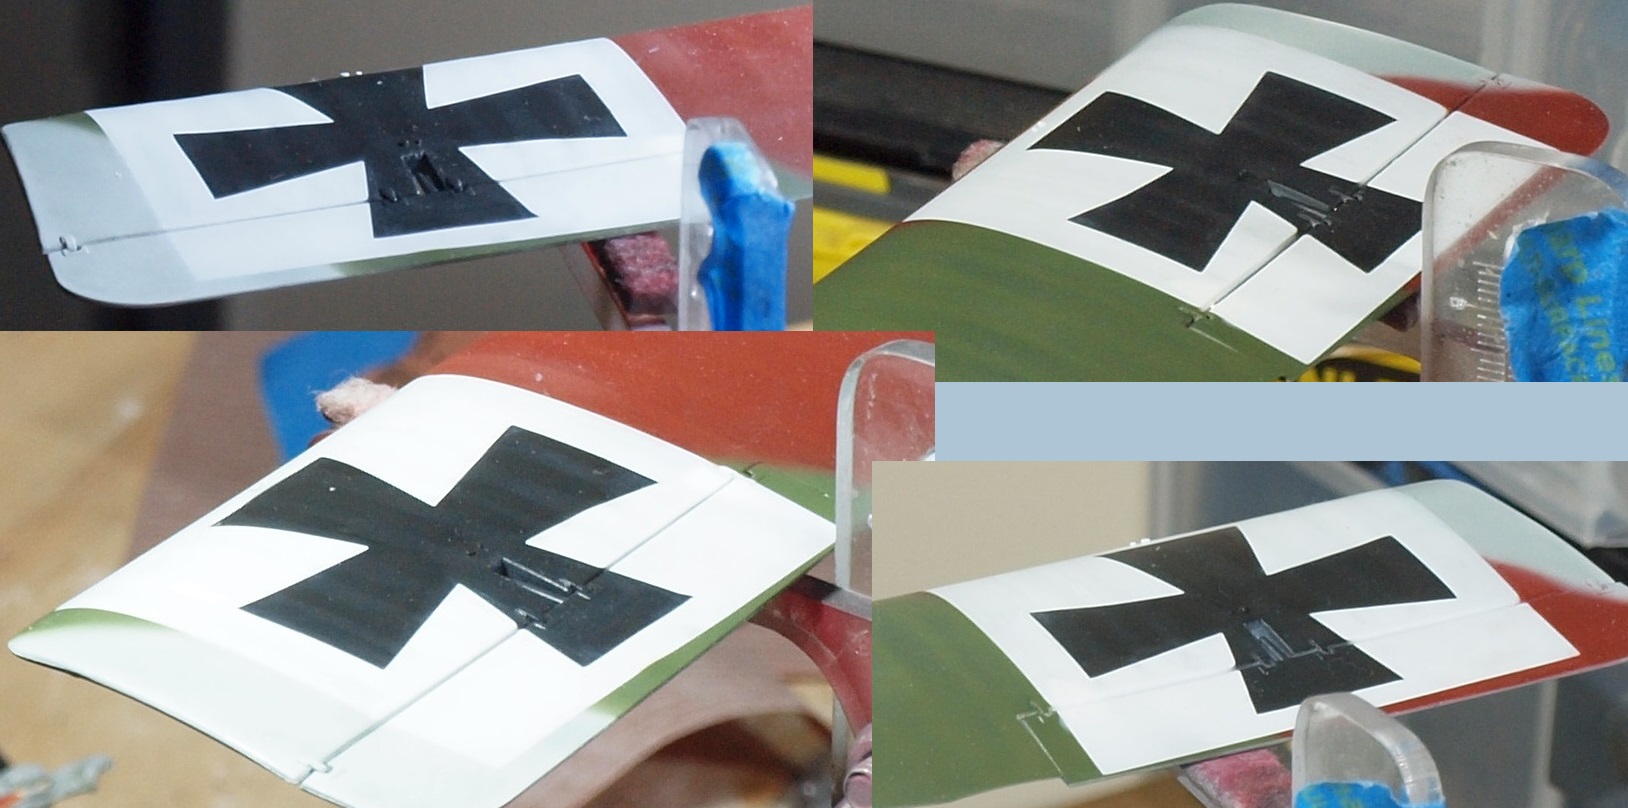
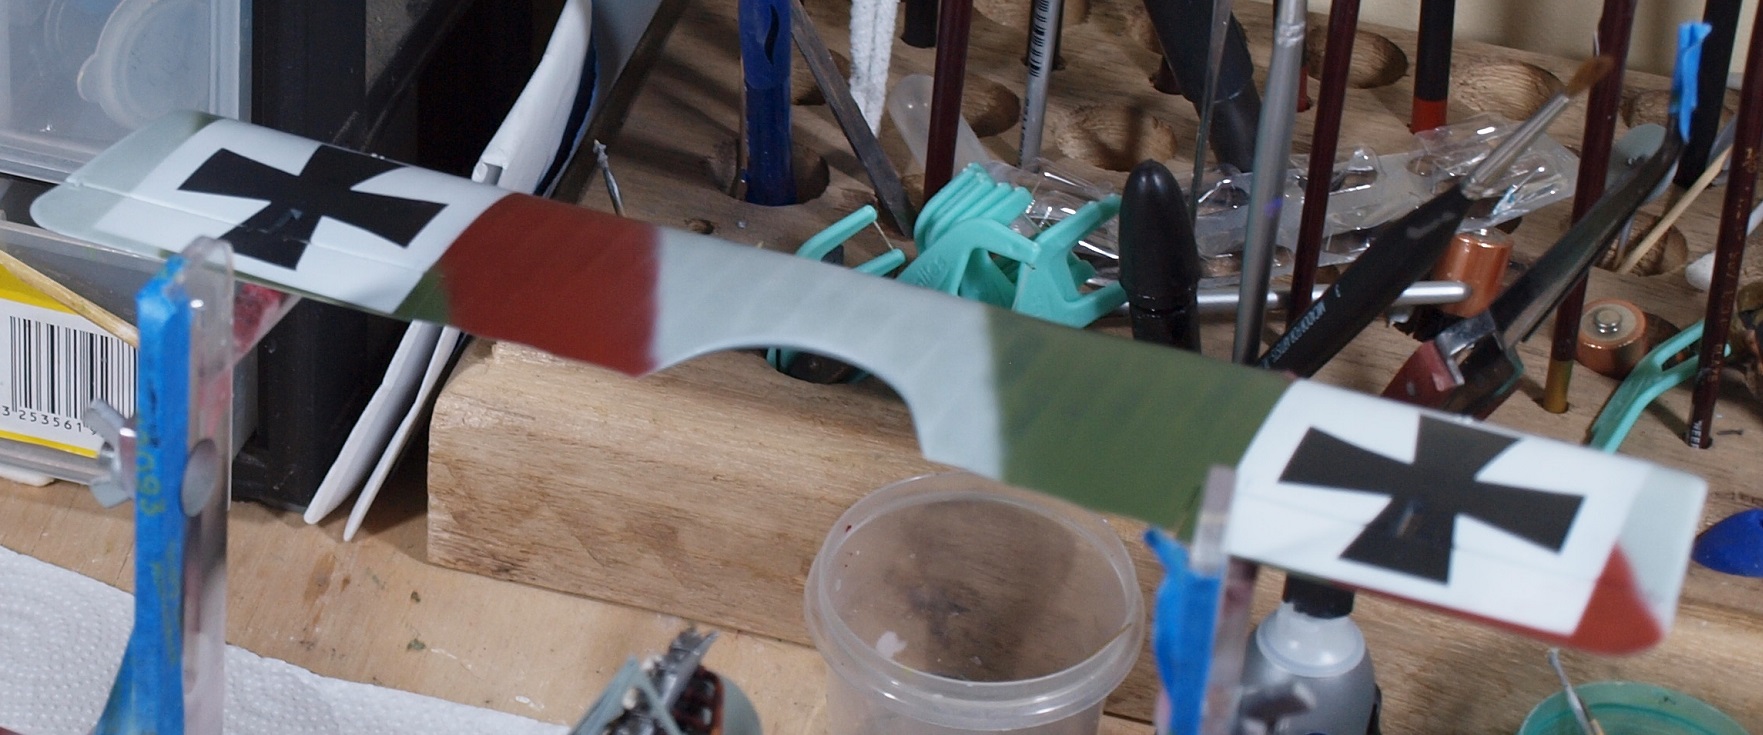
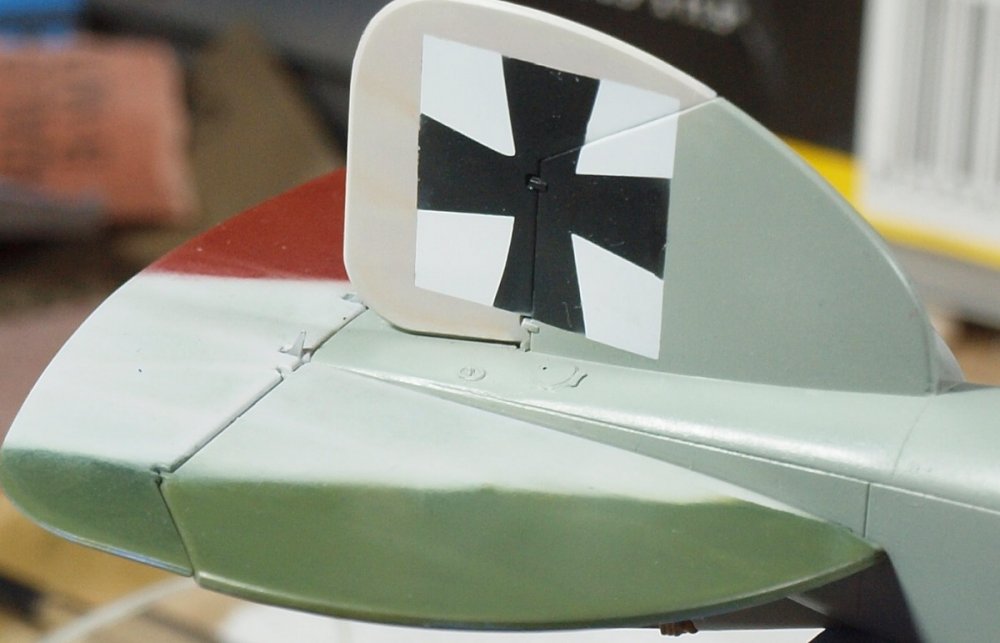
G'day Comrades... not in the Socialist sense, though. But in styrene. On work days, I have little time or energy for modelling. But I did continue work on the wing. My key goal was subtlety. White and black have different rules from other colors, I believe. White reflects light while black absorbs it. And effects need consistency to be believed. But I was very apprehensive about attacking the cross fields on the upper wing. So... I have no way to know how this will look once a matte coat is applied. Here is a collage of the upper wing crosses: I worked on the fuselage today, but no pics. I'm trying to use oil paints to bring out the unique shape of the fuselage. I have Thursday off... I hope to accomplish something noteworthy then. Happy modelling!

-
Anything but fighters was a huge mistake until they ran out of well-liked fighters to make.
-
Some great work already, Johnny B! Color me interested!
-

Israeli Mirage III C with Atar9C
GazzaS replied to Kaireckstadt's topic in LSM 1/35 and Larger Work In Progress
Great job, Kai! A huge transformation from what the LG once were! Now, you're getting close! -
What caught my eye was the figures for the Tamiya 1/35 scale Pz IVG. They look really nice and natural.
-
But it was all about the Douglas! I really don;t care much for older cars. Maybe a 63' corvette split window or maybe a 71 camaro splut bumper. Older cars are just novelties, really.
- 2,035 replies
-
- 4
-

-
- car related stuff
- anything about cars
- (and 6 more)
-
Thank you, fellas! I am glad to be of help.
-
This is really more about the Douglas....
- 2,035 replies
-
- 2
-

-
- car related stuff
- anything about cars
- (and 6 more)
-
You are welcome. Yes, you can seal everything in flat varnish. I usually give the oils a week to dry before I add any other effects or coats. Be sure before you use the oils to place them on a piece of rough card-board and let them sit for three hours to leach out the linseed oils in the paint. Otherwise... it can take a very long time for the paint to dry.
-
Thank you, Rob!
-
Thank you, Kai! This work was done without applying a clear coat, and the paints are MRP lacquers. A gloss coat will make the oil paints spread too quickly as they won;t have anything to grab. I suppose you could use a satin coat, but why add another layer of paint? The initial streaks are thinned to a creamy consistency. If you find yourself having trouble spreading the paint with a dry brush, just wipe it off with a clean paper towel and thin your paint more and do it again. I use odorless turpentine as my thinner. I applied the paint with a paint brush dedicated to the job of solely applying paint. Then I used a flat (7mm-8mm), dry, synthetic brush to spread the paint where I wanted. If I found I had too much paint, then I used another brush dipped in mineral spirits to remove some paint. The moral of this part of the story is that you really don't know how much paint you want until you see how it is spreading. Occasionally you need to clean out your dry brush with mineral spirits... or your thinner of choice. Mineral spirits dry fast, so that is what I prefer. Using your dry brush while it is damp will cause you to remove paint instead of spreading it. AS far as colors go, you have to determine your goal. If, like on a metal-skinned aircraft, you are trying to modulate the color, you can use any variety of colors really as you are spreading that paint so thin as to make the color you've applied disappear. But on this occasion I was trying to effect a shape change with three different base colors on a fabric skinned aircraft, with colors that specifically had to be darker versions of the colors already applied. For the grey-green, I just mixed black, white, and green. For the green I mixed green, blue, and yellow ocher. And for the brown, I mixed dark brown, red, and blue until I got a deep chestnut color. With oils, you can afford some experimentation as long as you try to find the right mix as long as your colors aren't too different from each other. For instance, if you used red over white, no amount of cleaning afterward is going to remove a pink stain. Do they have chestnuts in Germany? Finally... if you go out of the area you want your color to be in, you can use a brush dipped in white spirits to try to remove it. I actually got some red into the white around the kreuzen and will have to use paint to cover it. Regarding the FW 190 there was more to it as I modulate both with the airbrush by changing the base color a few times by tinting with complimentary colors of the same brand of paint.... and then I wet sand afterwards to make it smooth which also stresses the paint scheme and randomizes the finish. And all of this before I was even thinking about what I would be doing with oils.
-
Isn't that just about how long it took the US Army Corps of engineers to dig the Panama Canal?
-
So cool! Well done!
-
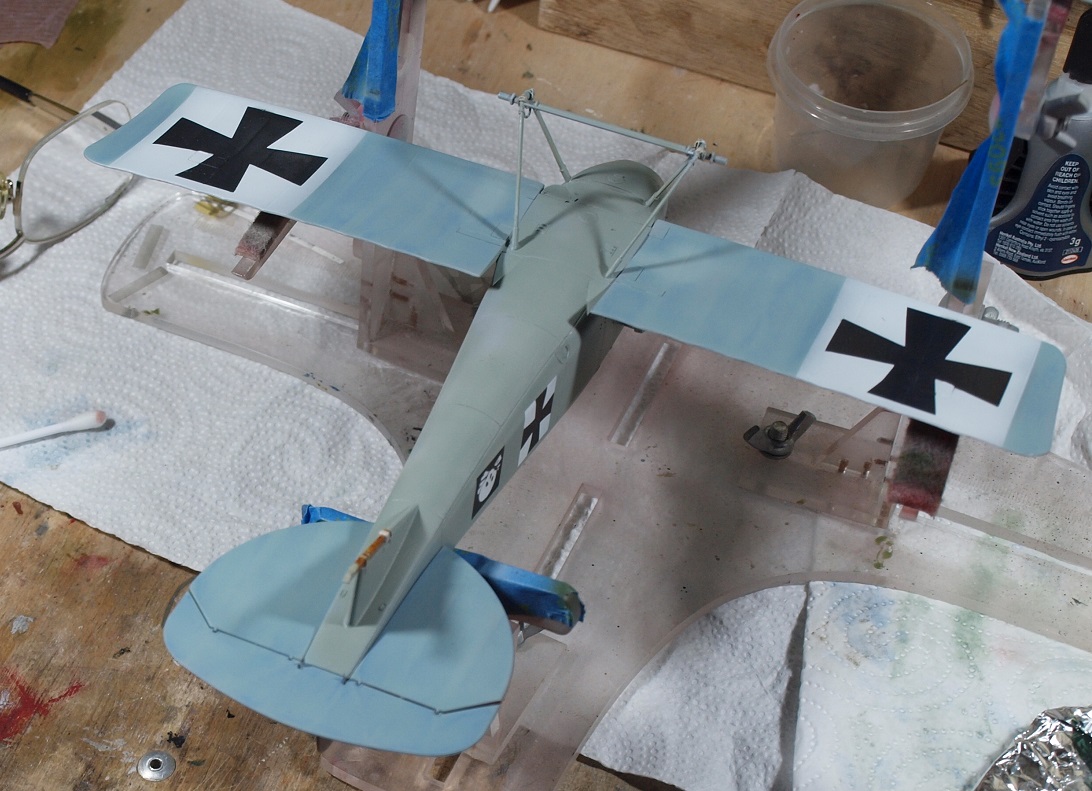
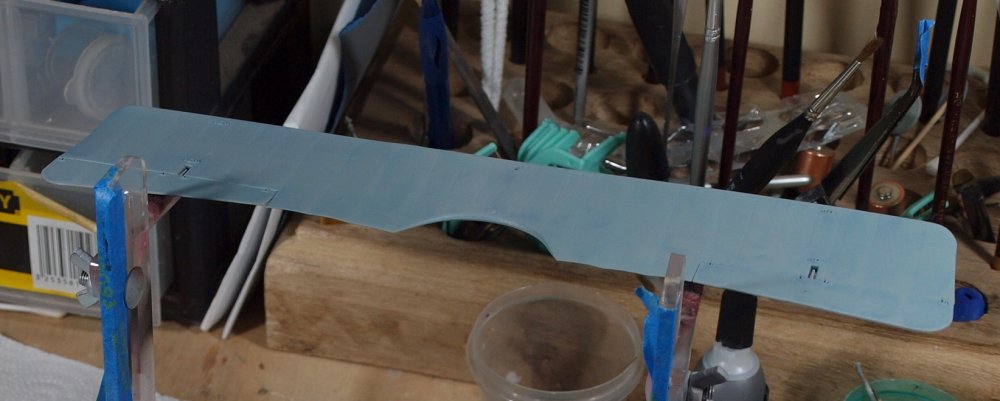
Thank you very much, my friends! Today's effort was with oils... almost all day long. This crappy phone shot shows the beginning of the technique. I laid oil paints, lightly thinned, between the raised ribs of the flying surfaces. Now... I have tried to get this effect with pre-shading, and I've never been happy with it. Maybe I just lack the knack. Anyway.... And I had to mix a separate color for each of the colors on the fabric surfaces. And now we can jump to the results: I wanted the effects to be subtle, yet not too even. In pics, you can barely see what I've done with the rudder. The large pattee cross gives little room for messing around. I still have to attack the area of the wing crosses. Happy modelling!


-
Israeli Mirage III C with Atar9C
GazzaS replied to Kaireckstadt's topic in LSM 1/35 and Larger Work In Progress
Even better, Kai! Do you find it difficult to find pledge/Future in Germany? -
I can only echo what Kai says. Really great progress!
-
Tamiya Sturmgeschutze IIIG with Ostketten
GazzaS replied to GazzaS's topic in LSM Armour Finished Work
Thank you, Peter! -
Thank you, my friends!