GazzaS
-
Posts
6,396 -
Joined
-
Last visited
Content Type
Profiles
Forums
Events
Gallery
Everything posted by GazzaS
-
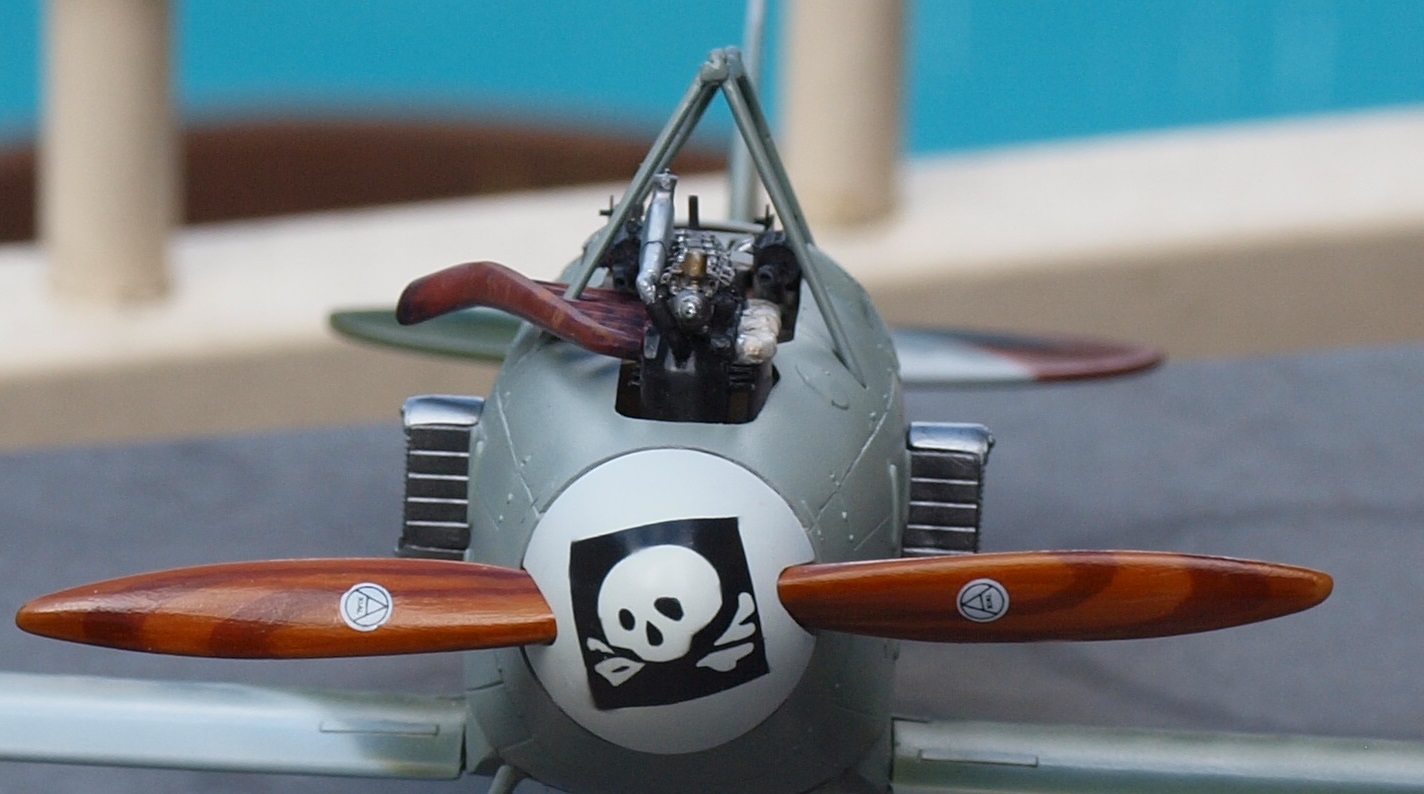
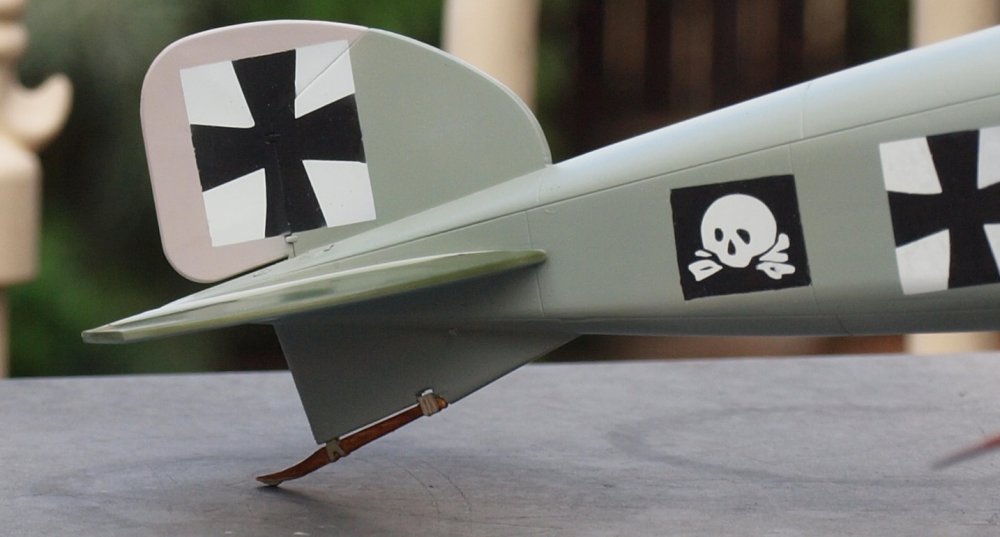
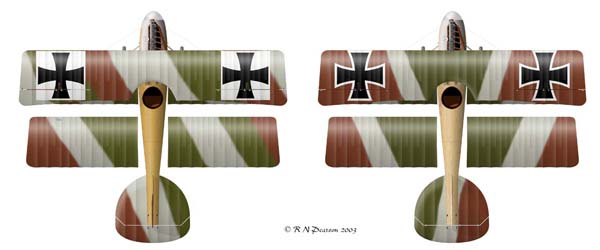
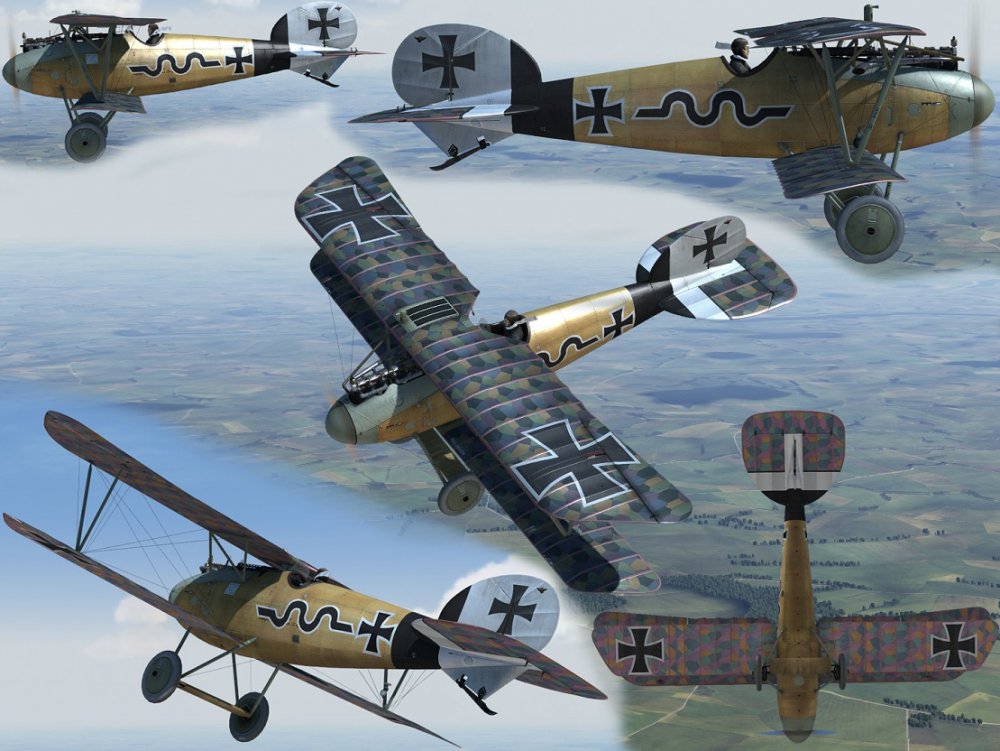
Thank you, Kai. I'm still unsure about what to do with the spinner. It just seems silly to have the skull on a rectangular background. And I have seen no real pictures of it. It would be far easier to have the skull on a circular background, and must have been difficult to do IRL. Here is another modellers take on it. Apparently, it was known in the unit as "Der Grun Maus". A new photo I just discovered, but it doesn't help with the prop: Perhaps my skull is too large and or on the wrong background.... Of course there is speculation about the wings, whether they were left in factory standard as I have painted them, or all-green as others have. So... whatever happens...
-

Israeli Mirage III C with Atar9C
GazzaS replied to Kaireckstadt's topic in LSM 1/35 and Larger Work In Progress
Those LG look damn nice, Kai! -
Thank you, Rob! The monochrome fuselage is demanding some better effort than a pin wash. I'm hoping I can find the right colors in my head to get it right.
-
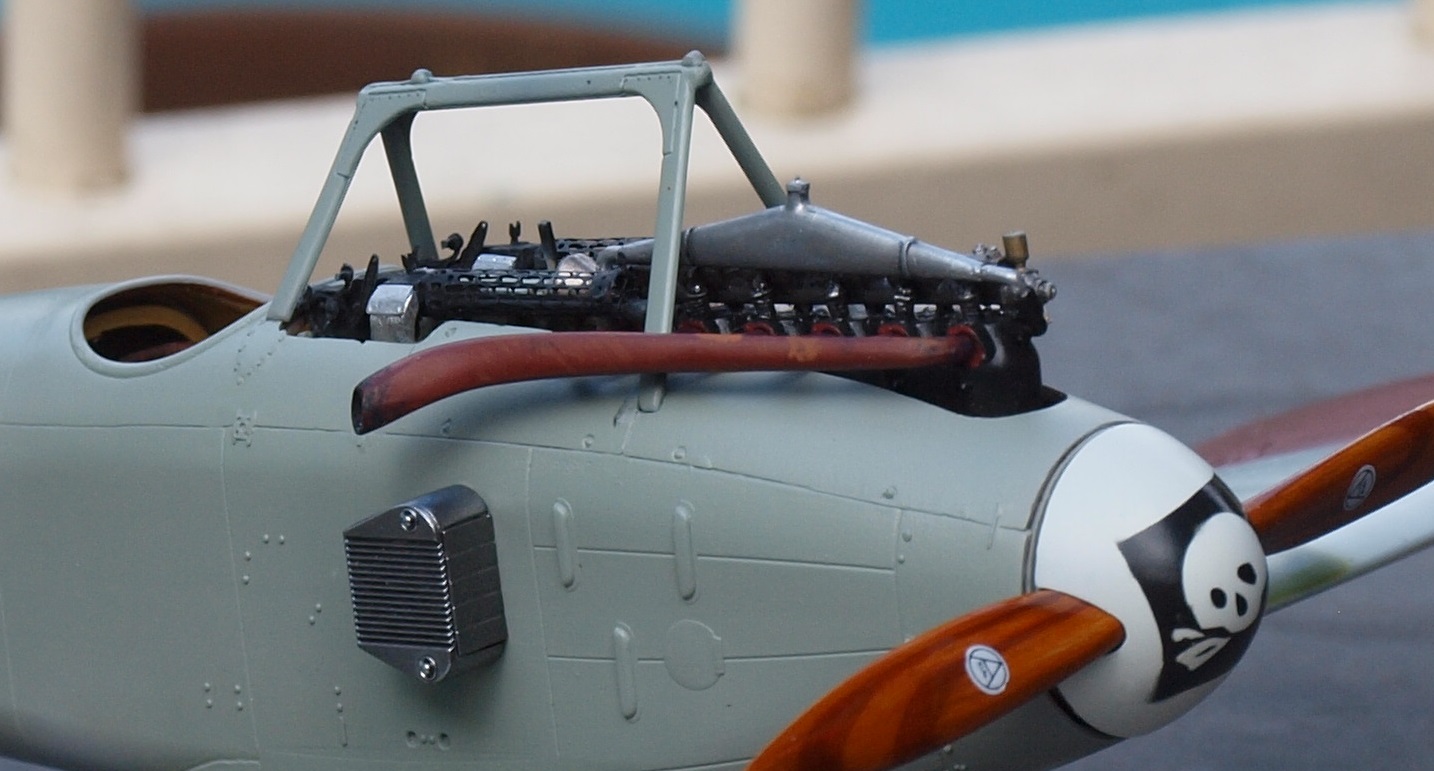
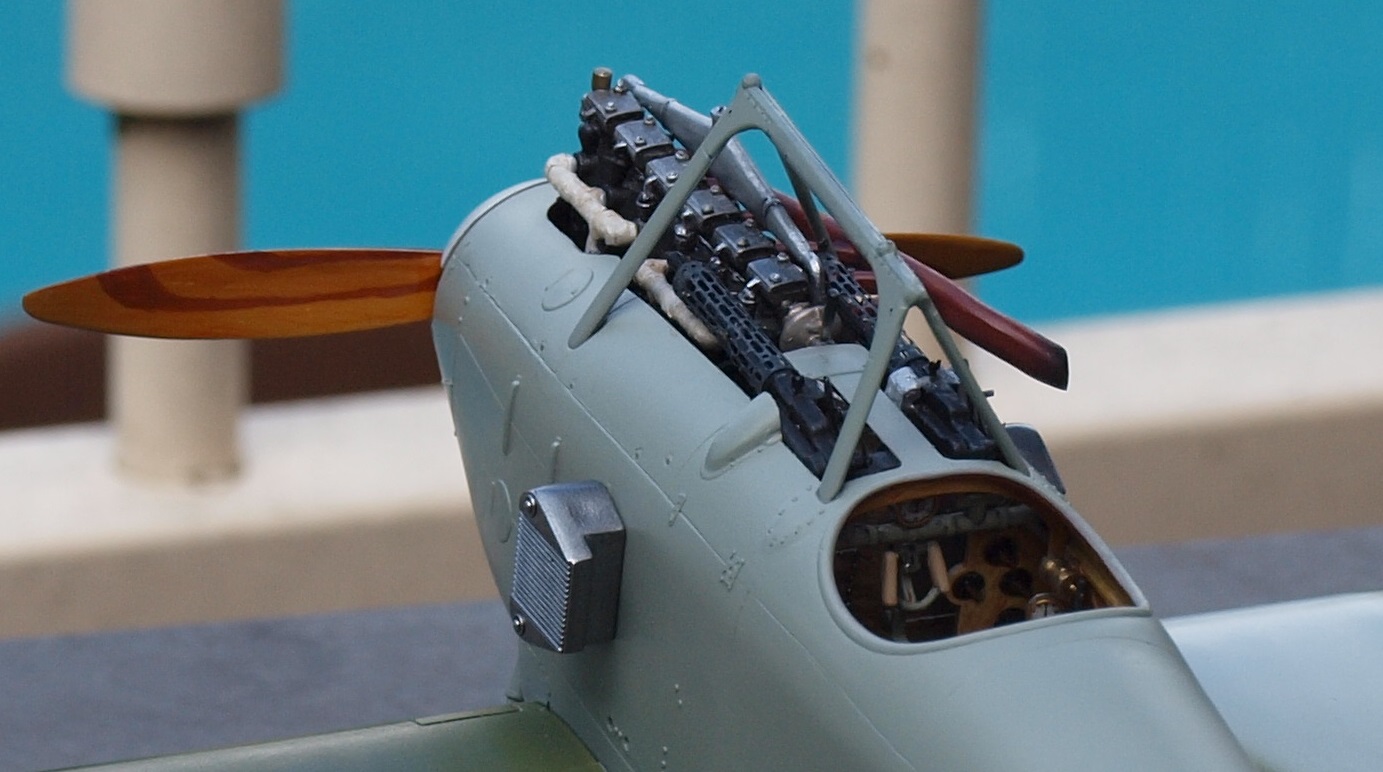
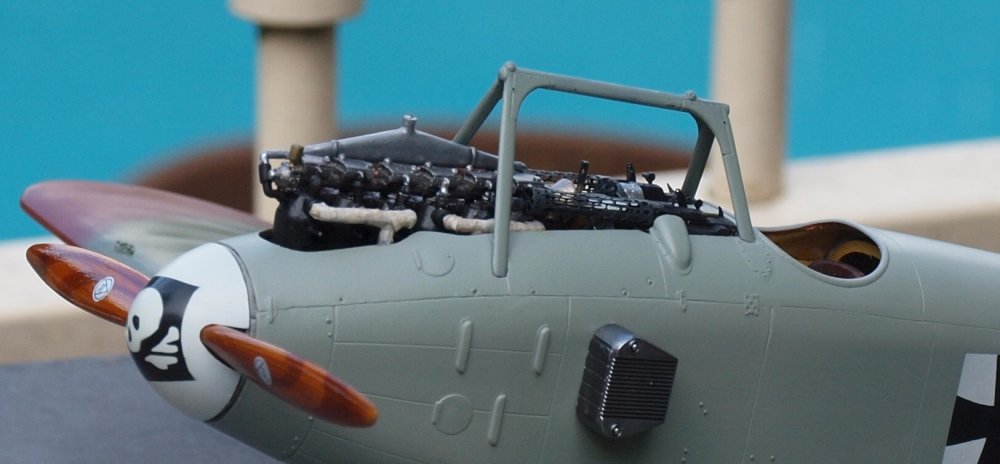
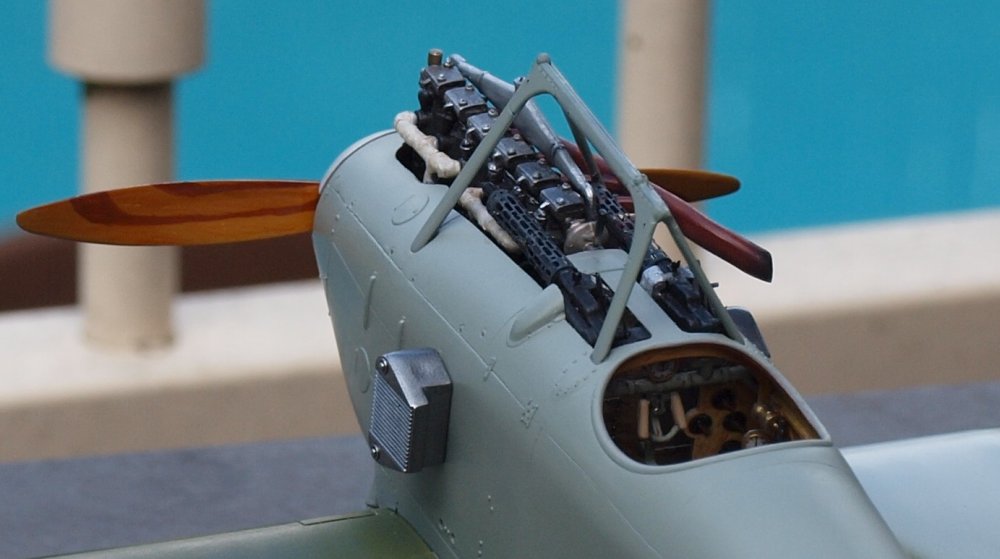
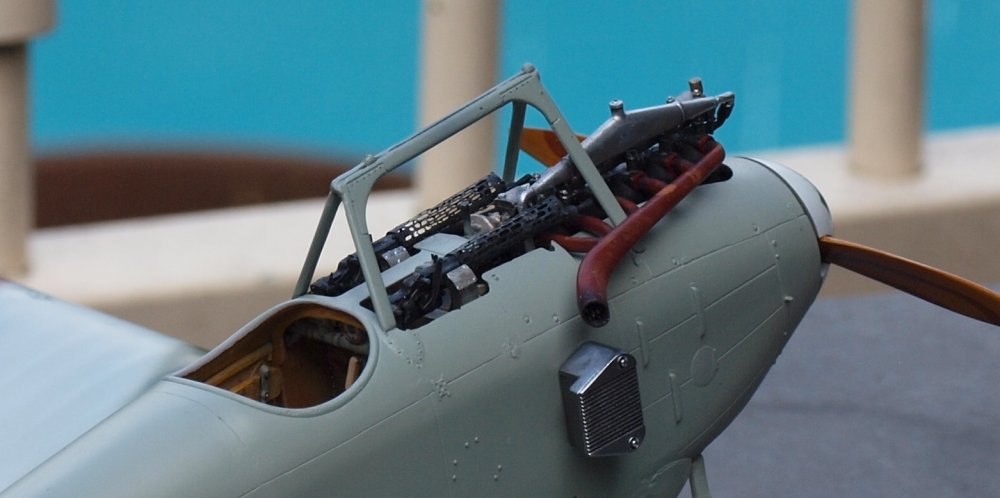
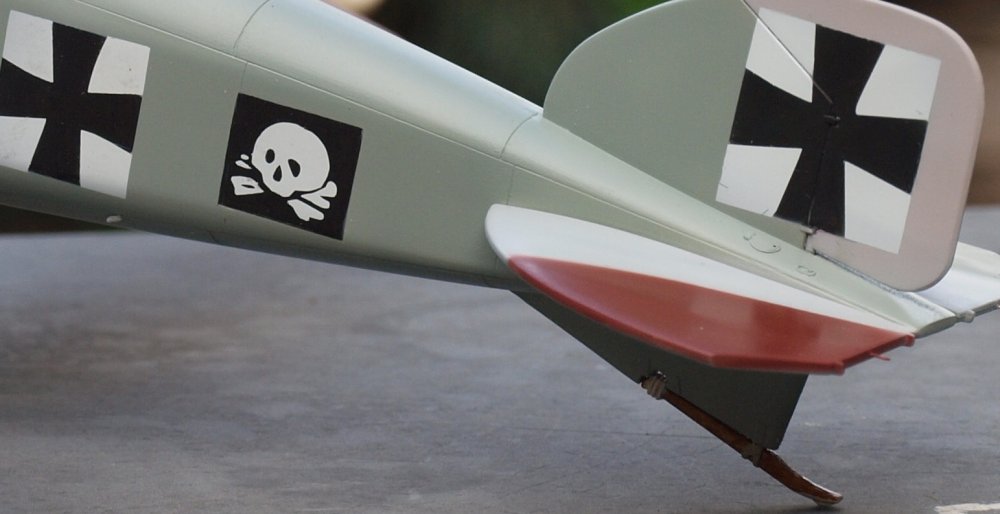
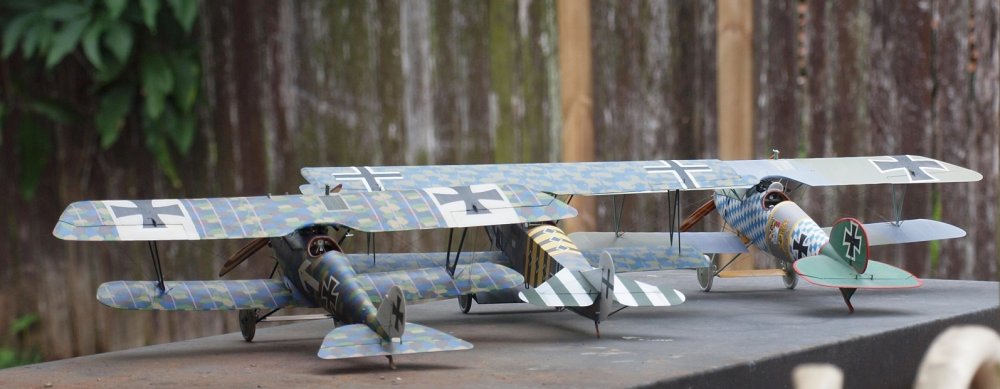
Thank you, Peter! If you don;t mind, I'll use your quote to segue into another update. Hello friends, although I keep preparing to start weathering with the oils, I find more and more stuff I need to get done first. Hopefully this update will put in the no-more-excuses/delays position. Whilst I'd attached the guns last weekend, there were still things to take care of... most of which were partially weathered, like the exhaust pipe. You can see from this front shot that it's a crowded area under the A-frame. The ear radiators are a feature unique to the type but were quickly replaced by the Teeves und Braun wing radiator. Atop the engine is a strange triangular contraption that is also common to the Roland C.II that I can only guess is the filler cap and coolant reserve/steam expansion area. Finally the tail skid. I think that puts me out-of-parts. Soon, it will join my small Jasta. Happy modelling!


-
Ah, this iwll be great to see come together! Nice start on the PE parts.... they look awesome!
-
Crikey! Special Hobby Westland Whirlwind Fighter
GazzaS replied to Wingco57's topic in LSM 1/35 and Larger Work In Progress
Looks interesting. -
Very nice work, Phil!
-
Voroshilovets 1/35 tractor.
GazzaS replied to belugawhaleman's topic in LSM 1/35 and Larger Work In Progress
Looks great so far! The nice thing about going a little light on the color is that it helps you from going too dark after weathering, and allows you to darken areas and play with shadows. -
Very nice looking work! Love the leather bag! That looks like Tamiya 02 to me. What 02 do you use? I usually lighten it quite a bit.
-
Tamiya Sturmgeschutze IIIG with Ostketten
GazzaS replied to GazzaS's topic in LSM Armour Finished Work
Thank you, Sir! -
Israeli Mirage III C with Atar9C
GazzaS replied to Kaireckstadt's topic in LSM 1/35 and Larger Work In Progress
Coming together nicely, Kai! The cockpit and ejector sat look spectacular. -
Tamiya Spit IX JE-J finished
GazzaS replied to JohnB's topic in LSM 1/32 and Larger Aircraft Ready for Inspection
Fantastic job John! -
Thanks for coming by, Ern. I've noticed you seem rather busy lately. No big deal. The wing struts are relatively thick and lacking in details. So I used .5mm rod. But I think it will be tougher on thinner struts. For instance, I don't think the cabanes on the D.II-D.Va would be thick enough to even mess with. I do have some .2mm copper wire which can be straightened by twisting. So, I'll try it on my other Roden kits when I can. I have a Roden D.III OAW built kit in the stash, and I'm going to save the D.III struts included in this kit for spares. Re: The prop... this was probably the quickest one I had ever done if you subtract the time I spent mixing the Tamiya clears. Full scratch is cool... but like you I don't want to spend too much time on it.
-
Thank you, Kai. I still haven't resolved how to clean up the spinner.
-
Tamiya Sturmgeschutze IIIG with Ostketten
GazzaS replied to GazzaS's topic in LSM Armour Finished Work
Thank you, Kai! -
Thank you, Rob!
-
Today's modelling ends after I pull off the masks from all of the markings. Funnily, there still parts I need to use which I haven't even removed from the sprue. Happy modelling!

-
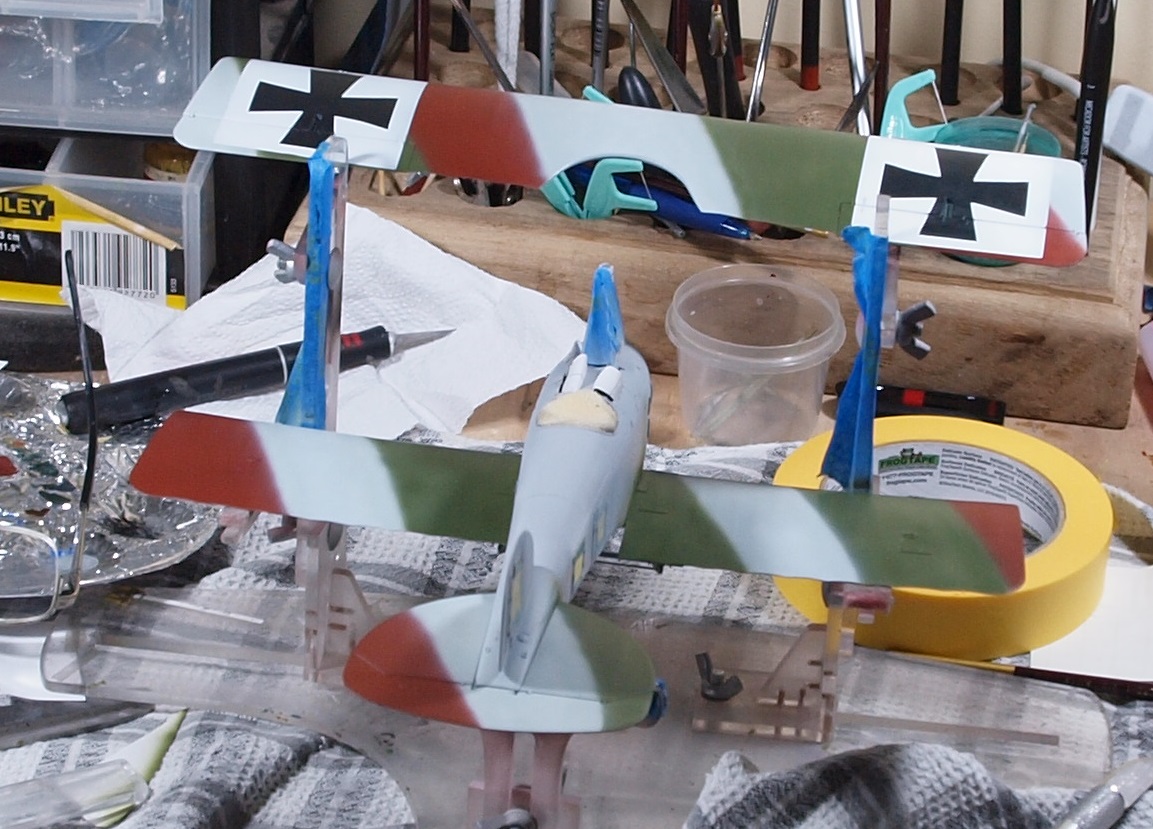
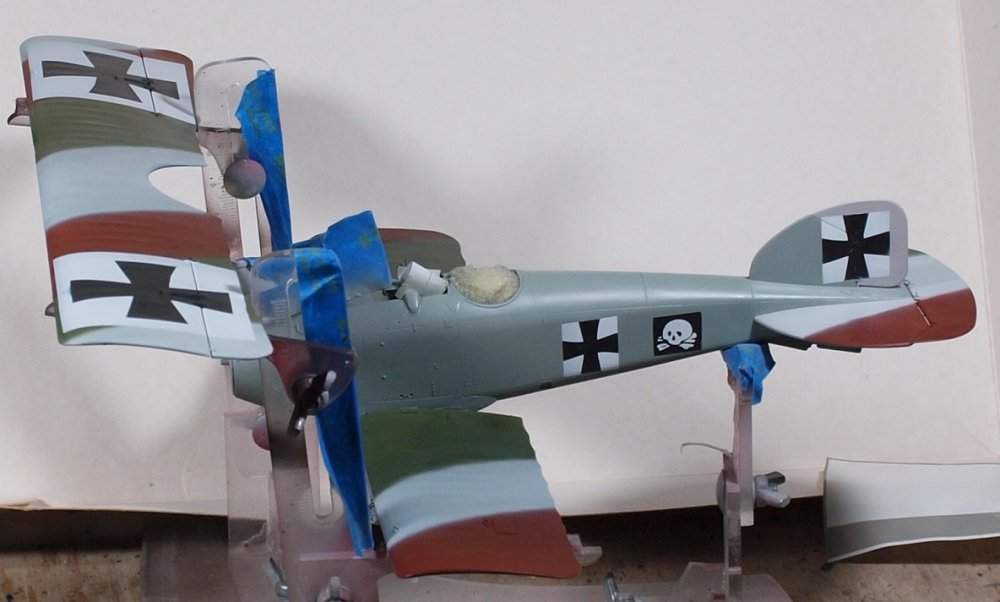
Thank you Kai. The camo colors are all either RAL or a mixture of RLM, gray and white. The underside is RLM 65 with a little blue added. Prior to the green and lavender, German planes (as far as I understand it) were red-brown, green, and light gray with blue undersides. Because there will be a lot of use of oils, I'm not overly worried about the original colors. One thing I've learned over time is to check the online wargaming community. There are some great aircraft skins, usually done after a lot of research saving the modeller a lot of time if he wants to use them. At some places, the creator of the skin has to submit it for approval amongst his peers who vote upon his ability to interpret the historical images correctly in accordance with what they know.
-
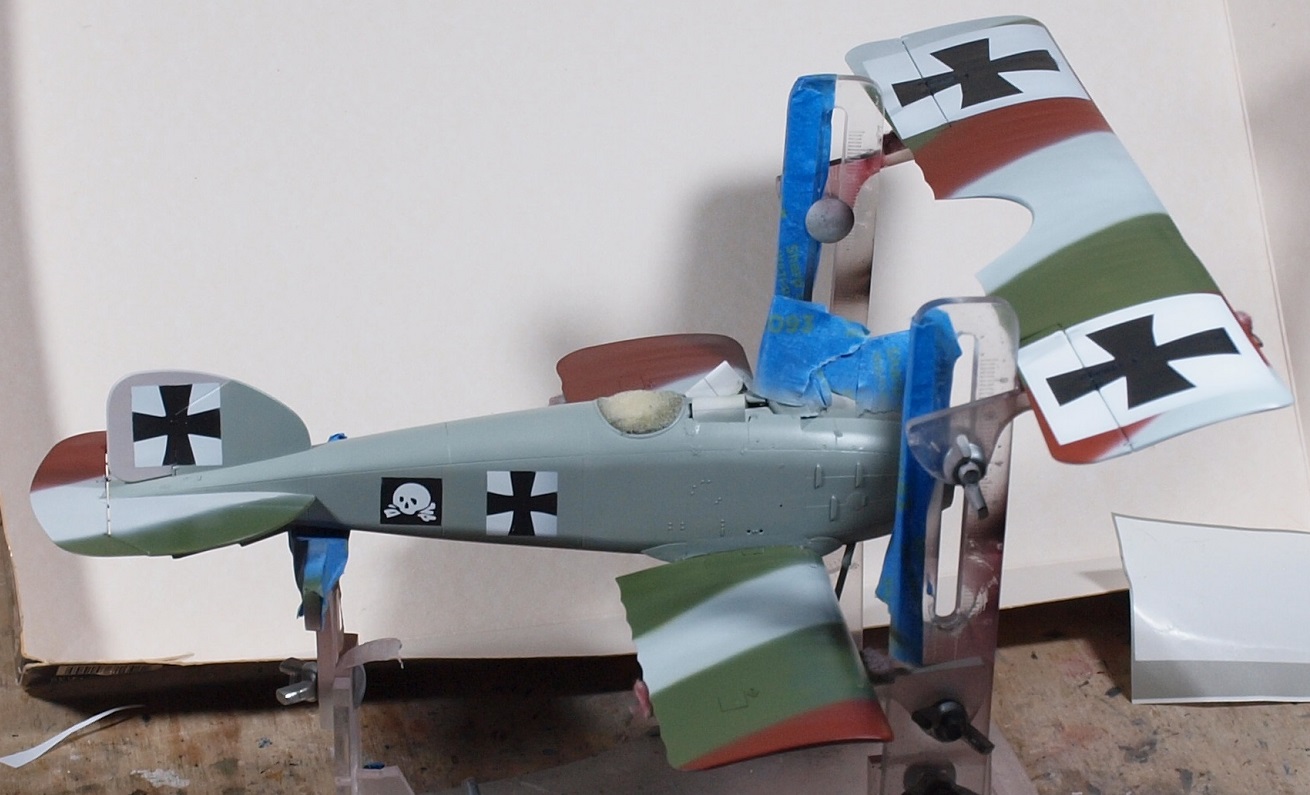
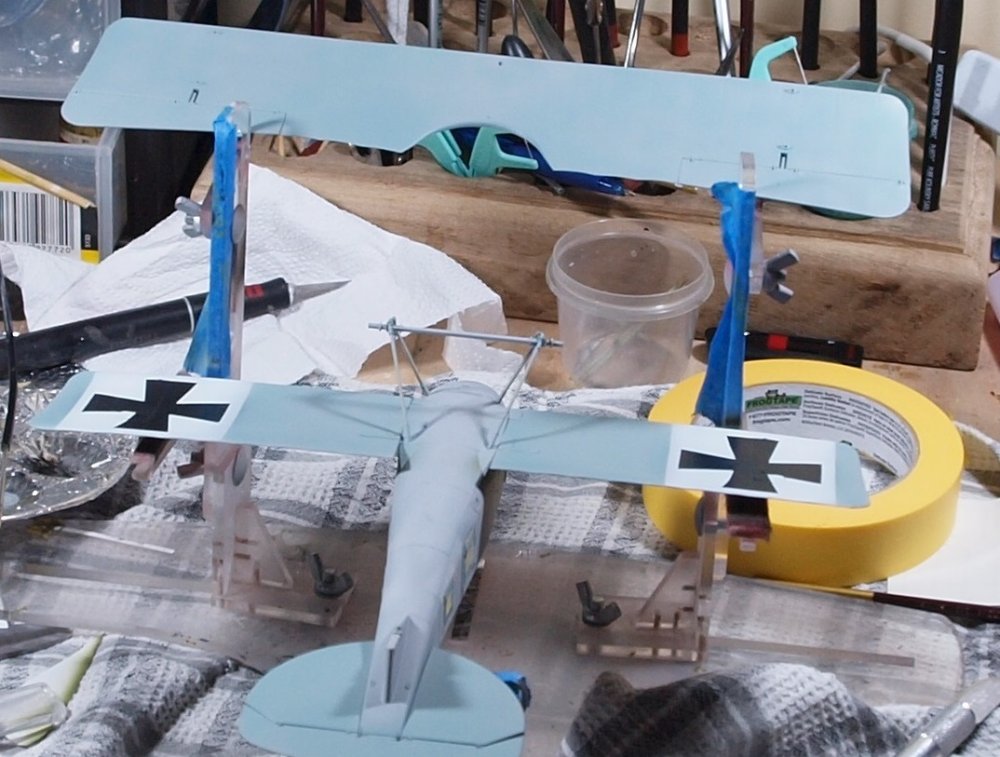
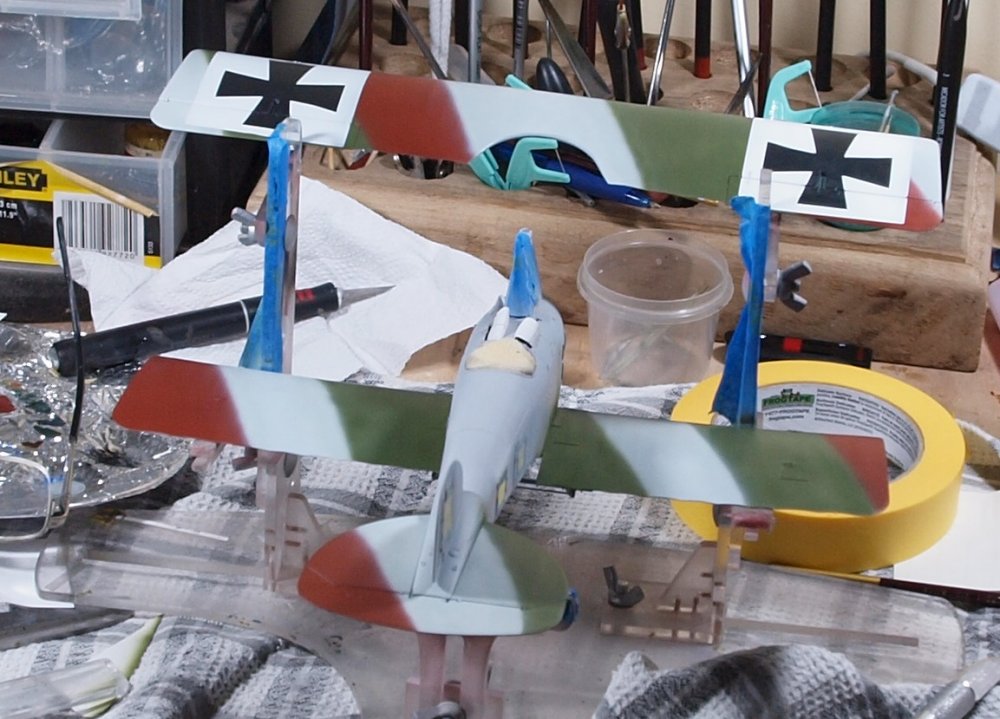
Hello friends, Wing paint on... Wing masks off. No paint lift yet! Let's keep our fingers crossed.
-
What is on your bench right now ? Share a picture :)
GazzaS replied to Martinnfb's topic in Modelling Discussion
Mighty fine work, Rob! Hope to see more... soon! -
I did a little research about doing my own that way... with real wood. Even tried it. ....and watched other guys doing it. Laminating the layers.... waiting for them to dry... Trying to pare it down evenly. ...and thin enough and still get the right shape. Stopping to look and measure after each whittling or grinding session. But it's never thin enough... until it's too thin. Failure after failure. Life is too short. If I had a programmable mill... maybe. I have tried painting by hand before. But I had never drawn it on first. That really helped with brush control. I made one mistake, but I have a spare brush on hand with a big cup of water. So, I just hit the error with water and washed it away before it could dry. The joy of regular acrylic paints. The base was a Tamiya very light brown... almost pink.
-
While I admit to liking them as objet d' art, as a modeller I find myself avoiding them. When I built my first WNW kit, I used the kit decals, and the thing came out looking like the same kit built by everyone else. I just felt kinda unimpressed with what I had done. It was more like I had avoided screwing it up, more than accomplishing anything. Even though I am trying to recreate a historical thing... the less of me that shows, kinda kills it for me.
-
You efforts look great, Frank!
-
Daft project or is it? 1/32 Short Stirling III
GazzaS replied to Wingco57's topic in LSM 1/35 and Larger Work In Progress
That interior is coming along beautifully. I envy your drive and discipline.