GazzaS
-
Posts
6,396 -
Joined
-
Last visited
Content Type
Profiles
Forums
Events
Gallery
Everything posted by GazzaS
-
Looking mighty fine, John!
-

I feel the need... for Shake and Bake... Tamiya StuG
GazzaS replied to GazzaS's topic in LSM 1/35 and Larger Work In Progress
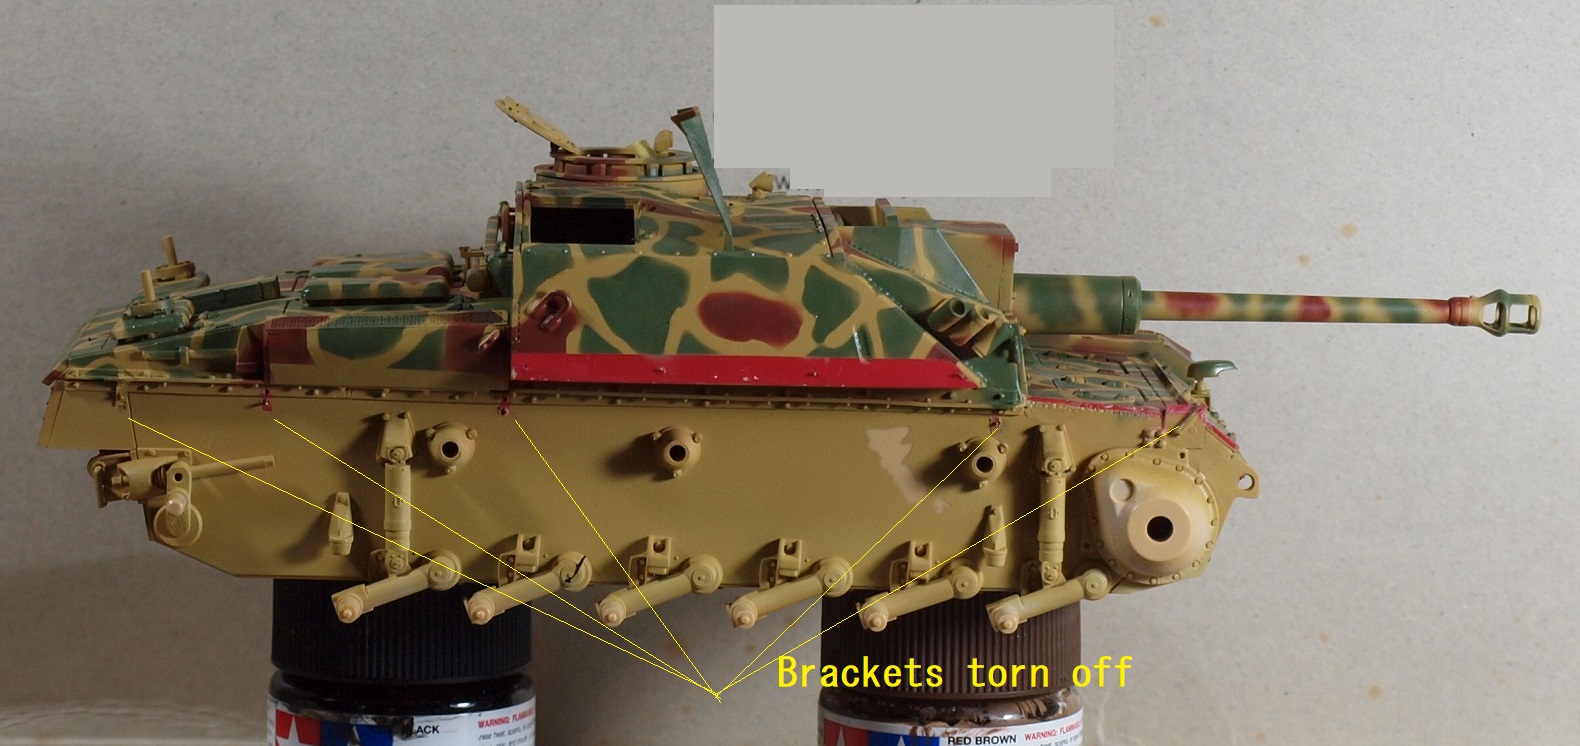
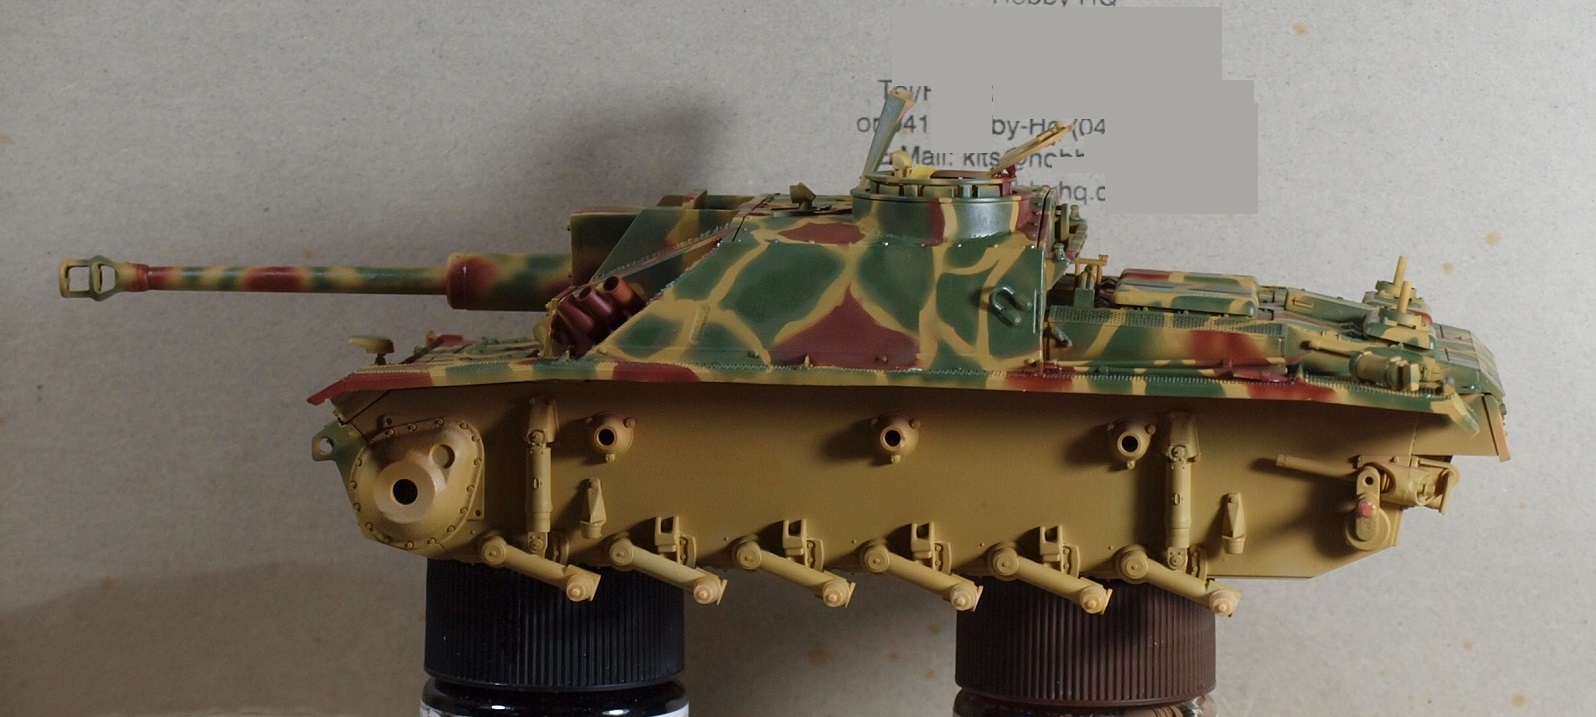
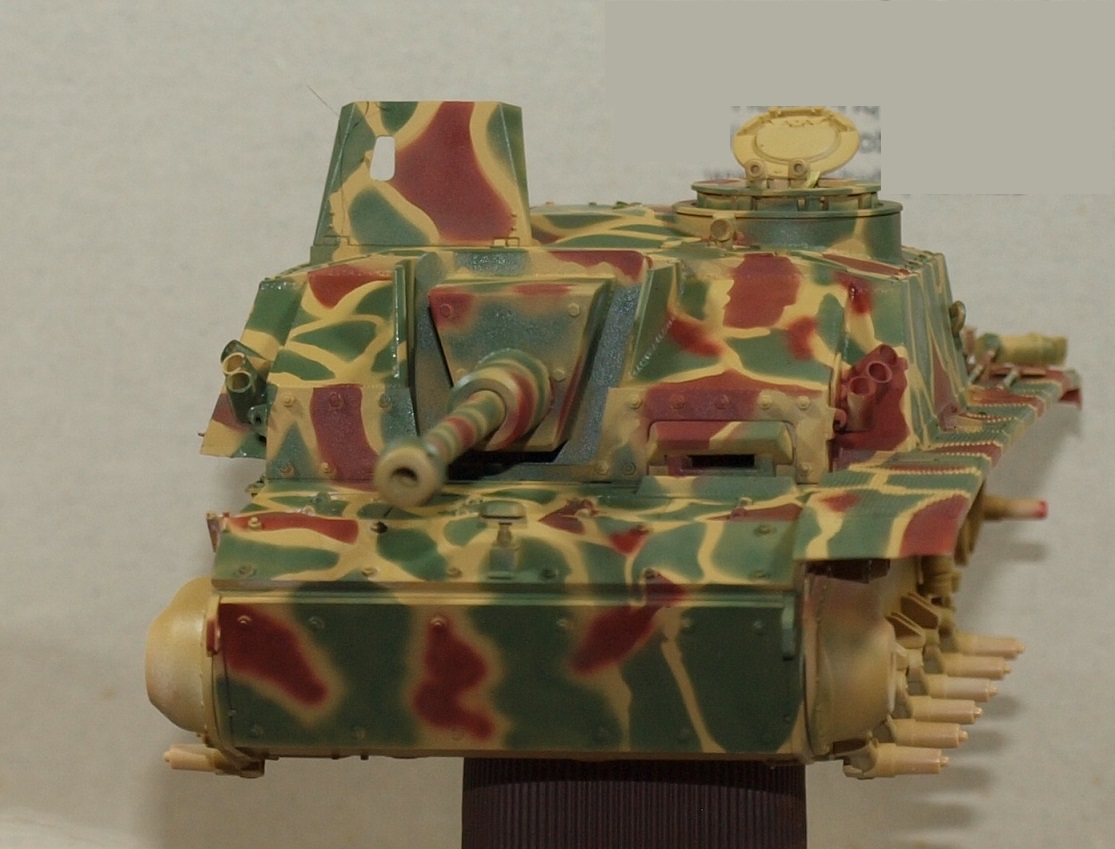
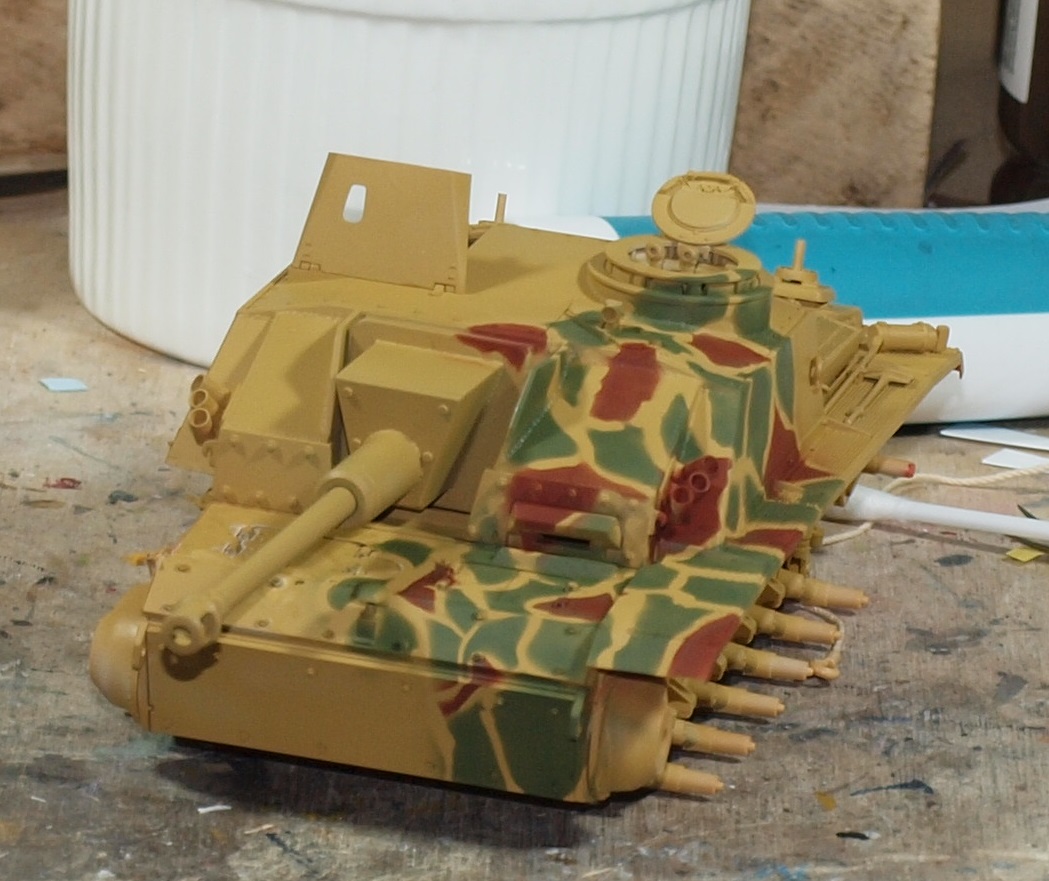
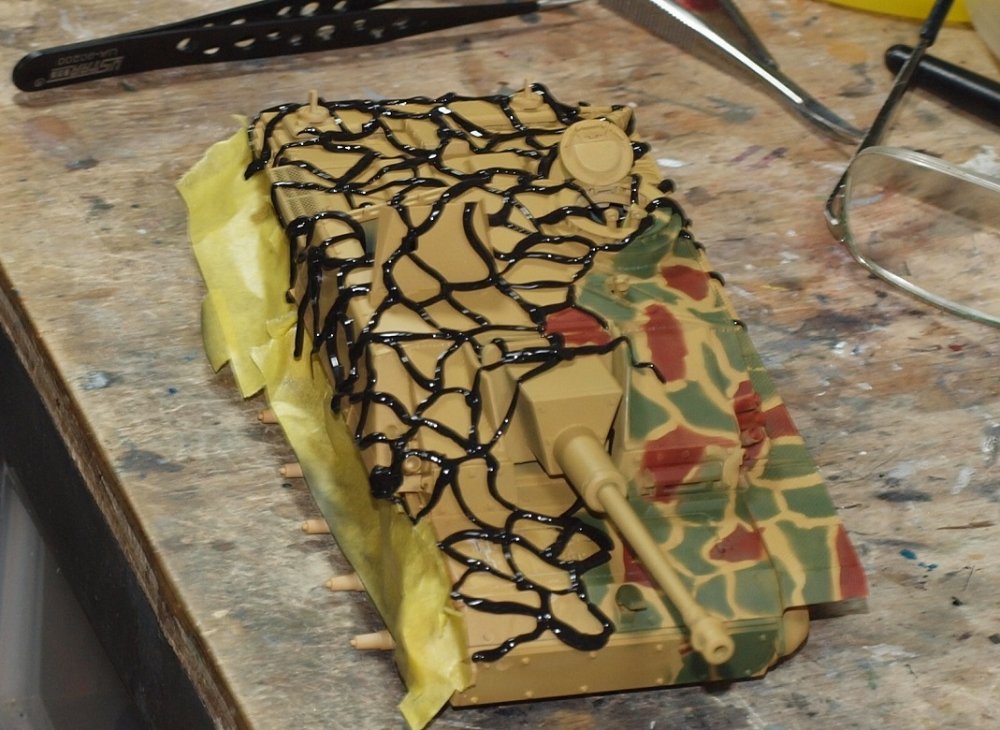
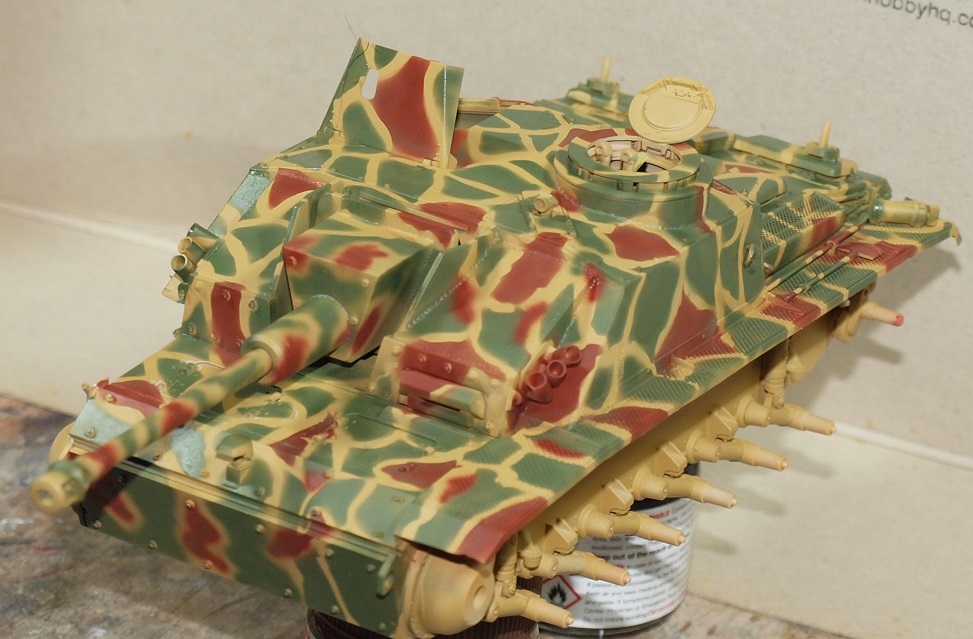
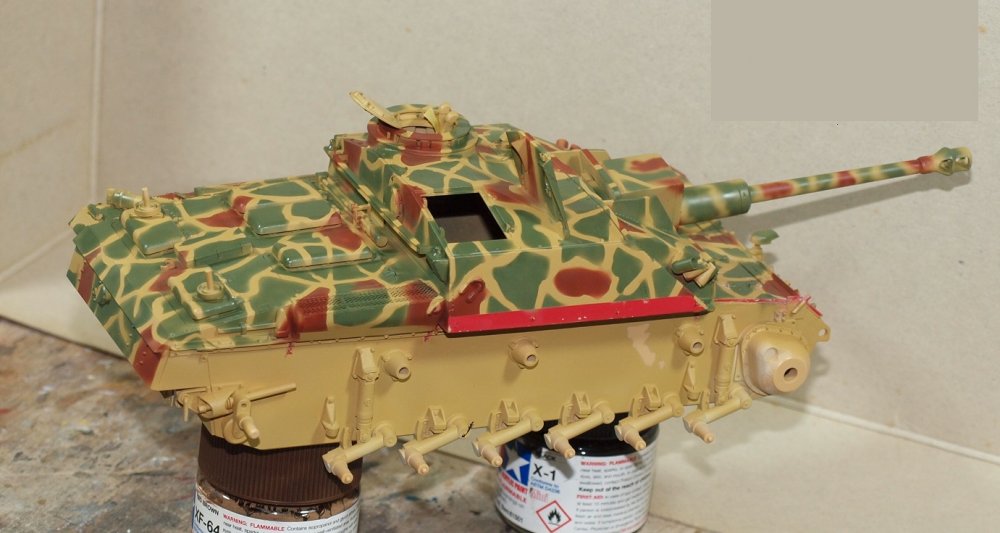
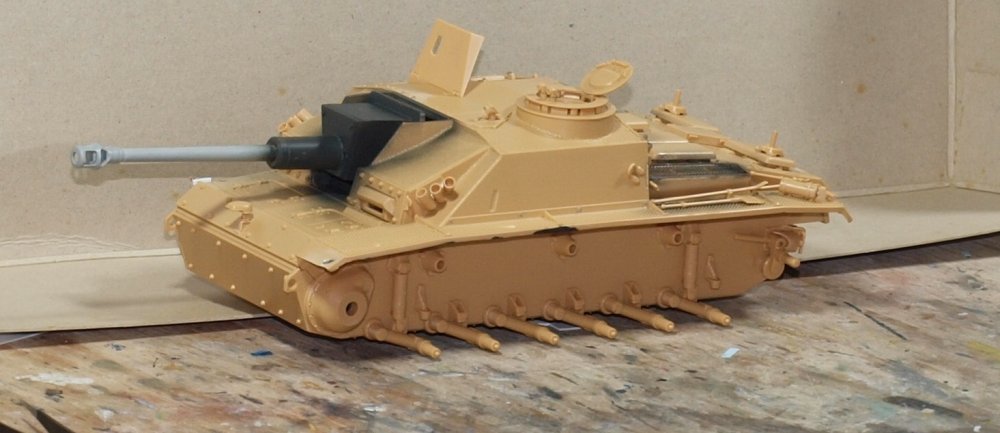
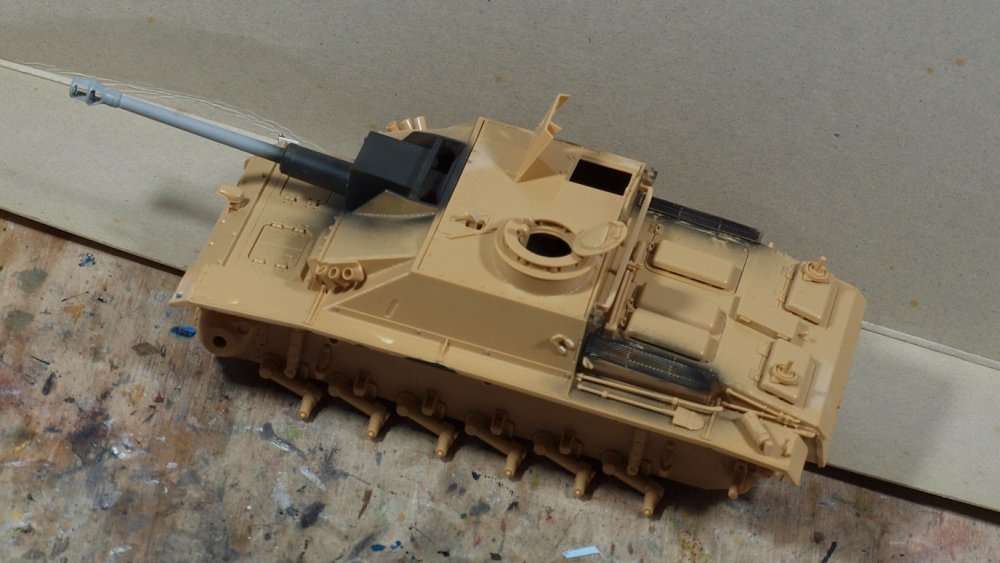
Well... after an hour of laying more panzer putty, I've a final painted result. I suffered a little paint lift in an area where I did no sanding. You can also see where the torn off brackets are. I'm not overly sure I'll ever go through the process again. While it prevents over-spray, it also causes lines that don't look natural for something that would have been painted with a paint gun. I'm hoping a couple filters will soften and blend everything. On this occasion I tried something I never did before: I thinned the SMS lacquer paint with Bunning's Diggers lacquer thinner in the purple can. Seemed to work alright. I also painted most of the mantlet, gun, and bow freehand. That is because Panzer putty has no adhesive properties. The two blurry photos are what photos look like when I don;t use the tripod.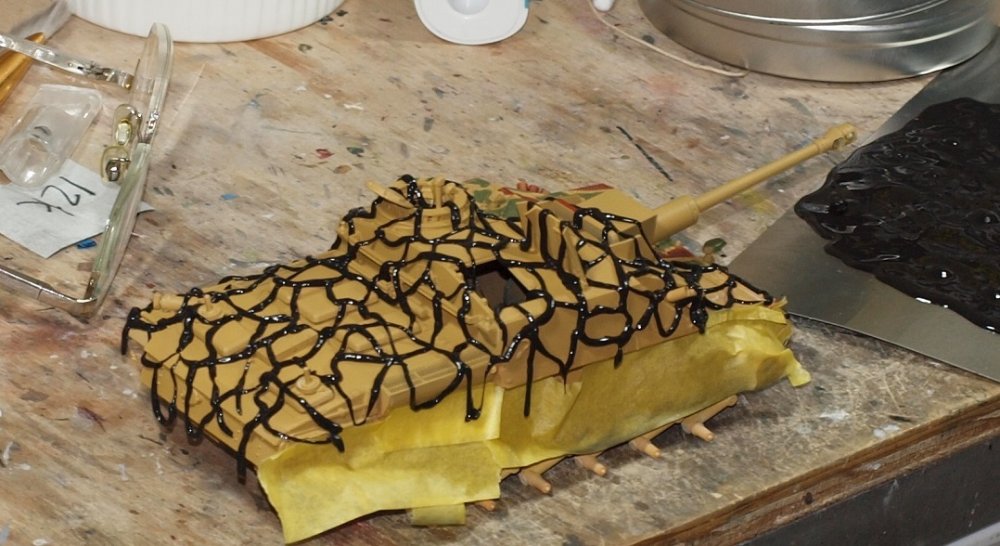


-
So... how do we go about setting up another social network?? I suppose the first answer would be money... and most of us just aren't that solvent.
-
PCM Focke Wulf FW 190 A-1/A-2/A-3
GazzaS replied to GazzaS's topic in LSM 1/35 and Larger Work In Progress
Thank you, Kai! There is still a fair bit to do. -
whatever it is... a farce or whatever... is still the source of many historical photos. So it is still of use to me until somebody comes up with another one.
-
This is me all over. I'm waiting for my ban.
-
PCM Focke Wulf FW 190 A-1/A-2/A-3
GazzaS replied to GazzaS's topic in LSM 1/35 and Larger Work In Progress
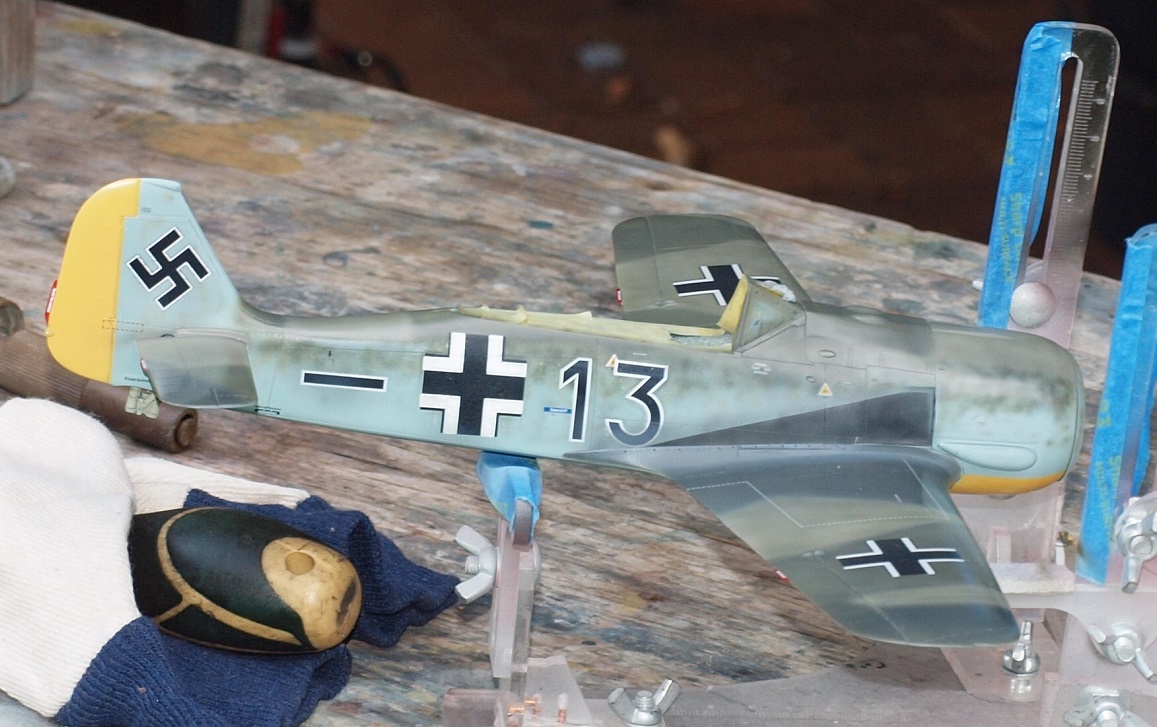
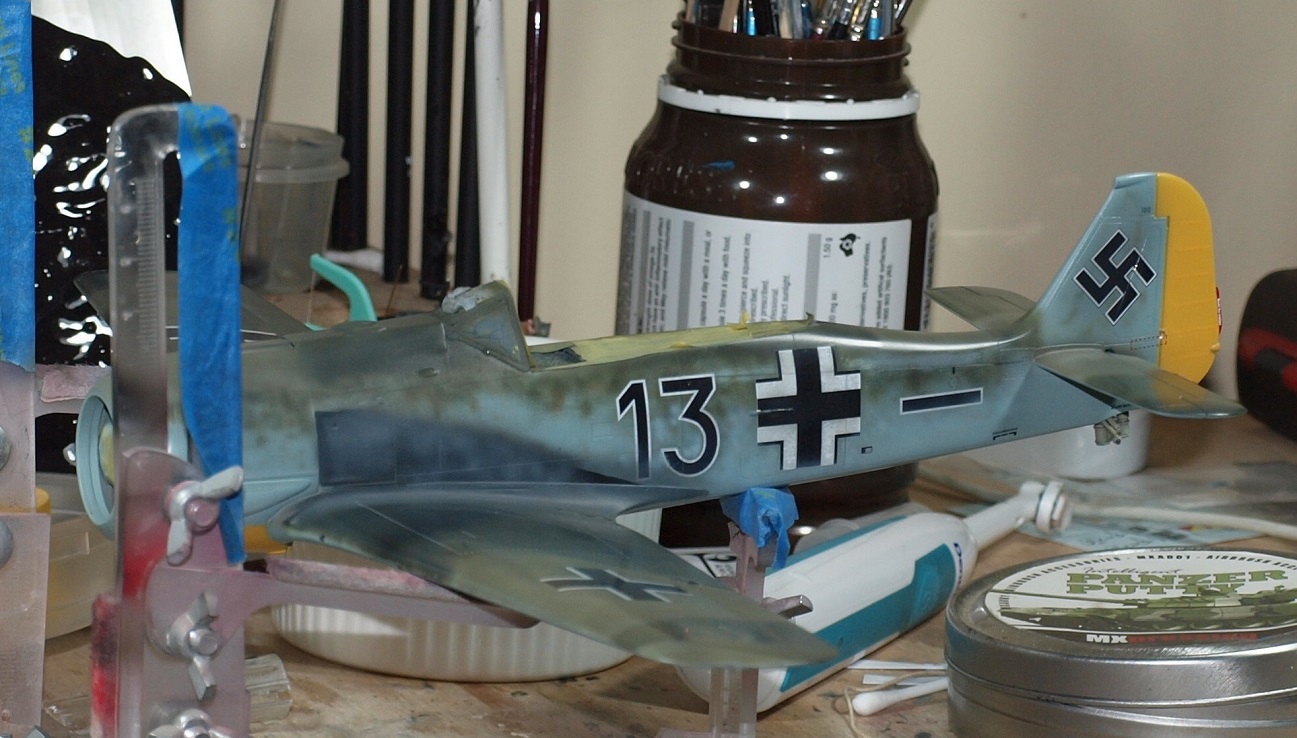
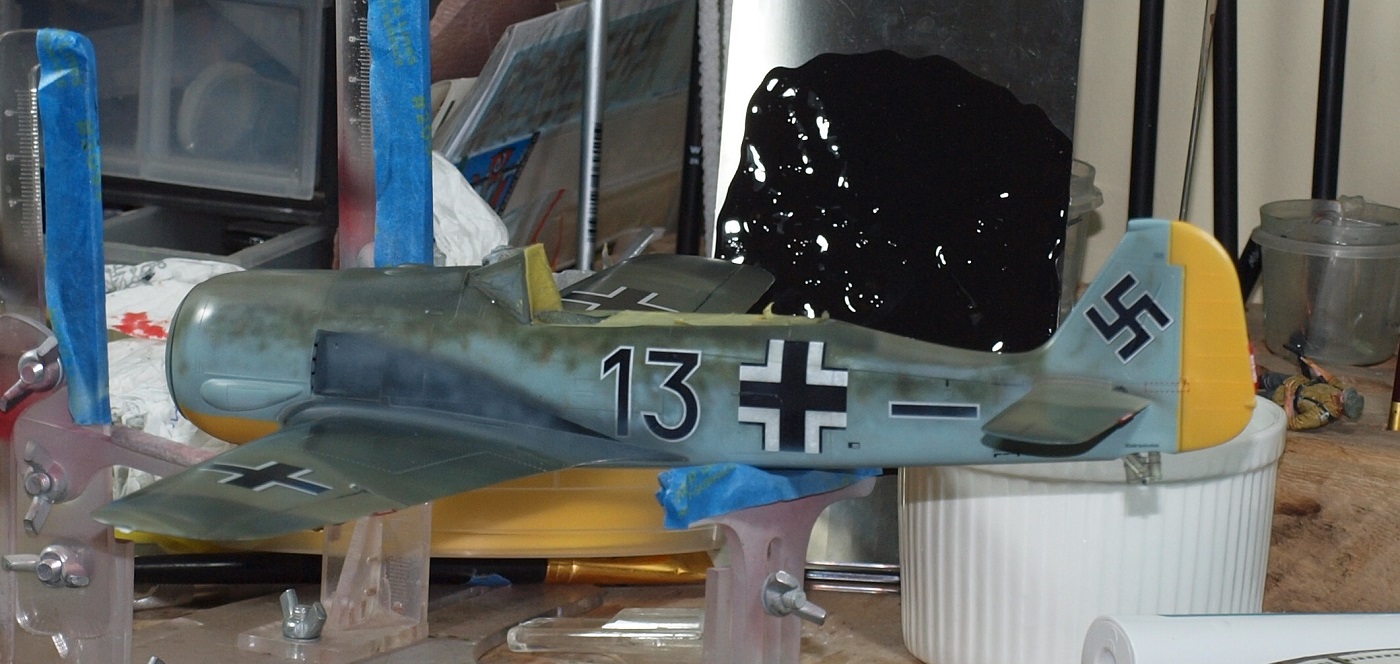
Hola Amigos y Amigas! After some useful advice from LSM friends, I have made some changes to the paint. It cost me a lifted decal... but I was able to change the direction of peeling away the thrice de-tacked masking tape, and re-seat the decal. The first two photos will show the black area added the the sides of the machine in a way hopefully very similar to what JG 26 did with their early FW's. The following three will show the exhaust streaking I have added in various shads of gray. Hopefully it looks quite like the photos discussed previously. I need to figure out how to take B&W photos with the Wife's Canon Olympus.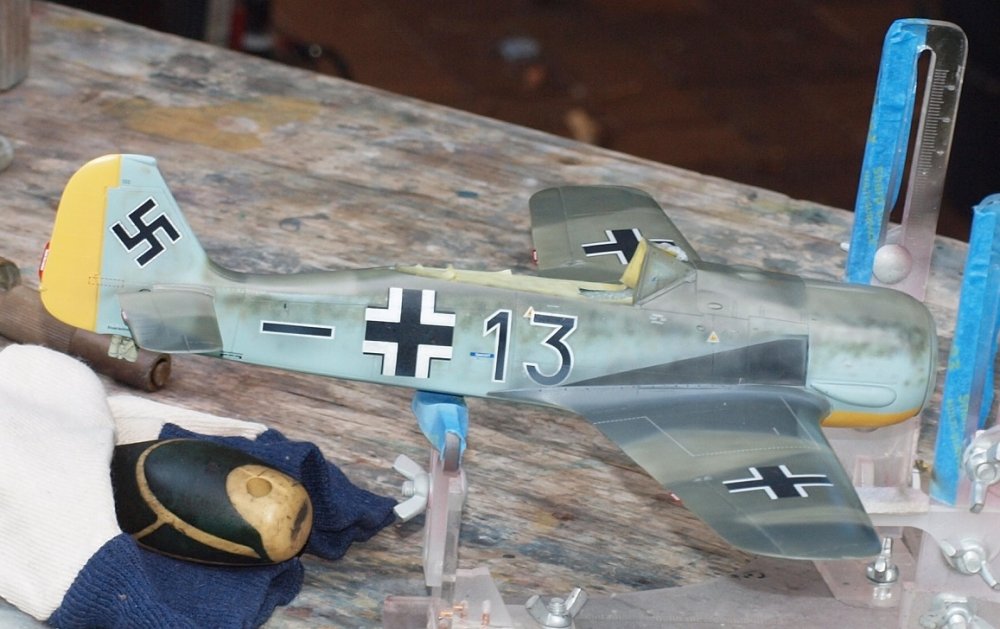


-
Very nicely done interior, John. That shade of green is mighty convincing!
-
This build is crazy... but awesome all the same.
-
Why has nobody told us about this one... Canadians??
GazzaS replied to GazzaS's topic in Modelling Discussion
I hope you aren't too offended. Besides... all of those things you mentioned were great parts of my earlier life in Michigan.
-
Why has nobody told us about this one... Canadians??
GazzaS replied to GazzaS's topic in Modelling Discussion
Ummm... yes. Nobody wants a big beaver, do they? Speaking of Big Beaver... Lemme show you a roadsign I saw a lot in my former life in America: -
Fokker D.VIII Razor Wing Jasta 6
GazzaS replied to DocRob's topic in LSM 1/32 and Larger Aircraft Ready for Inspection
Congratulations, Rob! Both machines look great. The size difference is quite amazing. I'm impressed that you would be able to build the little one, after completing the 1/32 version. -
Why has nobody told us about this one... Canadians??
GazzaS replied to GazzaS's topic in Modelling Discussion
How big of a model do you want?? -
Huh?
-
I feel the need... for Shake and Bake... Tamiya StuG
GazzaS replied to GazzaS's topic in LSM 1/35 and Larger Work In Progress
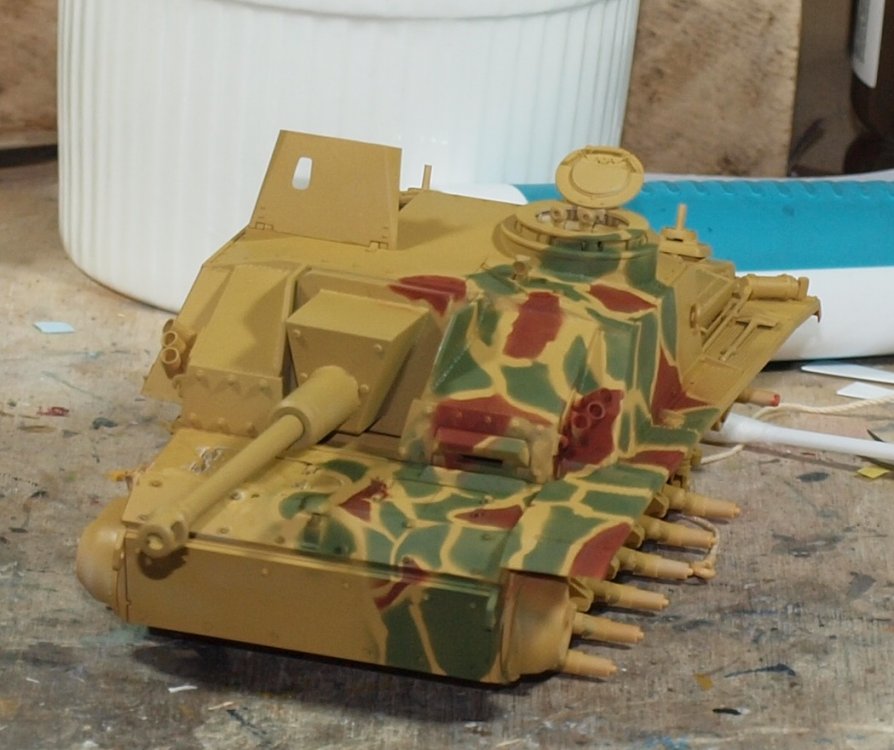
Because this will be a winter-white covered StuG, I decided to experiment with Panzer Putty. I tend to let the dark yellow color dominate. So, I decided to go the other way. I'm sure it would benefit from touch up and a filter or two.
- 98 replies
-
- 10
-

-

-
Israeli Mirage III C with Atar9C
GazzaS replied to Kaireckstadt's topic in LSM 1/35 and Larger Work In Progress
Very nicely weathered pit, Kai! This is one more area I need to work on. I'm lazy when it comes to pits. -
I feel the need... for Shake and Bake... Tamiya StuG
GazzaS replied to GazzaS's topic in LSM 1/35 and Larger Work In Progress
Thank you, Carl! Yes, it's a Dragon one-piece barrel. It's about 14 scale inches shorter than the Tamiya two-piece barrel and looks a lot less chunky. Gaz -
PCM Focke Wulf FW 190 A-1/A-2/A-3
GazzaS replied to GazzaS's topic in LSM 1/35 and Larger Work In Progress
Thank you! Great idea. -
PCM Focke Wulf FW 190 A-1/A-2/A-3
GazzaS replied to GazzaS's topic in LSM 1/35 and Larger Work In Progress
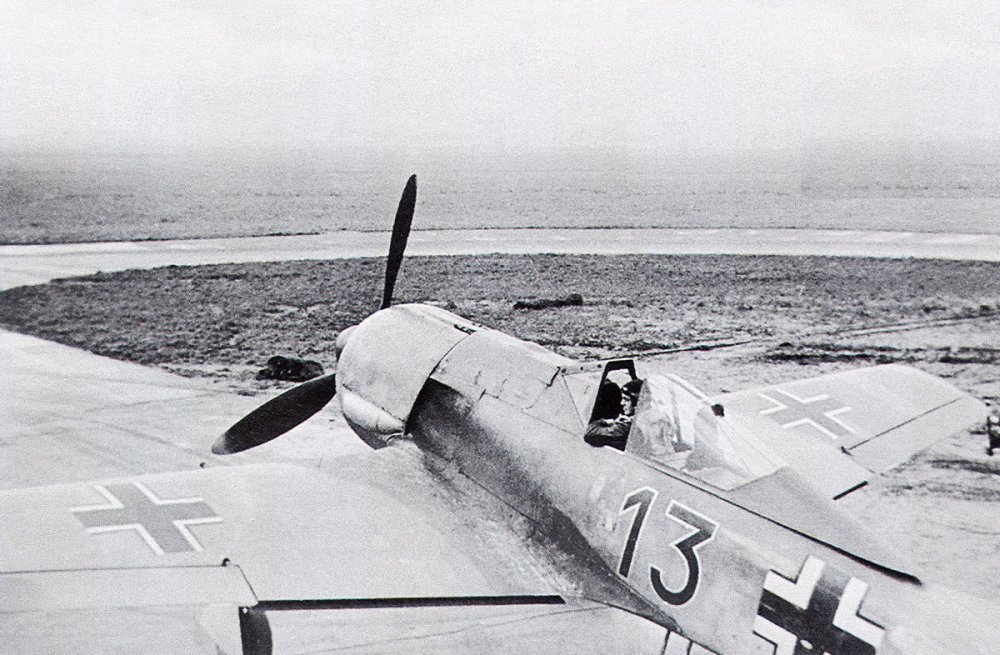
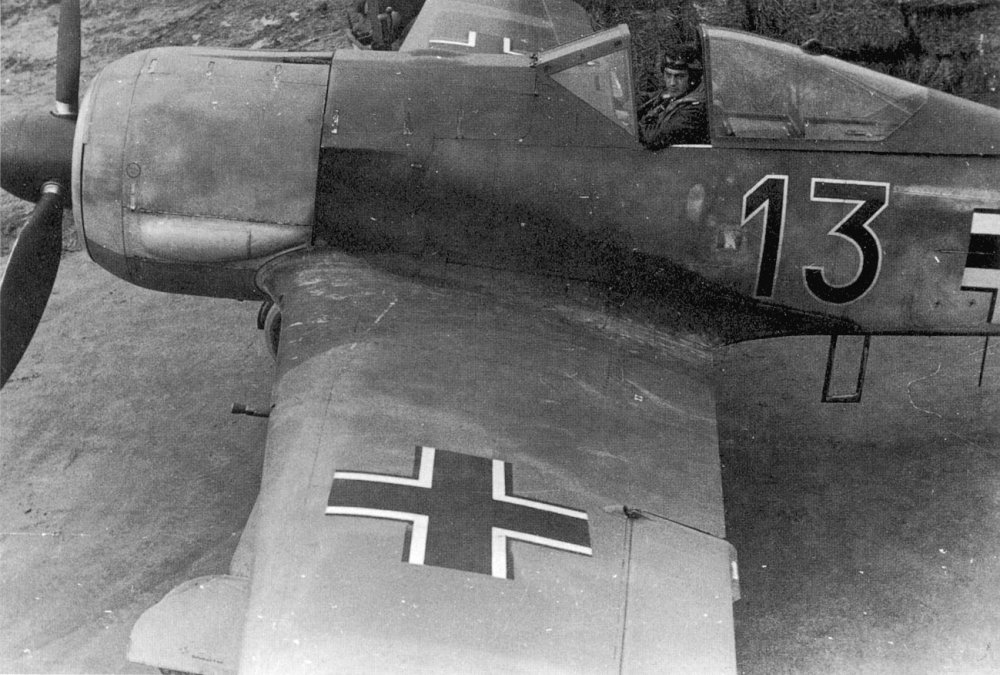
Thank you for those images. They're very helpful. That area has plagued my mind. I now wonder if the exhaust stains haven't put enough lighter shades over the black area to make it look confusing. -
PCM Focke Wulf FW 190 A-1/A-2/A-3
GazzaS replied to GazzaS's topic in LSM 1/35 and Larger Work In Progress
I have noticed that. But it is such an irregular shape that I haven't decided how to treat it. It only appears to be a meter long or so, and doesn't seem to go all the way to the exhaust stubs. I'm beginning to wonder if it isn't some sort of repair that has been painted over. The shape I see below: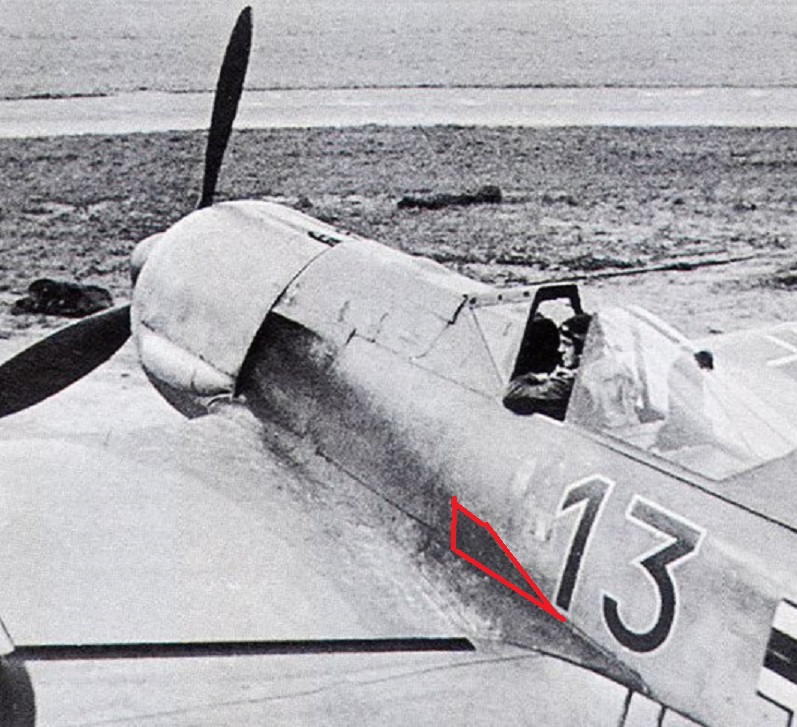
-
Fokker E.V / D.VIII Parasol Mikro Mir 1/32
GazzaS replied to DocRob's topic in LSM 1/35 and Larger Work In Progress
I've been getting a lot of practice with the toothbrush. I use it for most situations, now. Even on fragile stuff. -
I feel the need... for Shake and Bake... Tamiya StuG
GazzaS replied to GazzaS's topic in LSM 1/35 and Larger Work In Progress
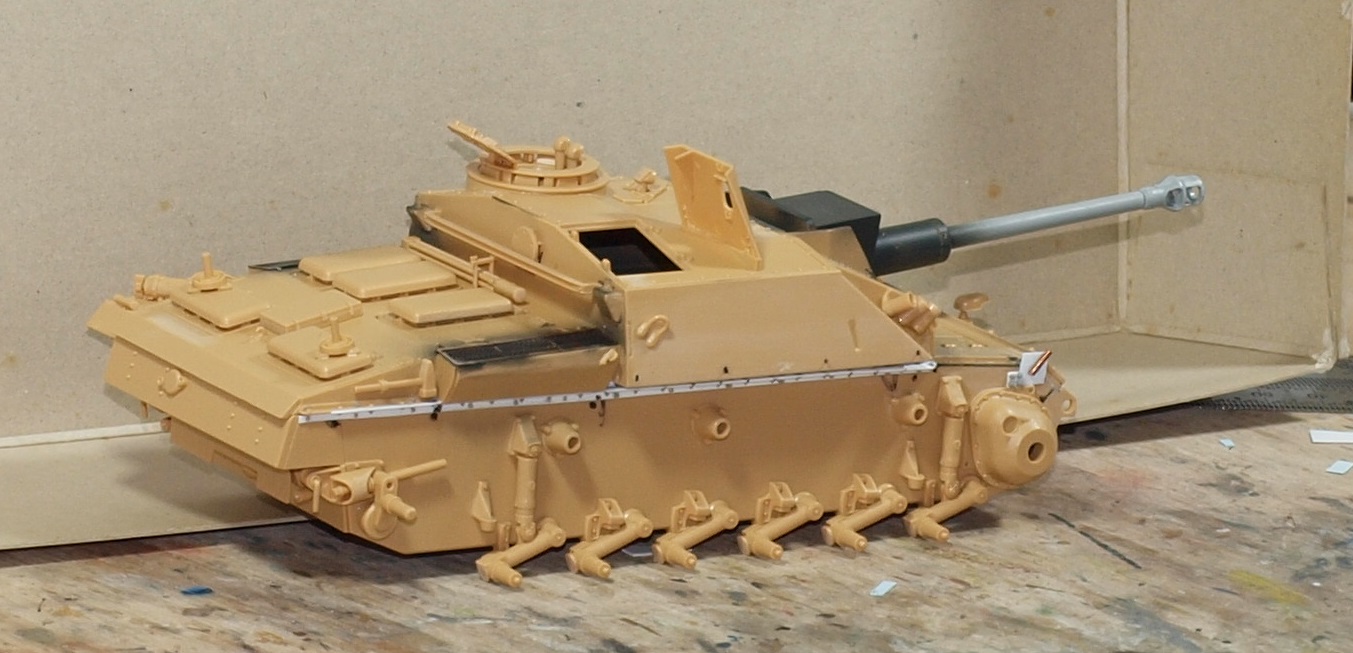
With the warship and the FW under way, I've been slow on this build. But... I'm ready for paint. Otherwise, not very noteworthy.
- 98 replies
-
- 14
-
-
PCM Focke Wulf FW 190 A-1/A-2/A-3
GazzaS replied to GazzaS's topic in LSM 1/35 and Larger Work In Progress
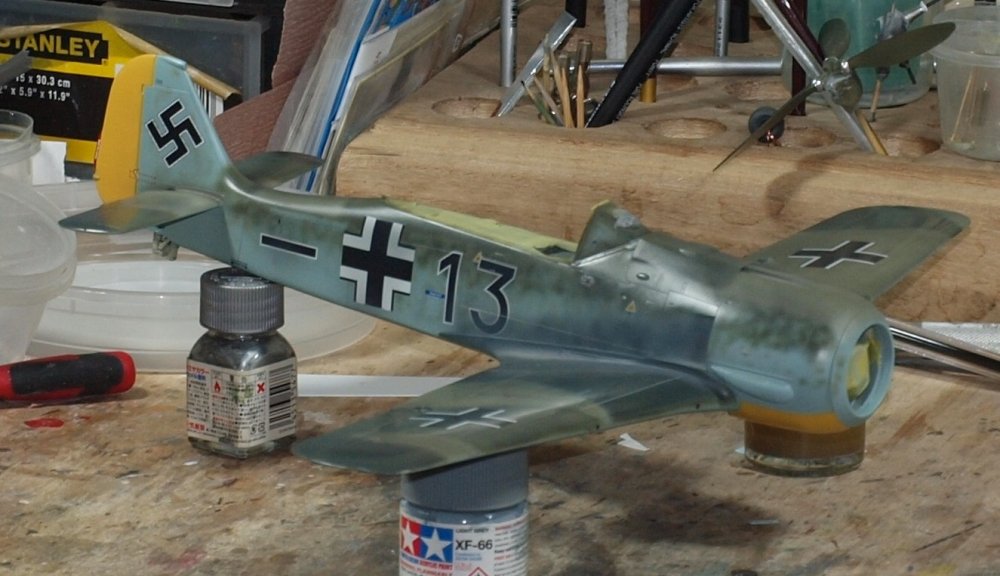
Guys, thanks for your input. Generally I don't like big exhaust stains. But the evidence below really points in one direction.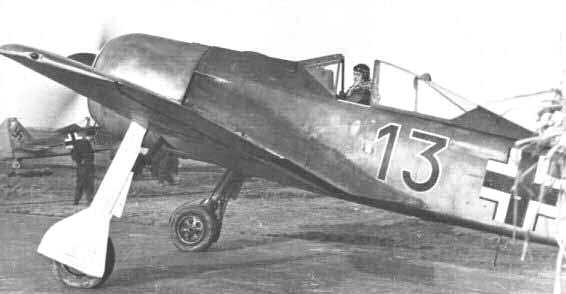
-
PCM Focke Wulf FW 190 A-1/A-2/A-3
GazzaS replied to GazzaS's topic in LSM 1/35 and Larger Work In Progress
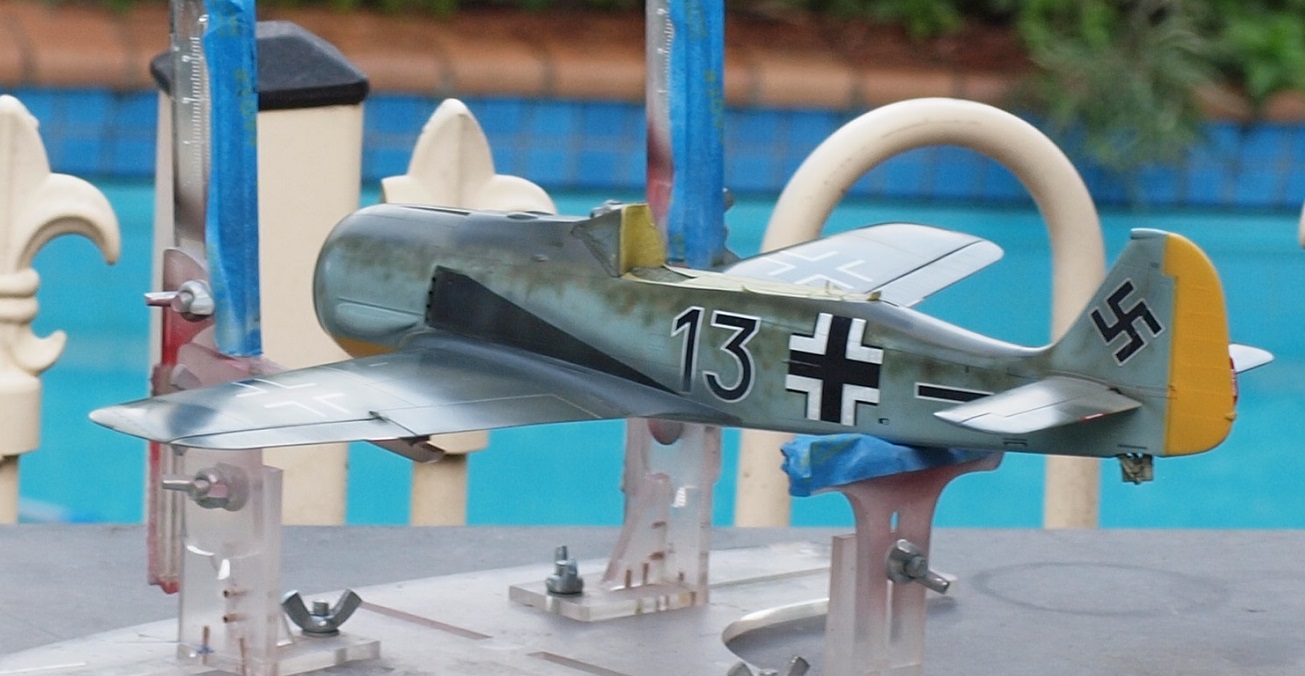
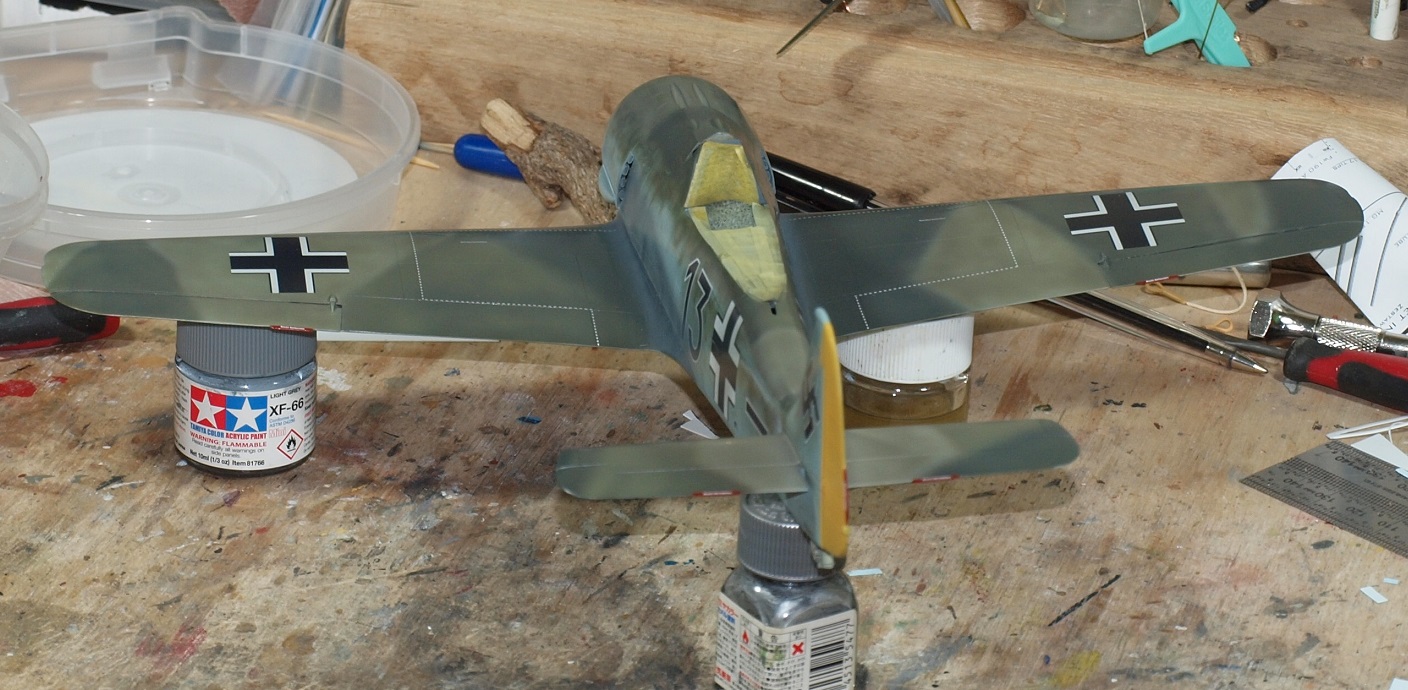
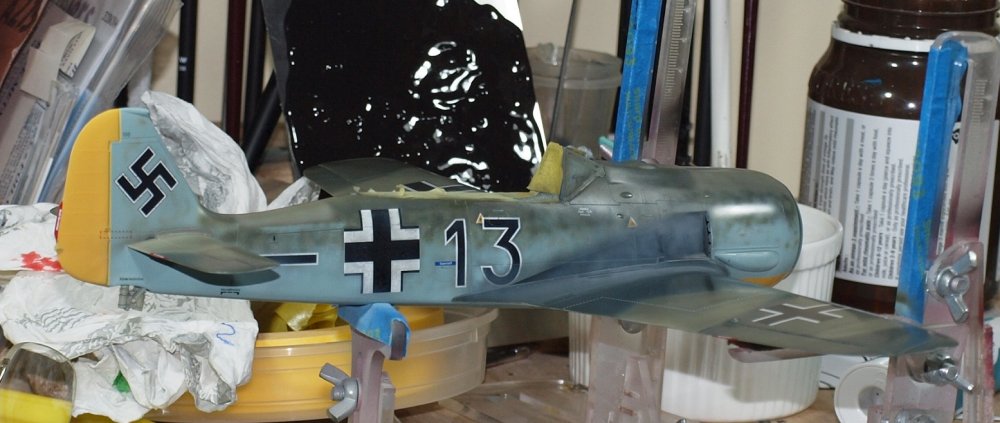
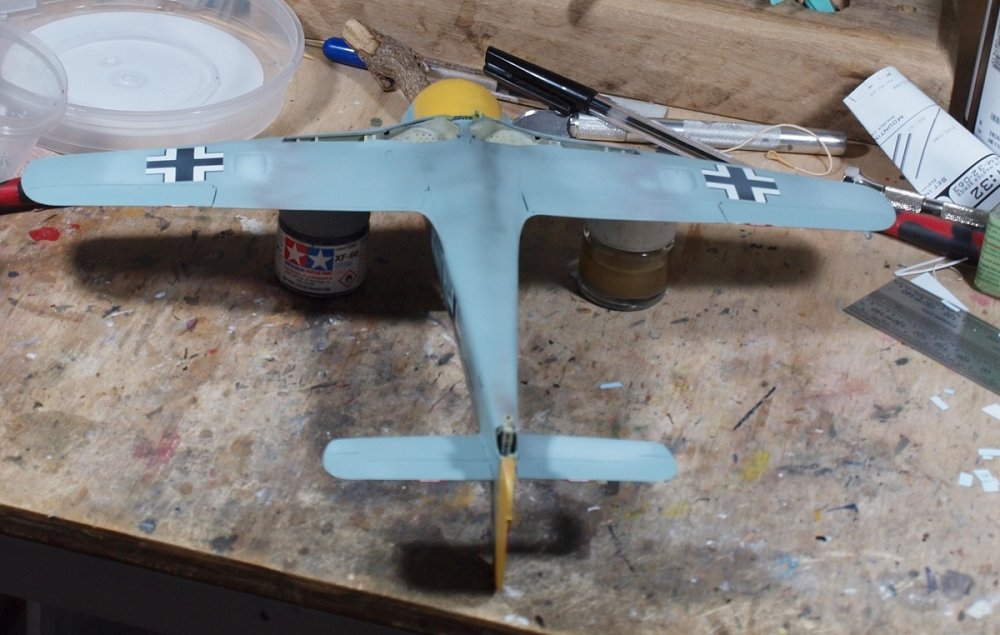
Thank you everyone for the great comments. Today was time for some airbrush effects. First was a grey misting of the entire upper surfaces to blend and and reduce the contrast of white and black decals. I also wanted to turn the greens a bit closer to grays. The exhaust streaking was added at the same time. And on the ventral side, I added some exhaust and minor dirt effects to the lower areas with the airbrush as well. This is all a a precursor to oils. Please tell me if if you think I've gone over the top with this step.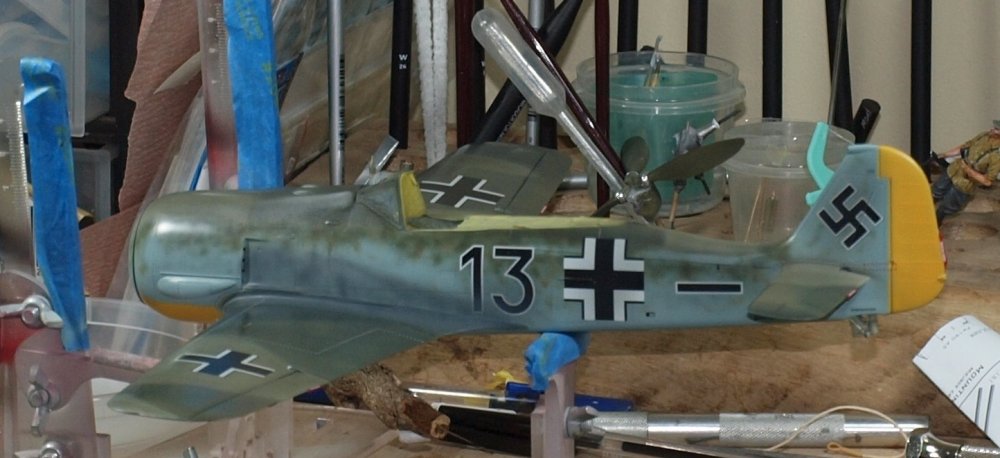

-
Daft project or is it? 1/32 Short Stirling III
GazzaS replied to Wingco57's topic in LSM 1/35 and Larger Work In Progress
Following along with interest. Huge parts!