GazzaS
-
Posts
6,396 -
Joined
-
Last visited
Content Type
Profiles
Forums
Events
Gallery
Everything posted by GazzaS
-
 Cool stuff, Rob! I'm looking forward to how your exterior work goes.
- 100 replies
-
- 6
-

-
- hasegawa
- ammoknight
- (and 1 more)
-
Daft project or is it? 1/32 Short Stirling III
GazzaS replied to Wingco57's topic in LSM 1/35 and Larger Work In Progress
Excellent work! -
I feel the need... for Shake and Bake... Tamiya StuG
GazzaS replied to GazzaS's topic in LSM 1/35 and Larger Work In Progress
Thank you for that info! I will give that a go! -
I feel the need... for Shake and Bake... Tamiya StuG
GazzaS replied to GazzaS's topic in LSM 1/35 and Larger Work In Progress
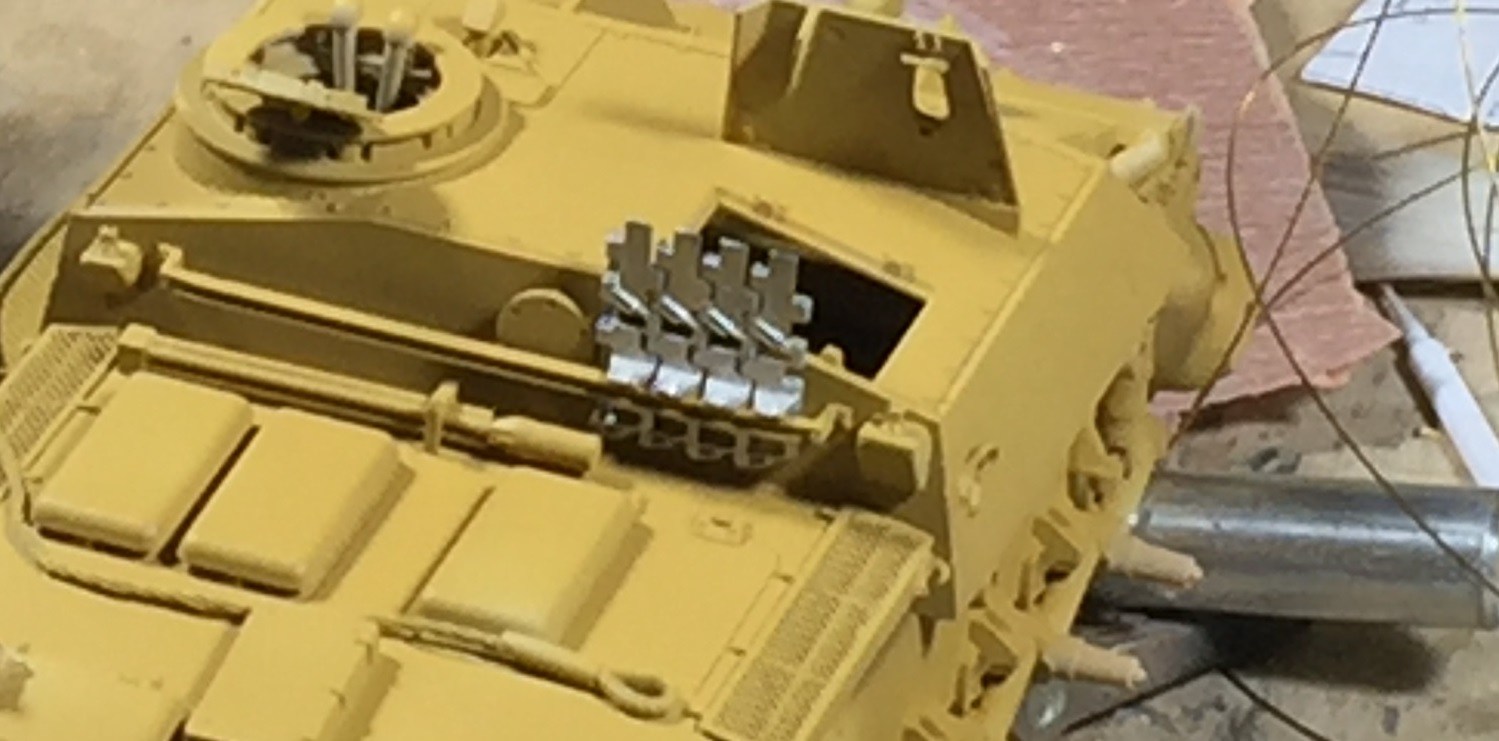
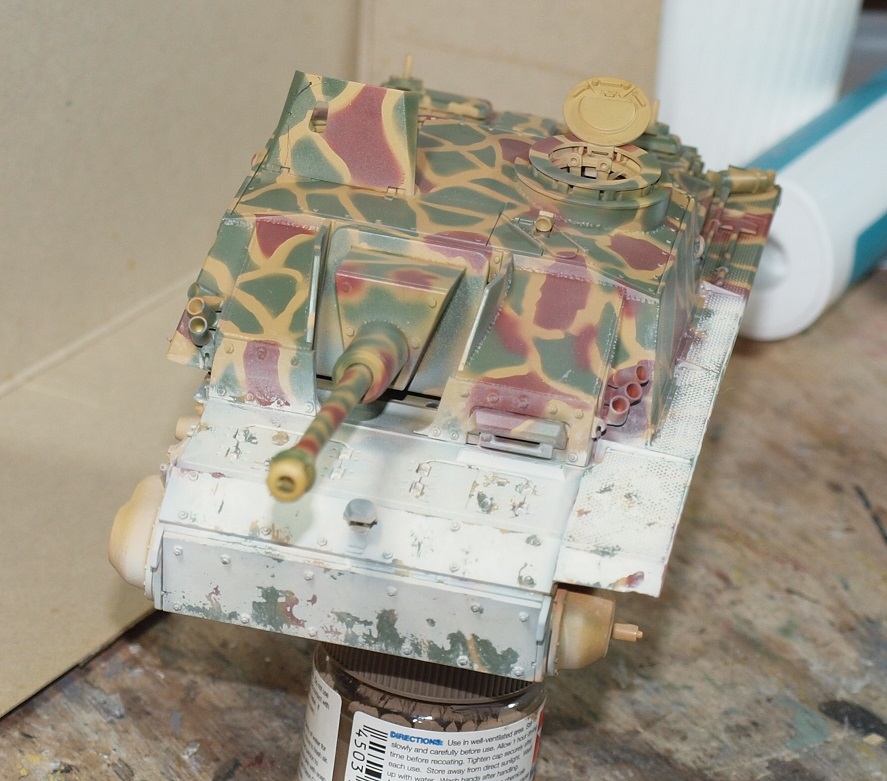
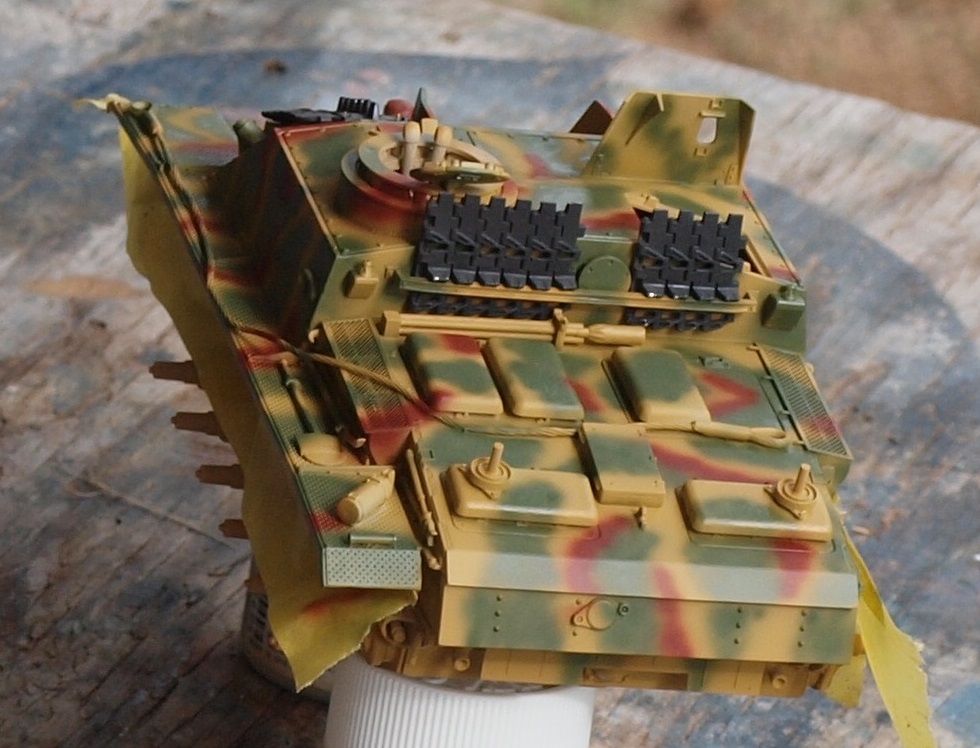
After further waffling, I decided I wanted some airbrush practice. The reason for further waffling was discovering that they were Ostketten and not winterketten. This opens up the deployment months to include all of the wet months.t My original display concerned a winter vehicle in a situation where there was some mud as well as snow. But... now I can dispense with the winter colors if I desire. Which helps because I don't have to try to find winter figures. Also... I didn't like the original scheme. It look unnatural. So, I painted this freehand last night. Again, I wanted the green to dominate. Again, SMS lacquers . And I added the Ostketten which are dry fitted. I had to put pins over the drivers compartment to hold the heavy tracks in place. Anyway... more kits to do and never enough time.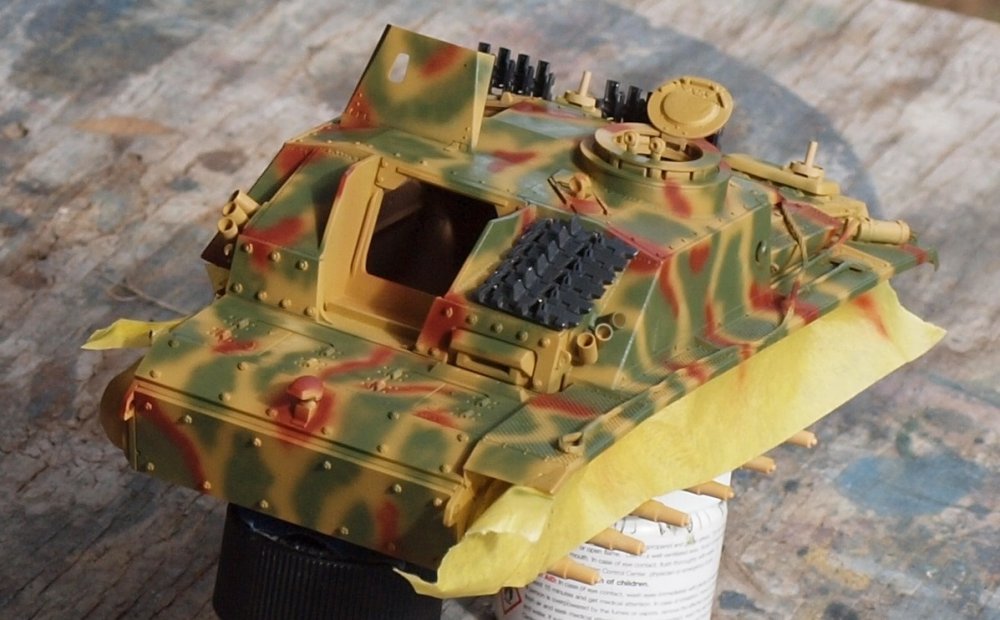
-
That cab looks amazing... though I know nothing about the real thing.
-
I feel the need... for Shake and Bake... Tamiya StuG
GazzaS replied to GazzaS's topic in LSM 1/35 and Larger Work In Progress
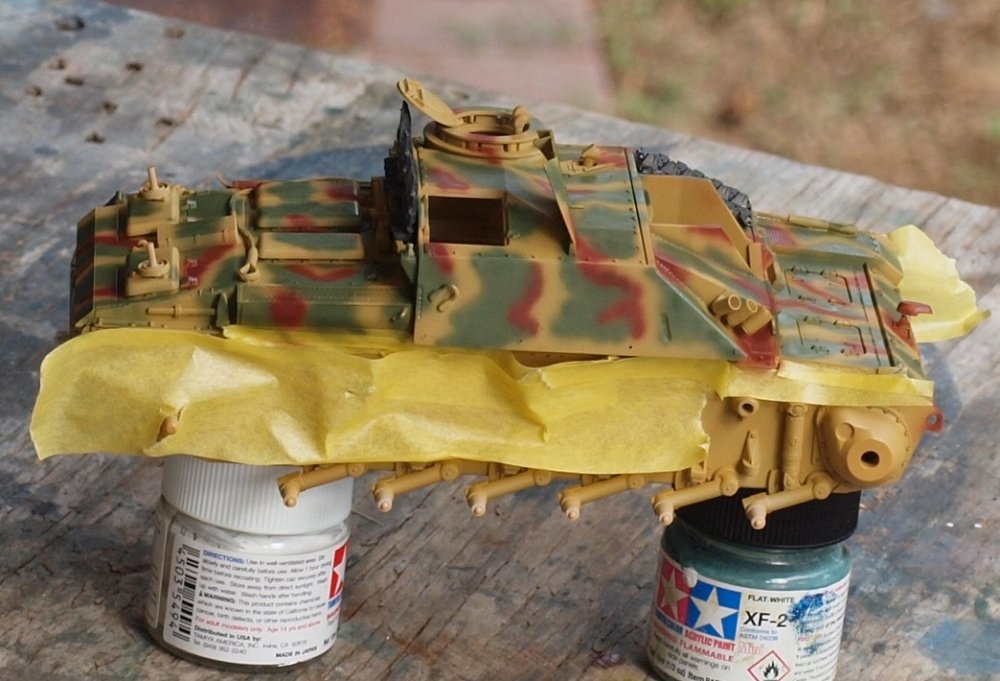
The StuG is repainted. I Think I'll pass on the camo scheme and just got the white over the yellow... We'll see. Meanwhile... a new discovery. What I thought were Winterketten are actually Ostketten. So, now I need ten spares to put in the rack behind the crew compartment. What color would you paint brand spanking new German tracks? Gaz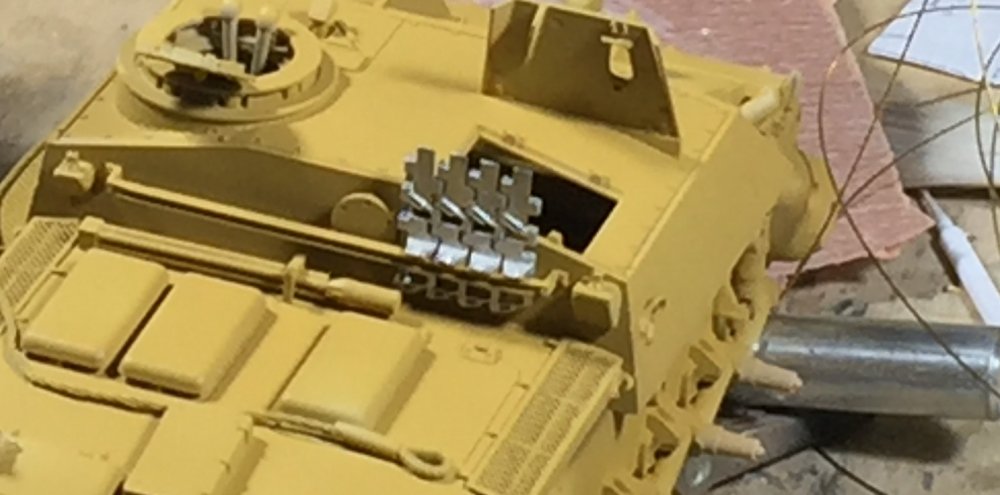
-
Airfix 1/24 Typhoon
GazzaS replied to GusMac's topic in LSM 1/32 and Larger Aircraft Ready for Inspection
Excellent job! -
Israeli Mirage III C with Atar9C
GazzaS replied to Kaireckstadt's topic in LSM 1/35 and Larger Work In Progress
Thank you, Kai! I'll never 'paint' an NMF model again. Unfortunately the only NMF models I have left in the stash are in 1/48. -
Very nice job! These things were in their final years with the USMC while I spent some time at MCAS El Toro. I remember watching them banking around the airfield with their flaps fully deployed. It was very cool!
-
Israeli Mirage III C with Atar9C
GazzaS replied to Kaireckstadt's topic in LSM 1/35 and Larger Work In Progress
Kai, She's been moved around a lot, and over time the ventral fin and pitot tube have become detached. I'm not really sure where the pitot tube ended up. Hope you like them, still. -
Israeli Mirage III C with Atar9C
GazzaS replied to Kaireckstadt's topic in LSM 1/35 and Larger Work In Progress
The skin on your model looks great Kai. For a long time I abstained from Italeri models. But when they released the Starfighter in 1/32, I had to check the reviews and decided to buy one. I'm glad I did, because I got a great result despite the kit's only noteworthy flaw which is trench-like panel lines. But not all of the panel lines were bad. Mainly those along the dorsal area. I have seen some guys go al the way with it and detail it to the hilt. But I'm not that guy, and I was quite happy with my investment. If I was going to do another, I'd make a commitment to fill and re-scribe. Maybe someday. -
Israeli Mirage III C with Atar9C
GazzaS replied to Kaireckstadt's topic in LSM 1/35 and Larger Work In Progress
Kai, The pit looks stunning. I have heard stories about the Italeri Mirage kits. Unfortunately, none of them good. However, with enough patience anything can be made to shine. Looking forward to see what you make with this one. -
I feel the need... for Shake and Bake... Tamiya StuG
GazzaS replied to GazzaS's topic in LSM 1/35 and Larger Work In Progress
Thank you, Peter. -
I feel the need... for Shake and Bake... Tamiya StuG
GazzaS replied to GazzaS's topic in LSM 1/35 and Larger Work In Progress
HI guys, Thank you very much. We're at a bit of a standstill at the moment because I wasn't happy with the white. So, I decided to strip the white and redo it. But... as will happen, I lost a lot of the lacquer paint. too. But not enough. So, I am hitting the whole thing with another spray of oven cleaner, and it will soak until after work tomorrow. Or maybe later tonite as I have no patience whatsoever. Carl, I don't really know how the winter white was applied in every case. Whether it was paint, or lime. Brushed or sprayed. Either way, I try to avoid 1/1 scale over-spray. I'm still feeling my way with this chipping fluid/hairspray. -
PCM Focke Wulf FW 190 A-1/A-2/A-3
GazzaS replied to GazzaS's topic in LSM 1/35 and Larger Work In Progress
Thank you, Phil. -
PCM Focke Wulf FW 190 A-1/A-2/A-3
GazzaS replied to GazzaS's topic in LSM 1/35 and Larger Work In Progress
Thanks, mate! -
PCM Focke Wulf FW 190 A-1/A-2/A-3
GazzaS replied to GazzaS's topic in LSM 1/35 and Larger Work In Progress
Thank you! I like that! -
I've just been invited to join MeWe by one of my Luftwaffe groups. Hopefully it'll get big. Because I'd like to get away from farcebook someday.
-
PCM Focke Wulf FW 190 A-1/A-2/A-3
GazzaS replied to GazzaS's topic in LSM 1/35 and Larger Work In Progress
Thank you, Peter! I will give it a try! -
PCM Focke Wulf FW 190 A-1/A-2/A-3
GazzaS replied to GazzaS's topic in LSM 1/35 and Larger Work In Progress
Thank you, Rob! The truest advantage of the oils is that you can use them and leave very little texture behind. I've made the mistake of 'stacking' acrylics before when what I wanted to do was blend them. So I won't go that route again. As for pigments, I've just never really had any luck getting them to look the way I want. I've always had a small fascination with the maschinenkrieger thing. Not enough to actually get involved... but they do look interesting. Gaz -
PCM Focke Wulf FW 190 A-1/A-2/A-3
GazzaS replied to GazzaS's topic in LSM 1/35 and Larger Work In Progress
Thank you, Kai. -
I feel the need... for Shake and Bake... Tamiya StuG
GazzaS replied to GazzaS's topic in LSM 1/35 and Larger Work In Progress
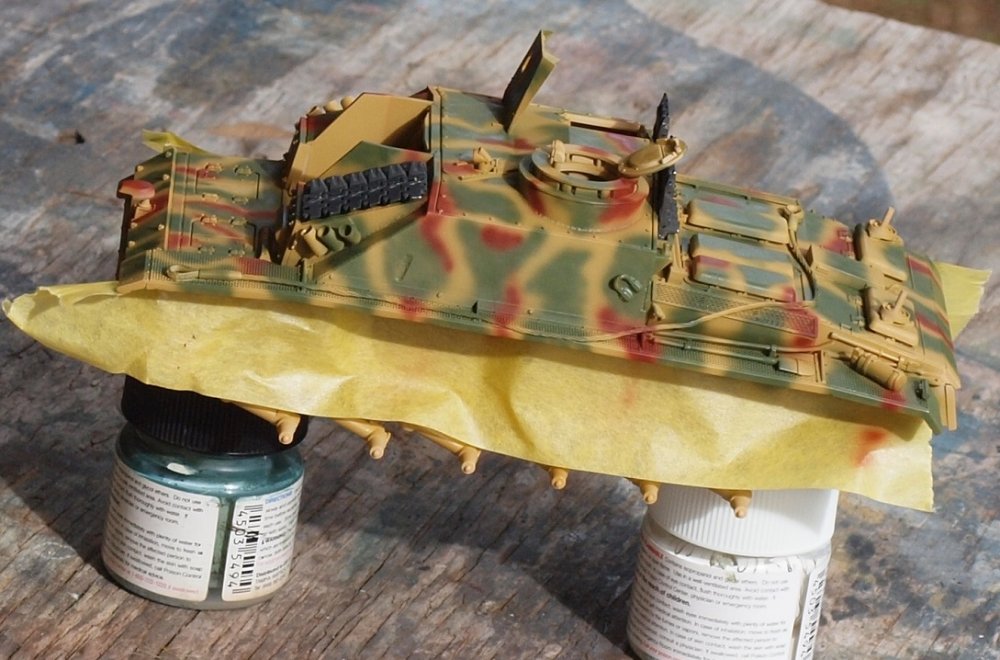
My first attempt at snow using the chipping method. I decanted some cheap hairspray into an old paint bottle and applied it with my airbrush. I'm not happy about the over-spray. They said to work in small areas. Anyway... once I get it all on, I'm hoping that regular weathering effects will make it look more realistic. Gaz

-
PCM Focke Wulf FW 190 A-1/A-2/A-3
GazzaS replied to GazzaS's topic in LSM 1/35 and Larger Work In Progress
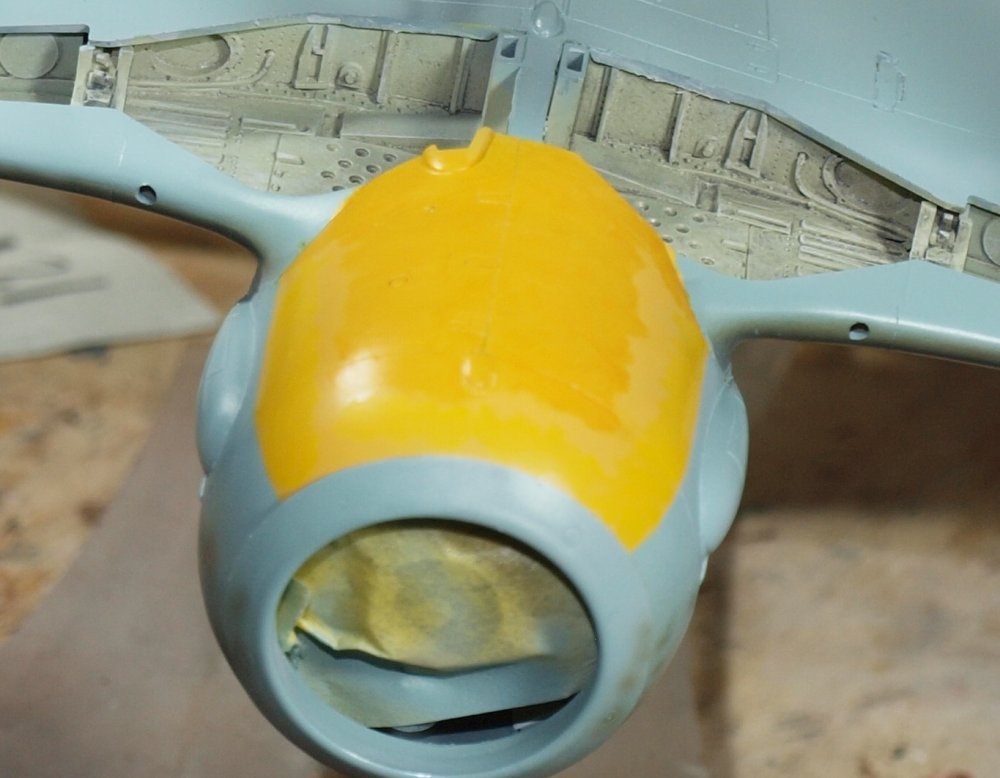
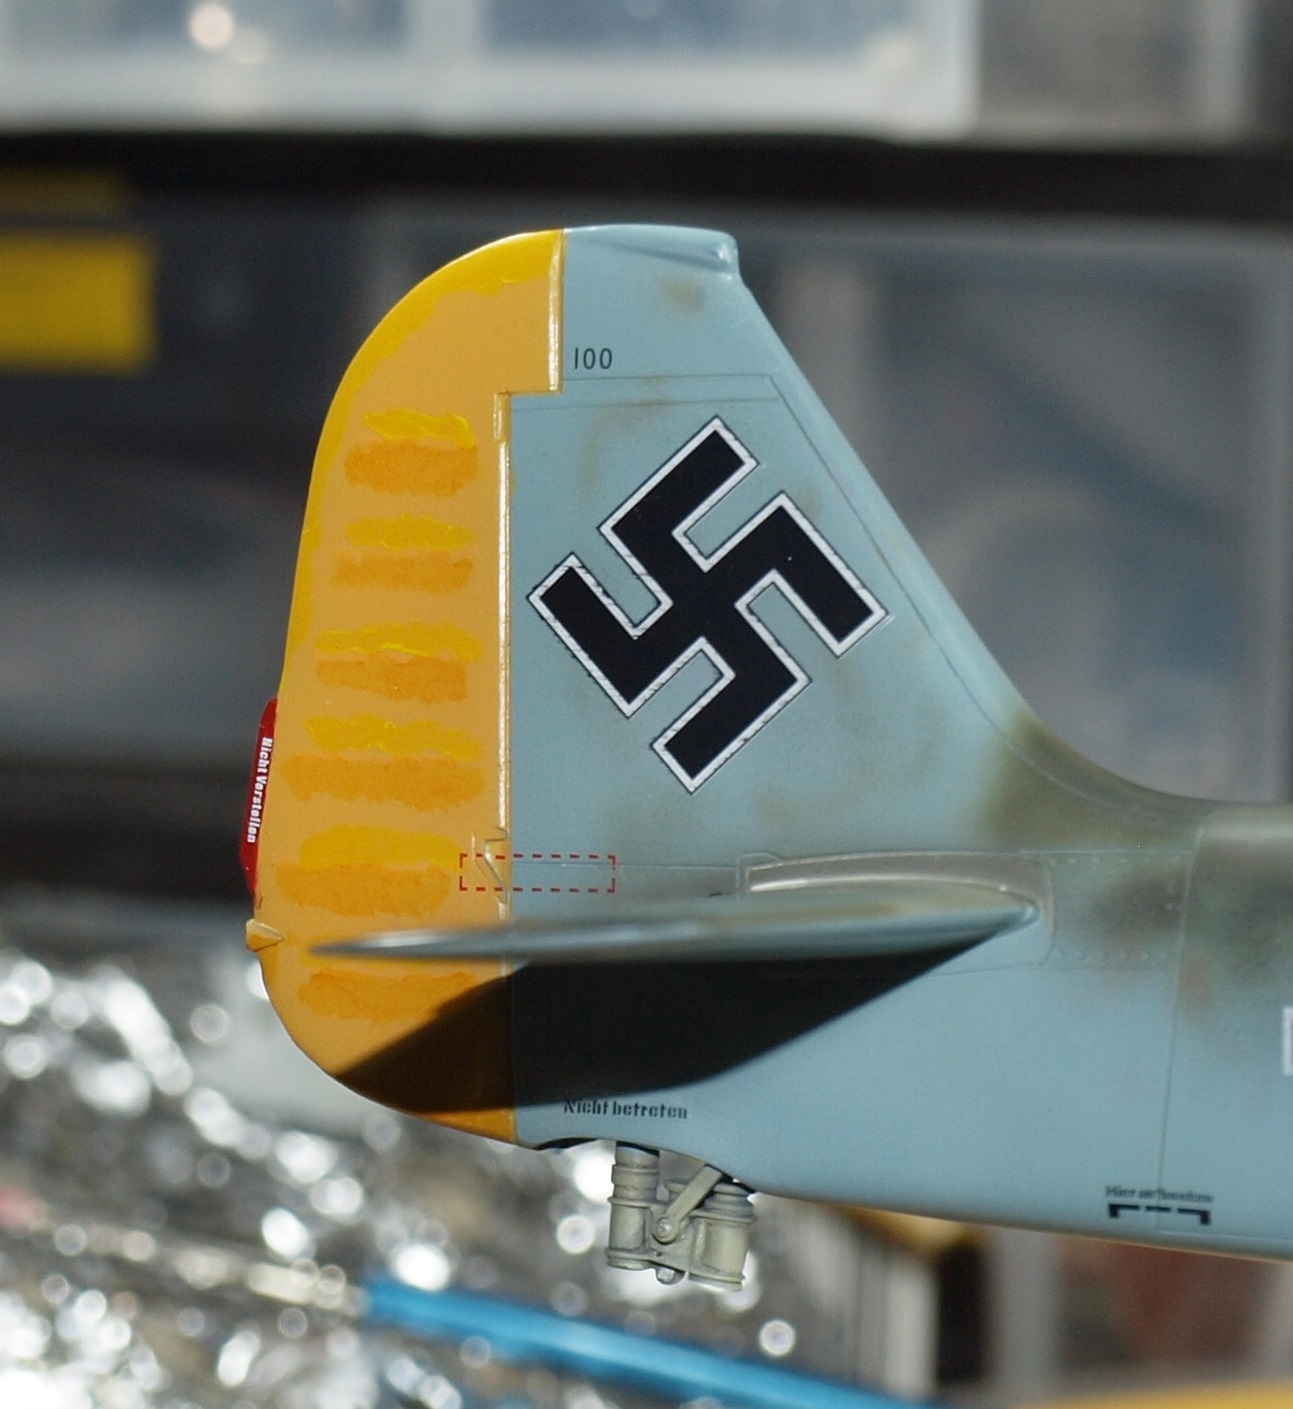
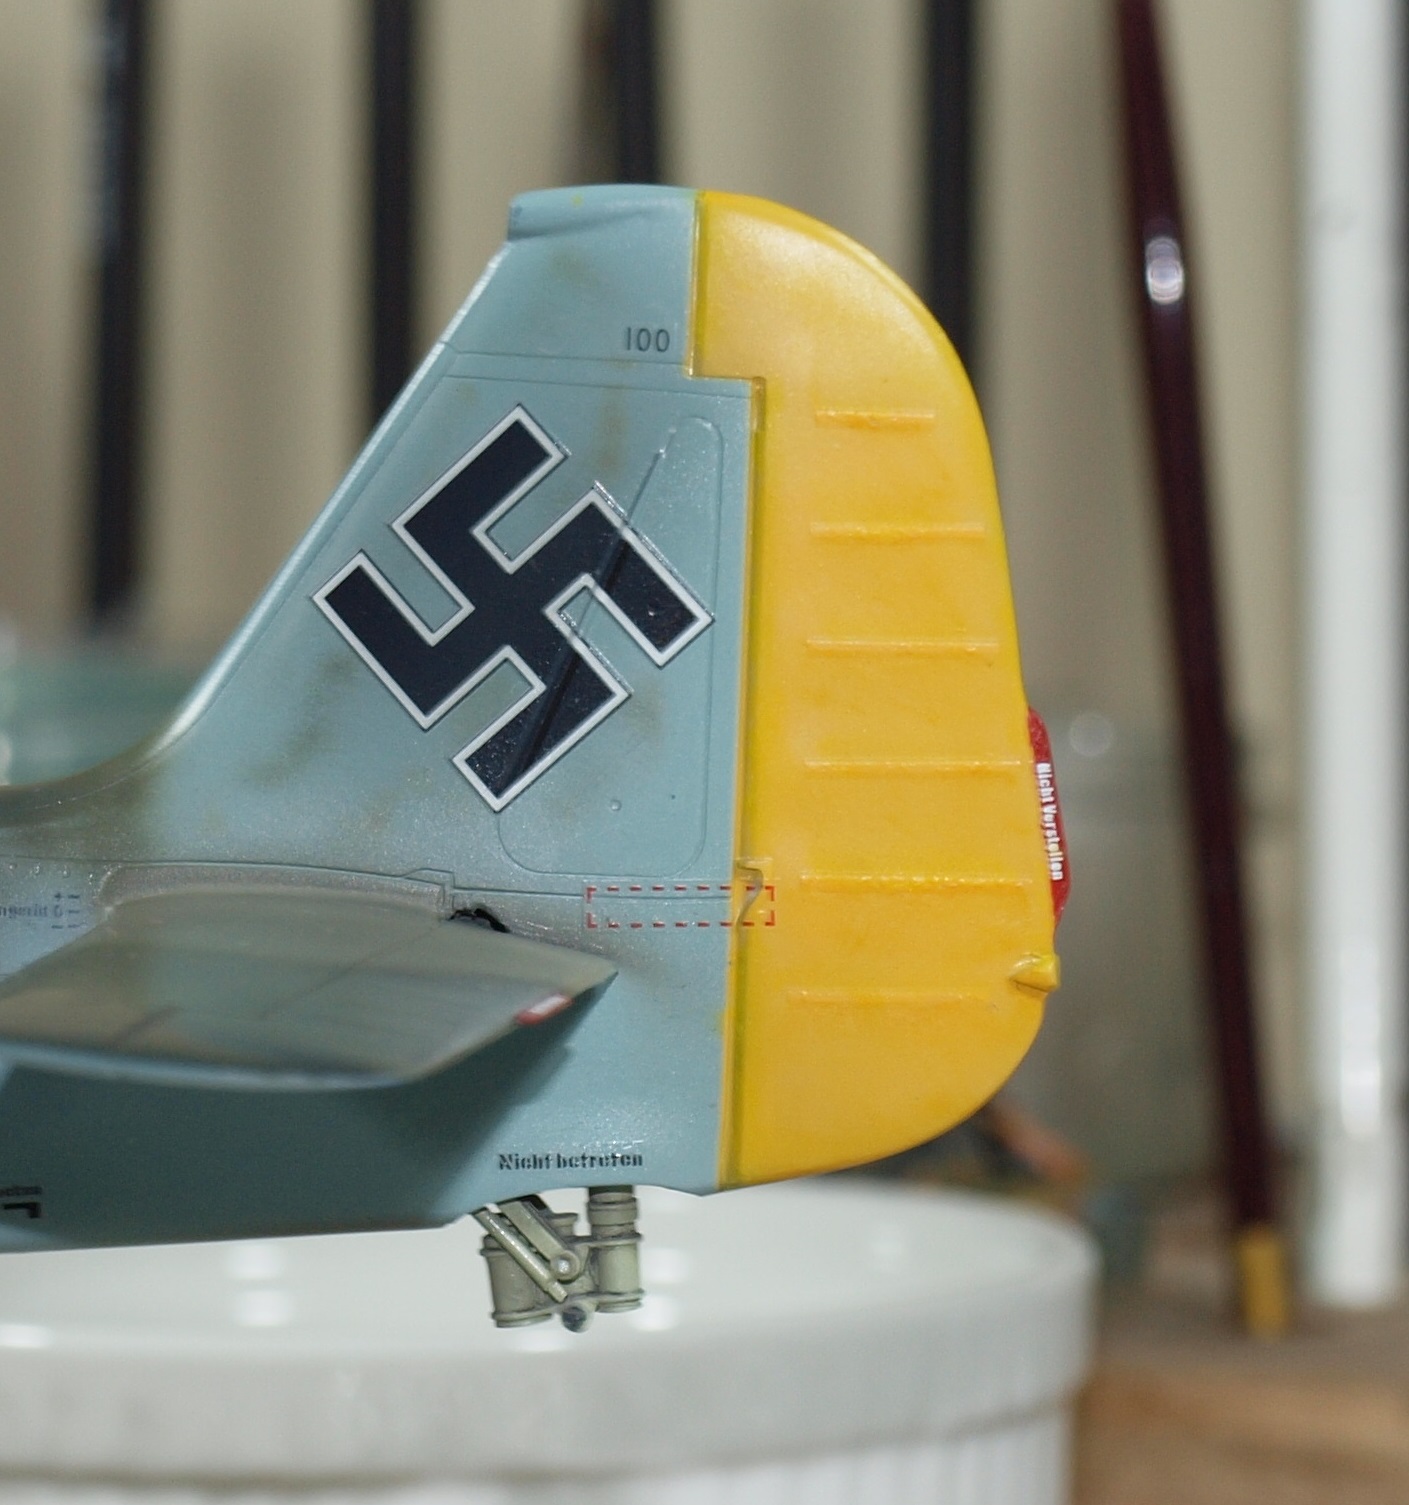
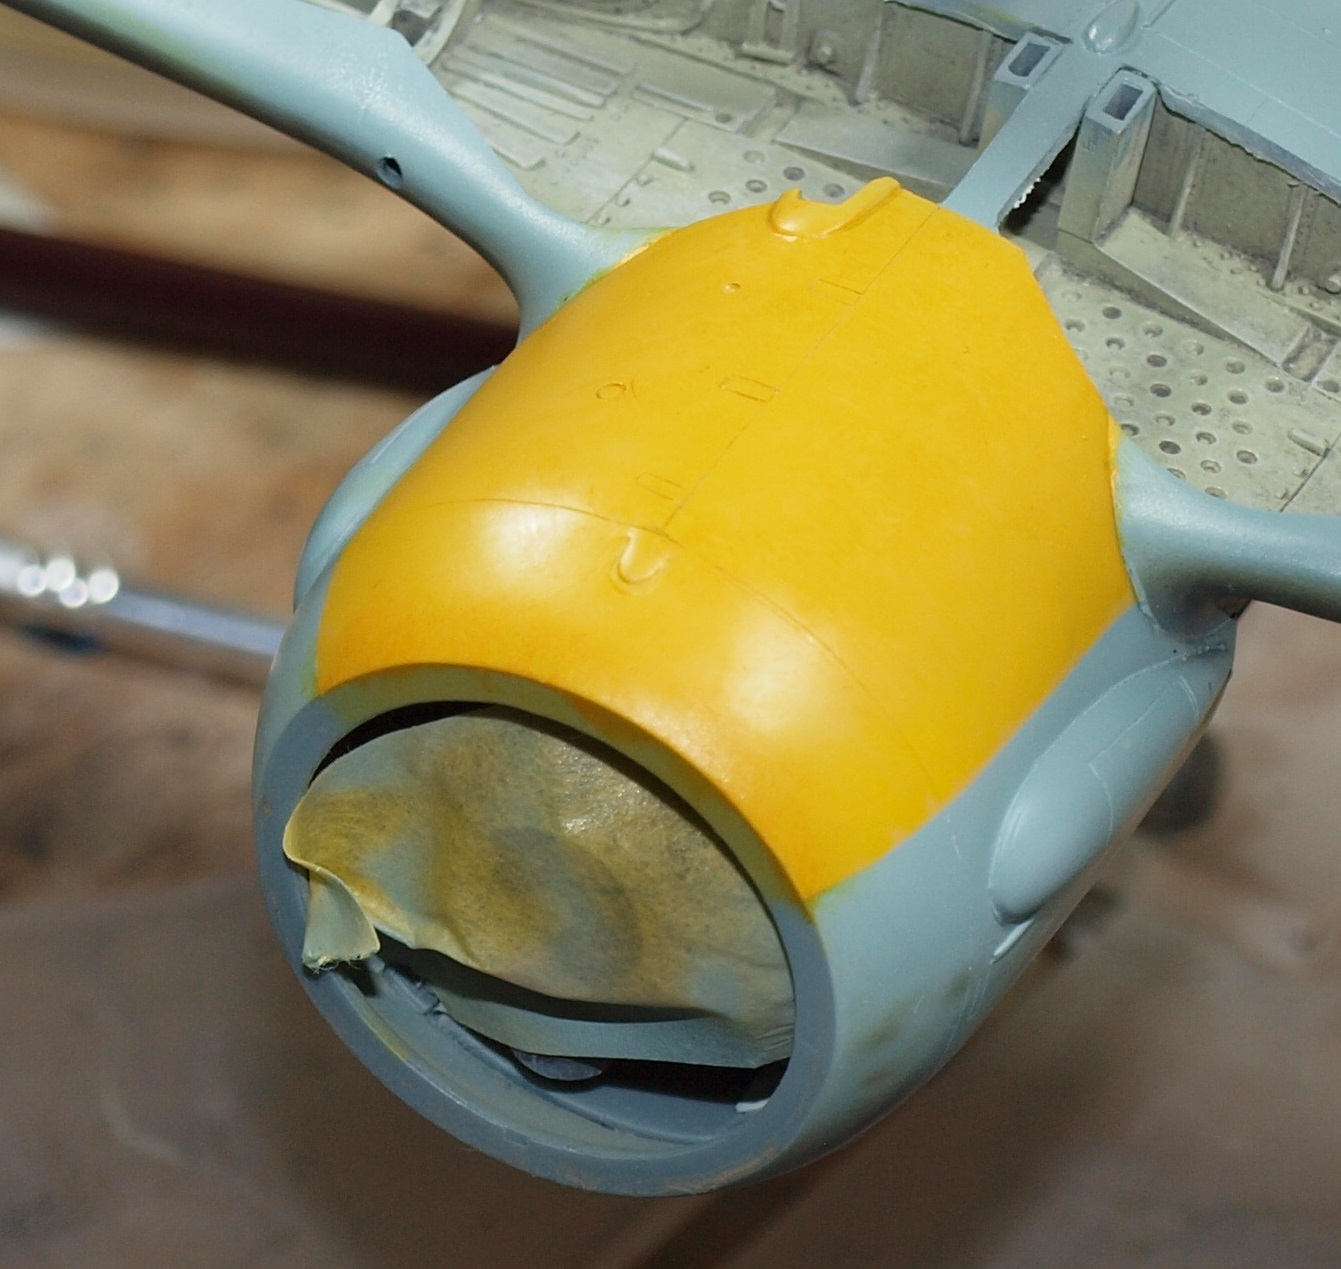
Hello friends, For a long time now I have been dreading, yet waiting with anticipation for this step of the weathering process. For a long time I have theorized on how one brings a three-dimensional object to life that is in one of the base colors. Because we deal so much with grays, greens and browns, I haven't given much consideration to yellow, red, and blue... though the WWI models have certainly been forcing this question to the forefront of my mind. Obviously, you cannot use black, or gray to make a shadow in yellow. So, your only real option is to use warm colors like yellow and orange. In the first photo you can see how I've added oils to the rudder to brighten higher spots and darken lower areas on the rudder. With the second photo, I've tried to apply those same rules to the yellow cowling beneath the engine. The next task was to blend the colors so that the transition from bright yellow to yellow-orange is subtle. The third photo will show the finished rudder. The fourth photo will show you the lower cowl after I realized that the armored oil-cooler ring would also cast a shadow. I believe this is only round 1 working with the yellow parts. I think that tomorrow or later I'll need to do it again, this time introducing a tiny bit of white to the brightest yellow. Your opinions will be greatly appreciated. Happy modelling!