GazzaS
-
Posts
6,396 -
Joined
-
Last visited
Content Type
Profiles
Forums
Events
Gallery
Everything posted by GazzaS
-

Special Hobby Whirlwind
GazzaS replied to Peterpools's topic in LSM 1/35 and Larger Work In Progress
Watch a war movie, Peter. Always helps. -
Nice... yours is taller... but the other guy has the bullet hole.
-
Some Russki was stealing it so he could improve the decor in his izba.
-
PCM-1/32 Reggaine Re.2005-Finished
GazzaS replied to KevinM's topic in LSM 1/35 and Larger Work In Progress
You can't really compare a PCM kit to to a mass-produced kit by a well-known manufacturer. You buy it accepting that extra work "may be required". Although the large part detail is pretty nice, when you look at the sprues, you'll be thinking "garage made". Parts count is small and often I have found that landing gear and wheels require extensive prettying up. -
Love that one!
-
Holy smokes, Martin! Great job!
-
Halloween is coming...

-
Wait... you bought an aftermarket shitter?
-
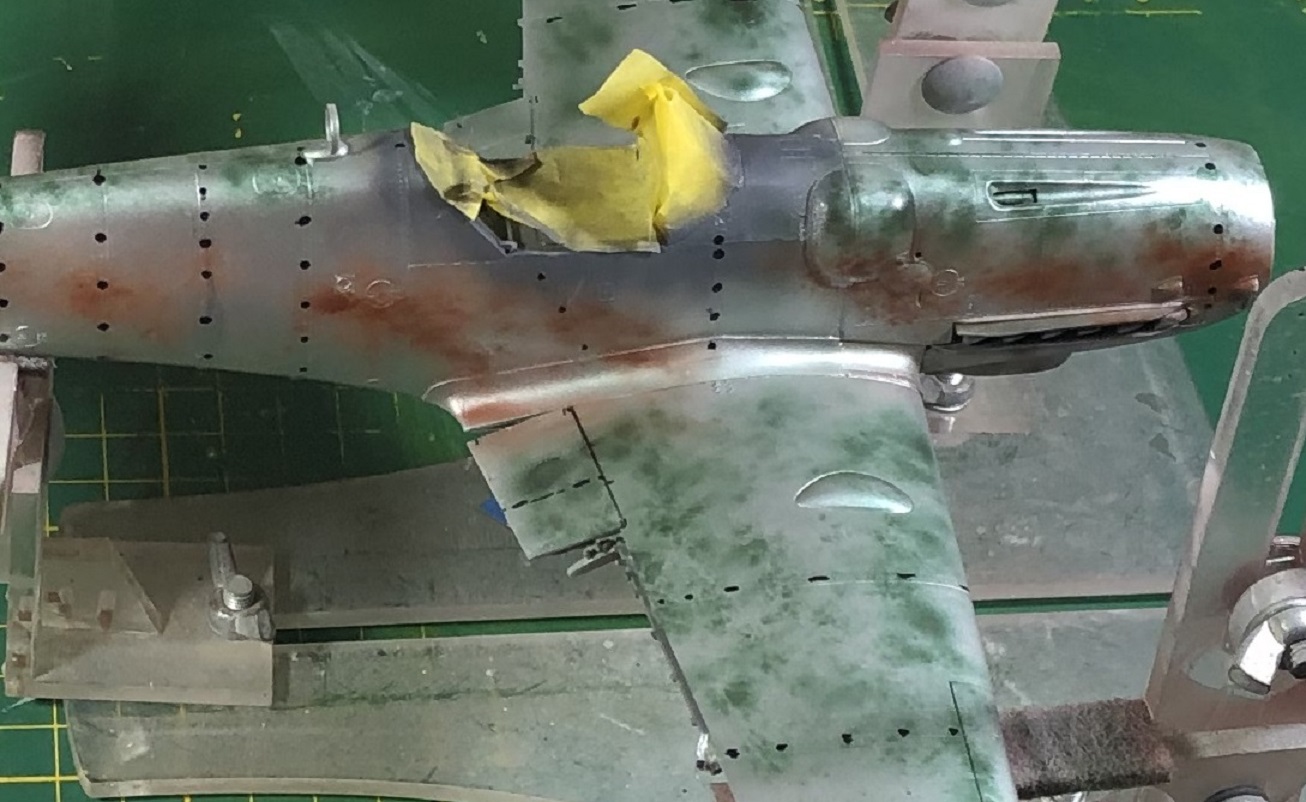
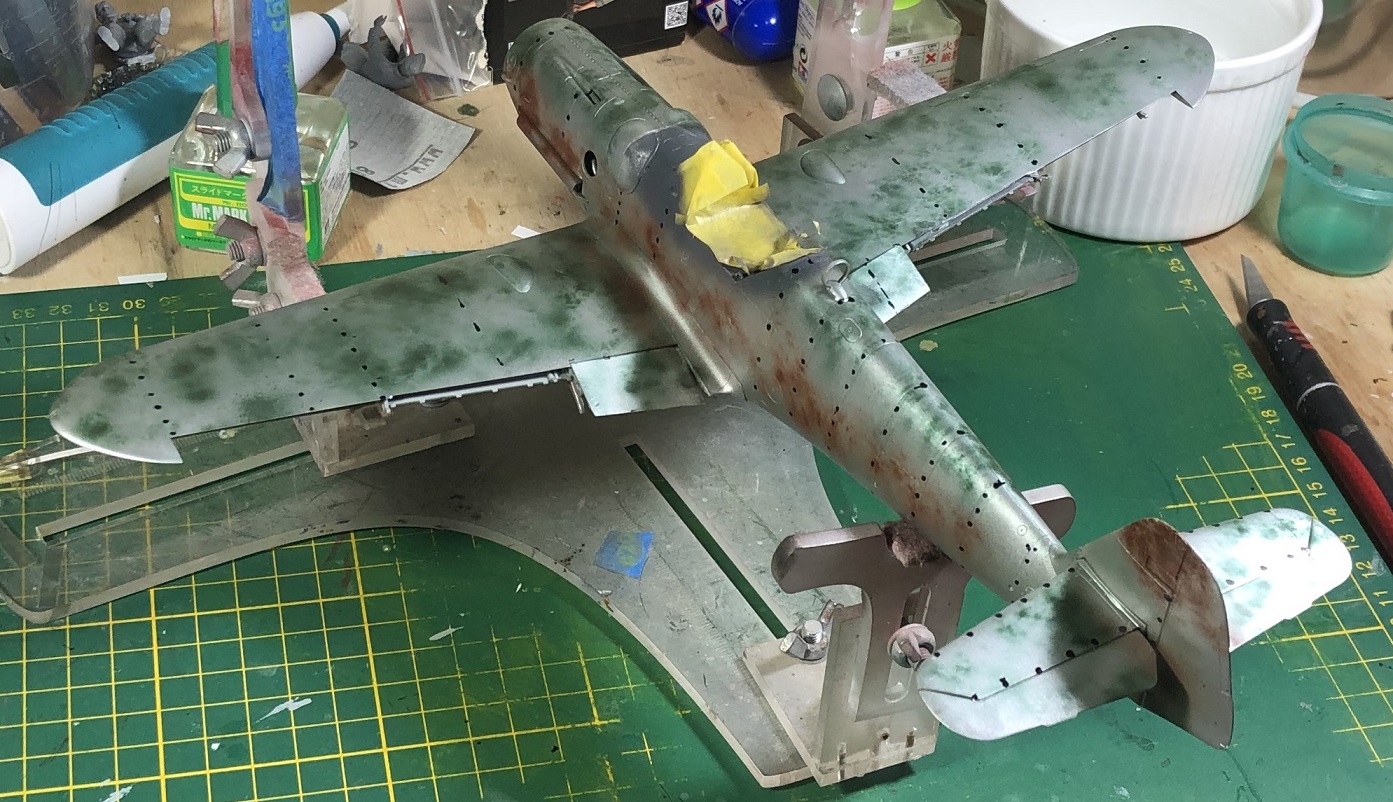
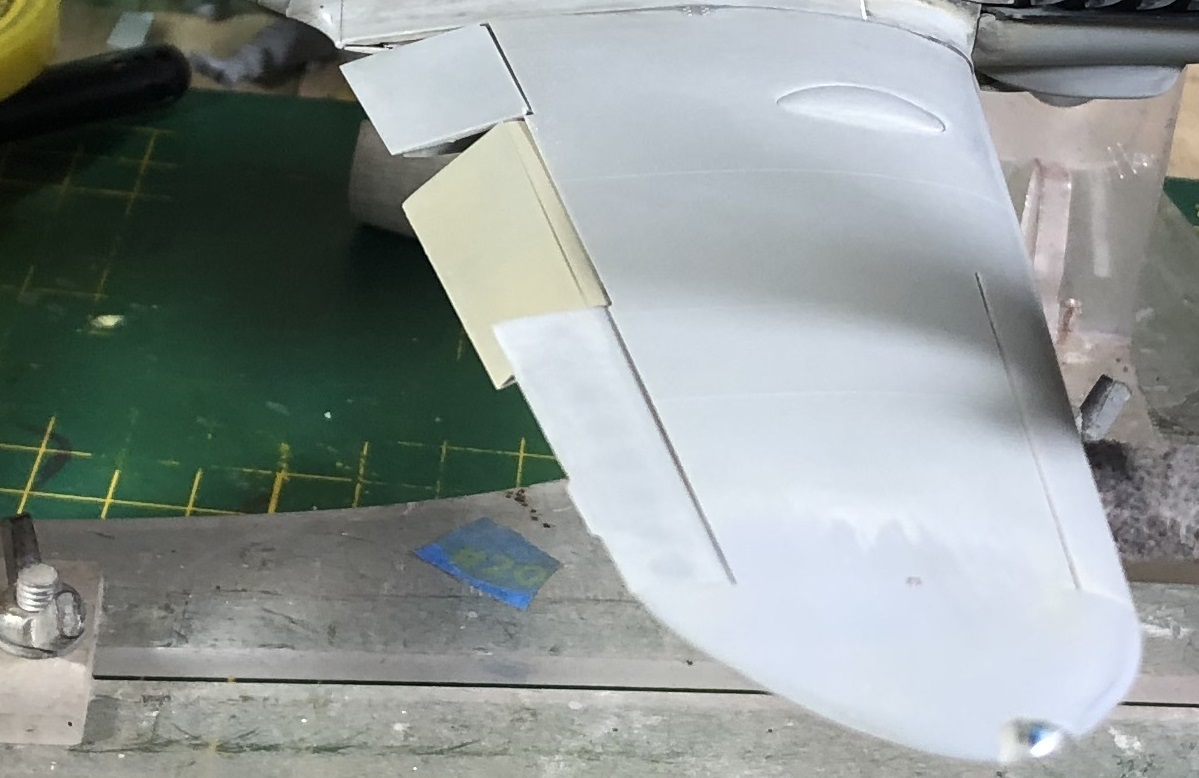
Hello boys and girls, Meet Dotty. I made a big mistake painting this bird silver. Cuz the HGW rivets are silver, too. If I had been able to use the rivet set, it might not have been so critical. But, since I am using straight lines, alignment and spacing is difficult. I made a mask out of a scotch brite pad. I hoped that by making some dark spots, that the problem would be fixed. But instead I'm finding that marking each line of rivets with a Sharpie gives me a decent center line to work with. Tomorrow after work, I will peel off all of the carrier film... and hopefully lay more lines. There is a lot more to do. Happy Modelling!

- 436 replies
-
- 11
-

-

-
P-51 Bardahl Special 2022 version next up
GazzaS replied to JohnB's topic in LSM 1/35 and Larger Work In Progress
Is it done yet? No? OK. Nice white paint, John. The screw heads came out well. -
I use Frog Tape brand from the local hardware. A lot cheaper than Tamiya (or other hobby centric) and is slightly less adherent. To get thinner strips I use a tape cutting template. They have different colors... if you can find it, you want the yellow.
- 5 replies
-
- 3
-
-
- tamiya
- zoukei-mura
- (and 1 more)
-
Special Hobby Whirlwind
GazzaS replied to Peterpools's topic in LSM 1/35 and Larger Work In Progress
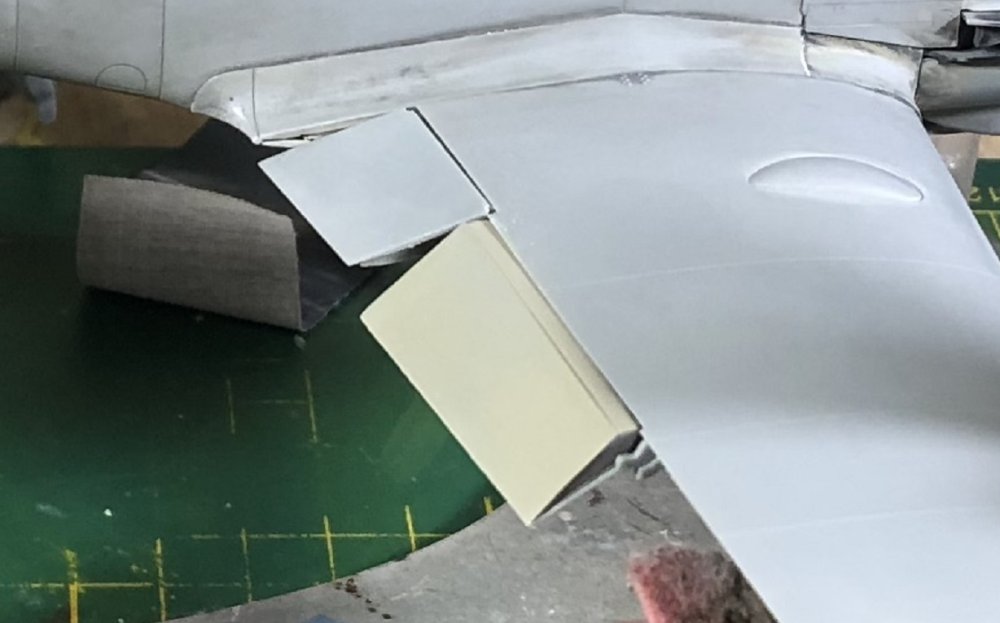
Peter, I have a newish philosophy/plan when it comes to tin engined or new-to-me birds: Before I get too deep, I tape together those nacelles, snip the lg covers from the sprue (taping on the part number on each, just in case) and seeing how they will fit and if they might have troubles competing for space with the lg legs later. Newer kits usually have a lot of tab to fit into a notch... But you cant trust anyone. -
Special Hobby Whirlwind
GazzaS replied to Peterpools's topic in LSM 1/35 and Larger Work In Progress
Peter, I'm sorry to hear that the kit pushed you over the edge. I know that what hurts the most is the effort invested. Take a break and have a rest. It's not your fault that the kit was bad. -
Well... I'm at a cross roads. The HGW Rivets are for the Hasegawa kit and don't fit very well. I have a Hasegawa kit, so they won't go to waste. So... What to do. .. I bought a whole bunch of generic rivets. The only bummer is that I will have to lay them one strip, or string at a time and then move on to a non-adjacent area. Then I can keep repeating until I decide that I can't do any more without risking touching the ones freshly laid. Then everything has to sit for 8 hours to fully dry. Then I get to repeat it all again until I think enough are laid. My alternatives are: 1. Foregoing rivets altogether. 2. Stabbing it full of holes with a rivet tool 3. Using a beading tool to make my own rivets. Obviously number 1. is the easiest. Number 2... I really hate the look of rivet holes. And I am notorious to myself for being unable to maintain a straight line, even using a straight edge. I have used a beading tool for small things... but never an entire model. And then I have to worry about spacing as well as maintaining a straight line. Any thoughts you could add?
-
Patience, my friend. I have to finish this 109 and you have to finish the one you have going now and the P-40.
-
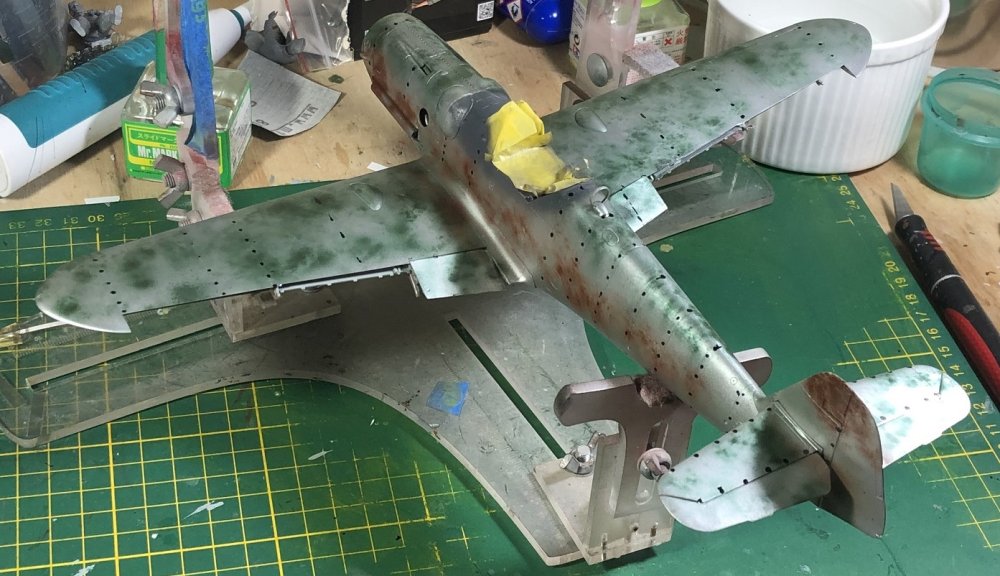
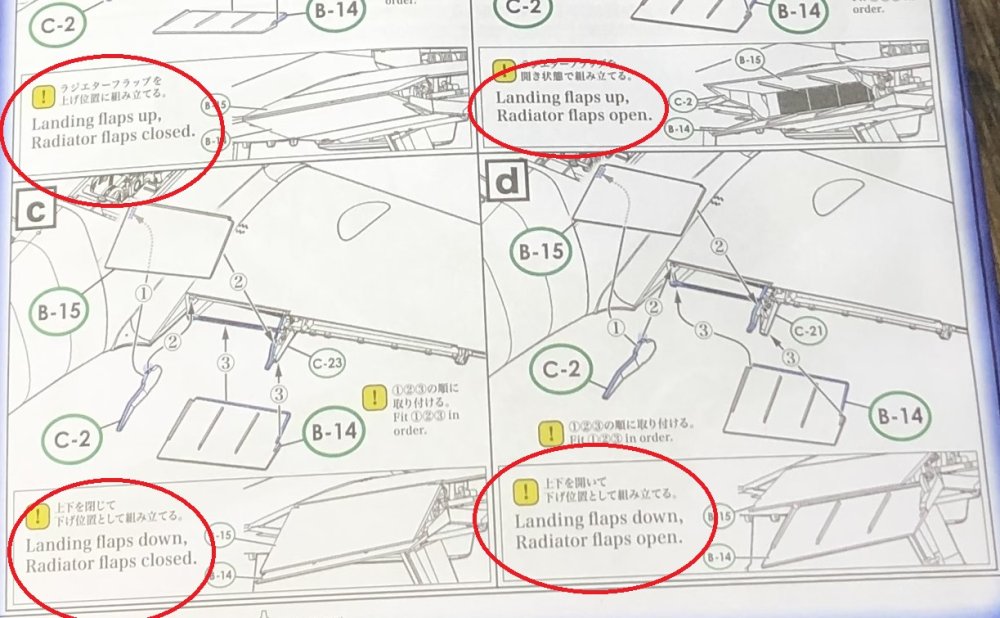
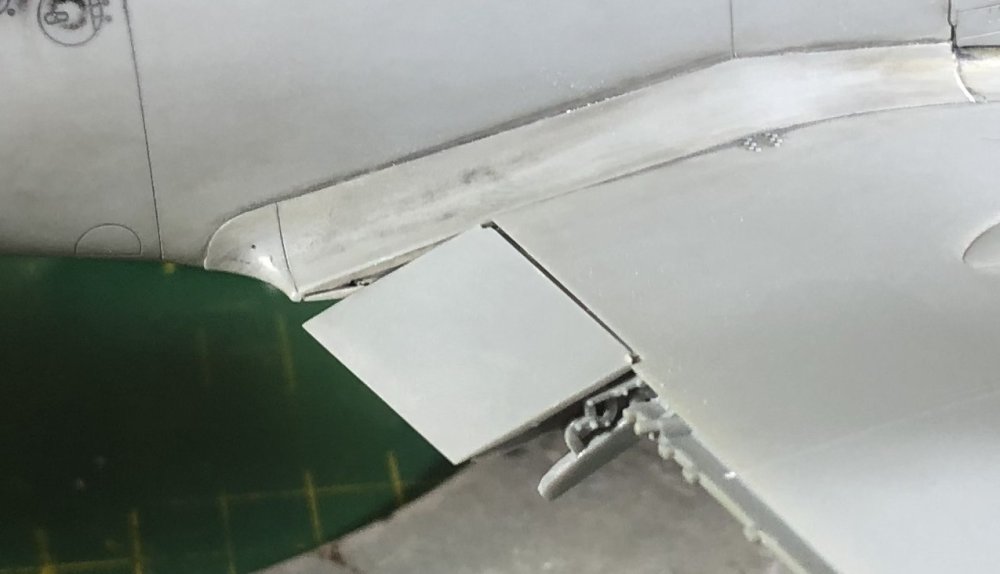
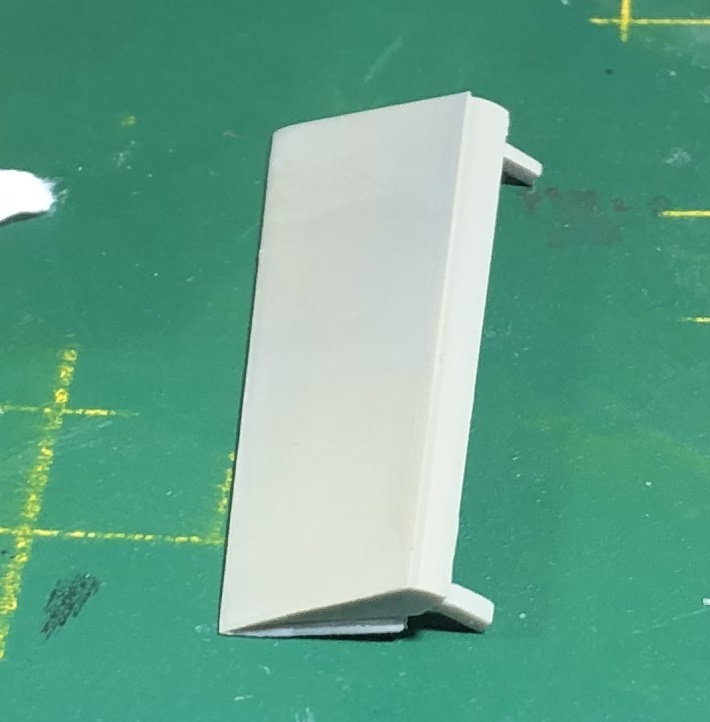
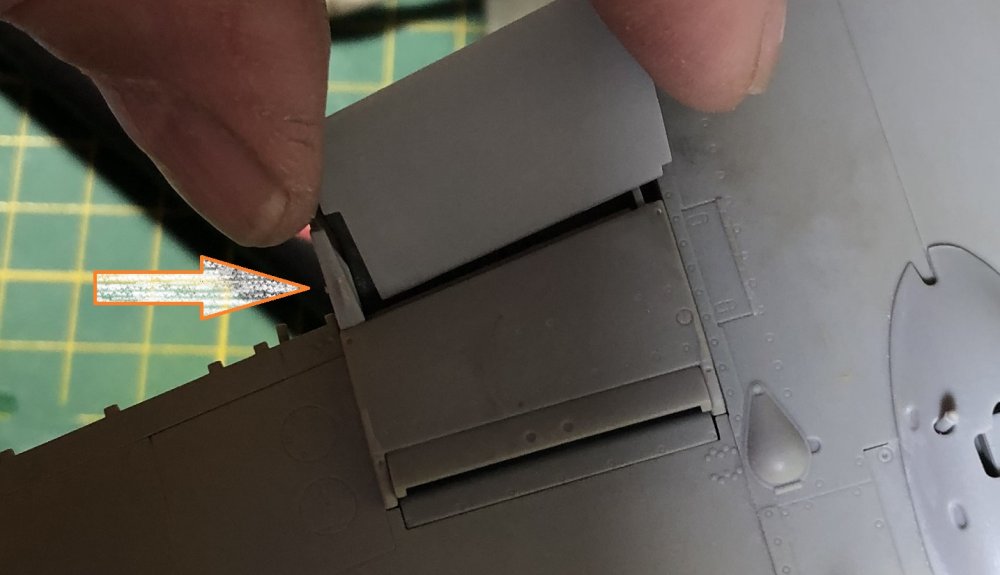
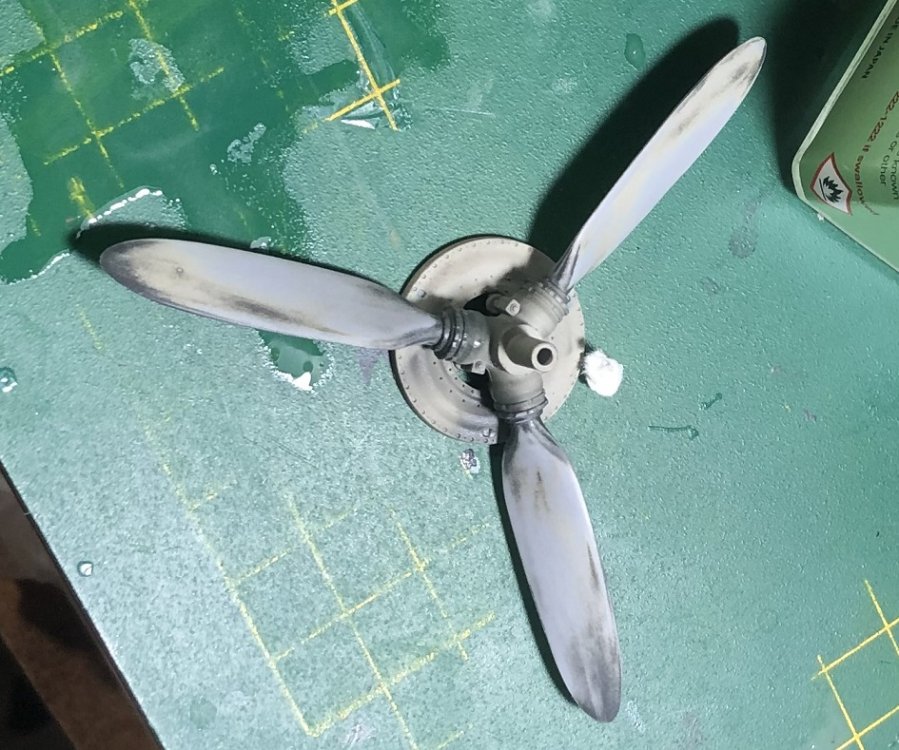
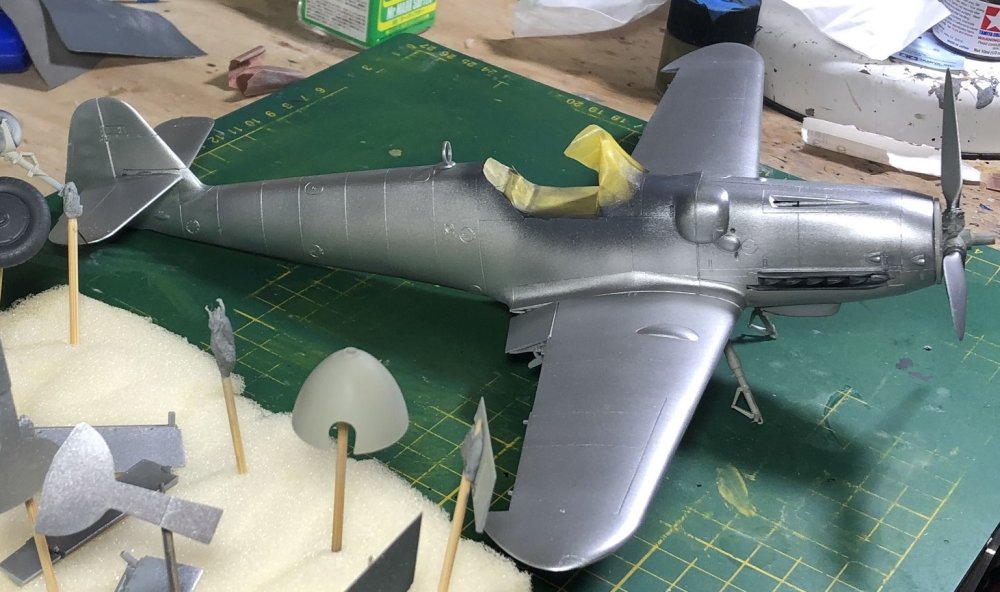
Hey everyone... more progress... One of the novel features of this kit is that it takes care of most of the angles for you. On how many 109 builds have you had to hold radiators or flaps at a certain angle until the glue set. Simple answer... all of them, except perhaps the Tamiya 1/48 G6. There are four ways you can arrange the radiators and flaps... With ZM giving you different parts to make it happen with no ambiguity. It's a little tricky at first until you realize that part C-2's angle of attack will be decided by the part on the outer edge of the radiator flap. I went radiators open. The parts are quite impressive. Be careful..... some of that hanging down bit is surface detail. The reverse view: You'll never see those injector pin marks again.... Likewise, the angle of the flaps is determined by which locator lugs you remove. Next, you can see the progression without me having to guess an angle at all. And finally, the ailerons. If you wanna do one-up, one down... Good luck. So... the upper radiator flap is cemented into position while the flap and aileron are held there by friction... no blutack or tape required. The lower radiator flap is different from any previous as well. Remember that surface detail I mentioned earlier... ZM had a chance to save modellers around the world from one of the most annoying seam clean-ups known to 109 builders: Now... I blew this photo up top very large because I wanted to point out something. On this image you can see the surface texture on the supercharger intake and on the propeller hub. It covers most of the model, but not all. I sanded the propeller blades to get rid of it, then covered them with two airbrushed layers of paint. The top layer of paint was MRP RLM 70 or 71... can't remember which at this second. Anyway... the areas where I didn't sand enough showed the texture badly... so, I had to sand them again. So really... the choice you are left with is to either live with all of the texture. Get rid of all texture. Or use a lot of paint. I chose to sand everything. And then... I used my favorite primer: Tamiya Paint. The "primer" is Tamiya's Chrome silver and Titanium silver mixed 50/50 -ish. I kinda like it. Tomorrow I will wet sand it with fine grits (3K to 8K) before I can start laying the HGW rivets. Finally... The aircraft I'm modelling has it's DF loop. You Hartmann builders will have to snip it off your DF loops but leave the blister on. Happy Modelling!


- 436 replies
-
- 10
-
-
-
I had to go to the LHS for some supplies today. While there I picked out a guy for the Kotare Spitfire.

-
Trumpeter F4F-3 Late - 1/32nd
GazzaS replied to Bomber_County's topic in LSM 1/35 and Larger Work In Progress
Honestly... I hate Trumpeter. I can't even see a blemish on your last pic. -
Nice work on that IP Bill.
-
Have you seen my car?

- 2,035 replies
-
- 4
-

-
- car related stuff
- anything about cars
- (and 6 more)
-
It’s only a decal, my friend. Except that you wait for 8 hours and then peel off the carrier film. I haven’t attached the control surfaces so that I will have fewer areas affecting each other.
-
P-47D "RAID HOT MAMA"
GazzaS replied to k5ikl's topic in LSM 1/32 and Larger Aircraft Ready for Inspection
Ooh, Very nice! My favorite American bird. Well done! -
You know the old adage: "If it smell like fish, it's a tasty dish, if it smells like cologne, leave it alone."