BlrwestSiR
-
Posts
9,138 -
Joined
-
Last visited
Content Type
Profiles
Forums
Events
Gallery
Everything posted by BlrwestSiR
-
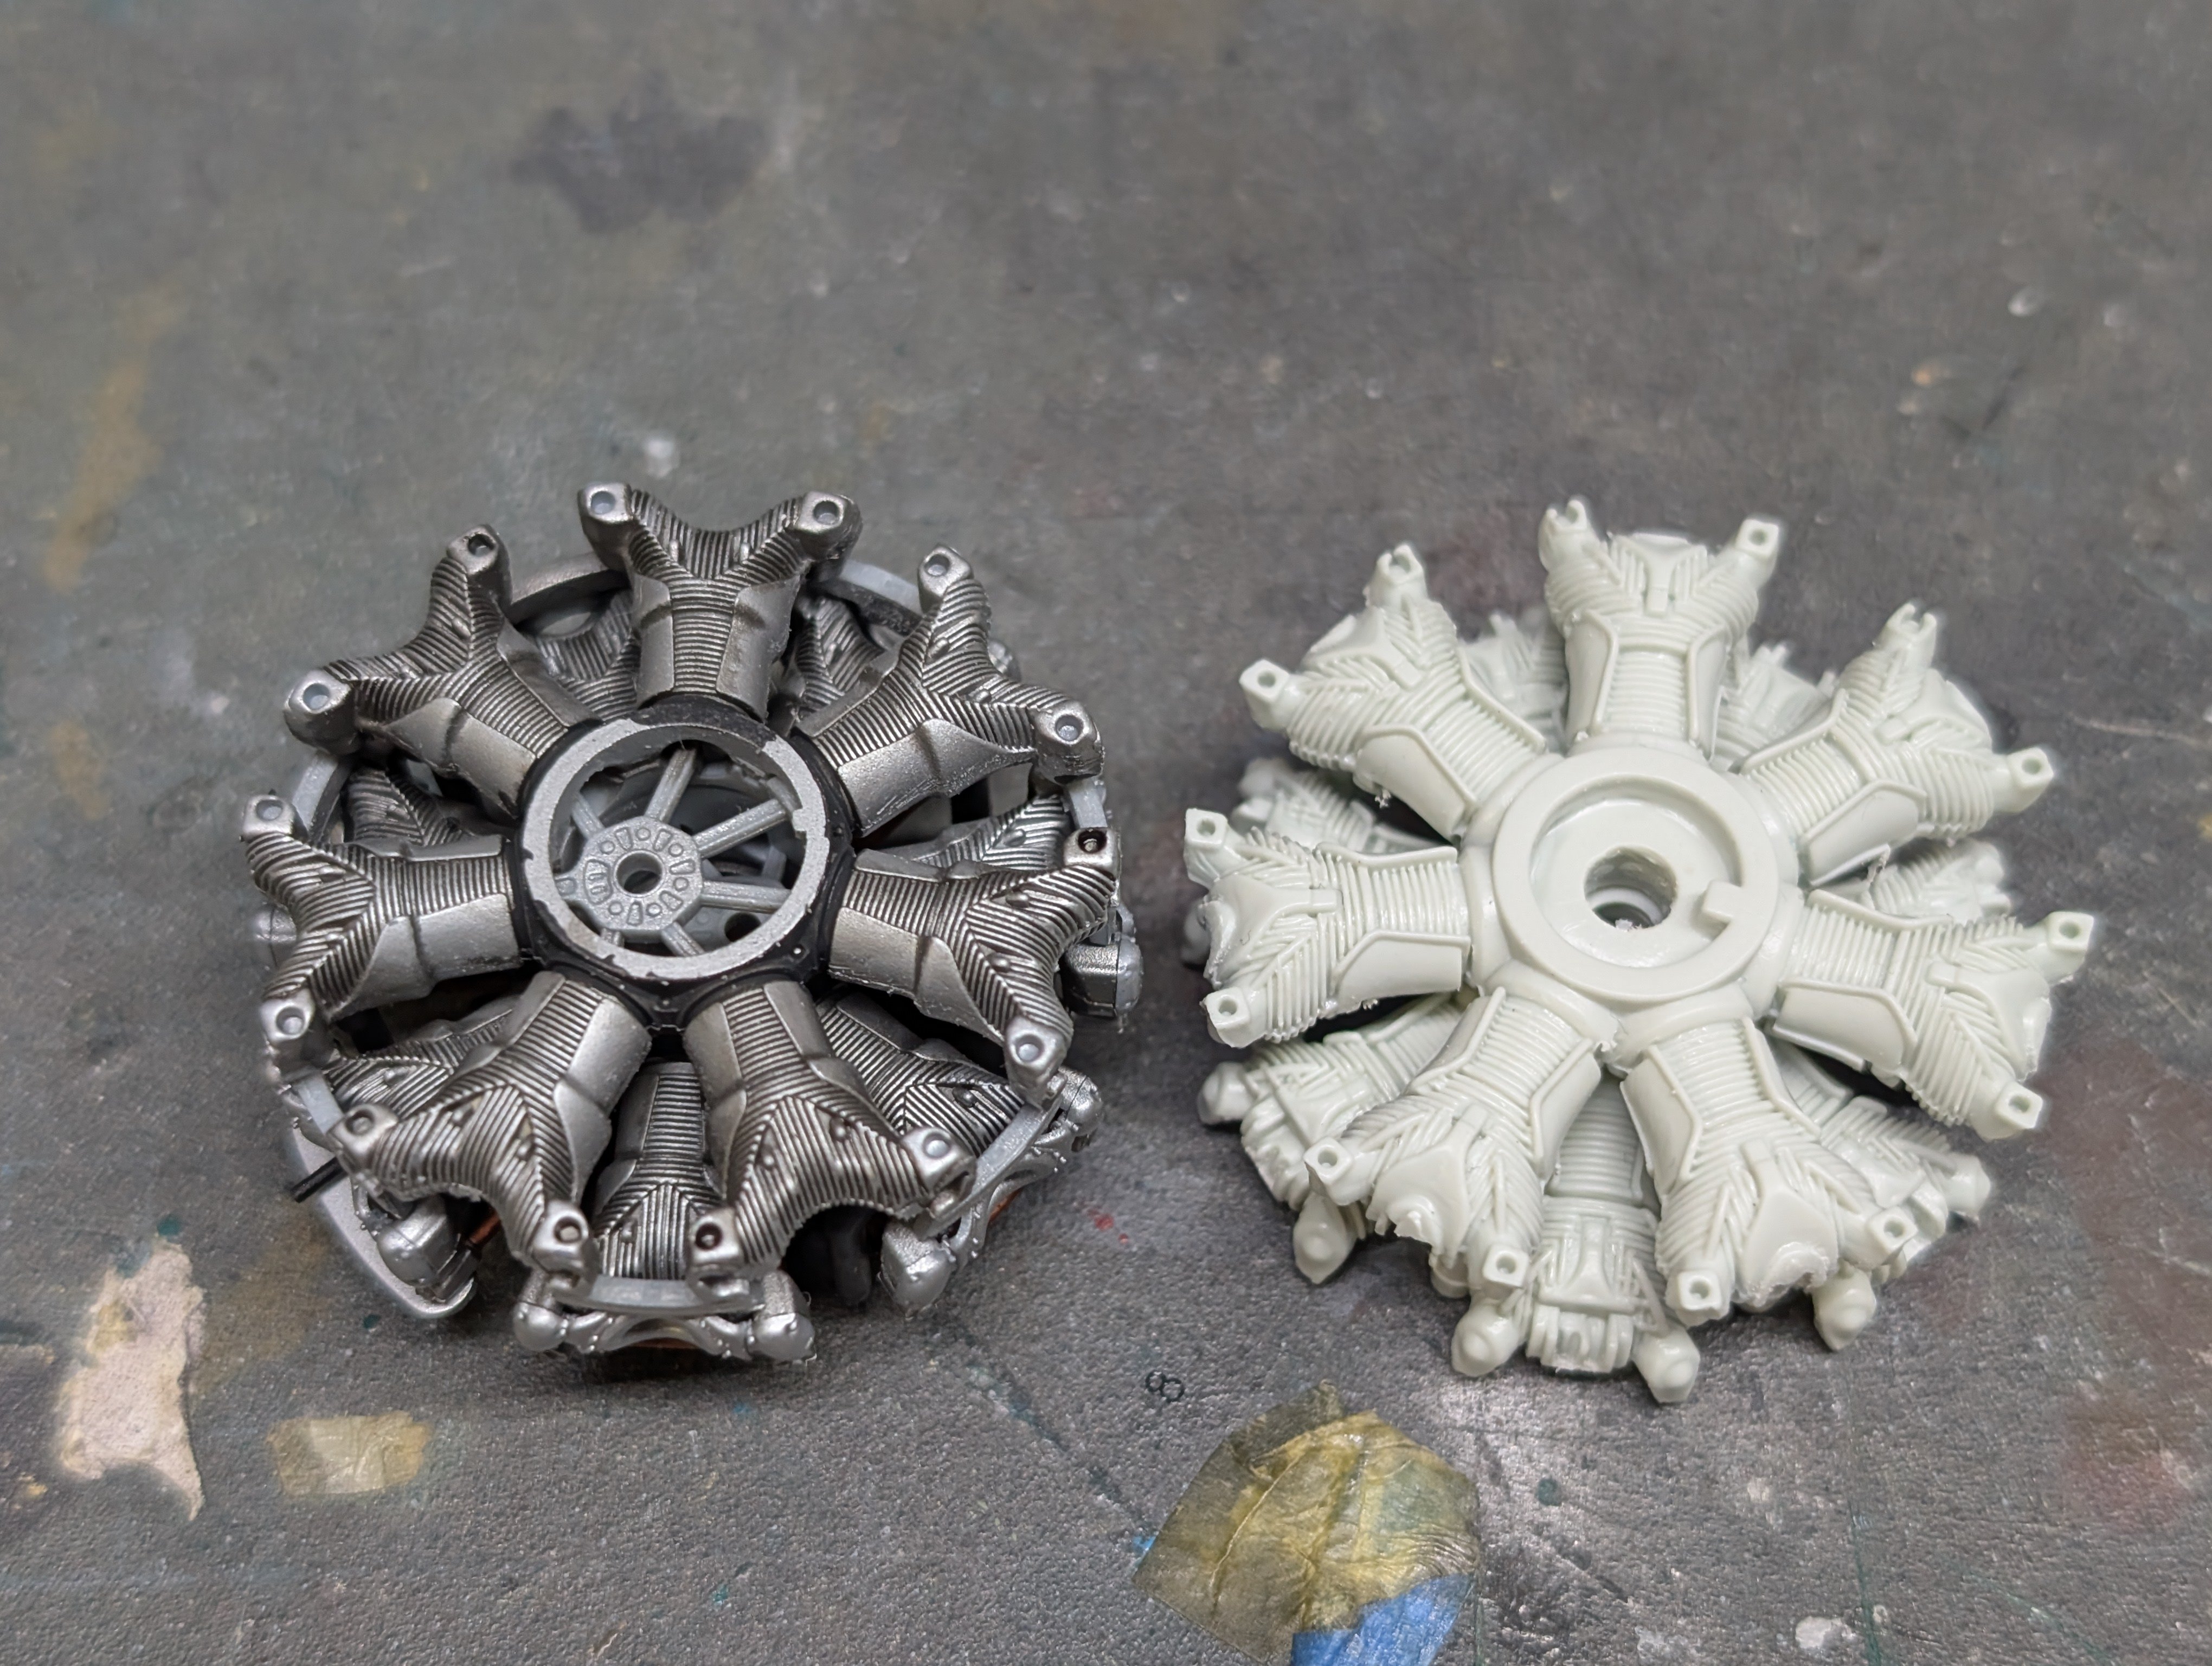
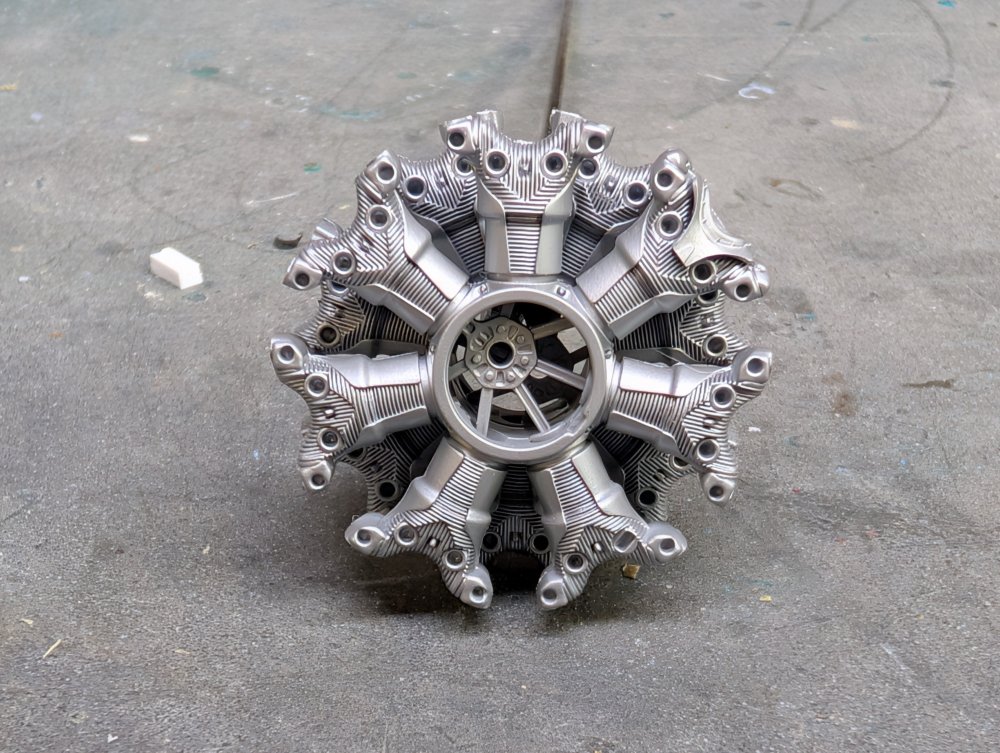
Since you asked so nicely and I happen to have a Revell kit in the stash, I took it out to compare them. Well, at least the engines anyways.

-
My '02 Civic had a rake to it. It was unintentional at first. Lowering springs hadn't come out yet for the EP3 Civic at the time Soni used ones for a DC5 Integra. They share the same chassis but obviously had enough differences for me to end up with a rake. Later when I went to full coil overs, I had it set up that way since I liked the look.
- 2,035 replies
-
- 1
-

-
- car related stuff
- anything about cars
- (and 6 more)
-

1/32 Westland Whirlwind
BlrwestSiR replied to JeroenPeters's topic in LSM 1/35 and Larger Work In Progress
Wow, absolutely stunning. -
Thanks @Martinnfb! Some great photos. That's a lot of exhaust staining I'm going to have to deal with. I think the second pic is <||. Or looks that way to me.
-
There's an option to have the rear tail plane pael for the tail wheel open and all the internal details are provided. Same with the radio hatch. And of course the gun bays and engine panels.
-
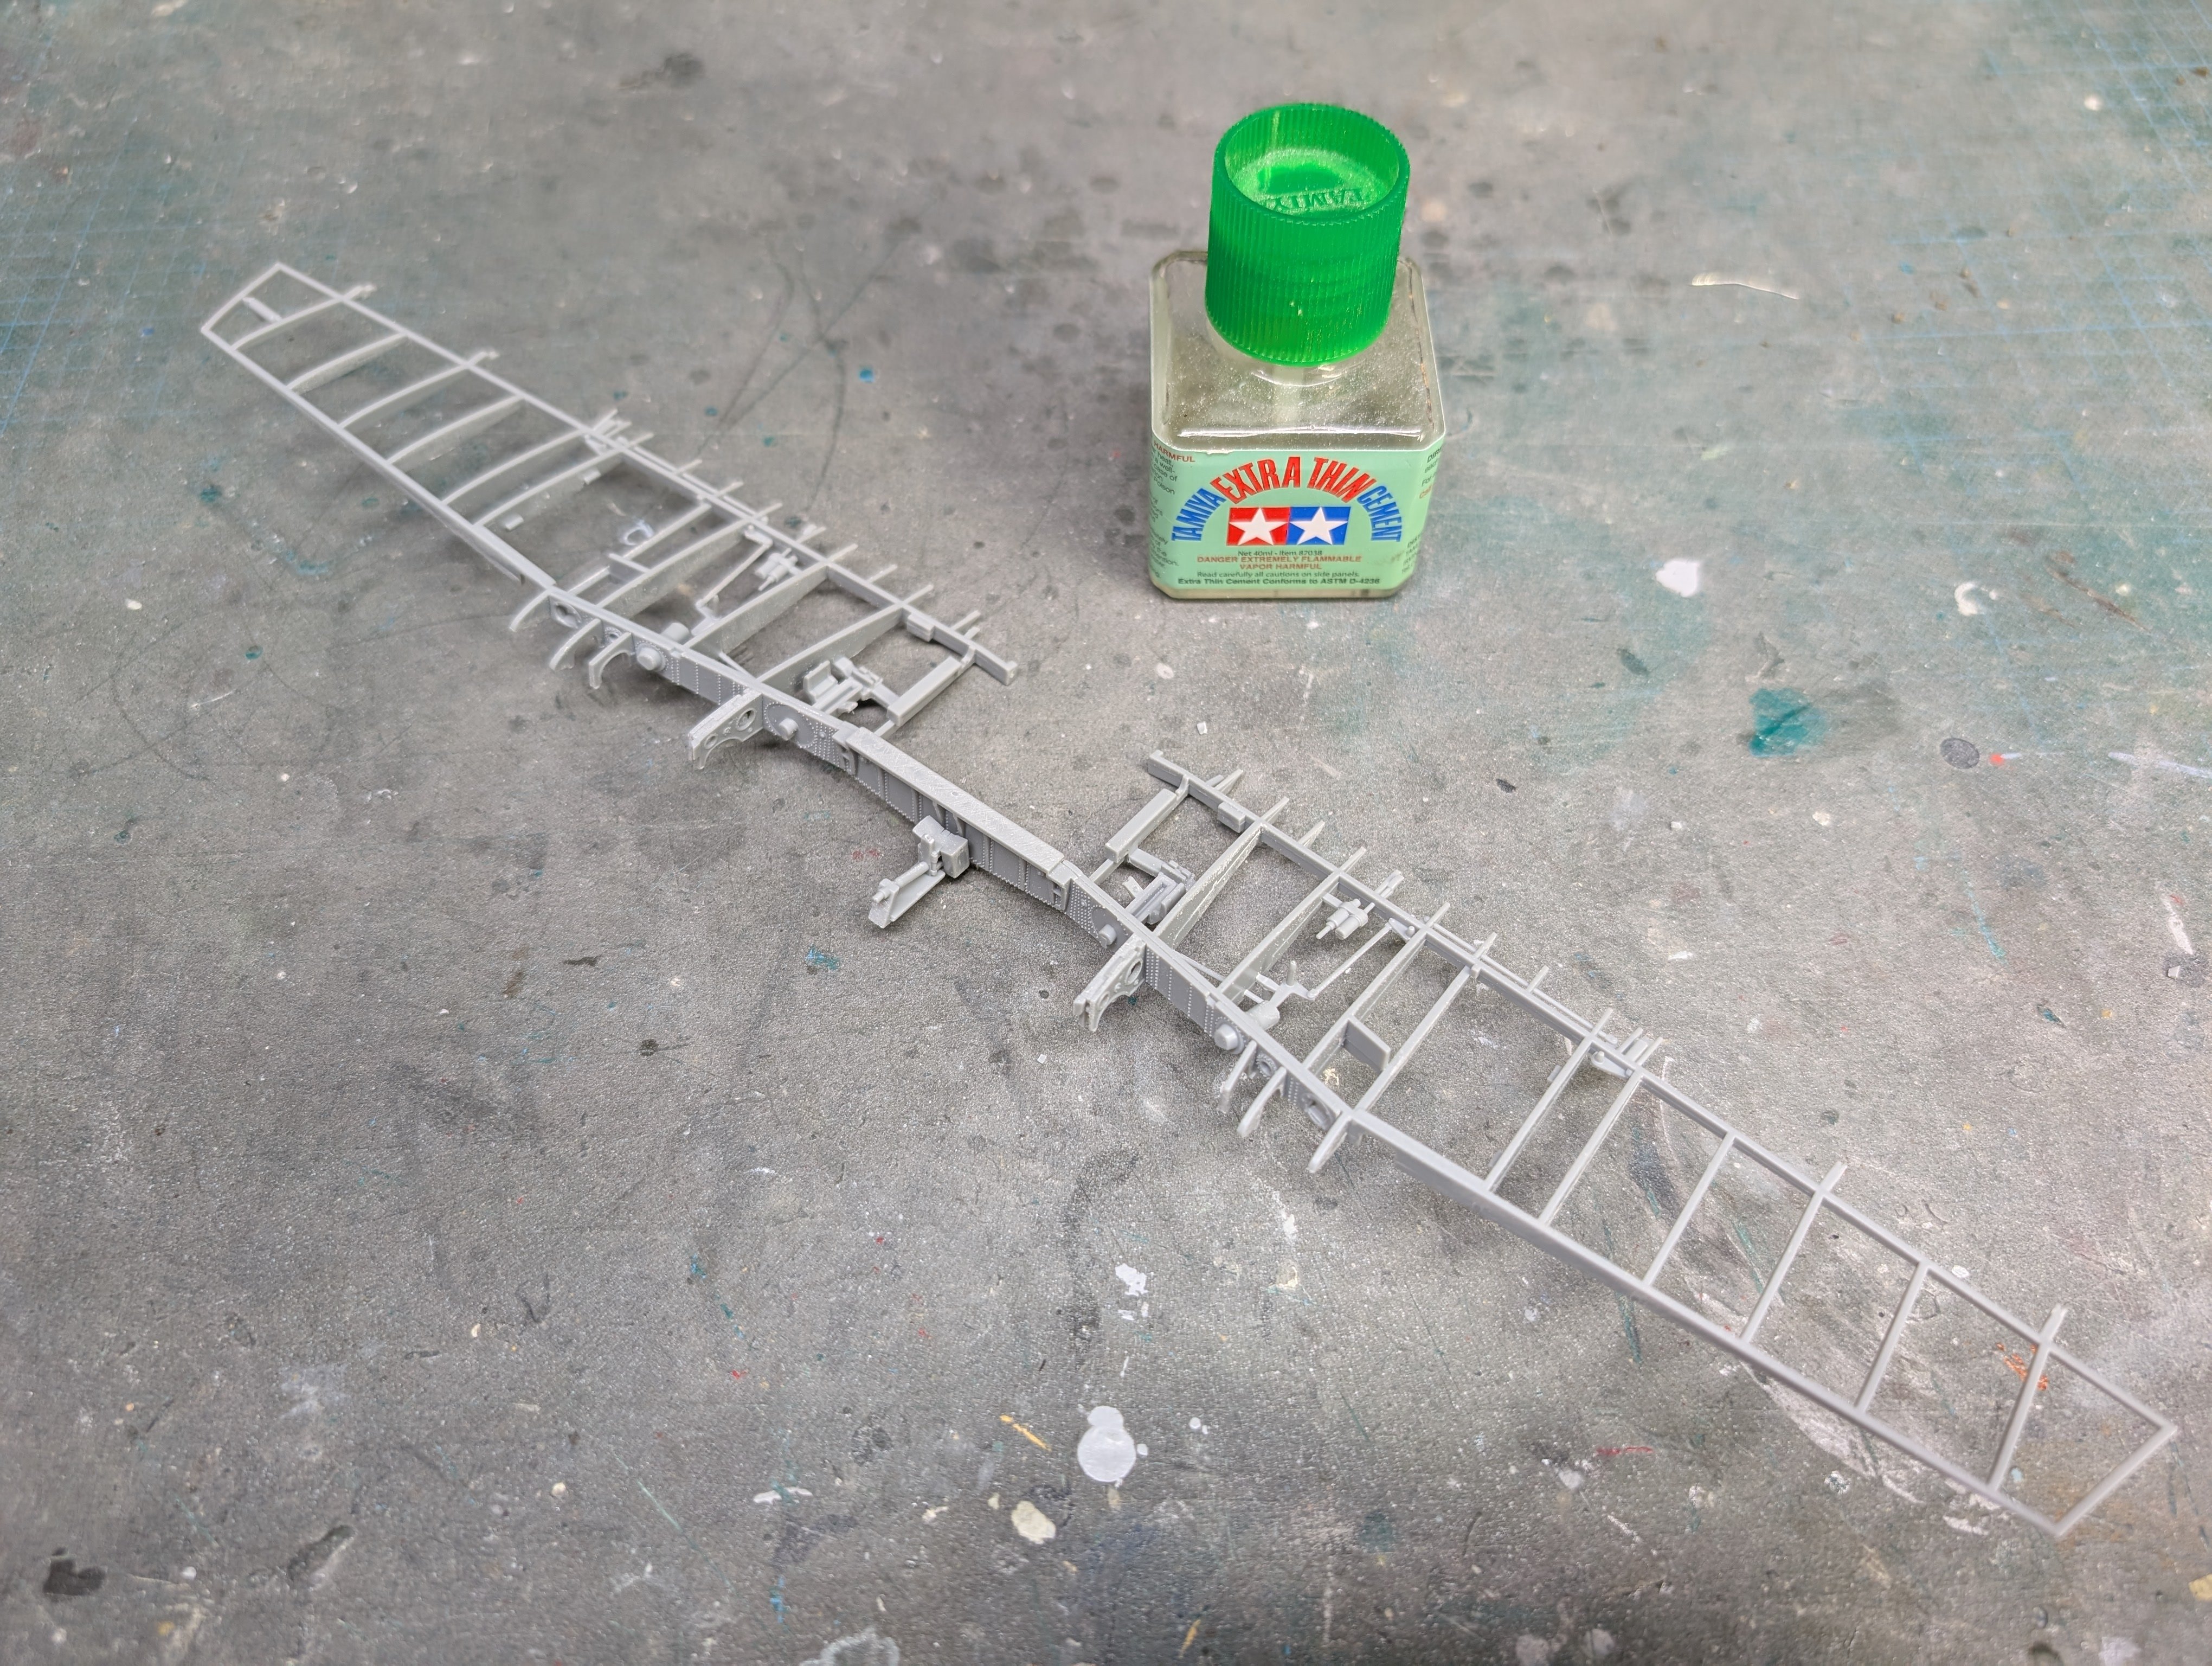
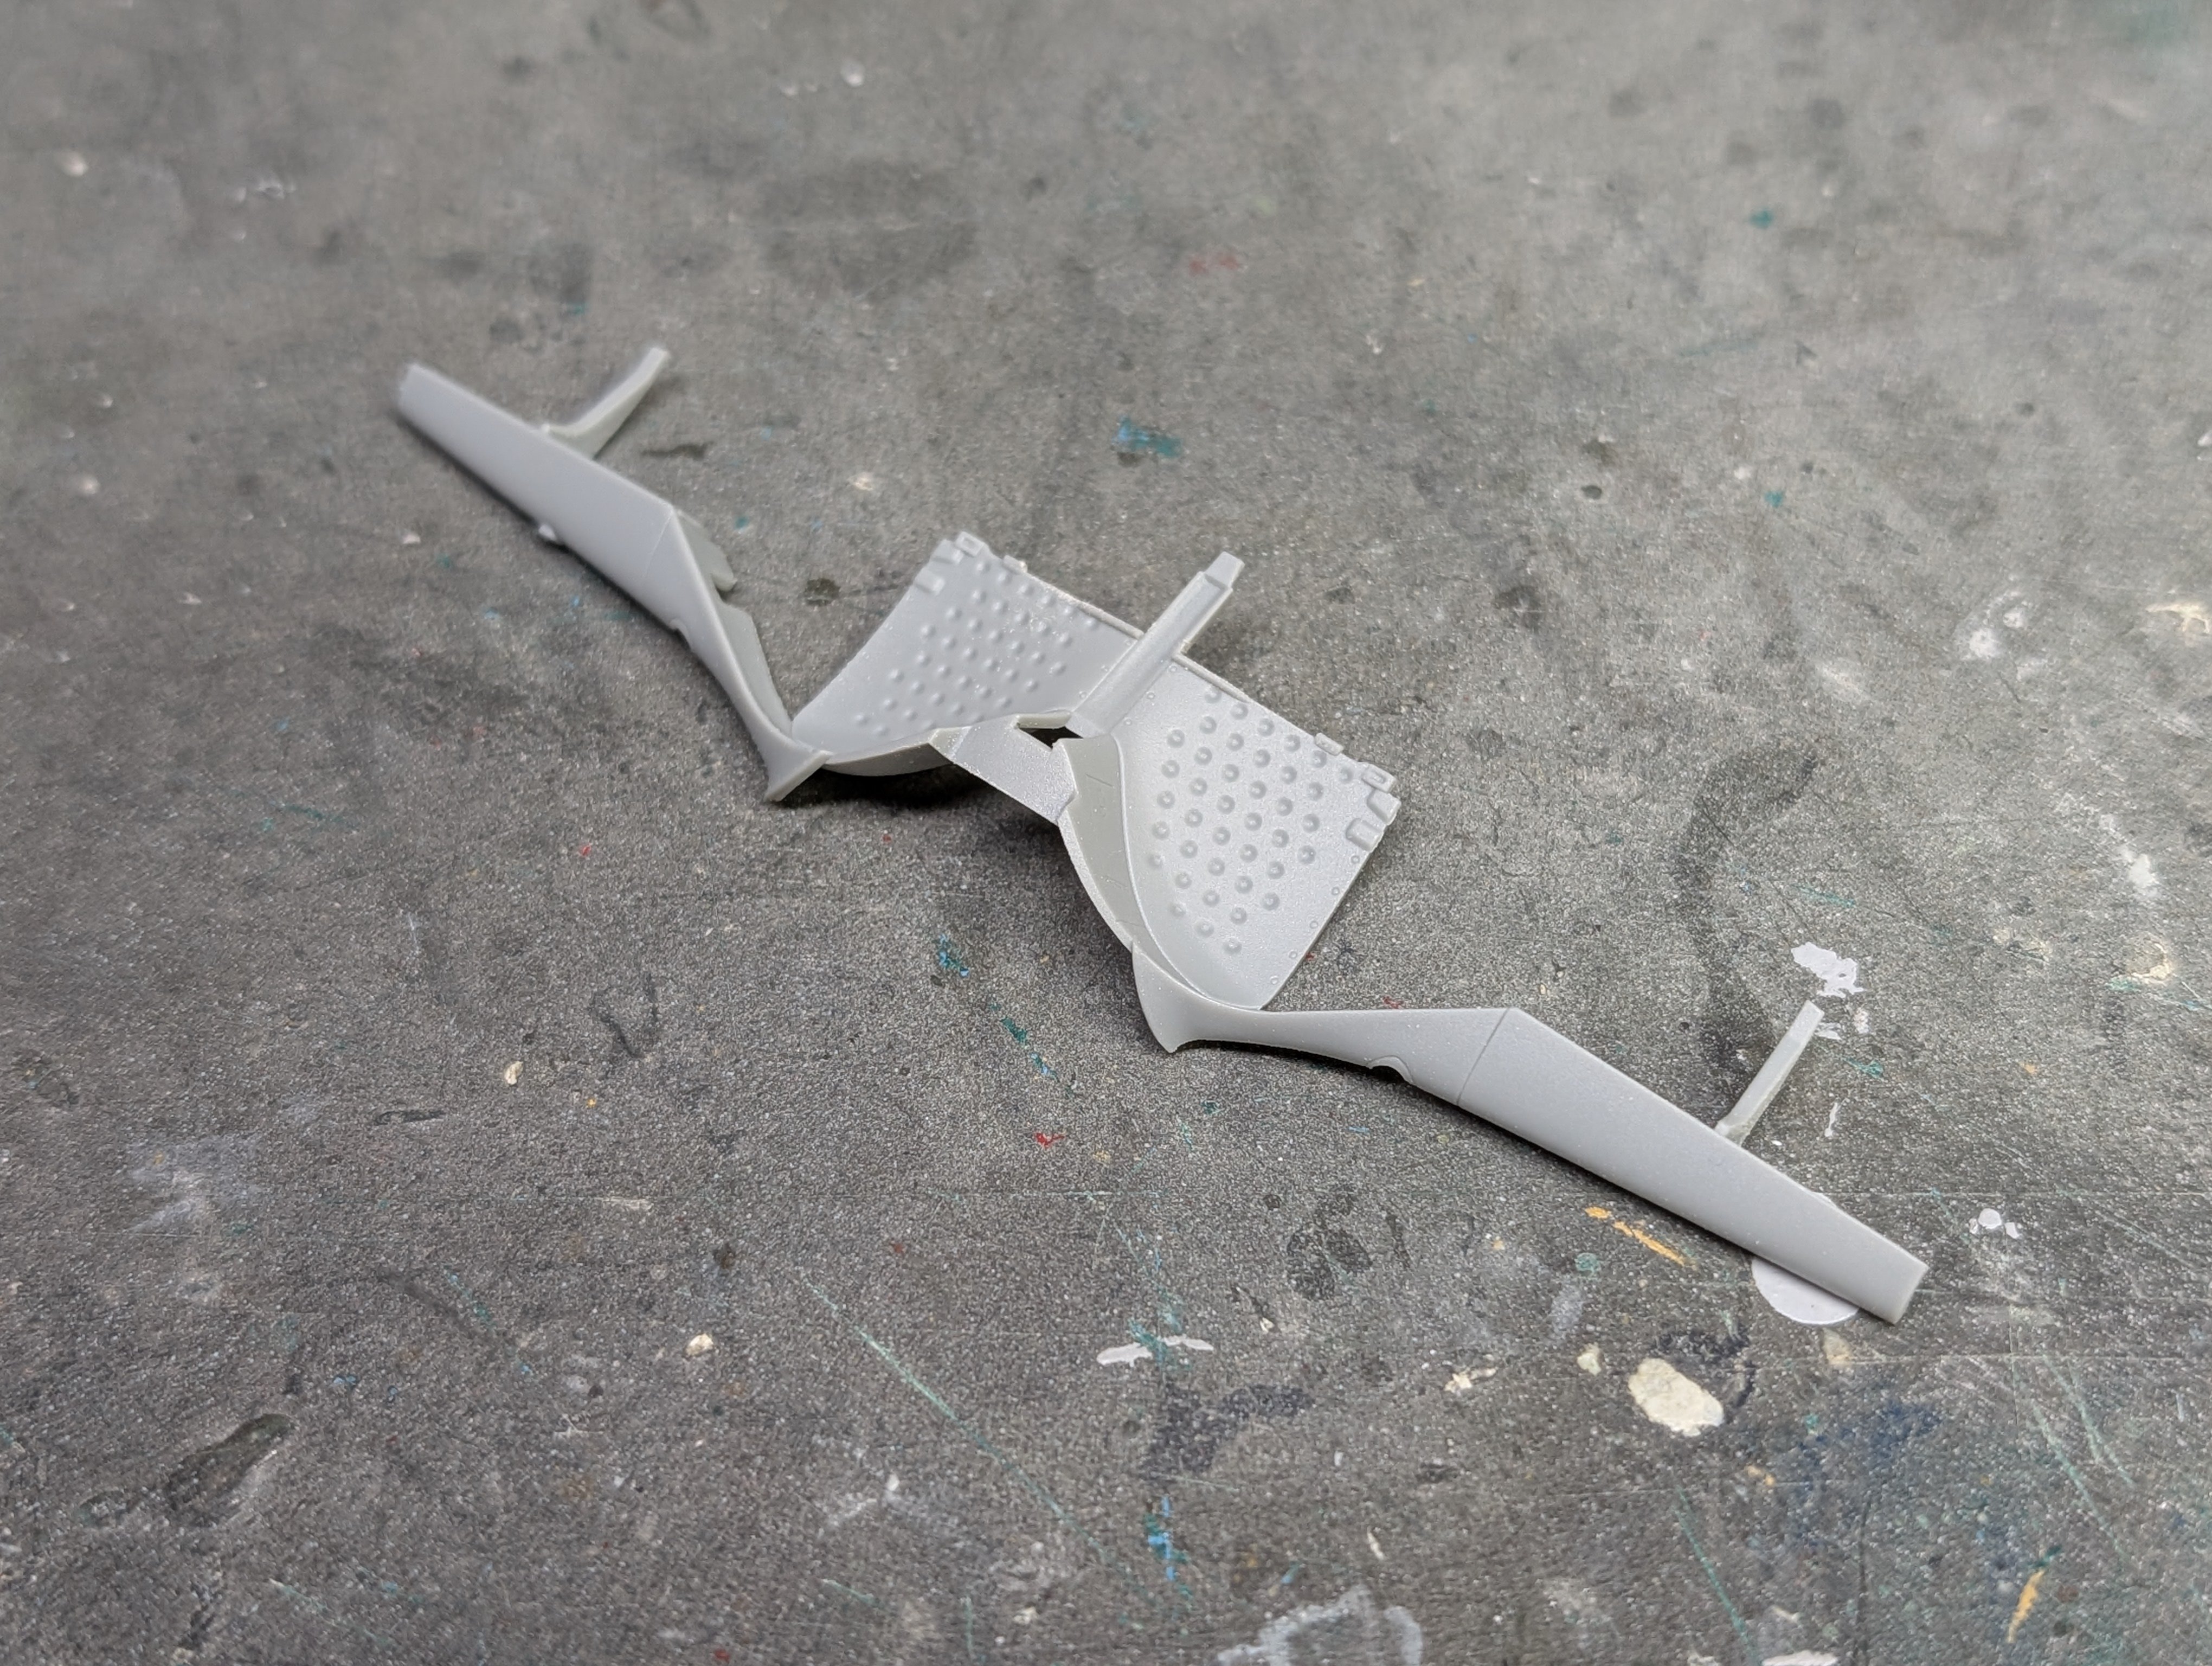
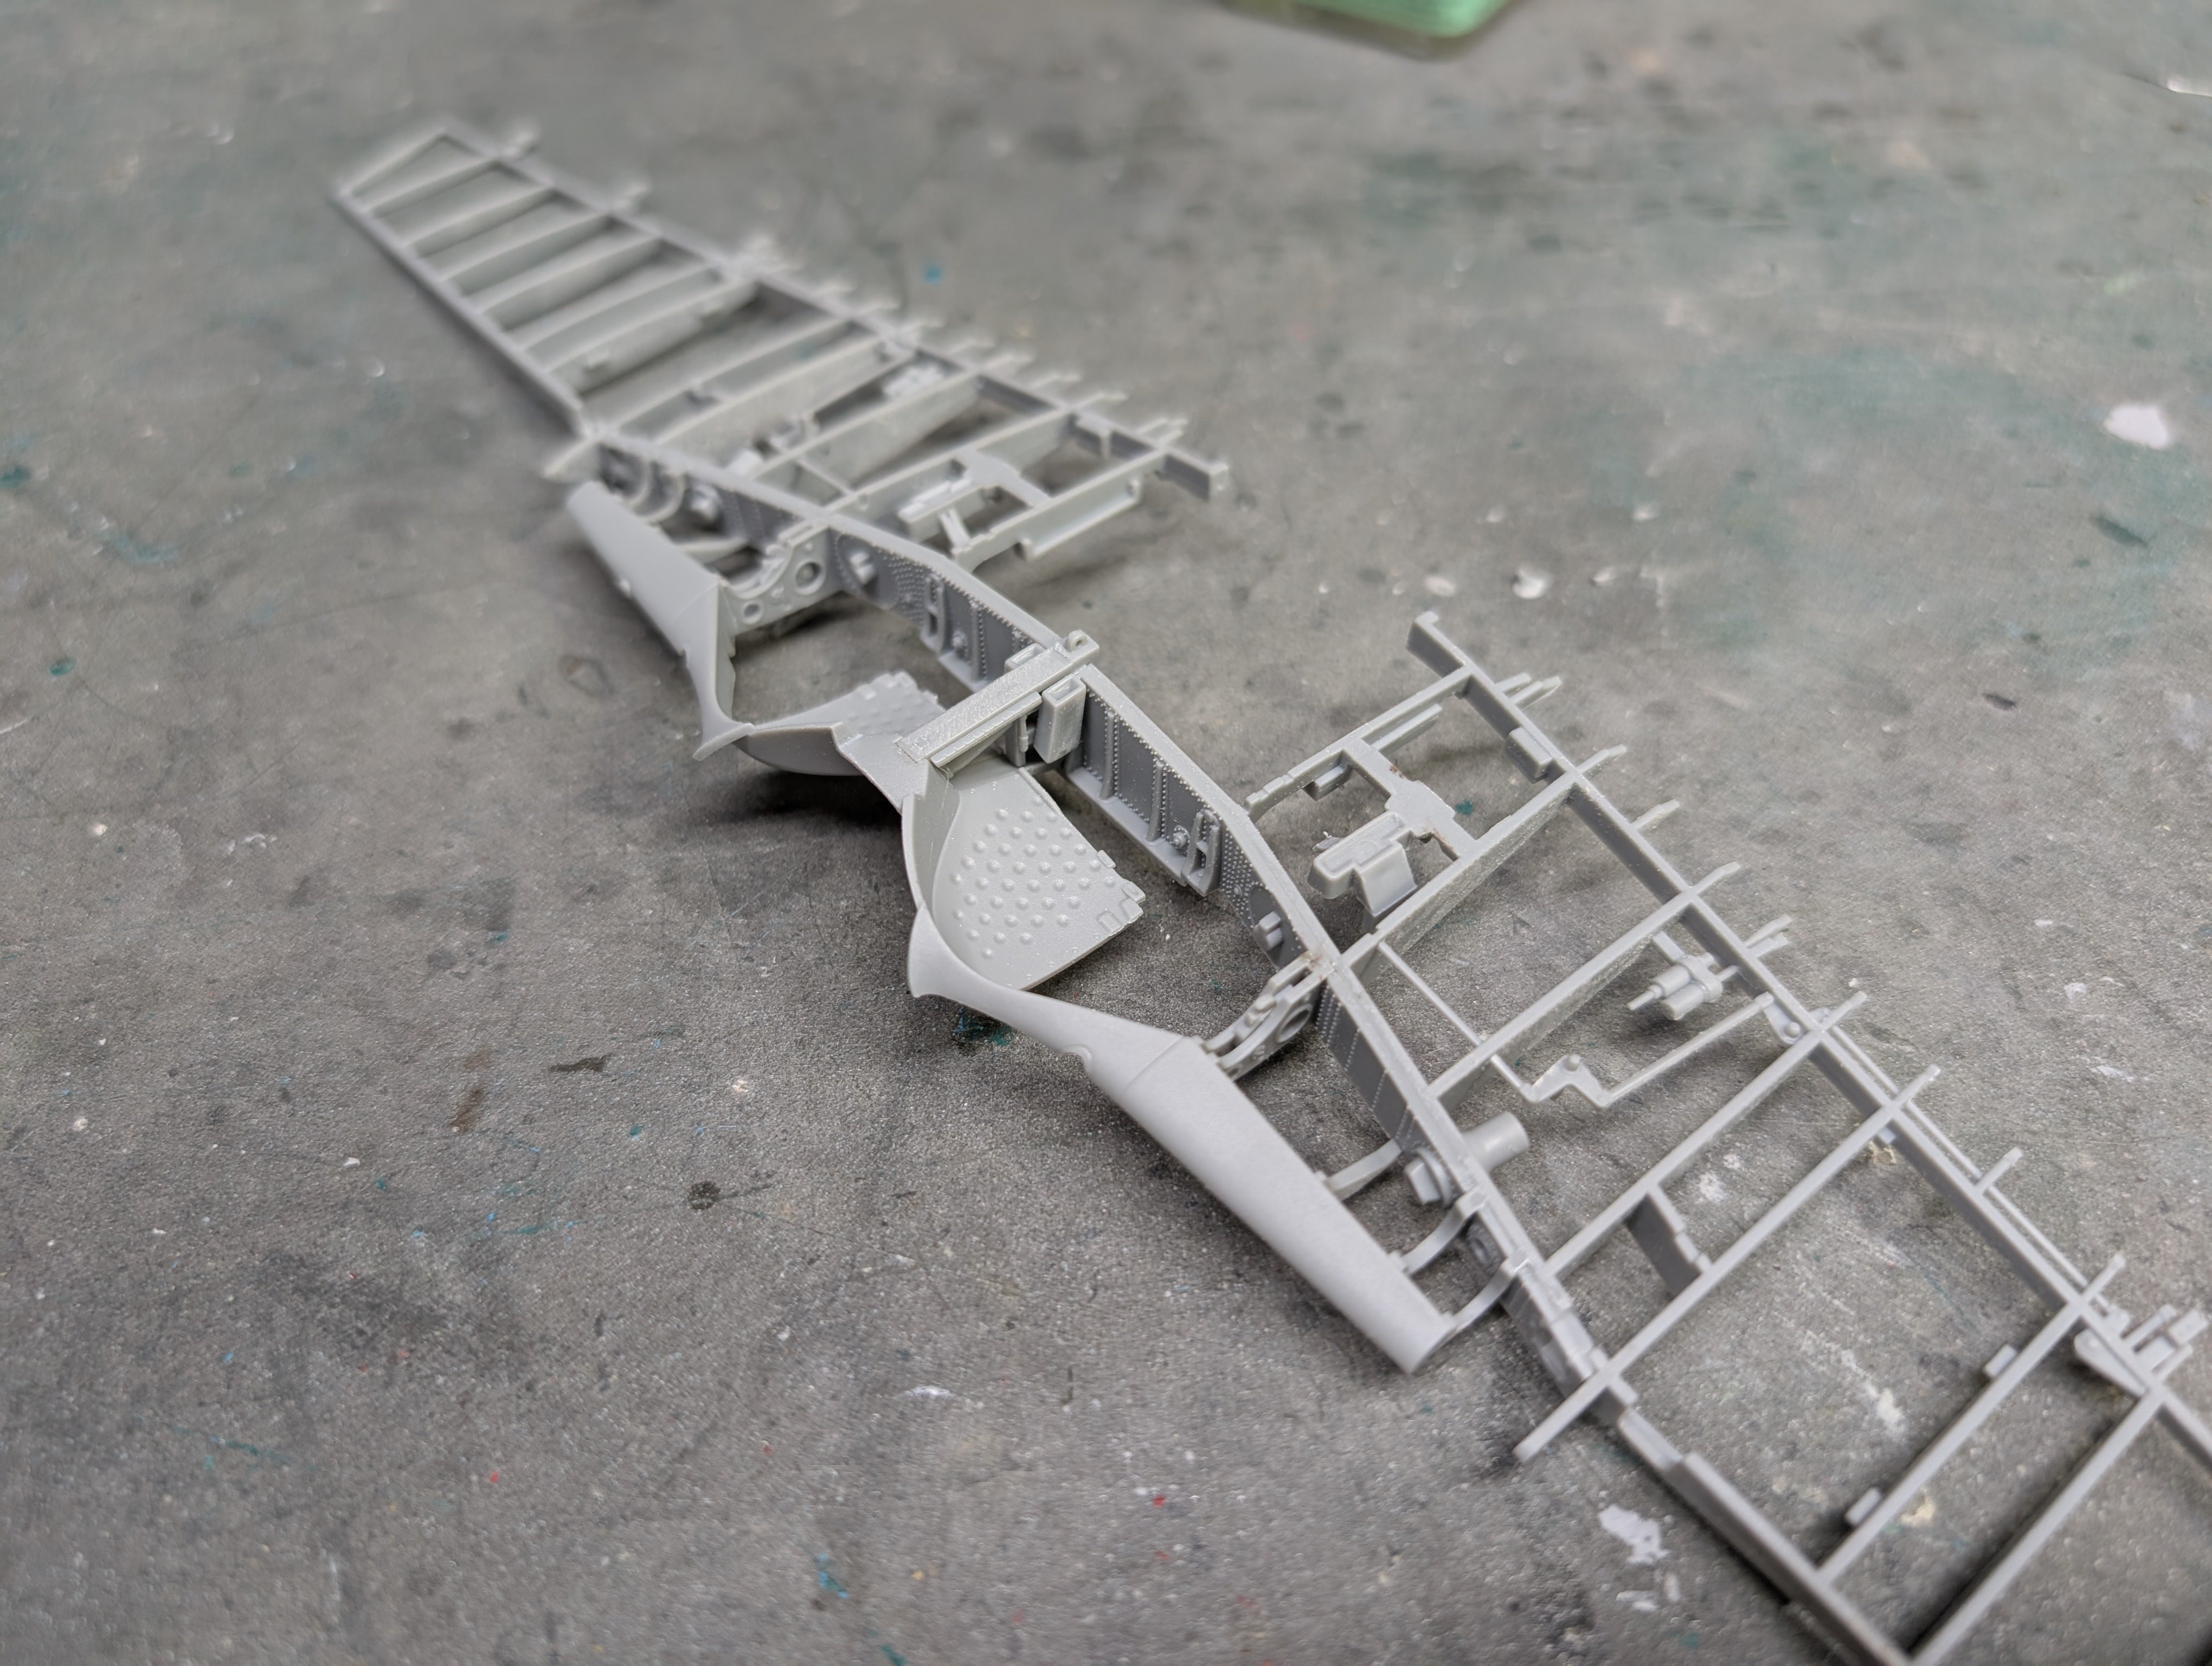
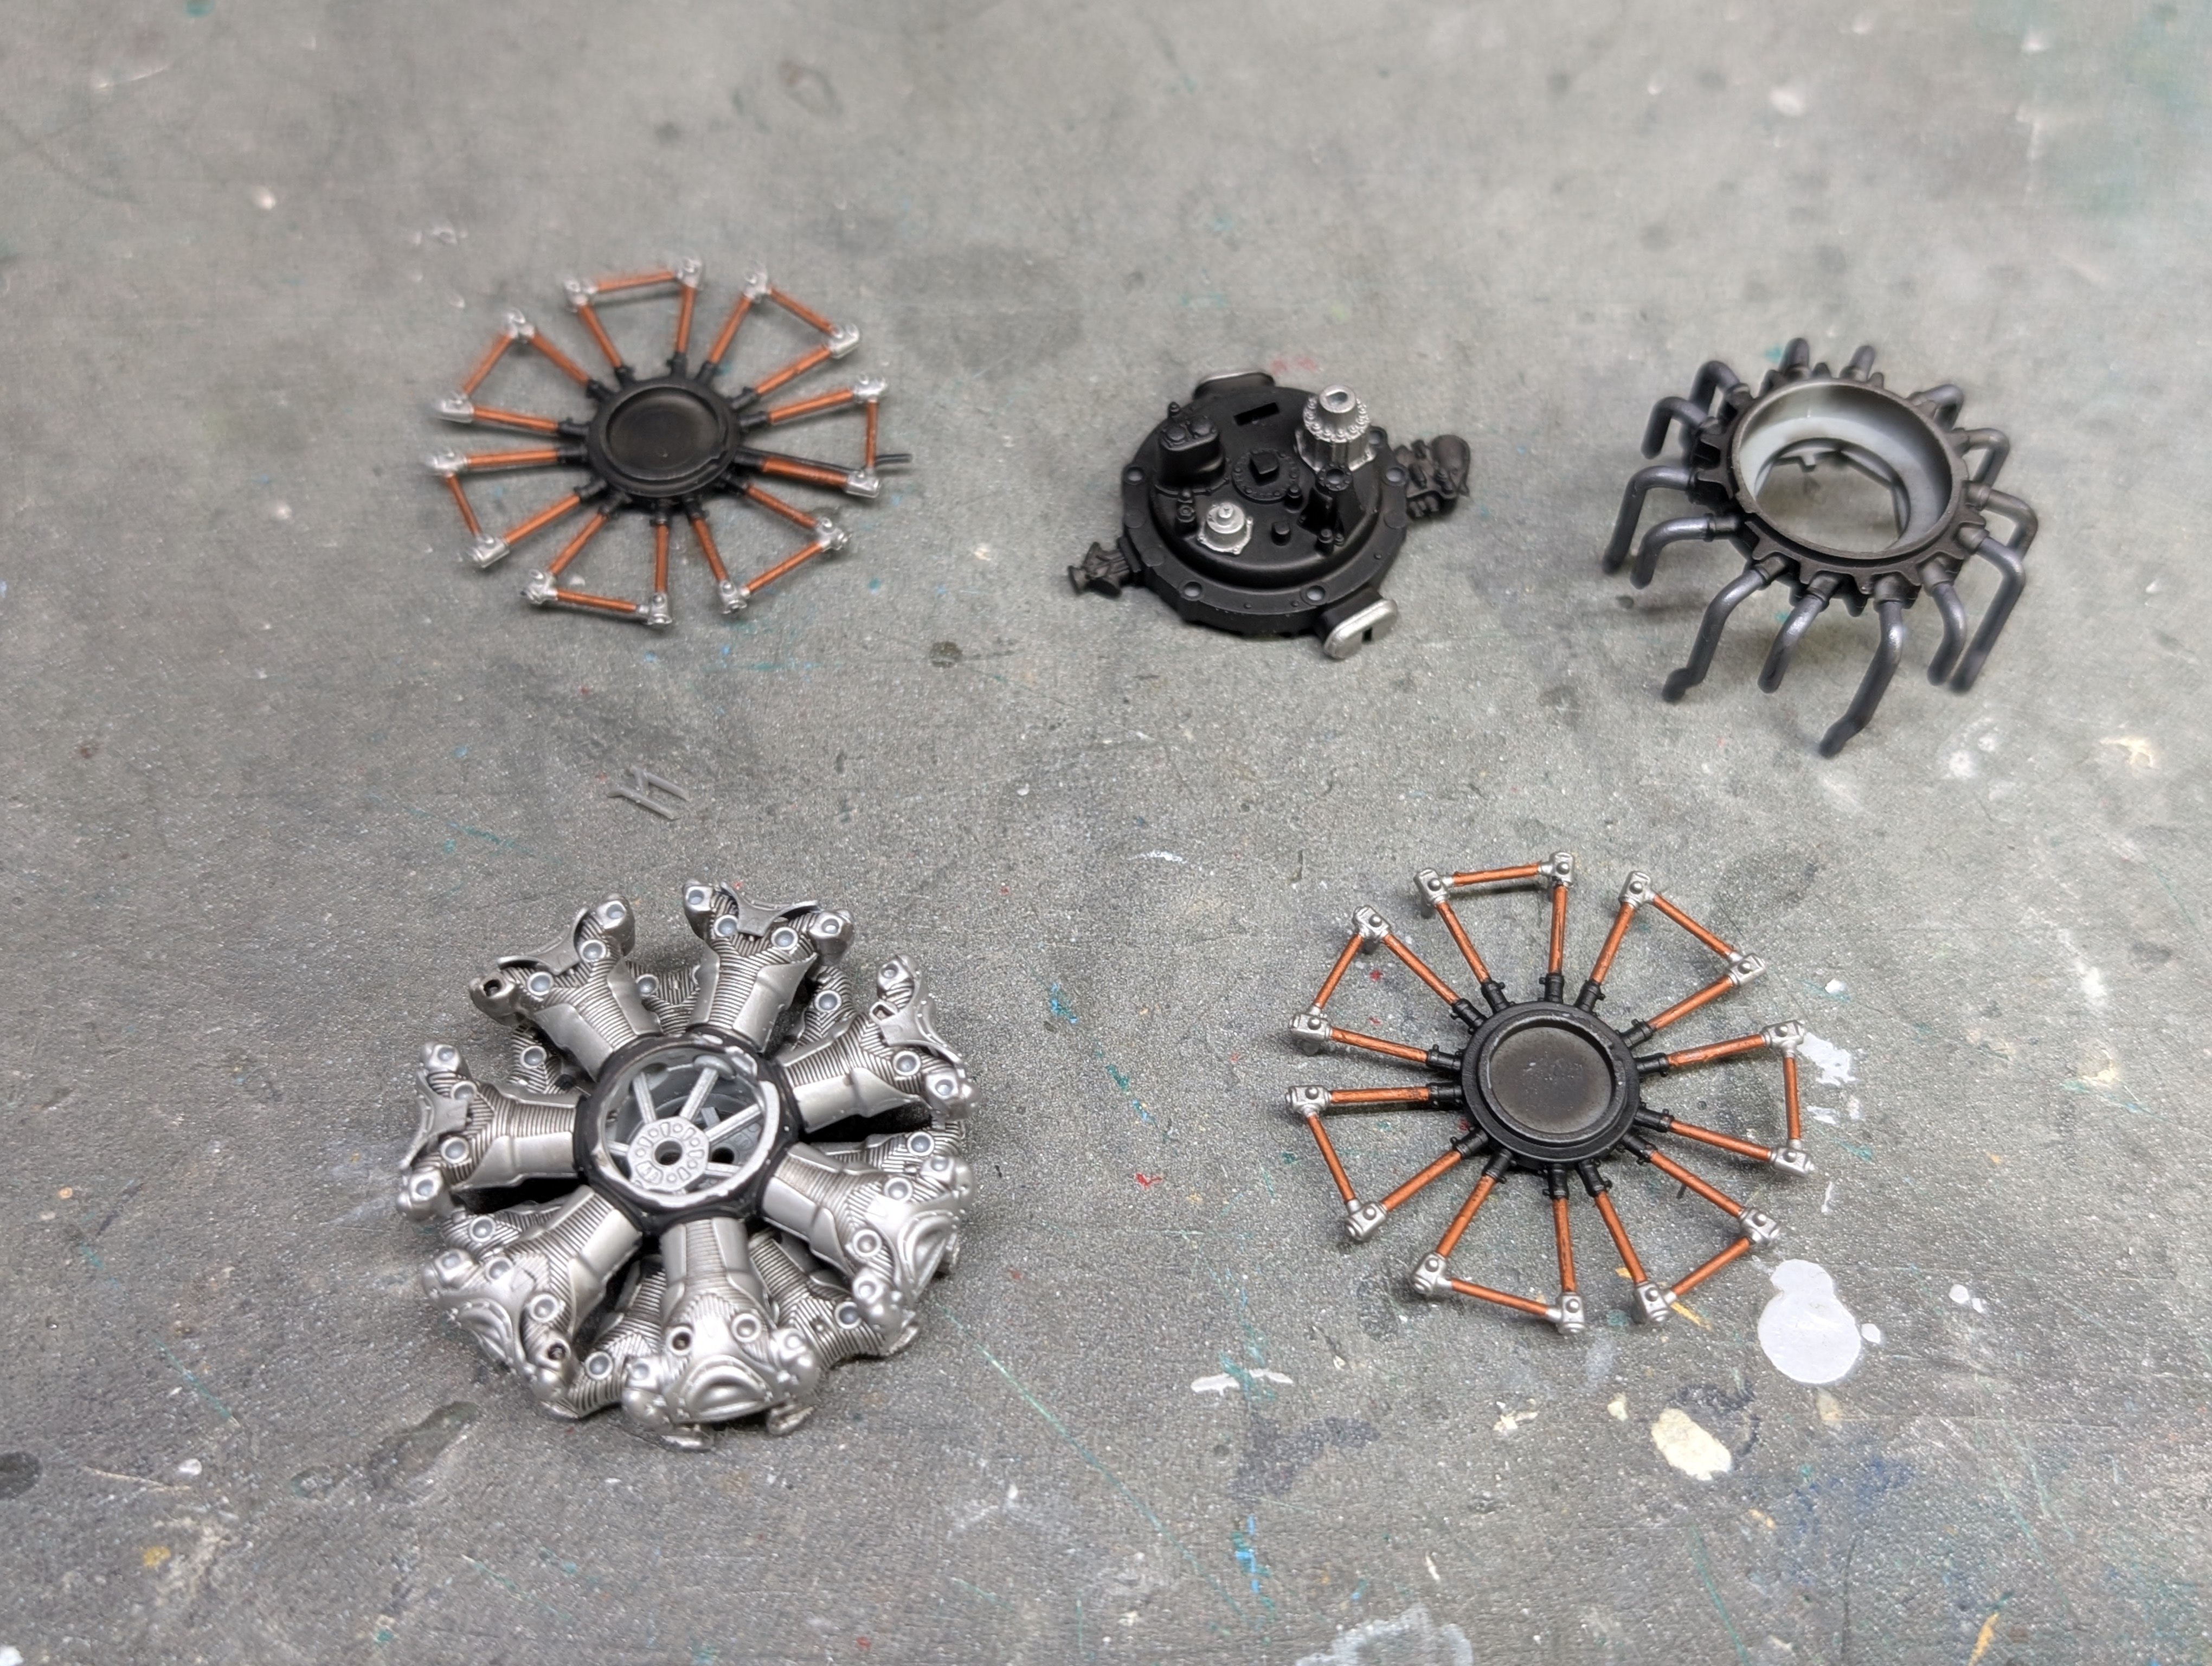
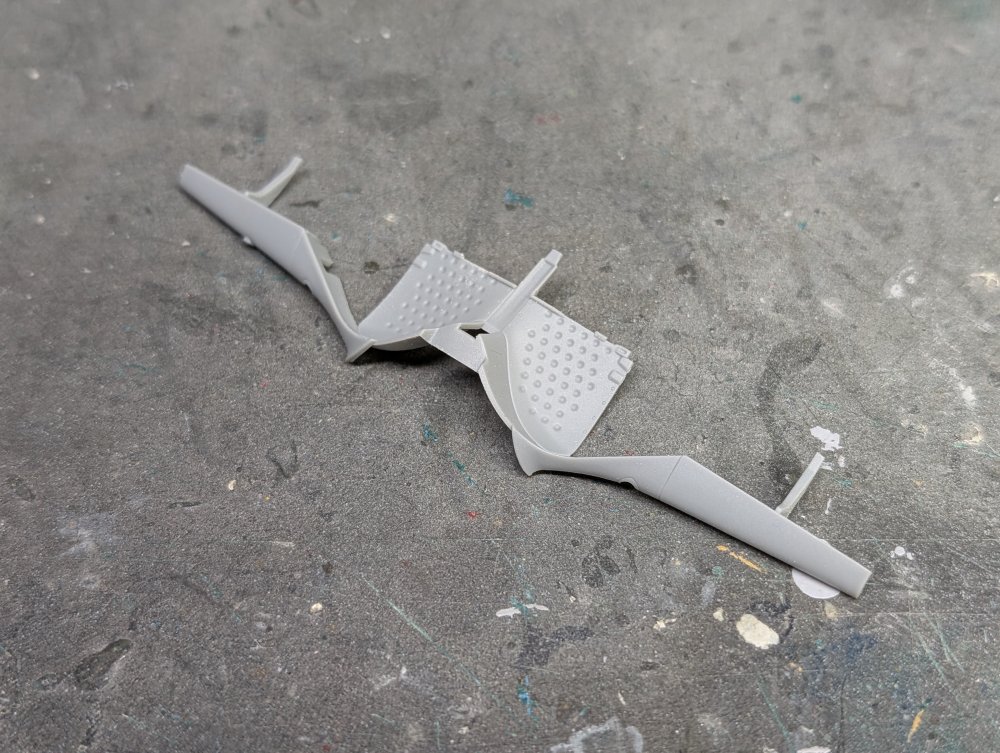
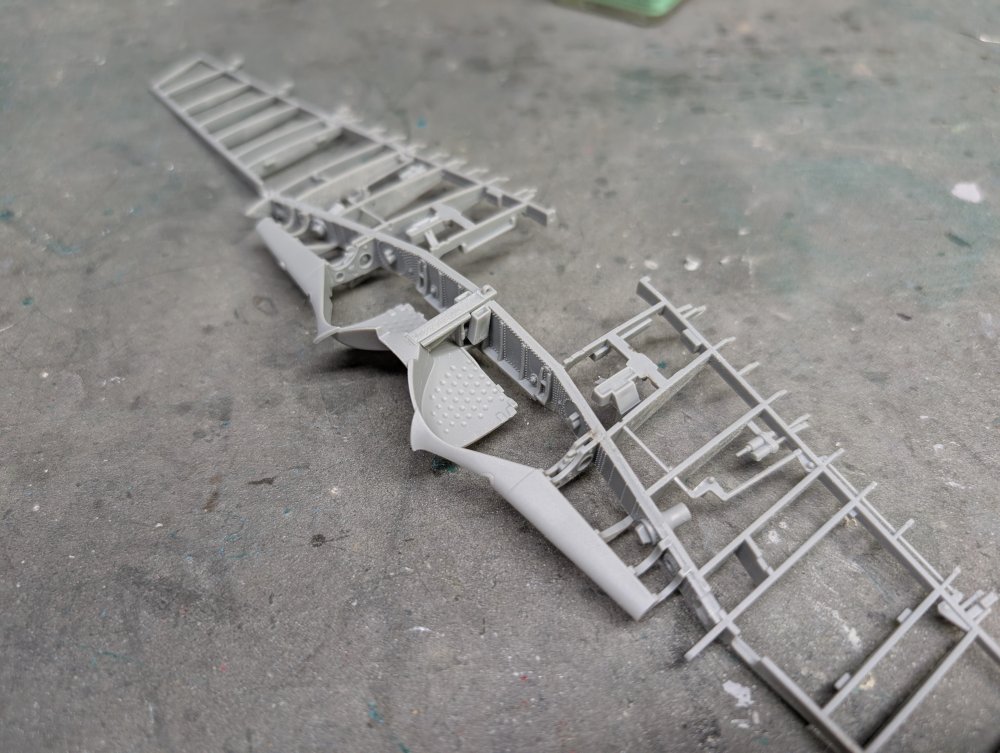
While the engine dried, I jumped a couple steps ahead and stared on the main wing with the inner frame. The two halves are joined together with the main spar. The centre part of the leading edge/MLG is a single part. Certainly a unique parts breakdown. It fit perfectly onto the spar.

-
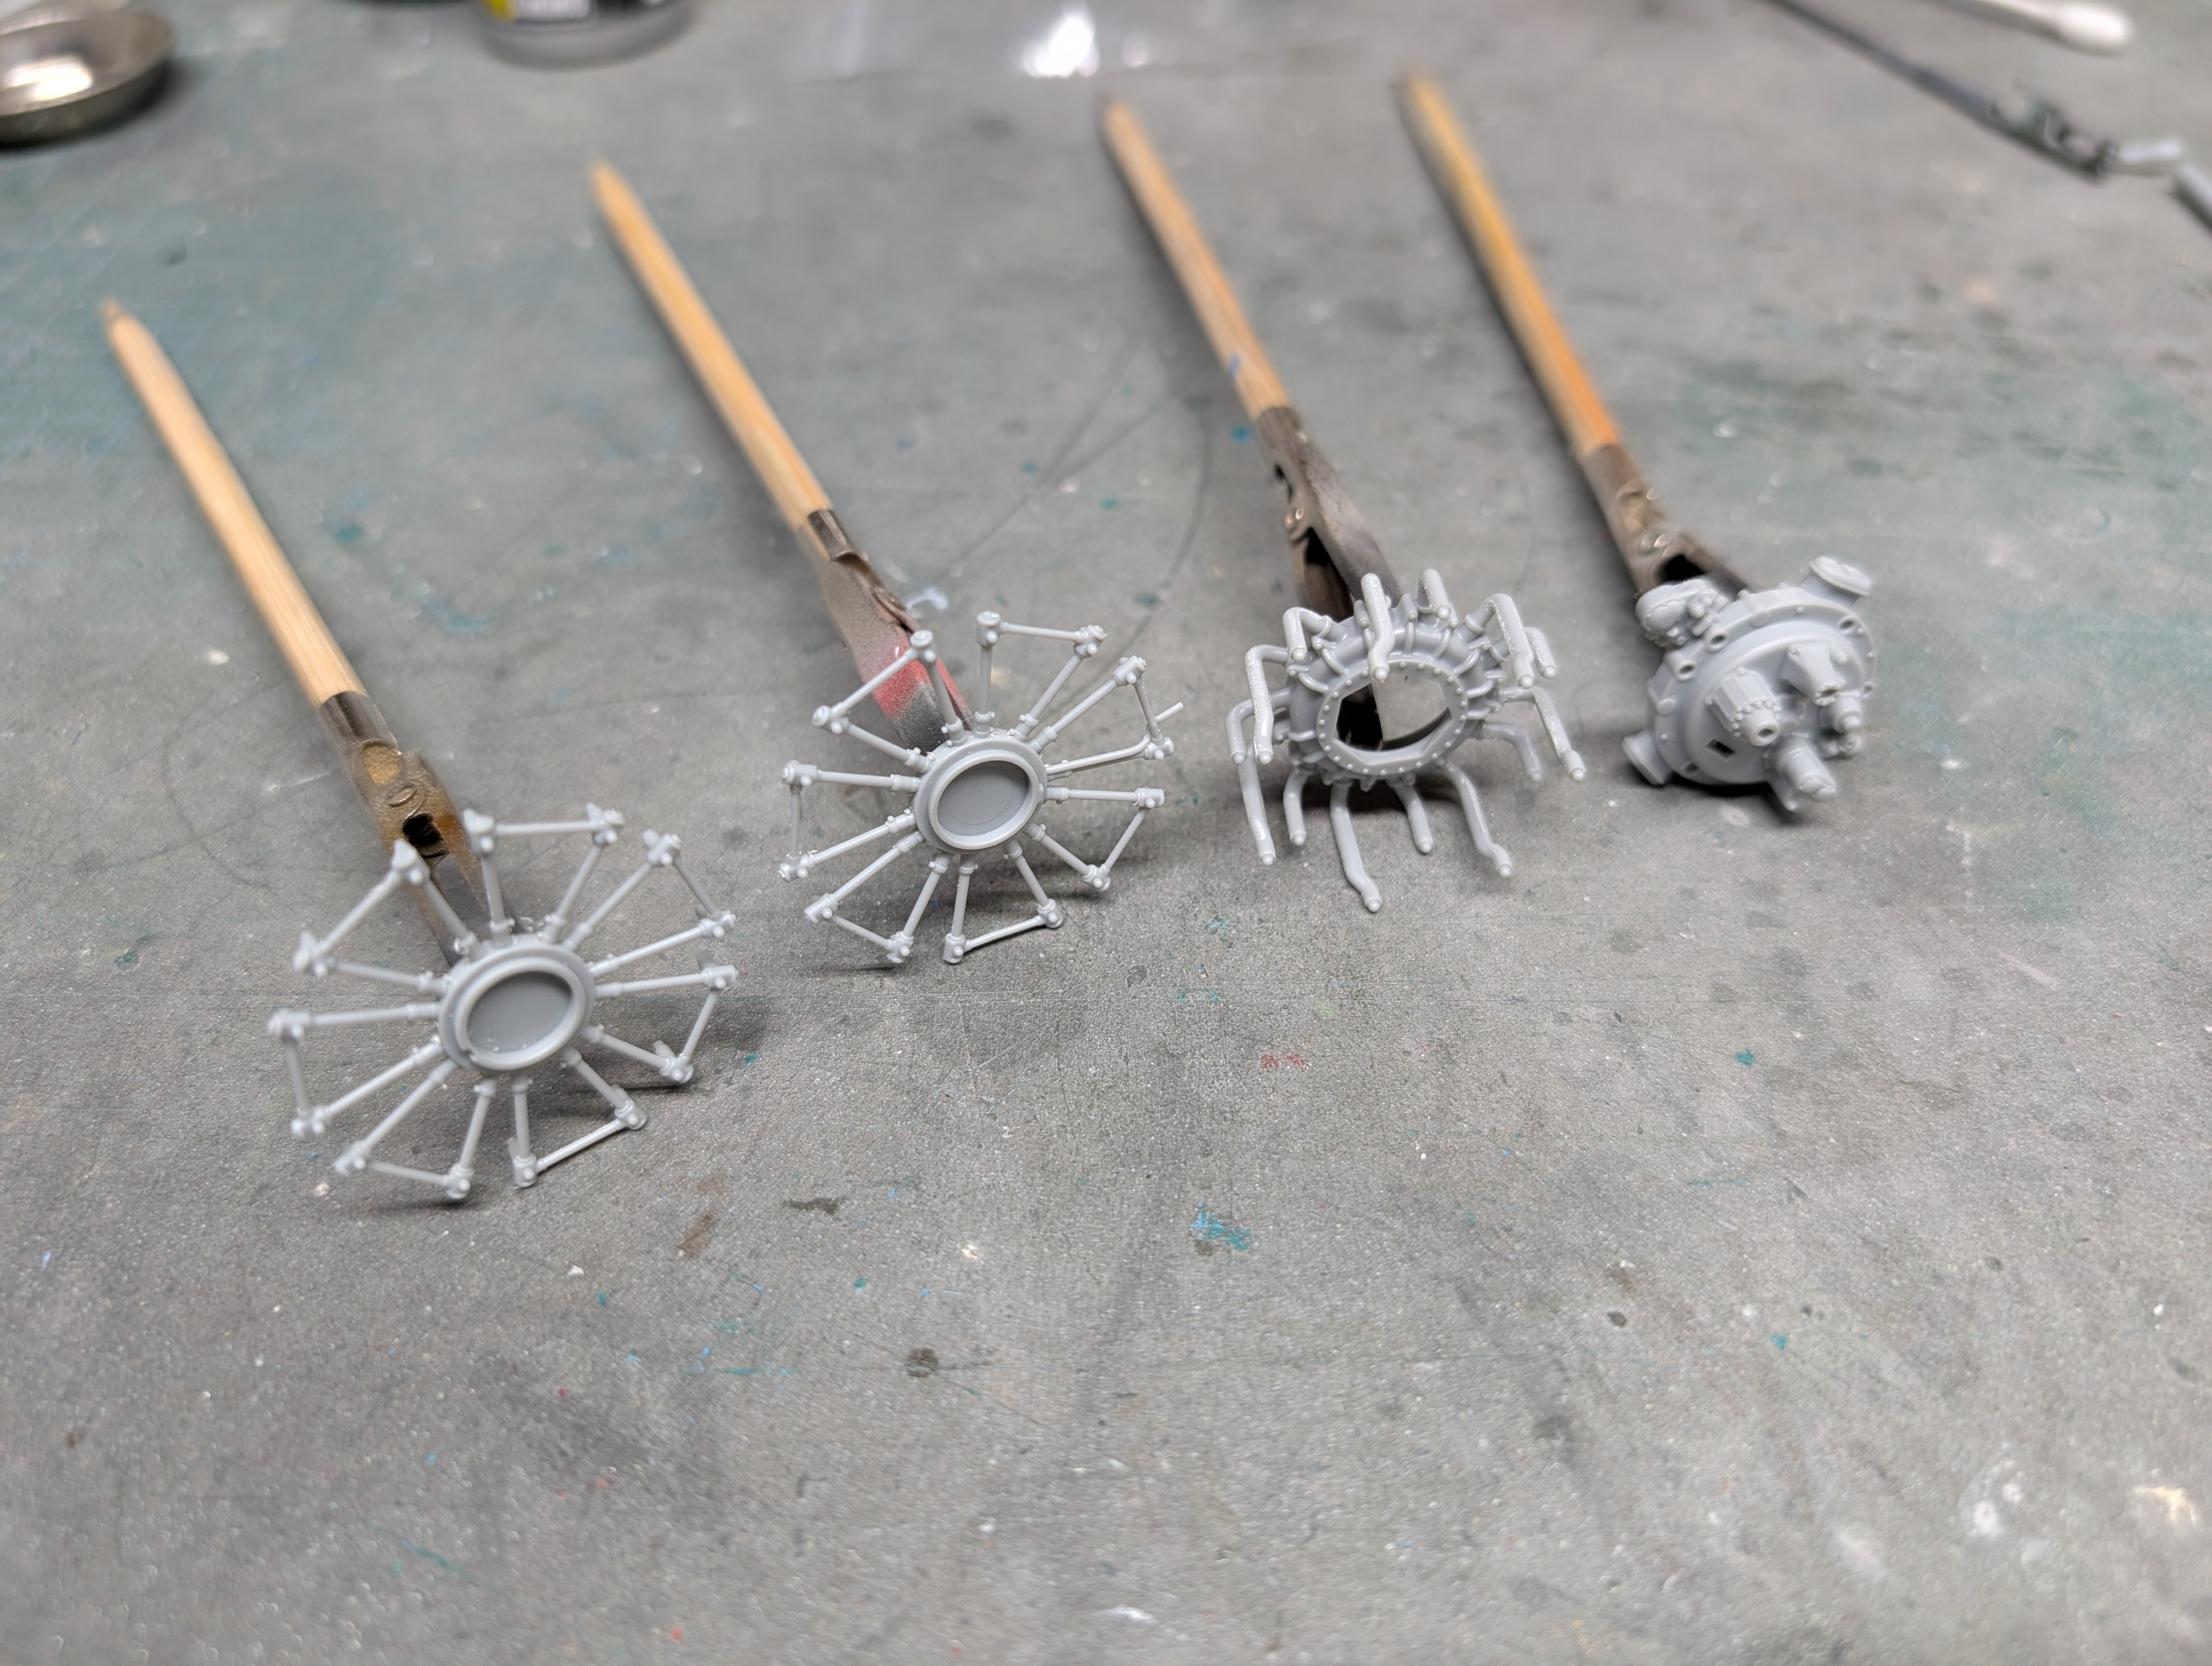
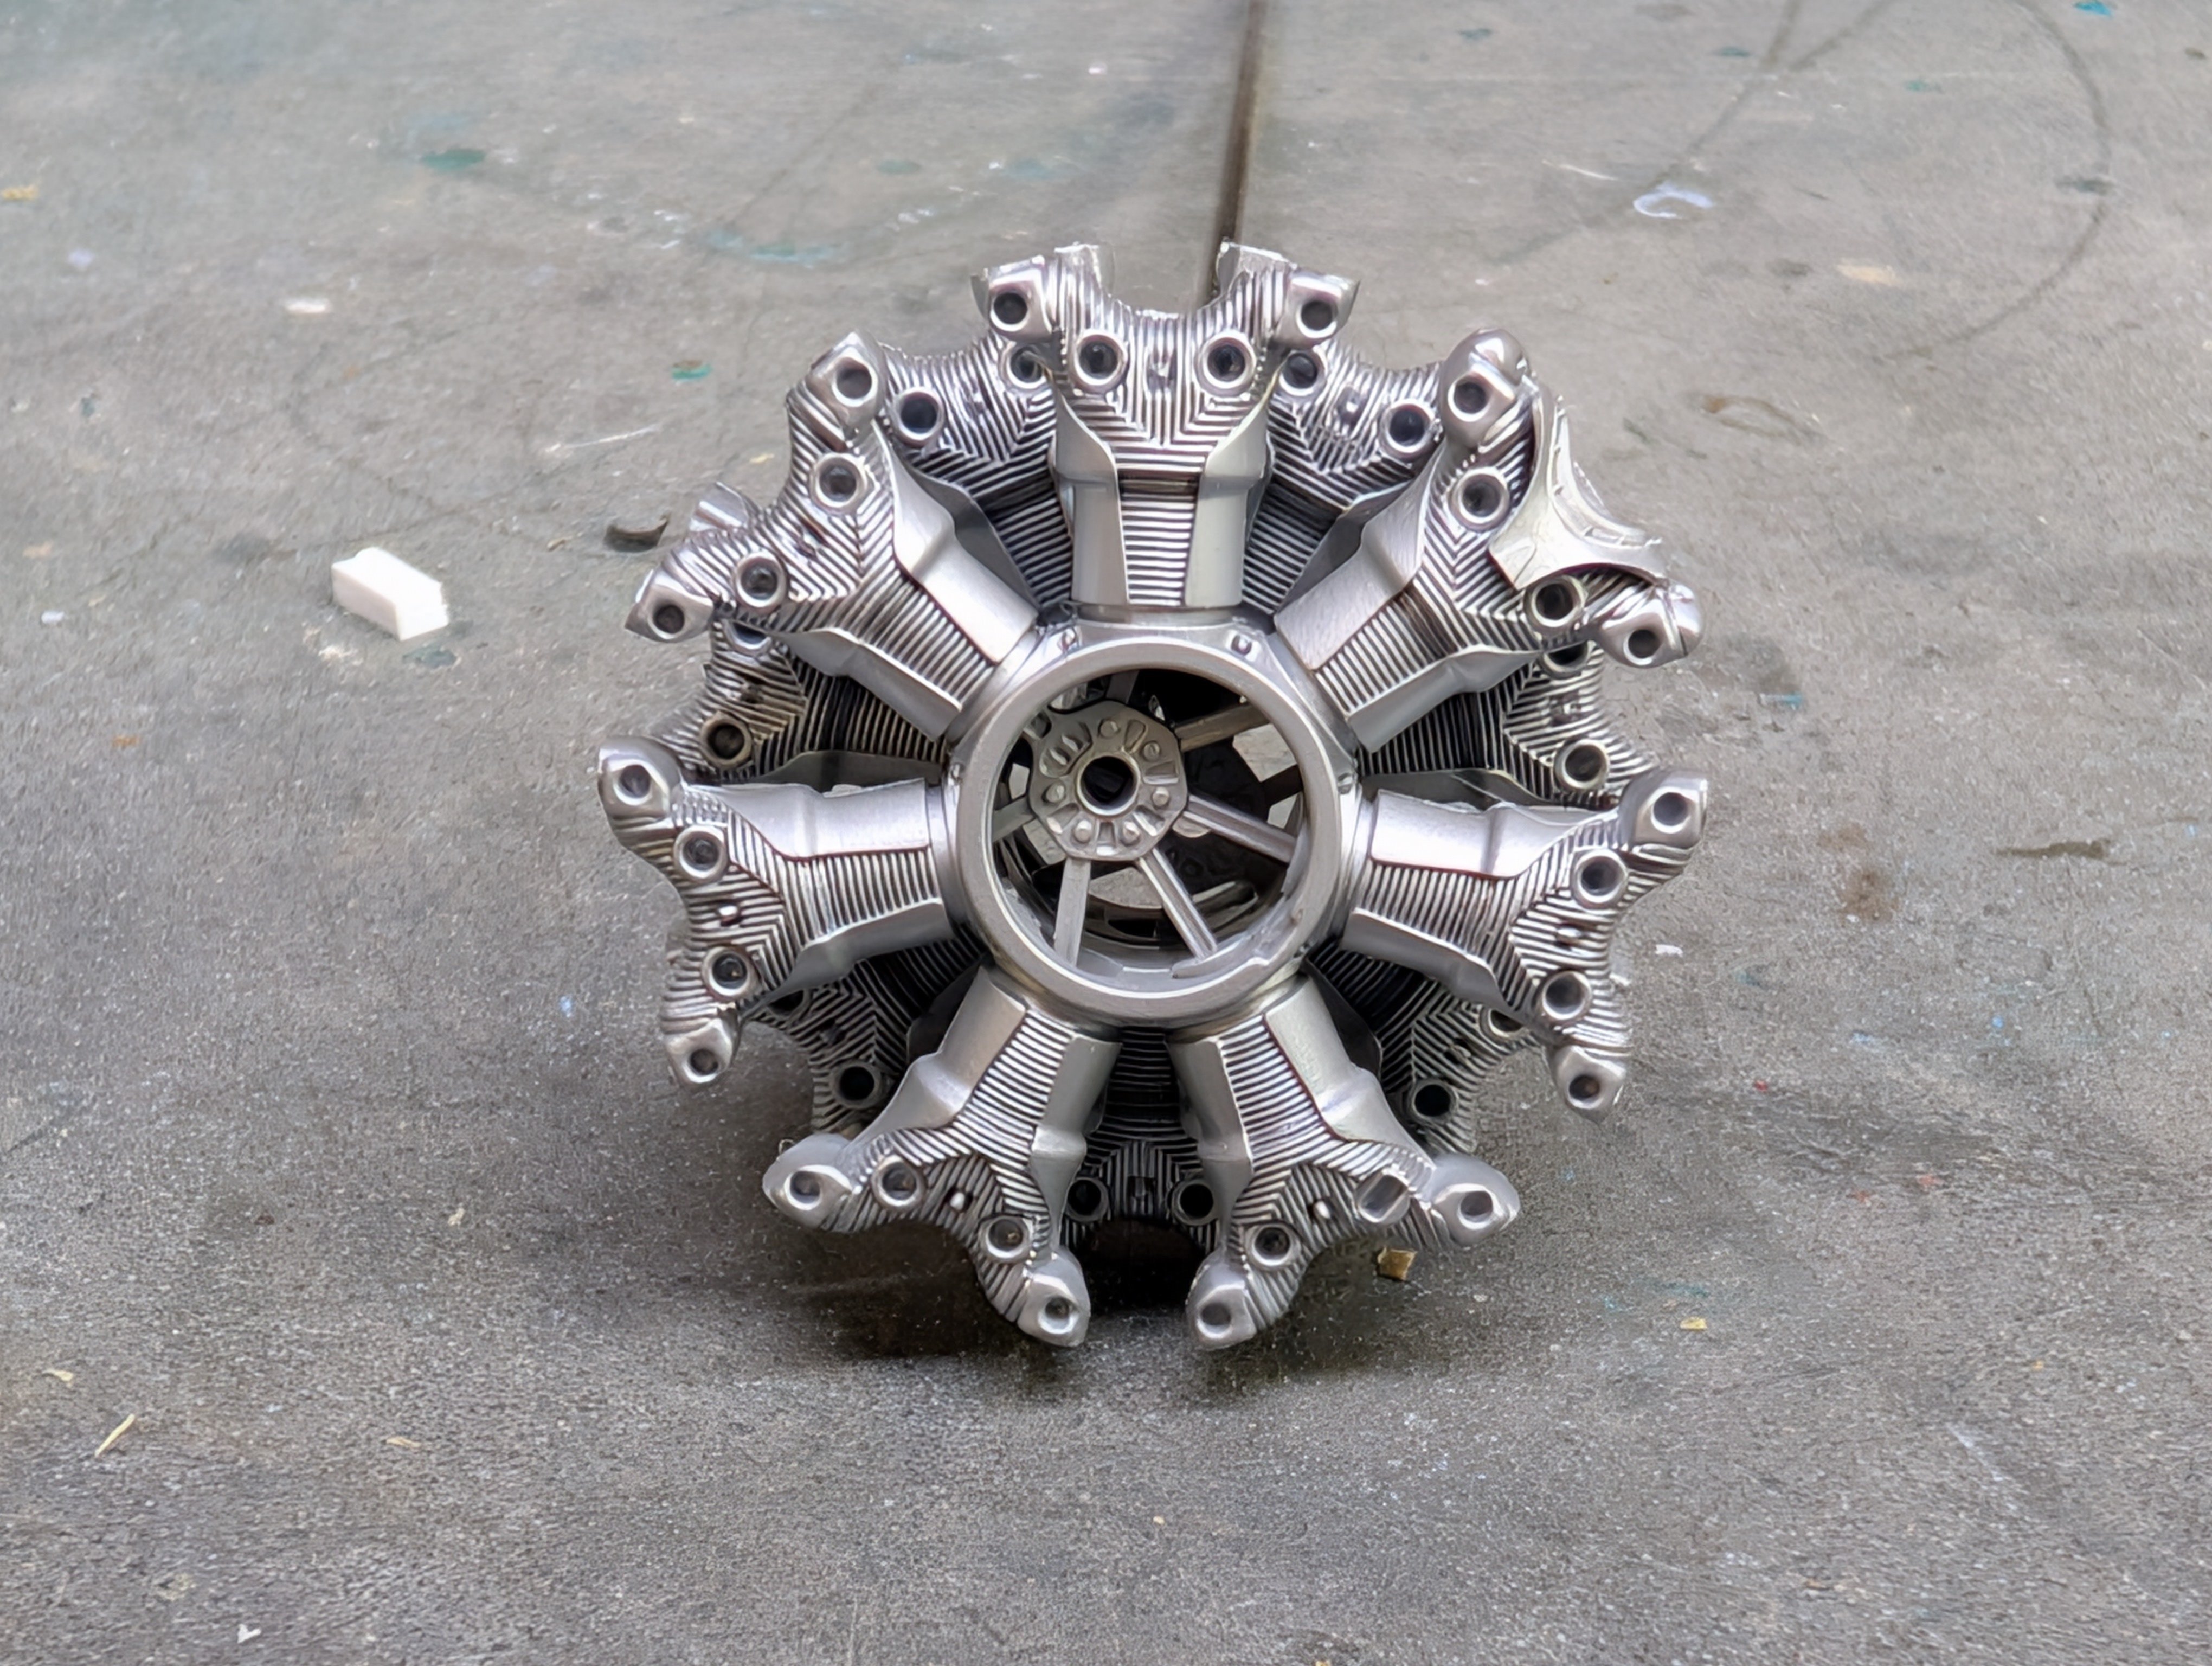
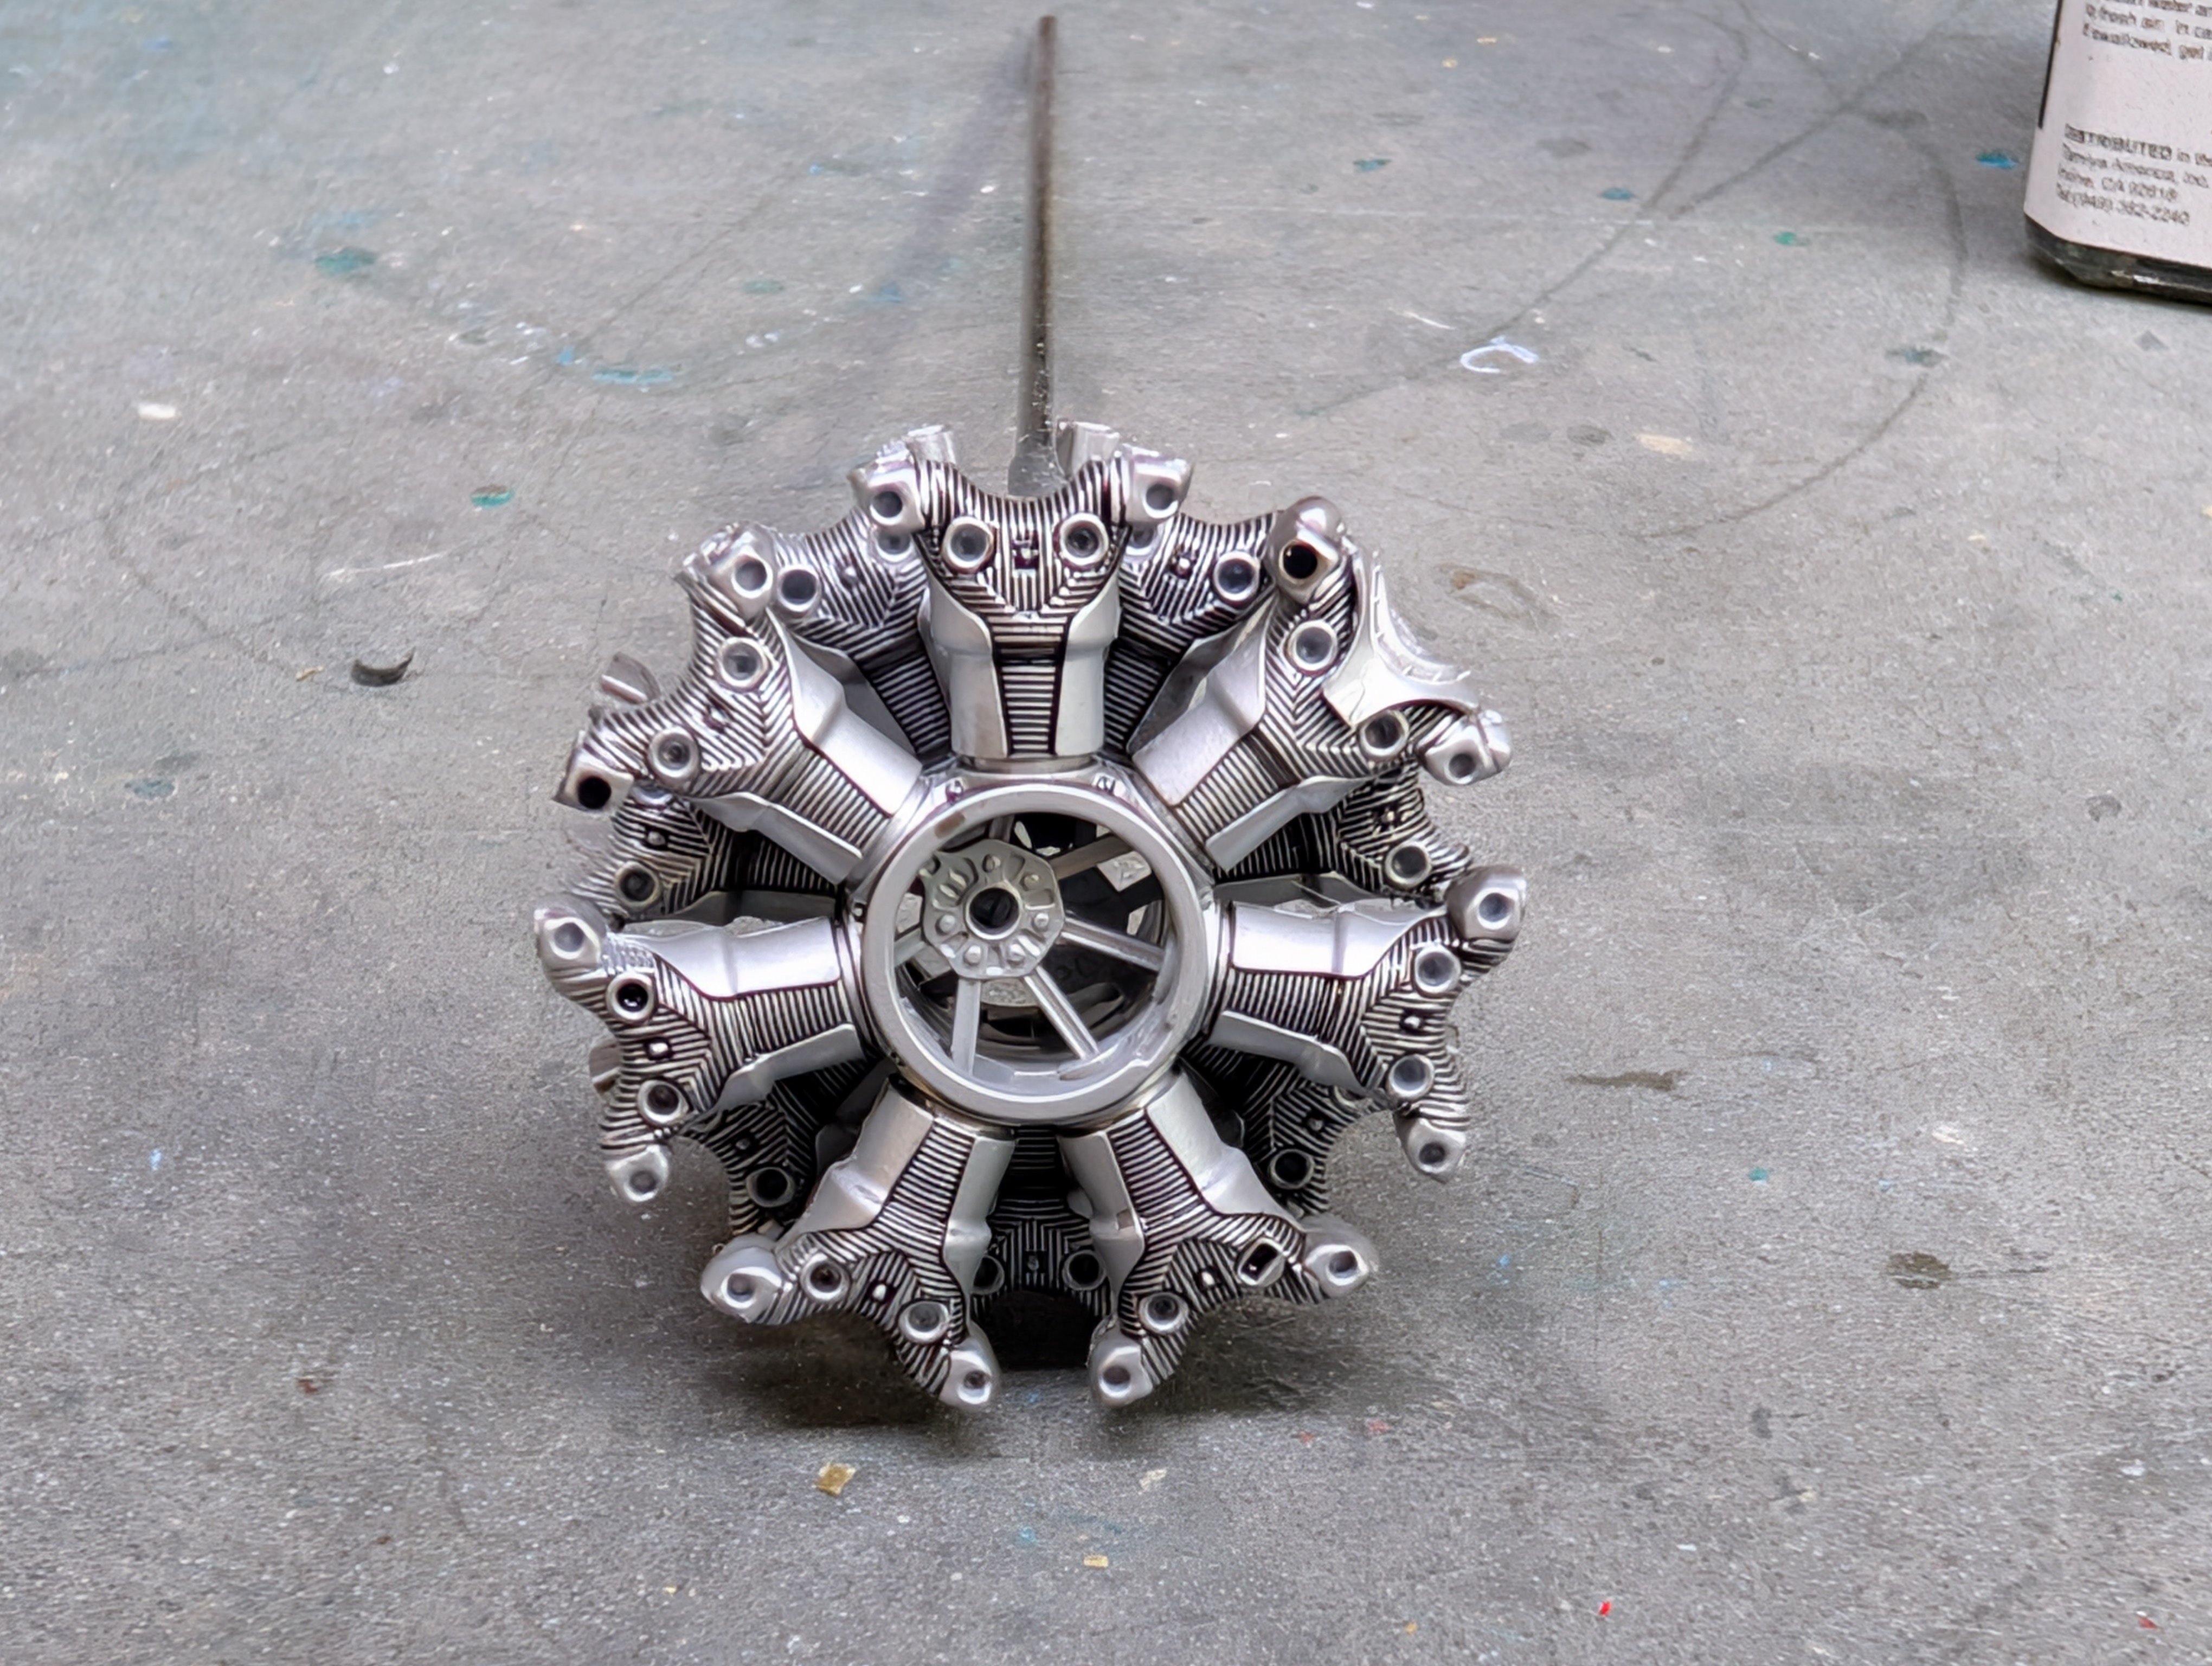
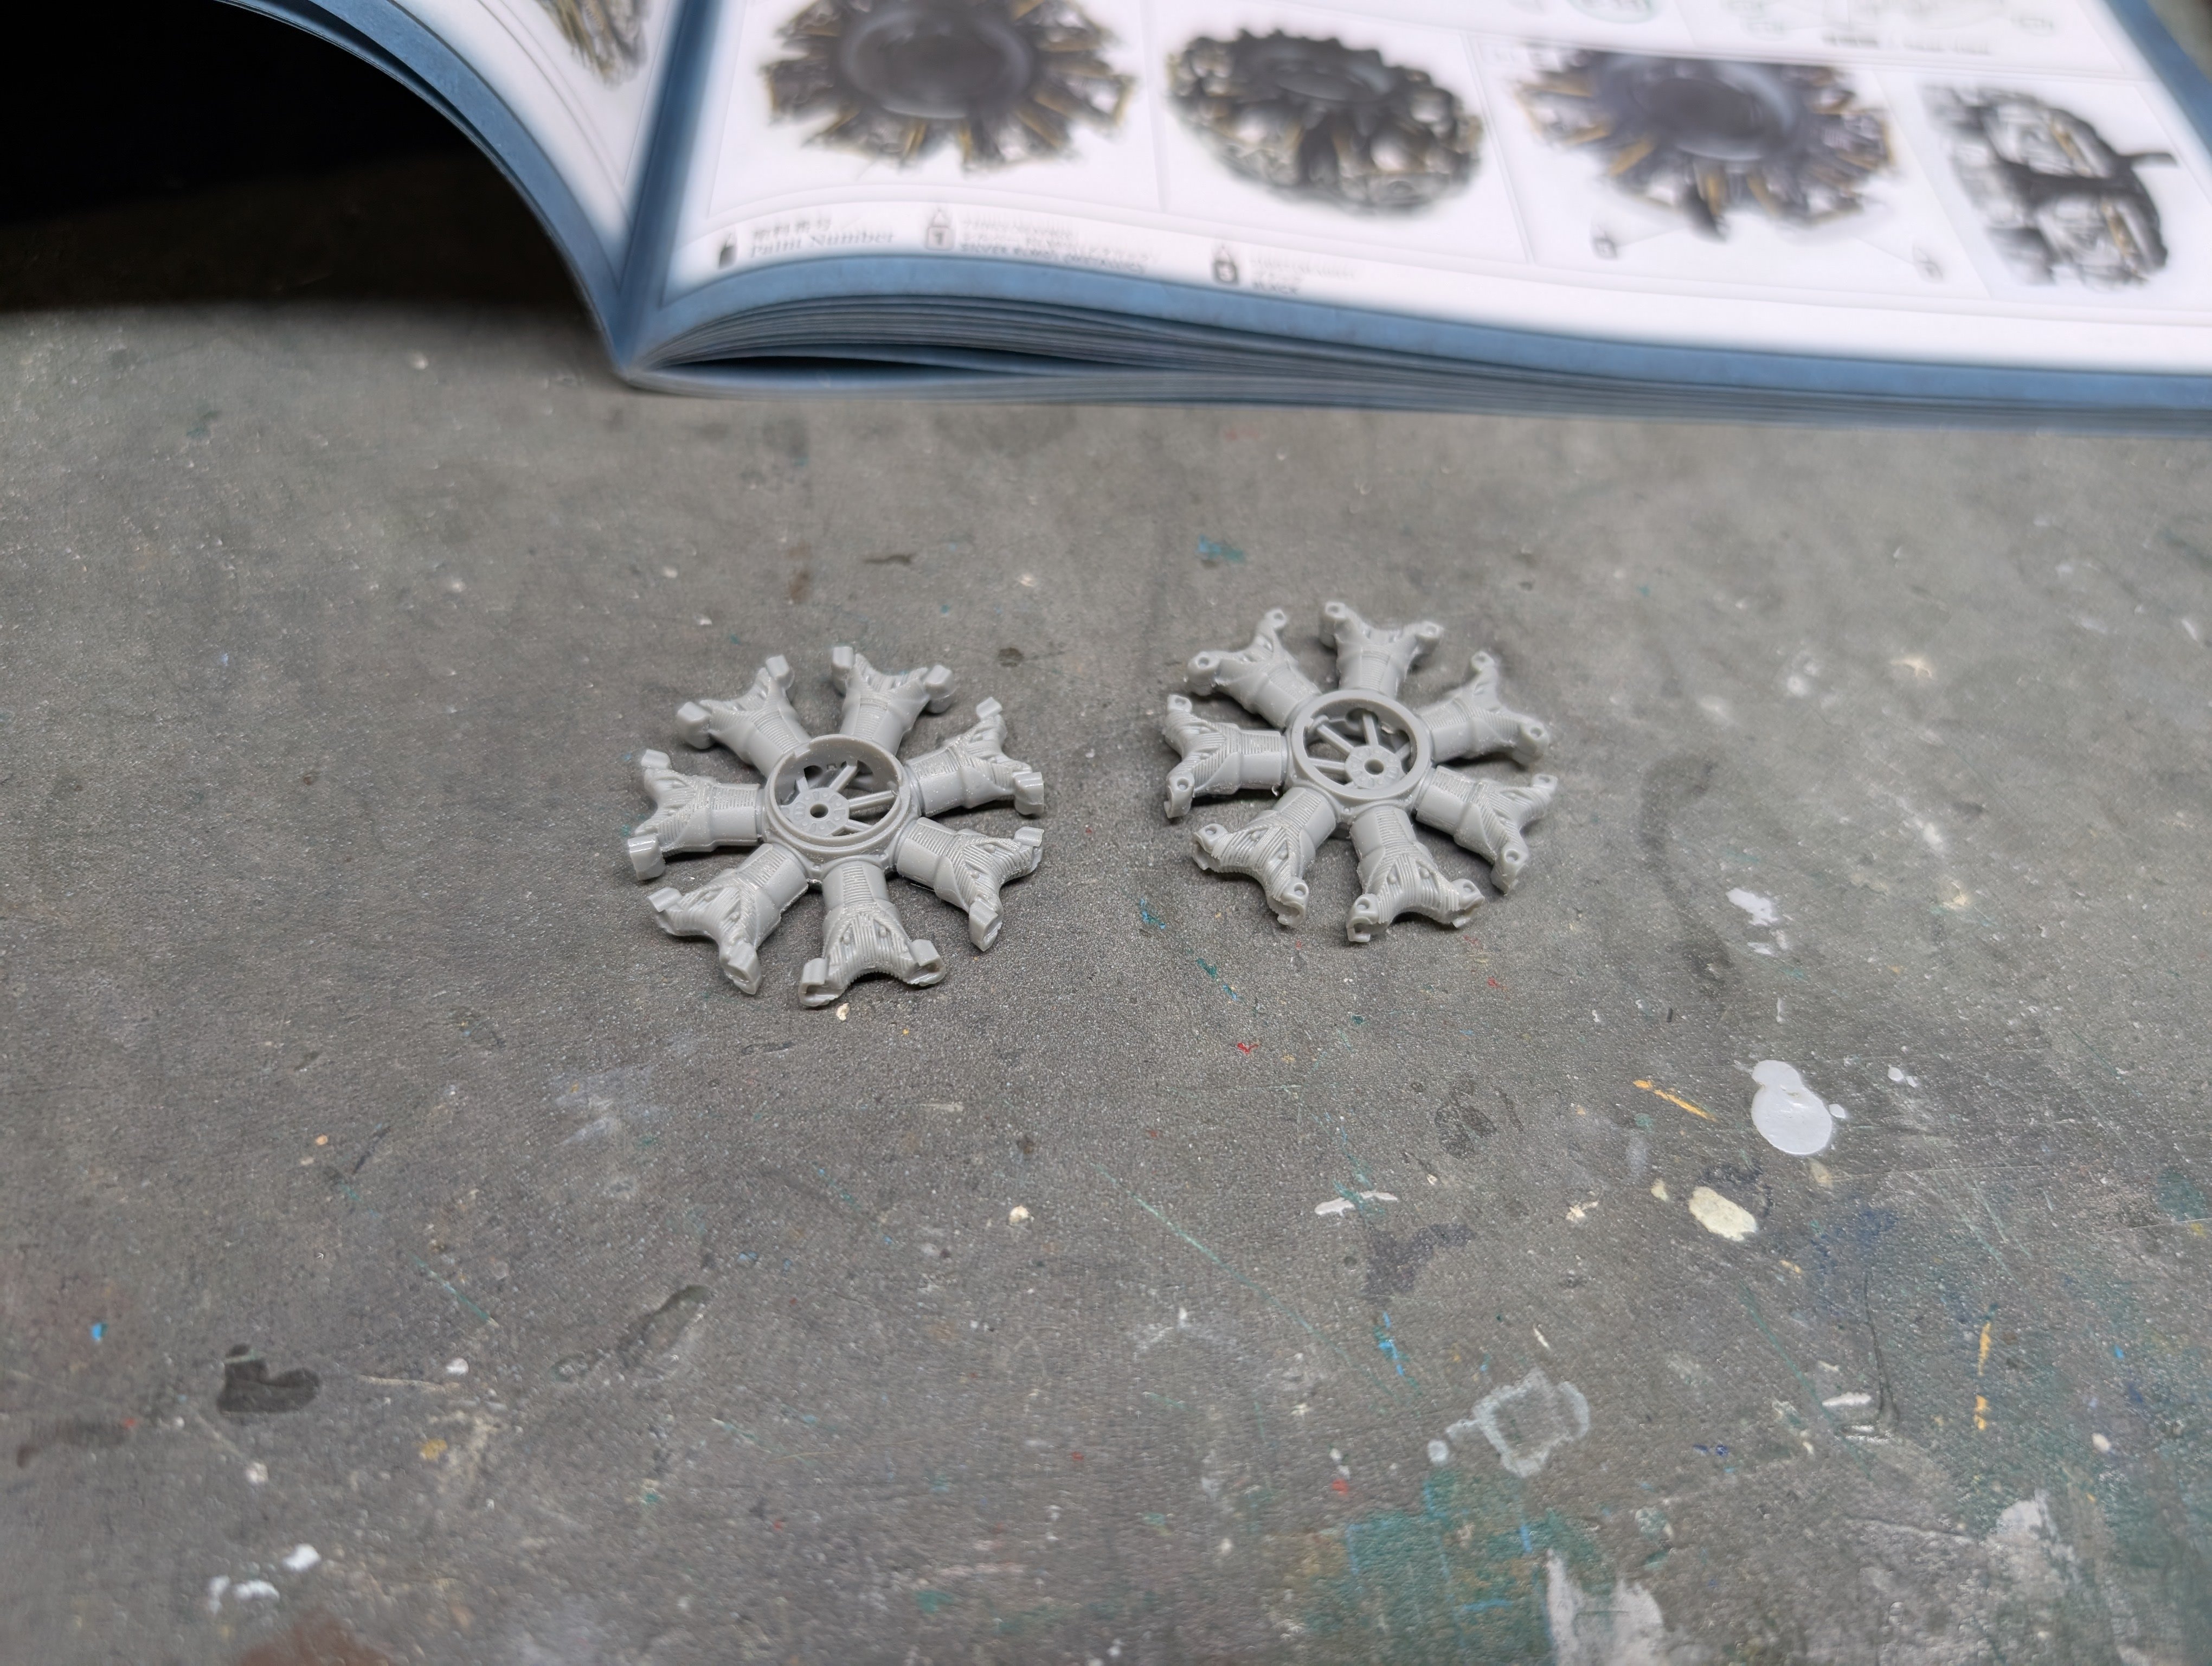
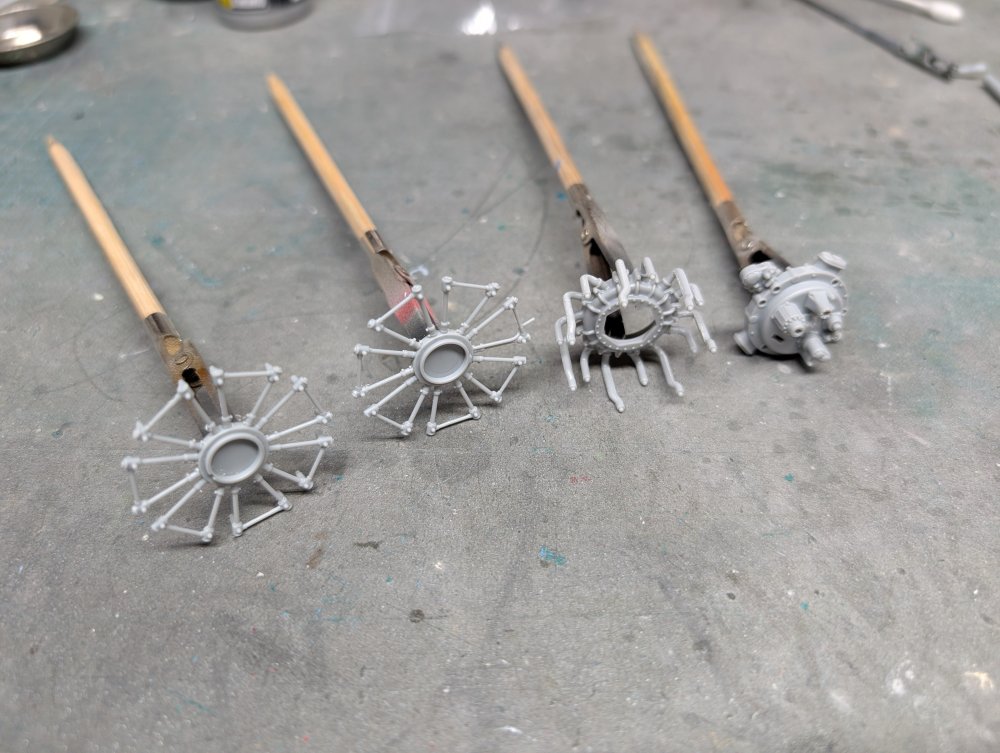
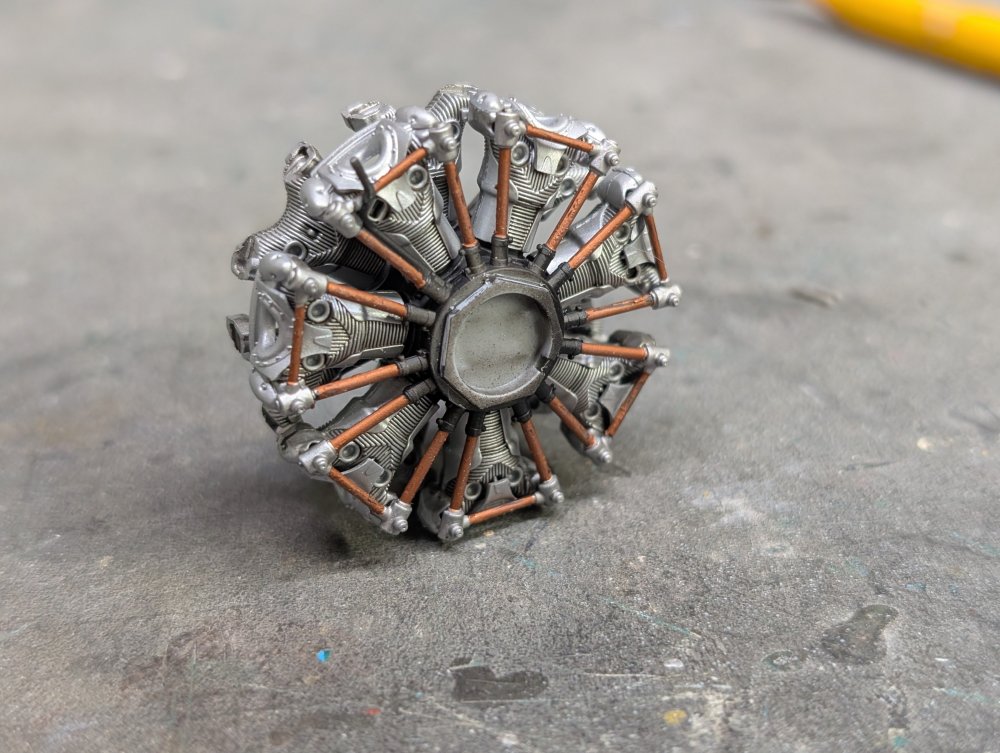
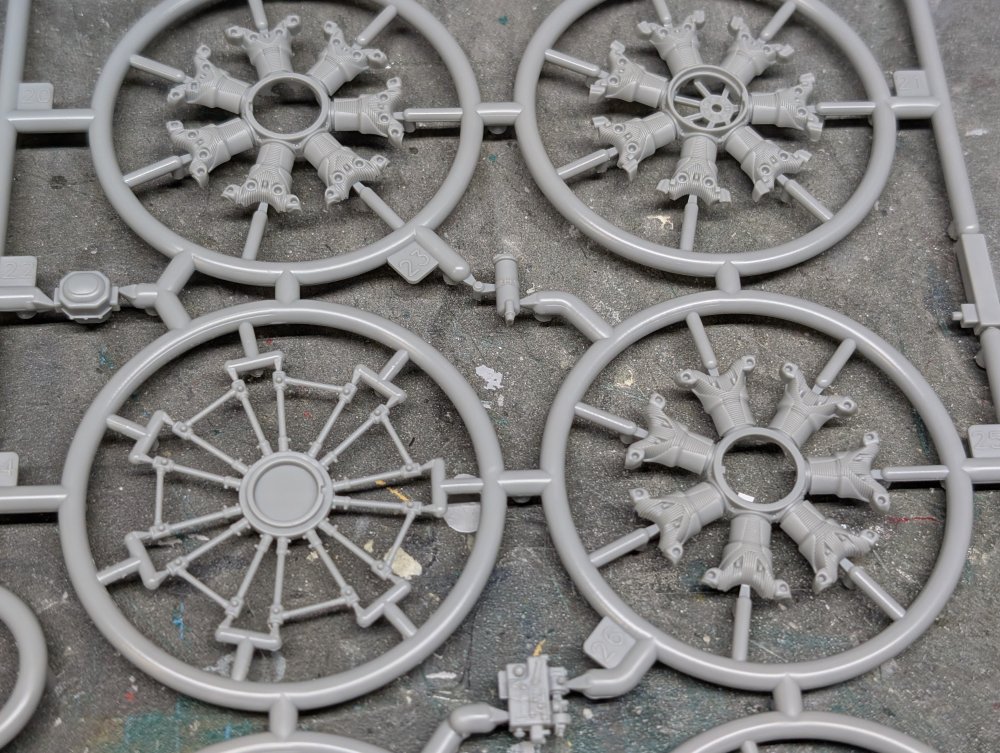
I started on the paint work for the next set of parts. This being the pushrods, intake ring and the engine rear bit. They were all painted black first and then I added the detail painting. The pushrods were added first. Followed by the intake ring.


-
Thanks for the input folks. Still a bit to go before I get to the markings stage so I guess I have time to decide. I have to say that painted over stencils is very appealing.
-
Lovely build there PW. The weathering looks so realistic especially the mud on the back of the hull.
-
What is on your bench right now ? Share a picture :)
BlrwestSiR replied to Martinnfb's topic in Modelling Discussion
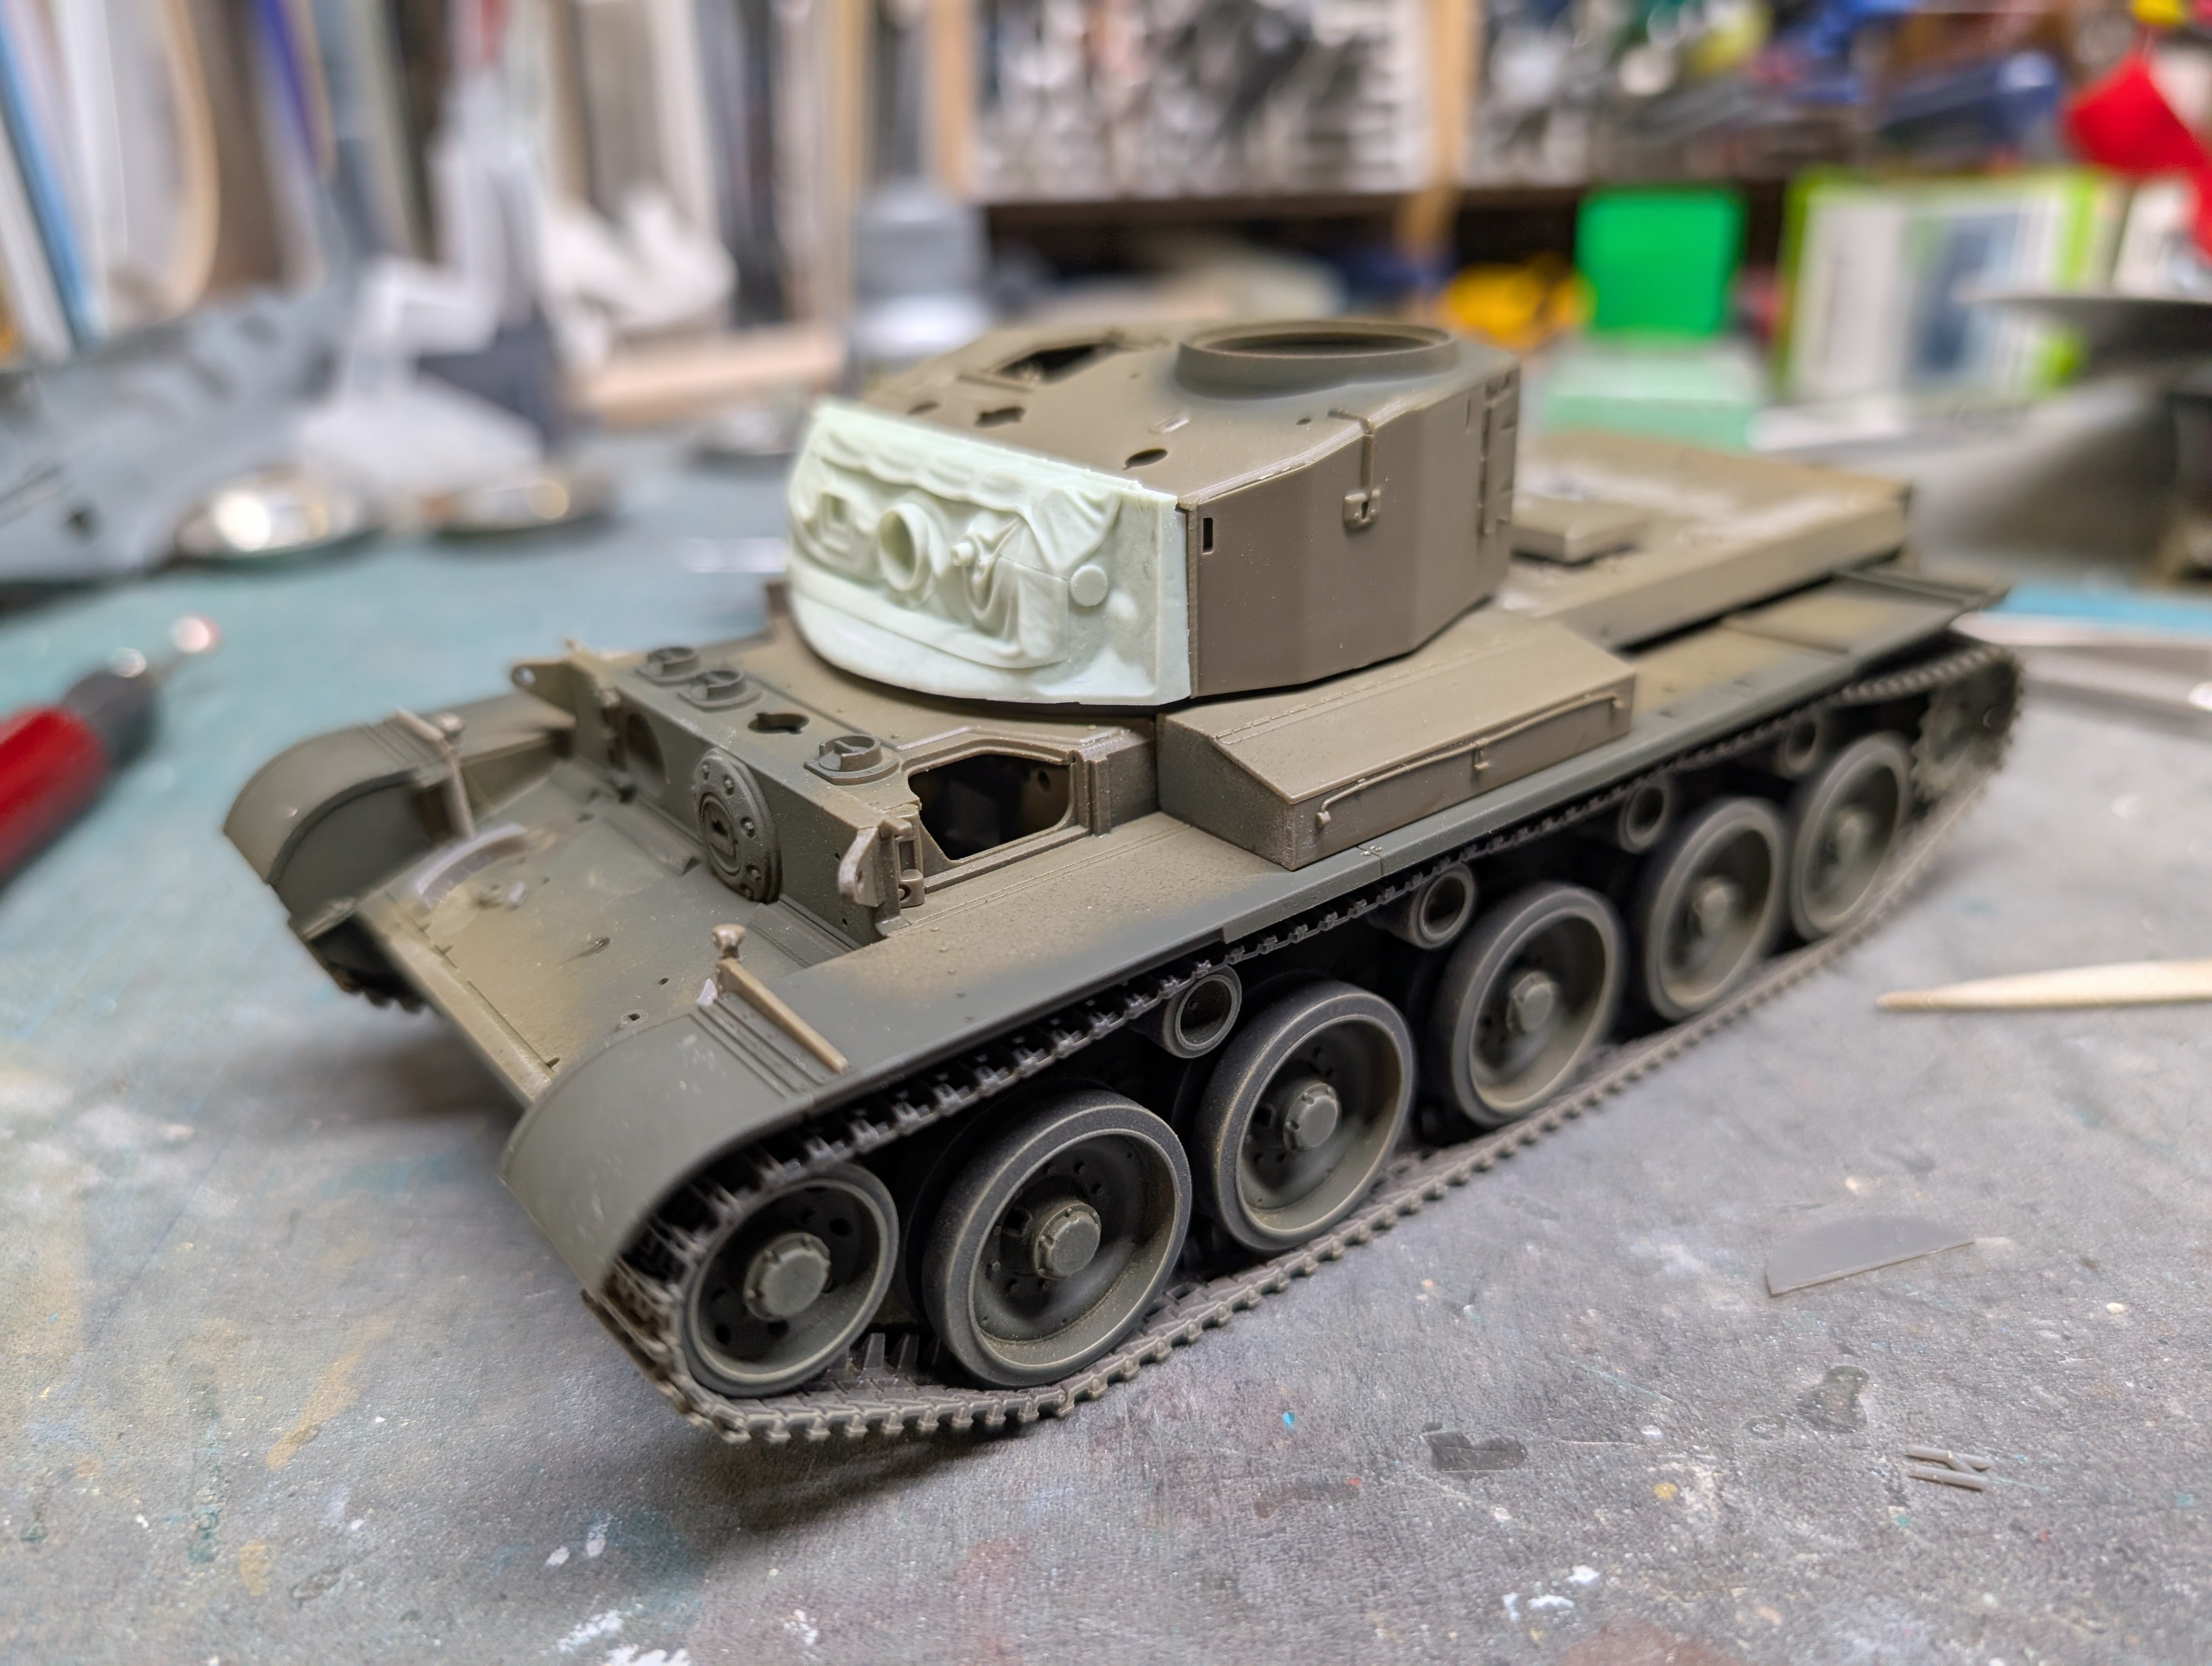
Thanks Paul! I have the Passion Models detail set for the kit. It's 3D printed like the T-REX one. The Bronco indie link tracks don't quite fit the Tamiya kit so good thing you have the Fruil ones. The other bit of AM I'm using is the DEF Models mantlet with the canvas cover.
-
What is on your bench right now ? Share a picture :)
BlrwestSiR replied to Martinnfb's topic in Modelling Discussion
My sister's dog is a 20lb at most Munsterlander. She's actually managed to catch squirrels while being walked on leash. Meantime, the best our dog Jimmy has done is step on a Chihuahua that was annoying him. -
Stunning work.
-
What is on your bench right now ? Share a picture :)
BlrwestSiR replied to Martinnfb's topic in Modelling Discussion
Sunny's last kill was a rabbit. I had to bury it as I didn't think he was going to be able to eat it. At least not without making a bloody mess. -
What is on your bench right now ? Share a picture :)
BlrwestSiR replied to Martinnfb's topic in Modelling Discussion
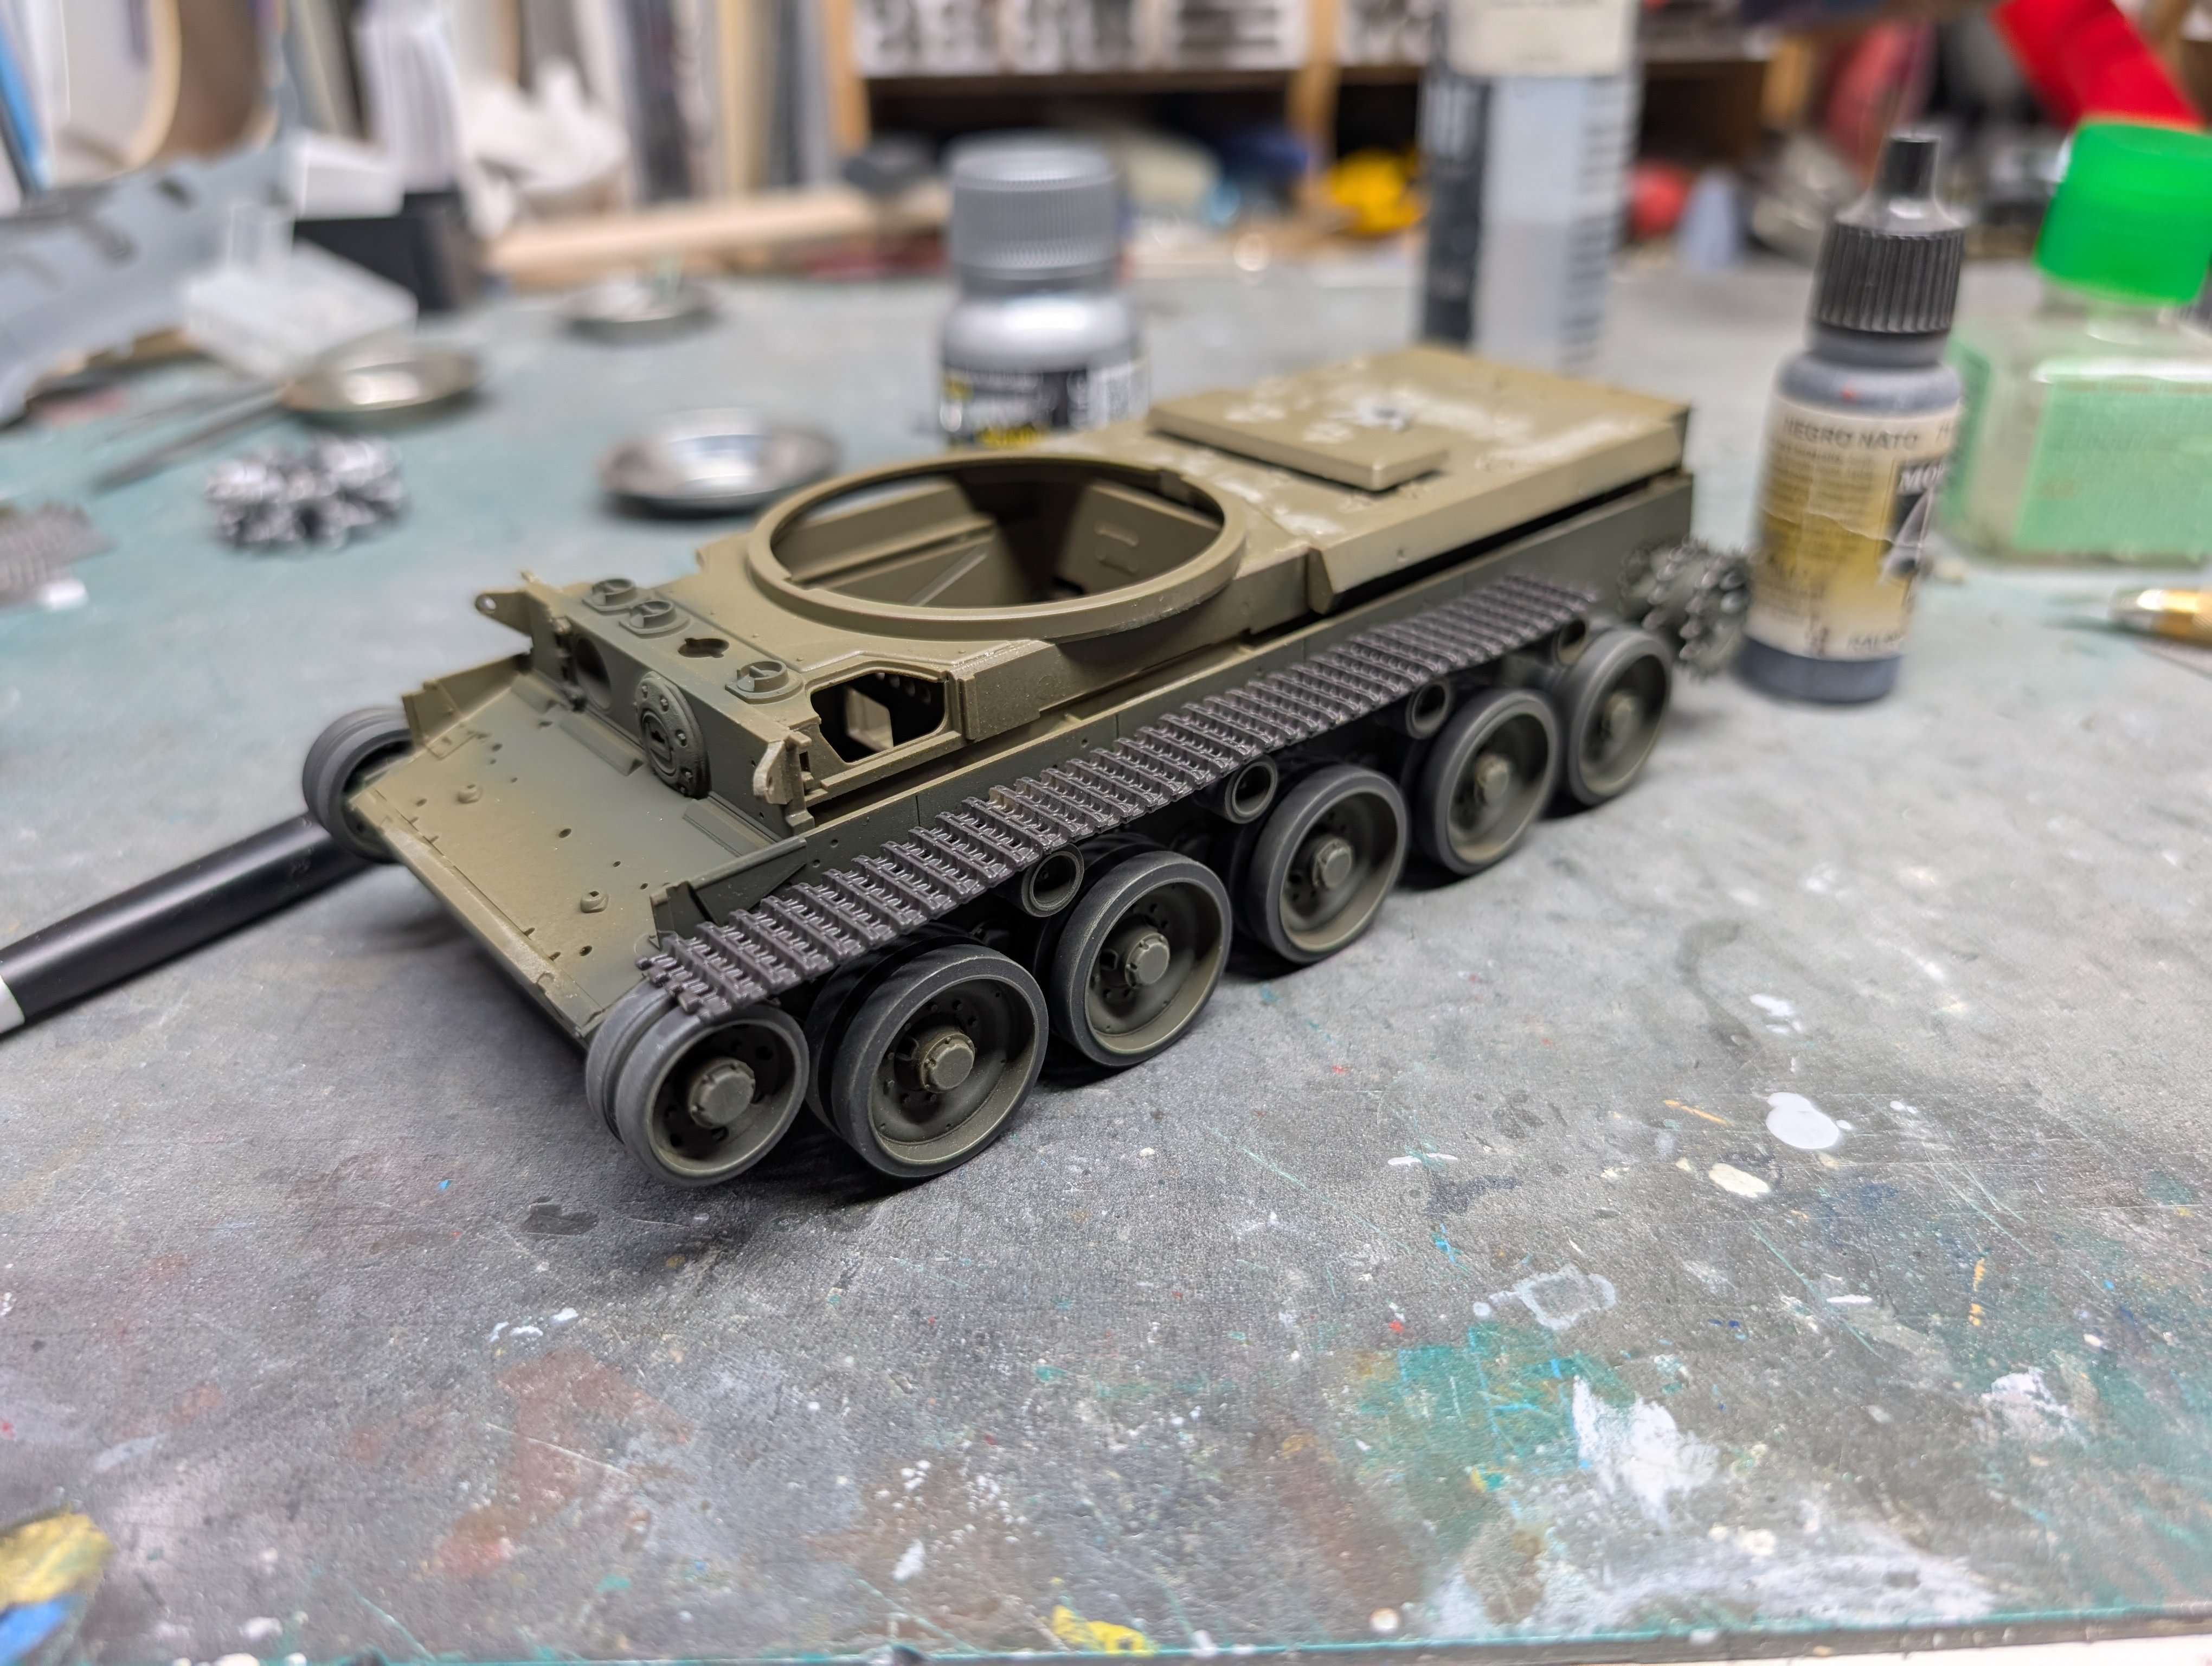
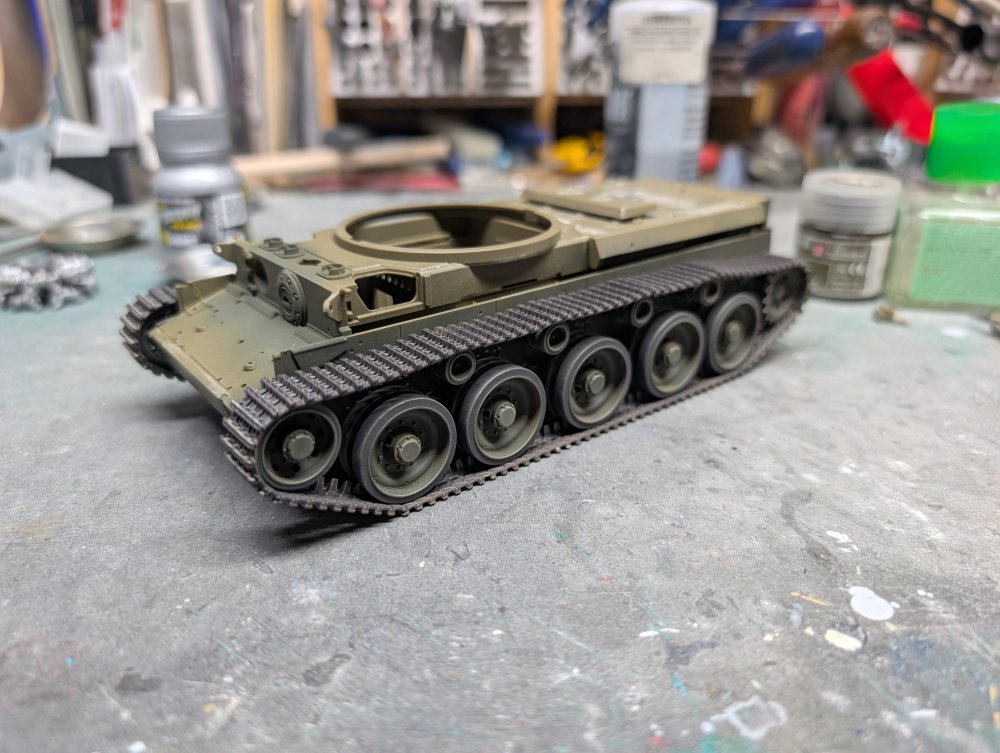
Gus, it's going together like a dream. The tracks are link and length and they even keyed the upper run so that they all line up. There's a few simplified details but I have the Passion Models detail set to improve some of that. -
What is on your bench right now ? Share a picture :)
BlrwestSiR replied to Martinnfb's topic in Modelling Discussion
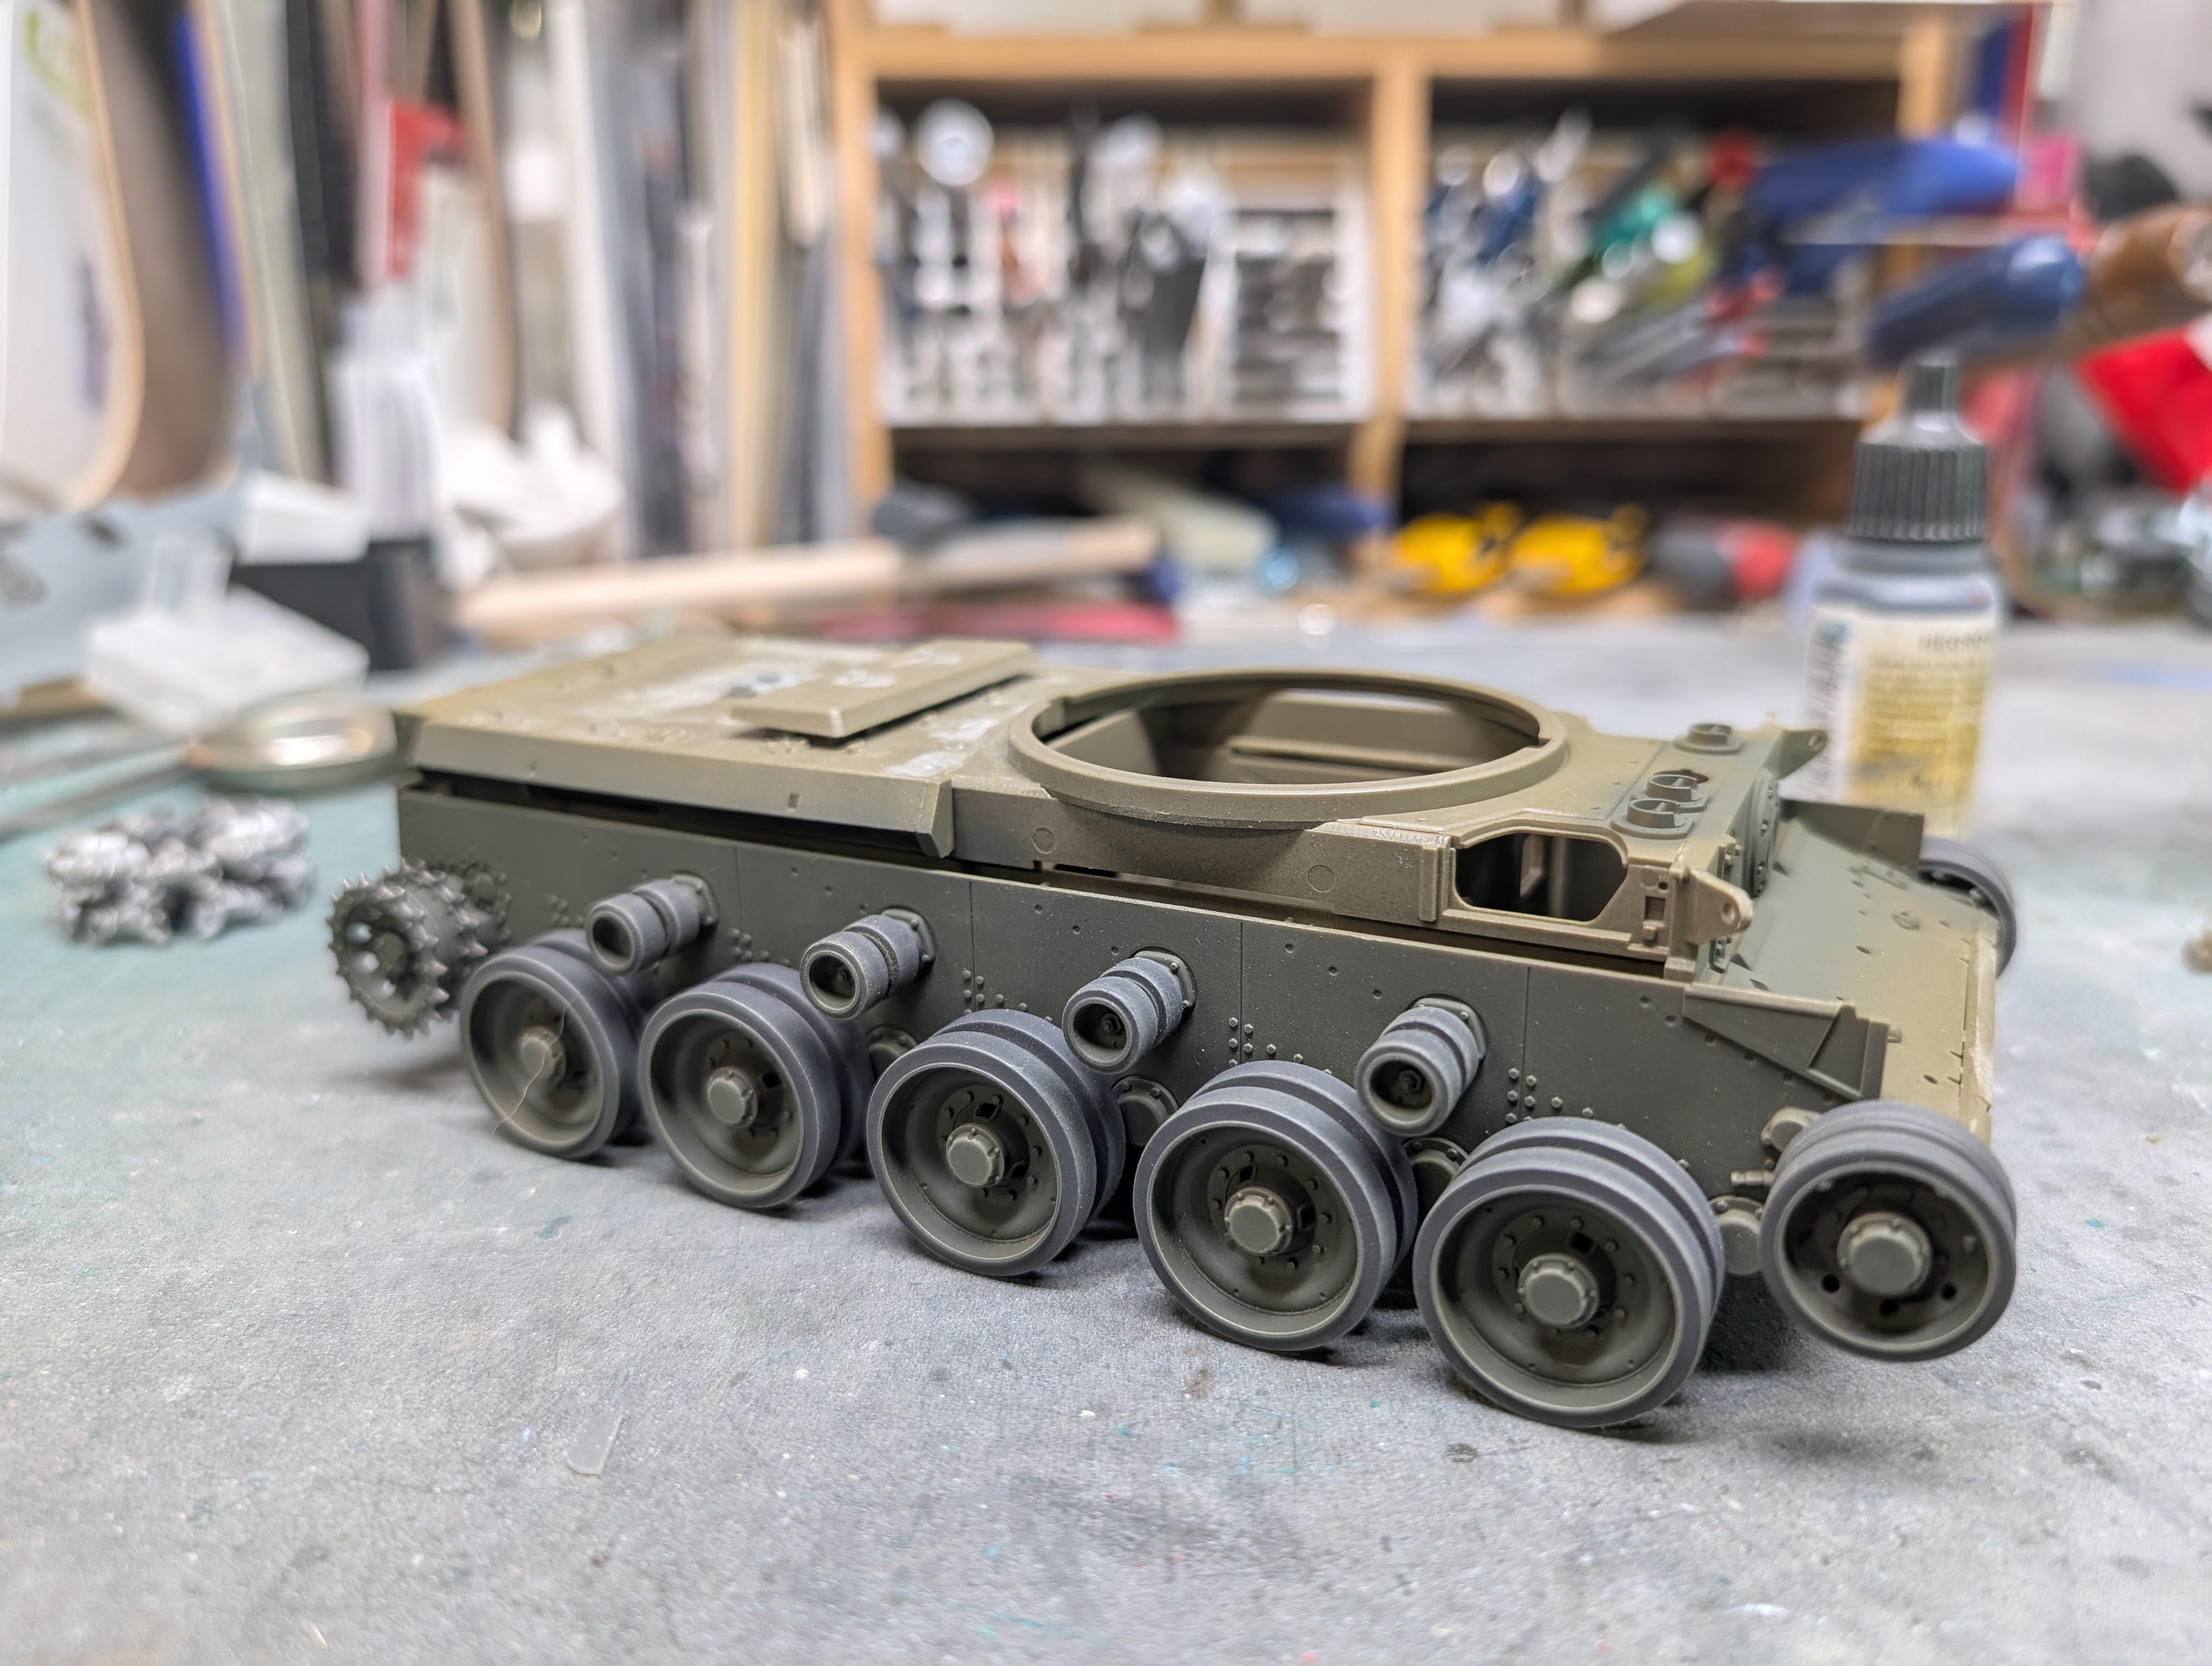
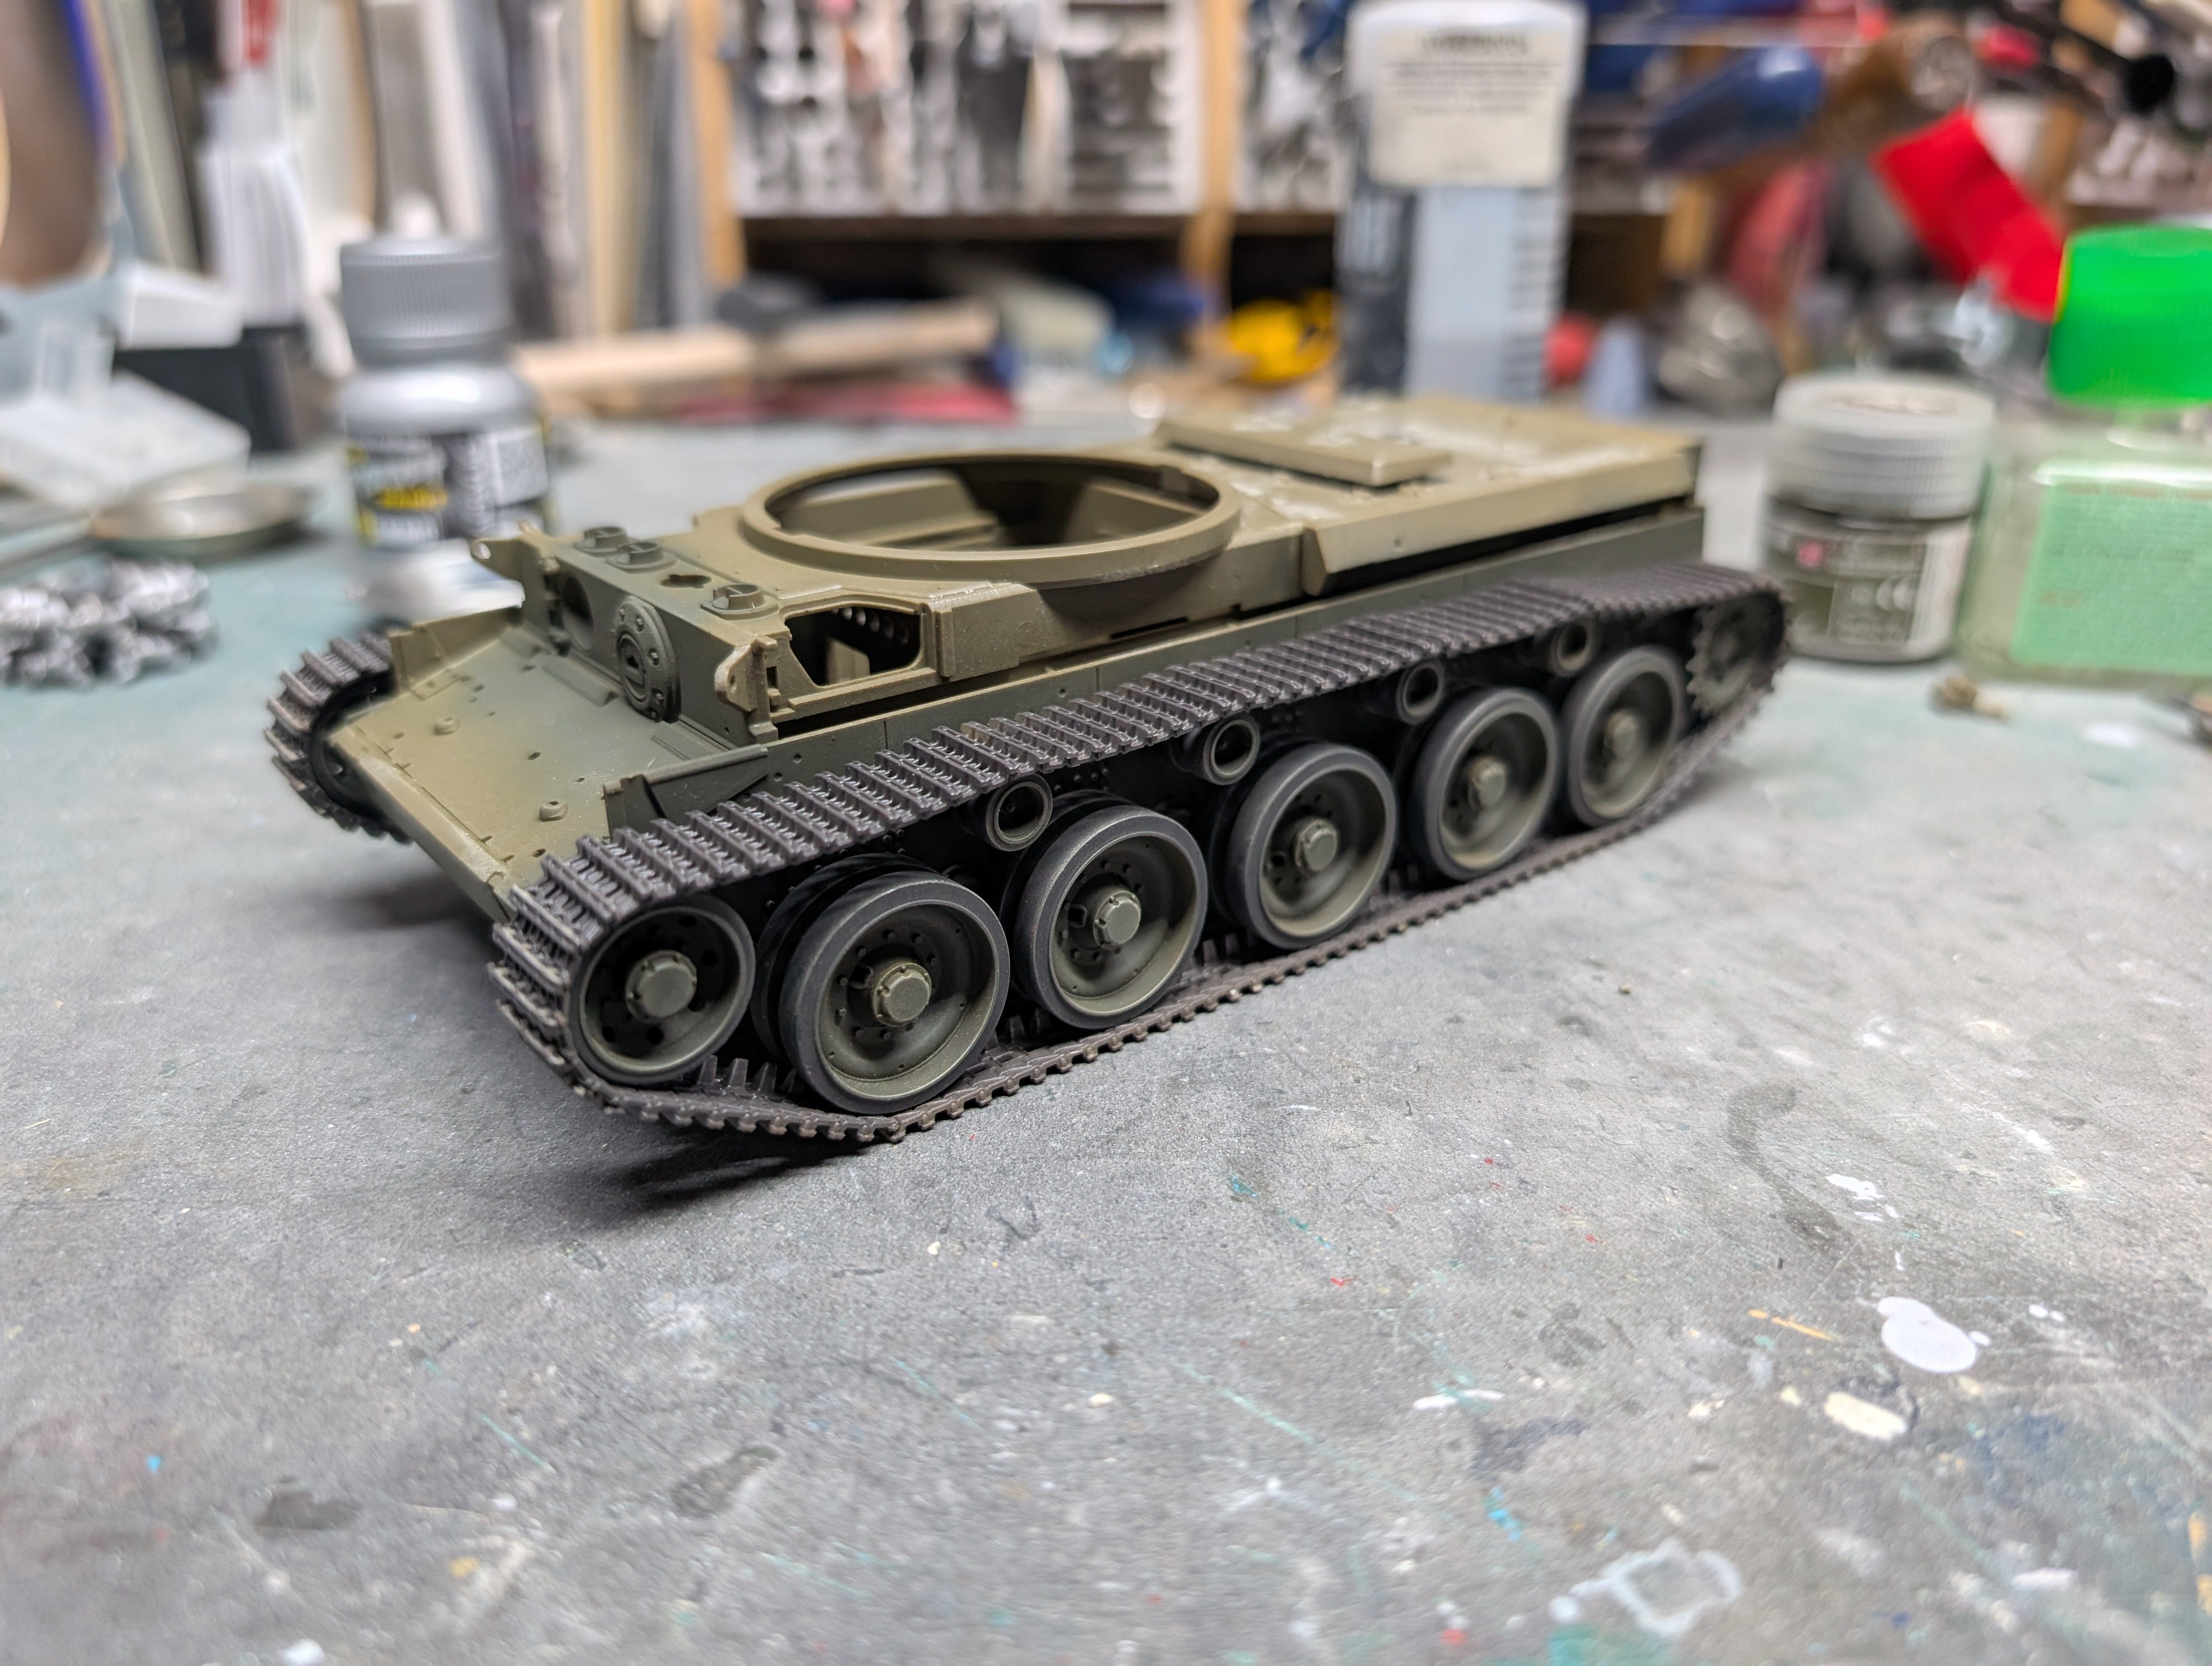
To make sure Sunny don't try to bounce any of those wheels, I decided to paint and glue them to a hull. Then I thought it best to add some tracks. This is the recent Tamiya A34 Comet.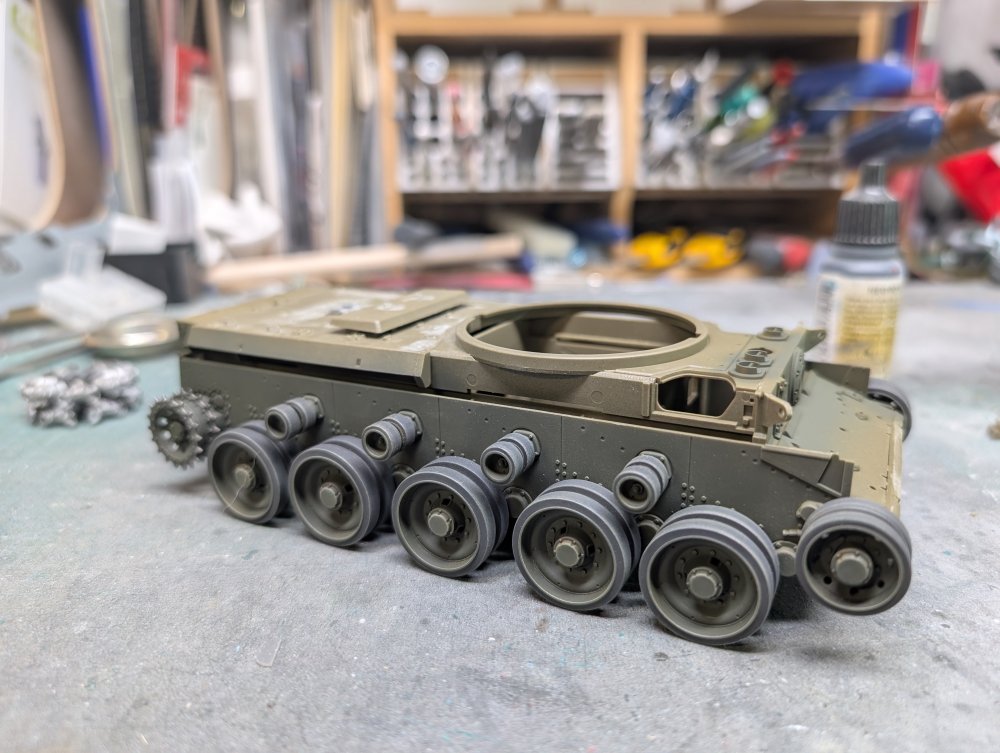

-
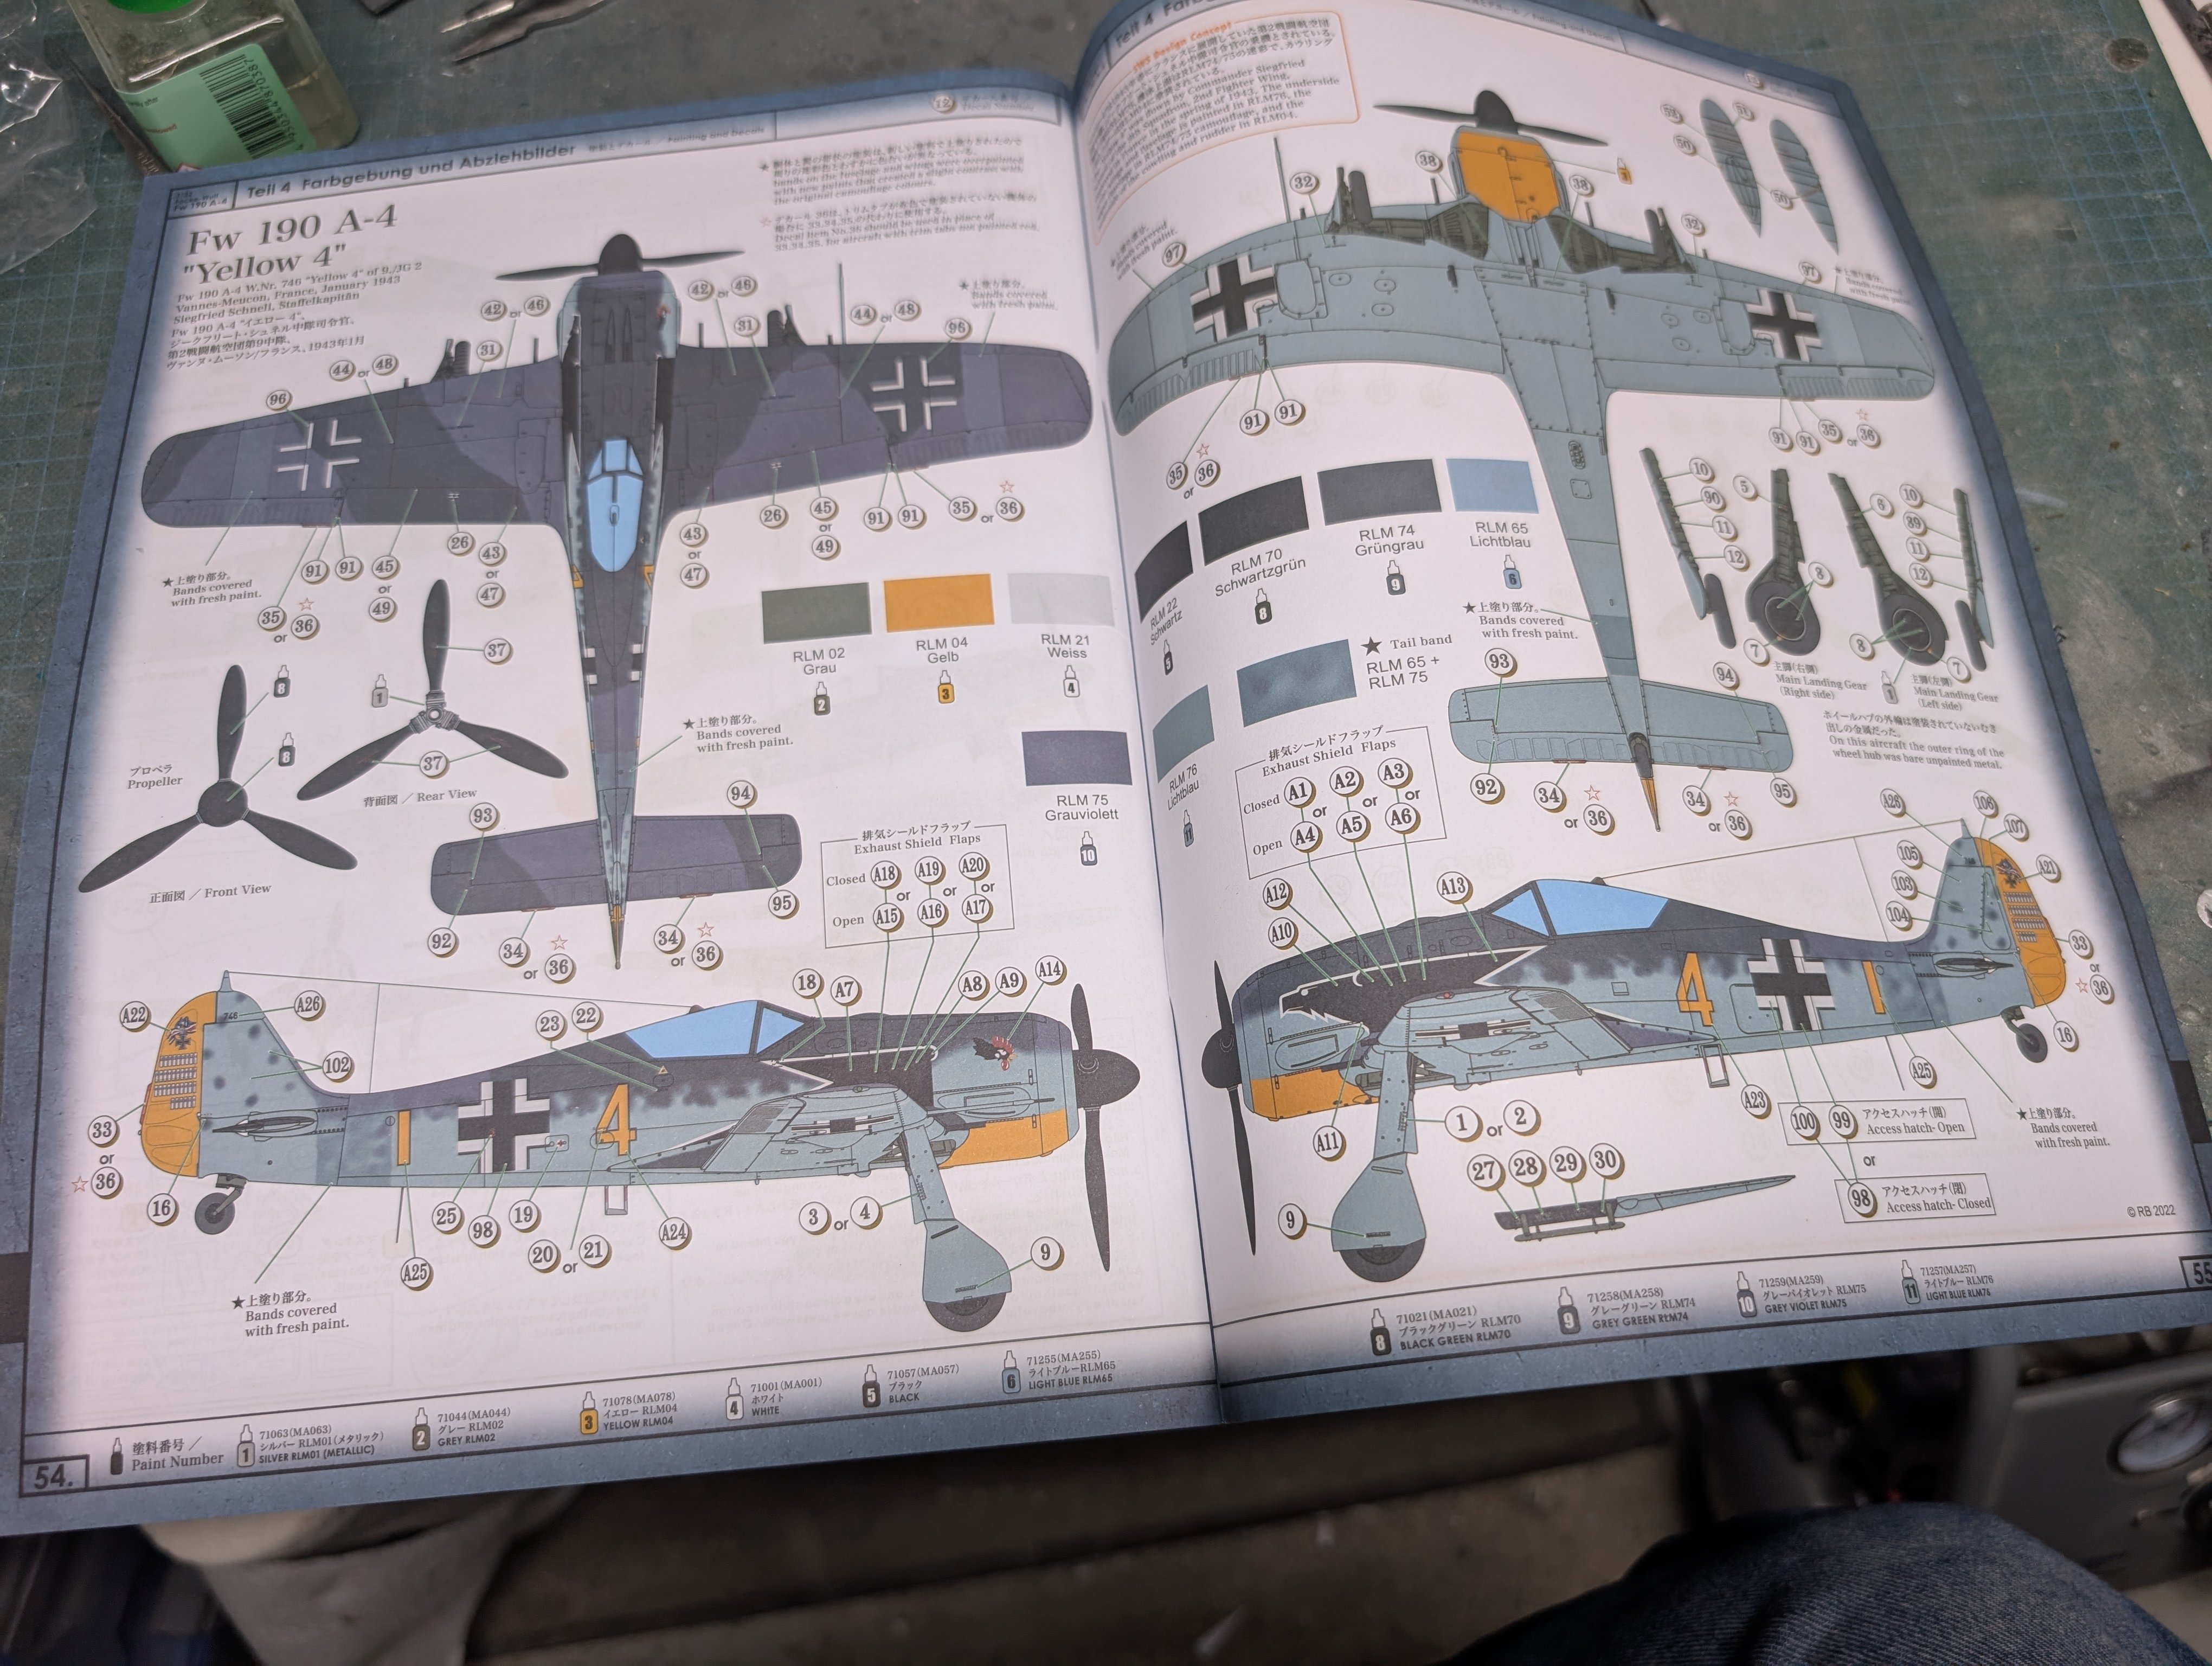
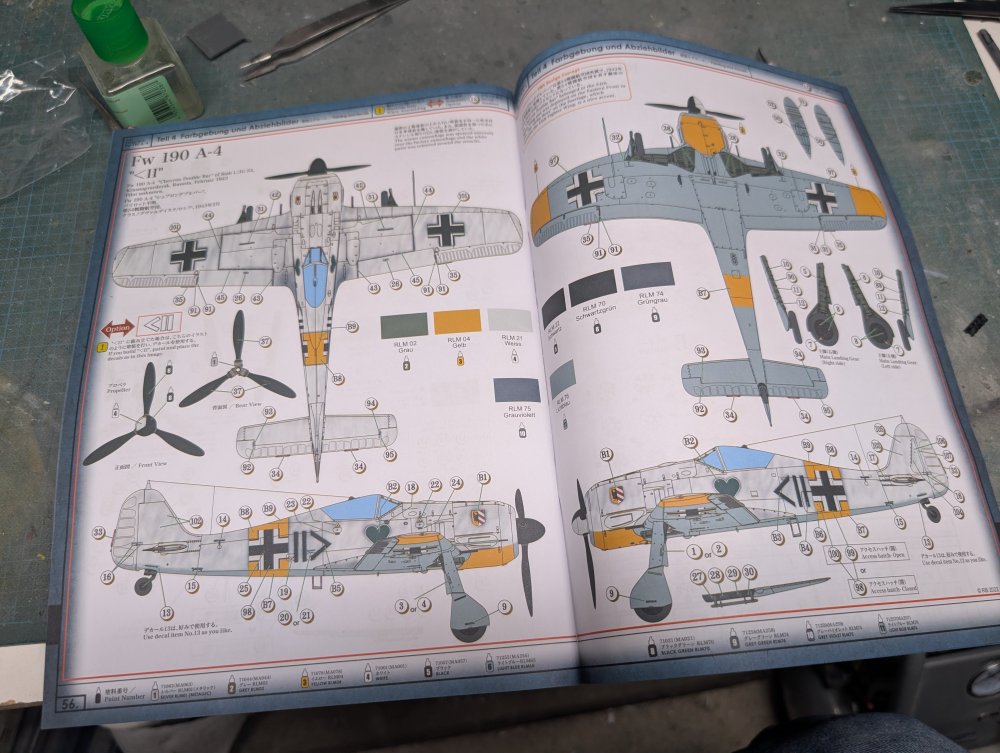
Anyone have any references for <|| ? I can't seem to find any. The winter scheme is very appealing and would go nicely with the BF109 F already in my display case. Carl
-
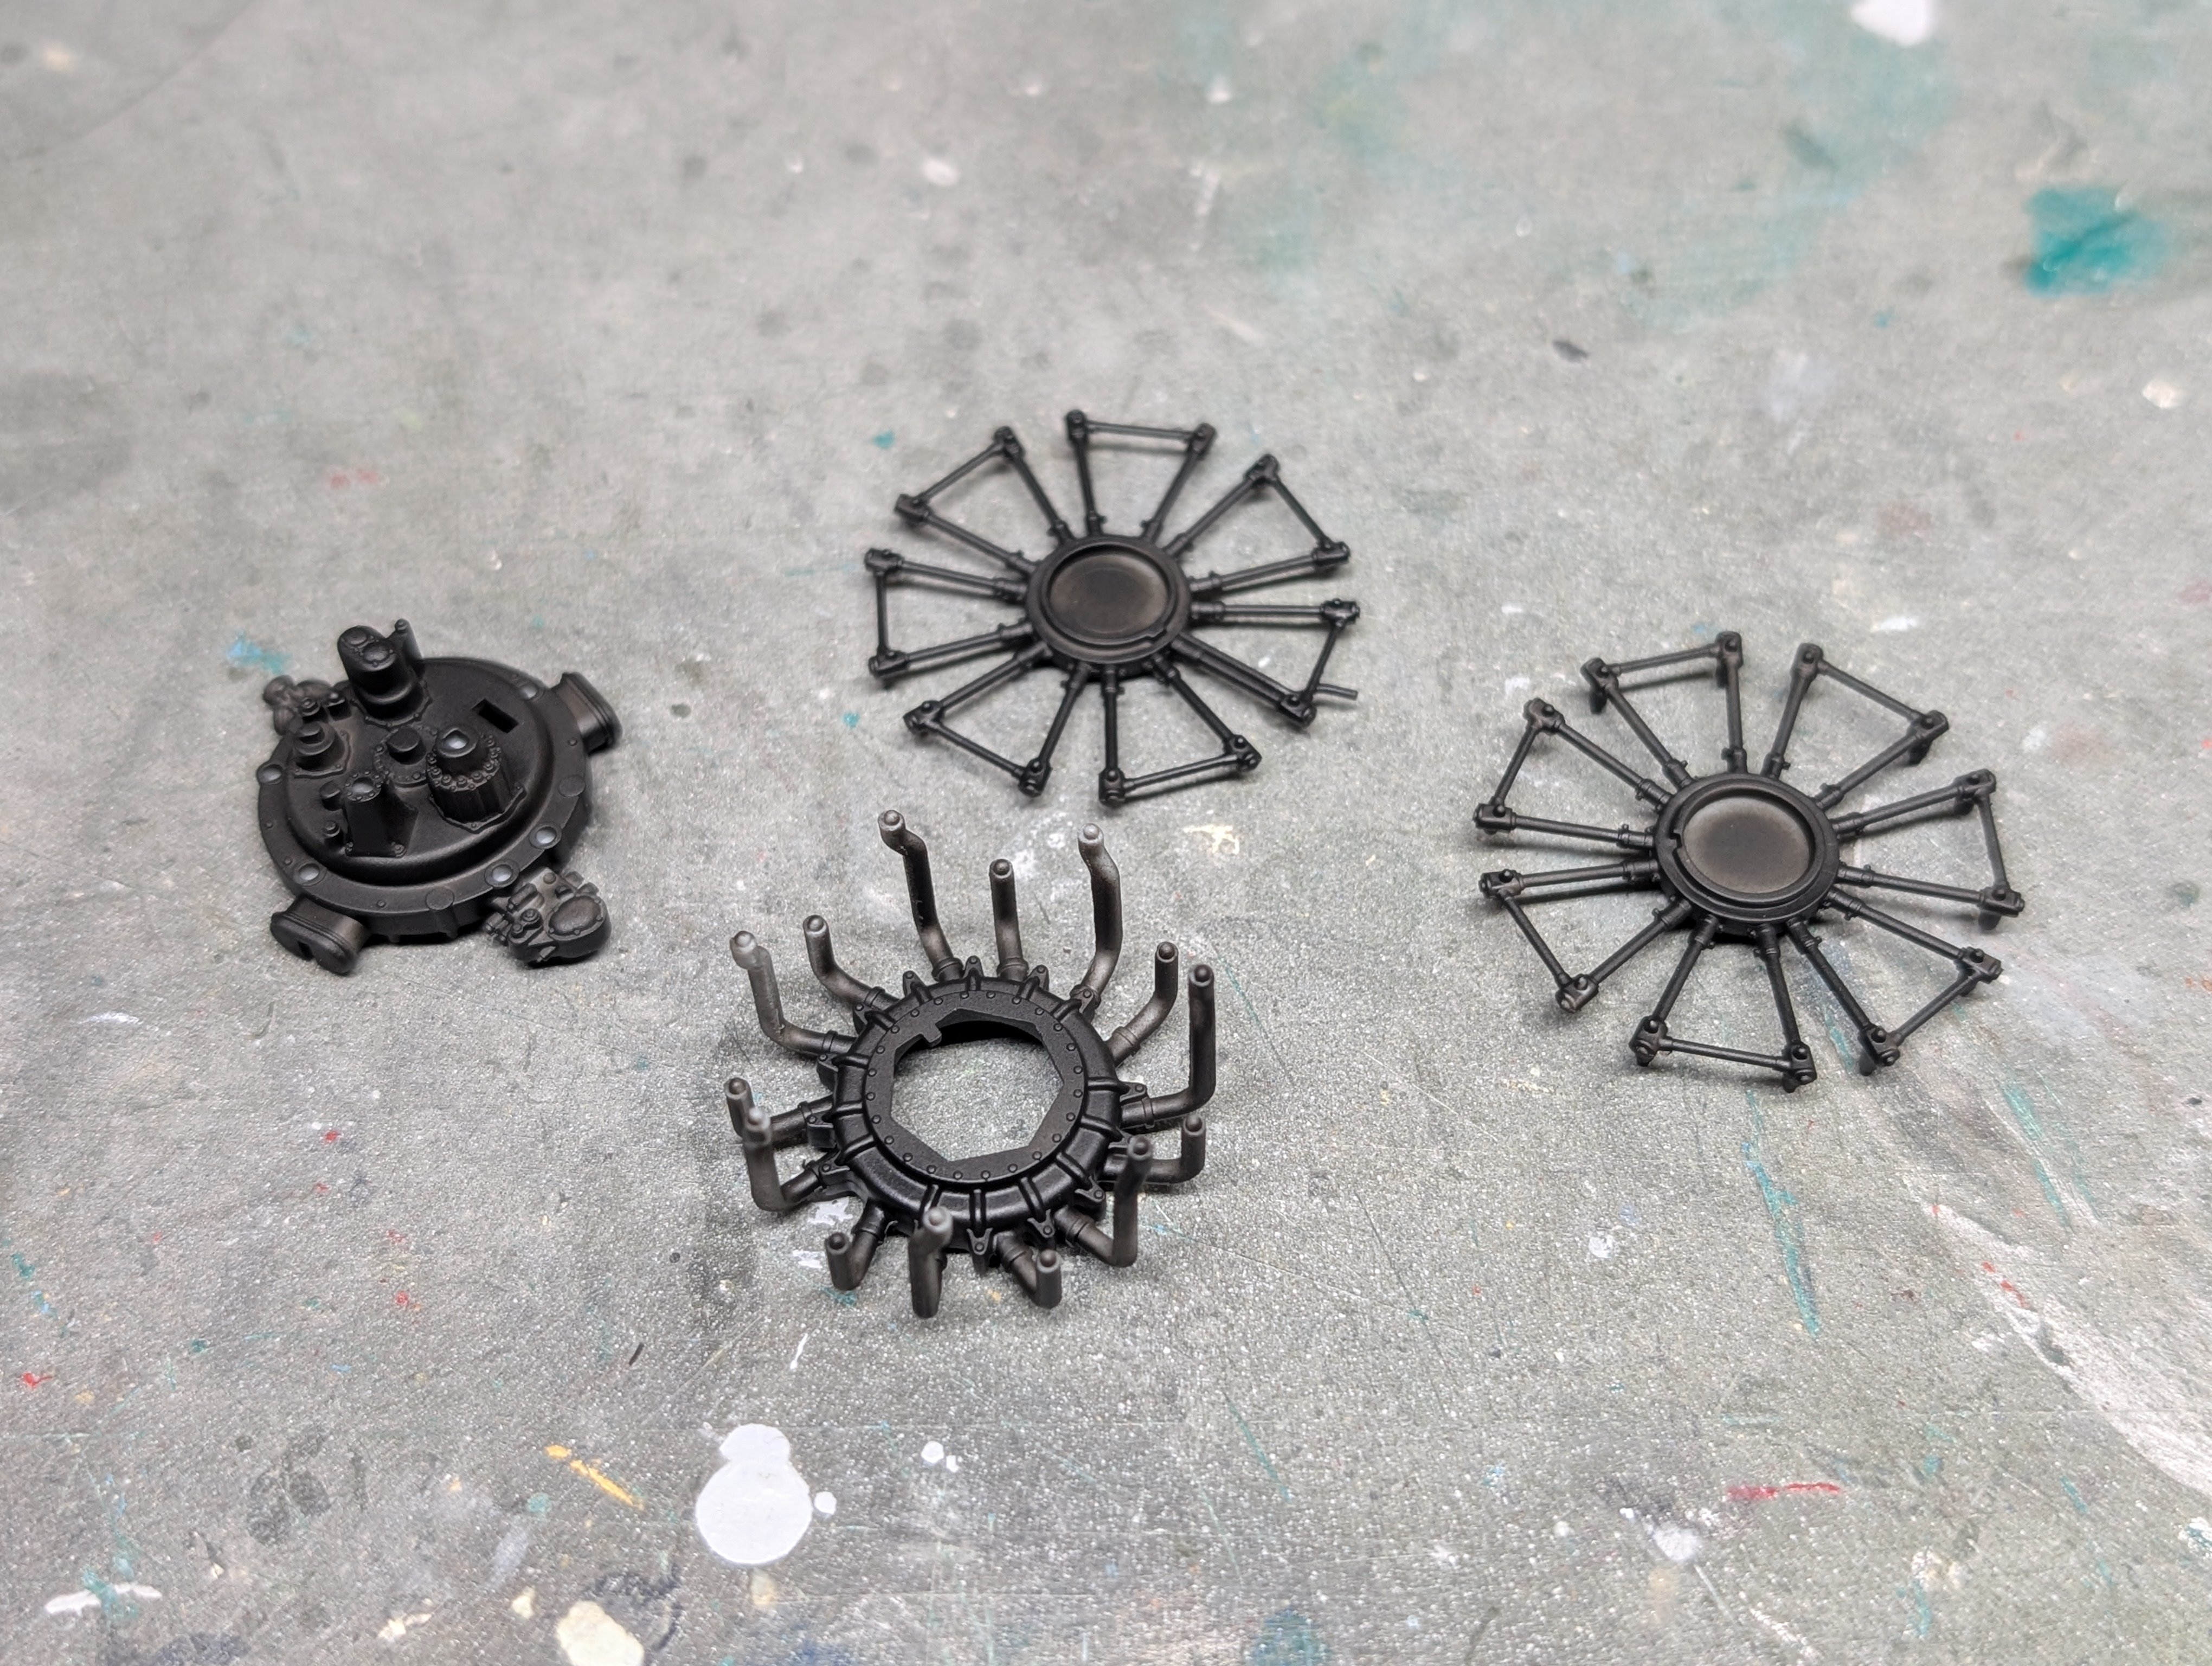
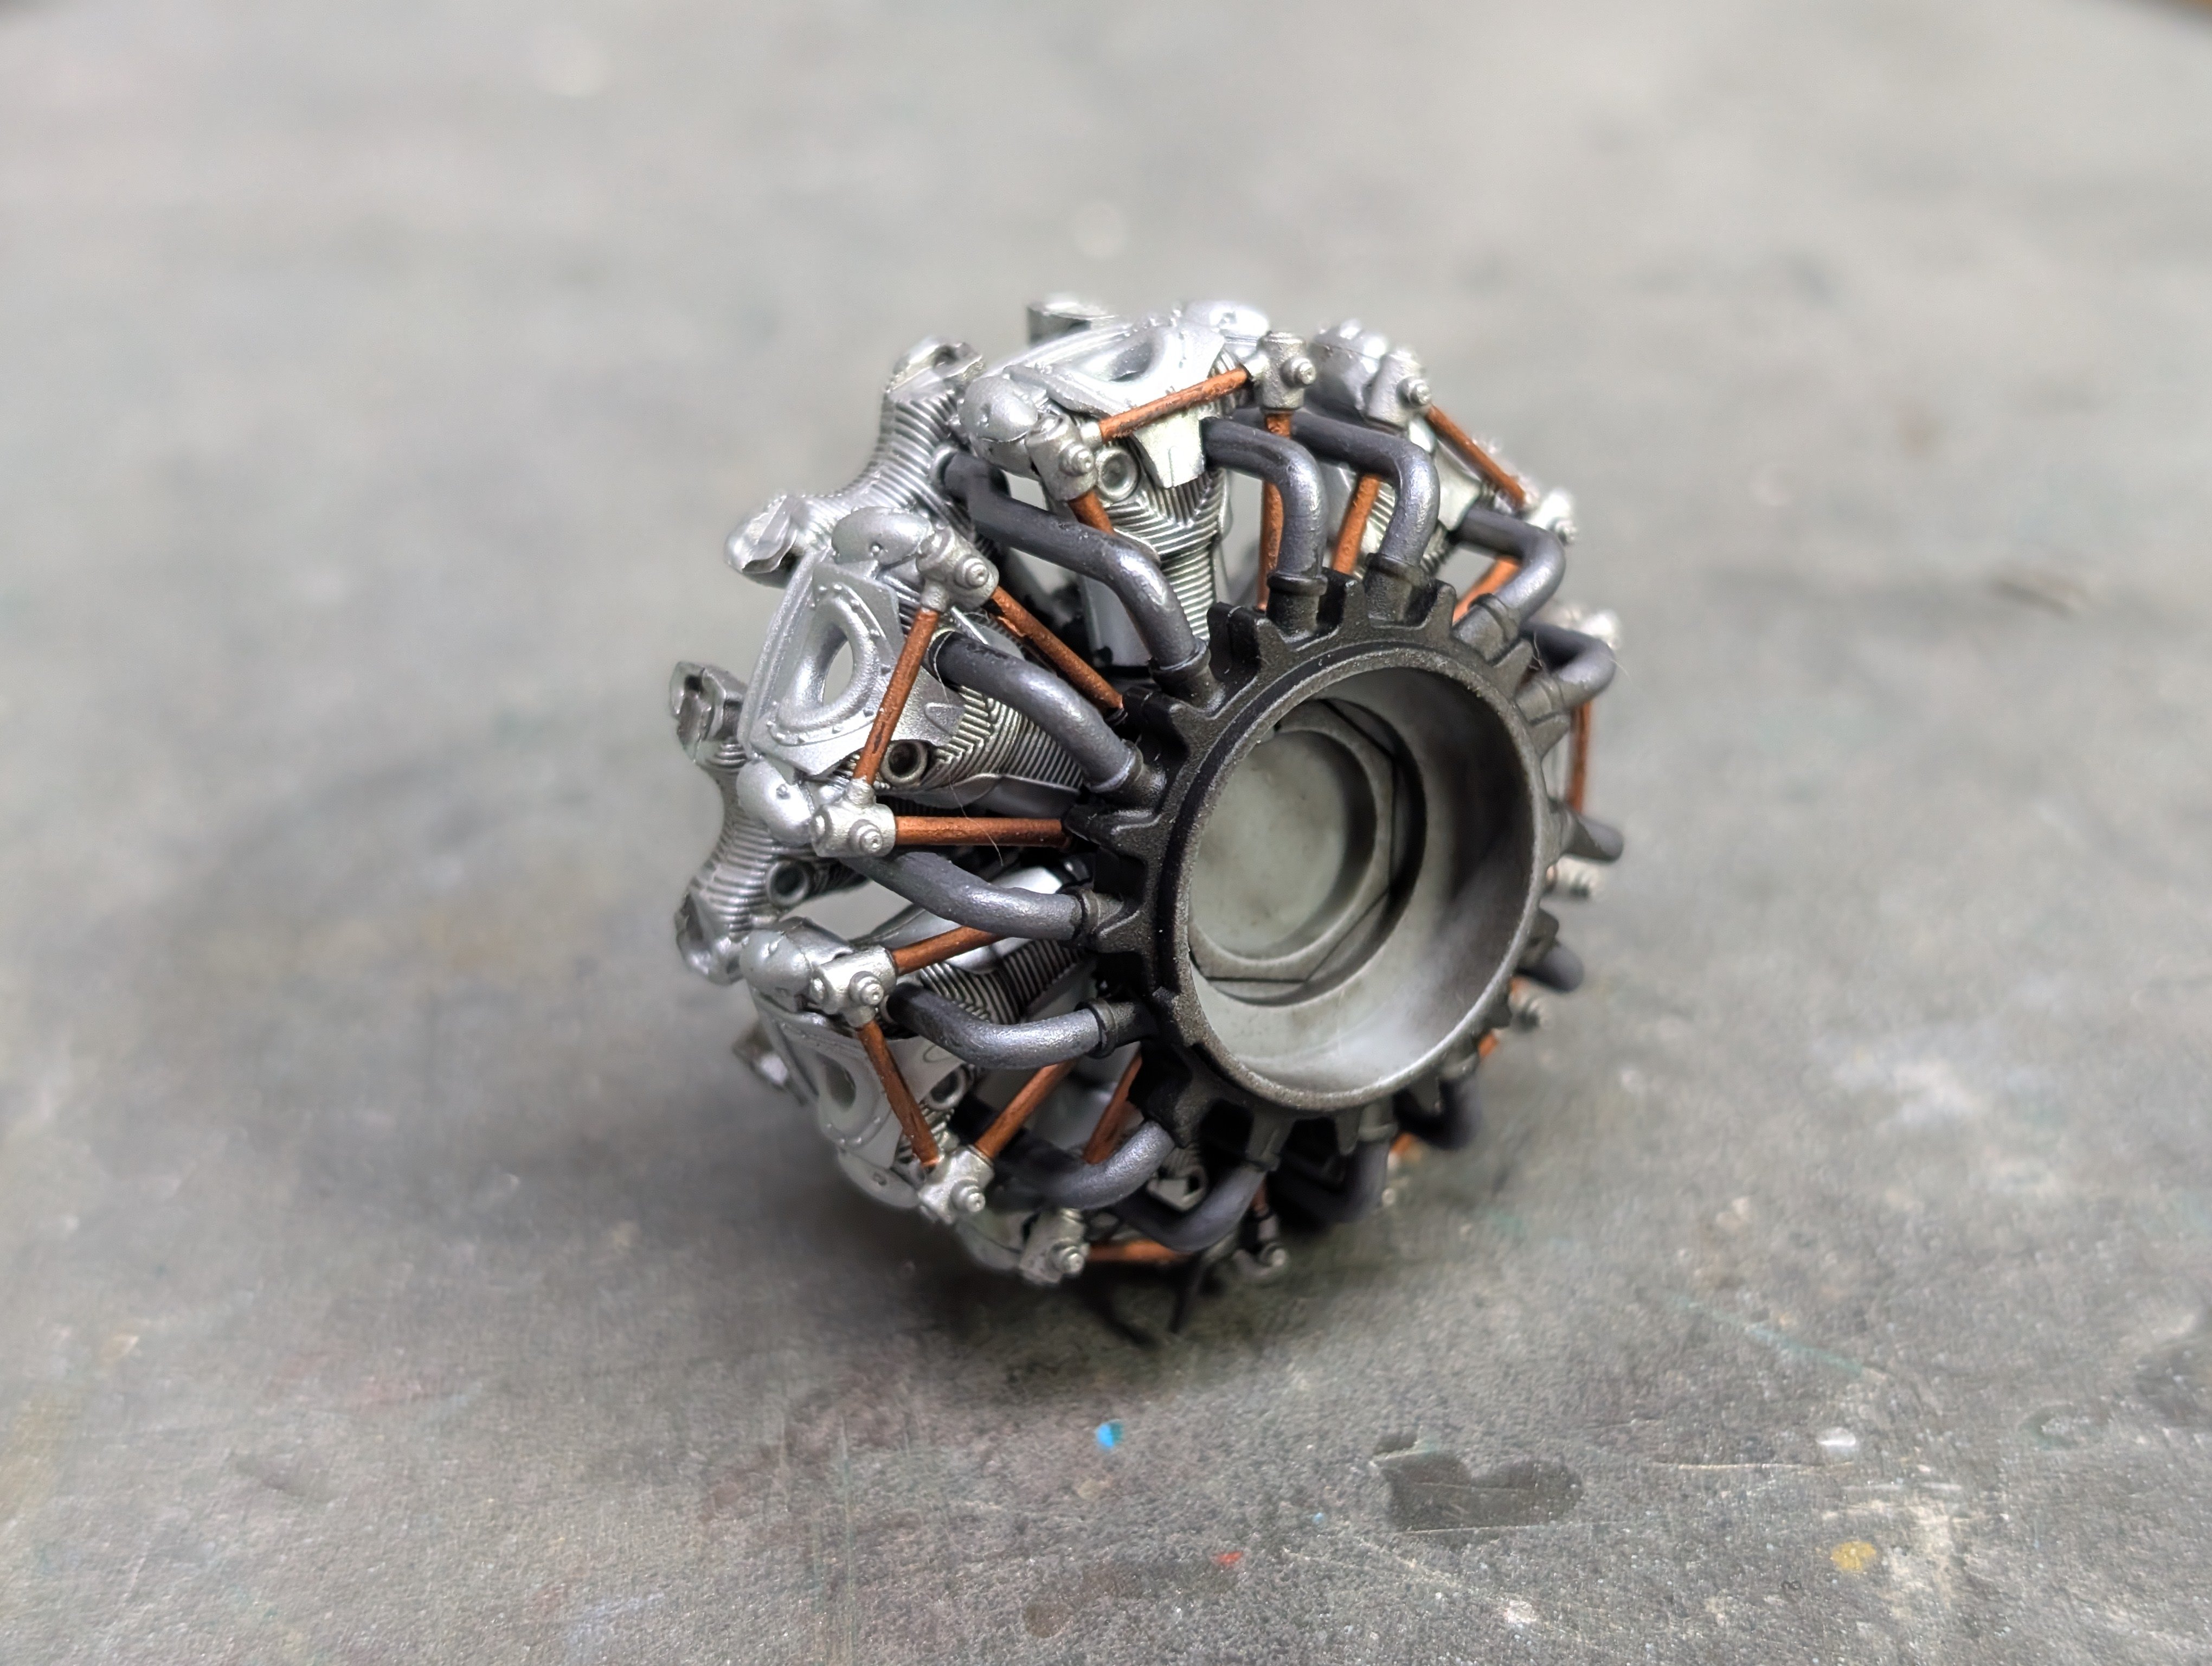
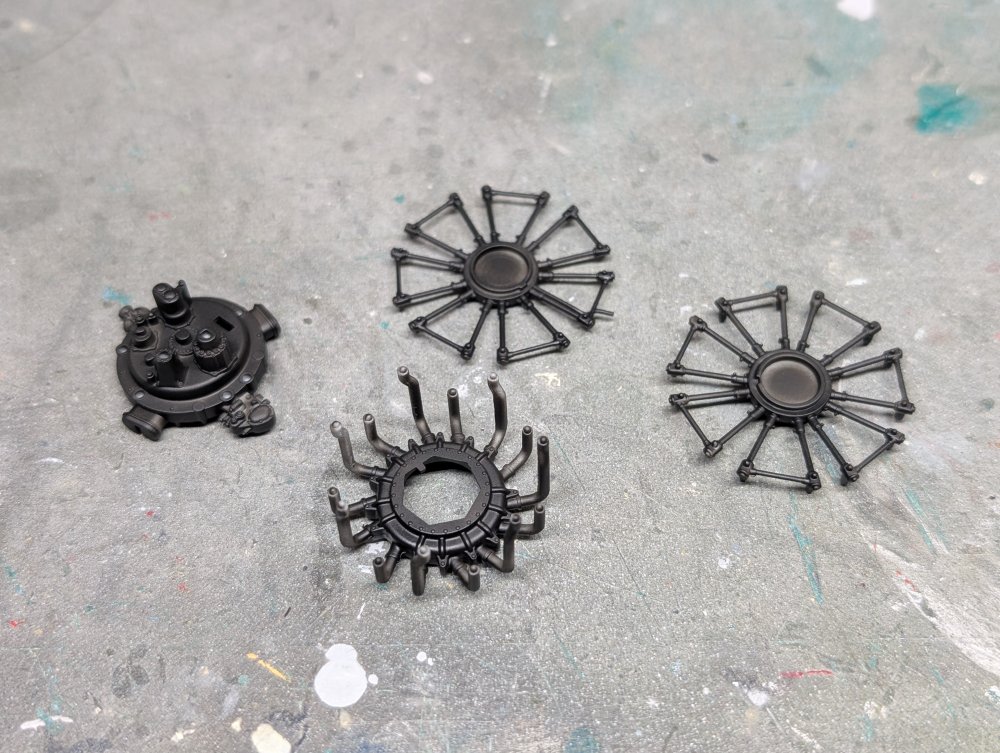
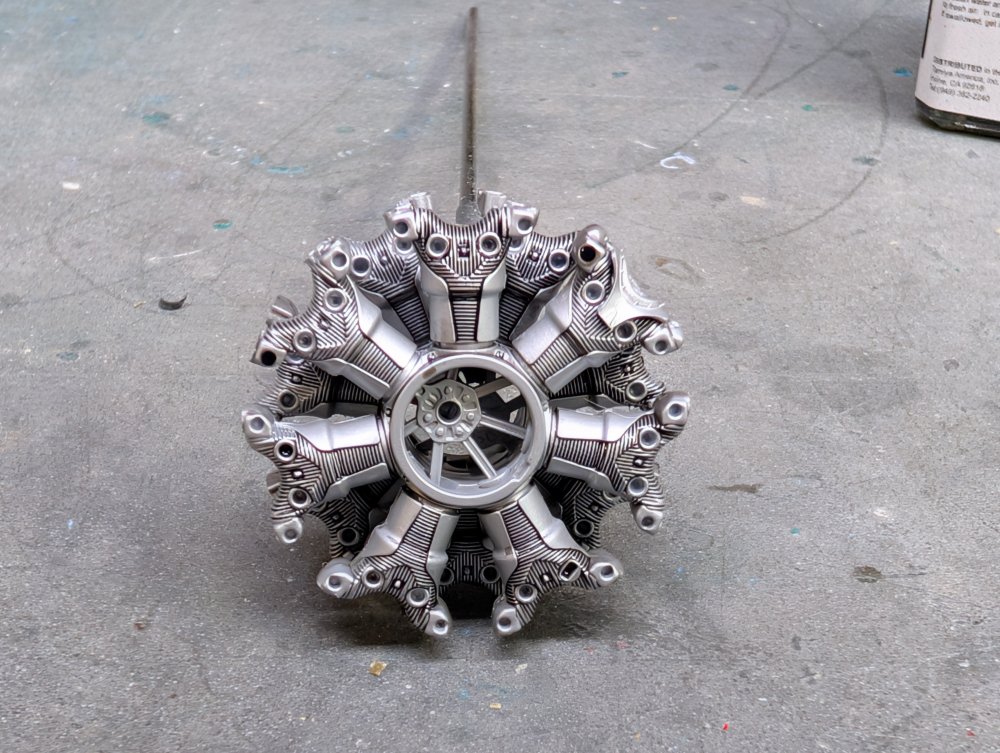
A quick coat of paint on the engine. Followed by a bit of panel wash.
- 47 replies
-
- 11
-
-
Nice work there Rob. The slogans look like graffiti on the tank. Carl
-
1:32nd scale SE5a (Viper)
BlrwestSiR replied to sandbagger's topic in LSM 1/35 and Larger Work In Progress
Wow, amazing work. Carl -
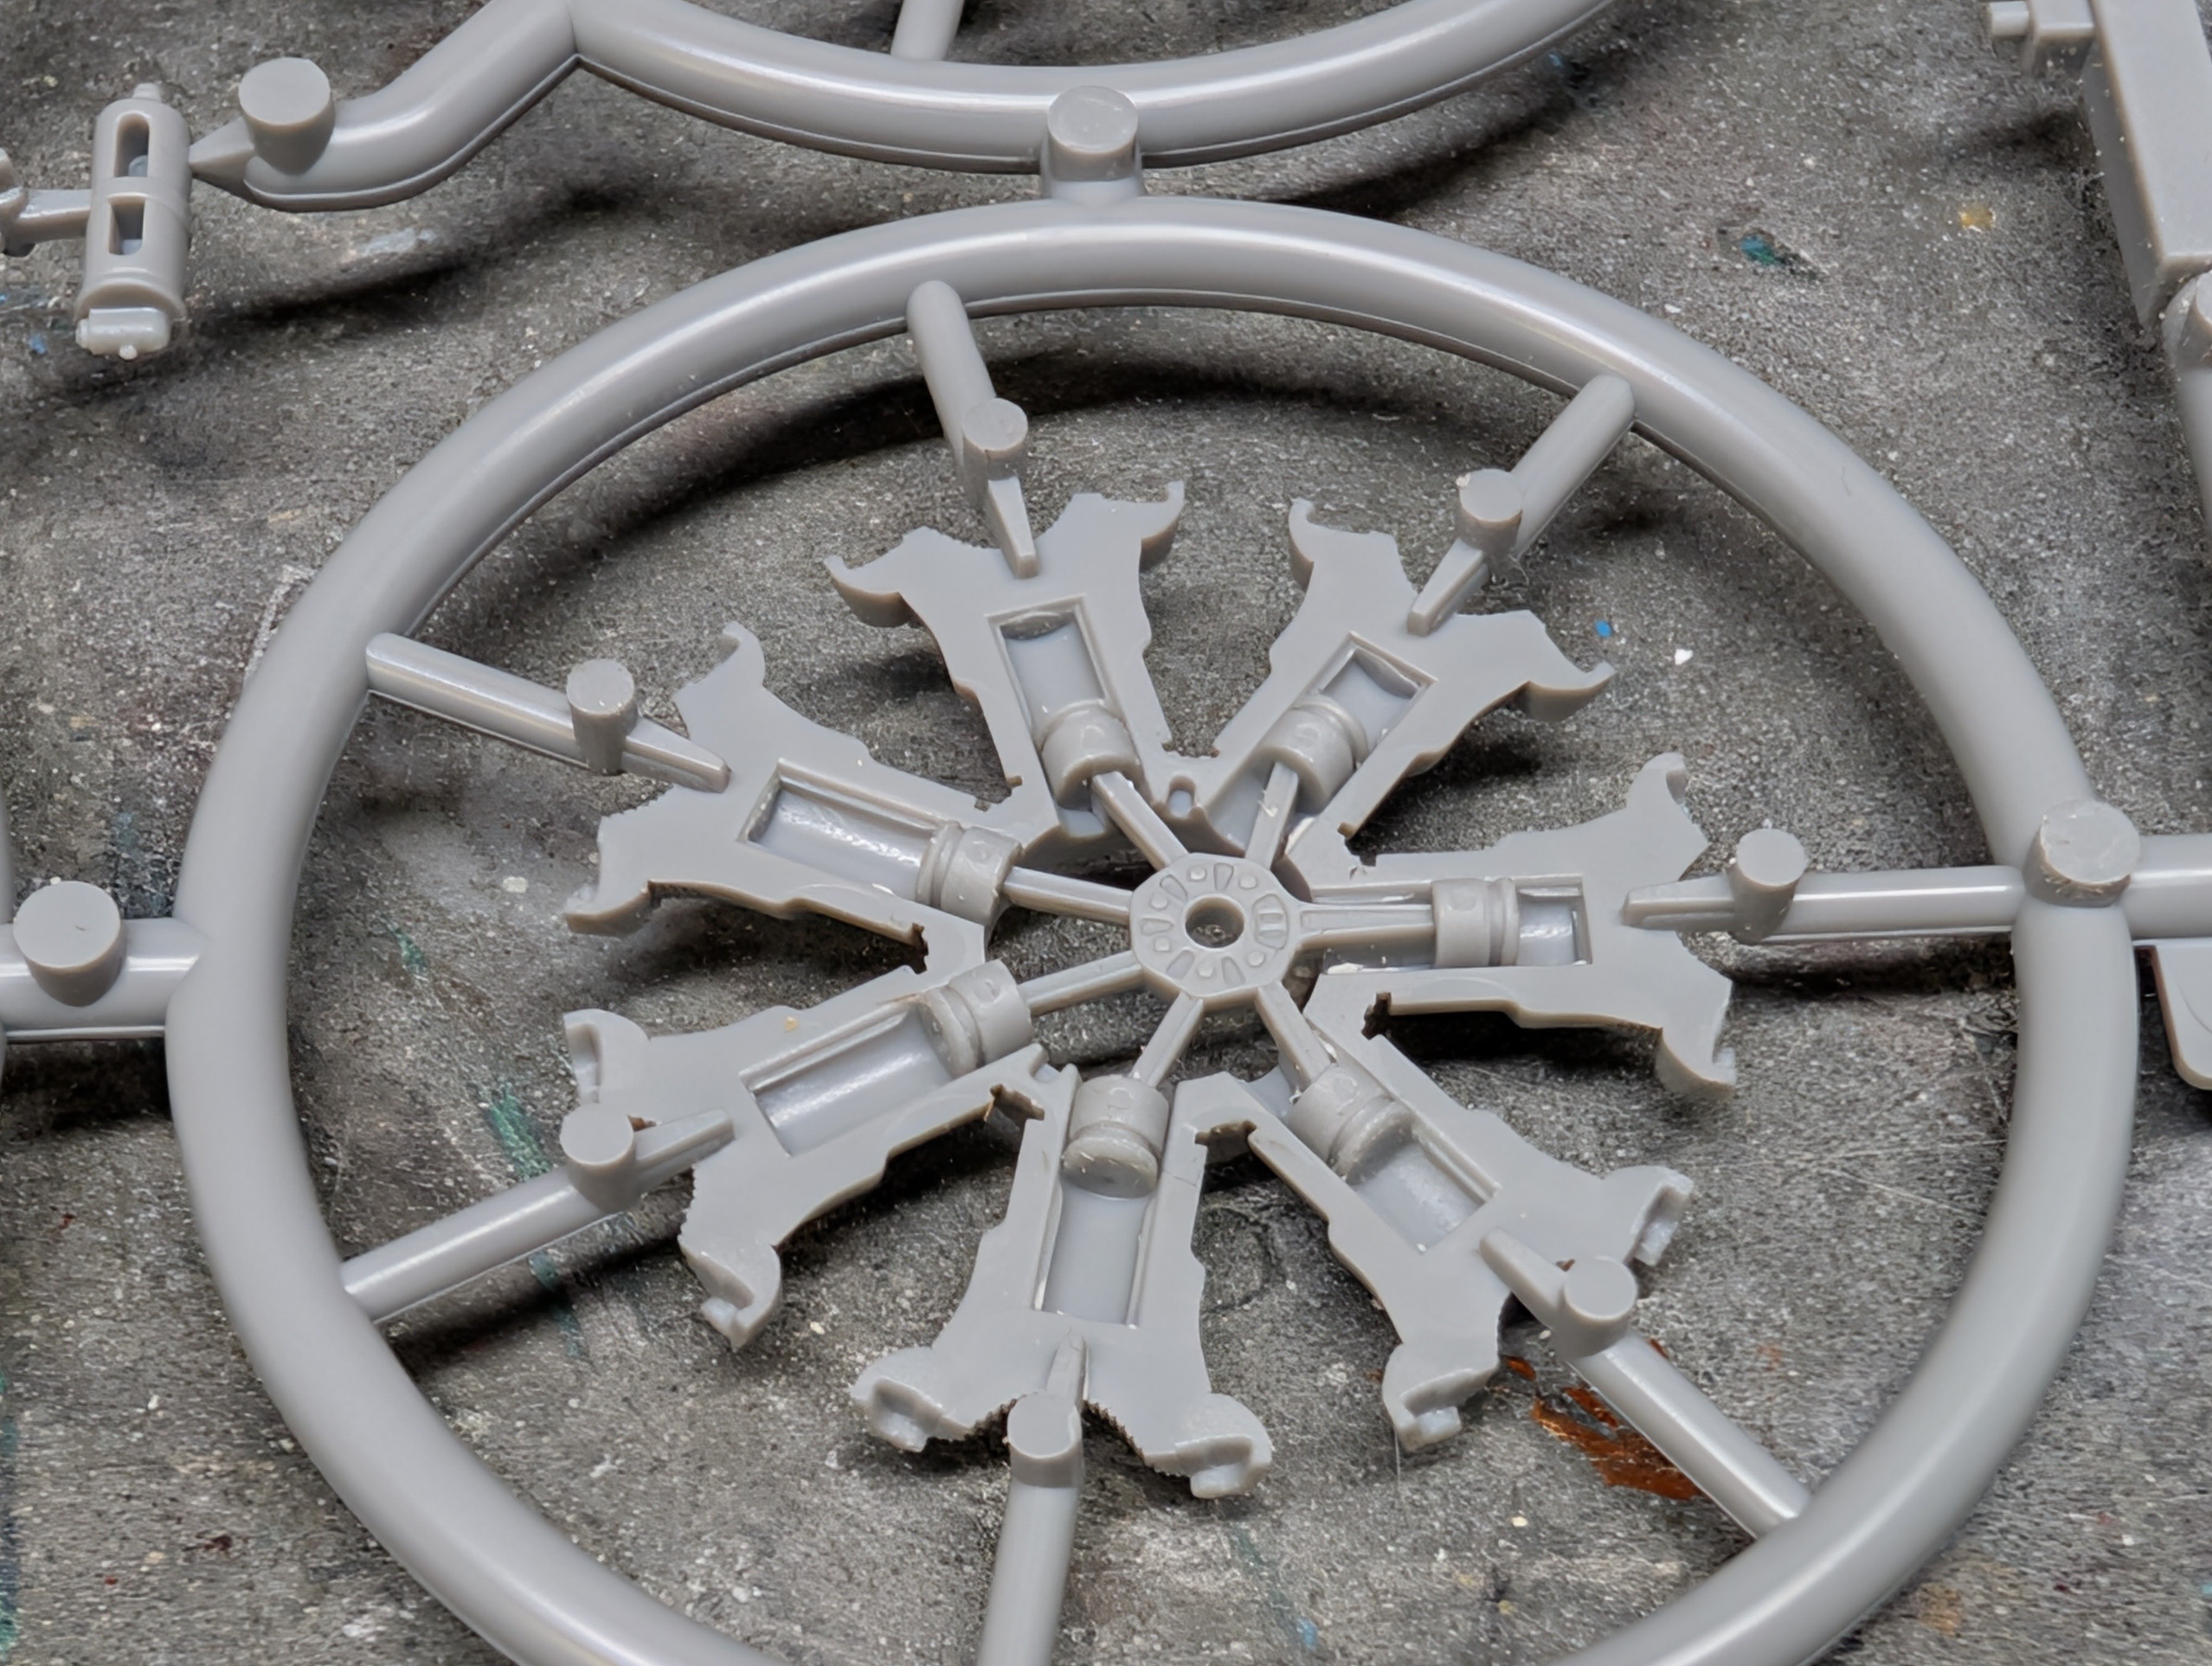
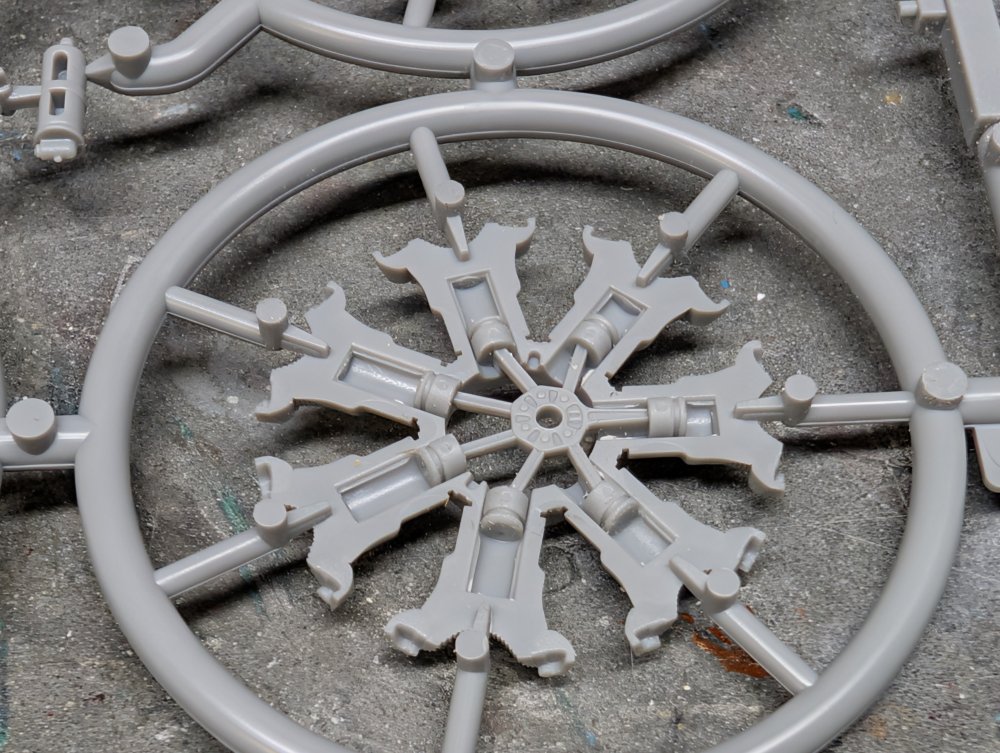
First step is not the usual cockpit but the engine. This has the typical rods and pistons moulded into the parts. Never to be seen again once closed up. Speaking of which:

-
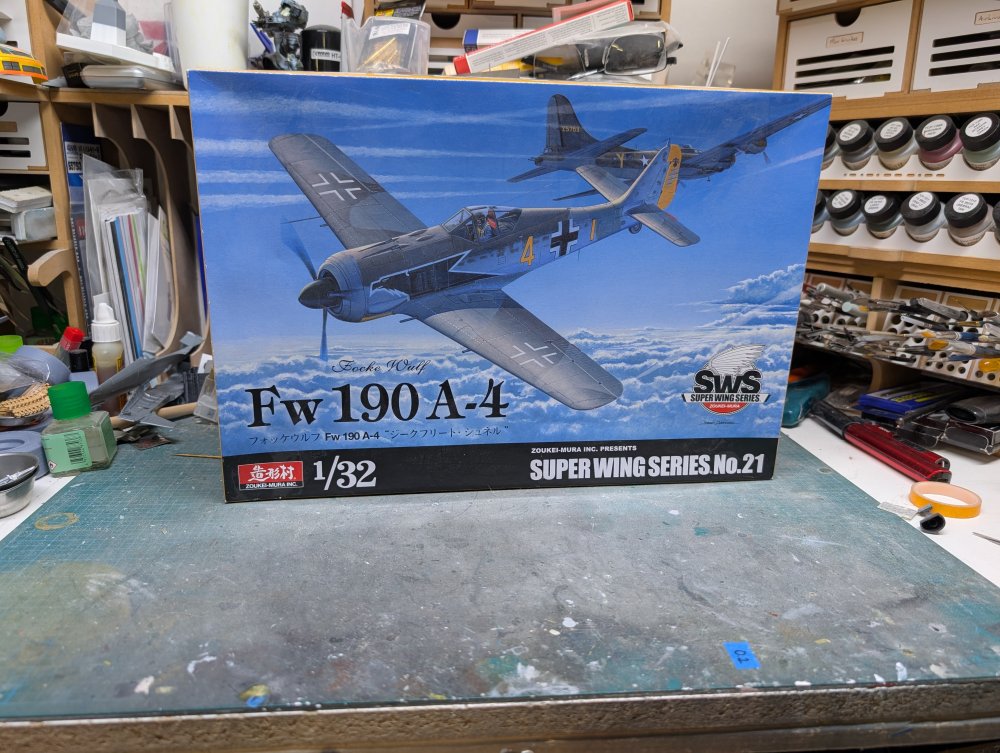
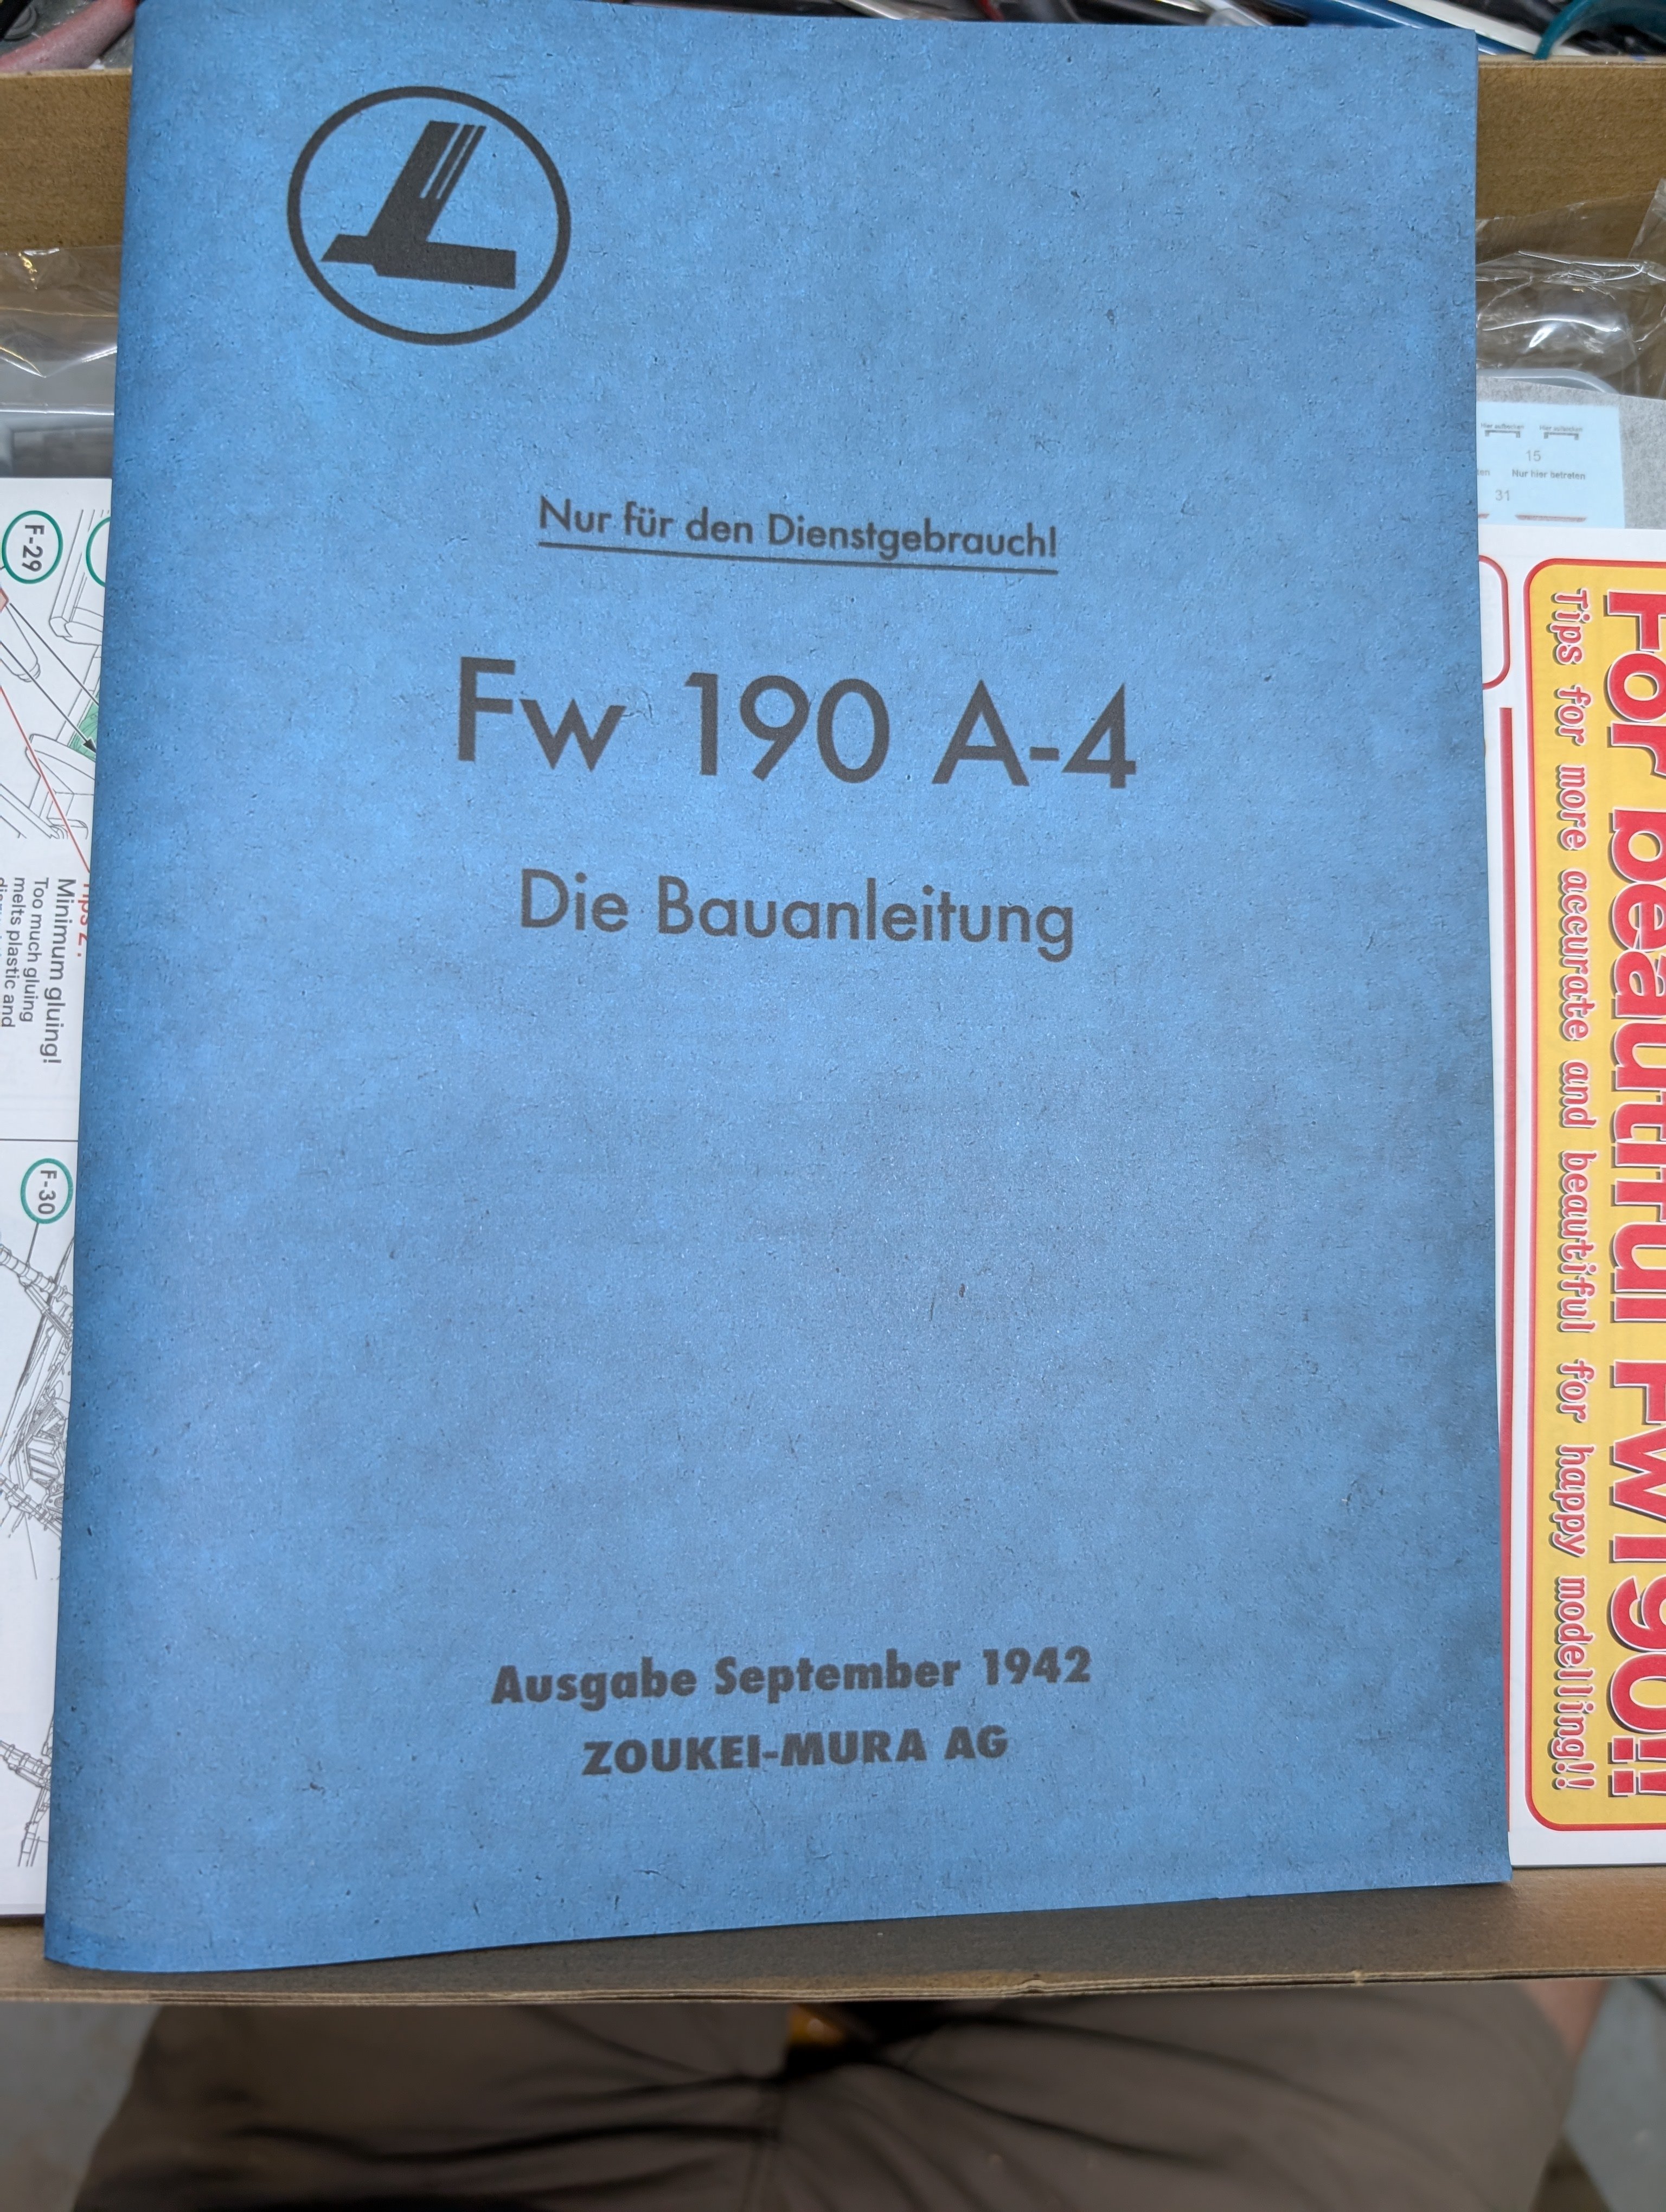
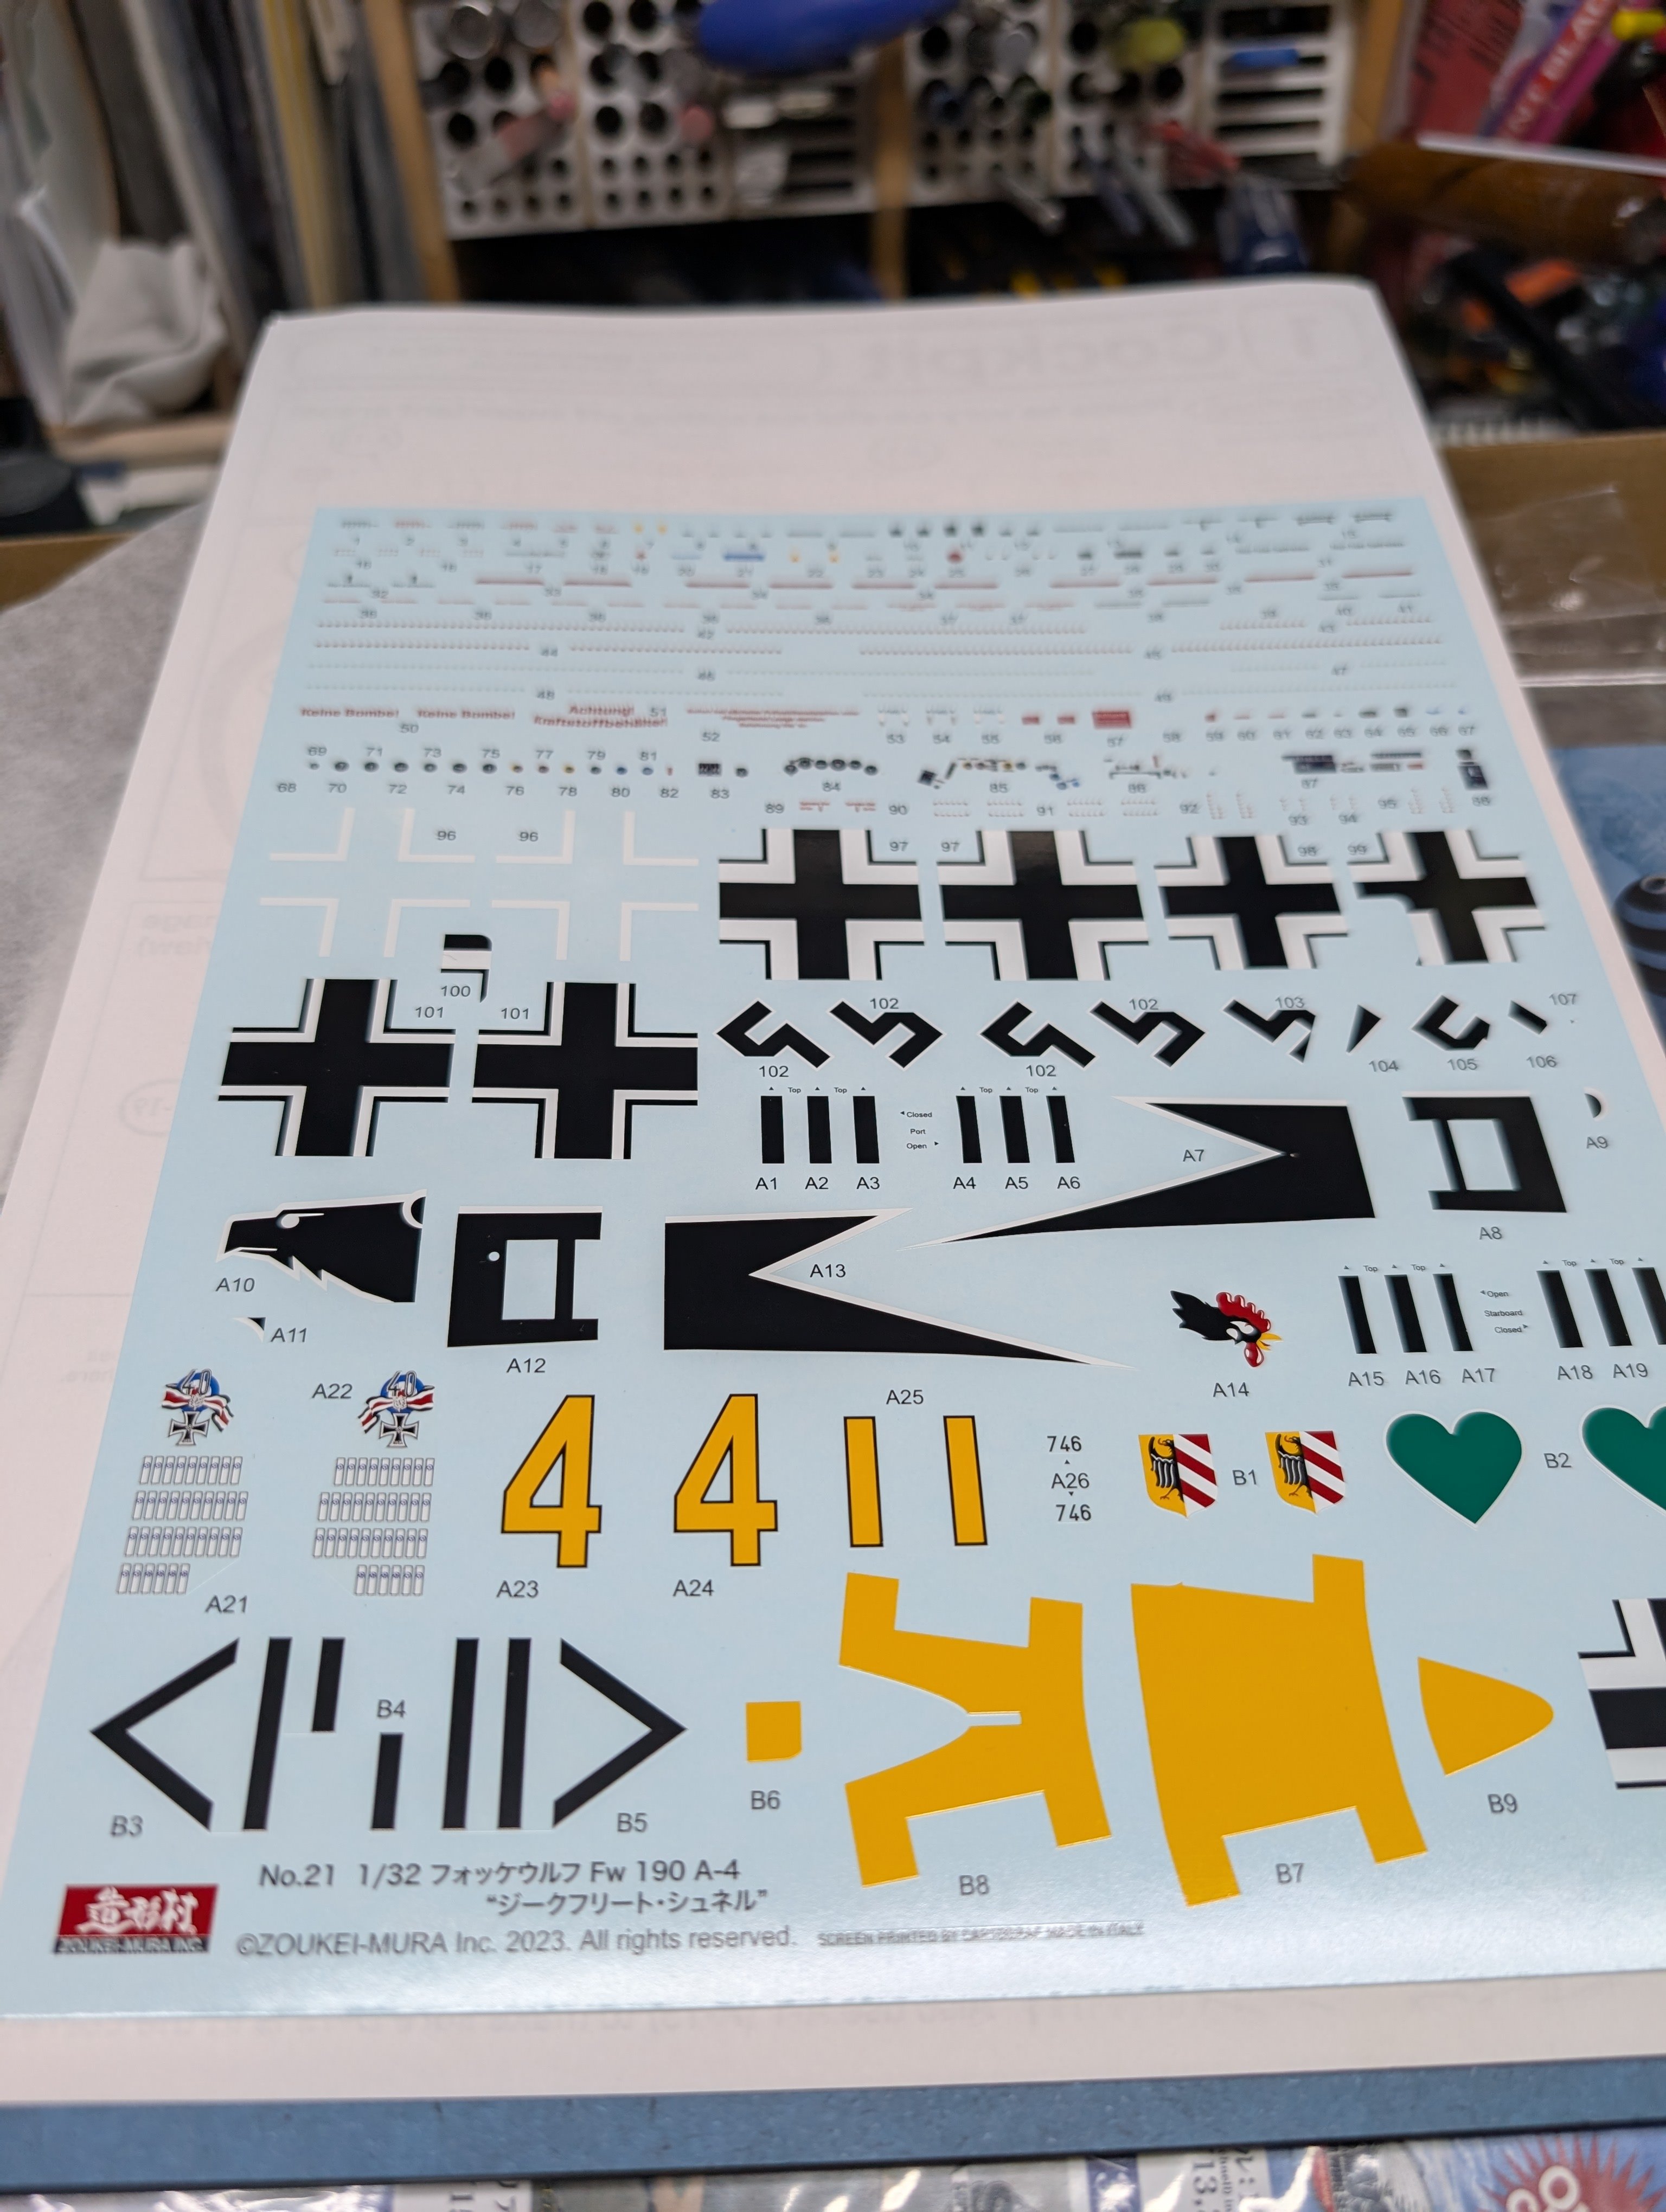
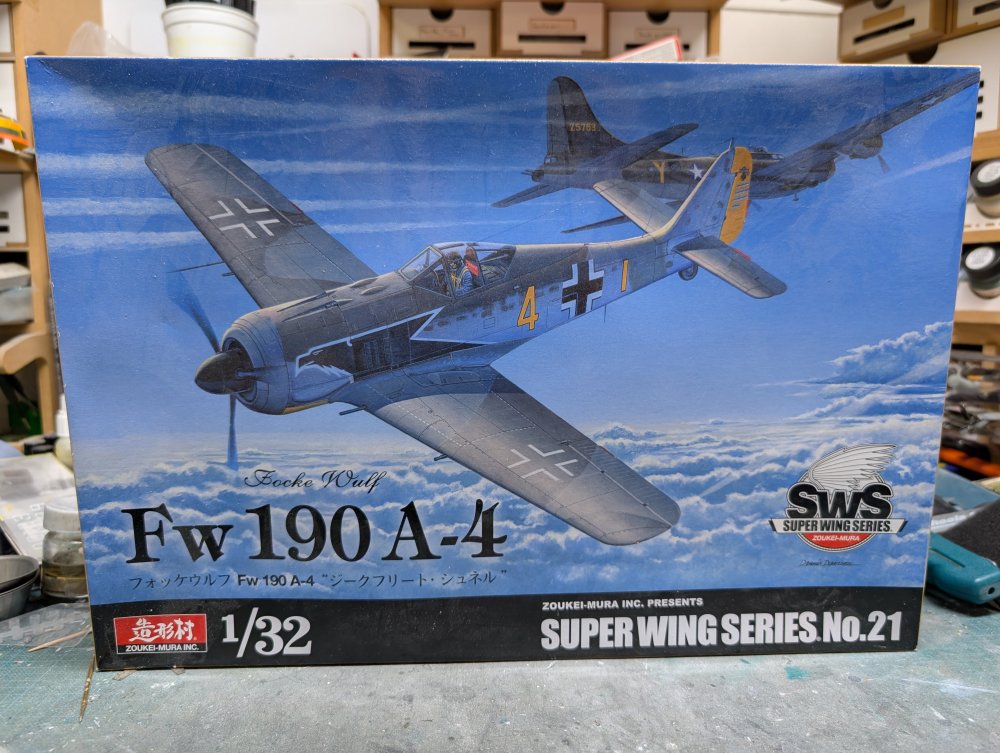
Here's my next aircraft build. The recent-ish ZM Wurger. Instructions come in the usual ZM style that mimics an owner's manual. Large print tips page with an alternate method for mounting the engine. A nice decal sheet with a pair of marking options. I haven't decided on which one yet. Option 1 is the box art version. While option 2 is a winter camo'd one.


-
What is on your bench right now ? Share a picture :)
BlrwestSiR replied to Martinnfb's topic in Modelling Discussion
Here you go! Then he got impatient and wanted to check out my sanding job.

-
Thanks for sharing. Those are some fantastic looking builds.
-
What is on your bench right now ? Share a picture :)
BlrwestSiR replied to Martinnfb's topic in Modelling Discussion
Resin printed 1 piece tracks? That's pretty cool. -
What is on your bench right now ? Share a picture :)
BlrwestSiR replied to Martinnfb's topic in Modelling Discussion
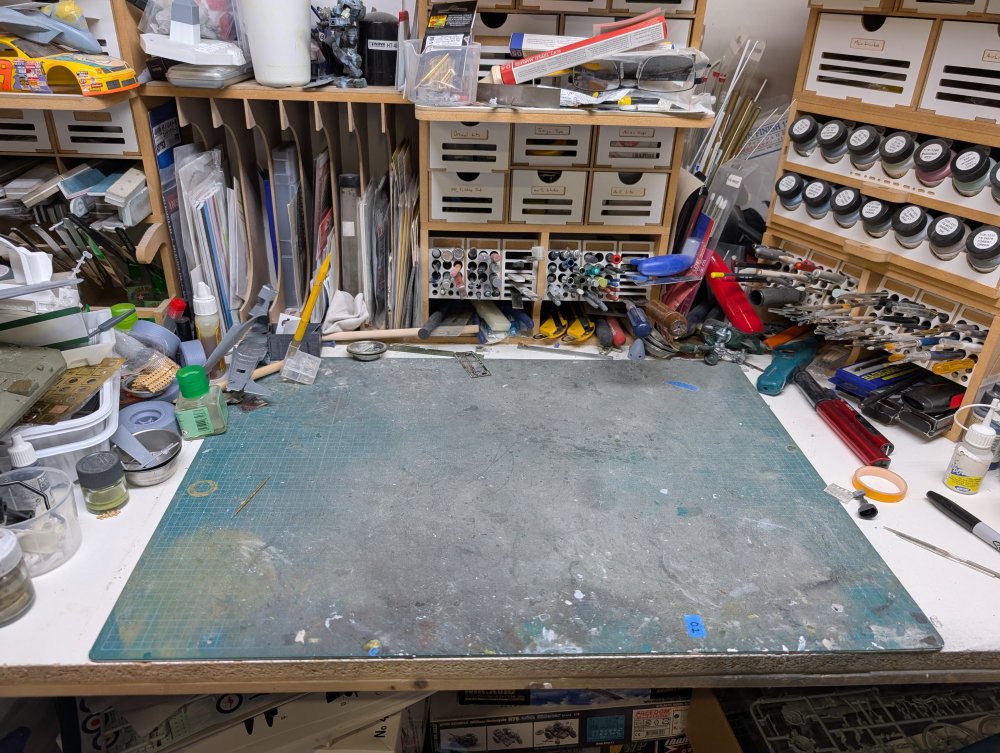
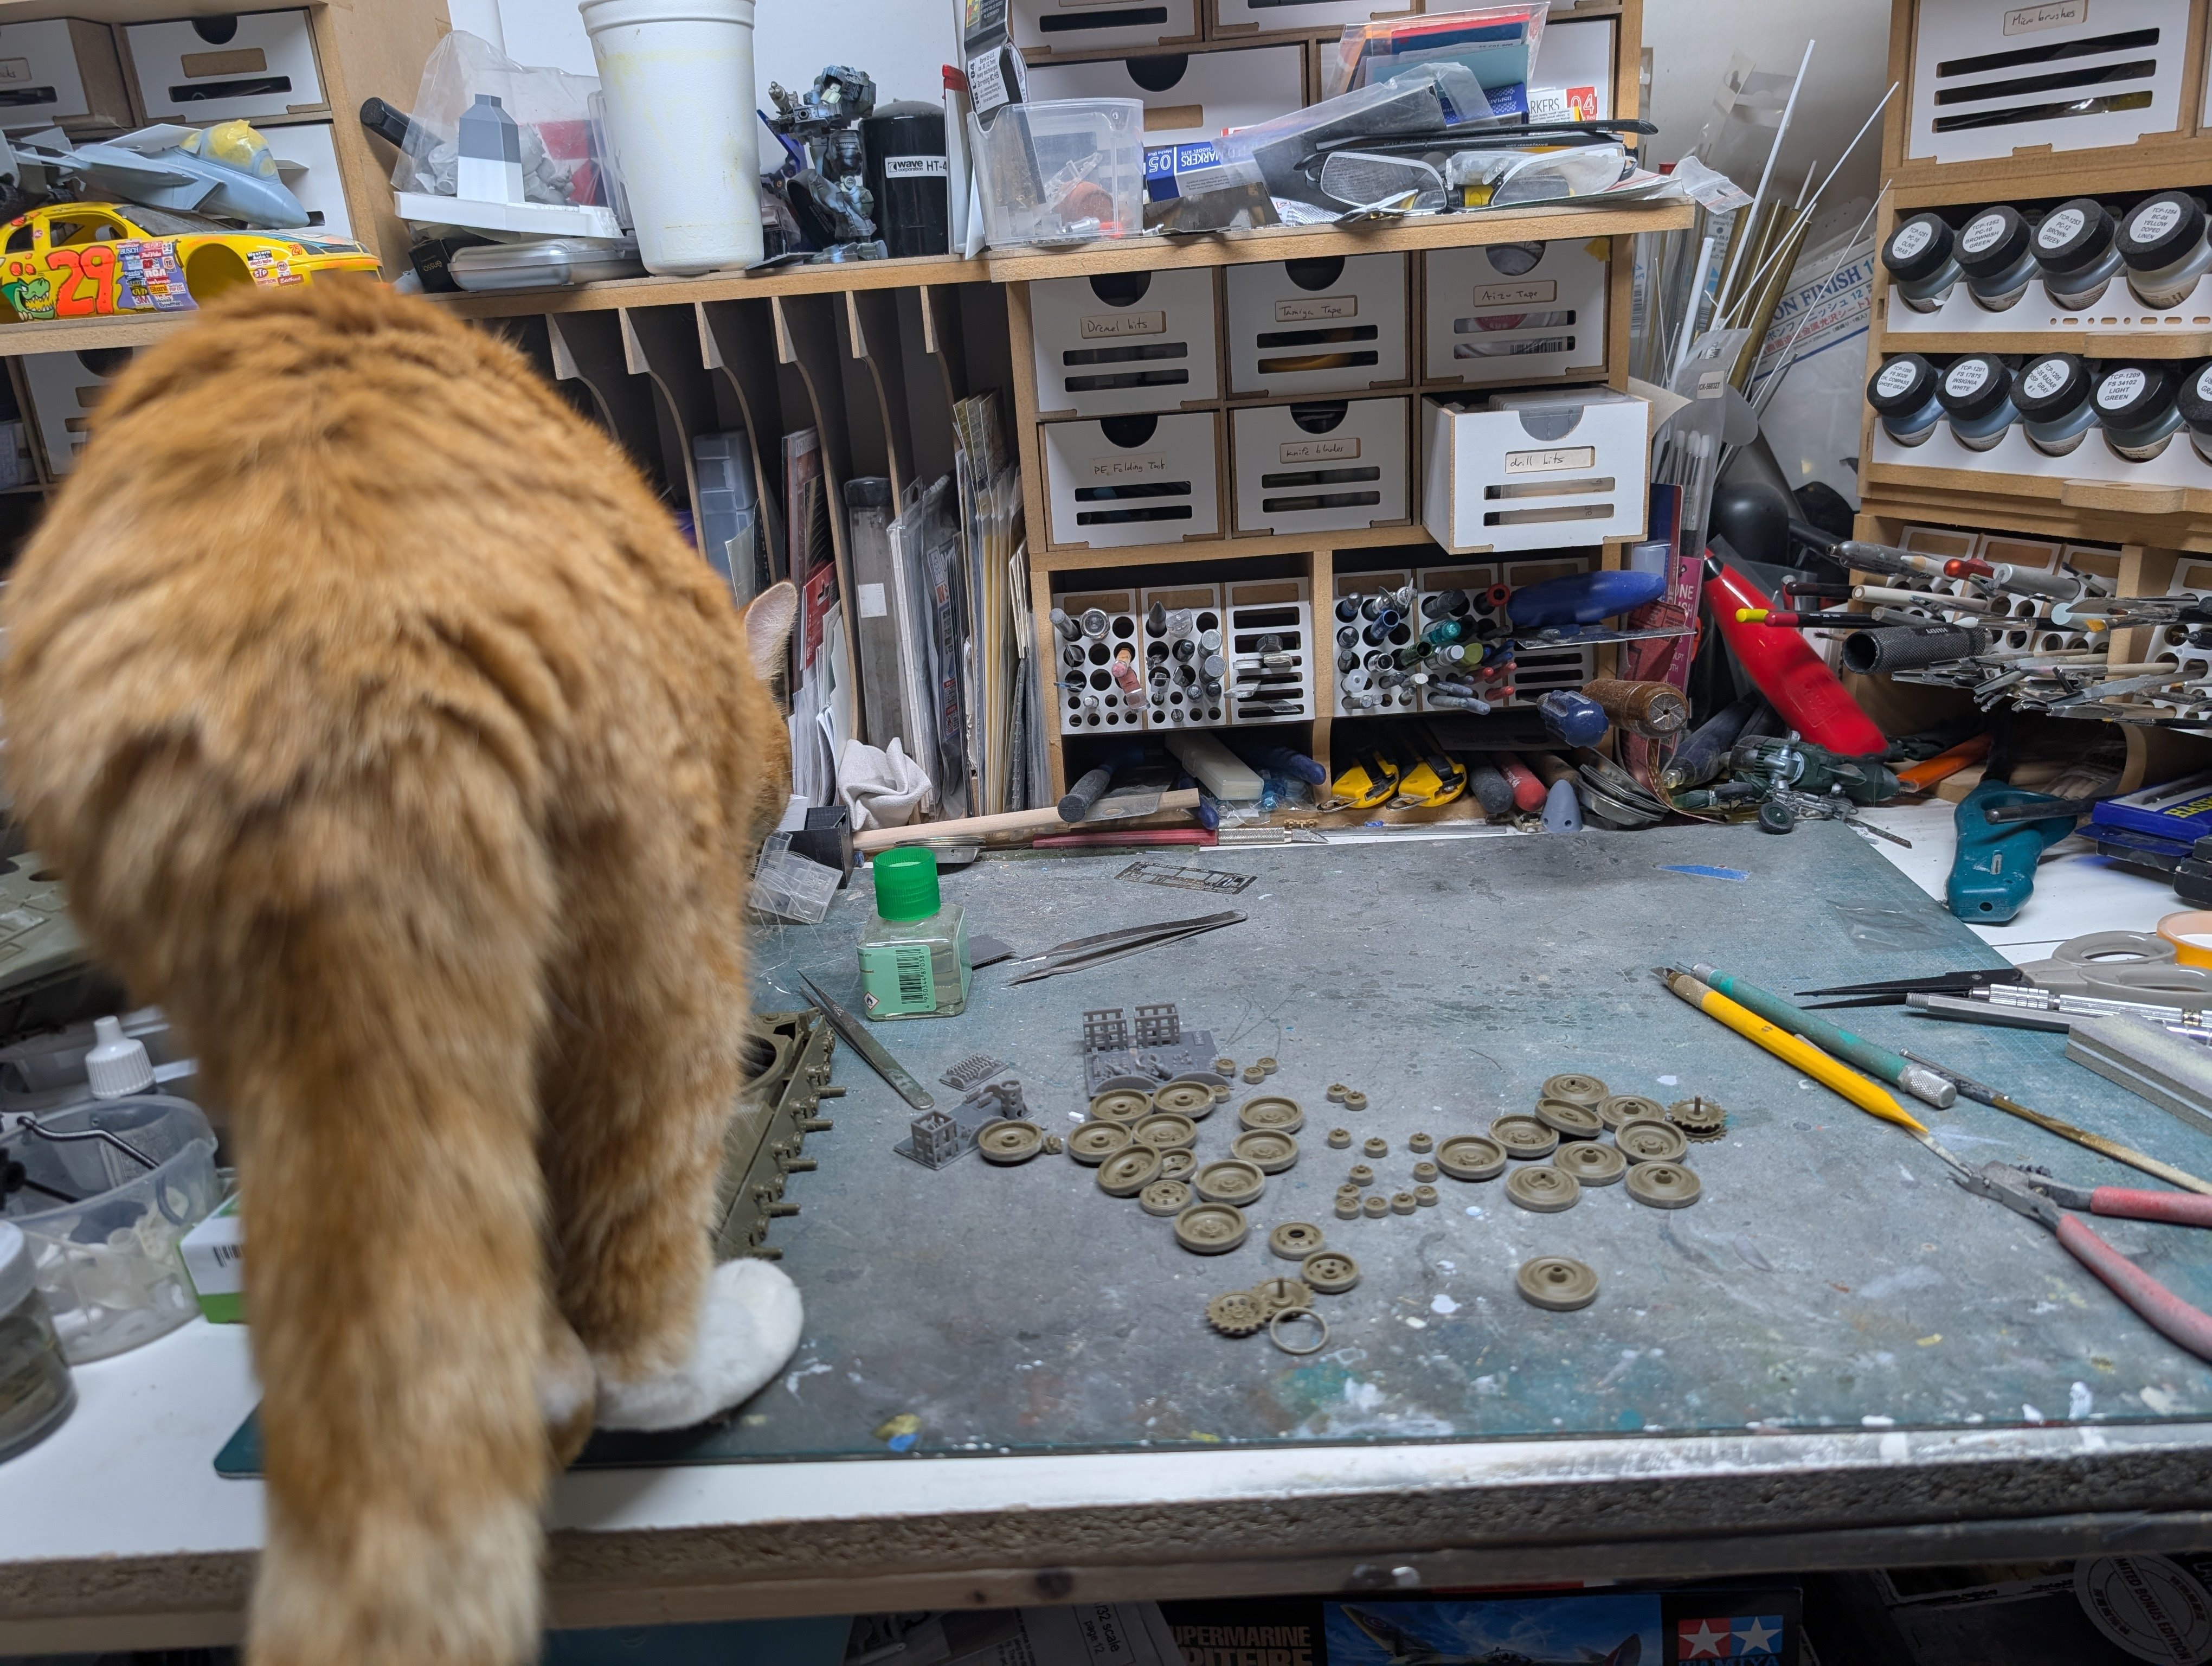
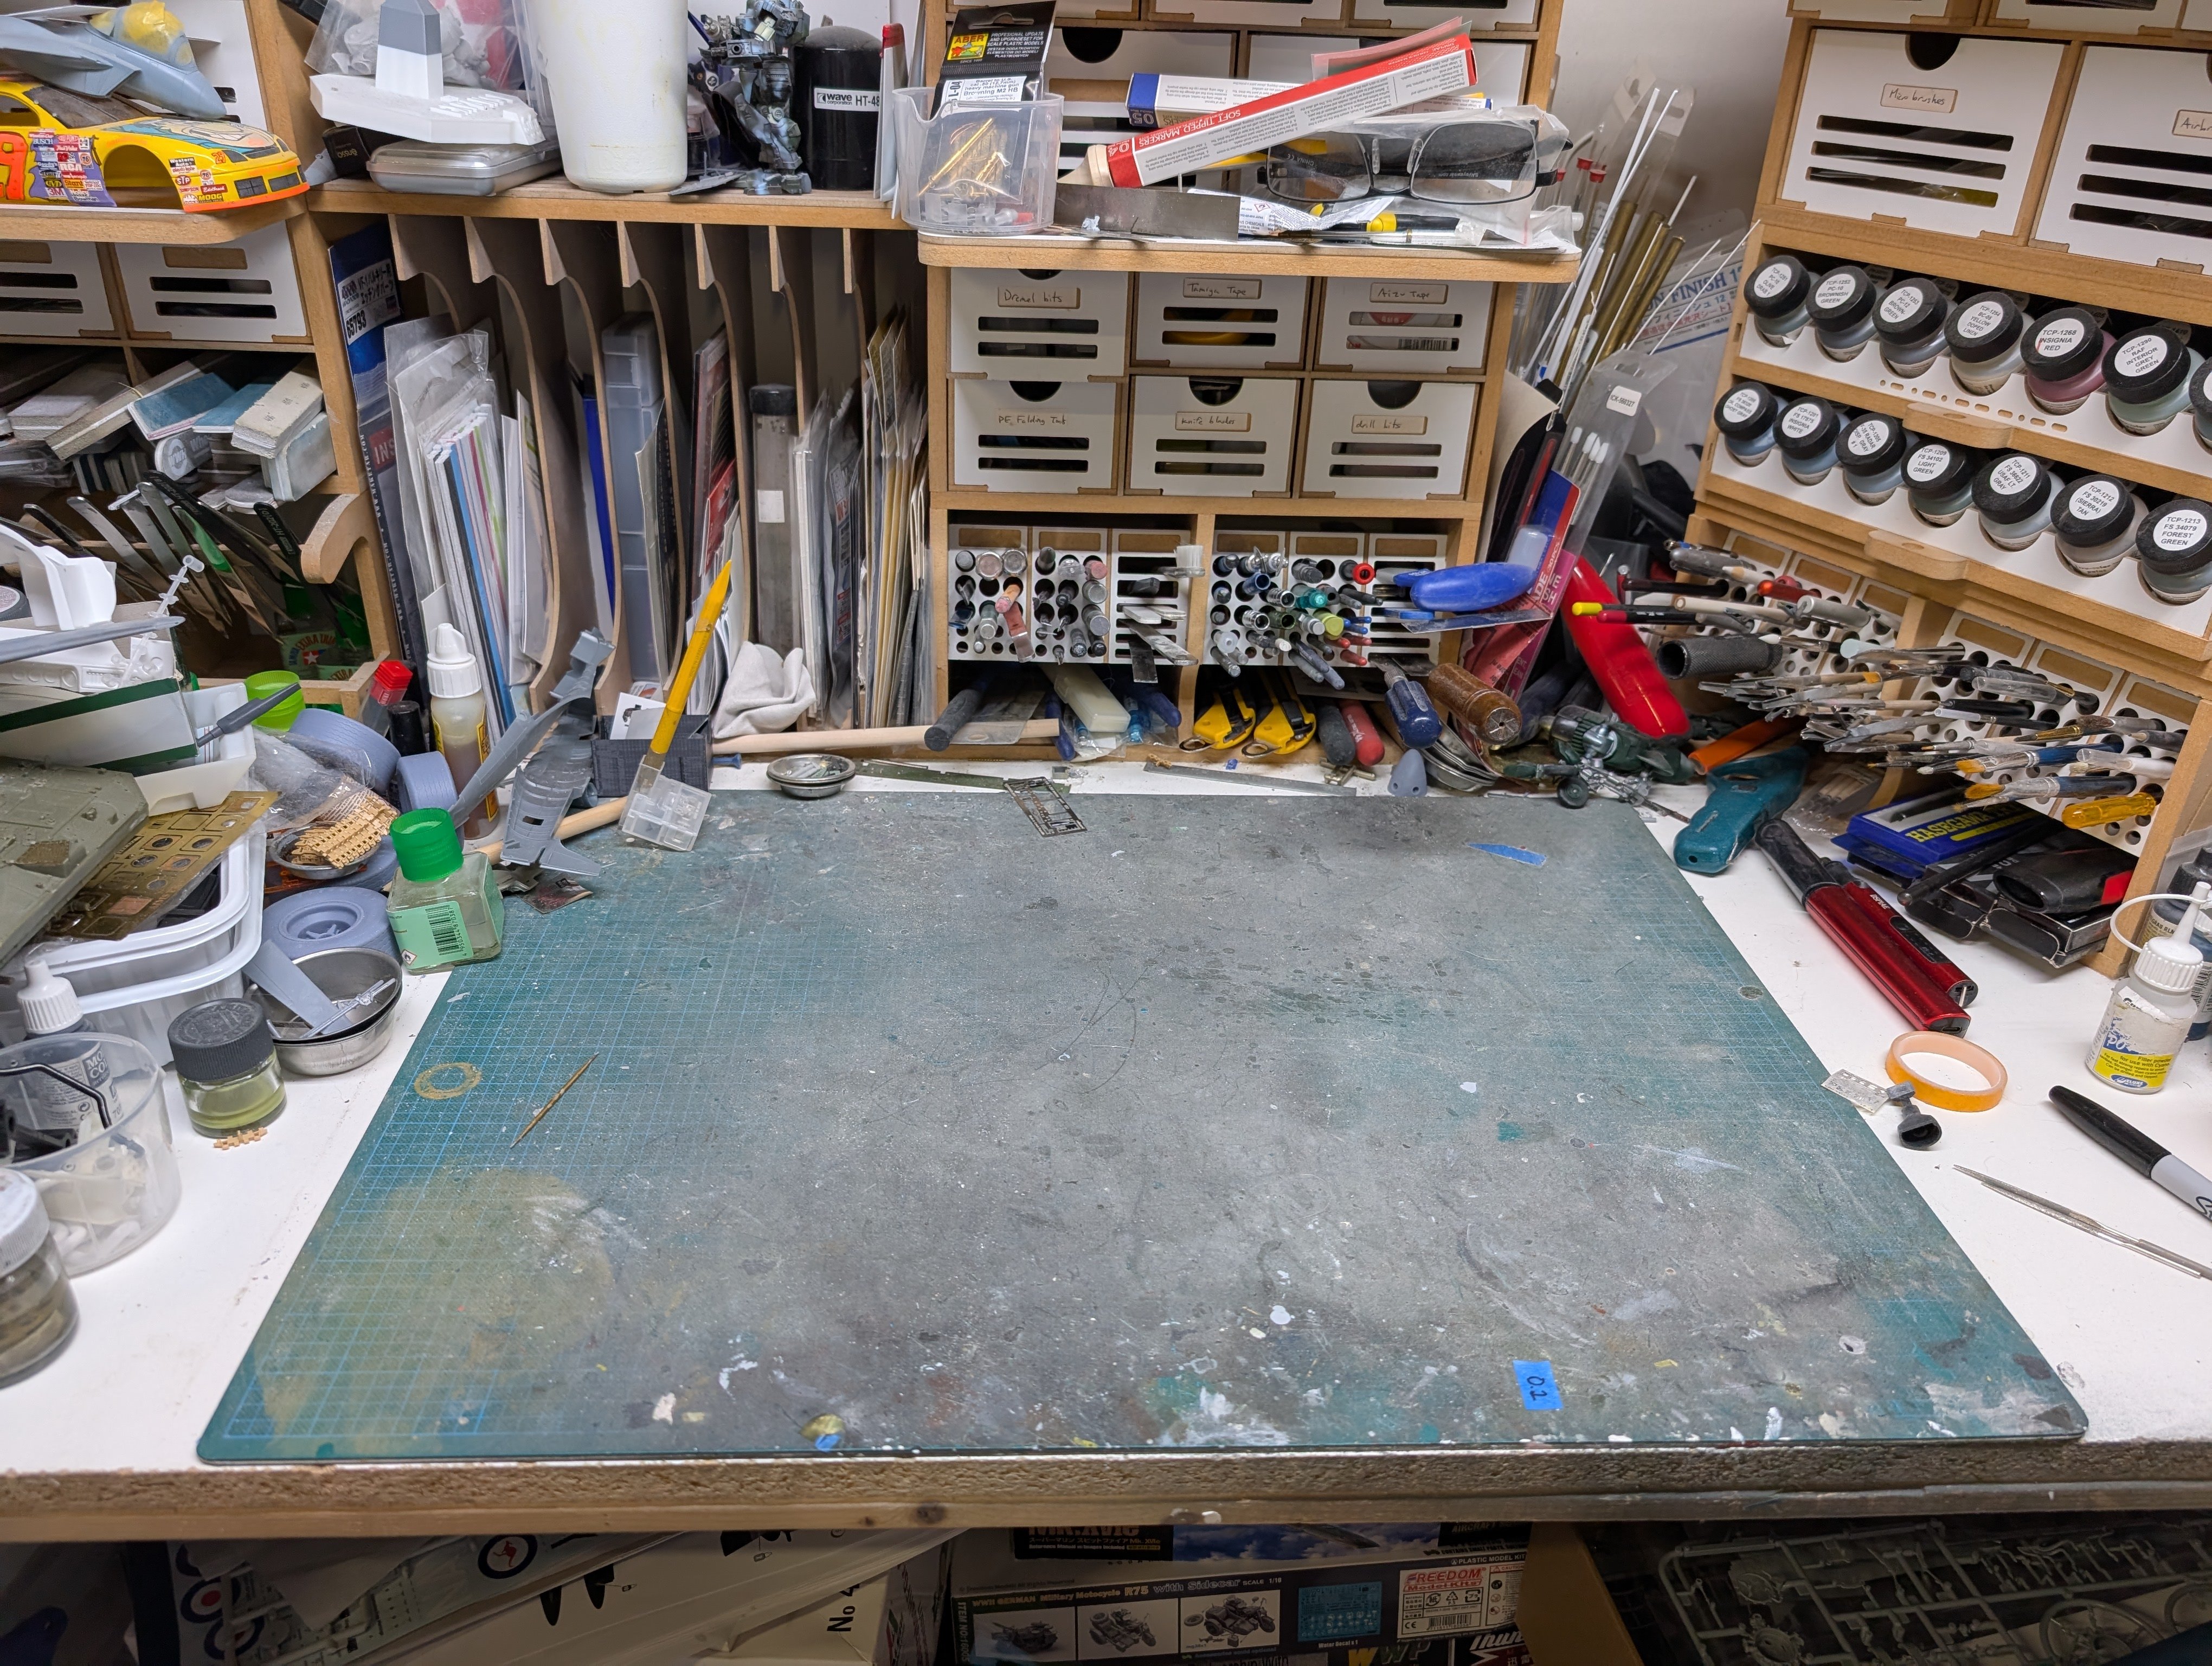
I couldn't stop myself and got carried away with the bench clearing. It's so, odd feeling. All that space that I don't know what to do with. Okay, how's this? I'll do a proper WiP once I get me bench back to it's usual state.