BlrwestSiR
-
Posts
9,149 -
Joined
-
Last visited
Content Type
Profiles
Forums
Events
Gallery
Everything posted by BlrwestSiR
-

Tamiya F-14 VF-2 Bounty Hunters
BlrwestSiR replied to Bill_S's topic in LSM 1/35 and Larger Work In Progress
Phil, the Tomcat was Tamiya's first 1/32 kit and is from the early '80s when Tamiya would print separate instructions and boxes in Japanese and English. So not quite the paradigm of plastic modelling we know today. -
Tamiya F-14 VF-2 Bounty Hunters
BlrwestSiR replied to Bill_S's topic in LSM 1/35 and Larger Work In Progress
What a great start to your build Bill and thanks for the back story. The Tomcat is my favourite jet hands down, mostly due to The Final Countdown. I've got 3 of the Tamiya Tomcats in the stash. They're all the original release. Peter, Trumpeter has a more recent release of the Tomcat out. The biggest issue with it is the intakes. The shape is off. Zacto do a correction set for it but it's a bit pricy and needs a fair bit of work to use. They also have replacement wing bladders to replace the kit's vinyl ones. You do get the option of dropped flaps and slats and it's fully engraved and be able to build a (more) accurate B or D Tomcat. Carl -
RCAF Liberator GR Mk VI
BlrwestSiR replied to BlrwestSiR's topic in LSM 1/35 and Larger Work In Progress
Martin, it sort of does look like a winglet doesn't it? To me, I think they tried to mould that bit with the cowl flaps in the open position rather than closed which is what they supplied. Just one more little (or not) mistake. The engineering of the kit really makes me suspect it was to be offered assembled. -
Meng 1/24 Ford GT40
BlrwestSiR replied to Peterpools's topic in LSM 1/35 and Larger Work In Progress
Very, very nice GT there Peter. -
Peter, try the following. https://shop.maketar.com/ You have the choice of Kabuki or vinyl for the masking material. The vinyl is the grey one that most folks like. They often use the discount code Maketar so give that a try when you check out. Edit: if you do place an order with them, check out their Utility masks. I've found the sheet they do of circles to be very handy for masking small circles. https://shop.maketar.com/?product=yellow-kabuki-masking-circles Carl
-
Peter, the Montex masks are fine for the Tamiya kit. As Dennis mentioned, the XVI denoted the Packard Merlin versus the RR one. So you could have both high- and low-back XVIs. One thing with the masks. Montex use a very thick and not very flexible material for the canopy masks. I've found on curved areas they tend to lift very easily. So use with caution. The Lifelike decals are very nice. They do several sheets but some may be sold out. Carl
-
That's a very nice IP there John and like Peter said, too bad you had to resort to AM to do it. Carl
-
RCAF Liberator GR Mk VI
BlrwestSiR replied to BlrwestSiR's topic in LSM 1/35 and Larger Work In Progress
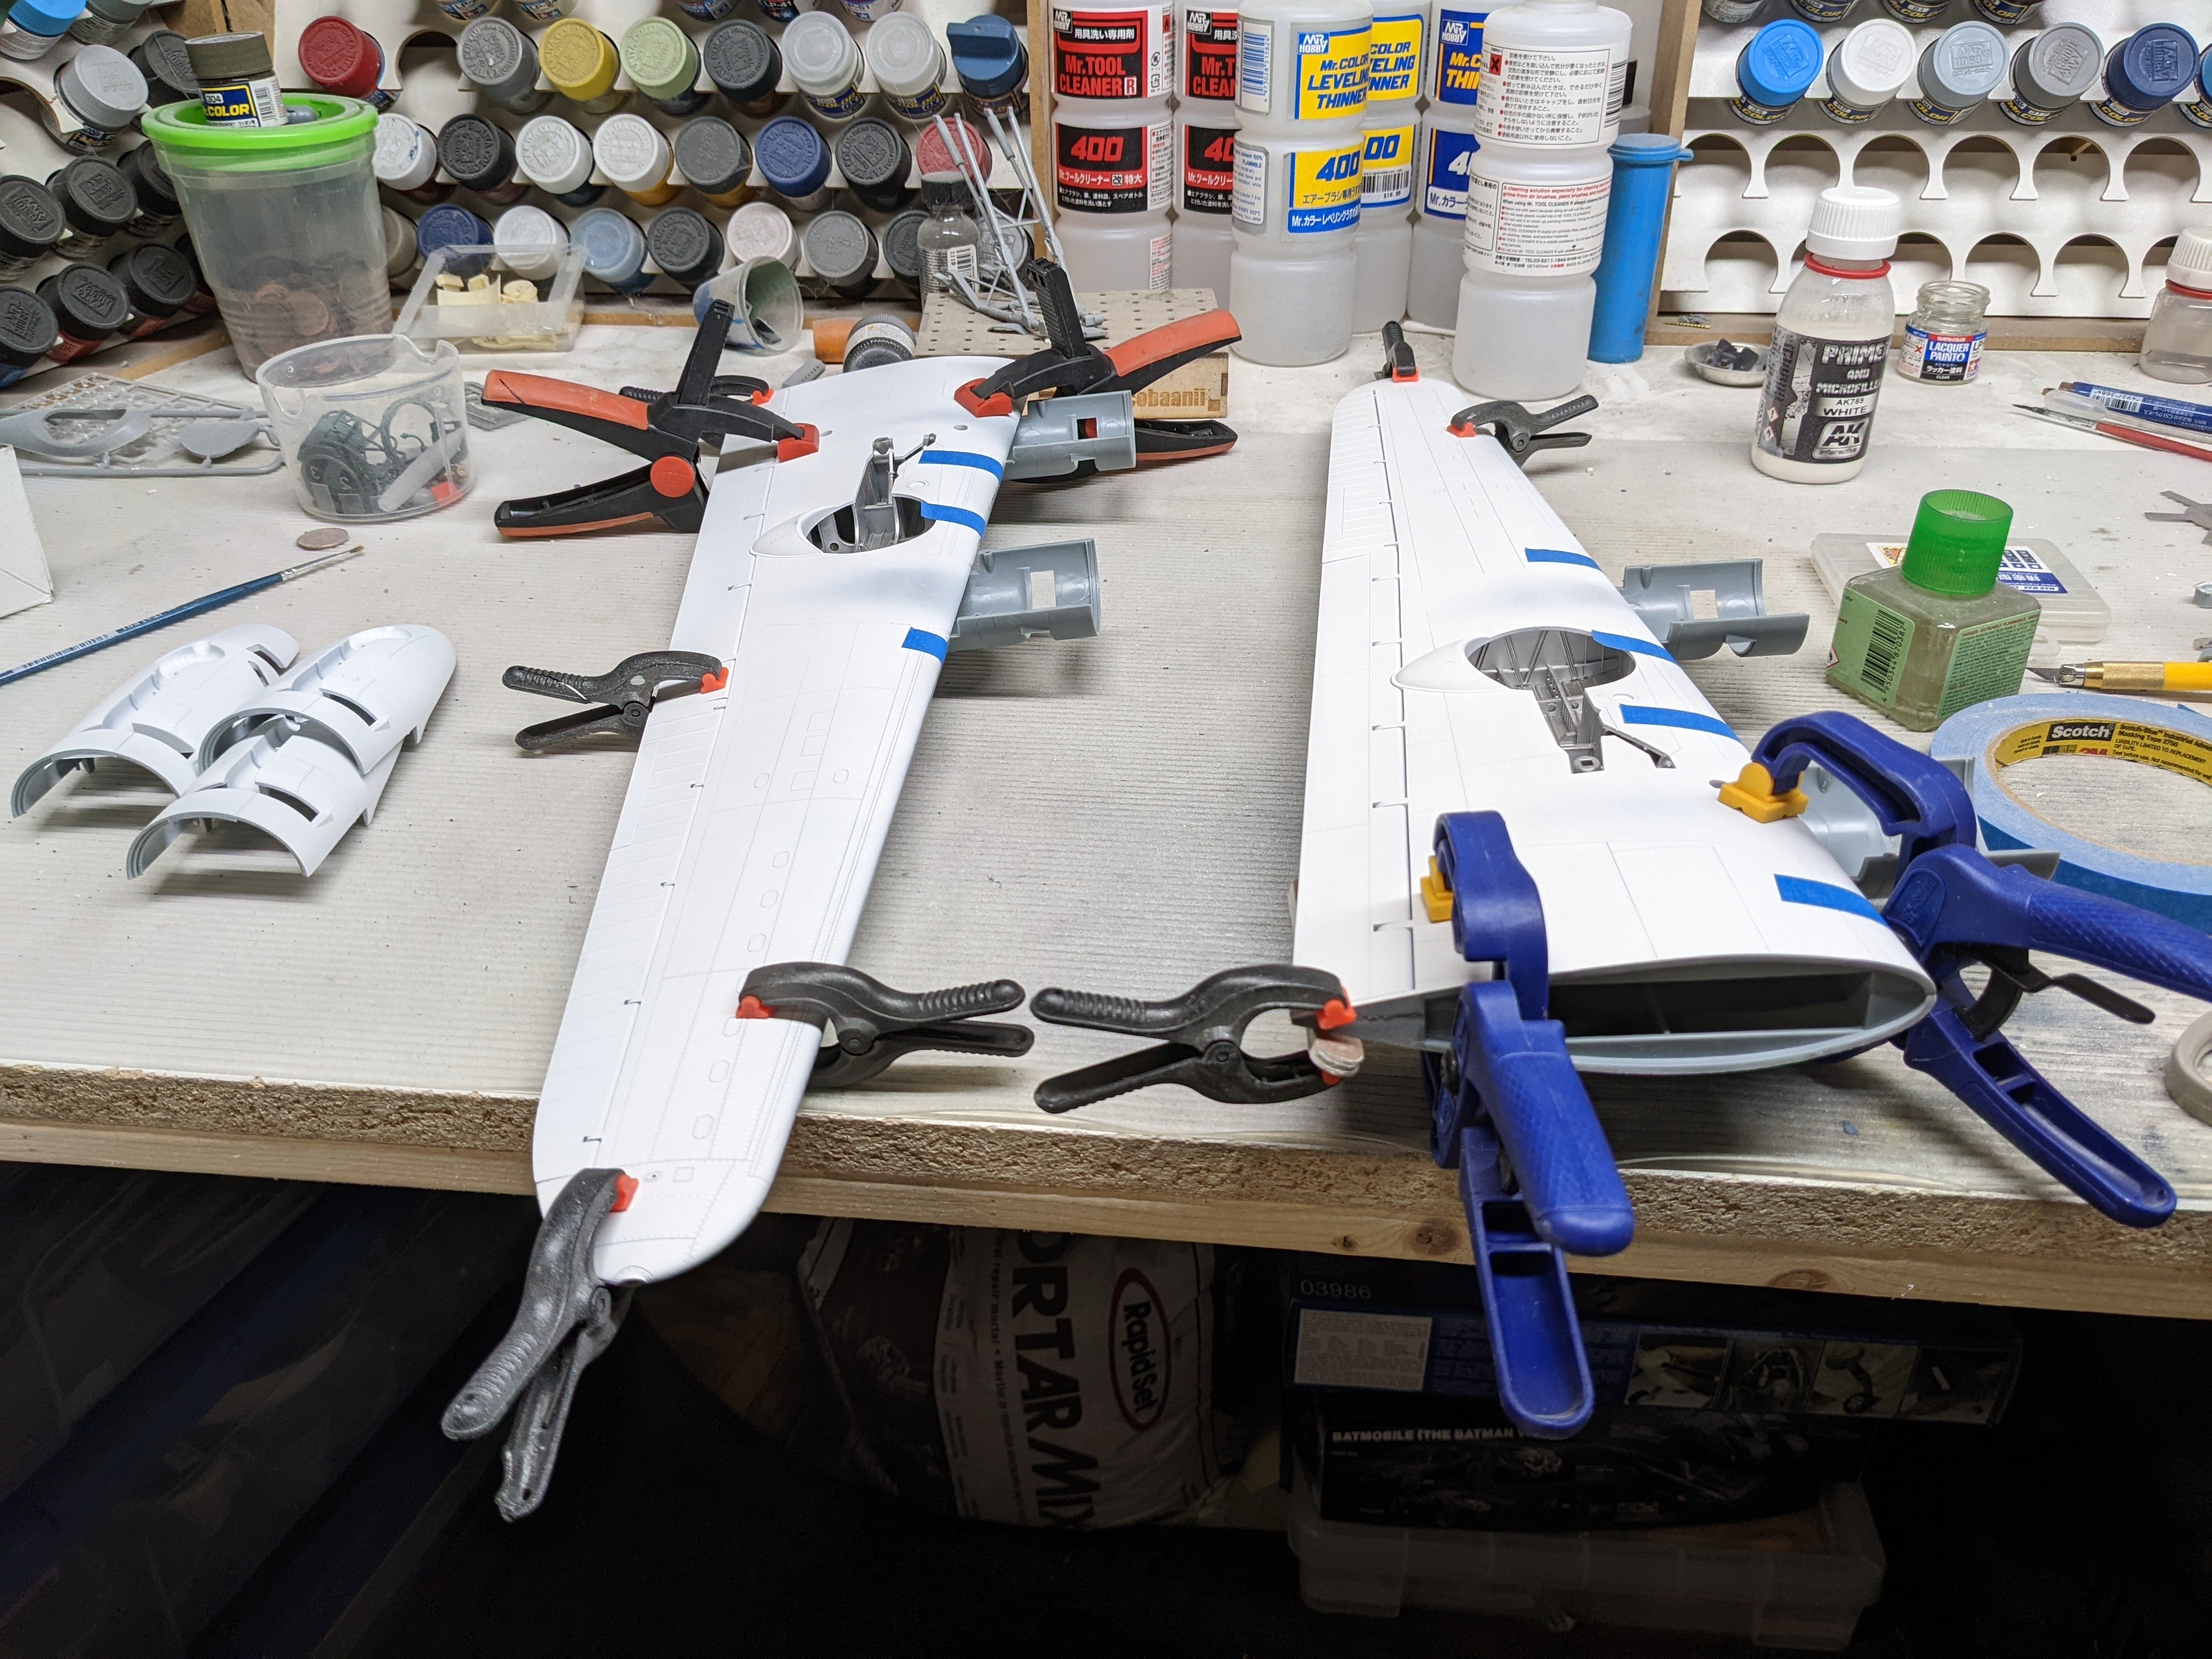
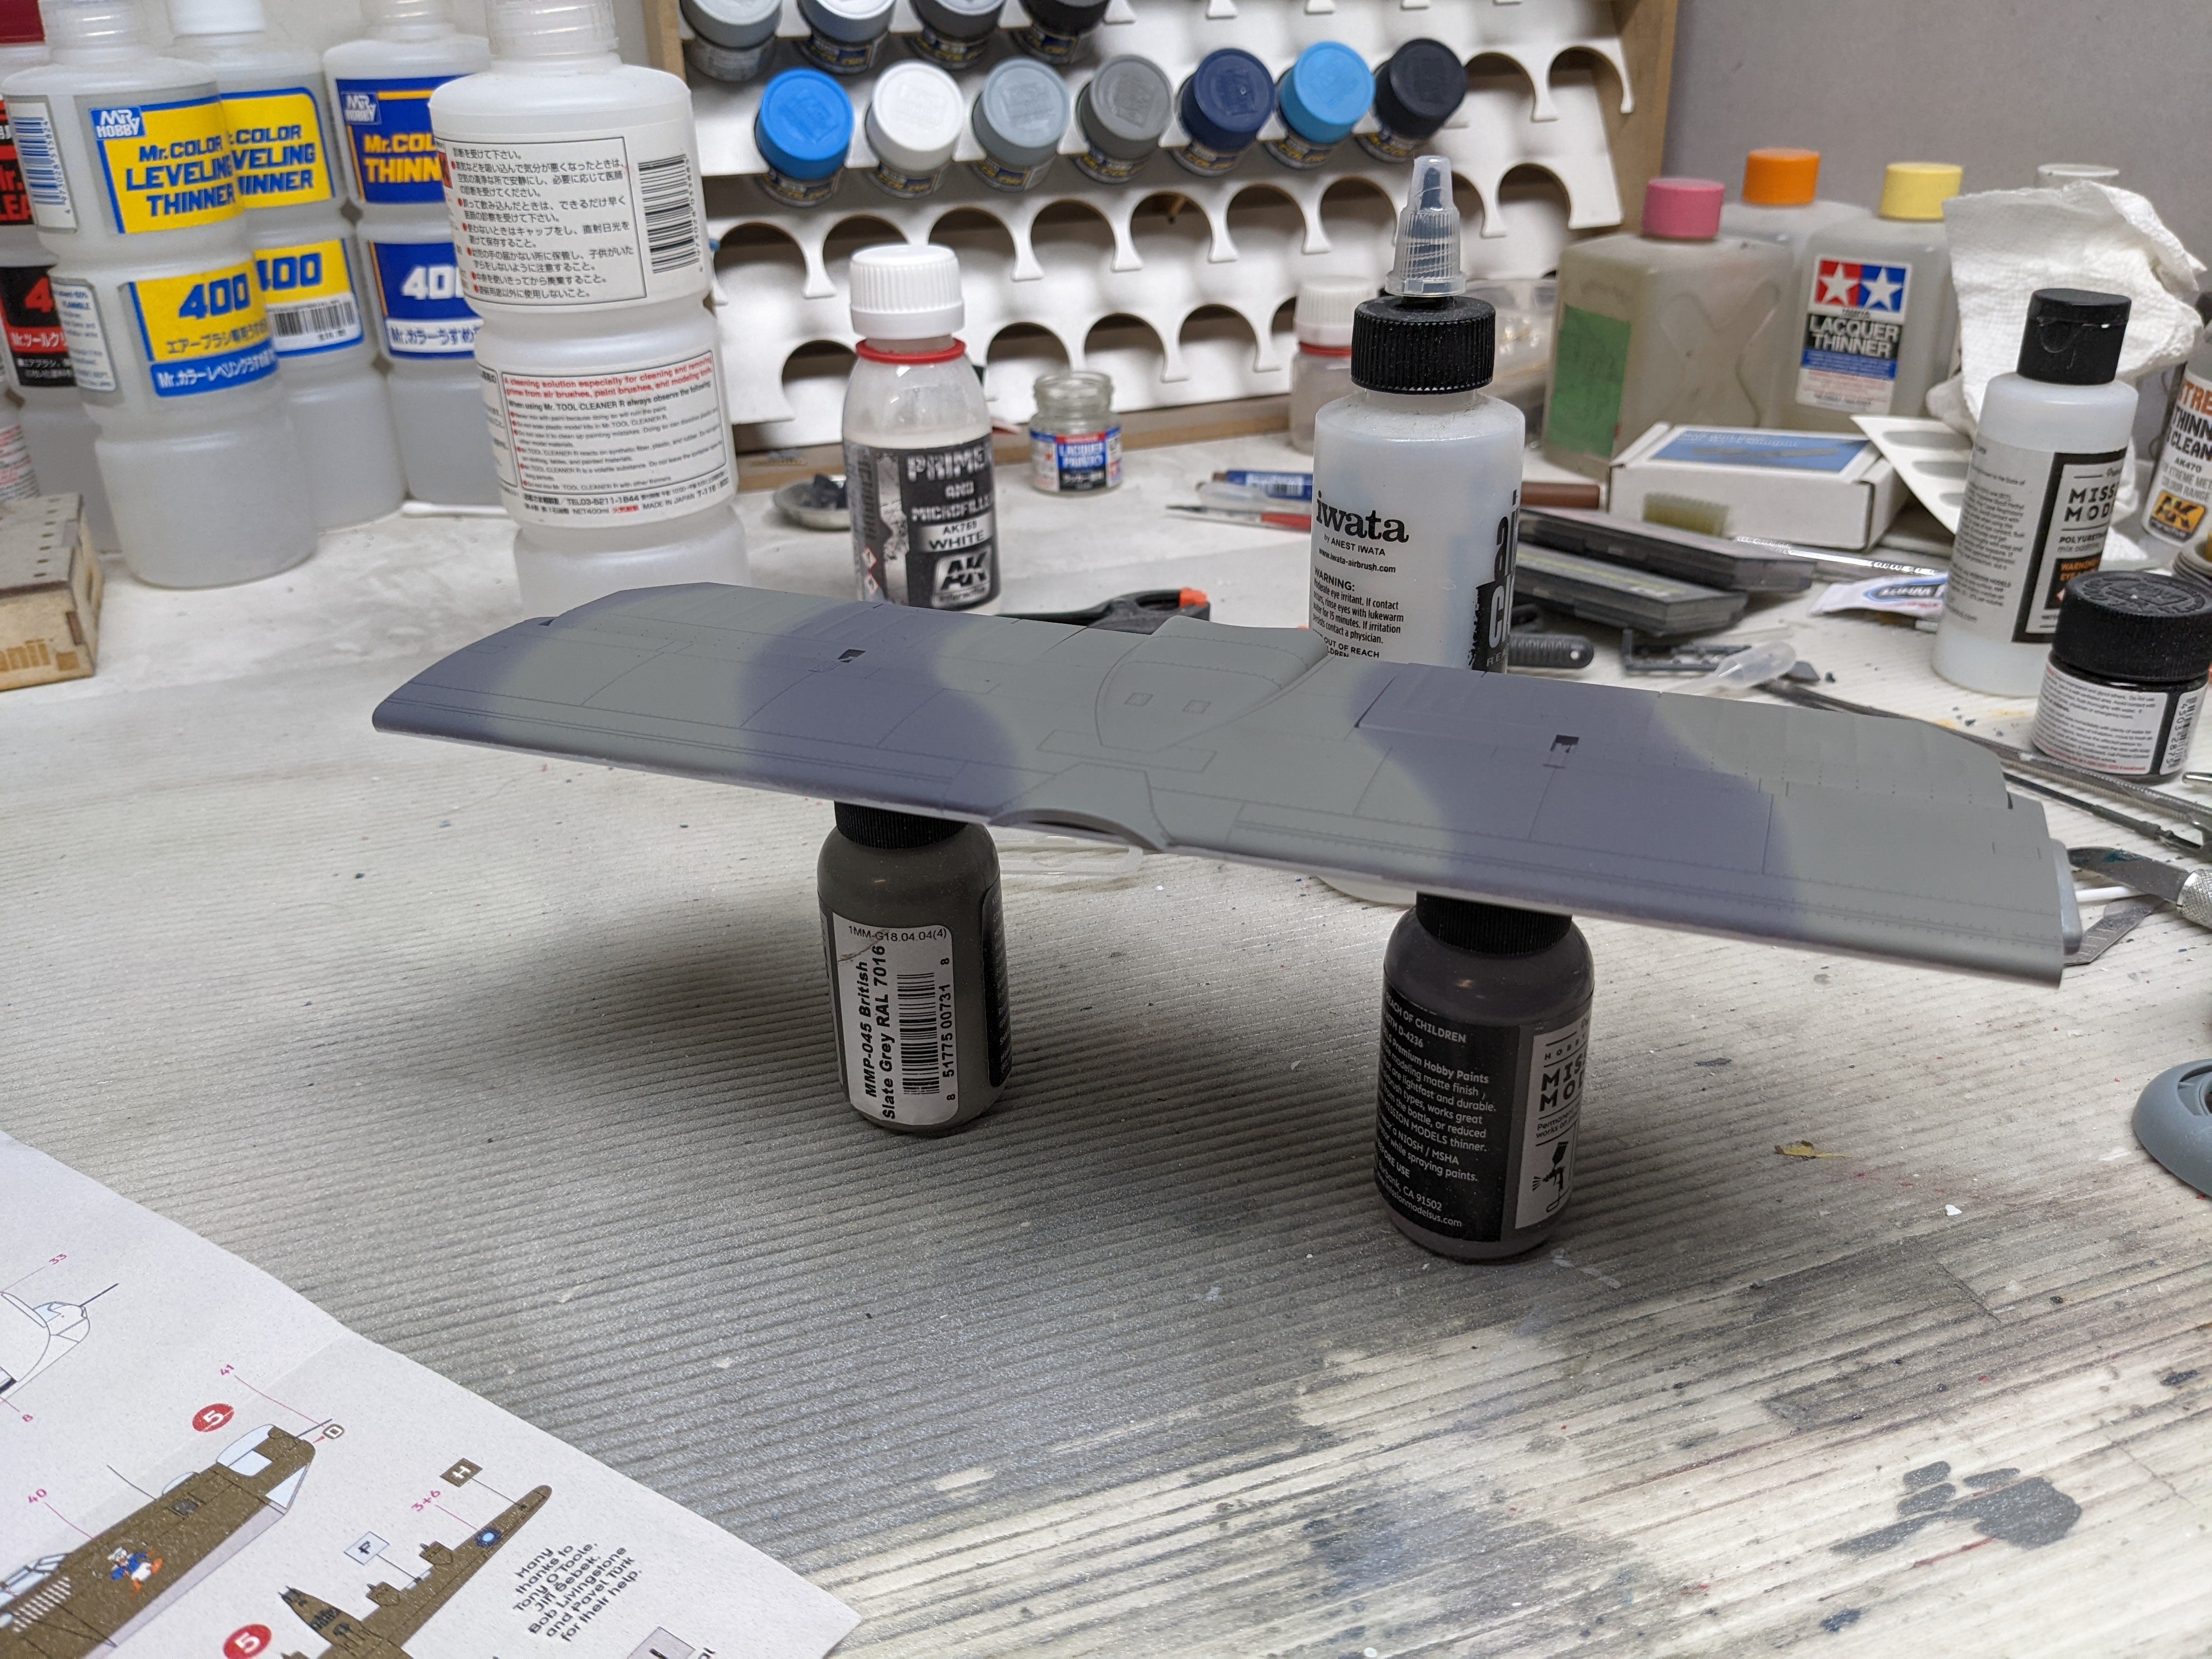
Thanks Gary! It's definitely helped being able to paint the wings separately. Would you believe I've only used just 1 bottle of white, 1/2 bottle of Extra Dark Sea Grey and 1/2 bottle of the Slate grey? All of it has been straight from the bottle without thinning. My LHS had complained that they don't sell much Mission Models paint as it goes a long way. I believe them now after painting this model. Thanks Peter, I may just leave them removable until I can find a permanent place to display it. -
RCAF Liberator GR Mk VI
BlrwestSiR replied to BlrwestSiR's topic in LSM 1/35 and Larger Work In Progress
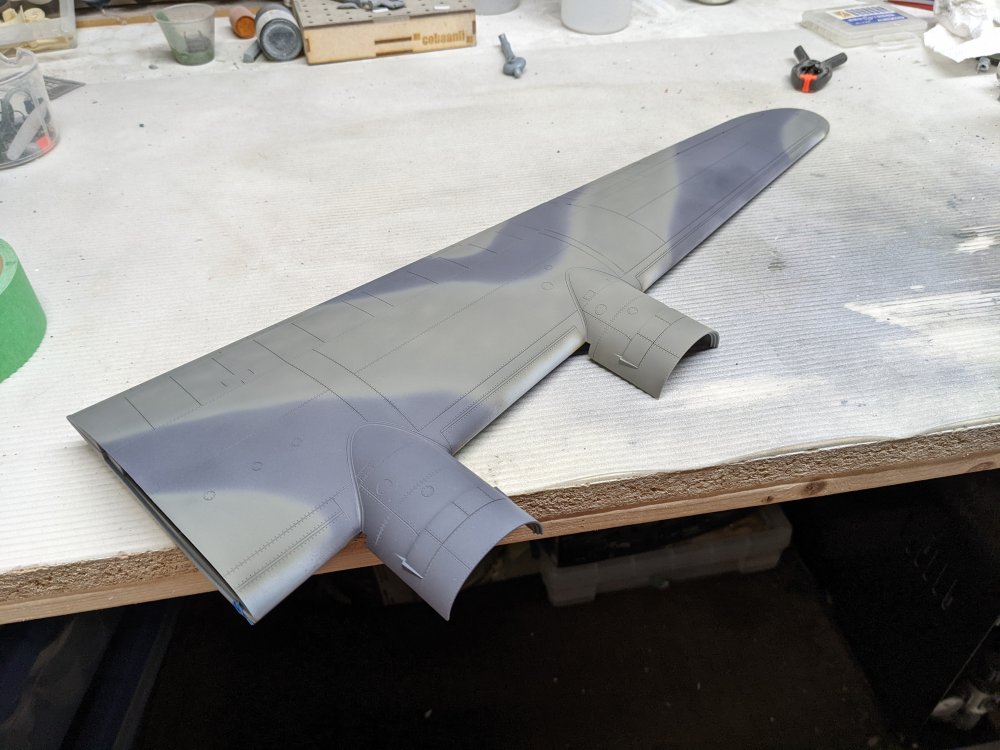
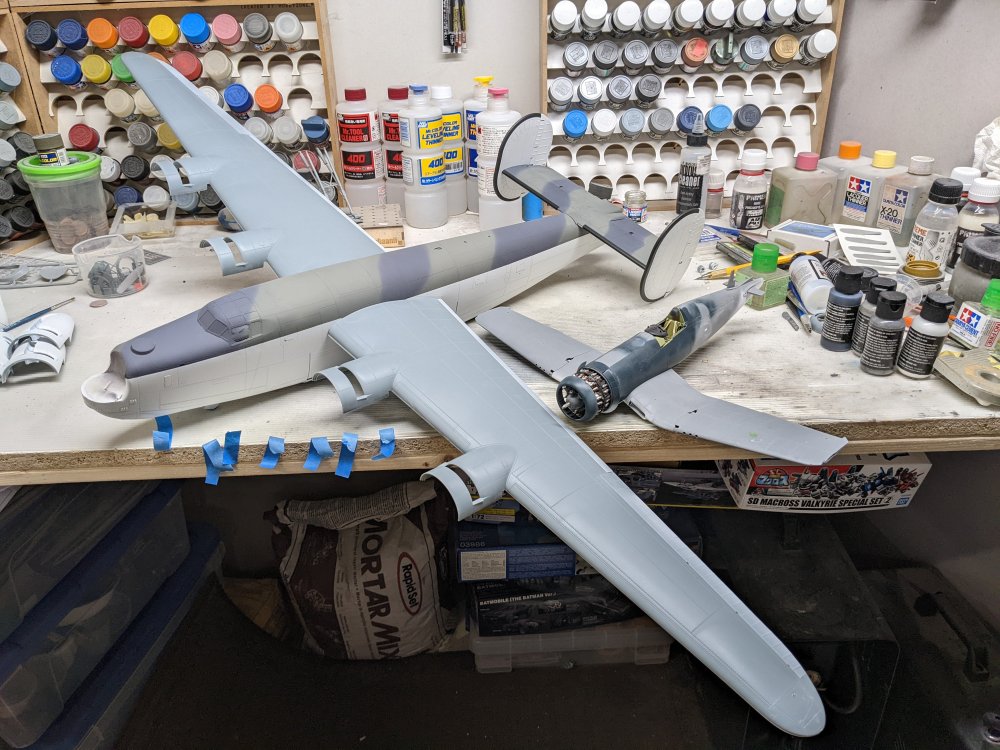
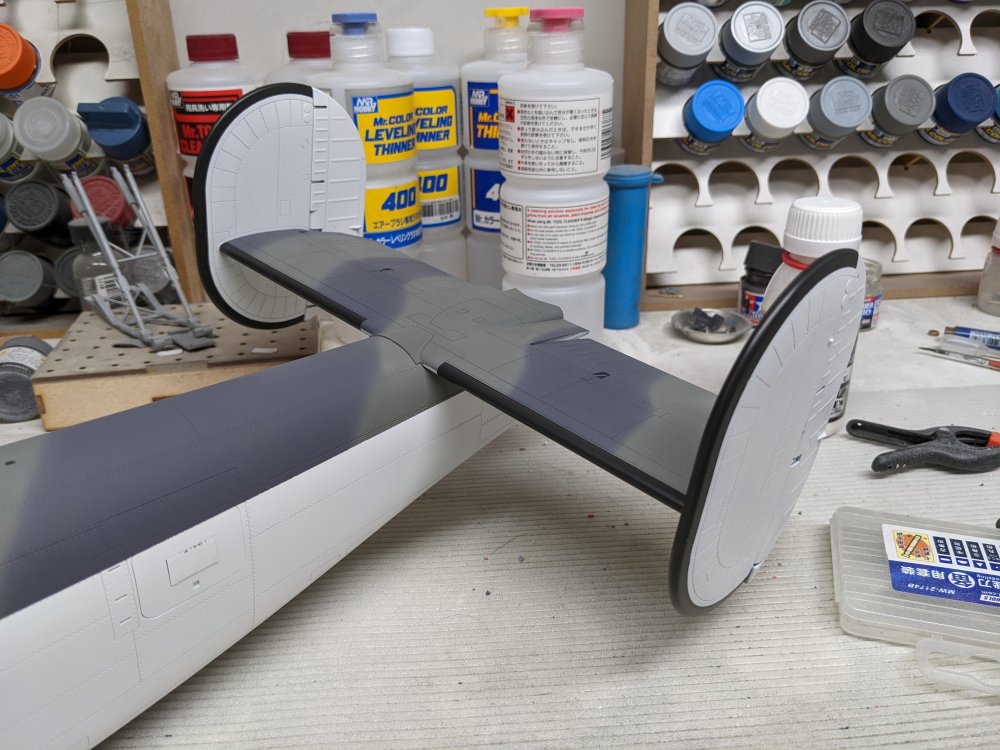
Wing camo is all done now. I masked off and painted the de-icer boots. Here they are l test fit in place. Here's the wing/fuselage join. No glue yet but the fit is decent. I will most likely leave it alone.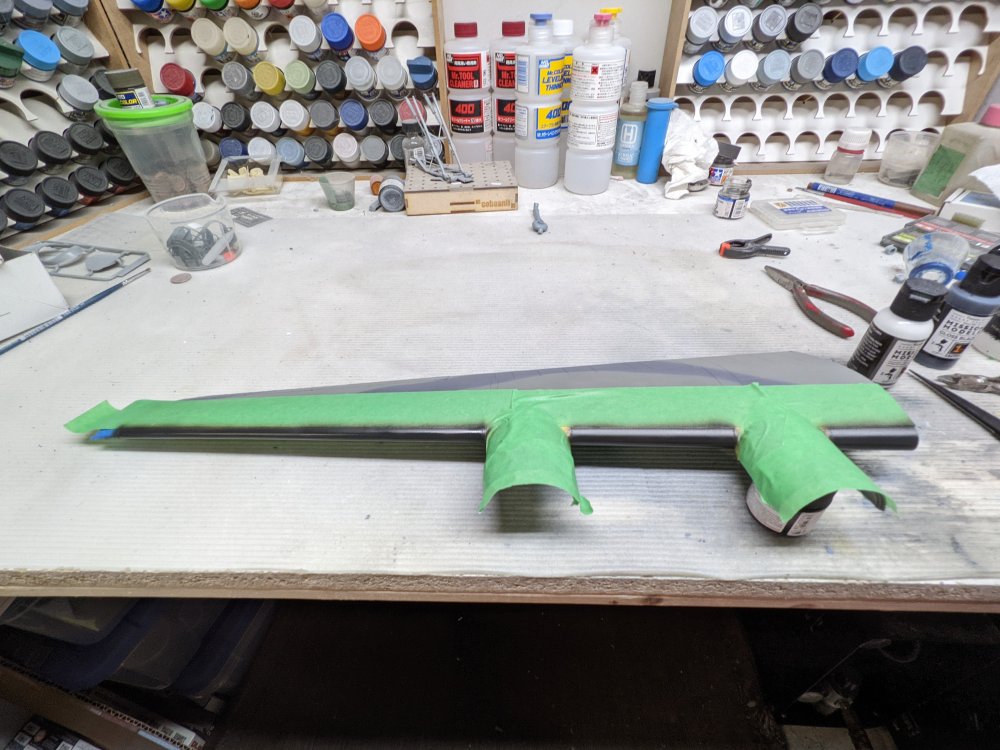
- 227 replies
-
- 10
-

-
Resin2Detail is very impressive stuff. I've got their Lancaster seats and the detail is incredible.
-
Trumpeter F4F-3 Late - 1/32nd
BlrwestSiR replied to Bomber_County's topic in LSM 1/35 and Larger Work In Progress
Just catching up on this Phil. Nice to see it's together, even if it was a struggle. I'm 0 for 3 when it comes to Trumpeter 1/32 kits myself. MiG-15, P-40B, and the F4U-1D. Probably a collection of their worst kits. Didn't finish any of them. And yet I still have a couple in the stash. But ones that at least I've heard good things about. Carl -
Happy birthday Rob! Glad to see you had a great time and another nice ship kit. Even better that your wife got it for you.
-
RCAF Liberator GR Mk VI
BlrwestSiR replied to BlrwestSiR's topic in LSM 1/35 and Larger Work In Progress
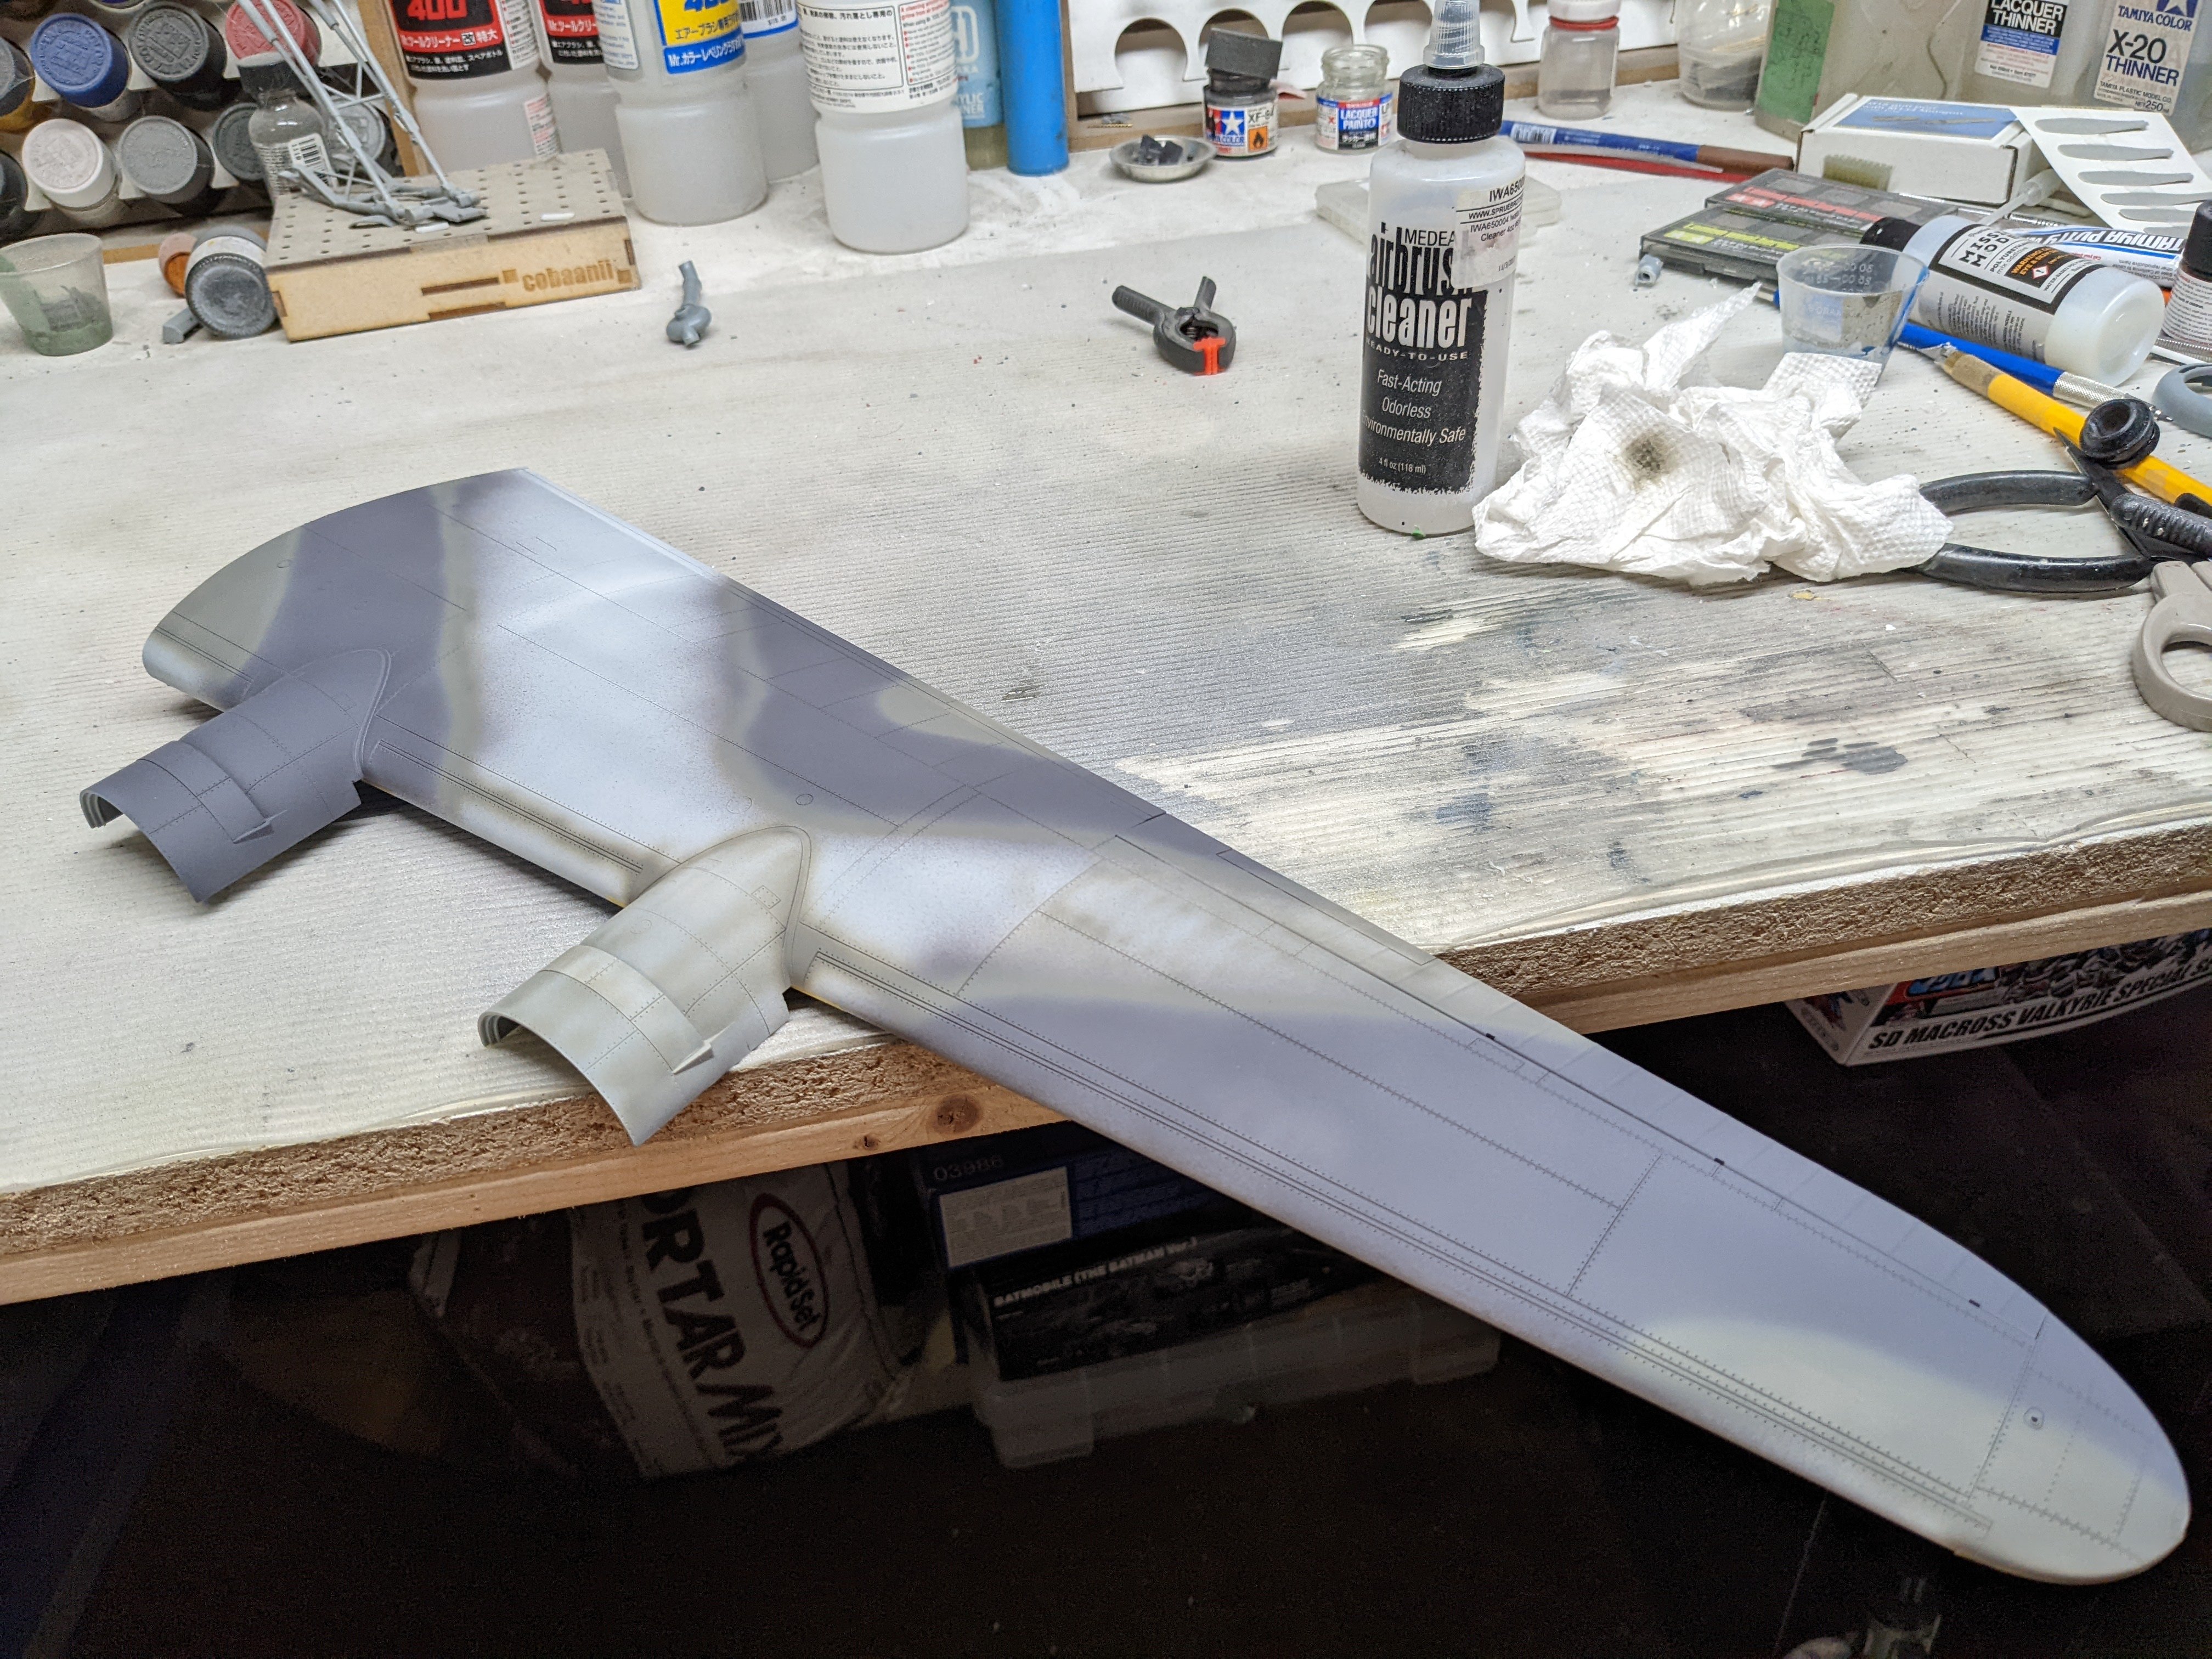
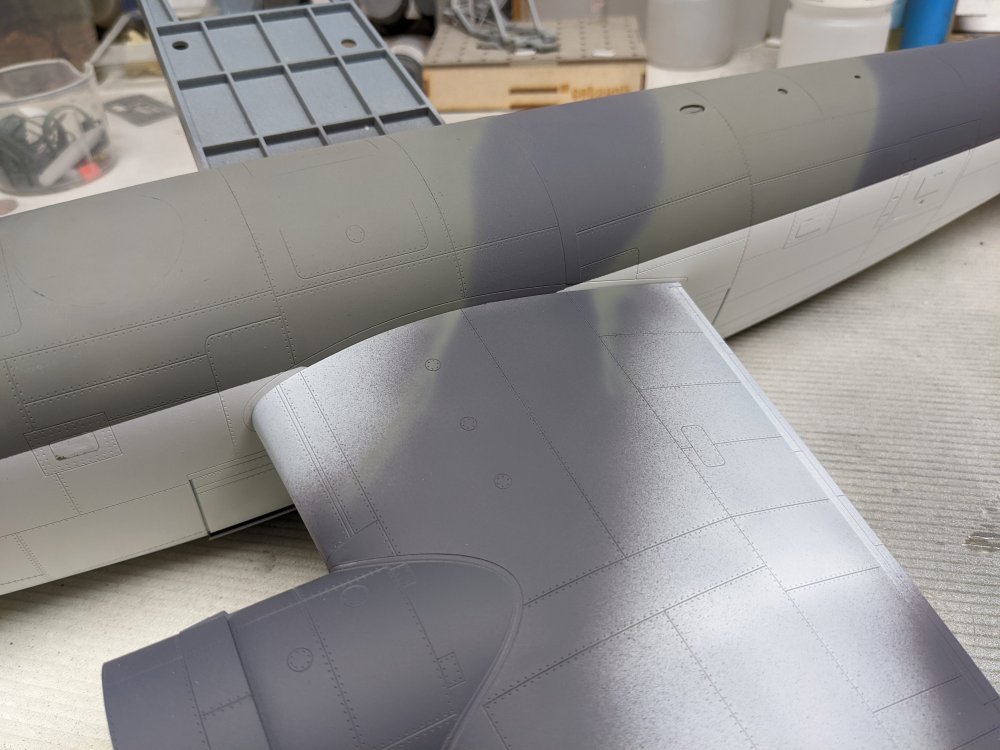
From there, I then masked off the fuselage so I could align the camo scheme between the wing and fuselage. I did a quick outline so that I made the camo aligned. Then I took the wing off and continued on the camo. Here's the finished wing dry fit on the fuselage. Looks to have worked out. The other wing is much easier so that will be next.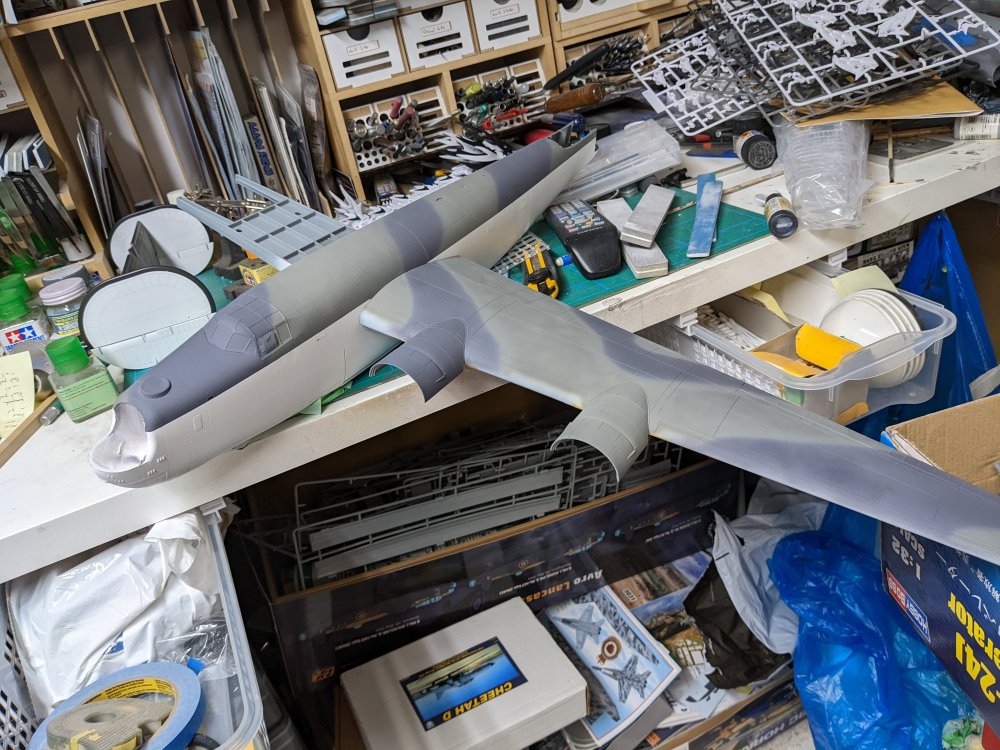

-
RCAF Liberator GR Mk VI
BlrwestSiR replied to BlrwestSiR's topic in LSM 1/35 and Larger Work In Progress
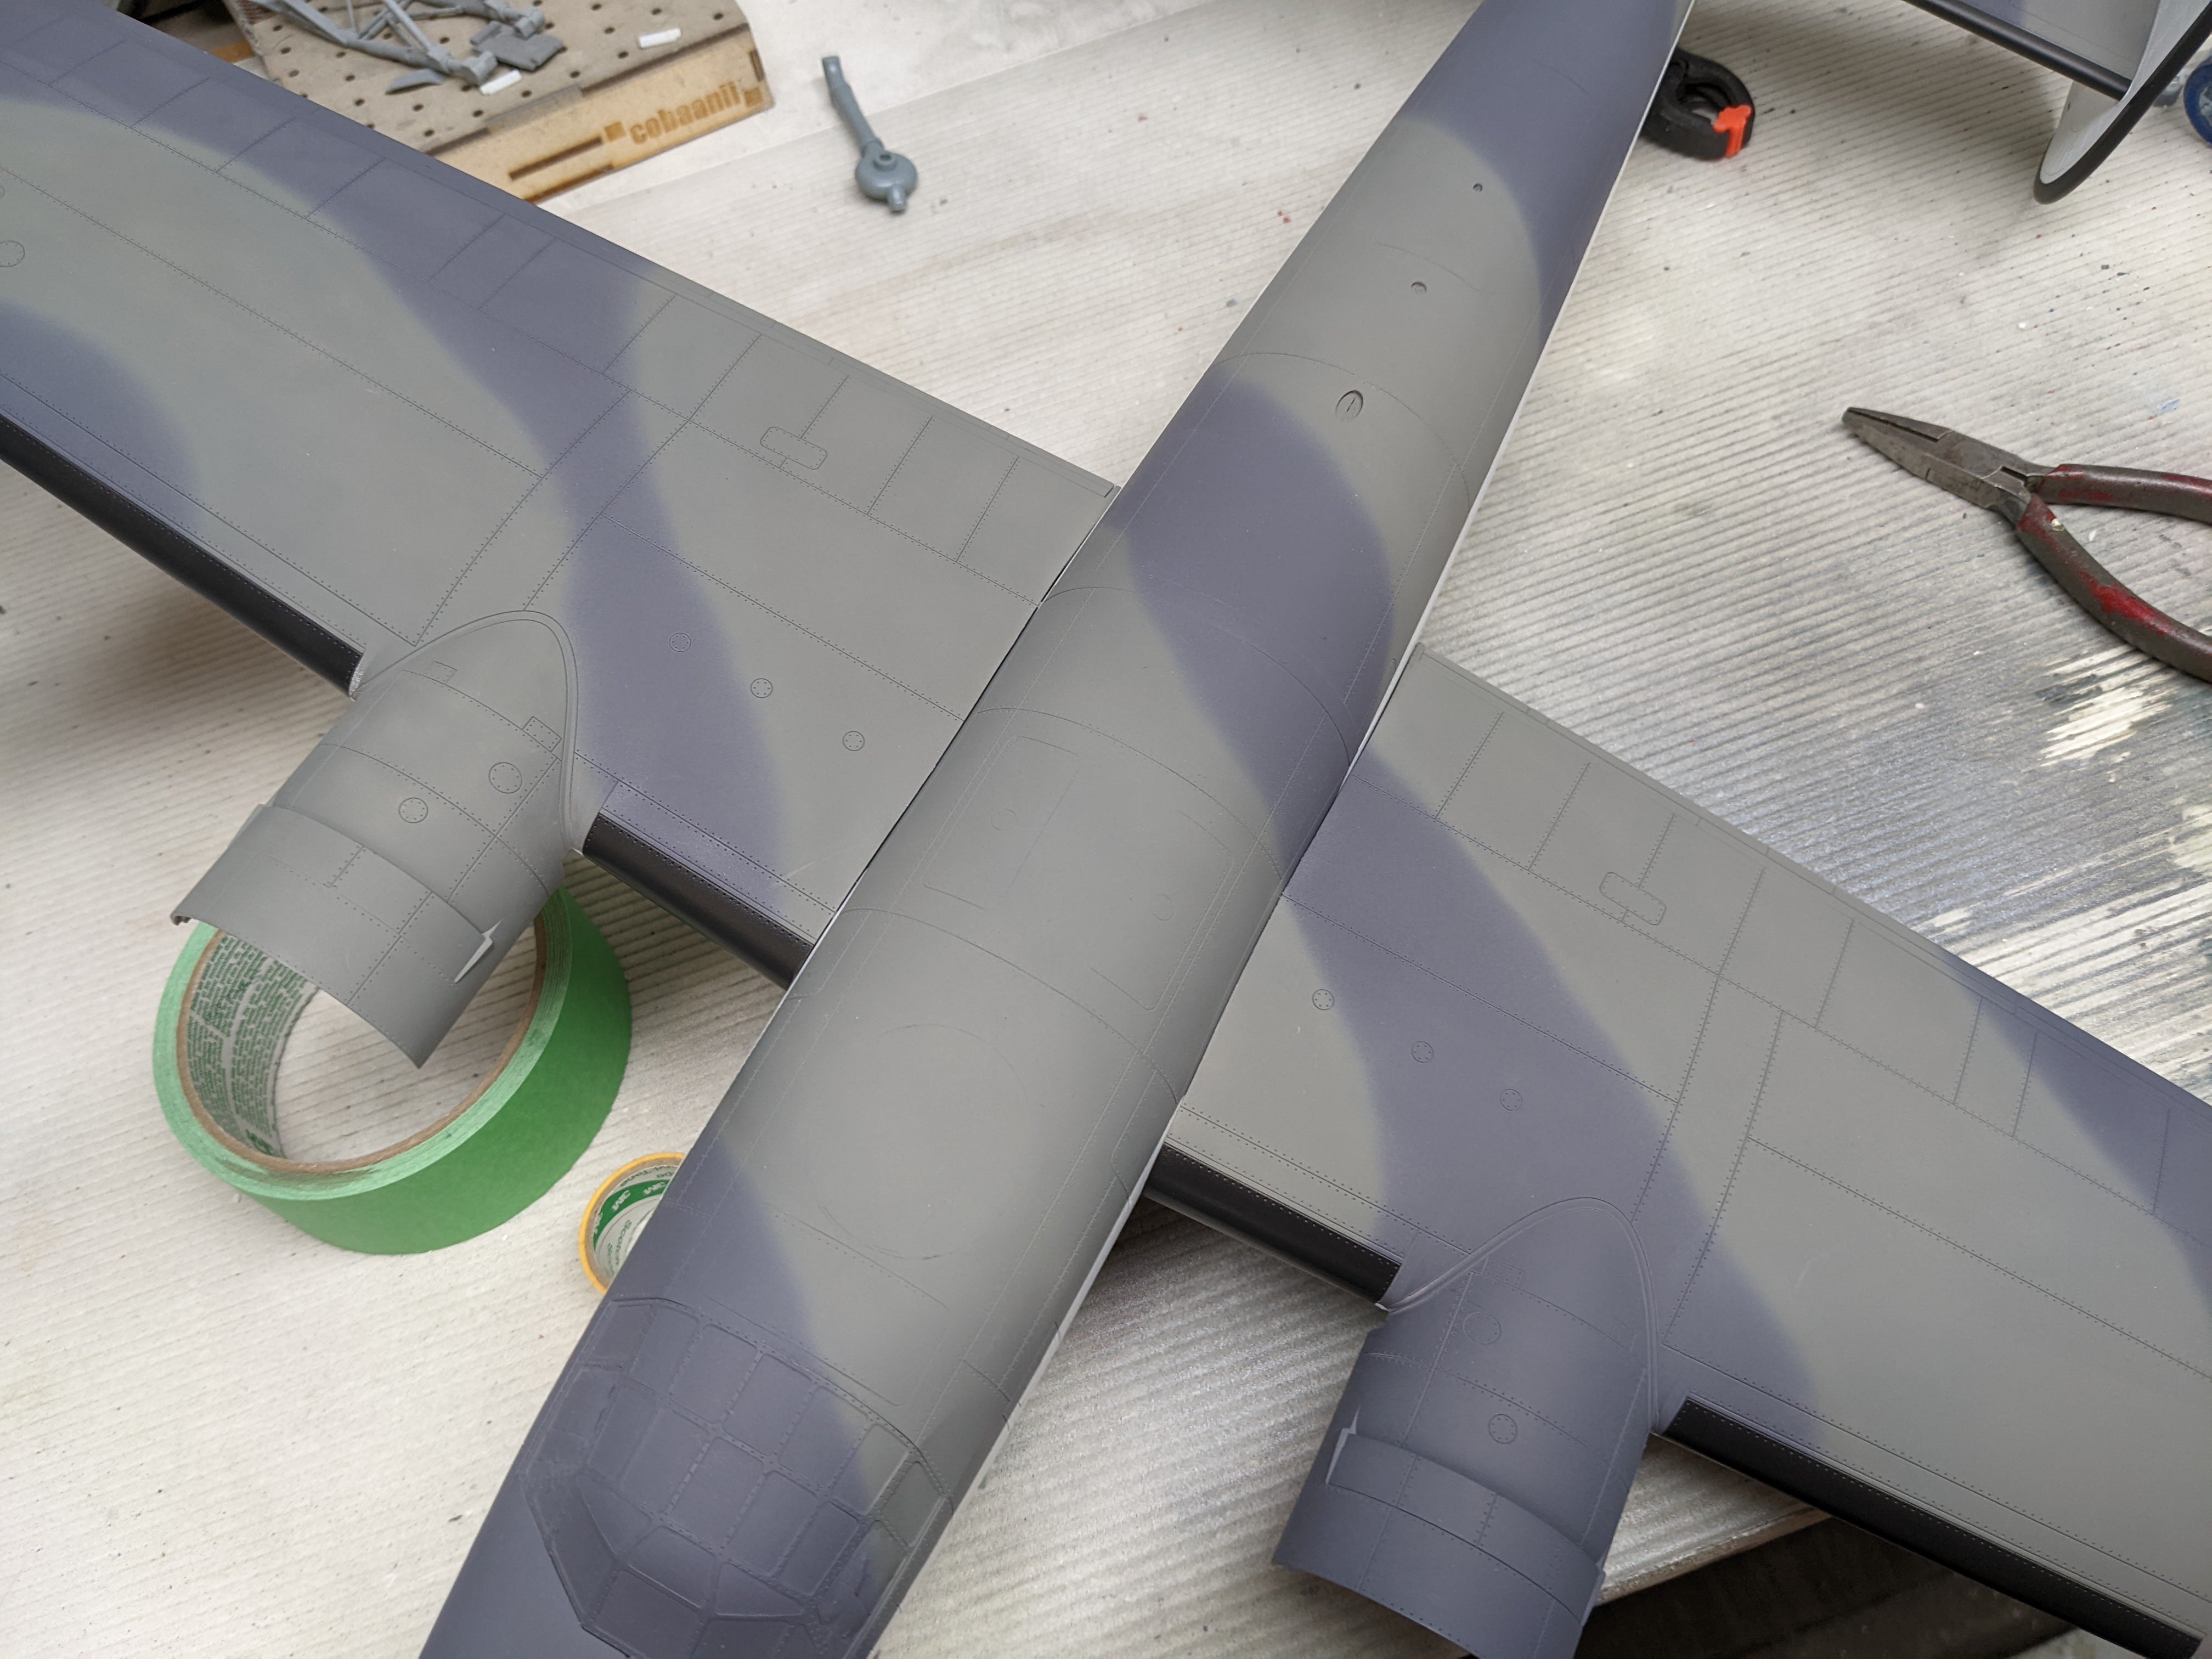
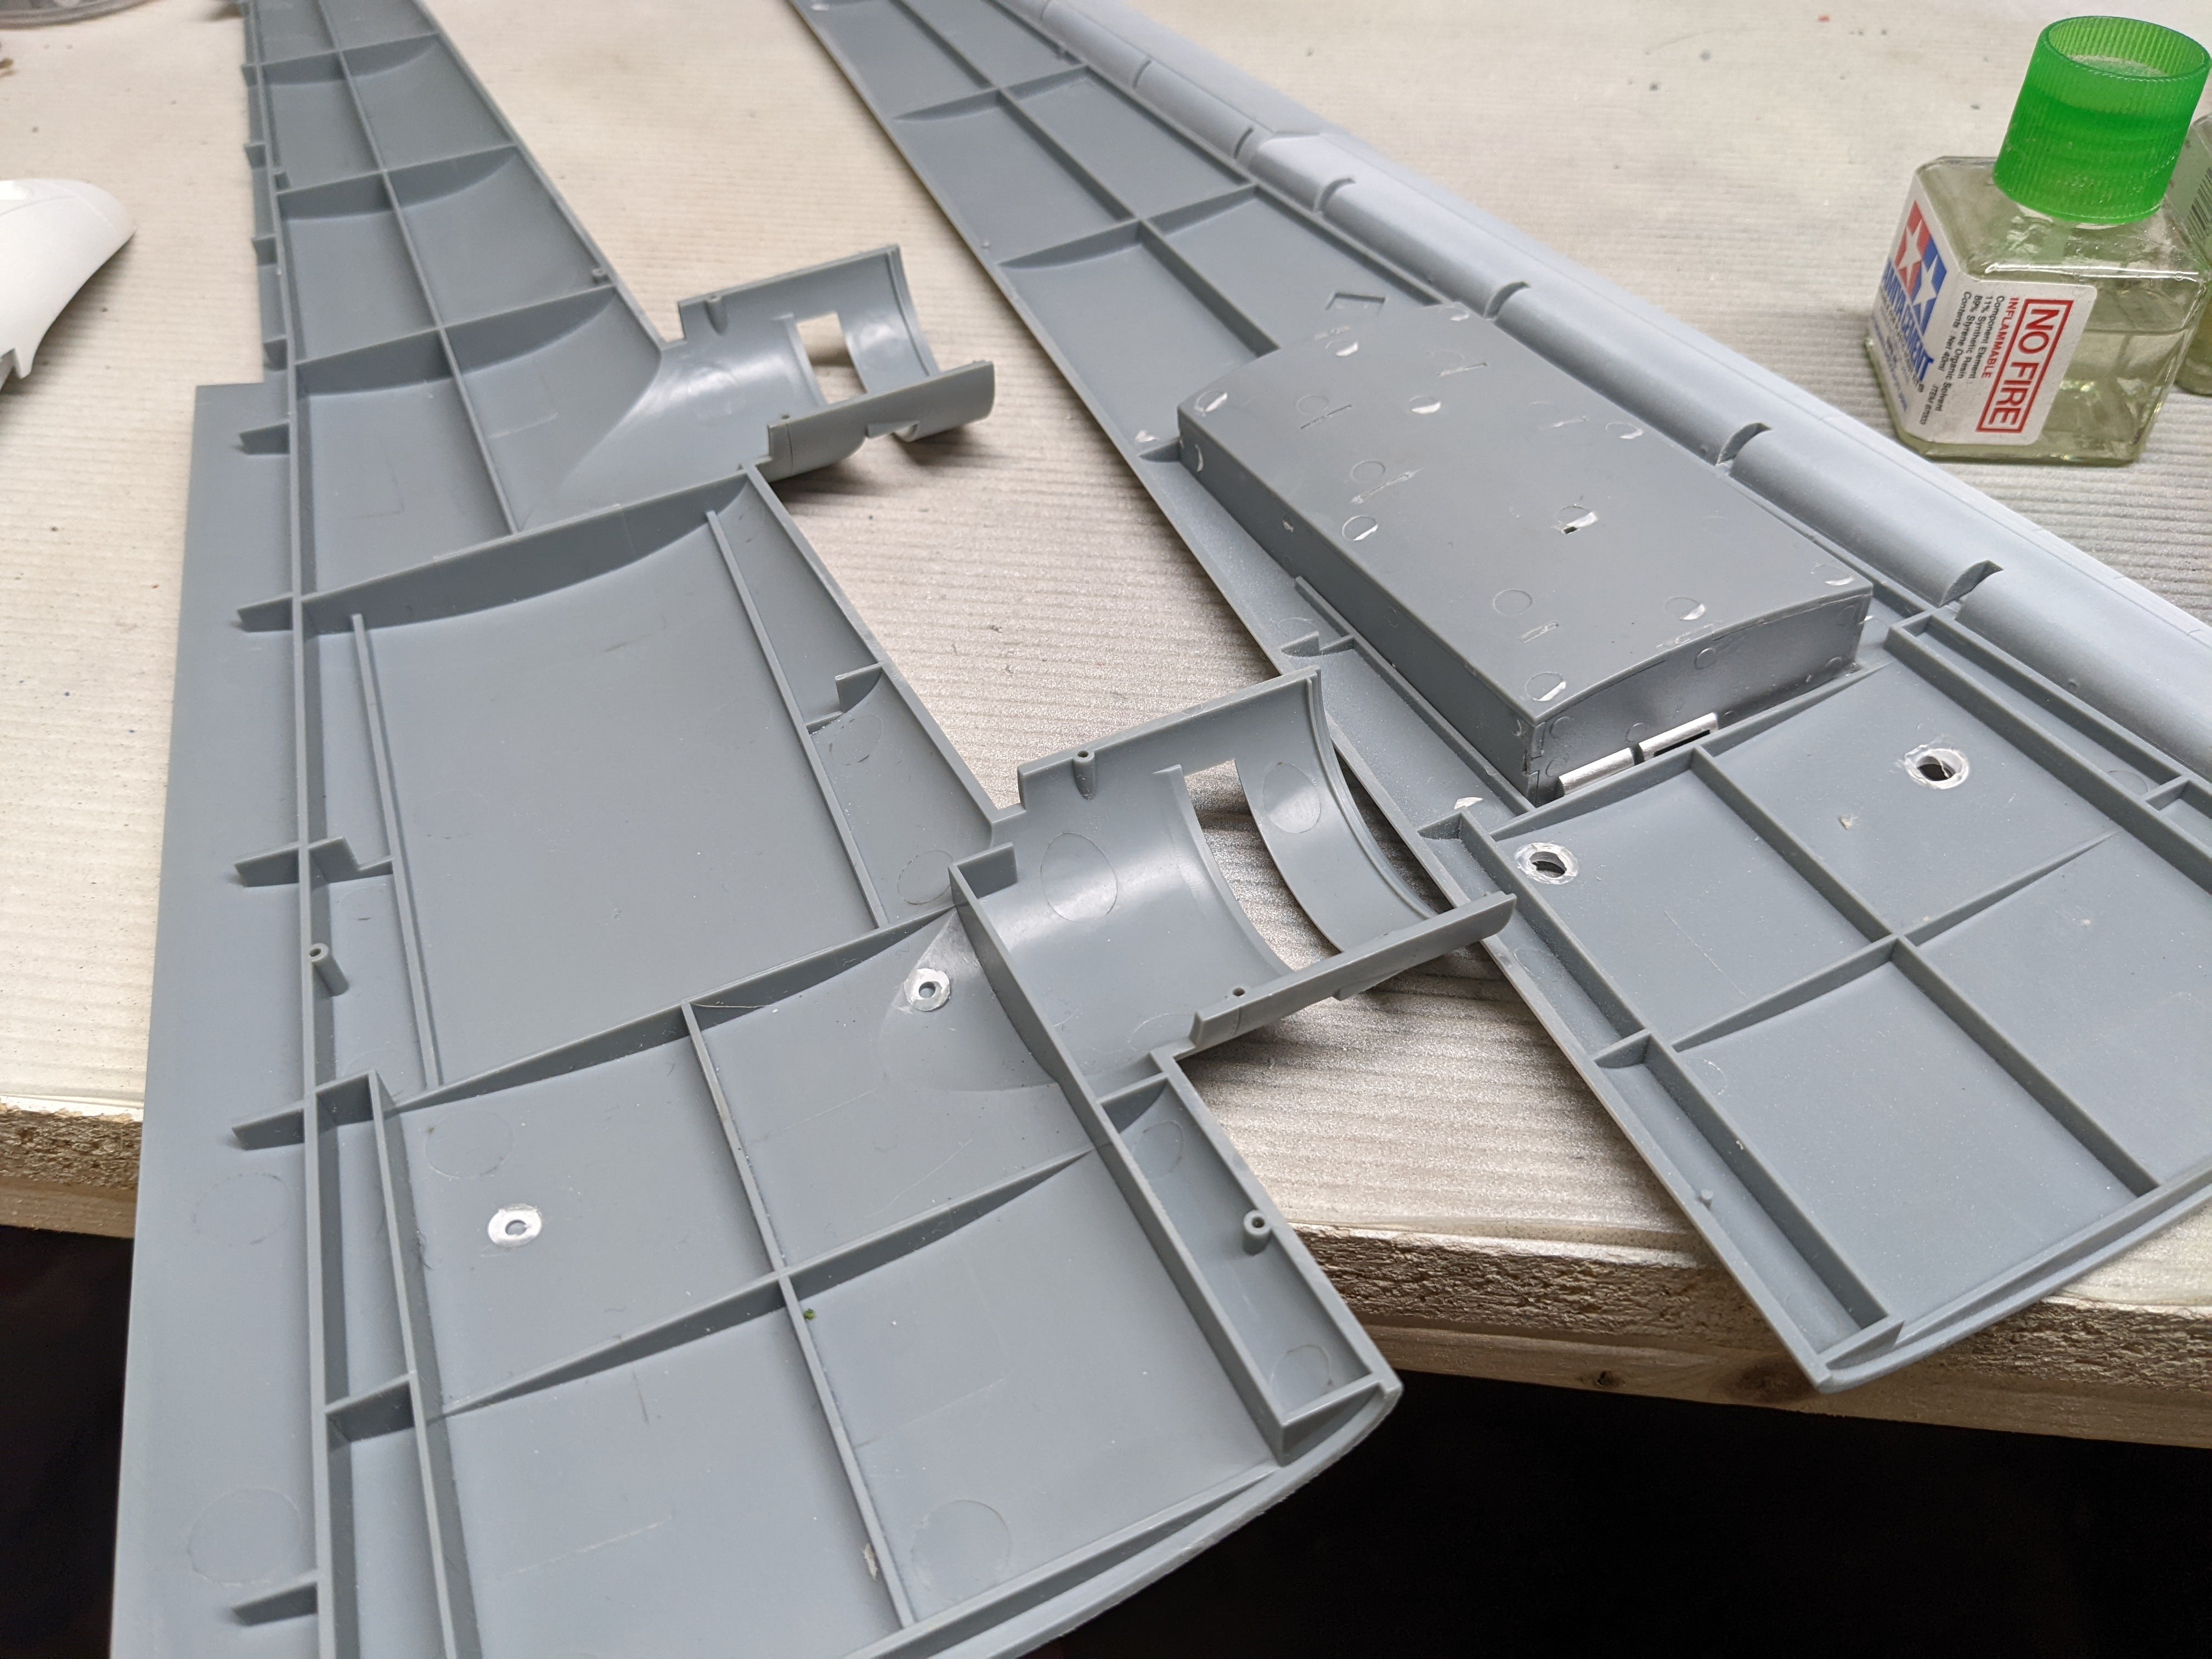
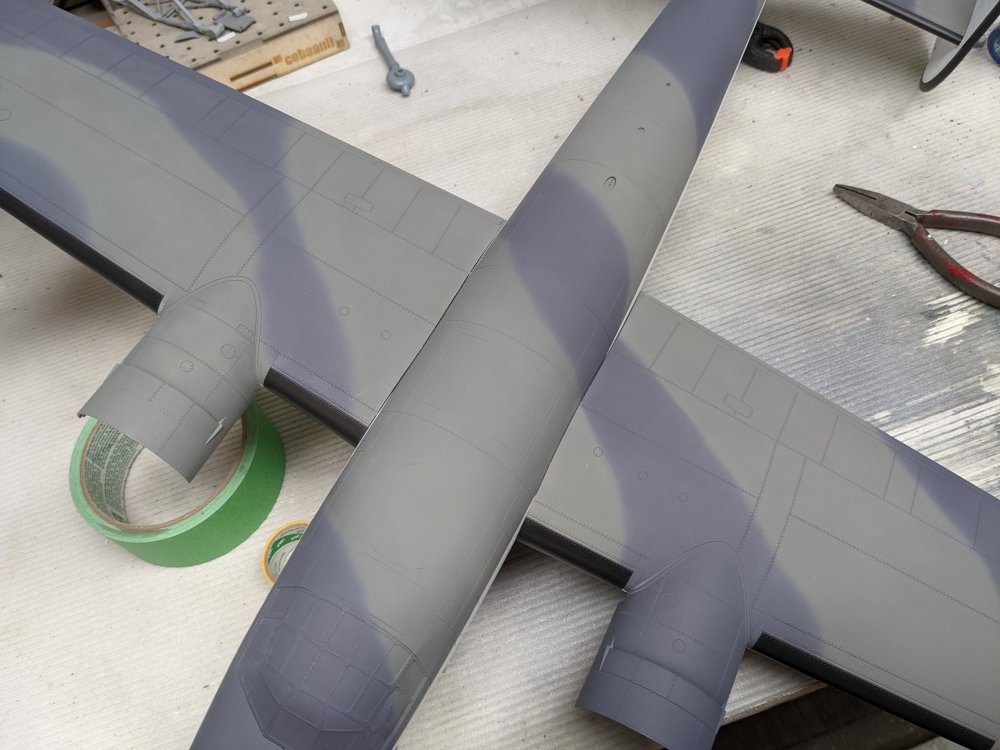
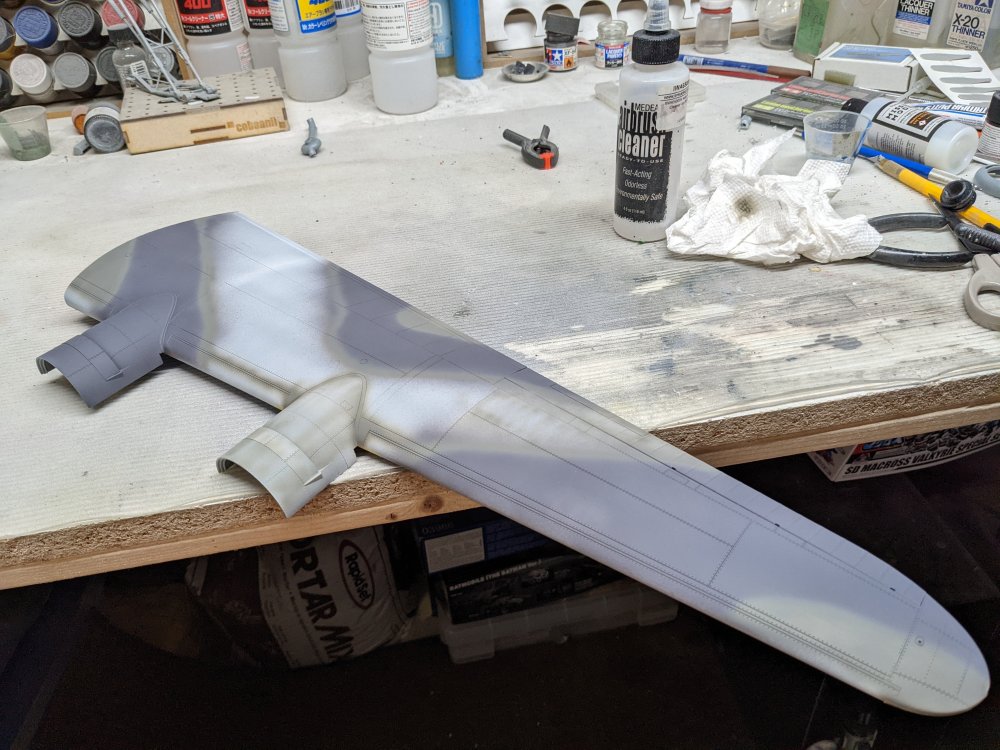
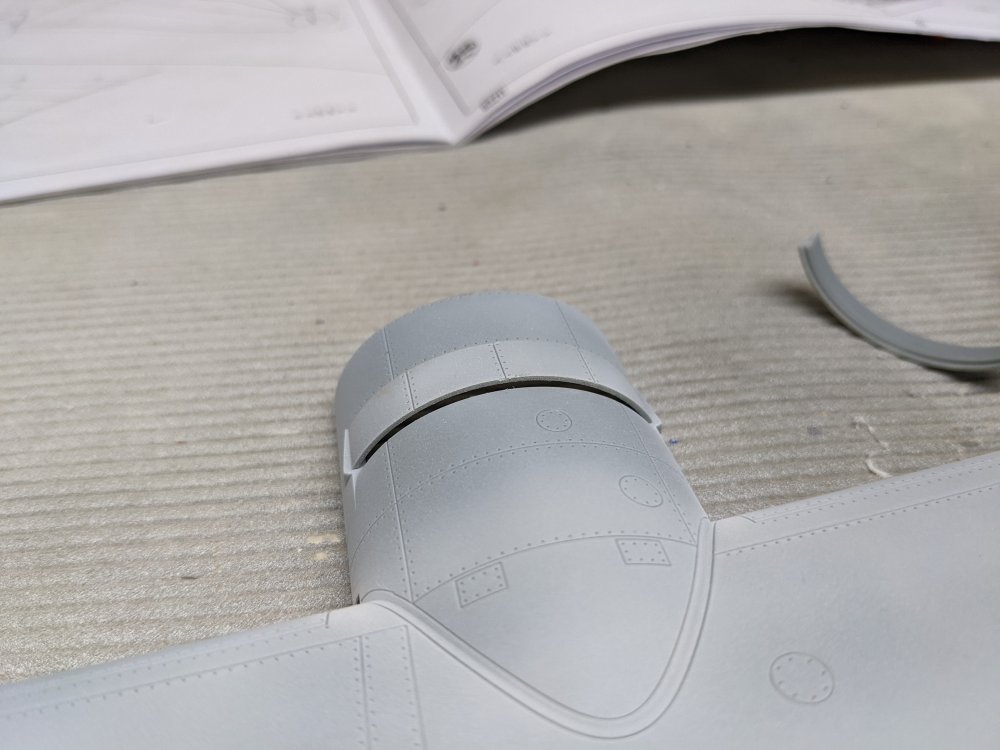
Time for an update. I started fitting the cowl flaps to the nacelles. The railing edge looks a bit thick so I shaved it down a bit to make it thinner. Before: After: Then I masked off the lower side as needed. I started the camo with the Extra Dark Sea Grey.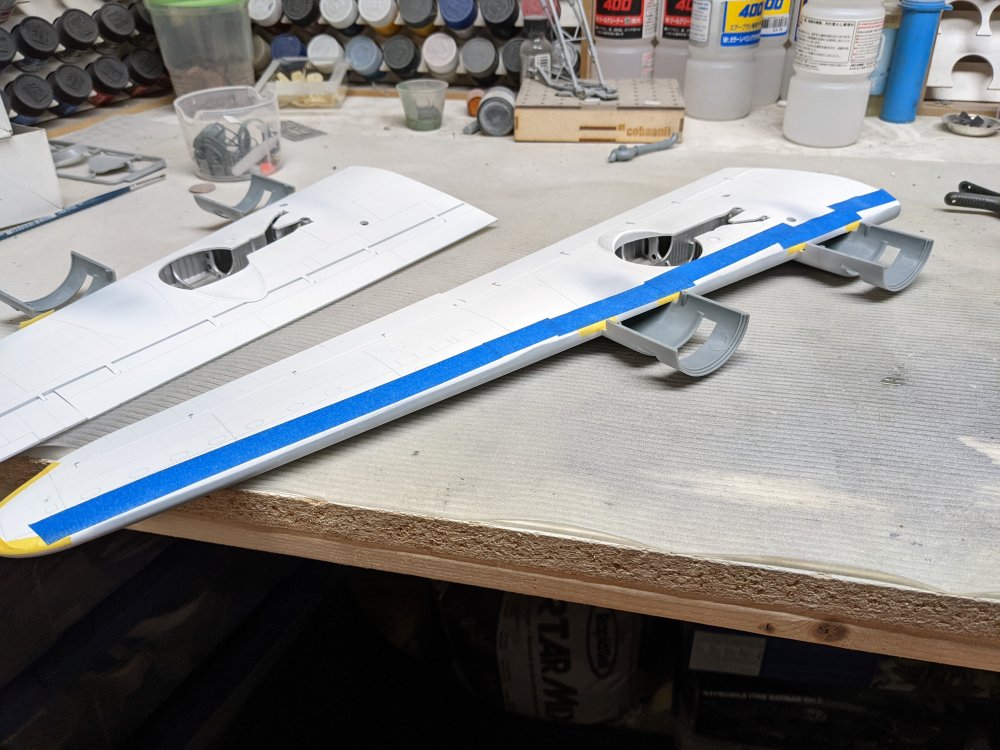


-
RCAF Liberator GR Mk VI
BlrwestSiR replied to BlrwestSiR's topic in LSM 1/35 and Larger Work In Progress
I'm not sure yet Peter. Sue says not in the living room. I think I'm still going with my plan to empty a shelf and replace it with a hopefully big enough display case. Thanks Gus! Definitely no hiding it. -
You don't see many of these getting built so it'll be nice to see one given your special touch. Carl
-
Martin, it's definitely hard. She has bad arthritis in both her back legs so getting up and down isn't easy for her. She can't do stairs any more, at least not going up. Last Dec, right before we got Jimmy she picked up vertigo so loses her balance from time to time. But she still wants to go out, if briefly and hang out with us. We'll have to see and also consider what the vet says.
-
Took Zoe for a walk and when we got back it was time for dinner. She didn't have the strength to stand and eat and lay down with her bowl between her legs. Not sure if we're approaching the end or if she was just a bit more tired than usual. Hoping for the latter.

-
RCAF Liberator GR Mk VI
BlrwestSiR replied to BlrwestSiR's topic in LSM 1/35 and Larger Work In Progress
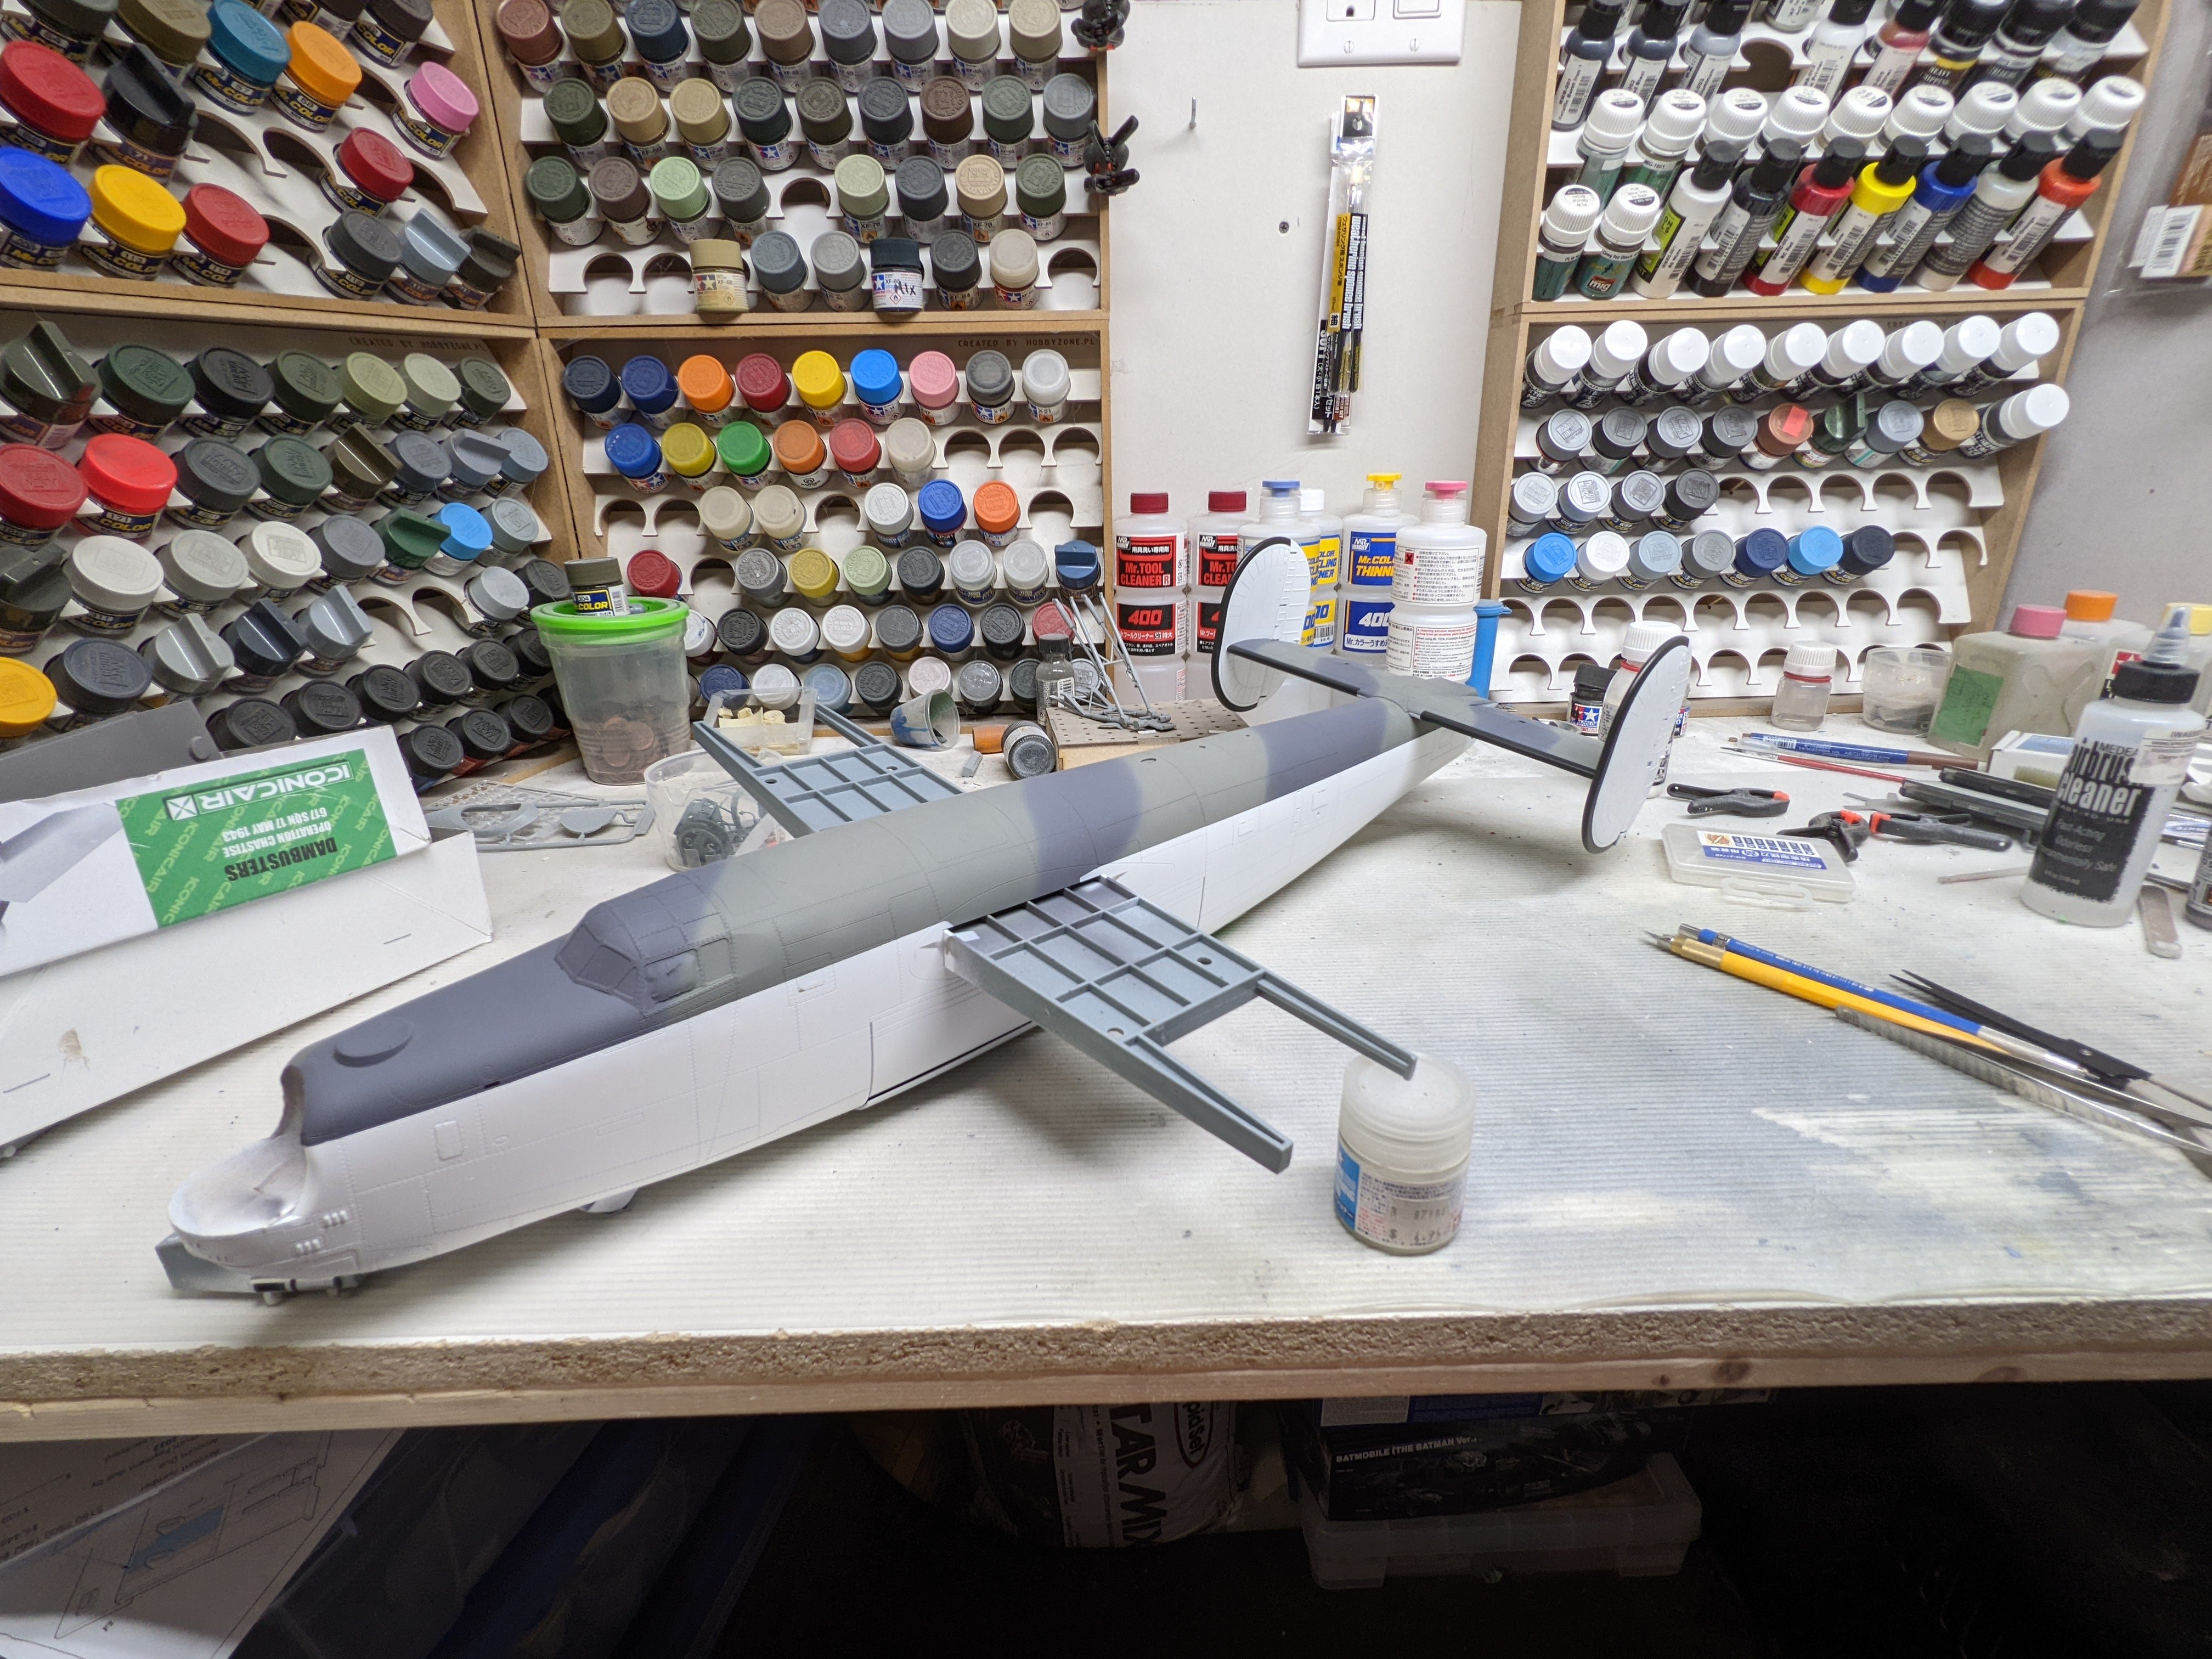
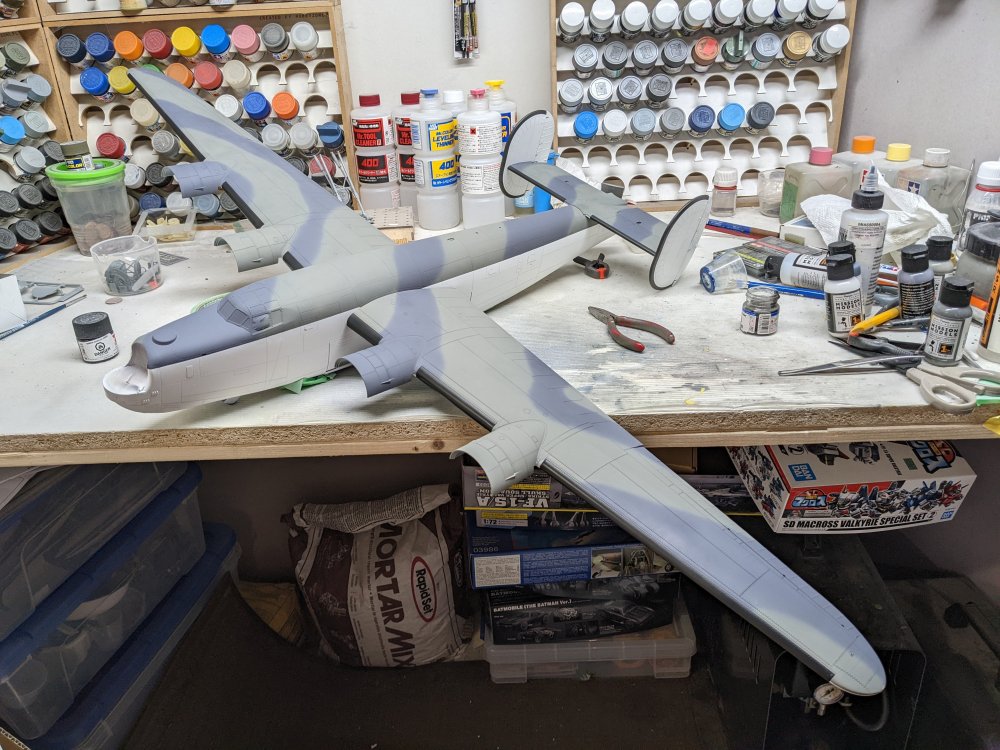
Okay, this plane is going to be big when done. For size comparison, here's my Tamiya Corsair next to it. To paraphrase Richard Dreyfus in Jaws, "I'm going to need a bigger shelf".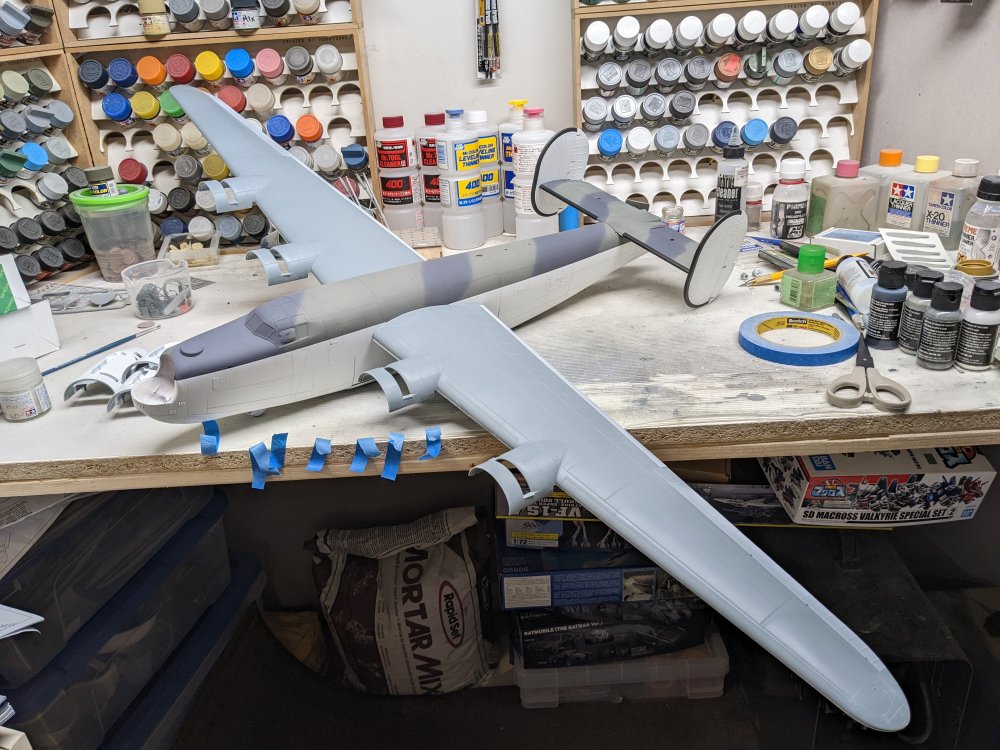
-
RCAF Liberator GR Mk VI
BlrwestSiR replied to BlrwestSiR's topic in LSM 1/35 and Larger Work In Progress
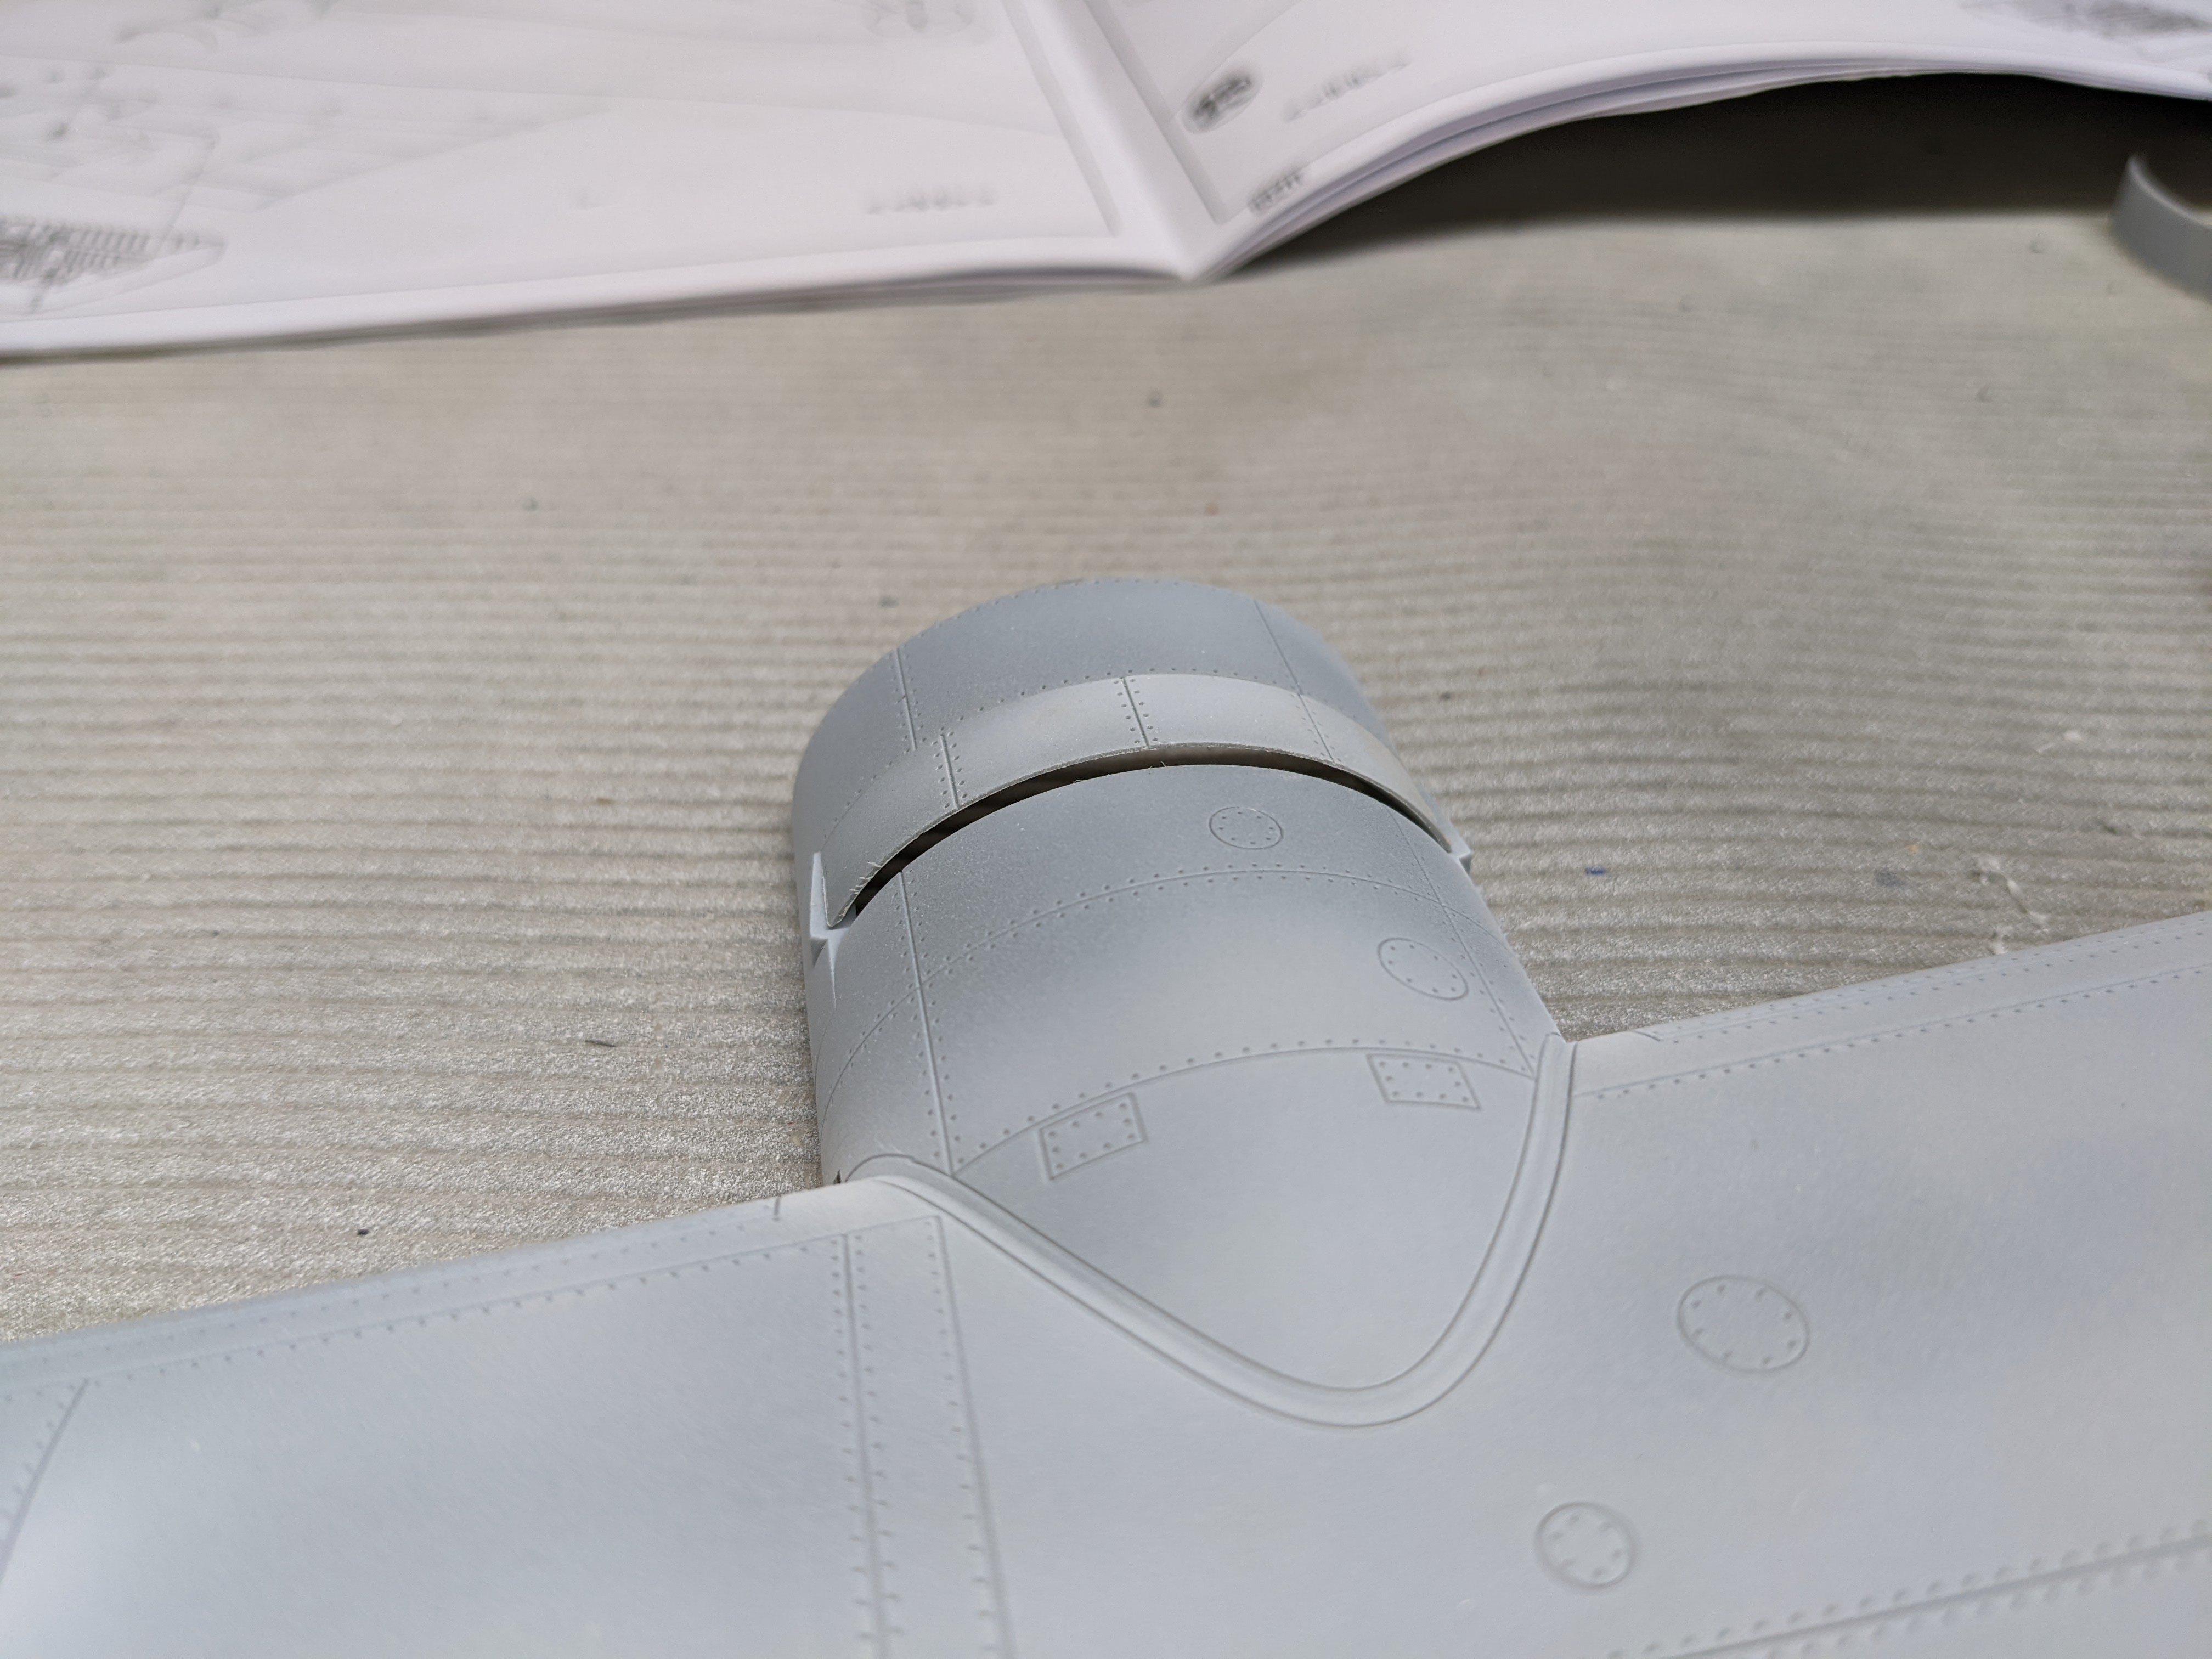
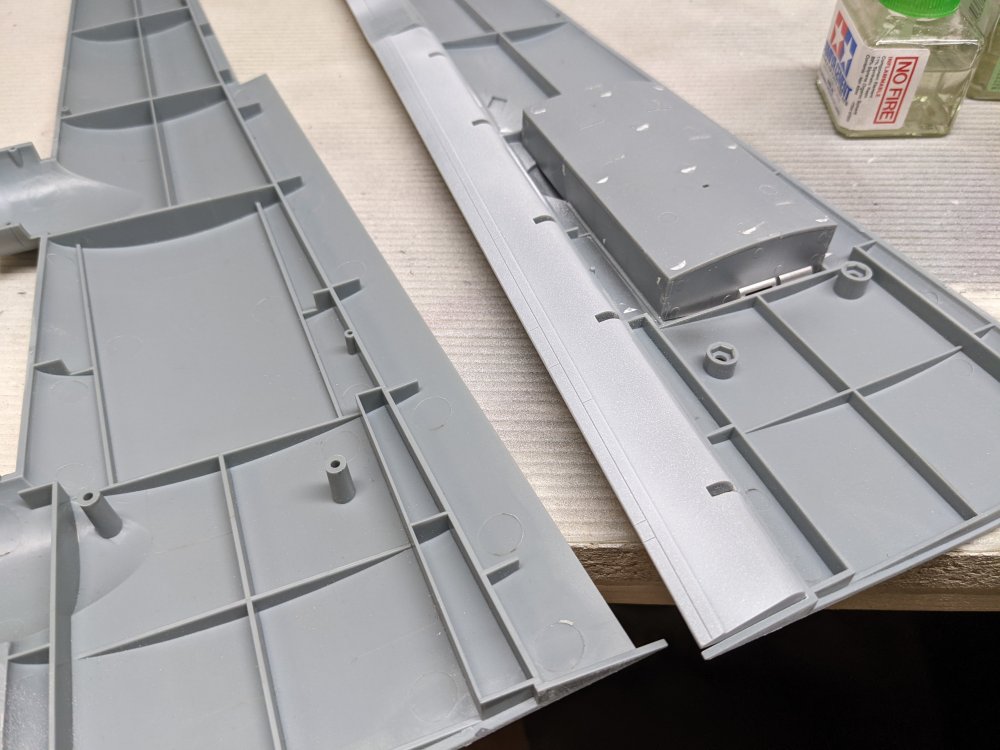
I had the day off work so I made some progress on the wings. Fitst thing I did was glue the gear bays in place before I forgot about them and end up with all sorts of pain later. After @monnthebiff's suggestion to assemble the wings and then slide them on, I took a look to see if it was feasible. OOB, there are two long legs that go through the spar and lock the wings into place. I clipped(hacked?) them off and found that you can indeed slip the assembled wing on. So both wings are now glued together and drying. Some seam filling and then time to paint the upper sides.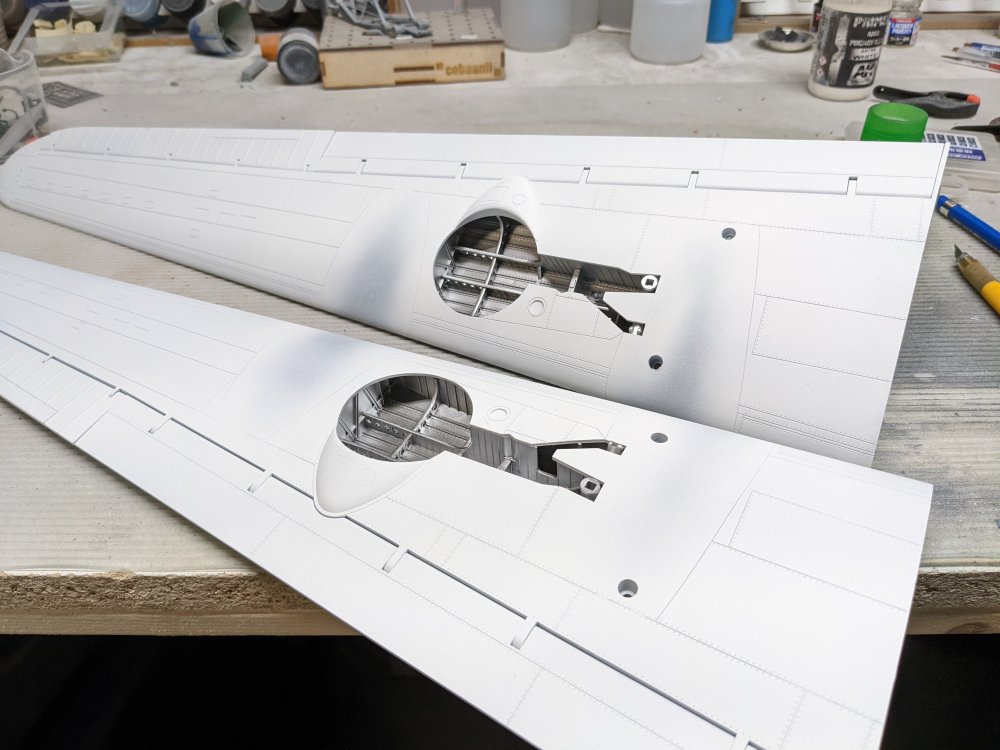
-
RCAF Liberator GR Mk VI
BlrwestSiR replied to BlrwestSiR's topic in LSM 1/35 and Larger Work In Progress
Peter, I hear you on the paints. Having my youngest at the bench has made me re-think some of the supplies I use as well. The times I do spray a lacquer and he's with me, I'll ask him to leave just to be that bit extra safe. I need to try the Ammo acrylics and see what they're like. I've been burned too many times by acrylics just not having the adhesion needed to stick to plastic or being fragile if they do. Even the Mission Models stuff isn't perfect. Tamiya and Gunze acrylics have been bomb proof but Tamiya doesn't colour match and Gunze until very recently had been near impossible to get. -
RCAF Liberator GR Mk VI
BlrwestSiR replied to BlrwestSiR's topic in LSM 1/35 and Larger Work In Progress
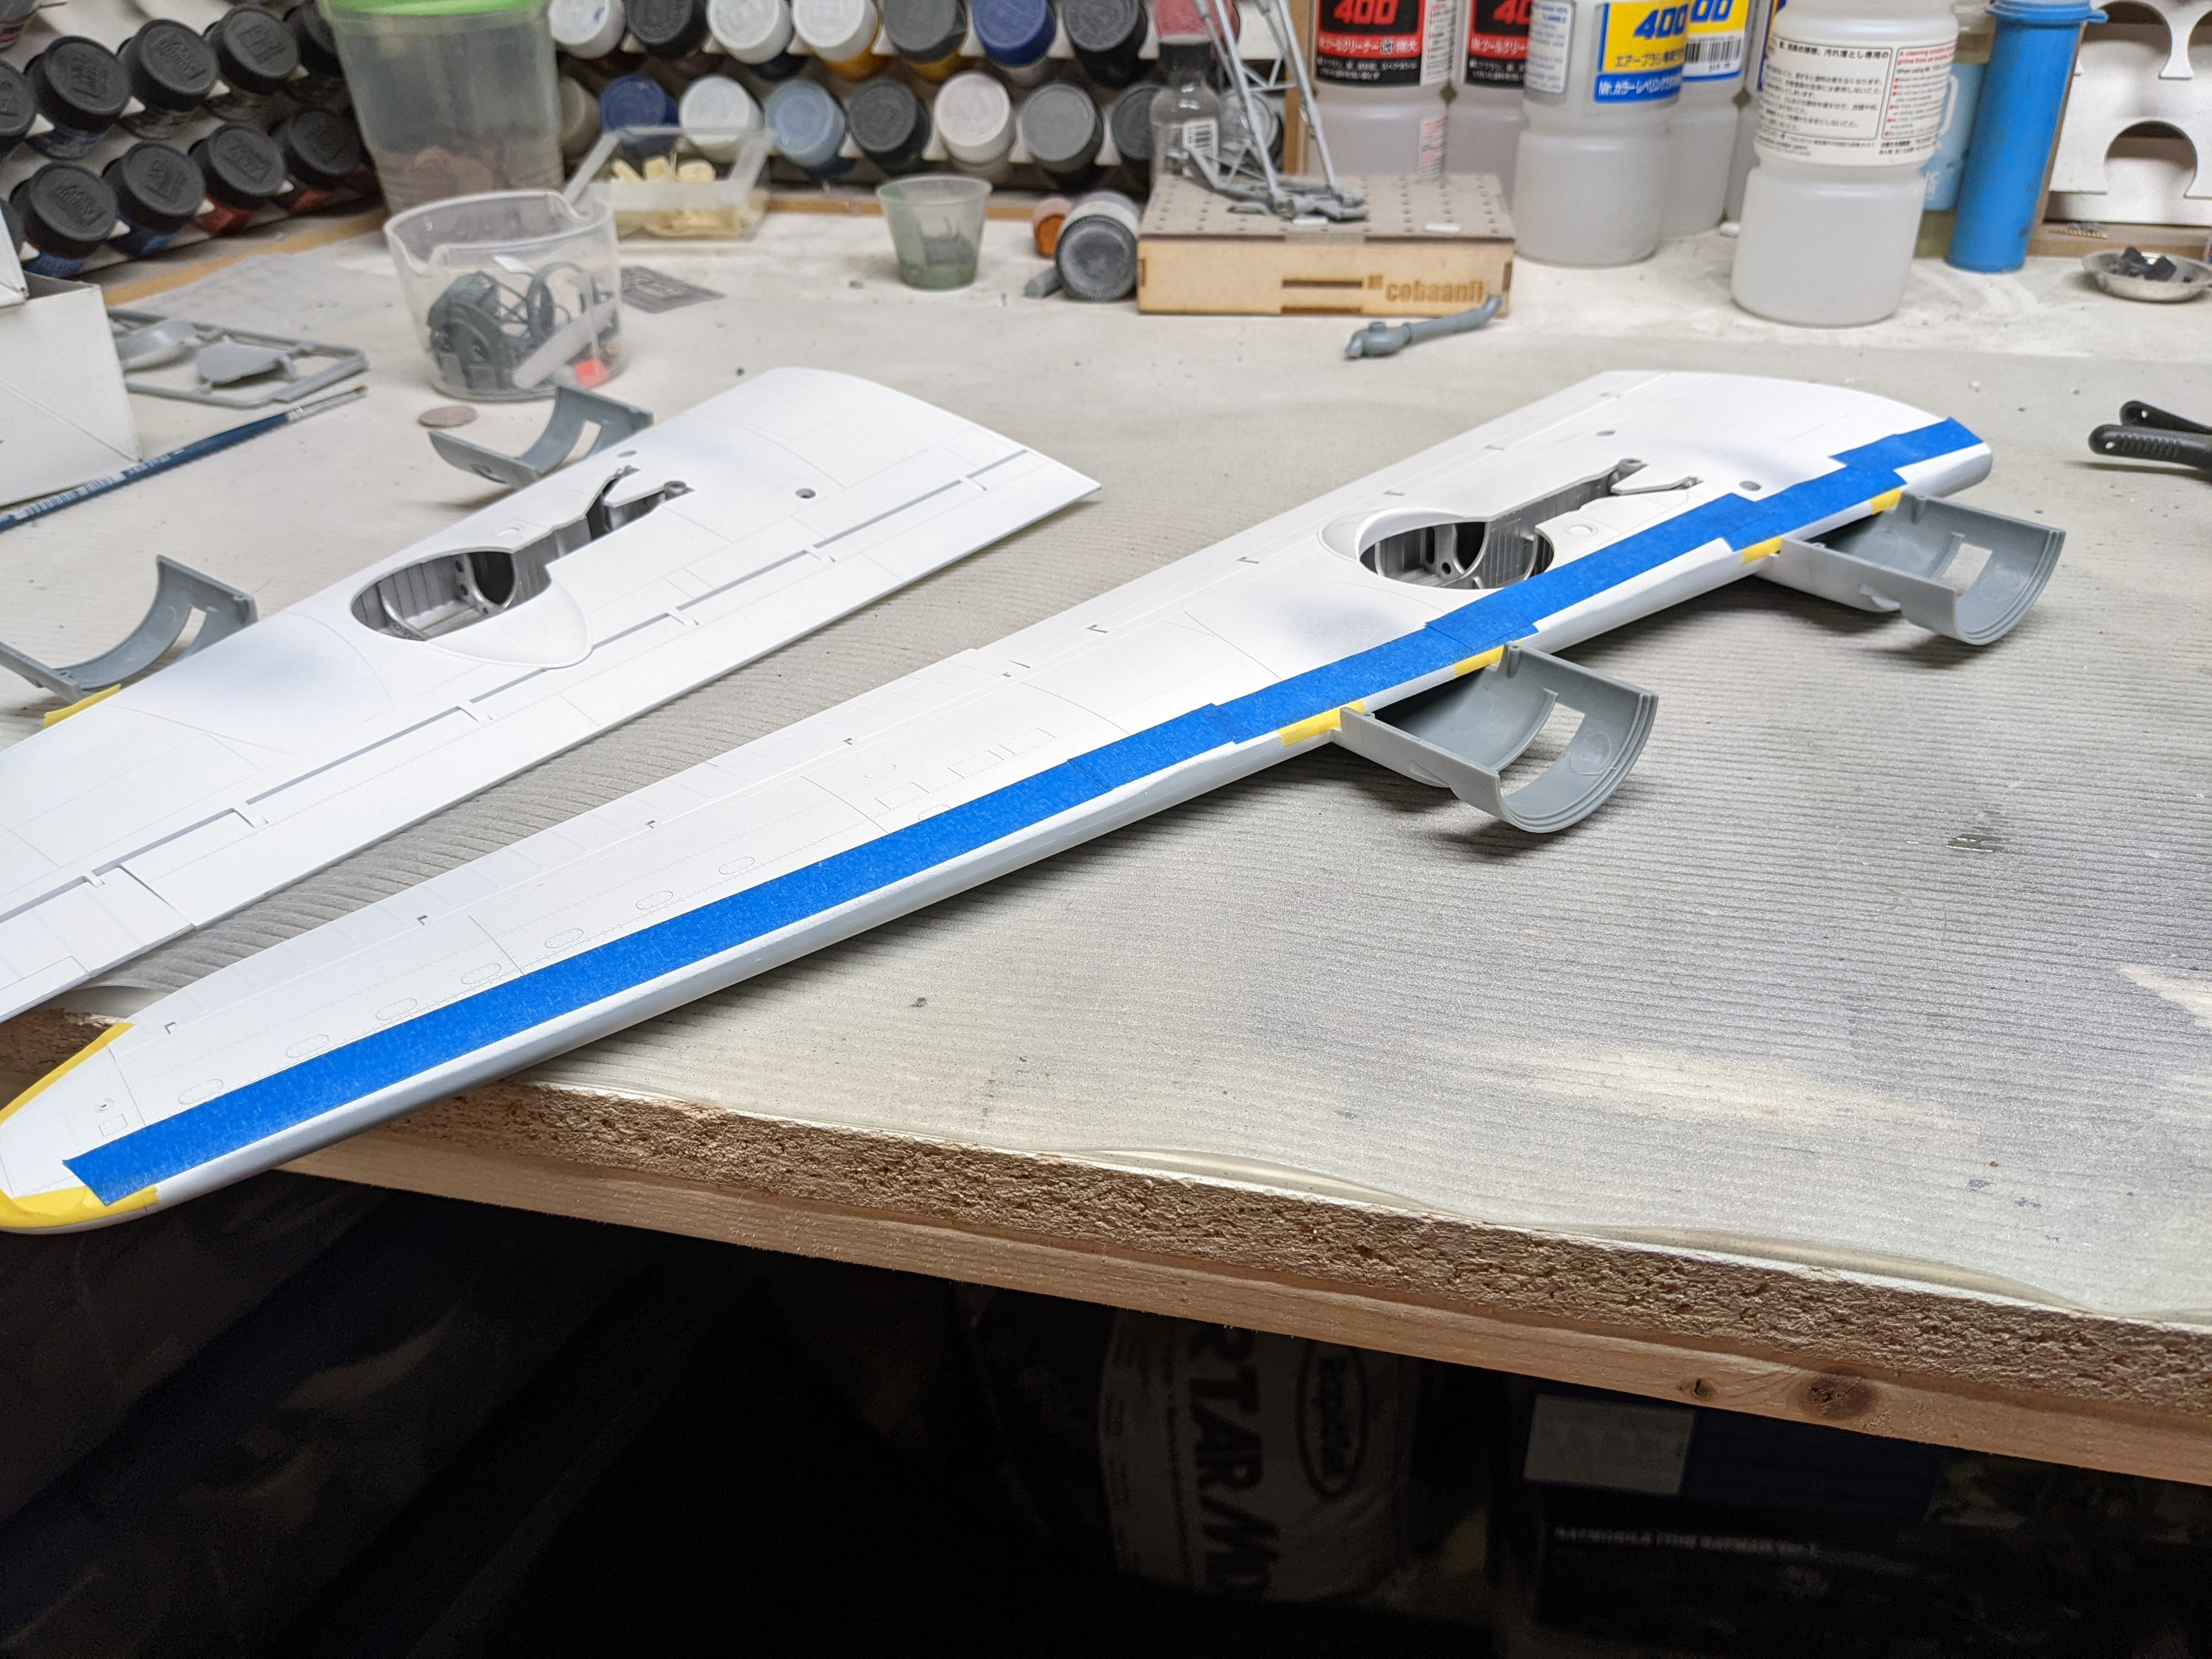
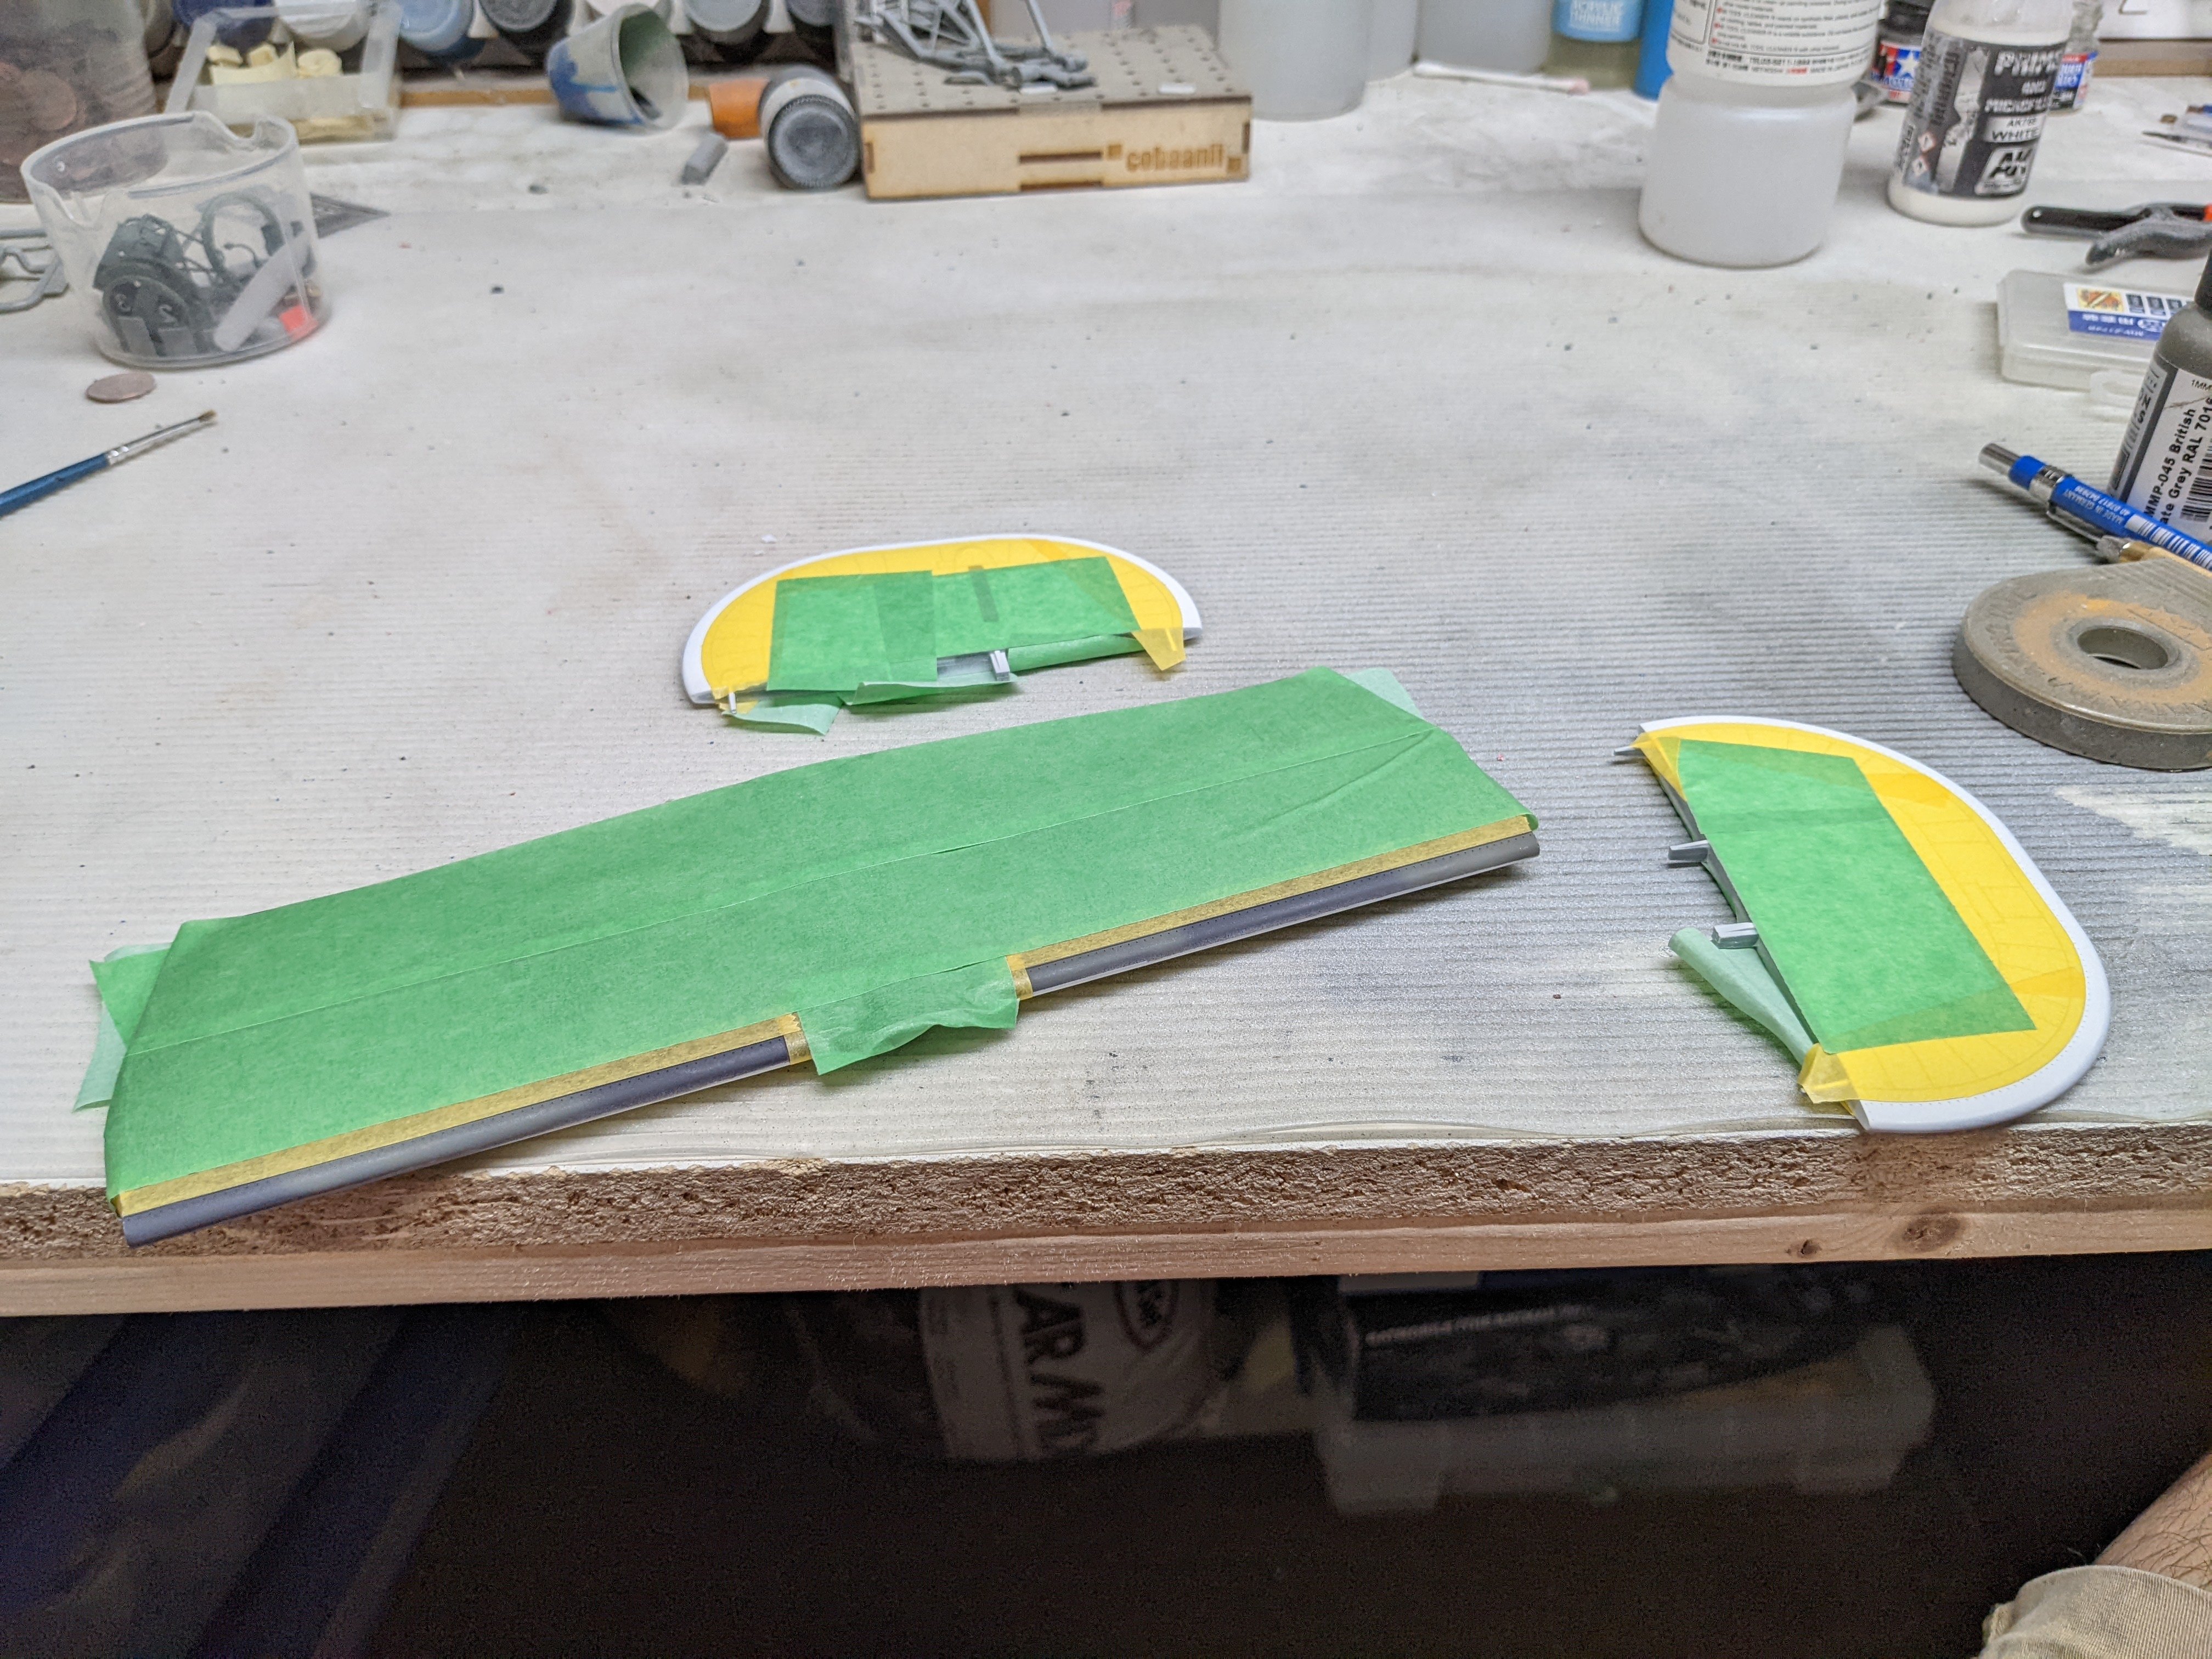
I made some decent progress tonight. I finished the camo on the horizontal tailplanes. I then masked them and they vertical tails for the de-icing boots. When done, I dry fitted everything together. I'm going to leave them off until I have main wings on. Less things for them to bump into.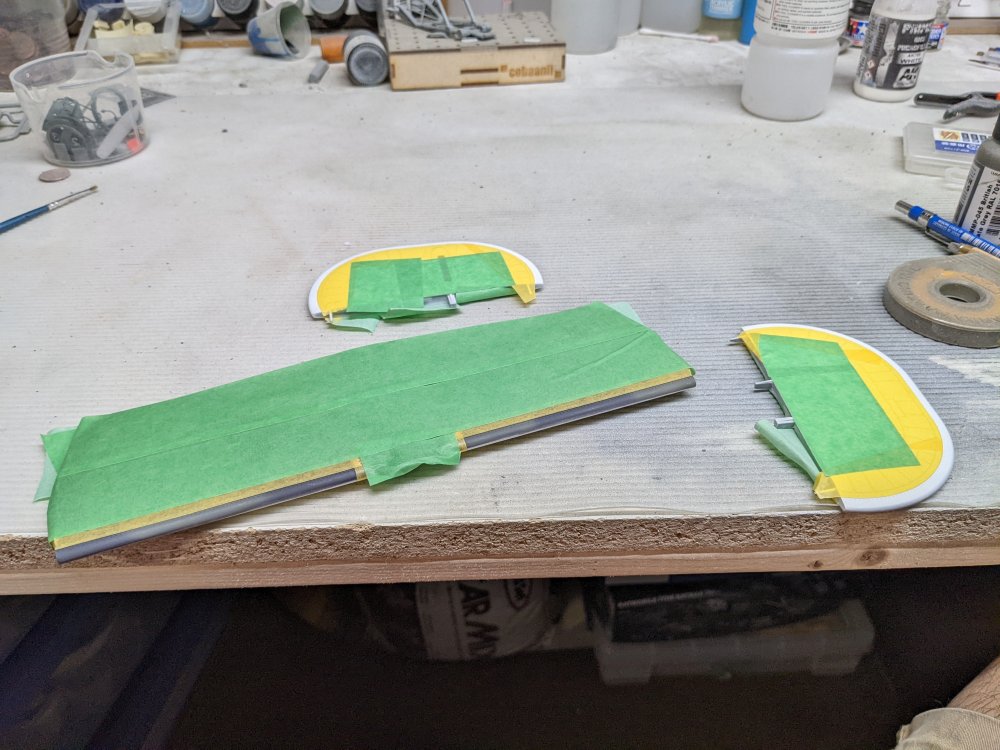


- 227 replies
-
- 10
-
-

-
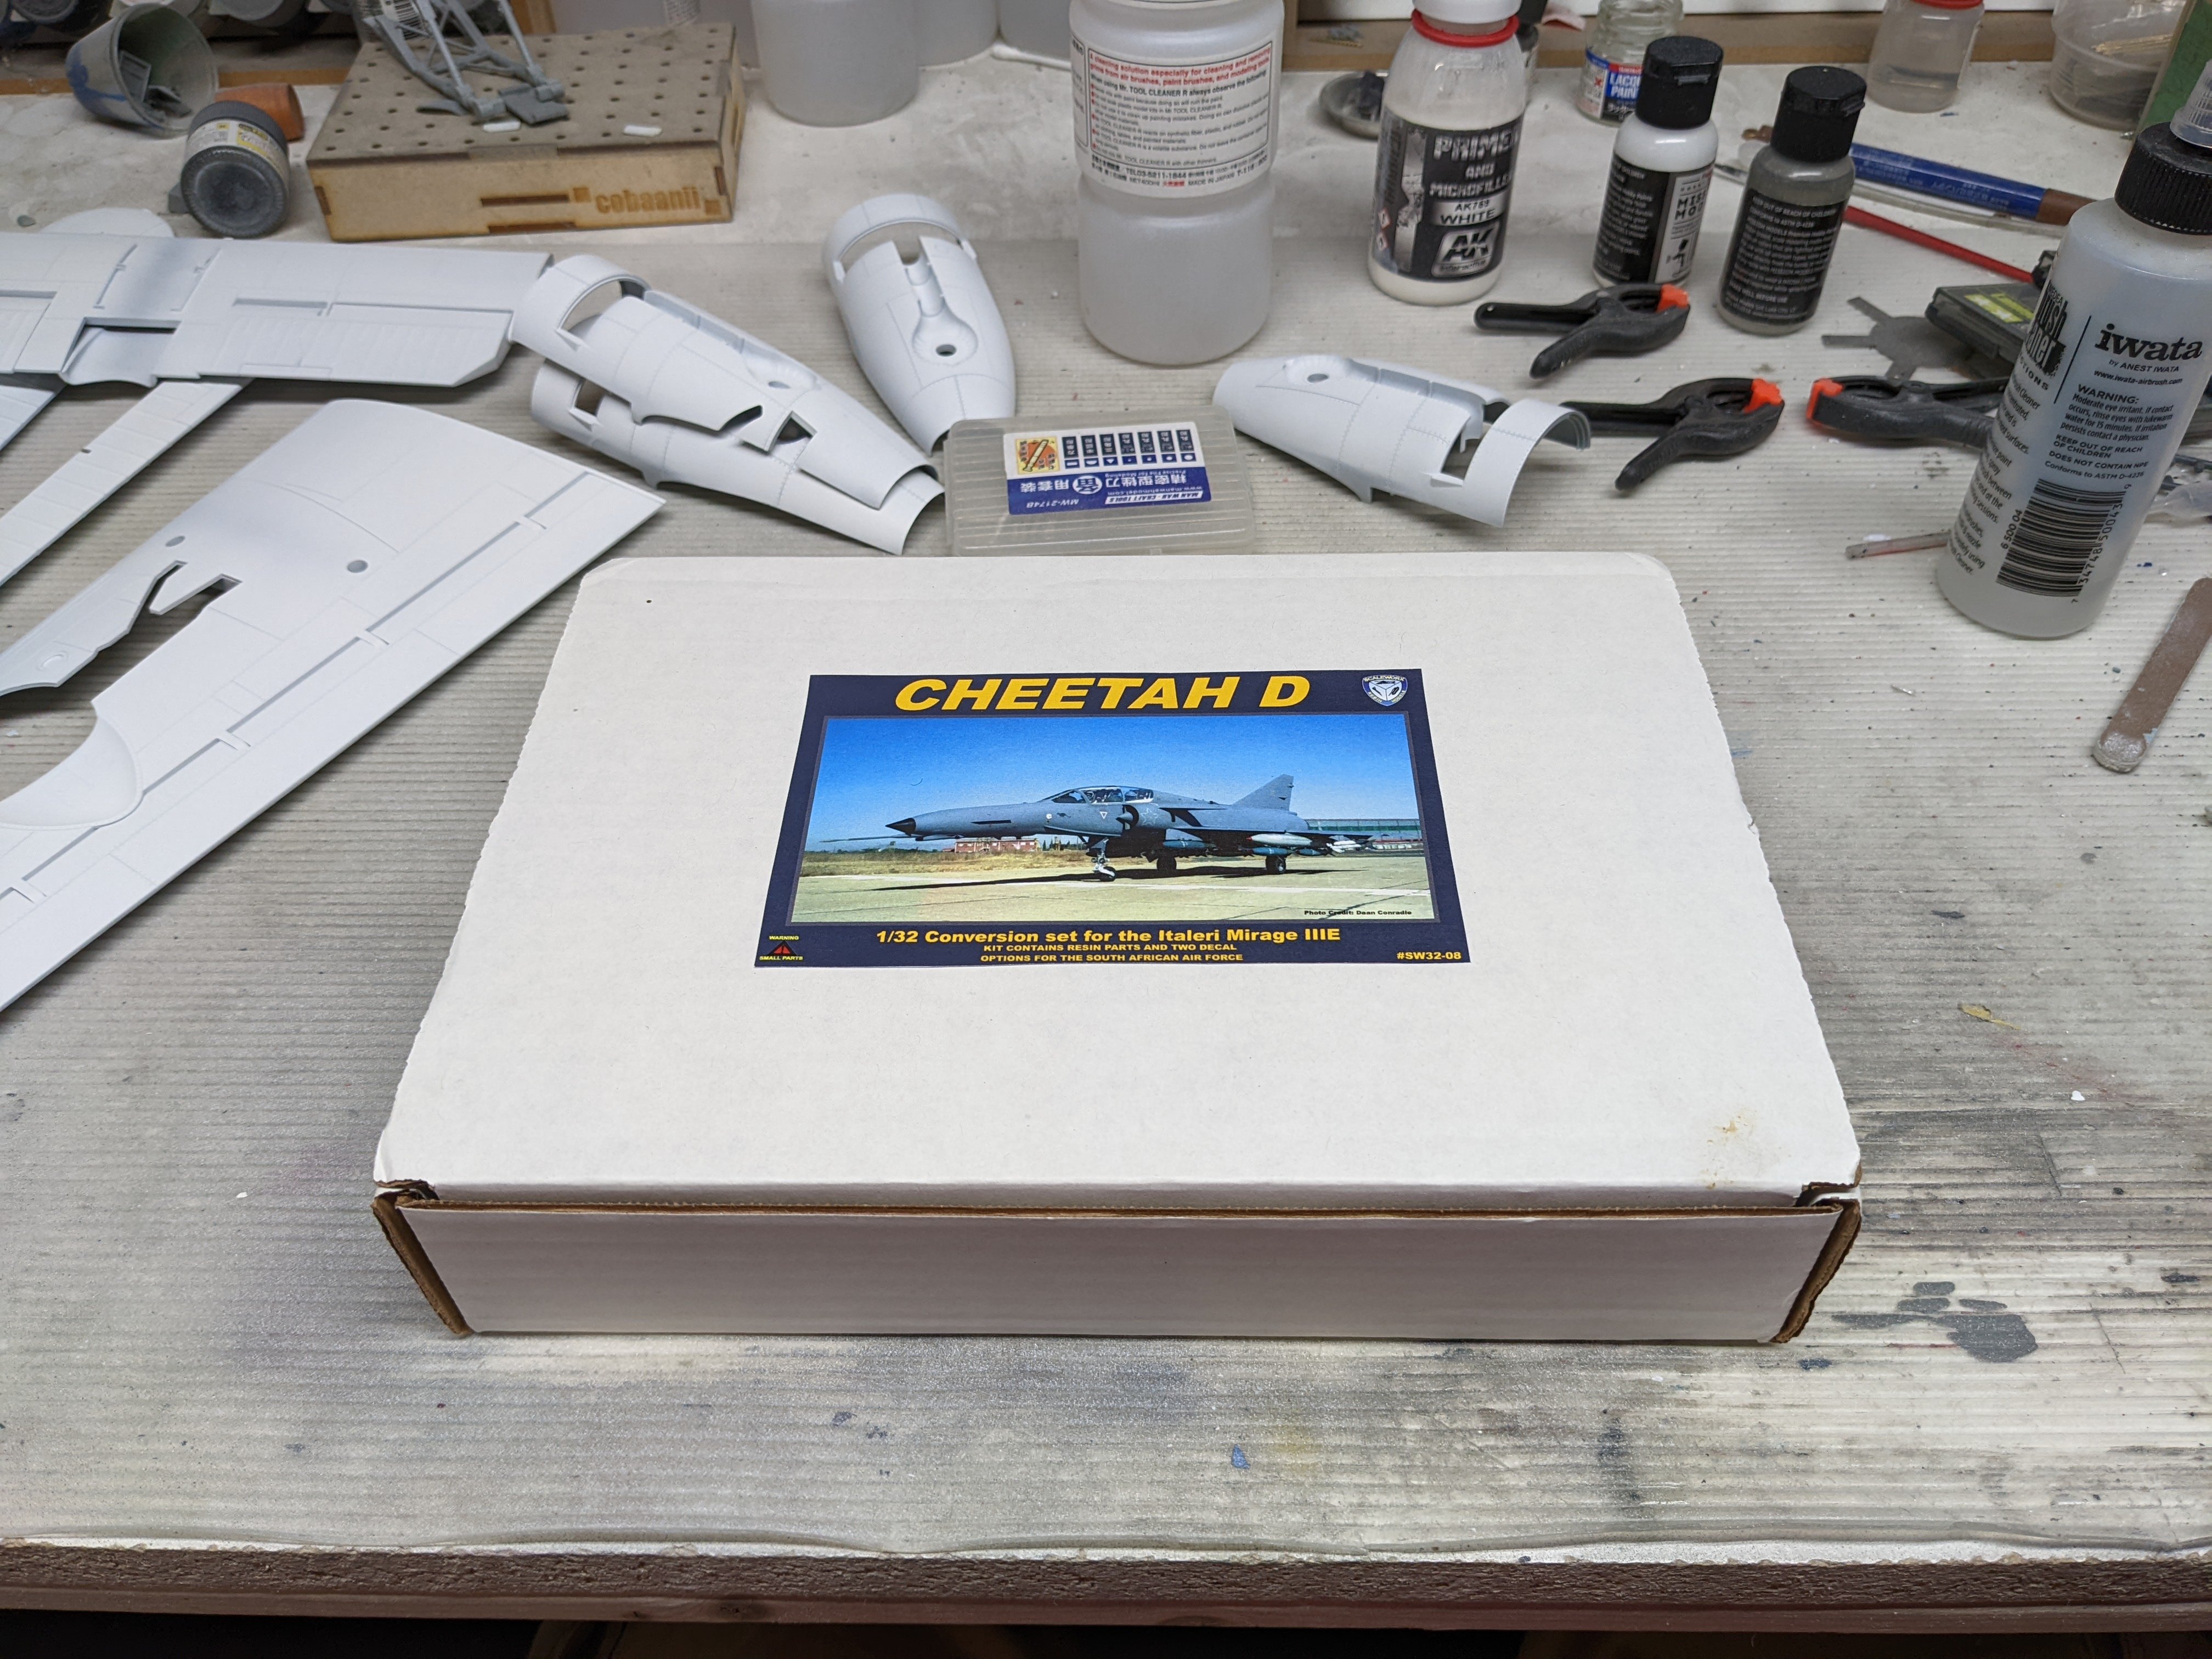
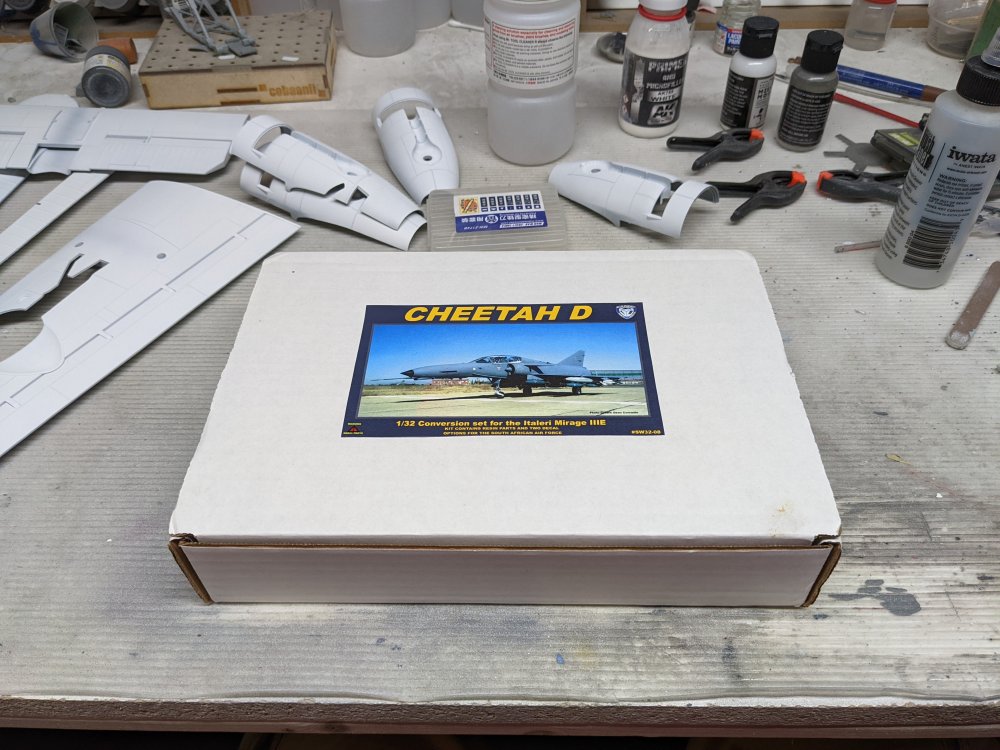
Finally got my Cheetah conversion from Scaleworx. Took a while but it's not like I was worried the stash was going to run out.
-
I need to get a lighting set for my 1/20 Strike Valkyrie. It's big enough that it seems not having it would be odd.
-
RCAF Liberator GR Mk VI
BlrwestSiR replied to BlrwestSiR's topic in LSM 1/35 and Larger Work In Progress
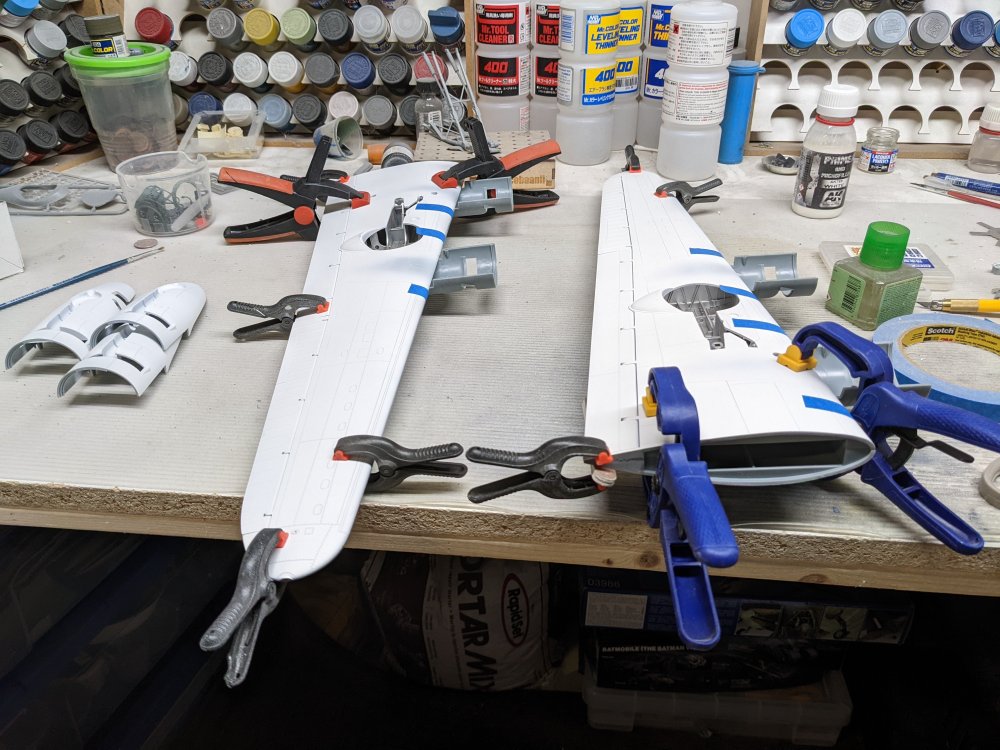
Thanks Andy! The wings has to be assembled around the spar so I'm going to paint it and then join the halves together. The good thing is the leading edge boots will need to be painted so that will cover up any filler. Thanks Kai!