BlrwestSiR
-
Posts
9,151 -
Joined
-
Last visited
Content Type
Profiles
Forums
Events
Gallery
Everything posted by BlrwestSiR
-

Trumpeter Mig-15 project, not unbuildable!
BlrwestSiR replied to 1to1scale's topic in LSM 1/35 and Larger Work In Progress
Nice to see this built. As I said previously, my first attempt did not end well. Seeing this, I may have to give it another shot. Hope things go well with your father in law. Carl -
Looking good there Harv. Nice approach working from the inside out. I need to finish something (anything really) that's on my bench before I join you with my Phantom. Carl
-
What is on your bench right now ? Share a picture :)
BlrwestSiR replied to Martinnfb's topic in Modelling Discussion
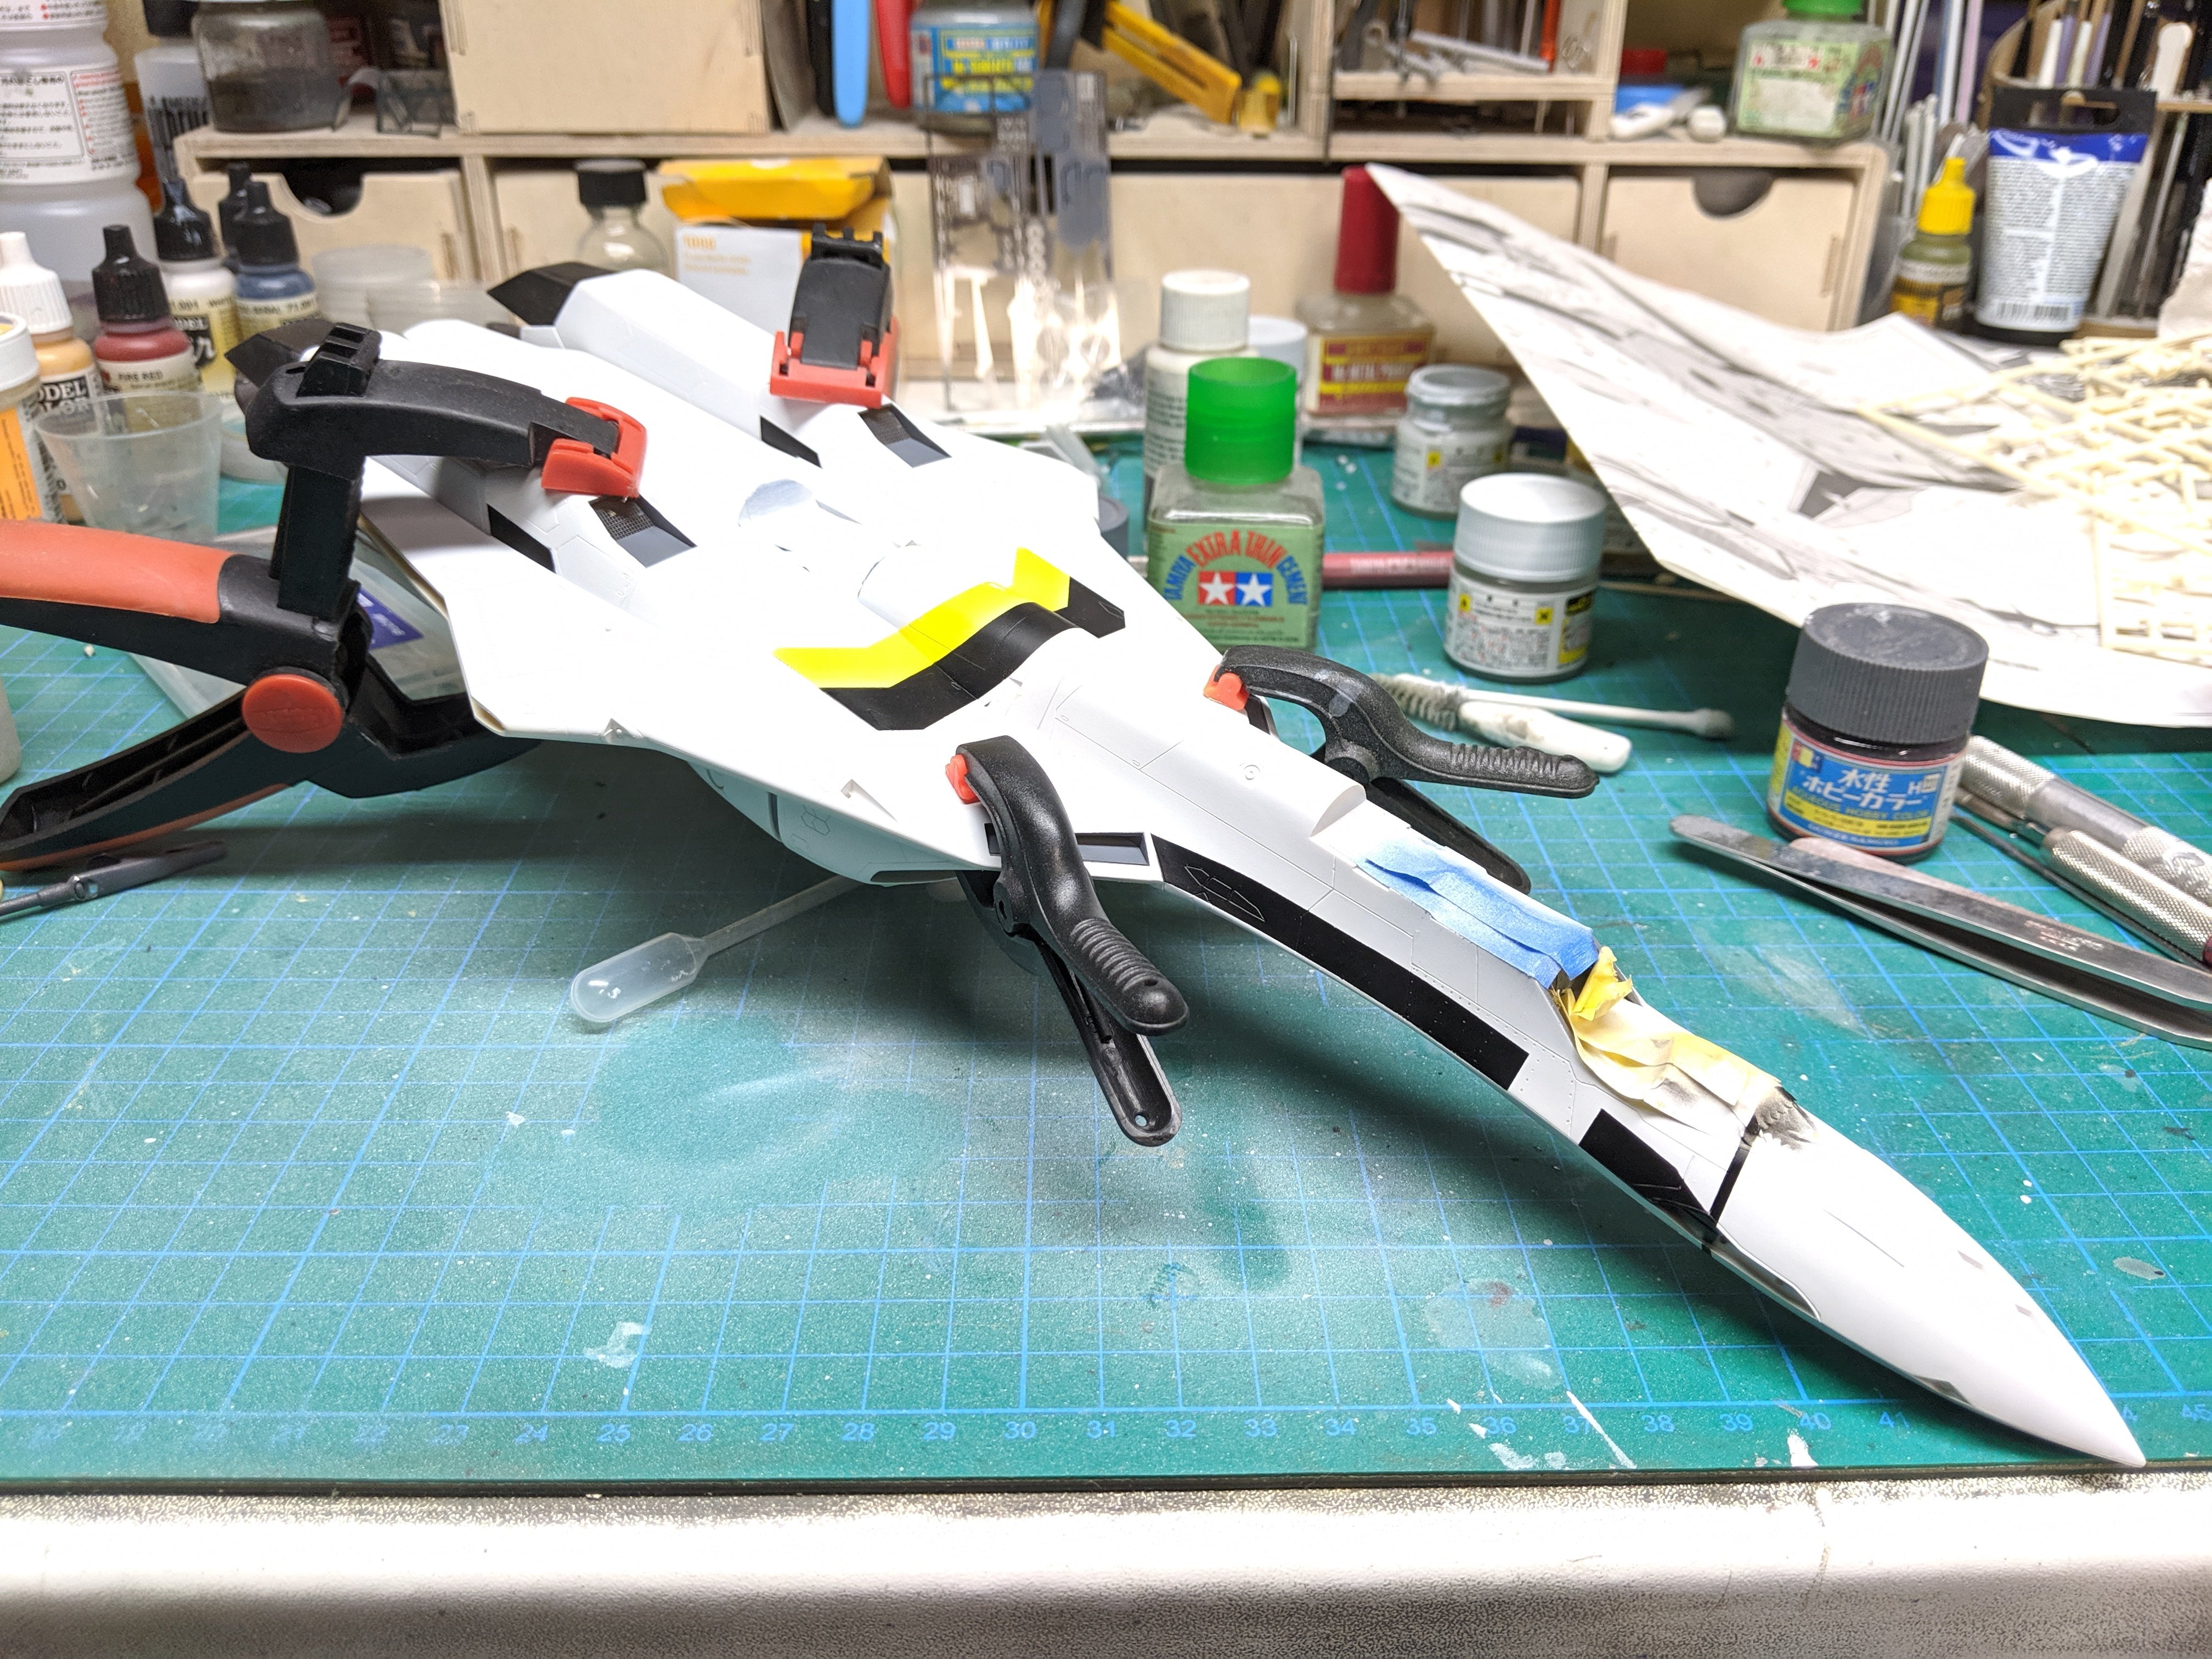
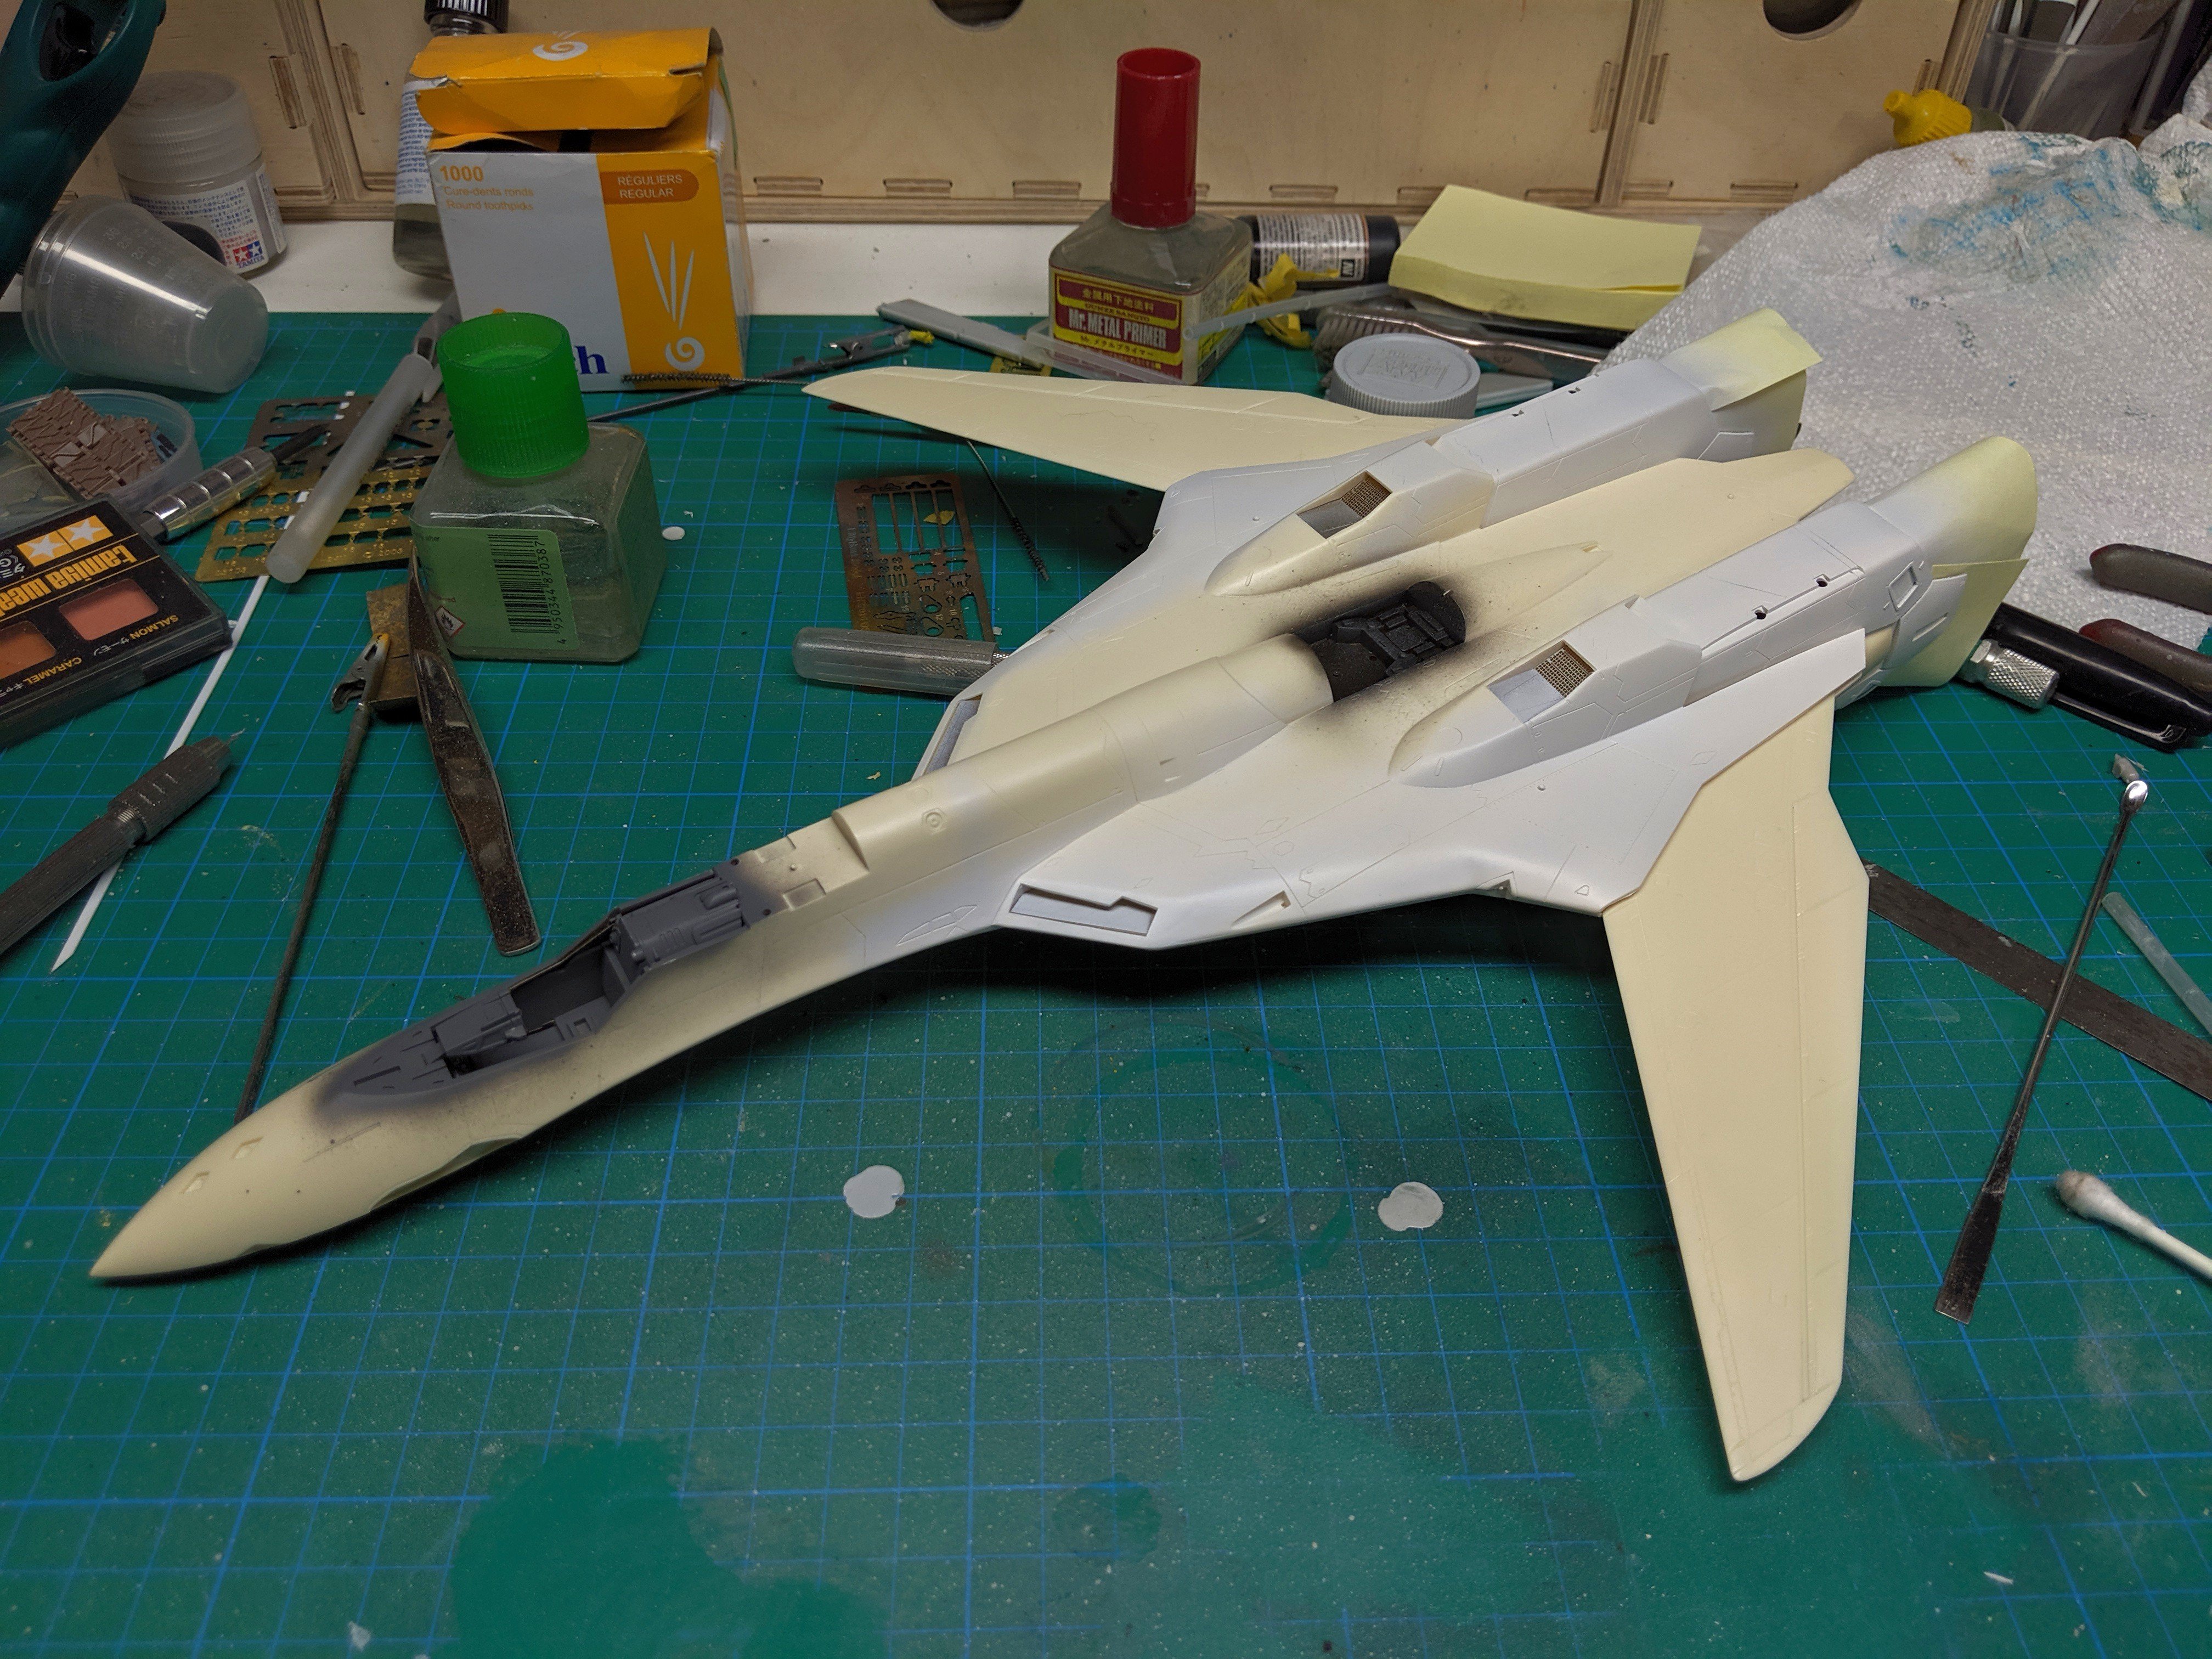
In conjunction with the arrival of my 1/20 Macross kit, I'm currently working on a more typical scale one. This is the VF-19 from the later series Macross Plus.
-
What is on your bench right now ? Share a picture :)
BlrwestSiR replied to Martinnfb's topic in Modelling Discussion
That's why I'm leaving my 1/72 kits for my sons. They have much better vision than I ever had. Nice job on your Spitfire Dale. Carl -
What is on your bench right now ? Share a picture :)
BlrwestSiR replied to Martinnfb's topic in Modelling Discussion
Rob, I built the Arado a couple years ago and really enjoyed it. Can't wait to see you work on it. If ZM do come out with one, I'll just have to build another. Carl -
Rog, I knew you'd like them. They're such a great design.
-
I still have a reasonably sized collection of Laserdiscs. I even have the last release of the original Star Wars films before George Lucas decided to make Greedo shoot first amongst other changes. I just need to grab a Laserdisc player from my folks.
-
That film is the reason I love the F-14. Even got it on BluRay. One of the F-14s I have in the stash will be a VF-84 one from the film. Carl
-
They also put this warning on every corner of the shipping box:
-
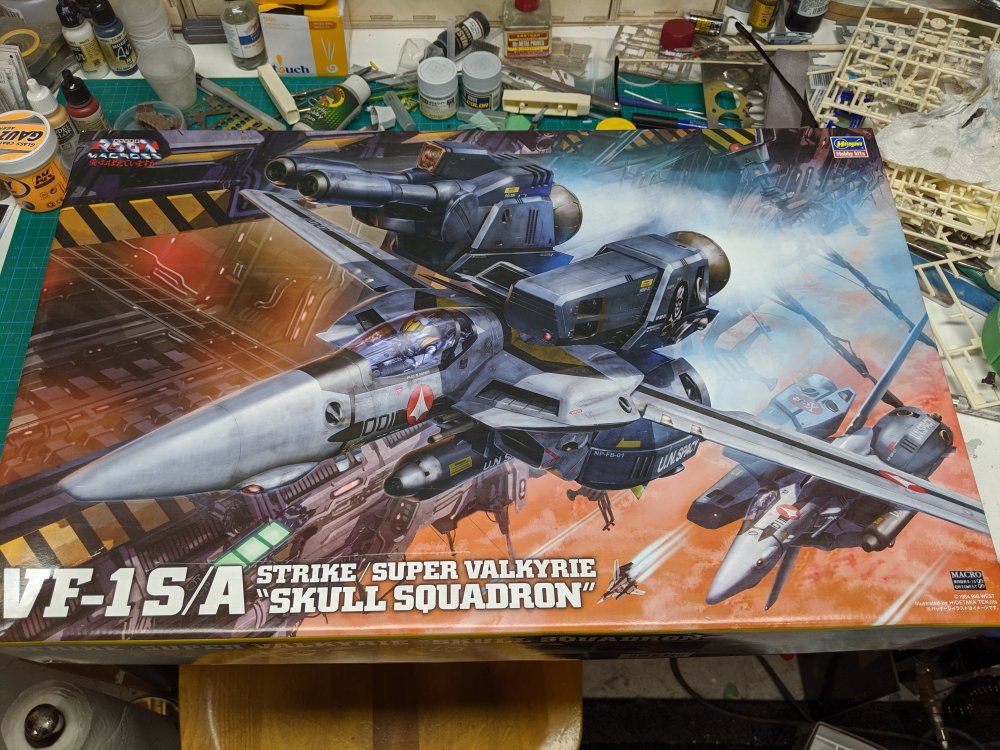
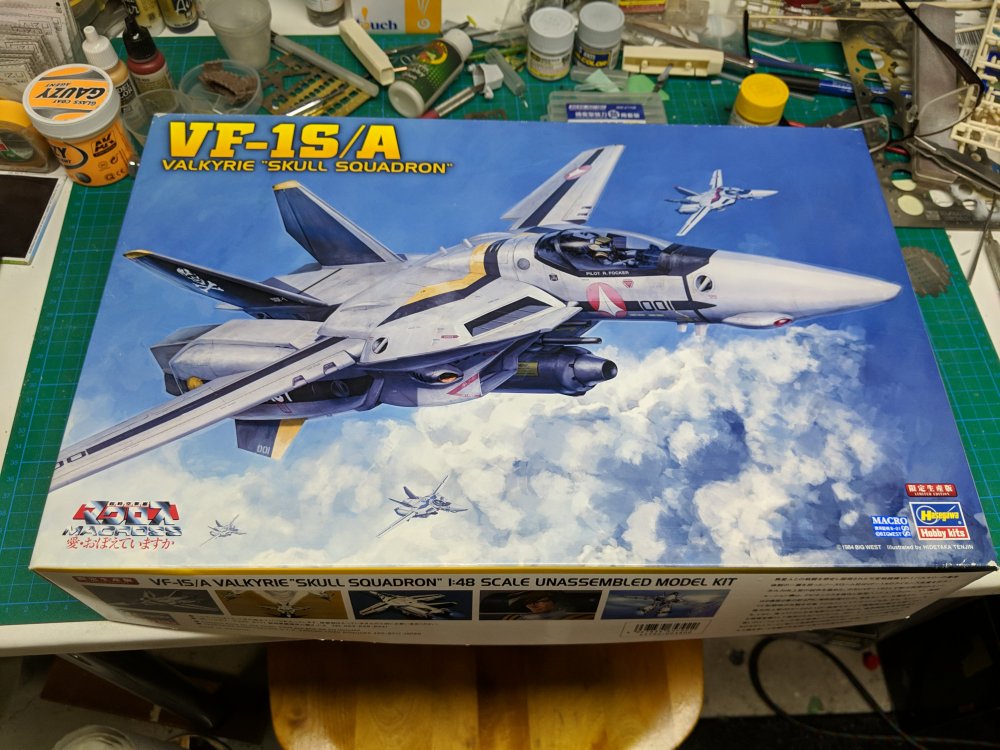
Here's a pic of the VF-1S but kitted by Hasegawa. The F-14 influence in probably more evident in the standard version.
-
The VF-1 is from a Japanese anime called Macross that came out in 1982. It was edited and dubbed into English and renamed Robotech (which made a complete travesty of the show). Yup, the designers were heavily influenced by the F-14. The swing wings, twin tails and even the Jolly Rogers Skull and Crossbones. It can basically transform into a giant humanoid robot when needed and is space flight worthy. The Super/Strike versions are basically up- armoured and -gunned versions. Here's a link to the movie version if anyone's interested. There's some great animation in it which was all hand drawn. No CGI in this one. The song at the end became a huge hit in Japan. As for Top Gun, someone redid the intro using the Too Gun anthem.
-
Forgot, one more pic of what the model looks like:
-
Well, since the site is called Large Scale Modeller I thought this would be appreciated. Inside the shipping box: The idea of a large scale Valkyrie from my favourite anime series coming out has to be easily the top of my Grail list. Just wasn't expecting it in 1/20 scale. Here it is compared to a HB B-24: Now to figure out where to stash it. Anyone got a spare dishwasher box I can stick it in?
-
Same here. I took my boys to the recent Godzilla King of the Monsters film when it was in theaters and they loved it.
-
I might be able to help out there. I have the movie and more importantly, slept in a Holiday Inn recently.
-
Certainly as the moon seen in the silent film A Trip to the Moon by Georges Meliès. Carl
-
CBC did one a few years ago with Dan Aykroyd in it. https://en.m.wikipedia.org/wiki/The_Arrow_(miniseries) The plane is in a hanger somewhere in the GTA but I'm not sure where.
-
More great photos. Thanks Smitty! Carl
-
I picked up a book called Canoe Craft on how to build a cedarstrip canoe basically the same way. Even got as far as clearing out my parents' garage so I'd have the space. But then my dad saw all the free space and promptly filled it up again. One day...
-
I was going to suggest the recent Lego Saturn V set as it's quite nice and would be a great reference. Then I saw you you wanted to start with the gantry tower. Maybe if you started with the crawler that would be easiest. That way you could move it around as needed.
-
F4U-1A finished!
BlrwestSiR replied to JohnB's topic in LSM 1/32 and Larger Aircraft Ready for Inspection
She makes a very nice addition to your collection of Corsairs John. I need to do another one at some point. I'm only at two so far. Carl -
For Canada, anything 15 years or older from the date of manufacture is ok to import as long as you pay the requisite duties. It must however pass any provincial safety or emissions requirements before it can be registered and put on the road. So for example, BC requires DOT certified headlights, whereas Ontario doesn't. In the case of my '91 Beat, as it was initially registered in BC the headlights got swapped to ones from a Toyota Paseo. The Paseo lights didn't quite fit so when I bought car, the dealer agreed to reinstall the original lights since I was registering it in Ontario. There's also no law here about not being able to pass. Not that in my case I'd be really doing much of that with 63 hp. Carl
- 2,036 replies
-
- 3
-

-
- car related stuff
- anything about cars
- (and 6 more)
-
Korean War - Looking for Mig-15 and F-86F Kit Reccomendation
BlrwestSiR replied to crazypoet's topic in Modelling Discussion
I believe the Italeri kit is the Kinetic kit reboxed. I haven't built either so can't attest to the quality and any short comings. 1to1, thanks for your take on the Trumpeter MiG. I tried to build one years ago and failed miserably. I might have to take another go at it. Carl -
Great photos! Thanks for sharing. Would love to see a U-2 one day. And a B-29. And.... Carl
-
What is on your bench right now ? Share a picture :)
BlrwestSiR replied to Martinnfb's topic in Modelling Discussion
Something a bit different.