


BlrwestSiR
-
Posts
9,232 -
Joined
-
Last visited
Content Type
Profiles
Forums
Events
Gallery
Everything posted by BlrwestSiR
-

Another P-40E to P-40K build!
BlrwestSiR replied to ScottsGT's topic in LSM 1/35 and Larger Work In Progress
That looks great there Scott. -
Another P-40E to P-40K build!
BlrwestSiR replied to ScottsGT's topic in LSM 1/35 and Larger Work In Progress
Looks good there Scott. Nice progress. -
1/32 Westland Whirlwind
BlrwestSiR replied to JeroenPeters's topic in LSM 1/35 and Larger Work In Progress
Yeah, those fenders are crazy thin. -
Hubert, just curious which Tamiya scriber you have? I use a Trumpeter one that looks like a hook, a really old Tritool one that's a pointy looking thing and razor saws.
-
Cobra Coupe - Le Mans - Model Factory Hiro 1/12
BlrwestSiR replied to DocRob's topic in LSM 1/35 and Larger Work In Progress
Looks fantastic Rob. Great finish on the gloss coat. Hope the chip from the cat isn't too hard to fix. -
1/32 Curtiss SC-1 Seahawk
BlrwestSiR replied to BlrwestSiR's topic in LSM 1/35 and Larger Work In Progress
Martin, it's really old Mr Color. Probably 20 years old. They've changed the bottle I think three times since I bought the paint. -
Thanks Rob. It's definitely easier than yours. Just 1 part so there shouldn't be any alignment worries.
-
1/32 Curtiss SC-1 Seahawk
BlrwestSiR replied to BlrwestSiR's topic in LSM 1/35 and Larger Work In Progress
I finally got a chance to do some masking. Then it was time for paint. Unmasked. A couple touchups are needed.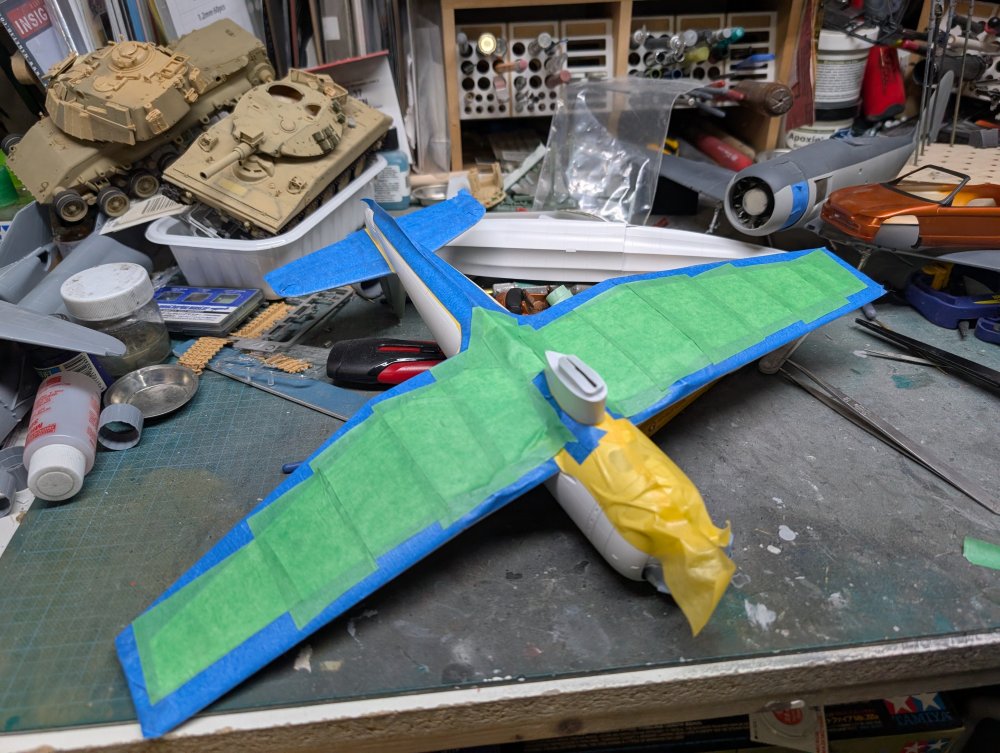

- 92 replies
-
- 10
-

-
Back to the Beat(s), I masked and sprayed the windshield frames.


-
I've got a few of these cars. I forgot I had them as they were stashed with my very stalled Seafire 47. One to go with your current thread Rob:


-
One more to add to this. This is from Neko. It's a cartoon style solid resin model of the Beat.

-
1/32 Westland Whirlwind
BlrwestSiR replied to JeroenPeters's topic in LSM 1/35 and Larger Work In Progress
The finish on the exhausts looks amazing. Like they're actually metal. -
Cobra Coupe - Le Mans - Model Factory Hiro 1/12
BlrwestSiR replied to DocRob's topic in LSM 1/35 and Larger Work In Progress
That looks great Rob. Looks very smooth. More importantly, it's dust free. -
I was at a friend's cottage and we were making burgers for dinner. We ended up not having enough buns. I remembered that we had leftover French toast from breakfast. So some of used them instead. They guys that did loved it.
-
Nice! Can't wait to see your build.
-
1/32 Curtiss SC-1 Seahawk
BlrwestSiR replied to BlrwestSiR's topic in LSM 1/35 and Larger Work In Progress
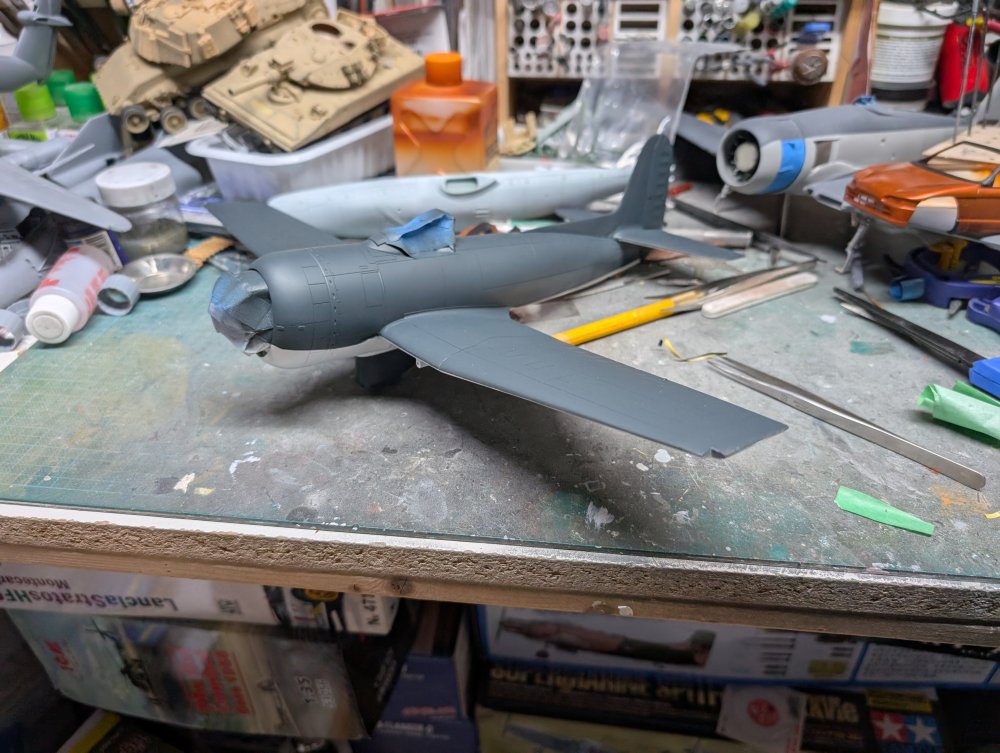
White undersides are done now. Once this dries I'll mask it off and start on the upper side.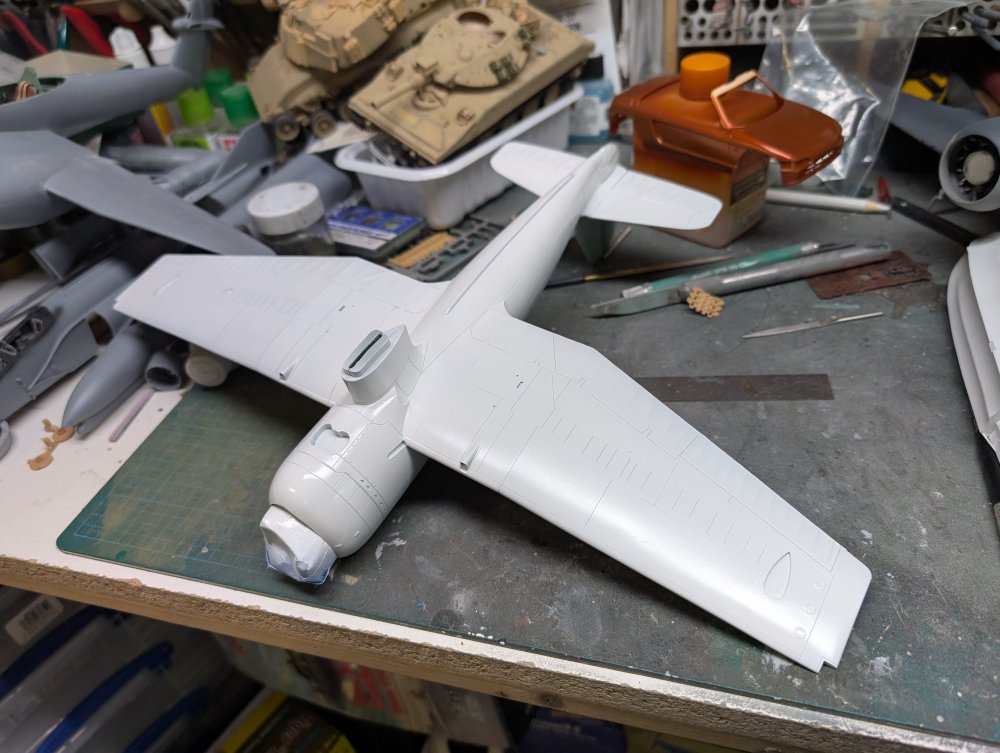
-
What is on your bench right now ? Share a picture :)
BlrwestSiR replied to Martinnfb's topic in Modelling Discussion
My TEAC CD player tray opens but then immediately closes. So you have to be quick in swapping out CDs. The Sony Minidisc player has a missing power button so it's just on all the time. At least there's nothing wrong with the Pioneer laserdisc player. Hope I haven't jinxed it. -
1/32 Curtiss SC-1 Seahawk
BlrwestSiR replied to BlrwestSiR's topic in LSM 1/35 and Larger Work In Progress
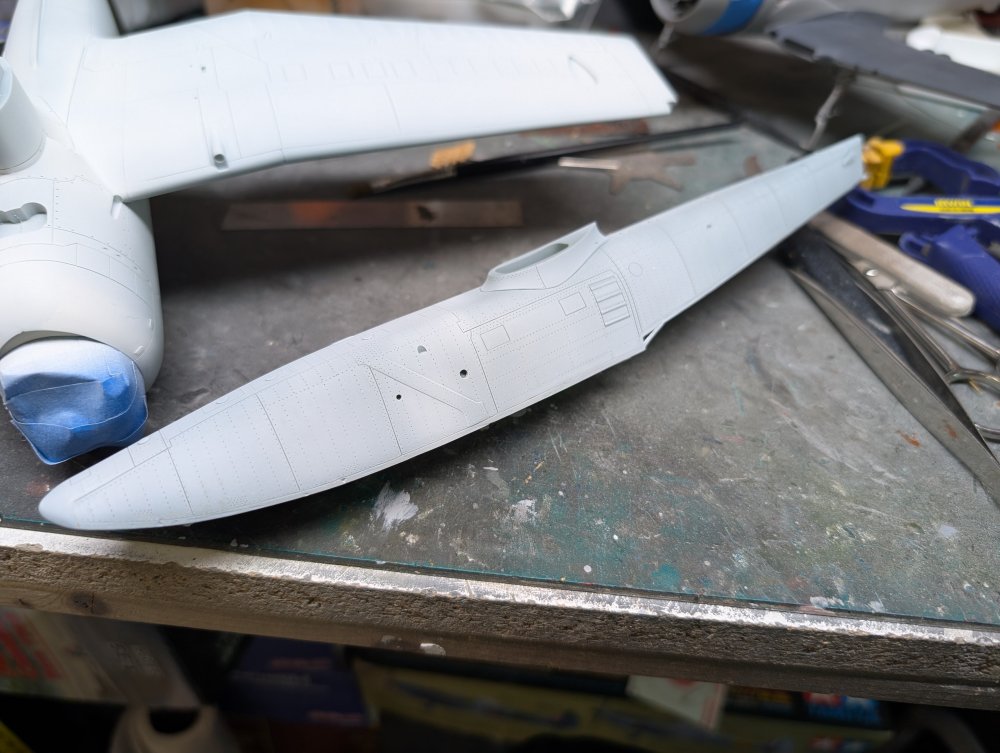
I got a coat of primer on just now. All the seams look good, I'm happy to report. A slight bit of touch-ups needed on one spot but that's it. I primed the float while I was at it. That will need a bit more prep work but I'm happy overall.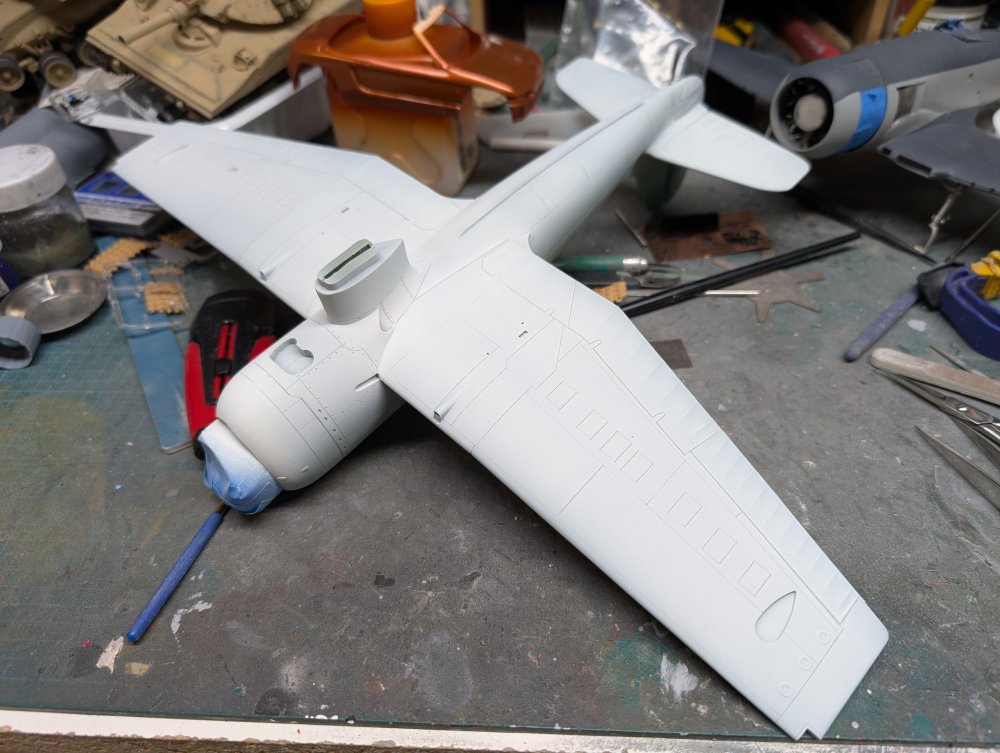
- 92 replies
-
- 10
-
-
This one has been slow to progress. The second try at painting the body ended up with more dust in the paint. Same with go #3 Finally, on my fourth kick at the can, I go something decent. Now hopefully I can make more progress.

-
Cobra Coupe - Le Mans - Model Factory Hiro 1/12
BlrwestSiR replied to DocRob's topic in LSM 1/35 and Larger Work In Progress
The painting has begun. Can't wait to see your magic on this. -
Trumpeter Abrams 1/16
BlrwestSiR replied to FullArmor's topic in LSM 1/35 and Larger Work In Progress
The extra details you're adding are really impressive. I wouldn't have thought that you're doing this without an airbrush. -
What is on your bench right now ? Share a picture :)
BlrwestSiR replied to Martinnfb's topic in Modelling Discussion
Sadly, I don't think I would even know the correct answer. -
Trumpeter Abrams 1/16
BlrwestSiR replied to FullArmor's topic in LSM 1/35 and Larger Work In Progress
If you want a second kit, BNA has it for 50% off for the next 24 hours. $133 CAD which is an absolute steal. https://www.bnamodelworld.com/military-vehicles-tanks-trumpeter-models-tr-00927-1:16-us-m1a2-sep-main-battle-tank-mbt -
What is on your bench right now ? Share a picture :)
BlrwestSiR replied to Martinnfb's topic in Modelling Discussion
Great Wall P-40? -
Sounds about right but 9-10 hours is better.


