BlrwestSiR
-
Posts
9,193 -
Joined
-
Last visited
Content Type
Profiles
Forums
Events
Gallery
Everything posted by BlrwestSiR
-

Cobra Coupe - Le Mans - Model Factory Hiro 1/12
BlrwestSiR replied to DocRob's topic in LSM 1/35 and Larger Work In Progress
That rear glass looks stunning. Lots of work to get a perfect but worth it. Carl -
What is on your bench right now ? Share a picture :)
BlrwestSiR replied to Martinnfb's topic in Modelling Discussion
The railgun is now mounted. Now its in the danger zone. I need to push through and add the last couple parts, decals and call it down before I find something else that distracts me. Heritagecon is Sunday so hopefully I get it done before then as I'm sure there'll be lots of shiny new plastic there.
-
Maybe they got Jr and Sr mixed up? I'm still on the fence about getting an Avenger. Still haven't built one in any scale but not sure that's enough of a reason. The Squirrel just isn't quite strong enough I guess.
-
Average time in US Customs? UPDATE: PayPal is refunding.
BlrwestSiR replied to ScottsGT's topic in General Discussion
Wow, that's approaching Canada Post wait times at their worst. Actually the longest wait time I experienced was when I mailed an airsoft Berreta 92 from Taiwan to a friend in Toronto. It spent 2 months bouncing back and forth between Canada Post and Canada Customs. The former said it was a firearm and therefore it couldn't be sent by mail while the latter said it wasn't and could be. Canada Customs finally won out and Canada Post duly delivered it. The amount of labels on the package was staggering when my friend got it. -
Cobra Coupe - Le Mans - Model Factory Hiro 1/12
BlrwestSiR replied to DocRob's topic in LSM 1/35 and Larger Work In Progress
Some challenging work there Rob but it looks good. -
Another P-40E to P-40K build!
BlrwestSiR replied to ScottsGT's topic in LSM 1/35 and Larger Work In Progress
Scott, this is the same guy that did the C-17 for Tyler Perry. -
Cobra Coupe - Le Mans - Model Factory Hiro 1/12
BlrwestSiR replied to DocRob's topic in LSM 1/35 and Larger Work In Progress
Sorry that you couldn't find a solution to the fit of the hood. It's a spectacular looking build so I'm glad to hear you're going to finish it. -
1/32 Westland Whirlwind
BlrwestSiR replied to JeroenPeters's topic in LSM 1/35 and Larger Work In Progress
Stunning... -
Another P-40E to P-40K build!
BlrwestSiR replied to ScottsGT's topic in LSM 1/35 and Larger Work In Progress
Hubert, with enough thrust, anything can be made to fly. Just got to make sure Scott's throwing arm is up to it. On a separate note, have you seen the RC 777 this guy built? That's large scale... -
It was great to meet you and Gary and Dave (Denders) at the Nats last year. I wish I could have met more of you, including Harv. I was supposed to go to the Vegas one as it was my 50th that year. I even had the hotel booked and then COVID happened and I couldn't go. Carl
-
What is on your bench right now ? Share a picture :)
BlrwestSiR replied to Martinnfb's topic in Modelling Discussion
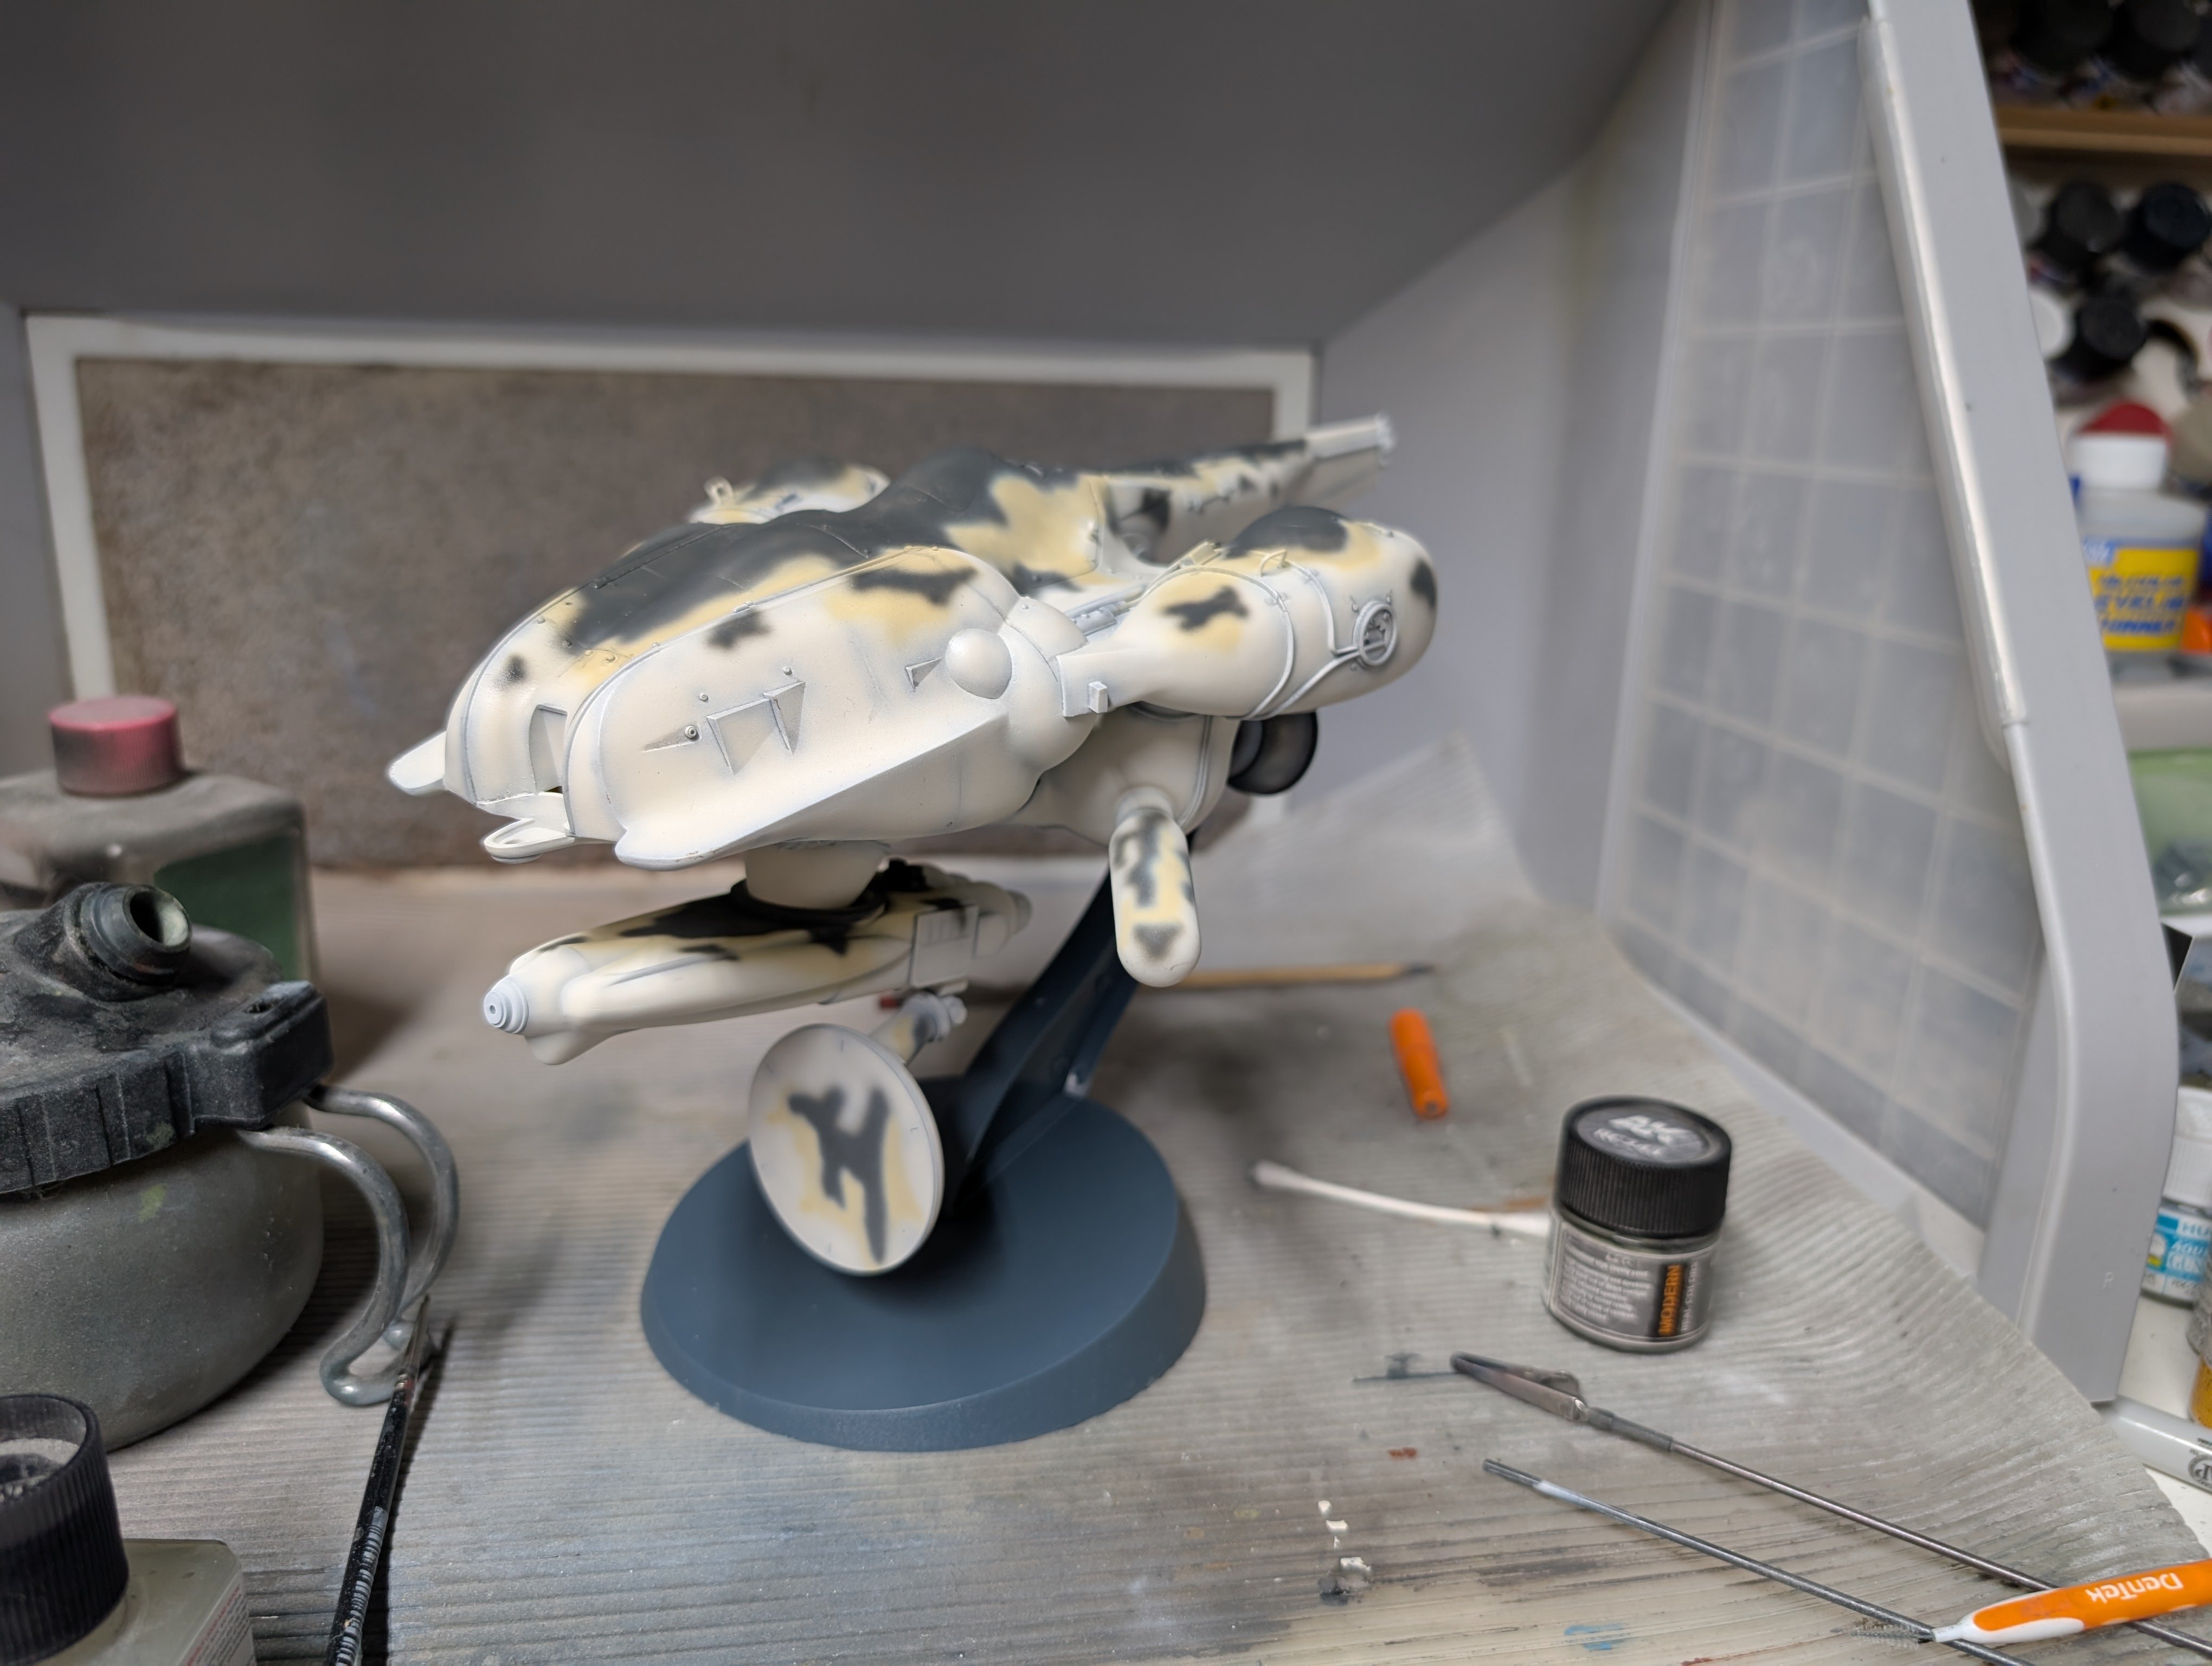
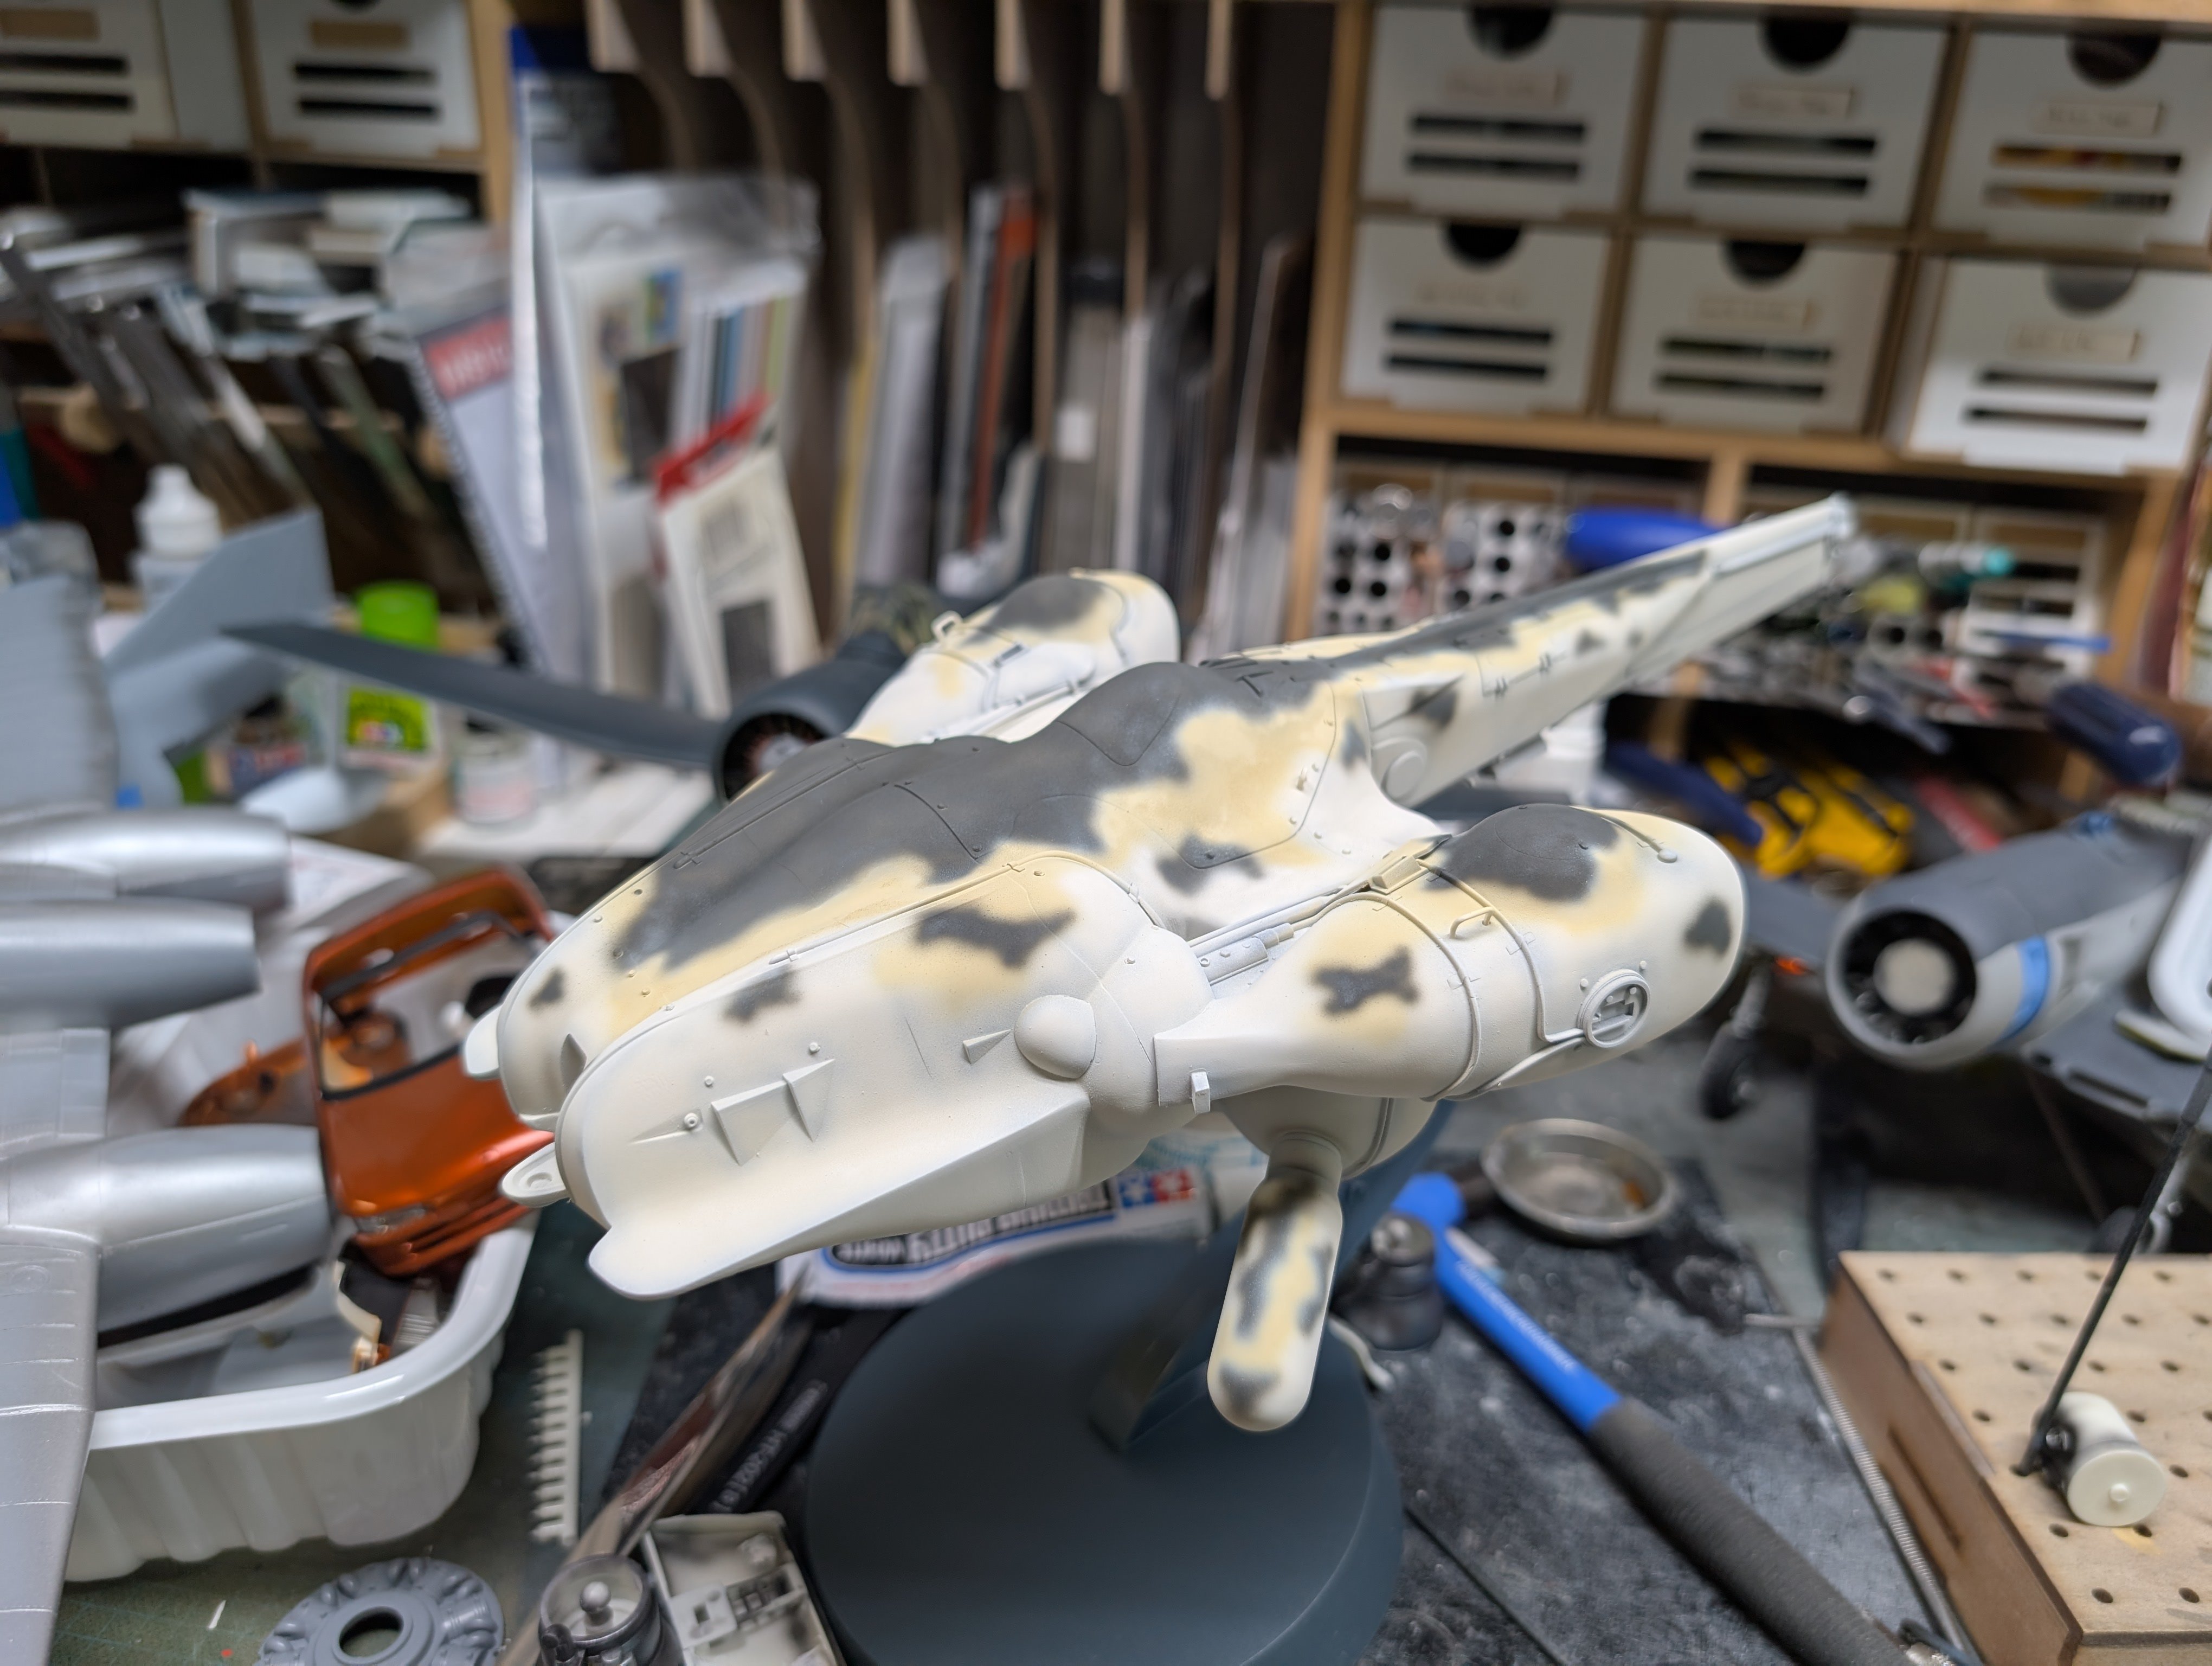
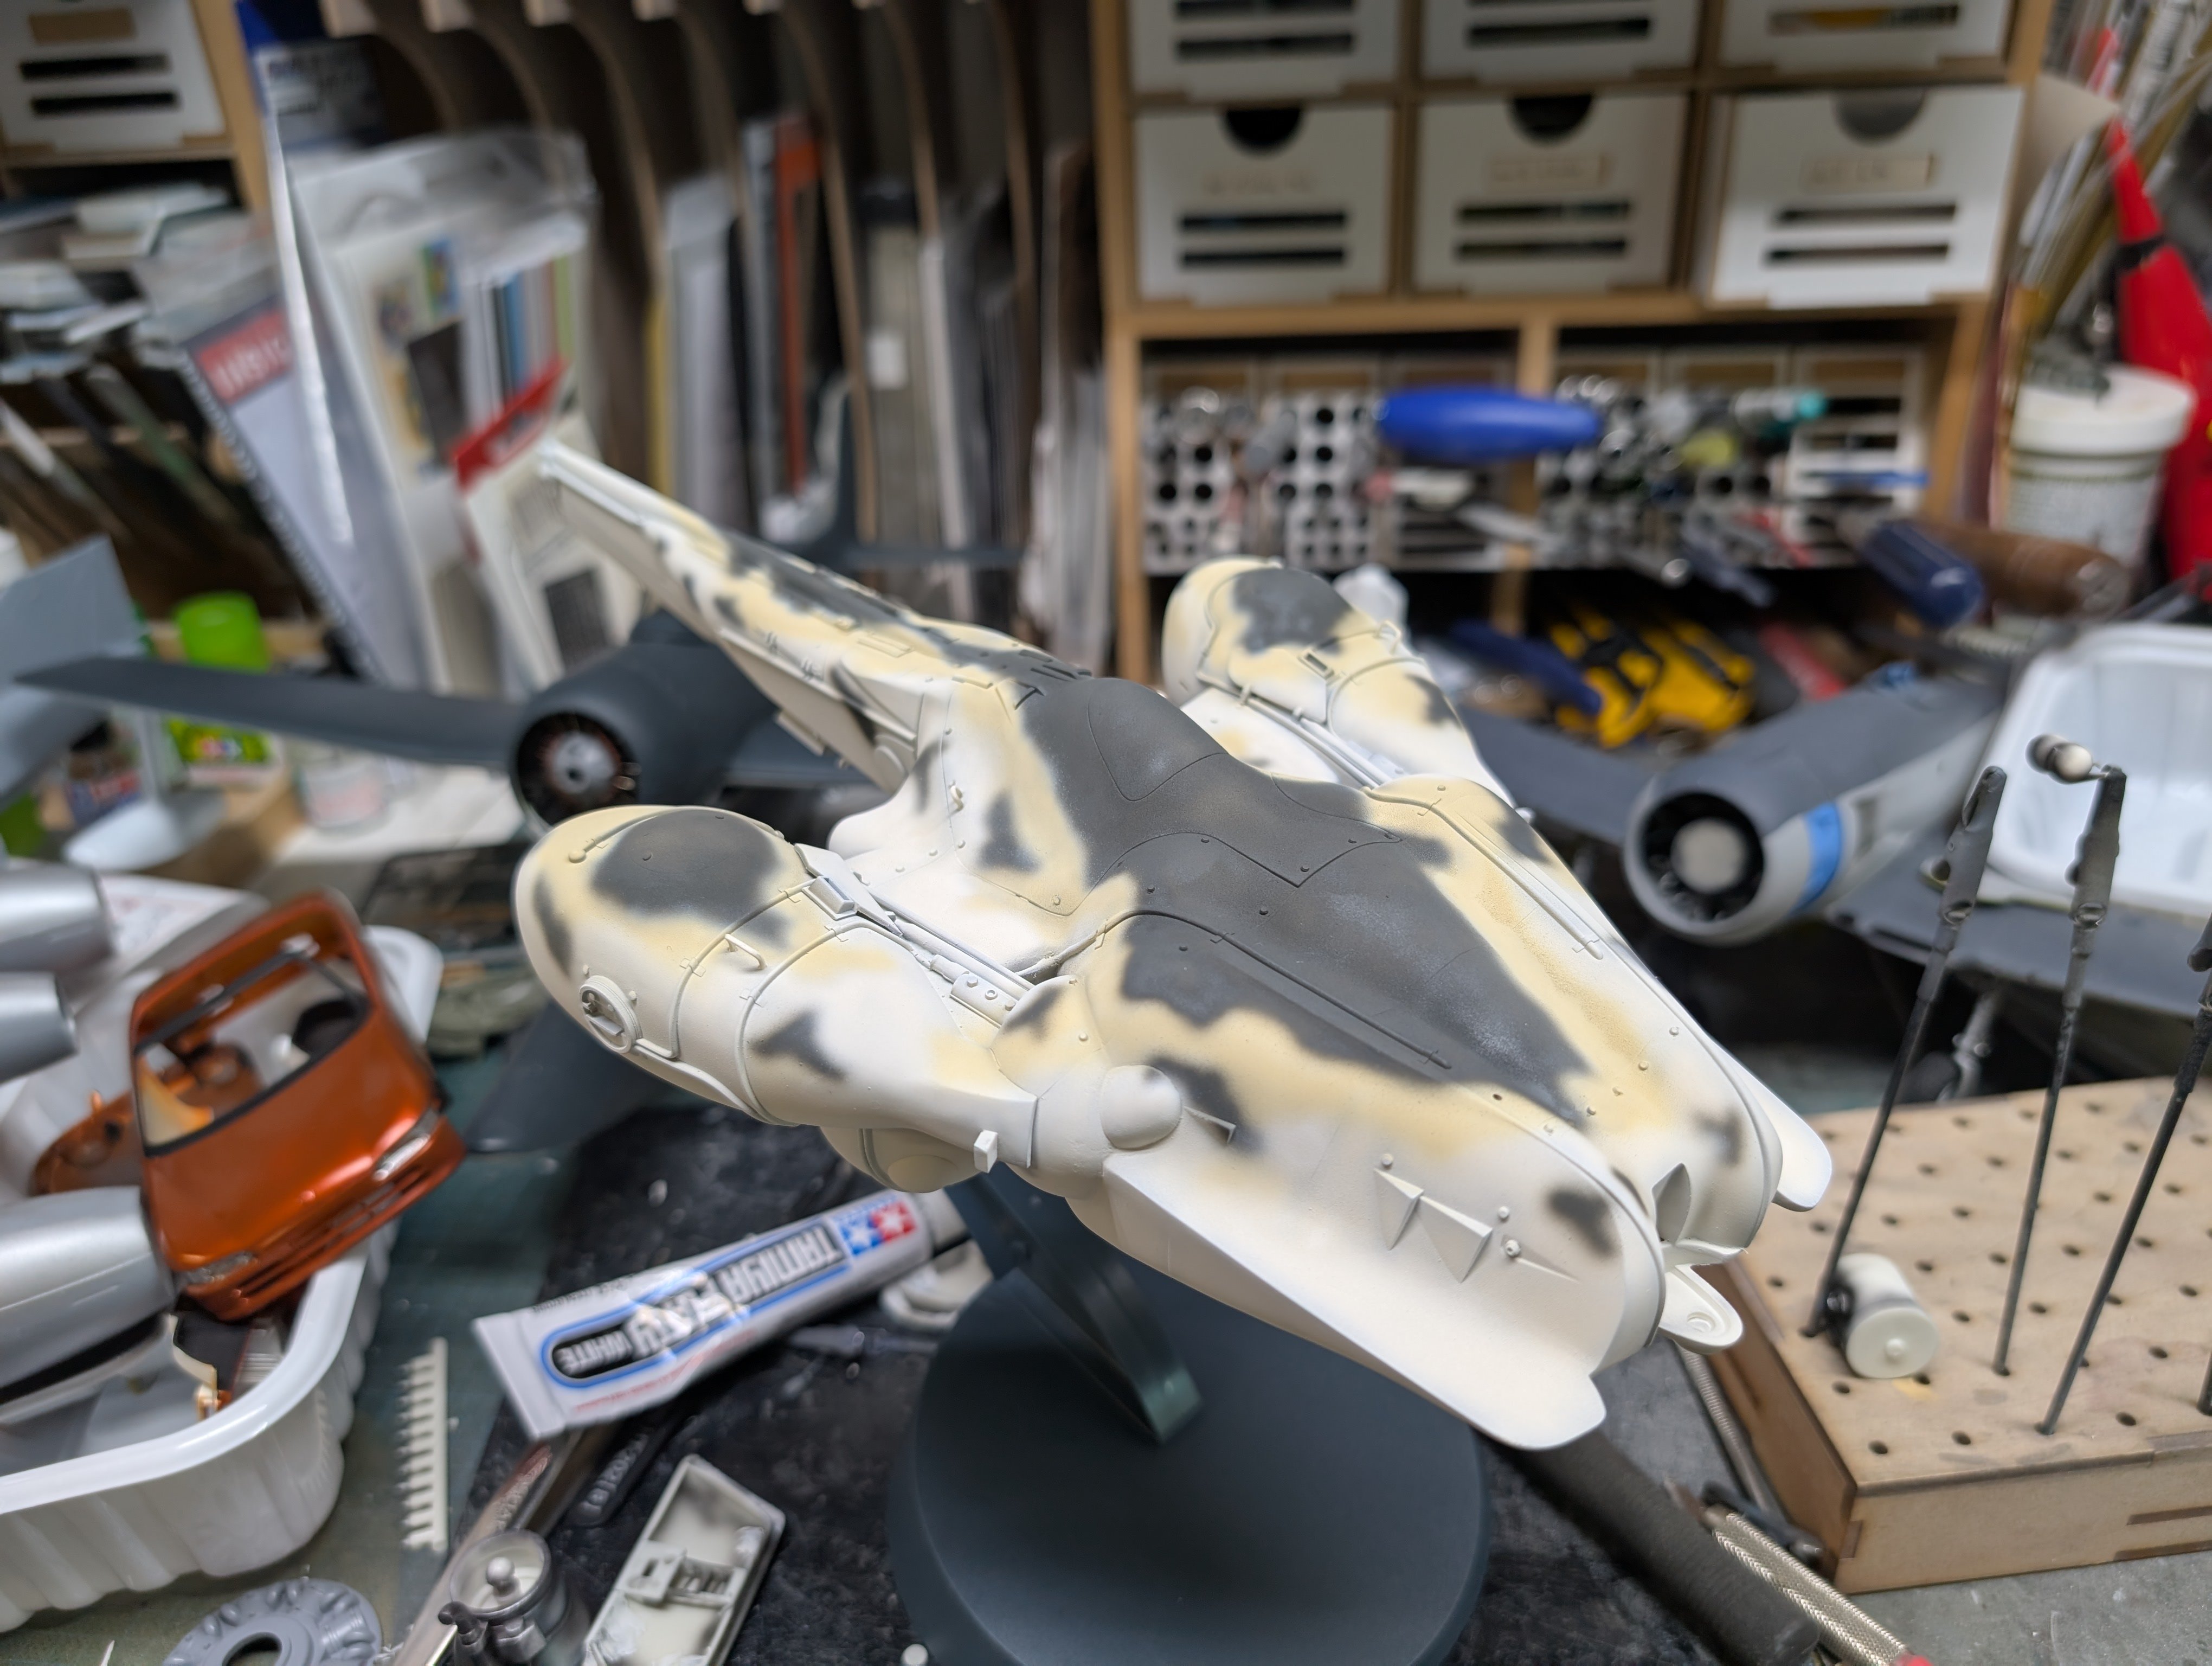
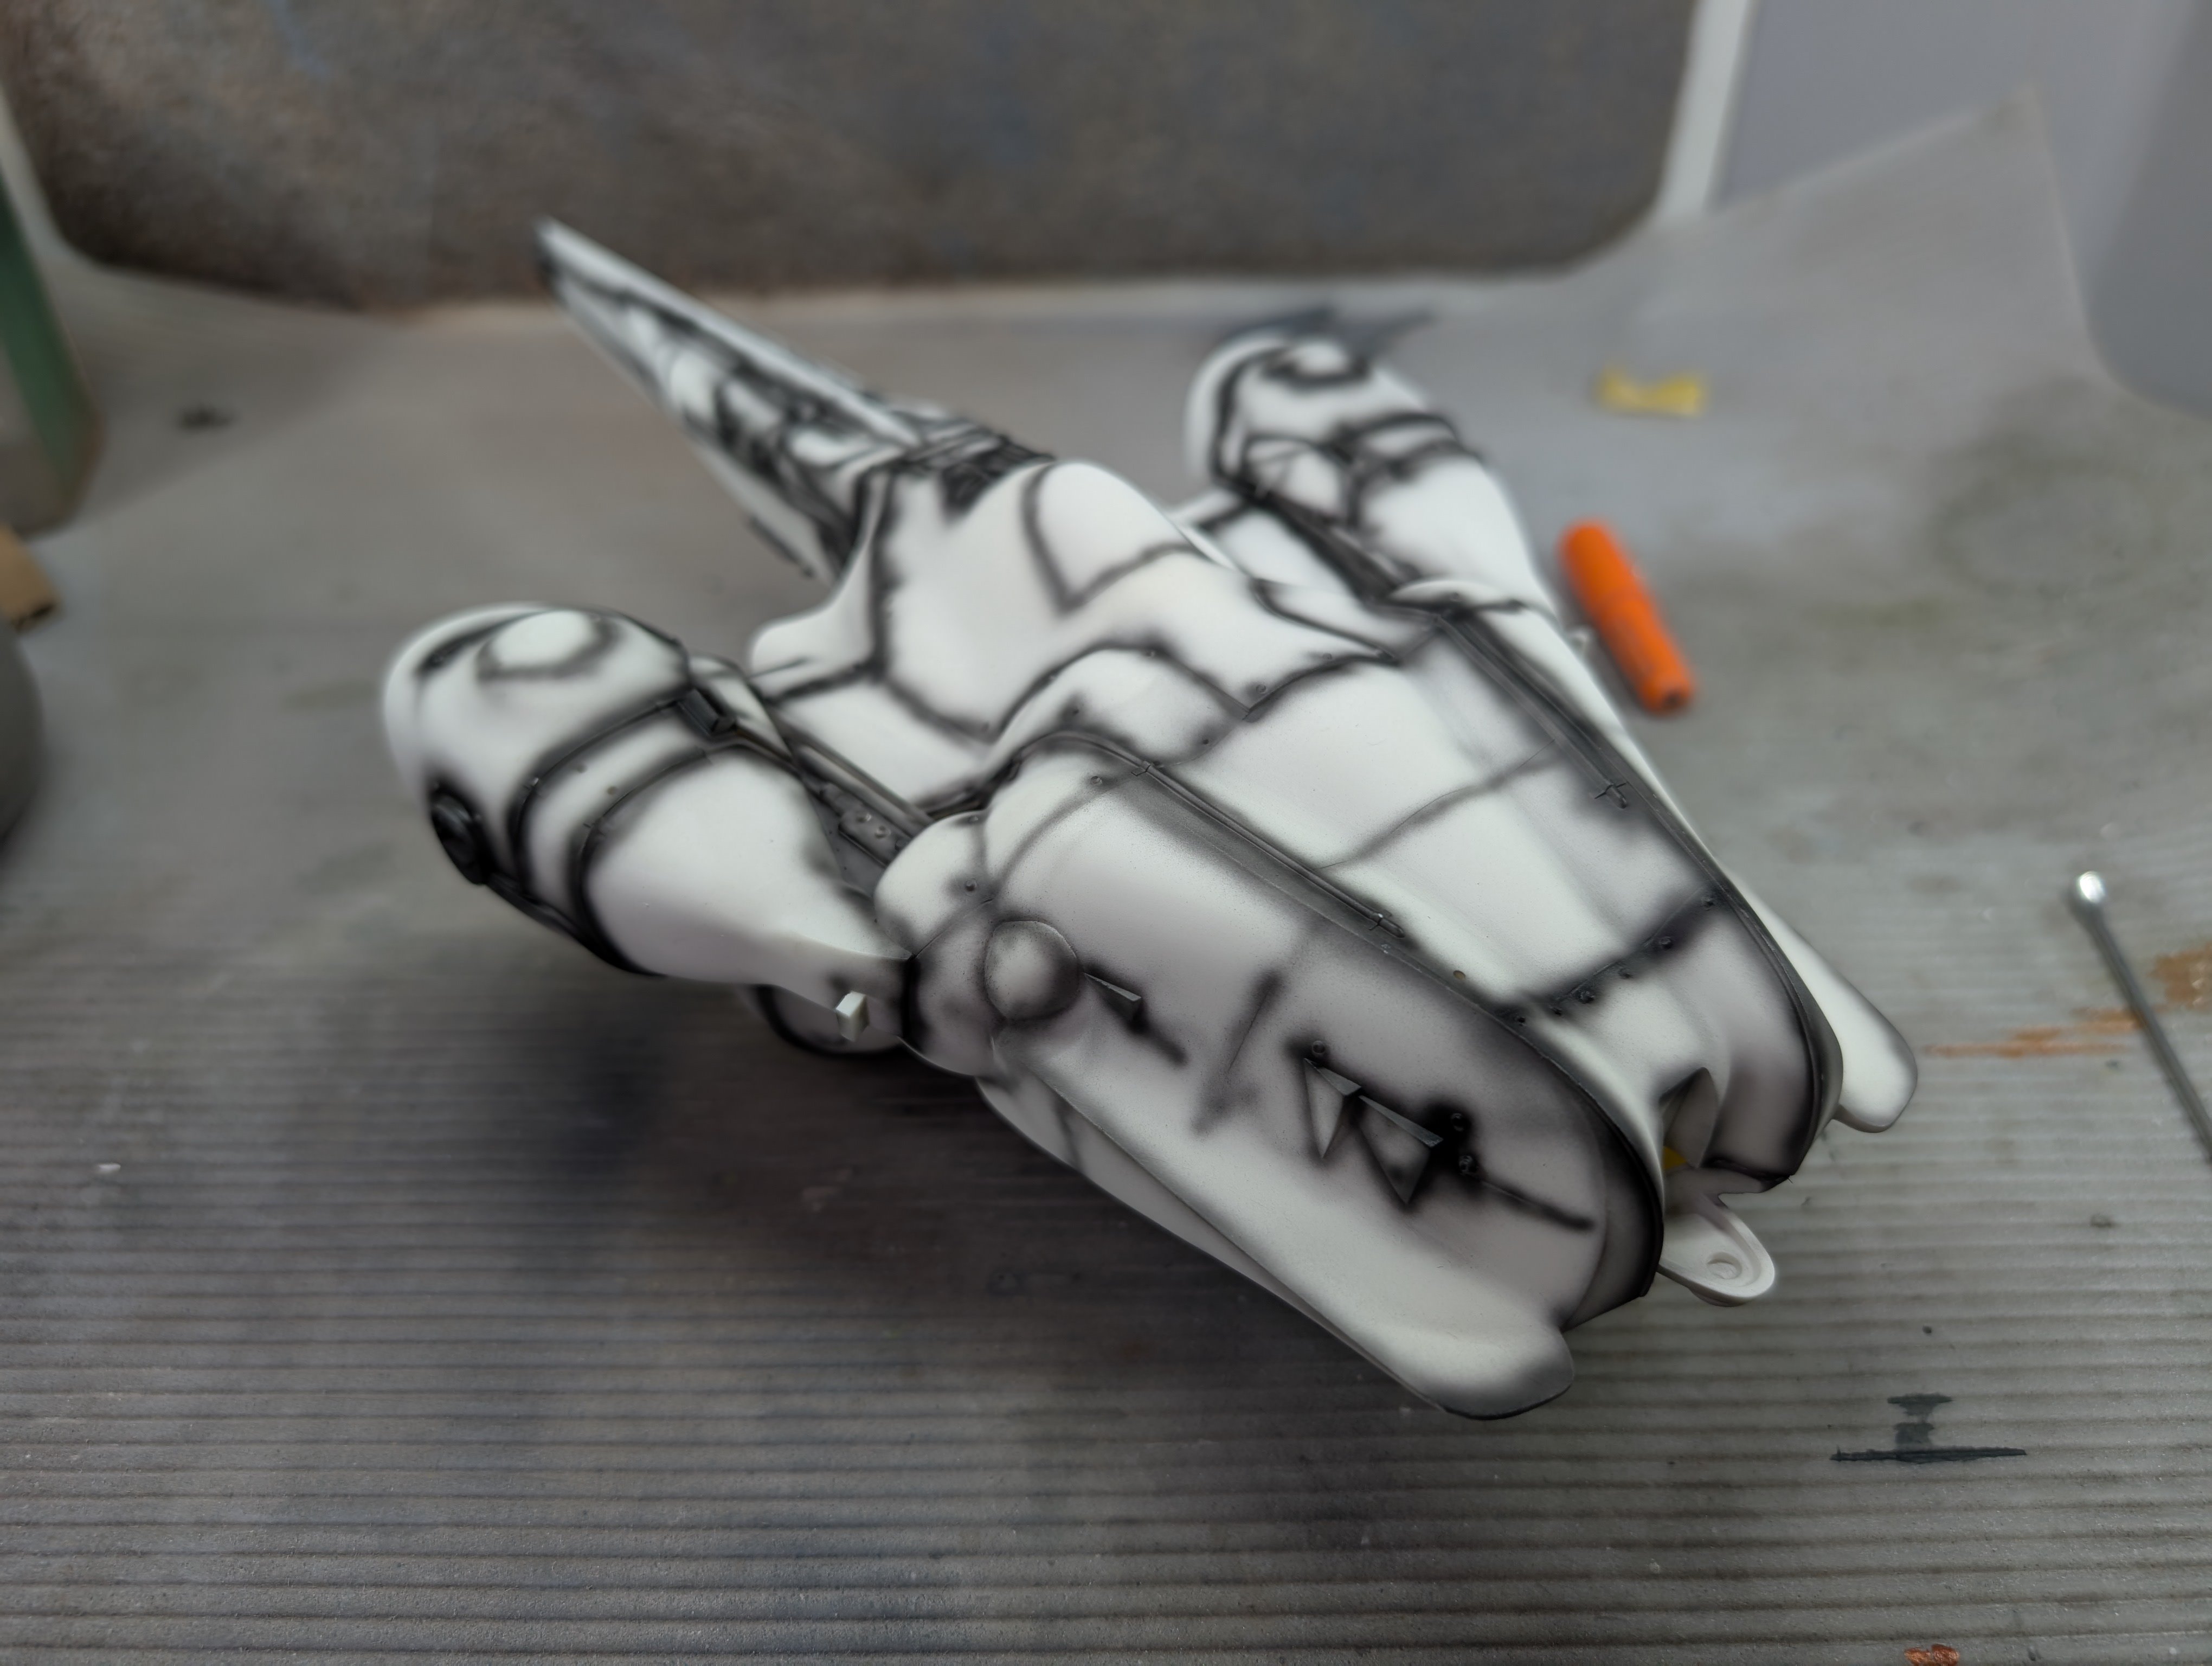
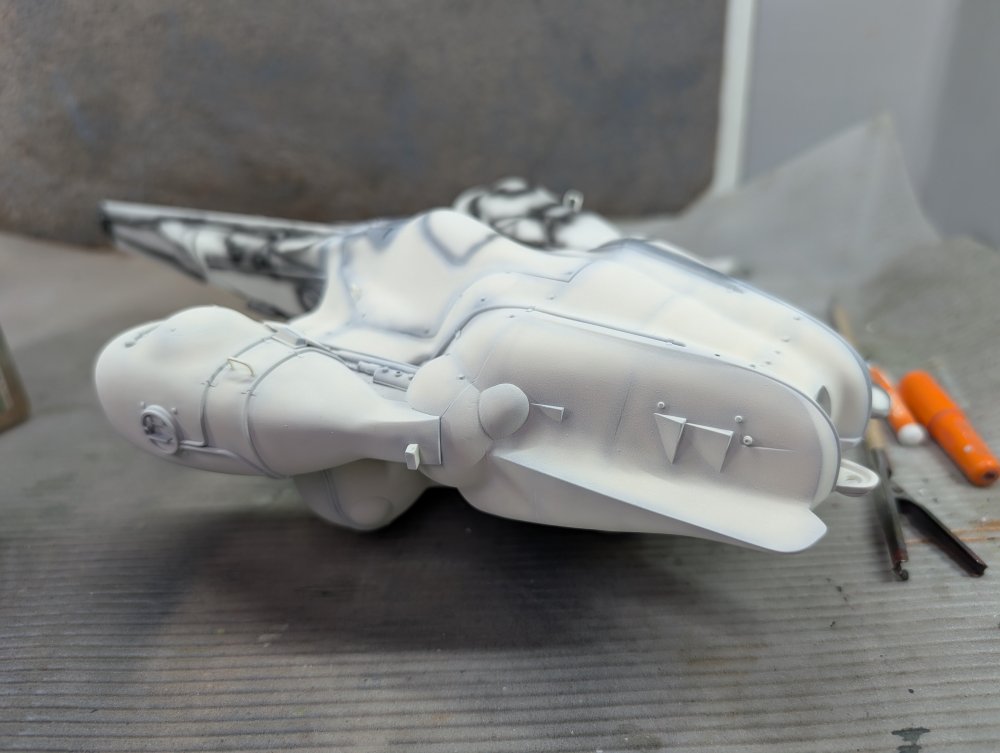
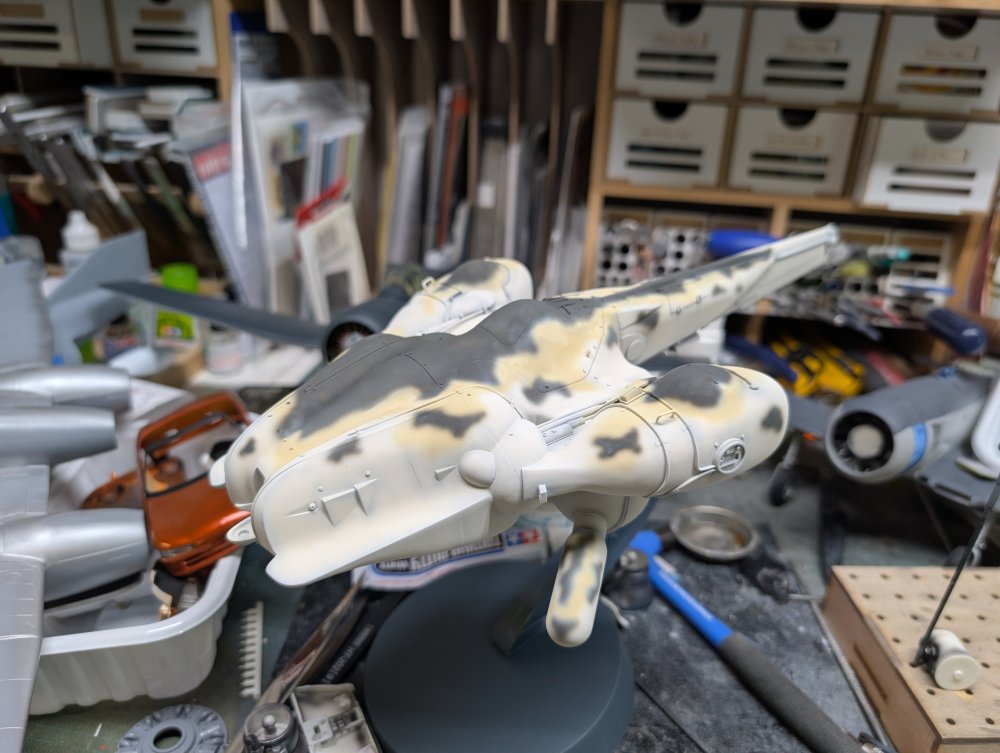
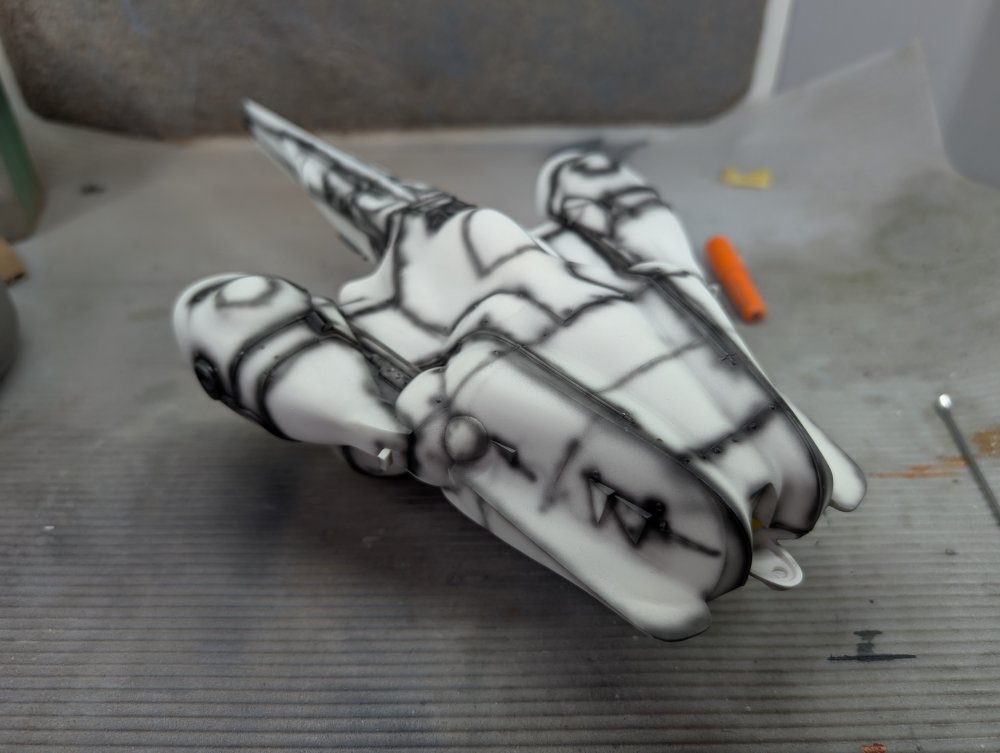
Camo time for the Lunadiver. First up was cream white. Then Elfenbein. Finally FS36081. Now for some drying time.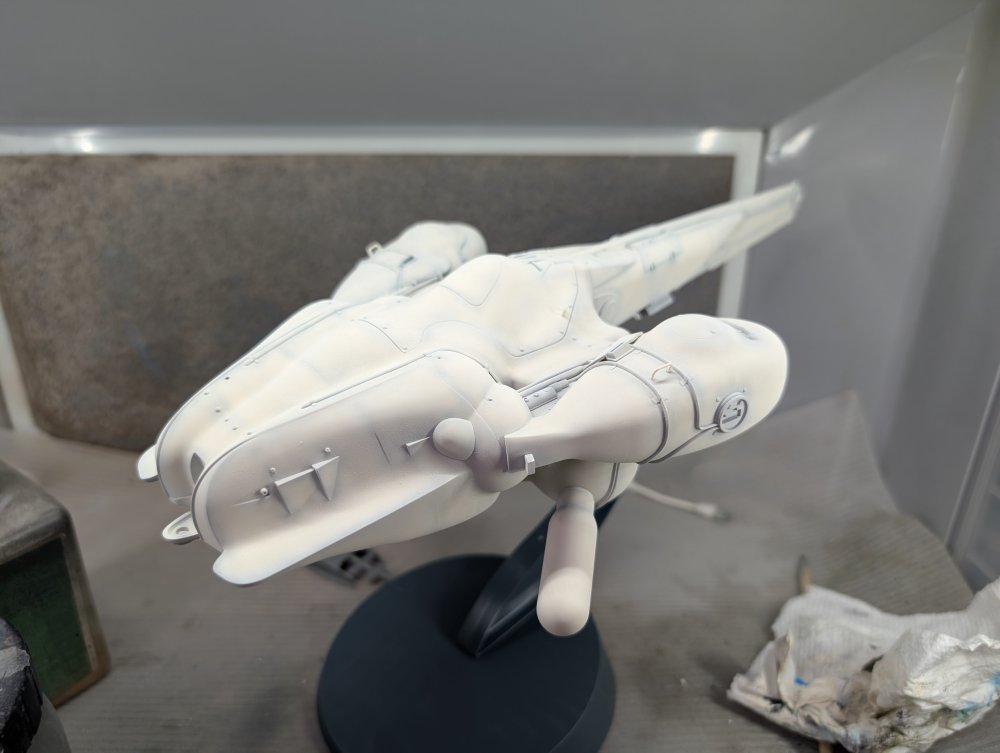


-
As Hubert said, the ZM one is the more accurate. As for the resin one, here's what mine looked like. There was no way to straighten it out completely as much as I tried. I know someone else who had the same set and theirs was even worse. The replacement set that ZM sent wasn't any better.

-
Wow, nice recovery there John. I guess the clean break at the tail helped. Hope the gear legs aren't as bad as they look.
-
Snapshots from the 2025 Atlanta IPMS Model show
BlrwestSiR replied to KUROK's topic in Modelling Discussion
Thanks for sharing the pics Vince. Some nice looking models there. Carl -
What is on your bench right now ? Share a picture :)
BlrwestSiR replied to Martinnfb's topic in Modelling Discussion
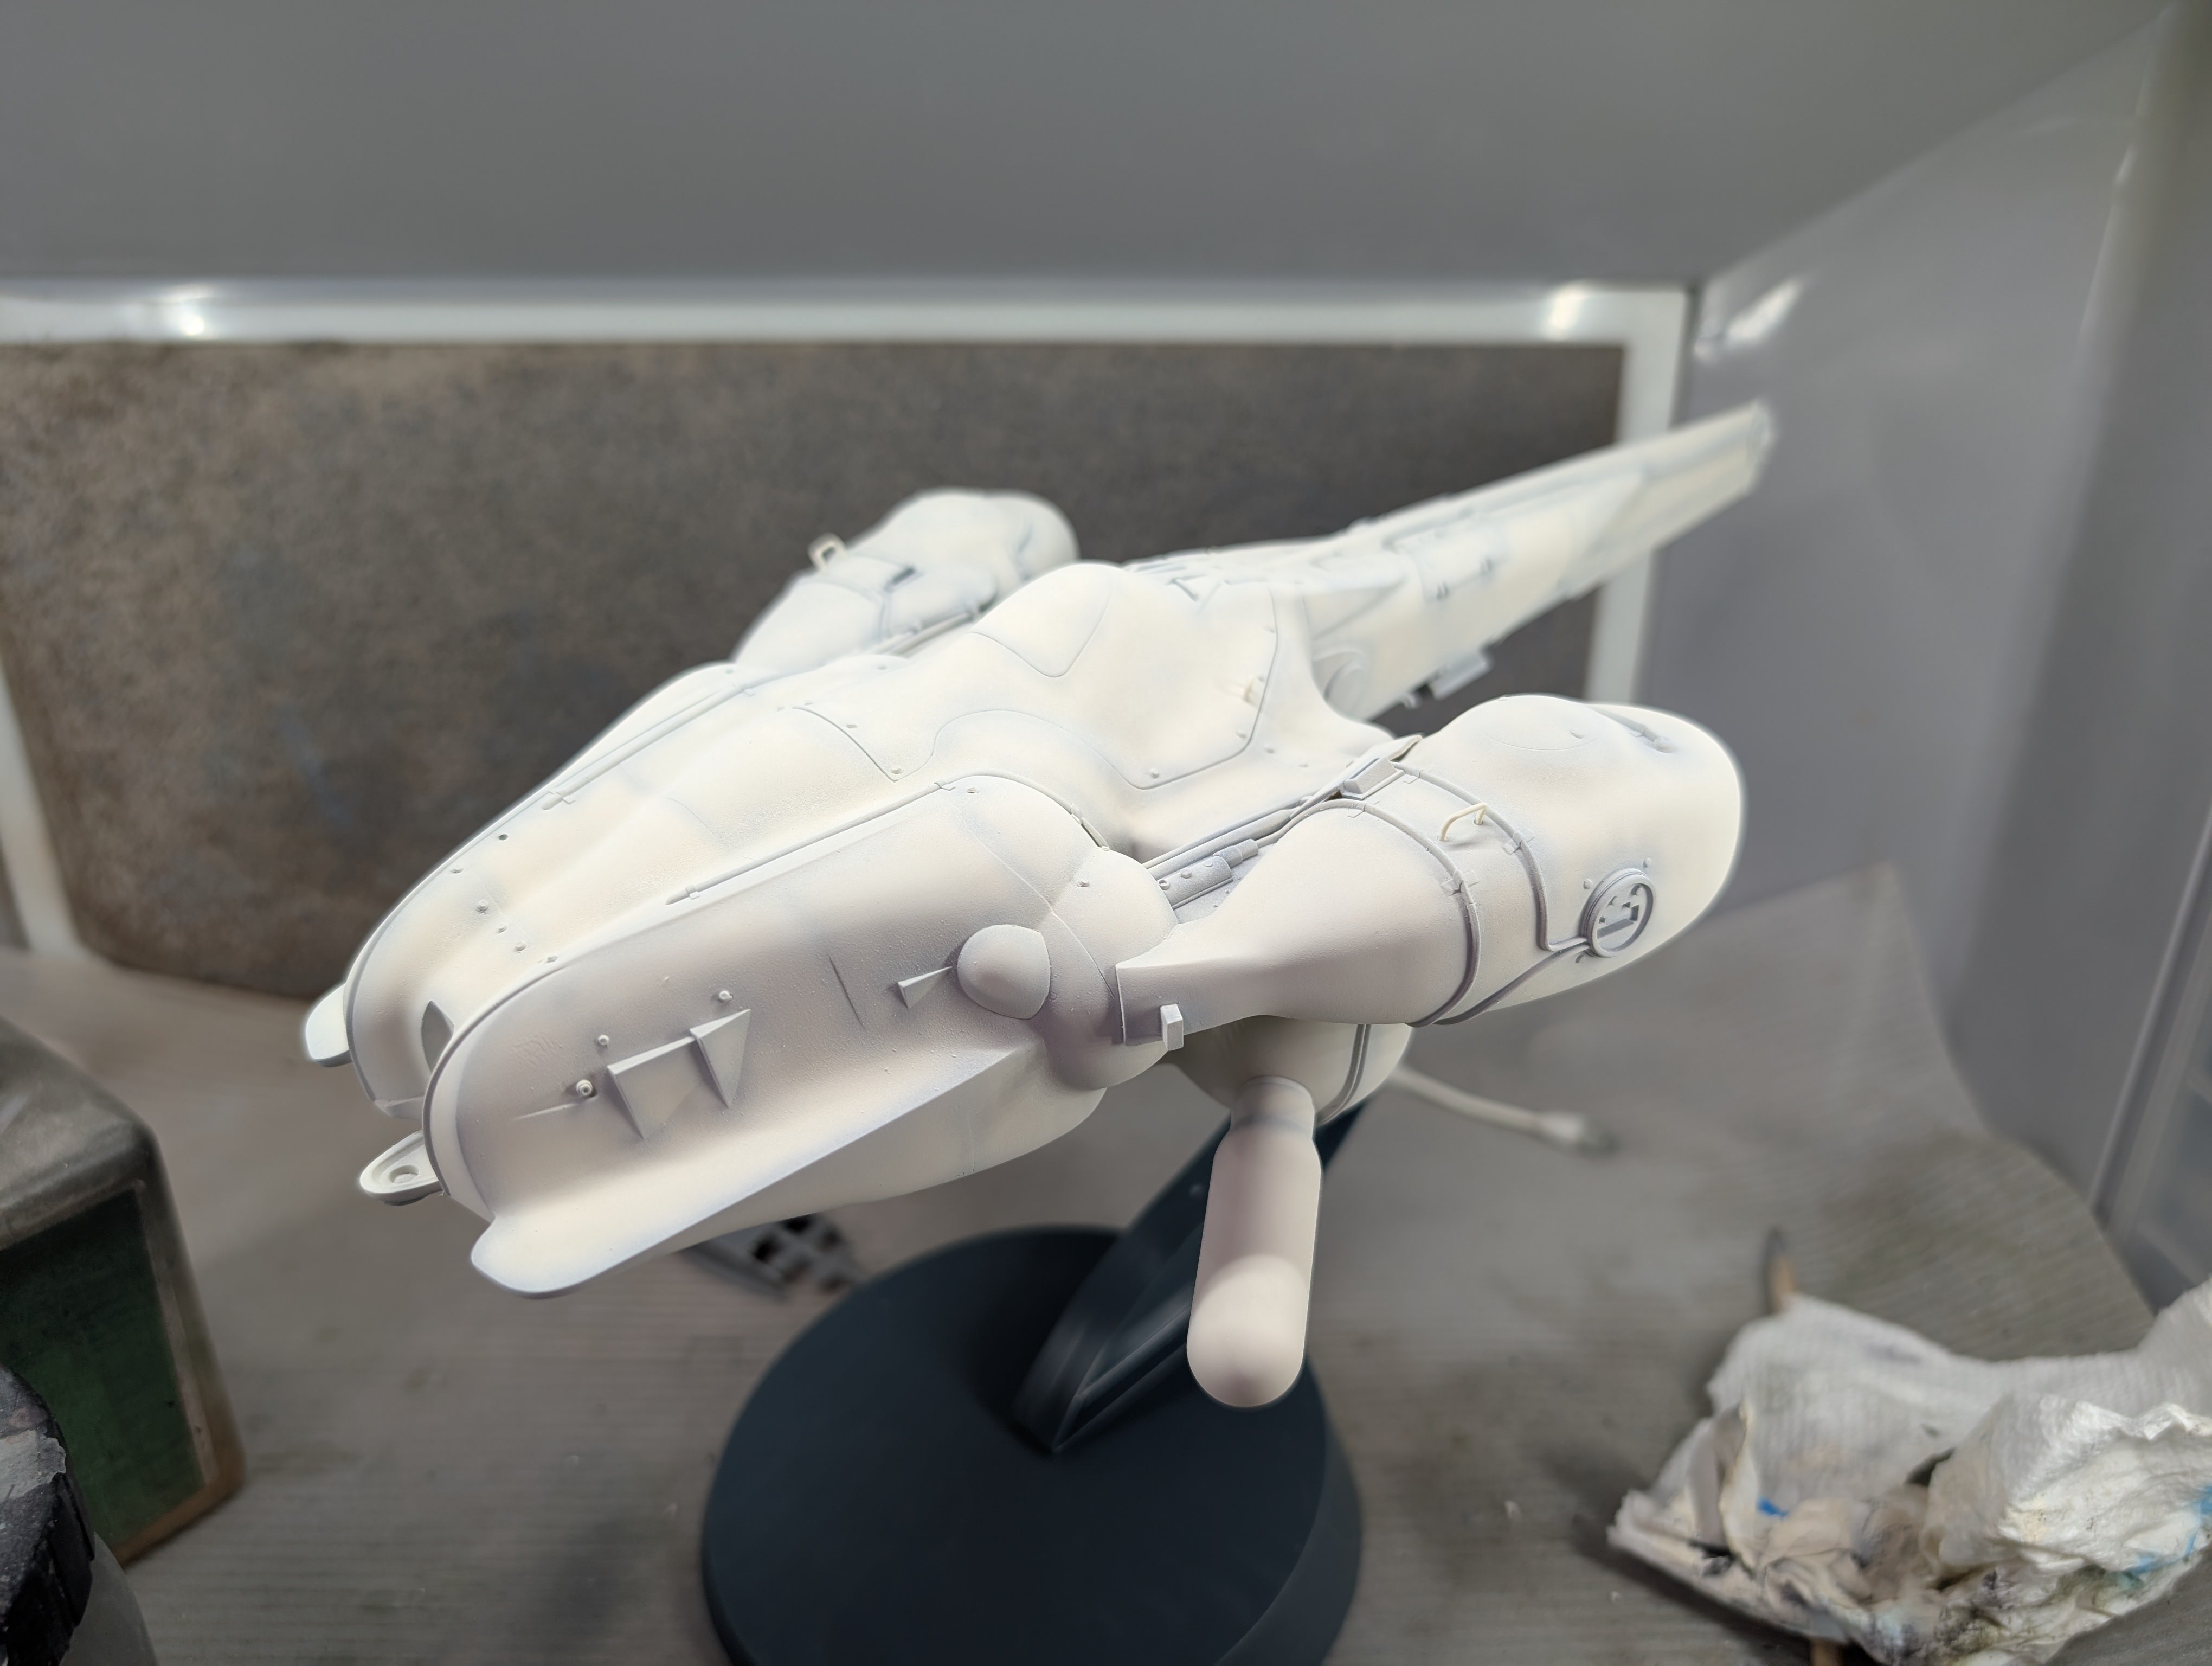
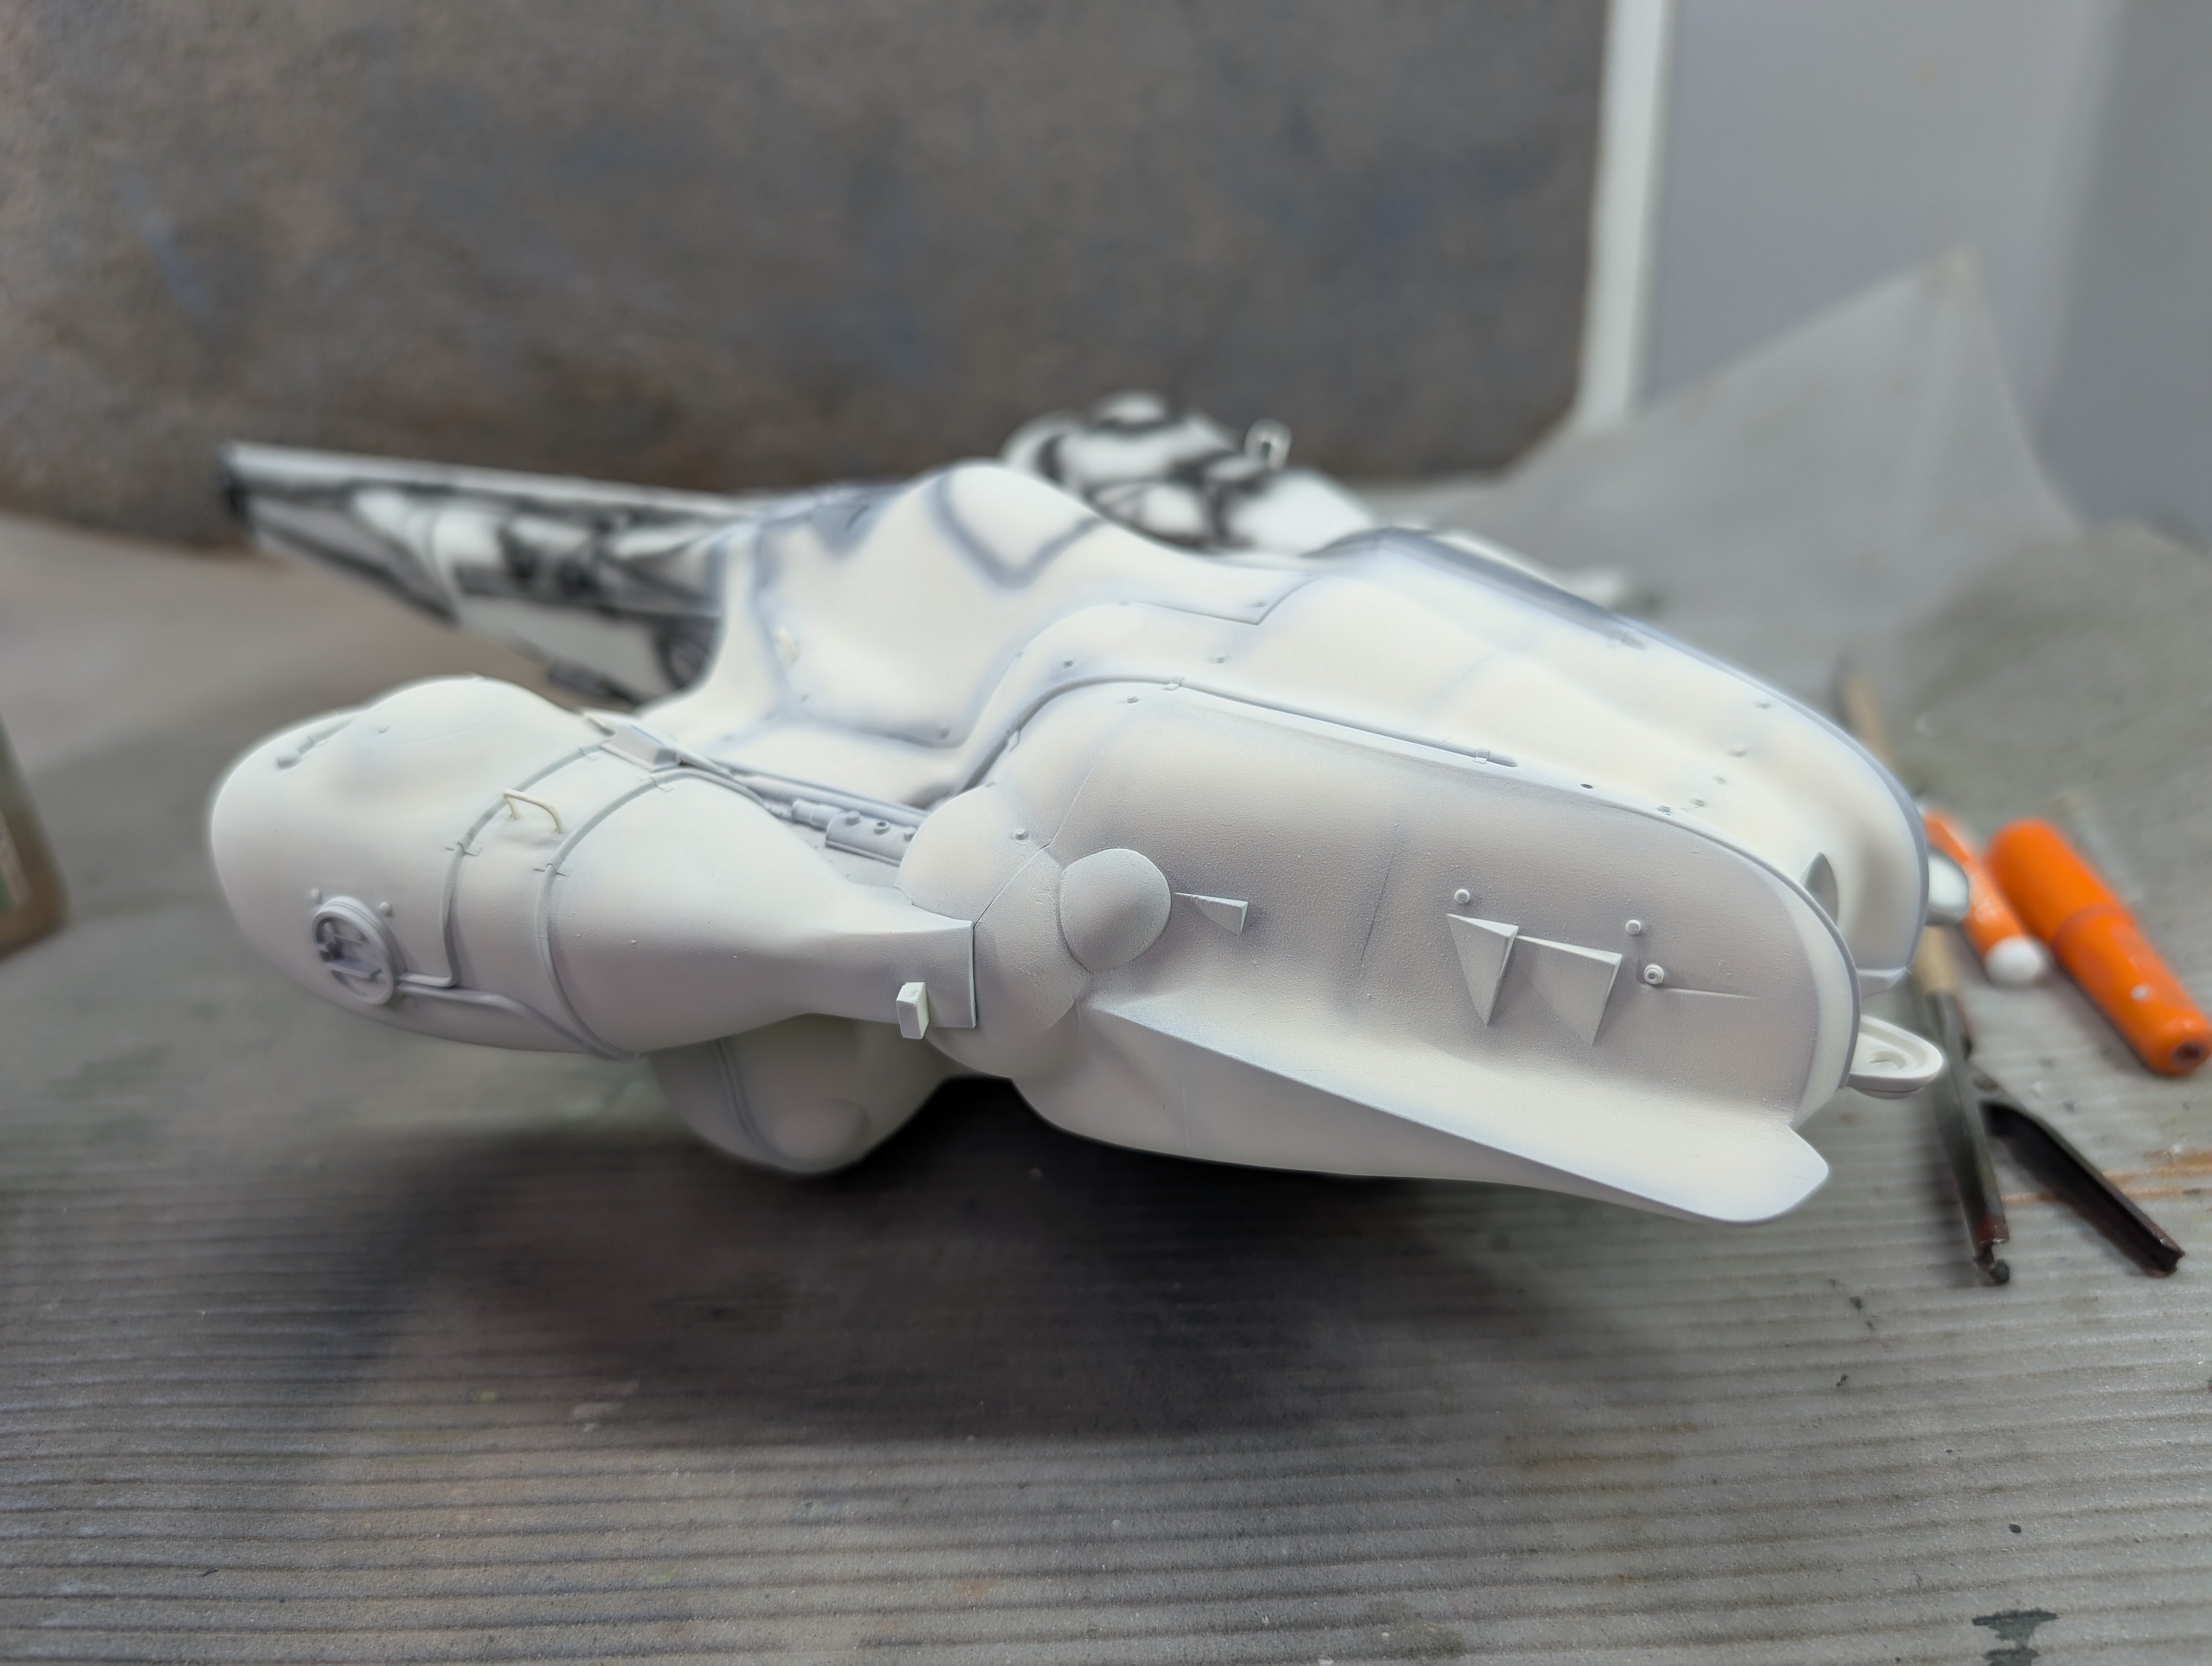
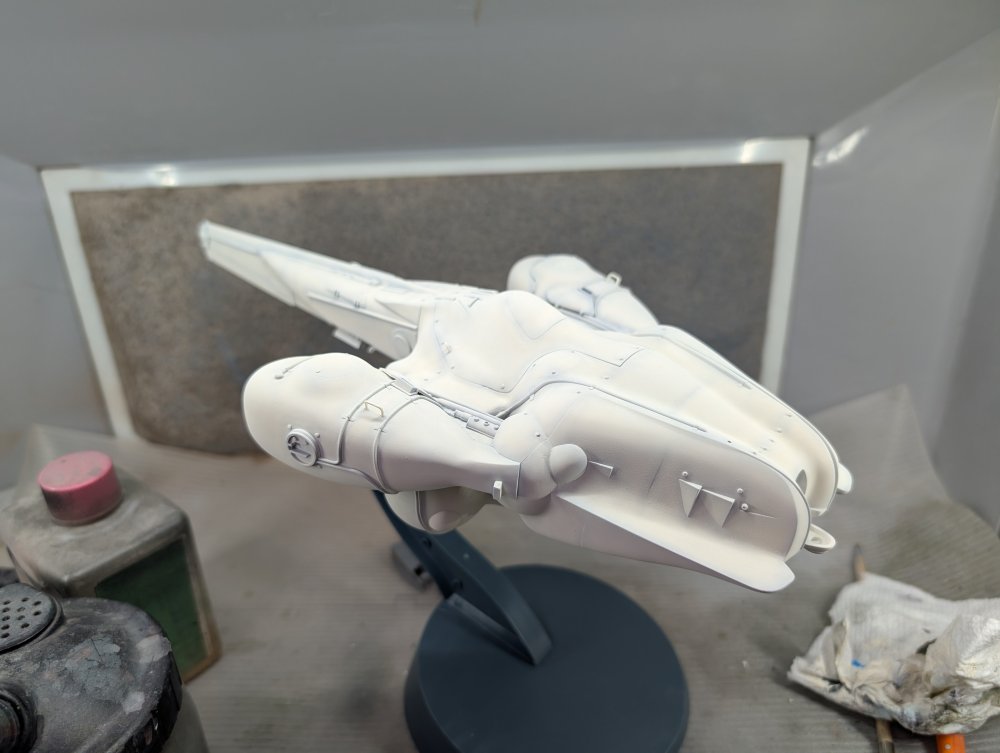
I started on the paint work for the Lunadiver. First, a coat of primer Followed by some pre-shading. At this point I noticed the missing handles I'd left off so they wouldn't get knocked off. I'll add those and then start with the colour coats.
-
The ZM B nose supposedly is a different shape to the Takom one. It's supposed to be closer to the actual drawings and have a more correct rear cockpit. It'll certainly be better than the original ZM conversion kit for the 2 seater.
-
Trumpeter Abrams 1/16
BlrwestSiR replied to FullArmor's topic in LSM 1/35 and Larger Work In Progress
Wow, looks like you're in the home stretch. -
Cobra Coupe - Le Mans - Model Factory Hiro 1/12
BlrwestSiR replied to DocRob's topic in LSM 1/35 and Larger Work In Progress
It looks just like you're plumbing a real engine bay. Nice work there including the touch ups you've had to do. -
Nice variety of items there @Count0. Spot Model is a great place to get stuff for car models. I love the VF-1 Valkyries too. I managed to grab the 1/20 Max Factory Strike Valk when it came out. It's a bit basic but it's 1/20. One day...
-
Cobra Coupe - Le Mans - Model Factory Hiro 1/12
BlrwestSiR replied to DocRob's topic in LSM 1/35 and Larger Work In Progress
Years ago when I was the warehouse manager at a wine agency I had to cover for one of the regular drivers while he was on vacation. We had 1 ton cargo vans but there was no safety barrier between the driver and the cargo area. So when I had to slam on the brakes one time a case of wine went flying from the back right between the seats and slammed into the dash. Left a sizable dent in the dash. Surprisingly none of the bottles broke. After that happened , the drivers started putting the cases at the front so it wouldn't happen again. When the vans got replaced with newer ones they asked for and got the barriers. -
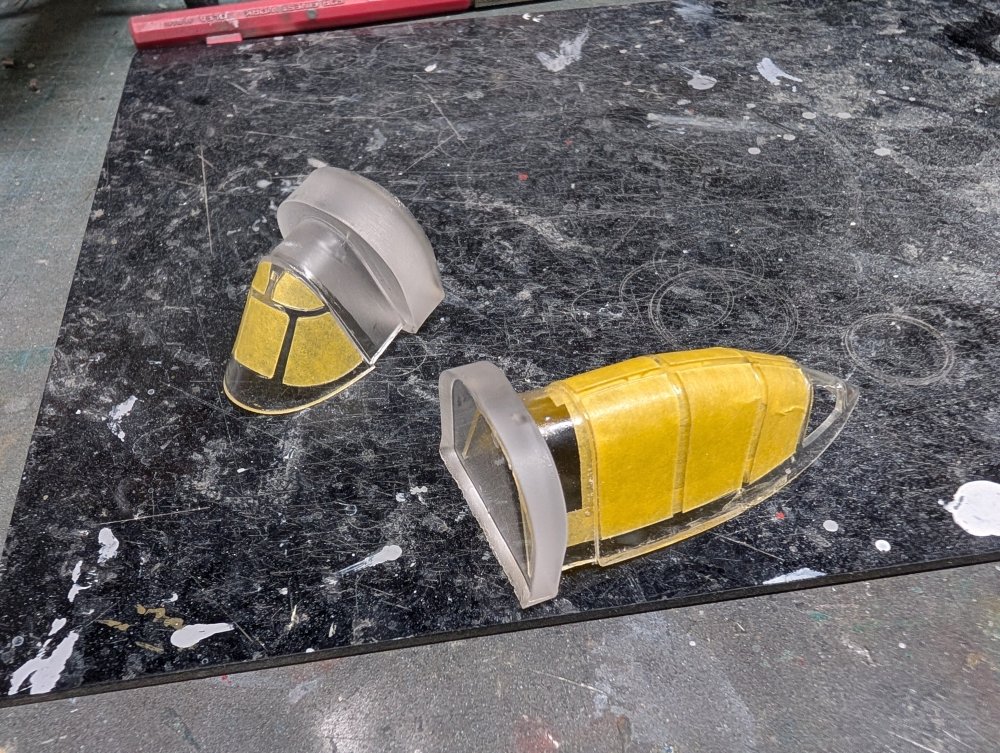
1/32 Curtiss SC-1 Seahawk
BlrwestSiR replied to BlrwestSiR's topic in LSM 1/35 and Larger Work In Progress
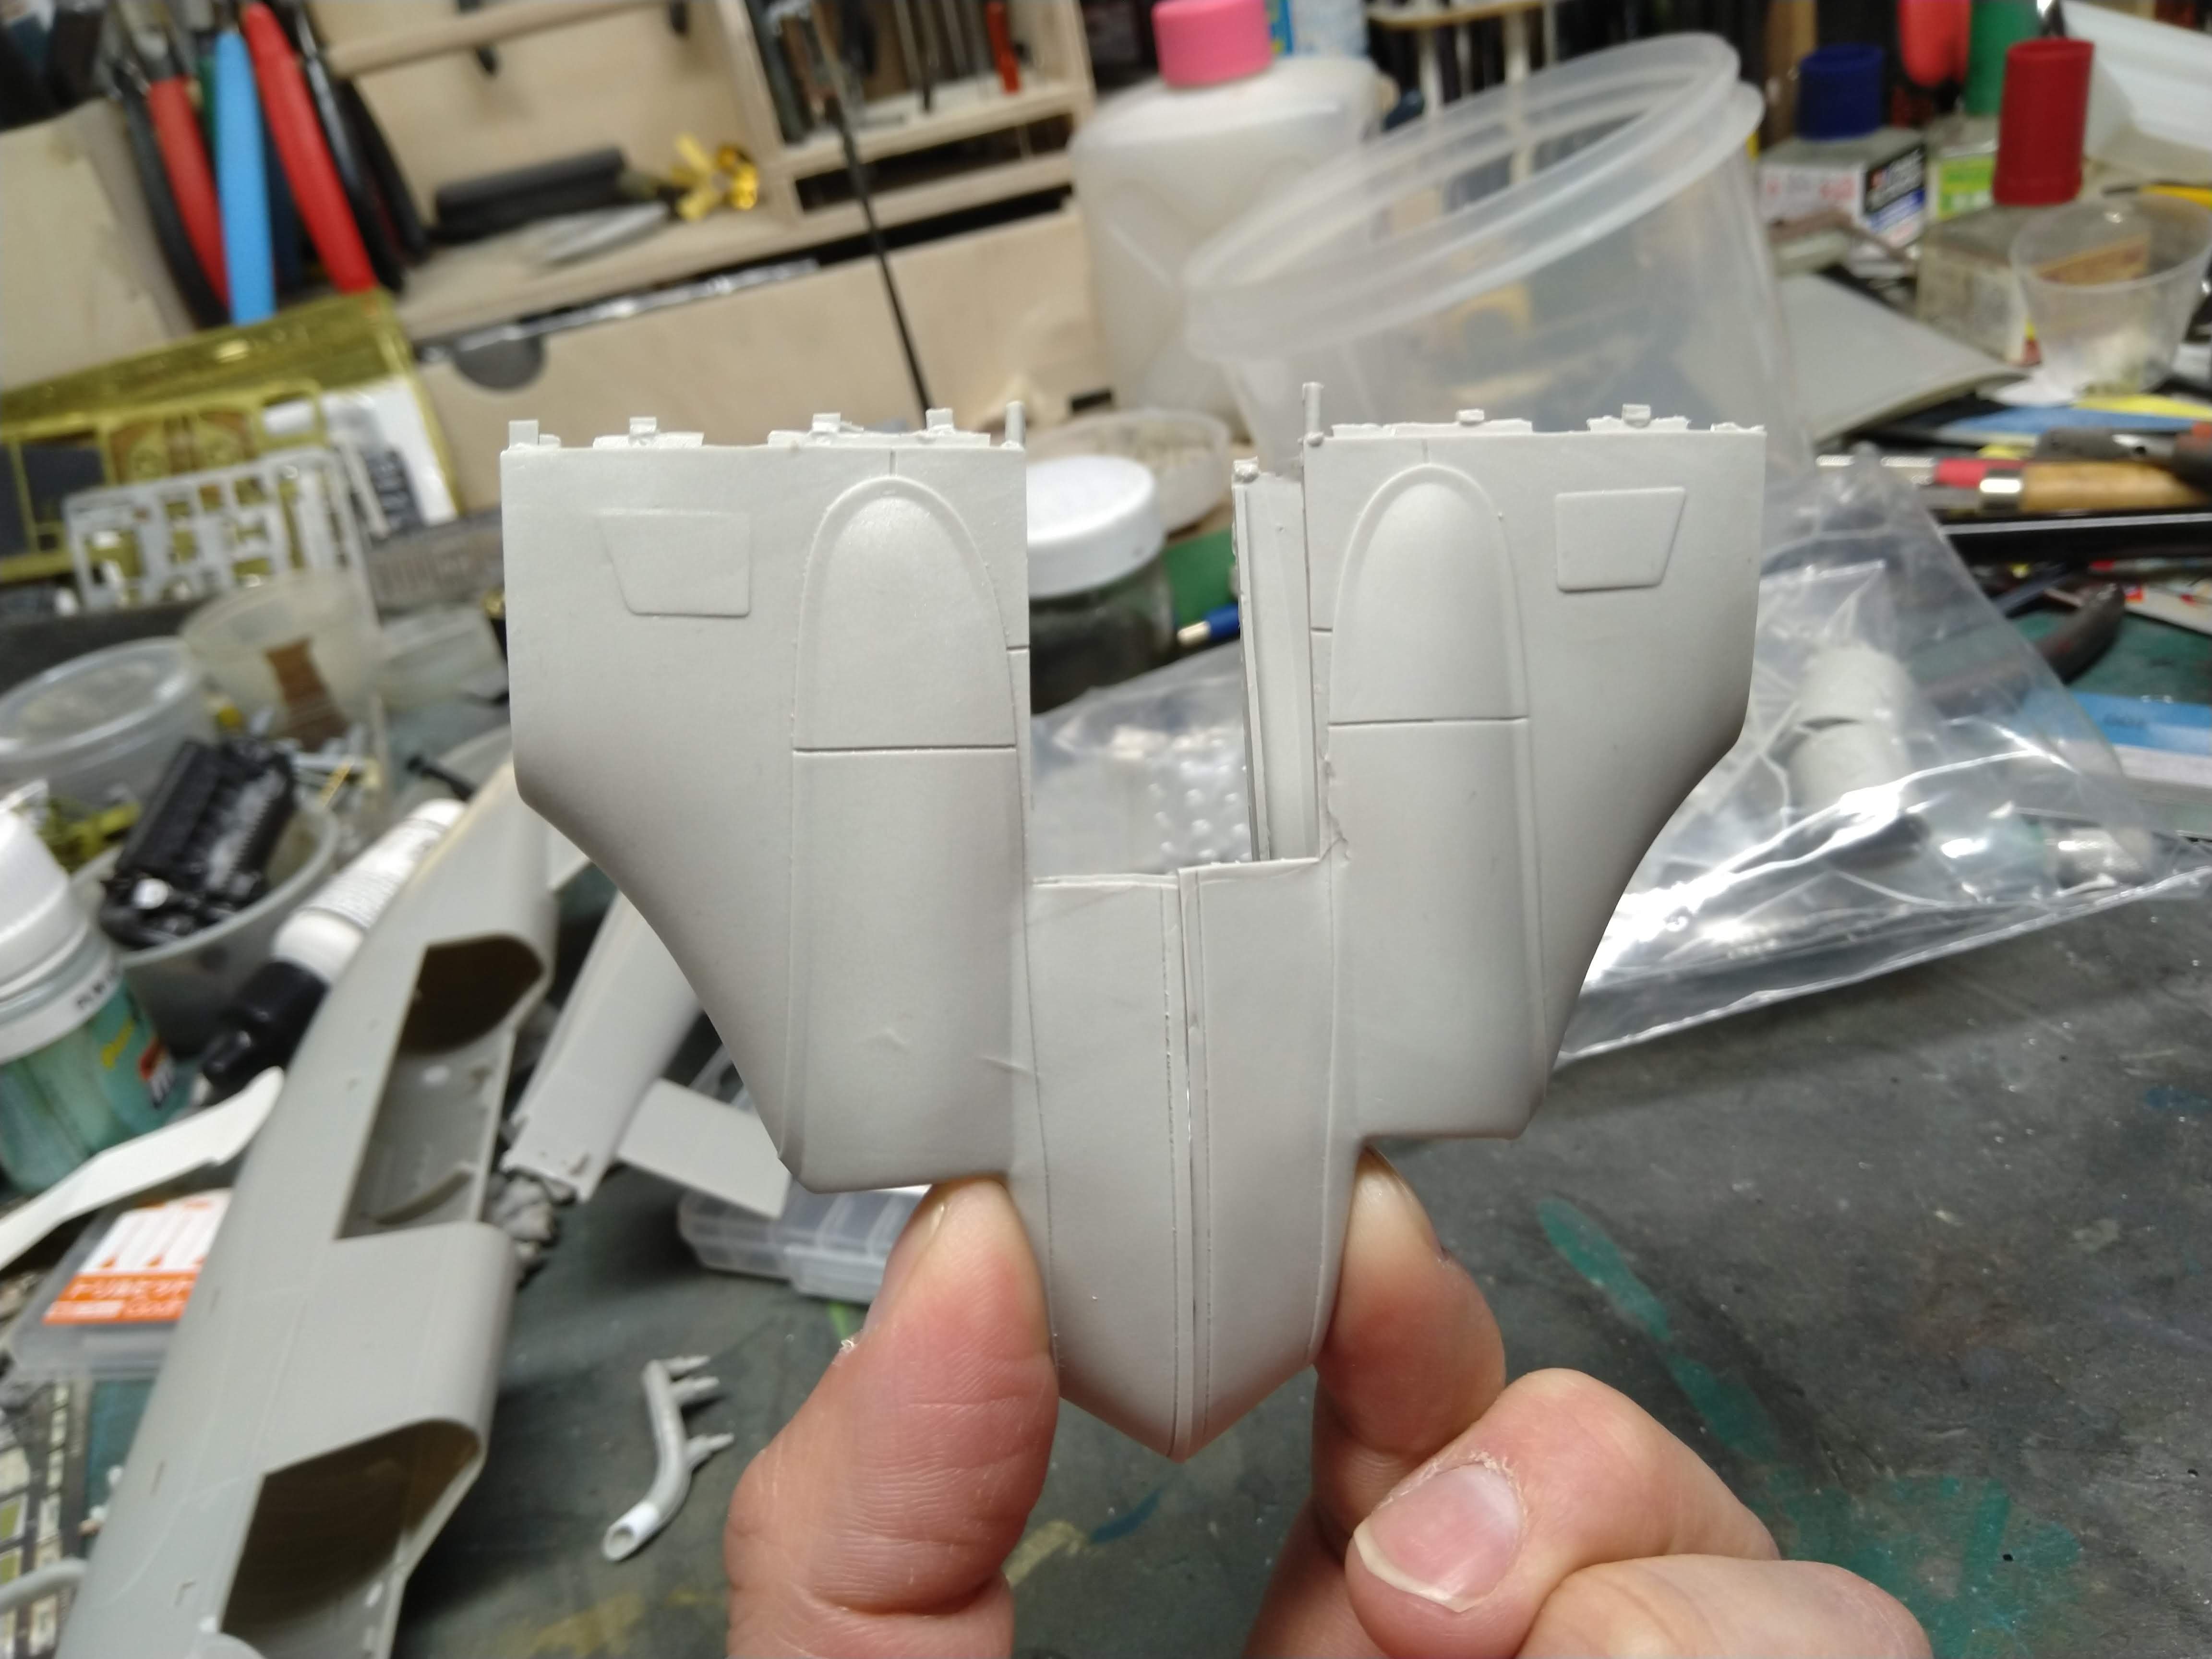
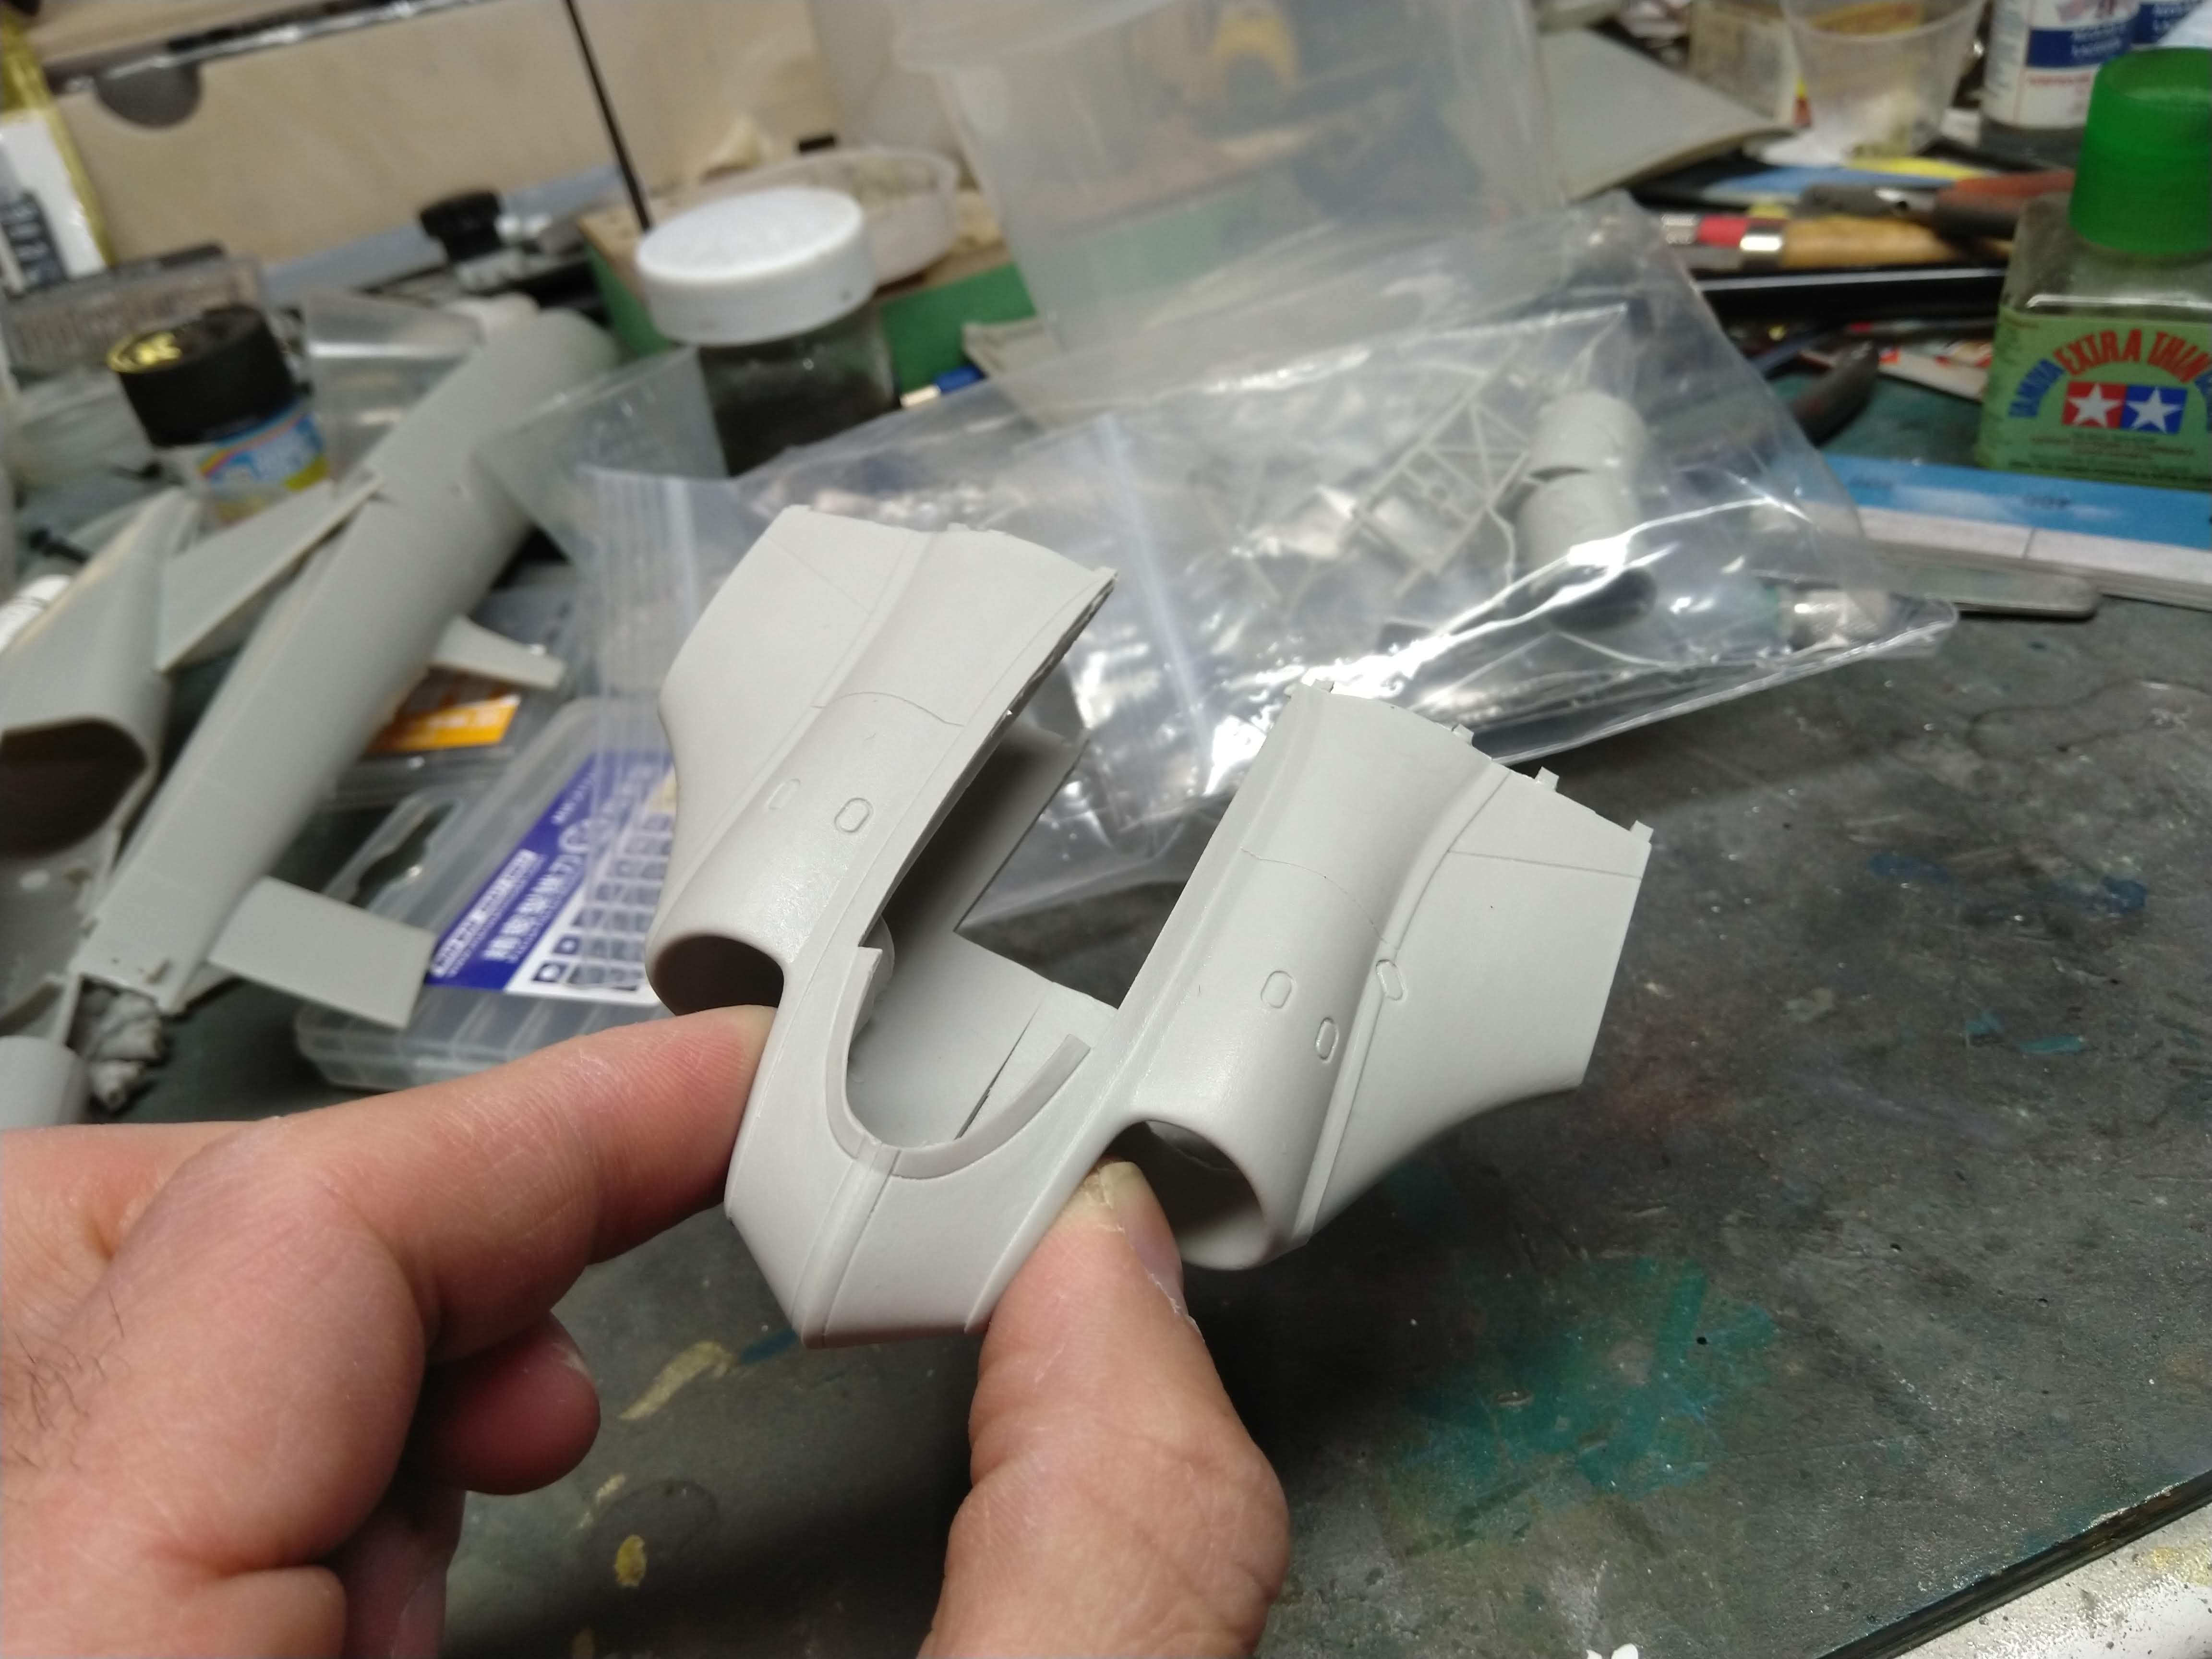
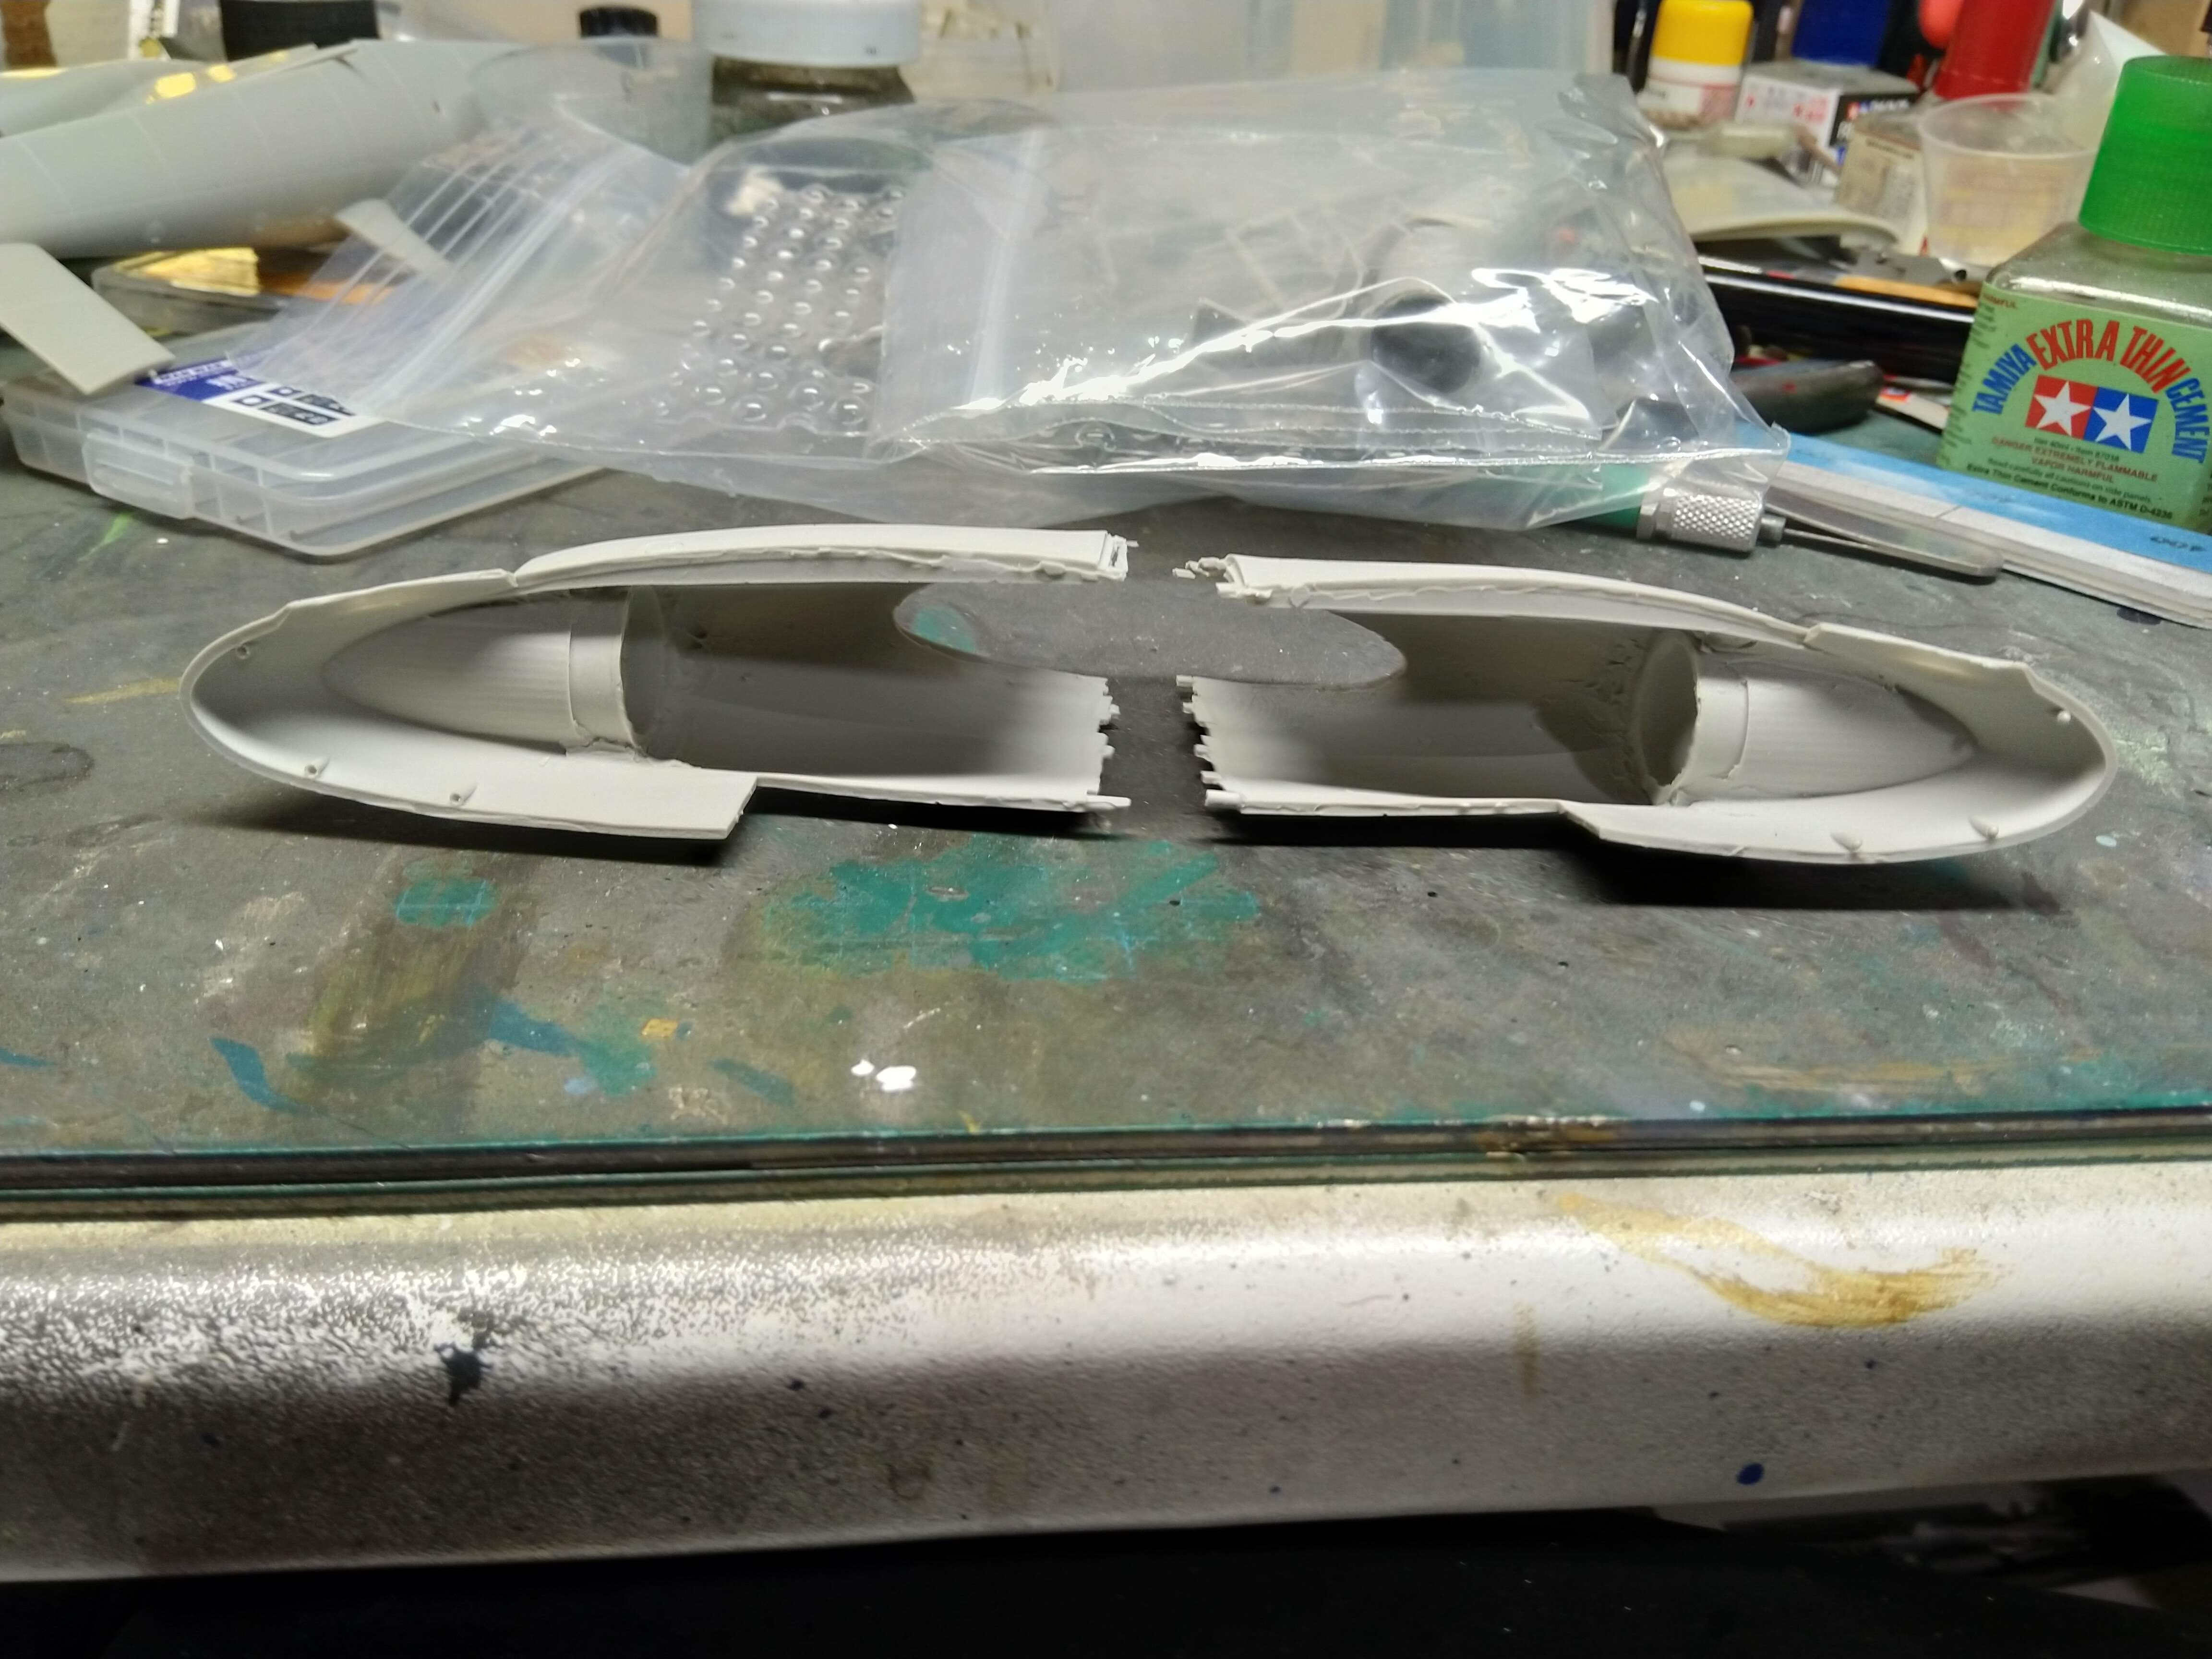
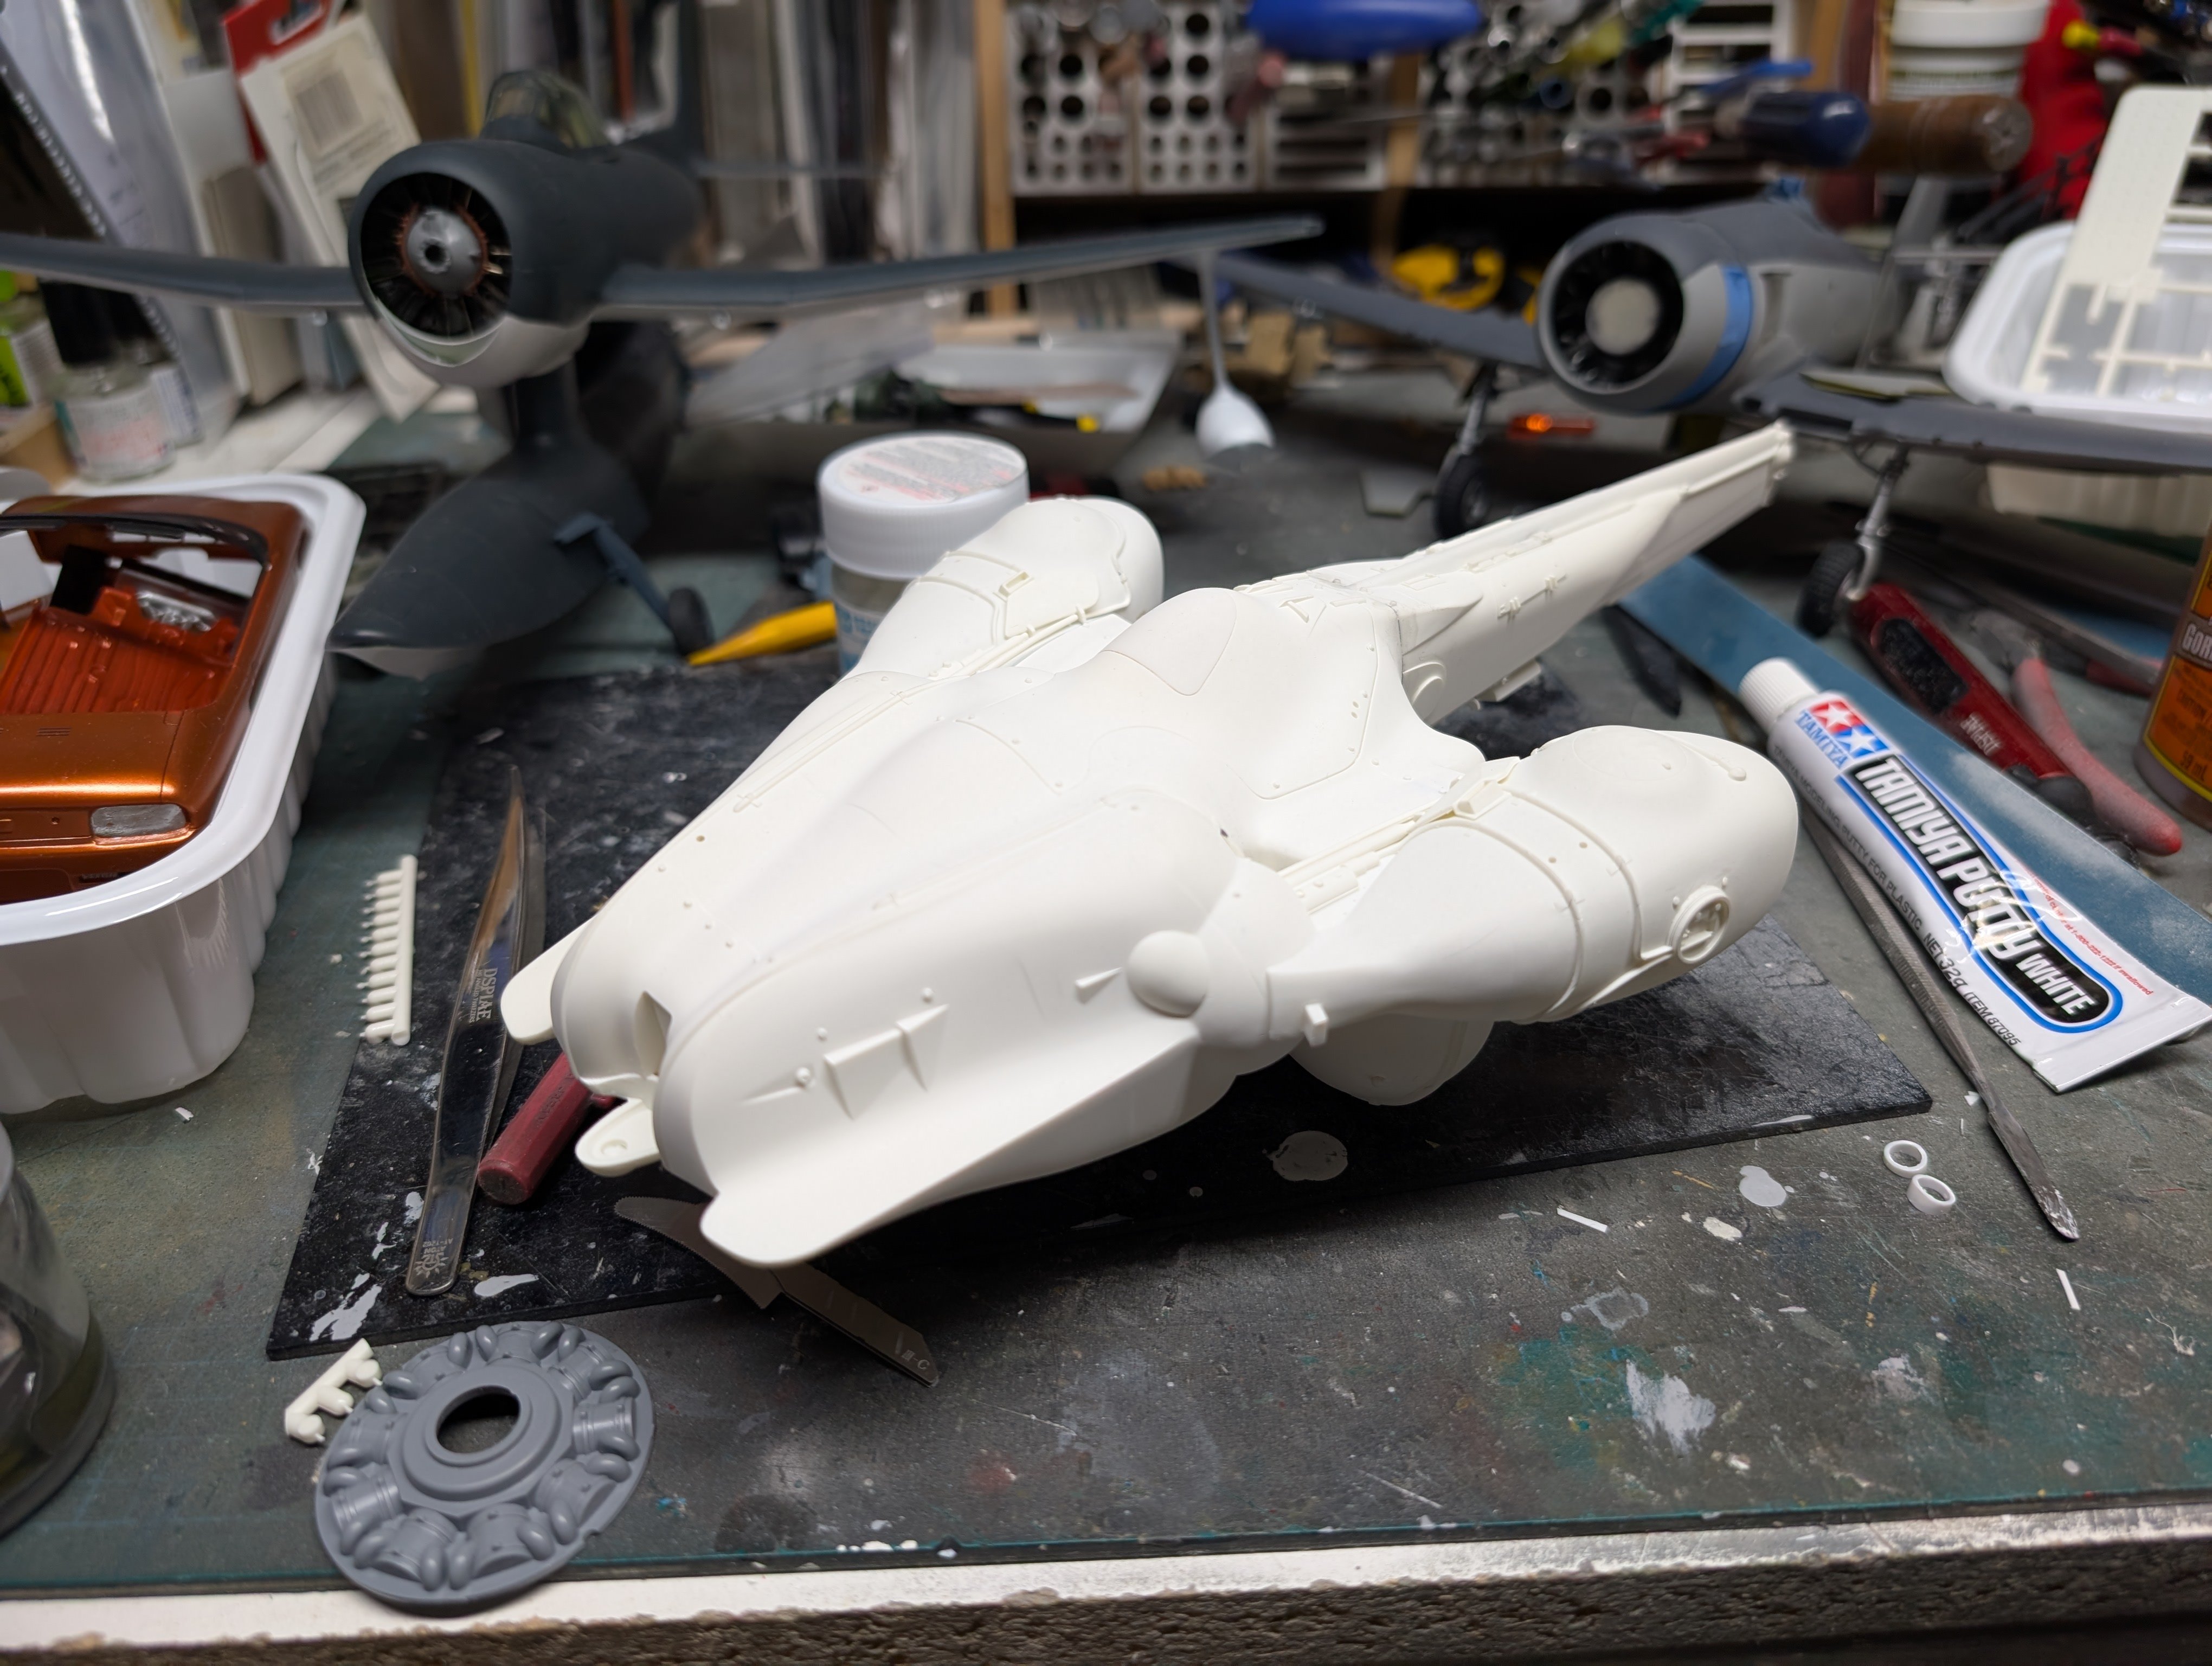
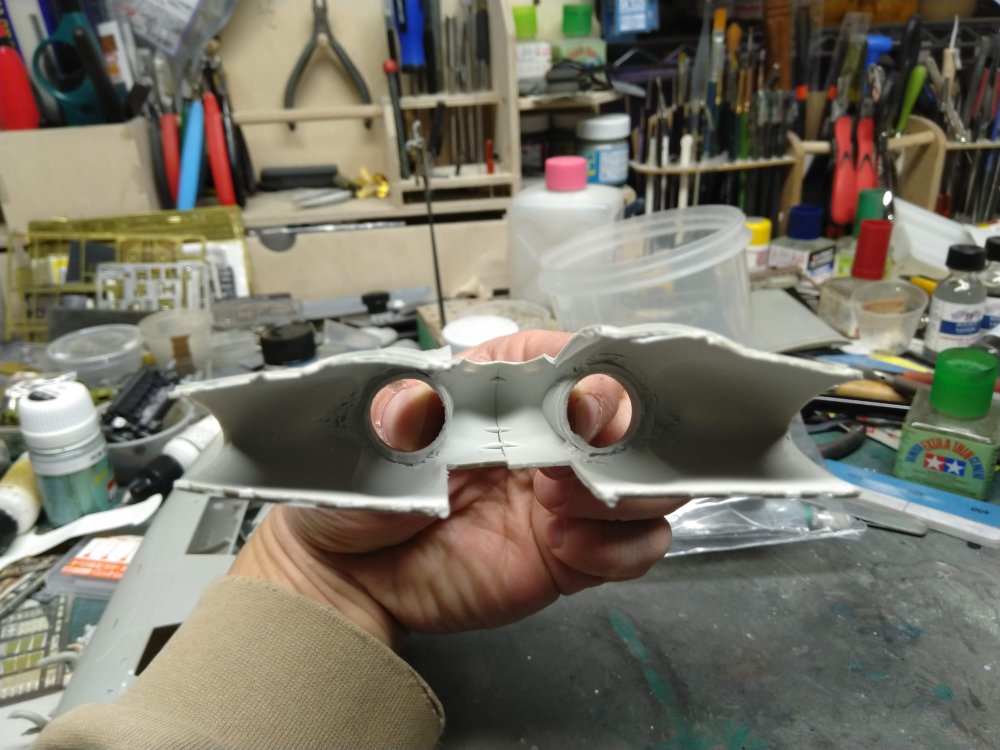
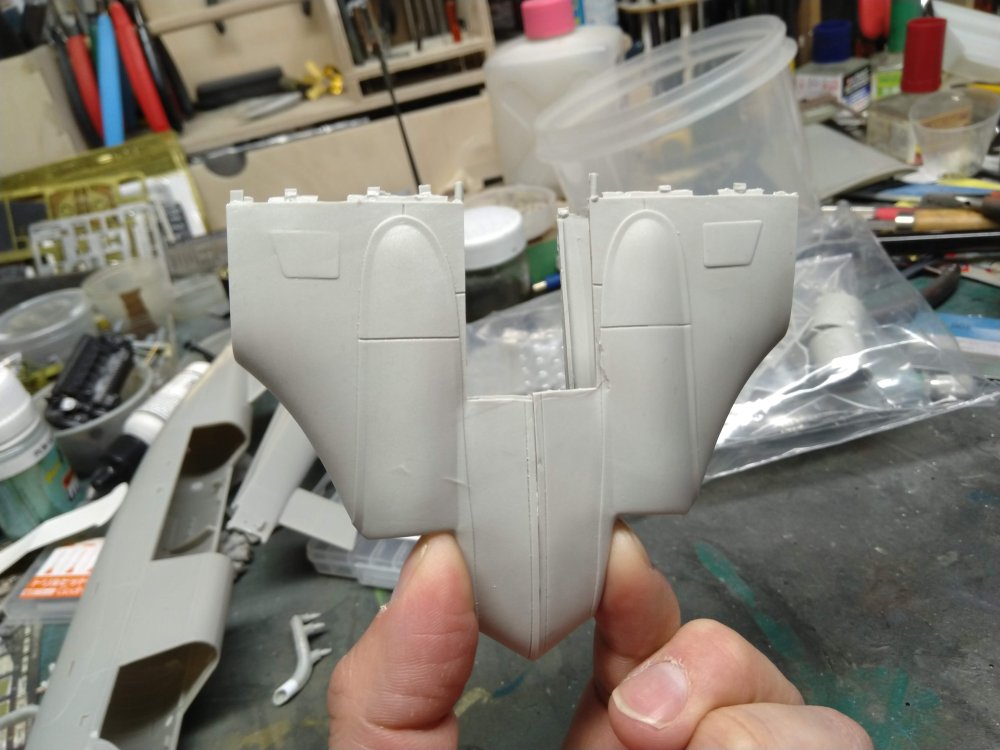
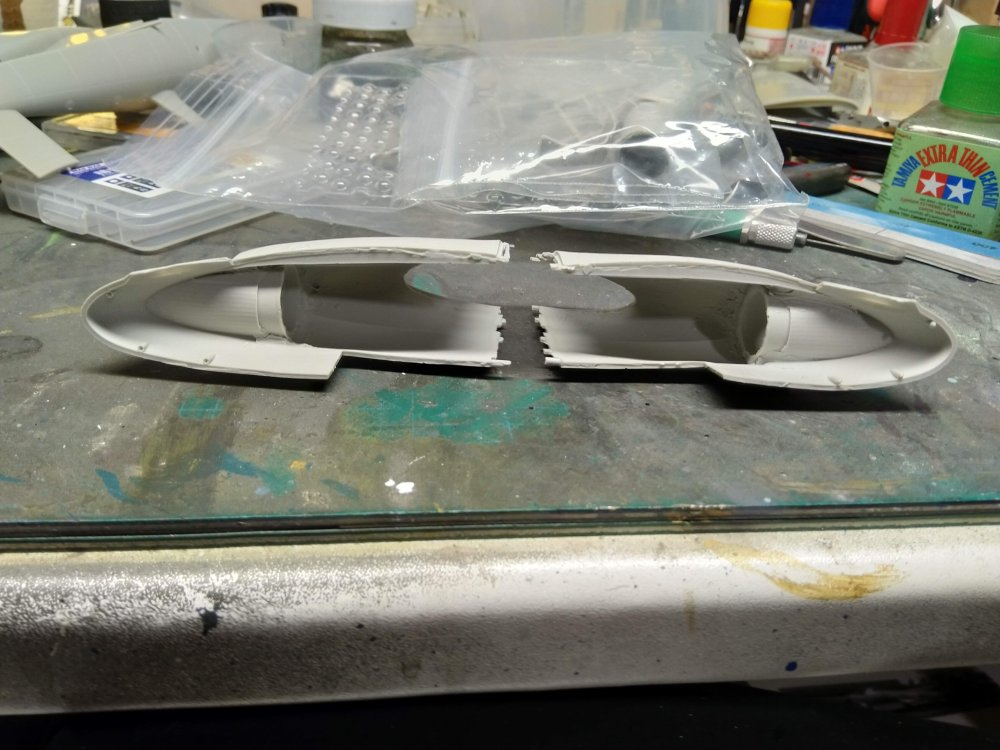
Hey look, an update. Lots of squirrels running around since we're approaching spring but I managed to spend a bit of time on the Seahawk. I was kinda hoping someone would do a masking set for the Seahawk but it wasn't to be. So I did it the old fashioned way with tape and a knife. I then cut the canopies from the pour stubs. Might have been easier to have down that first but hey, squirrel!!! First up was a coat of interior green Then a coat of Gloss Sea Blue. I forgot to grab a pic before I removed the masking tape.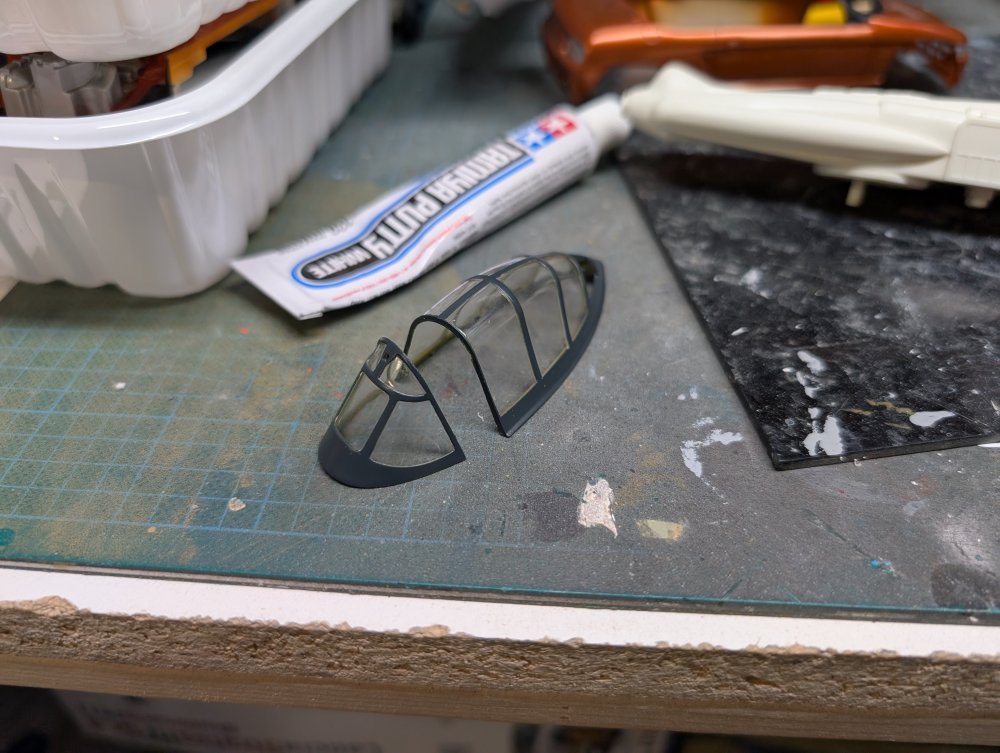

-
What is on your bench right now ? Share a picture :)
BlrwestSiR replied to Martinnfb's topic in Modelling Discussion
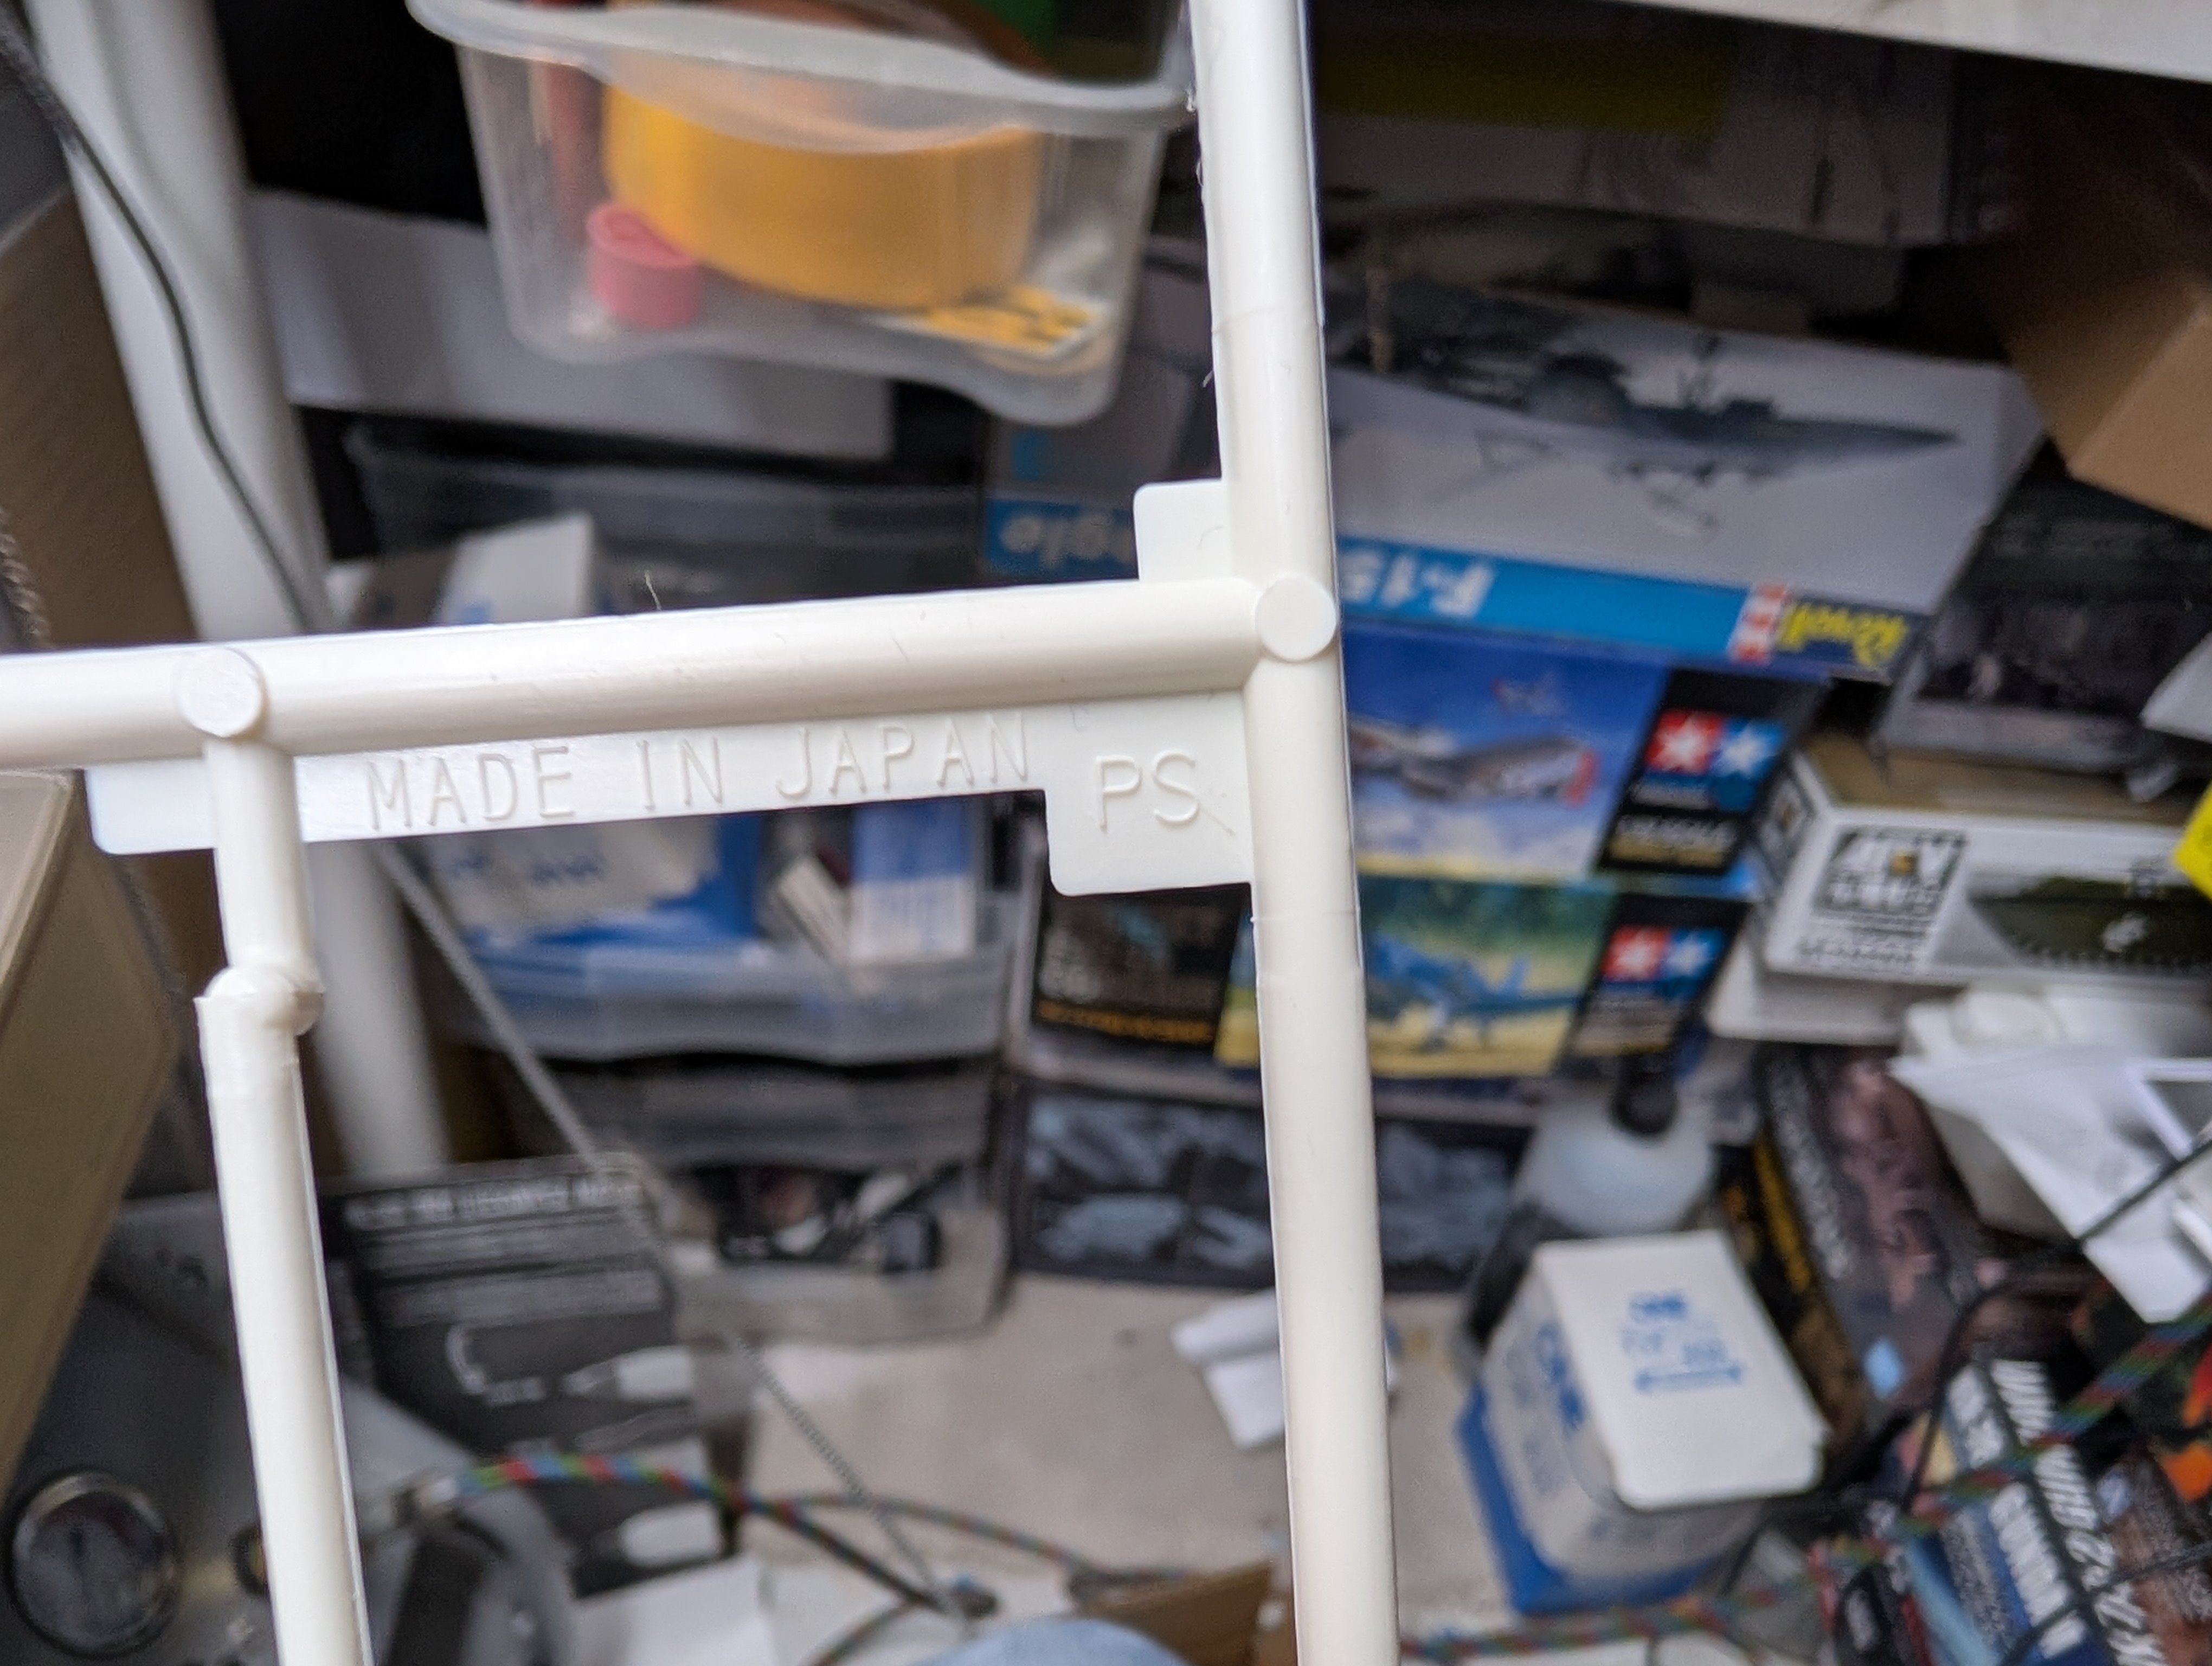
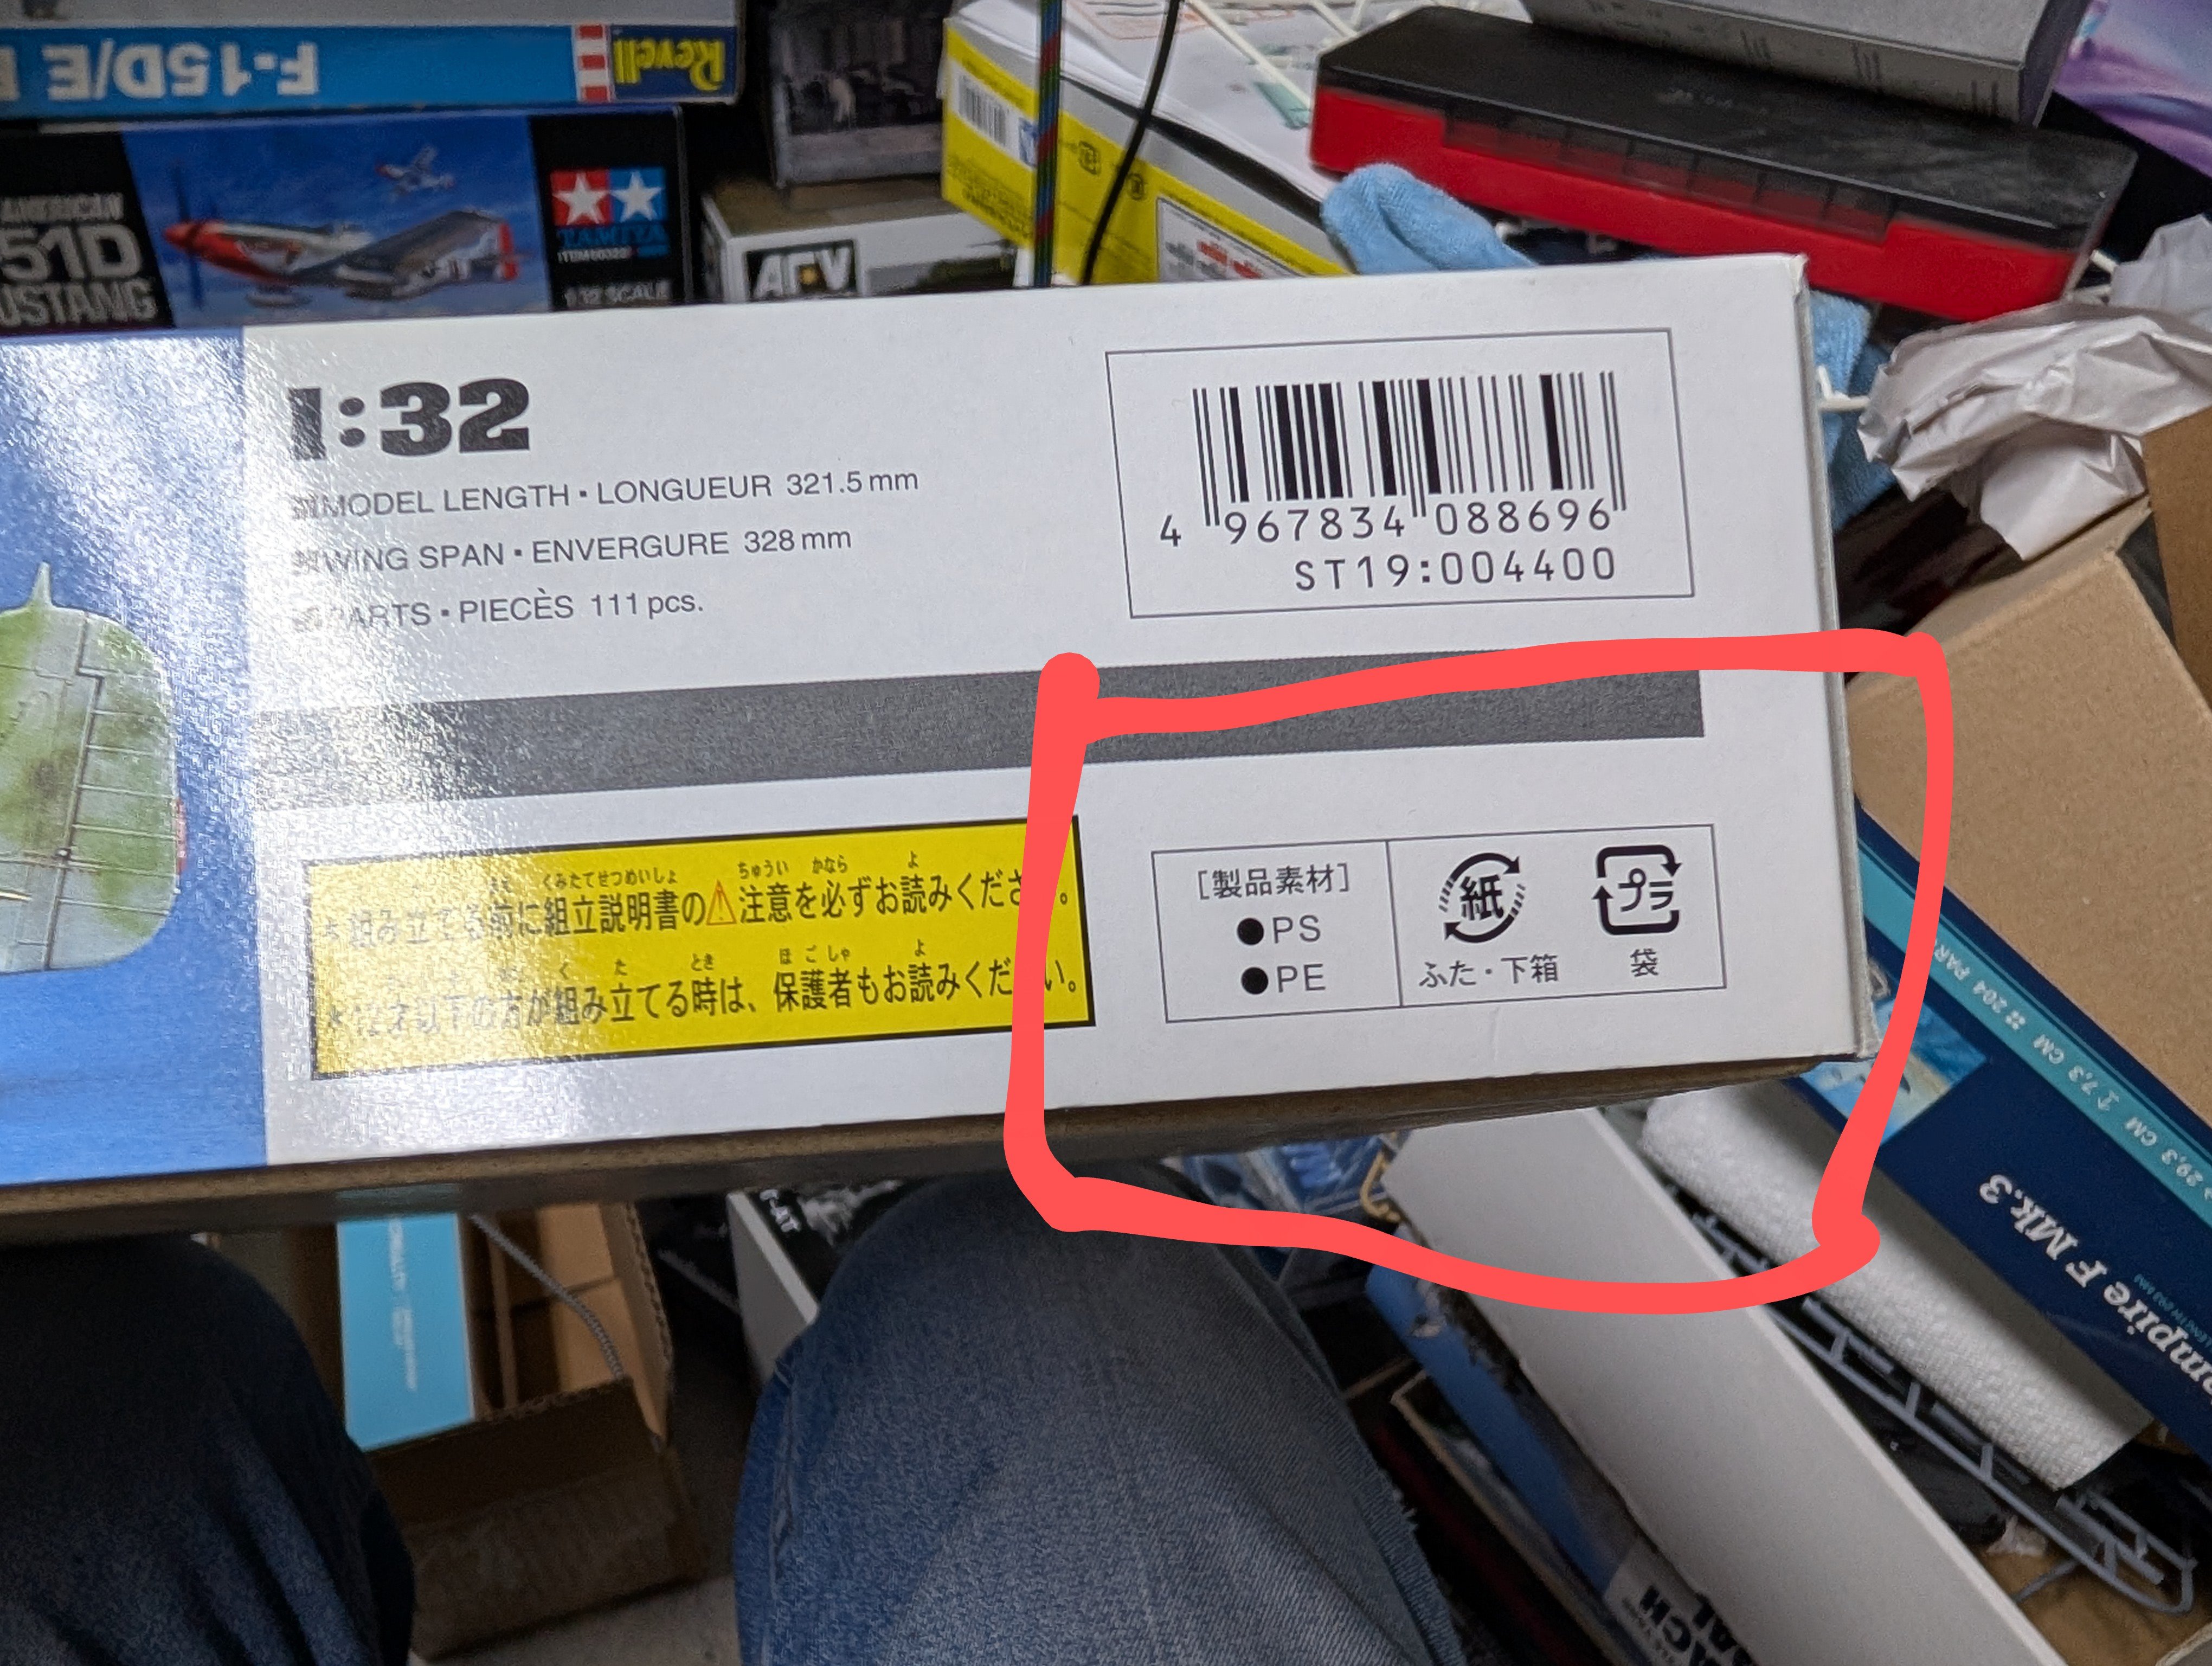
There's also a couple ways to tell on Japanese kits what type of plastic is used. Almost all Japanese kits list on the box the type of plastic, especially those from about the last 20 years or so. On the kit box, there will be a small info box that says what materials are in the box. So for example, on this Hasegawa FW190 D box, it shows PS and PE. The PS is polystyrene, PE is polyethylene (for the poly caps). No ABS. If a kit has multiple plastics in it, you an check the sprues themselves. Look for a tag moulded onto the sprue. On one side it will have letters identifying the type of plastic. So PS for polystyrene again. As far as I can tell, this applies to Japanese kits from roughly the last 20 years or so. Earlier ones may not be so labelled. So hopefully this helps out.

-
Another P-40E to P-40K build!
BlrwestSiR replied to ScottsGT's topic in LSM 1/35 and Larger Work In Progress
Oh I know that feeling. We just got a quote to get the space under the kitchen dug out and turned into a usable room. There's currently no foundation under the kitchen. So that's going to be dug up, a foundation wall built and sump pump installed. It will give us a bit more space in the basement and hopefully finally eliminate the risk of our pipes freezing. It does mean I'm going to have to take down the modelling bench. That could be a real challenge in getting things out away. So I best finish some of the stuff on it. -
What is on your bench right now ? Share a picture :)
BlrwestSiR replied to Martinnfb's topic in Modelling Discussion
Paul, the Hasegawa kit should be regular styrene. I'm fairly sure the Wave kit is as well. -
Rest in peace Harv. I'm glad to have known you, even if we never got the chance to meet in person. Carl