Landlubber Mike
-
Posts
1,275 -
Joined
-
Last visited
Content Type
Profiles
Forums
Events
Gallery
Everything posted by Landlubber Mike
-
Airfix Hurricane Mk IIc SEA Command Pelel Airfield.
Landlubber Mike replied to BradG's topic in Non LSM Ready for Inspection.
Nicely done! -
The Scharnhorst 1/200 by Trumpter-Operation Paderborn
Landlubber Mike replied to KevinM's topic in Non LSM 'WIP
That's actually not bad at all. I have the 1/200 Trumpeter Bismarck in the stash - was worried at what that would cost me! -
The Scharnhorst 1/200 by Trumpter-Operation Paderborn
Landlubber Mike replied to KevinM's topic in Non LSM 'WIP
Wow, looks great! Are you doing glass or acrylic for the panes? Probably not inexpensive given the size! -
Thanks man, looks like I missed it unfortunately. I'm sure I'll find someone on eBay looking to sell it with the AM at some point. I picked up my other ZM kits on eBay for much less than retail with all or almost all the AM. For some reason, ZM kits don't command much resale value.
-
Thanks Hubert and Peter for the kind words! I still feel like very much a novice compared to some of the stellar works on here, but thank you!
-
Maybe one day Peter if I can find it for a good deal. It does look like a nice kit. I have a few of ZM's other offerings that I'd love to tackle someday, just want to get my skill set up a bit.
-
Oh wow Peter, I'm a bit late to the party but the engines came out incredible! And those Quinta electronics decals are quite impressive as well. This is turning into quite the epic build!
-
Special Hobby 1/32 -Tempest Mk.VI -Egypt 1949-Finnished
Landlubber Mike replied to KevinM's topic in The Sandbox Group Build.
It's coming together quickly Kevin - looking great! Glad to hear the airbrush problems are resolved. -
I love their lacquer paints, haven't tried using their Aqueous line. Use Mr. Color Leveling Thinner - I usually go 1:1 or up to 1:2 paint to thinner. Personally, I found them to be very good paints that spray really well and leave a hard finish that you can sand if need be. I've never had their paint pull up from being taped. I'm trying to move more to Vallejo to stay with healthier acrylics, but find myself using Mr. Color more and more. They have a lot of colors, more so than Tamiya which makes finding the exact color call out very easy. I try not to brush paint with them, but only to do very minor touchups. Otherwise, I treat Mr. Color like Tamiya and use them in an airbrush.
-
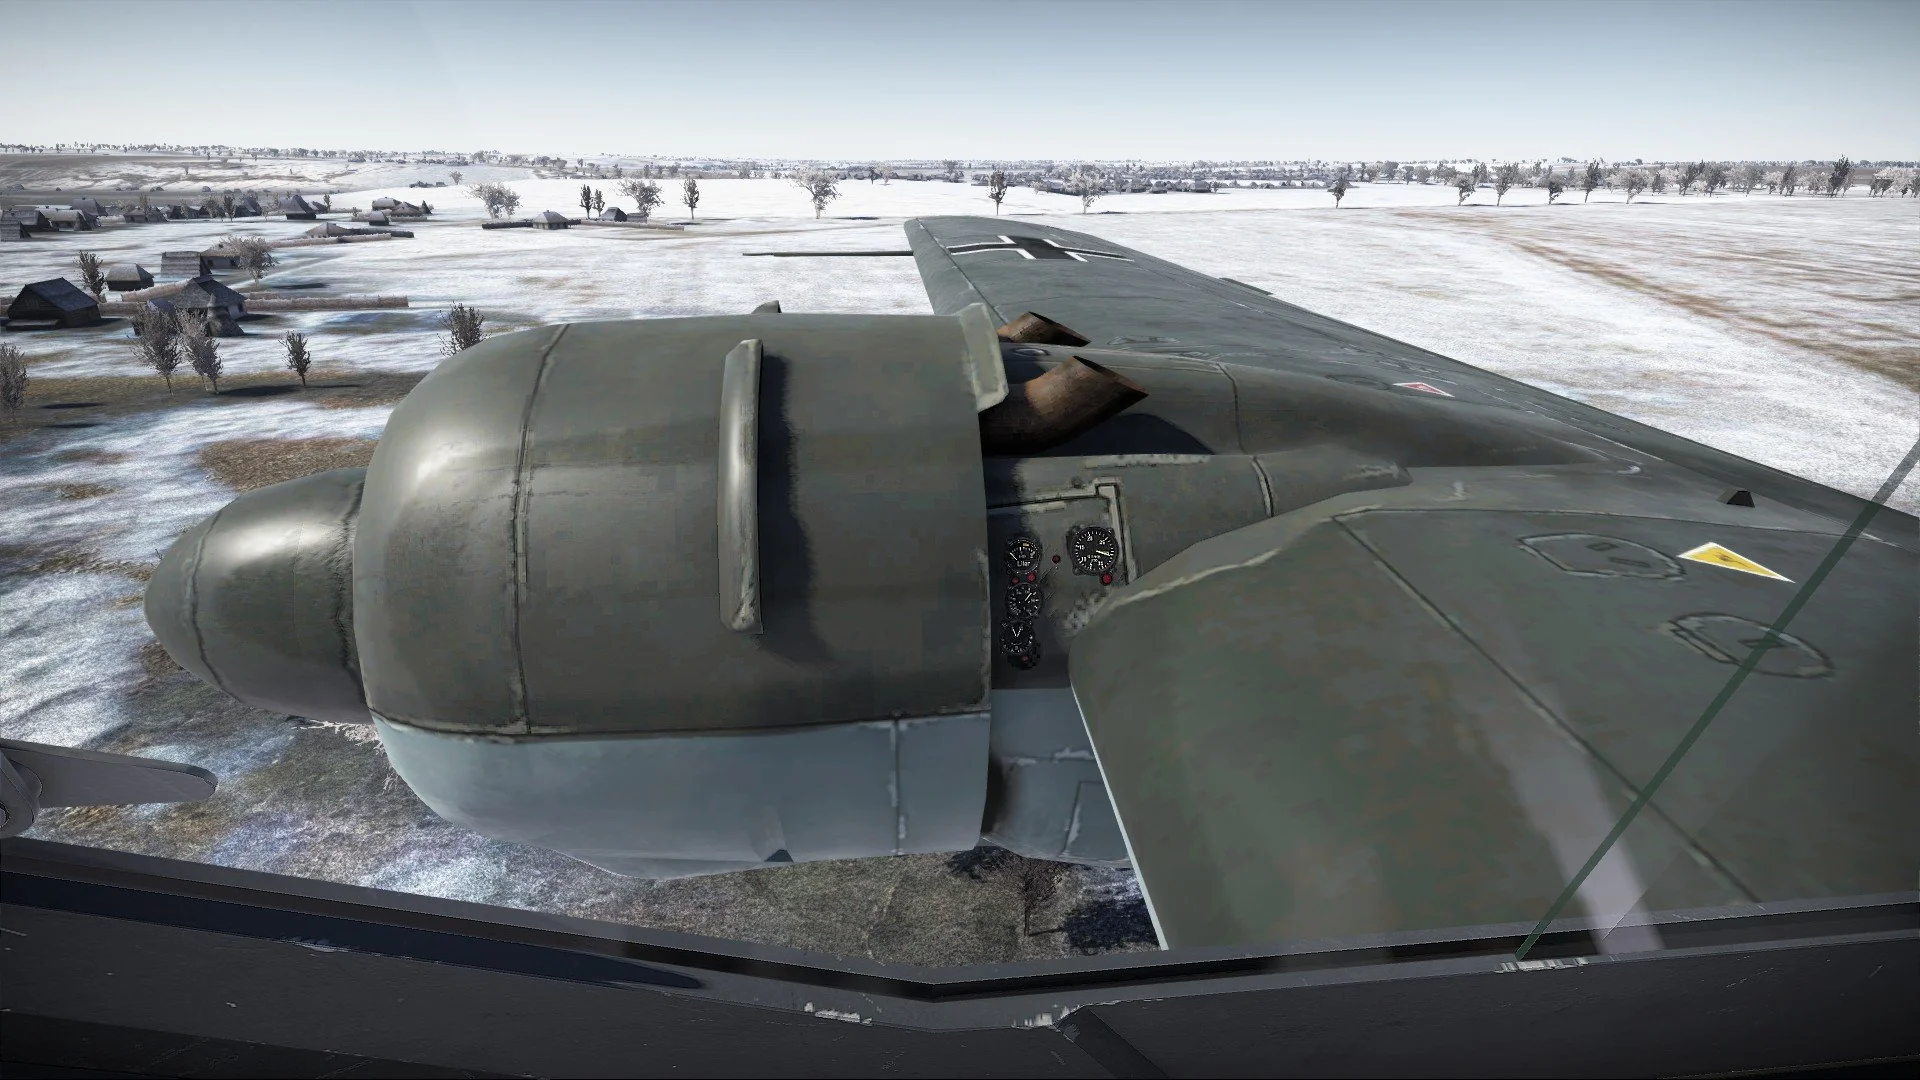
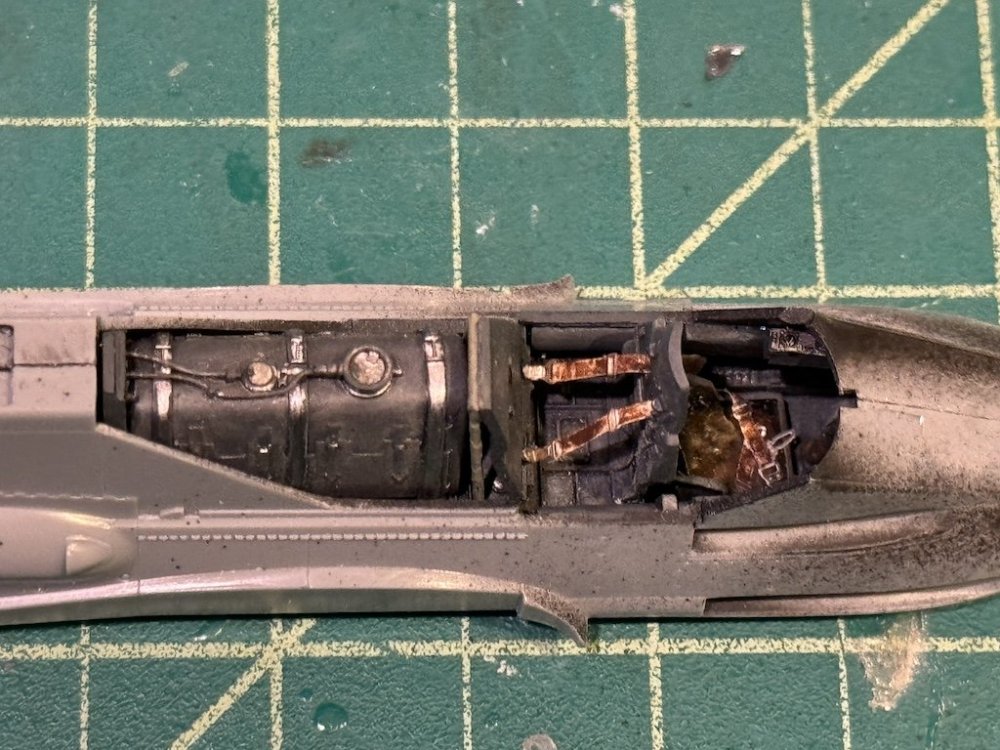
In fact, the cockpit is so small, a number of the instrument gauges had to be located outside of the cockpit and onto the engine gondolas:

-
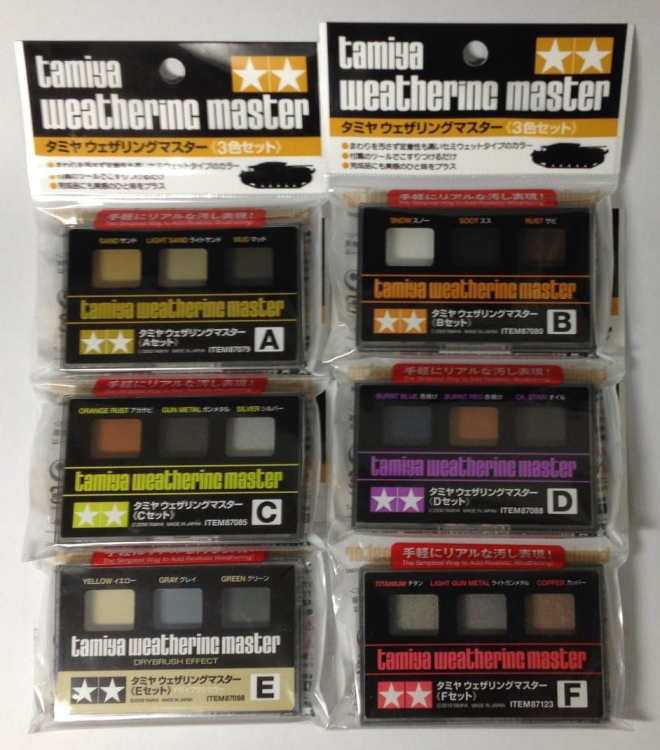
You can always reapply the chalks after the clear coat if needed. I think I used some of the Tamiya products on my Buffalo build for the first time prior to the final clear coat and saw that the clear muted the effect of the weathering. So, a quick application after the clear dried and I was back in business. You already have the chalks, but just to let you know, I found the Tamiya products very easy to apply. You can get cheap makeup brushes to apply the different colors, but so far I've just used the same brush that comes with the packs. I'm a big fan as they apply easily with no cleanup needed, and really help get very subtle tonal modulation.
-
Those custom printed parts look amazing Hubert! And thanks for outlining how the process works!
-
Hey Chris, looks great! I tried some of these Tamiya weathering products on my JRS-1 which I think act like your chalk. I similarly noticed that they really help blend colors and add a bit more of a matte finish. I read though that you can't really add a clear coat on top as the effect of the weathering product disappears. I was thinking about getting some sand weathering pigments to add more of a dust effect on my sandbox builds as well. Always learning something new - I've said it before, but there are so many products and applications now that it's a whole different world than when I was a kit and painted with Testor's enamels in those little glass bottles and called it a day.
-
Thanks Peter! The kit is a repop of a 25+ year old Hasegawa kit, but wow, I'm not used to parts fitting together so well. The cockpit tub and fuselage halves just snap all together for a very tight fit. If building the kit out of the box, you don't need much filler at all, except maybe to deal with seam lines. The CMK sets offer a ton of detail. I forget where I found the detail sets, but someone was offering most of them as part of a package for a fairly low price. I ended up adding a bunch more from Aires, Verlinden, and Taurus engines, so probably spent as much on the two kits and AM as I would have if I had just bought the Z-M kit. The Z-M kit looks really nice, and offers you plenty of options for open hatches, engines, etc., which makes it a lot easier as you don't have to modify third-party AM to fit. If I had known this plane was this small, I probably would have just gone with the Z-M kit. That being said, it's been a lot of fun building the Hasegawa kit - definitely a different experience from the JRS-1!
-
Yeah, I was surprised how small it was when I opened the box. I was originally planning to get one of the Zoukei Mura offerings, but thought it would be a huge model in 1/32. I haven't worked on too many planes, but it's not much bigger than the FM-1 Wildcat I built a year or two ago - maybe just a wider wingspan. Given the size, maybe I'll go for the ZM offering in the future. They have a B-2 version similar to the ones I'm working on, and also a B-3 with the big BK 7.5 cannon. I'd love to build another in a winter camo scheme. This zebra pattern looks really cool to me:

-
Thanks Rob! yeah, it's a really cramped cockpit. Definitely not ideal if you were claustrophobic!

-
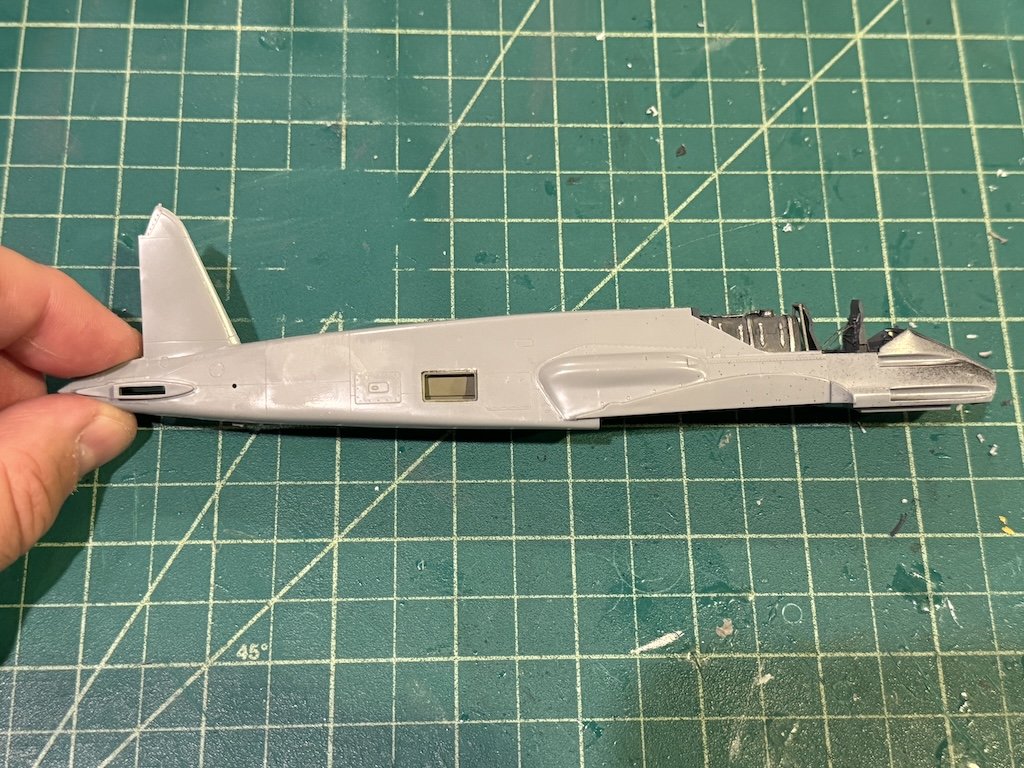
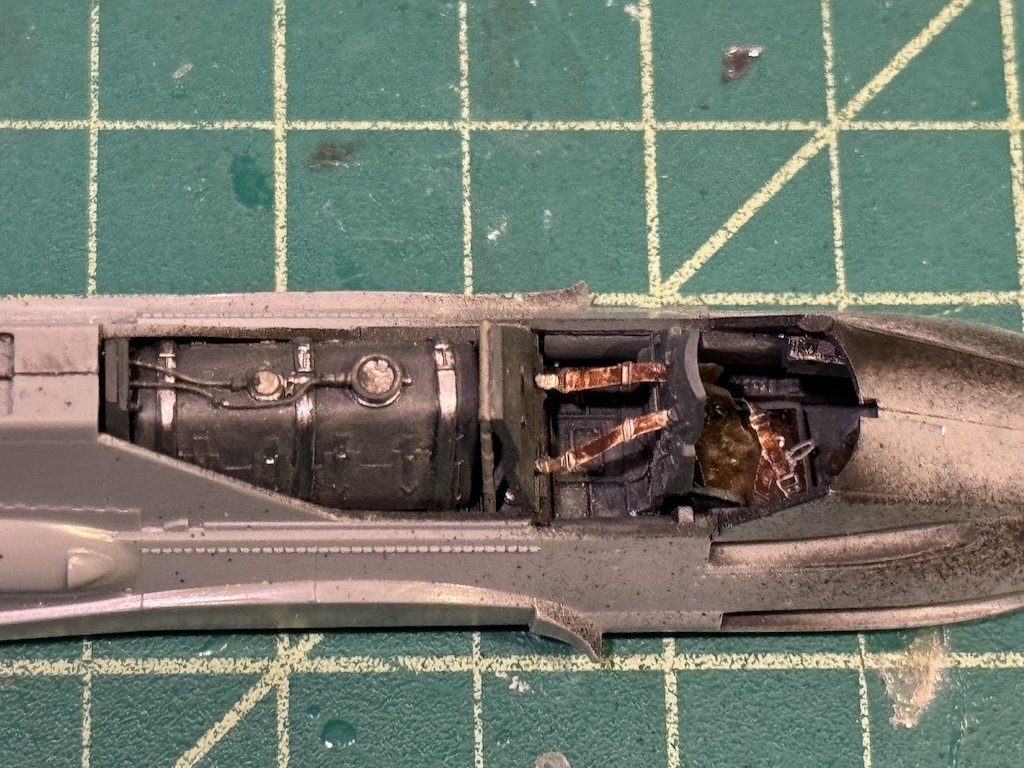
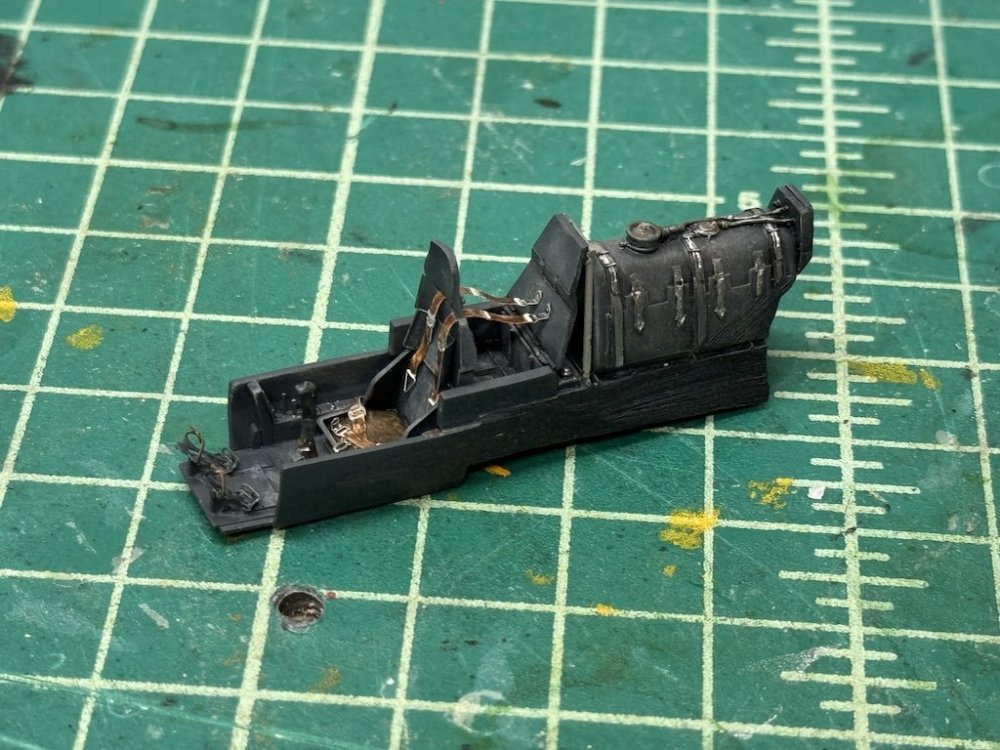
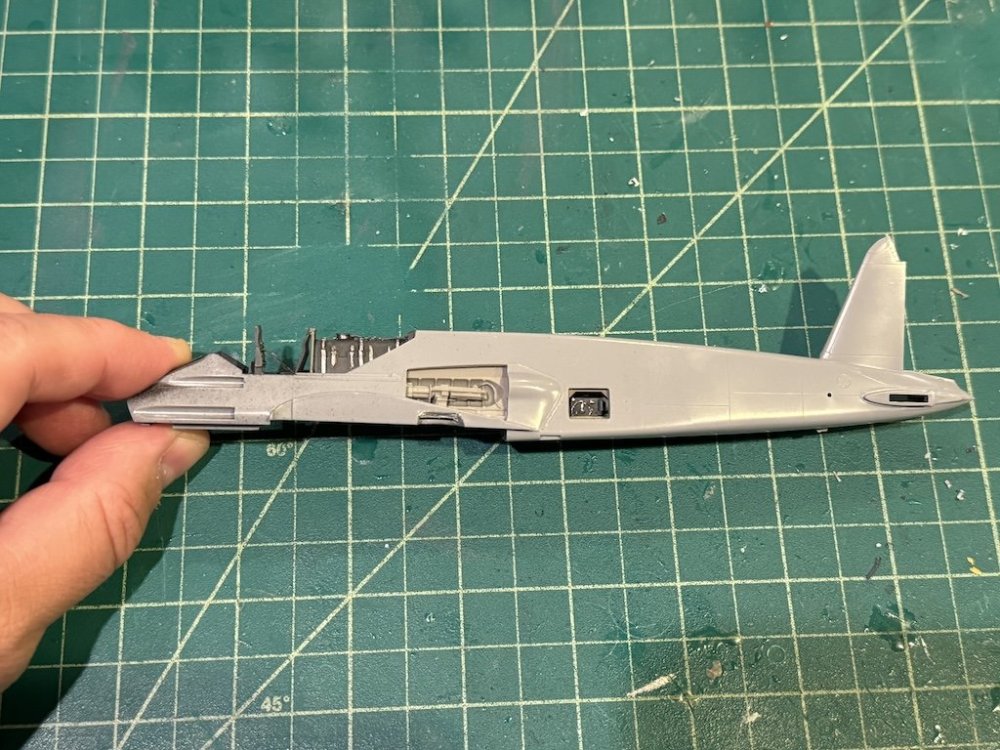
Some progress on the two Hs 129s. The first one with all the aftermarket has taken quite a bit of time to get the detail pieces installed. The CMK sets individually fit well, but there is quite a bit of work to make them all fit together. Here is the CMK cockpit set - I still need to add wires between the seat armor plate and the firewall for the fuel tank. I also have to finish up painting the seat belts: Here it is installed with the fuselage halves closed. Took quite a bit of time test fitting to get the fuselage halves to close properly, but eventually I got there: Left side of the fuselage showing the MG 151 (from Aires set) and FuG 7 radio (from CMK armament set): Right fuselage with open luggage compartment (from CMK armament set): I also closed up the fuselage on the second Hs 129. Because the cockpit was covered in a tarp in the picture I'm reproducing, I didn't do much in the cockpit aside from adding the cockpit tub. The fit on the kit is incredible - the two fuselage halves and the tub snapped together perfectly! The only other change I made was to (1) cut off the rudder, since I have a one-piece rudder in the Verlinden set, and (2) close up the insertion points for the horizontal stabilizers/elevators, since those were left off the Hs 129 as it was being towed. Can't really see it well in the picture, but I inserted a piece of plastic strip, with three holes drilled out as seen in some of the pictures of wrecked Hs 129s. Thanks for looking in!


-
Nicely done PW! I love your dioramas - always bring a model subject to life.
-
Way to think outside the [sand]box! Looking forward to this one!
-
You look spot on Chris - it's just a very crazy scheme. I love it!
-
Looks really sharp Chris with the decals on, wow! I have to say though, this scheme really is rough on the eyeballs!
-
Special Hobby 1/32 -Tempest Mk.VI -Egypt 1949-Finnished
Landlubber Mike replied to KevinM's topic in The Sandbox Group Build.
Nicely done Kevin - seat and belts are especially nice! -
Hasegawa 1/32 Bf-109 F-4-Finished
Landlubber Mike replied to KevinM's topic in The Sandbox Group Build.
Came out great Kevin! Love the camo scheme! -
I have the Vallejo clears but haven’t really used them yet. I have only used them for interior items or to hand brush where I want a flat coat for a particular part surrounded by parts of a different finish. I’ve also used them to touch up things like CA spots where I break something off and need to glue it back. A little matte and the shiny CA spot is gone. I’ve used Testor’s Dullcote in similar situations, but I’m looking to minimize the product lines as much as possible. Difficult though as products from different brands tend to have different strengths and weaknesses, so some seem better in certain applications than others. On the multiple builds, I tend to get burned out and need a mental break from a build, or I get stuck and can’t figure out what to do (like the rigging on my Walrus or the cowl ring on my Brewster Buffalo) so I put my energies and excitement into something new. Or, I’ll have similar enough kits so will bucket them together for efficiency- I have a few 1/700 ship models that are 95% done, but I’m going to finish them together by building their sea diorama bases st the same time. That being said, I’m pretty much spending all my energies doing the sandbox builds given that I’m trying to complete two before the deadline. I did take a couple of evenings to work on some 1/700 aircraft for a Japanese army escort carrier that I started a while back. With how easily the Hasegawa Hs 129 kits are falling together, I figured I’d torture myself with some 1/700 PE to keep me on my toes. There are certainly times I wish I went full bore on a subject like you do! I try to keep physical and mental notes on where I am on builds, but sometimes I lose track of what I’m supposed to do or even where I put the parts.
-
Looks so good Chris! The Eduard instructions are one thing, but seeing the camo in 3D on the model itself is quite another. Really striking scheme for sure. On the subject of glosses, I forgot to mention that I've also used the Mr. Super Clear in a rattle can. It works pretty well, and is very easy to spray compared to Tamiya rattle cans where I've found it's better to decant as the nozzles on the Tamiya cans tend in my experience to spit, etc. Do people still use Future to gloss coat before weathering/decaling? I think I tried it once or twice when I first got back into plastic models, but haven't since as I've had the [irrational?] fear that it just won't do the job as well as products specifically designed for modeling. Would hate spoiling a nicely built and painted model with a bad gloss coat.