Landlubber Mike
-
Posts
1,276 -
Joined
-
Last visited
Content Type
Profiles
Forums
Events
Gallery
Everything posted by Landlubber Mike
-
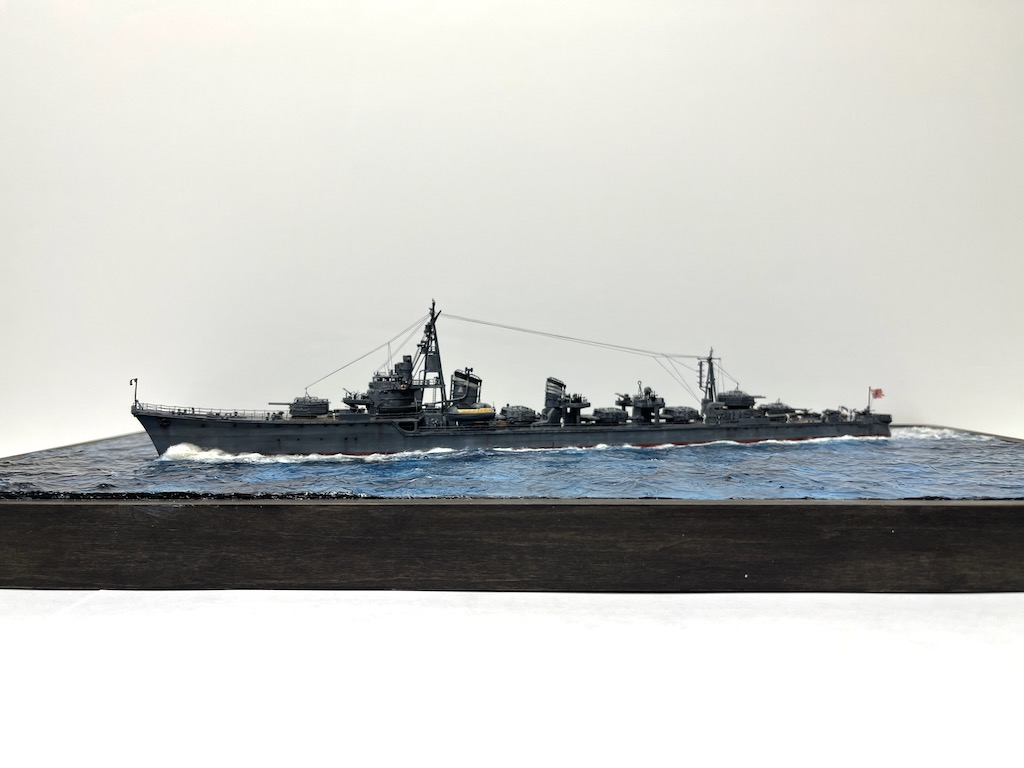
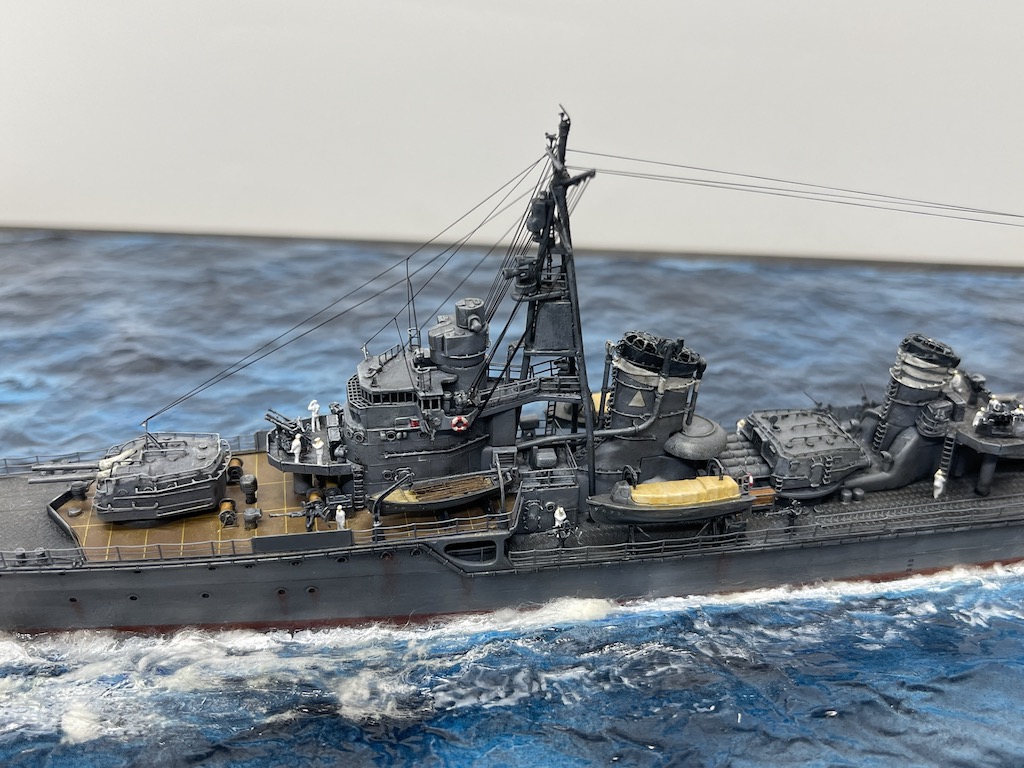
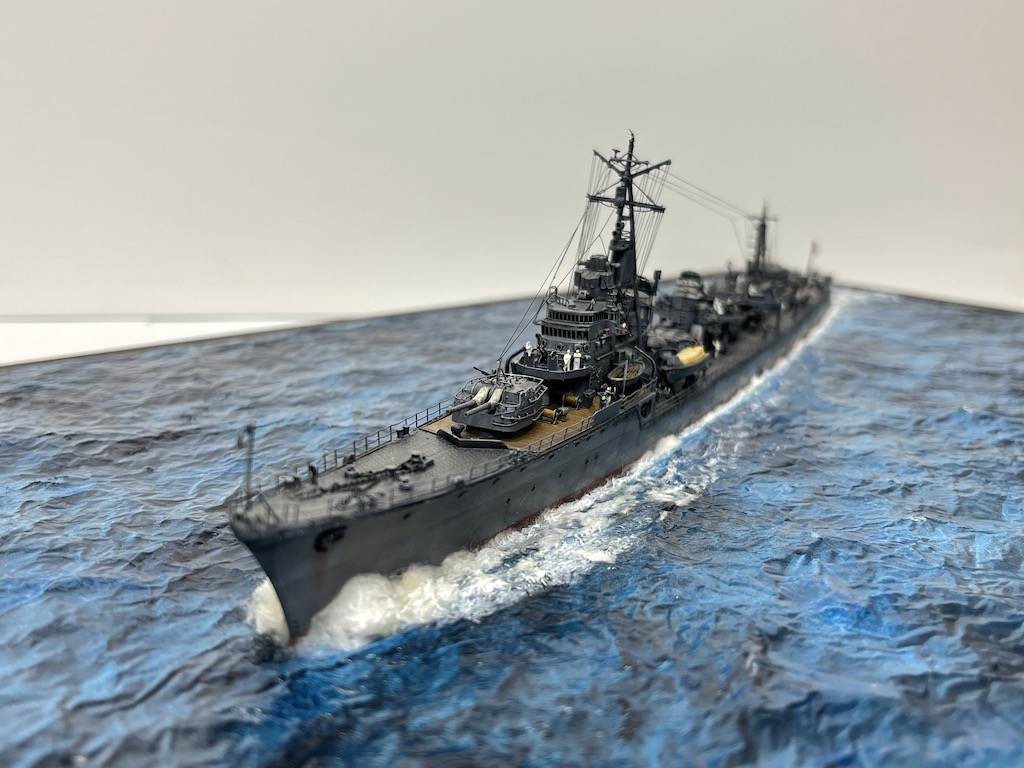
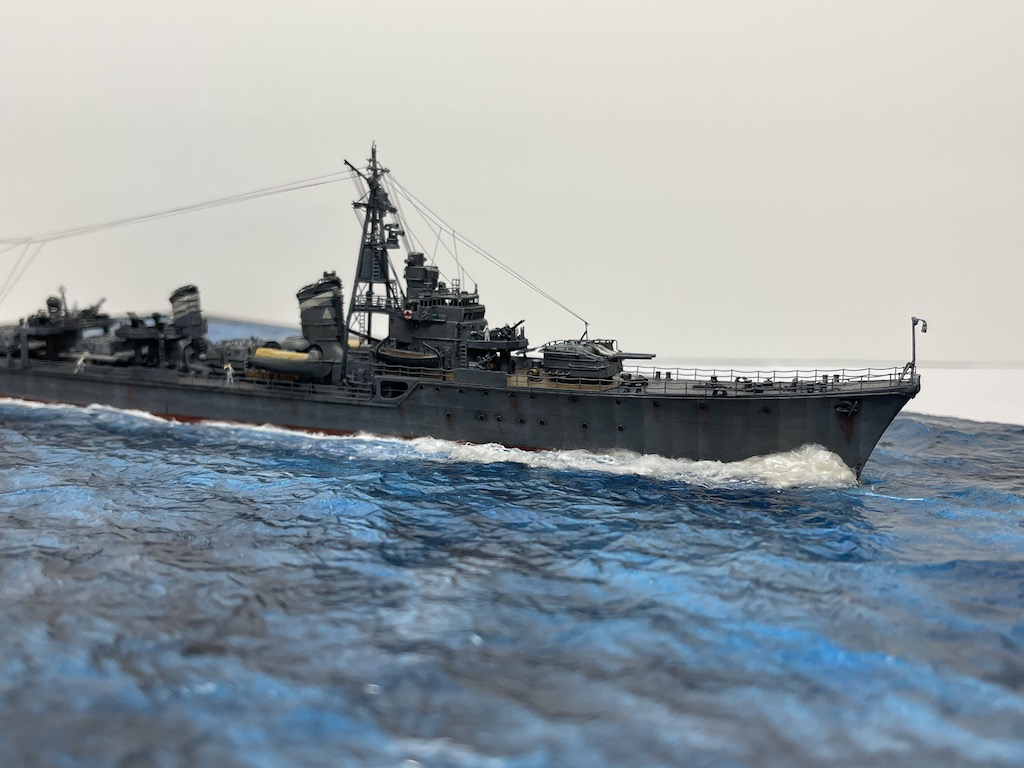
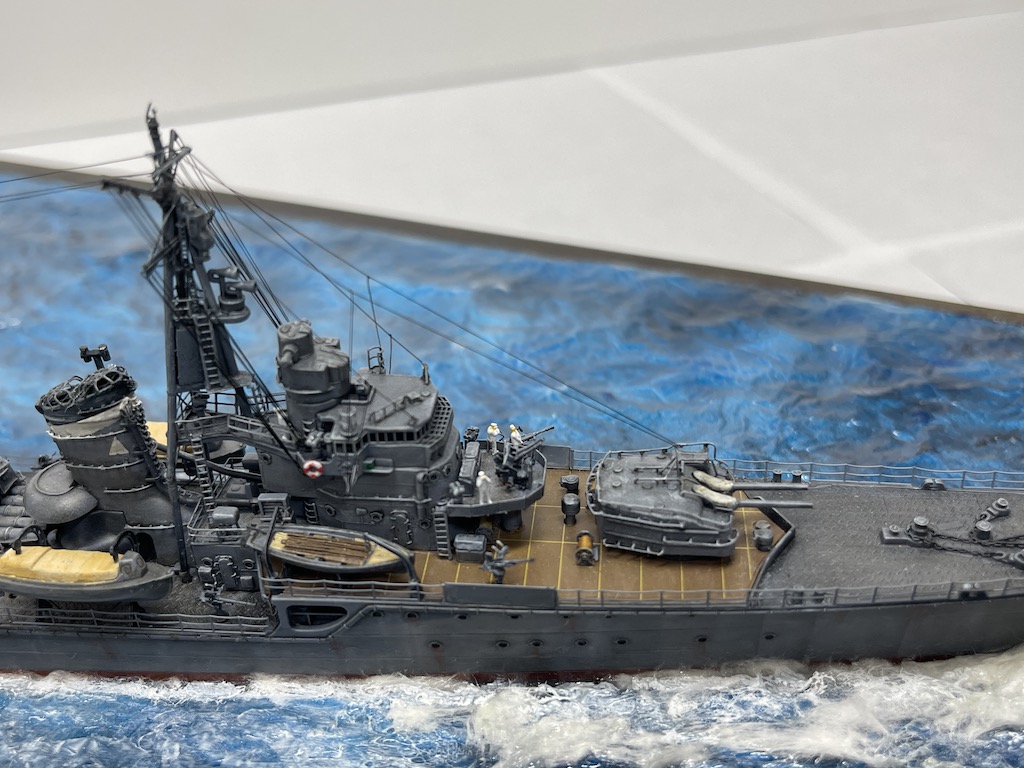
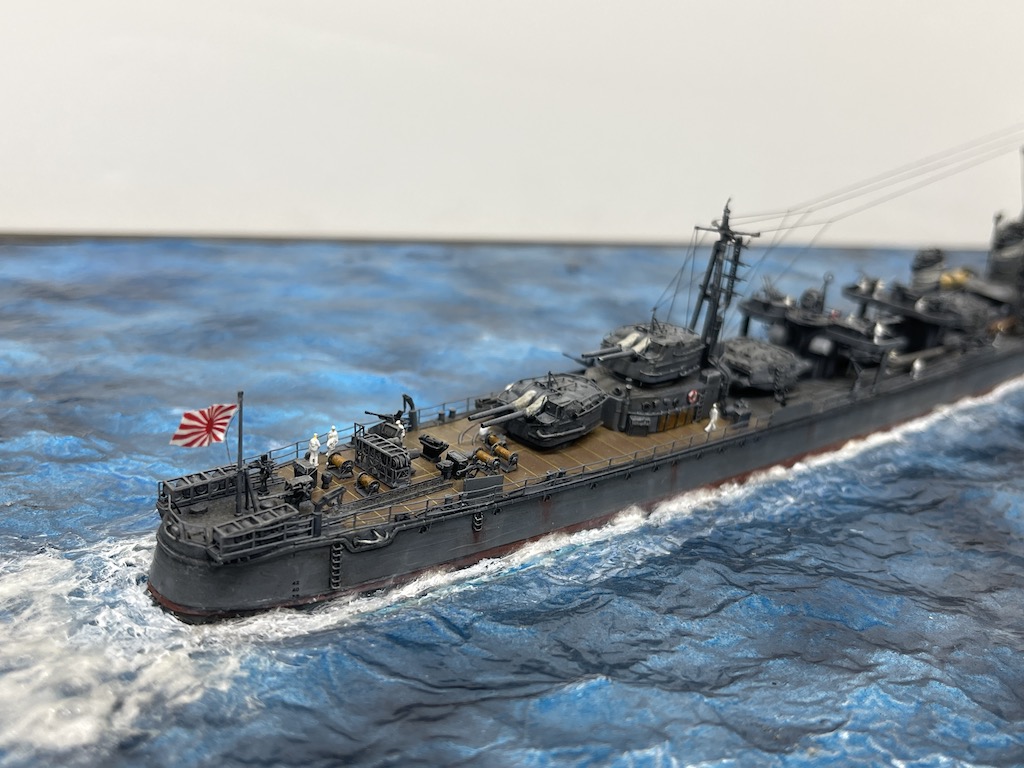
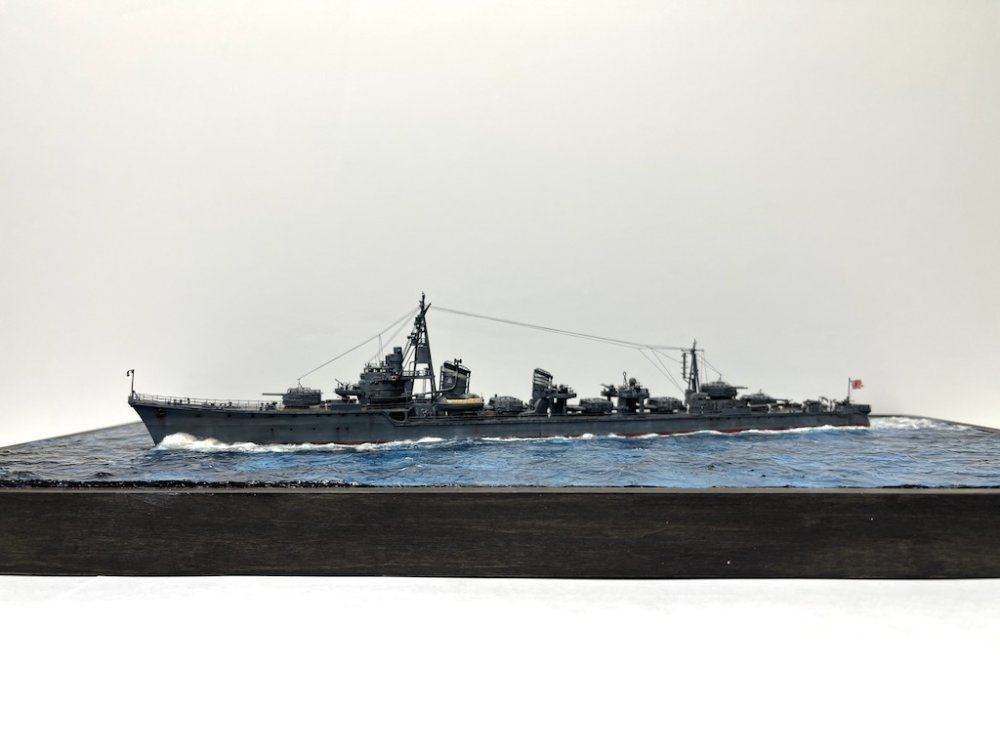
Hey guys, seeing @KevinM's beautiful Chikuma build lit a fire under me to finish my first 1/350 ship. Base kit is from Hasegawa, supplemented by the amazing Infini upgrade kit and some other aftermarket. A really fun build and I'm glad I put it into a diorama setting.


-
Ugh, thanks for that info Ernie. I also have the HpH Me410 - is that any better?
-
100 pack of #11 blades, complete junk.
Landlubber Mike replied to ScottsGT's topic in General Discussion
I switched over to Swann Morton too. Much better blades, and the blade holder/handle is better as well. -
I haven't participated in a GB before, but would try it out especially if it's a "it gets wet" build. I have a bunch of seaplanes in the stash, and just happened to score an HpH Walrus the other day. I'd probably start something easier than the HpH Walrus - I have the 1/48 Airfix Walrus with the Neomega catapult set) and a bunch others in 1/48 like the Goose, Catalina, Ju52 with floats, F1M2 Pete, etc. Anyway, whenever you guys want to start is cool with me. I sorta work on models and then get bored and move on, so this would cause me to be a little more focused on a single subject if others are progressing on their builds.
-
Fw-190 A-8/ R-2 "Sturmbock" Revell 1:32
Landlubber Mike replied to Sasha As's topic in LSM 1/35 and Larger Work In Progress
Looking amazing Sasha!! -
Kitty Hawk Texan
Landlubber Mike replied to ScottsGT's topic in LSM 1/35 and Larger Work In Progress
Beautiful paint job, wow! I've done a few yellow wings and had enough of a hard time. Couldn't imagine trying to spray an entire plane in that color. Great work! -
Ben, another stunner! Your diorama builds are absolutely incredible. Always a good level of detail an interest to keep the eye moving and make you feel like you are there.
-
Rog, that is an epic post for this thread! Good luck with your builds! My wife similarly would be giving me the evil eye if I didn't have a chance to sneak all those boxes into the basement before she saw them. 🤫
-
Ben, sorry I didn't see this earlier, wow! What an amazing build and diorama! And I know this particular Revival kit isn't the easiest to build, at least from what I've read. If you don't mind me asking, what paint did you use? It looks really spot on. I like this version with the four rear tires. I have the kit and only thought it built up with four tires total, but I'm looking at the directions online and it shows the six-tire option as well. Love the figures too by the way and the diorama base, what a great touch!
-
HKM 1/32 B17G Milk Wagon
Landlubber Mike replied to ajaycad's topic in LSM 1/32 and Larger Aircraft Ready for Inspection
That came out really great! Nice job! That must be massive! -
Special Hobby Whirlwind
Landlubber Mike replied to Peterpools's topic in LSM 1/35 and Larger Work In Progress
Looks great Peter! Nice and smooth! -
Special Hobby Whirlwind
Landlubber Mike replied to Peterpools's topic in LSM 1/35 and Larger Work In Progress
Peter and Rob, many thanks for answering my question about the booth. For what you get, the booths seem inordinately expensive. Rob, I was thinking about doing something similar - really, all you need is a plastic box with a hole cut out, and those LED lights are a nice touch (mine includes the lights). I might also try opening up one of the side panels and attaching an extension to see if that works. Either that, or ultimately get something like the one Peter shows. Even 30" seems a bit too small for some of the bigger builds. I have ship models that will exceed that - the 1/200 Bismarck on the shelf is something like 4-5' long For those very big builds, I might get one of those pop-up spray booths and use it outdoors or in my detached garage. -
Special Hobby Whirlwind
Landlubber Mike replied to Peterpools's topic in LSM 1/35 and Larger Work In Progress
Looks great Peter - exciting step to get to in the build just before the primer goes on. One question I've been meaning to ask - for these larger models/larger scale builds, do you spray in a spray booth? My booth with exhaust is probably 20 inches or so wide, which limits what can be put in the booth. Since I like to use Mr. Surfacer and other paints on the stinkier side, I'm curious what set up you guys use to paint bigger models? -
Wow, that last picture is amazing - insane amount of rigging detail. Gives you a real appreciation for how complicated these old ships were.
-
Wow, that case is beautiful Scott!! Can you make me one? 🤗 I'm looking into some kind of display/storage option for my plastic models but not really finding much besides bookshelves. I'm not sure my wife would appreciate something with glass doors. If you want to reduce the size of your model, you can always just build the hull and skip the masting and rigging. Also, like plastic models, you can always just go smaller in scale. Once I get through my current stash of wooden kits, I was thinking about modeling in miniature scales. Here is one from Donald McNarry, who is a true master when it comes to modeling wooden ships in small scales. This clipper is 32' = 1", and for idea of size that works out to, the display case is only 14.5" x 9.5" x 6.875" 😳 https://www.shipmodel.com/acadp_listings/spindrift/ By the way, the view outside your house is incredible. I'm jealous!

-
I know some people use compressed air to try to blow the dust off, but I'd be so nervous doing that around the rigging or small parts. If anything isn't fully adhered to the model, you could quickly ruin it. Your detail work is amazing - very nicely done! Even more impressive that it's scratch built! Can I ask what scale you built it in?
-
I have three wooden ships in process at the moment (well, haven't really touched them in a year or two because I got sucked into plastic). Space is definitely a consideration. I think what I'm going to do is try to either sell them, or more likely, just donate them to a local library, a school, etc. I'm more into the journey in building models, not really looking to turn my house into a museum - and I'm sure my wife feels similarly 😆
-
A lot of people put them in glass/plexiglass cases. But, that becomes a very expensive add-on to the end of the build. I put my first (and only) completed ship in a plexiglass/wood display case, and it looks like the day I finished it, but the cost was painful. Probably in the end cost 2-3 times what I paid for the kit 😳 You should totally try one out. It's a different method of building than obviously plastic builds, but I think having the cross experience will serve you well. Personally, I like the wooden ships in that you are working in many materials - wood, metal, rigging line, cloth, etc.
-
Holy cow, that's amazing! Even more so given that you scratch built it, wow! Your sail work is fantastic - personally, I think adding sails is a great choice for these types of subjects, especially on clipper ships.
-
Kitty Hawk Texan
Landlubber Mike replied to ScottsGT's topic in LSM 1/35 and Larger Work In Progress
Looks really great Scott, nice job! I know what you mean on priming, filling, sanding, and repeating multiple times. I'm in that cycle on my Special Hobby Buffalo at the moment. On other builds I primed, and maybe fixed a place or two, and called it a day. This is the first time I'm really trying to ensure perfection after the priming stage, but hopefully it's all worth it in the end. -
Special Hobby Whirlwind
Landlubber Mike replied to Peterpools's topic in LSM 1/35 and Larger Work In Progress
Good save Peter. My heart sank when I first read the beginning of your post that there was an error! -
Thank you Martin! We'll see how the next steps go!
-
Not sure how I missed this one, but really great job! I love desert camo - yours came out very nicely!
-
1:48 Revell (ex-accuratte Miniatures) B-25 C "Casper Flash"
Landlubber Mike replied to Fran's topic in Non LSM 'WIP
Really nicely done Fran!!! -
It's taken a ton of time, but I've made some little progress cleaning up and otherwise throwing more aftermarket at my Buffalo. I ended up adding brass gun barrels and a pitot from Master - a bit of a splurge, especially when you can barely see the guns, but the profiles look much more to scale and with better definition than the kit parts. I added rivets using my 0.75mm Rosie the Riveter wheel (thanks again @Martinnfb for posting the plans!), and re-scribed some of the panel lines. I've also had to do a few other fixes as well. Apparently all Buffalos except the 339E only had one landing light on the port wing, so I went ahead and filled the starboard side (used my RP Toolz punch set and the 4.5mm punch filled the hole perfectly). It's not in the pictures here, but I also scratch built the radar antenna that goes on the starboard side of the cowl. The kit piece just glues to the side of the cowl, and wasn't a very robust piece of plastic, so I figured it was only a matter of time before I knocked it off. So, I drilled a hole into the cowl, and epoxied in a longer antenna where the base is inserted a few millimeters into the cowl. Seems a lot more robust and will be harder to break off. I'm now in the middle of priming everything with Mr. Surfacer 1500. I had some fit issues which Special Hobby is known for, so it's been prime, fill and sand, prime, and repeat. But getting closer to throwing some colors on it. Building into a nice kit I think. Thanks for looking in!