
Fran
-
Posts
2,289 -
Joined
-
Last visited
Content Type
Profiles
Forums
Events
Gallery
Everything posted by Fran
-
For me, one of the best liquid mask is the one from Deluxe Material https://deluxematerials.co.uk/products/masking-magic-opaque-40g
-
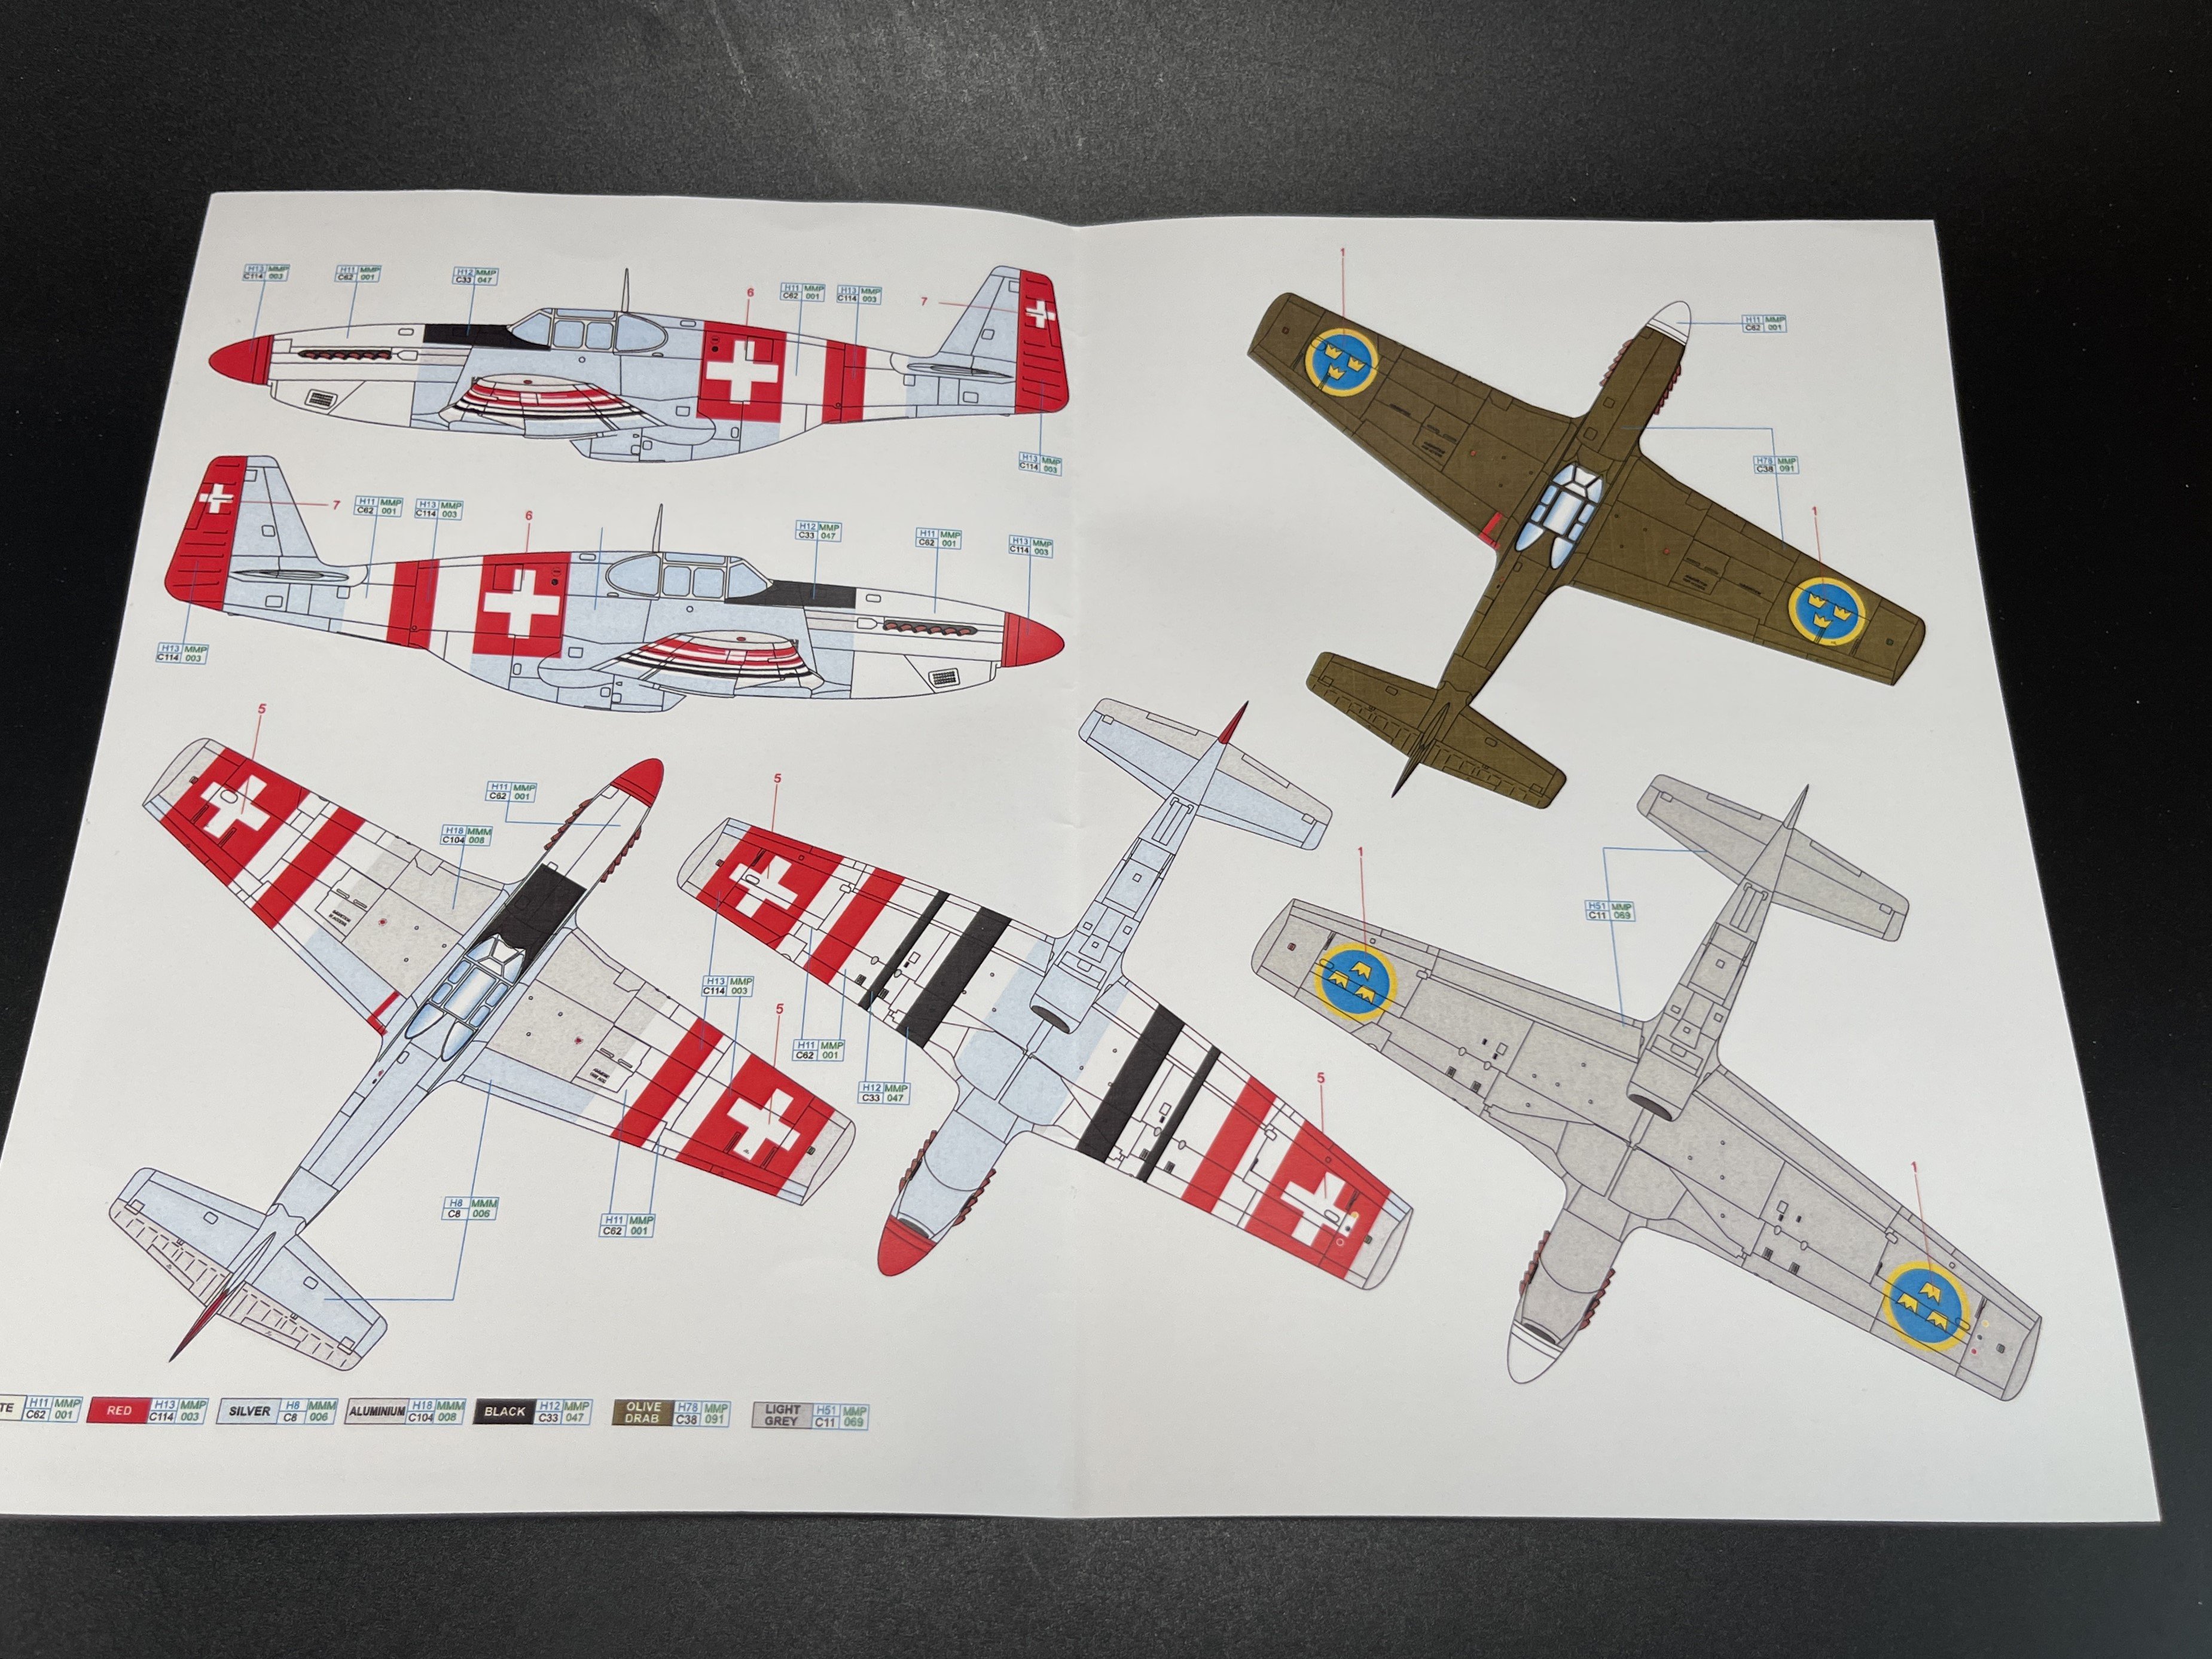
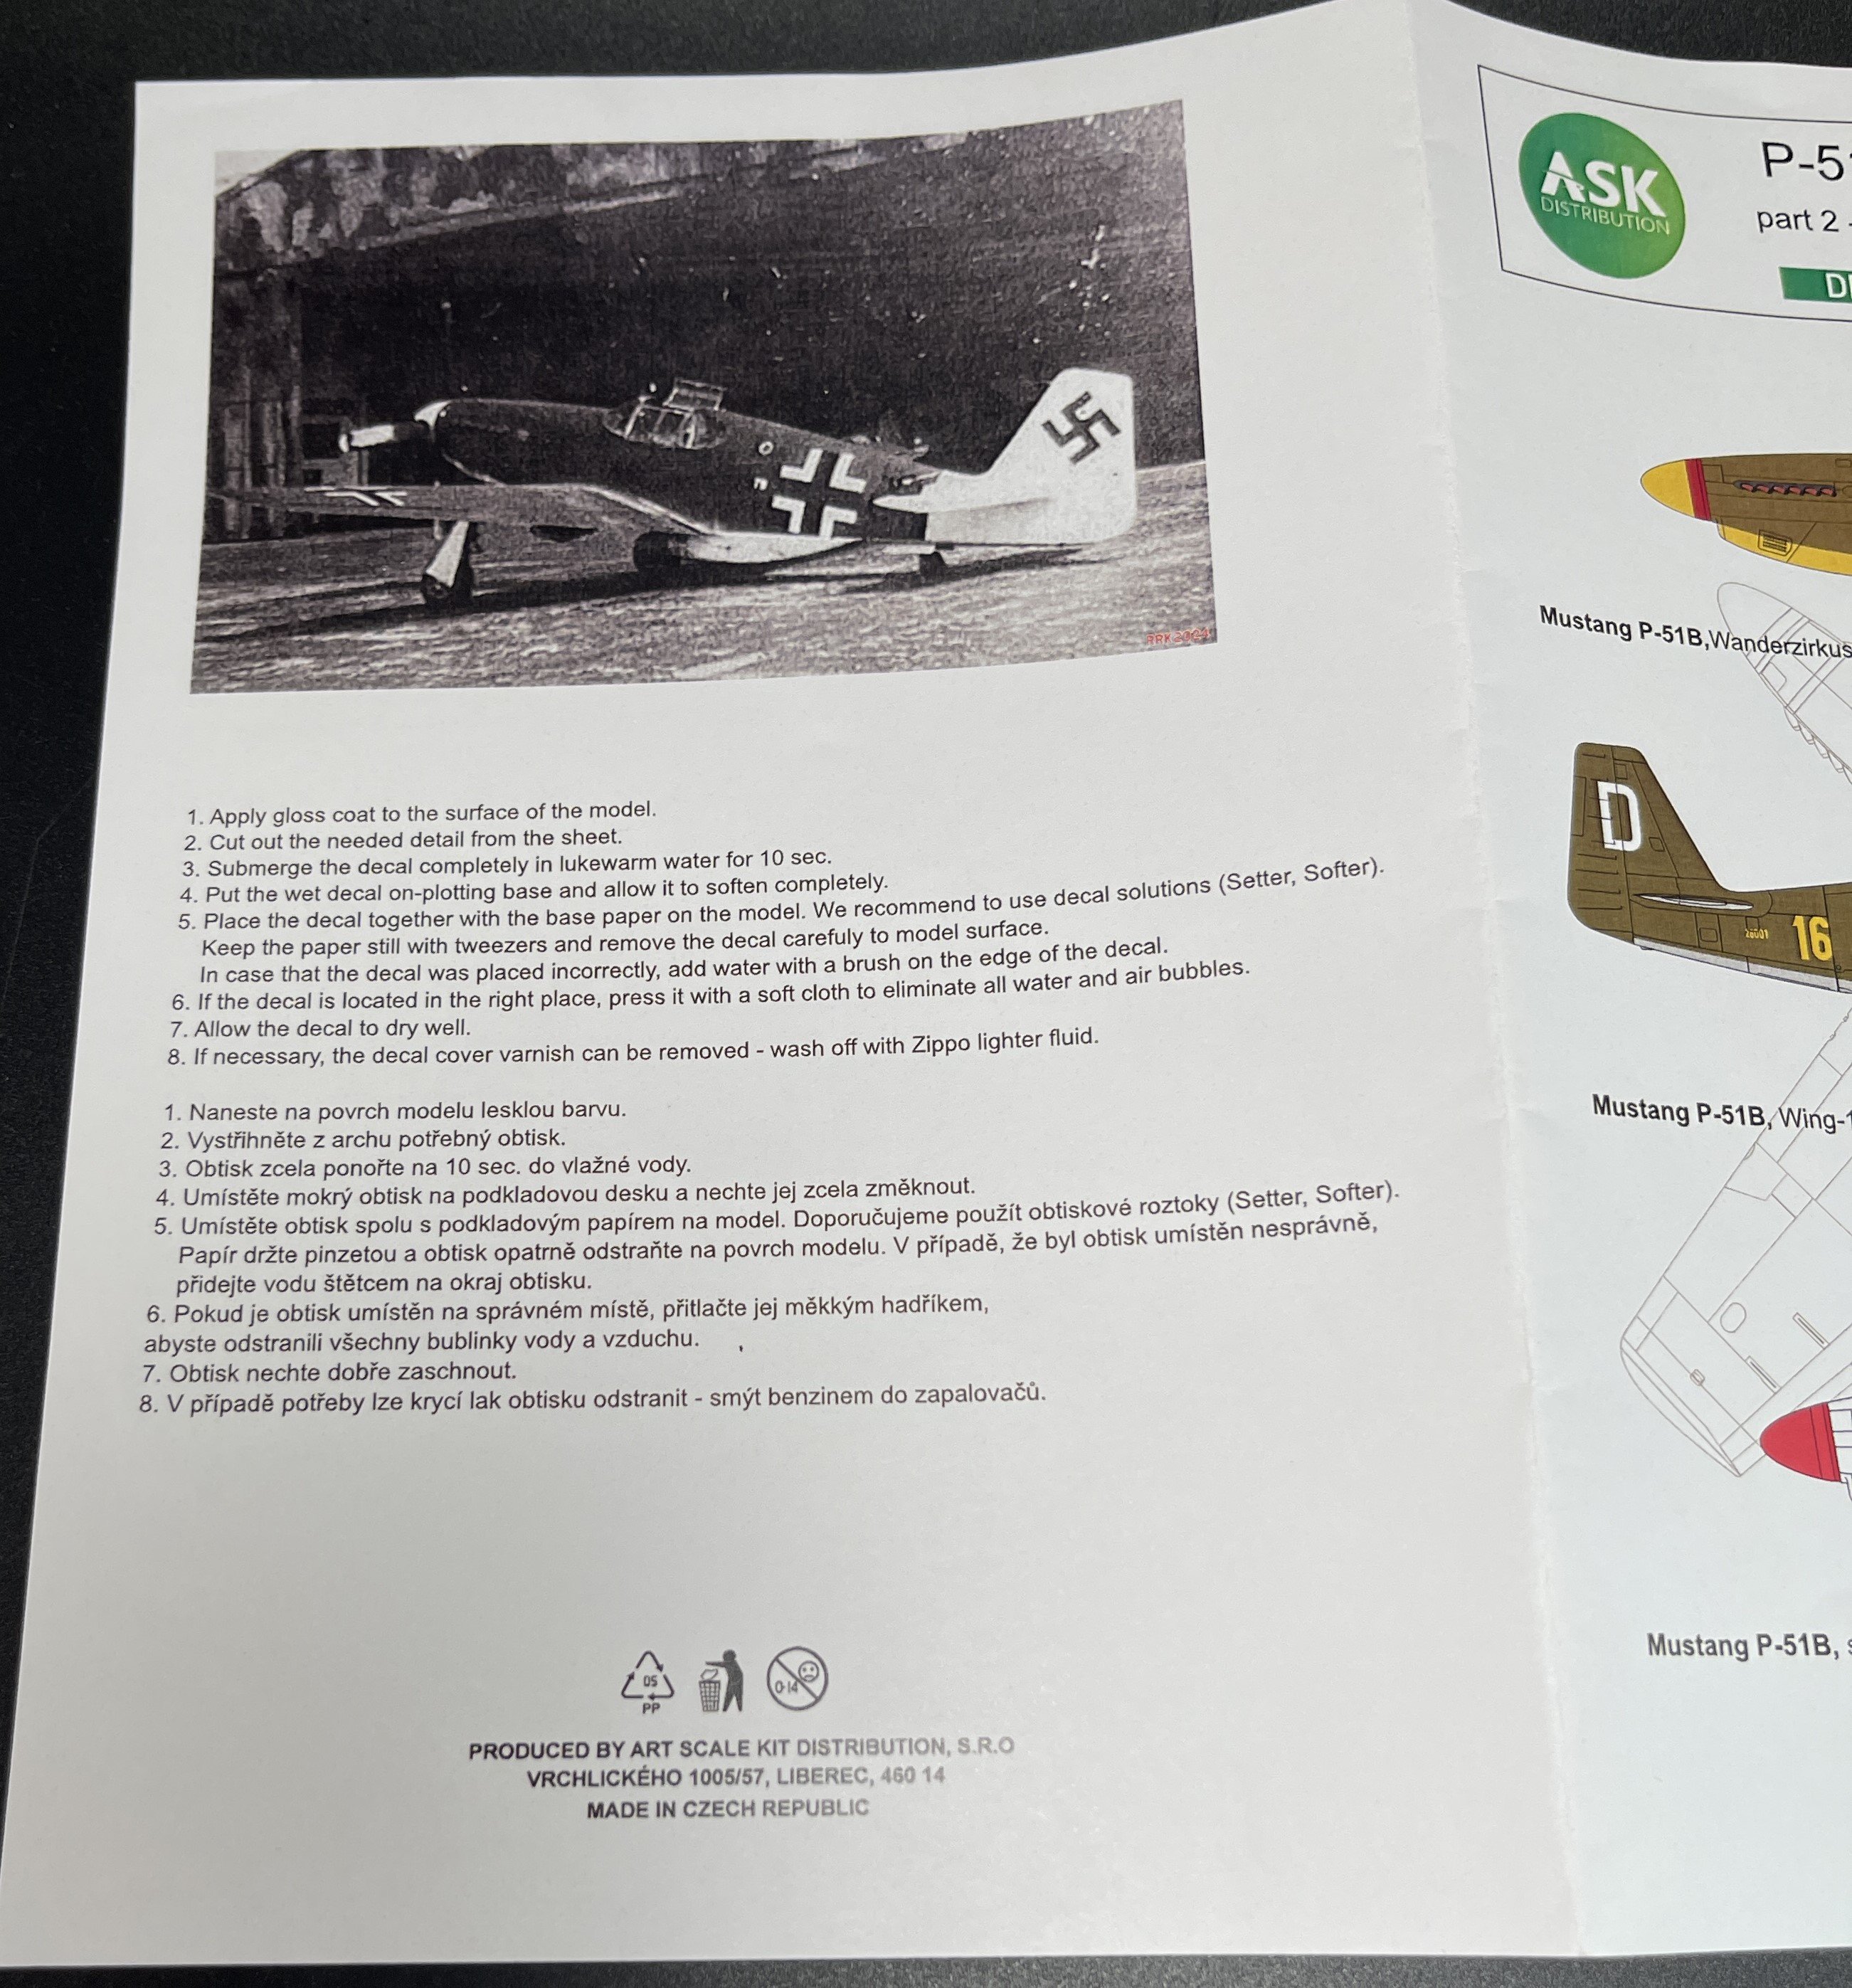
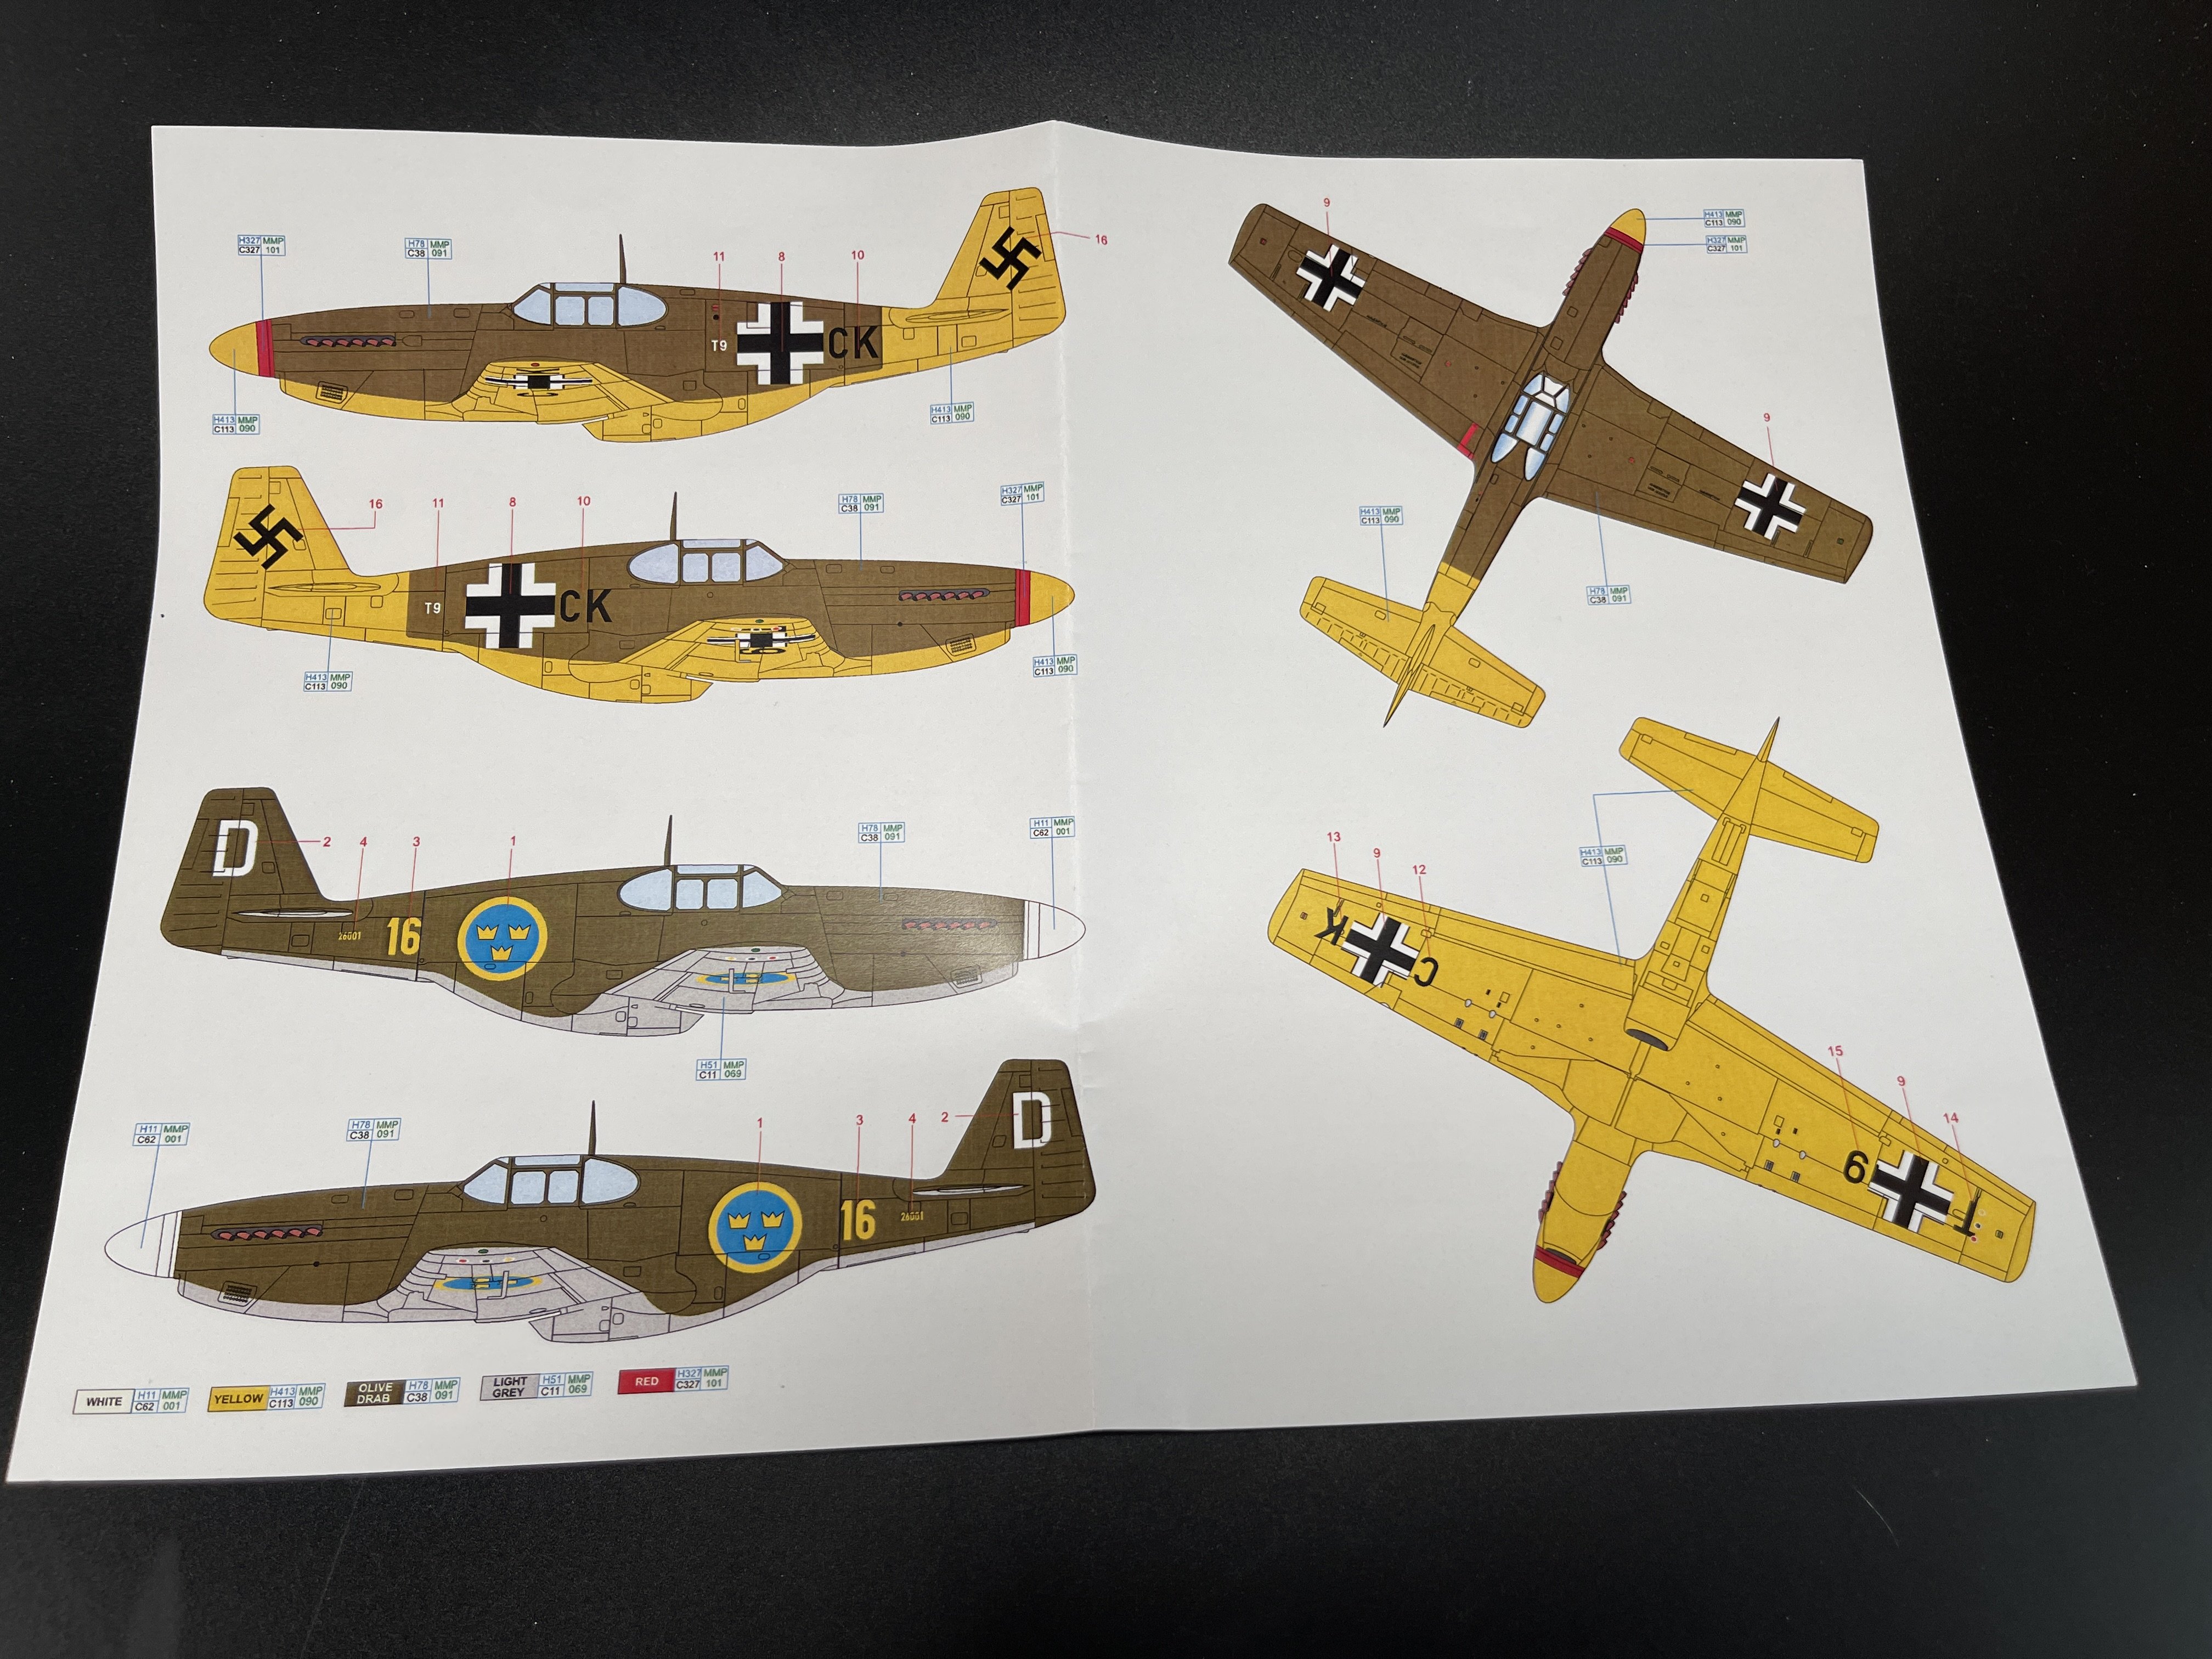
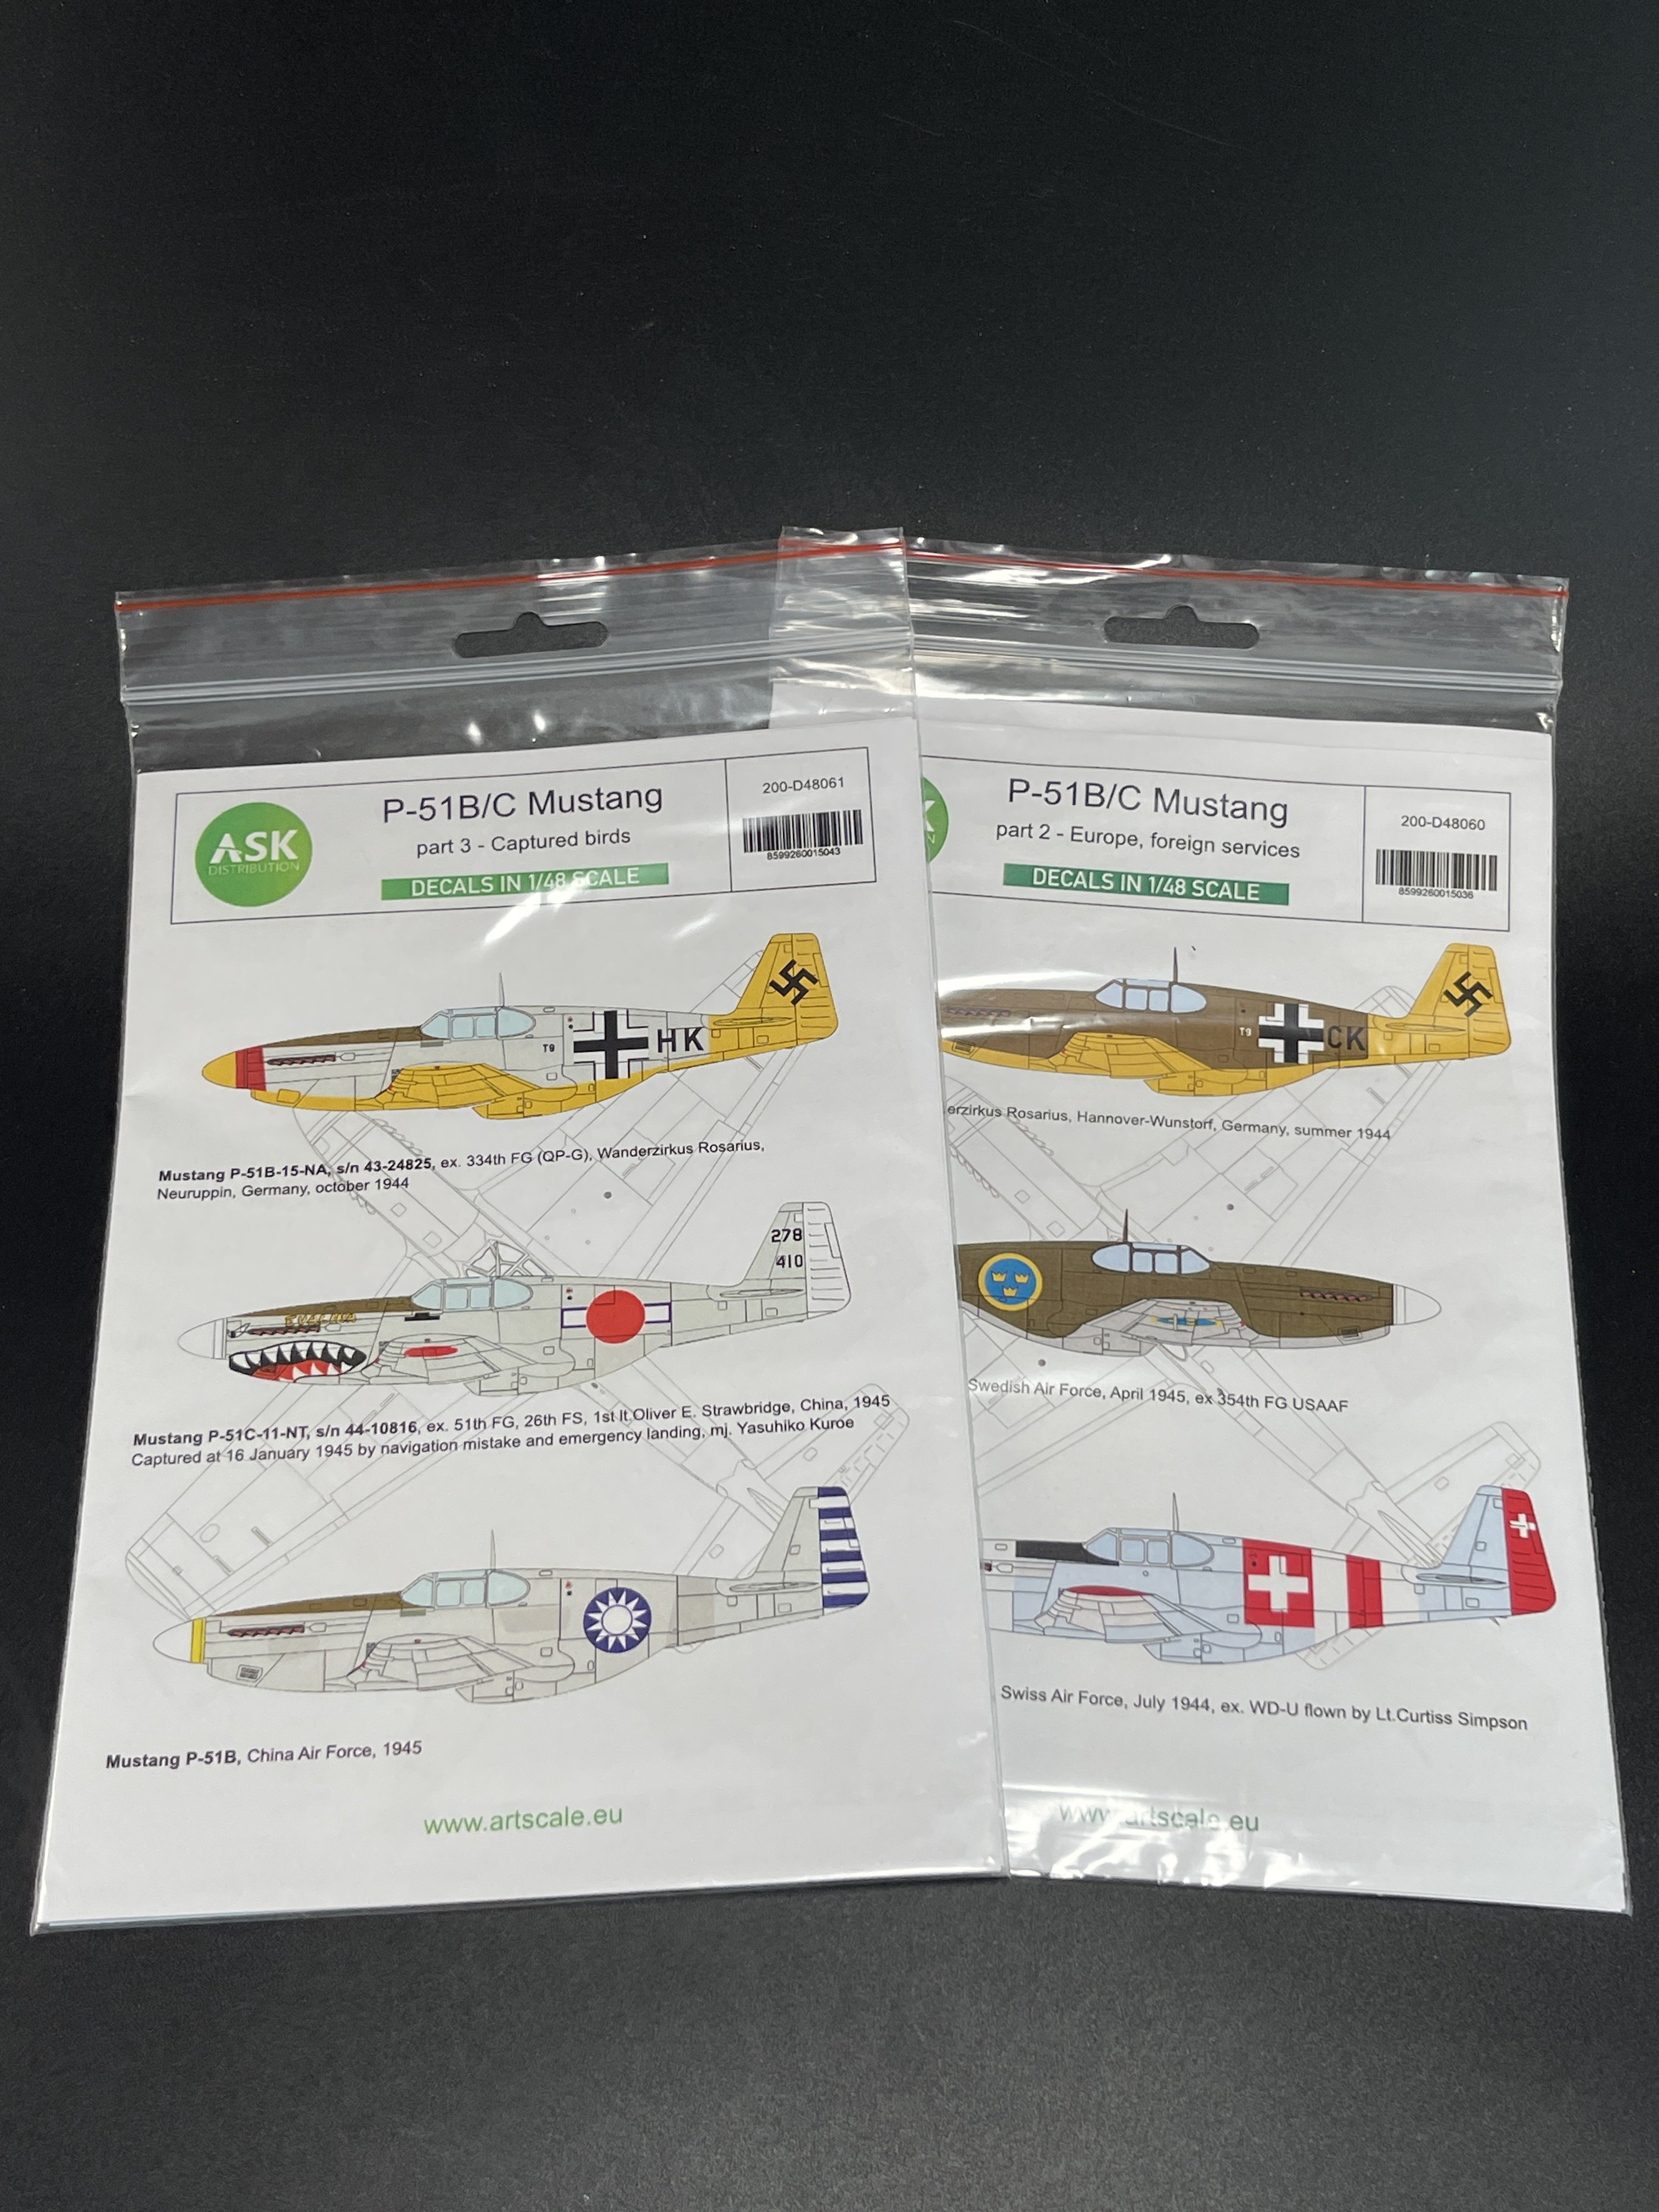
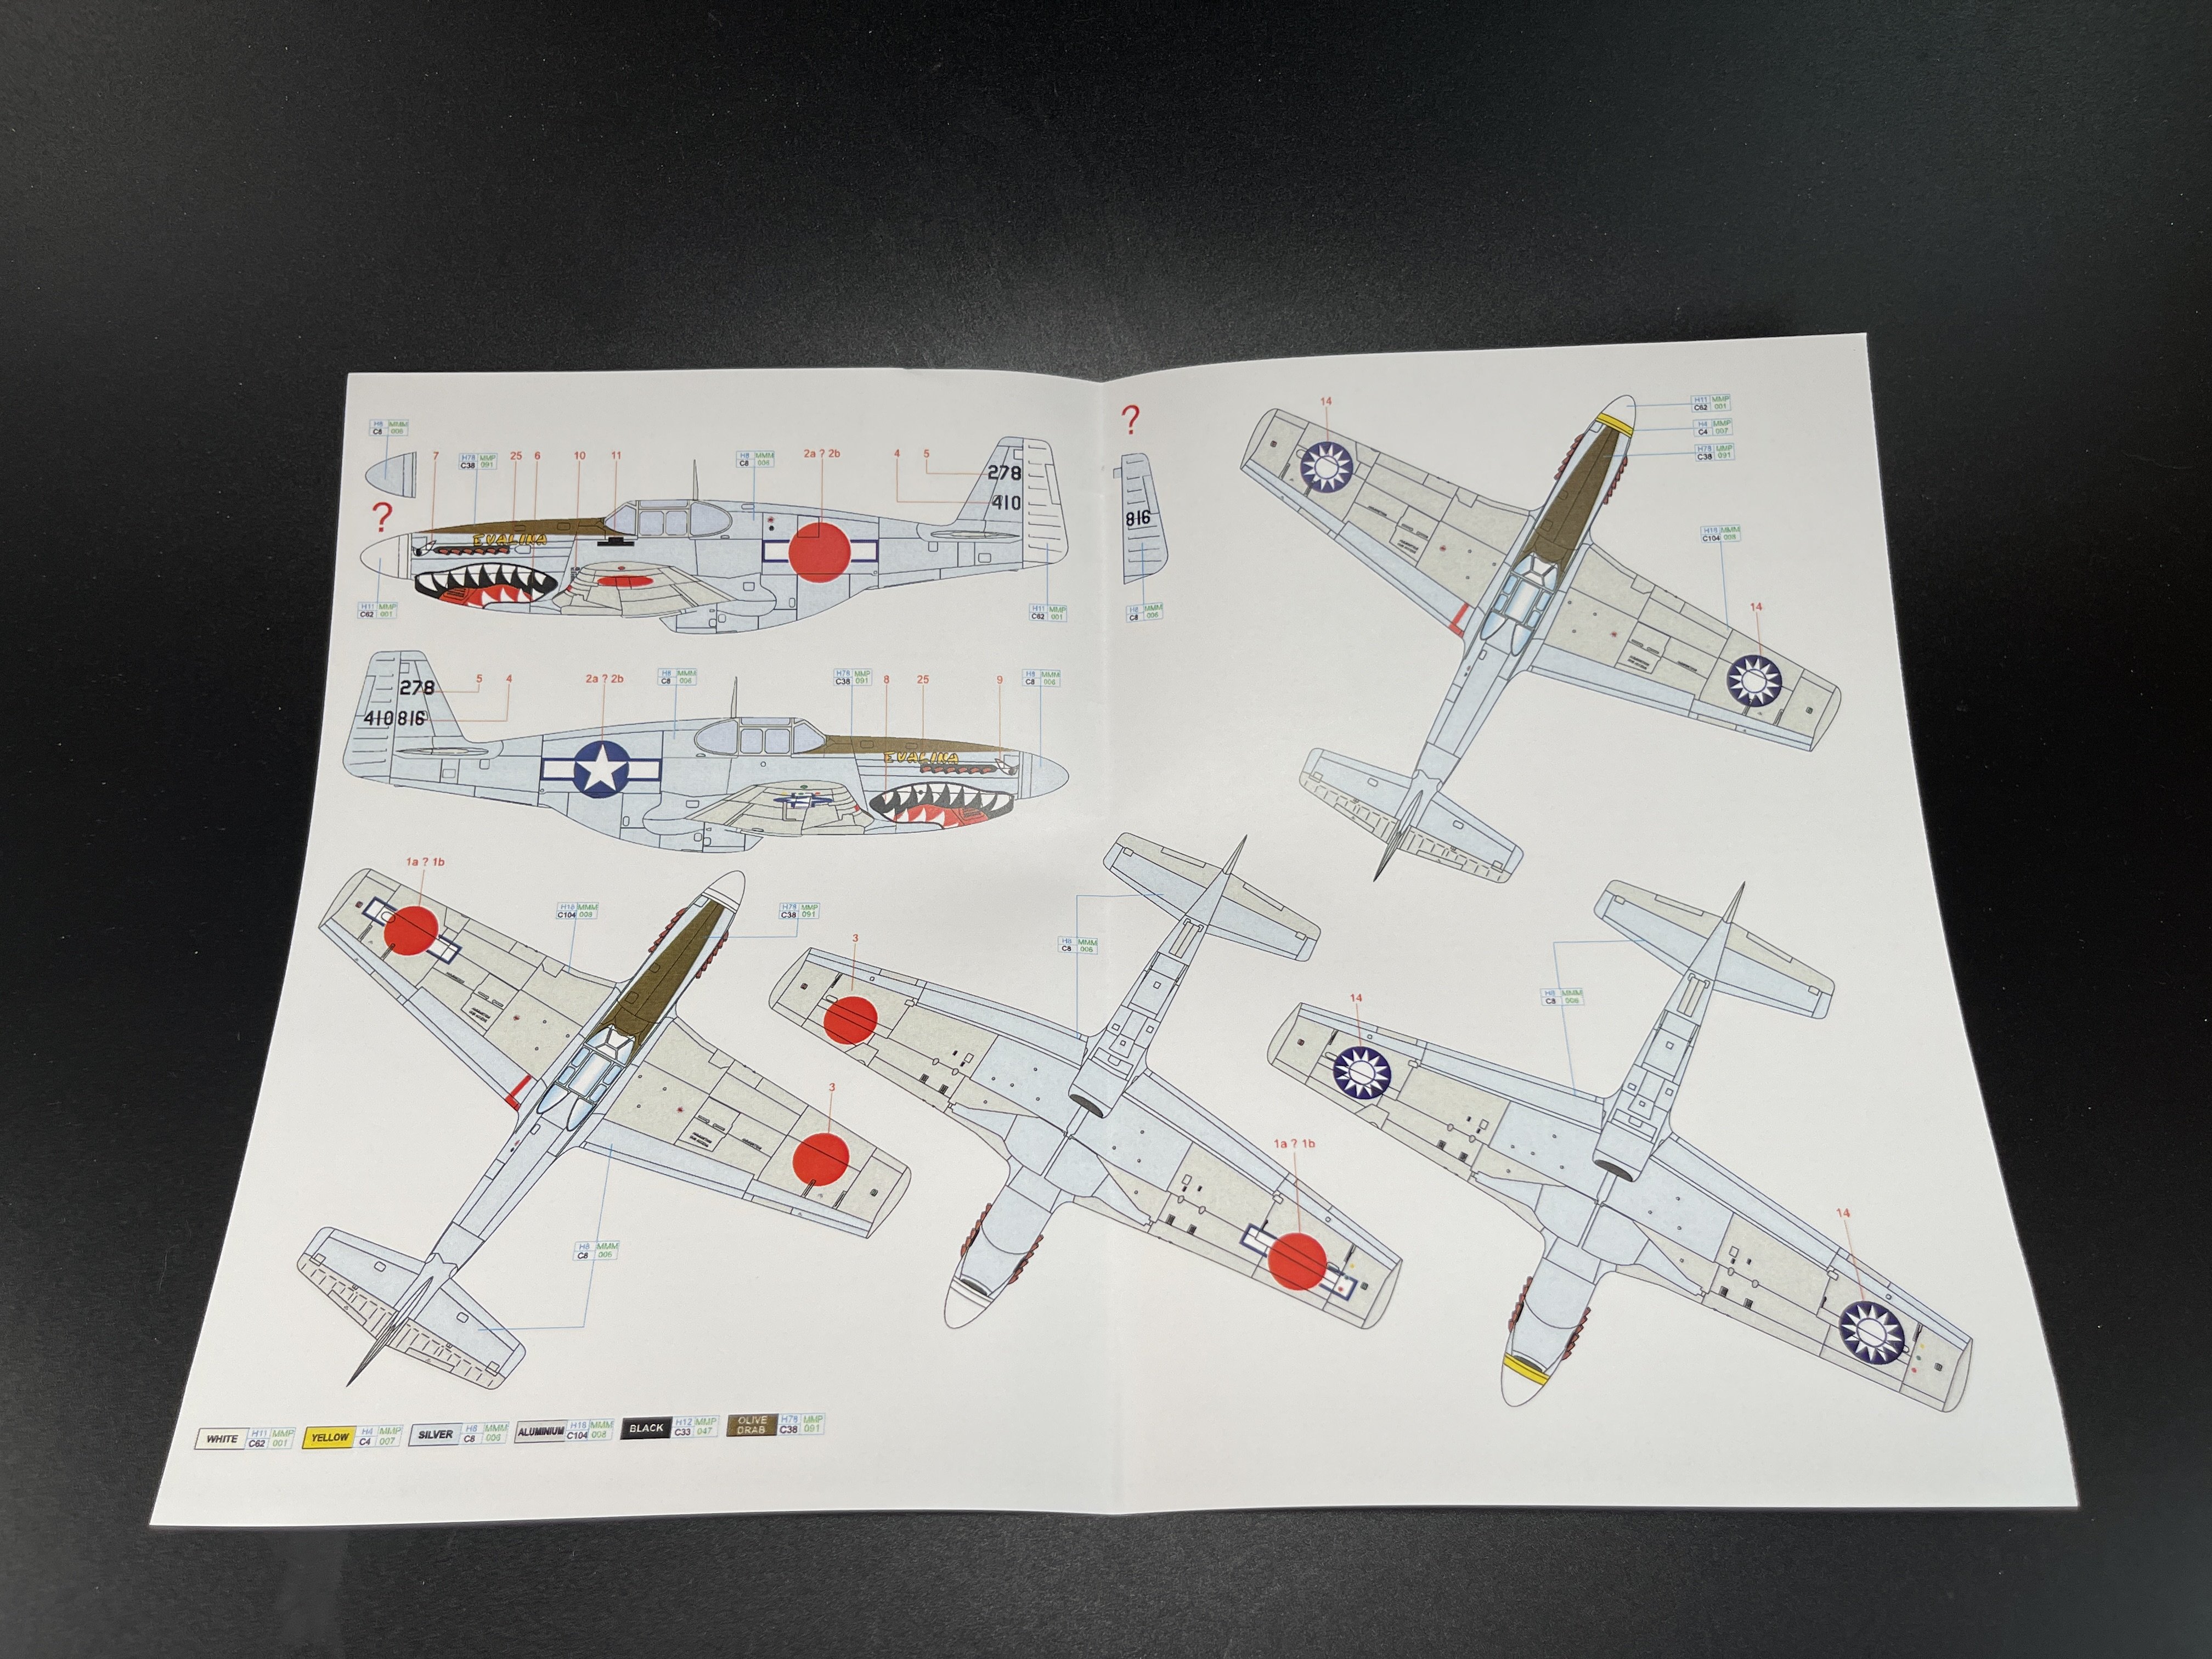
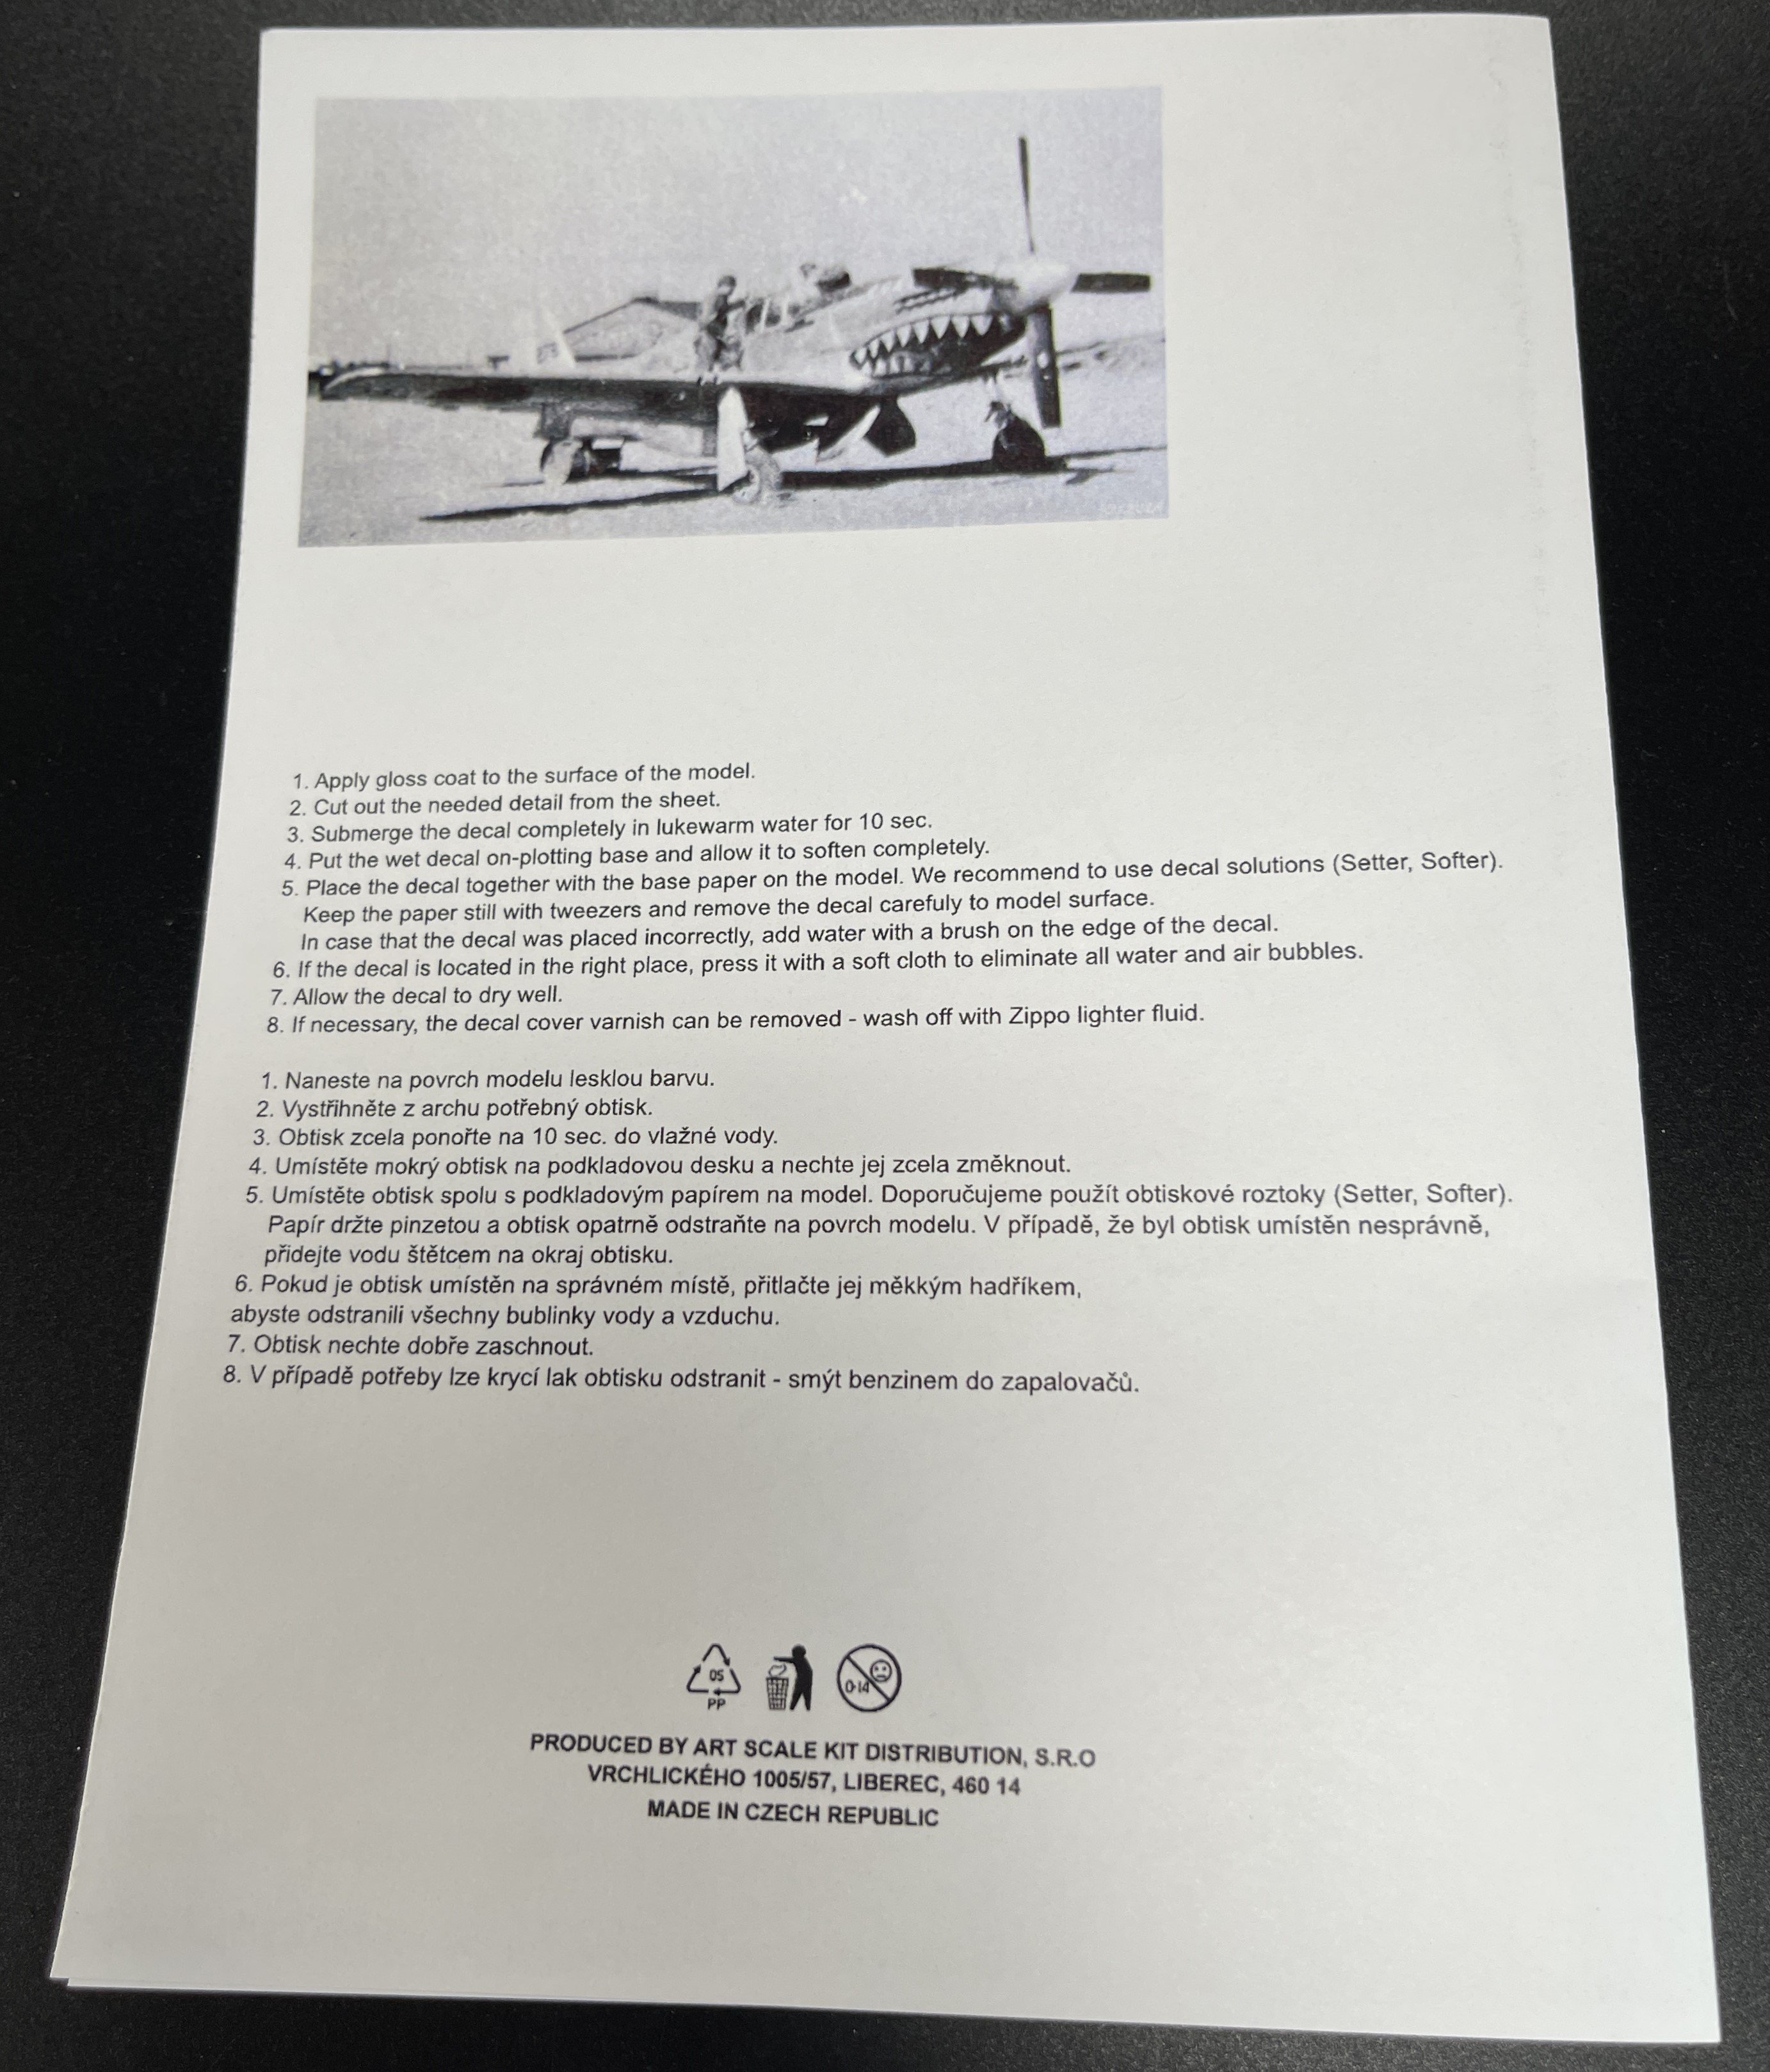
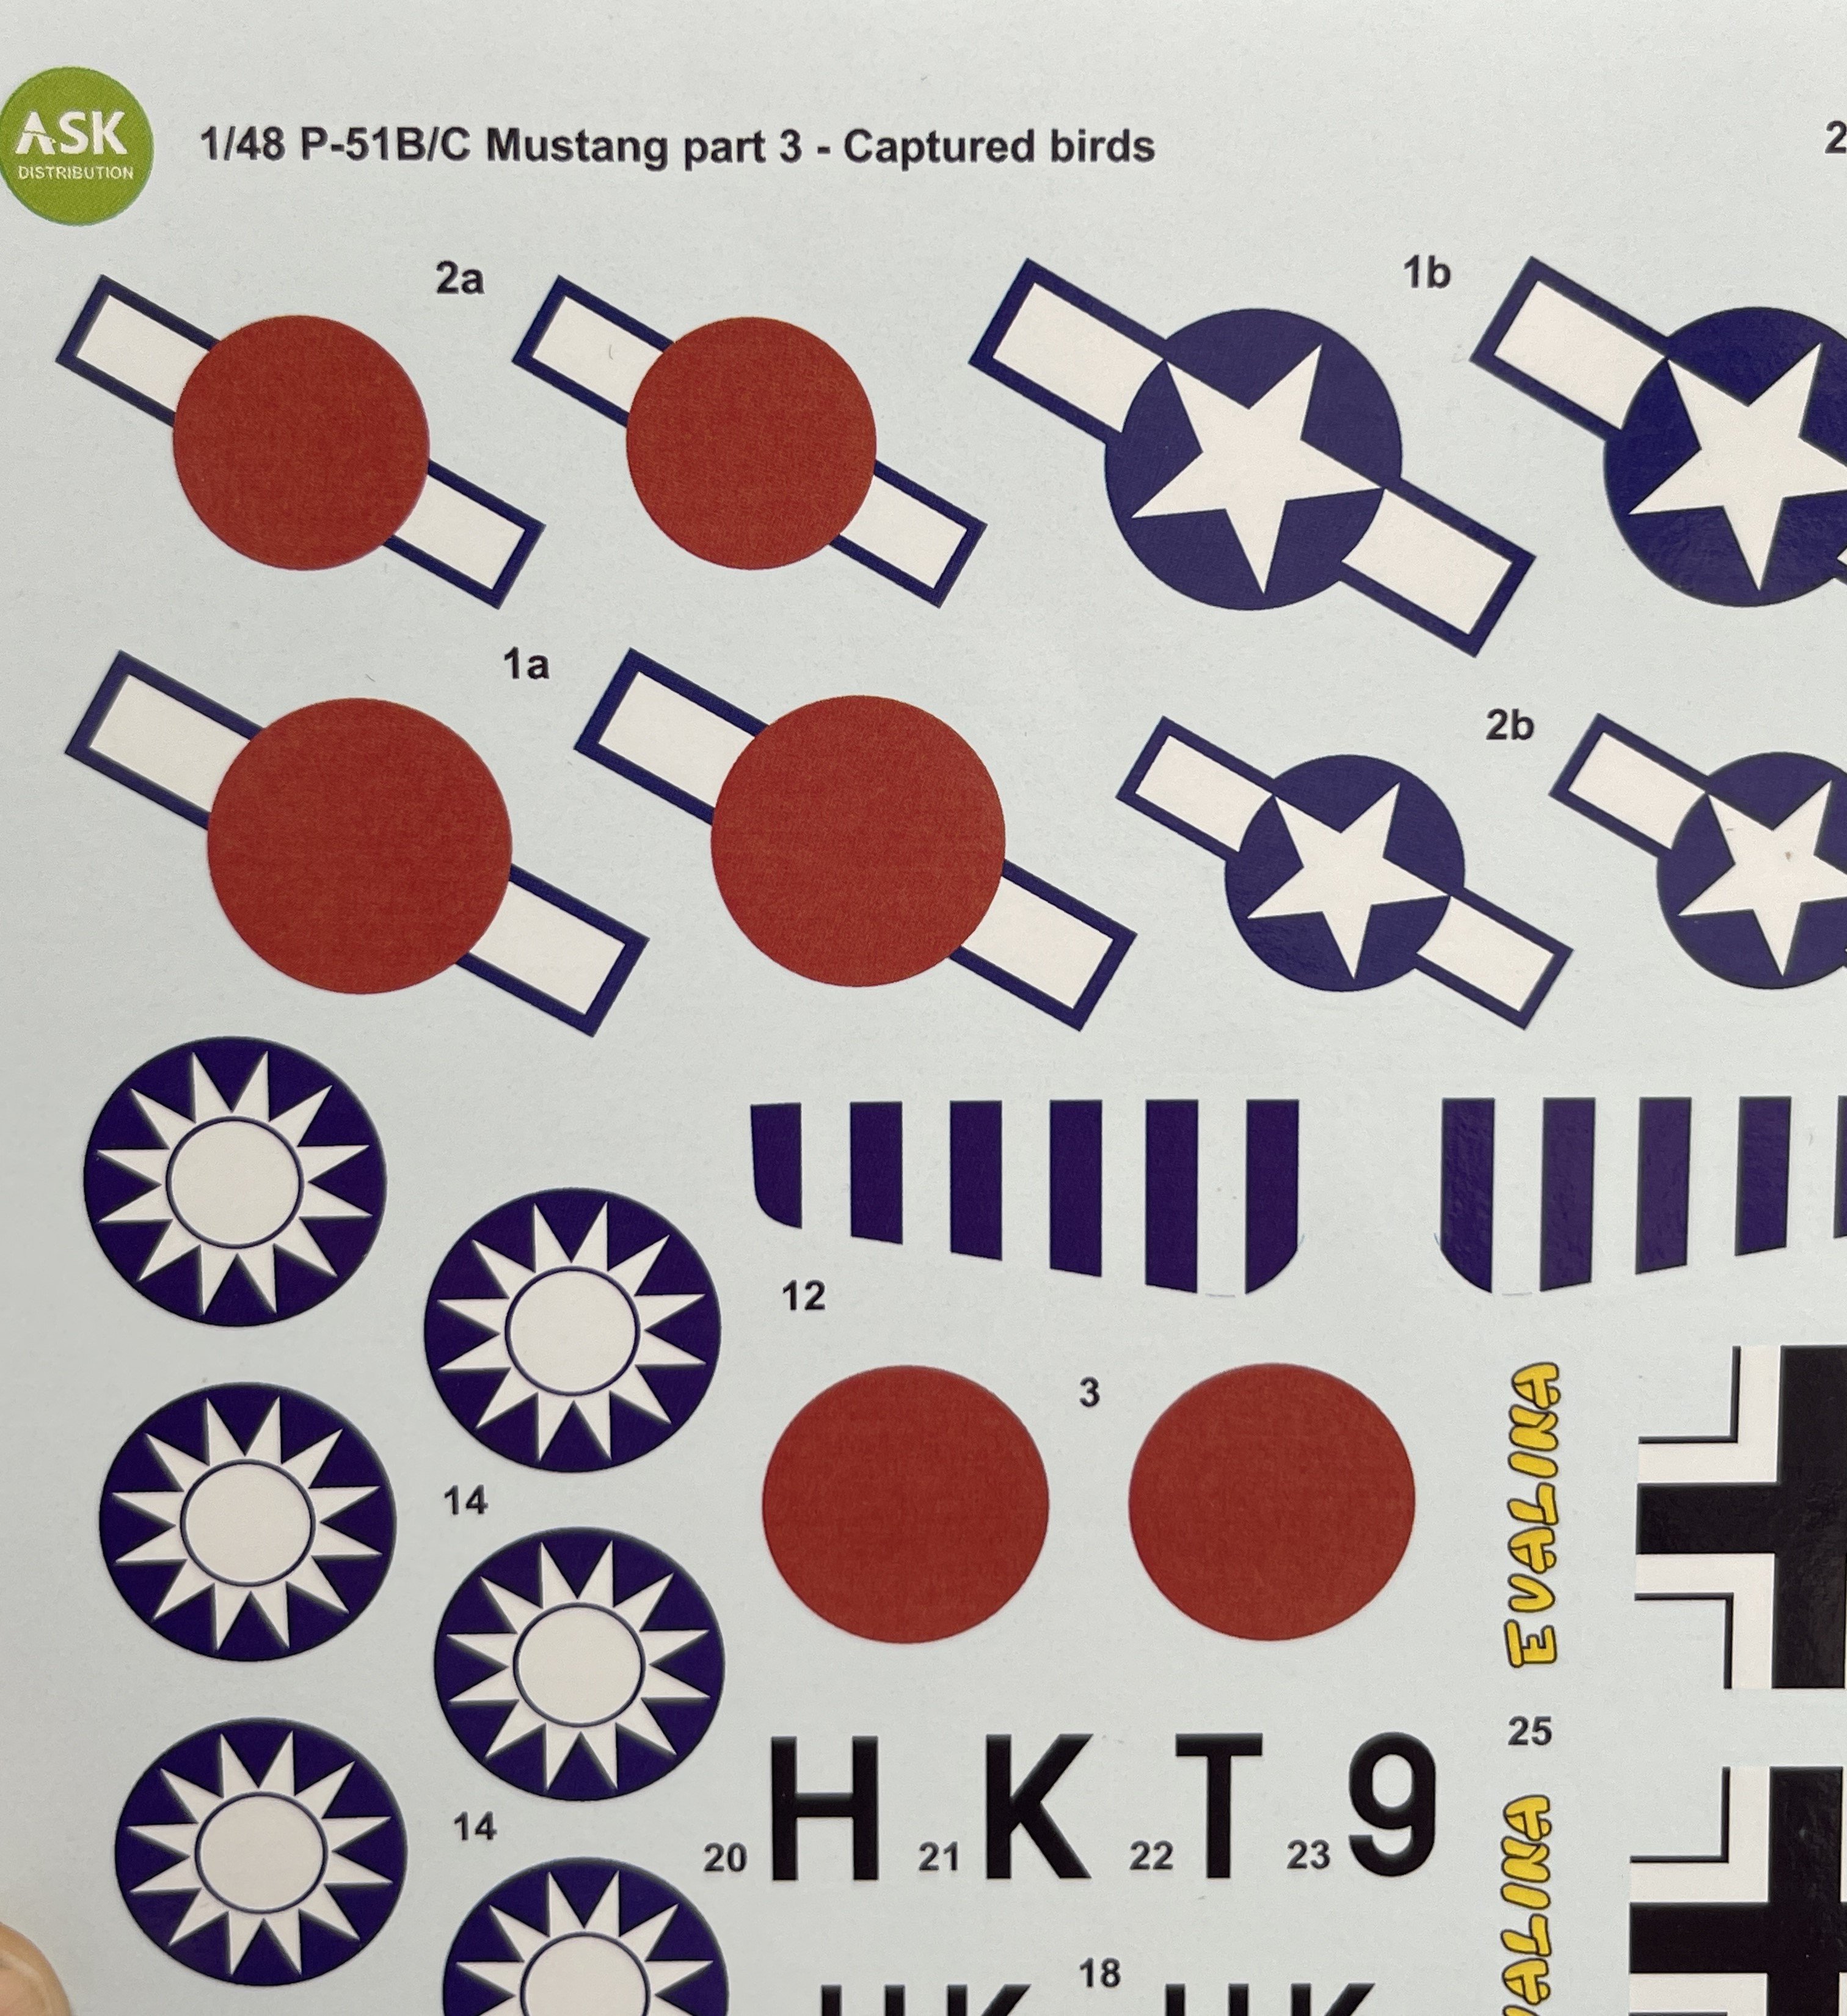
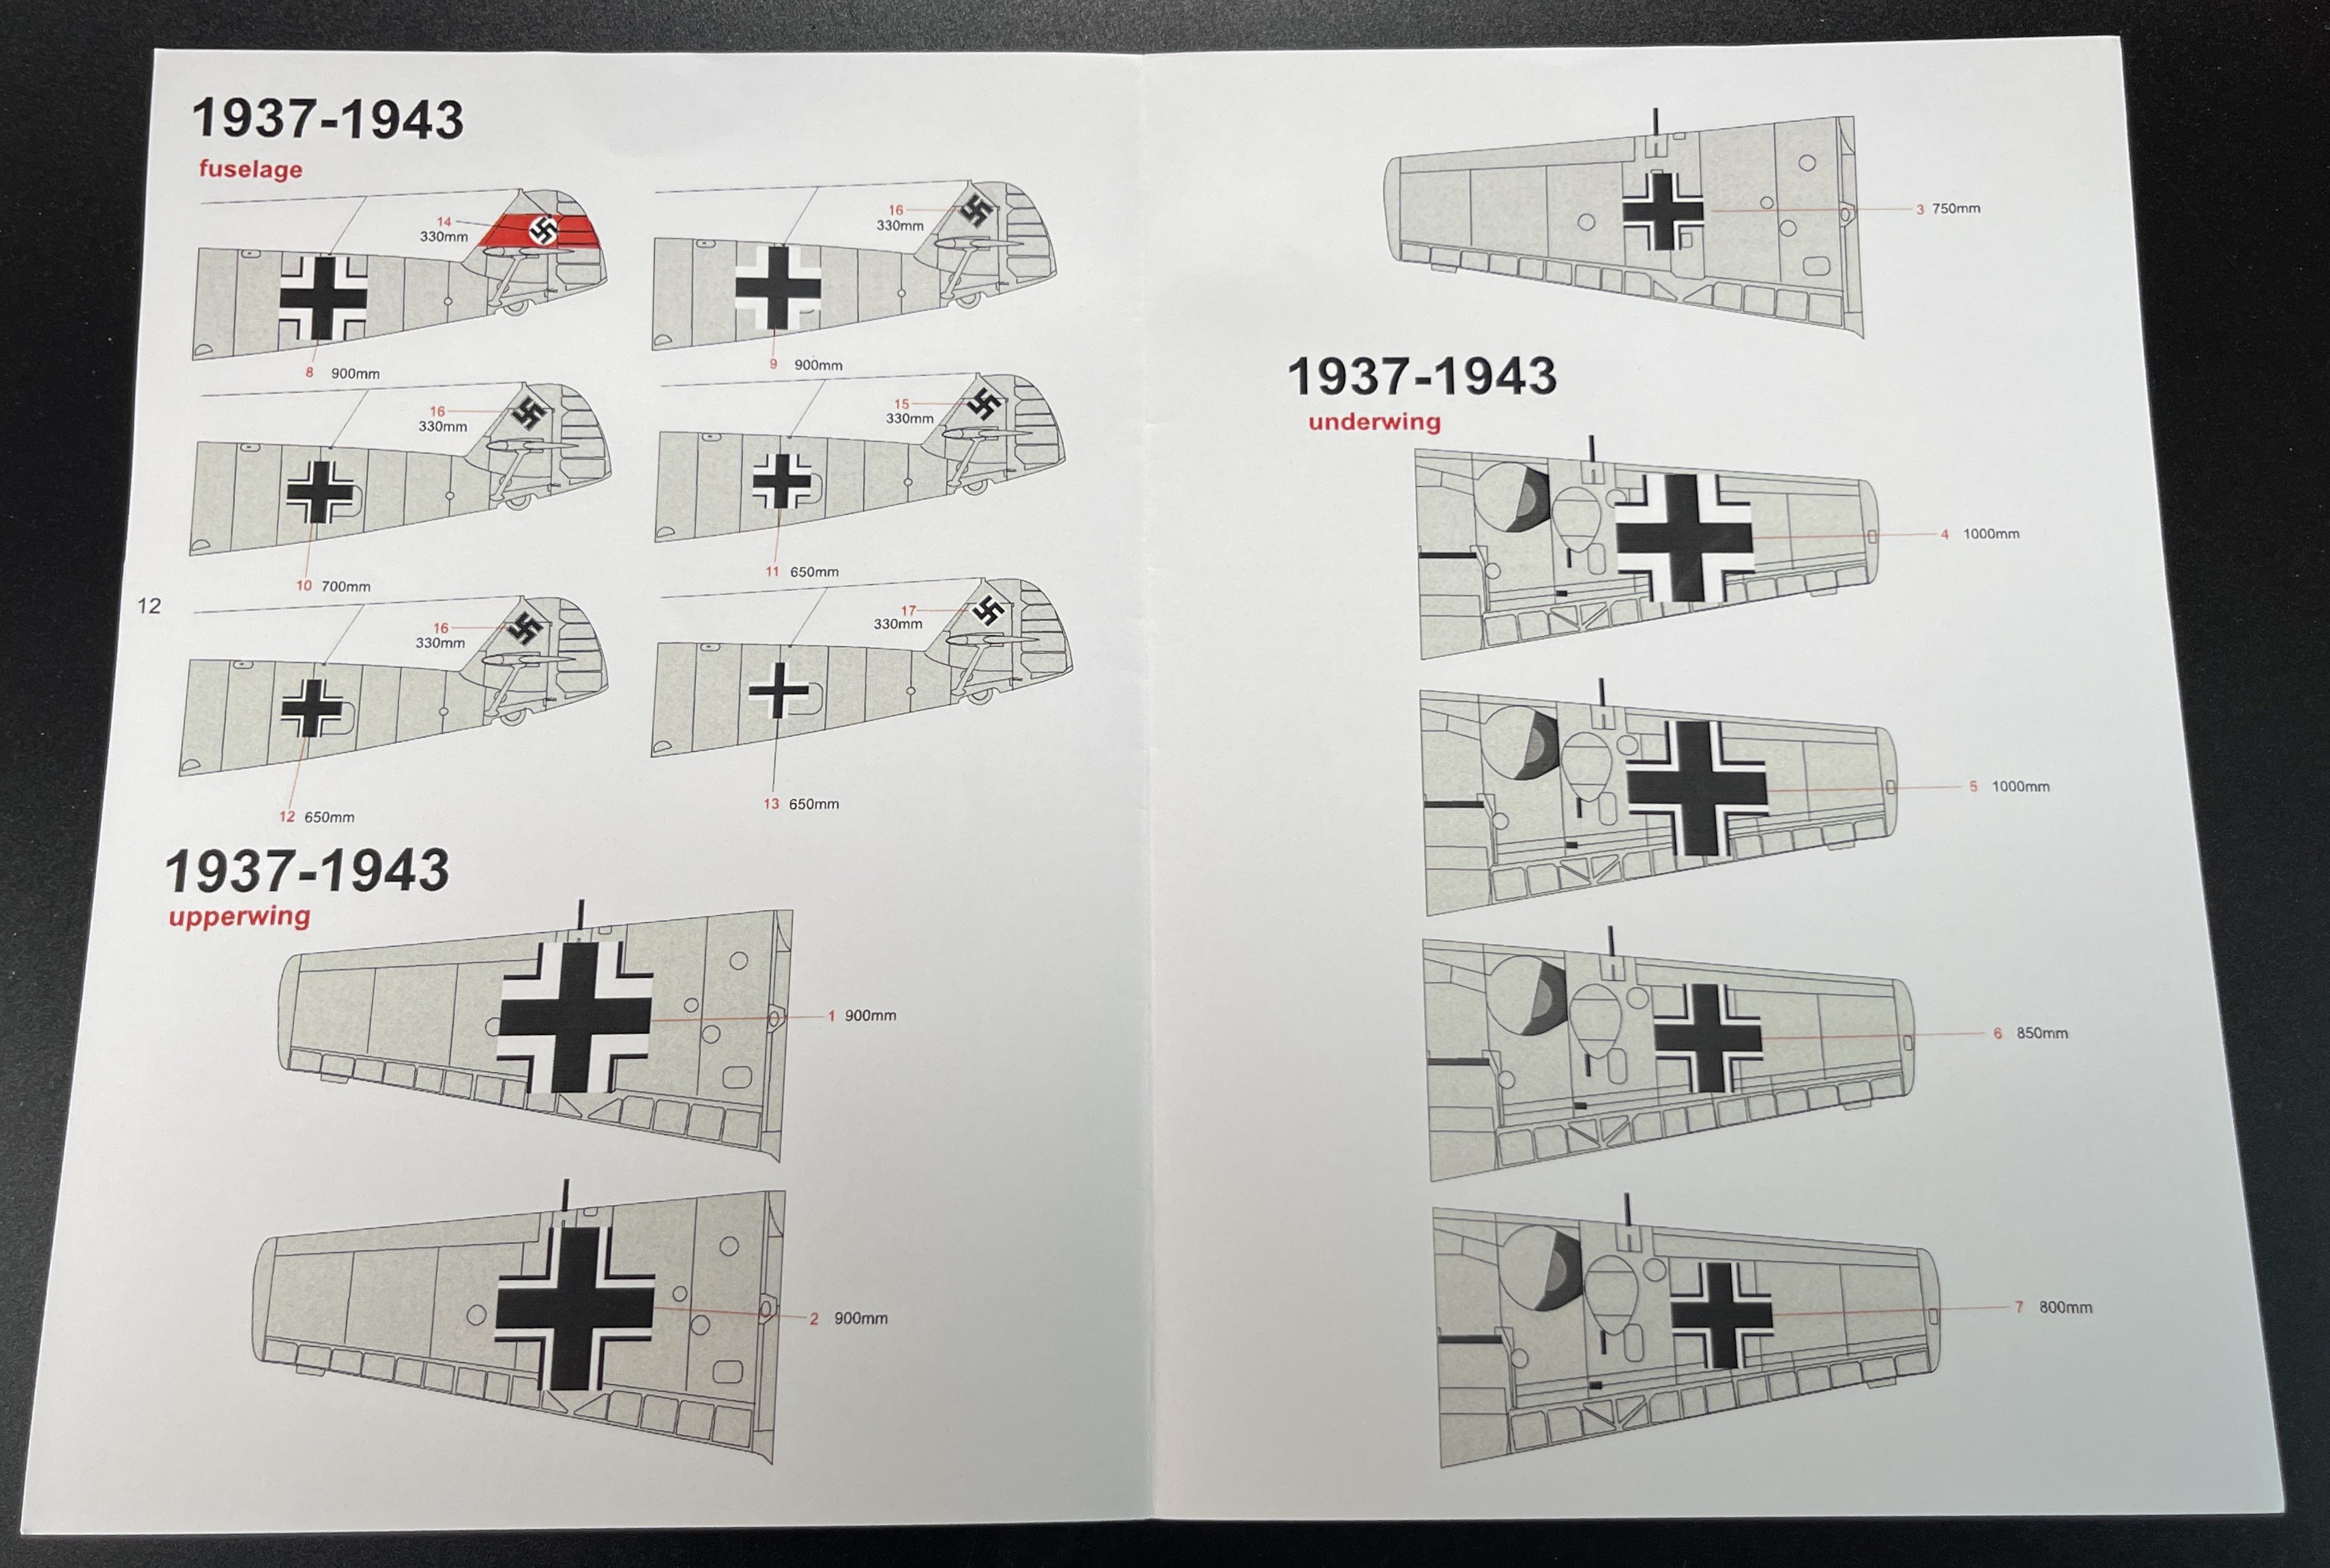
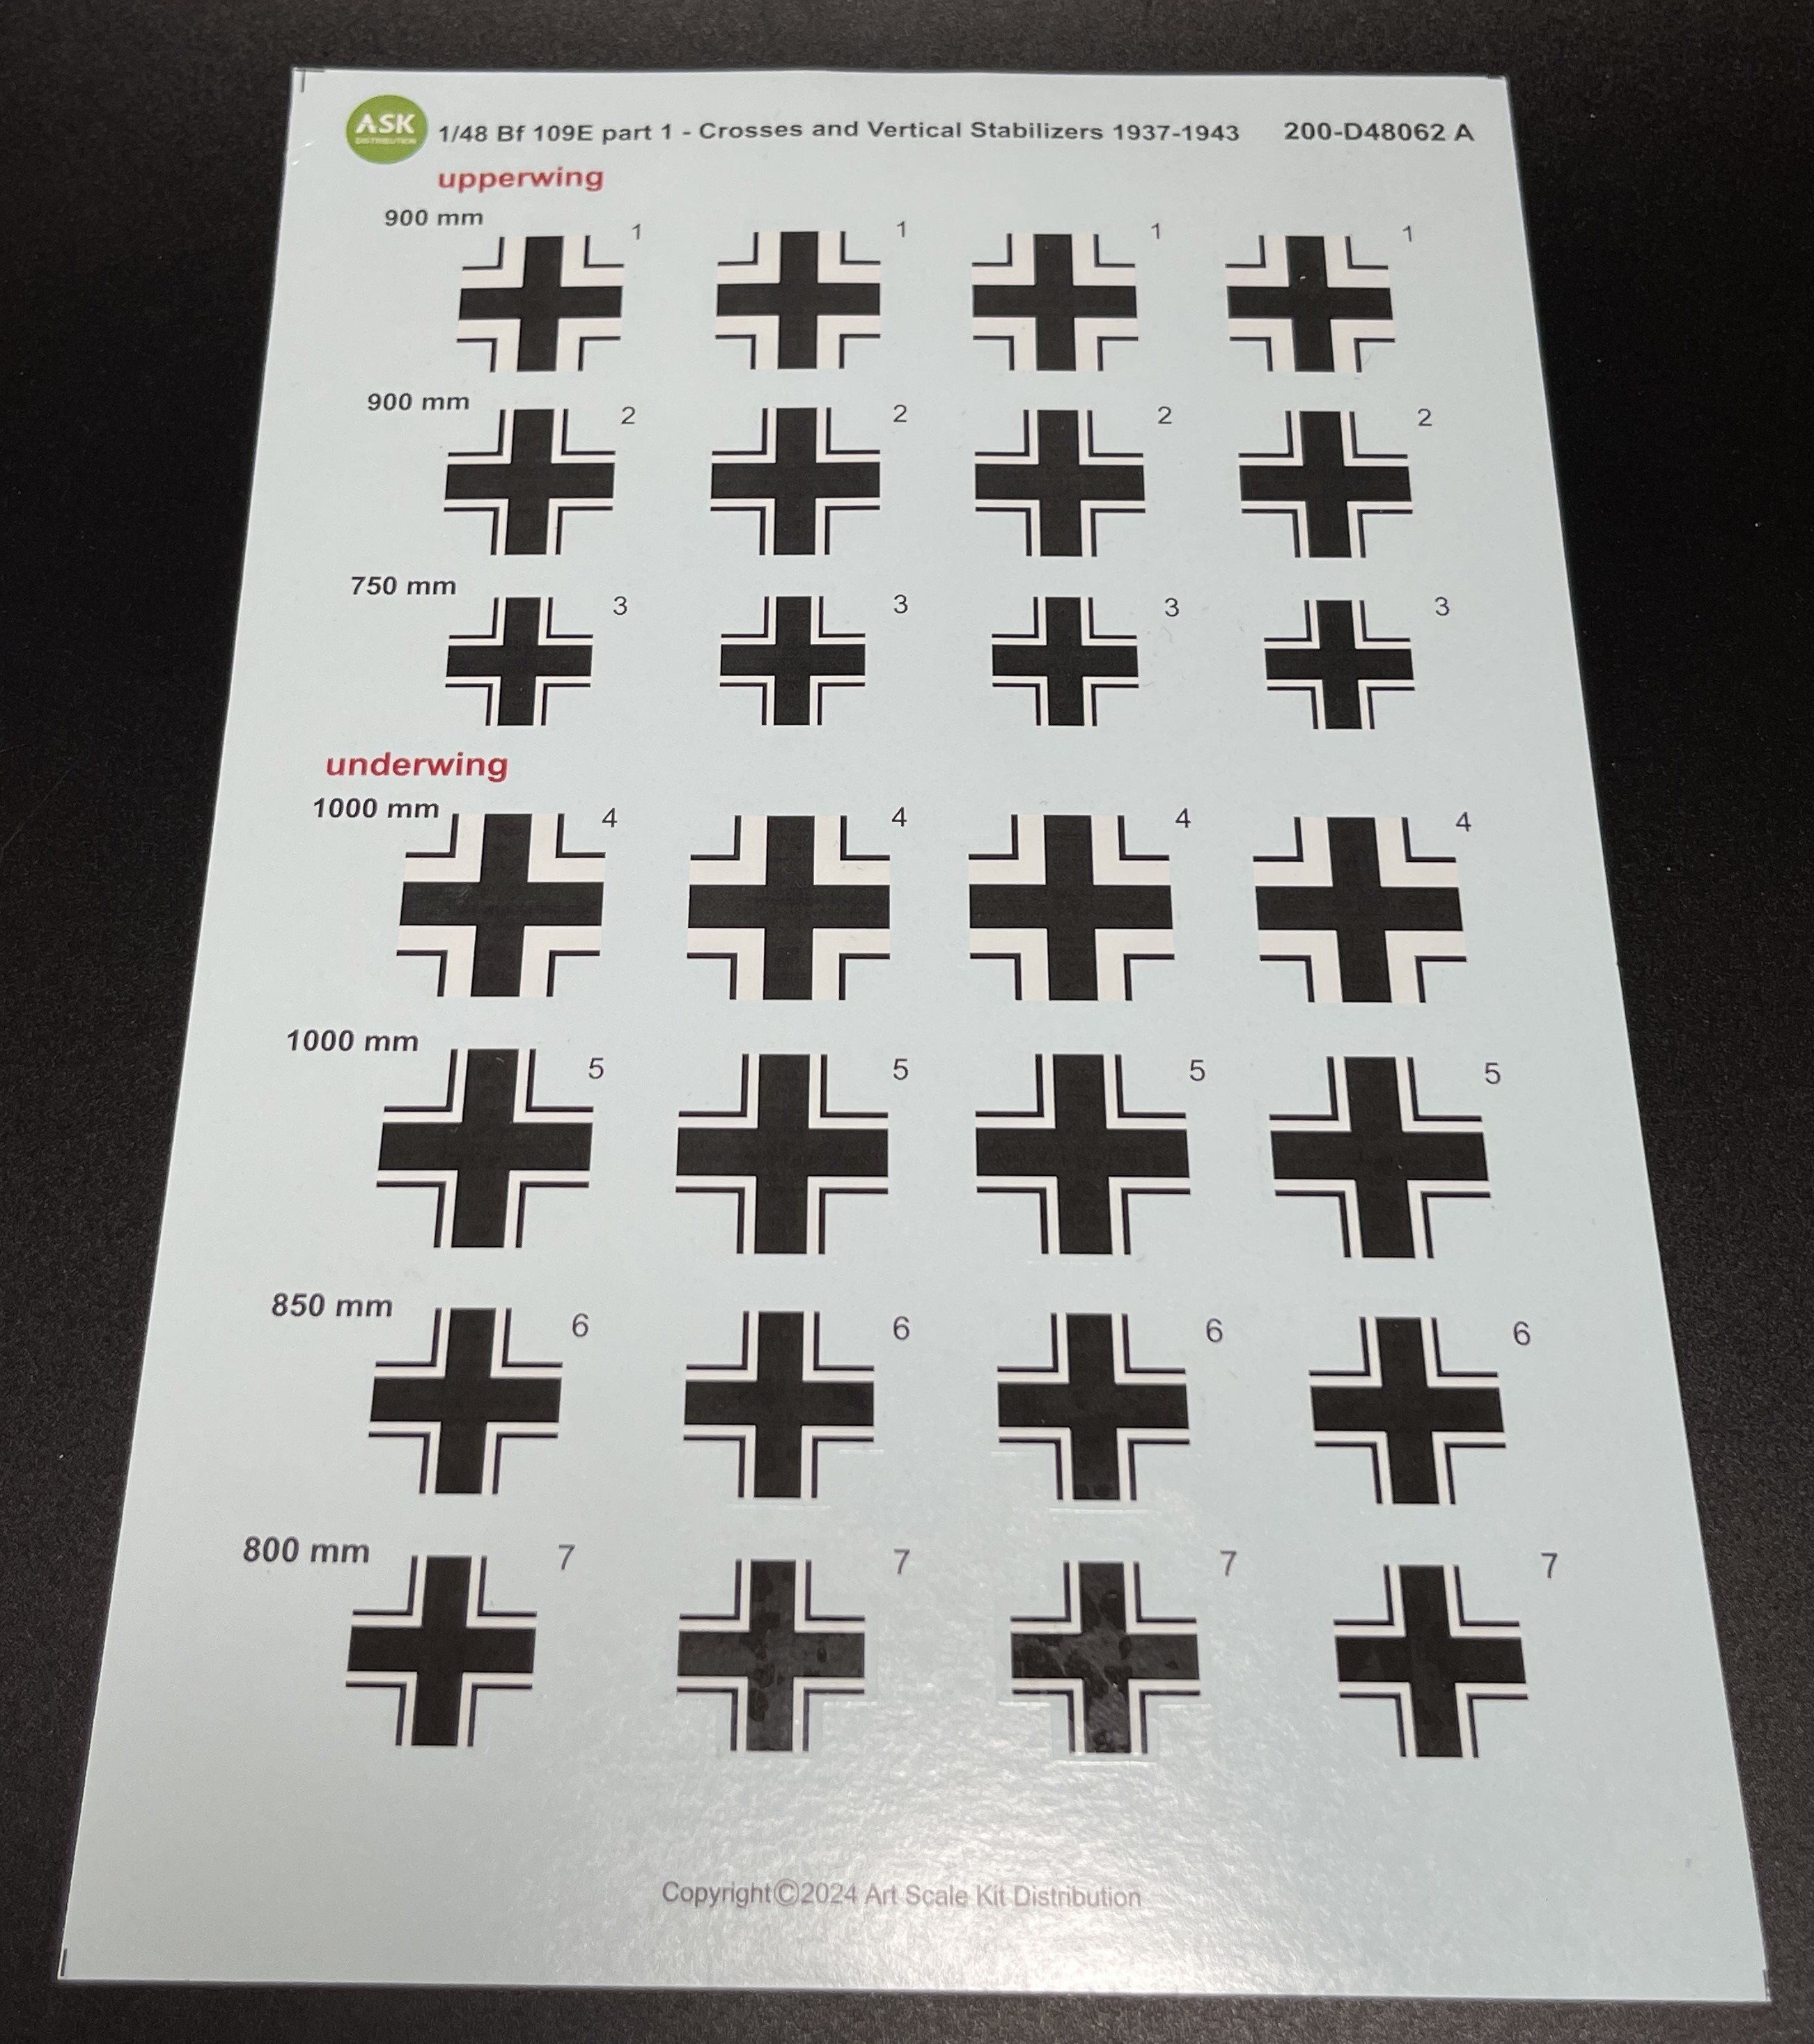
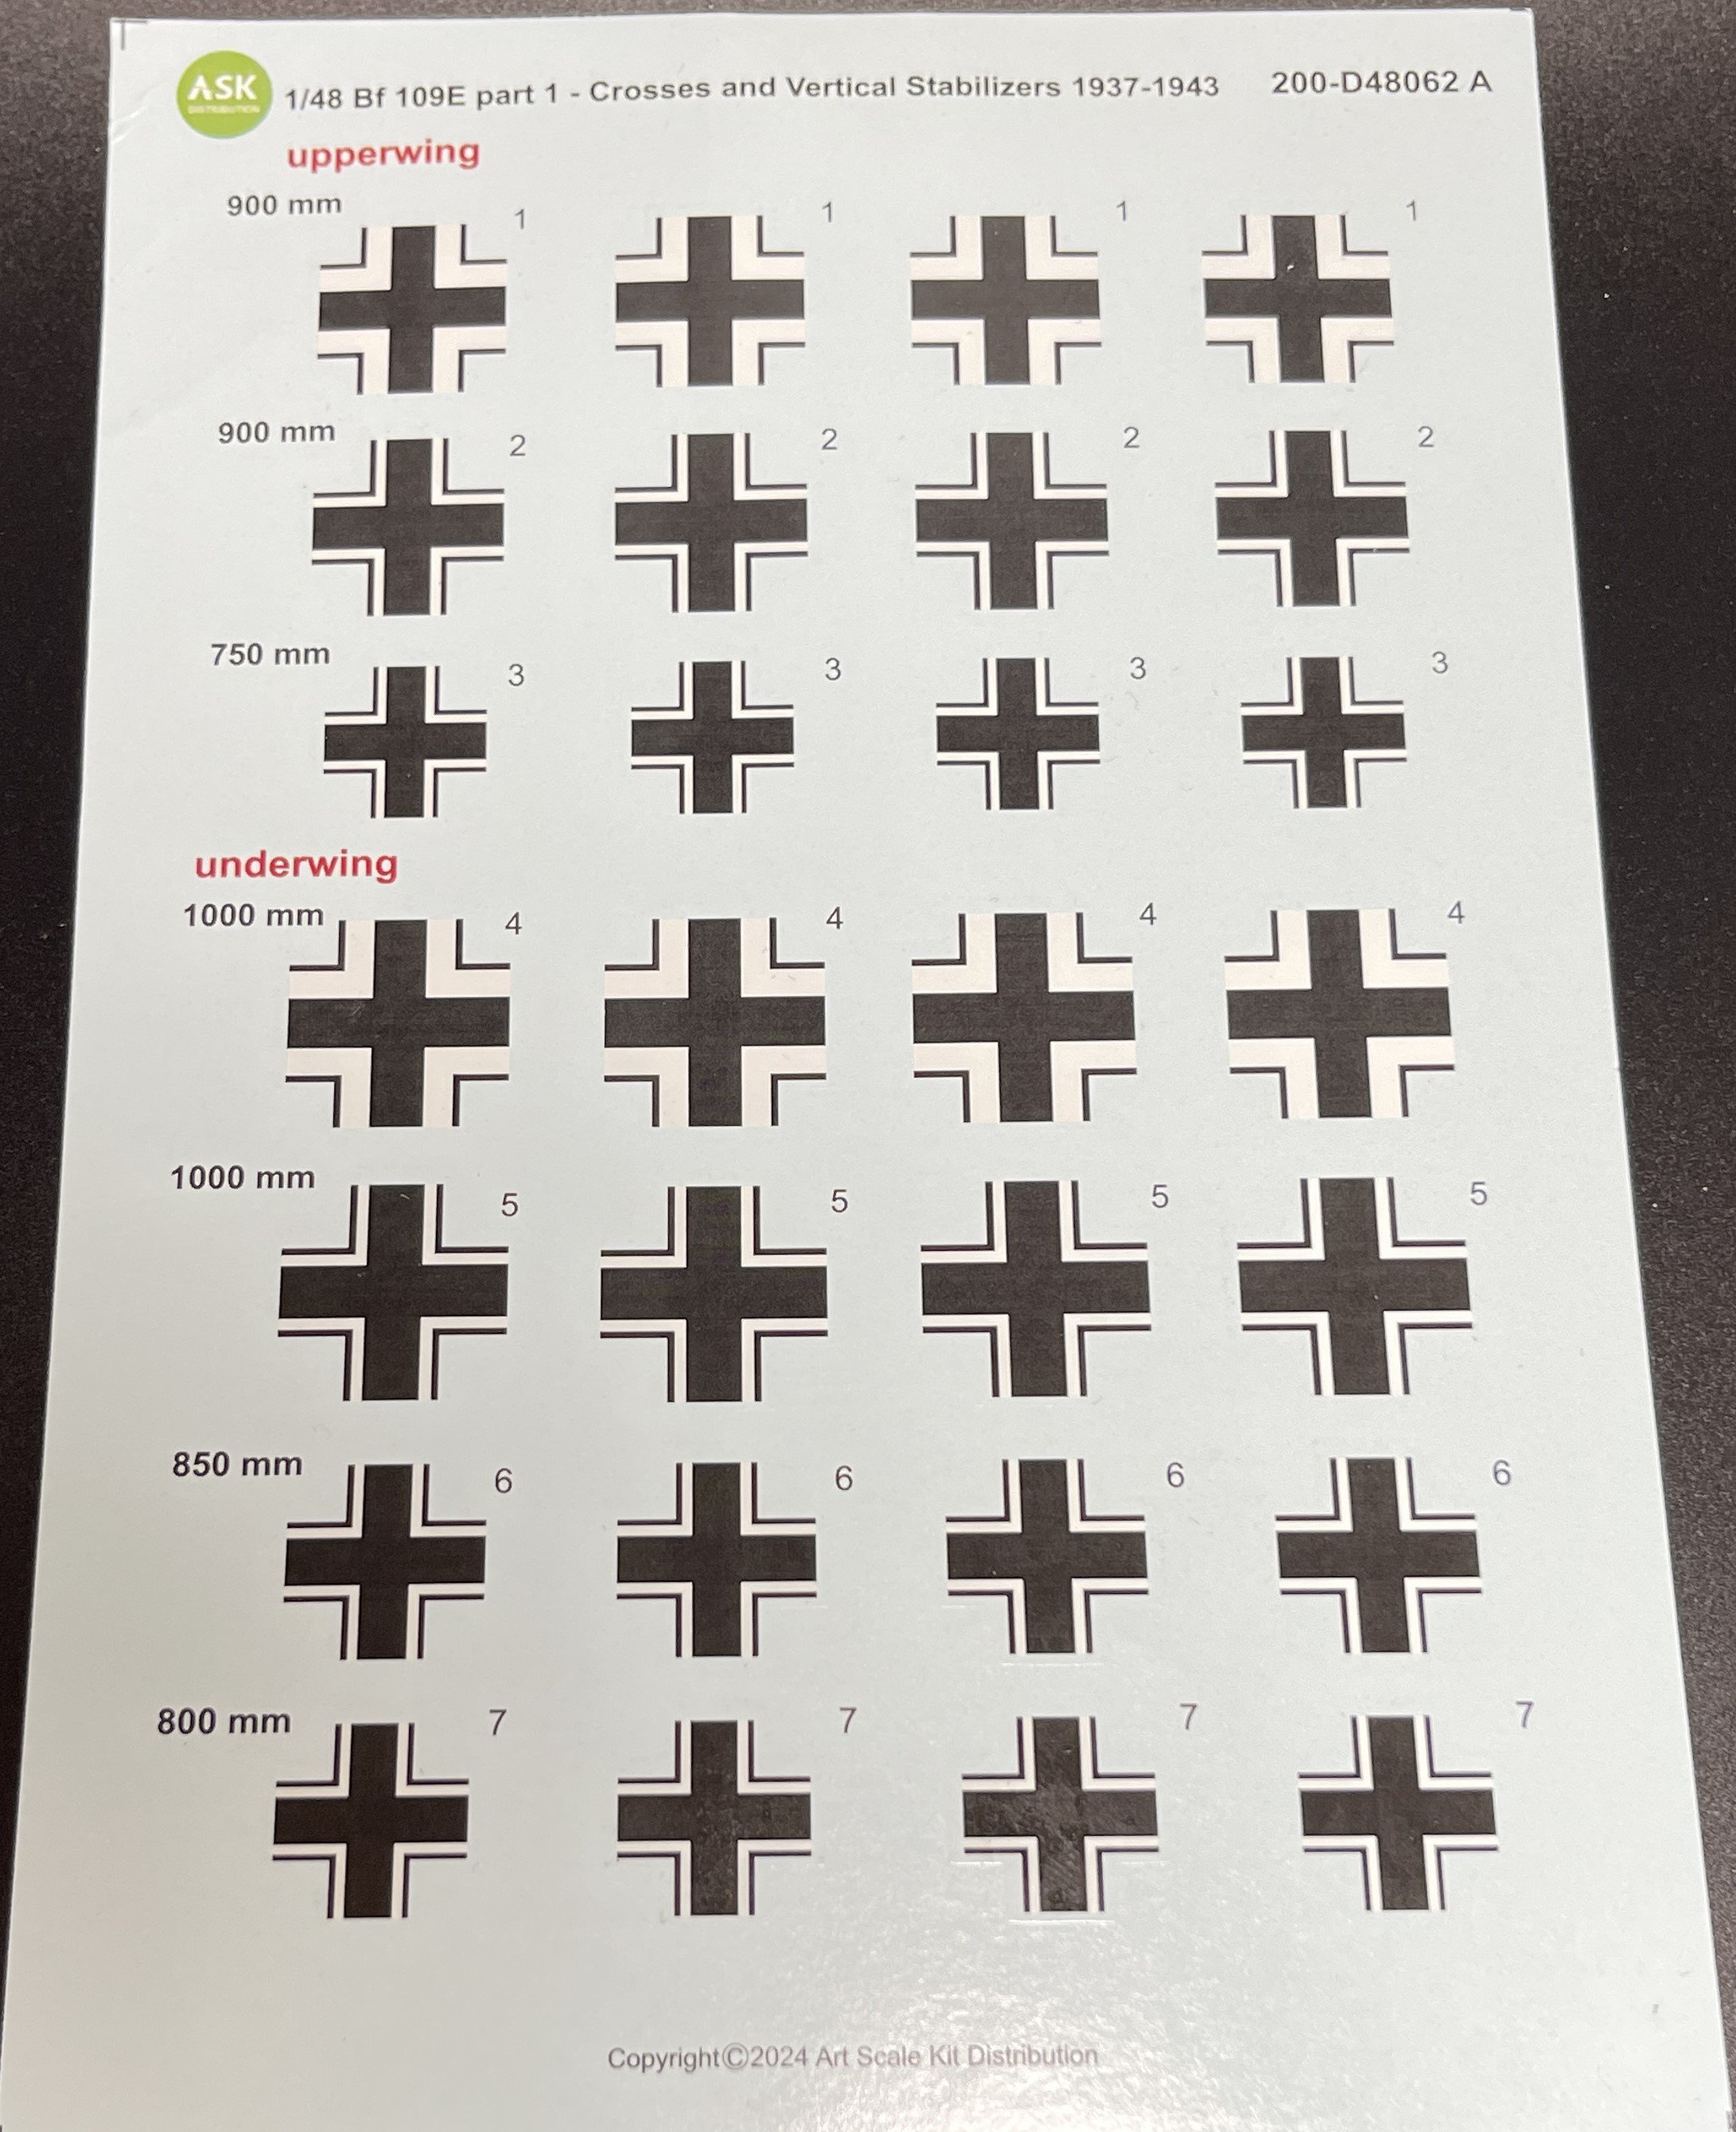
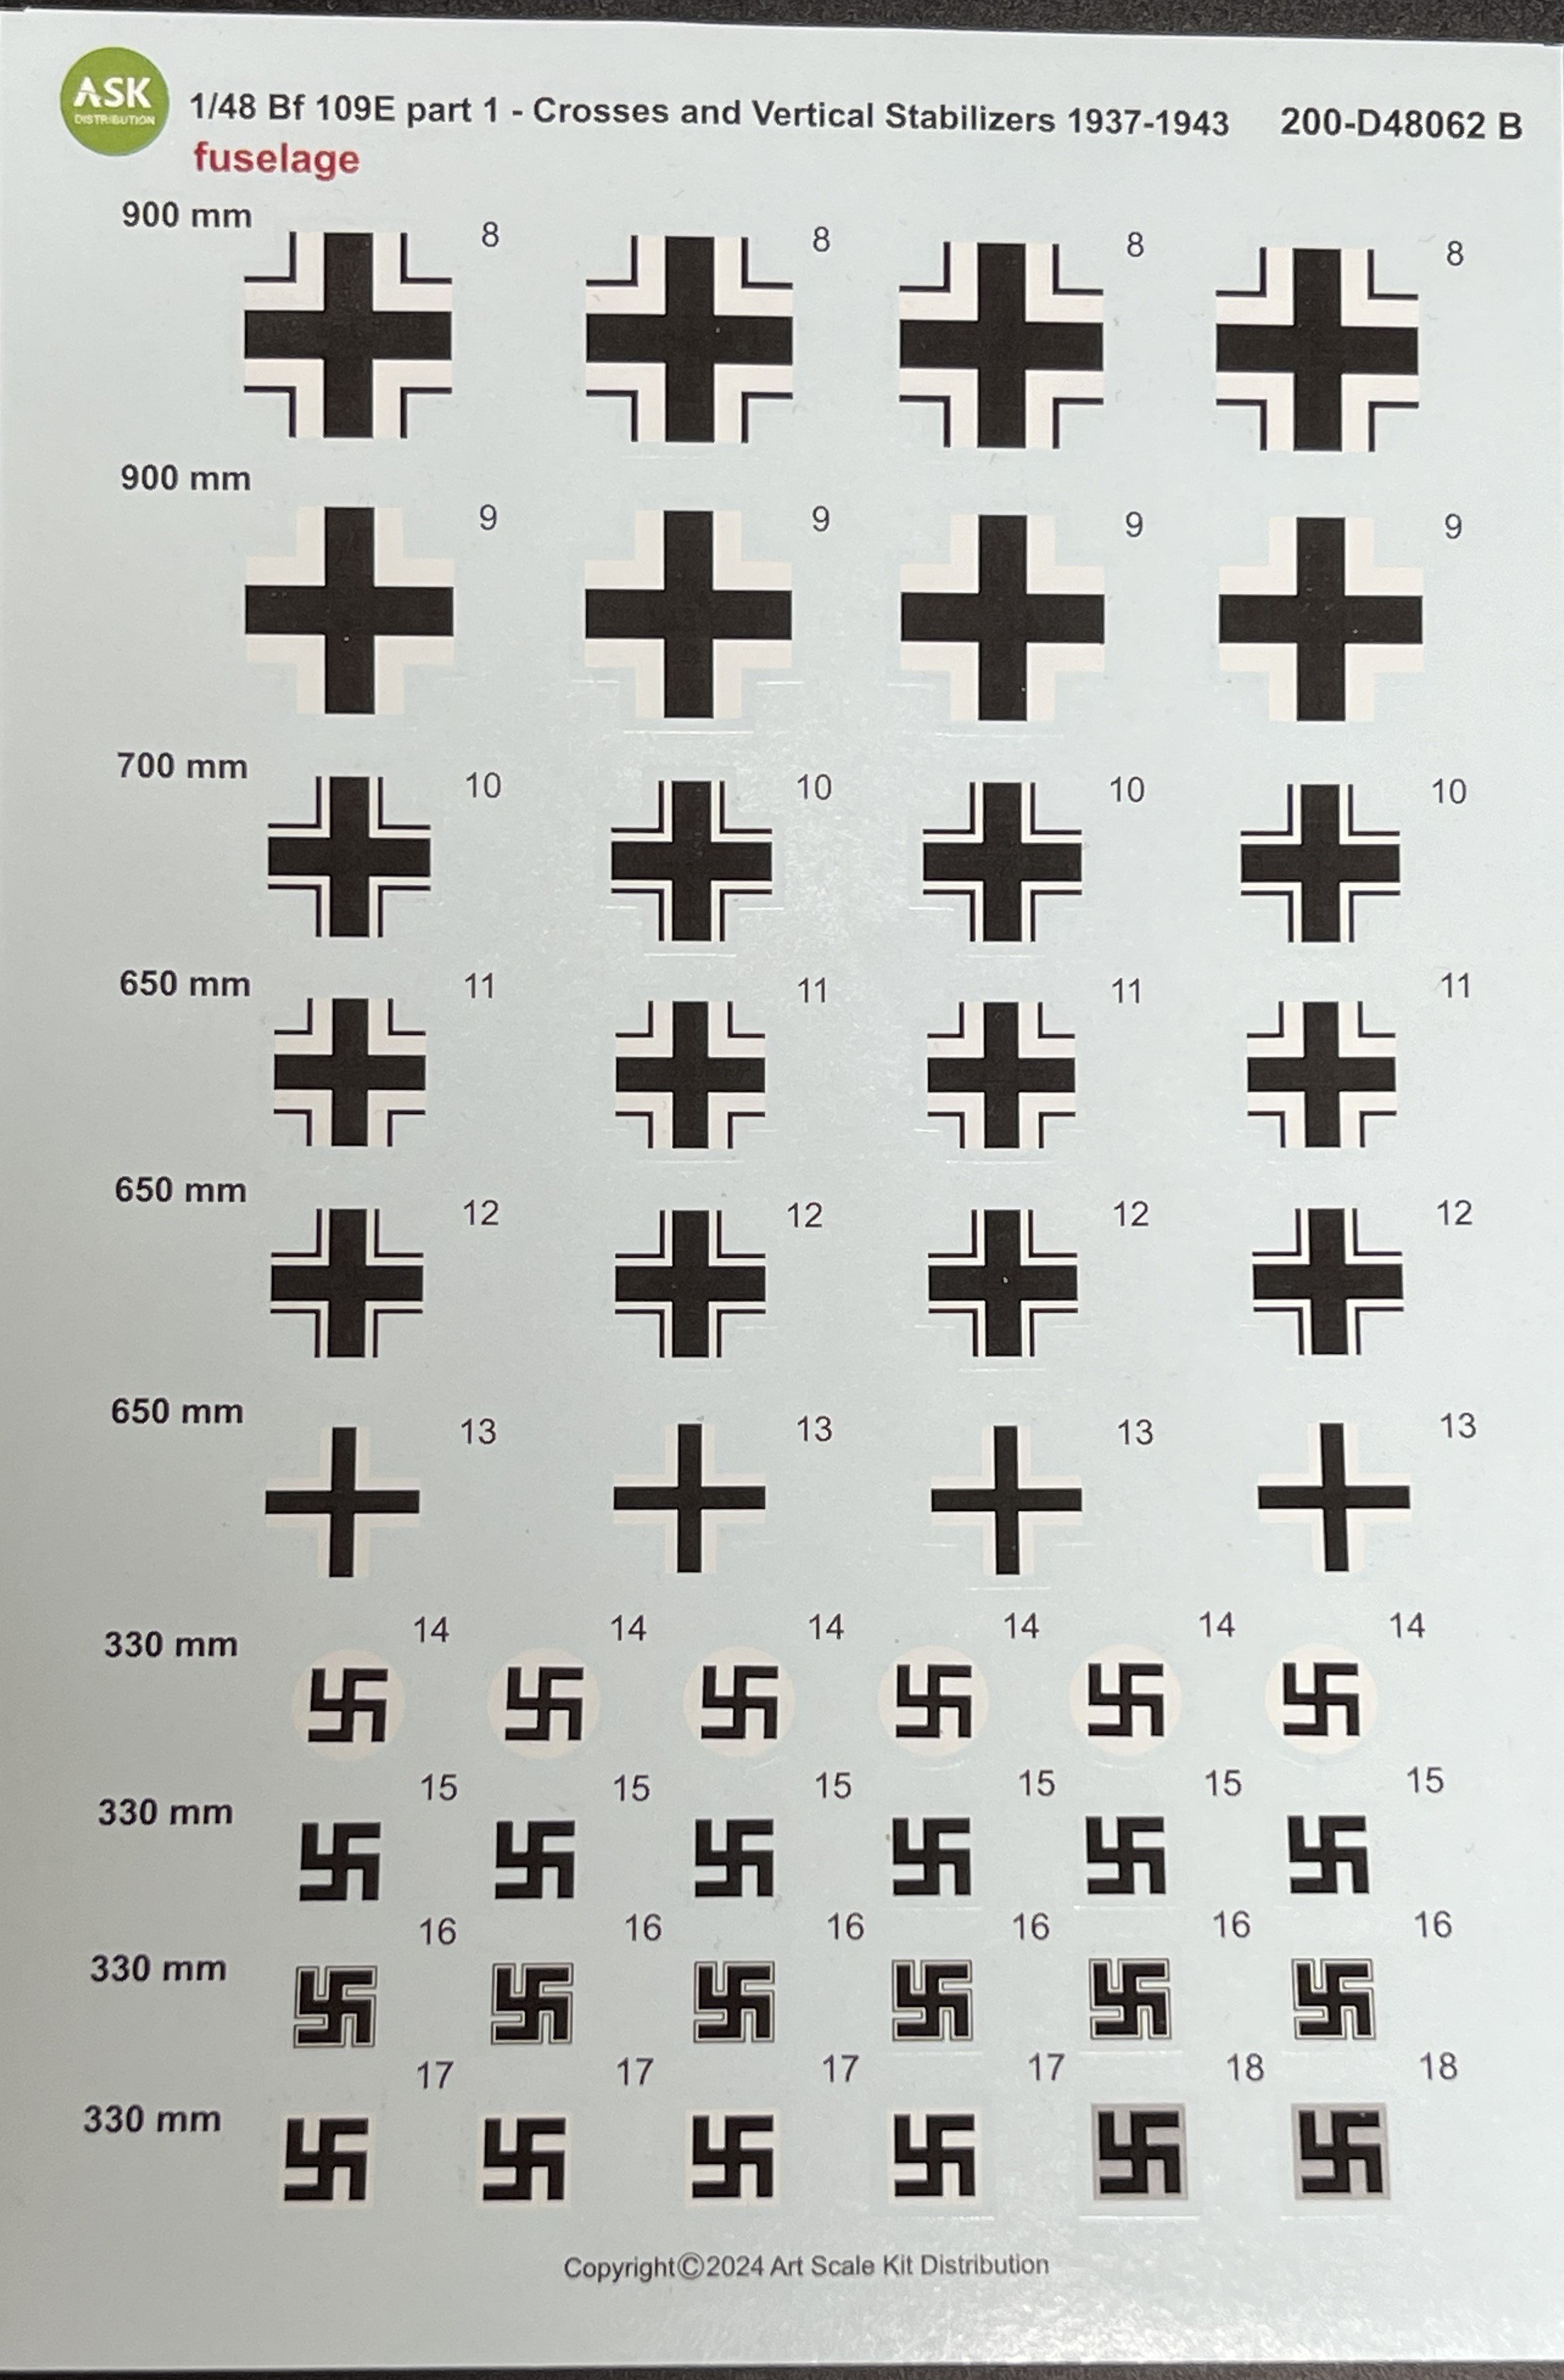
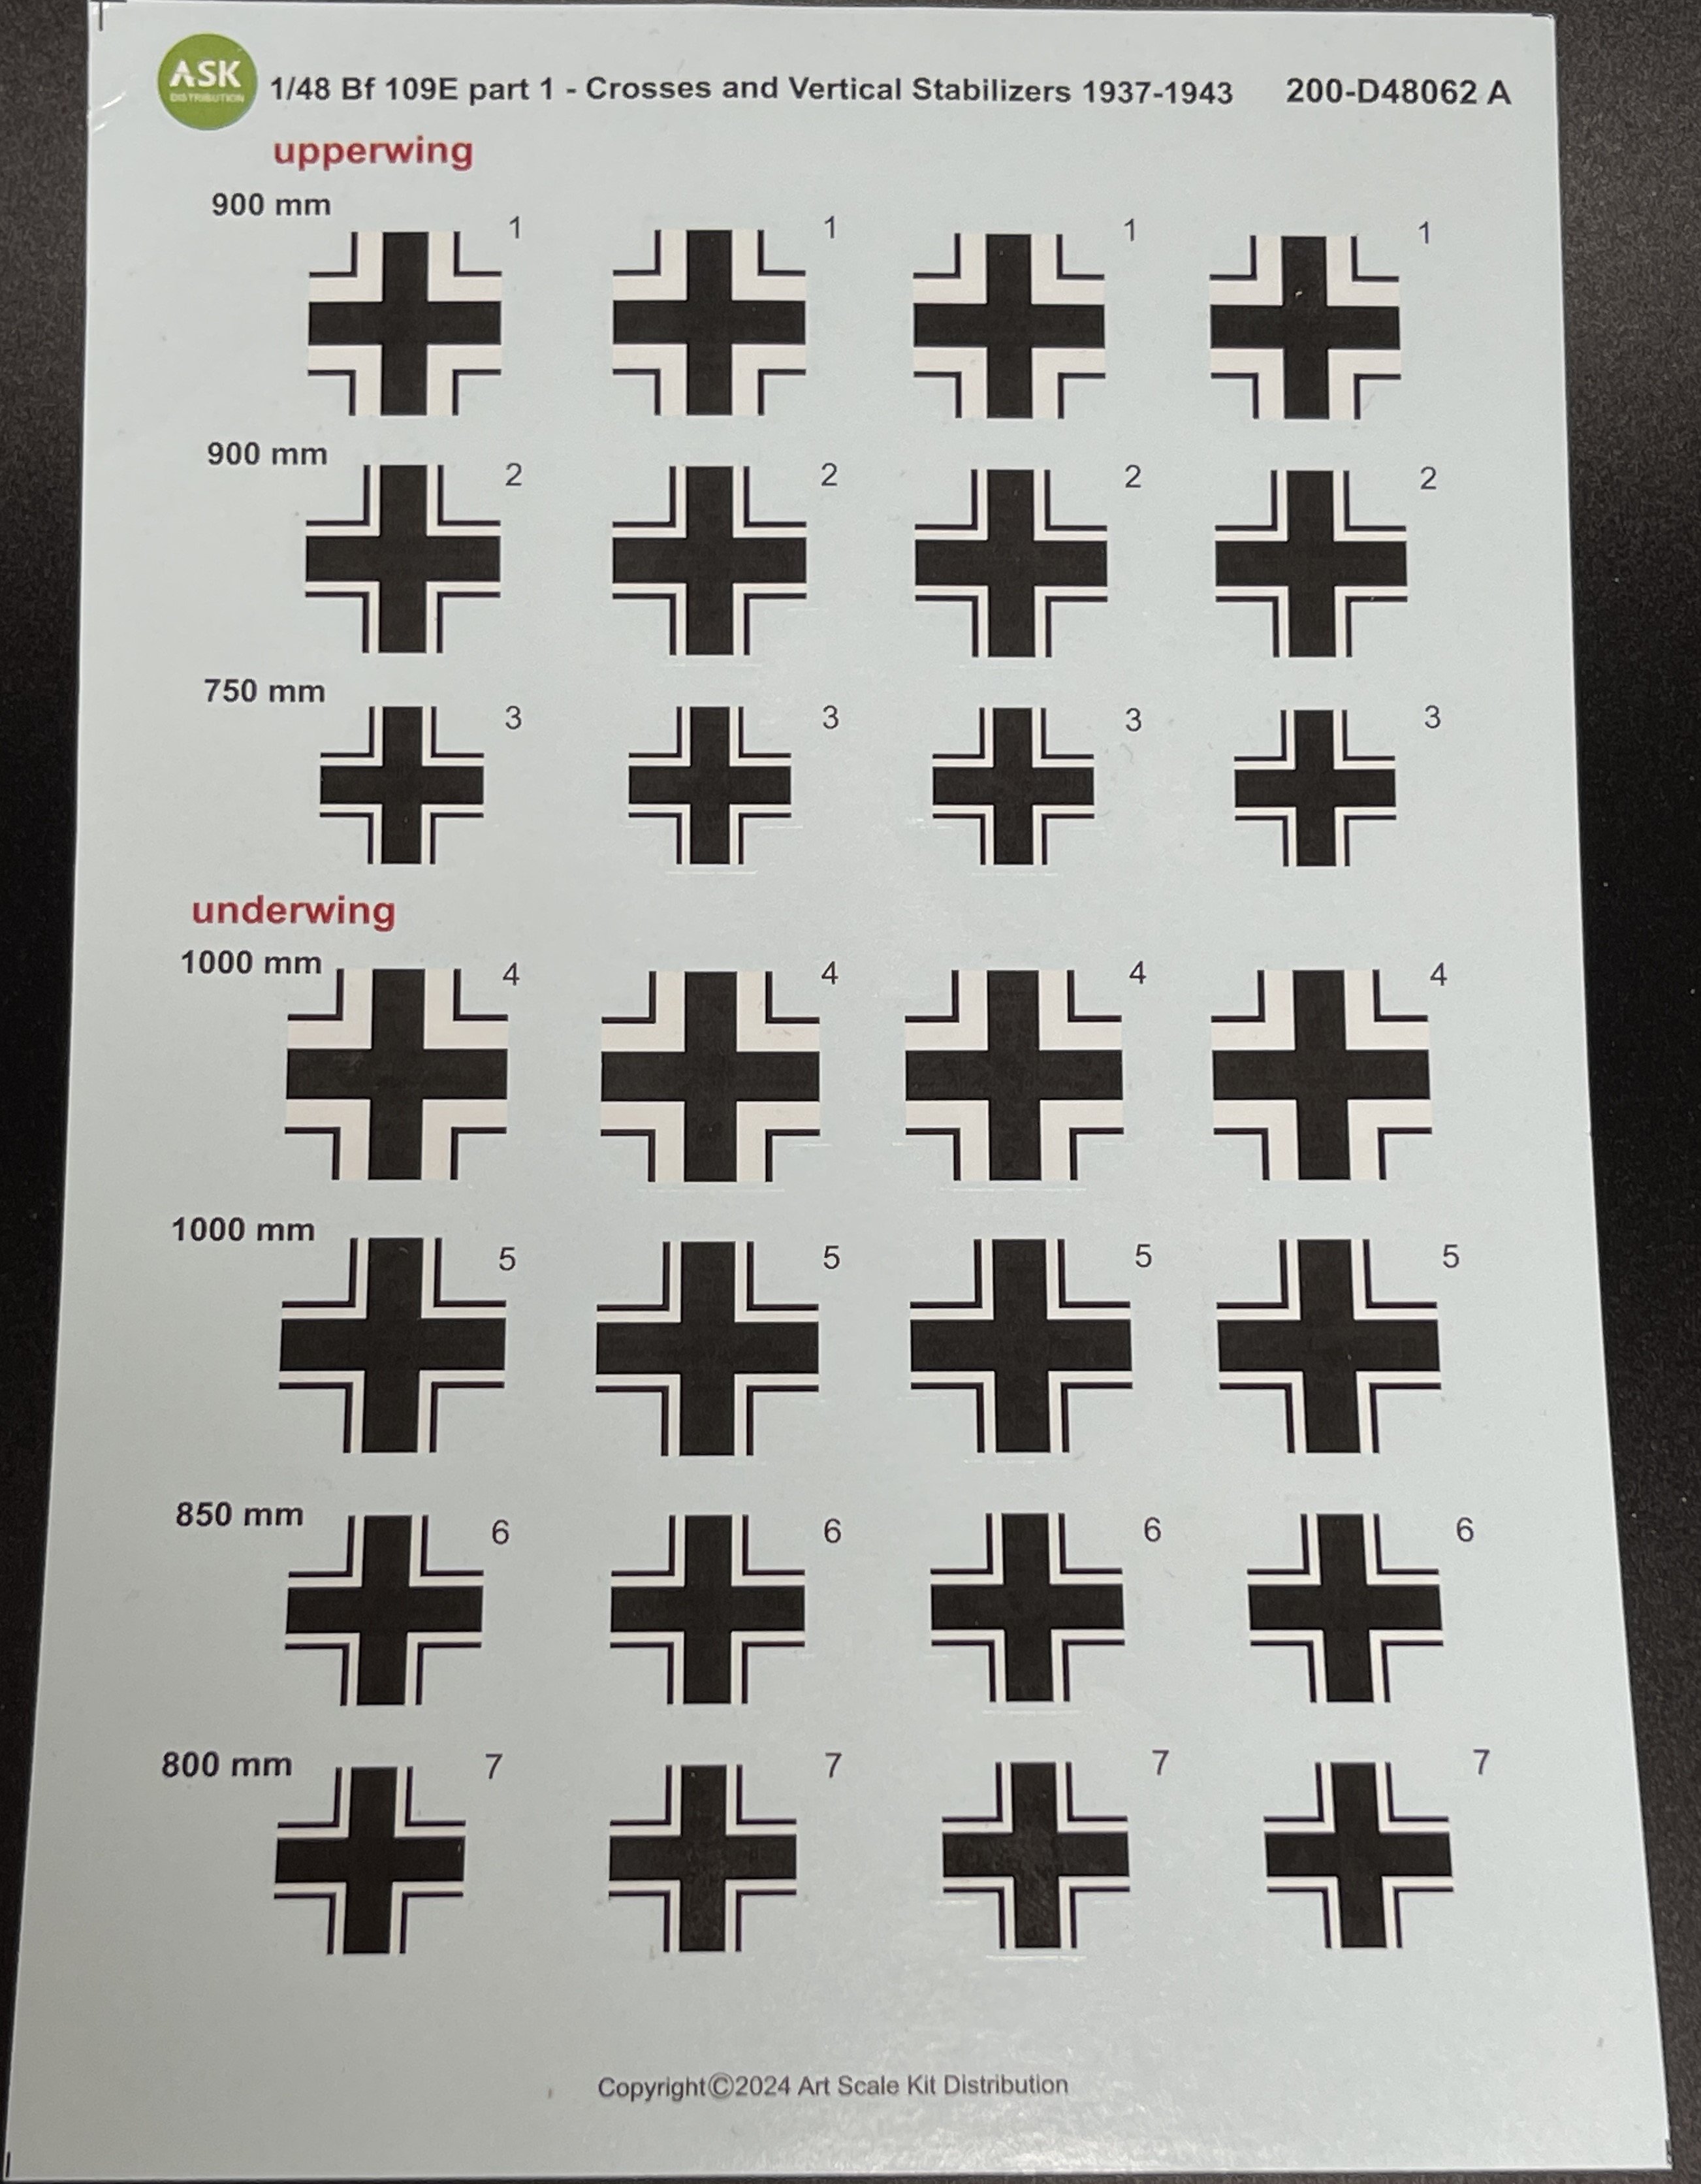
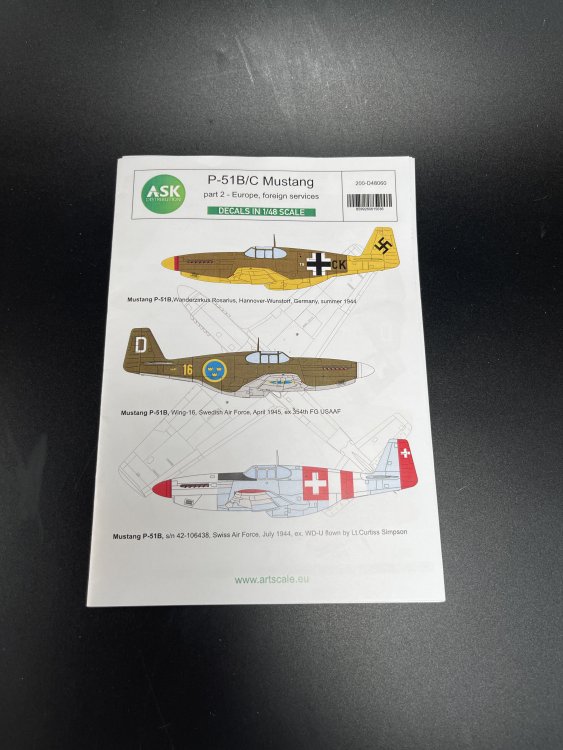
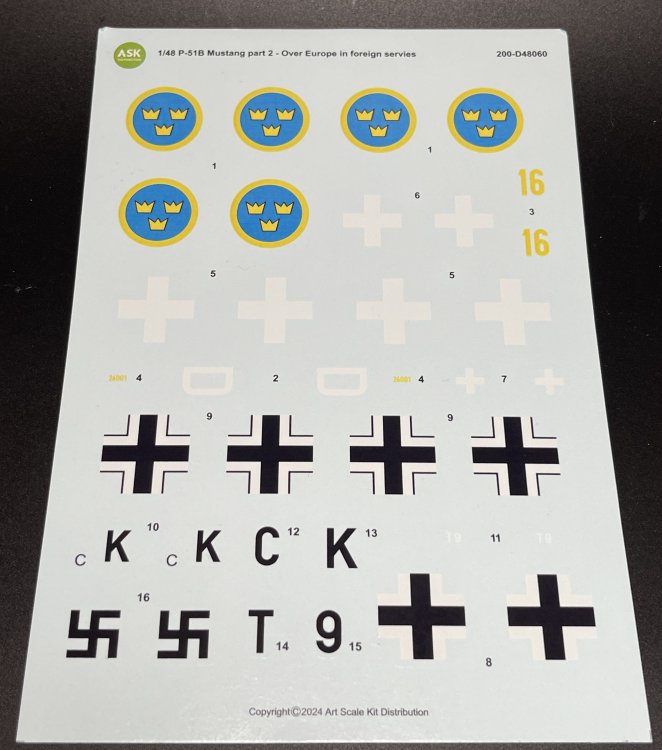
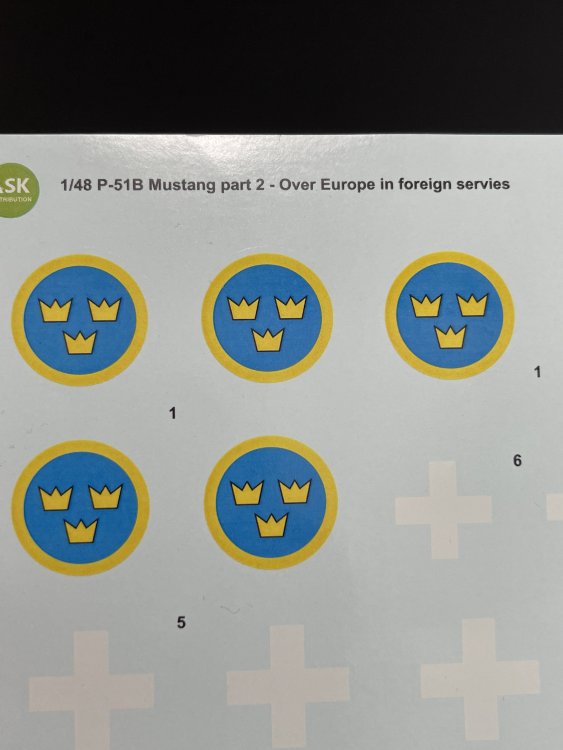
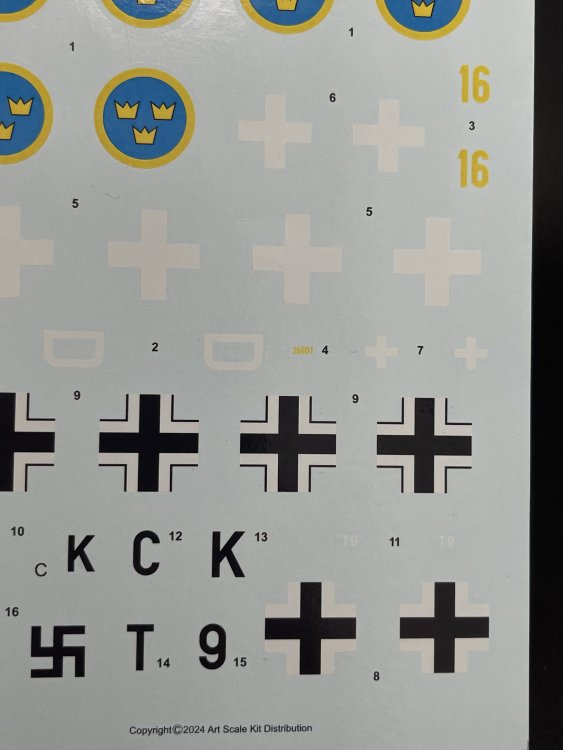
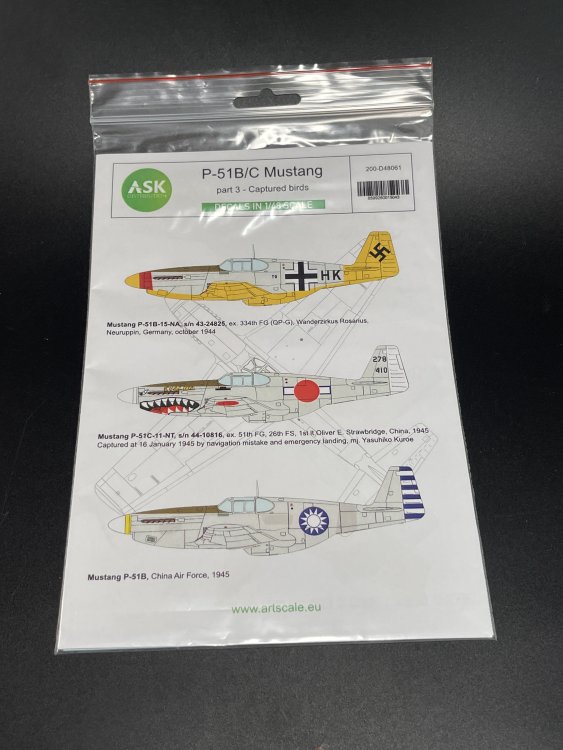
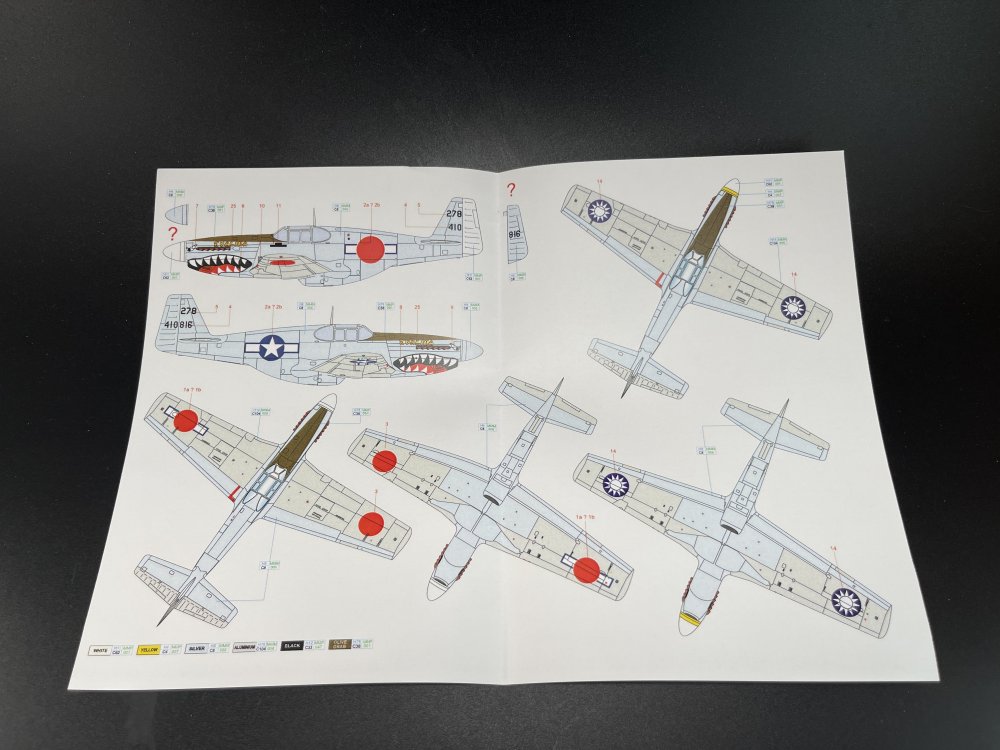
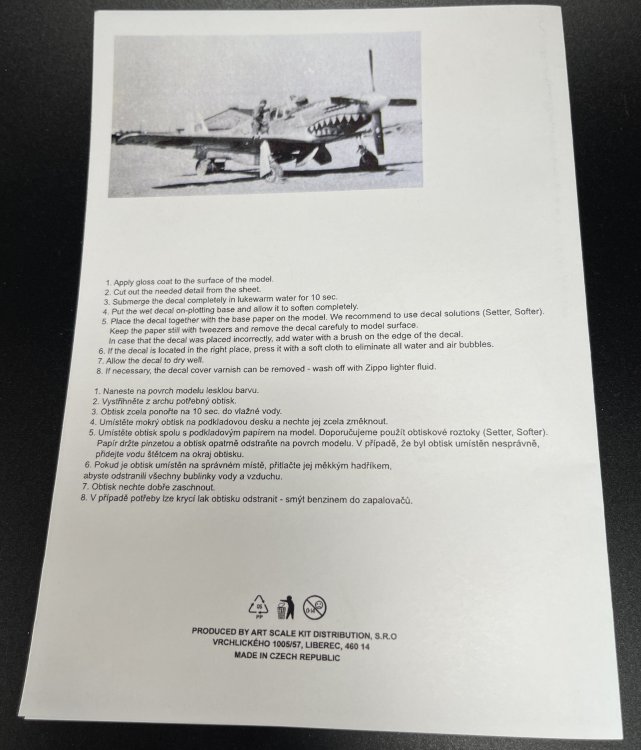
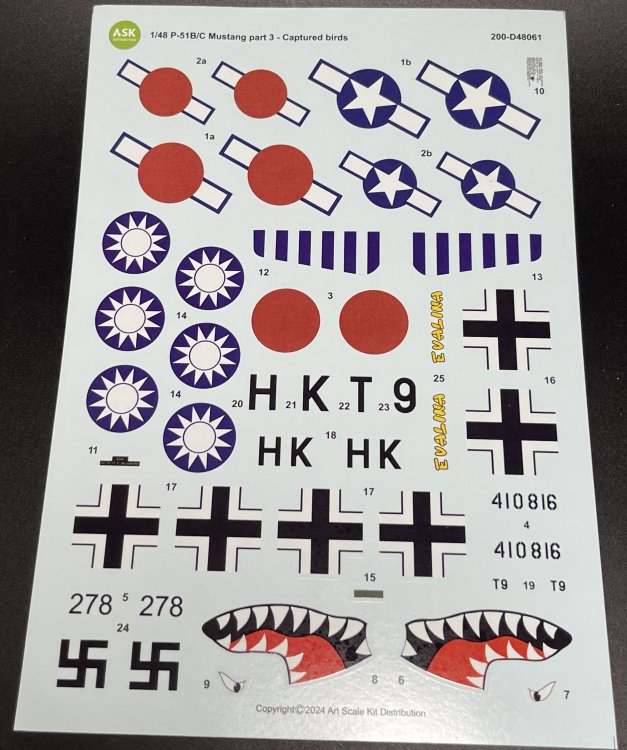
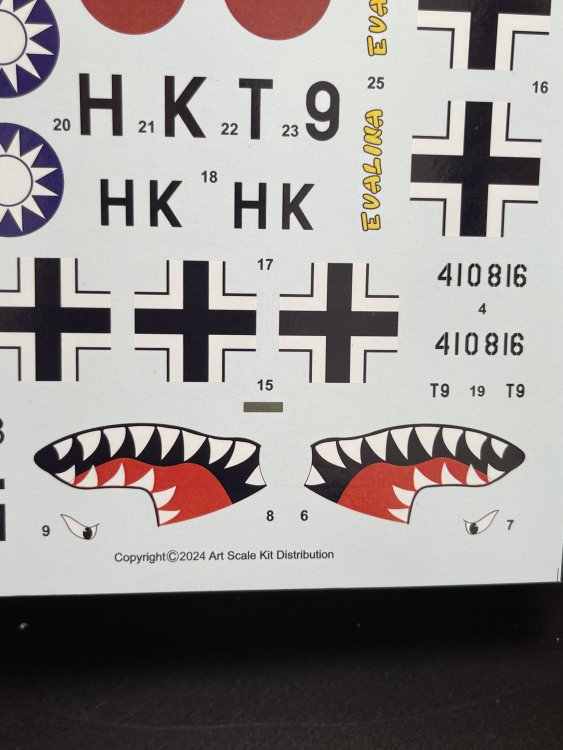
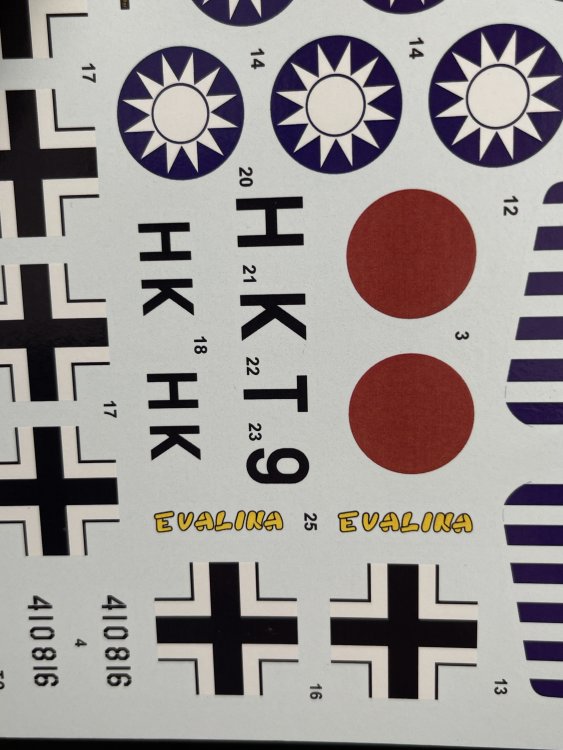
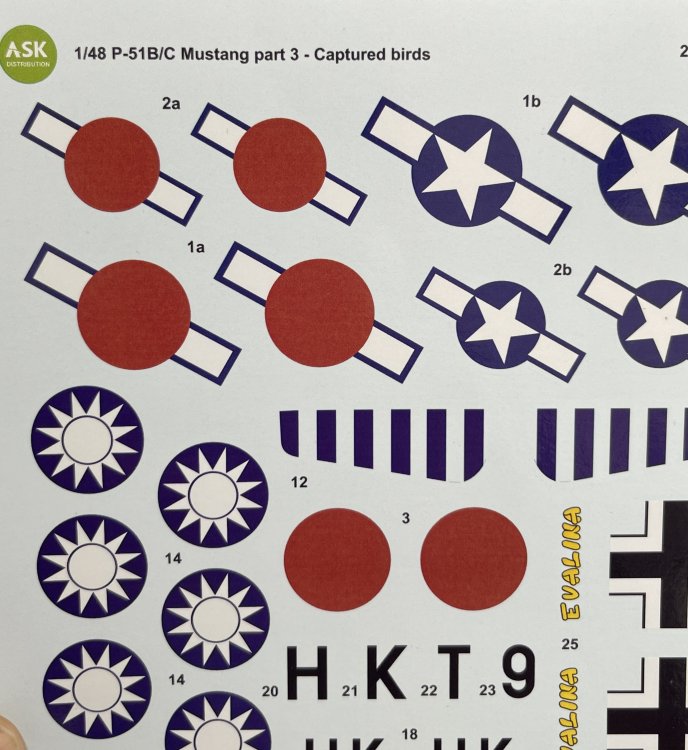
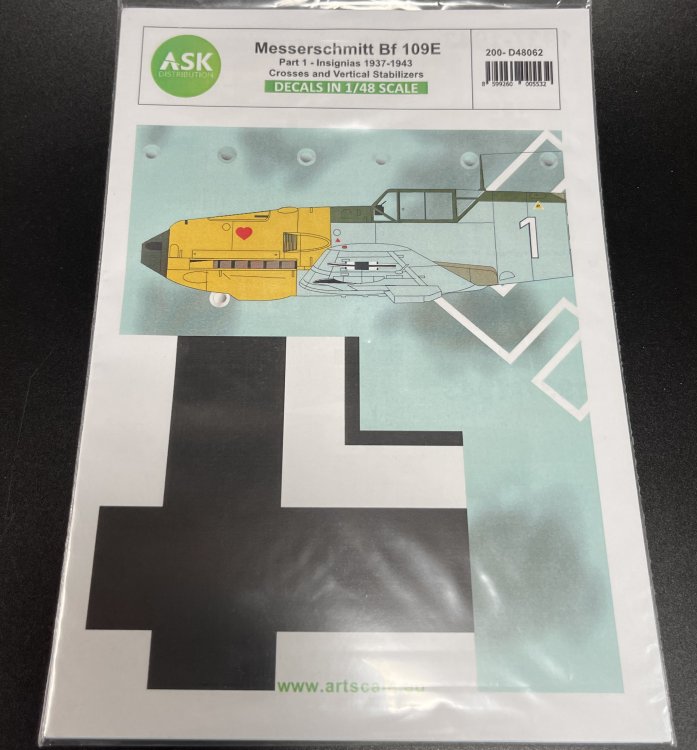
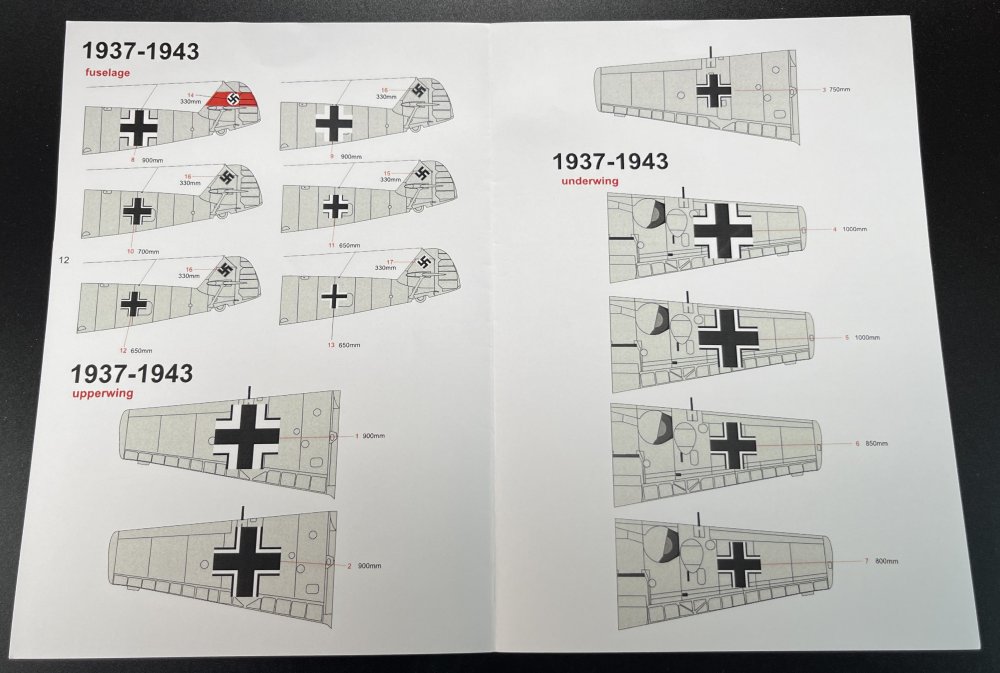
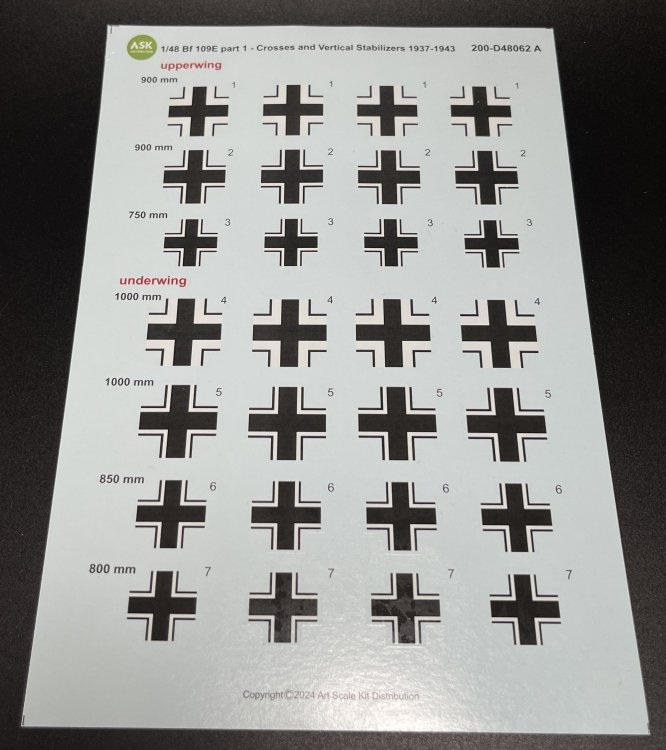
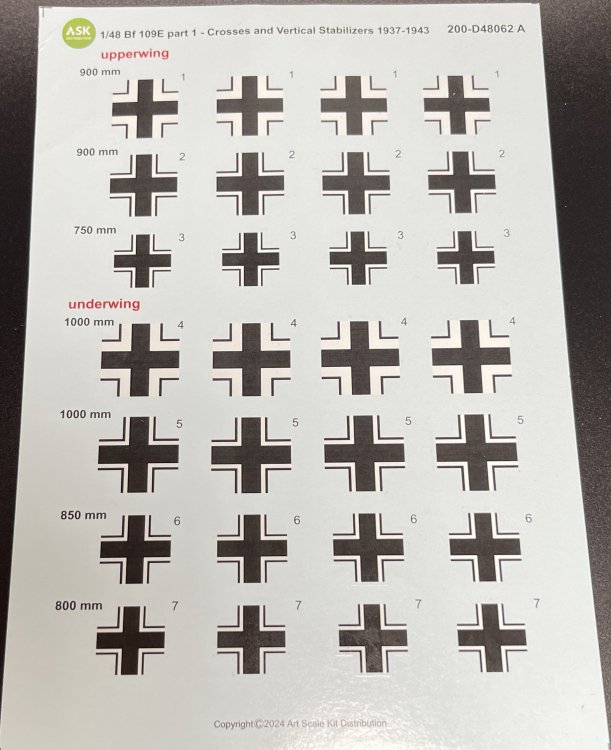
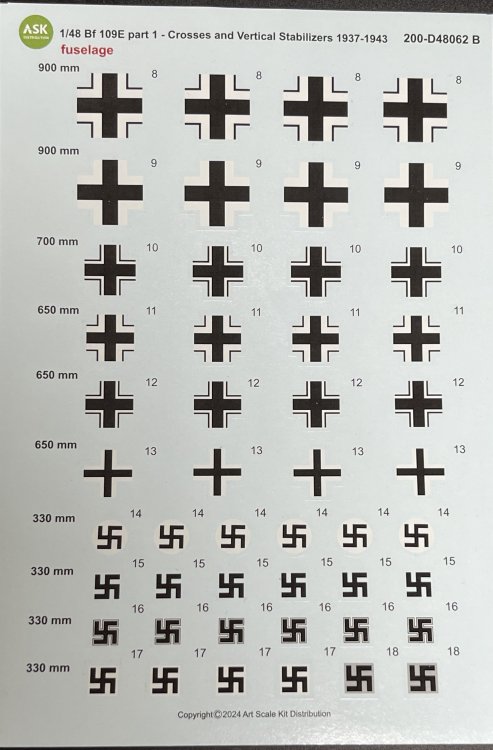
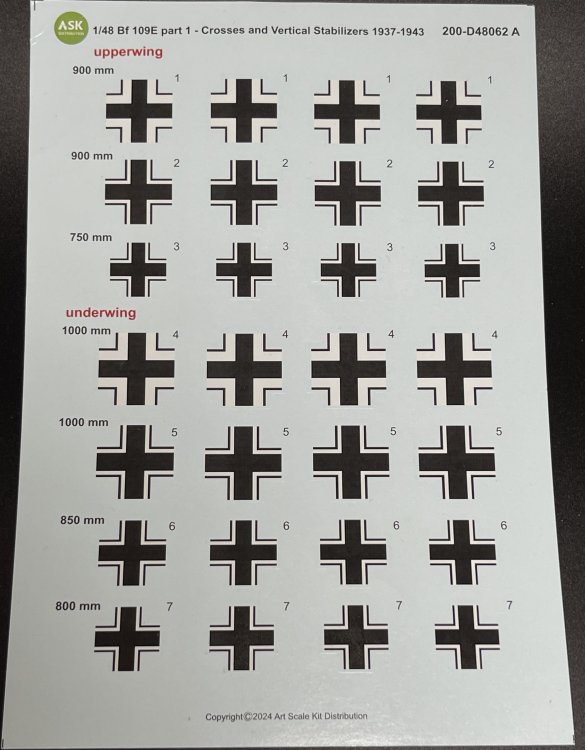
1:48 Art Scale Kit P-51 And Me-109 Insignias Several Sheets Art Scale Kit (also known as ASK) is a model hobby shop and now it known in the modelling world all around for their decals, tools and 3D productions. And ASK can`t stop of releasing decals sheets. Today, I´m going to review two decal sheet from ASK with six striking schemes for the rand new Eduard P-51B and a very useful one: Me-109 insignias! All sets came in a ziplog bag, small A5 size sheet with profiles colors instructions steps how to apply ASK decals. The Me-109 brings the wings and fuselage indication place and which cross to put and where. So let’s looks to the P-51 option schemes first. Here, unlikewise the B-26 sheets (that are an exception) only on picture of one of the schemes is given so theres`s real photo of one of the airplanes that are represented on the decal sheets. P-51 B/C - Part 2 – Europe, foreign services Catalogue number200-D48060 Price: 11,90€ To order, click here. This sheet has 3 schemes options of P-51 B in foreign, more concretely a German, a Sweden and a Swiss scheme. 1 - P-51B Mustang, Wanderzirkus Rosarius, Germany, Hannover-Wunstorf, summer 1944. 2 - P-51B Mustang, Wing-16, Swedish Air Force, April 1945, ex 354th FG USAAF. 3 - P-51B Mustang, s/n 42-106438, Swiss Air Force, July 1944, ex. WD-U flown by Lt. Curtiss Simpson. P-51 B/C Part 3 – Capture birds Catalogue number200-D48061 Price: 11,90€ To order, click here. Here, some striking Mustangs with some unusual markings, like German or Japanese. 1. Mustang P-51B-15-NA, s/n 43-24825, ex. 334th FG (QP-G), Wanderzirkus Rosarius, Neuruppin, Germany, October 1944. 2. Mustang P-51C-11-NT, s/n 44-10816, ex. 51th FG, 2.6th FS, 1st Lt.Oliver E. Strawbridge, China 1945, captured at 16 January 1945 by navigation mistake and emergency landing. Mj. Yasuhiko Kuroe. 3. Mustang P-51B, China Air Force 1945. And finally, a very usefull sheet Me-109 Part 1 – Insignias 1937-1943 Crosses and vertical stabilizers Catalogue number200-D48062 Price: 19,80€ To order, click here. Several swastikas (lets never forget… erasing the past, is the way to repeat it in the future) and several types of Balkenkreuz, all for Me-109 in 1:48 with the clear specification that is for the timeline from 1939 to 1943. So, for sure that this sheet will be a most to all aircraft modeler. ** Checking the decal sheets, as usual the color registration e density is great and a very good definition of the details. The decals have a thin film, in fact looking very thin and delicate. Once again, there is no indication where are they printed so I assume that will be in ASK house. The printing quality is quite good, as they are sharp, with outline very well defined. The instructions are the general ones that are applicable to all decals, it is always important to remember the general principles of decal application. In this case, there is no specific rule for applying these decals. The profiles draws contains lots of information, with side view (both side) and top view with precise decal indication. *** Conclusion: So, theses sheet is quite sparkle with very striking and attractive schemes. Thanks to ASK to keep releasing these decals in the modelling world. The location indication of the decals is quite good and very perceptible. The decals as already said, have a very good colour registration, very thin, with minimum decal film, and they work quite nice! My thanks to Art Scale for producing these fantastic decals. Francisco Guedes .


- 5 replies
-
- 5
-

-

-
- art scale kit
- ask
- (and 3 more)
-
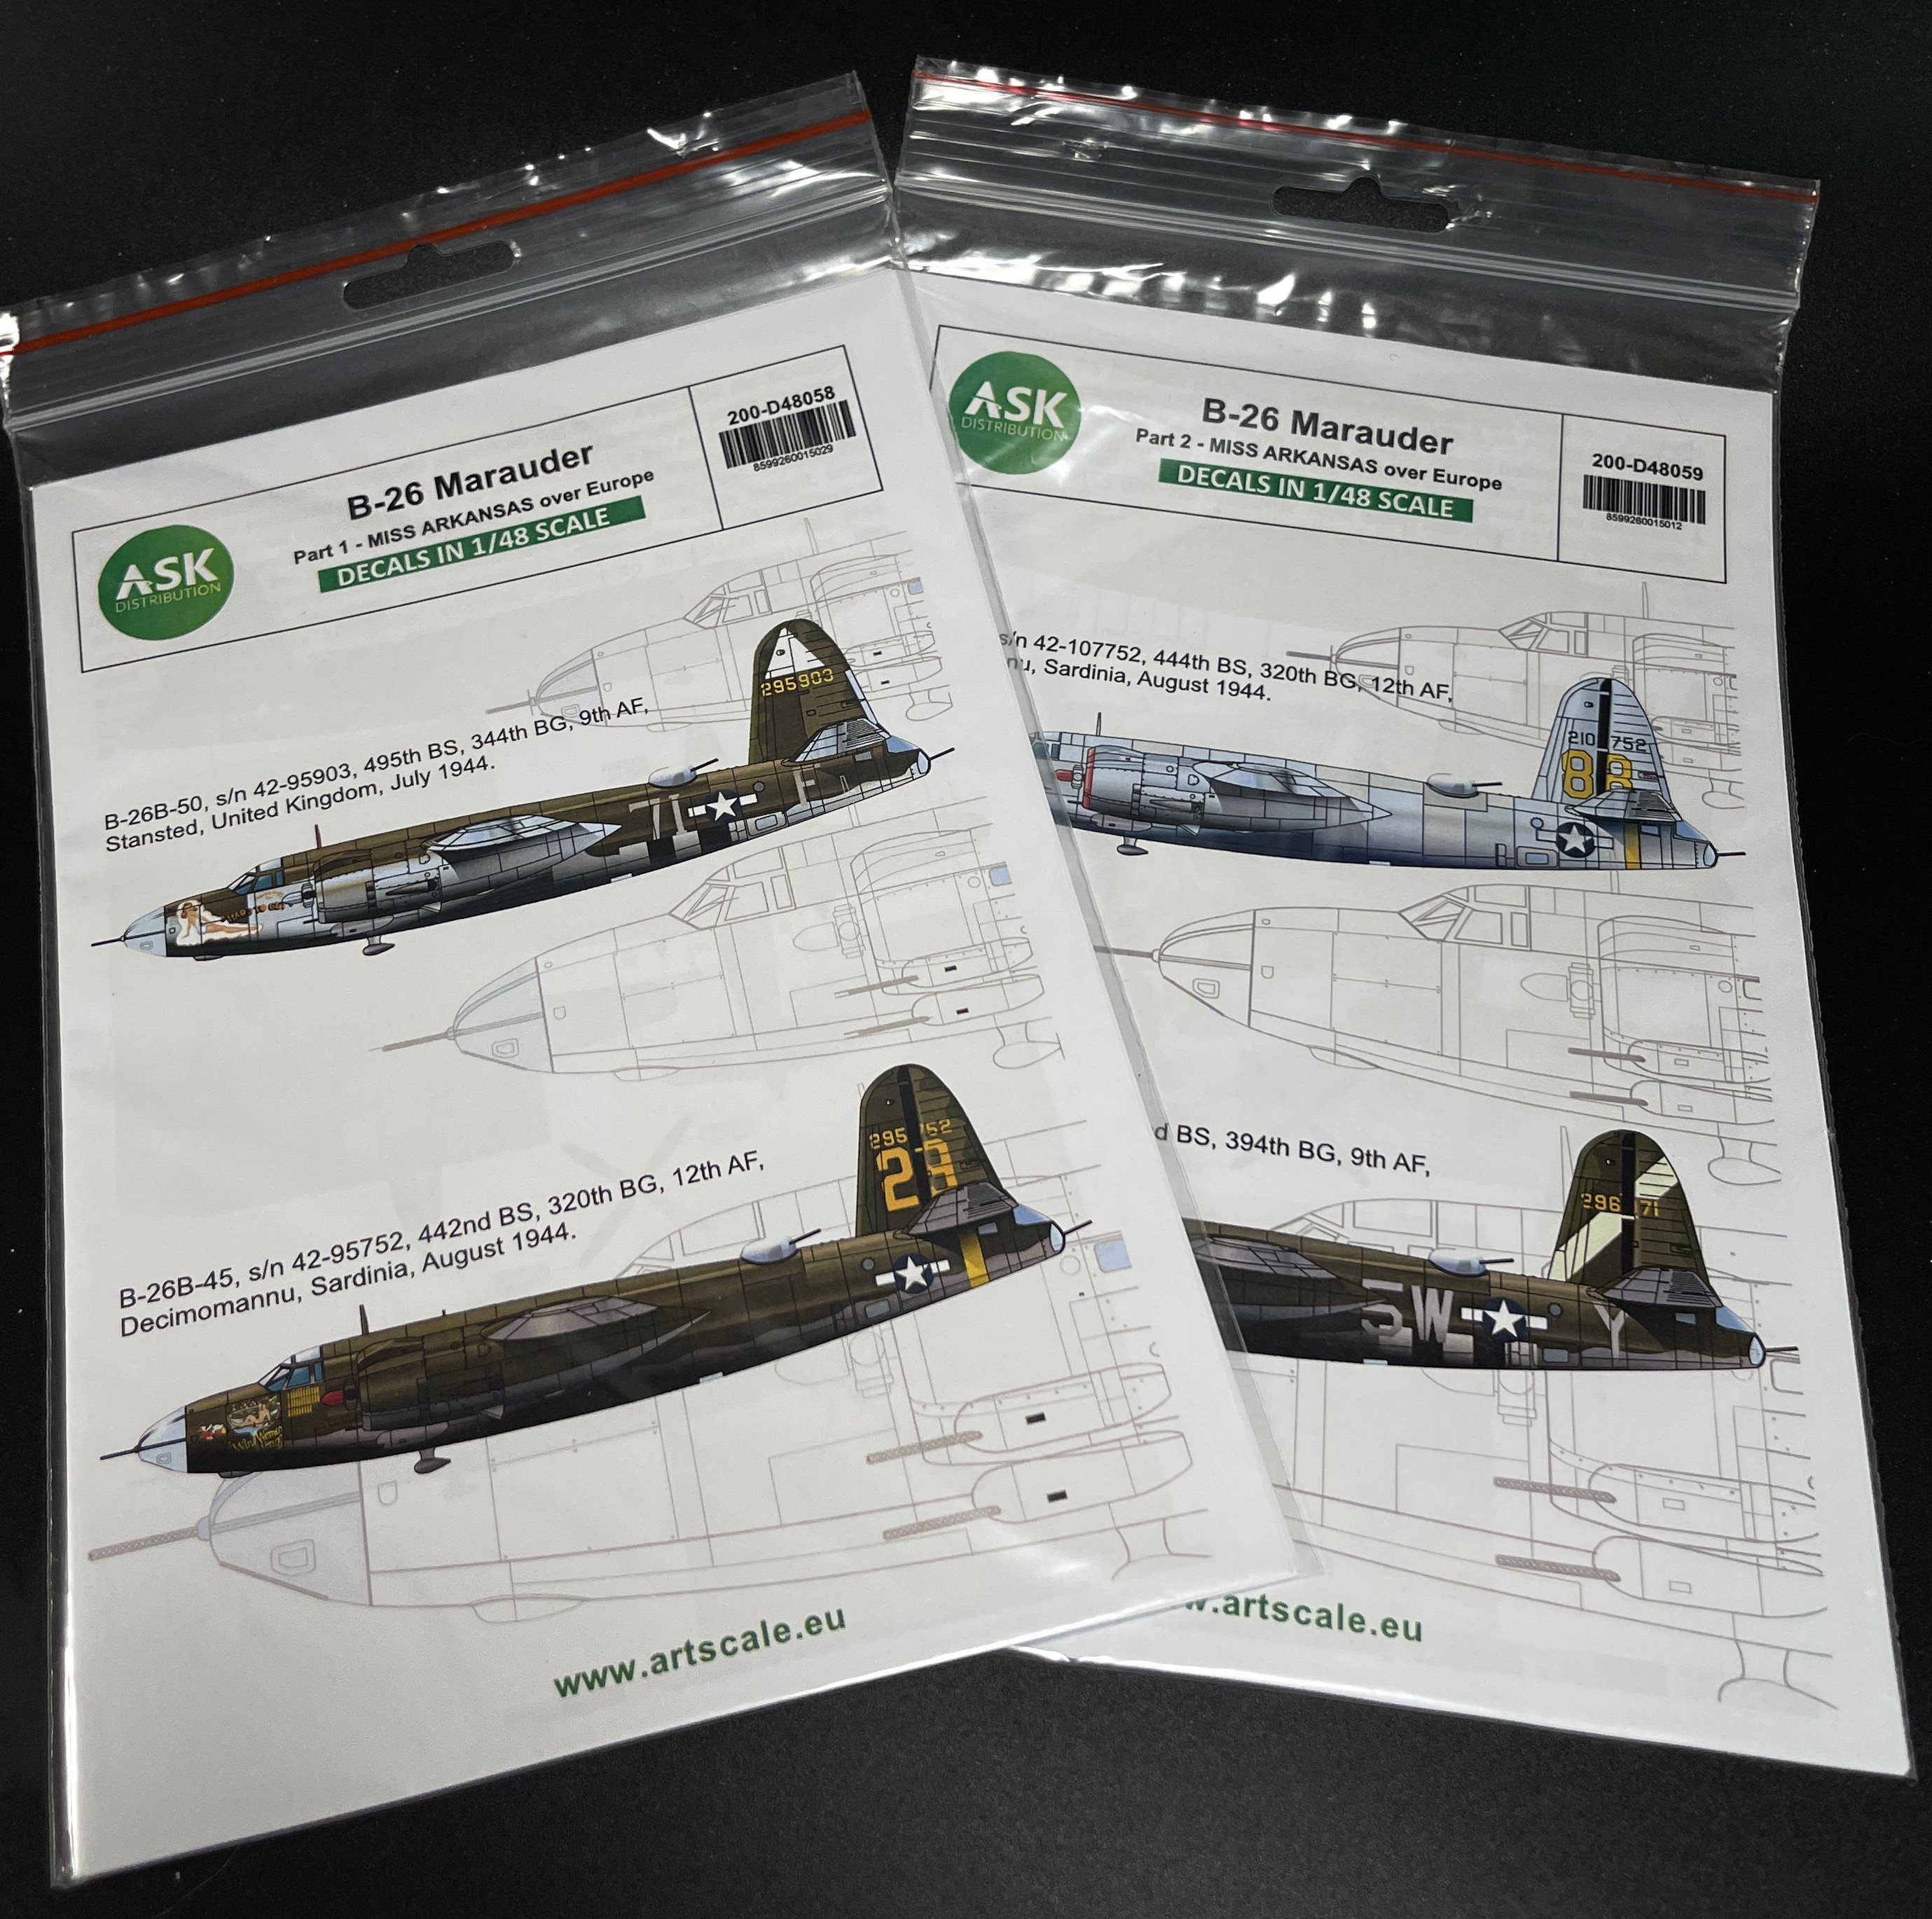
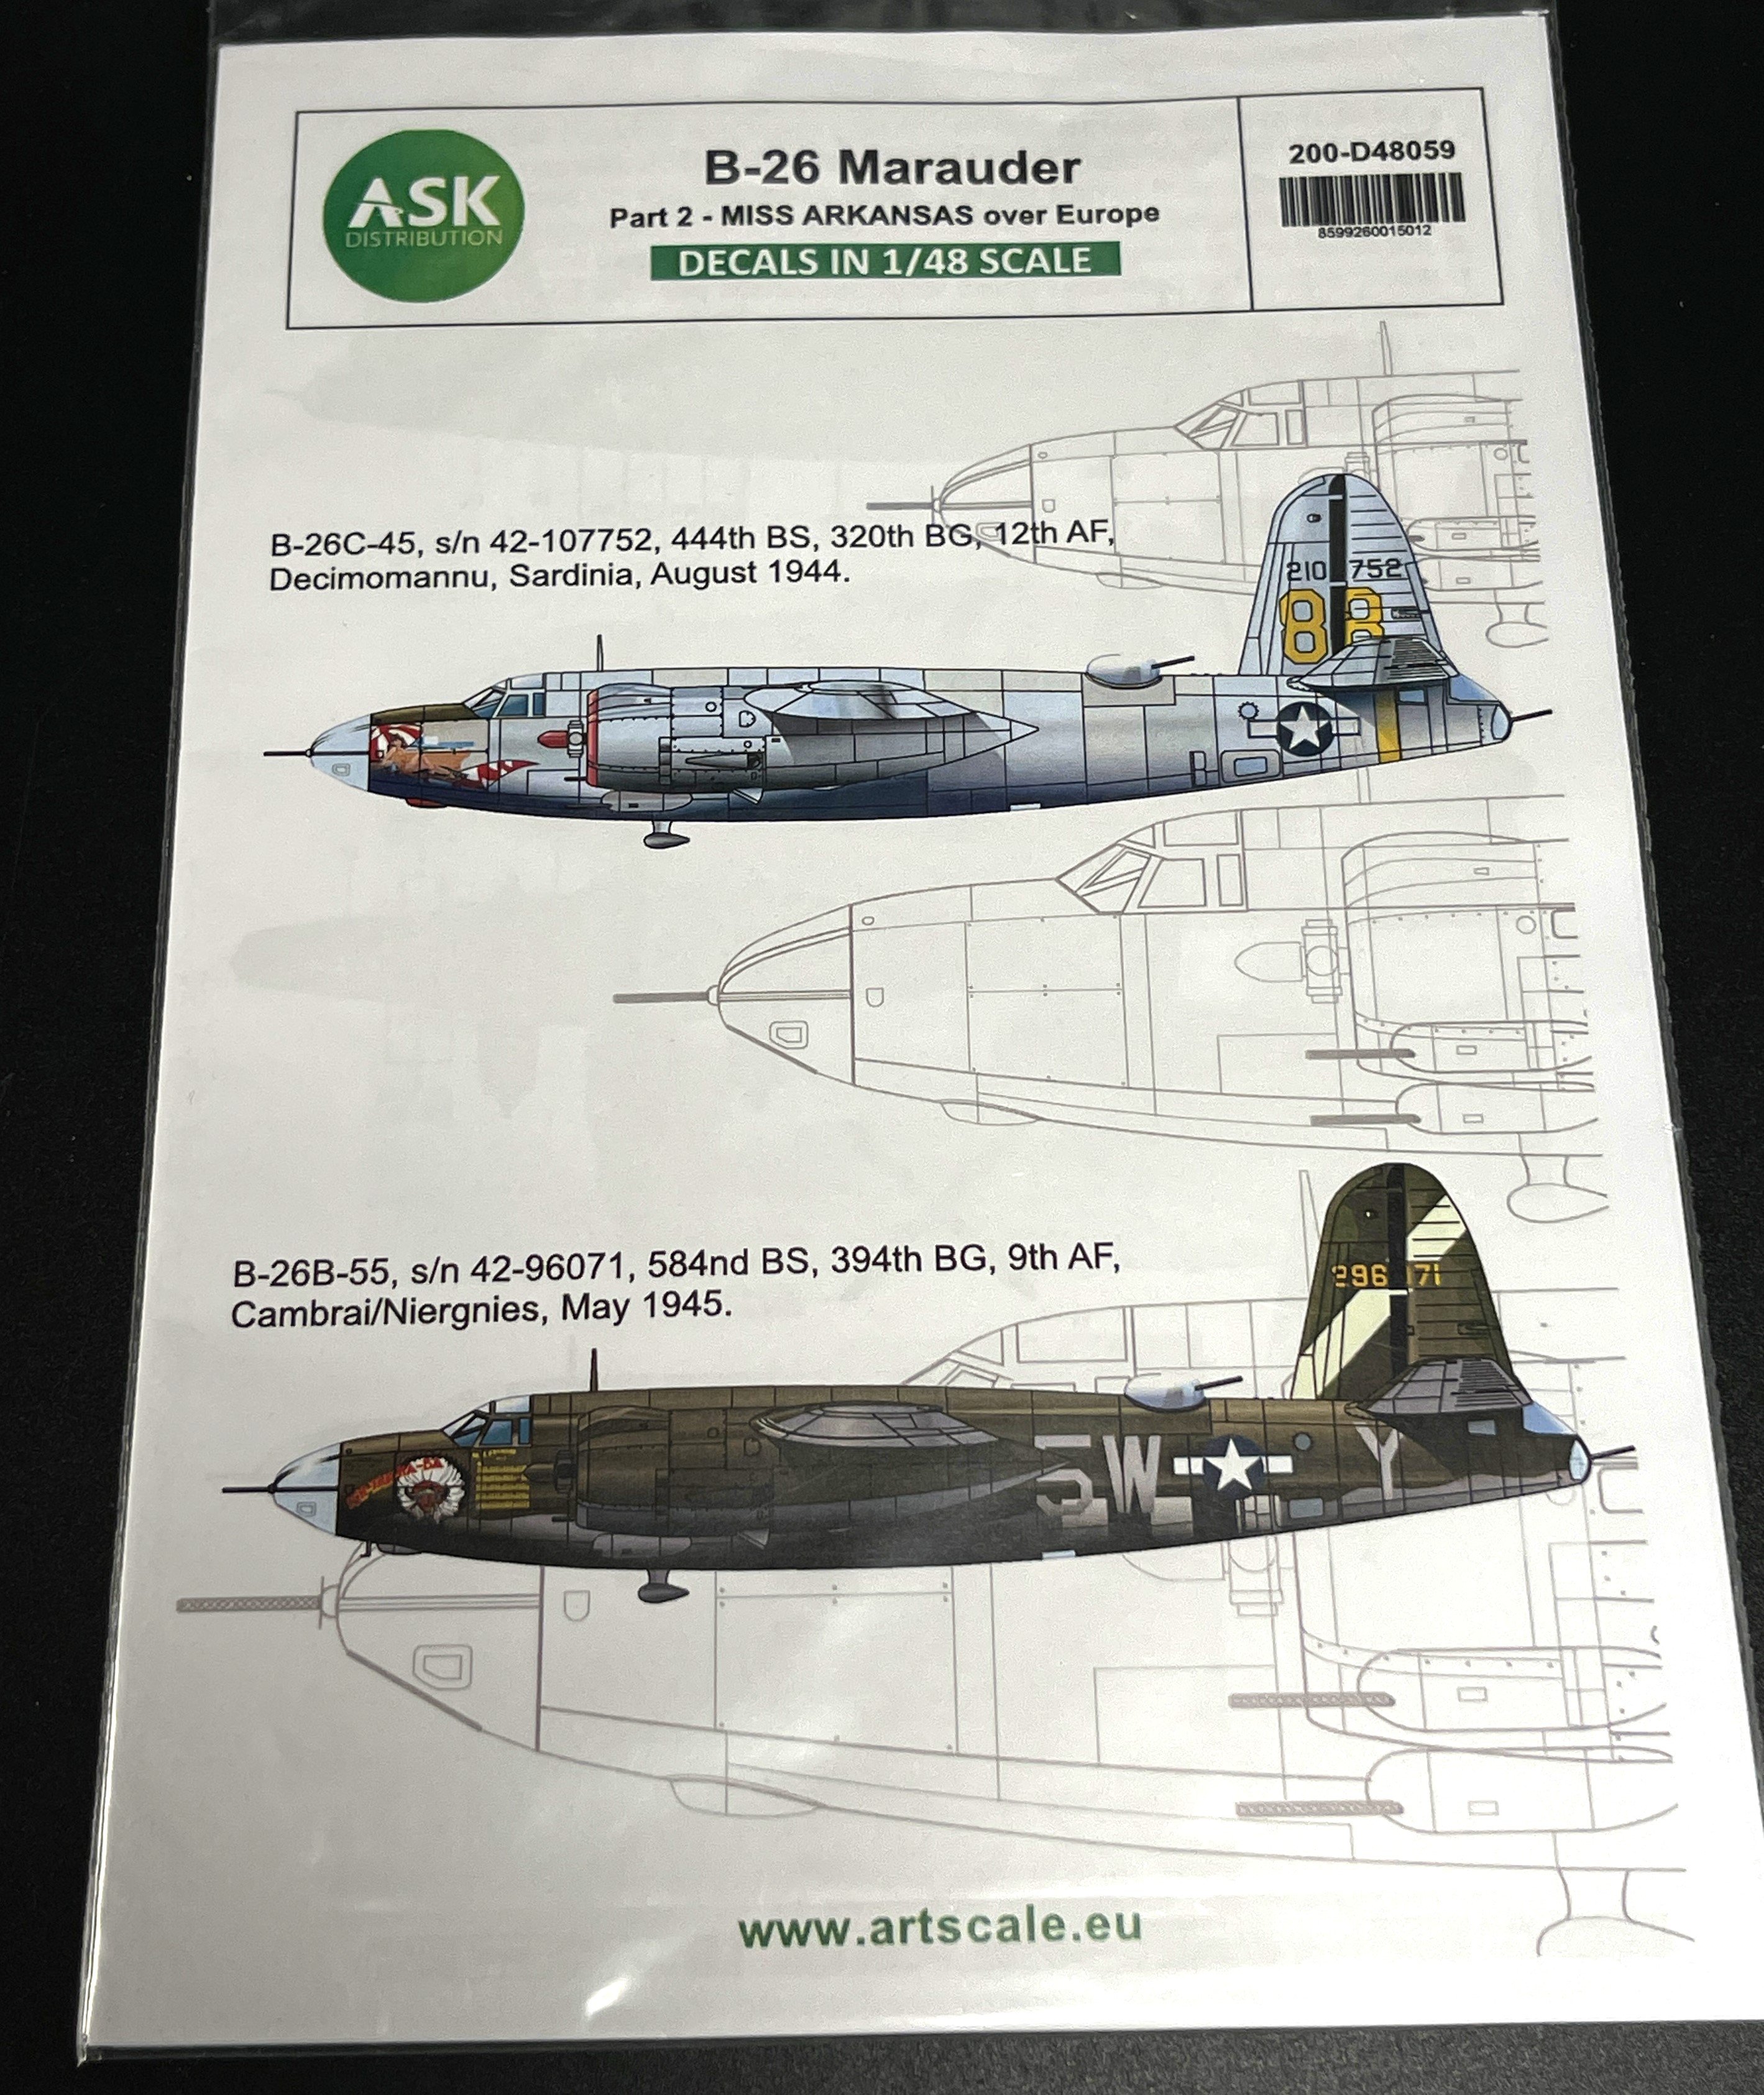
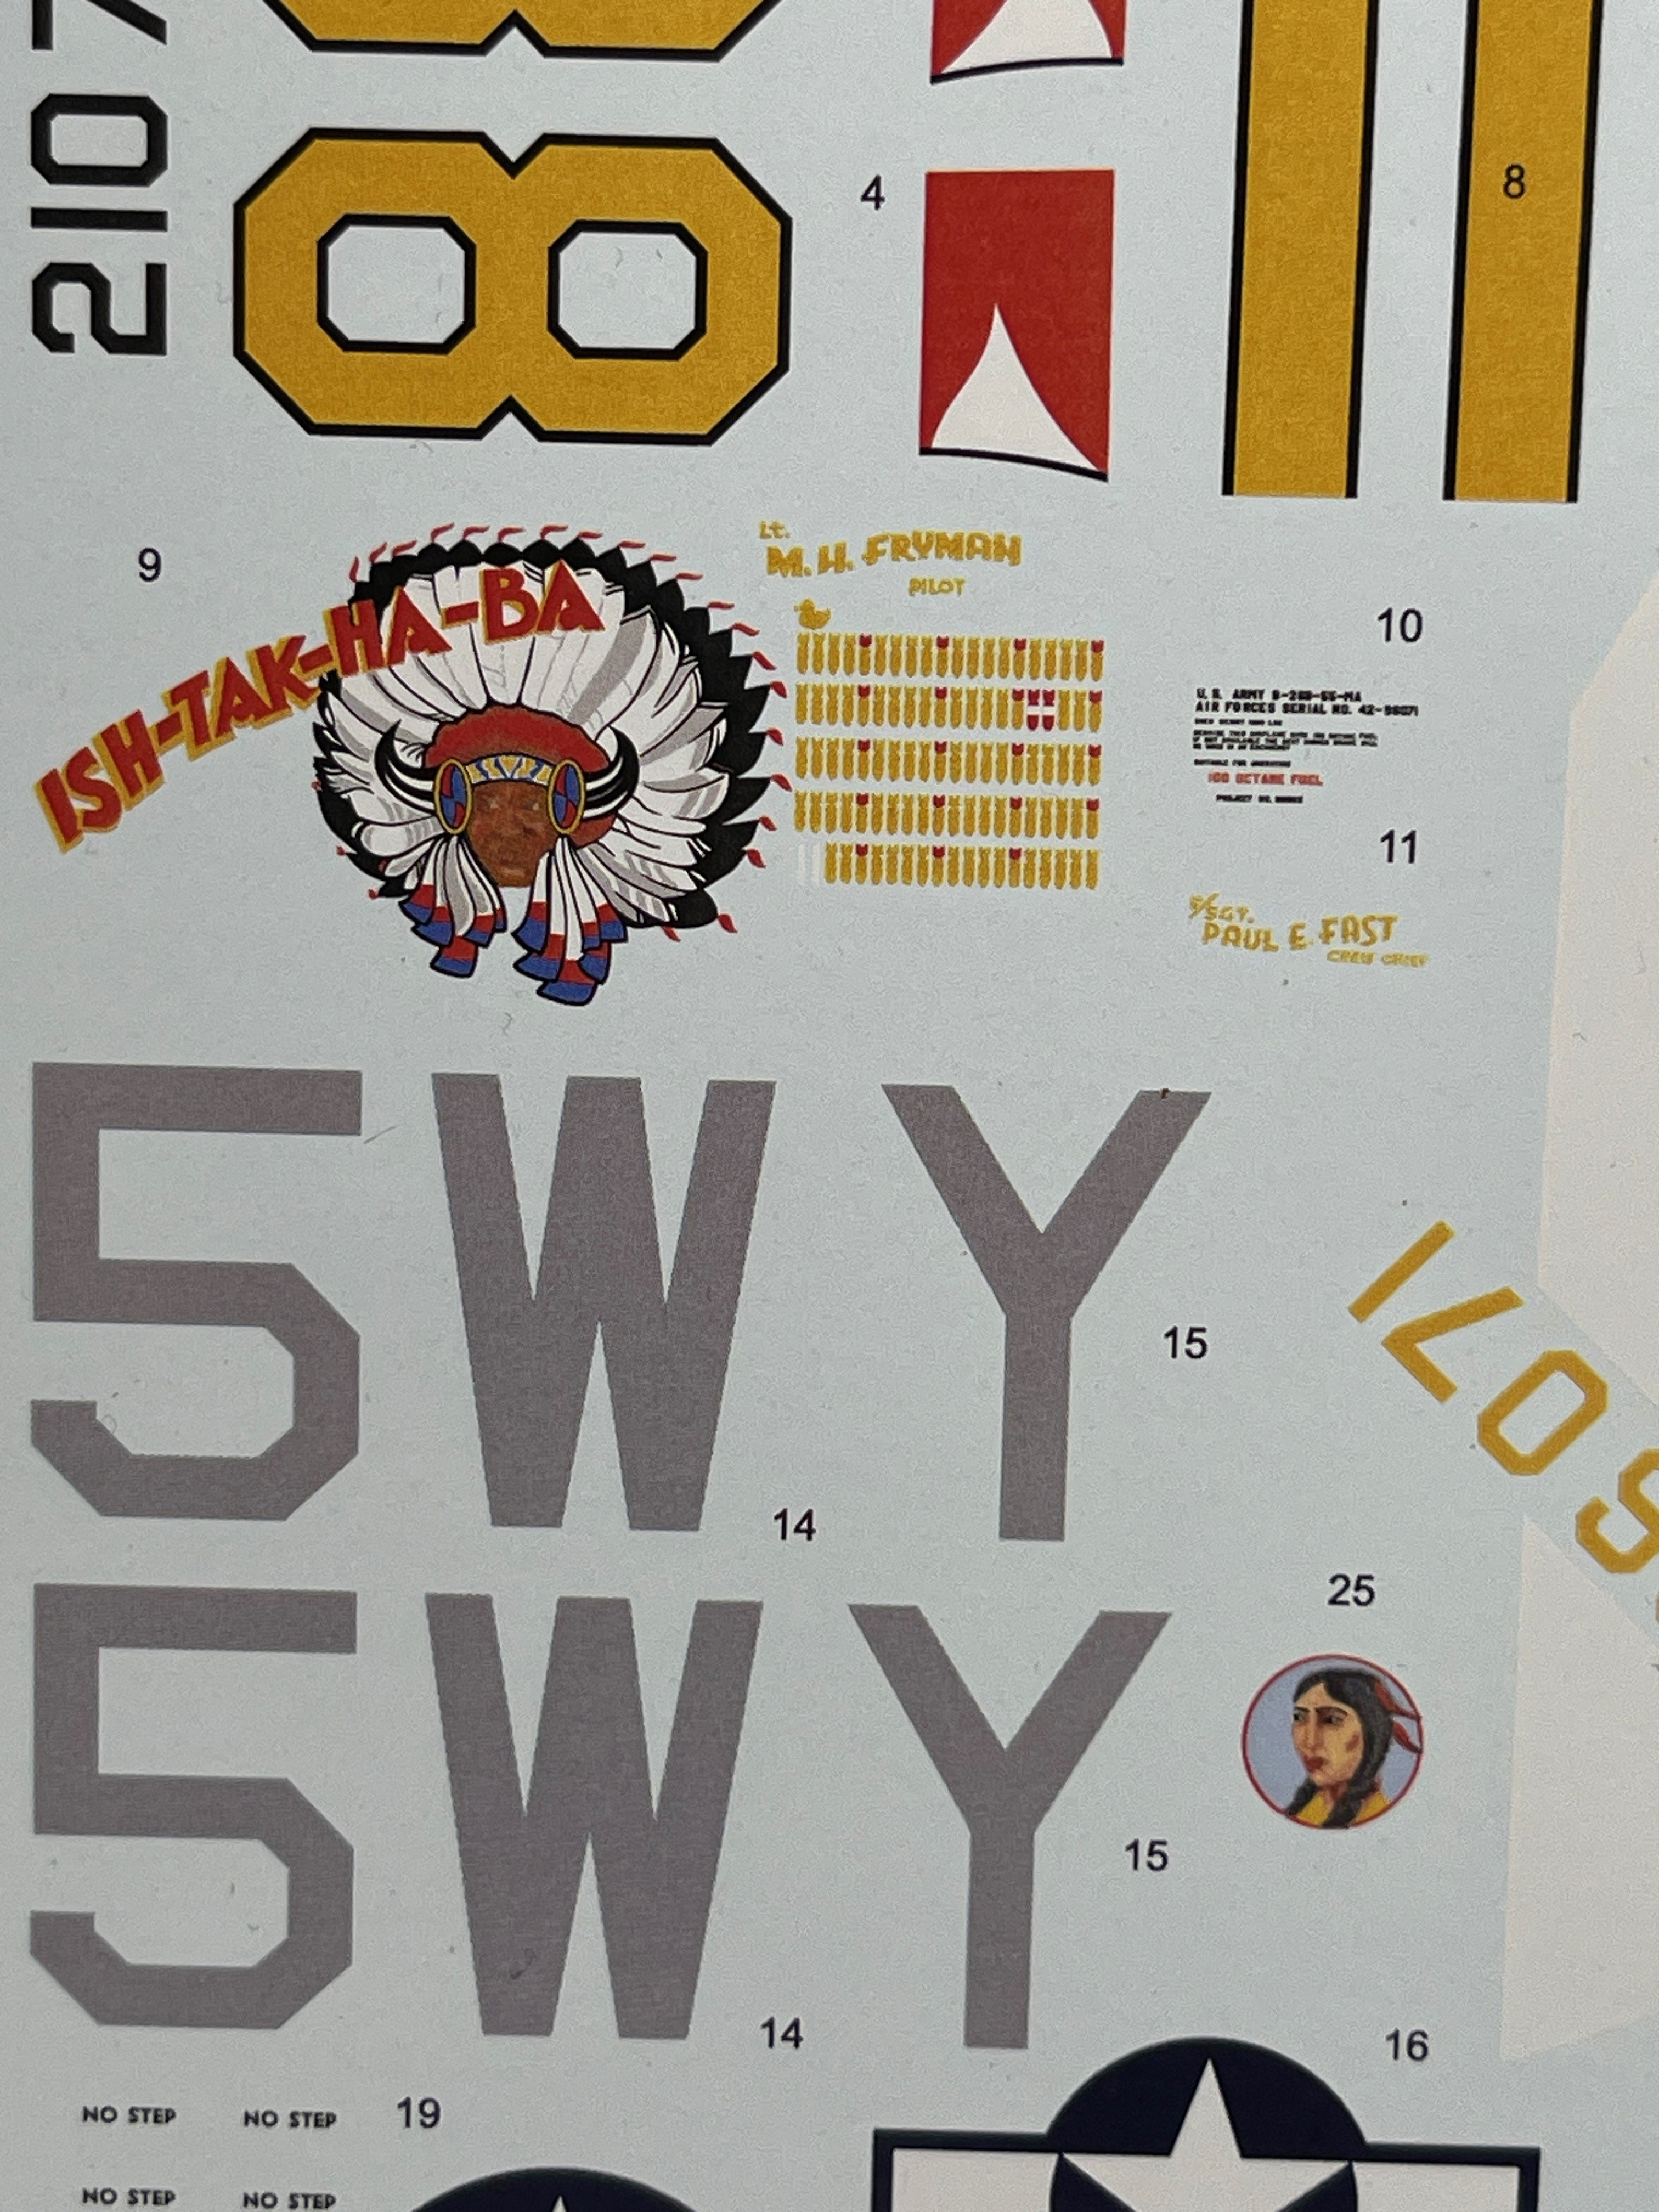
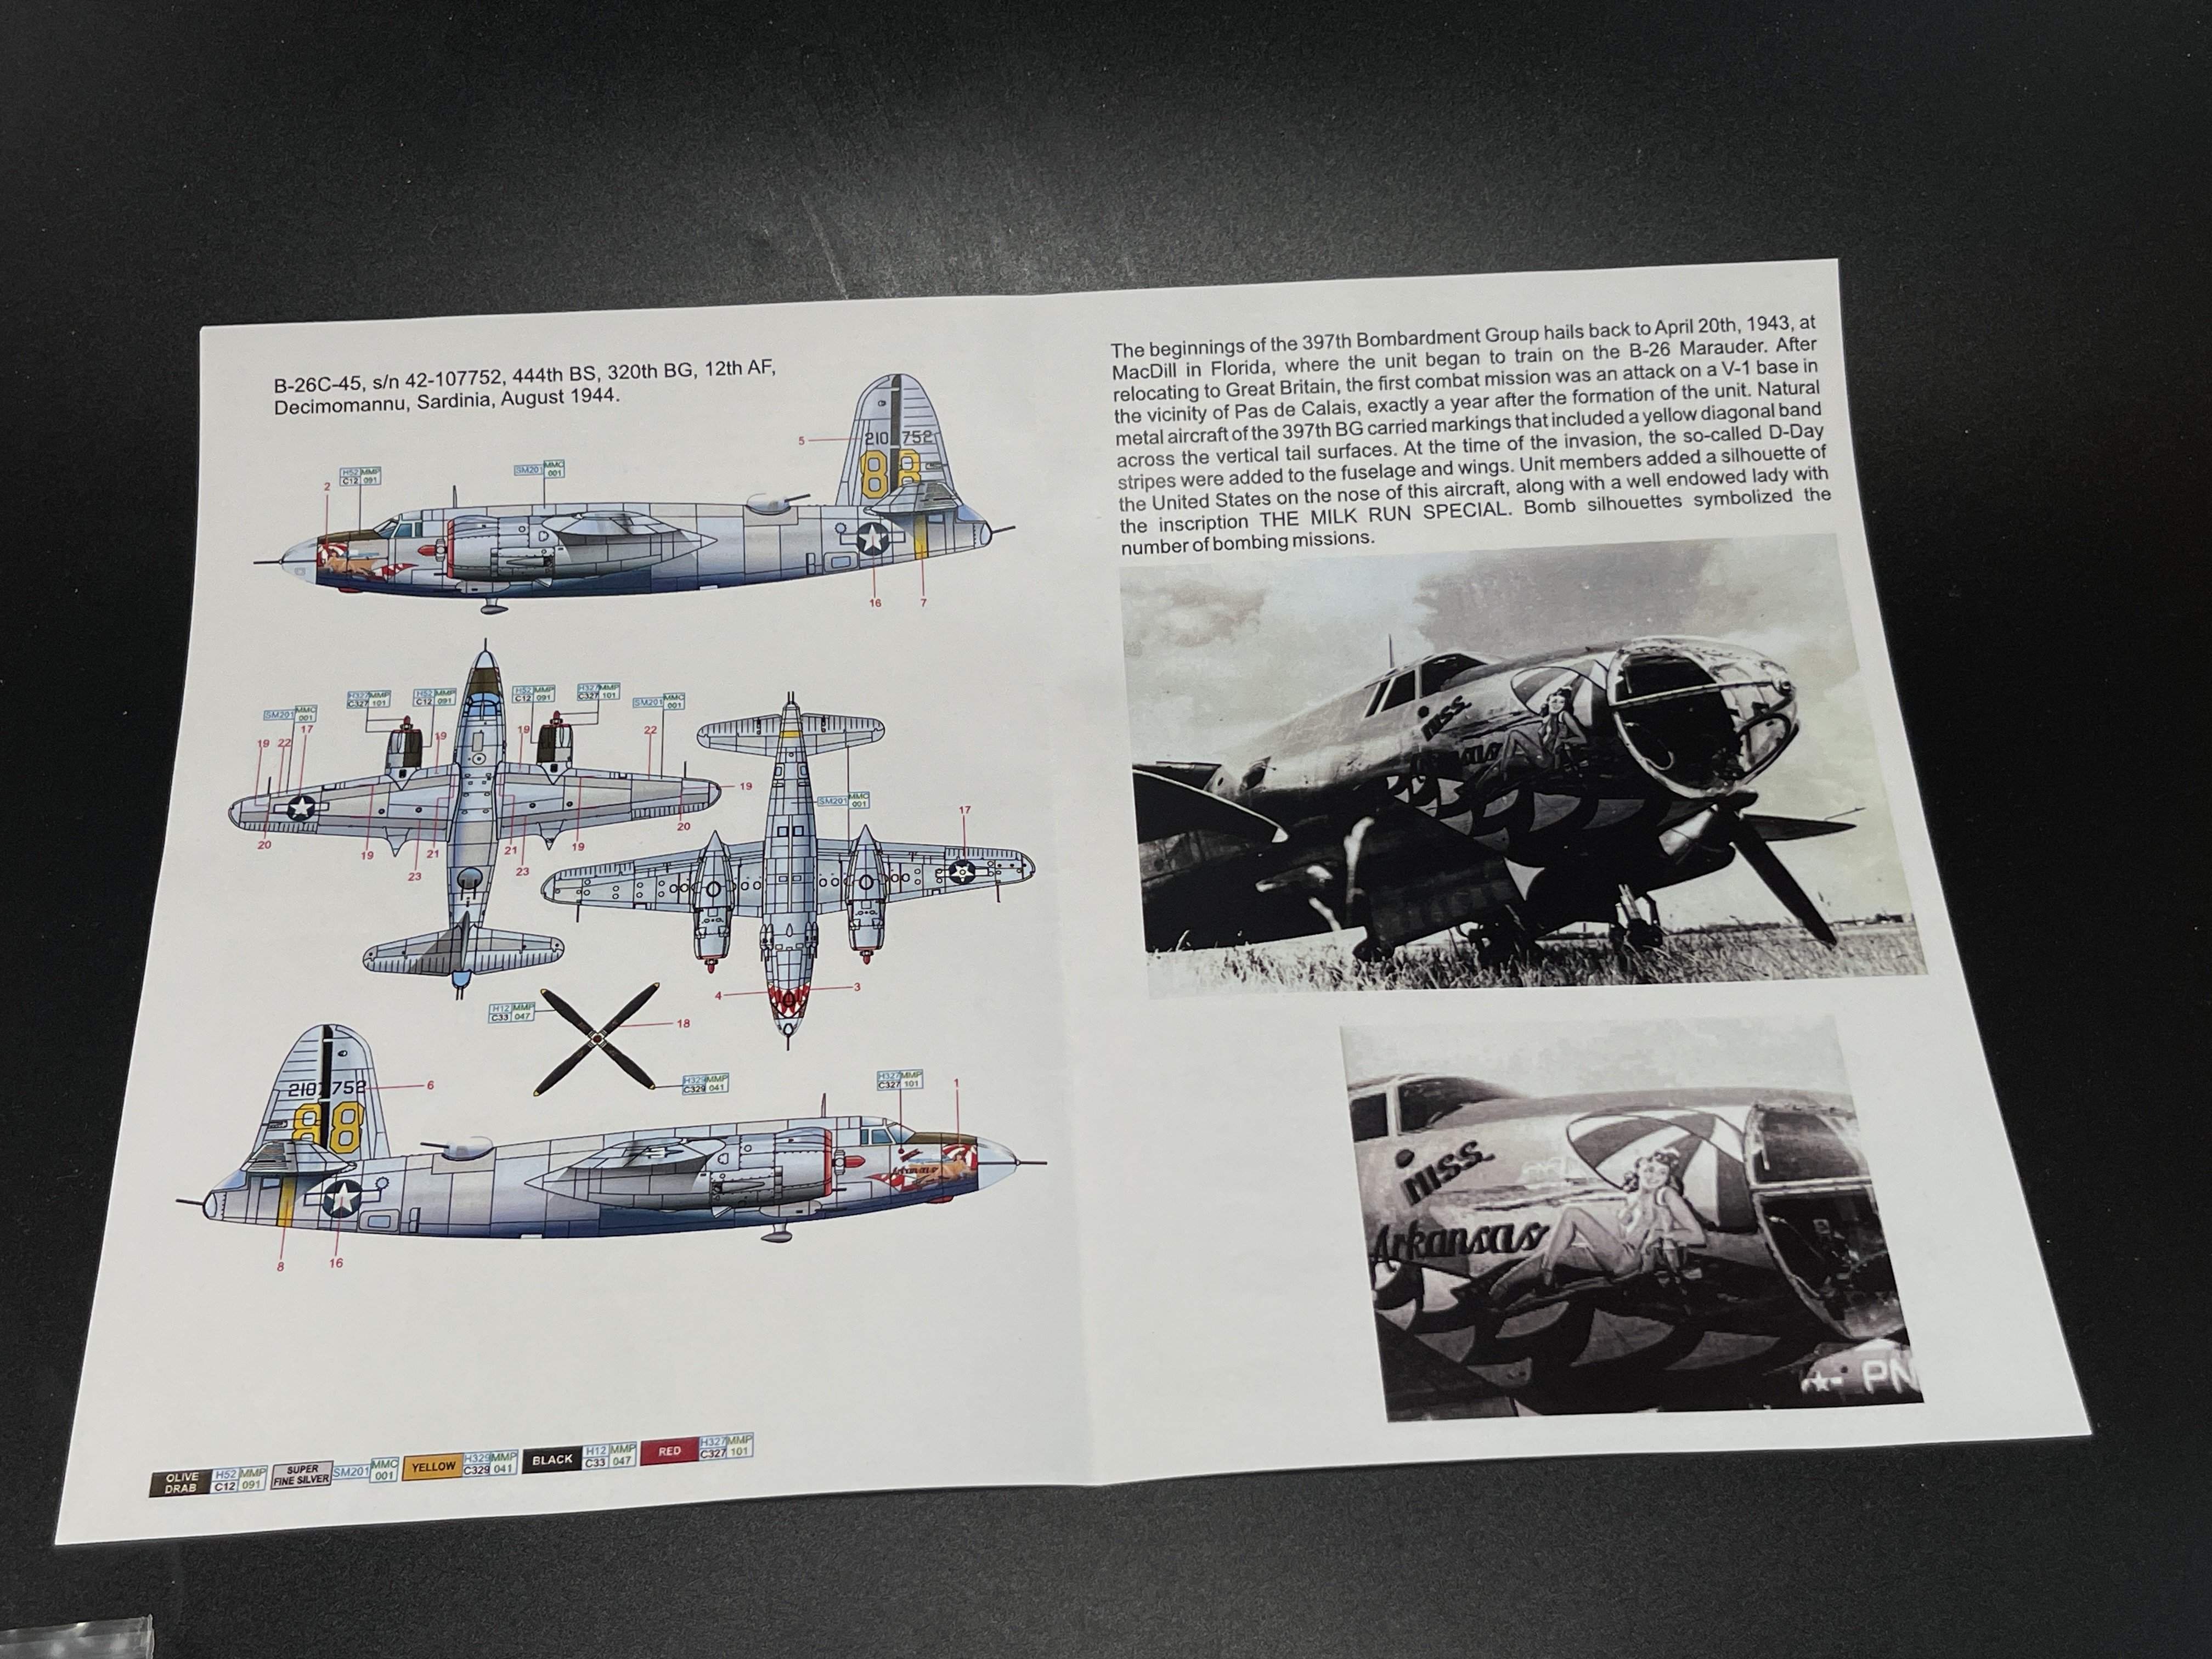
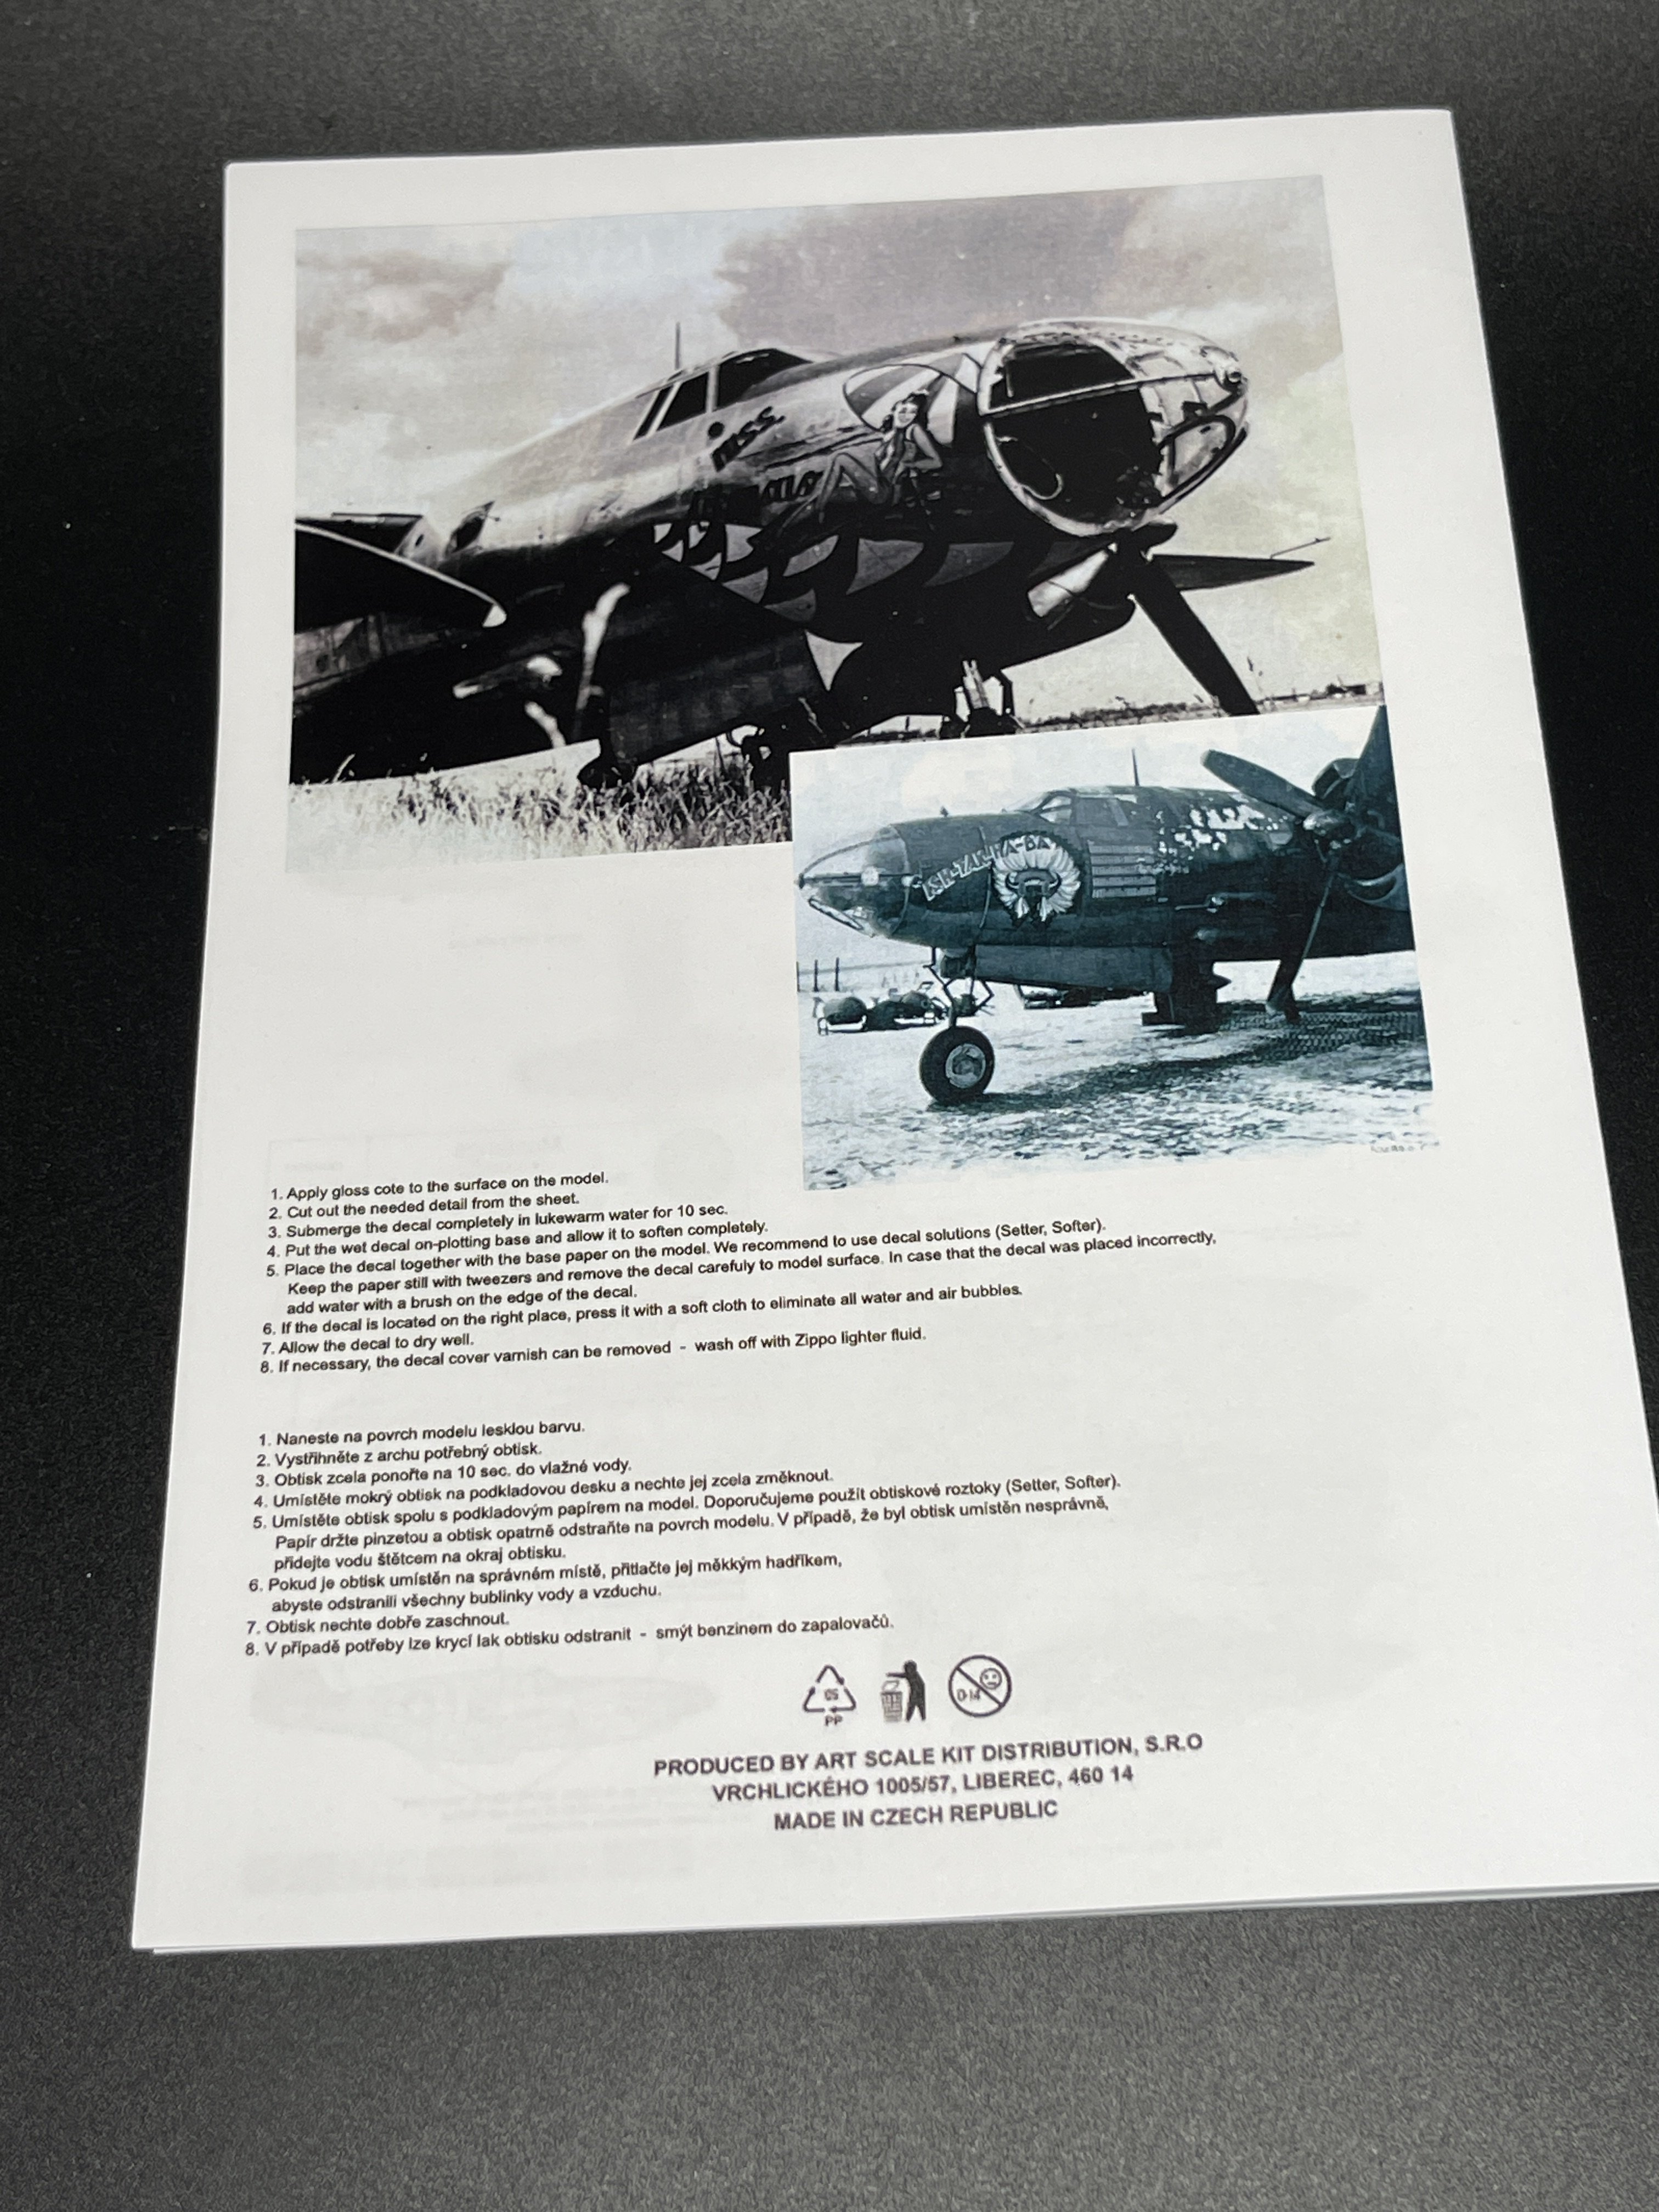
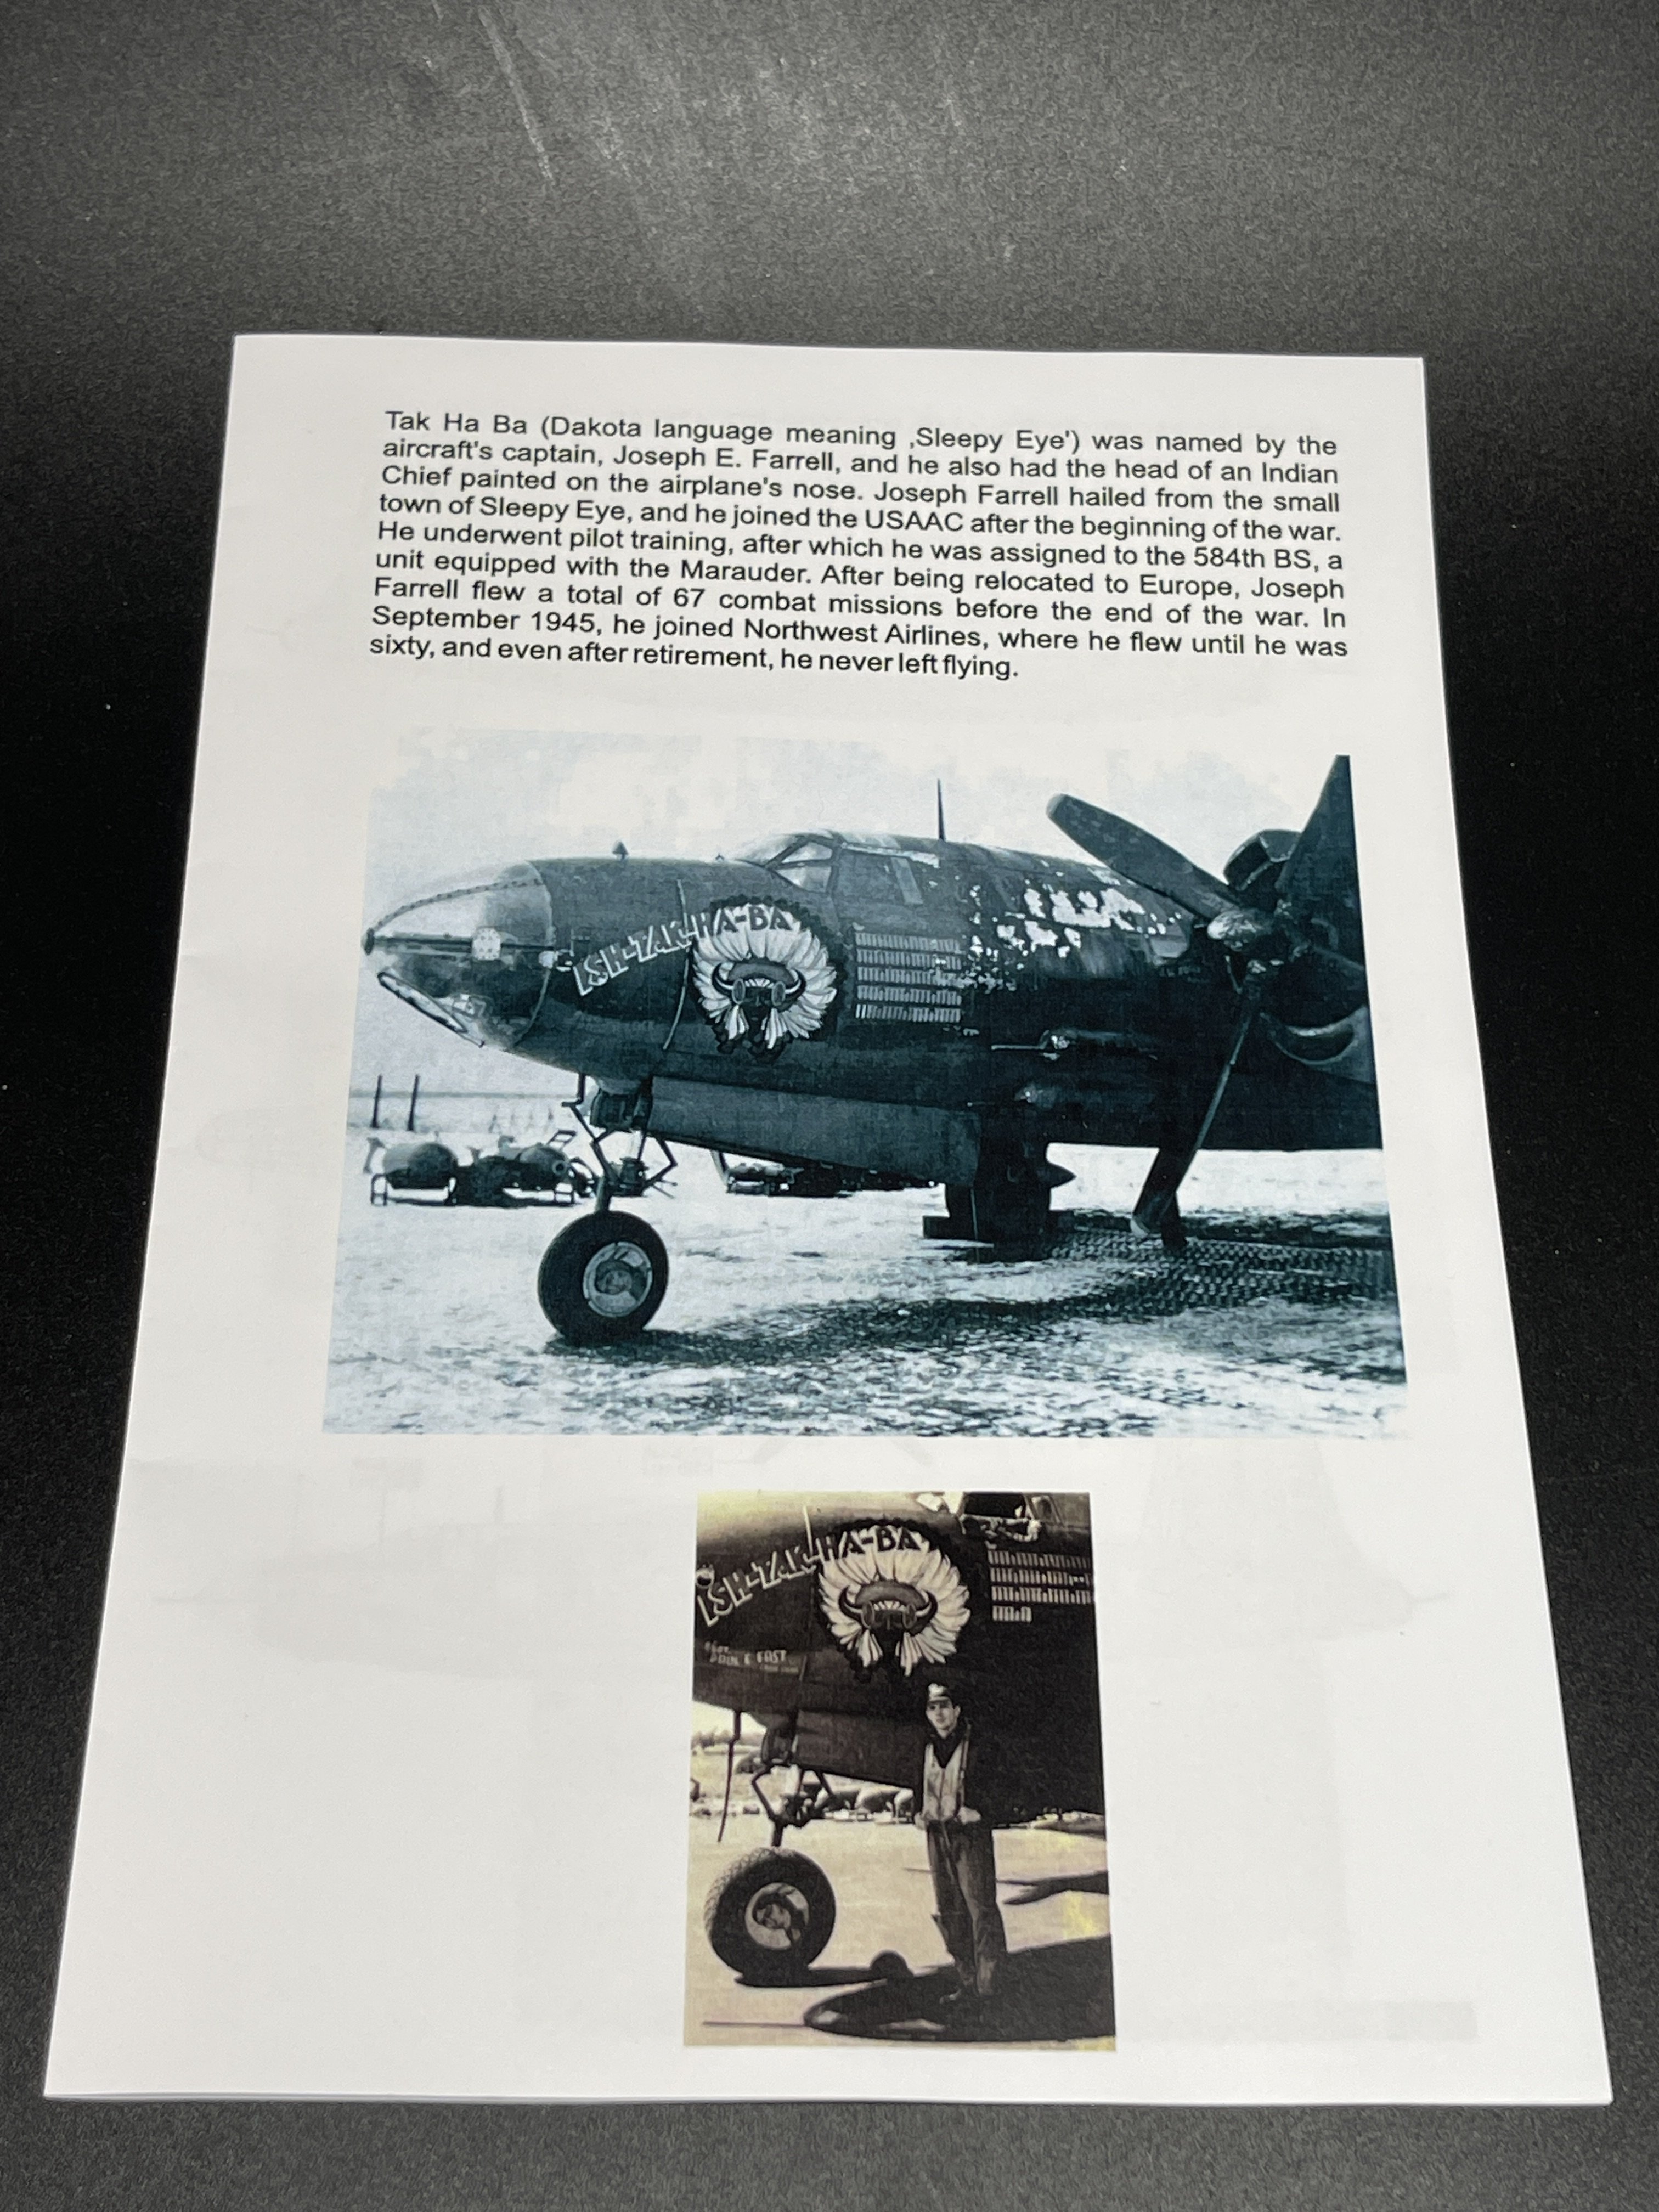
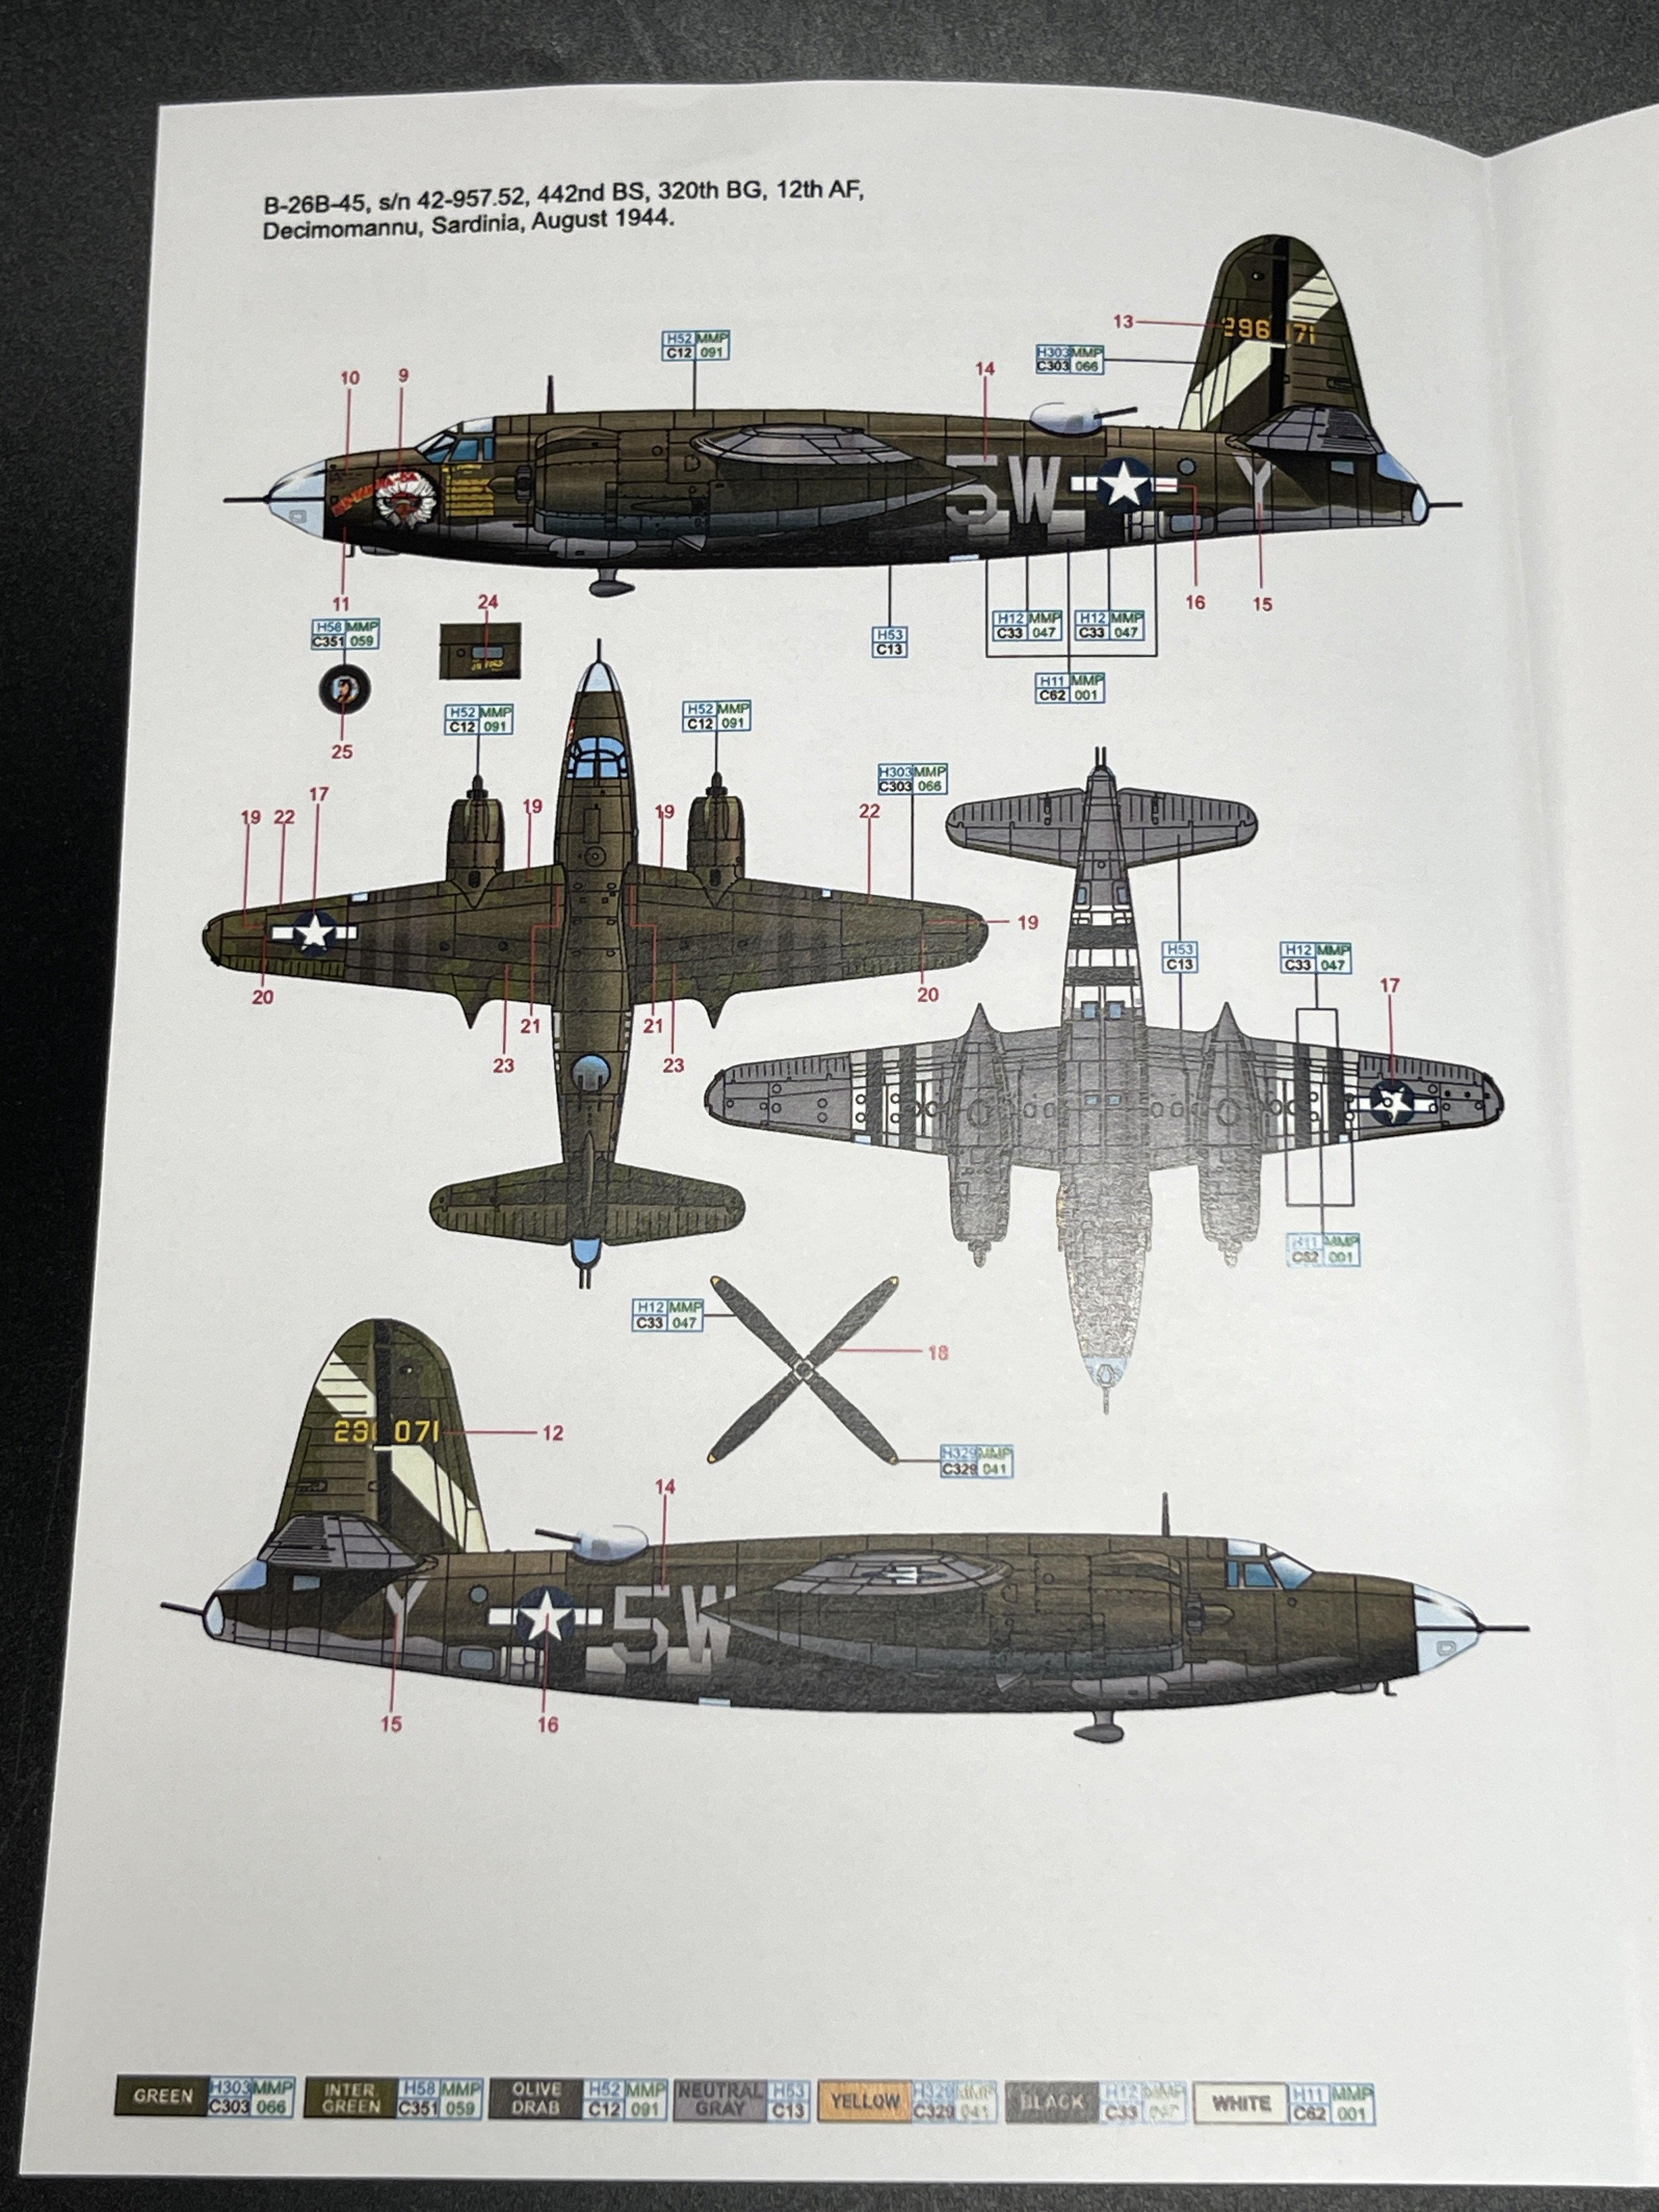
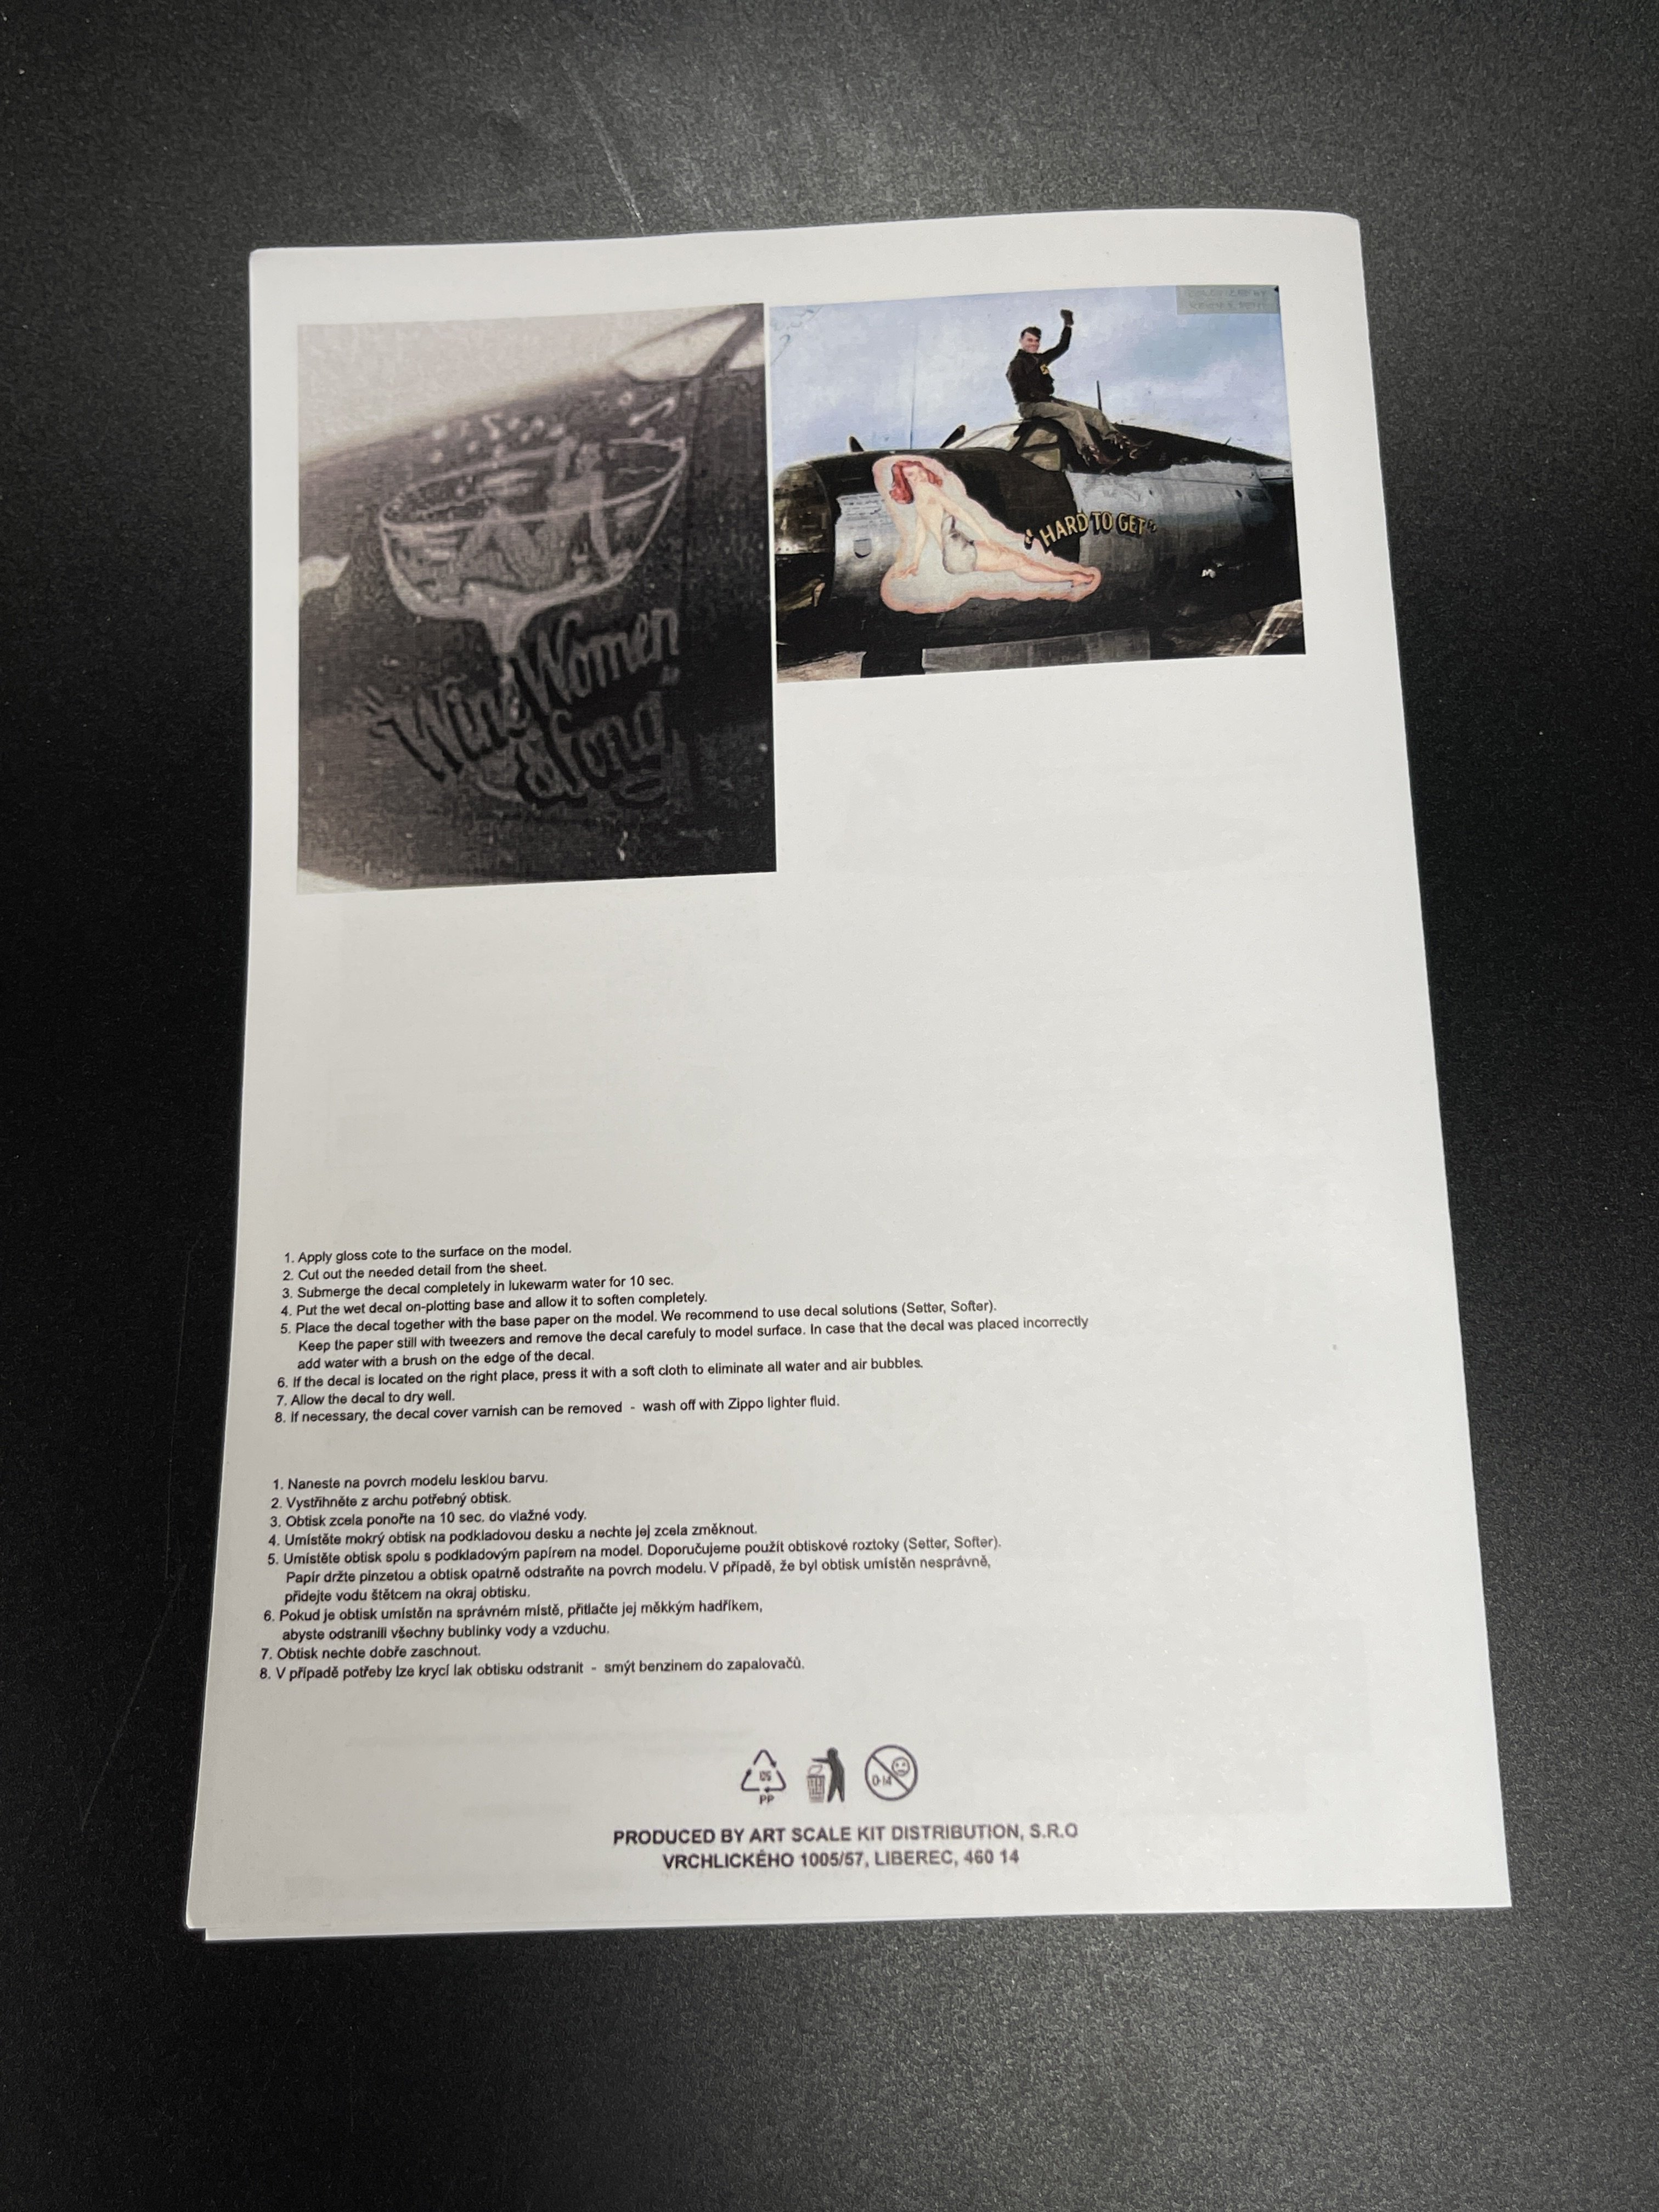
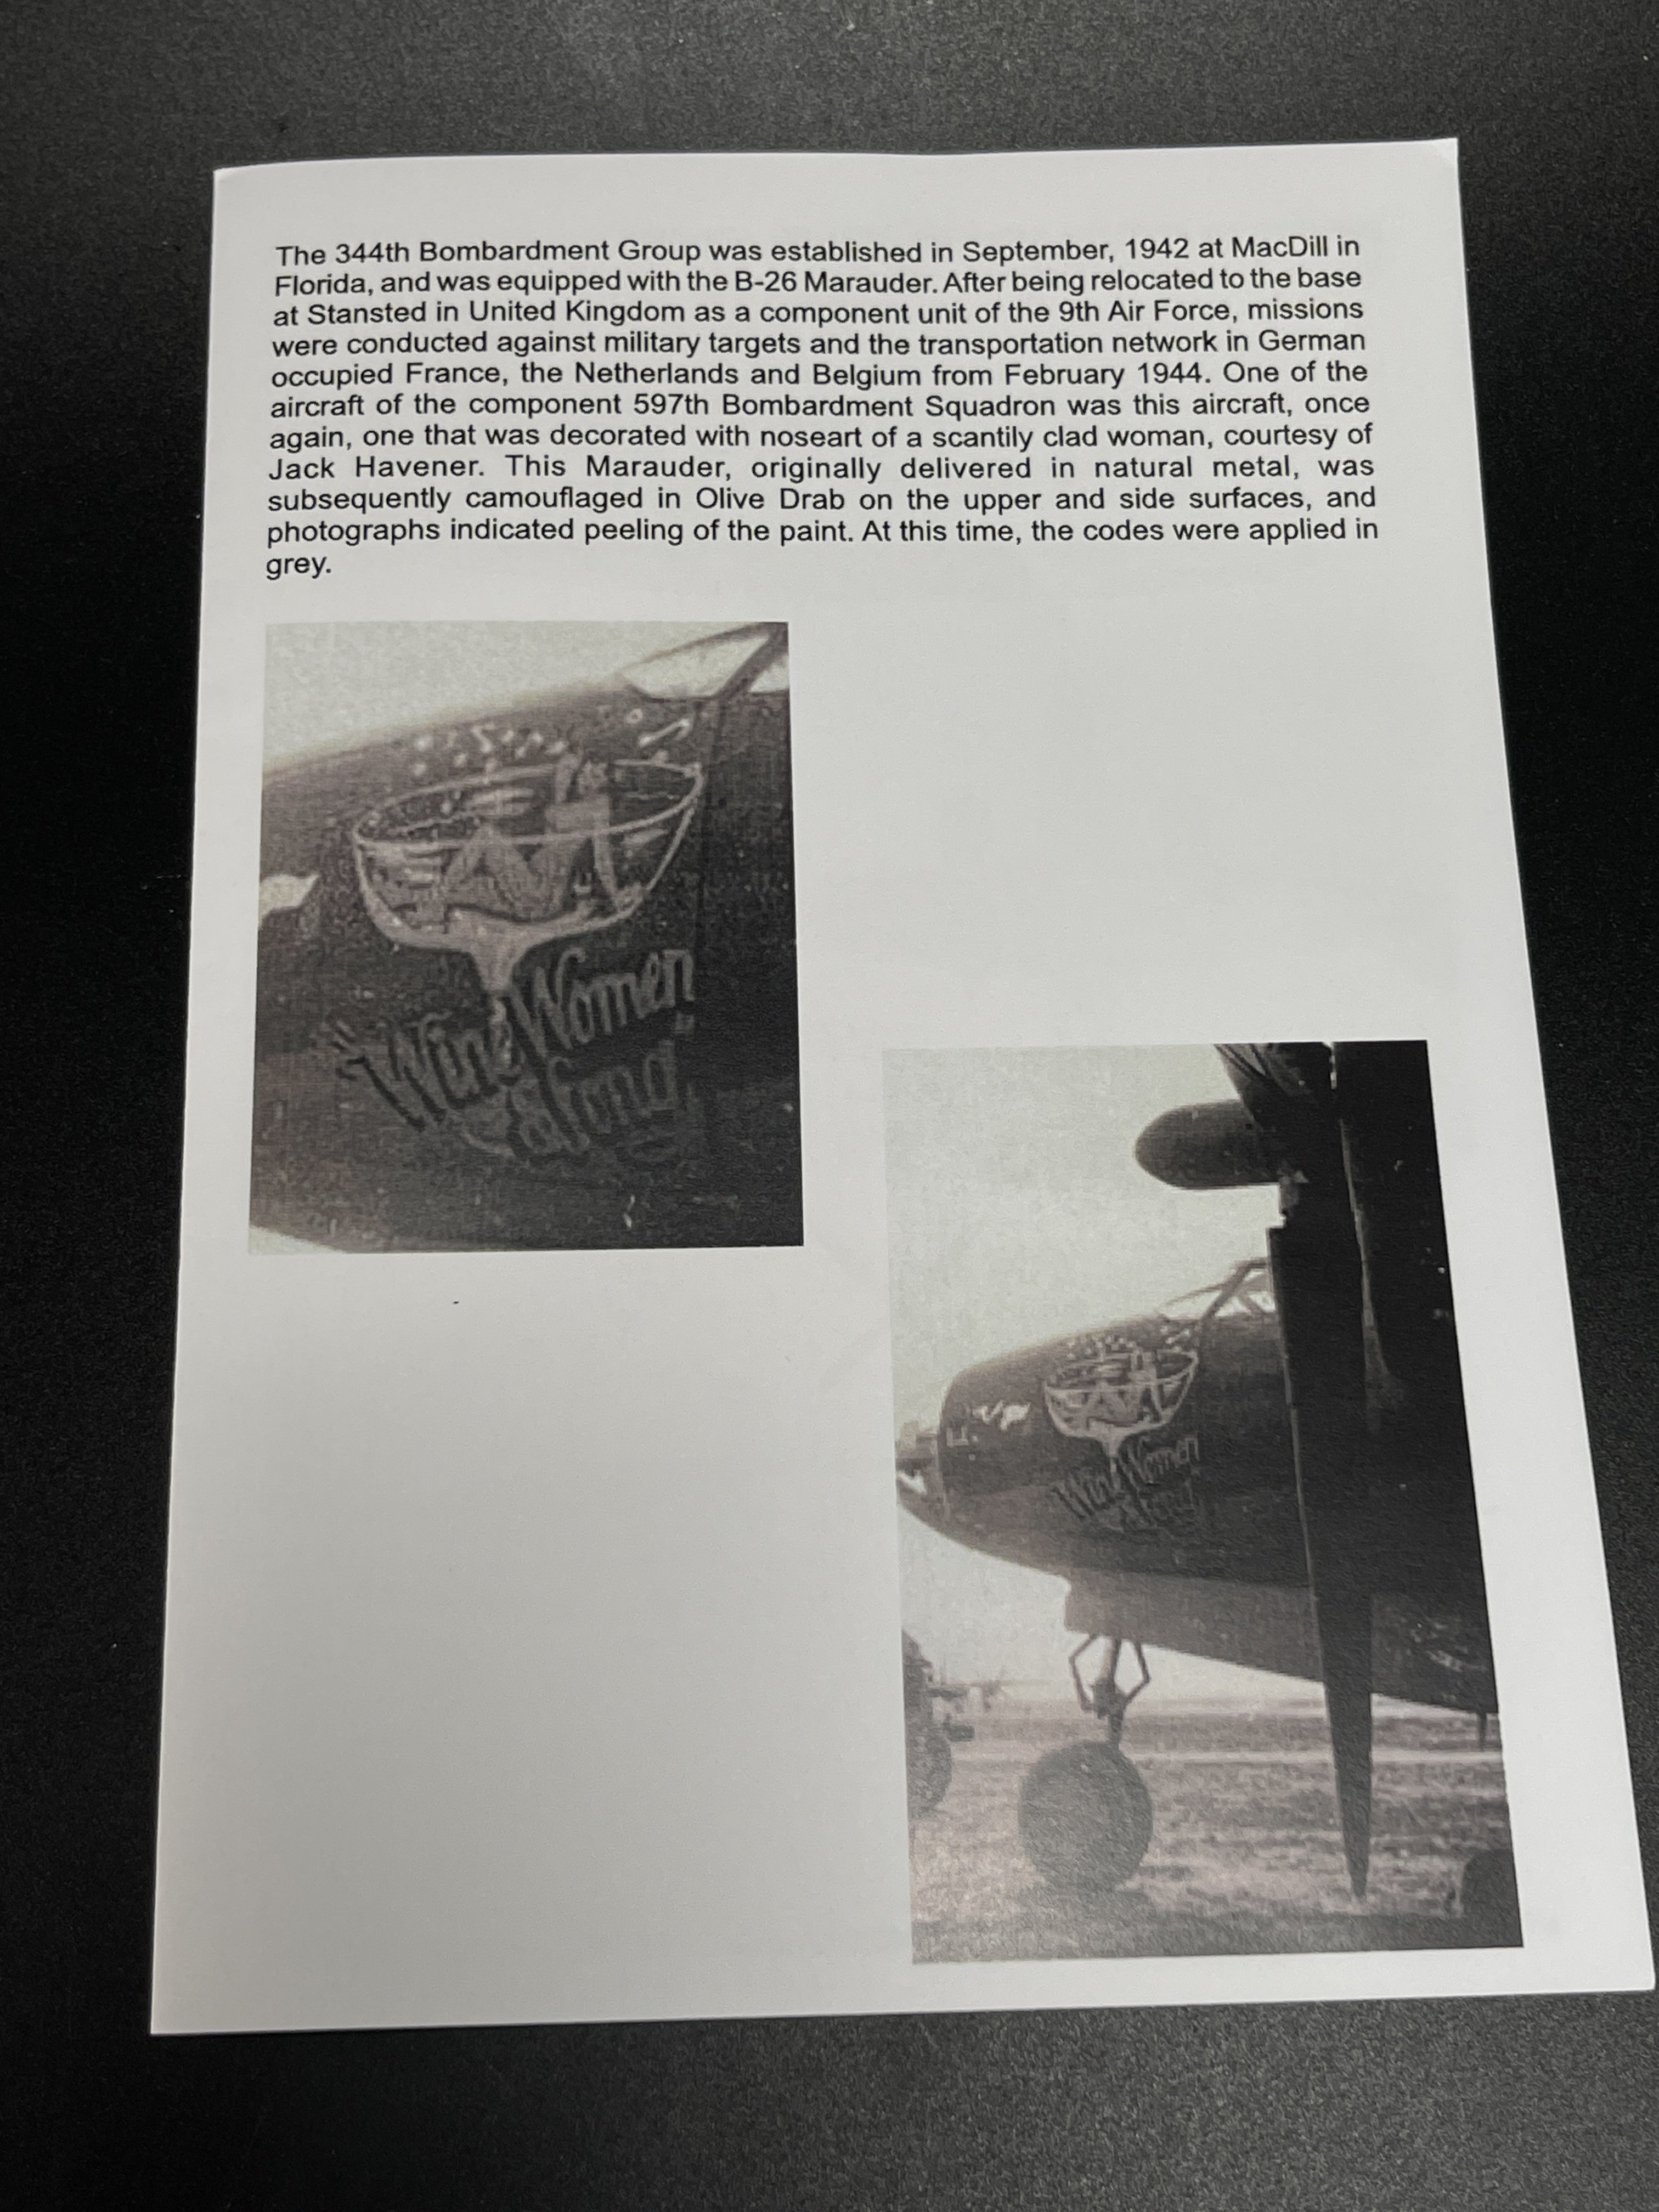
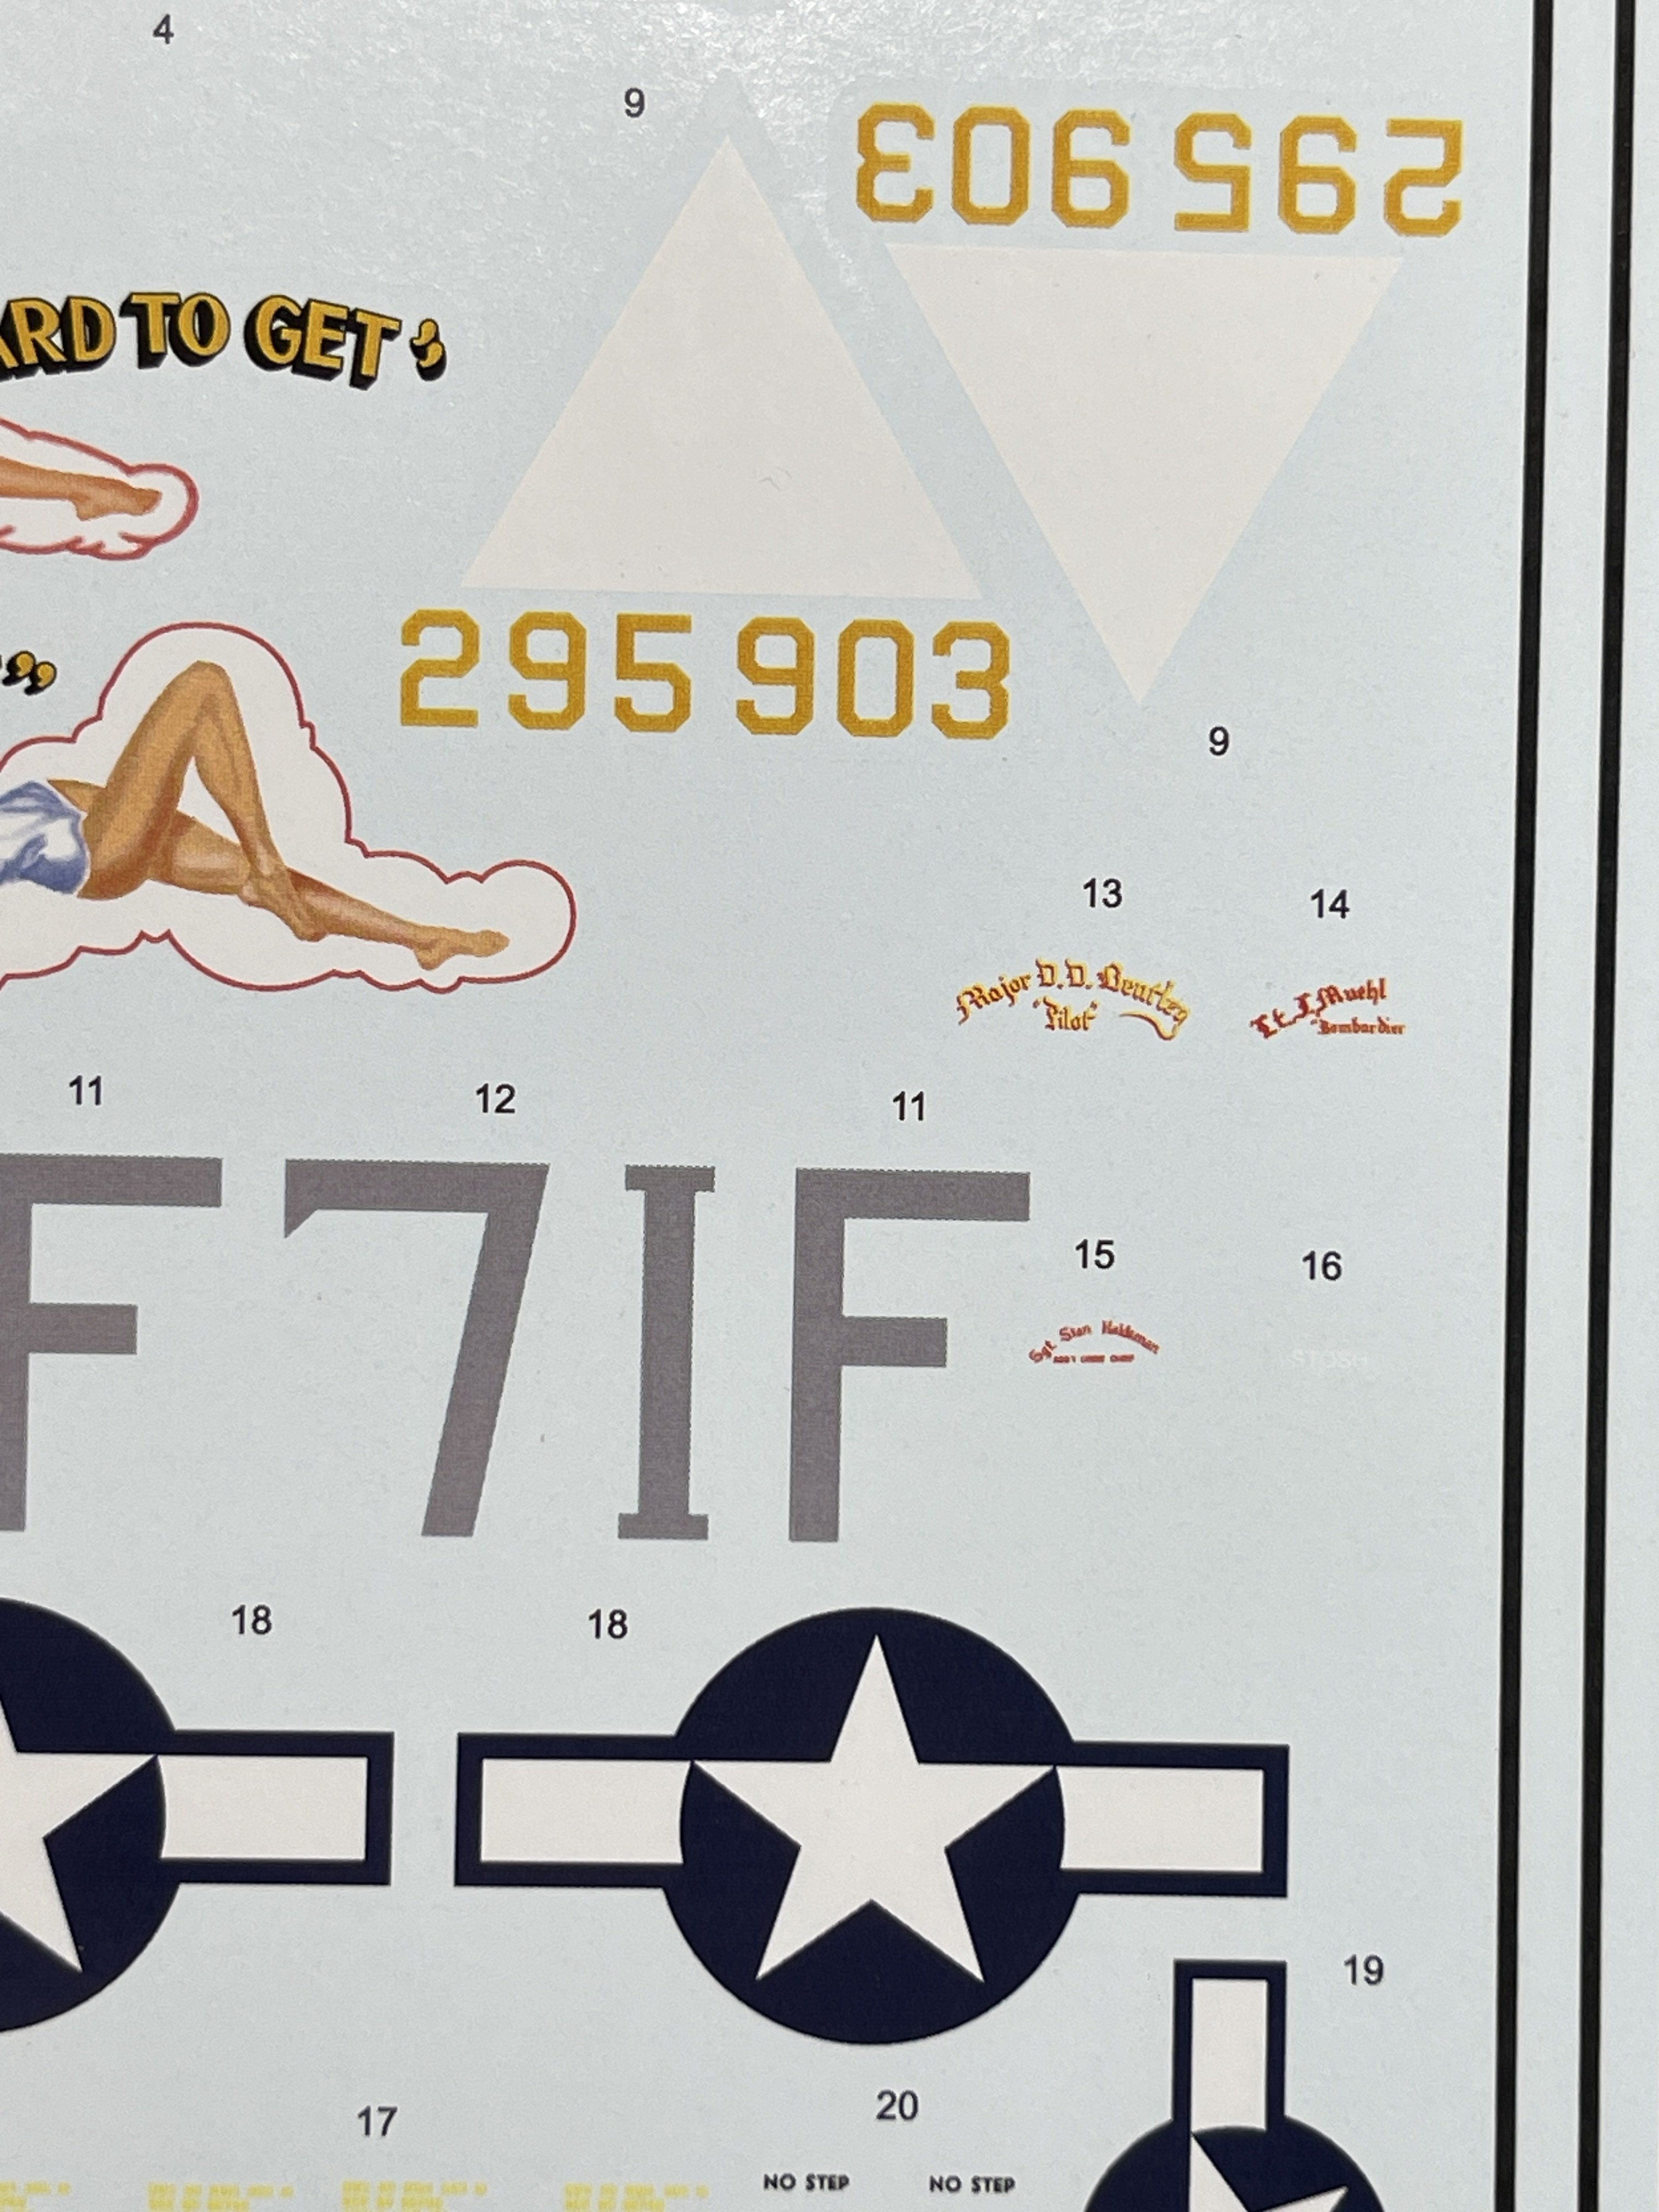
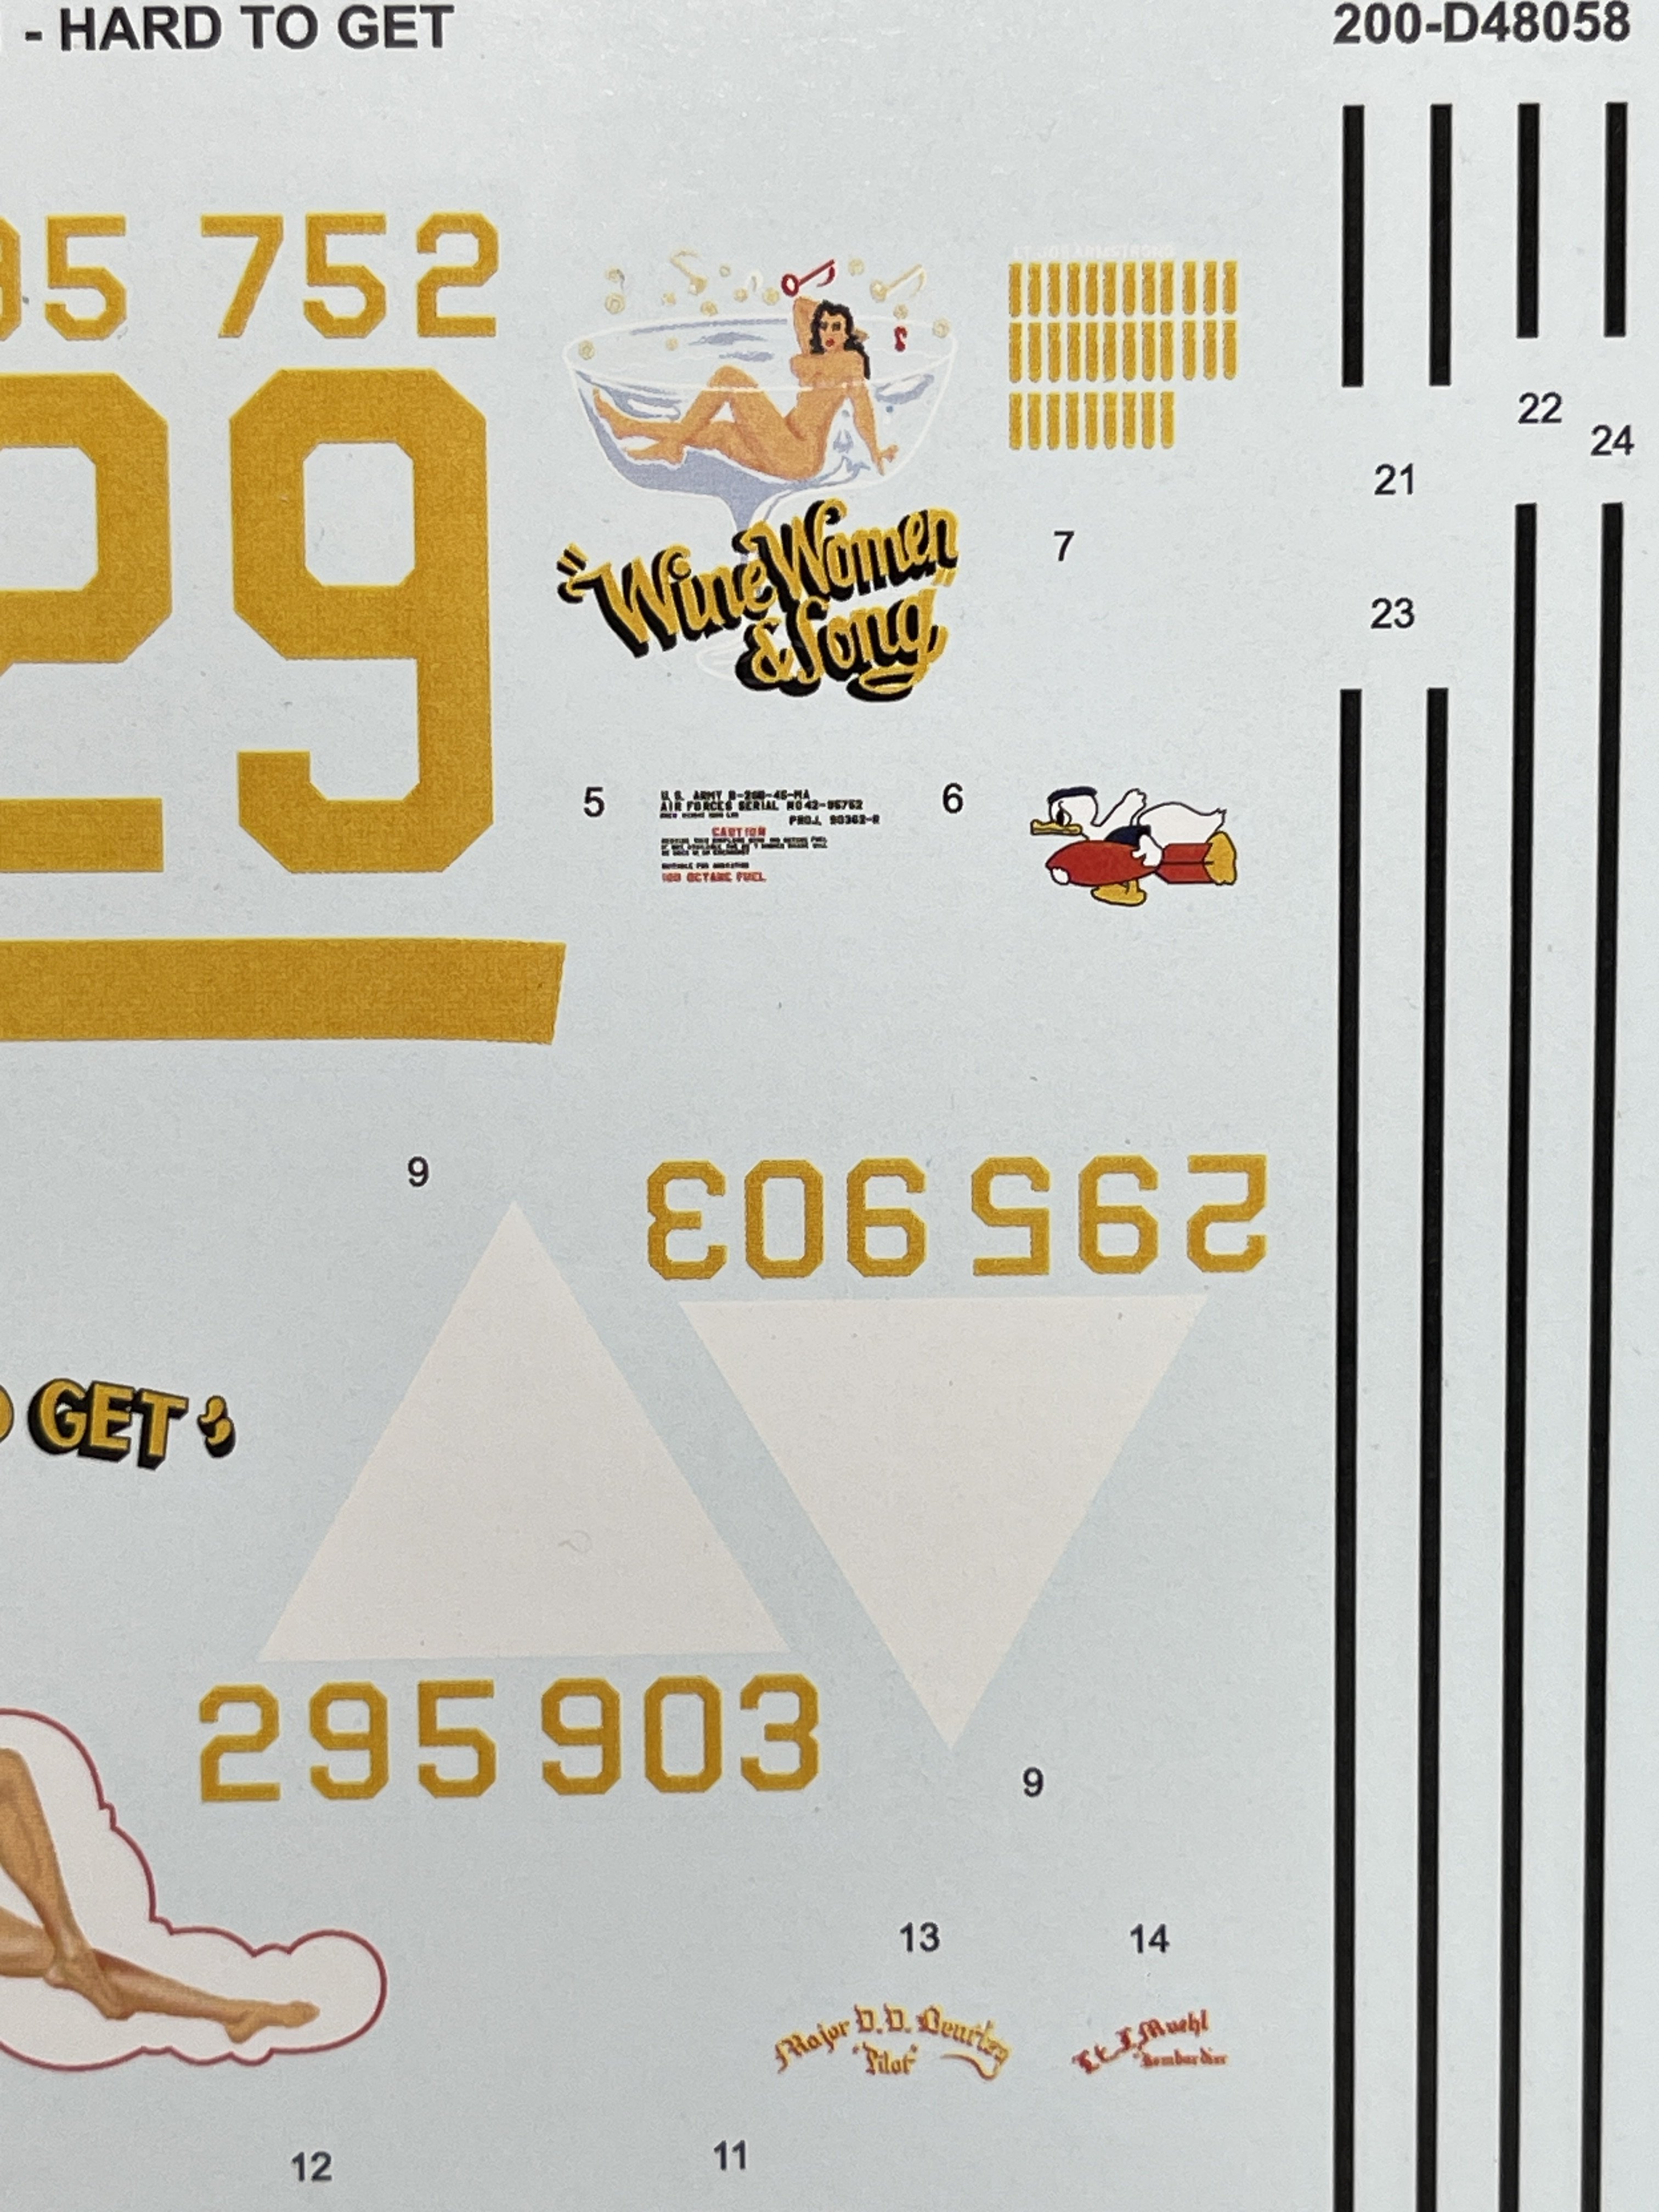
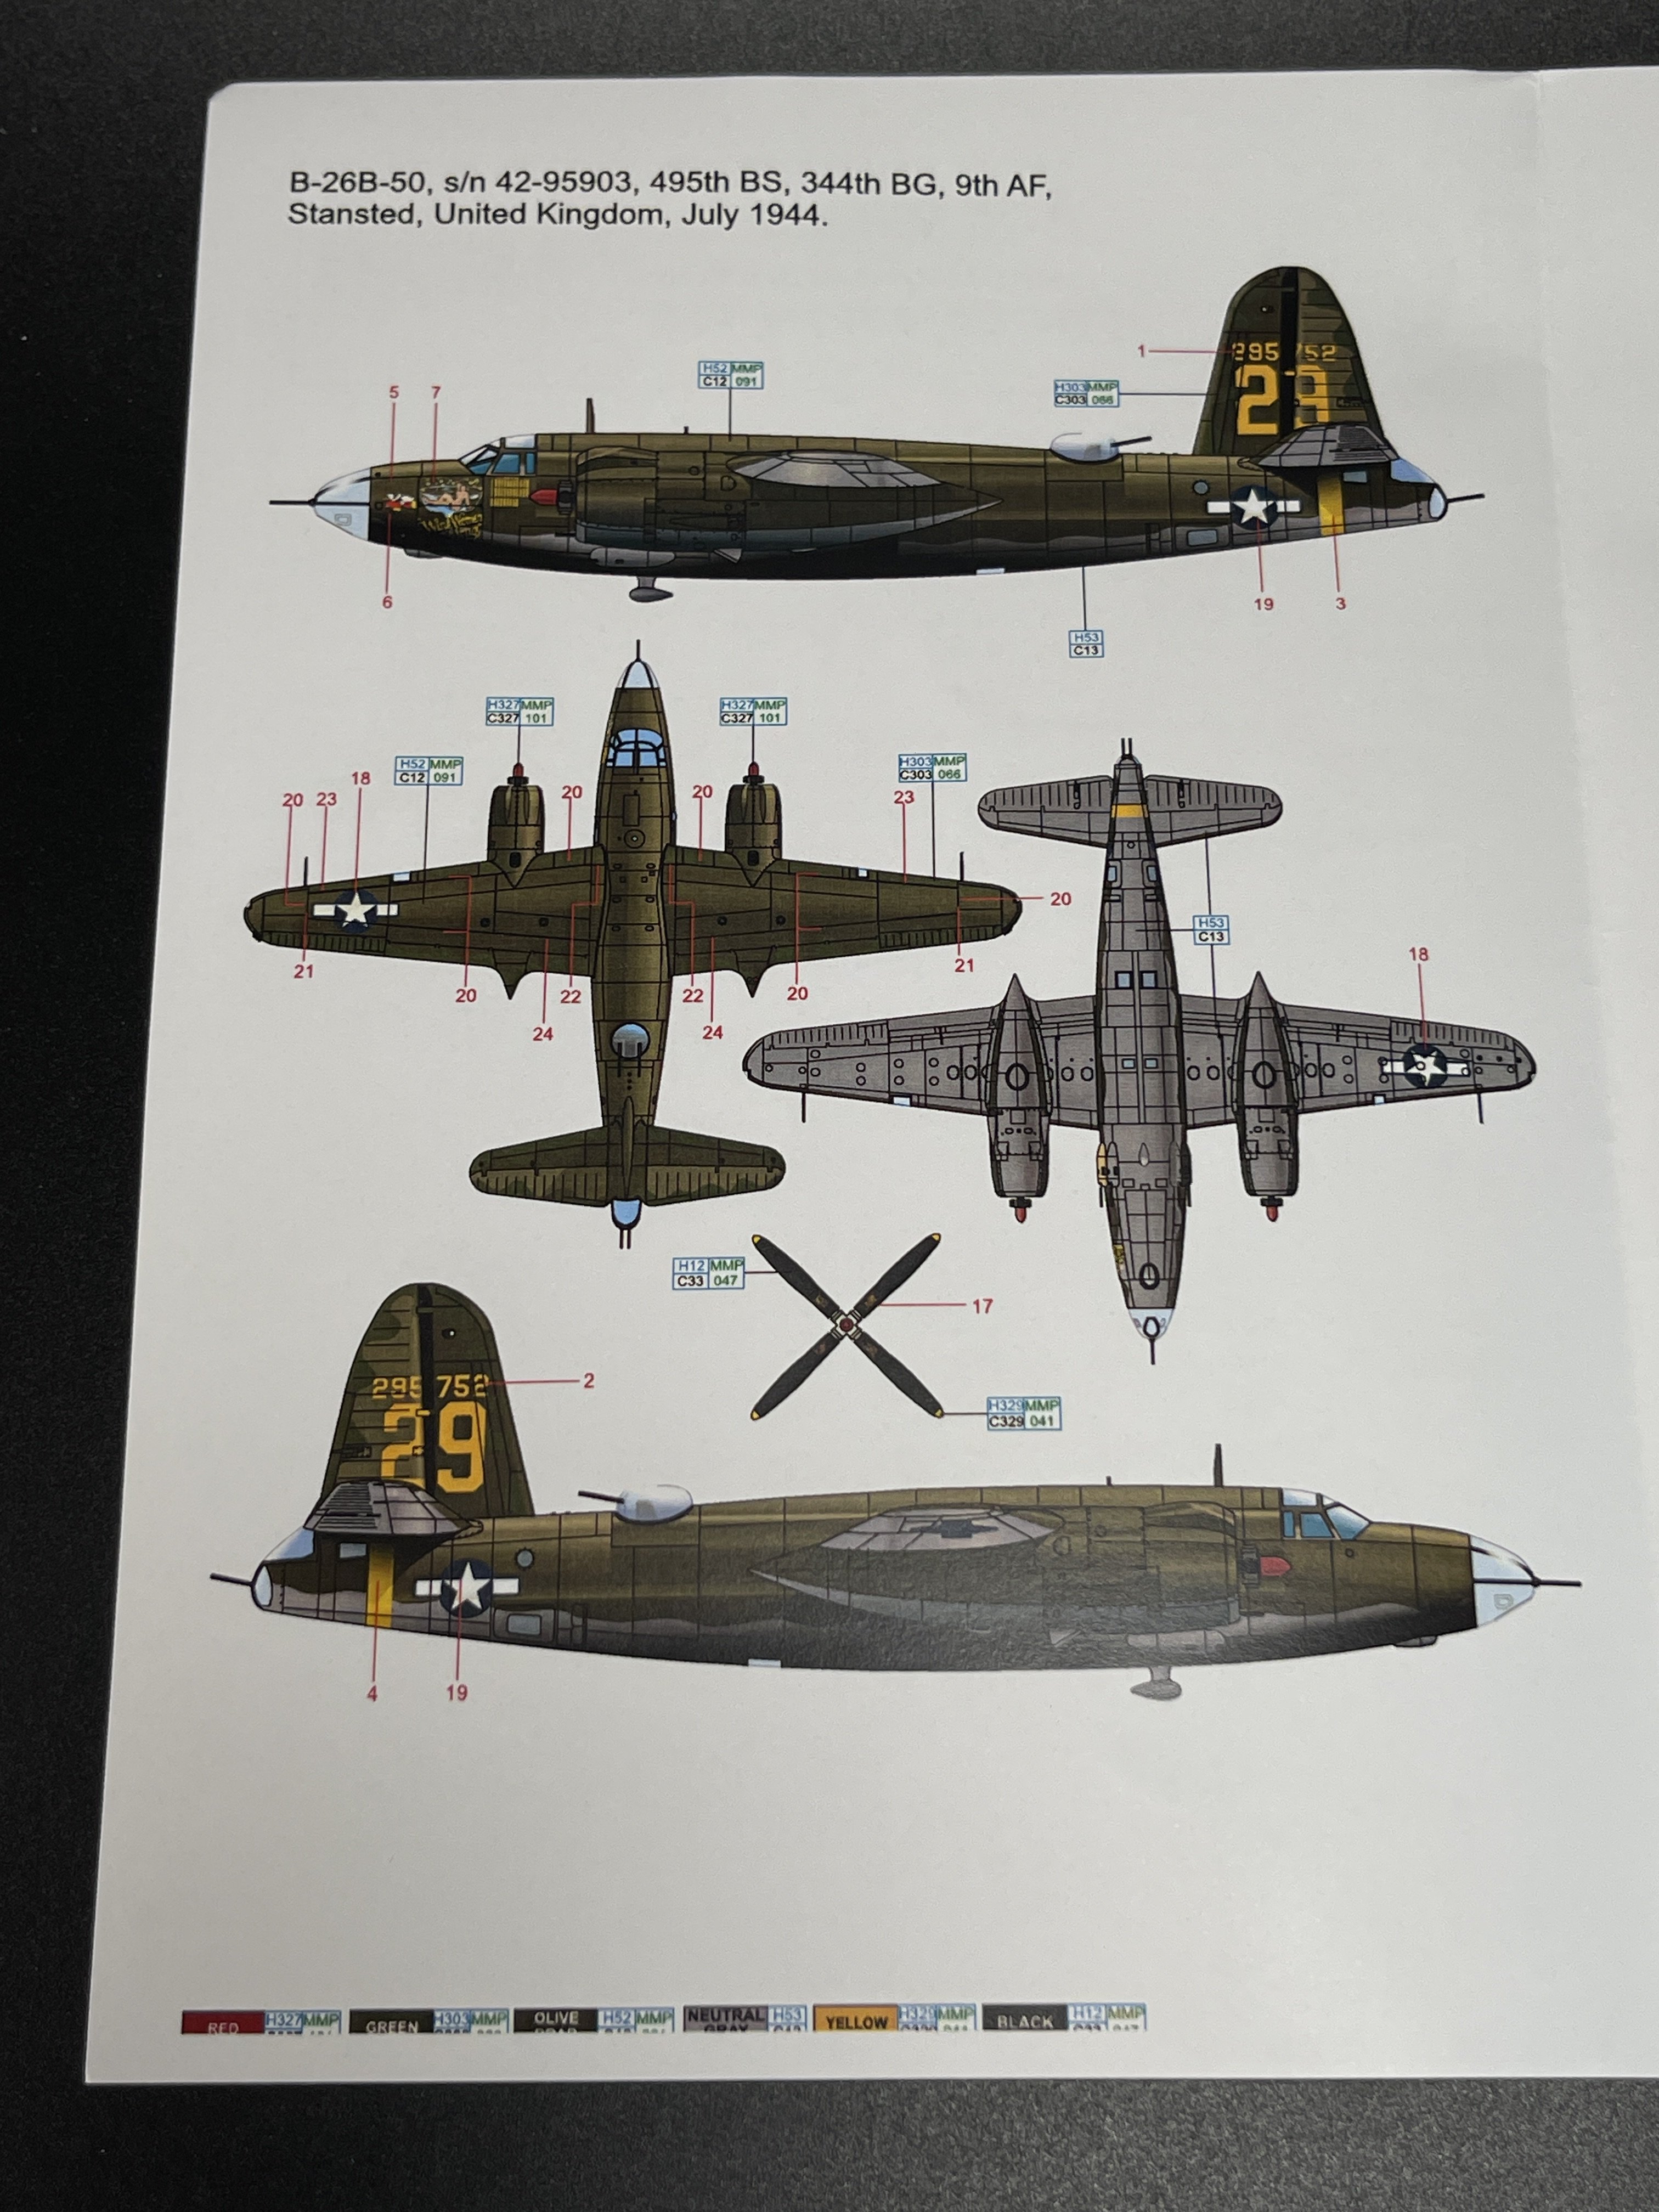
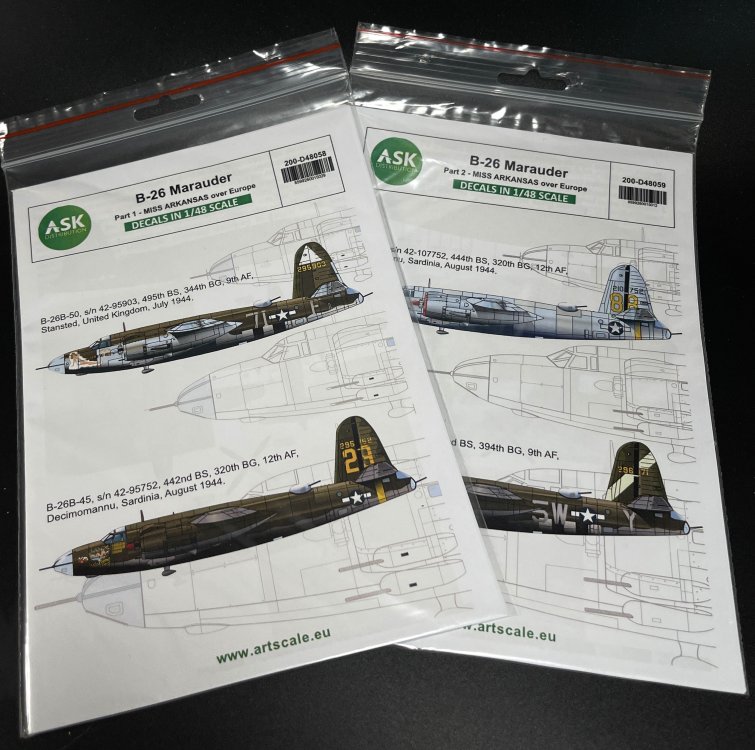
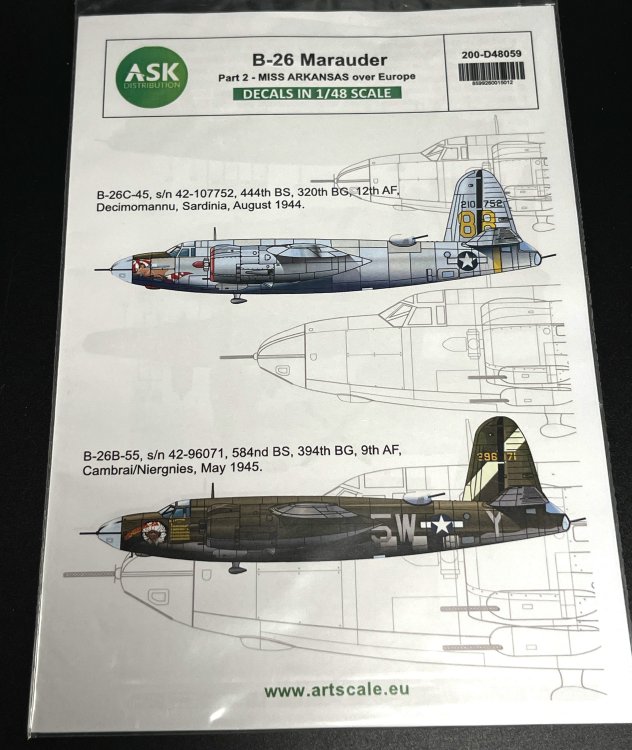
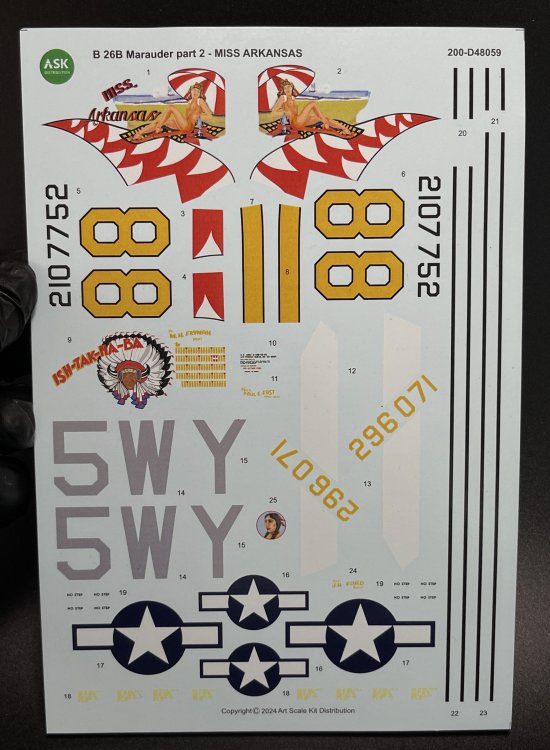
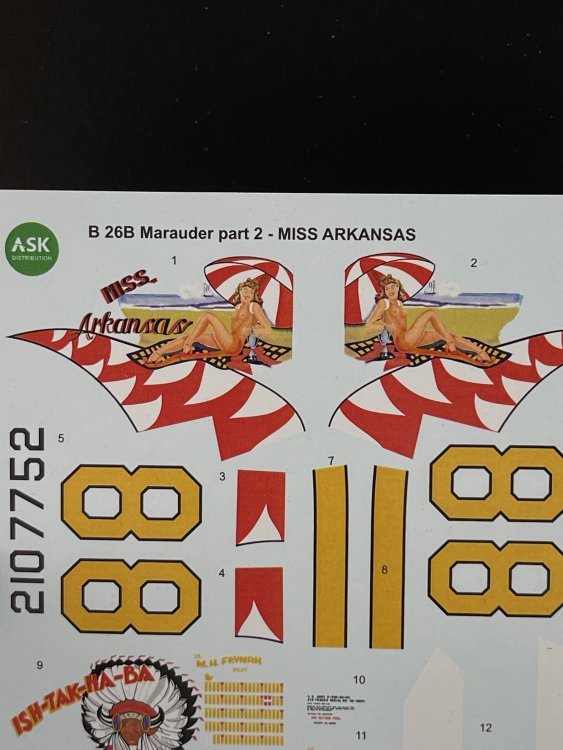
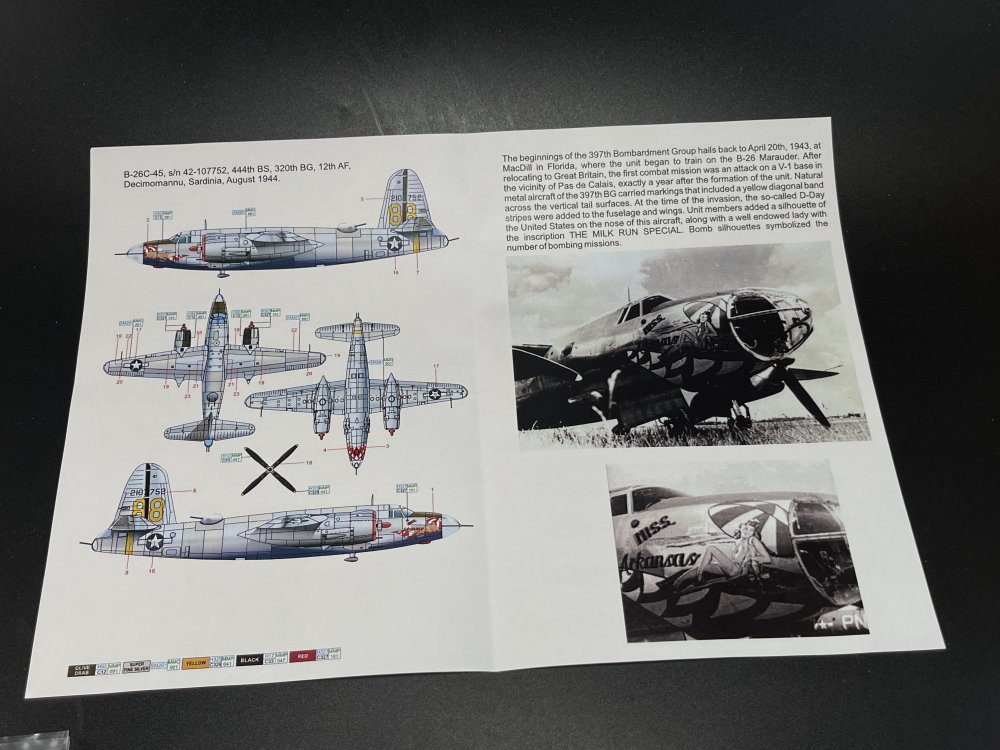
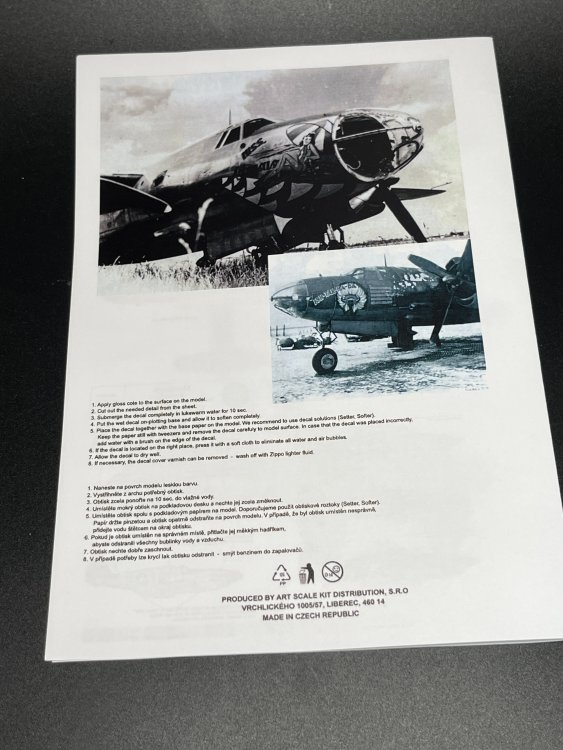
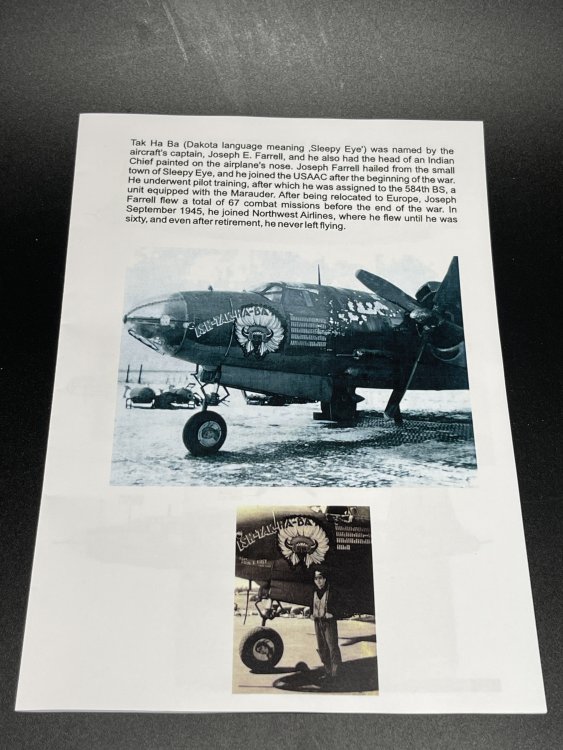
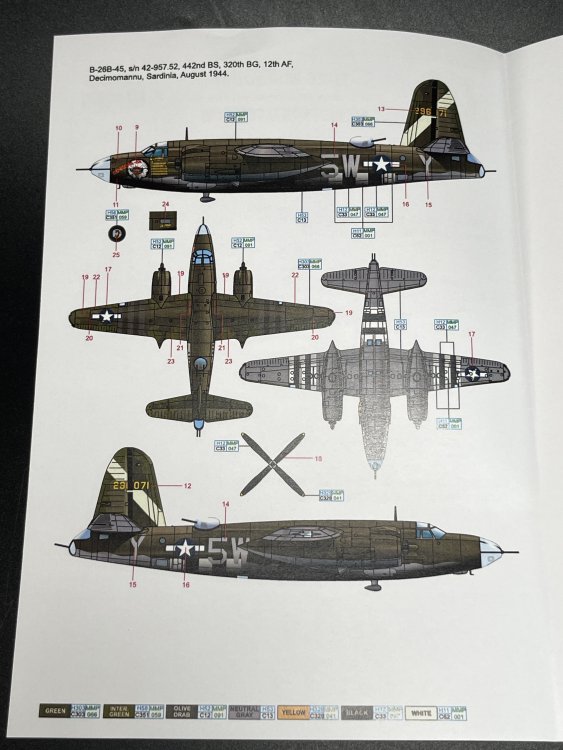
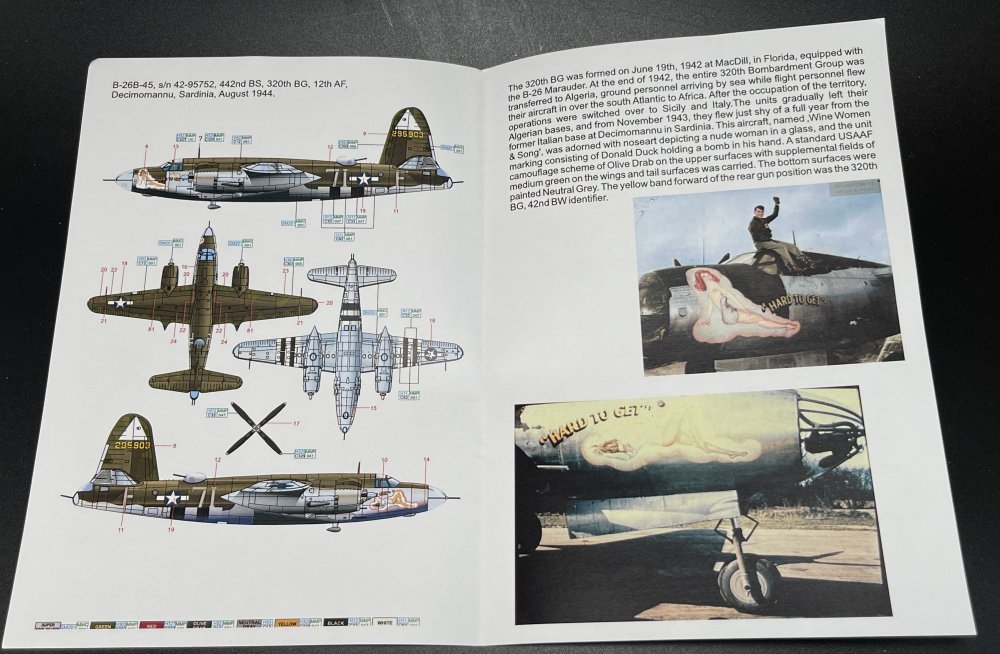
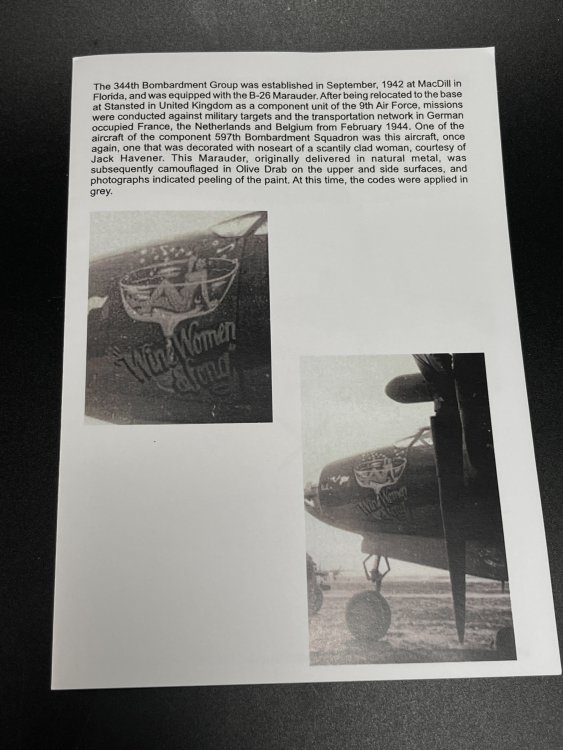
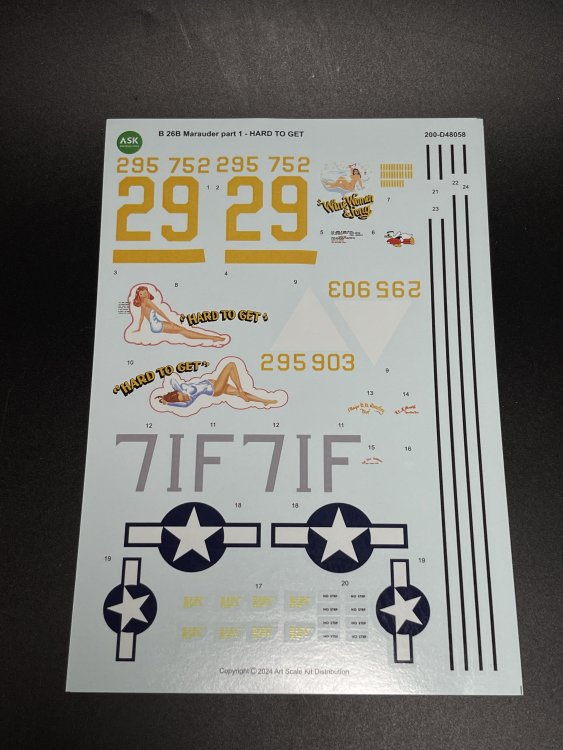
1:48 Art Scale Kit B-26 Marauder Several Sheets Art Scale Kit (also known as ASK) is a model hobby shop and now it knonwed in the modelling world all around for their decals, tools and 3D productions. Today, I´m going to review two decal sheet from ASK with four strikings schmes for the ICM 1:48 B-26 Marauder. All sets came in a ziplog bag, small A5 size sheet with profiles colors instructions steps how to apply ASK decals. So let’s looks to the option schemes that are offered. But first, one detail that I loved about in all ASK decals sheets. In the applying instructions, in all sheets, theres`a real photo of one of the airplanes that are represented on the decal sheets. I really love that "bonus" B-26 Marauder – Part 1 – Over Europe: Wine, Women and Song and Hard To Get Catalogue number200-D48058 Price: 11,90€ To order, click here. This sheet have 2 schemes options quite famous. My set has a typo error with the “Miss Arkansas” when that belongs to part II. So, the first on is the B-26B-50, s/n 42-95903, 495th BS, 344th BG, 9th AF, Stansted, United Kingdom, July 1944, best known by the sexy pin-up and the lettering “Hard to Get”. The history of this particularly B-26 is well-know but ASK give the modeler a small context and history even so. “The 344th Bombardment Group was established in September, 1942 at MacDill in Florida, and was equipped with the B-26 Marauder. After being relocated to the base at Stansted in United Kingdom as a component unit of the 9th Air Force, missions were conducted against military targets and the transportation network in German occupied France, the Netherlands and Belgium from February 1944. One of the aircraft of the component 597th Bombardment Squadron was this aircraft, once again, one that was decorated with noseart of a scantily clad woman, courtesy of Jack Havener. This Marauder, originally delivered in natural metal, was subsequently camouflaged in Olive Drab on the upper and side surfaces, and photographs indicated peeling of the paint. At this time, the codes were applied in grey.” The second is probably one of my favourite… The B-26B-45, s/n 42-95752, 442nd BS, 320th BG, 12th AF, Decimomannu, Sardinia, August 1944, Well known for the nose art “Wine, Women & Song” ASK gives the modeler also a small history context of this aircraft. “The 320th BG was formed on June 19th, 1942 at MacDill, in Florida, equipped with the B-26 Marauder. At the end of 1942, the entire 320th Bombardment Group was transferred to Algeria, ground personnel arriving by sea while flight personnel flew their aircraft in over the south Atlantic to Africa. After the occupation of the territory, operations were switched over to Sicily and Italy.The units gradually left their Algerian bases, and from November 1943, they flew just shy of a full year from the former Italian base at Decimomannu in Sardinia. This aircraft, named Wine, Women & Song', was adorned with noseart depicting a nude woman in a glass, and the unit marking consisting of Donald Duck holding a bomb in his hand. A standard USAAF camouflage scheme of Olive Drab on the upper surfaces with supplemental fields of medium green on the wings and tail surfaces was carried. The bottom surfaces were painted Neutral Grey. The yellow band forward of the rear gun position was the 320th BG, 42nd BW identifier. B-26 Marauder Part 2 – Miss Arkansas over Europe Catalogue number200-D48059 Price: 11,90€ To order, click here. The second sheet also have quite famous and attractive schemes. So the first one: B-26C-45, s/n 42-107752, 444th BS, 320th BG, 12th AF, Decimomannu, Sardinia, August 1944. “Miss Arkansas” It’s a fantastic delivery so you can get a very attractive B-26. Love it! Here ASK also give us a brief history “The beginnings of the 397th Bombardment Group hails back to April 20th, 1943, at MacDill in Florida, where the unit began to train on the B-26 Marauder. After relocating to Great Britain, the first combat mission was an attack on a V-1 base in the vicinity of Pas de Calais, exactly a year after the formation of the unit. Natural metal aircraft of the 397th BG carried markings that included a yellow diagonal band across the vertical tail surfaces. At the time of the invasion, the so-called D-Day stripes were added to the fuselage and wings. Unit members added a silhouette of the United States on the nose of this aircraft, along with a well endowed lady with the inscription THE MILK RUN SPECIAL. Bomb silhouettes symbolized the number of bombing missions. The second scheme, is the B-26B-55, s/n 42-96071, 584nd BS, 394th BG, 9th AF, Cambrai/Niergnies, May 1945. The “Ish-Tak-Ha-Ba” “Ish-Tak Ha Ba (Dakota language meaning ‚Sleepy Eye') was named by the aircraft's captain, Joseph E. Farrell, and he also had the head of an Indian Chief painted on the airplane's nose. Joseph Farrell hailed from the small town of Sleepy Eye, and he joined the USAAC after the beginning of the war. He underwent pilot training, after which he was assigned to the 584th BS, a unit equipped with the Marauder. After being relocated to Europe, Joseph Farrell flew a total of 67 combat missions before the end of the war. In September 1945, he joined Northwest Airlines, where he flew until he was sixty, and even after retirement, he never left flying. Checking the decal sheets, as usual the color registration e density is great and a very good definition of the details. The decals have a thin film, in fact looking very thin and delicate. Once again, there is no indication where are they printed so I assume that will be in ASK house. The printing quality is quite good, as they are sharp, with outline very well defined. The instructions are the general ones that are applicable to all decals, it is always important to remember the general principles of decal application. In this case, there is no specific rule for applying these decals. The profiles draws contains lots of information, with side view (both side) and top view with precise decal indication. *** Conclusion: So, theses sheet is quite sparkle with very striking and attractive schemes. I will need another B-26 to build at least two of these. Thanks to ASK to keep releasing these decals in the modelling world. The location indication of the decals is quite good and very perceptible. The decals as already said, have a very good colour registration, very thin, with minimum decal film, and they work quite nice! My thanks to Art Scale for producing these fantastic decals. Francisco Guedes .


-
 Great great job!! WWI in 1:48 is really not easy...
 -
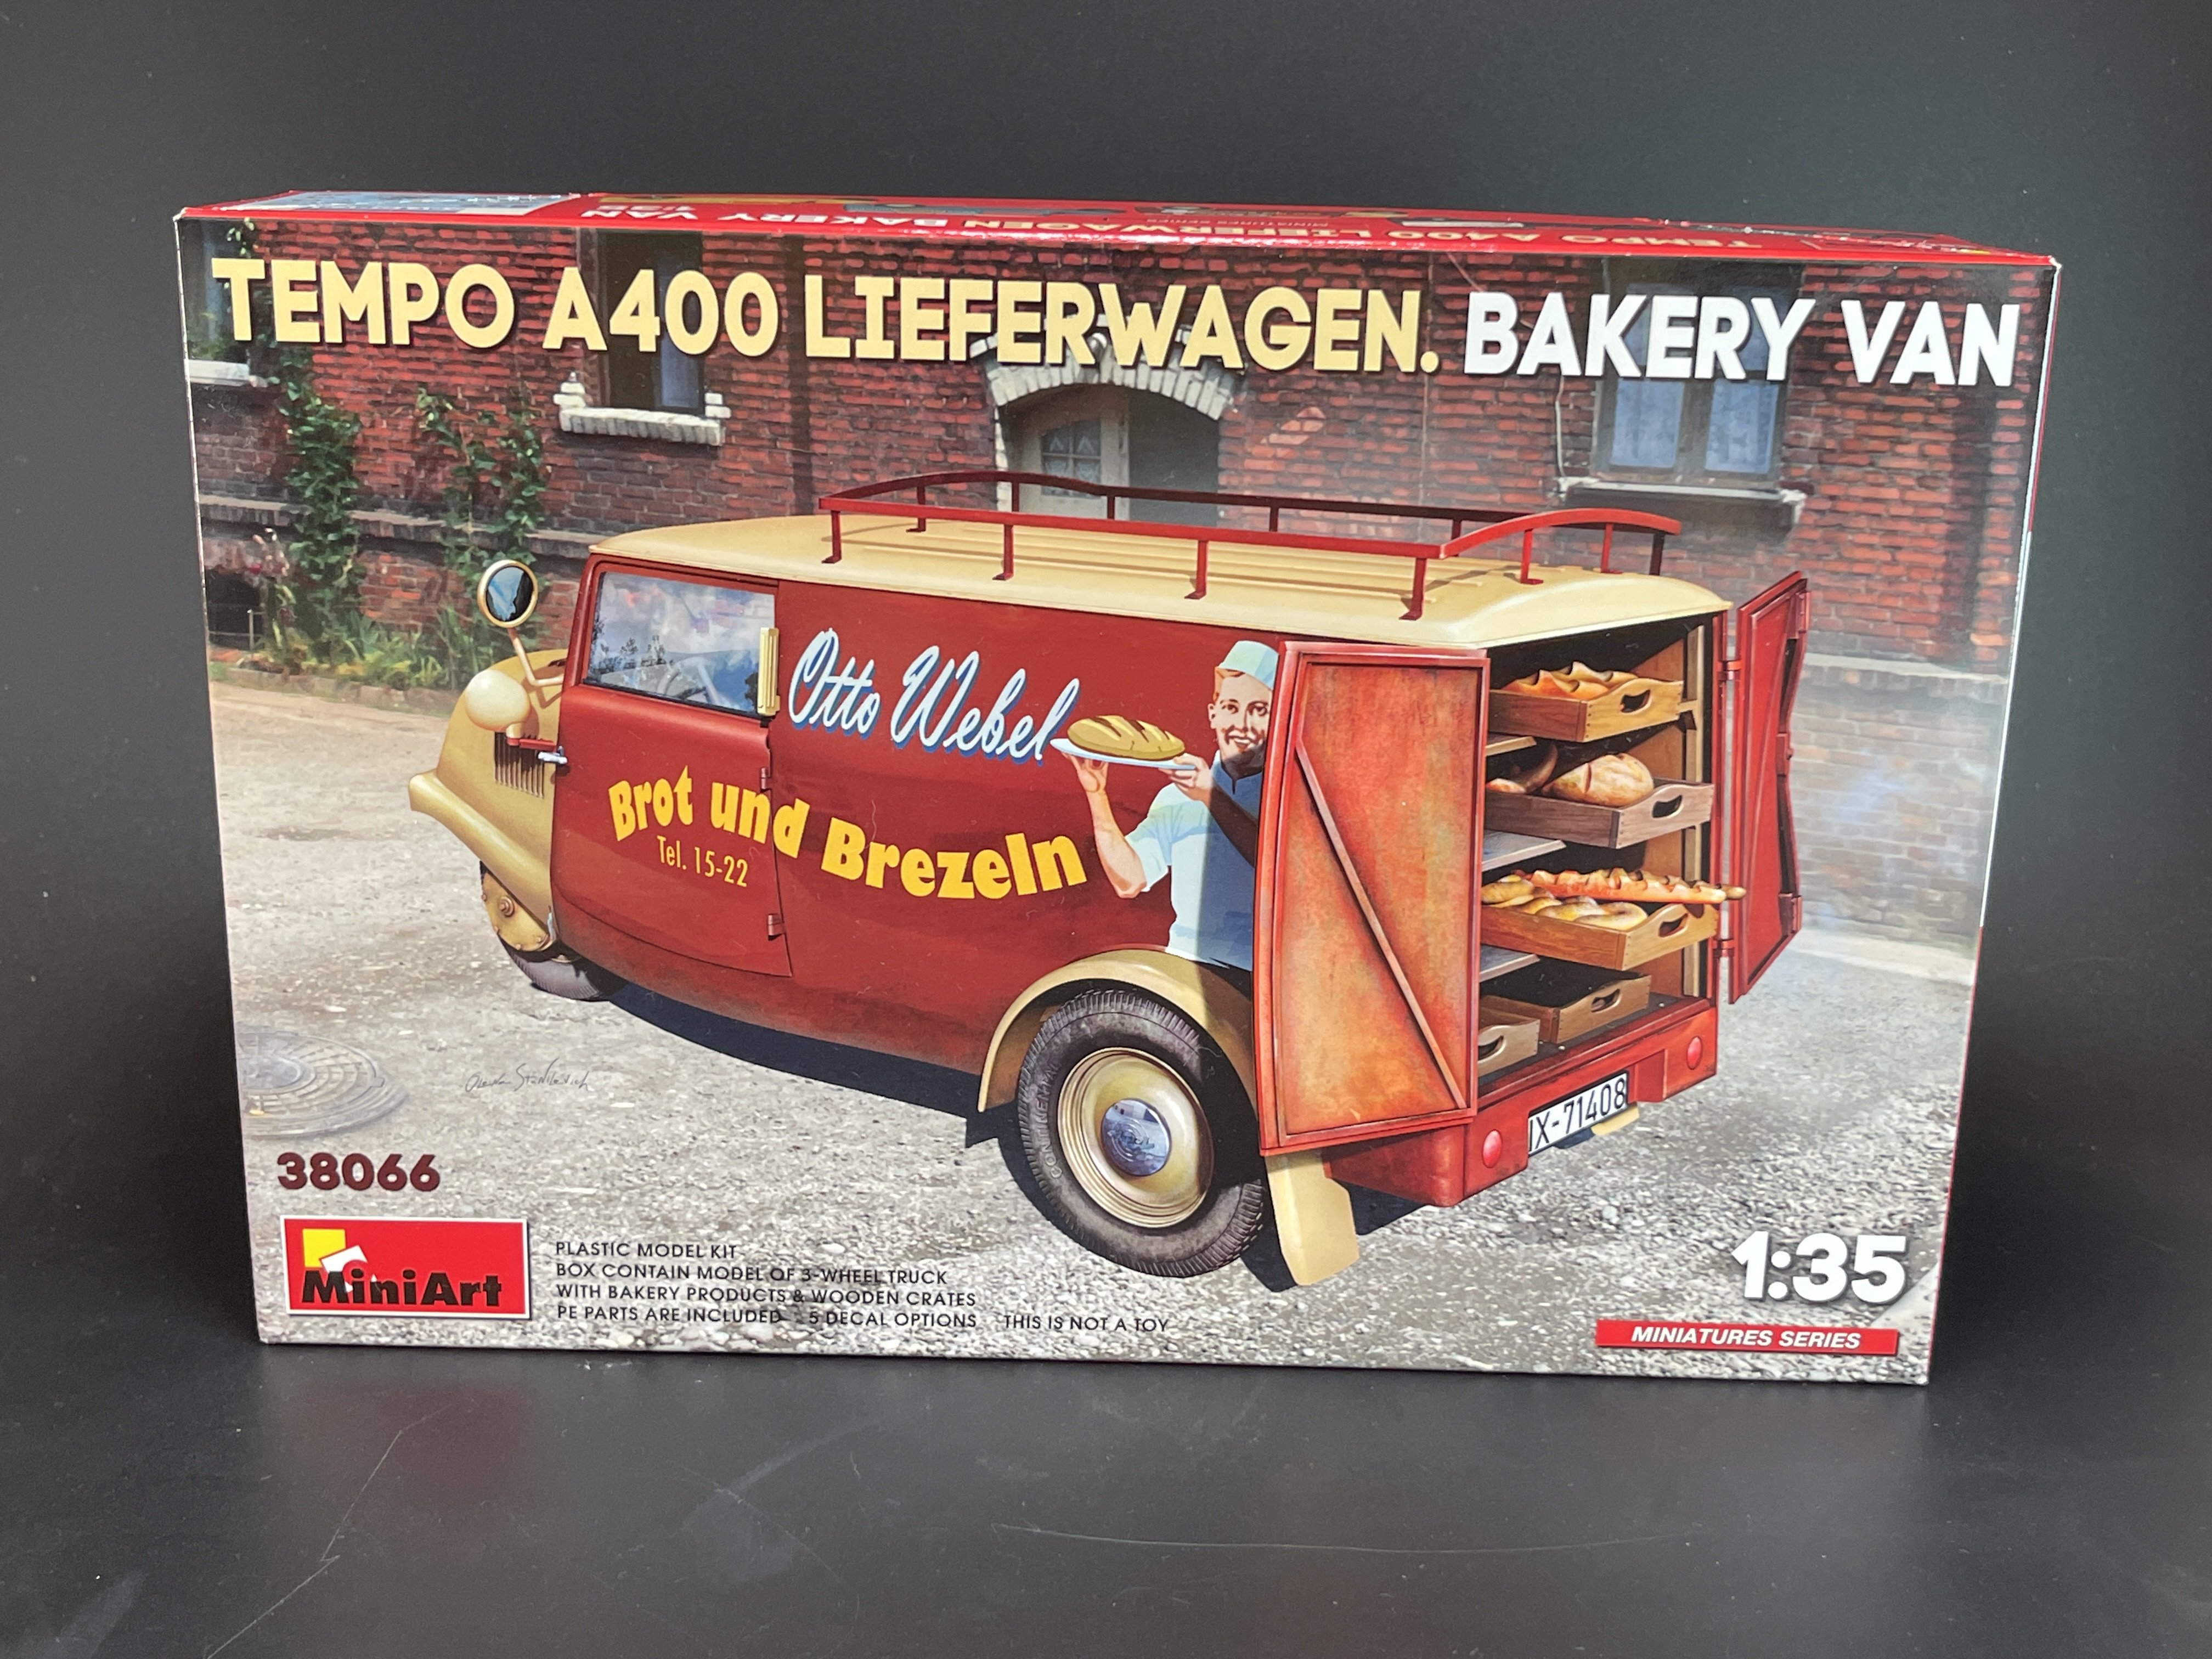
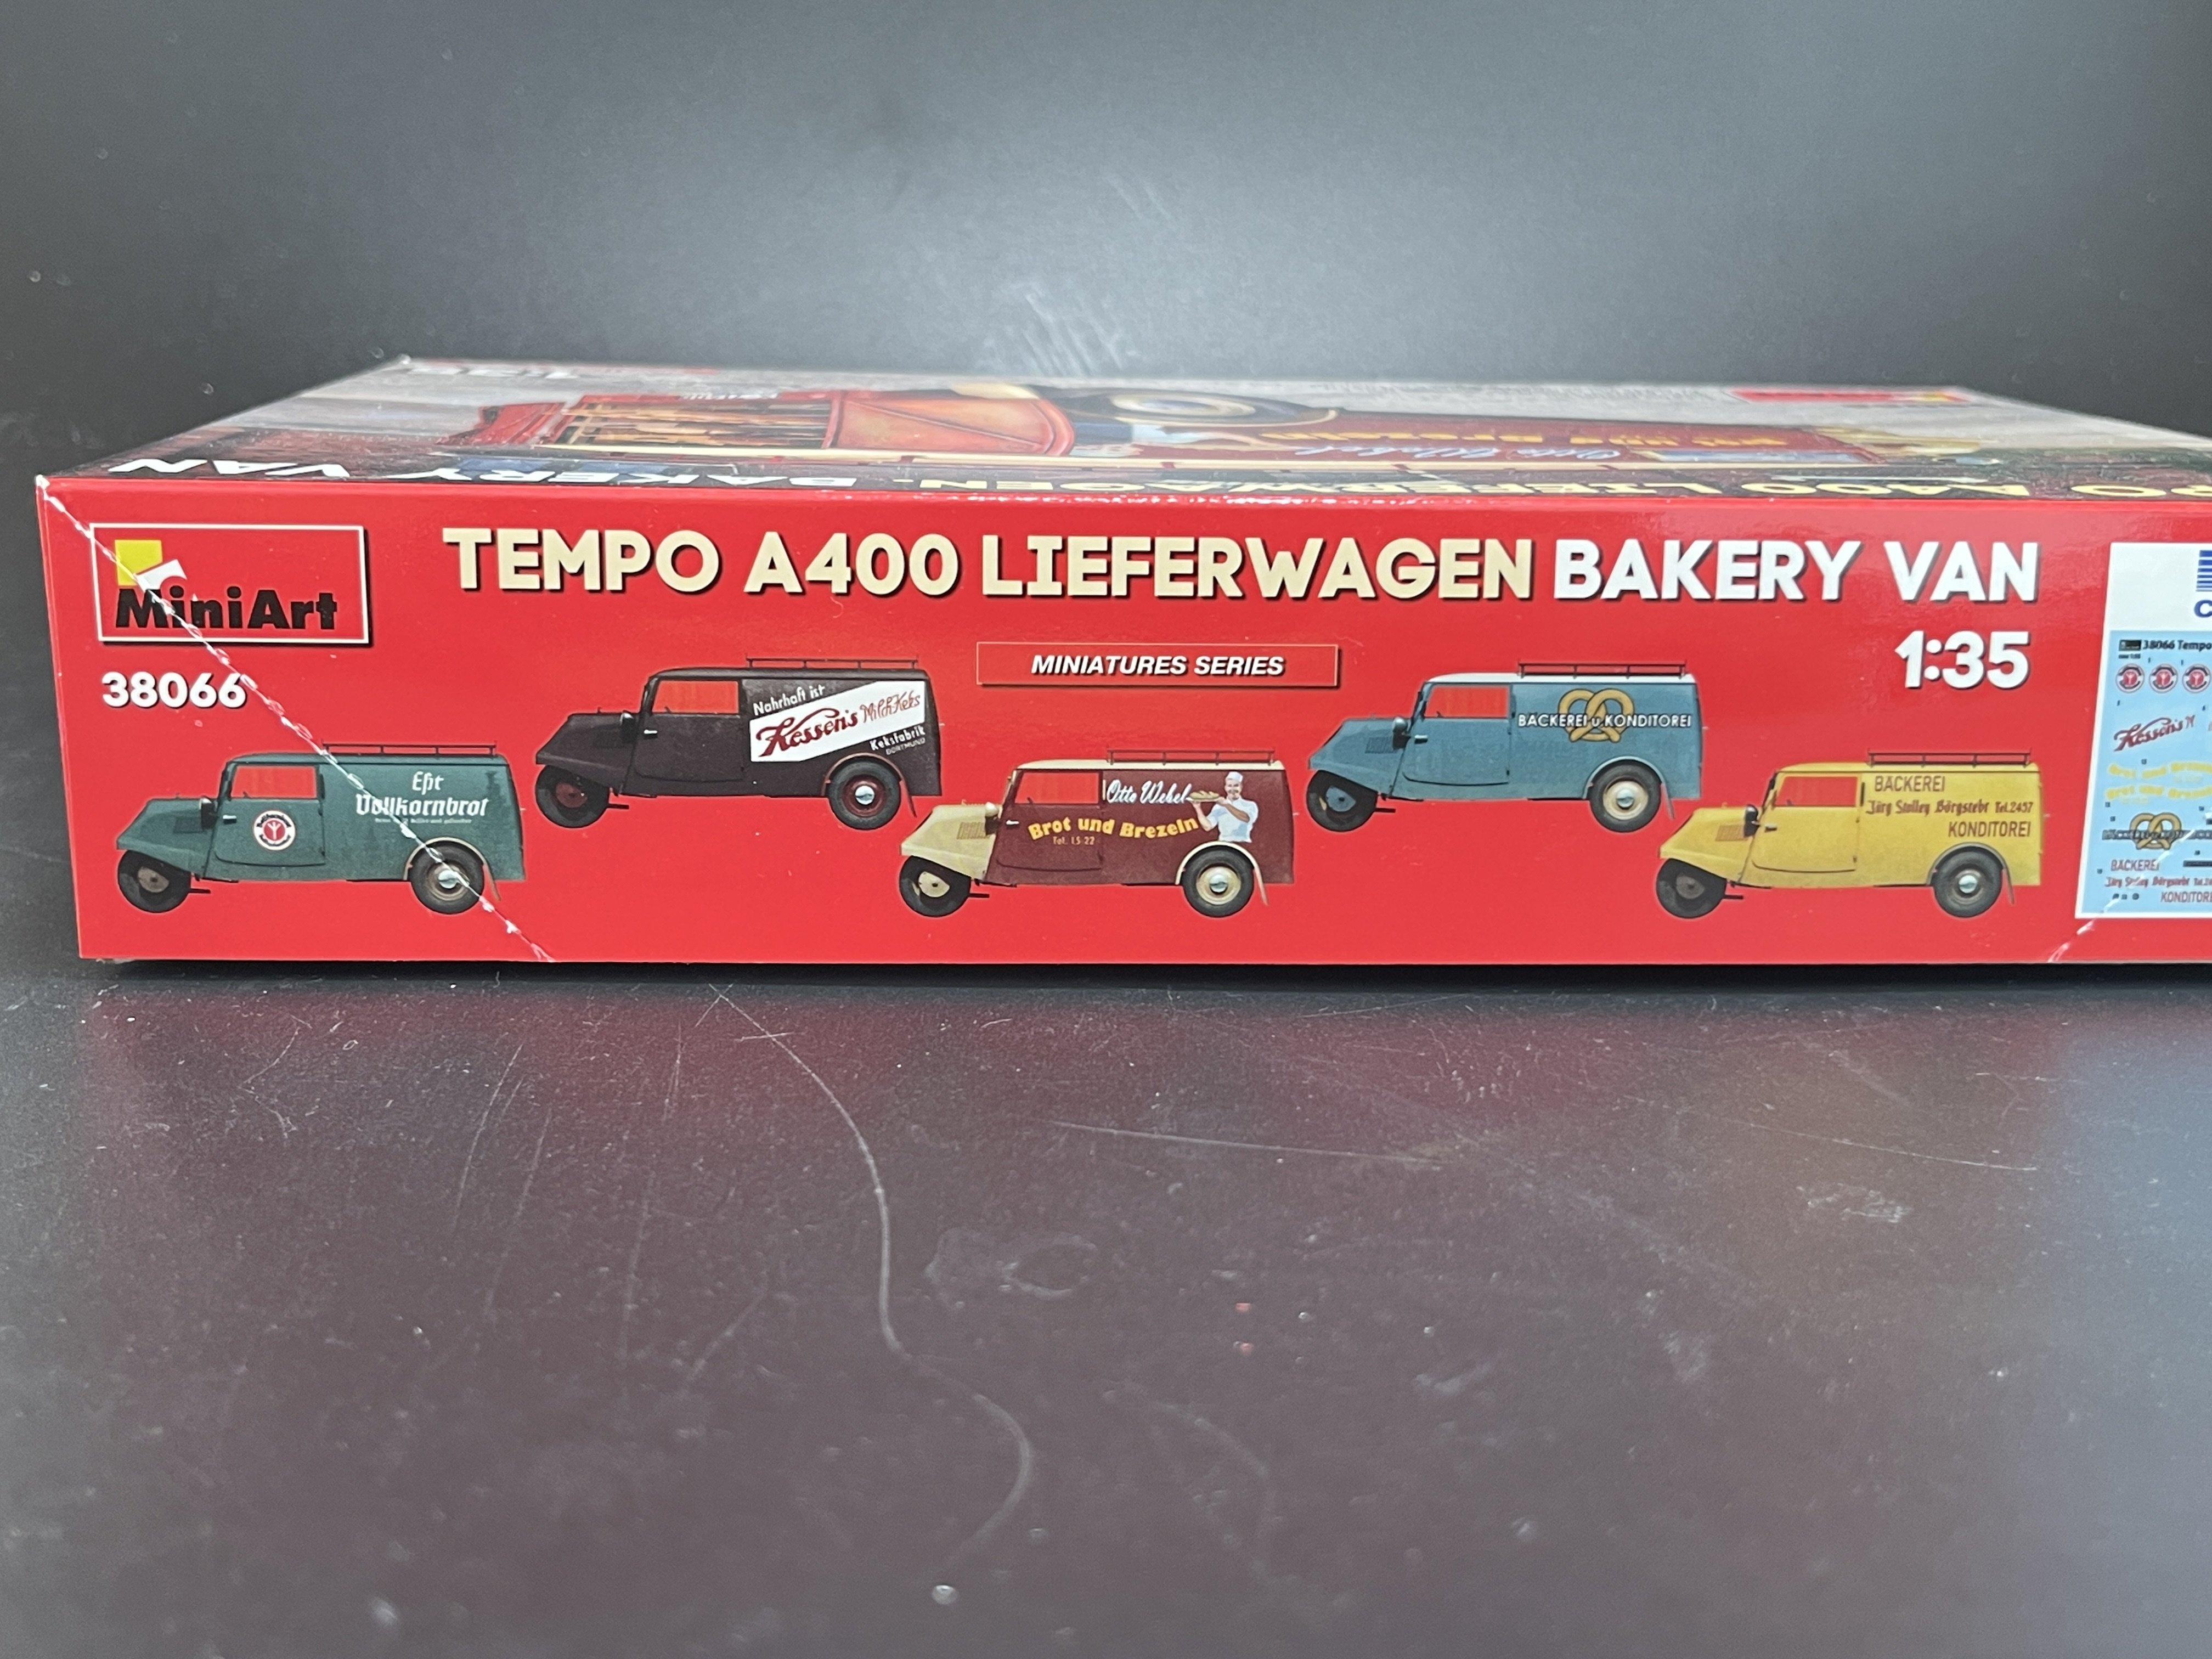
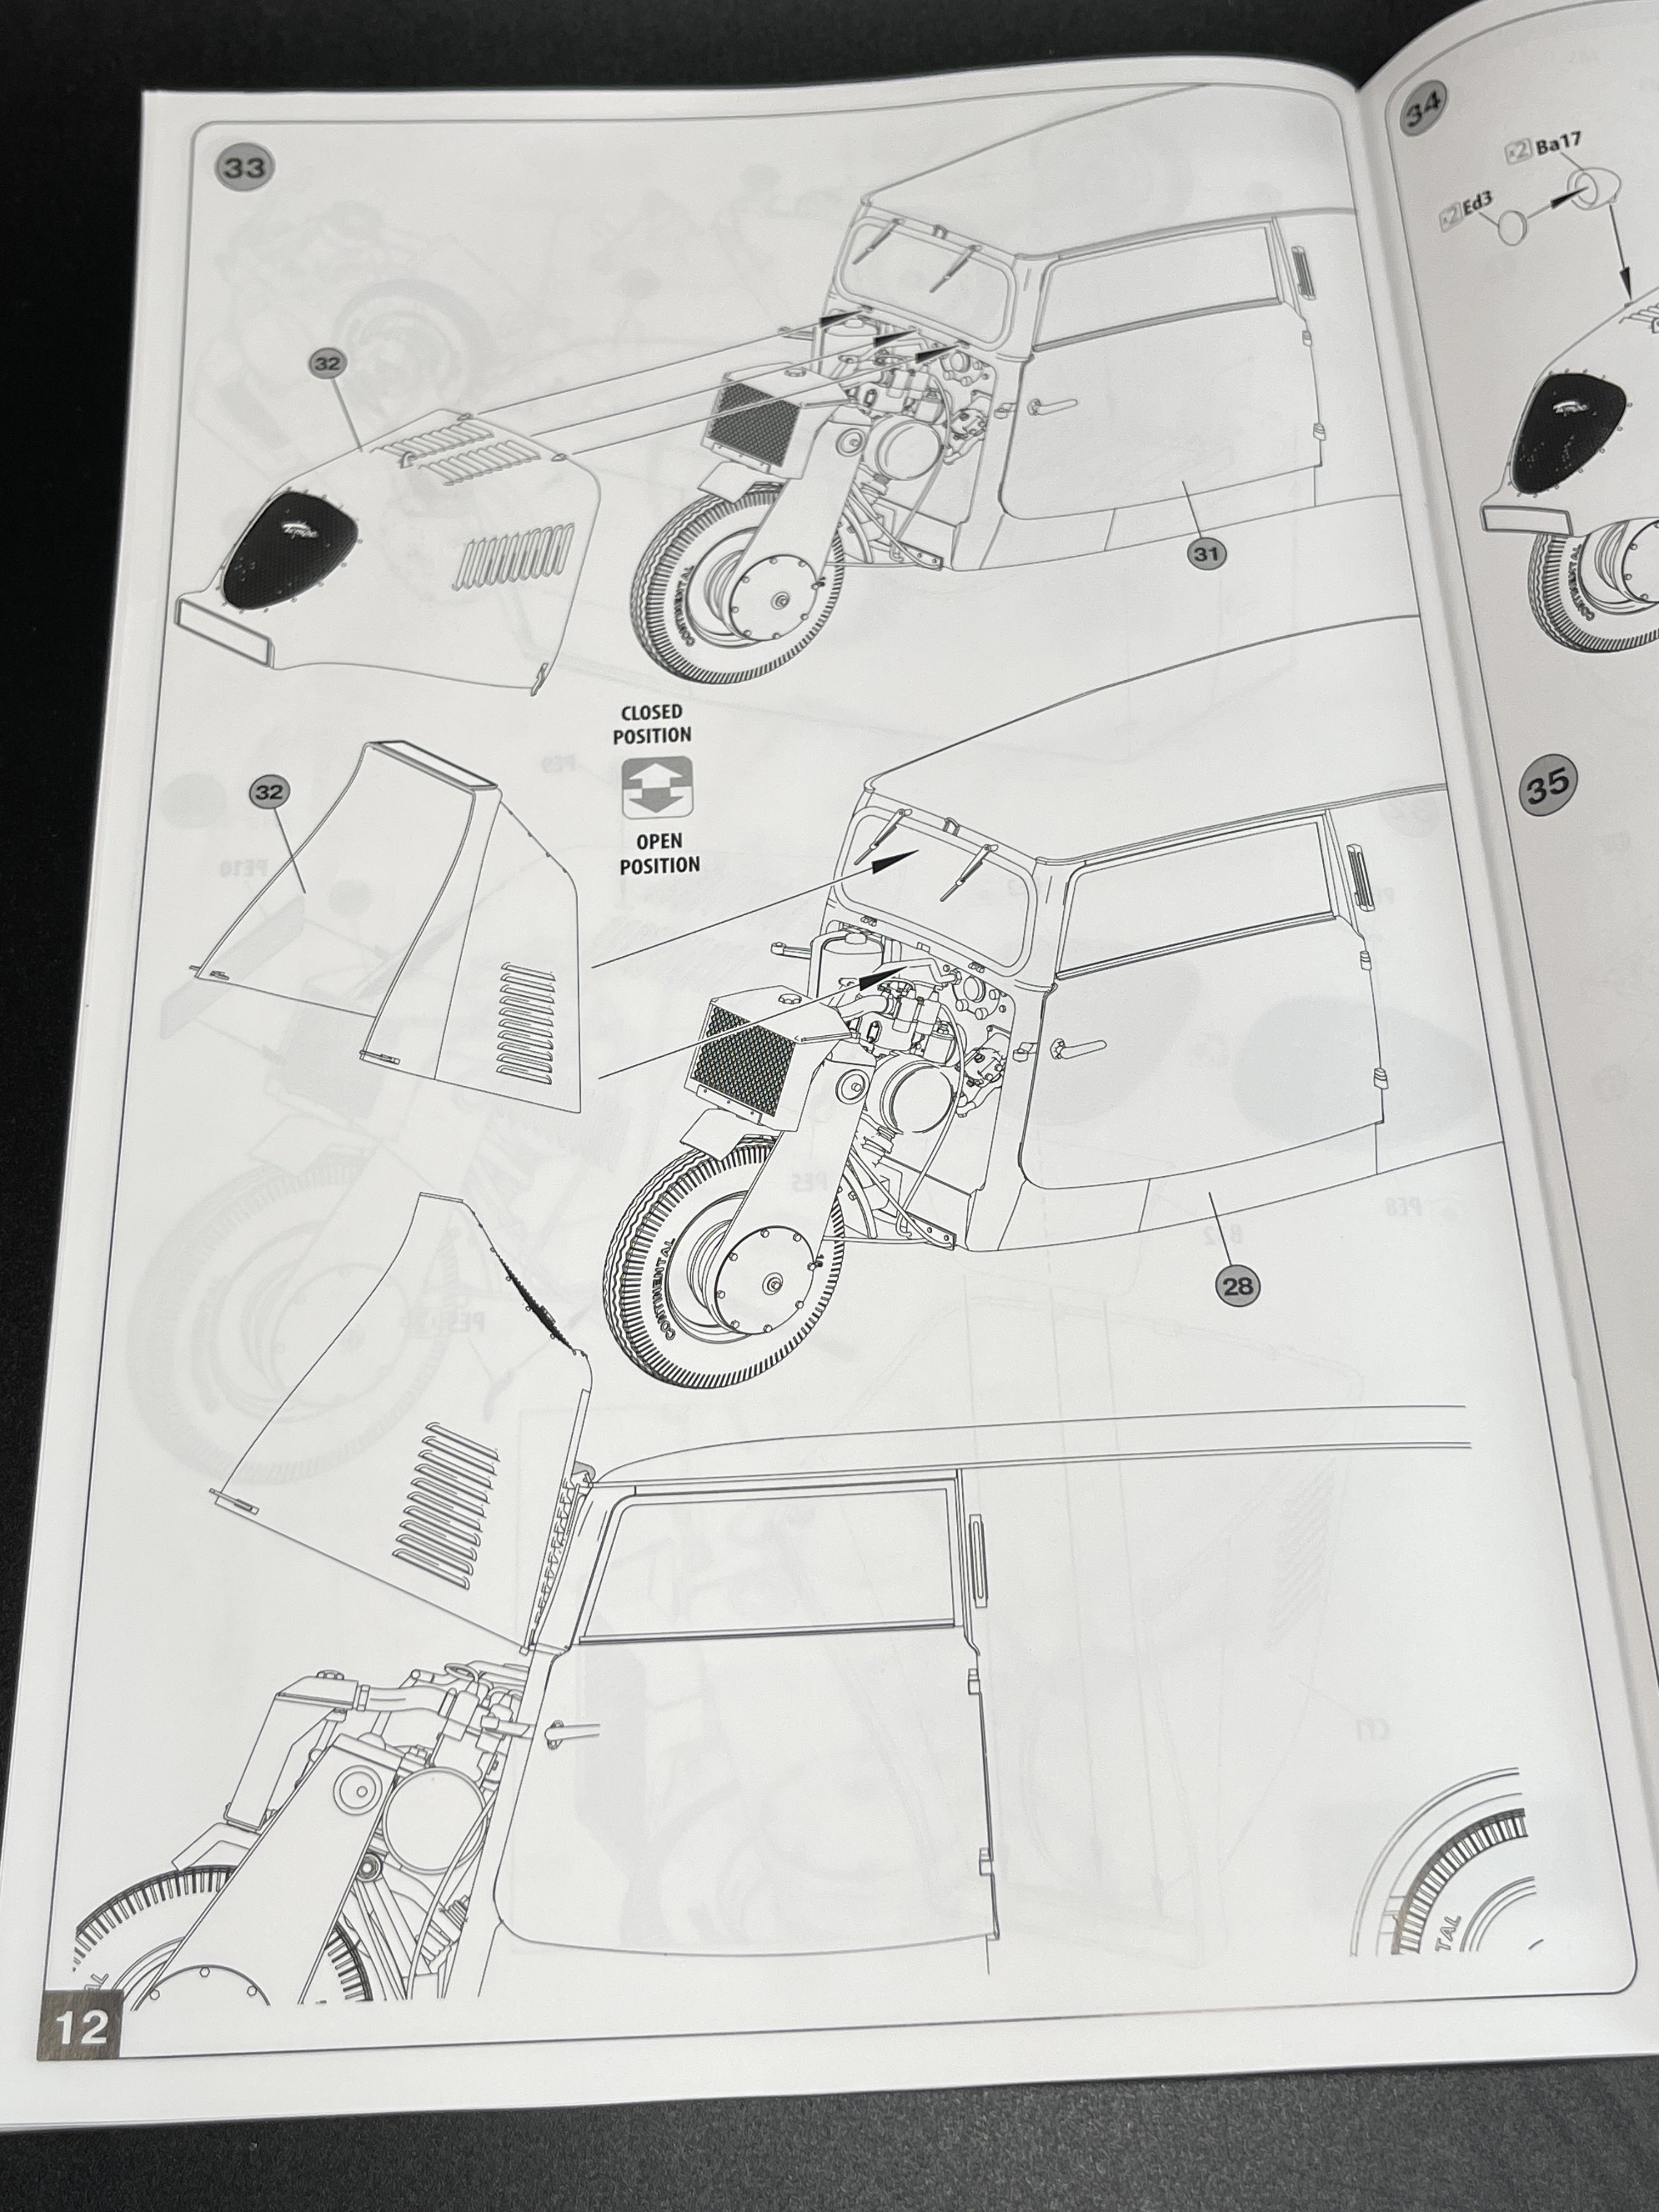
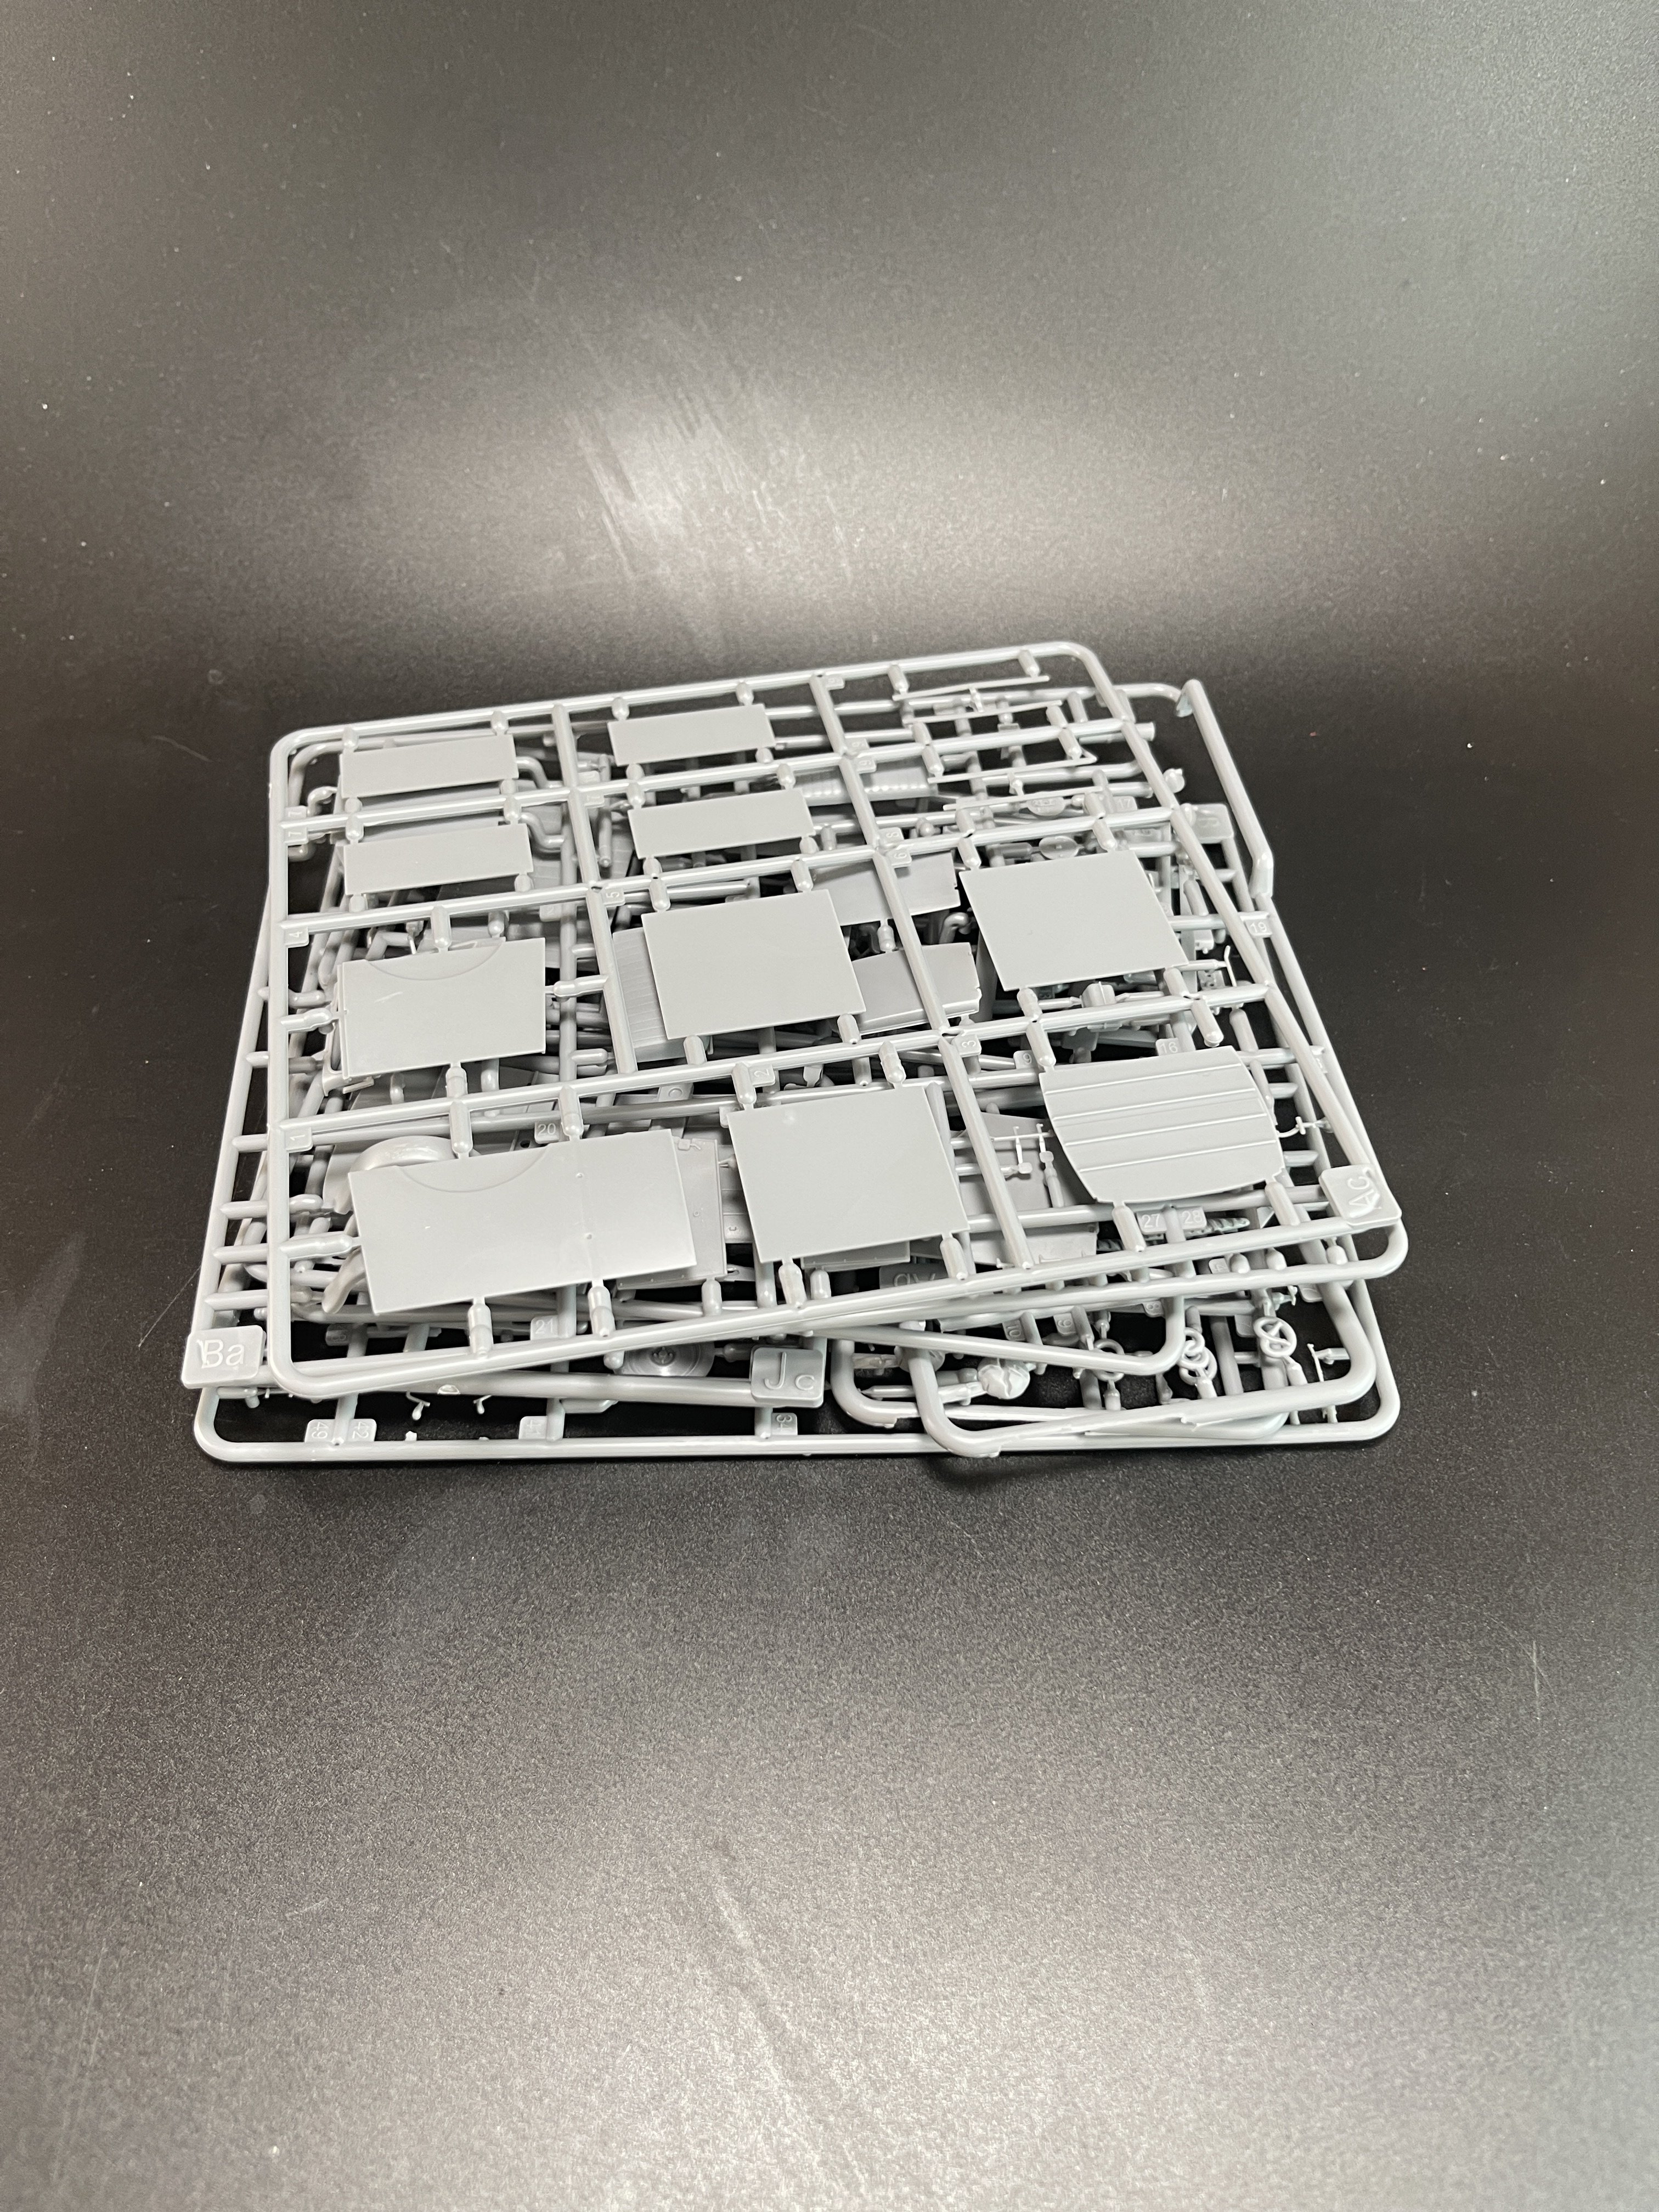
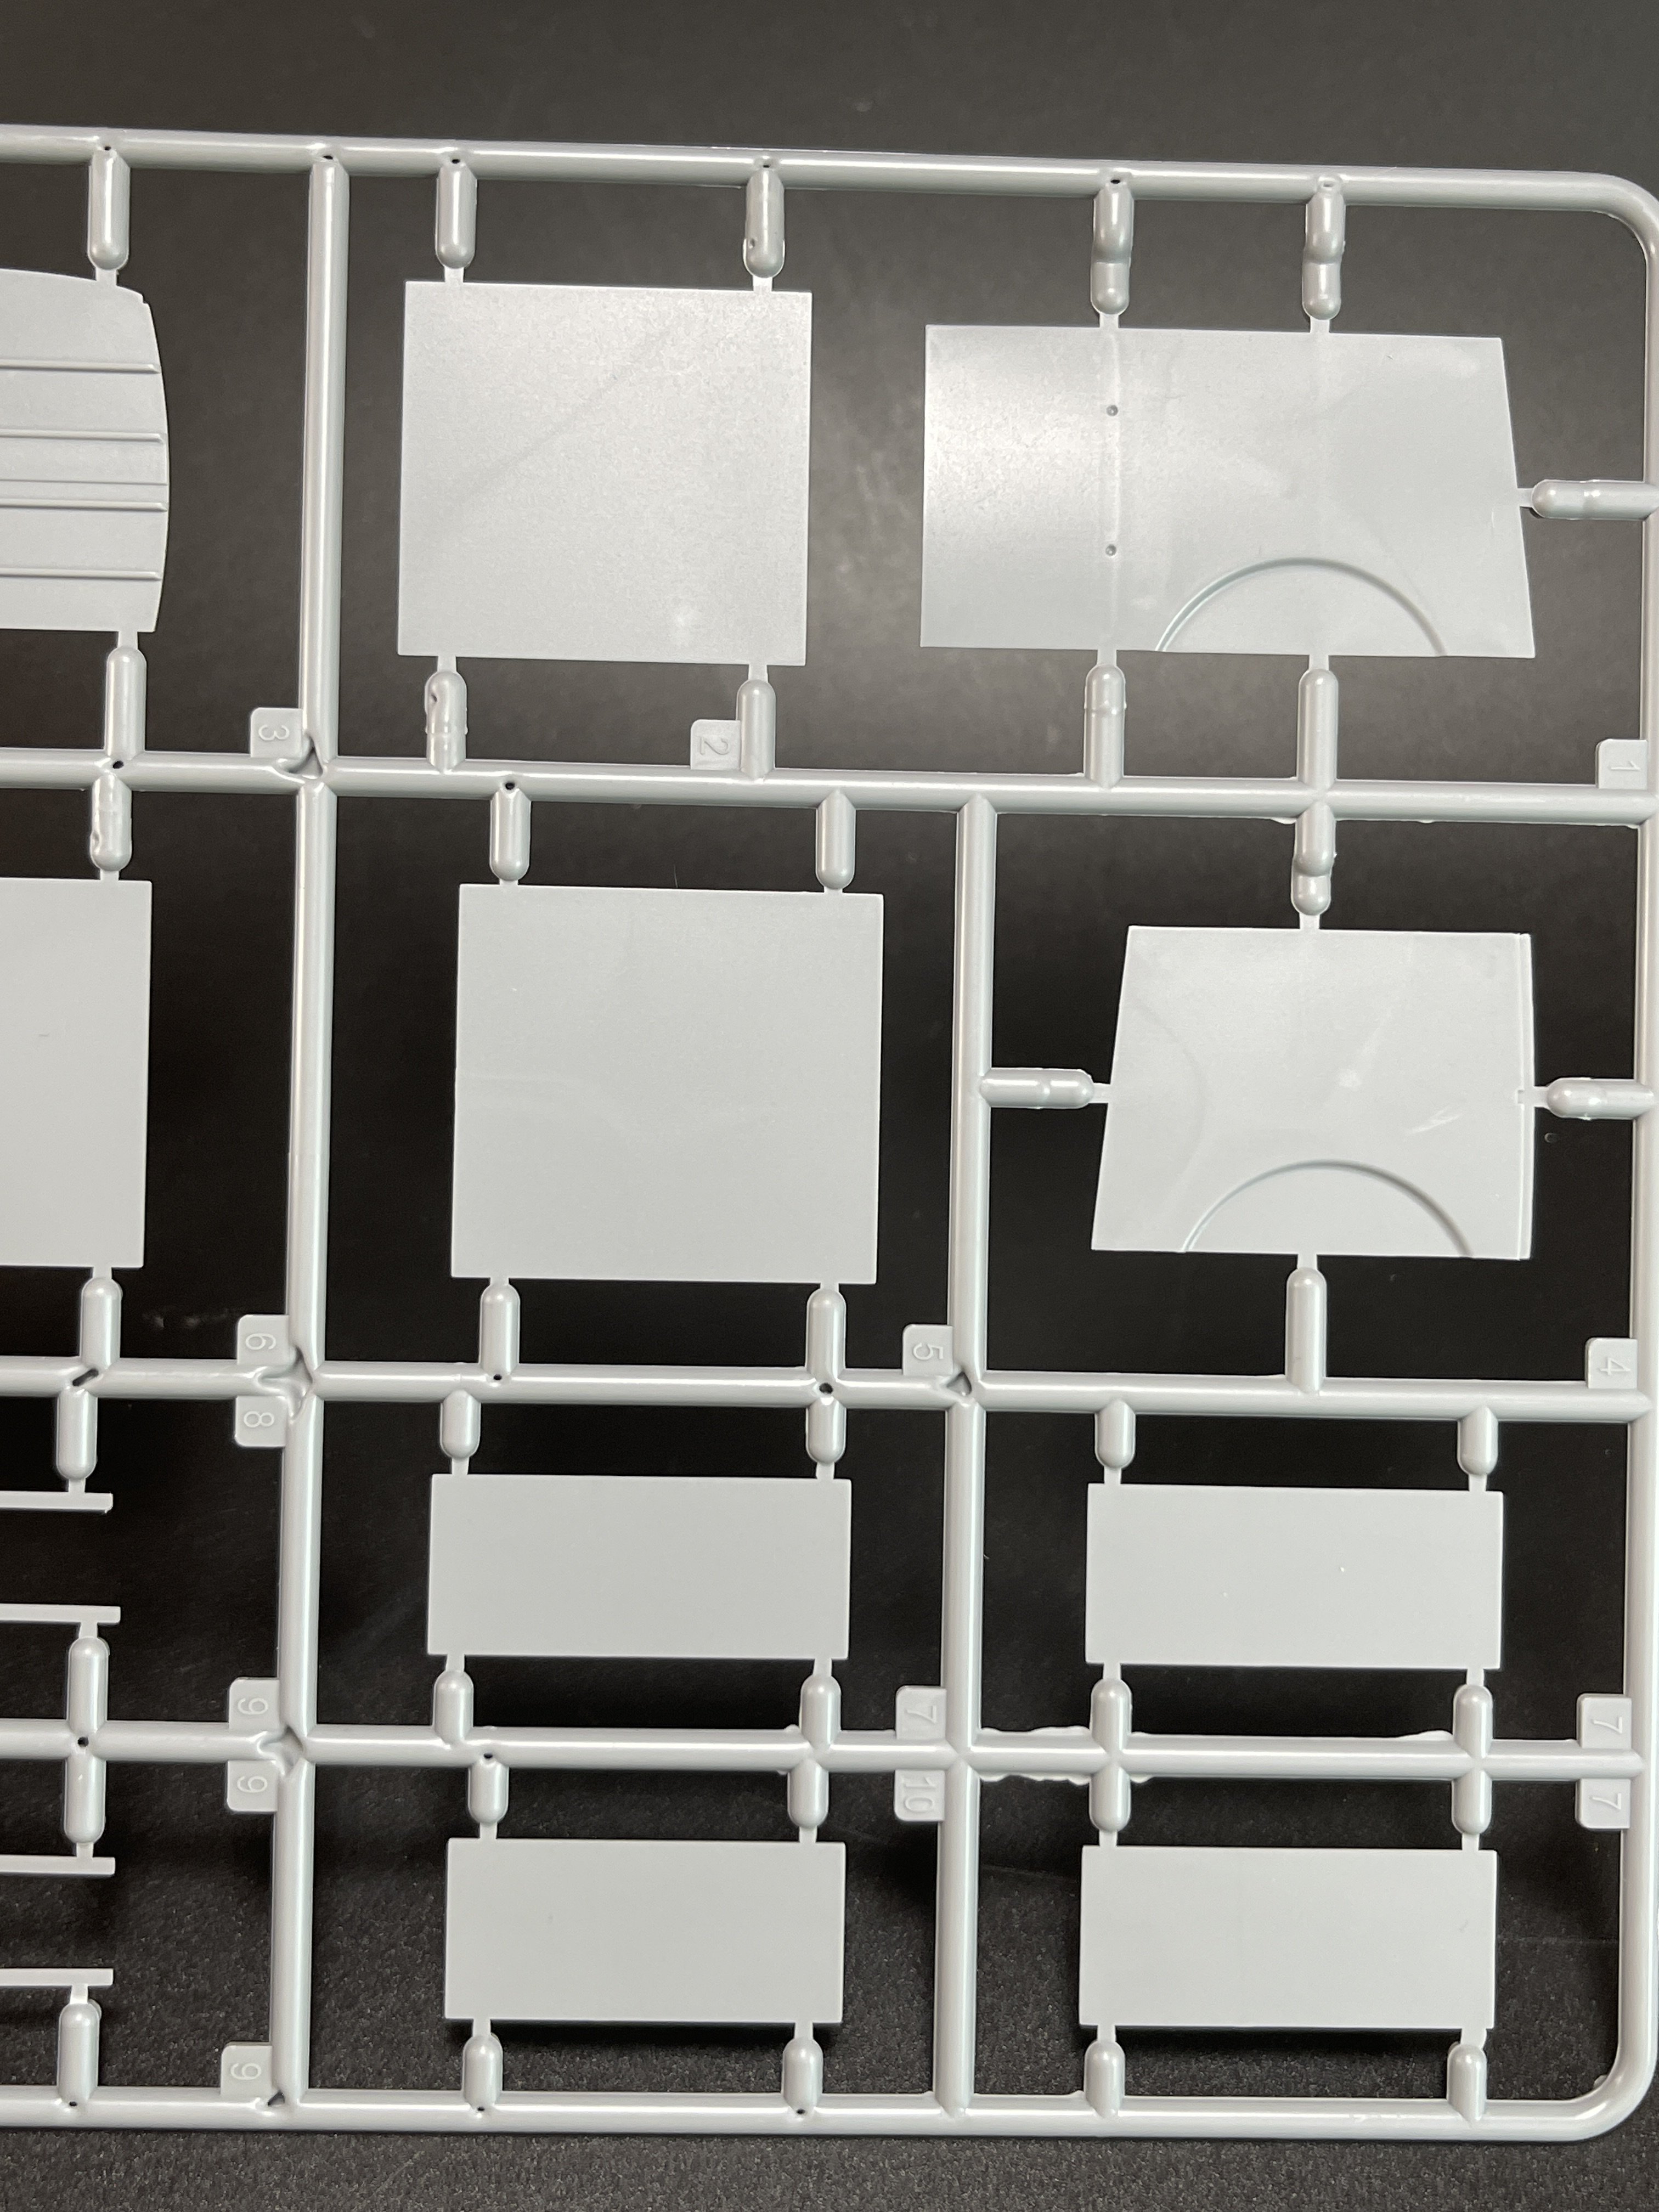
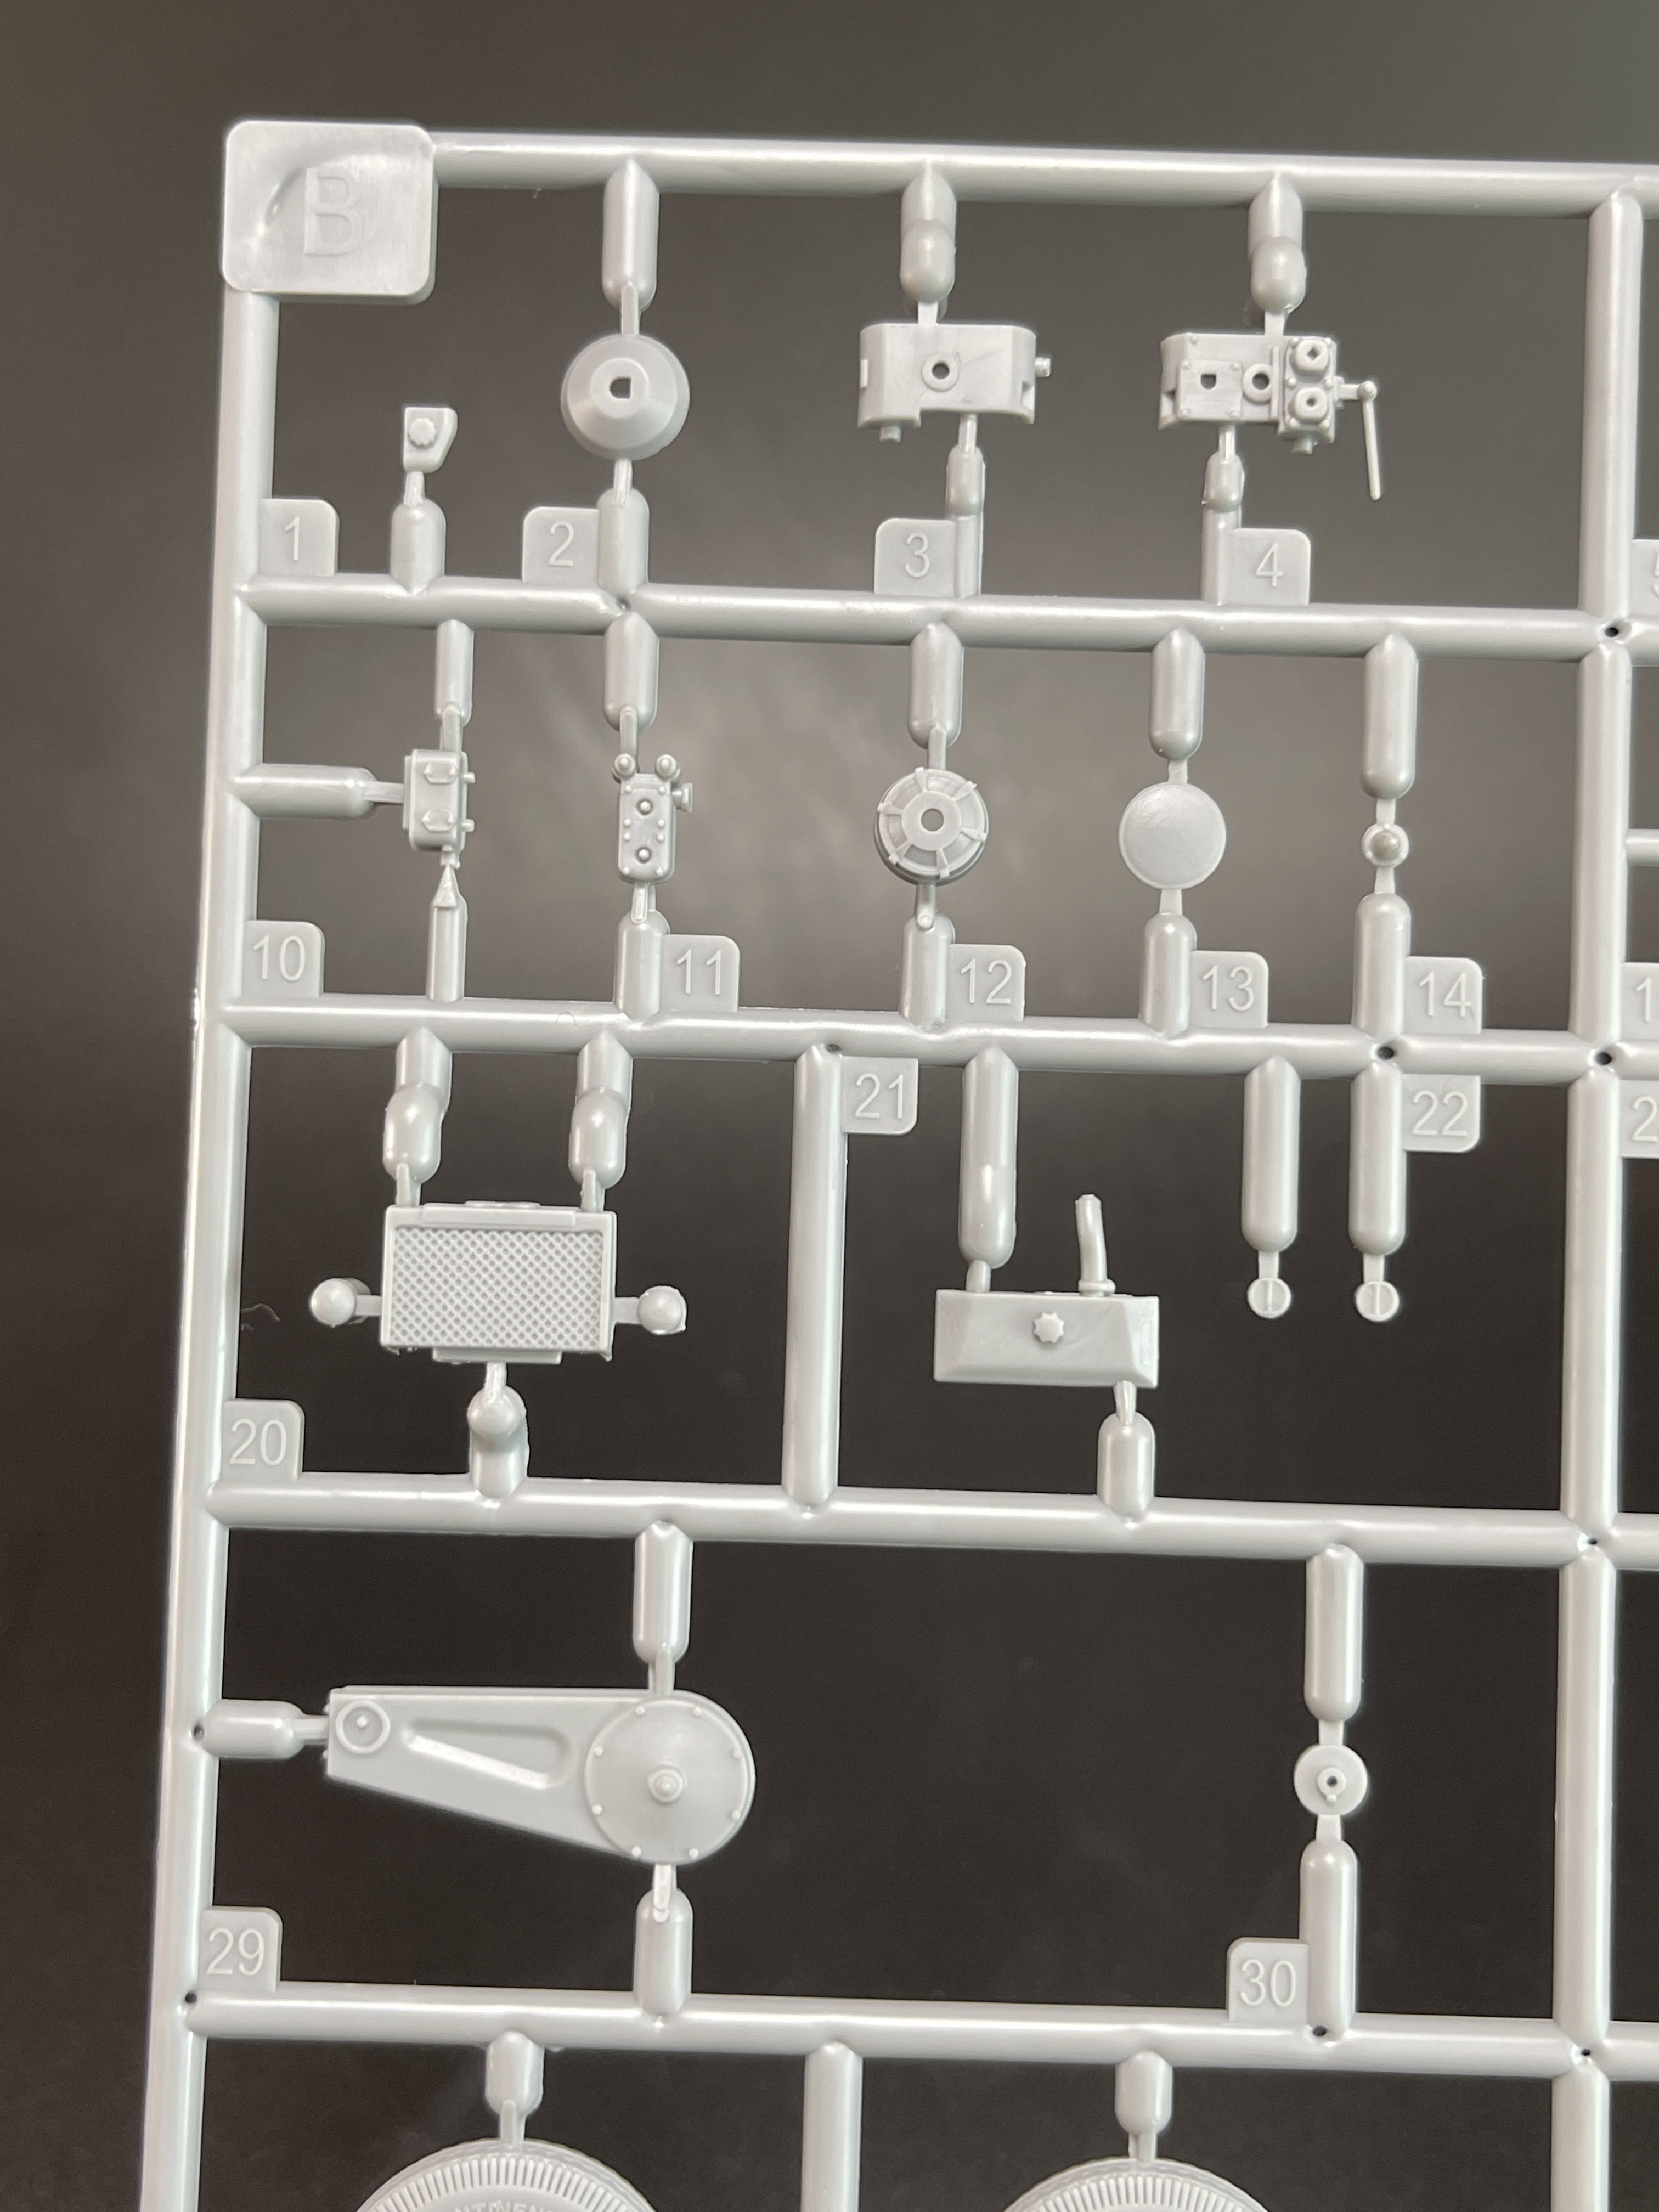
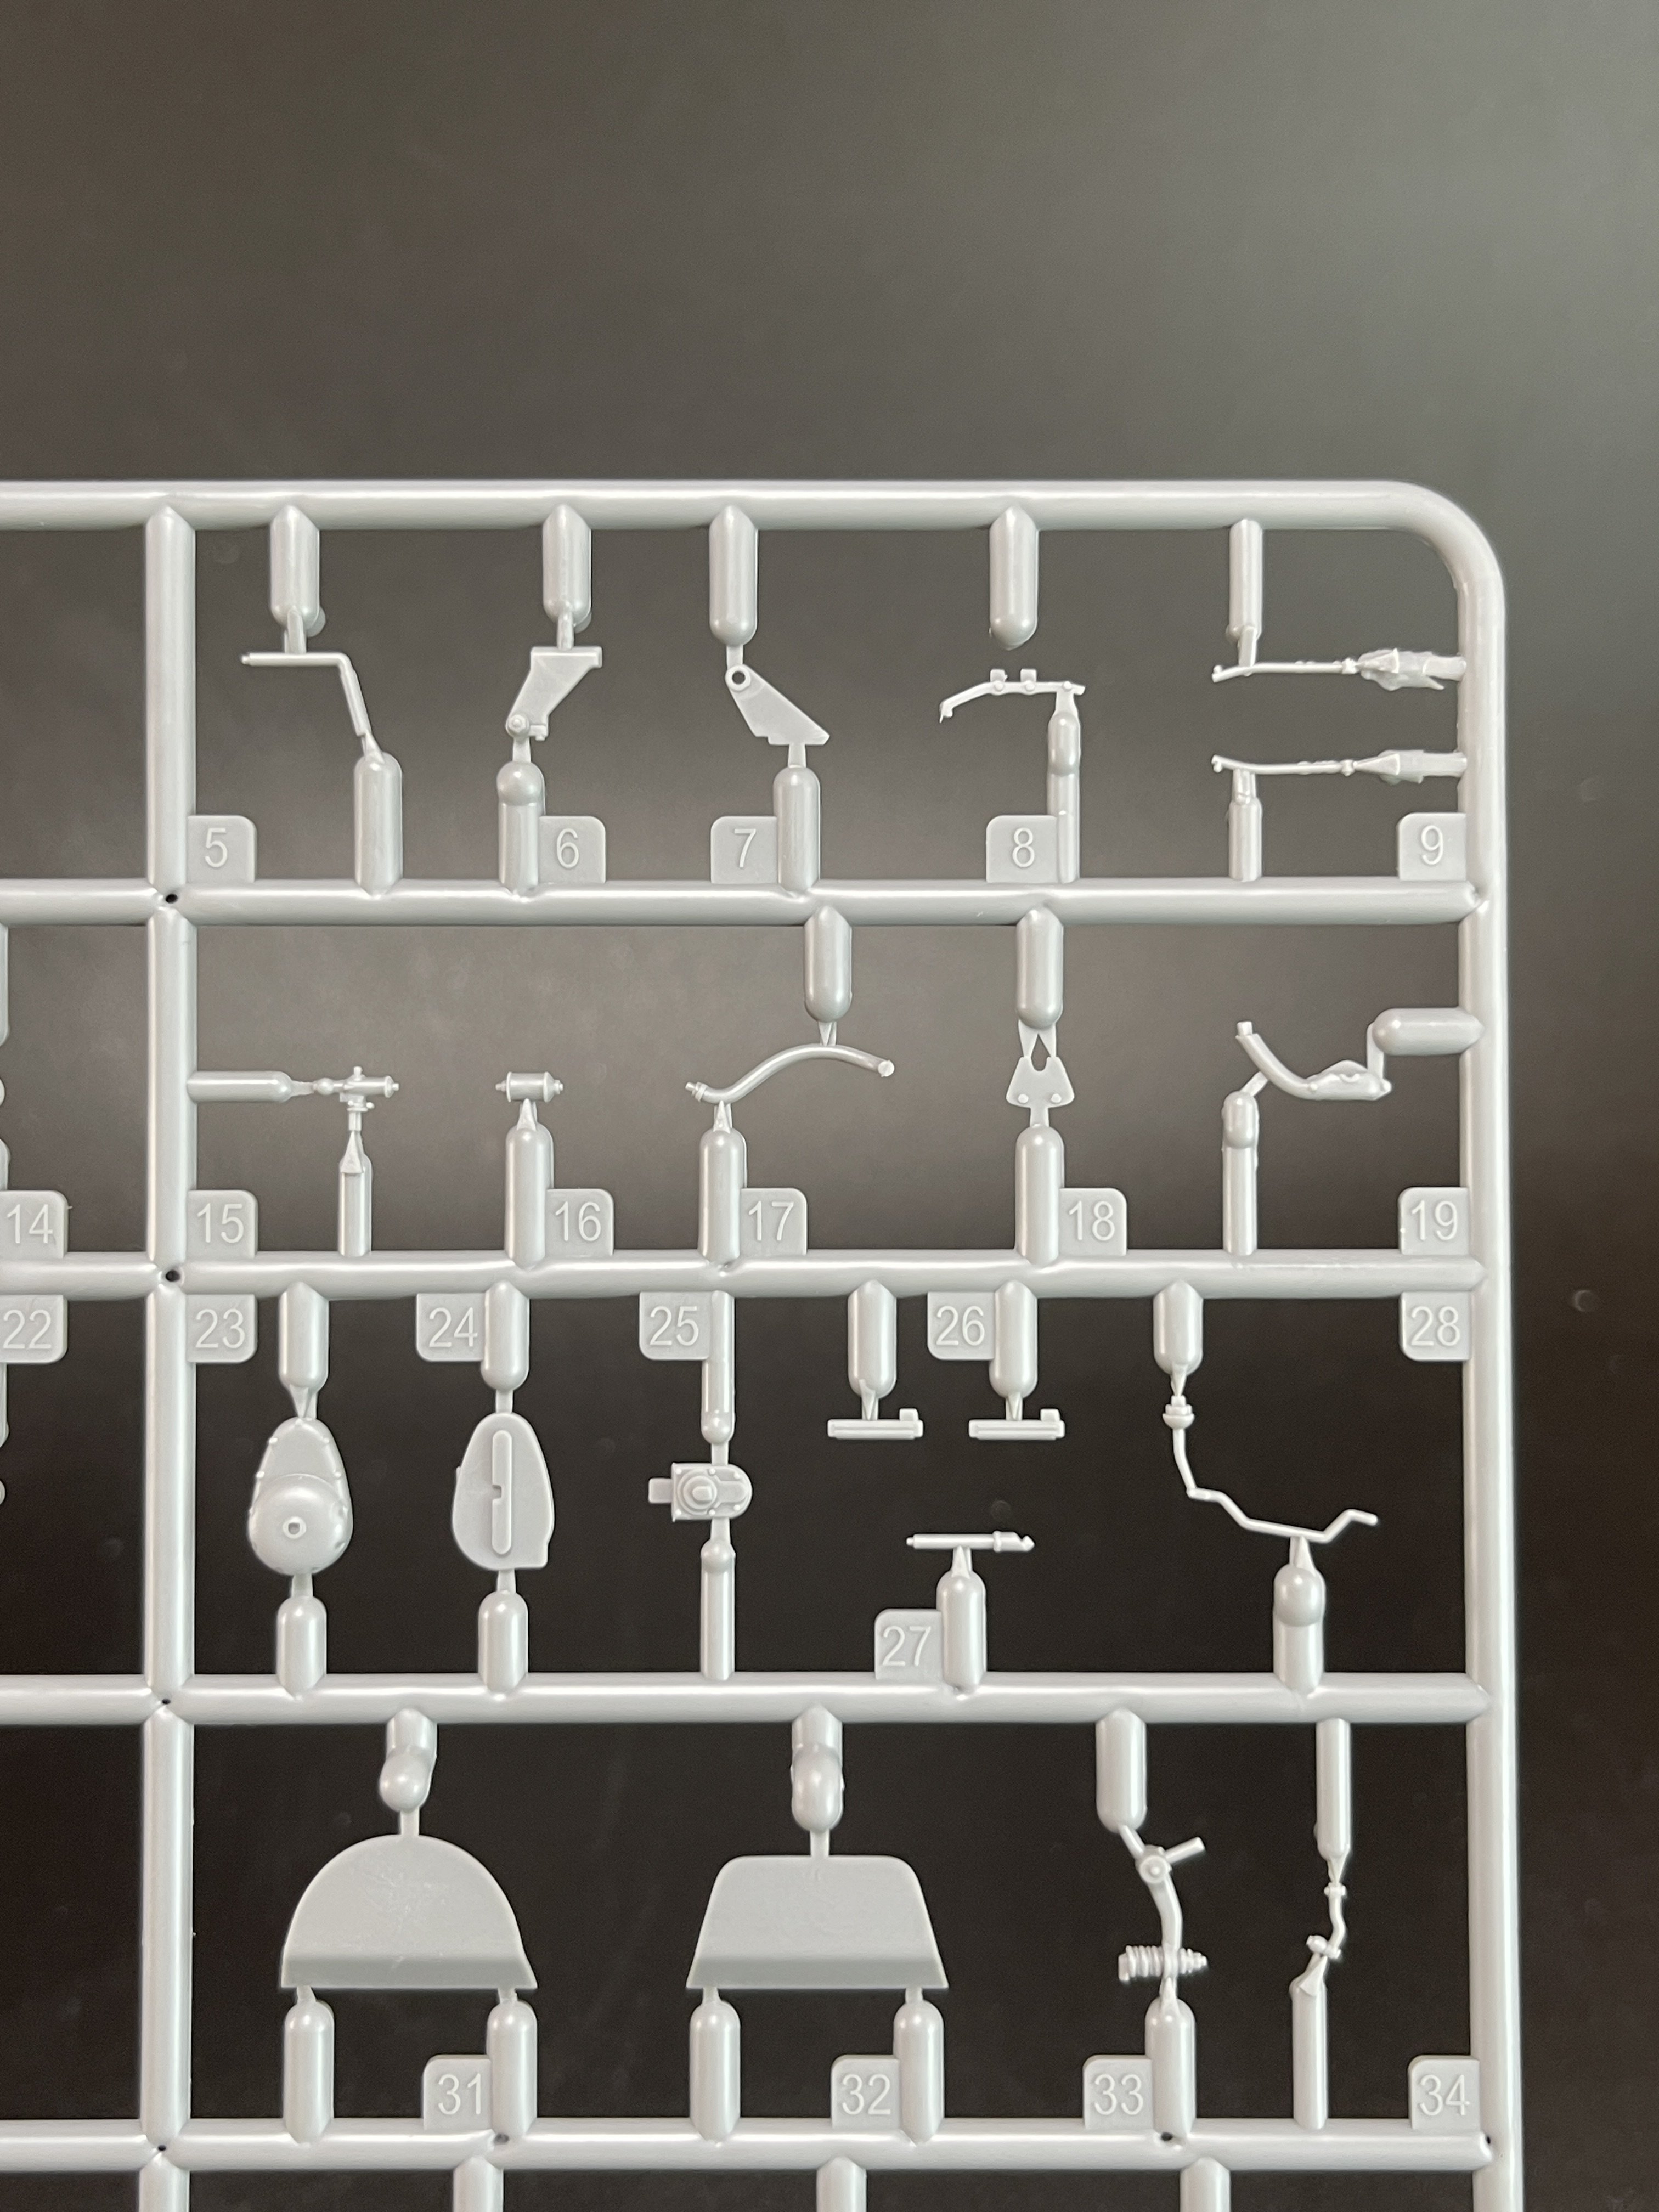
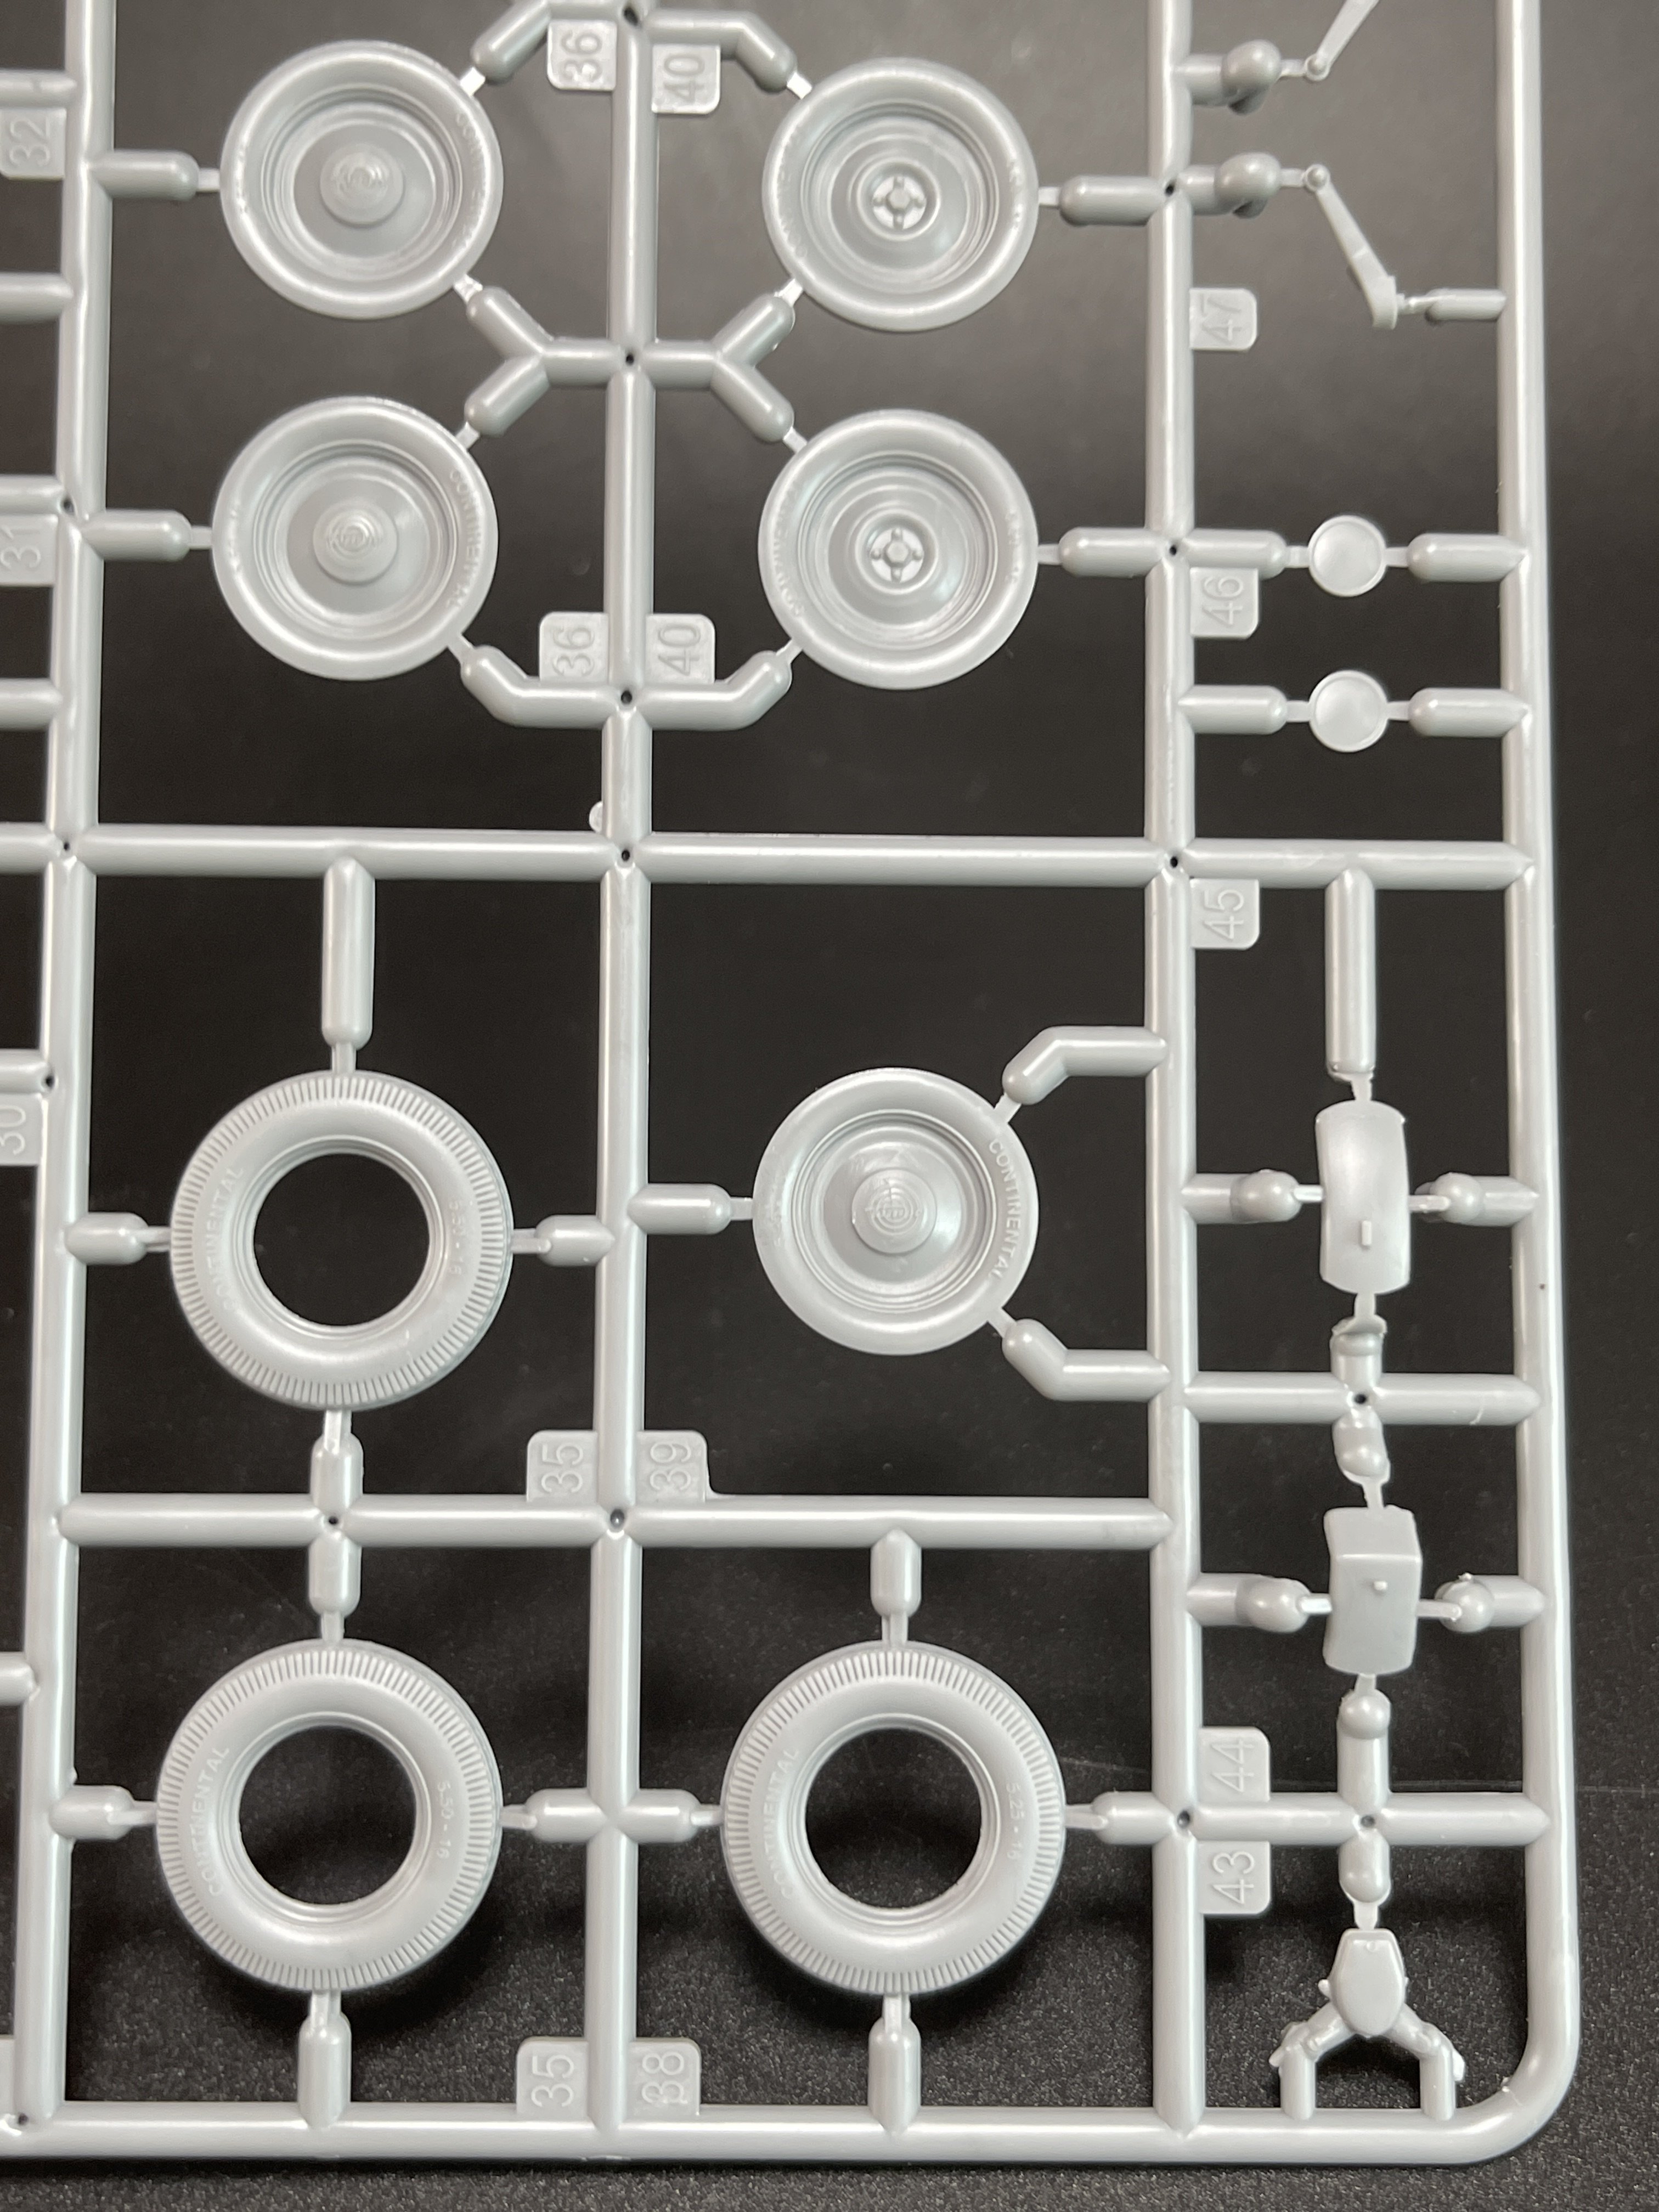
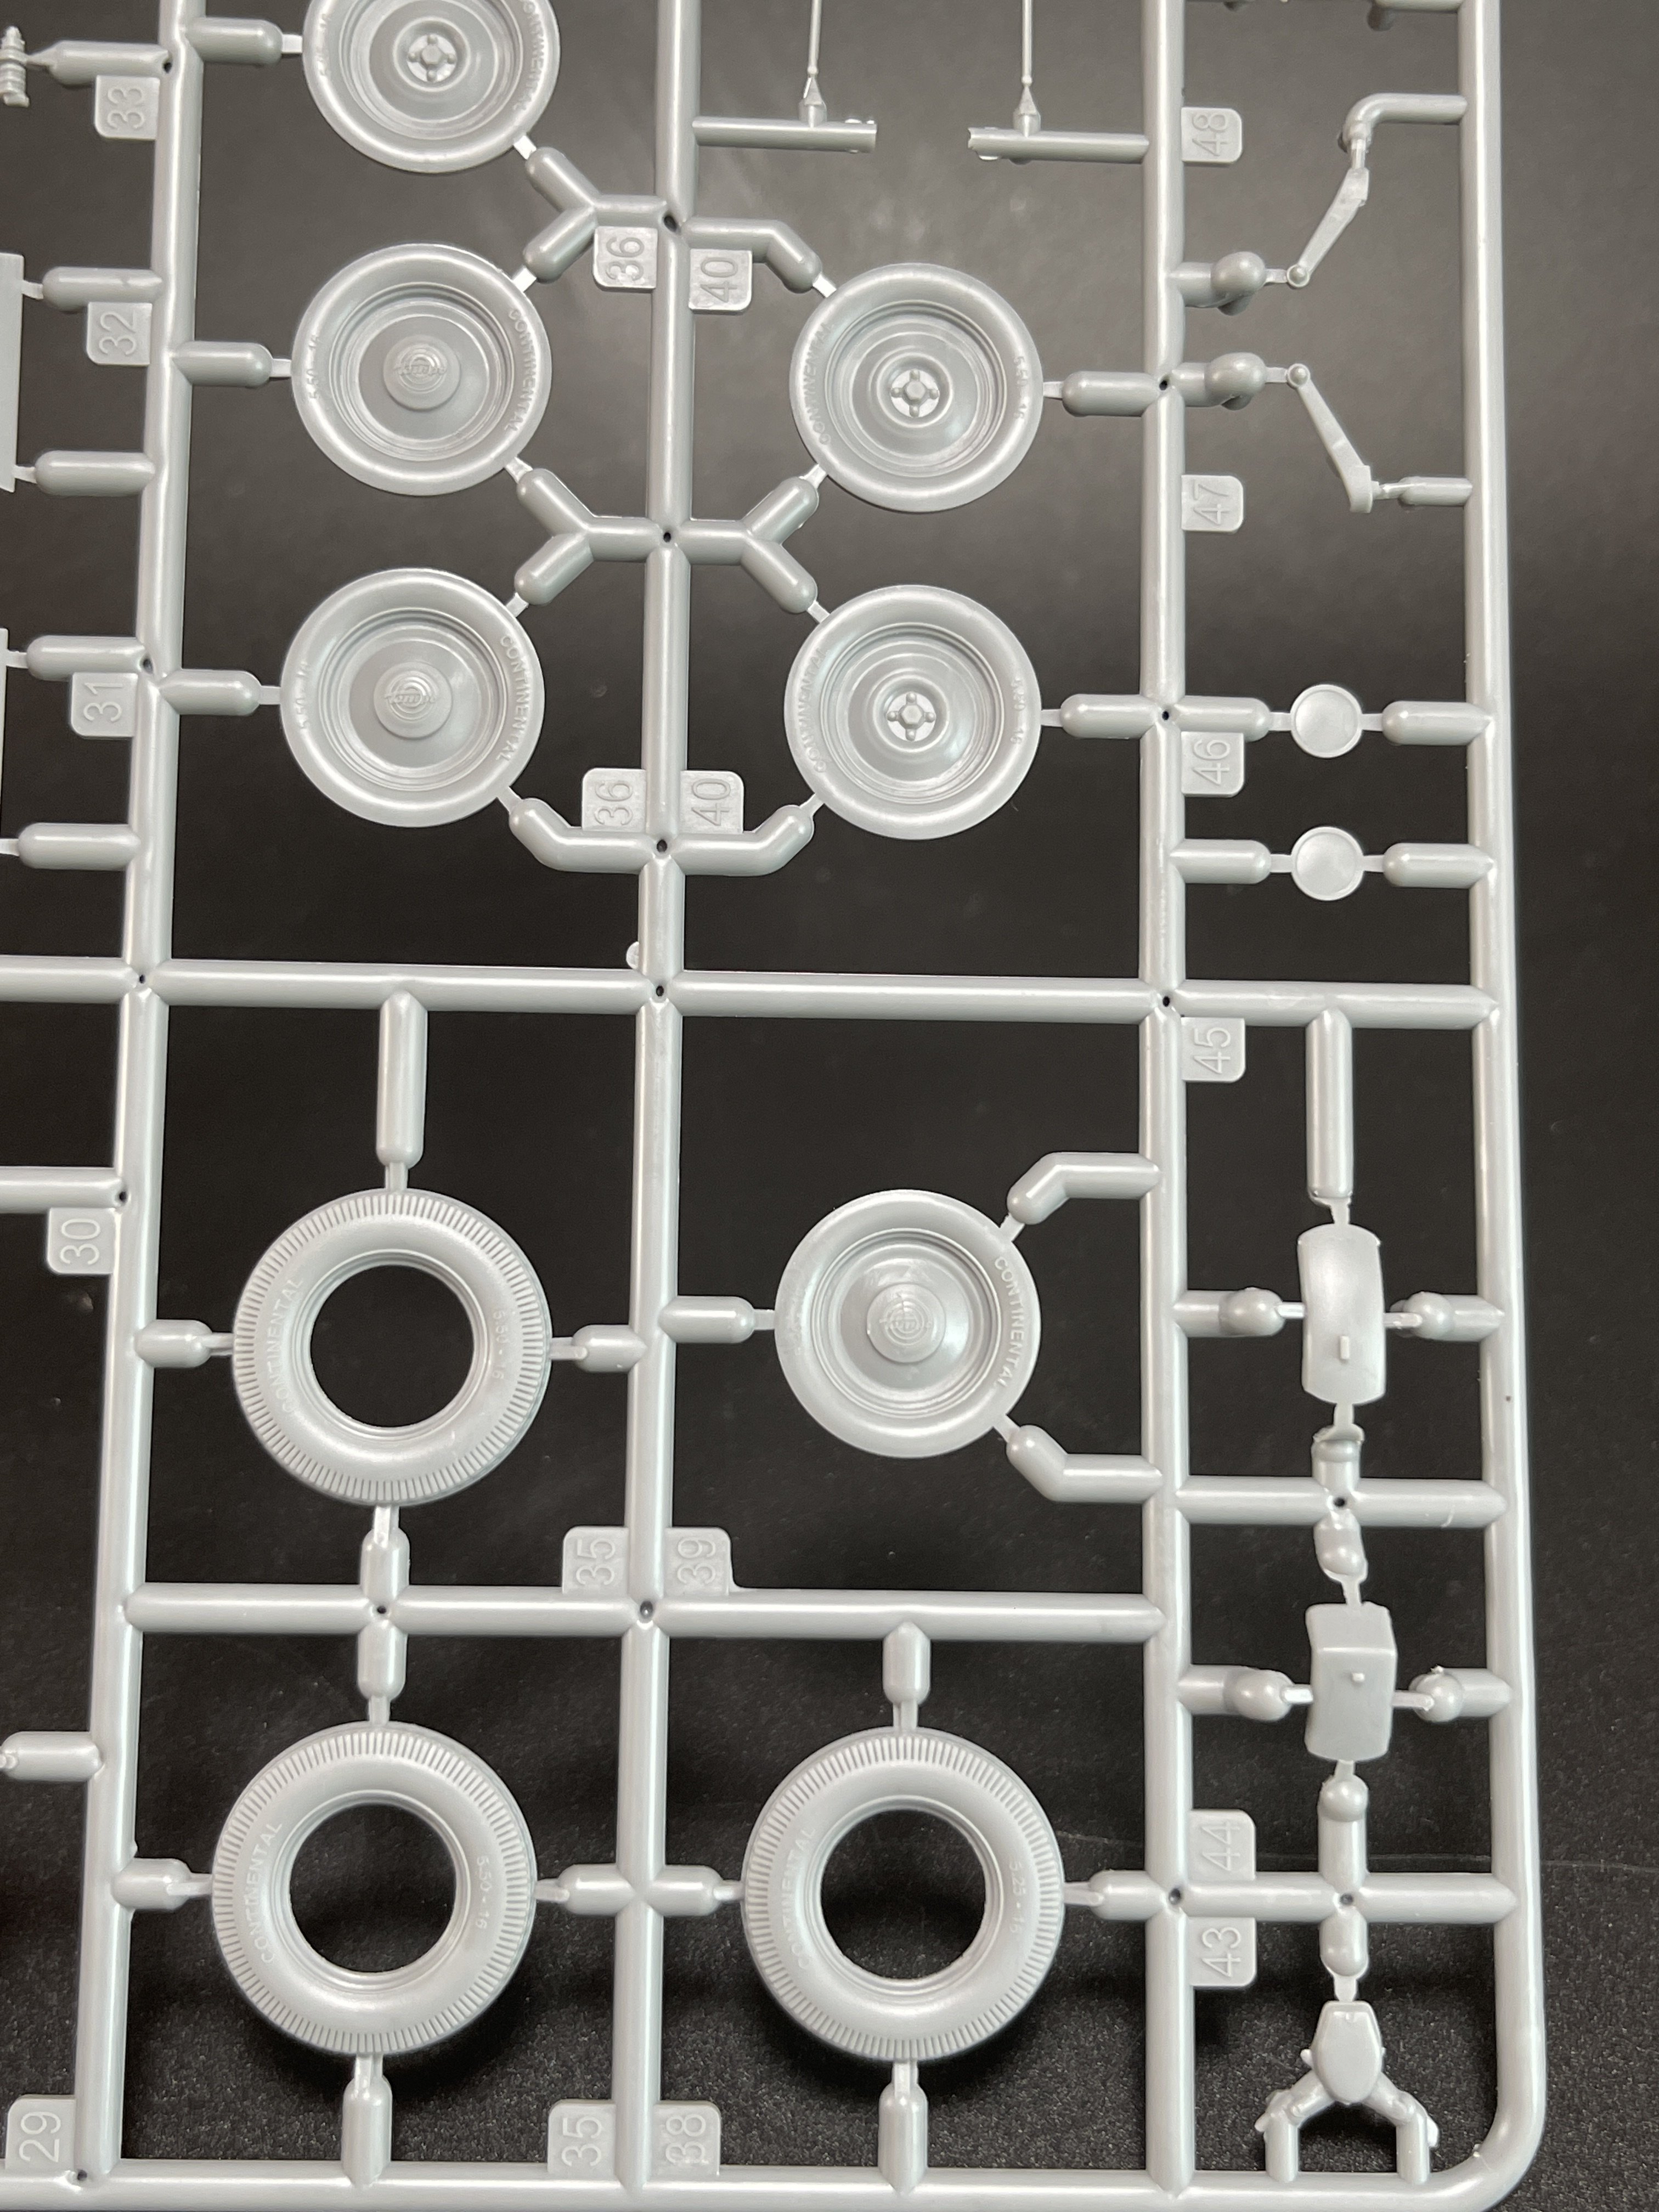
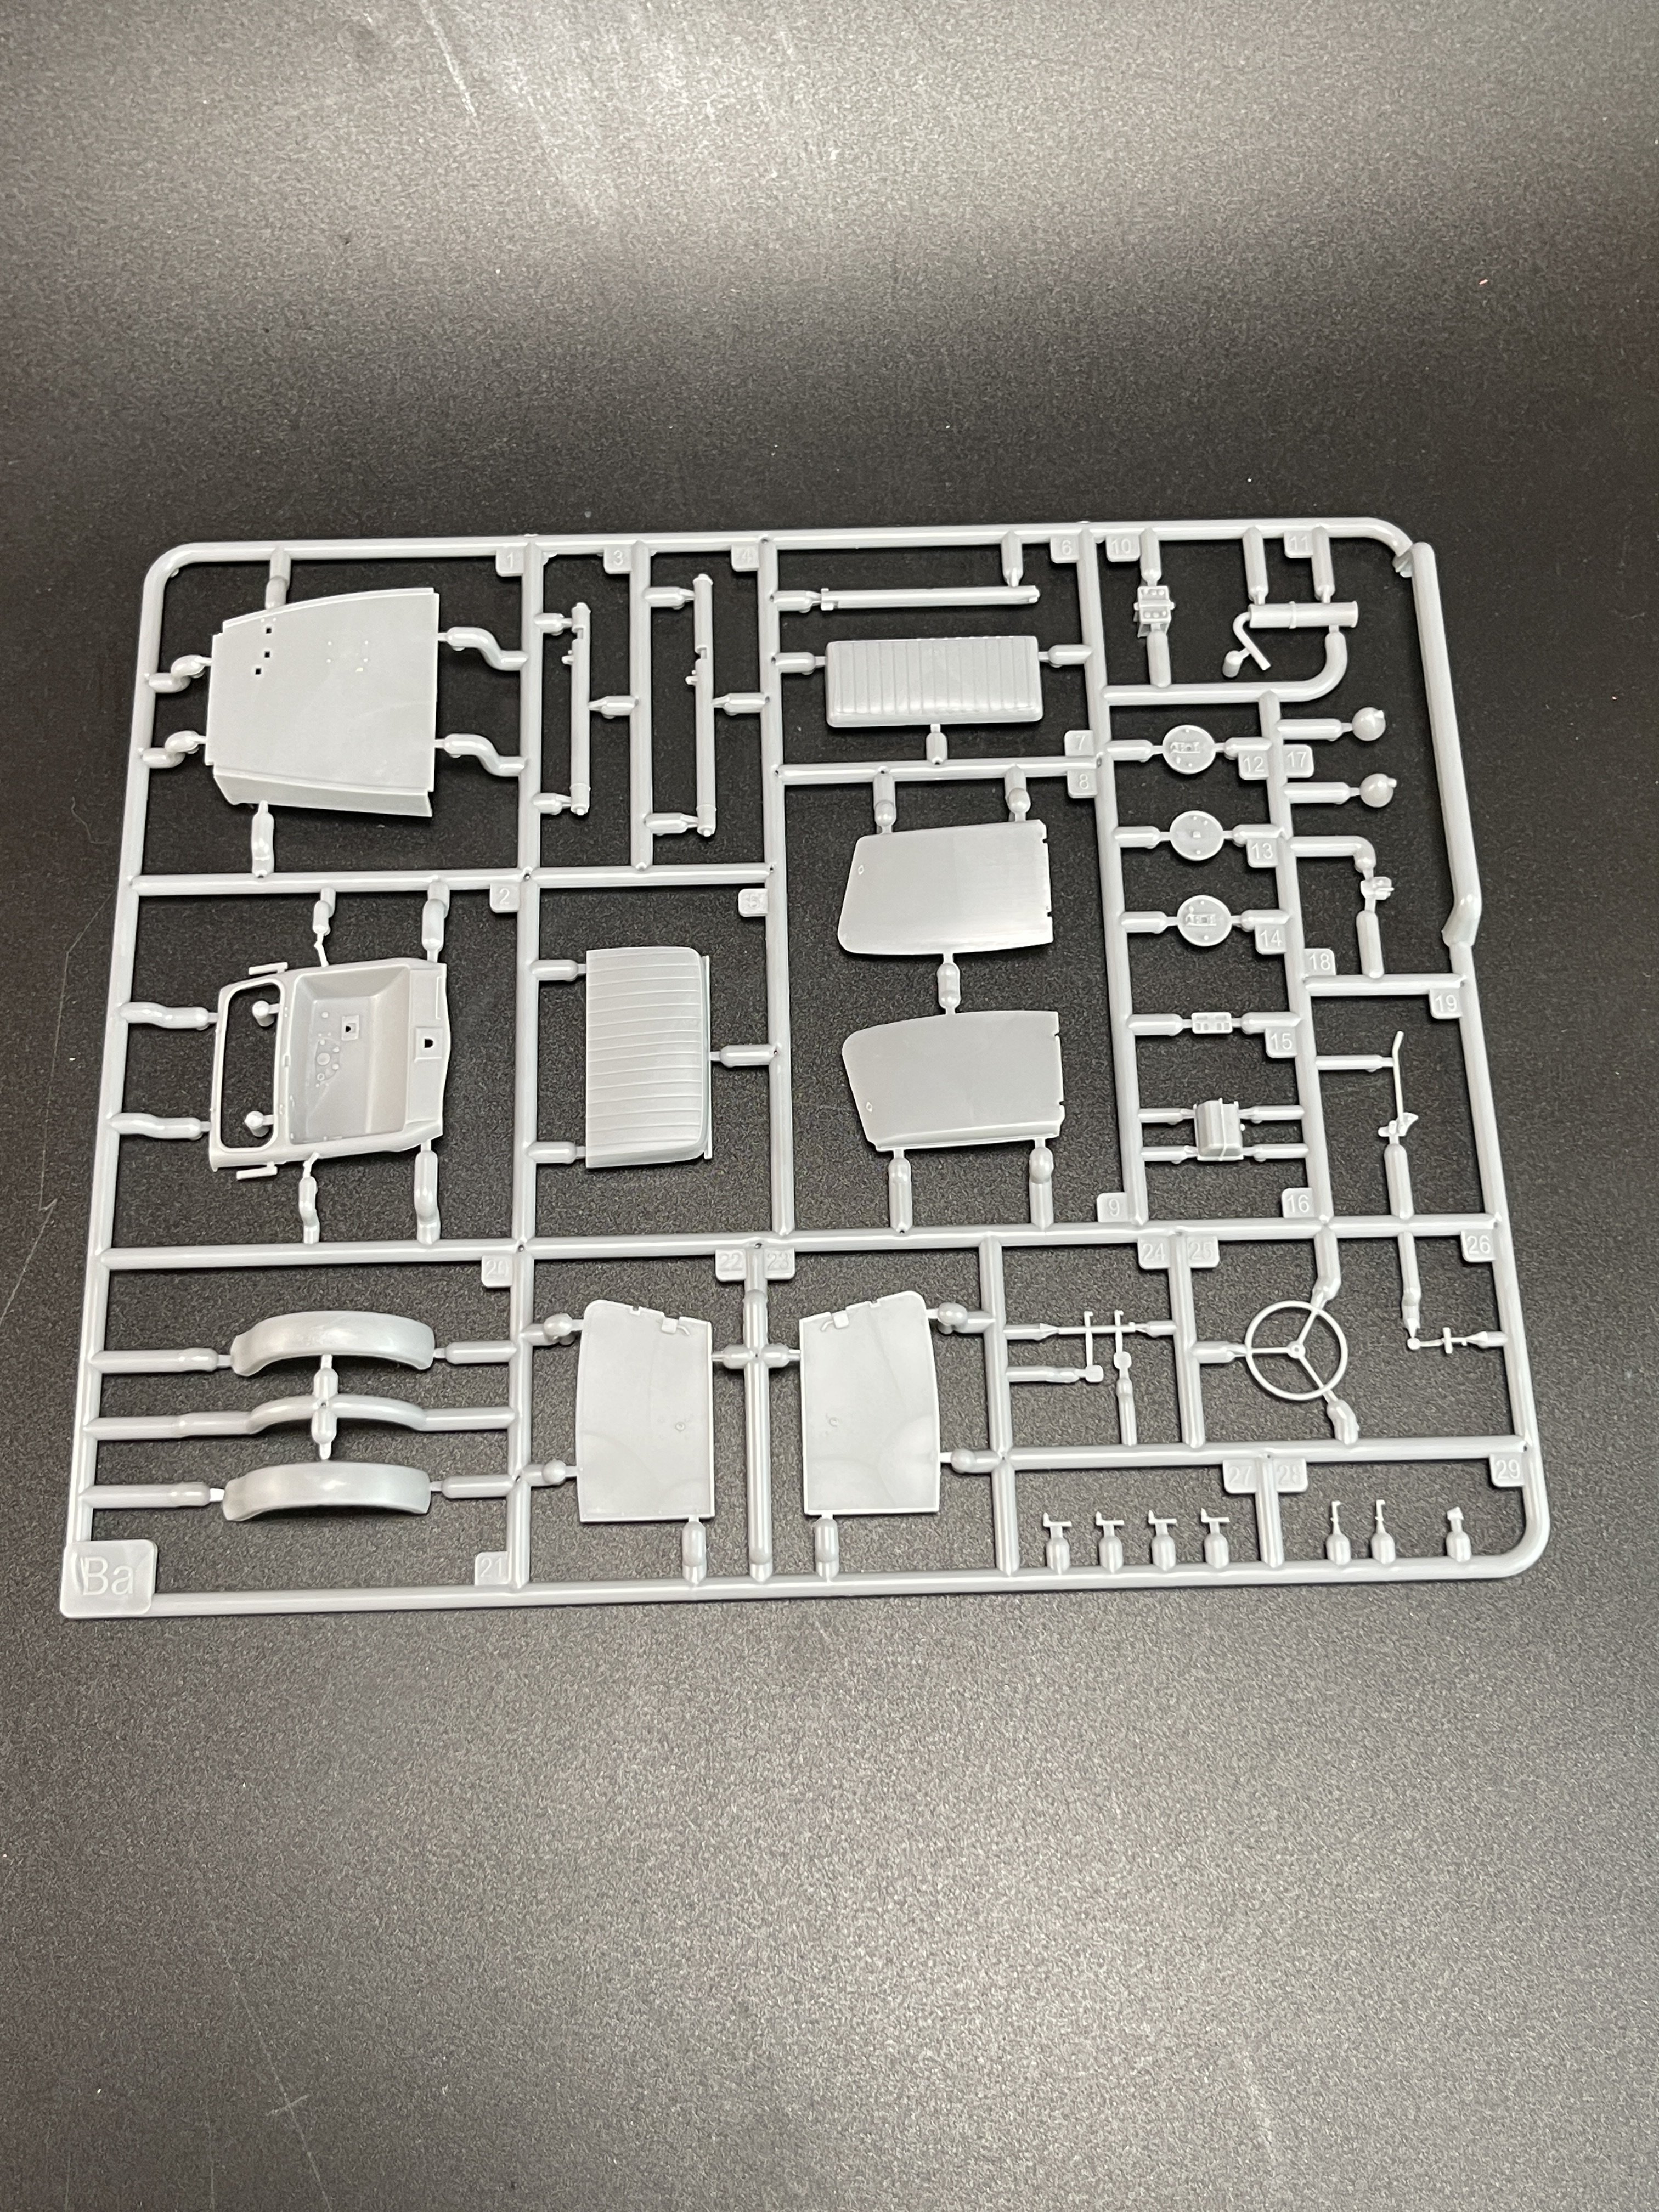
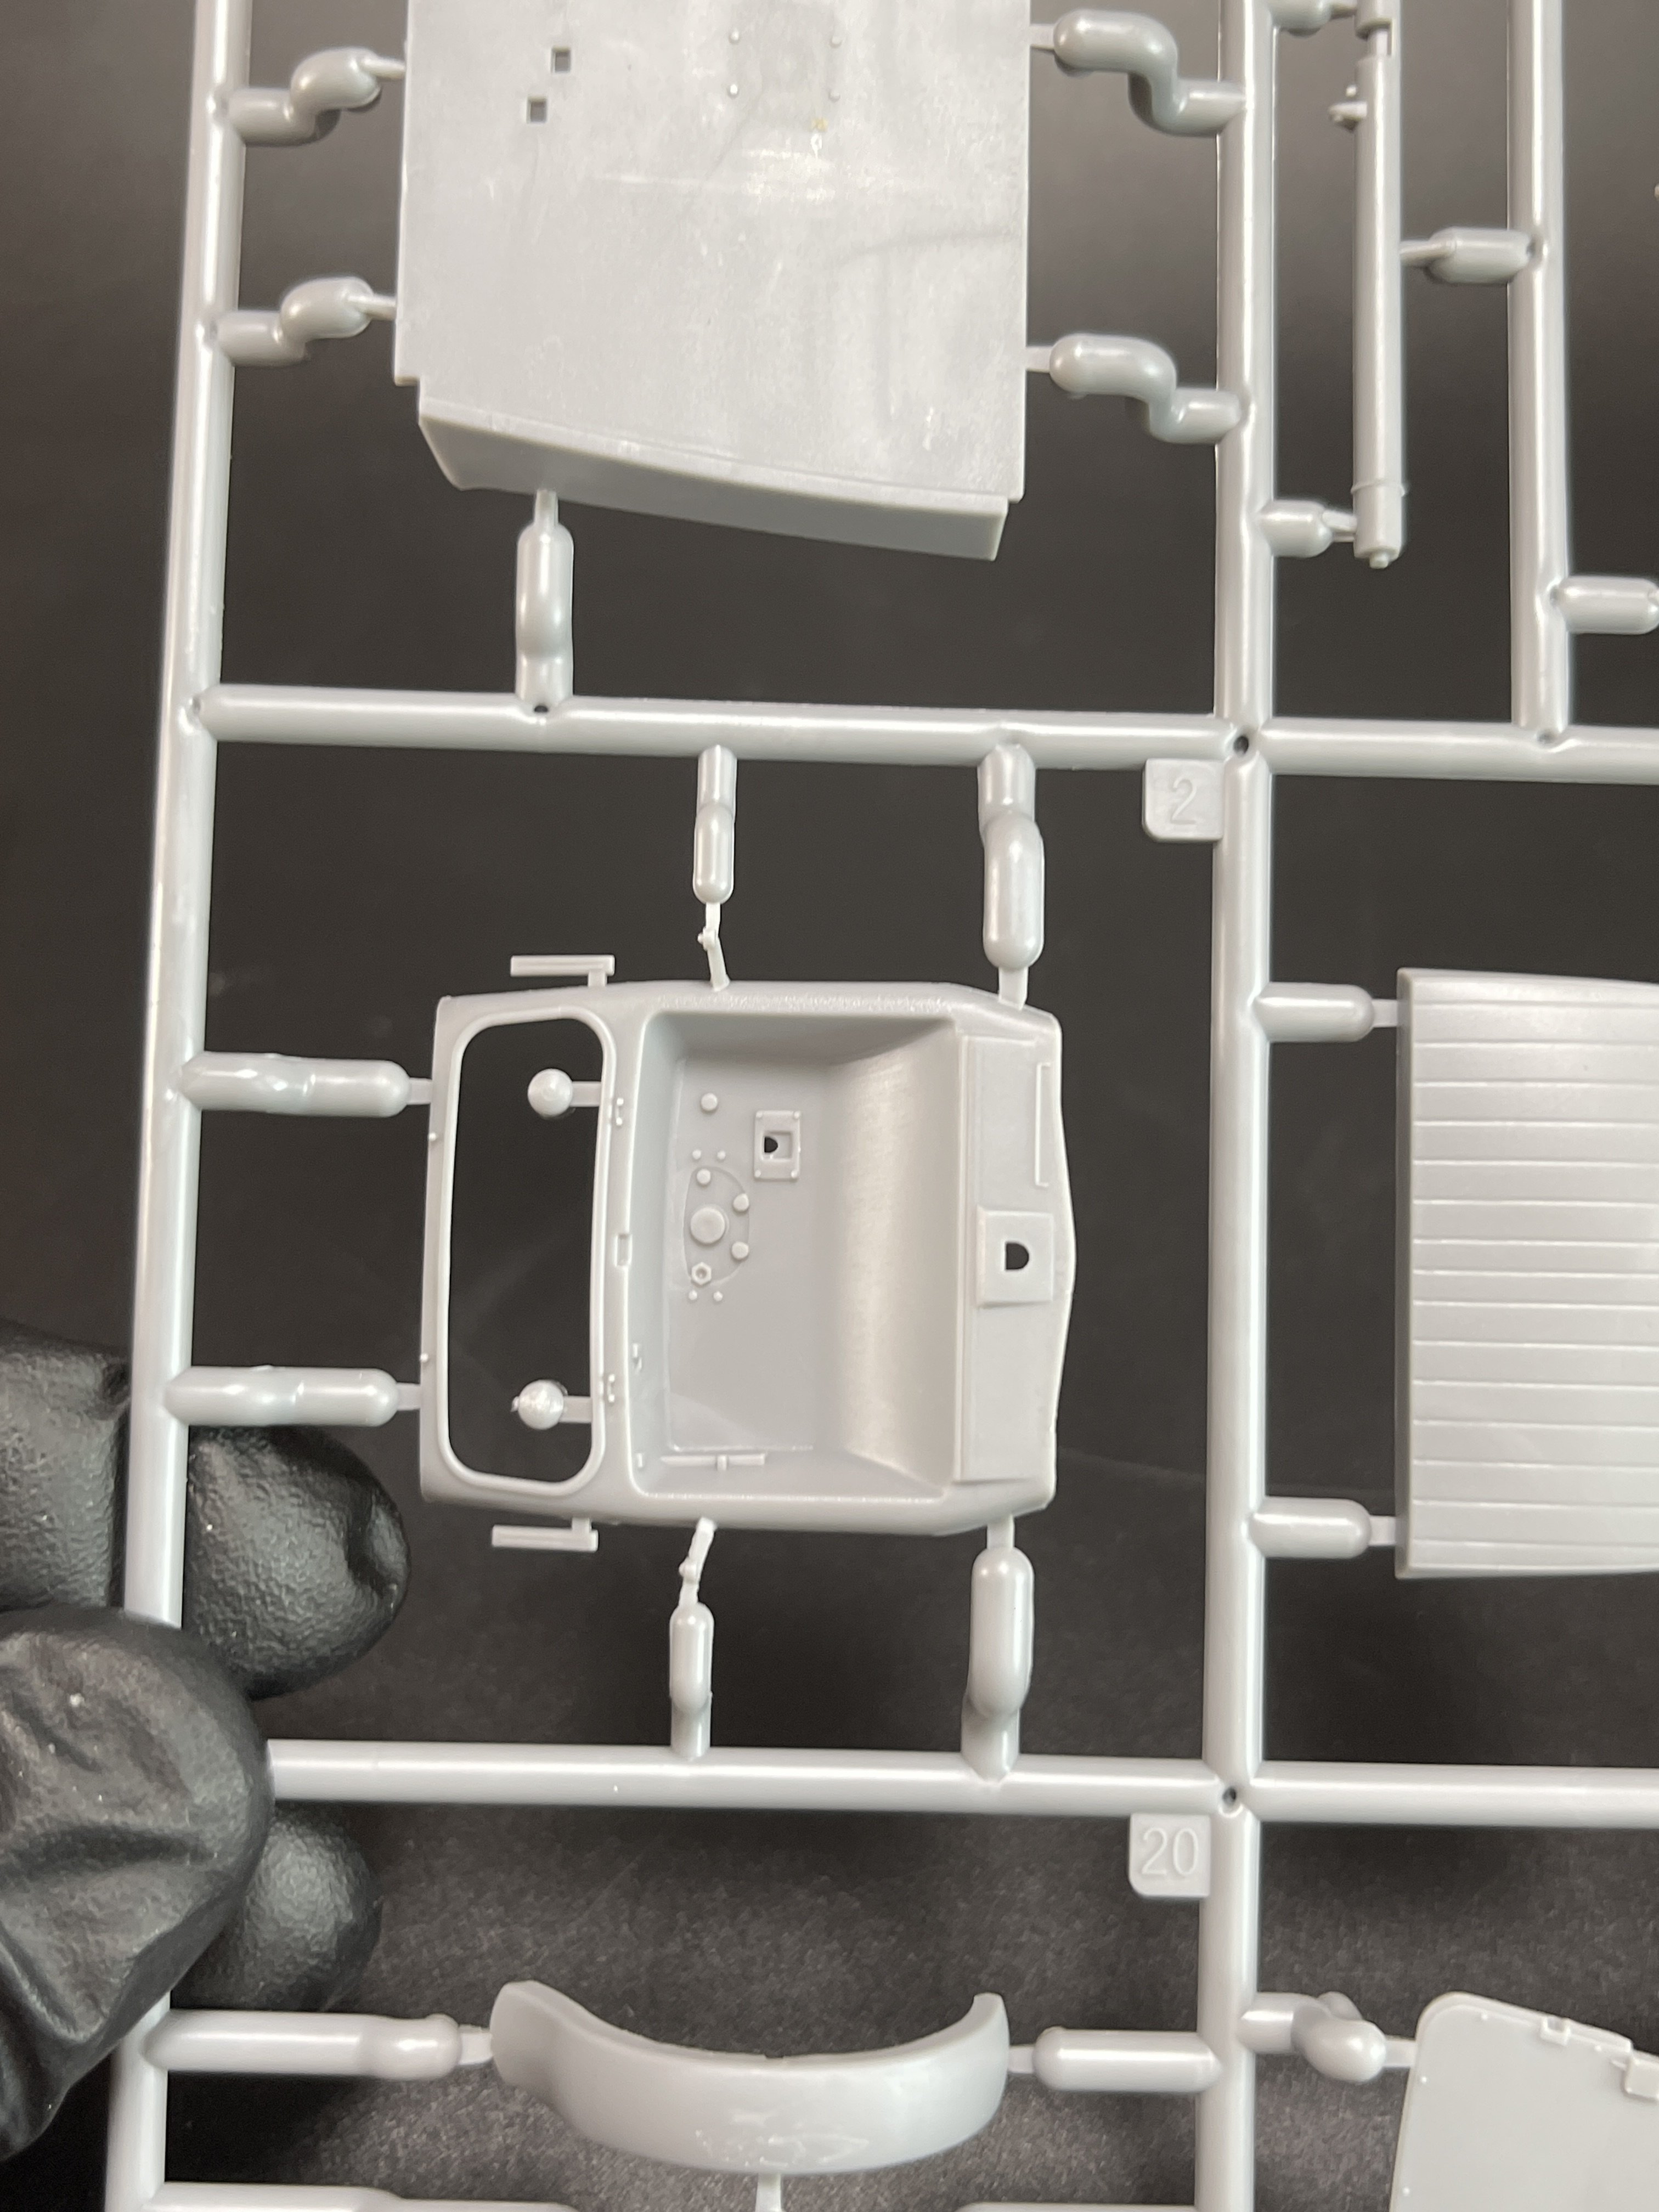
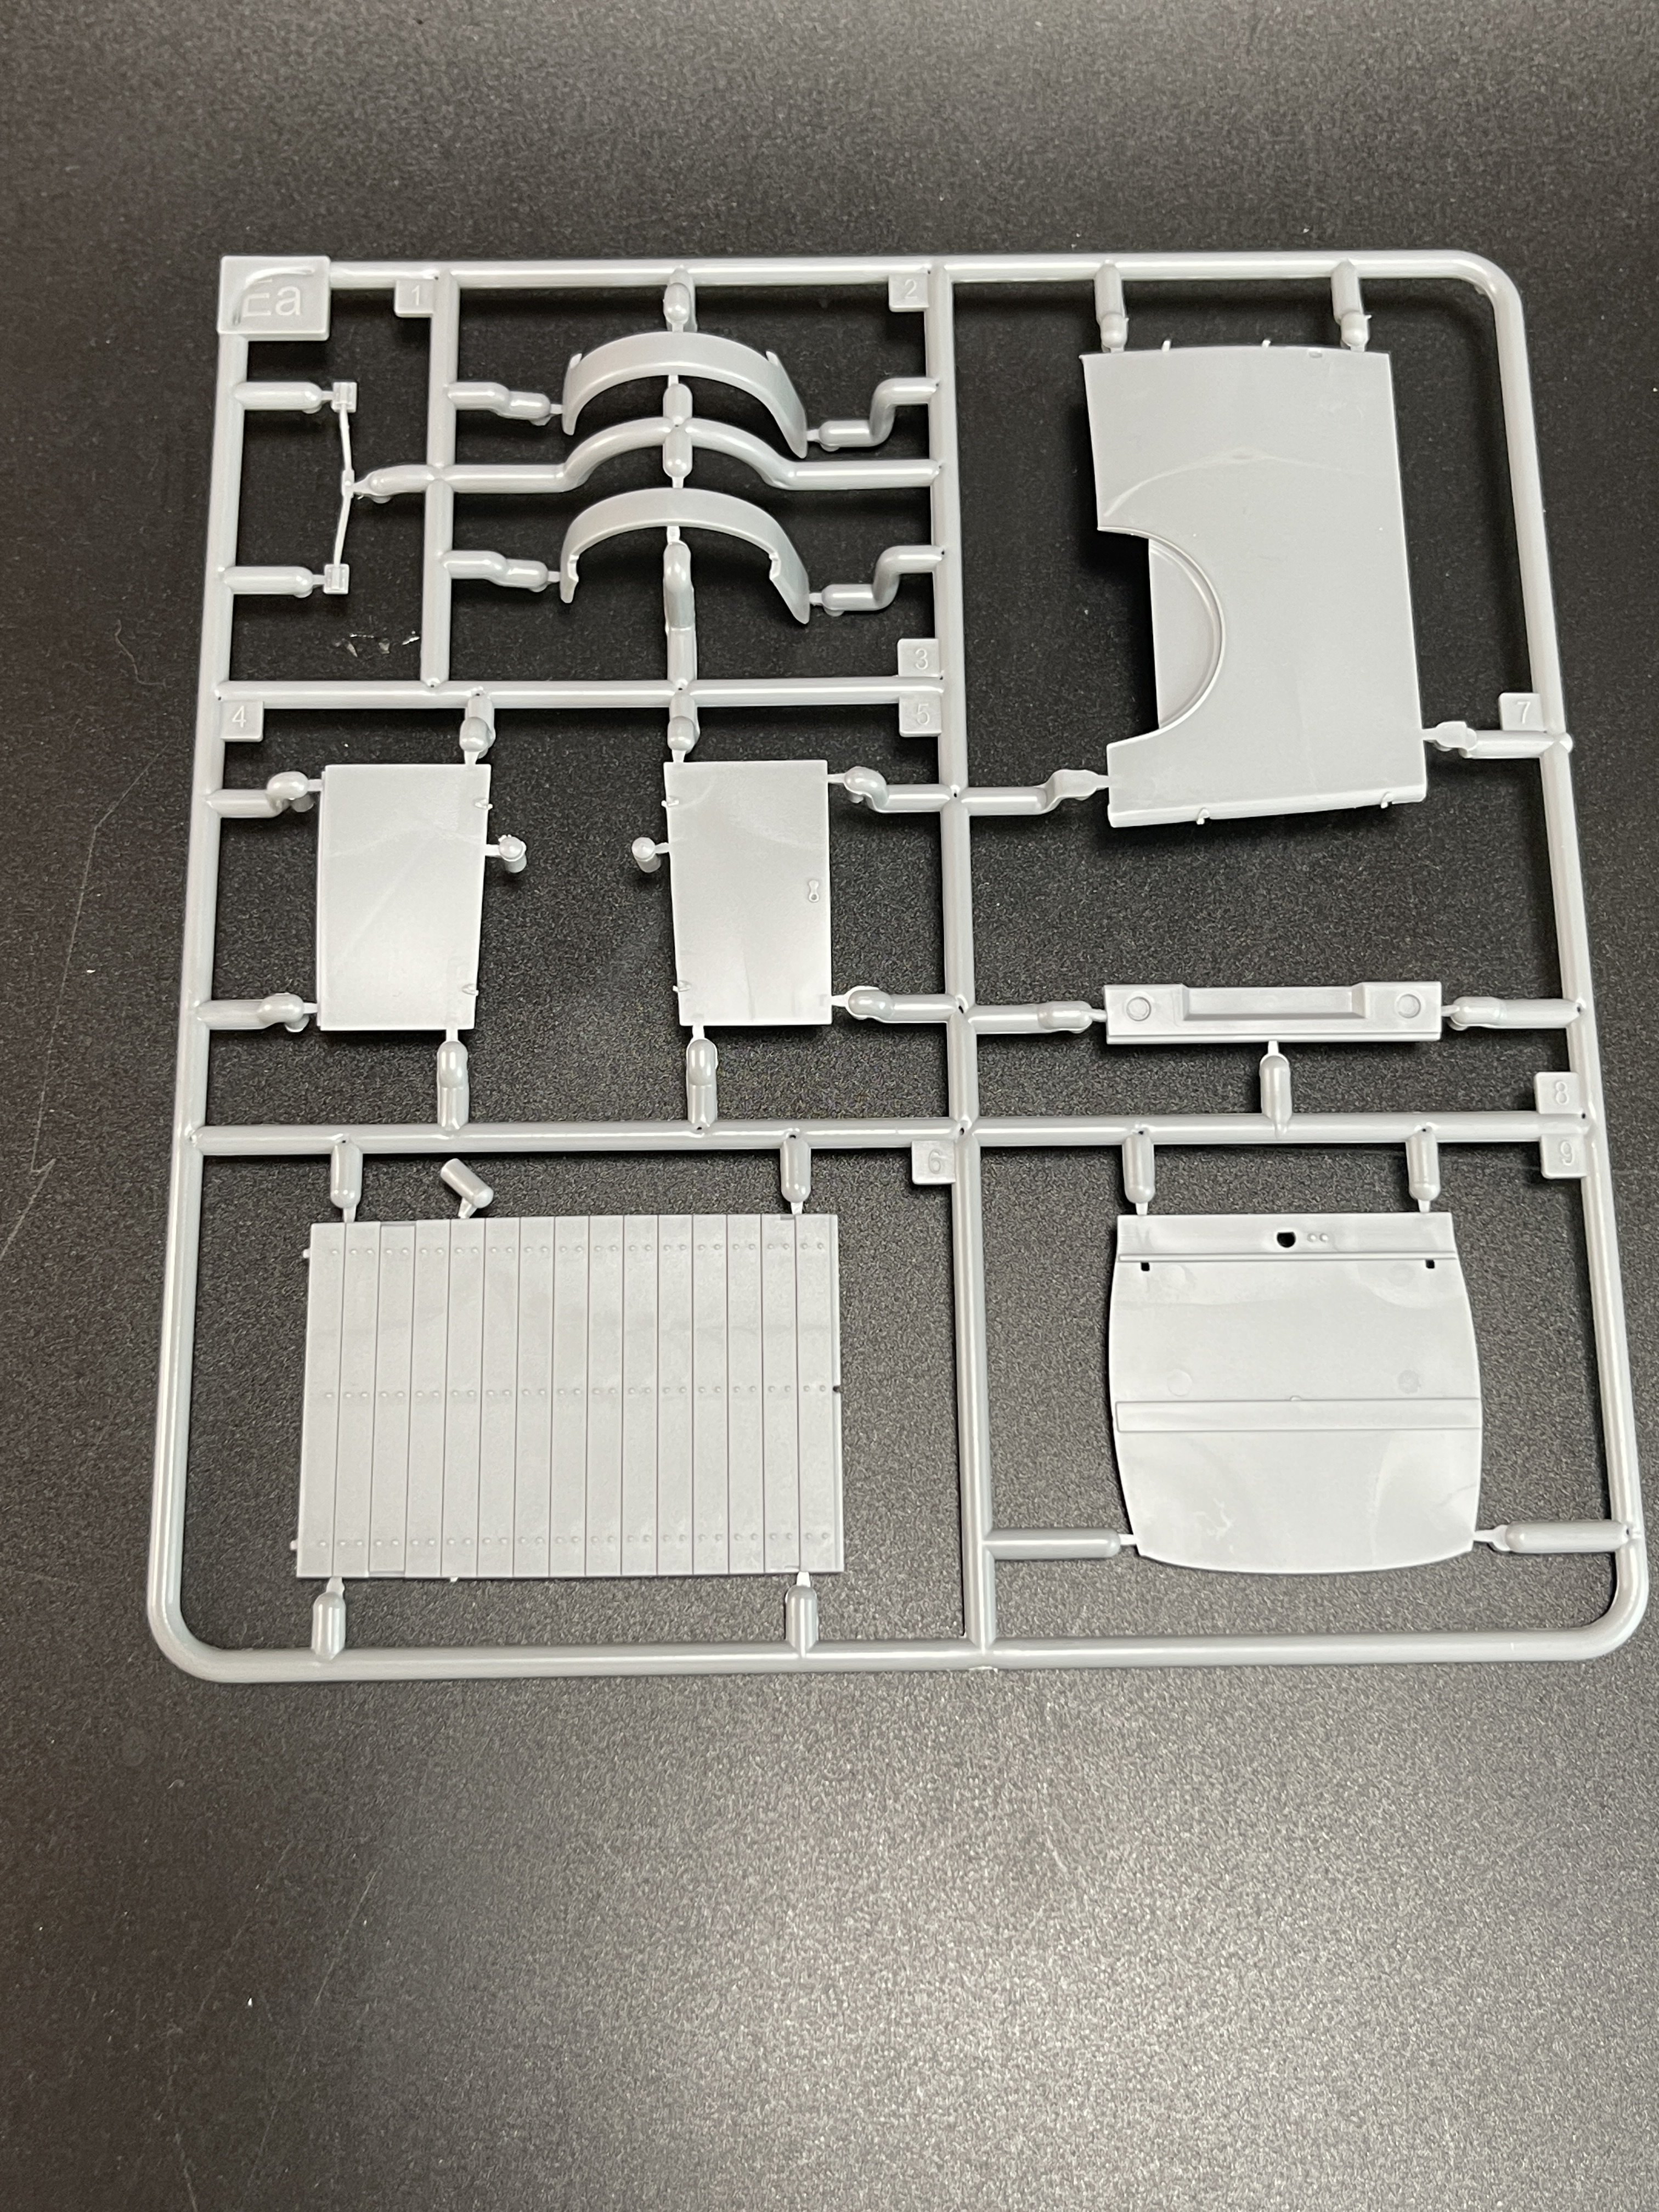
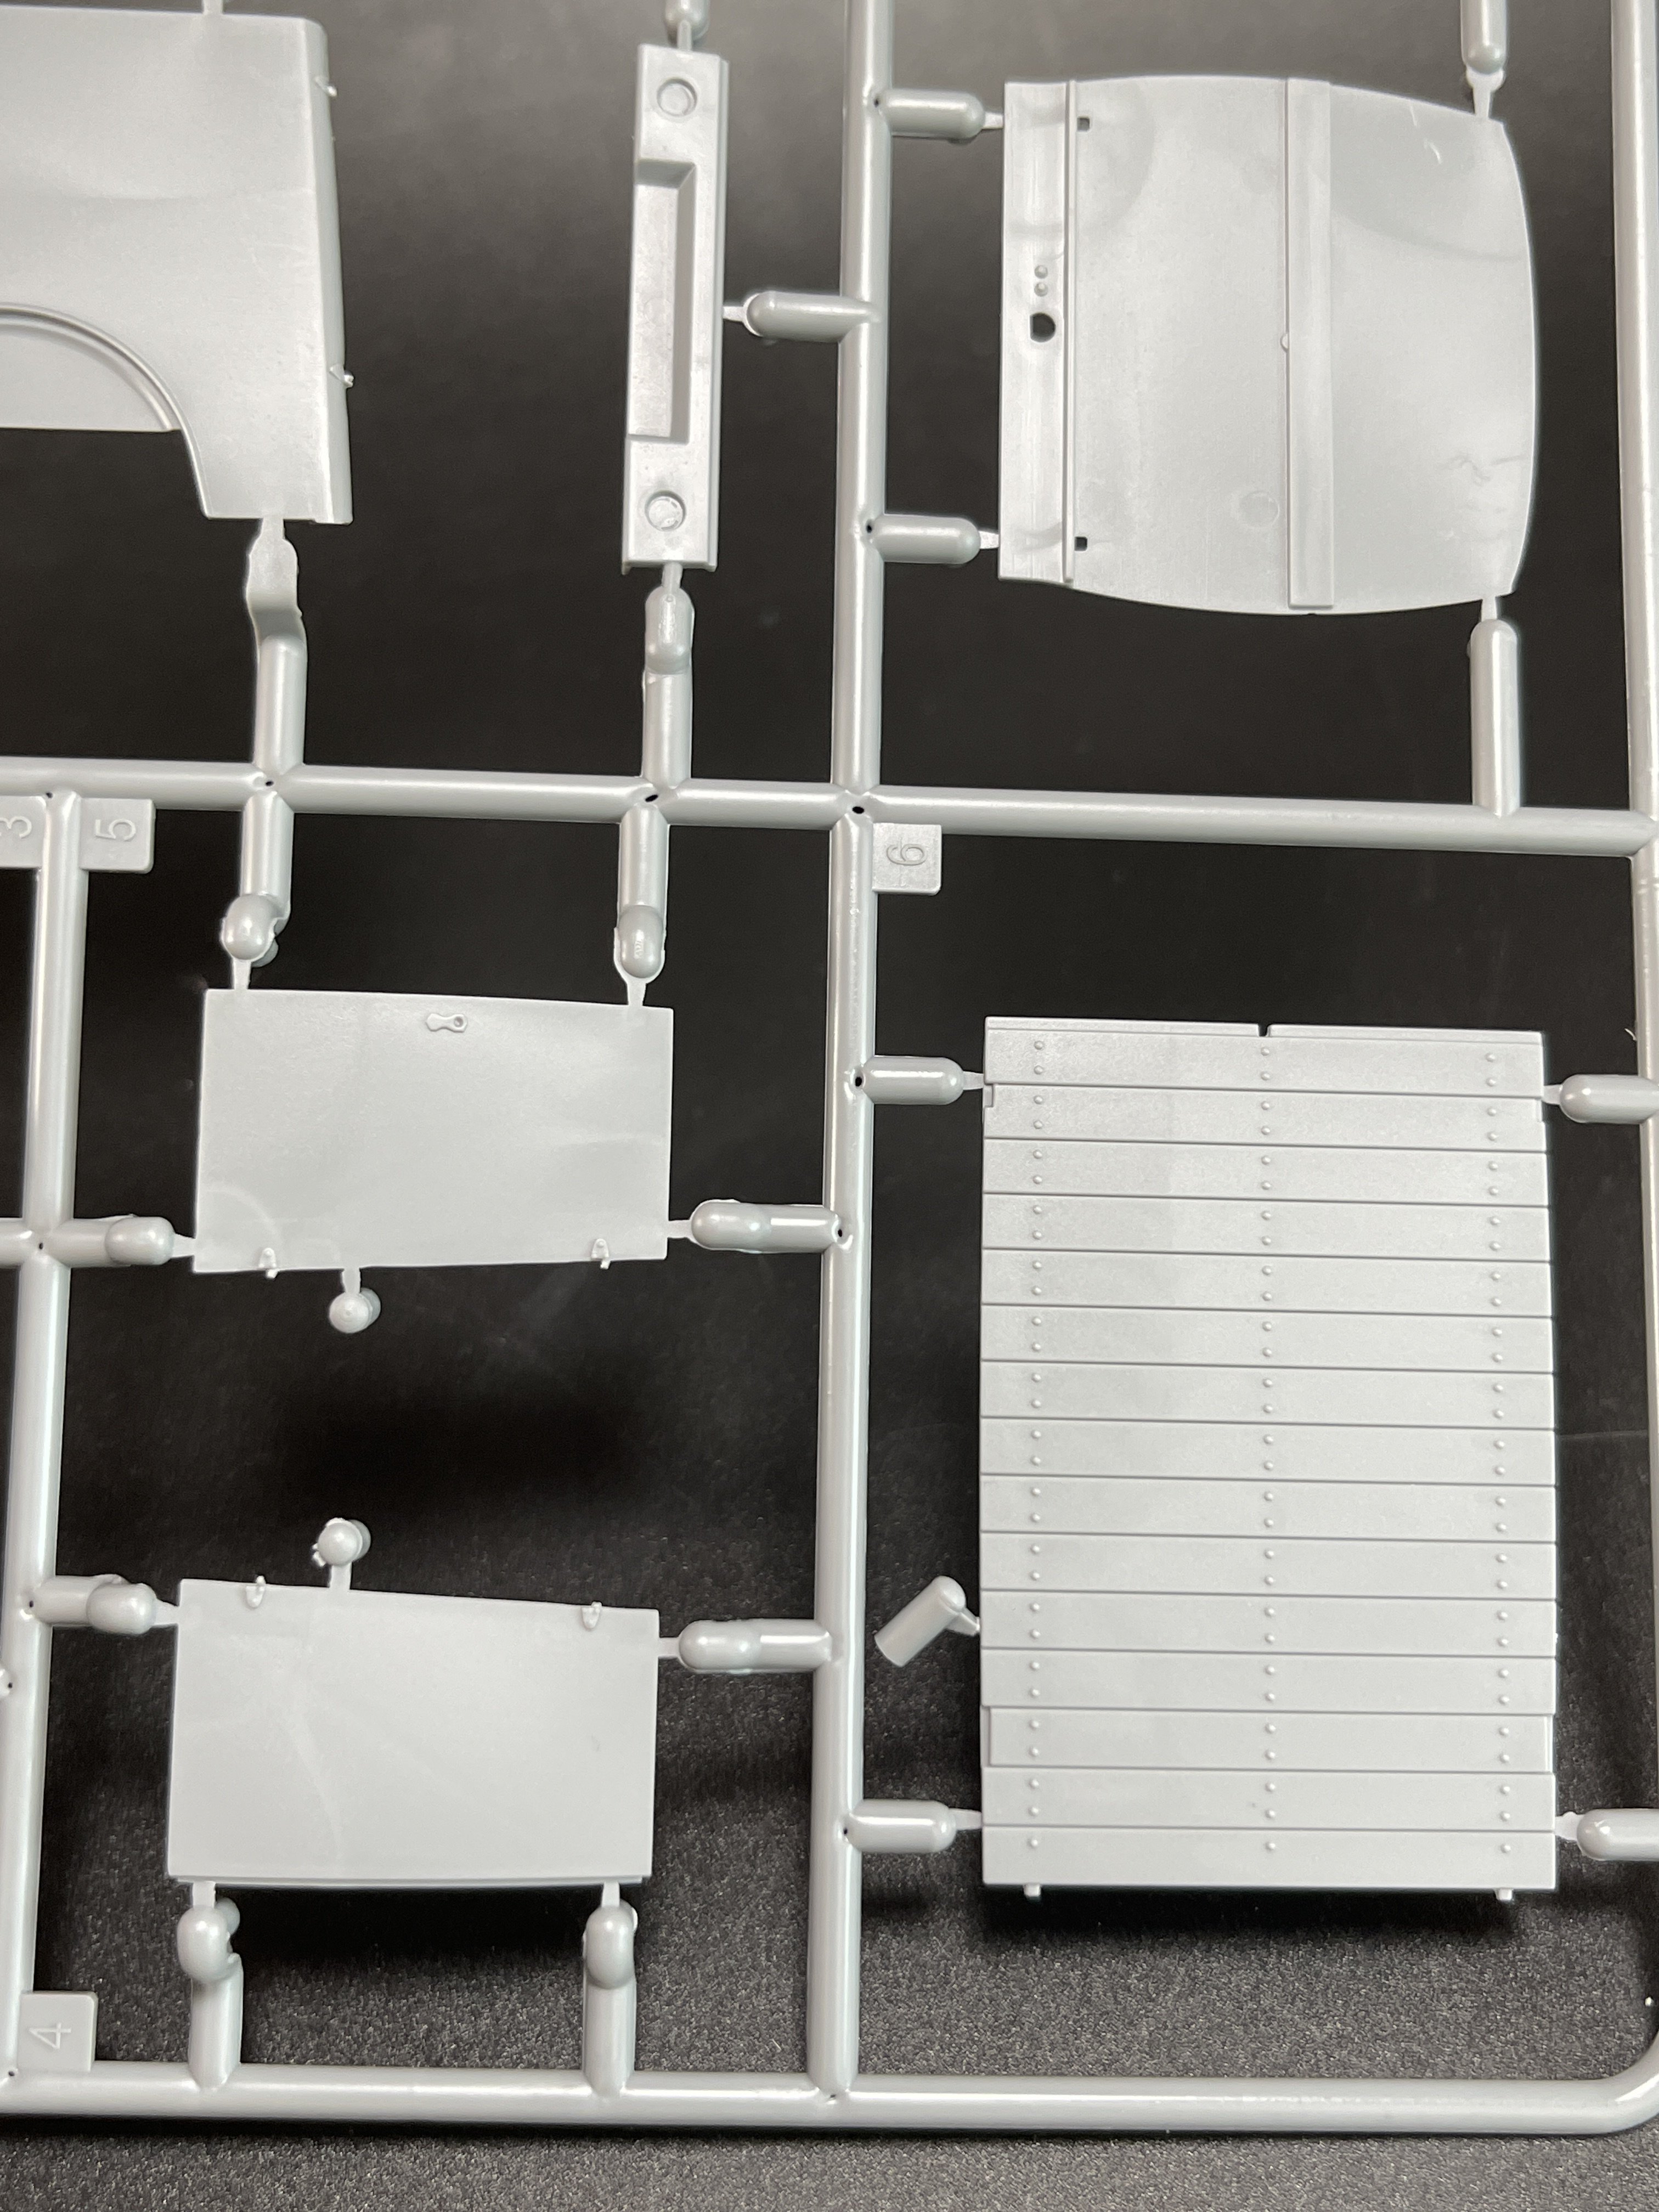
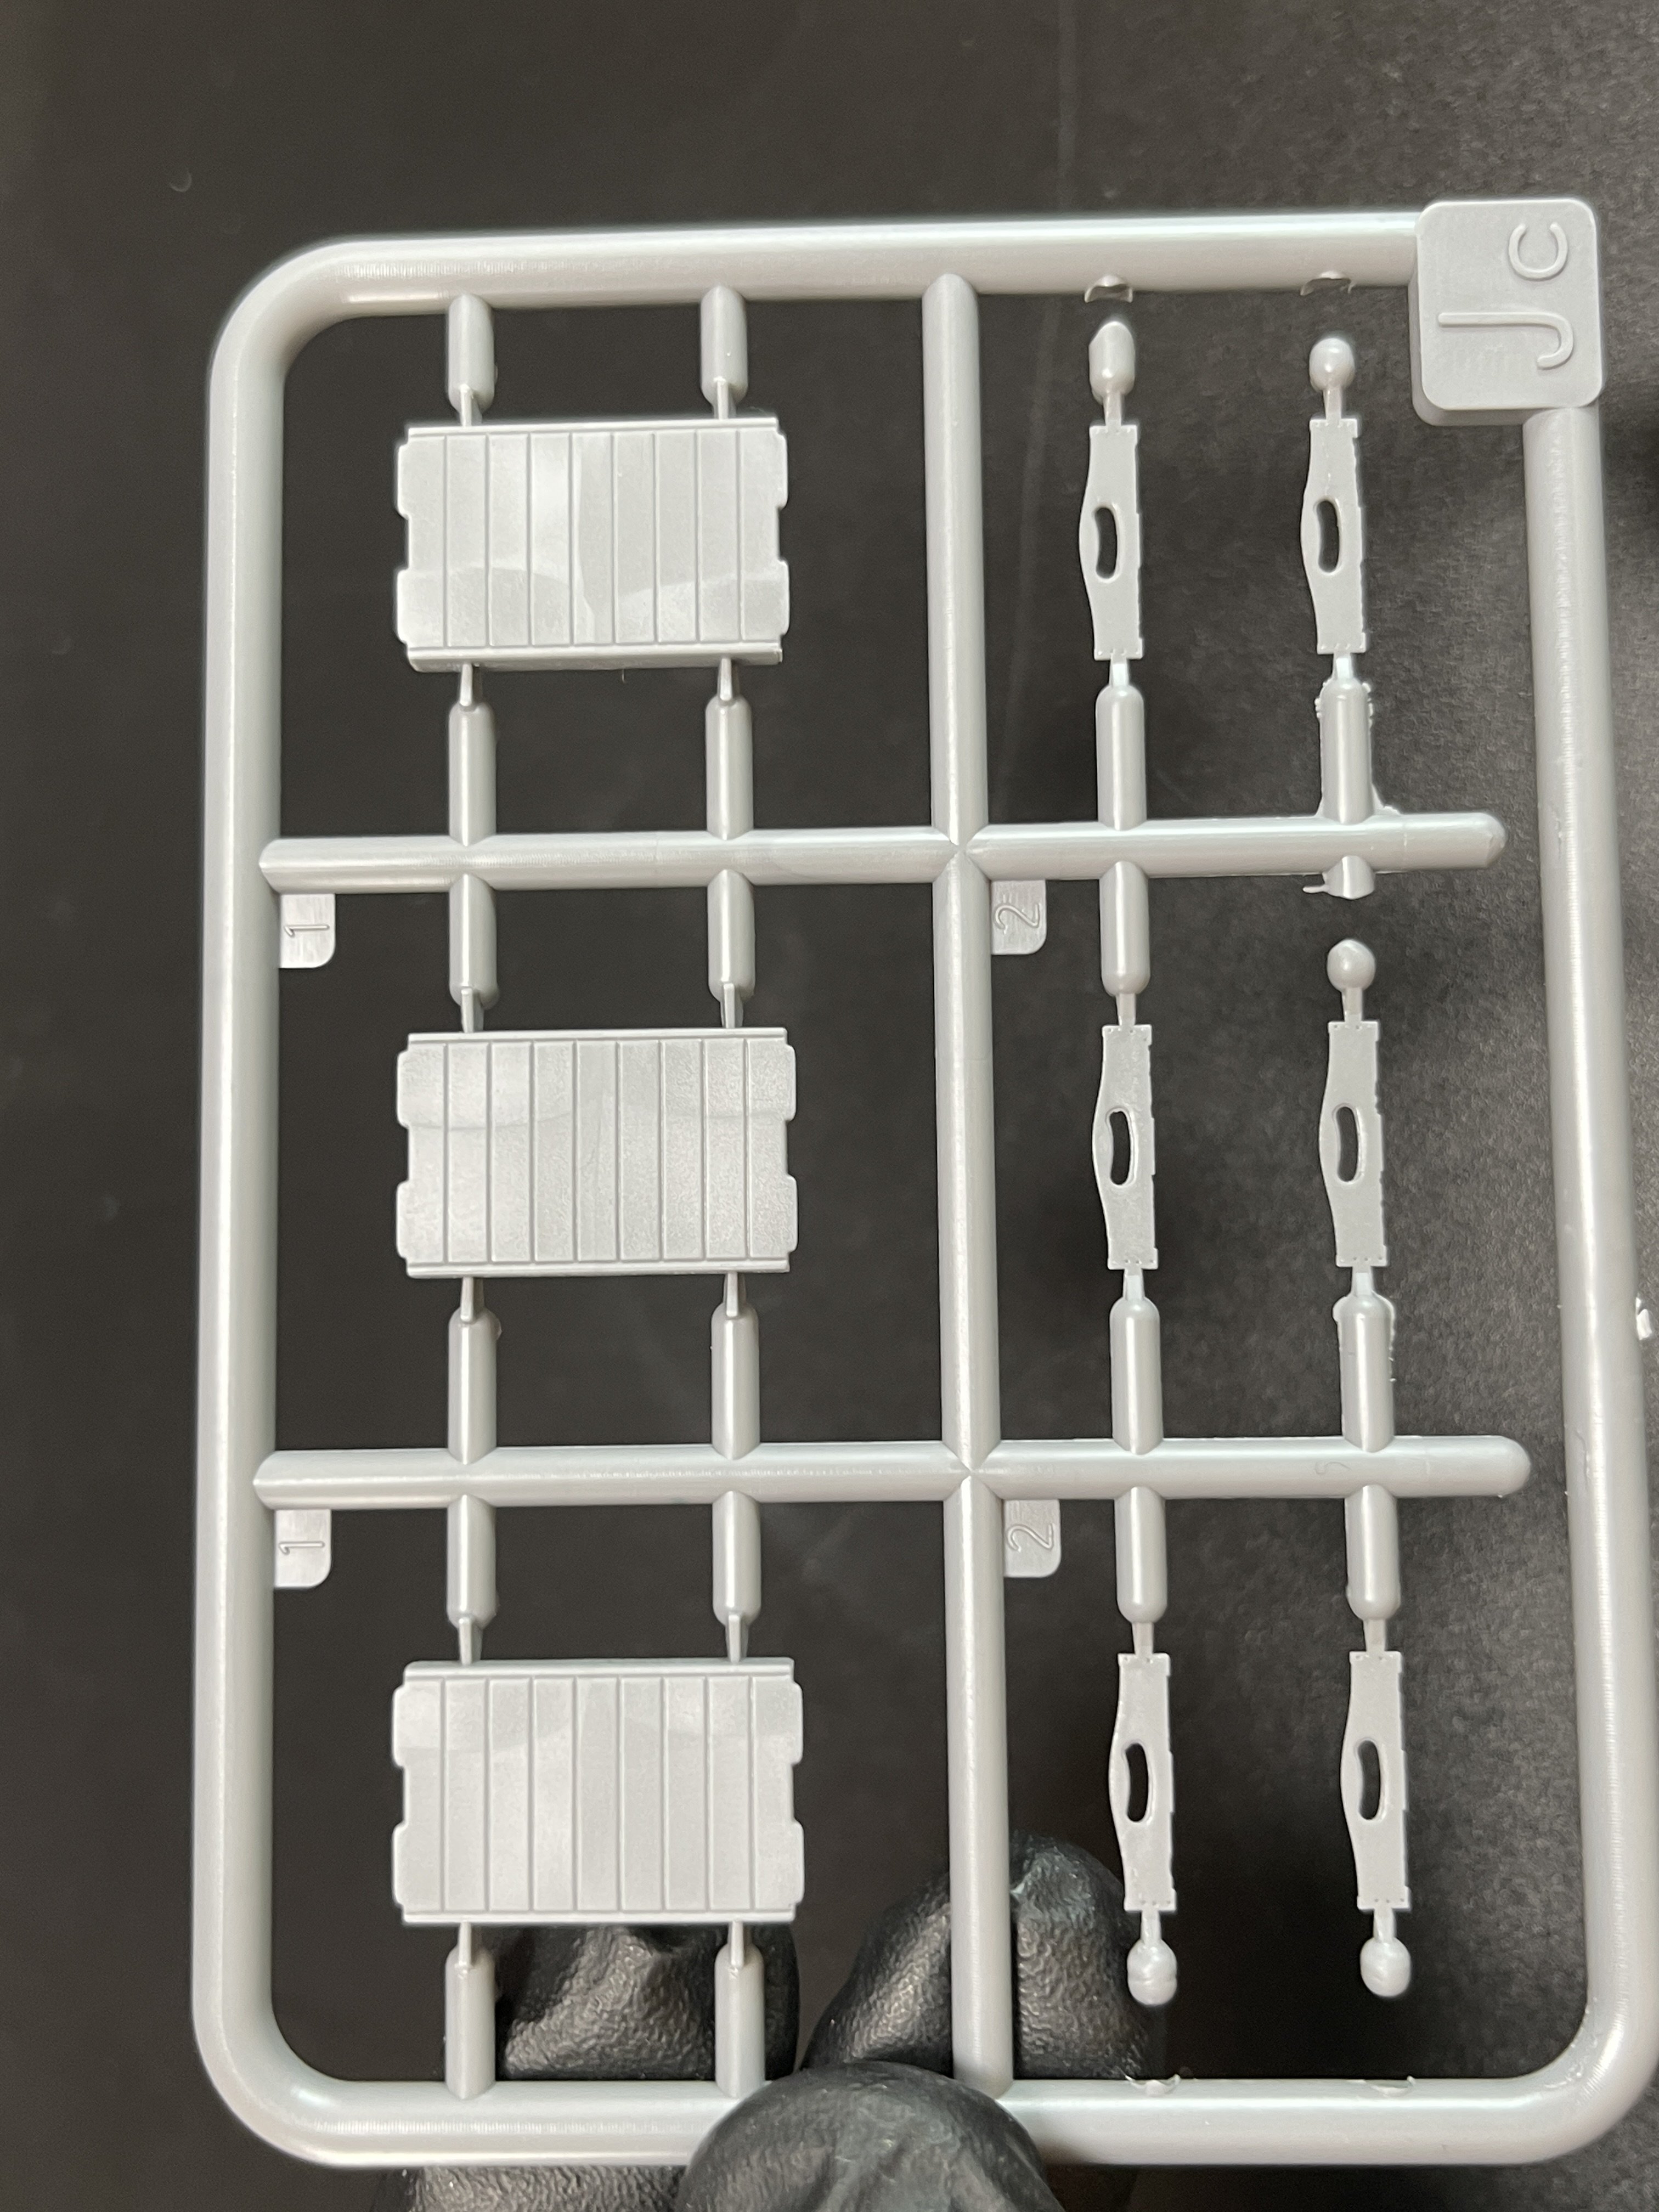
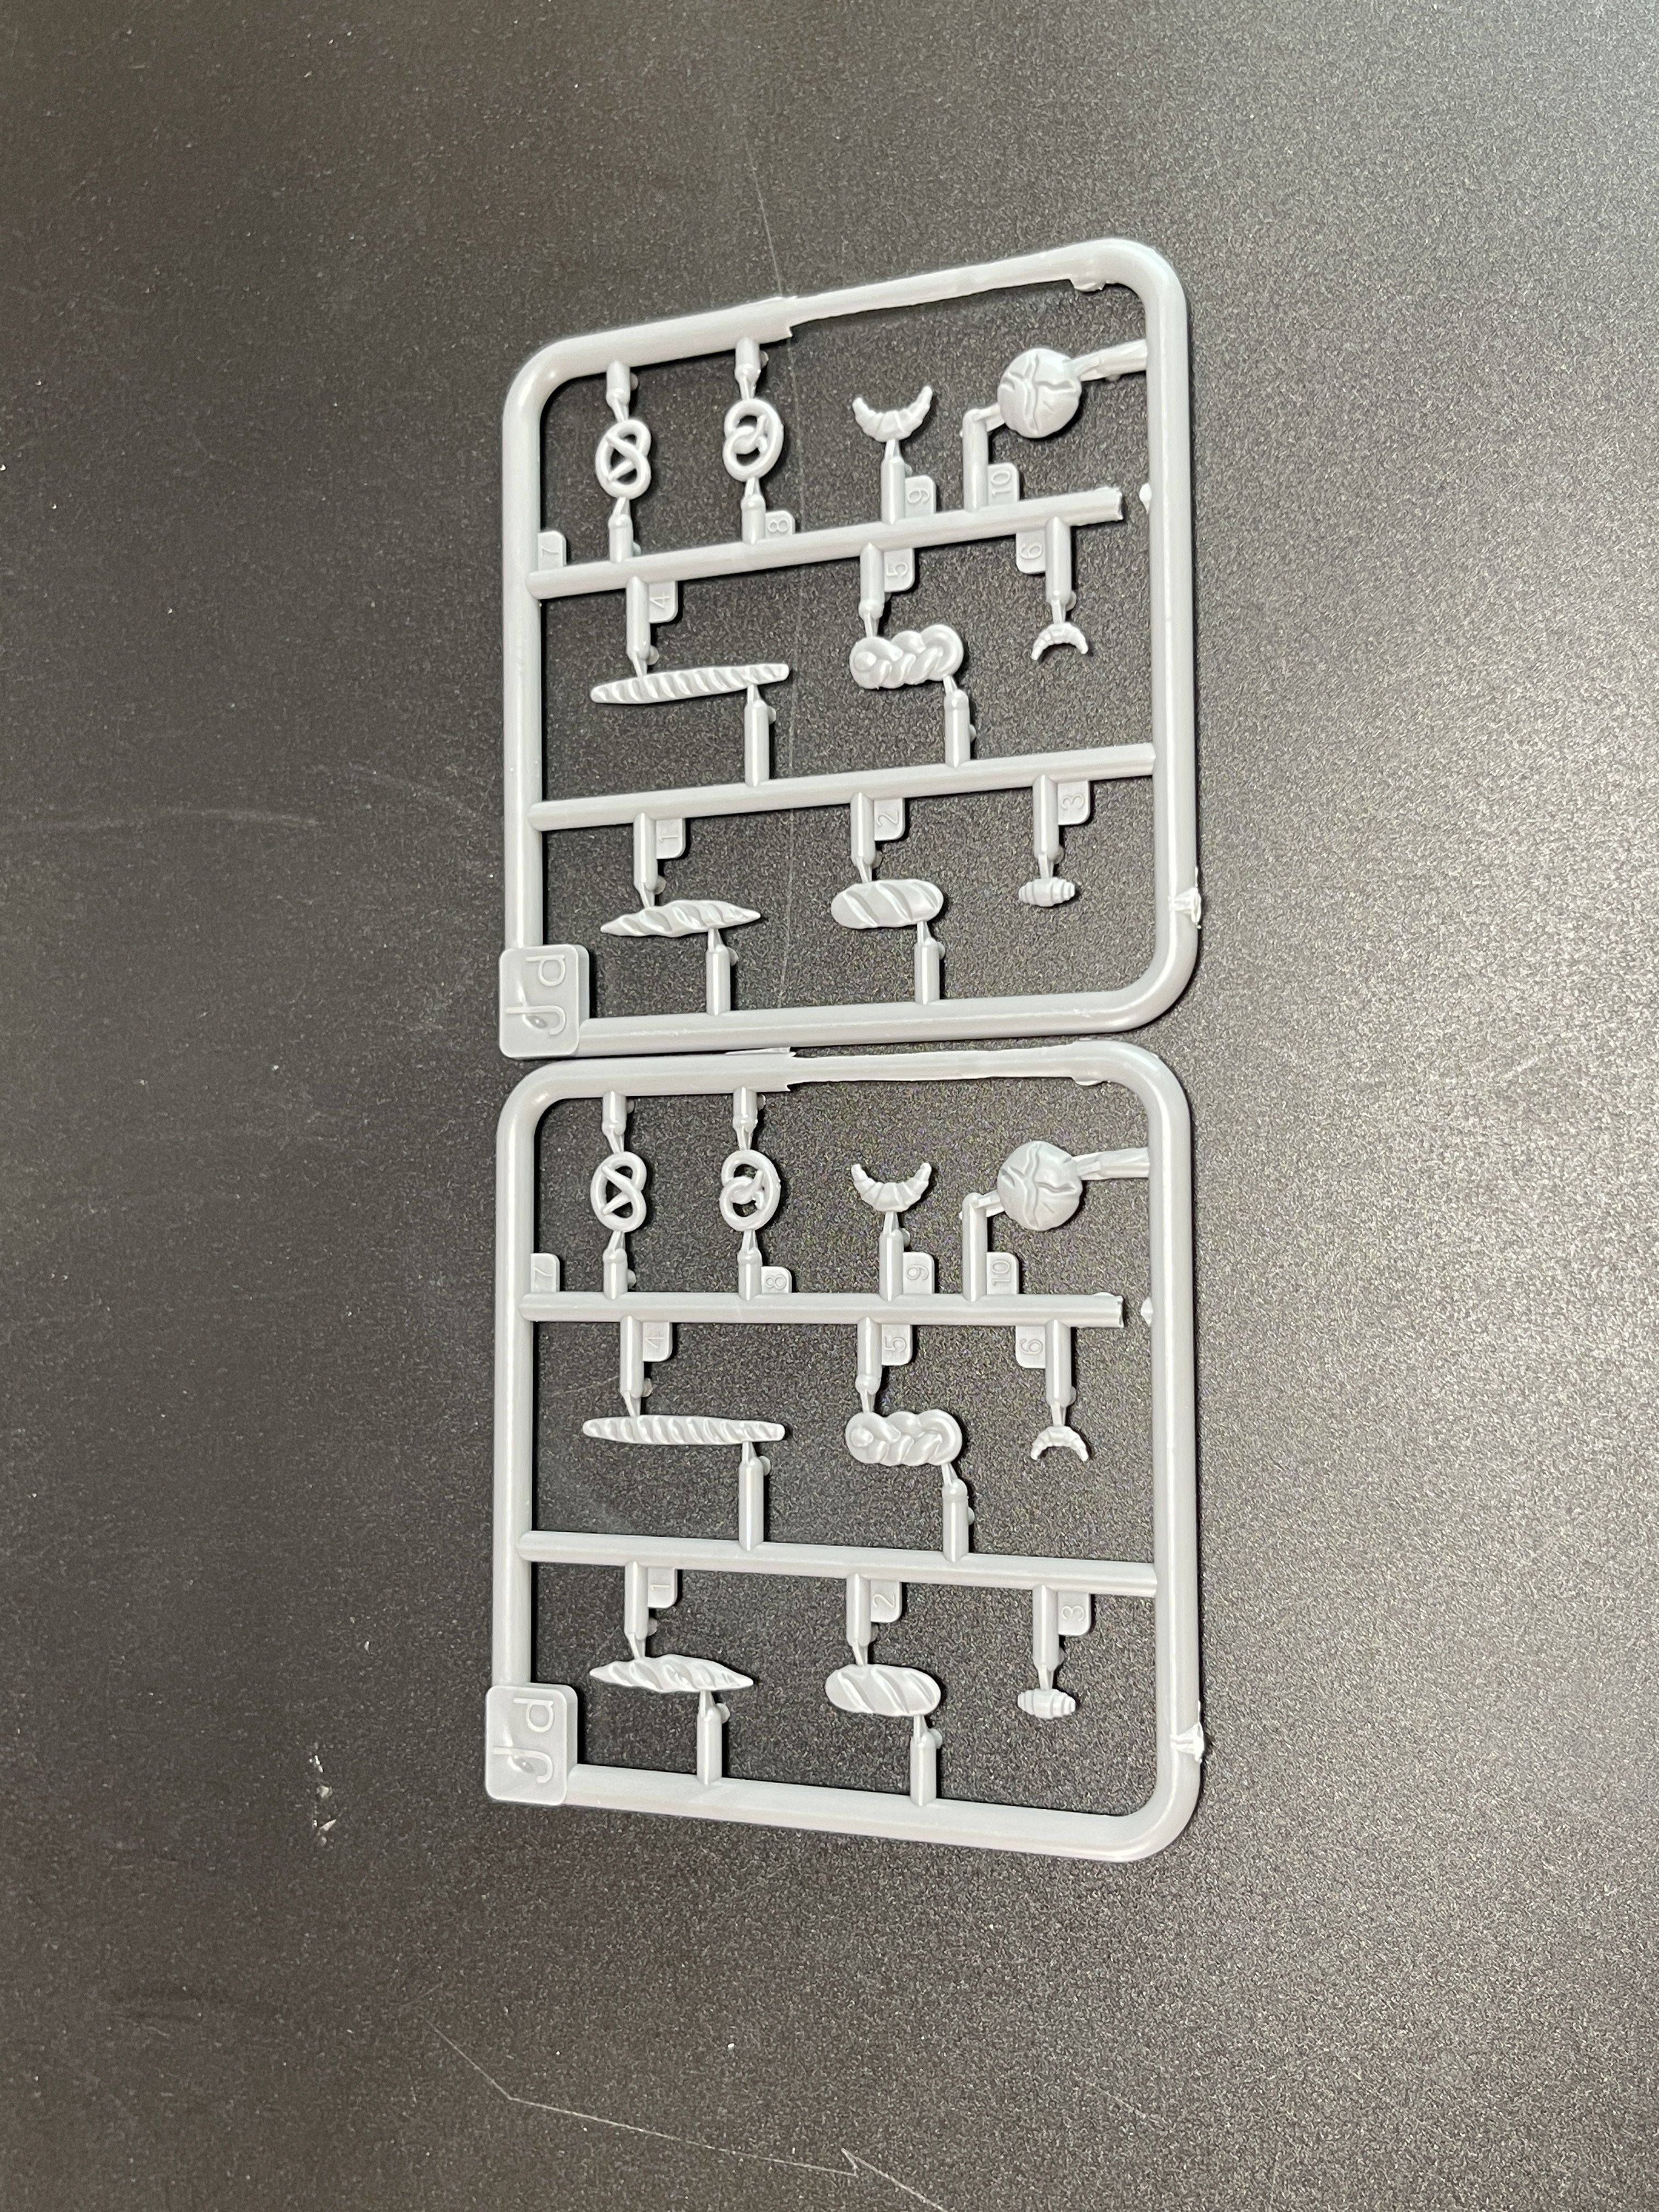
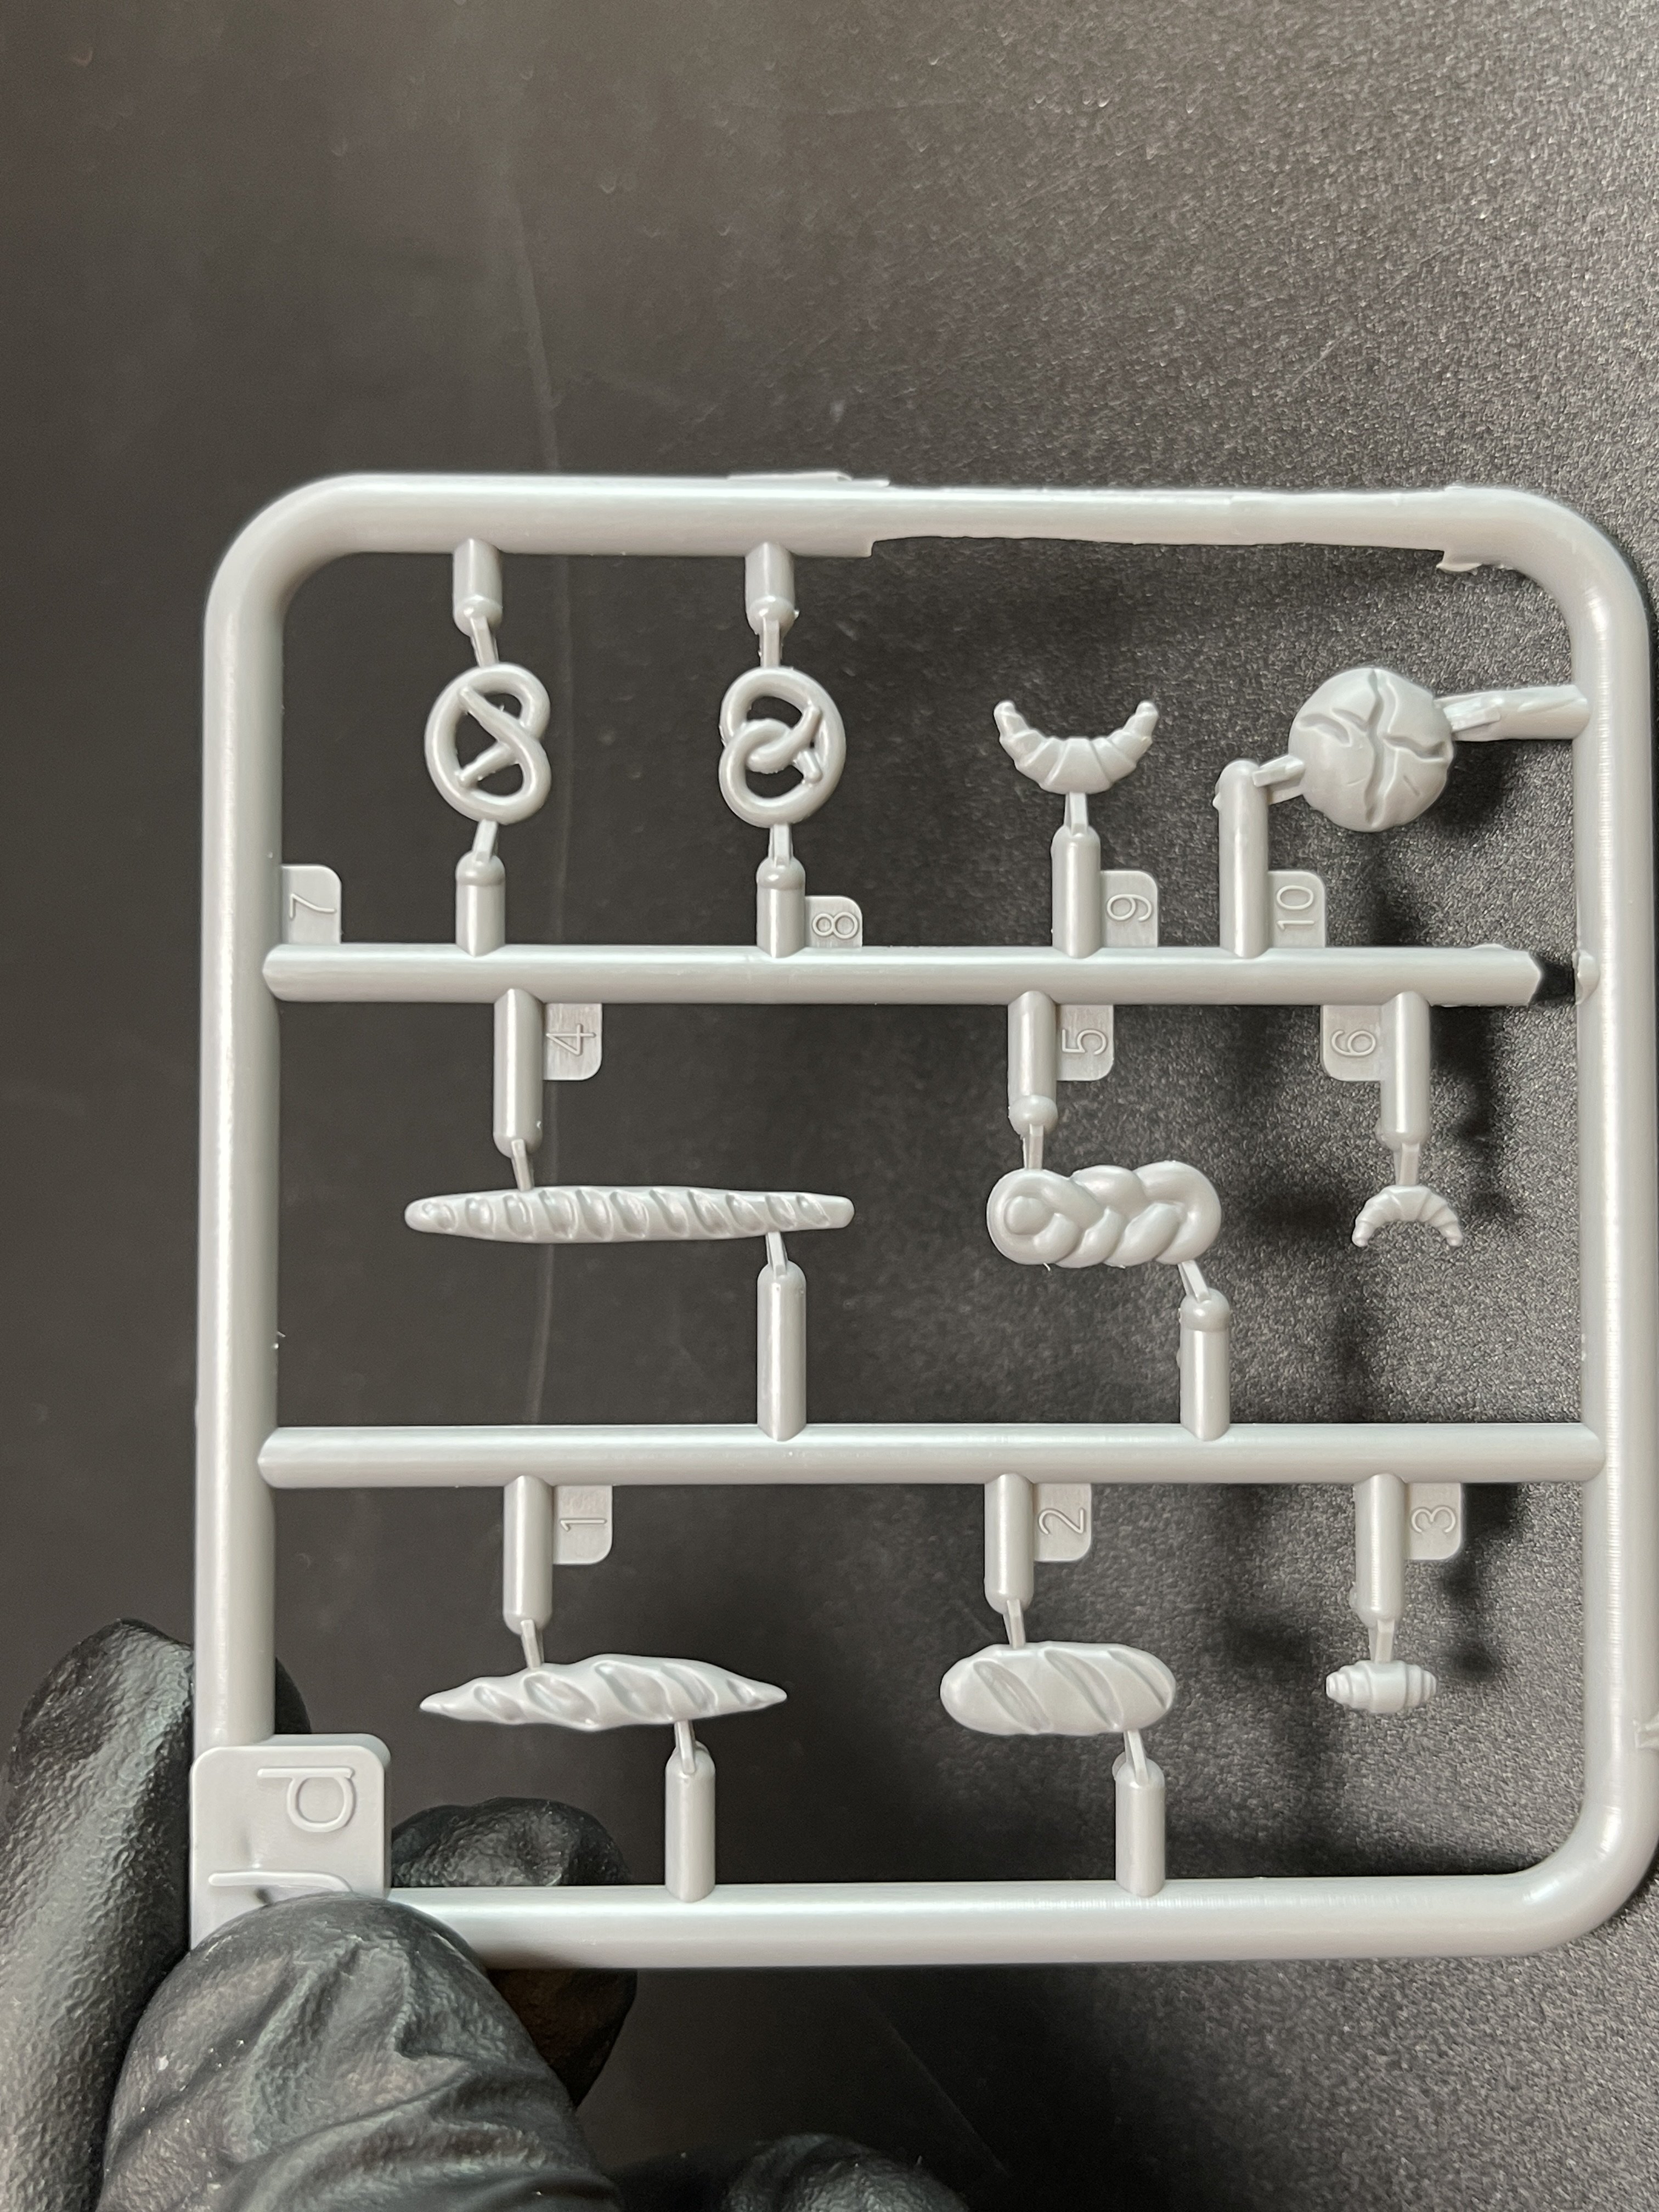
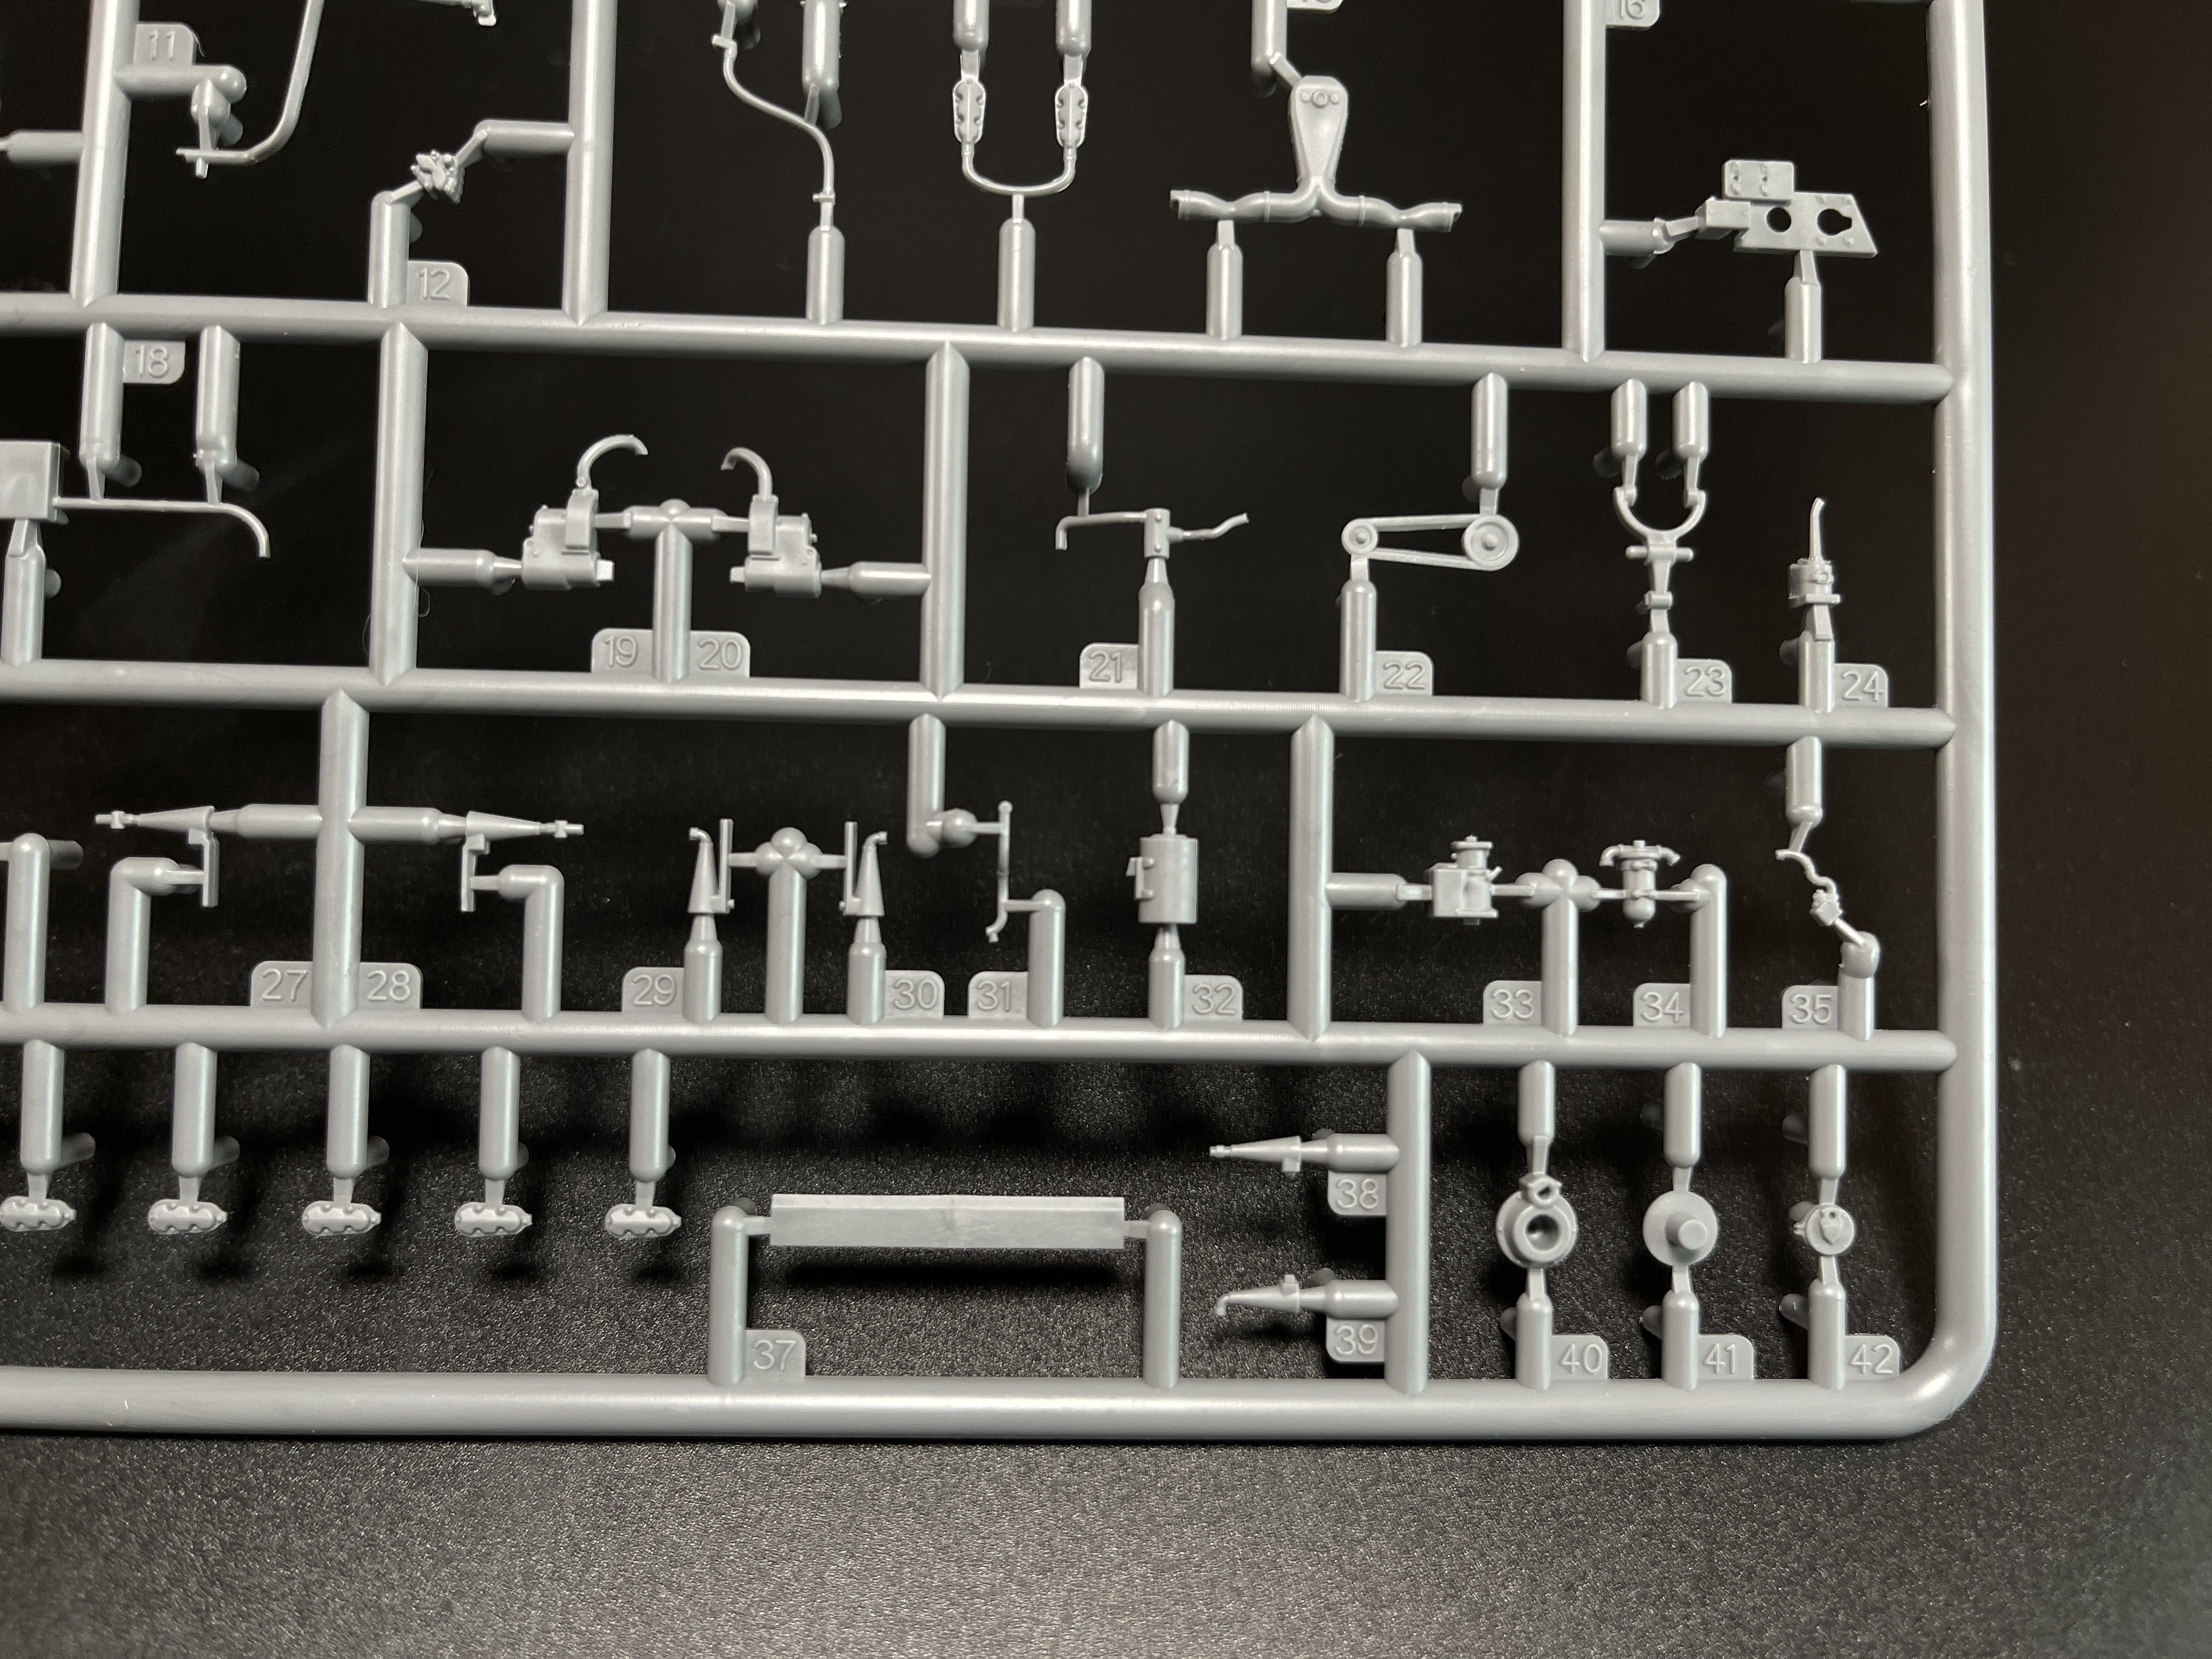
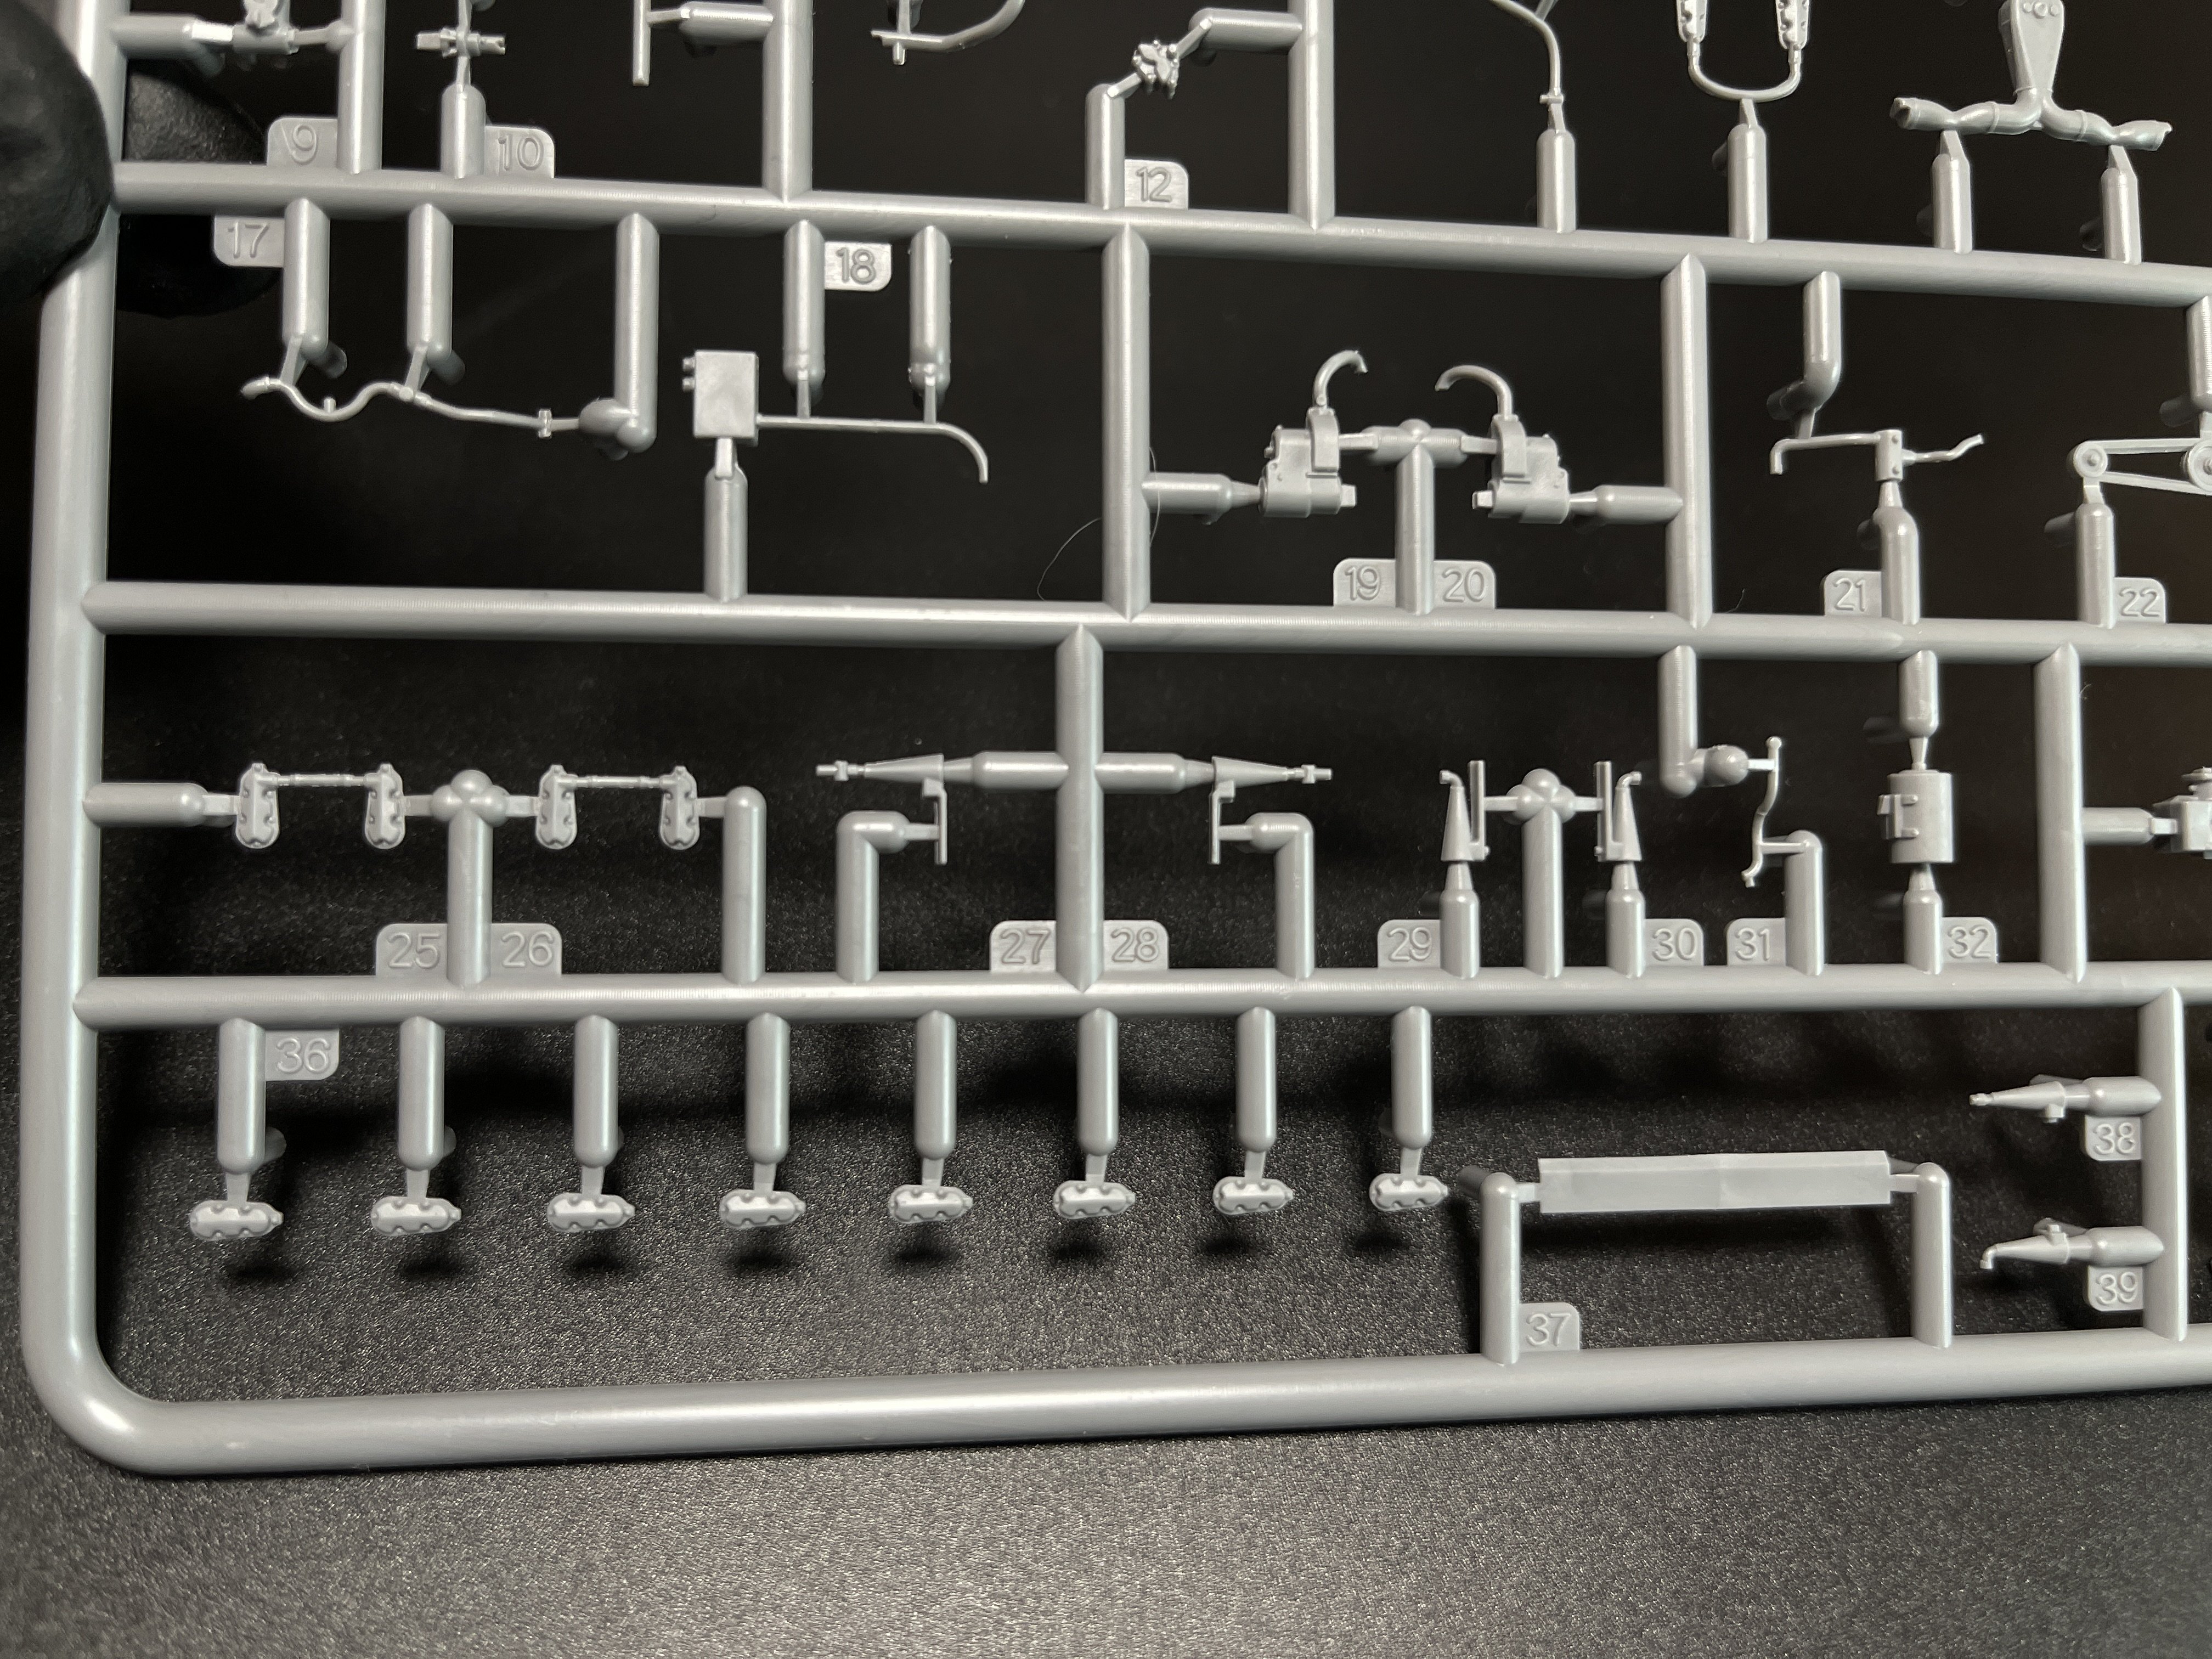
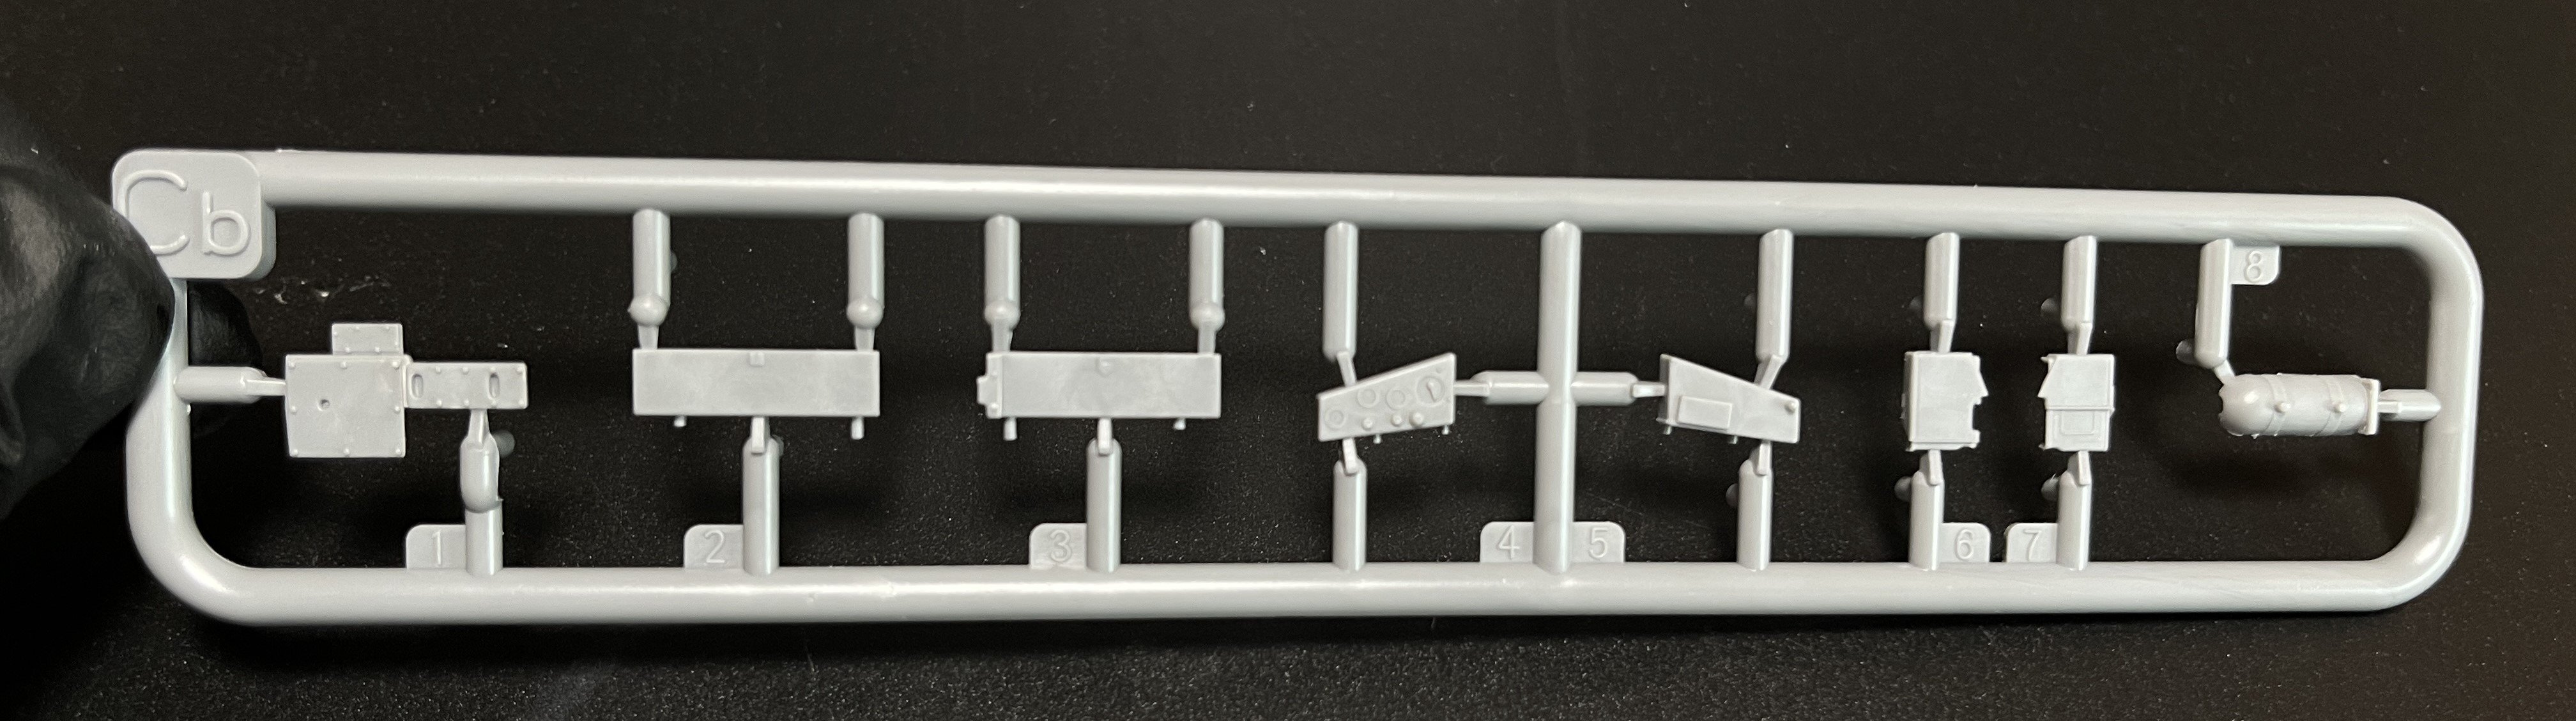
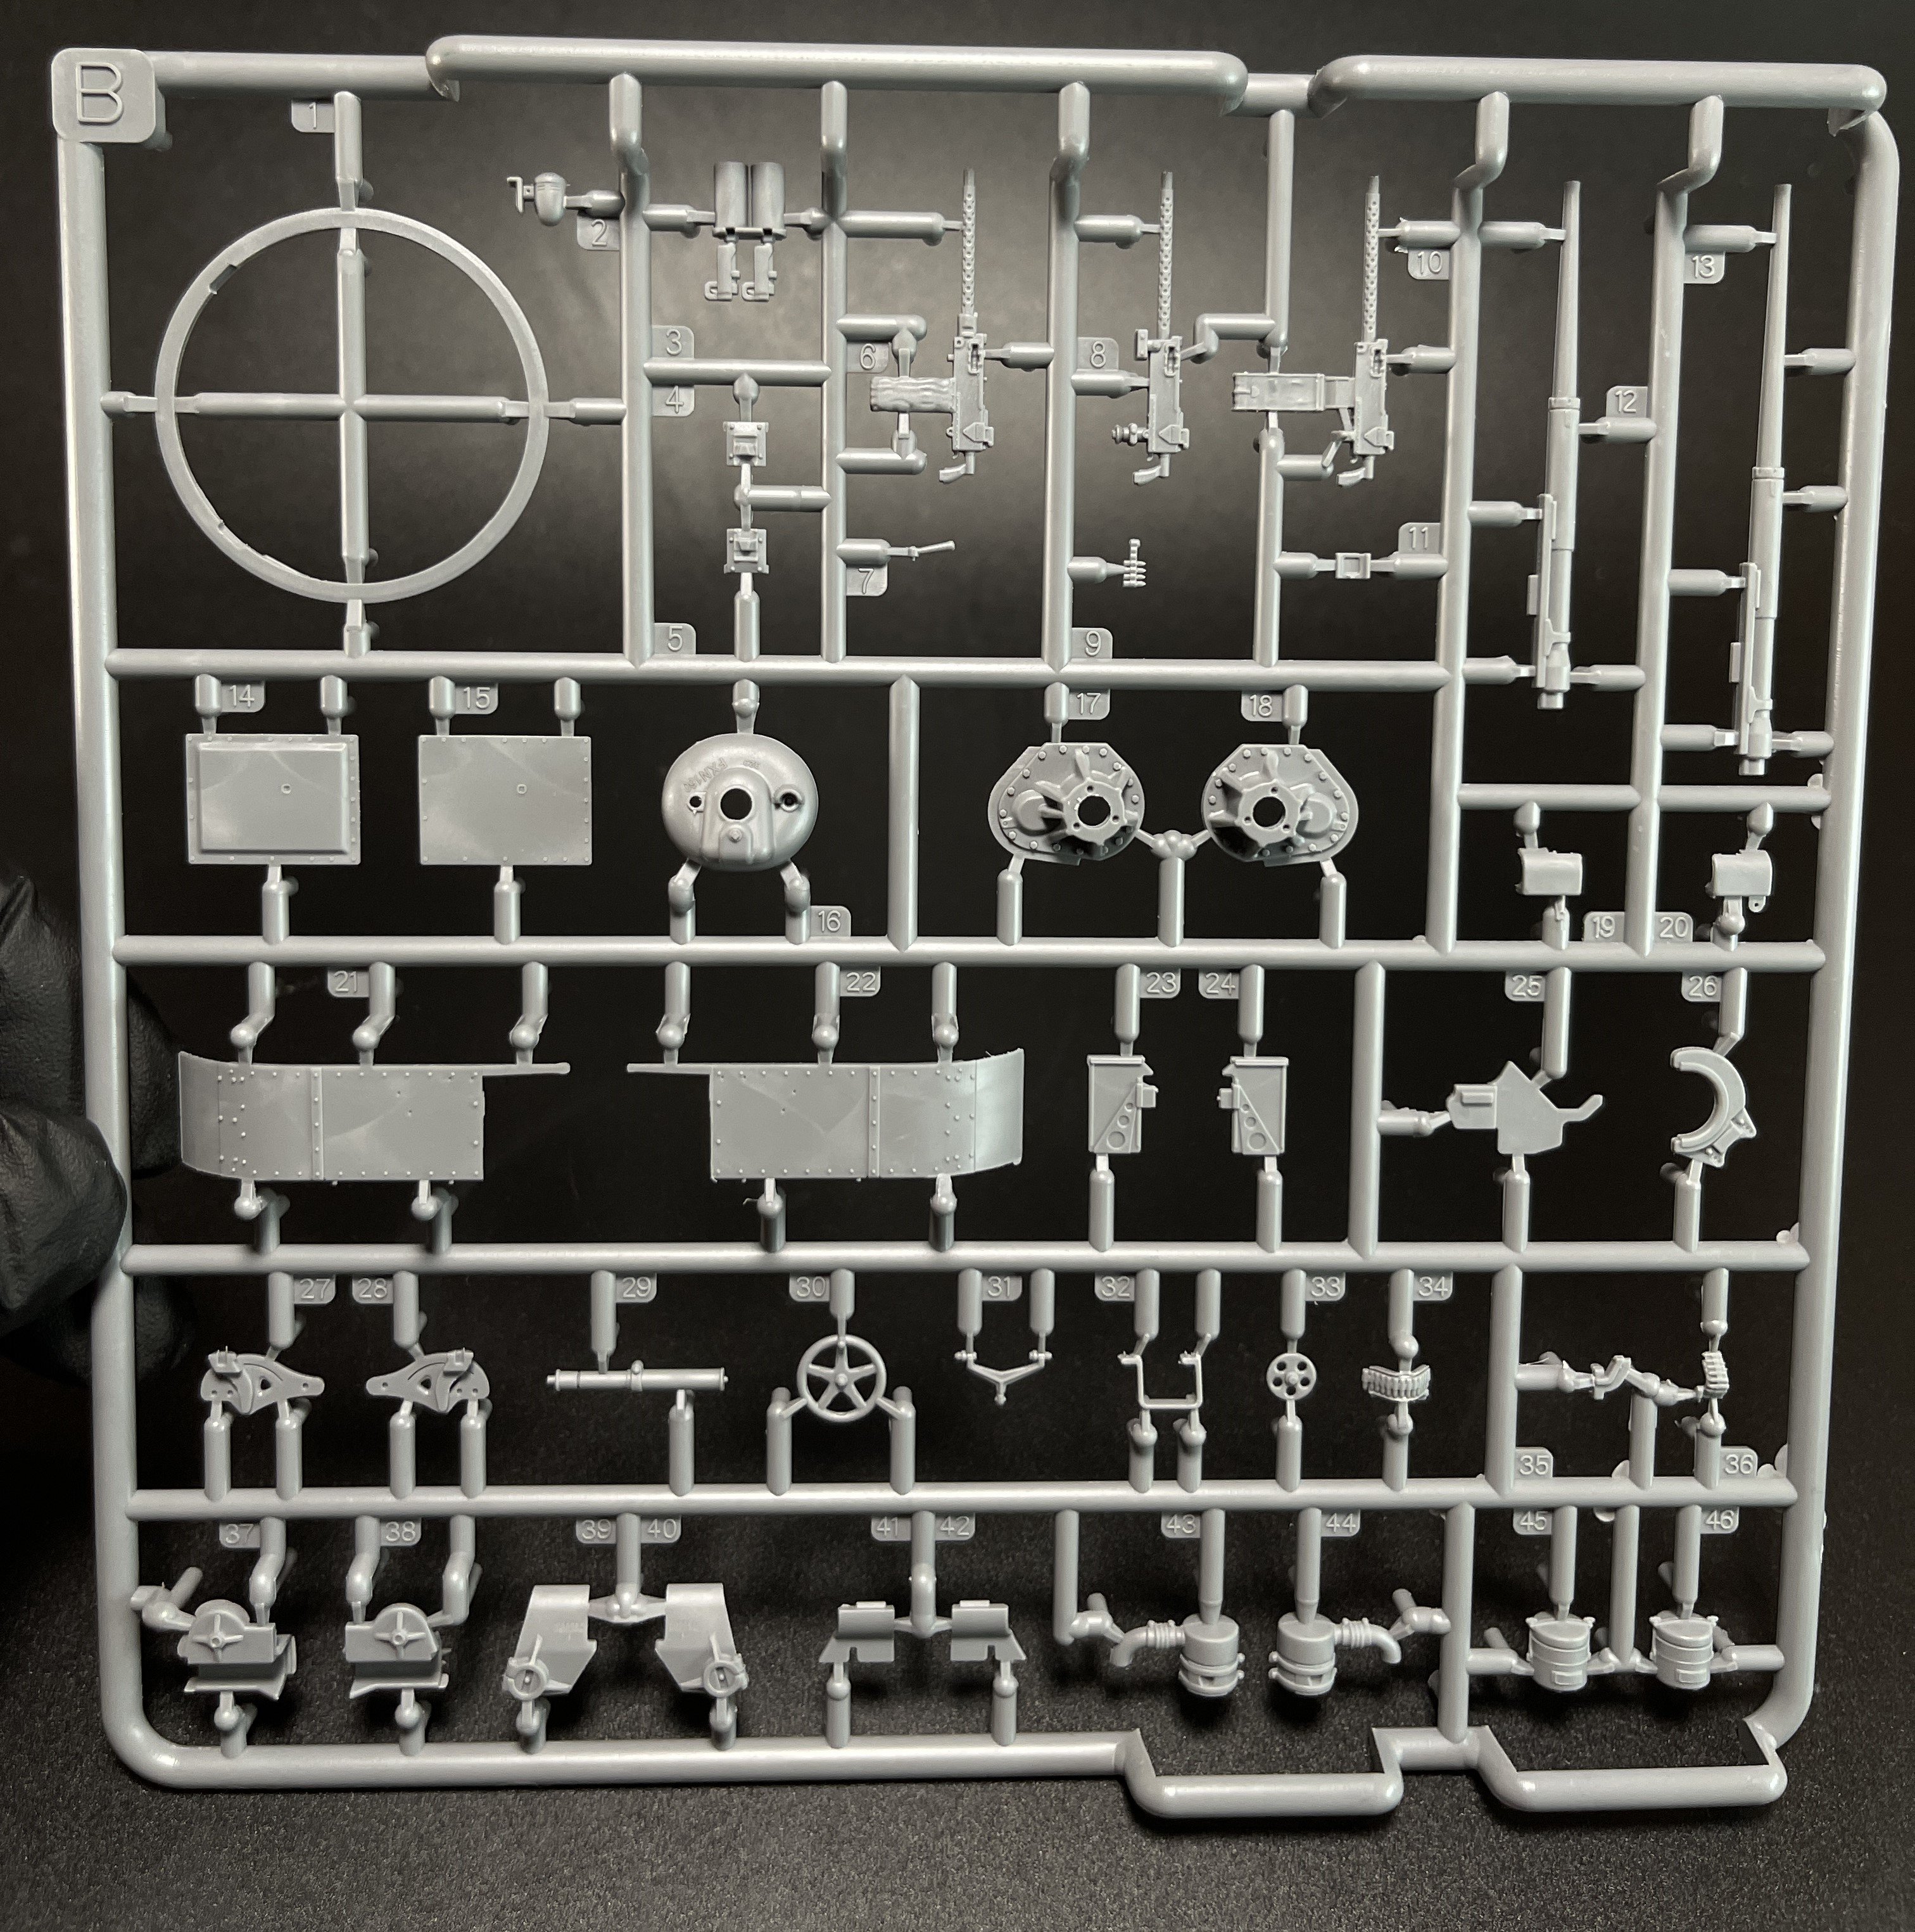
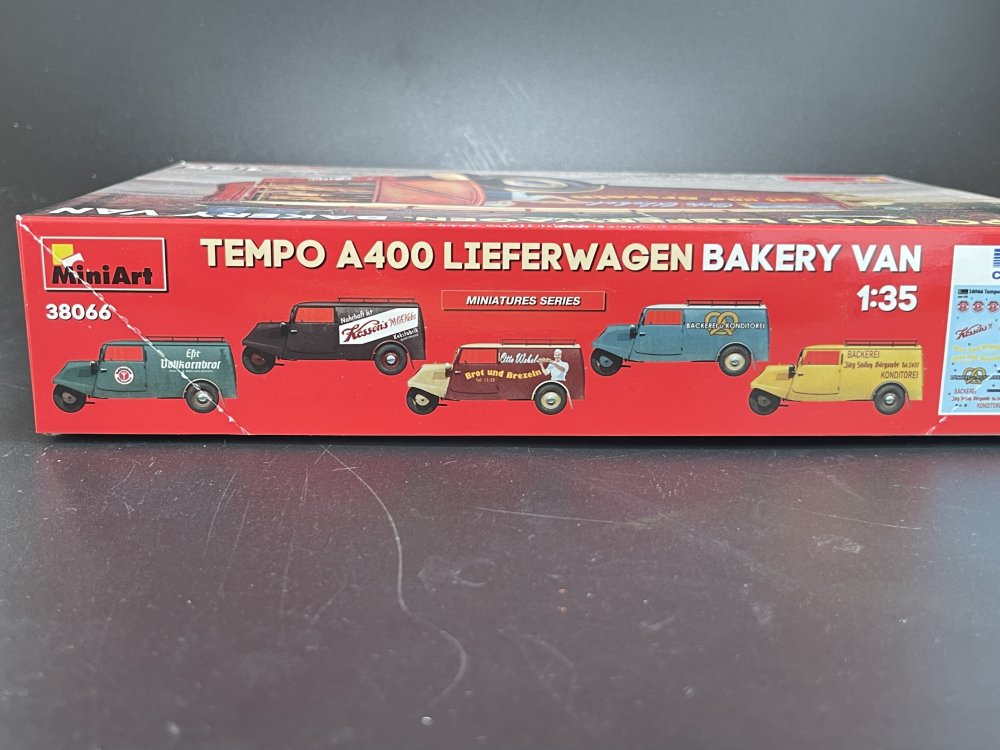
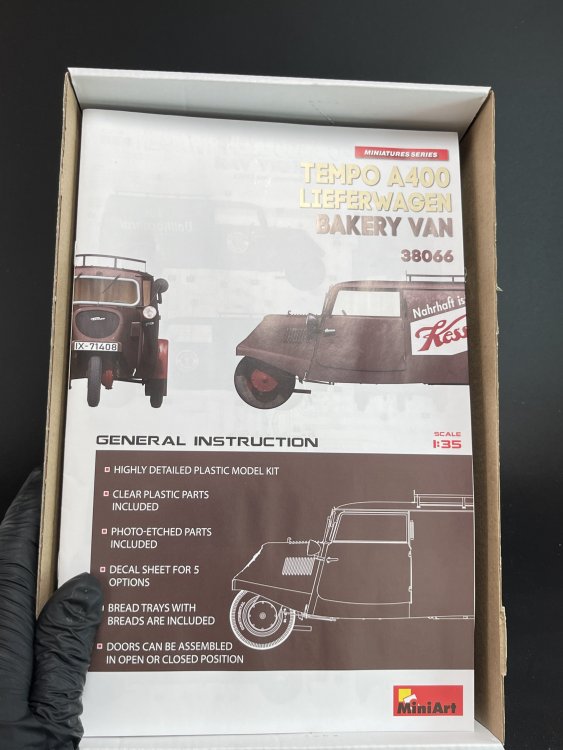
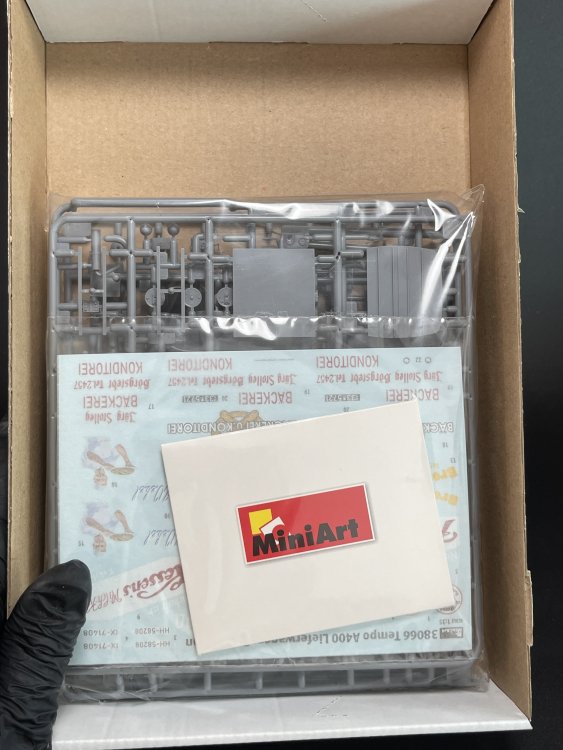
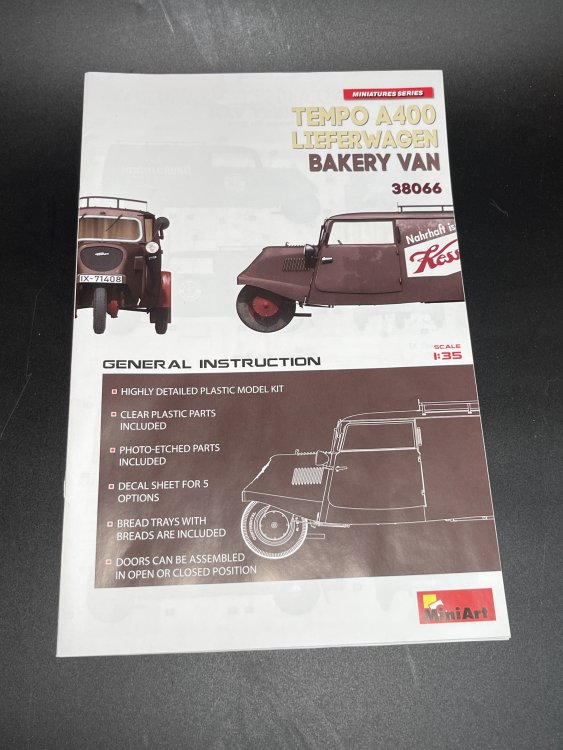
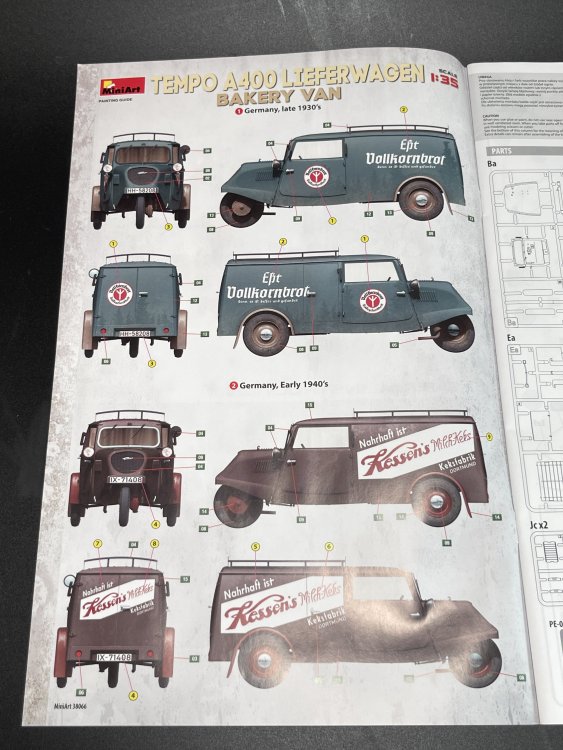
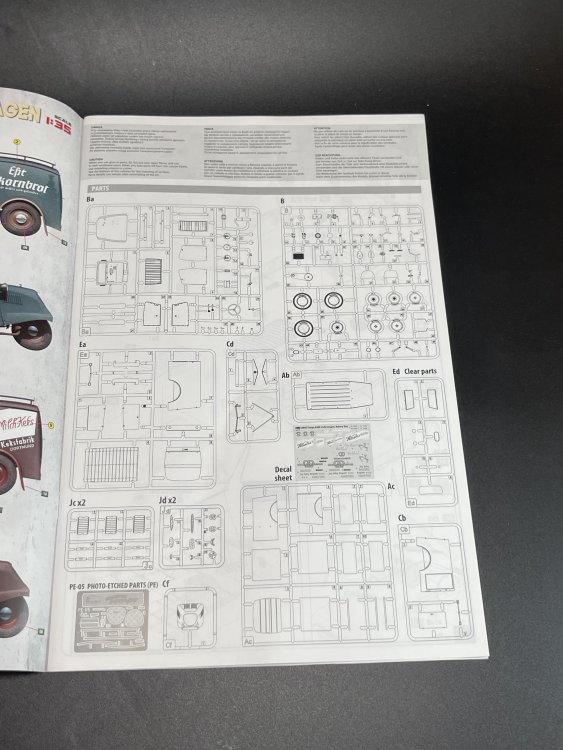
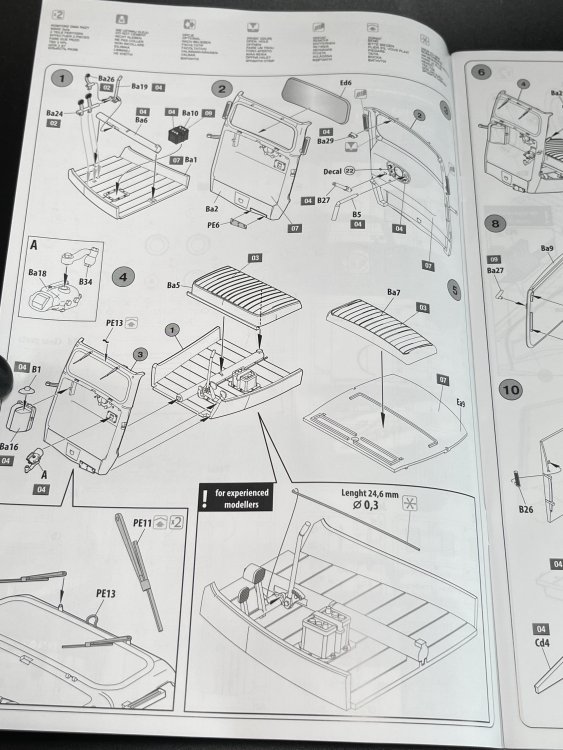
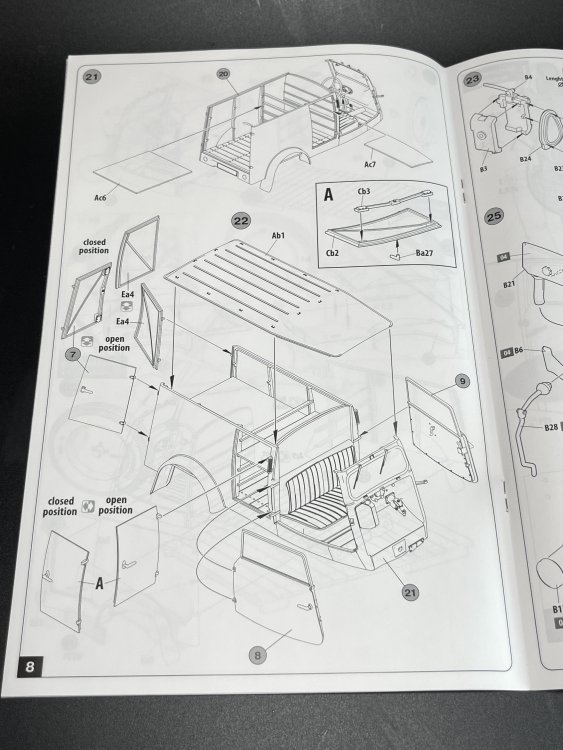
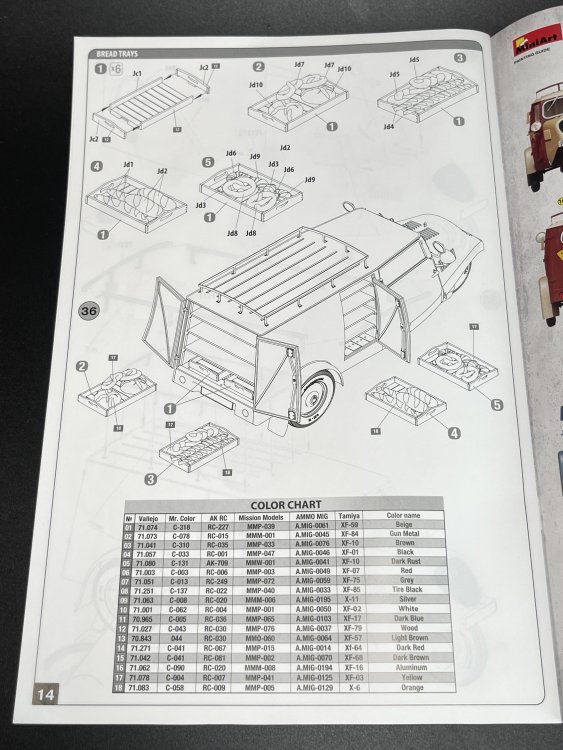
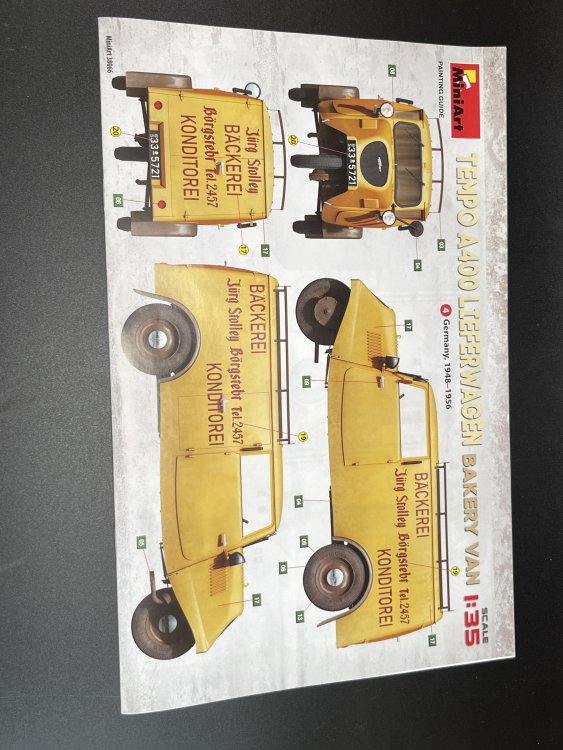
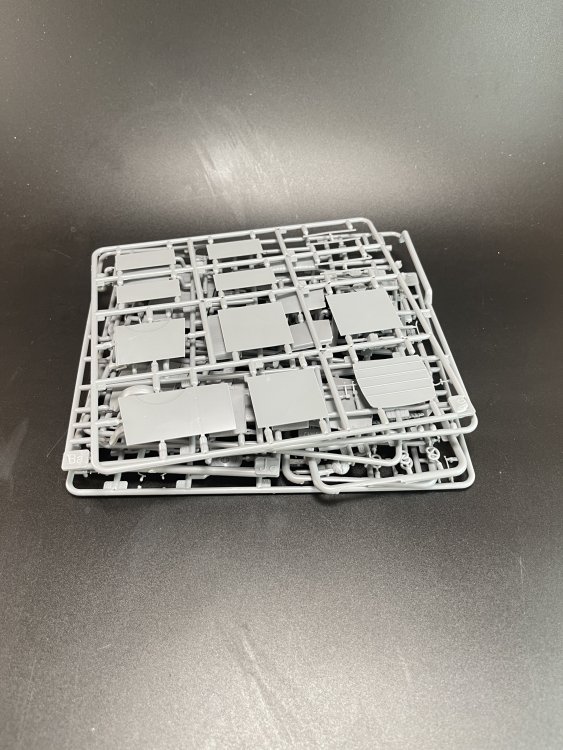
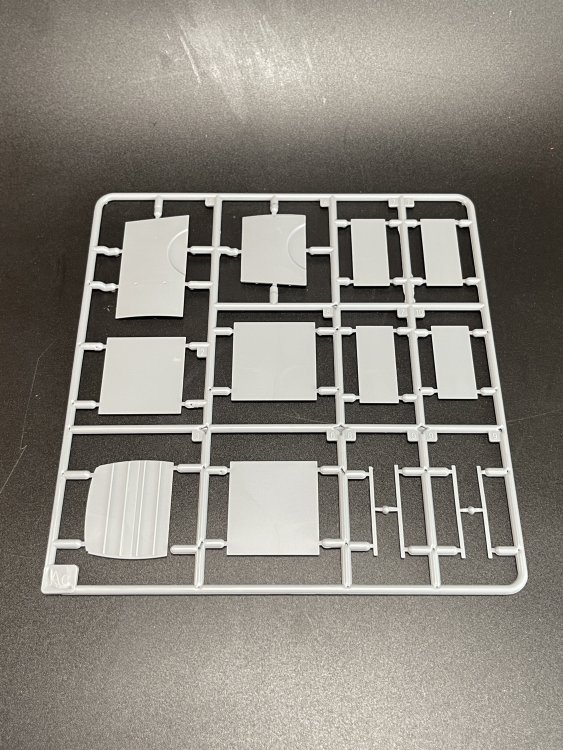
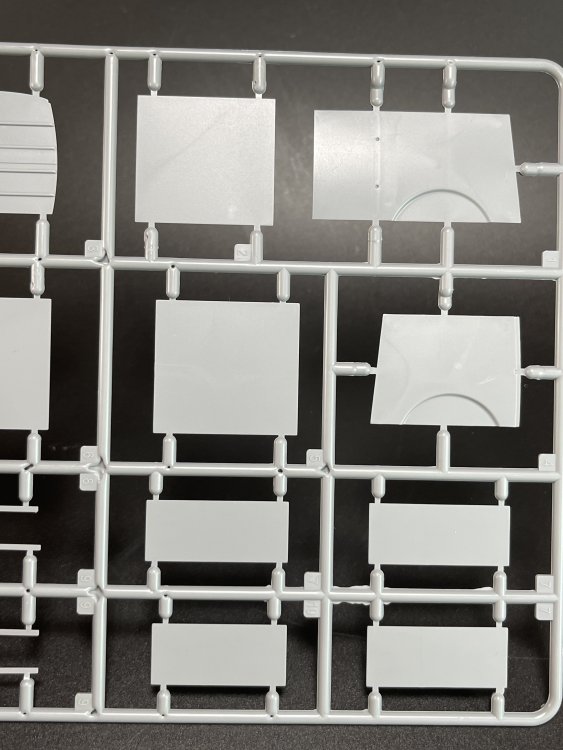
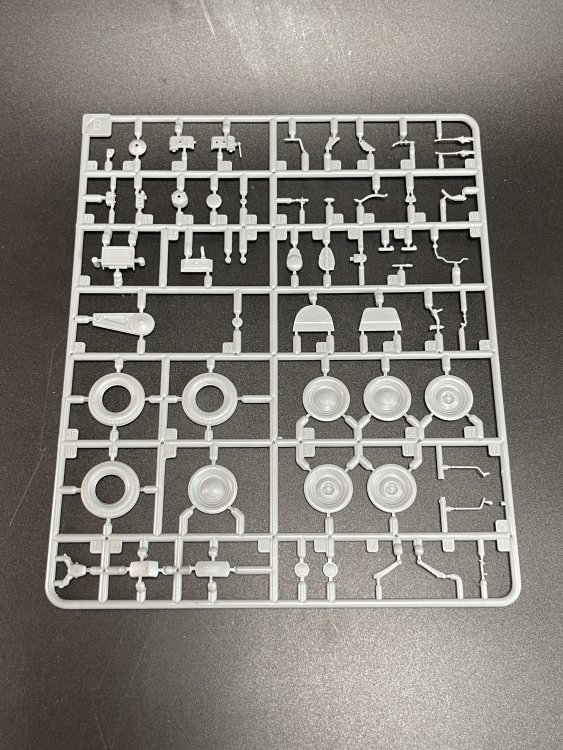
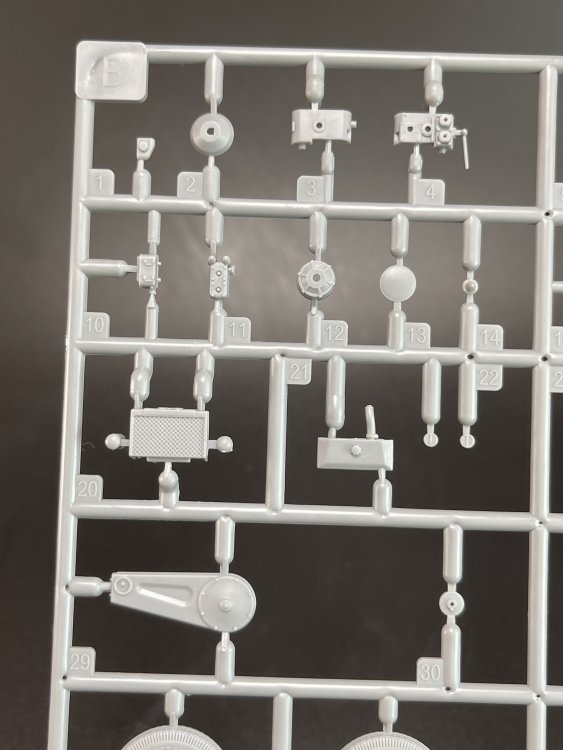
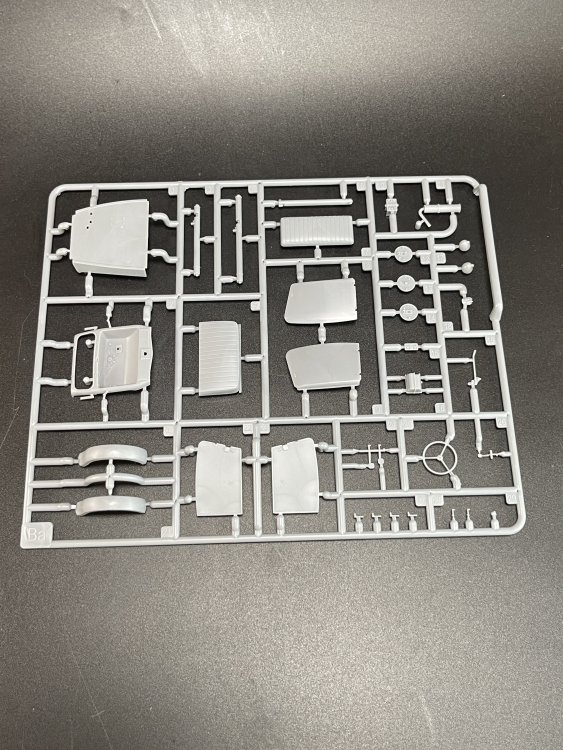
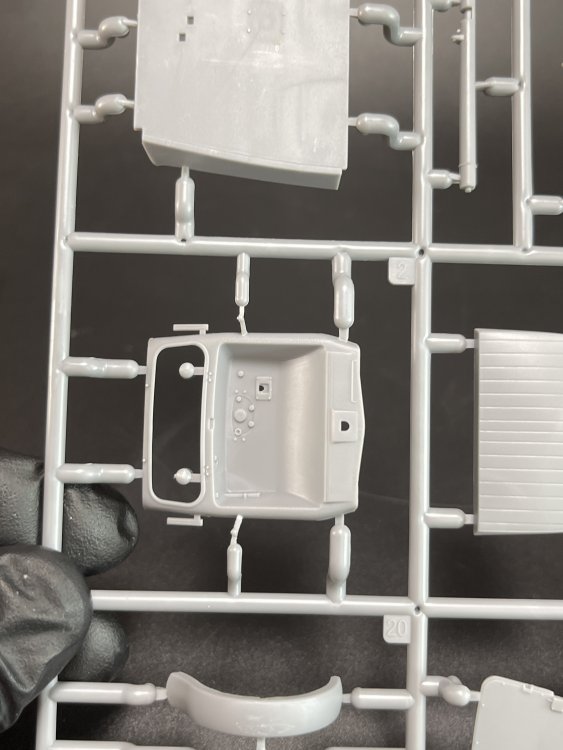
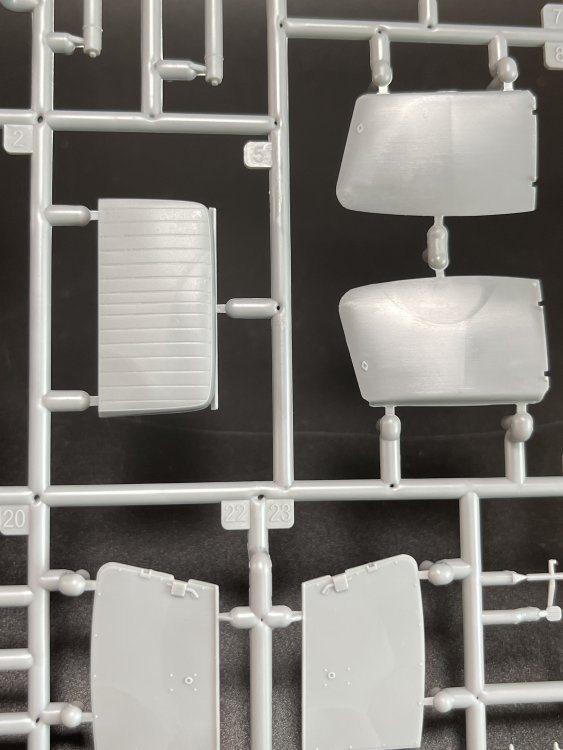
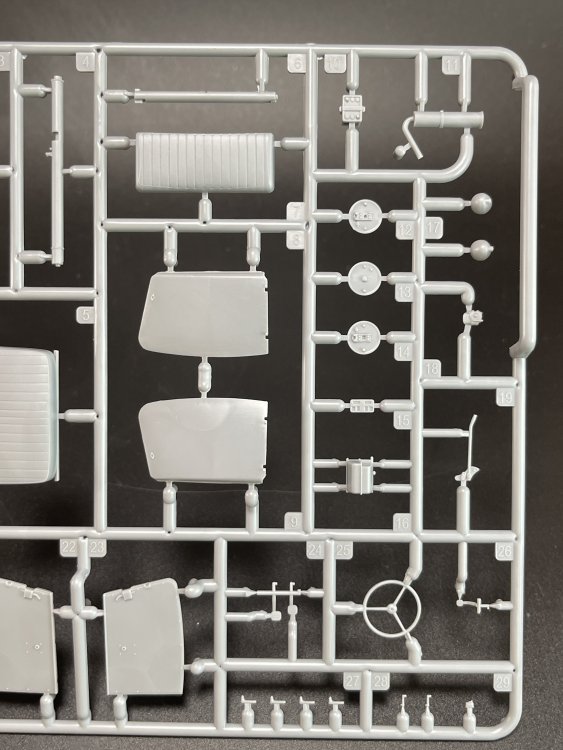
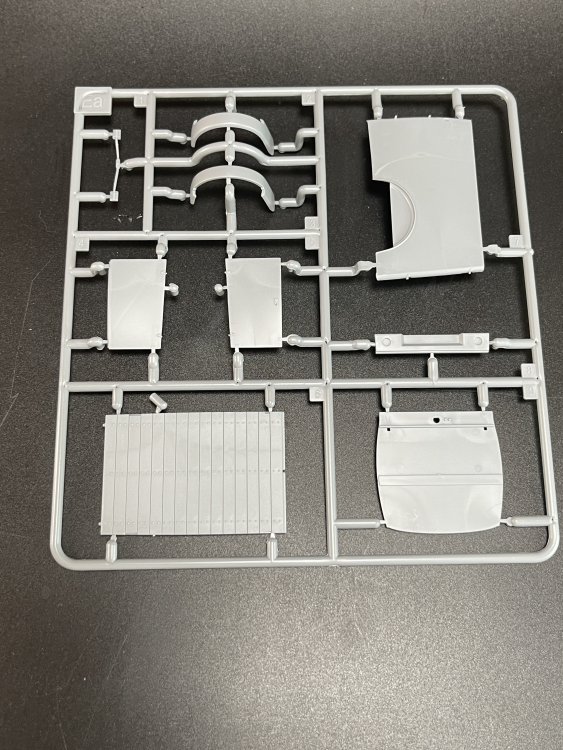
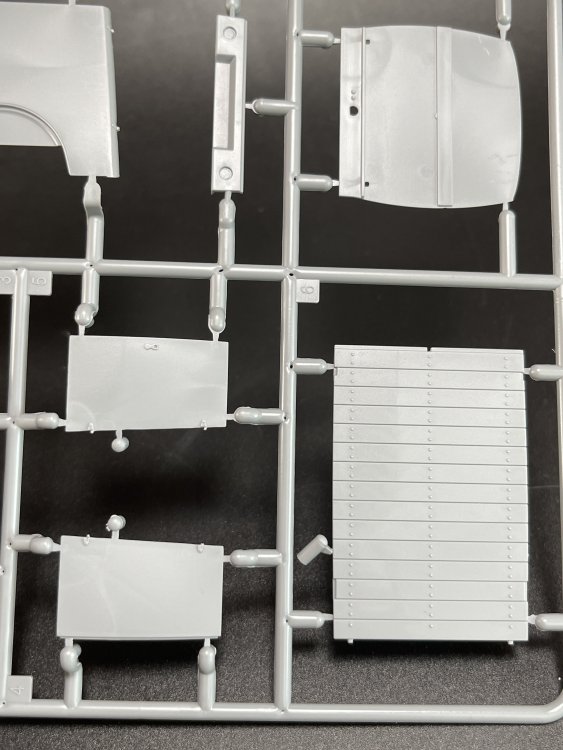
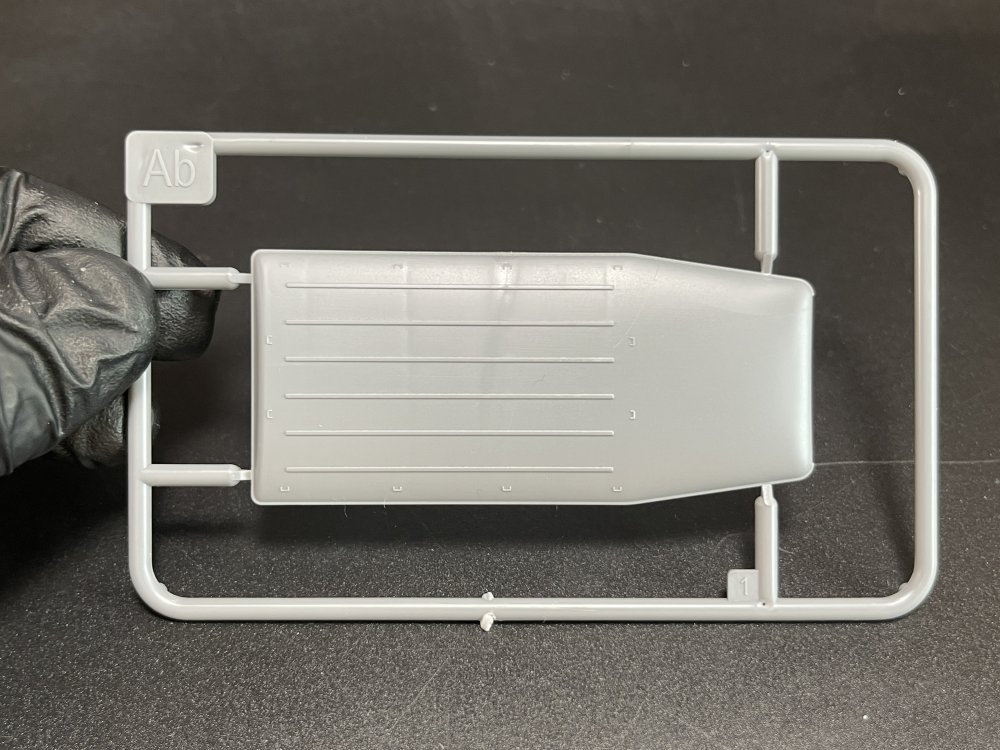
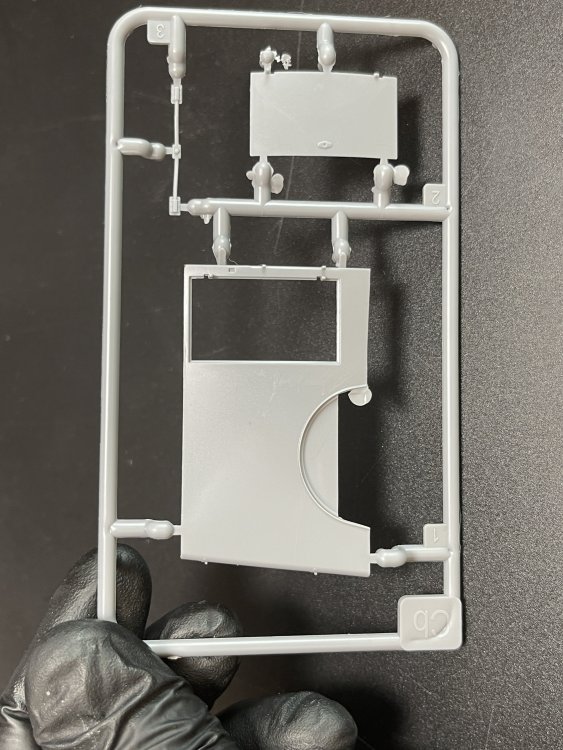
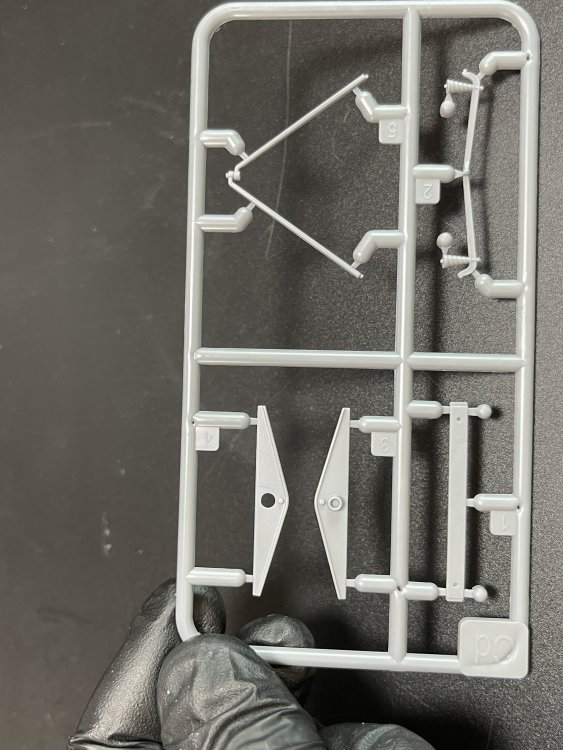
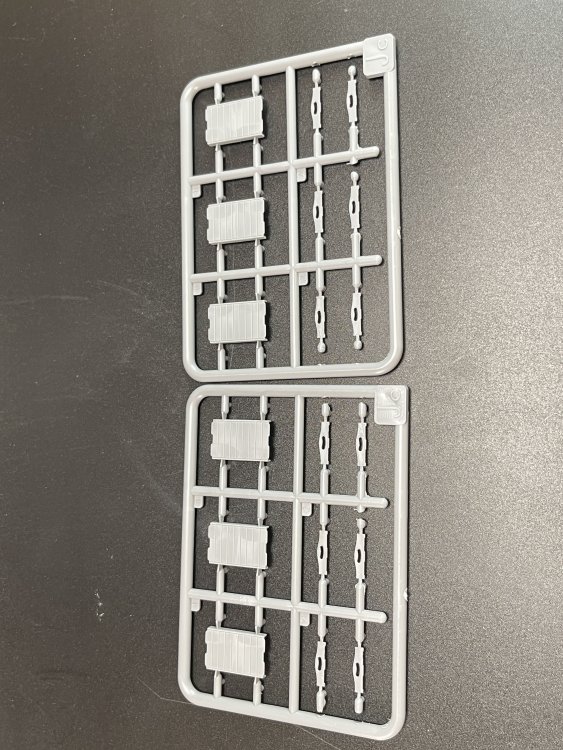
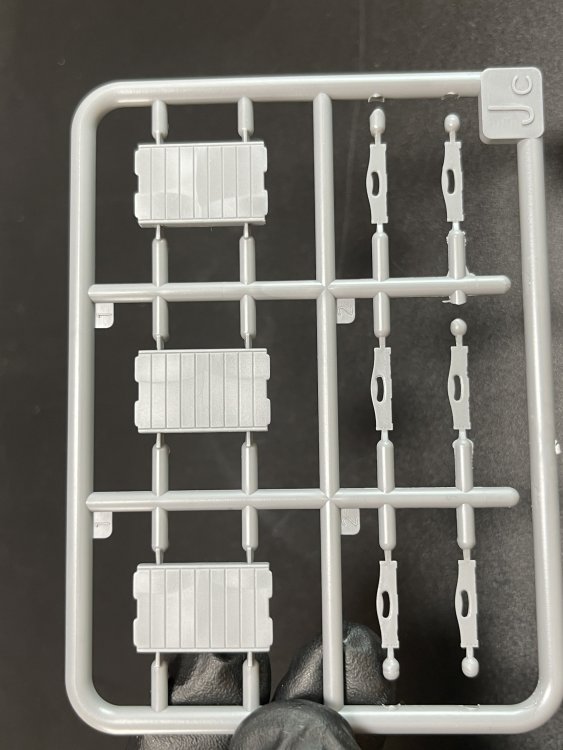
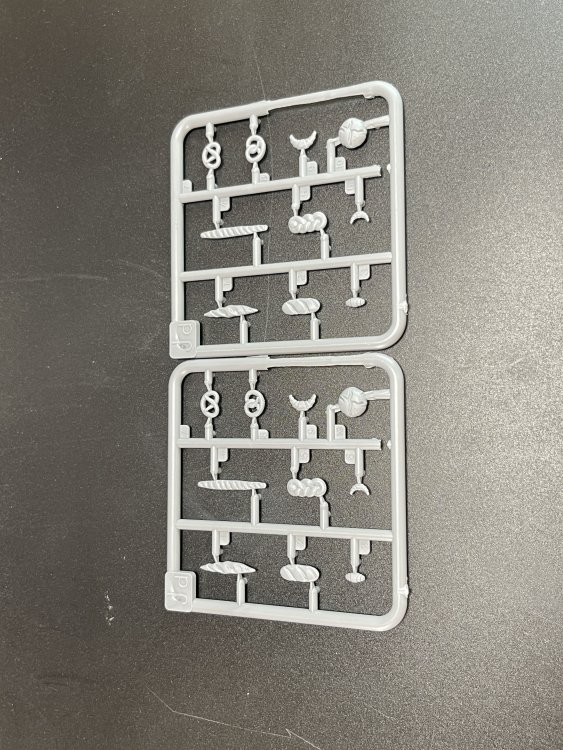
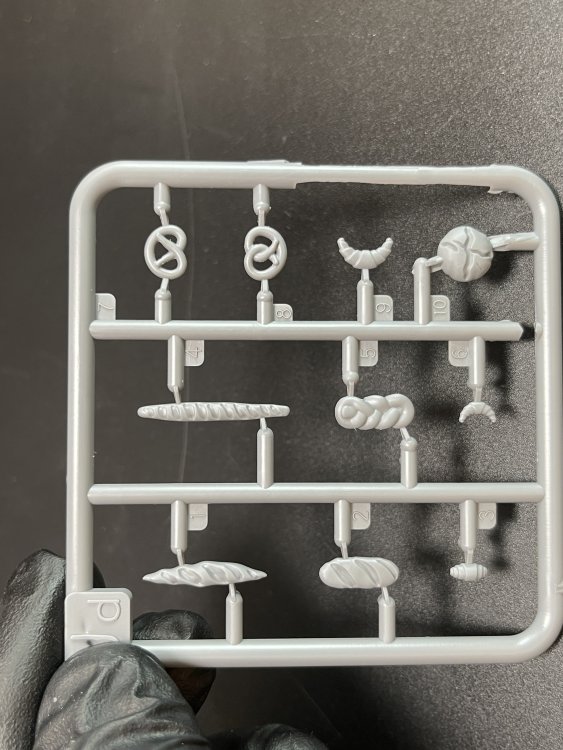
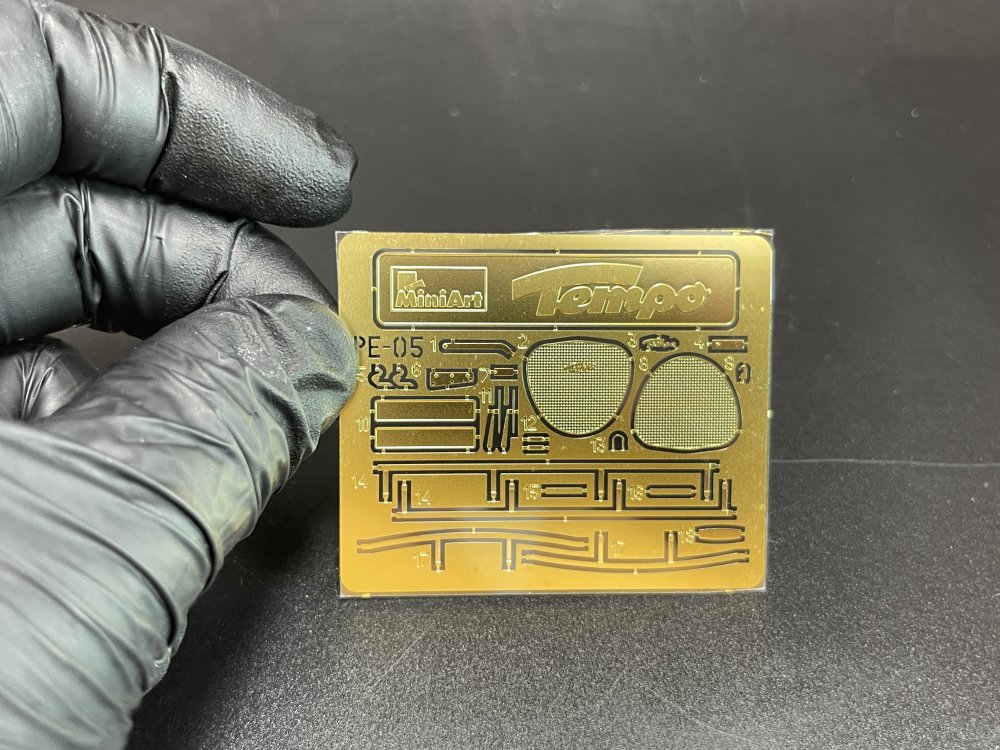
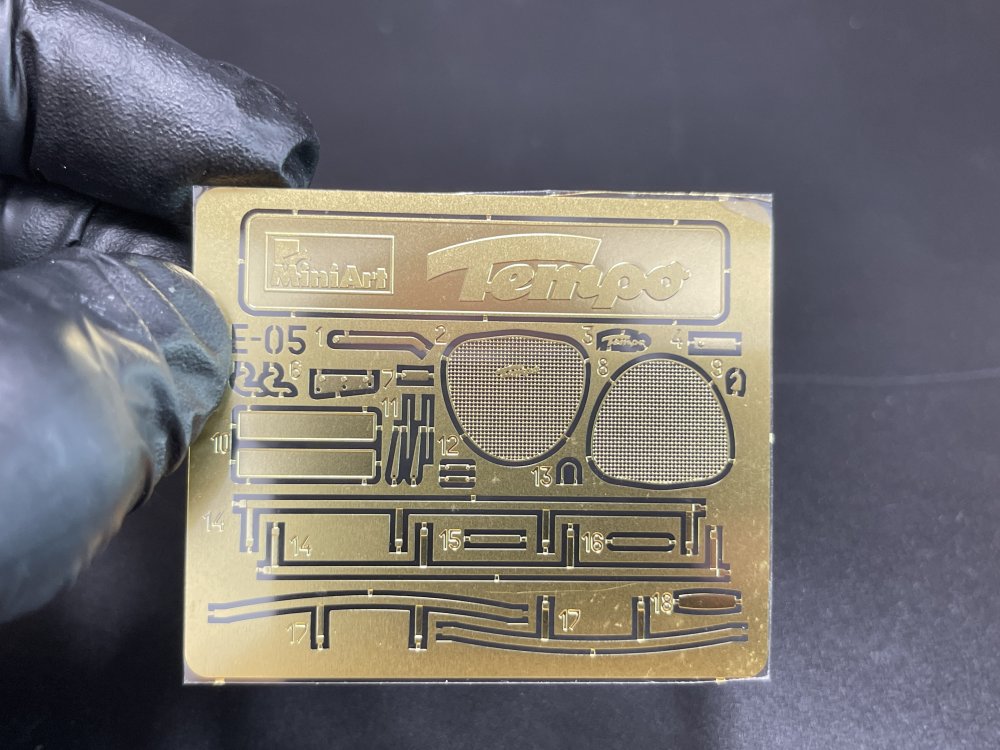
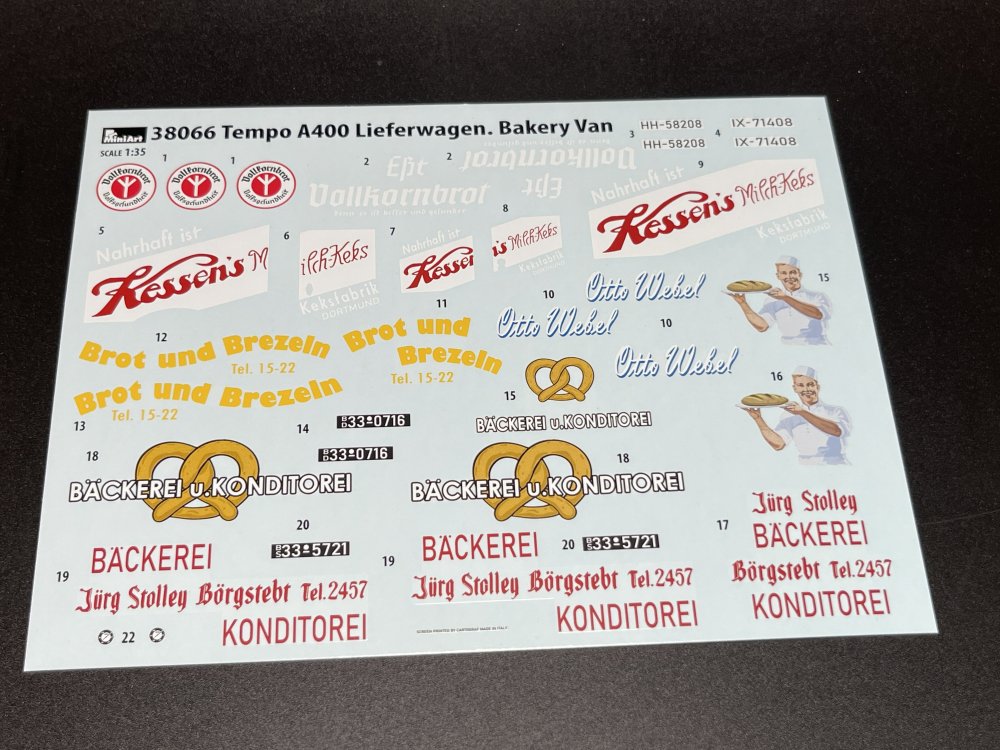
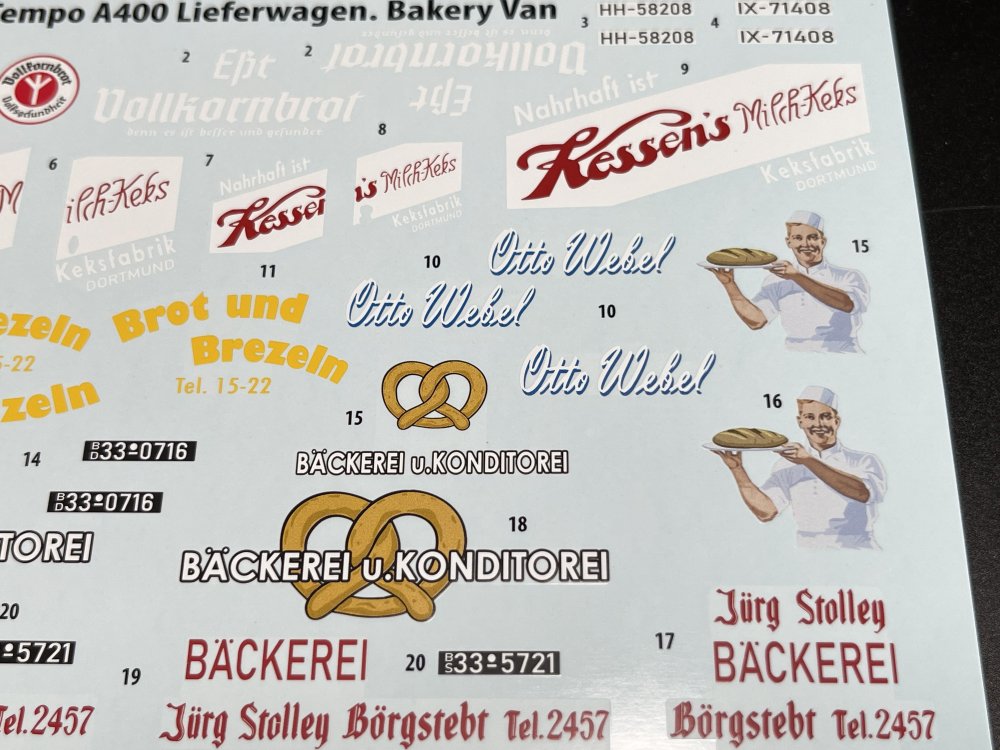
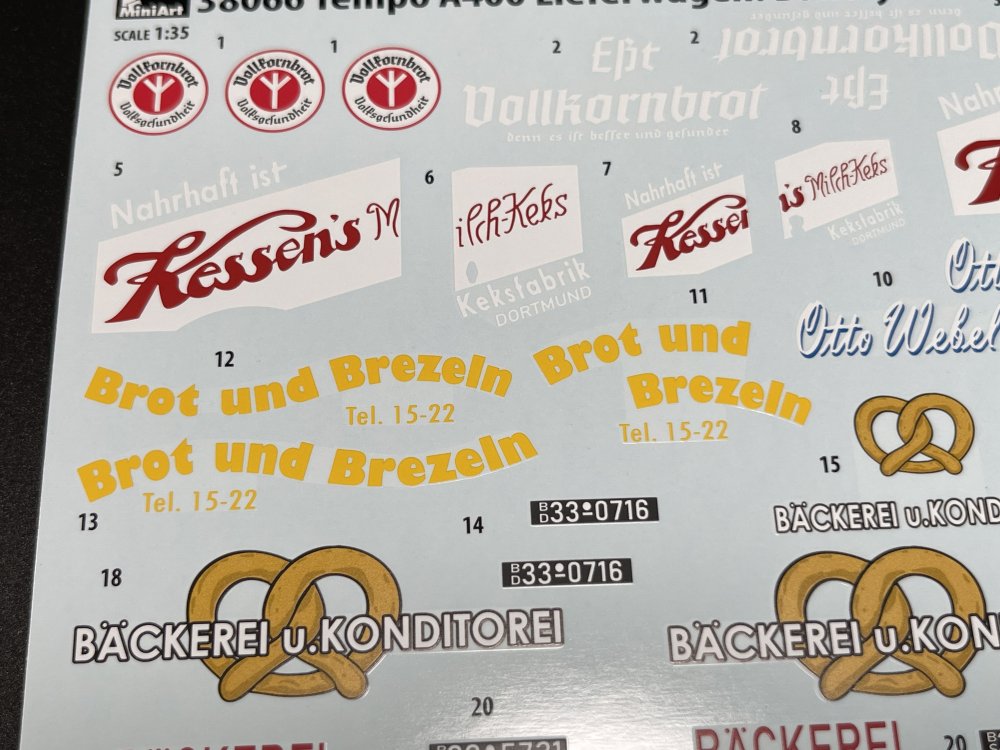
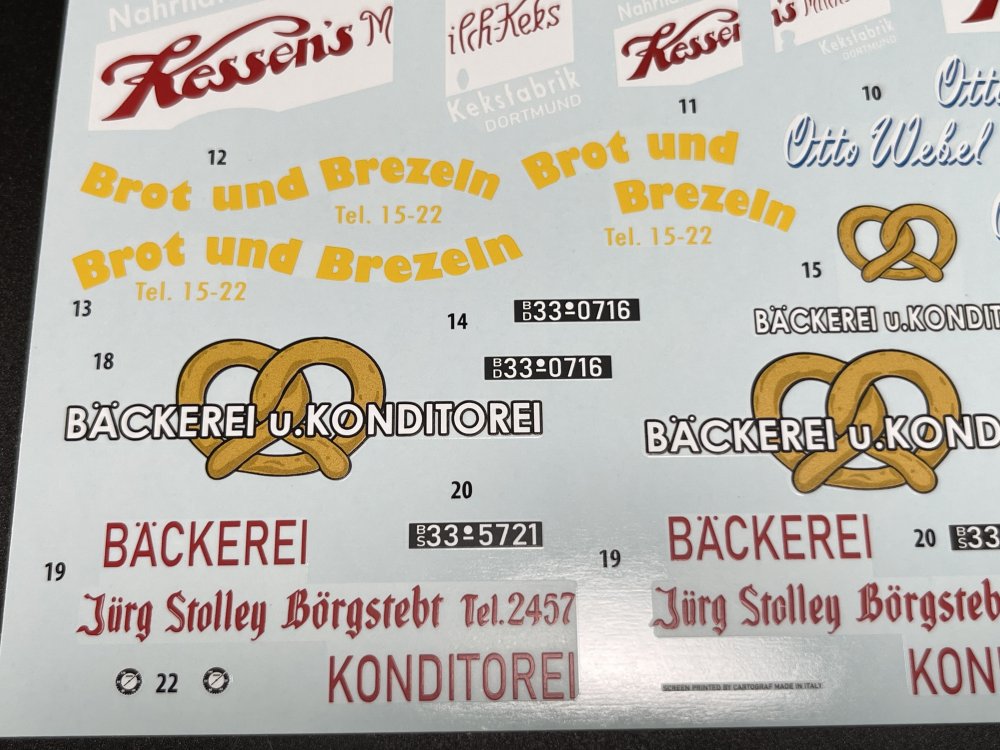
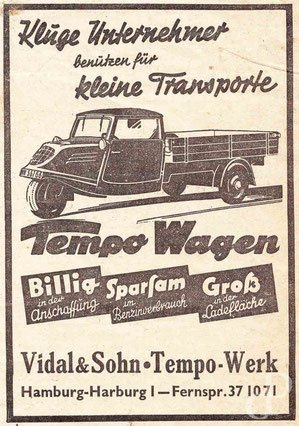
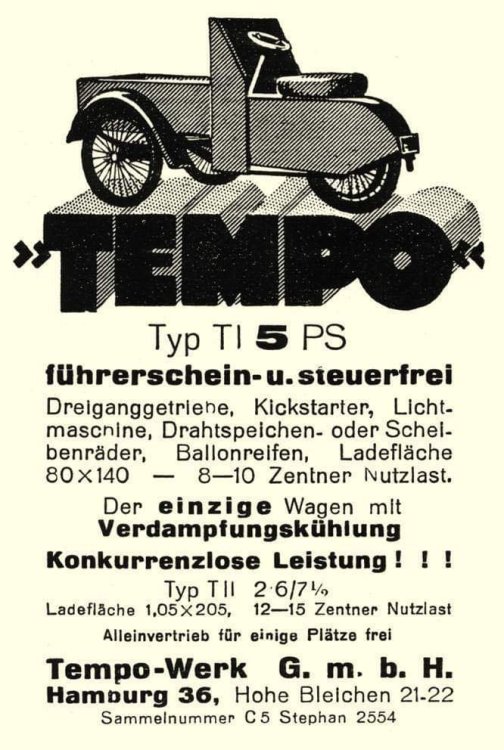
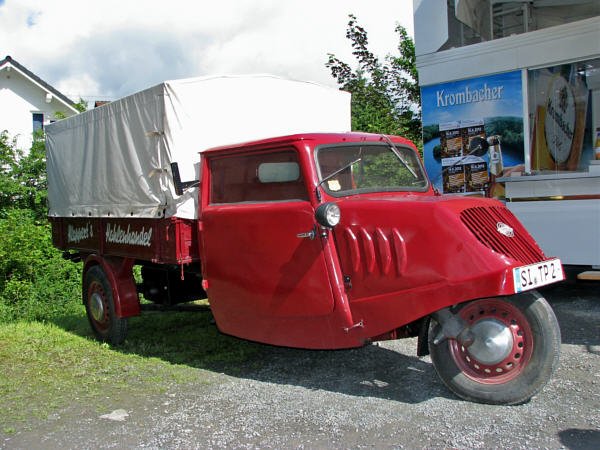
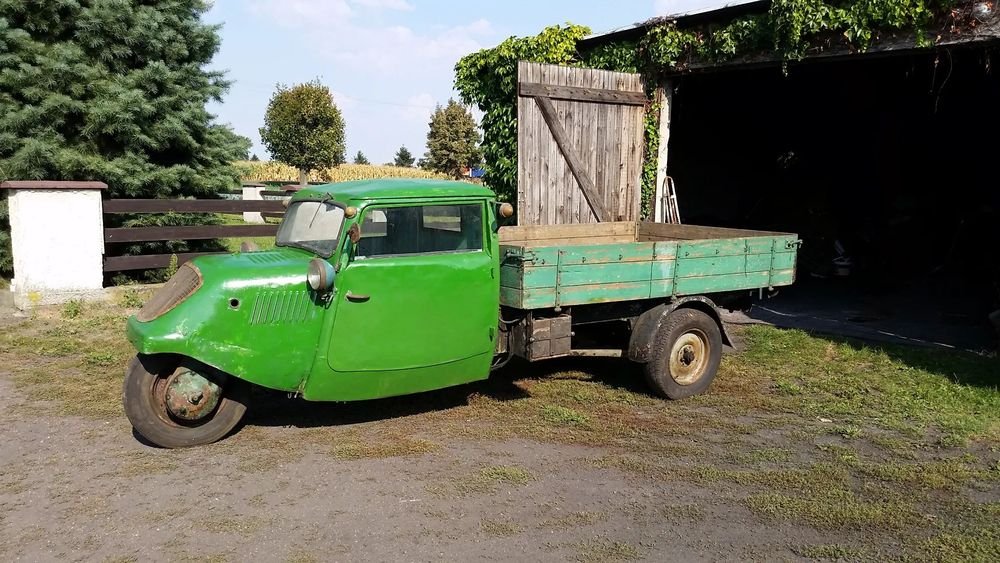
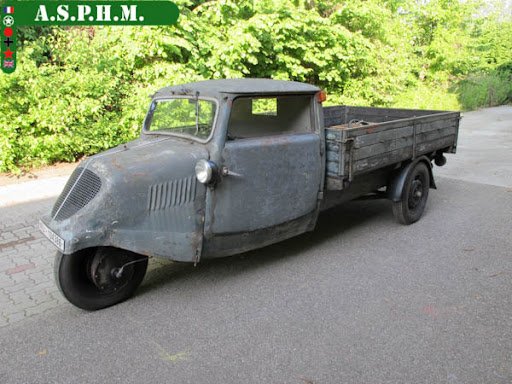
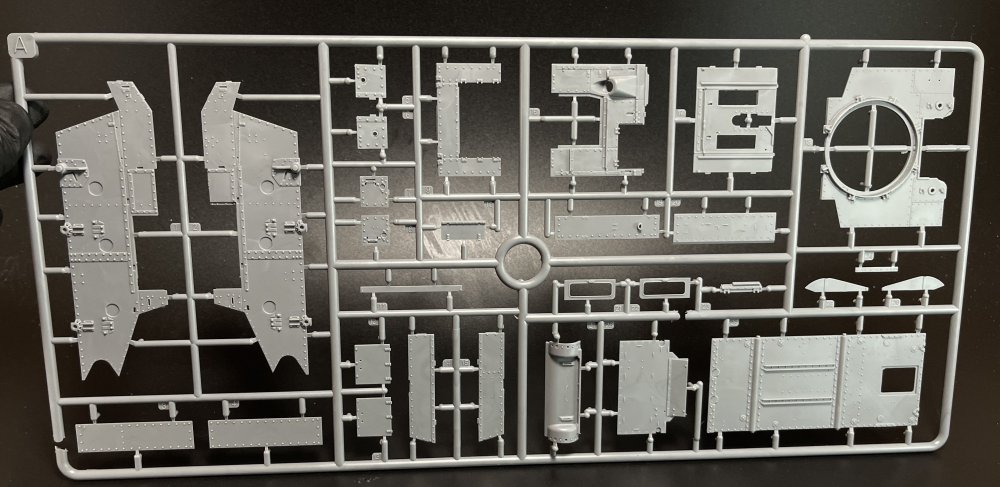
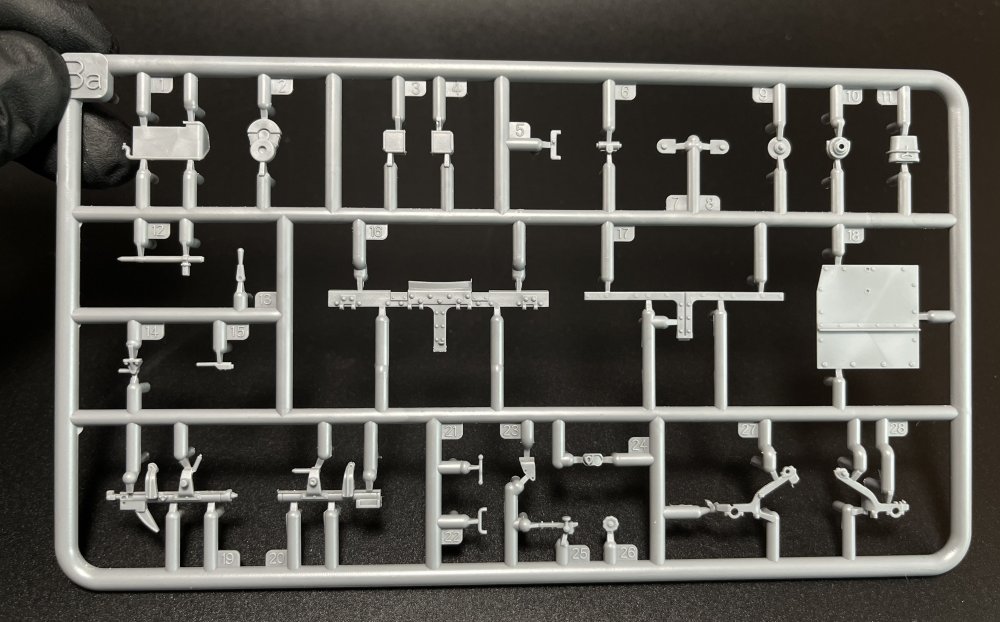
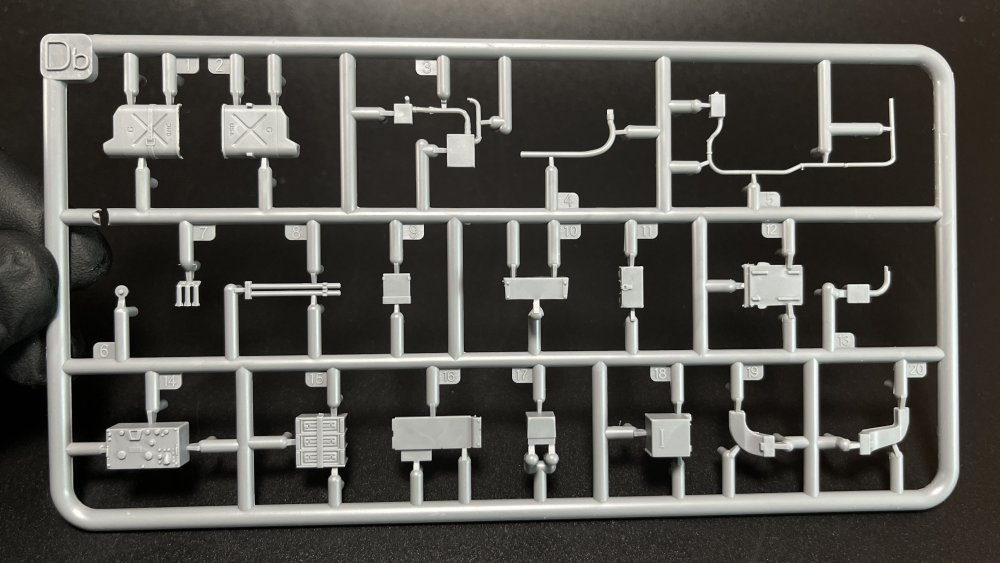
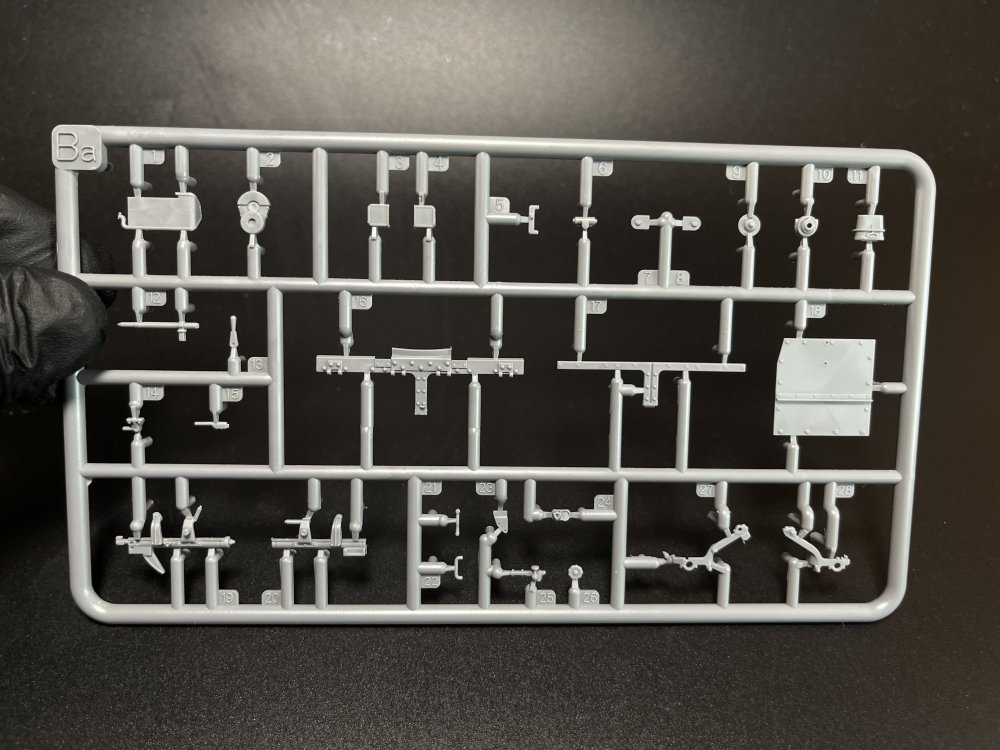
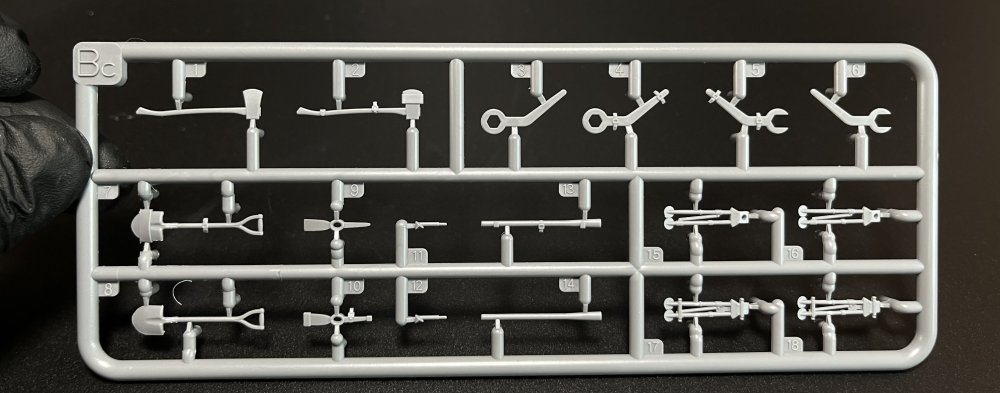
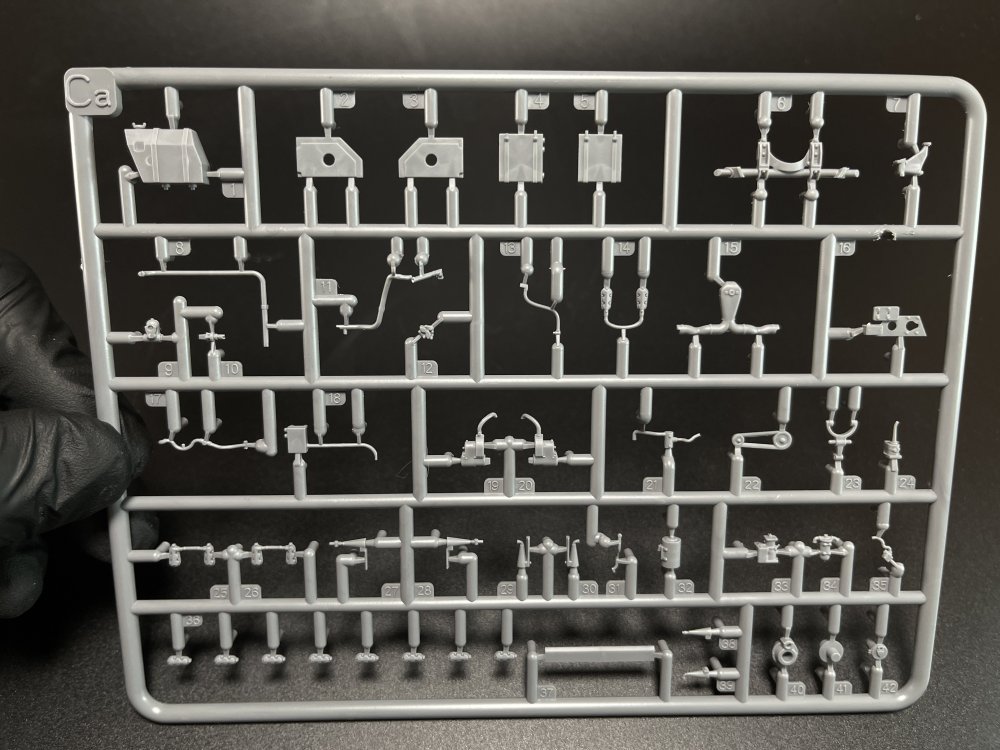
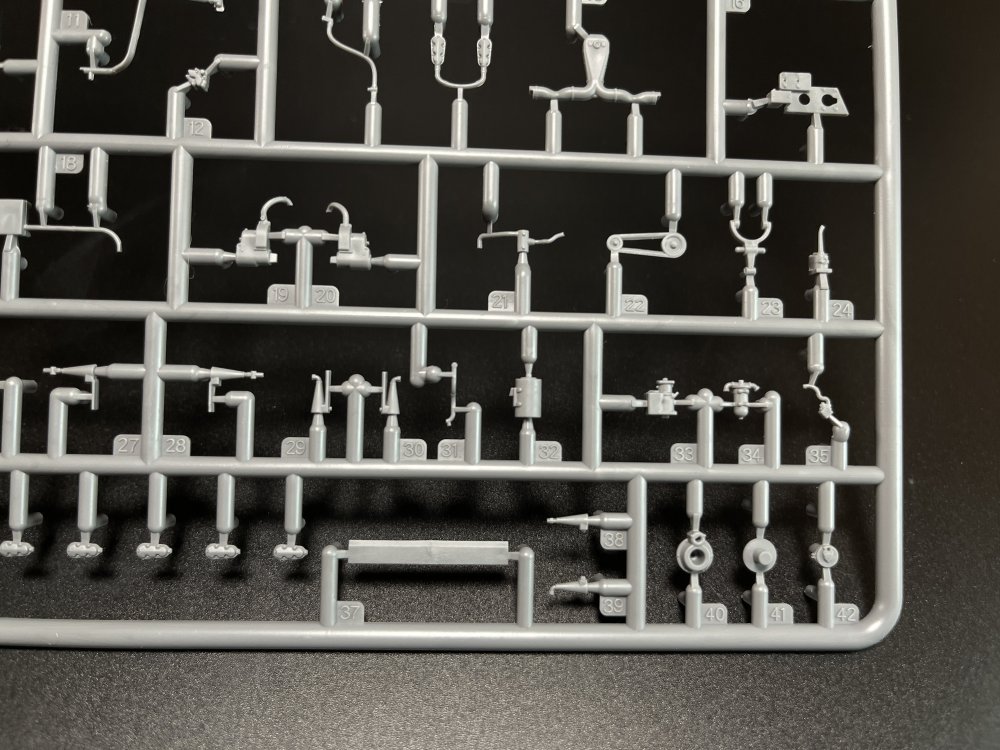
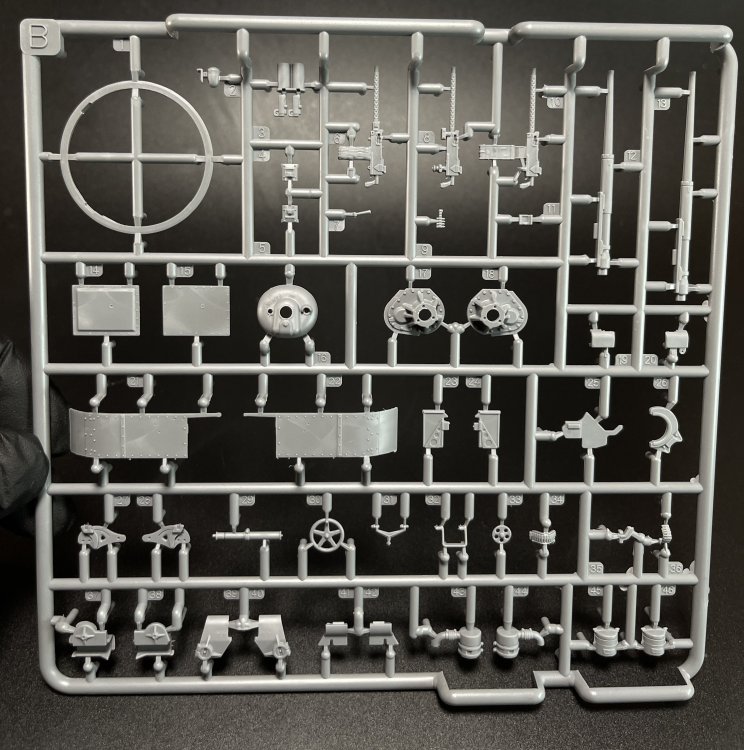
1:35 MiniArt Tempo A400 Lieferwagen Bakery Van Catalogue n.º 38066 Price tag: 33,50€ Today, we are going to get deep in a very awkard vehicle, that I have a soft spot for it. For me it is almost a cartoon vehicle. Long before even to imagine a plastic model Tempo A400, there was only one made in resin. Now, a truly amazing panoplia of Tempo A400 is now available thanks to Miniart. The Tempo A400 was a three-wheeled delivery van developed in Germany in the 1930s. It was widely used for small businesses because of its compact design and ability to navigate narrow streets. “The Vidal & Sohn Tempo-Werk GmbH based in Hamburg was founded in 1928, in order to manufacture delivery vans. Above all, the Tempo tricycles and the post war model Matador are known nowadays. Tempo vehicles were used in the Wehrmacht only very rarely. A use by the location administrations is conceivable. About 1,300 exemplars of the all-terrain vehicle Tempo G 1200 were made from 1936 to 1944. The Wehrmacht did not accept this type. So, only single exemplars of this type were used by the Wehrmacht. 985 exemplars were delivered to Sweden, 20 to Denmark, and further exemplars to Australia, Chile, Iraq and allegedly to Romania and China.” Resource: http://www.kfzderwehrmacht.de/Homepage_english/Motor_Vehicles/Germany/Tempo/tempo.html Check this page for some amazing Tempo pictures https://www.ndr.de/geschichte/chronologie/Tempo-und-seine-Fahrzeuge,tempowerk104.html Now let´s see the model. The first thing that trike me is the size of it… even in 1:35 is a quite small but being a MiniArt kit that doesn’t represent less parts. Checking the spurs, the plastic is a traditional light grey one, non brittle, easy to work with. All the parts have no flash whatsoever and the details are very defined. The sprue A is actually two sprues ( Ac and Ab) and they are the main vehicle bodies with the hood exception that is in one piece, perfect mold, perfect surface details and with no distortion at all. A nice touch is the fact that rear doors can usually be posed open or closed to show off the interior. The B sprues, the 3 wheels and engine, transmission are present. Some parts may be quite small, so precision tools like a sharp hobby knife and tweezers will be necessary. As for the sprue Ba, all the parts for the cabin are present. The interior includes a detailed driver's cab, with seats, steering wheel, and dashboard all finely represented. I hate to repeat myself but the detail on this little model are just amazing. On sprue Cd, front arm suspension and other suspension parts. One the Cb, one cargo panel side. The only explanation that I found for having so many little sprues with very few parts is the innumerous variants made by Miniart and this is probably the best way to do it reducing the productions costs. That`s totally fine by me as long MiniArt keep on business giving to the modelling world their fantastic models. Moving of the clear parts. I always liked Miniart clear parts as they are in fact clear and no distortion. Now, the last but no the least, the best sprues. The bread tray, all six of then And the croissant, several kinds of bread, the cornbread…. Now the PE sheet which add a level of realism, especially for finer details like grilles, hinges. The decals are very well printed with fantastic colours and pigmentation. It´s a very striking decal sheets resulting in several fantastic liveries. With this decal sheet you have 5 markings options since Germany Late 1930`s, two Germany Late 40`s, two Germany early 1940`s and one Germany 1948-1956. The instructions are quite easy to understand adn to follow with some good color indication. Conclusion: The ultimate model kit of the iconic Tempo A400 with fine attention to detail, from the interior to the exterior. The PE parts add extra realism and fine details The options given are very striking and will made this model to stand out being perfect for dioramas as its compact size and historical context make it a great addition to vintage or war-time street scenes. However this is not beginner model kit as the very small parts, sub-assmblies and PE makes this model perfect for the intermediate modeler. The MiniArt Tempo A400 Lieferwagen Bakery Van (38066) is an exceptional kit for modelers who enjoy a challenge and appreciate the historical significance of early 20th-century vehicles. Do yourself a favour and get one here. Thanks to Miniart for producing such a little jewel.


-
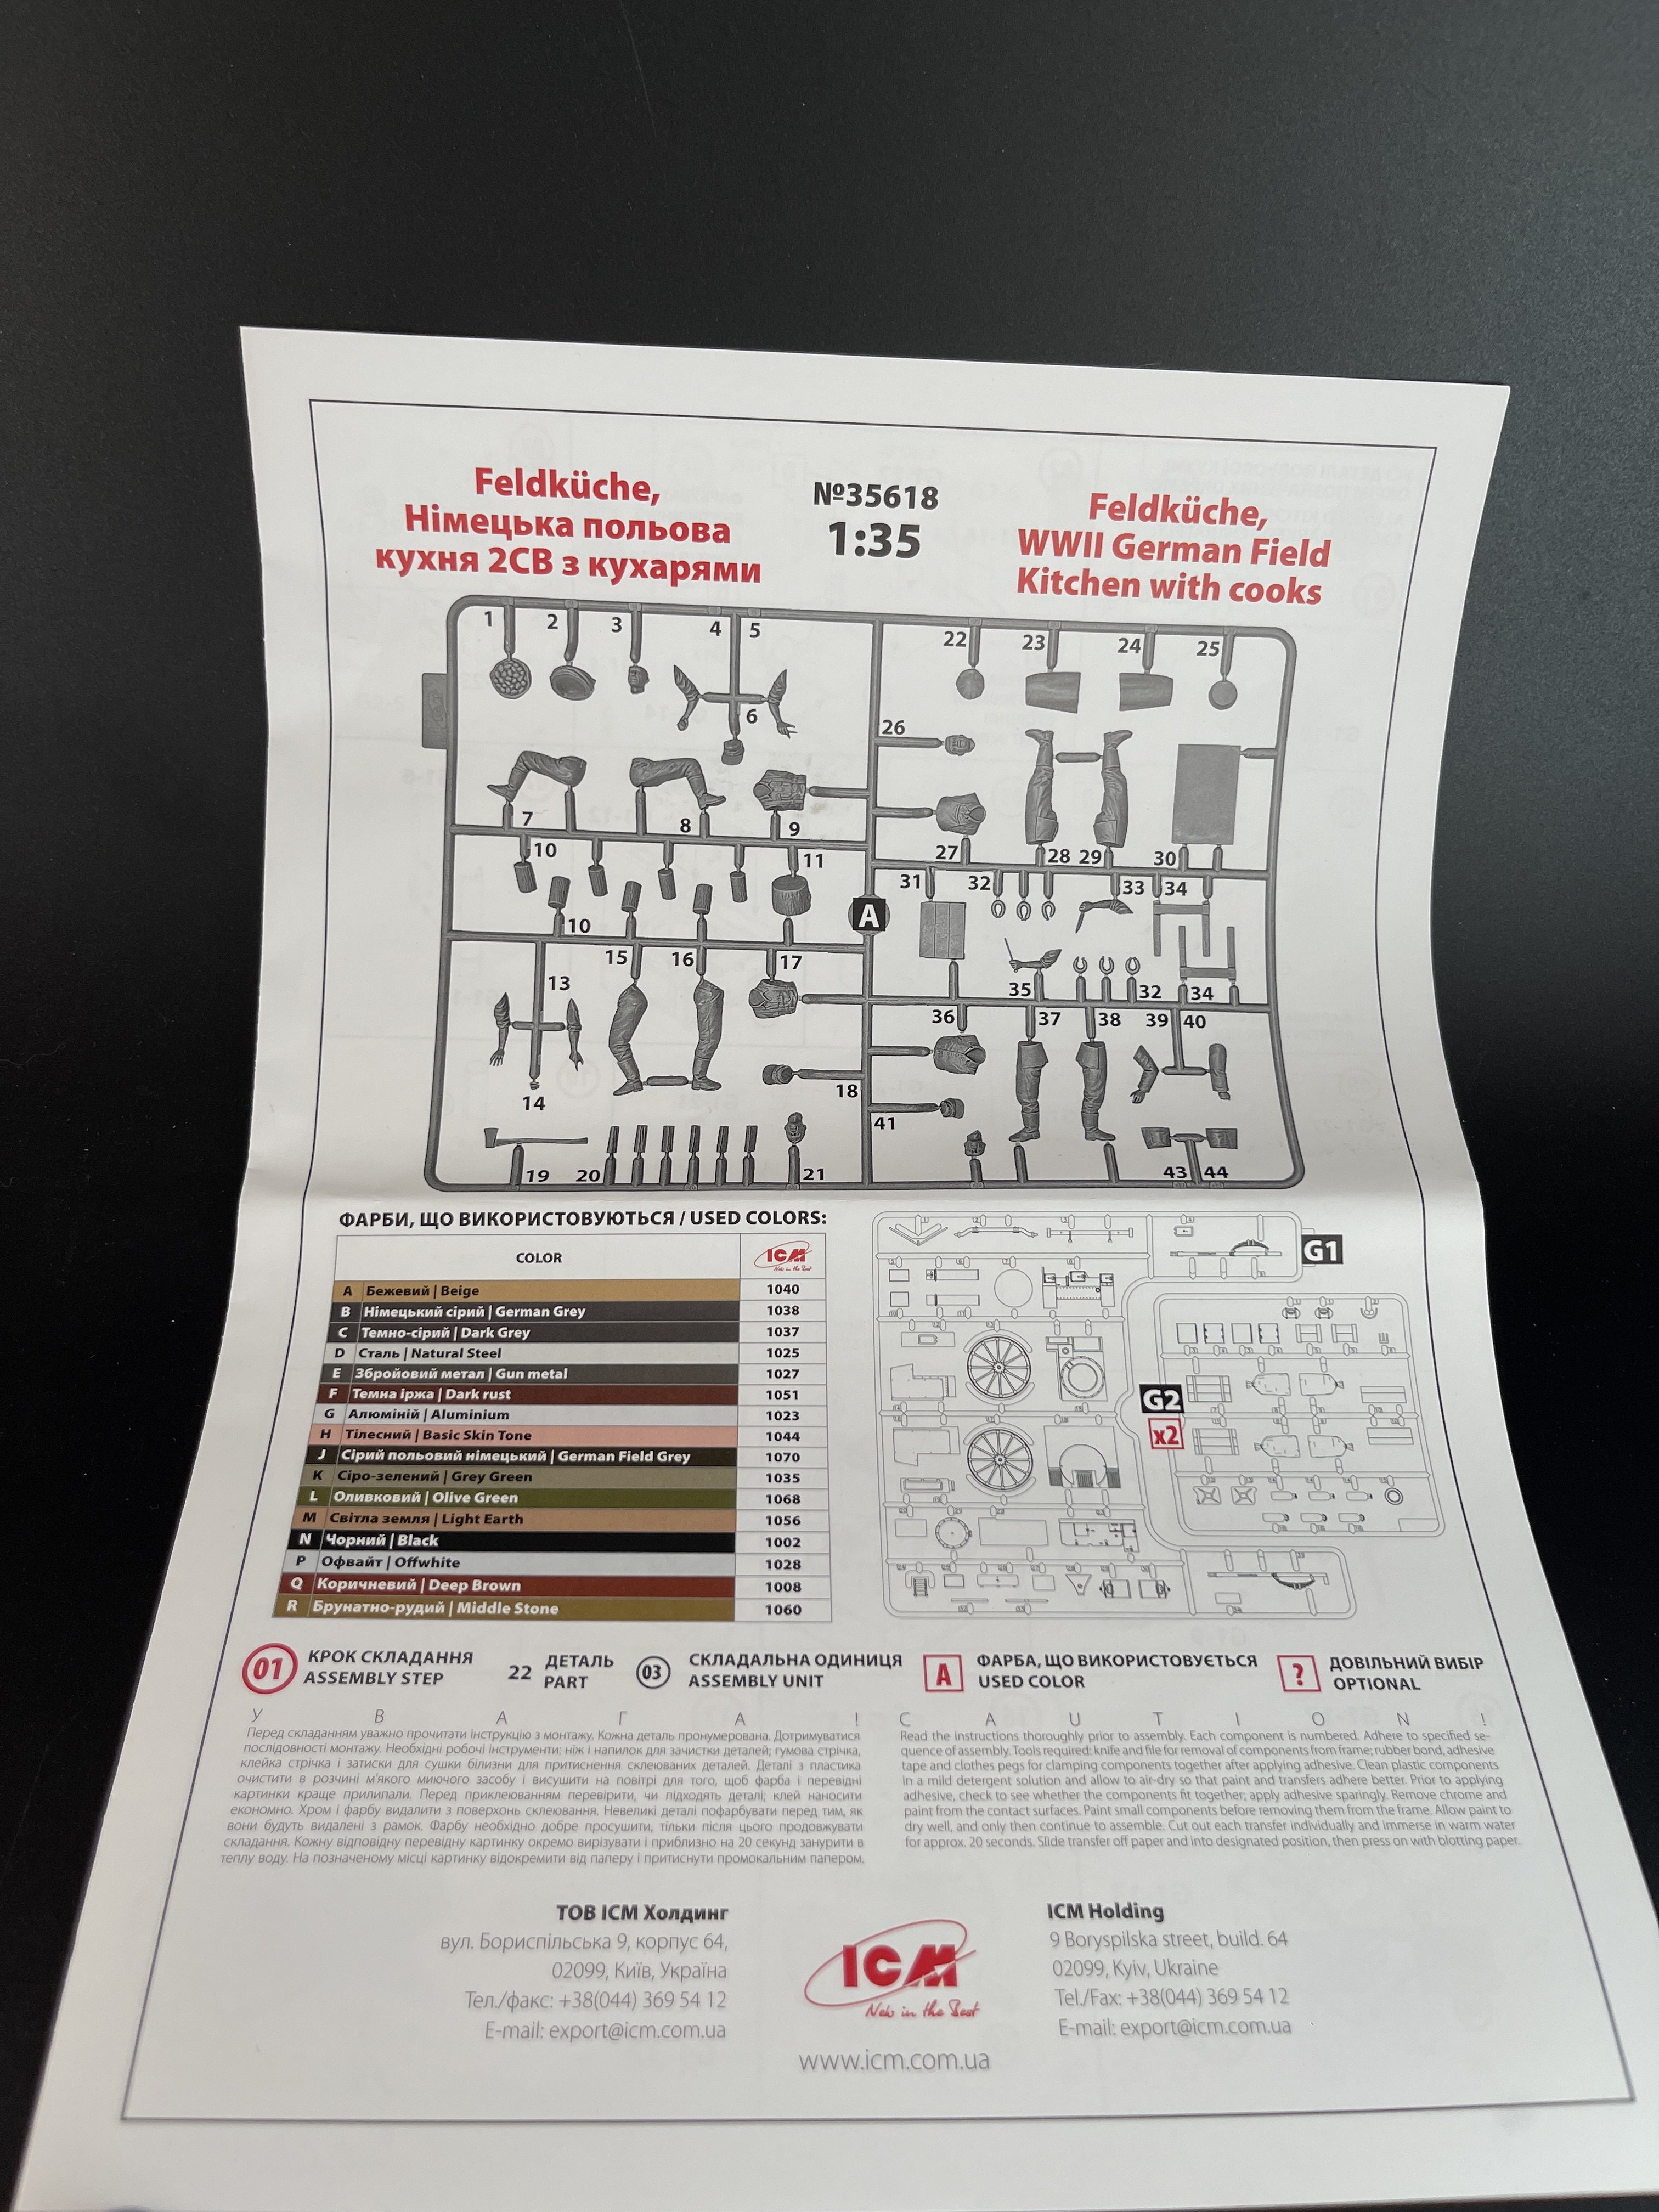
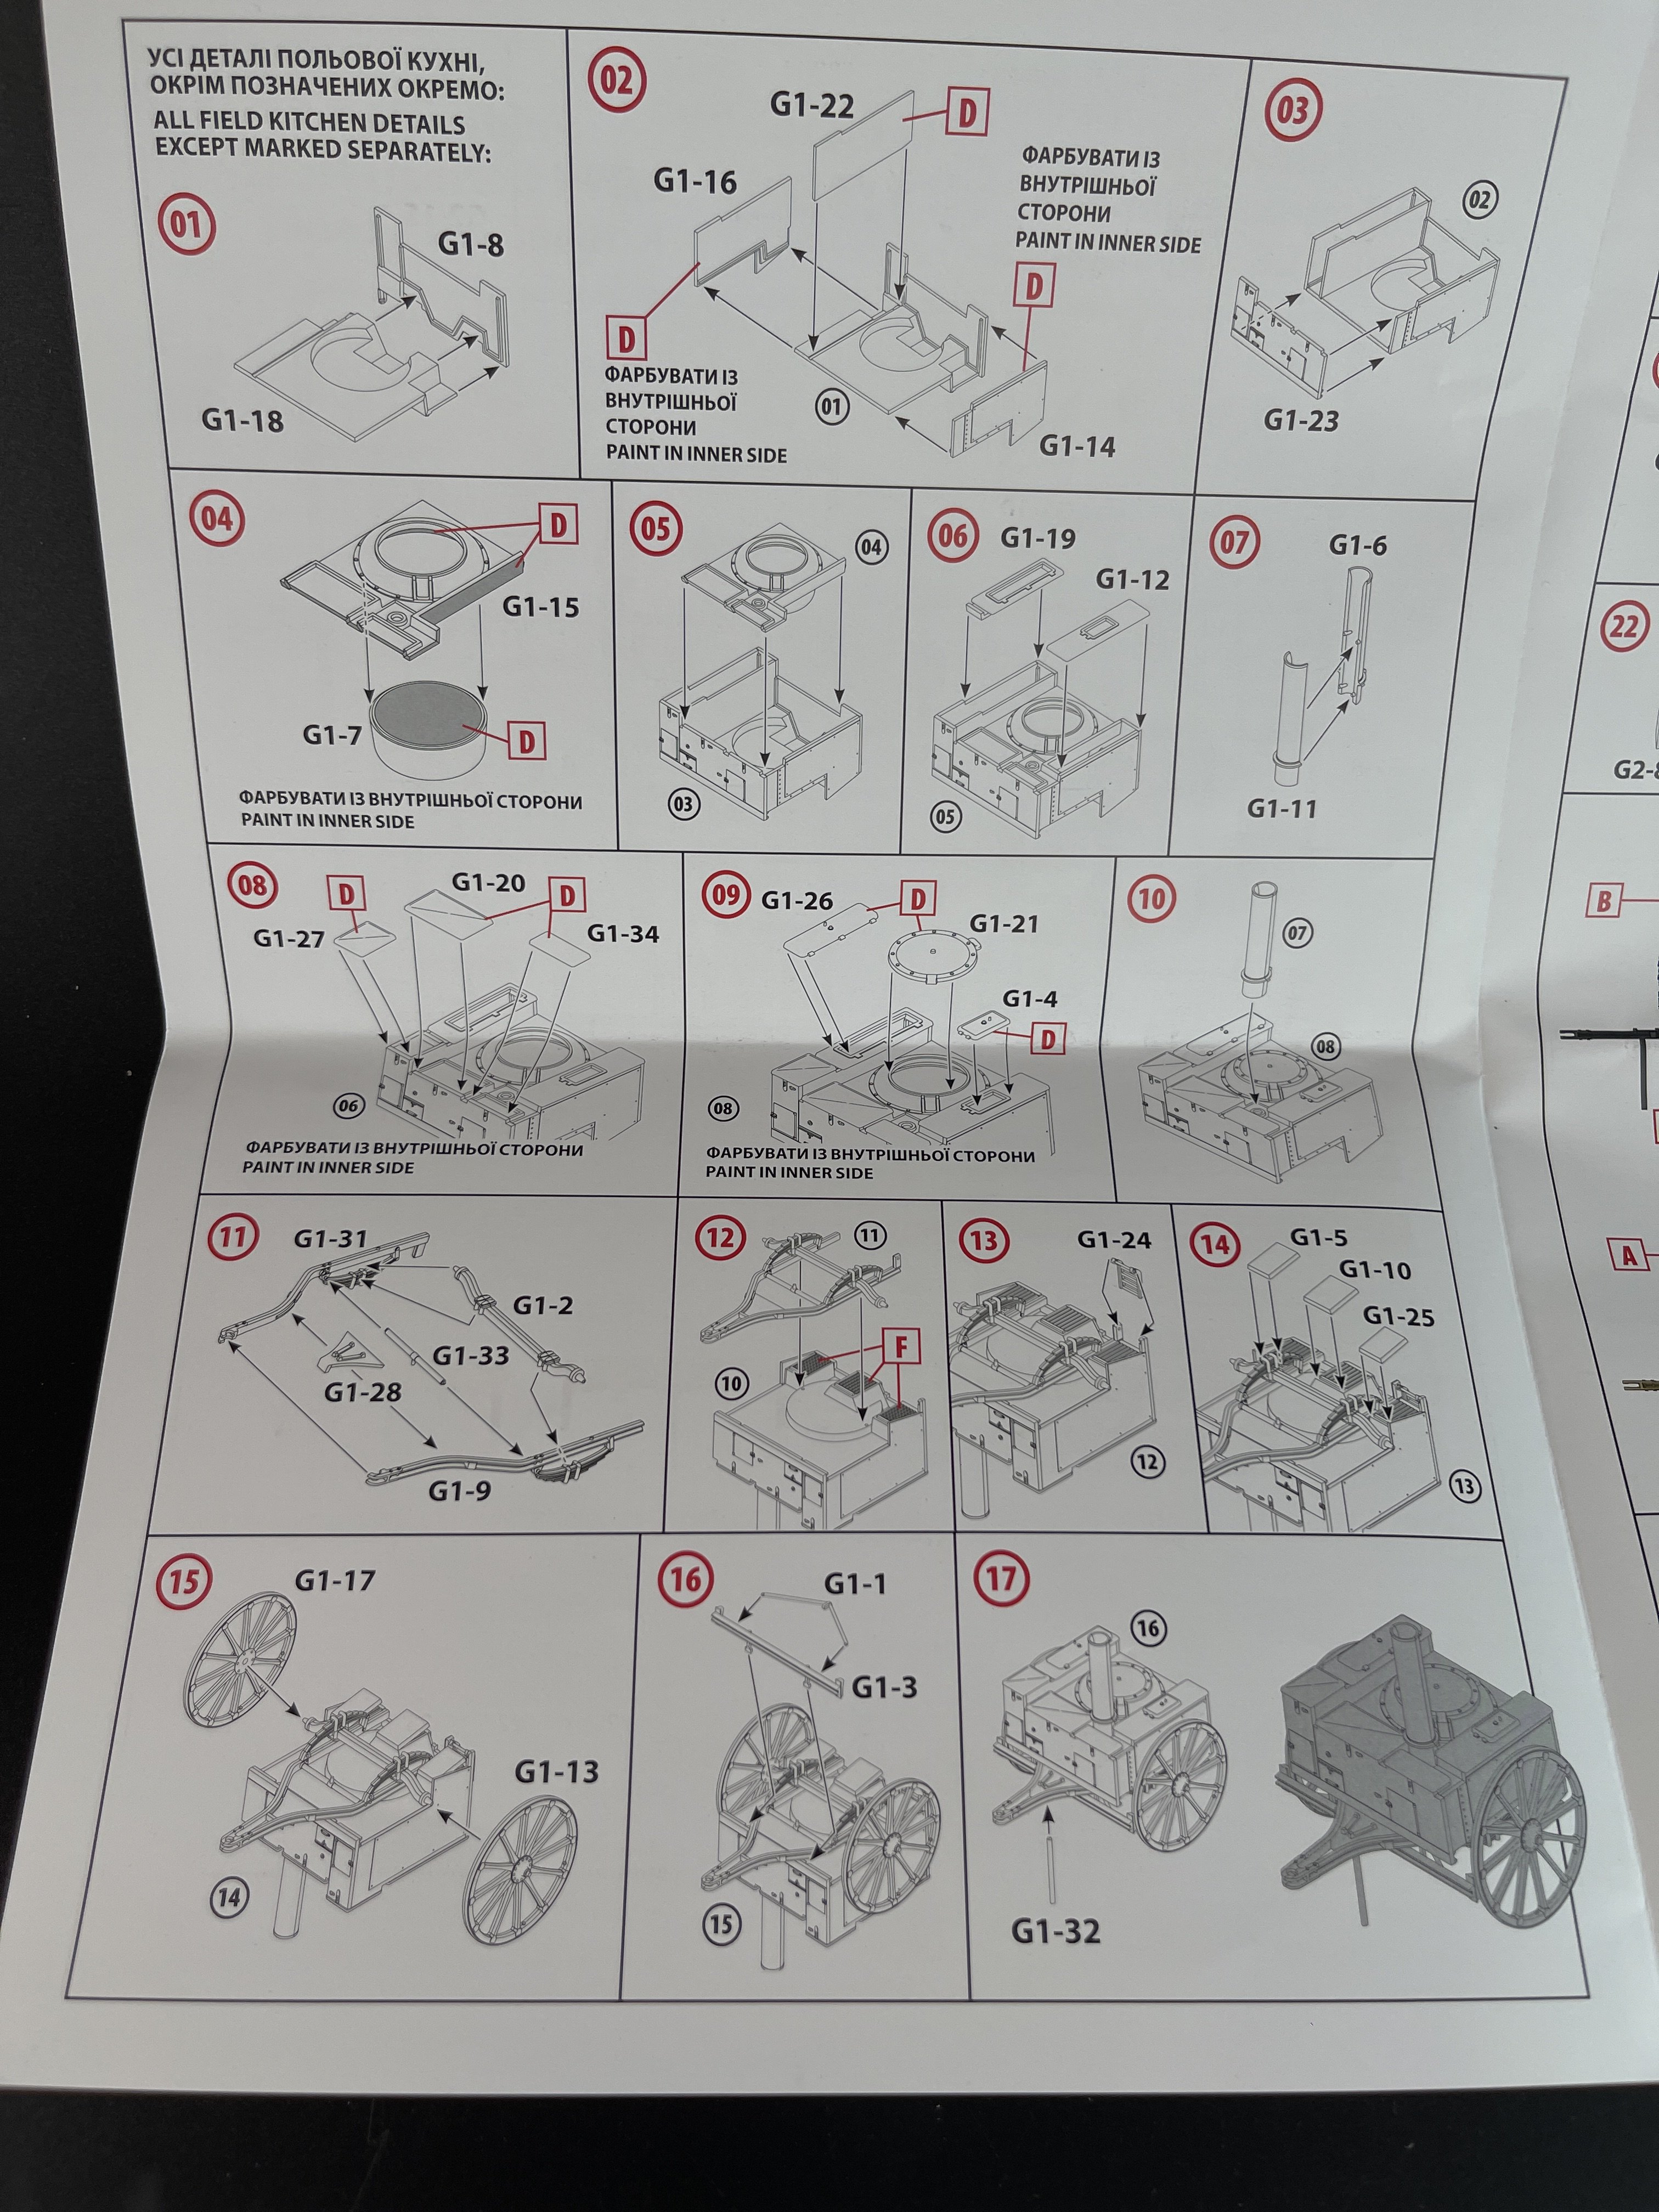
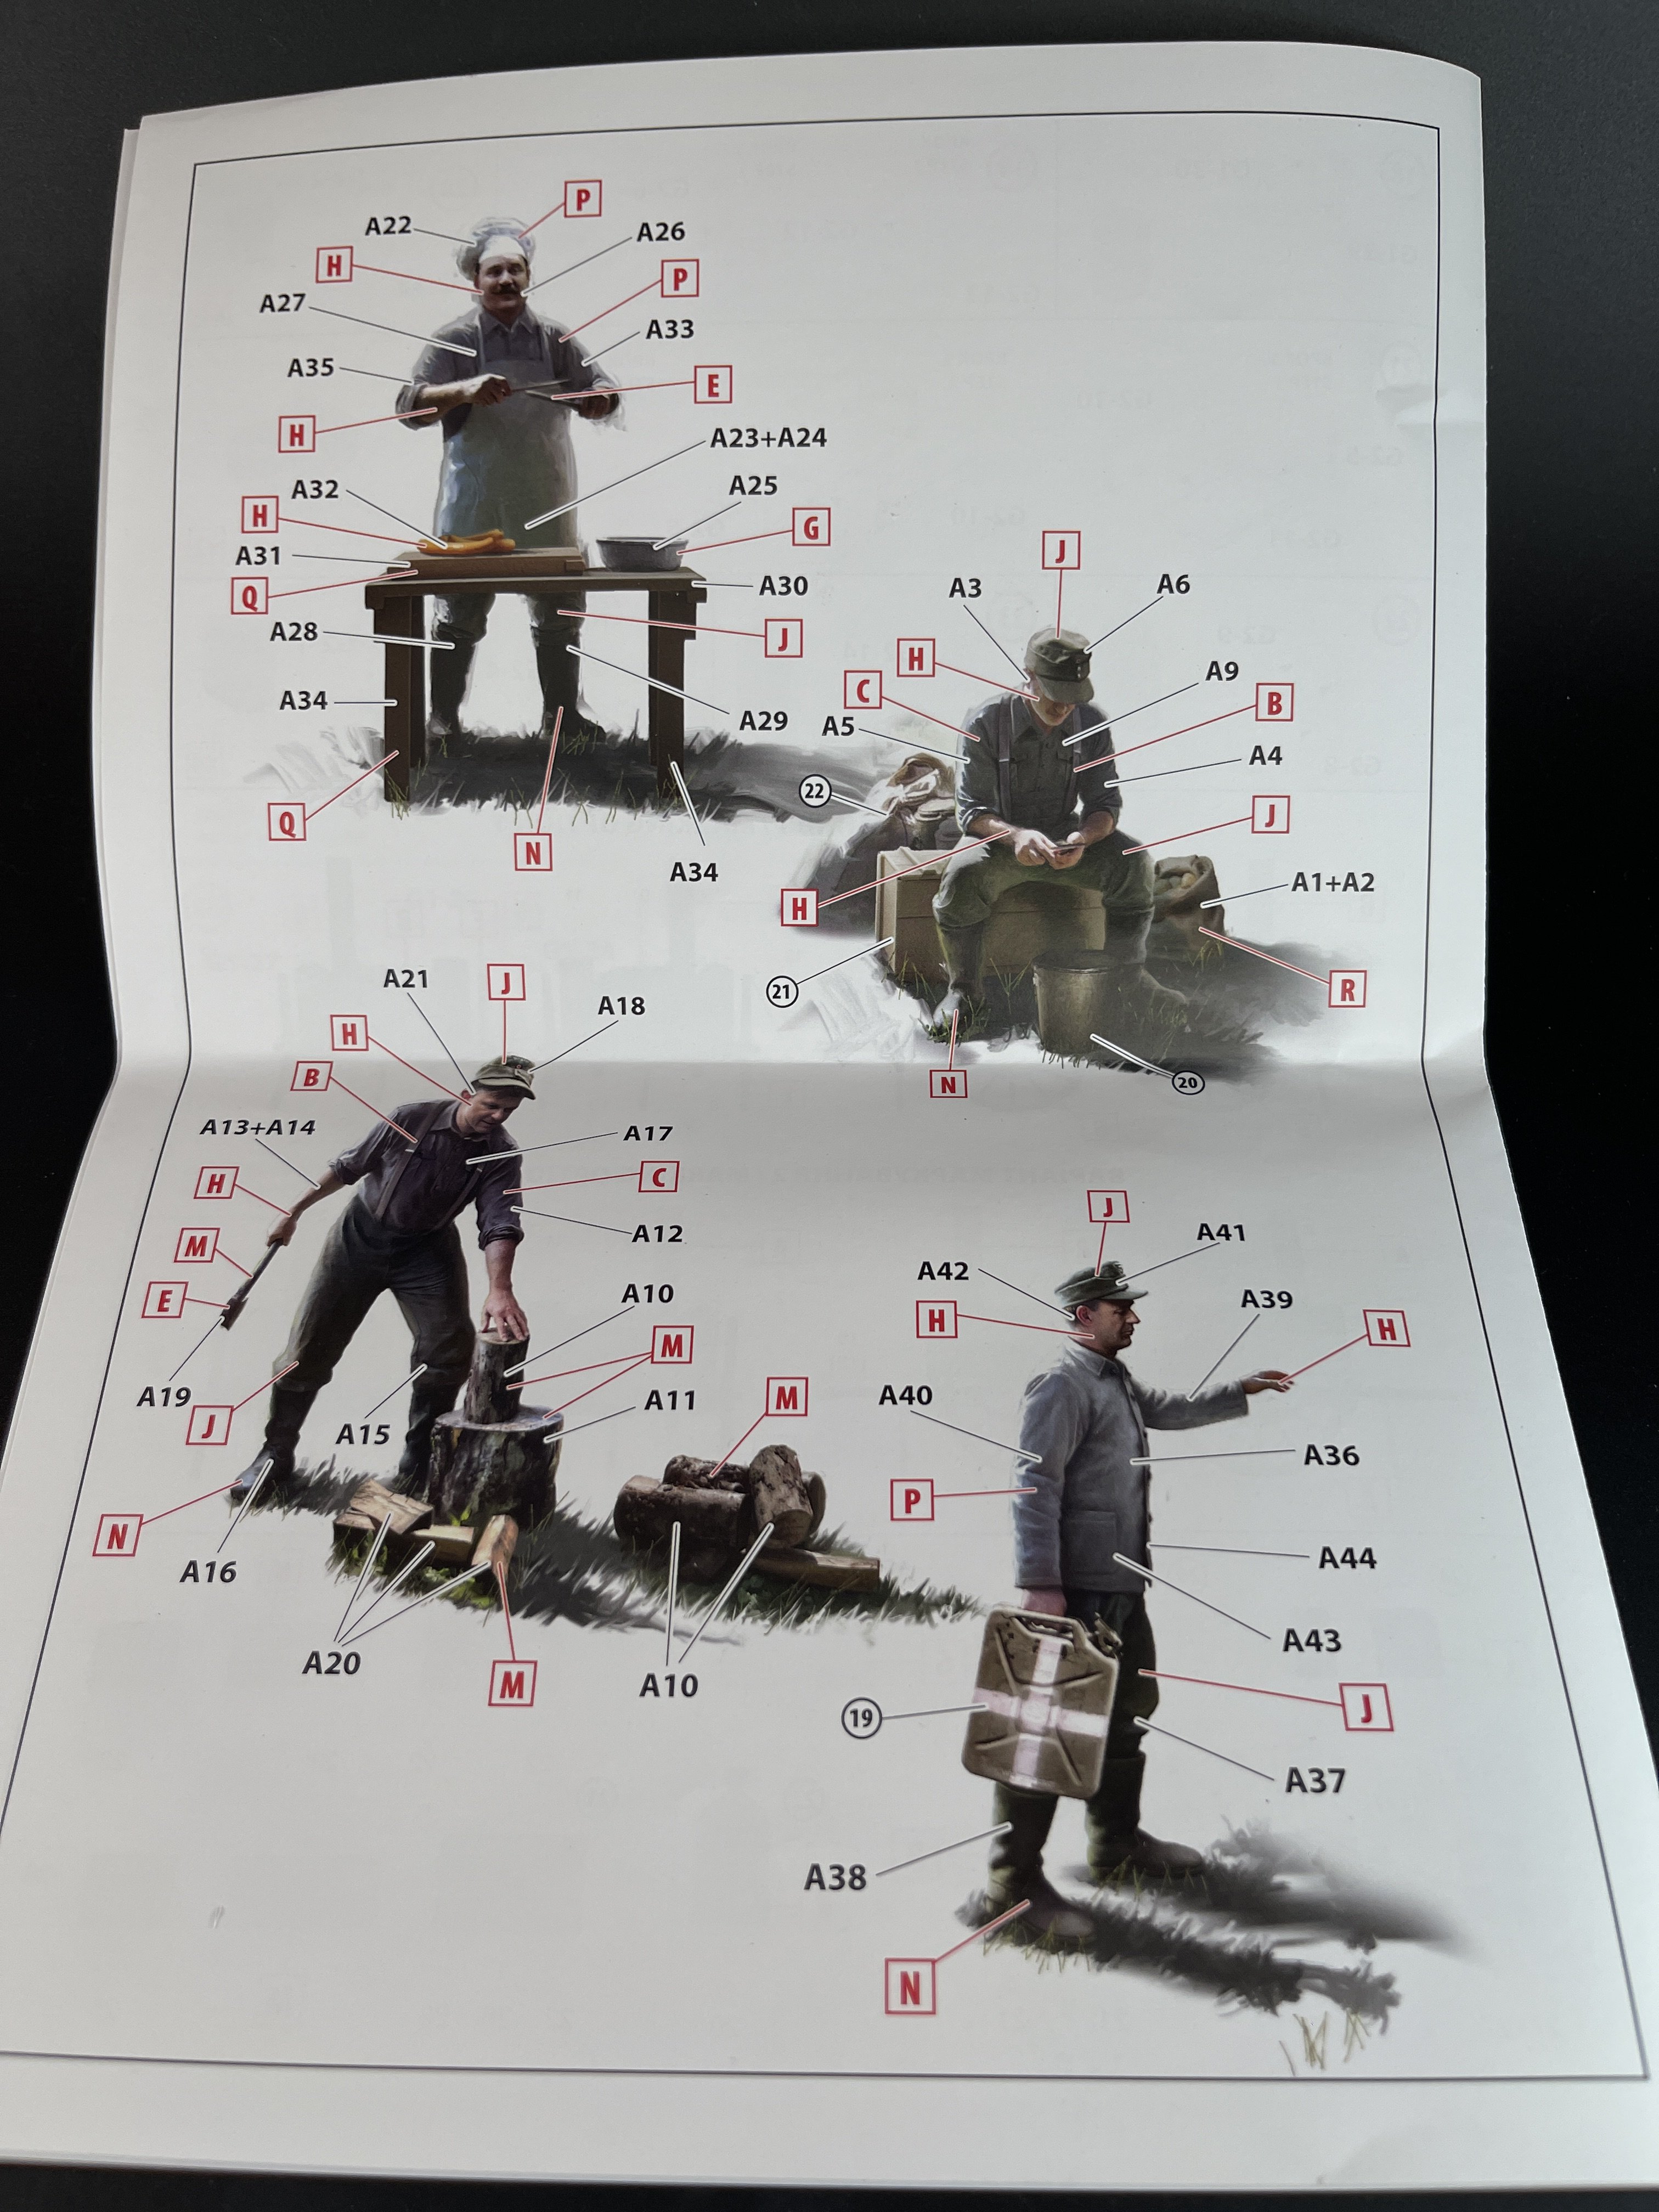
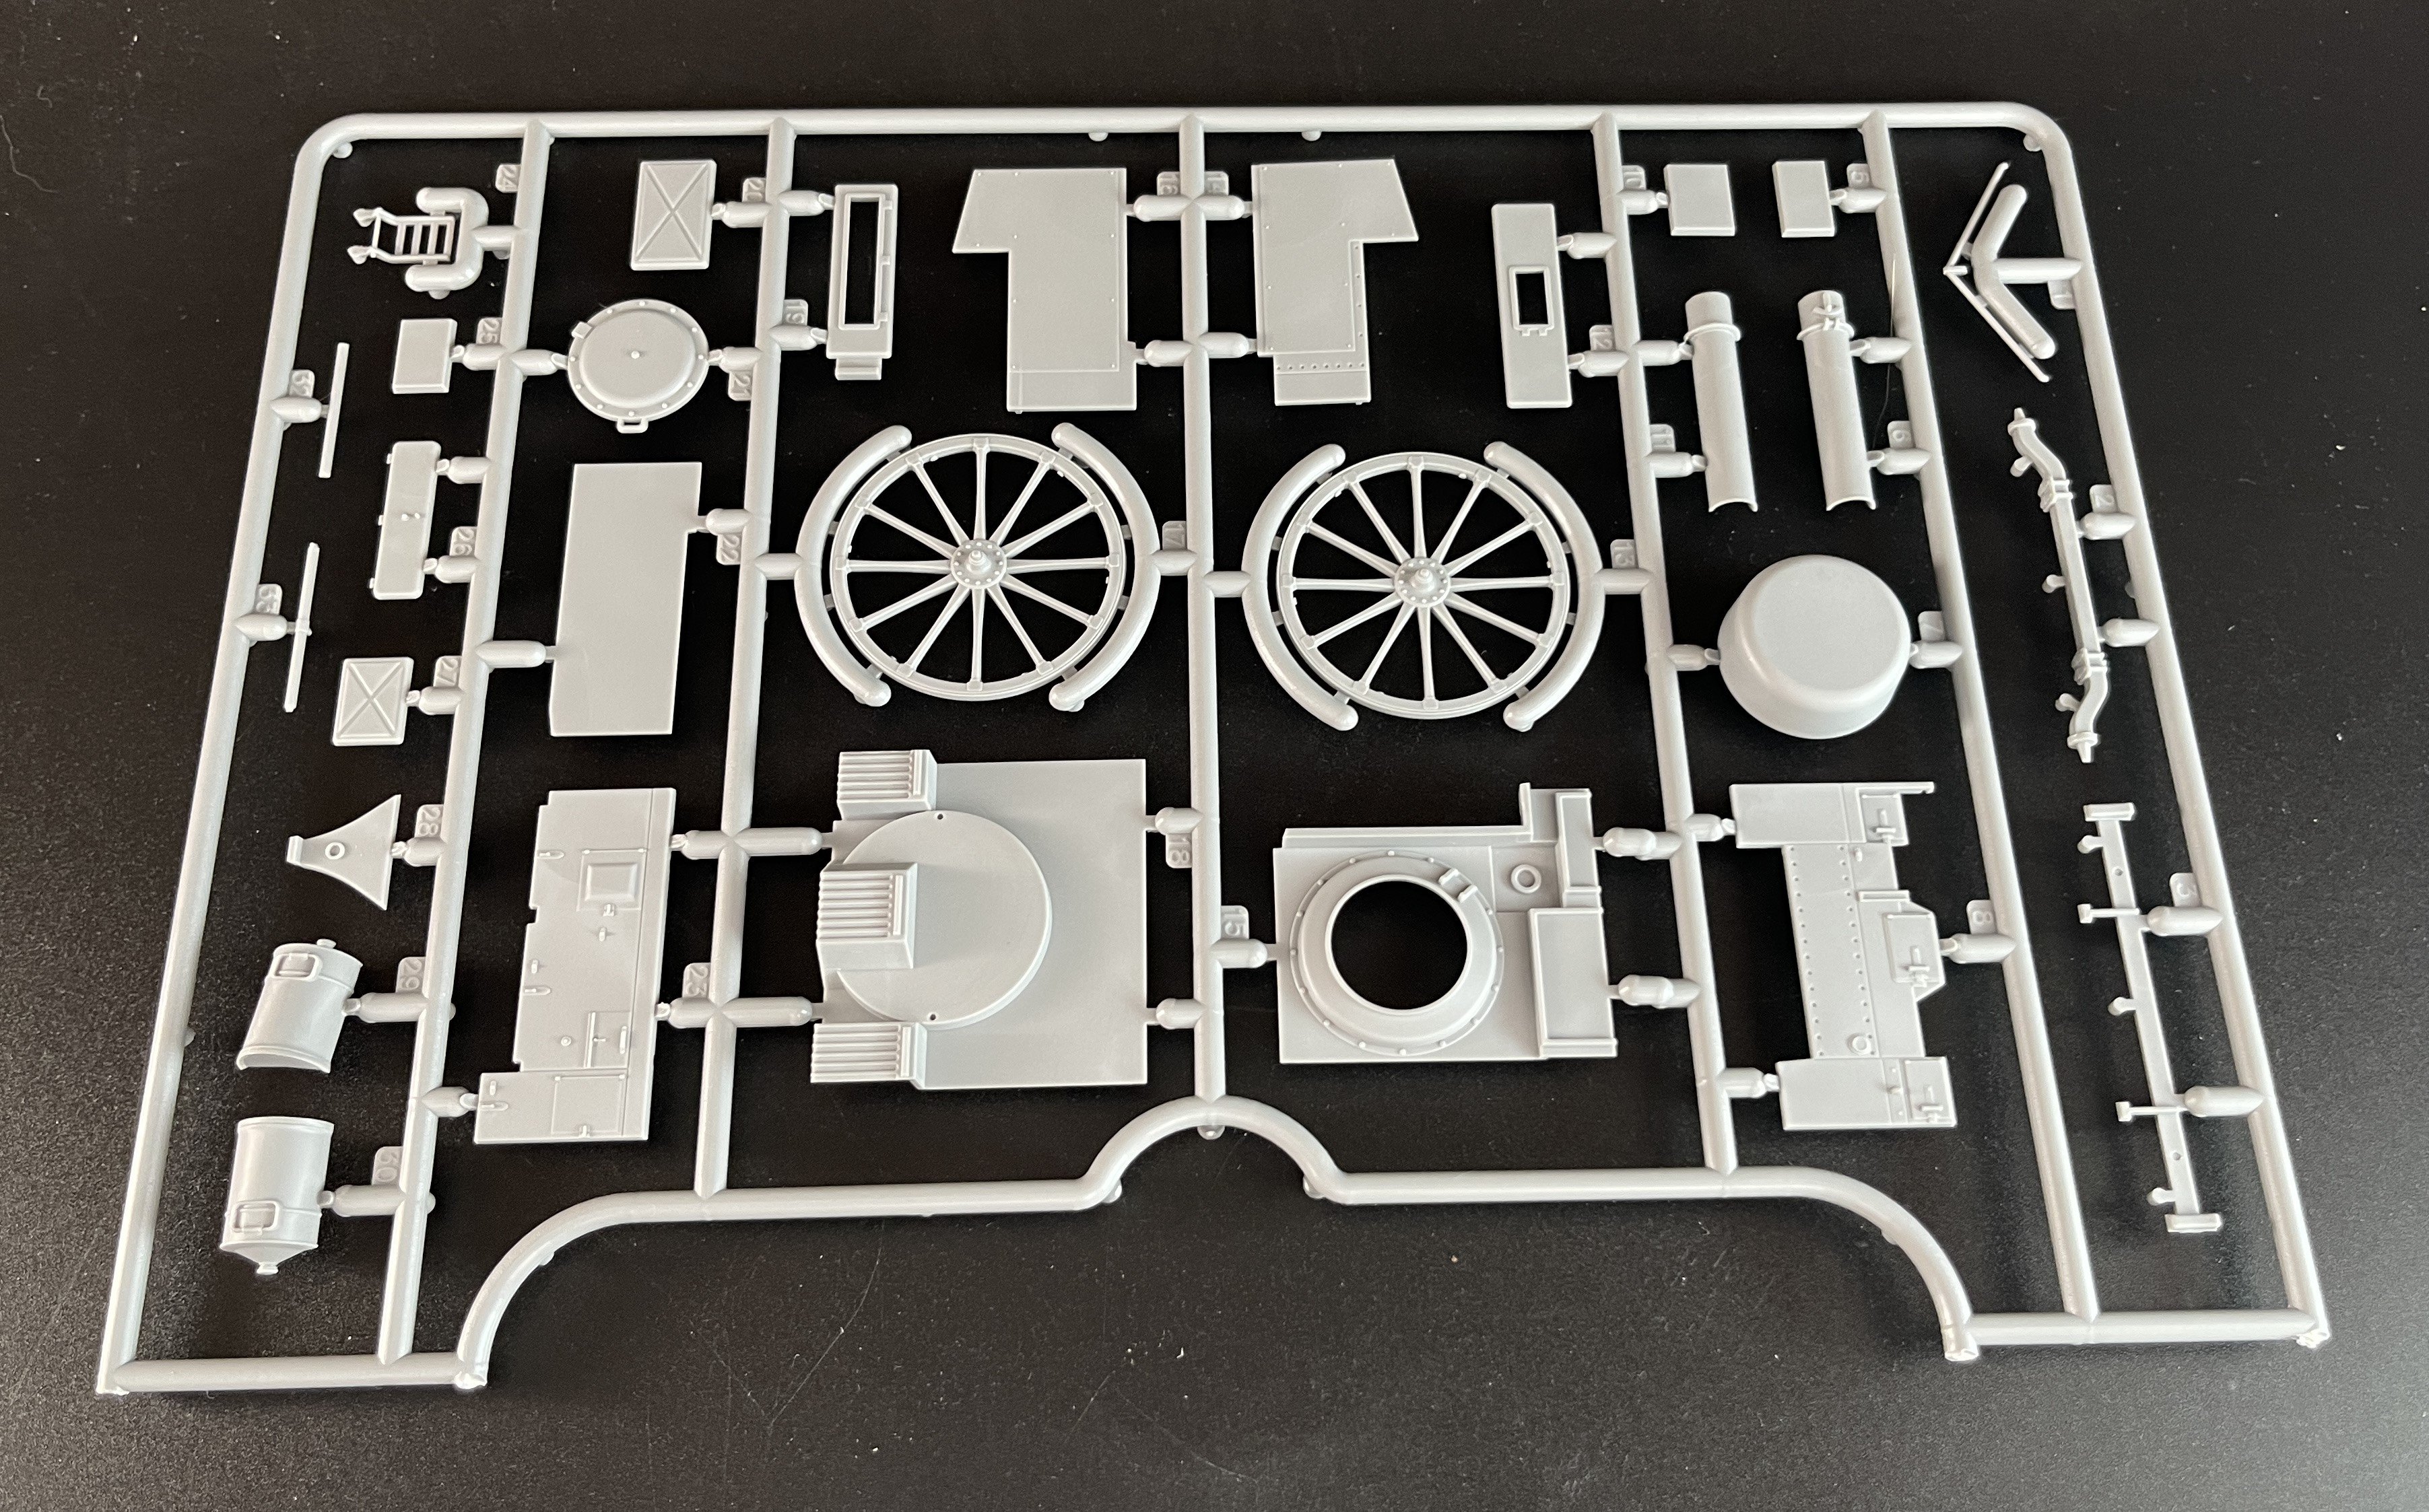
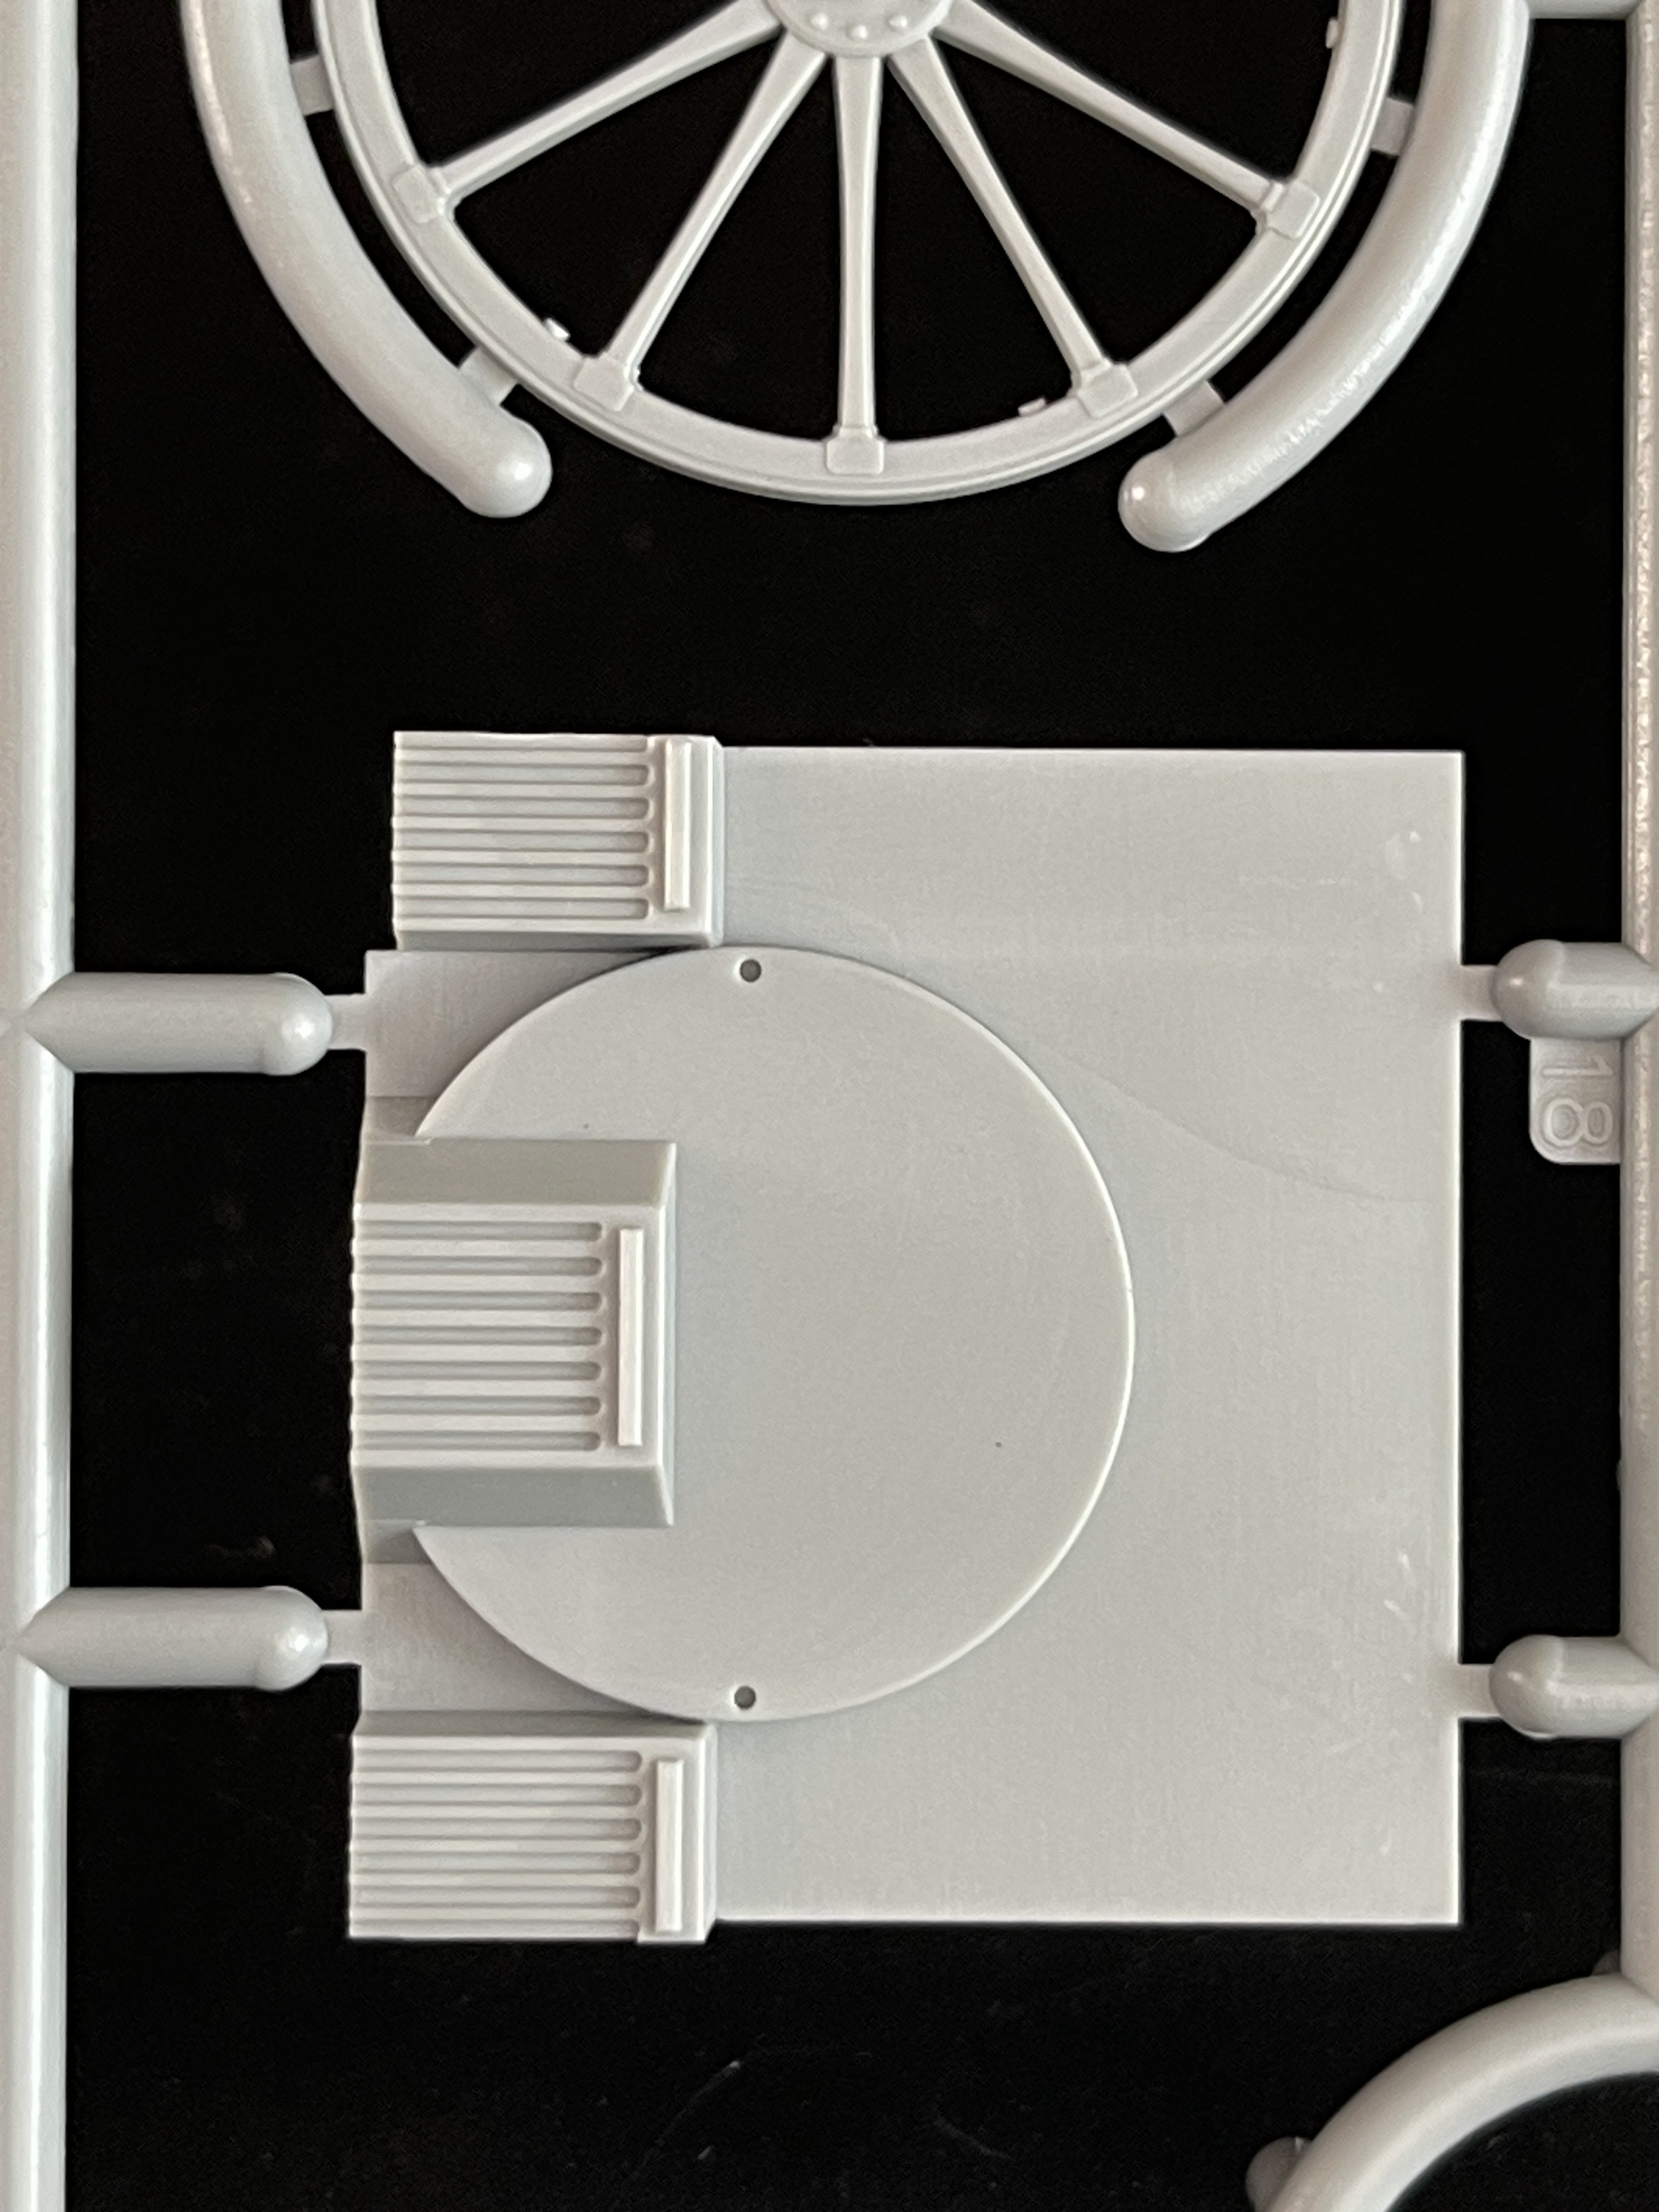
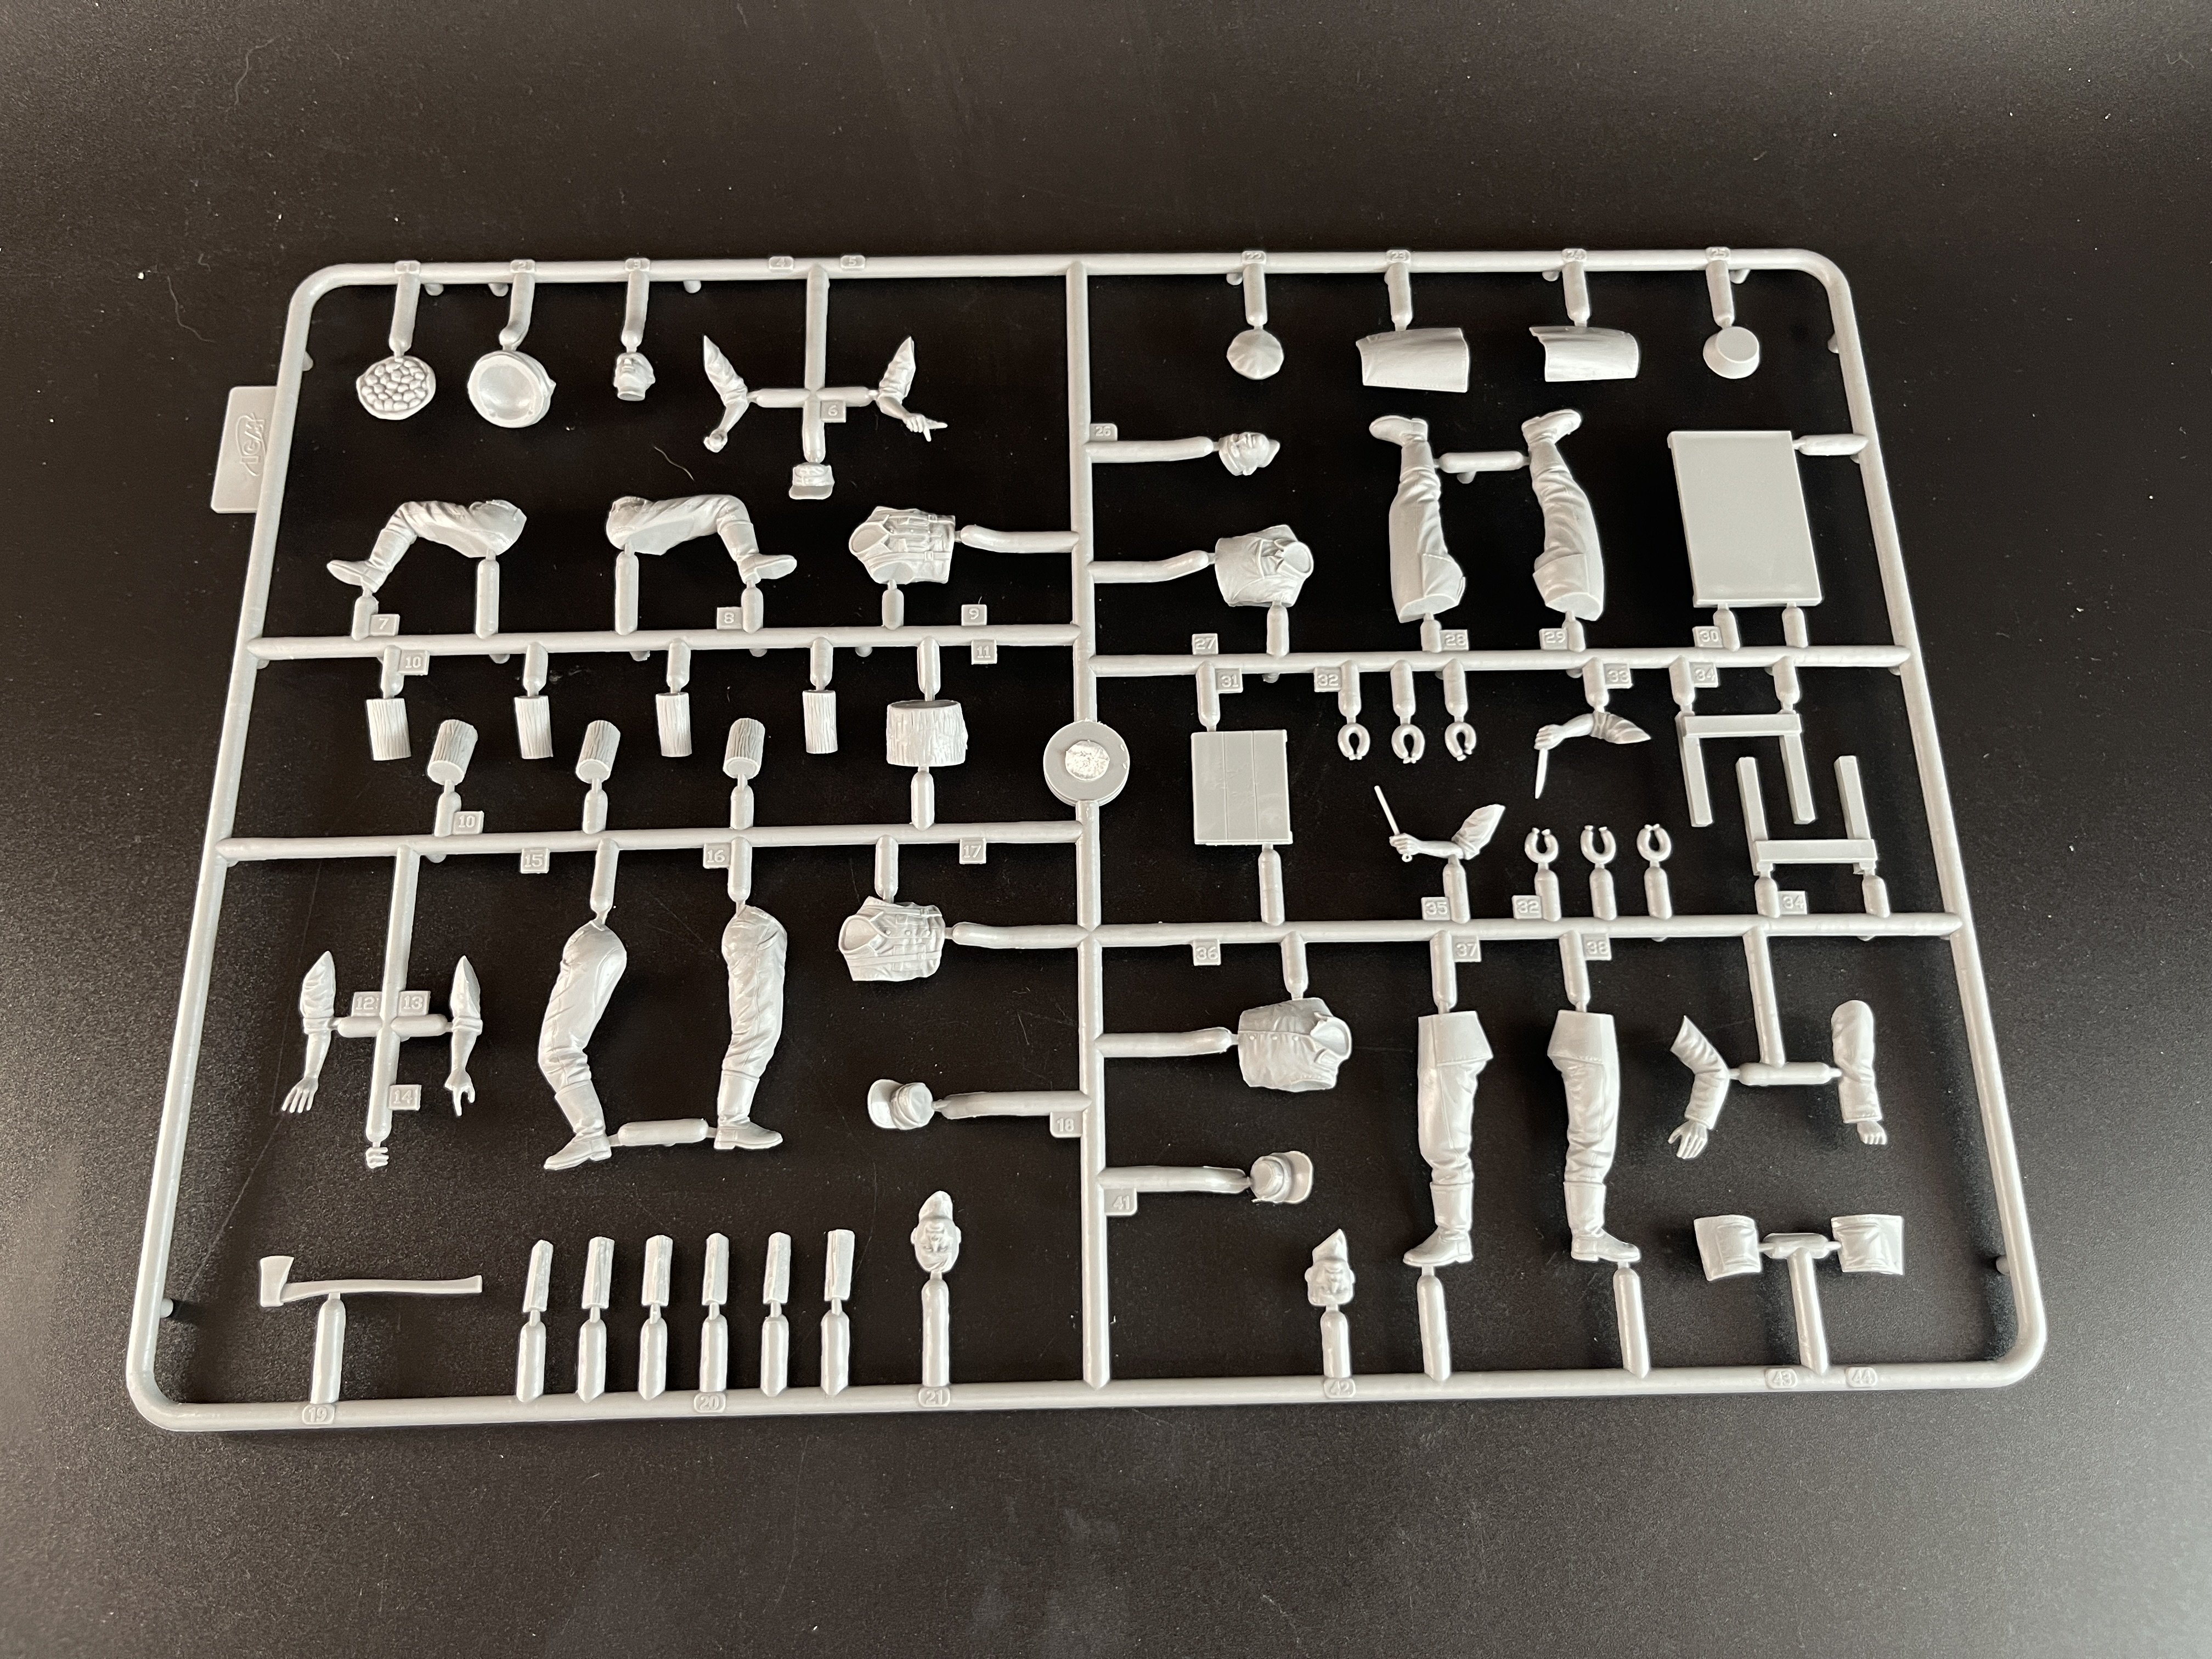
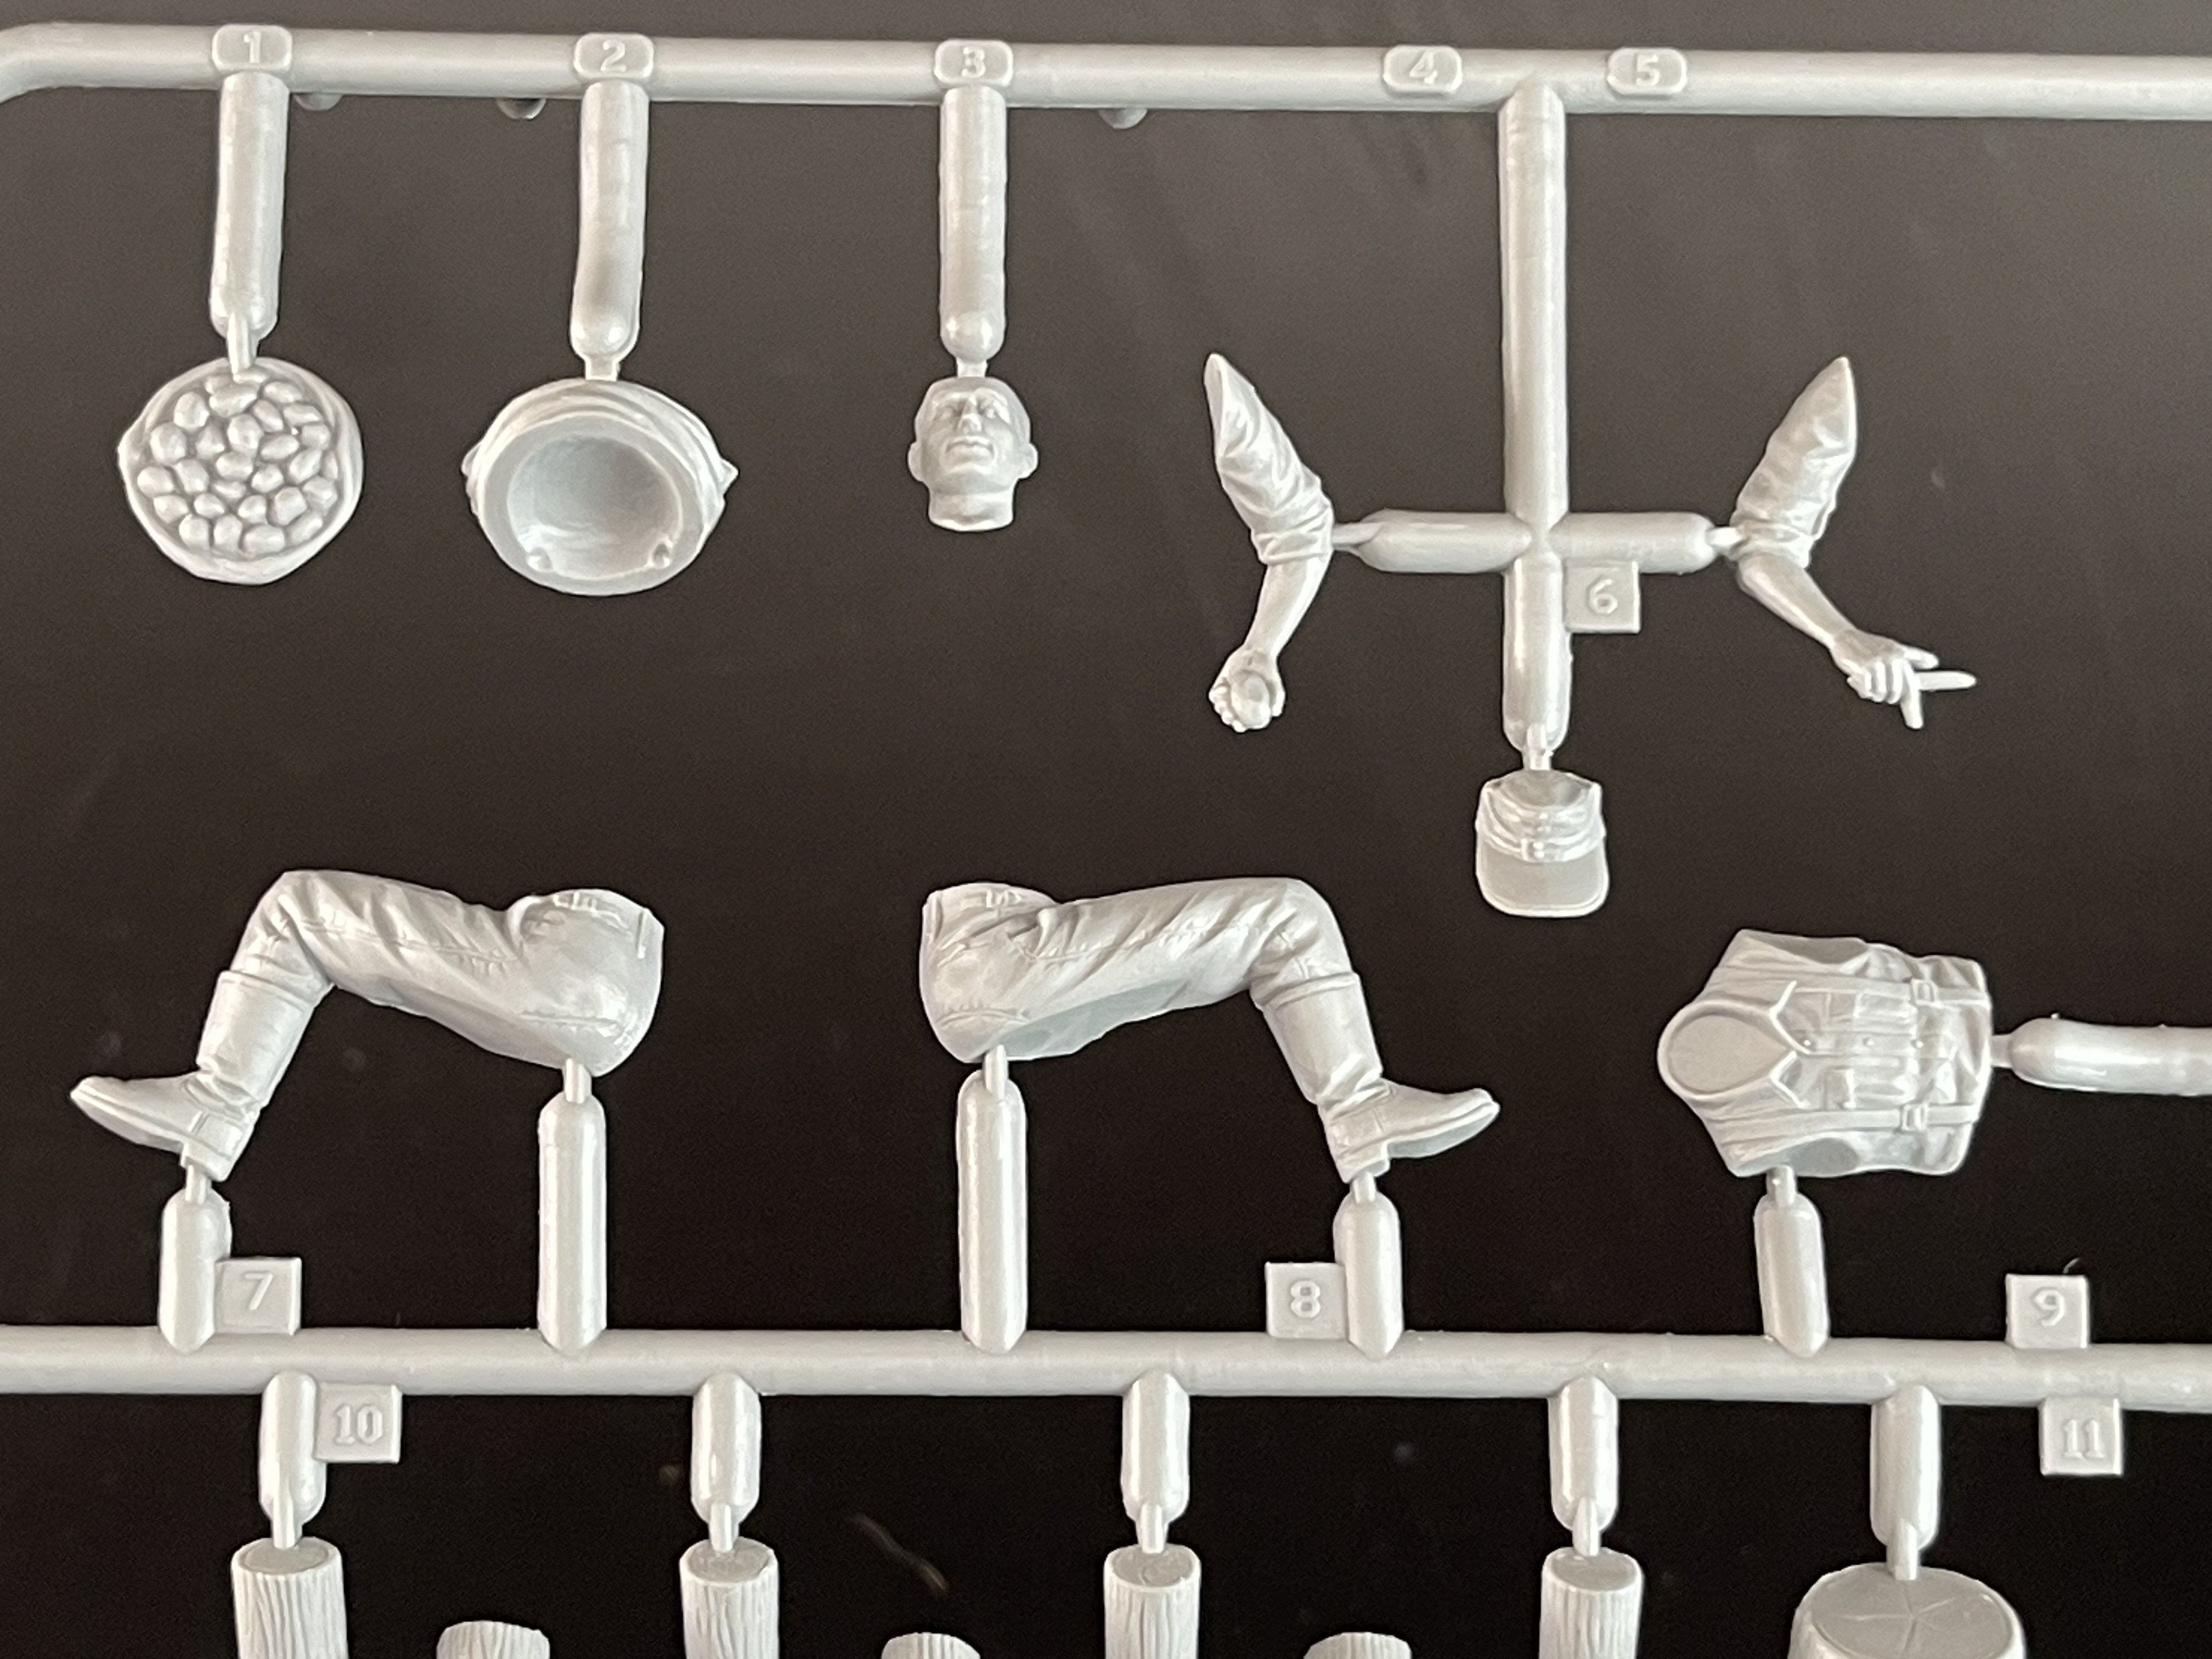
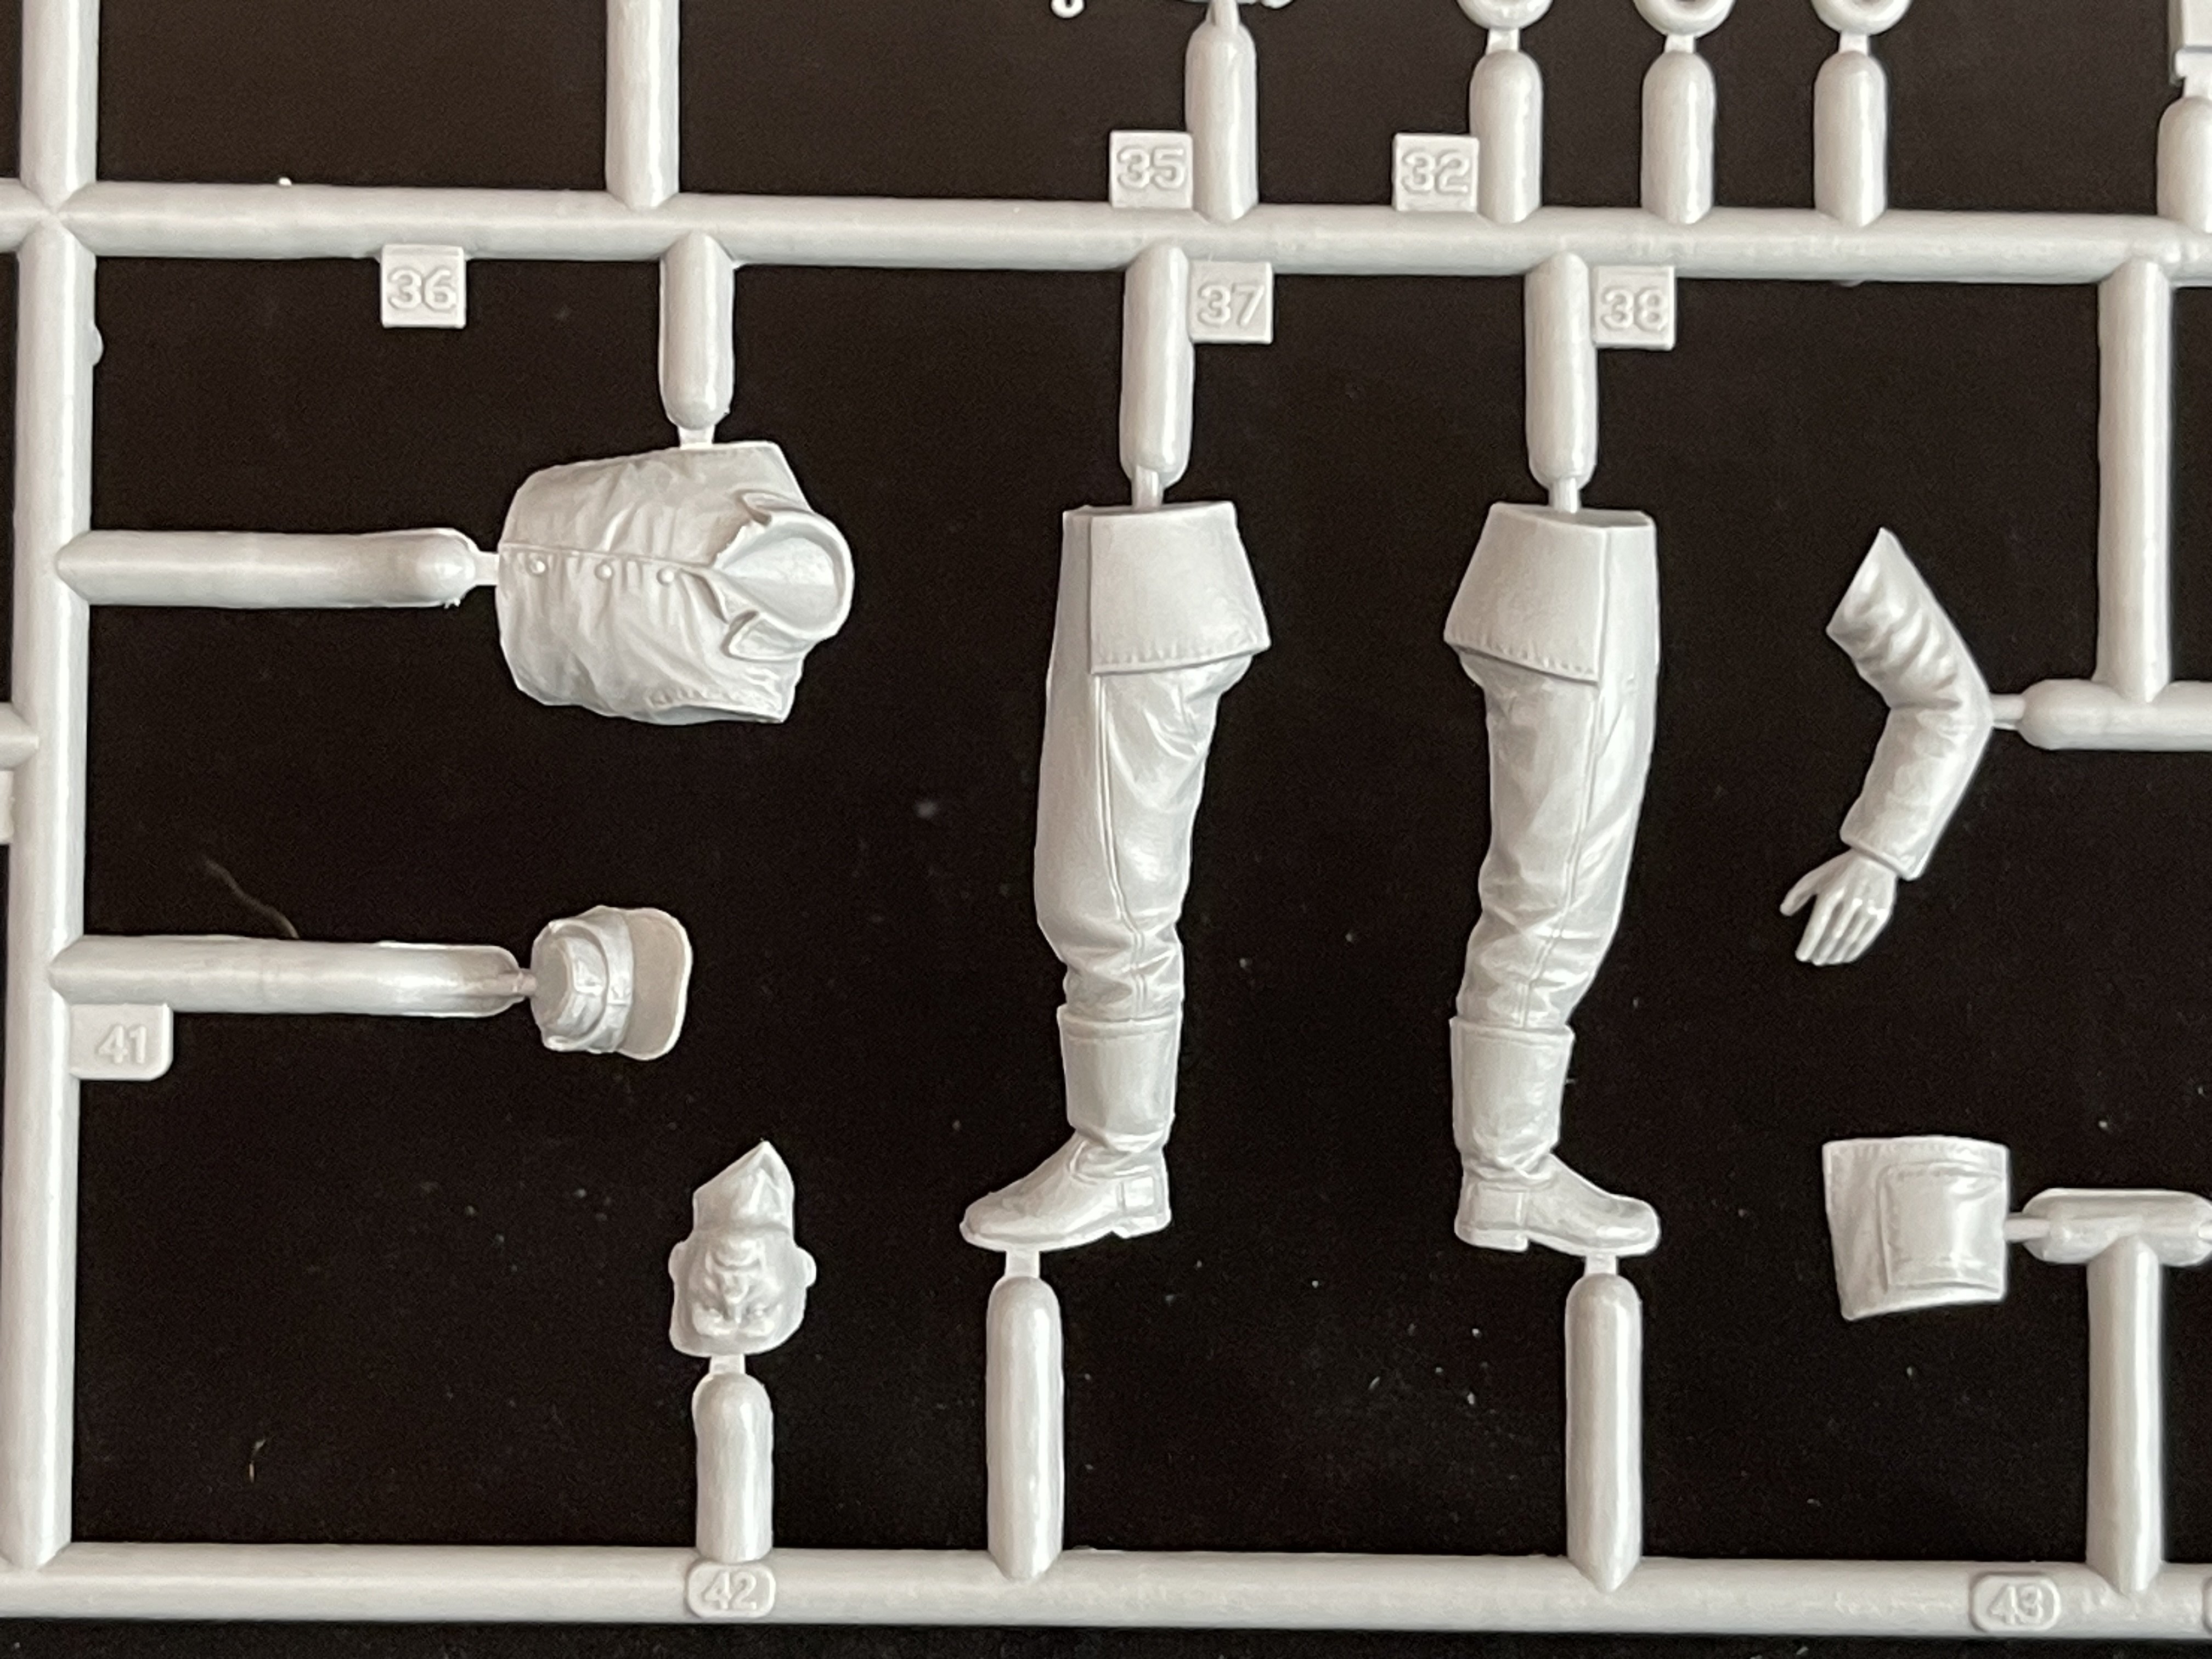
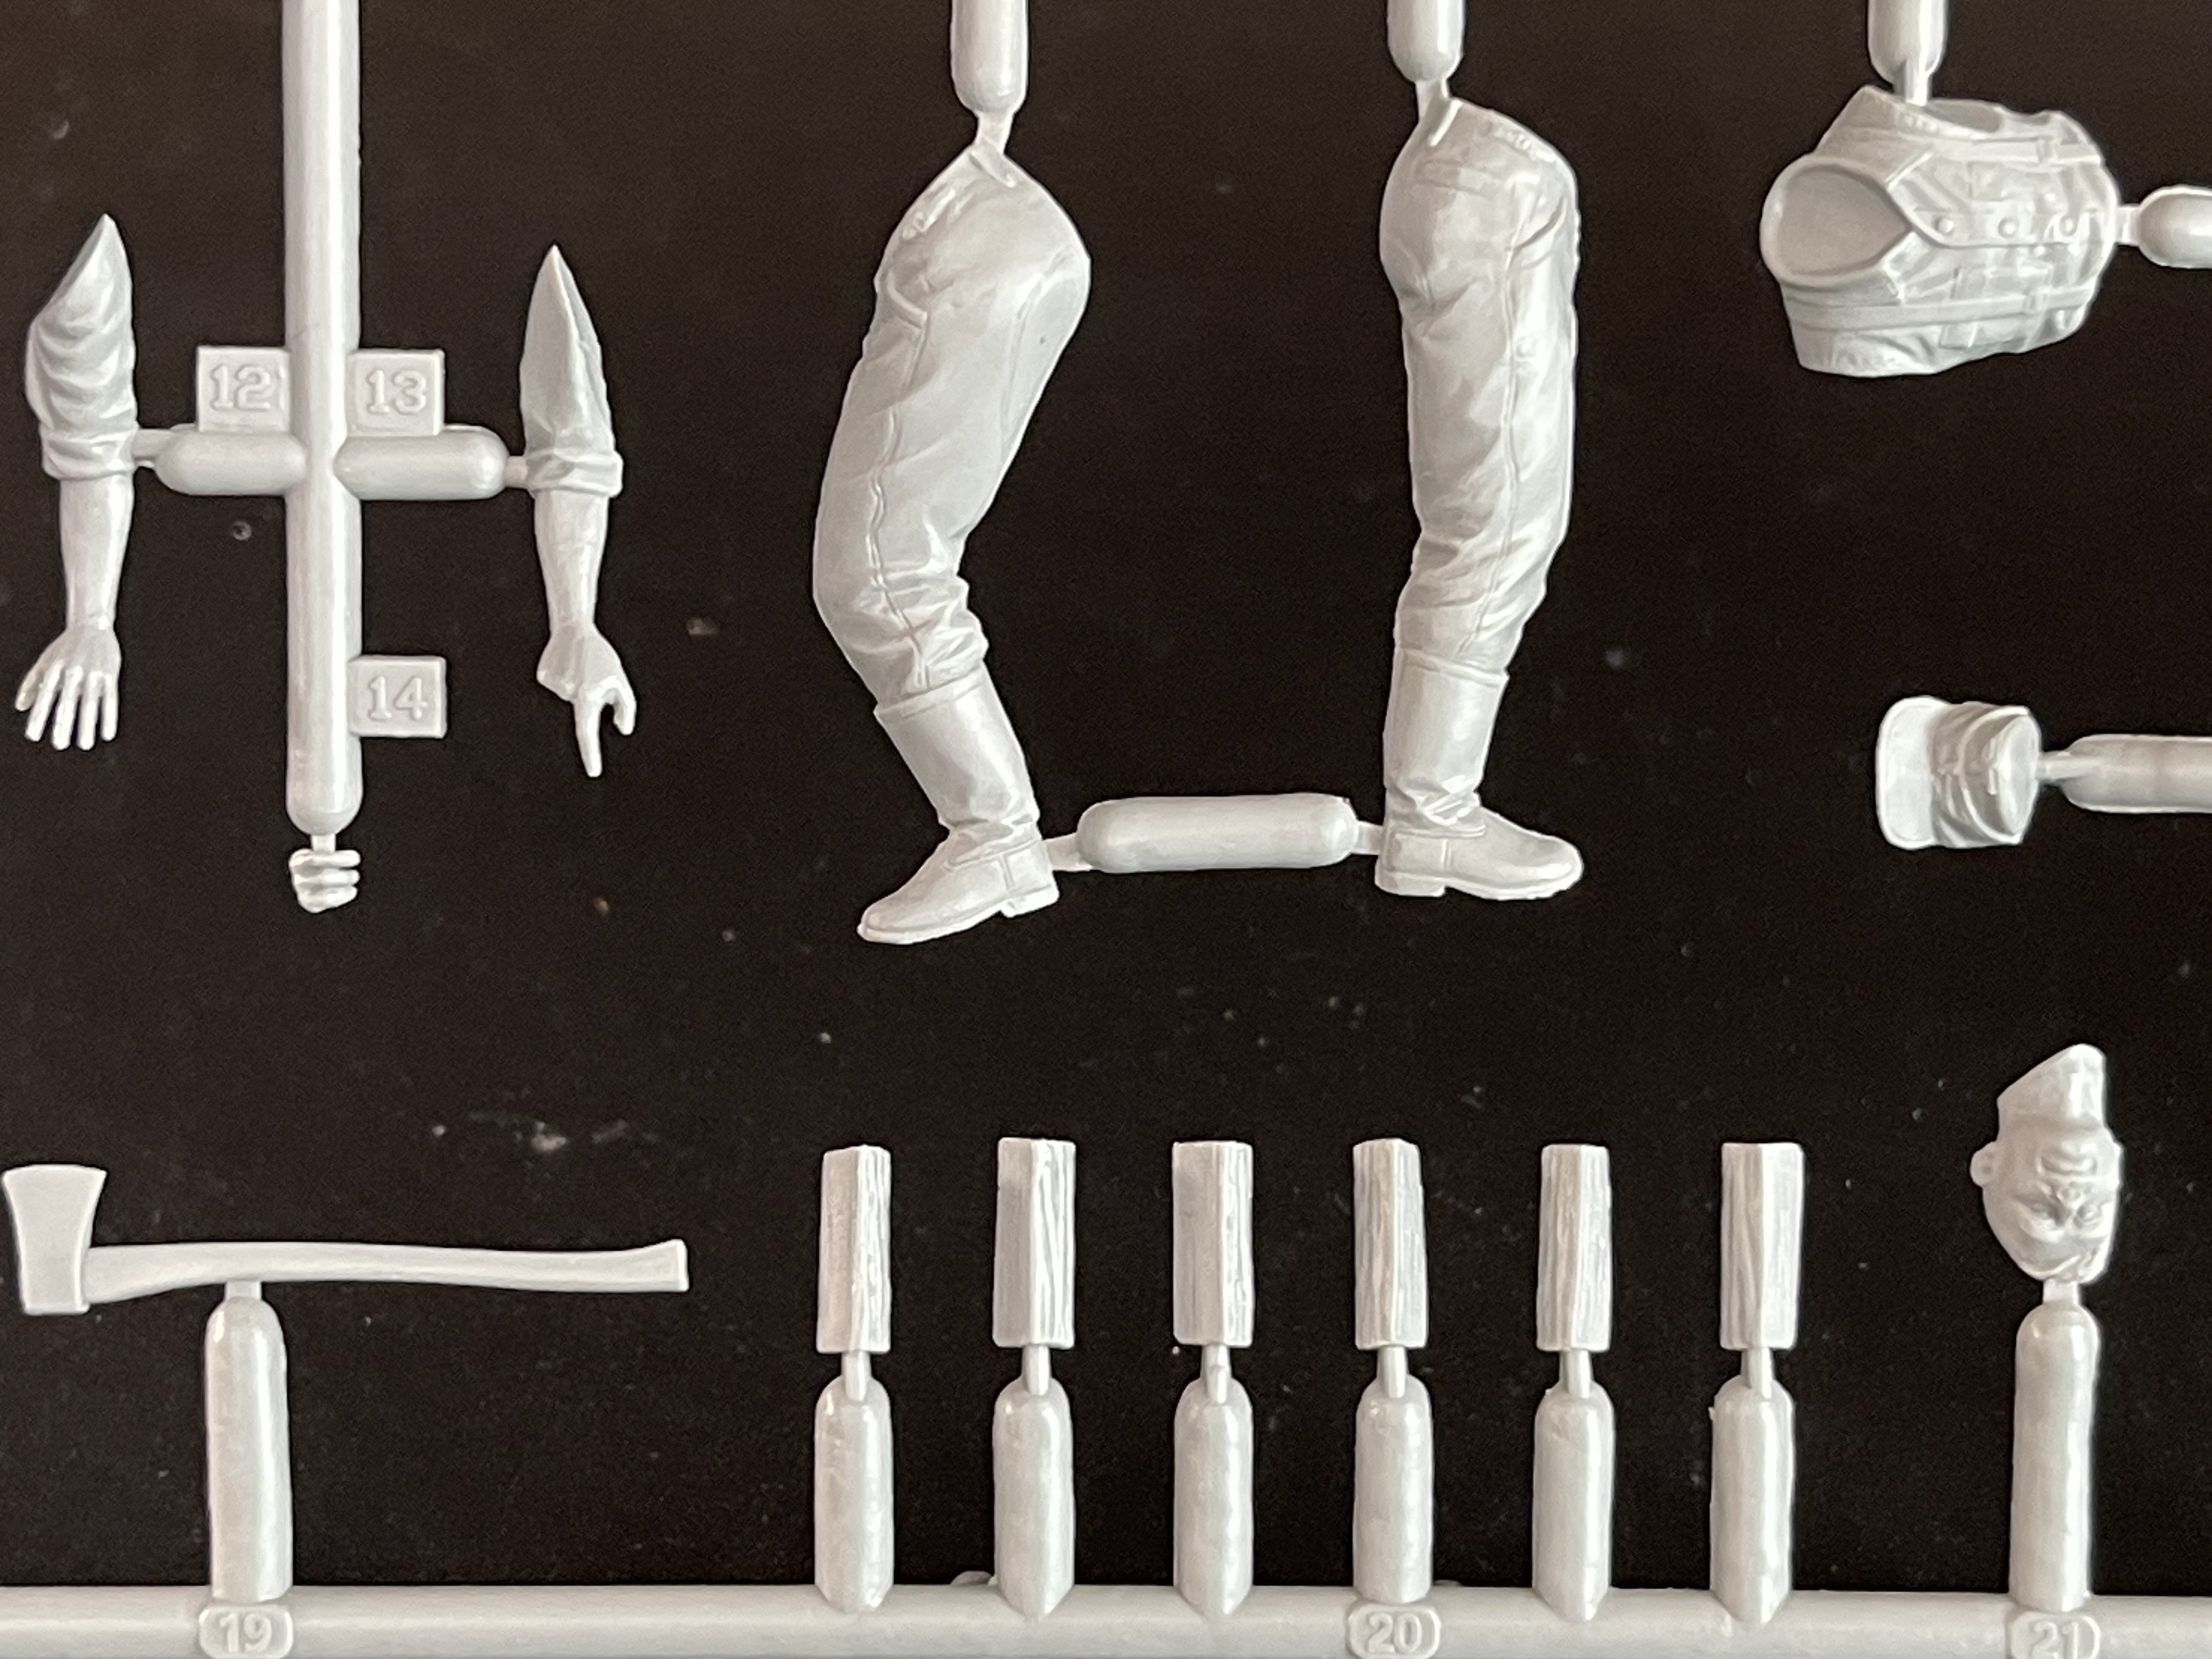
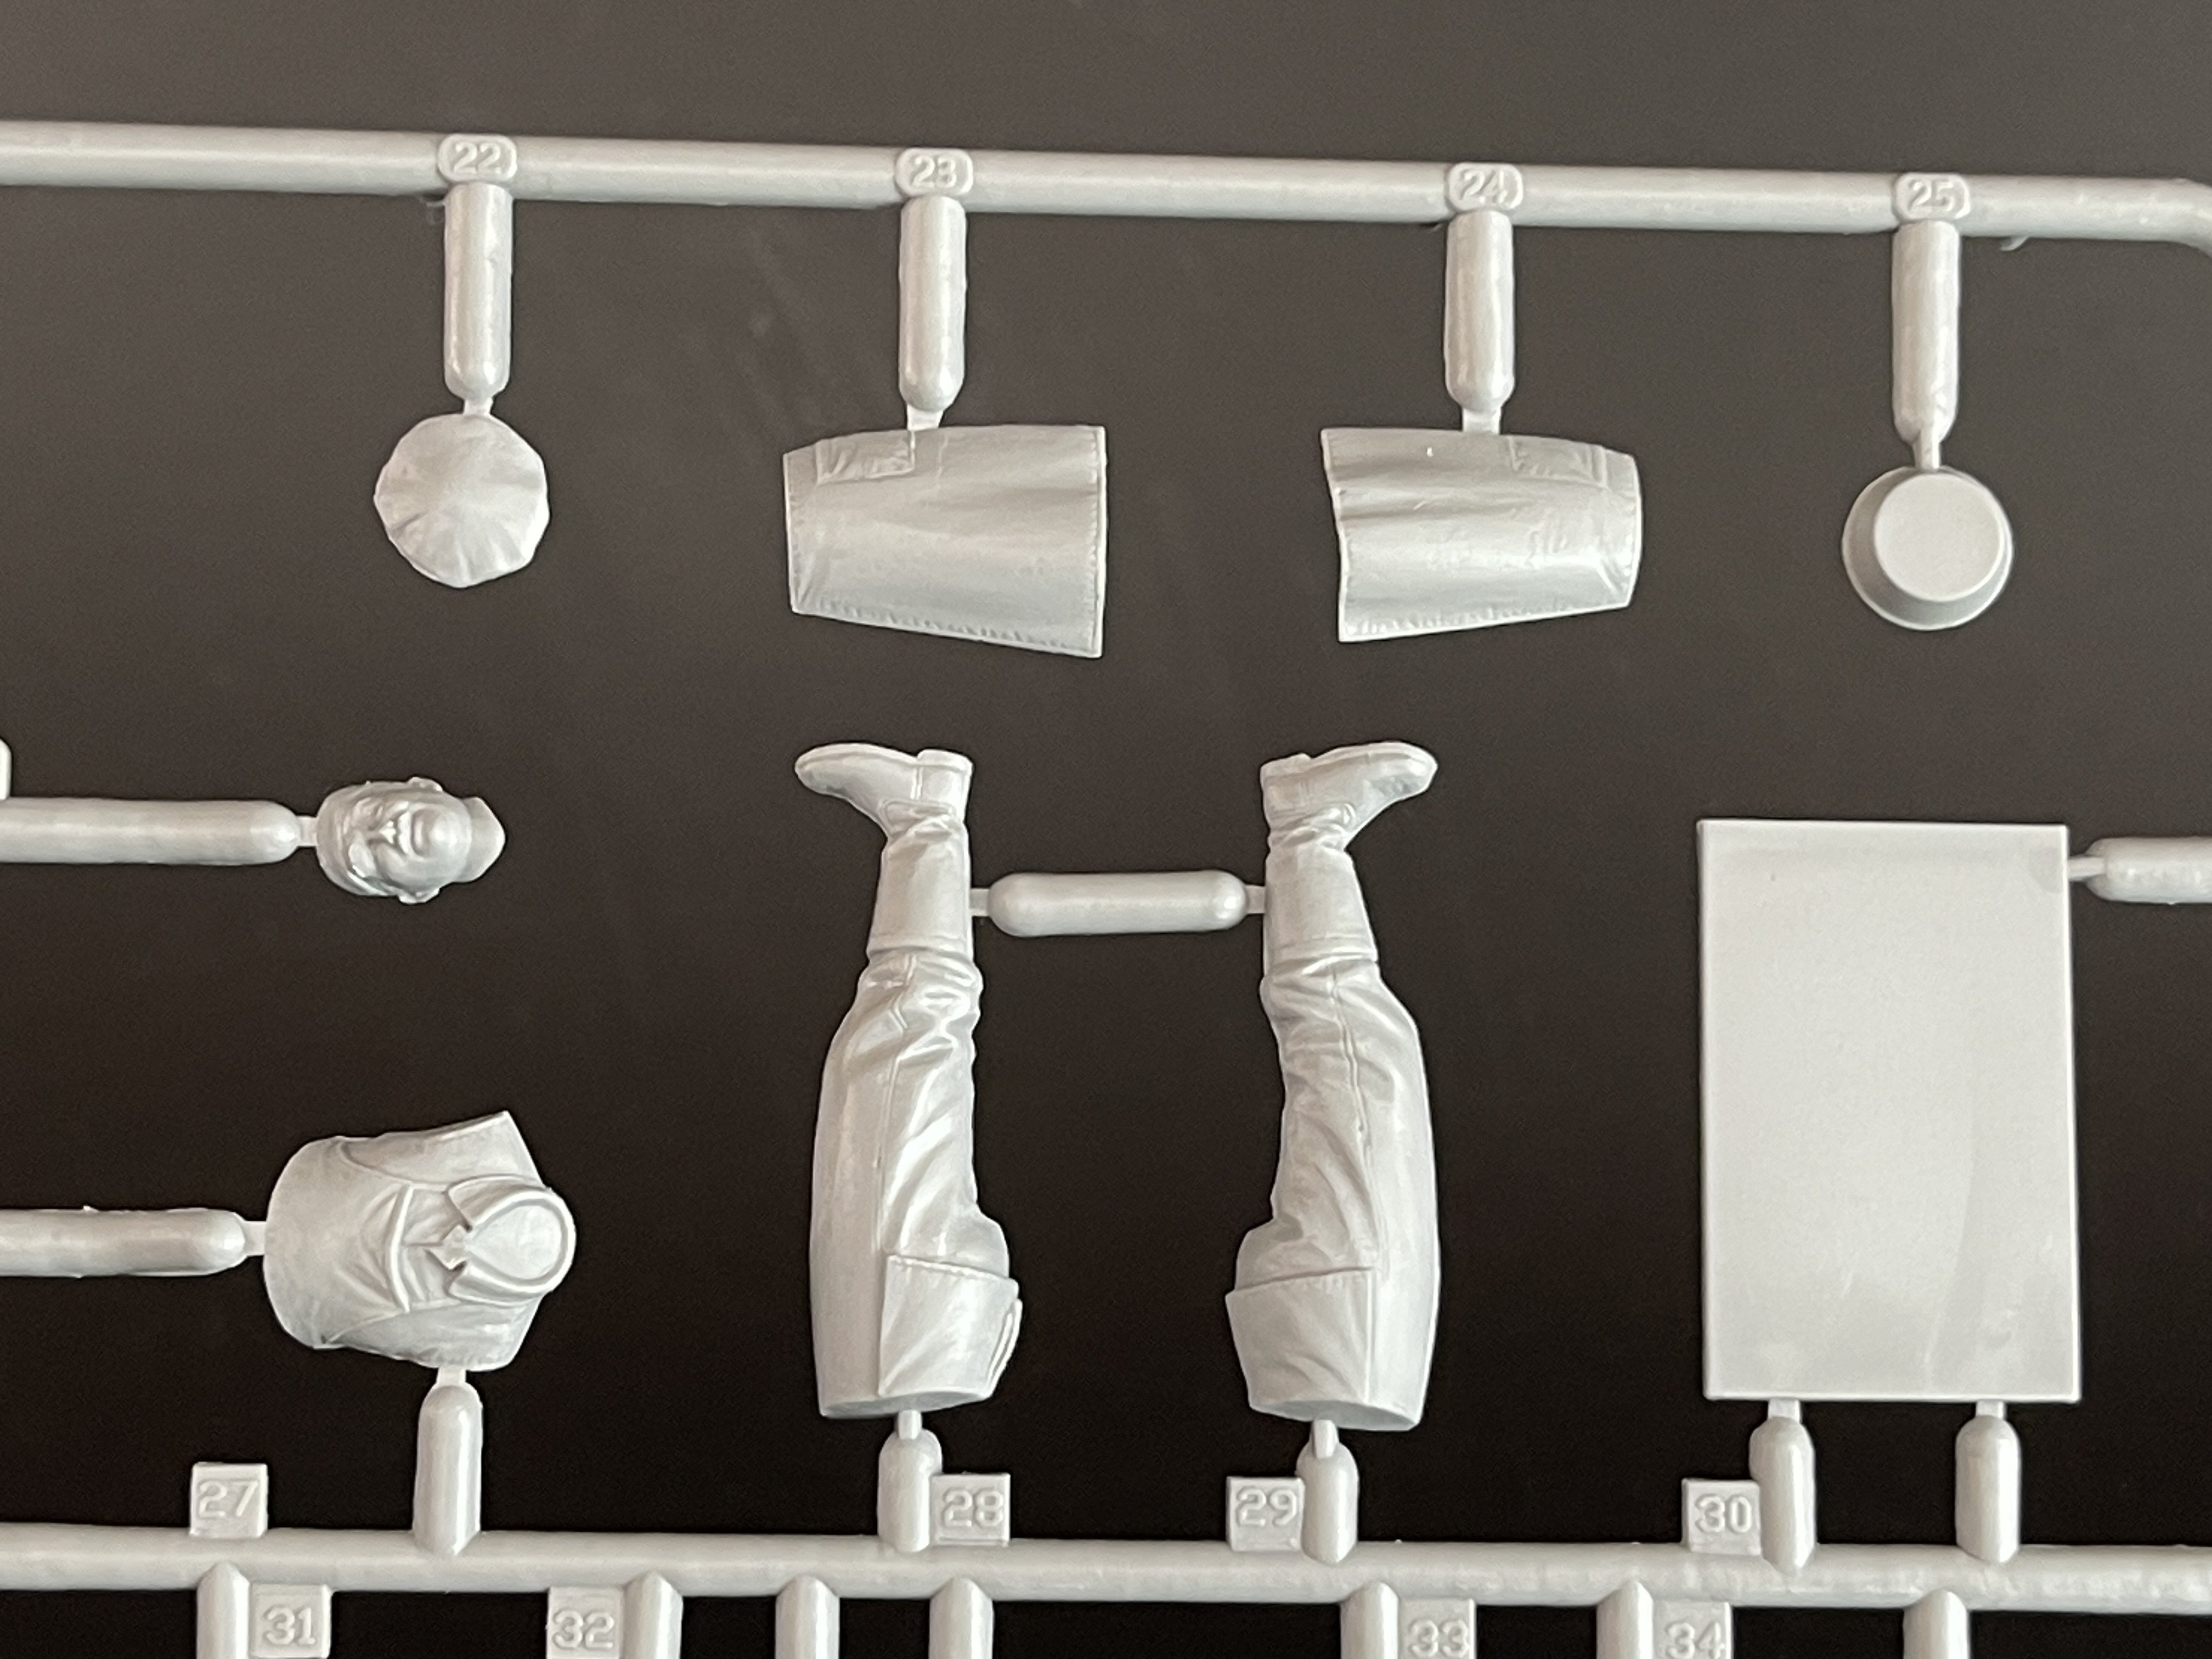
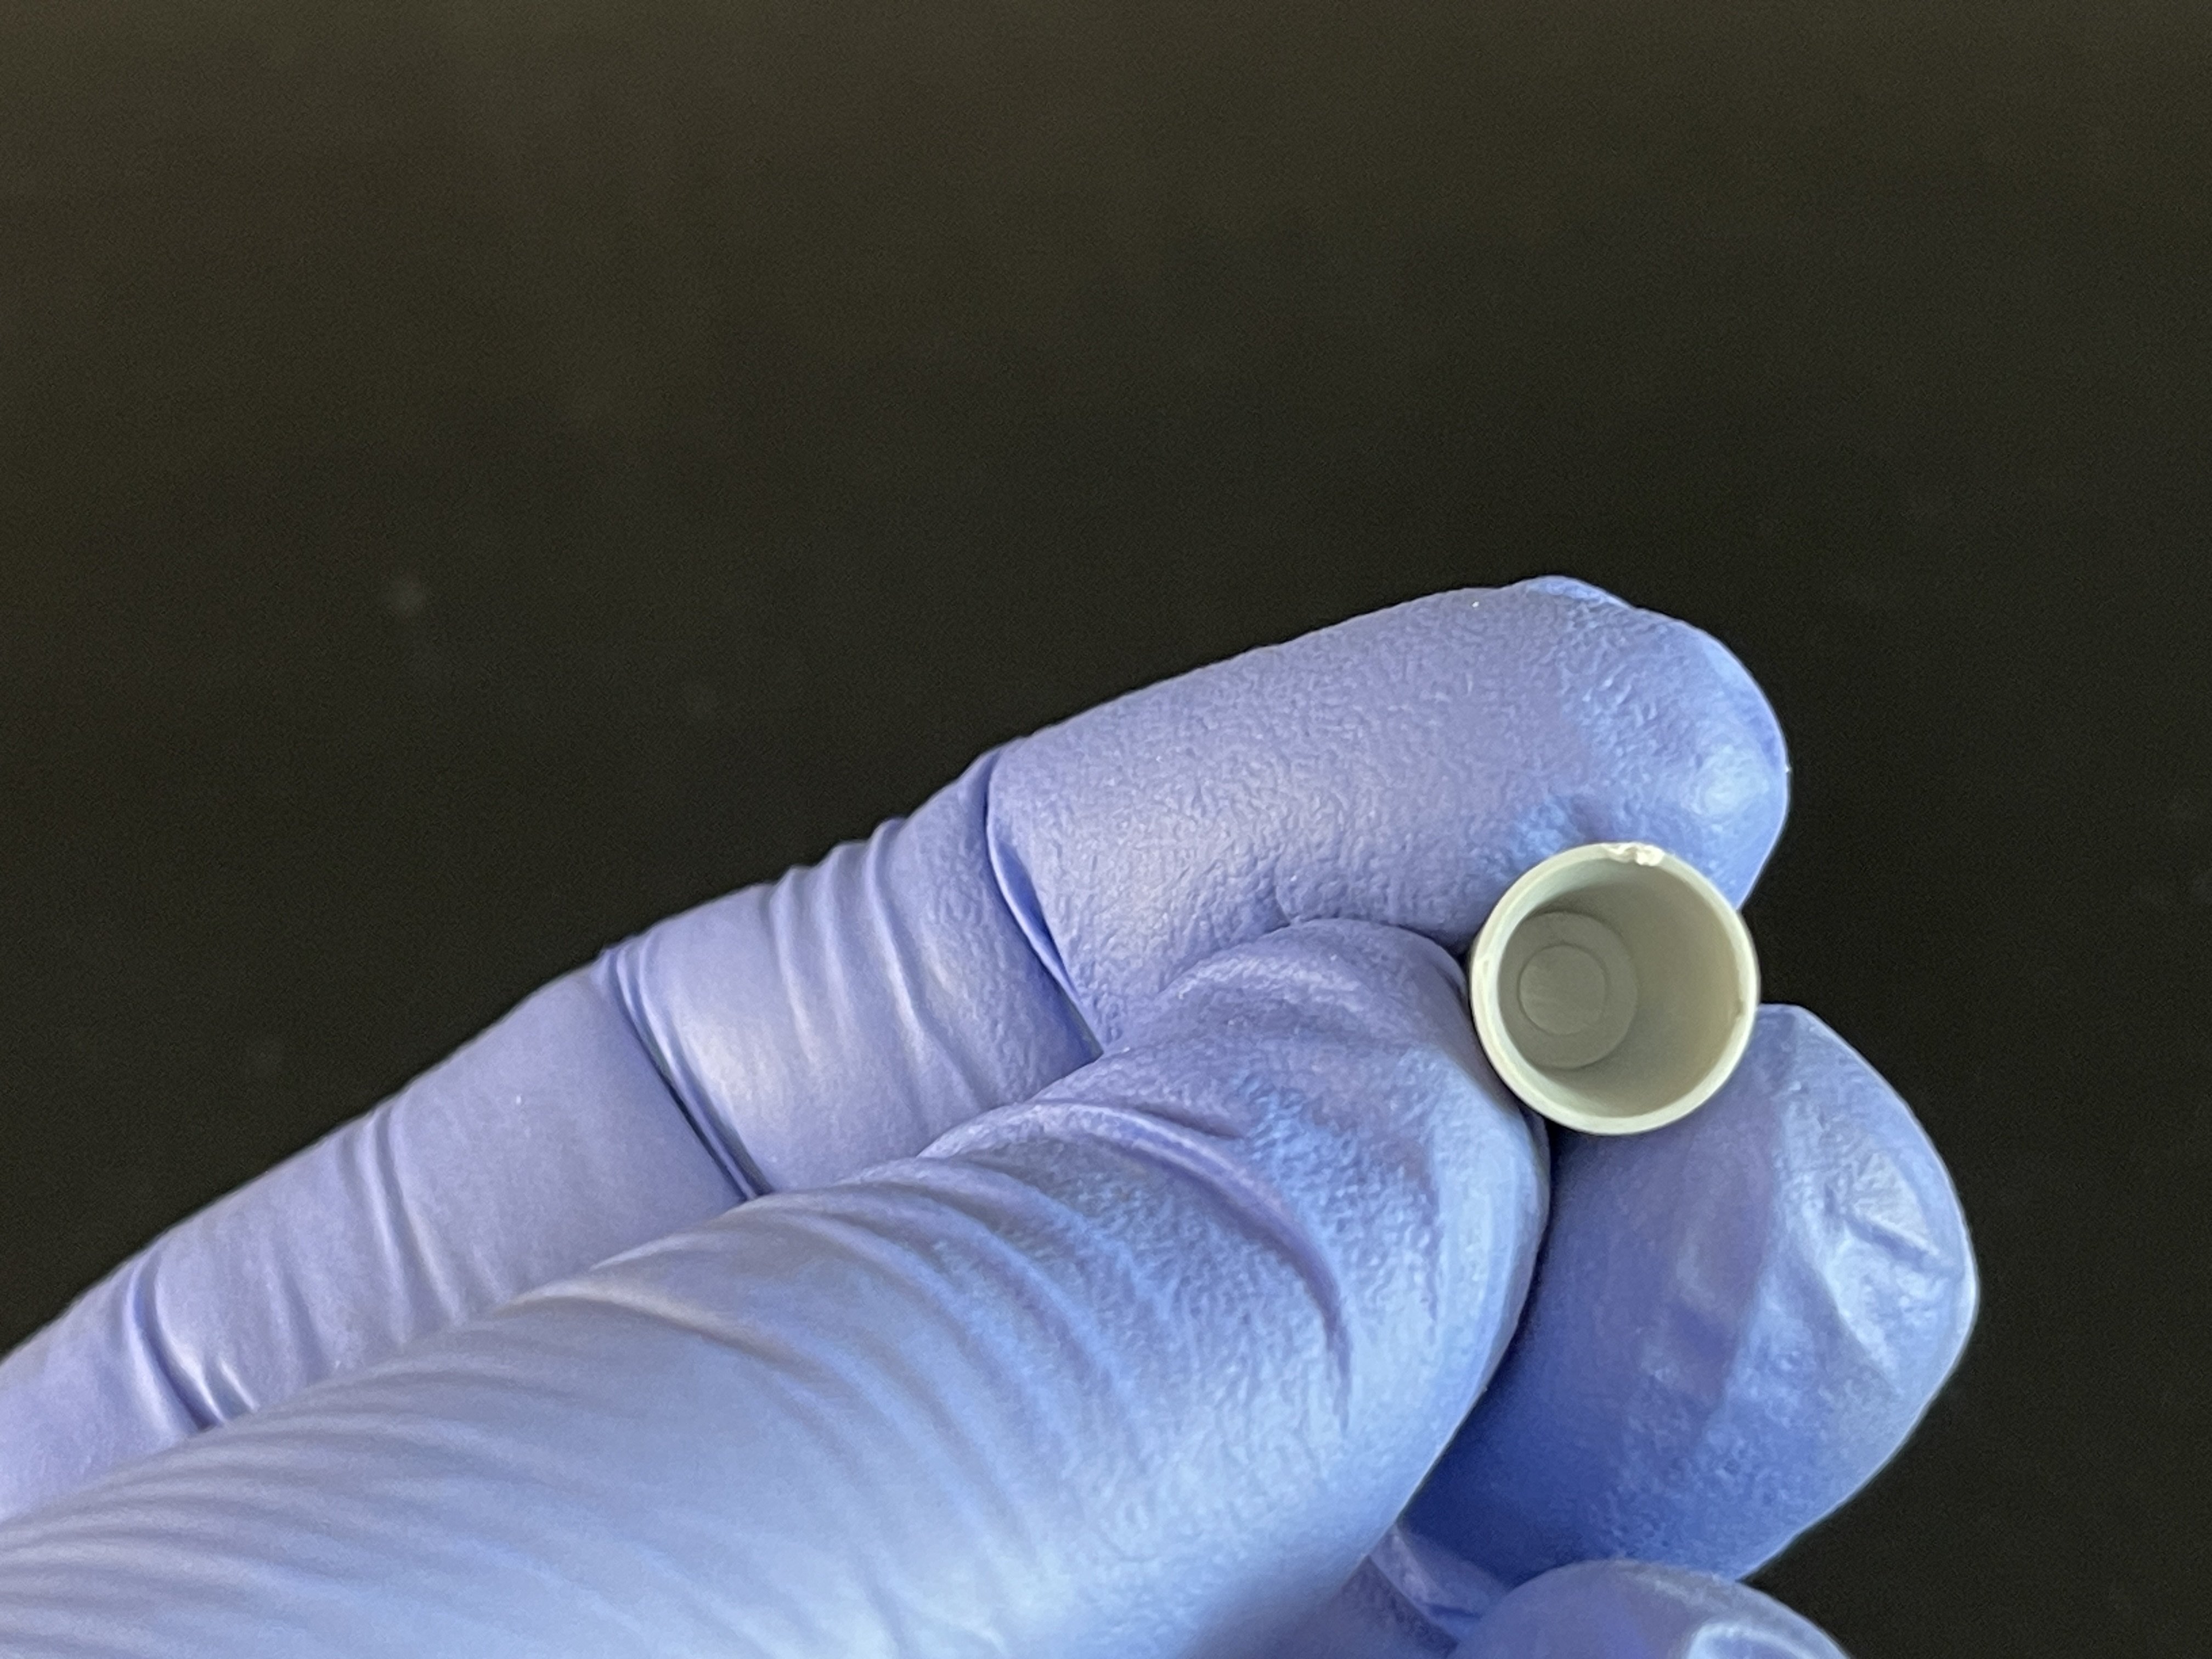
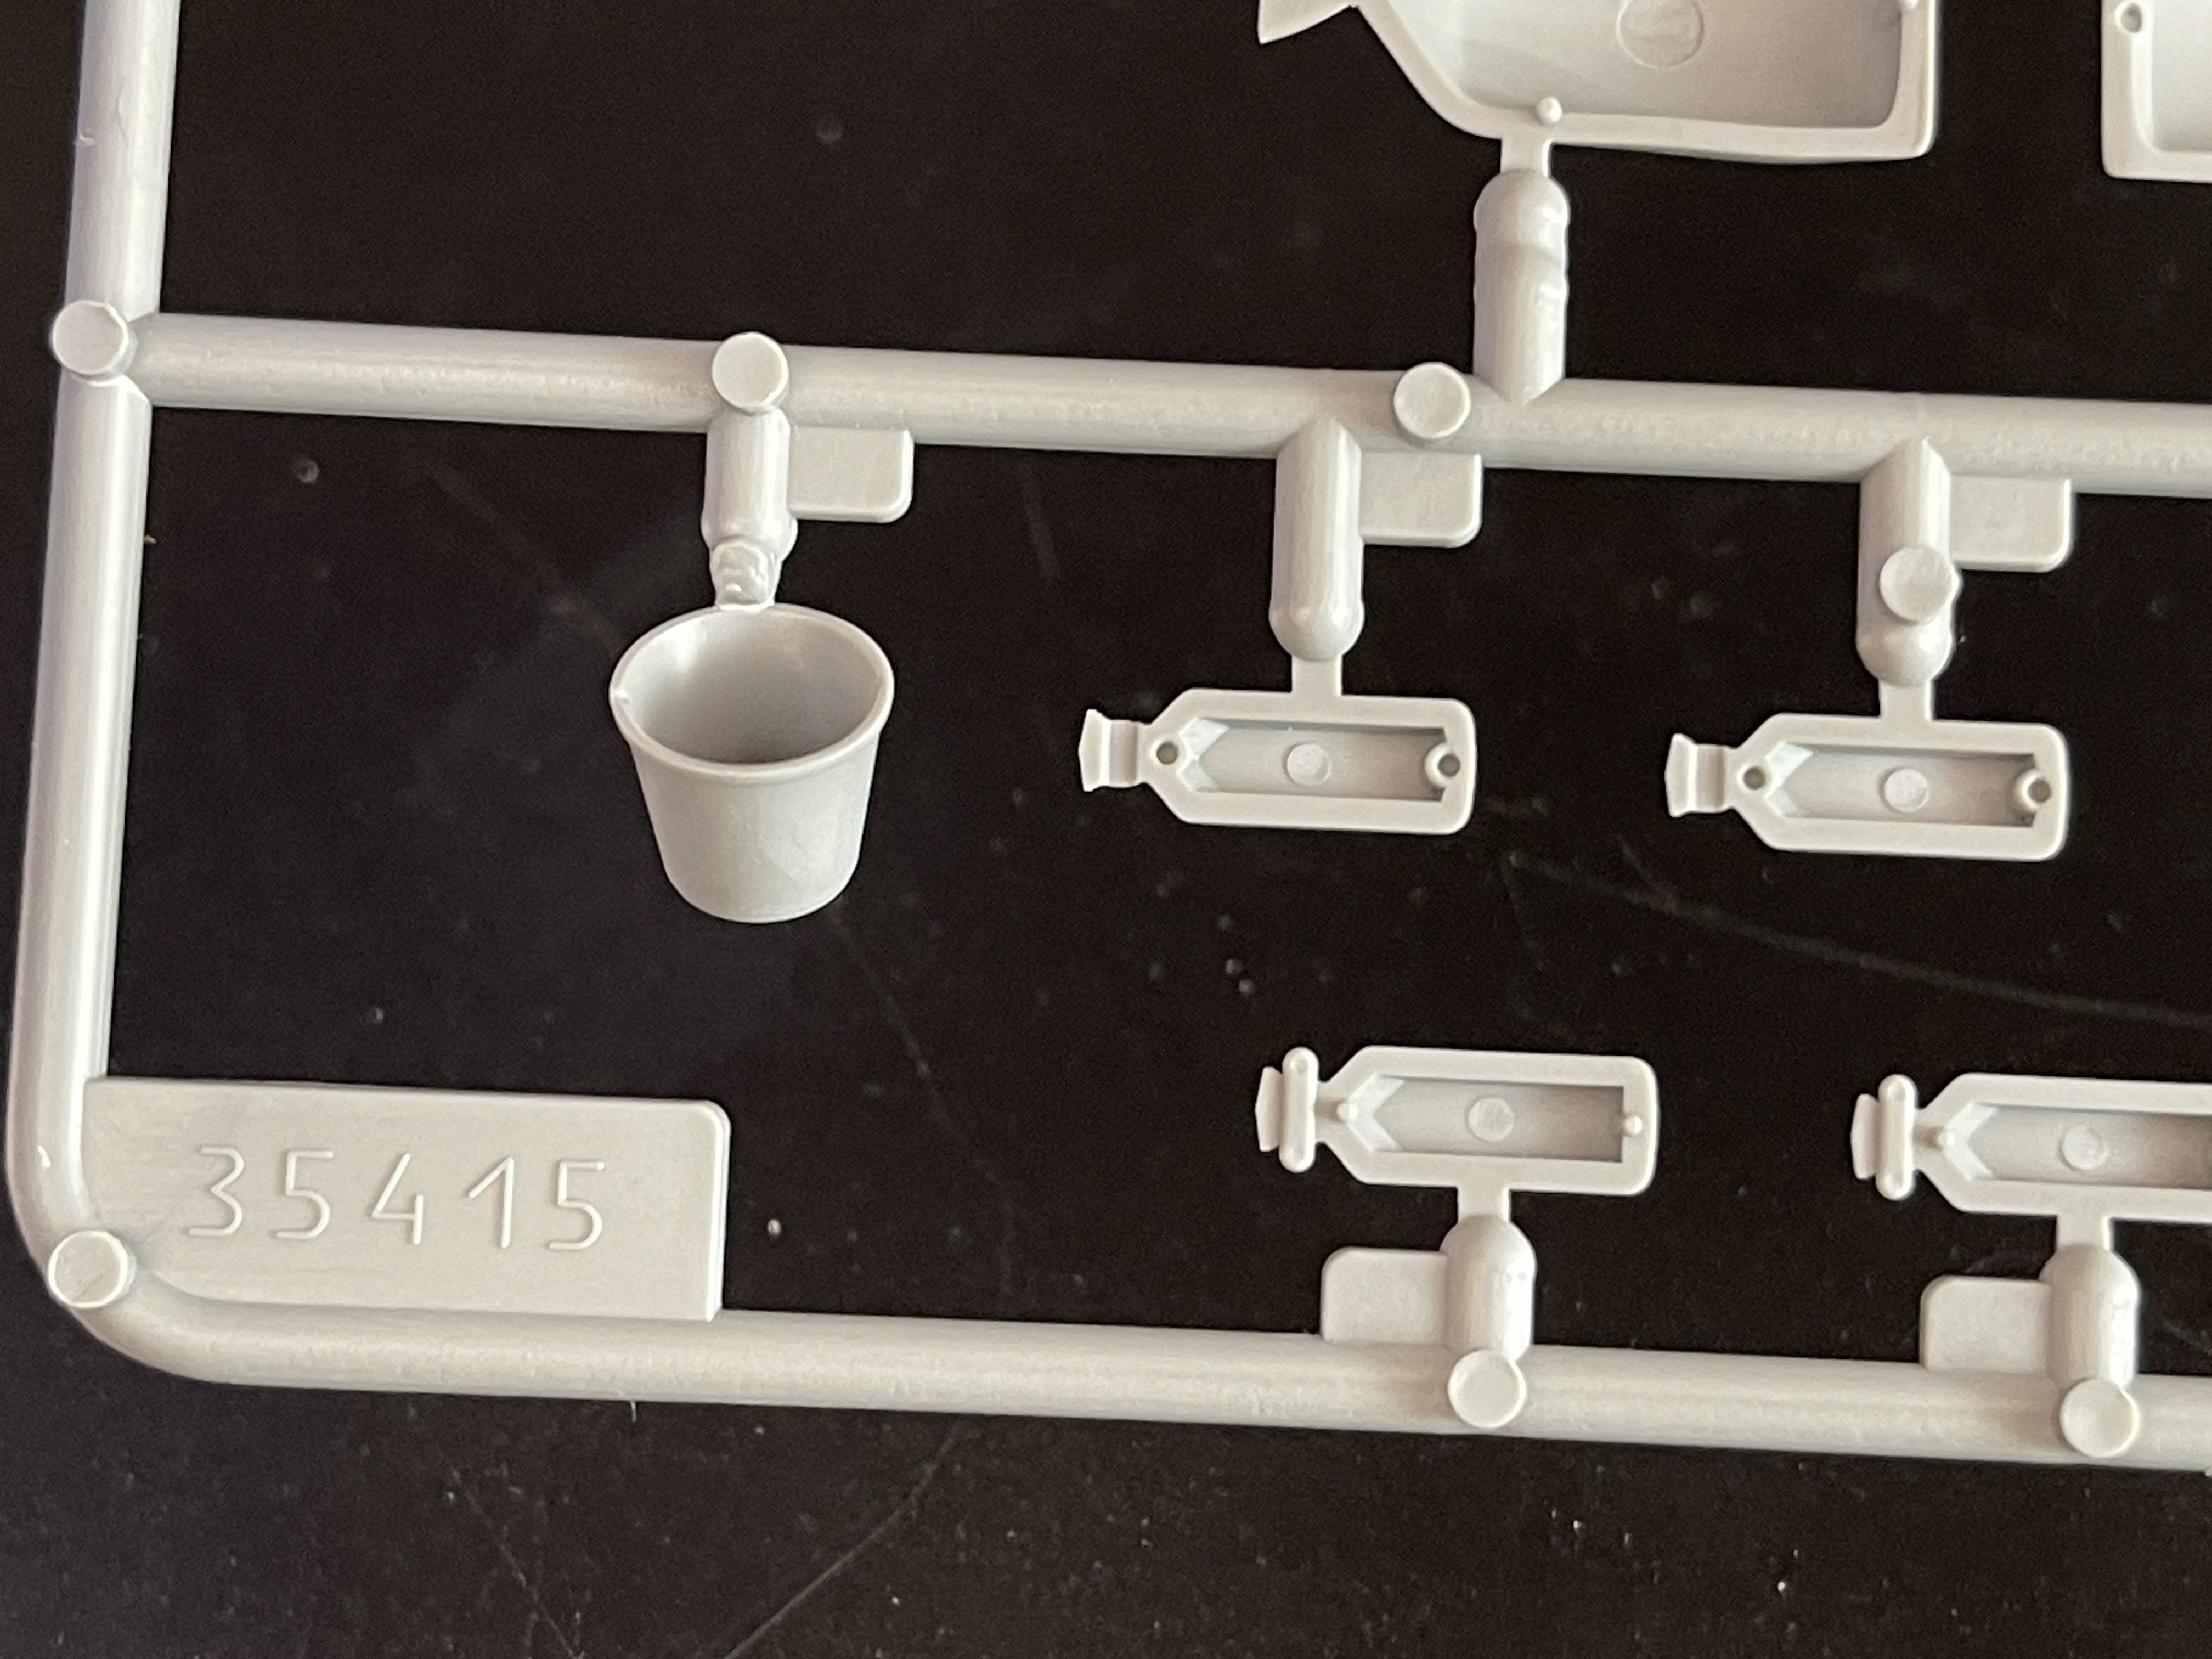
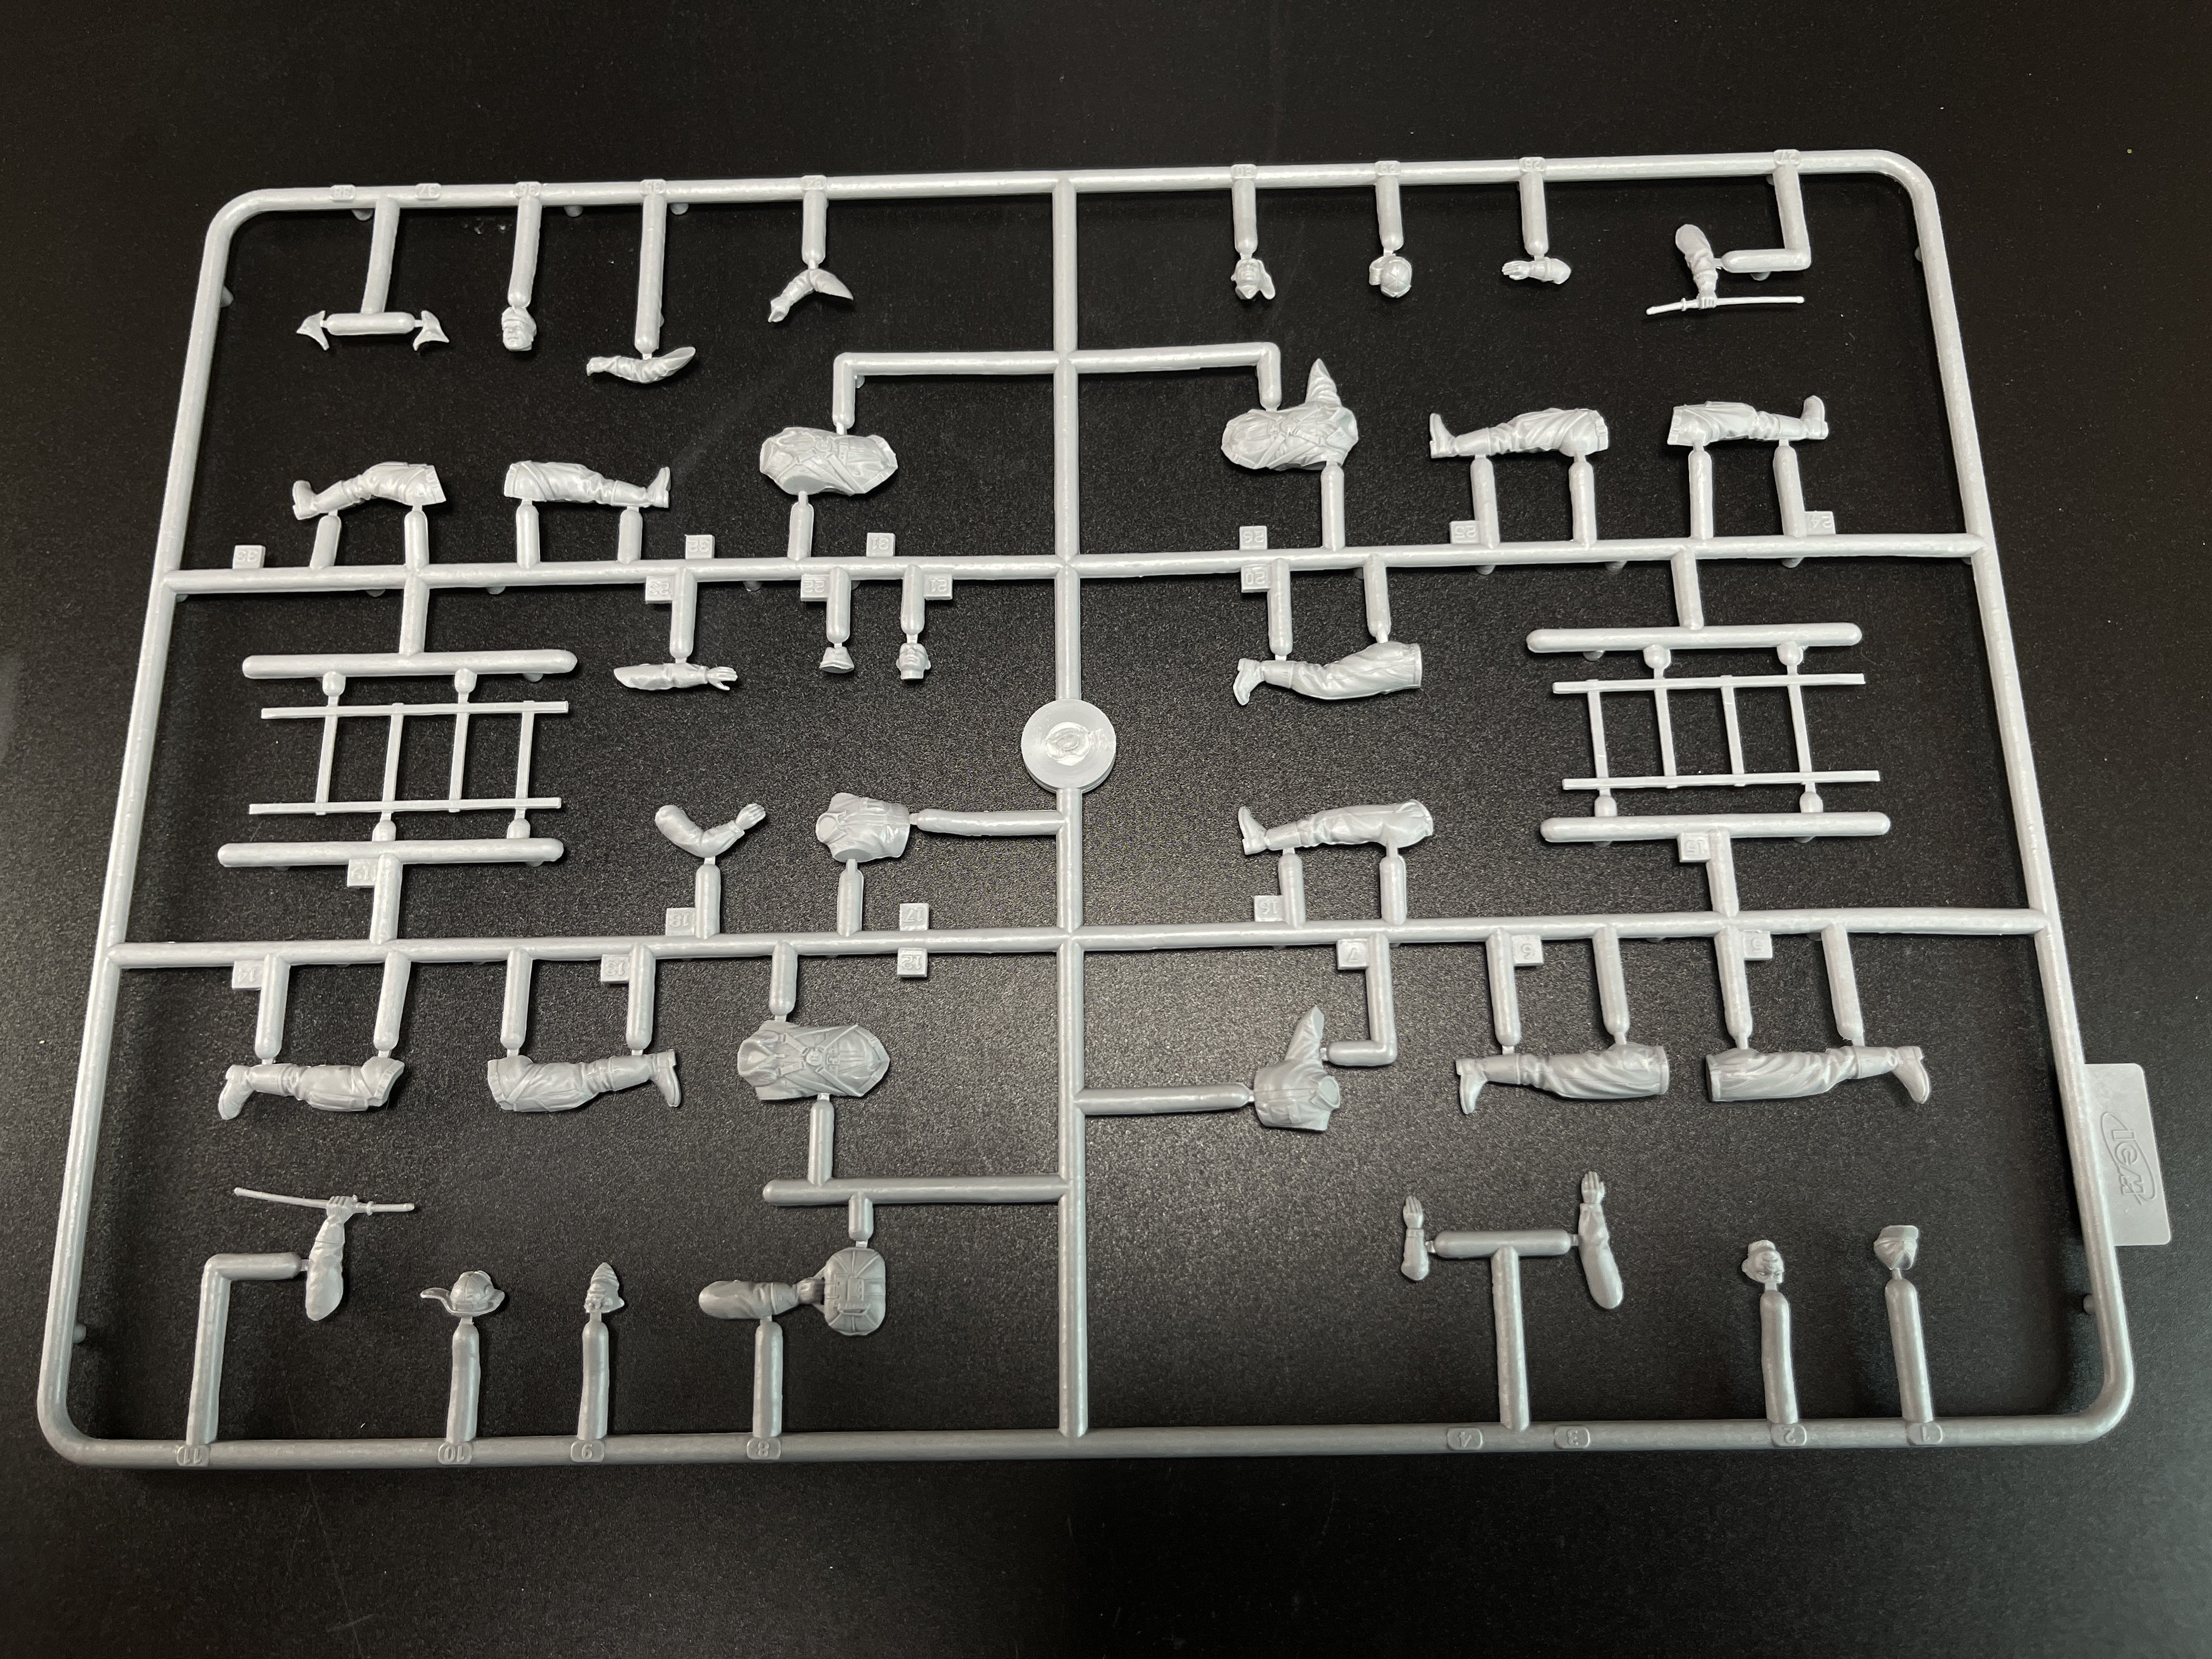
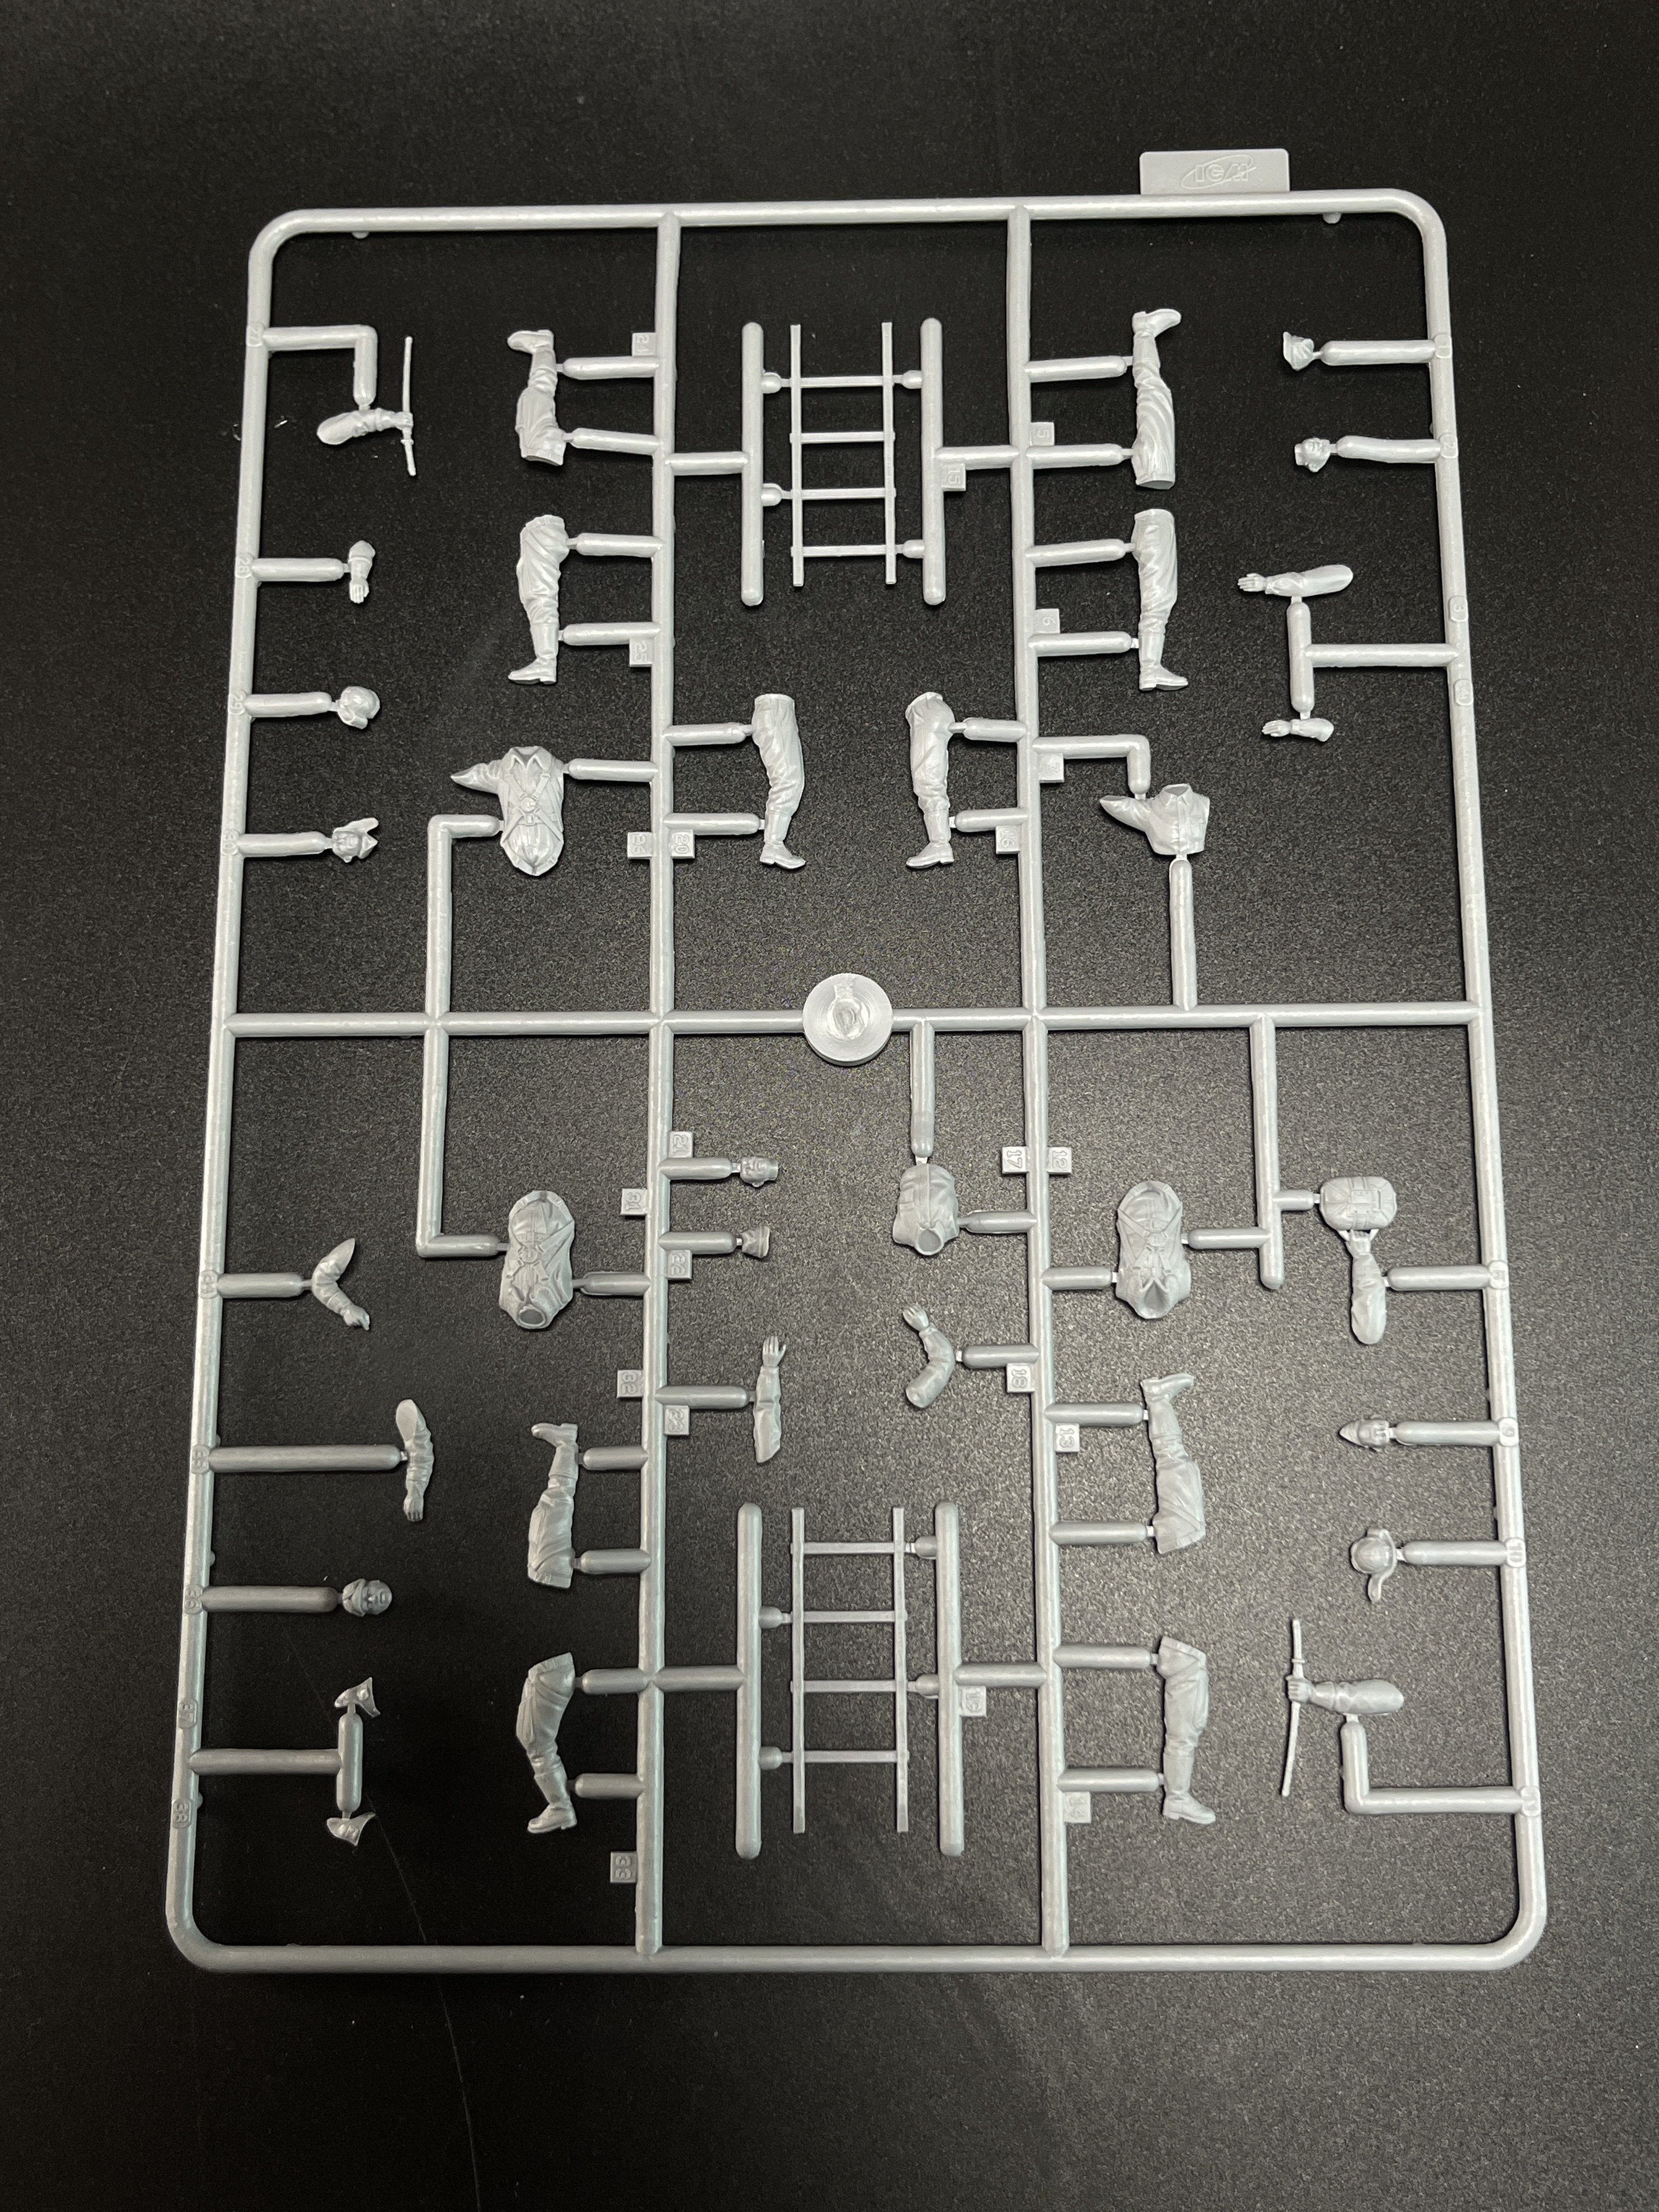
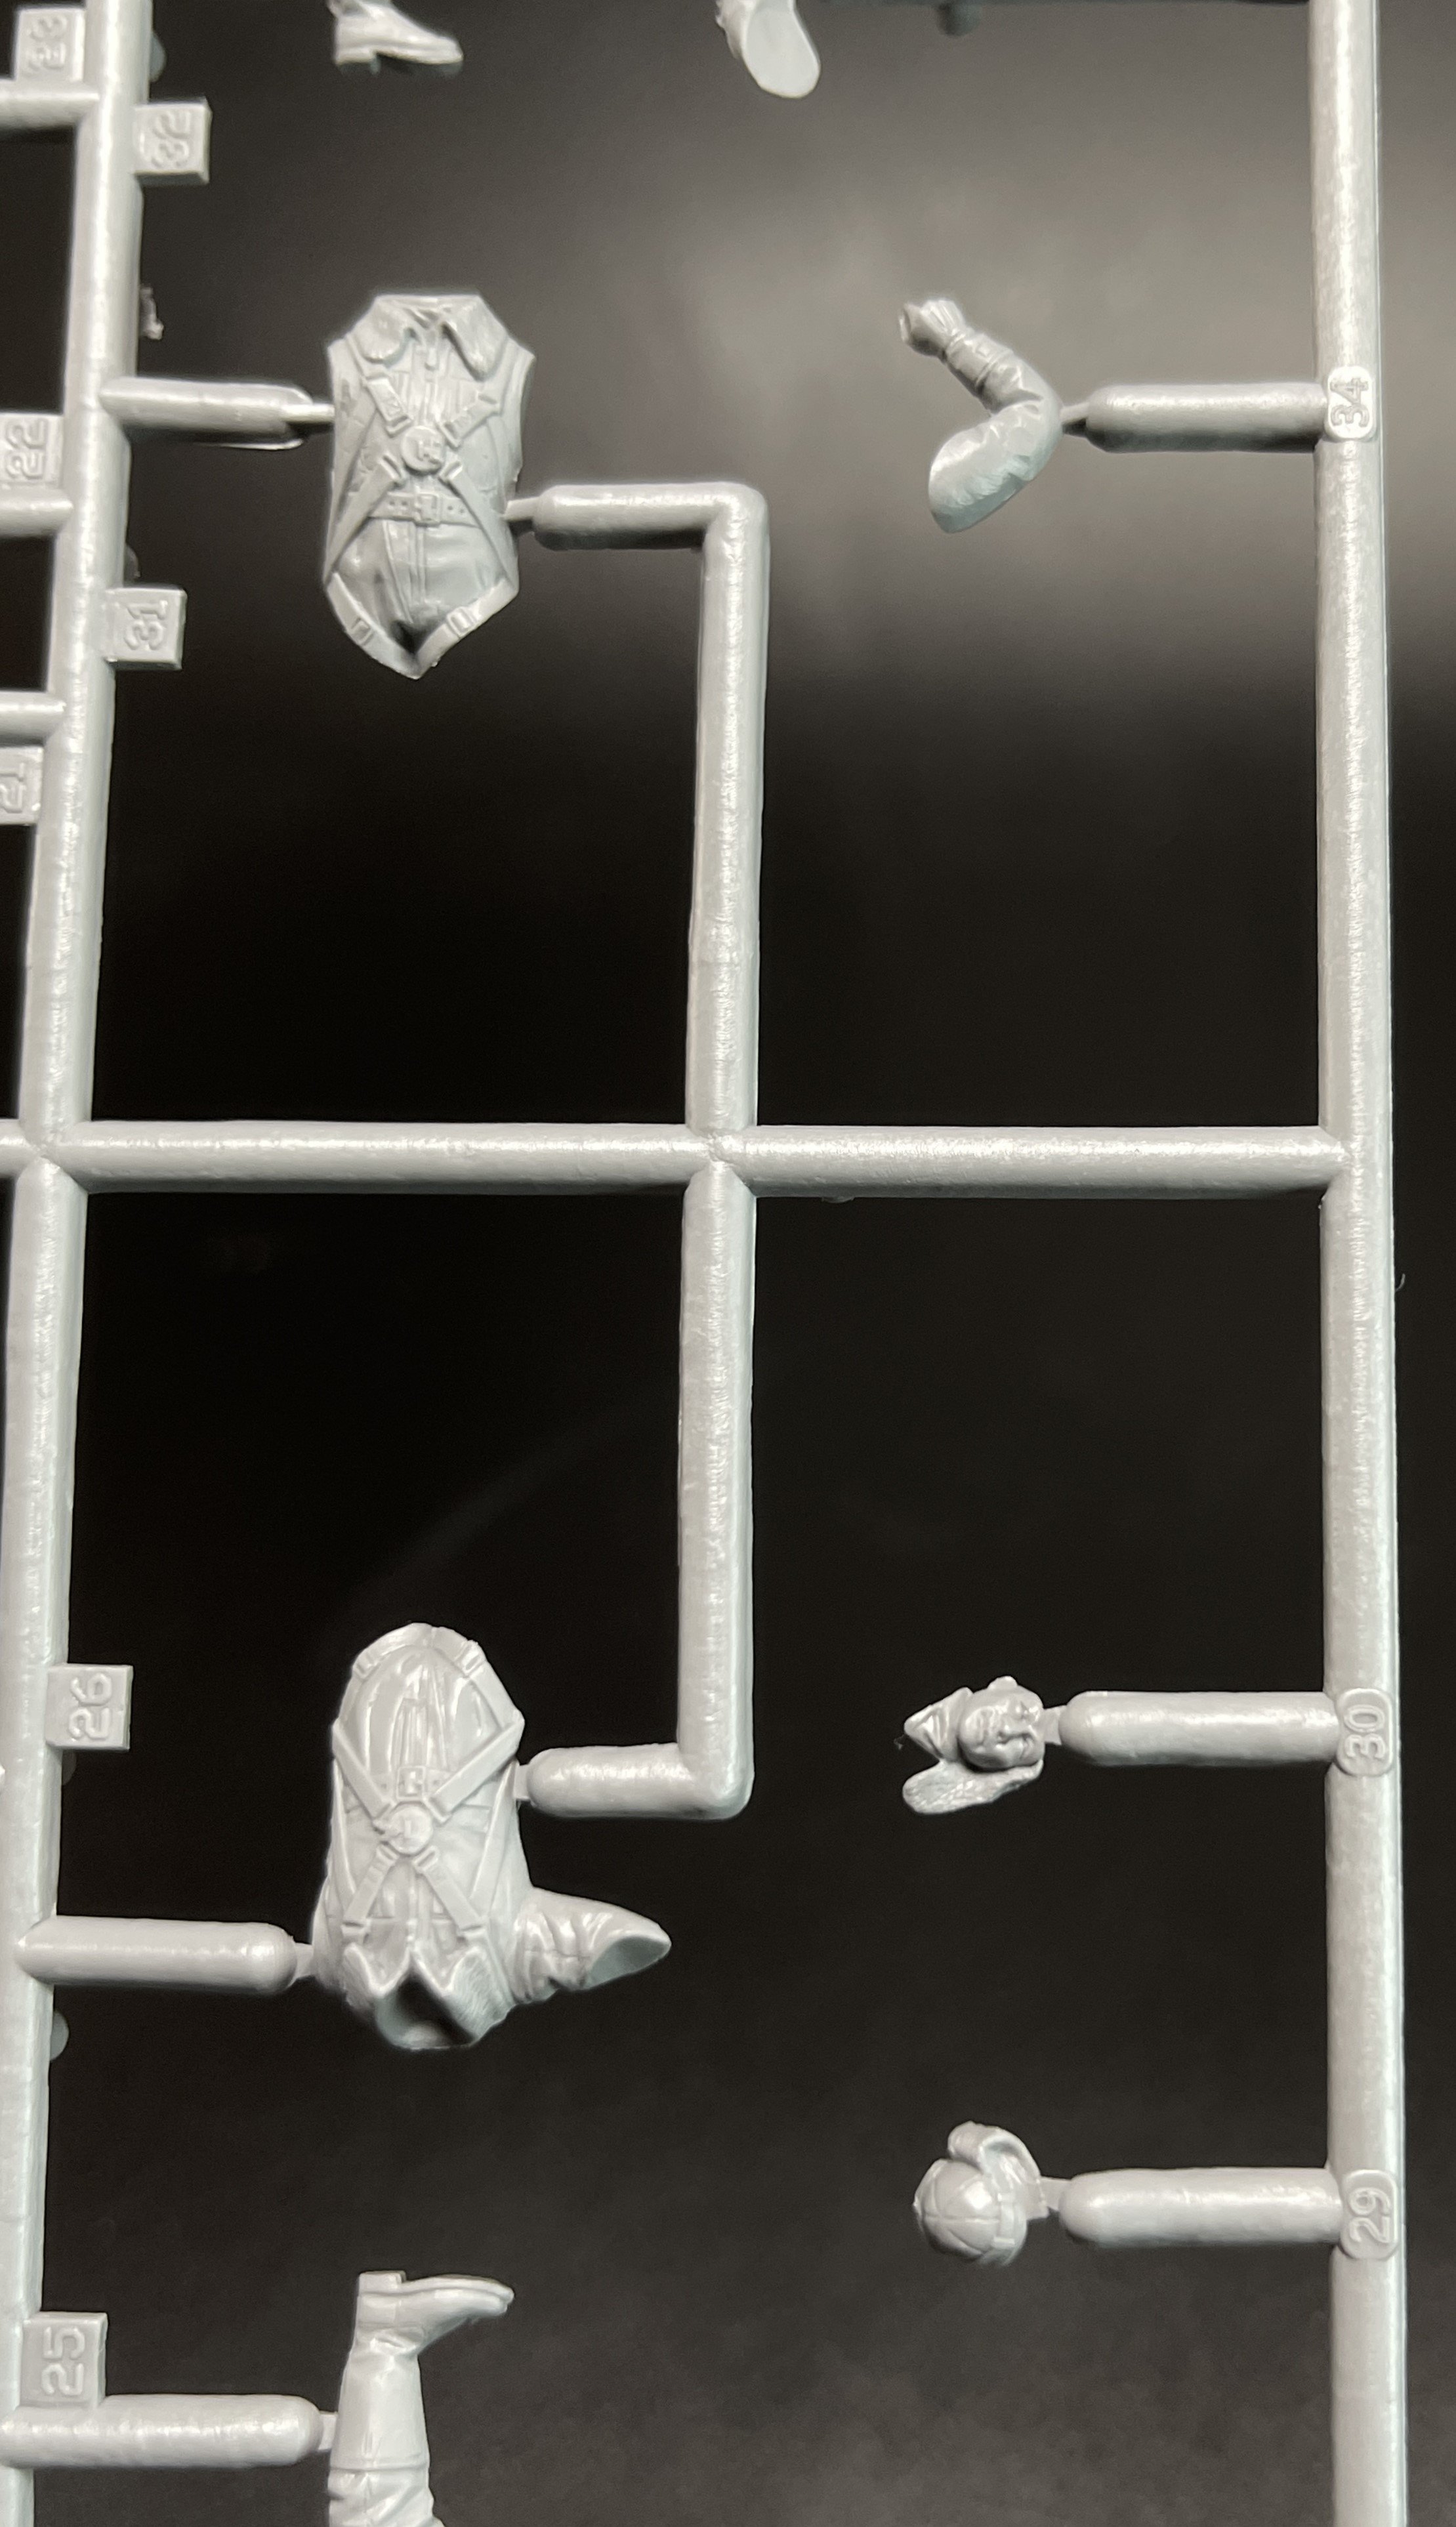
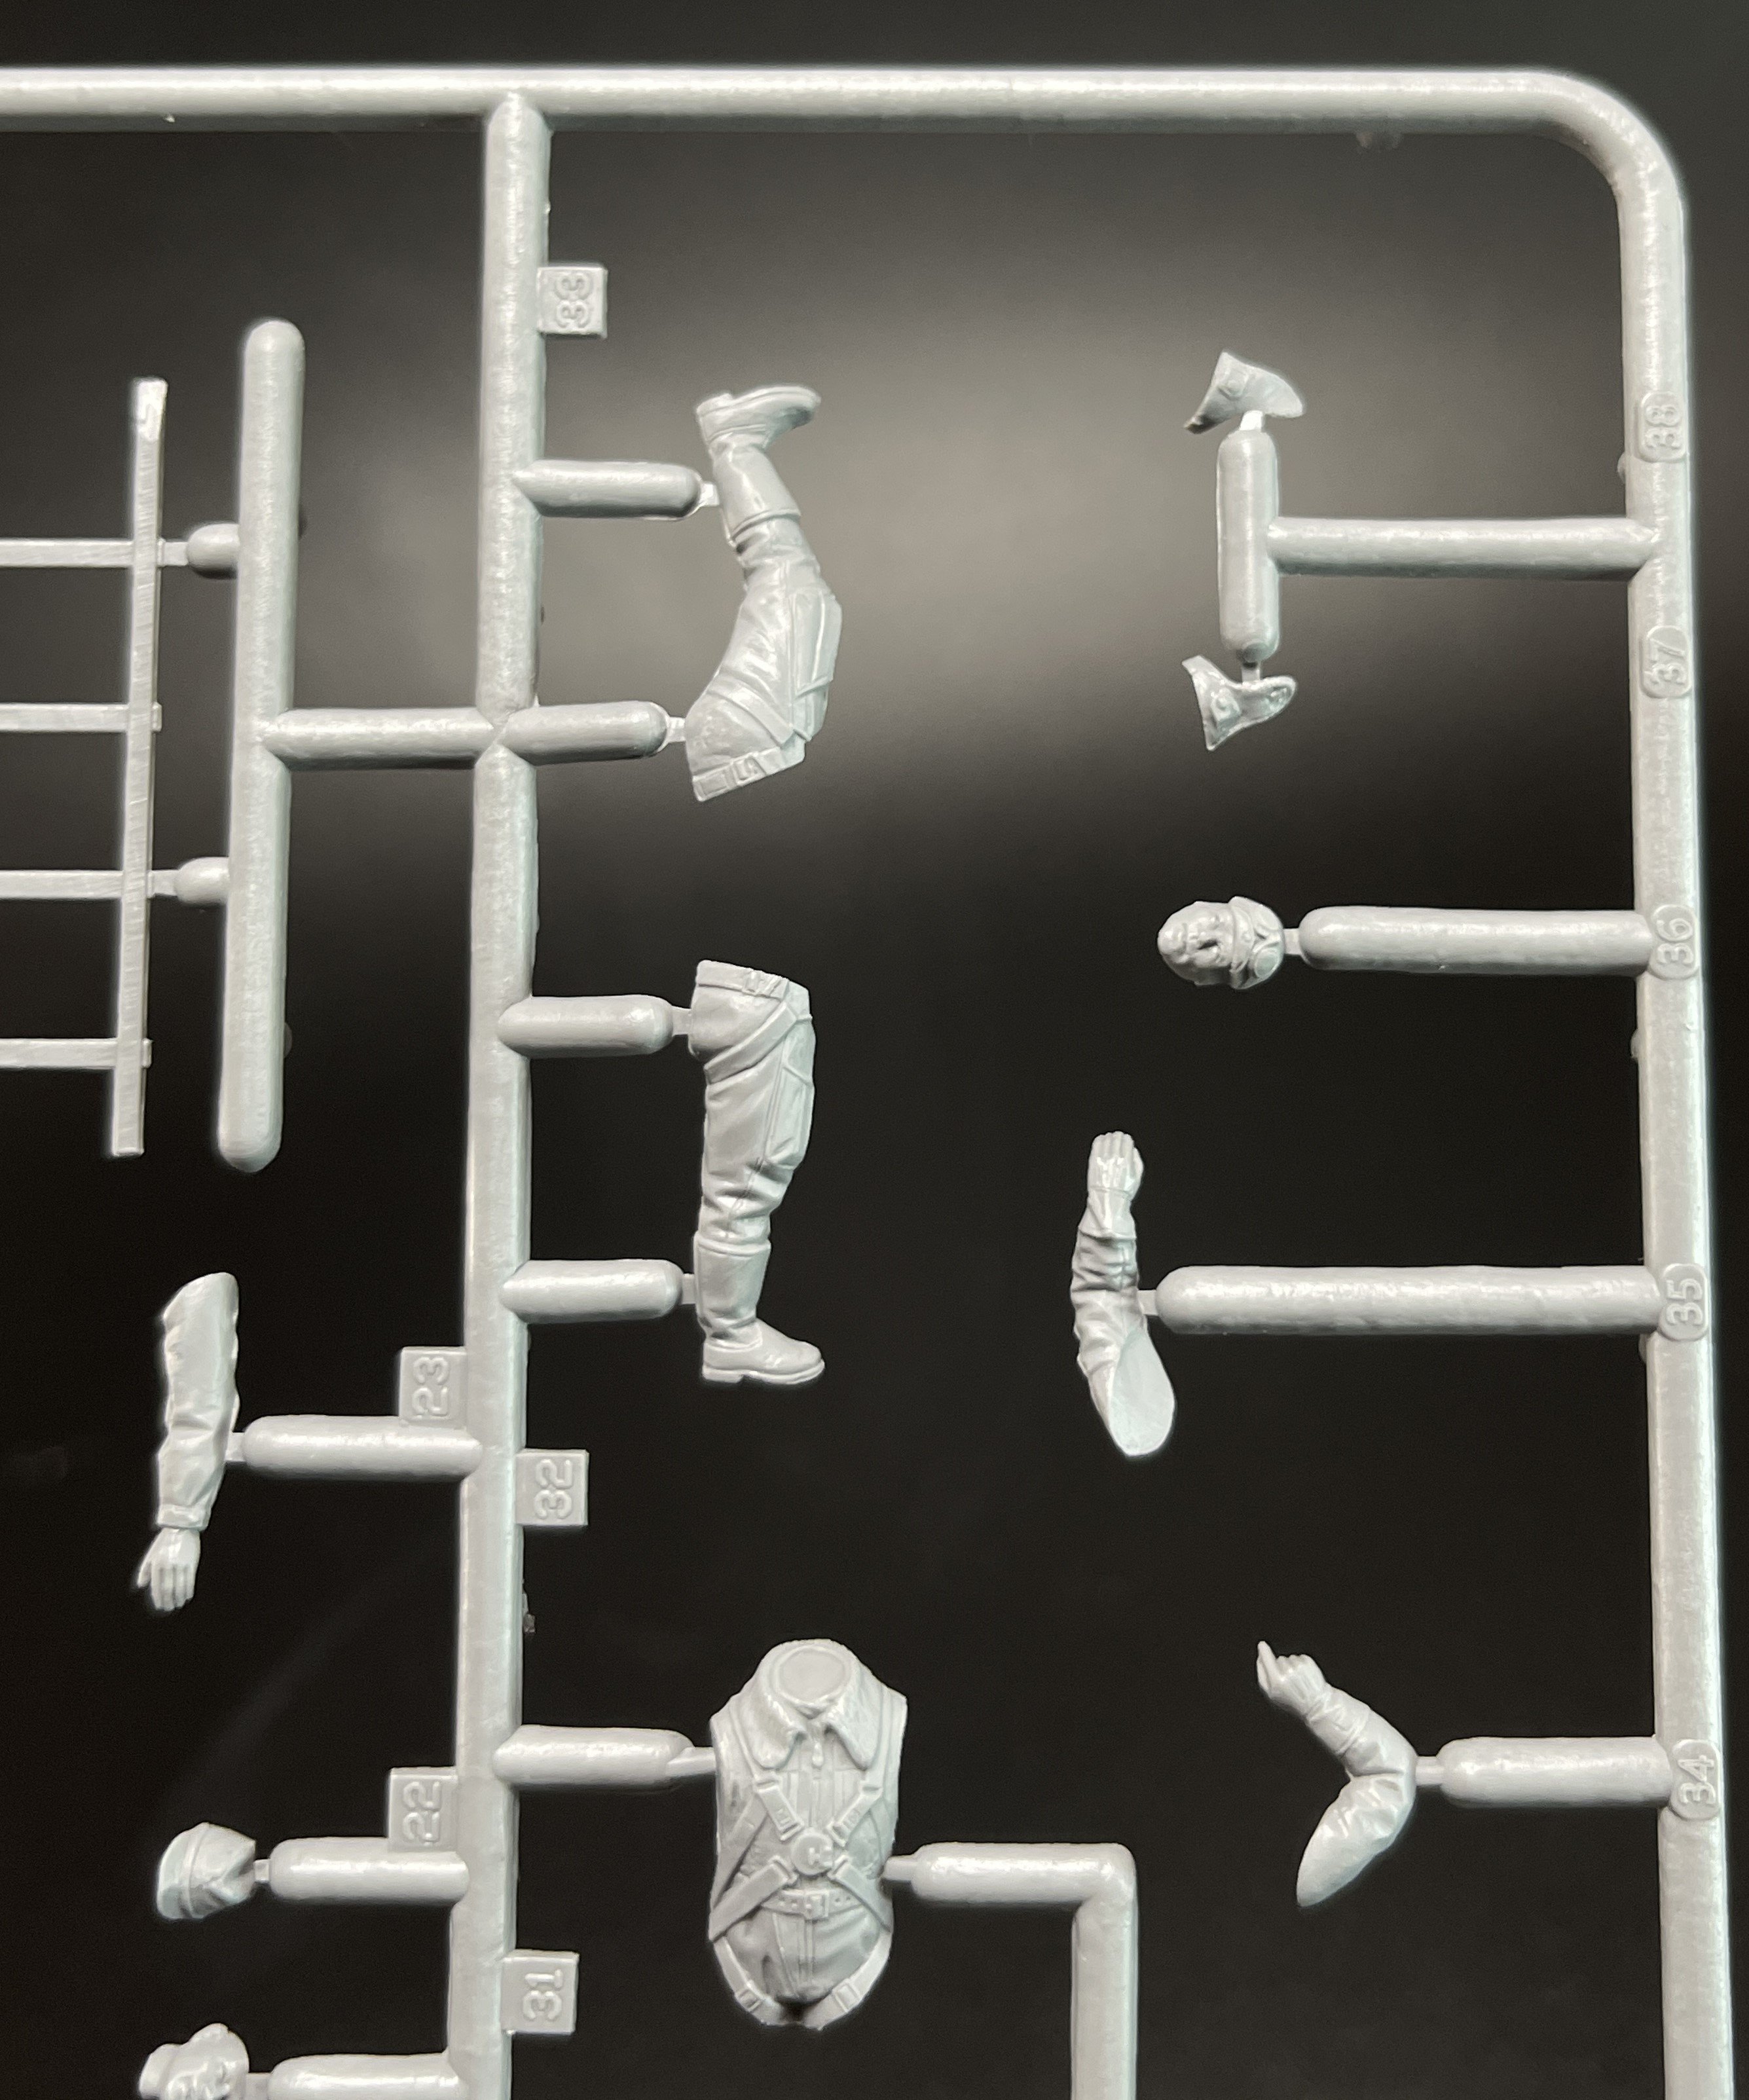
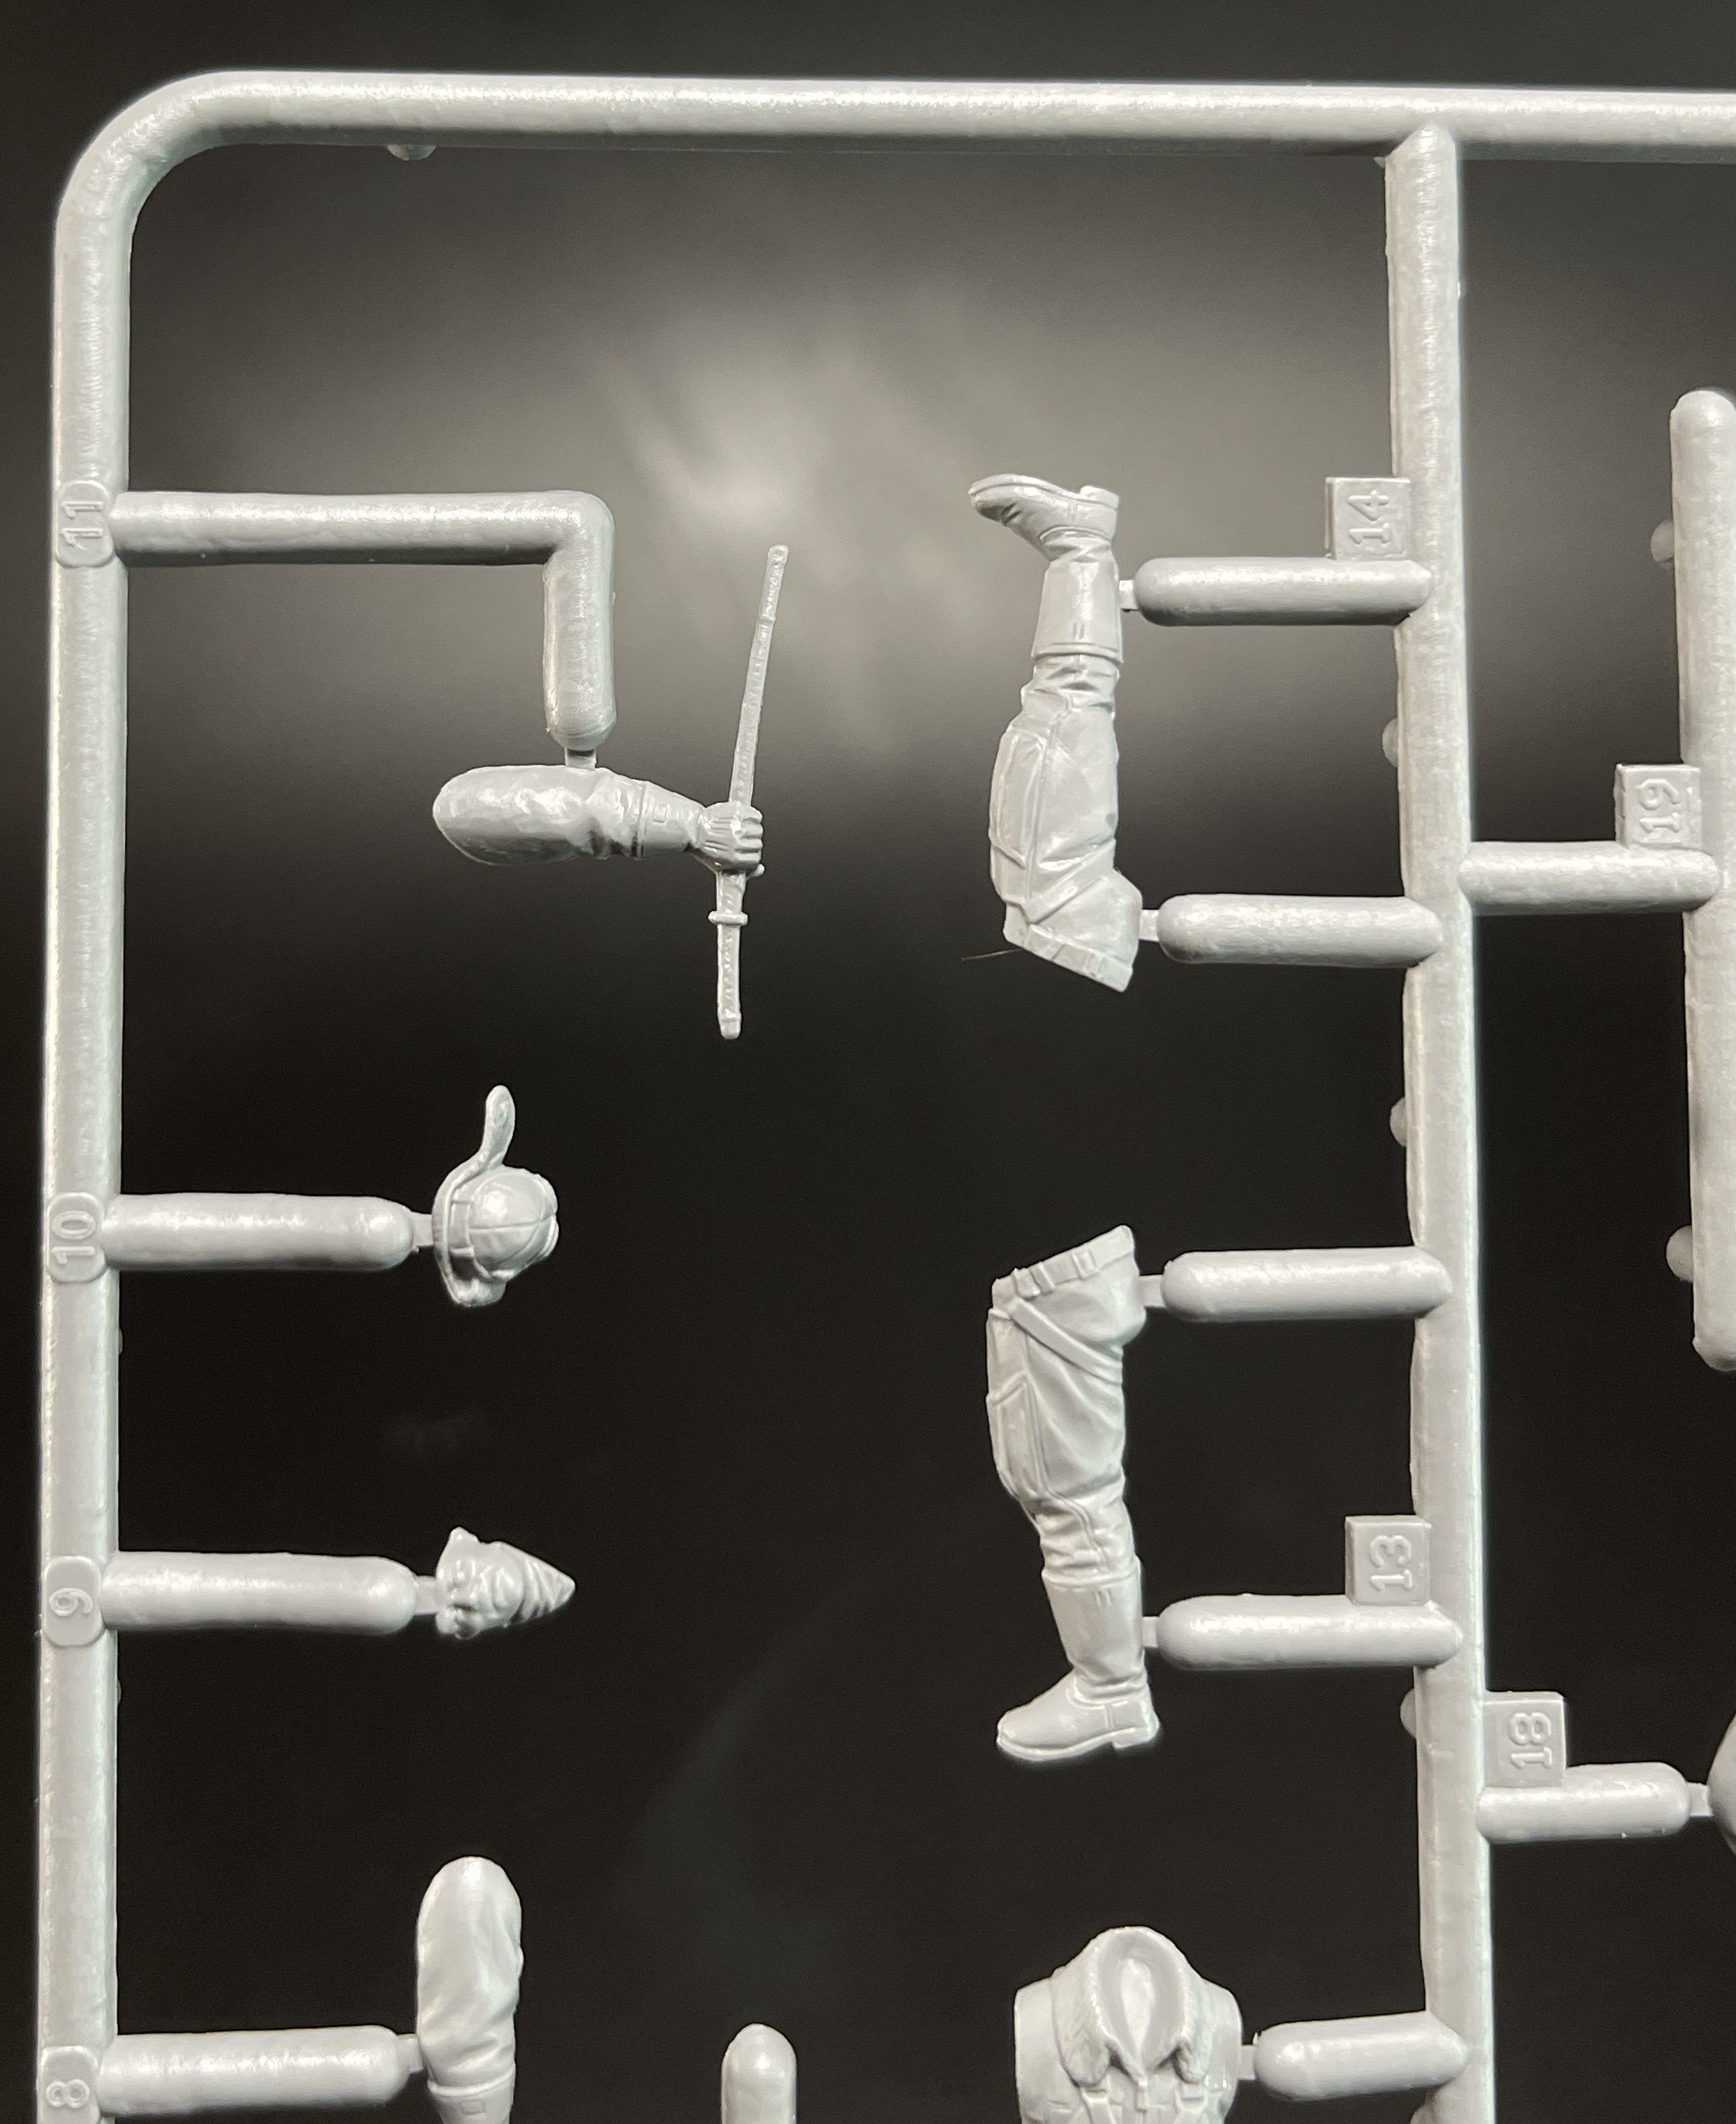
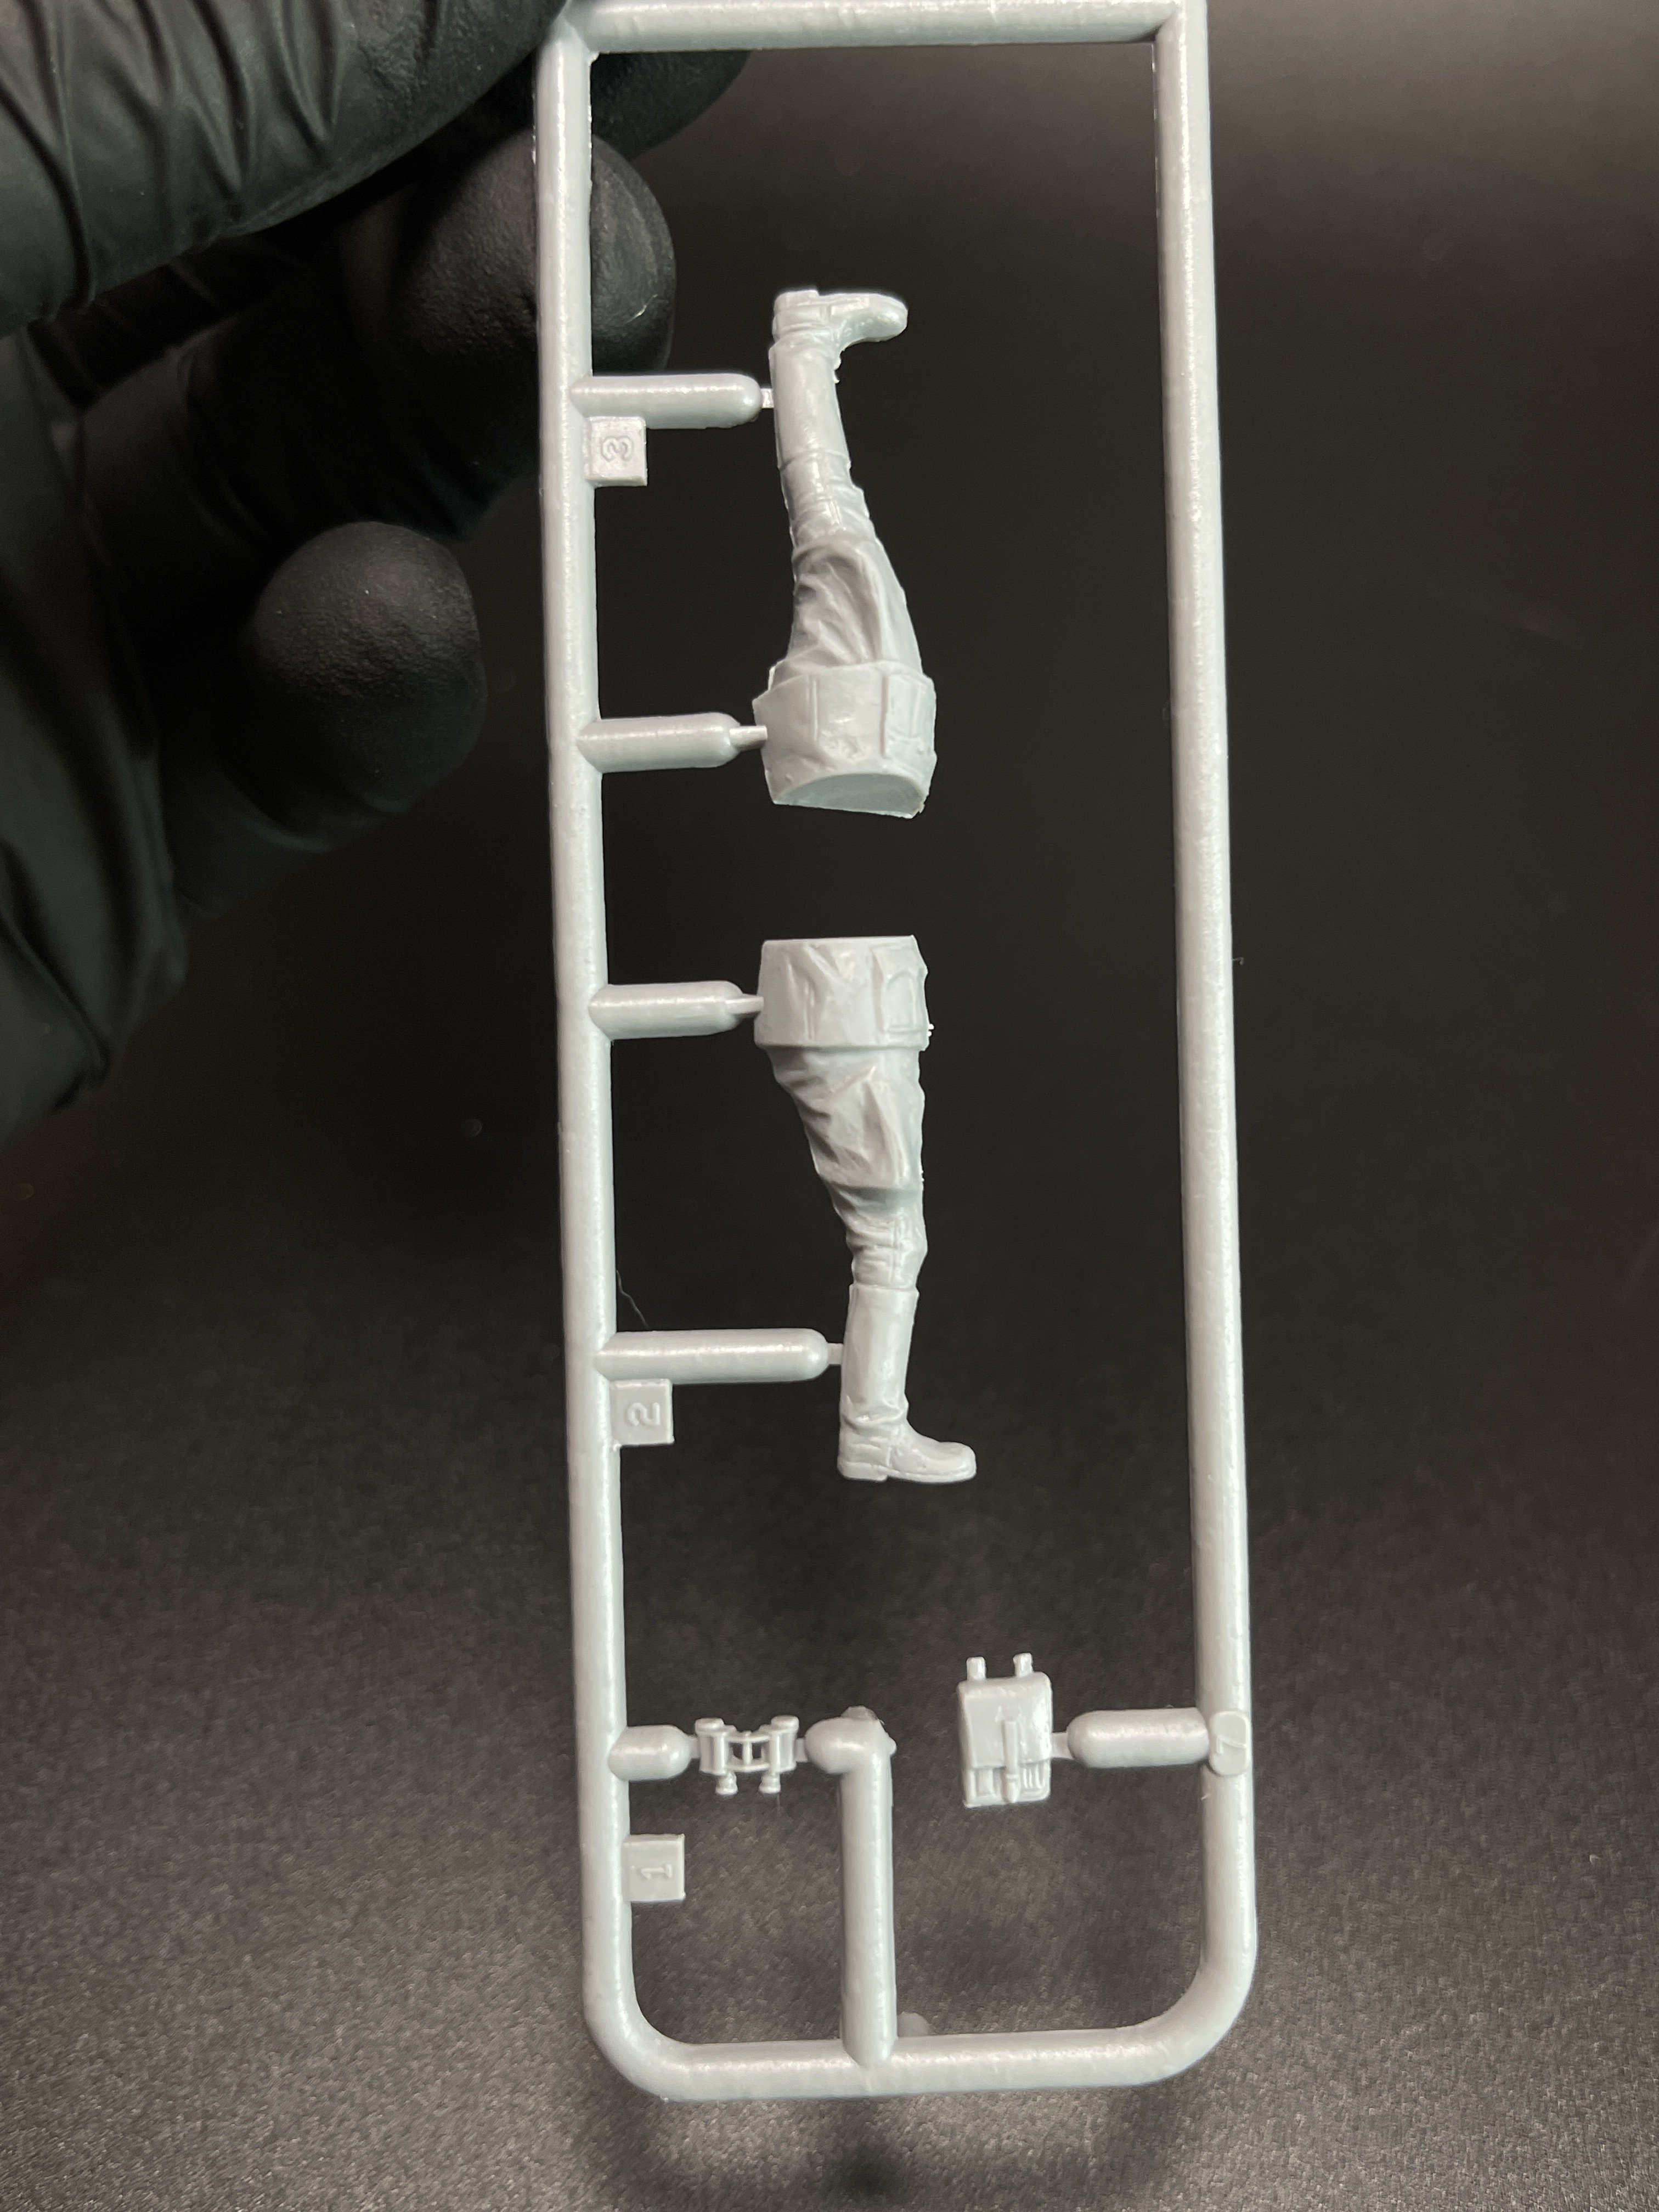
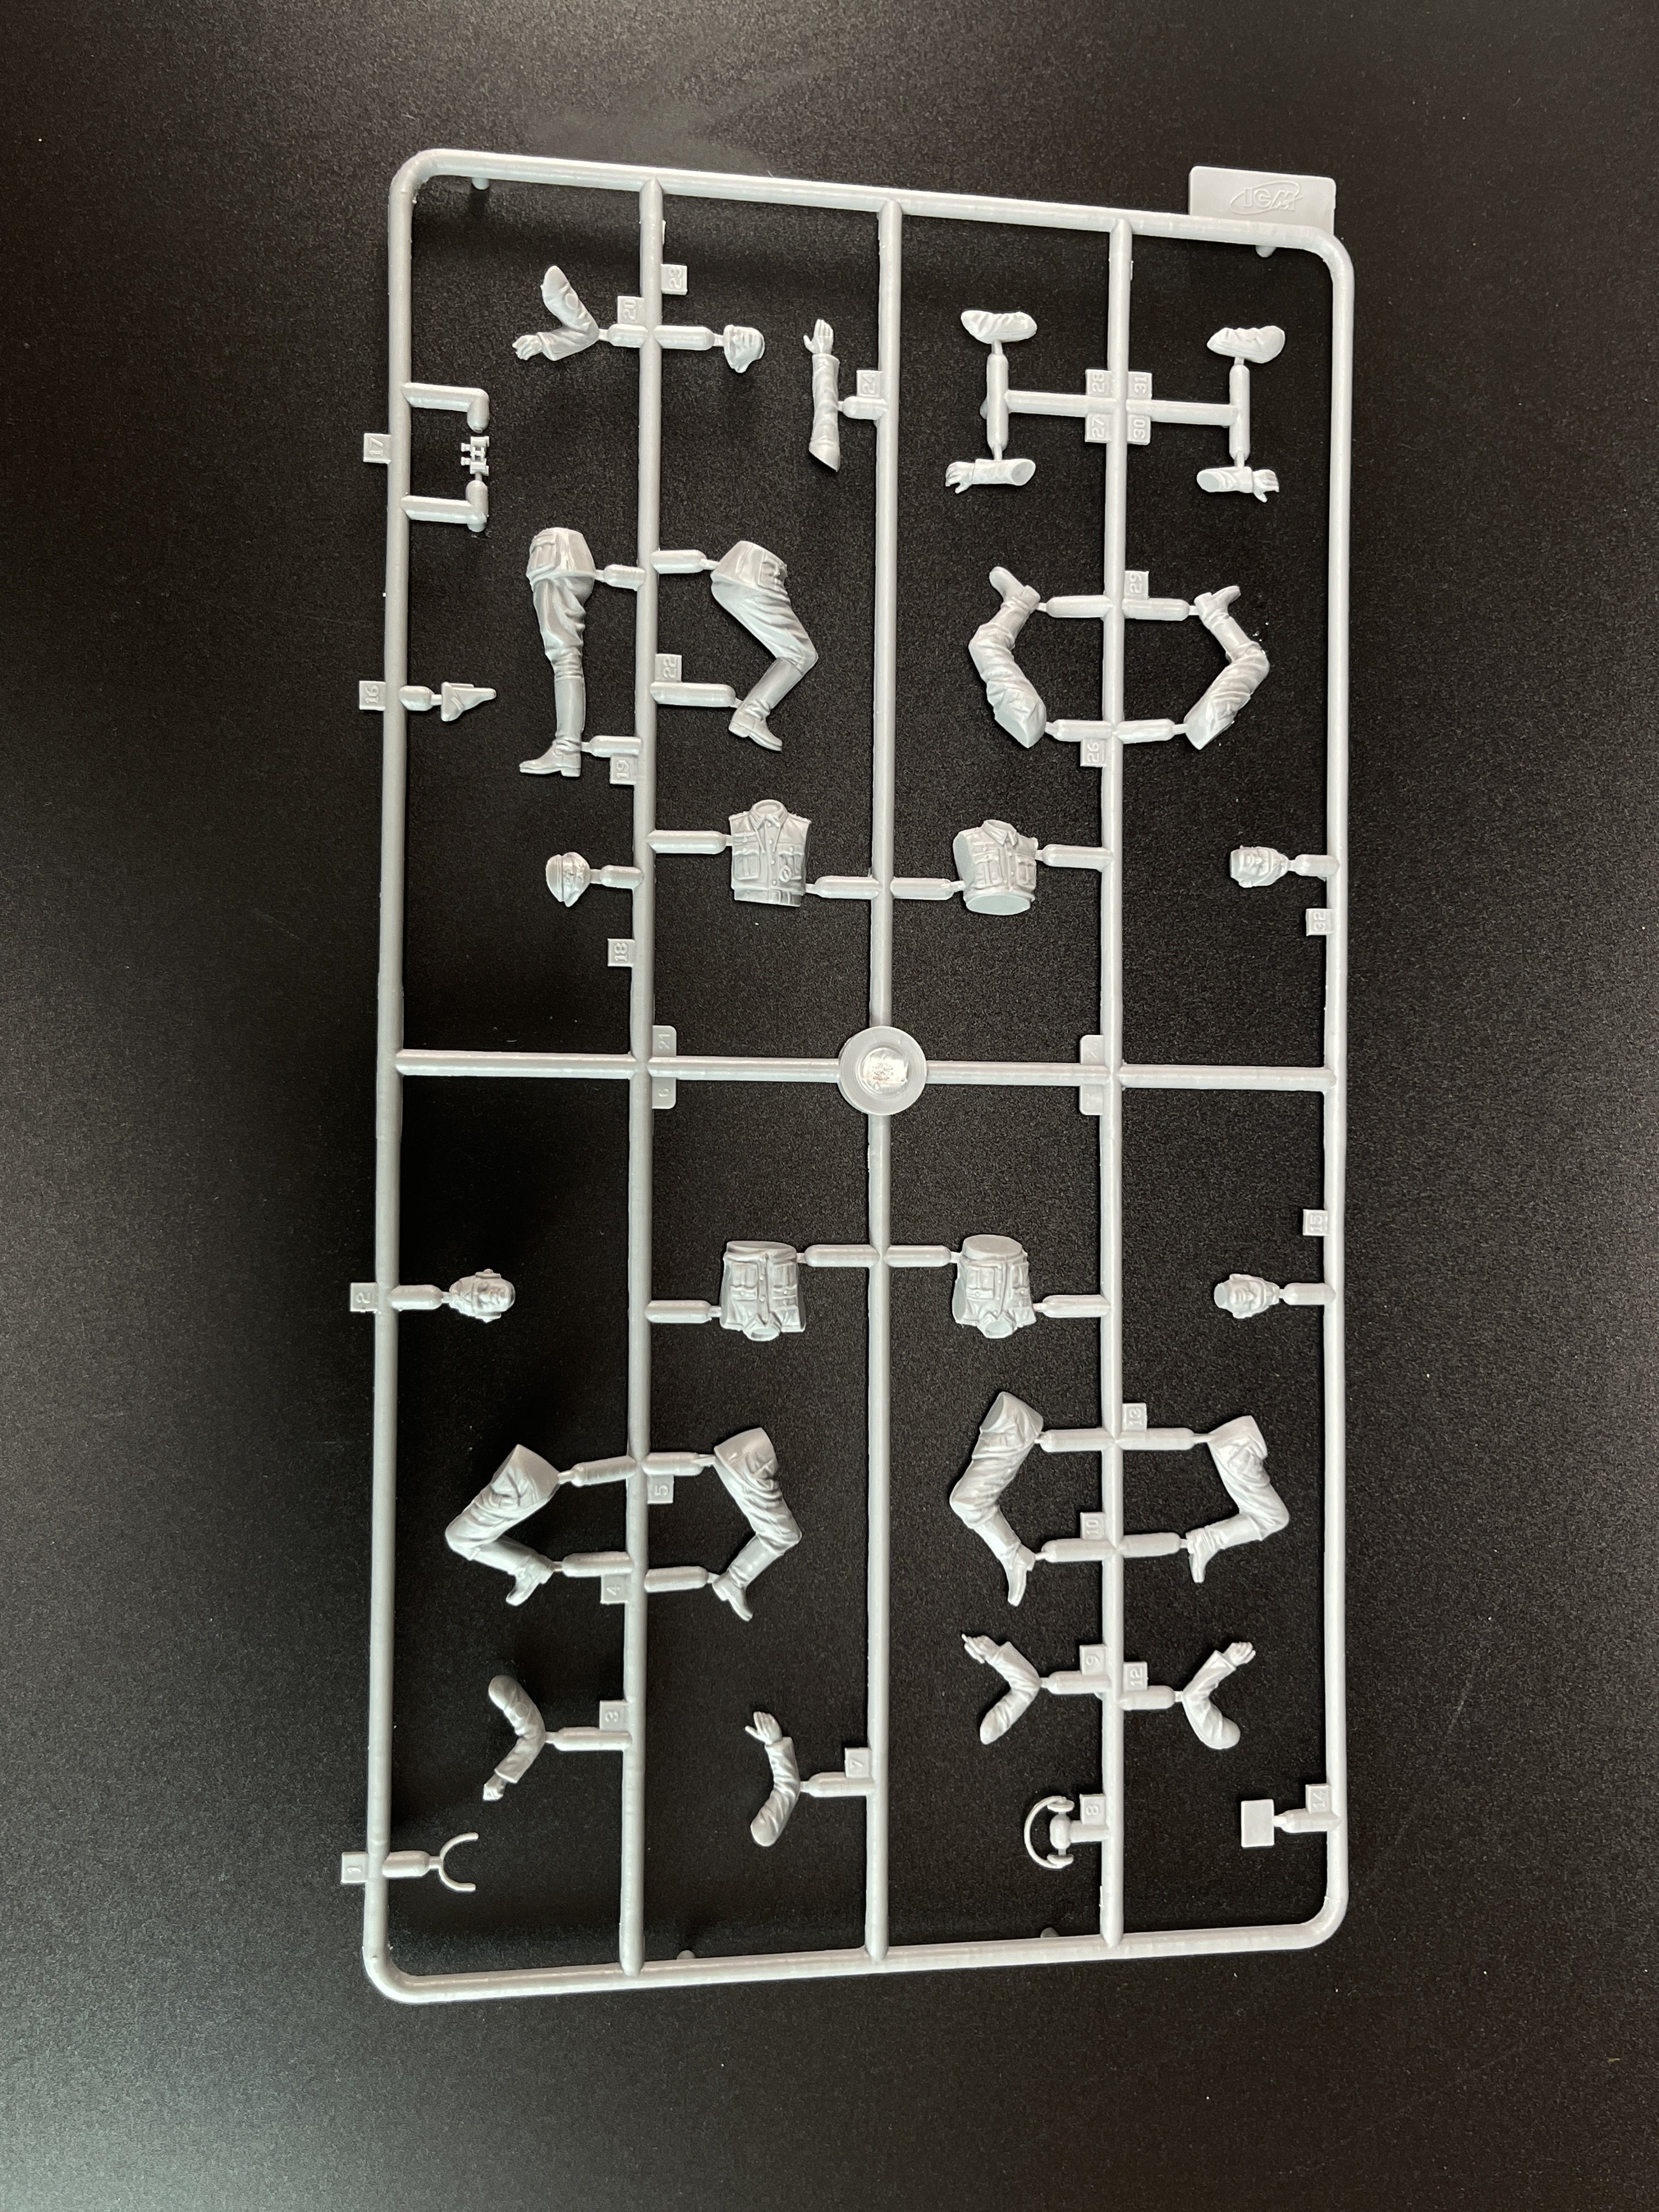
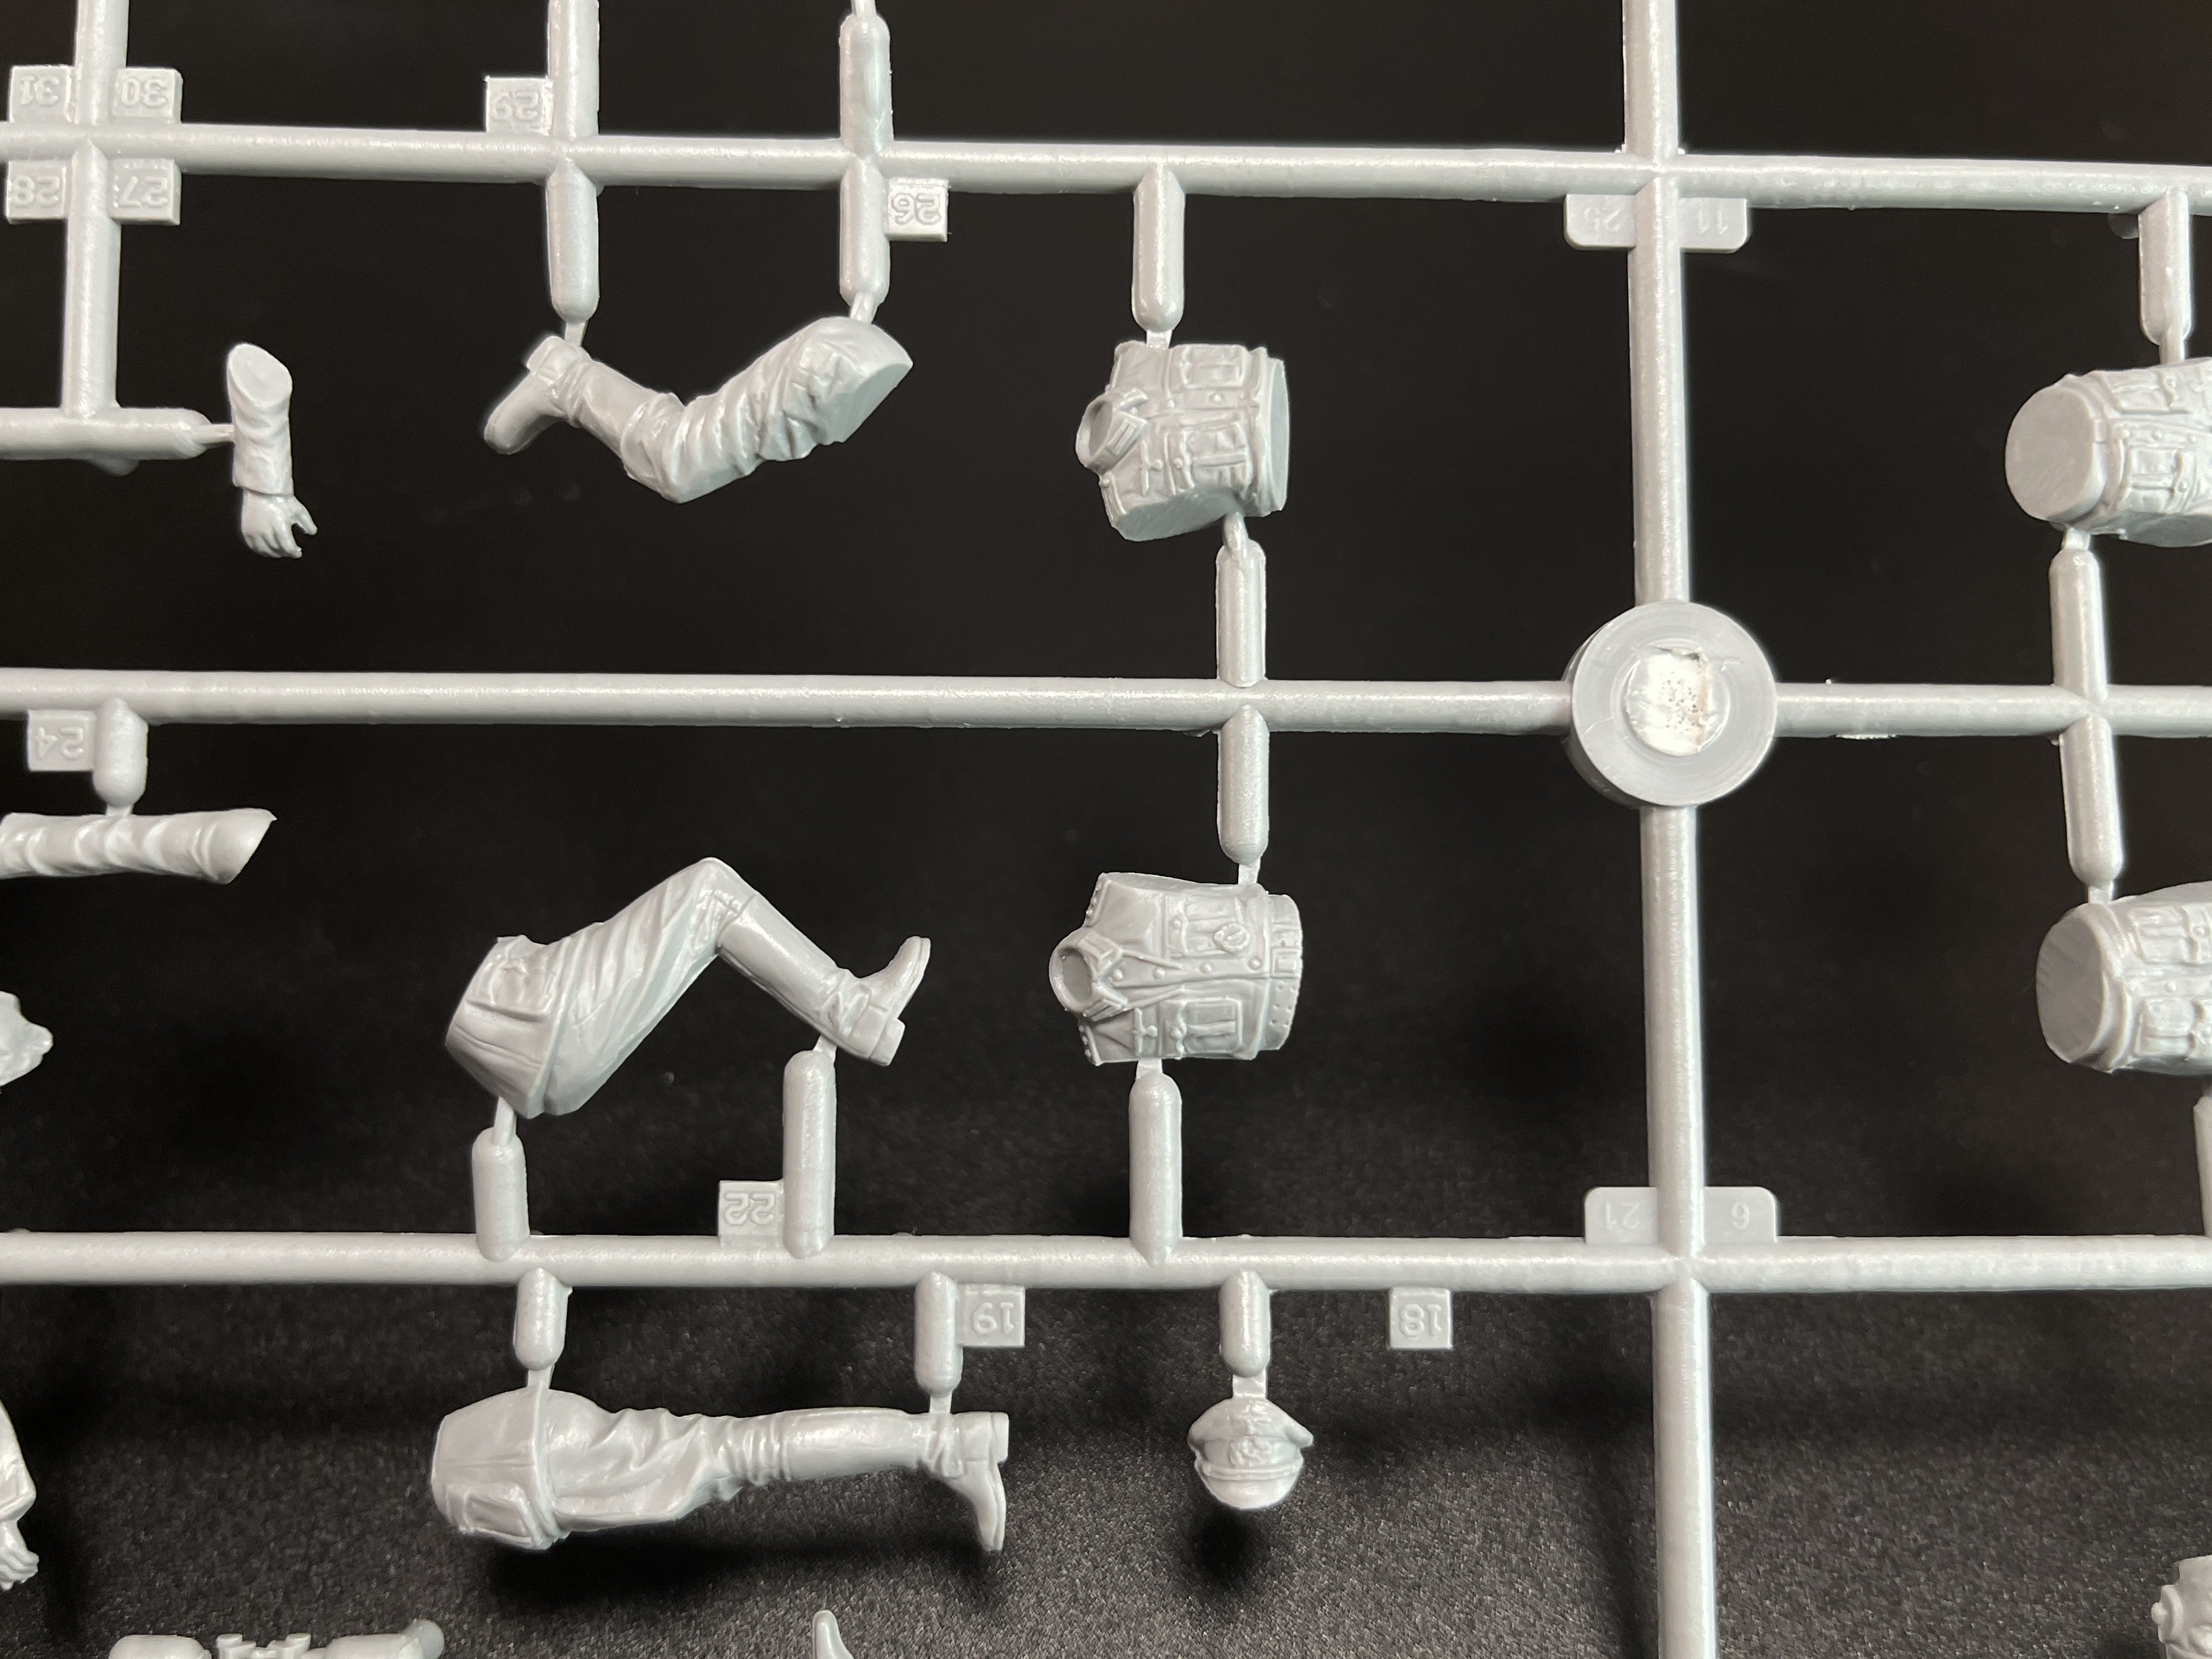
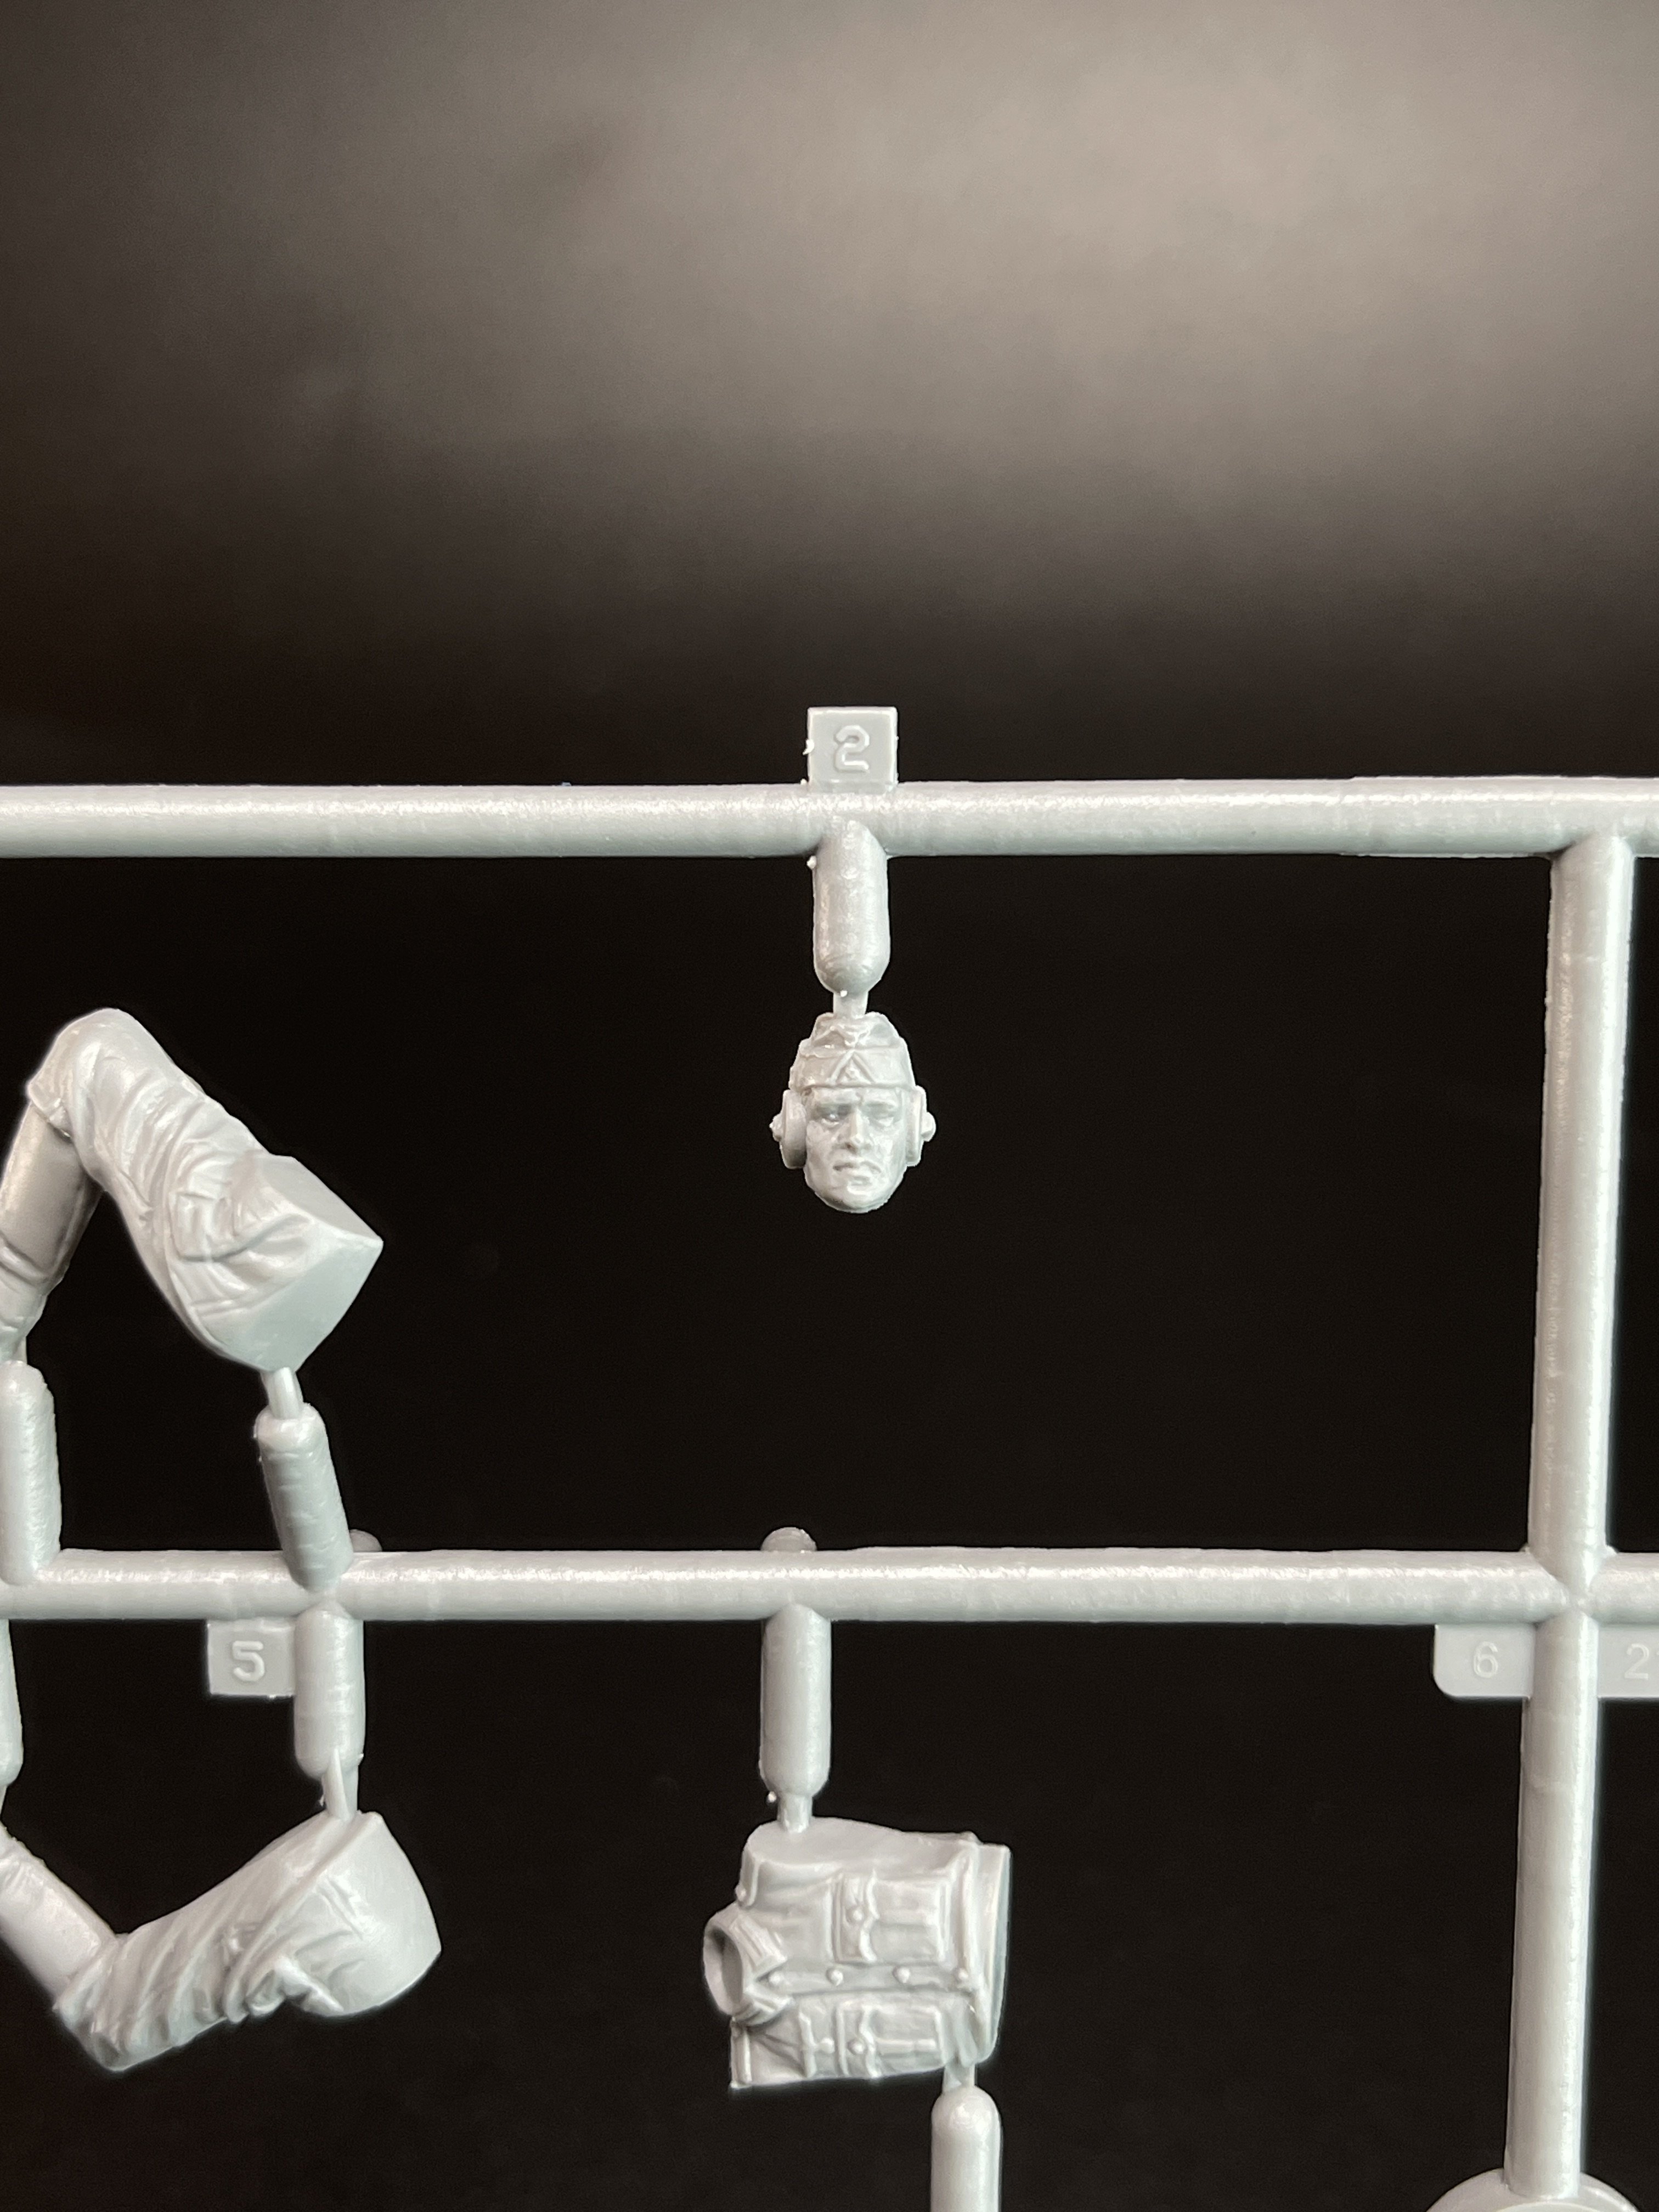
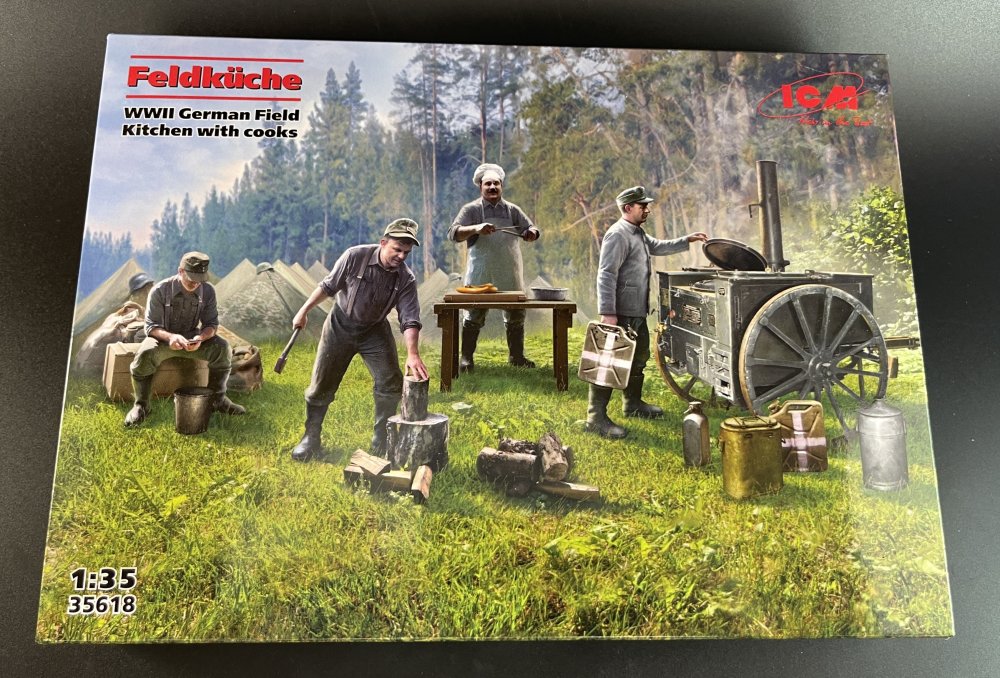
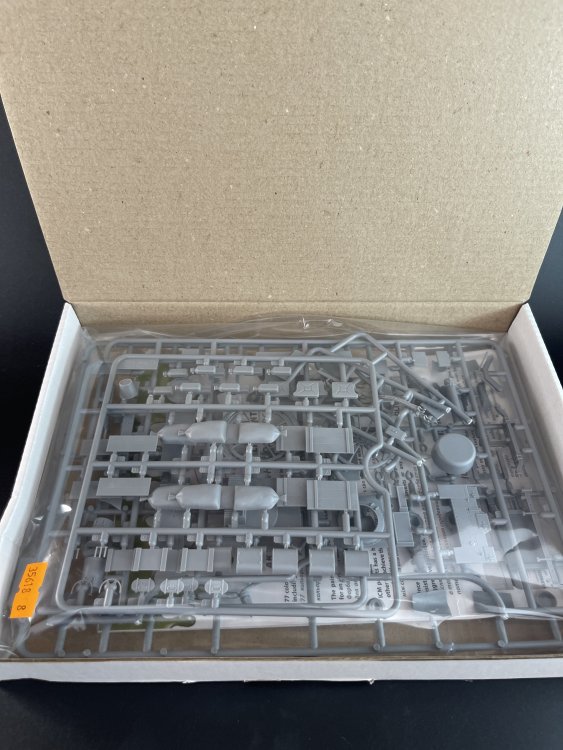
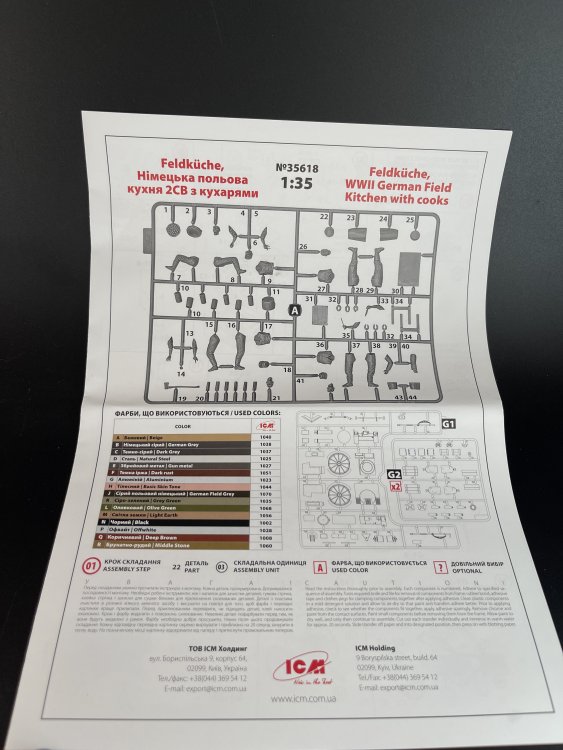
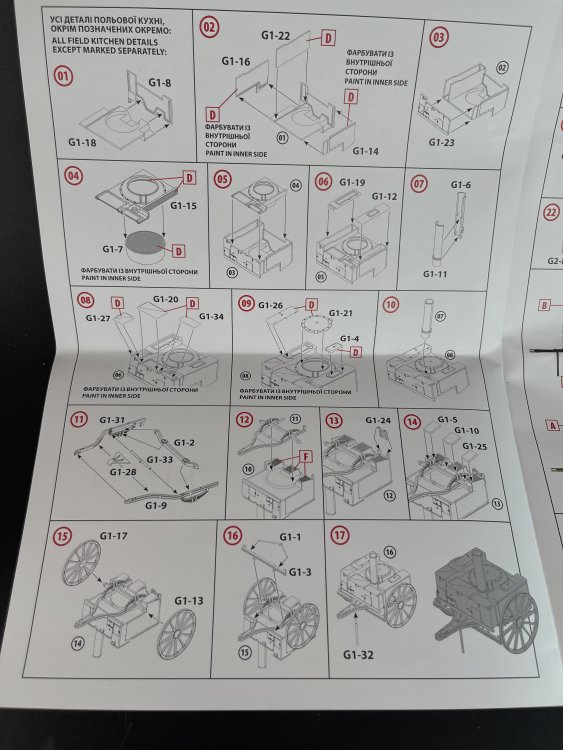
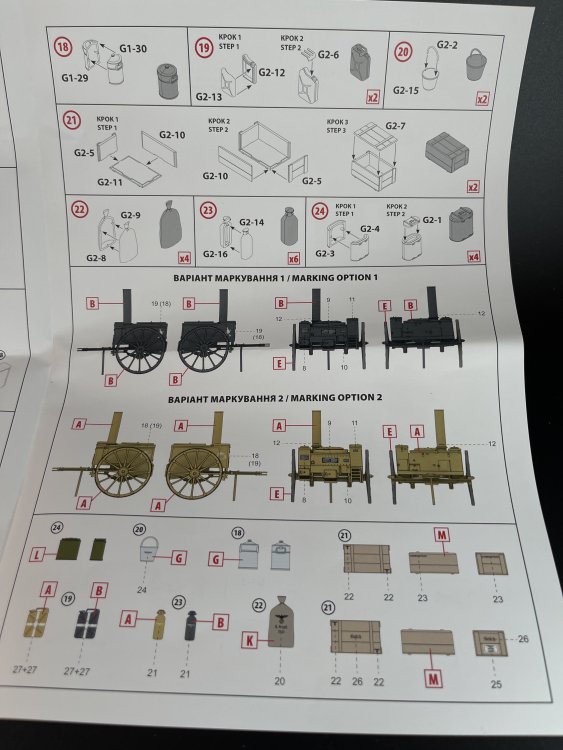
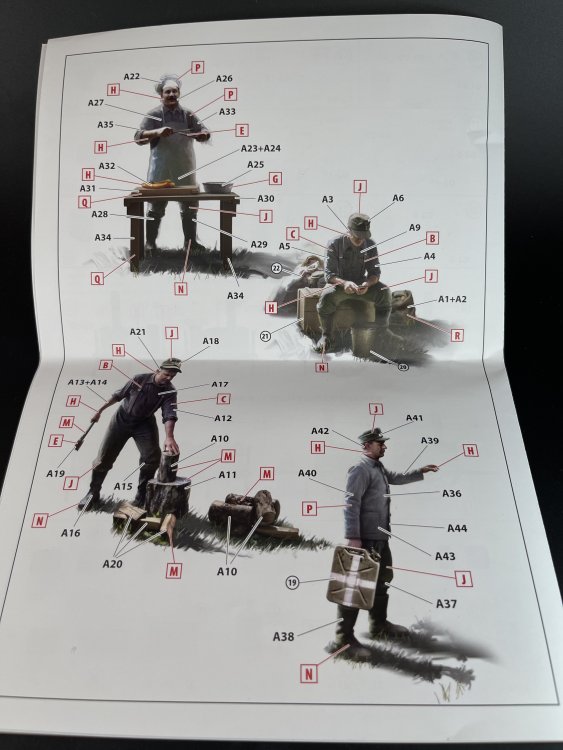
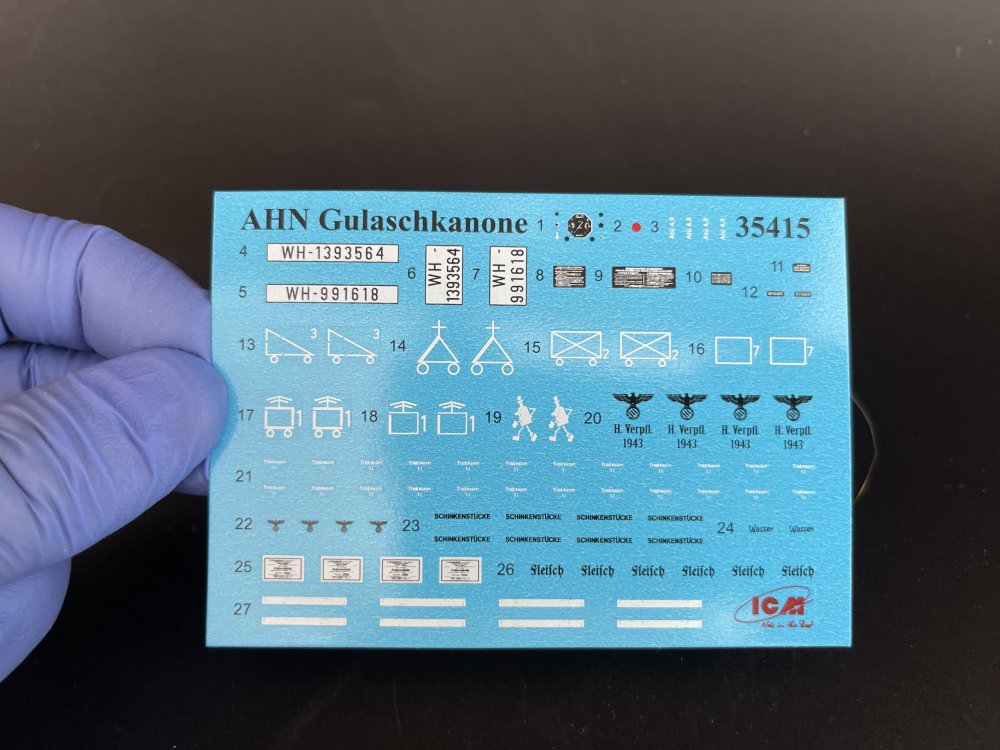
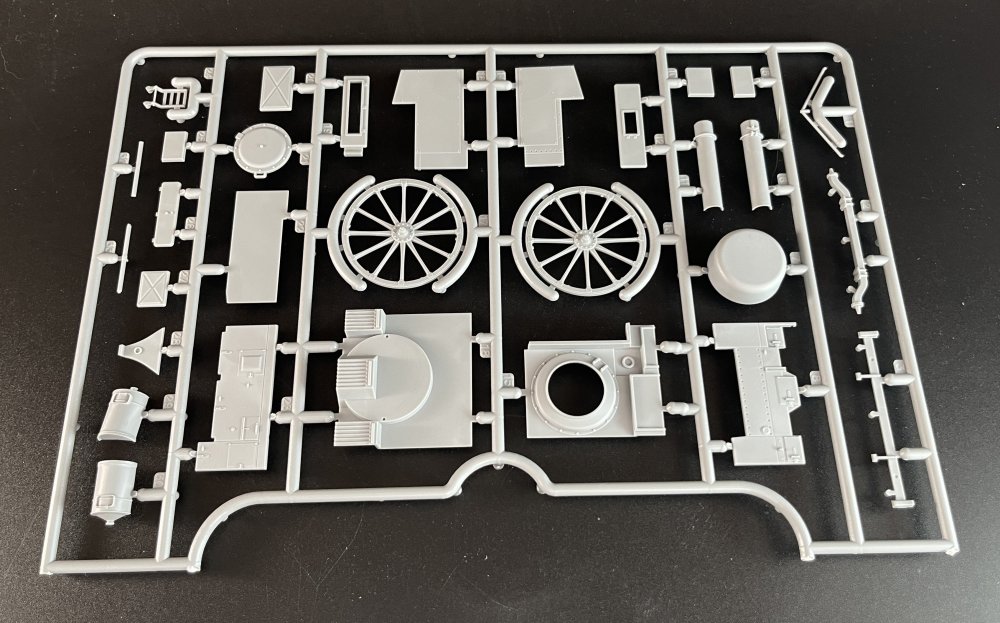
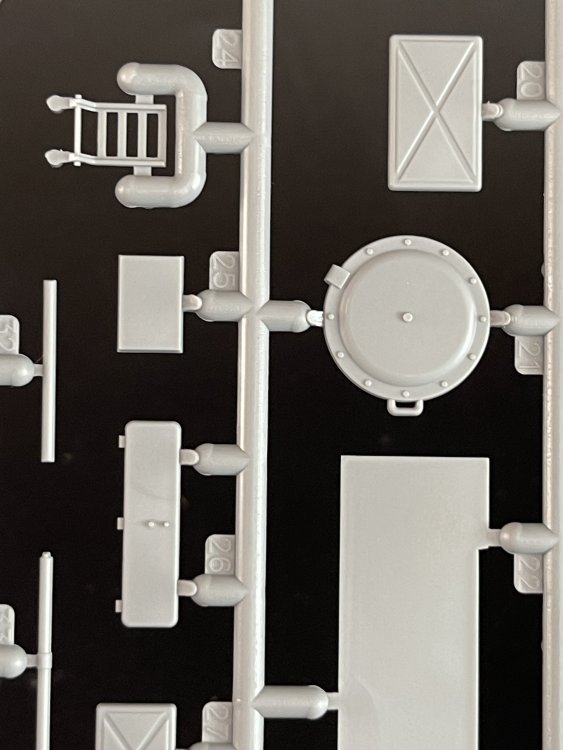
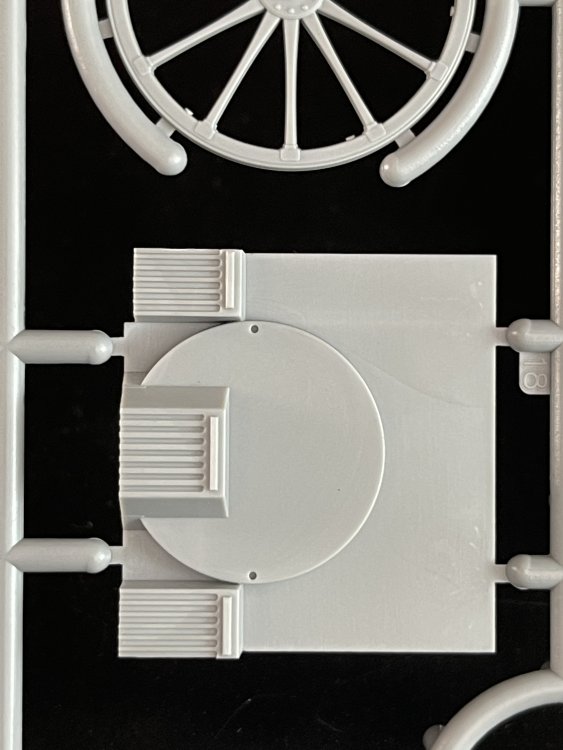
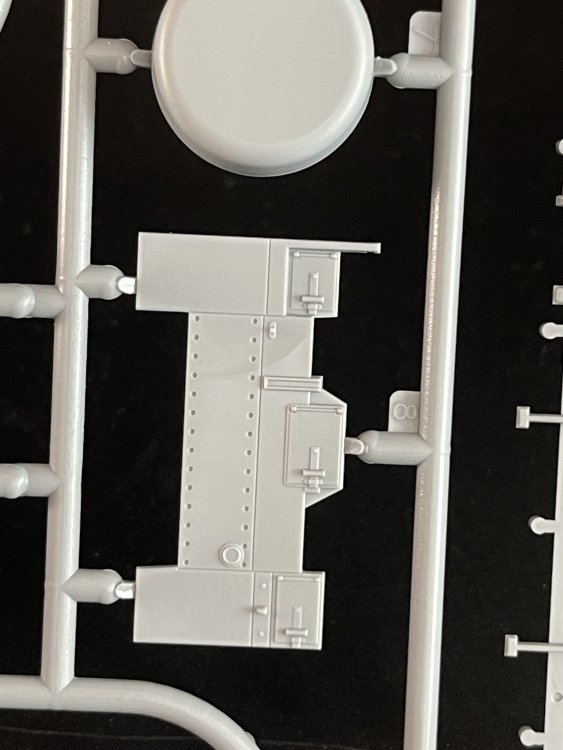
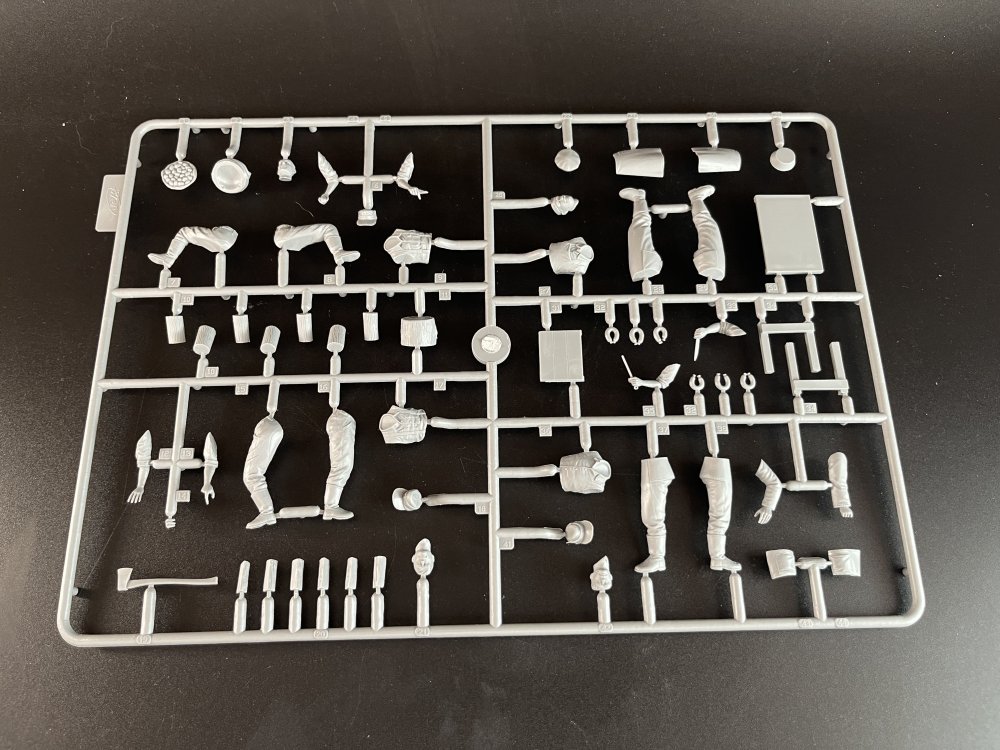
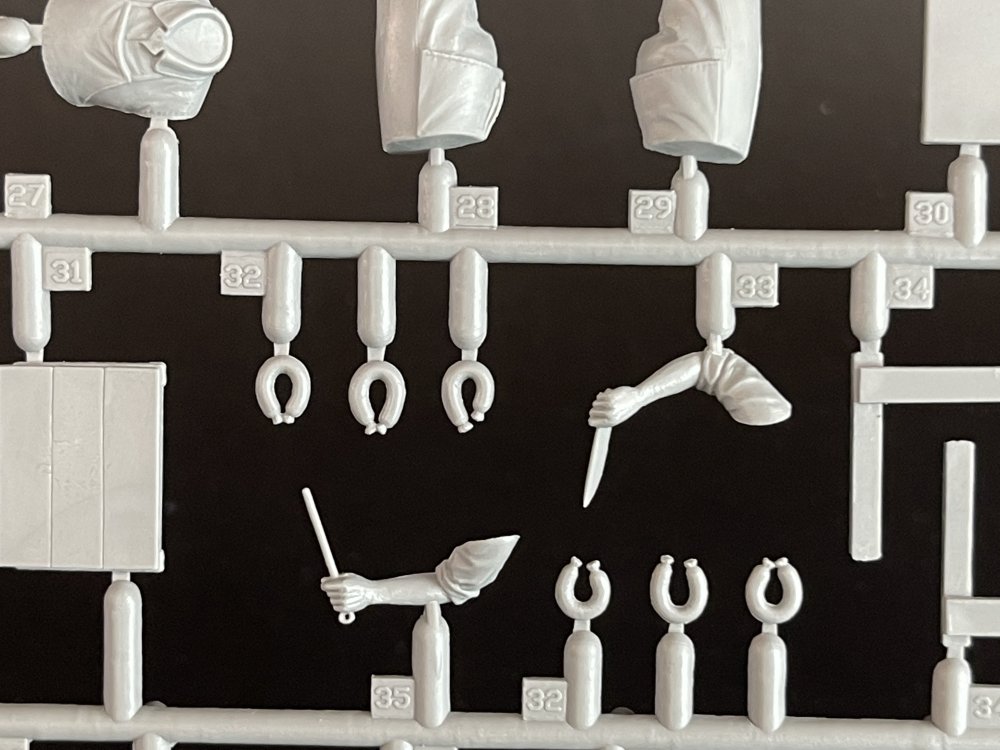
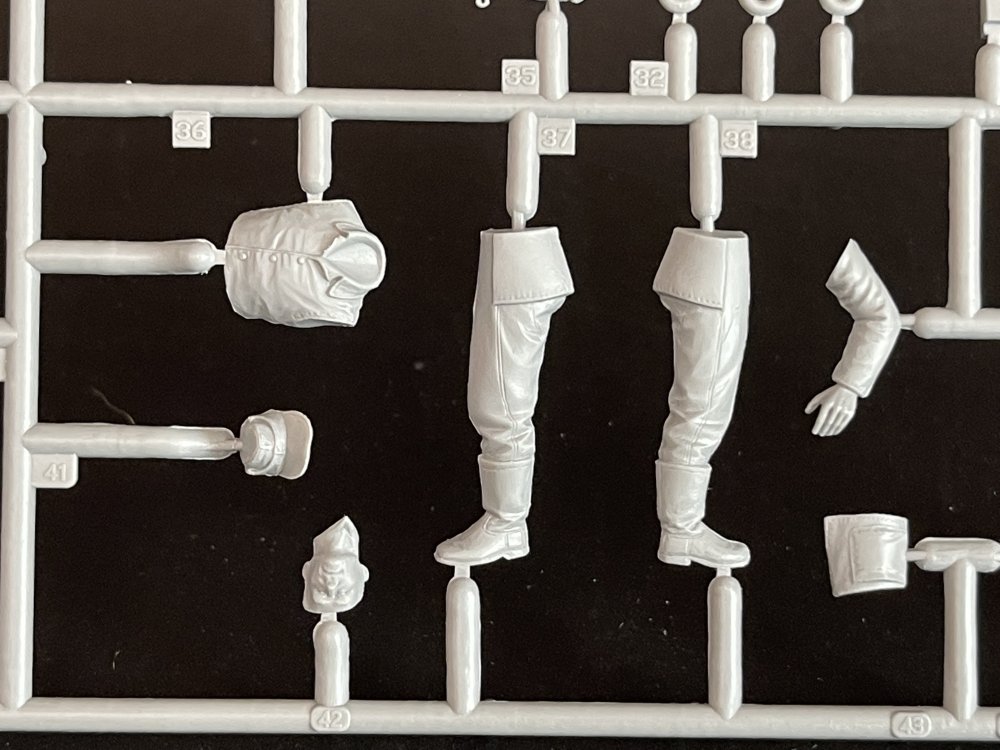
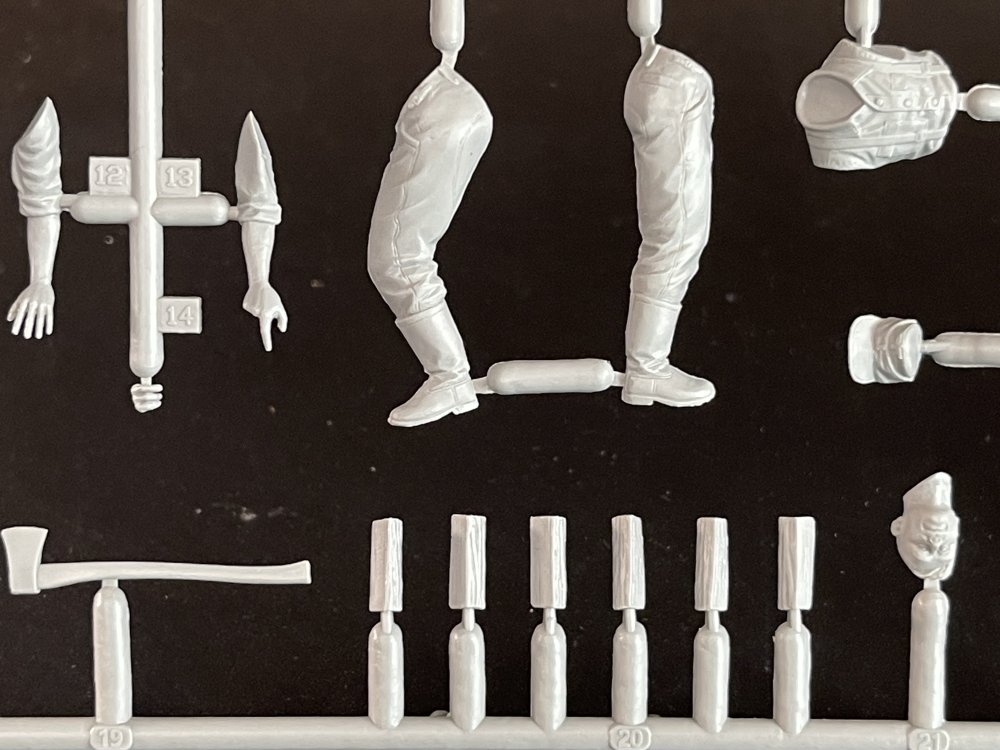
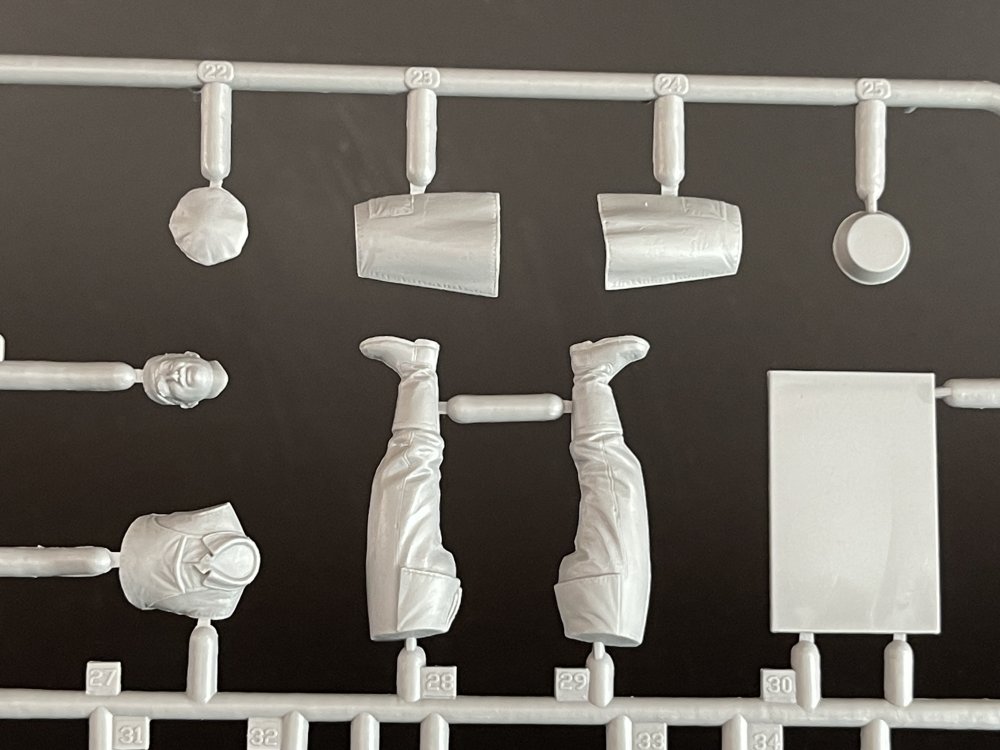
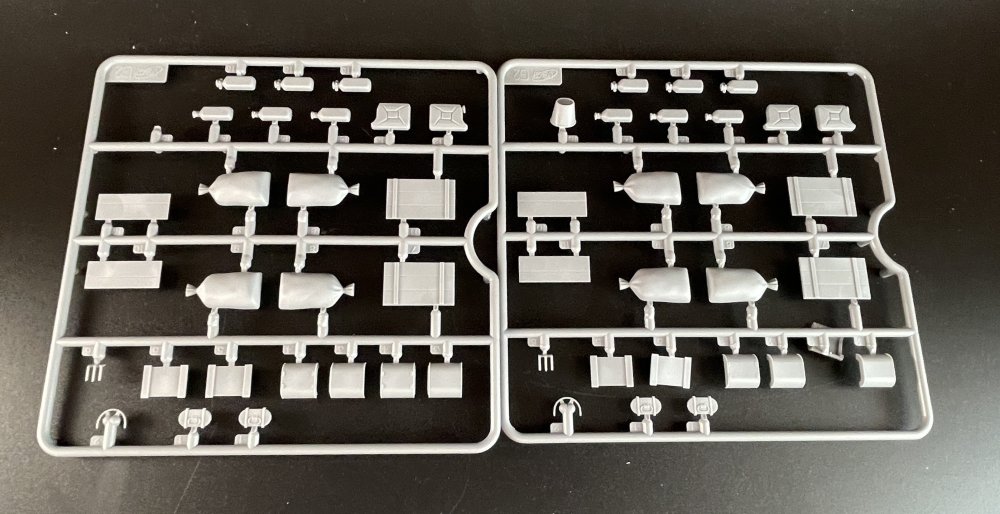
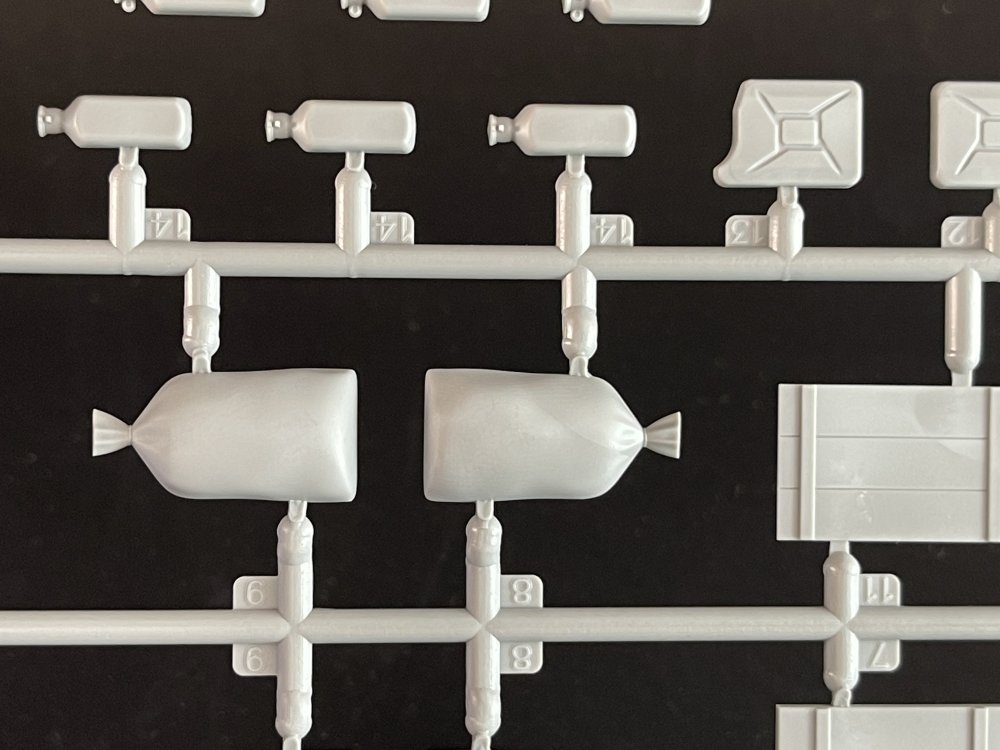
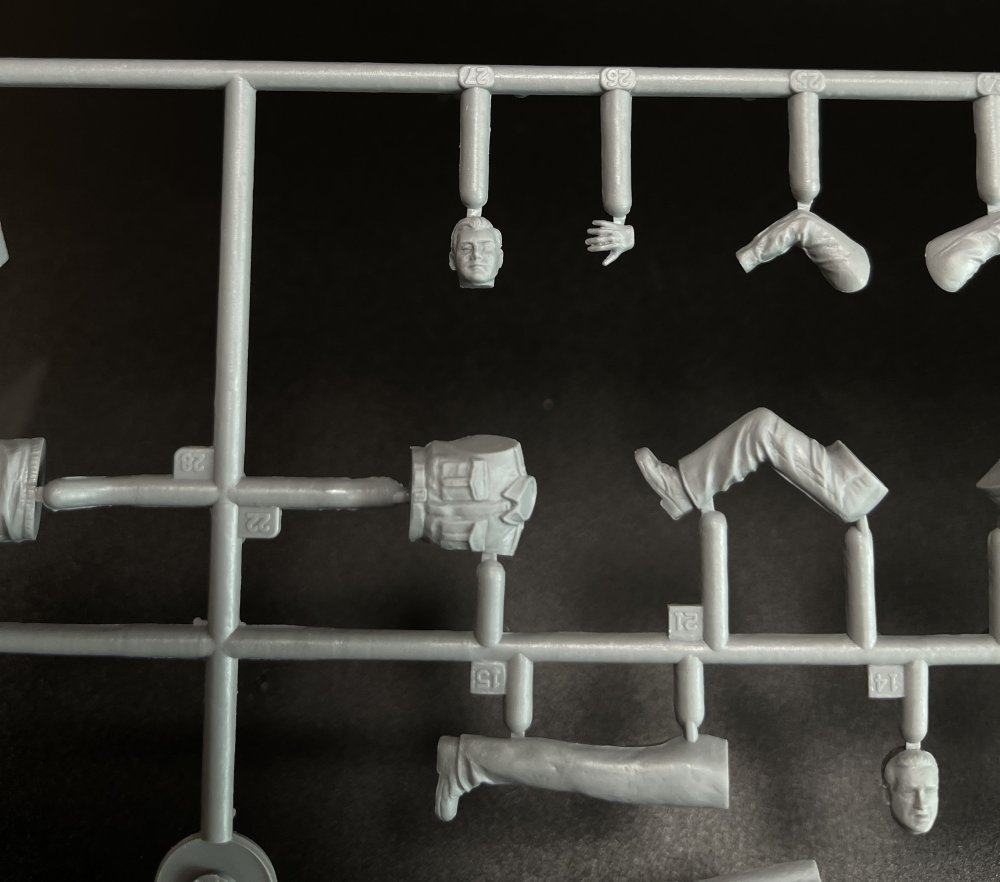
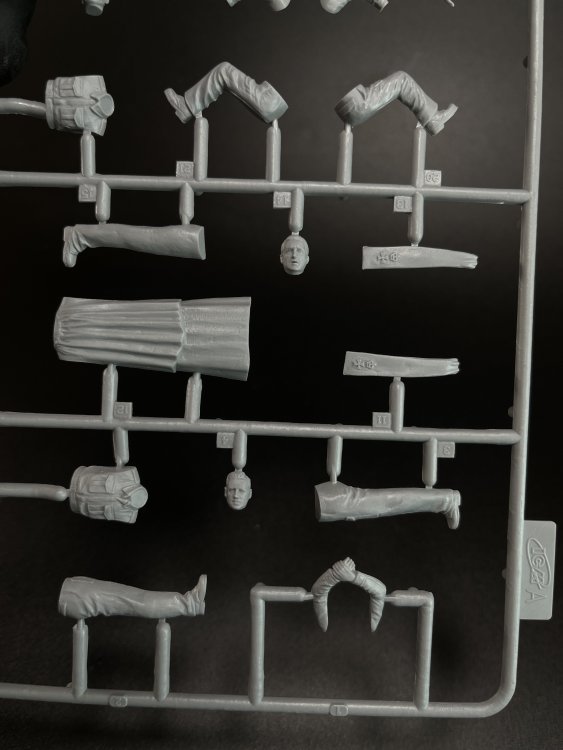
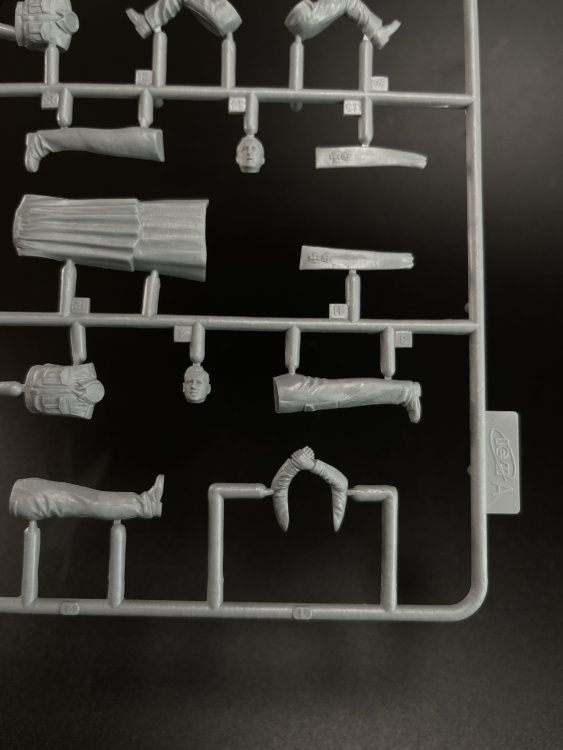
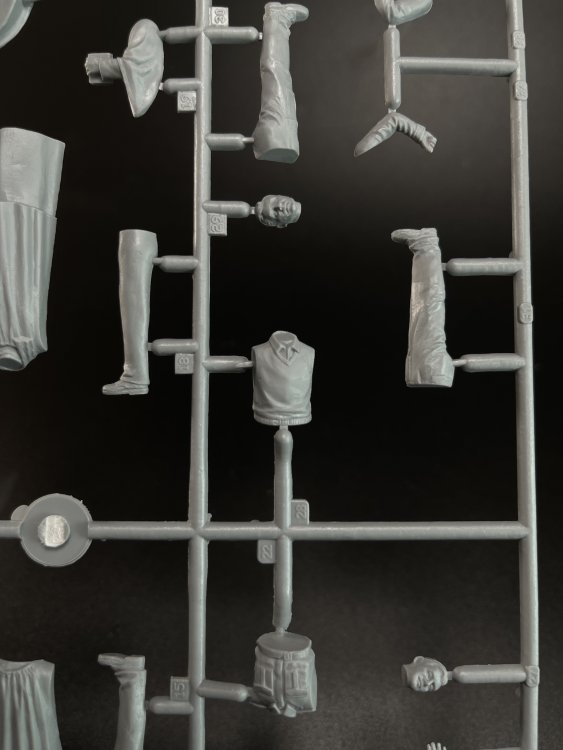
1:35 Feldküche WWII German Field Kitchen with cooks ICM Catalogue n.º 35618 Price tag: 17,00€ Once again, ICM keeps releasing new stuff showing to the world their enormous work capacity for producing and launching new products onto the market at a very high rate despite being at war. Today, we will take a look in the 1:35 Feldküche In the box art, you can see 4 cooks peeling potatoes, preparing meat, chopping wood and preparing the stove. We'll see if this is really what is offered. But before that, the mobile kitchen is the same kit that we can get with the AHN truck, the AHN Gulaschkanone model kit, that we already review it (click here). Beside the kitchen itself, the G2 sprue (kitchen accessories) is the sama exact sprue. Even the decal sheet on this release is exactly the same. So, I invited you to check the Gulas review. Now moving to the cooks. And the answer to the initial question is yes. You get four cooks in the different poses, as in the box art. As usual there`s no assembly instructions are given for the figures… you don’t get a schematic drawings with the parts, but, as I said in previous reviews, if you look carefully we see the parts numbers on the figures. So there´s is assembly instructions. For the field kitchen the instrcutions are comprehensive and easy to follow. The figures have the torso in one piece without arms or legs as they are separated for the rest of the body. The molding is very nice, with no flash at all and very good subtle details in very difficult parts like the hands and faces. The soldier cutting up a potato or something similar does have a potato (or something) in one hand and a knife in the other hands! Brilliant detail for plastic mold. Theses ICM figures are getting better and better. You will also get all the accessories that they are using in the box art, as table, axes, wood, bucket. Conclusion: These figures set with mobile kitchen is a fantastic little set with tons of details giving the modeler, several option to work with, all together, only one figure, a mix of figures and simple can use any other model with it! It goes well with any 1:35 AFV model or some can also be use with some 1:35 Aircraft that are popping now. The details specially on face and hands are very good really, one of the best there is in plastic injection, if not the best ones. A great kit with very good detail OOB. Downside: the colors indication. My sincere thanks to ICM for making this model.


-
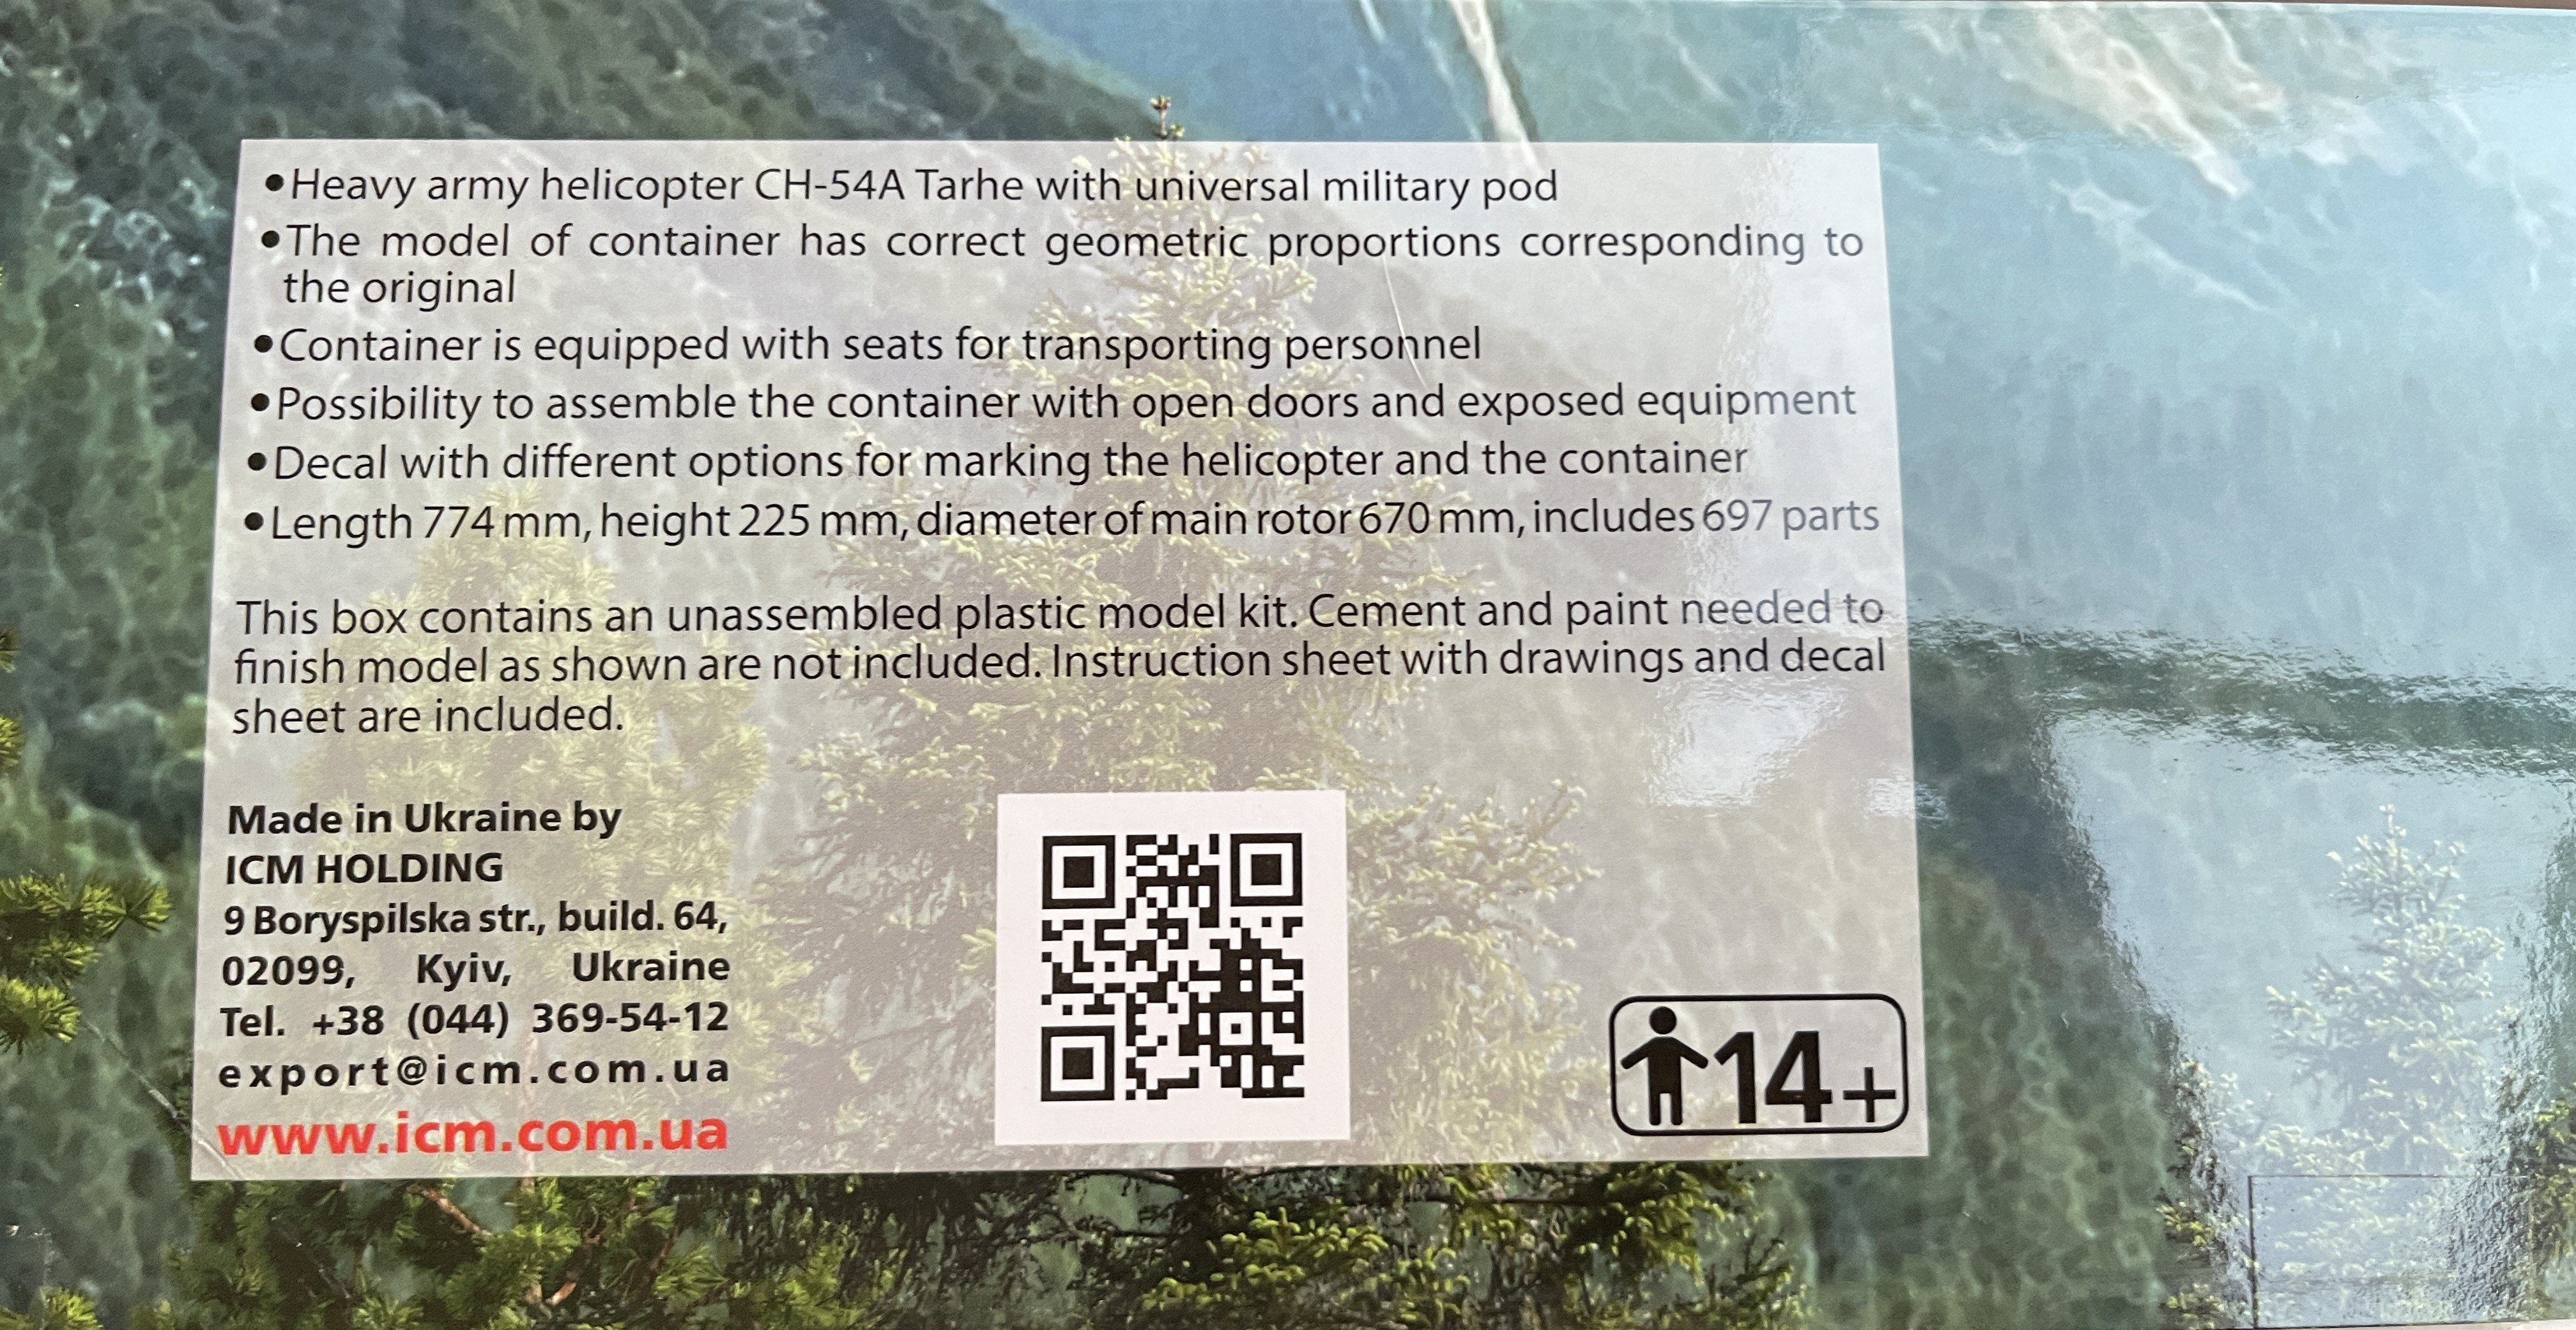
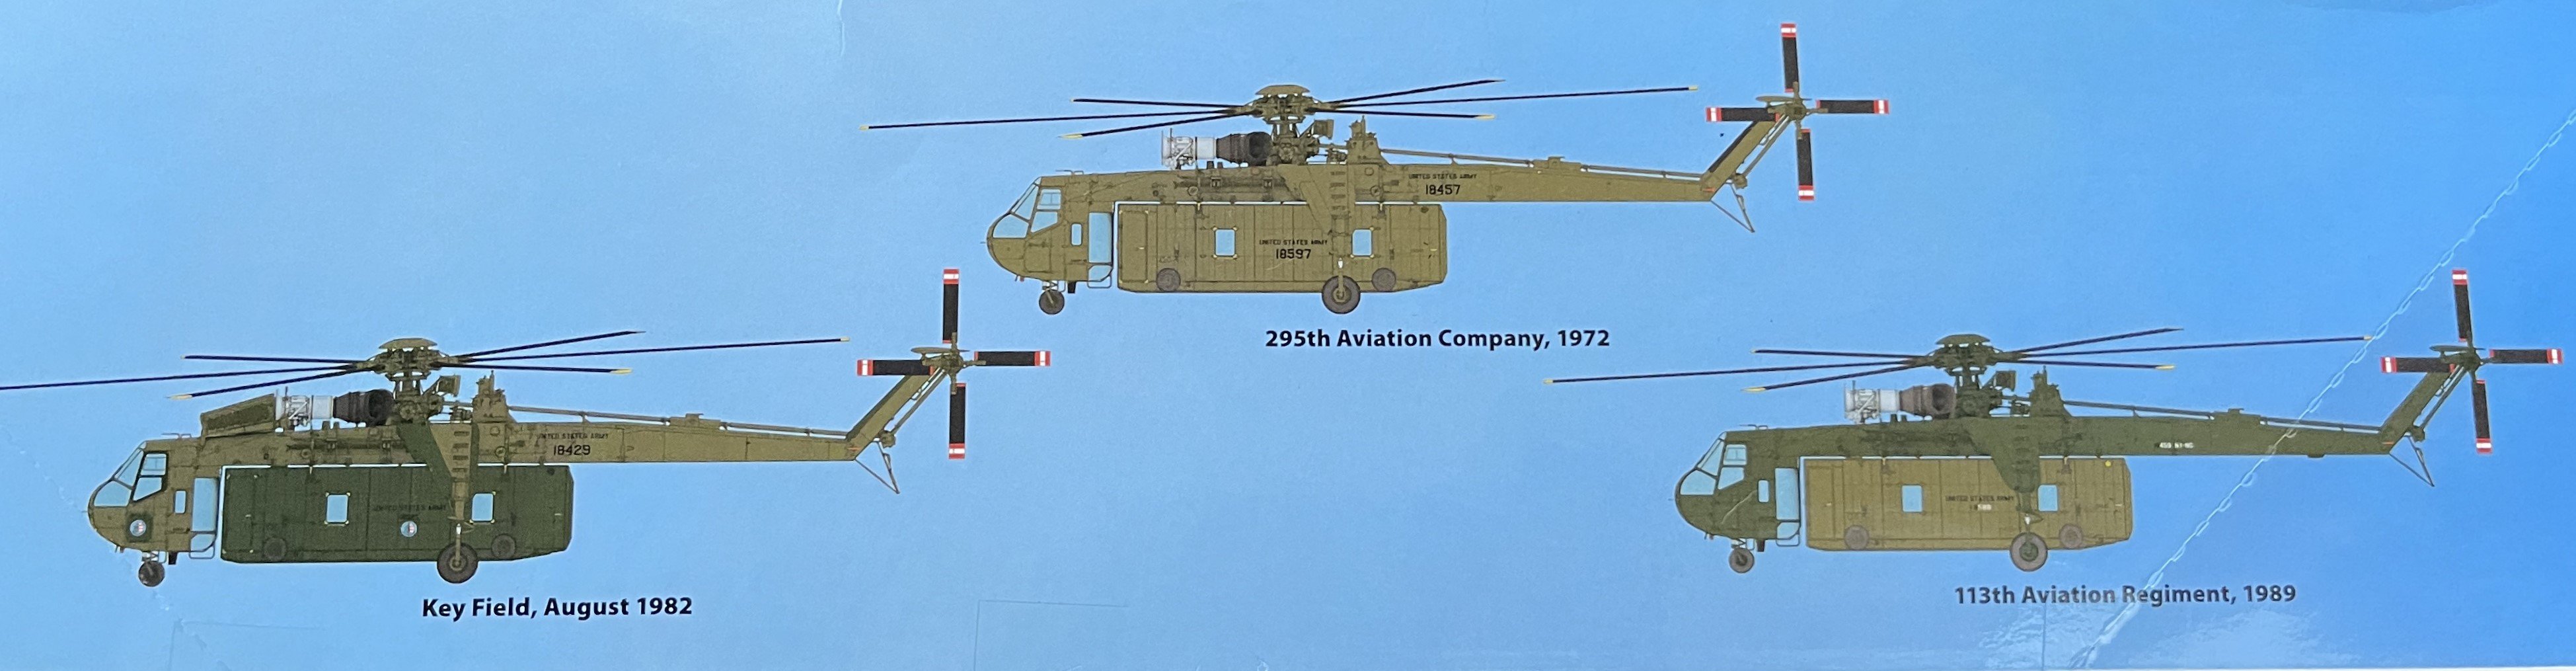
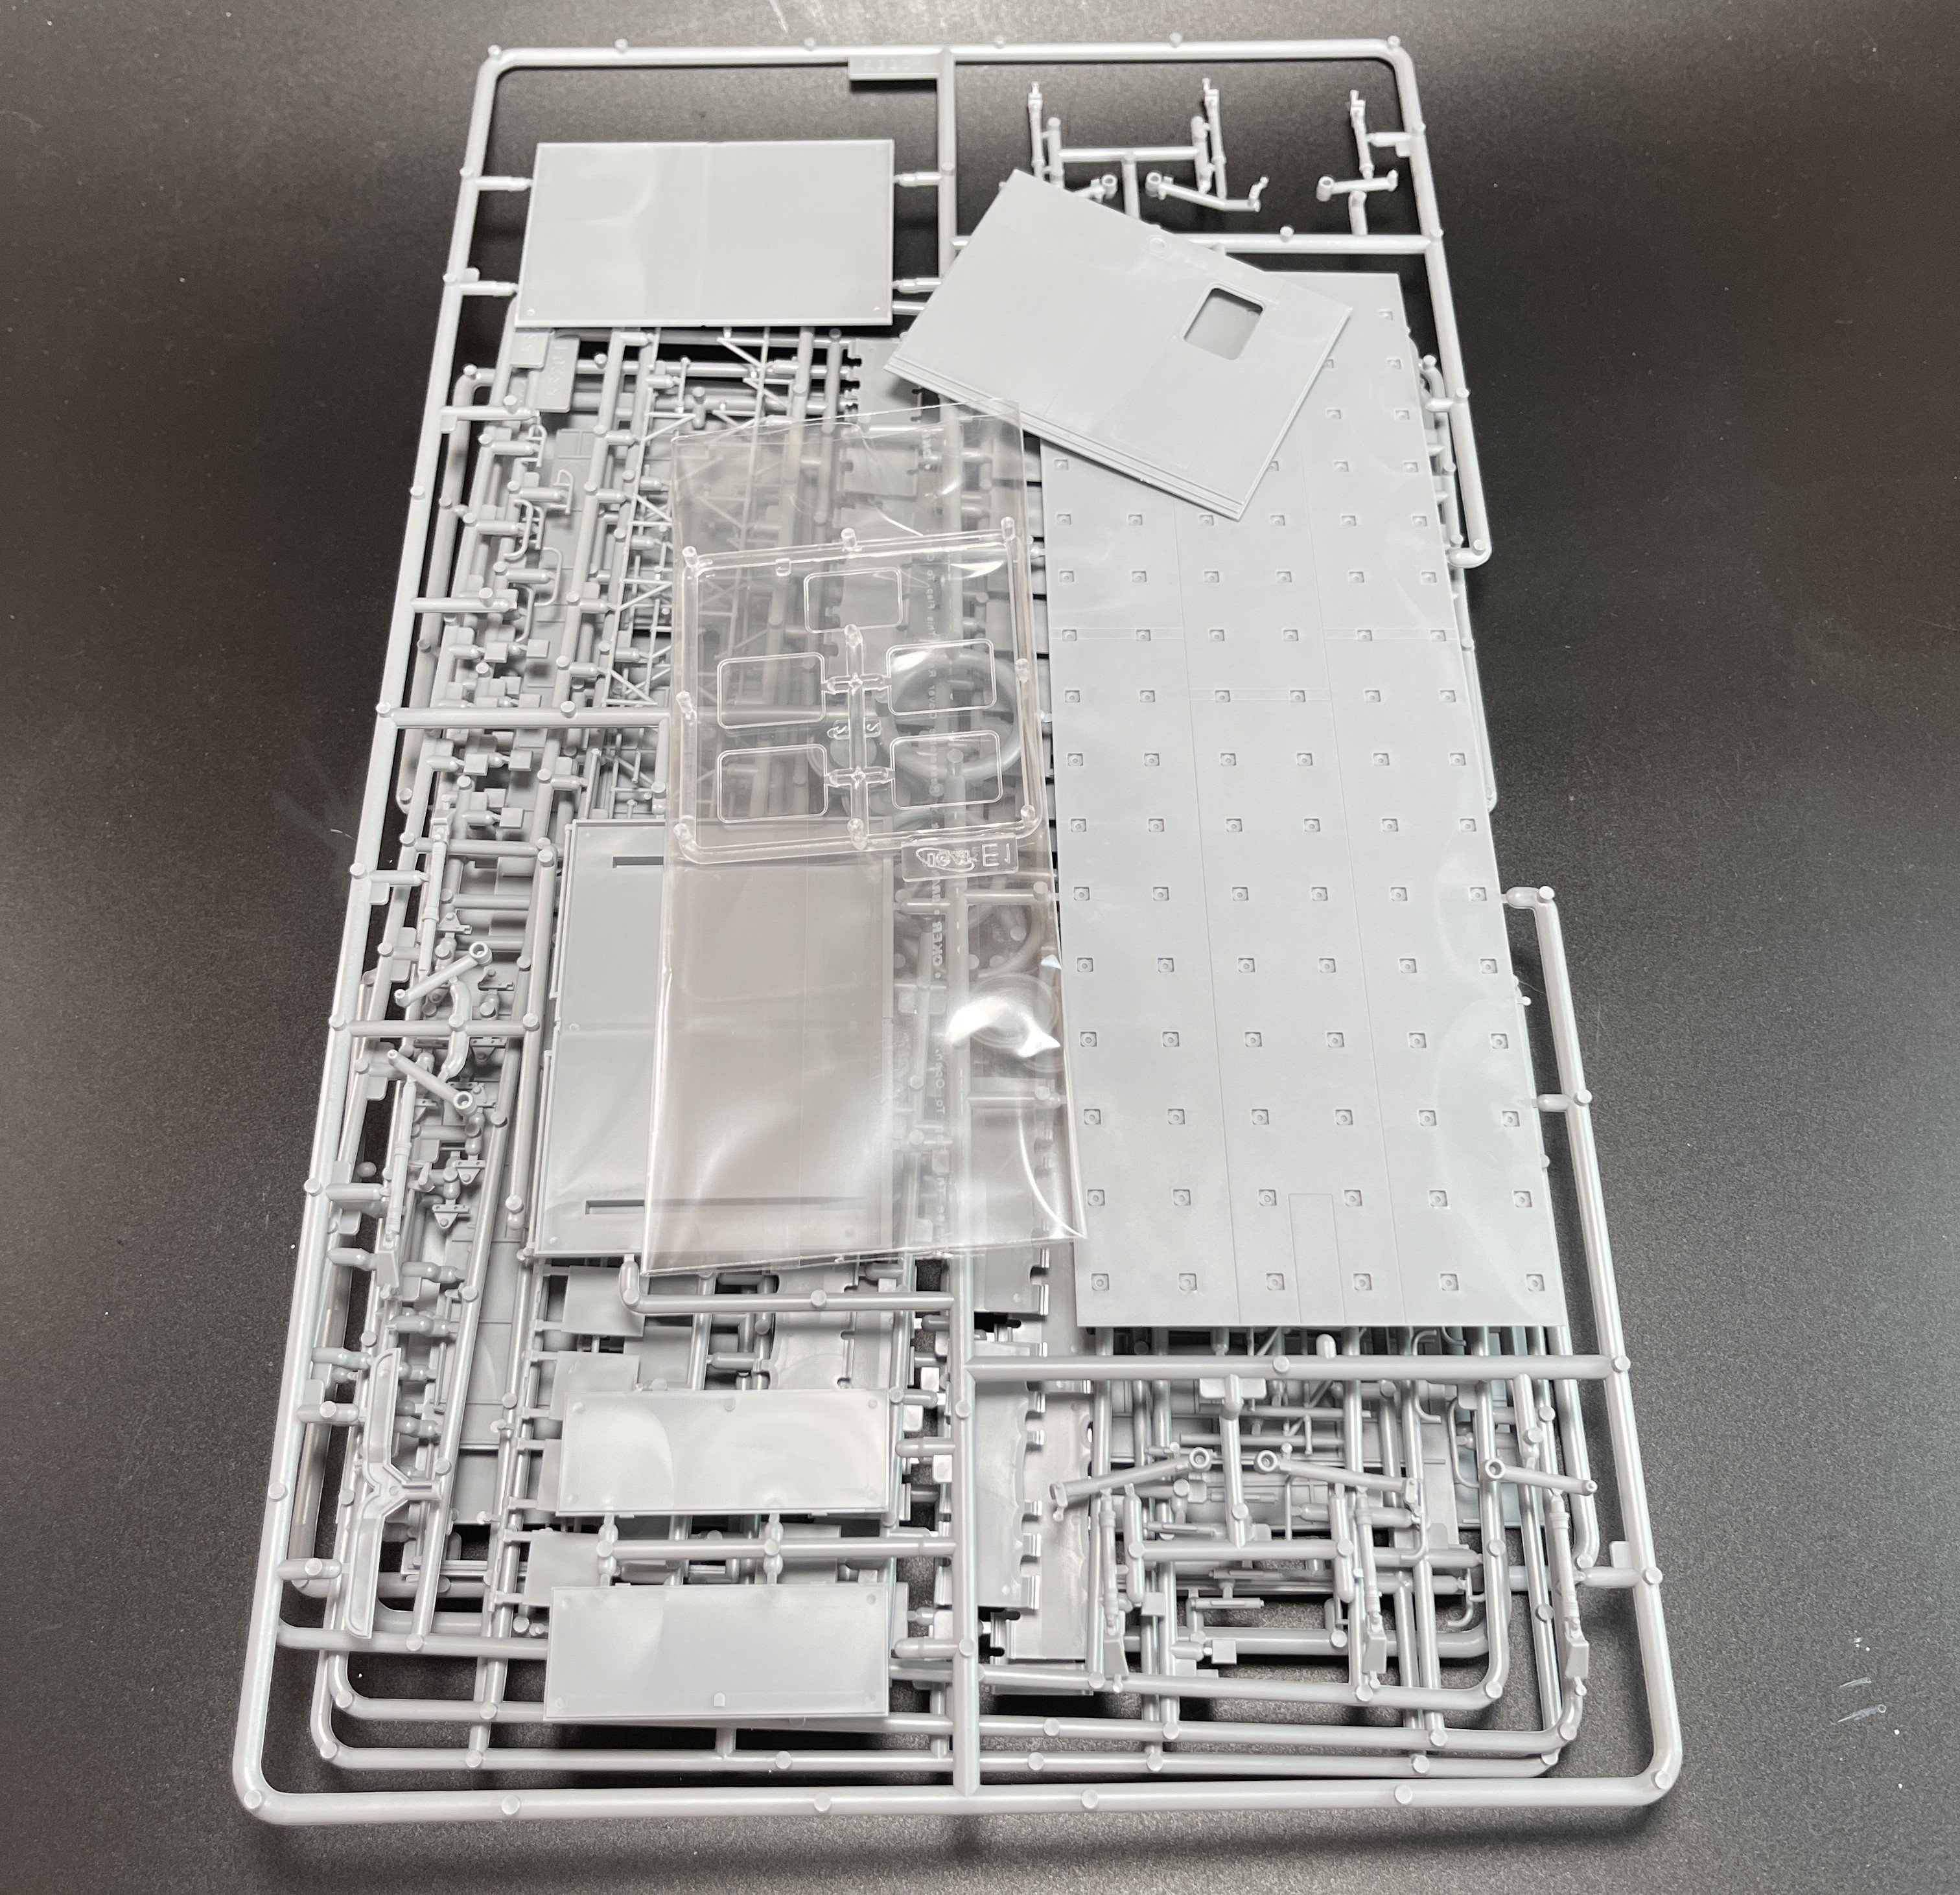
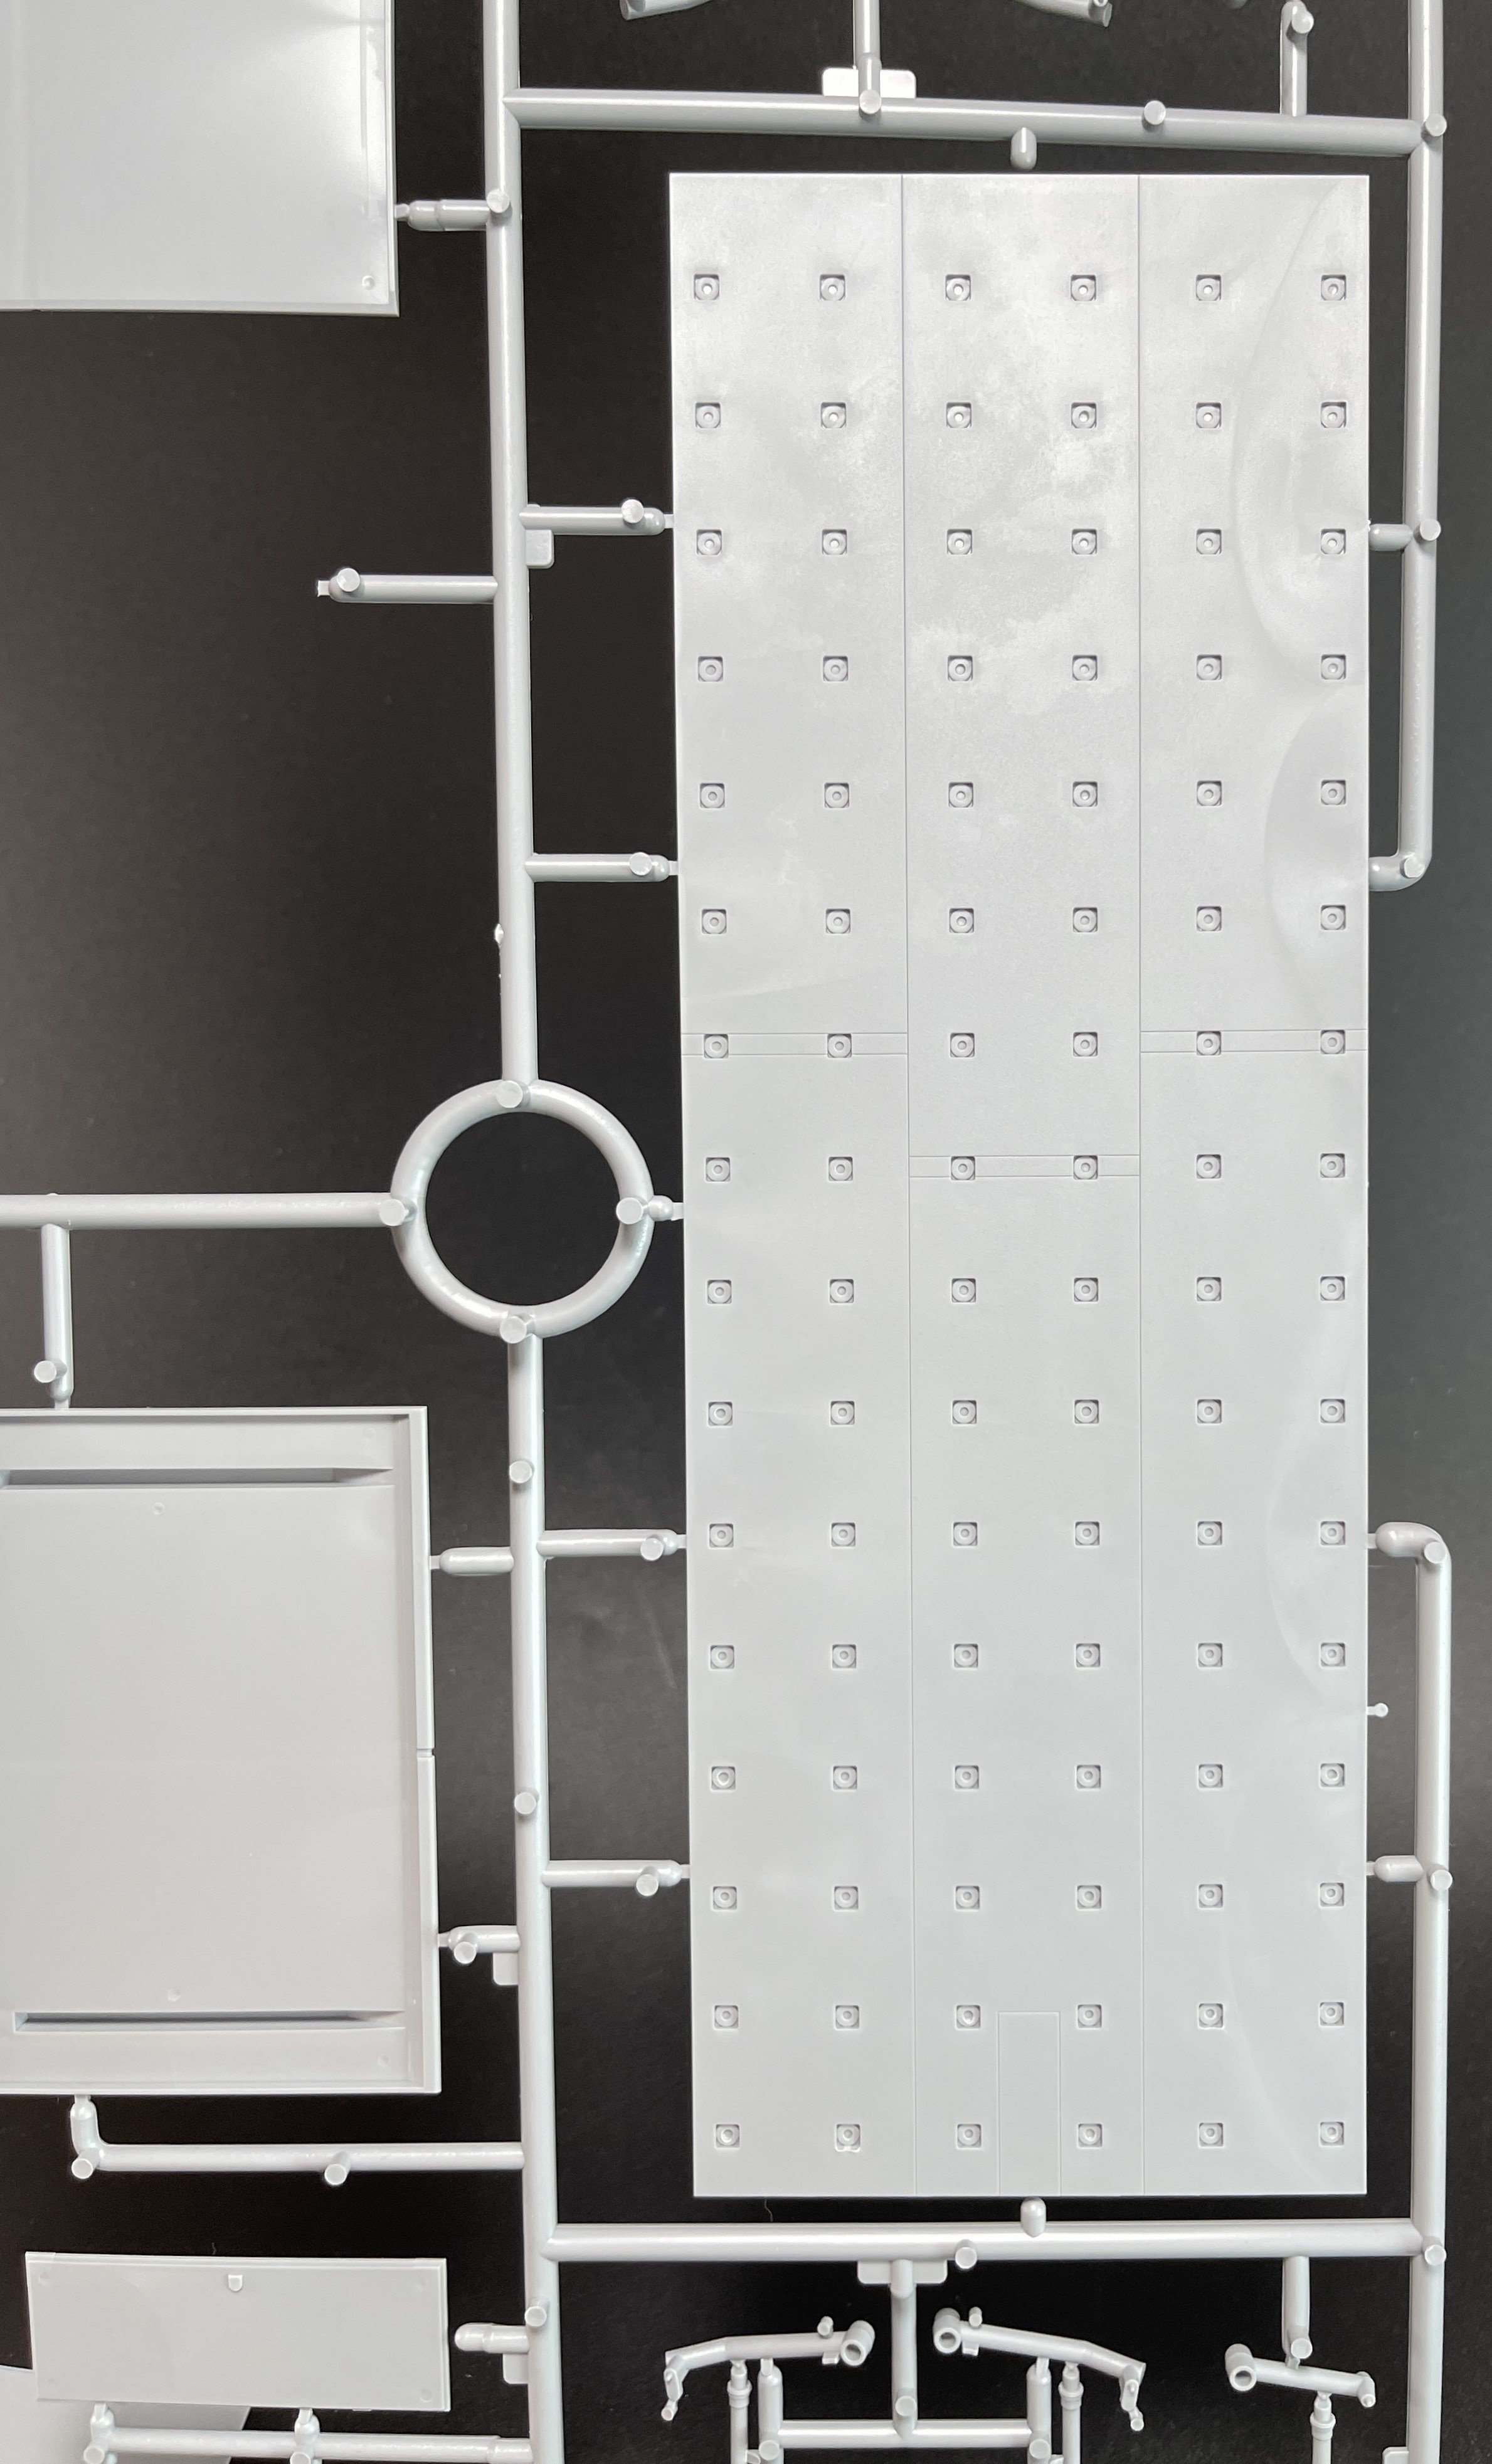
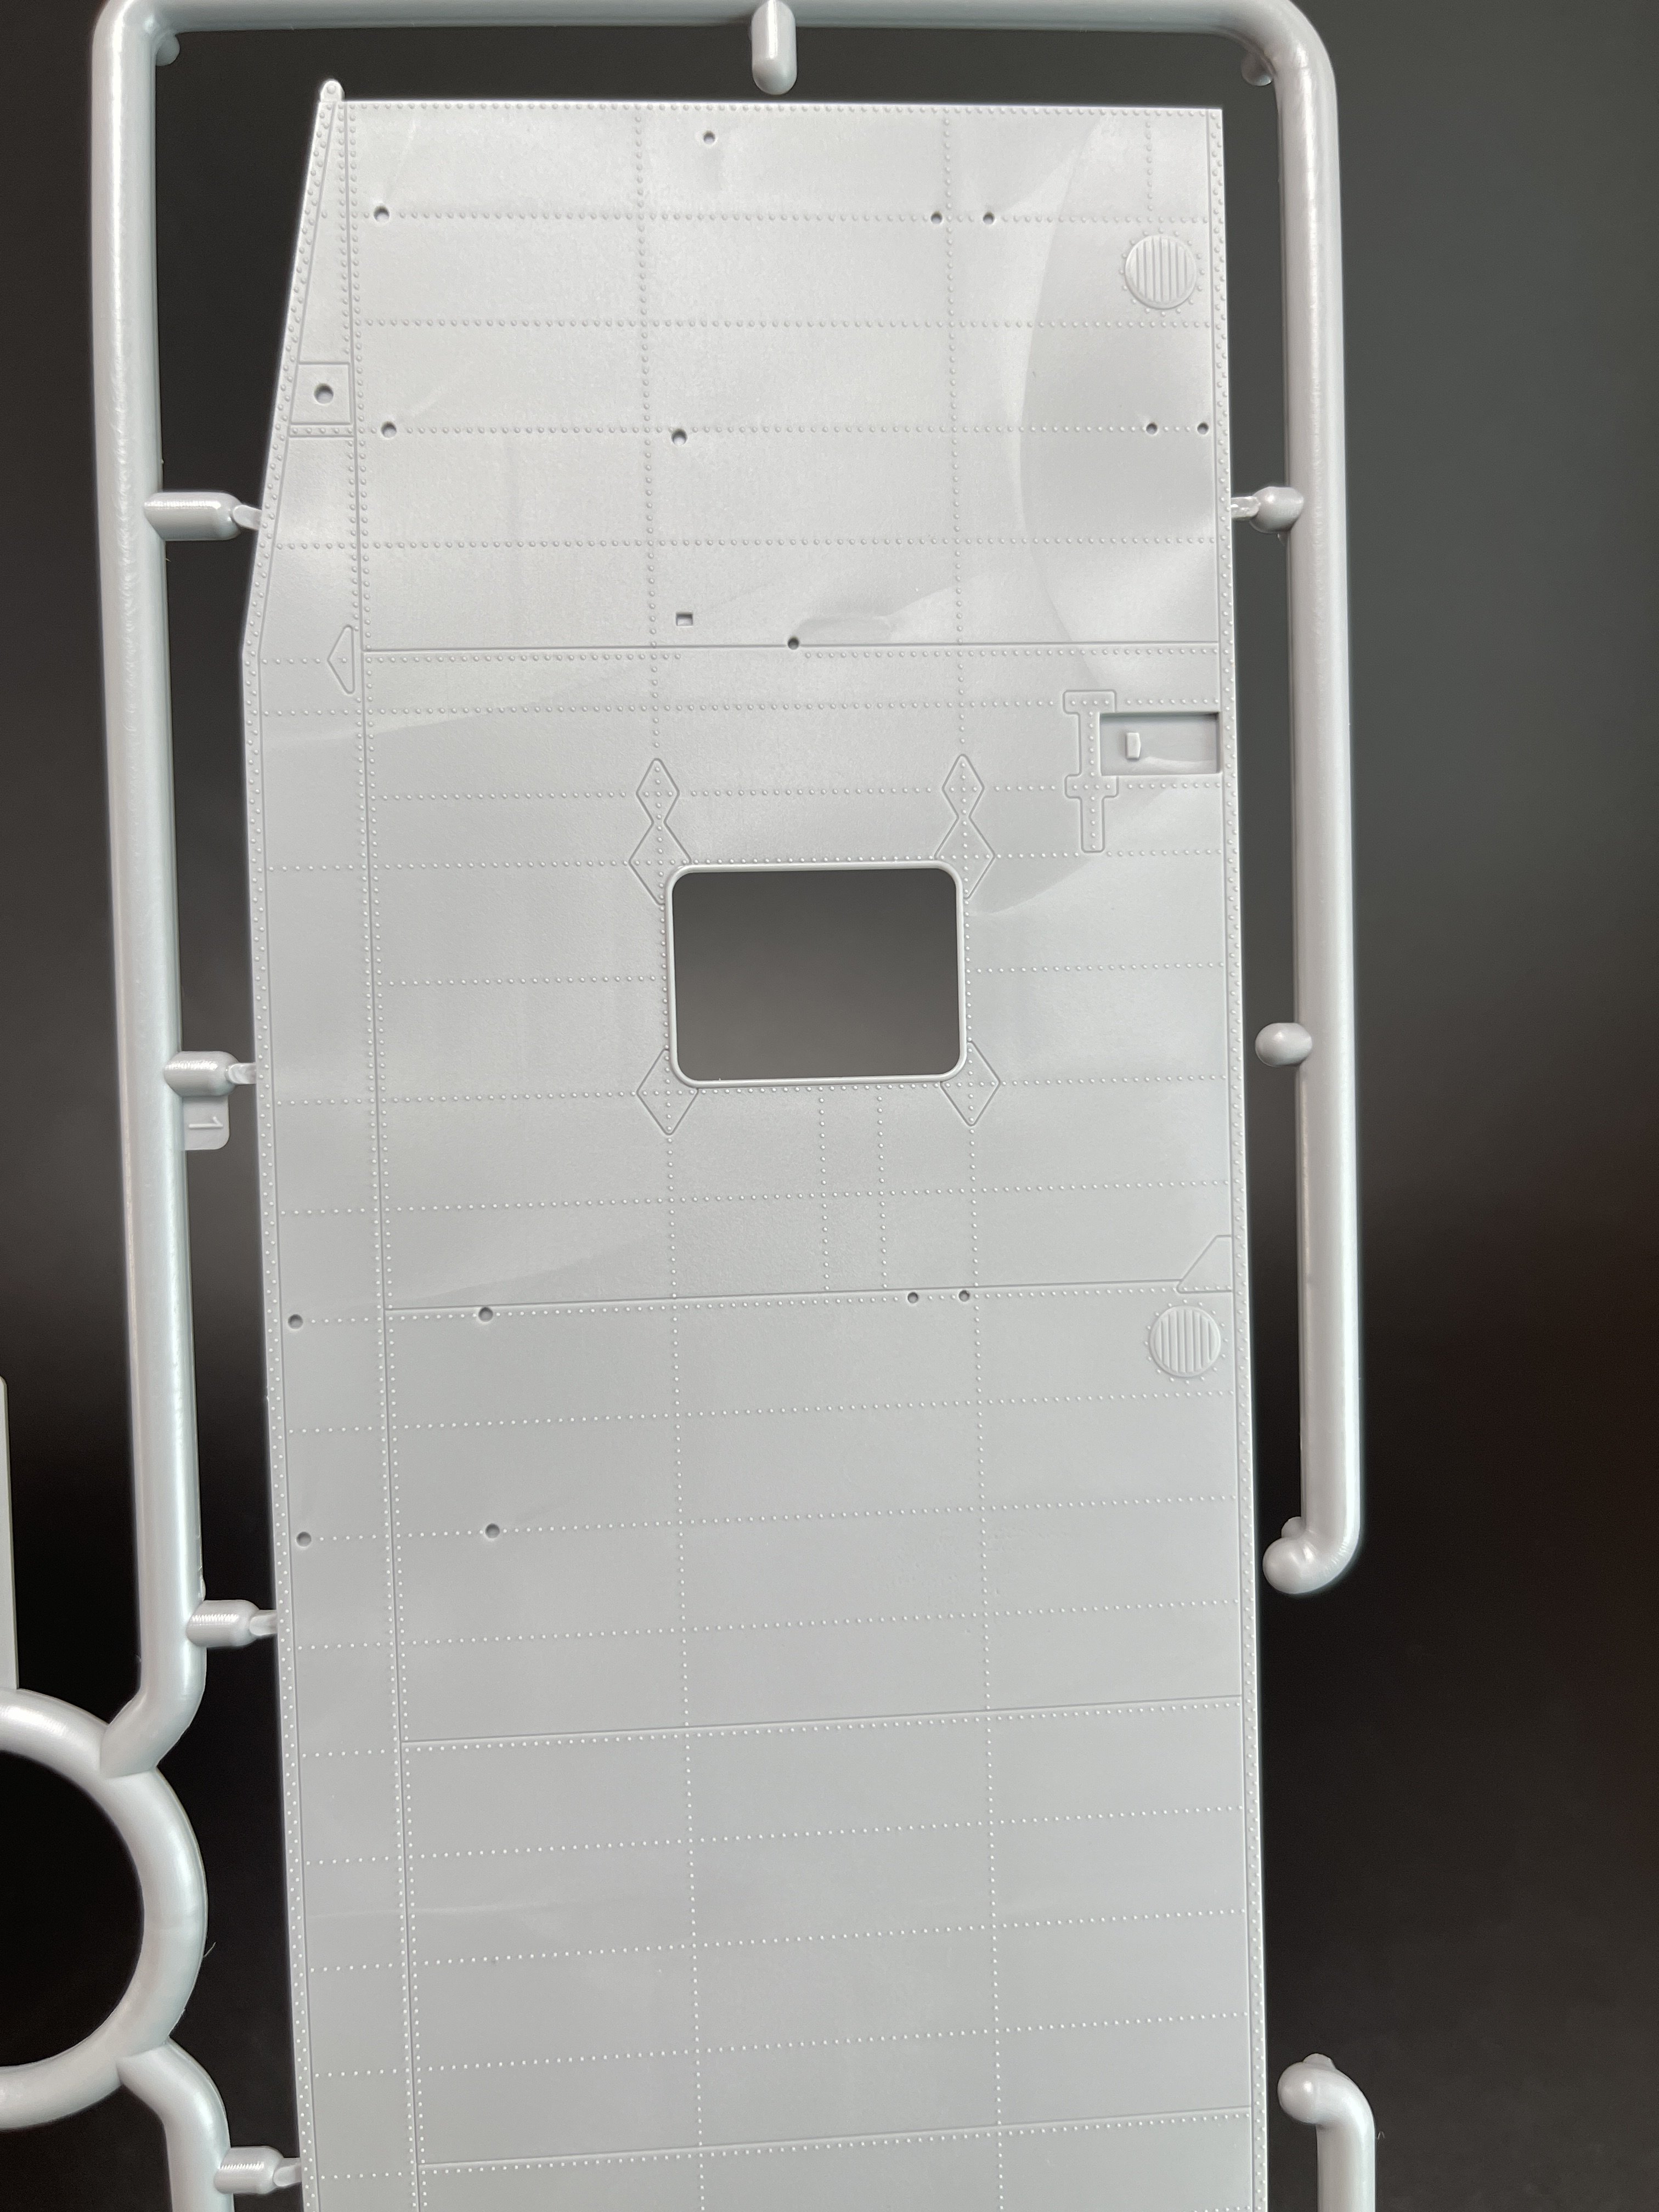
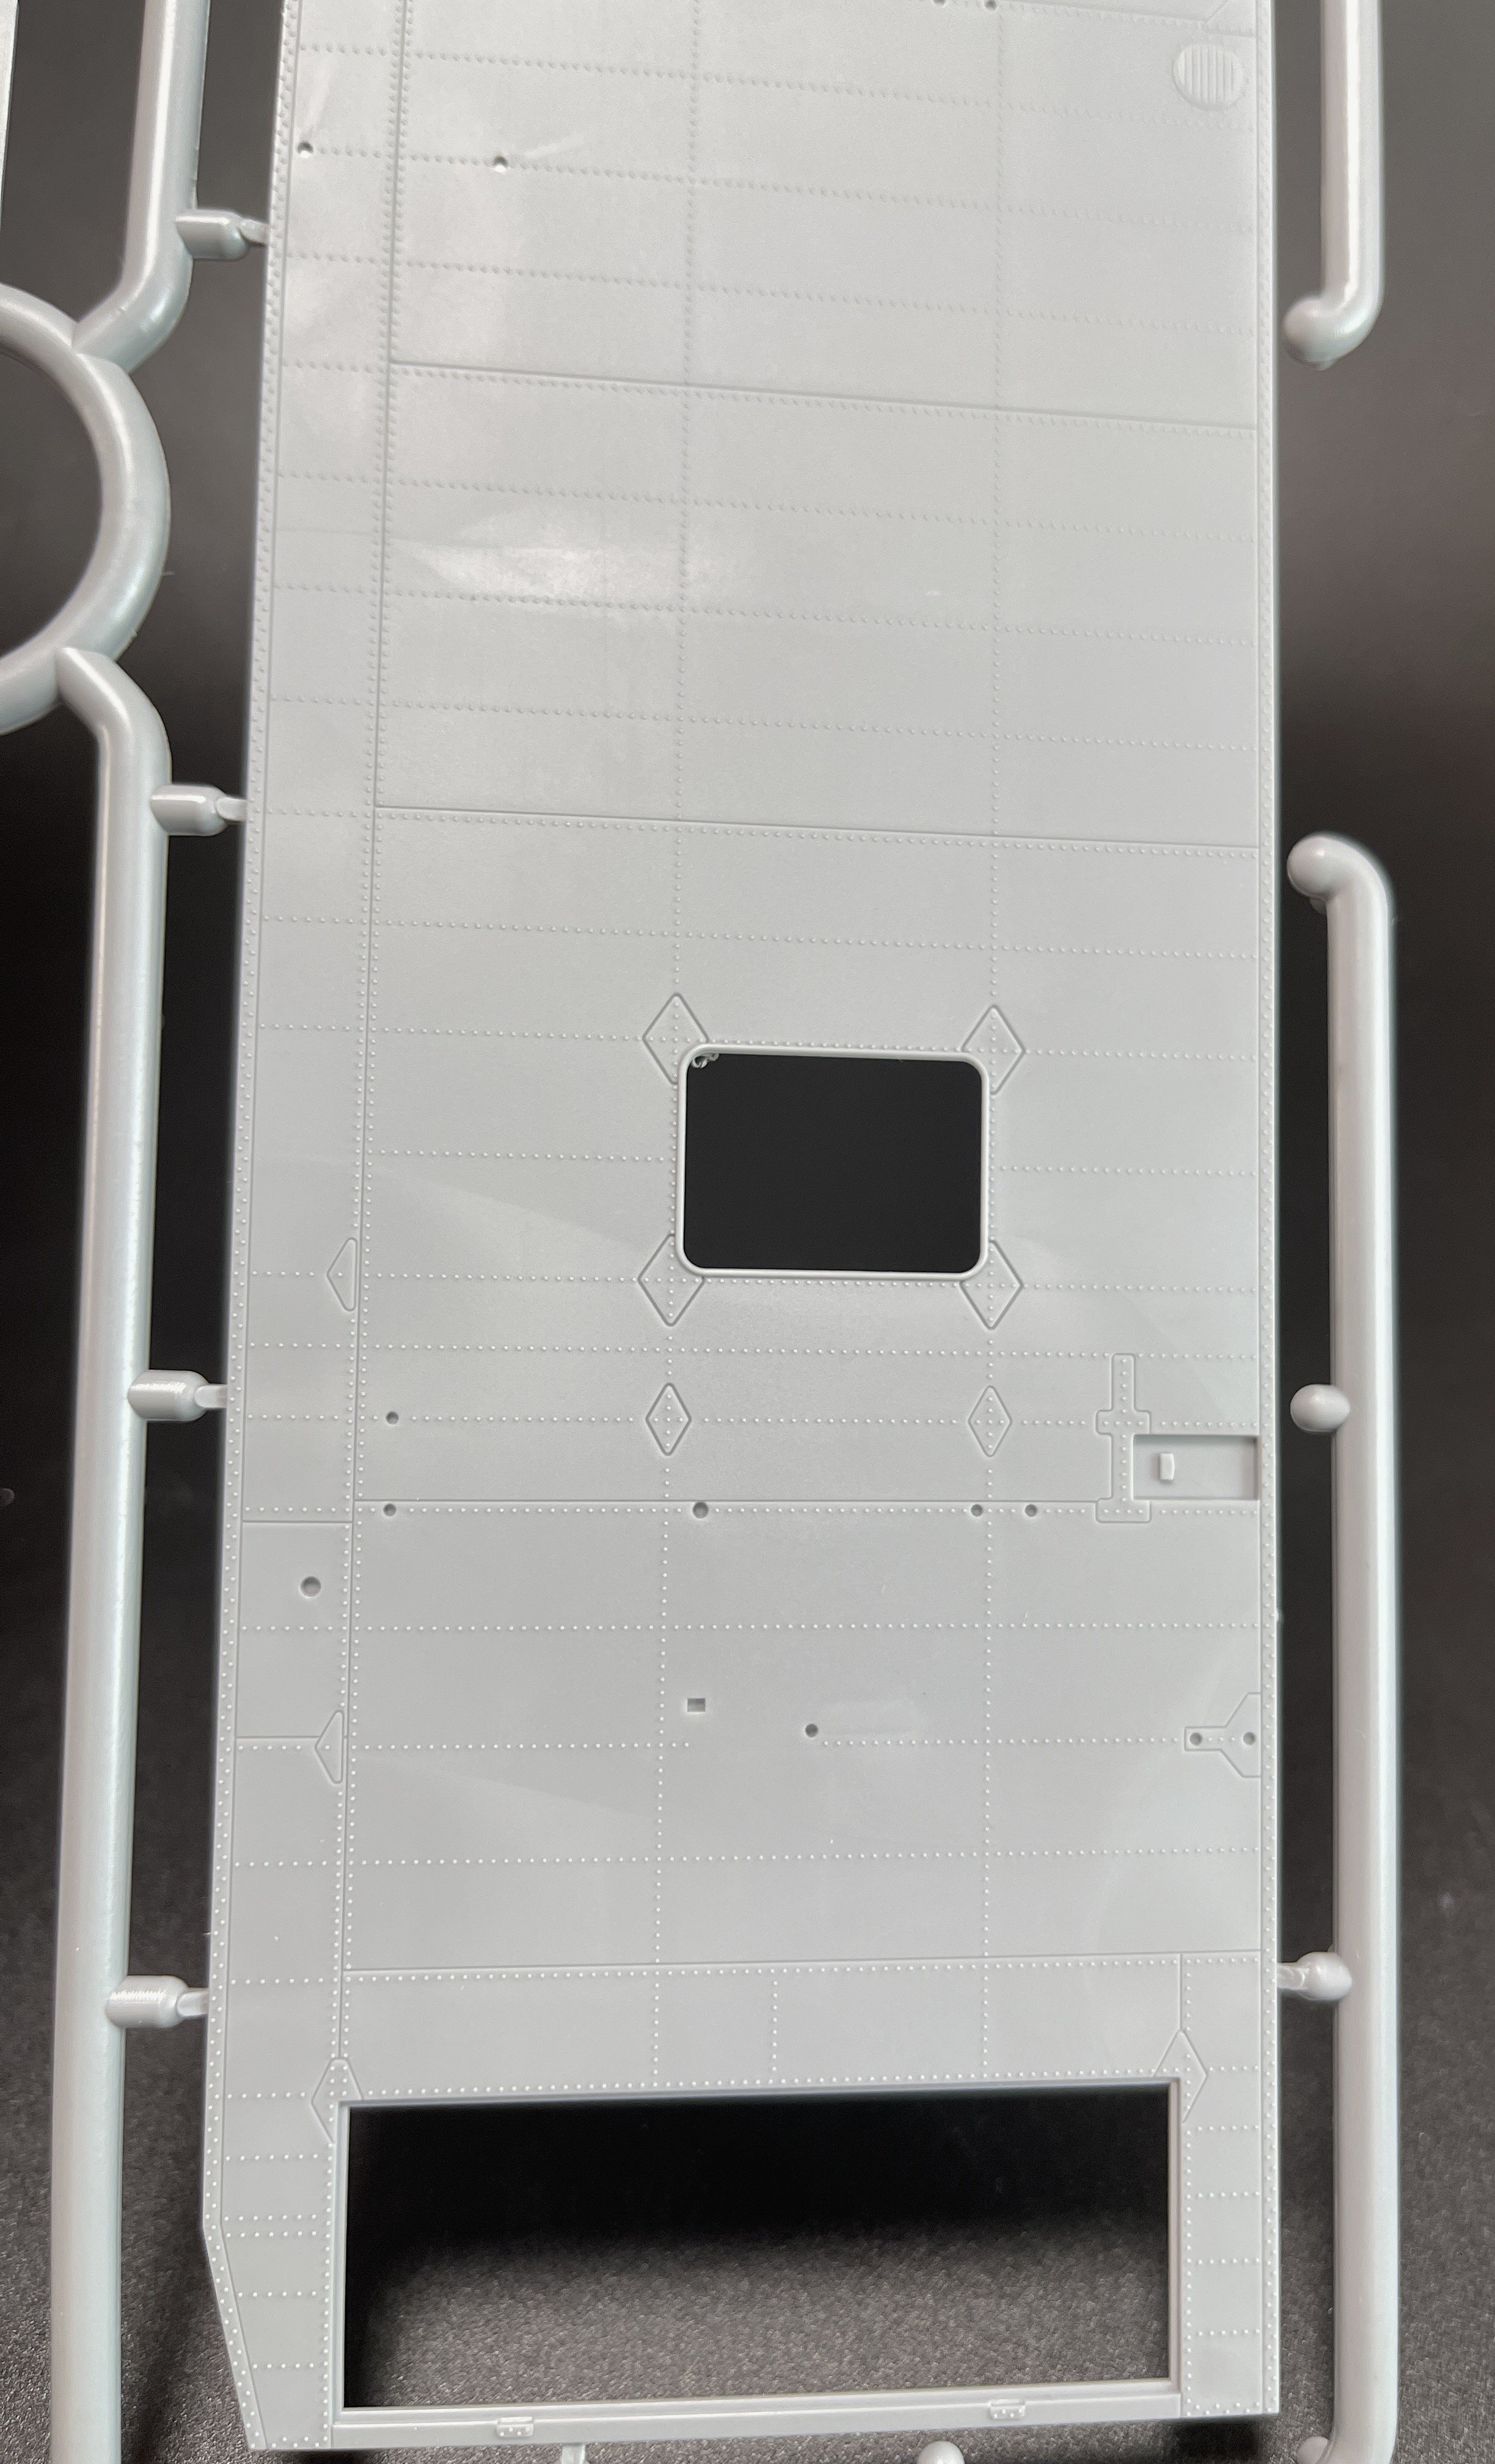
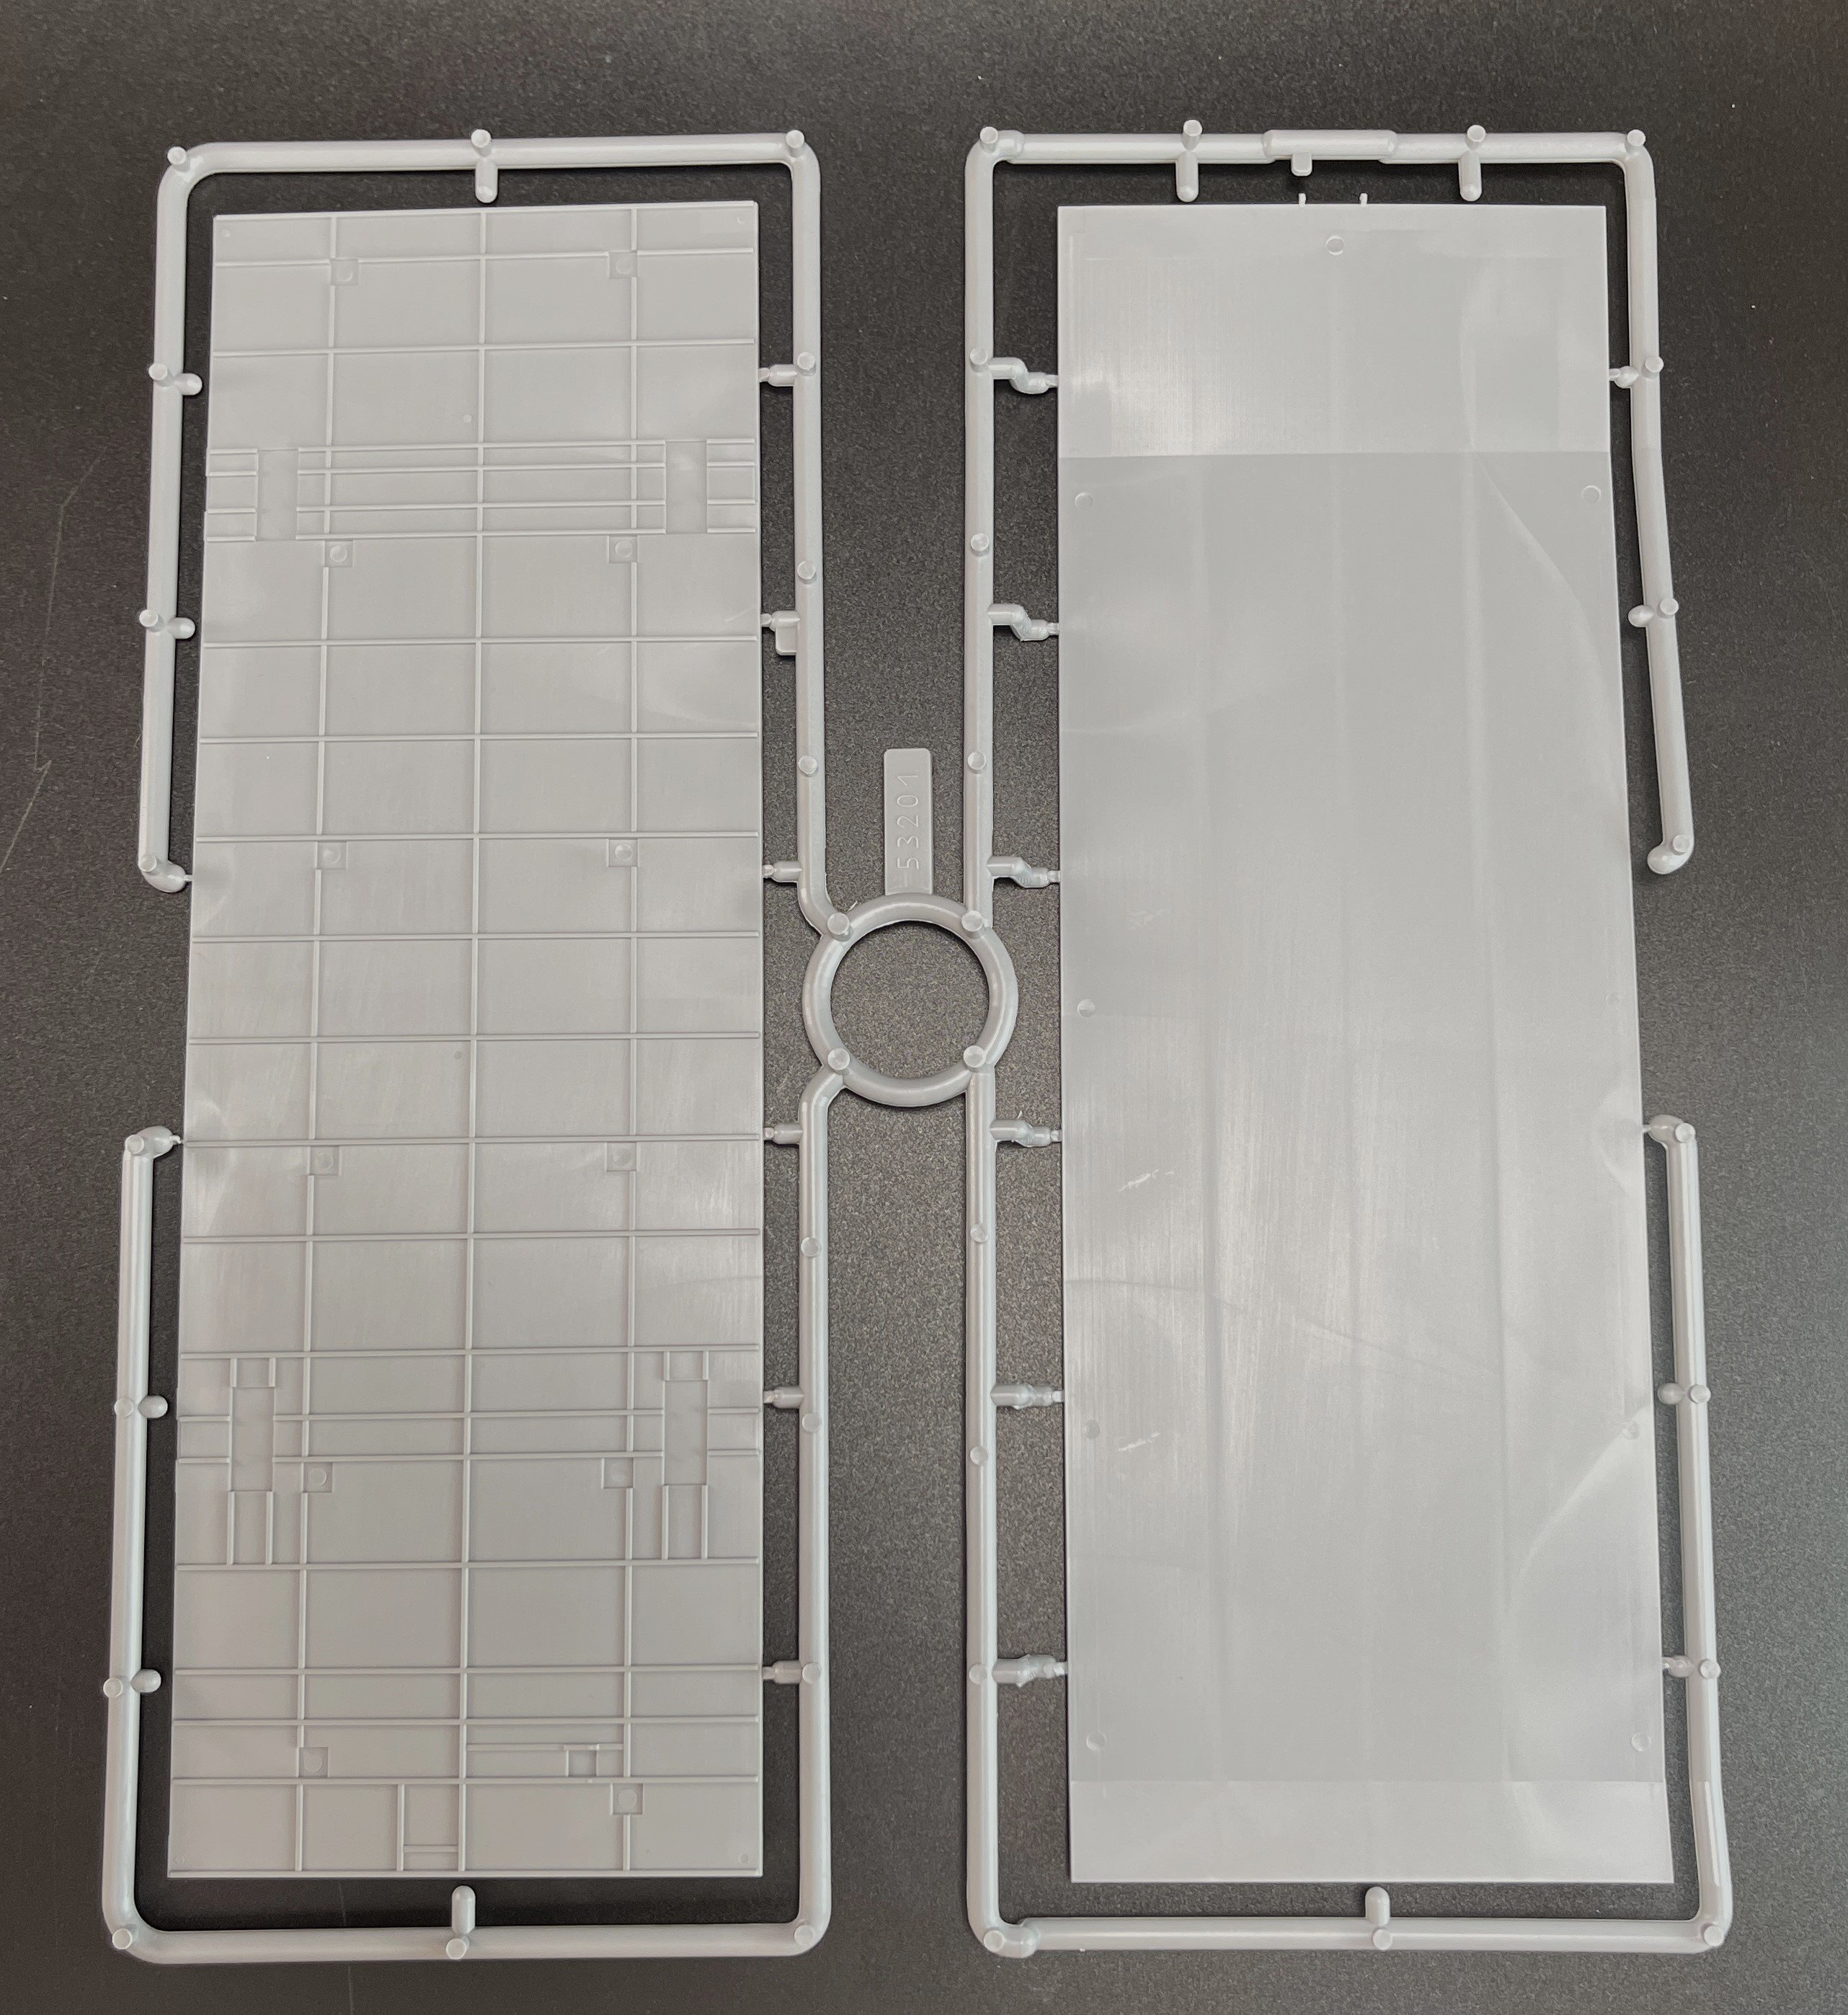
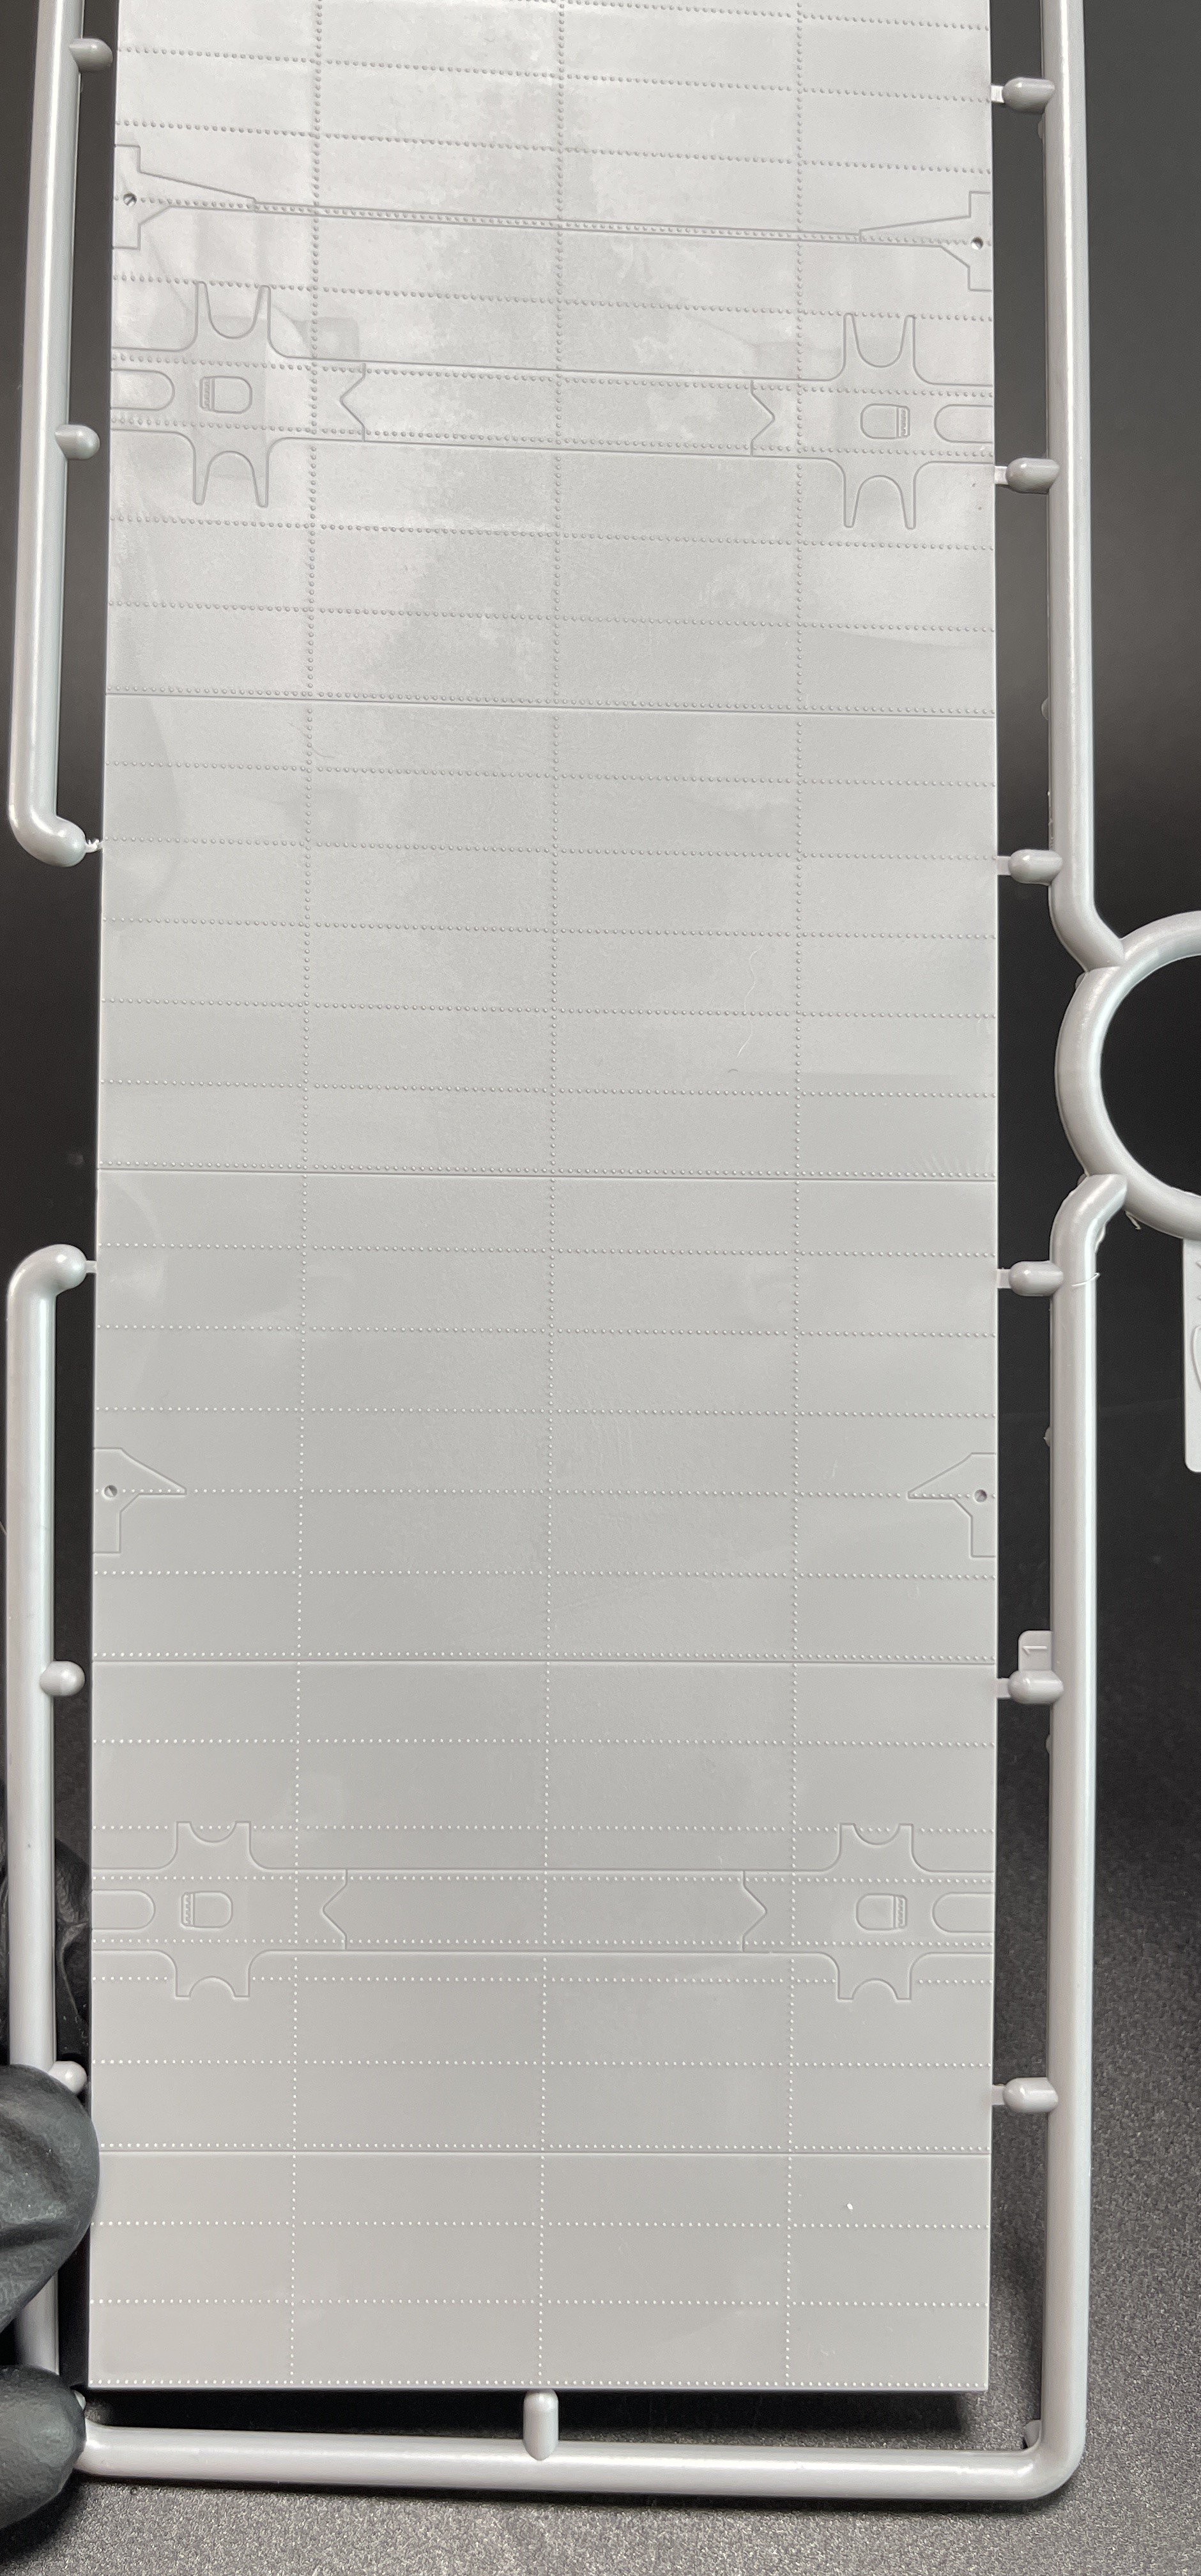
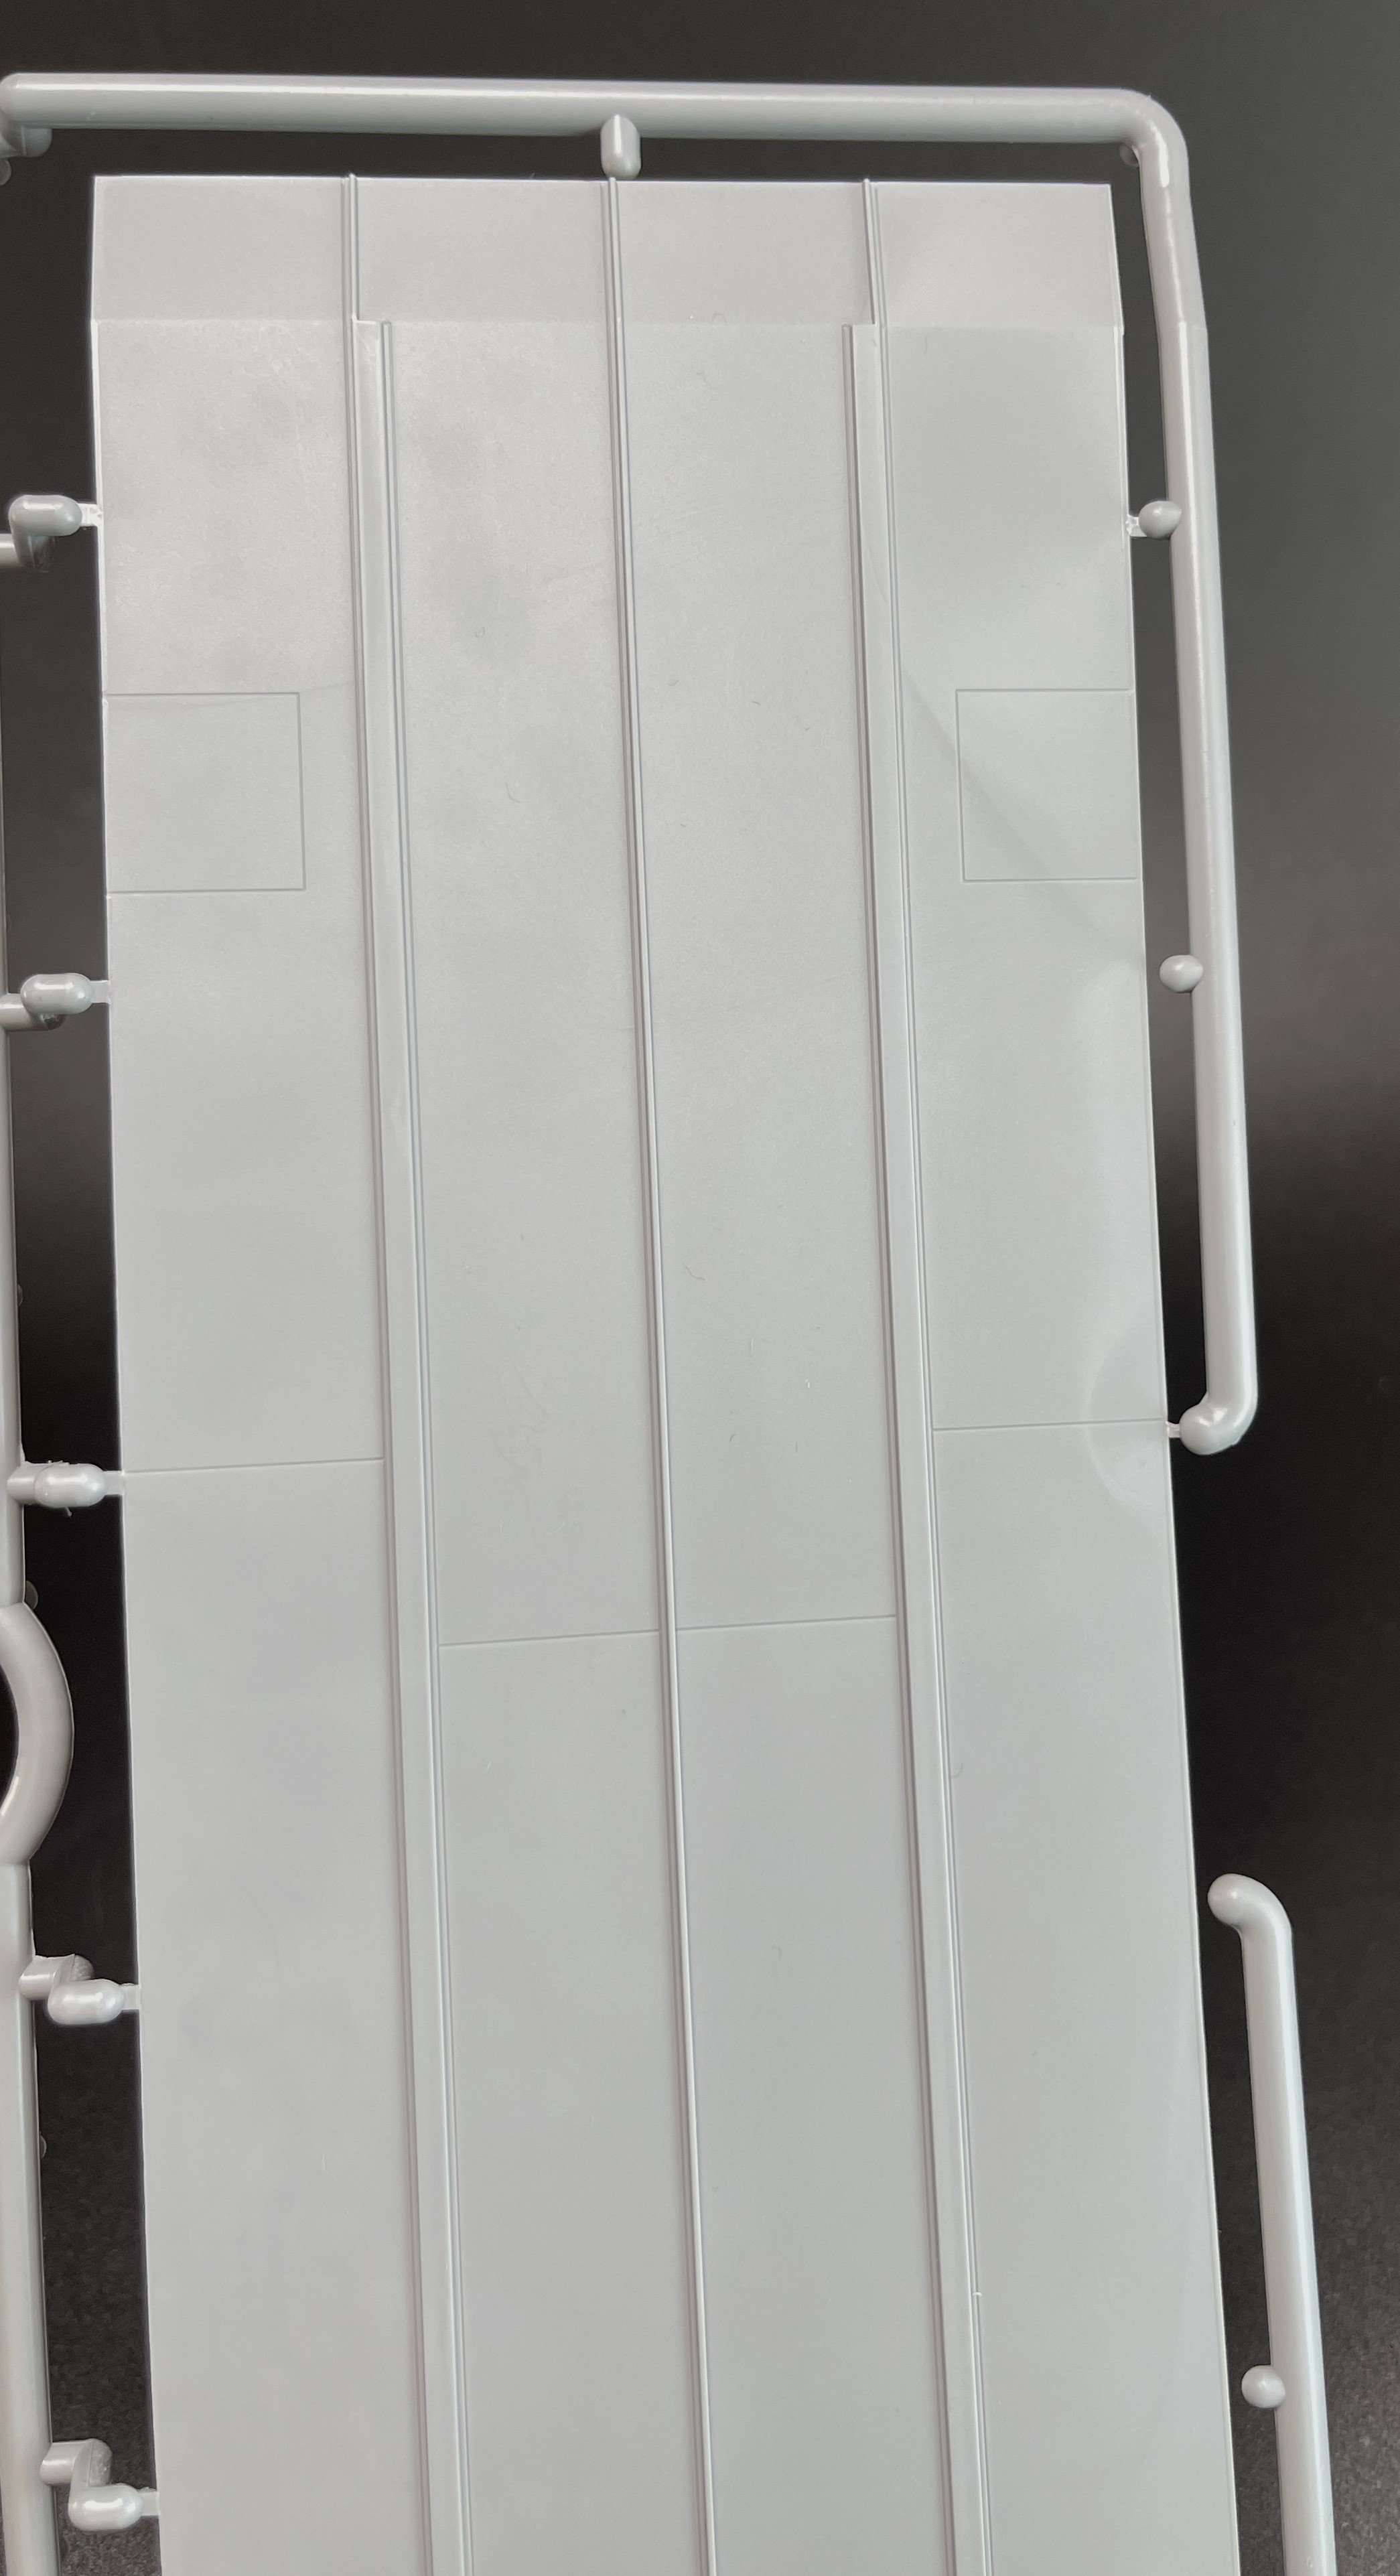
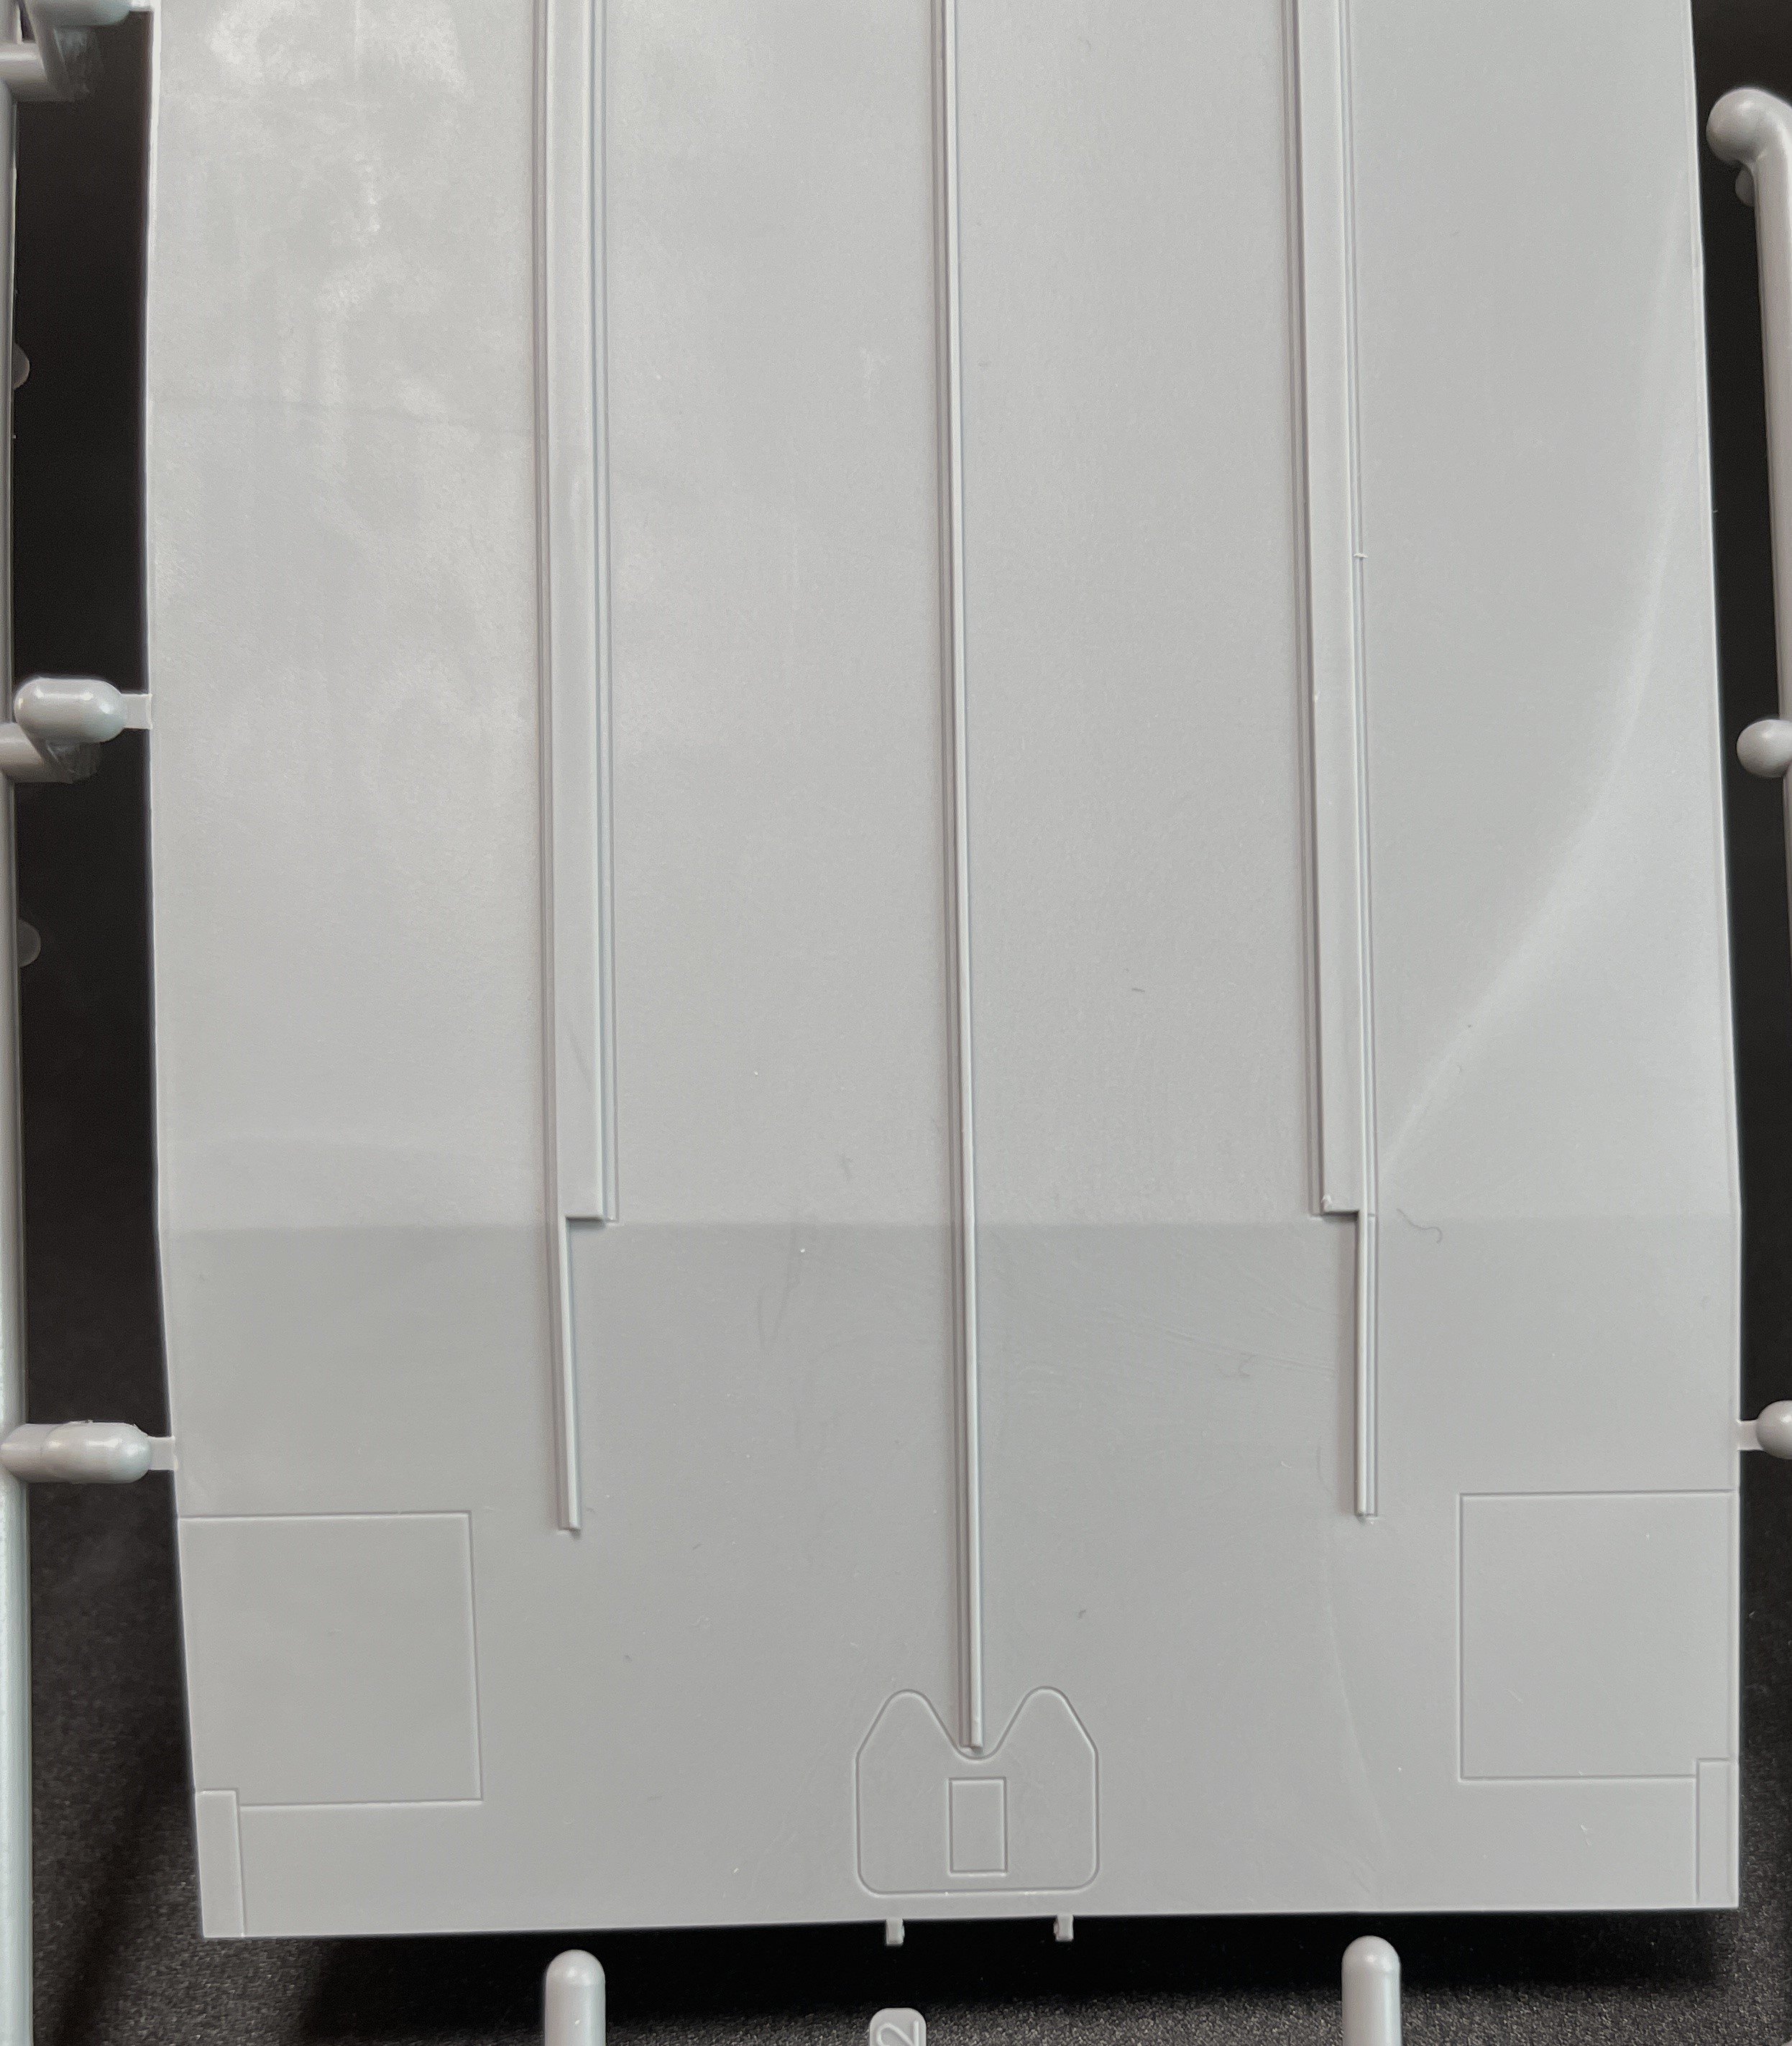
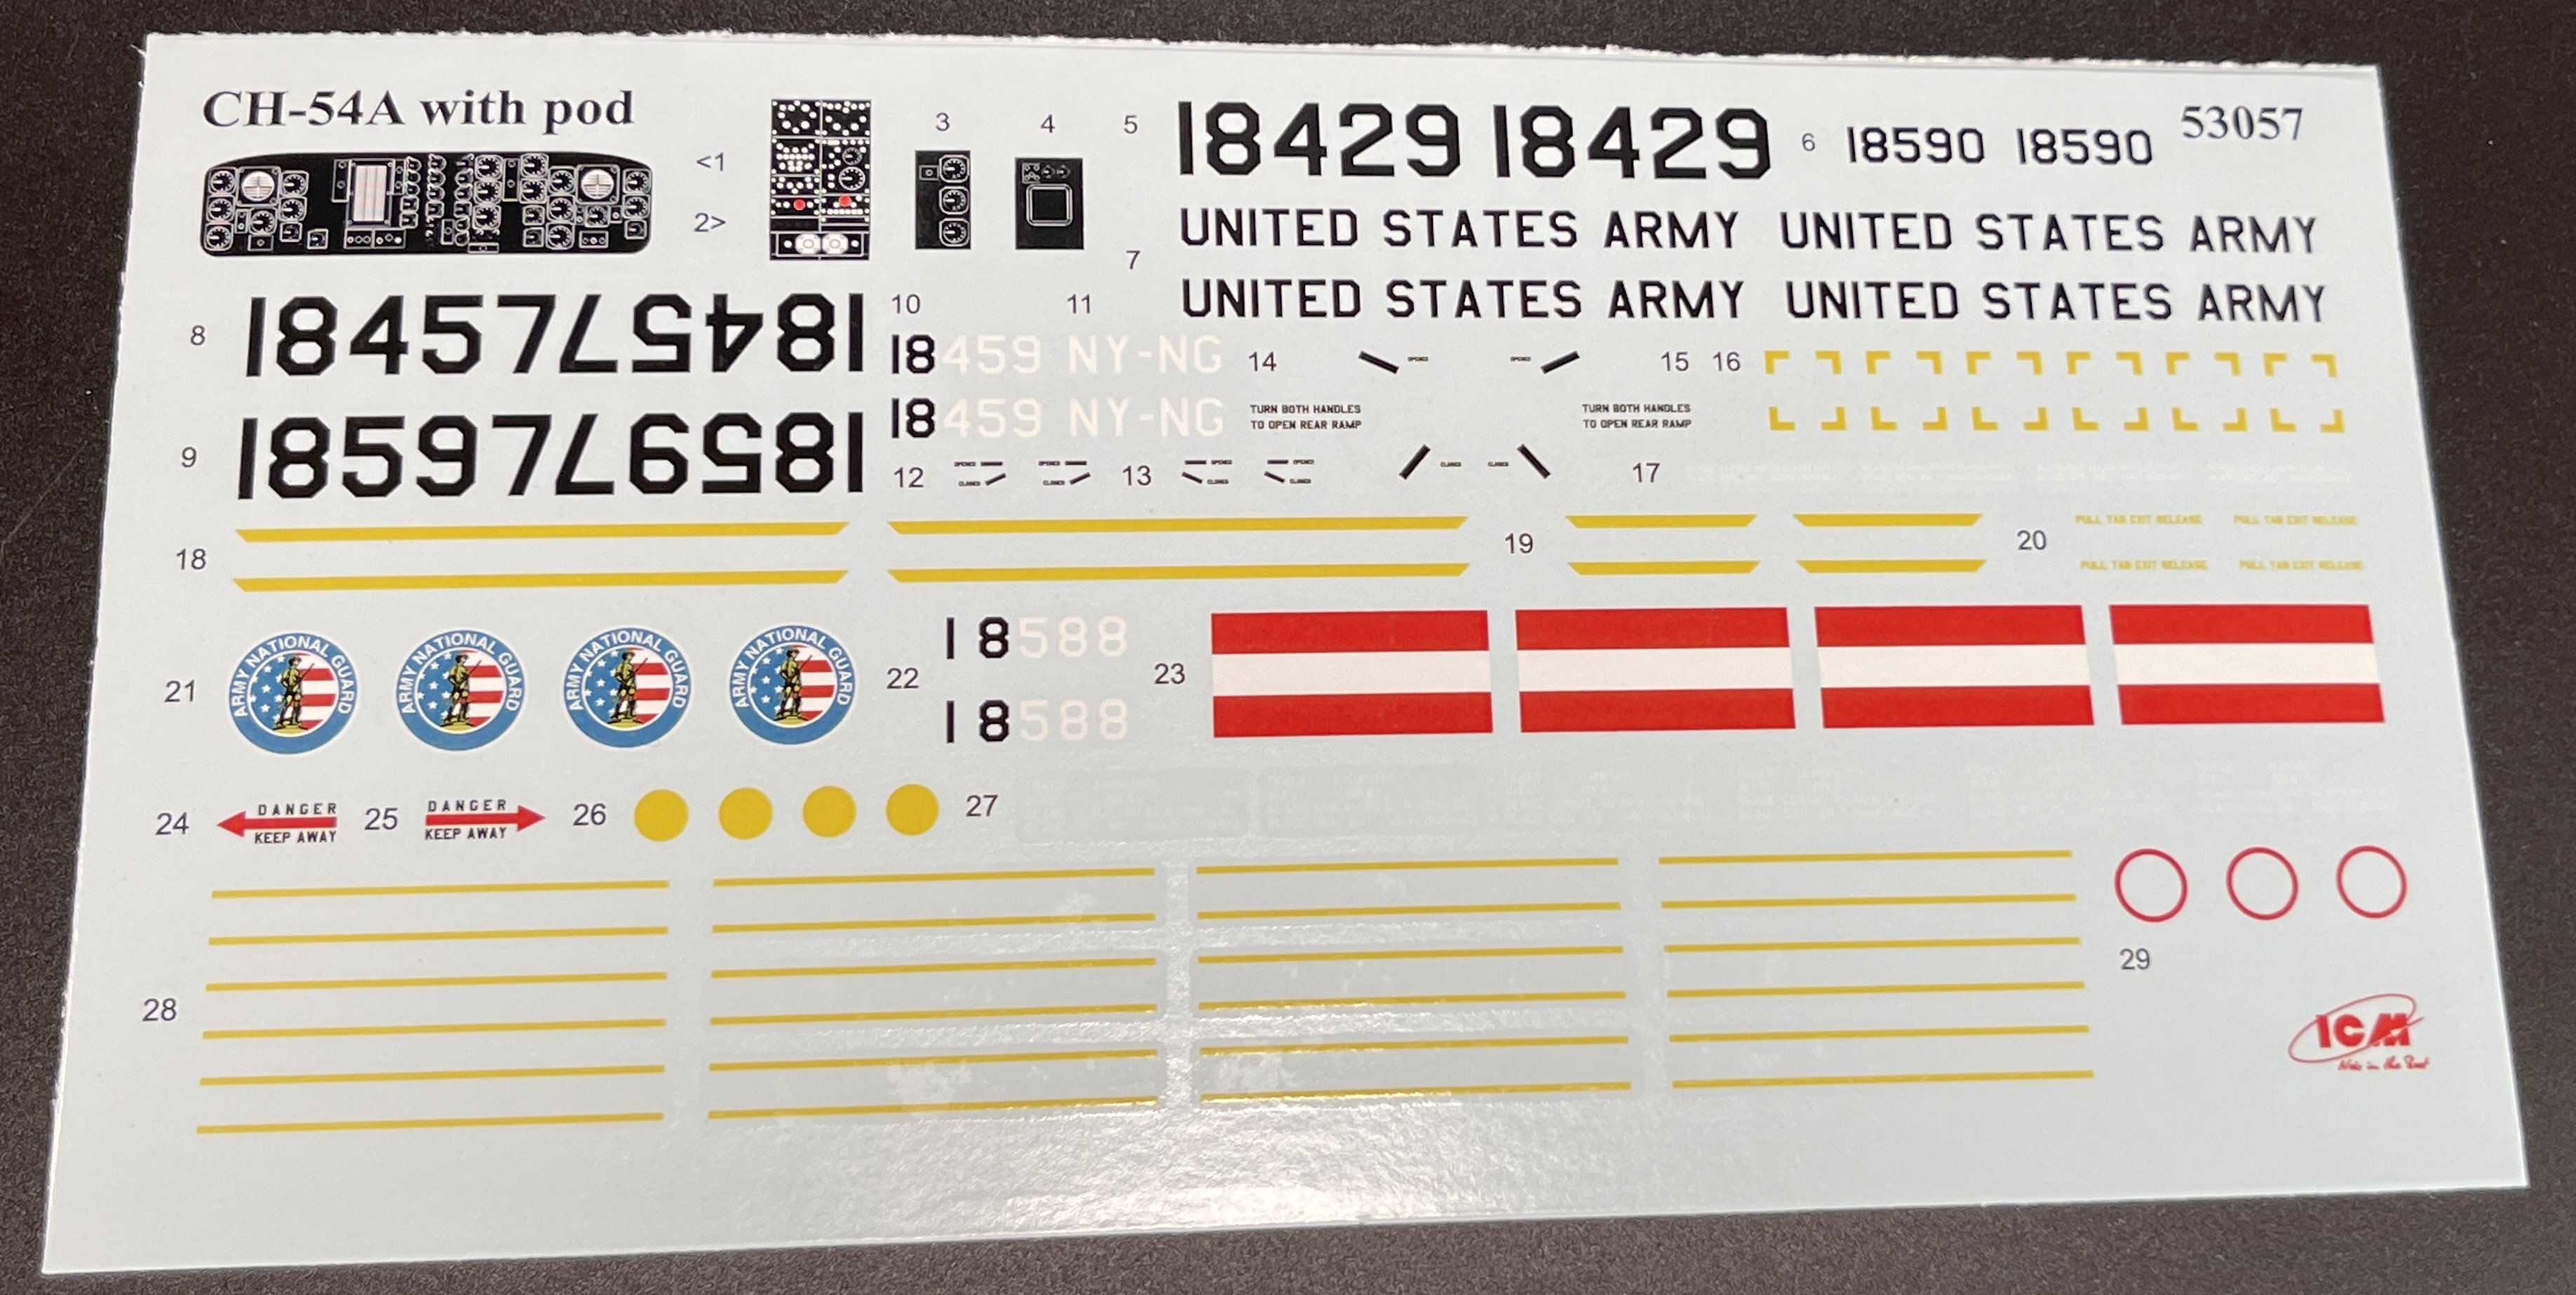
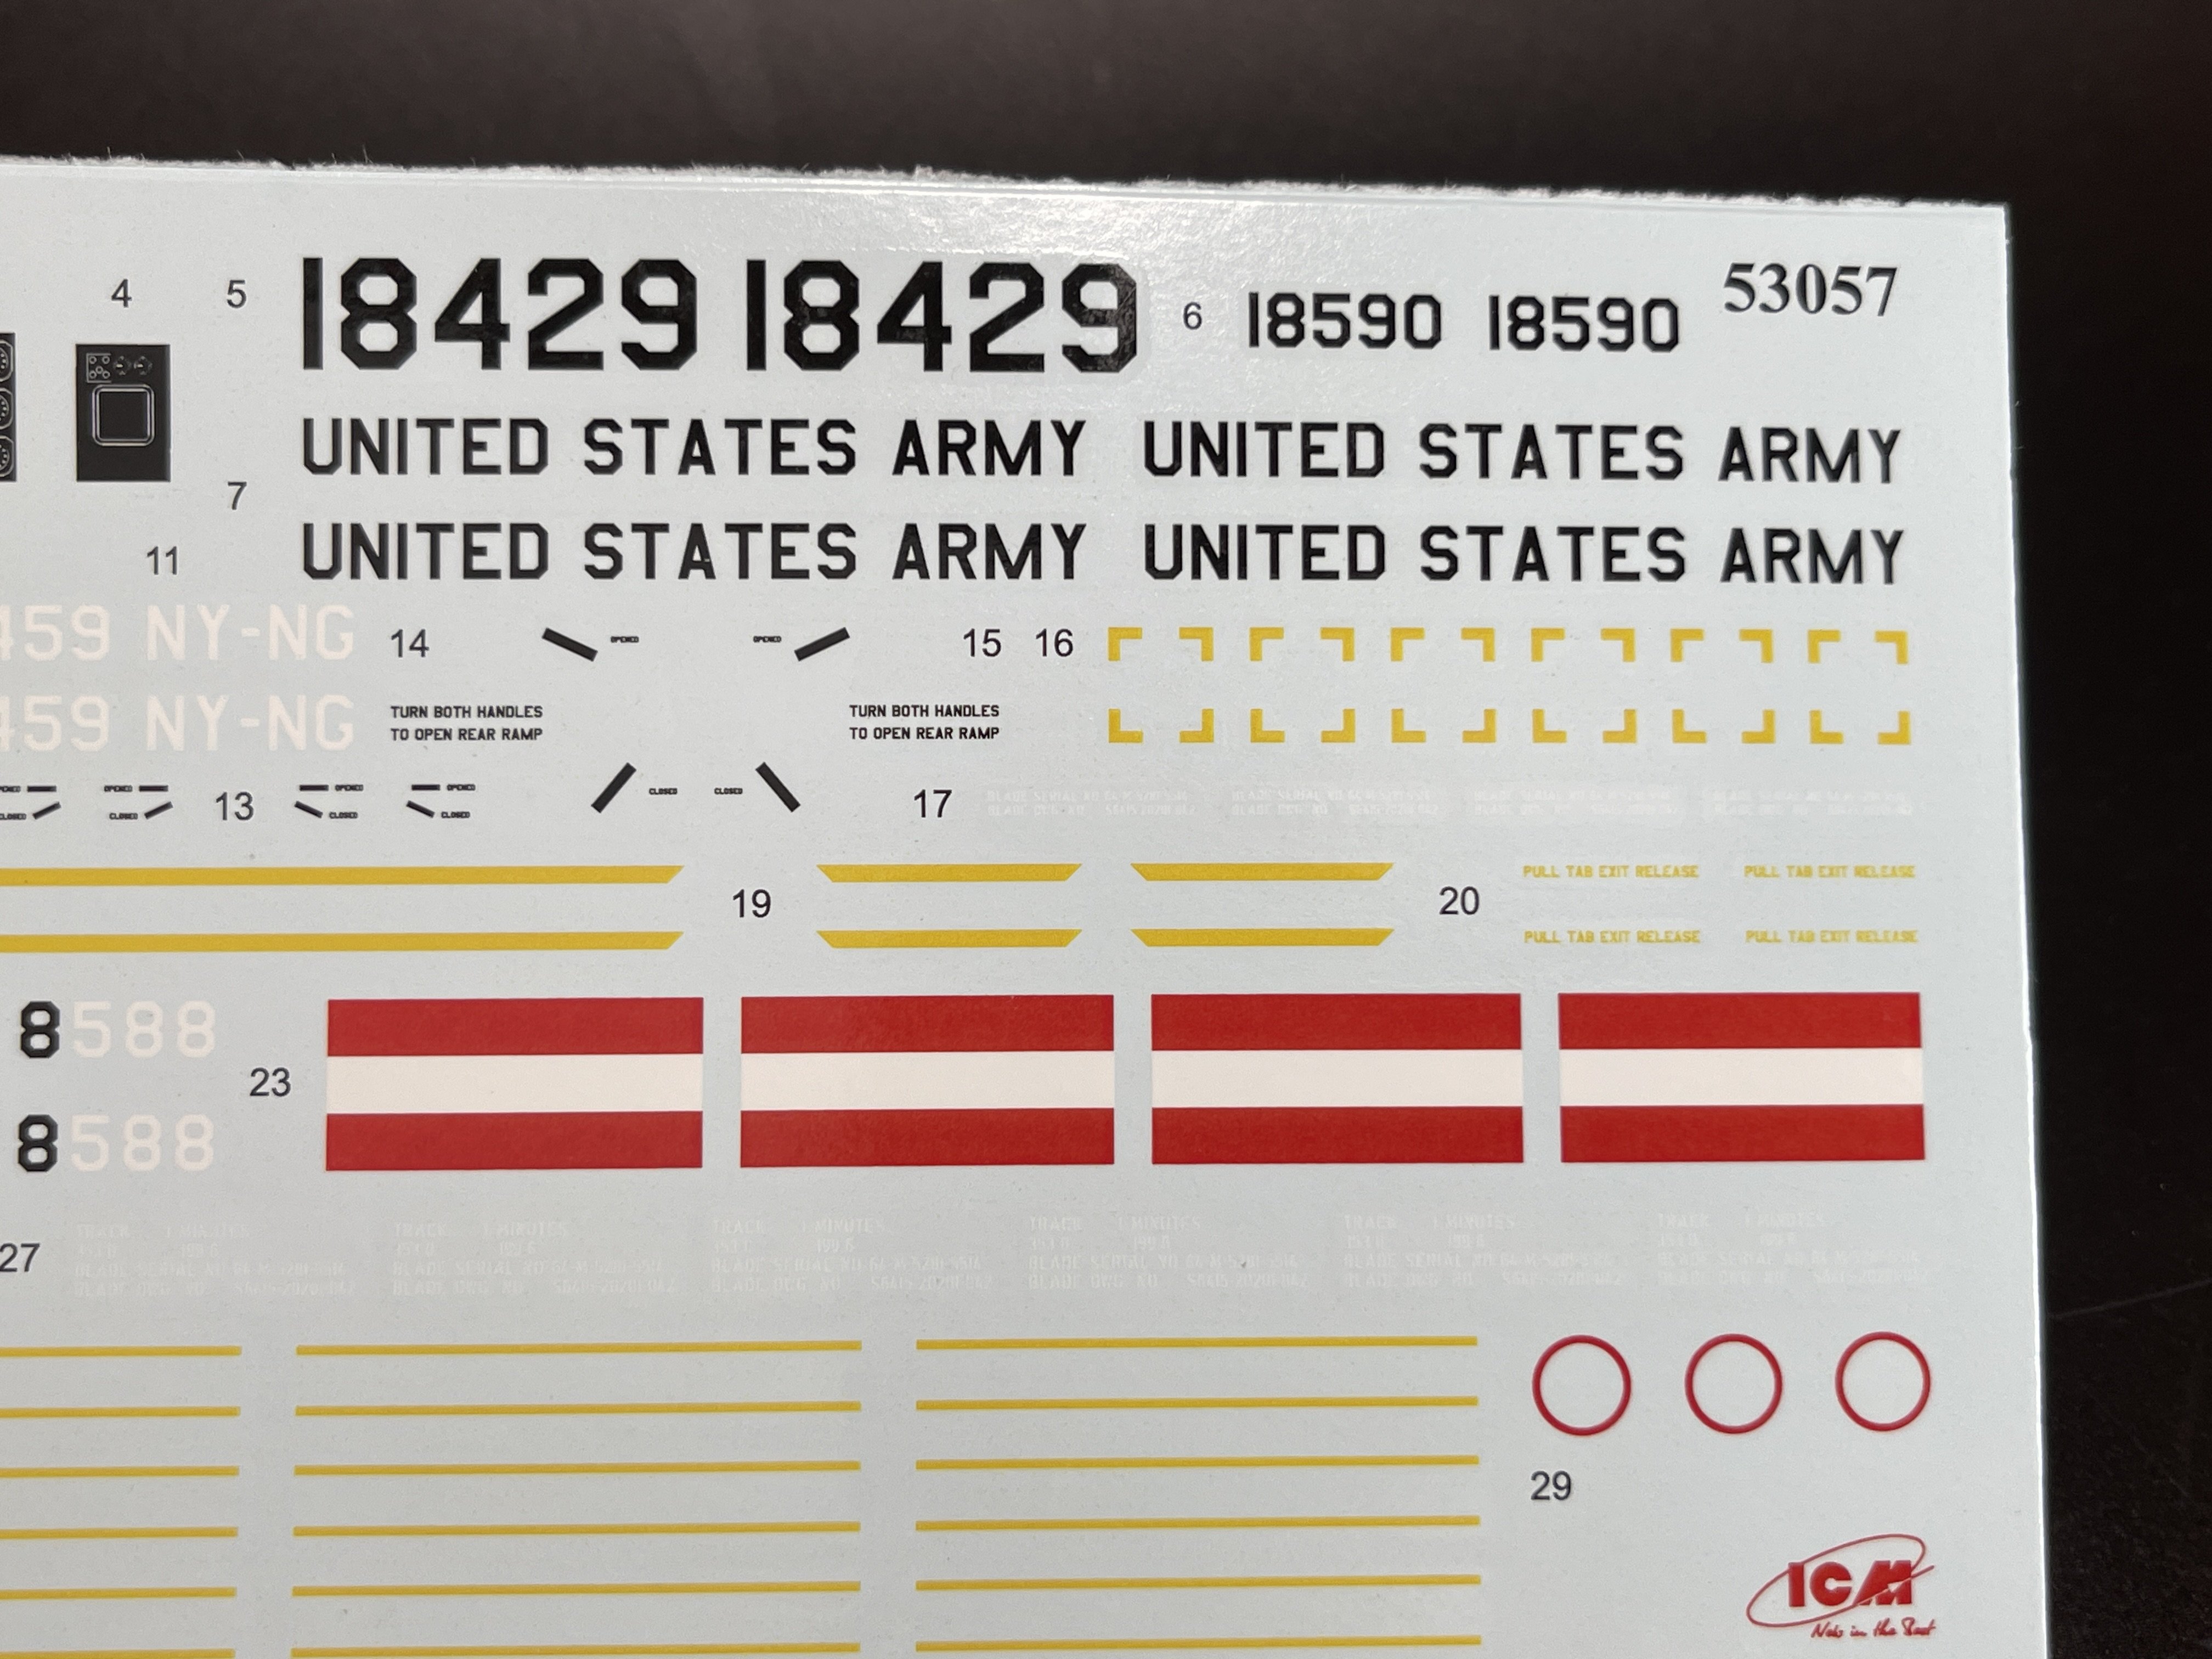
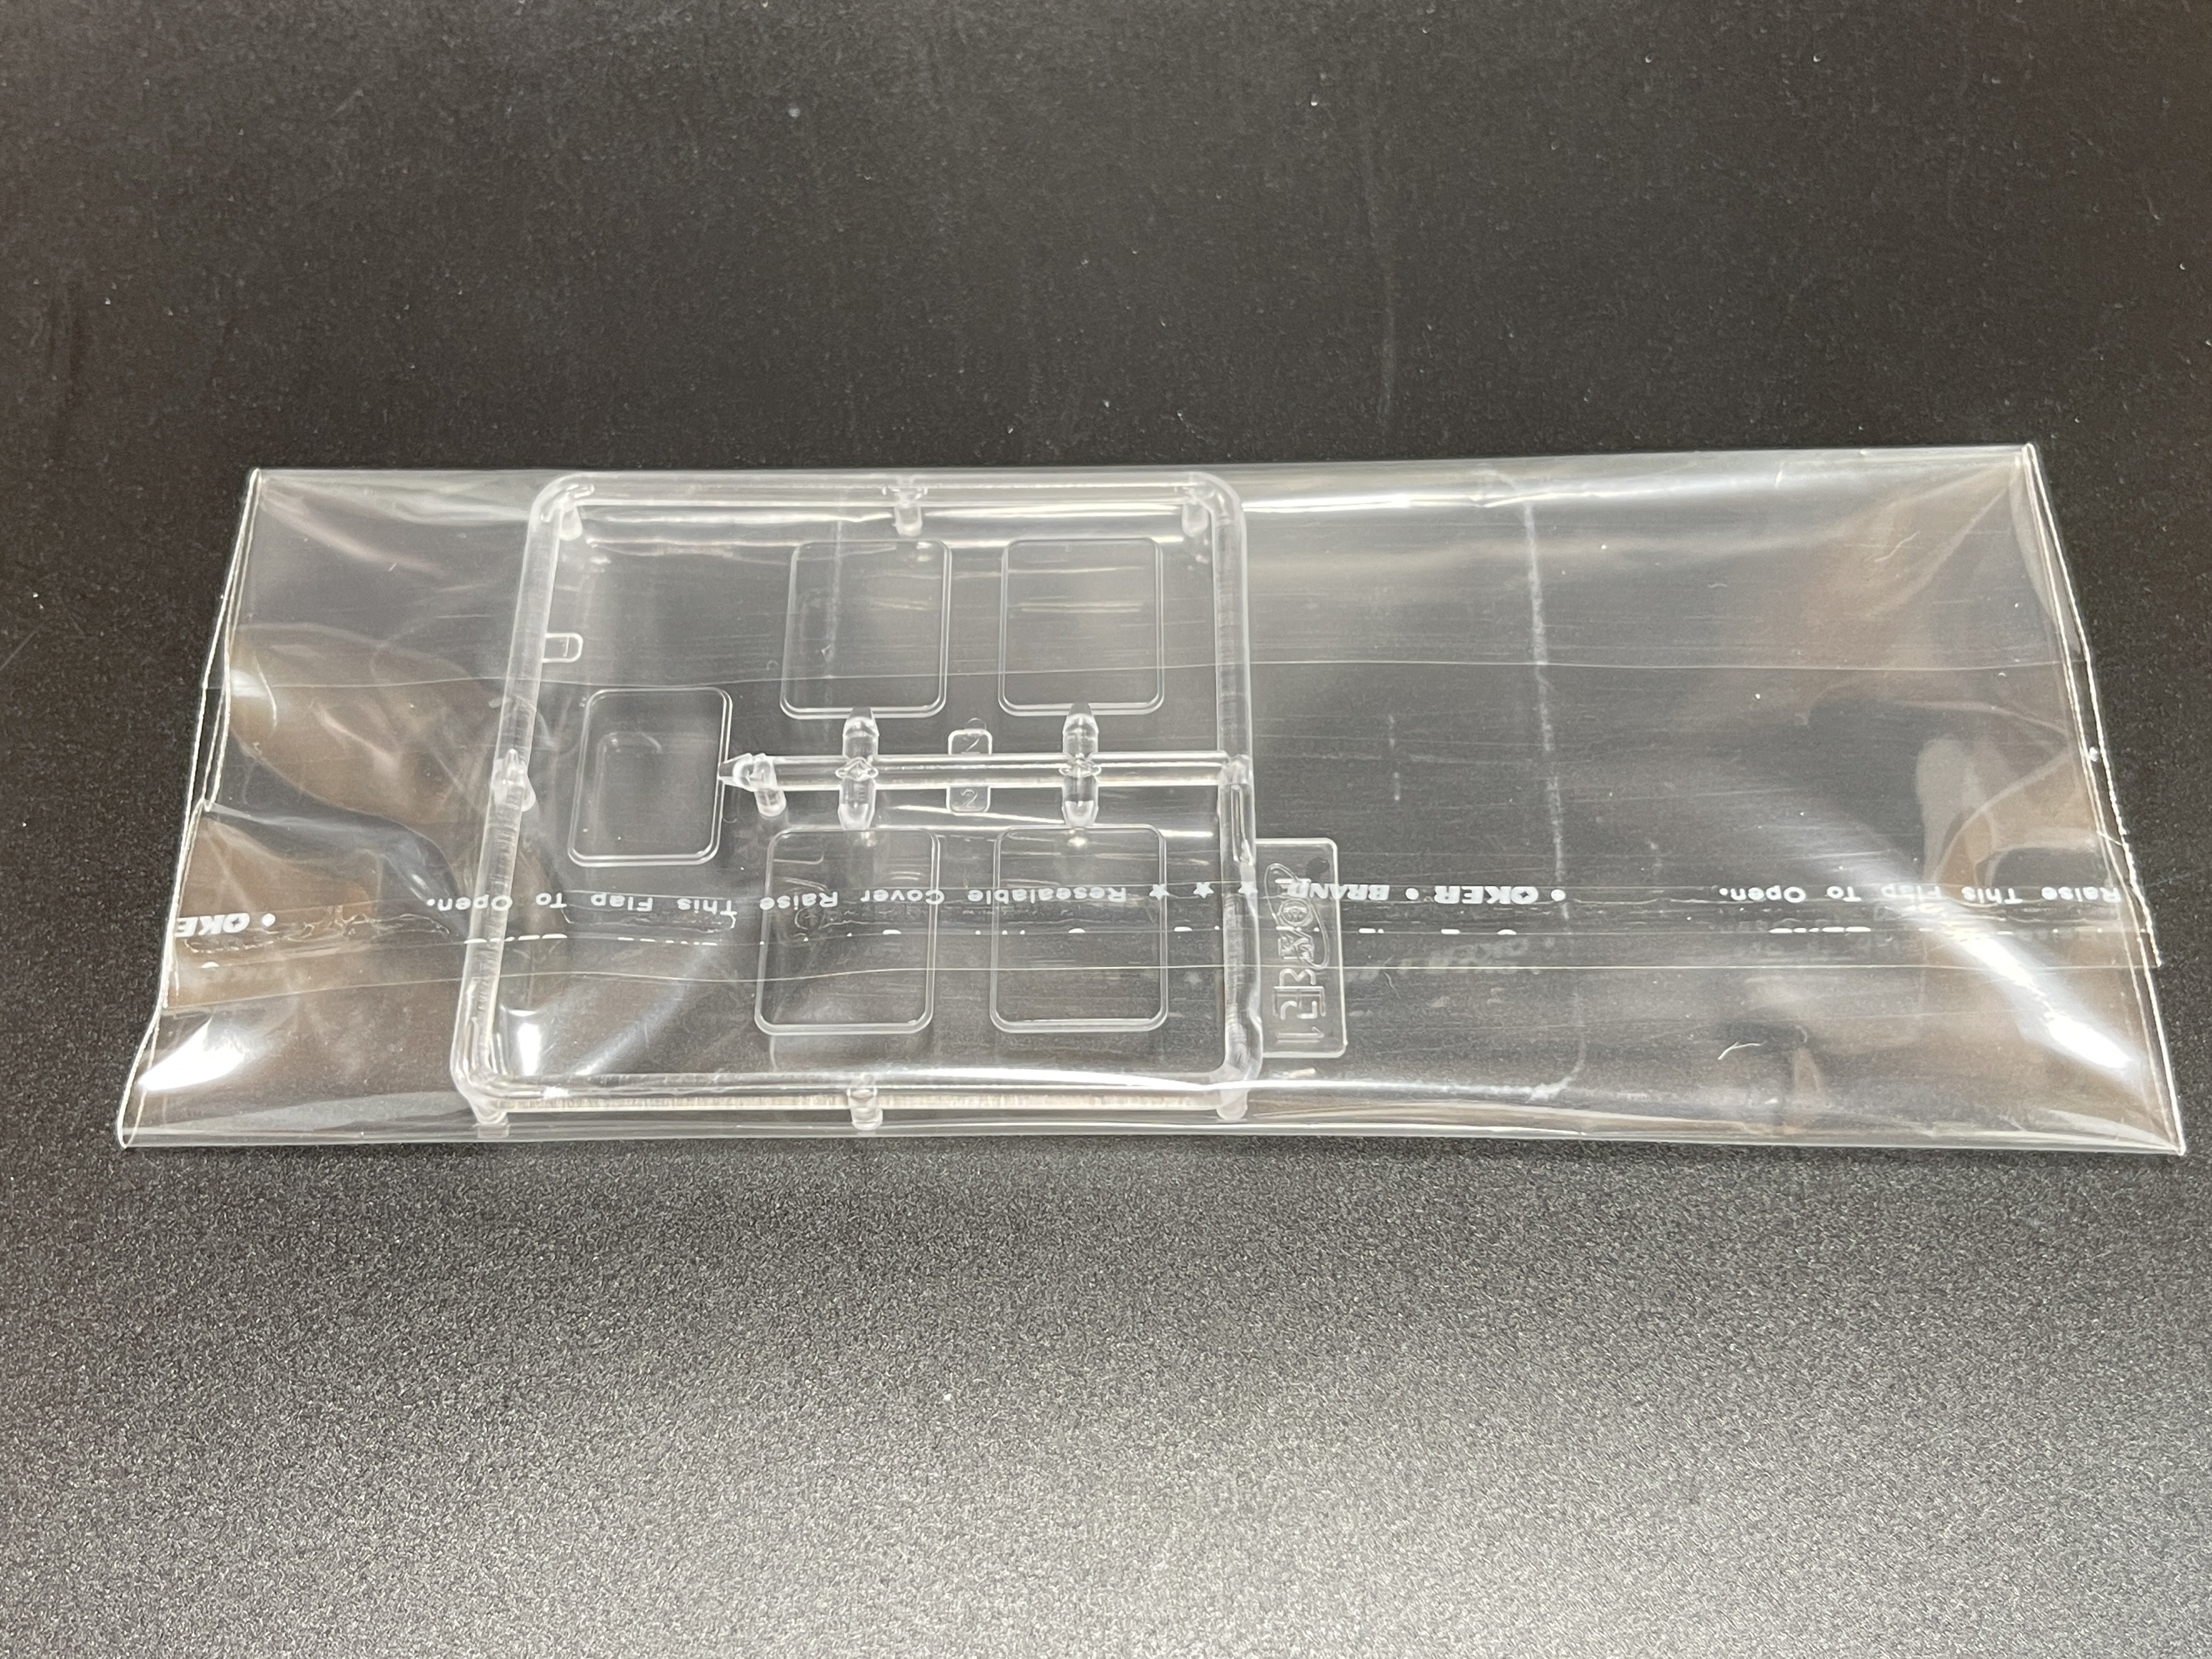
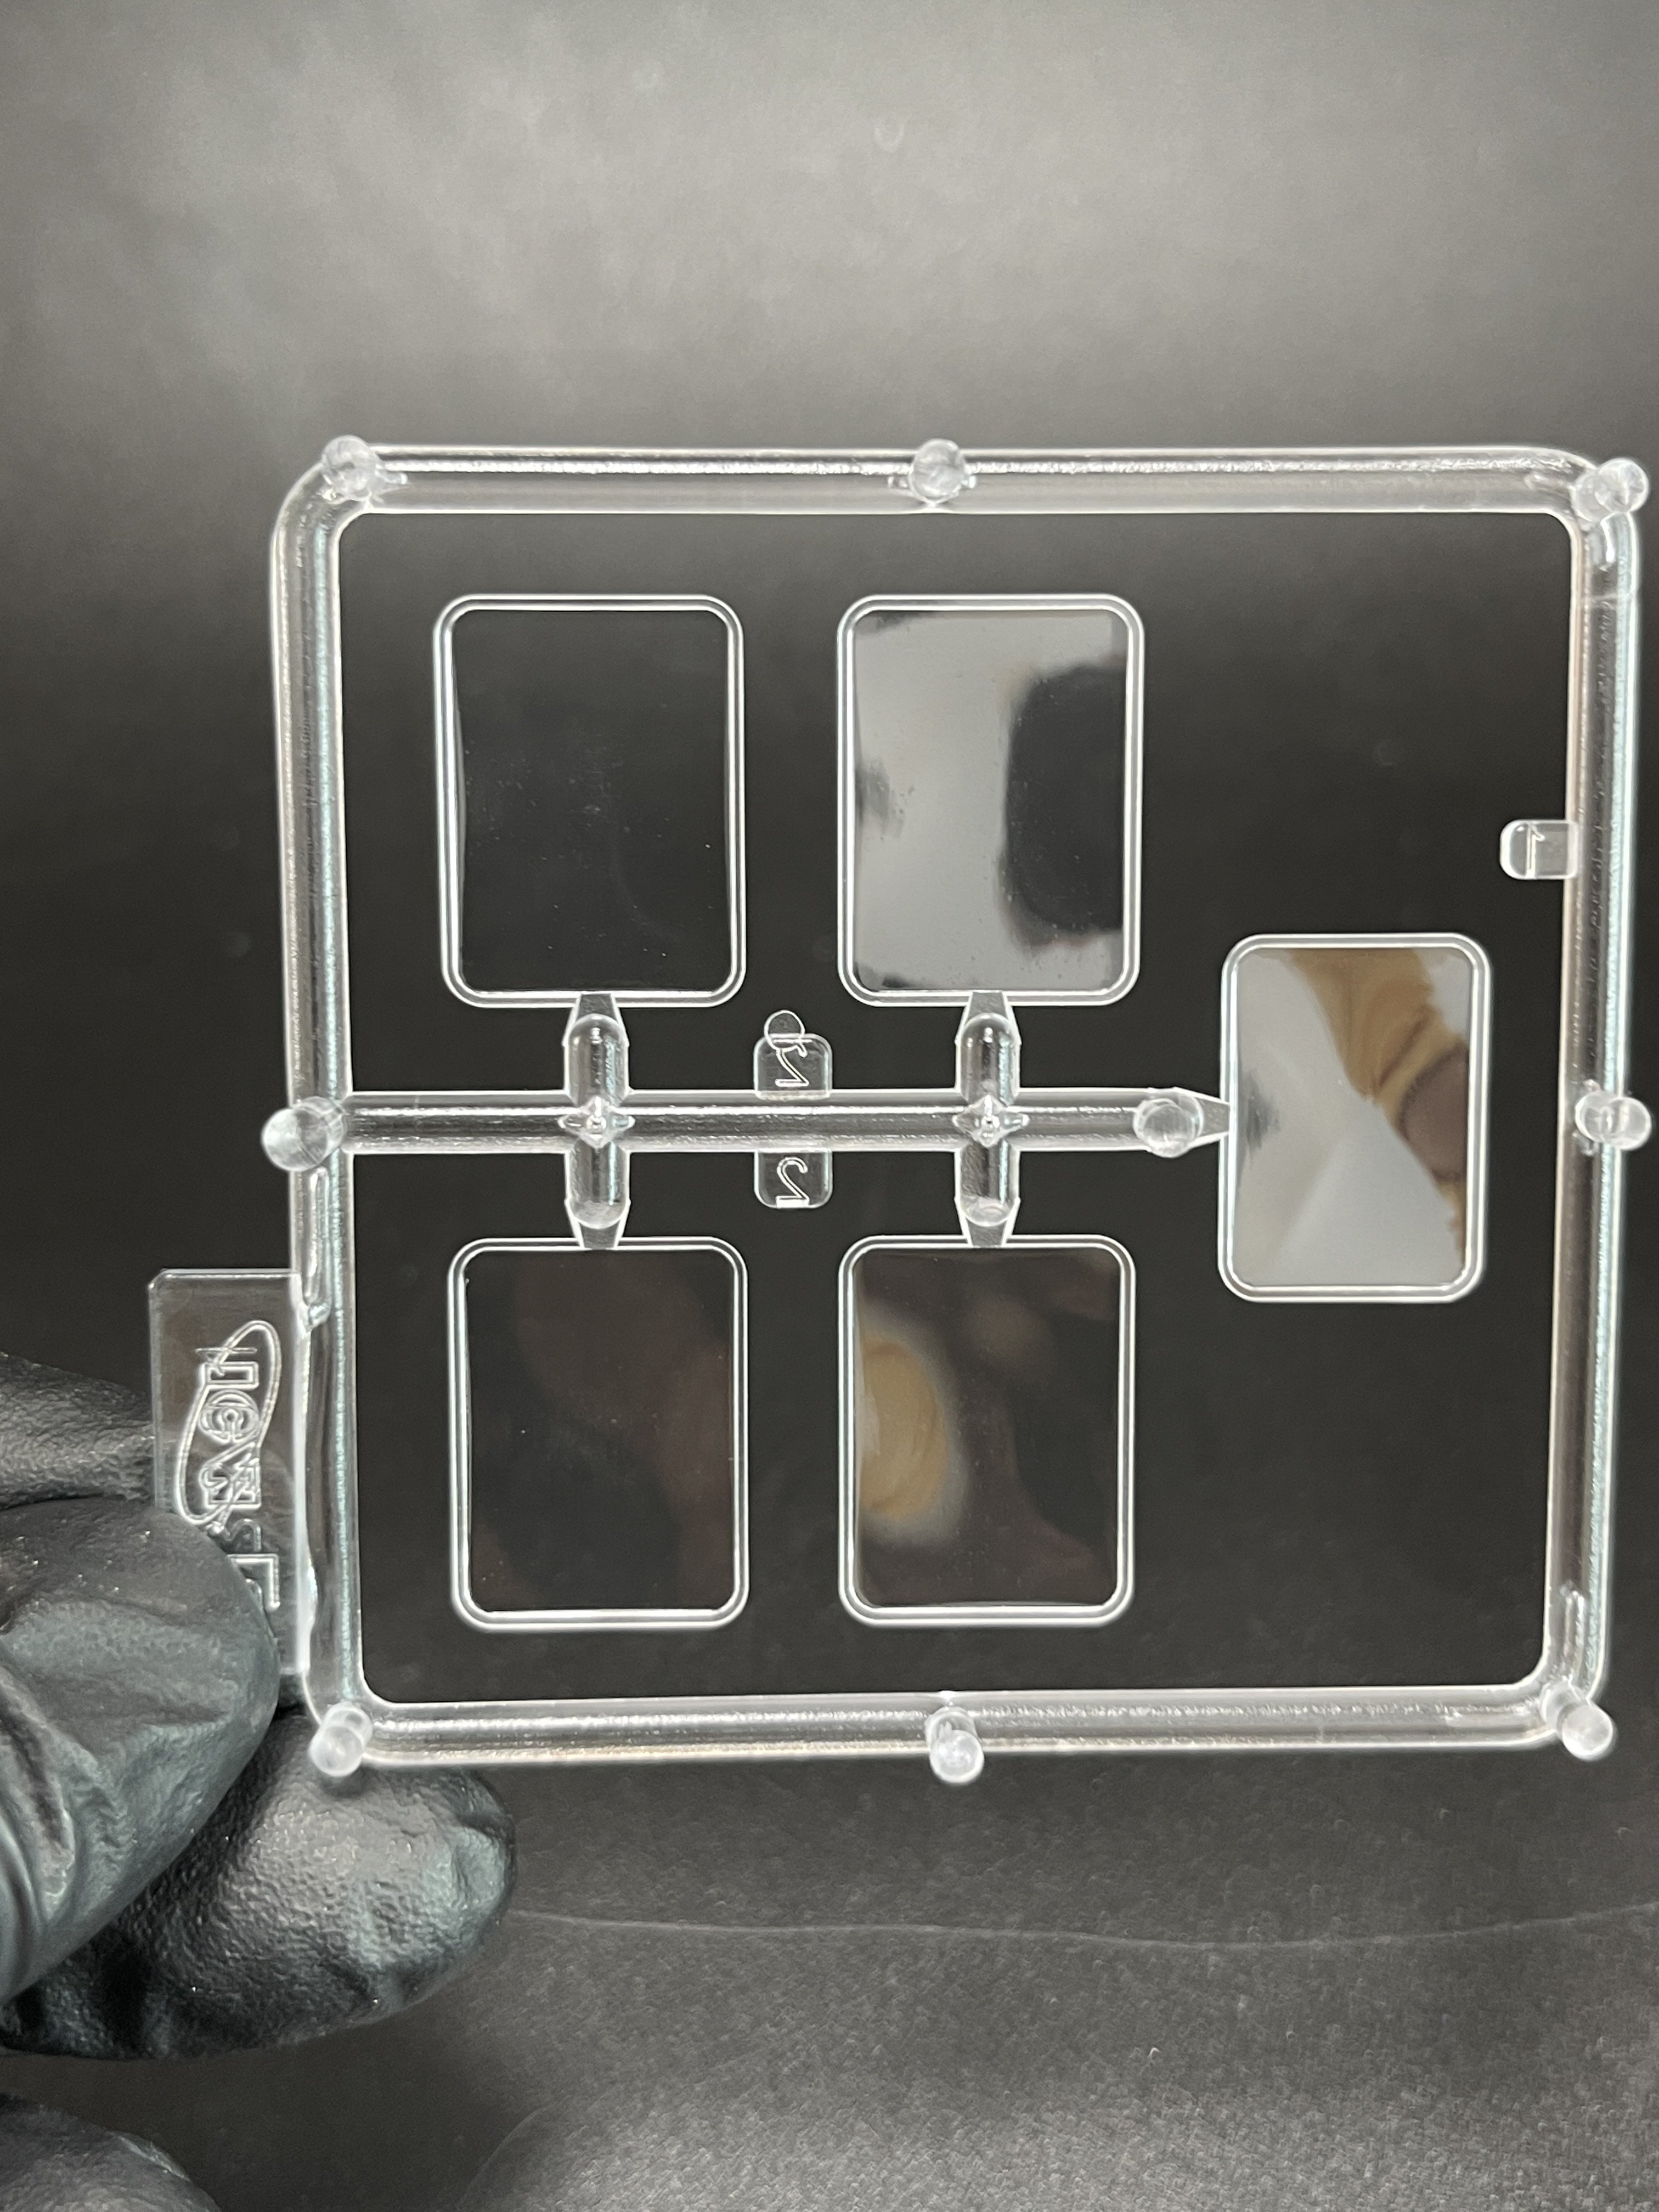
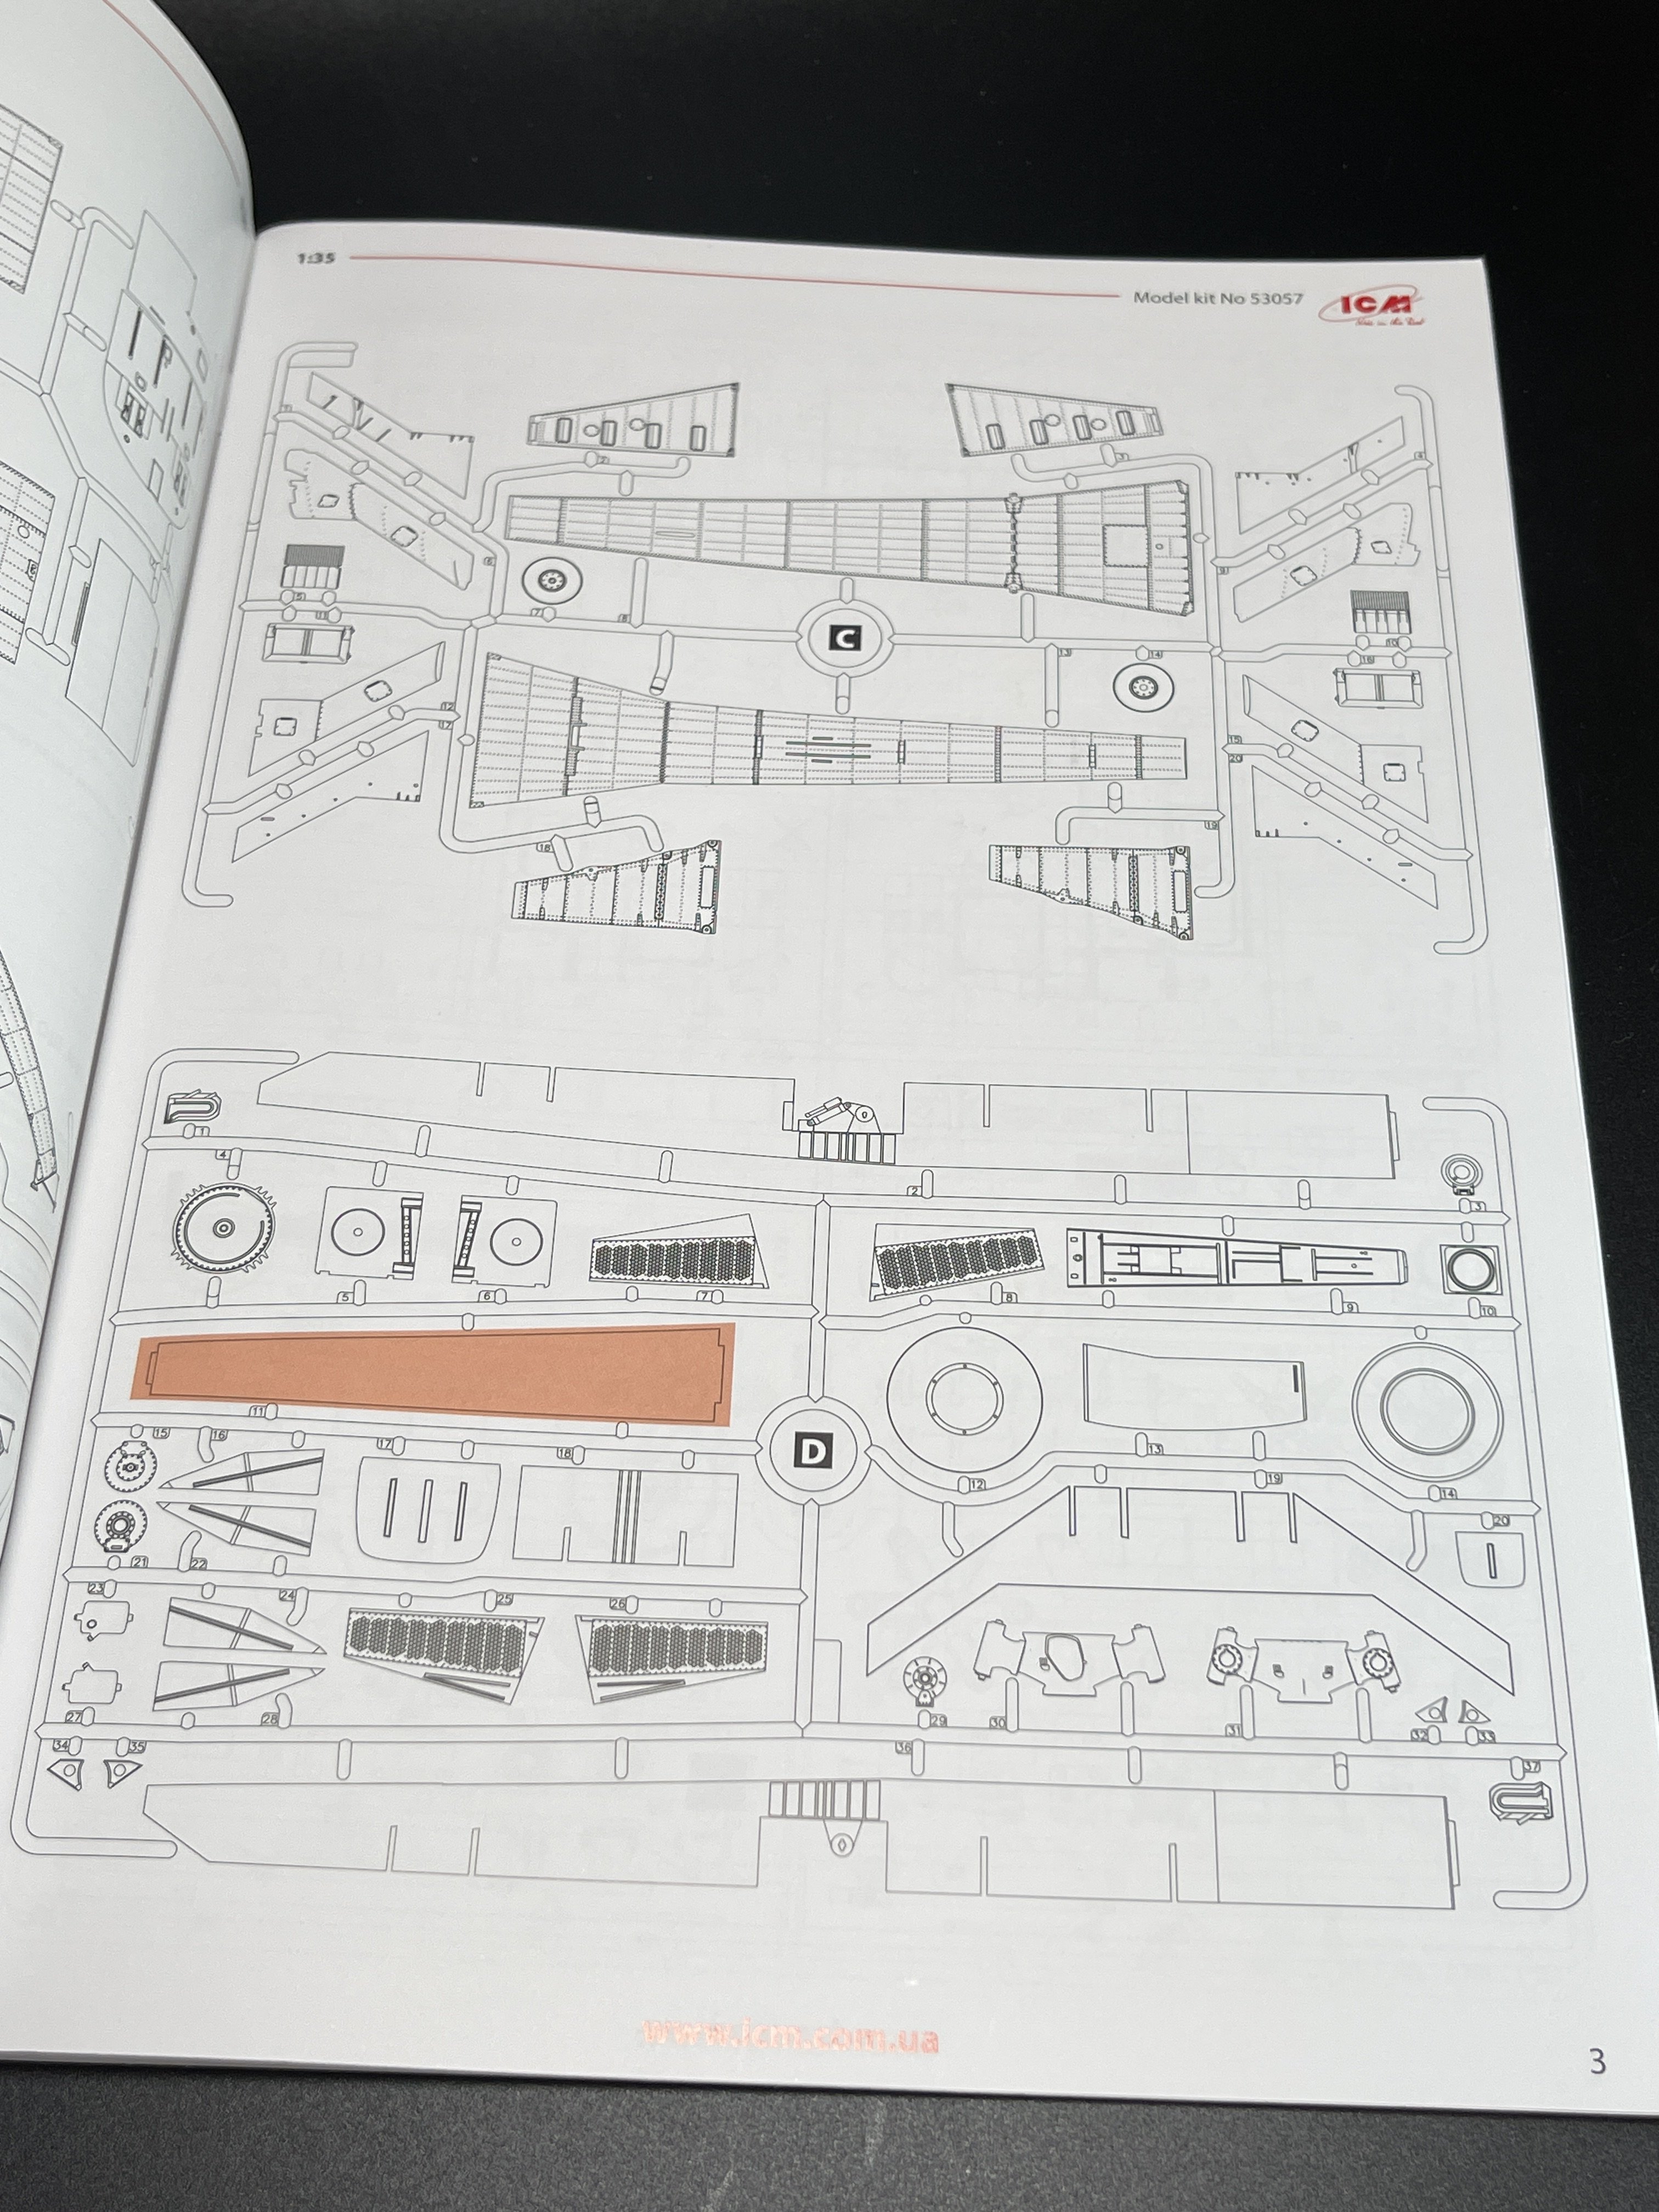
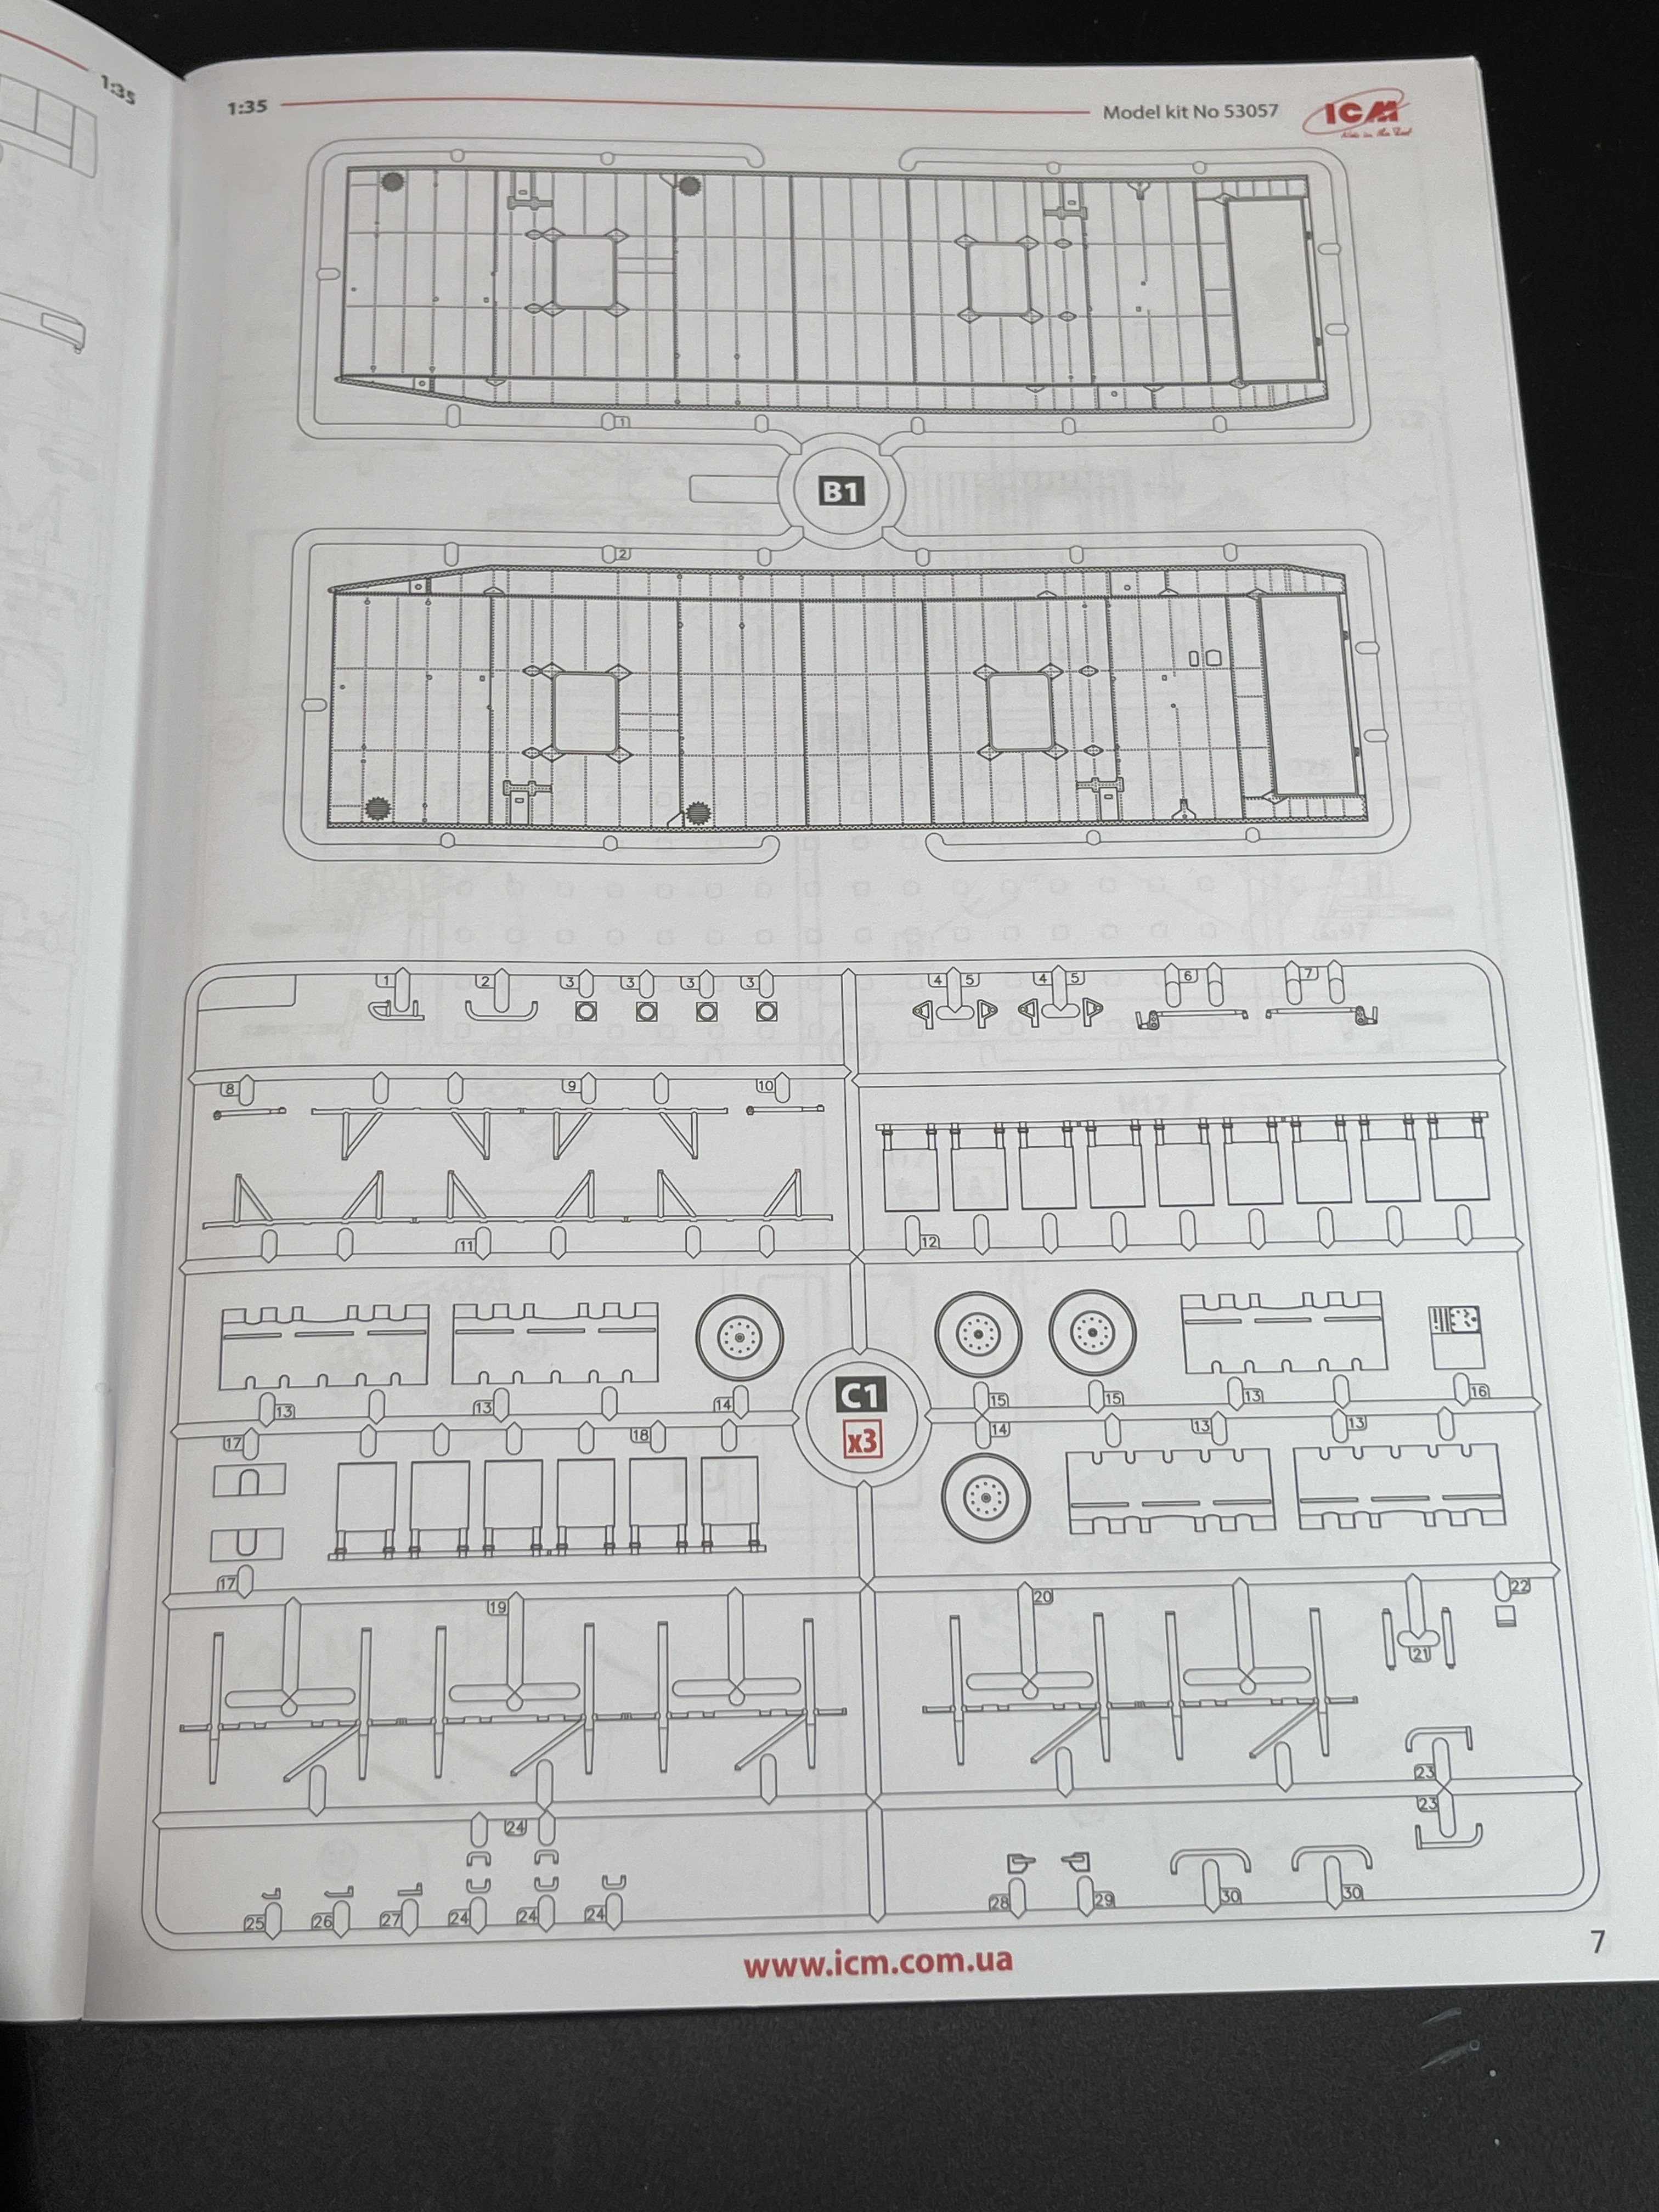
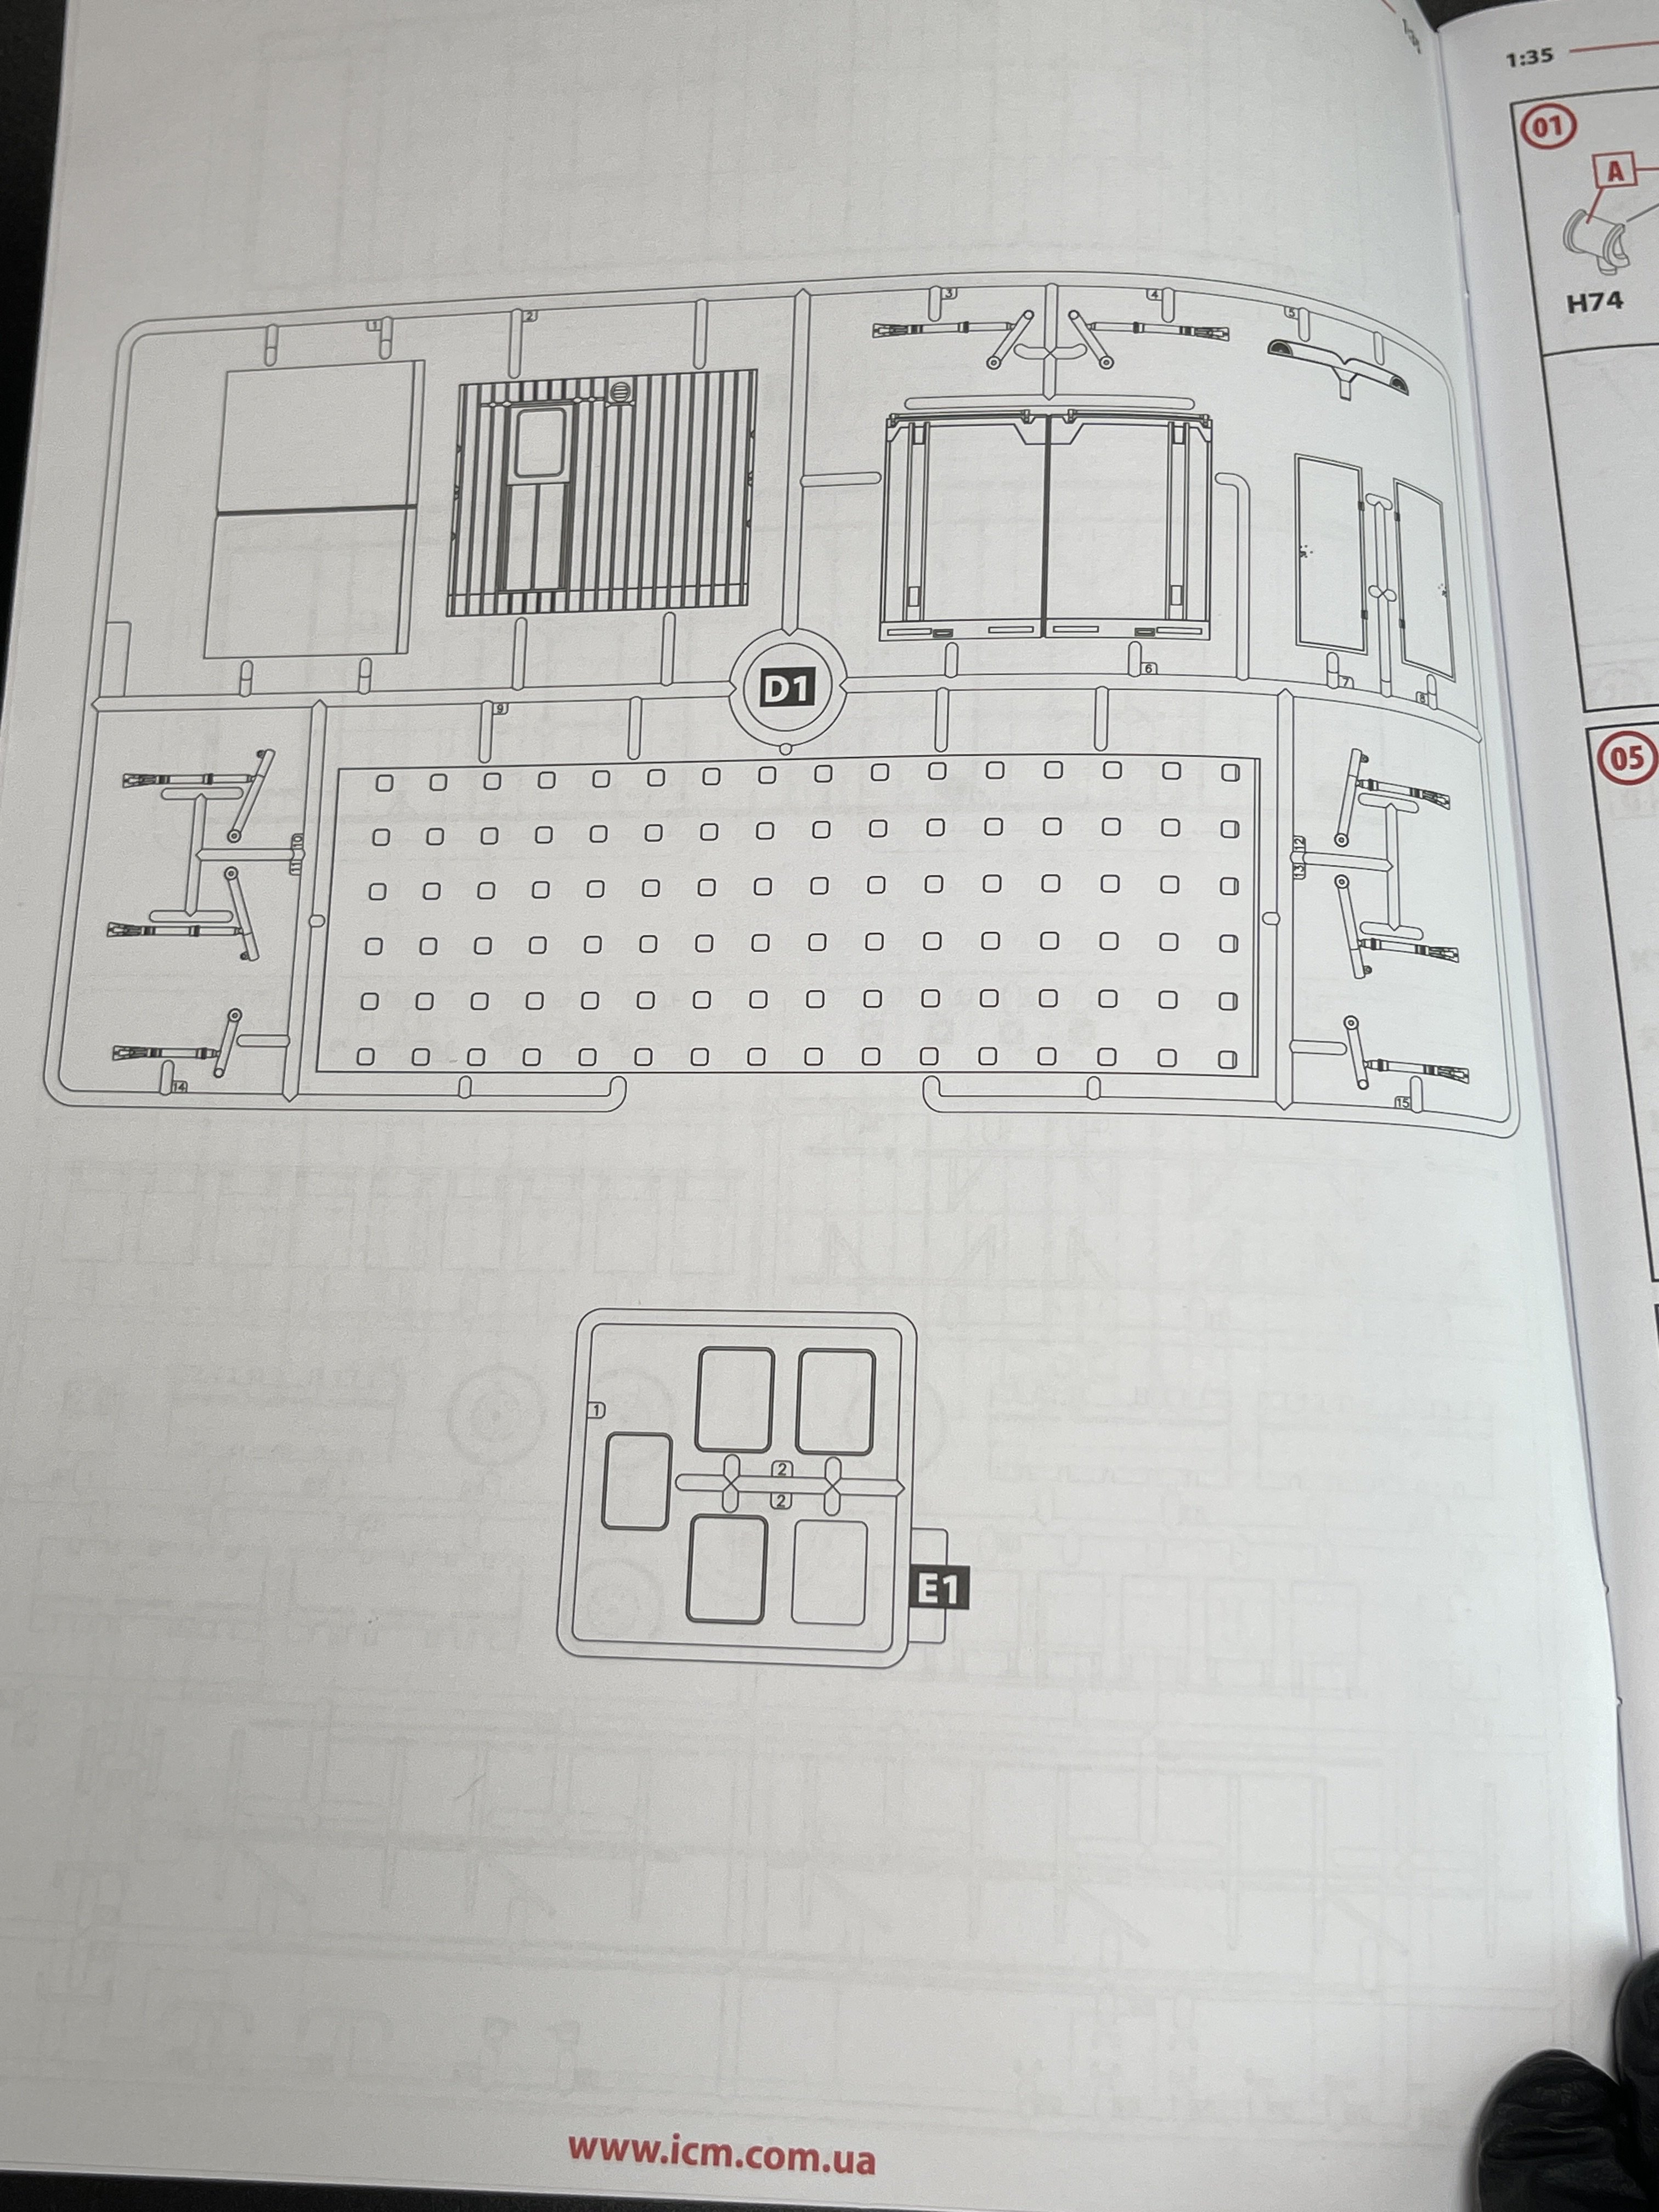
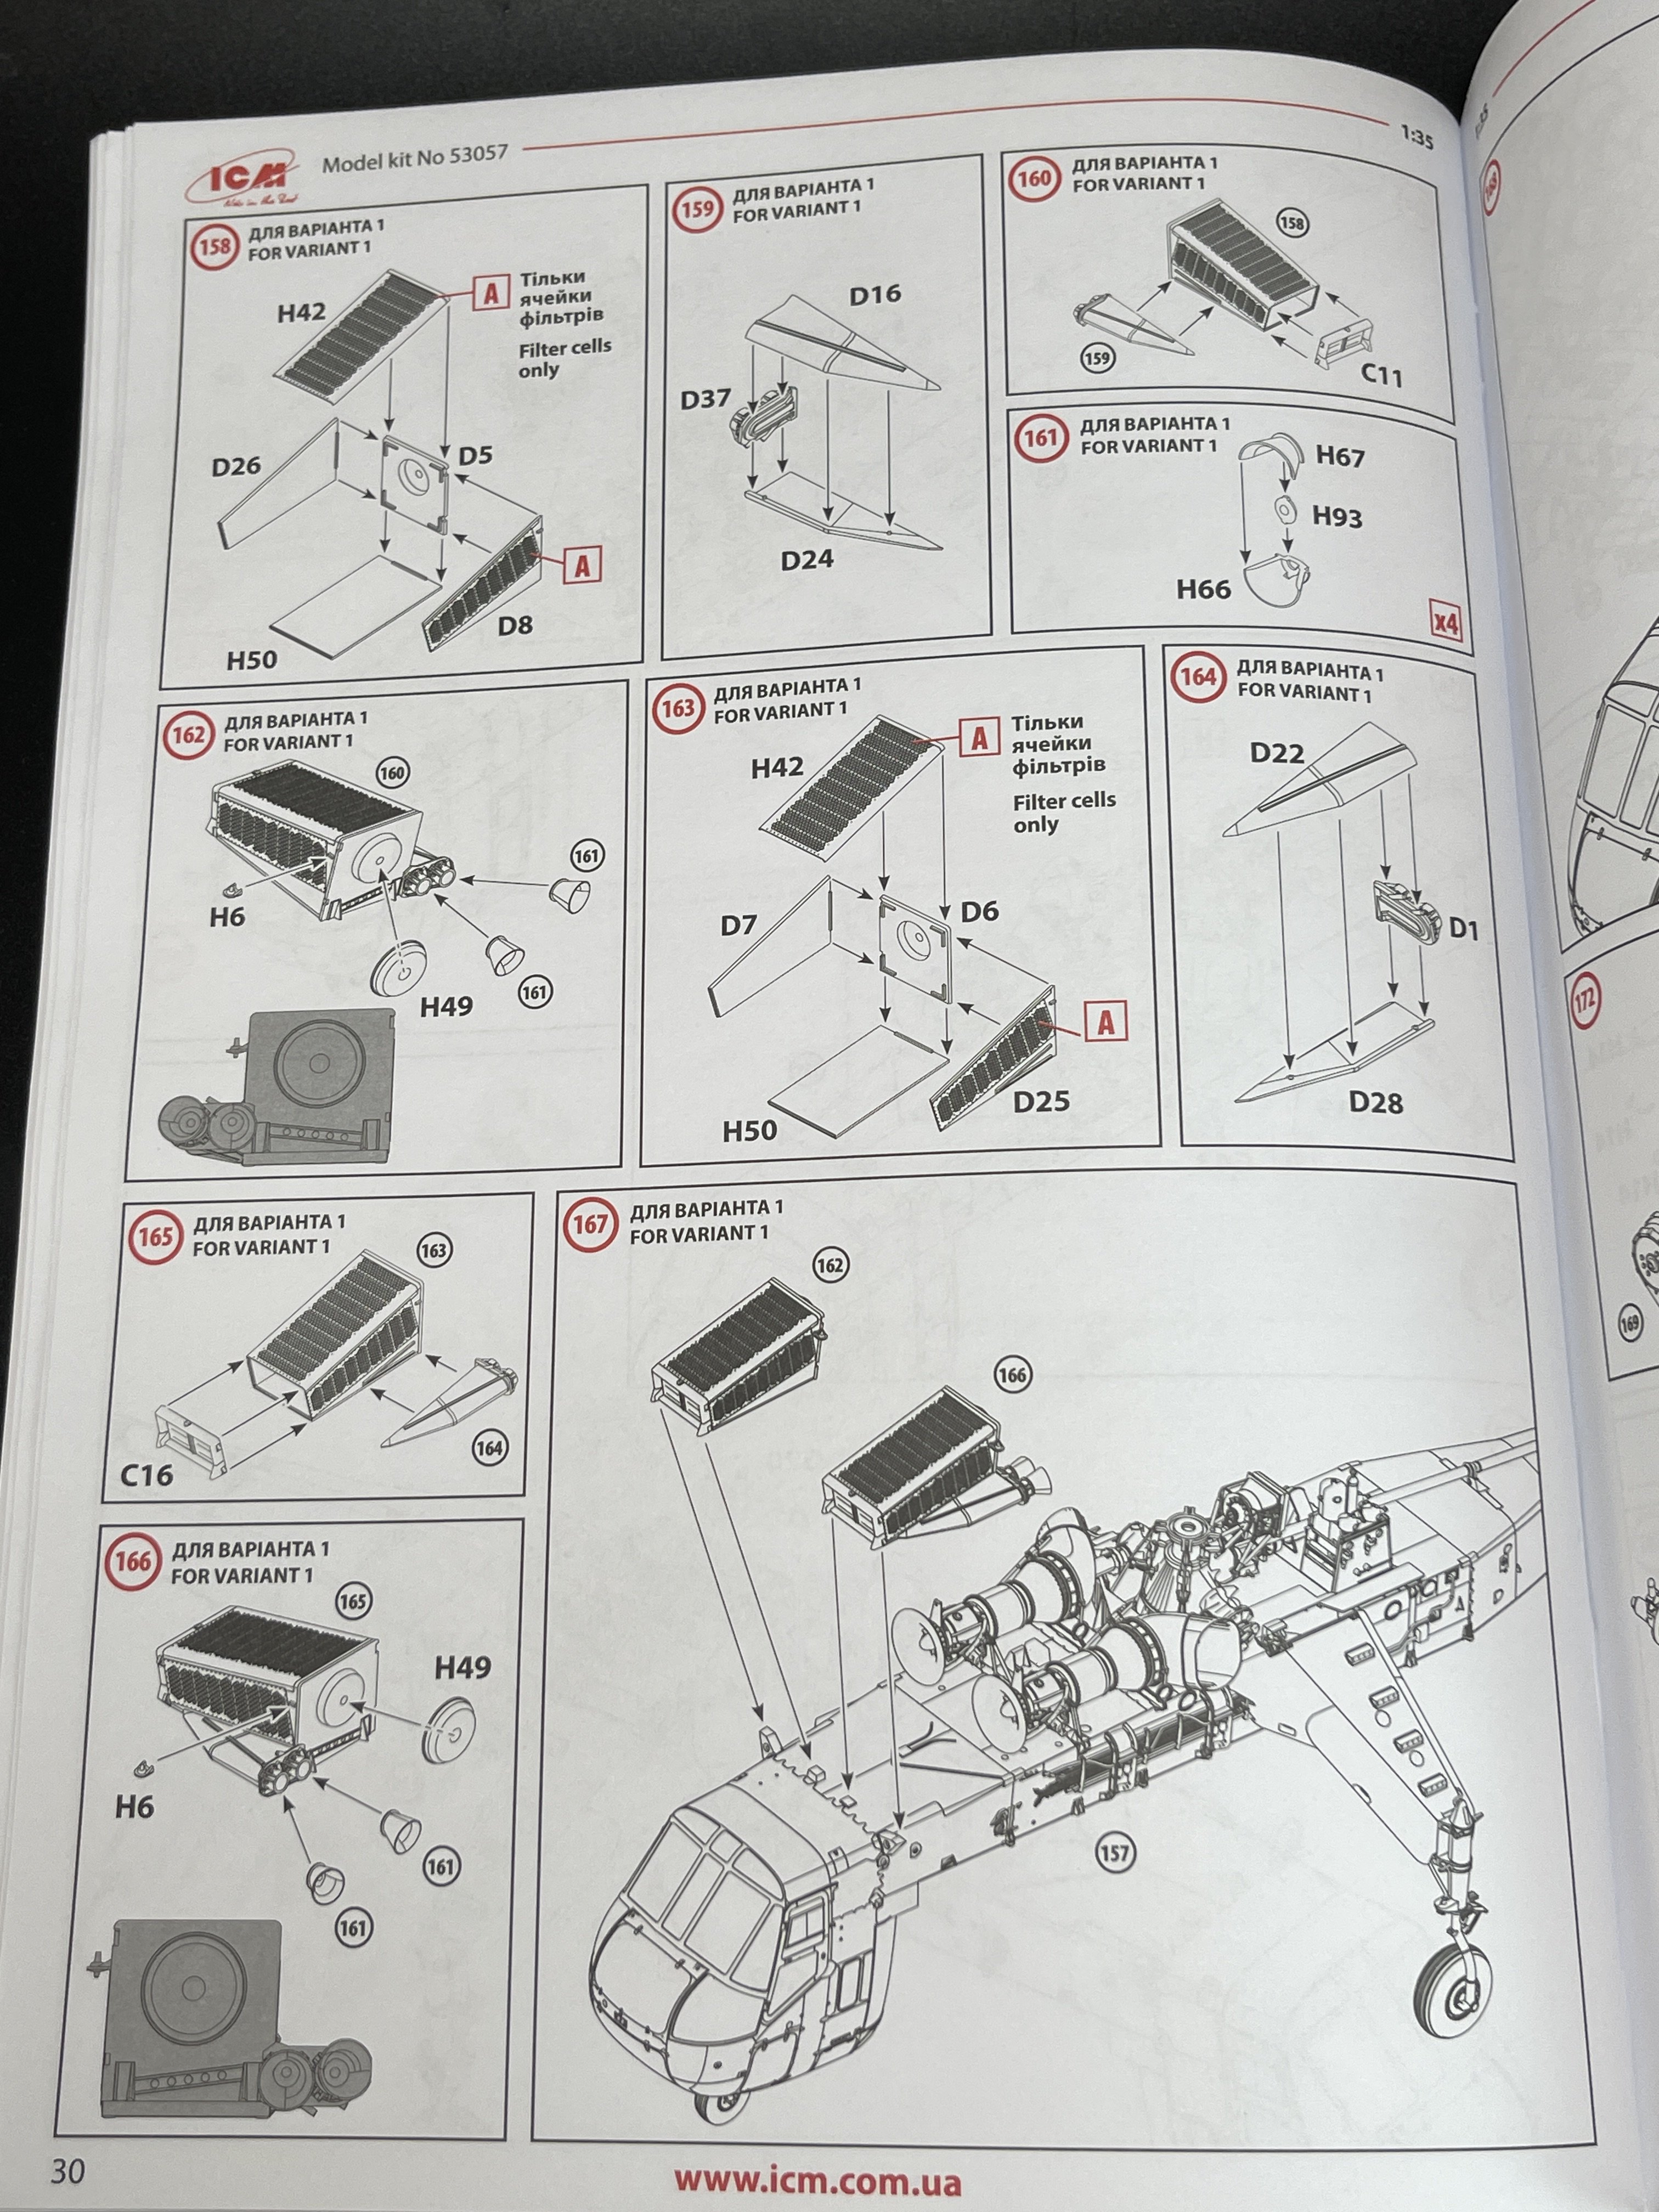
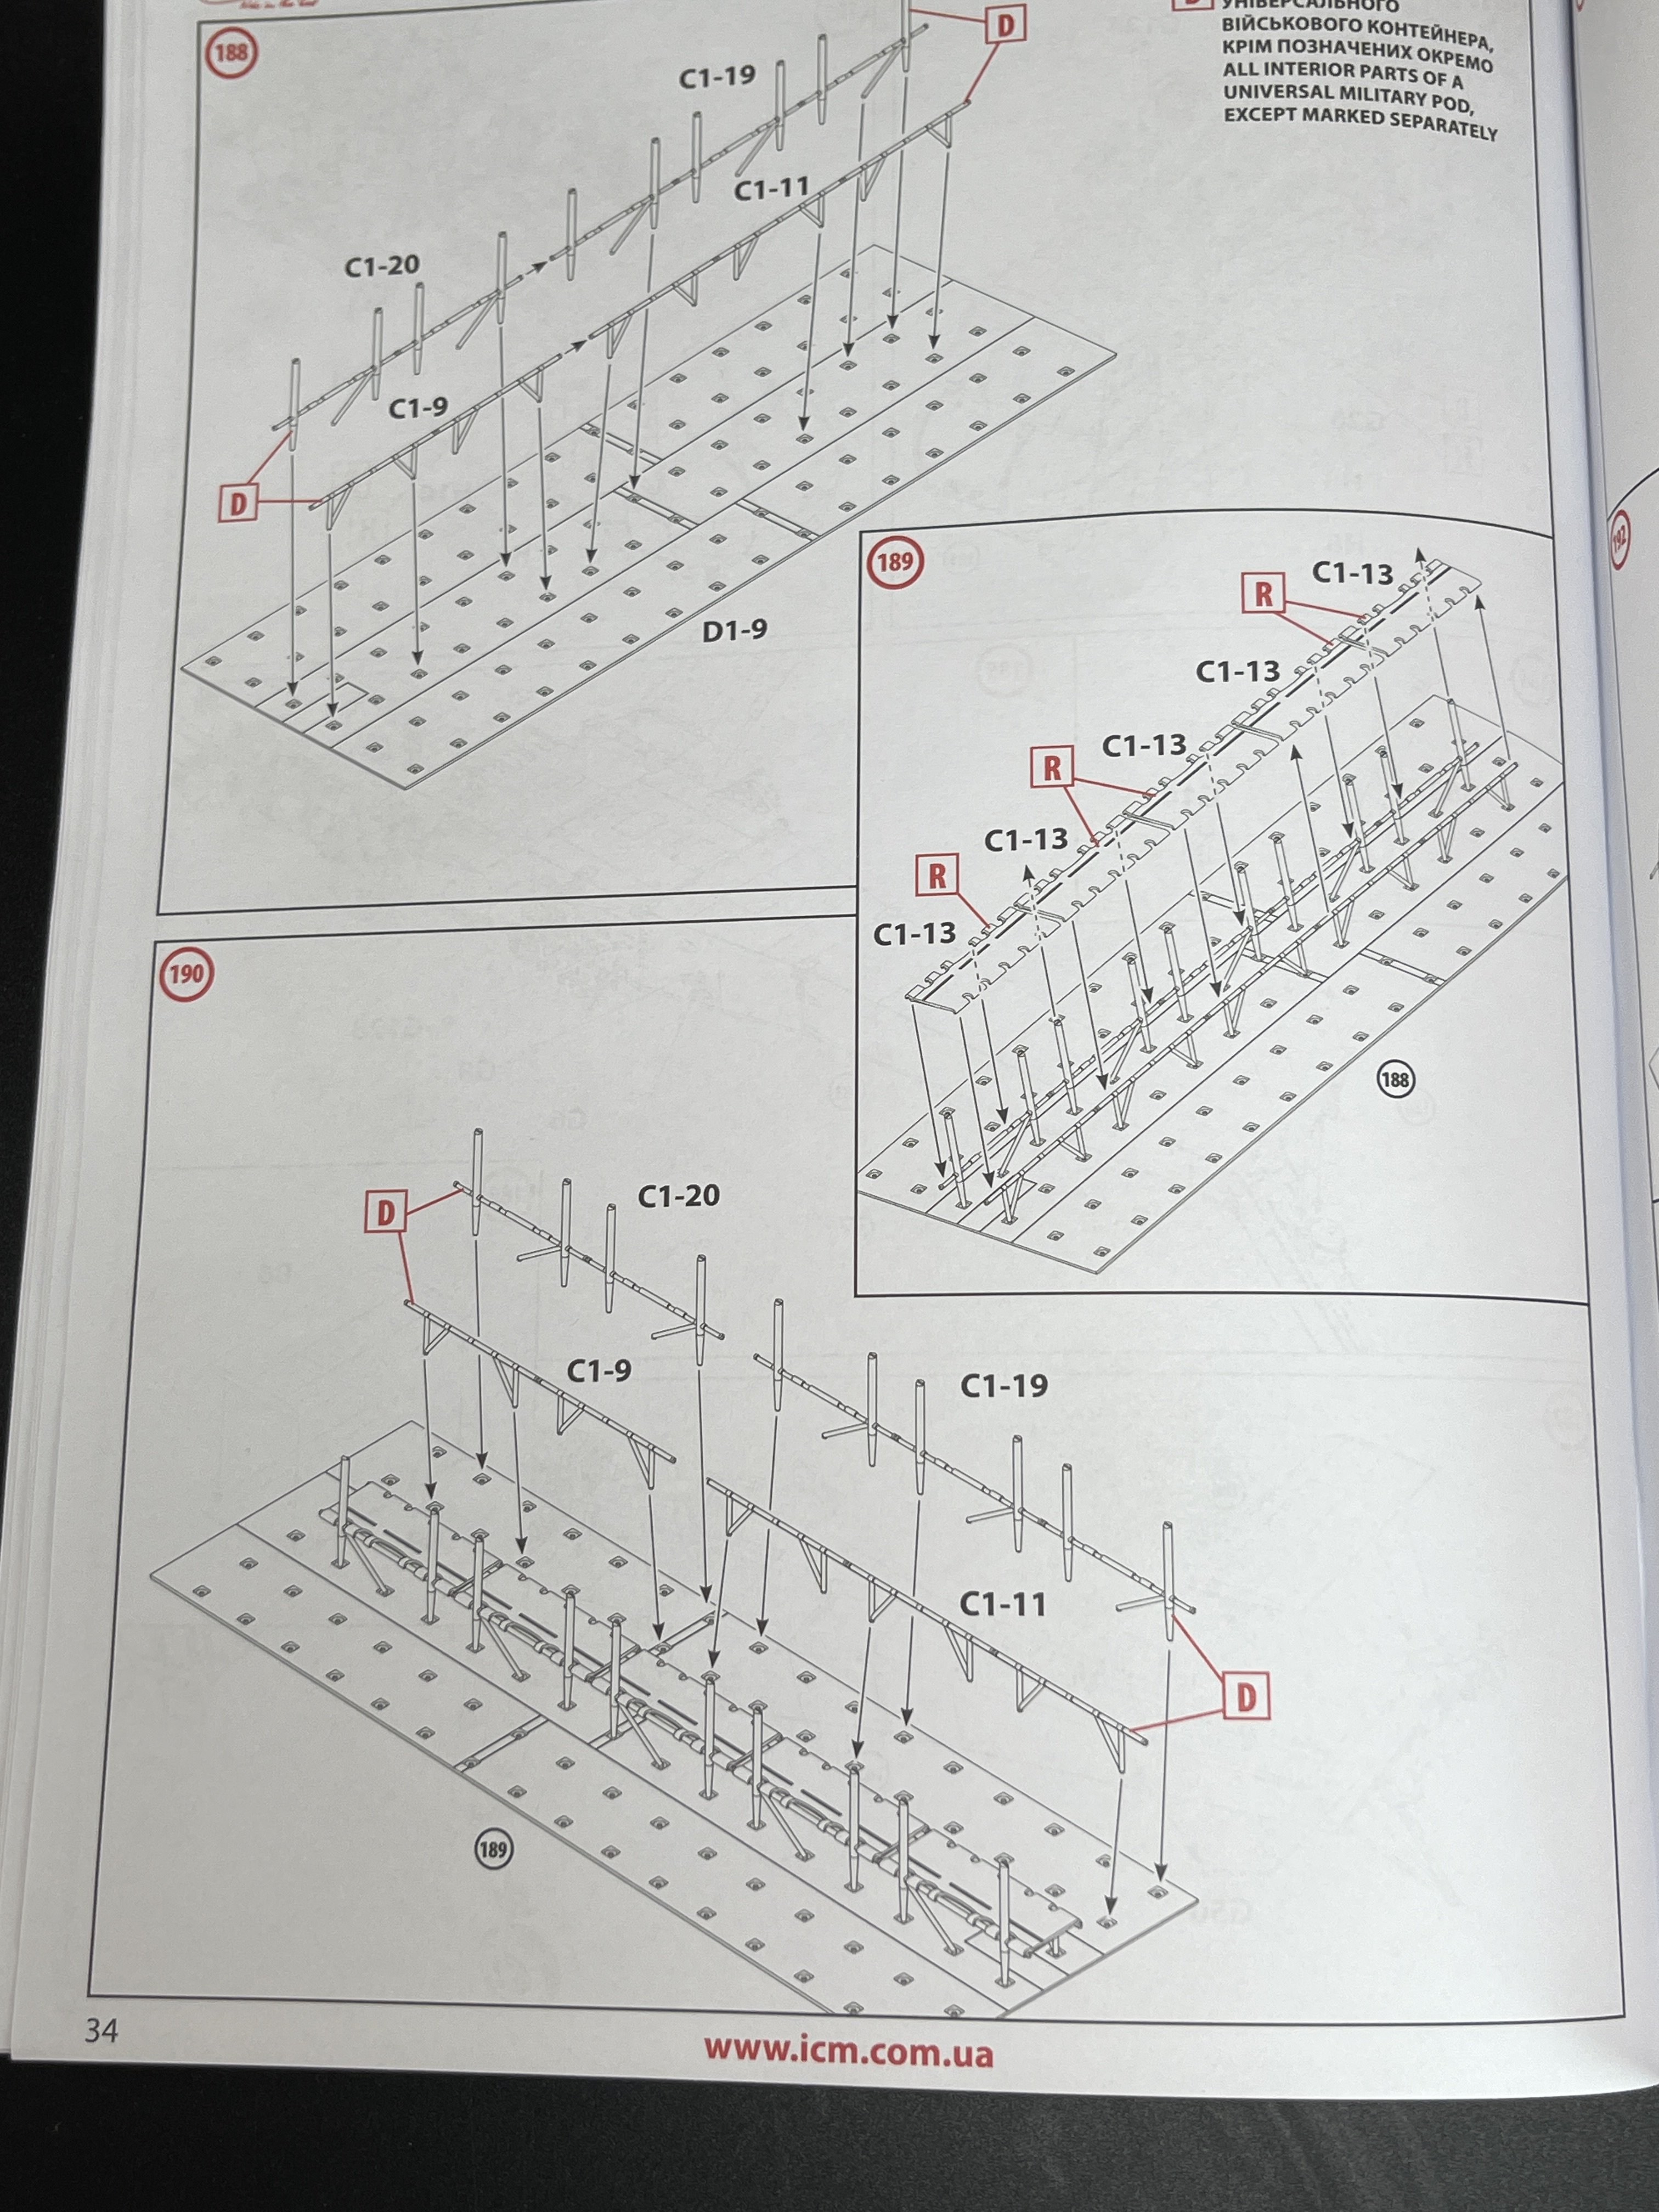
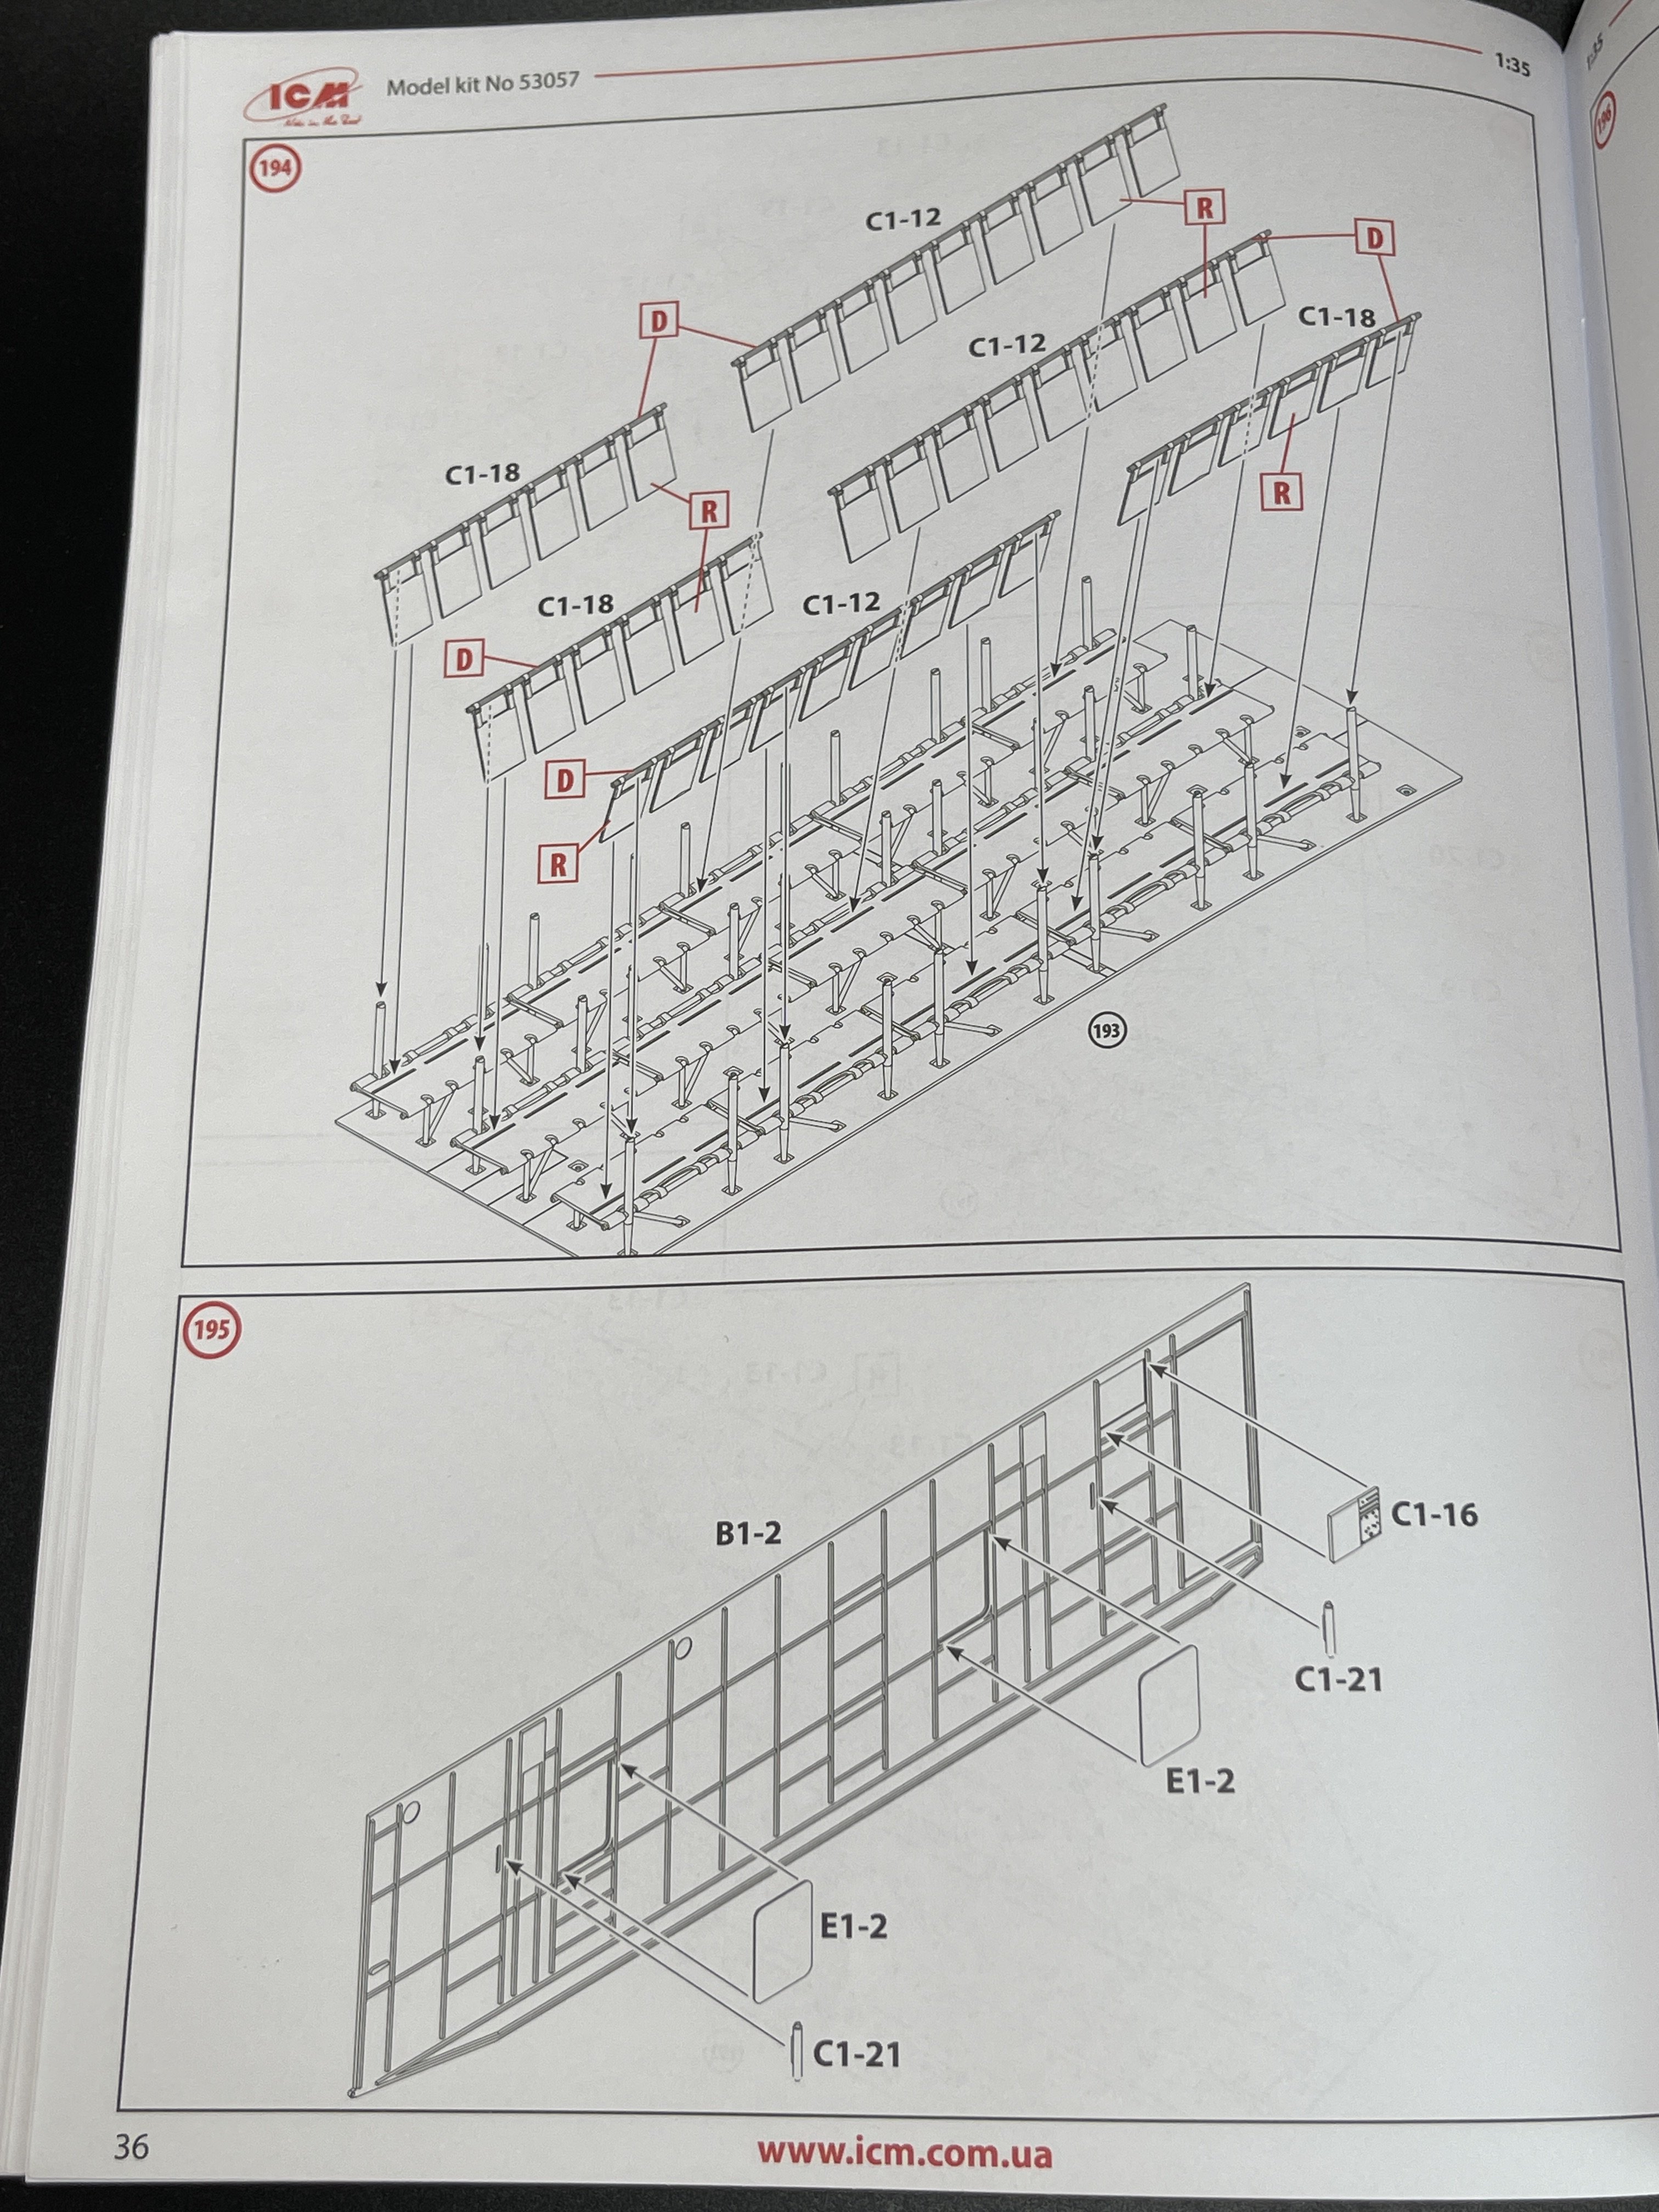
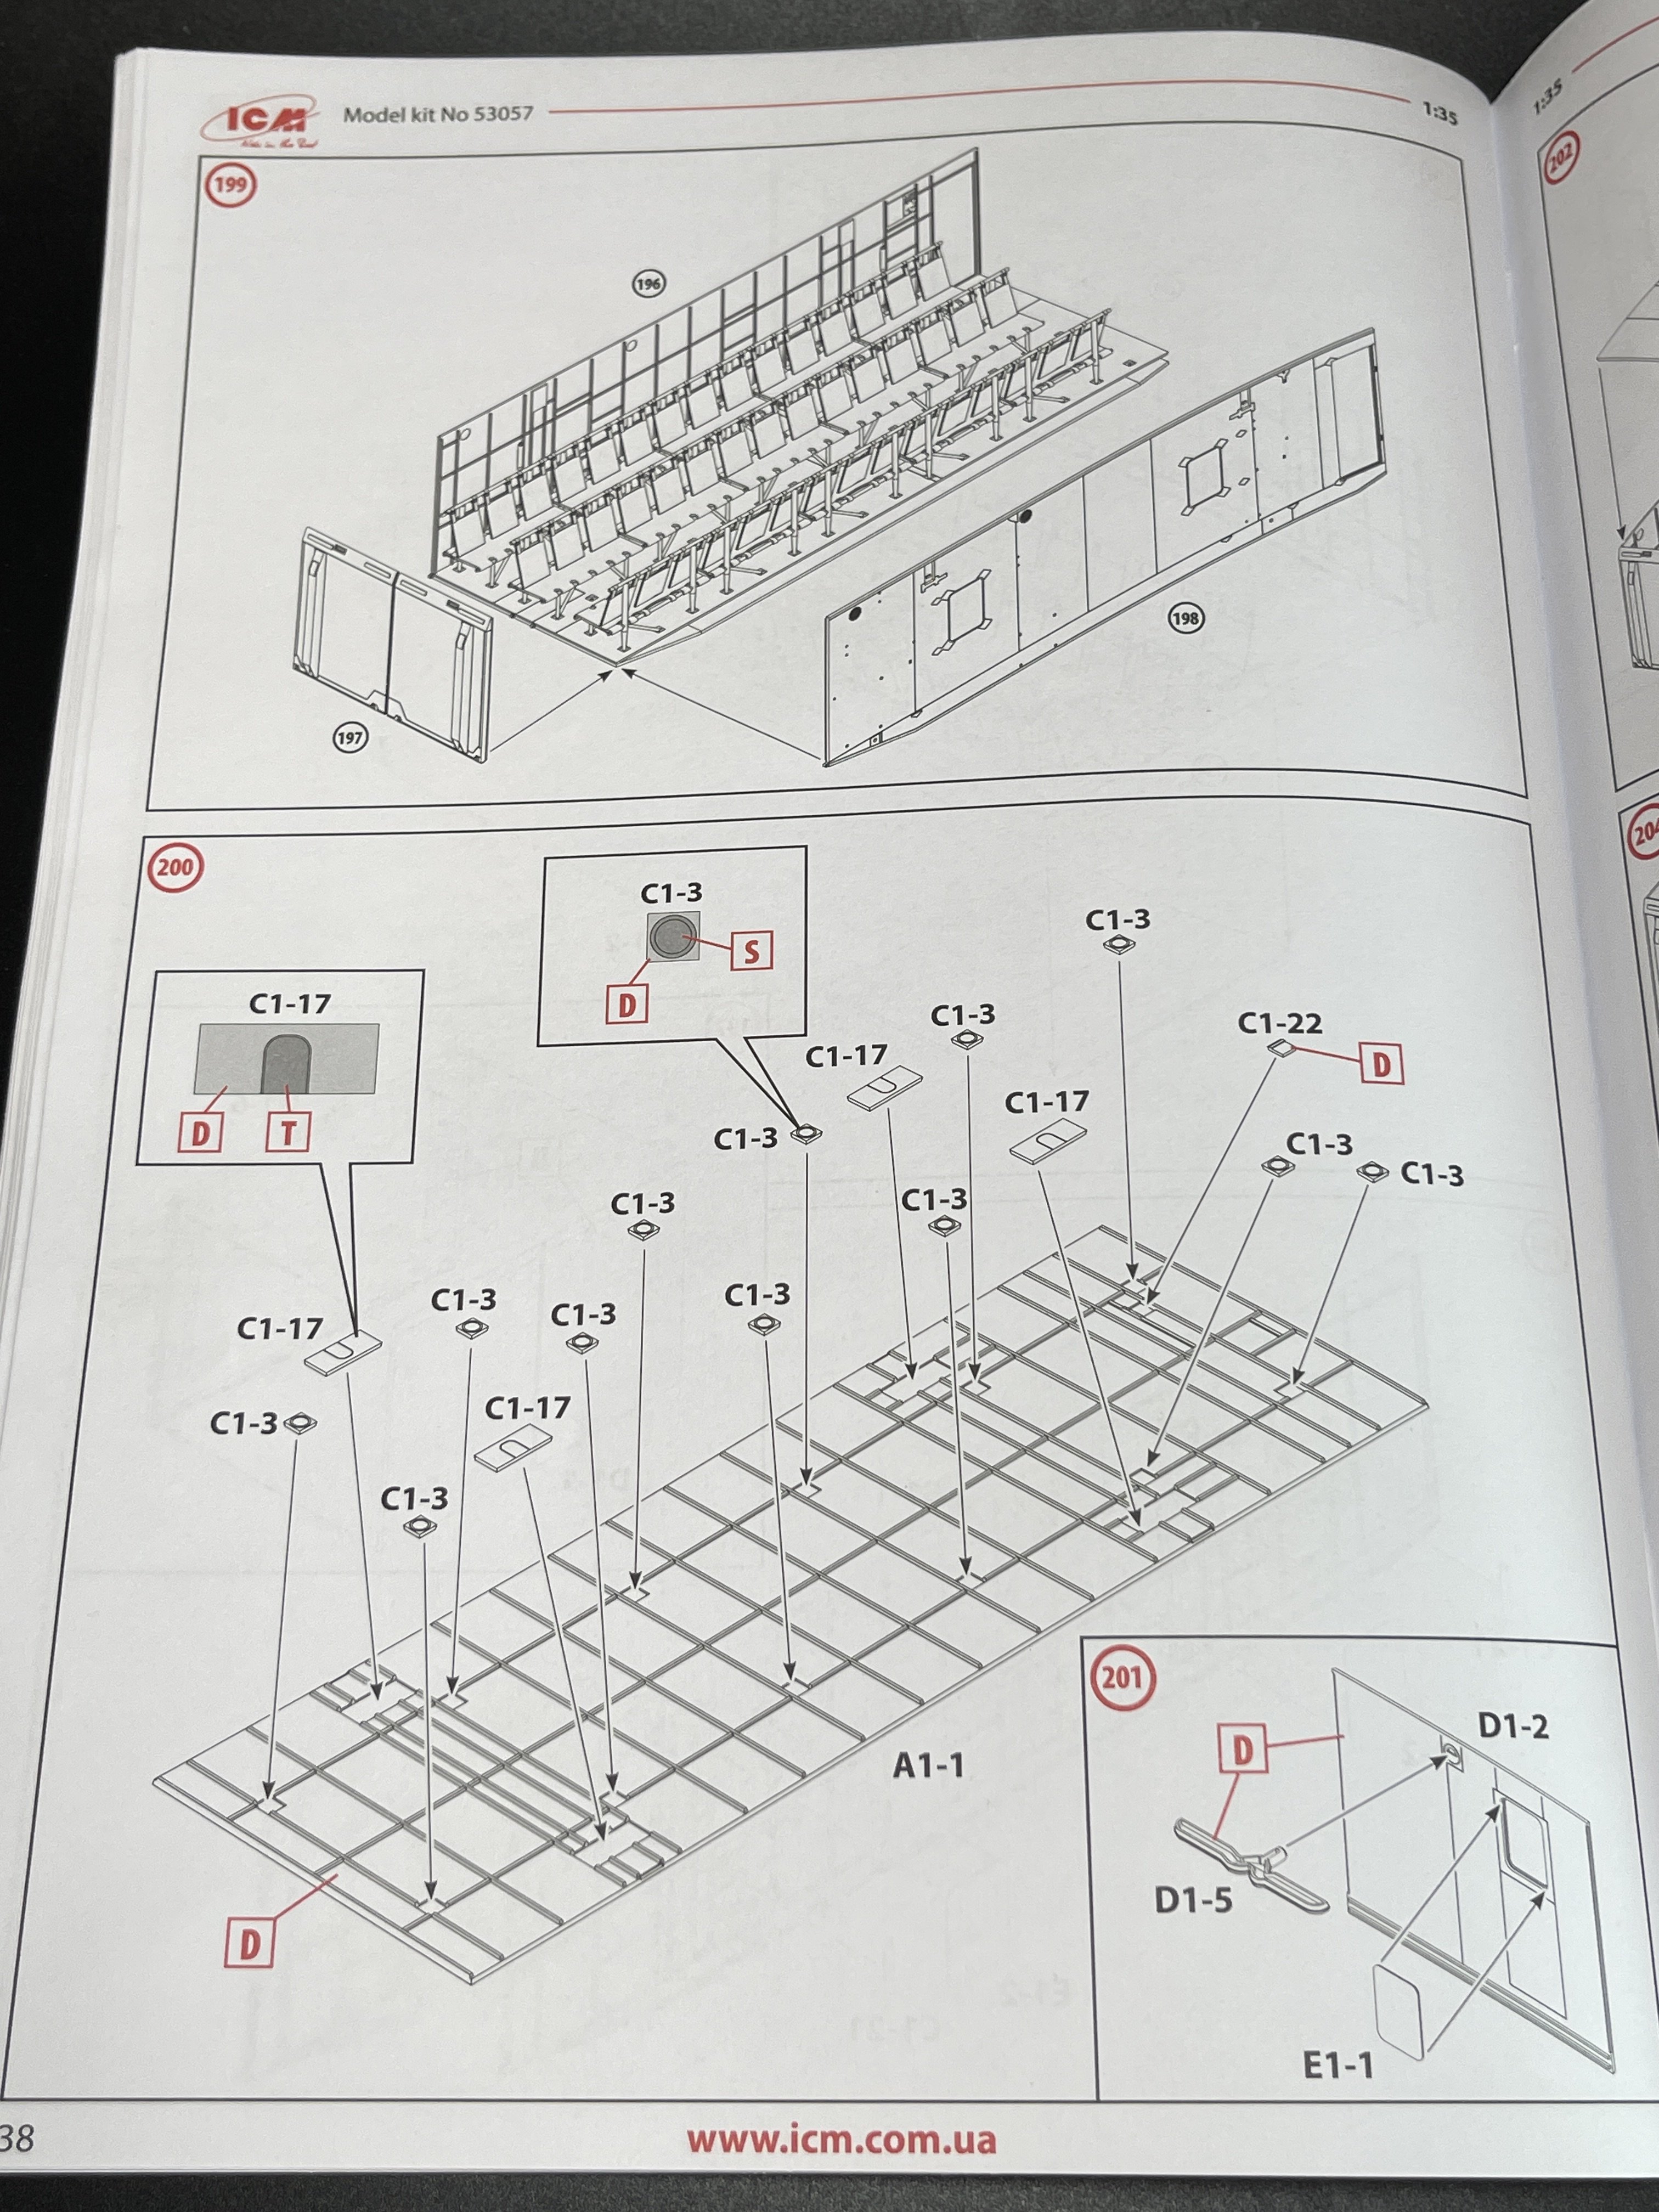
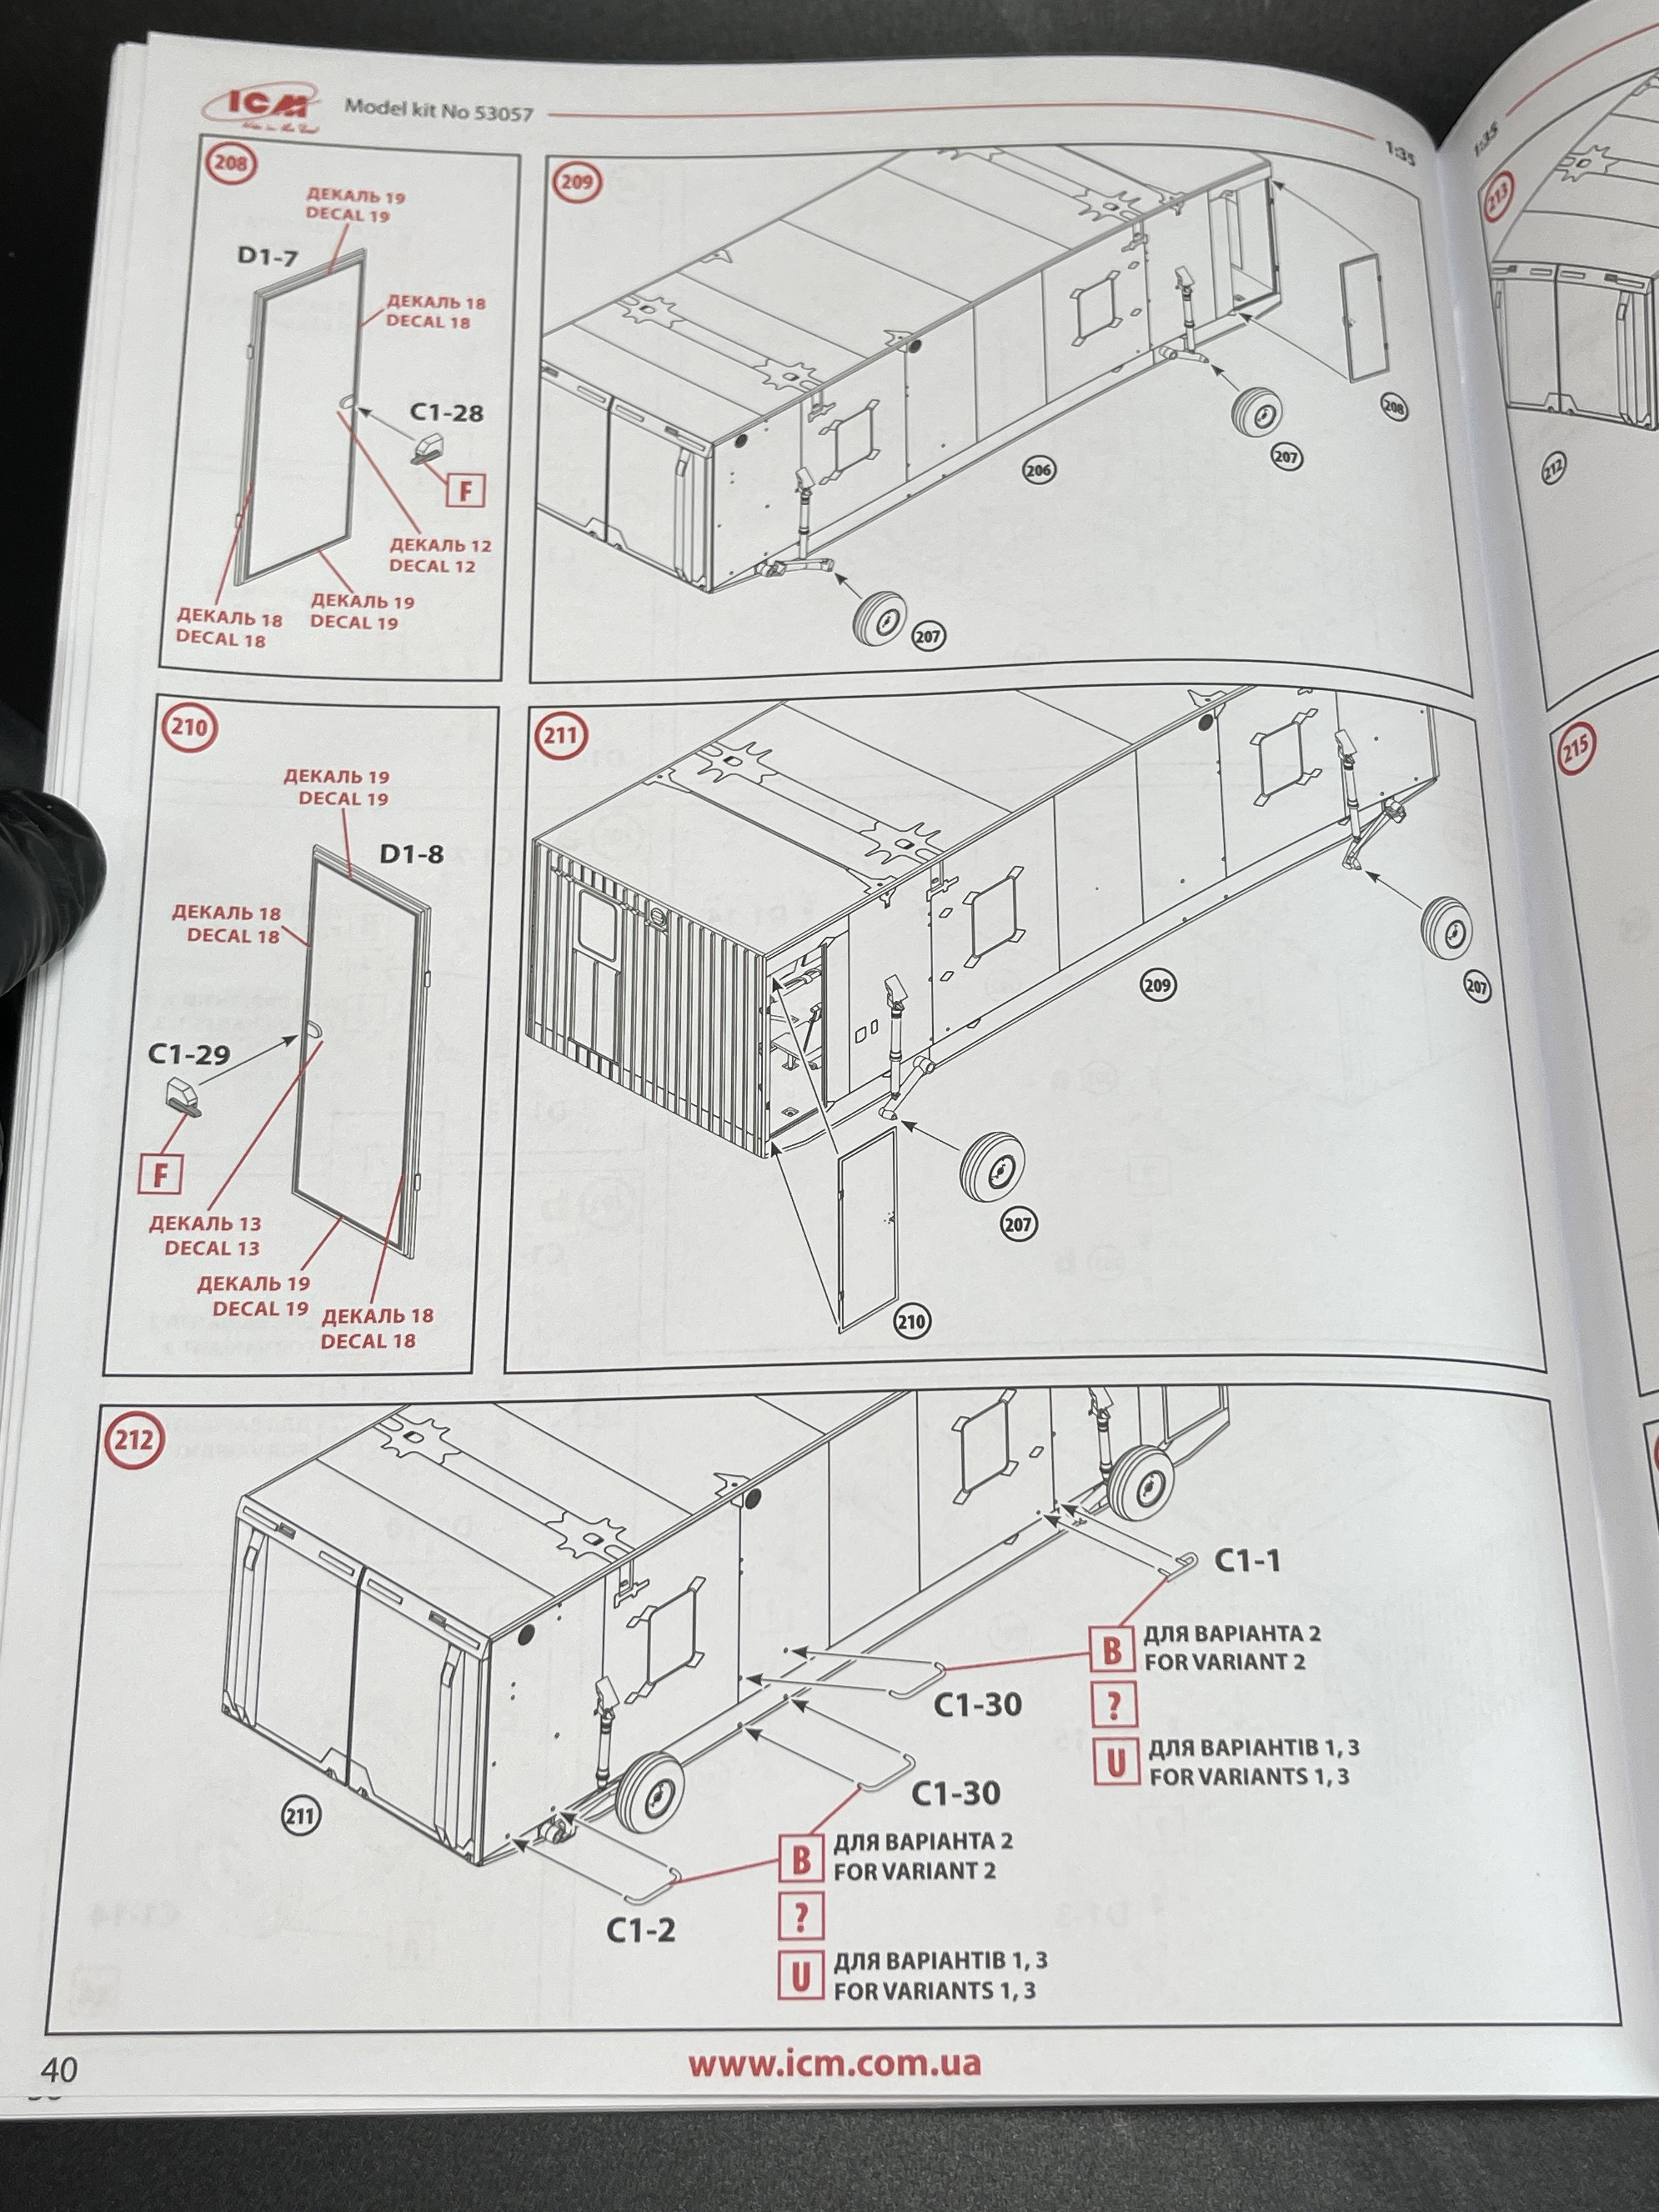
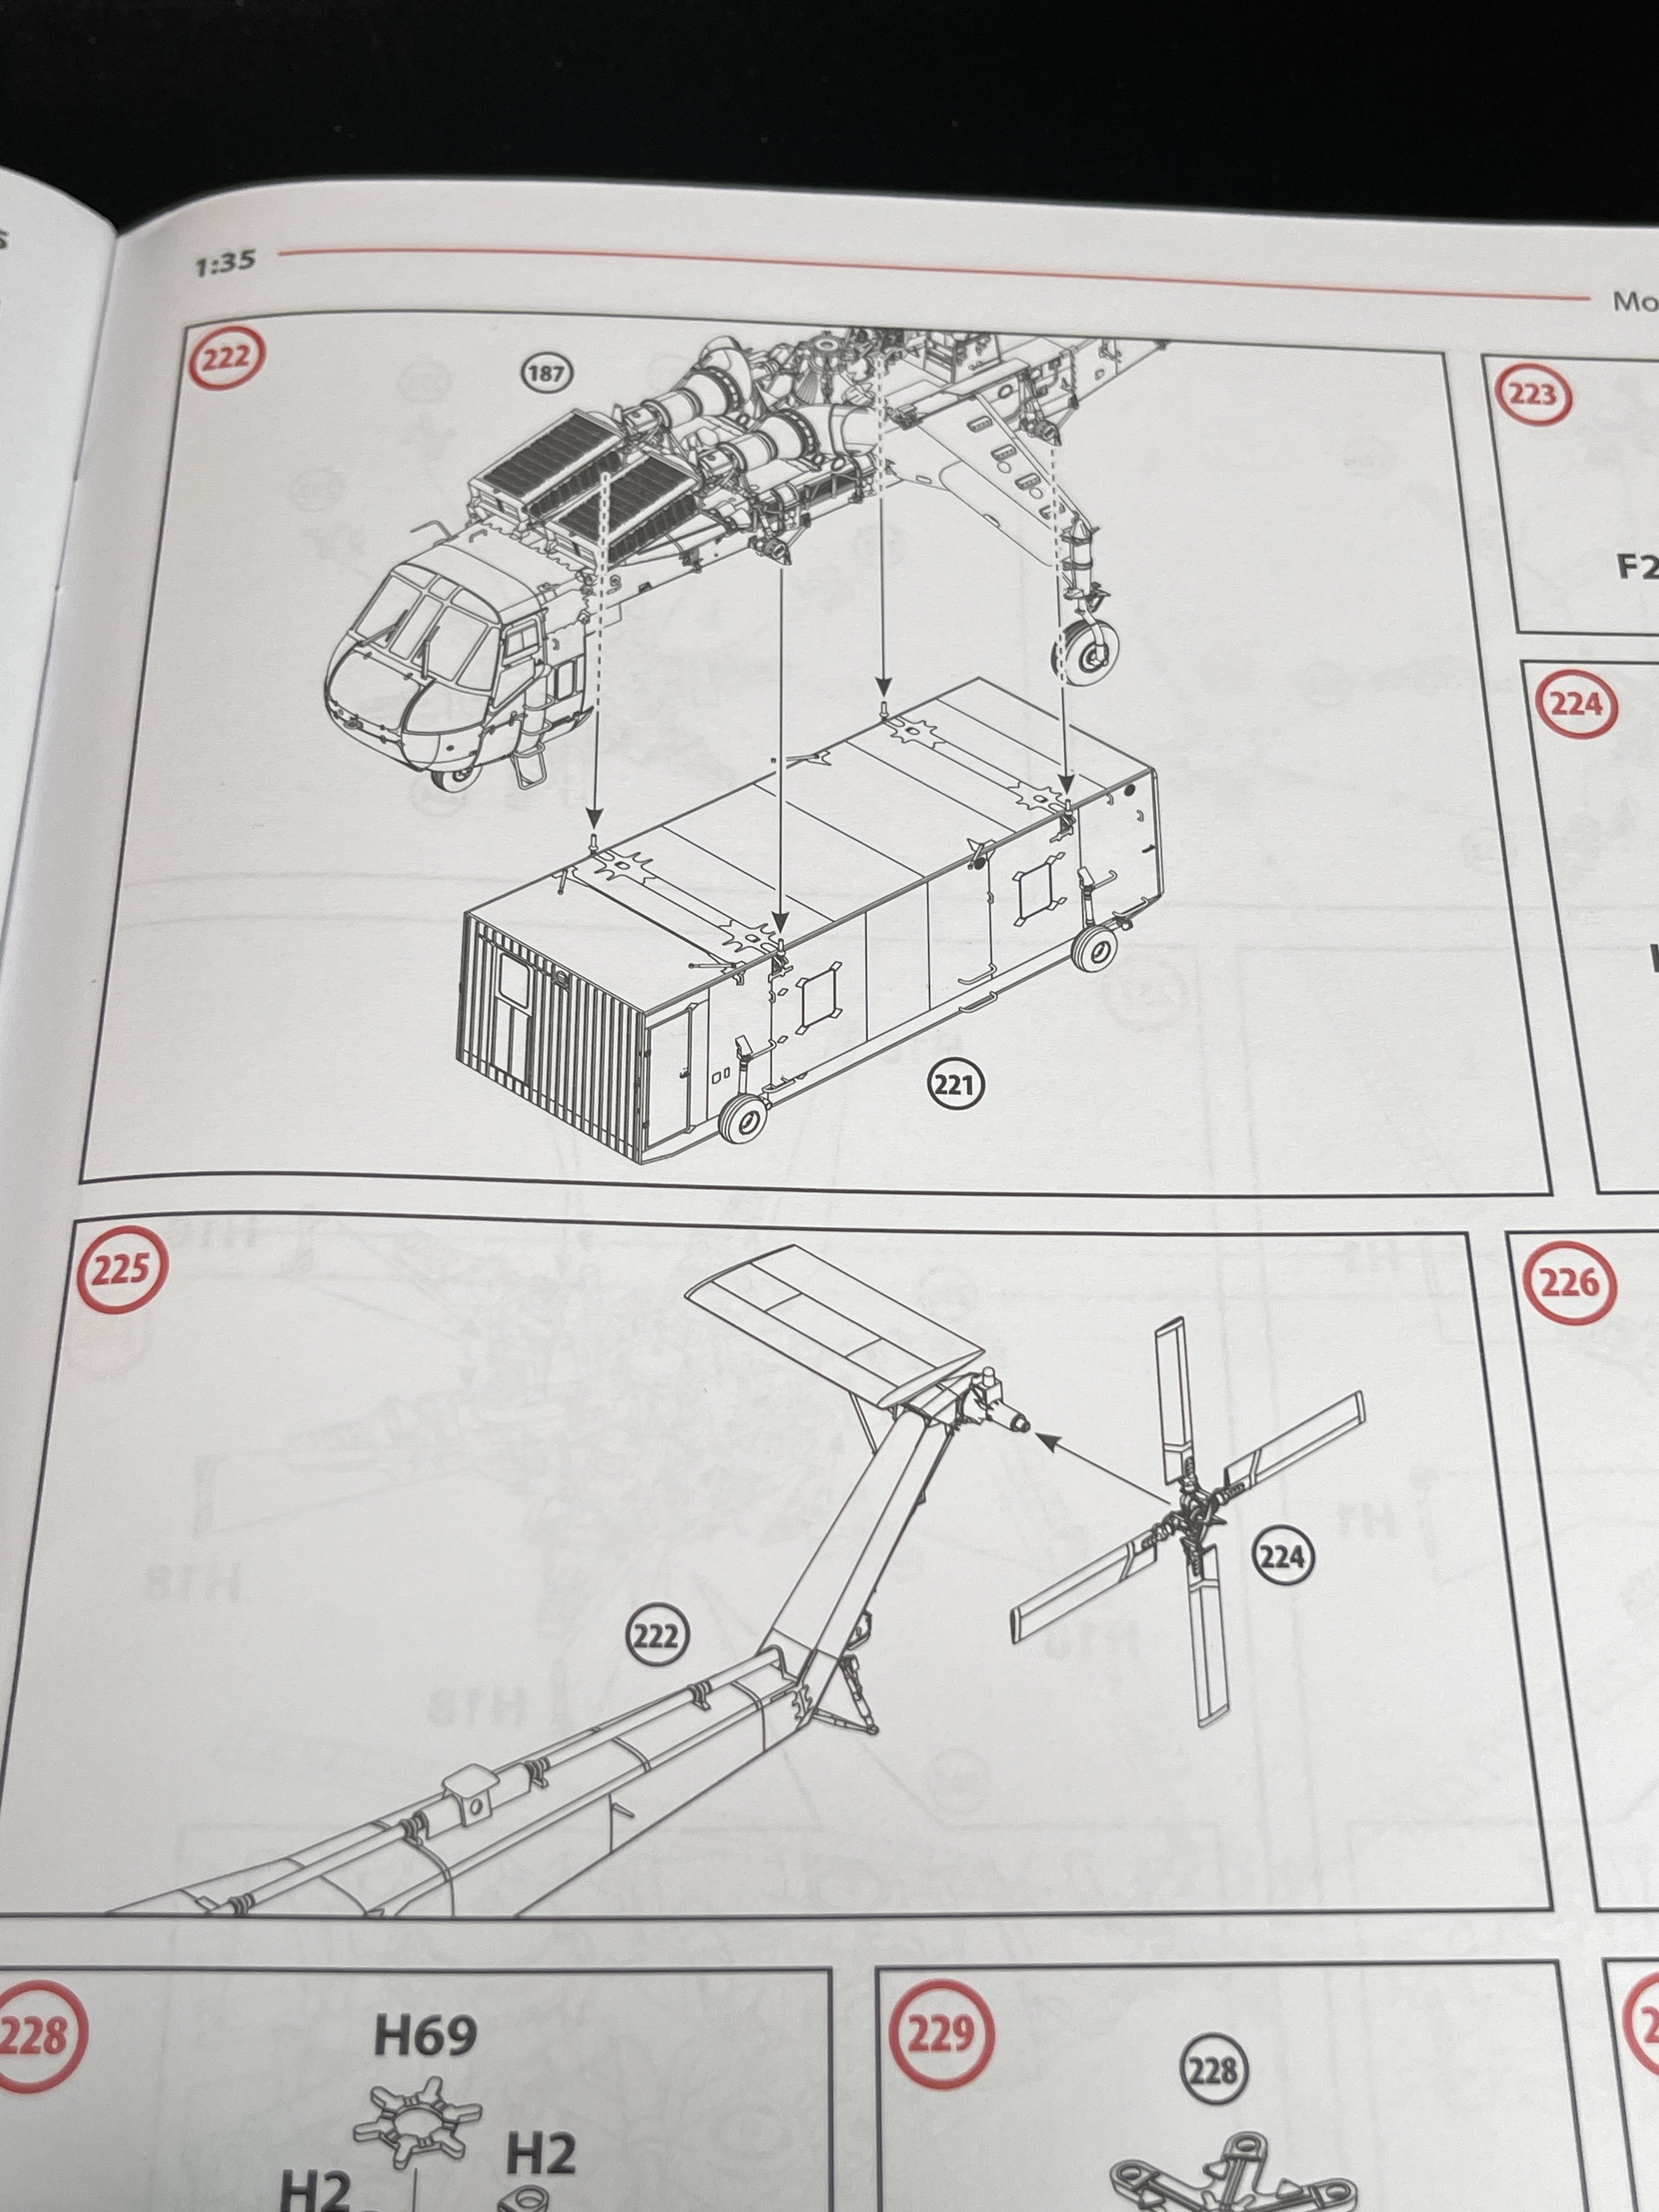
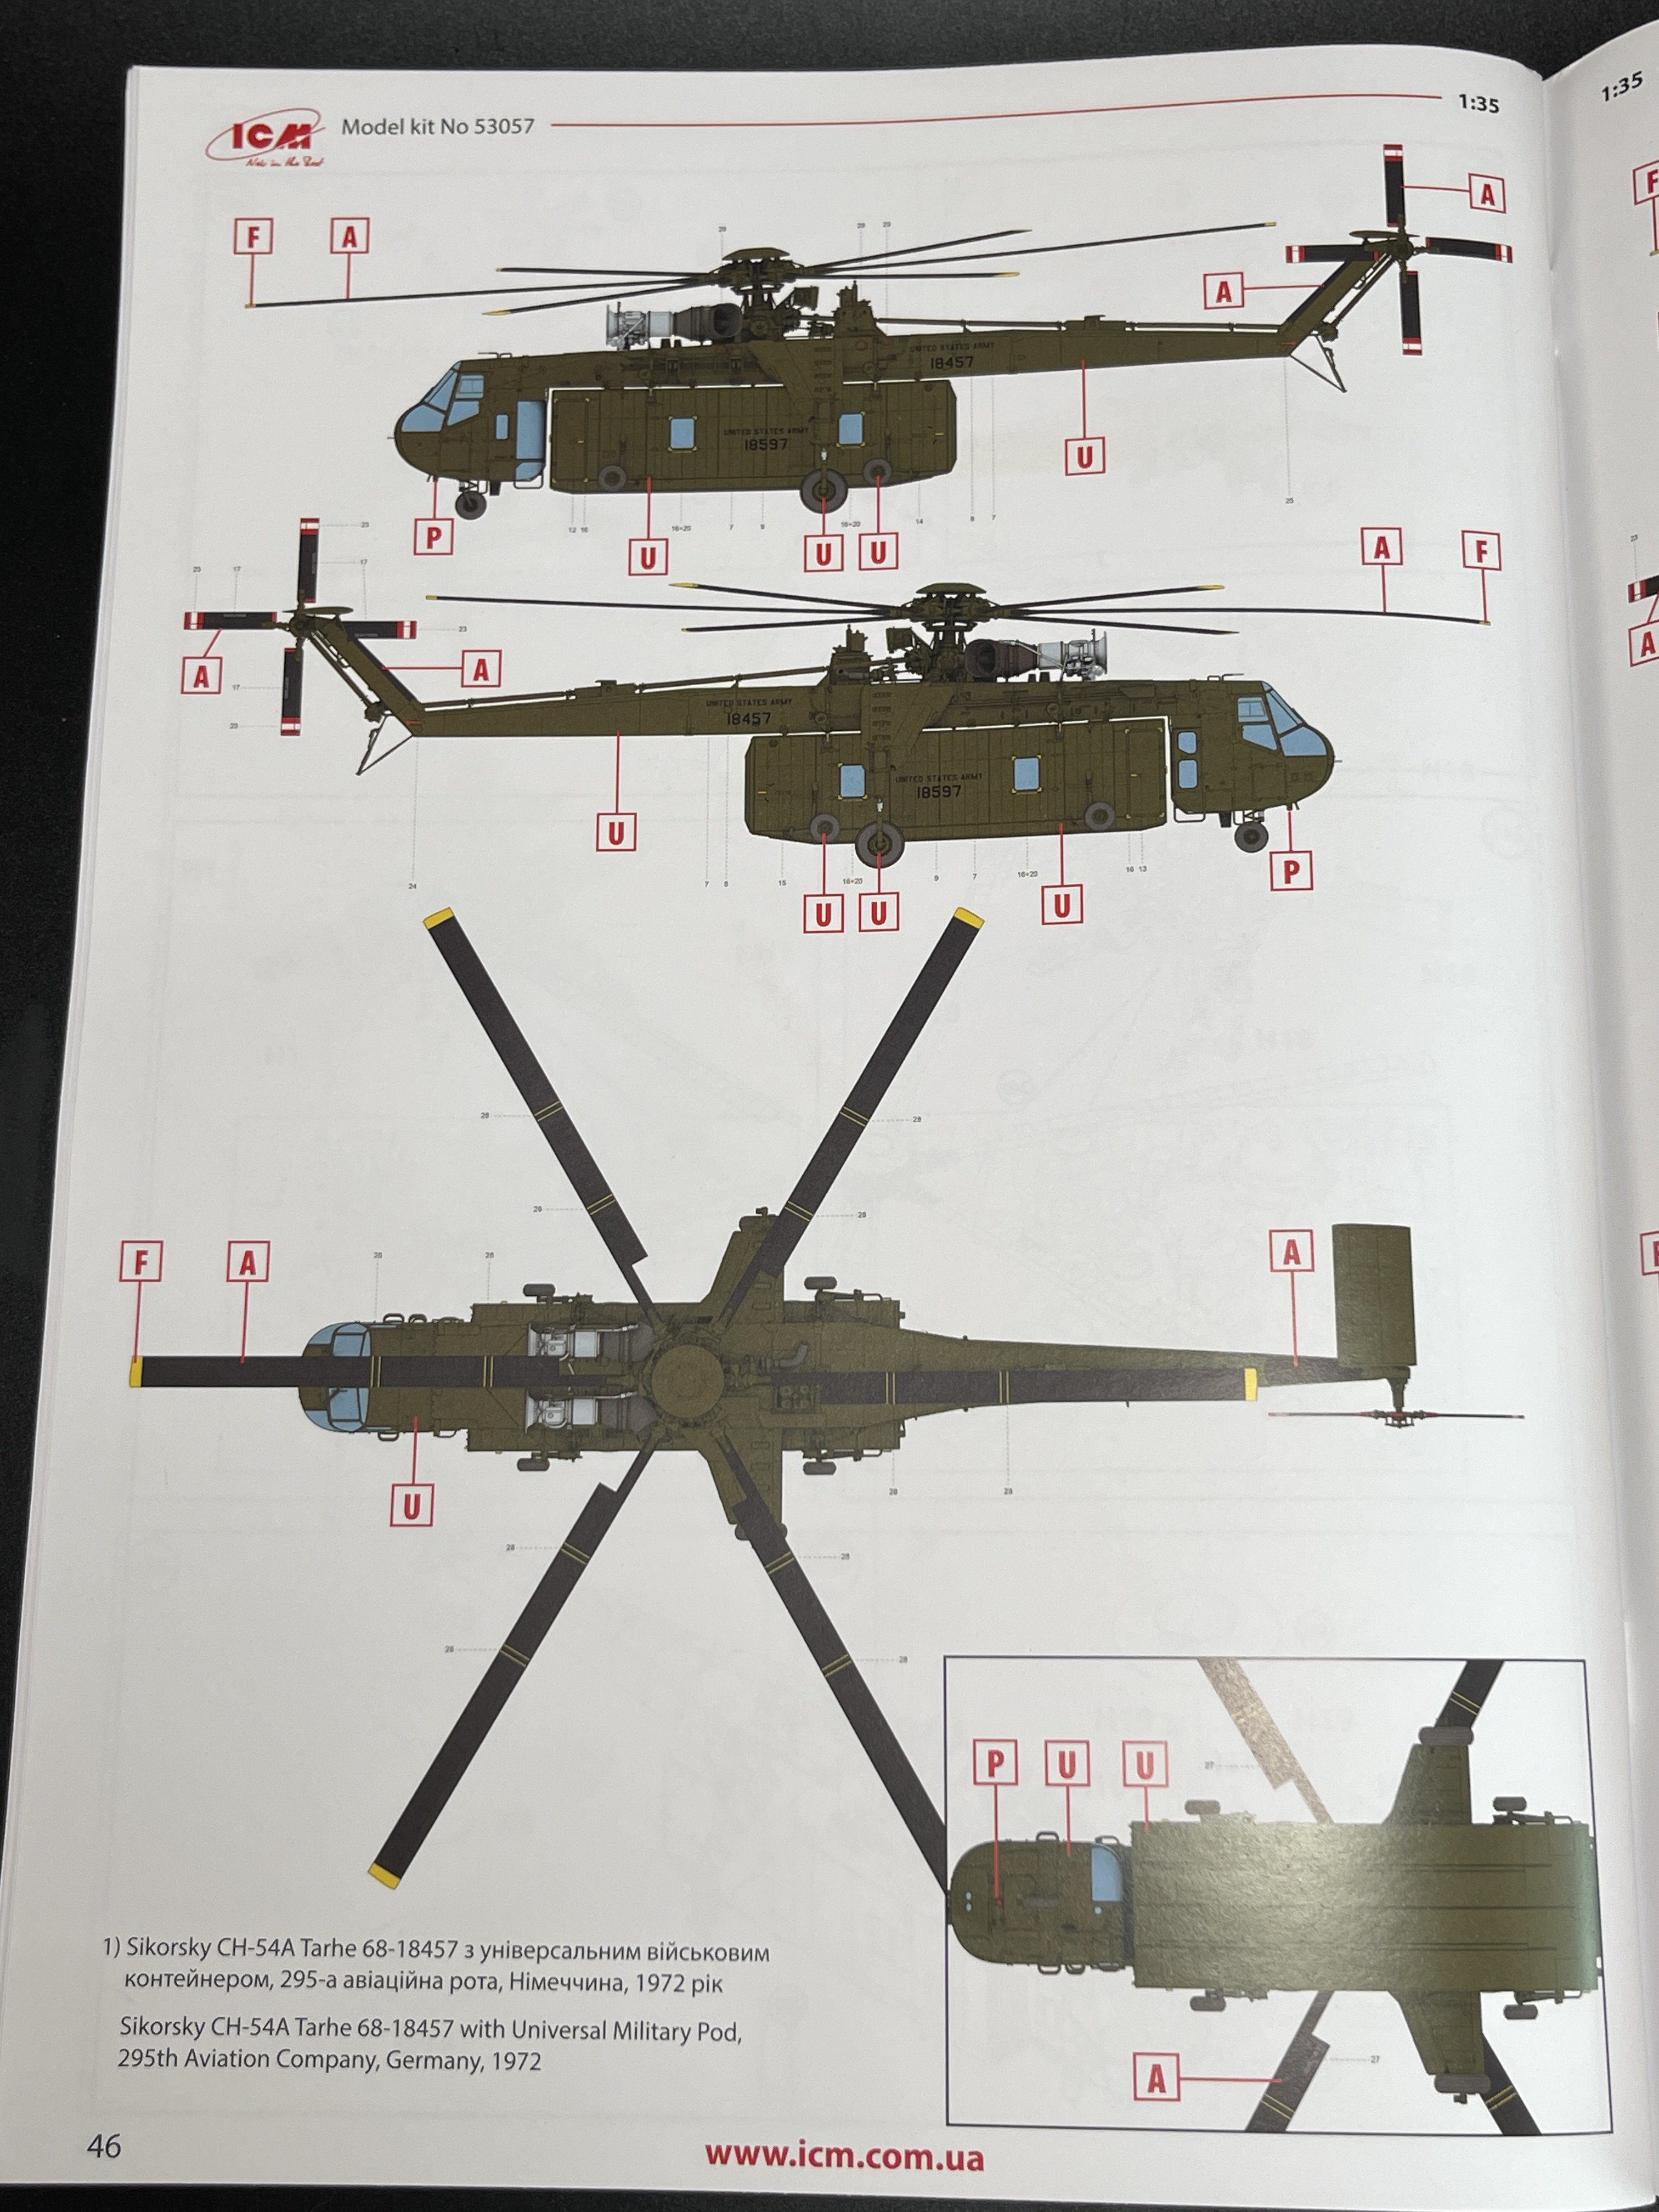
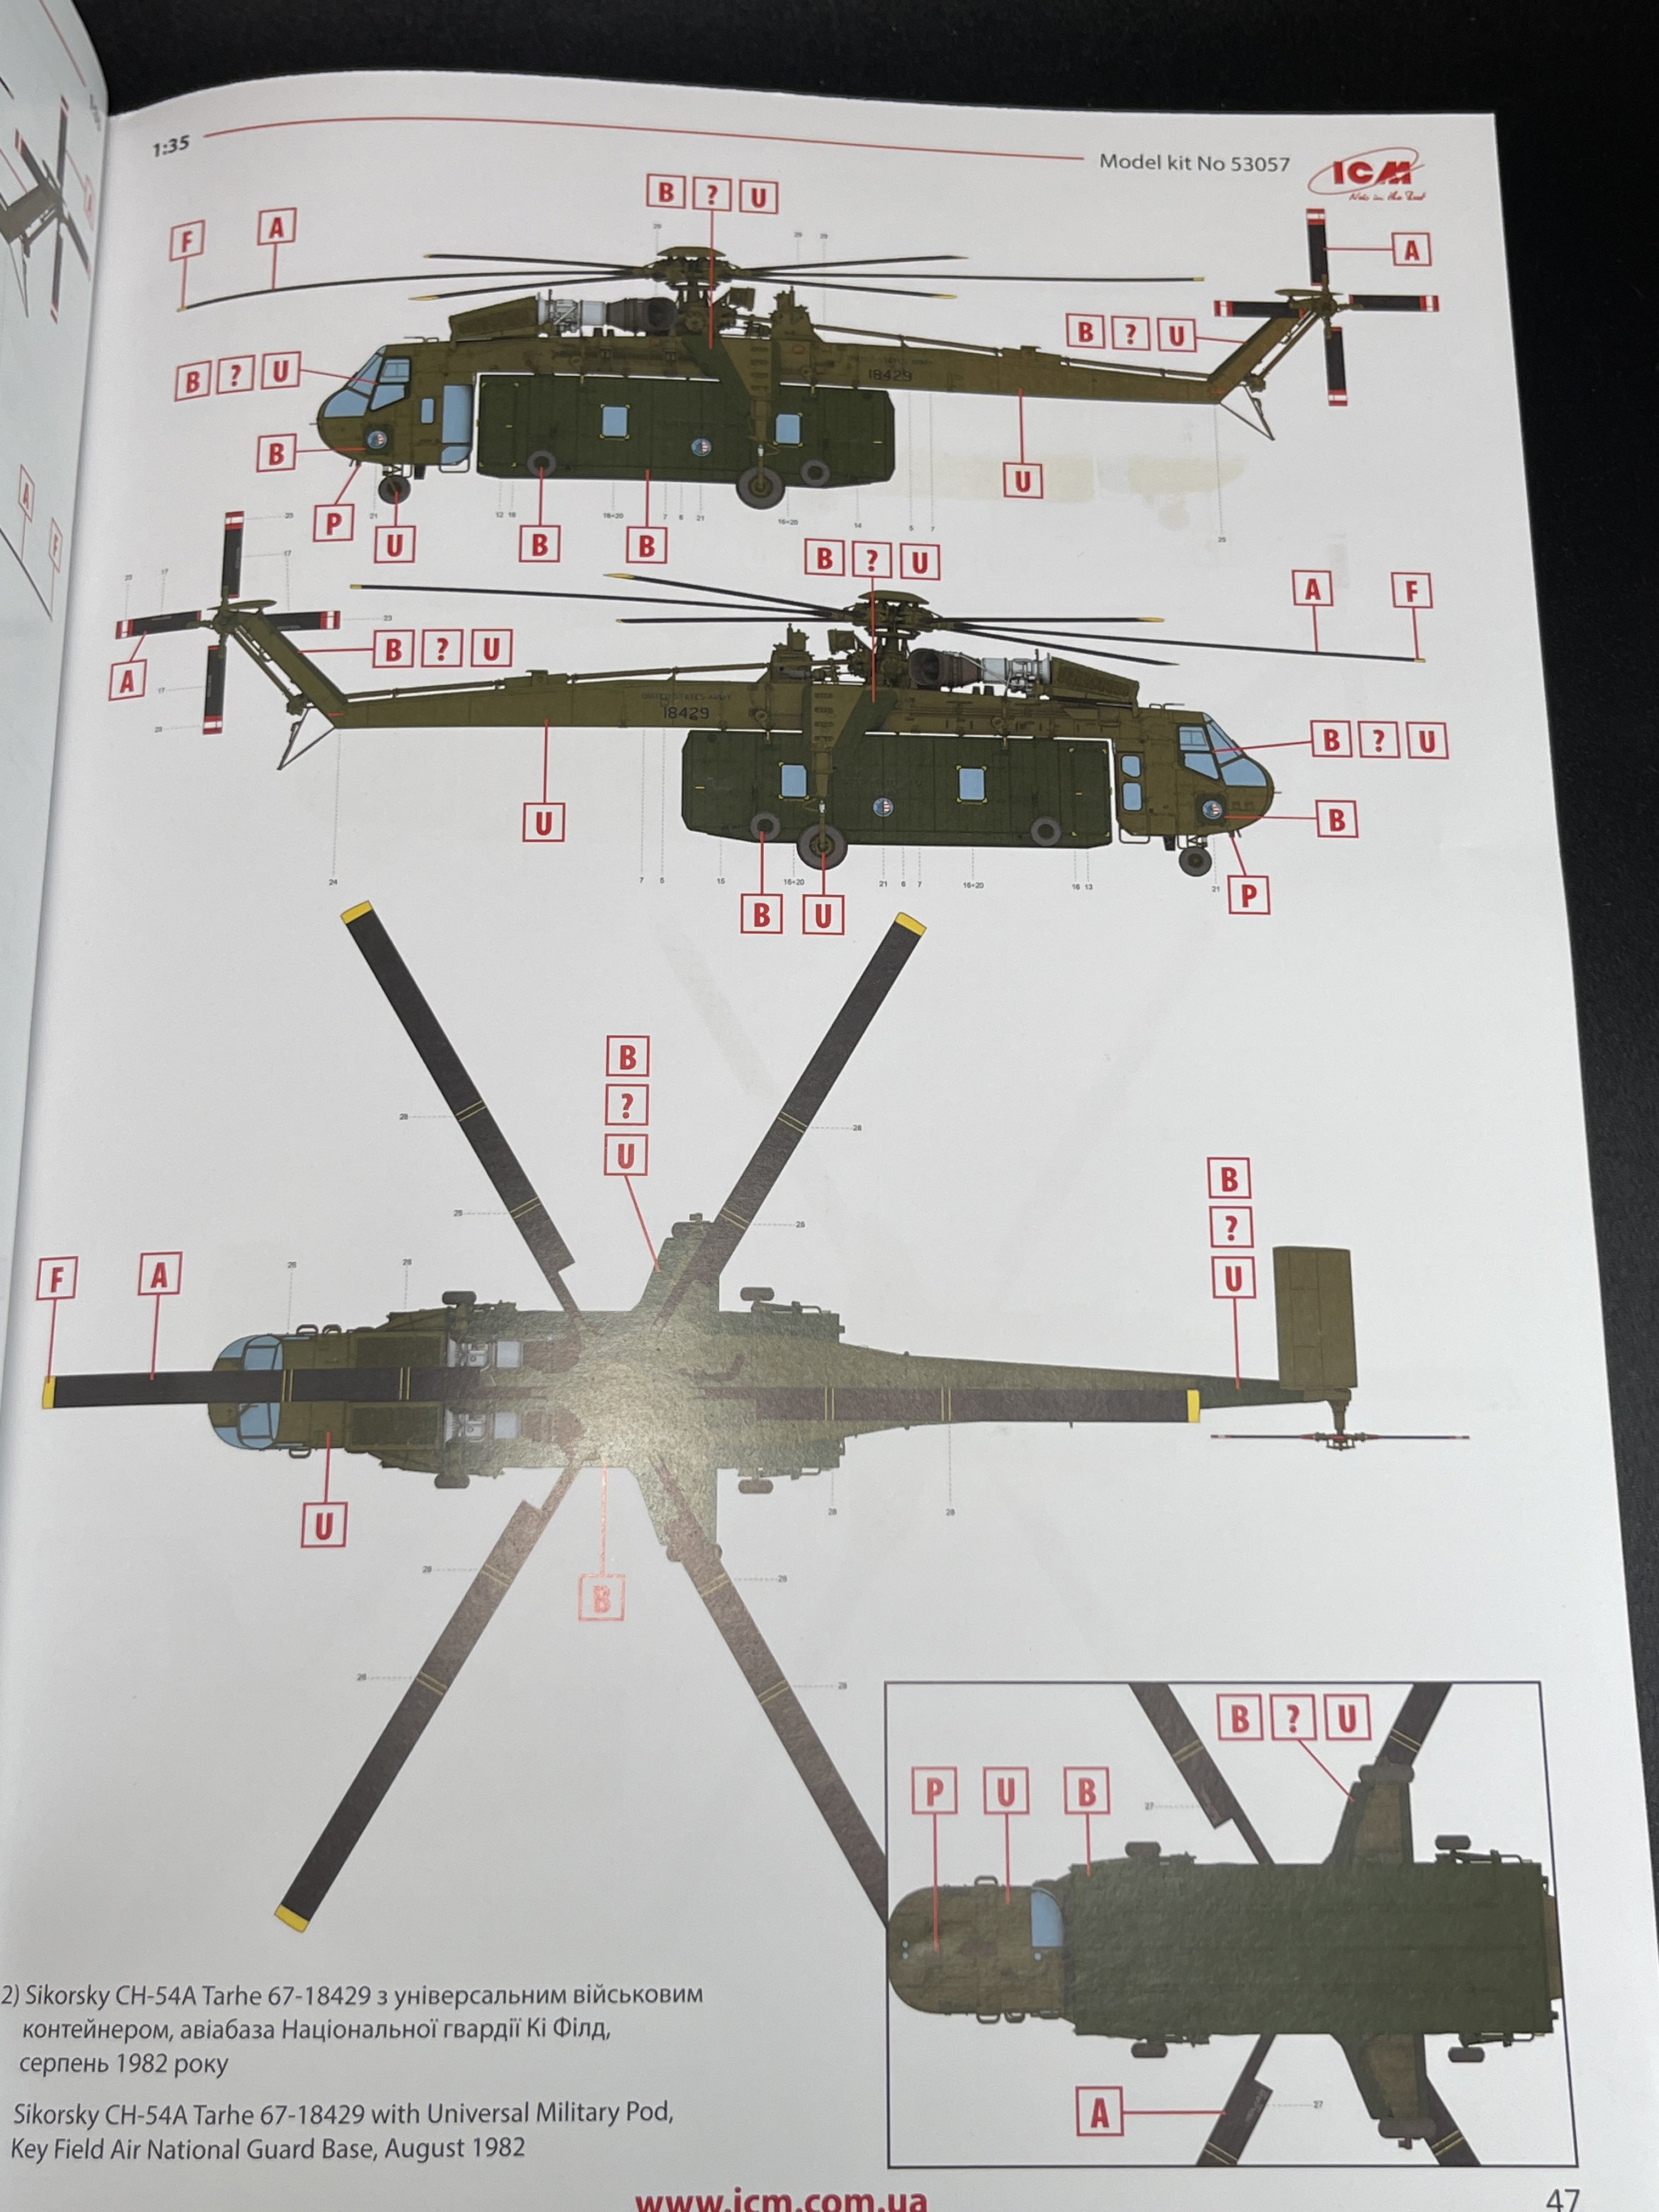
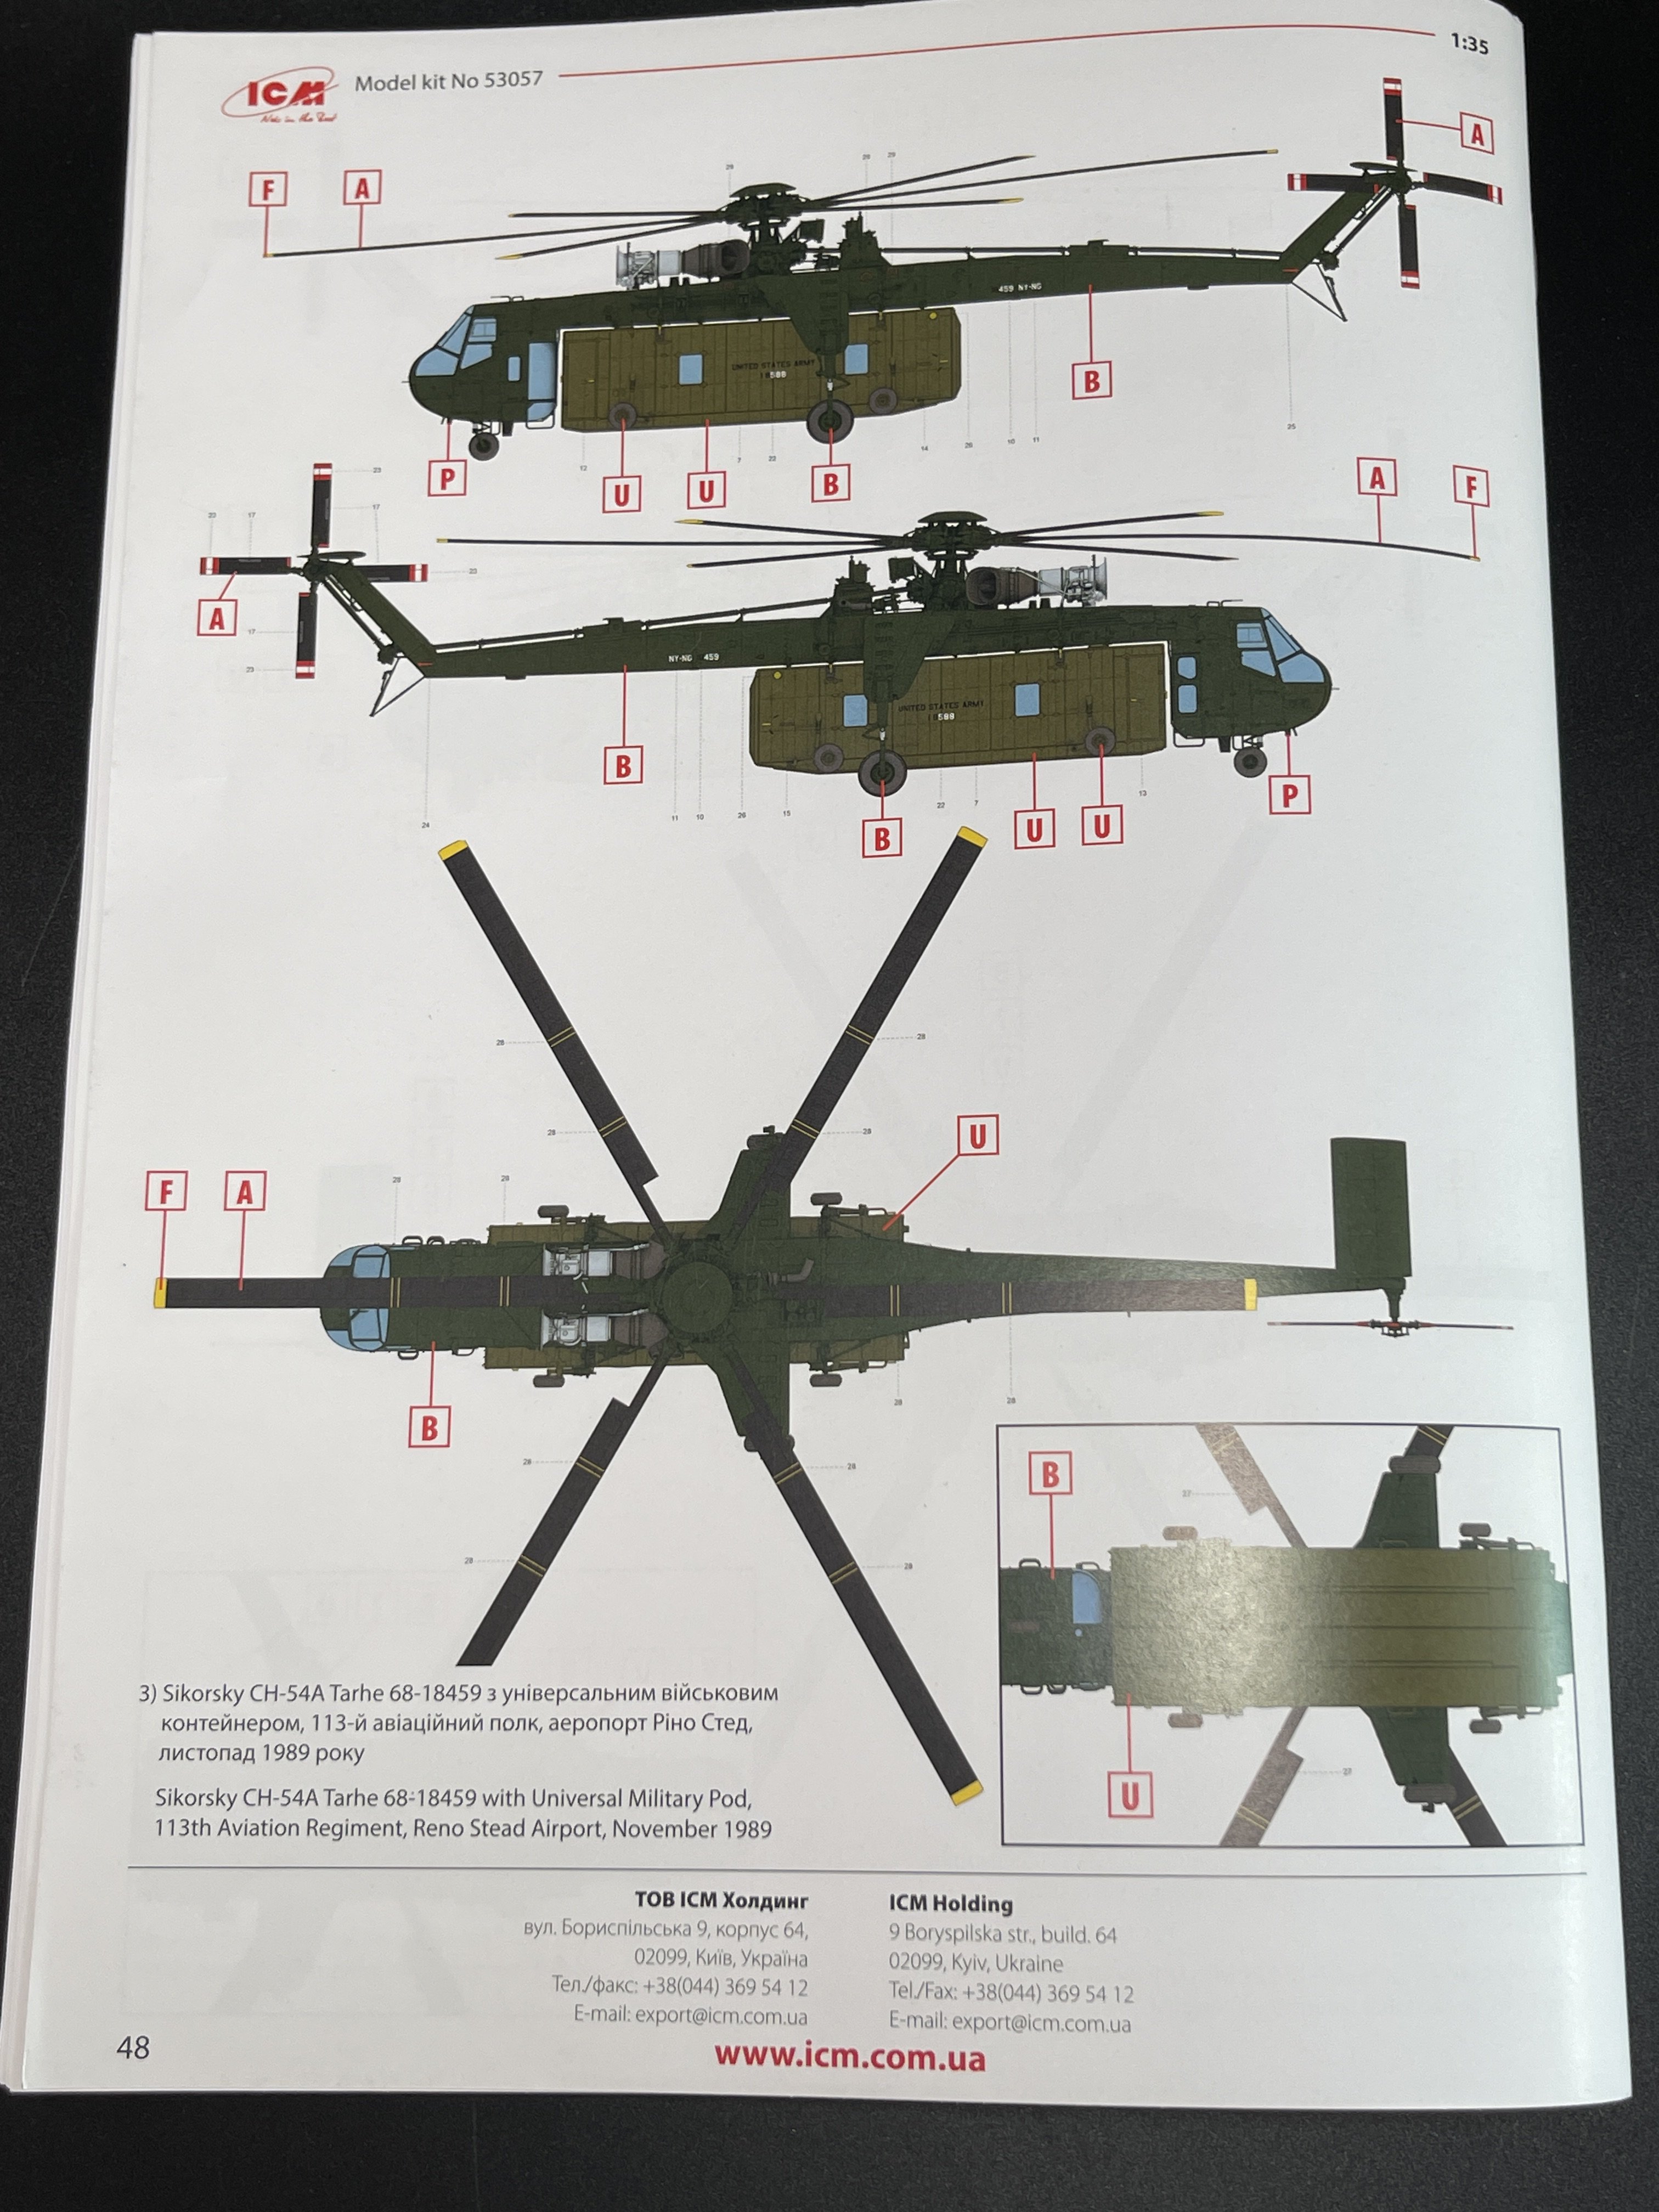
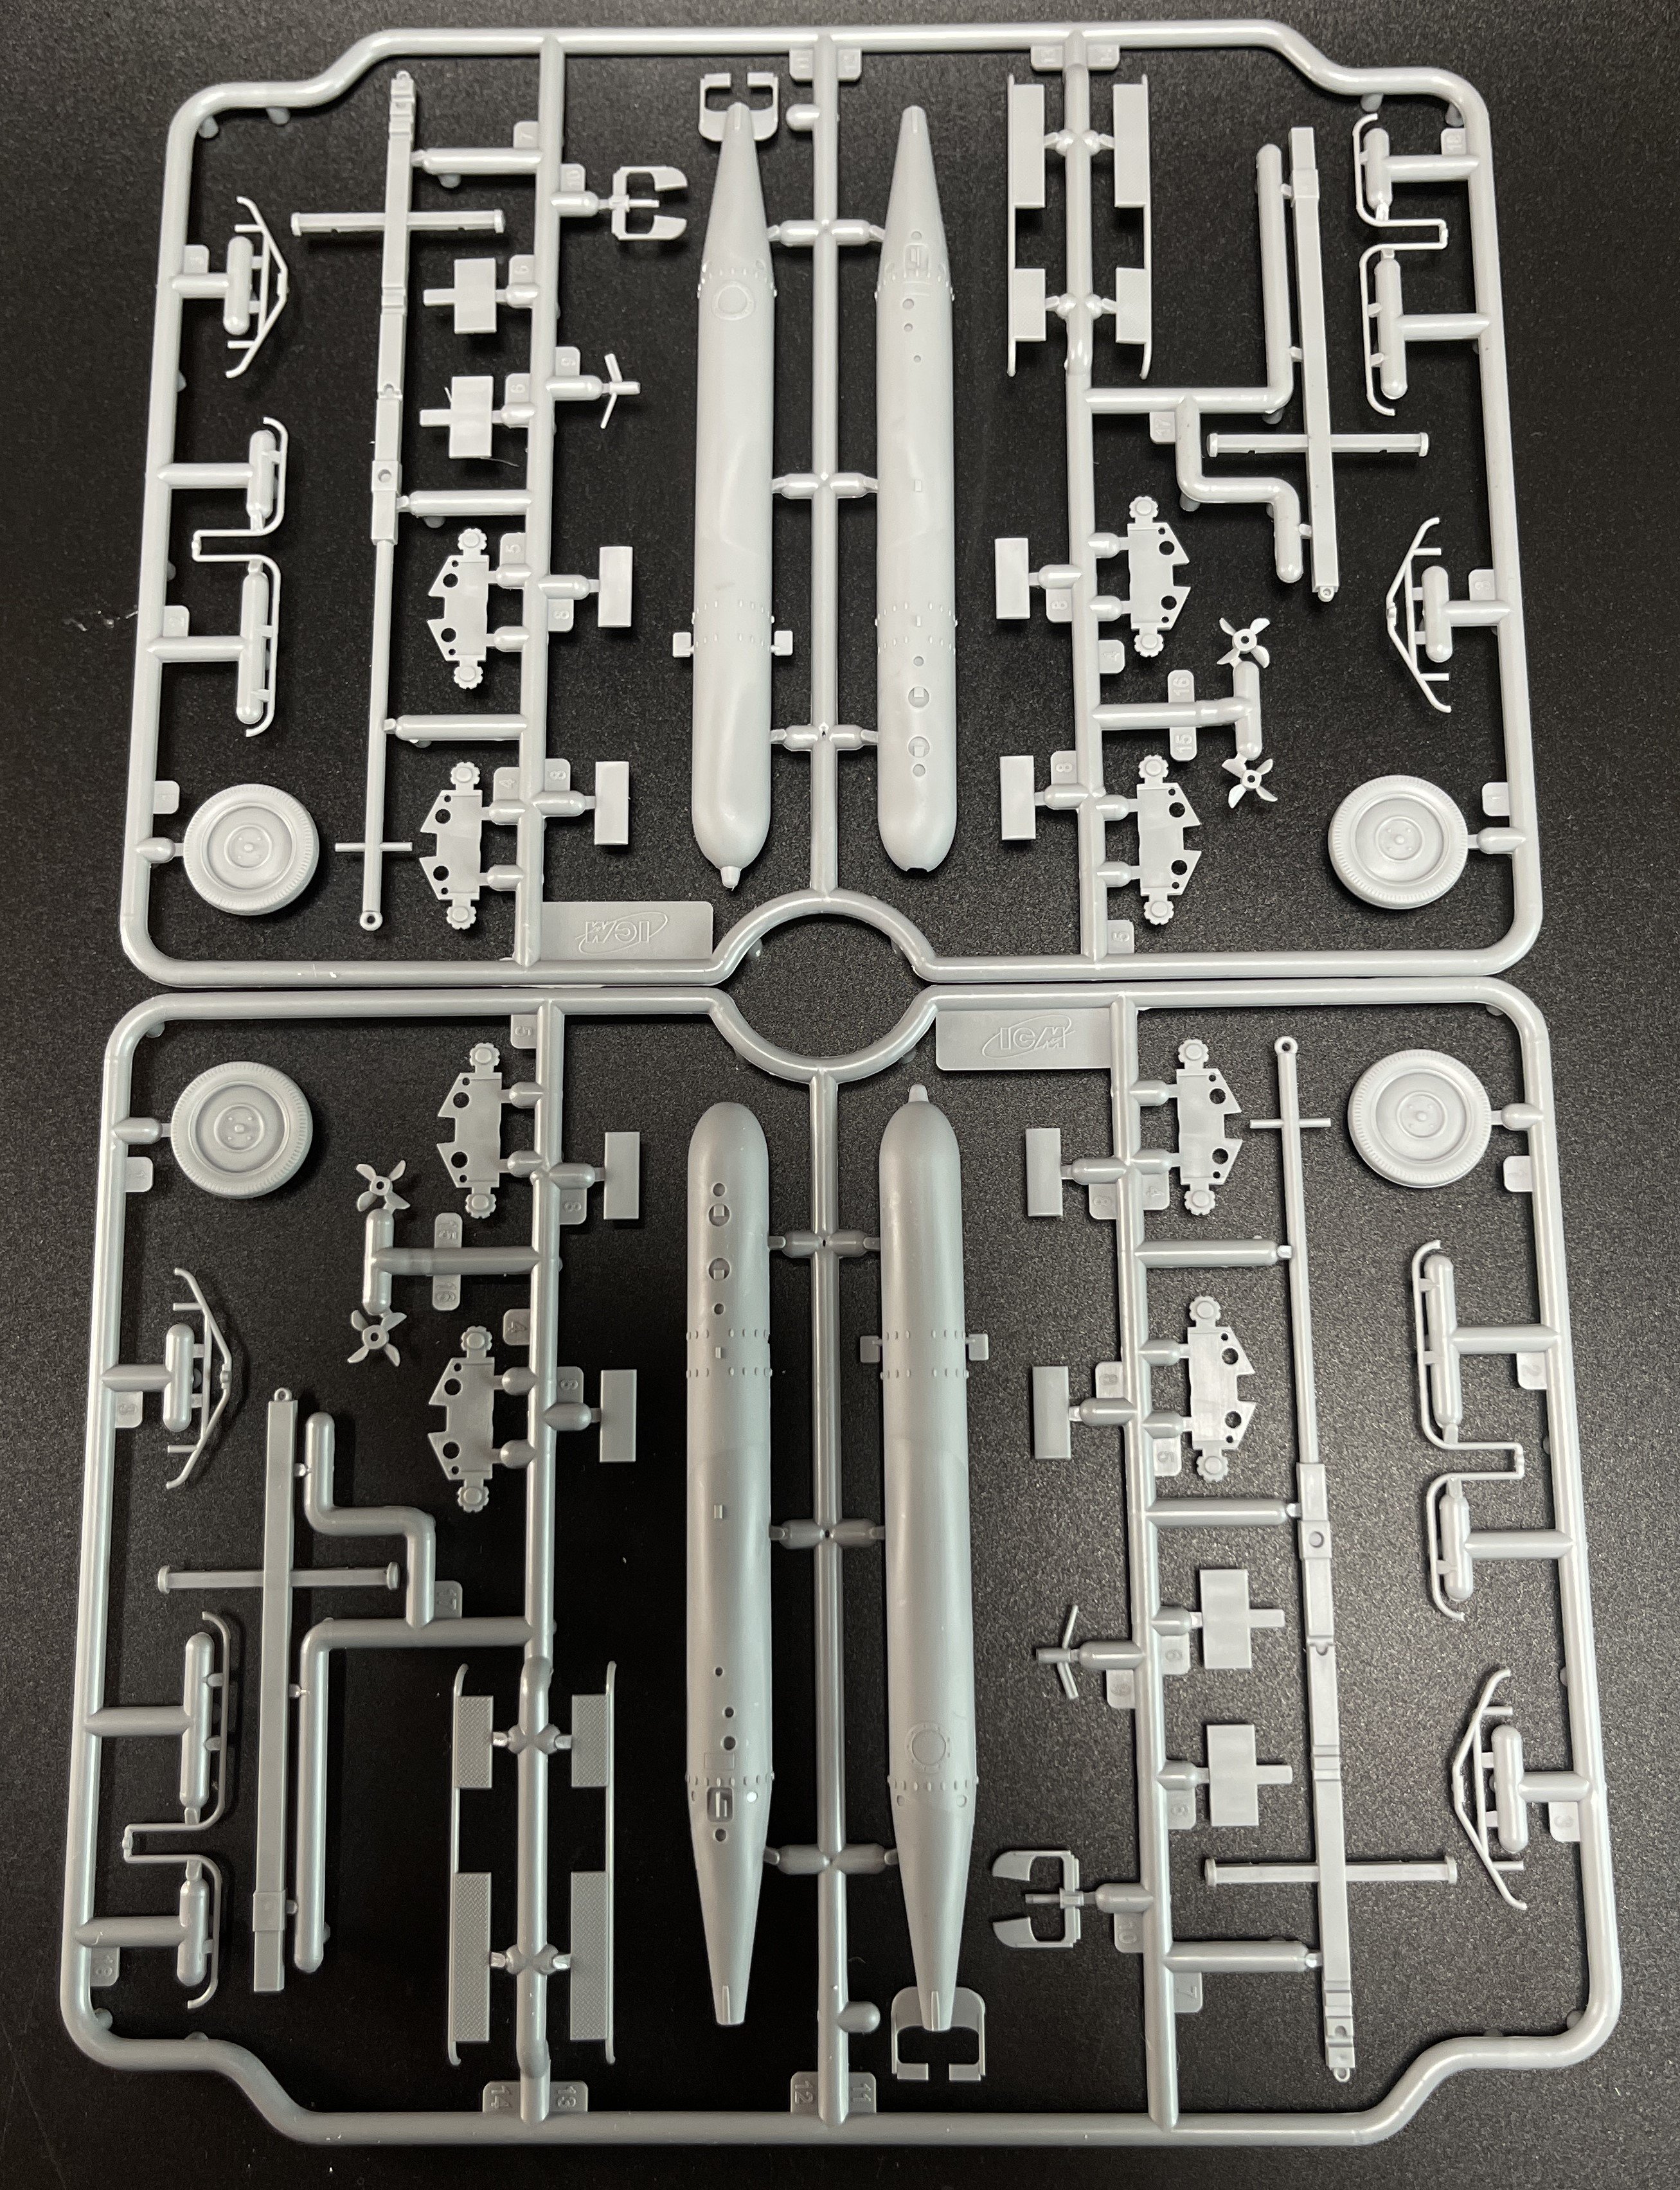
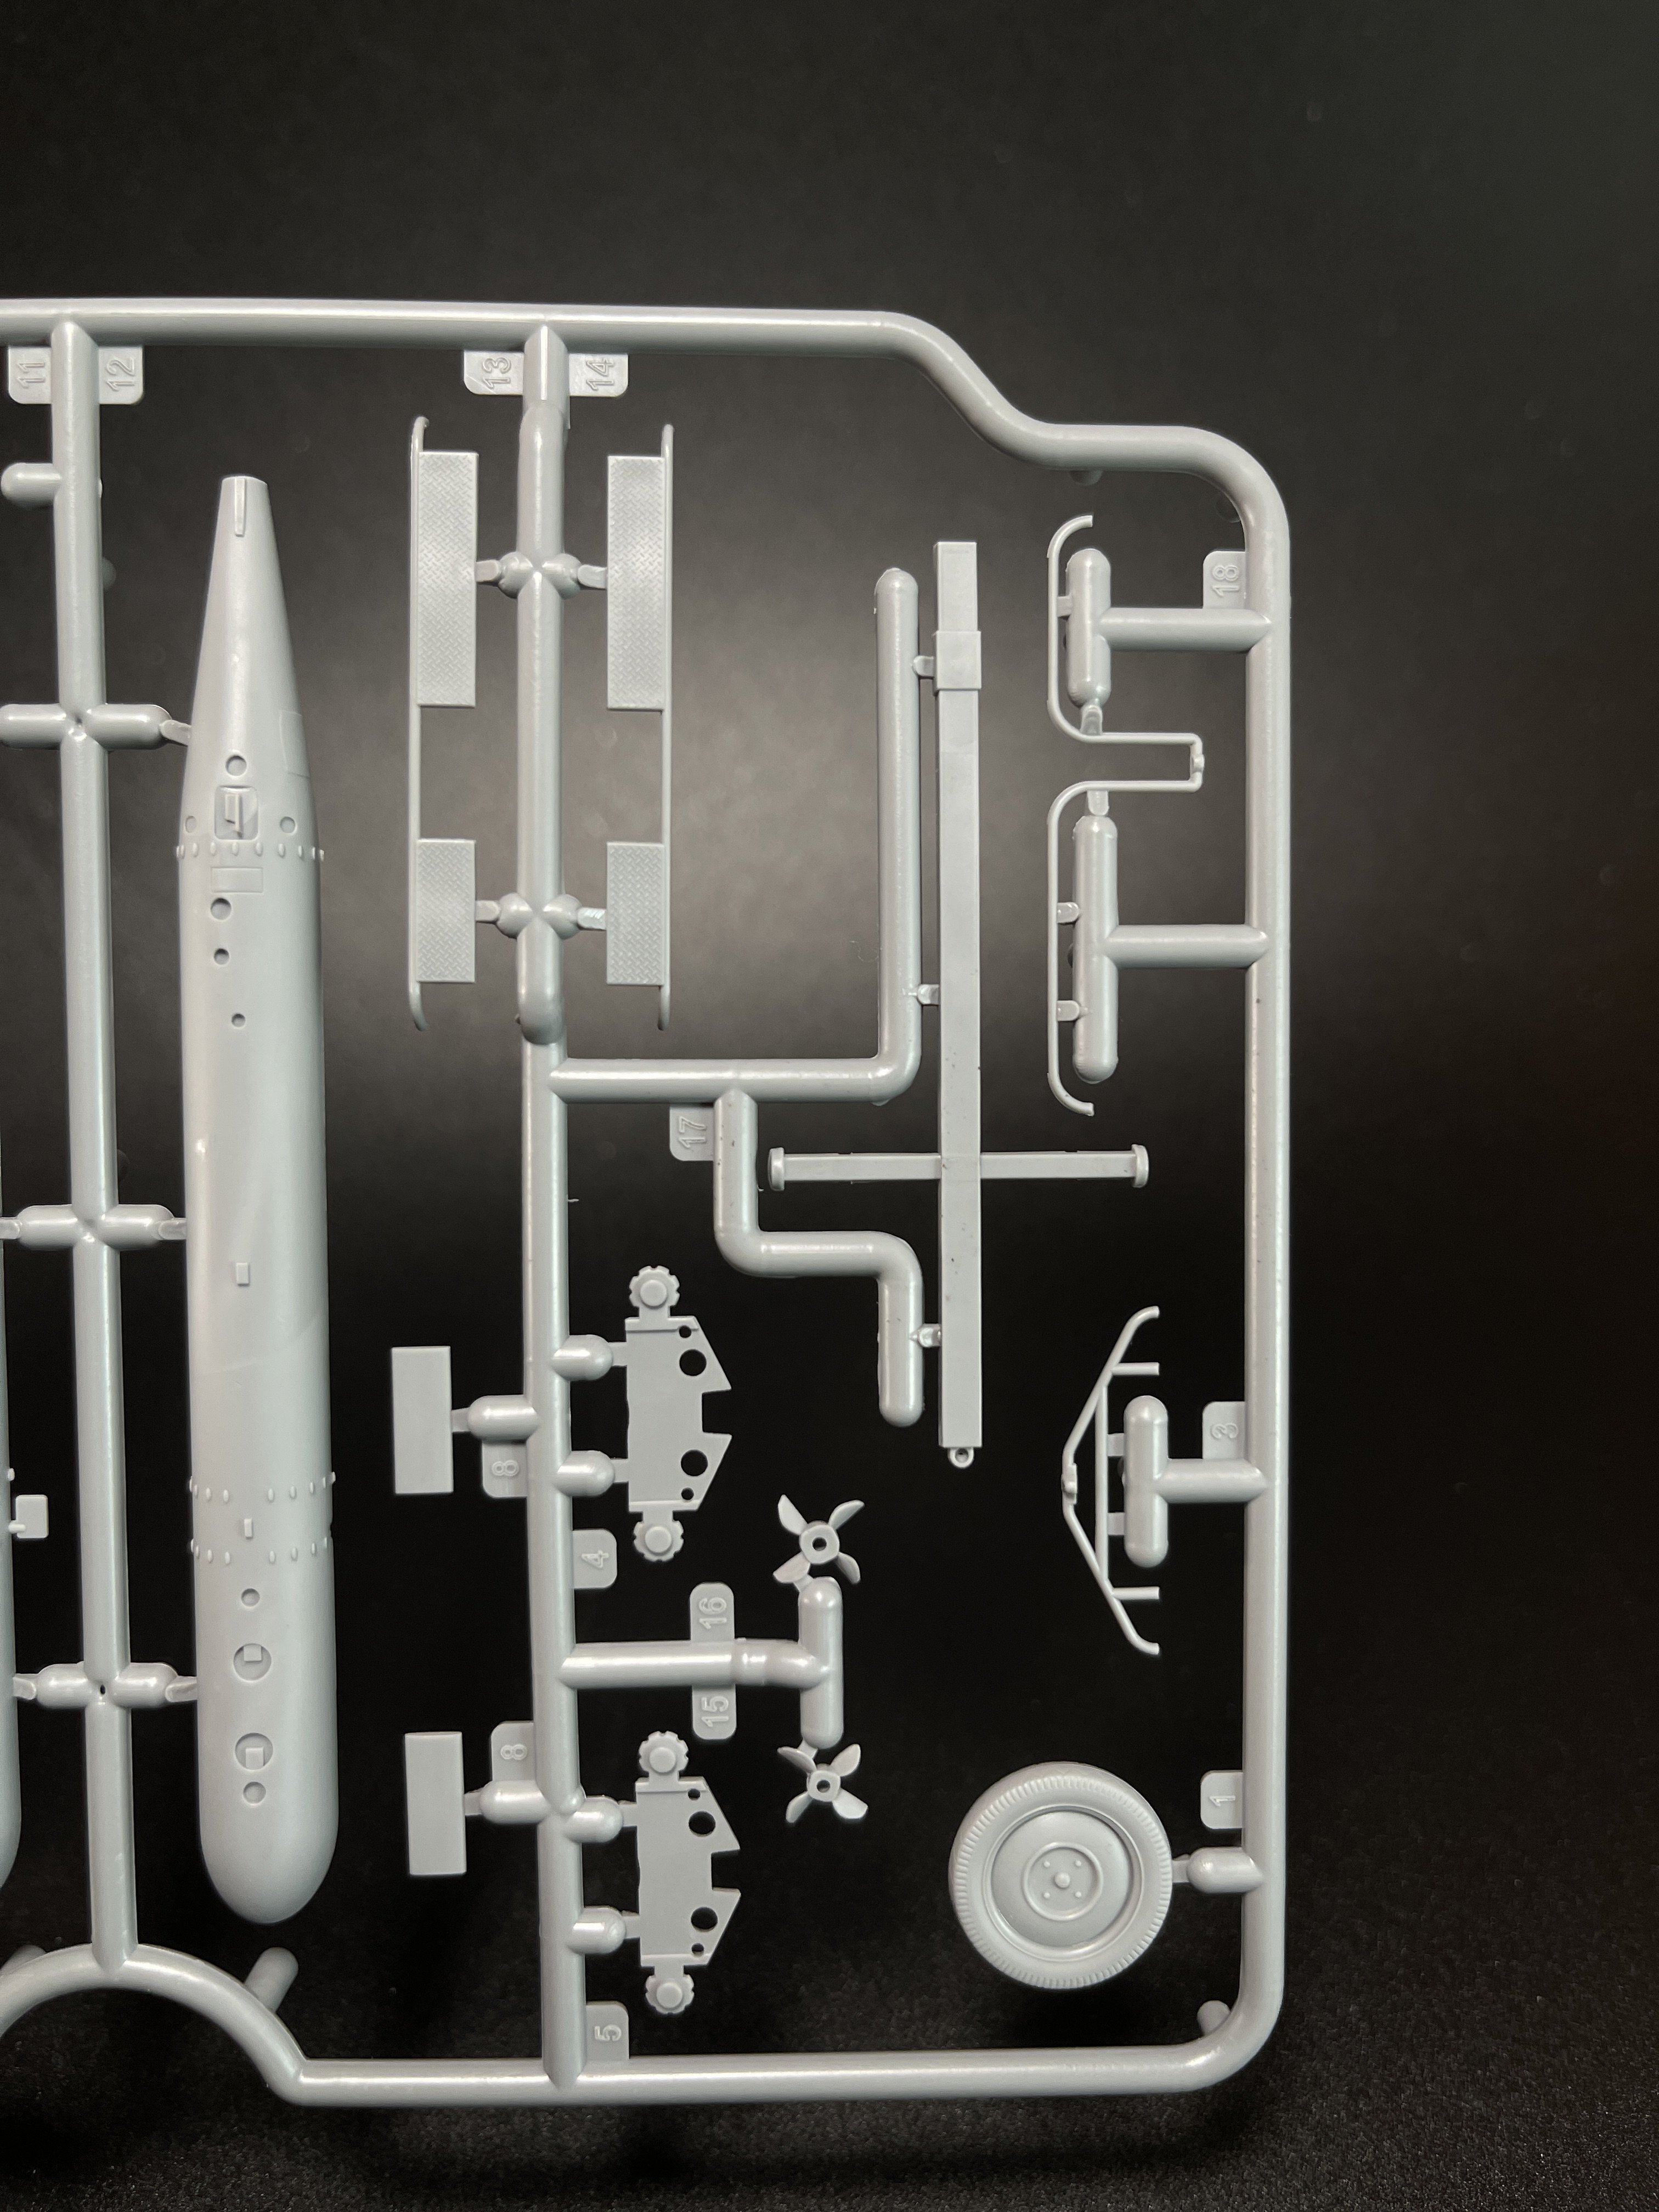
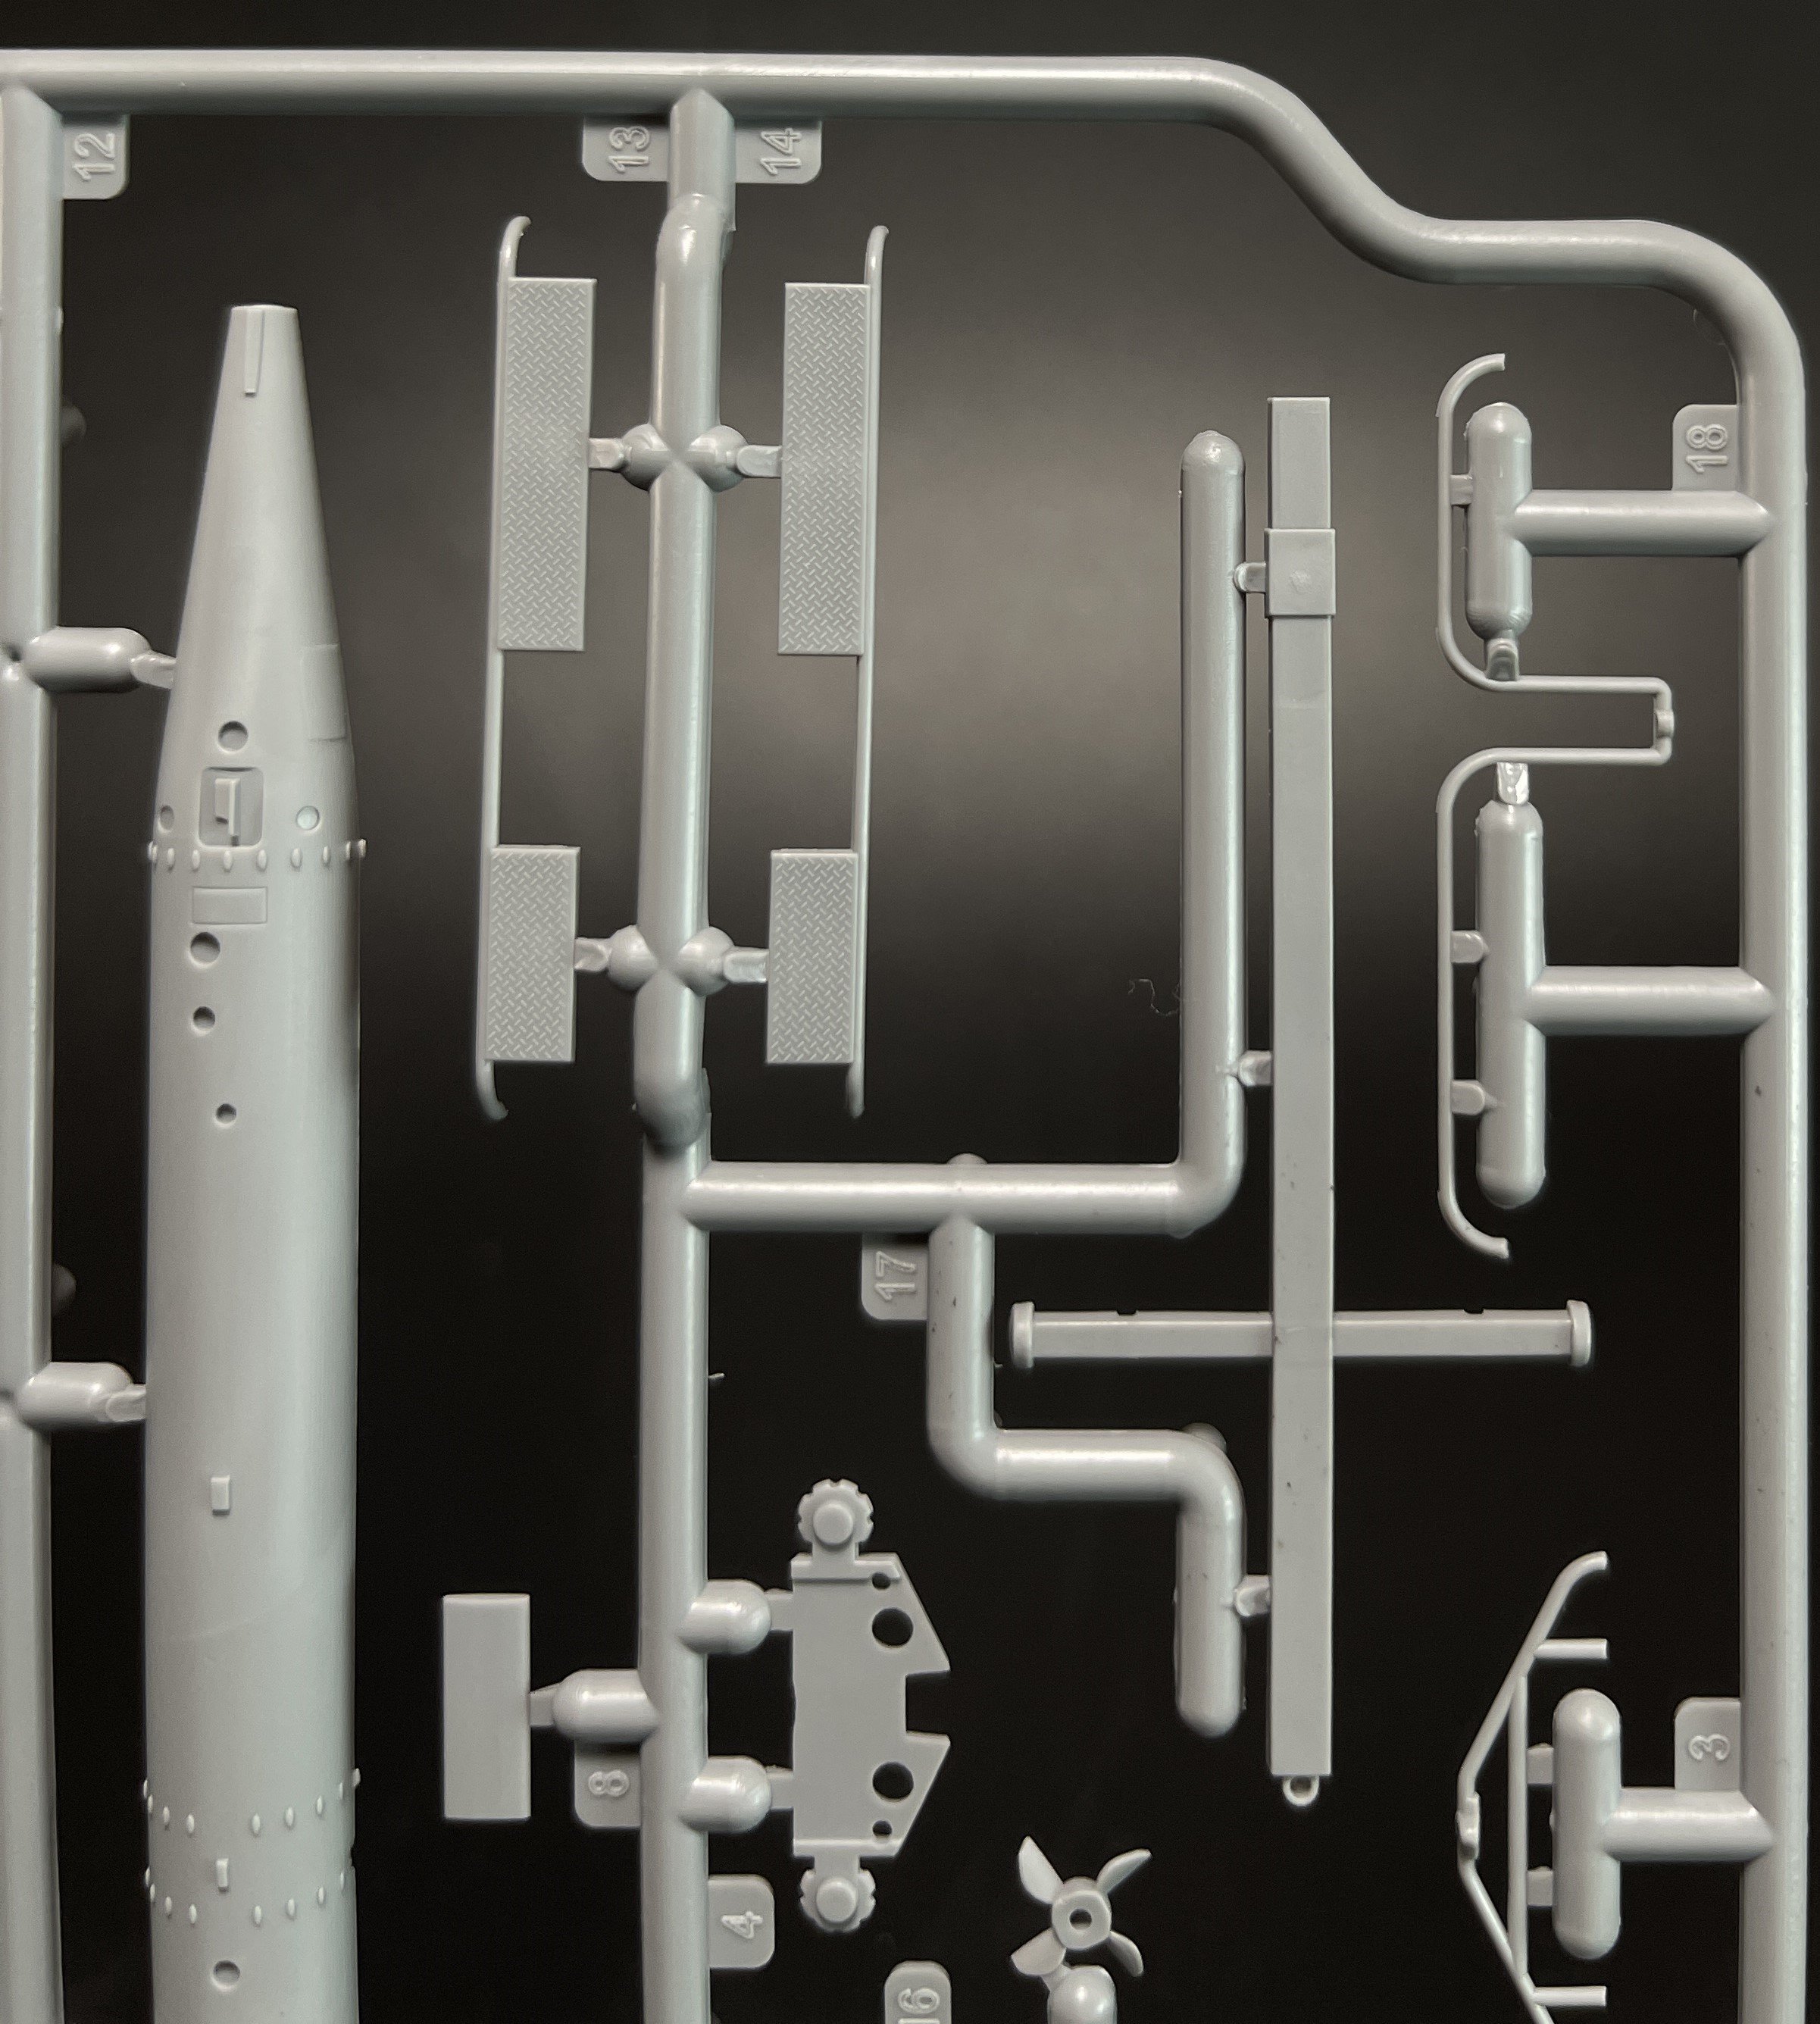
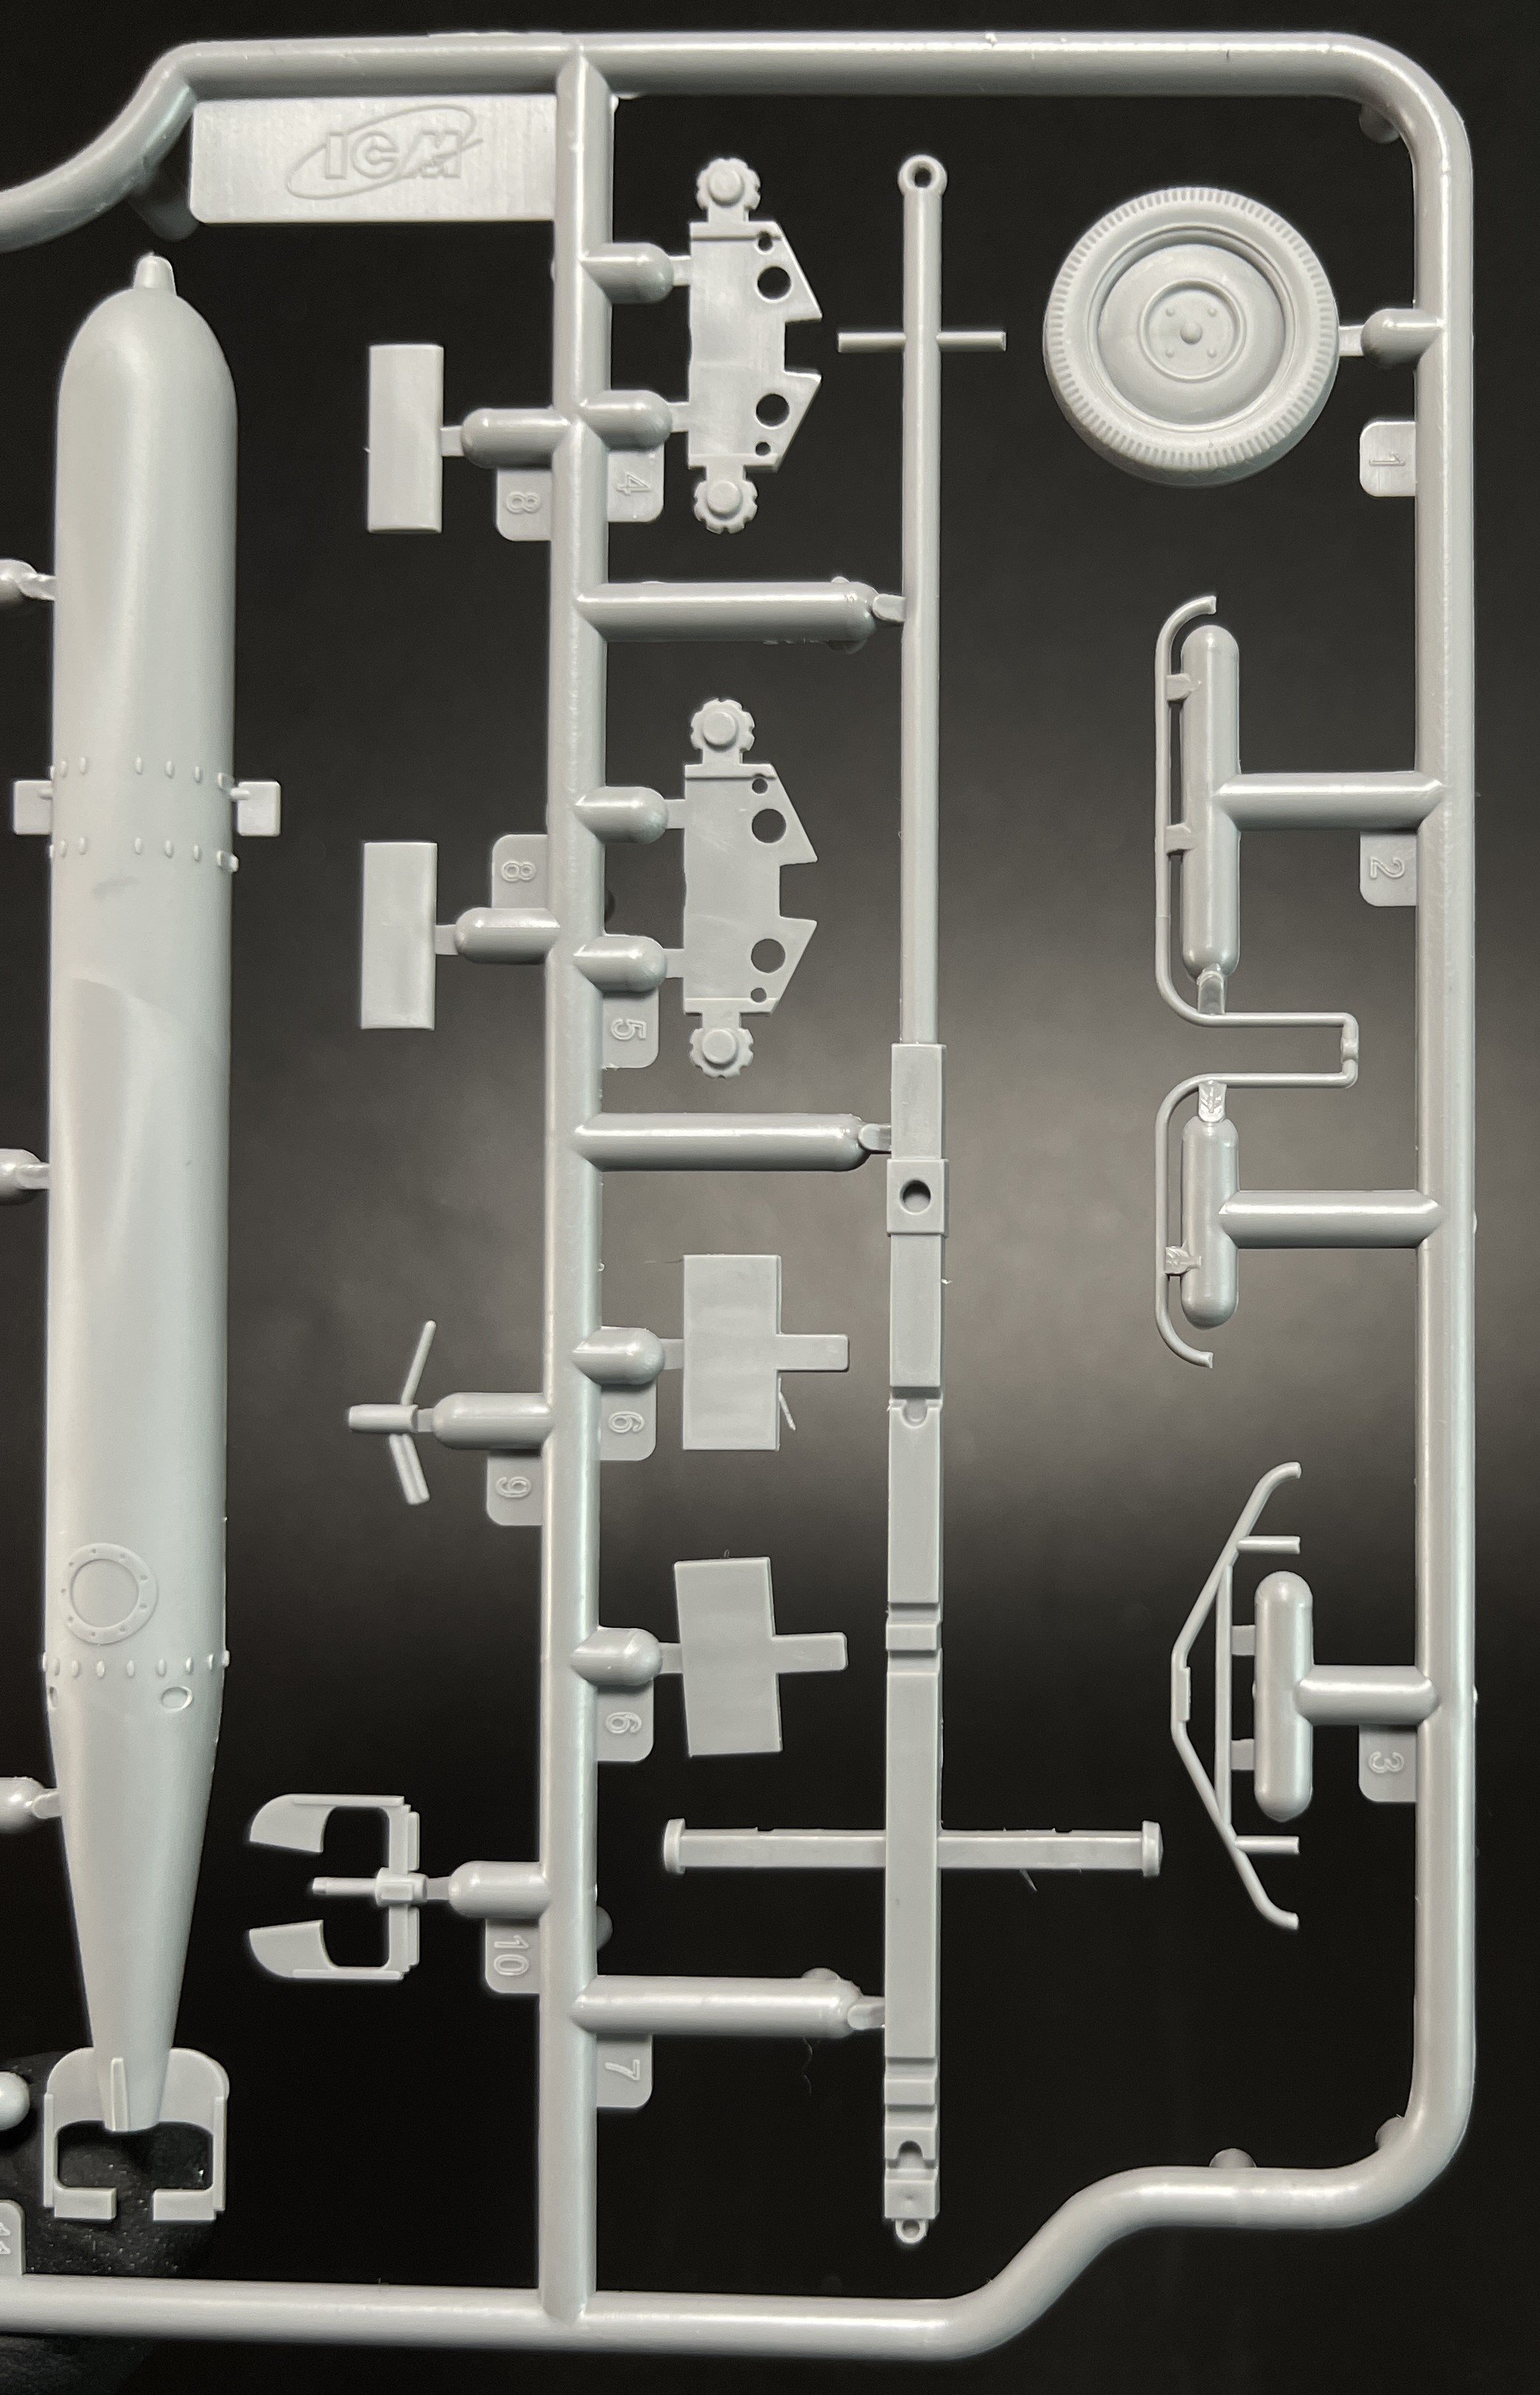
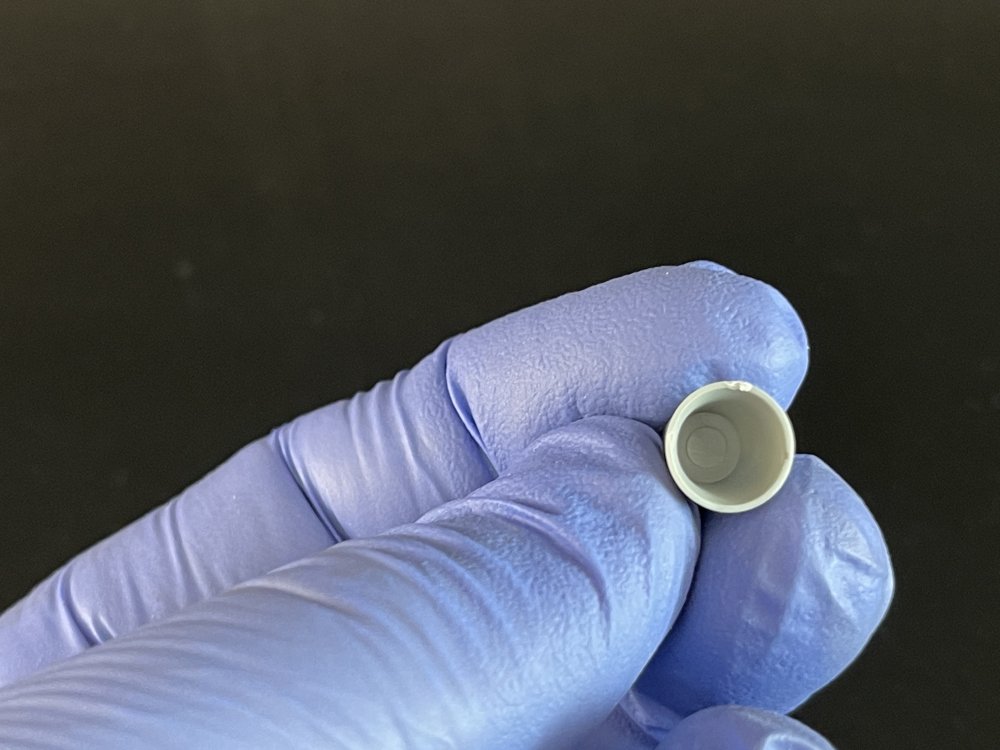
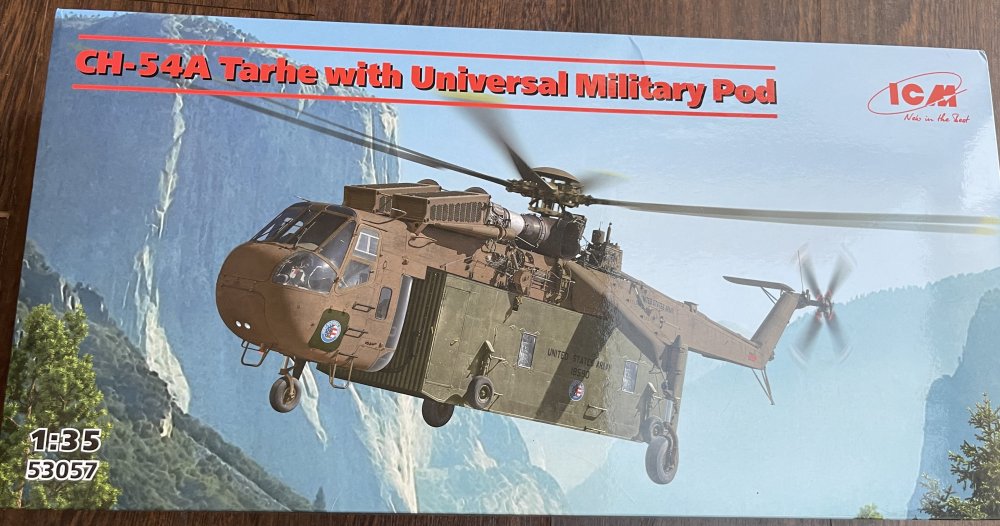
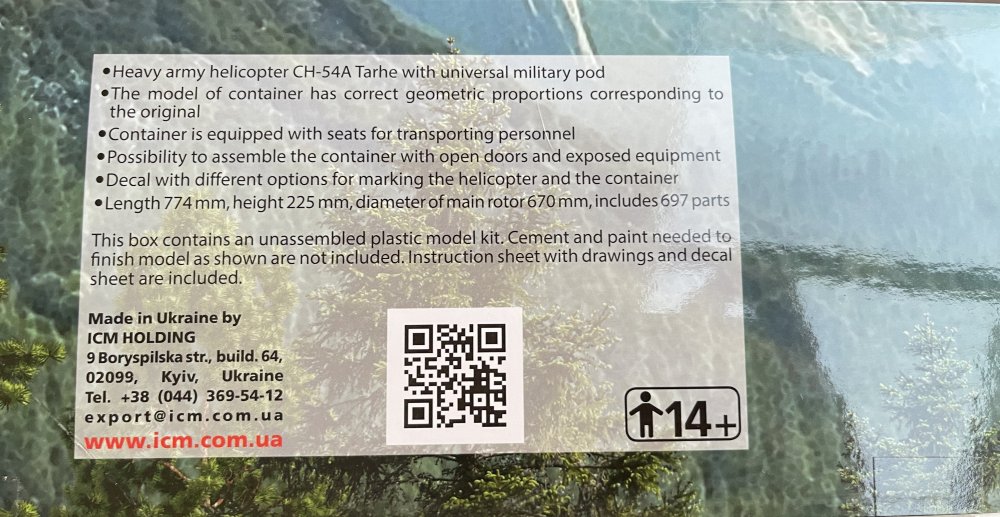
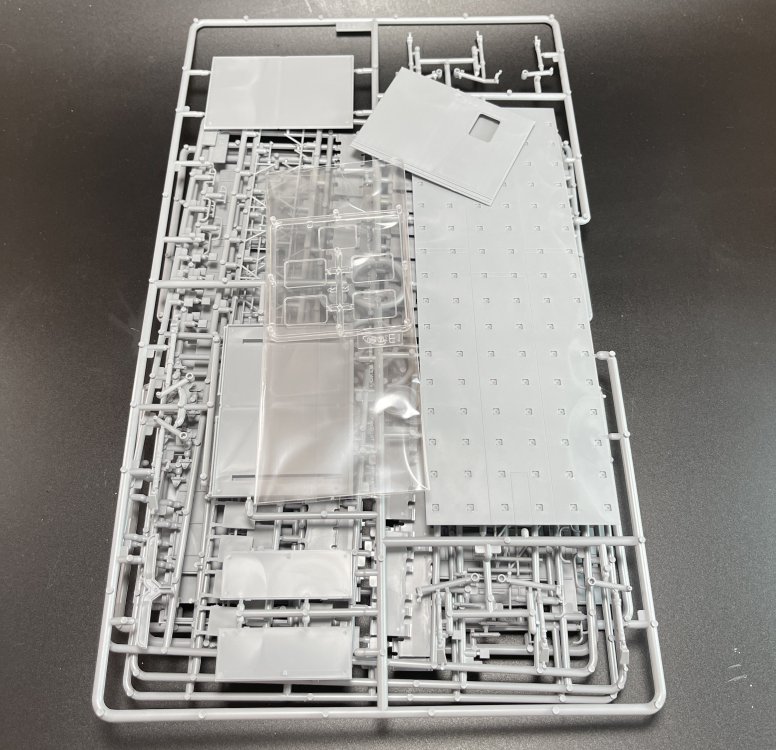
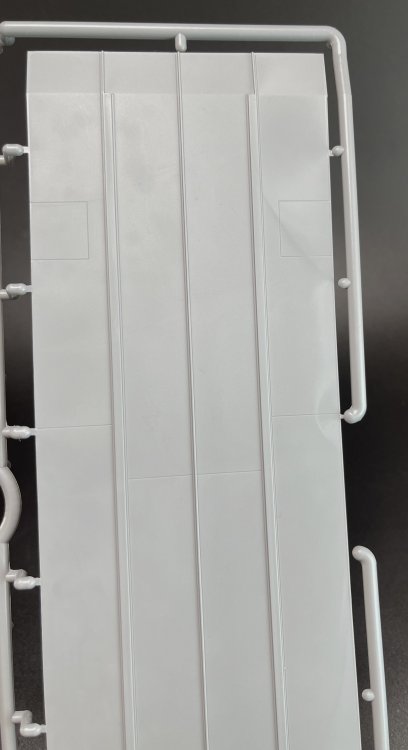
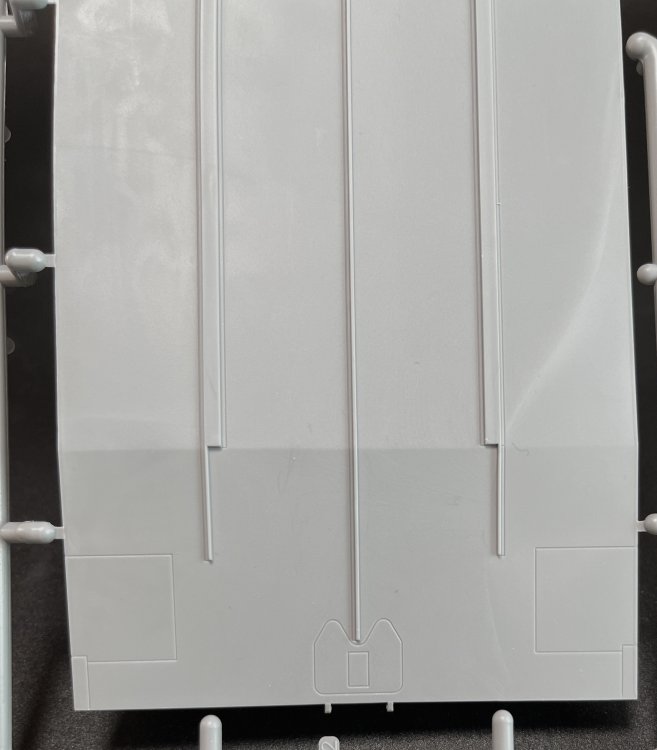
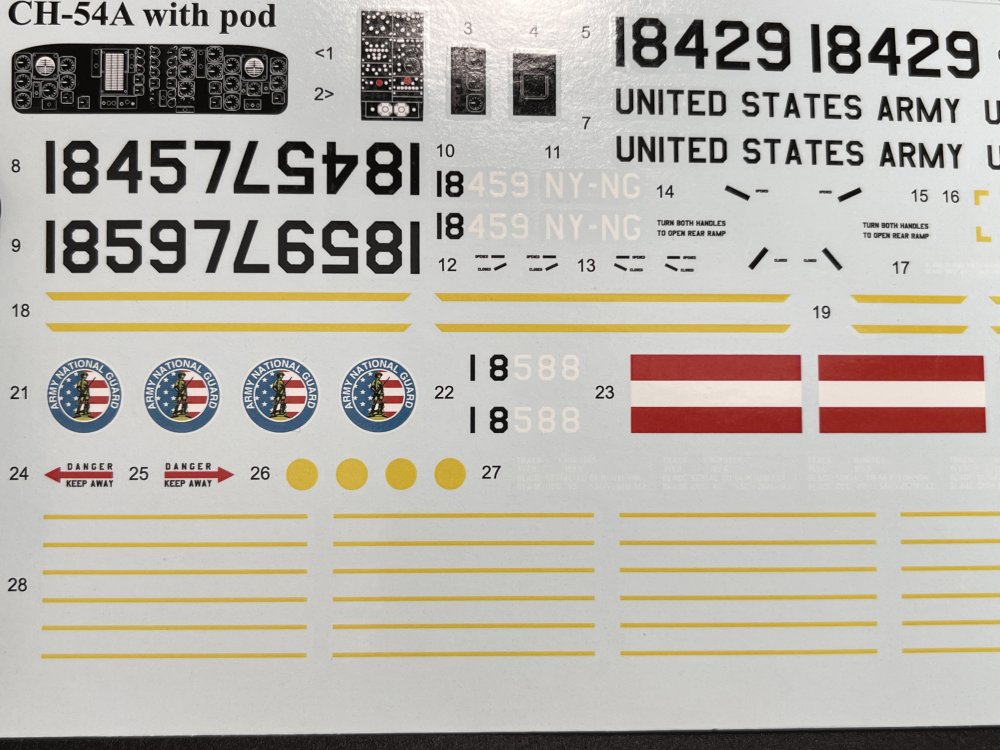
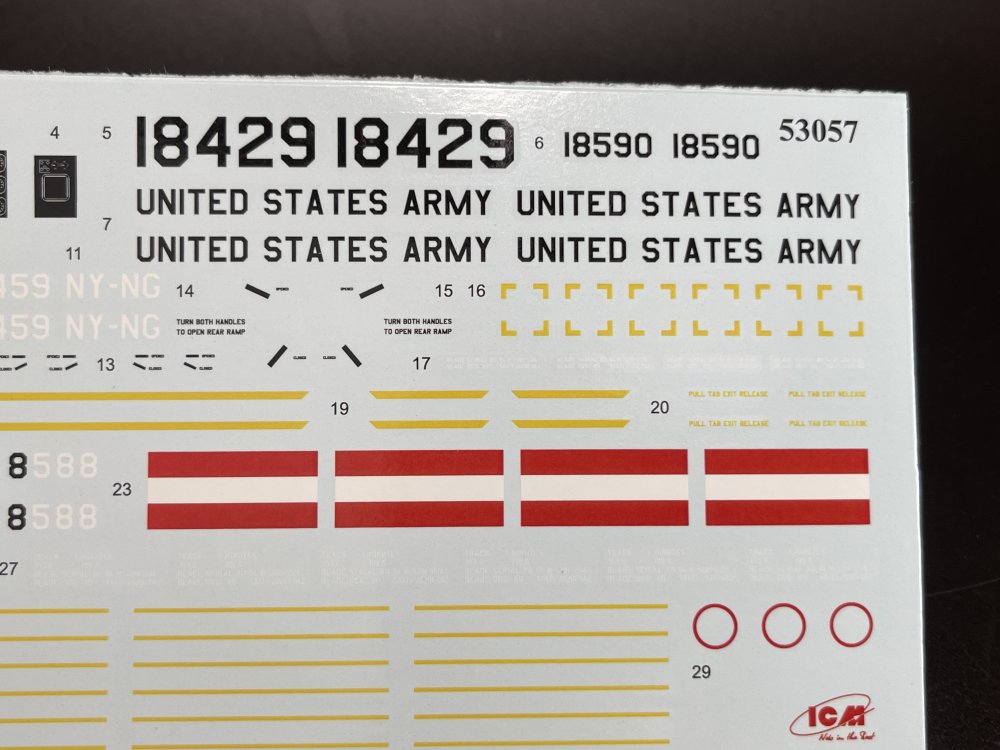
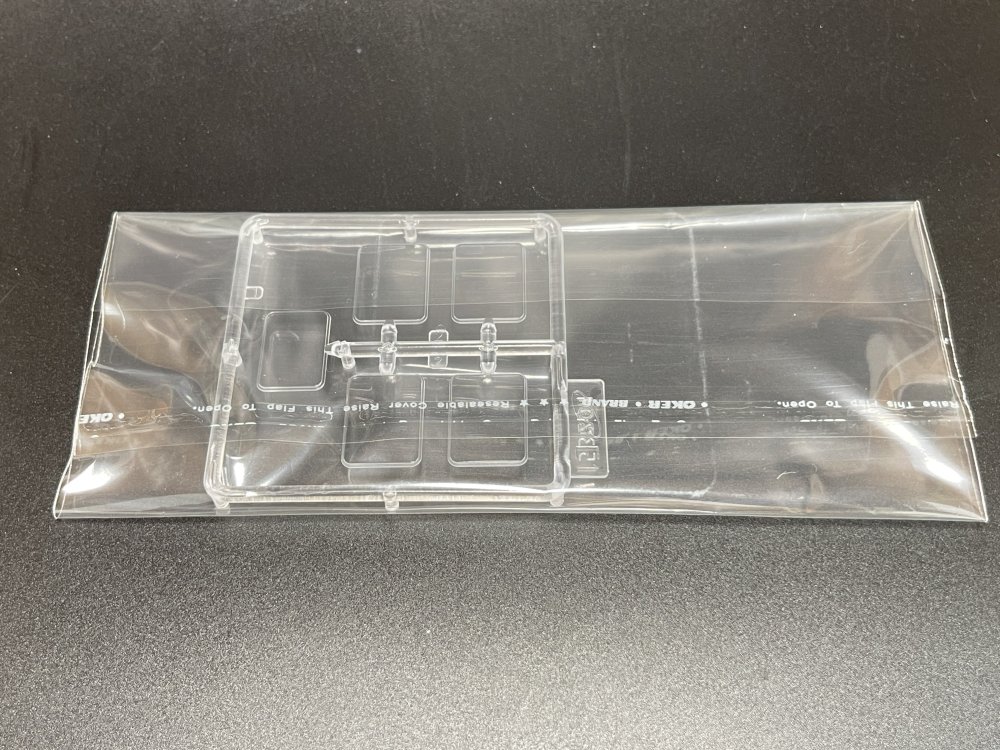
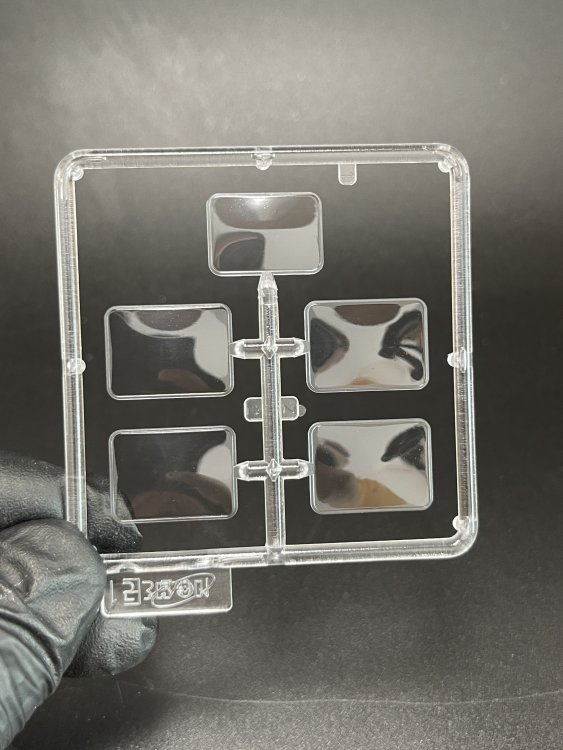
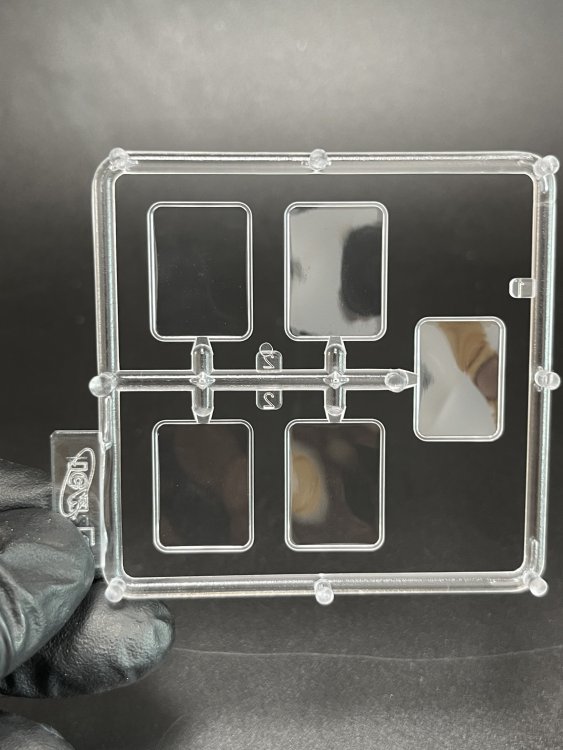
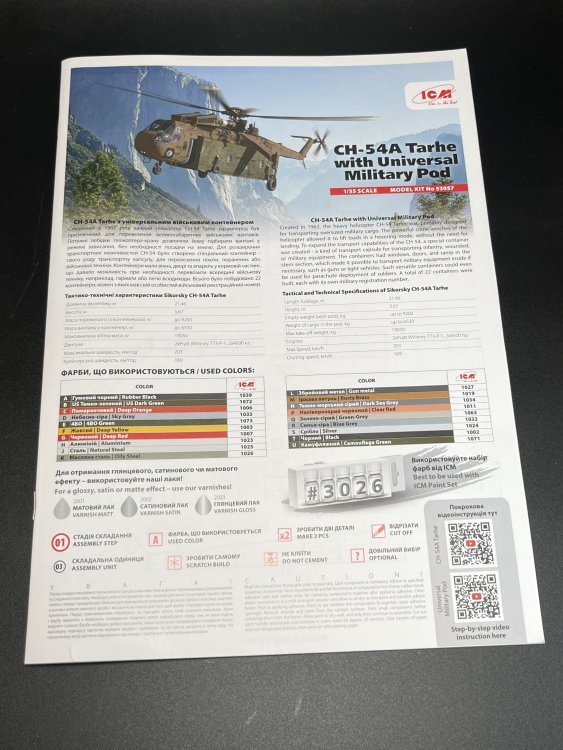
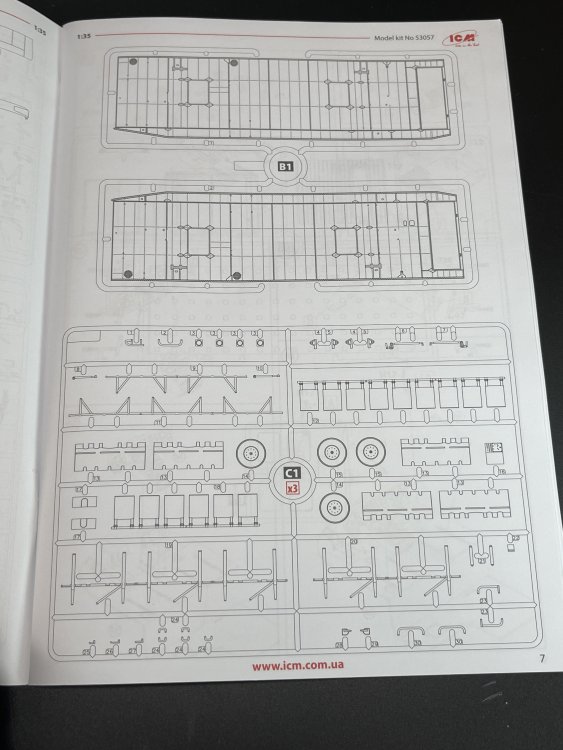
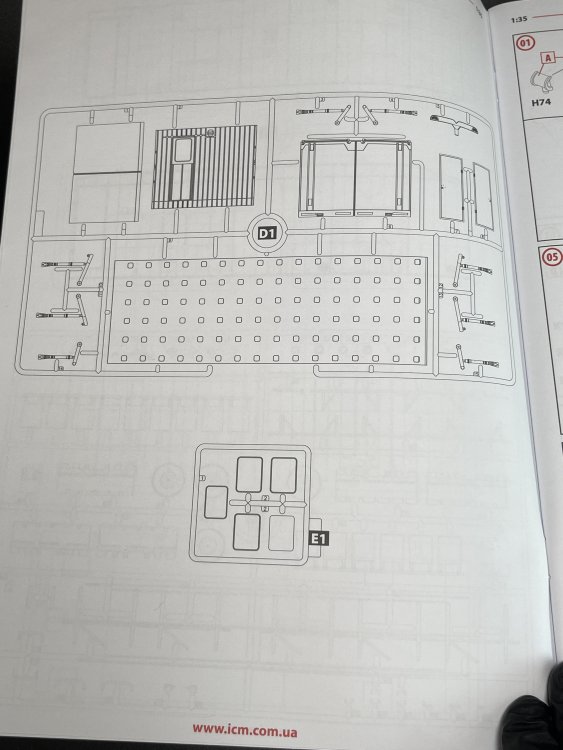
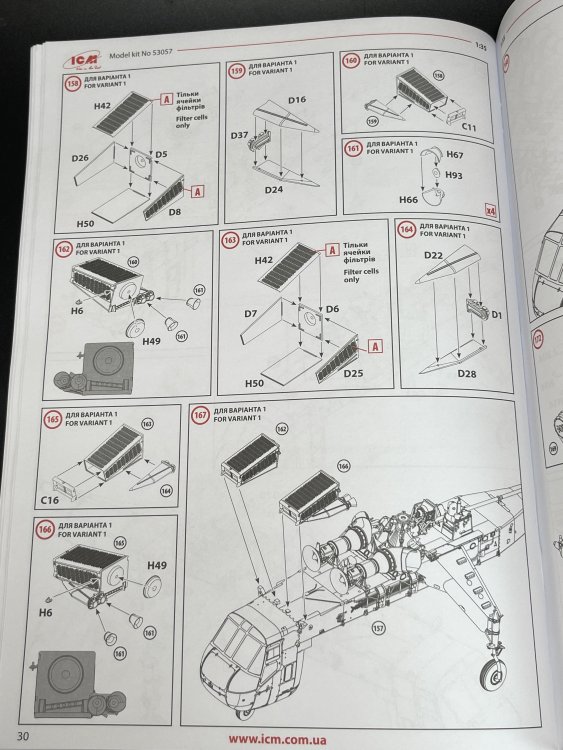
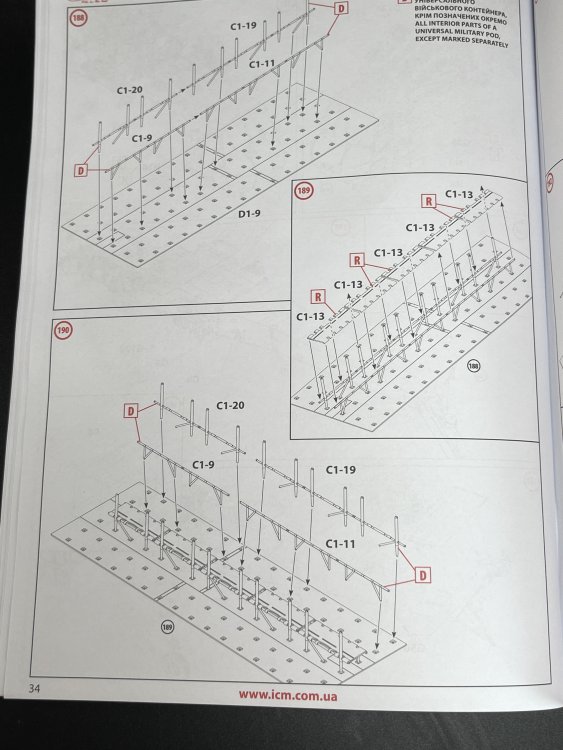
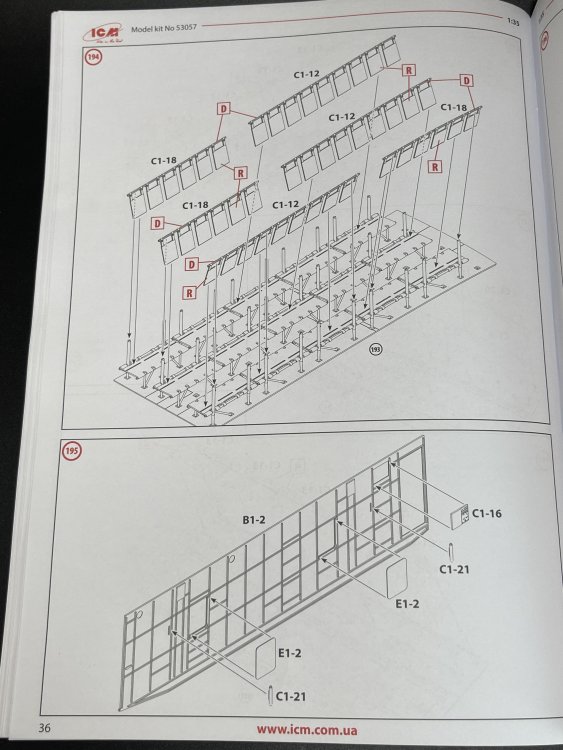
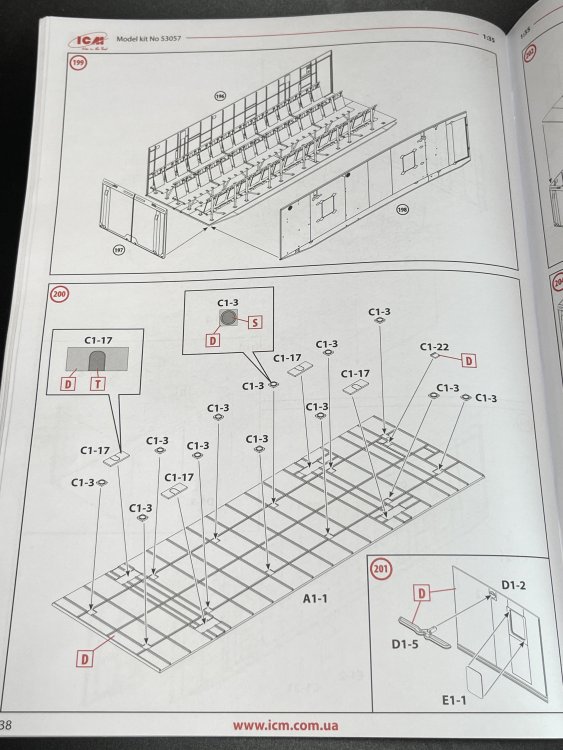
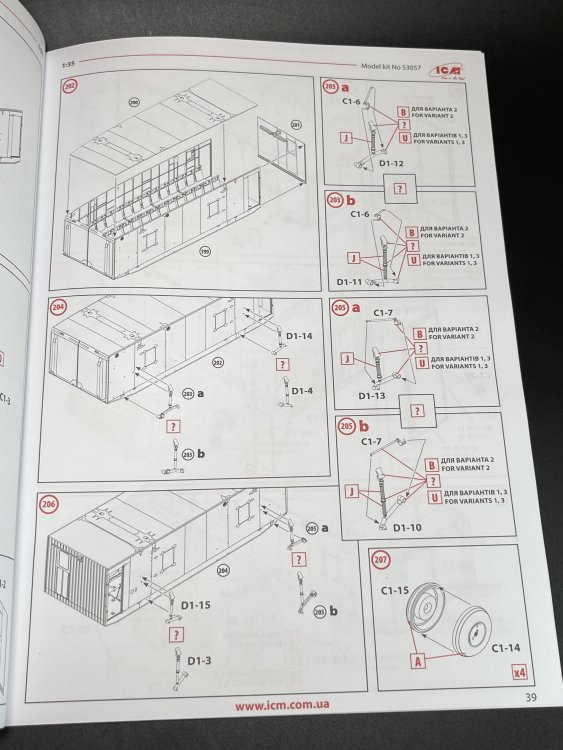
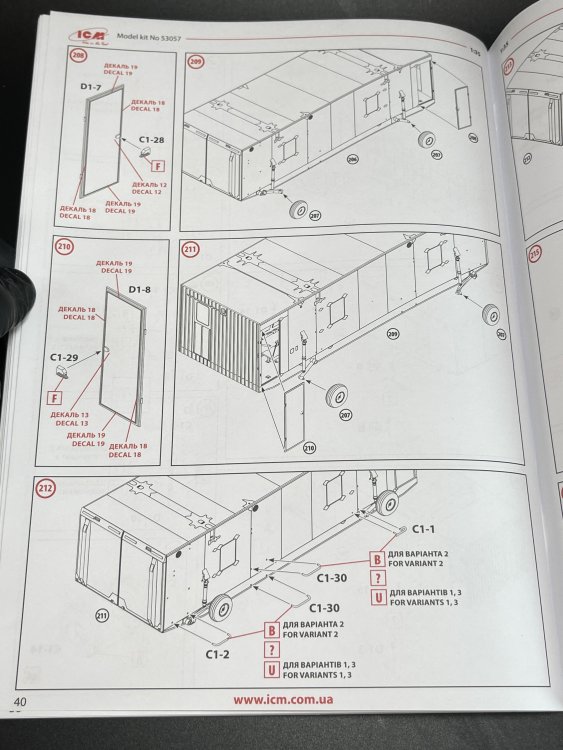
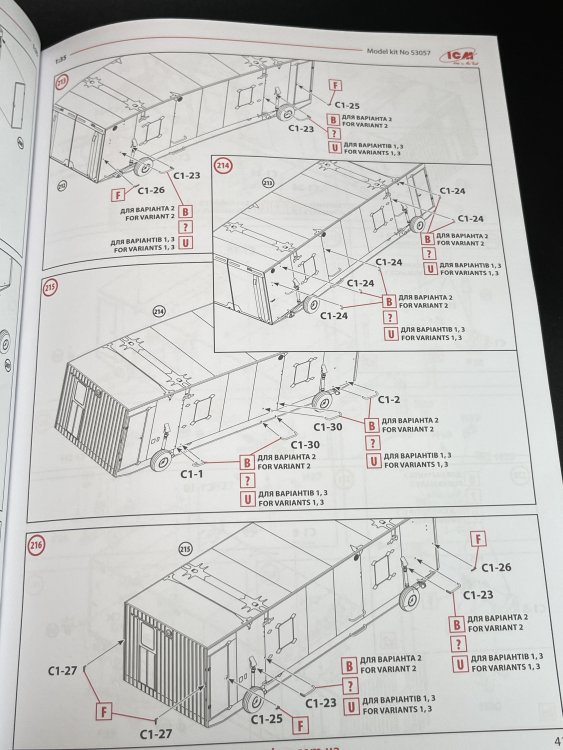
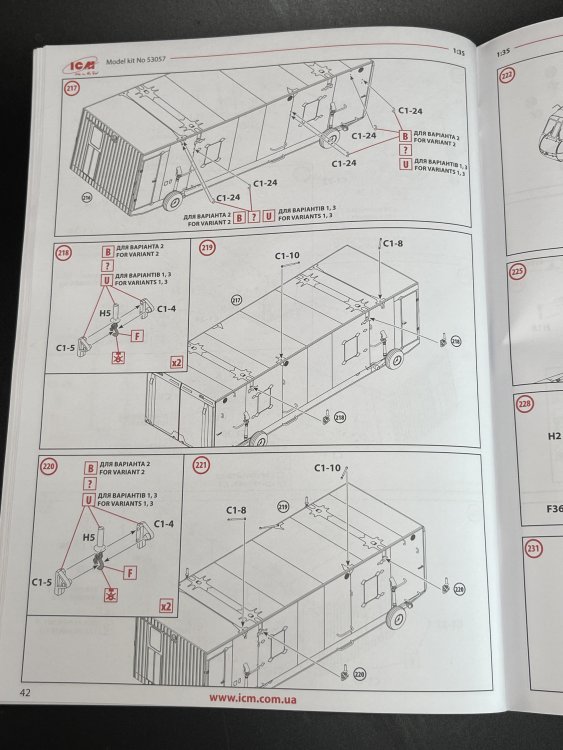
Sik Sikorsky CH-54A Tarhe with Universal Military Pod ICM 1:35 Catalogue n. 53057 Price Tag: €159,80 And, here we are again with an another great release from ICM. Even in war, ICM still producing fantastic models!! They are proud (and really should be) Ukrainian Company and they proudly announce themselves. ICM is an example of resistance and resilient. The CH-54, the skycraner is well know from historicians and from modellers in general. Even thought, I just put here a brief history. “The CH-54 was produced in two versions; A and B. The Museum’s Tarhe is an A version, one of at least 54 built. Tarhe is a Wyandotte Indian word meaning “crane.” The Skycrane was first flown in 1962. It was initially designed as a military heavy-transport helicopter. Interchangeable rectangular box-shaped cargo pods allowed it to perform many diverse jobs. The Skycrane has been used as a troop transport, cargo transport, and missile transport. It has also been used to lay mines, anti-submarine duties, and field hospital operations. The pods were fitted with communications, ventilation, and lighting systems. Wheels were also installed to make moving them easier. A pod could hold up to 45 fully equipped combat troops. The Skycrane proved itself a reliable workhorse during the Vietnam War. It saved the military approximately 210 million dollars by retrieving more than 380 damaged aircraft. Tarhes were also used as rotary-wing bombers on several occasions, carrying and dropping 10,000 pound “daisy cutter” bombs, used to create landing zones by flattening just about everything within an area several hundred yards in diameter. We have little in the way of military records on our CH-54A. It is serial number 67-18424, which tells us the helicopter was procured with Fiscal Year 1967 funds. We also know it flew with the 137th Army Aviation Group, Kansas Army National Guard at Forbes Field during part of its military service. The Museum acquired the Tarhe on loan from the US Army as surplus federal property in 1991. It was ferried to Forbes by a US Army crew from Fort Indian Gap (Anneville), Pennsylvania in December of that year. When the Kansas Army National Guard, south of our Museum, used to fly the CH-54, they transported three of the aircraft in the Museum’s collection to Topeka, the F11F-1 Blue Angel Tiger, the F-84F Thunderstreak, and the F-86H Sabre. Although no longer in US military service, many Skycranes fly commercially in heavy lift service, forestry service, and as aerial firefighters, hauling large buckets of water or fire retardant to a fire. This helicopter is on loan from the US Army Tank-automotive and Armaments Command, Warren, Michigan TECHNICAL NOTES: Manufacturer: Sikorsky Basic Role: Twin-turbine heavy flying crane helicopter Crew: Pilot and co-pilot side by side, aft-facing seat for third pilot (third pilot takes control during loading and unloading) Engines: Two Pratt and Whitney T73-P-1 (A) or T73-P-700 (B) turboshaft engines. Maximum speed at sea level: 126 m.p.h. (203km/hr) Cruising Speed: 105 m.p.h. (169km/hr) Max. Range: 230 miles (327km) Ceiling: 9,000 feet (2,743m). Diameter of main rotor: 72 feet (21.9m) Diameter of tail rotor: 16 feet ( 4.9m) Overall length: 88 feet, 6 inches (27m) Empty weight: 19,234 lb. ( 8,725kg) Max Takeoff weight: 42,000 lb. (19,051kg) Armament: None Serial number: US Army s/n 67-18424” In https://www.combatairmuseum.org/aircraft/sikorskyskycrane.html It`s the second time I have the opportunity to review the CH-54 now with the military pod. The first review you can check here. And the first release you can see here So, I will stay short and locate mostly in the new parts (the military pod) decals and instructions. So, the universal military pod is a kit itself with interior detail. The real Military Pod itself is quite convertible so the seats can be quickly removed to provide space for 24 litters. That versatility makes it possible to transform it and adapt it to serve as a field surgical unit, command post, food service center, communications post or a unit for chaplains. ICM offer you a military pod with seated areas, but with no seatbelts. In the instructions and check the parts, ICM only indicates the building of the seat area, making no observation of that being or not opcional. However, I think that the no inclusion of the seats is possible and you can make another end of the military pod. So, in fact, you can make your military pod with no seats and “transform it” in a field surgical unit… The interior detail is a quite good one, but the AM guys can make a some extra to put the detail way up even because you can leave the access doors open and you have windows to see inside. At least you need to get some seatbelts, hoping the some AM will release it. The outer surfaces have quite good detail. This pod is complete with the maneuvering wheels. The decals are from the CH-54 and also for the military pod. So if you want to make a military pod with different use, probably the decals will not be the ones to use. Checking the decals these are quite complete and with very good color registration. The decals are sharp and well-printed, with good color fidelity and thin carrier film, ensuring they will sit well on the model with proper application. I still didn’t found you make these decals for ICM! ICM gives us 3 decals options for this release: 1. Sikorsky CH-54A Tarhe 68-18457 with Universal Military Pod, 295th Aviation Company, Germany, 1972 2. Sikorsky CH-54A Tarhe 67-18429 with Universal Military Pod, Keyfield Air National Guard Base, August 1982 3. Sikorsky CH-54A Tarhe 68-18459 with Universal Military Pod, 113th Aviation Regiment, Reno Stead Airport, November 1989 The instructions come in a A4 format, with good drawings but I would like to see a more colour information along the construction, even if it only with ICM colours Conclusion: The ICM Sikorsky CH-54A Tarhe with Universal Military Pod is a highly detailed and accurate kit that will stand out in any collection. That`s for sure. Have no doubts about that. This release is even bigger of the both before it as the military pod is huge and a truly massive presence and gives you a lot more of kit in a big large box (by the way, is much better one large box that the two boxes of the previous releases). I love everything about this beast as it has great details, no flash whatsoever, fantastic clear parts.. I totally recommend it!!! To get one, just go here My thanks to ICM to make this beauty!!


-
Fantastic work so far!!
- 18 replies
-
- 2
-
-
- caproni ca.100
- fly
- (and 1 more)
-
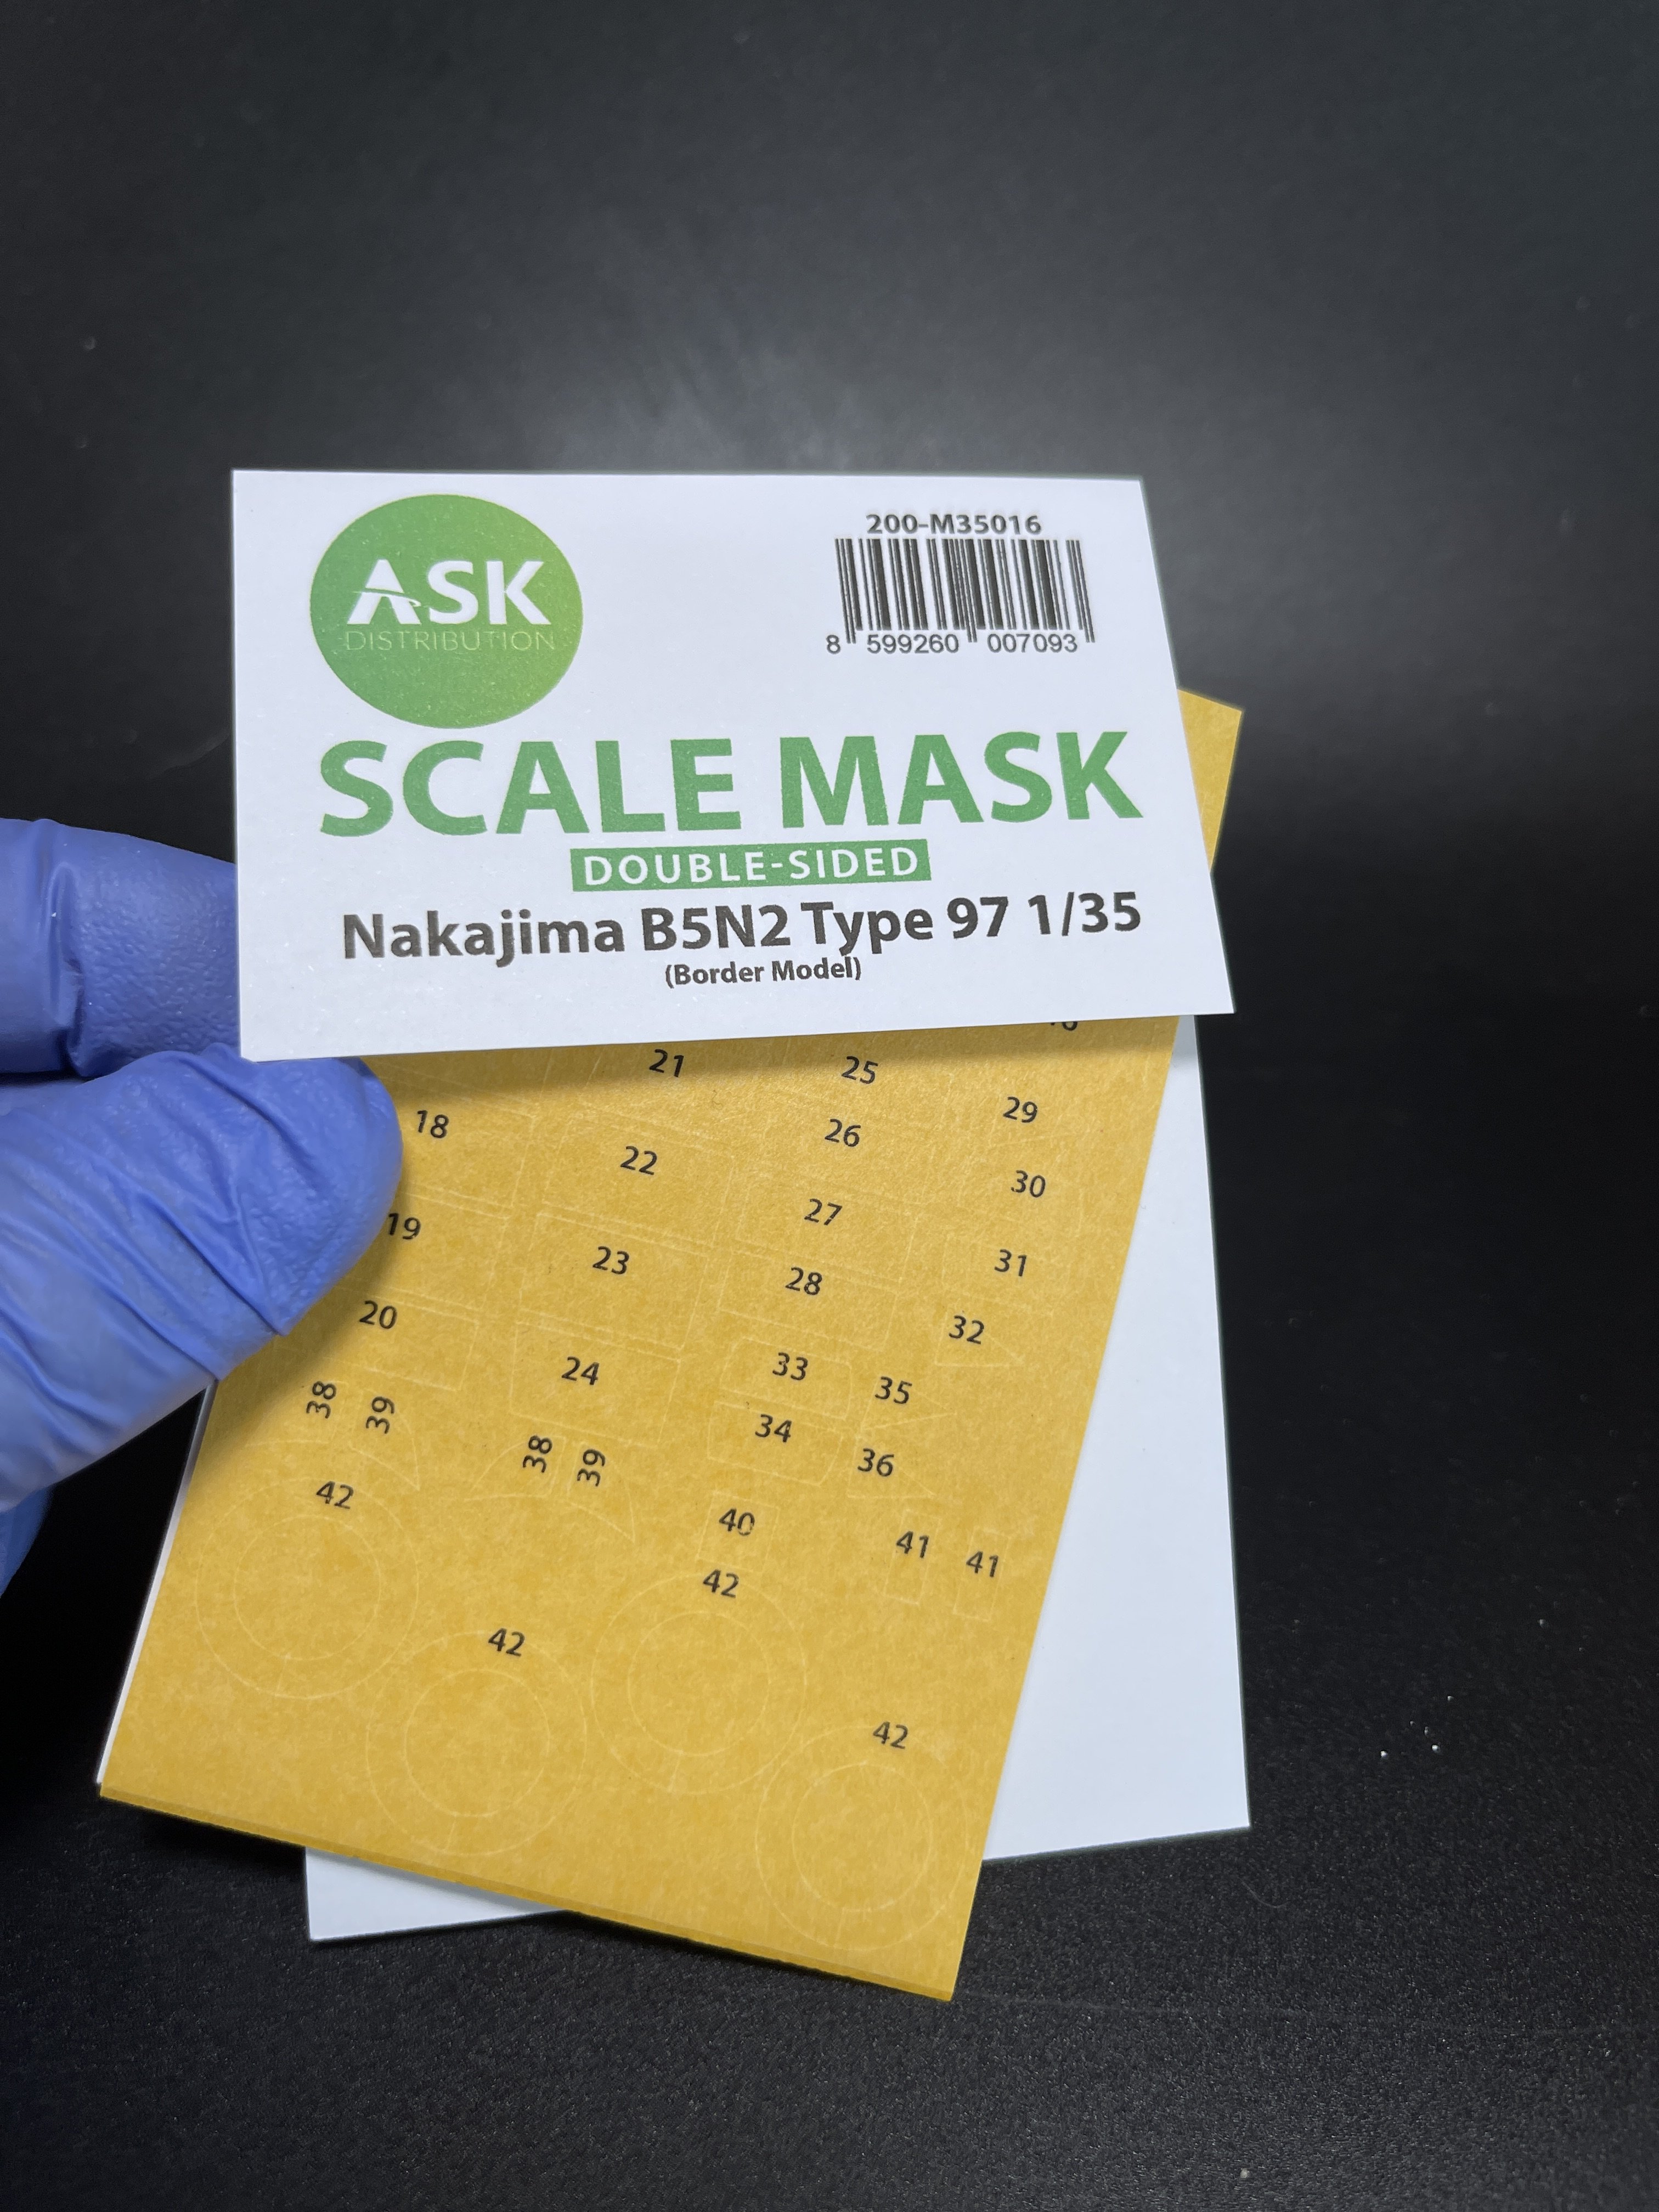
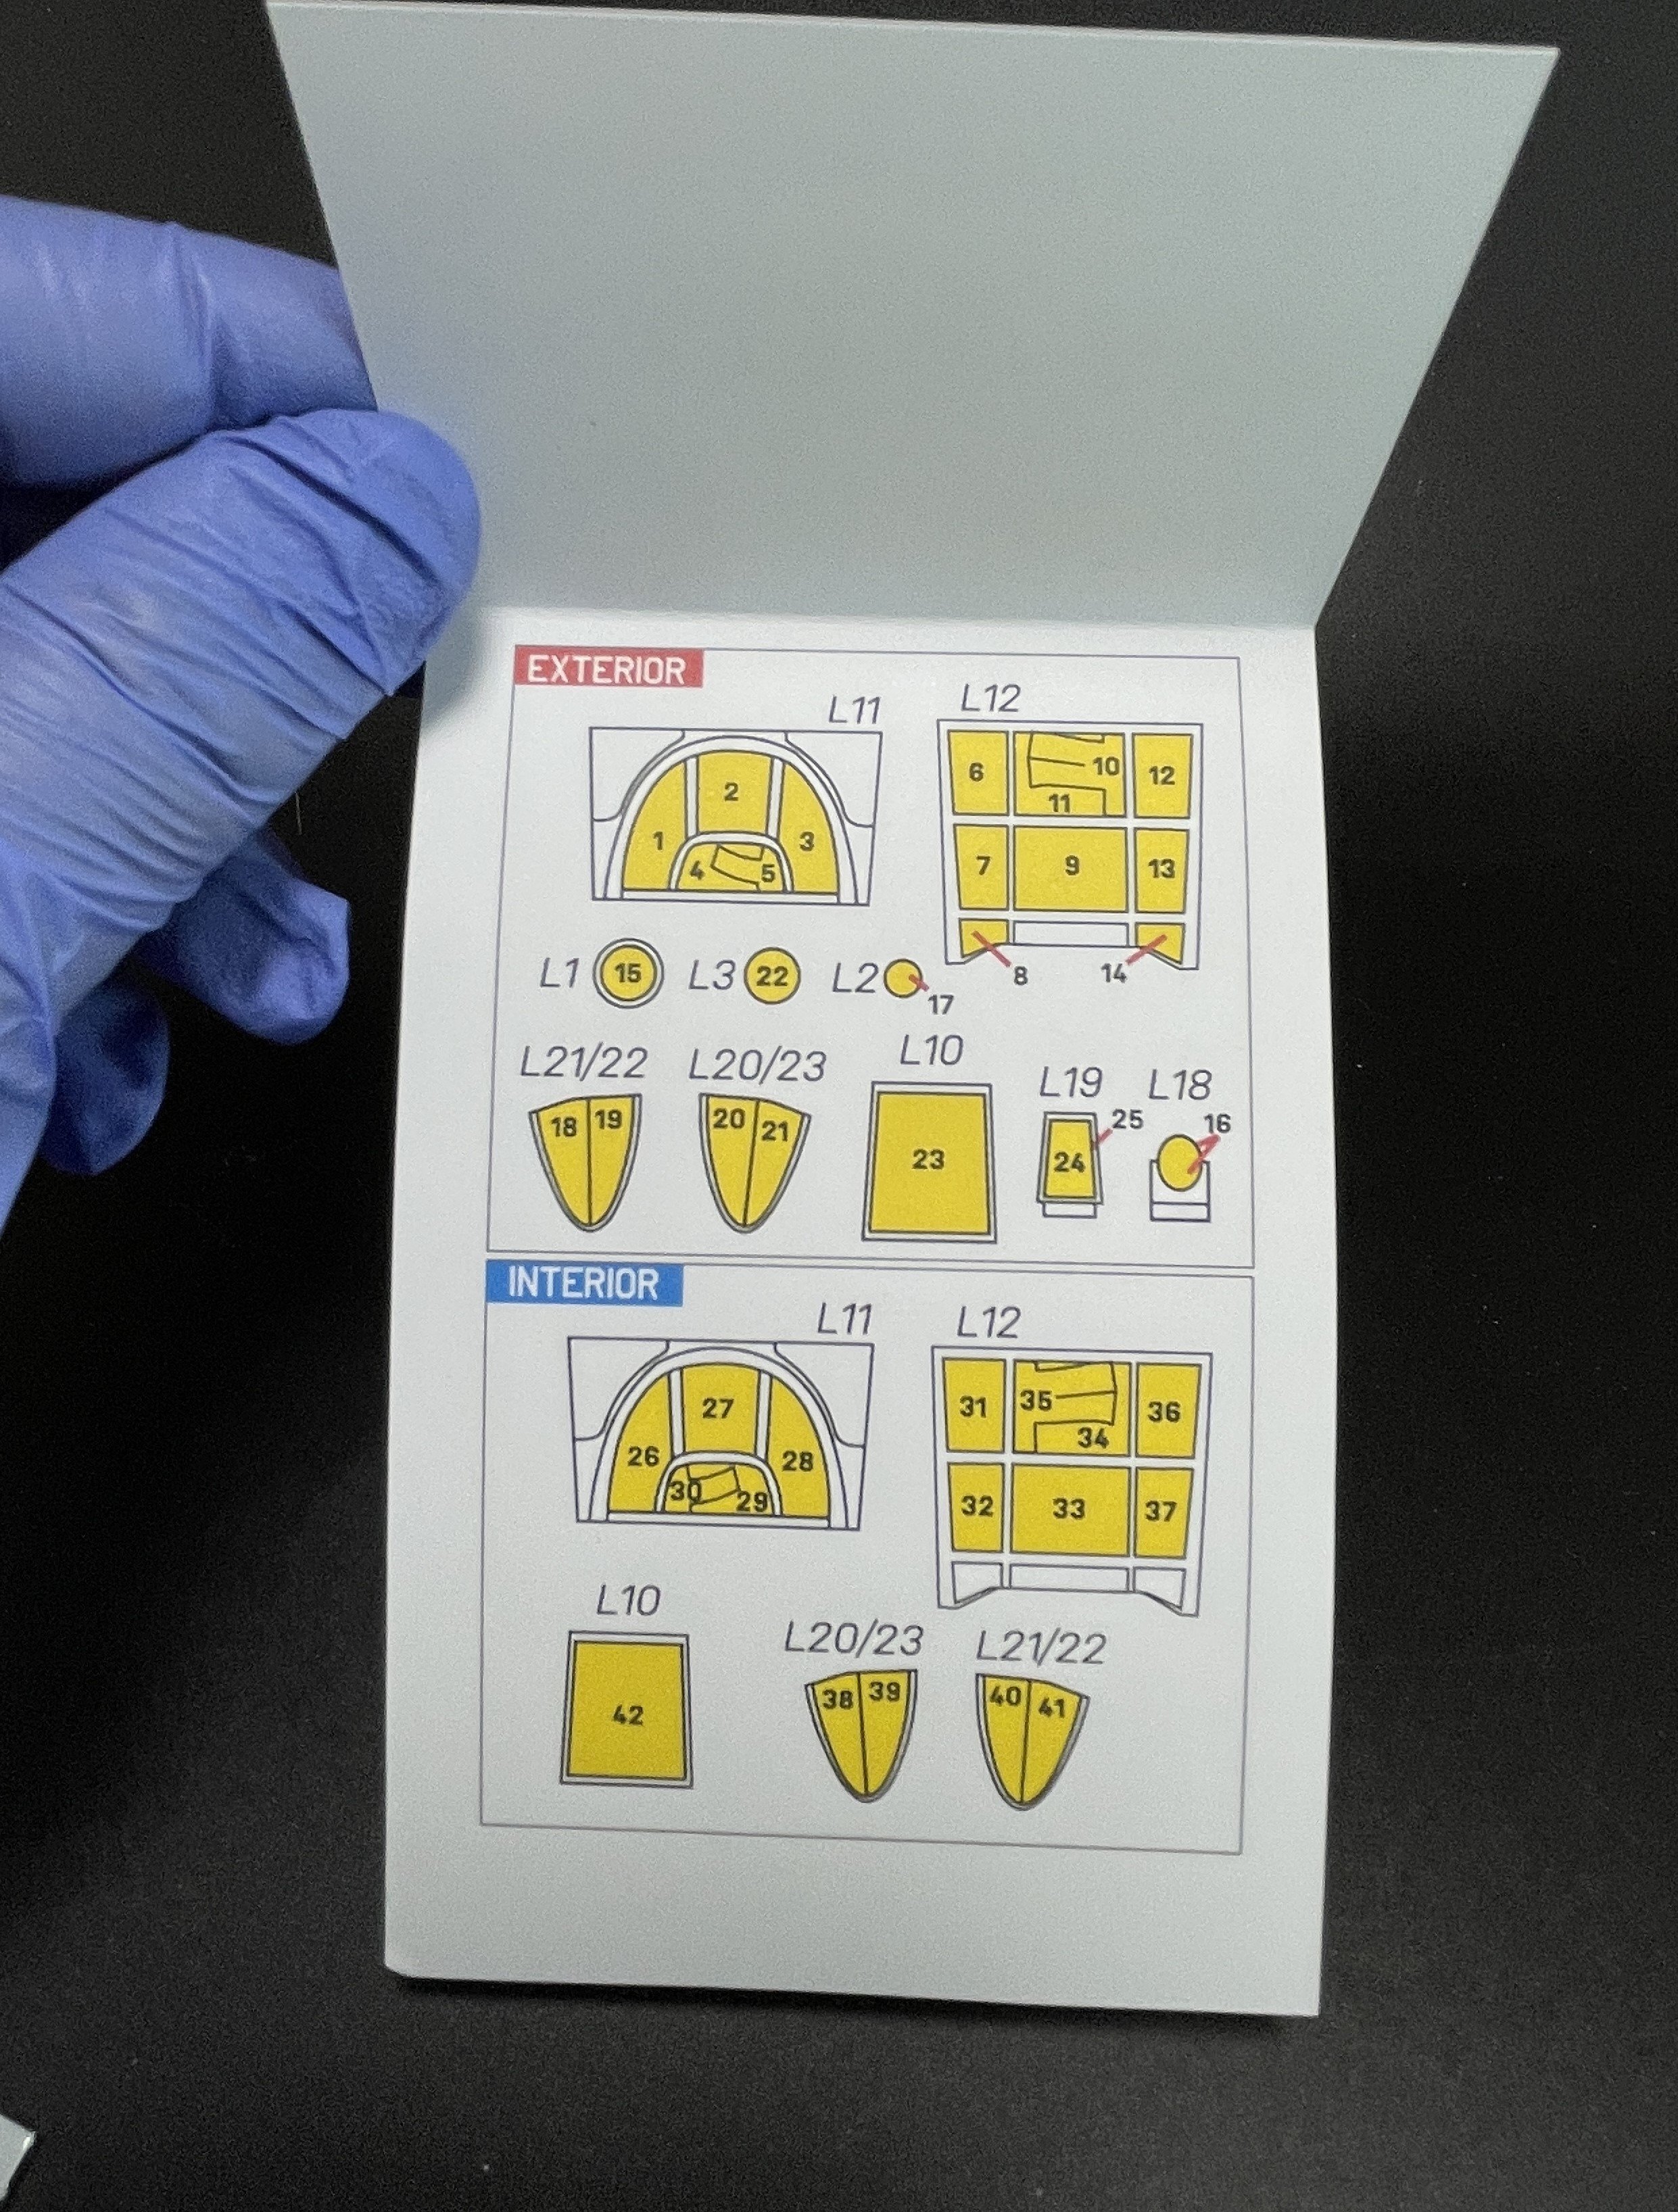
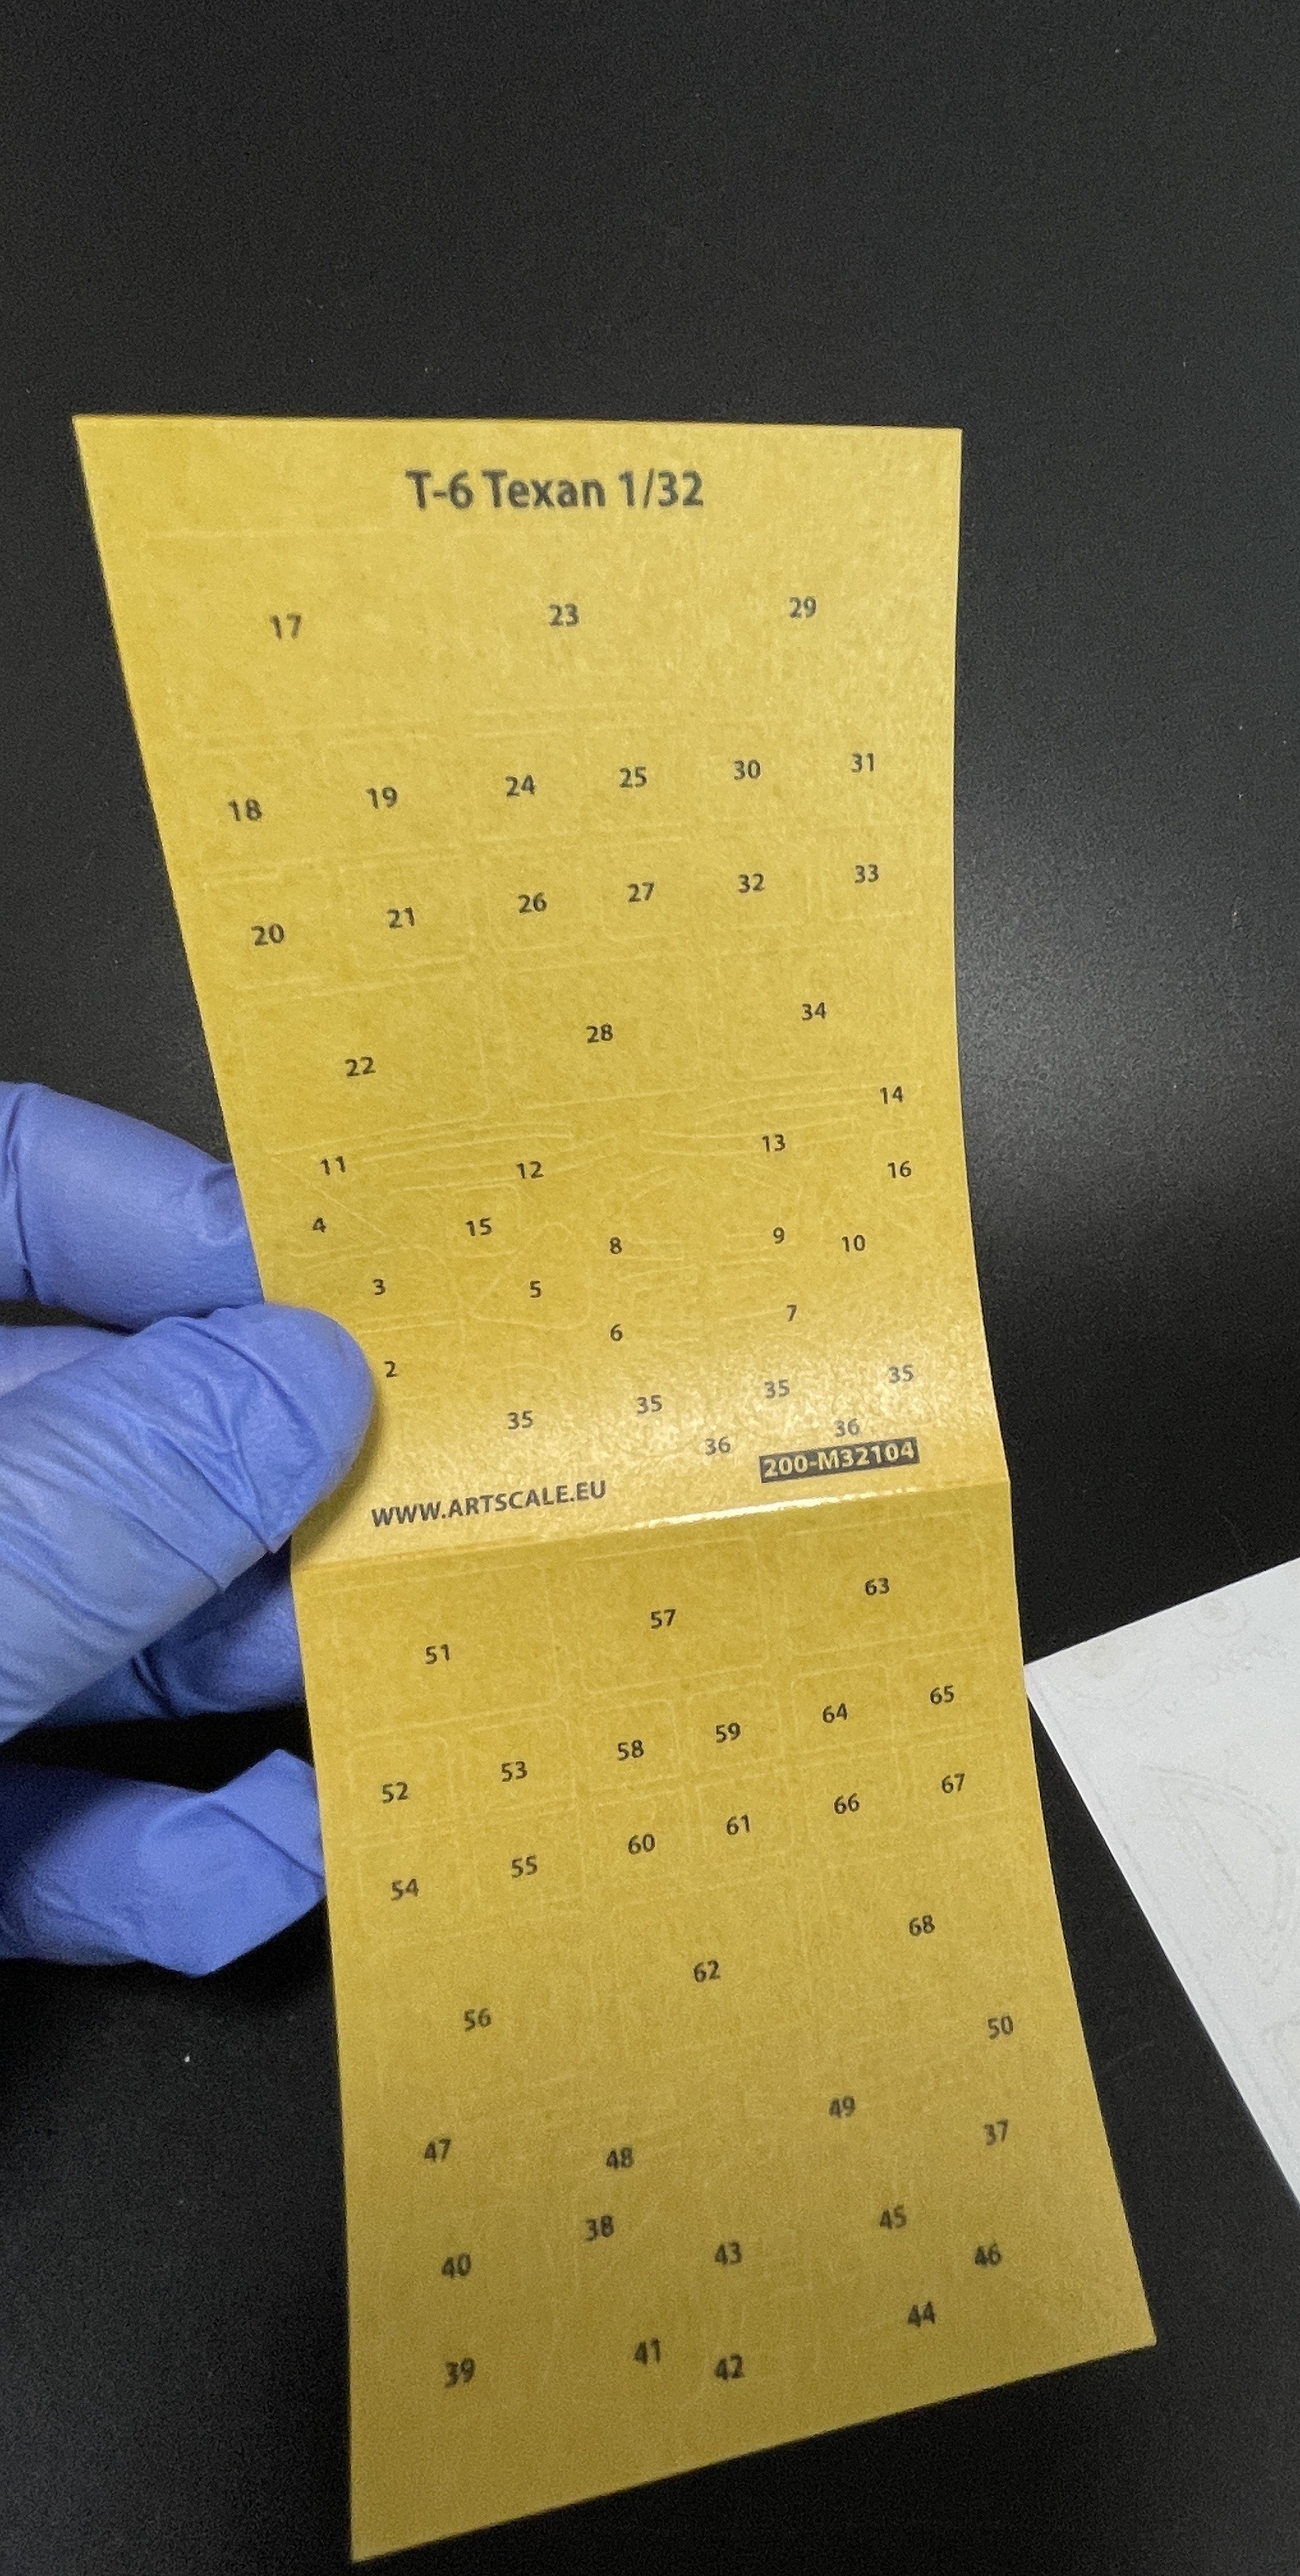
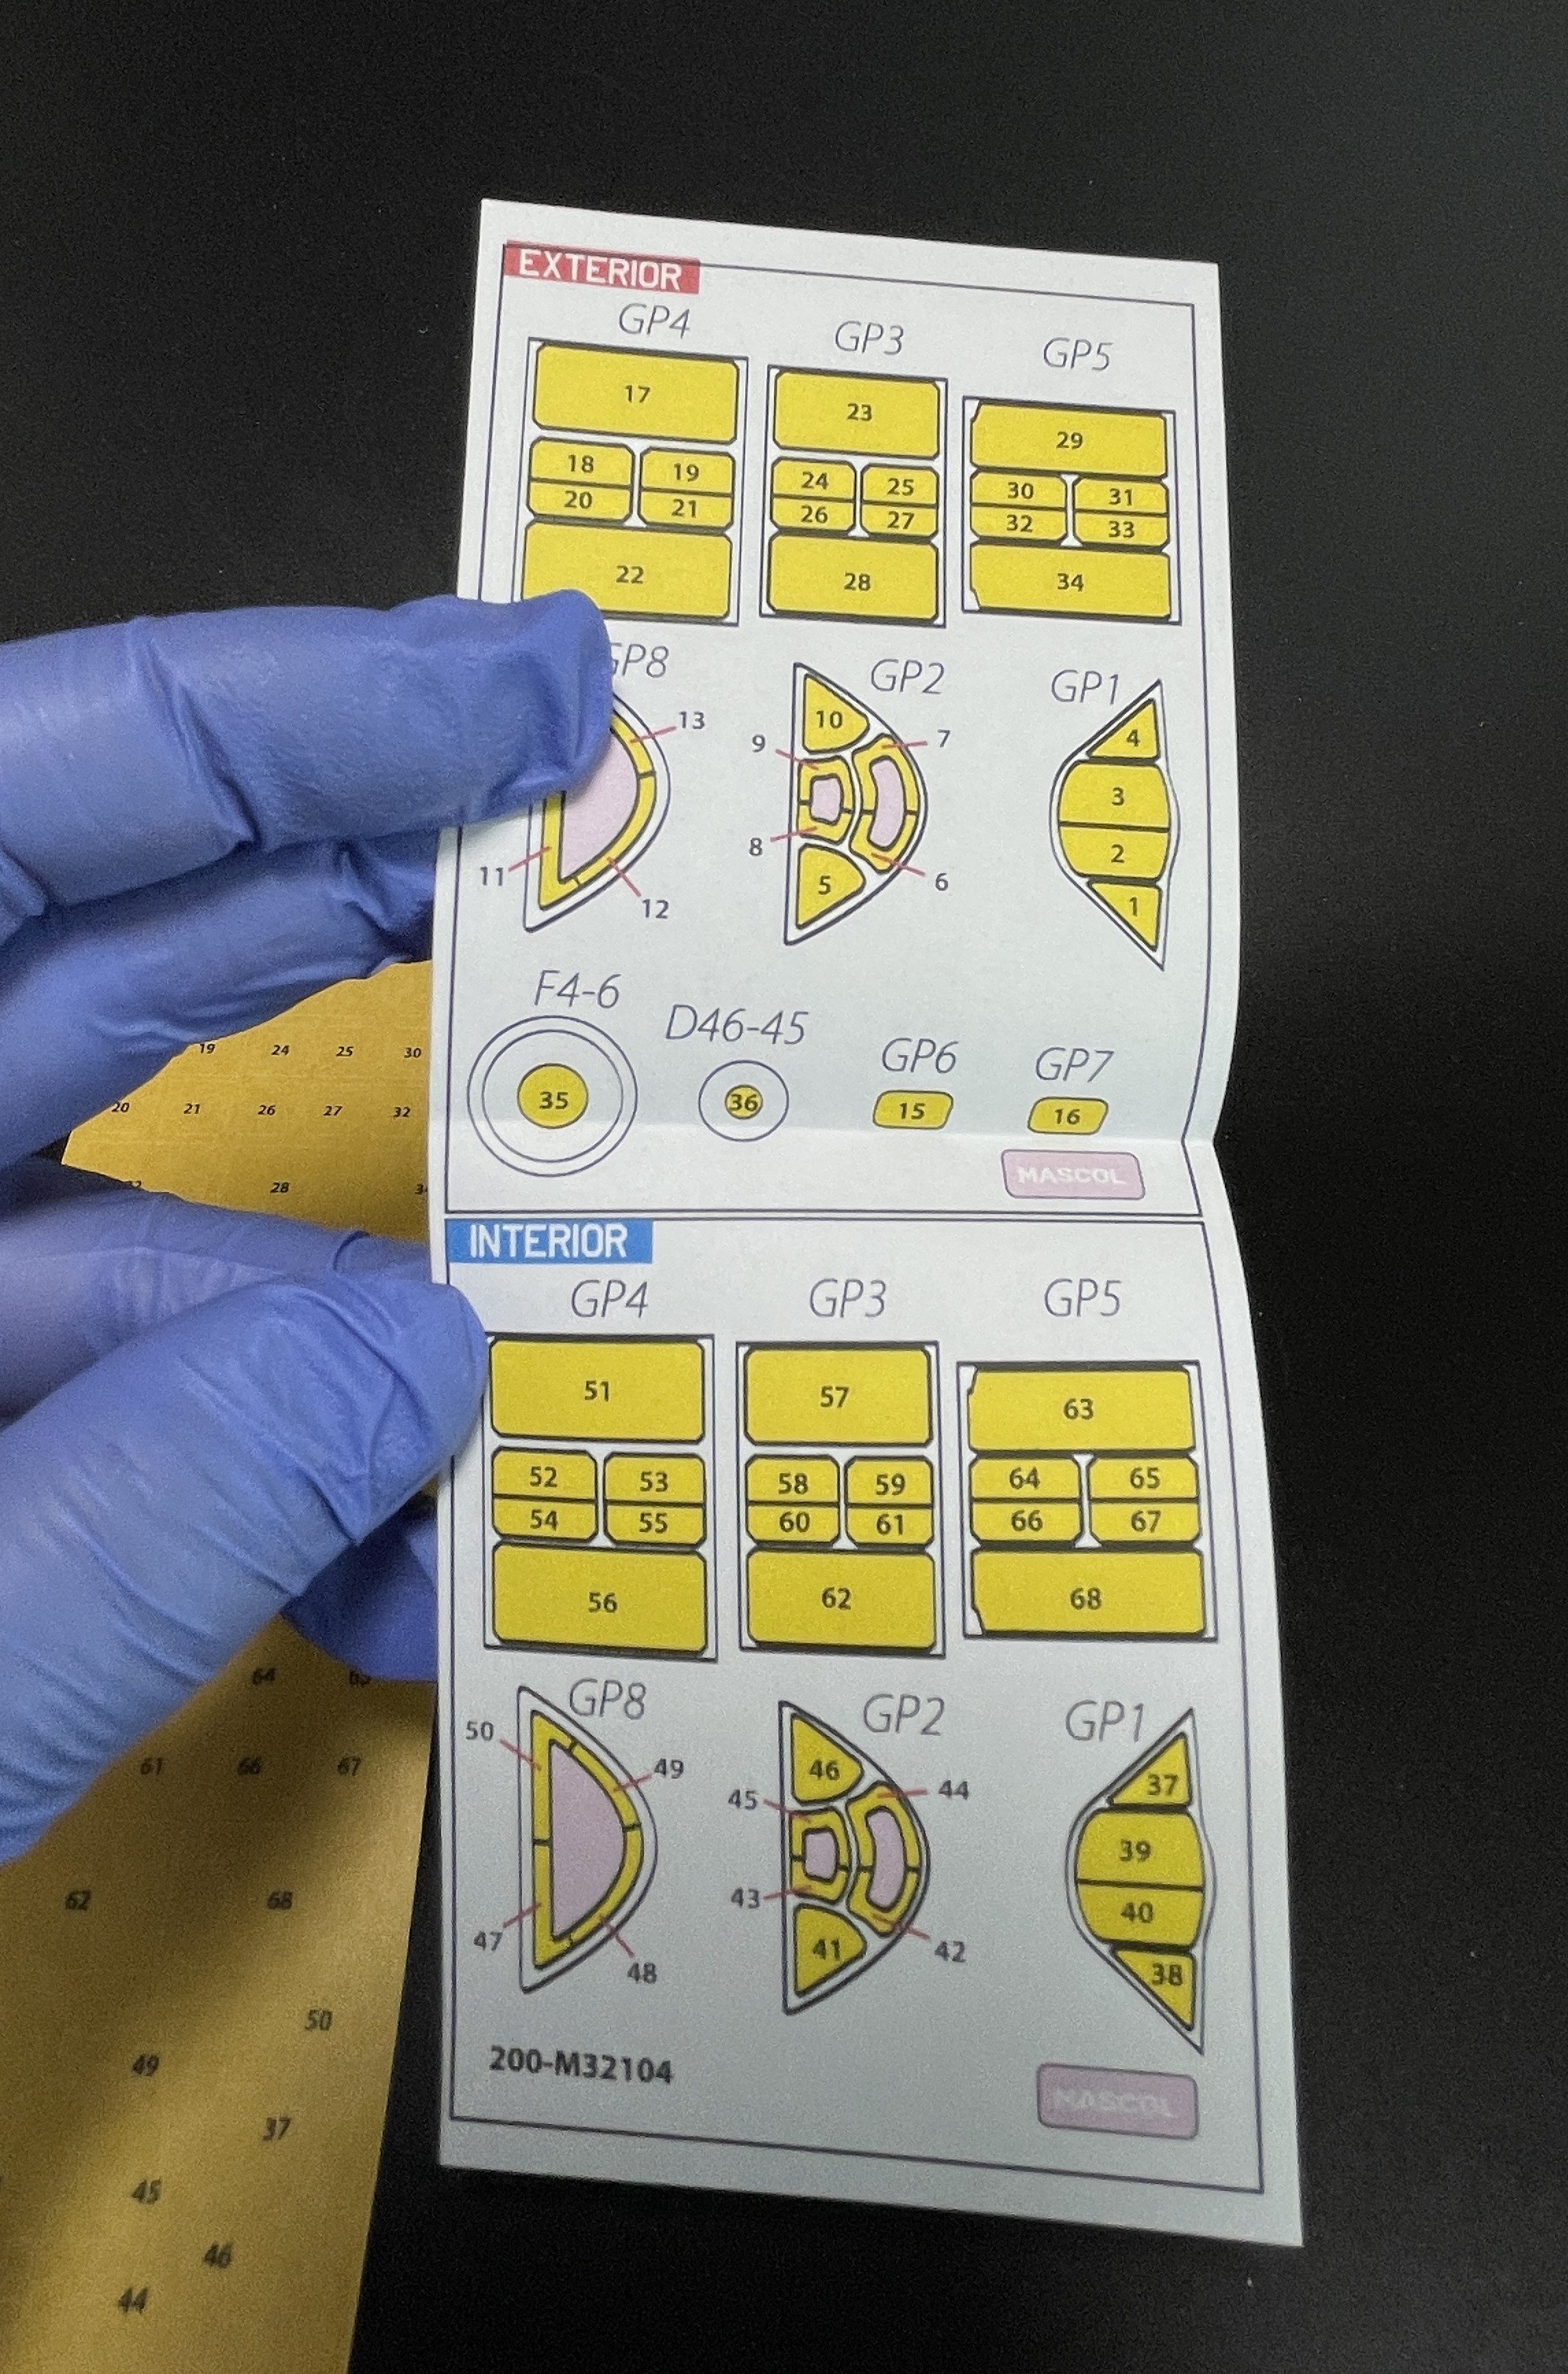
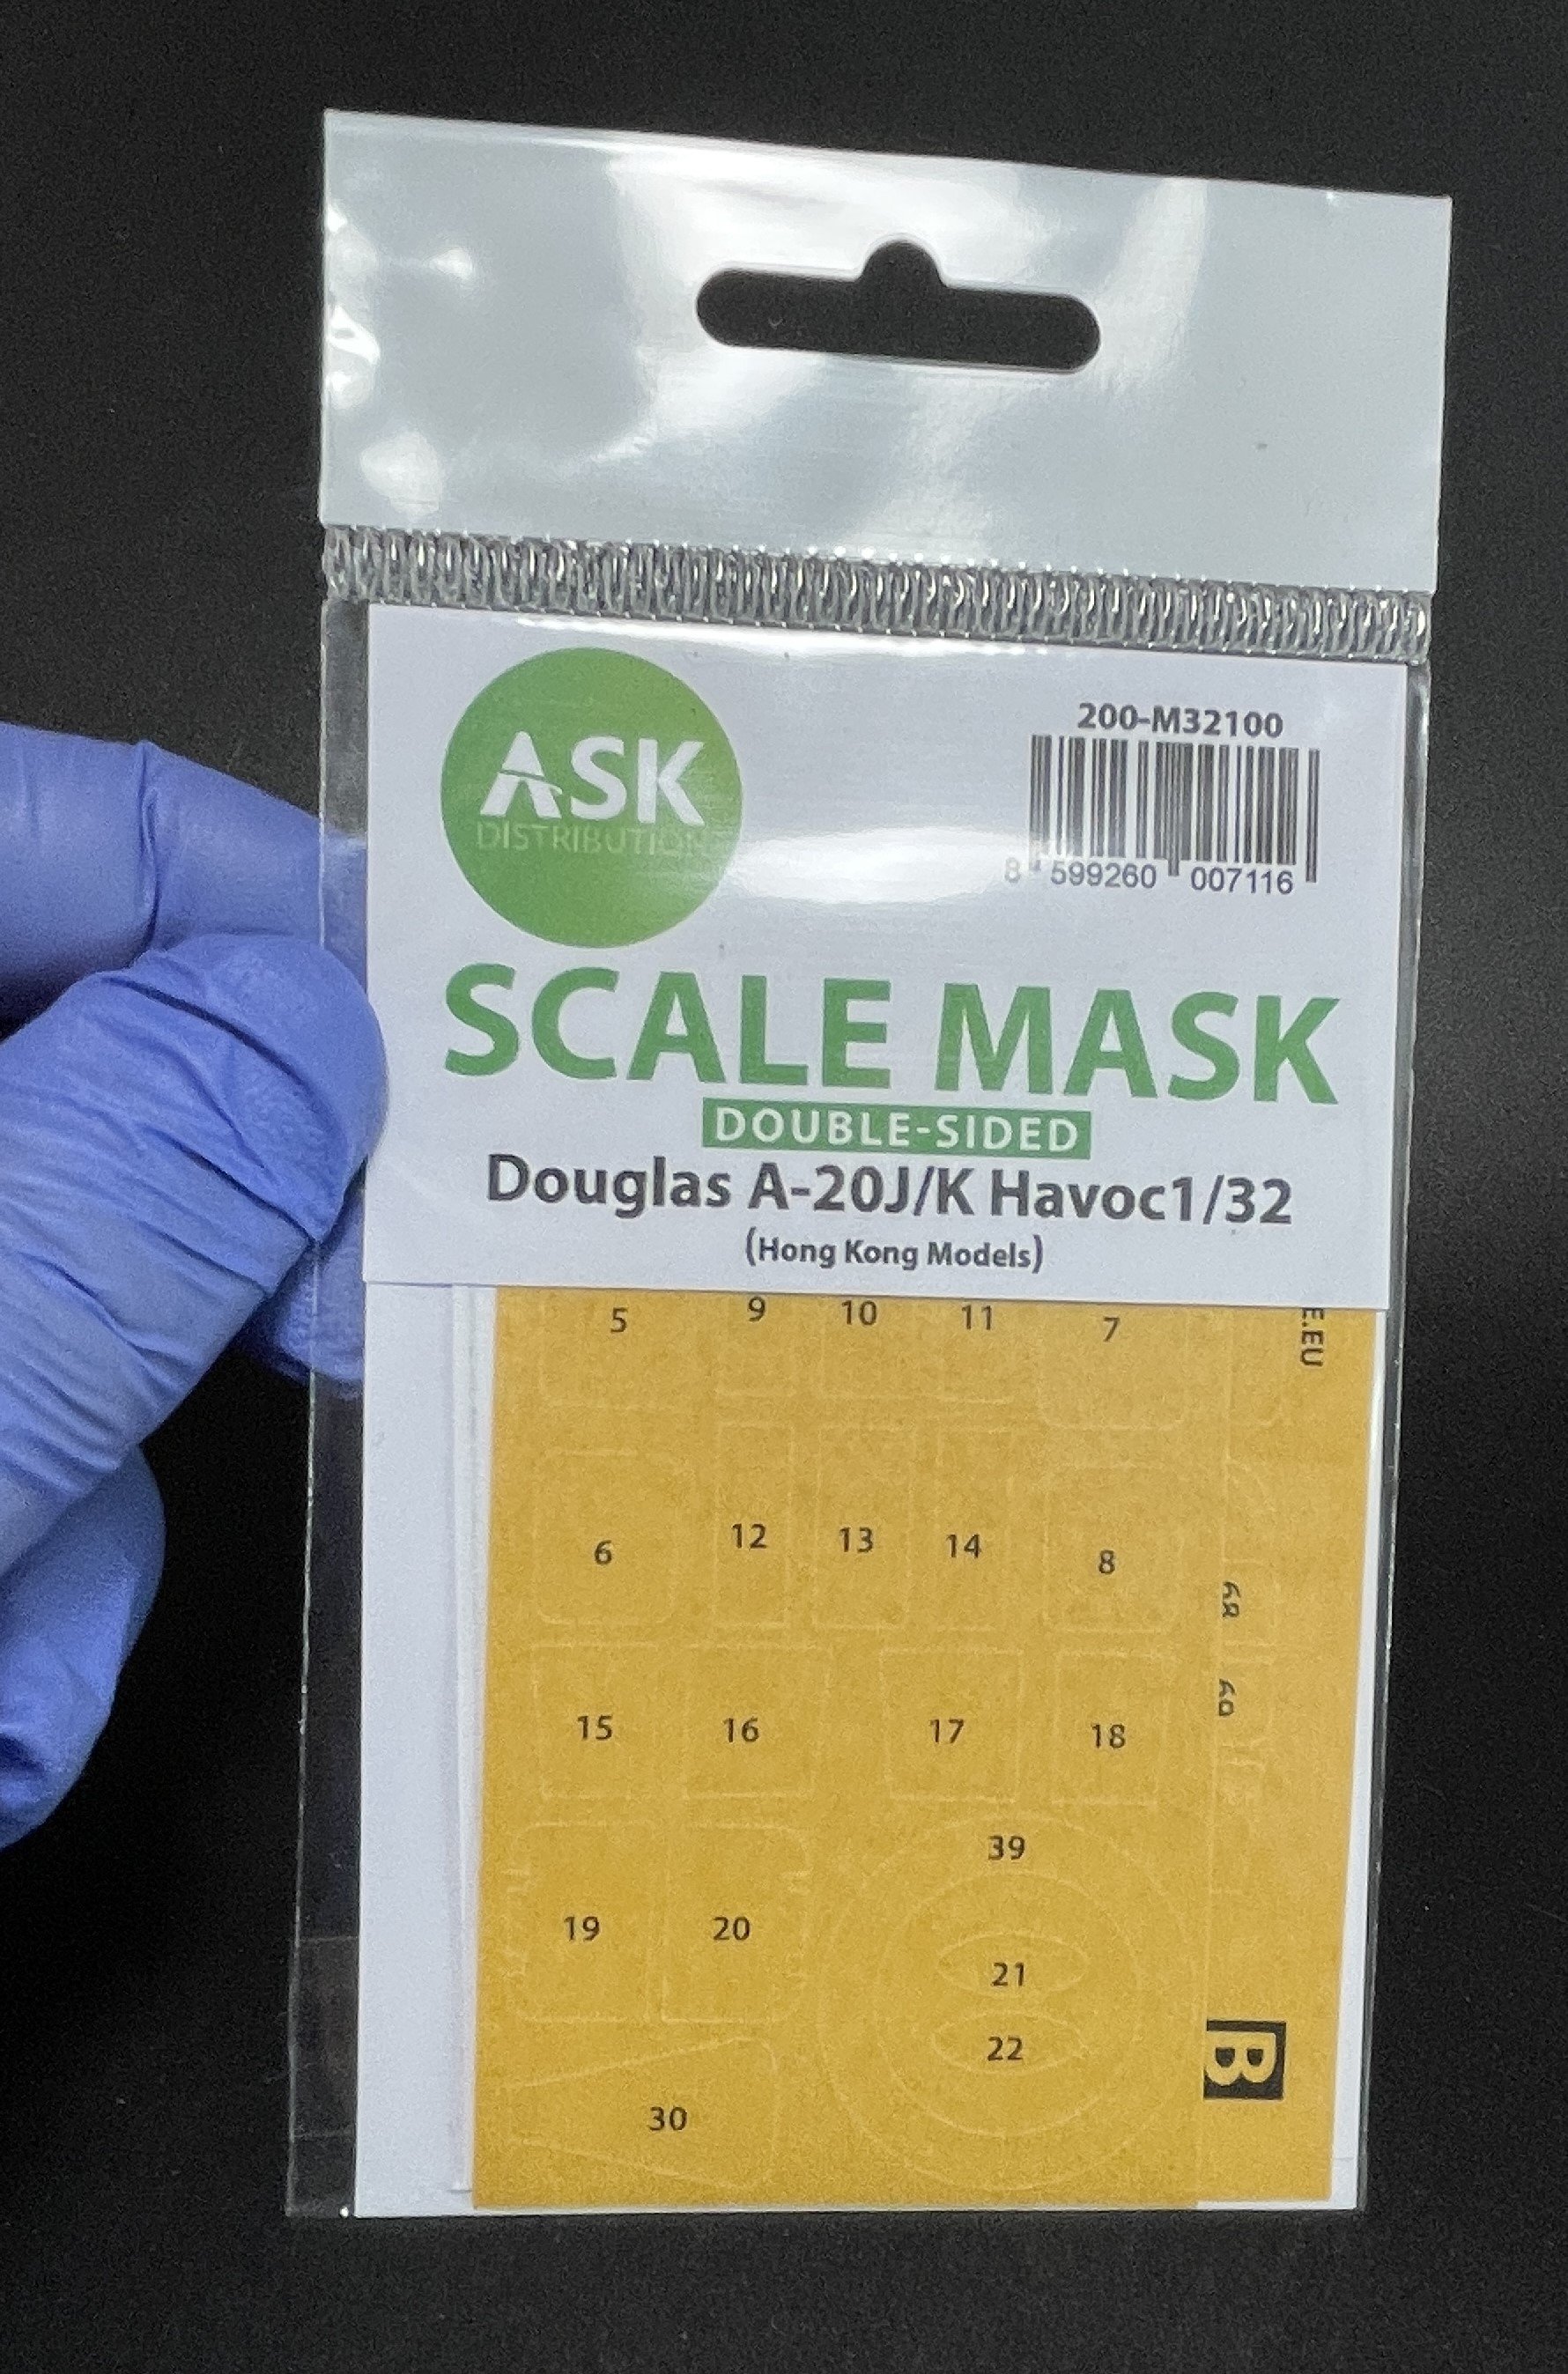
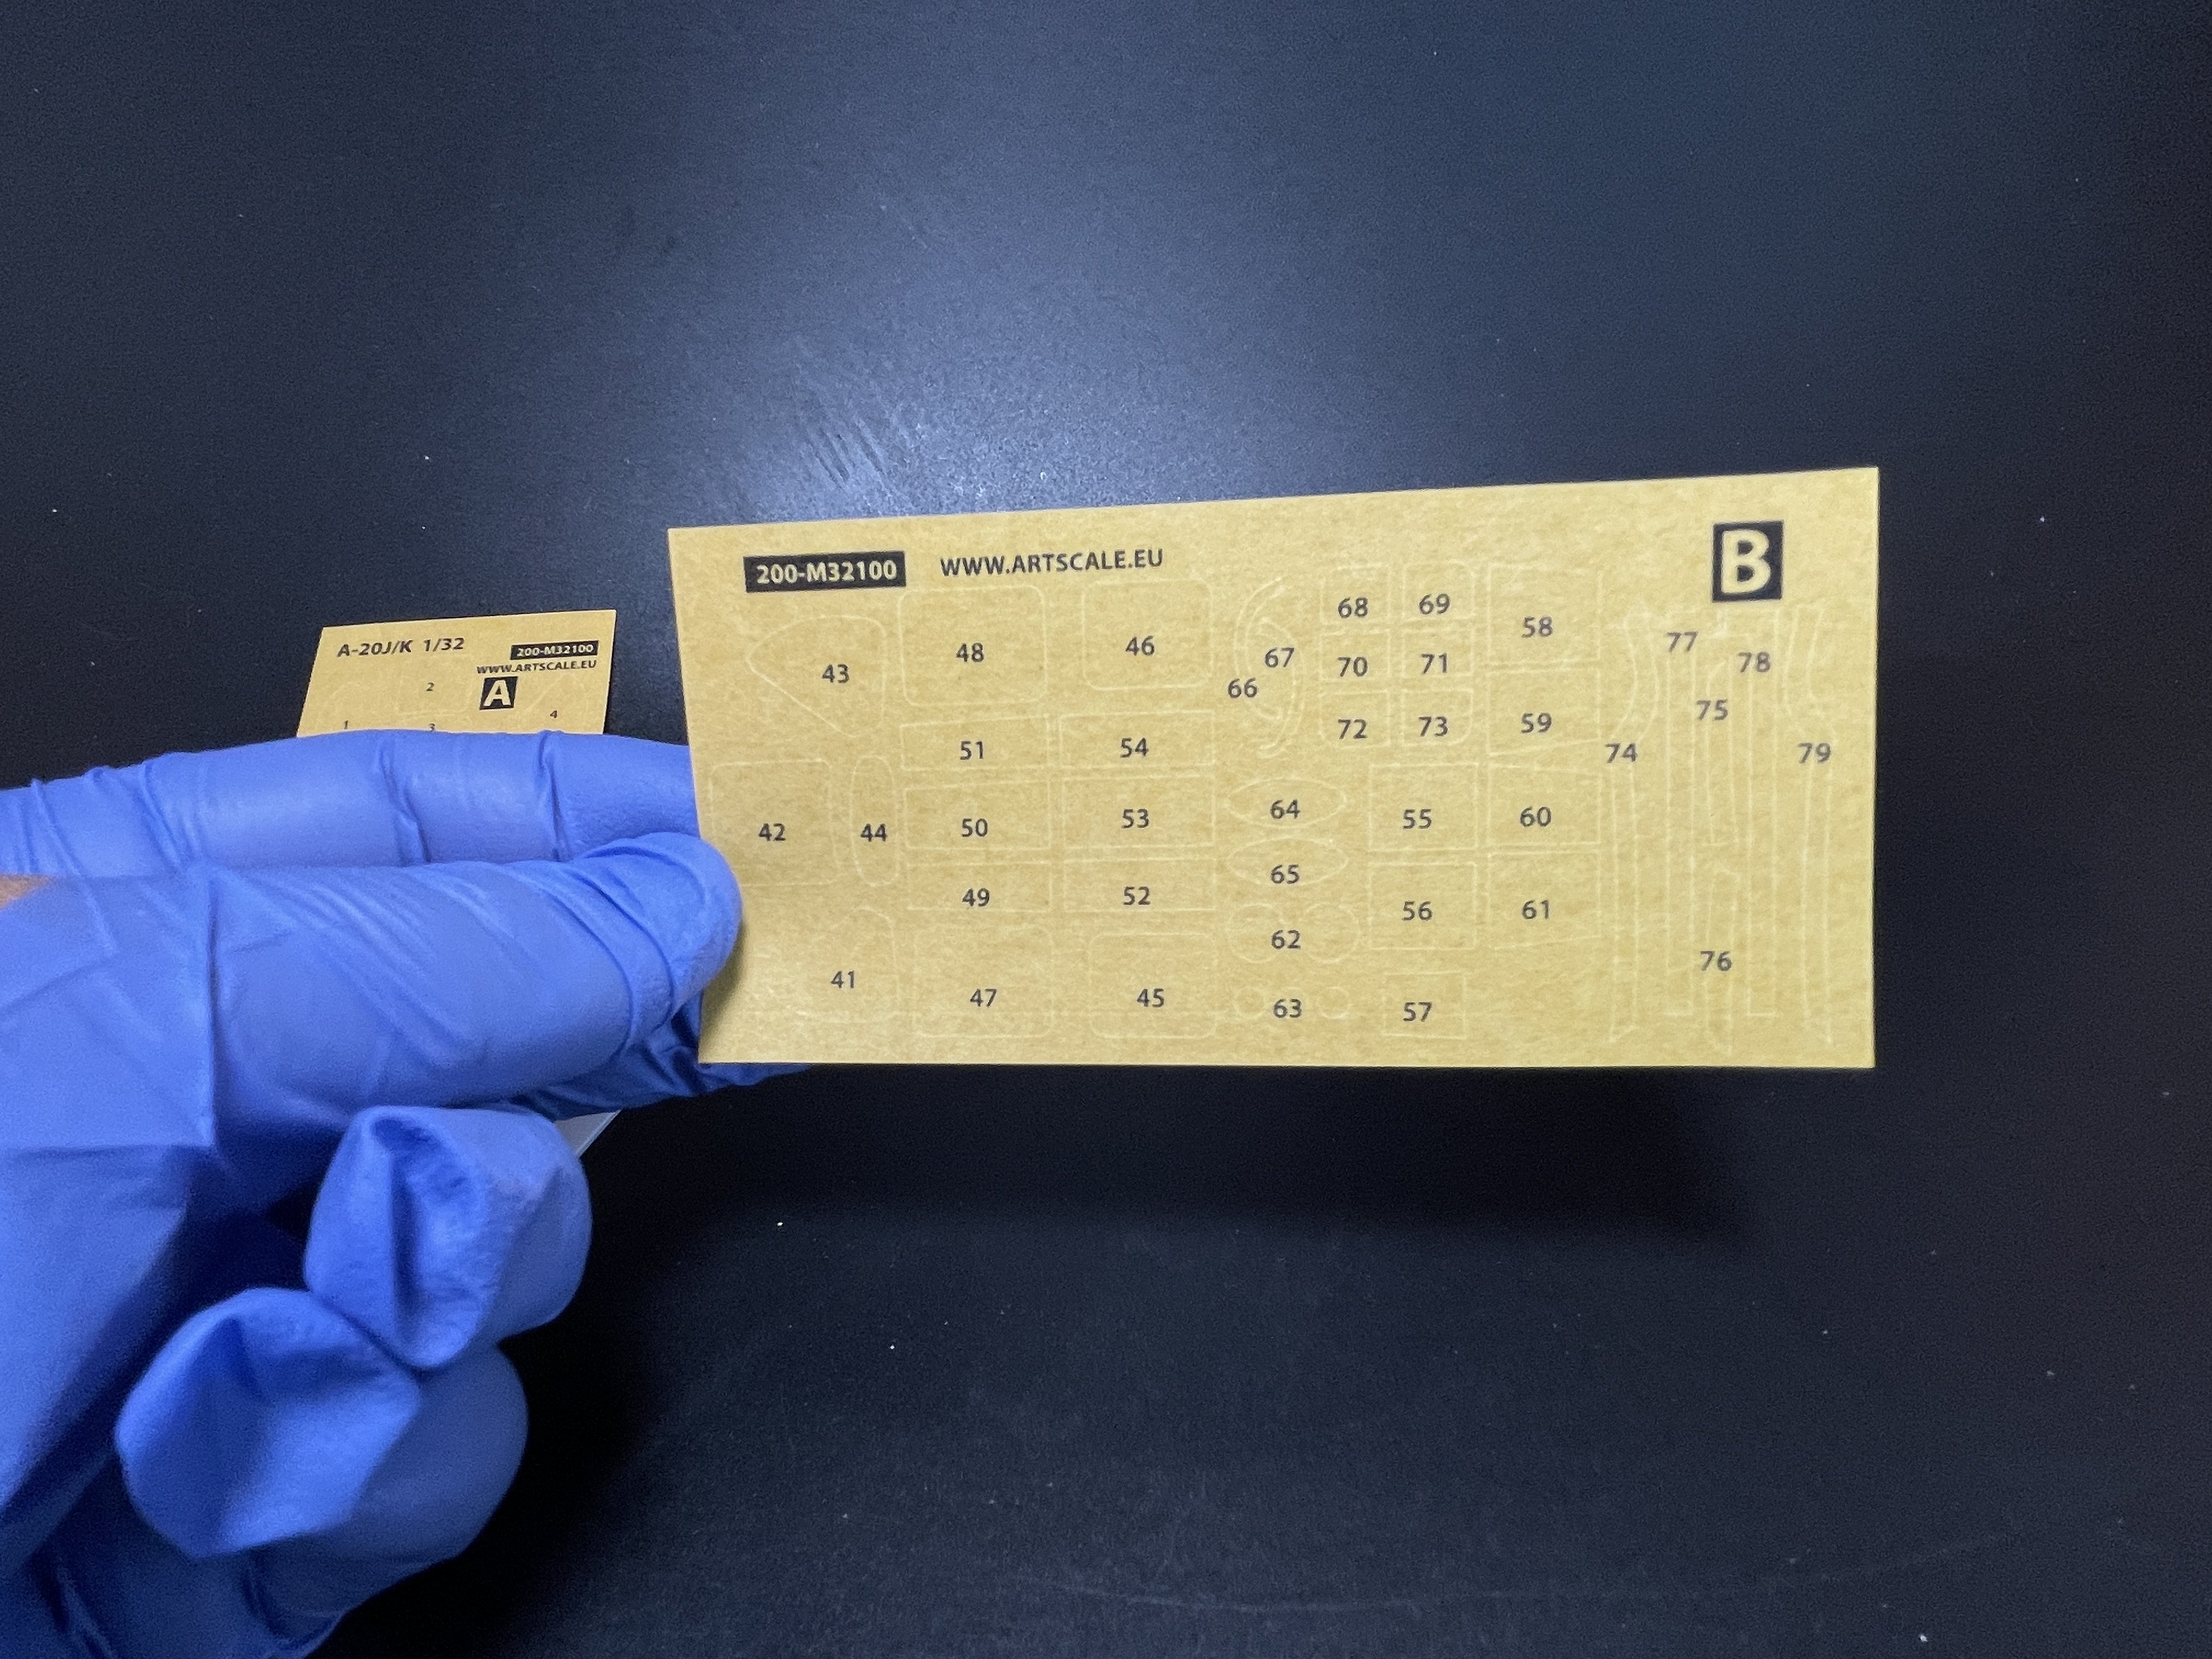
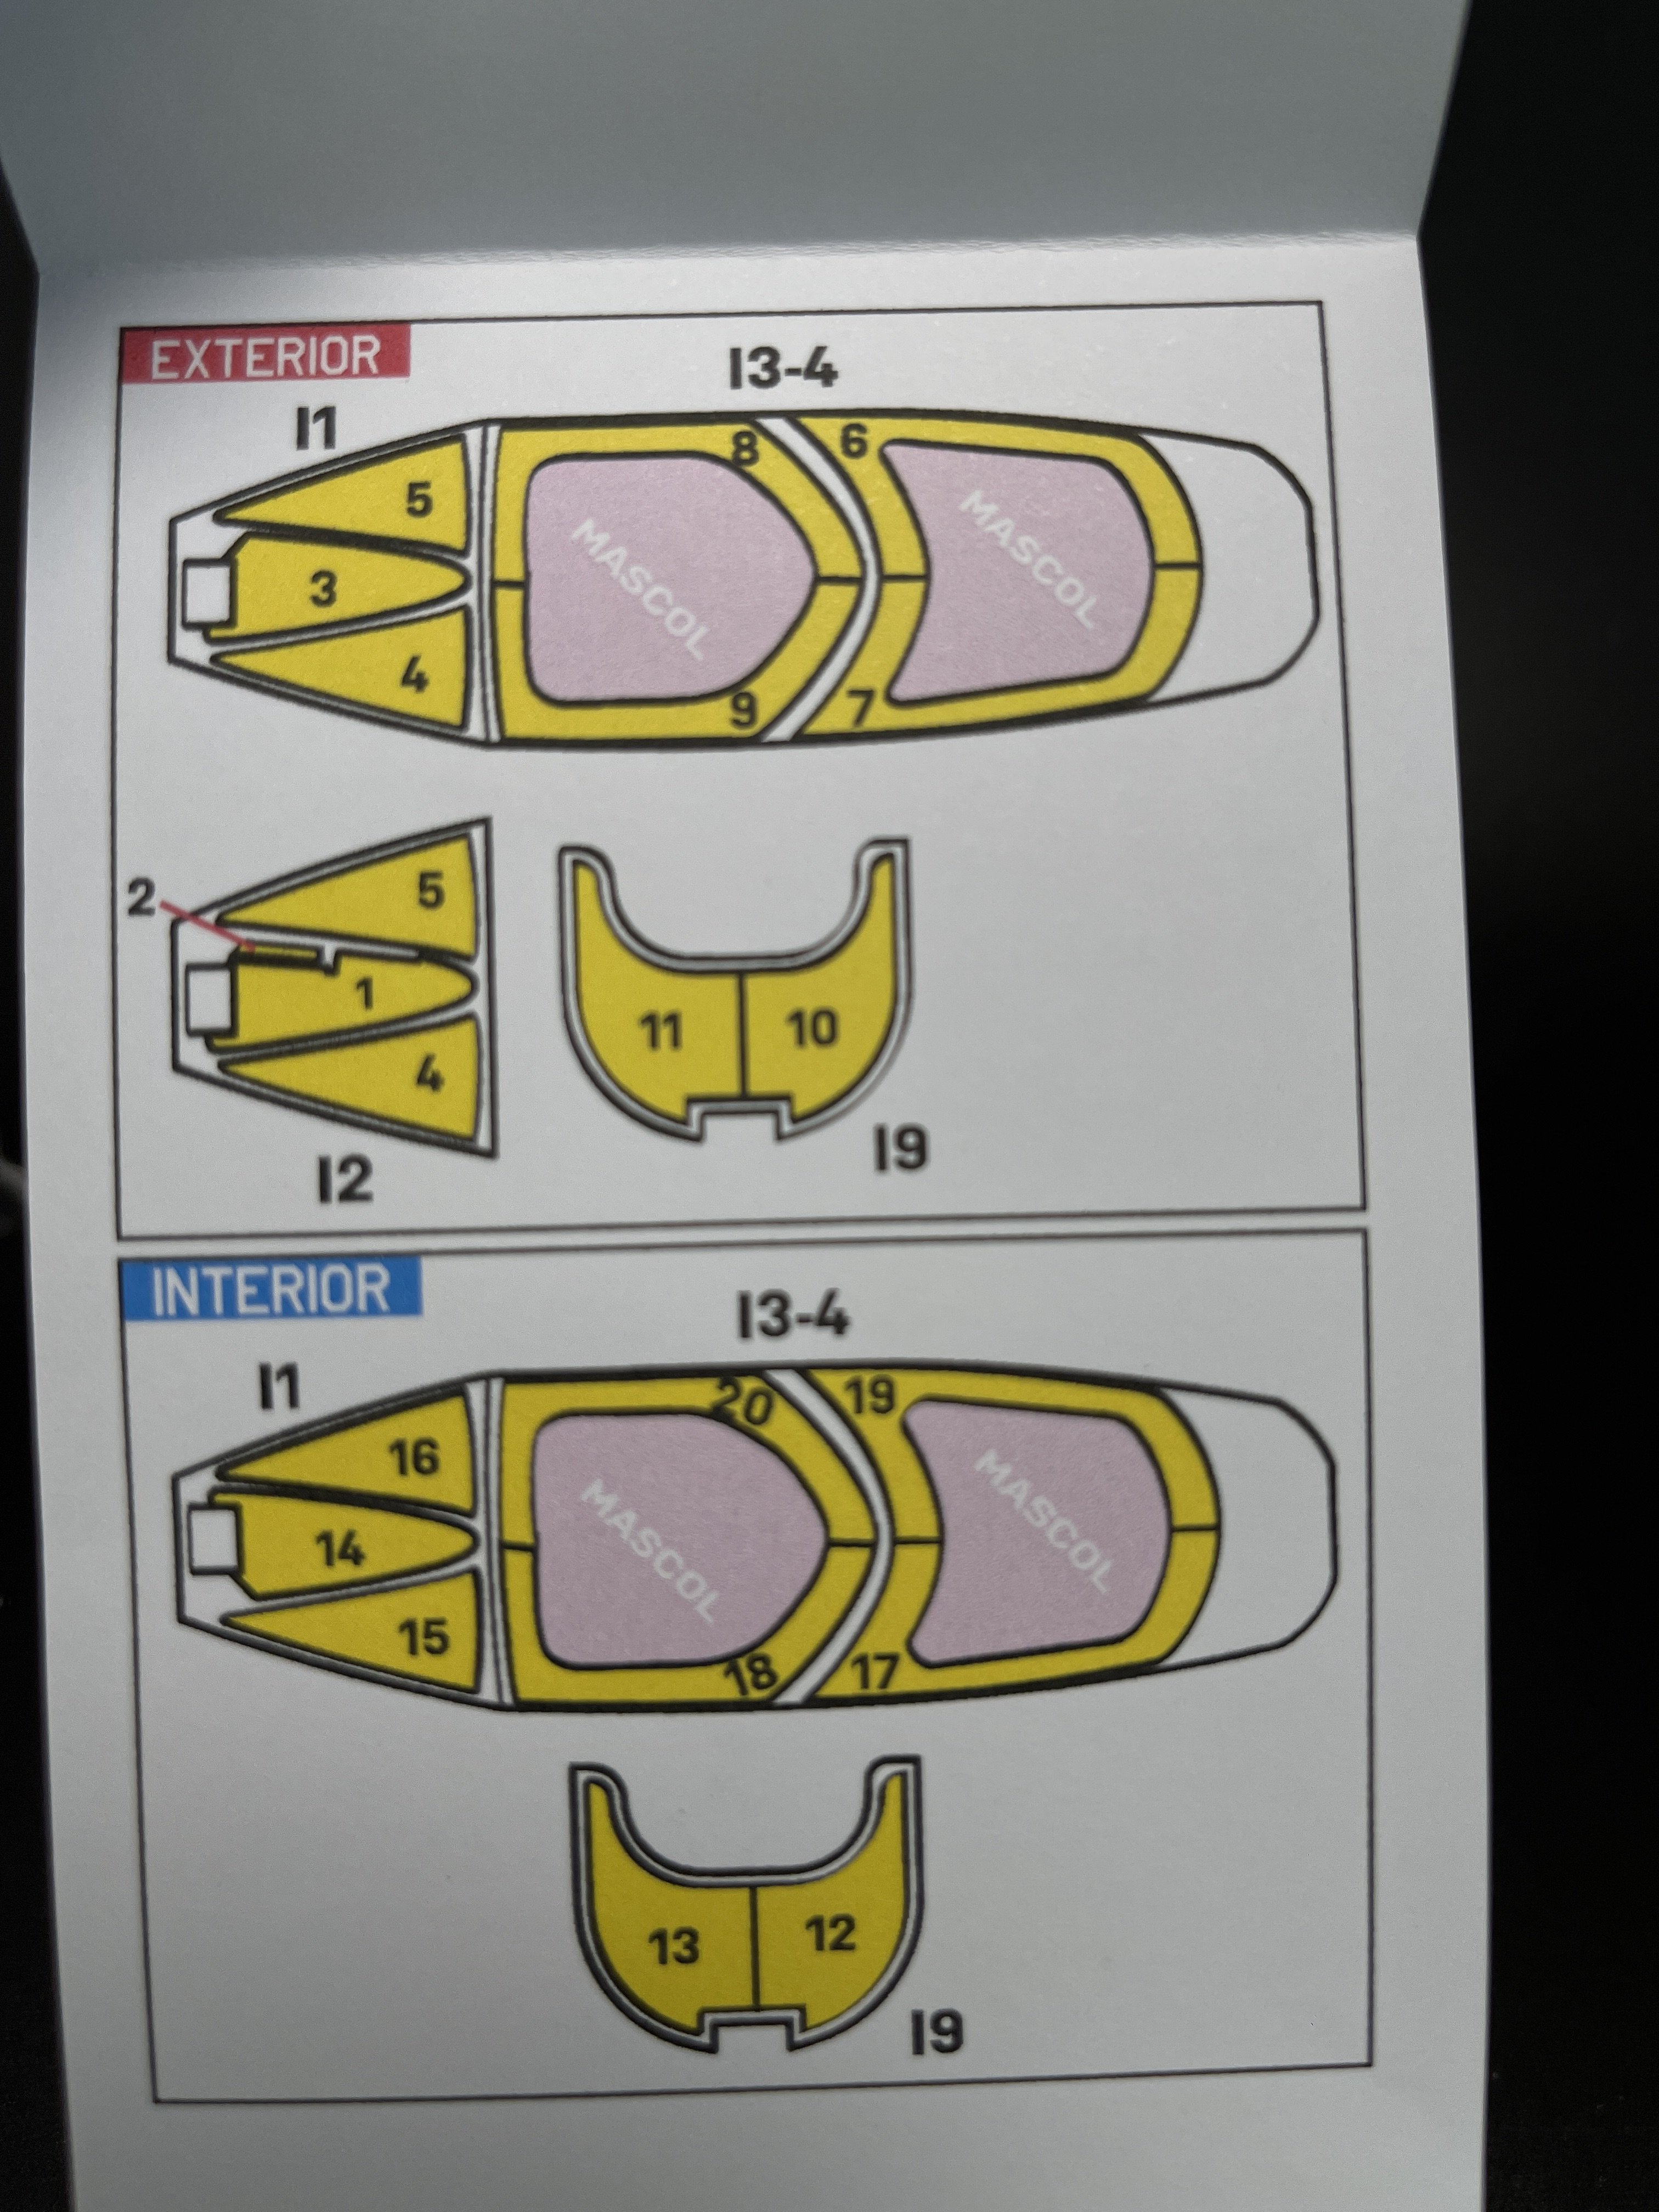
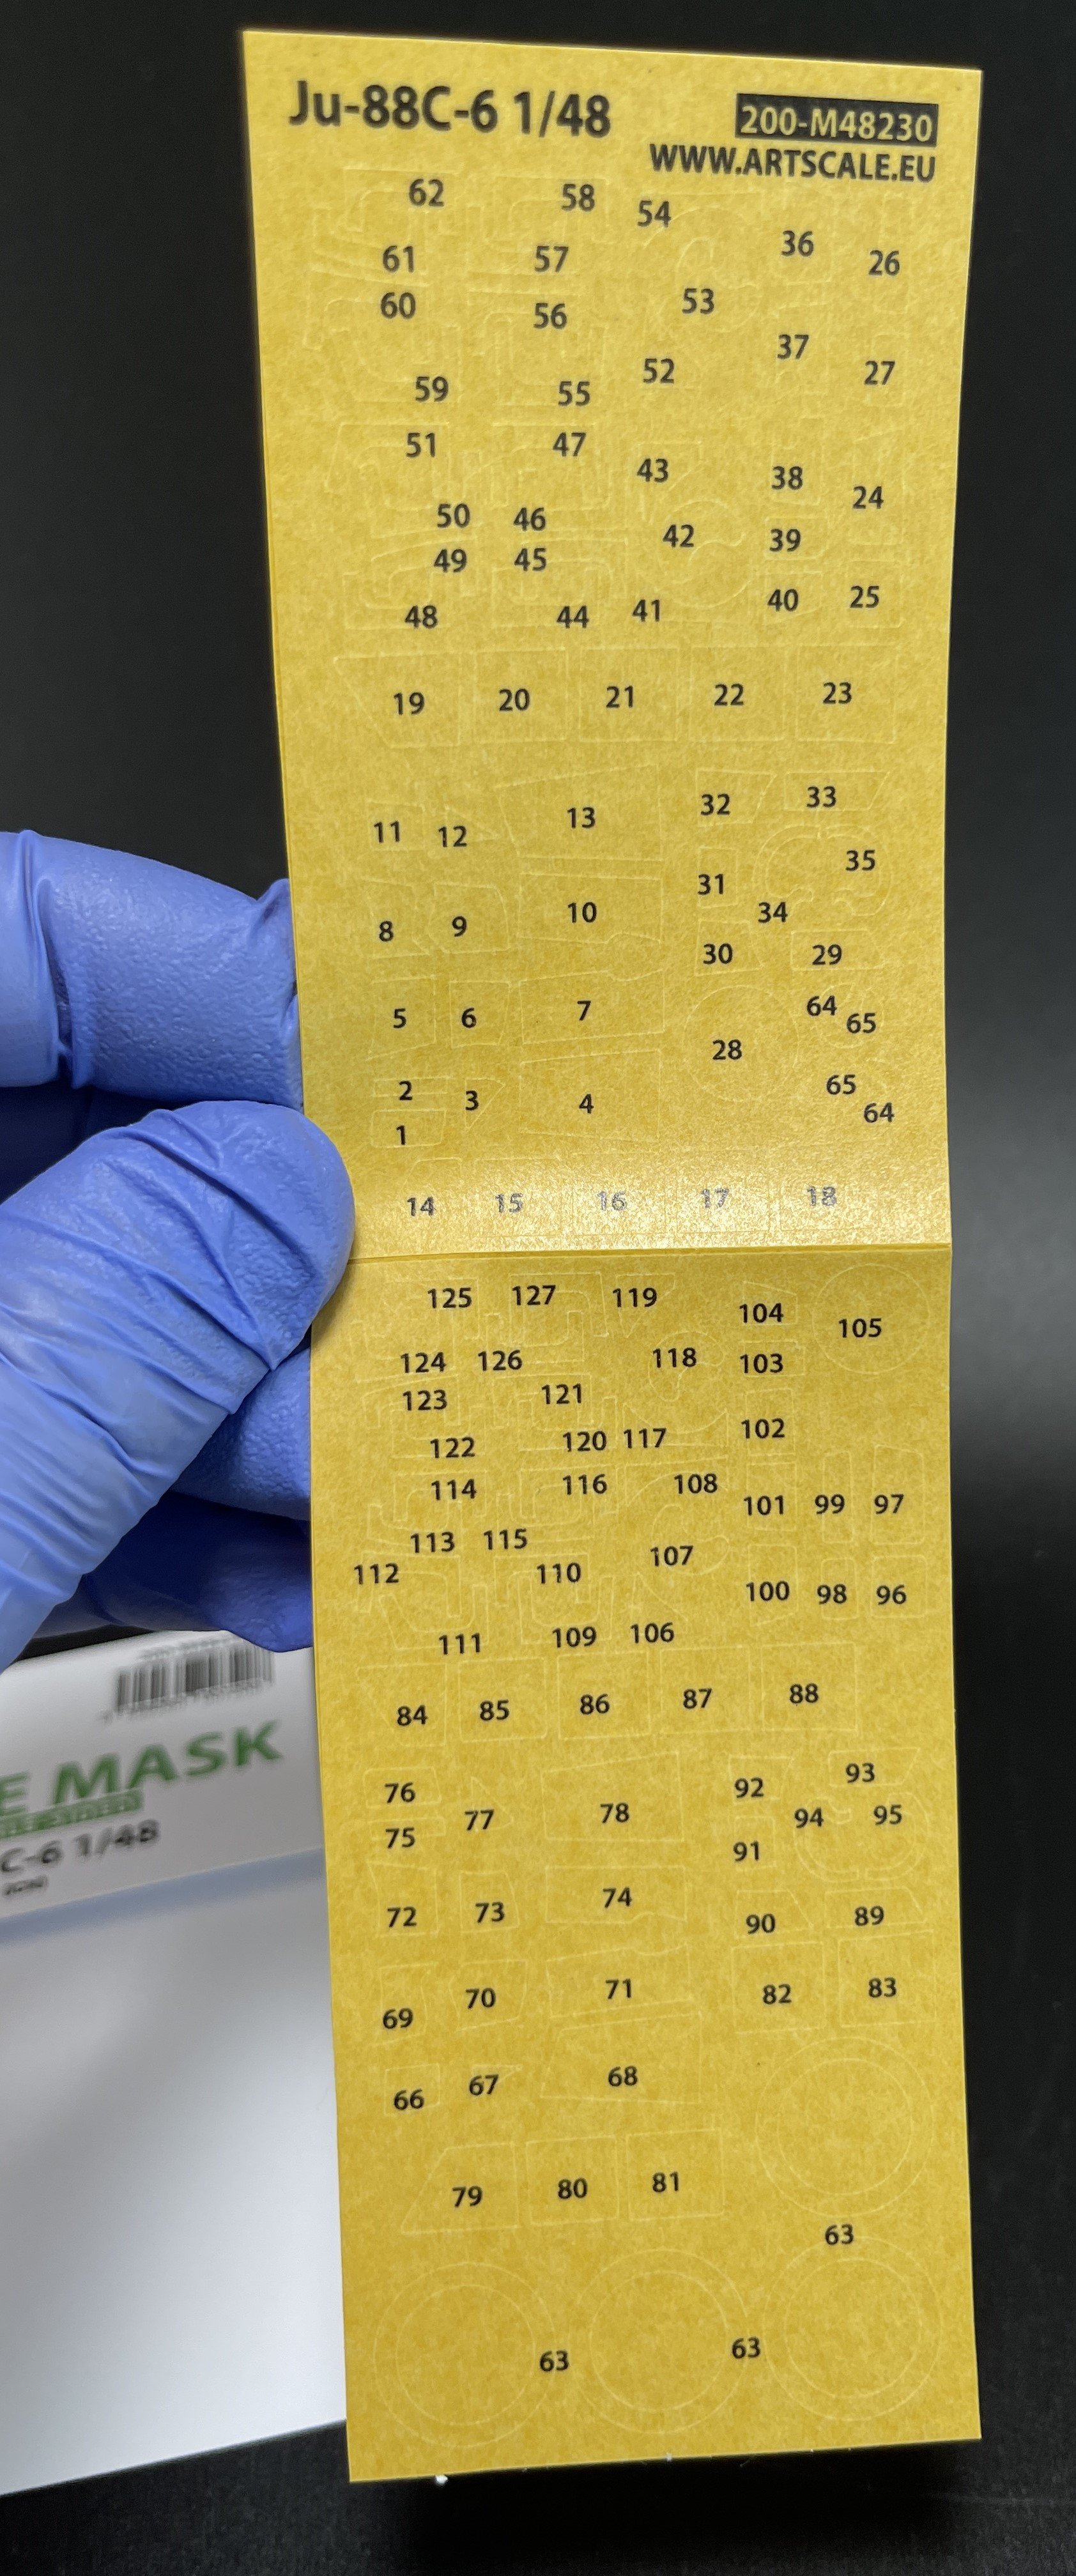
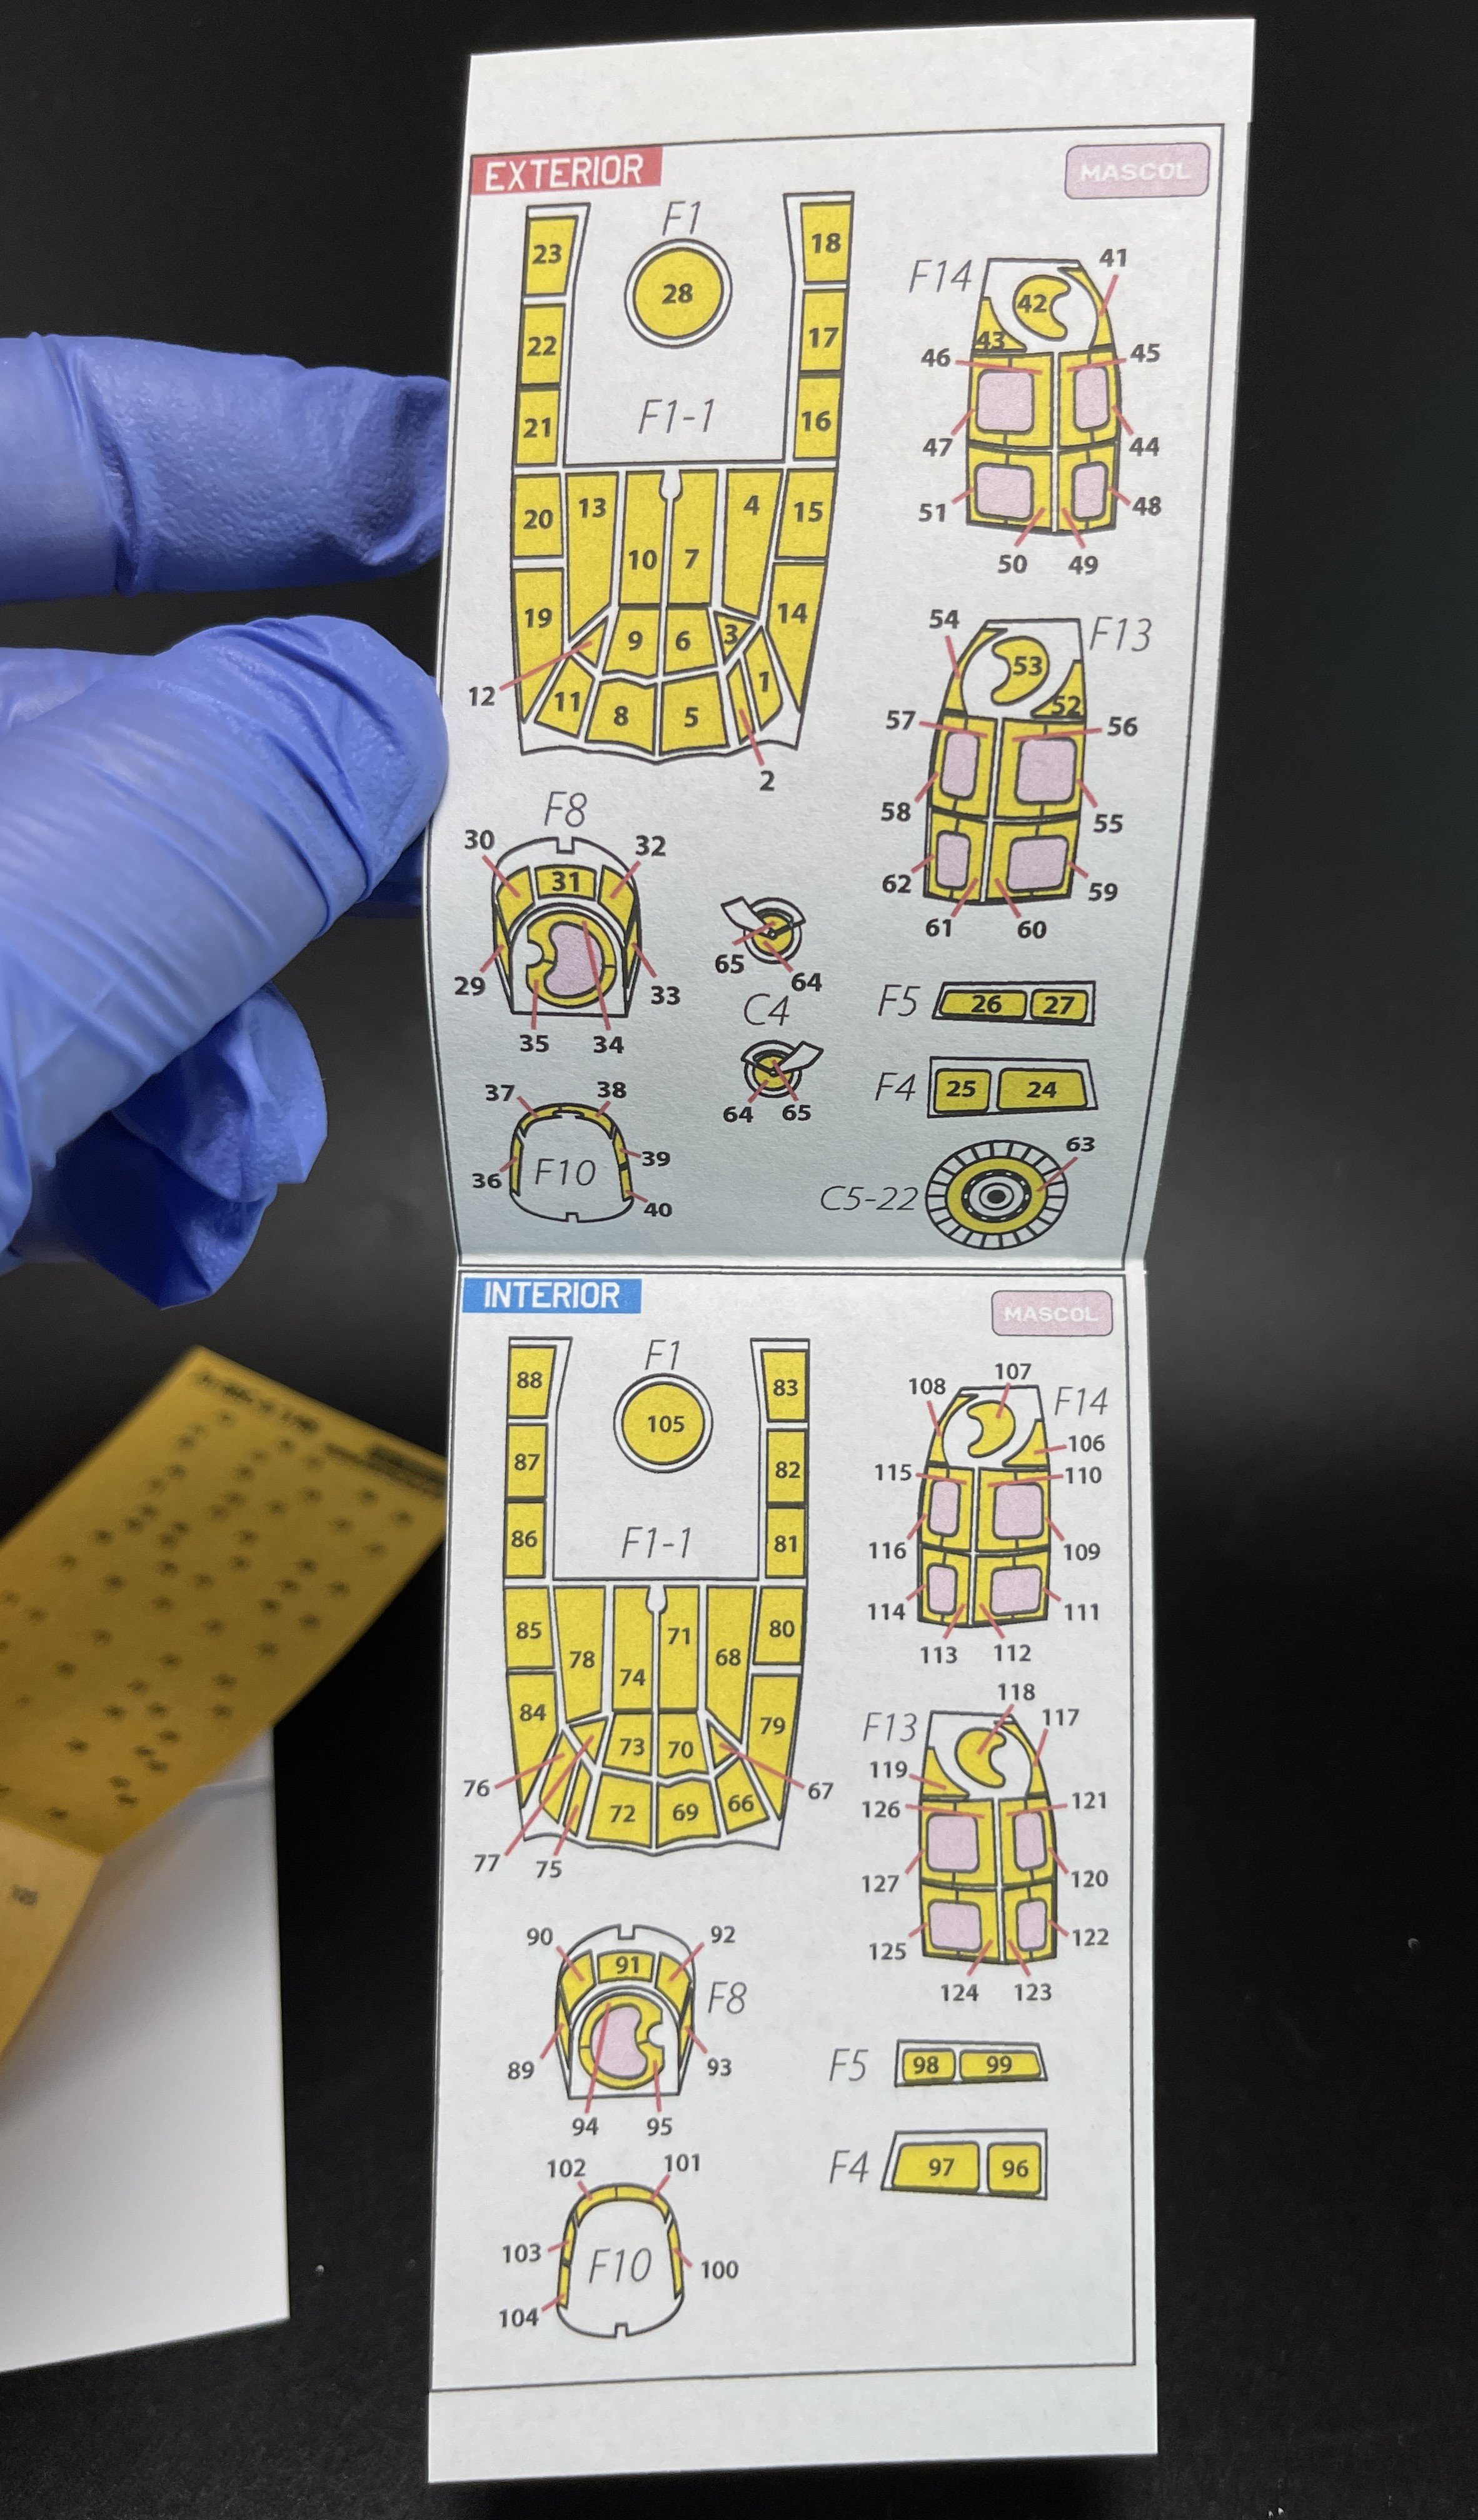
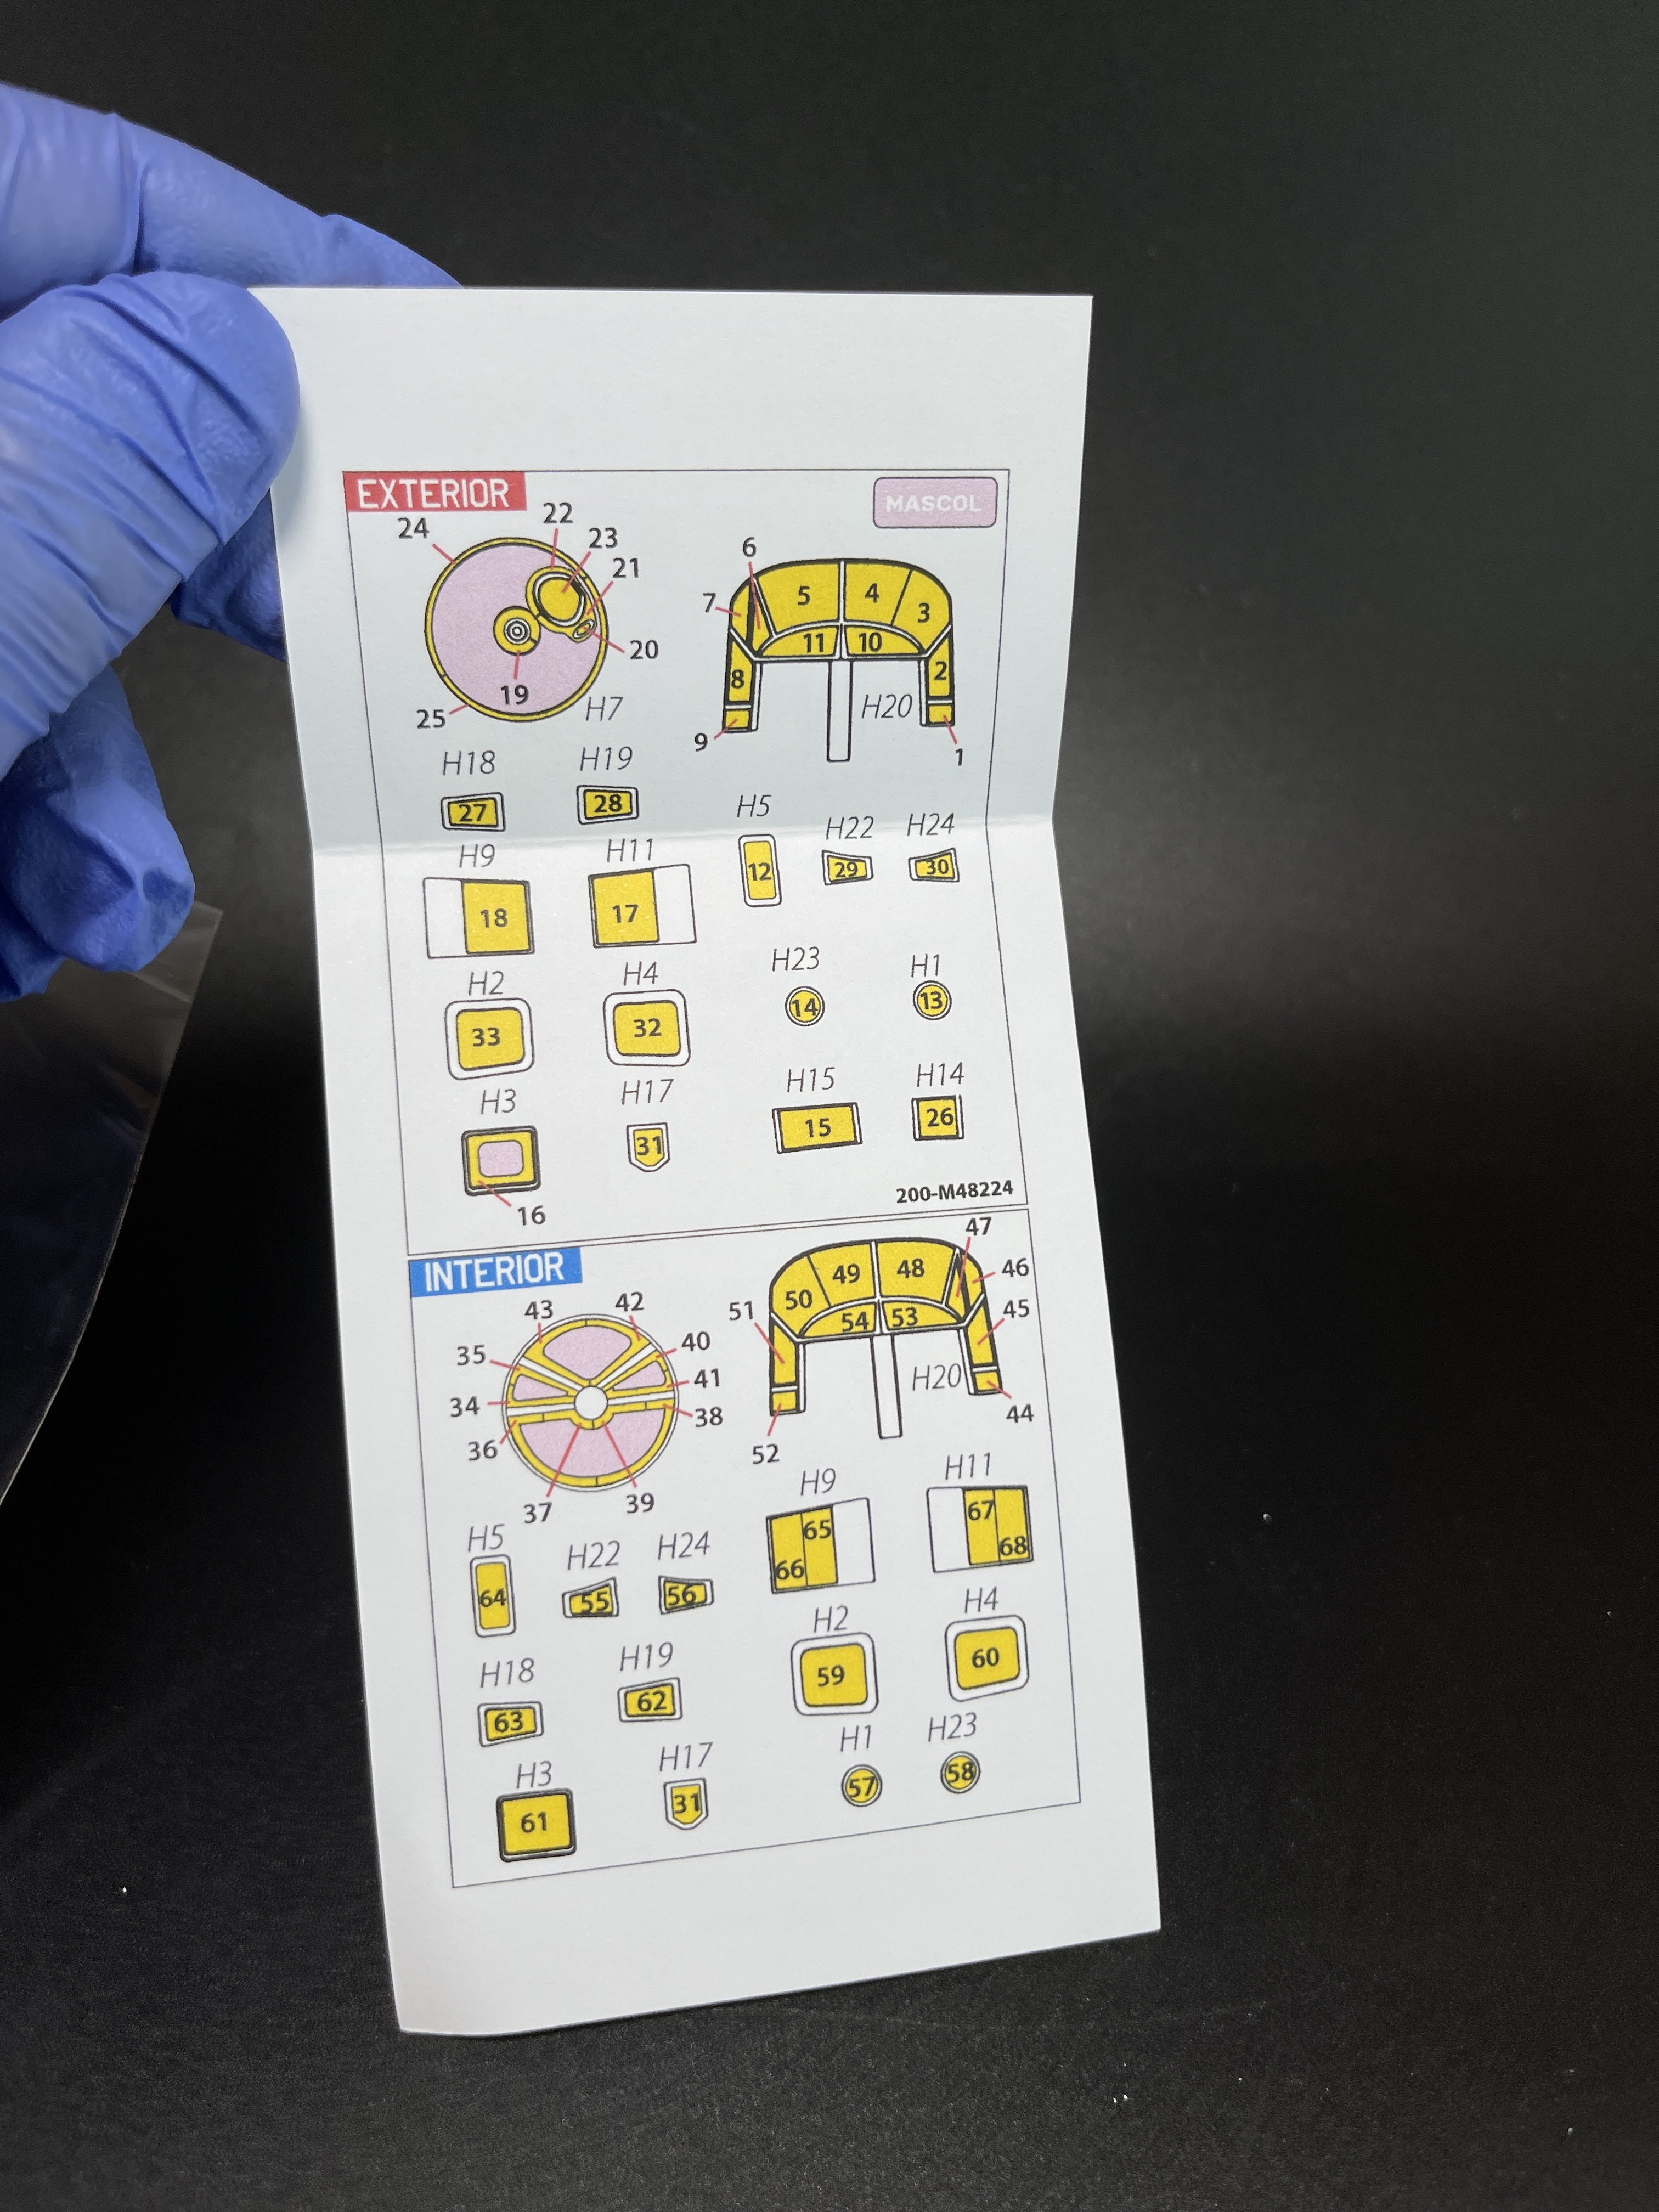
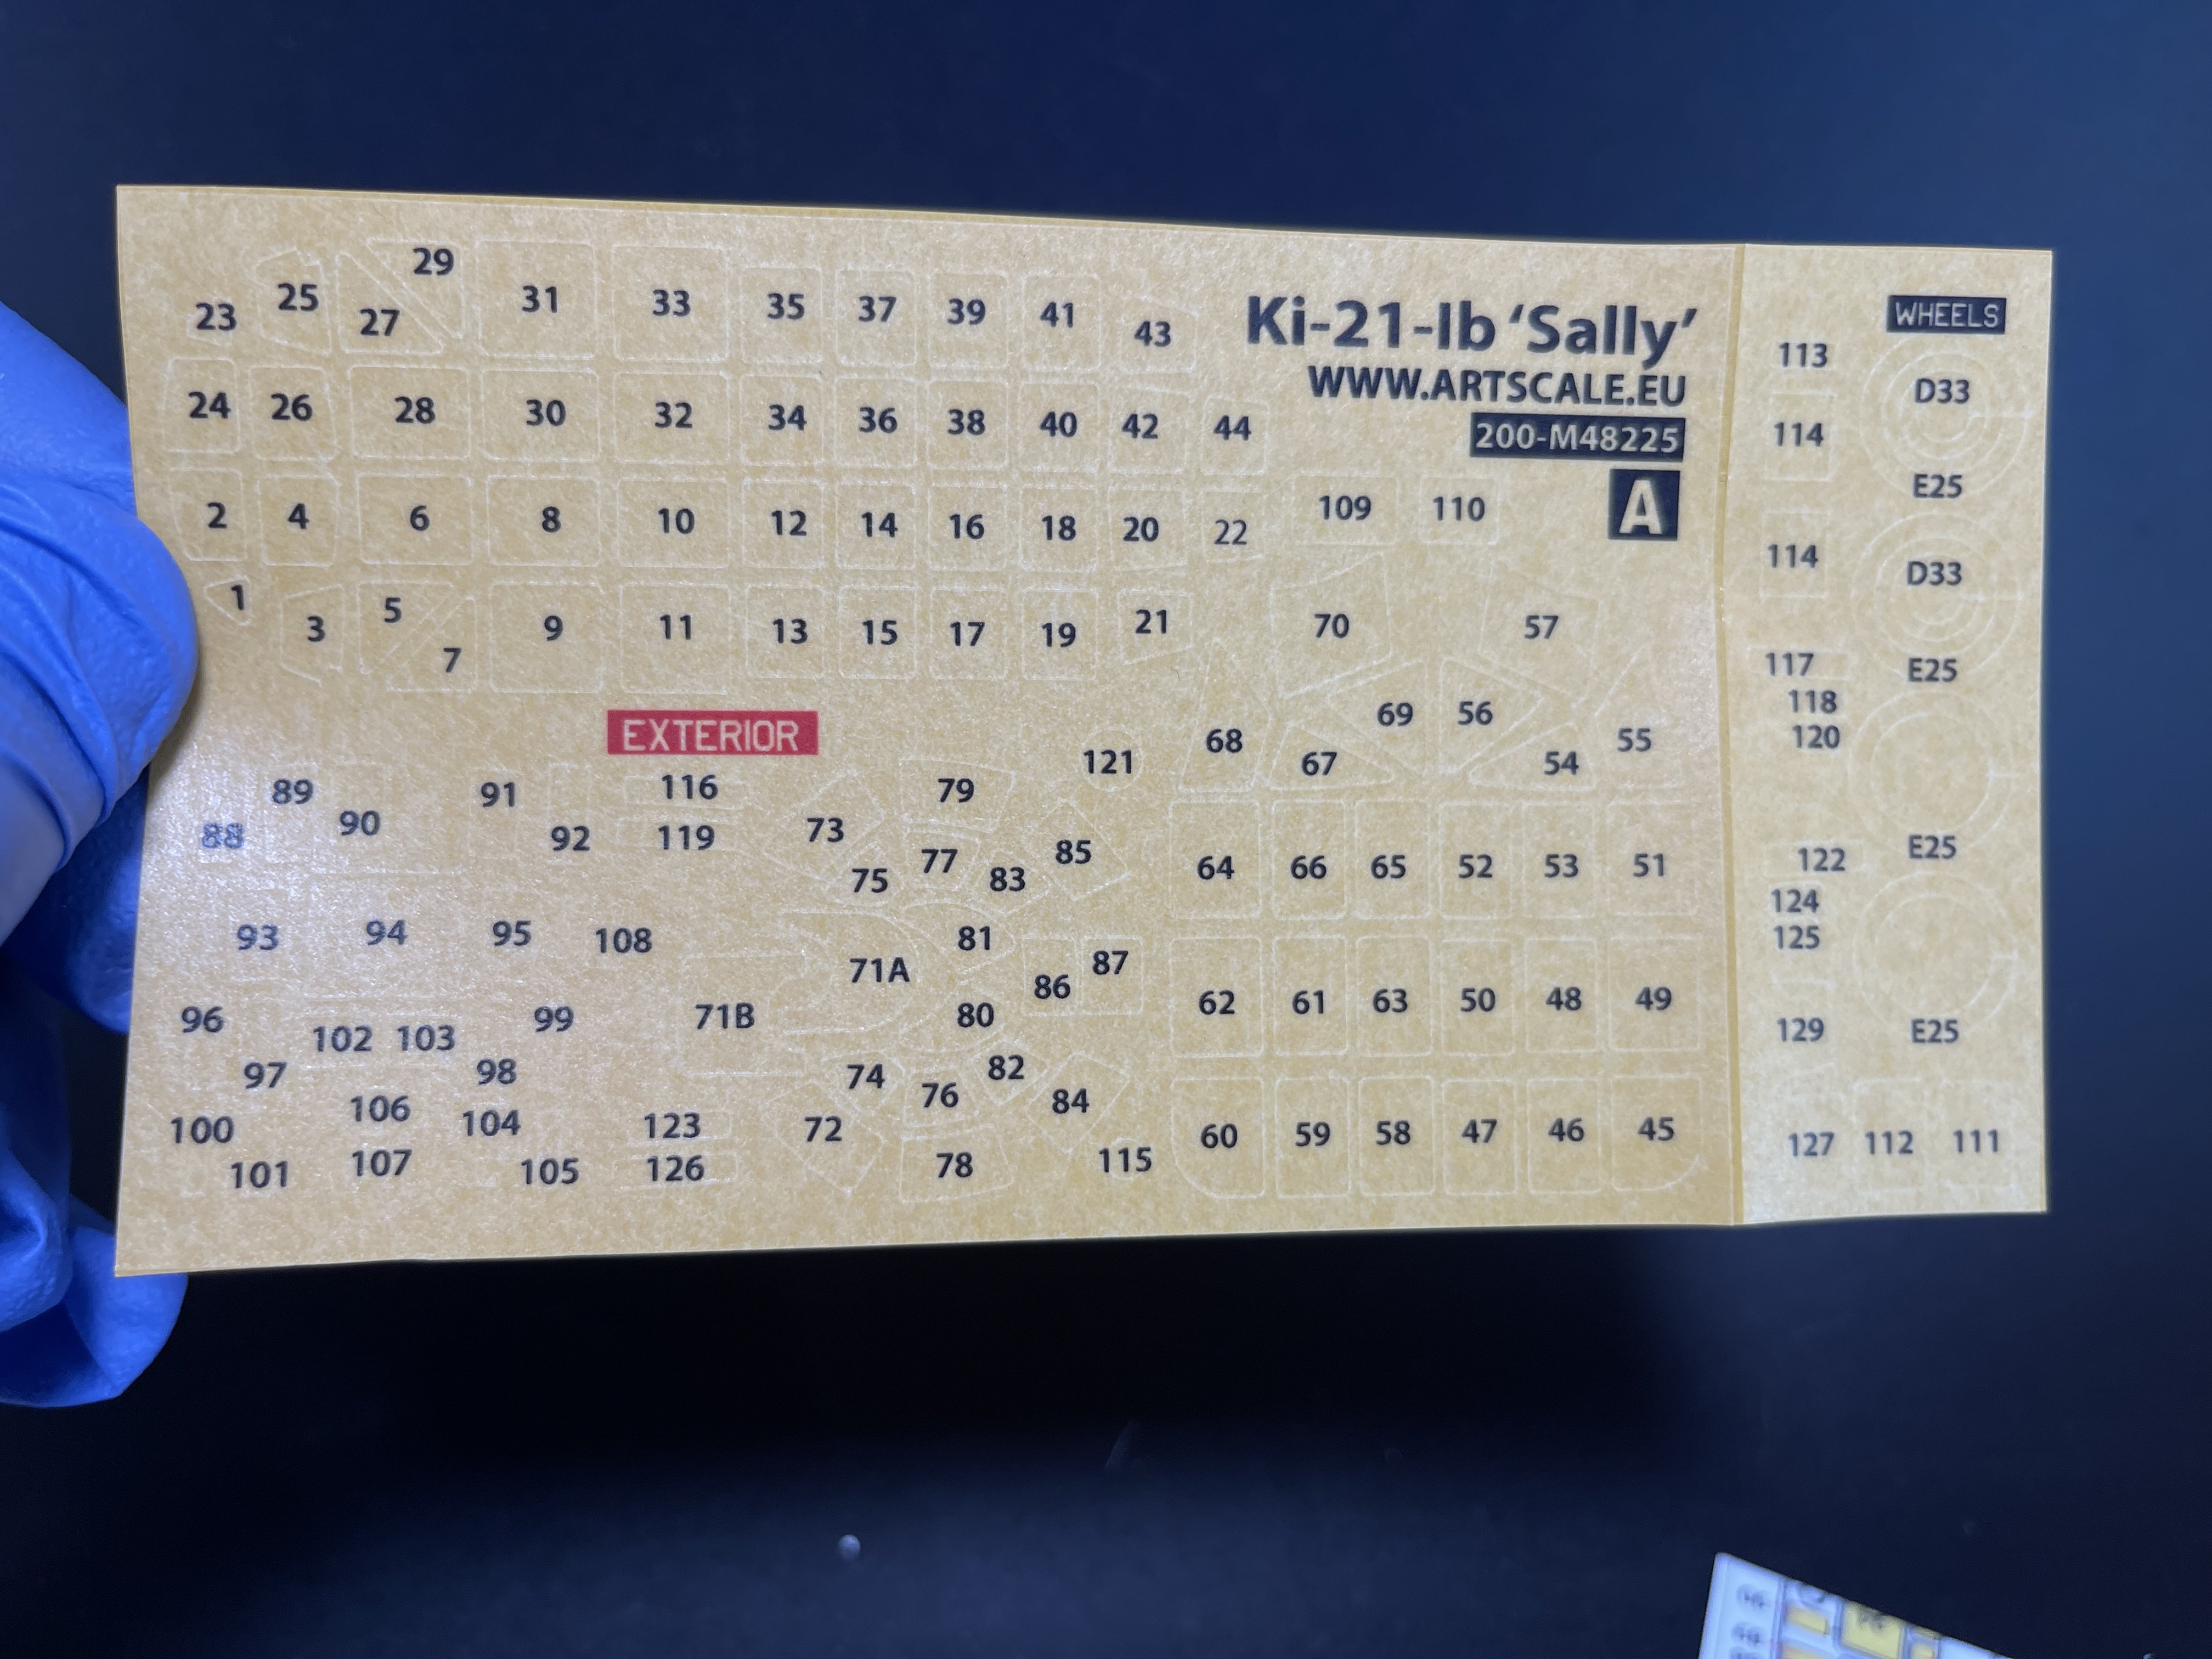
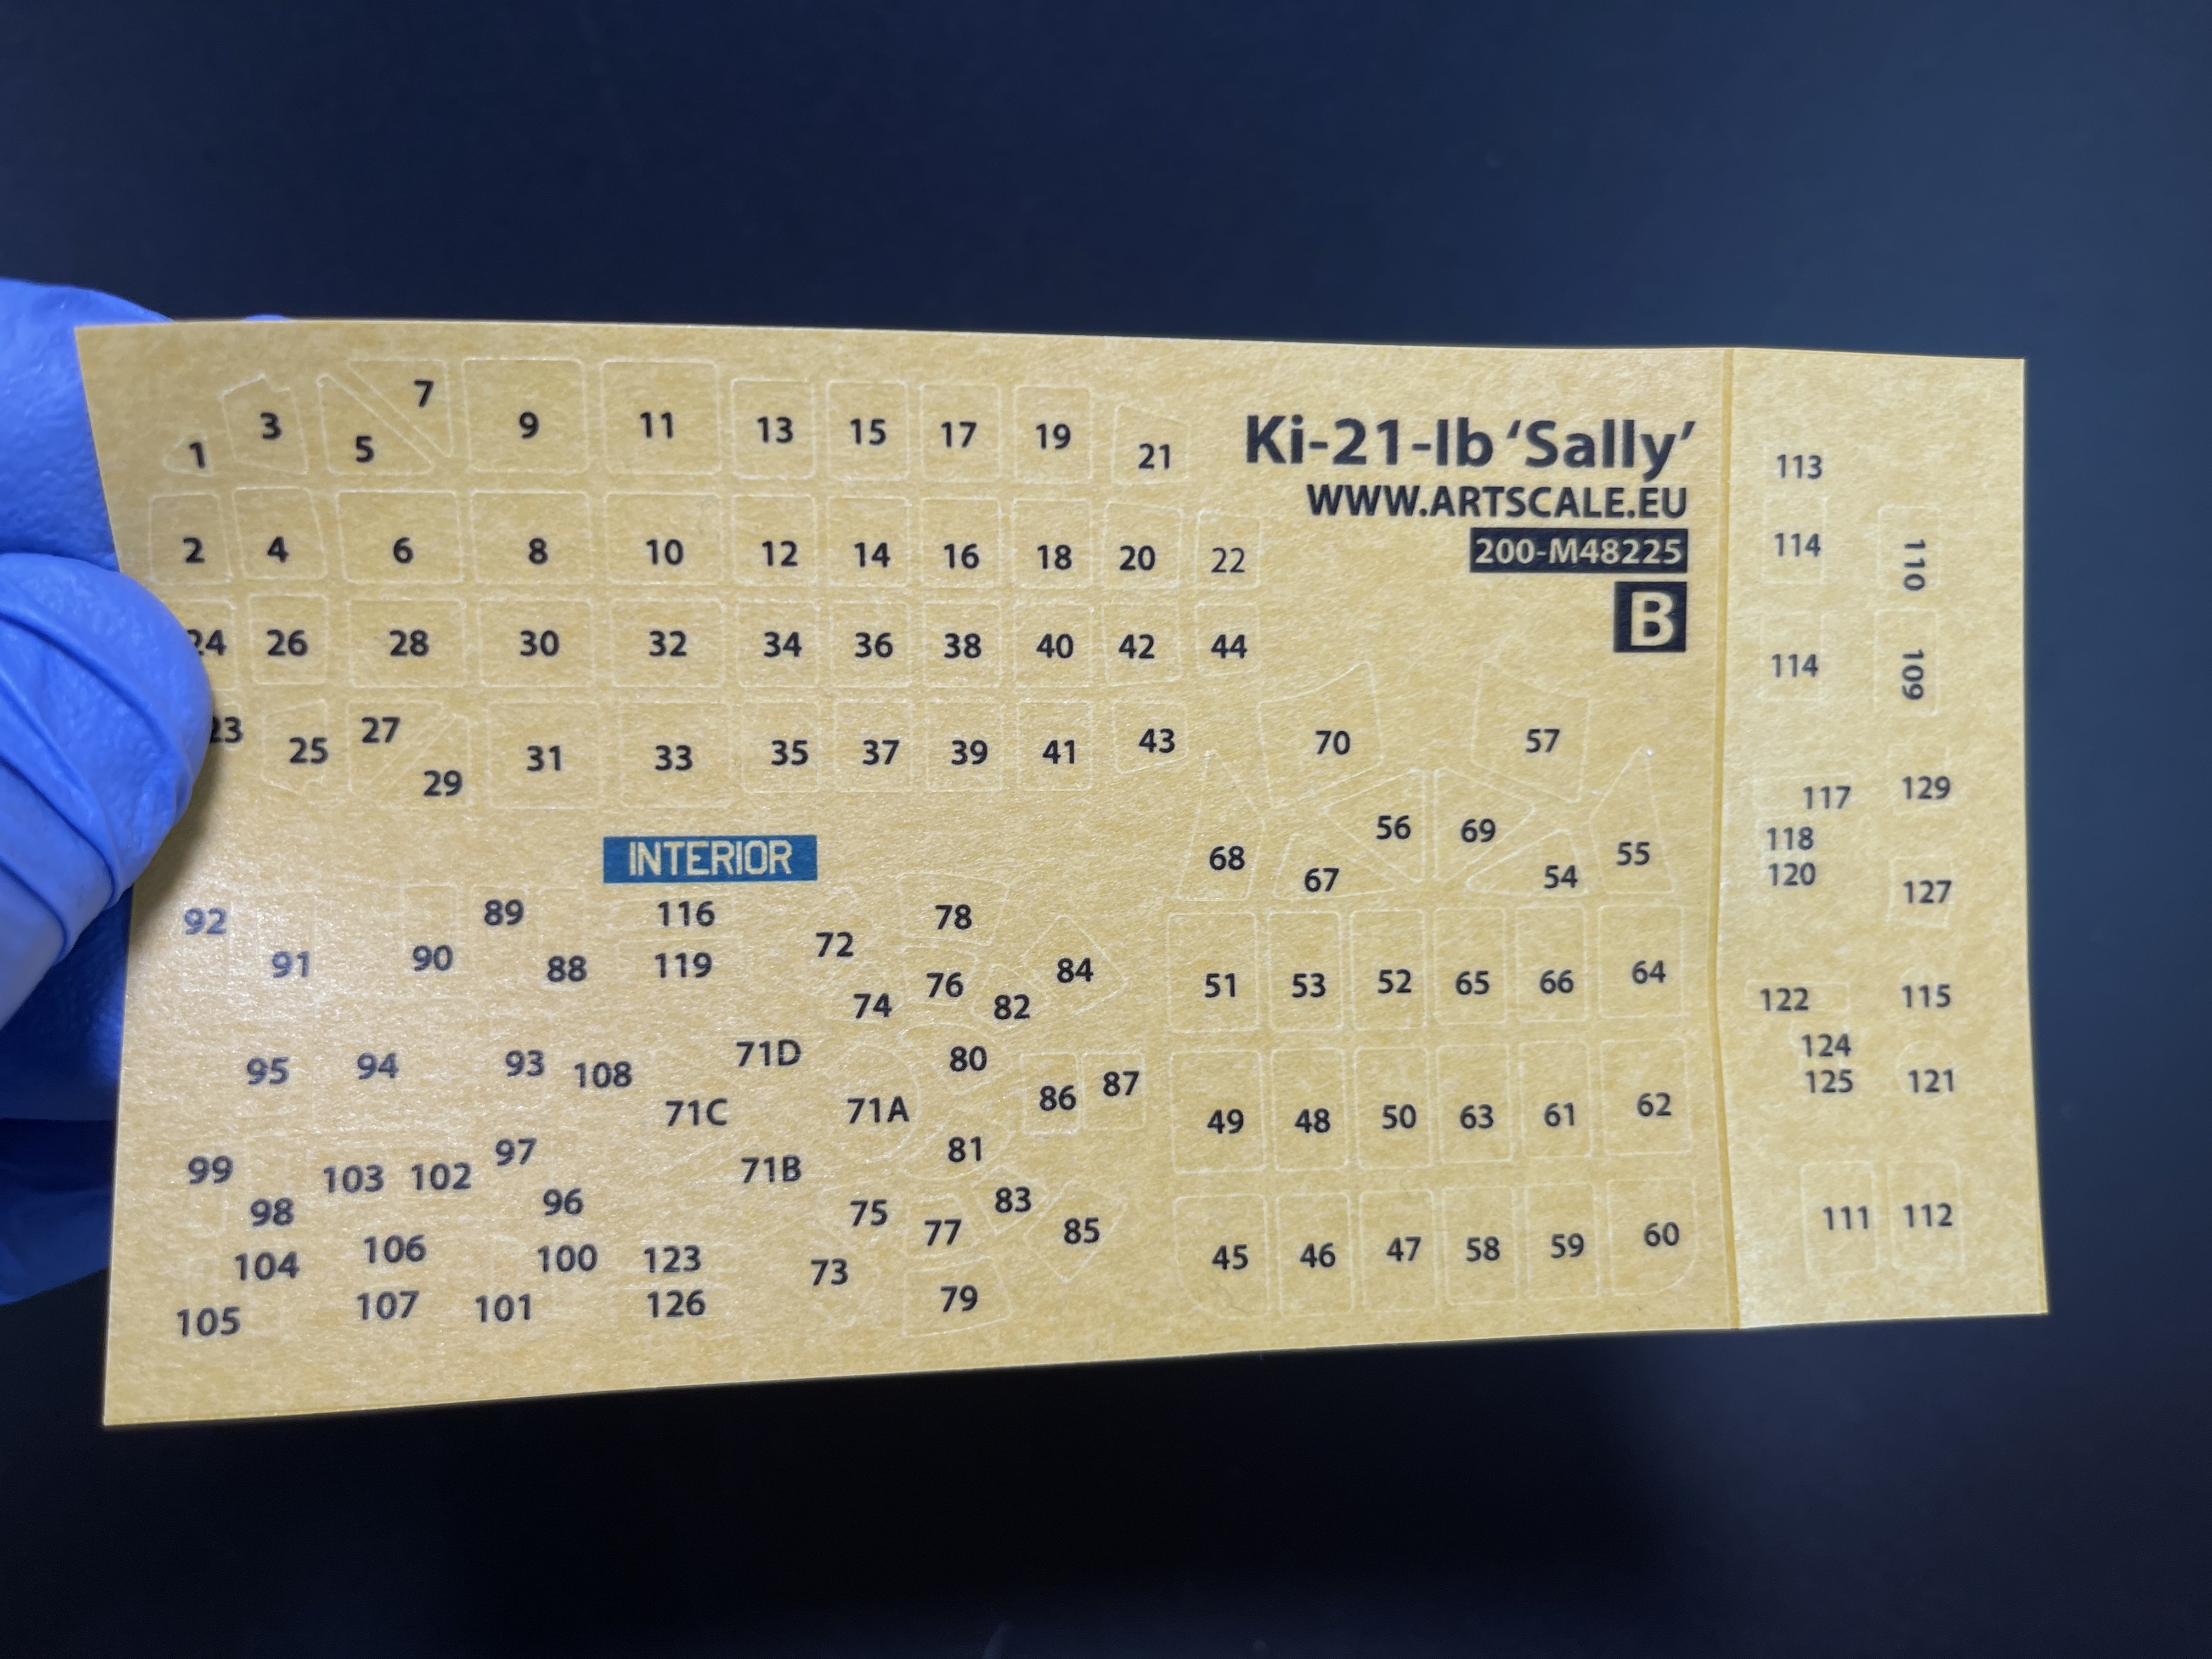
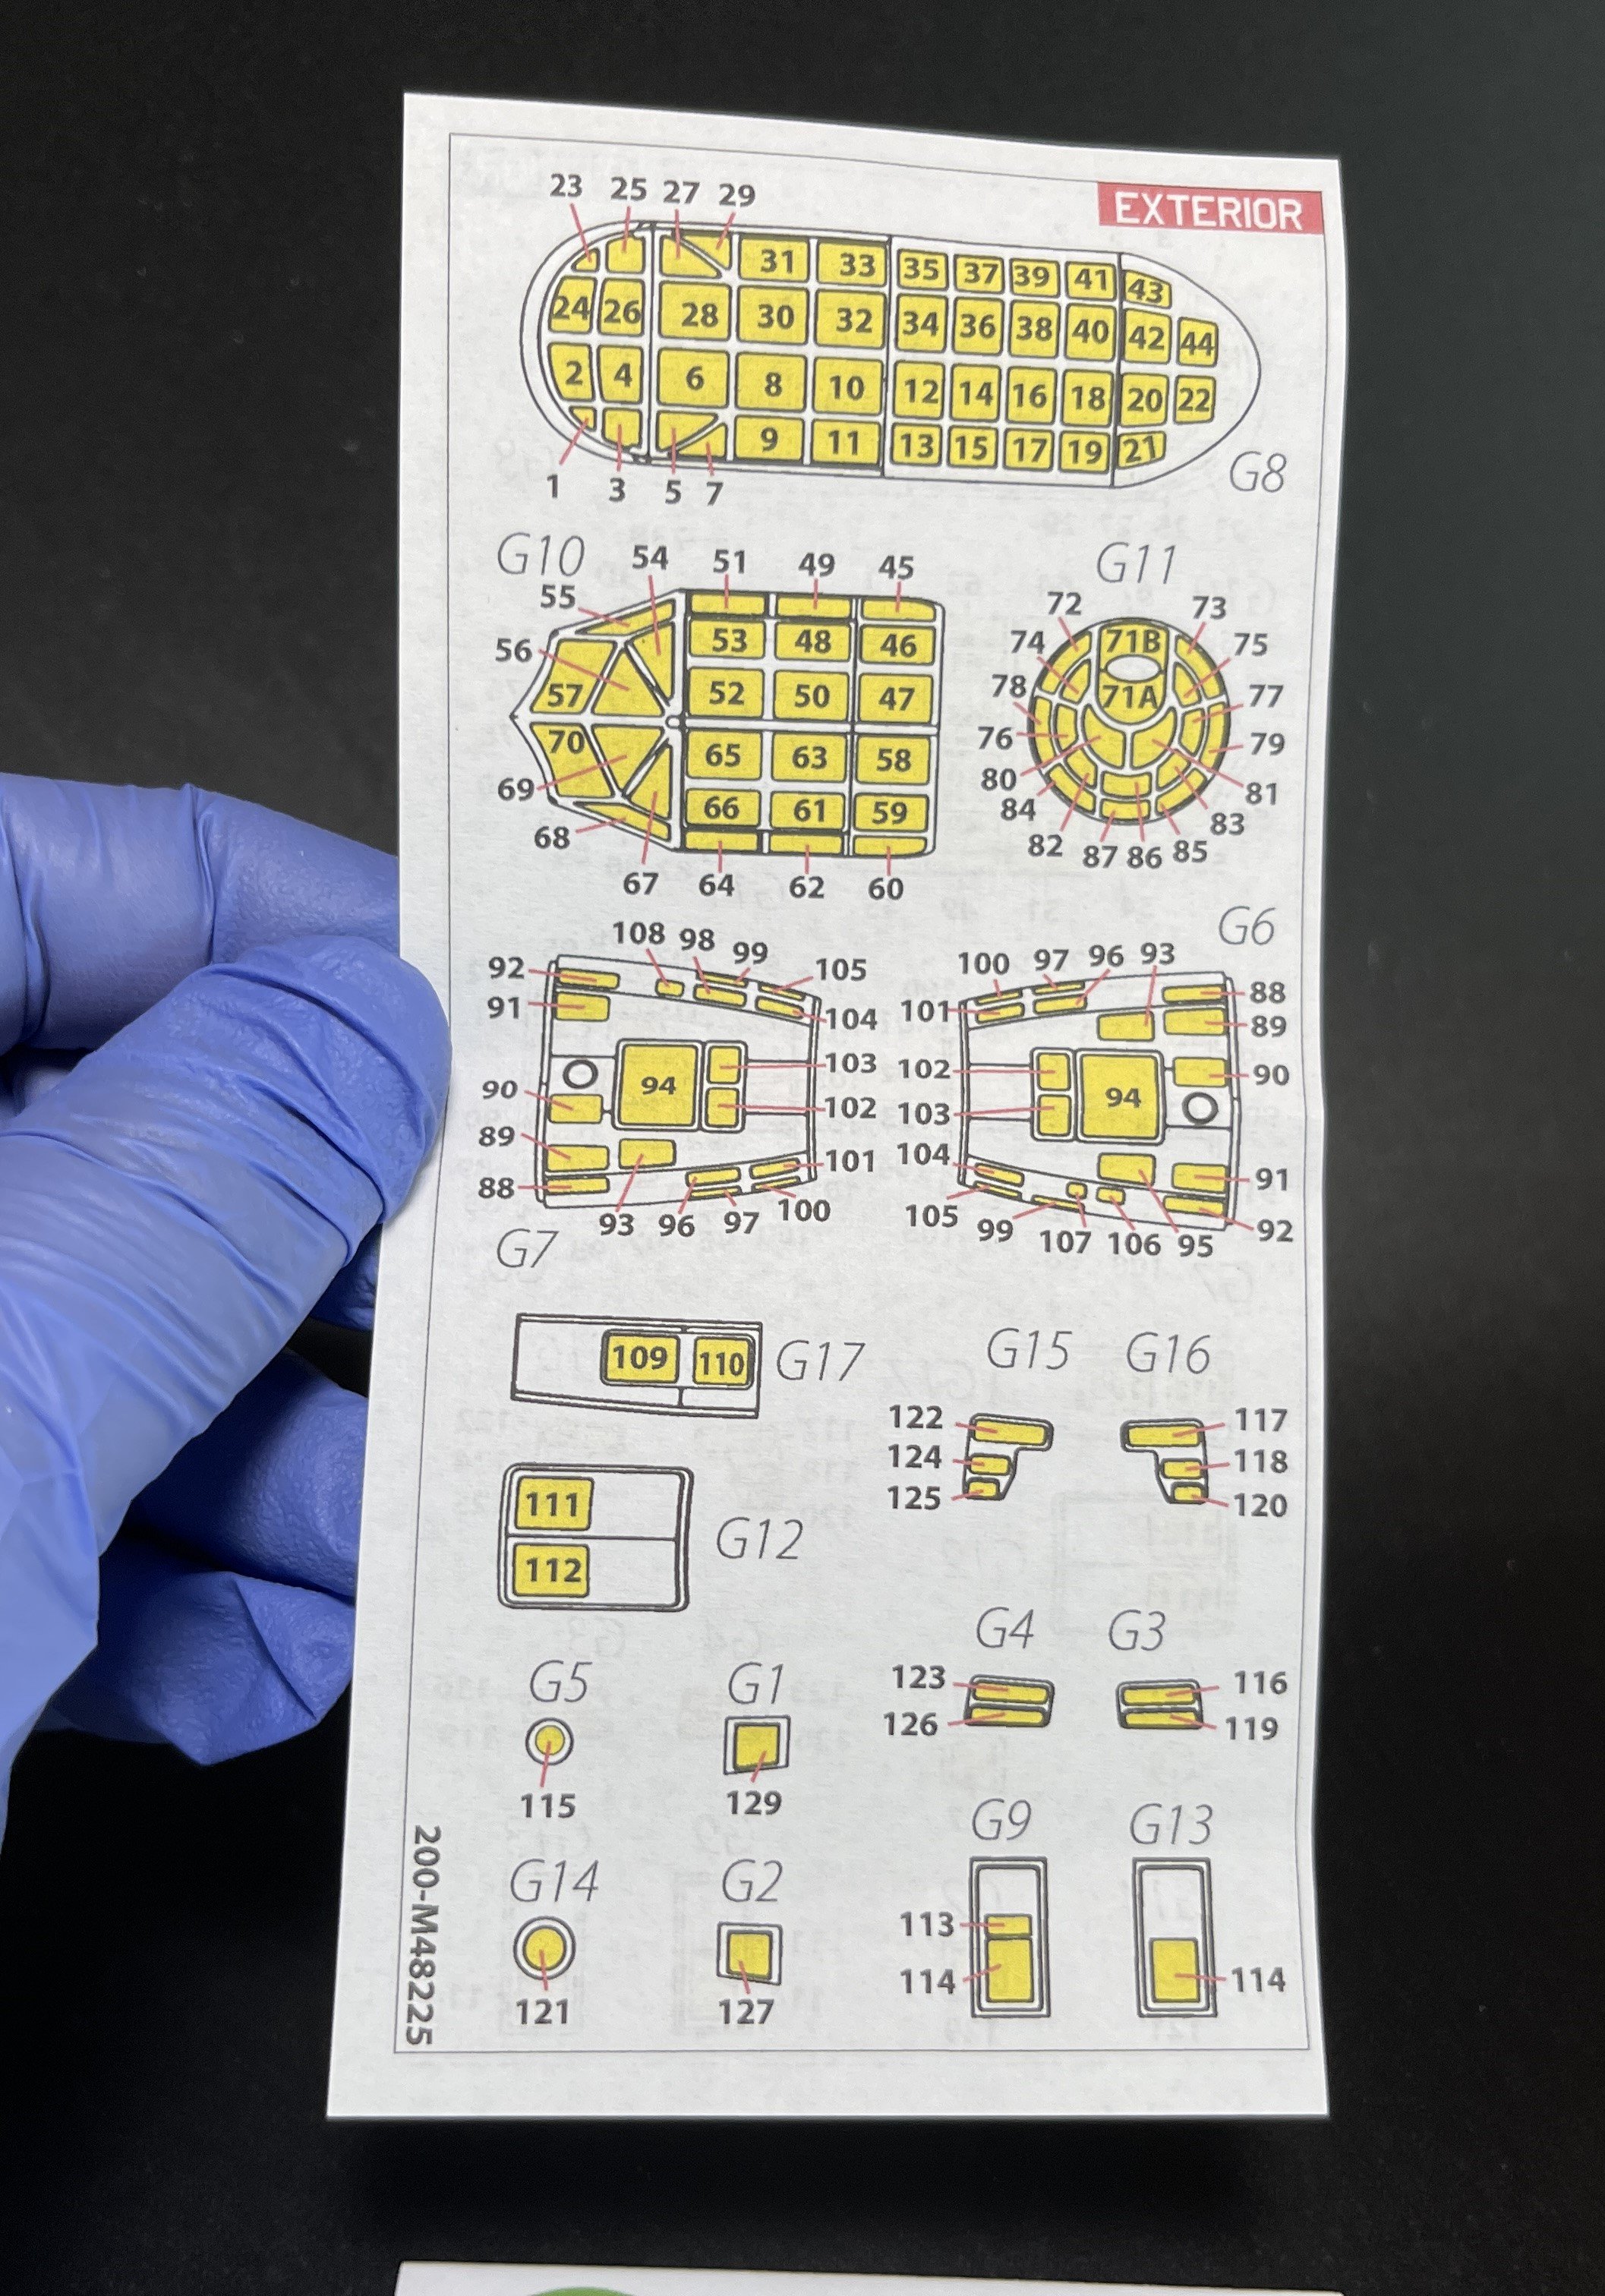
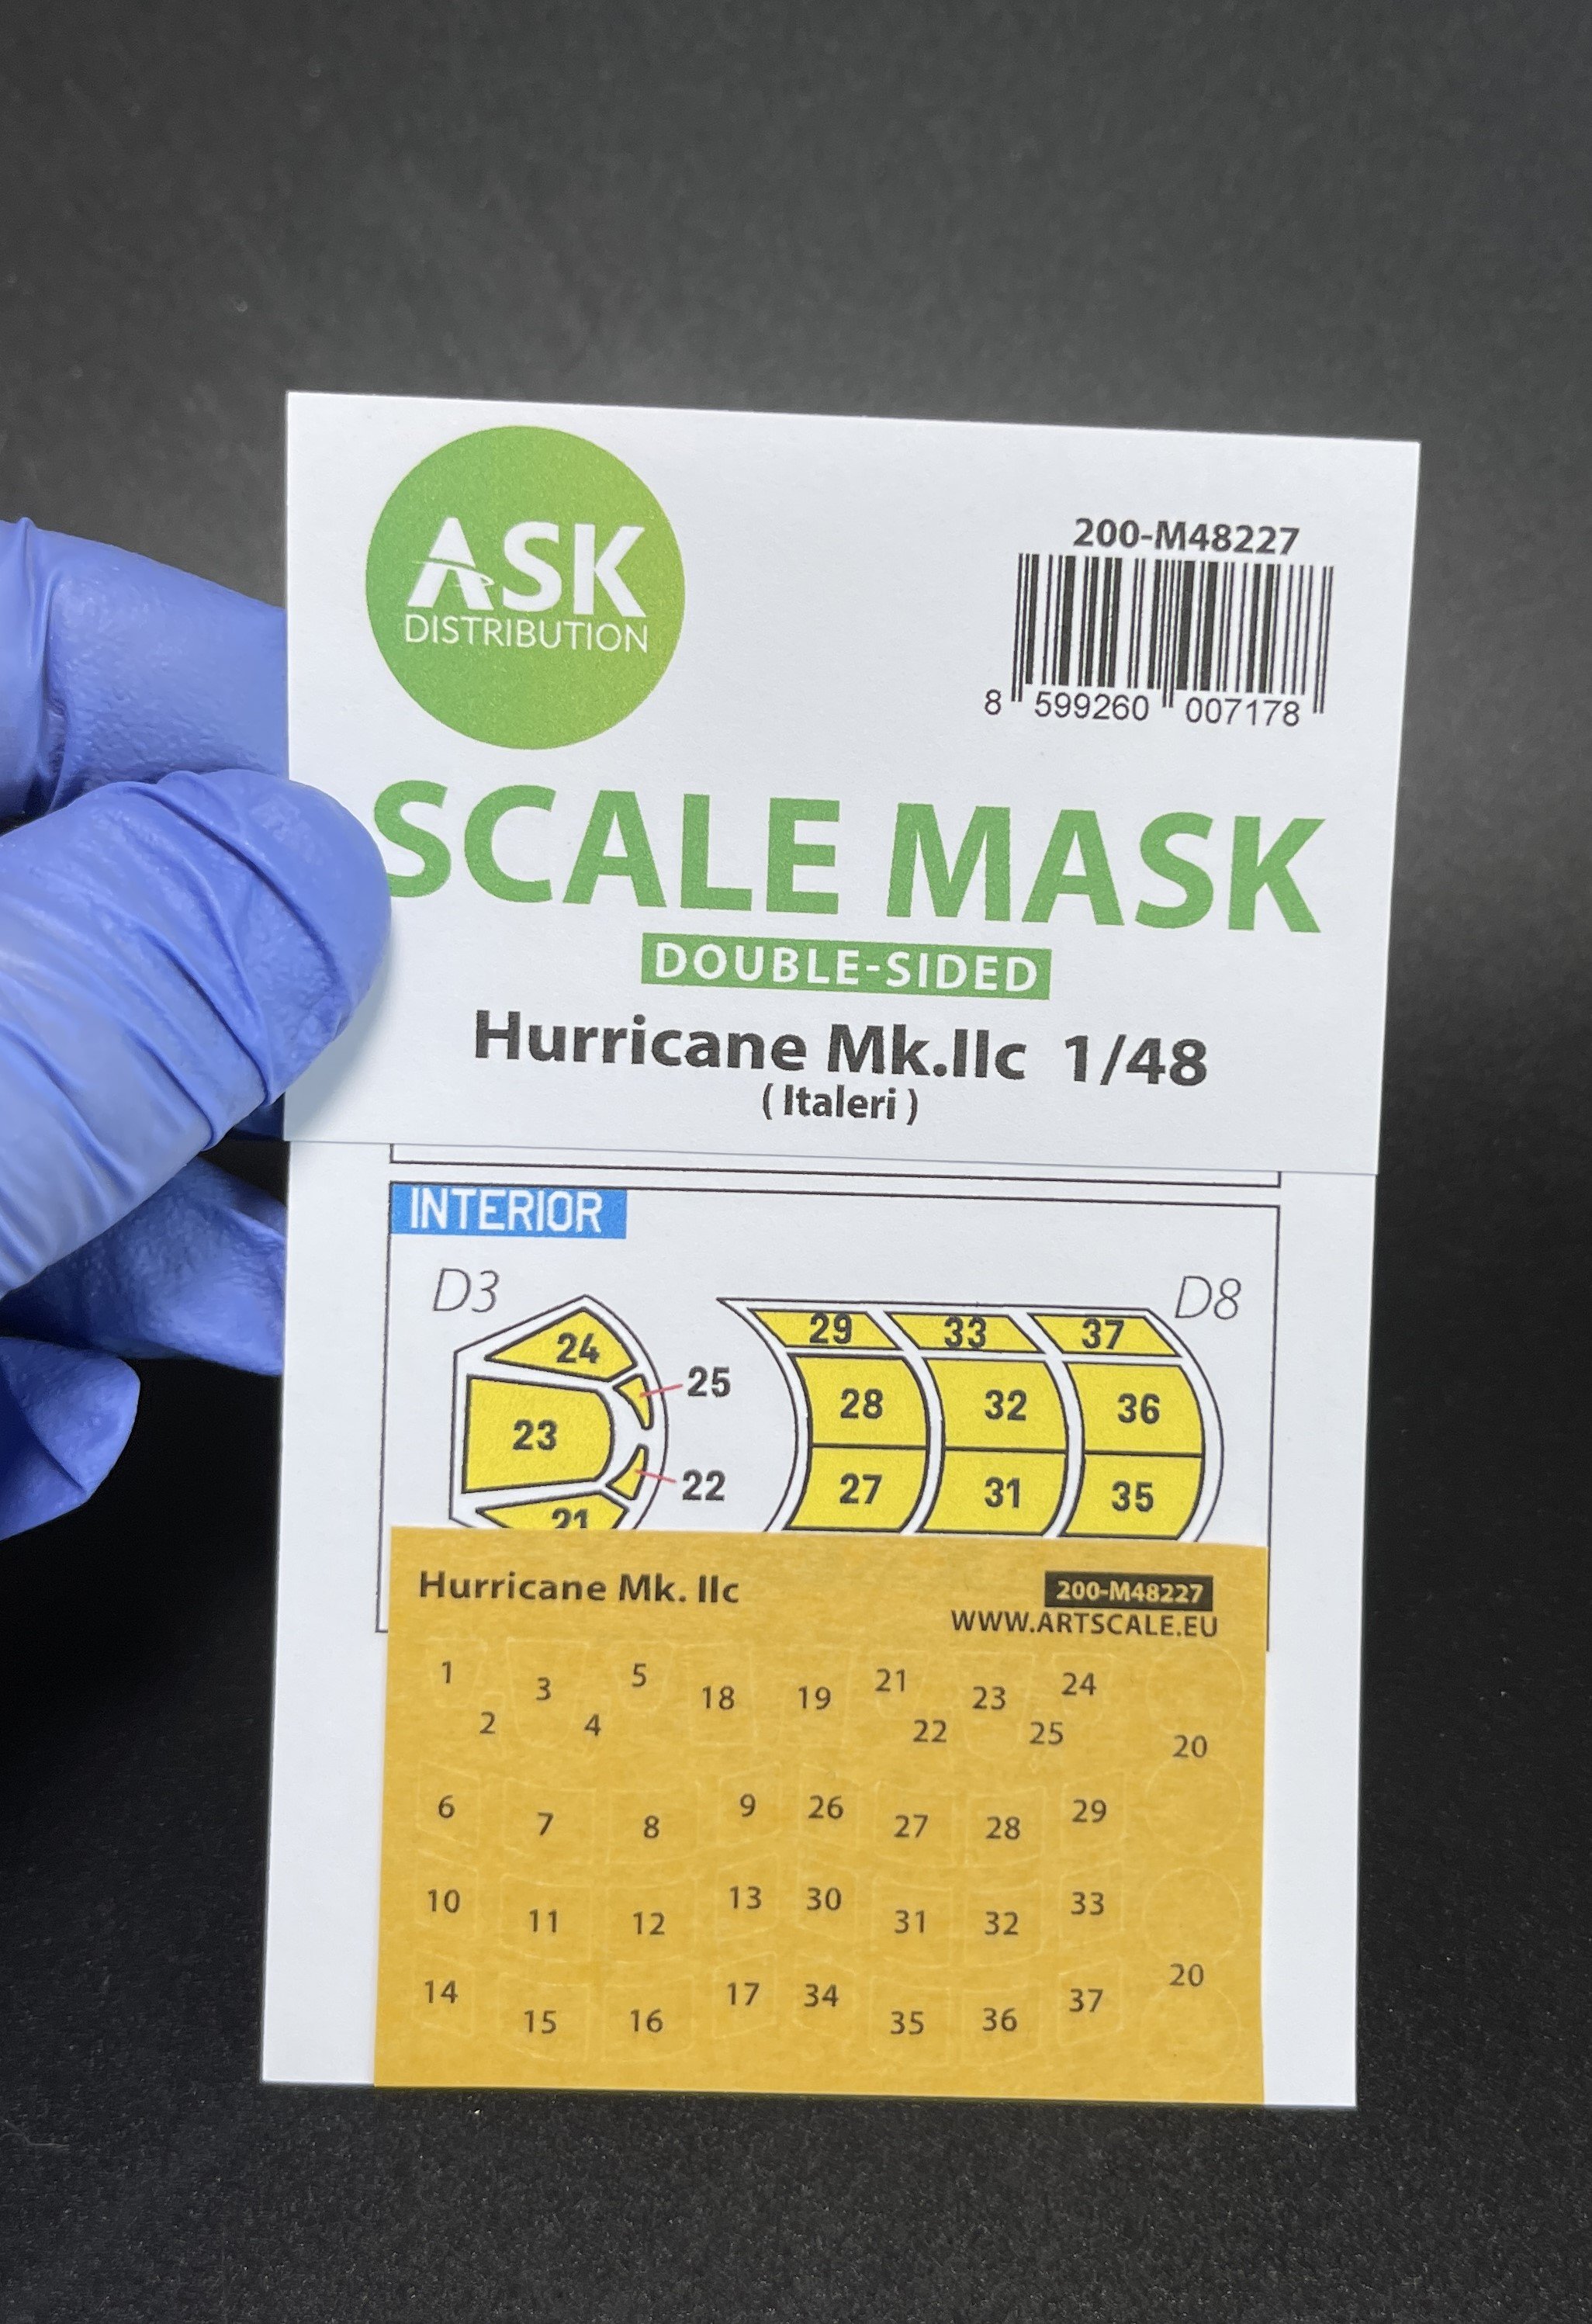
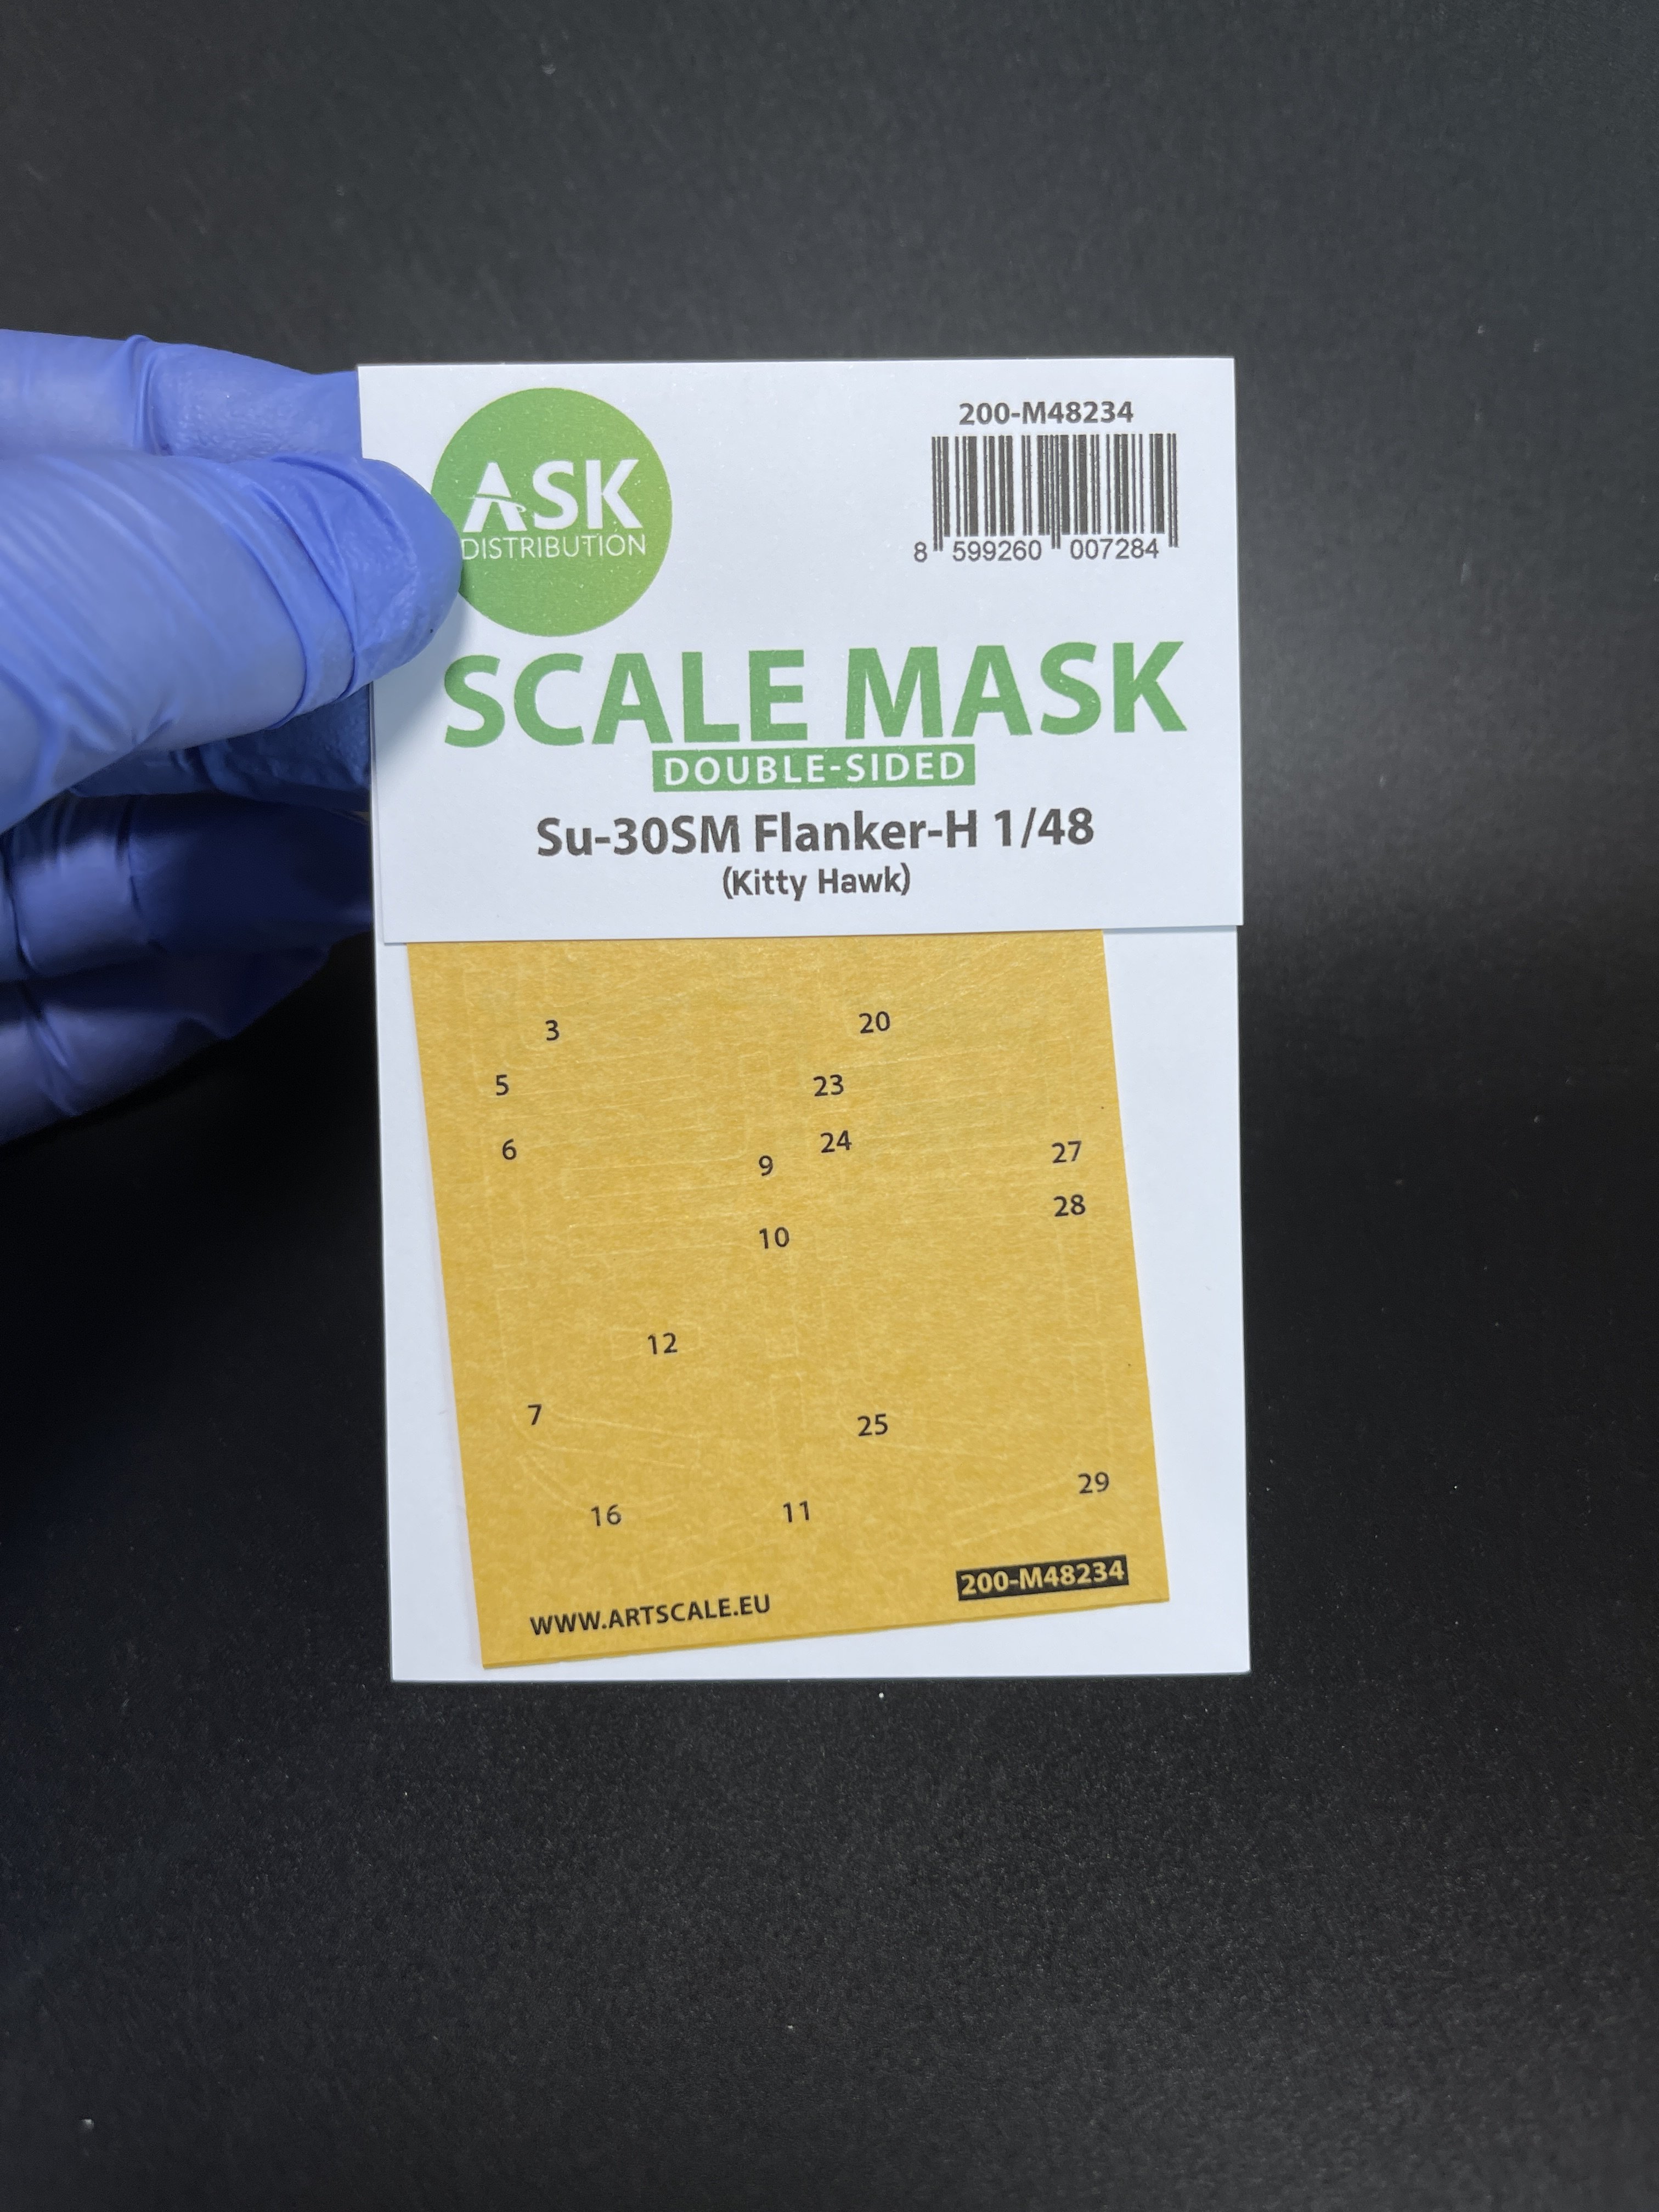
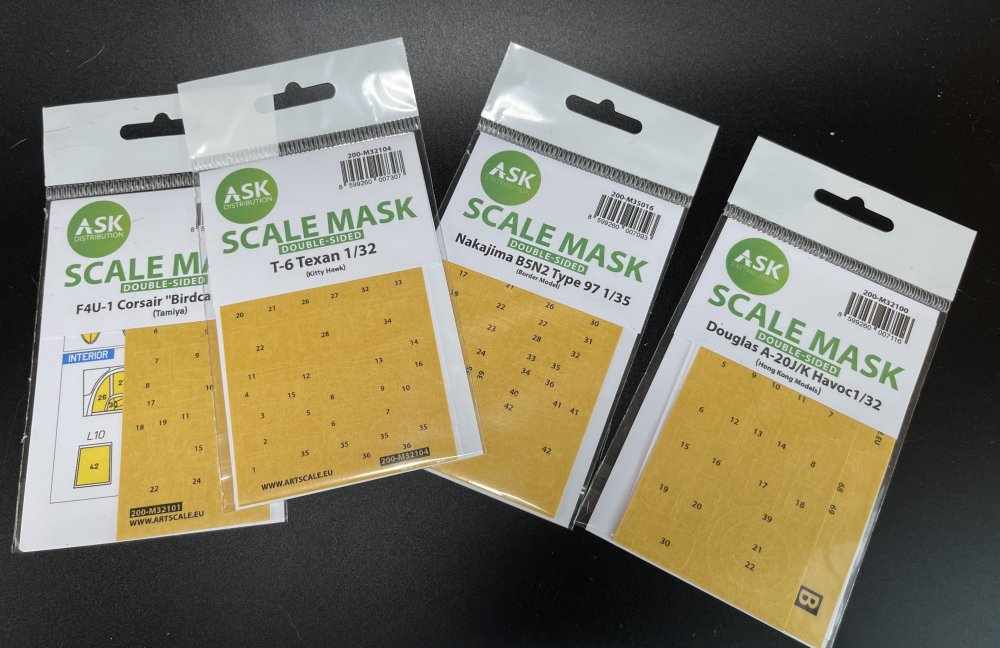
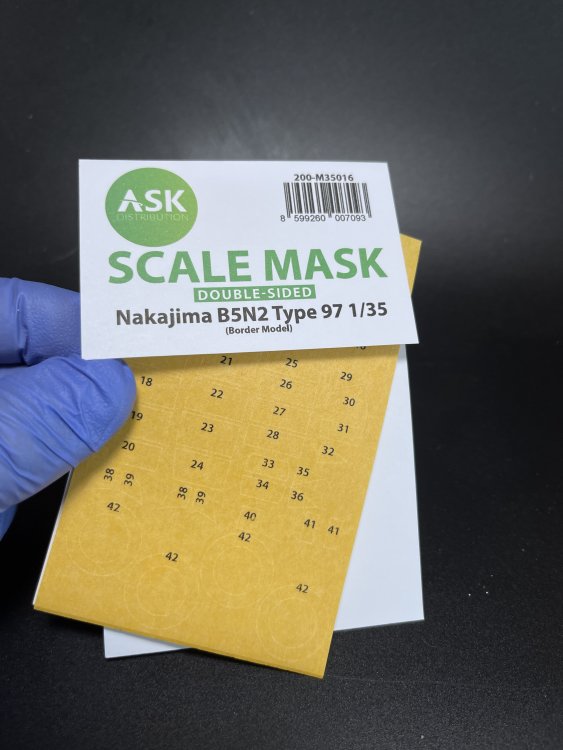
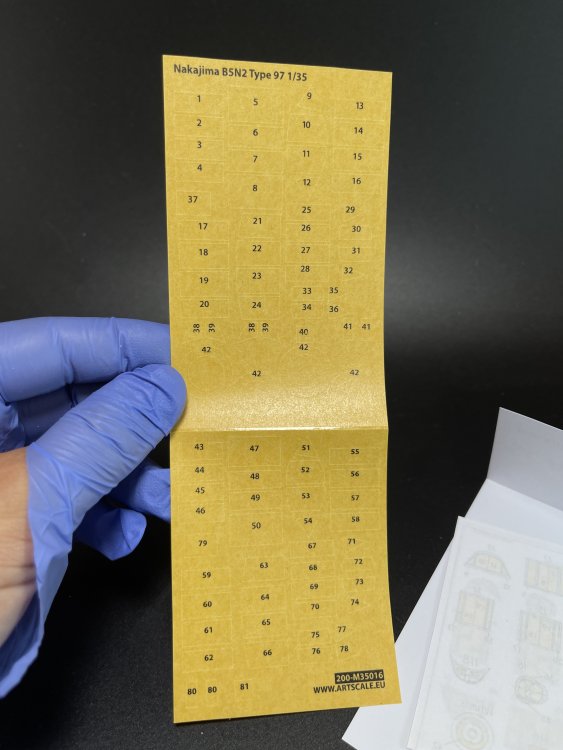
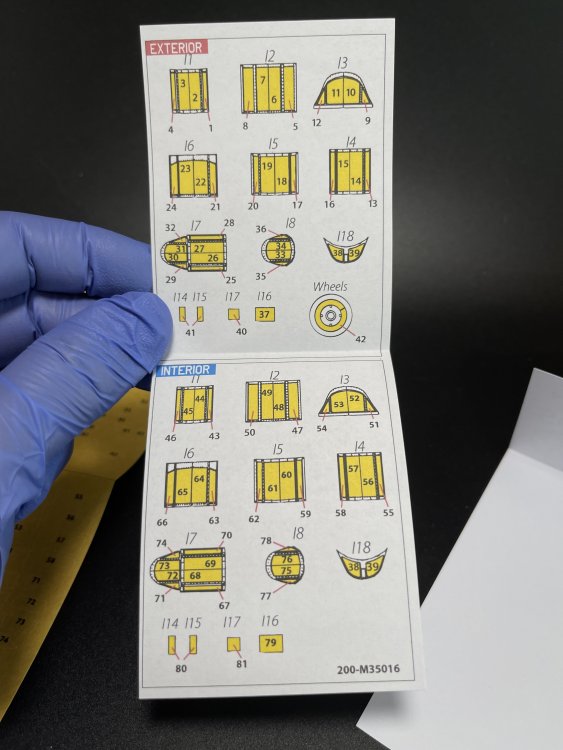
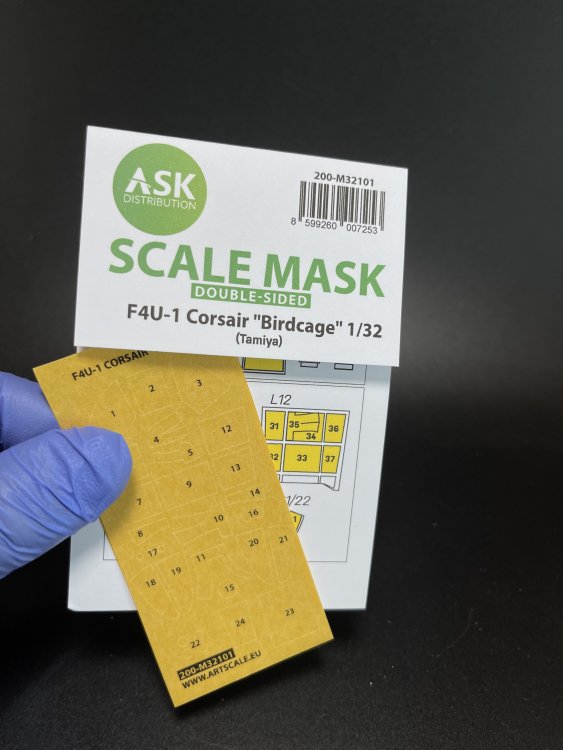
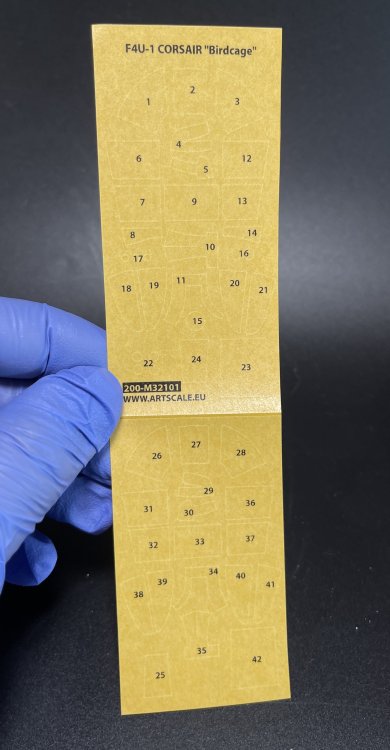
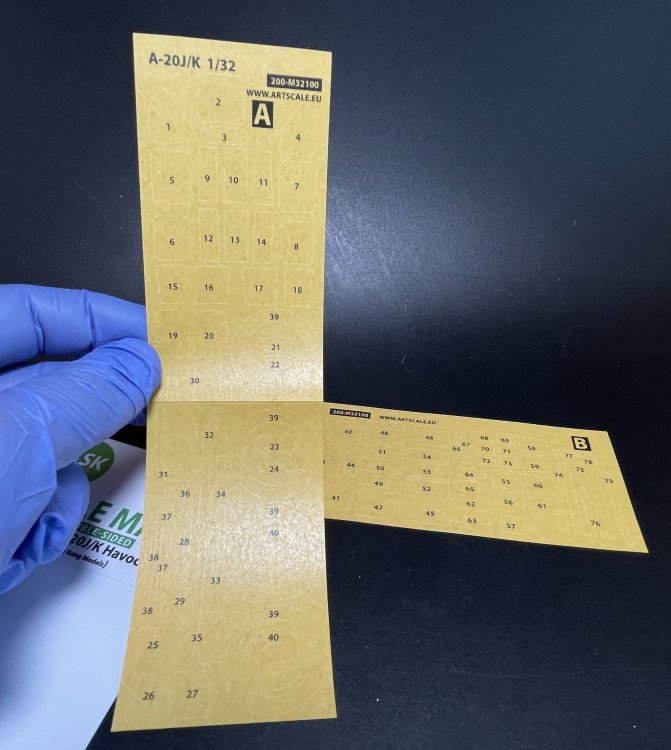
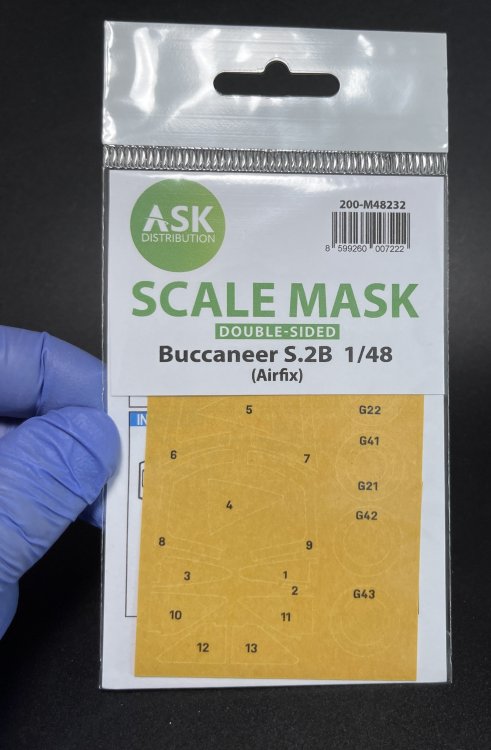
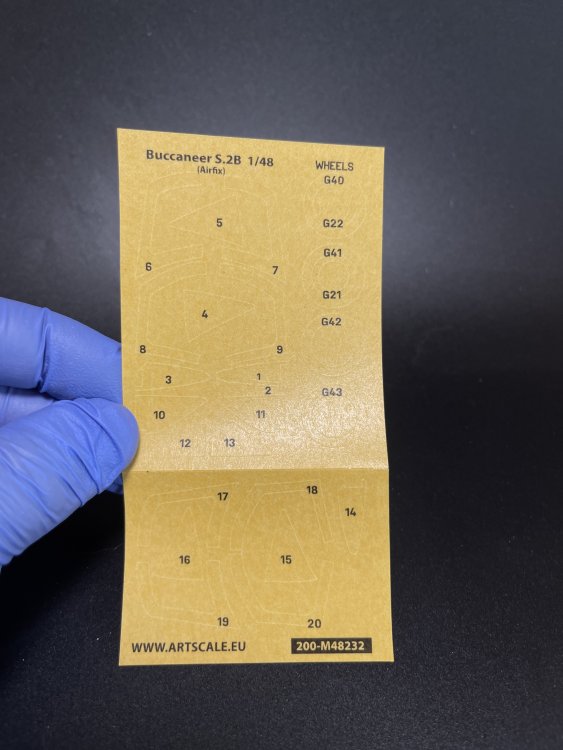
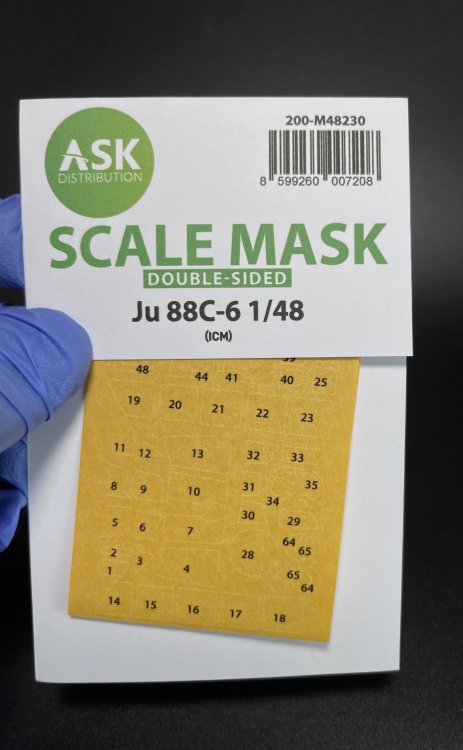
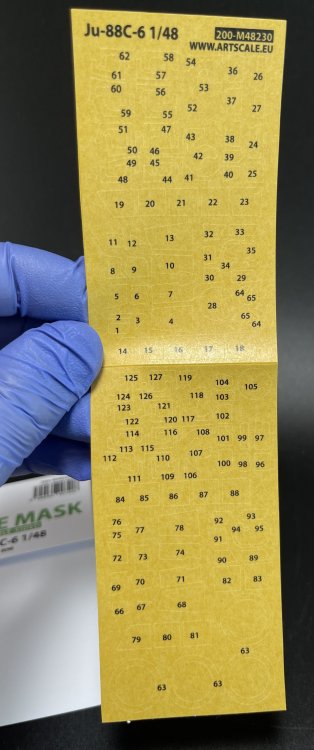
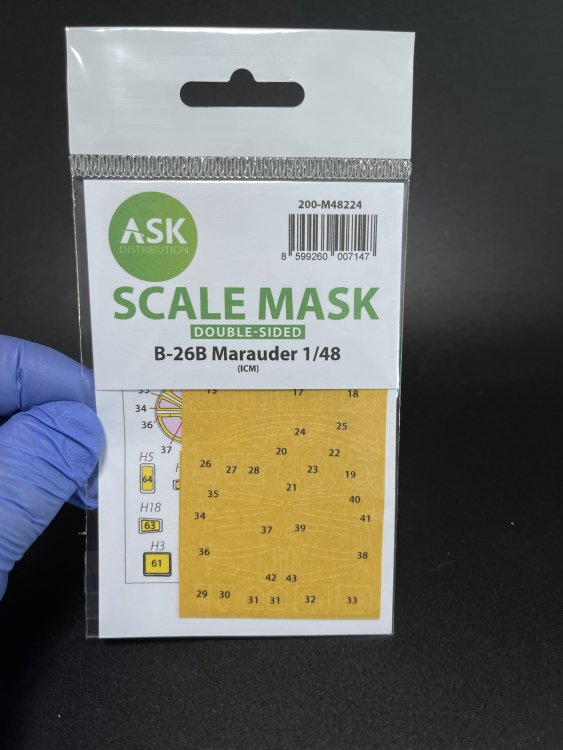
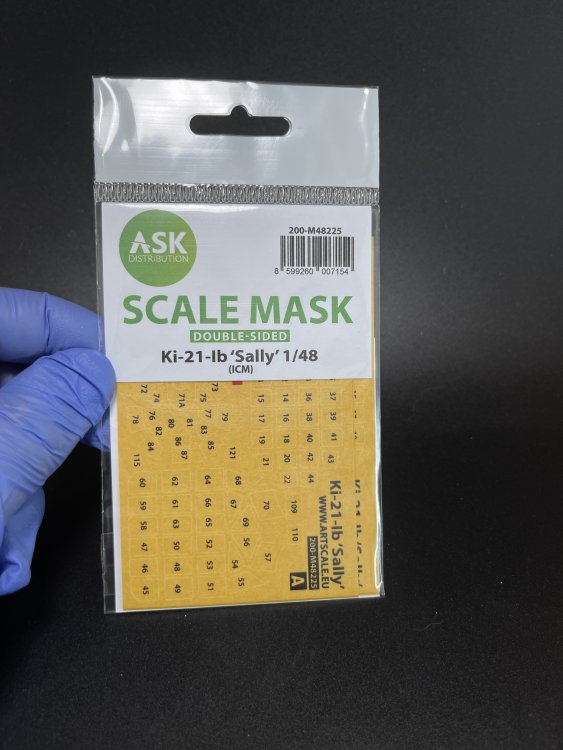
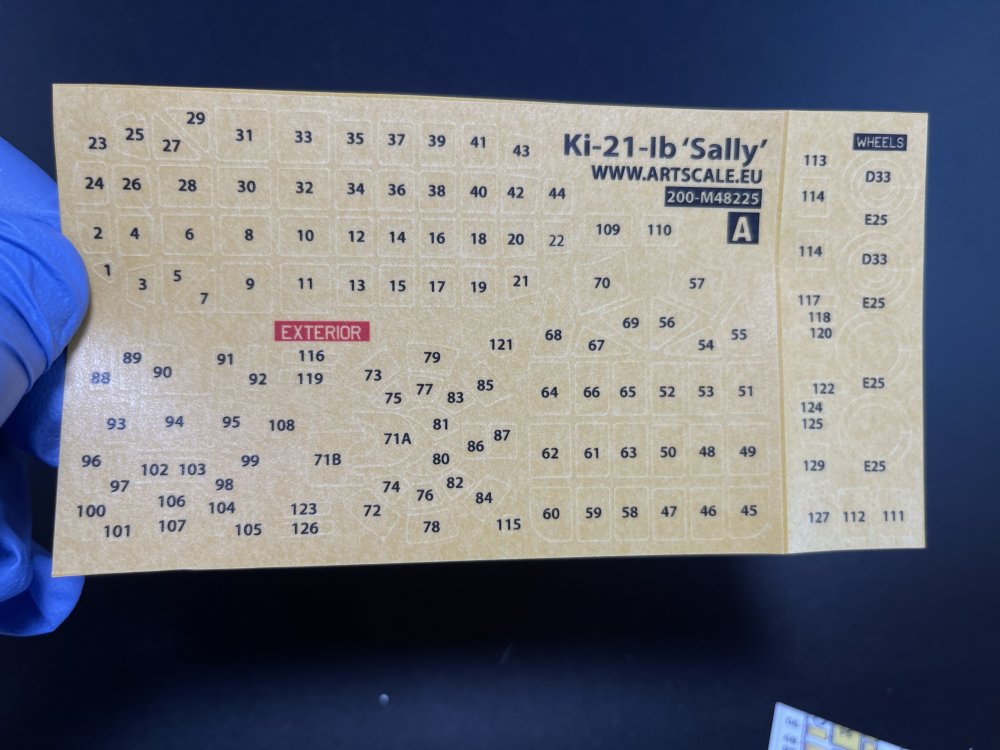
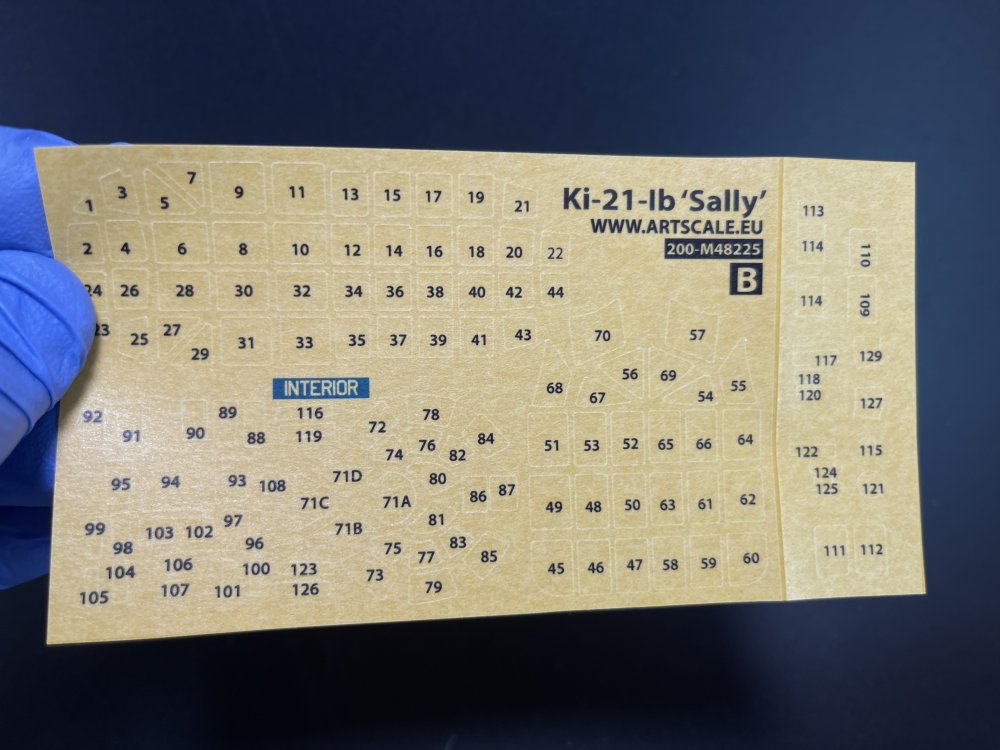
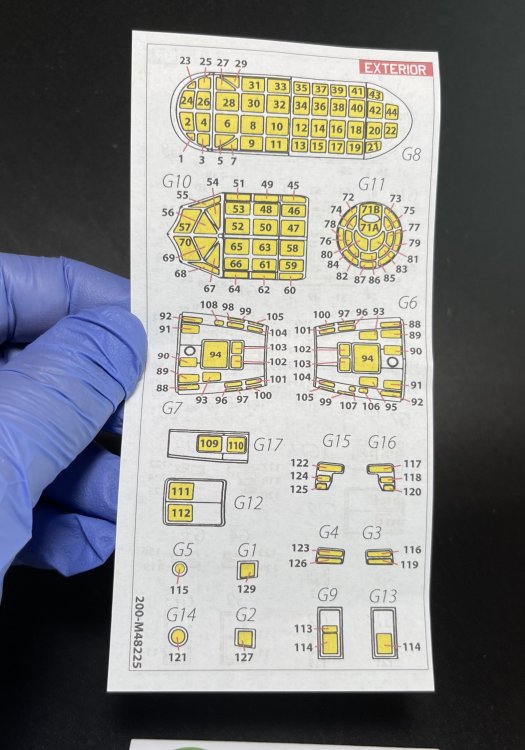
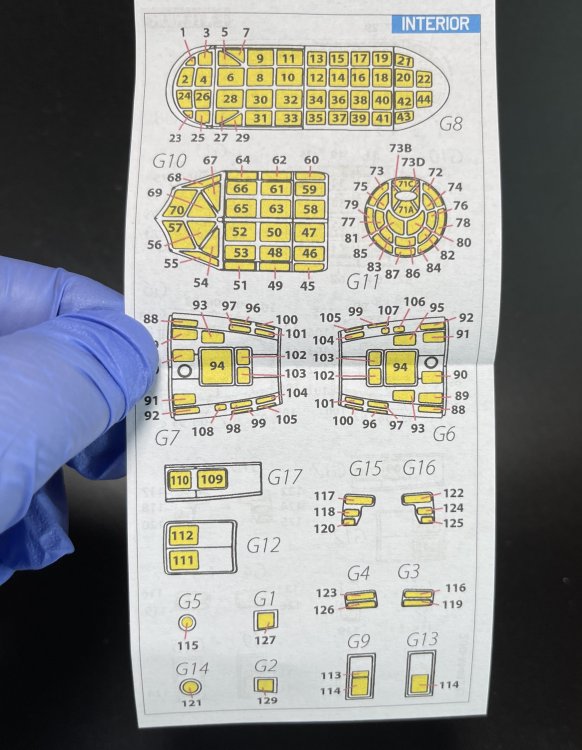
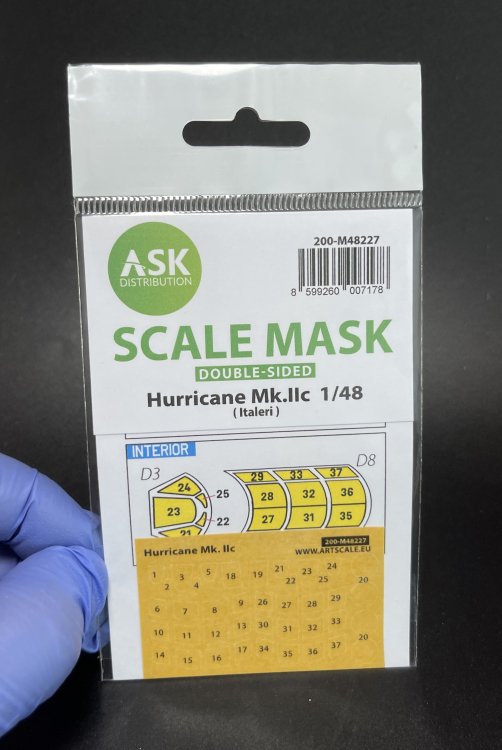
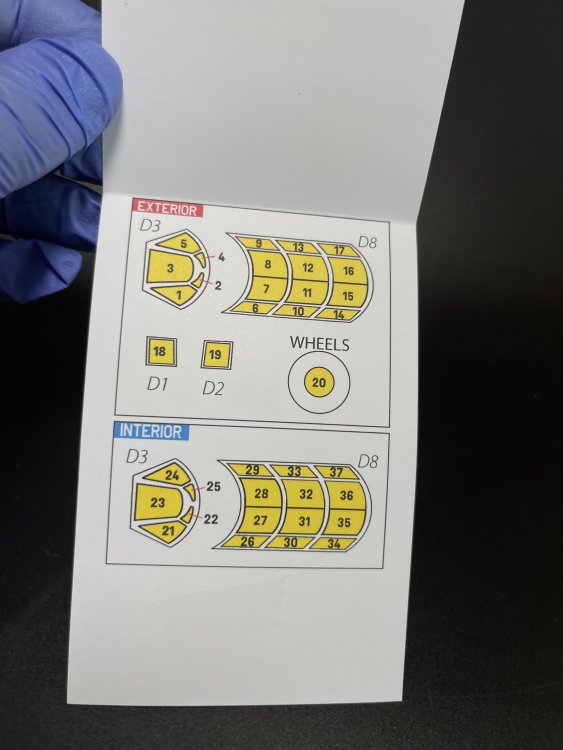
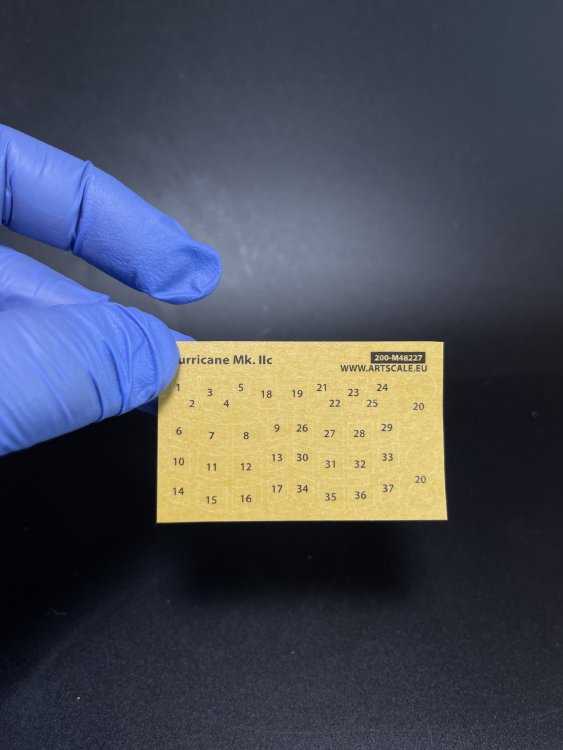
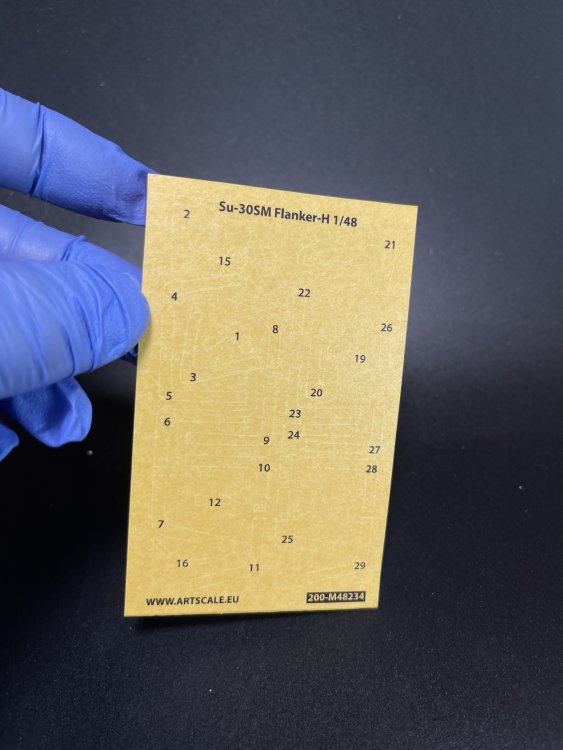
ART SCALE KIT Art Scale Kits Masks Several Masks 1:32 F4U-1 Corsair “Birdcage” (Tamiya) 1:32 T-6 Texan ( Kitty Hawk) 1:32 Douglas A-20J/K Havoc (HK Models) 1:35 Nakajima B5N2Type 97 (Border Models) 1:48 Buccaneer S.2B (Airfix) 1:48 Ju-88C-6 (ICM) 1:48 B-26B Marauder (ICM) 1:48 Ki-21-Ib “Sally” (ICM) 1:48 Hurricane Mk. IIc (Italeri) 1:48 Su-30SM Flanker-H (Kitty Hawk) Available at ASK store, here One of the aftermarket that I usually get to my builds is canopy mask. For one main reason: time! With a much less amount of time you get a very good result that you also can get in the tradicional way, but with lots of time “wasted”… So, I had the luck to get some masks from ASK Productions canopy mask. It was a product that I was had the luc to already try it in previous builds. So, all masks comes in a plastic bag like all other mask set from others brands. The mask itself is made from a tape very similar to kabuki tape, only a bit darker. The inside instructions are very clear and every mask it has it`s on number, so it is very easy to locate the mask for the right wing. It`s great touch to make your life even easier. All the masks in this review are double-face mask so you can mask inside to make more realistic your build. It`s praticaly impossible to paint inside without this. I really like these double side mask but I do have my doubts if I will use the inside mask in close canopies in 1:48 scale. I already use in close canopy at 1:48 and I don’t know if the time that takes (the inside is much consuming time than the exterior masks) is worth it. The mask is easy remove from the sheet with a fine tweezer. The glue on the tape is very good and it is resistant so you can glue and unglue form the clear part to get the perfect alignment without worries of losing the tape glue and the glue will last quite some time. The numbers are simply perfect! A great add to find that small mask in the full yellow sheet. CONCLUSION: Well, another batch of ASK mask that are much need in any model construction with you want save lots of time and with a guaranteed great result. Theses mask are not a laser cut as ASK use a very high quality cutter that use different cutting speed and a daily changing knifes. I really do because is a great product (perfect tape glue, perfect tape), with super clear instructions with the numbers of the mask that makes the job super easy and super fast. I have tried several other mask products (kabuki and vinyl mask) and this product, with the quality tape and the mask number indication makes to the top of my favorite mask canopy set. Very Highly recommended Fran Our thanks to ASK – Art Scale Kit for the making these masks. You can get this set and all mask set at Art Scale Kit webshop


- 1 reply
-
- 2
-
-
-
- ask
- canopy mask
- (and 3 more)
-
Welcome to LSM!!!
-
Great review! Love it mate! Thanks
-
Paolo RIP! A major lost to all his family and friends and to the modelling community. You will be missed.
-
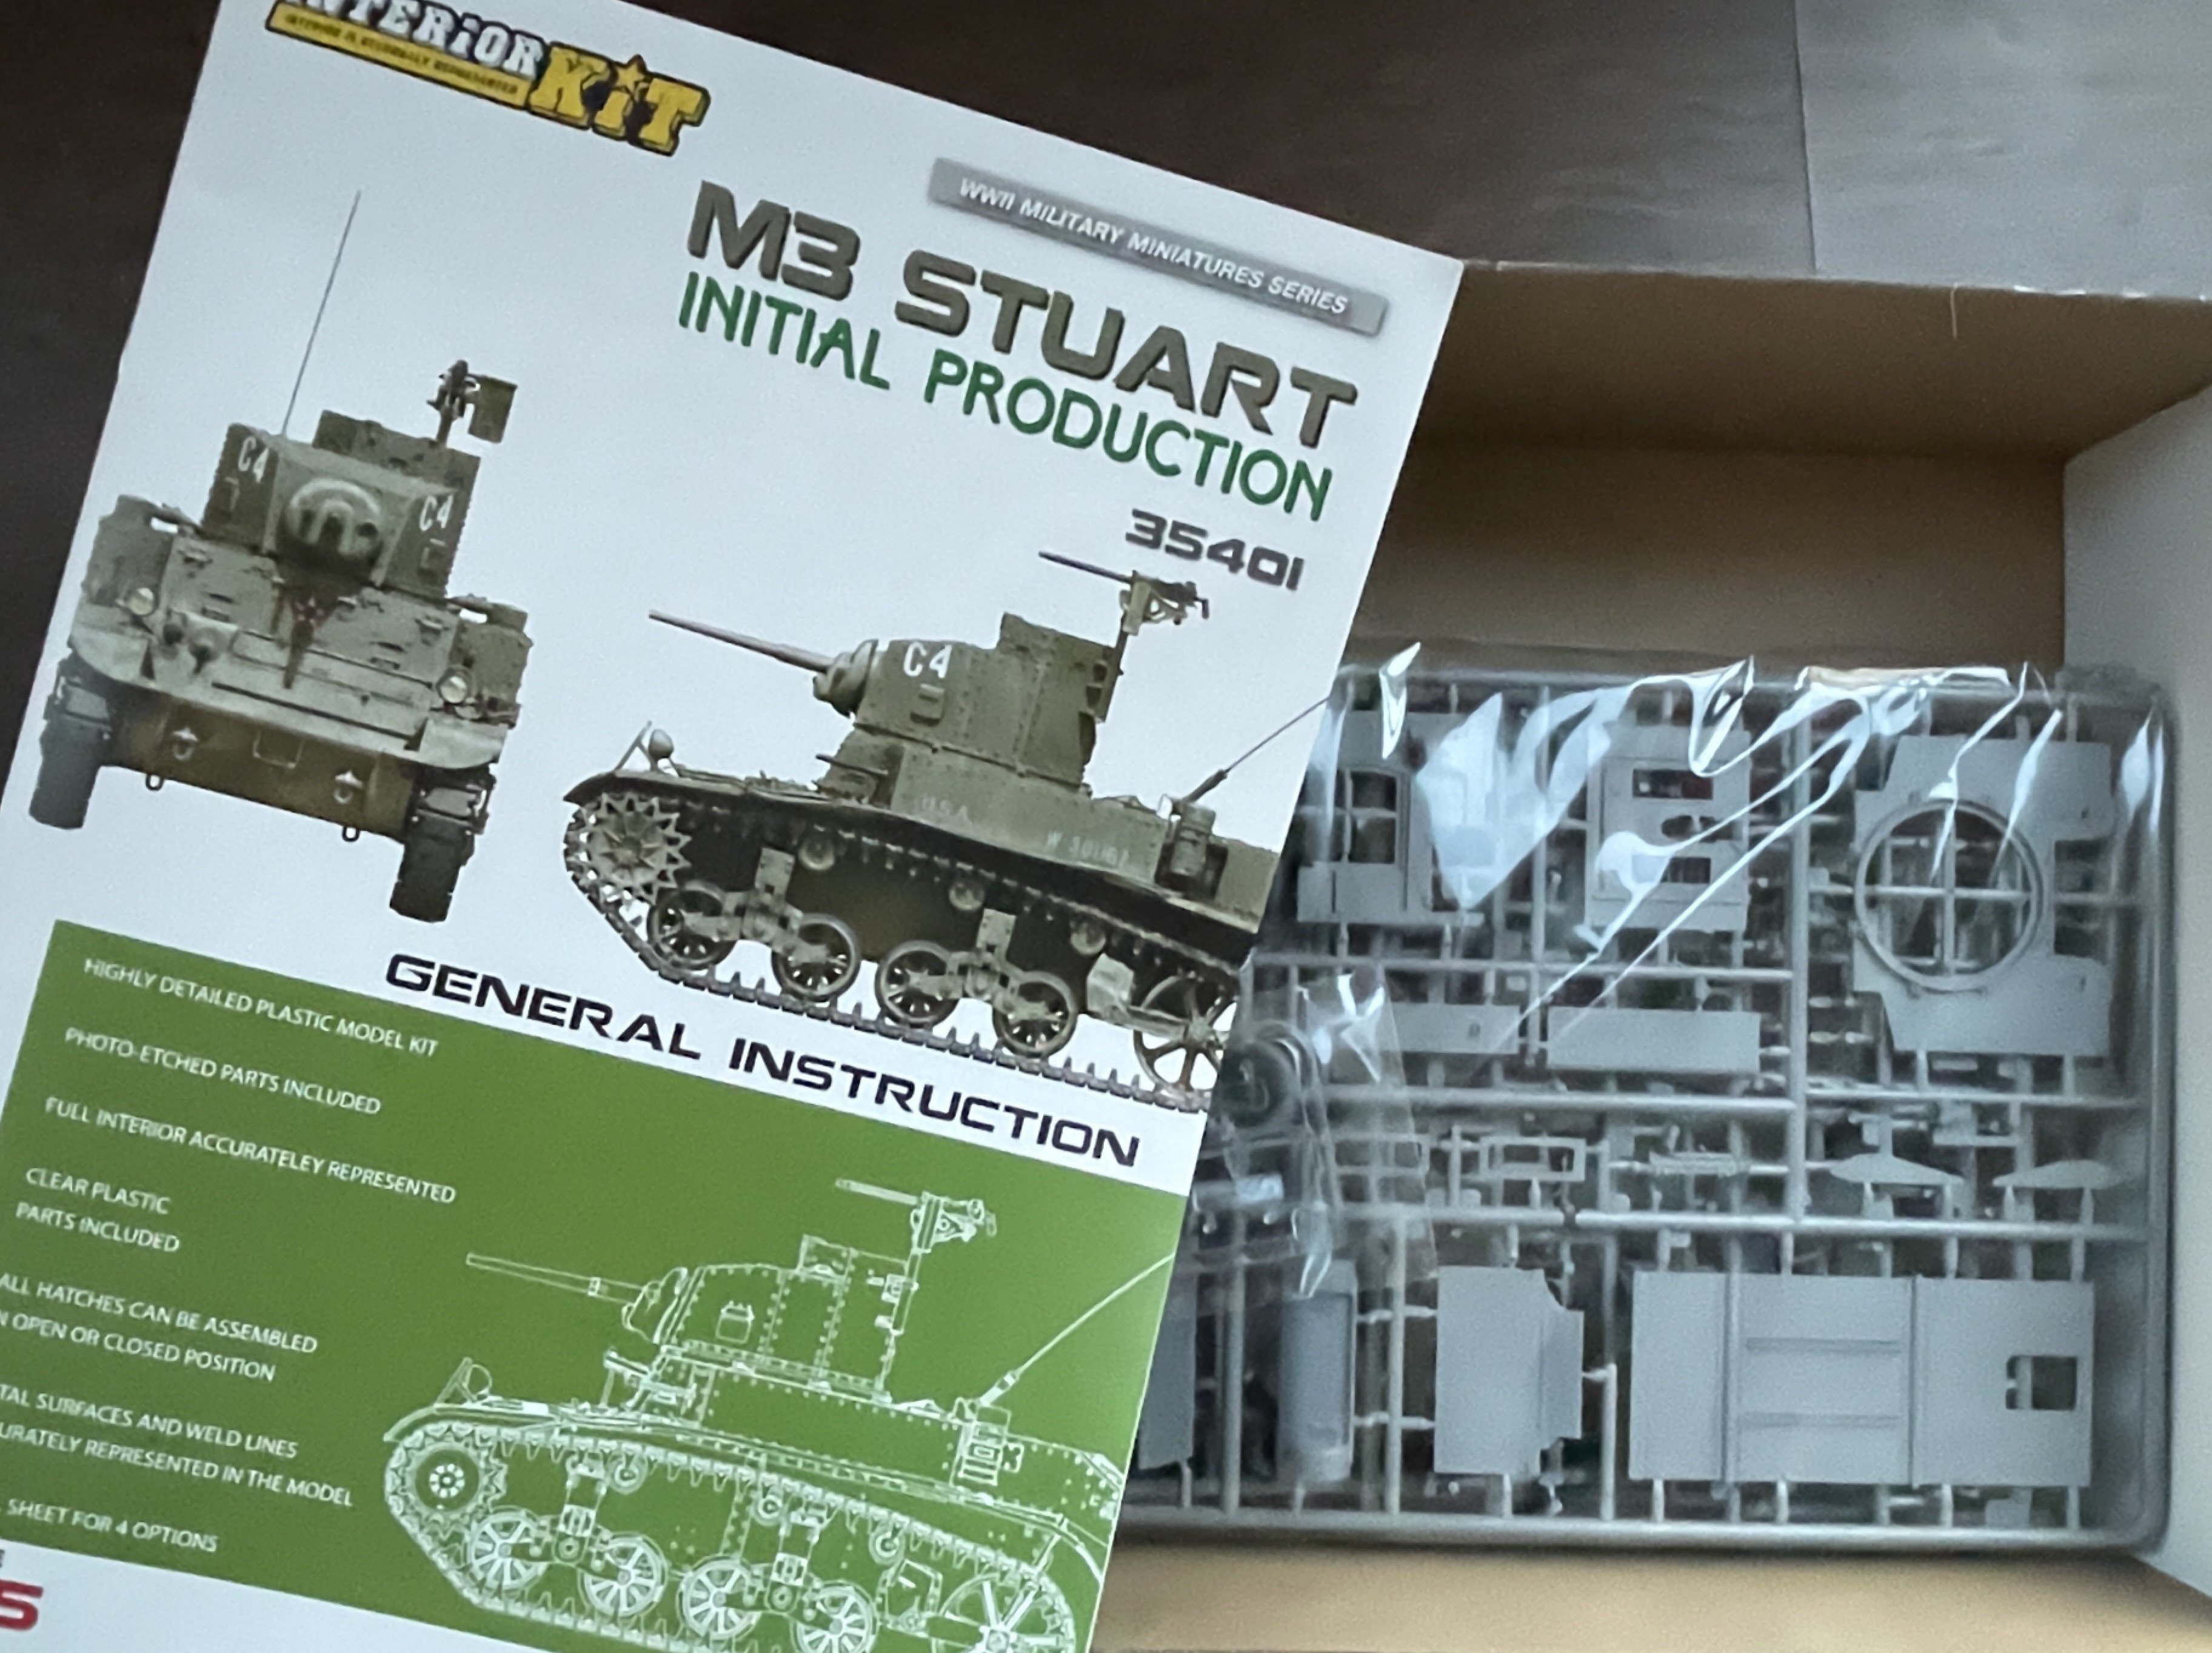
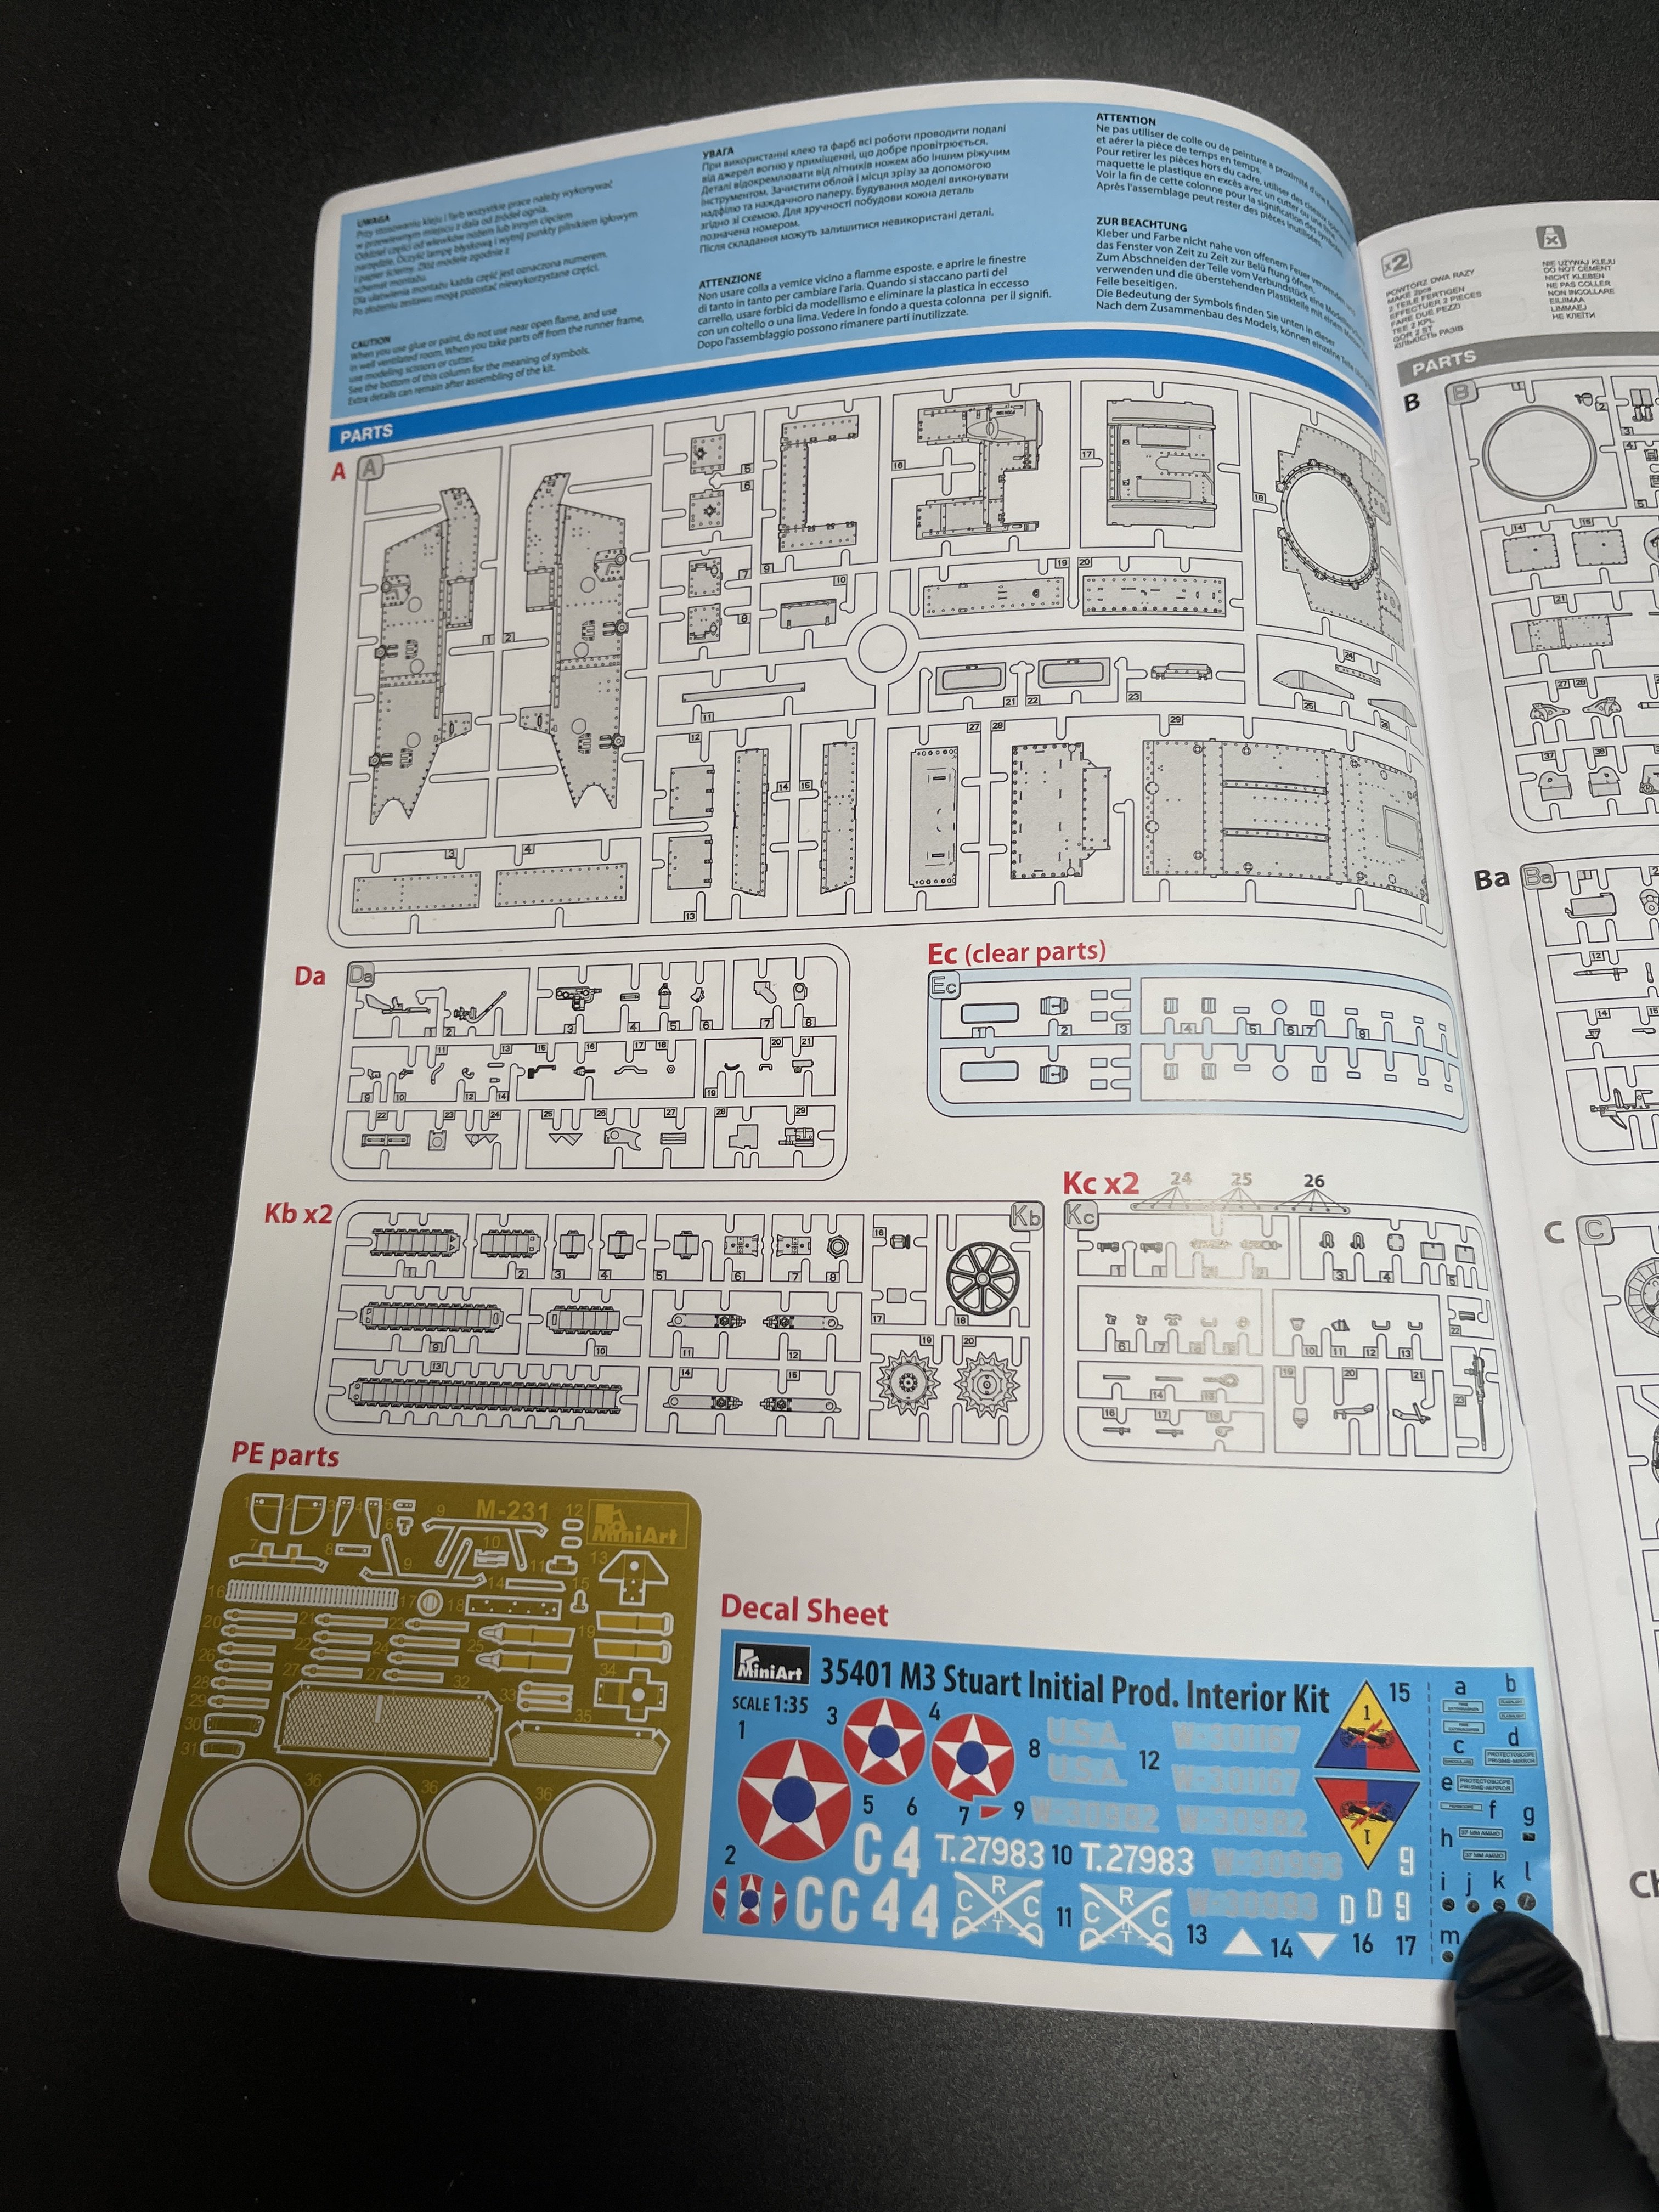
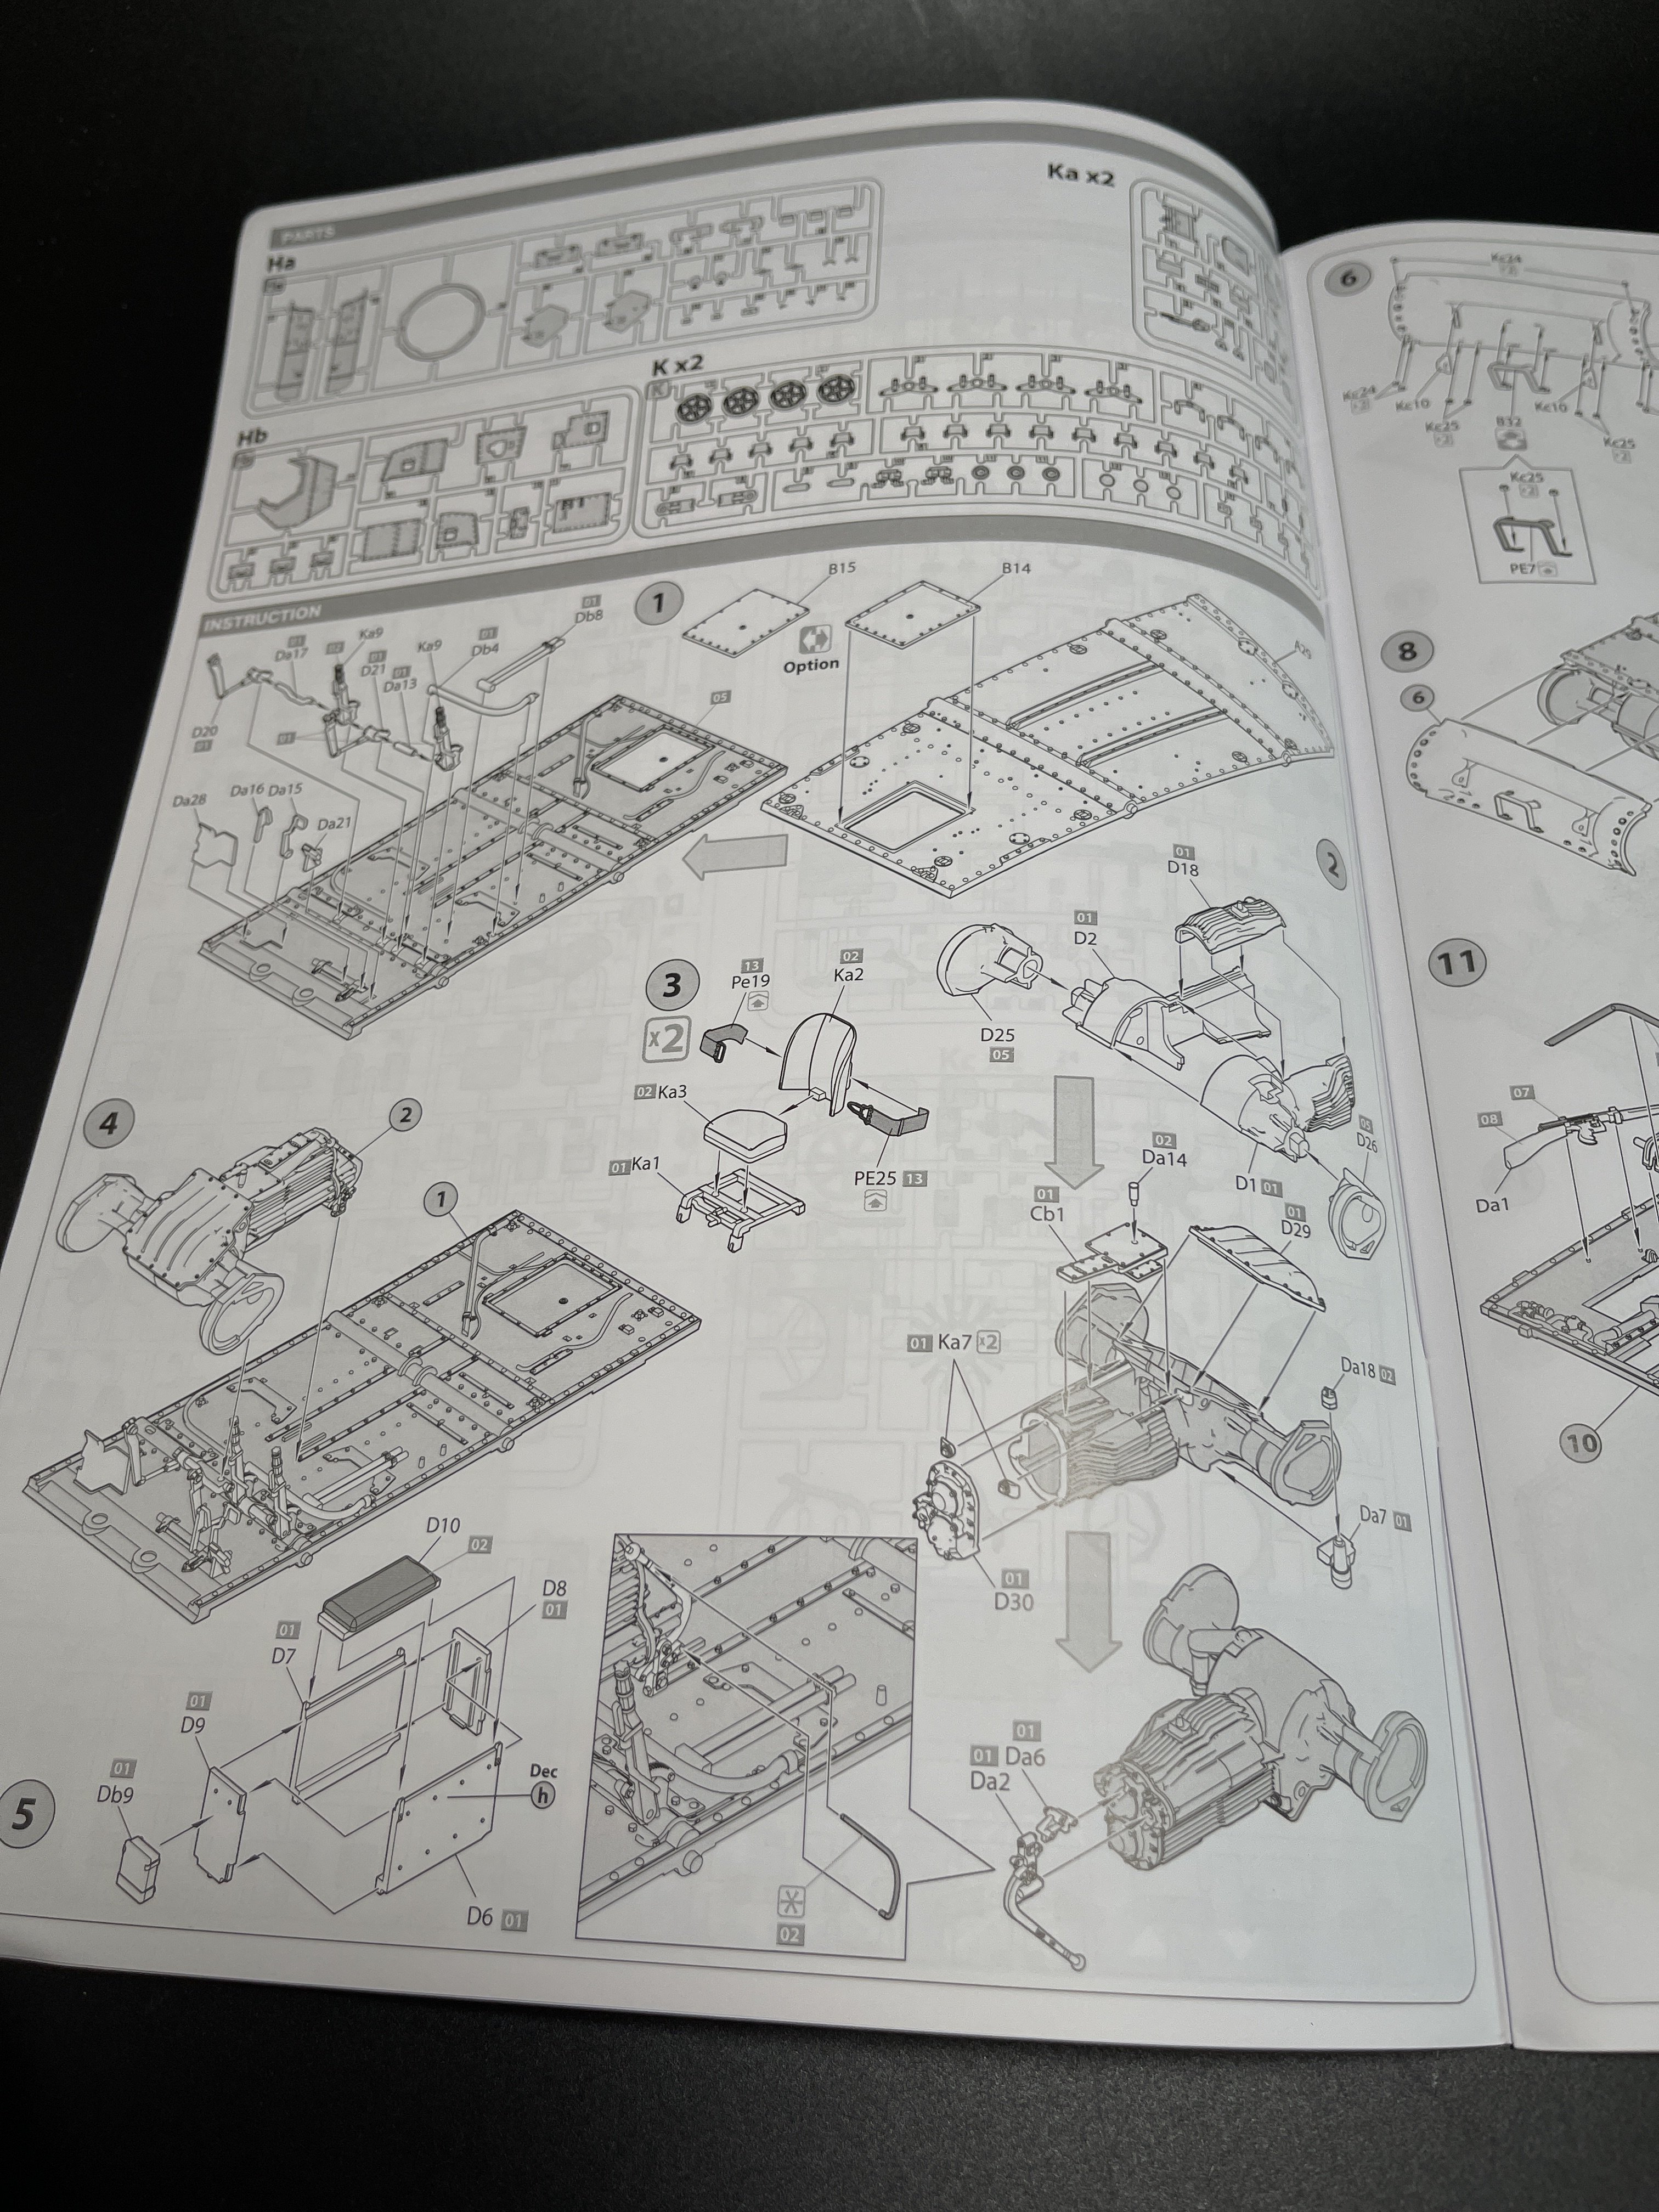
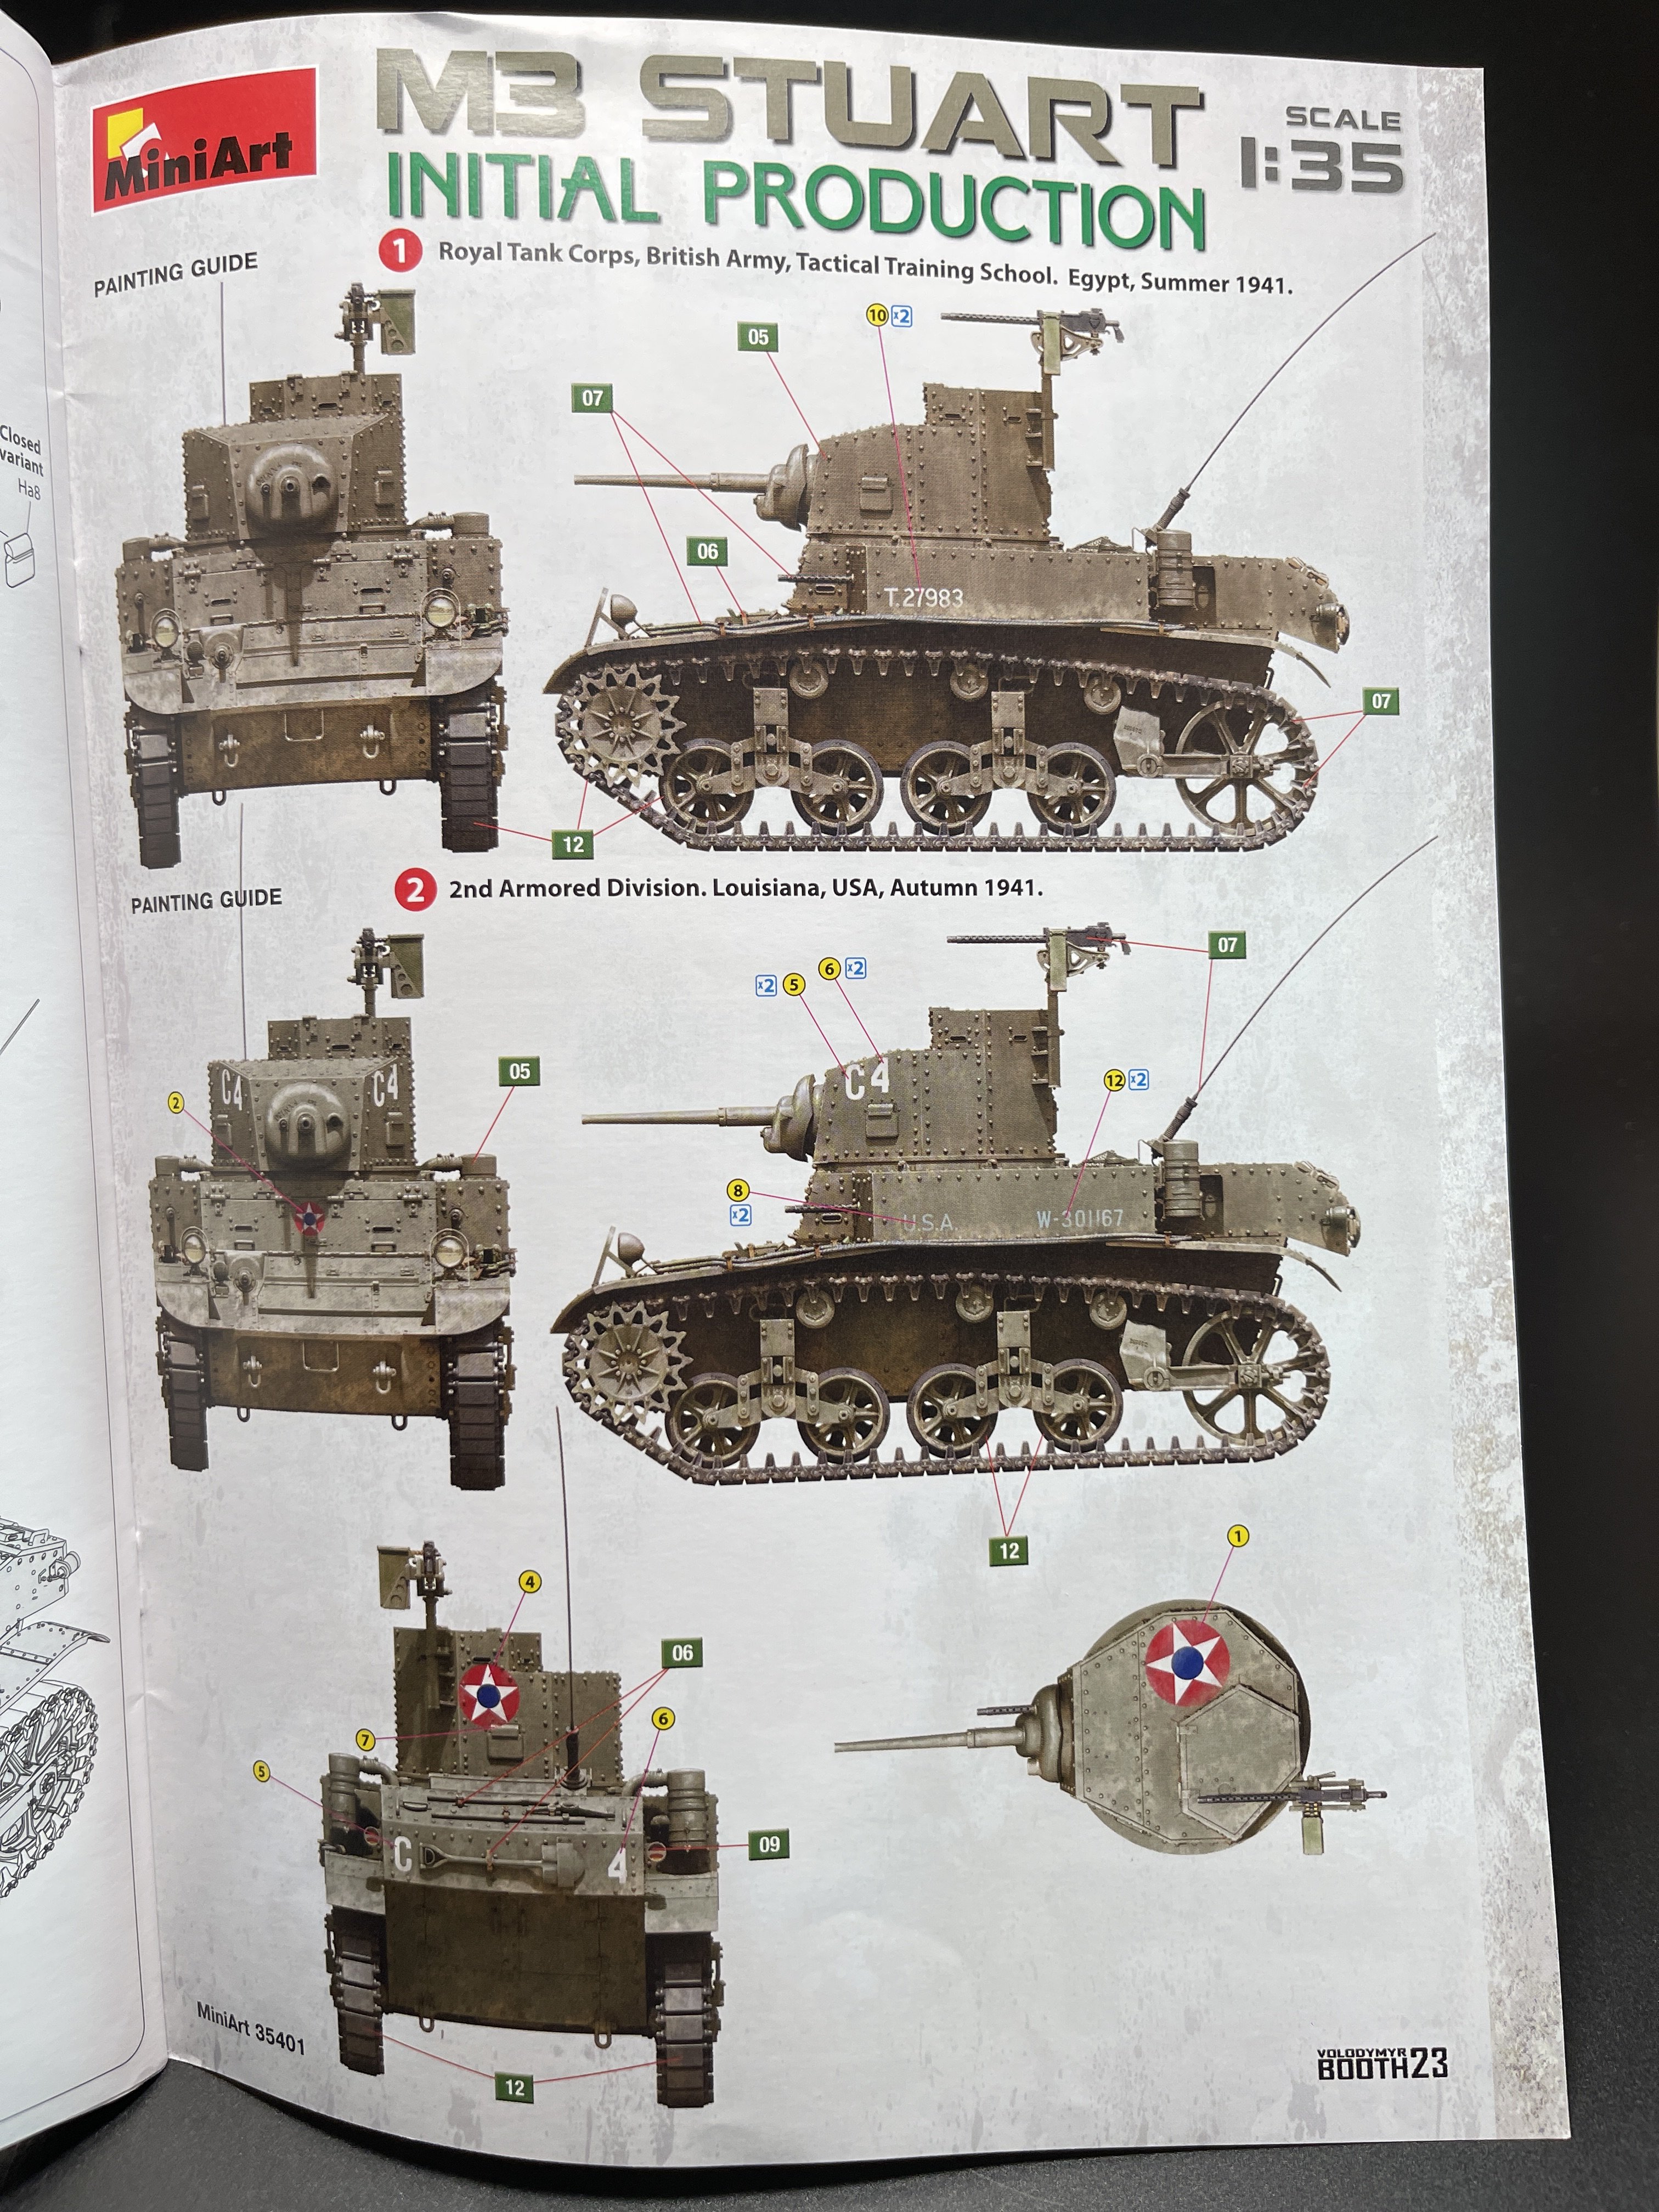
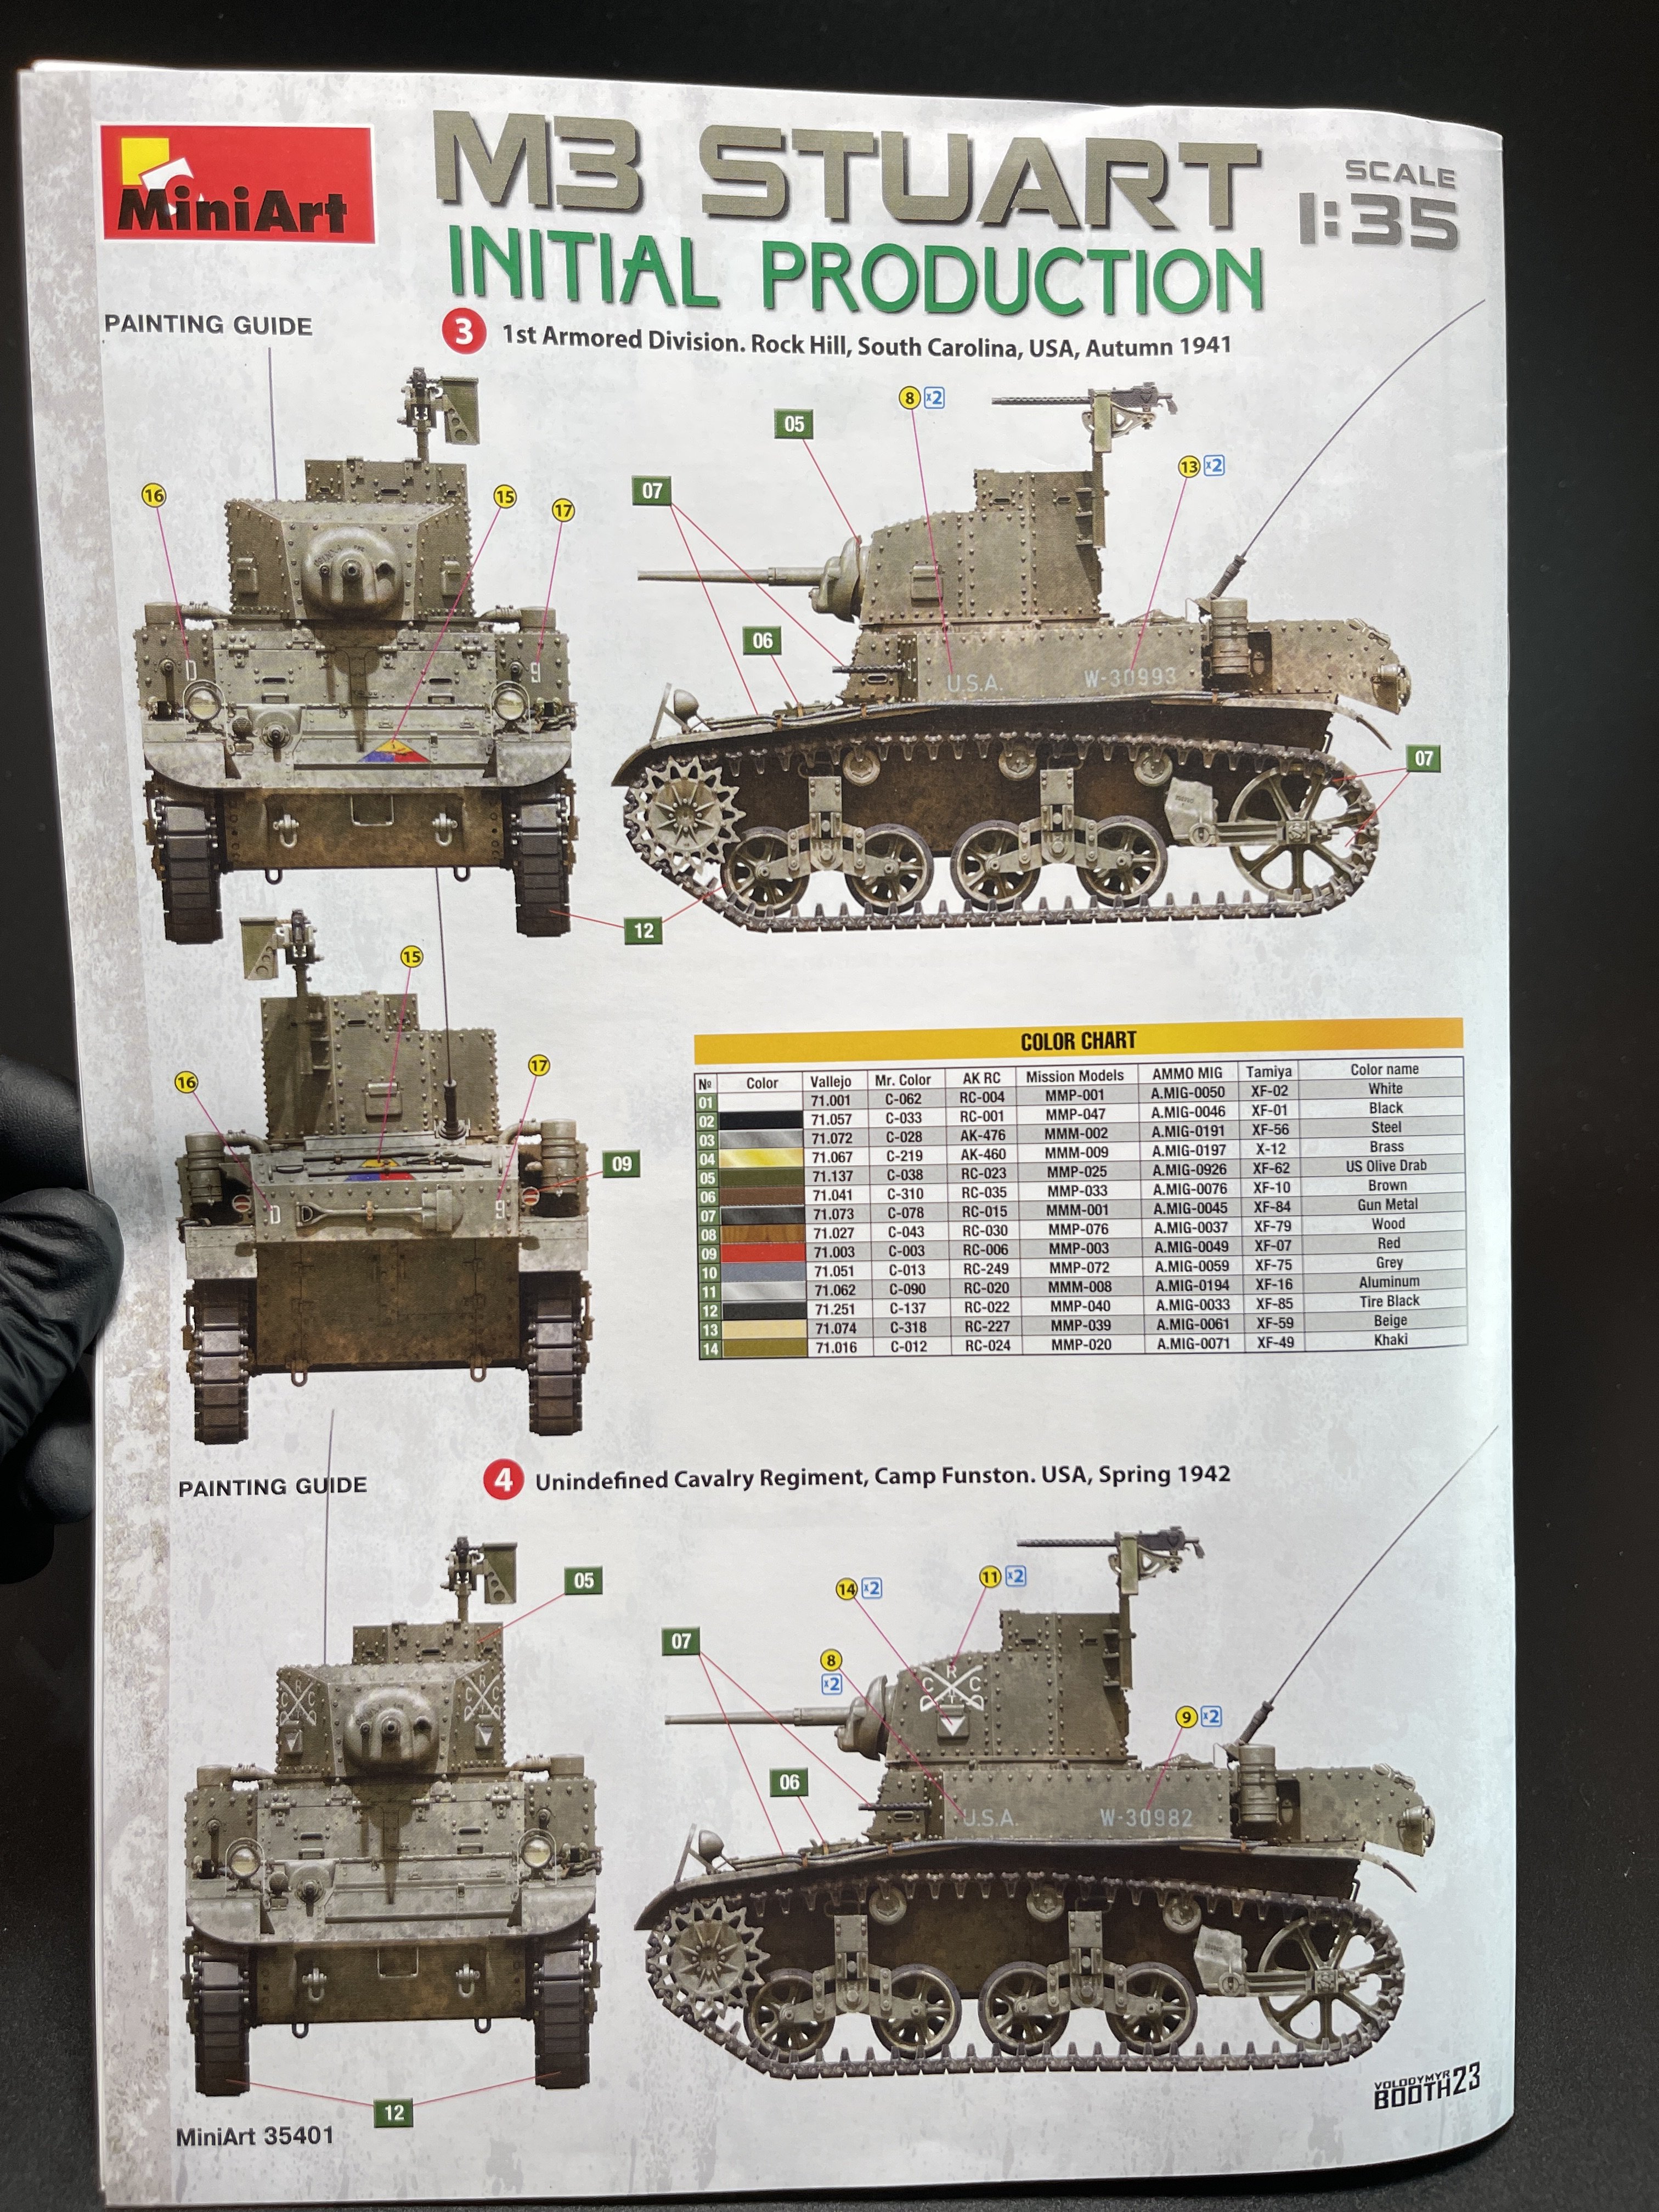
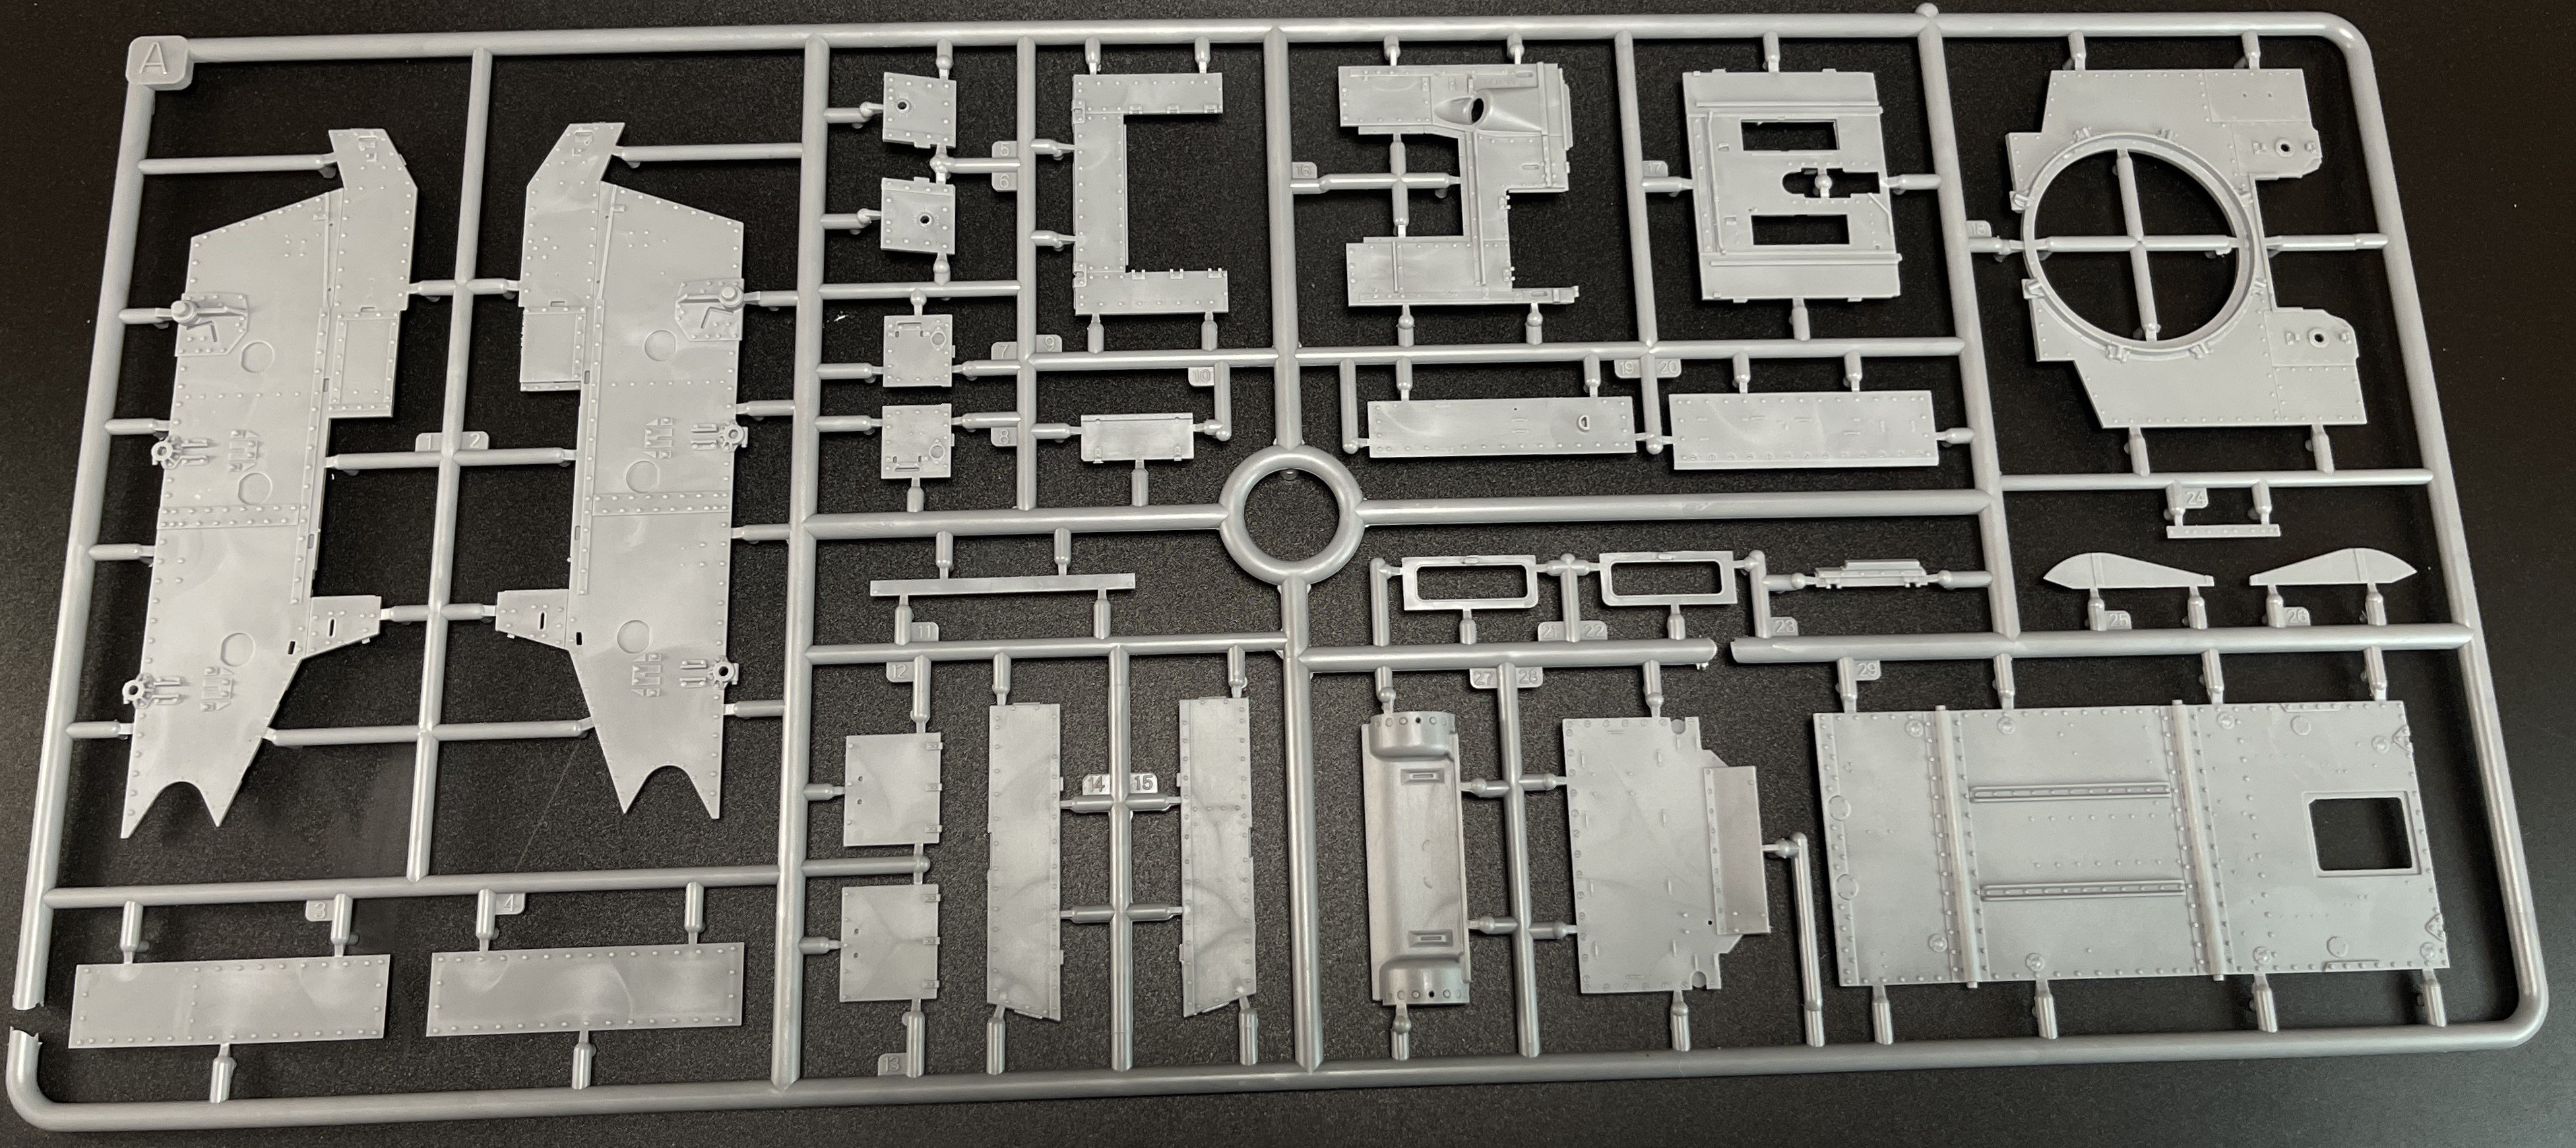
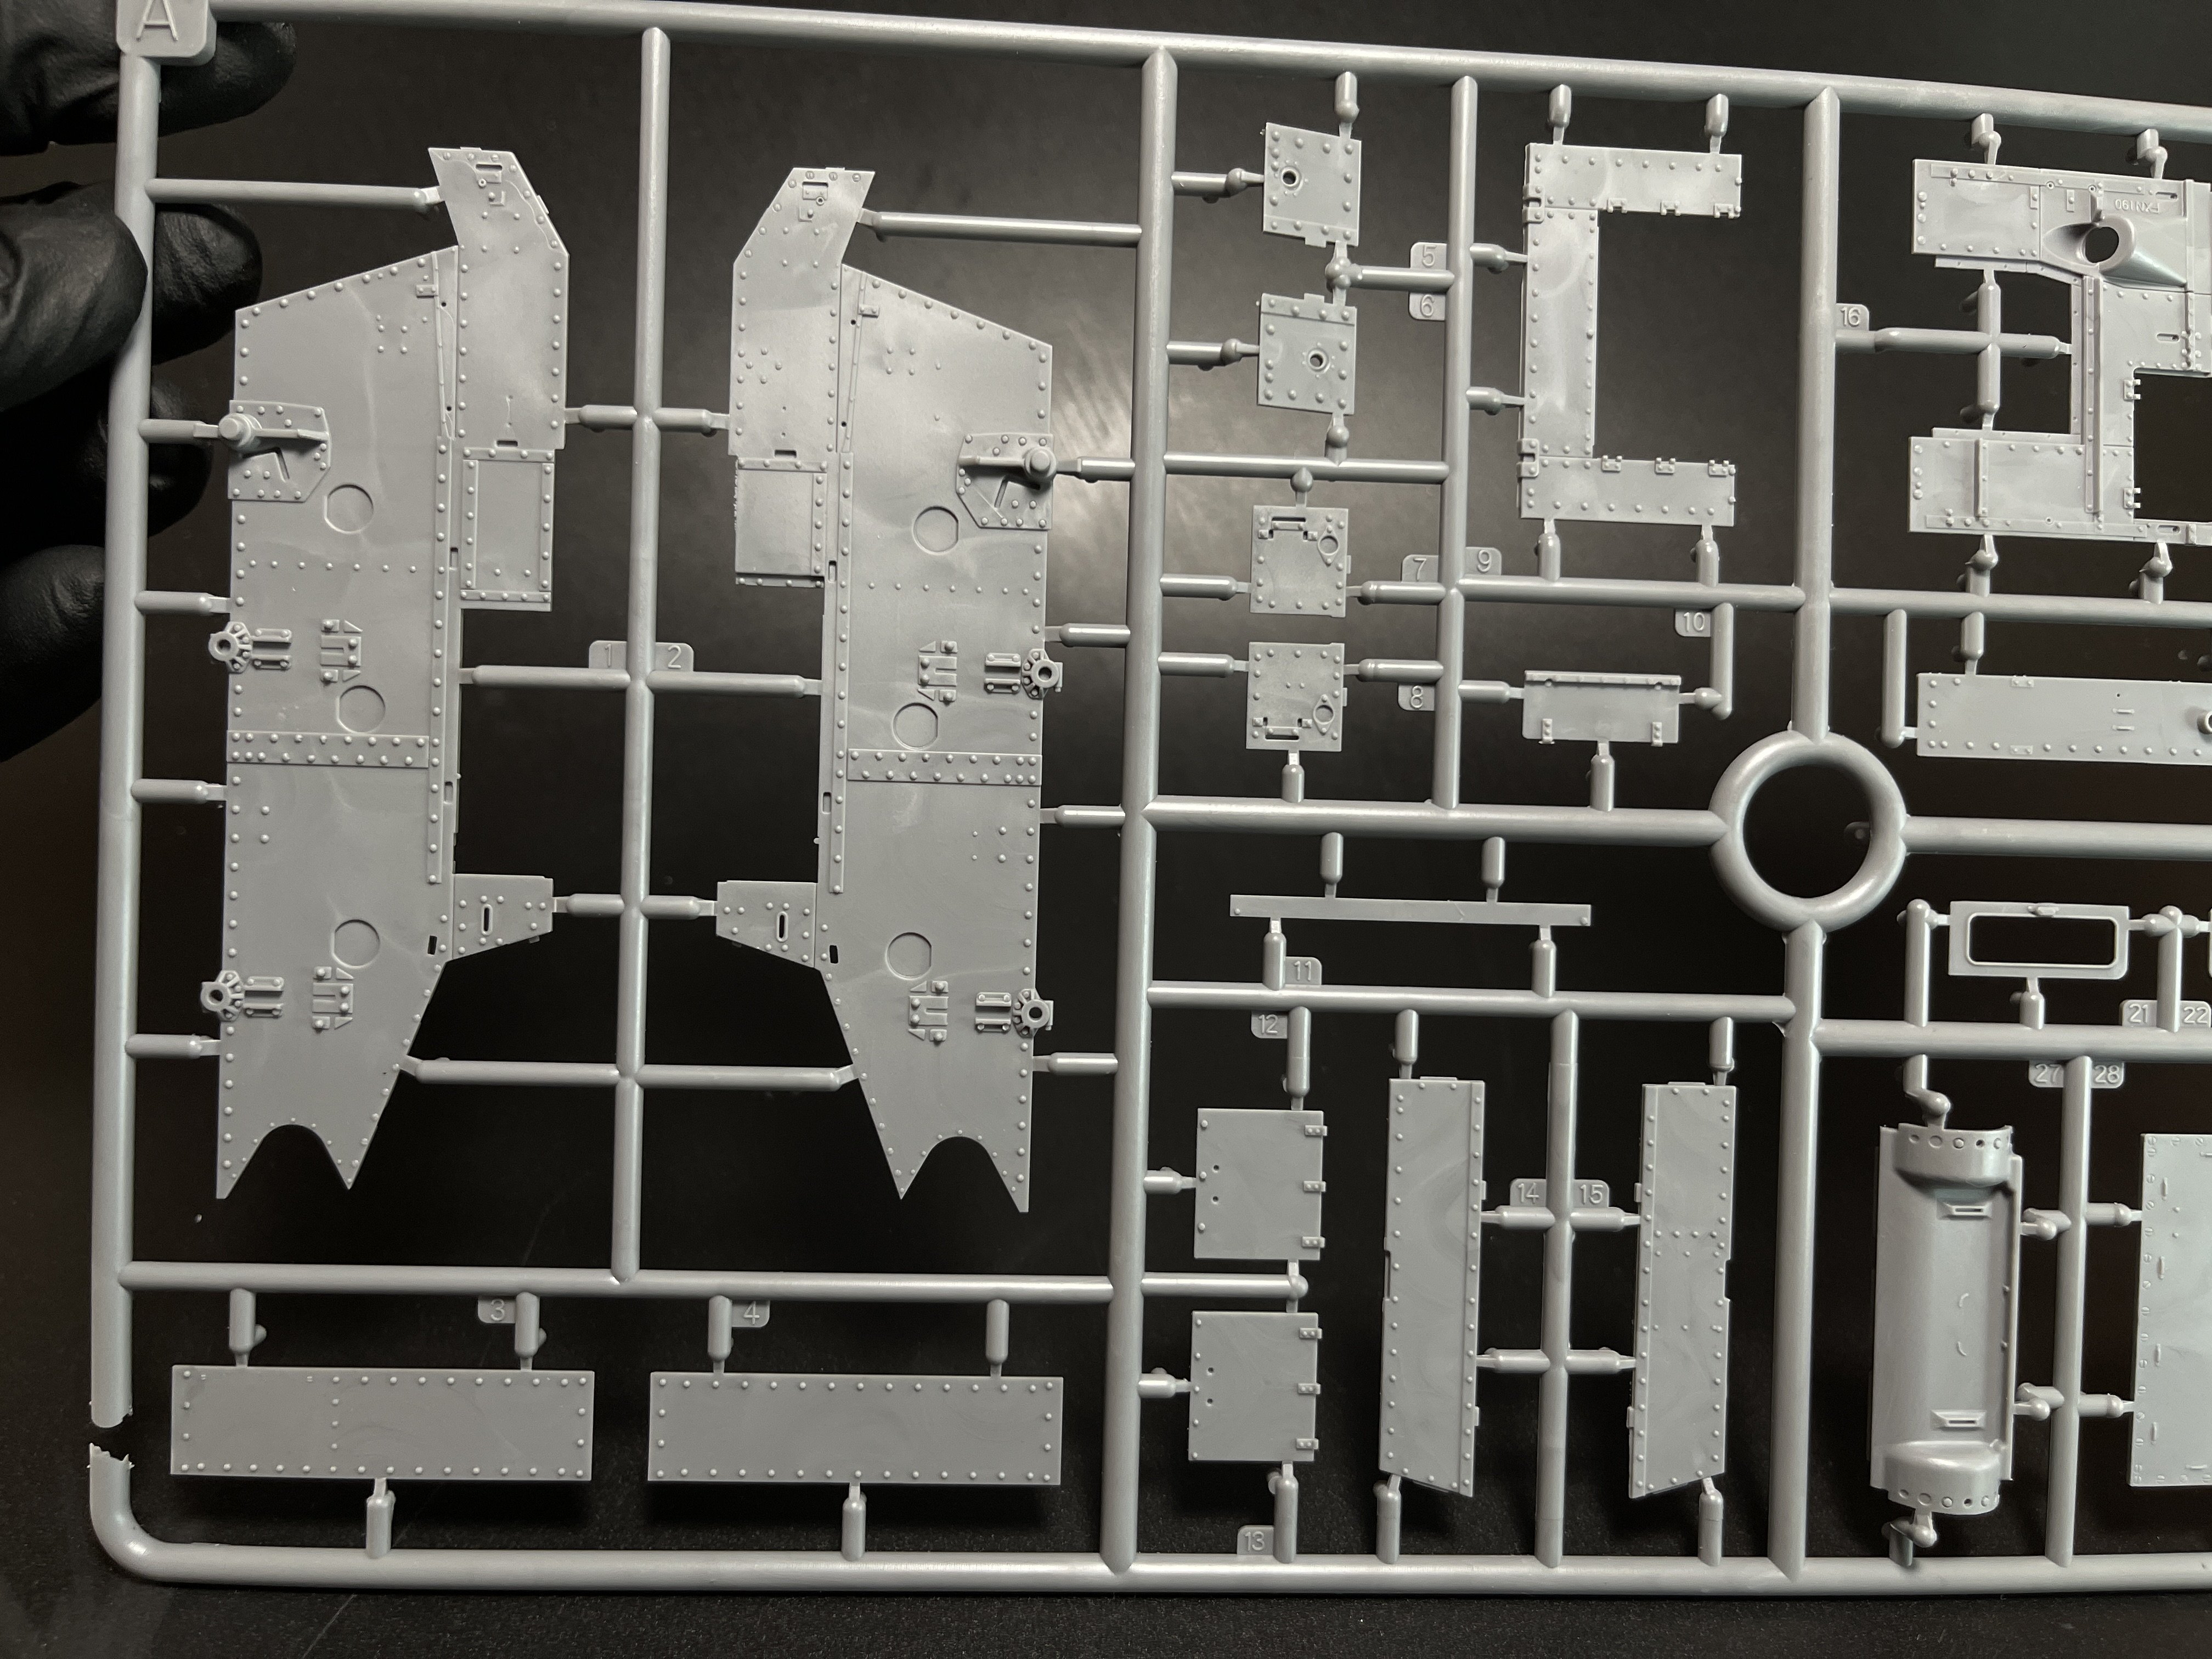
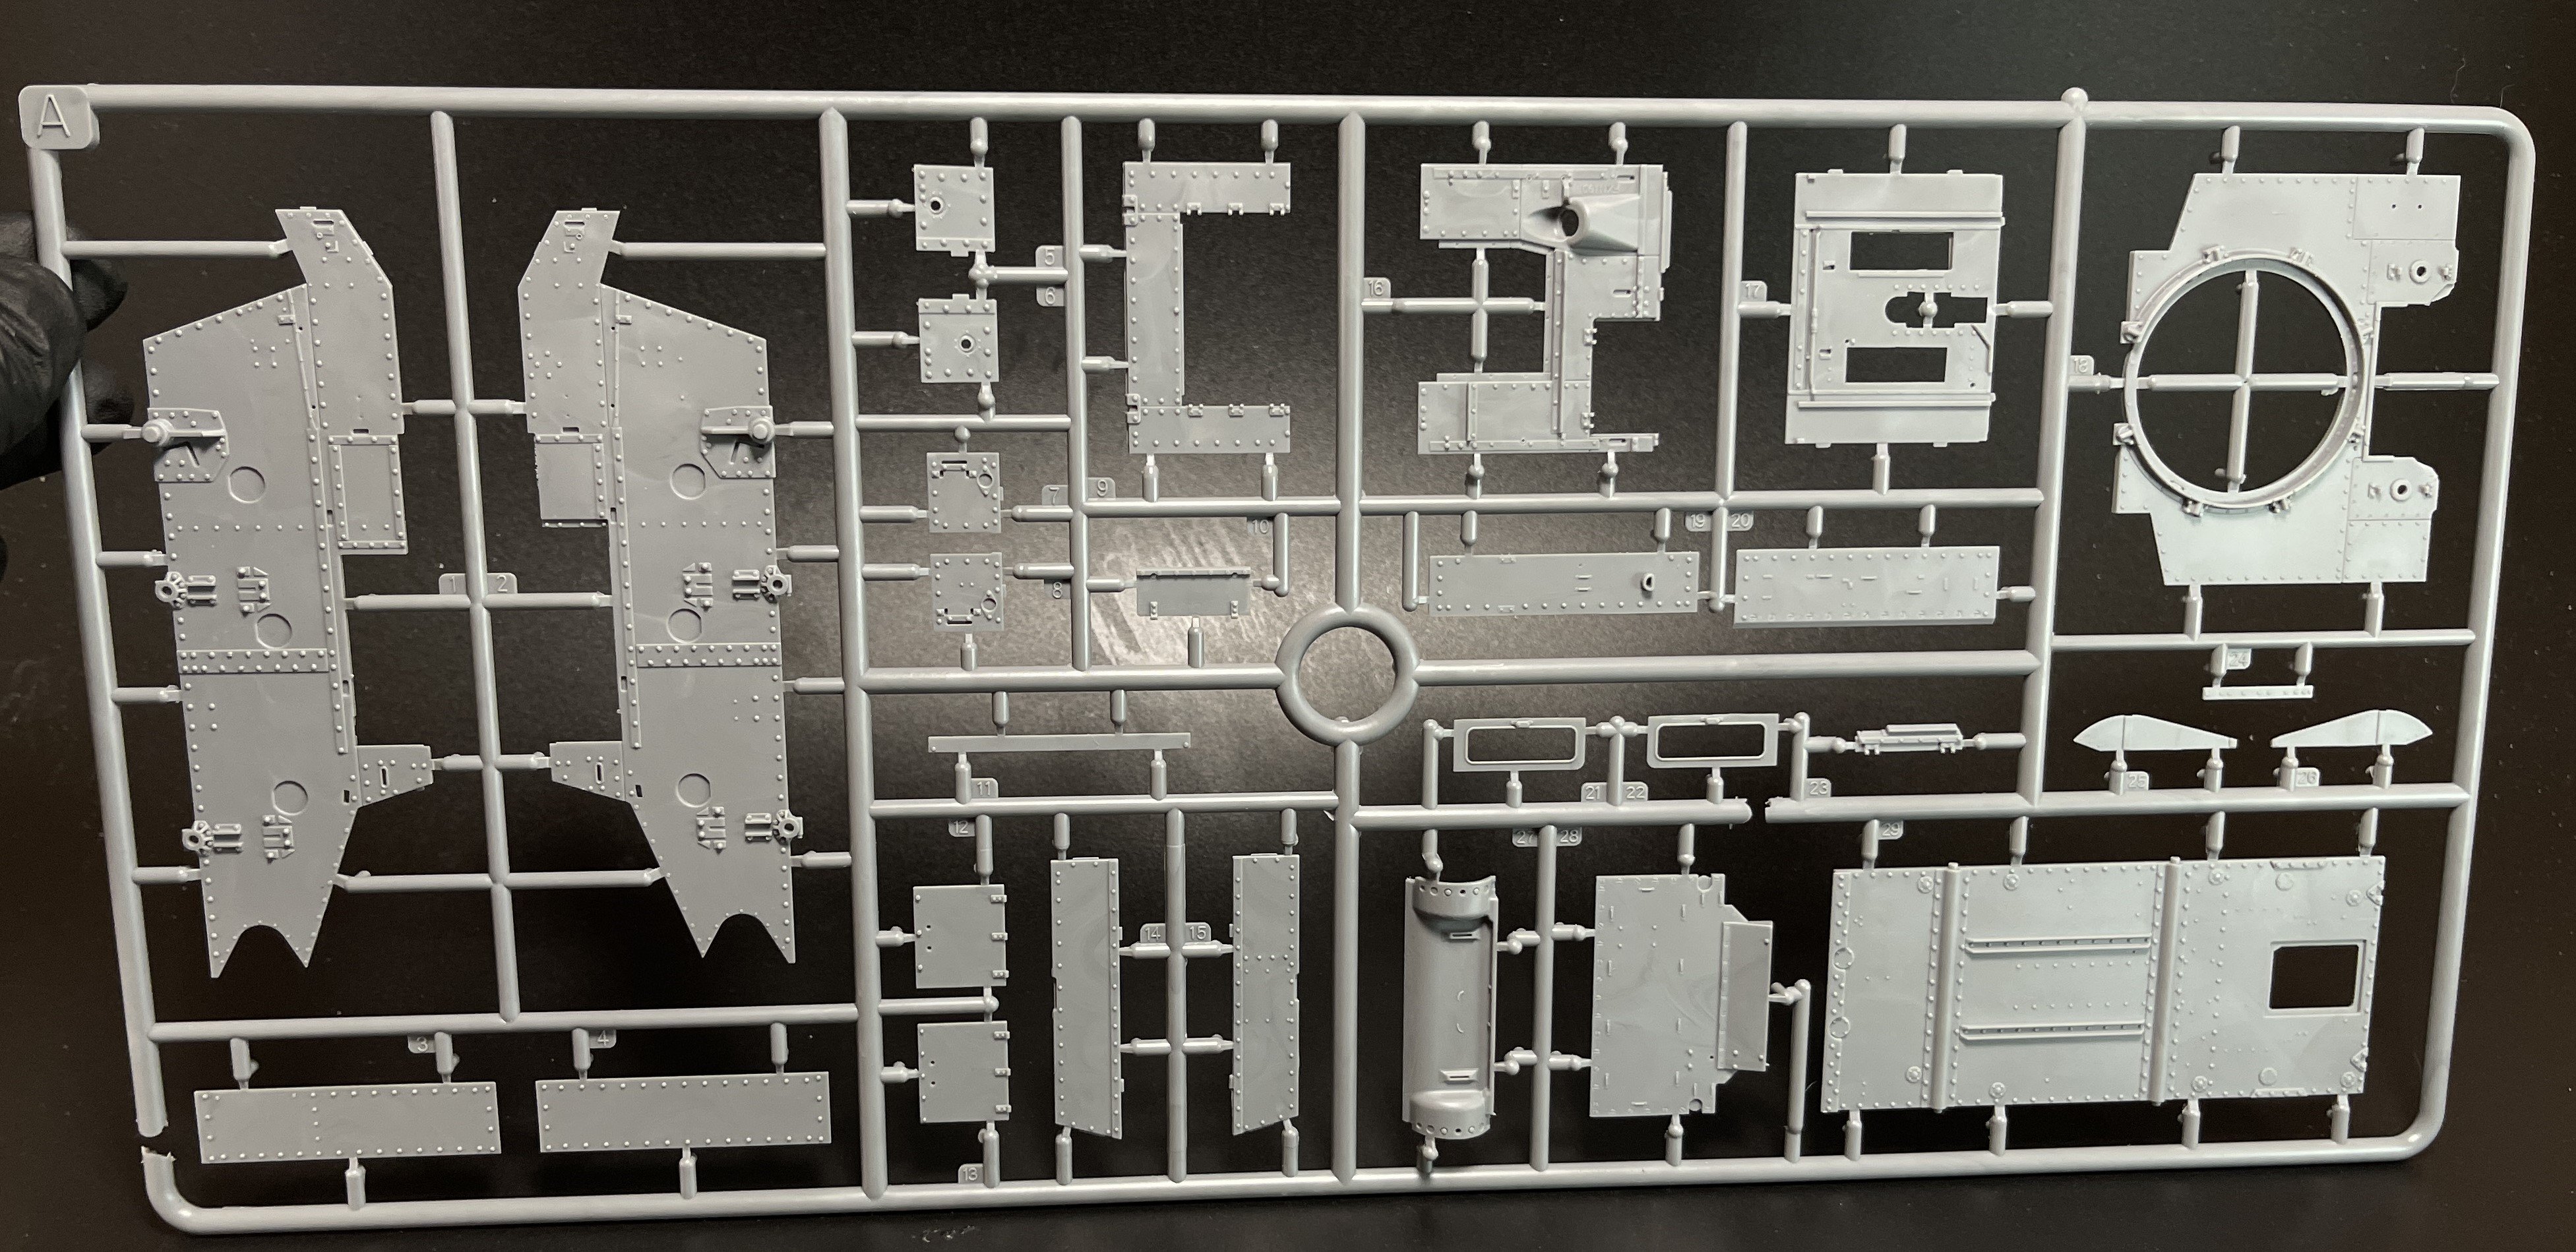
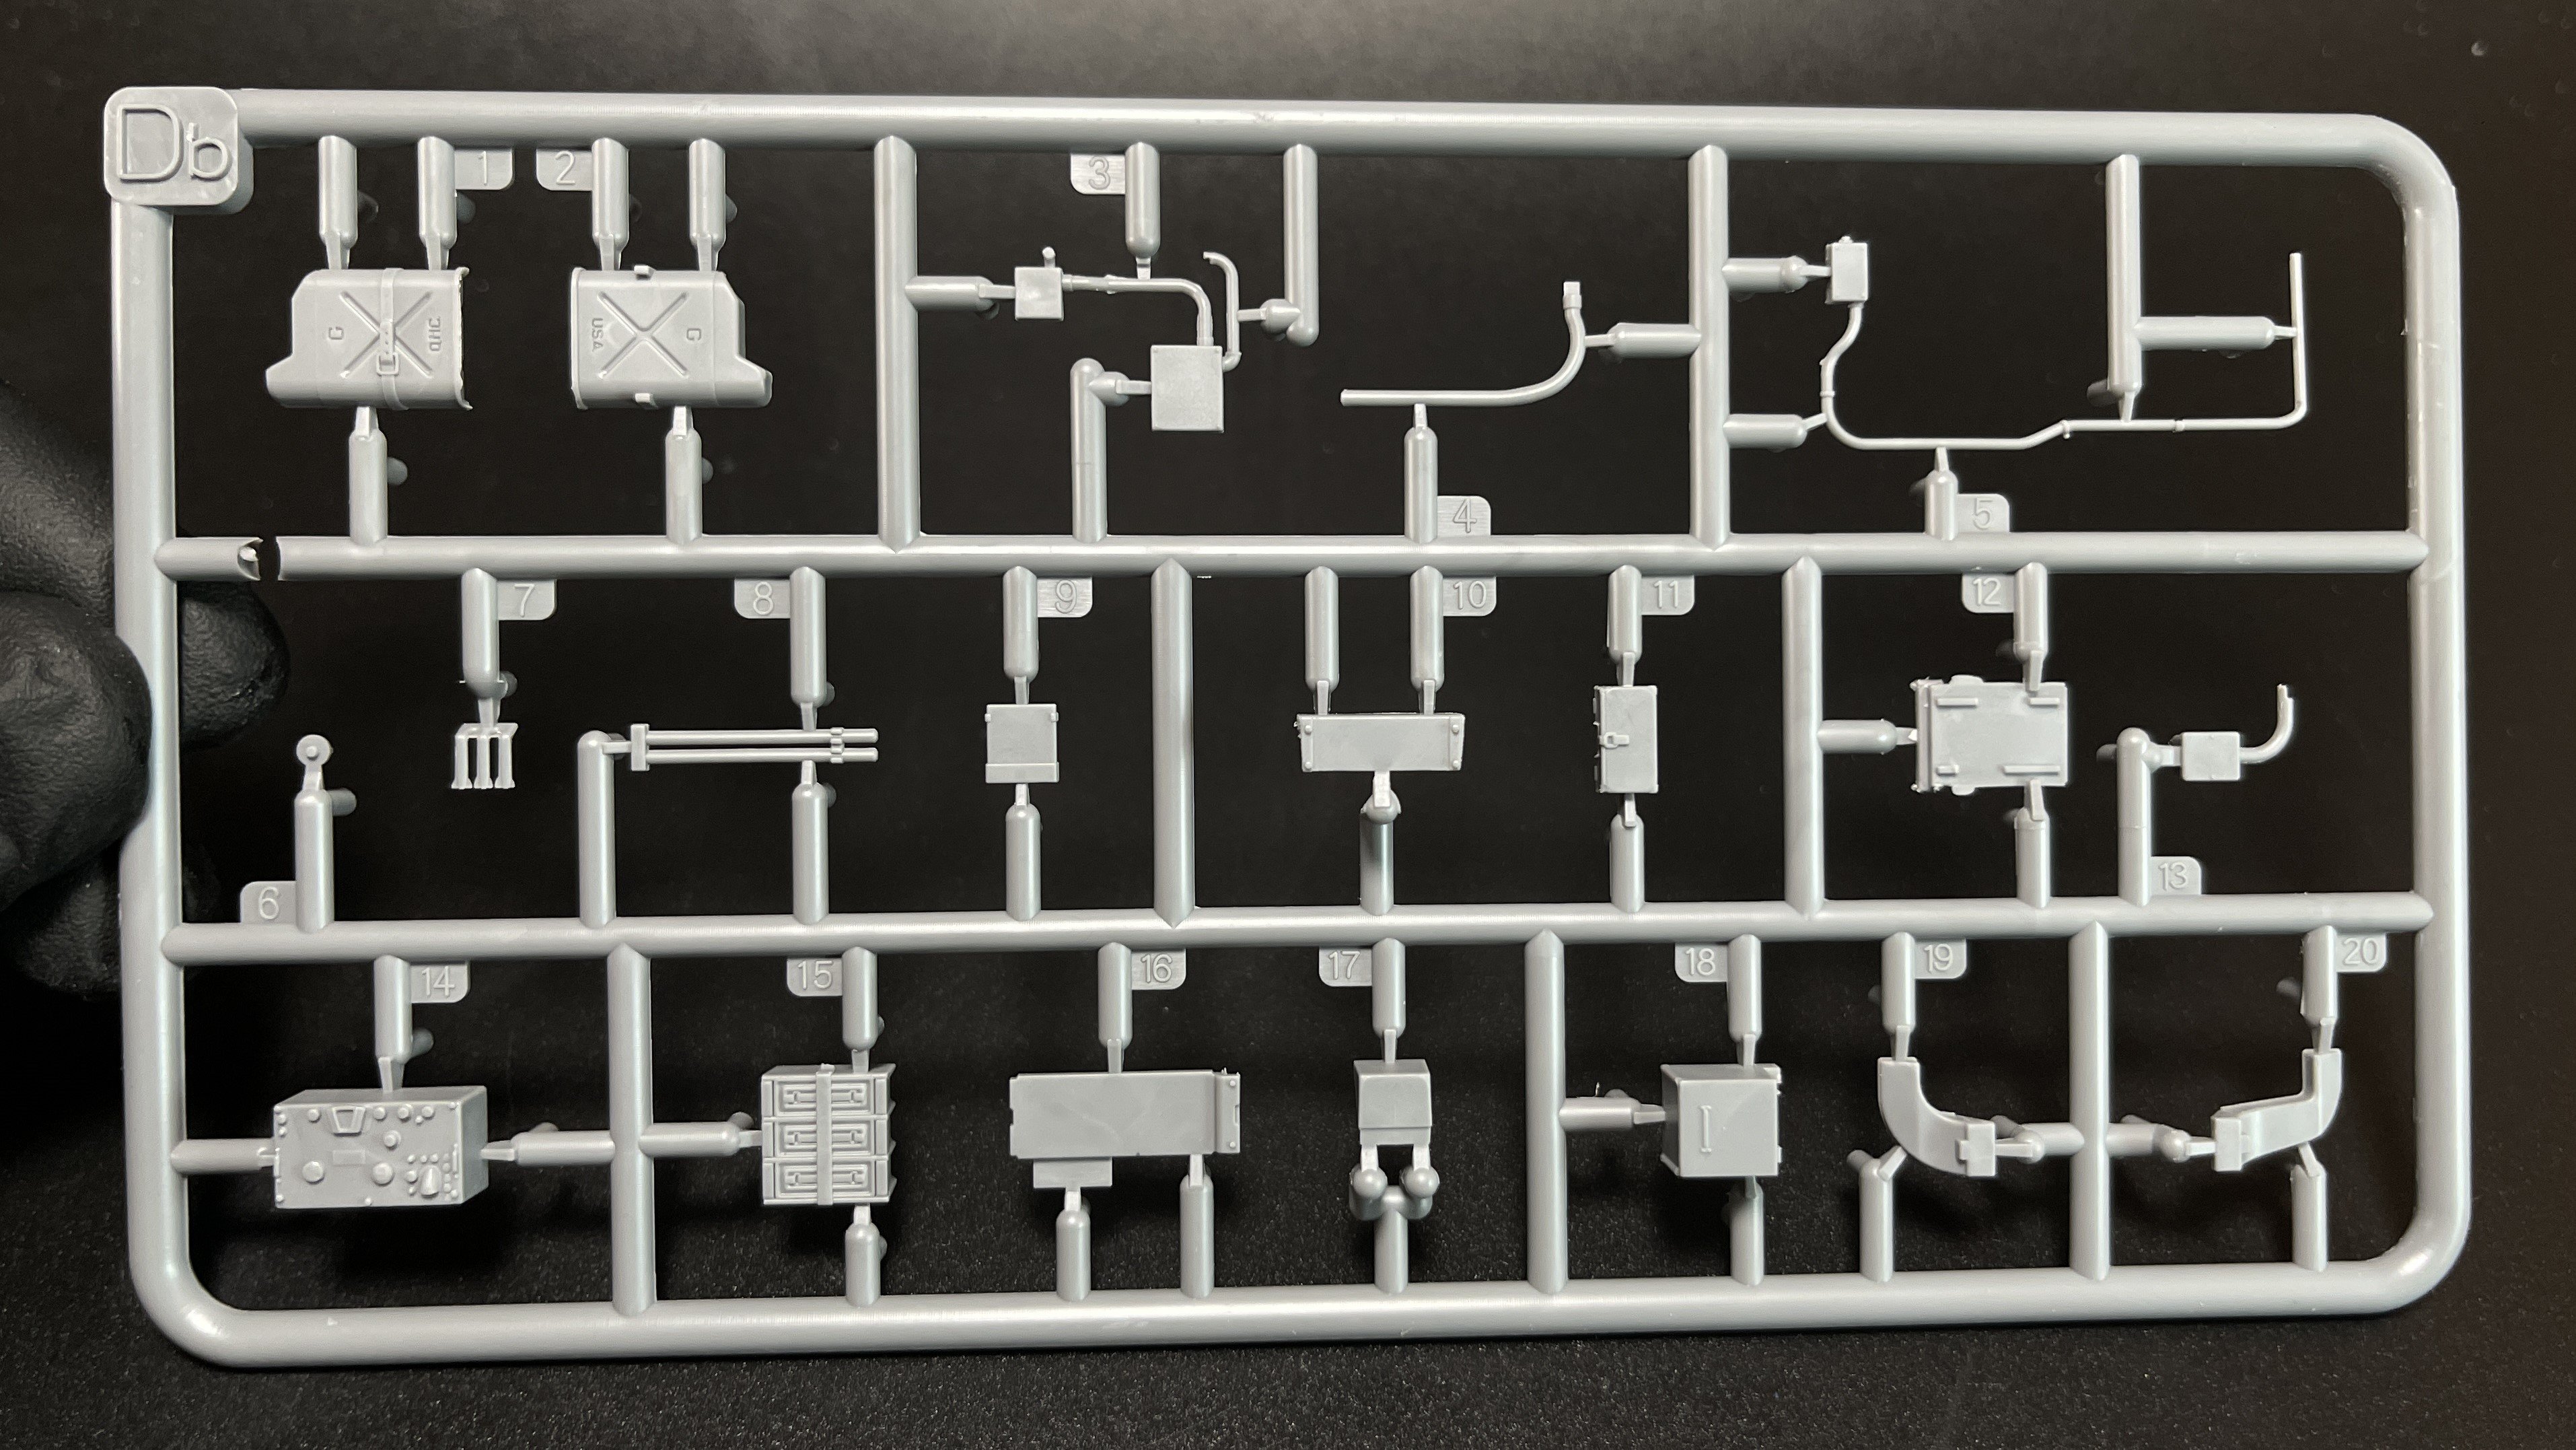
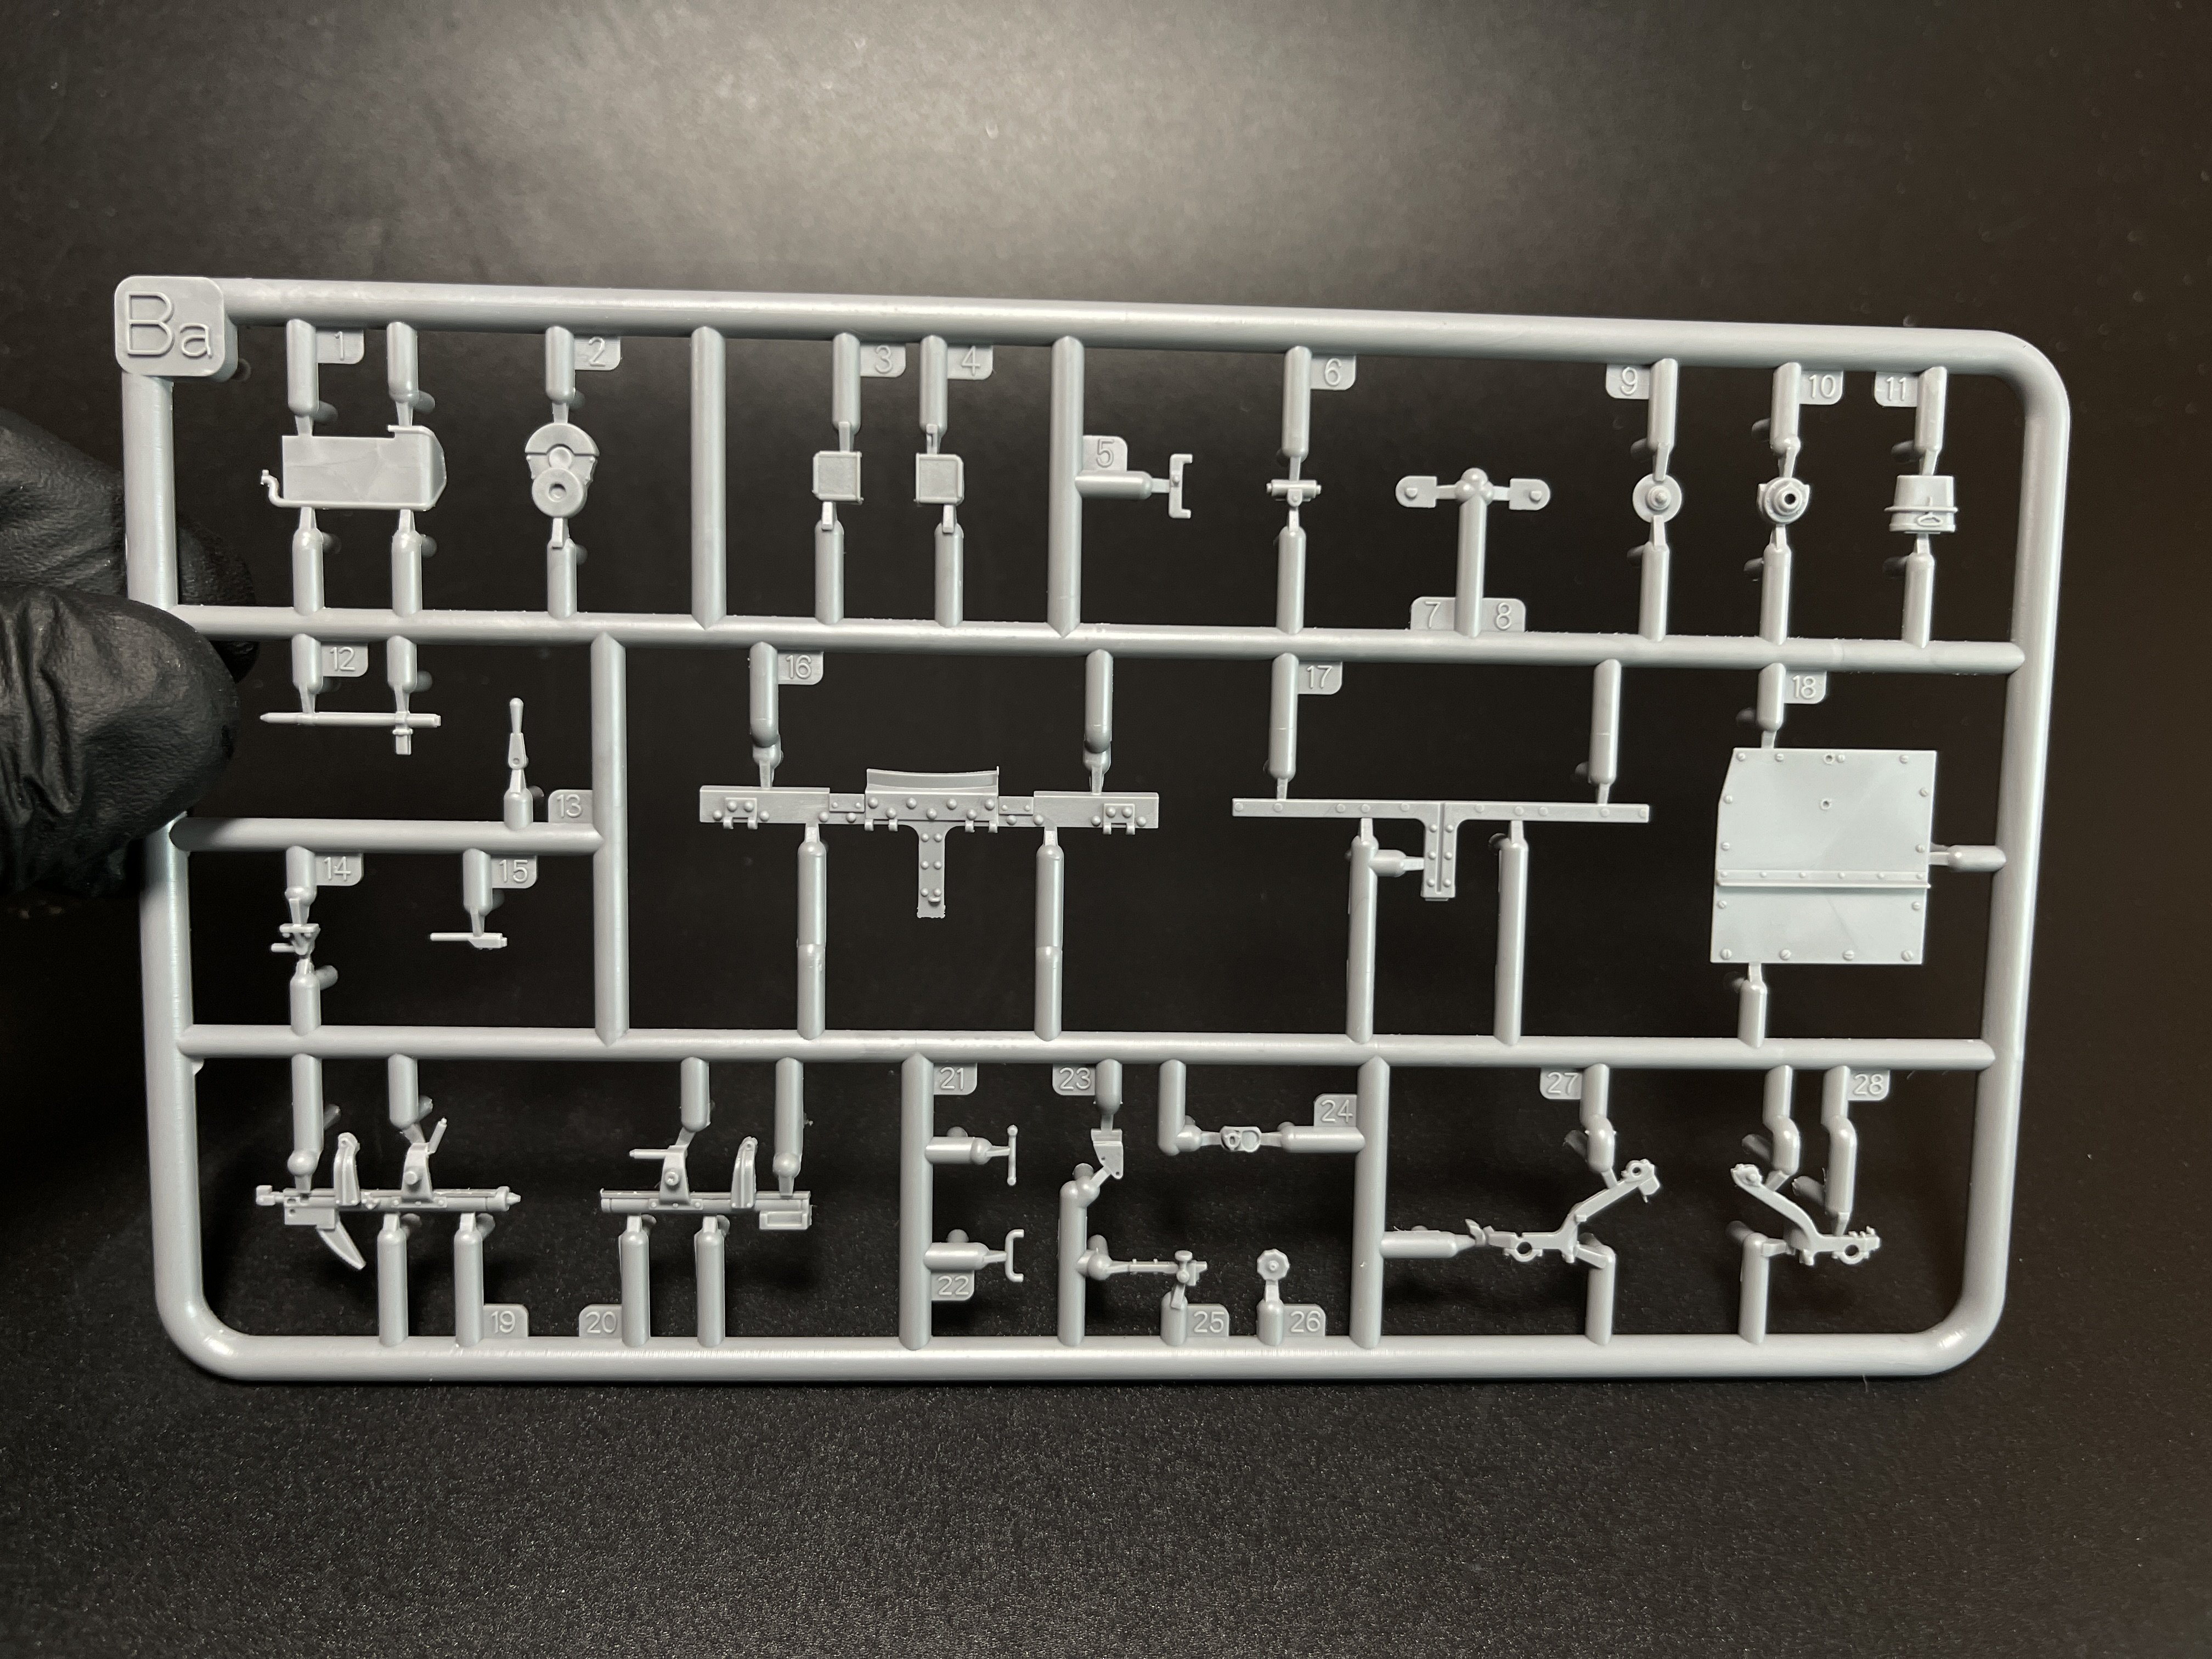
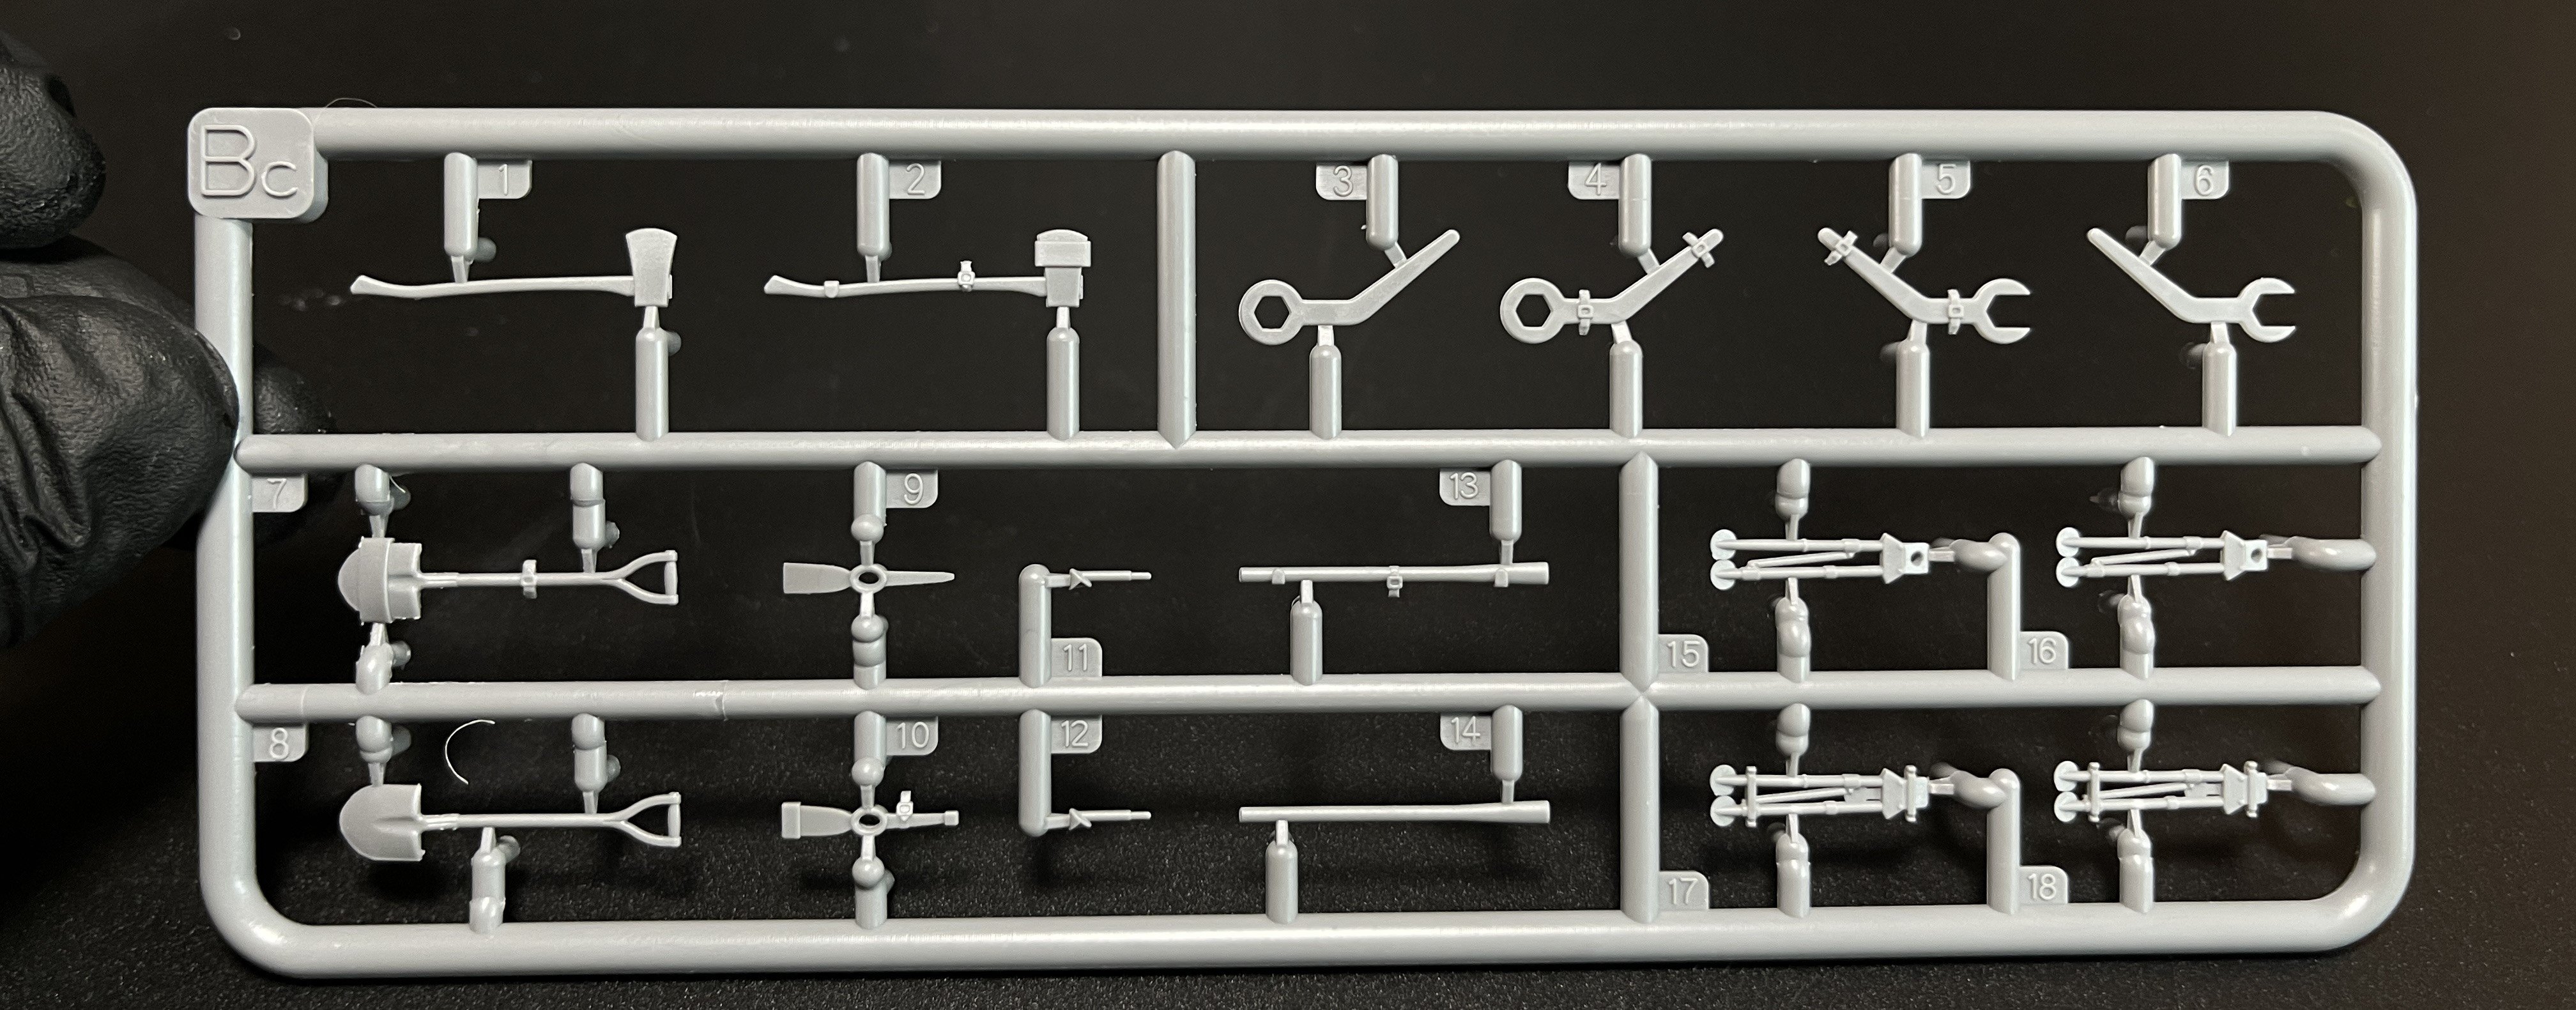
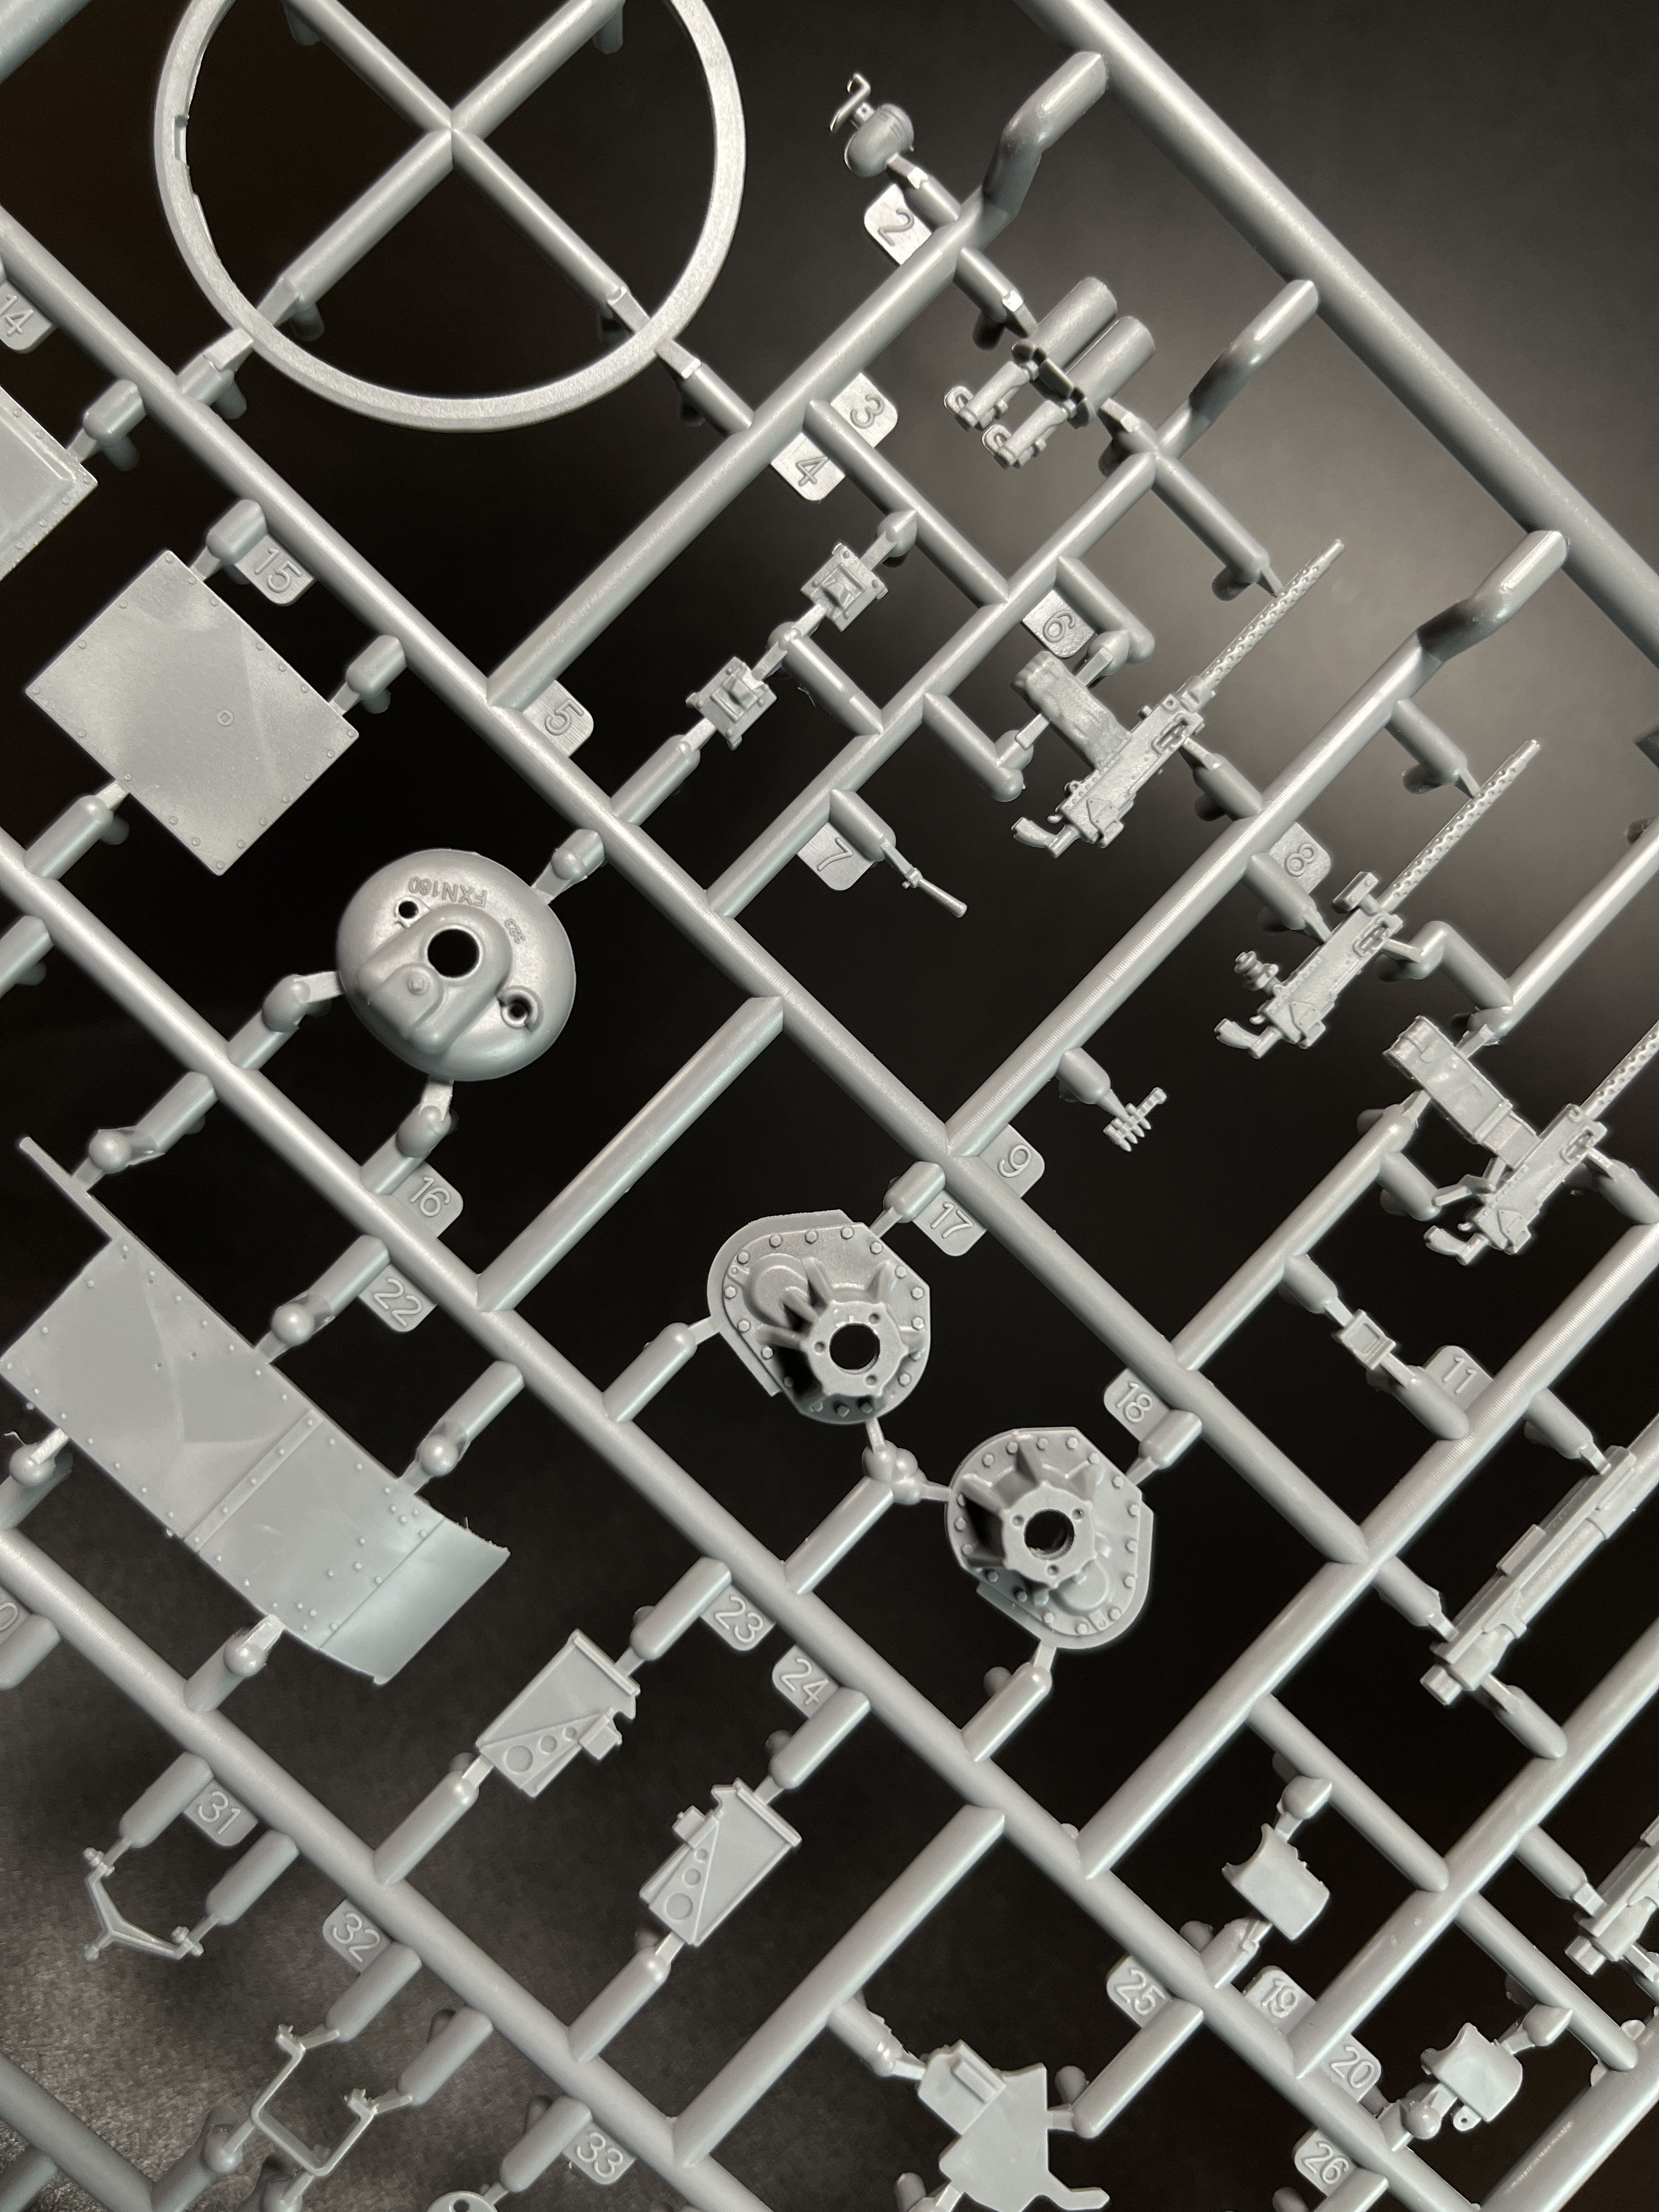
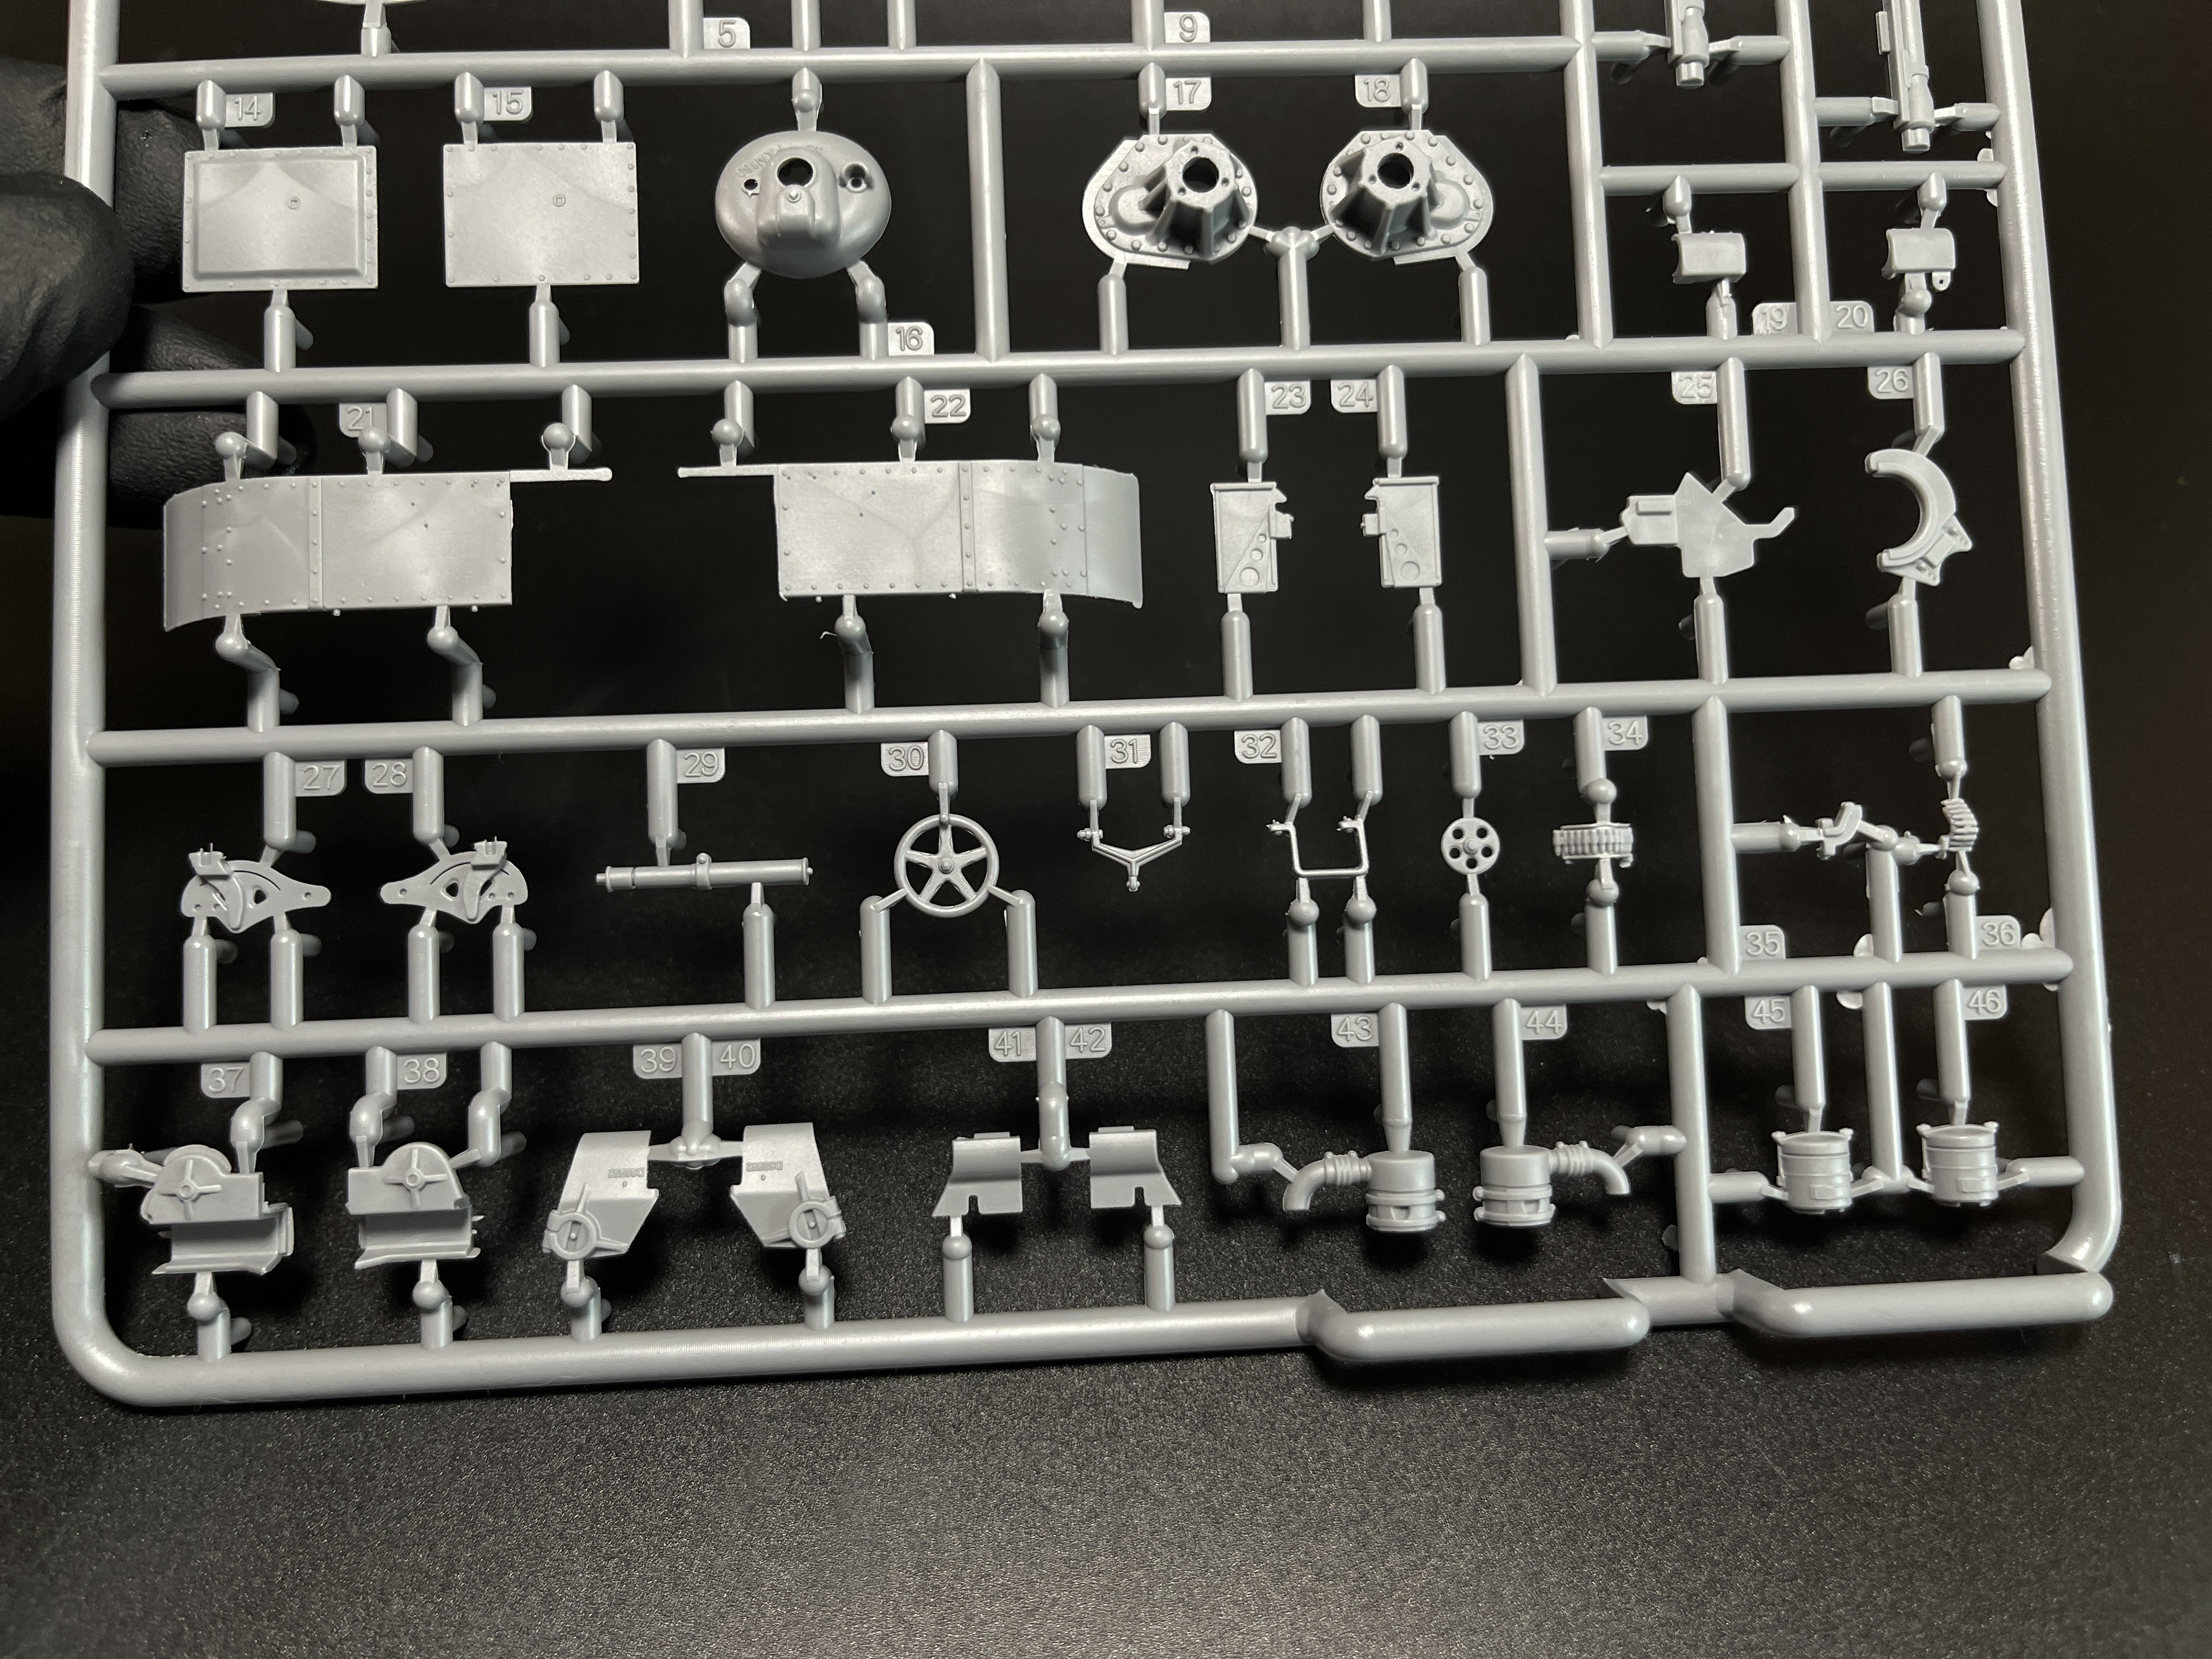
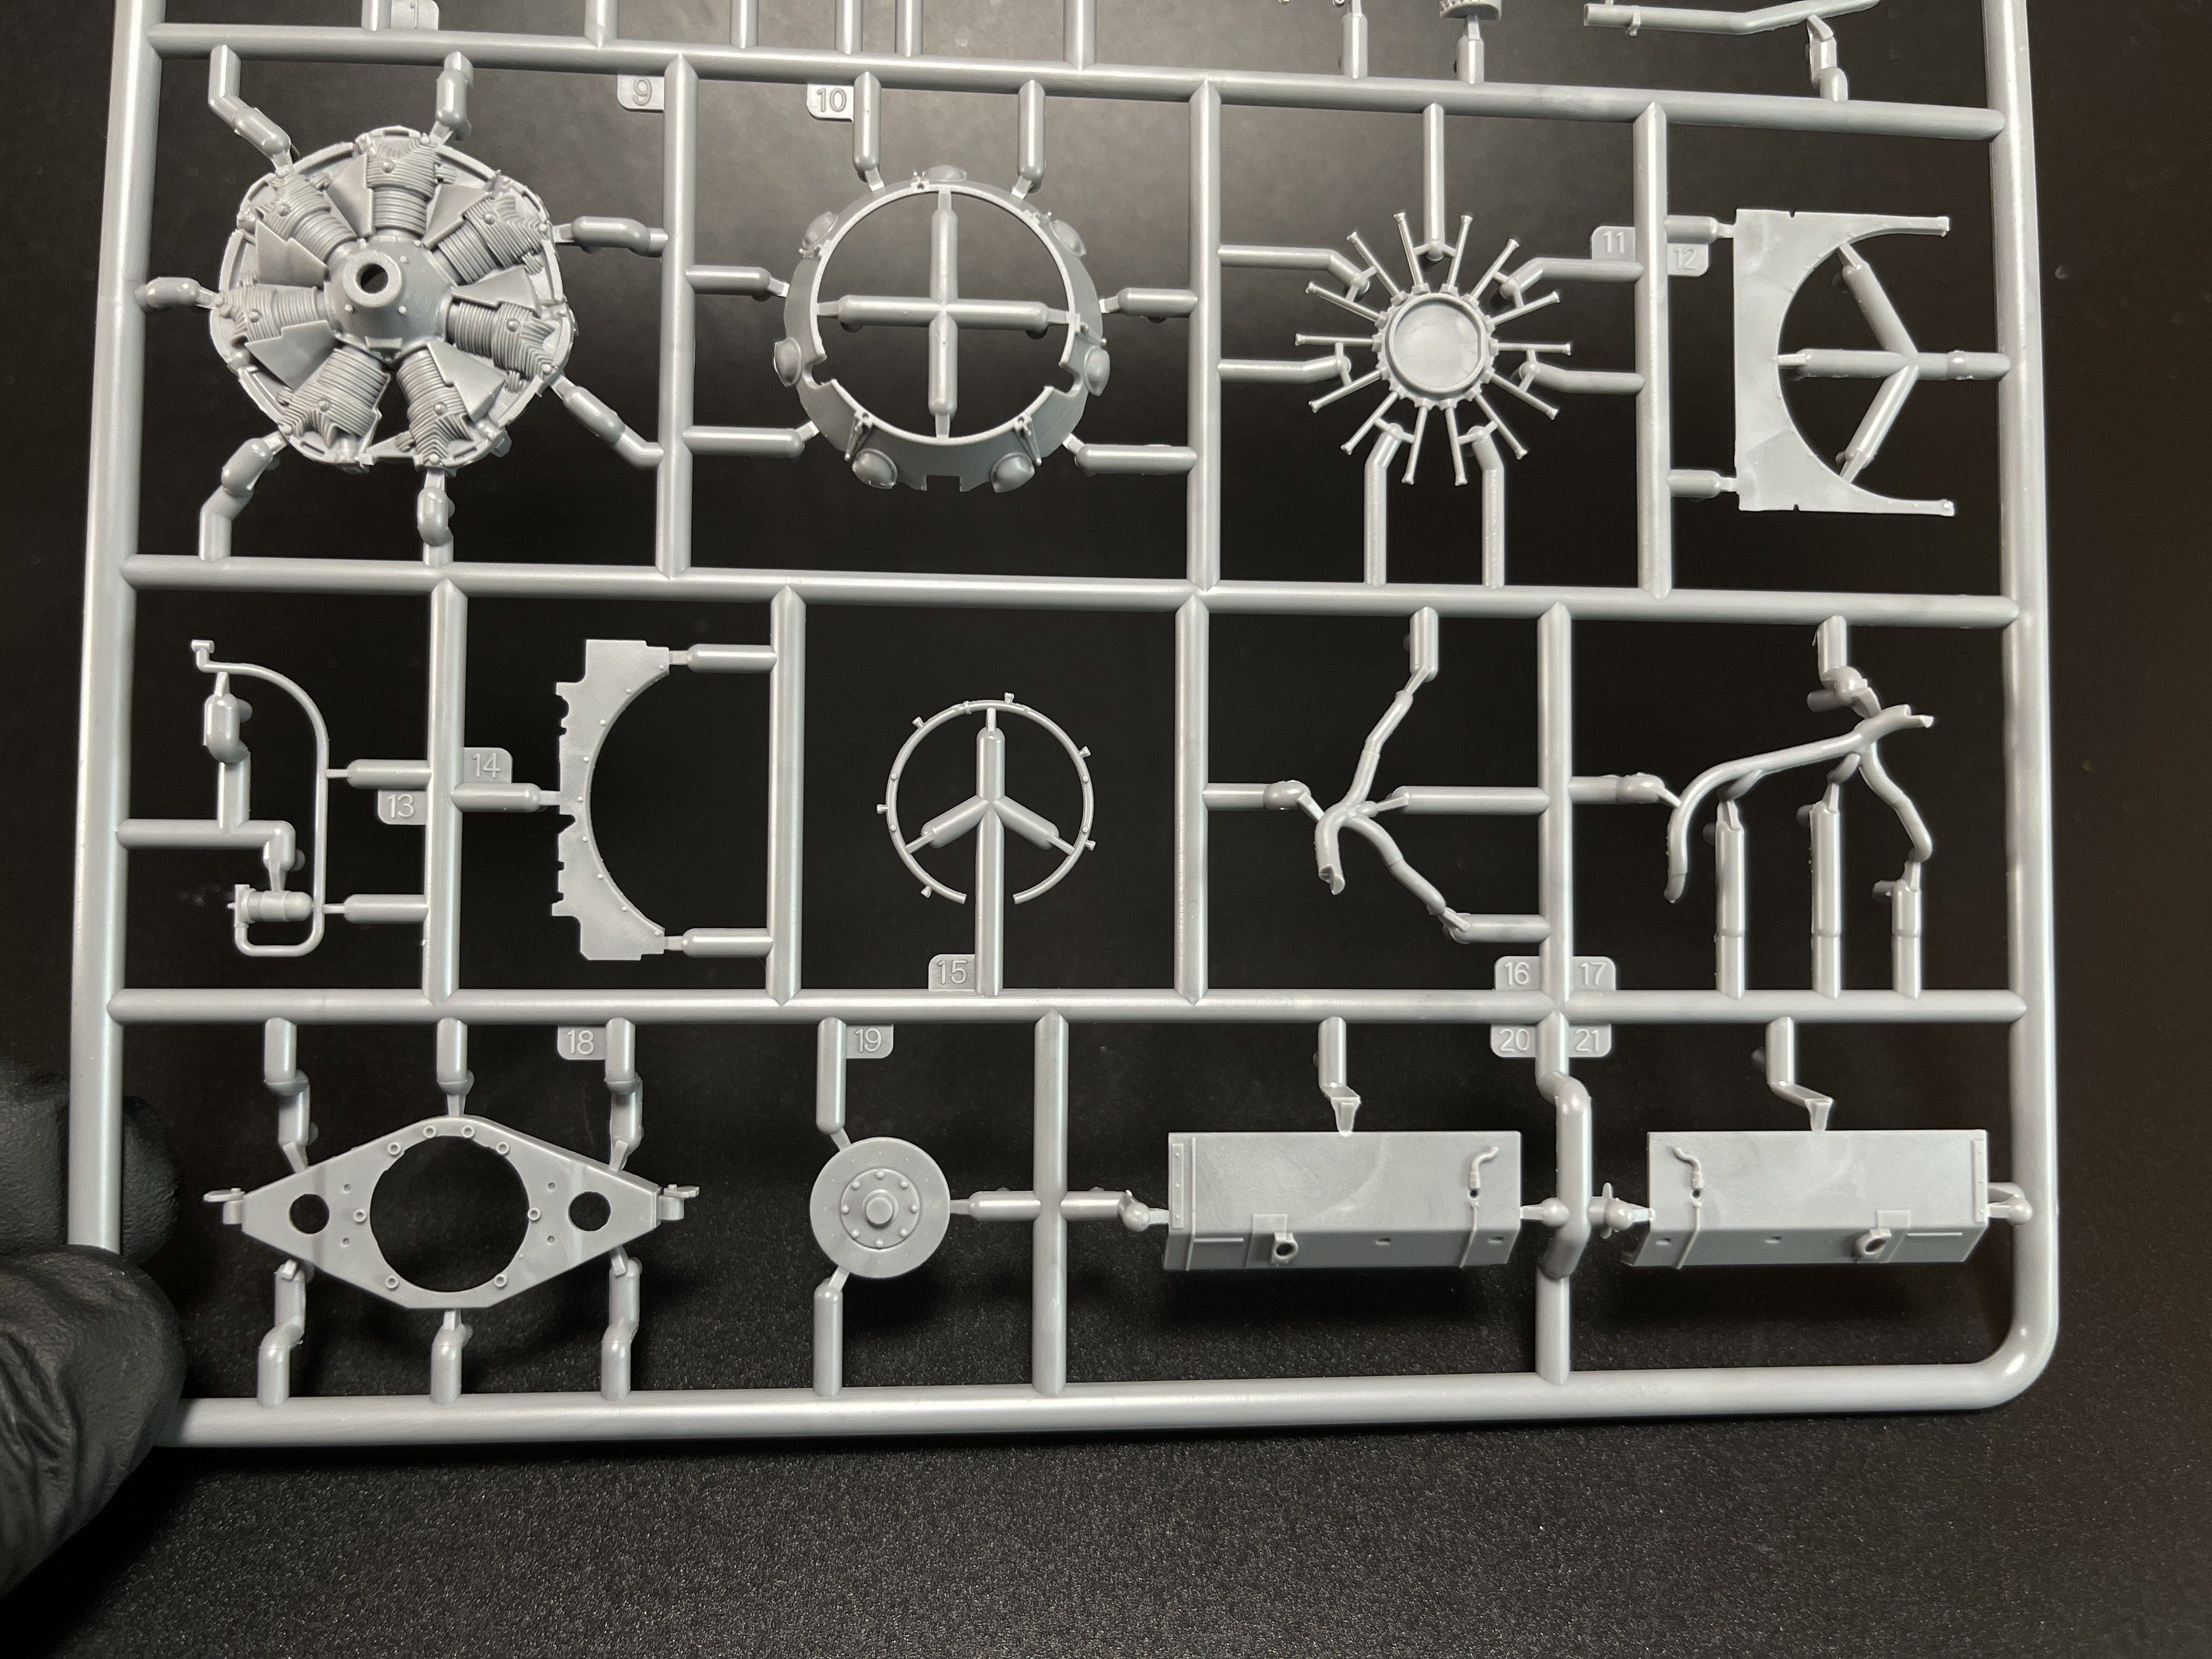
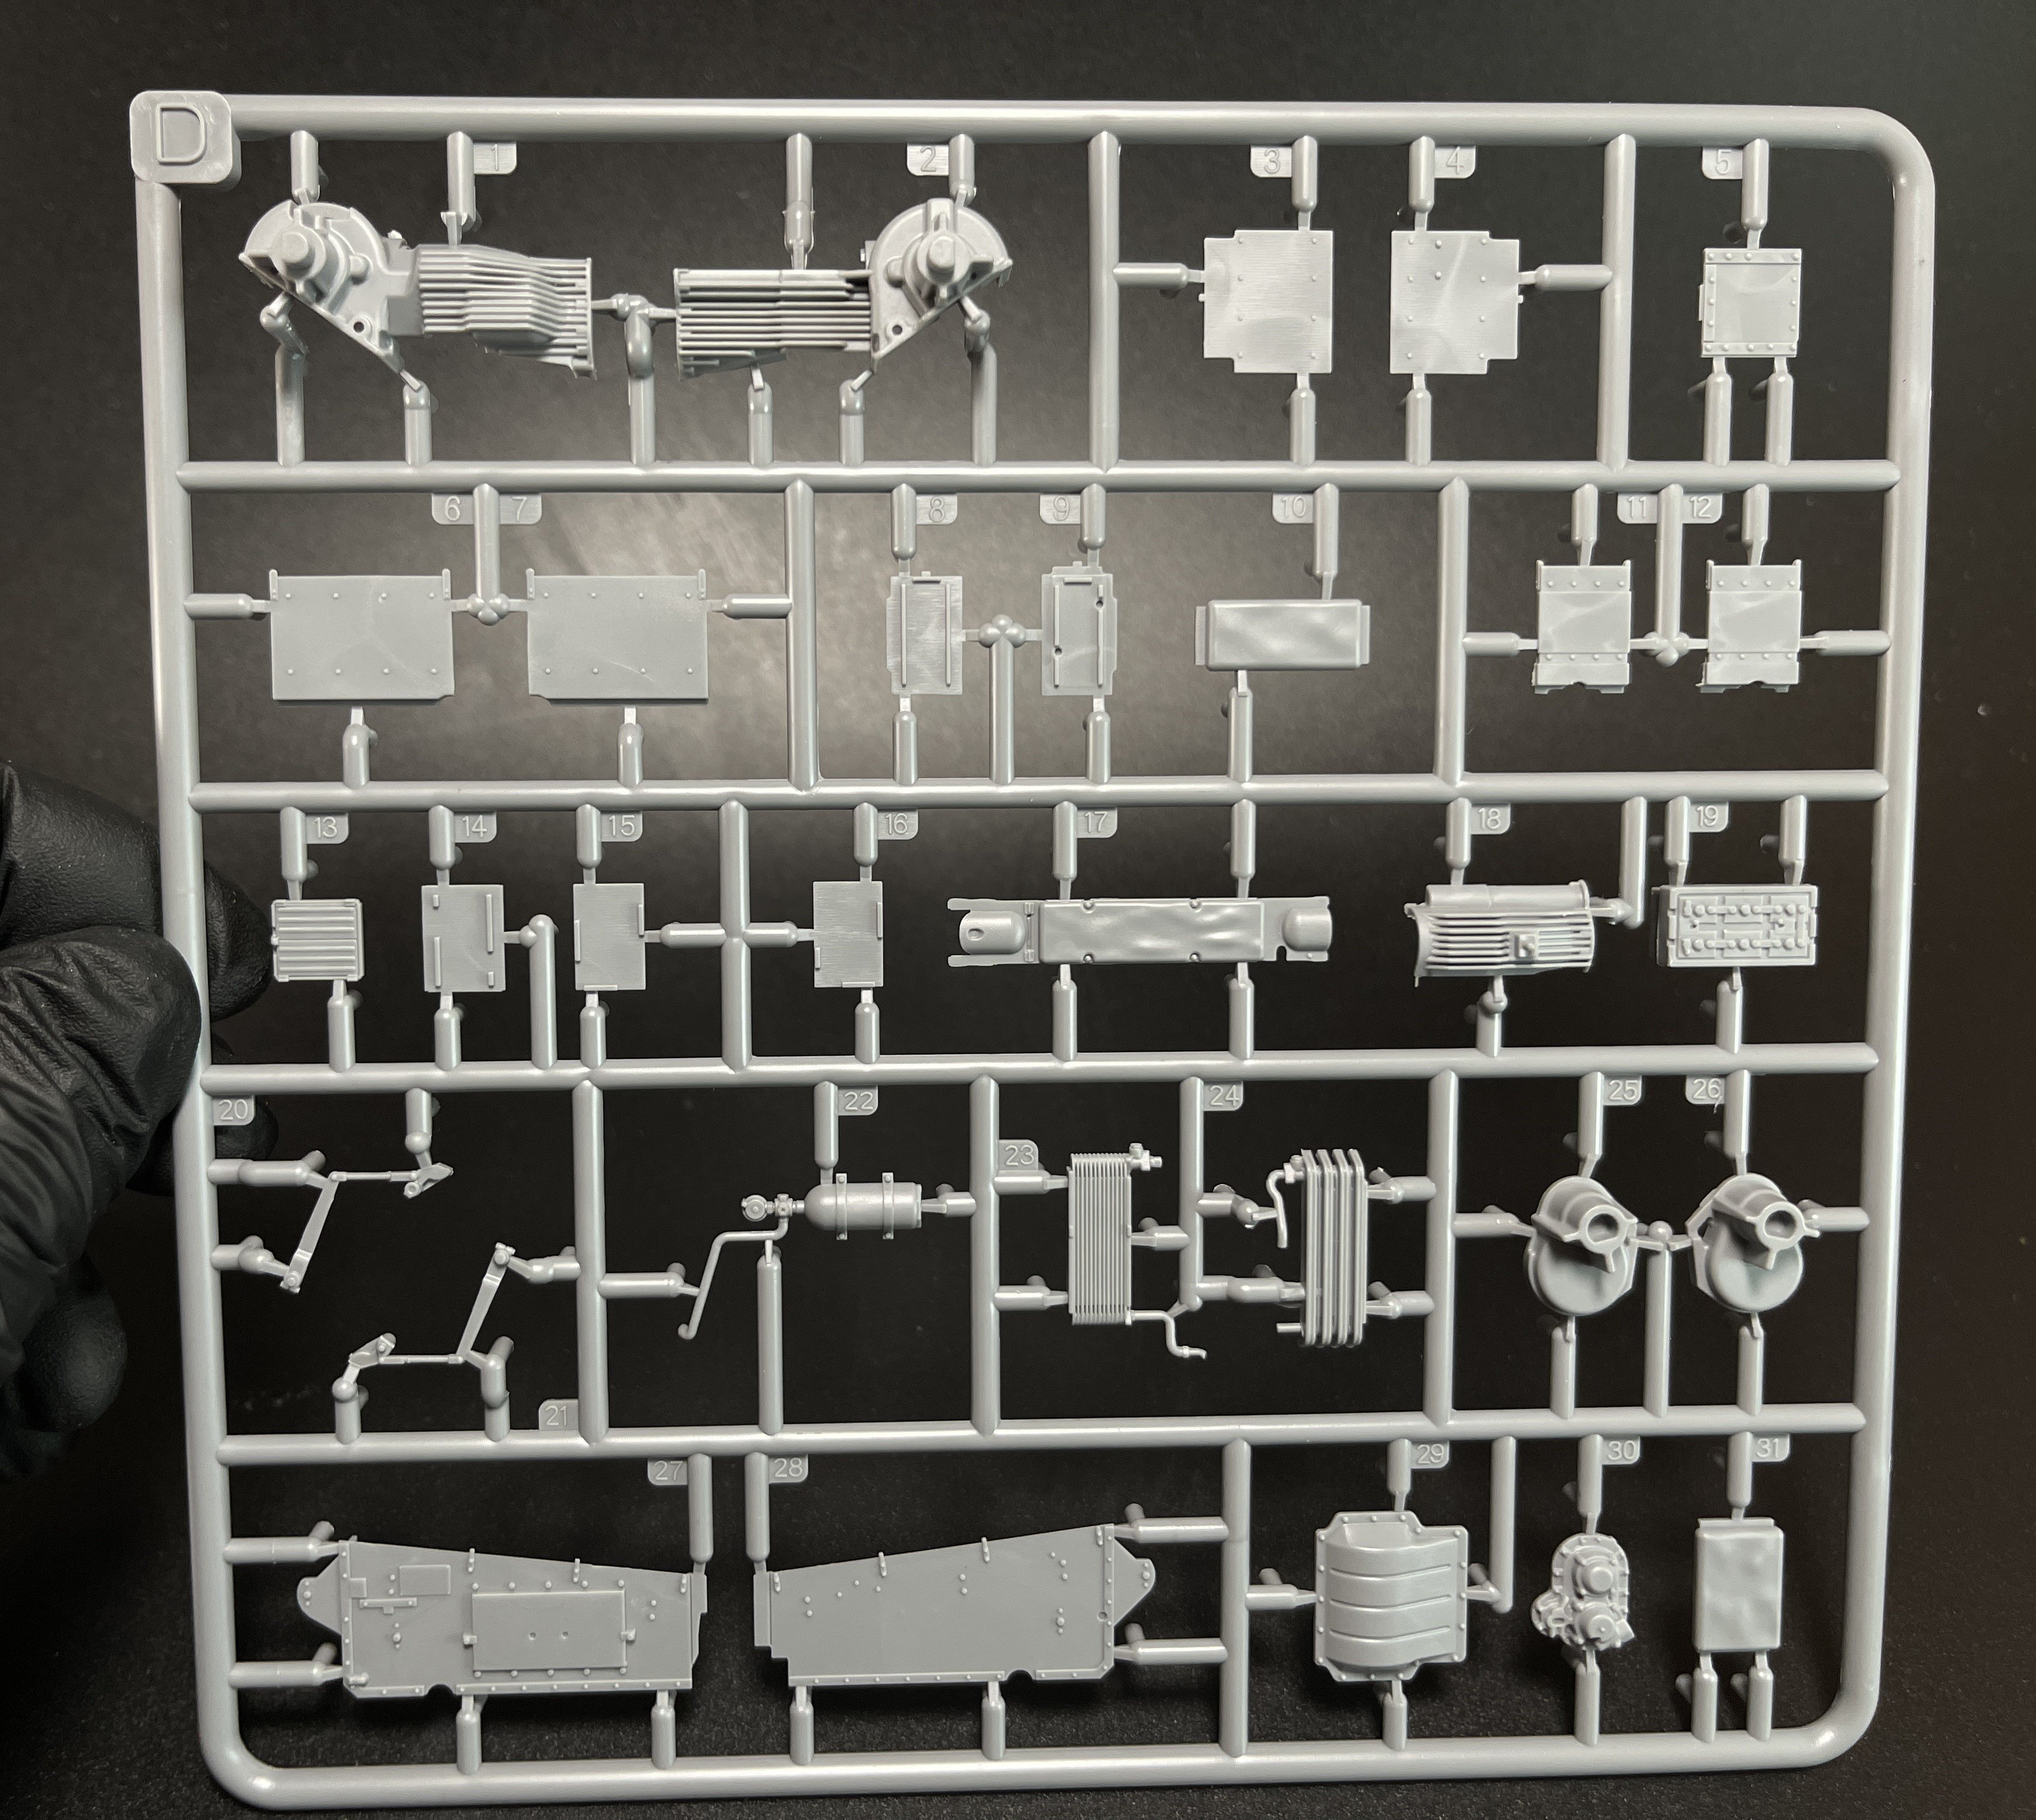
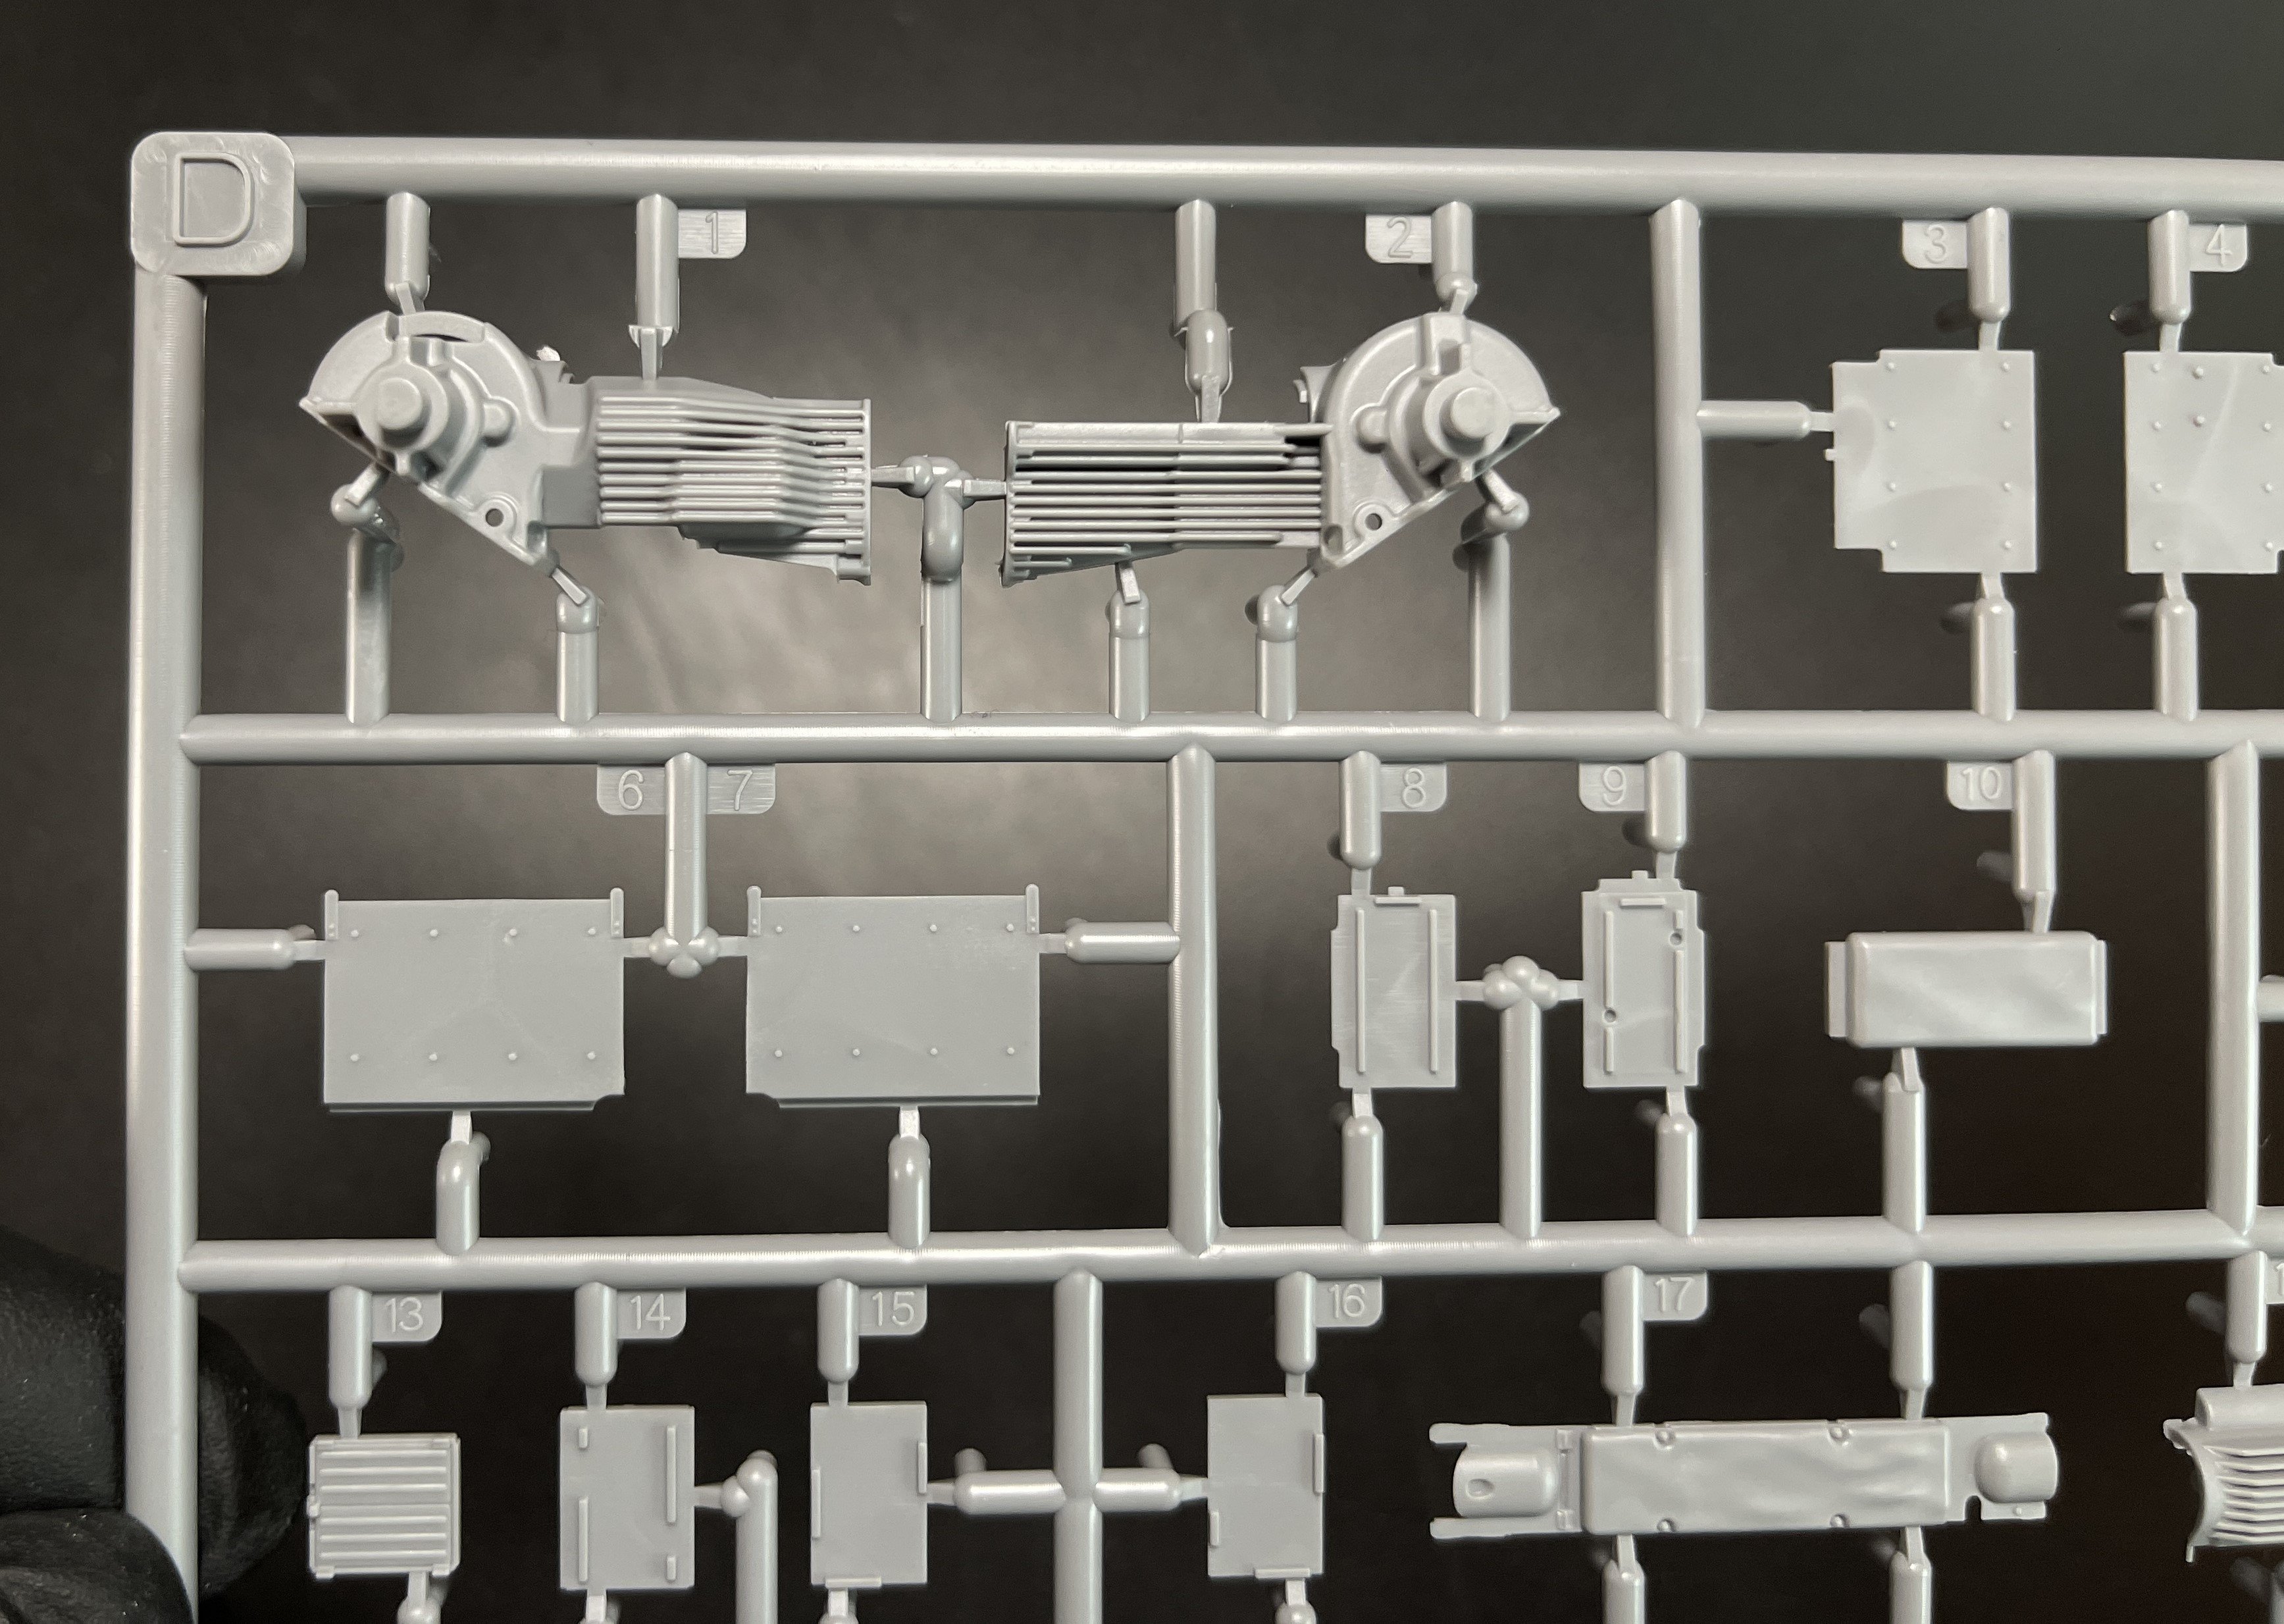
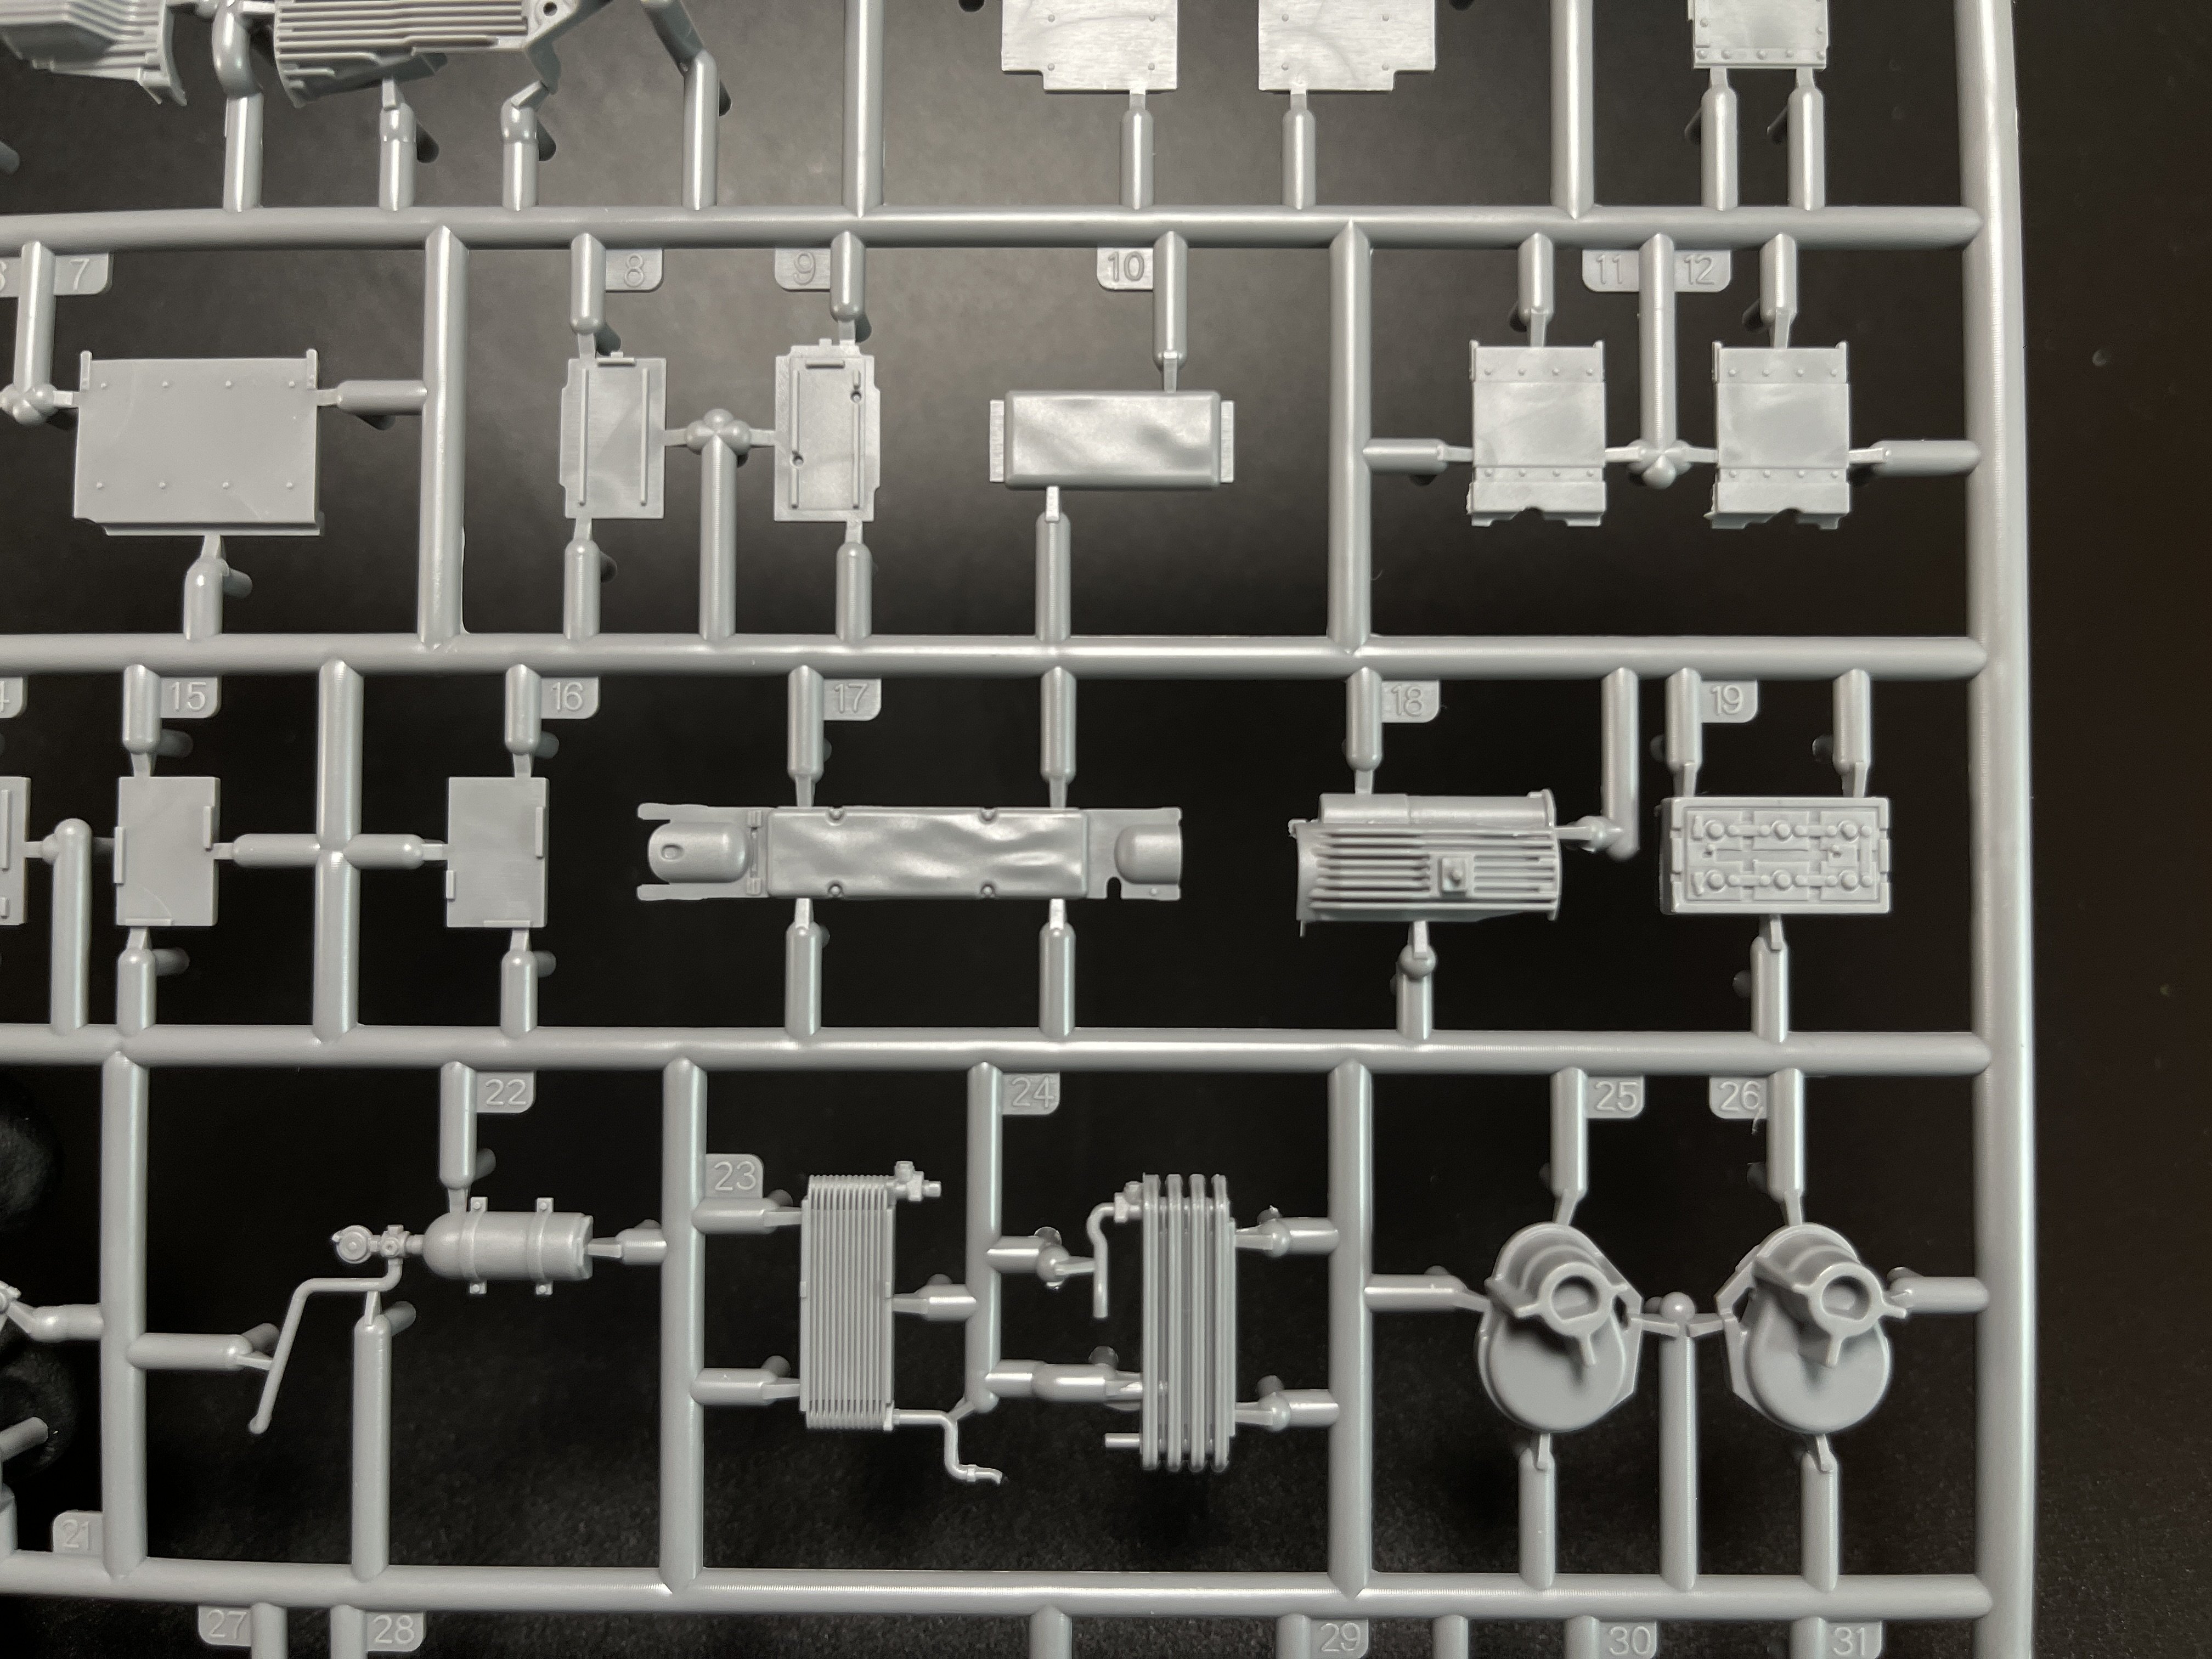
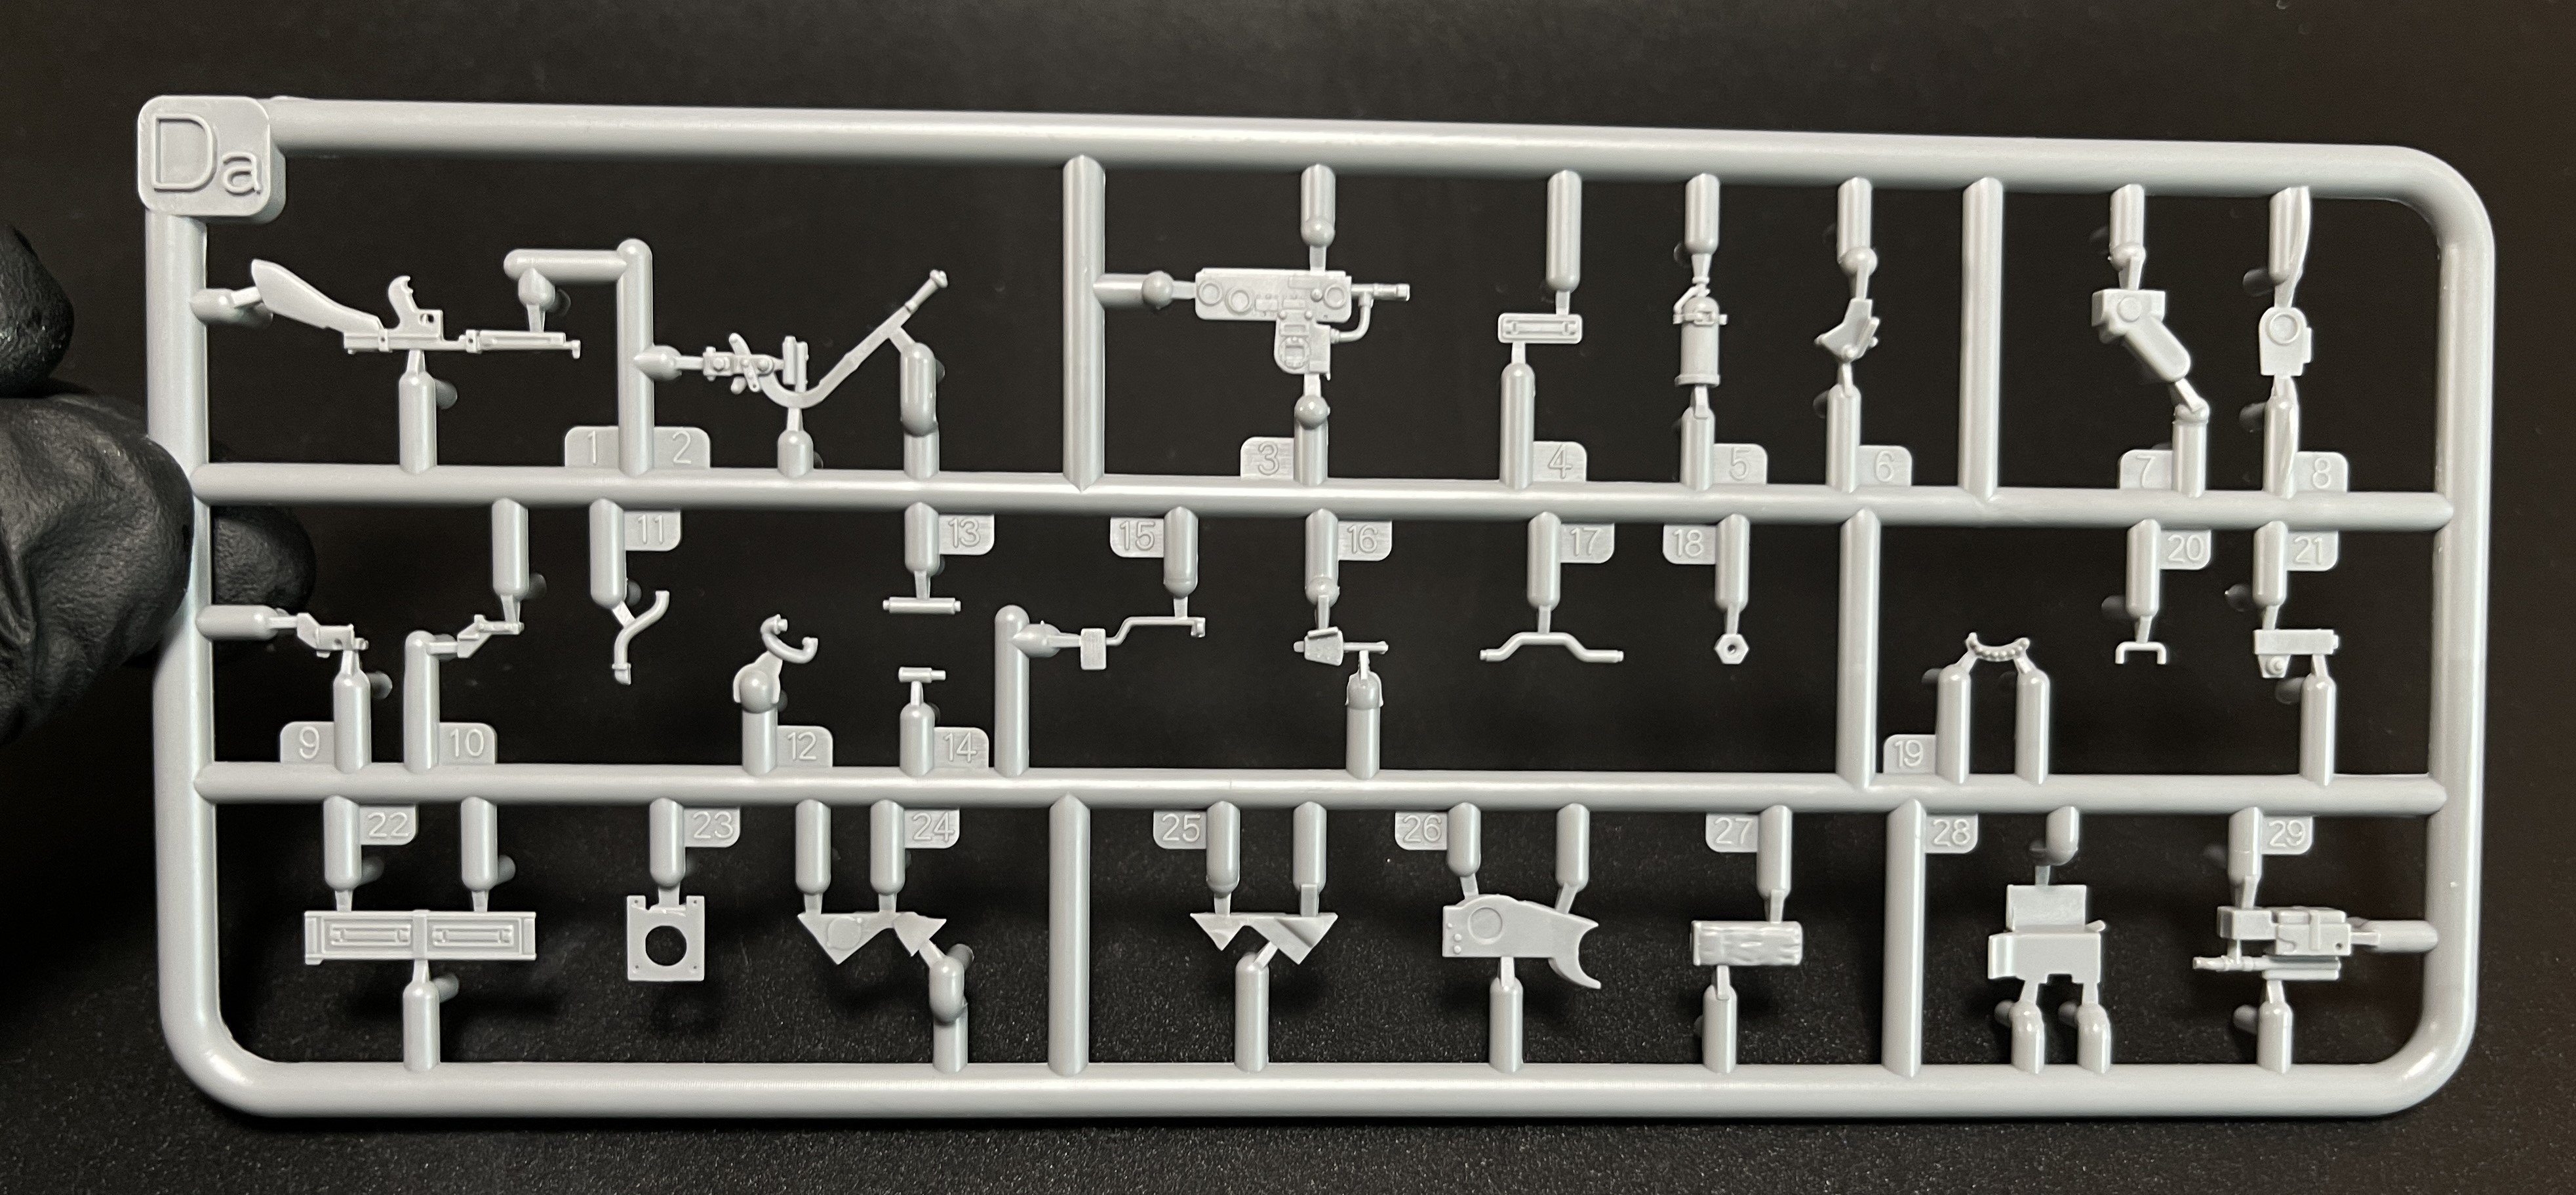
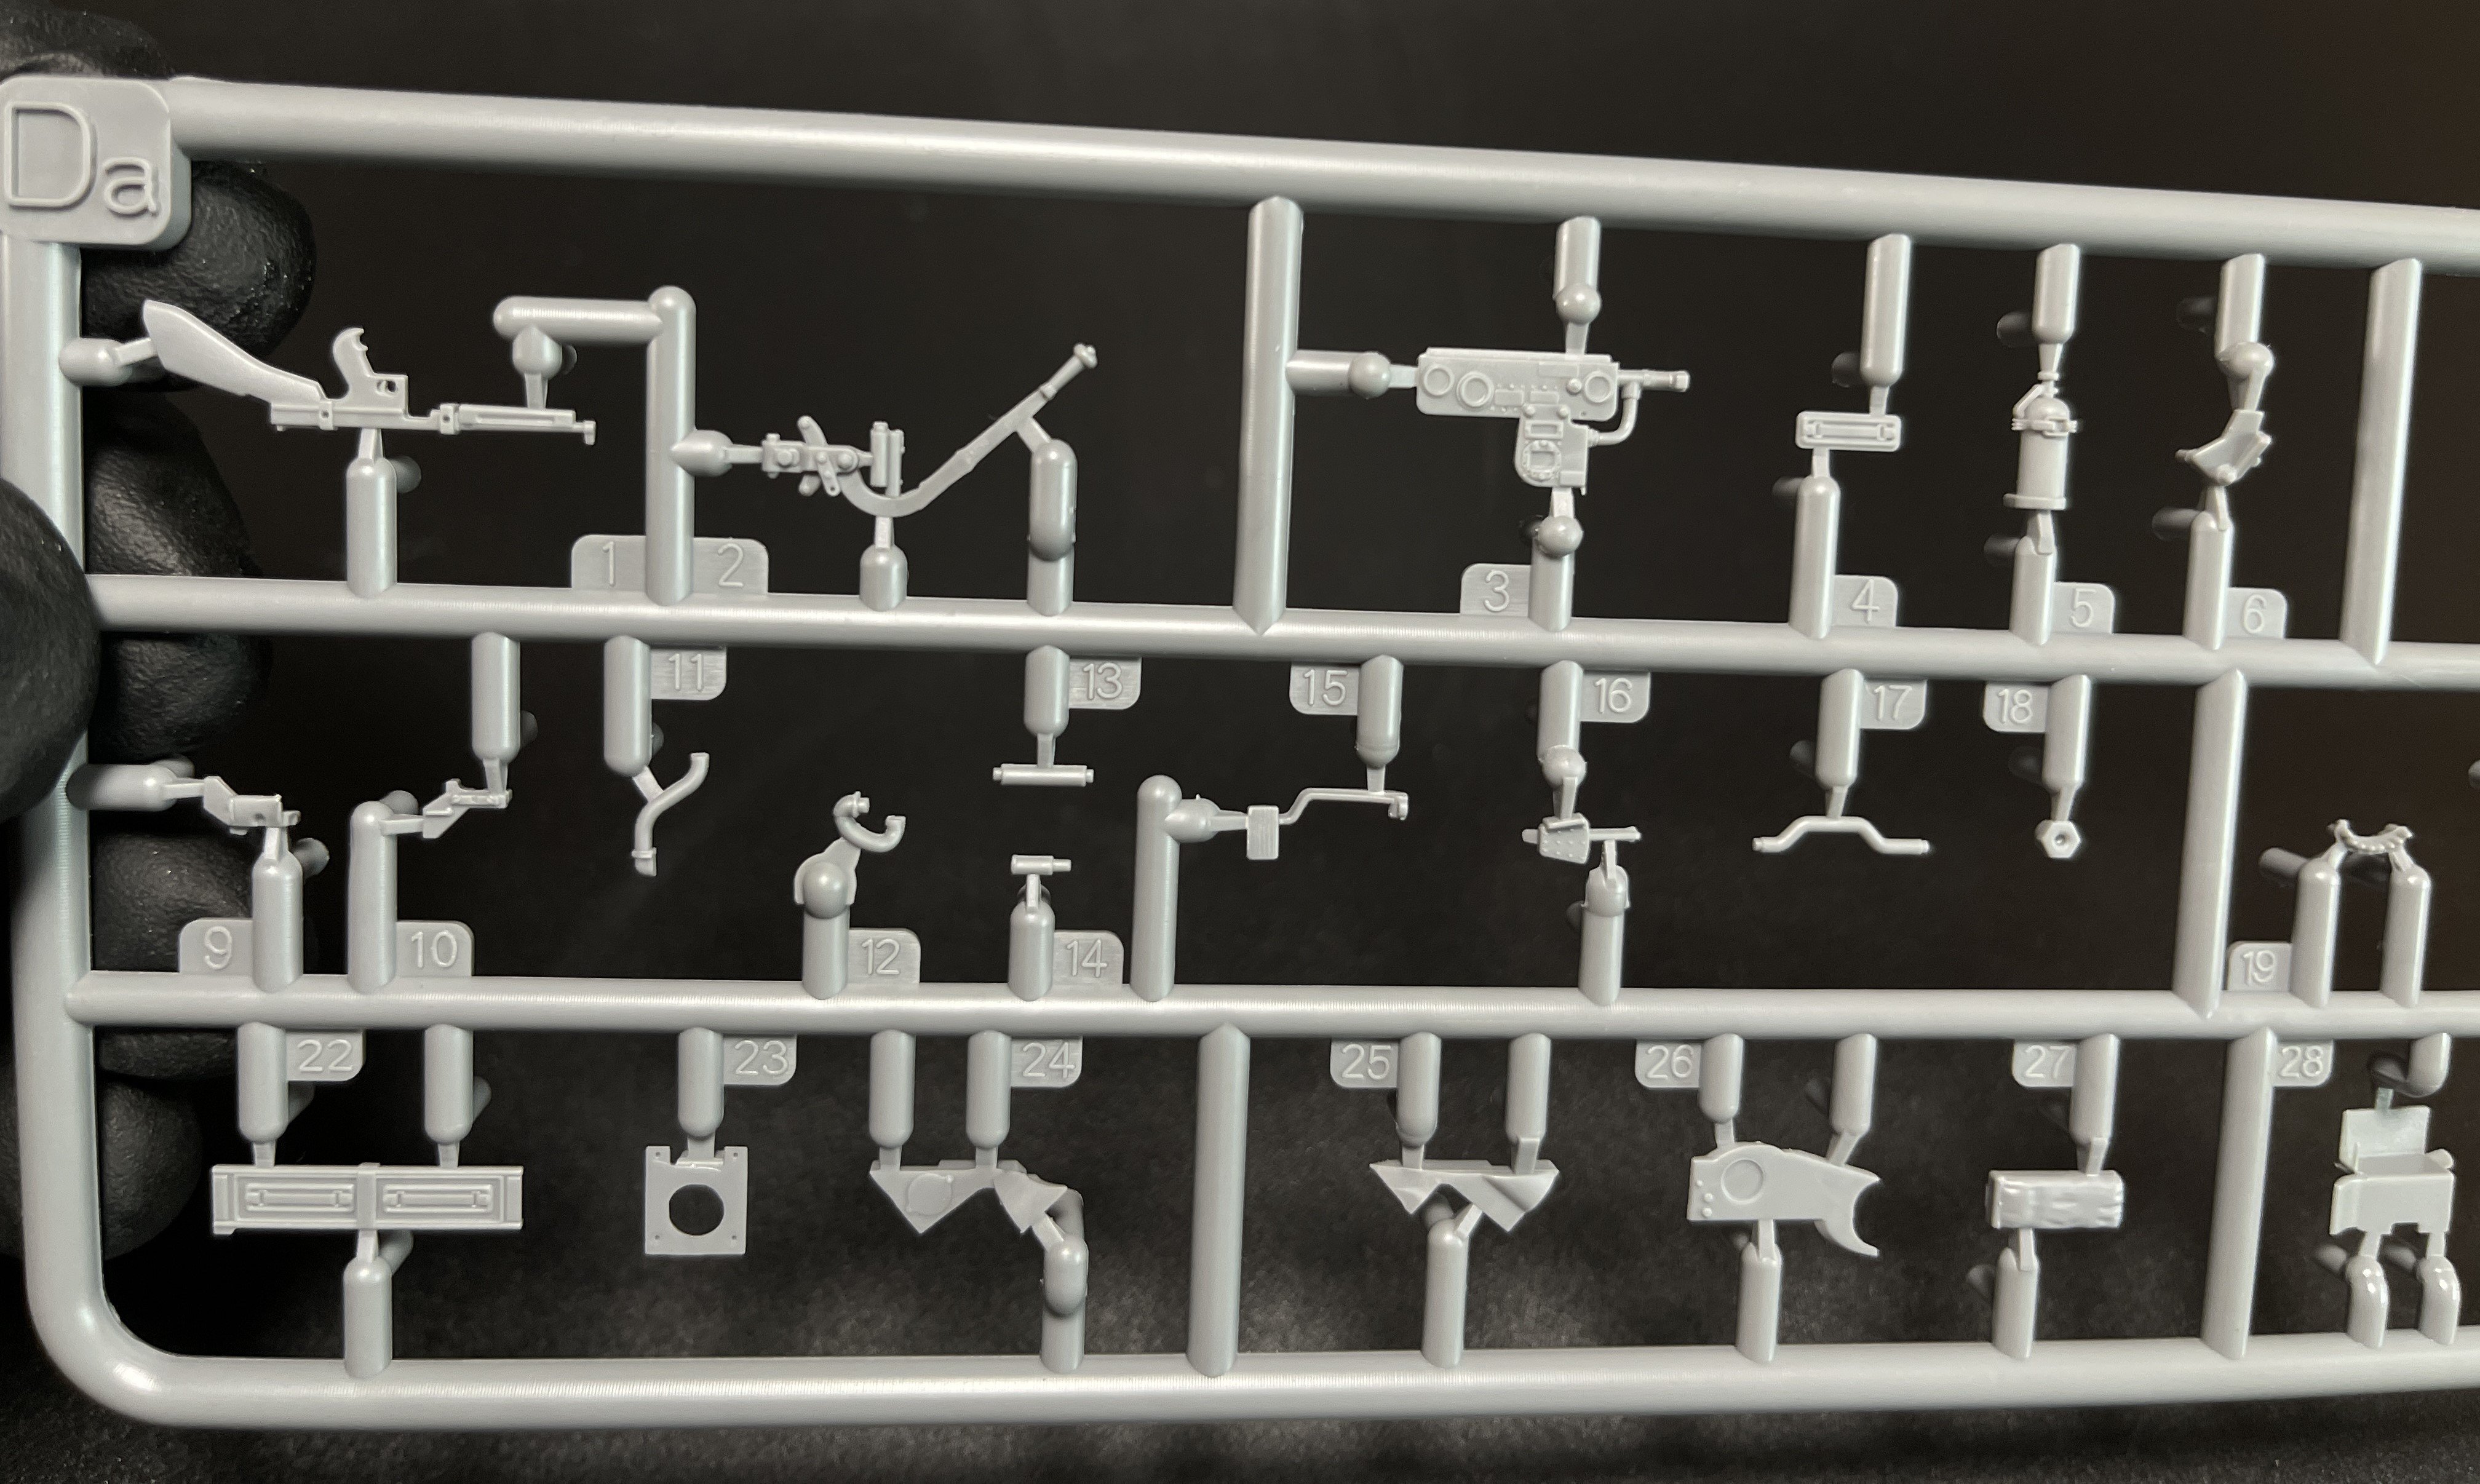
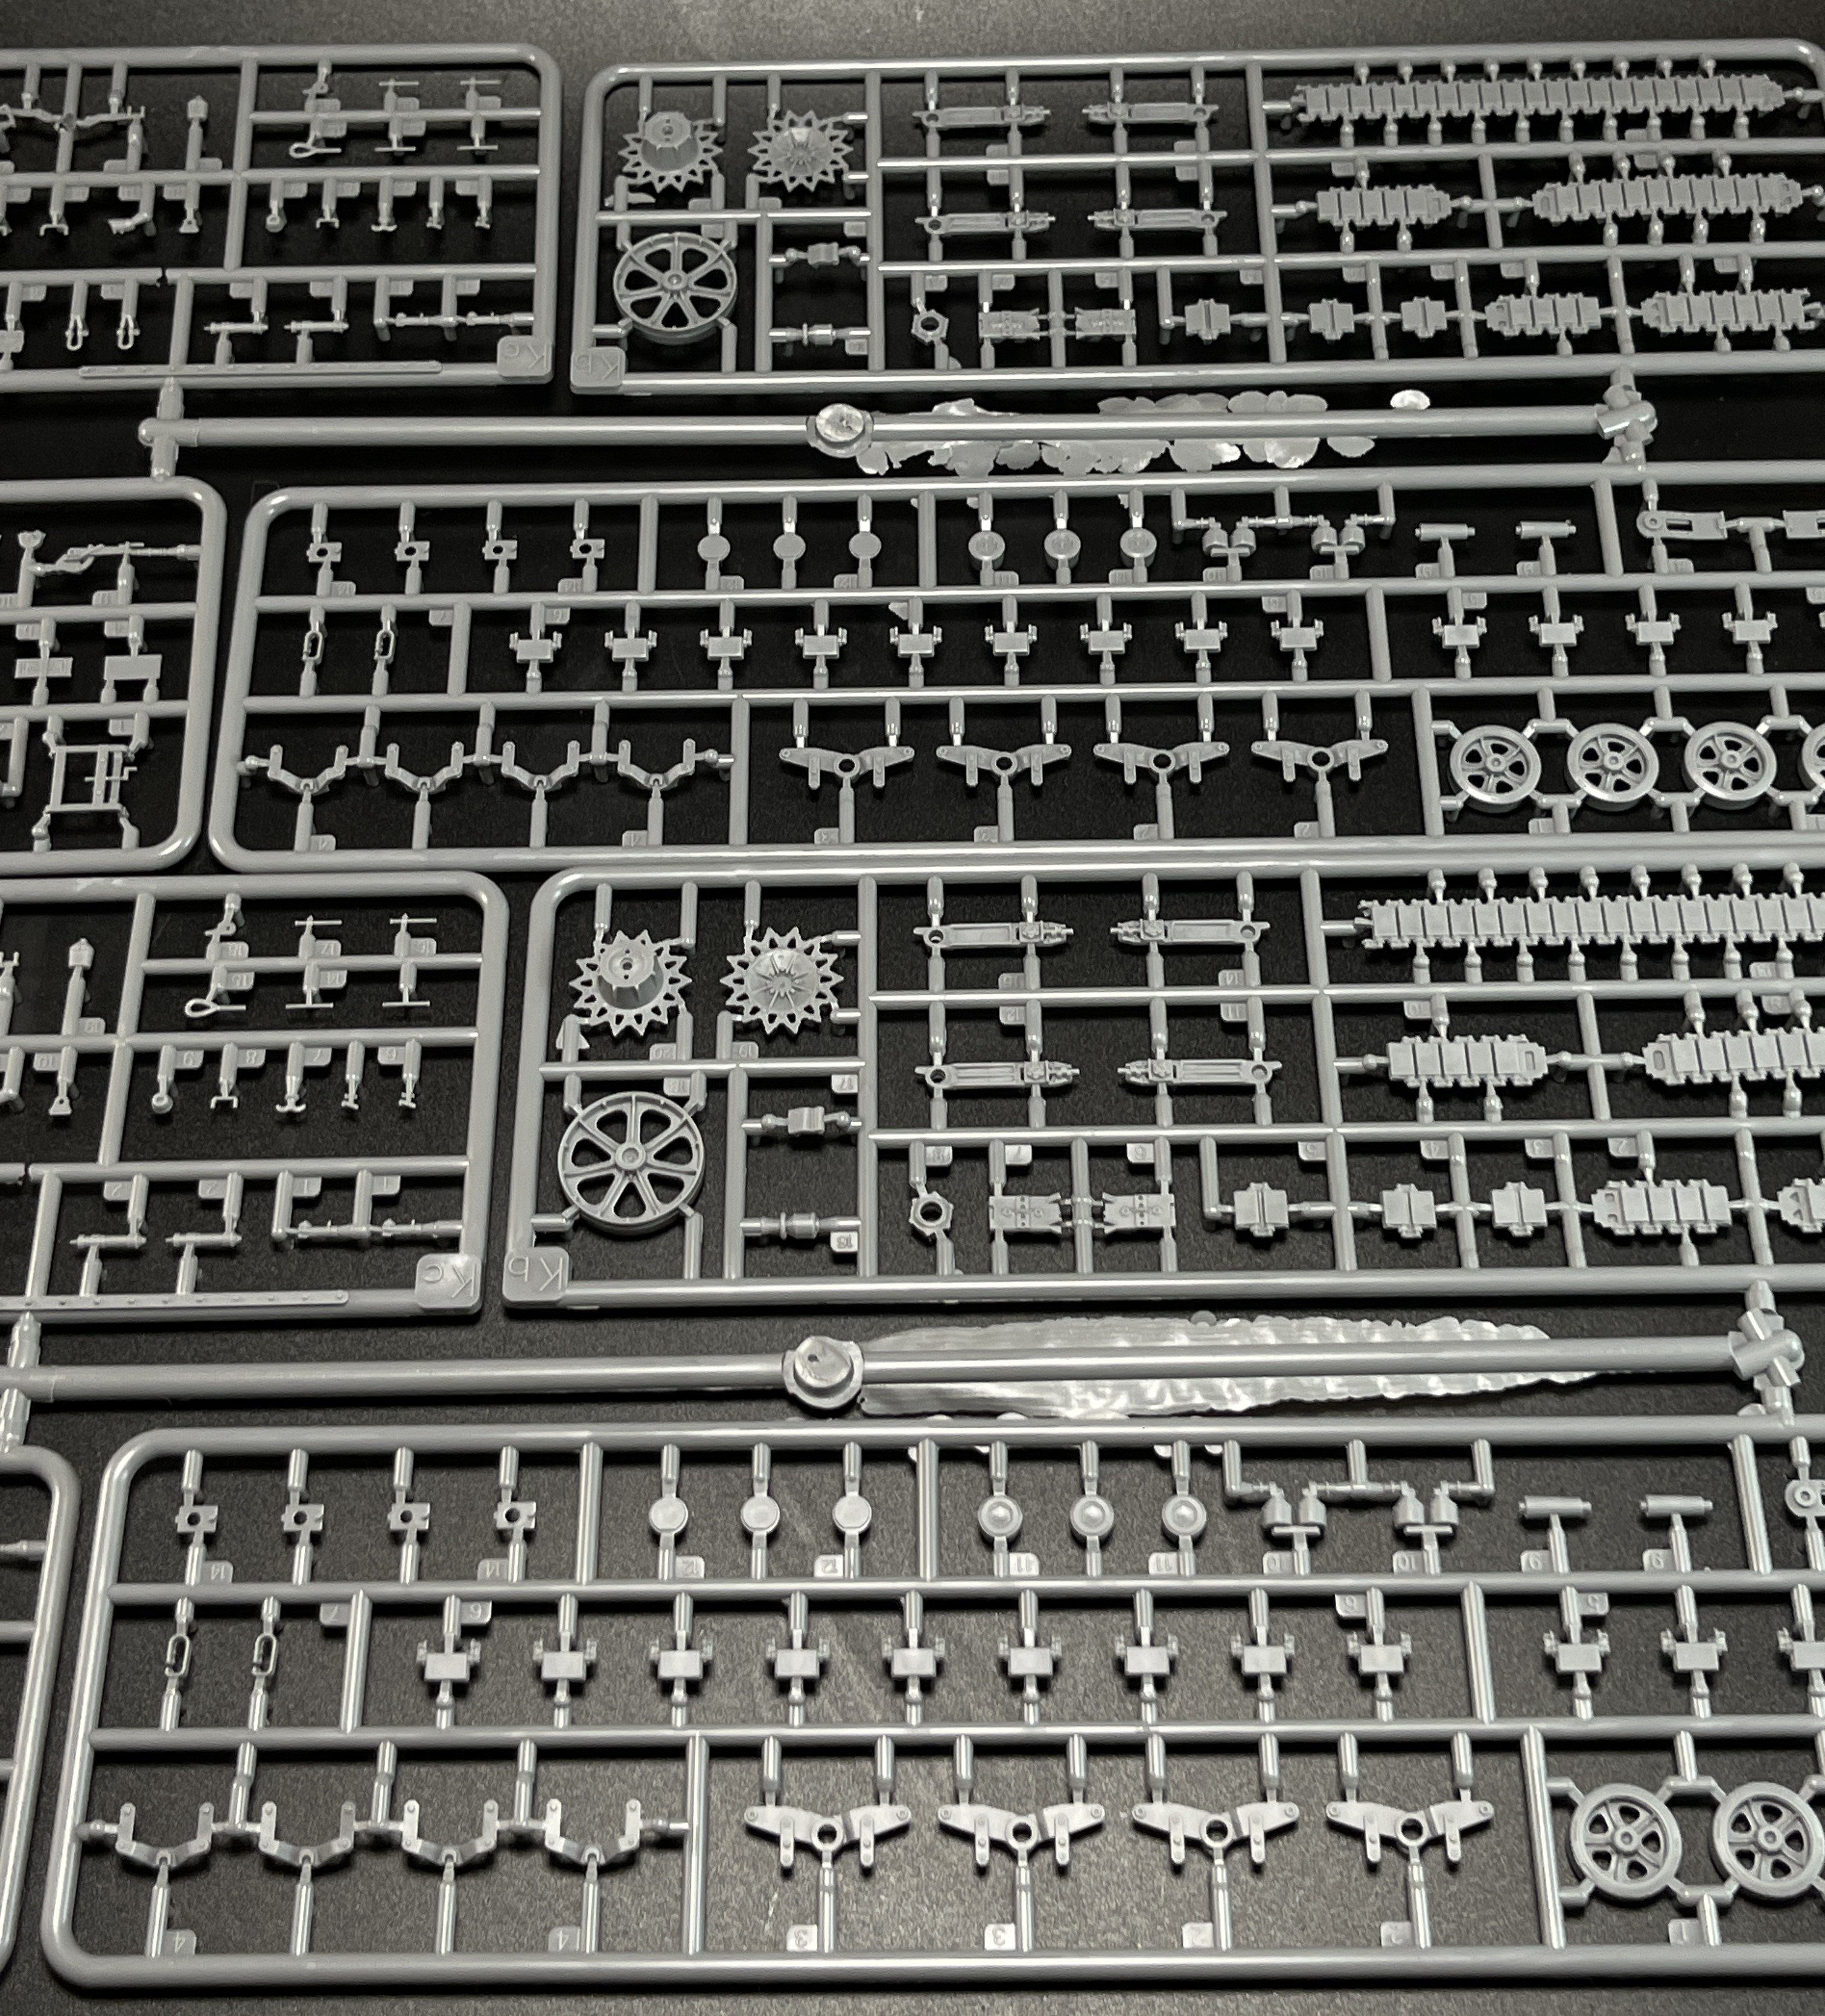
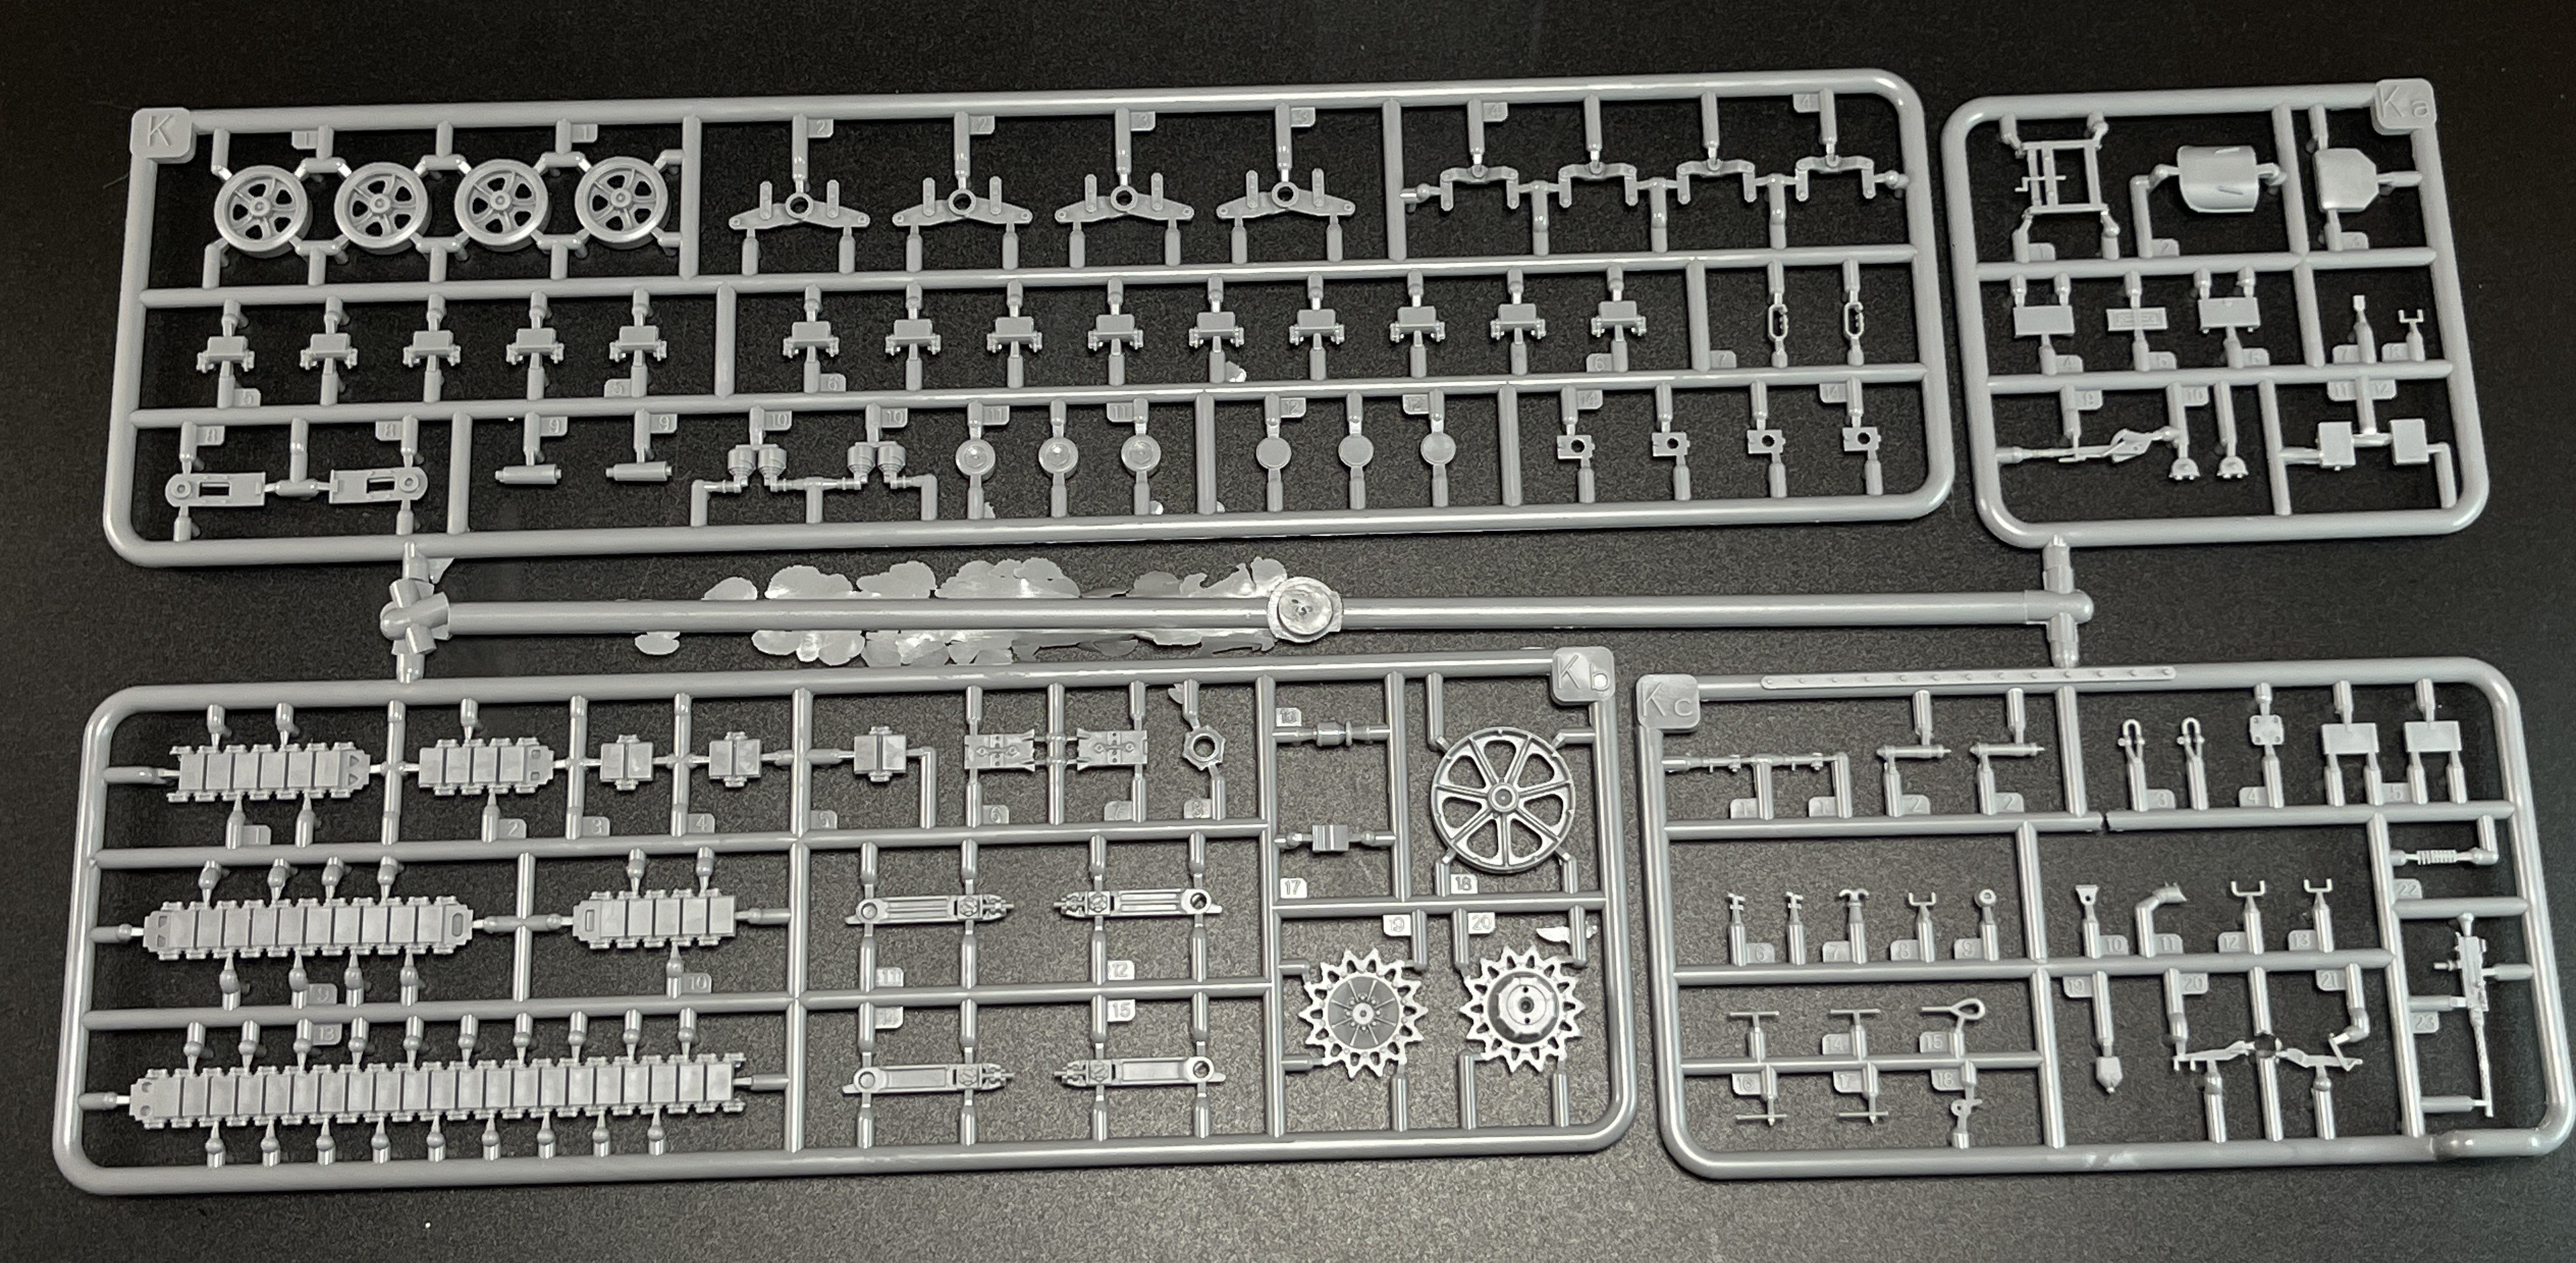
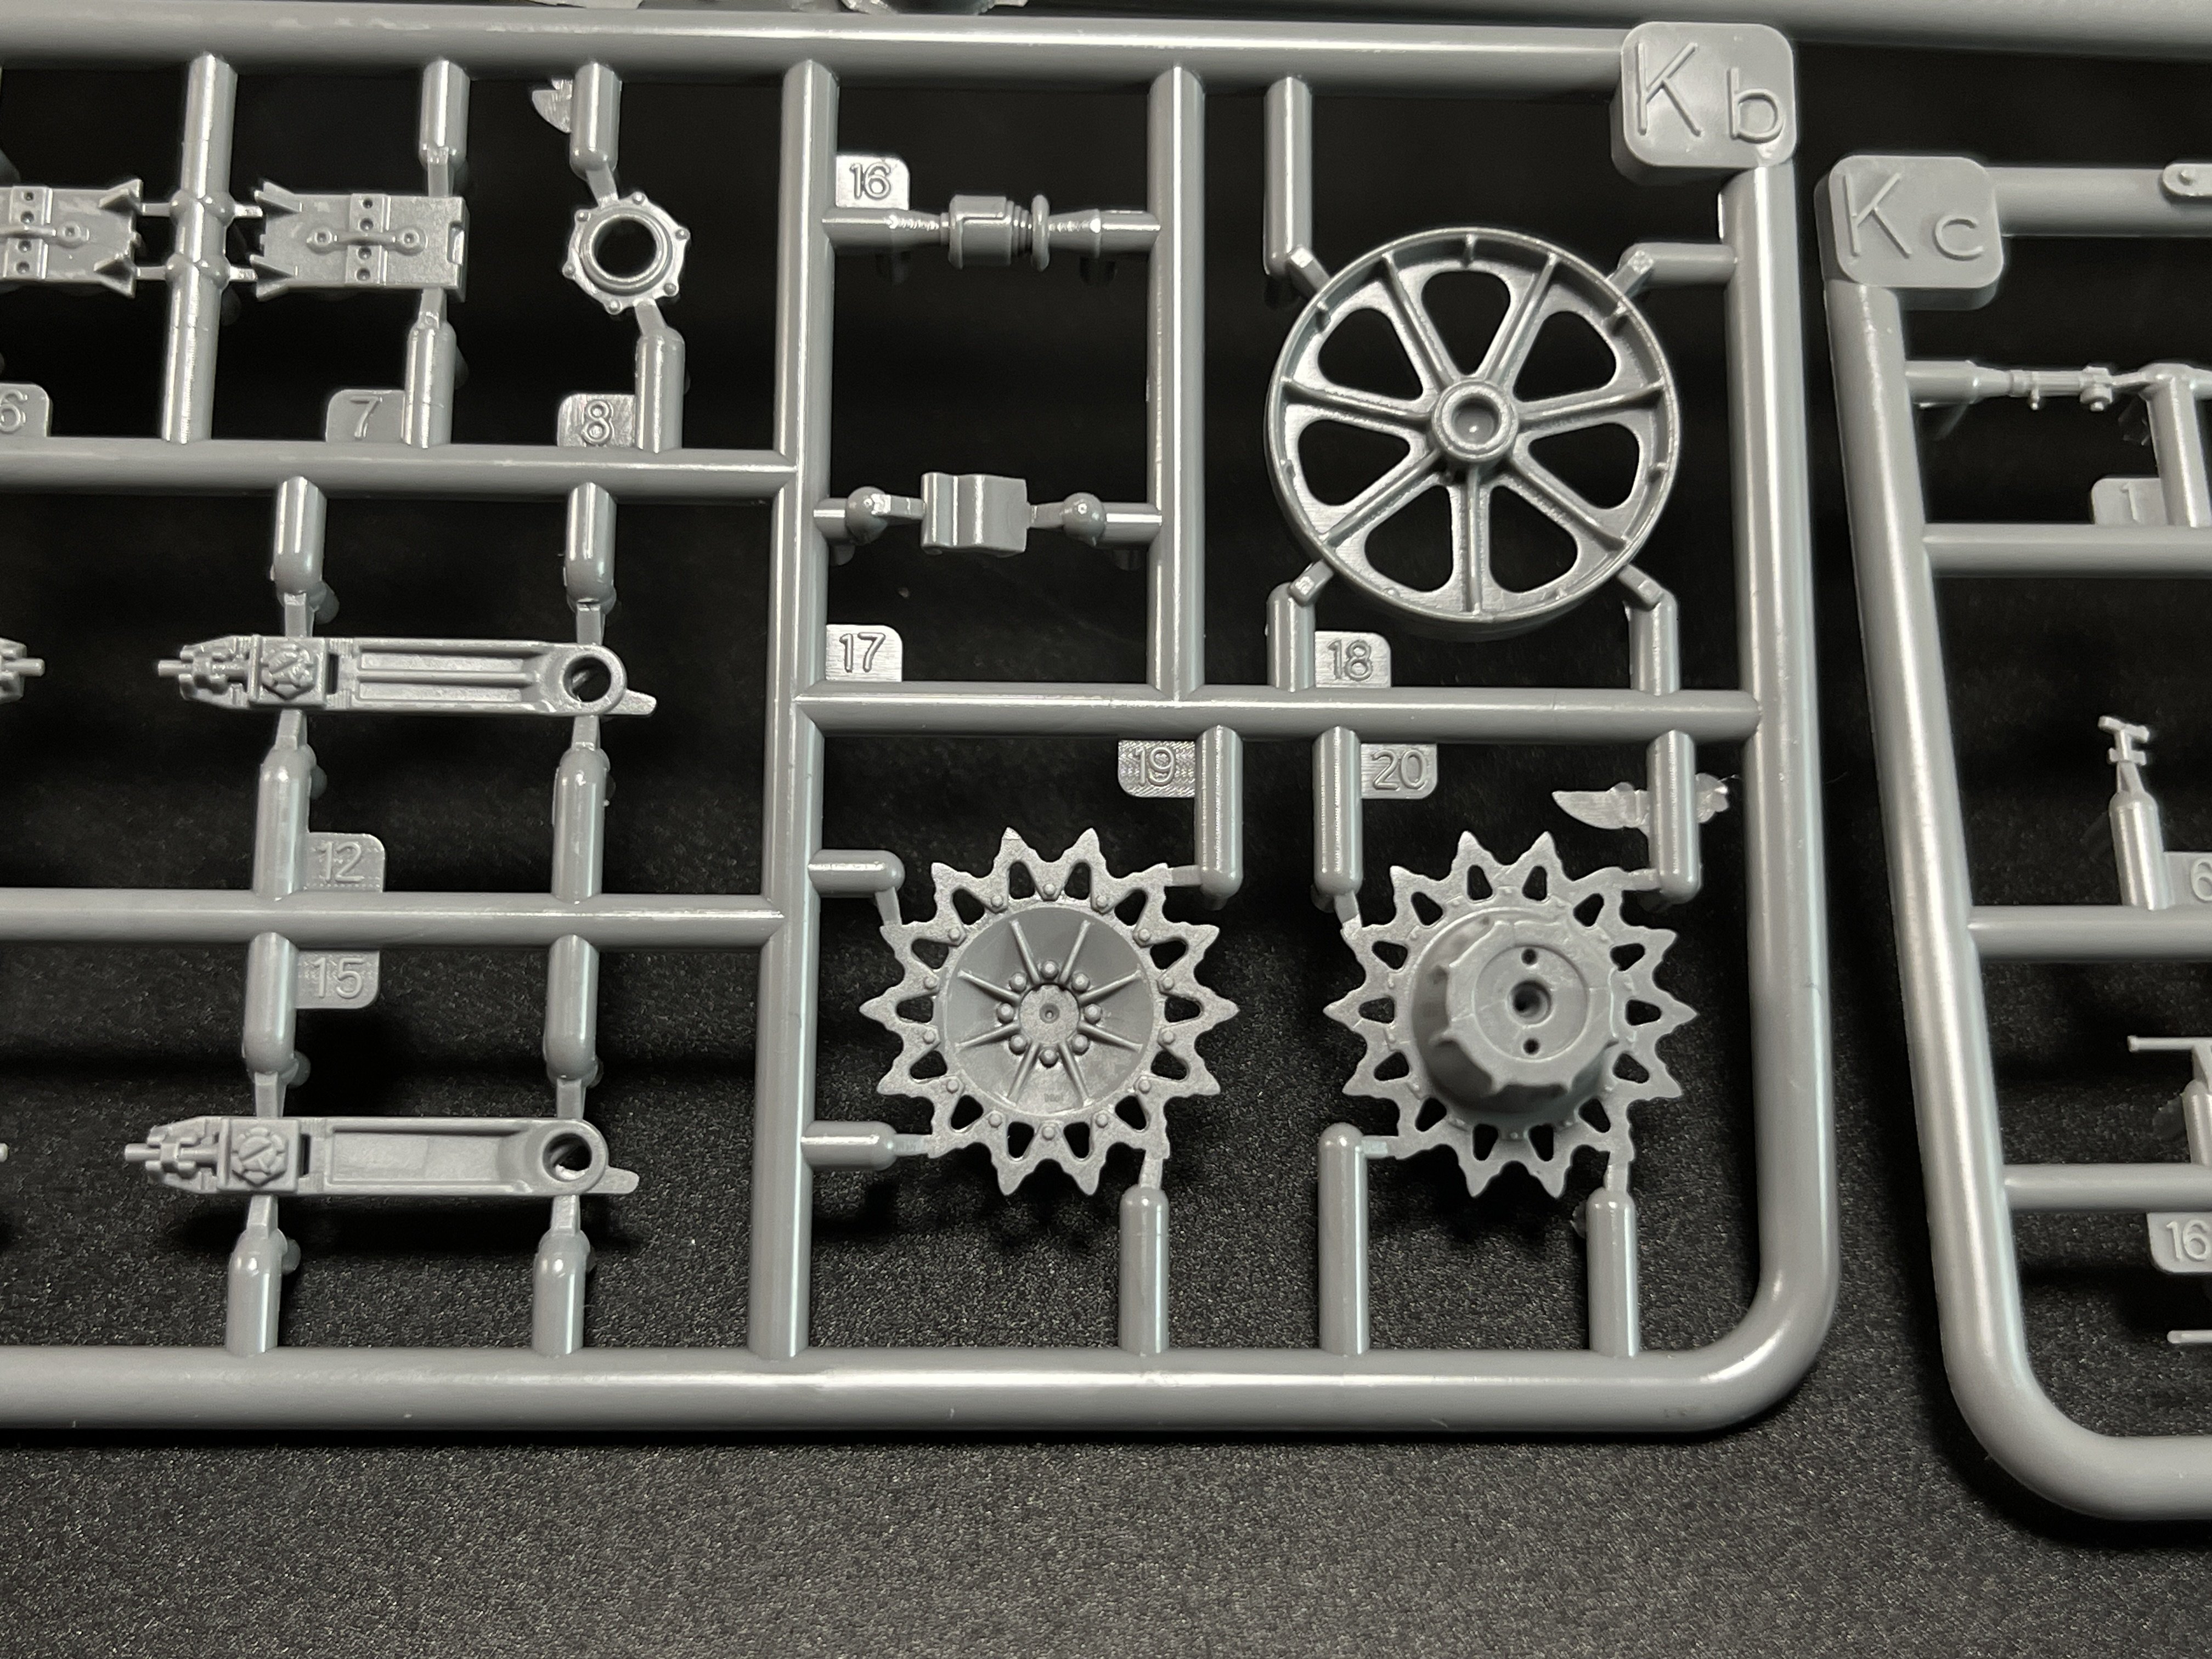
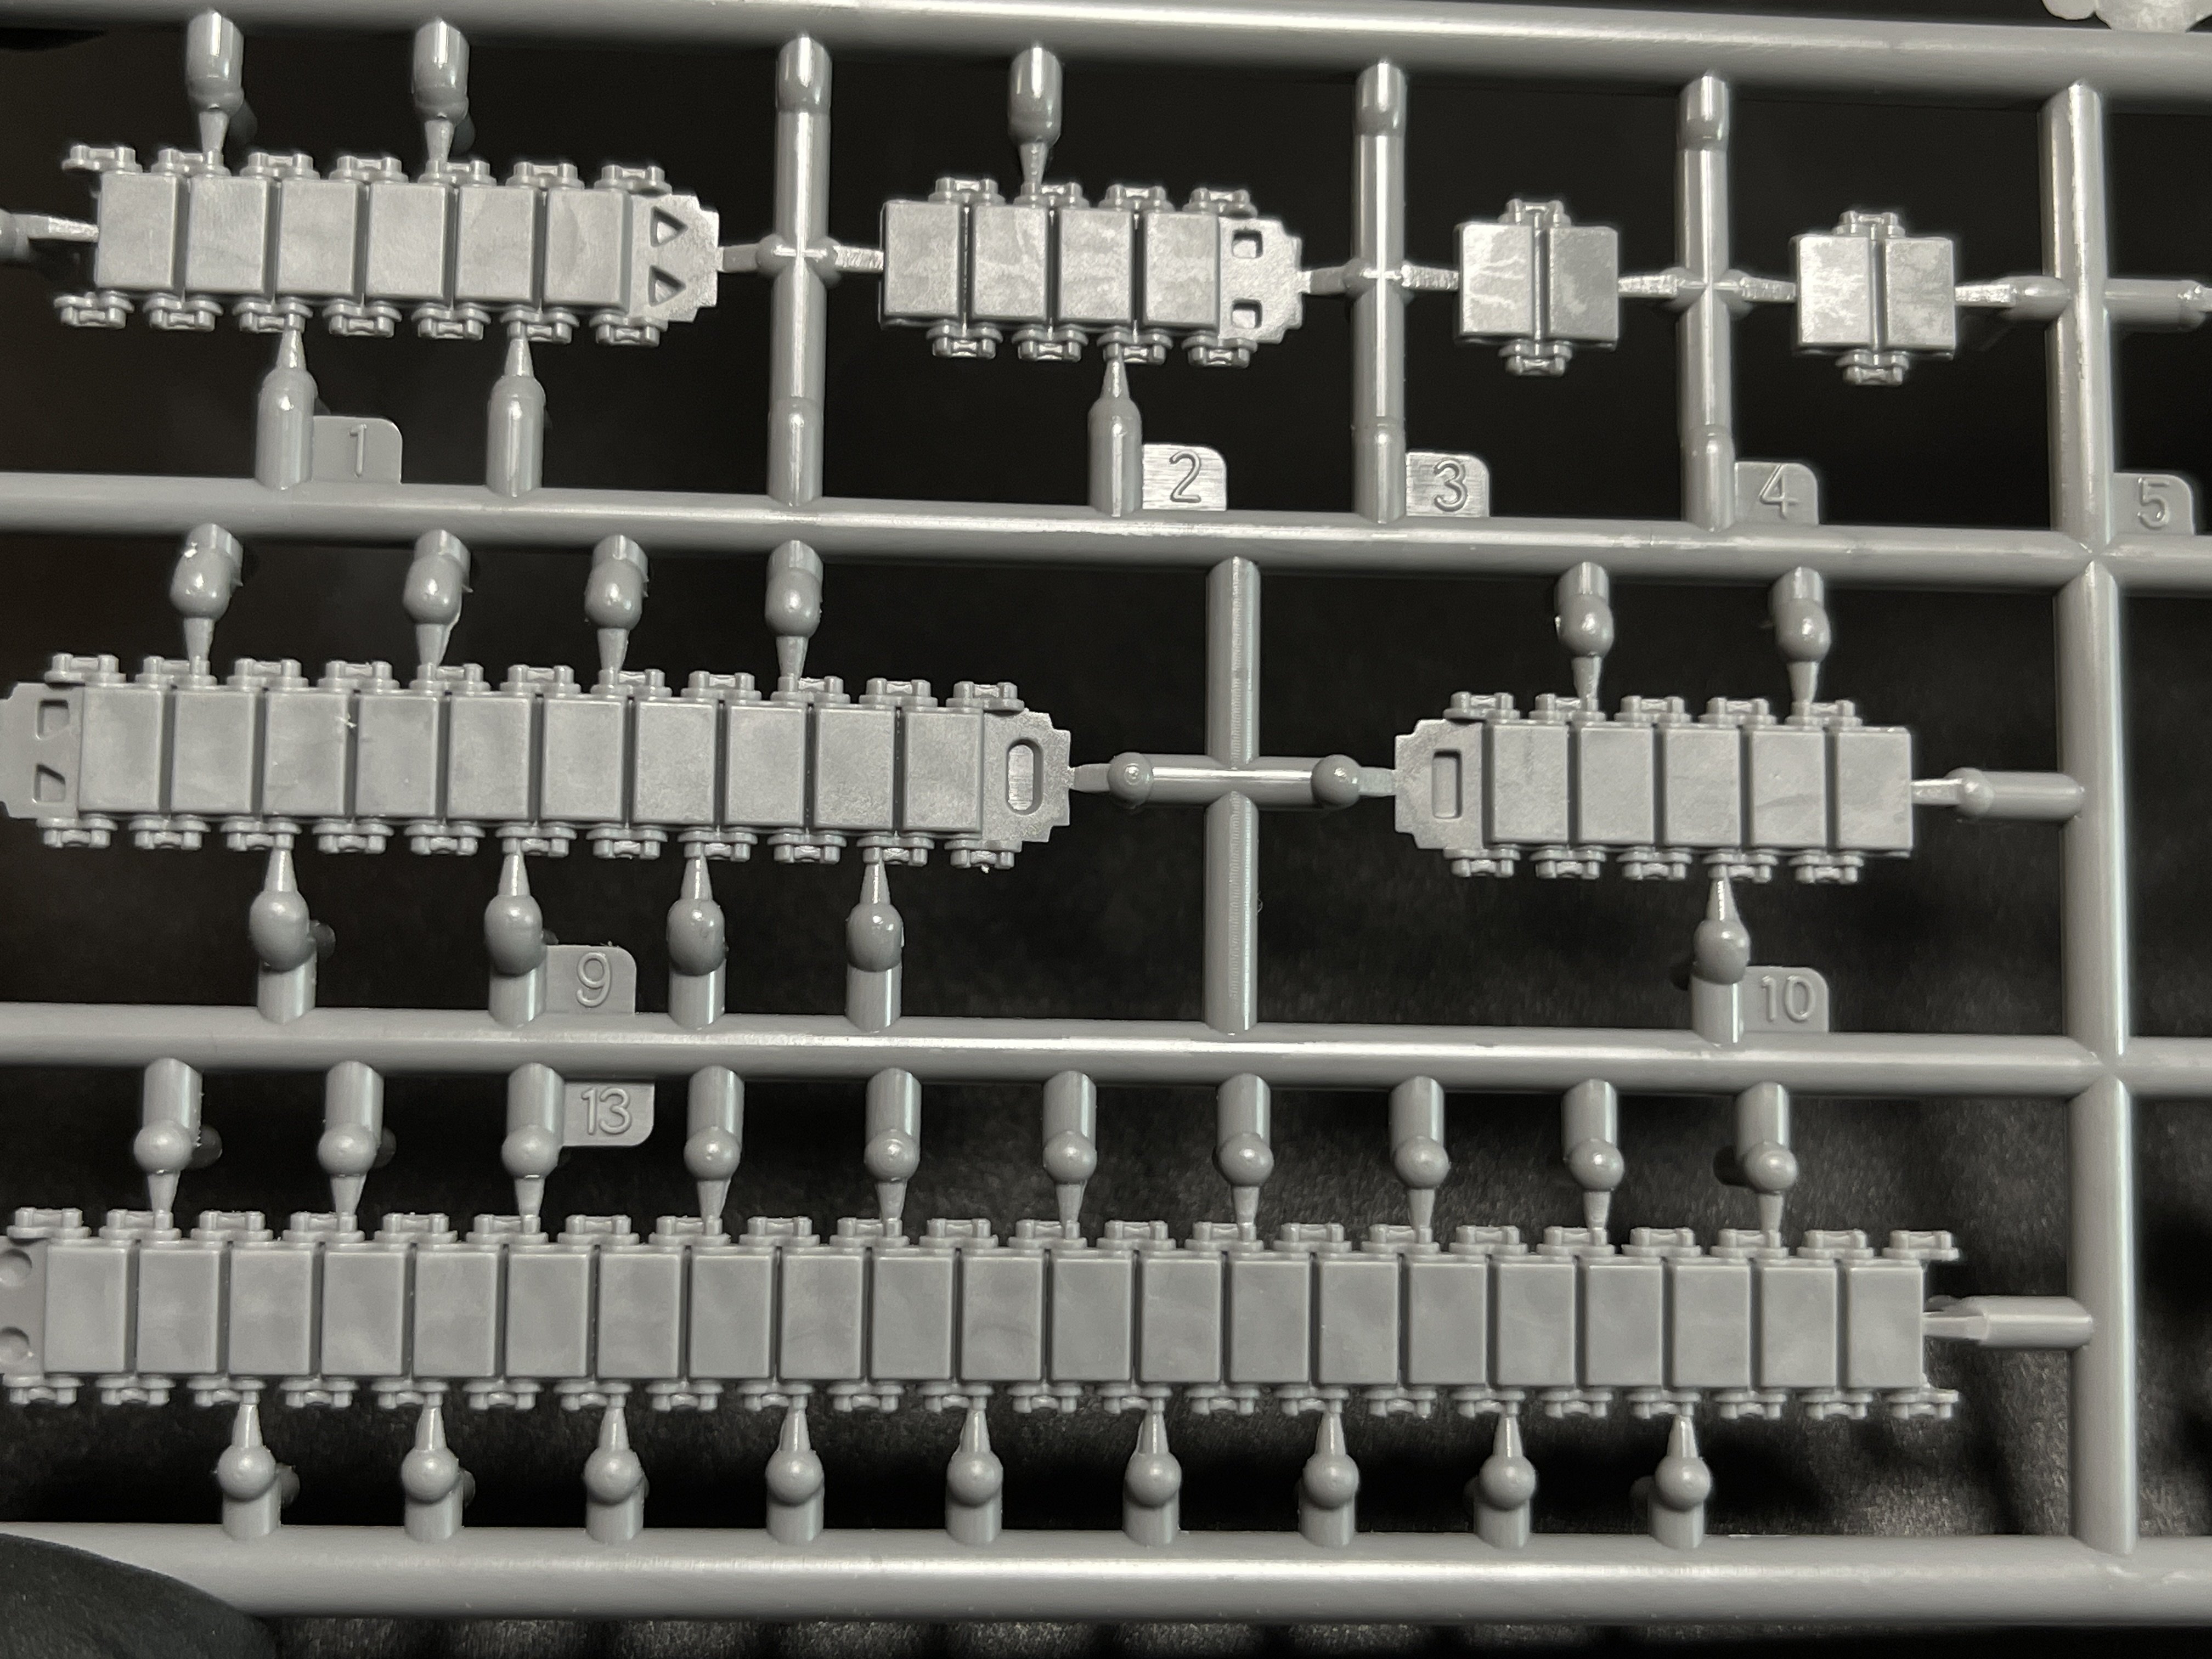
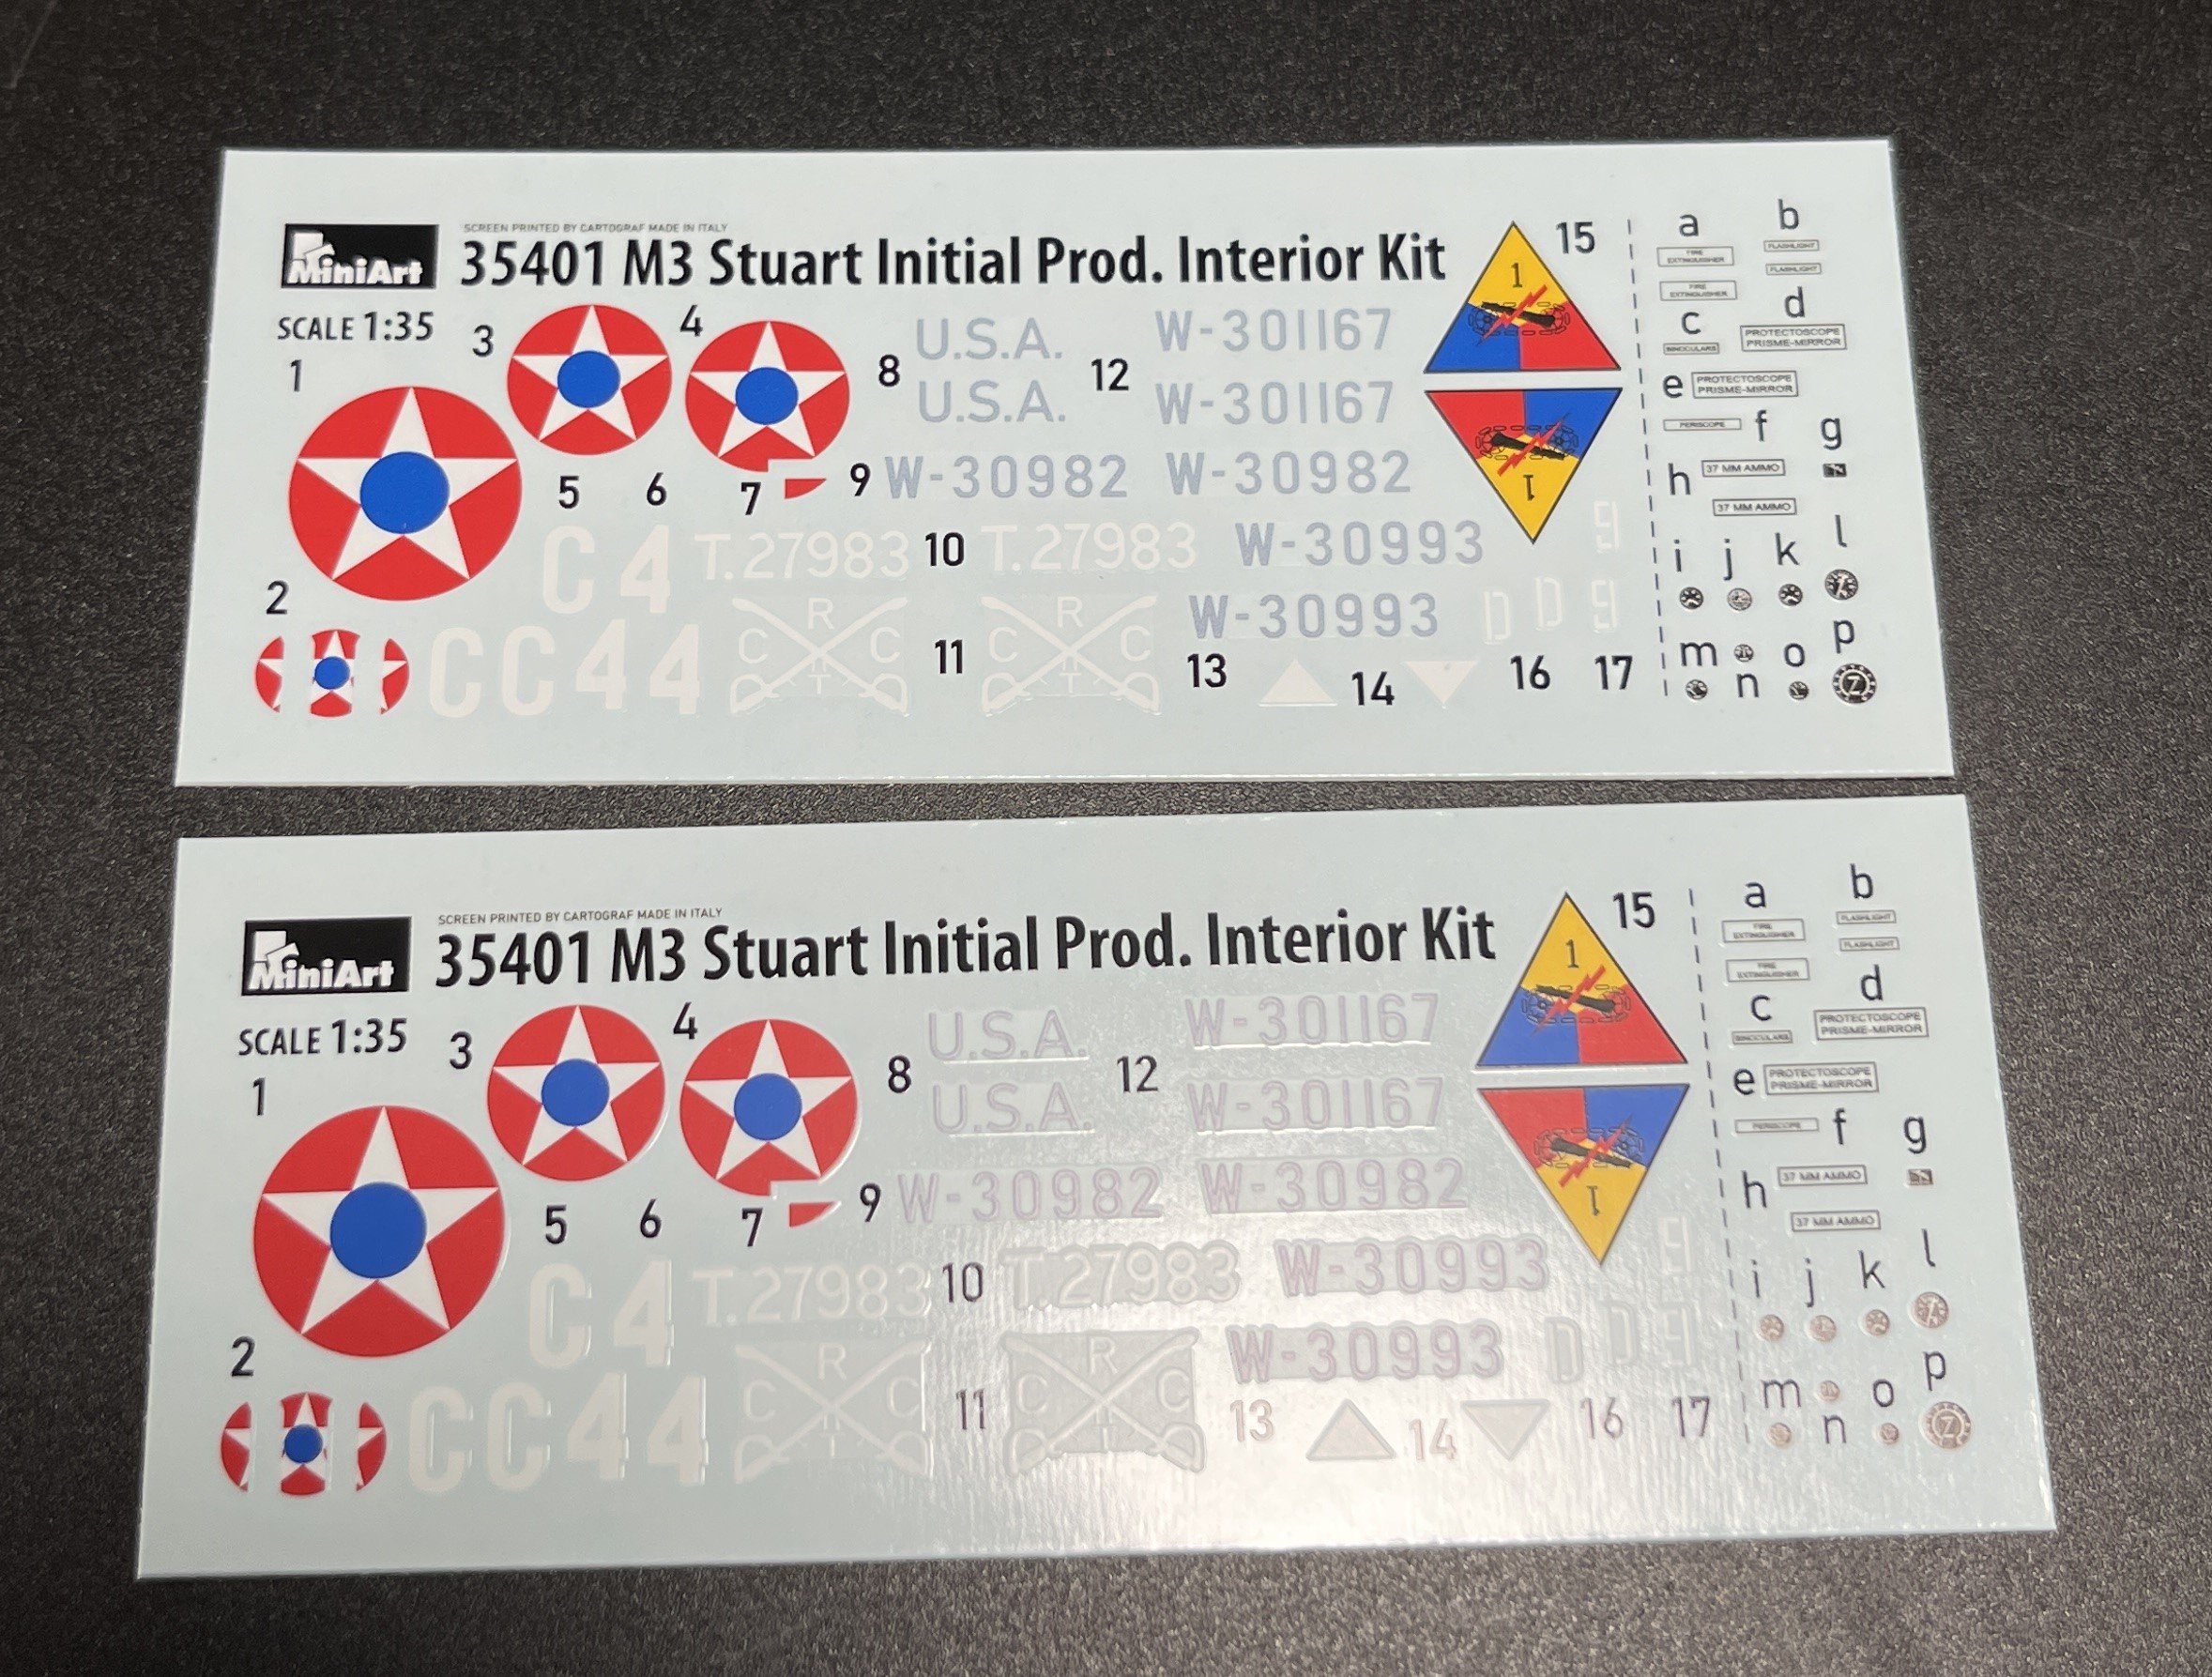
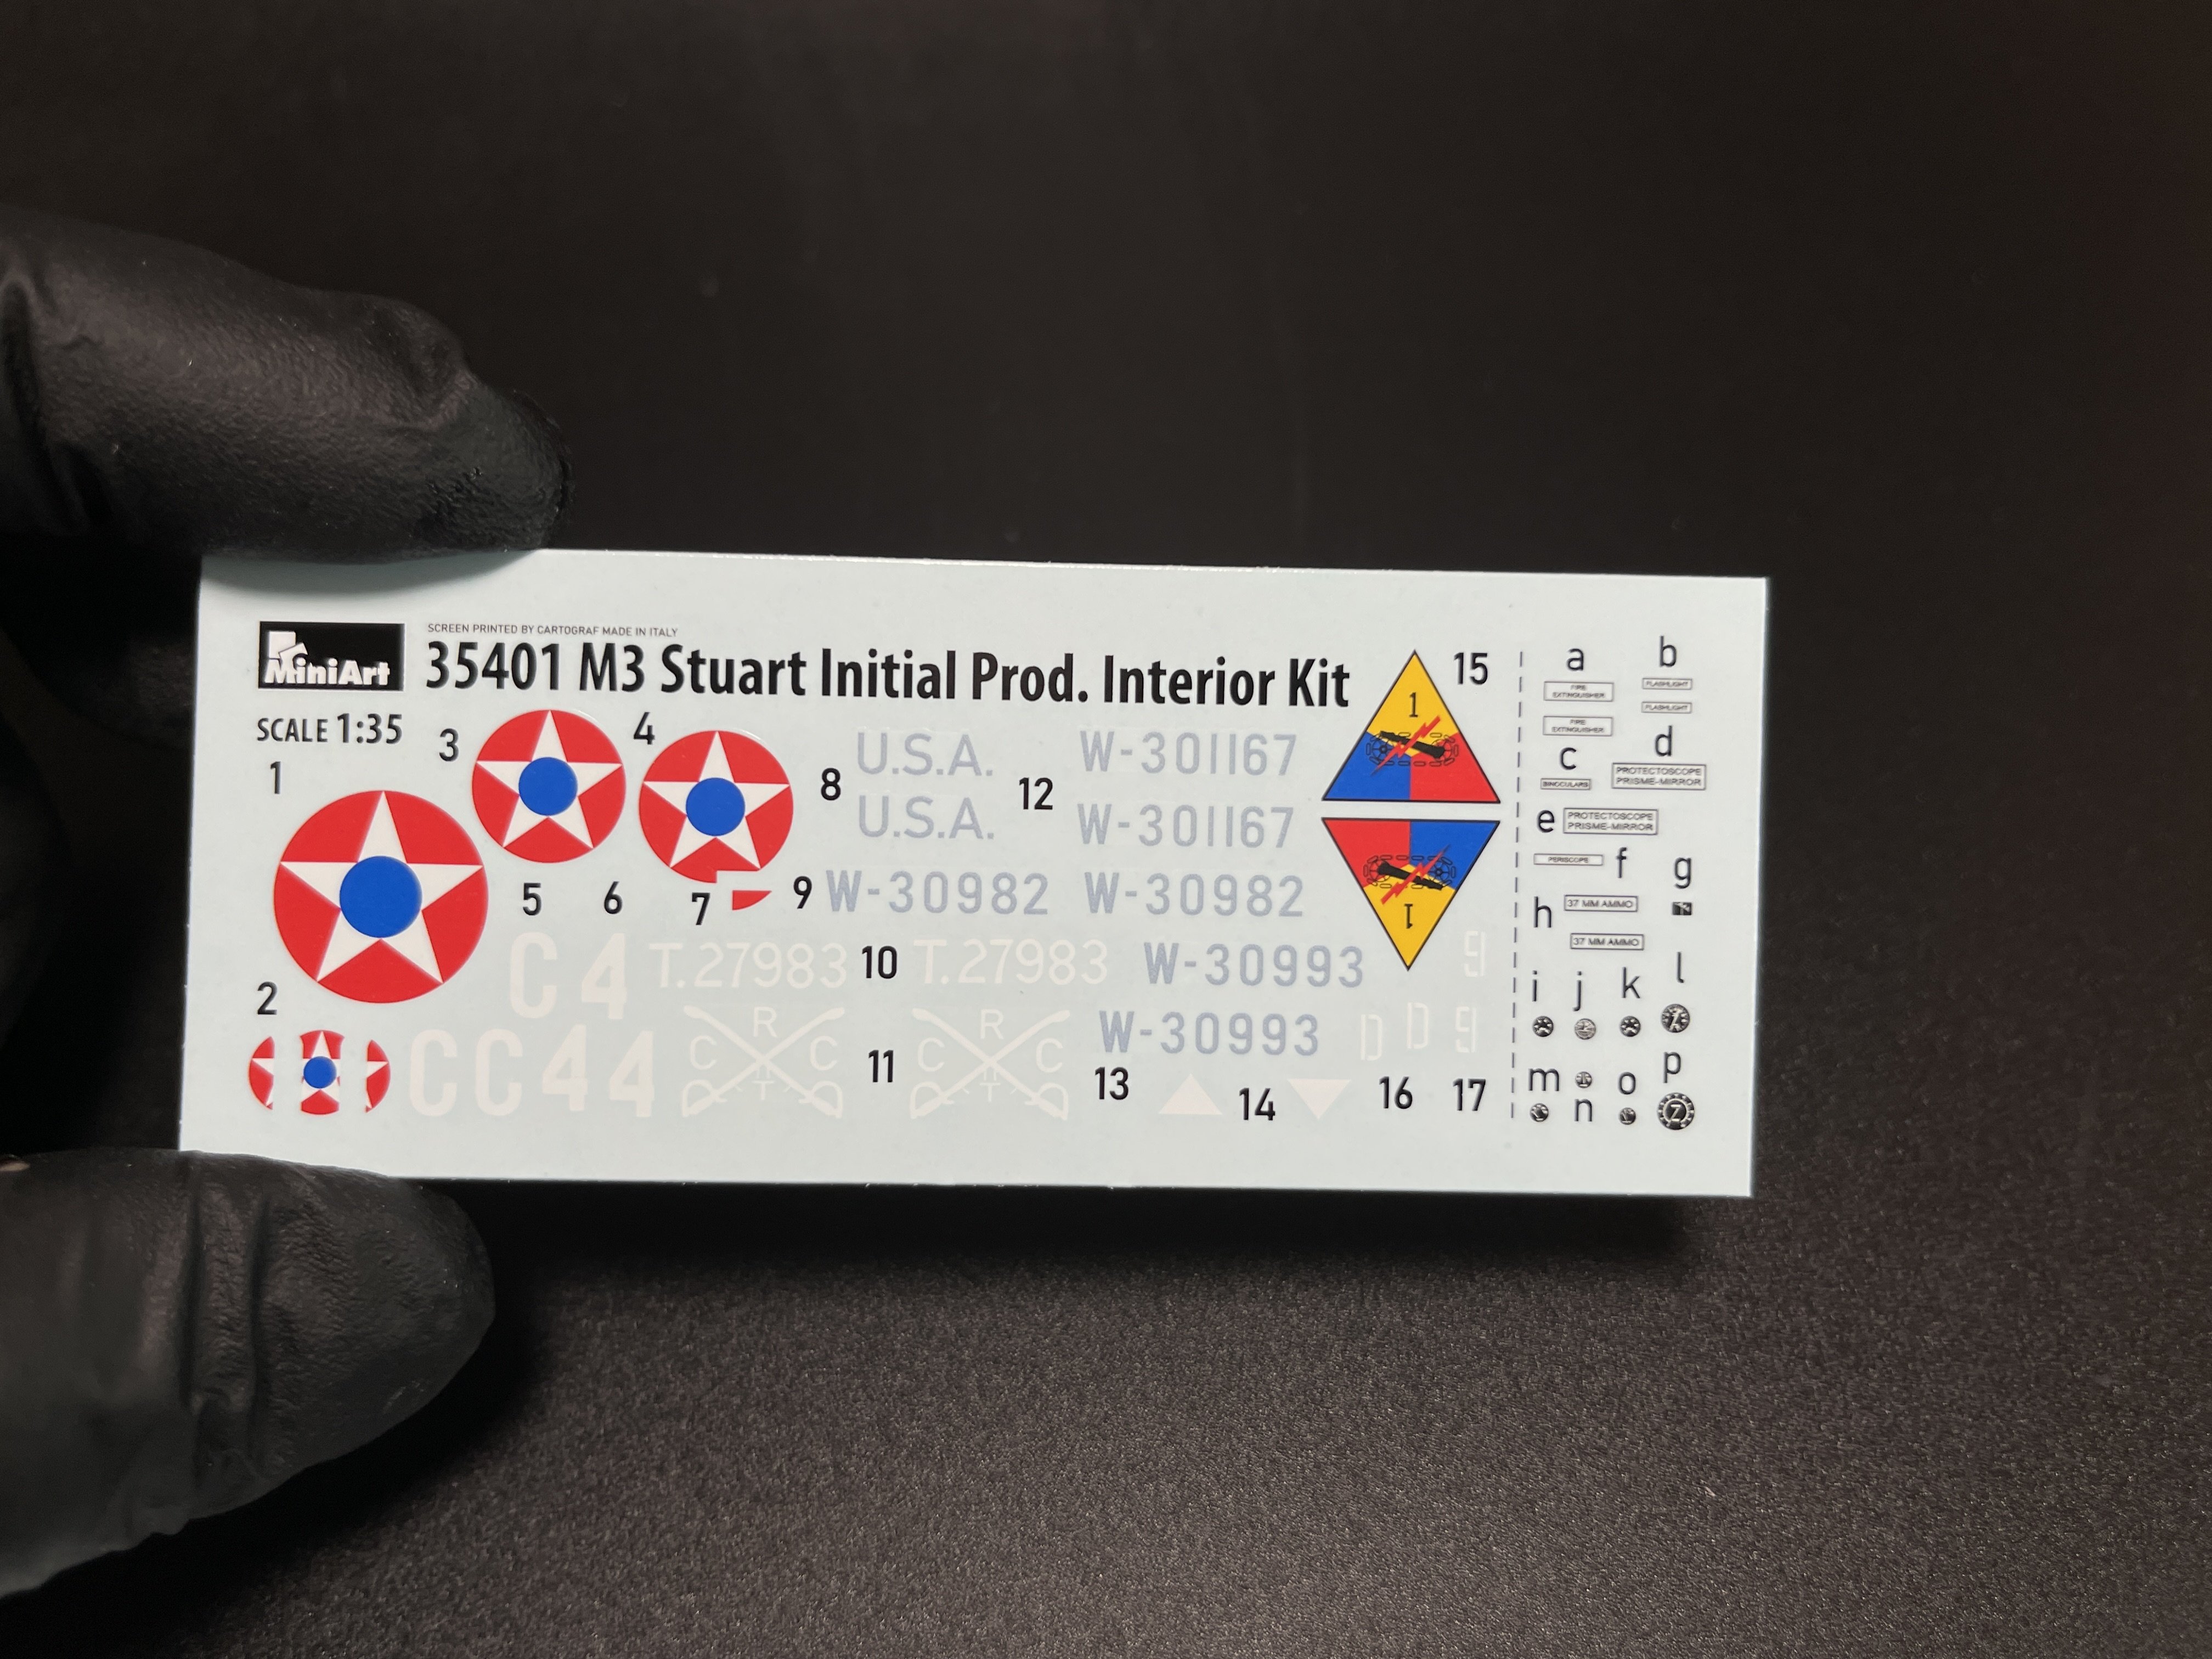
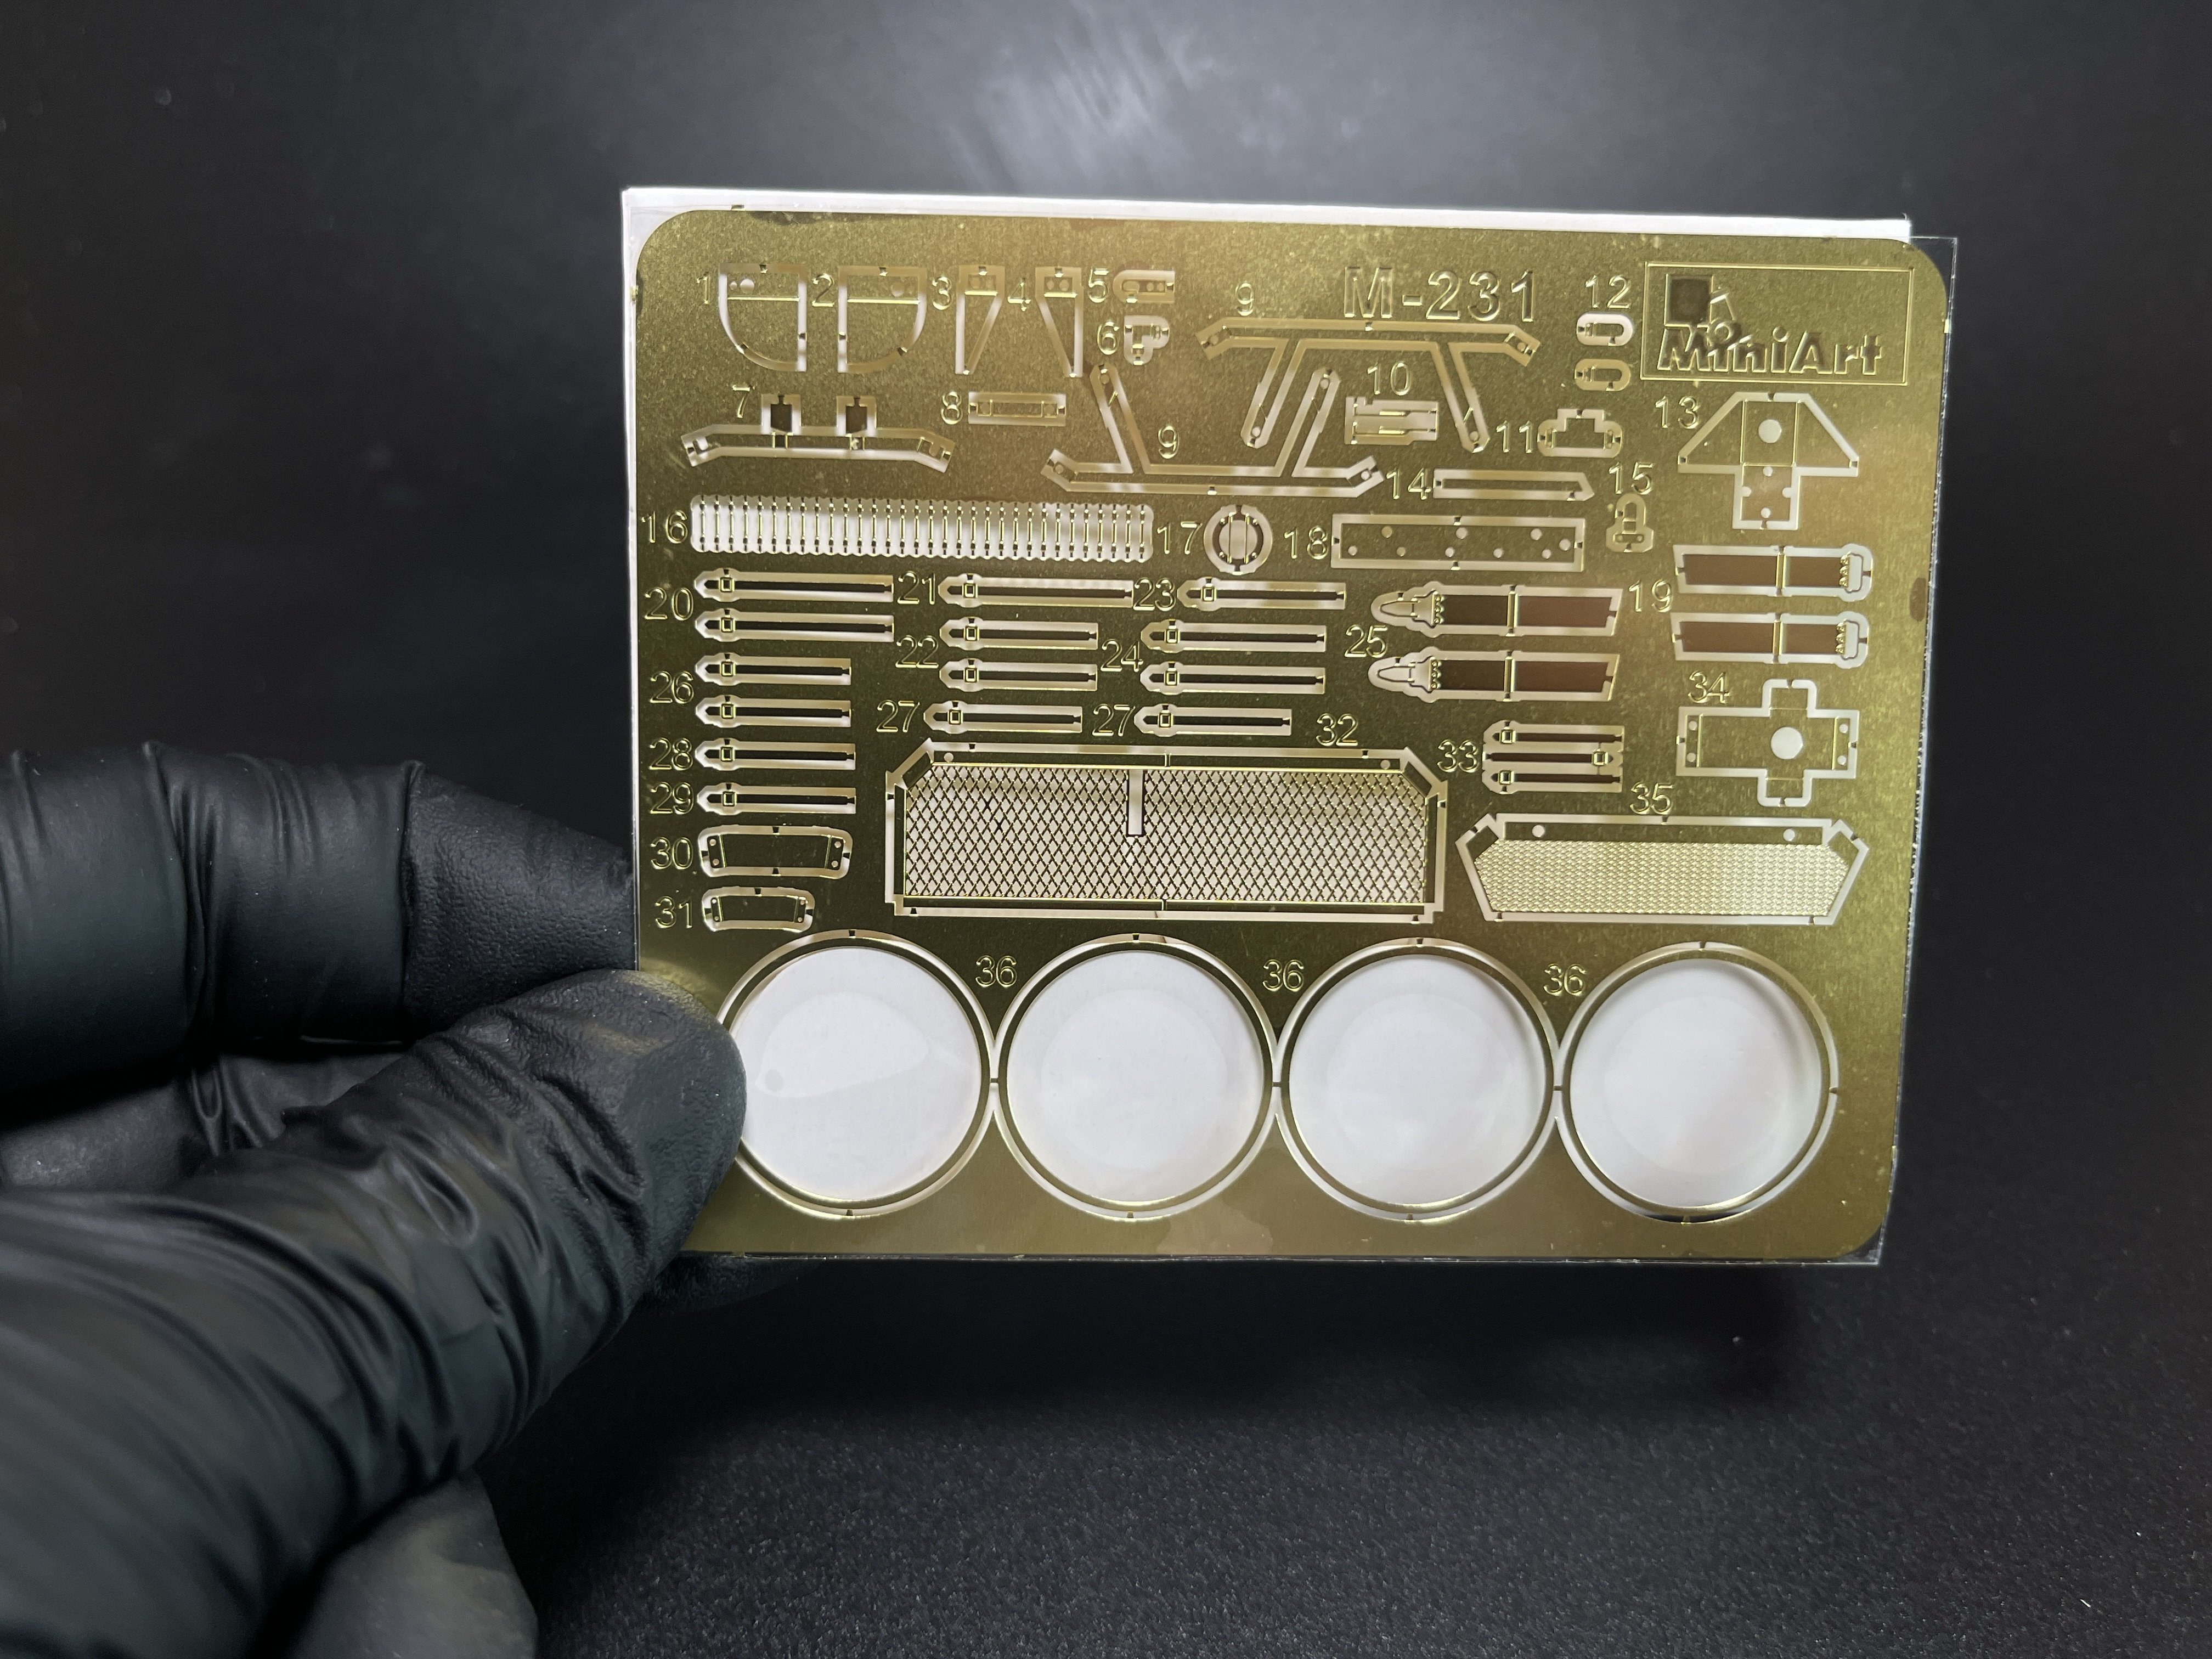
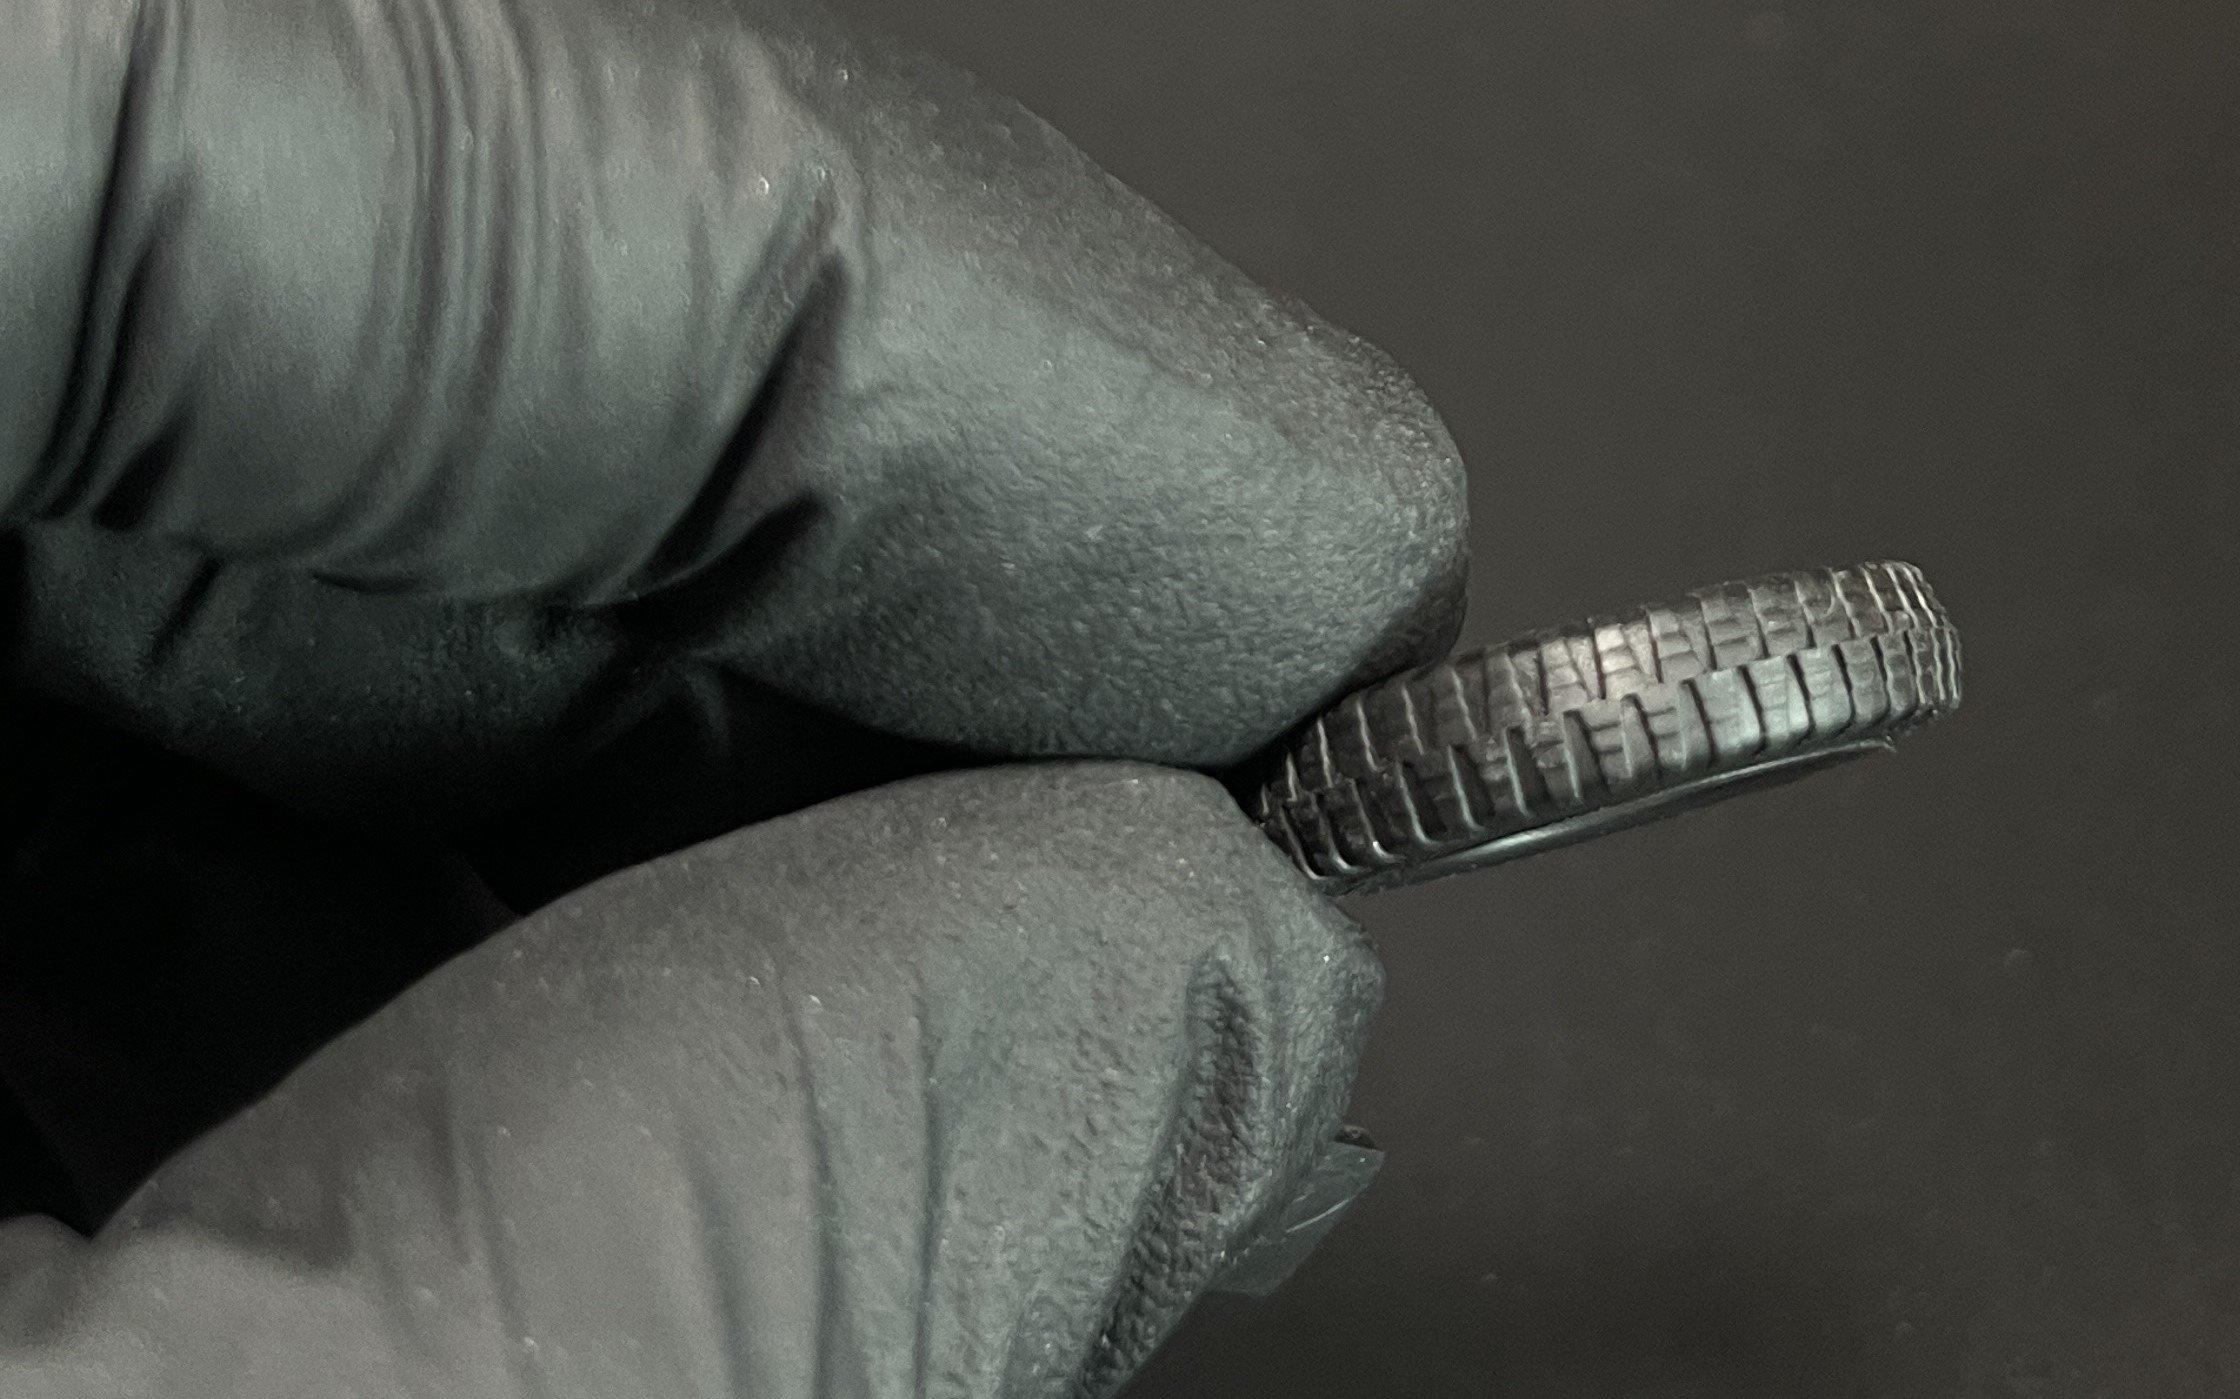
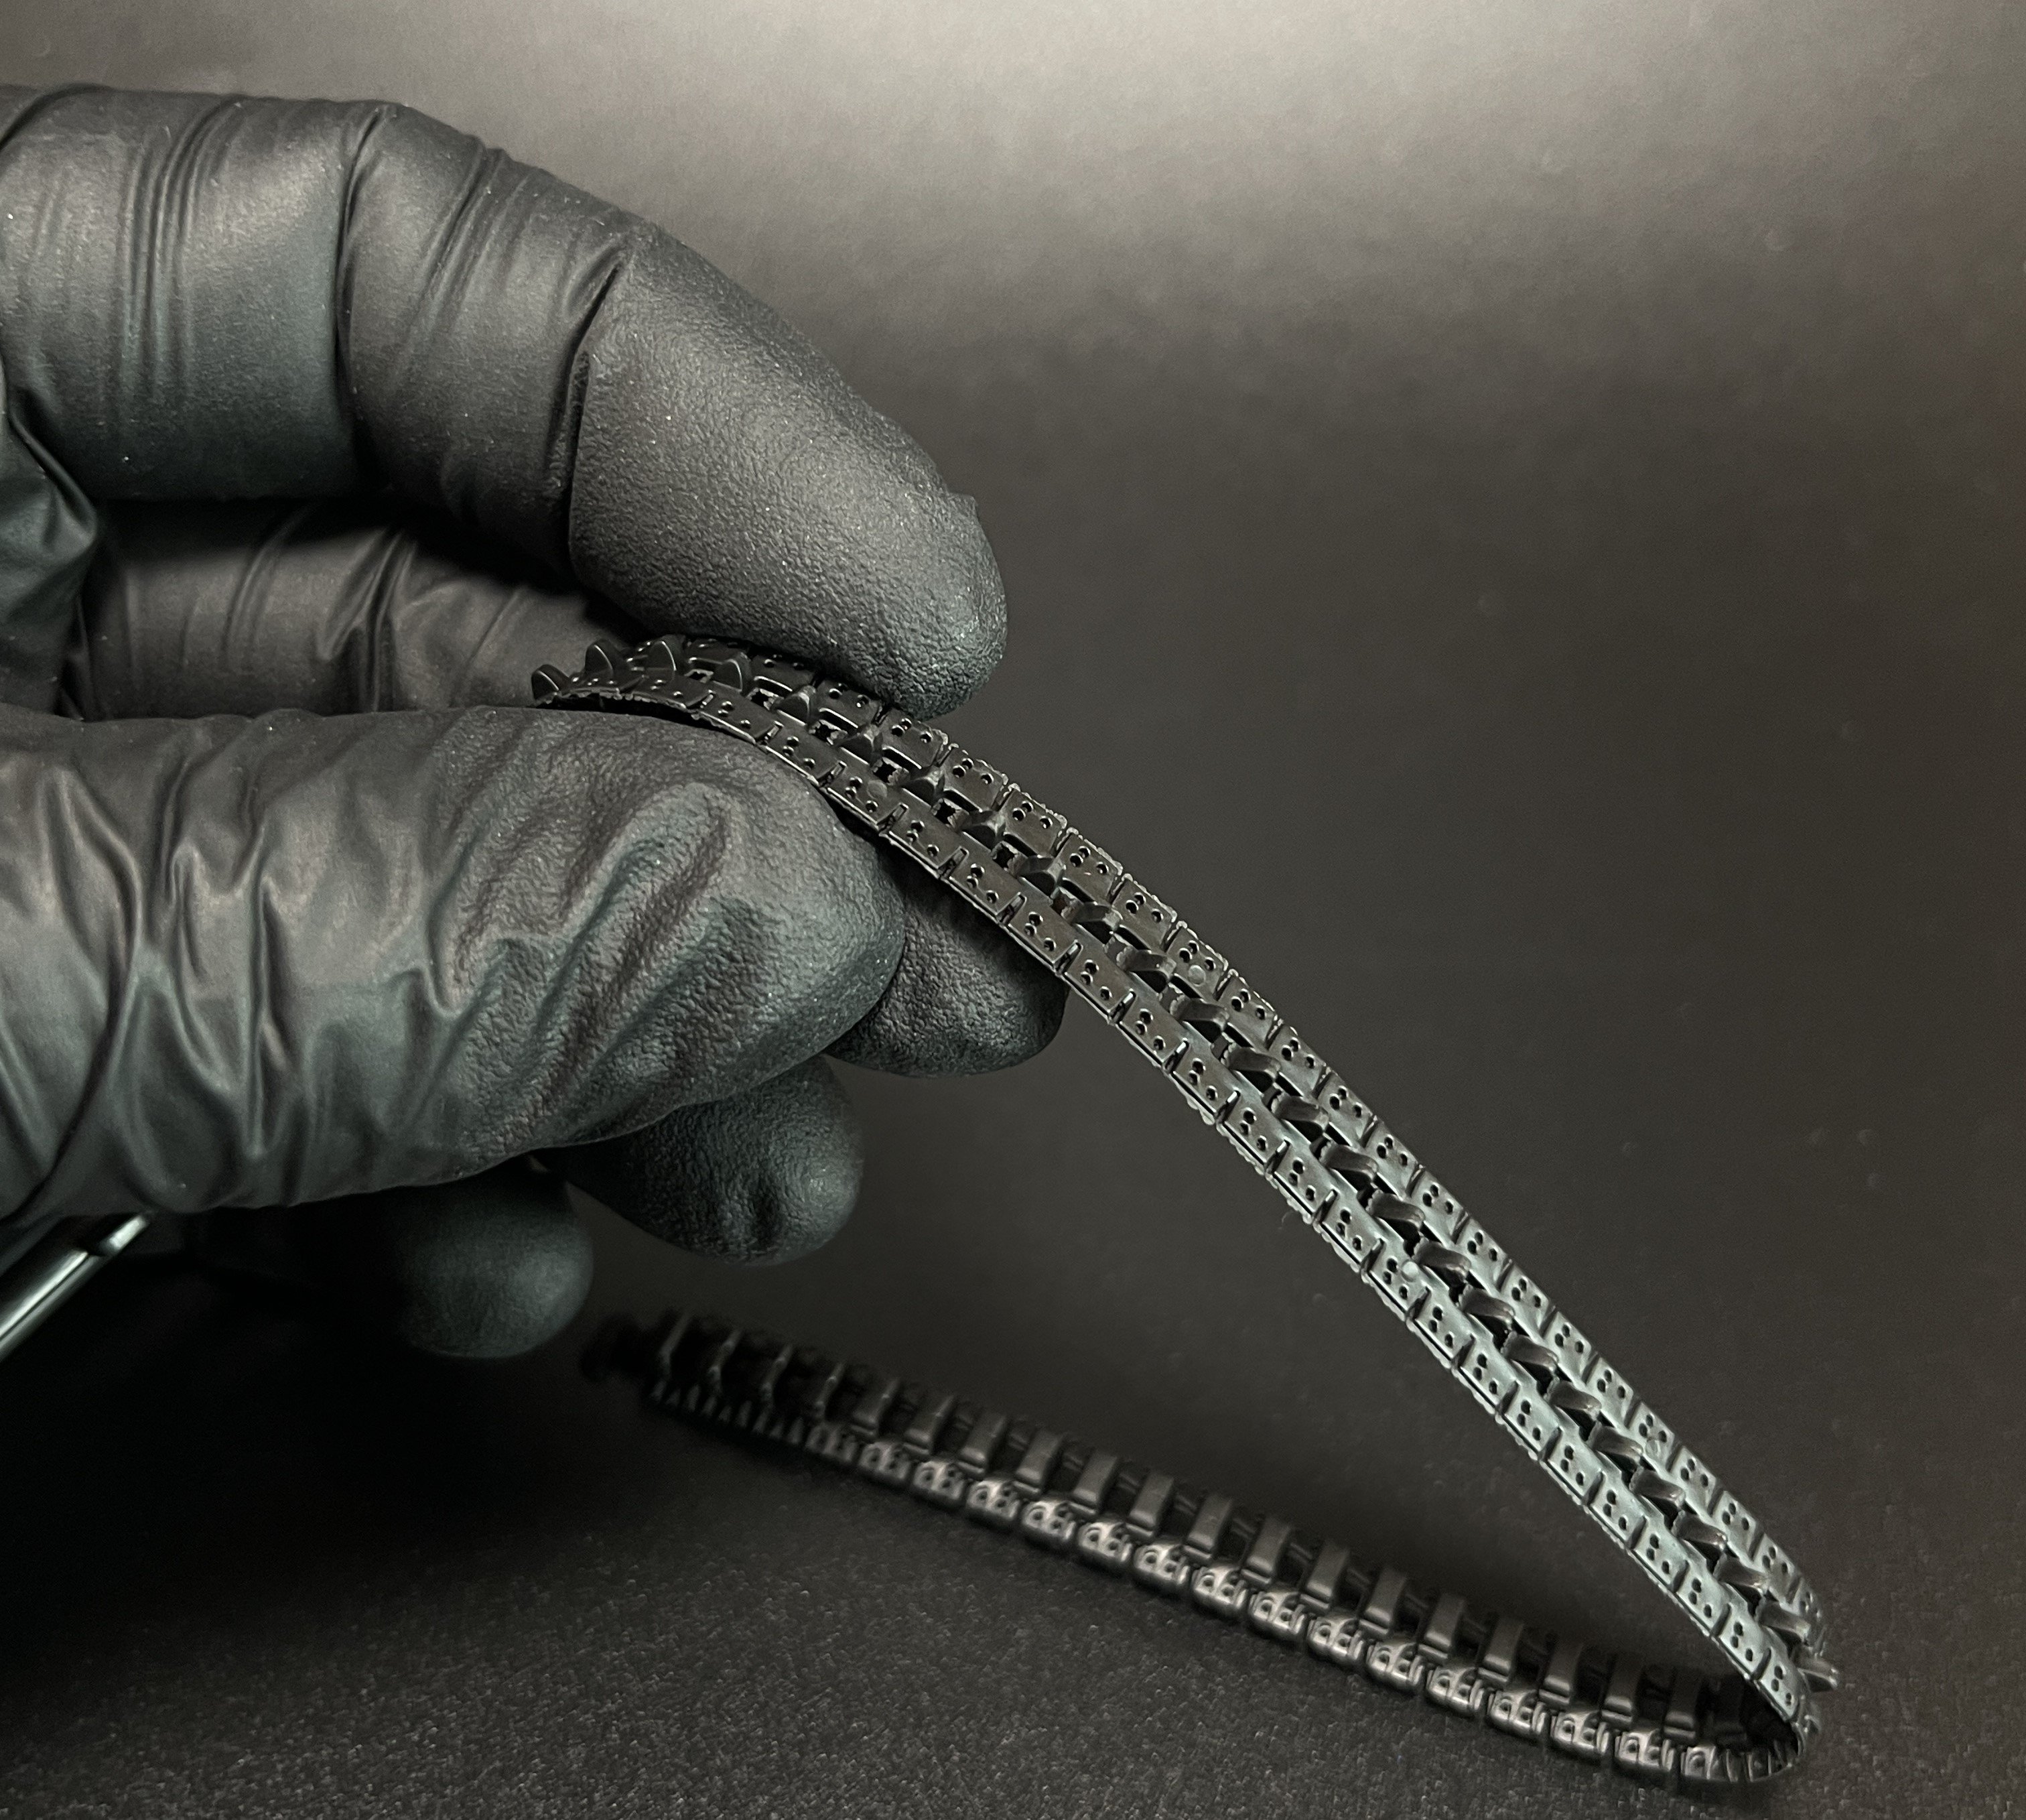
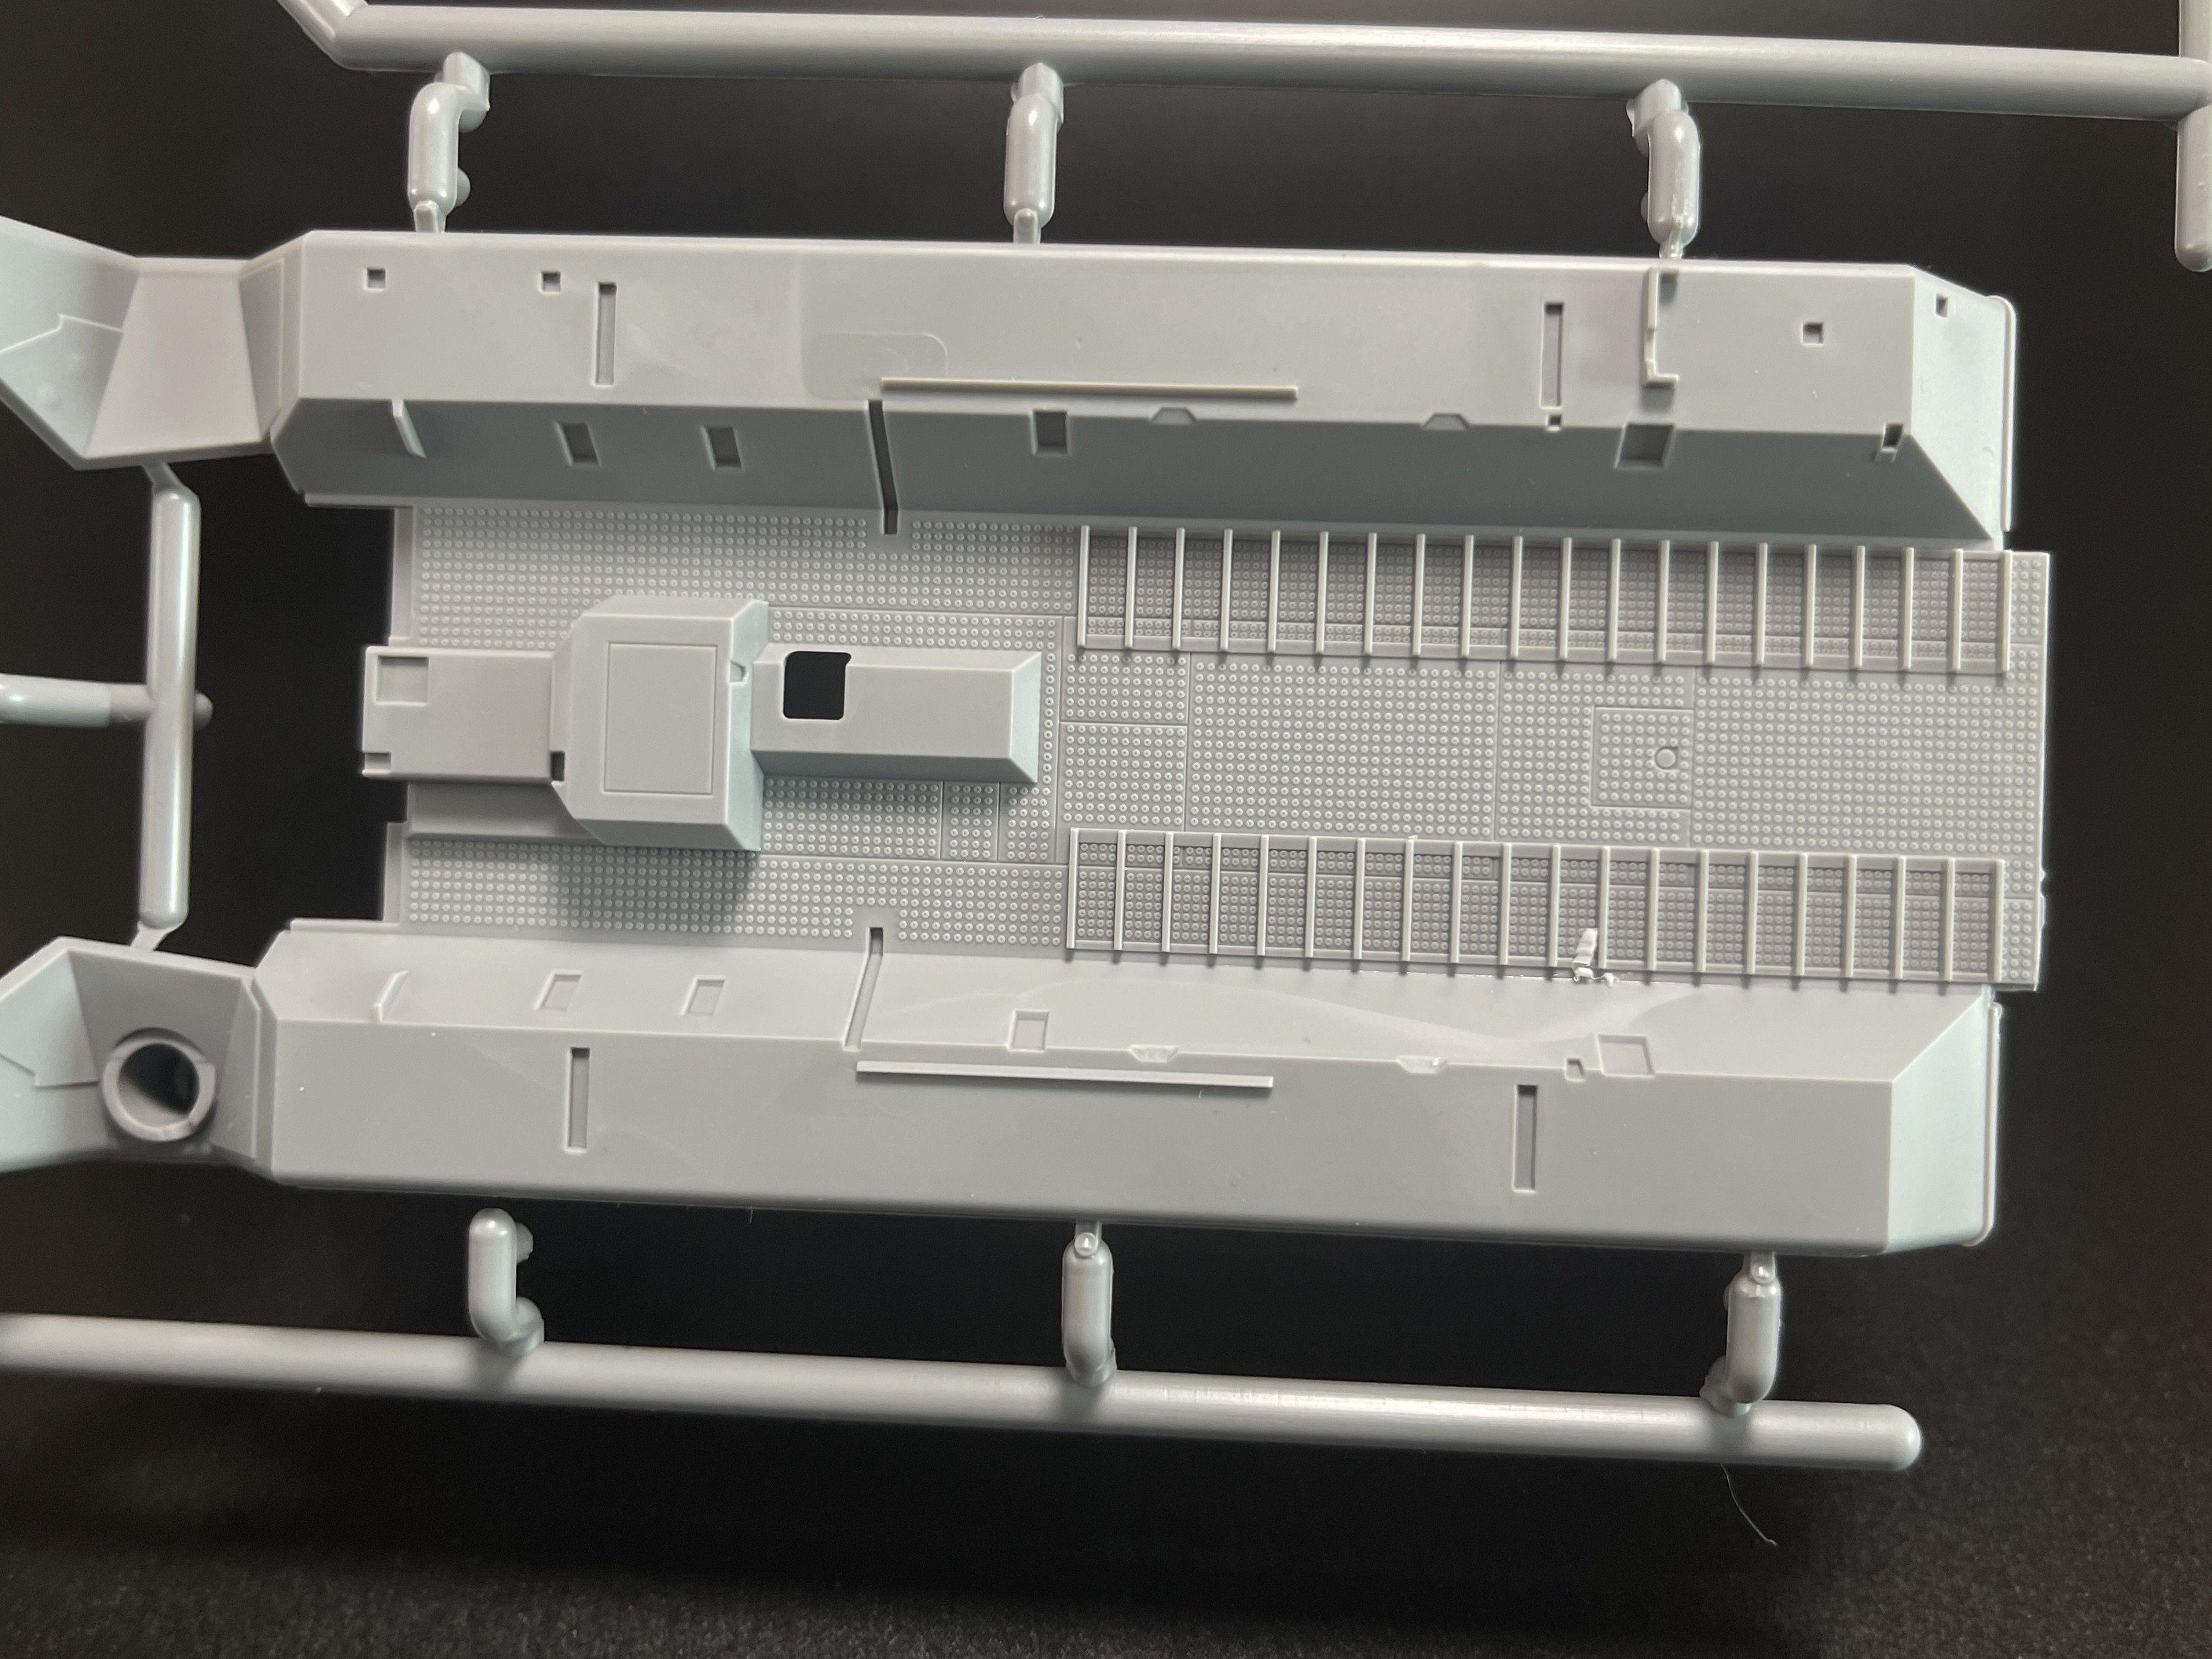
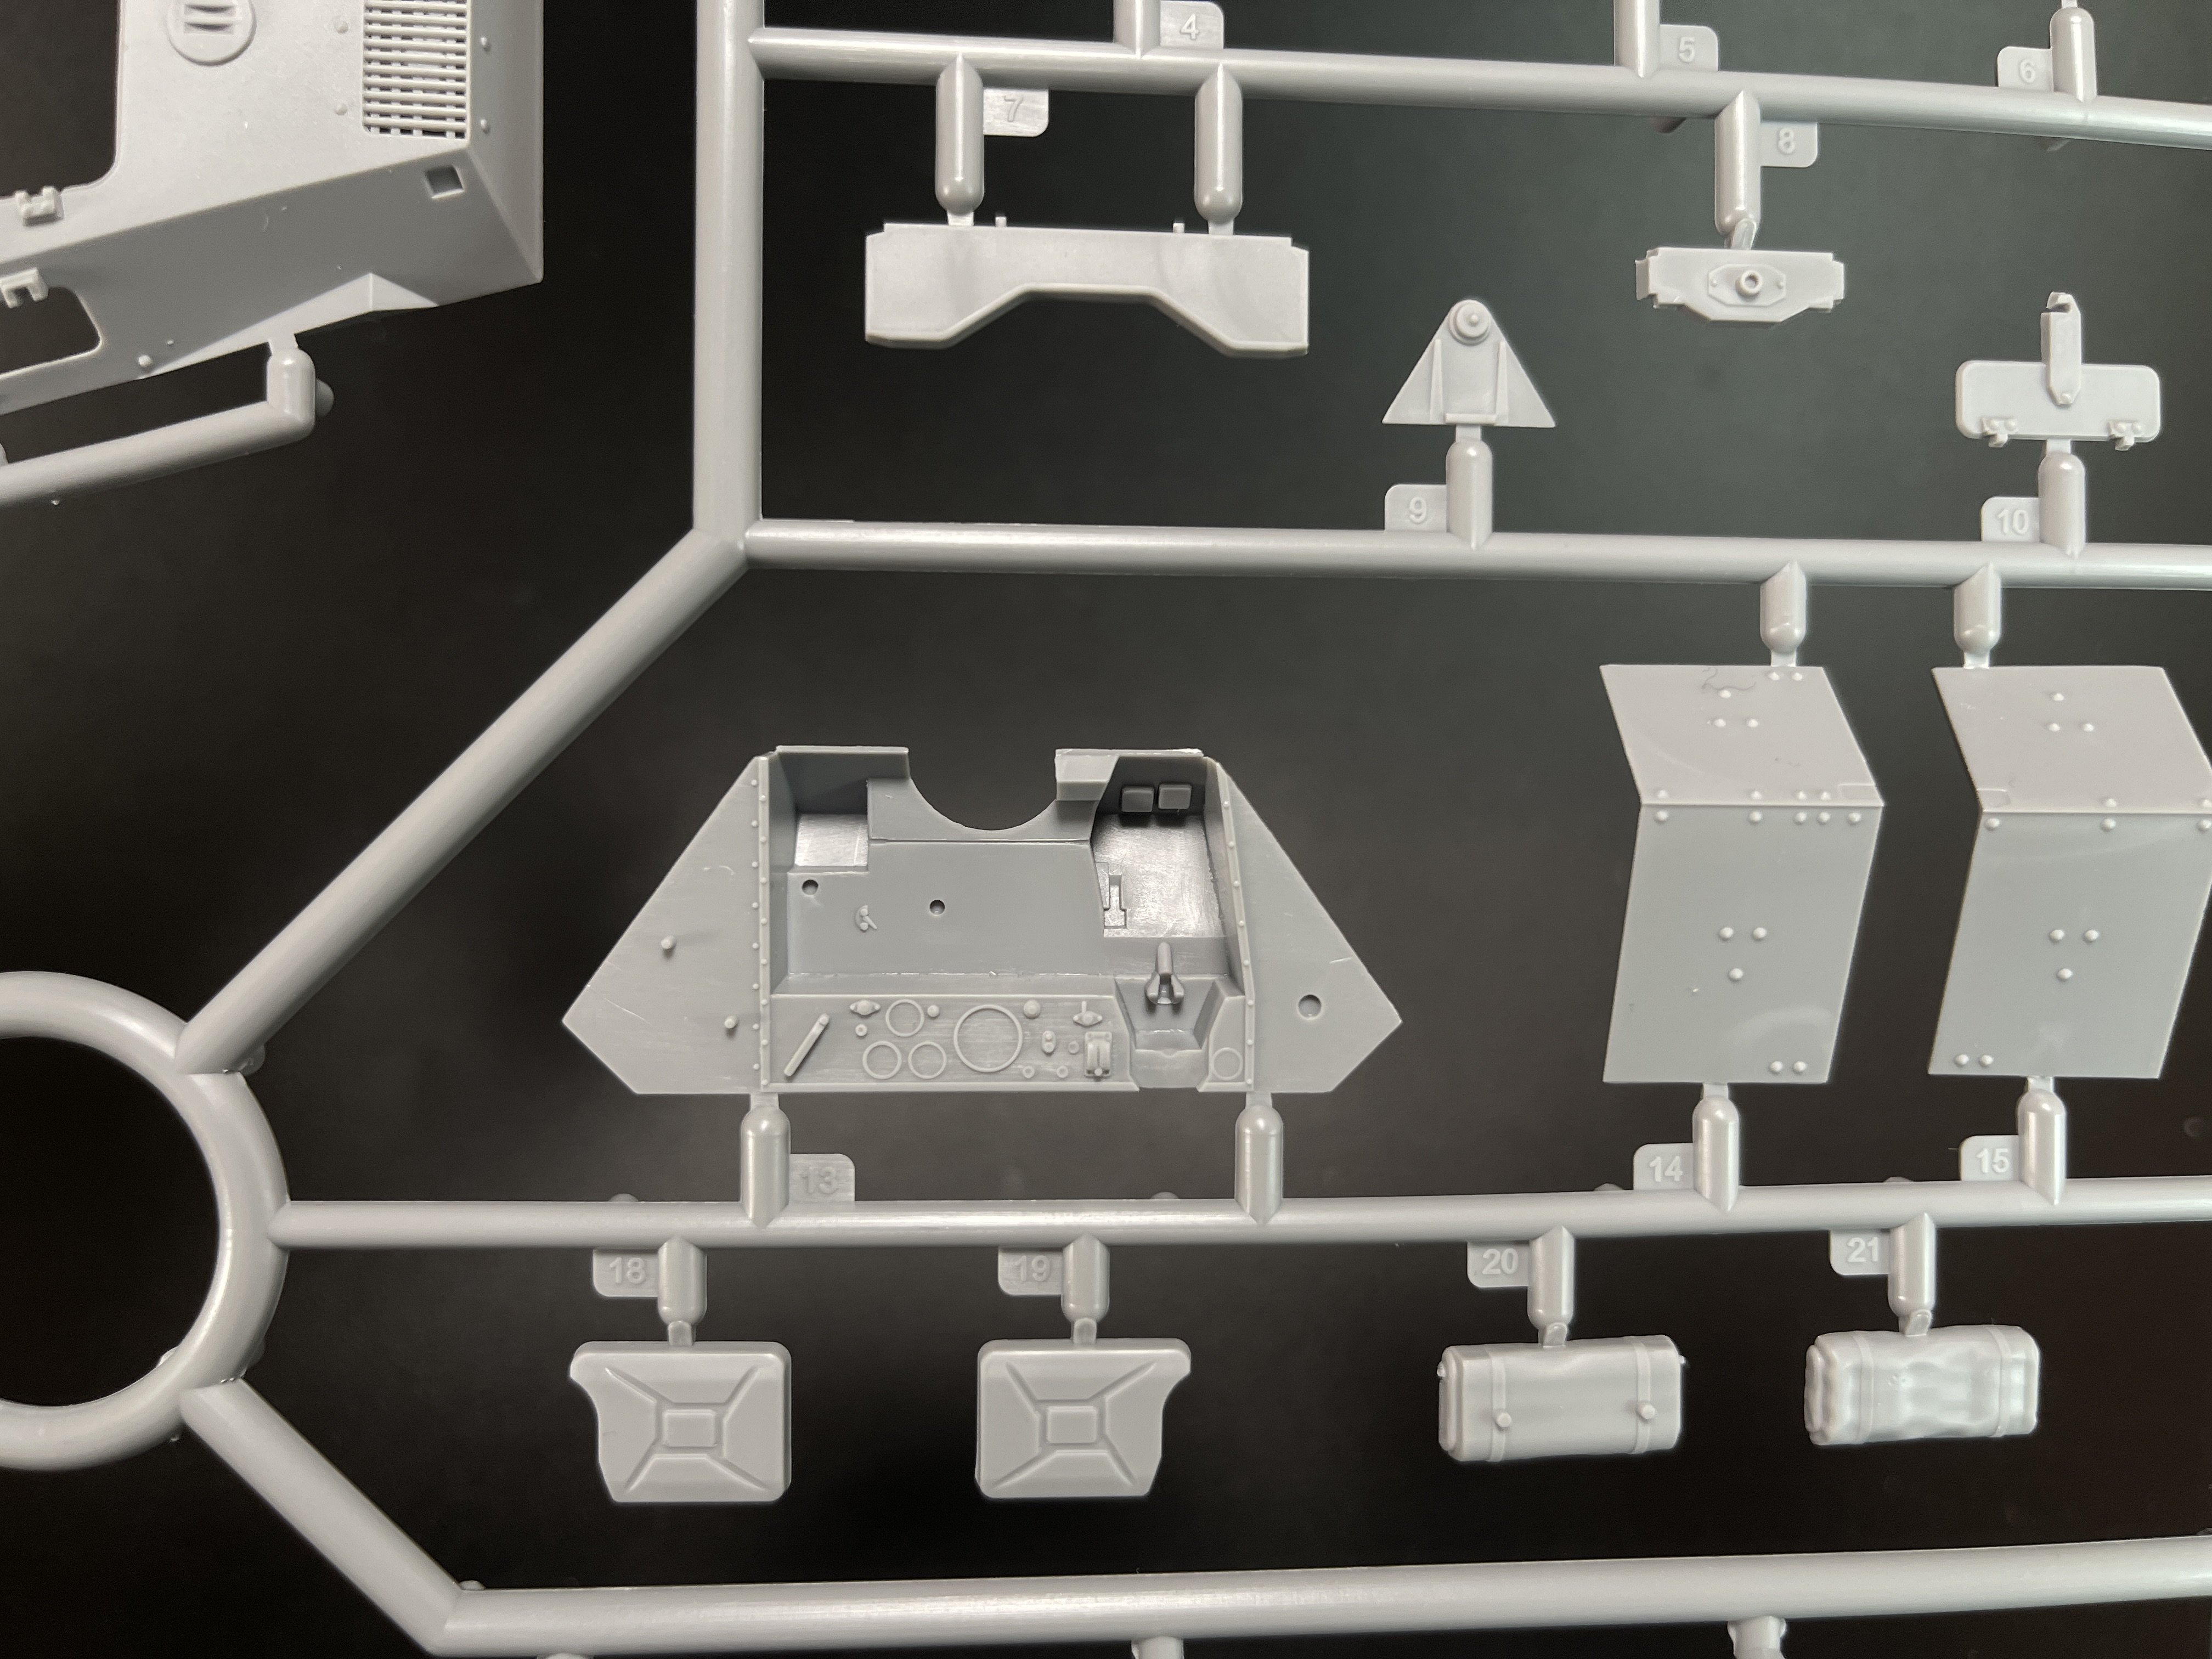
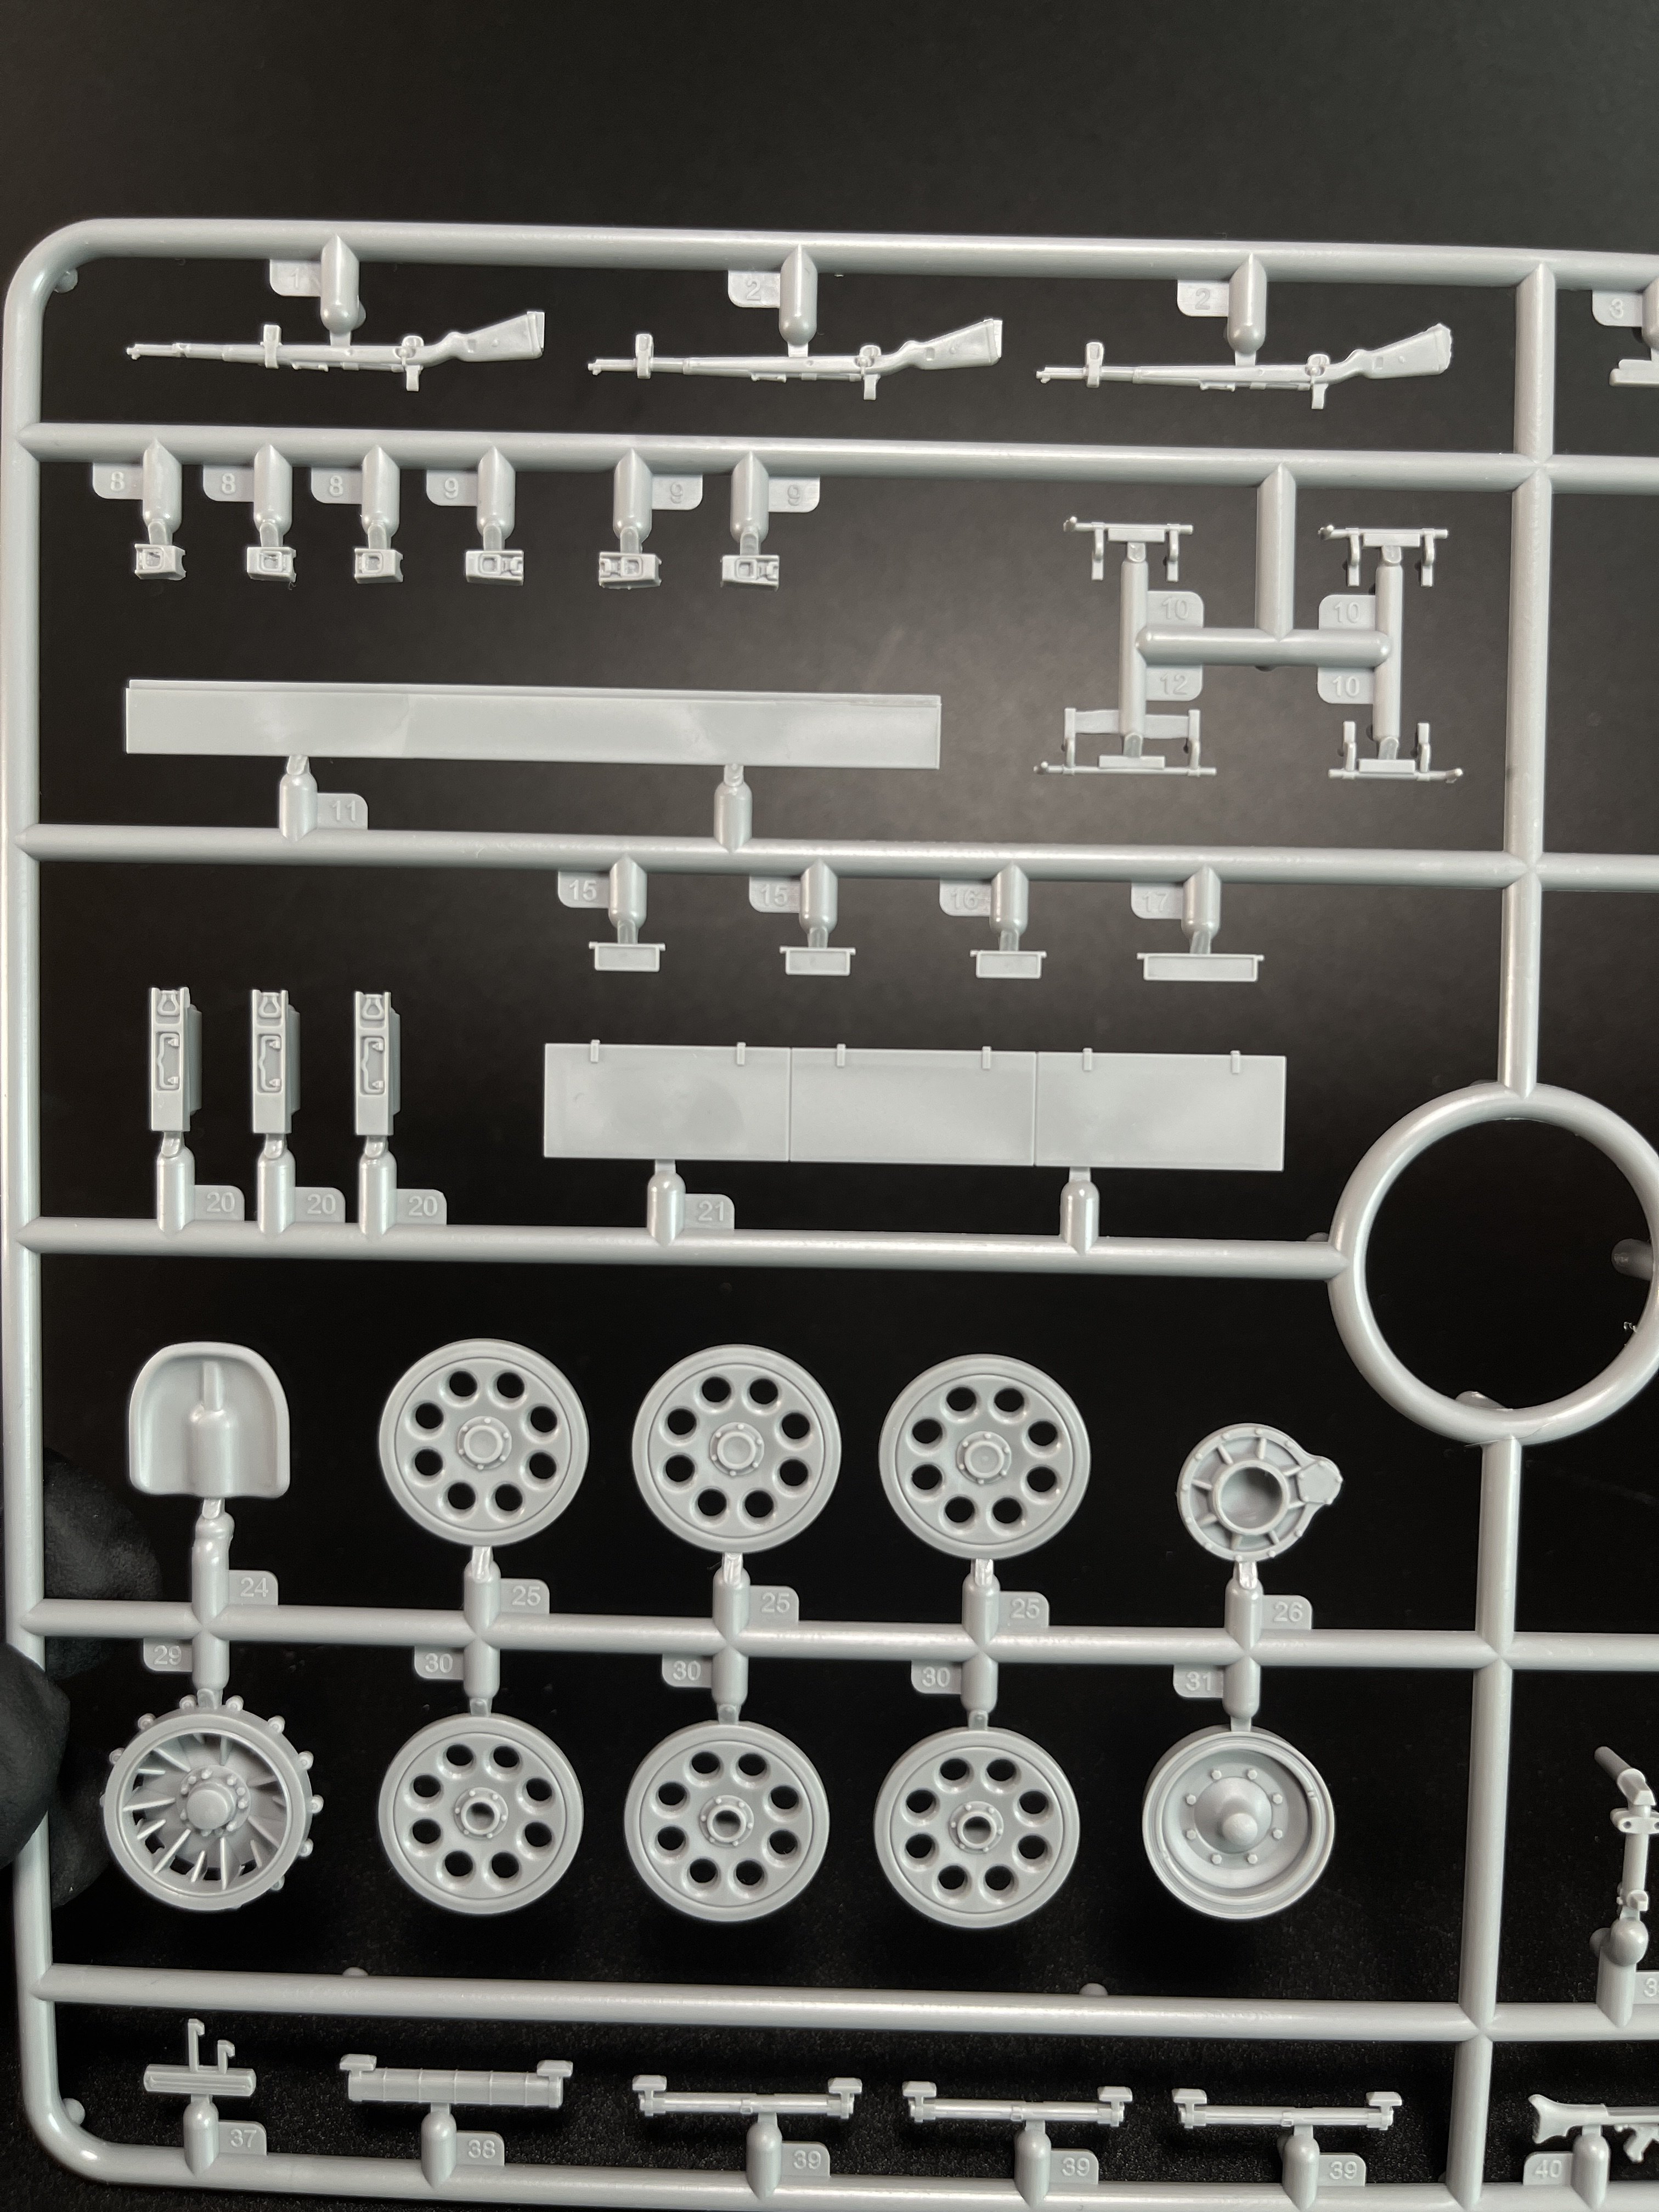
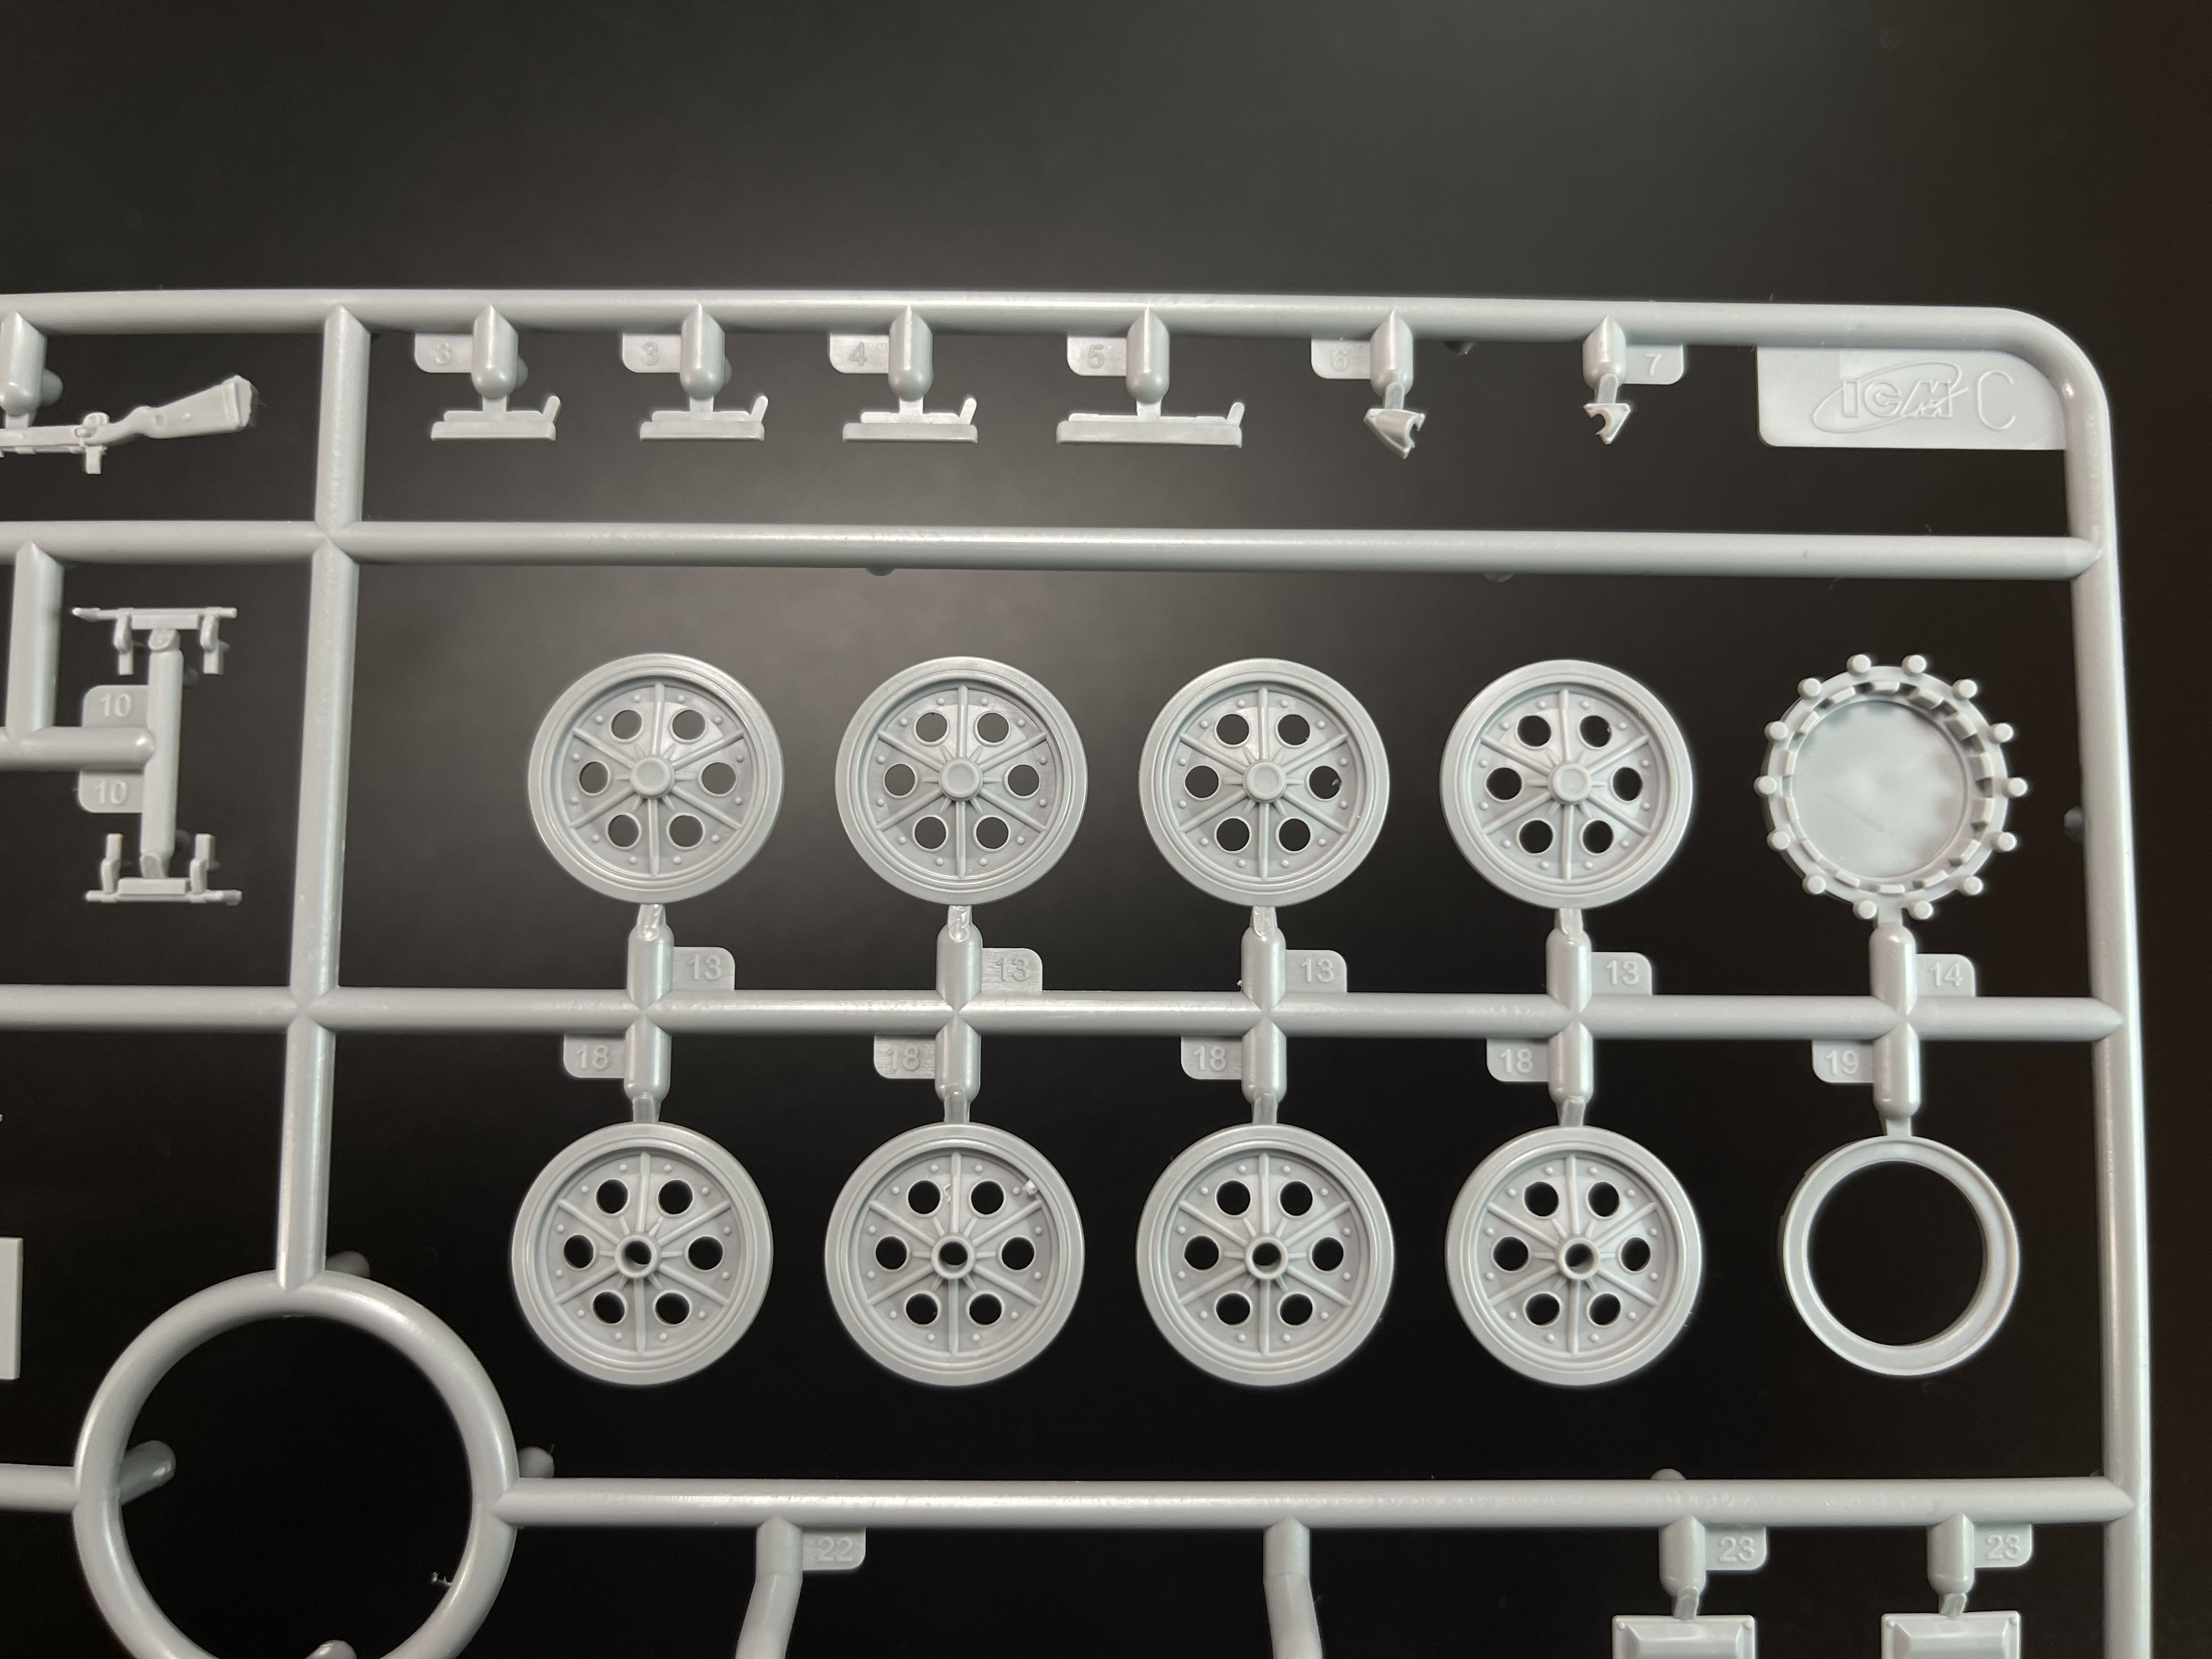
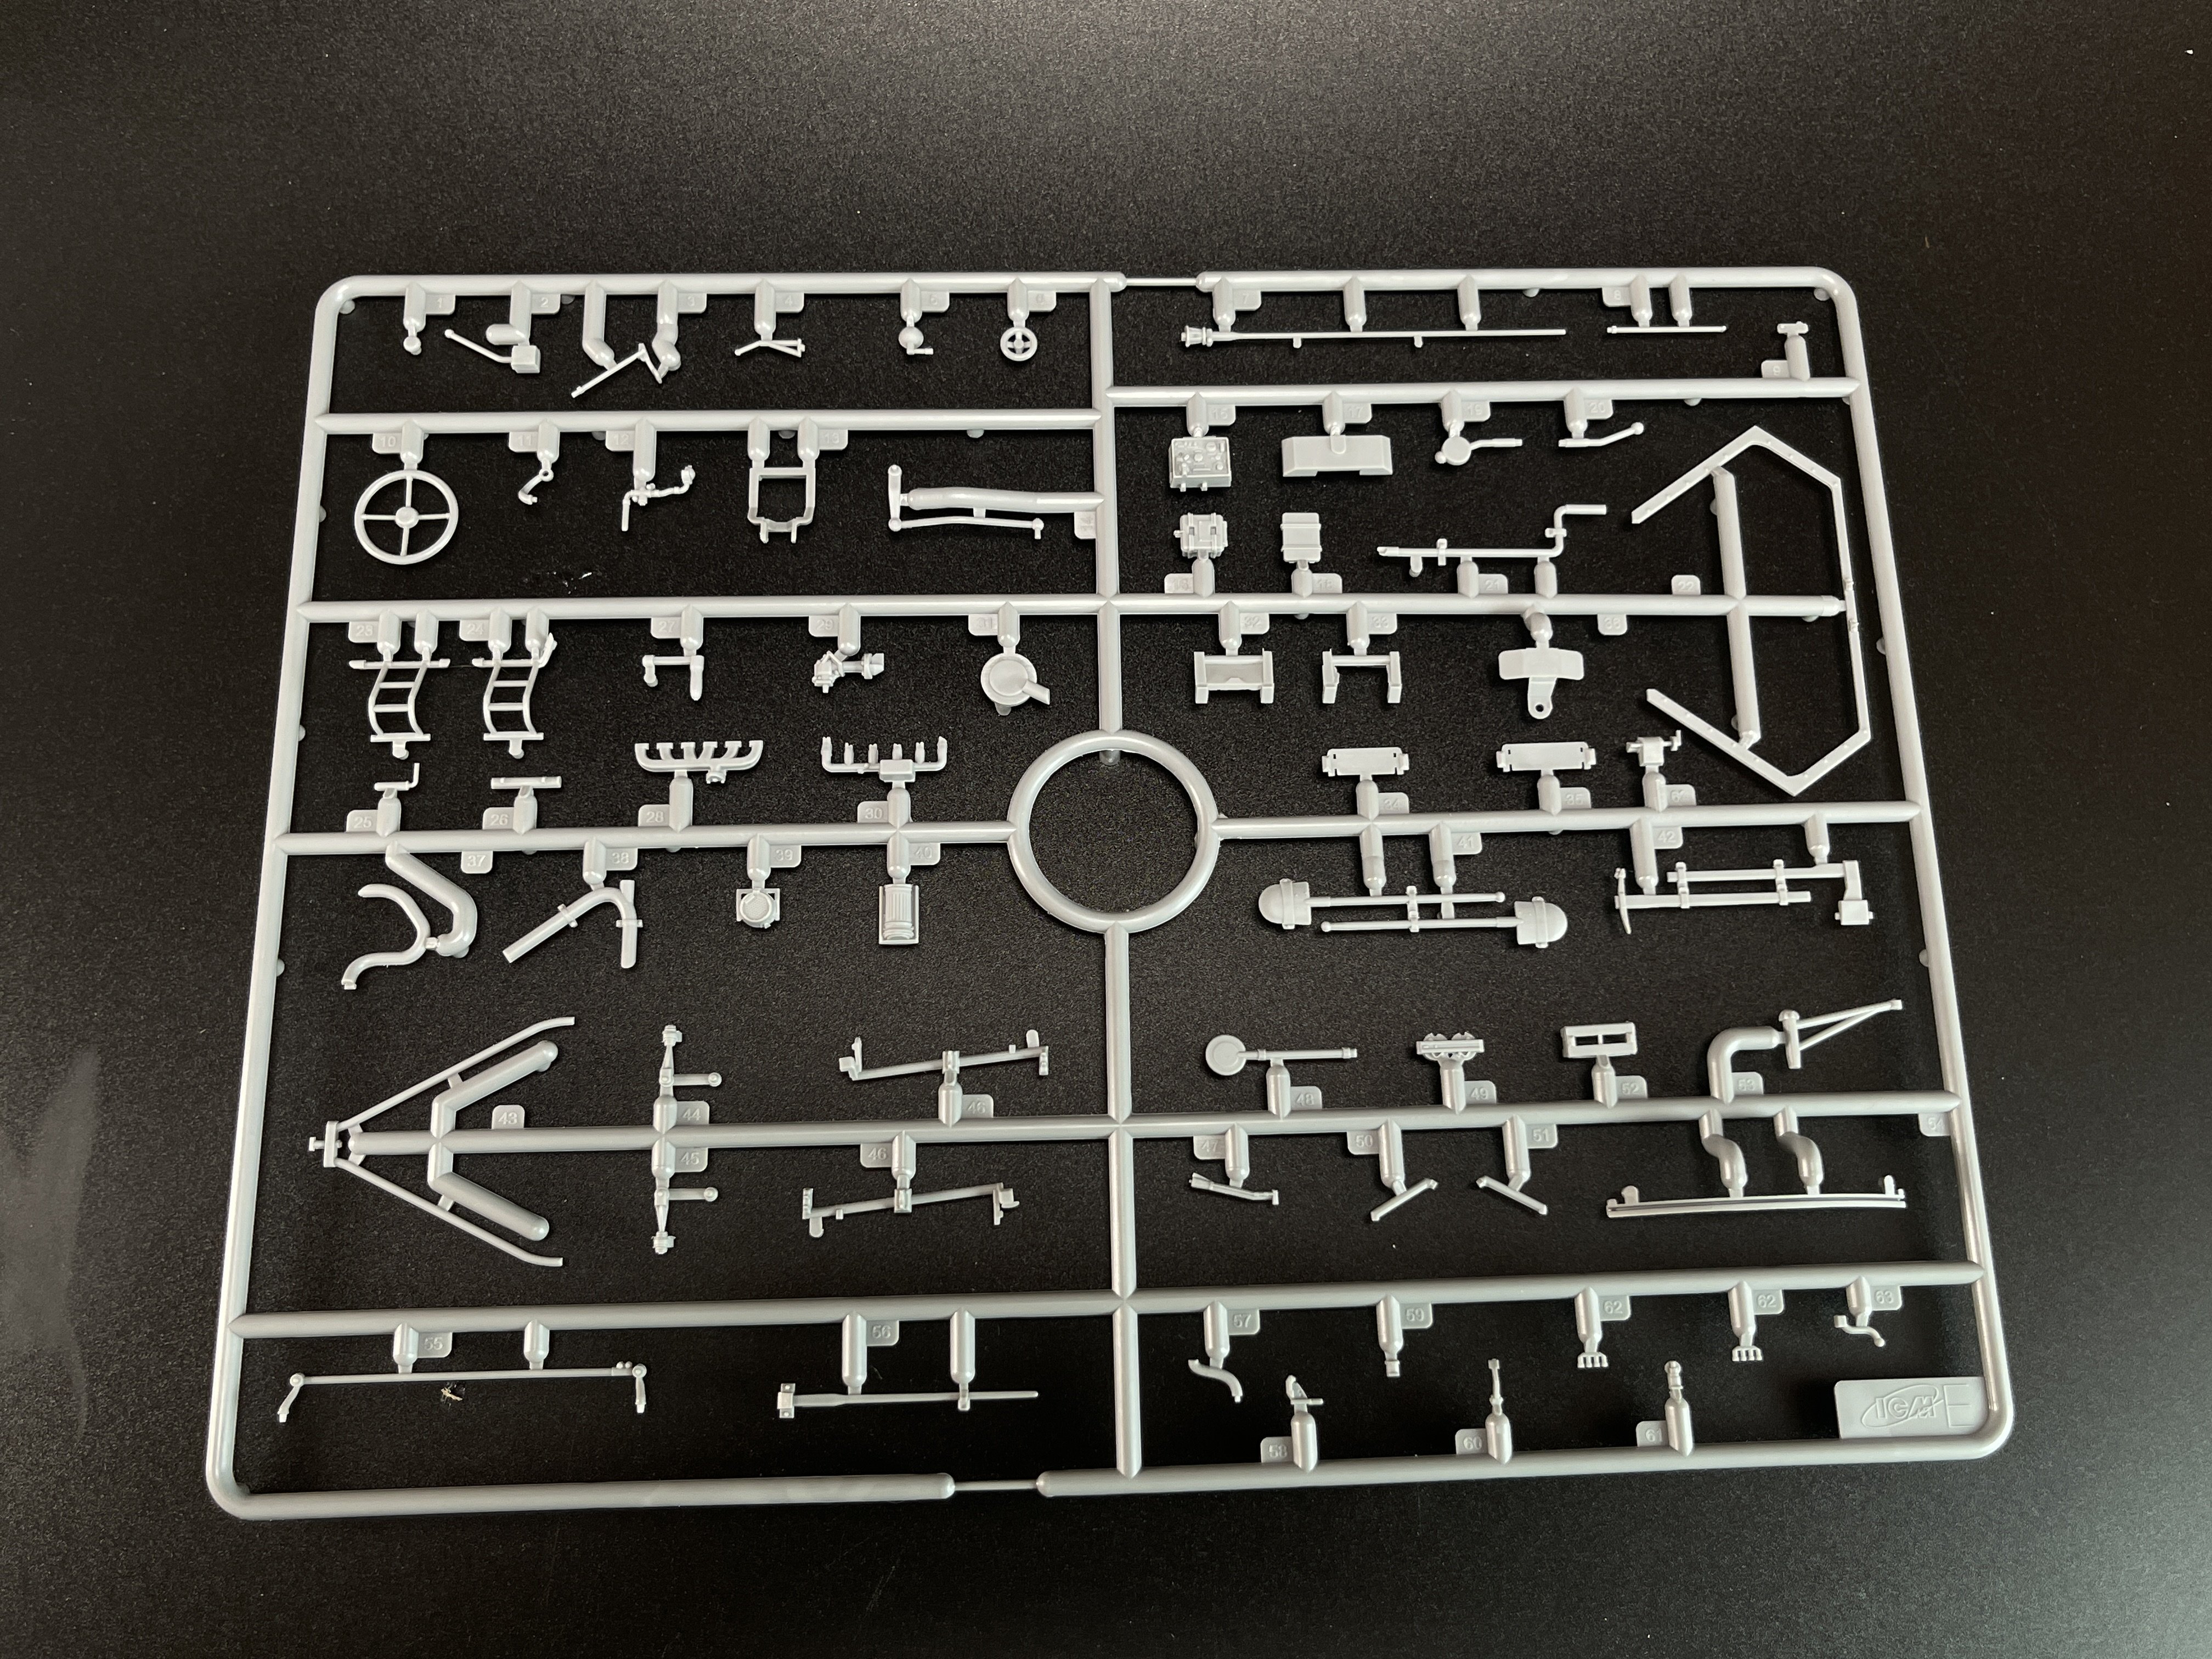
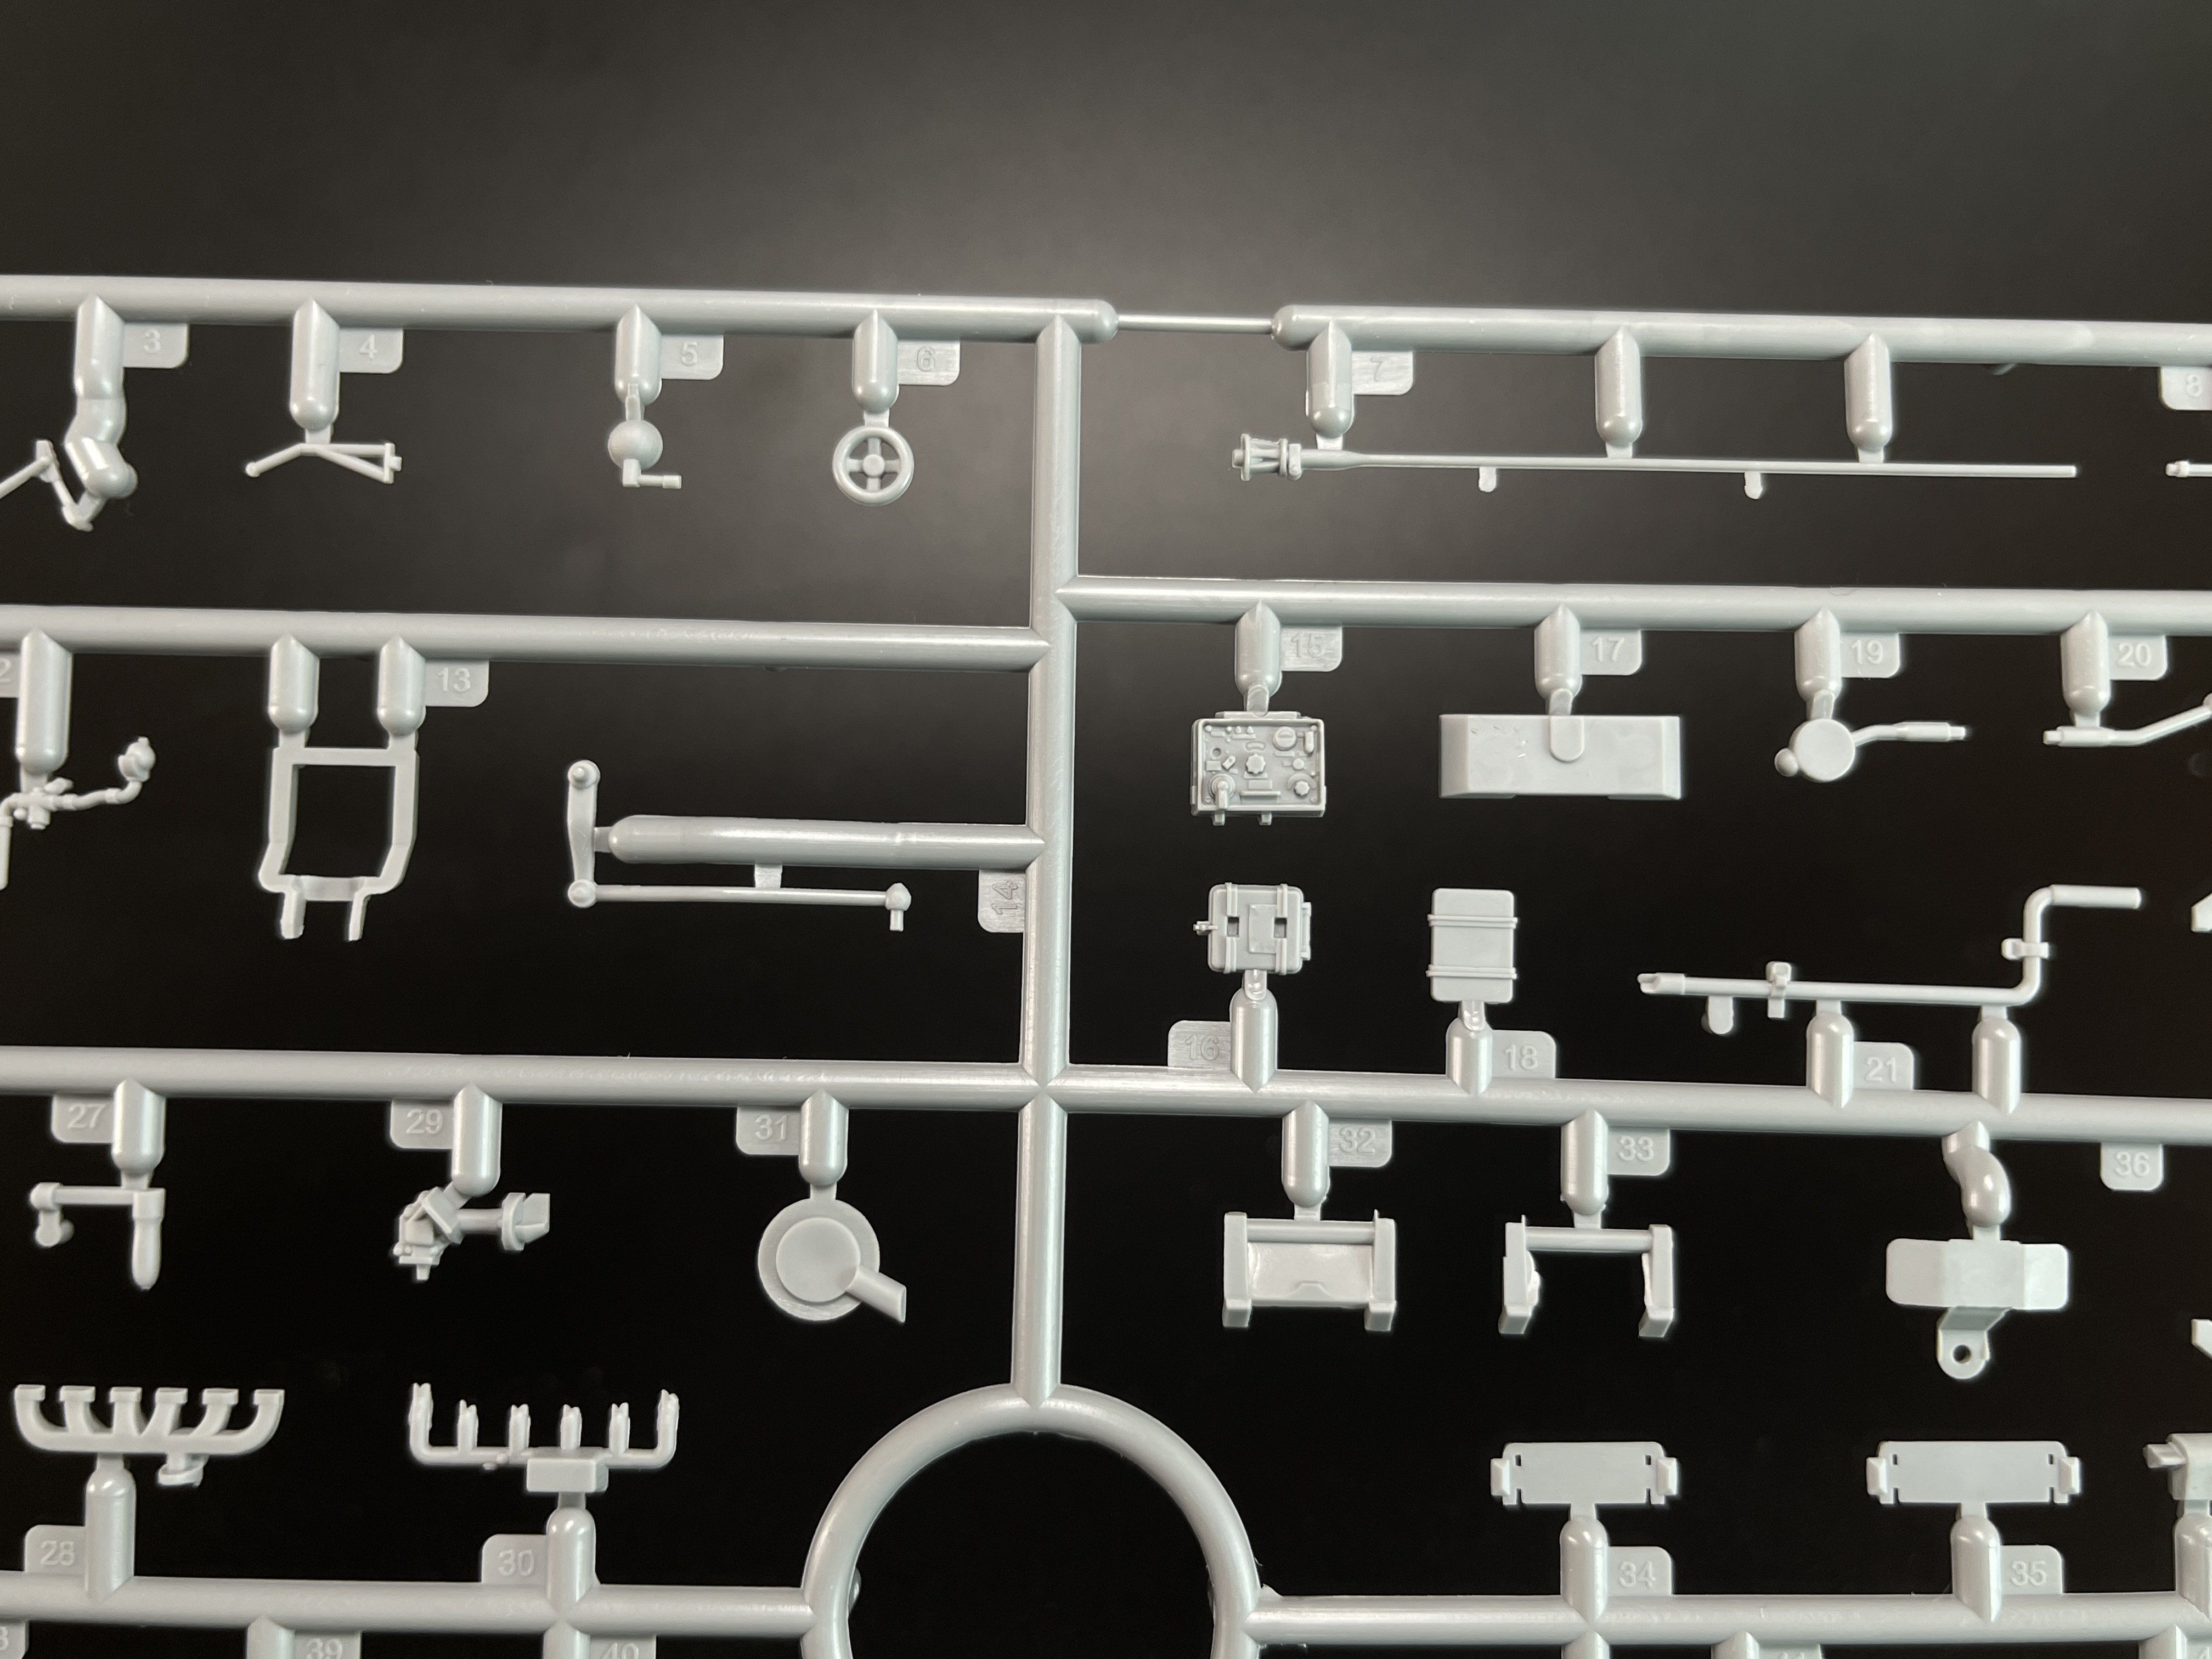
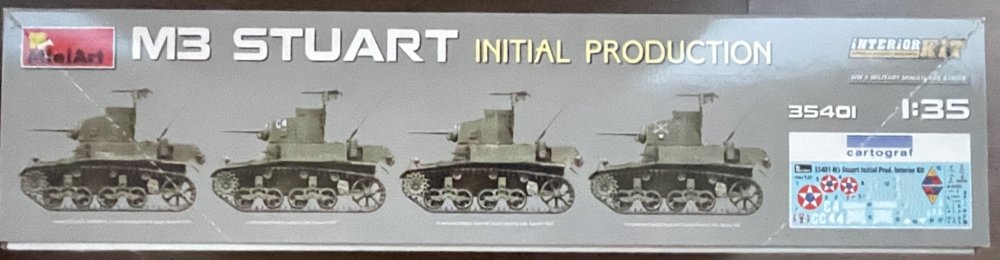
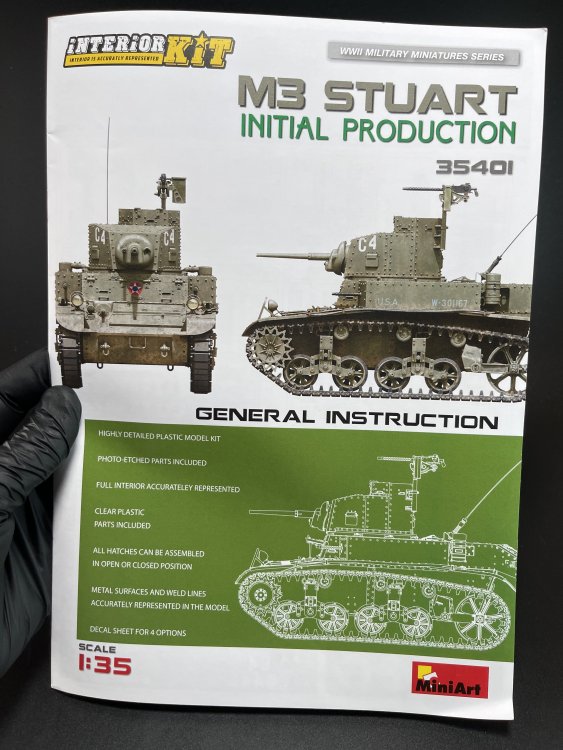
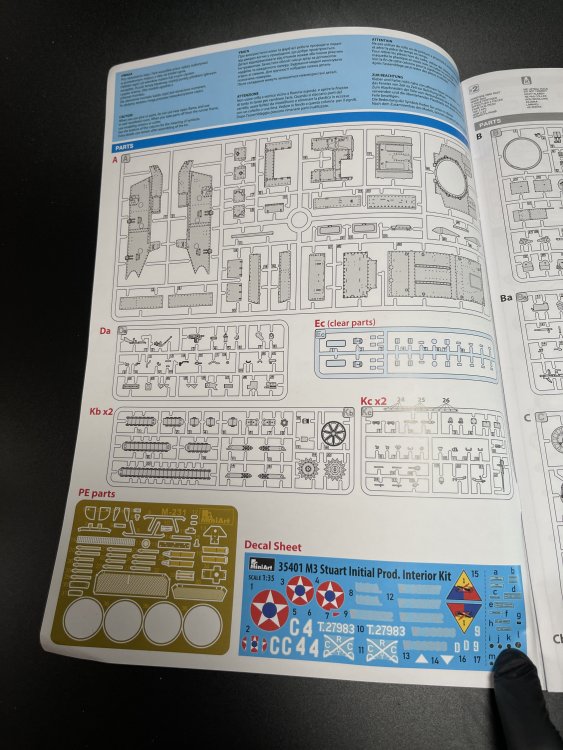
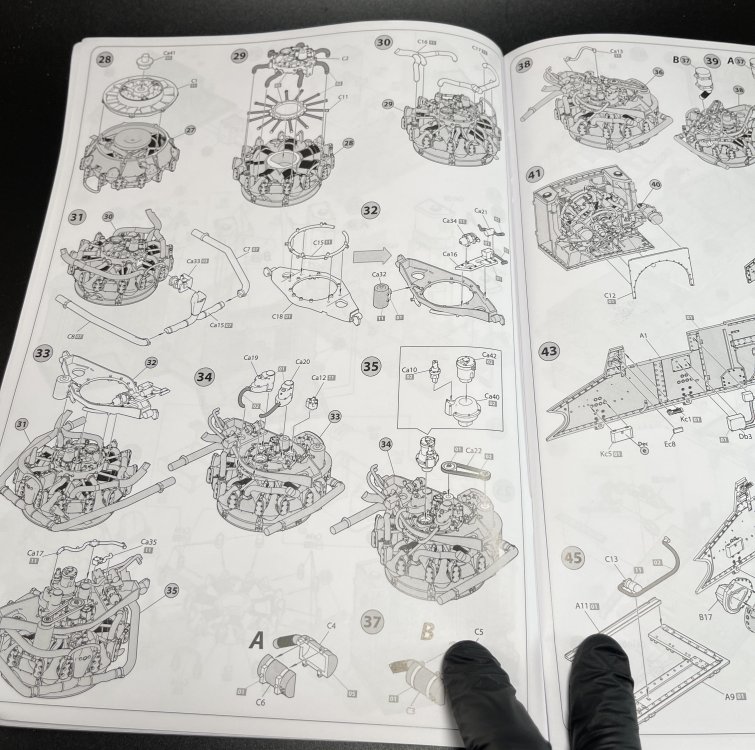
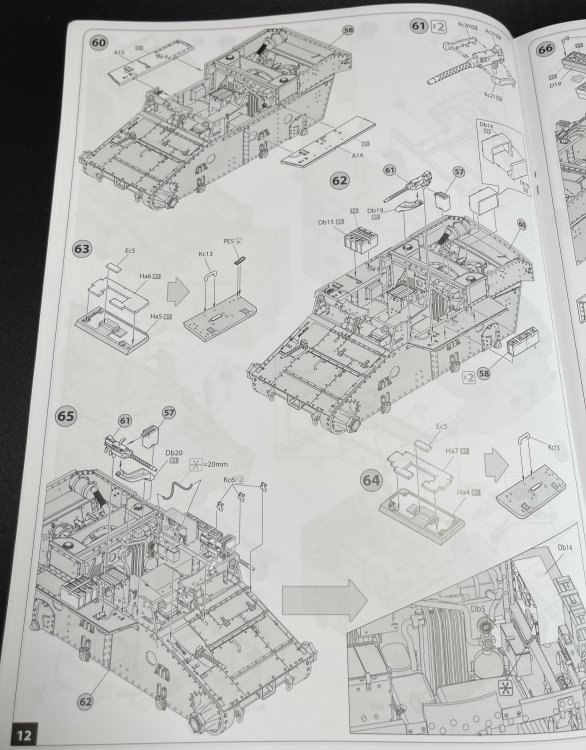
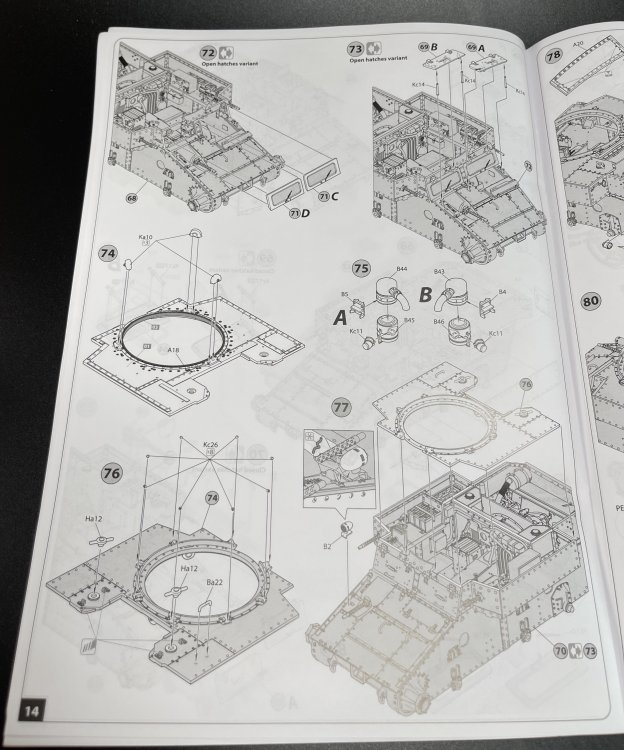
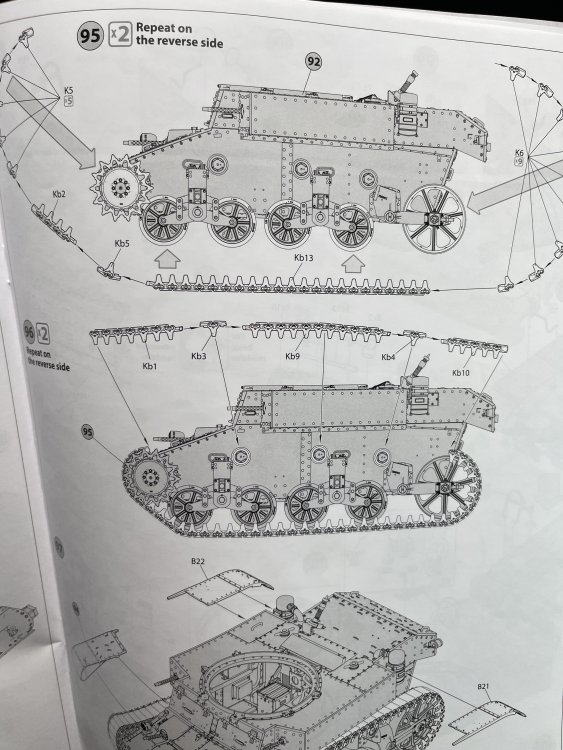
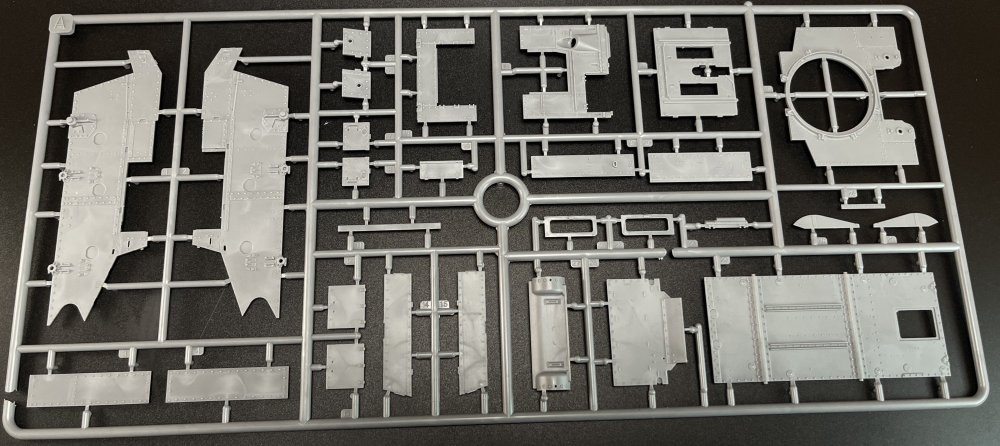
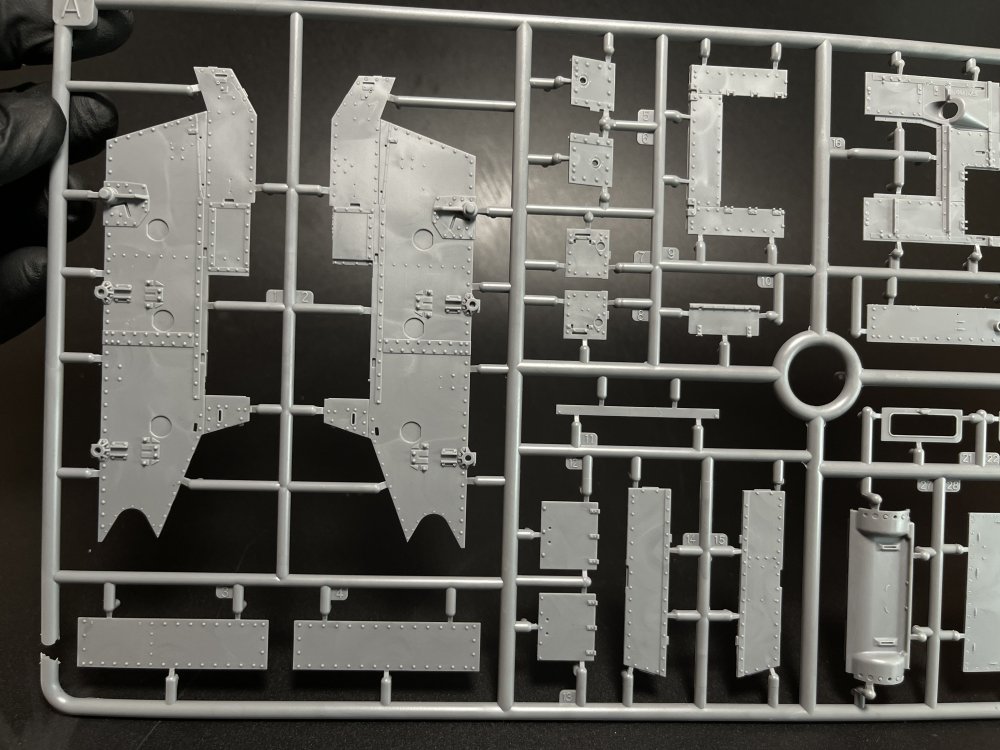
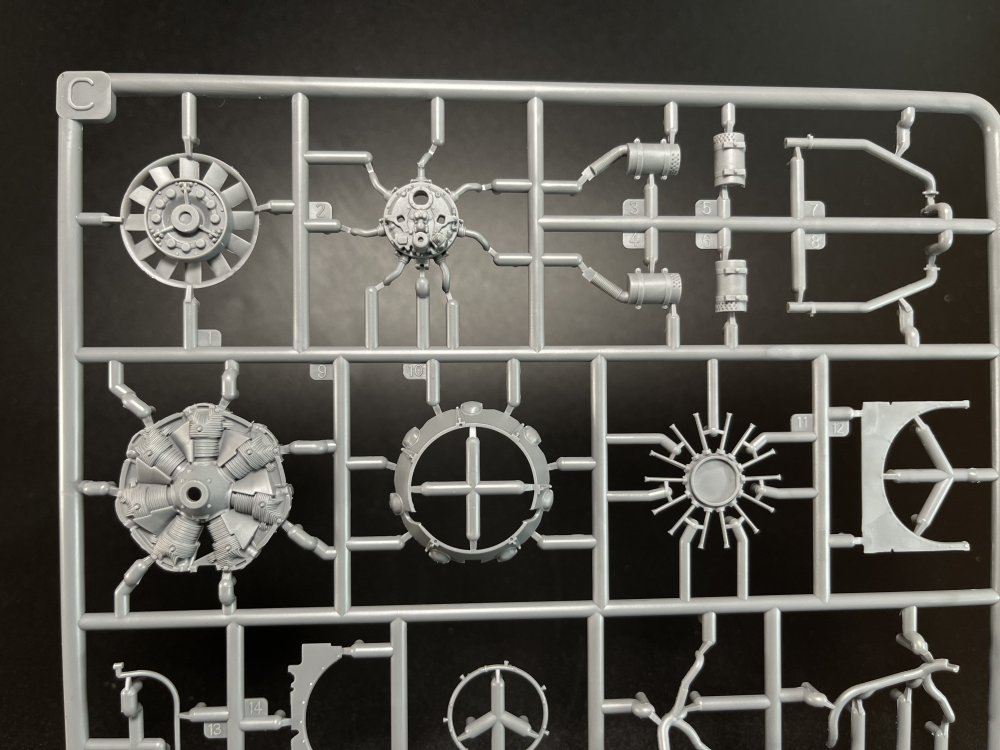
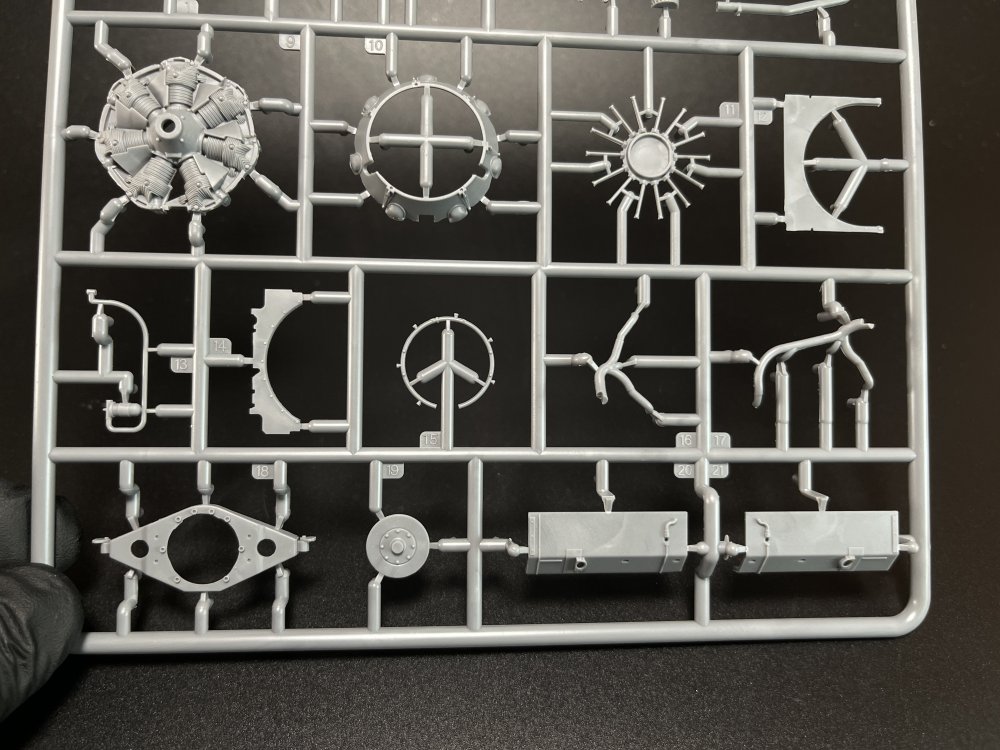
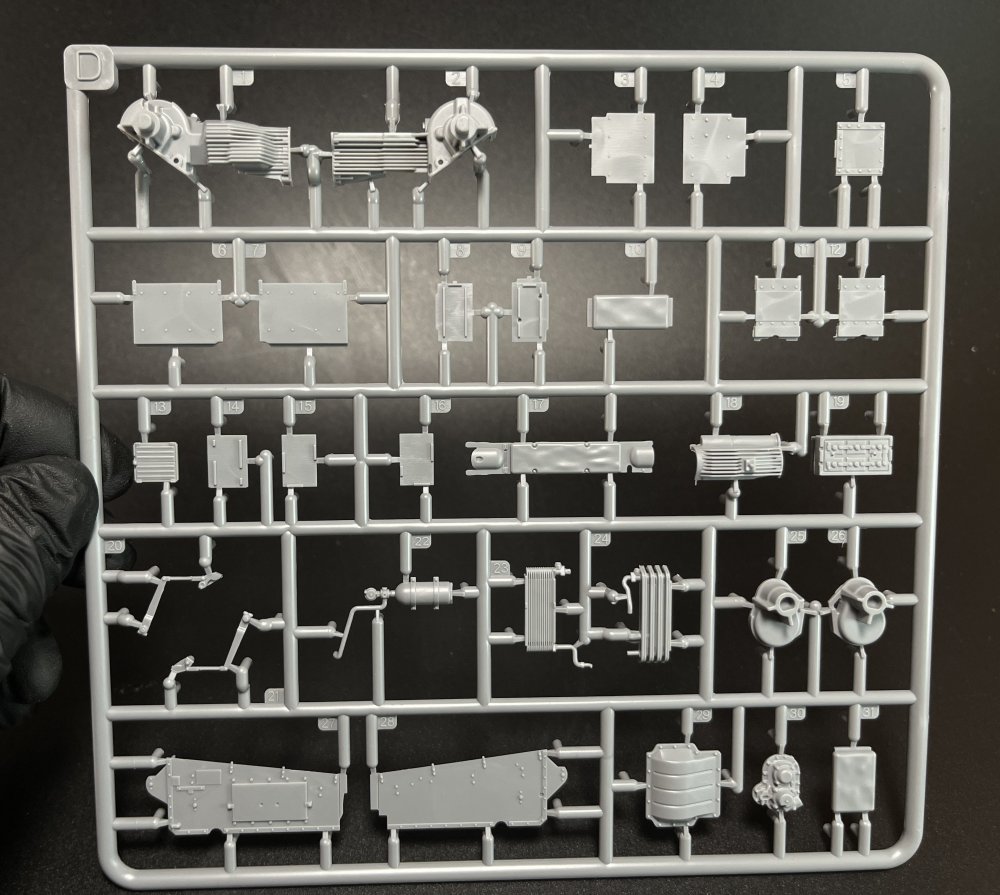
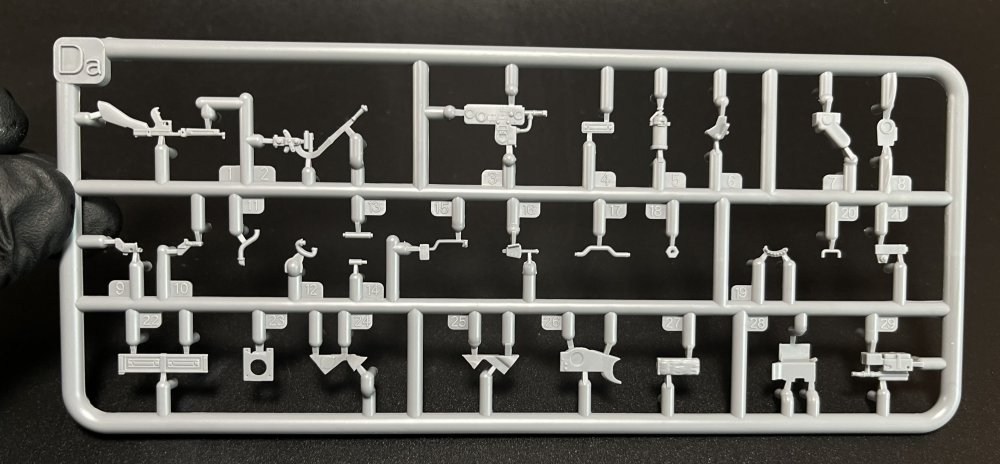
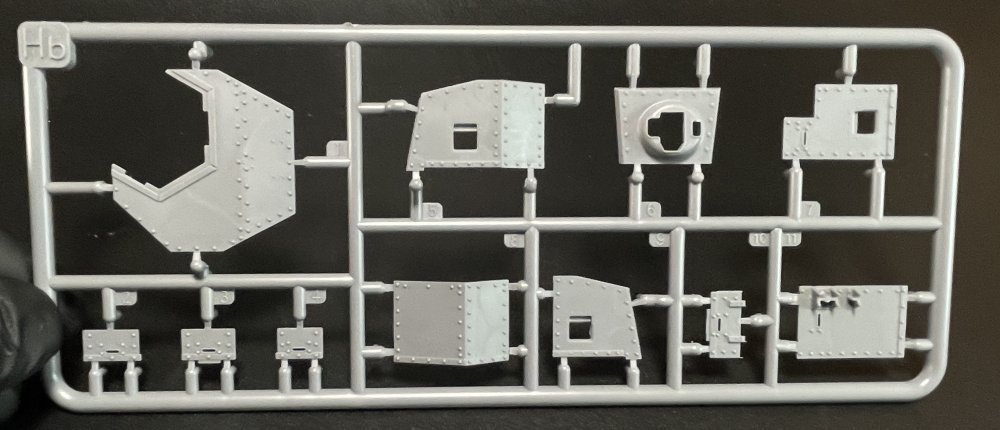
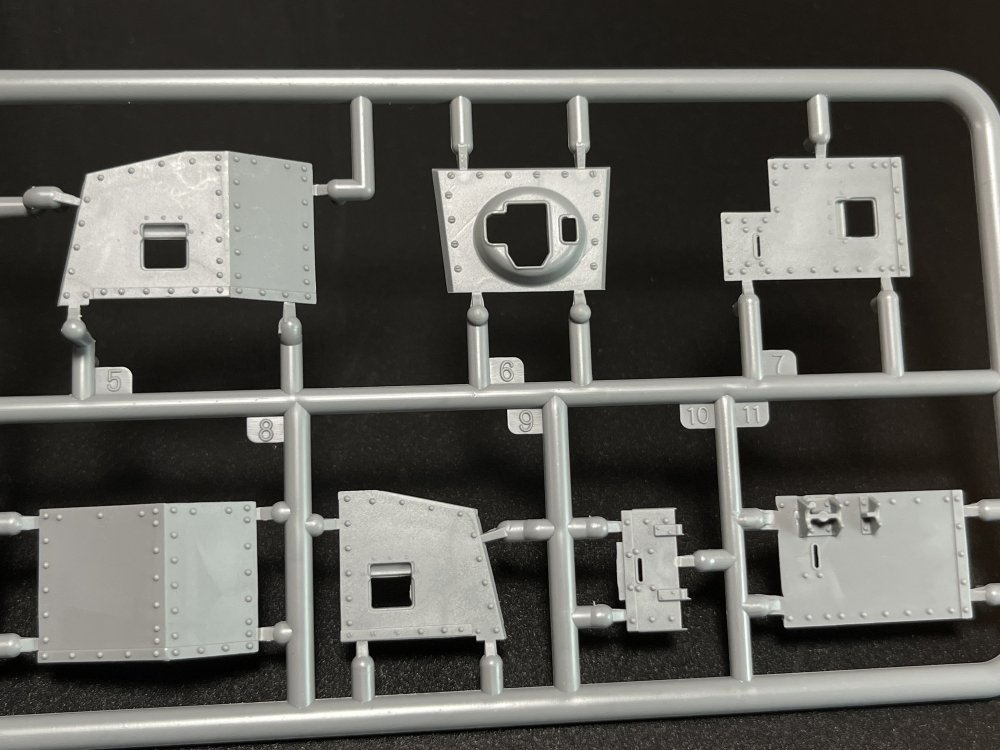
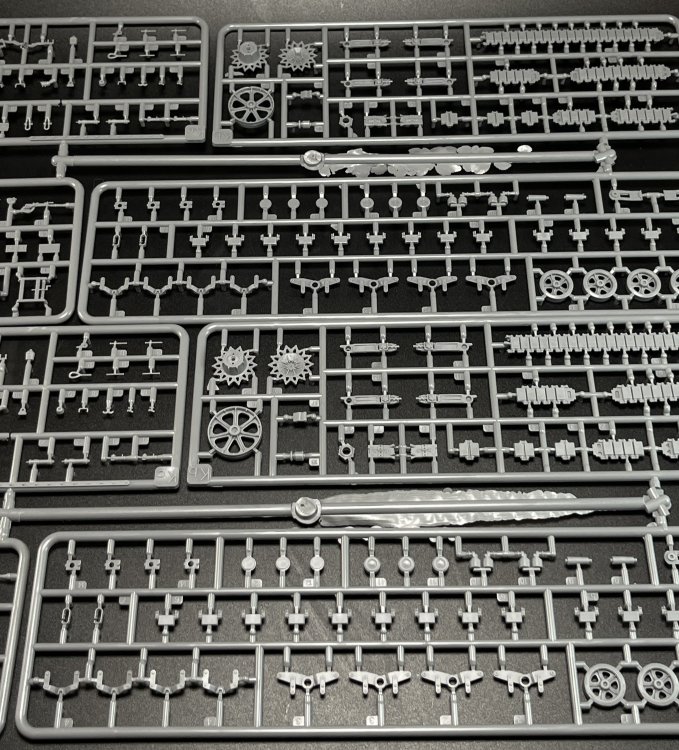
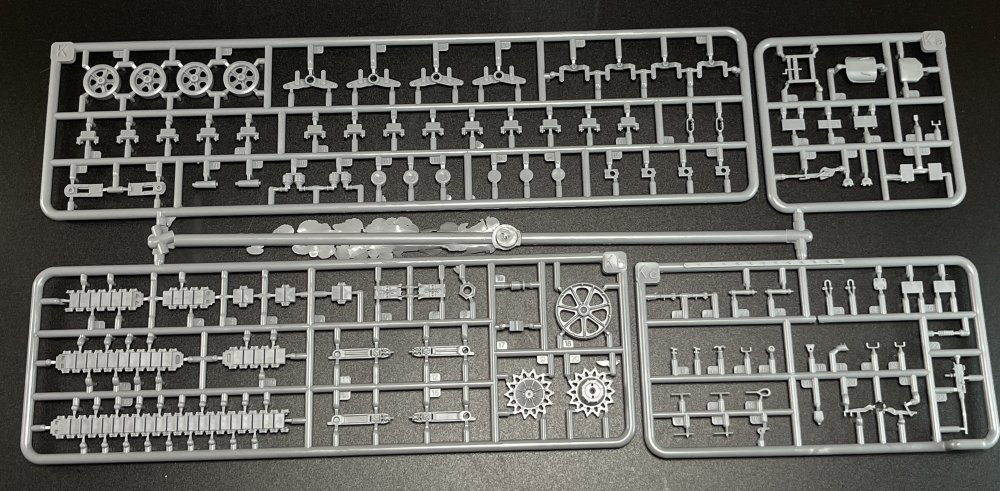
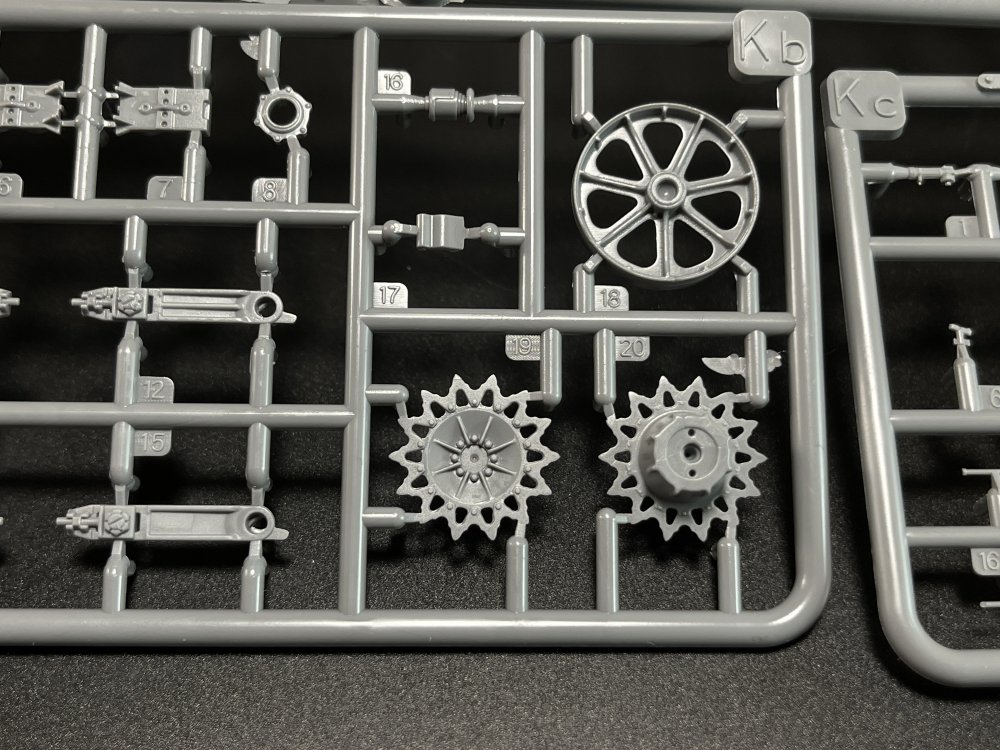
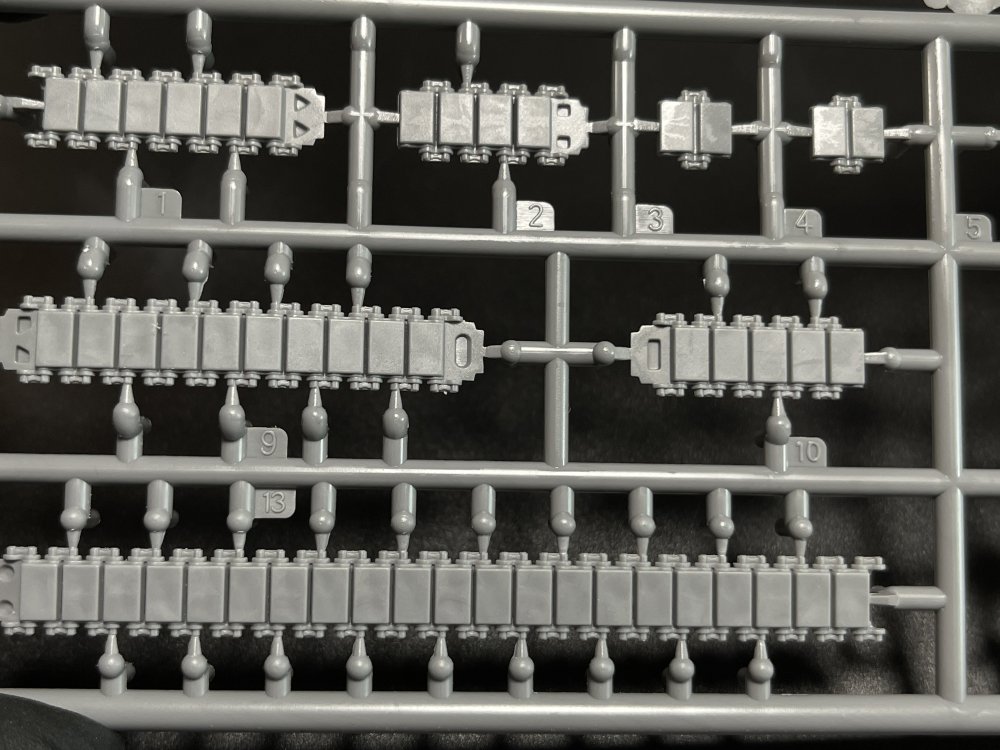
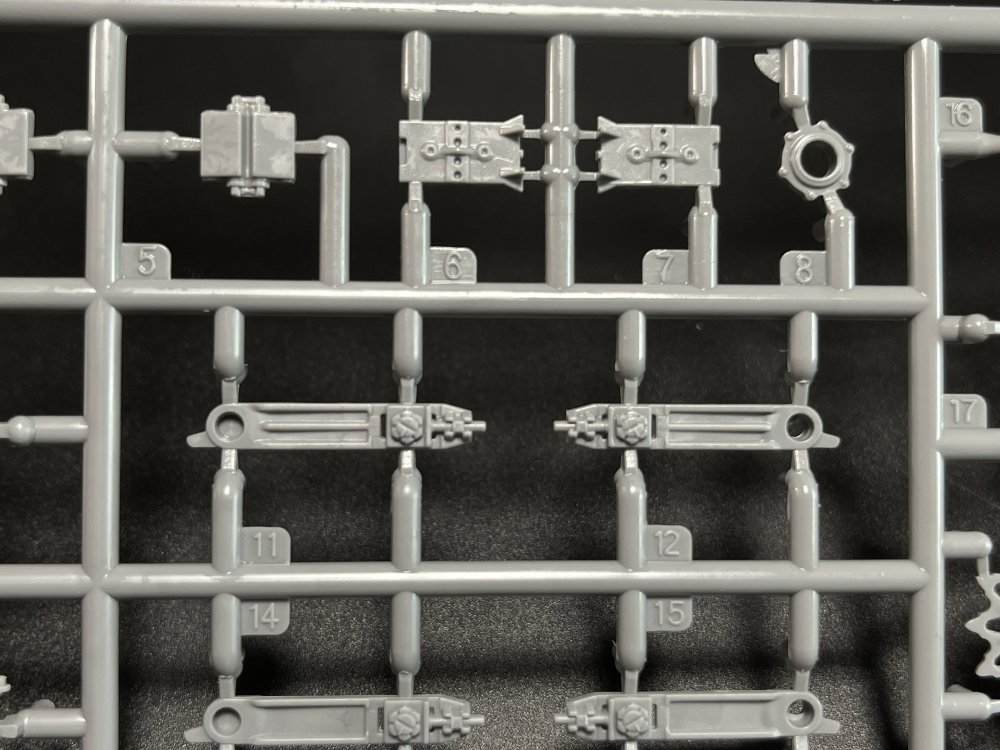
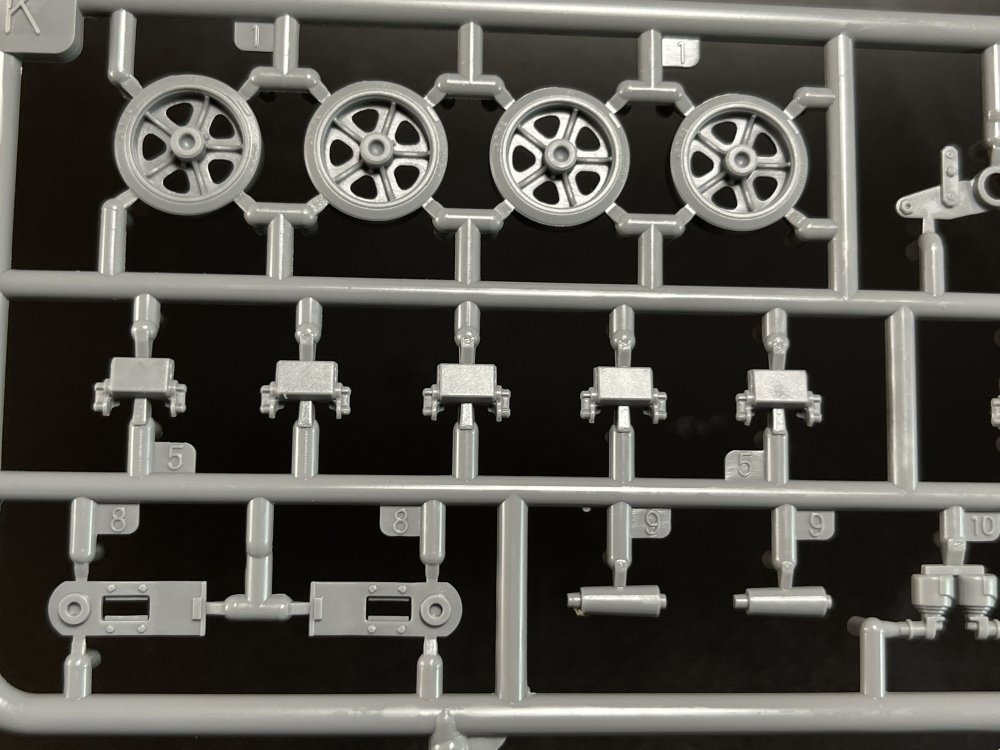
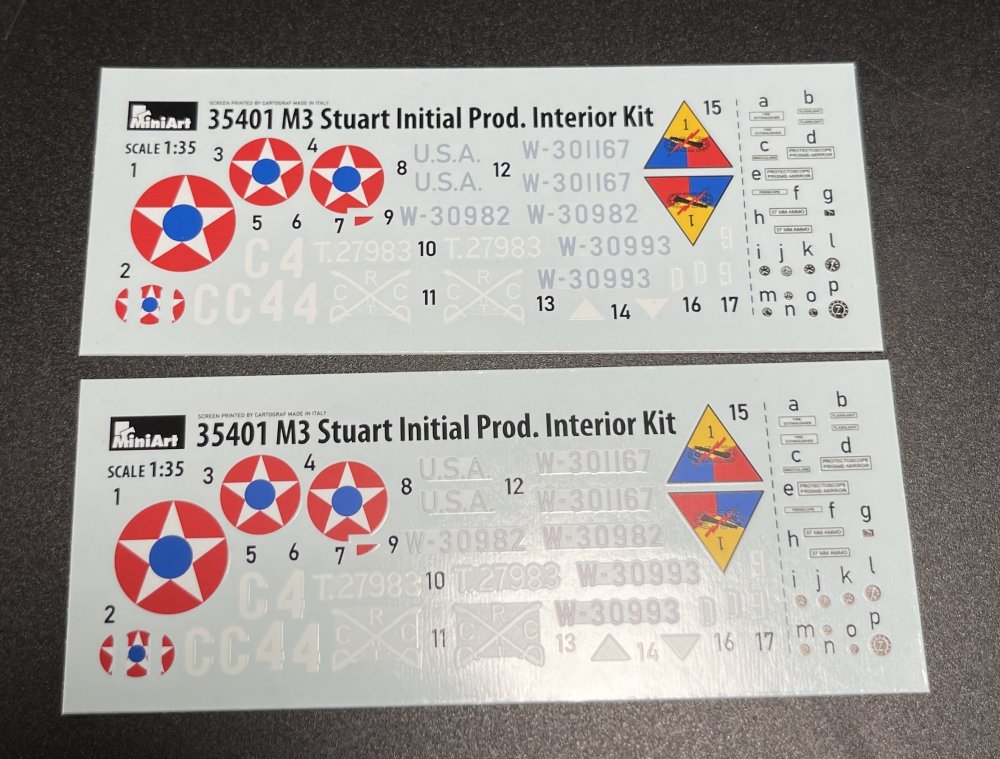
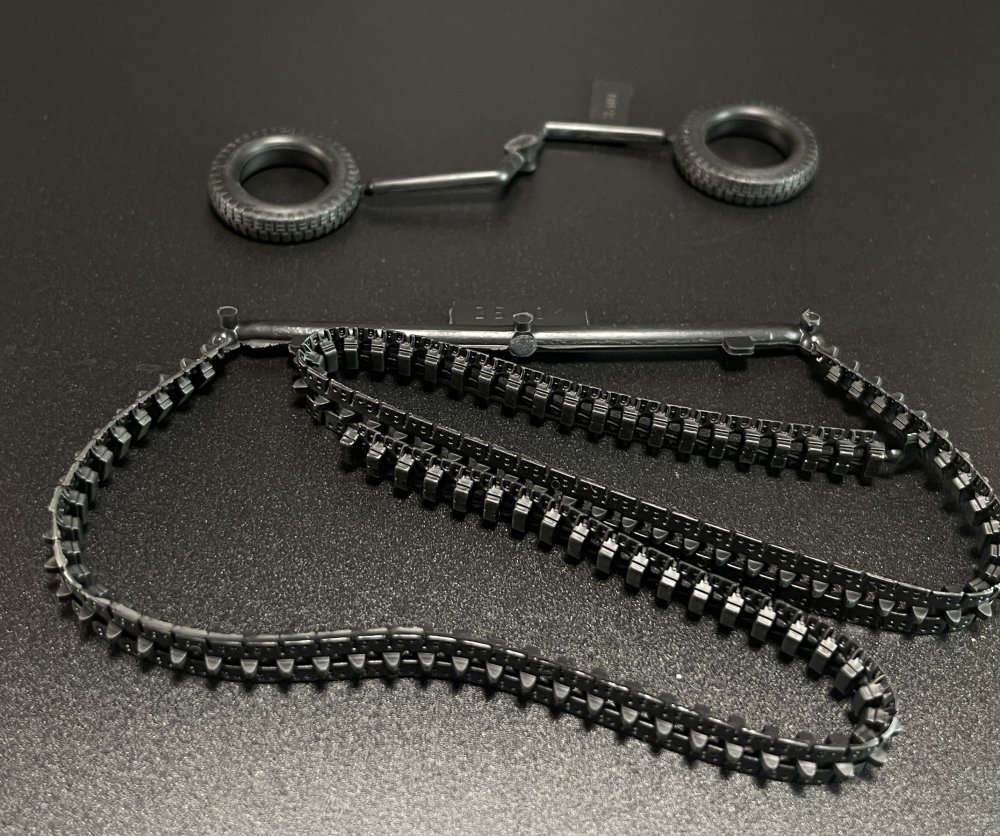
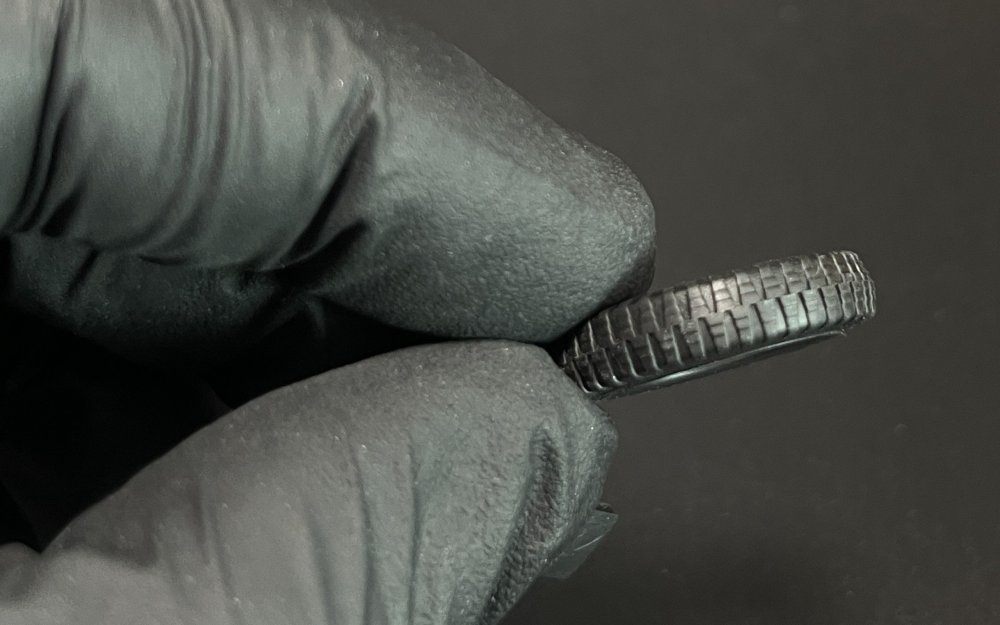
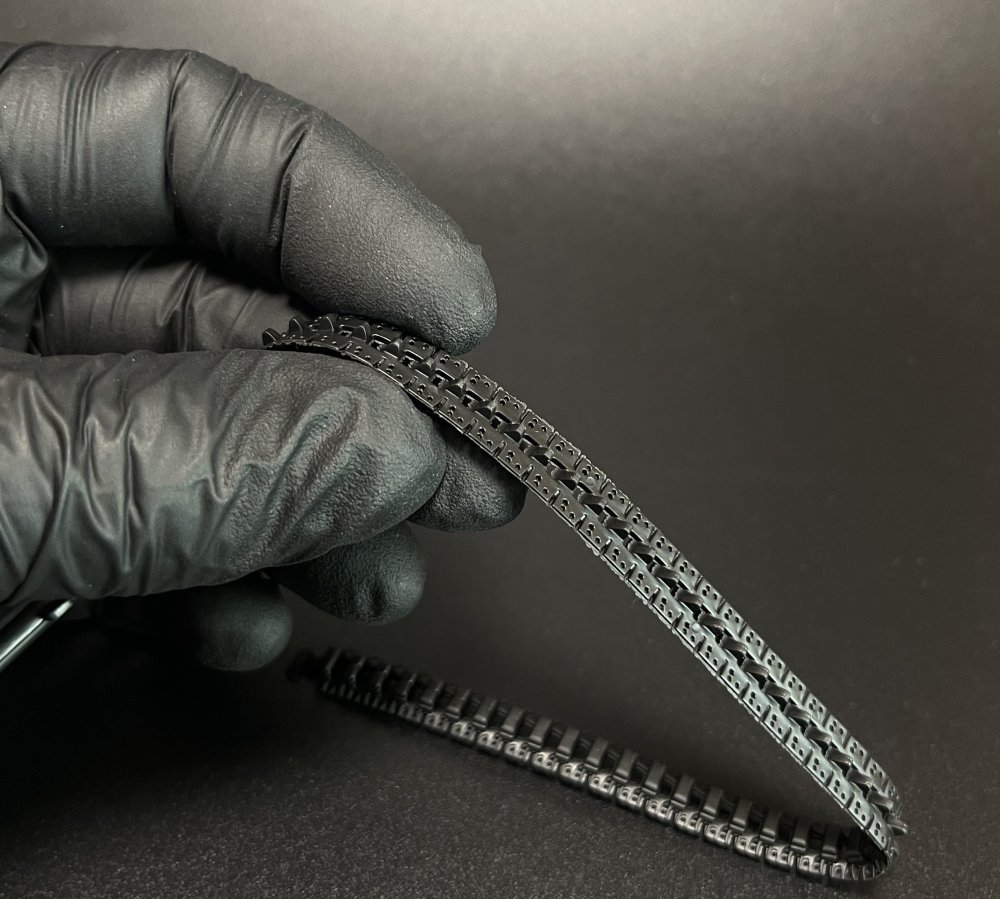
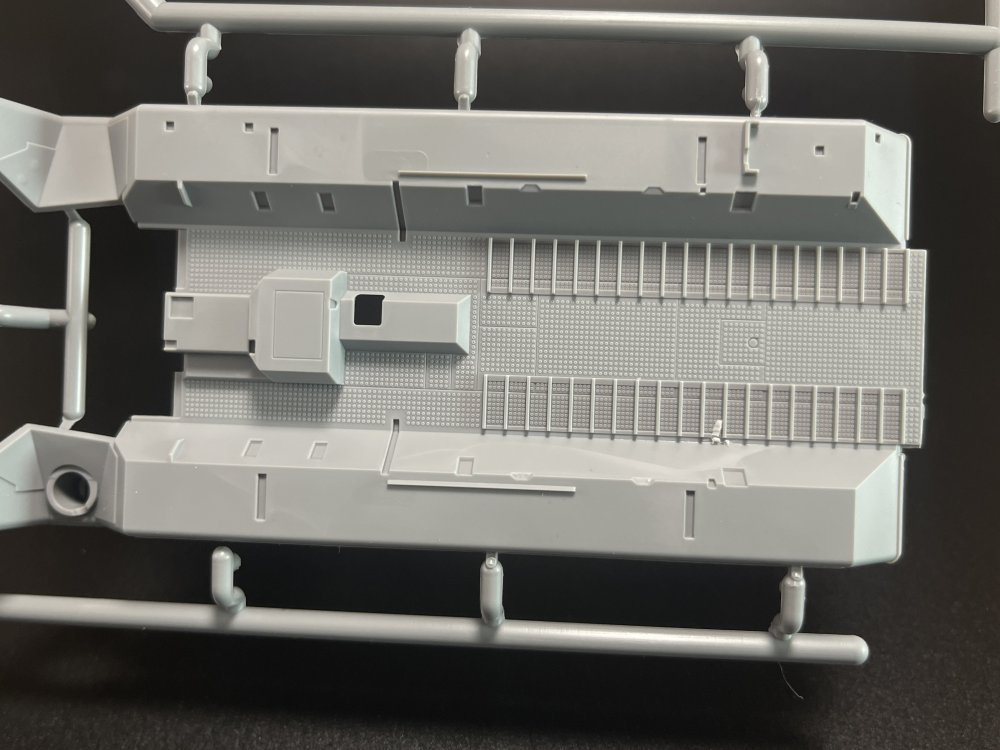
1:35 M3 Stuart Initial Production Interior Kit MiniArt Catalogue number n.º 35401 Price tag: 54€ To buy one click here. In fact, the M3 Stuart is a very well know light tank for all modeler, but still a brief resume from wikipédia. “The M3 Stuart/light tank M3, was an American light tank of World War II. An improved version of the tank entered service as the M5 in 1942 to be supplied to British and other Commonwealth forces under lend-lease prior to the entry of the U.S. into the war. Afterwards, it was used by U.S. and Allied forces until the end of the war. The British service name "Stuart" came from the American Civil War Confederate general J. E. B. Stuart and was used for both the M3 and the derivative M5 light tank. Unofficially, they were also often called "Honeys" by the British, because of their smooth ride. In U.S. use, the tanks were officially known as "light tank M3" and "light tank M5". Stuarts were first used in combat in the North African campaign; about 170 were used by the British forces in Operation Crusader (18 November – 30 December 1941). Stuarts were the first American-crewed tanks in World War II to engage the enemy in tank versus tank combat when used in the Philippines in December 1941 against the Japanese. Outside of the Pacific War, in later years of WWII the M3 was used for reconnaissance and screening. Observing events in Europe and Asia during World War II, American tank designers realized that the light tank M2 was becoming obsolete and set about improving it. The upgraded design, with thicker armor, modified suspension and new gun recoil system was called "light tank M3". Production of the vehicle started in March 1941 and continued until October 1943. By the standards of the era for light tanks, the Stuart was fairly heavily armored. It had 38 mm of armor on the upper front hull, 44 mm on the lower front hull, 51 mm on the gun mantlet, 38 mm on the turret sides, 25 mm on the hull sides, and 25 mm on the hull rear. Like its direct predecessor, the M2A4, the M3 was initially armed with a 37 mm M5 gun and five .30-06 Browning M1919A4 machine guns: one coaxial with the main gun, one on top of the turret in an M20 anti-aircraft mount, another in a ball mount in right bow, and two more in the right and left hull sponsons. Later, the main gun was replaced with the slightly longer M6, and the sponson machine guns were removed. The M3 and M3A1 variants were powered by an air-cooled radial engine, either a gasoline-fueled 7-cylinder Continental W-670 (8,936 built) or a 9-cylinder Guiberson T-1020 diesel (1,496 built). Both of these powerplants were originally developed as aircraft engines. Internally, the radial engine was at the rear and the transmission at the front of the tank's hull. The driveshaft connecting the engine and transmission ran through the middle of the fighting compartment. The radial engine's crankshaft was positioned high off the hull bottom and contributed to the tank's relatively tall profile. When a revolving turret floor was introduced in the M3 hybrid and M3A1, the crew had less room. A further 3,427 M3A3 variants were built with modified hull (similar to the M5), new turret and the Continental W-670 gasoline engine. In contrast to the M2A4, all M3/M5 series tanks had a trailing rear idler wheel for increased ground contact, whereas on the M2 the idler wheel was off the ground and did not aid in suspension. From https://en.wikipedia.org/wiki/M3_Stuart Probably as most of modellers, I do have a little soft spot for the Stuart. Its probably because of his “fragile appearance” comparing with other WWII tanks specially, the big ones for the Wehrmacht. To get this even better, this version as a full interior. Being MiniArt, you know that the parts and sub-assemblies will be in high number, but the detail in all will be exquisite. Let’s check if this release stand for those standards. Firstly, the plastic sprues come in gray plastic, very good to handle and work as all previous recent releases. And there is a lot of sprues, 21 in total (in these, one clear sprue – yes, in a 1:35 AFV model kit) Checking the sprue A, you “only” have the main body structures all there. So, a lot of carefully alignment and care must be taken even with the location points for all inside parts. That is a “minus” of having a full interior kit… I `m not complaining as I love these full interiors but is a thing that you should be careful with. The first major small details for the interior are in sprue D, Da and K. Despite the small parts (and there is a lot of them), the details are right there, with no flash and quite sharp, as you would expect form MiniArt. The engine (powered by an air-cooled radial engine, a gasoline-fueled 7-cylinder Continental W-670 (8,936 built) is amazing!! I`m not an engineer so I confess that when I saw the sprue C (and Ca) I thought for one second: “hum… an aircraft engine sprue here? It´s probably a mistake by MiniArt…” But no… So, the engine Continental W-670 engine sits between the two fuels tanks, making the engine deck quite busy. All the interior is very busy as it should be inside any tank so MiniArt achived the goal (as expect) of having an interior quite busy and with tons of details and you can just leave all hatches open… full beautiful interior to appreciate. Do AM have some space? I believe so, as always, but not much indeed. Now, Wheels and tracks… Well, no vinyl!! But it`s link-and-length. Personally, I like individuals links all the way but I prefer link and length than vinyl, so I can`t complain. Probably for me, here is one spot where AM guys will enter. As for the wheels, undercarriage and suspension system... now that`s a lots of parts and subassemblies.... and the clear parts... Yes, we do have clear parts on this beauty and even windshields whipers in PE As for the PE, comes, as usual, in a card envelope with MiniArt logo. The PE has several details, as PE clapping plate in the rear hatch, mesh, seatbelts (yes, for the driver), handles, clamps, idler wheels rims etc. The decal sheet is a rather small sheet but quite a colorful one, giving all the three markings and some stencils and instruments gauges. The color density and the thin paper are spot on so all good here also. As for the markings, you got straight from the box, four markings: - Royal Tank Corps, British Army, Tactical Training School, Egypt, Summer 1941; - 2nd Armored Division, Louisiana, USA, Autumn 1941; - 1st Armored Division, Rock Hill, South Carolina, USA, Autumn, 1941; - Unindenfined Cavalry Regiment, camp Funston, USA, Spring 1942; For the tow cable you only have the hollow end so you needc to get some thread to make the towing cables. The instructions booklet has 22 pages of full constructions with very good color indication all the way. Speaking of color indication, MiniArt gives the modeler a color chart with not one or two brands but 6 (six): - Vallejo - Mr. Color - AK RC - Mission Models - AMMO MIG - Tamiya THANK YOU MiniArt for such a comprehensive color charter and very good indication color along the instructions. Conclusion This M3 Stuart is a fantastic little kit with TONS of details. You can make a little very detail gem directly from this box! It’s an all in package and Kudos for Miniart for doing it. The recessed and raised detail, the detail on the engine all the compartments in a single box, directly with no extra whatsoever is fantastic! Of Course this in NOT a Weekend project! Not even a month project for me! 10/10 MiniArt!! Again! Thanks to MiniArt for producing the beautiful model kit.


- 5 replies
-
- 7
-
-
- miniart
- full interior
- (and 2 more)
-
wow!!! I just saw this post Ernie!! Glad that you and family are all ok!!
-
wow!!! That`s is great!! Congrats Jeff and to her!
-
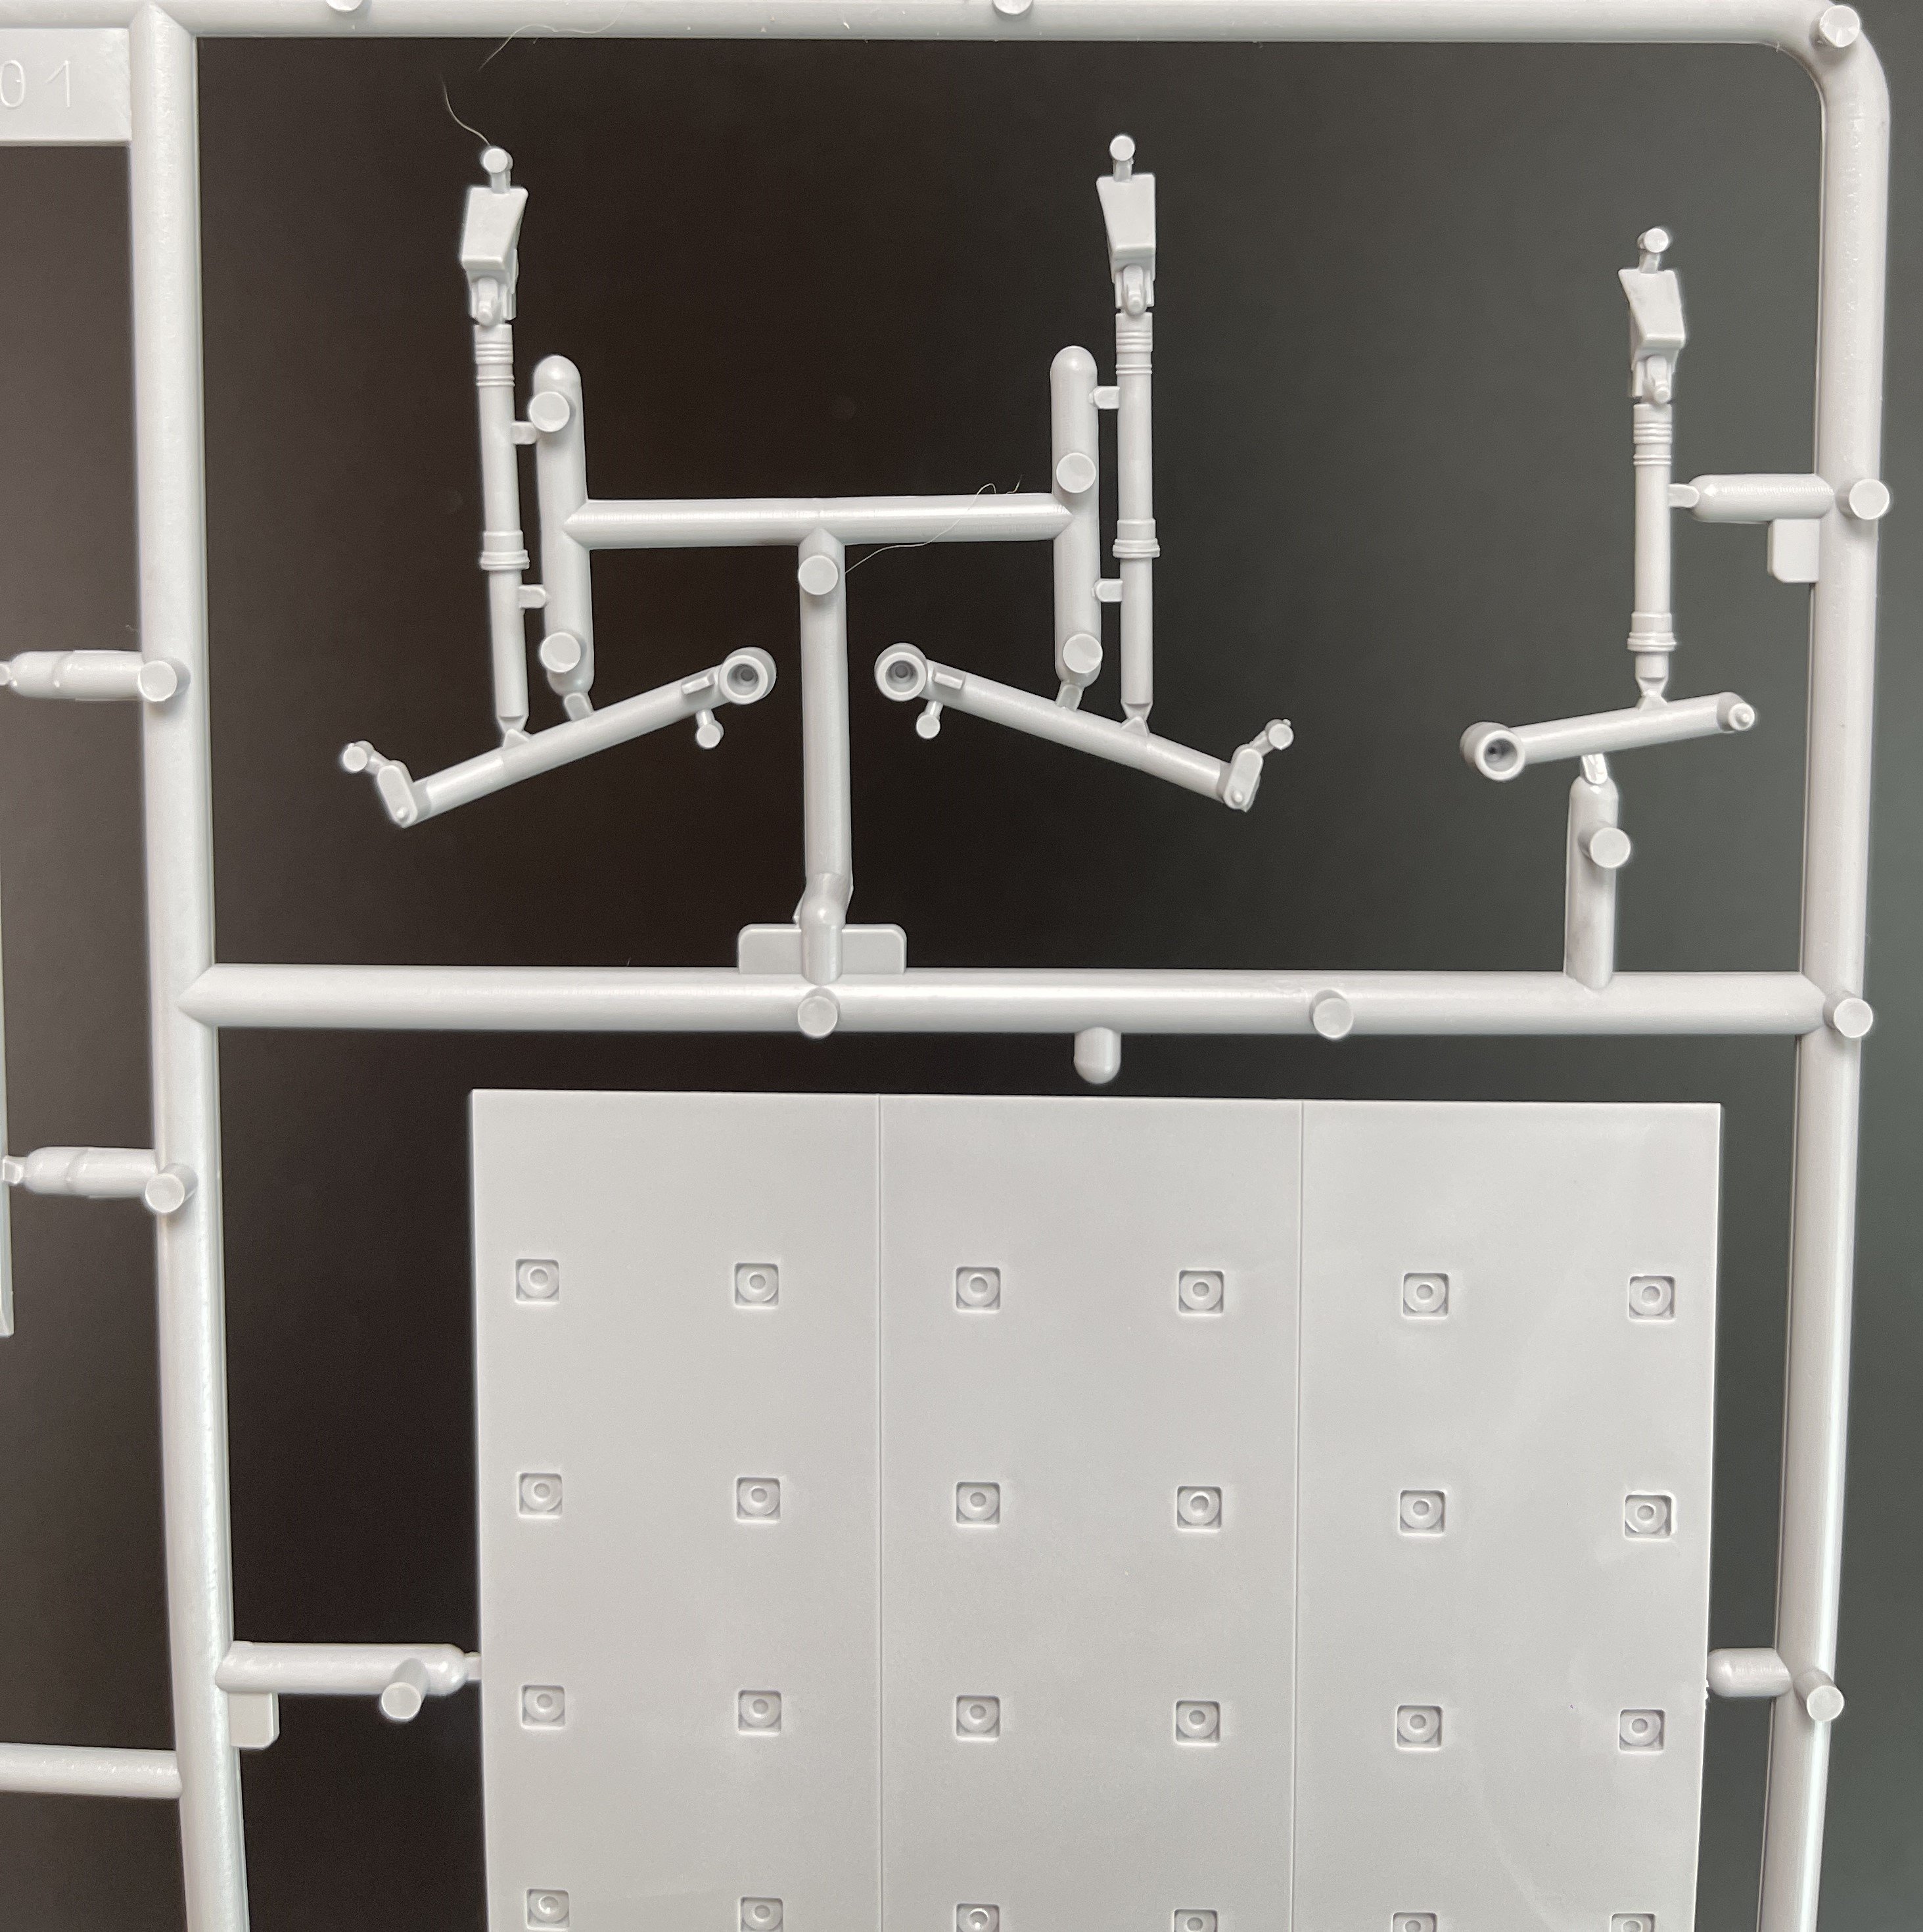
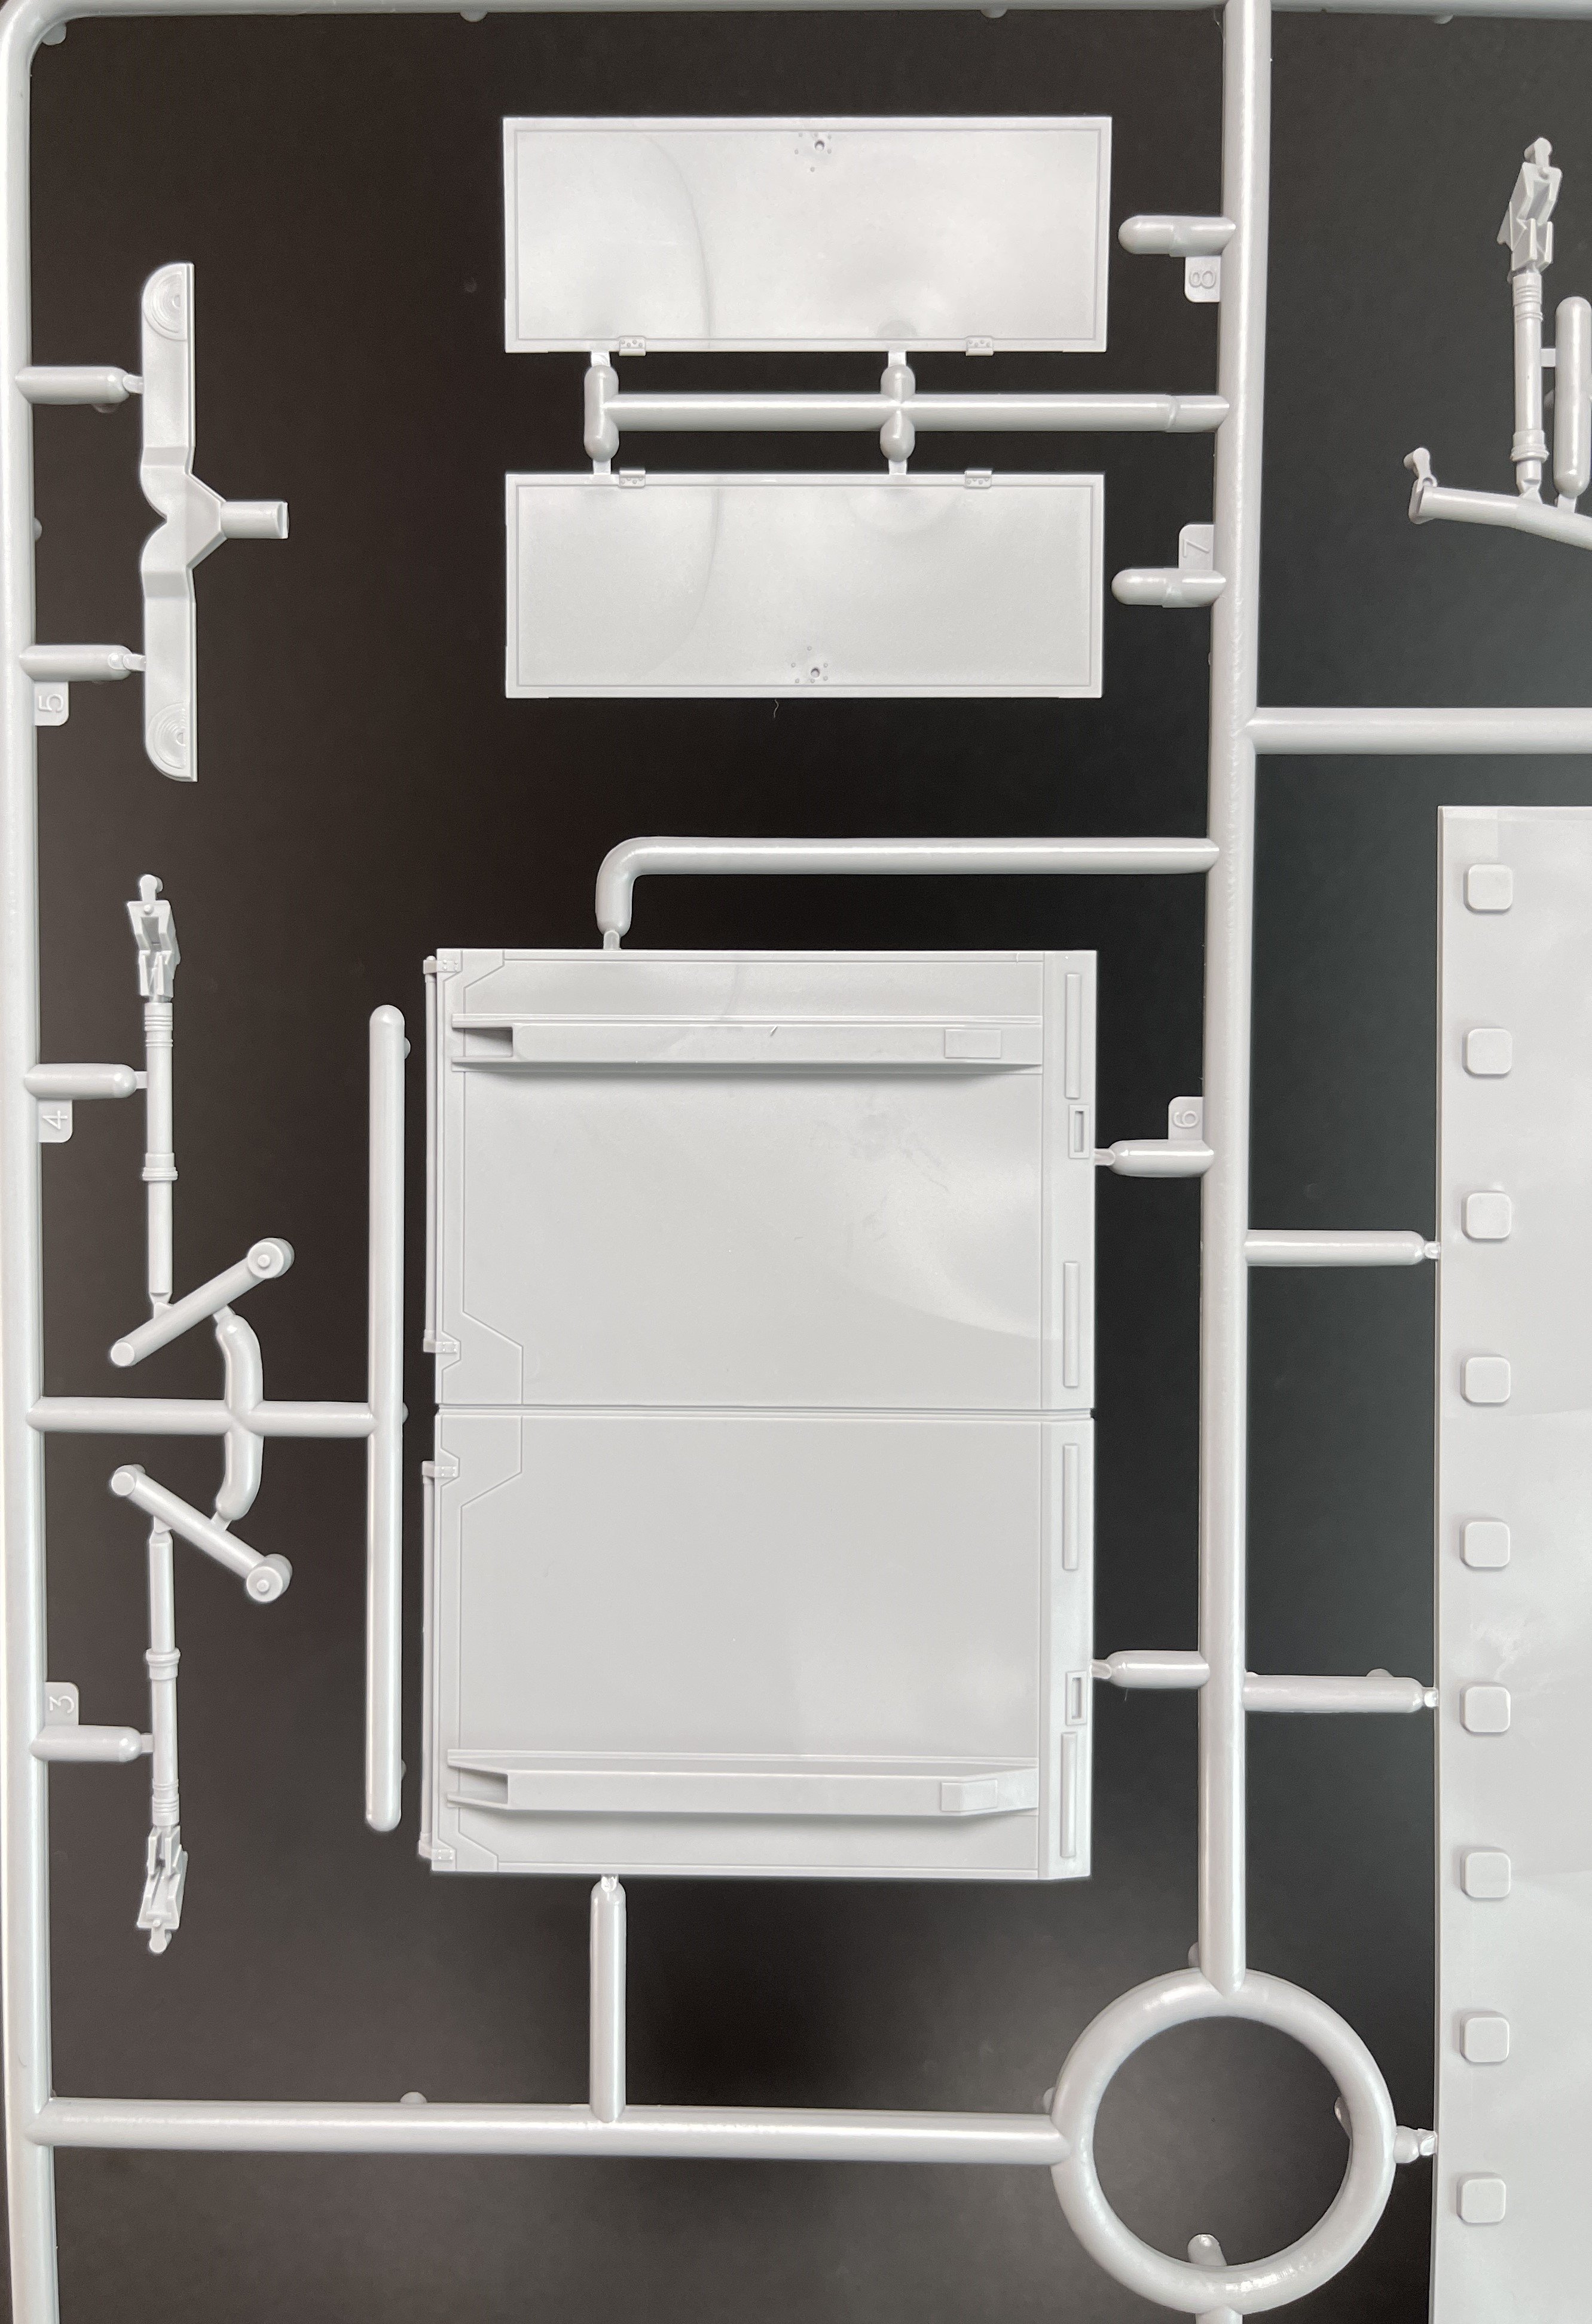
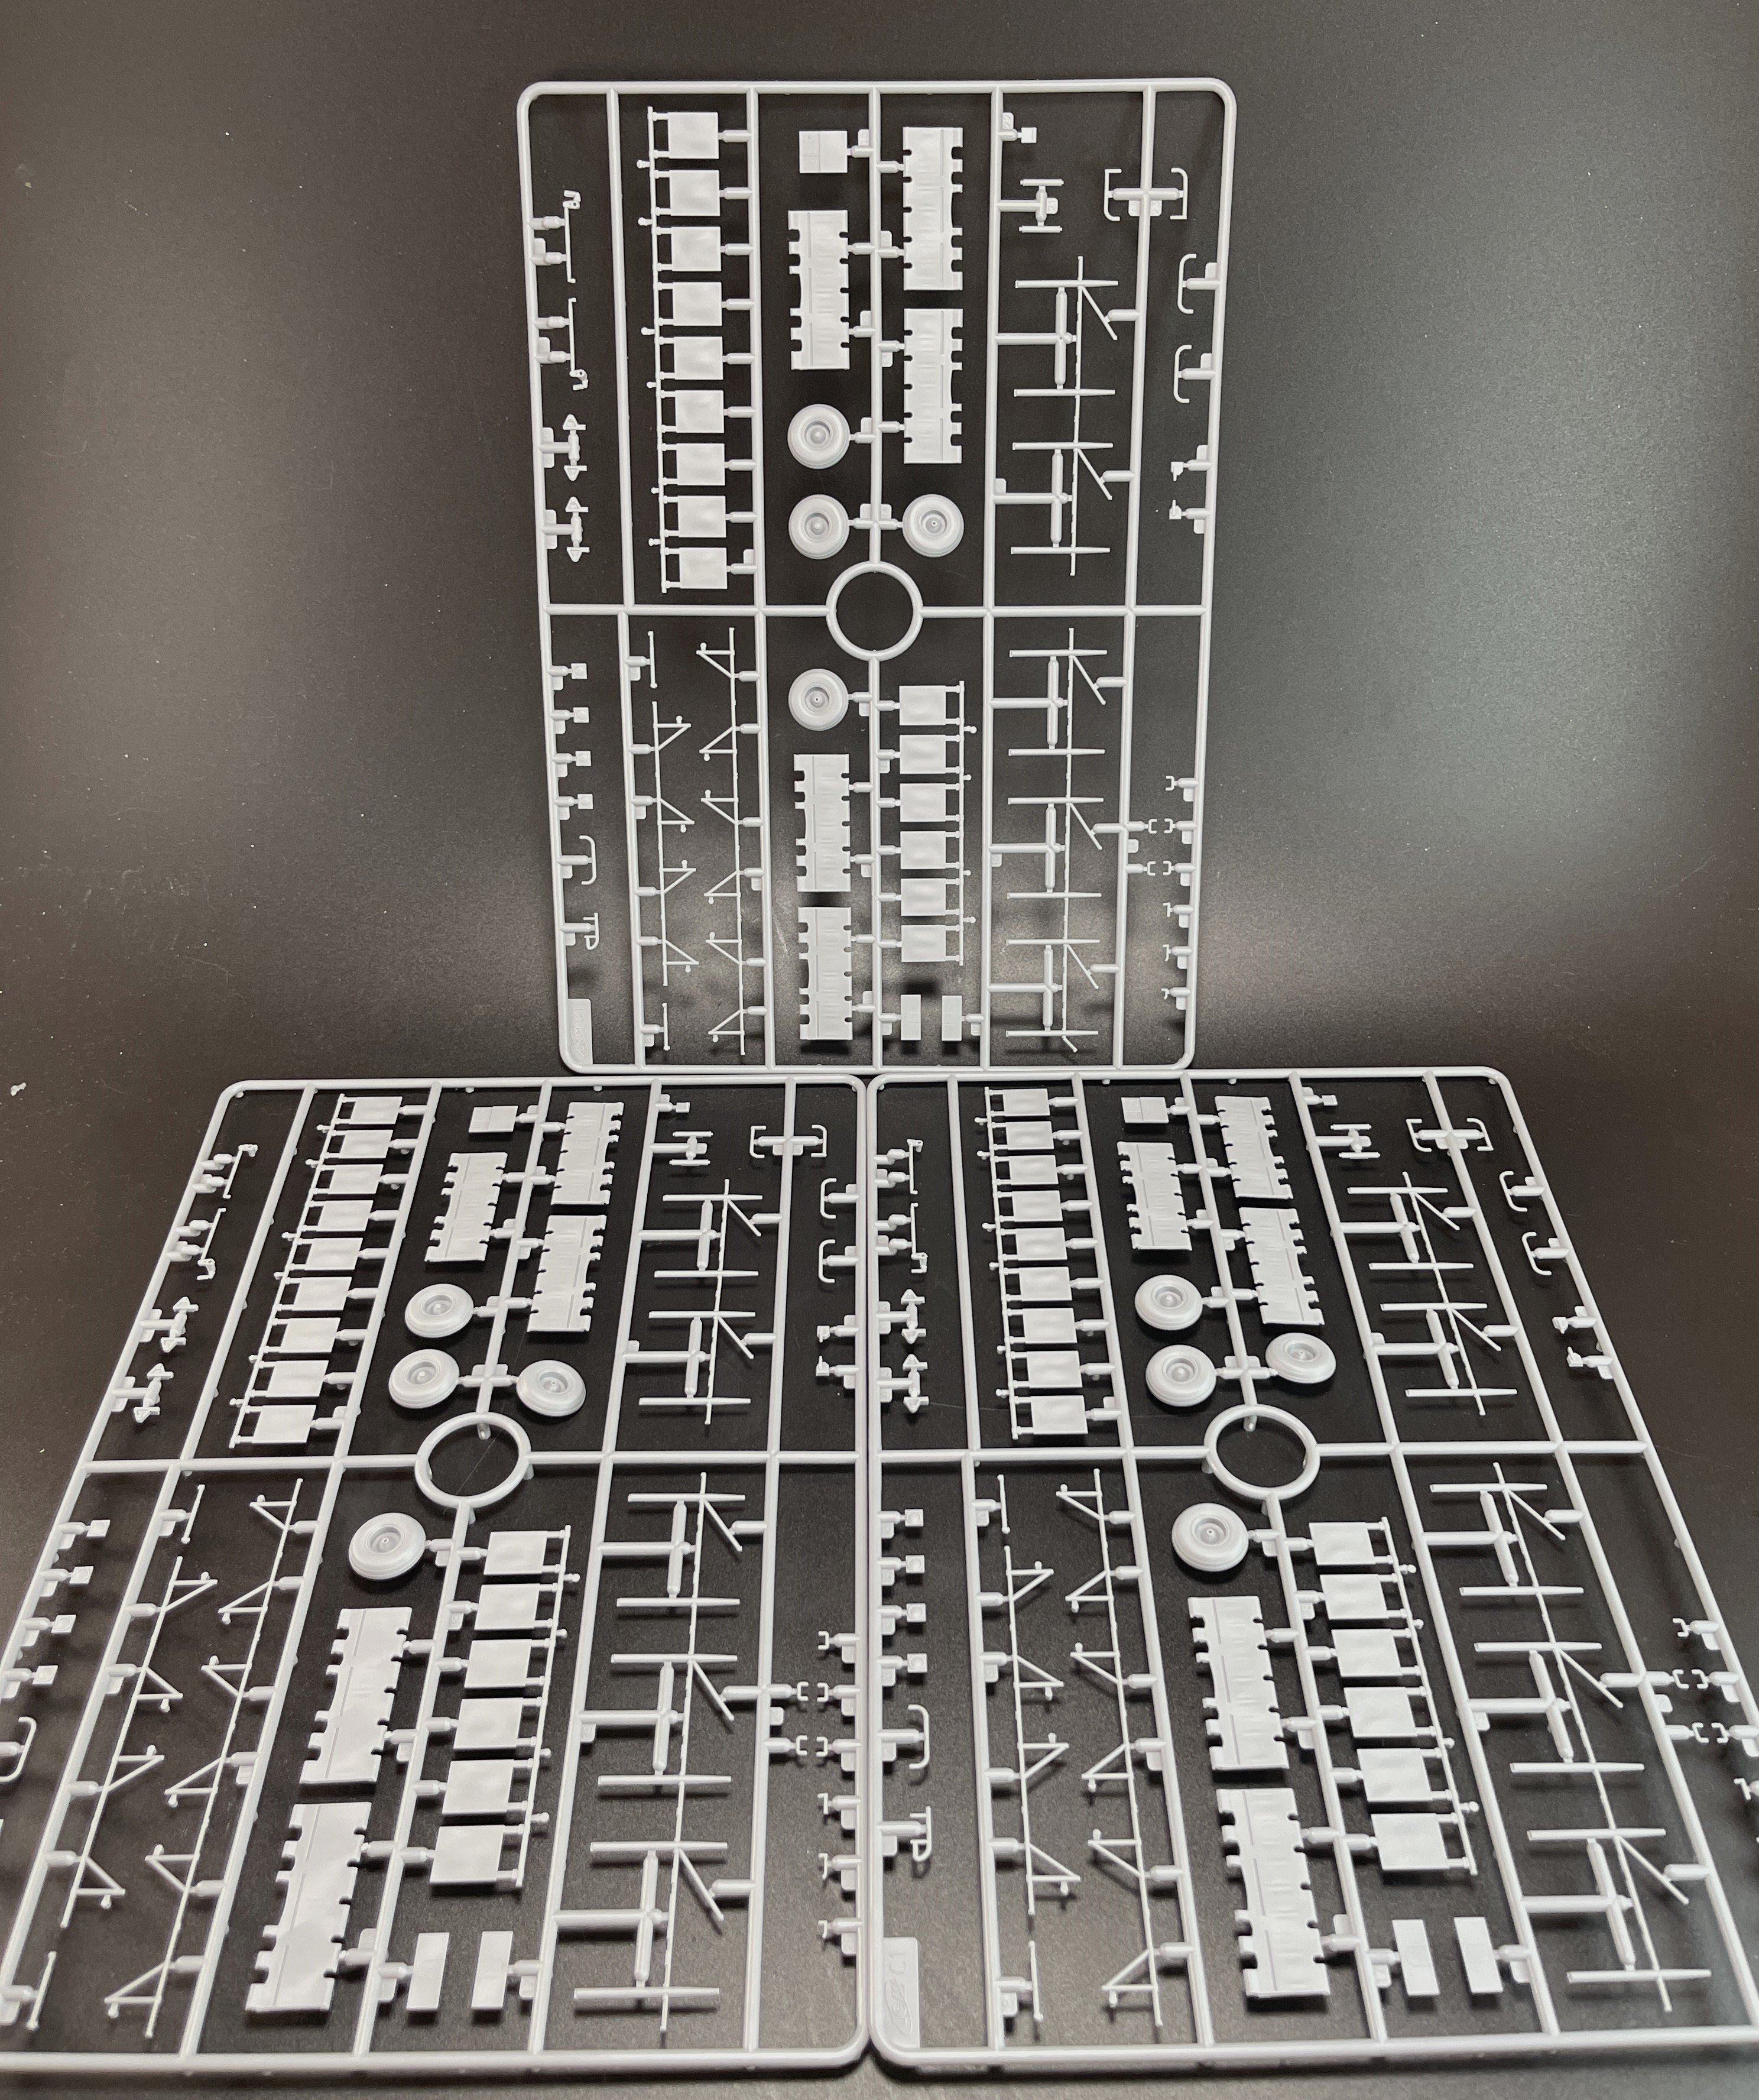
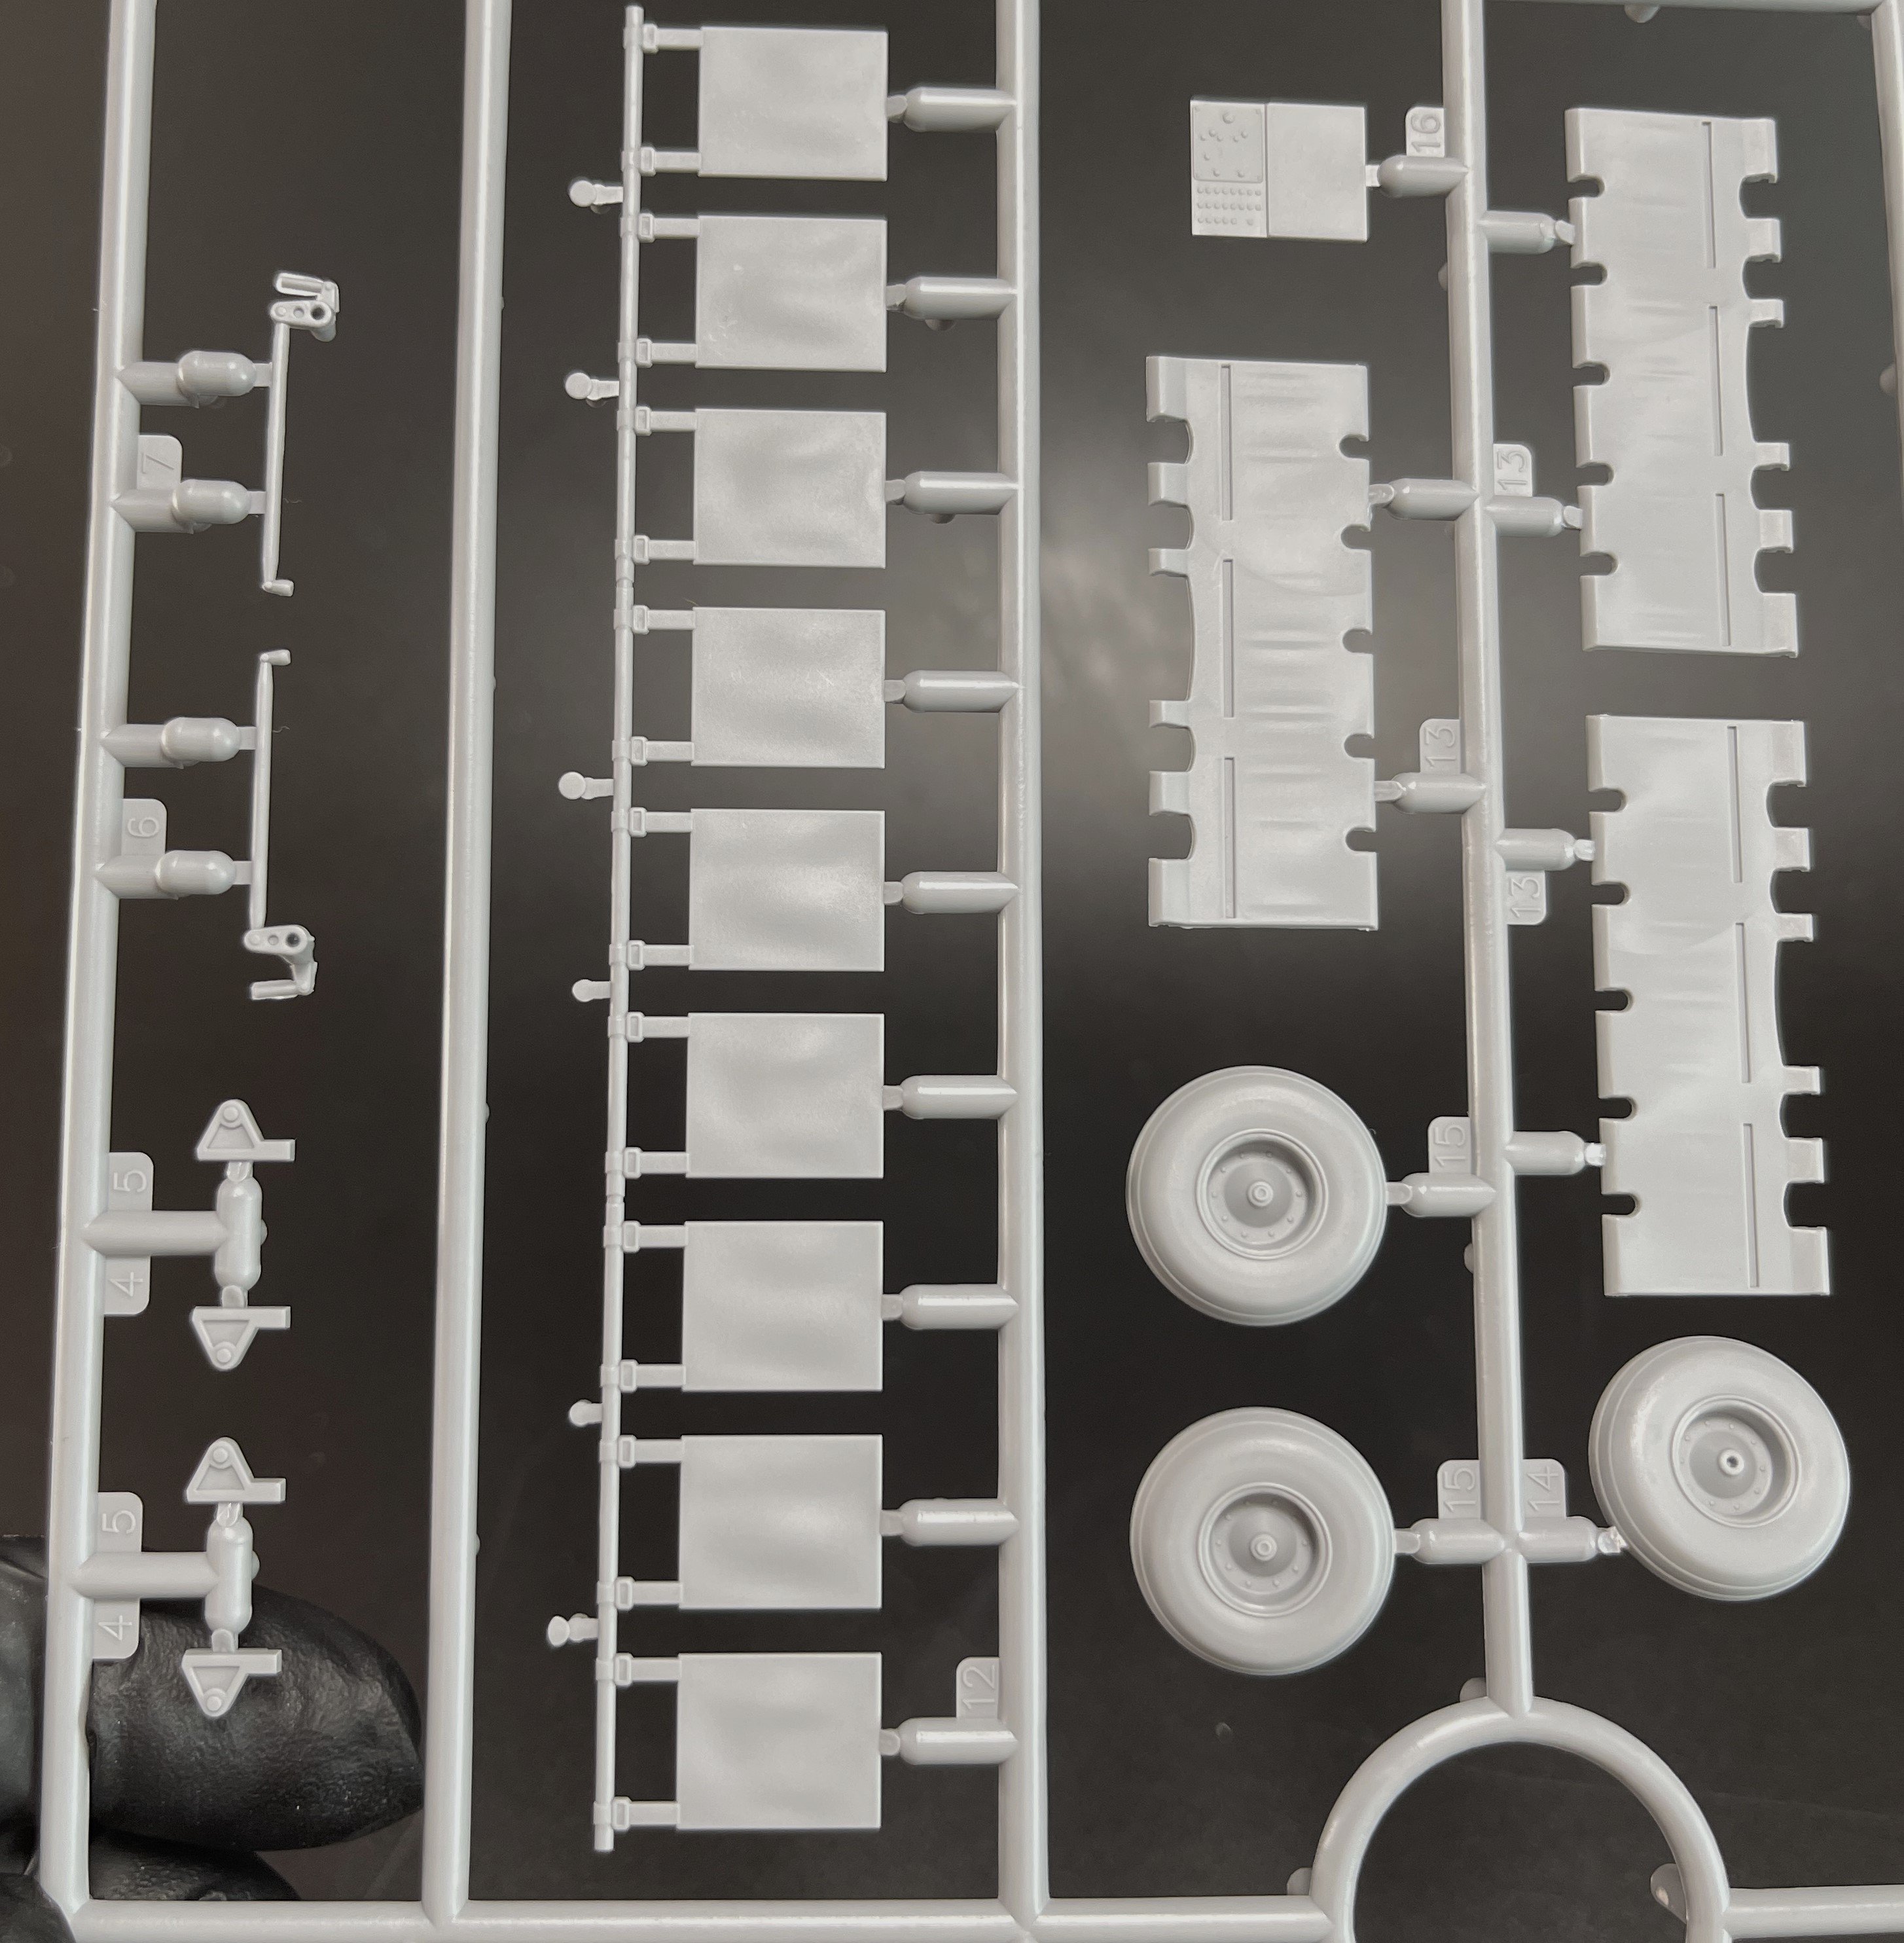
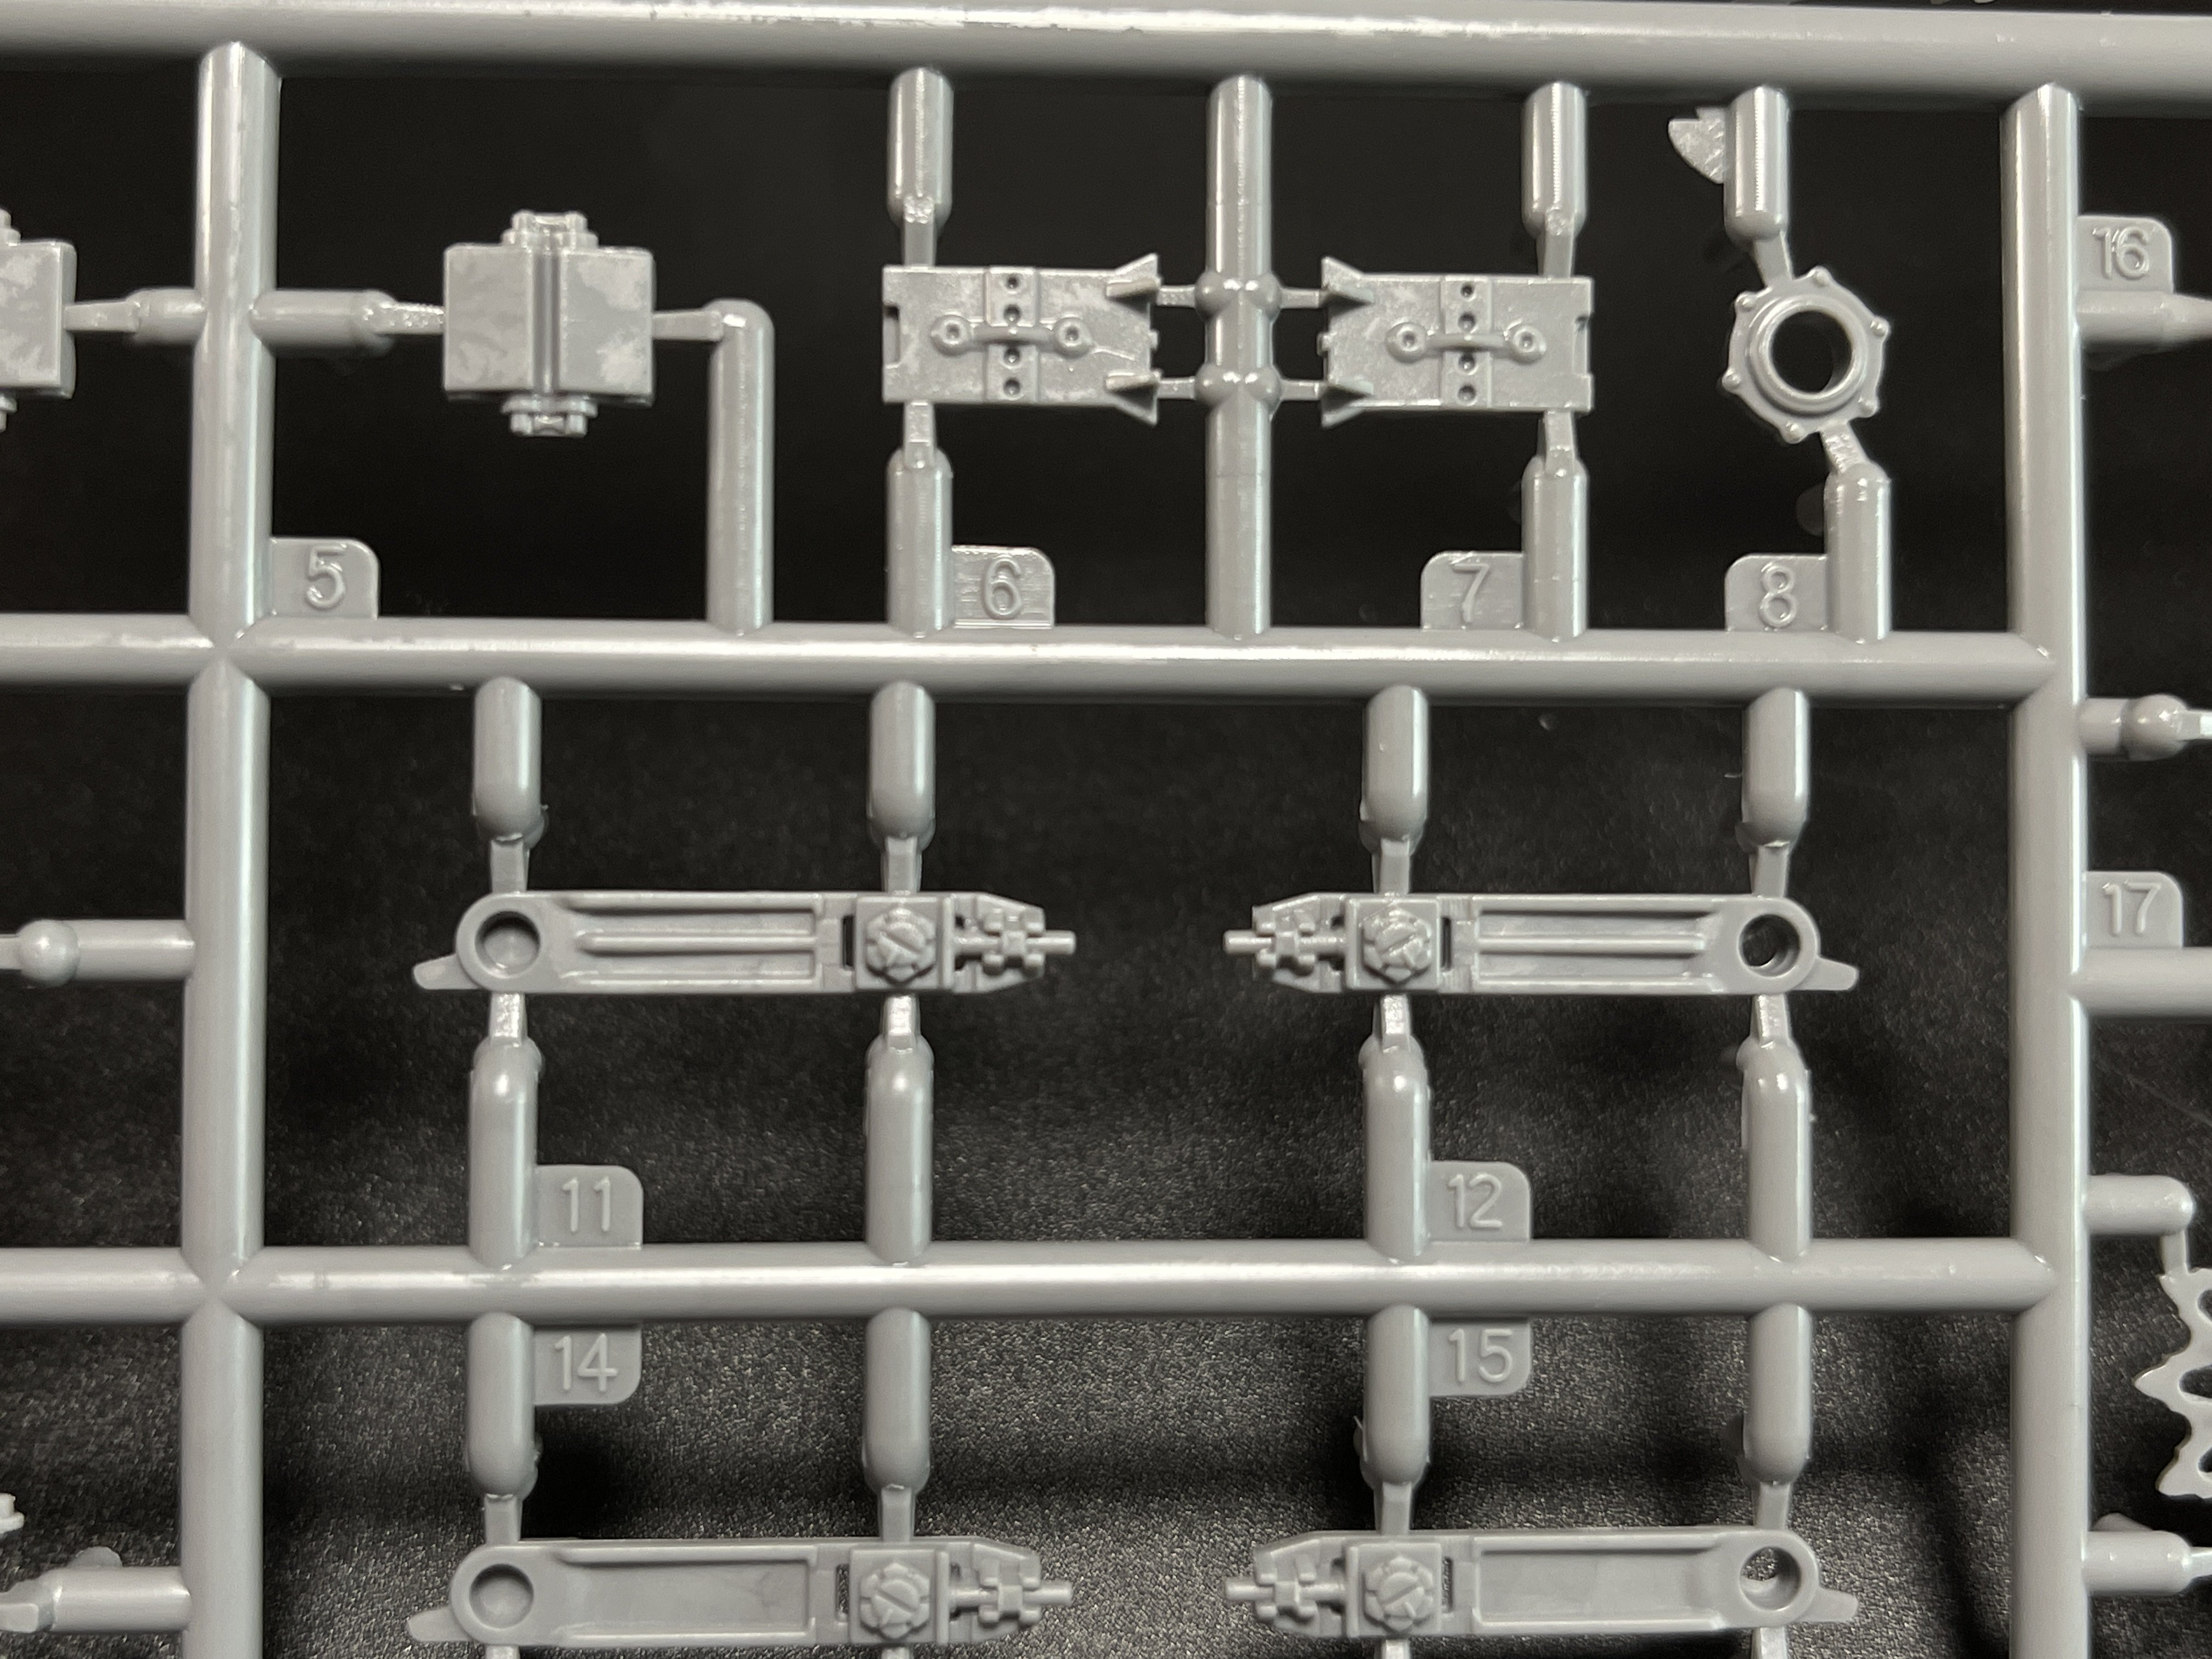
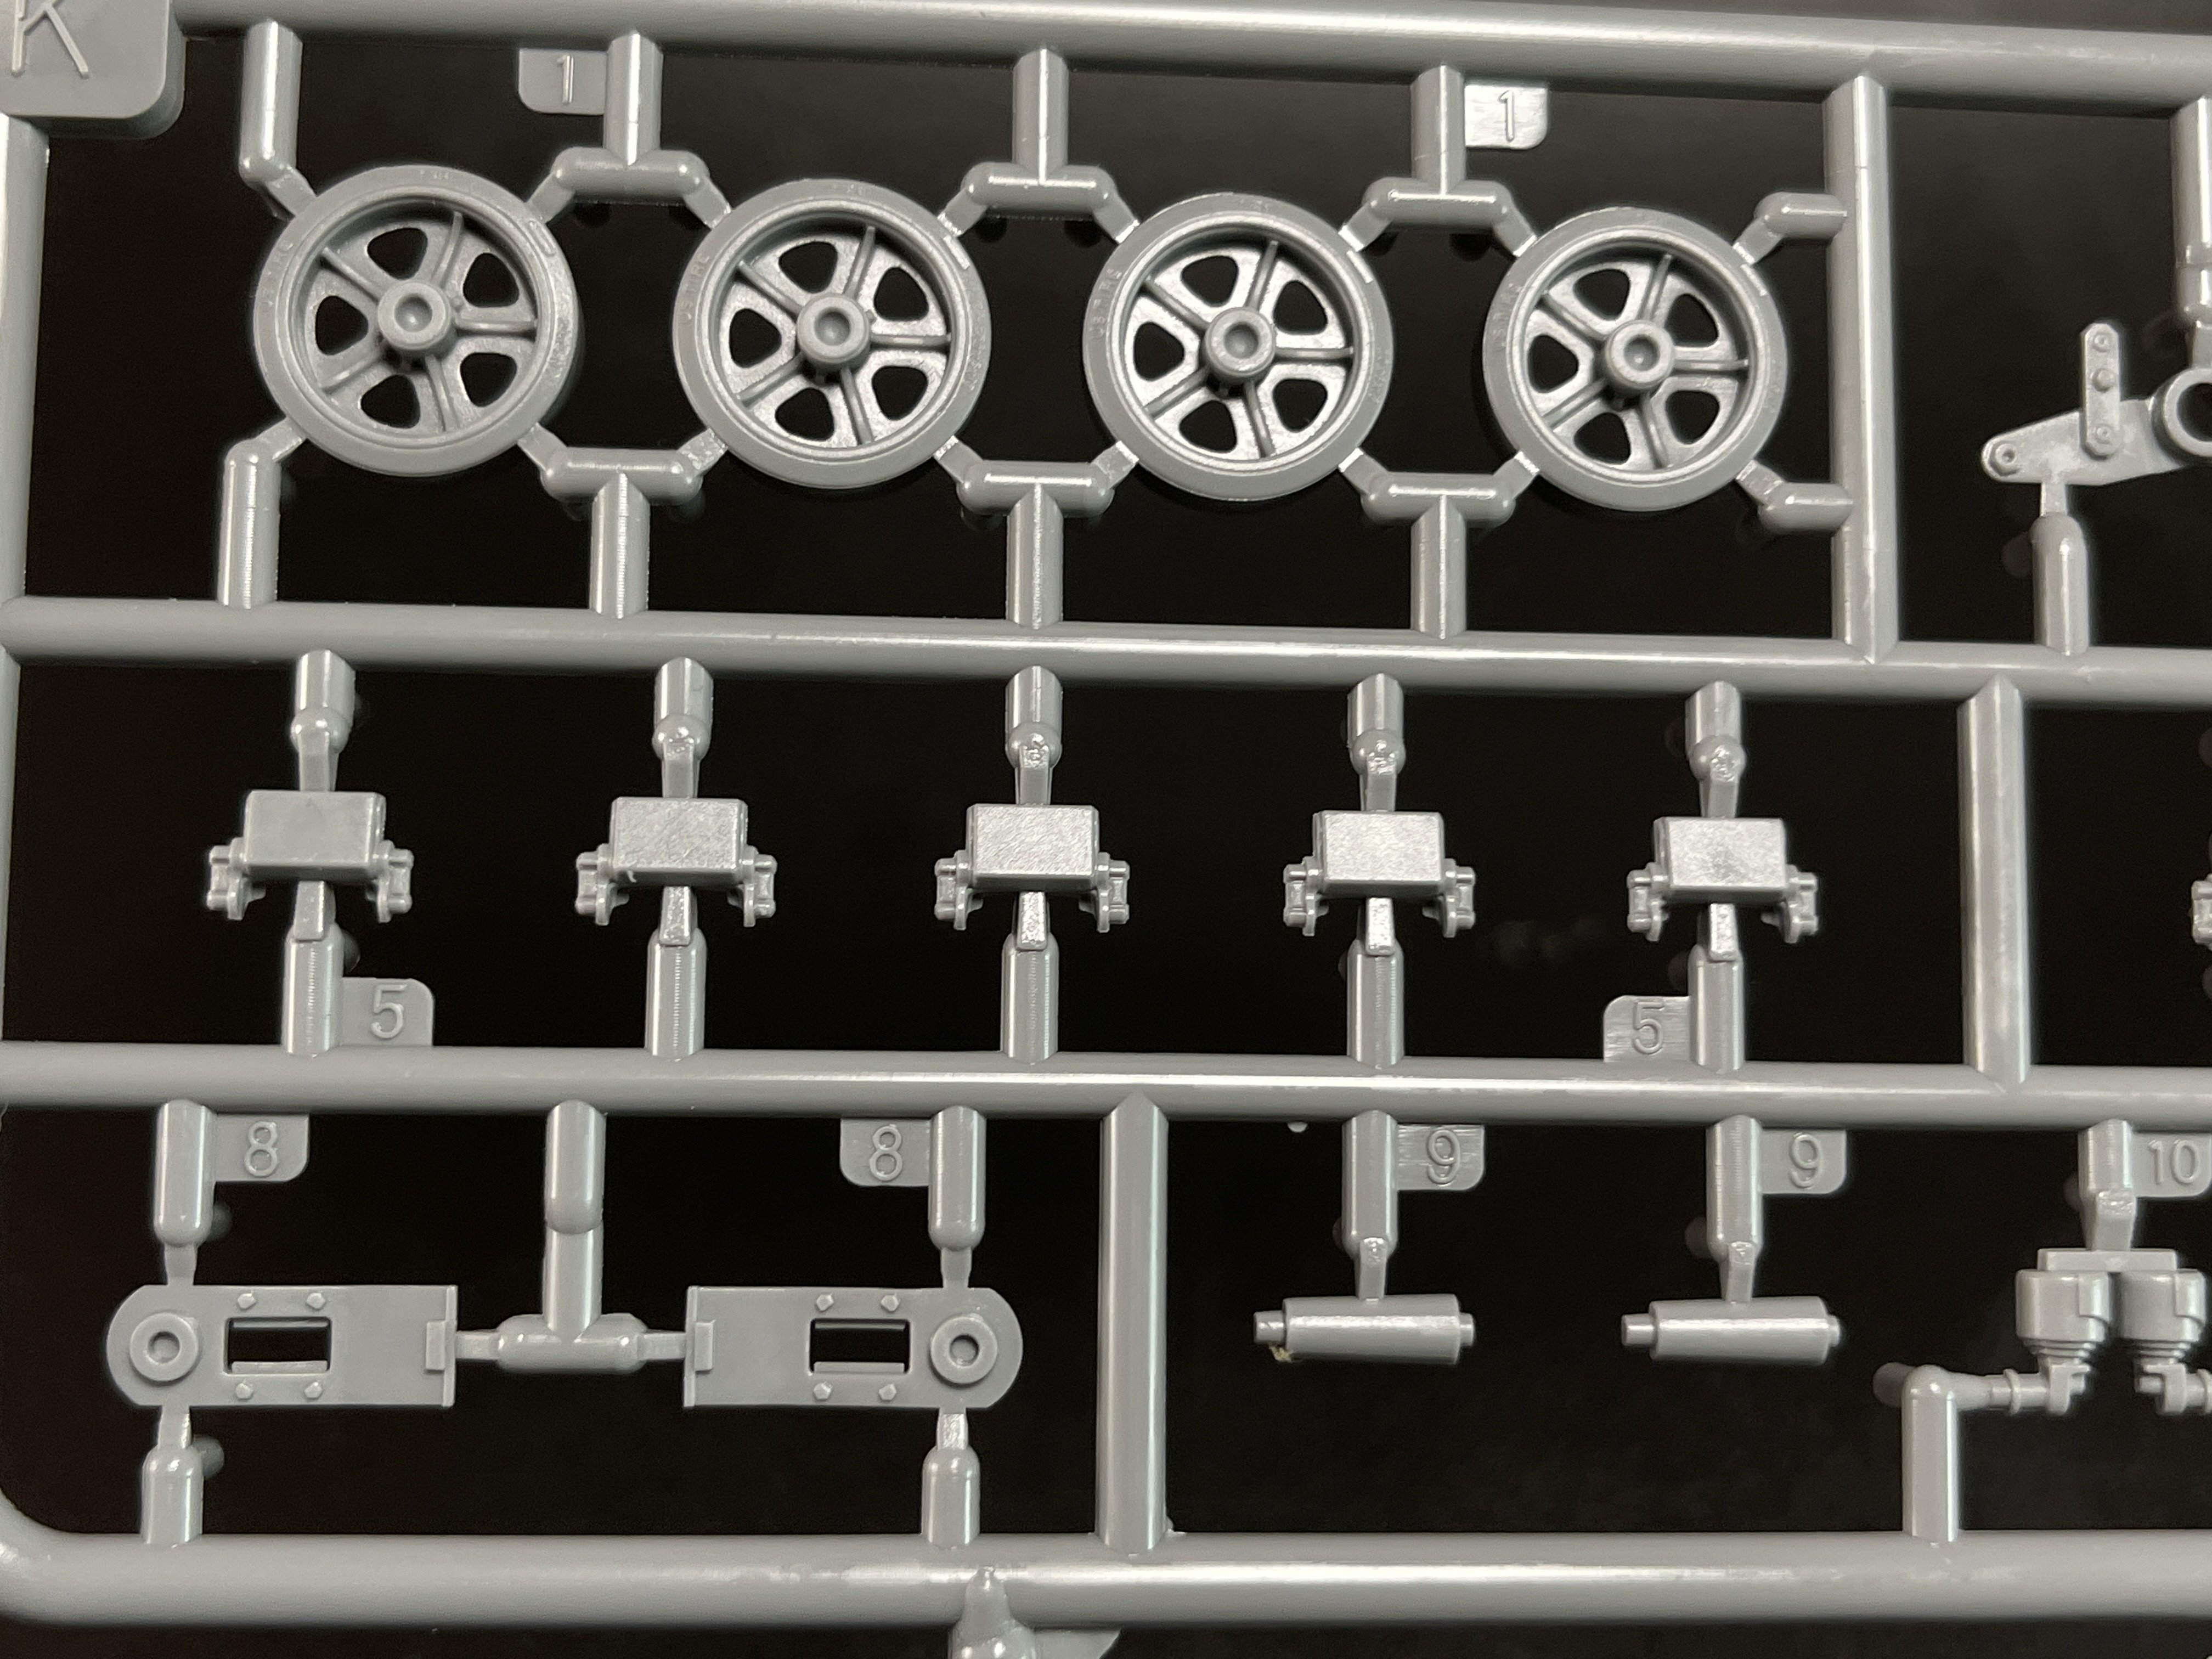
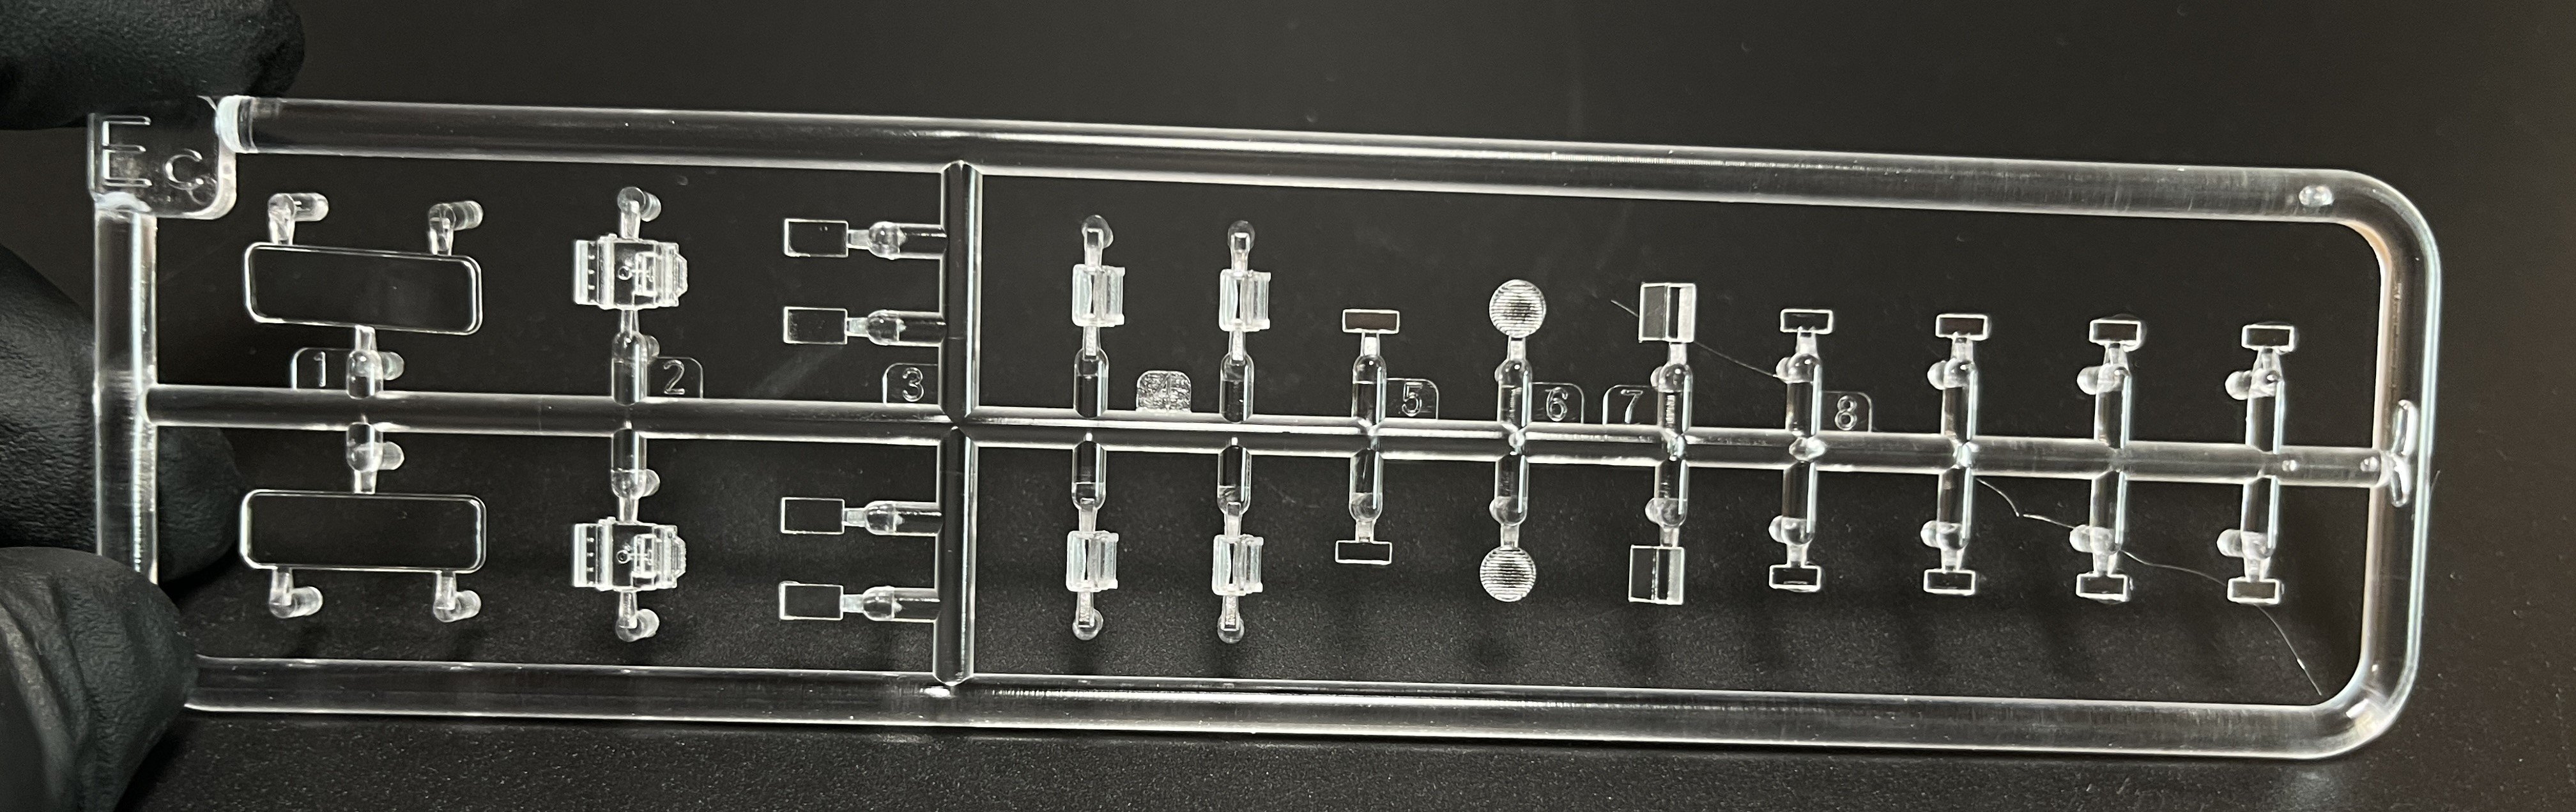
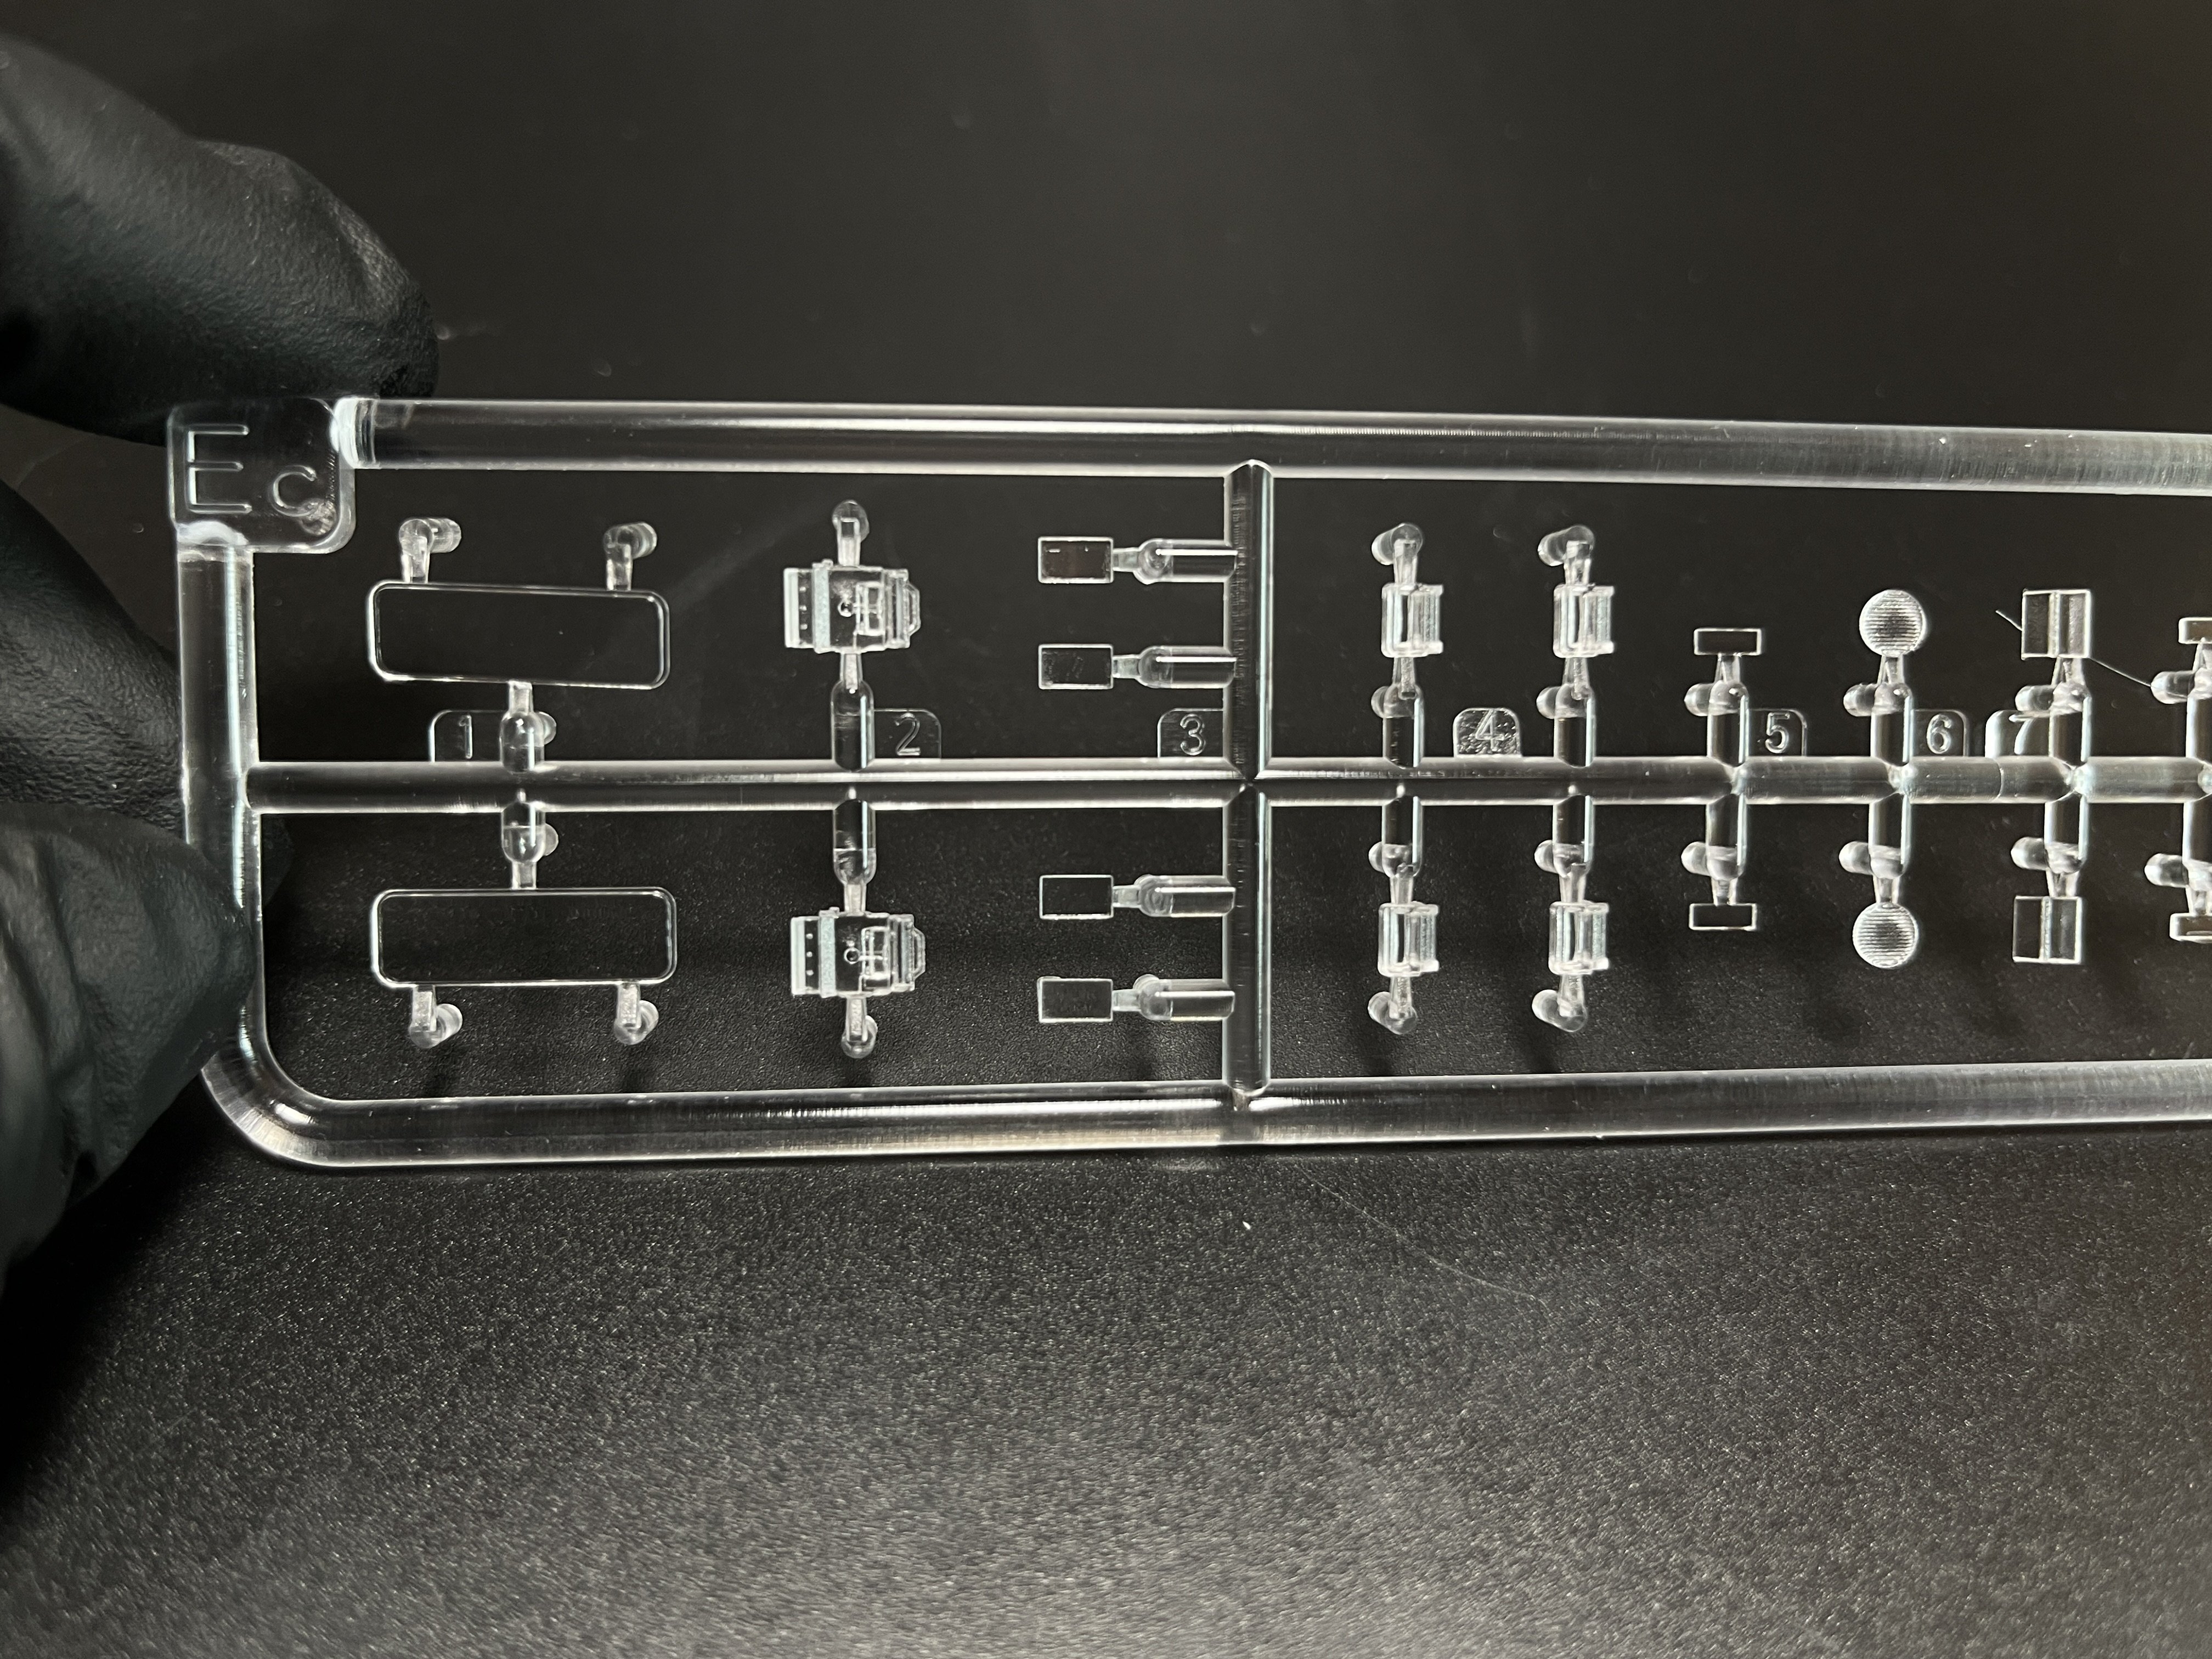
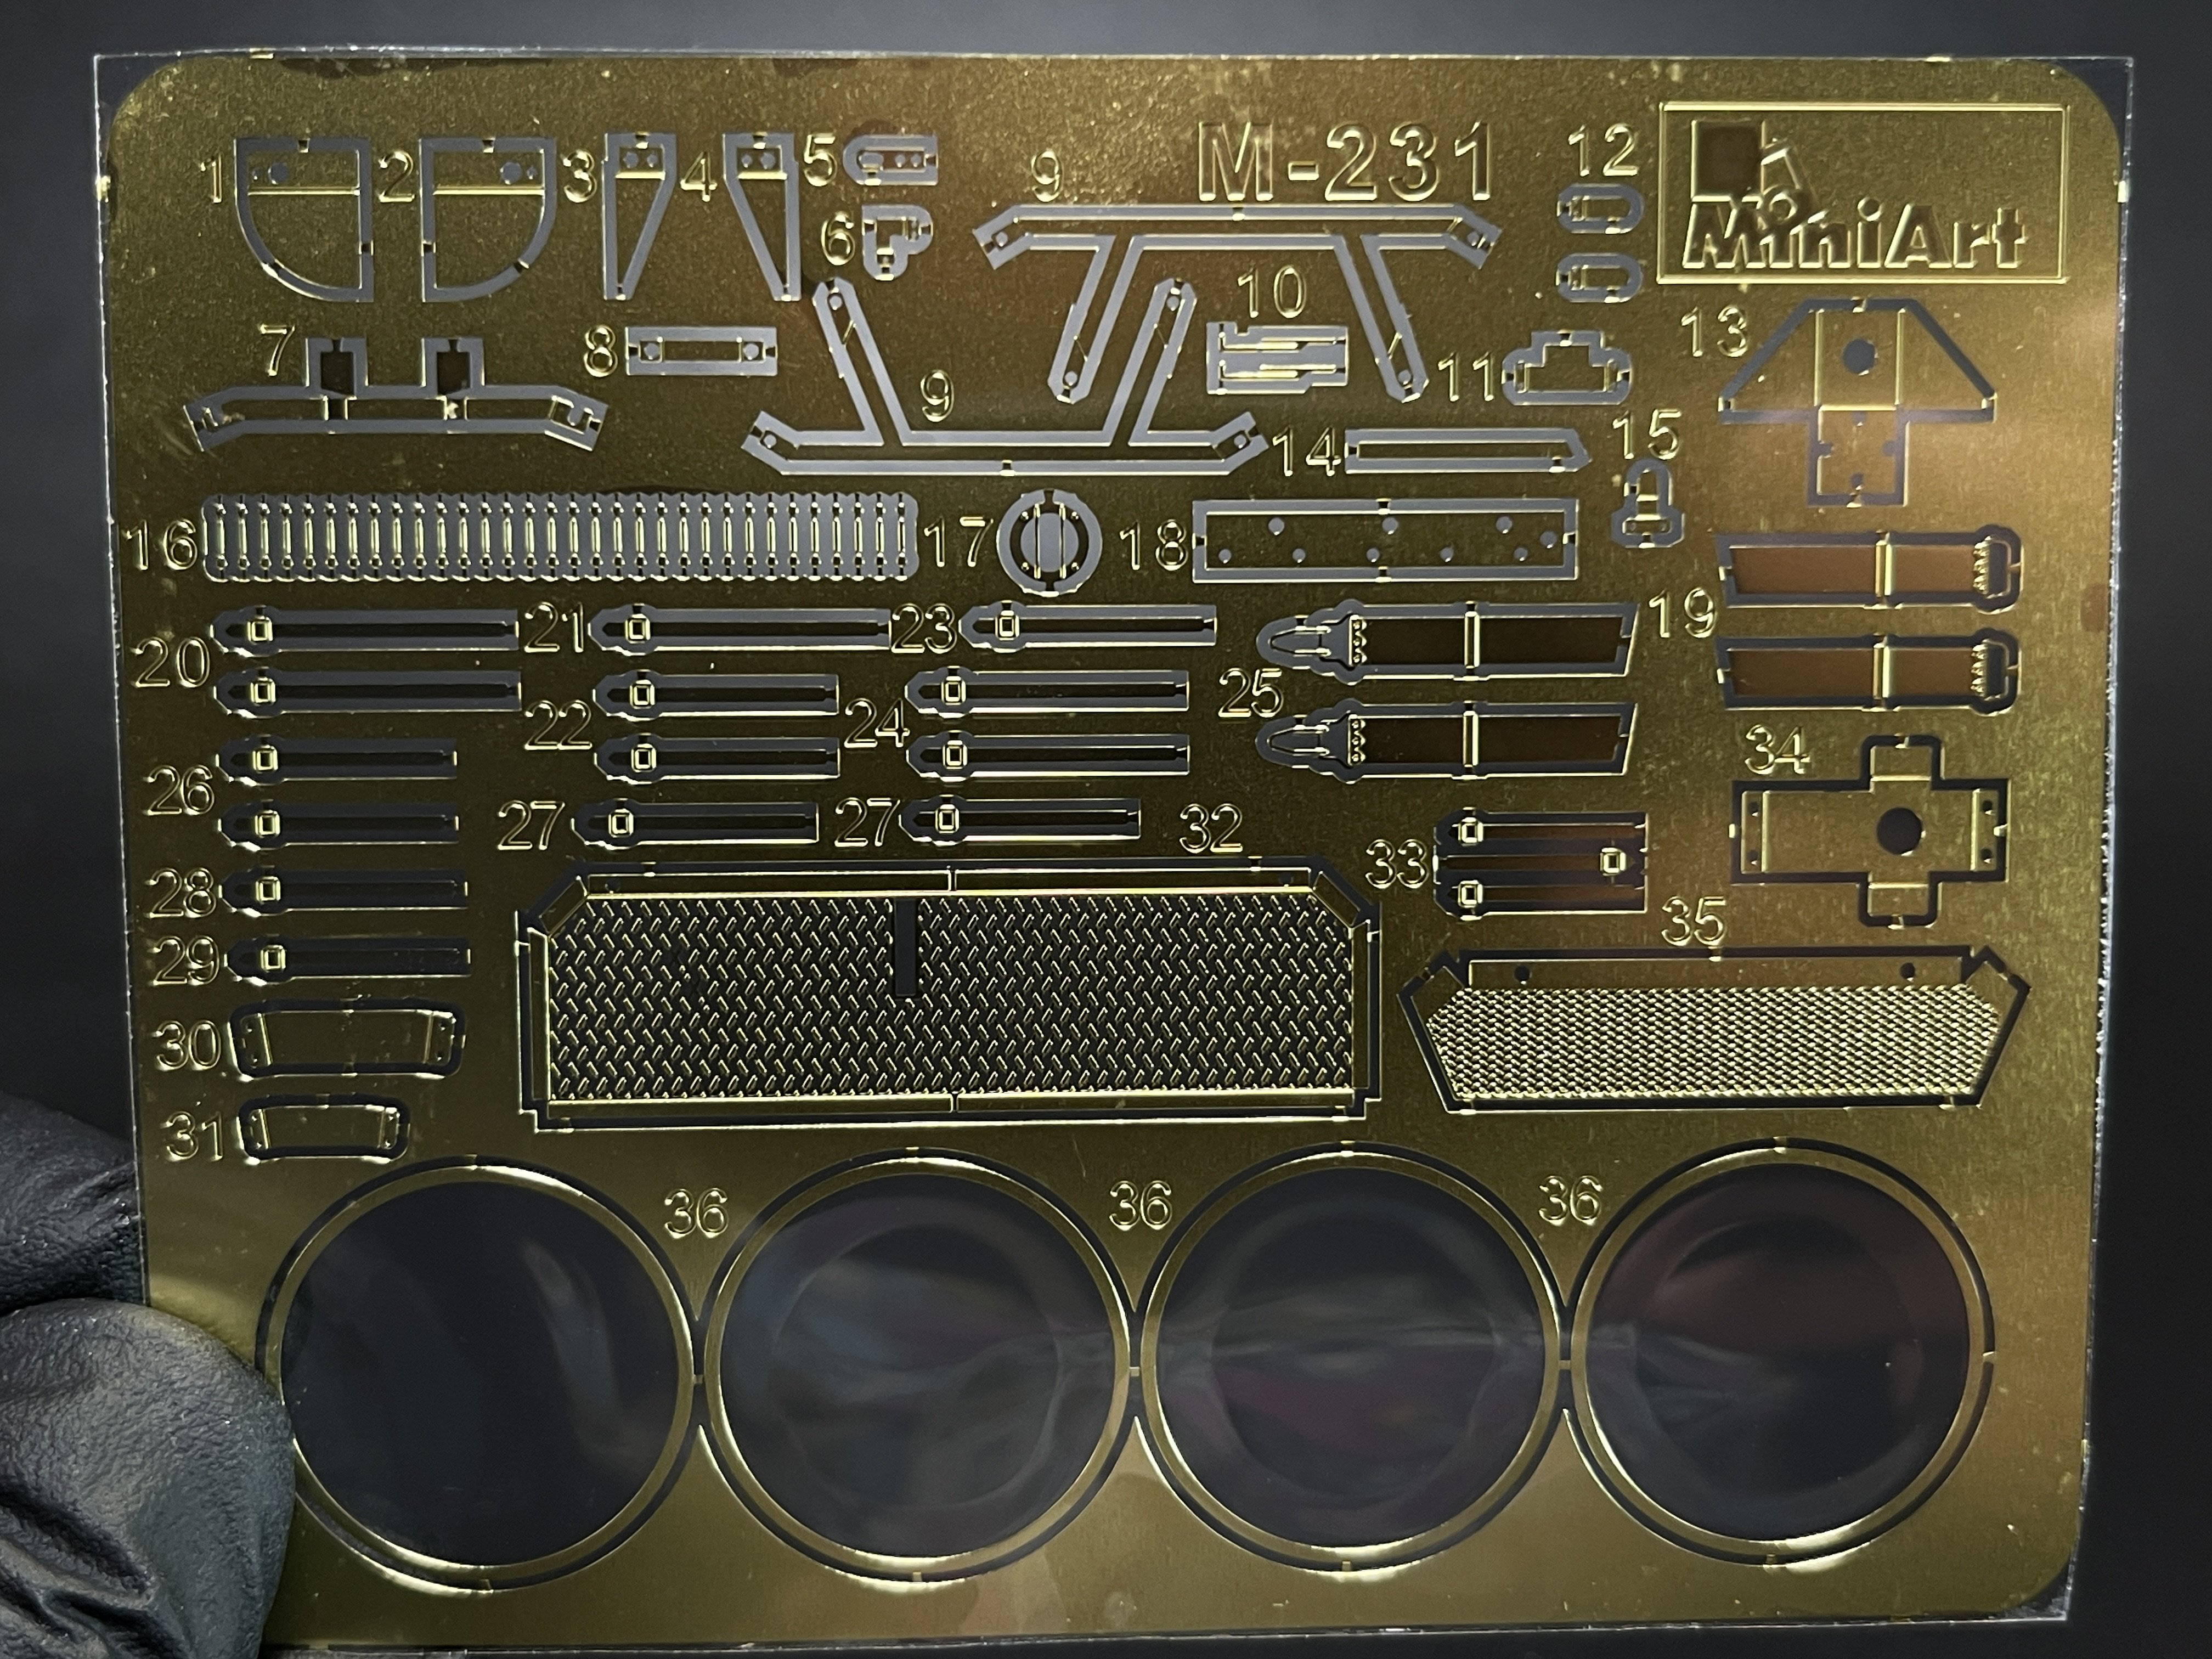
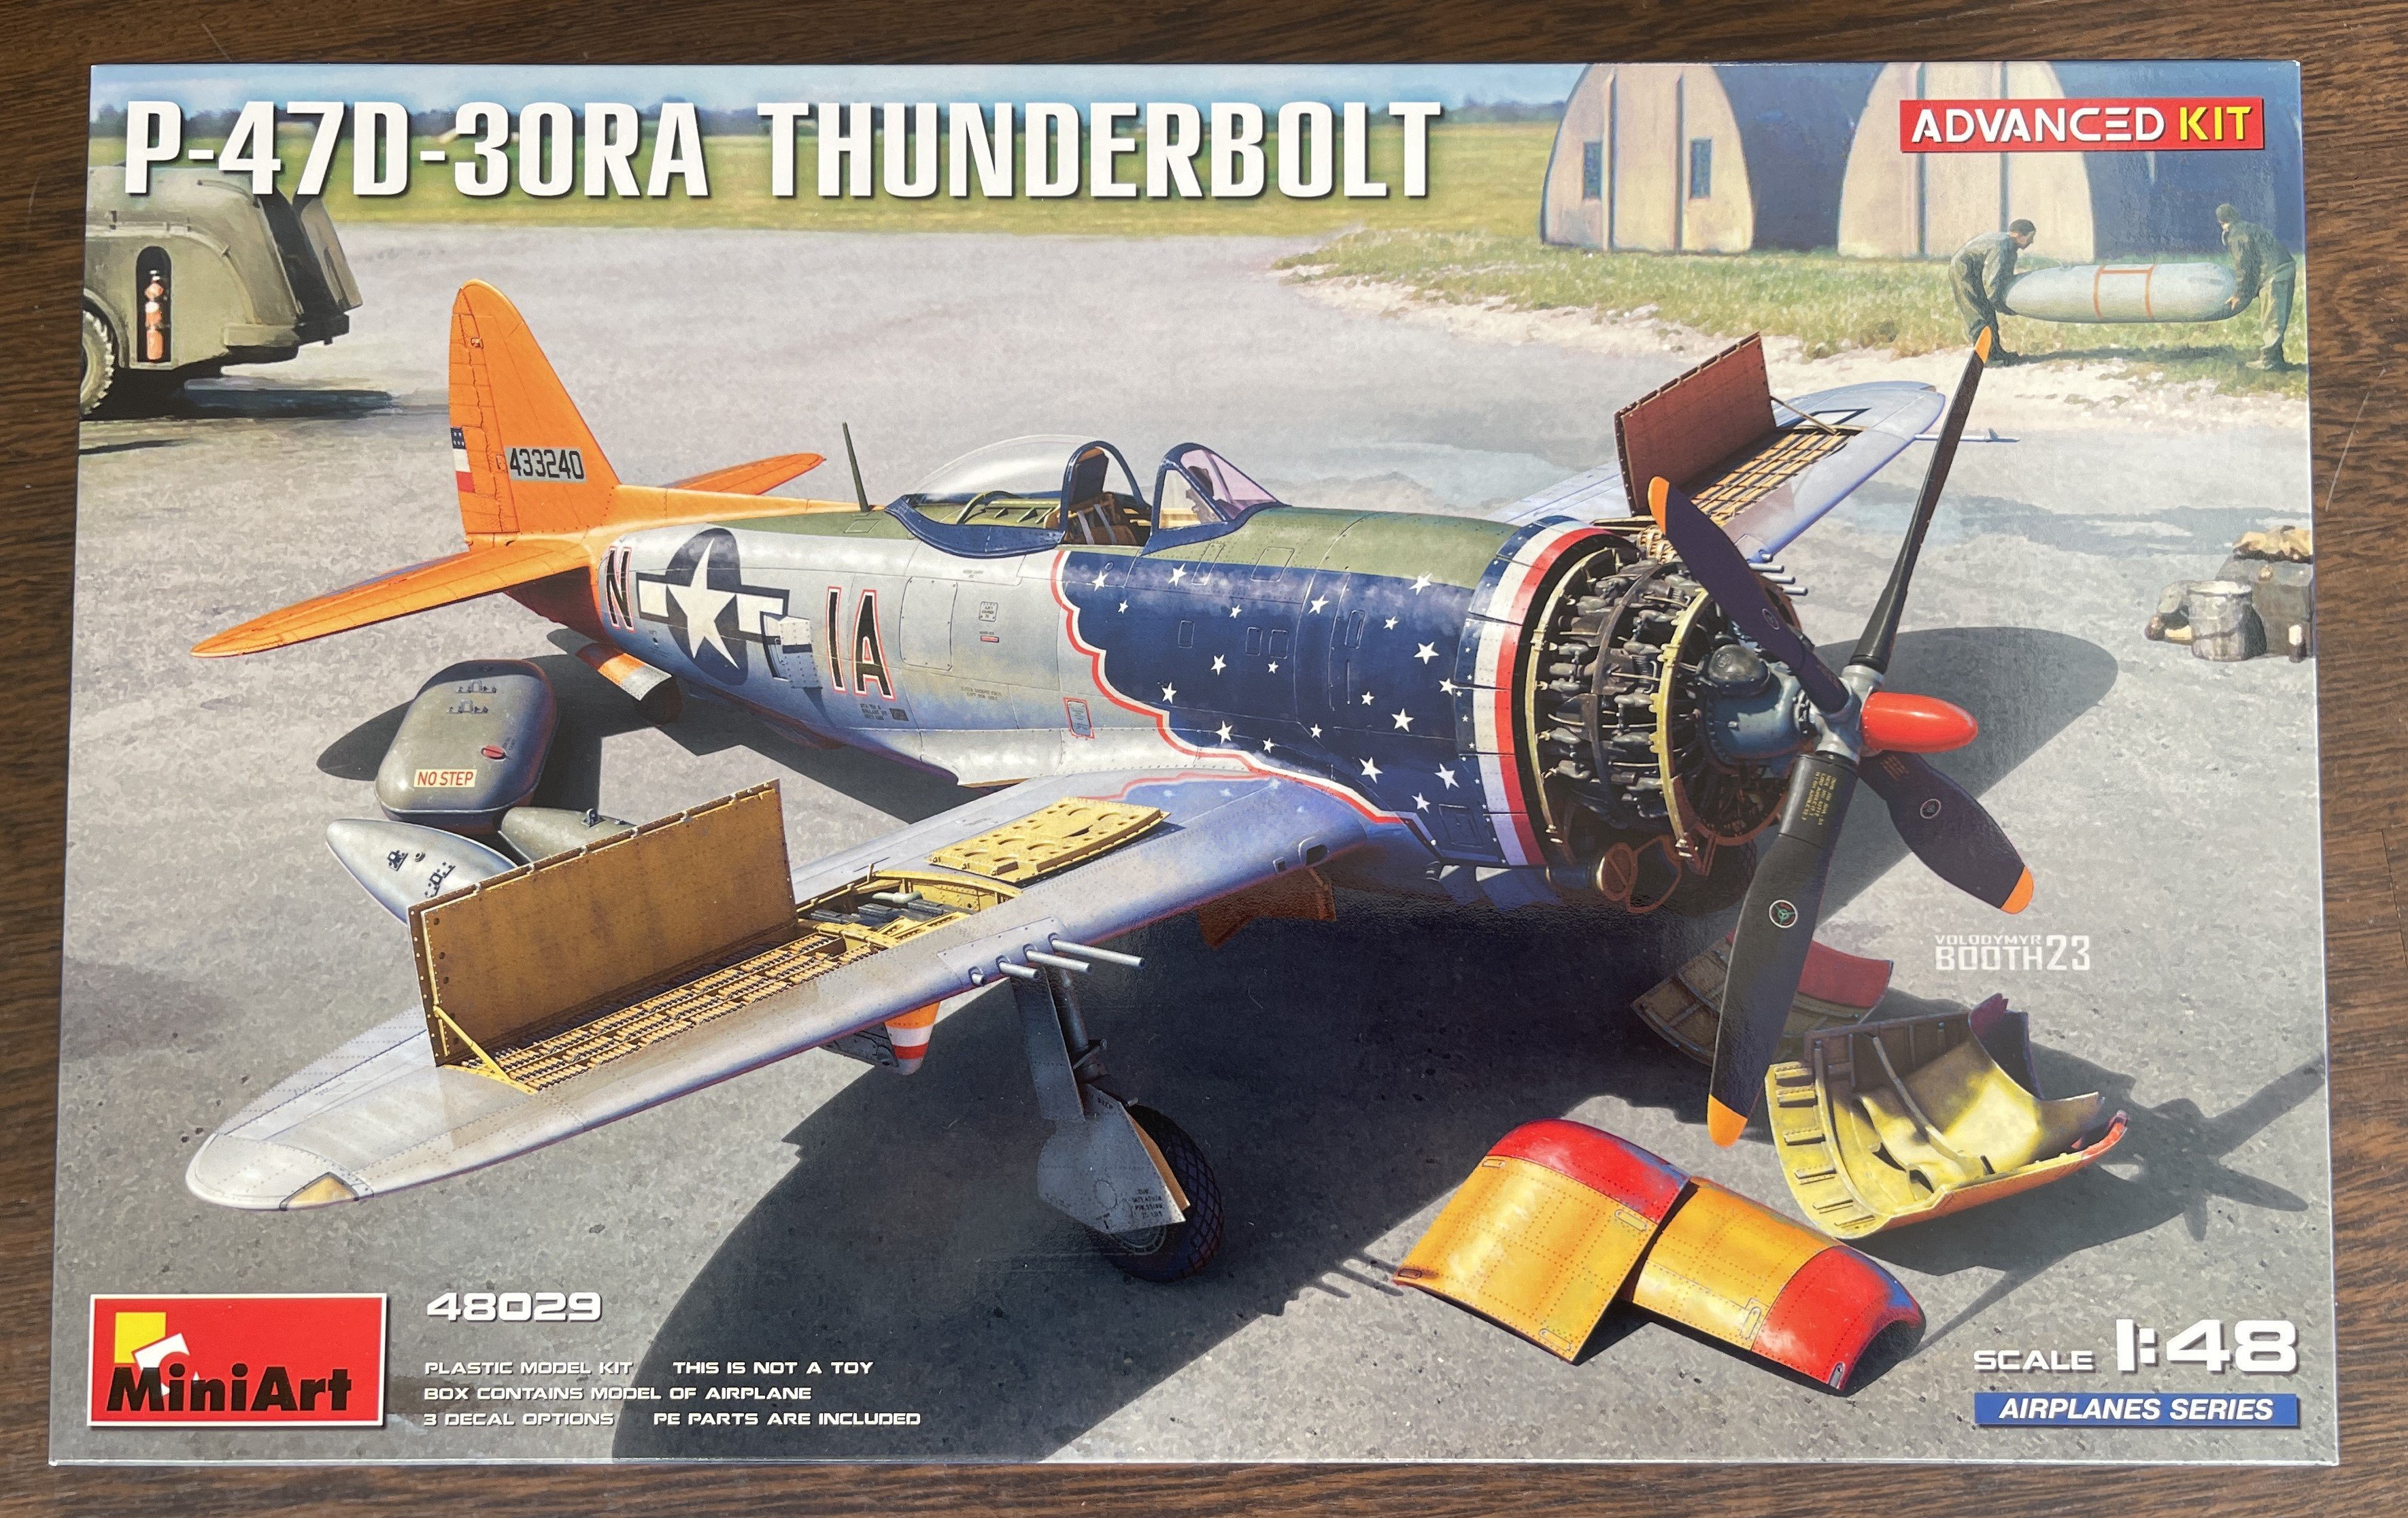
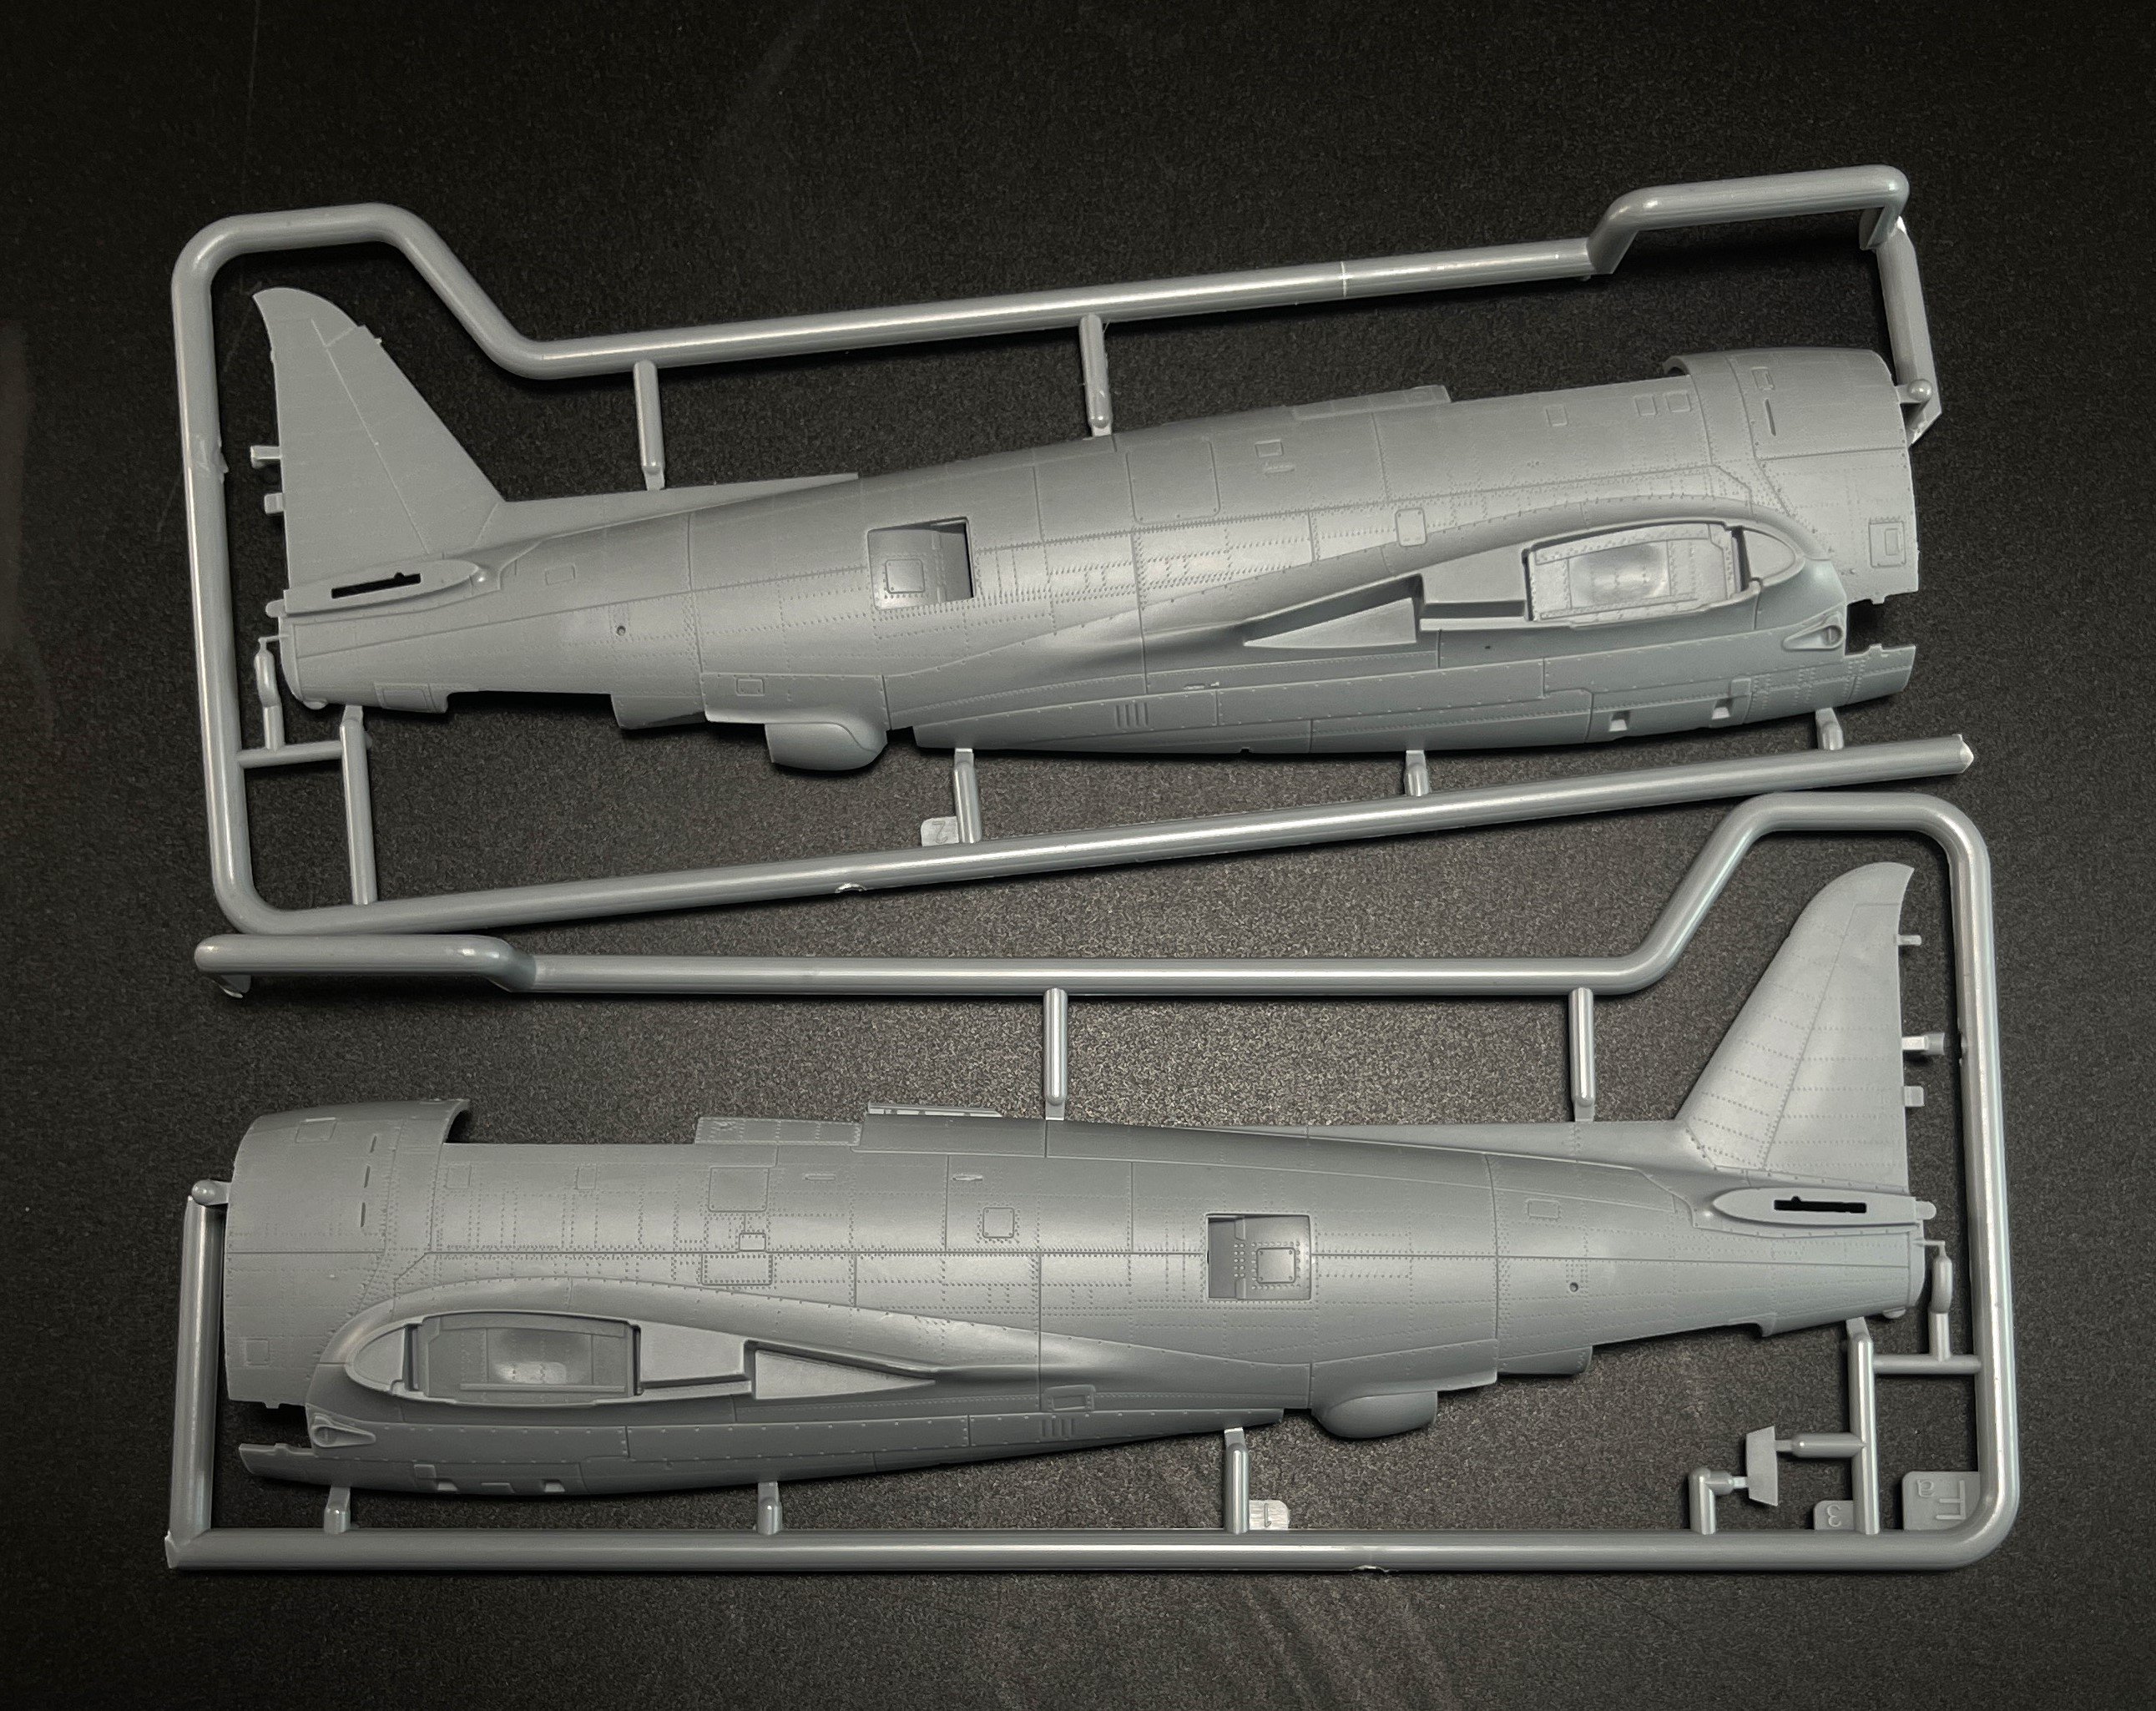
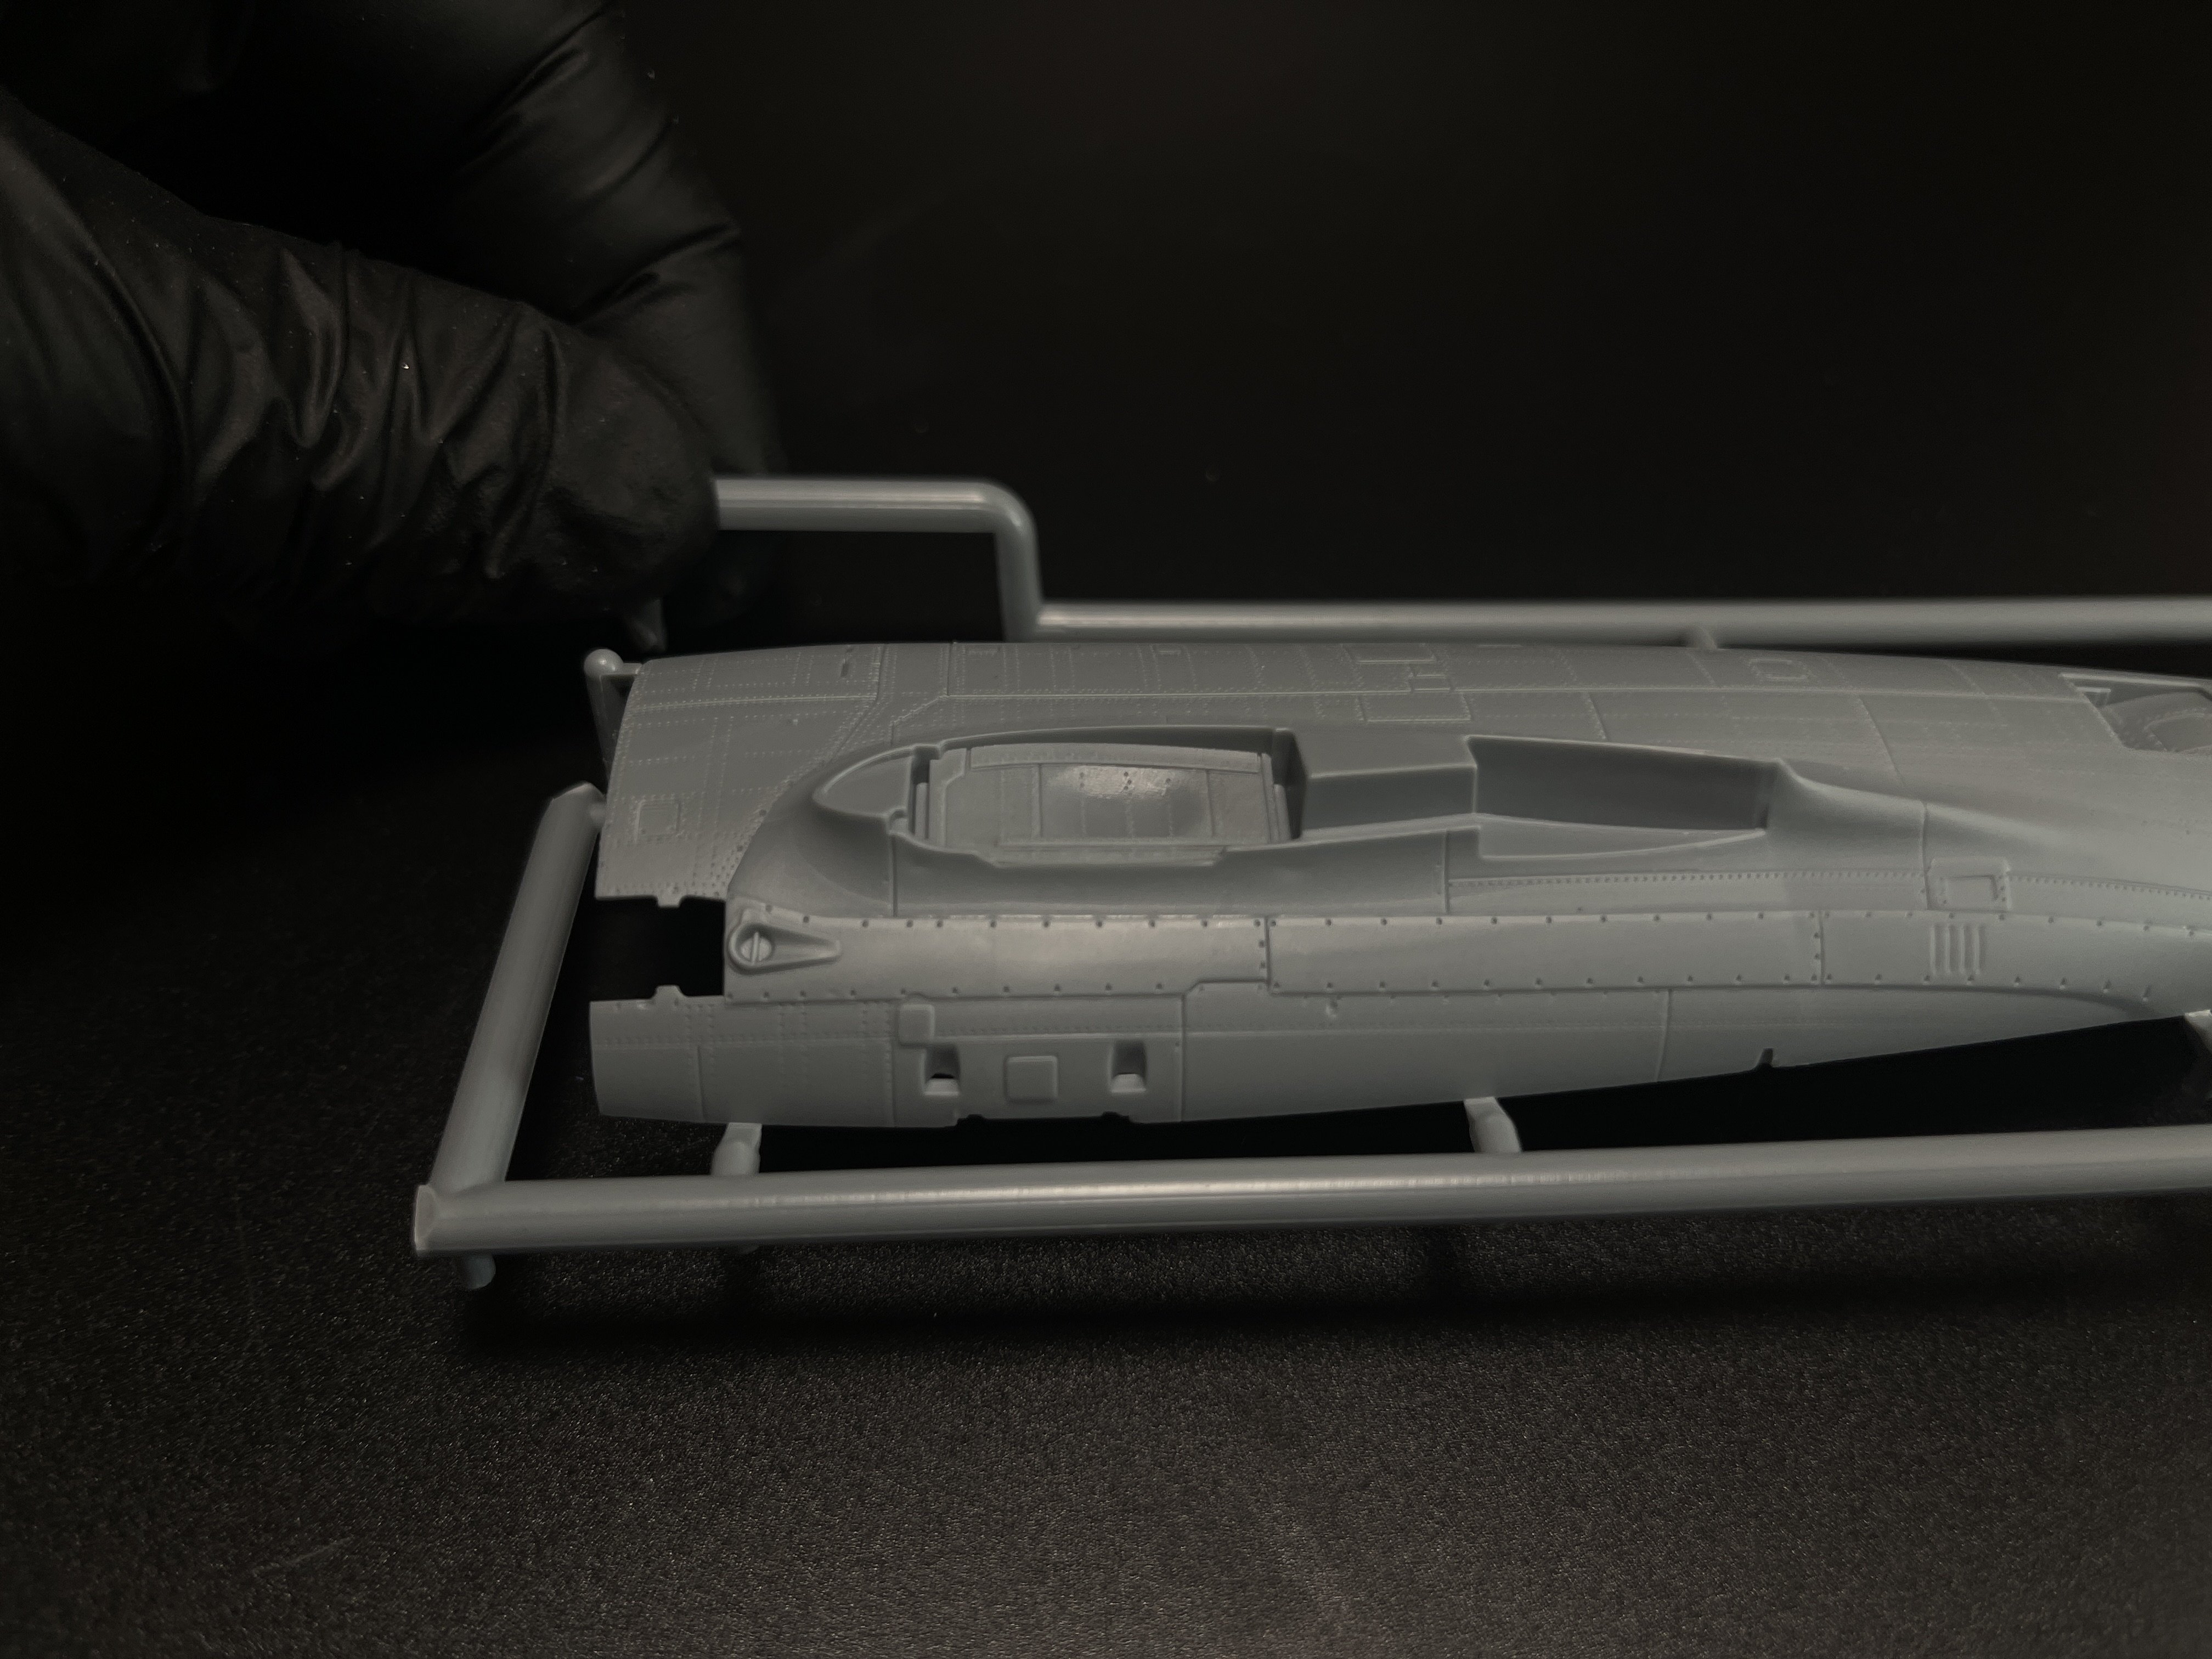
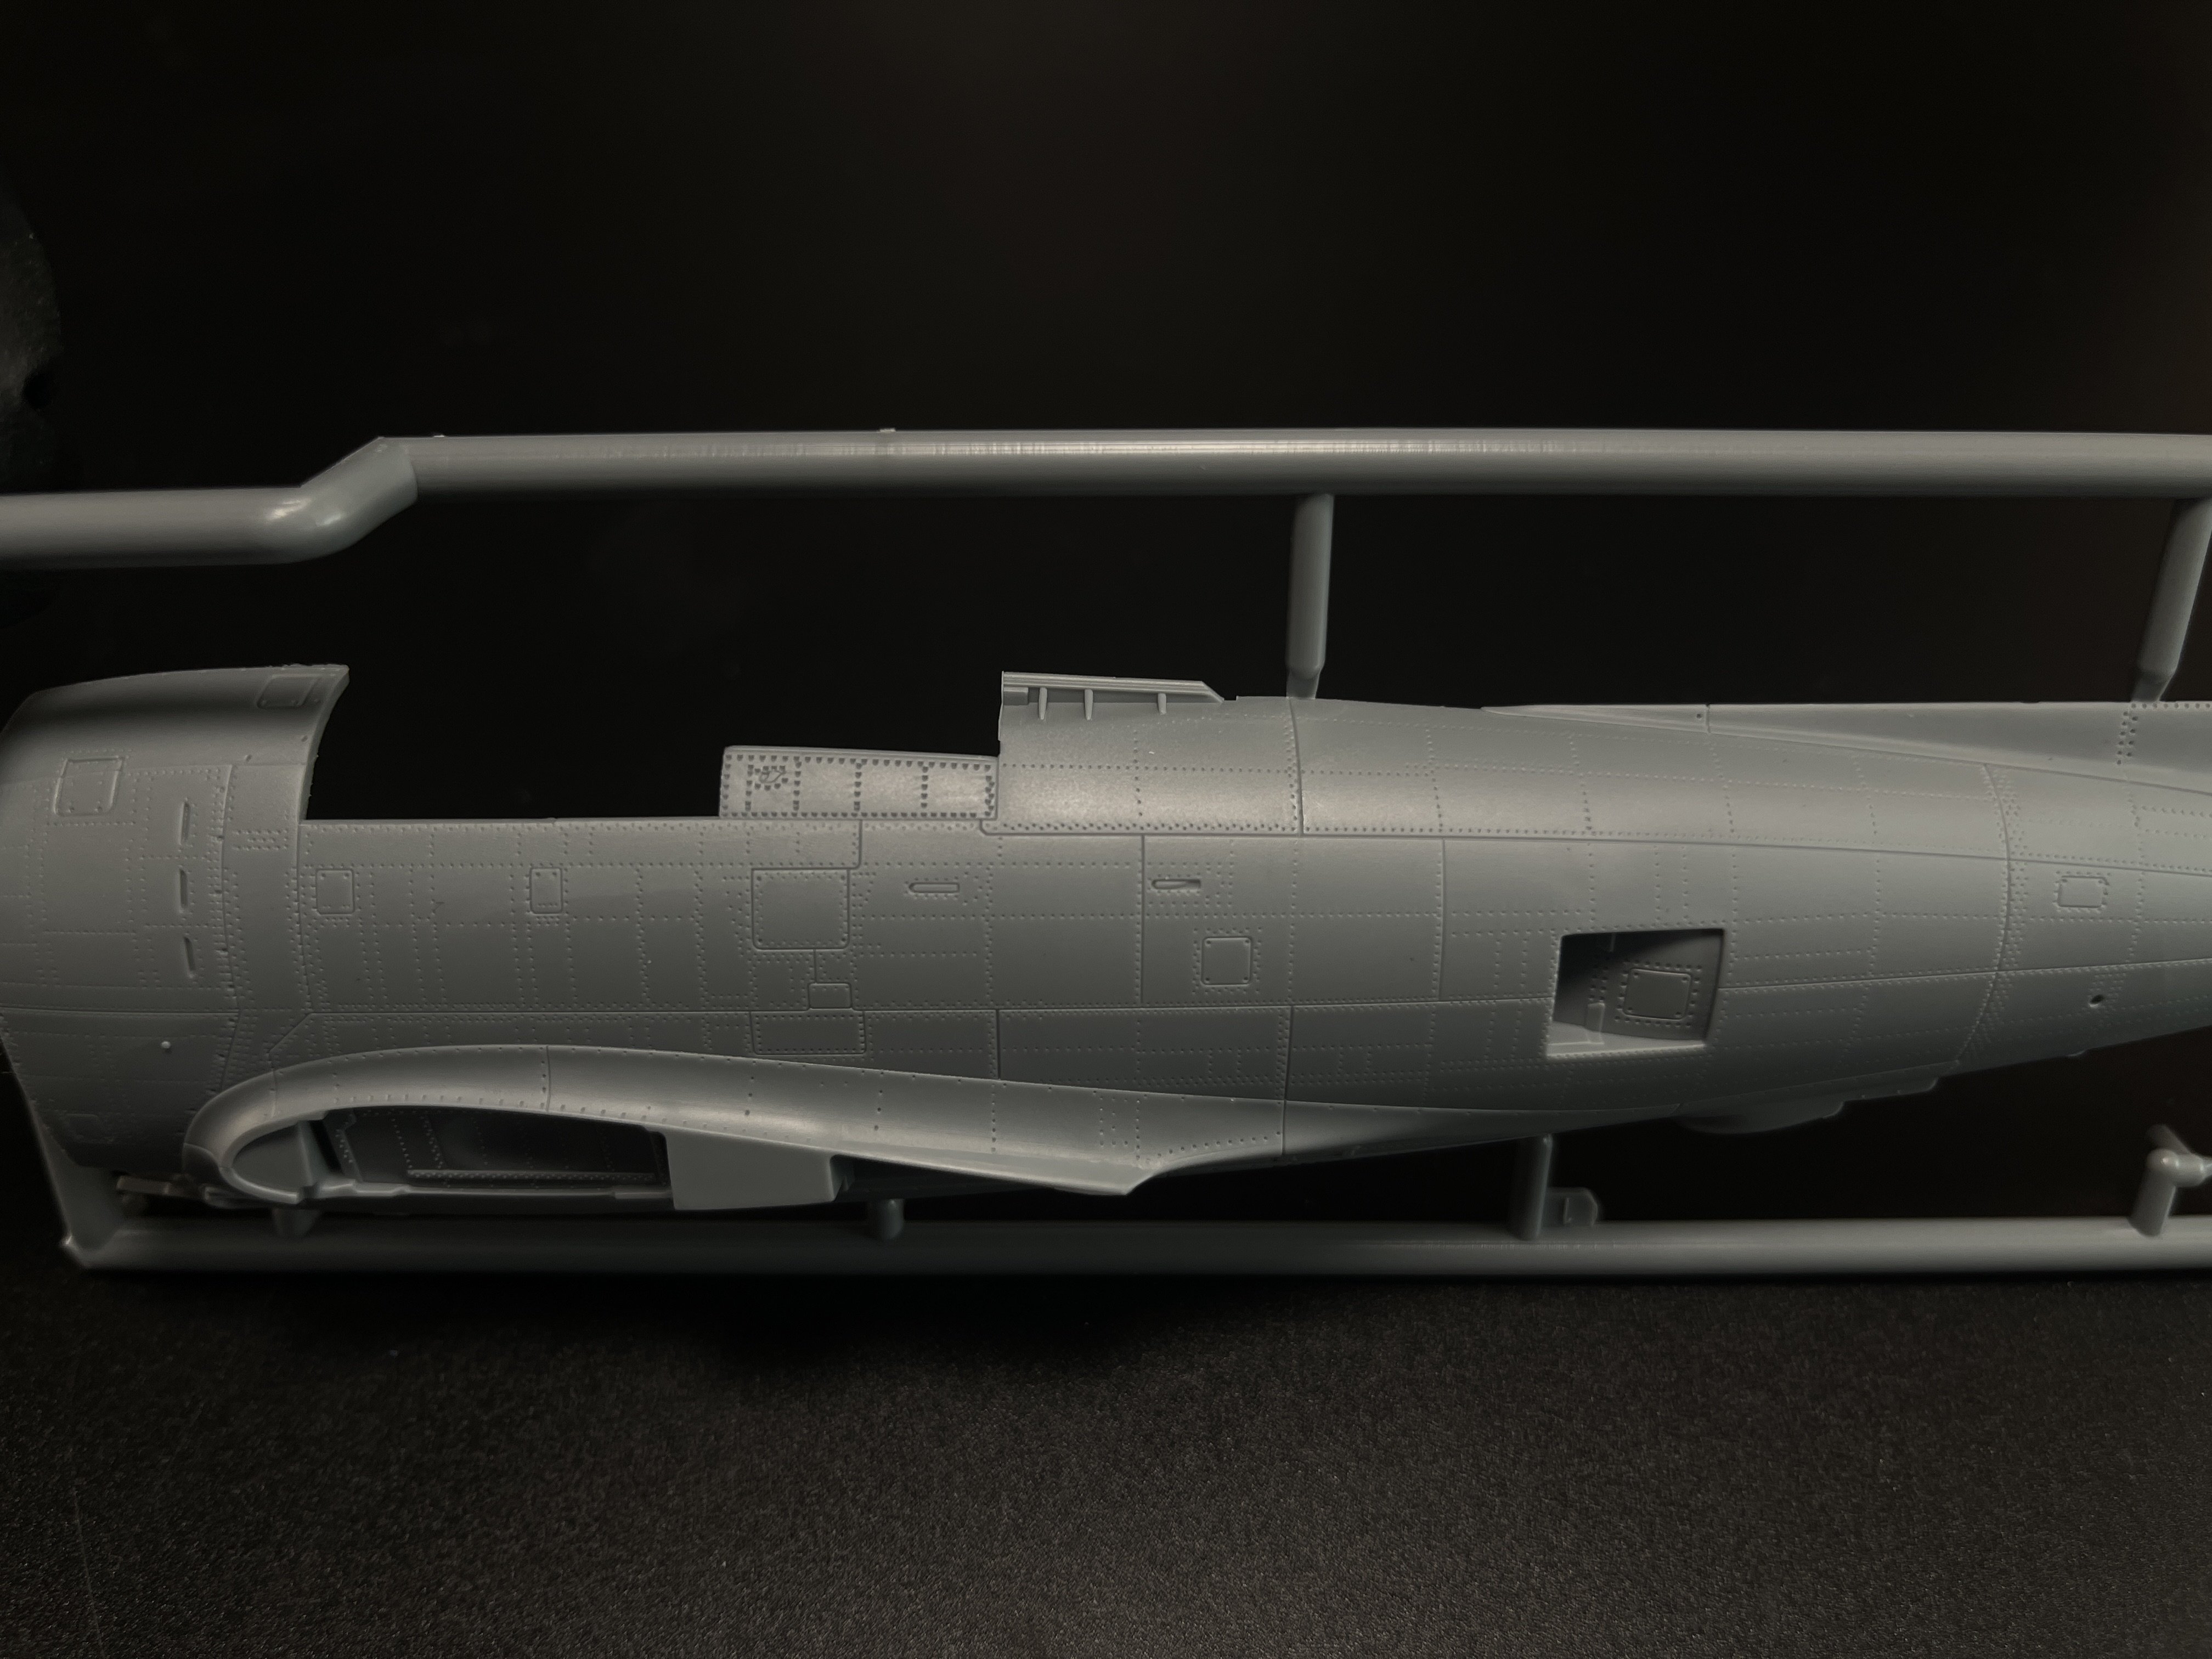
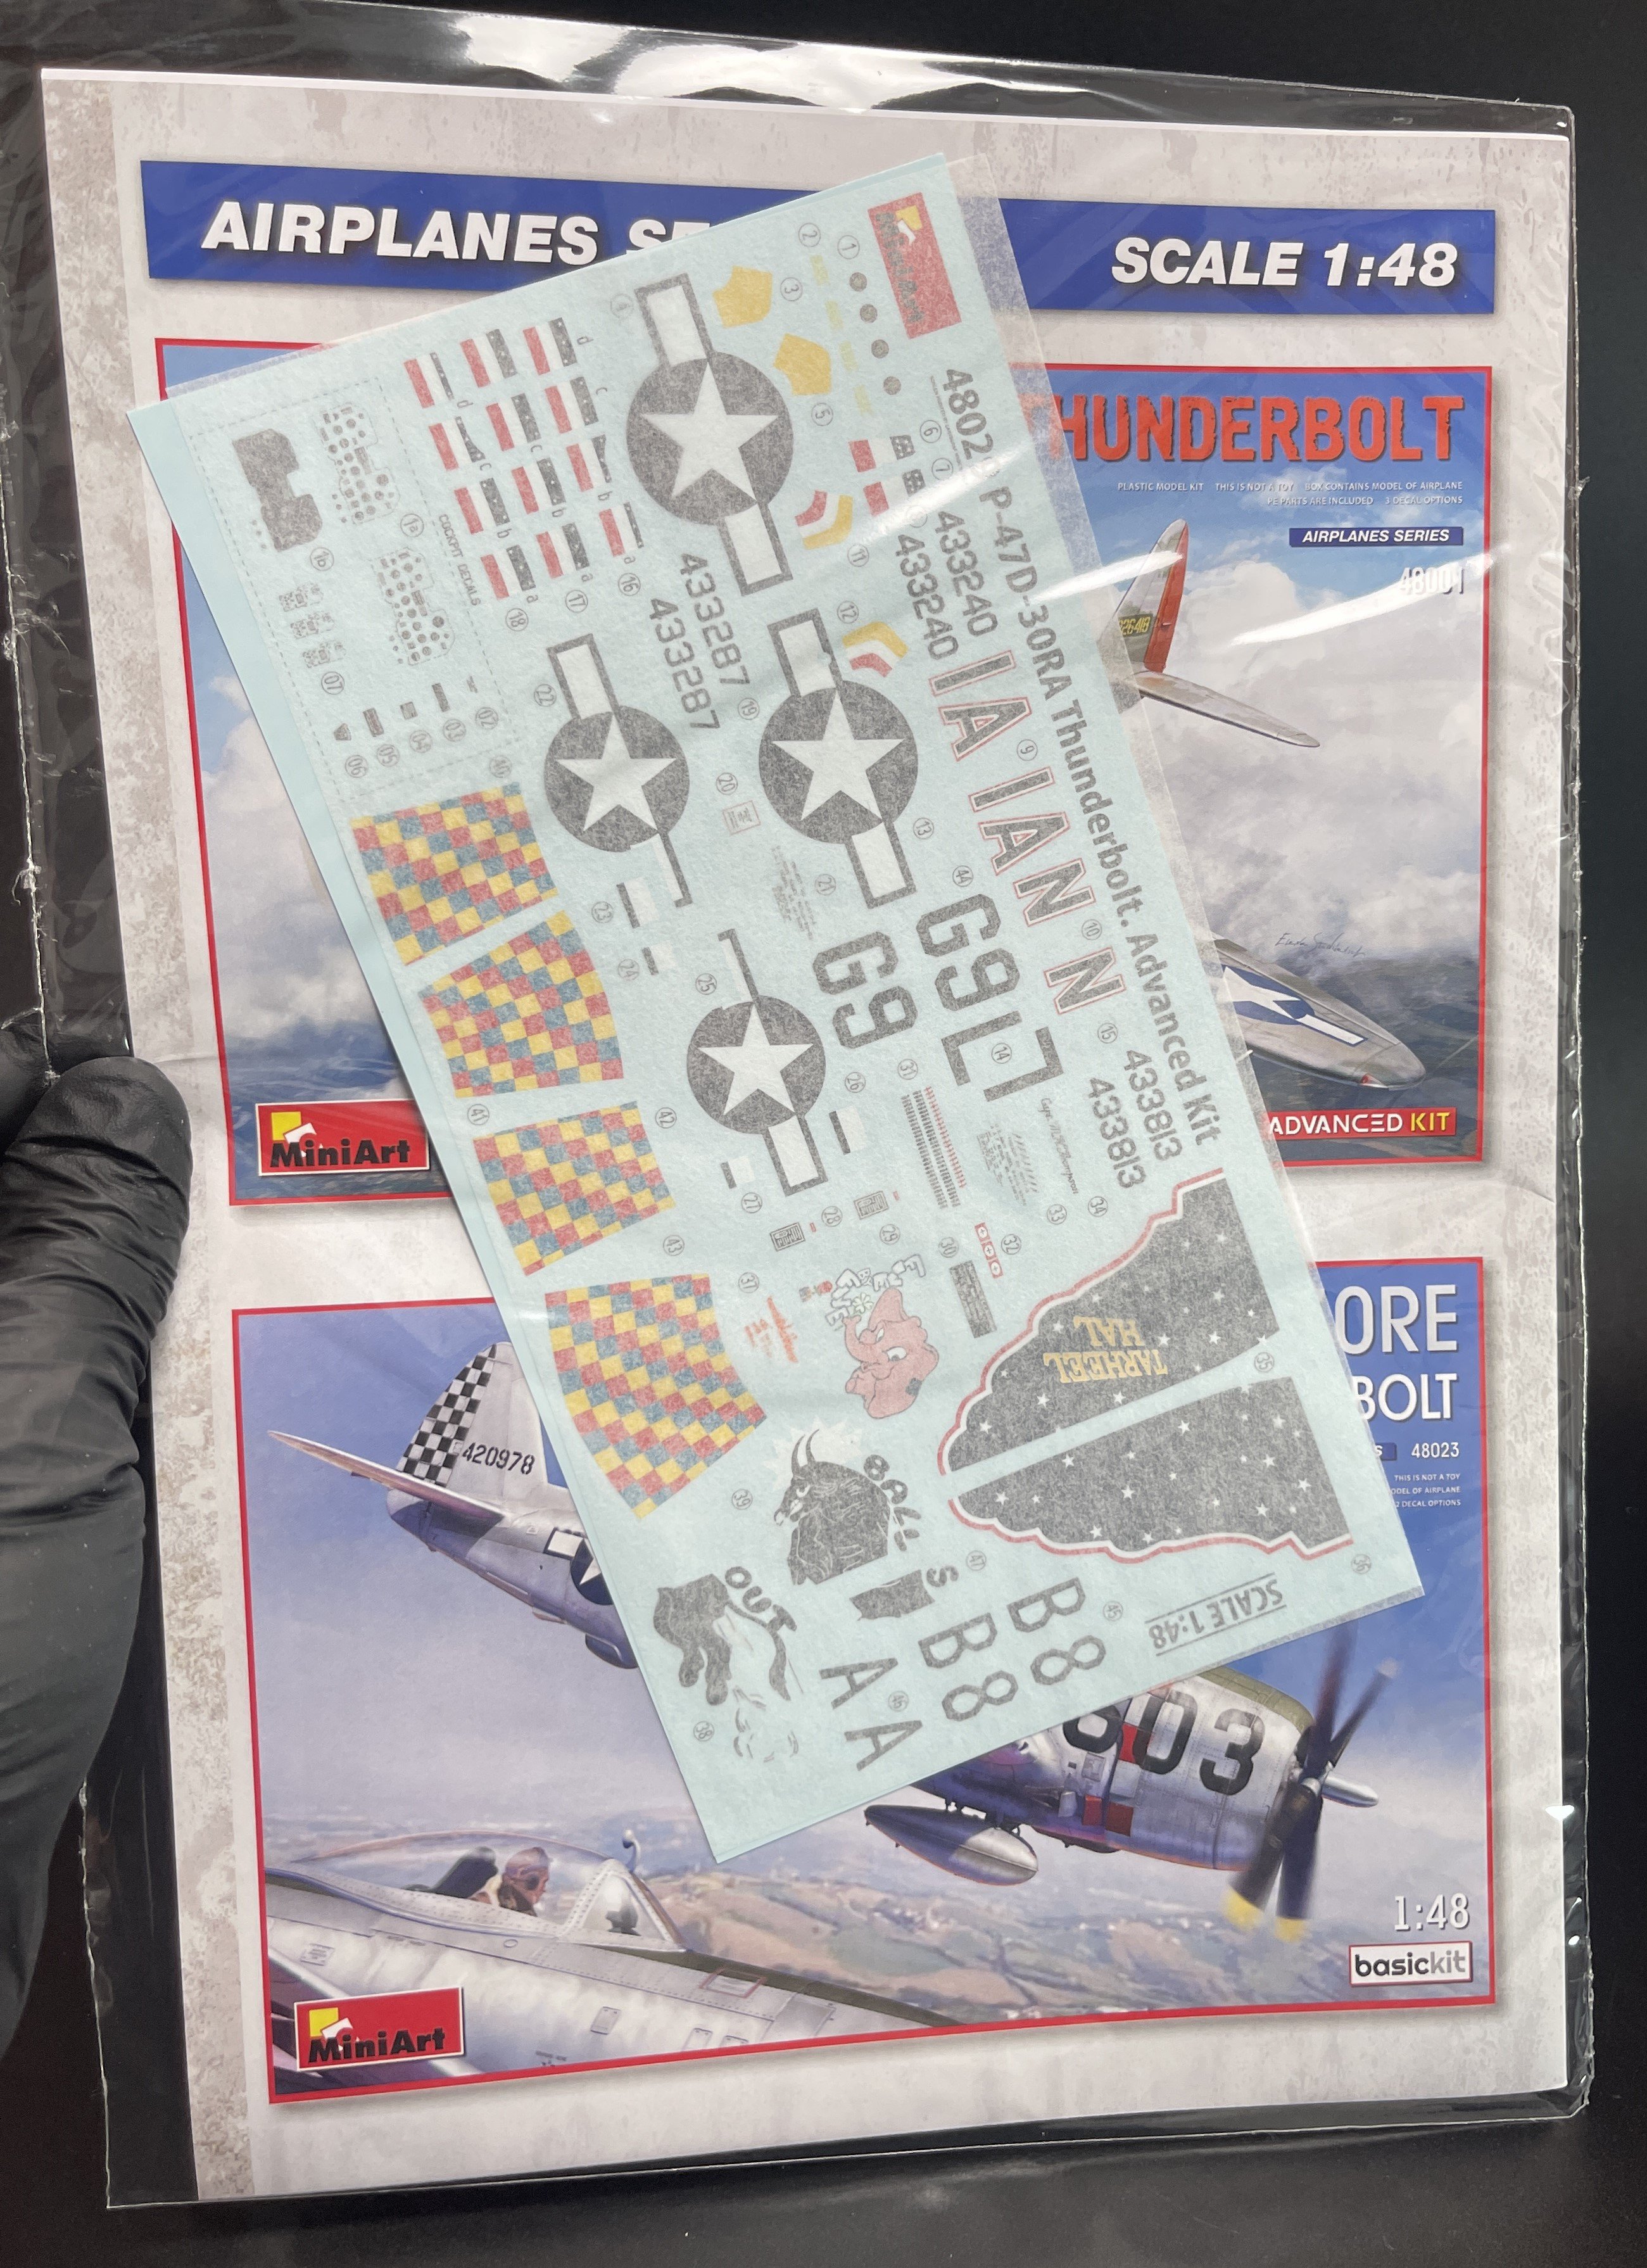
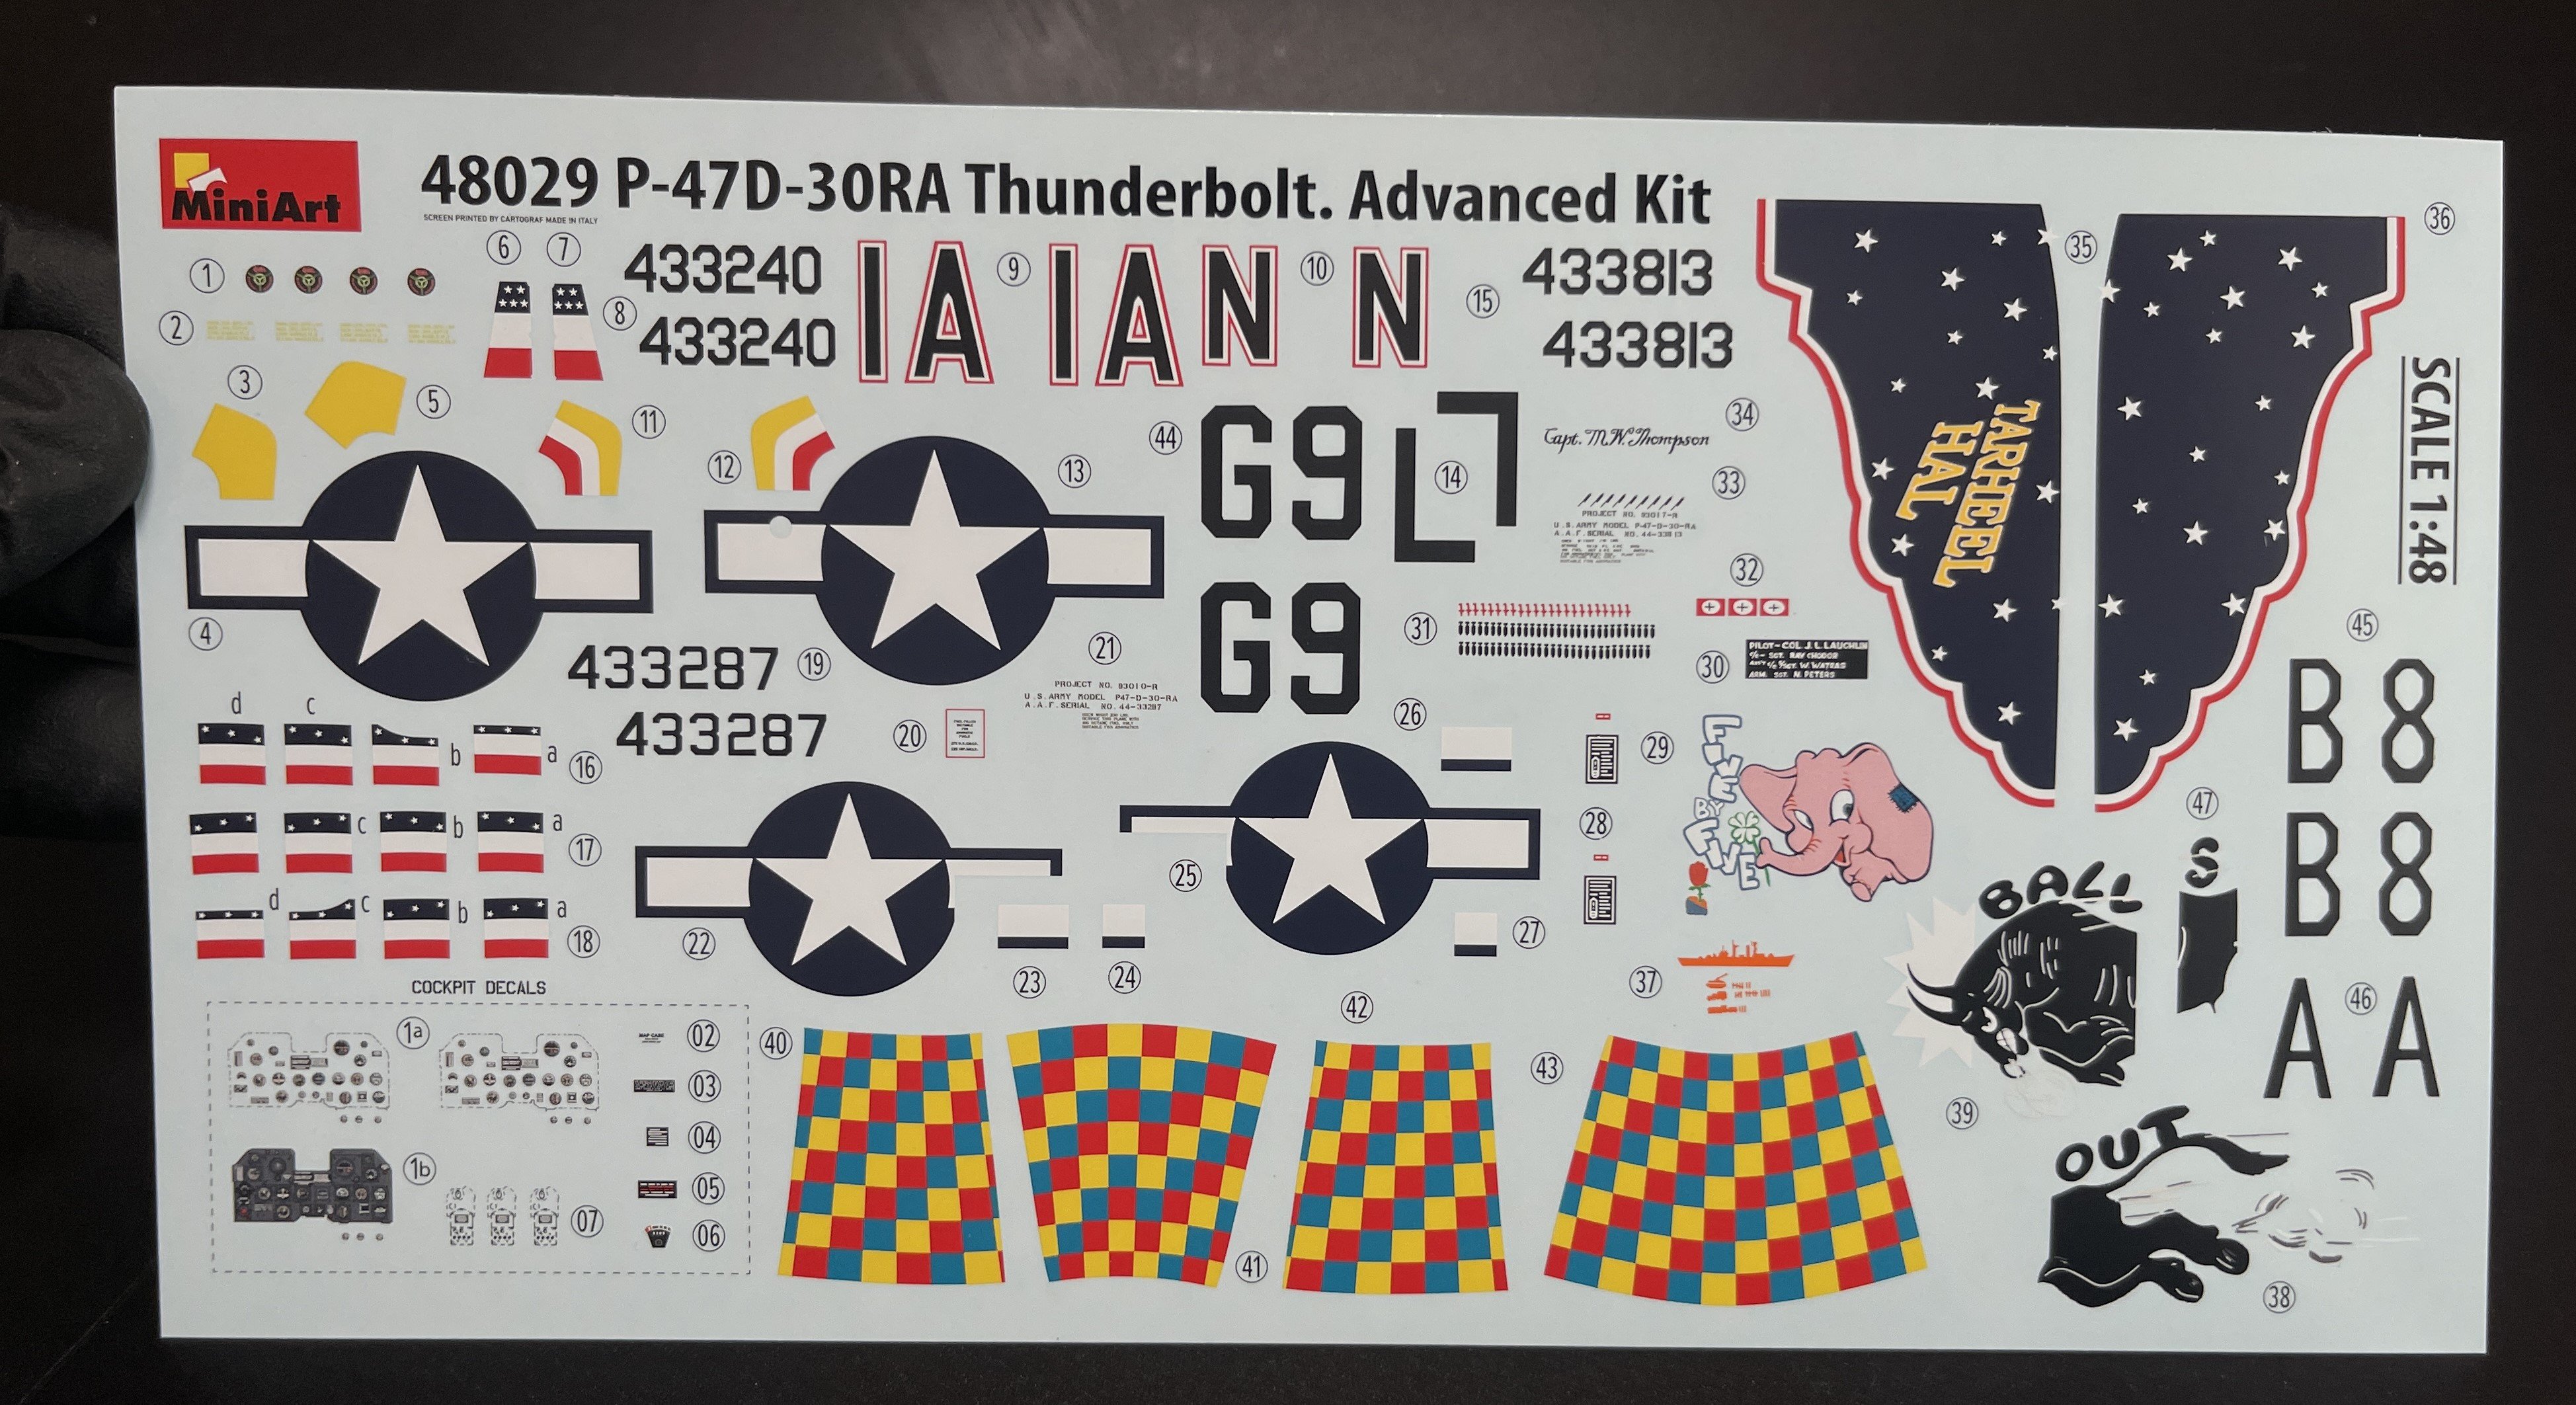
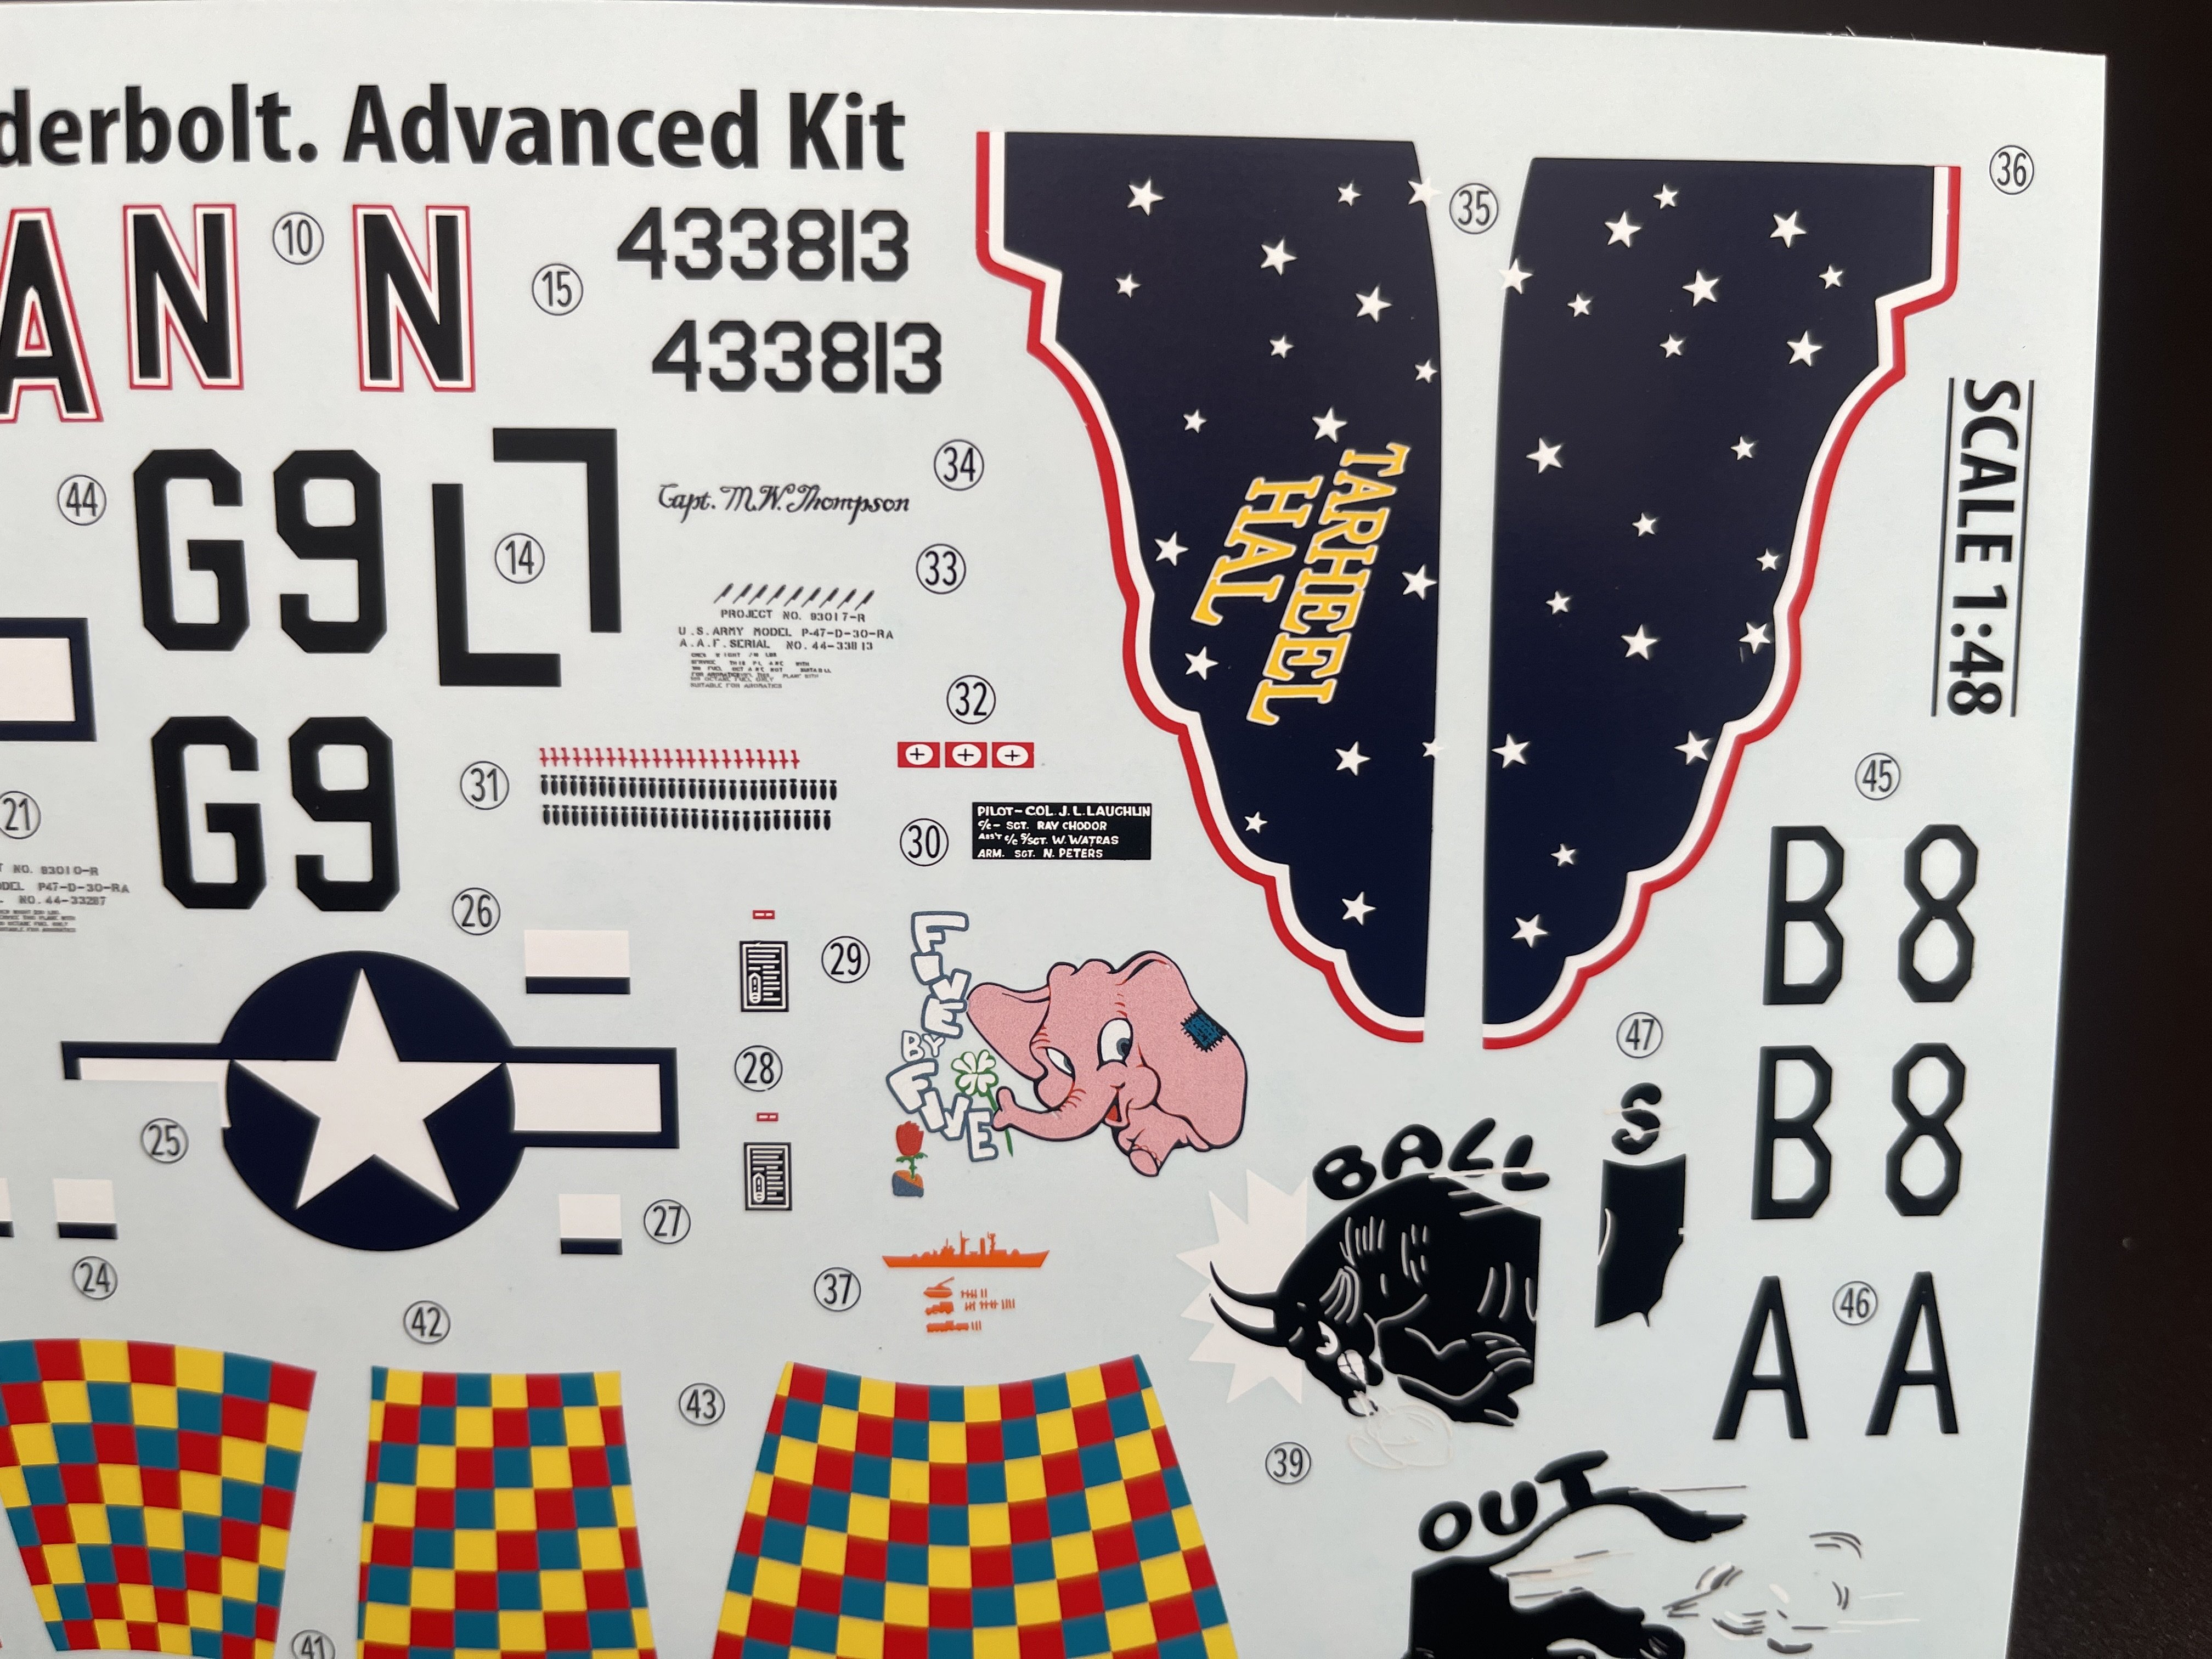
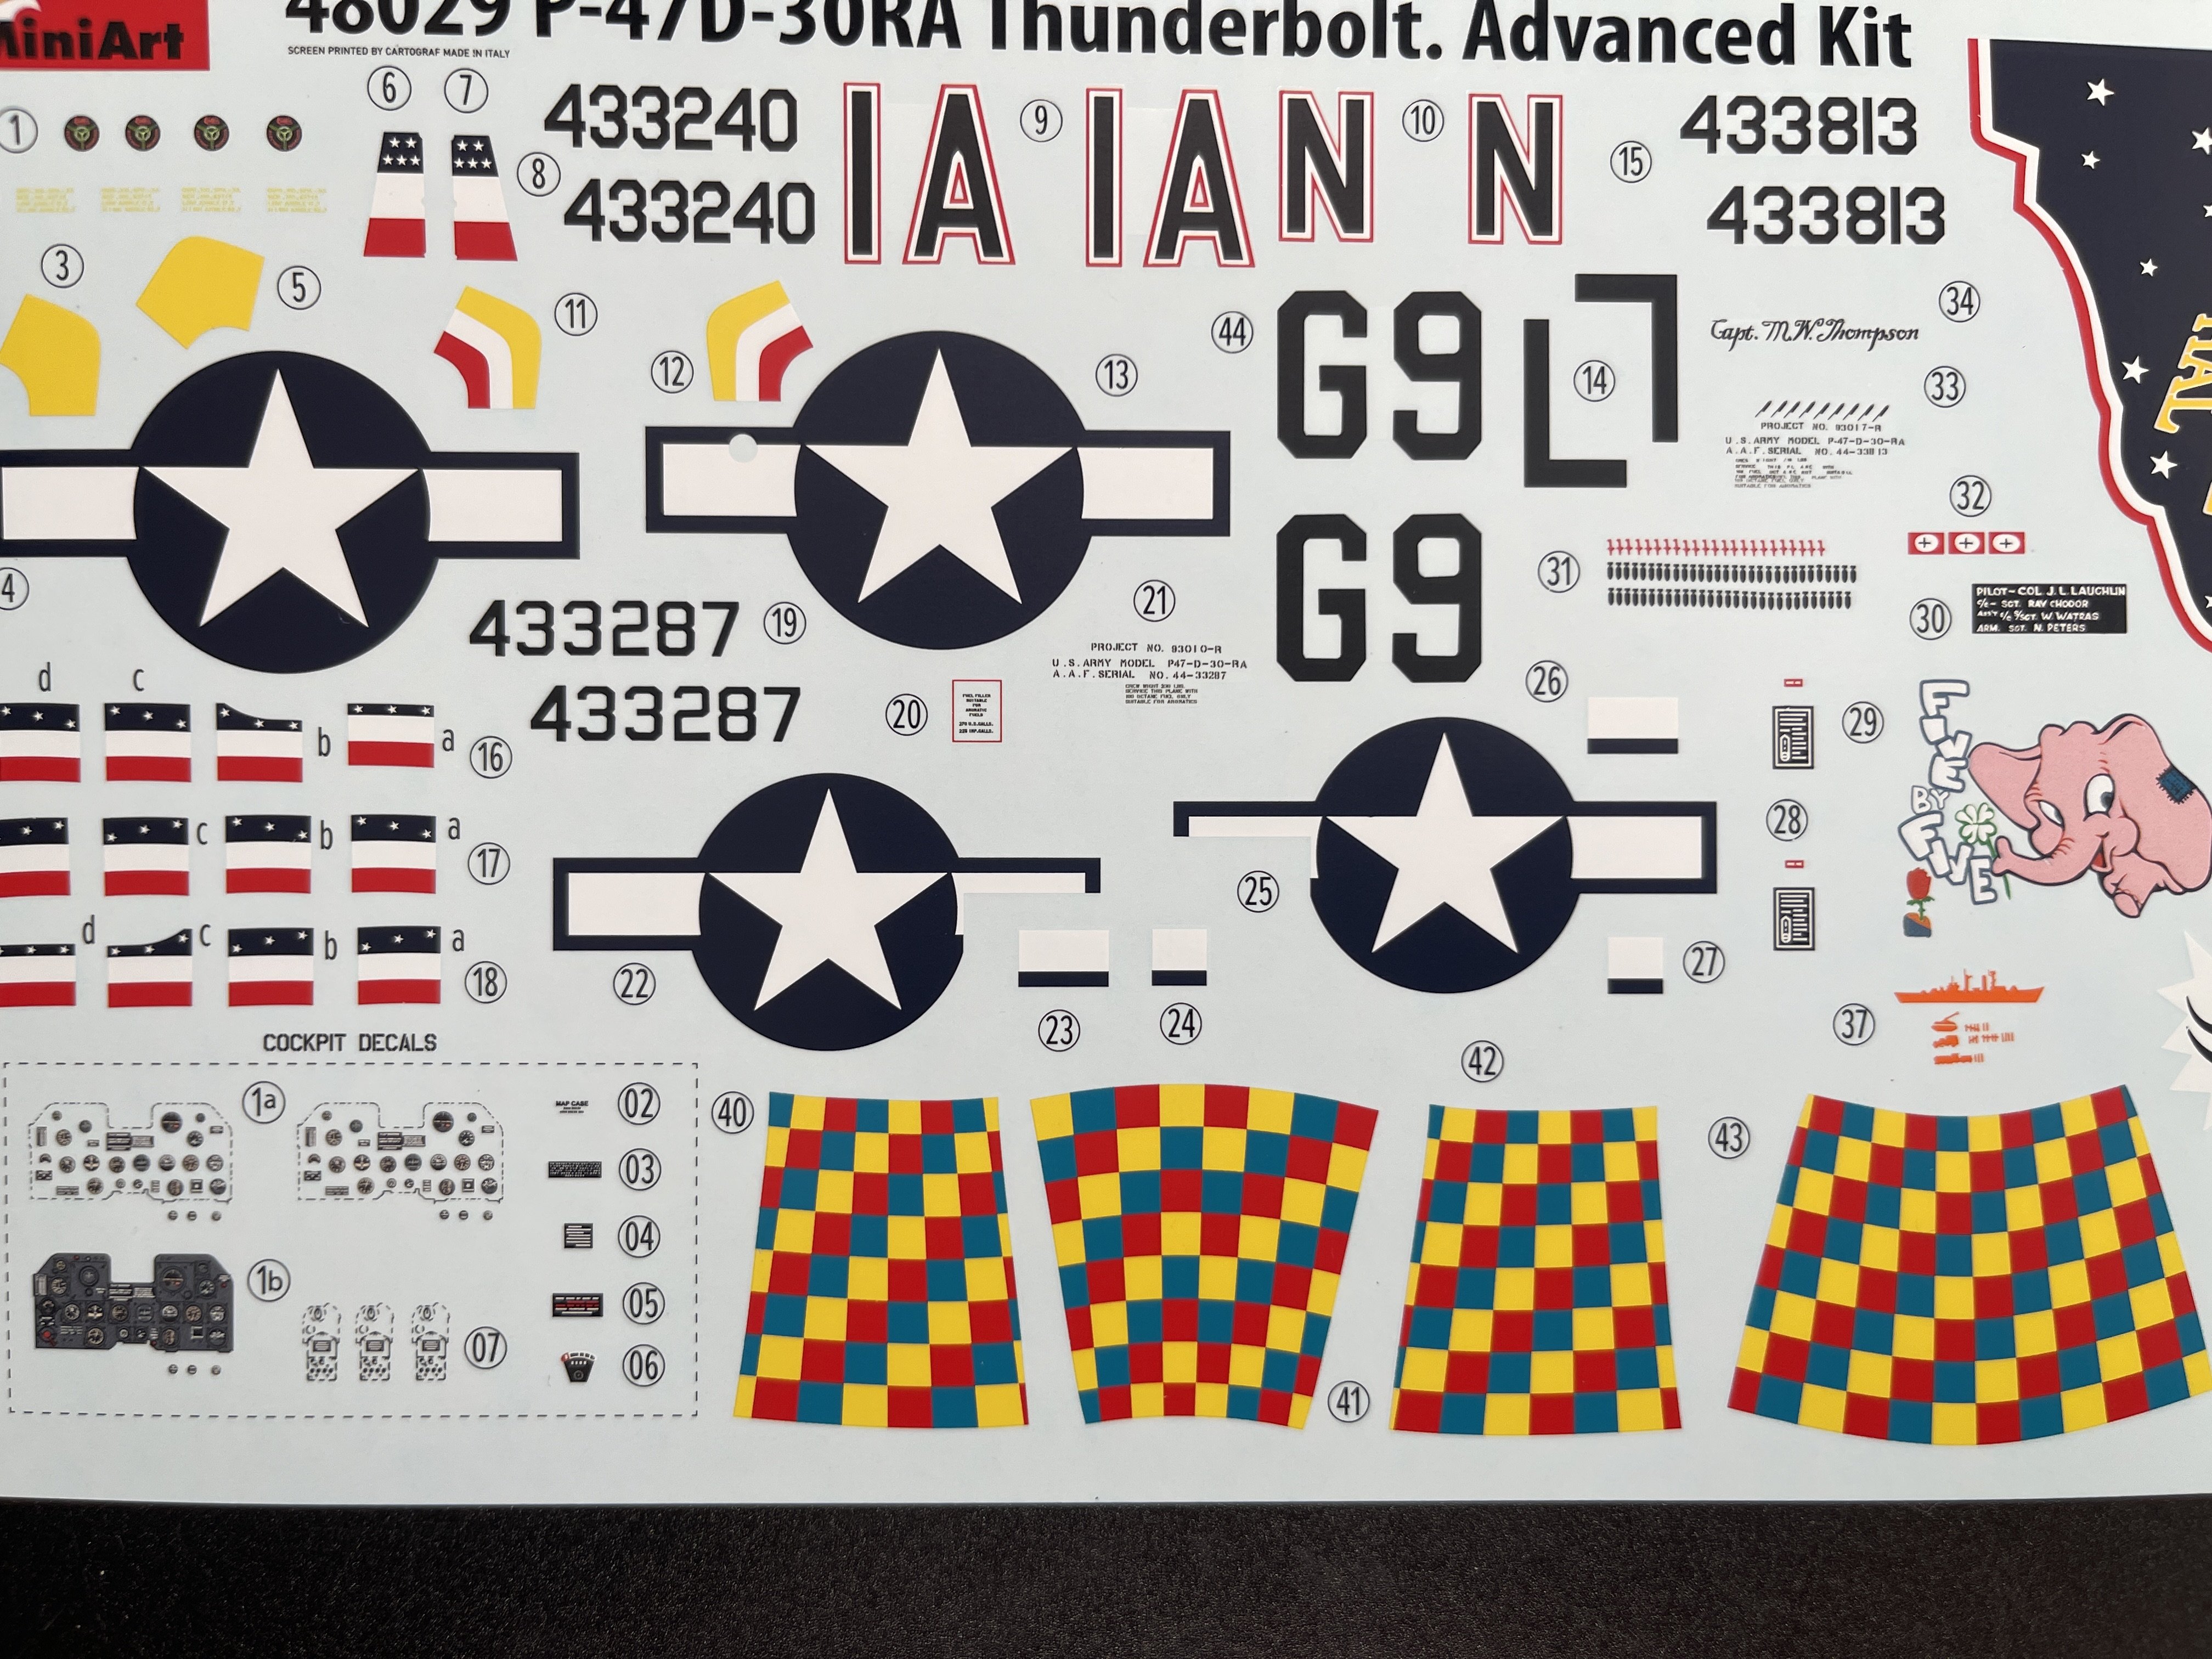
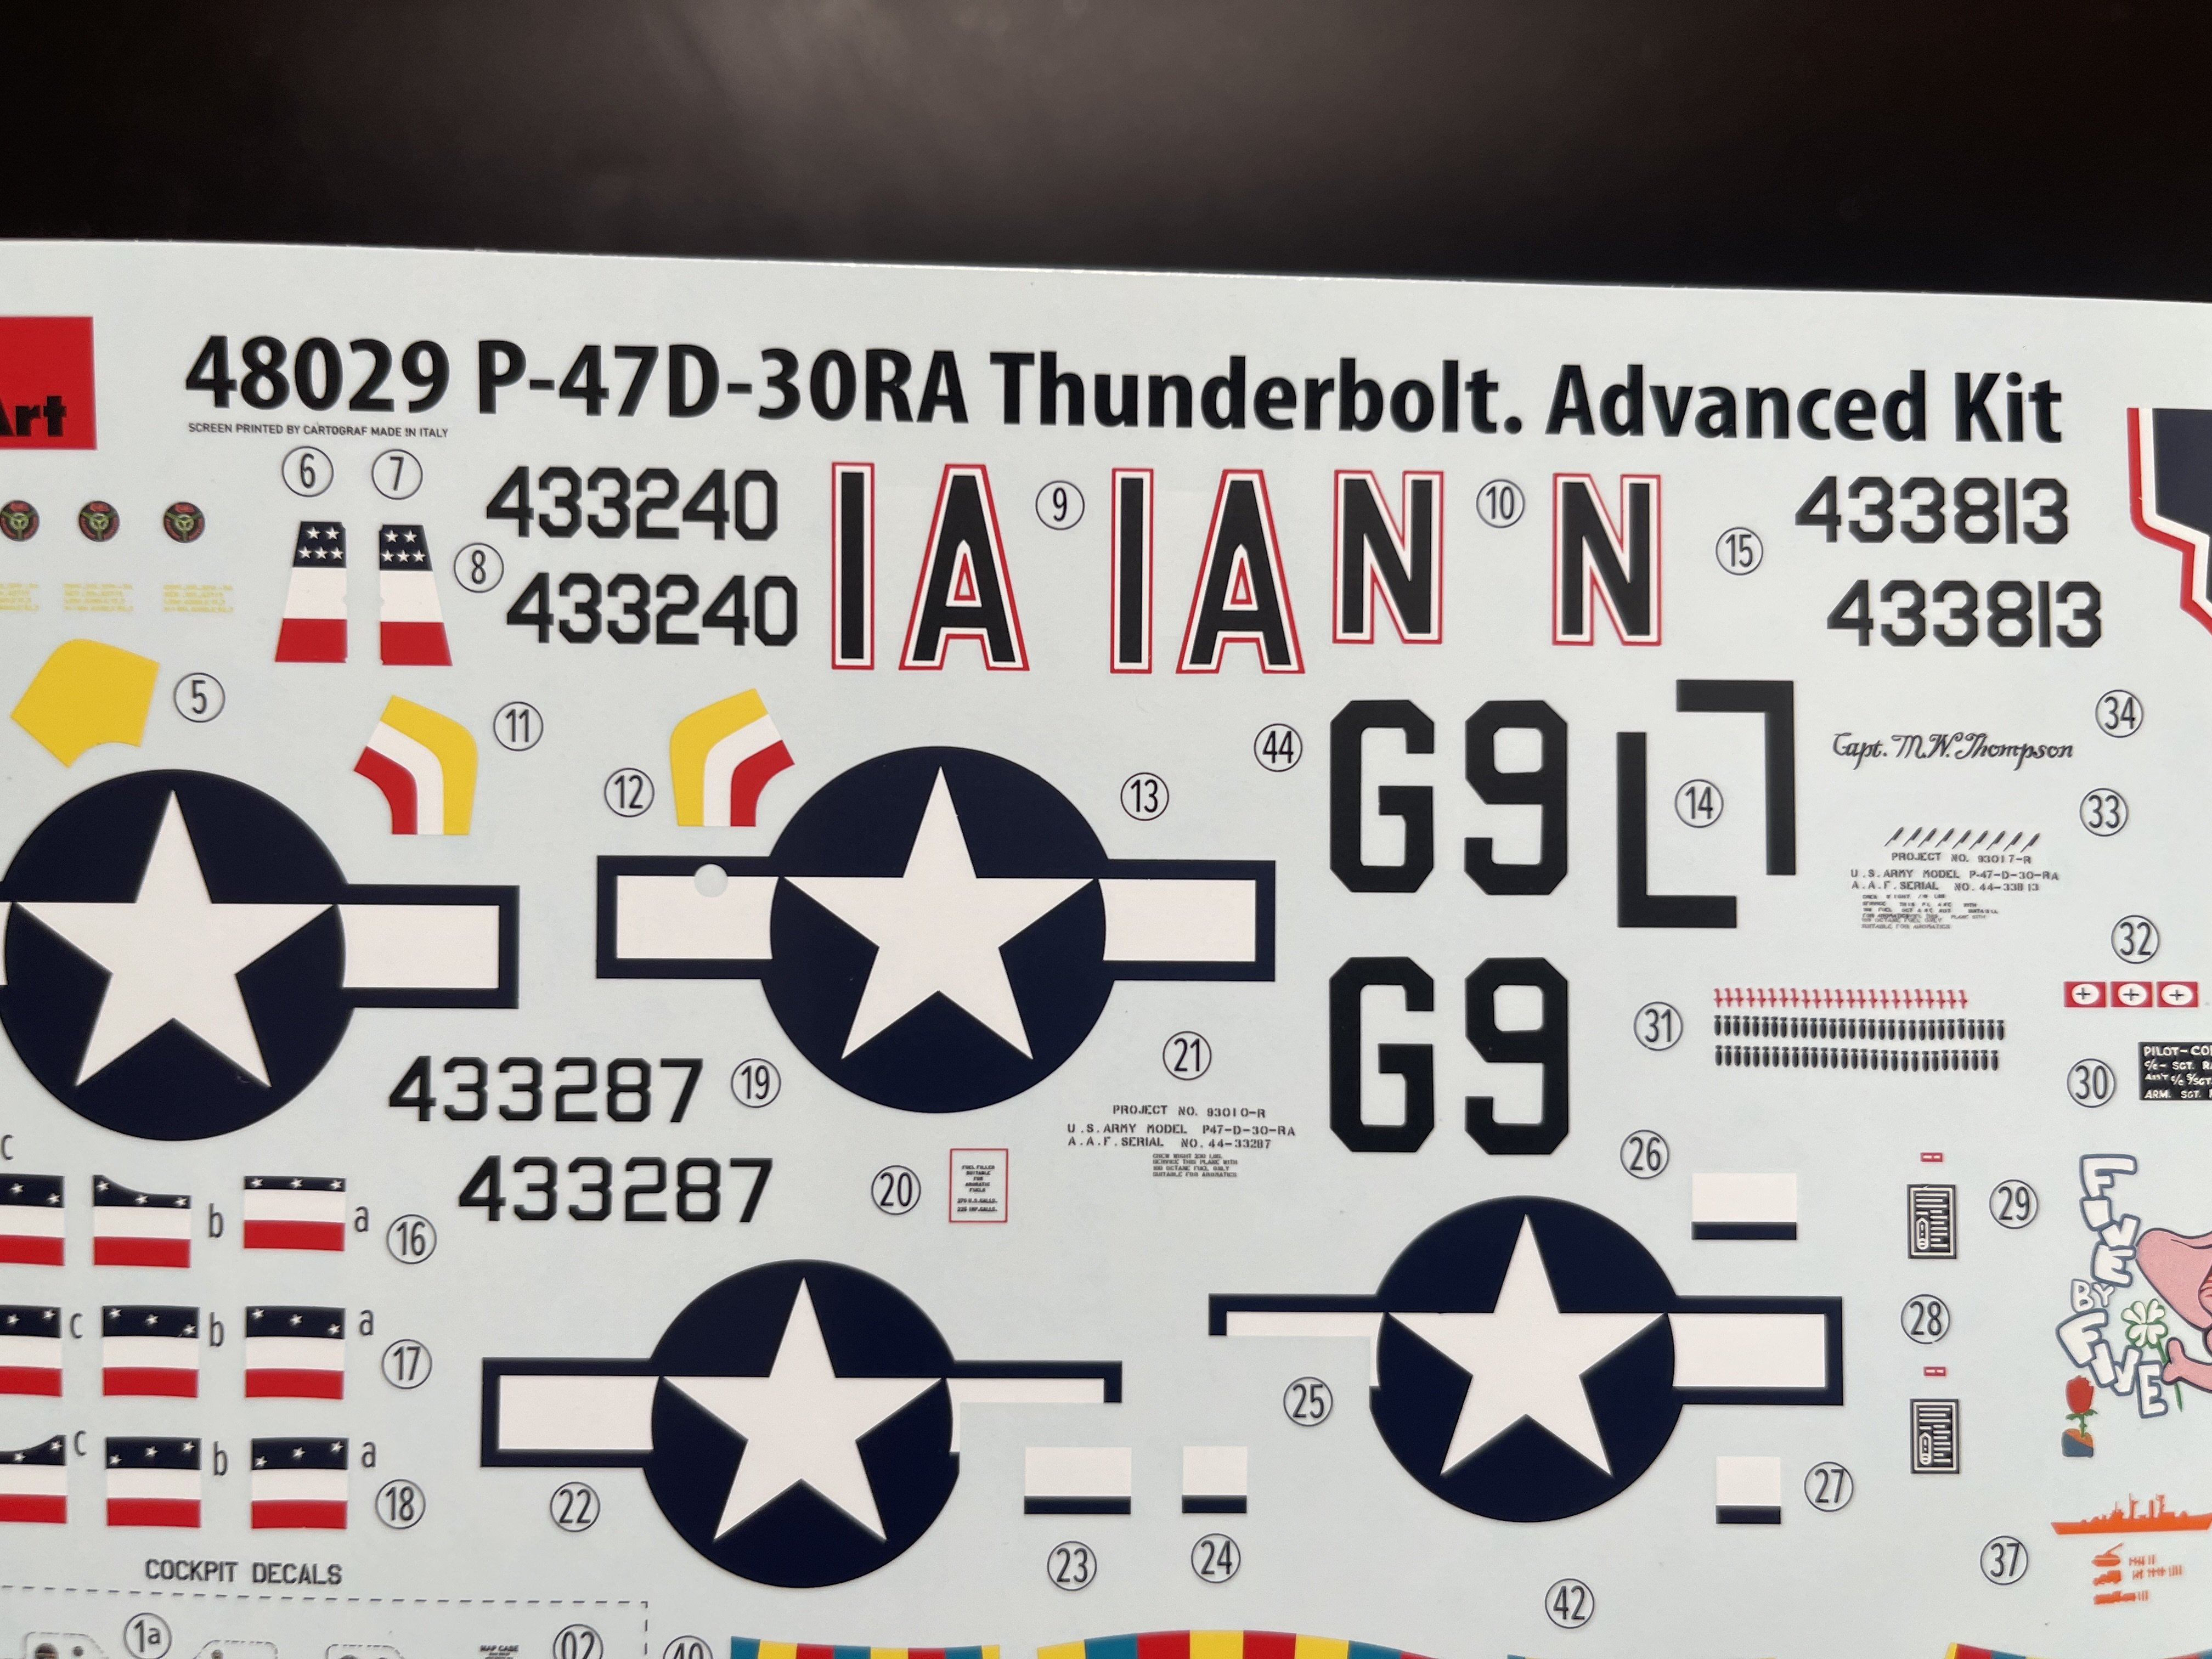
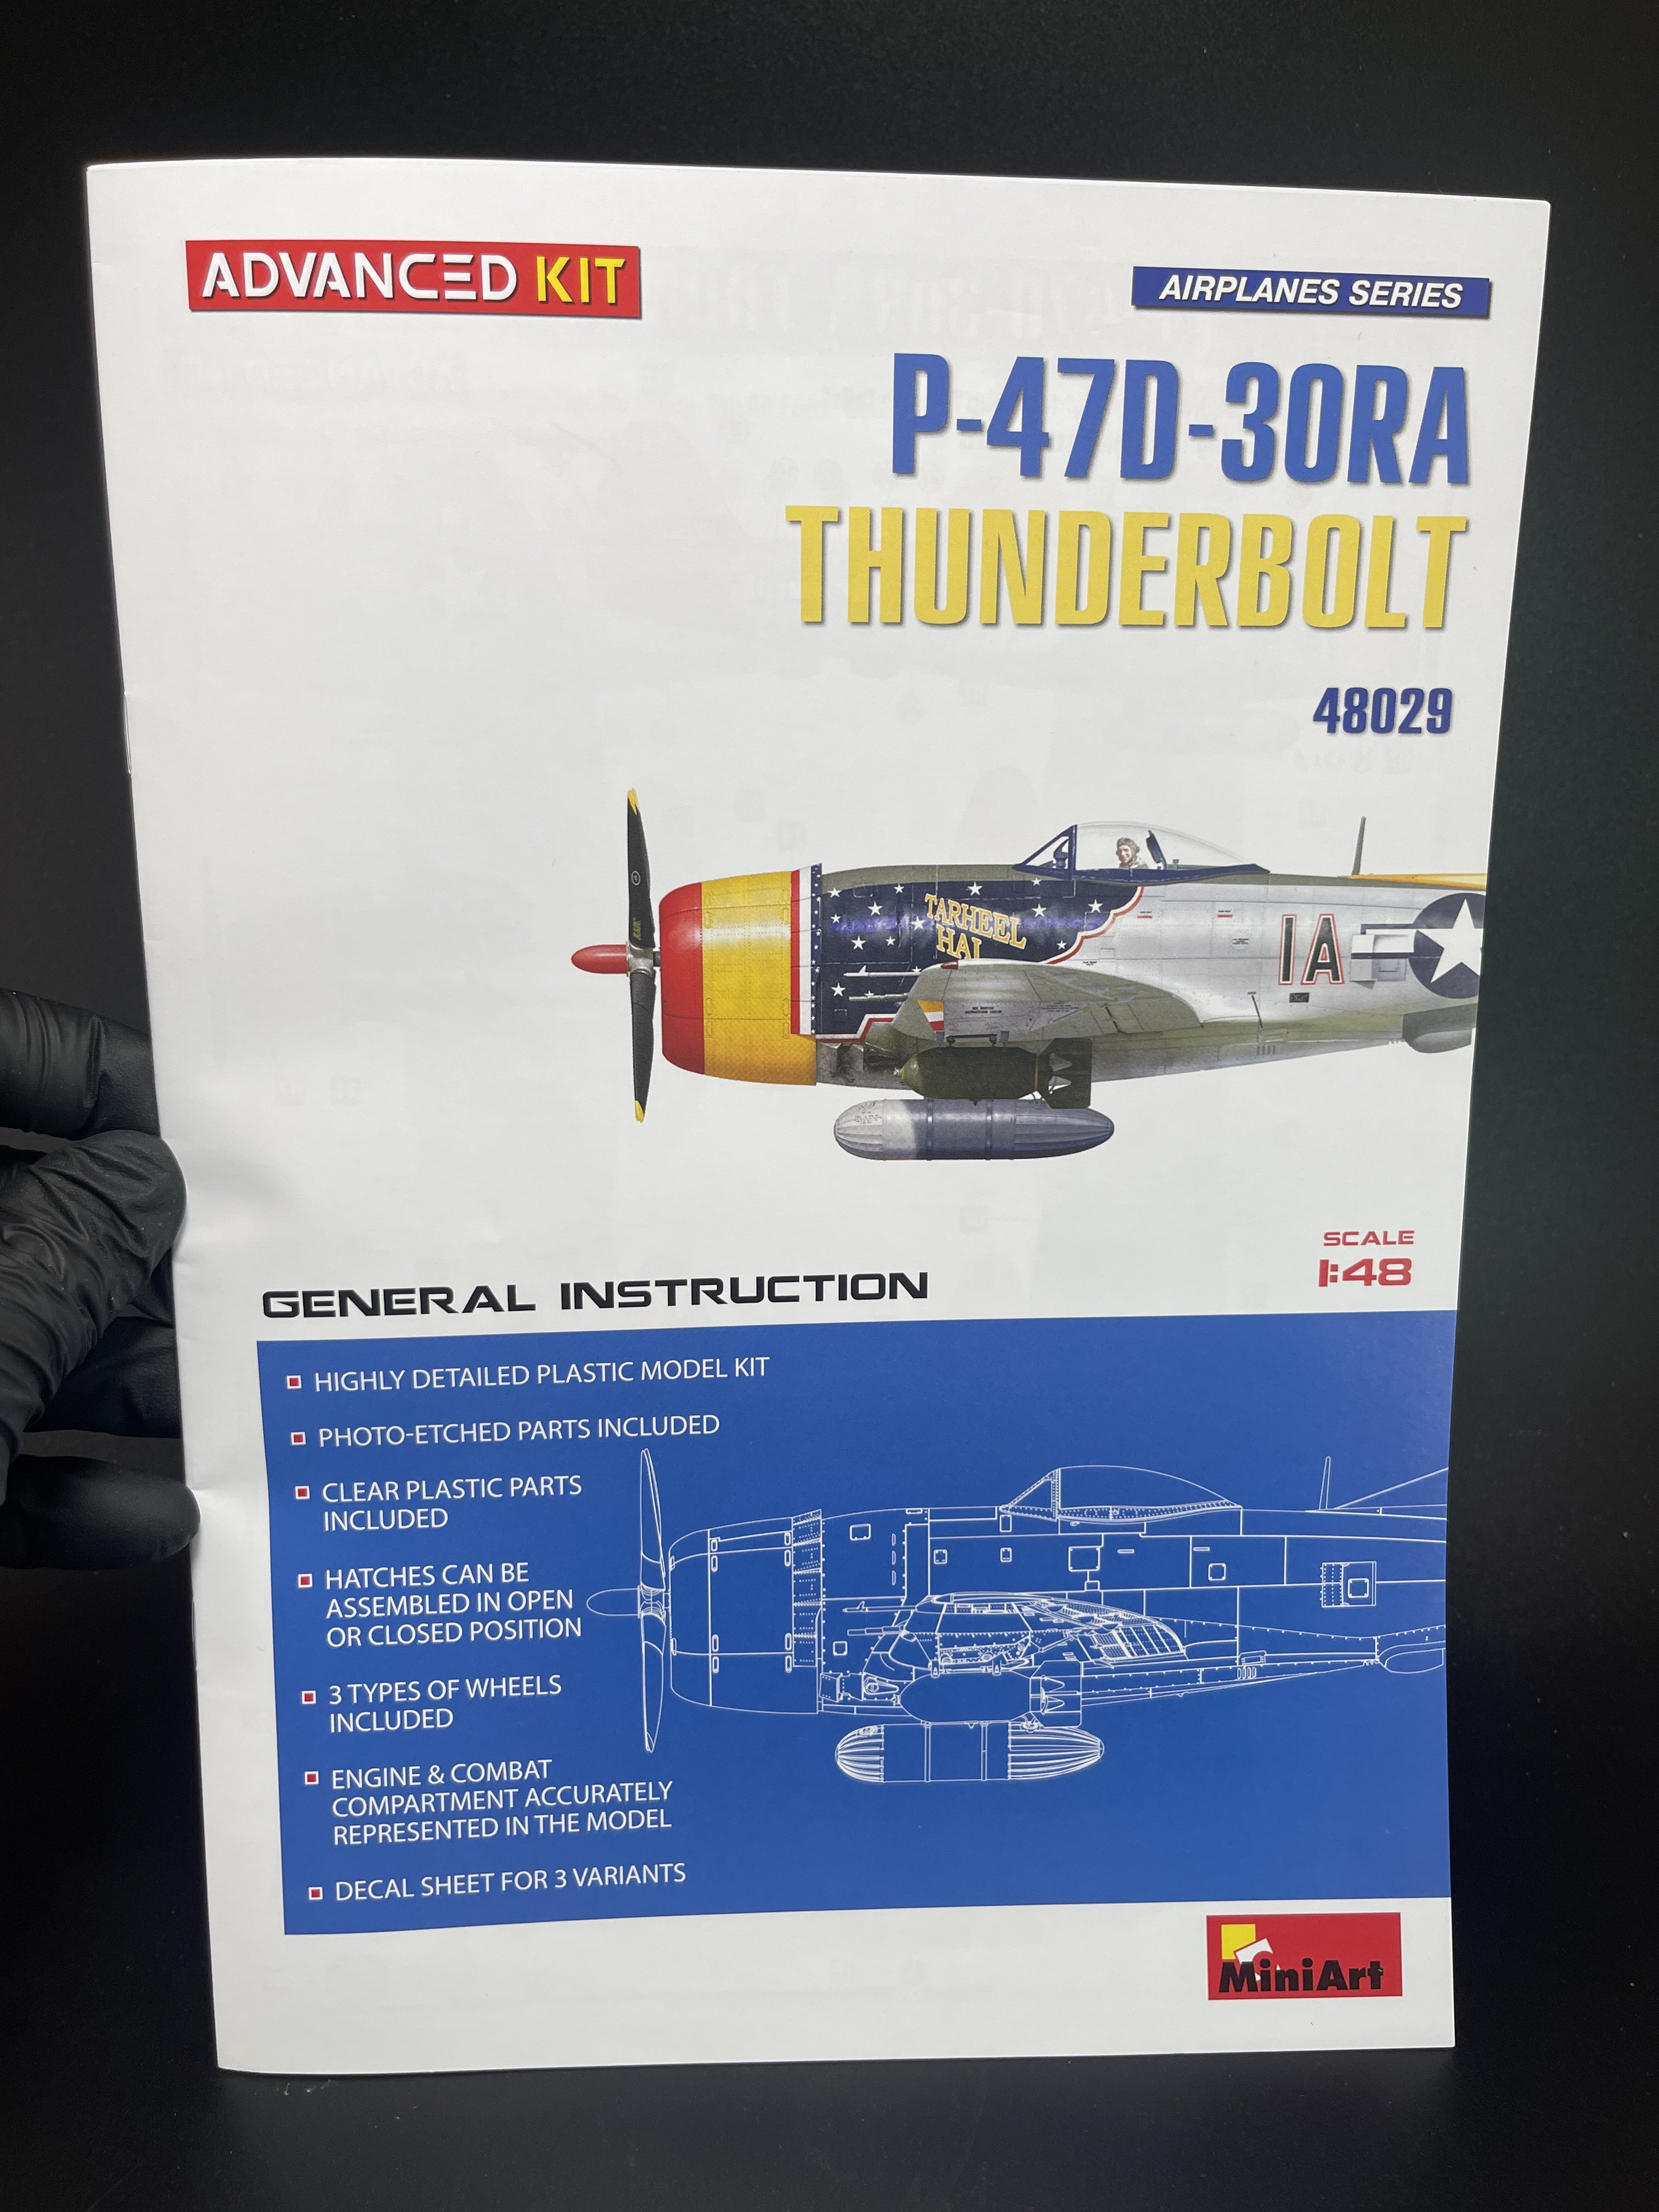
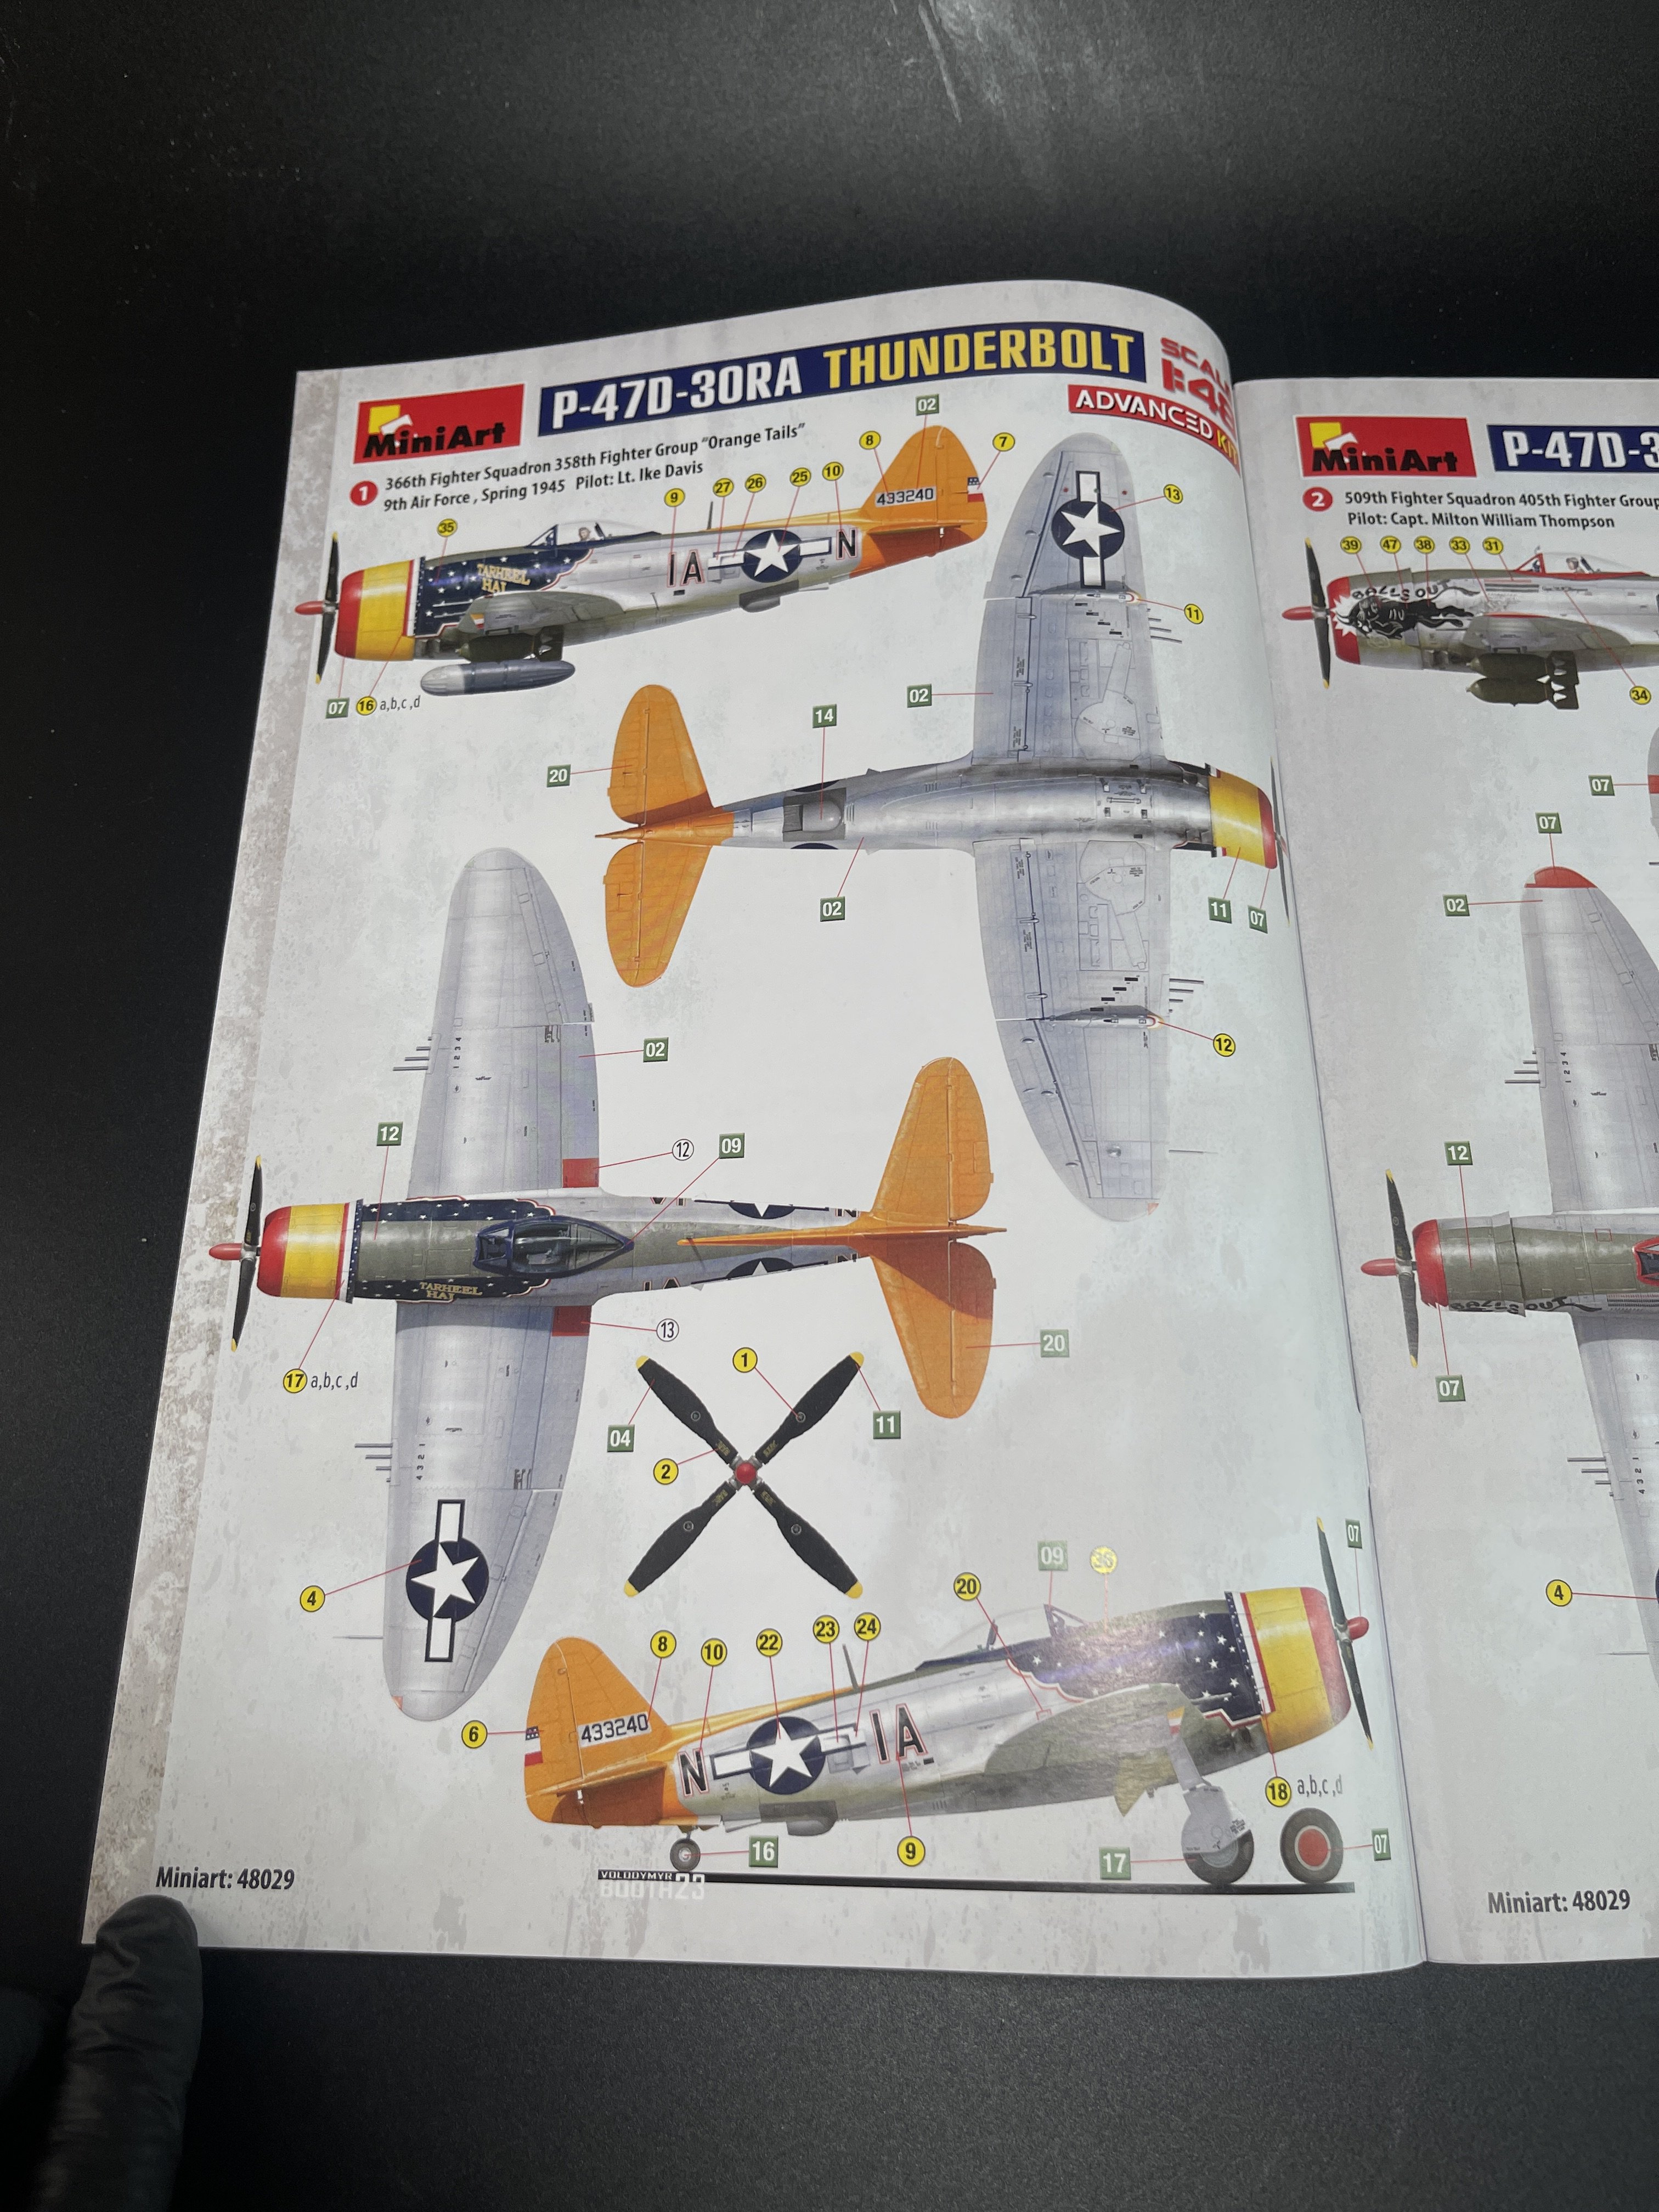
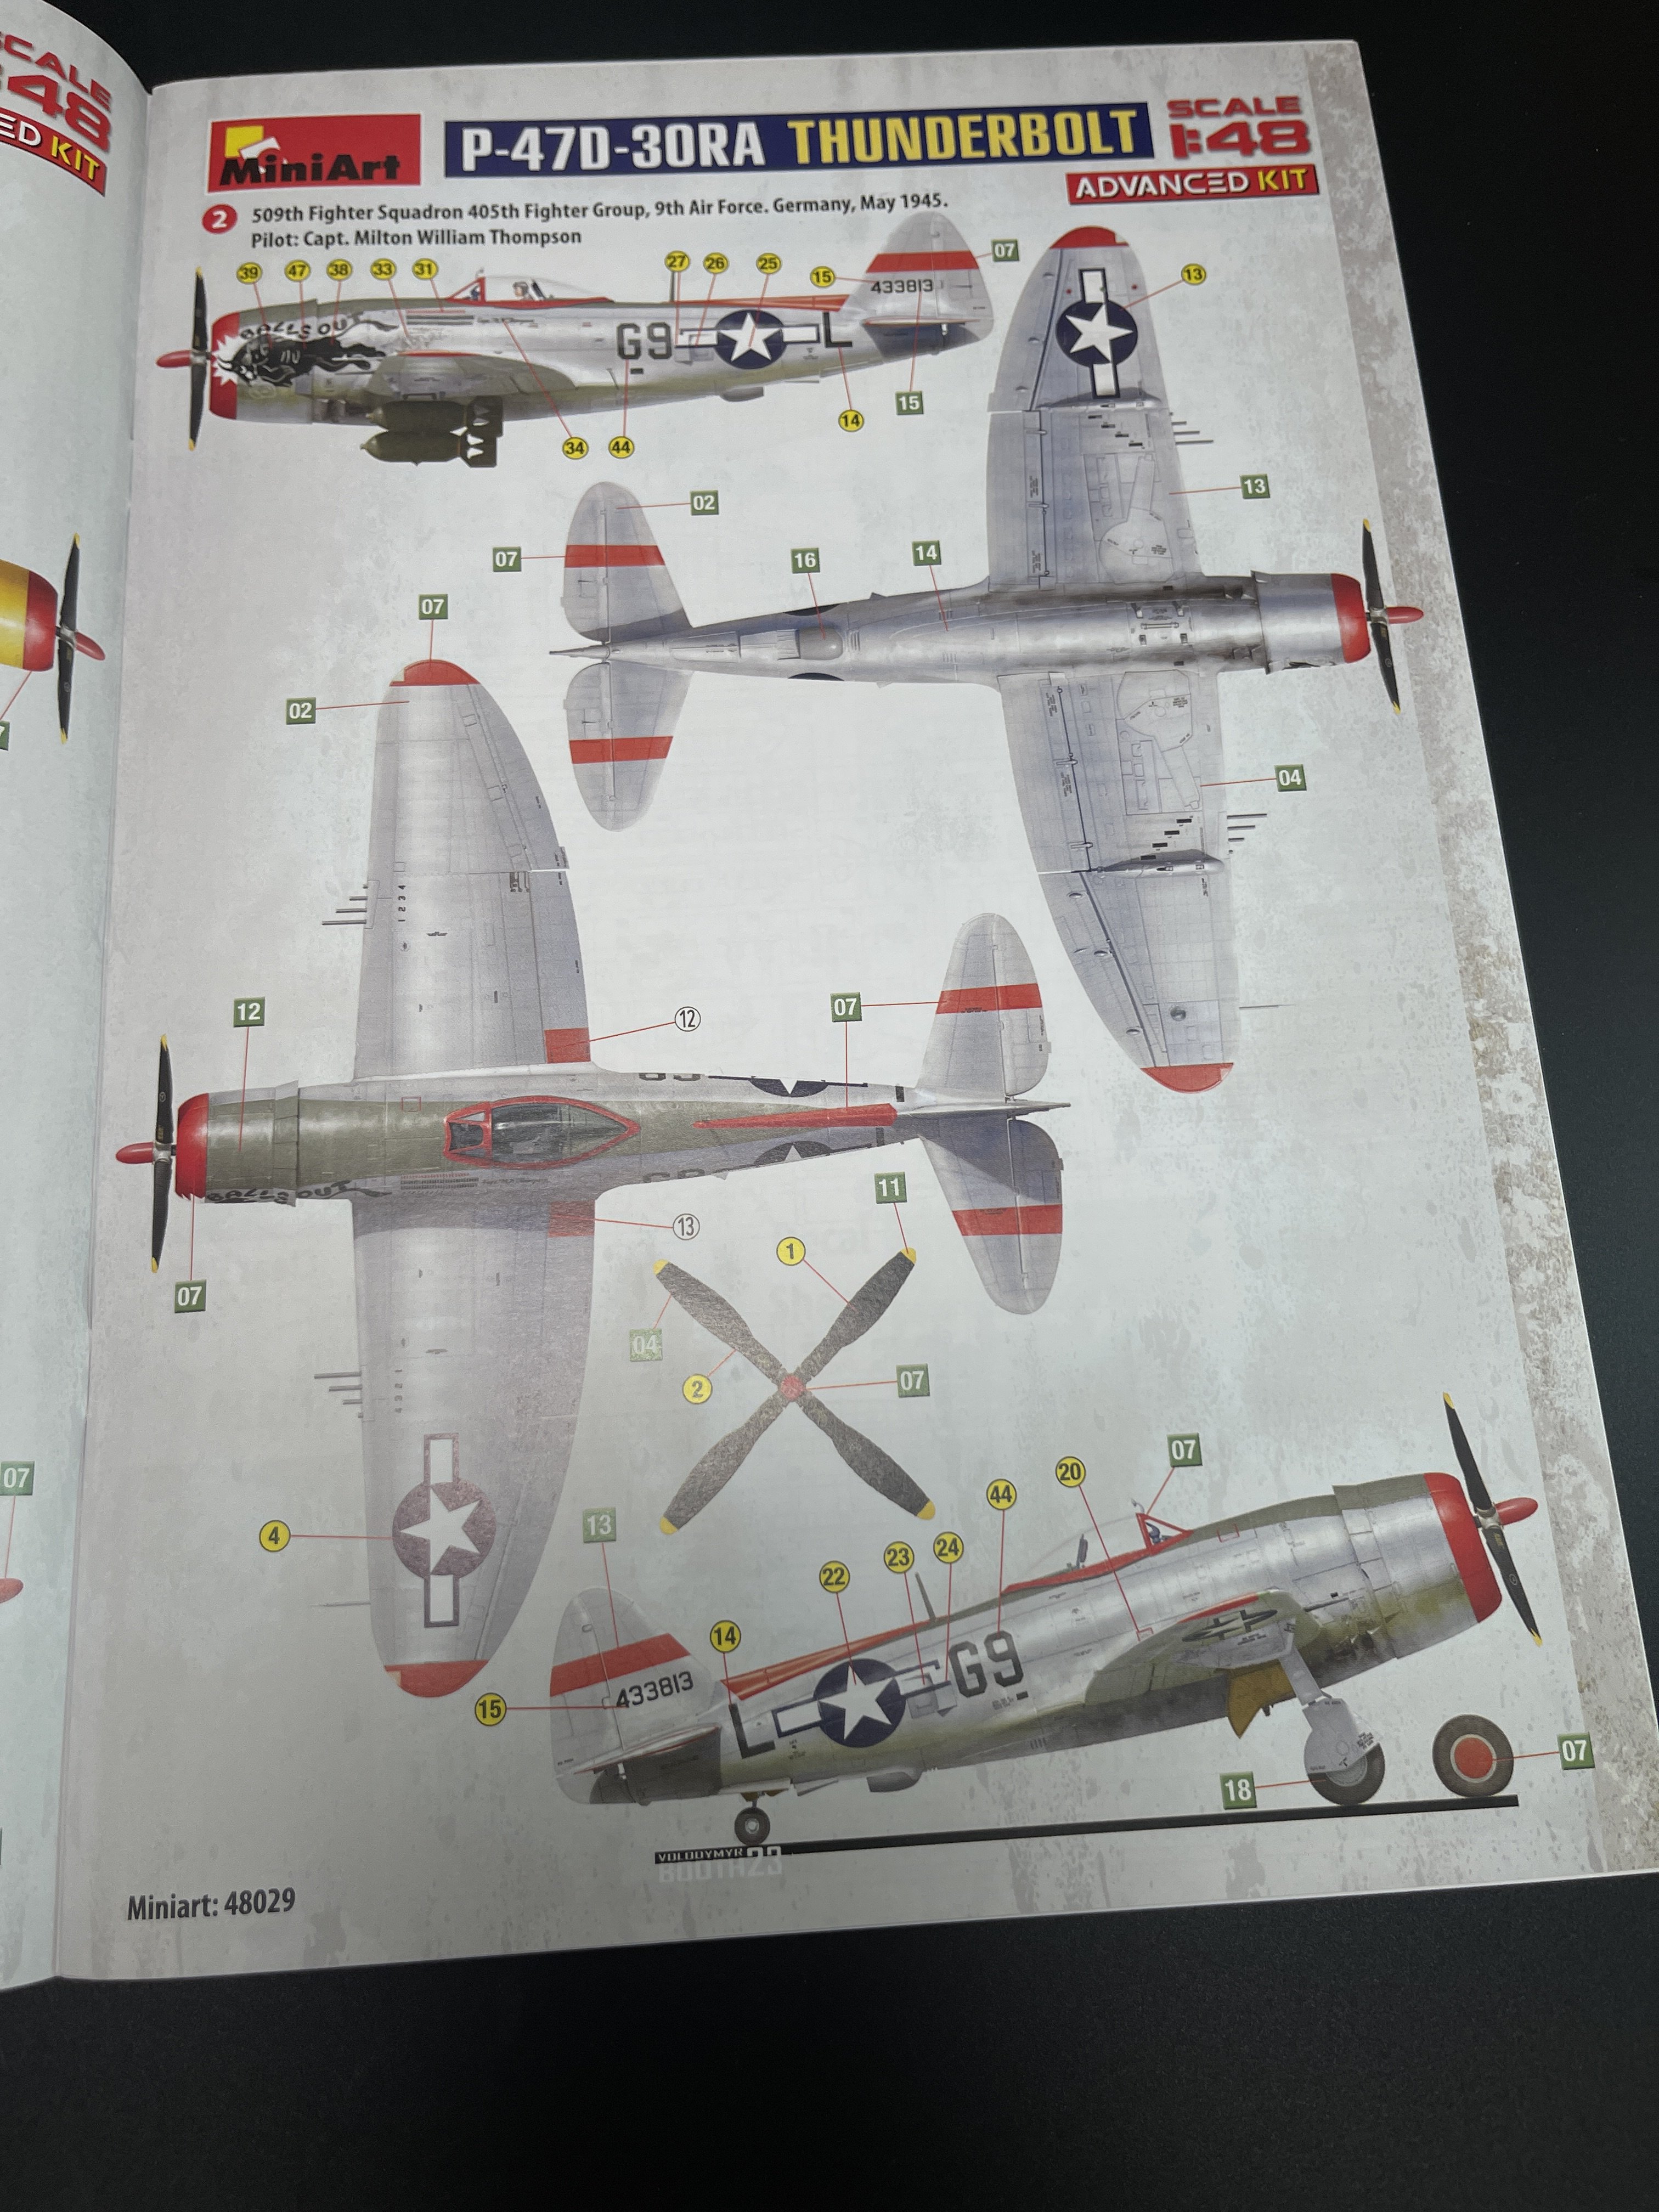
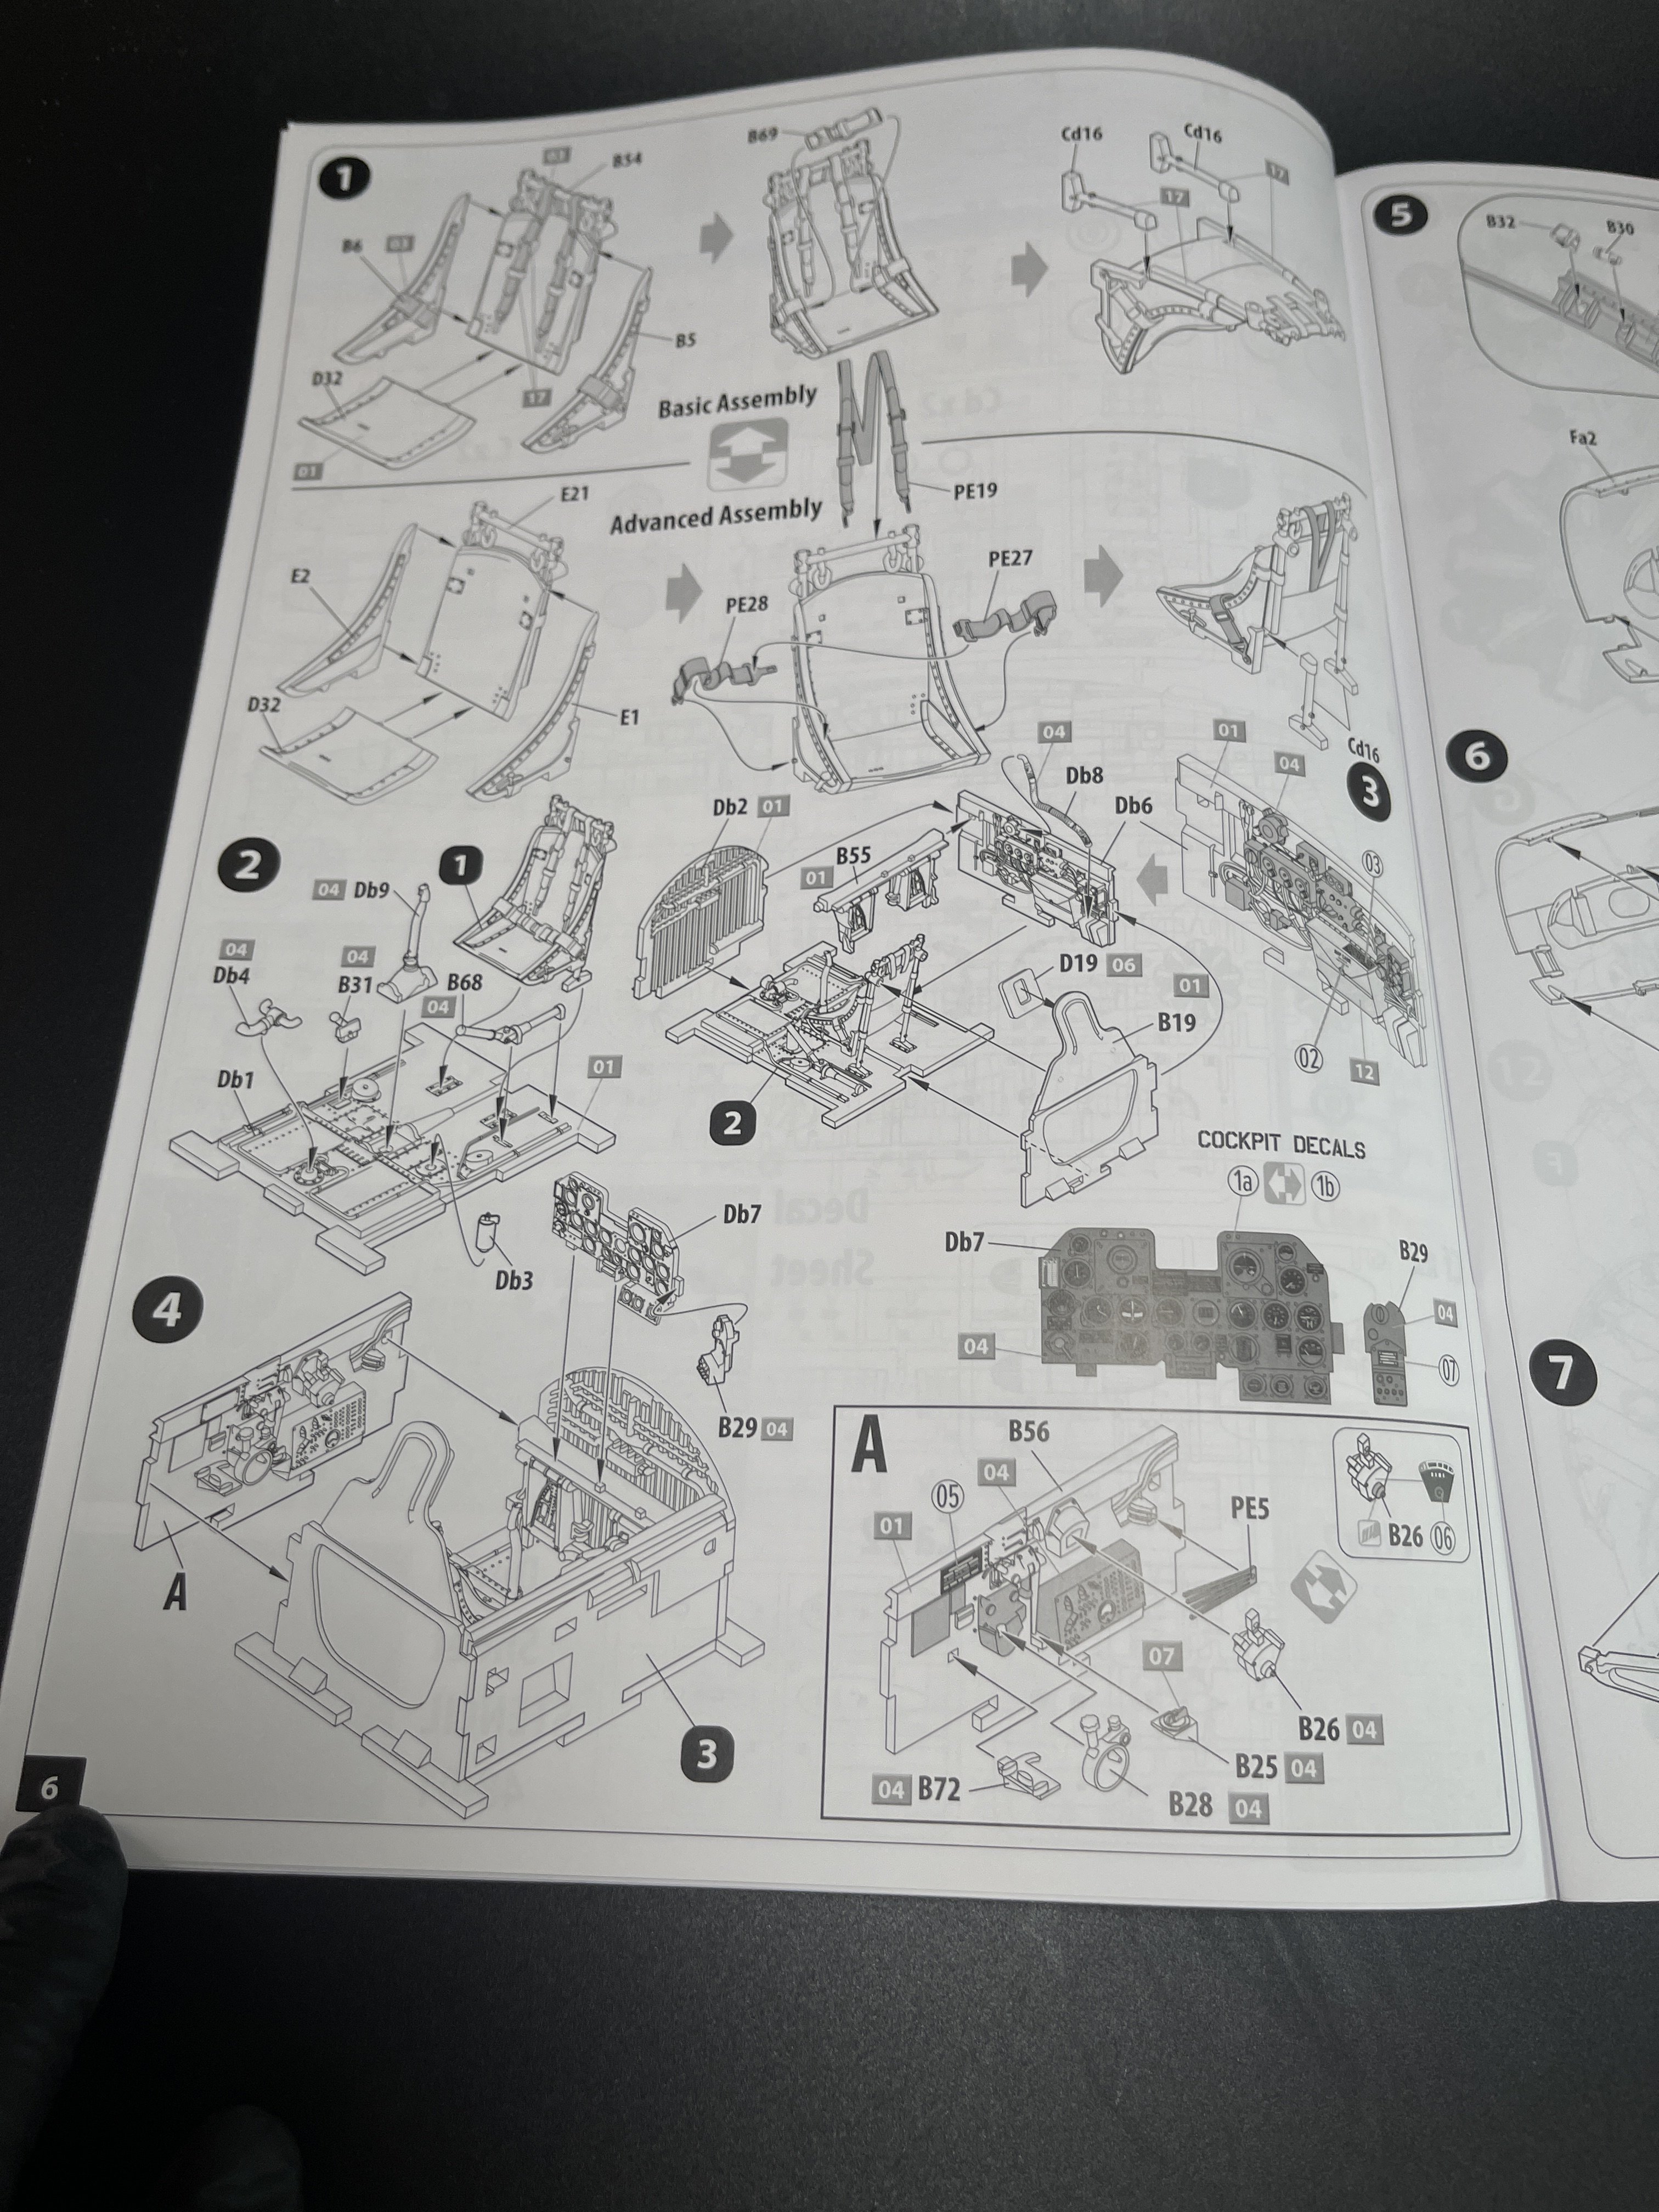
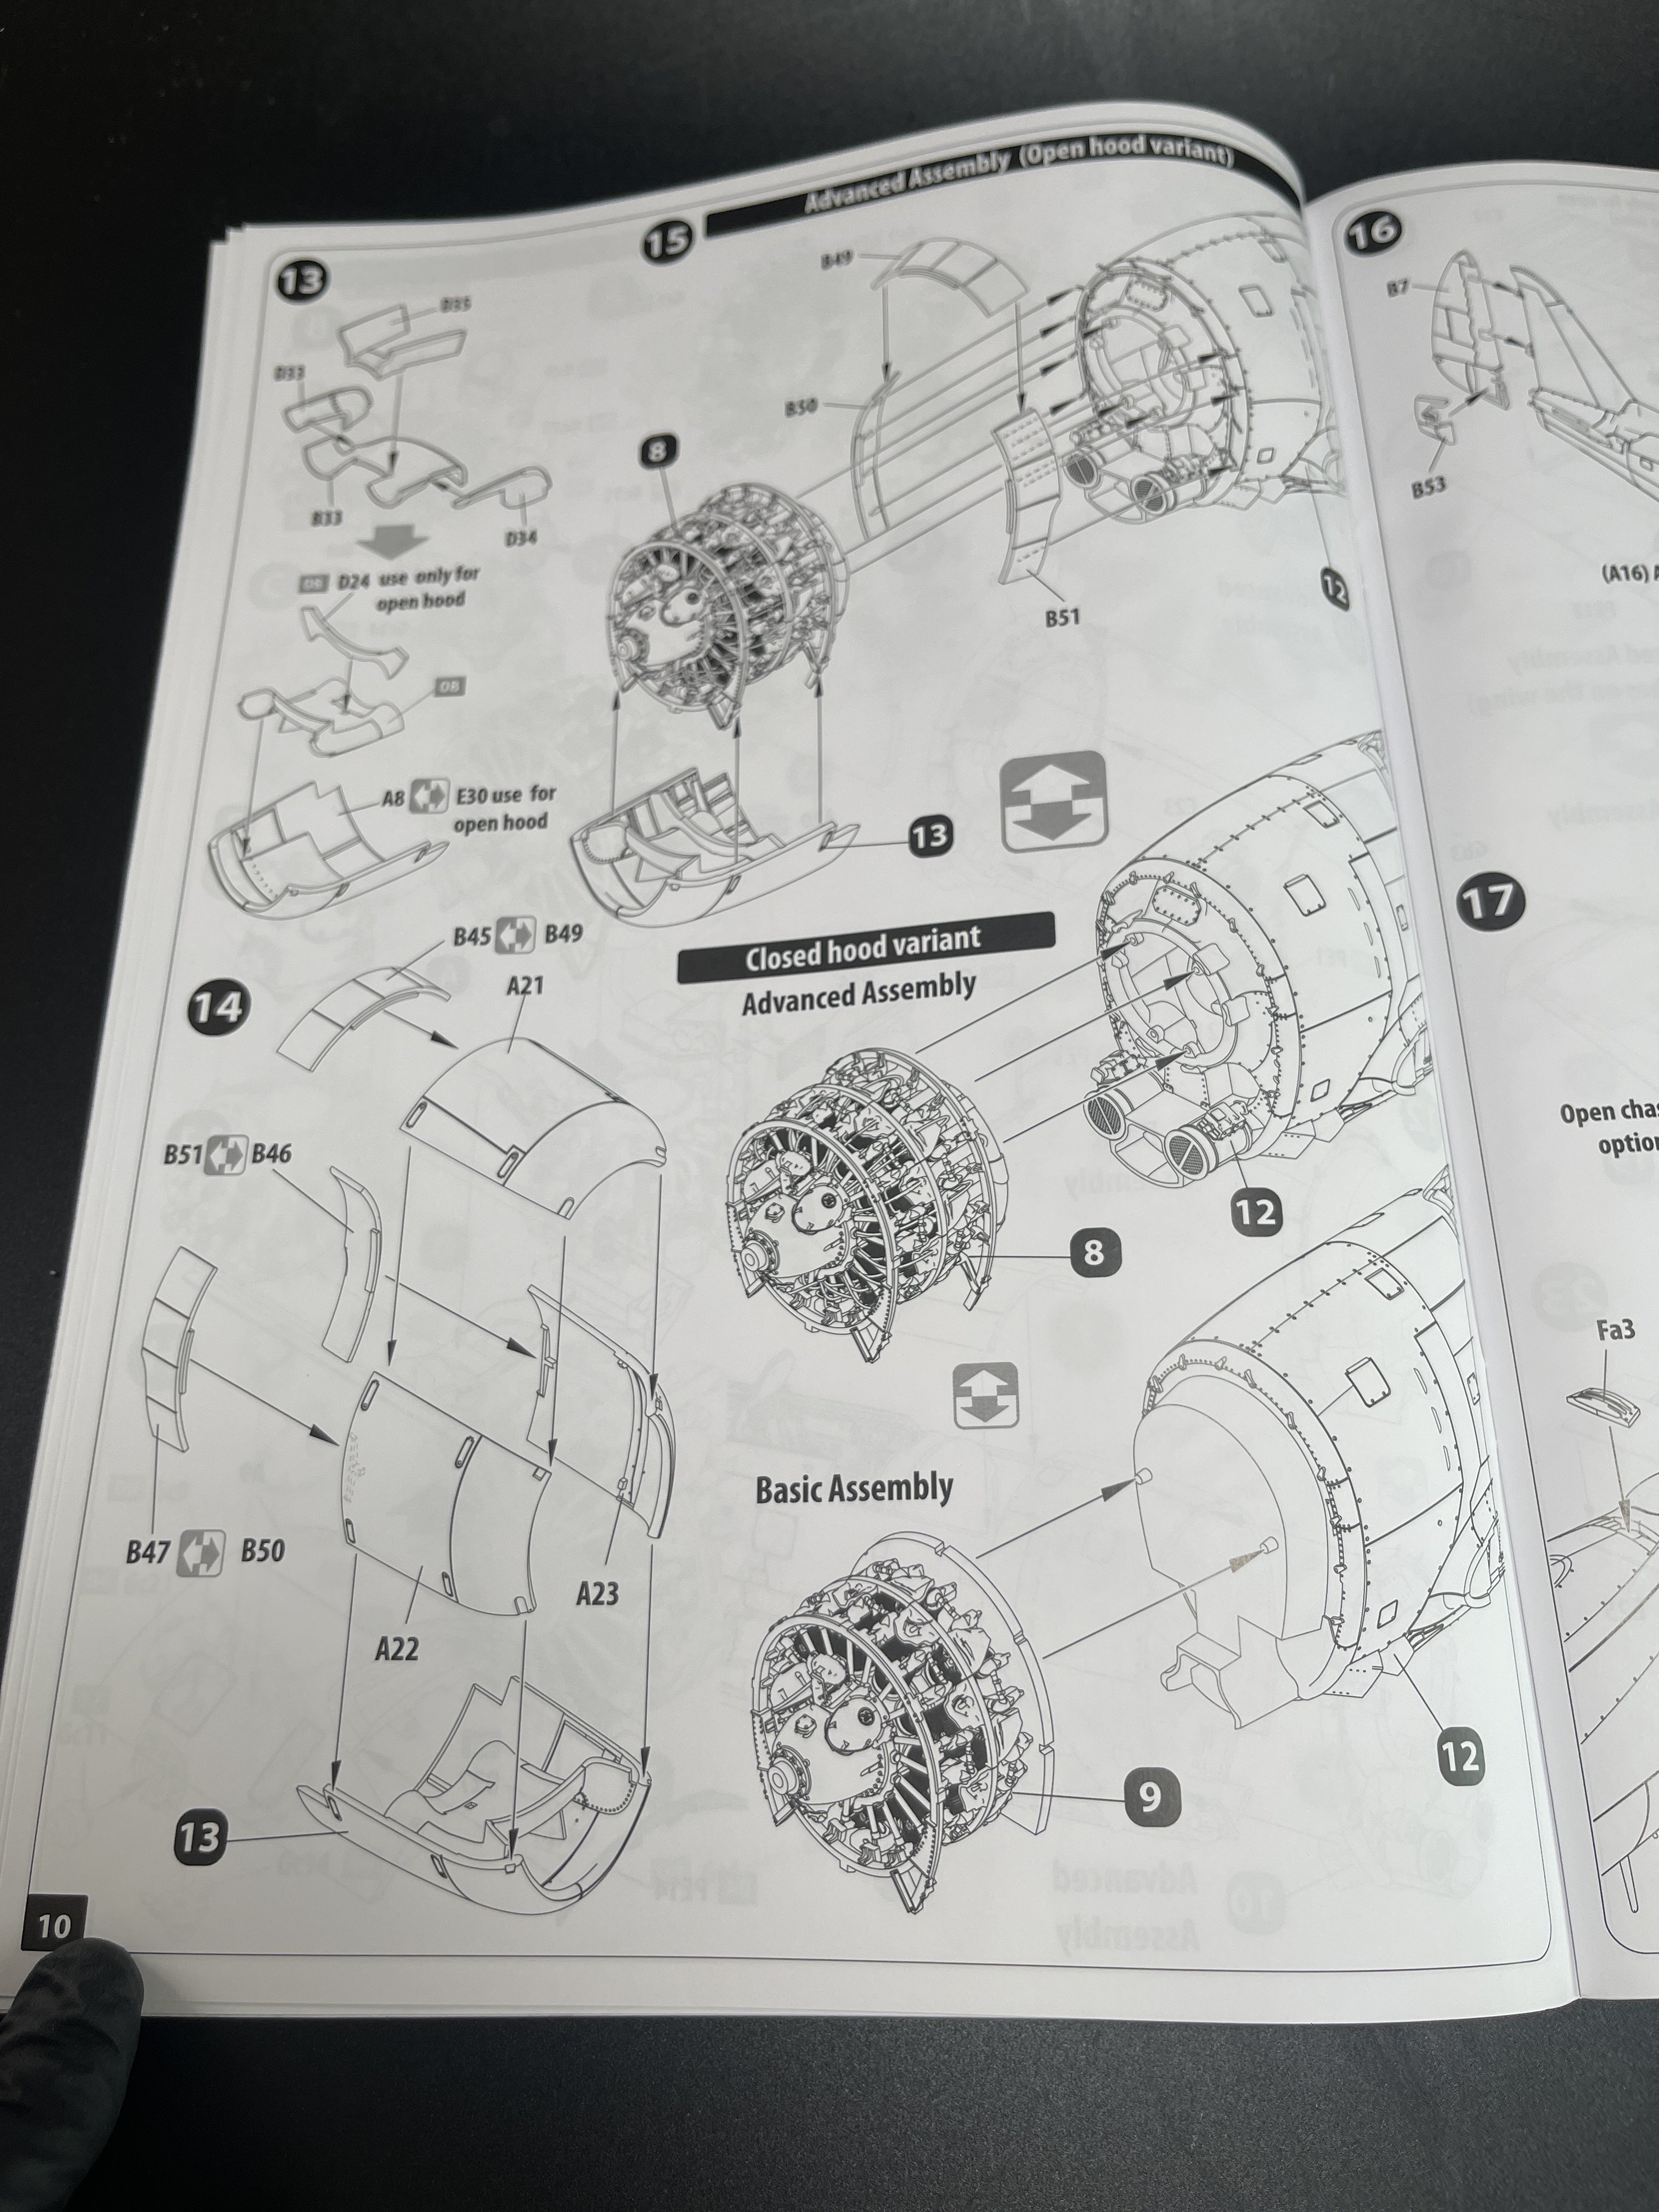
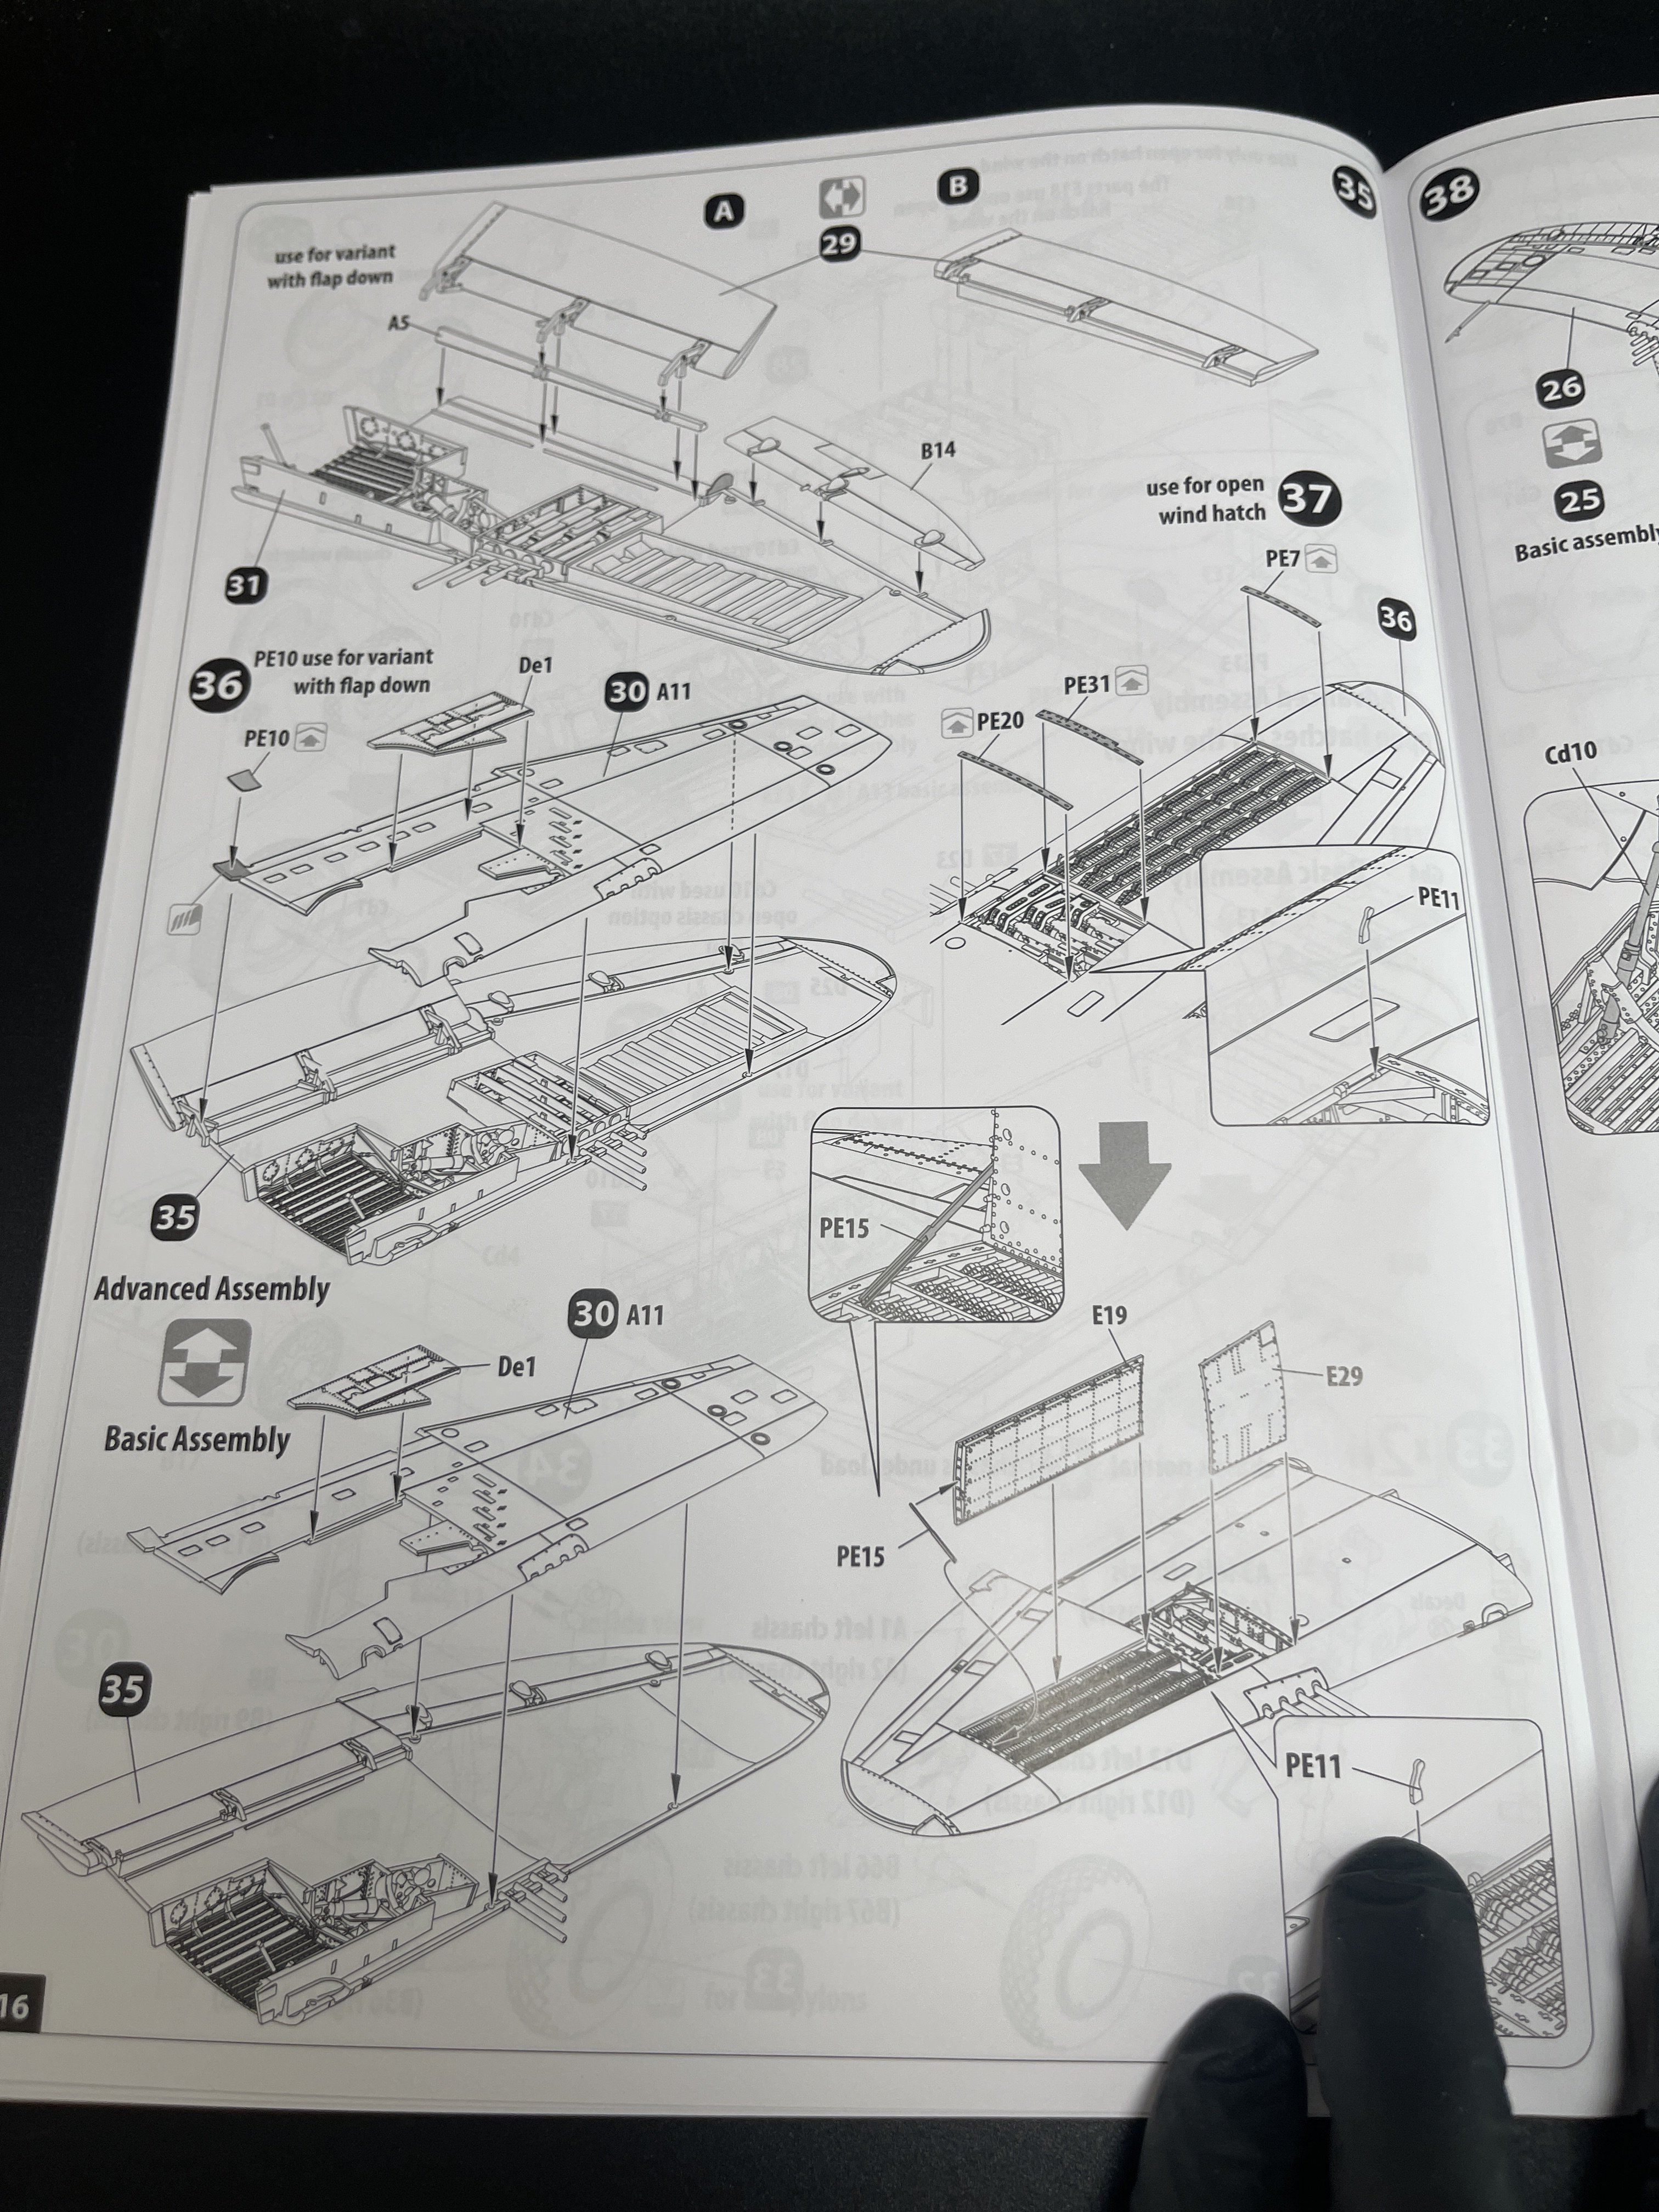
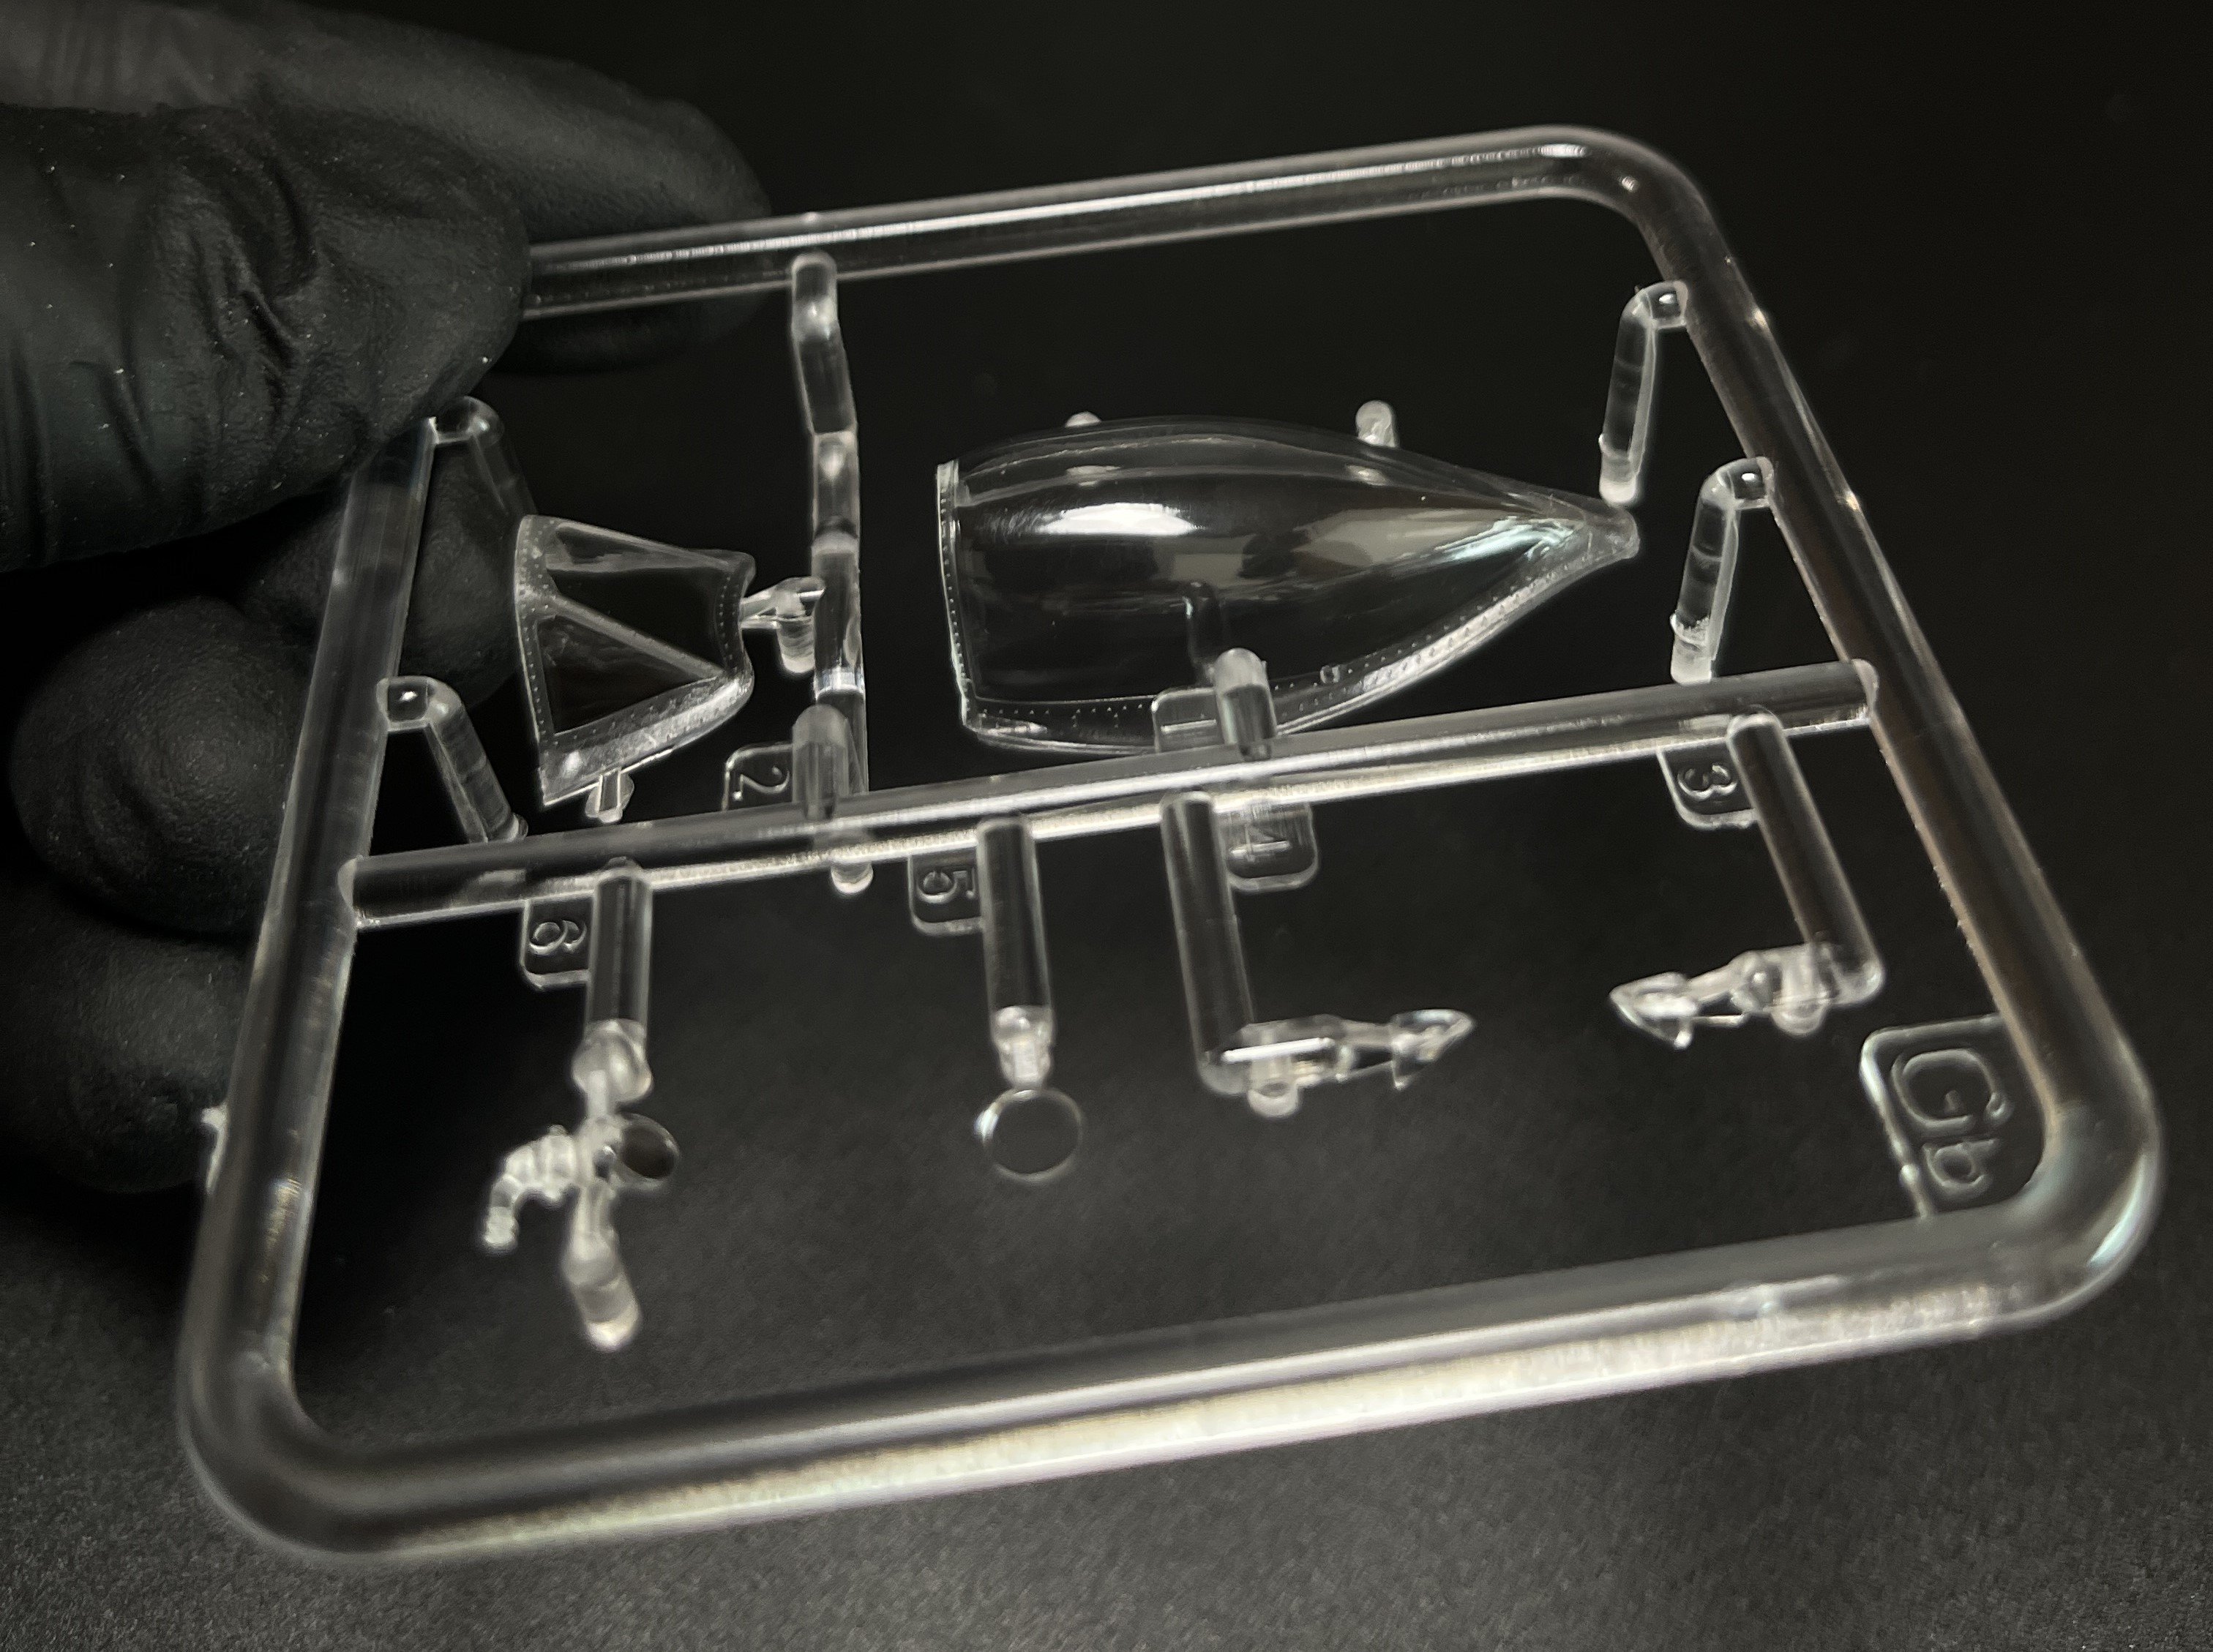
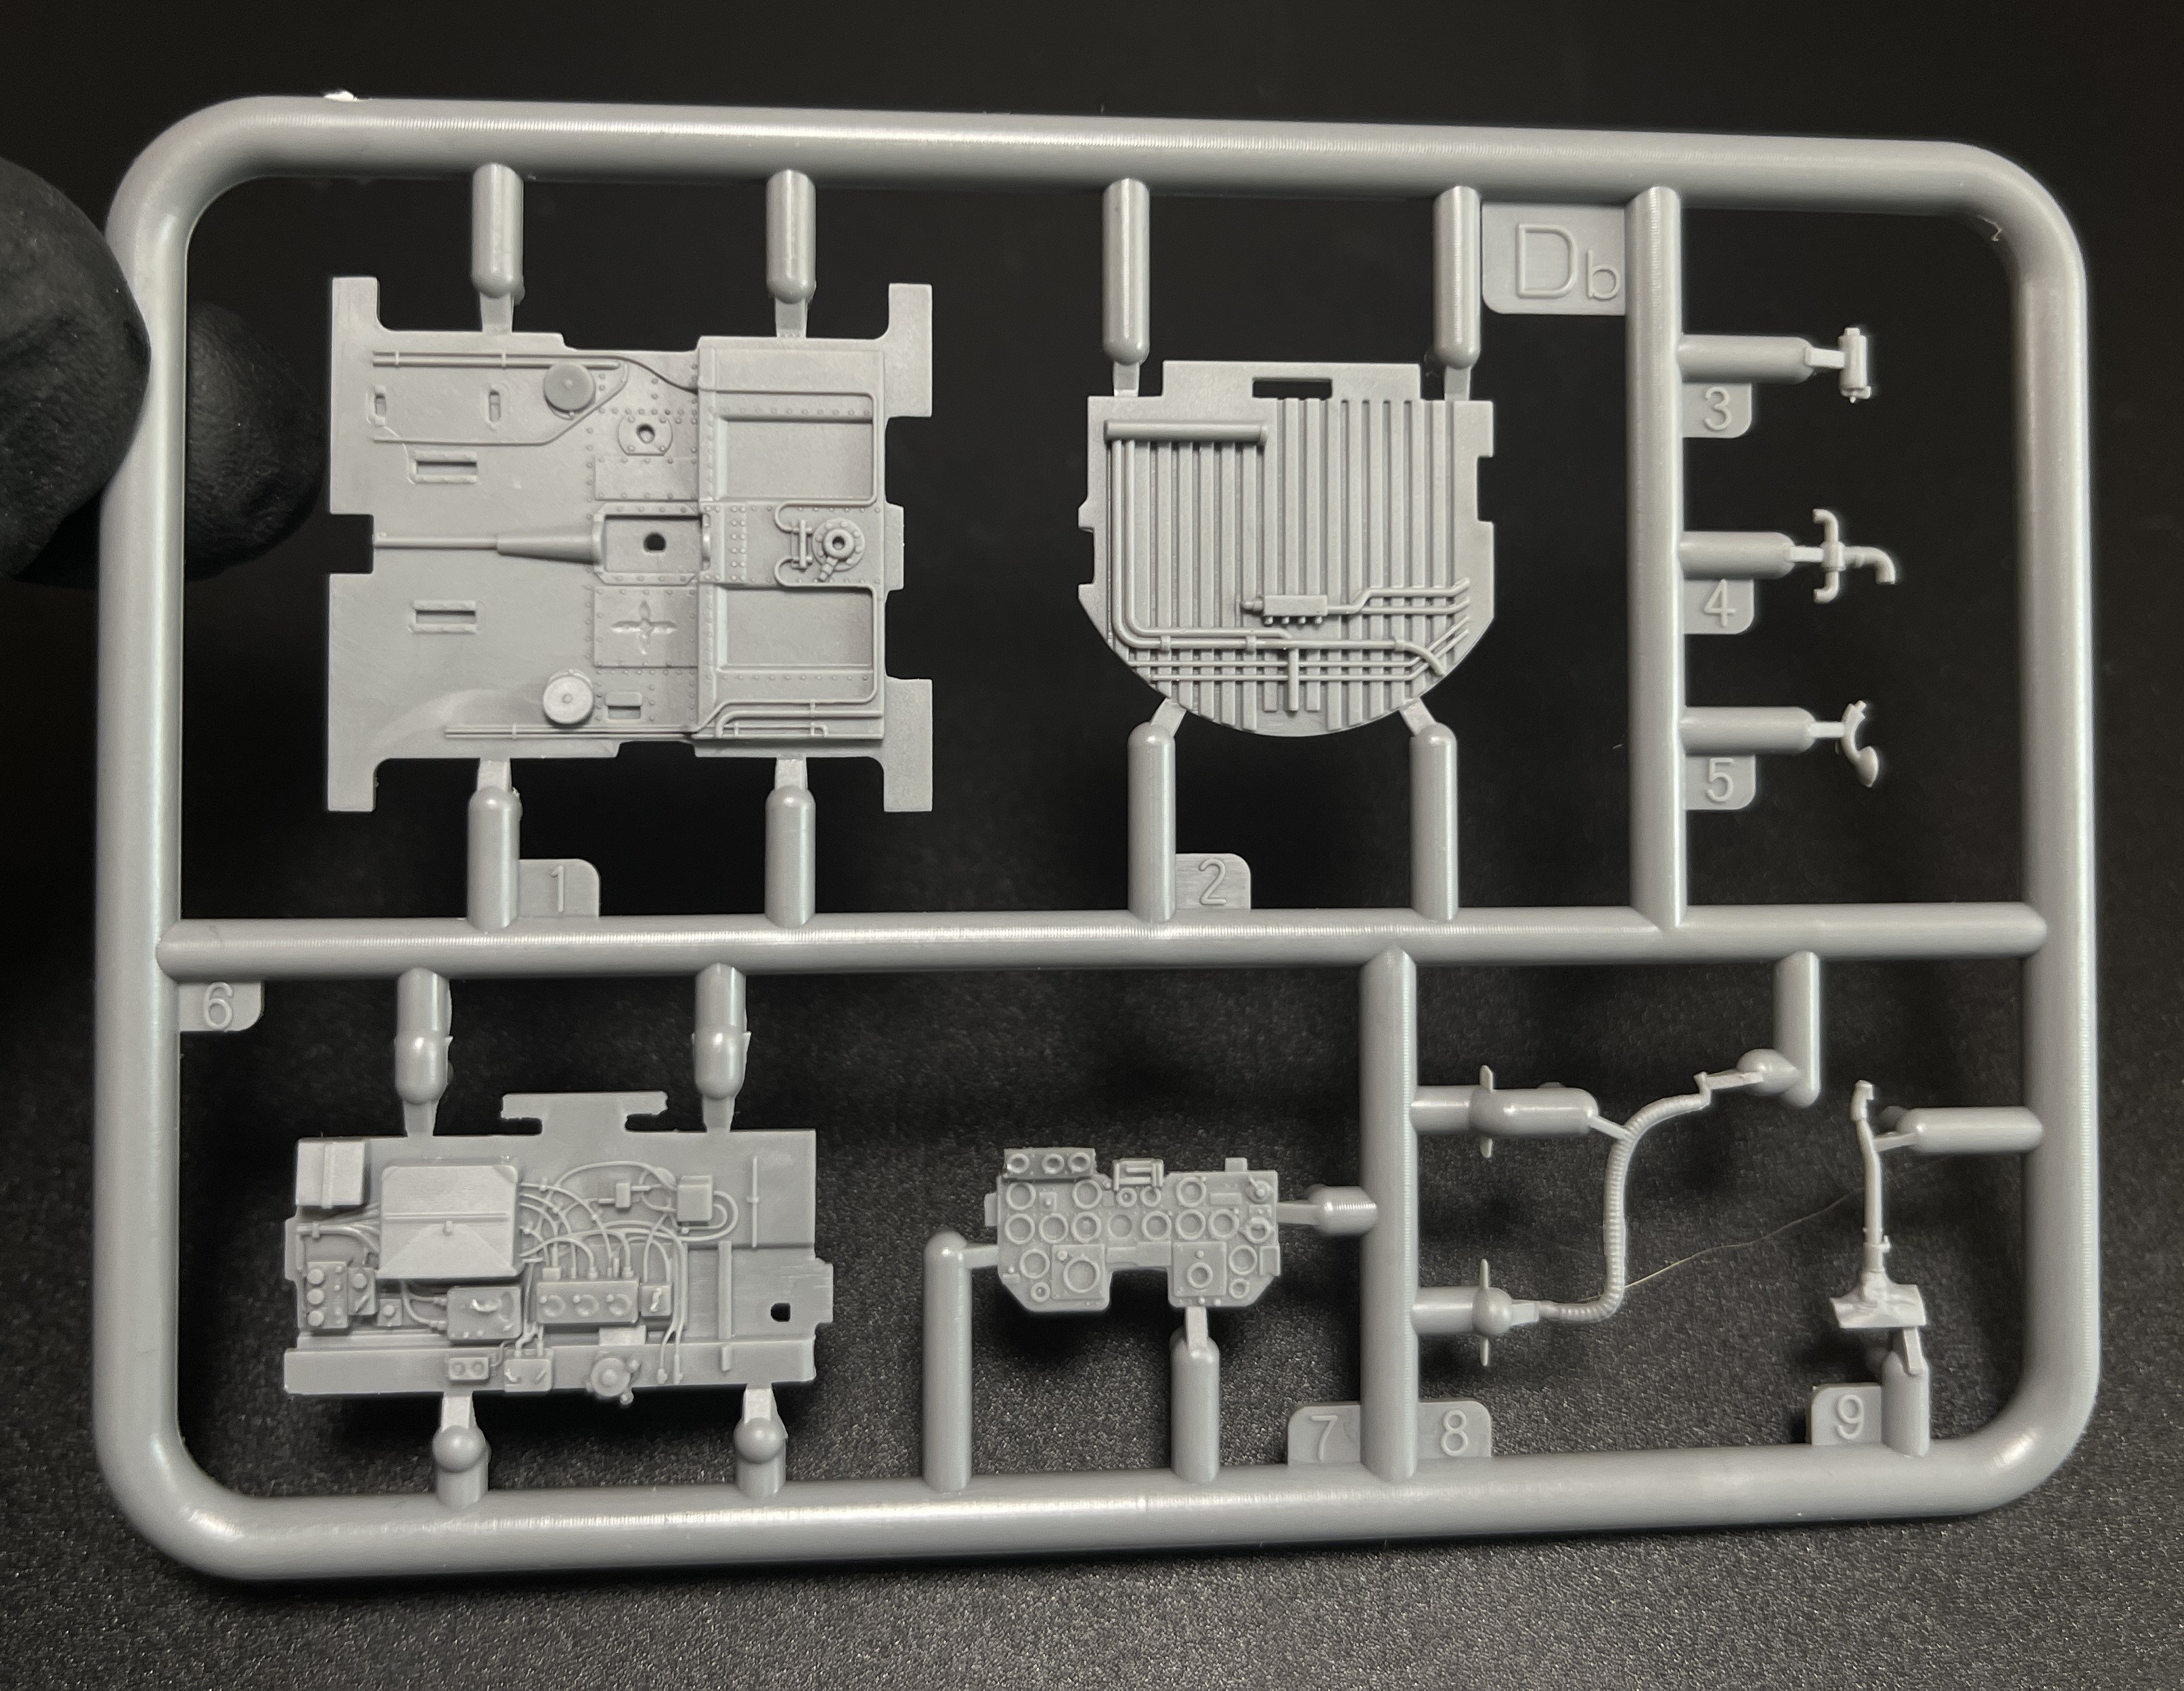
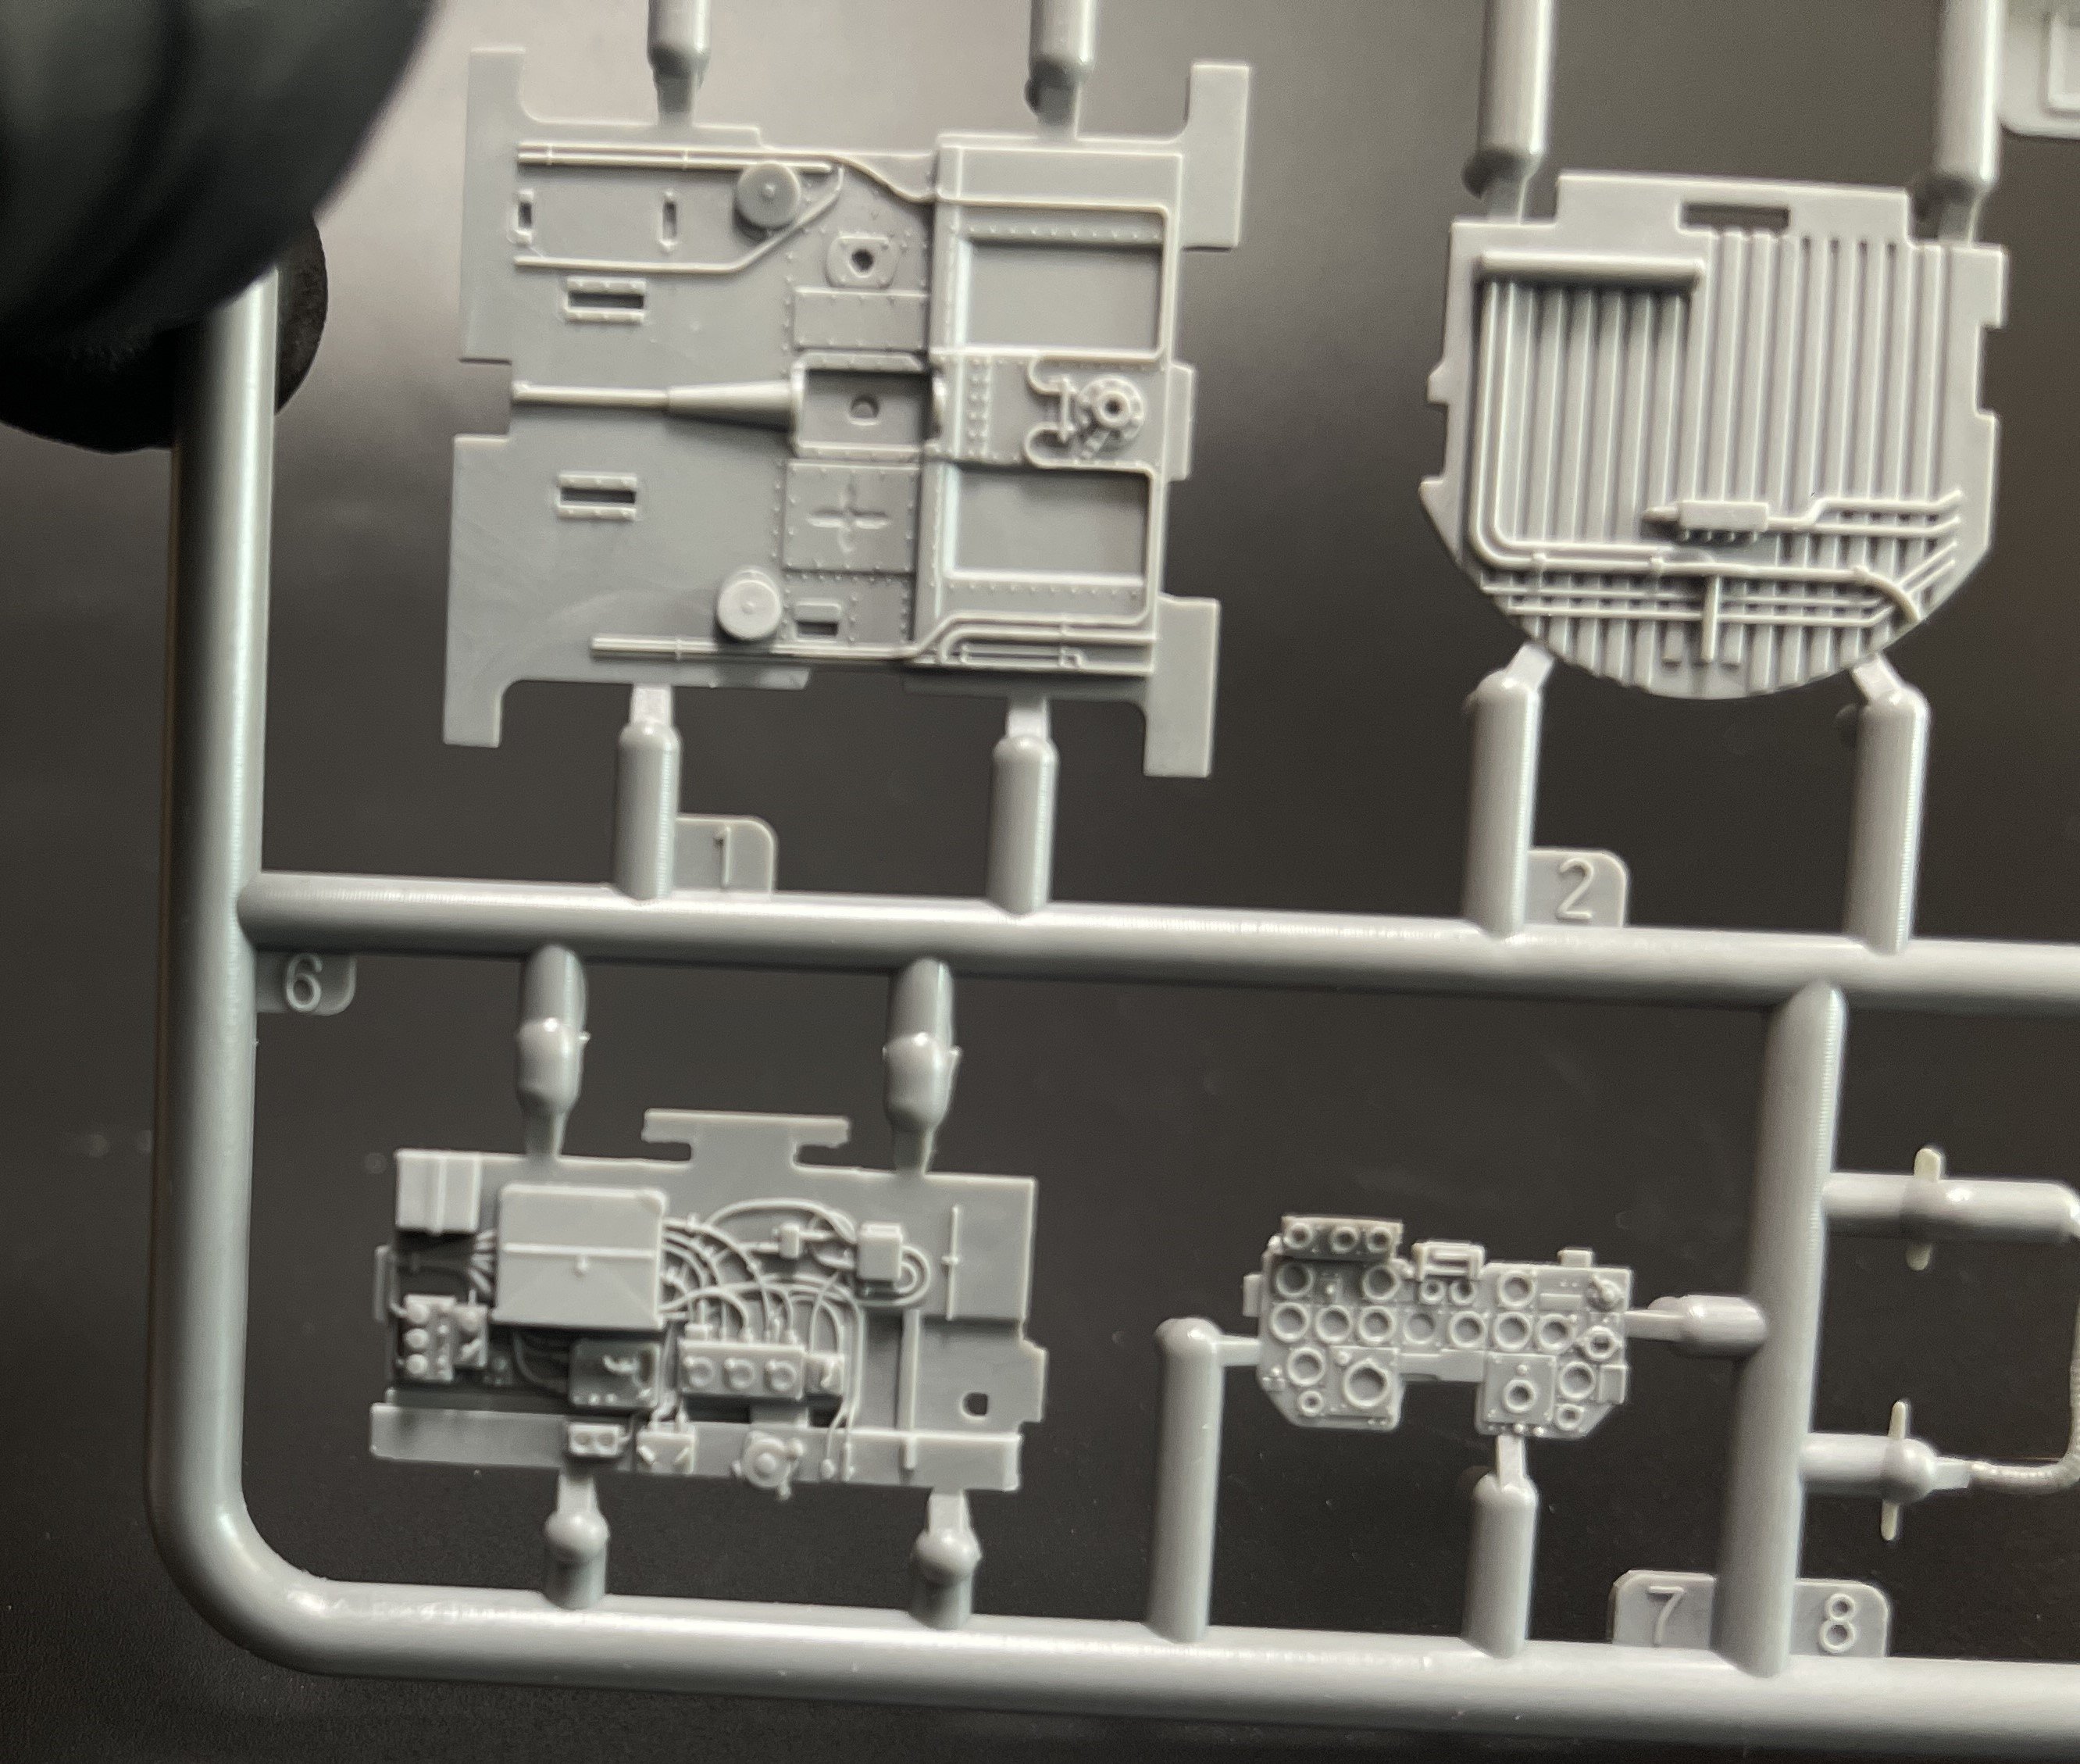
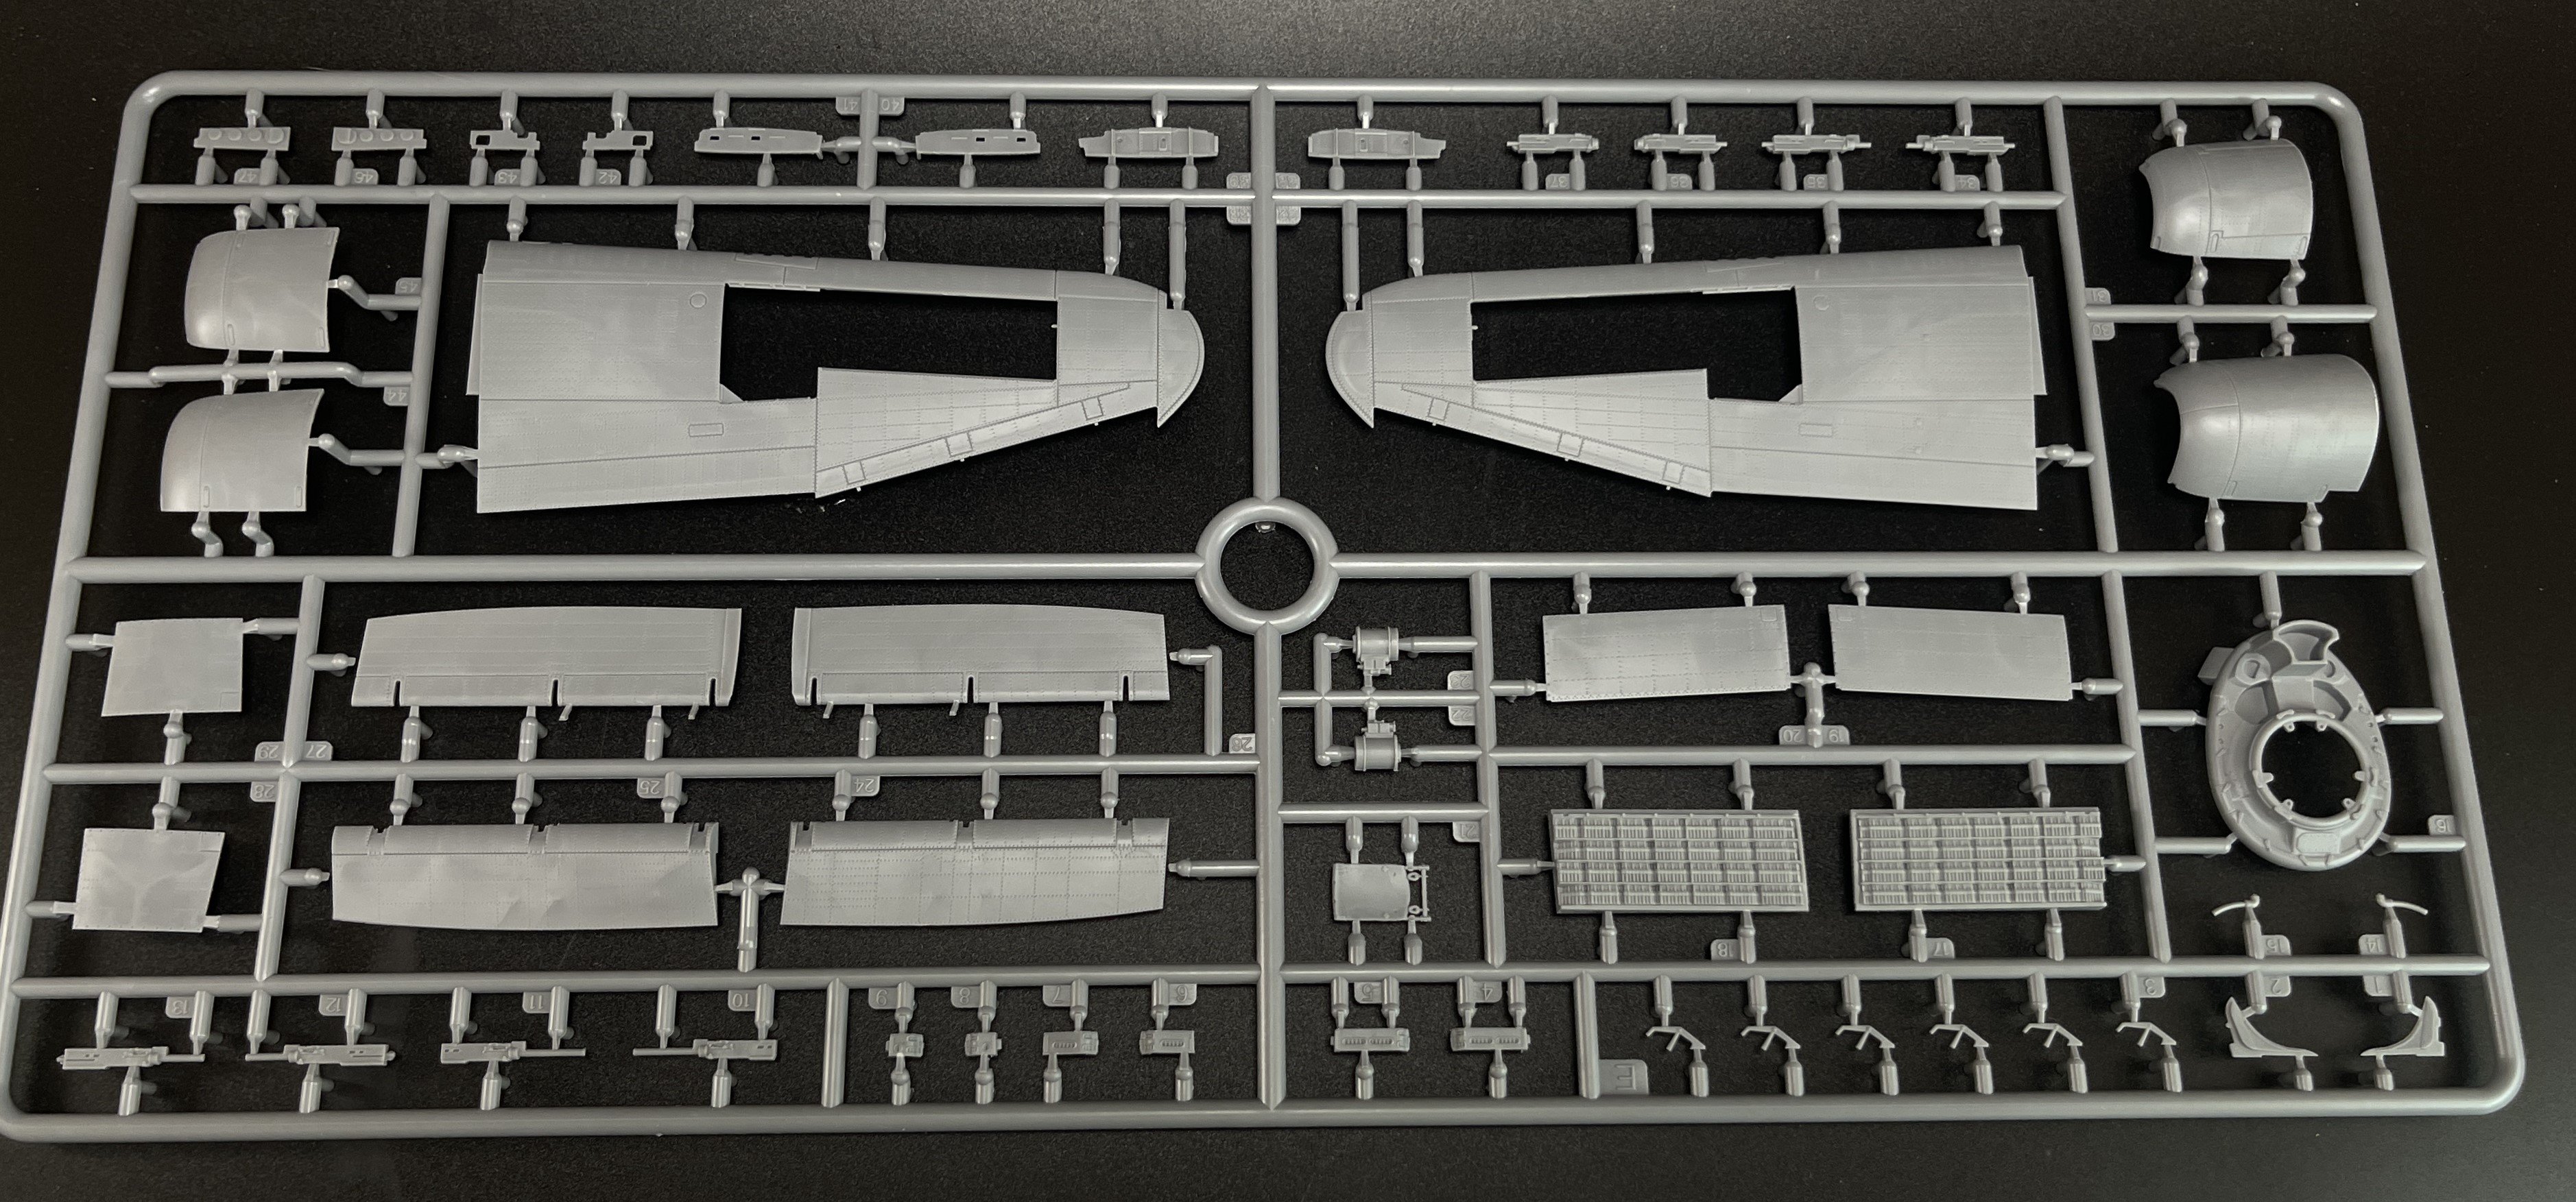
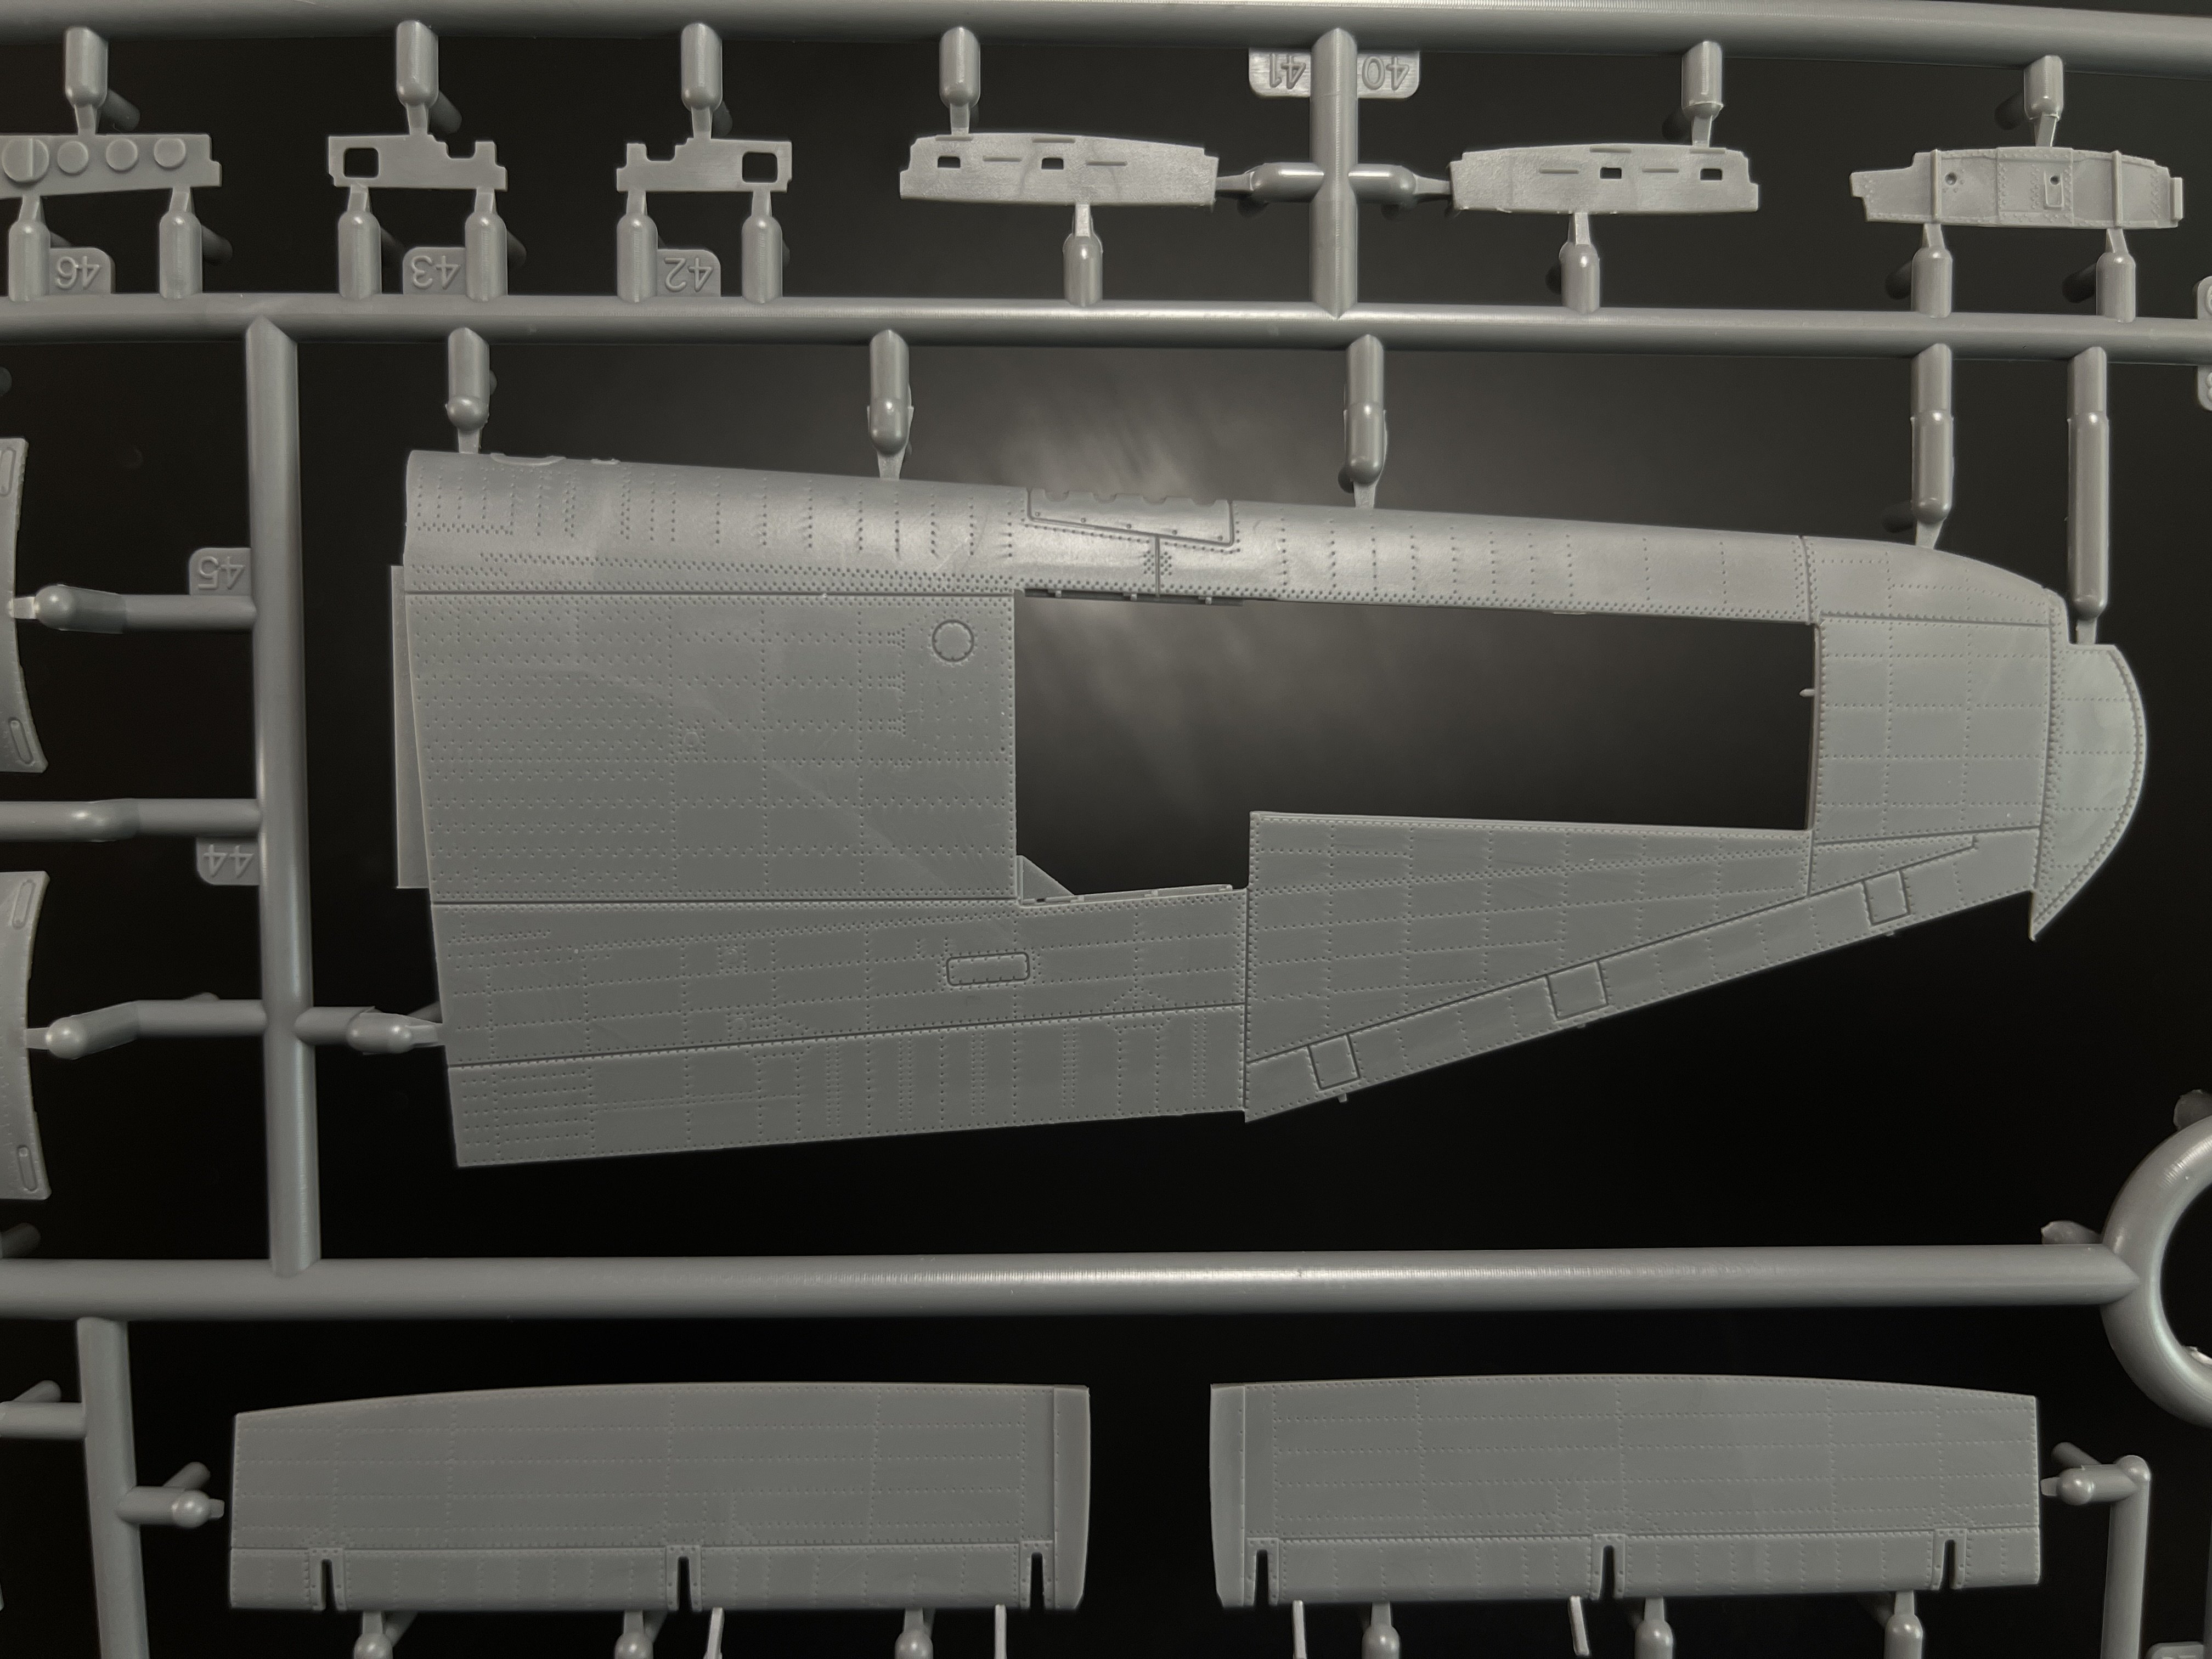
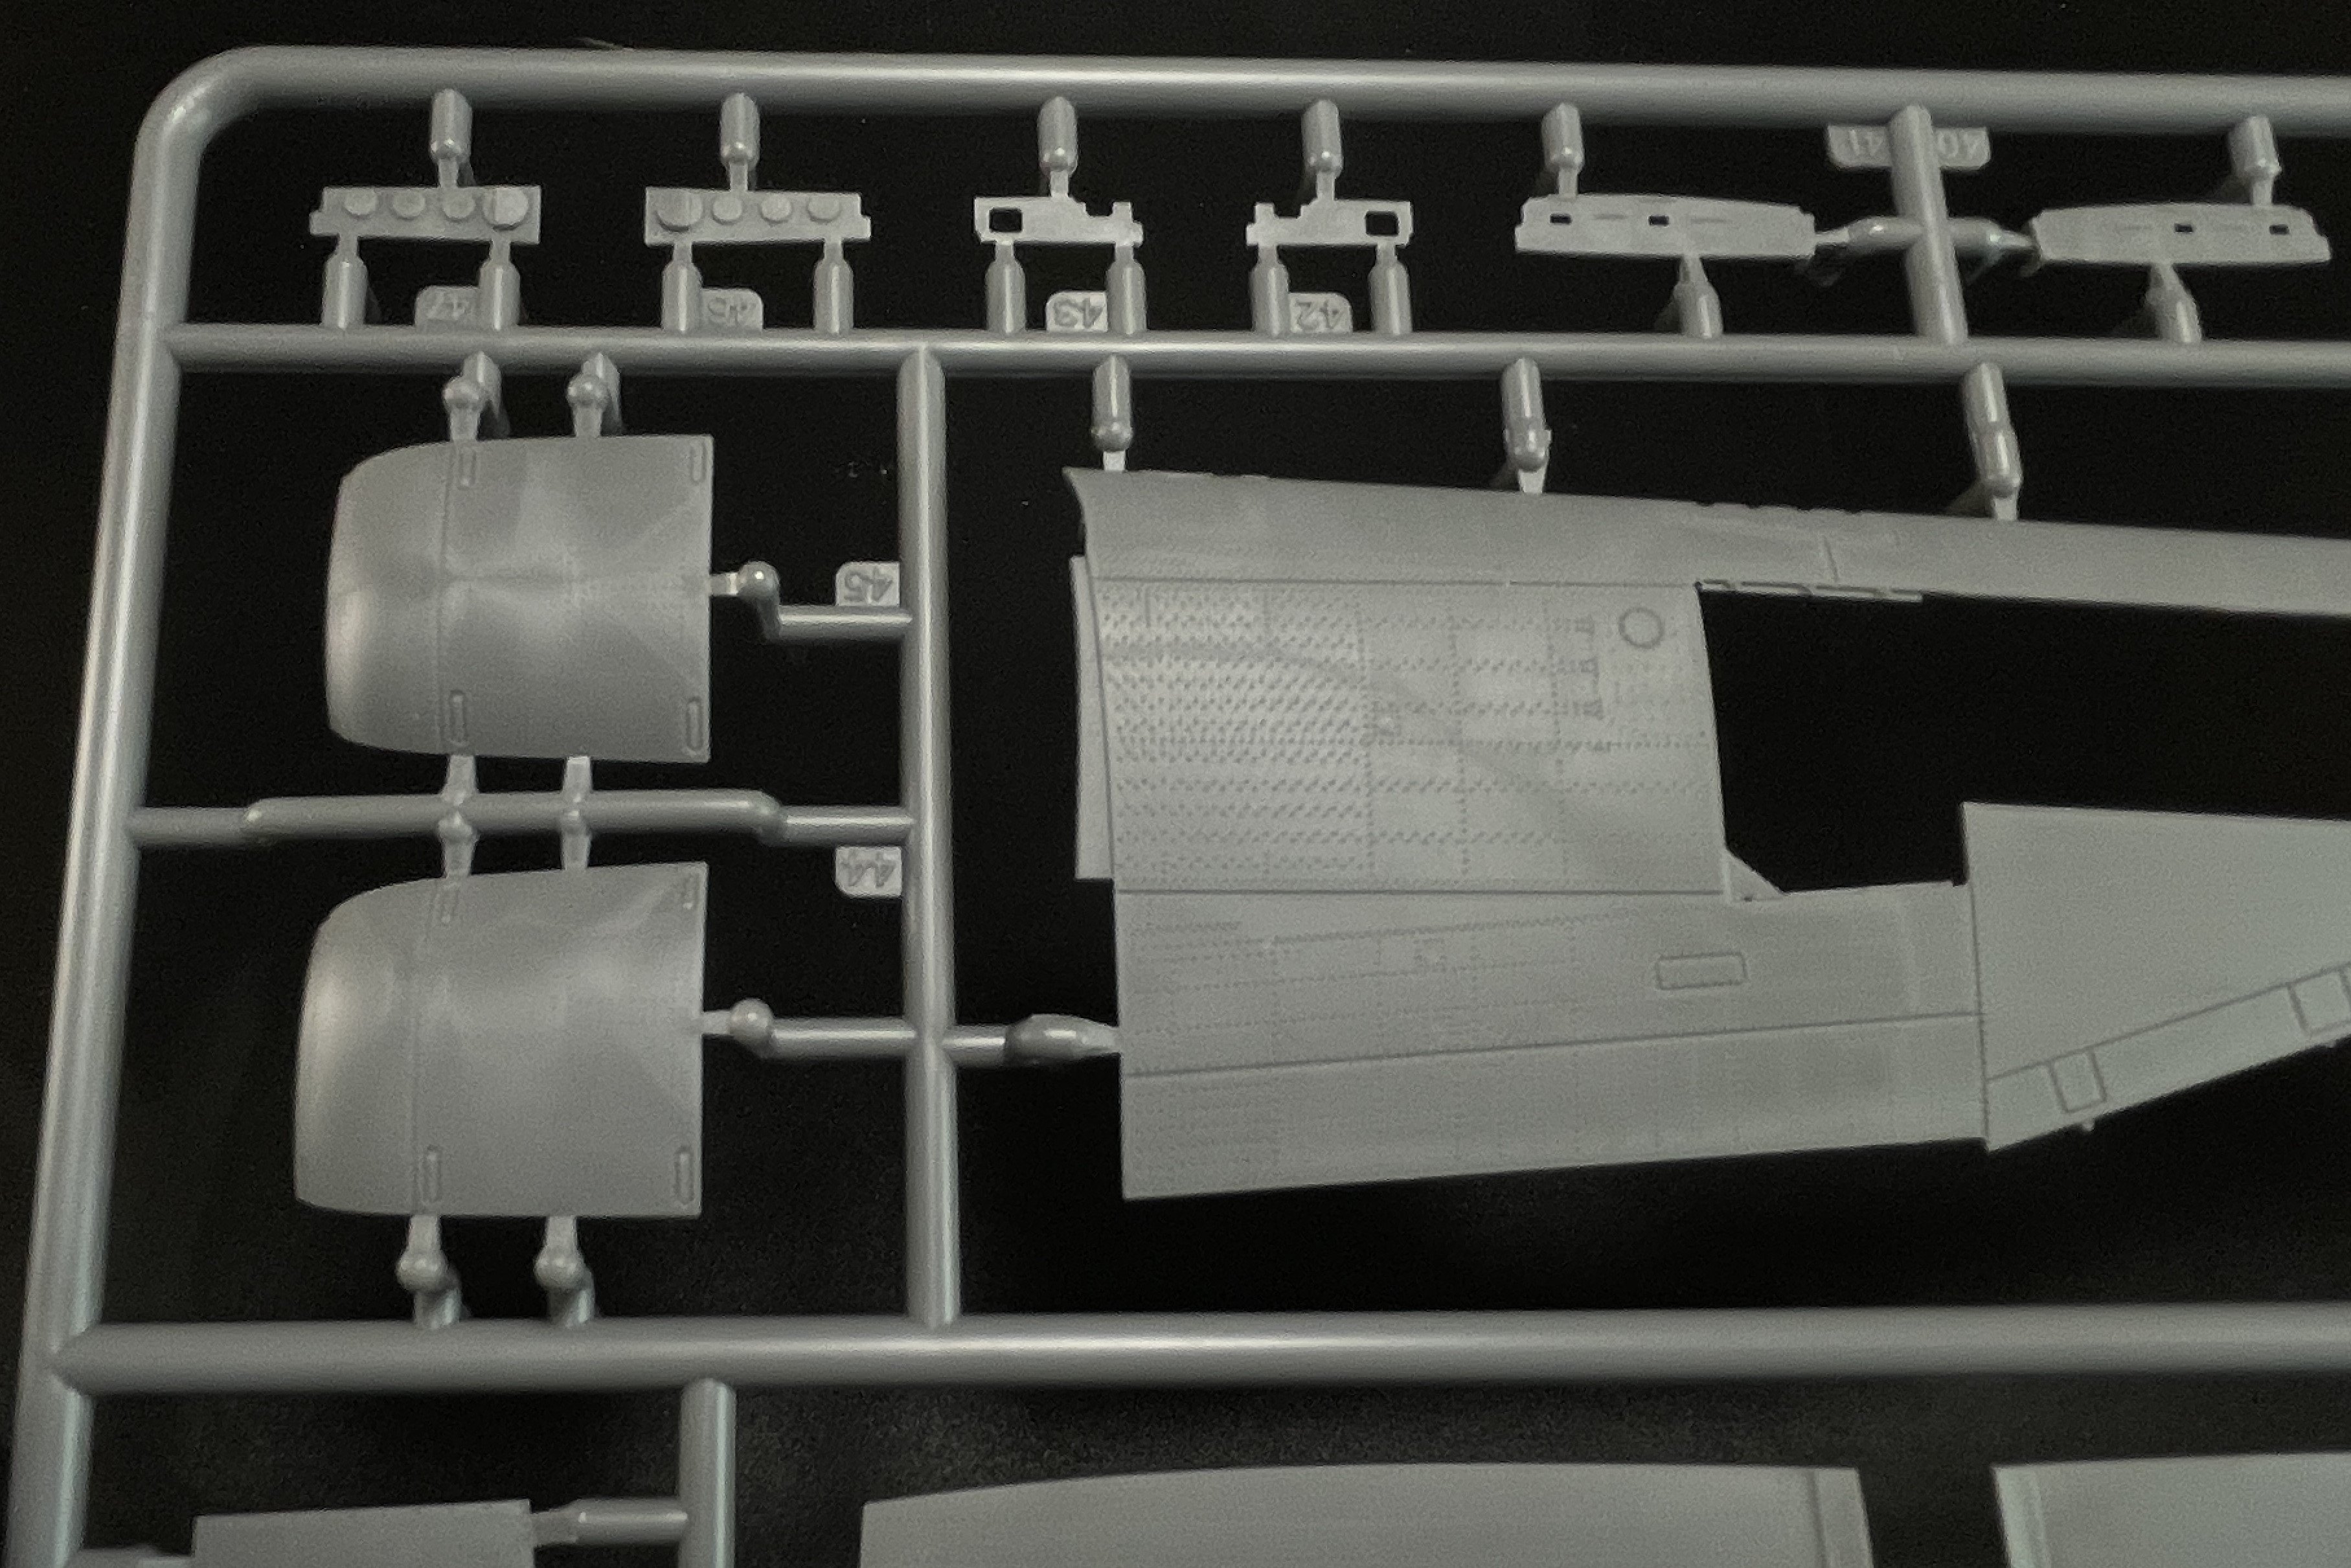
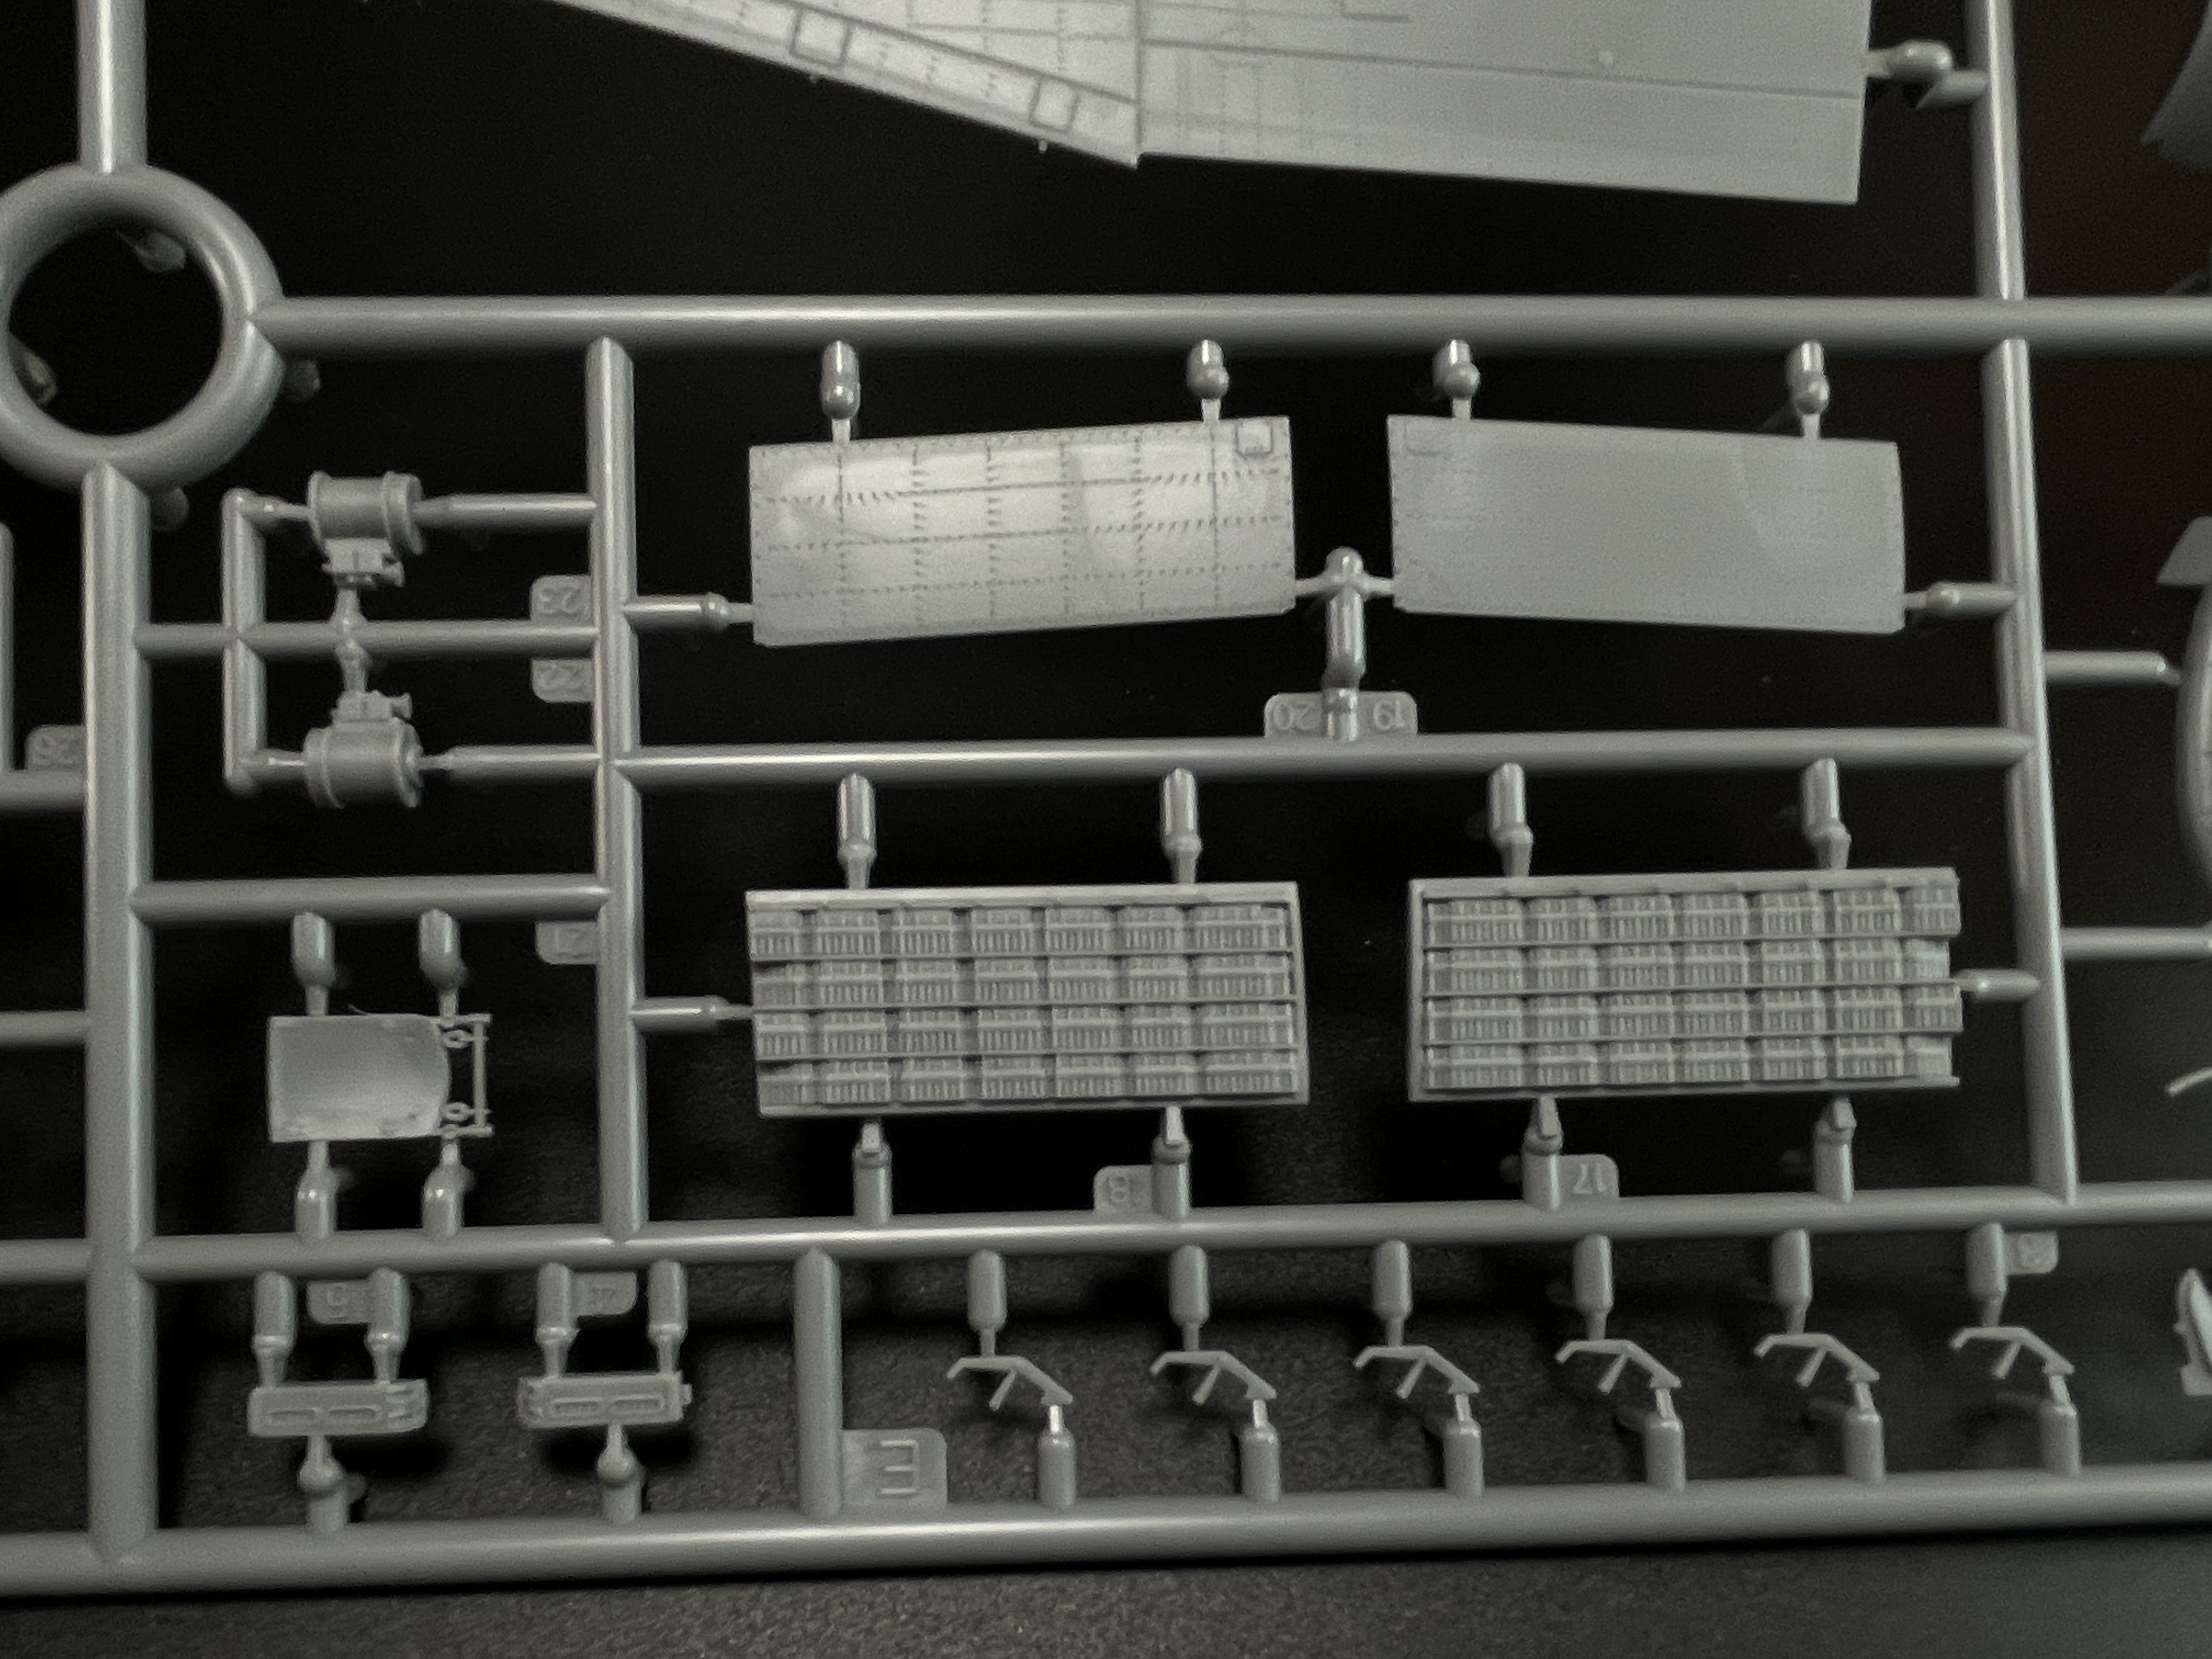
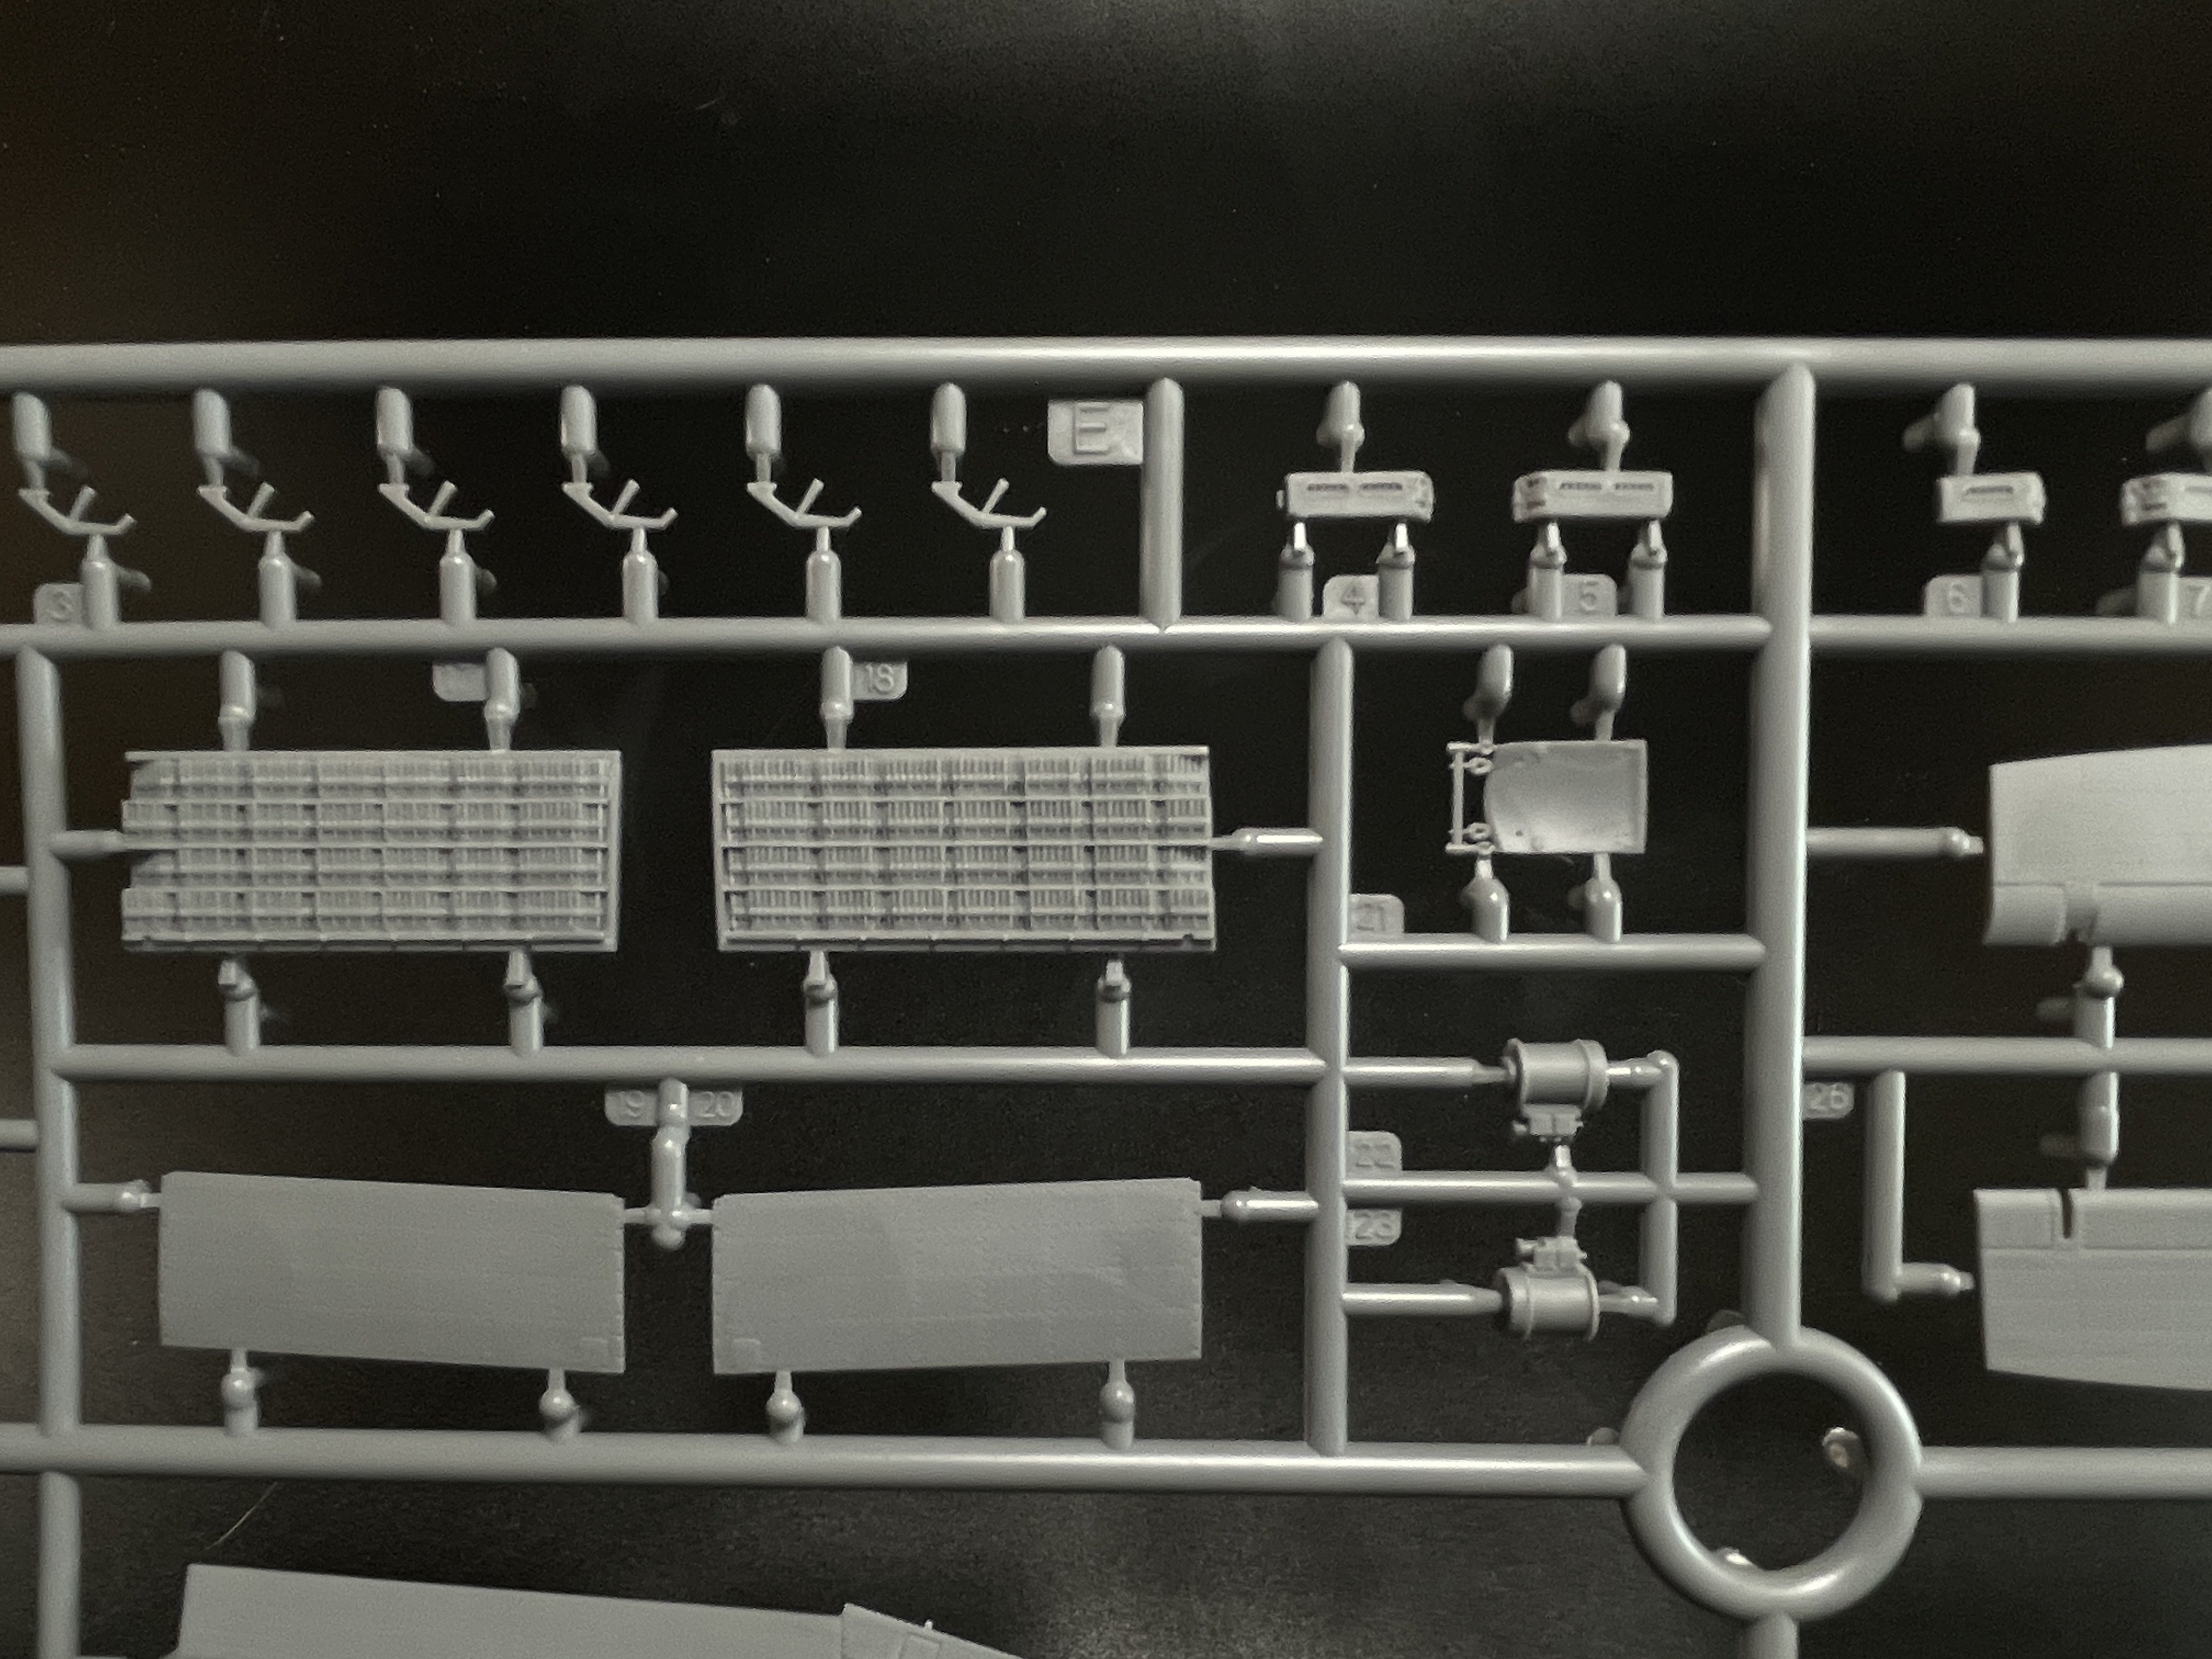
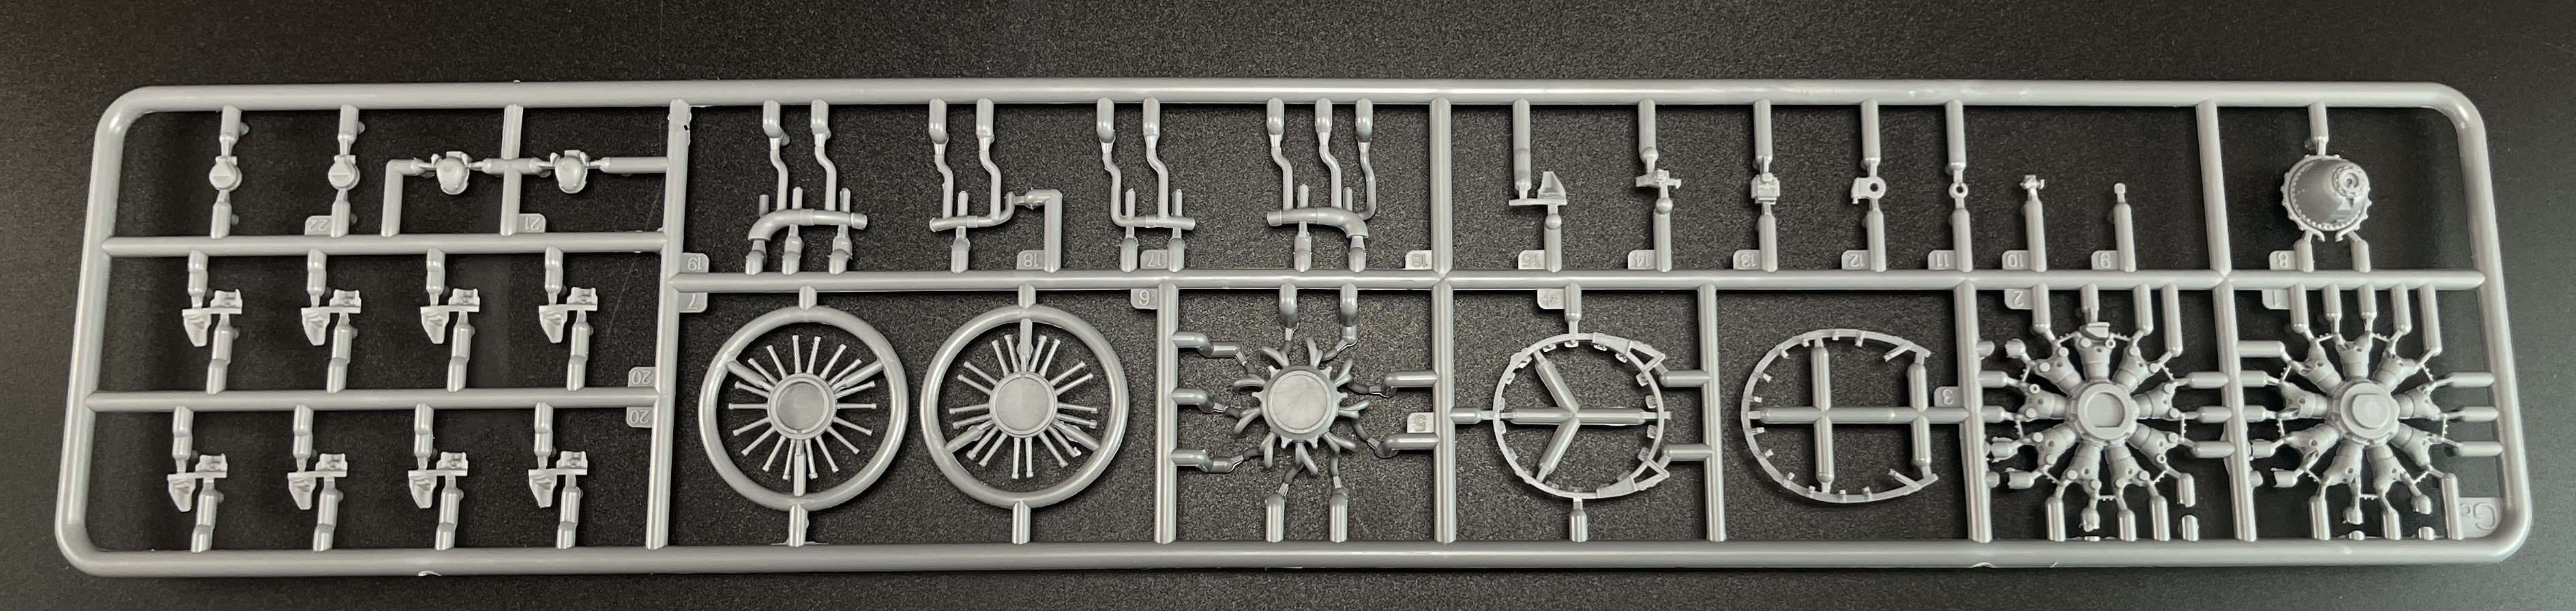
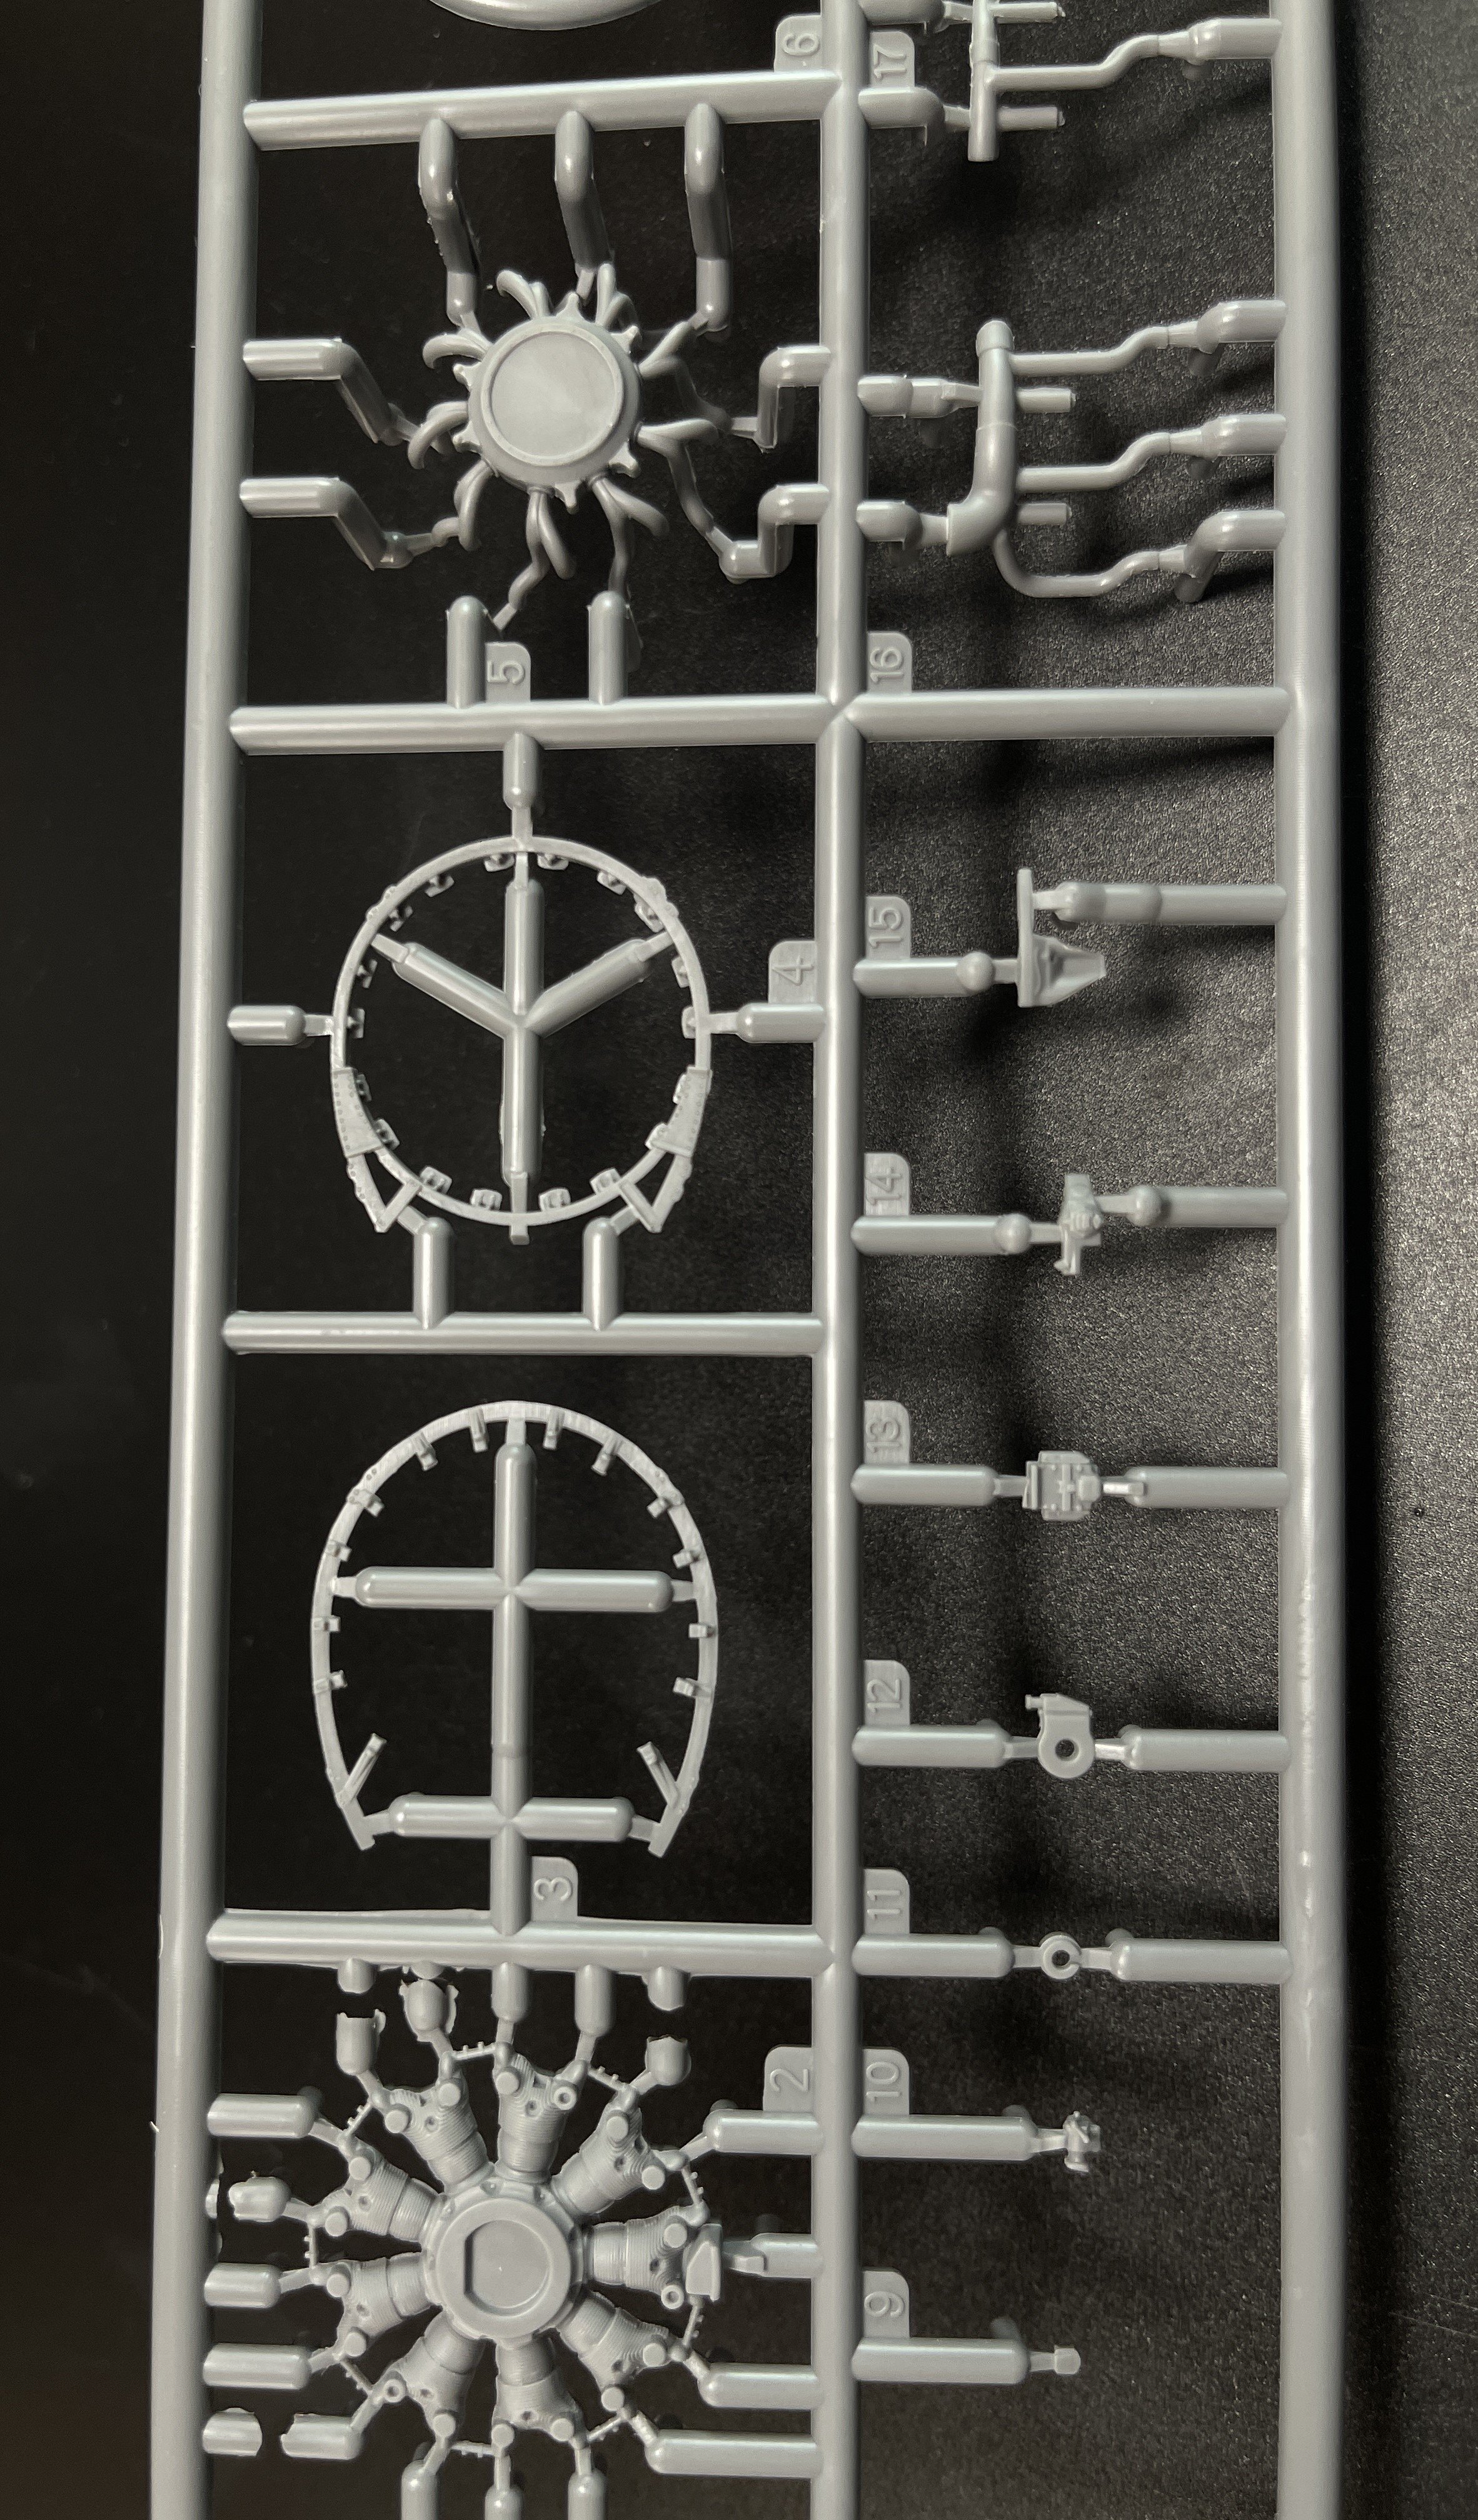
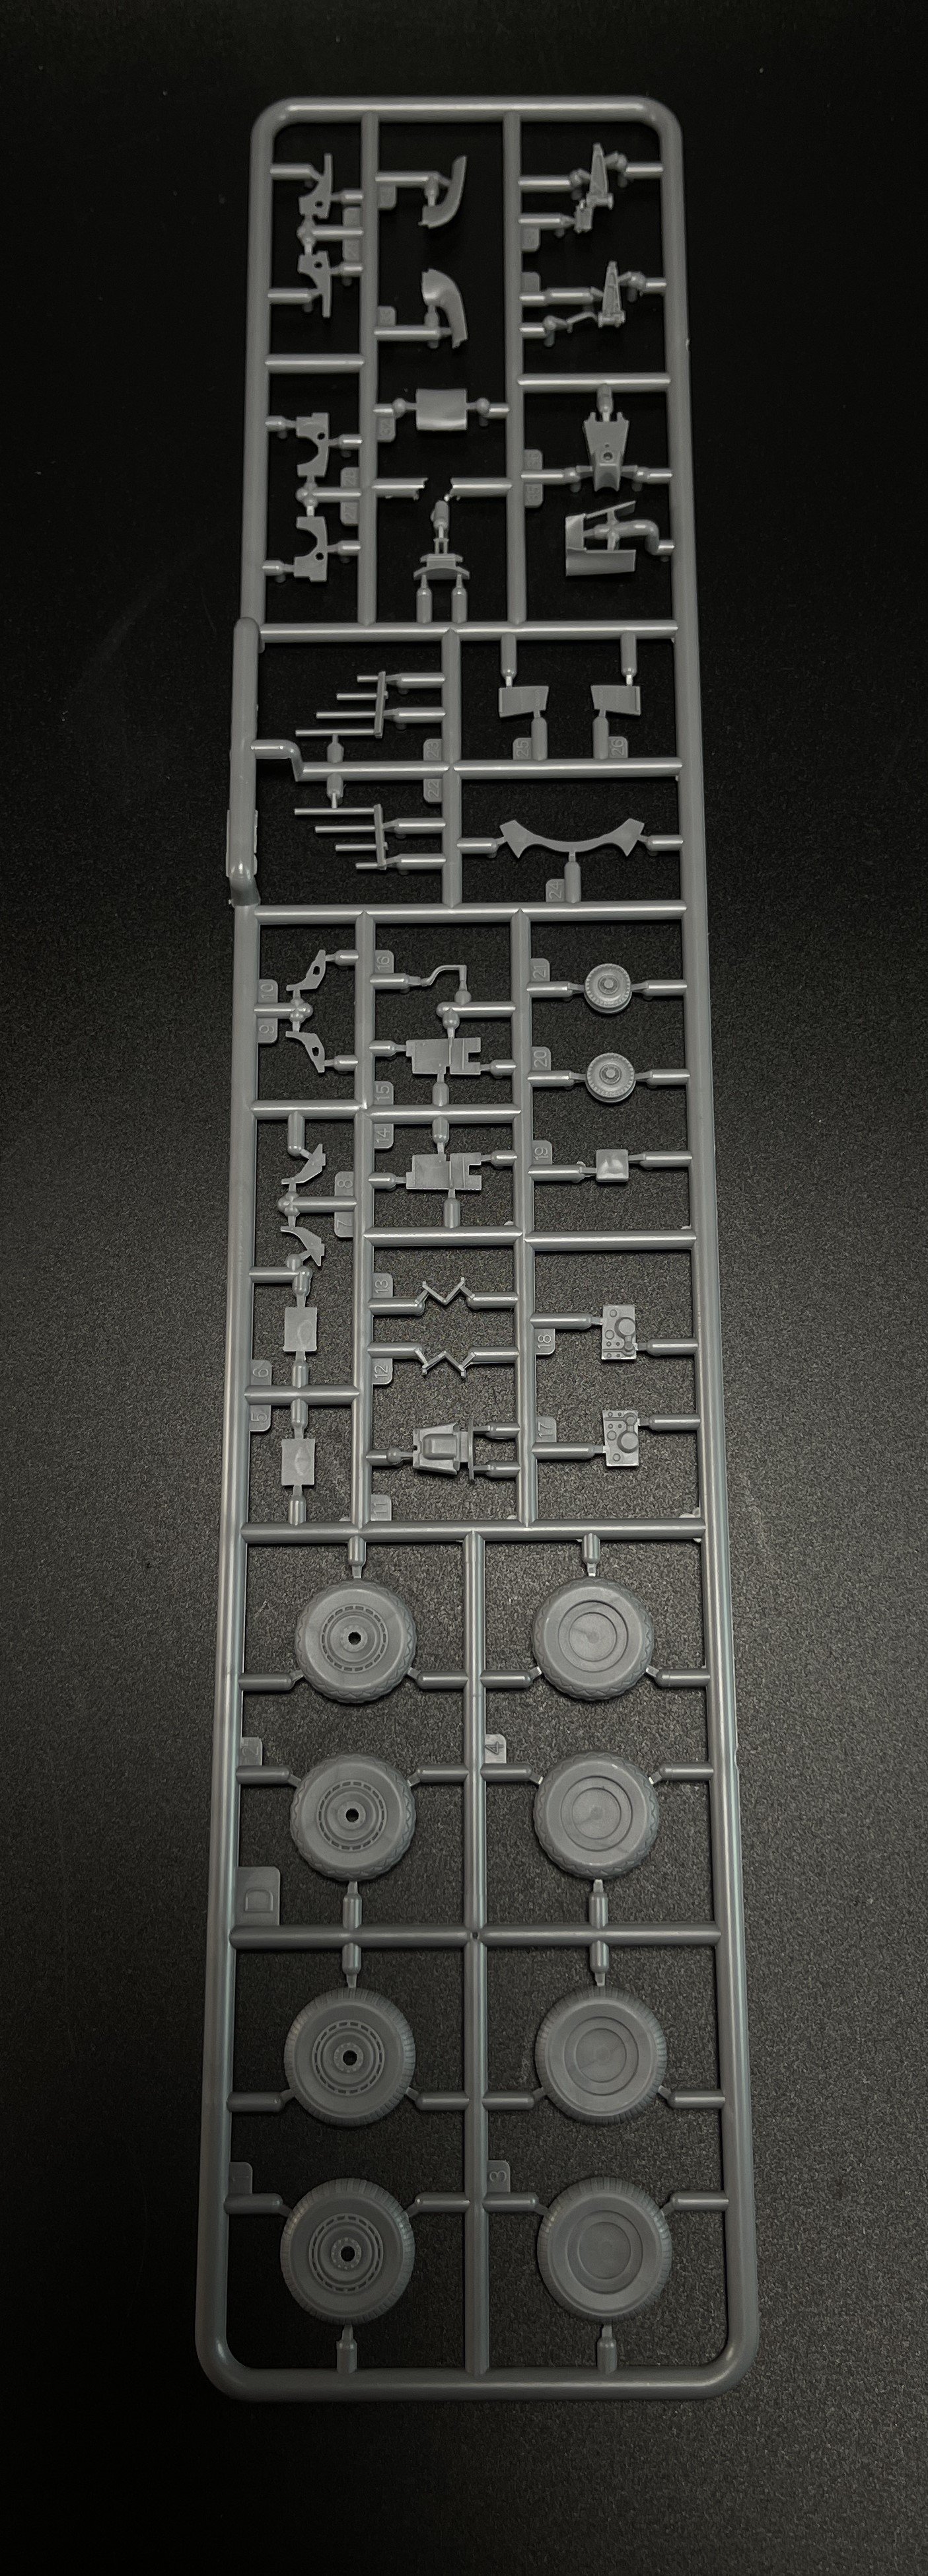
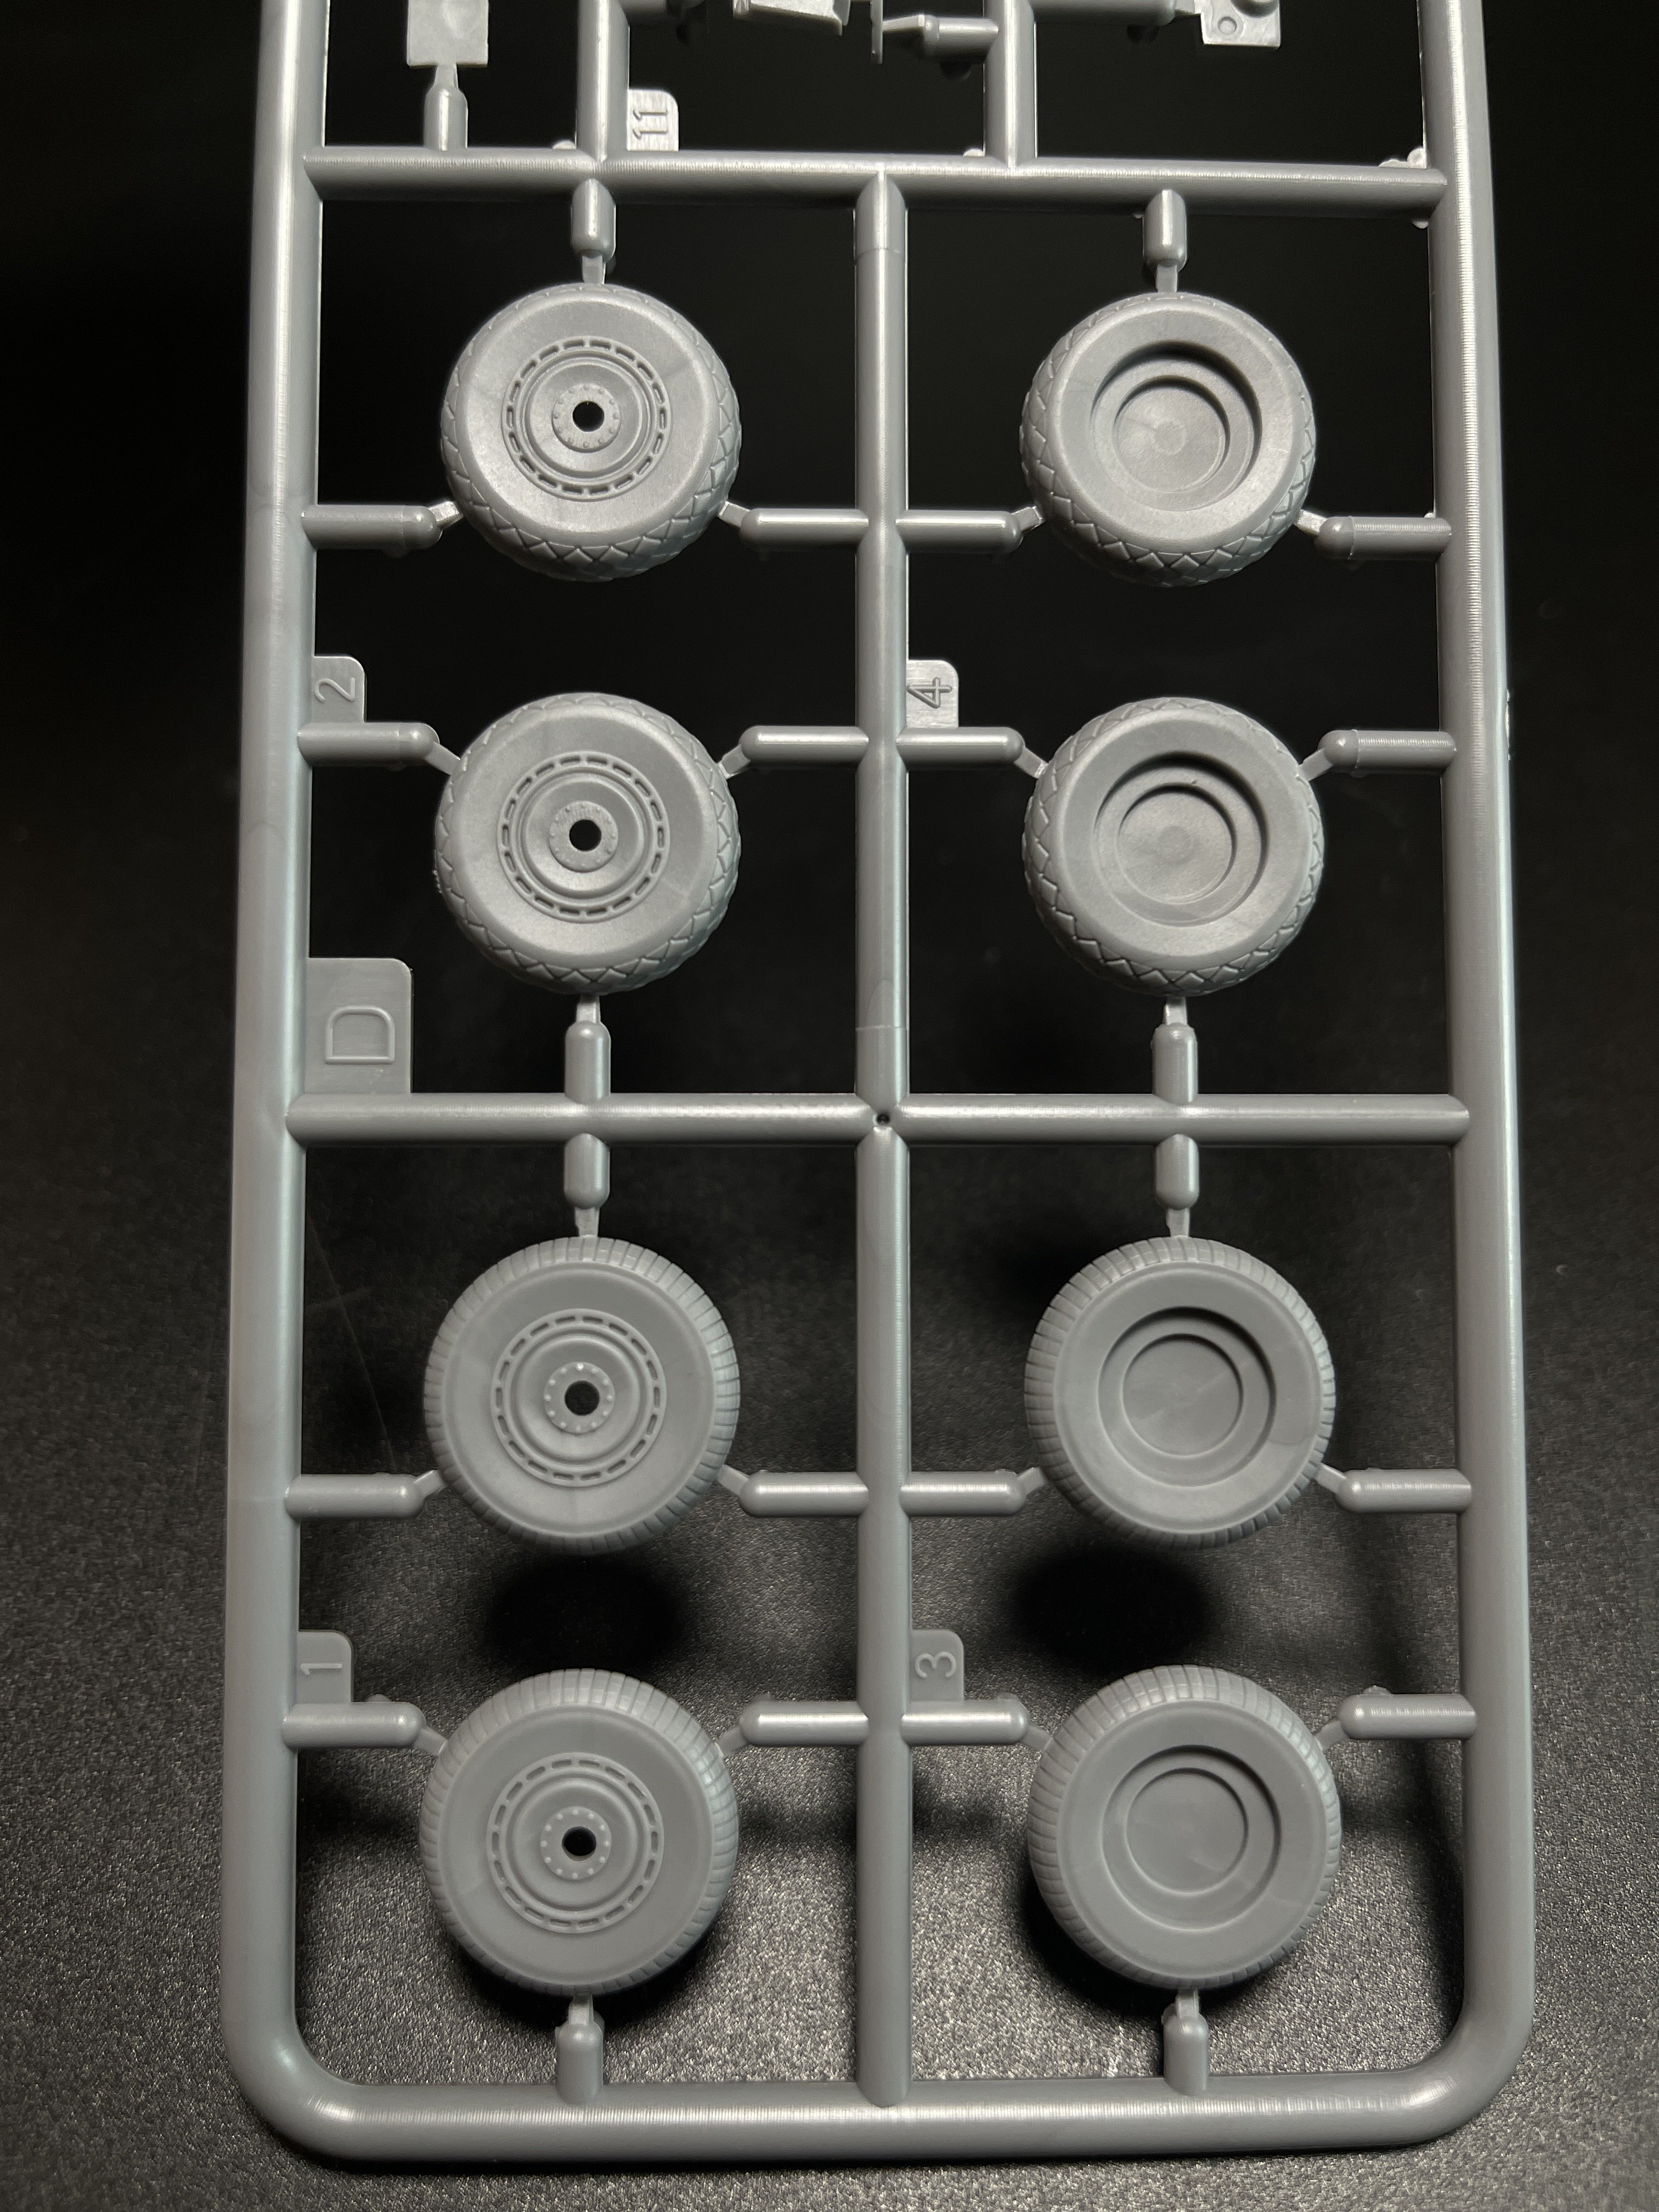
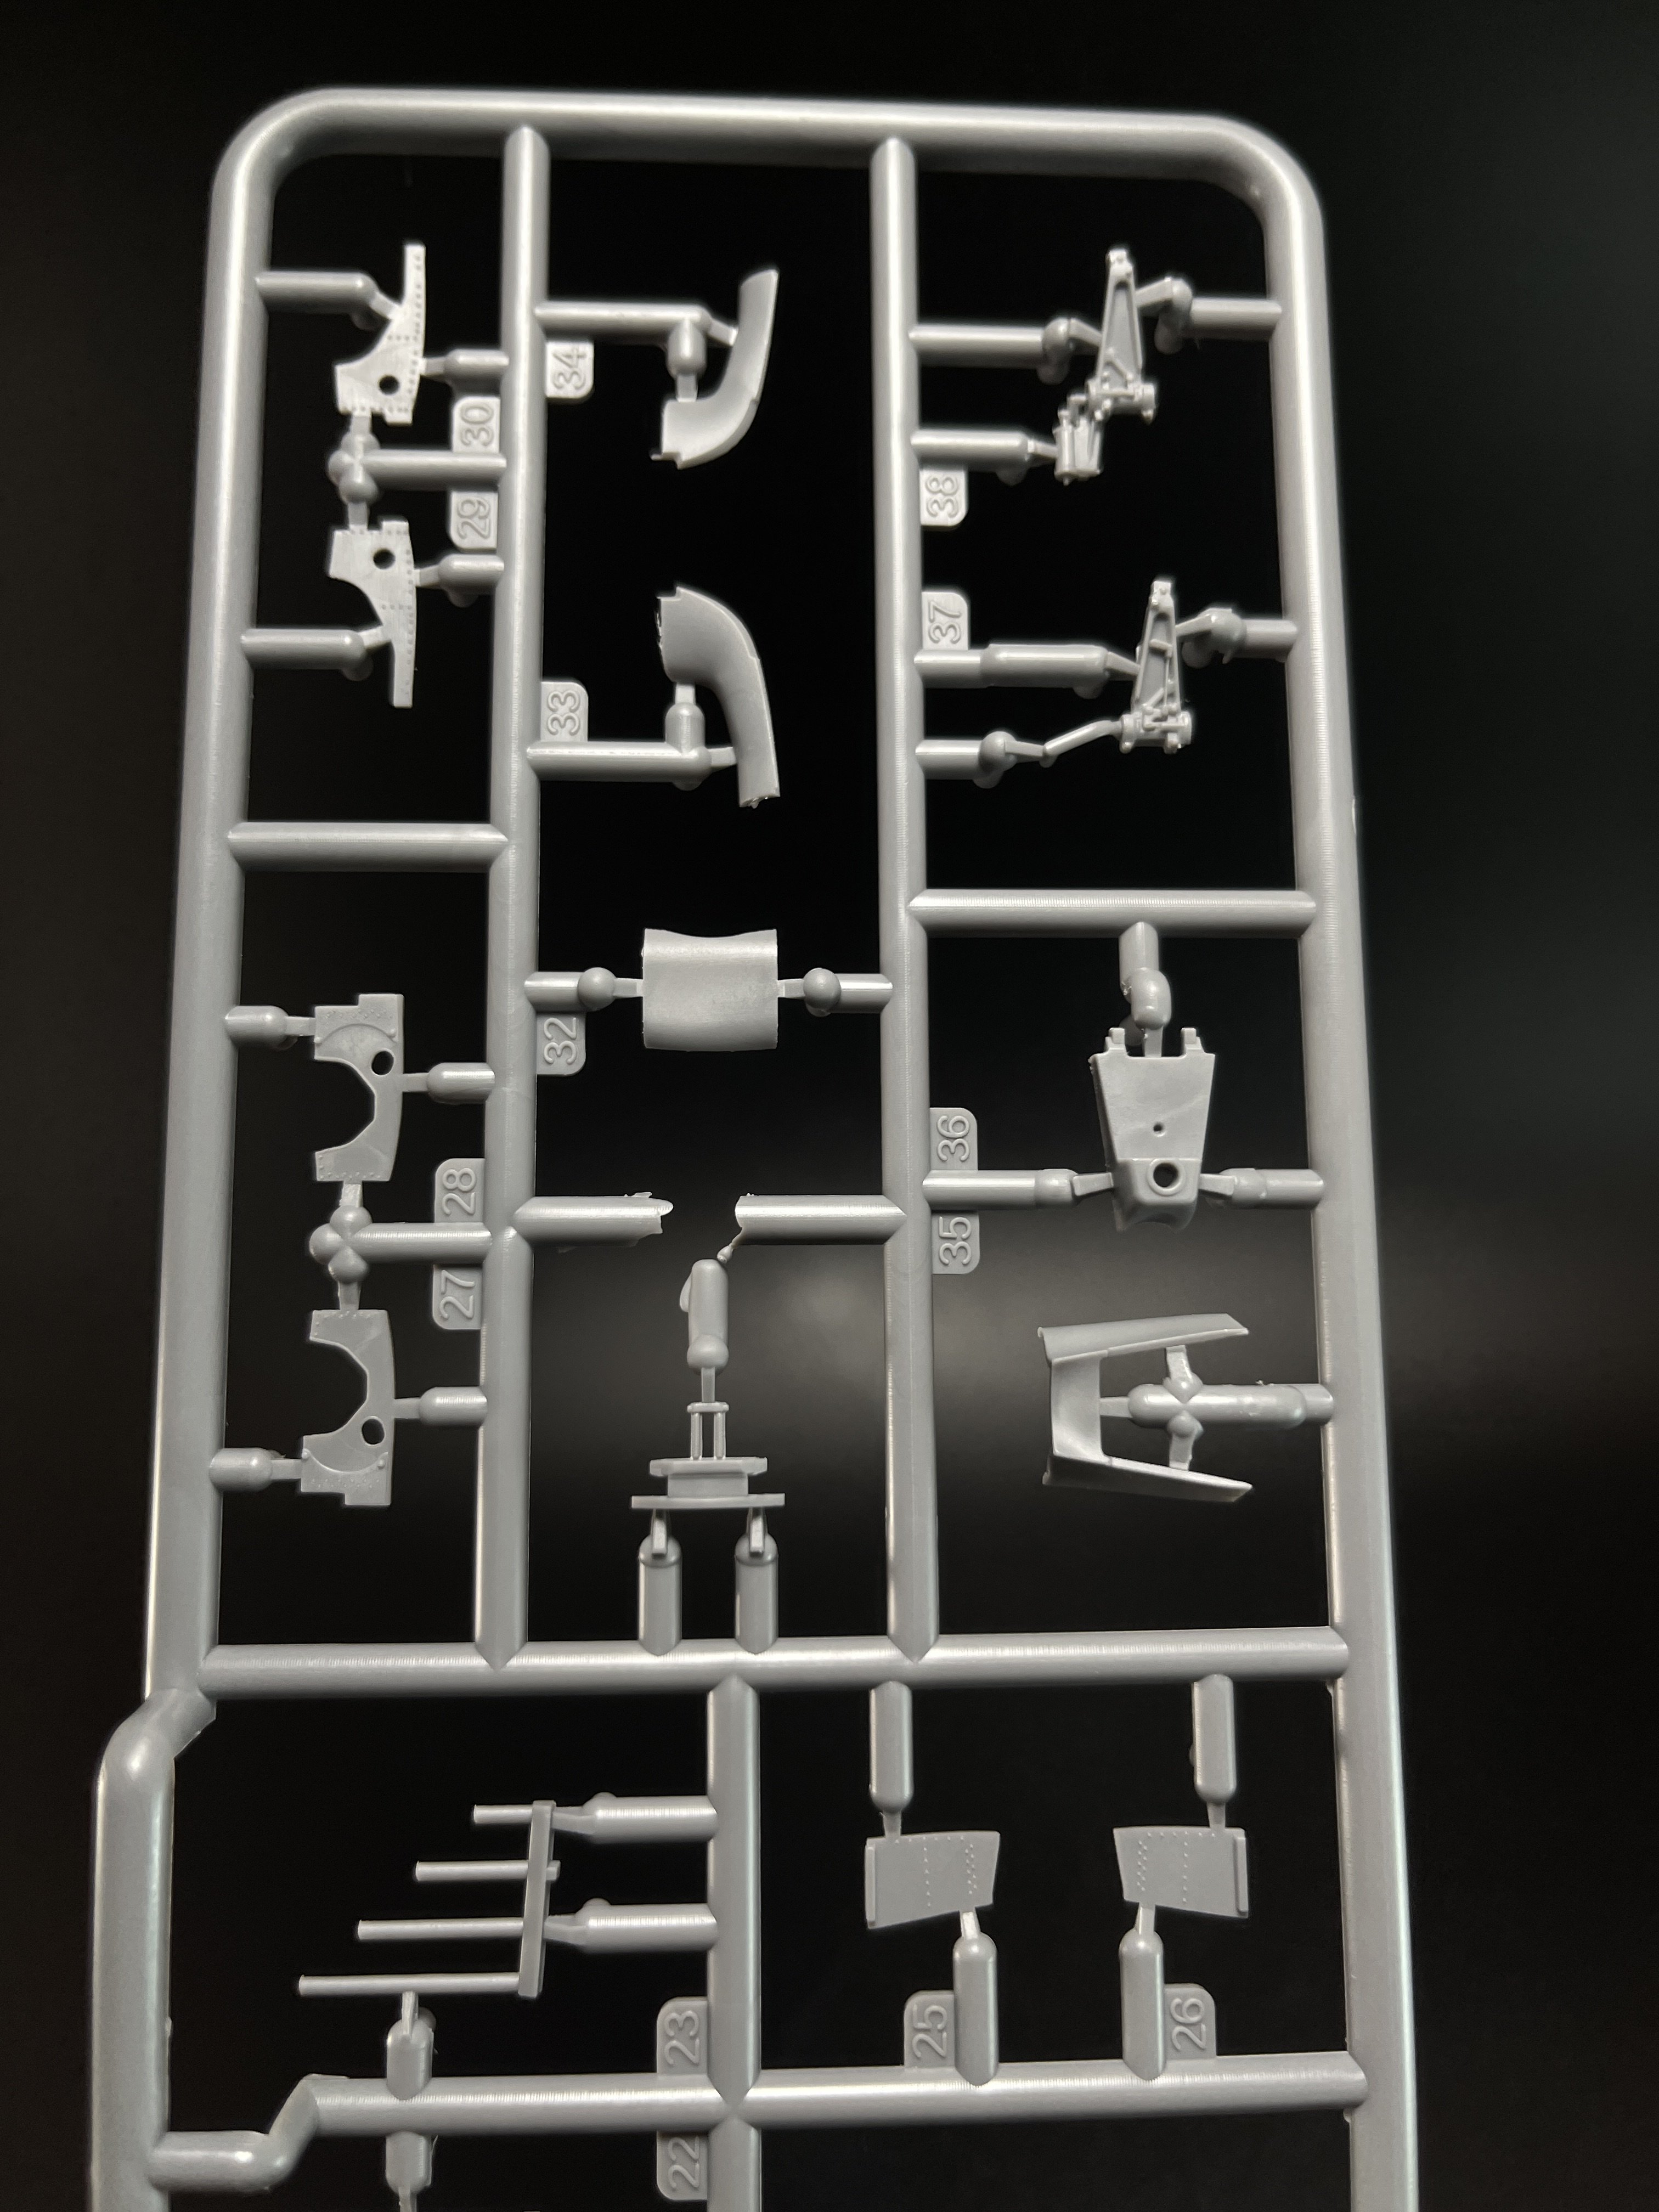
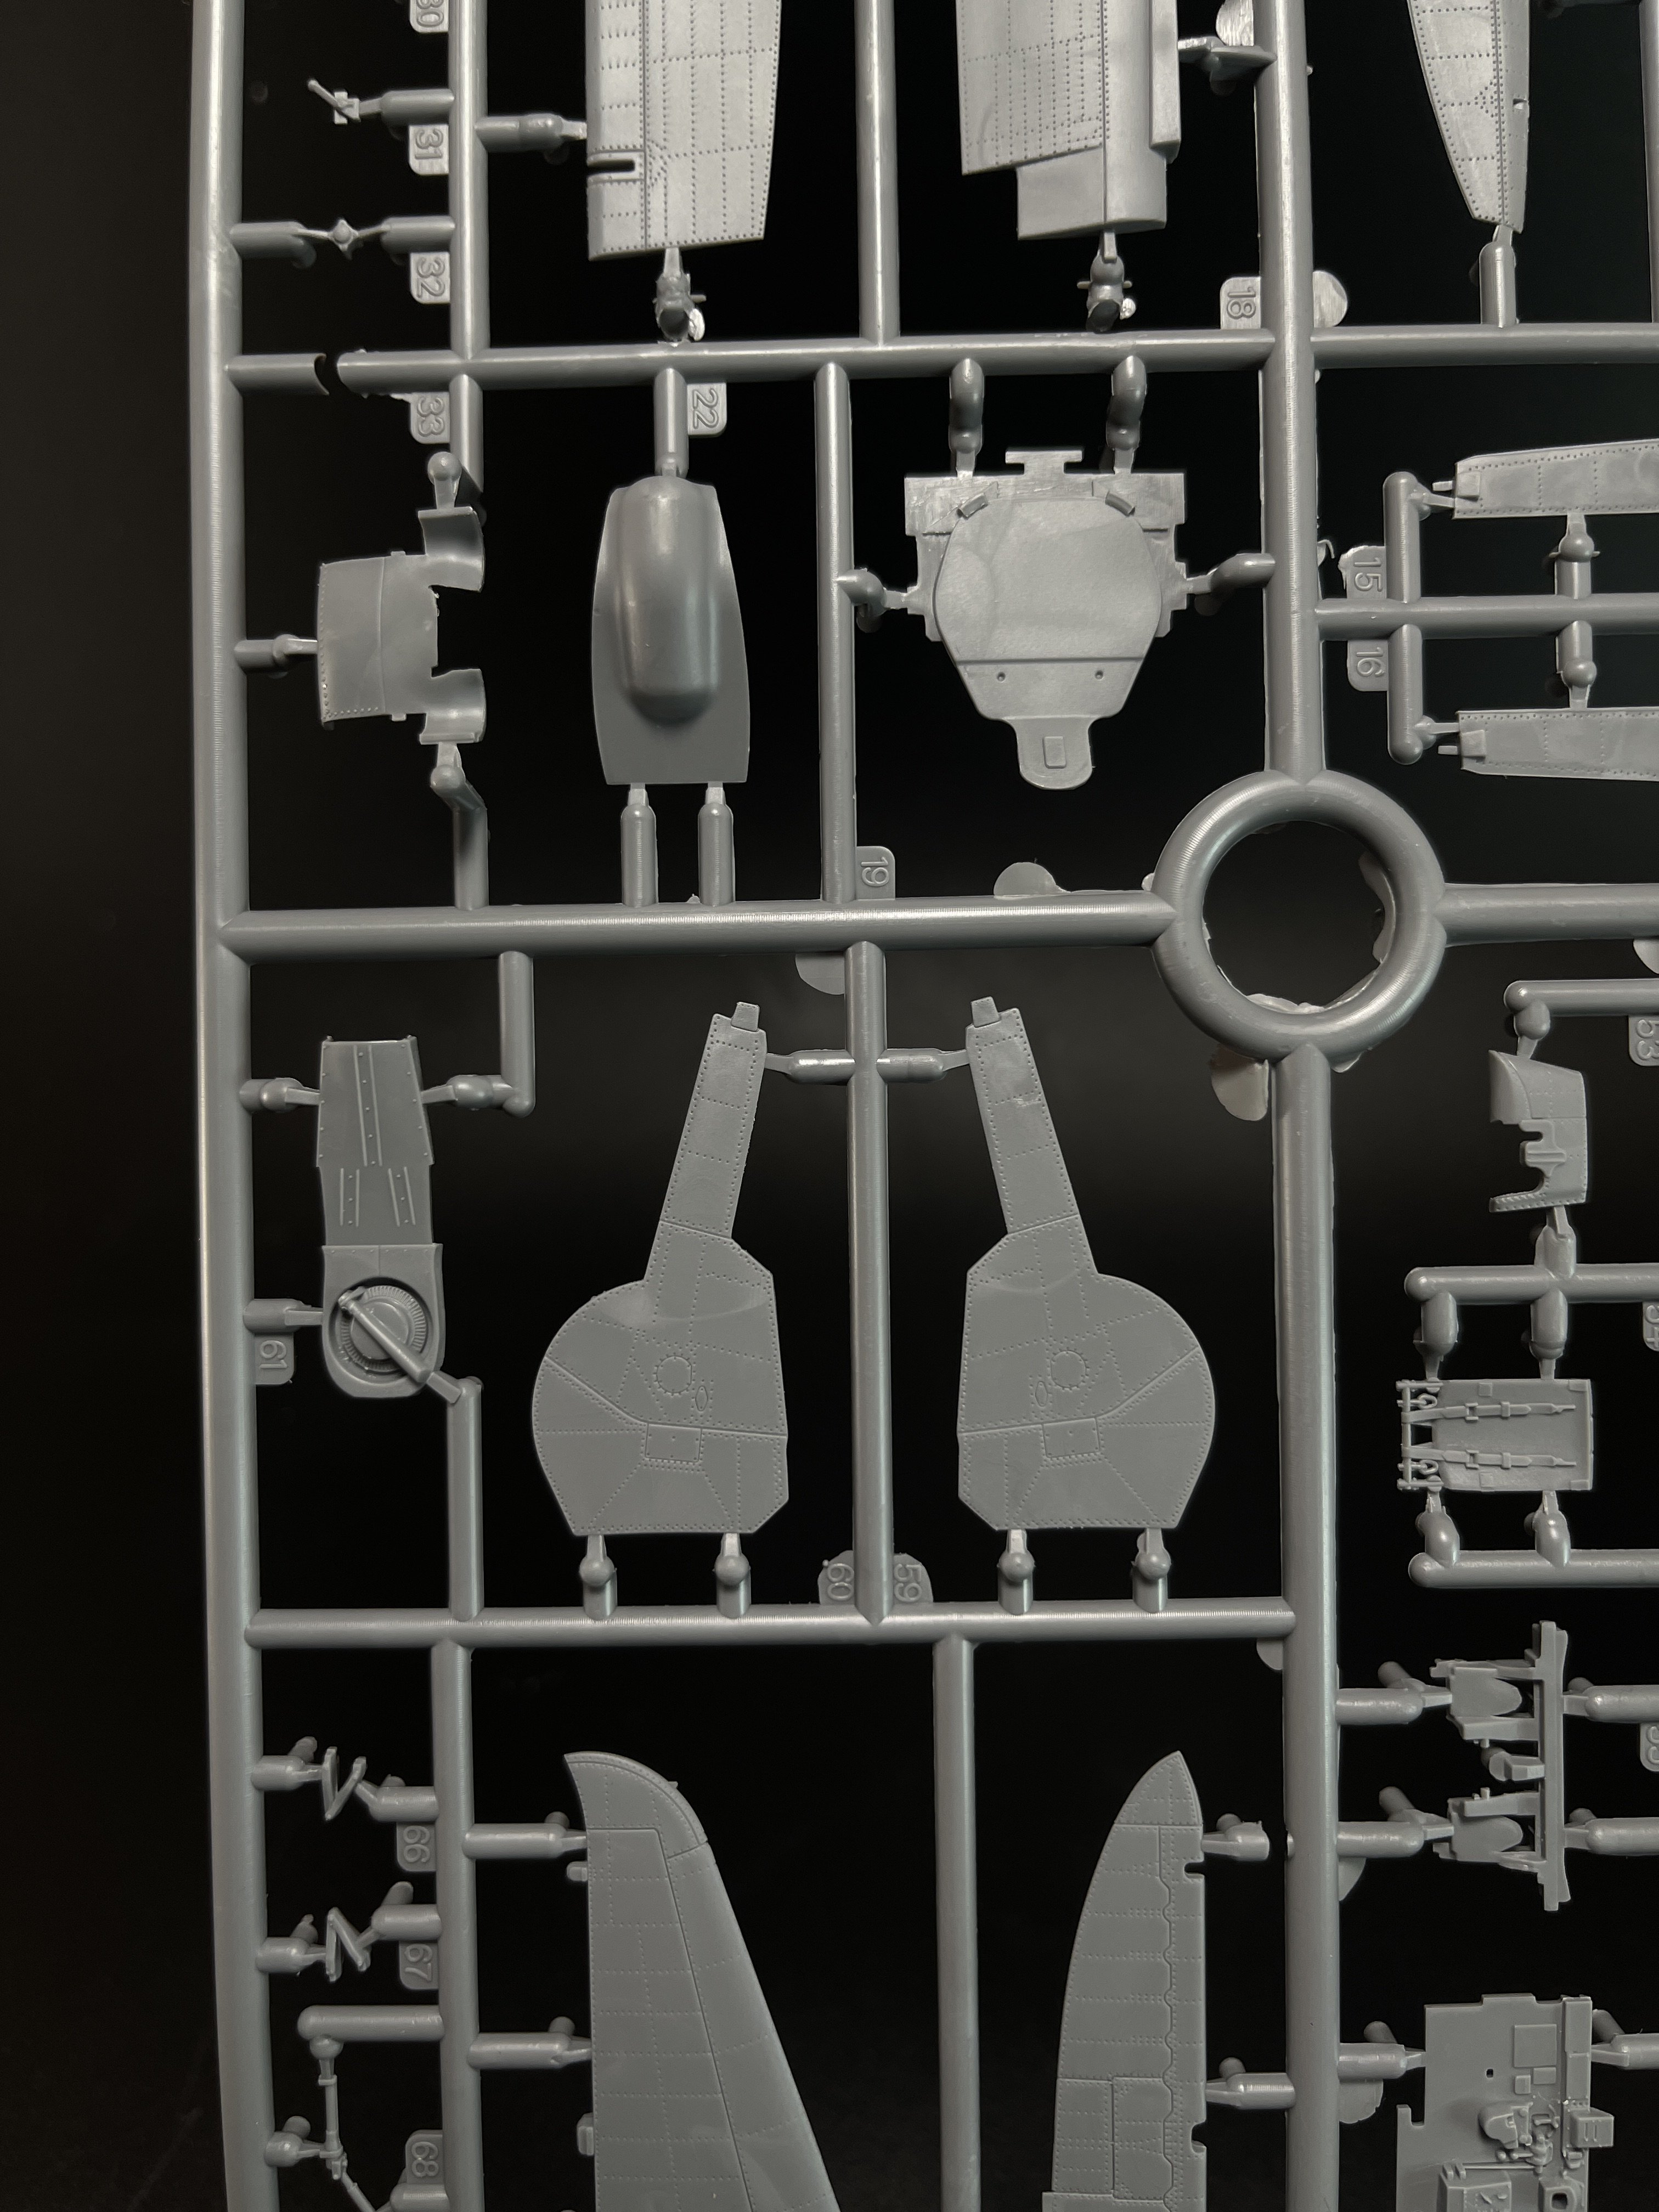
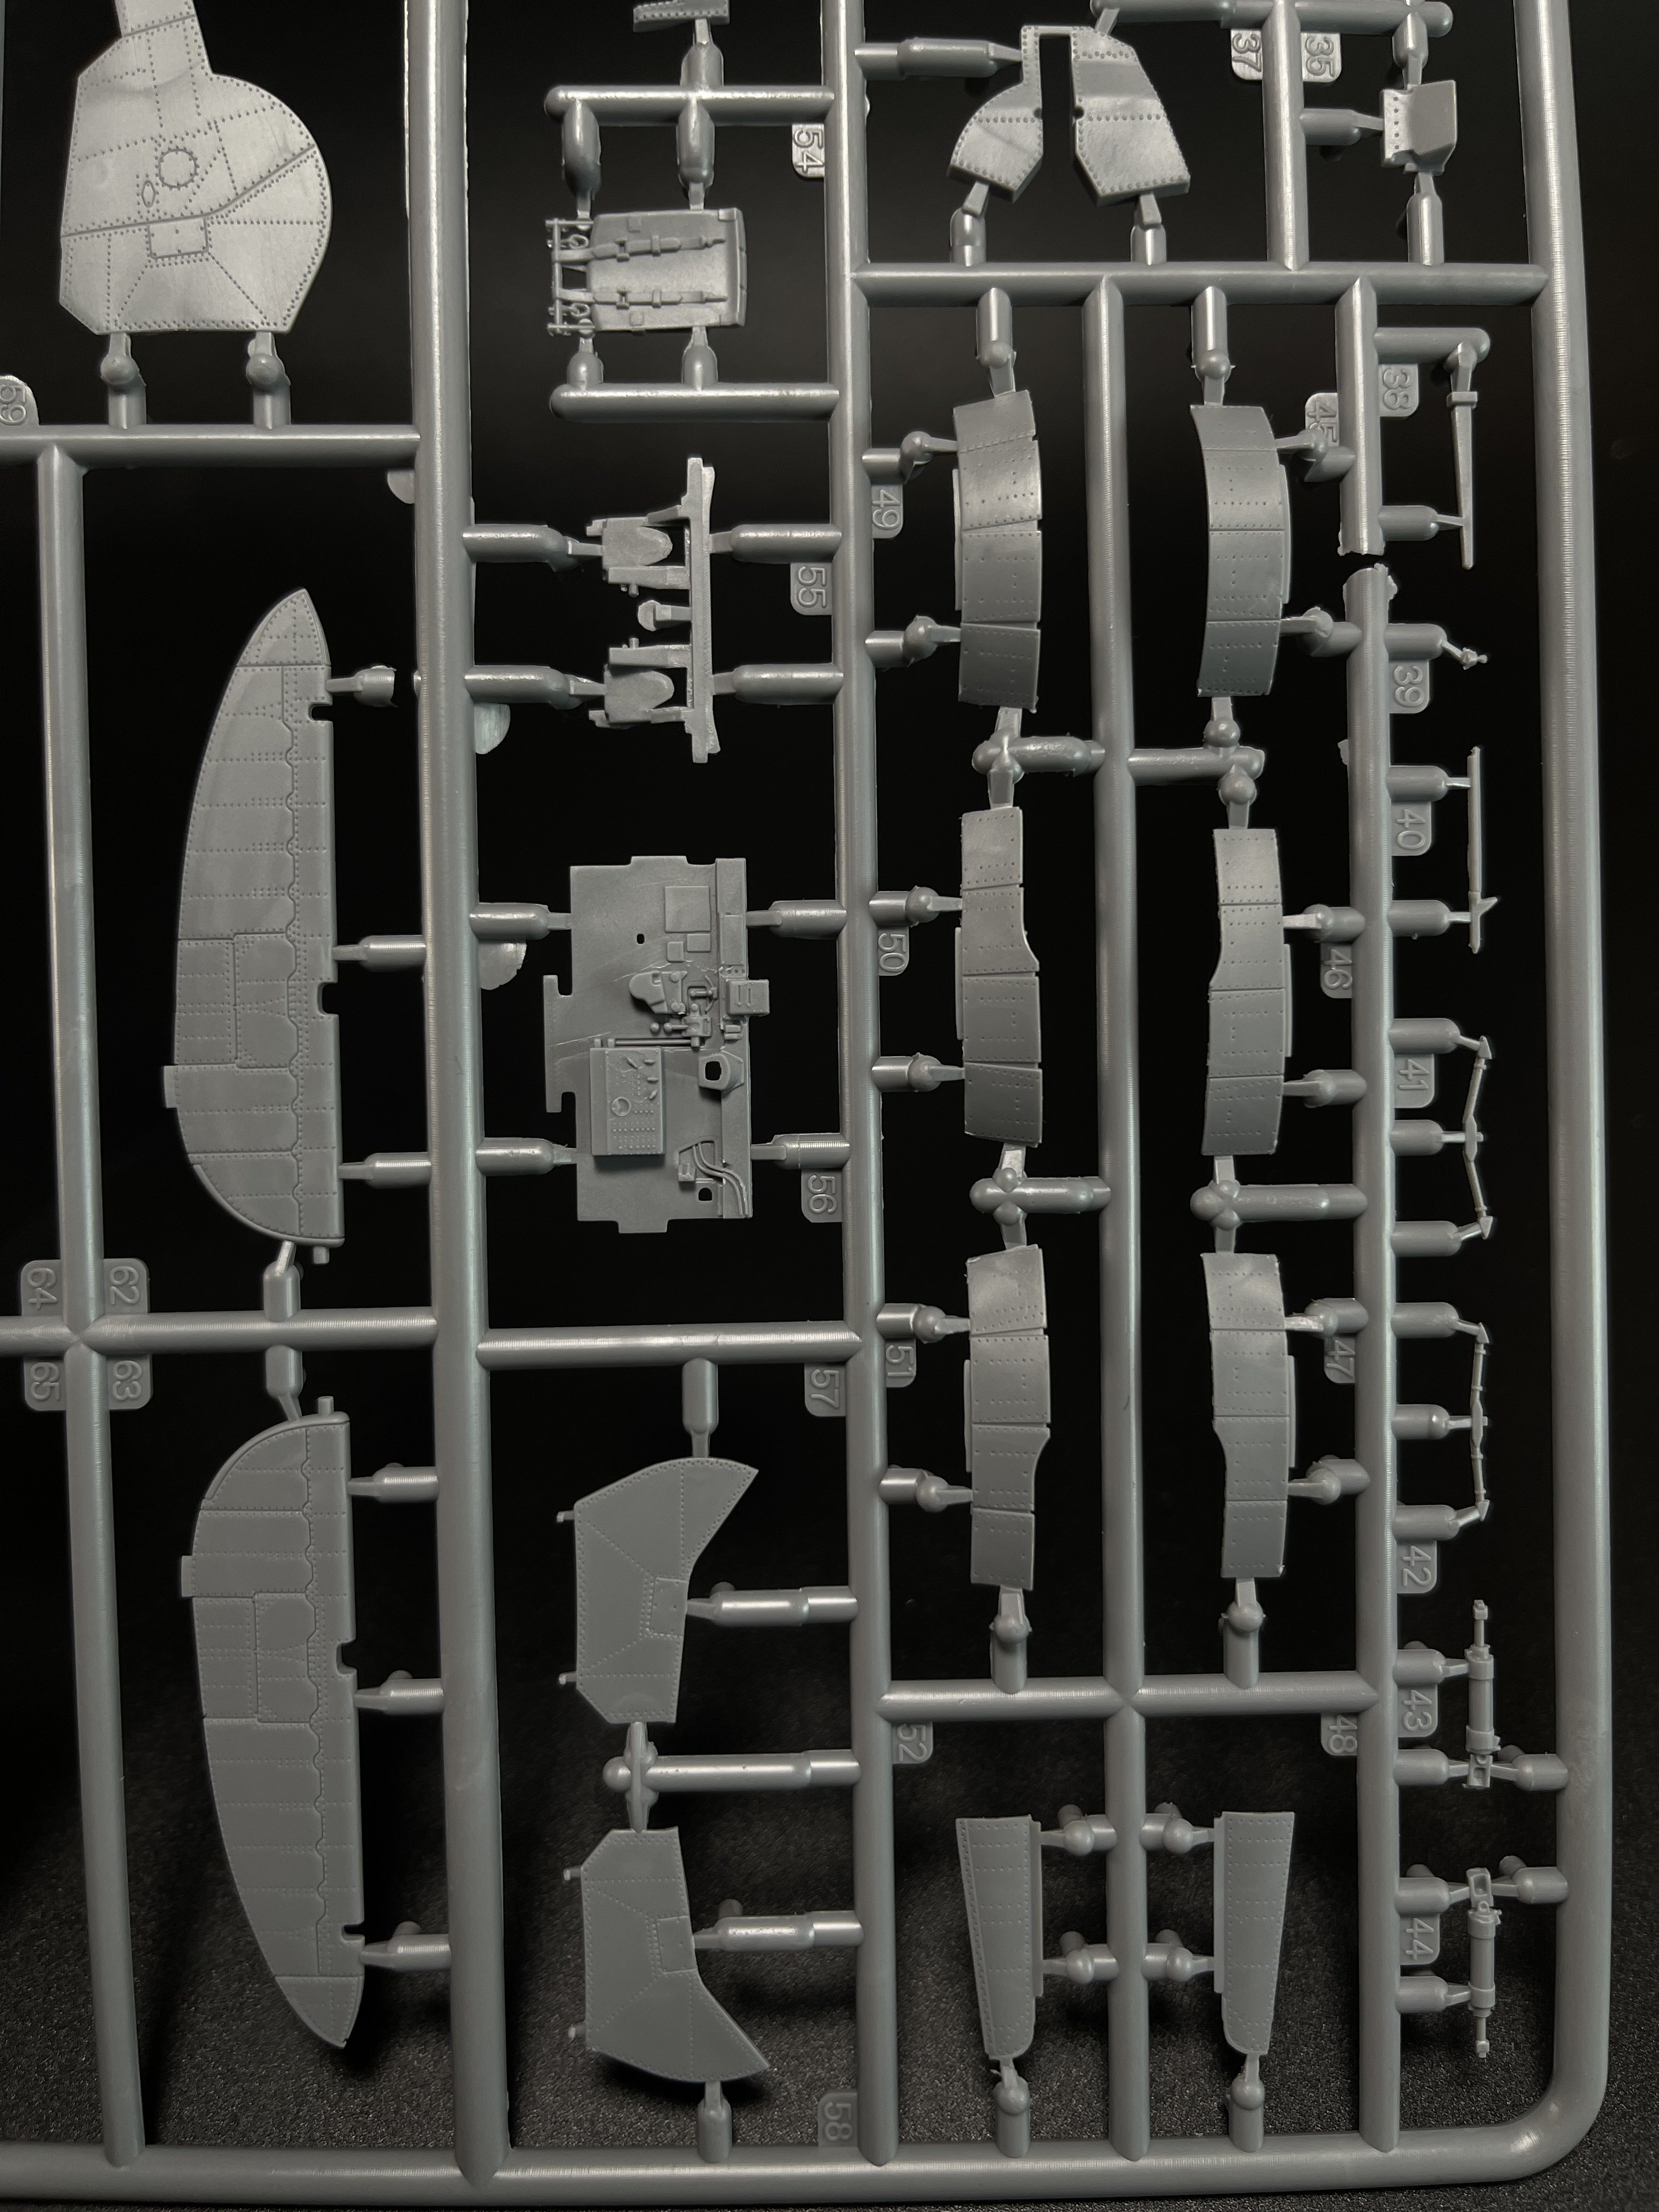
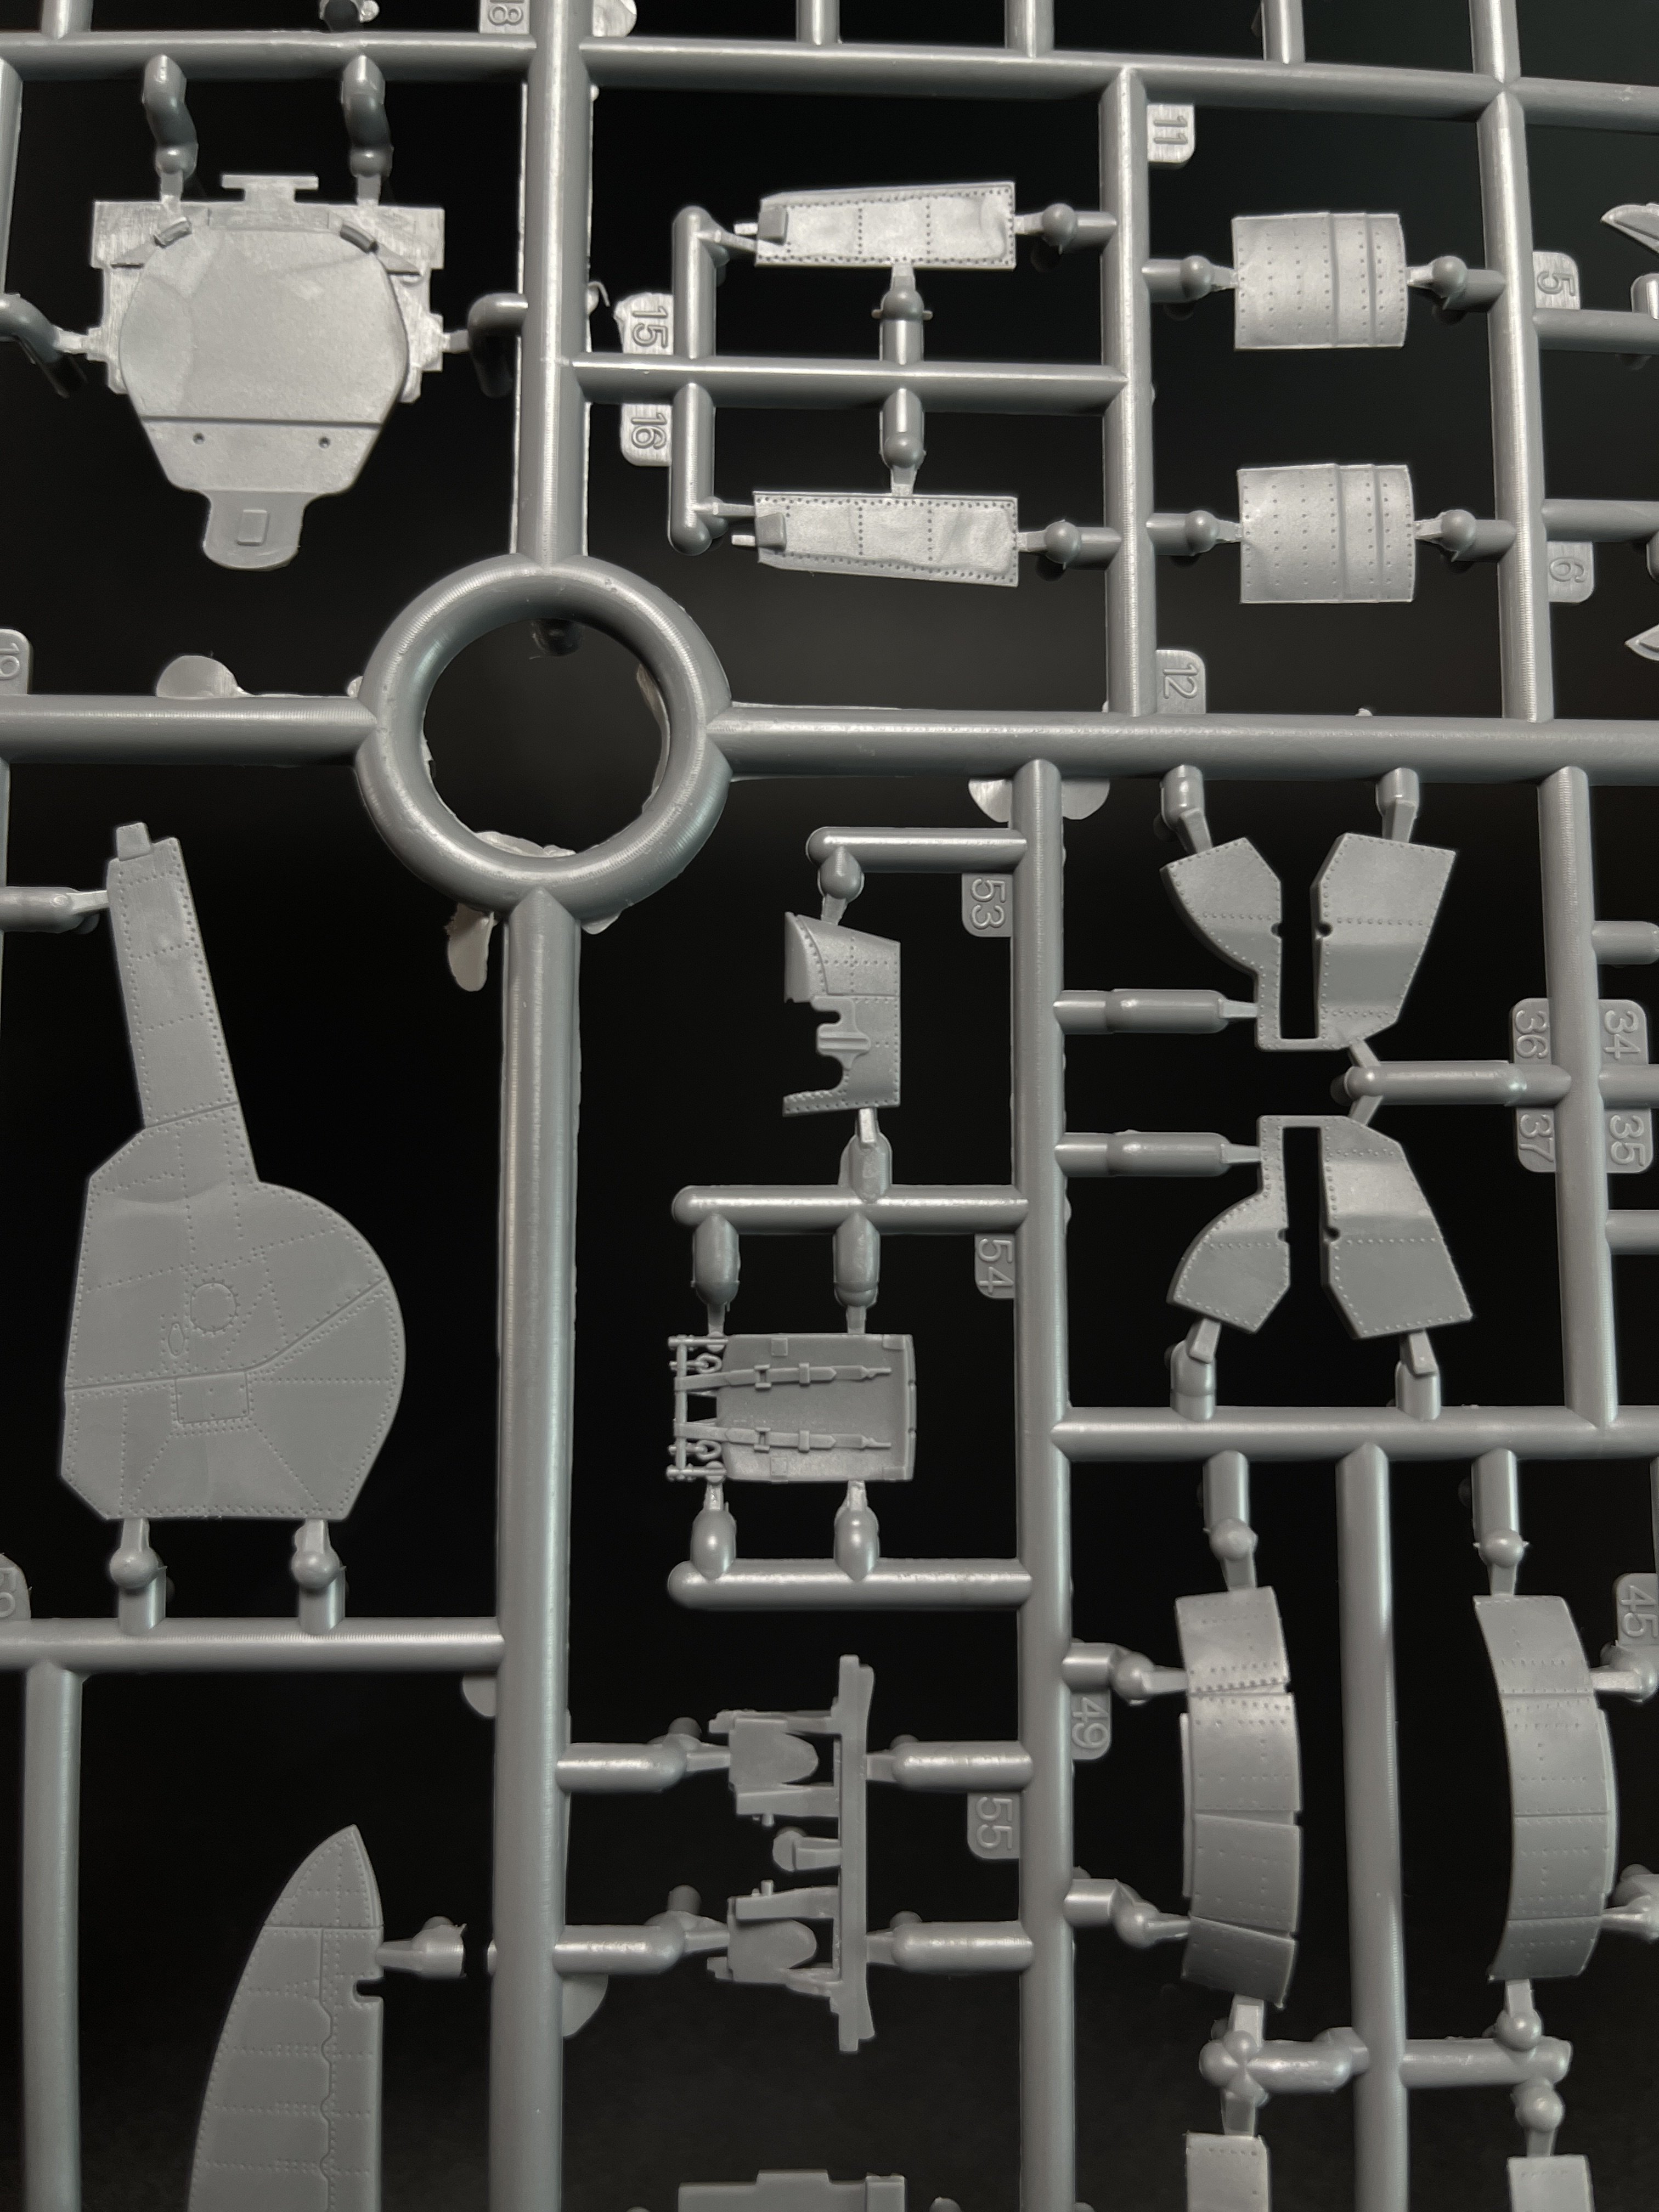
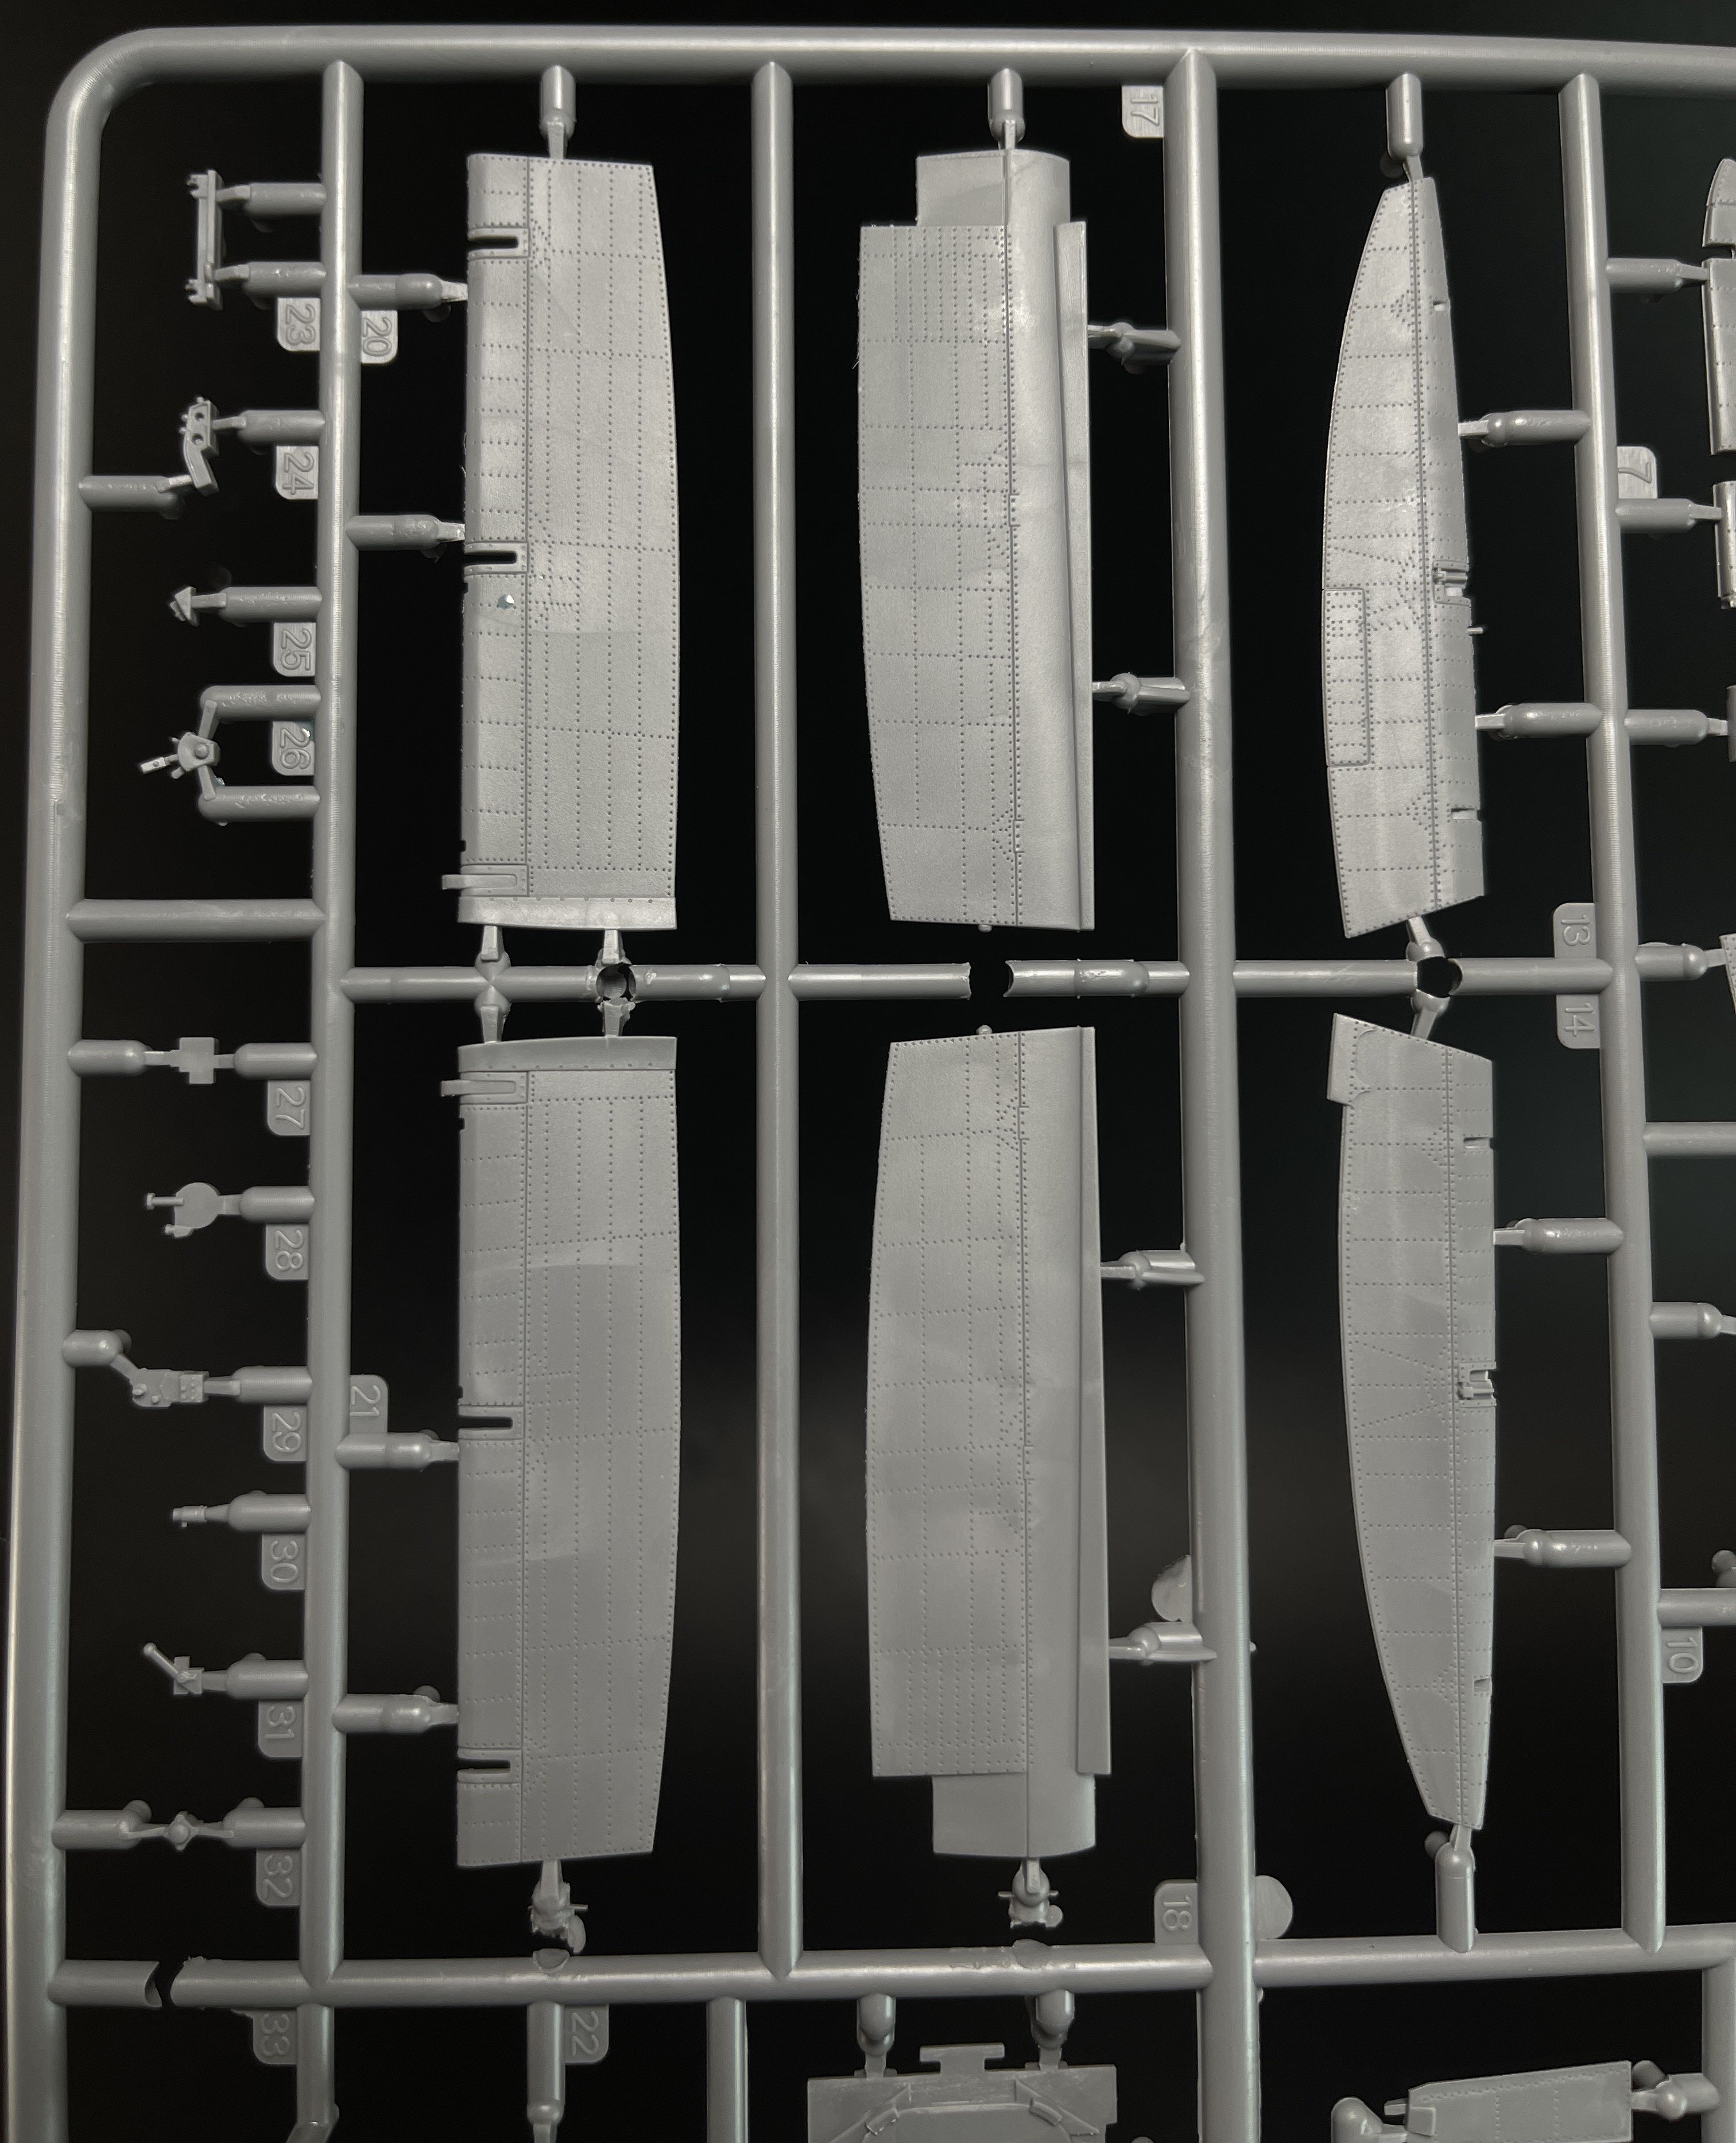
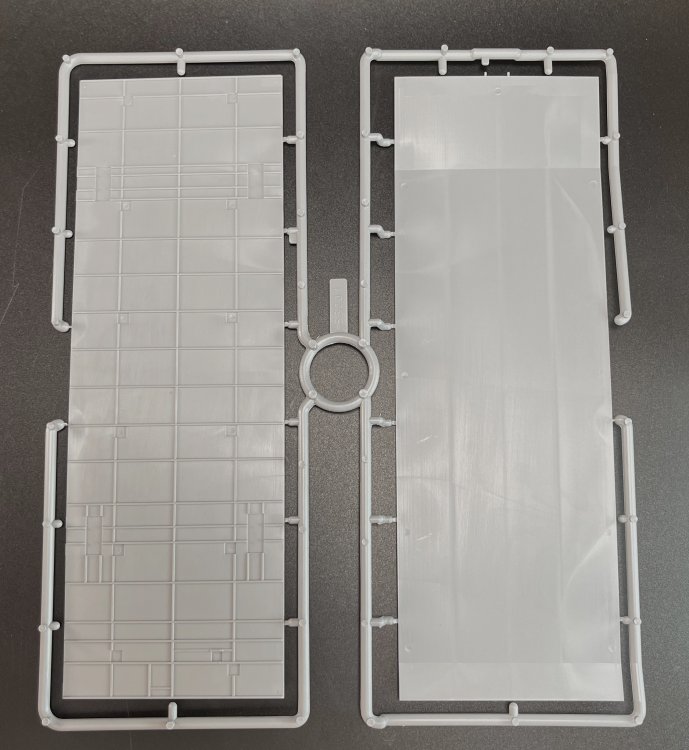
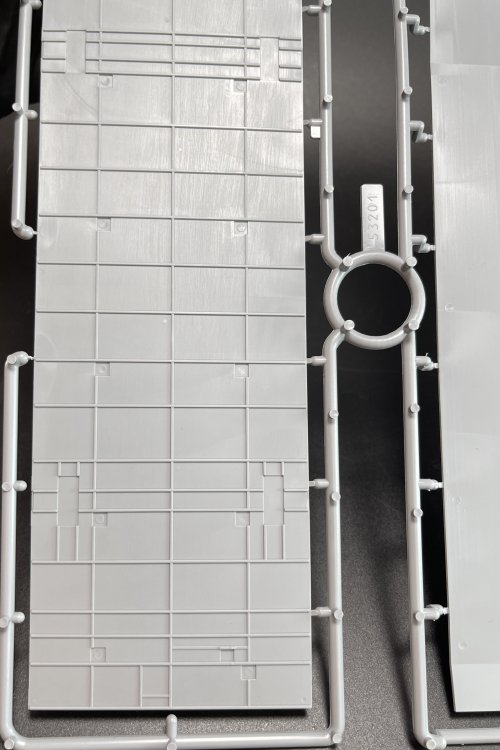
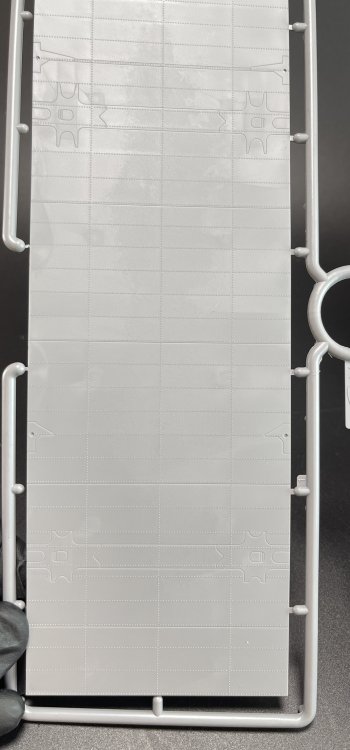
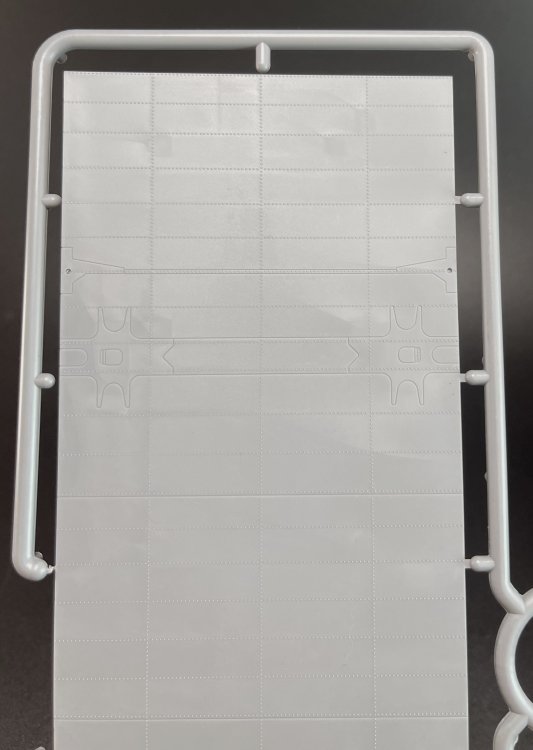
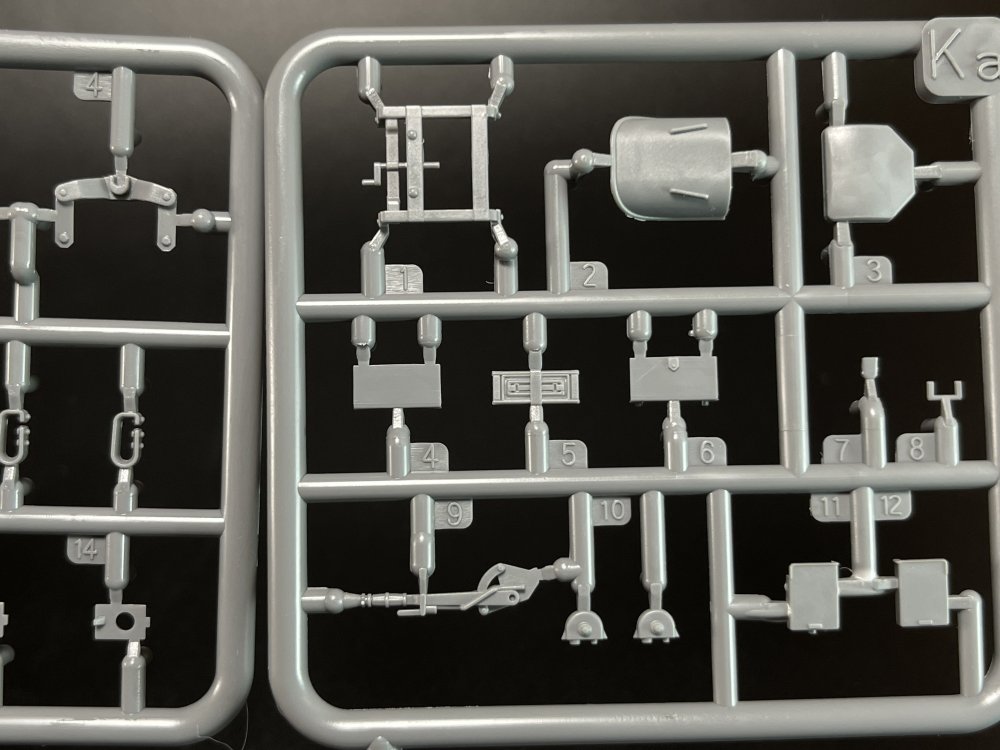
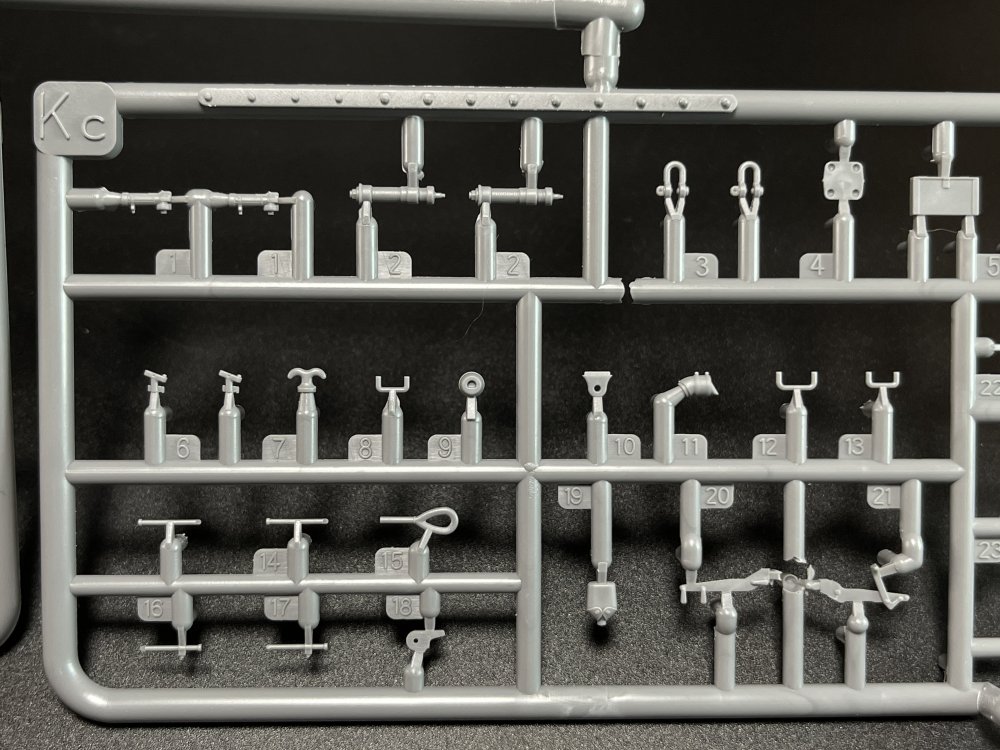
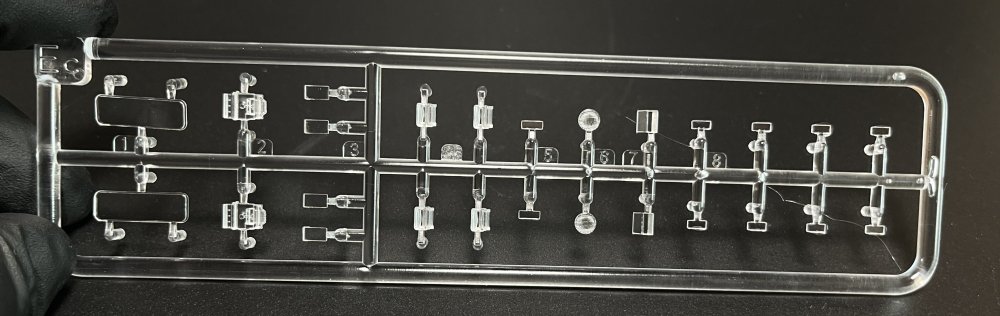
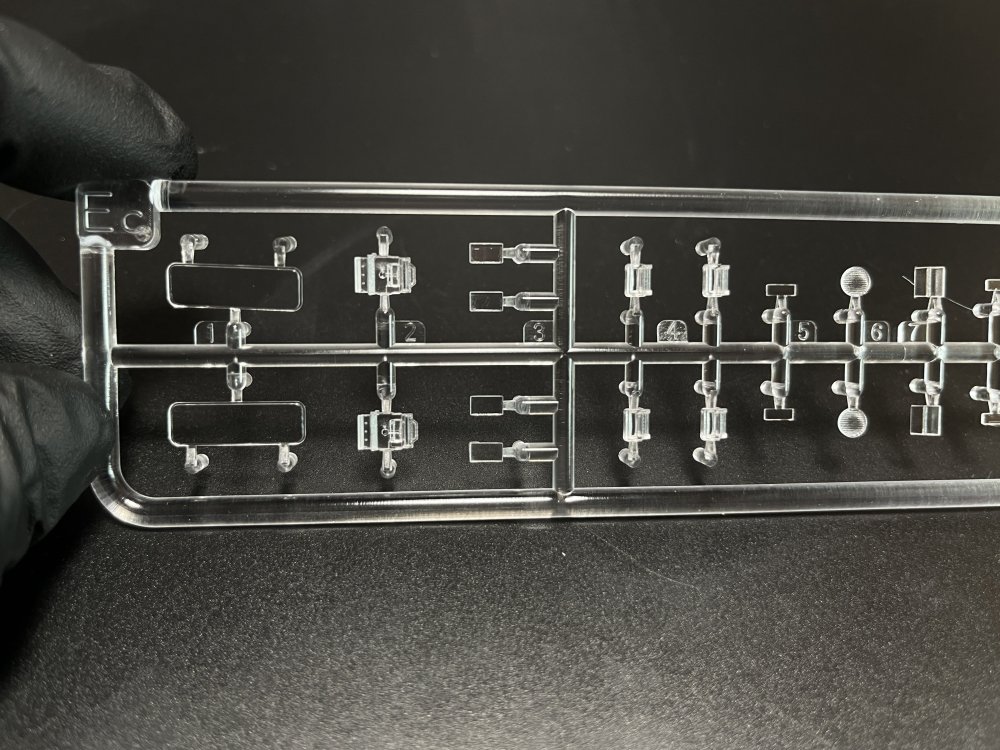
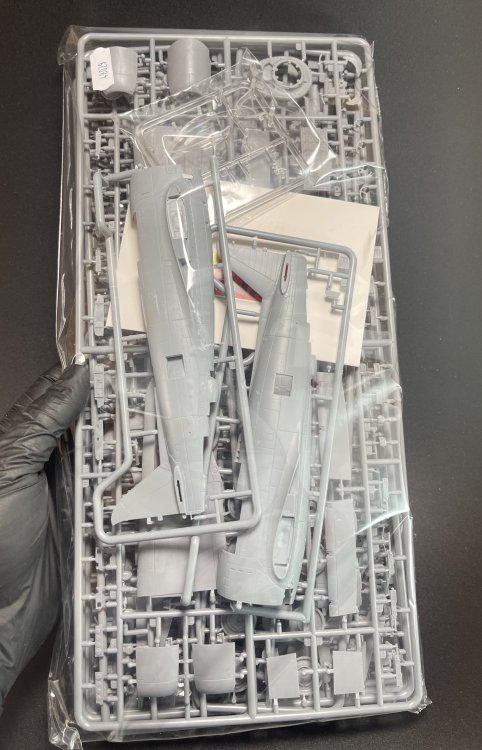
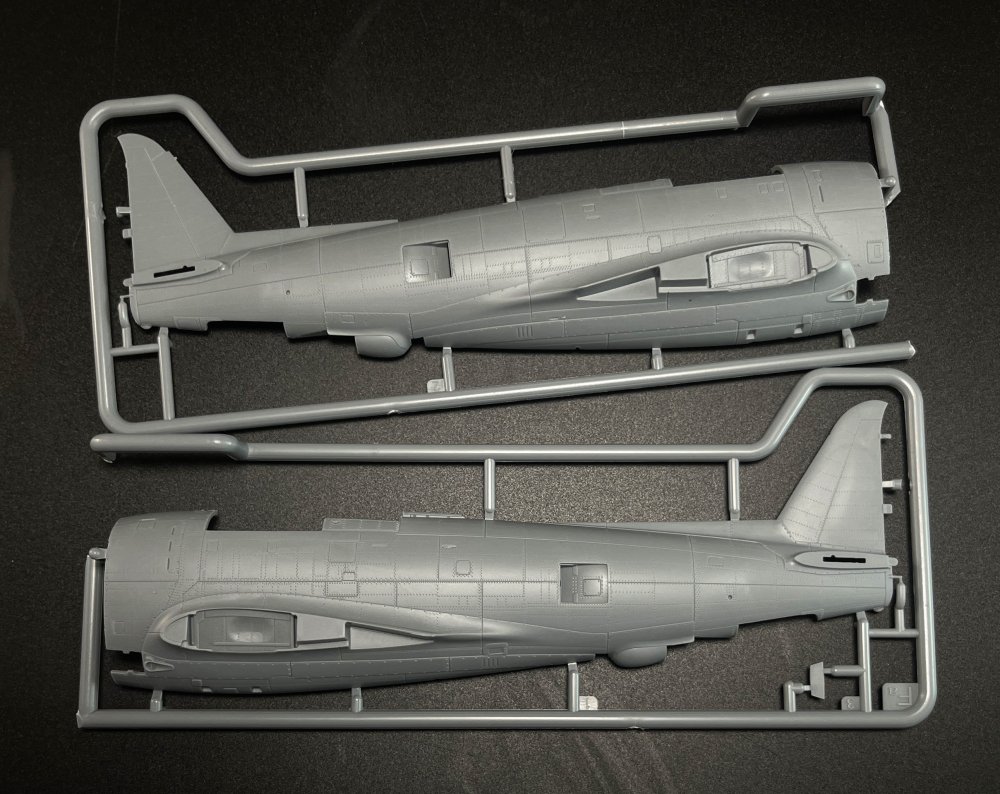
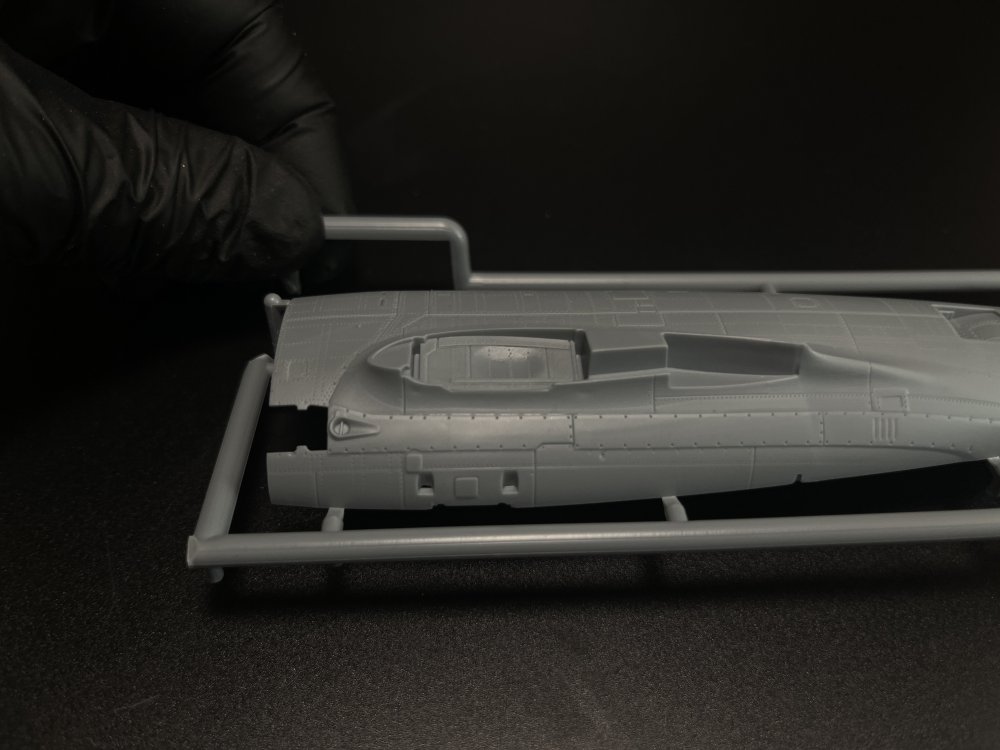
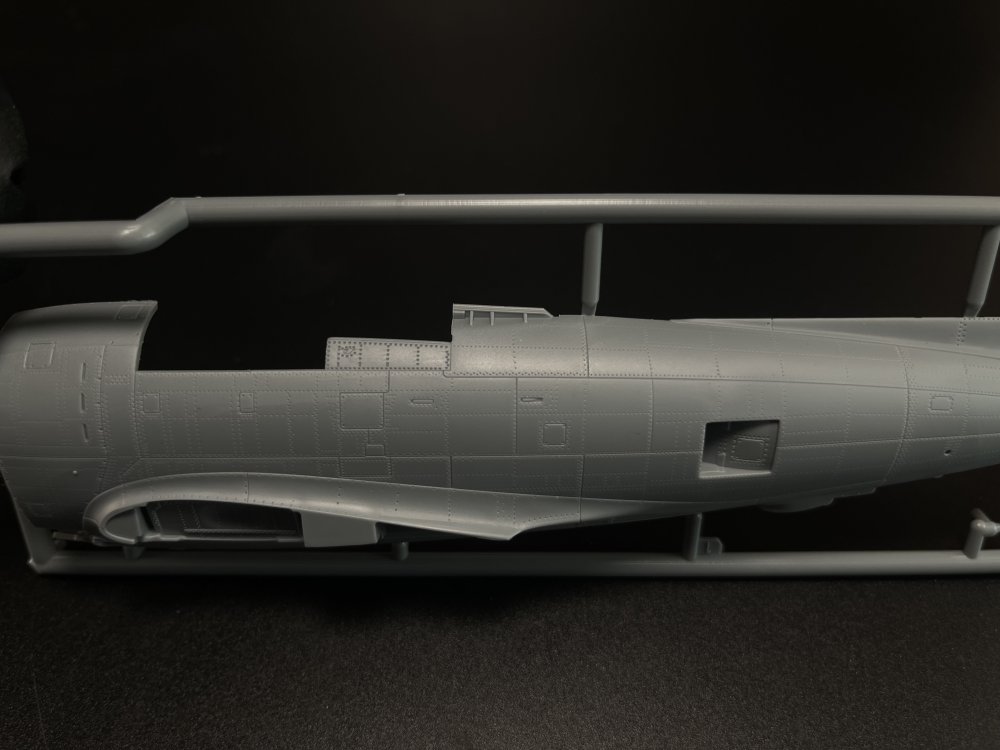
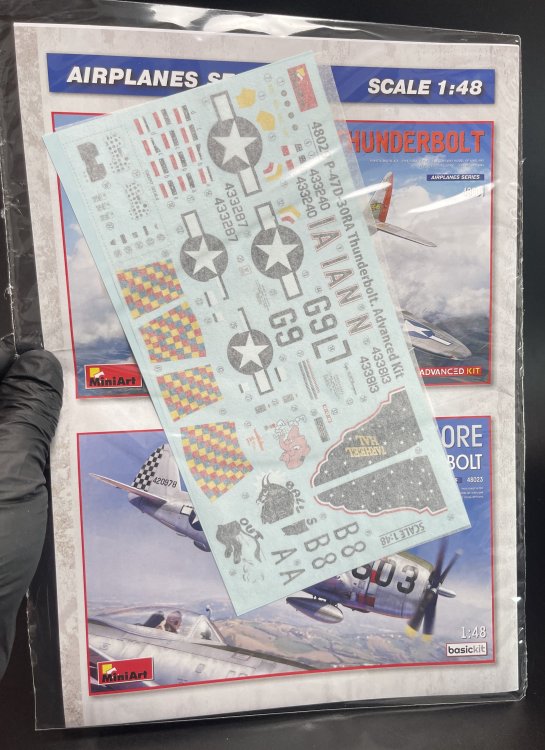
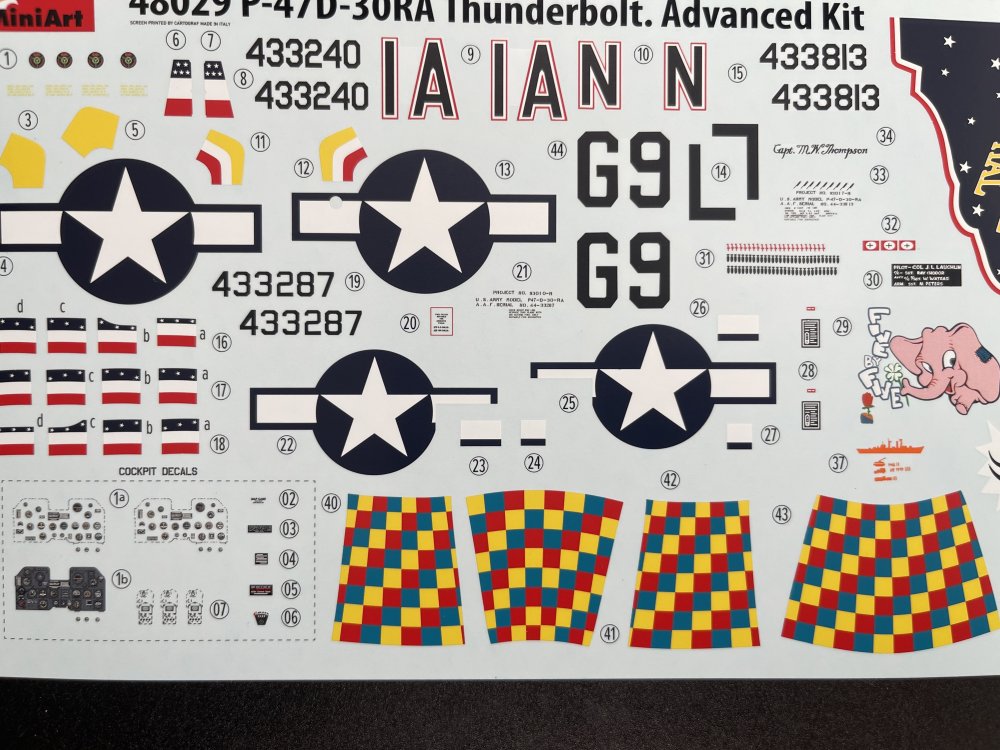
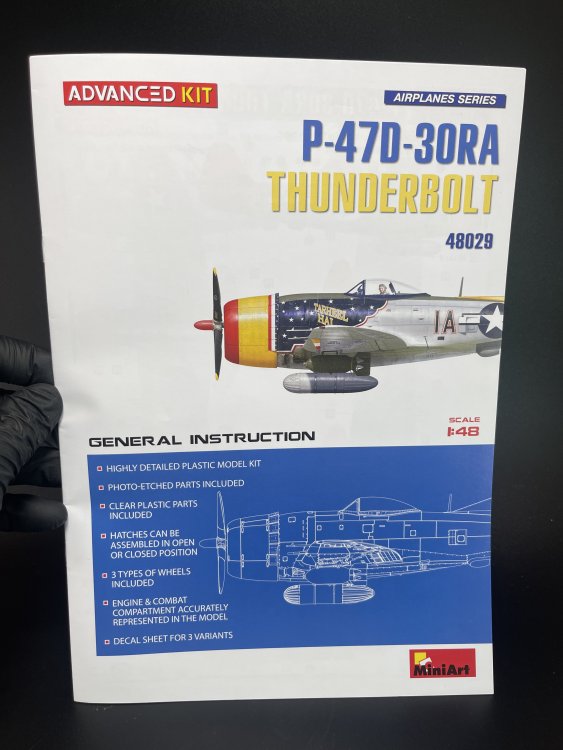
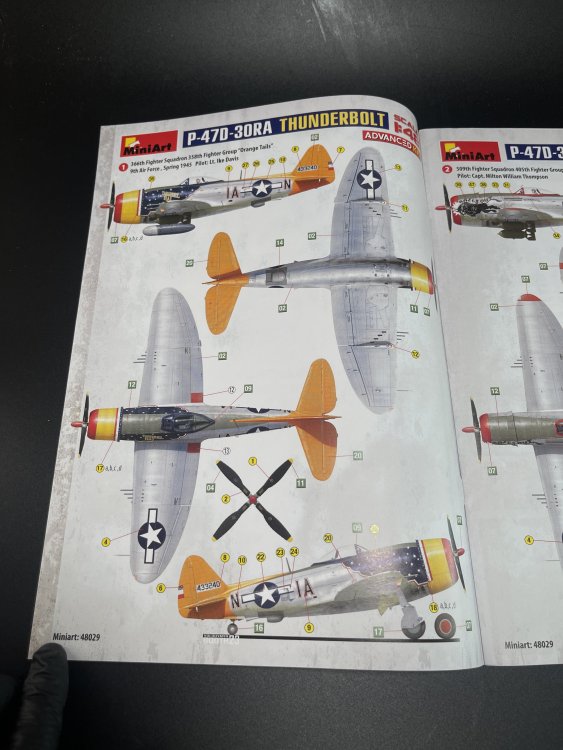
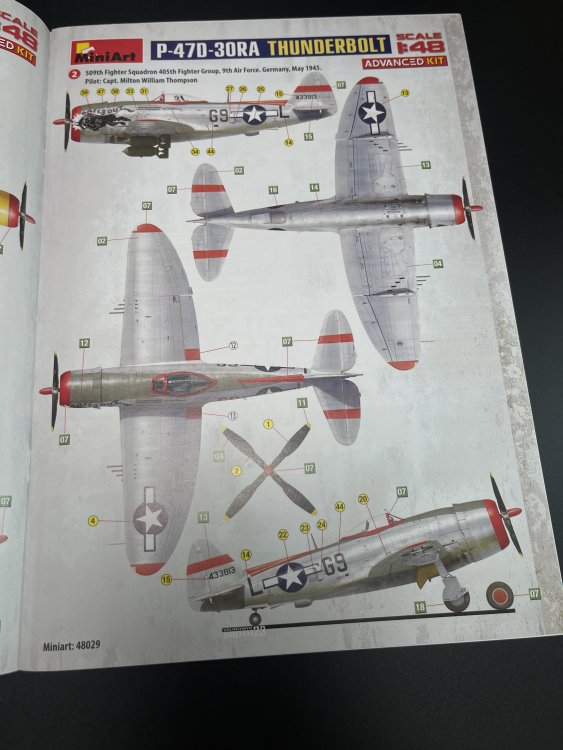
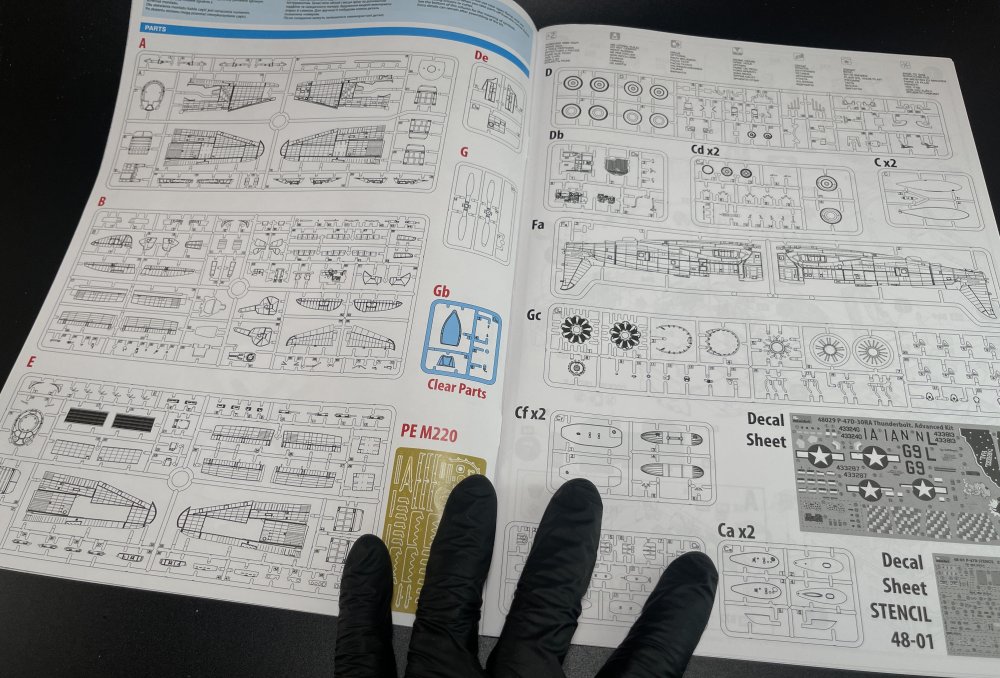
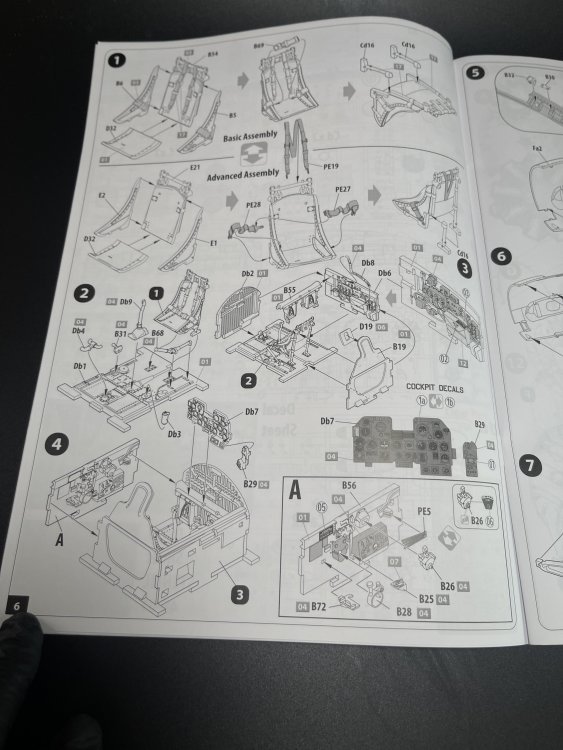
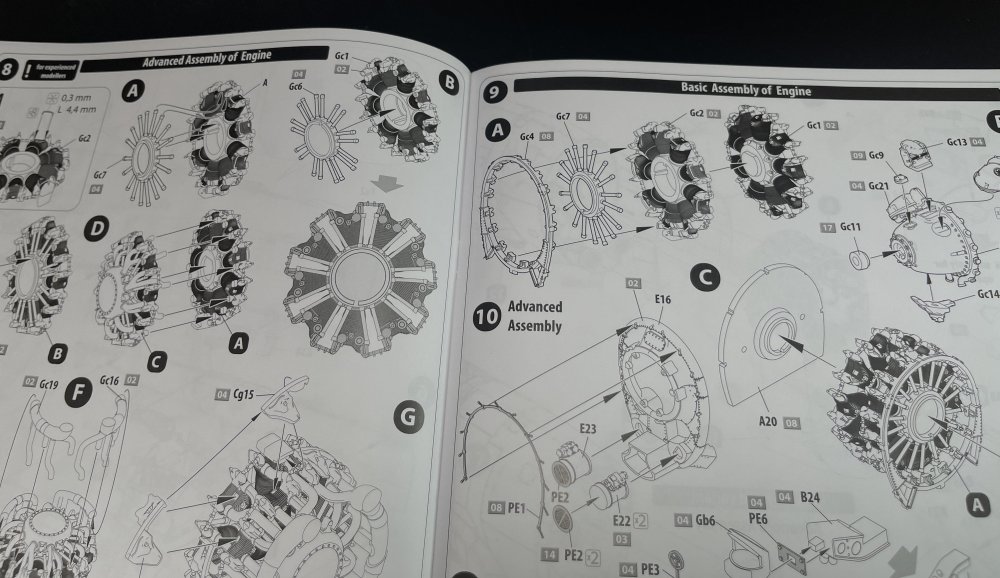
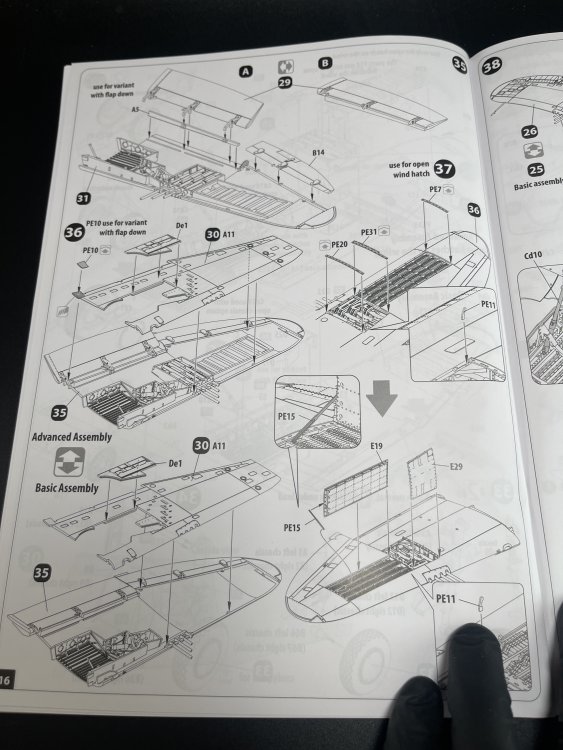
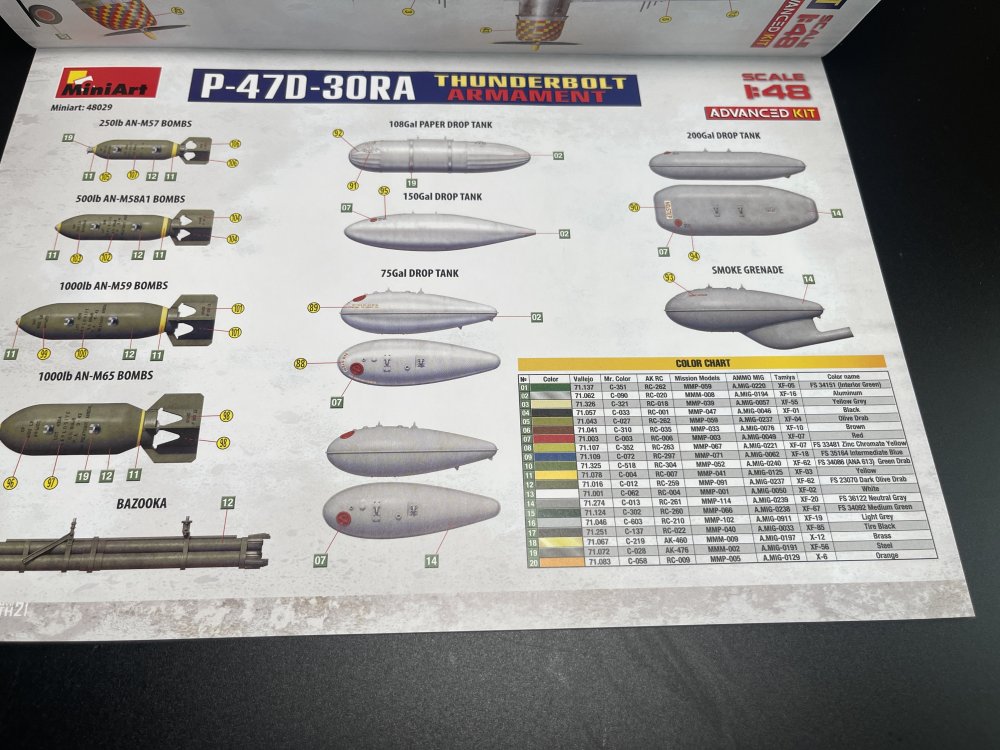
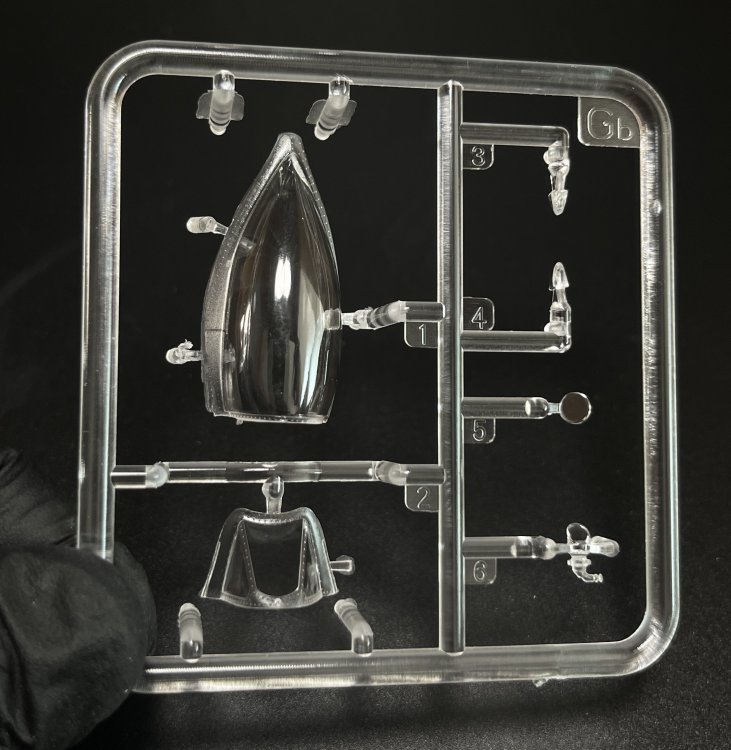
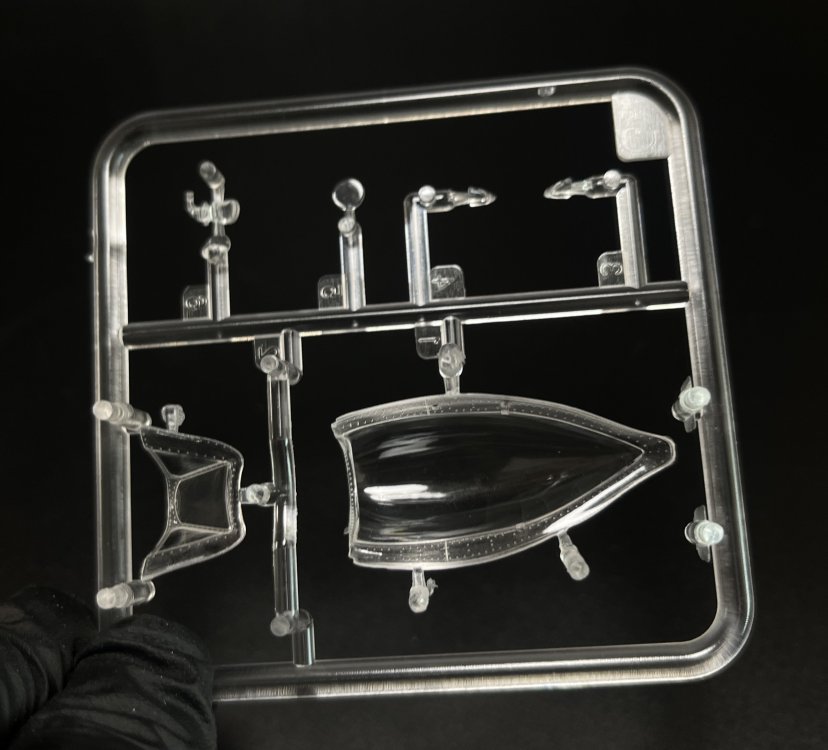
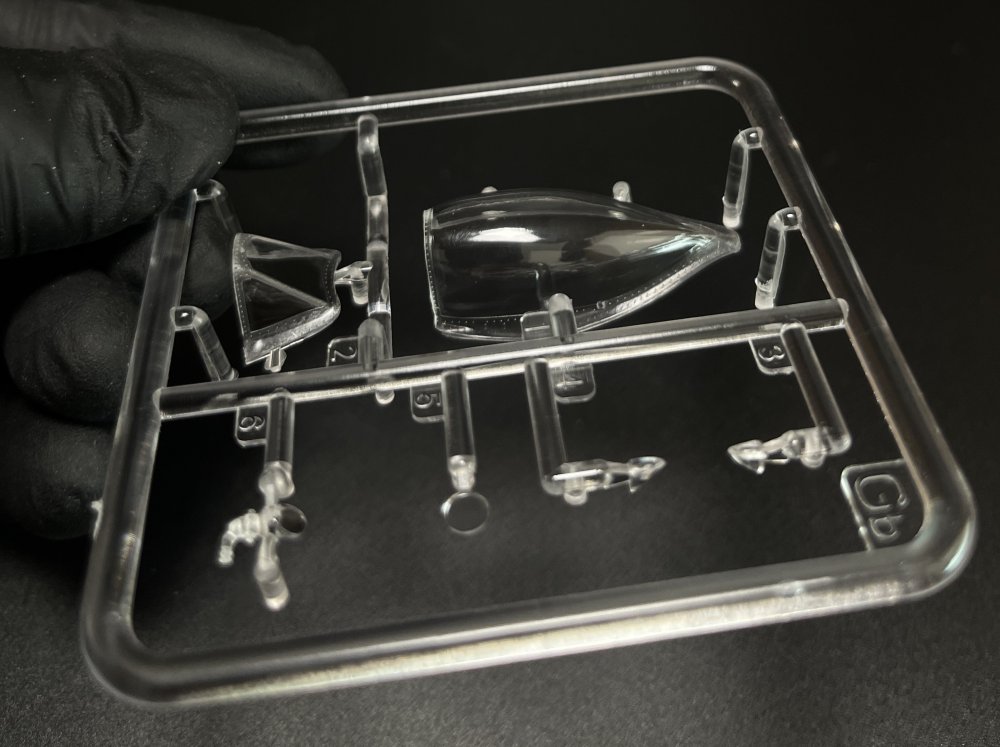
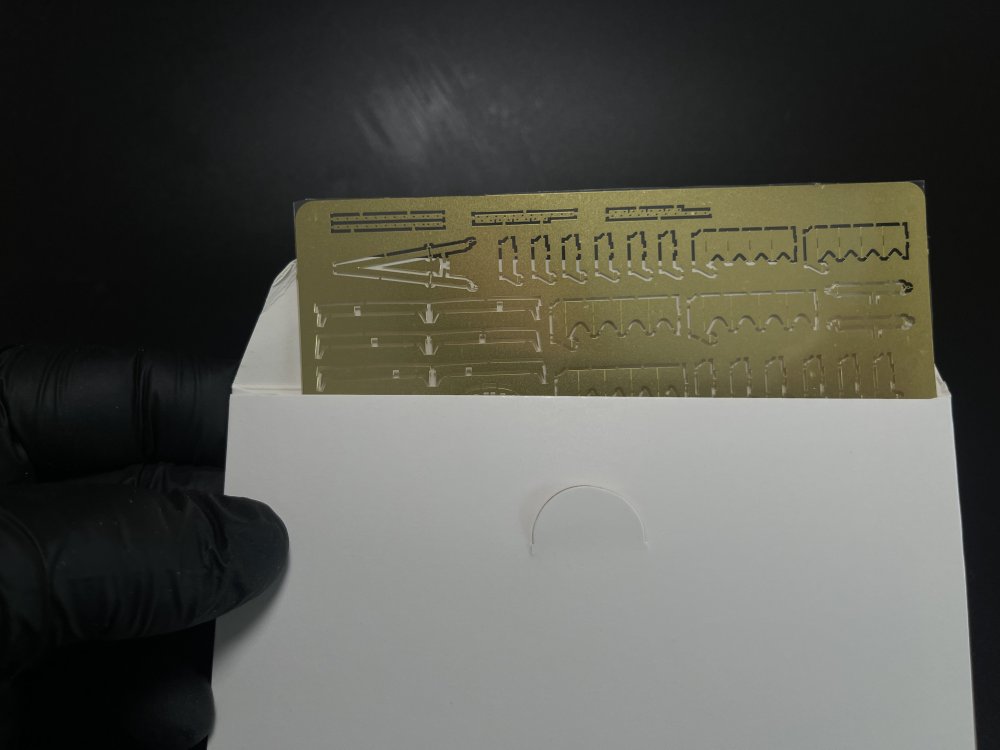
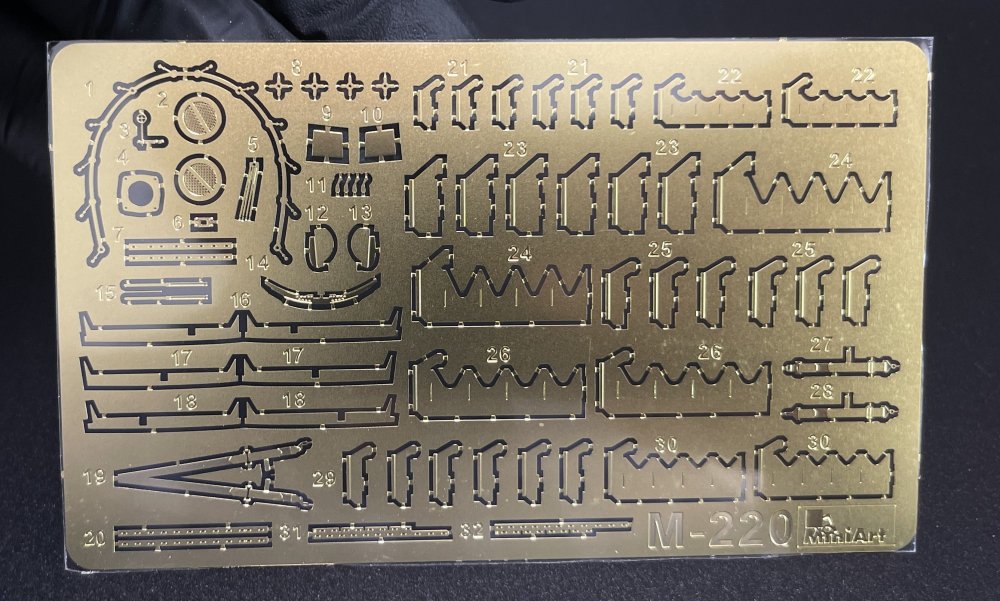
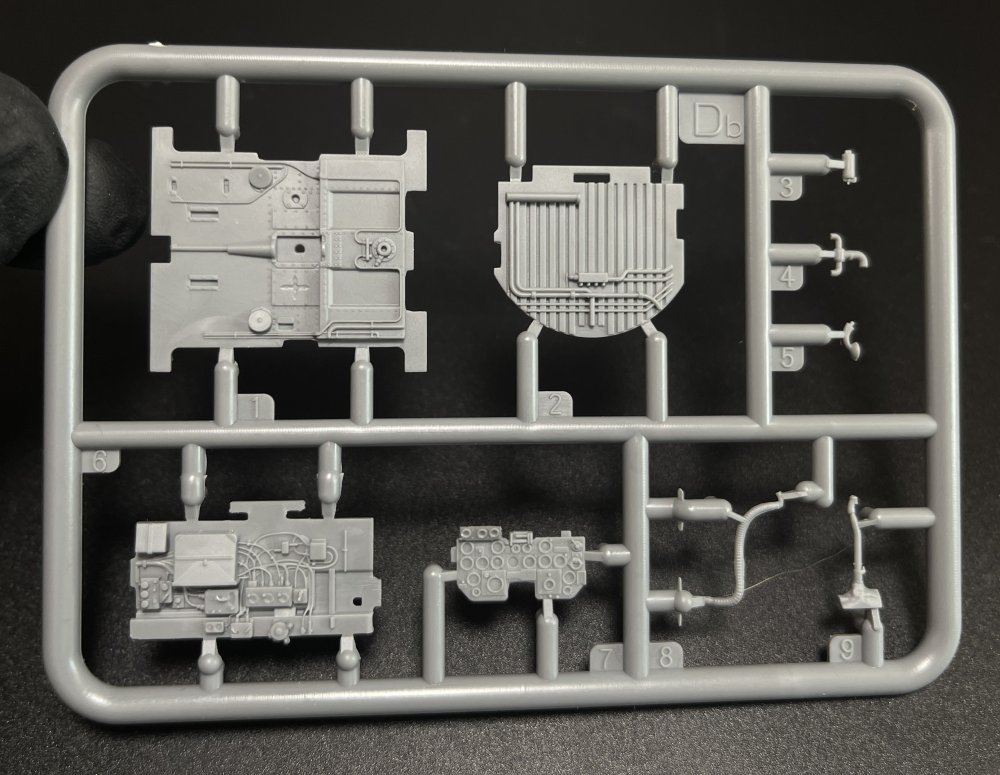
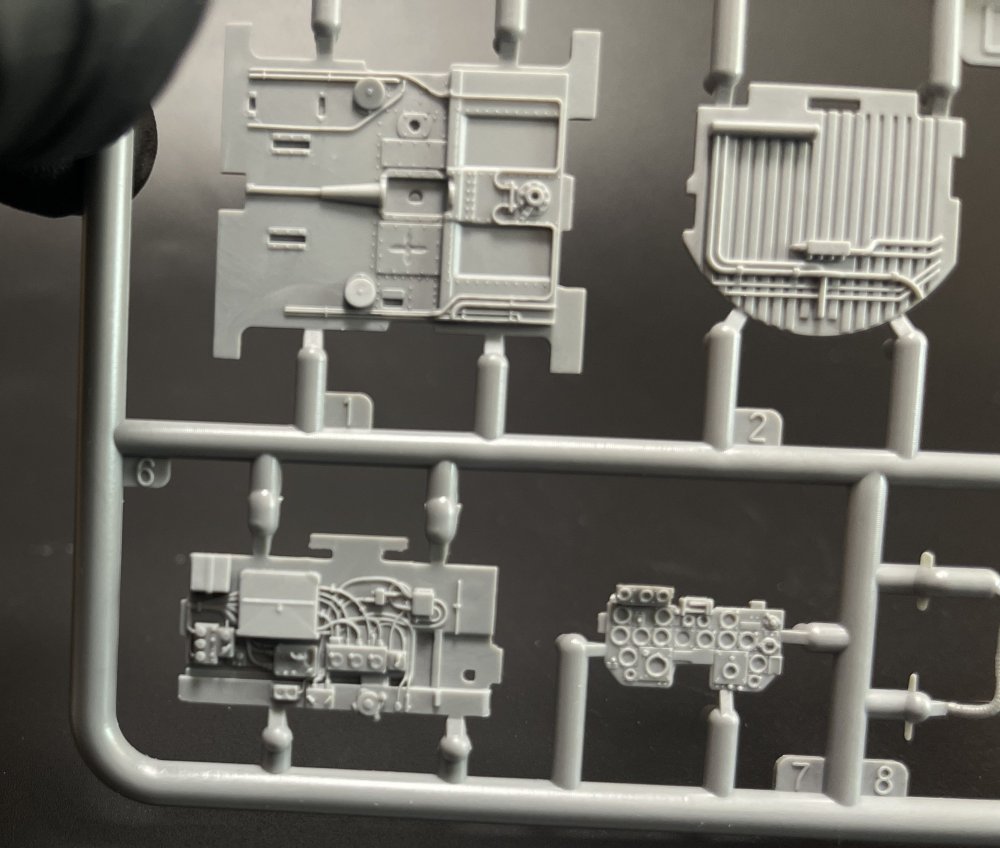
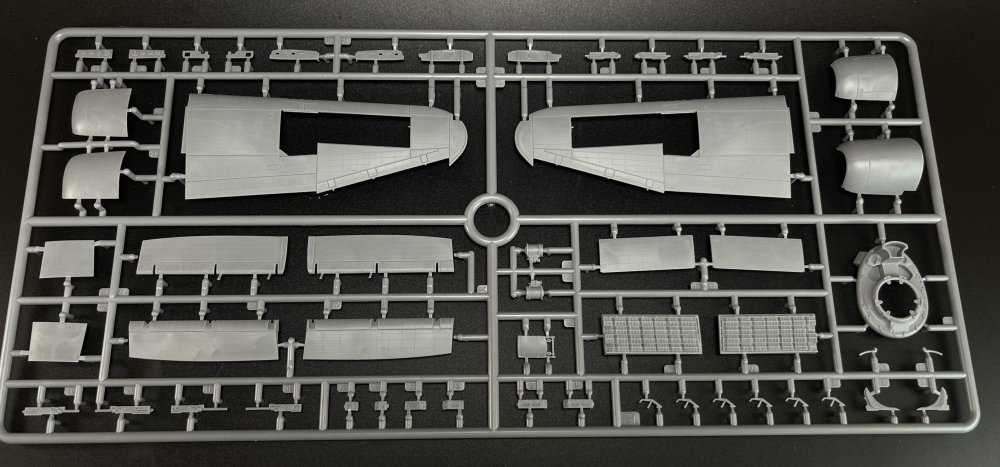
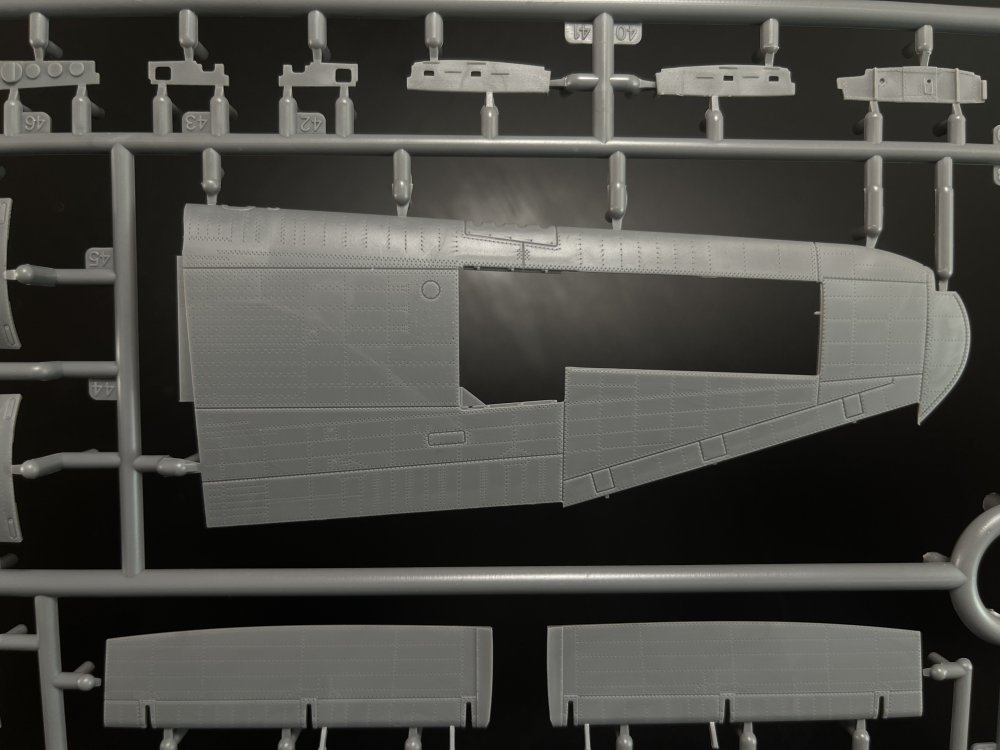
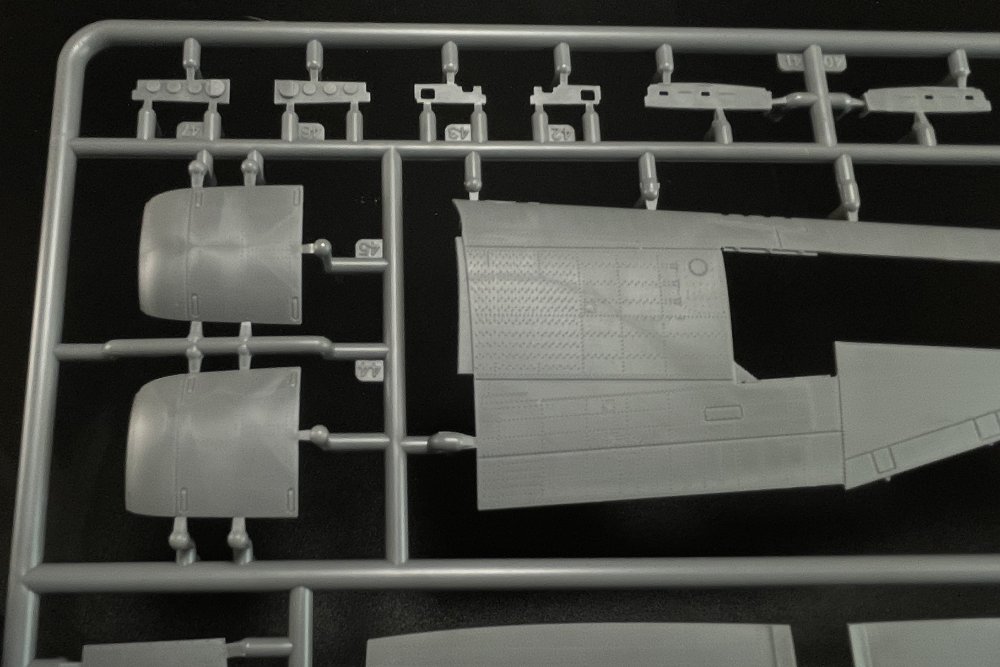
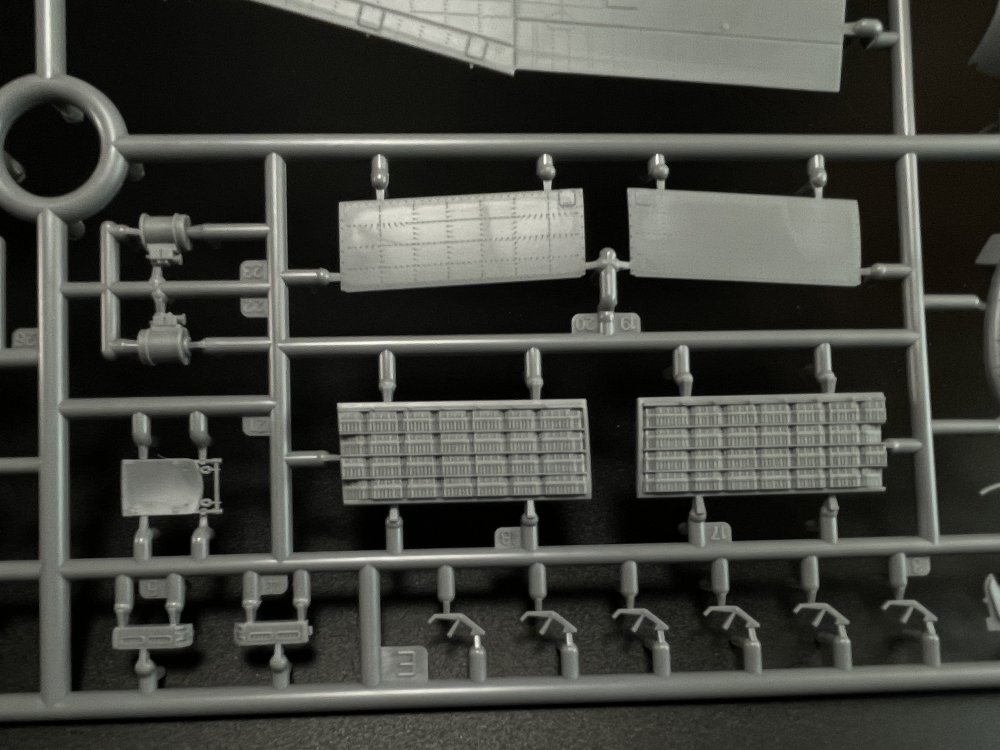
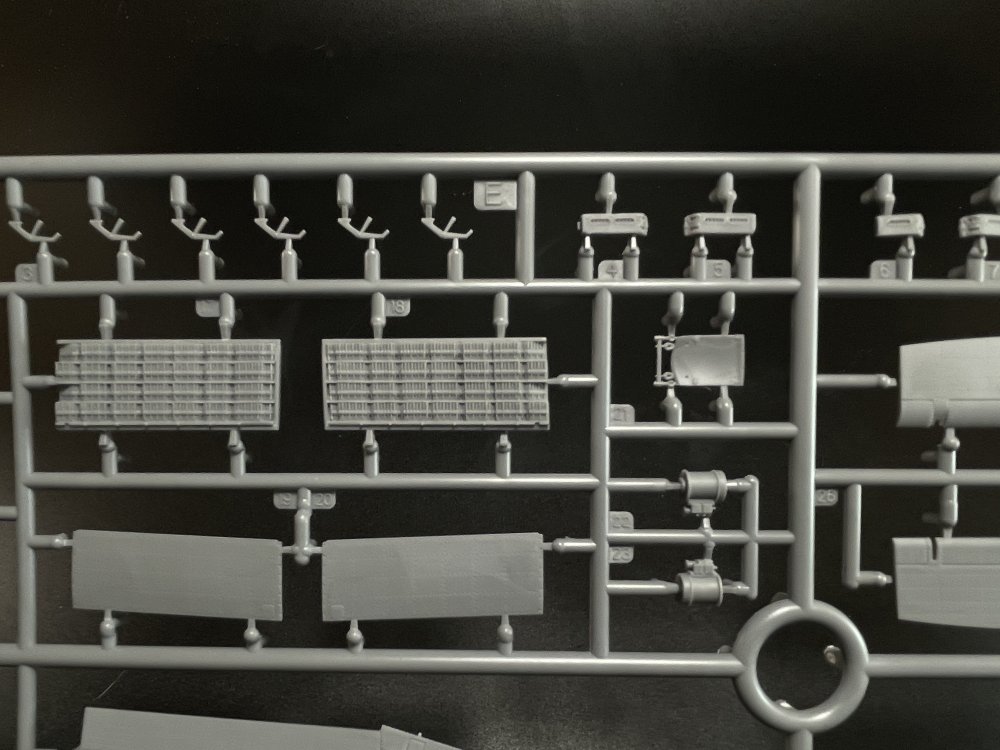
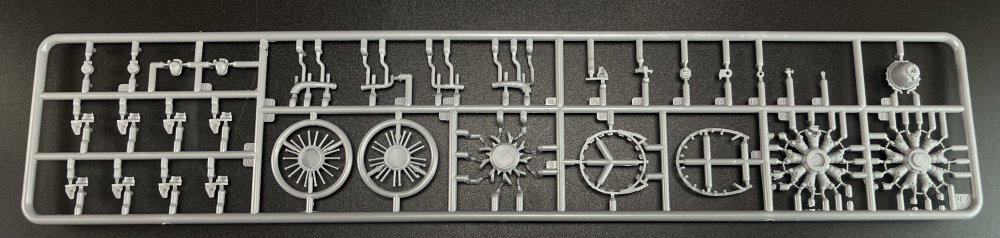
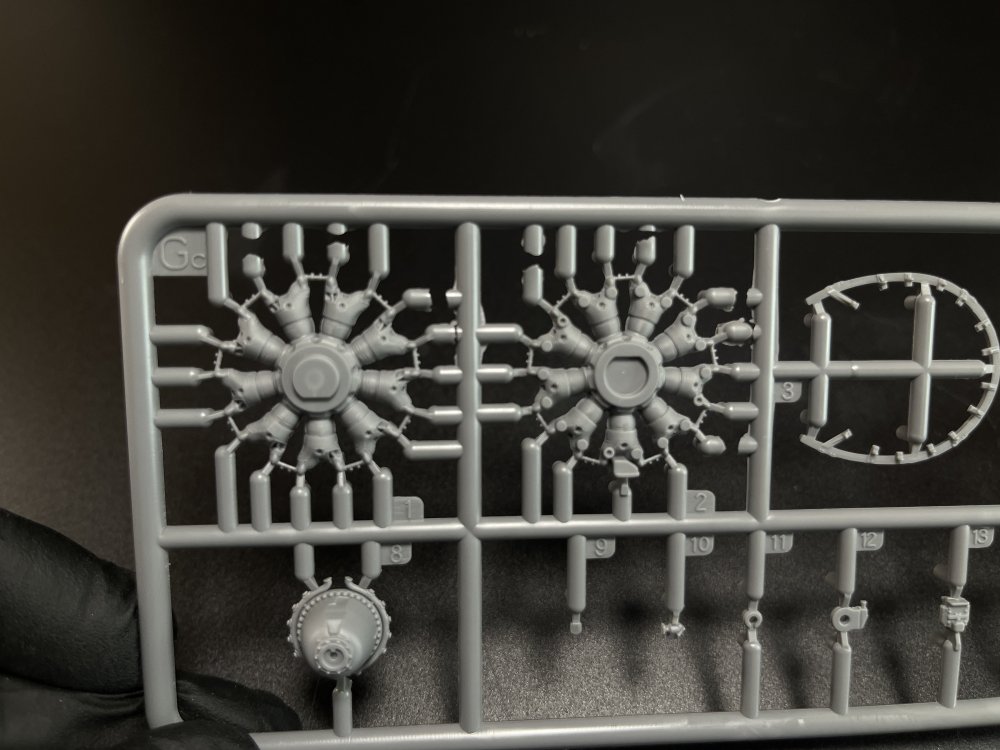
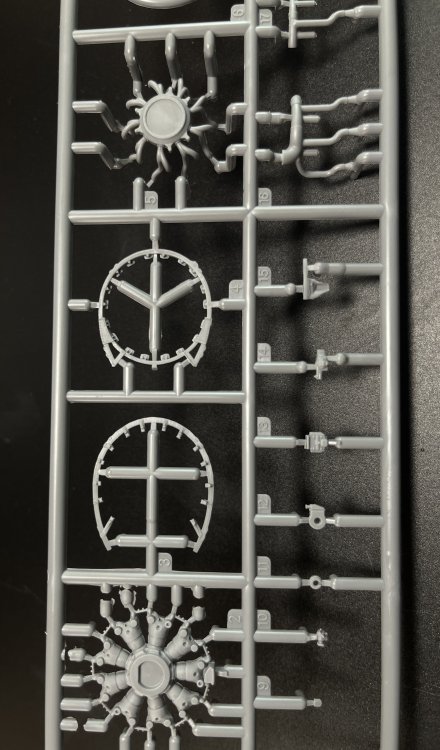
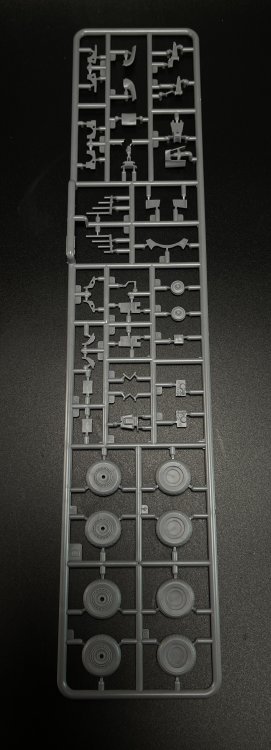
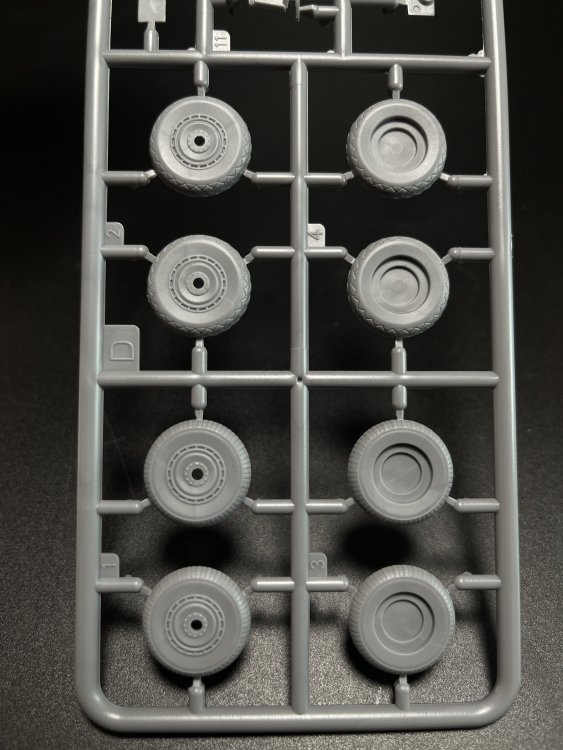
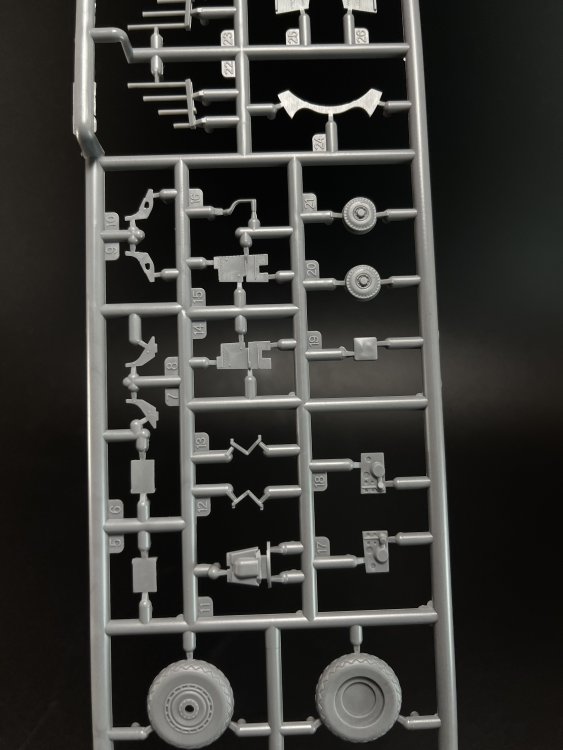
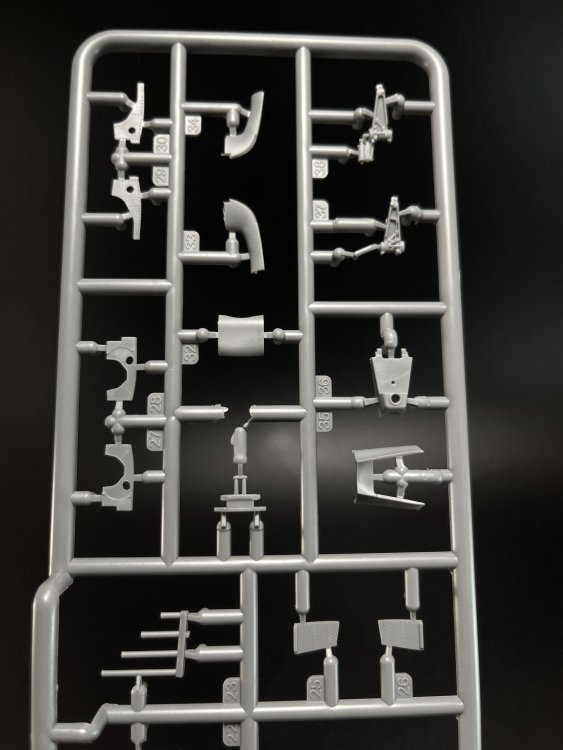
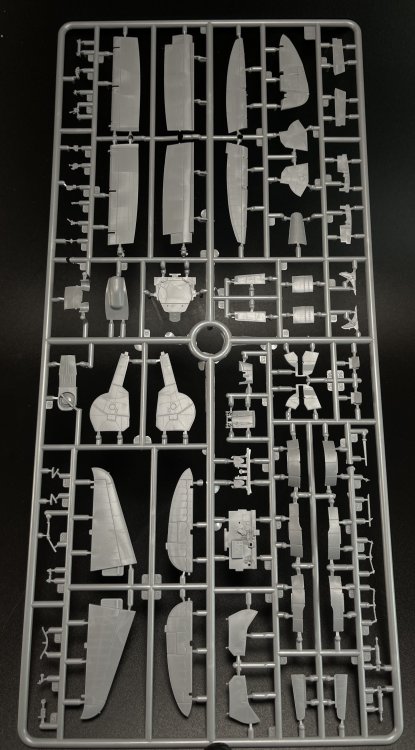
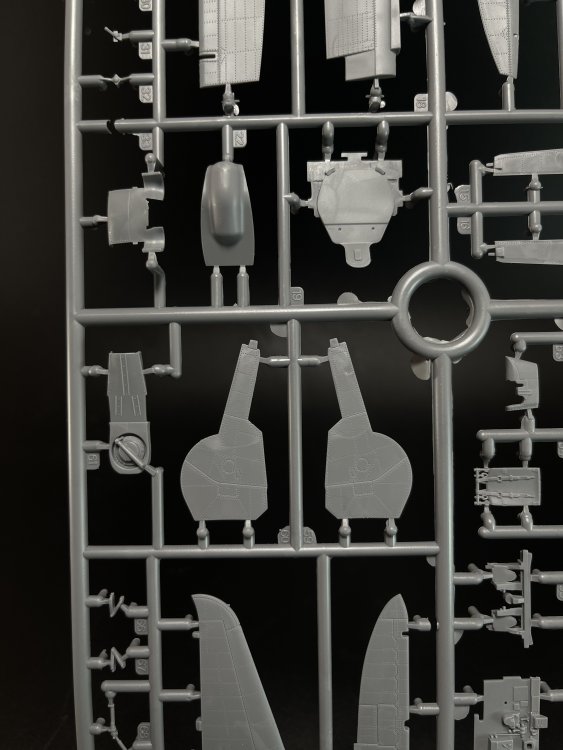
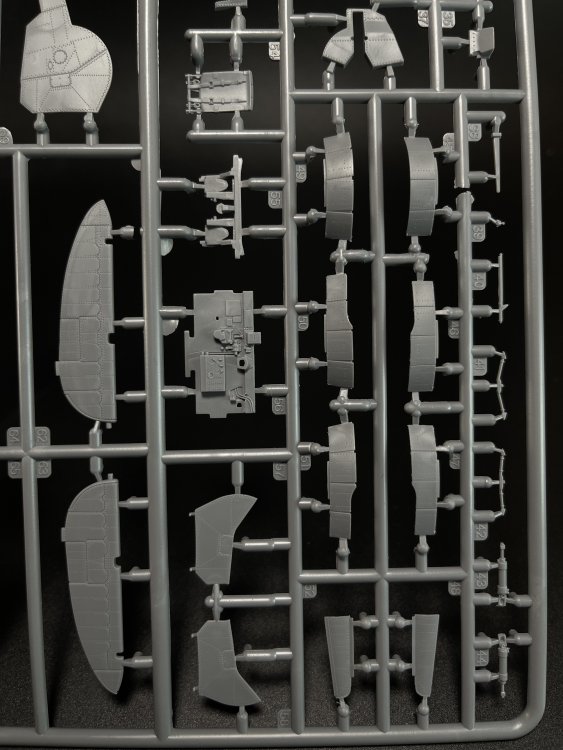
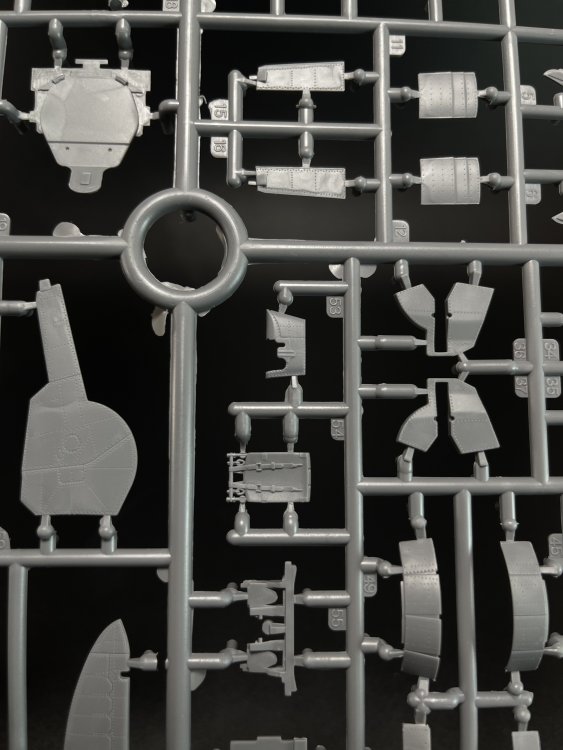
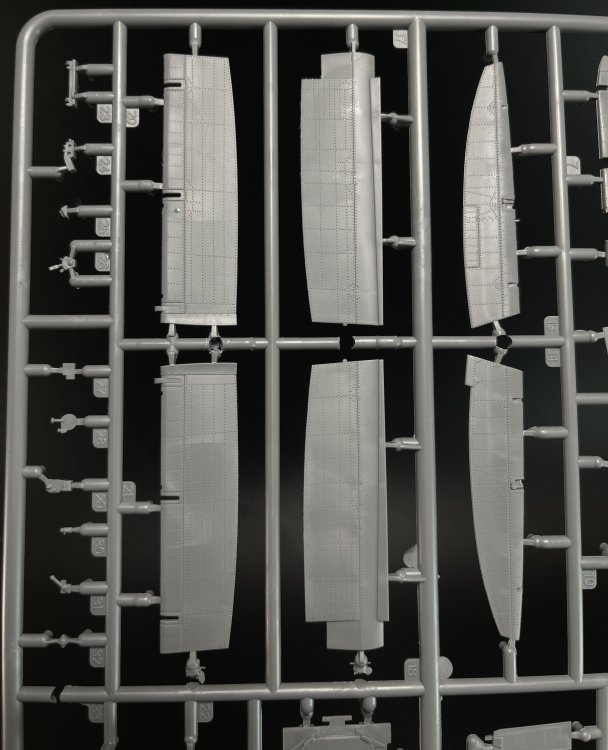
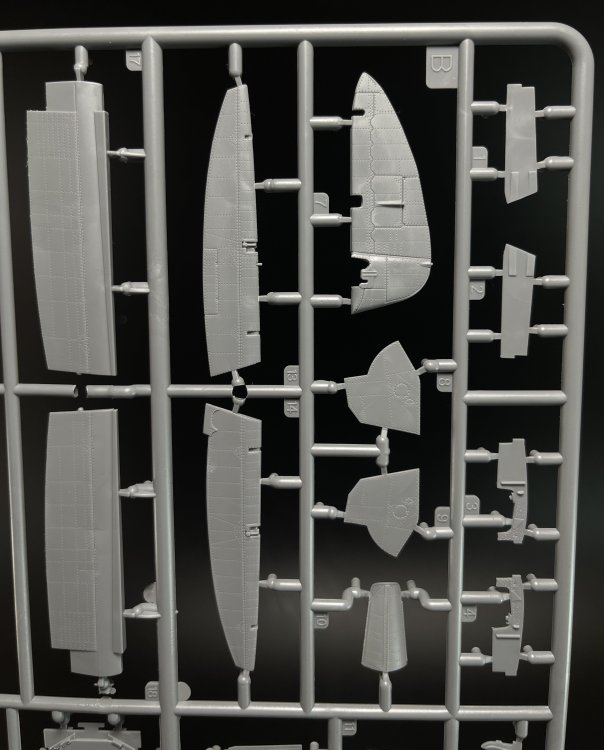
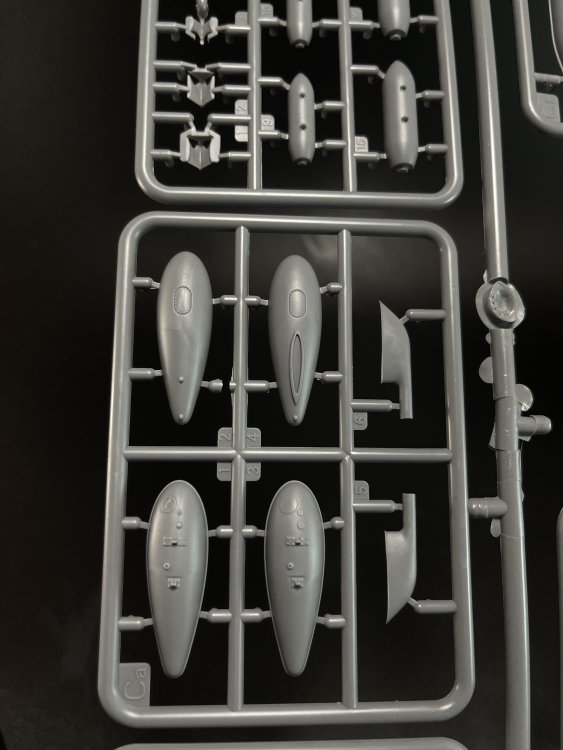
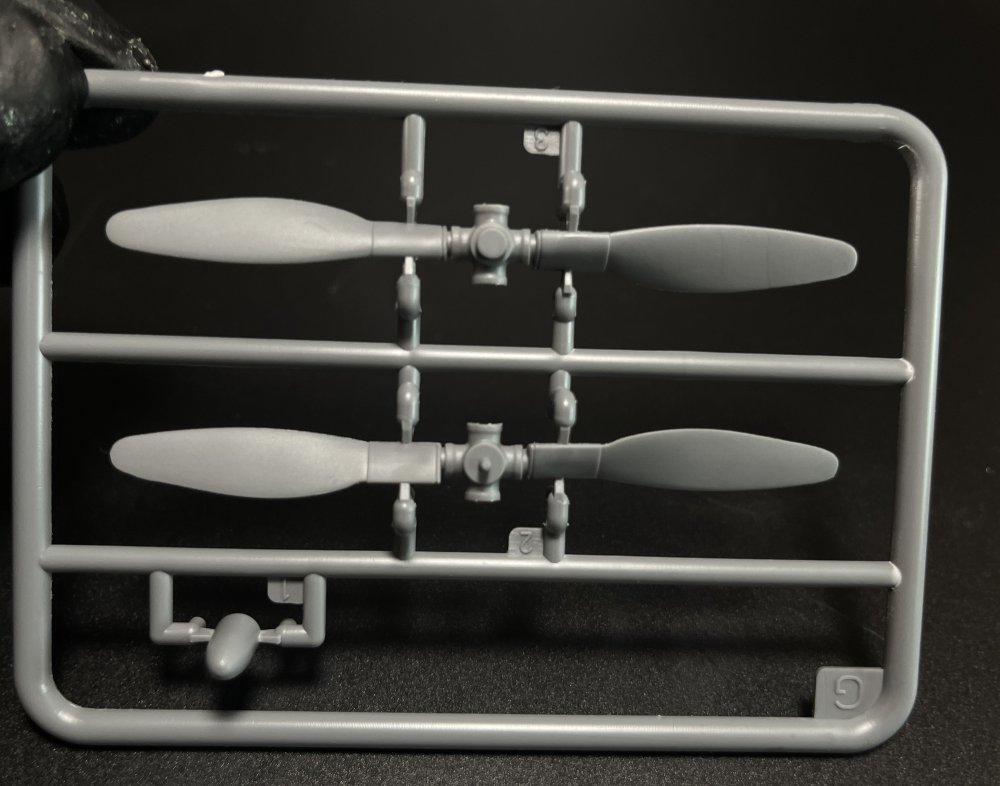
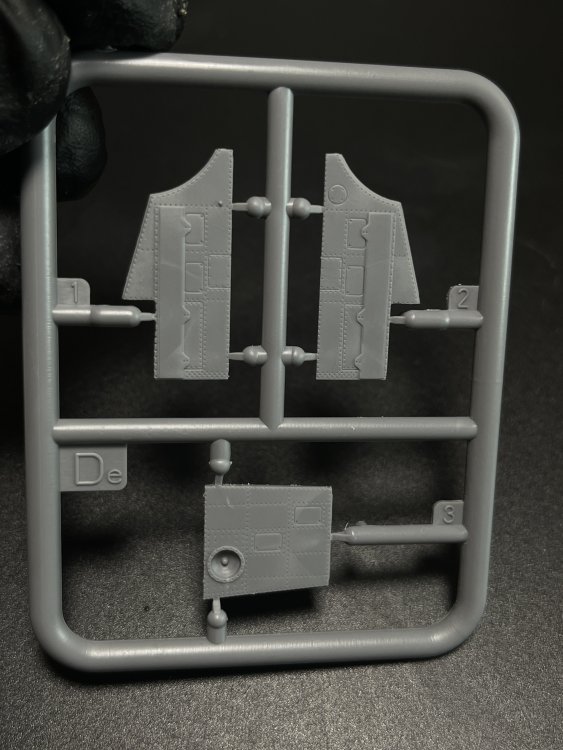
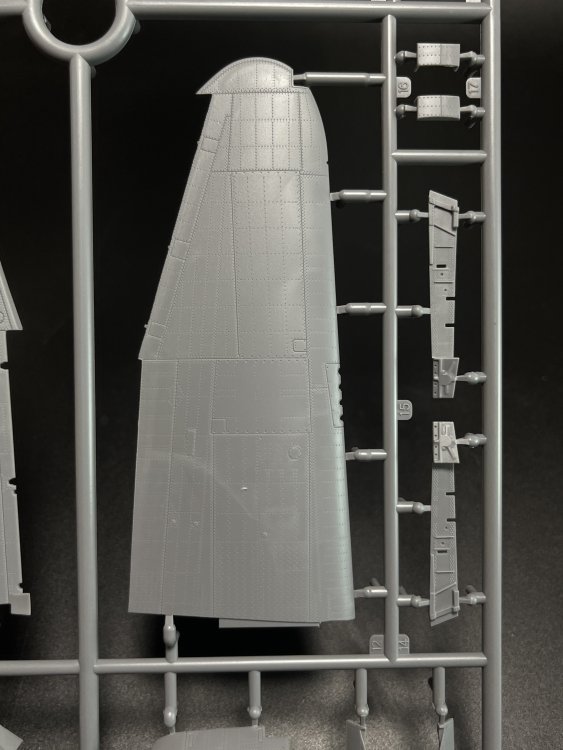
1:48 P-47 D-30 RA Thunderbolt Advanced Kit MiniArt Catalogue number n.º 48029 Price tag: €48,40 To buy get it here. And we are back with MiniArt here on Large Scale Modeller. And to start this restart, nothing better that an 1:48 aircraft… Yes, MiniArt is not known for 1:48 Aircraft… (some what-if in 1:35, some little helis) but nothing with wings. But since last year, MiniArt is releasing a series of P-47 in 1:48, and with two lines: basic kit and advance kit. And today we are going to look to the brand-new P-47D-30RA Thunderbolt, advance kit. The advance kit is a bit more expensive that the basic kit but gives the modeler a lot of other options for detail like engine open (and more detail engine with new several plastic parts) wing gun bay open with some really nice PE, a seat without seatbelts to use the PE ones. Also give you 3 decals options and the basic kit line only brings two. This advance version gives the modeler the possibility to choose in making a basic line or advance line. Both choices are very good ones and invites modeler to get one of each at least. One advance to make it with all in and several basic line to make all those beautiful markings that you ever dream. Knowing MiniArt work in 1:35 AFV, anyone expect nothing but quality by MiniArt and lots of parts also. I always liked MiniArt gray plastic and this is no exception. It`s a good plastic to work with, very helpful with extrathin Tamiya cement glue and does not brittle easily. So, there is a quite lot of plastics parts with a lots of sub-assemblies. First that we can notice is the surface details of the fuselage and the wings…. Gorgeous.! All the rivets are present and fantastic raised and recessed detail. Having P-47 from other brands (Hasegawa, Academy and Tamiya) this one is the one who has the better, by far, surface detail of all. Kudos MiniArt. But this exquisite detail is present in all the model, cockpit parts, wheels bay and engine (the engine is fabulous even the basic version) are great pieces of fine and impeccable detail. Checking all sprue and starting with the sprue E. This sprue is for sure different from the basic version as the top panels are removable so you can show the wing gun bay in all beauty. It`s a crime not to do it! The sprue Gc has the main parts for the engine. There’s a lot of sub-assemblies to make this fantastic engine that you must leave it open… MiniArt even gives you separate cowling sections that will be handy to expose the engine. Well you have the option in closing the engine but…. For that go for the basic kit option. I know I will in some marking I want to do that the nose art is a center piece! The engine has fantastic detail straight from the box with the PE adds up given by MiniArt. Yes, you can detail even more, specially with some wires and some connectors that you now can get in 3D printing but that is for the ultra detailers. The cockpit (sprues B, Db and E). It’s another piece of detail art! The side panels and console are very good molded with superb surface detail. You can choose the seat with the seatbelts on or the seat and use the PE seatbelts that come in the advanced version. One quite fantastic extra detail: the landing gear with two position, chassis normal or chassis under load, as included all possible external equipment for this aircraft. A wonderful detail, quite realistic, to have a P-47 with different heights. and weight as you get a full load to put on the P-47 The Tail wheels come with two options. The PE sheets in full brass looks a bit more stick that the usual PE I see from Eduard for example. However, the detail on the PE looks good (seatbelts) the other pieces area complementary detail on the engine, wing gun bay and cockpit. I would probably would go to an AM seatbelts like ASK seatbelts but that is me. You can get a good replica straight from box. The clear parts are present in a separate bag to not have any danger of risking it. The parts are in fact quite clear with no distortion and makes the possibility to left the canopy open which is great specialty with all the cockpit detail. The Advance kit version doesn’t have any templates to mask the clear parts but the P-47 canopy is quite easy to mask even without masks. The decals. First are printed by Cartograph so the quality on application and color registration are granted. Second, these are beautiful draw by MiniArt. They look spot on. And the schemes are perfect. Speaking of schemes, this model box gives you 3 options that are: · 366th Fighter squadron 358th Fighter Group “Orange Tails”, 9th Air Force, Spring 1945 Pilot: Lt. Ike Davis. · 509th Fighter Squadron 405th Fighter Group, 9th Air Force, Germany, May 1945, Pilot Capt Milton William Thompson; · 379t Fighter Squadron, 362nd Fighter Group 9th Air Force, Germany Spring 1945. Pilot Col. Josesph L. Laughlin You got two sheets so if one is with markings and nose art, the other is full of stencils. As usual from Cartograph, the printing is very good with the letter being quite perceptible even in 1:48. Well now passing for the instructions. I do have a lot of Miniart kits and already made several reviews and this manual is a typical MiniArt manual which means that is a quite good instructions manual with good color indications and a good parts indications and constructions indication of parts gluing connections. This one has 21 pages and kind of 44 steps (with a lot of sub-assemblies steps) and the profiles in full colors and in all sides which is great to help put place the decals (a lot of them specially the stencils). I leave here a few more pictures of the remain plastic... It`s pure modelling parts. CONCLUSION Well, this advance kit MiniArt P-47 D is in fact, the best P-47 in any scale, straight from the box. And now that is not an easy thing or an achievement easy to get as the rivals are Tamiya, Hasegawa, Trumpeter… and more recently Dora Wings (also a great kit). All of thn make very good P-47, but none will give all the detail you can get diretlly from the box that MiniArt P-47 gives you. The recessed and raised detail, the detail on the landing gear and the option of airborne/no airborne landing gear, the engine, the movable surfaces and all that in a single box, directly with no extra whatsoever, is the receipt for the best P-47 model available. 10/10 MiniArt!! Perfect box!! Thanks to MiniArt for producing the beautiful model kit.


-
LSM Modelling News 2023 merged Fran and Artful69’s threads
Fran replied to Fran's topic in Modelling Discussion
And... here it is: 1:32 HpH Models BV 138 Price tag: 675€ http://shop.hphmodels.cz/en/model-kits-in-scale-132/226-blohm-voss-bv-138.html -
I haven´t saw this! Totally new to me! @Clunkmeister
-
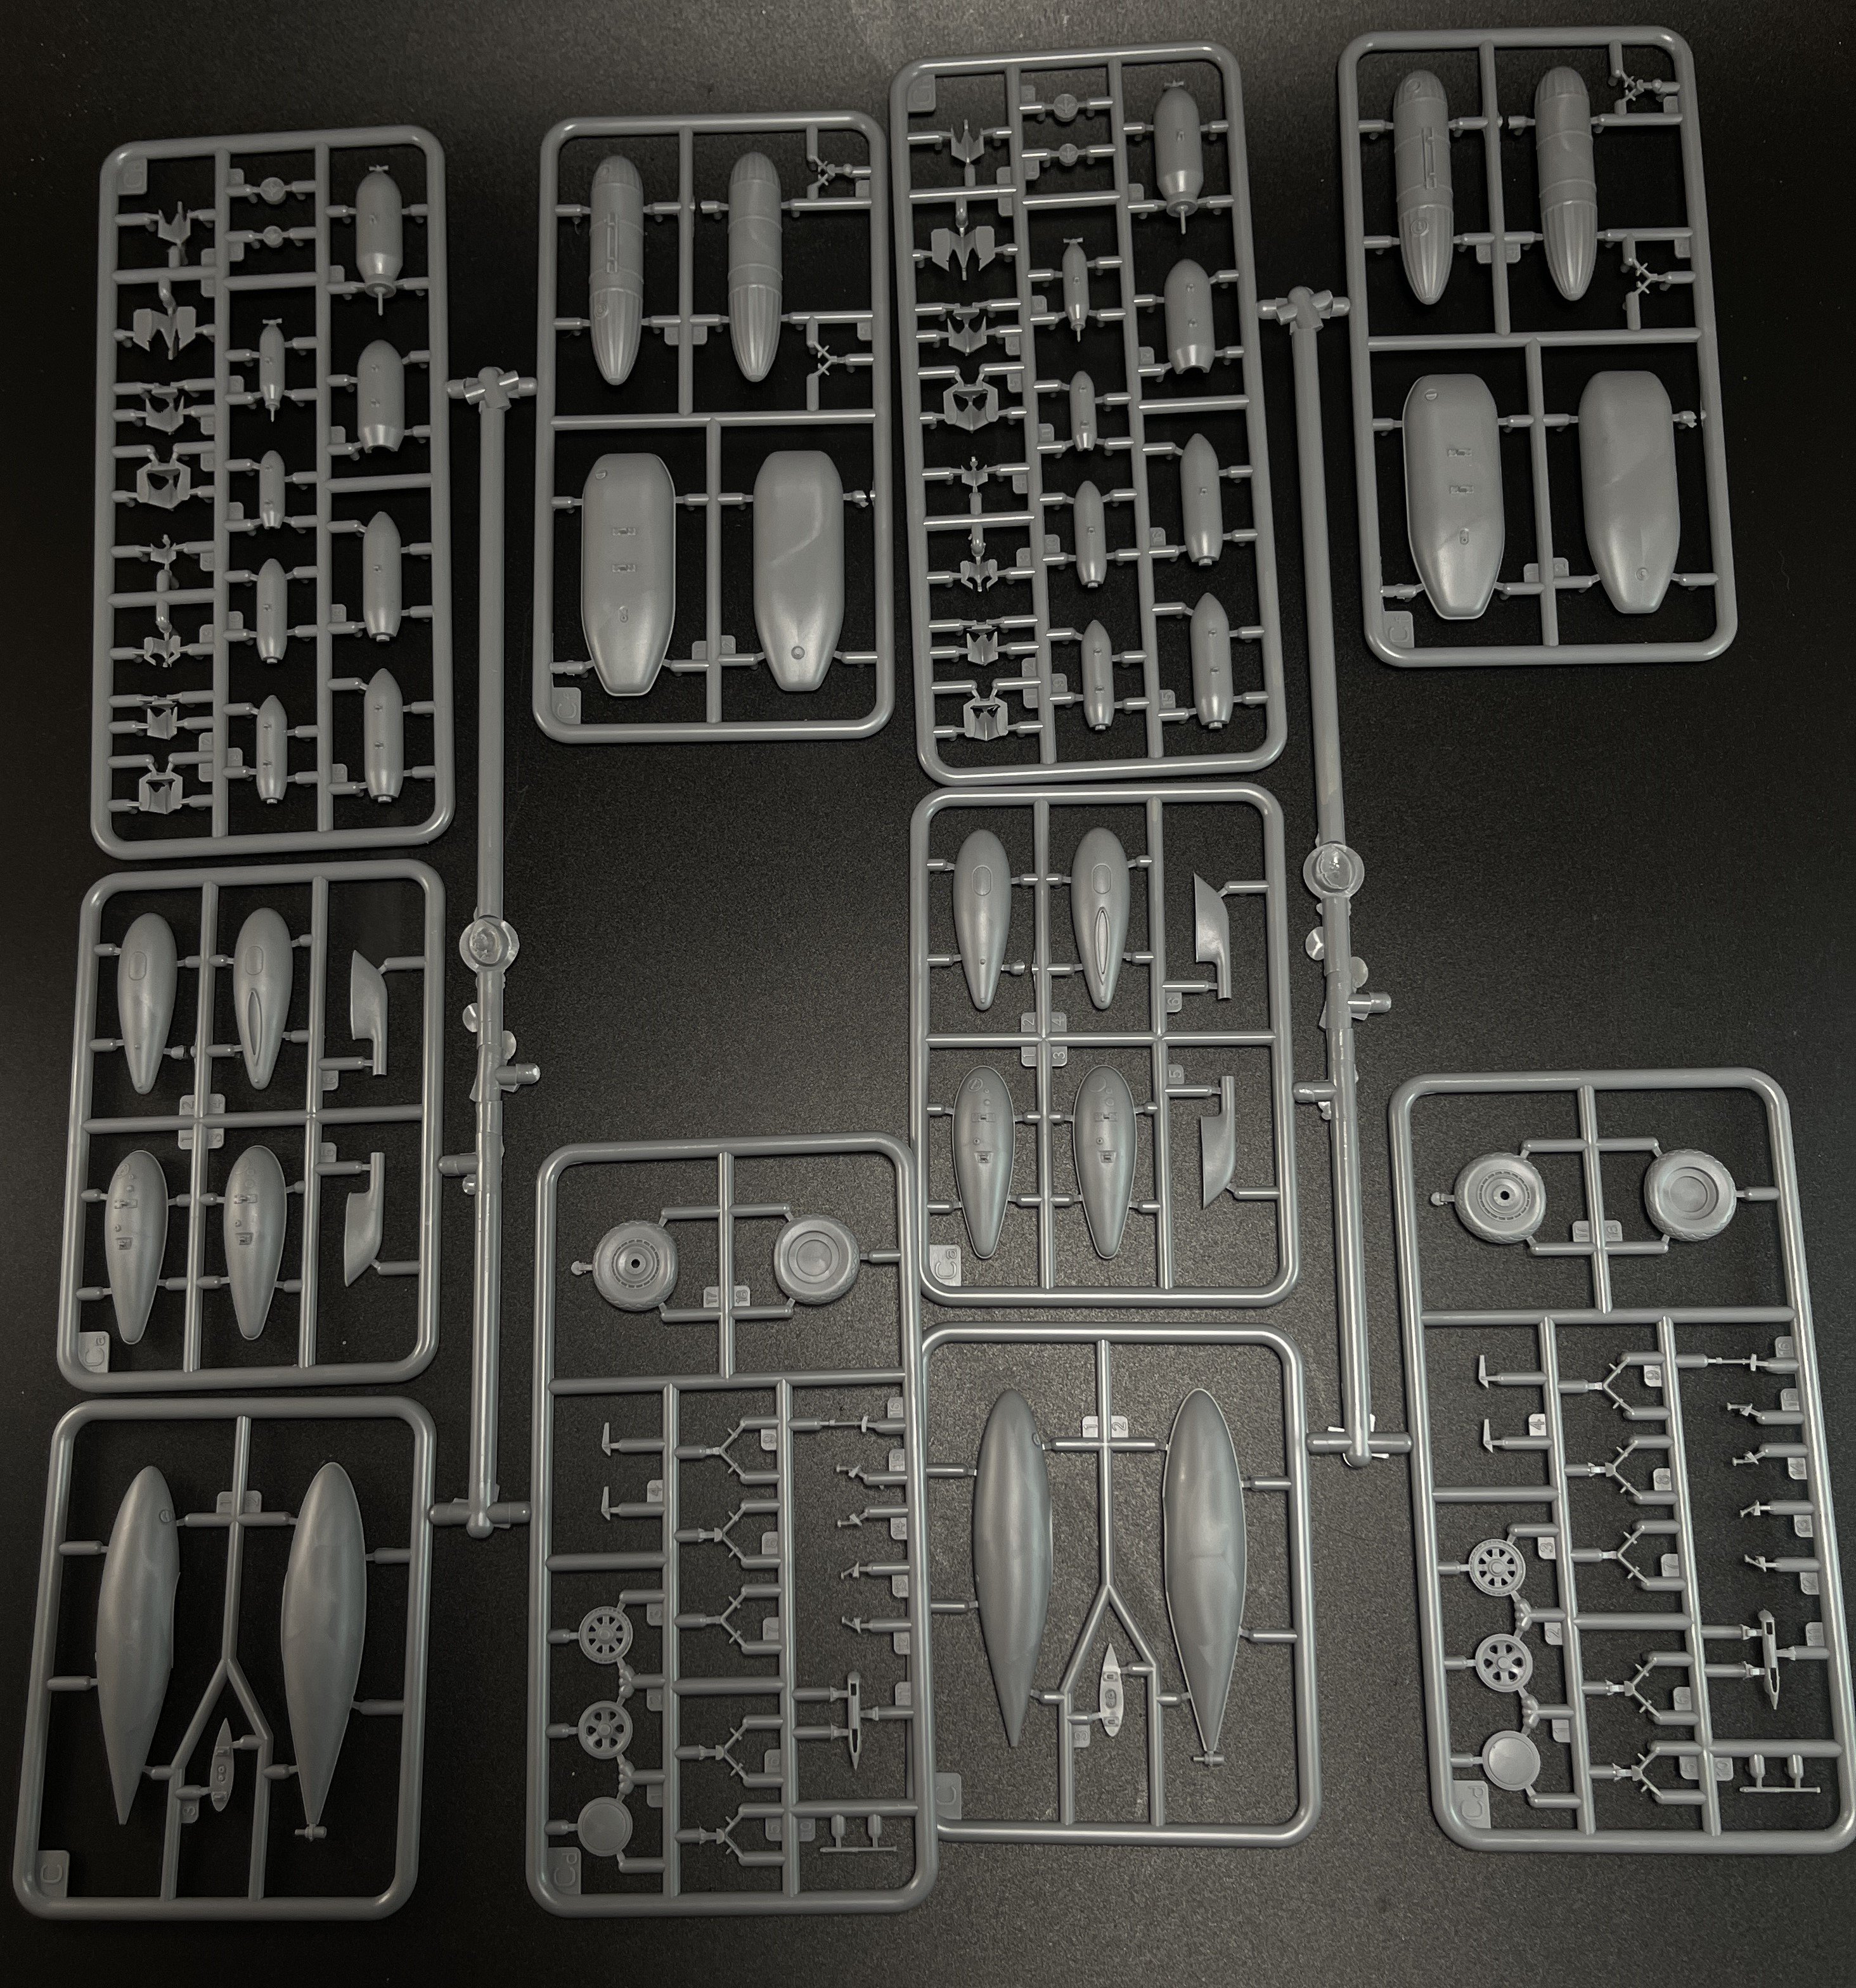
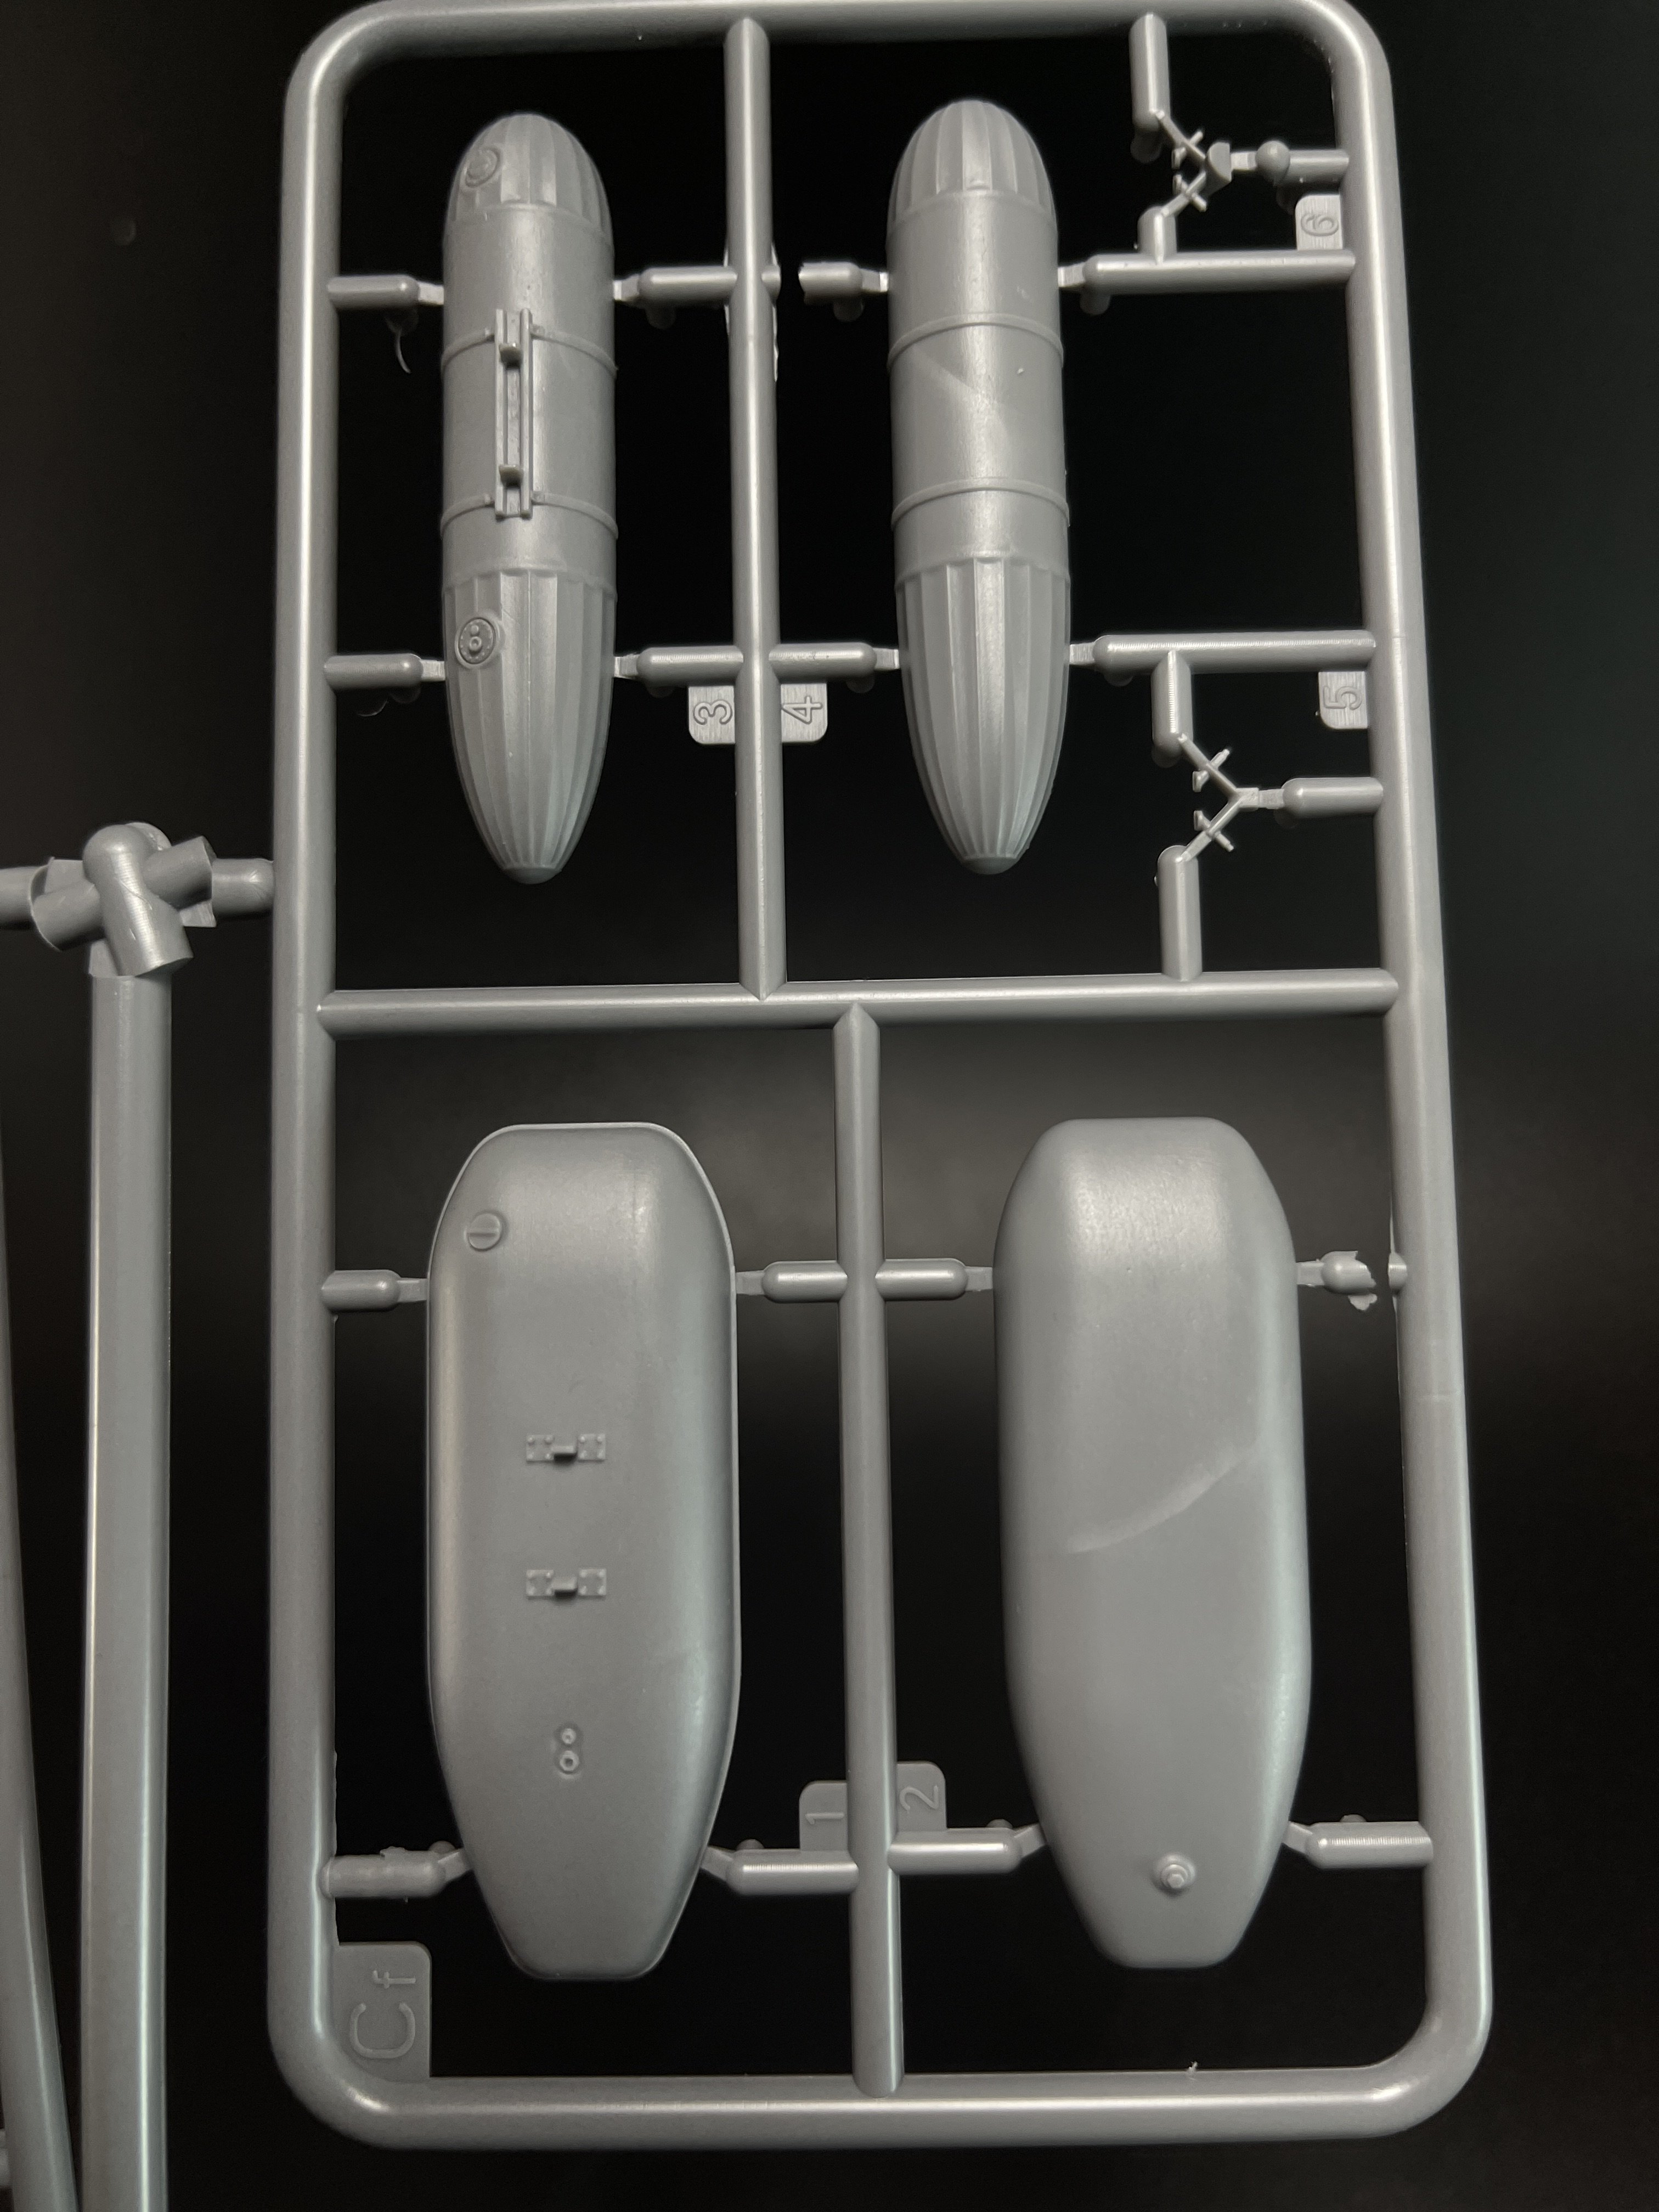
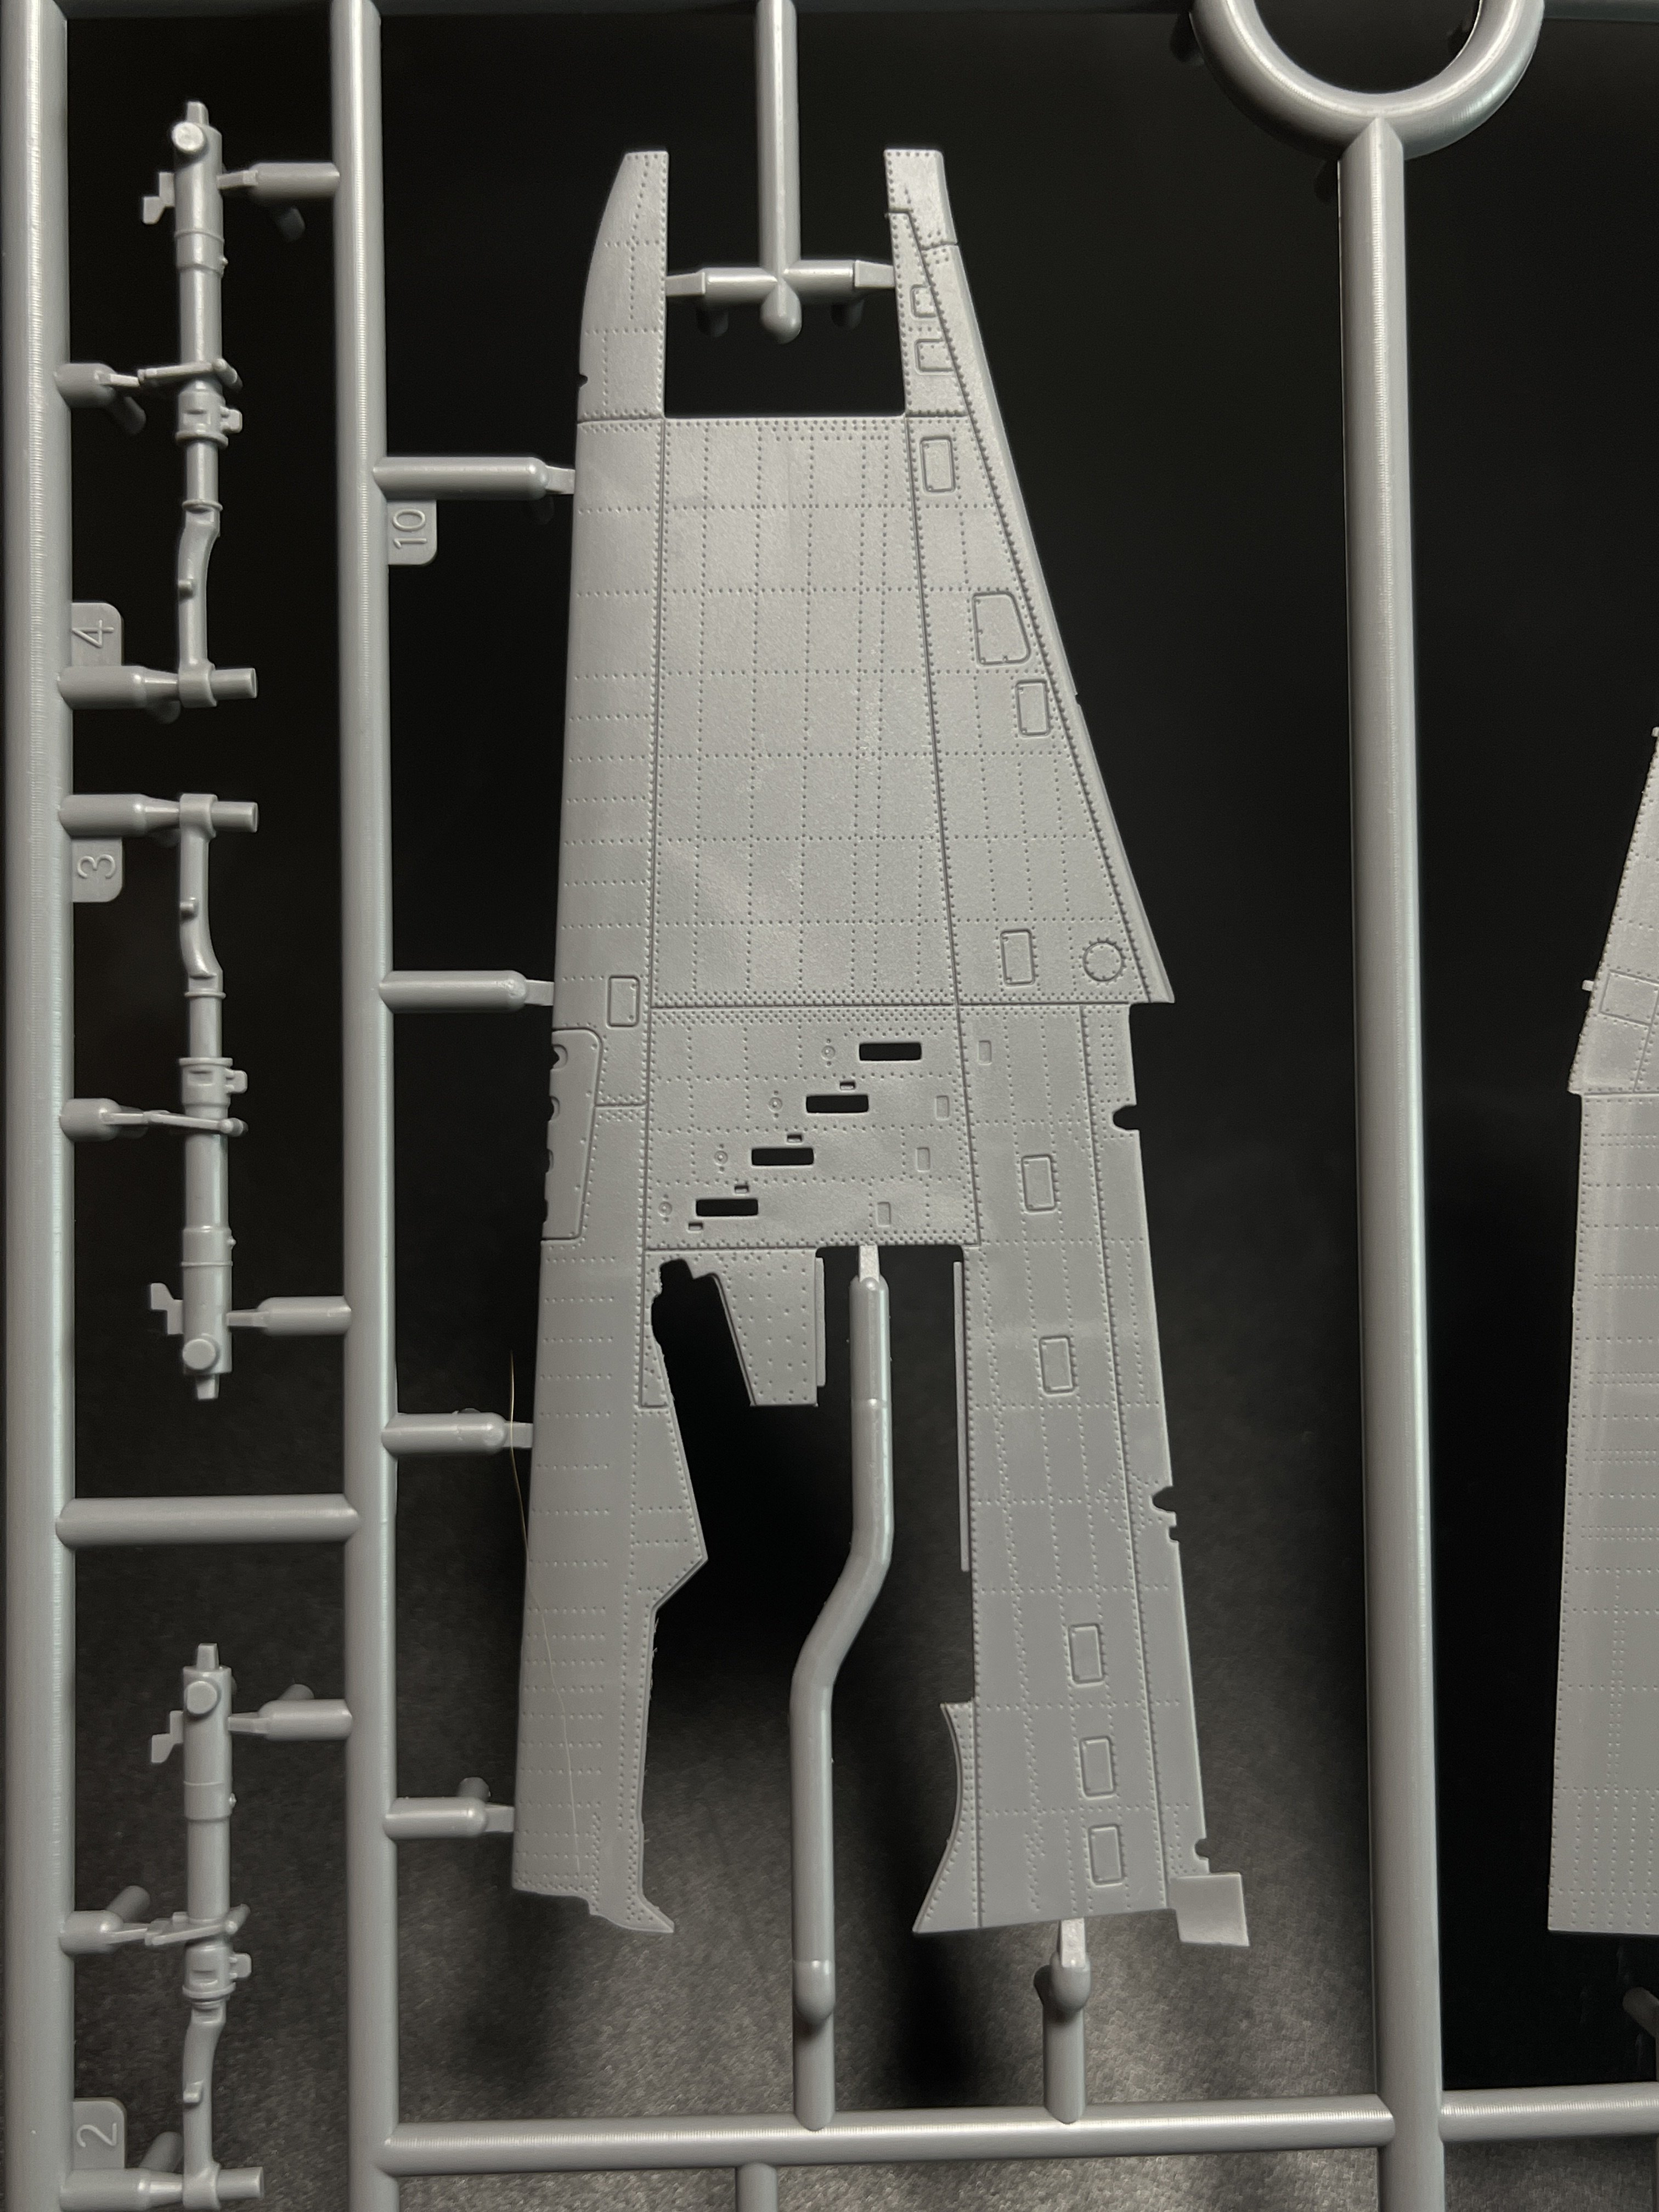
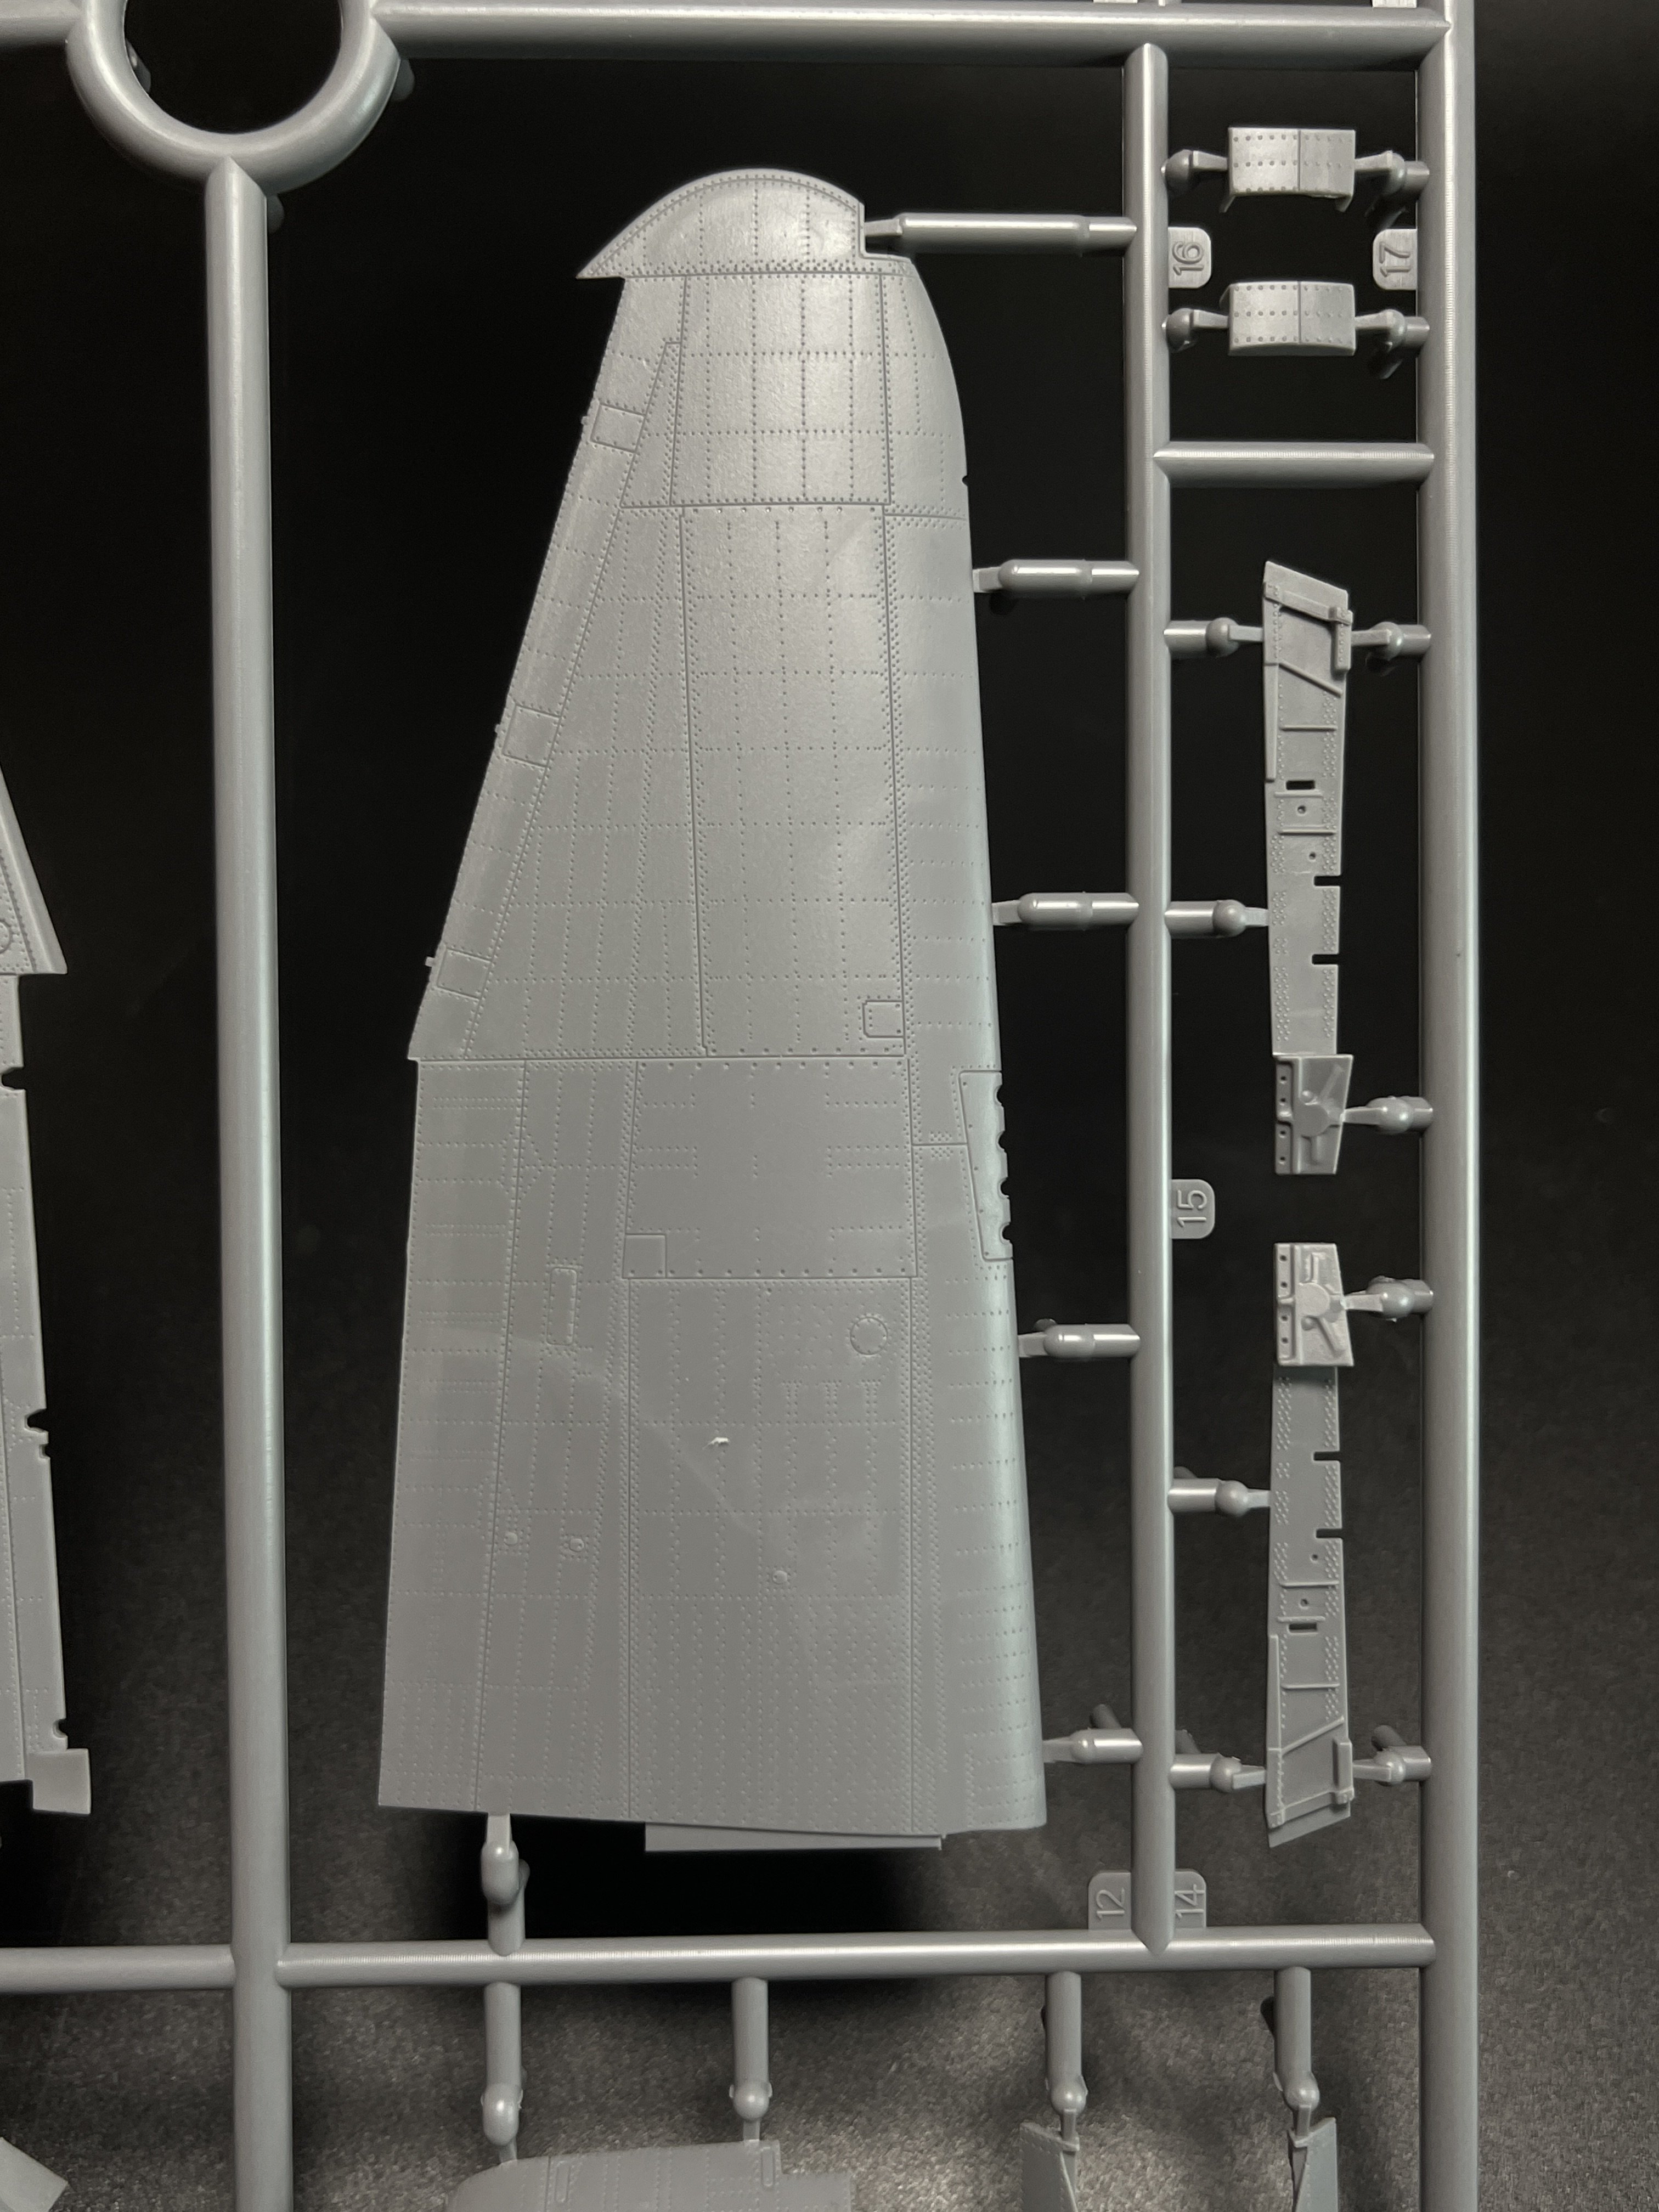
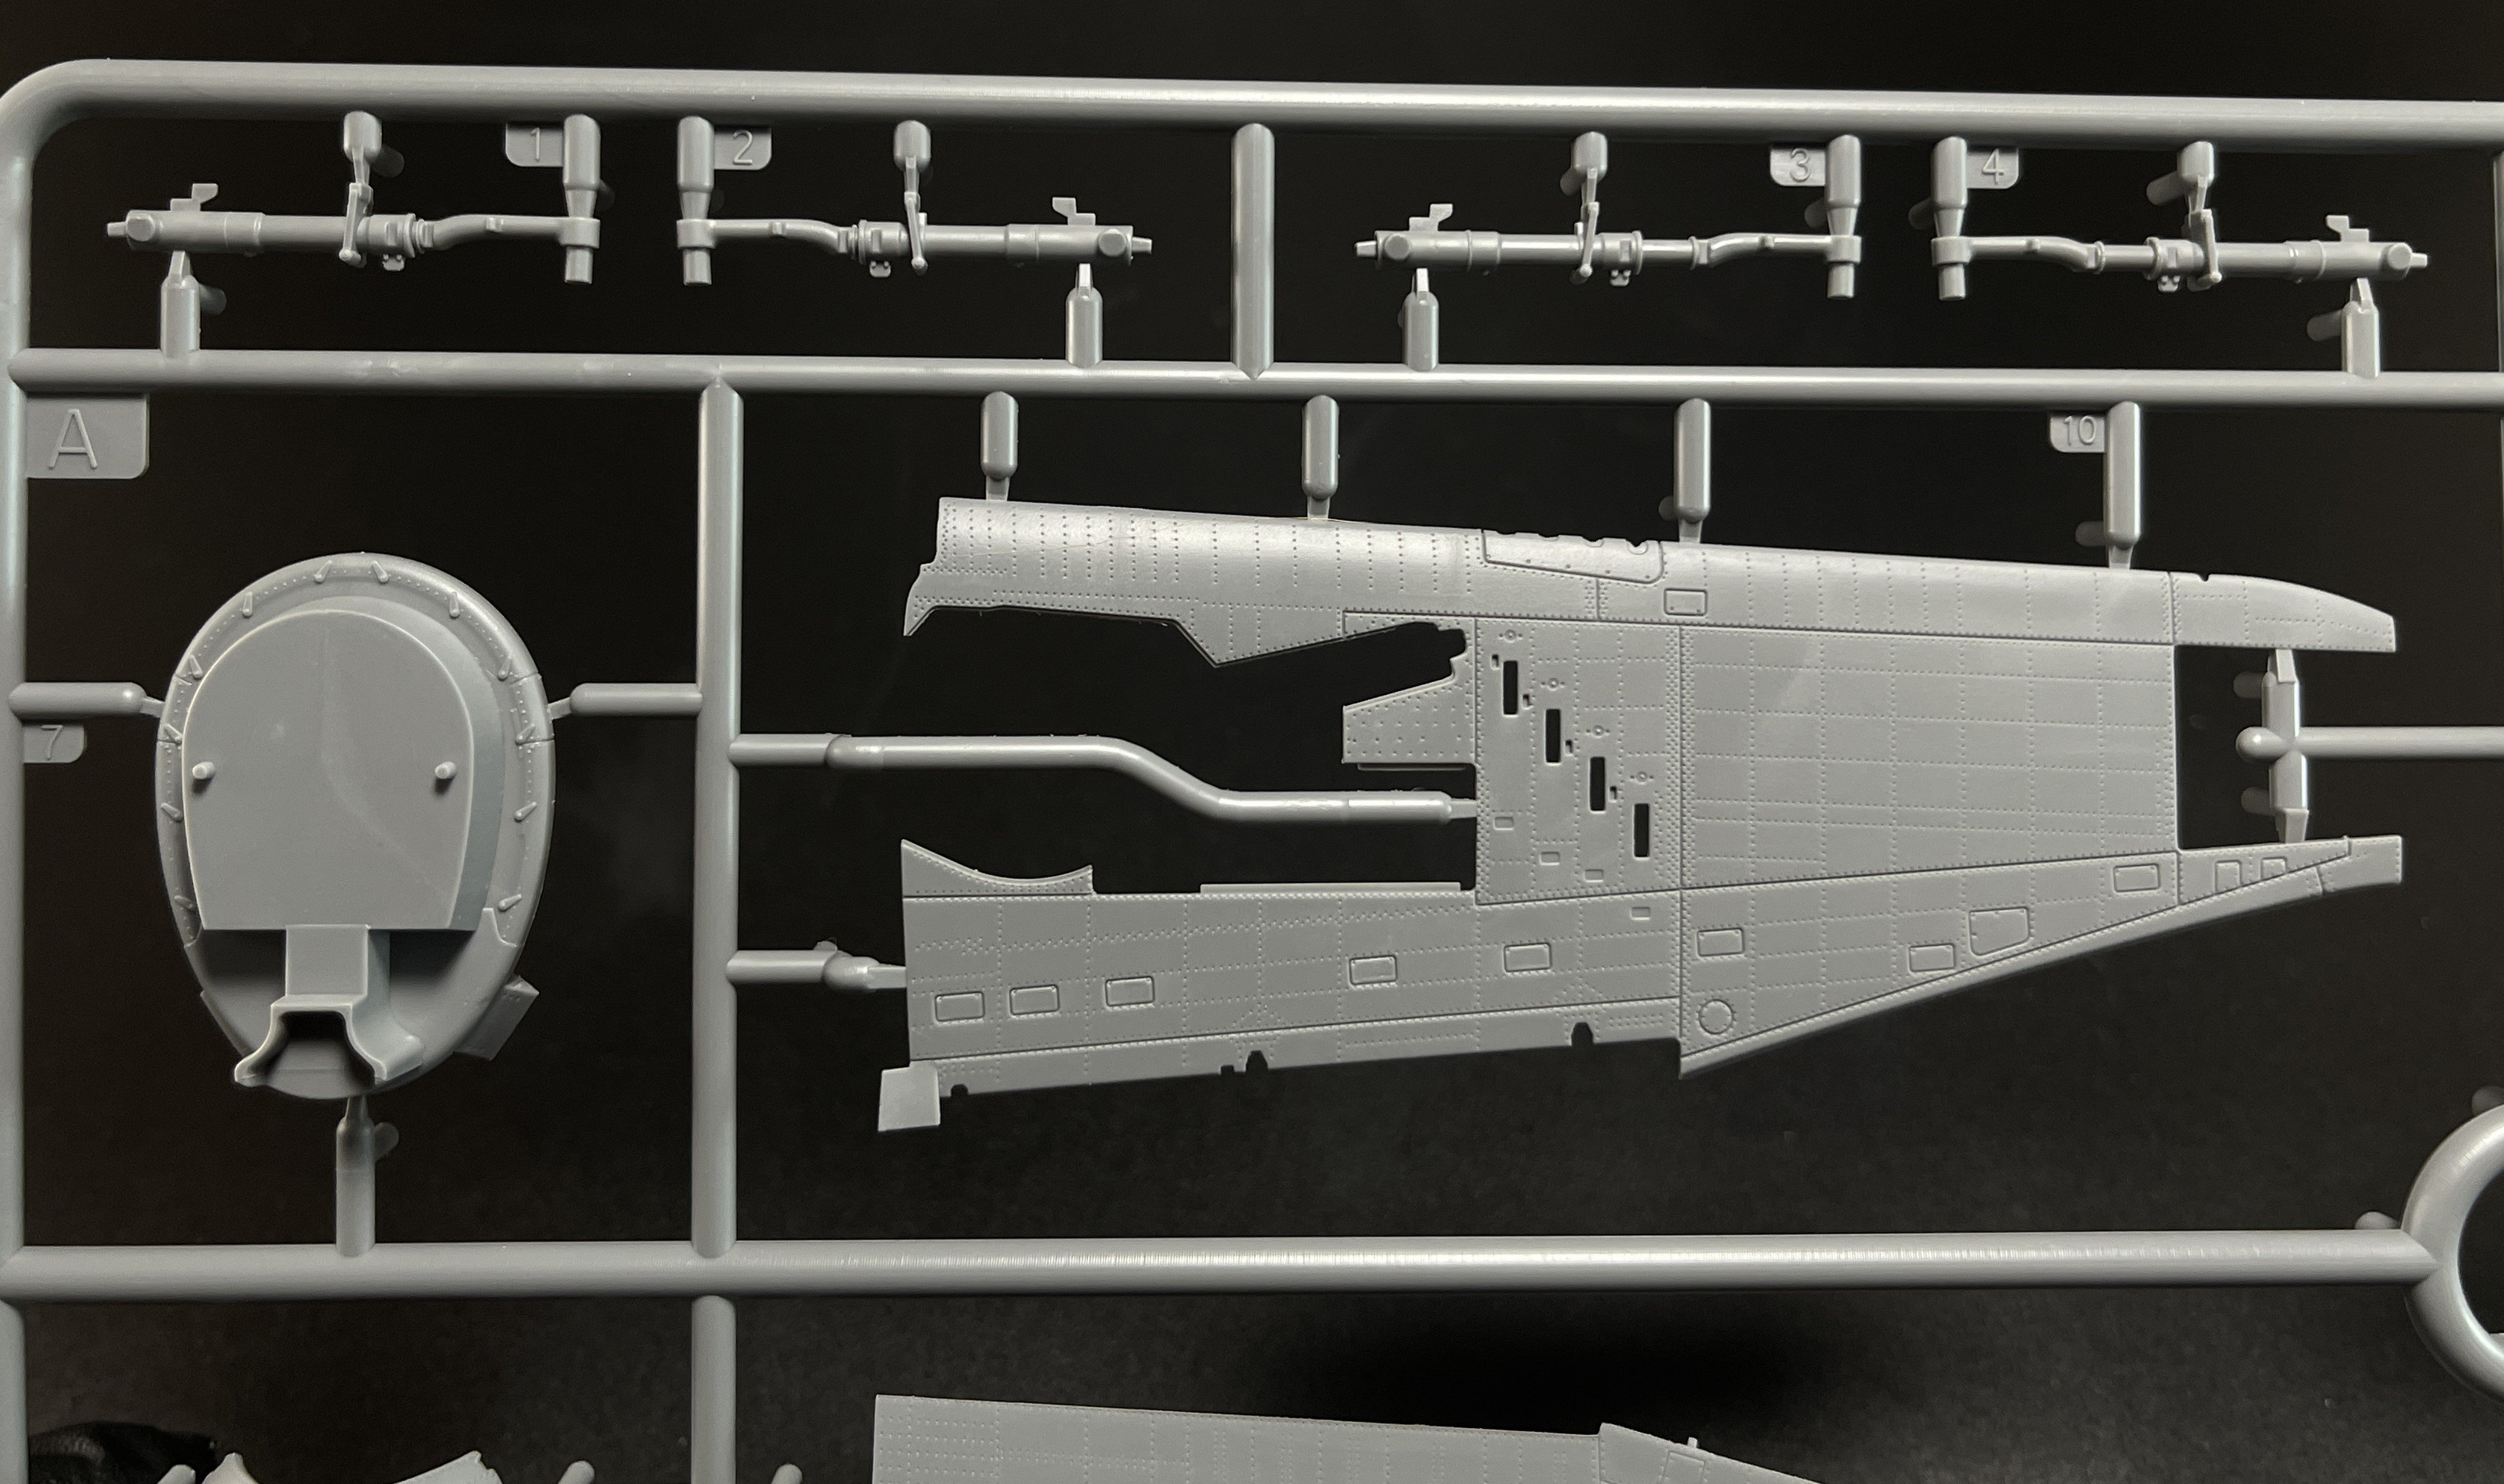
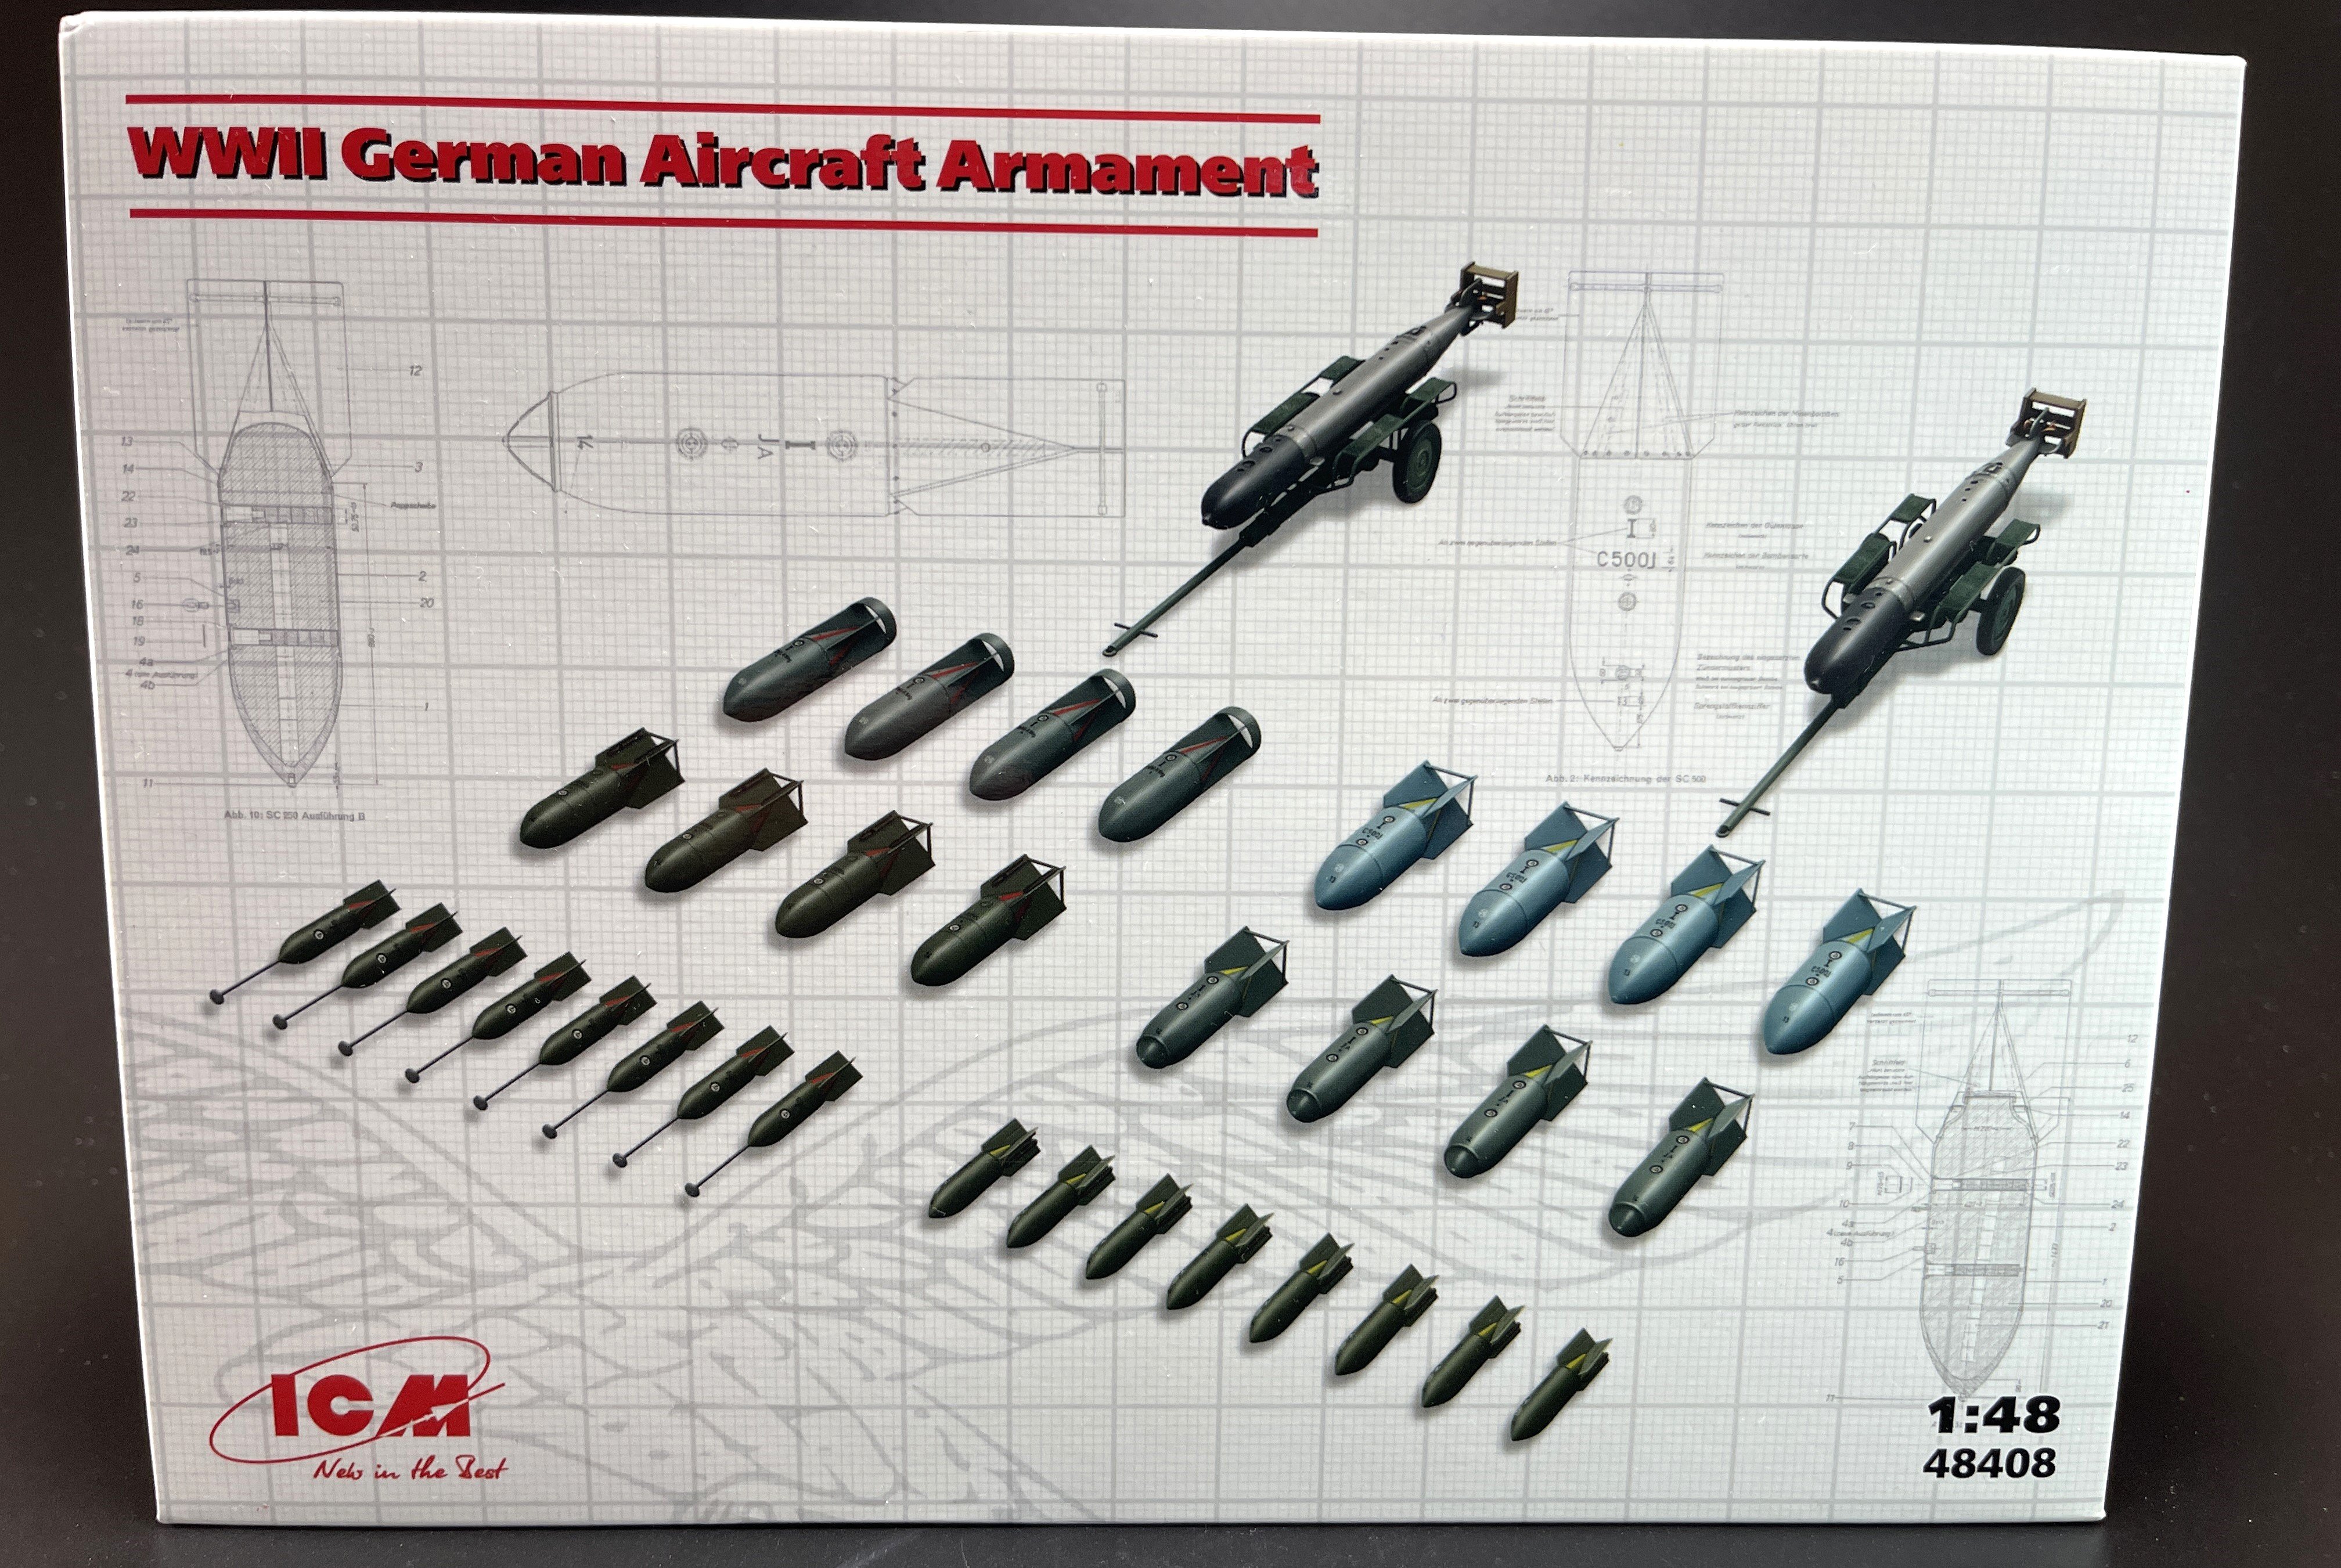
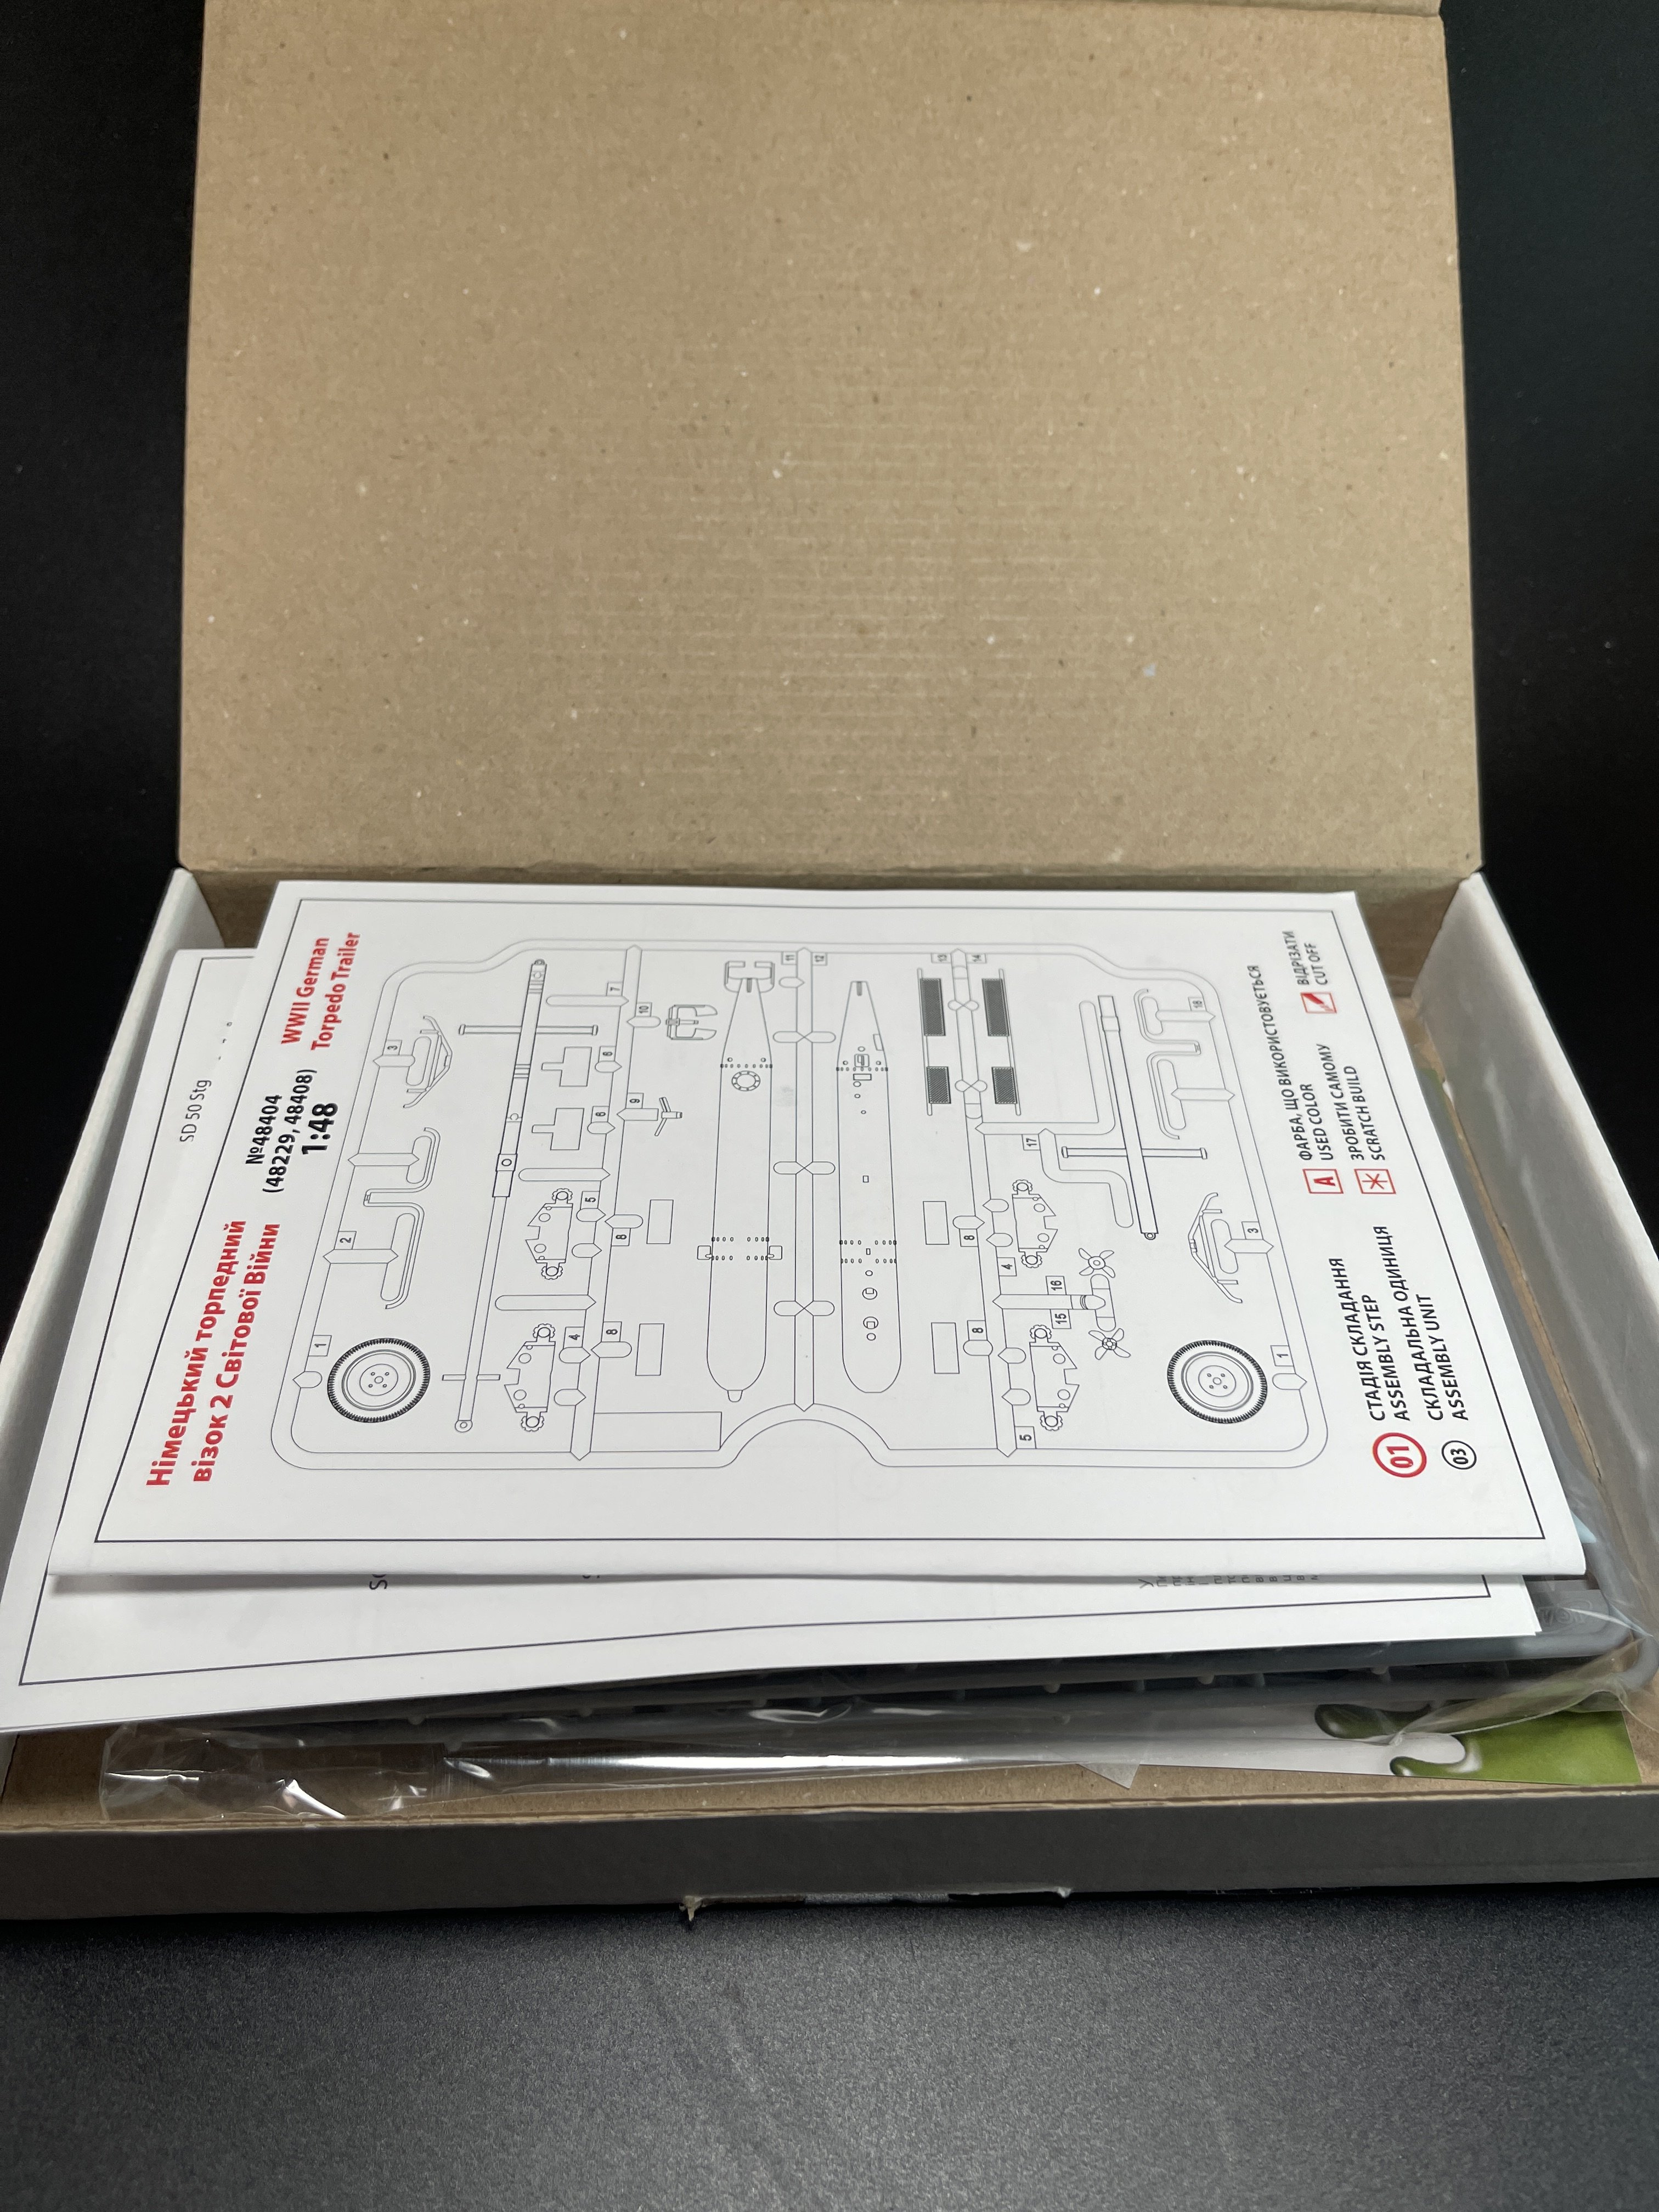
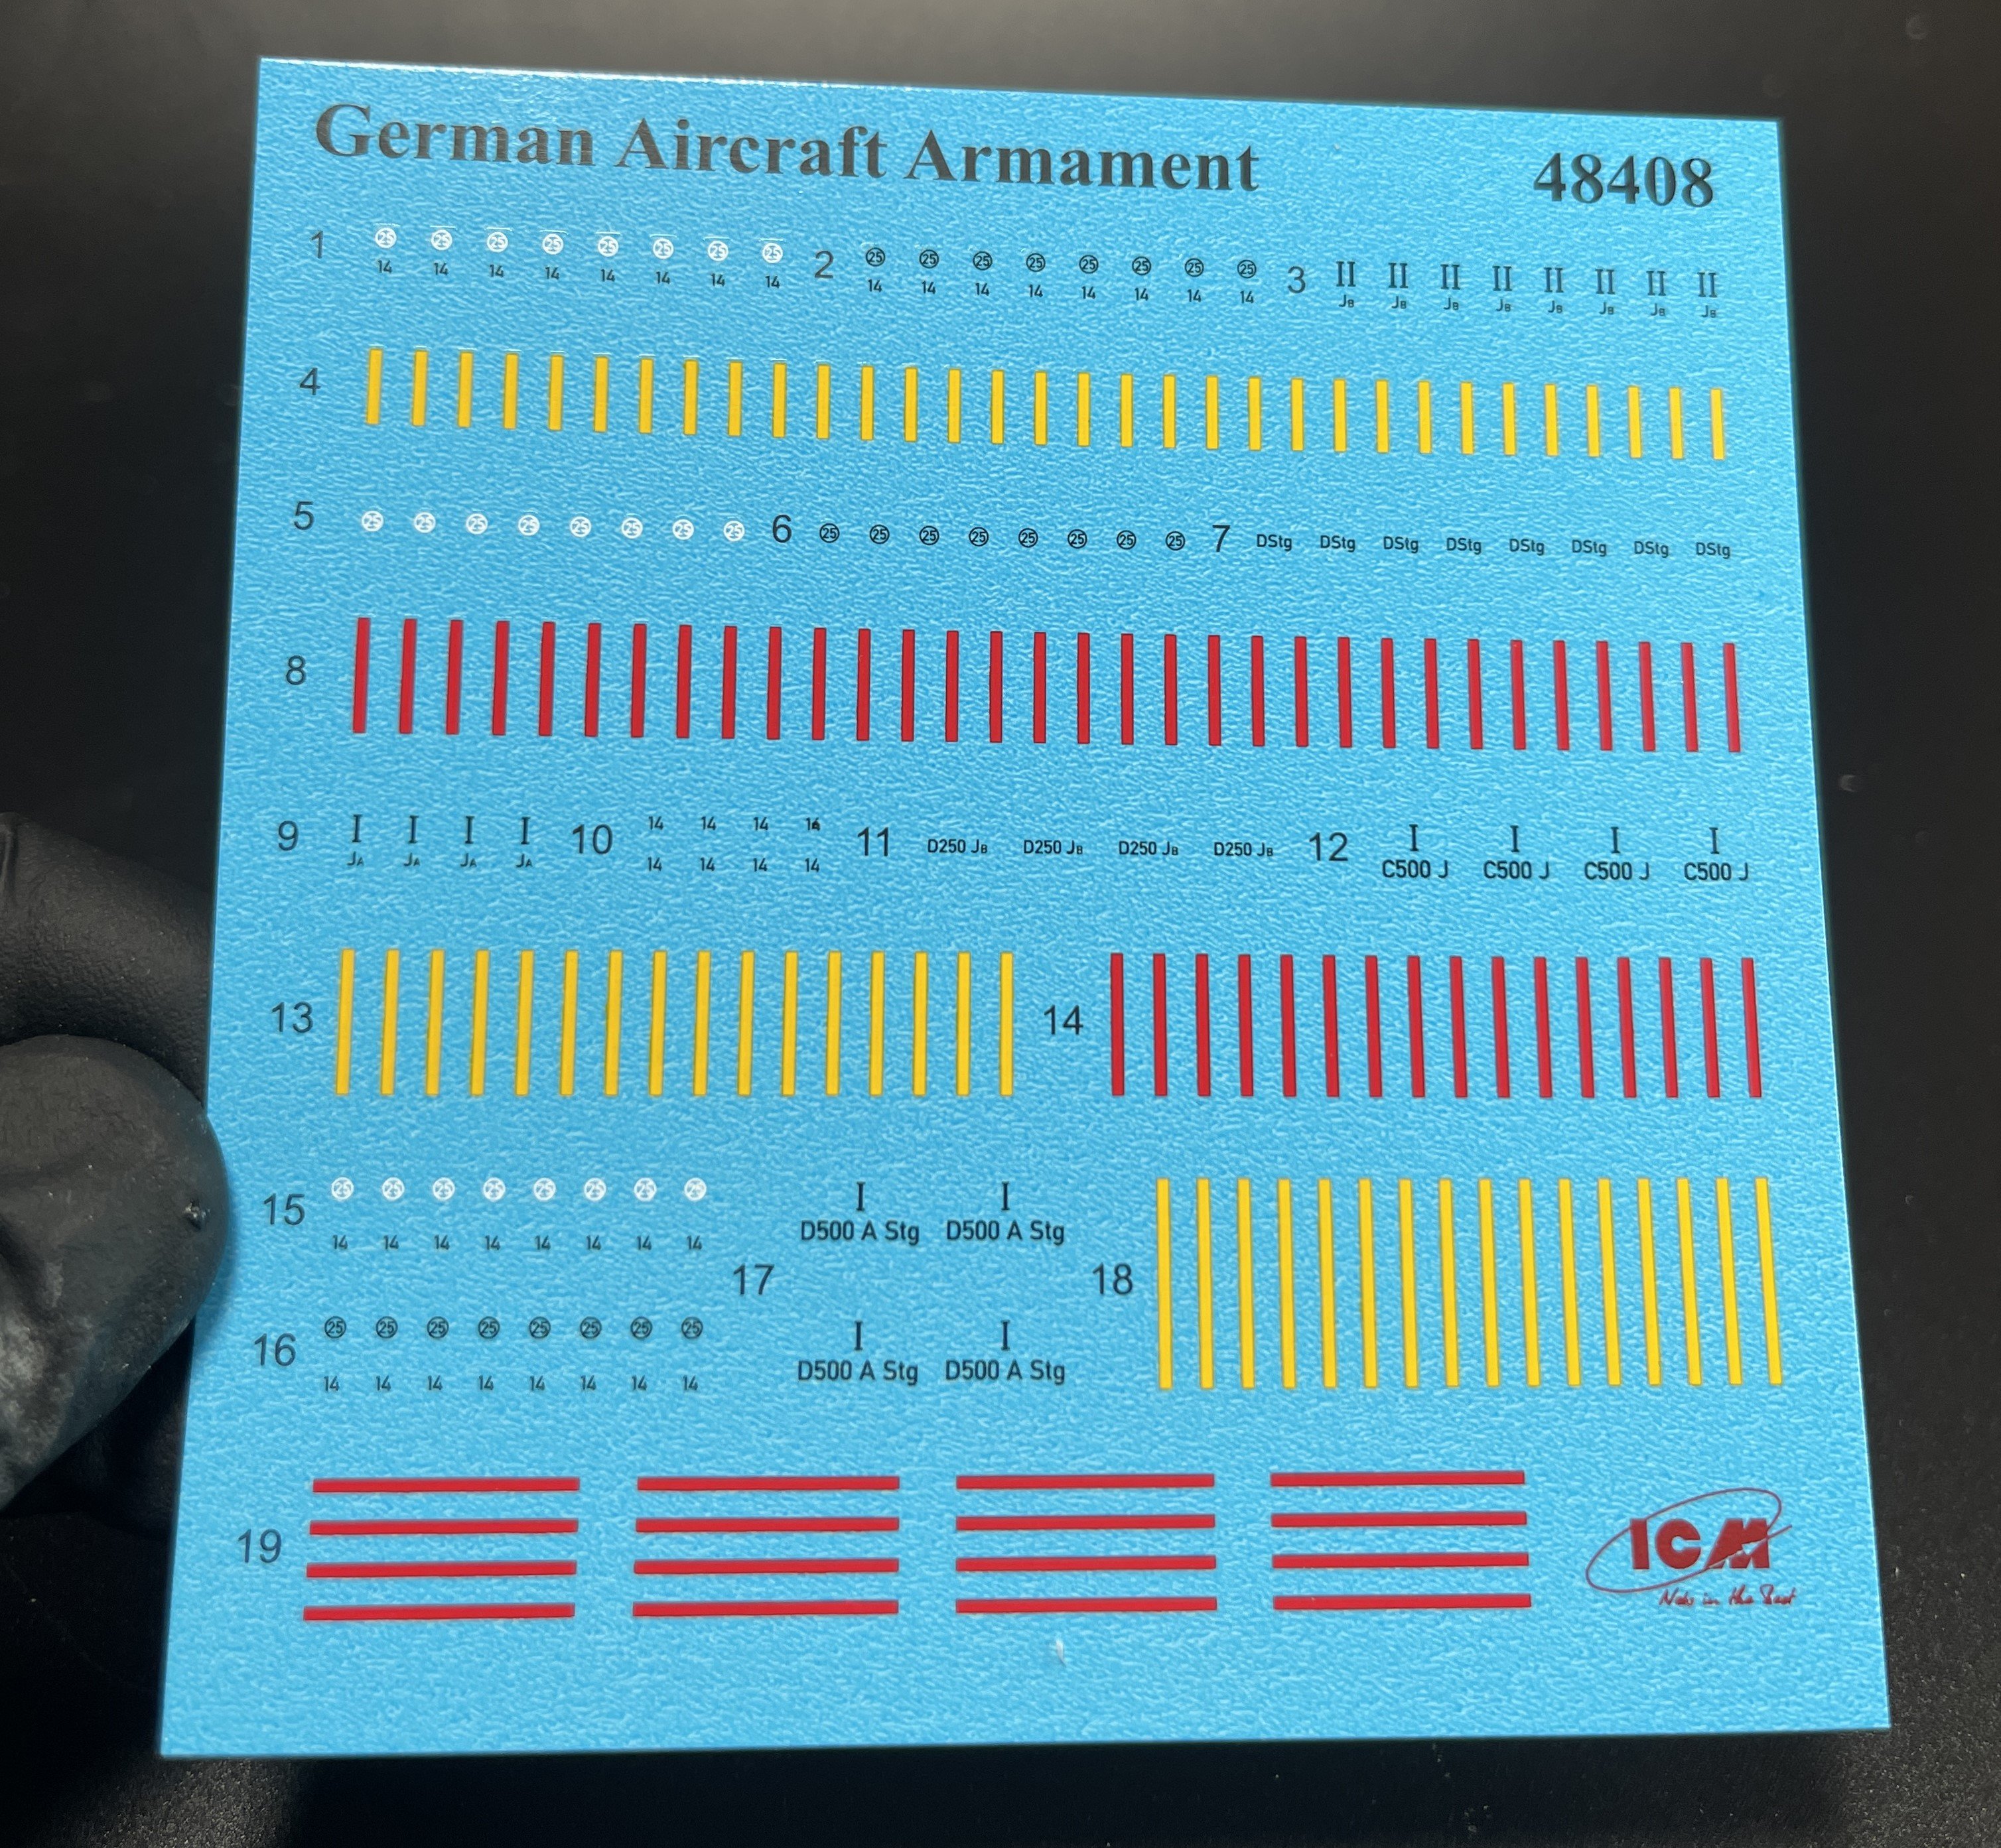
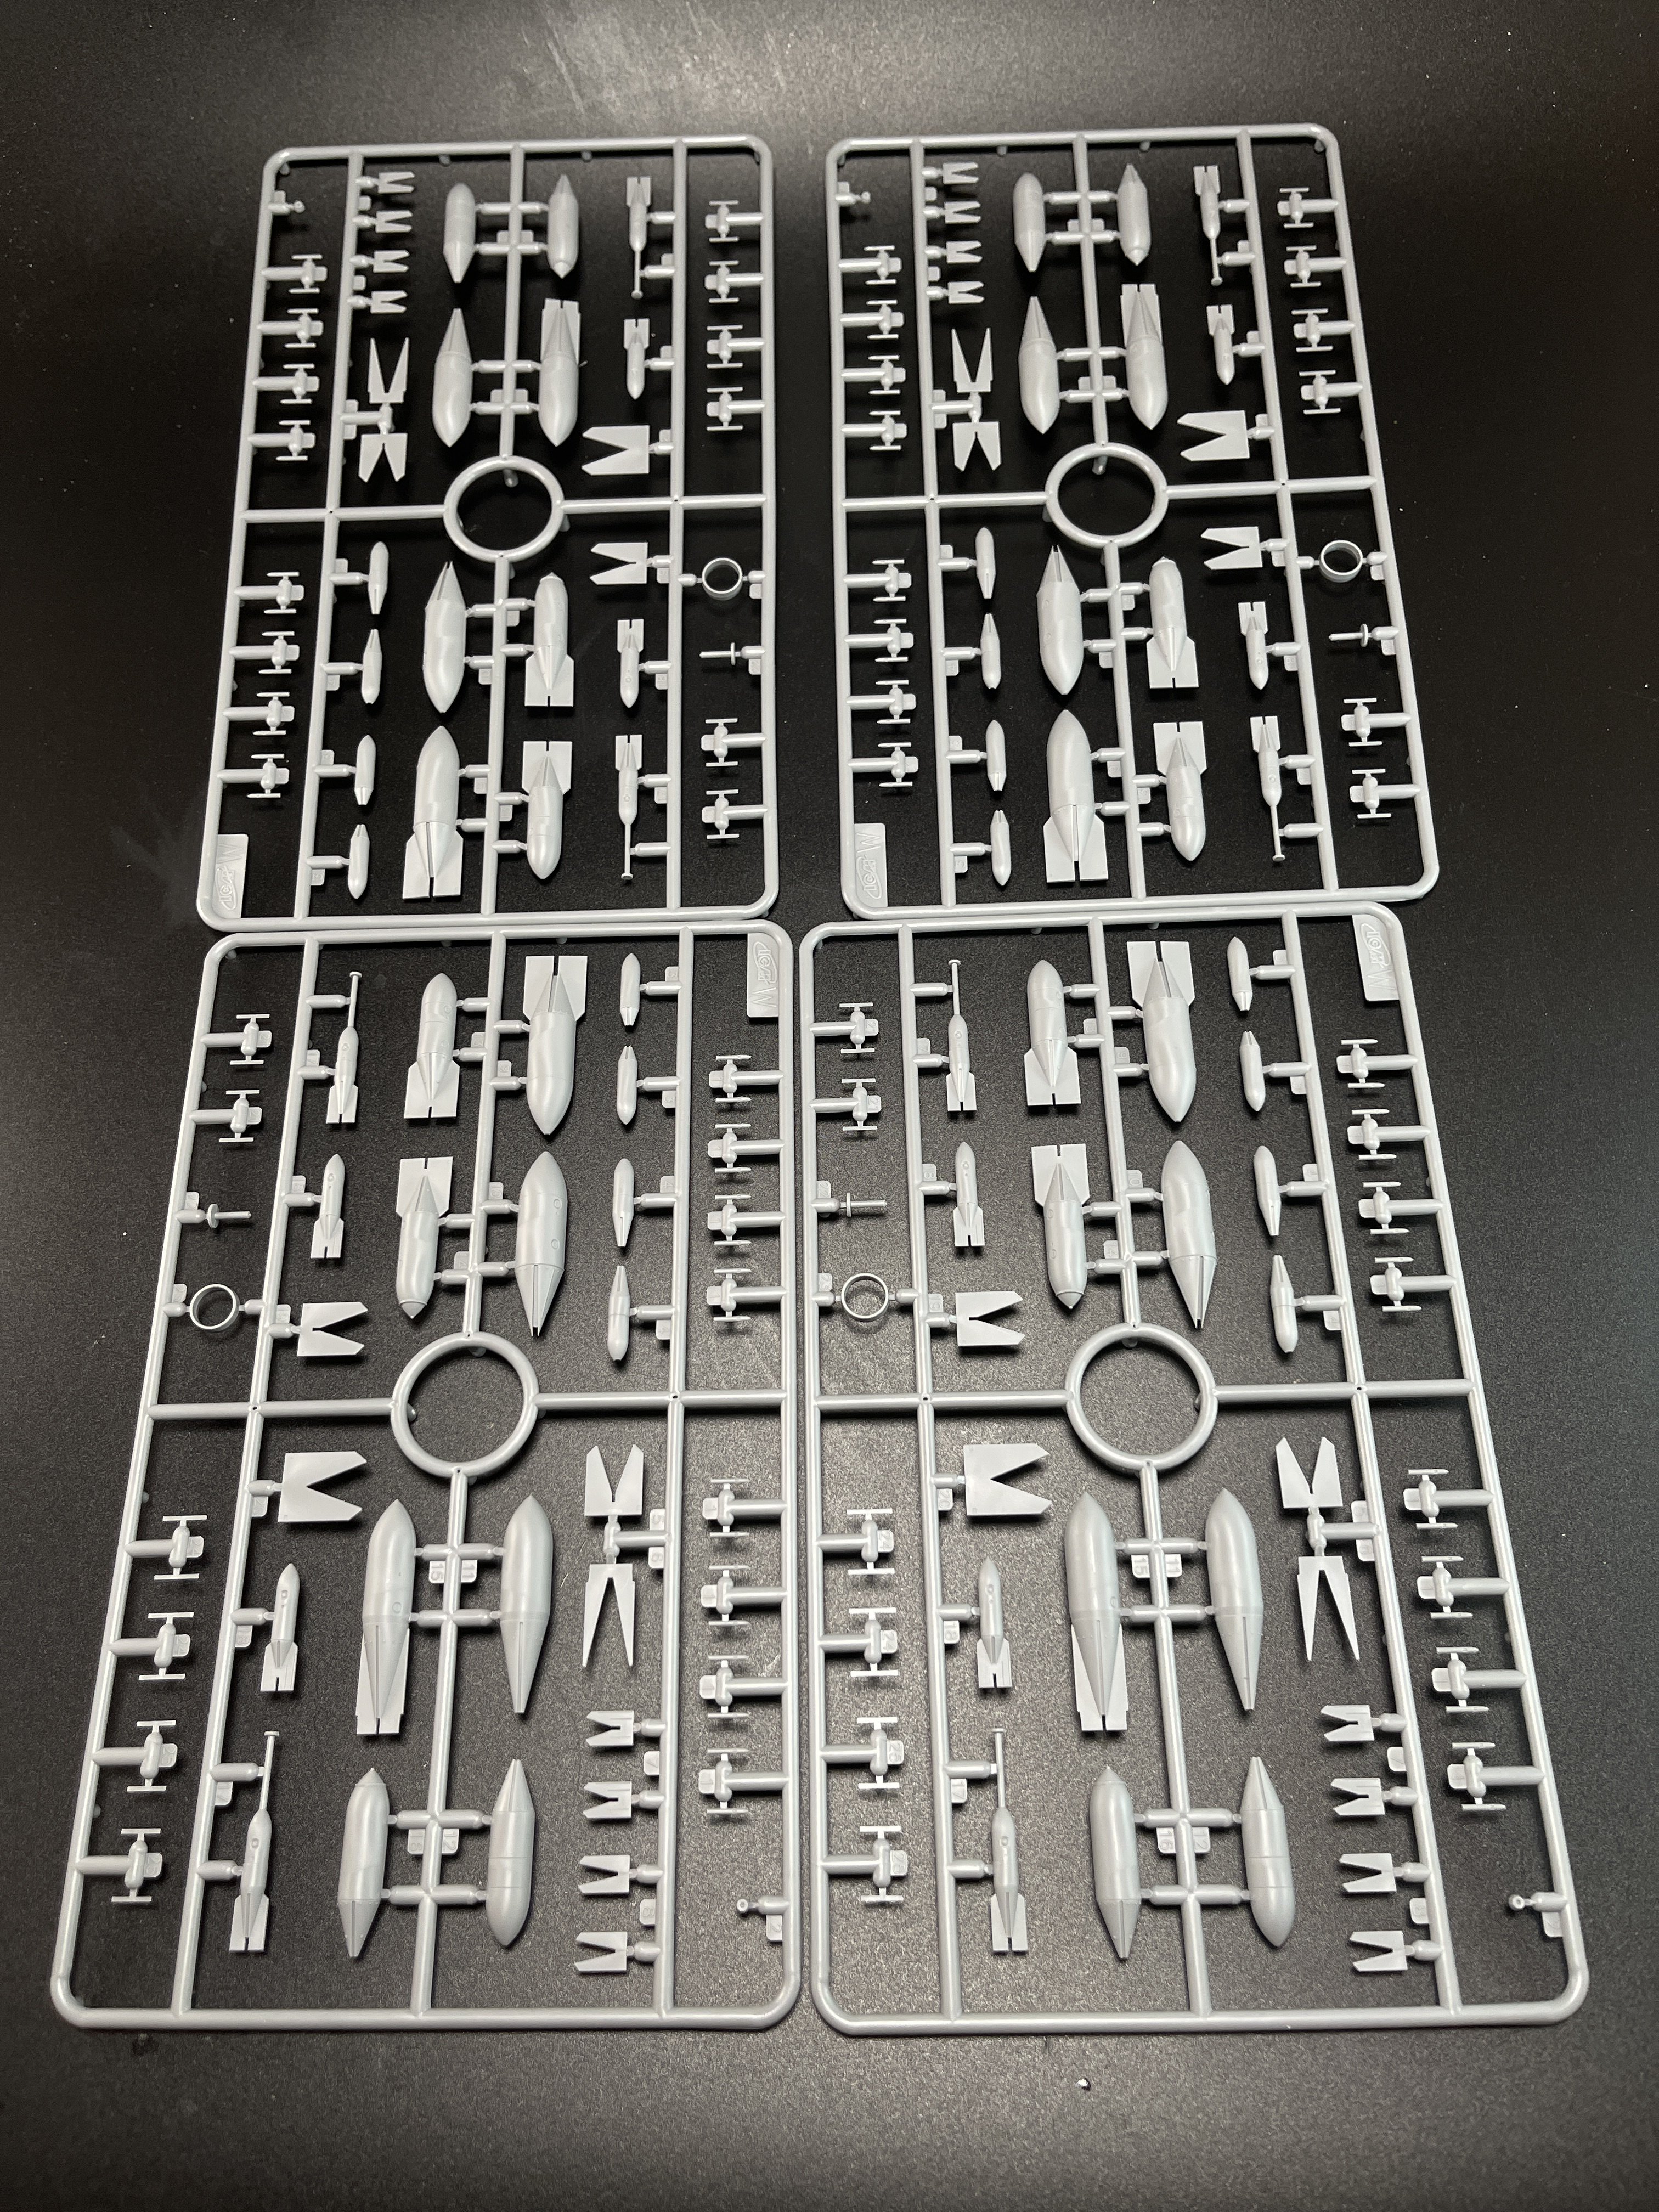
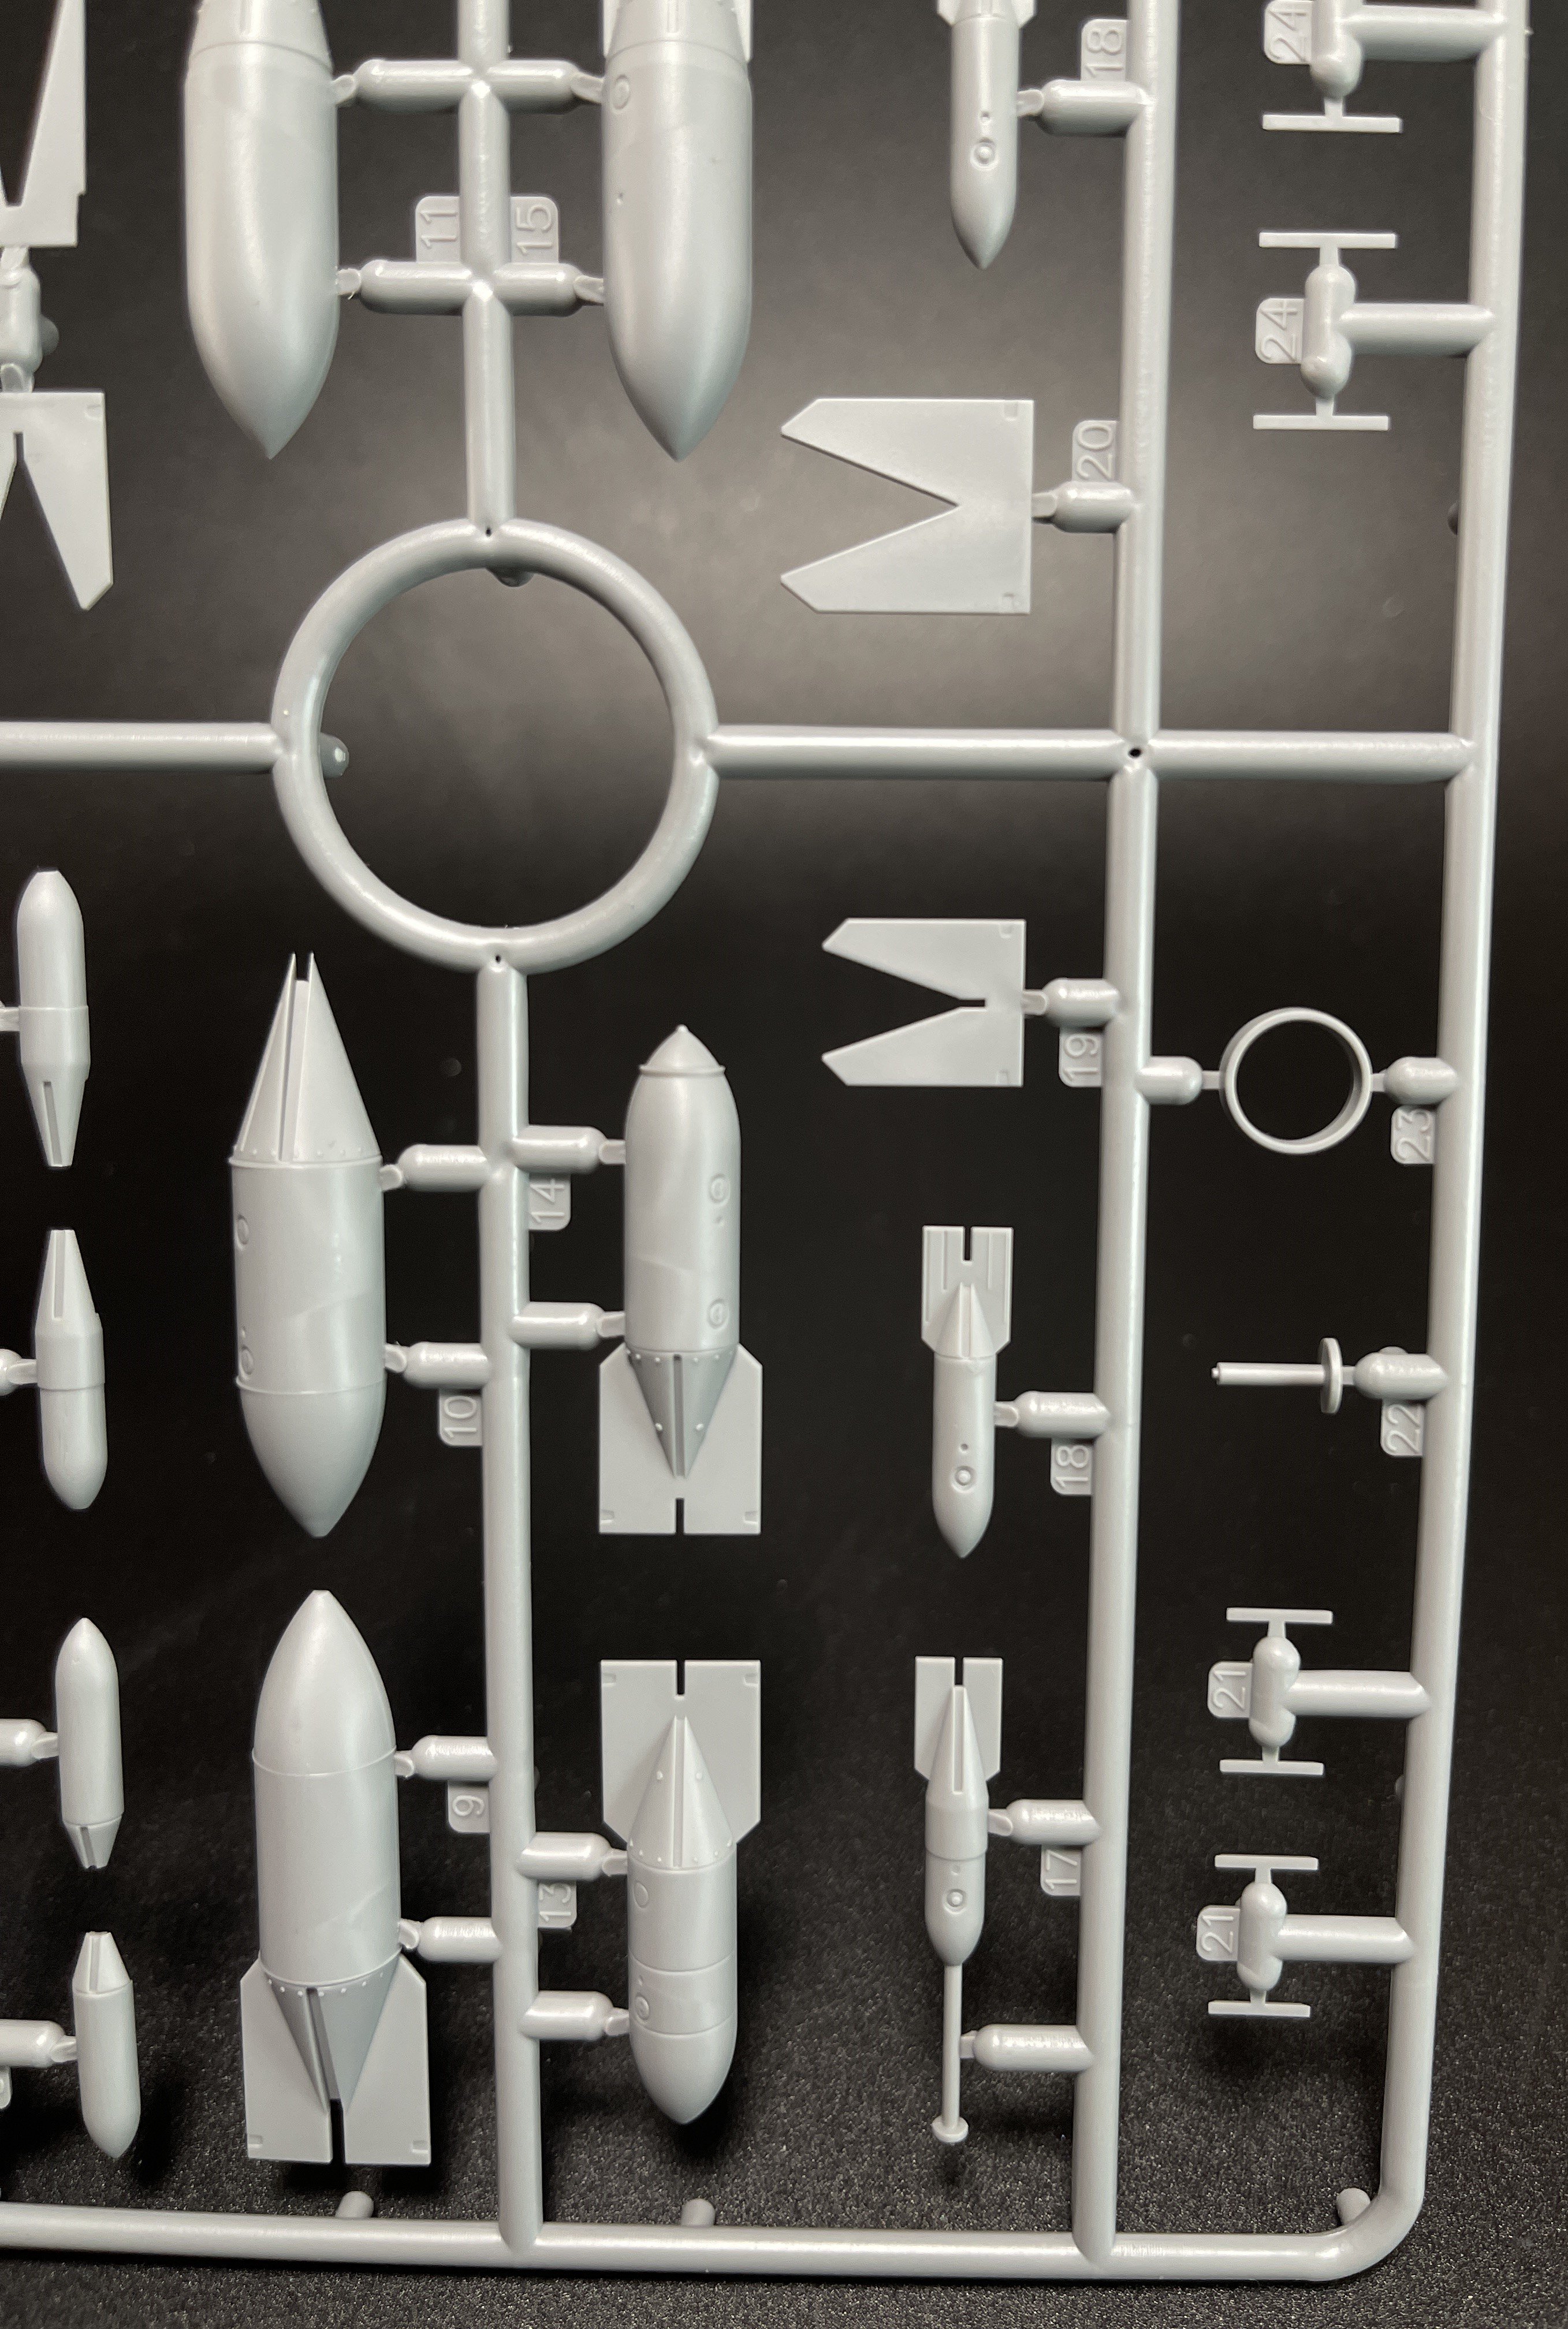
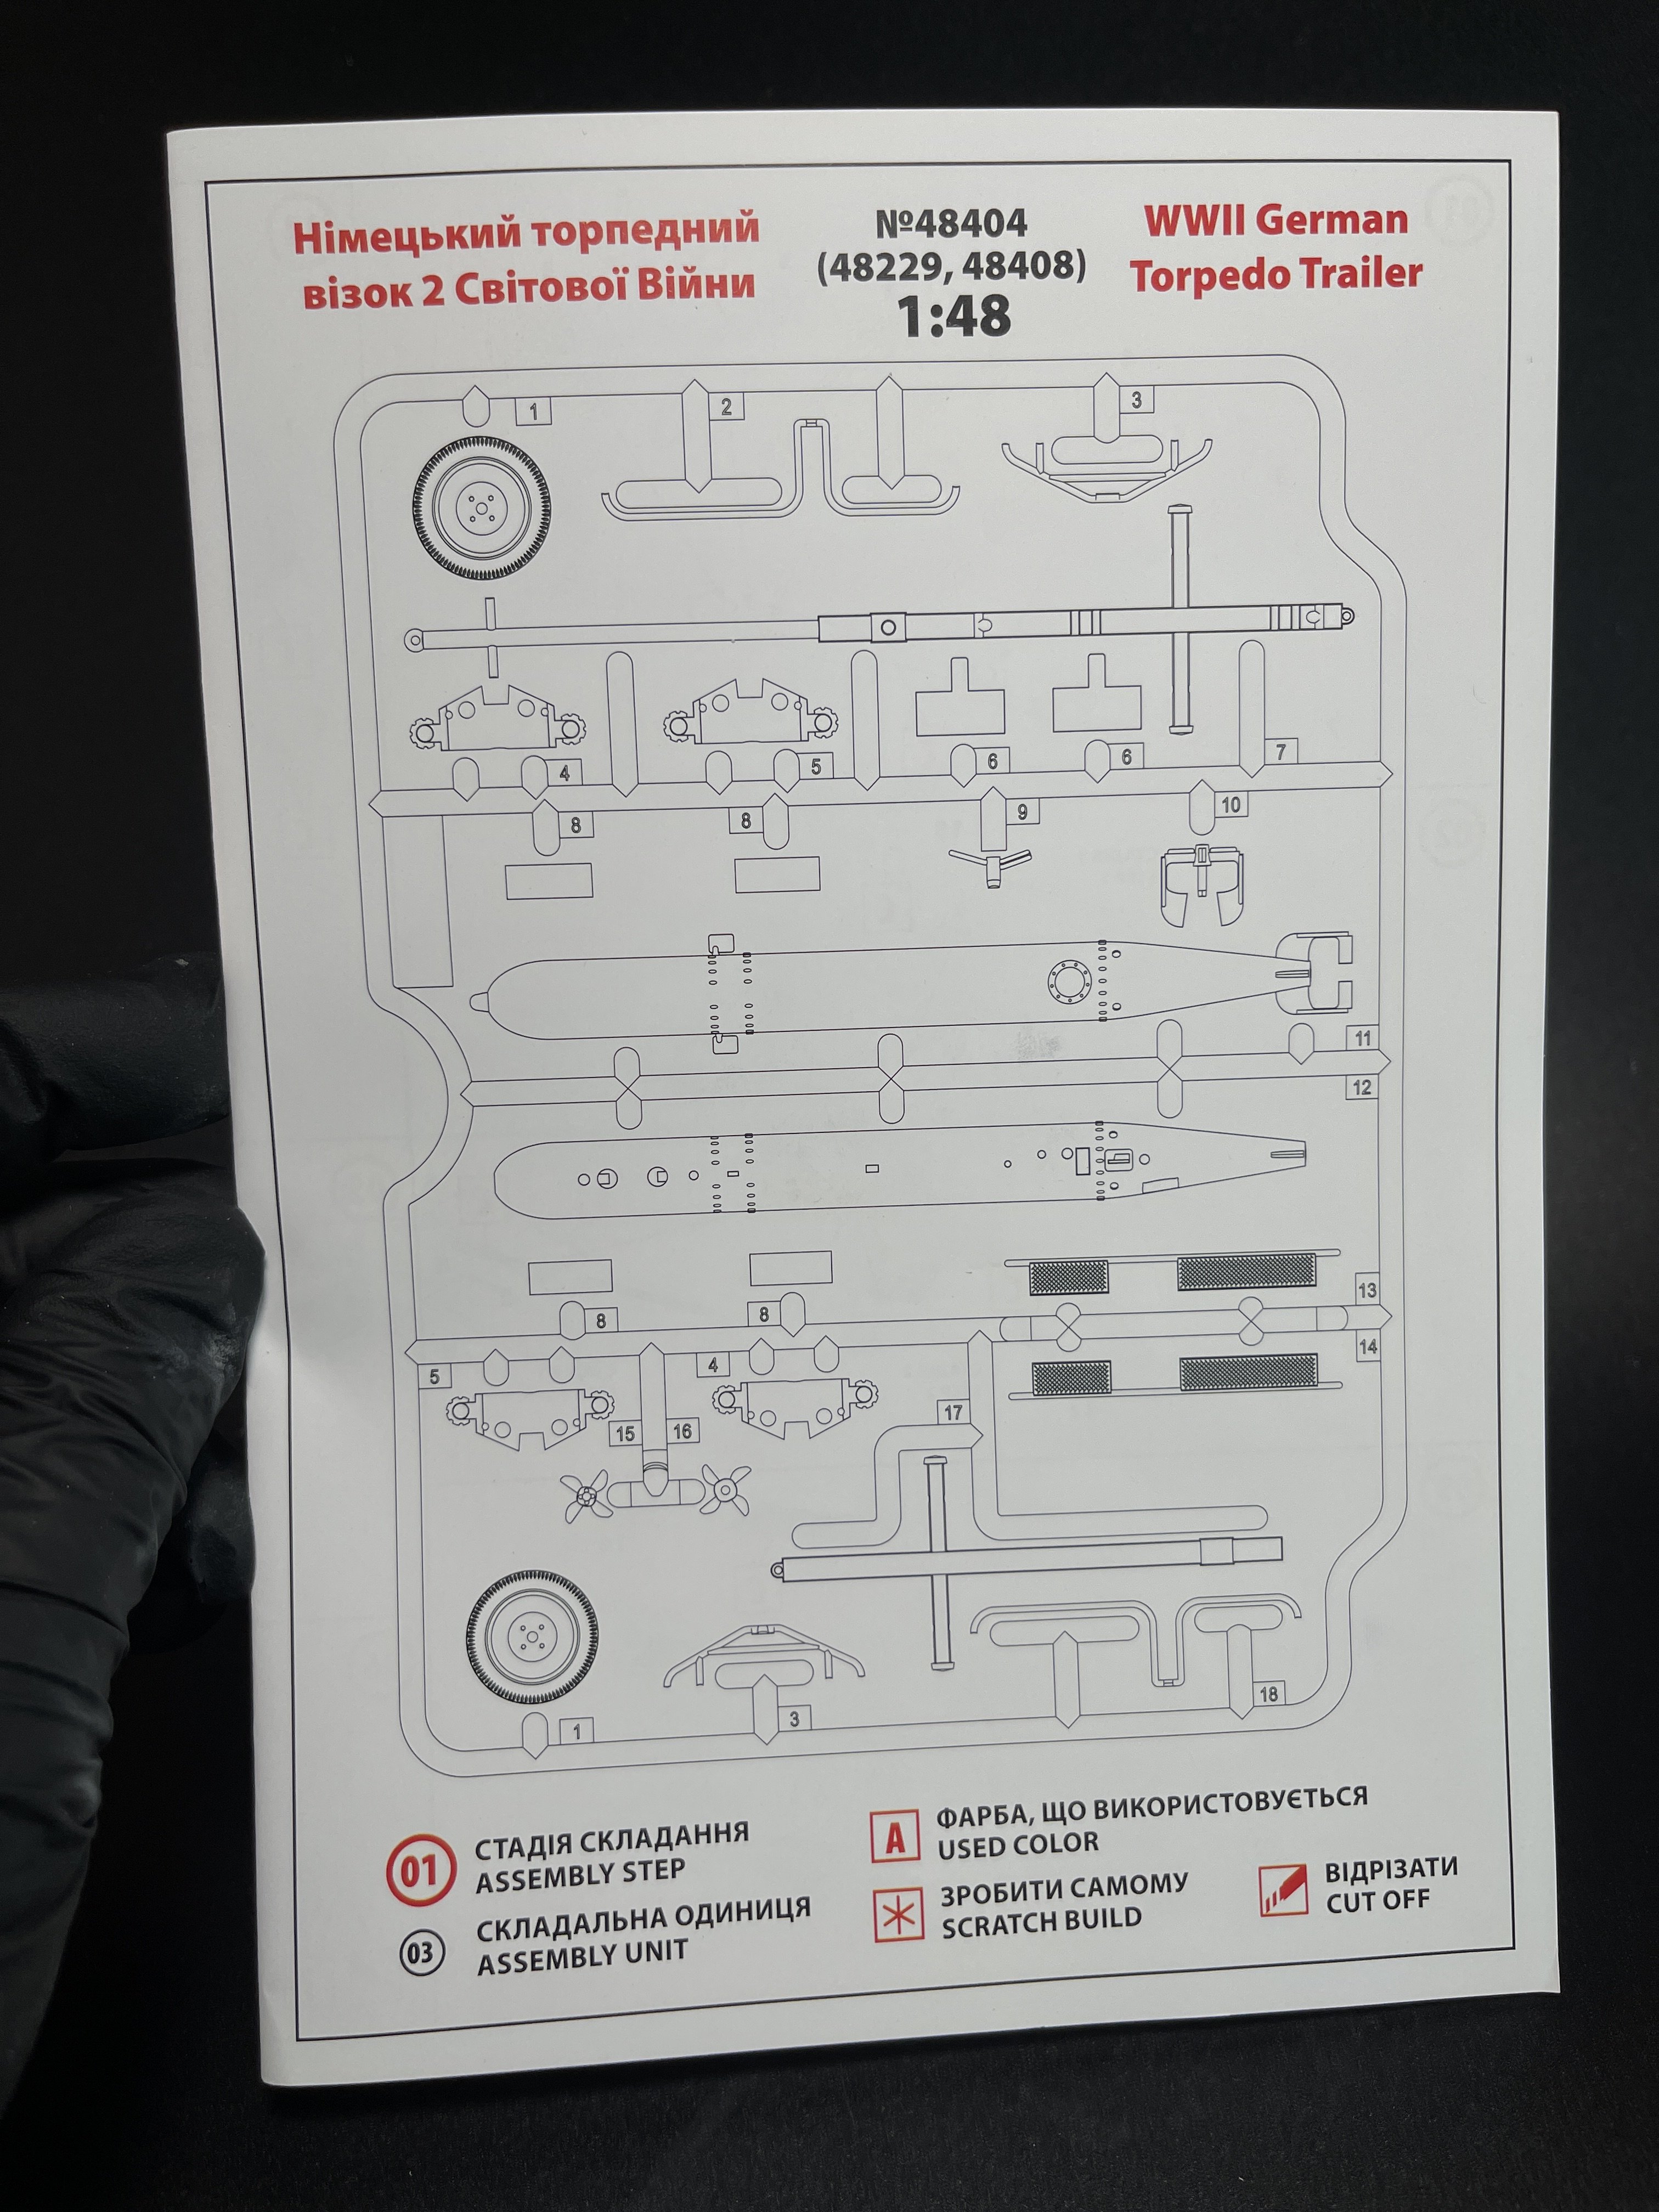
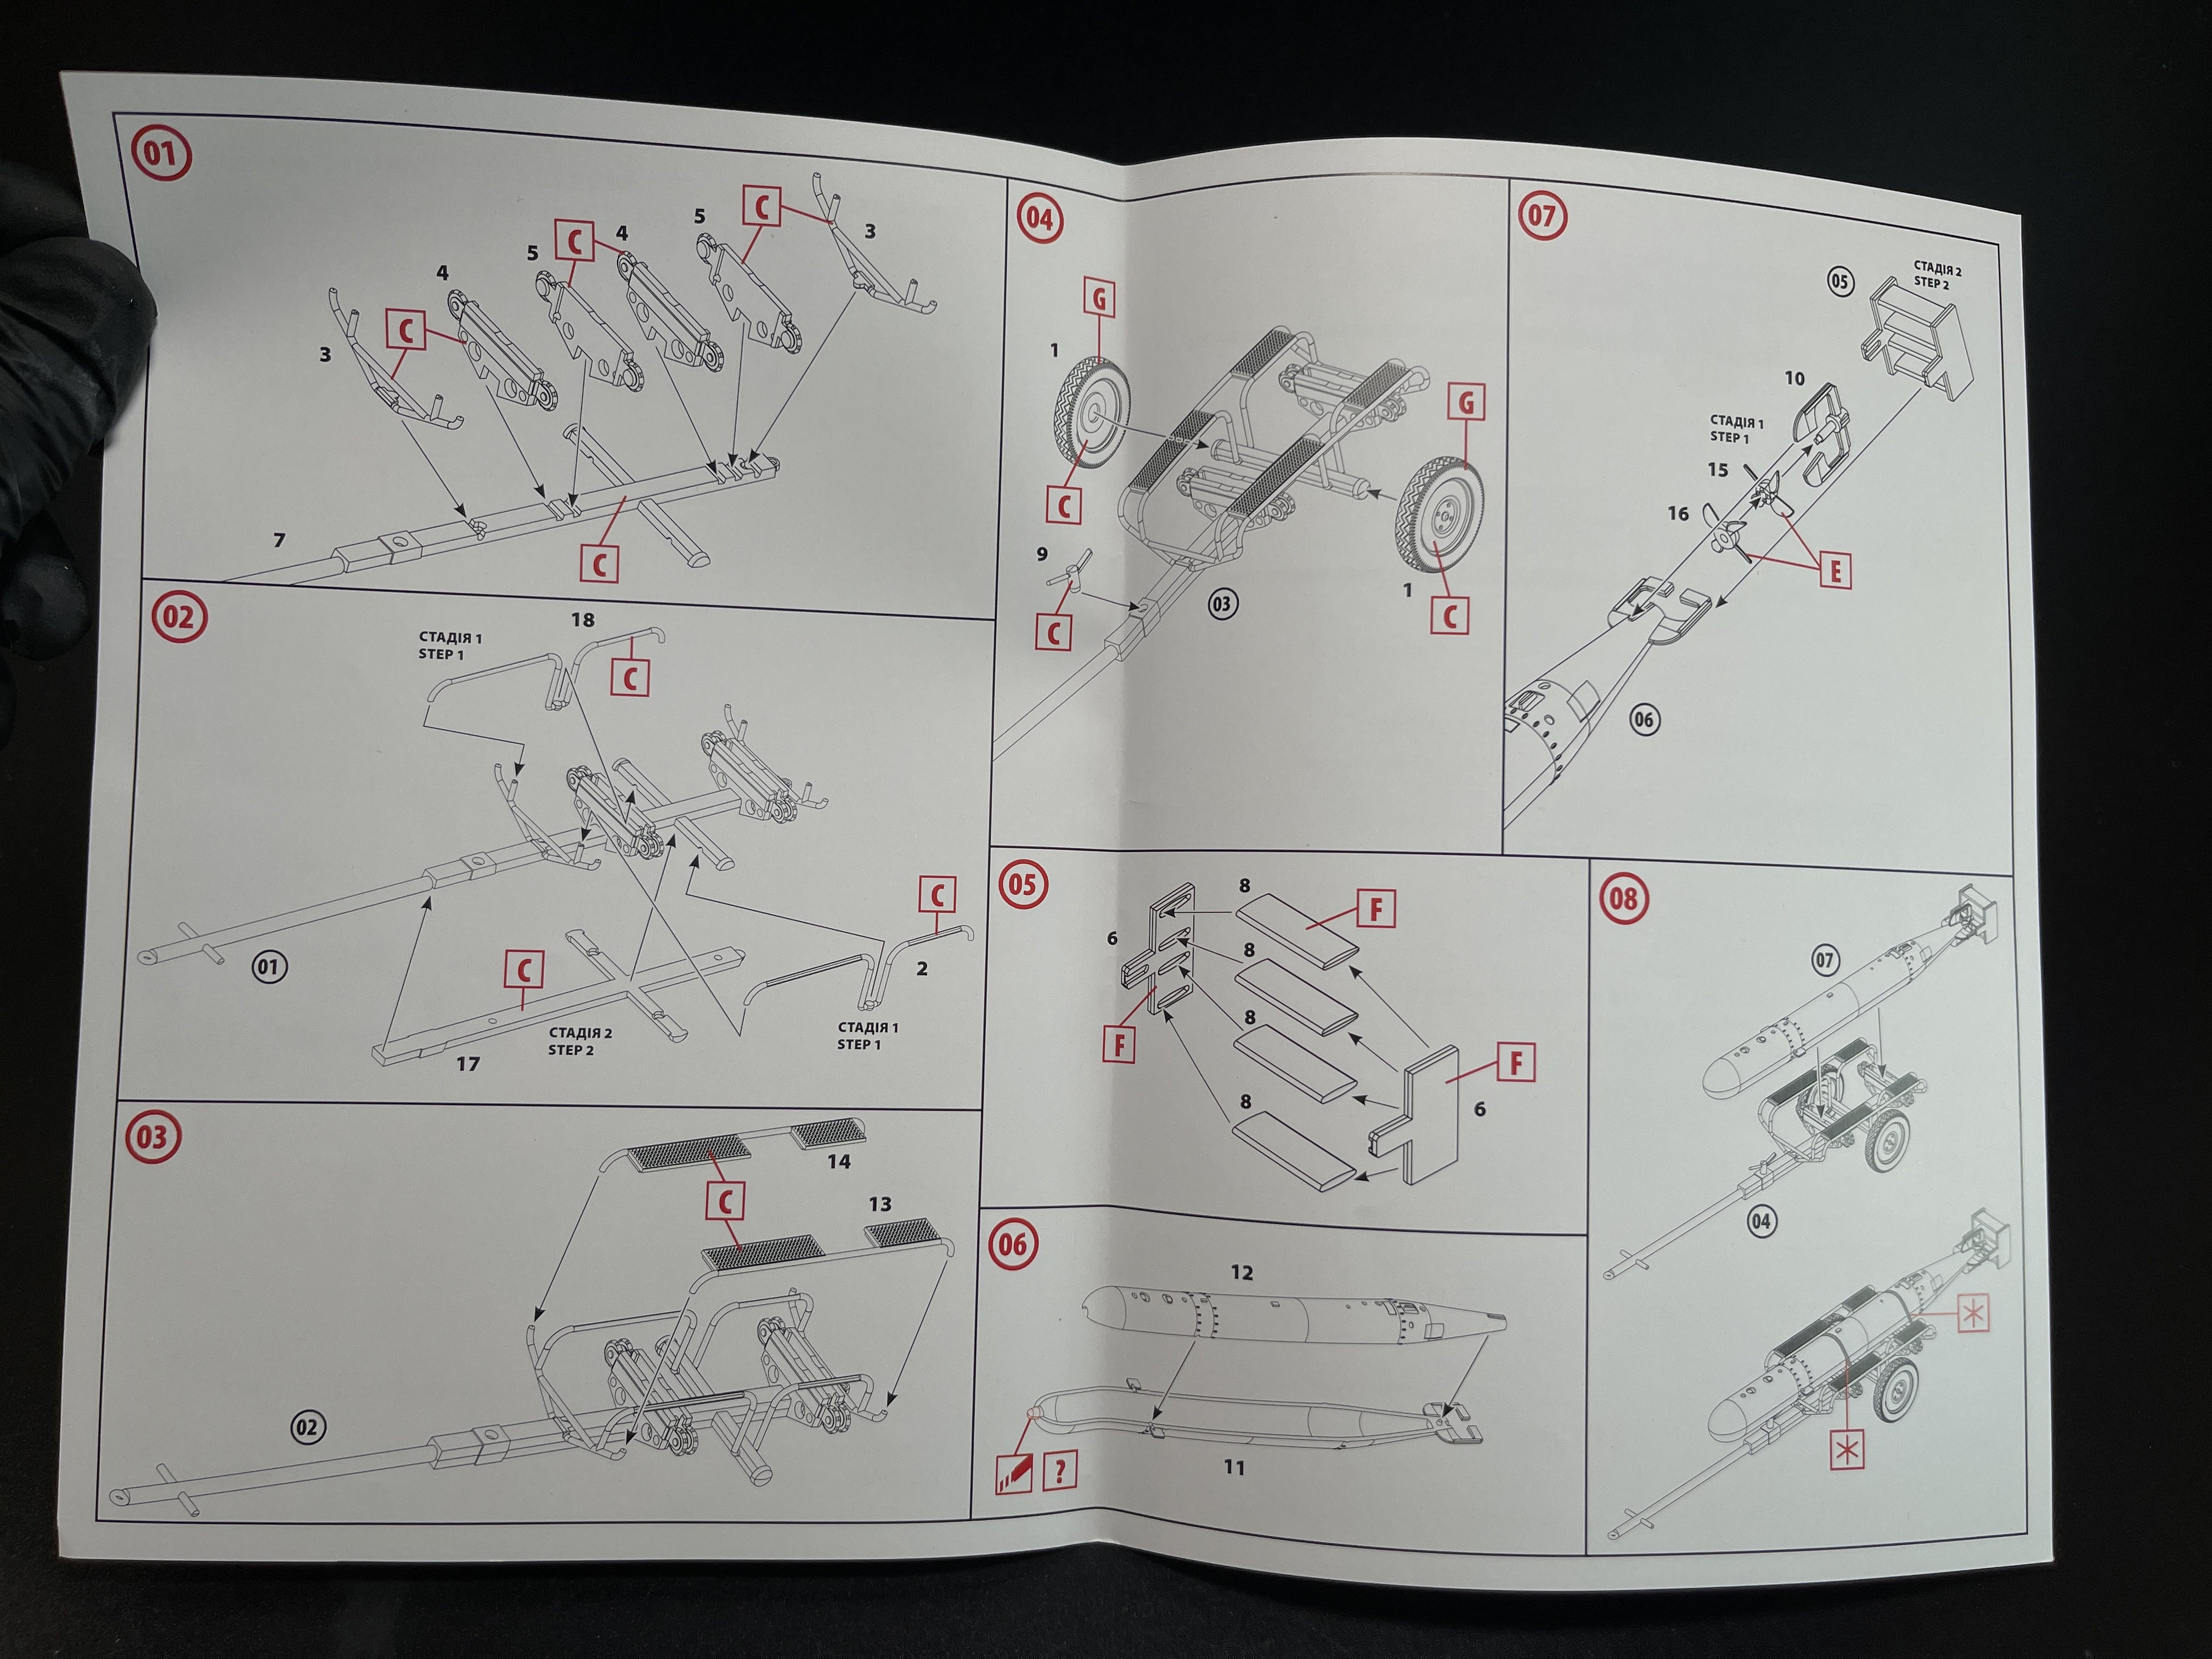
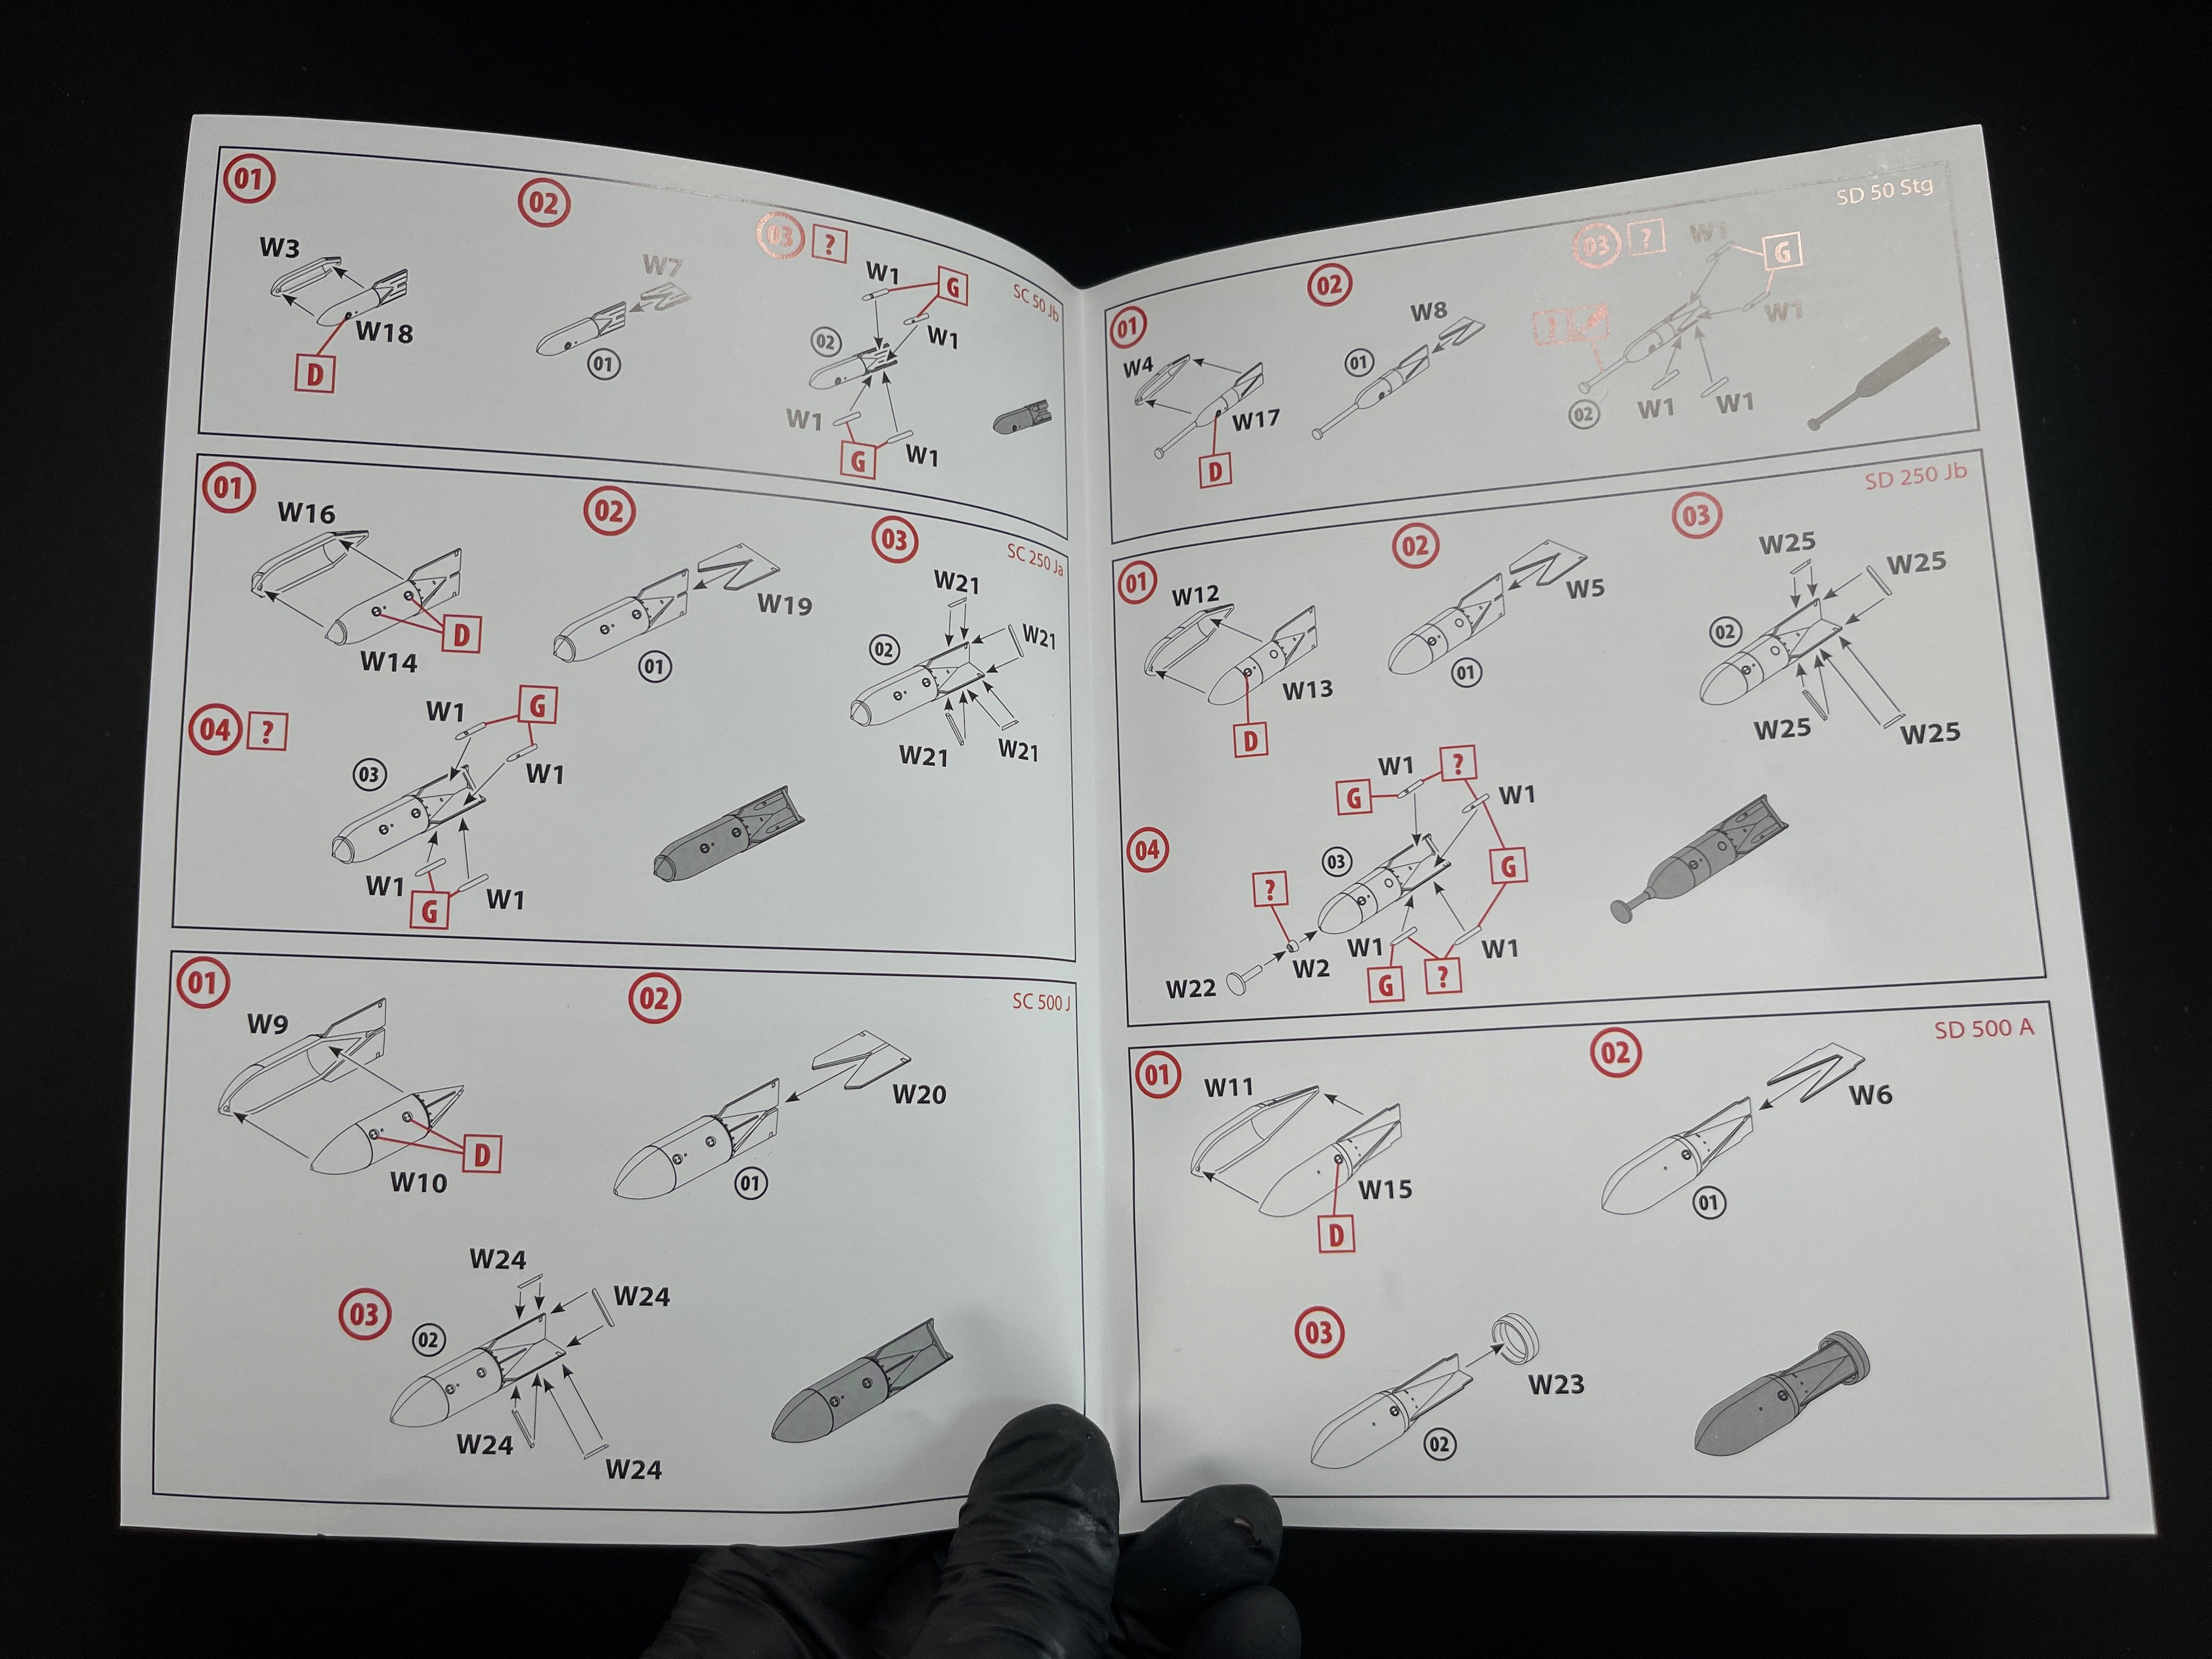
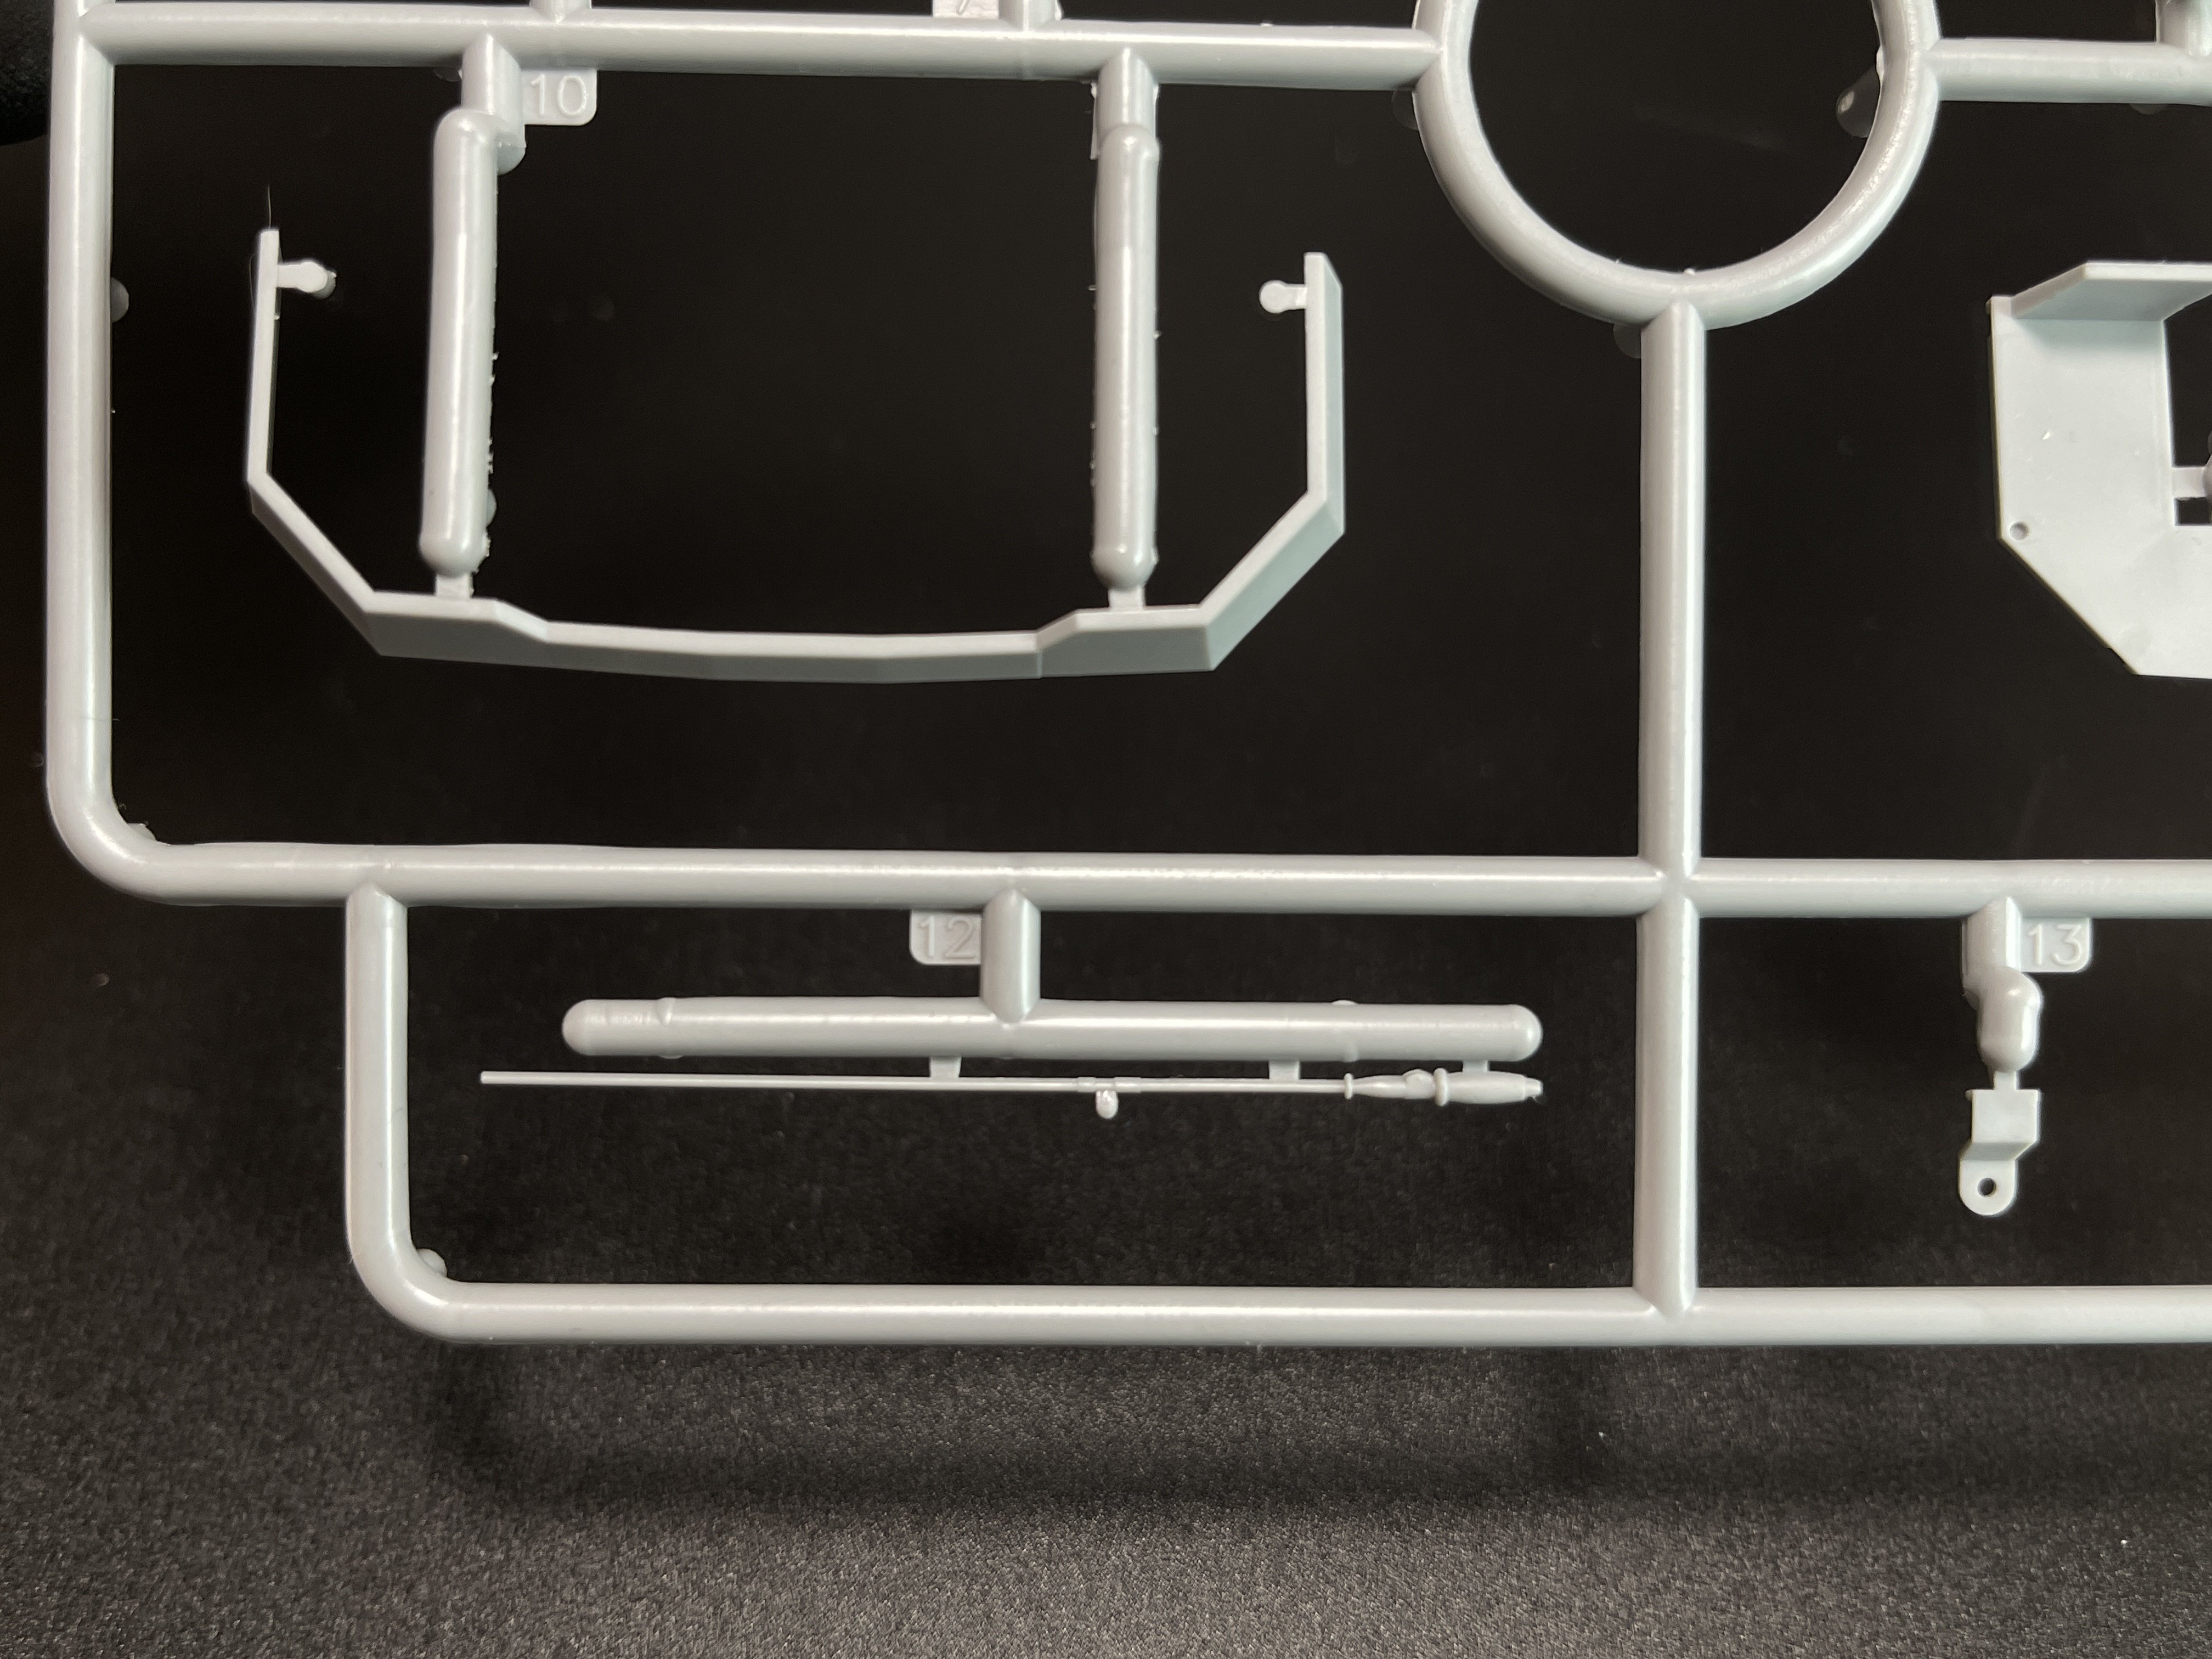
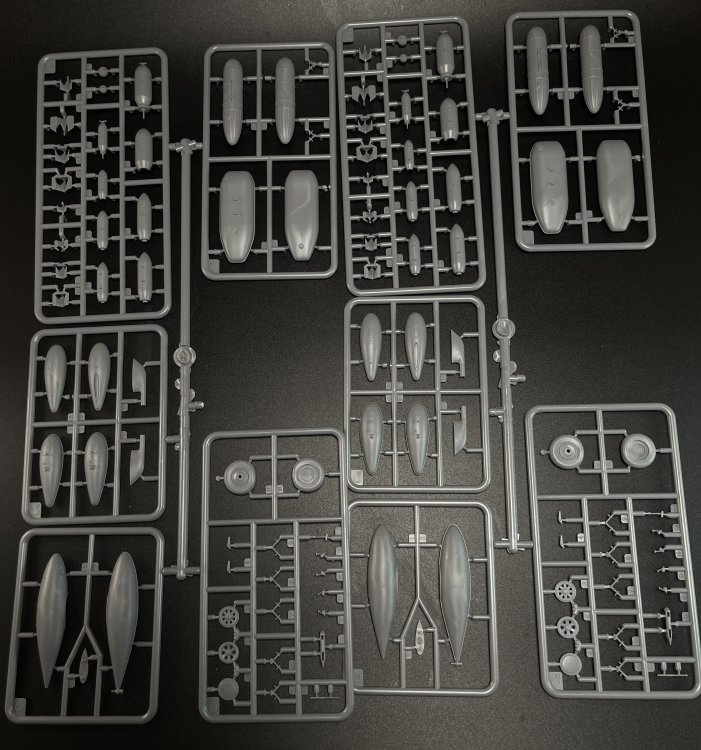
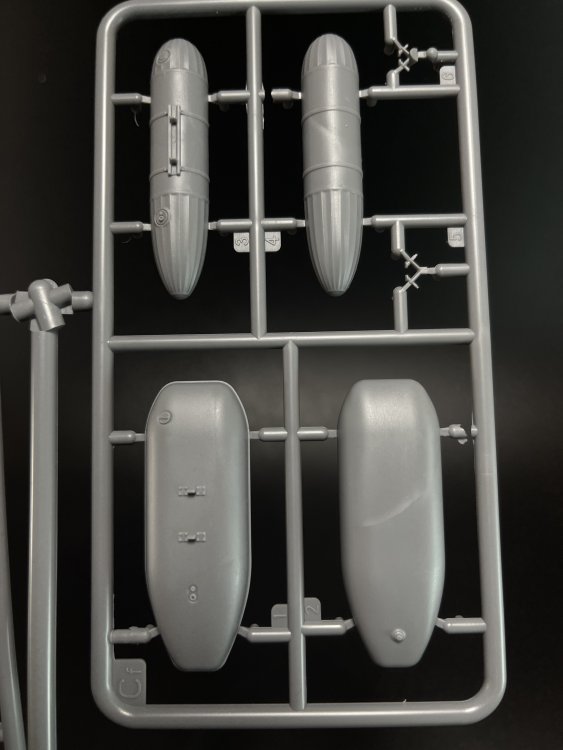
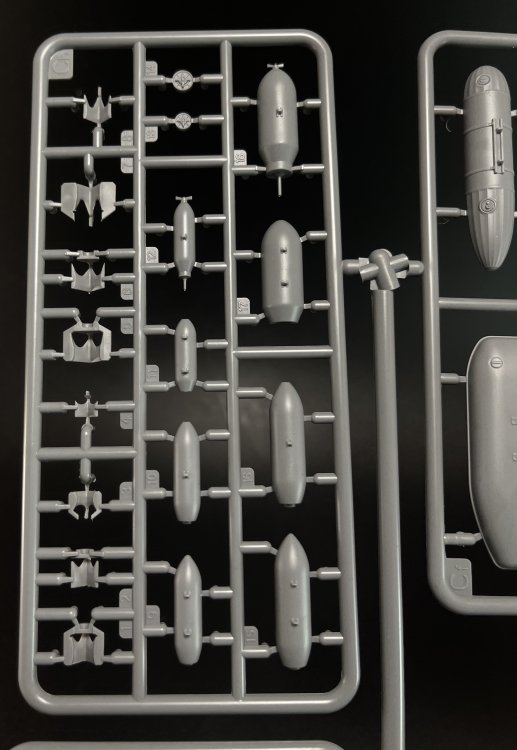
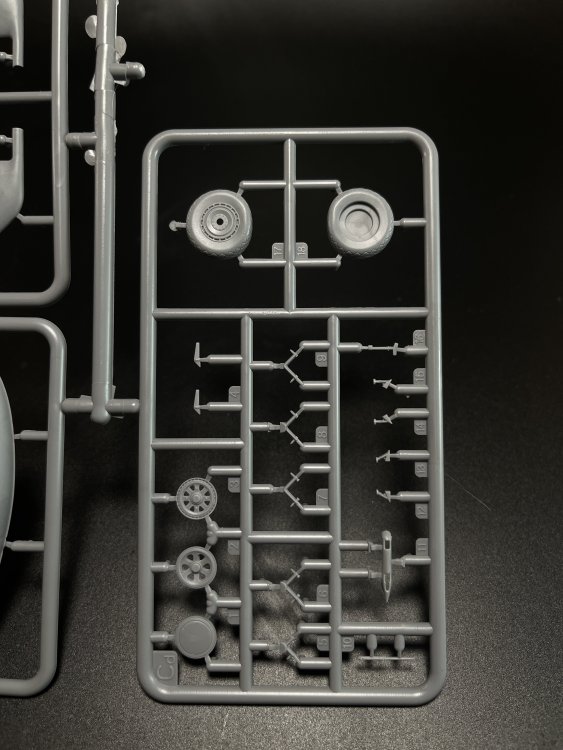
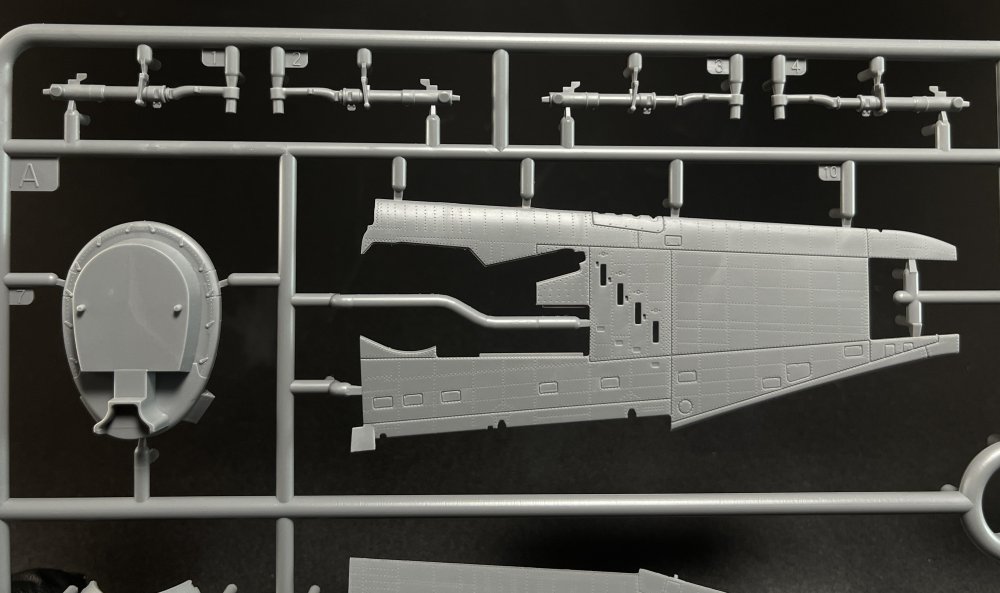
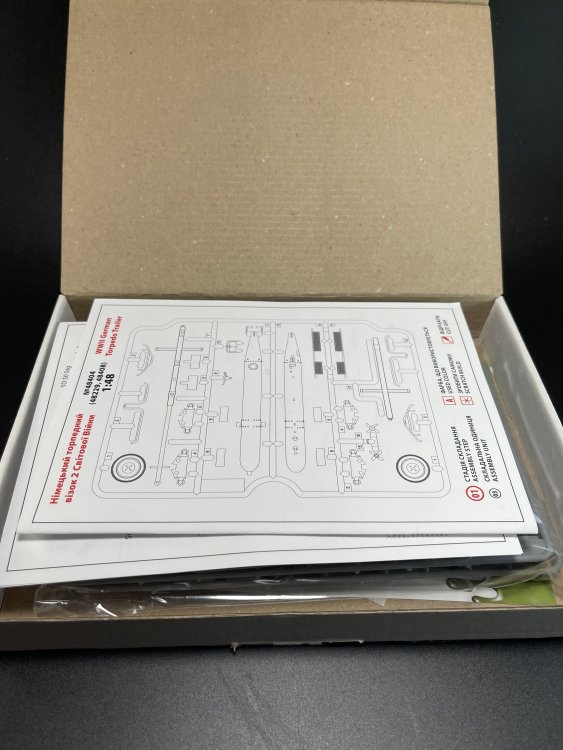
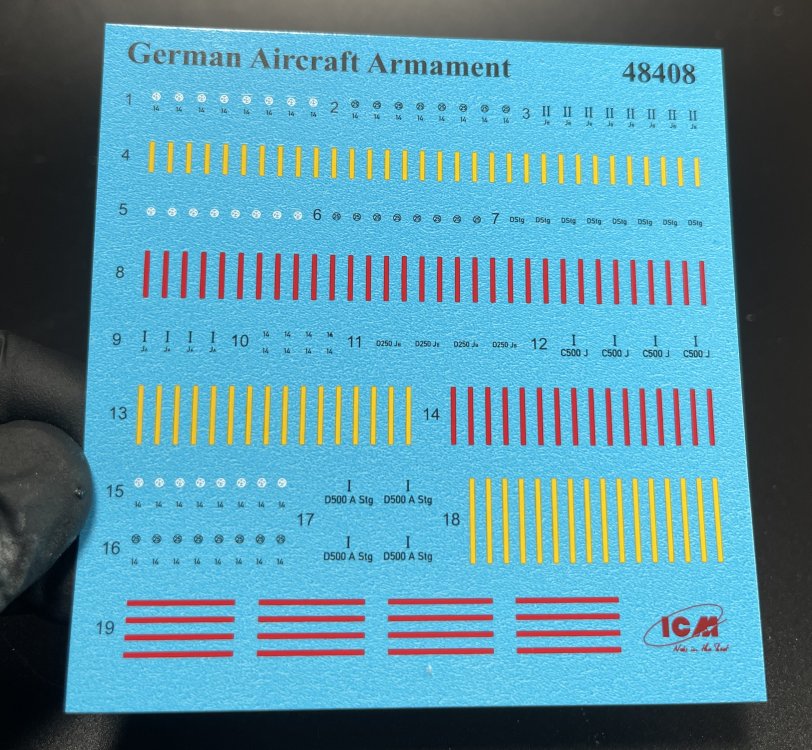
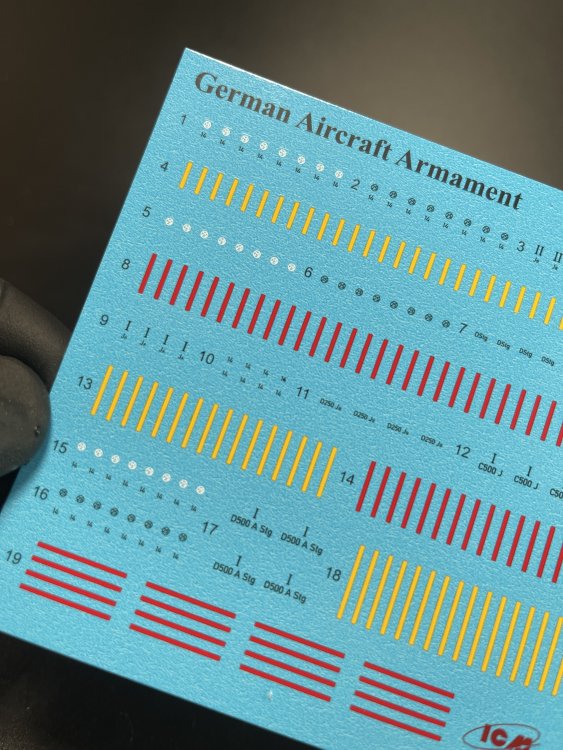
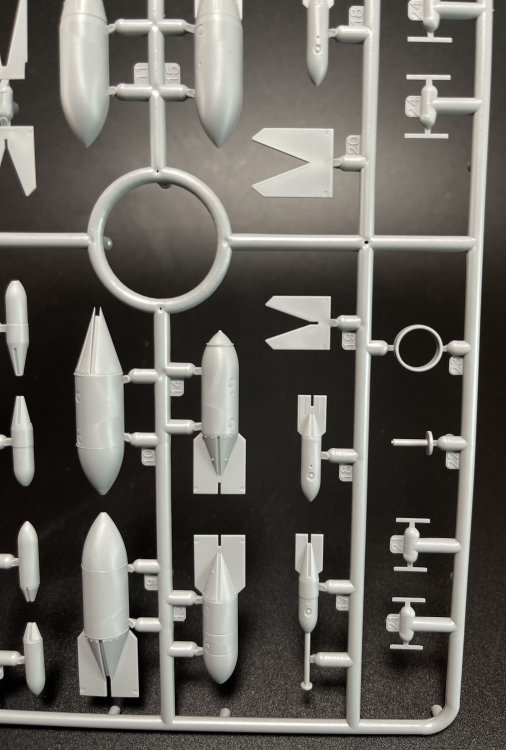
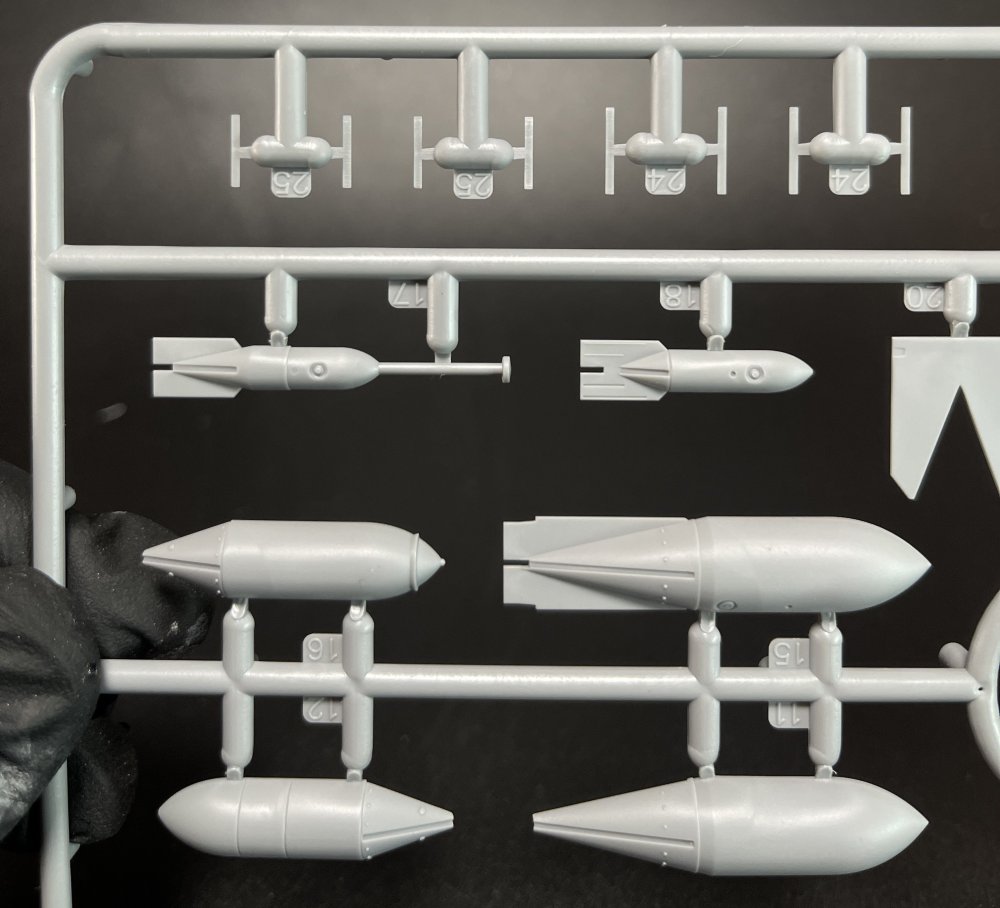
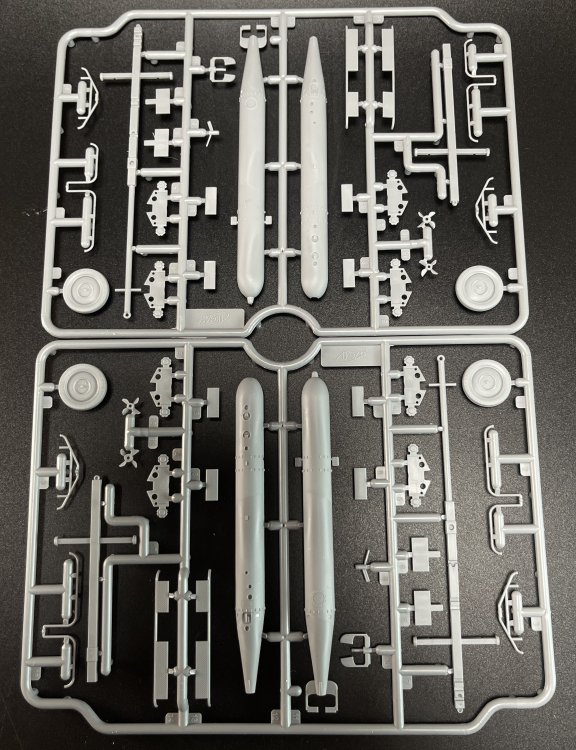
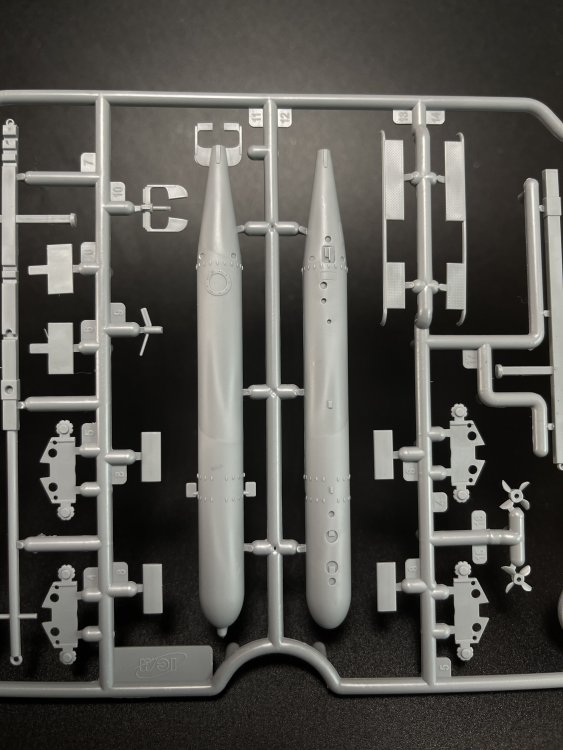
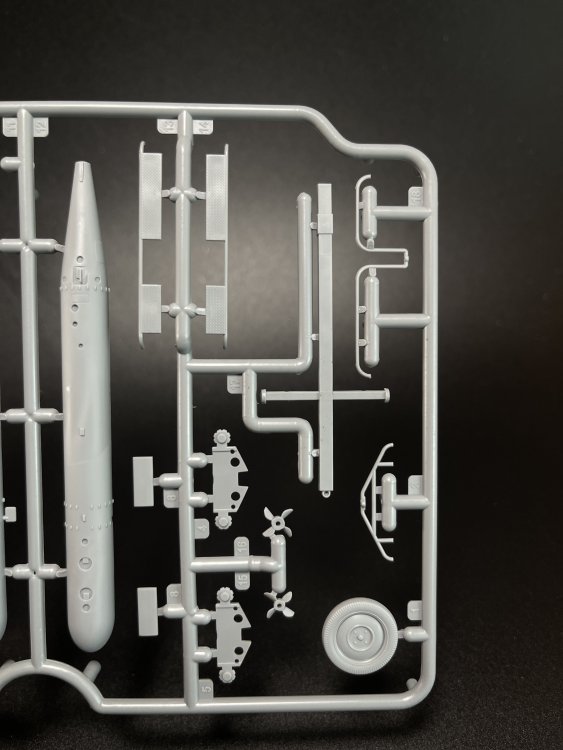
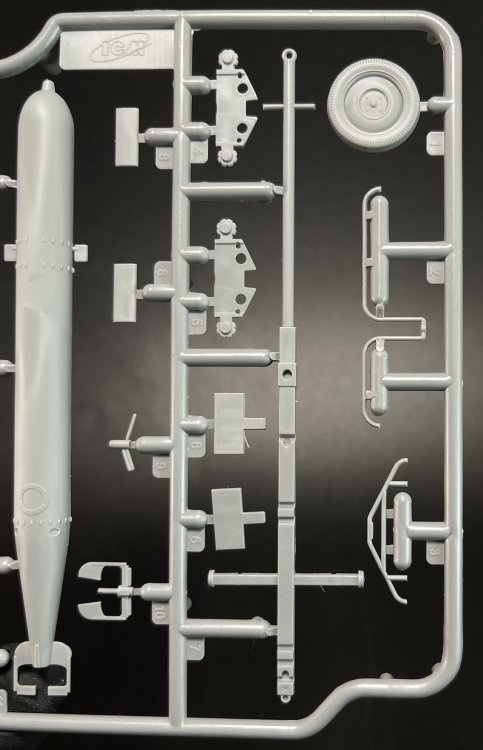
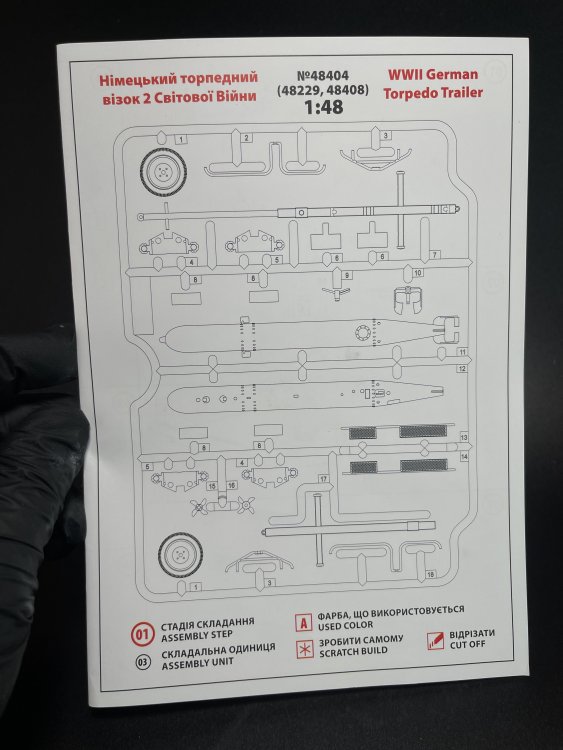
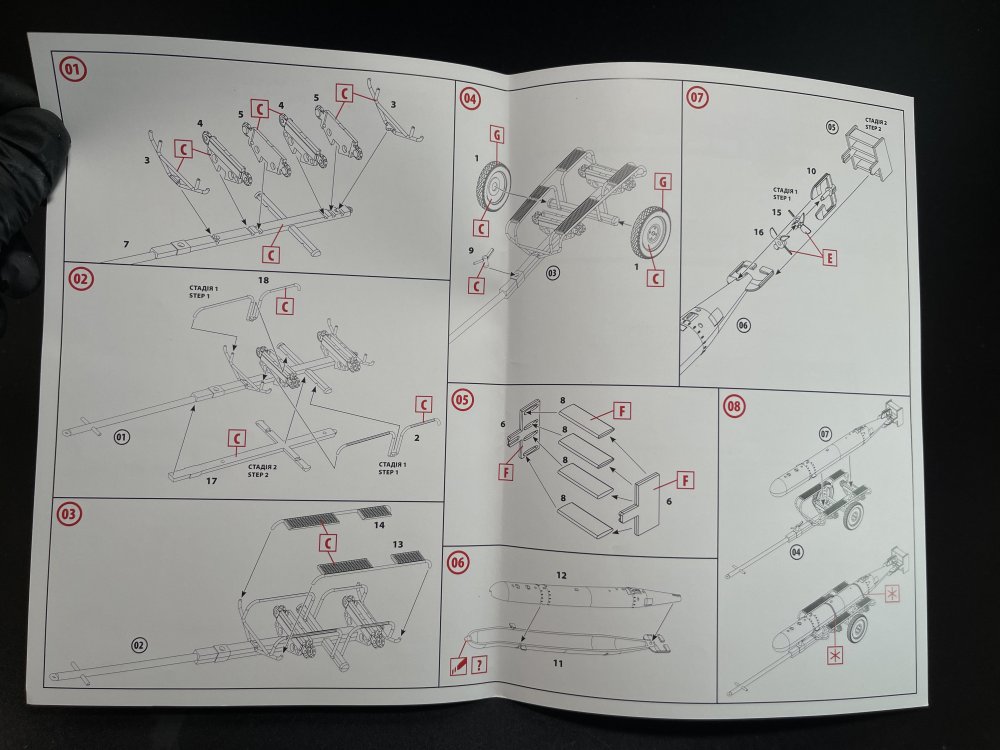
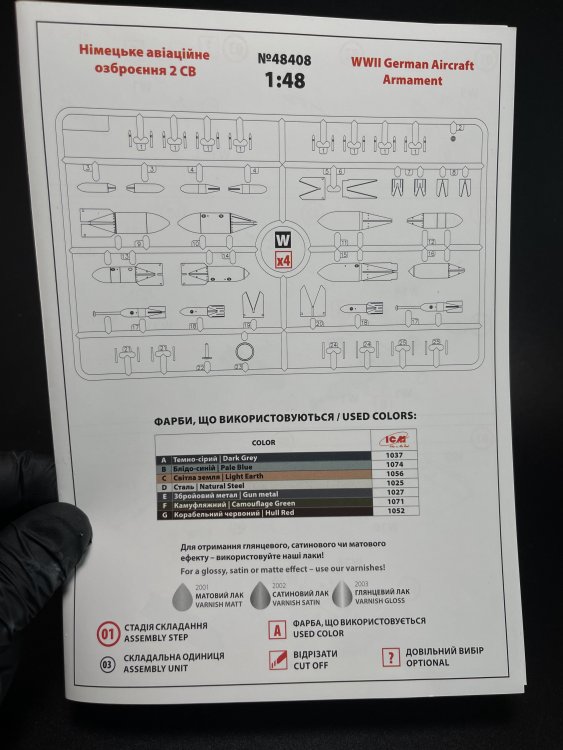
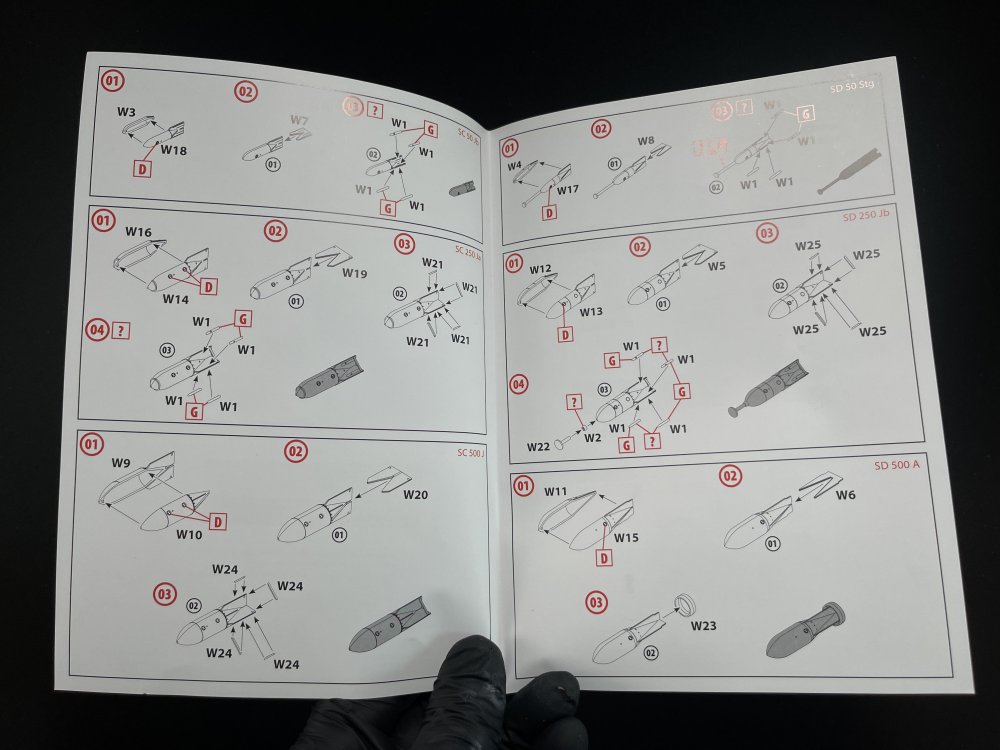
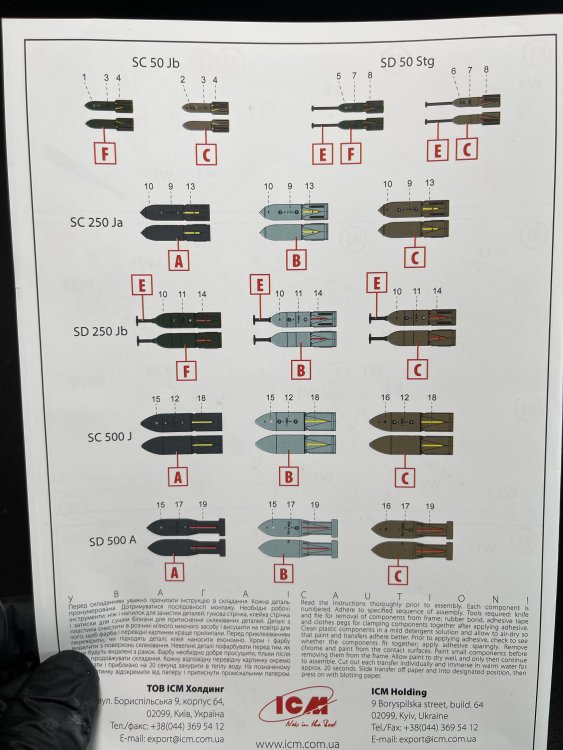
ICM 1:48 WWII German Aircraft Armament (Catalogue number: 48408) Price Tag: 15,80€ ICM is a quite prolific model manufacture, releasing AFV, Airplane and figures. And now also accessories in 1:48 and a very important one: ordnance. The name “armament” is not truly the best one to get a set of bombs… Armament is more direct to defensive guns or cannons (as attacking guns). These are bombs so I think the more accurate term would be: WWII German Aircraft ordnance. Ordnance is the term often used when describing the payload of air-to-ground In this set, you get 6 types of bombs (range of bombs from 50 to 2500 kg) and two torpedos with a trailer each.. All parts have no flash at all, and the surface detail is quite good so you get several options to use in more than one or two dioramas or vignette alongside your airplane. A quite large decals sheet is given with bomb markings! The instructions are very clear and easy to folow. The cloor indication is good with only ICM range color given. Conclusion So, everything you need to get some really looking WWII German bombs is here. Either to put directly on an aircraft or side by side to an aircraft, it´s always a a bonus to your model as these have crispy surface detail and several range of bombs. Very usefull set to all aircraft modeller. Great Work ICM! Keep Then coming! HIGHLY RECOMMEND. Our sincere thanks to ICM for making this fantastic figure set. Francisco Guedes www.largescalemodeller.com


-
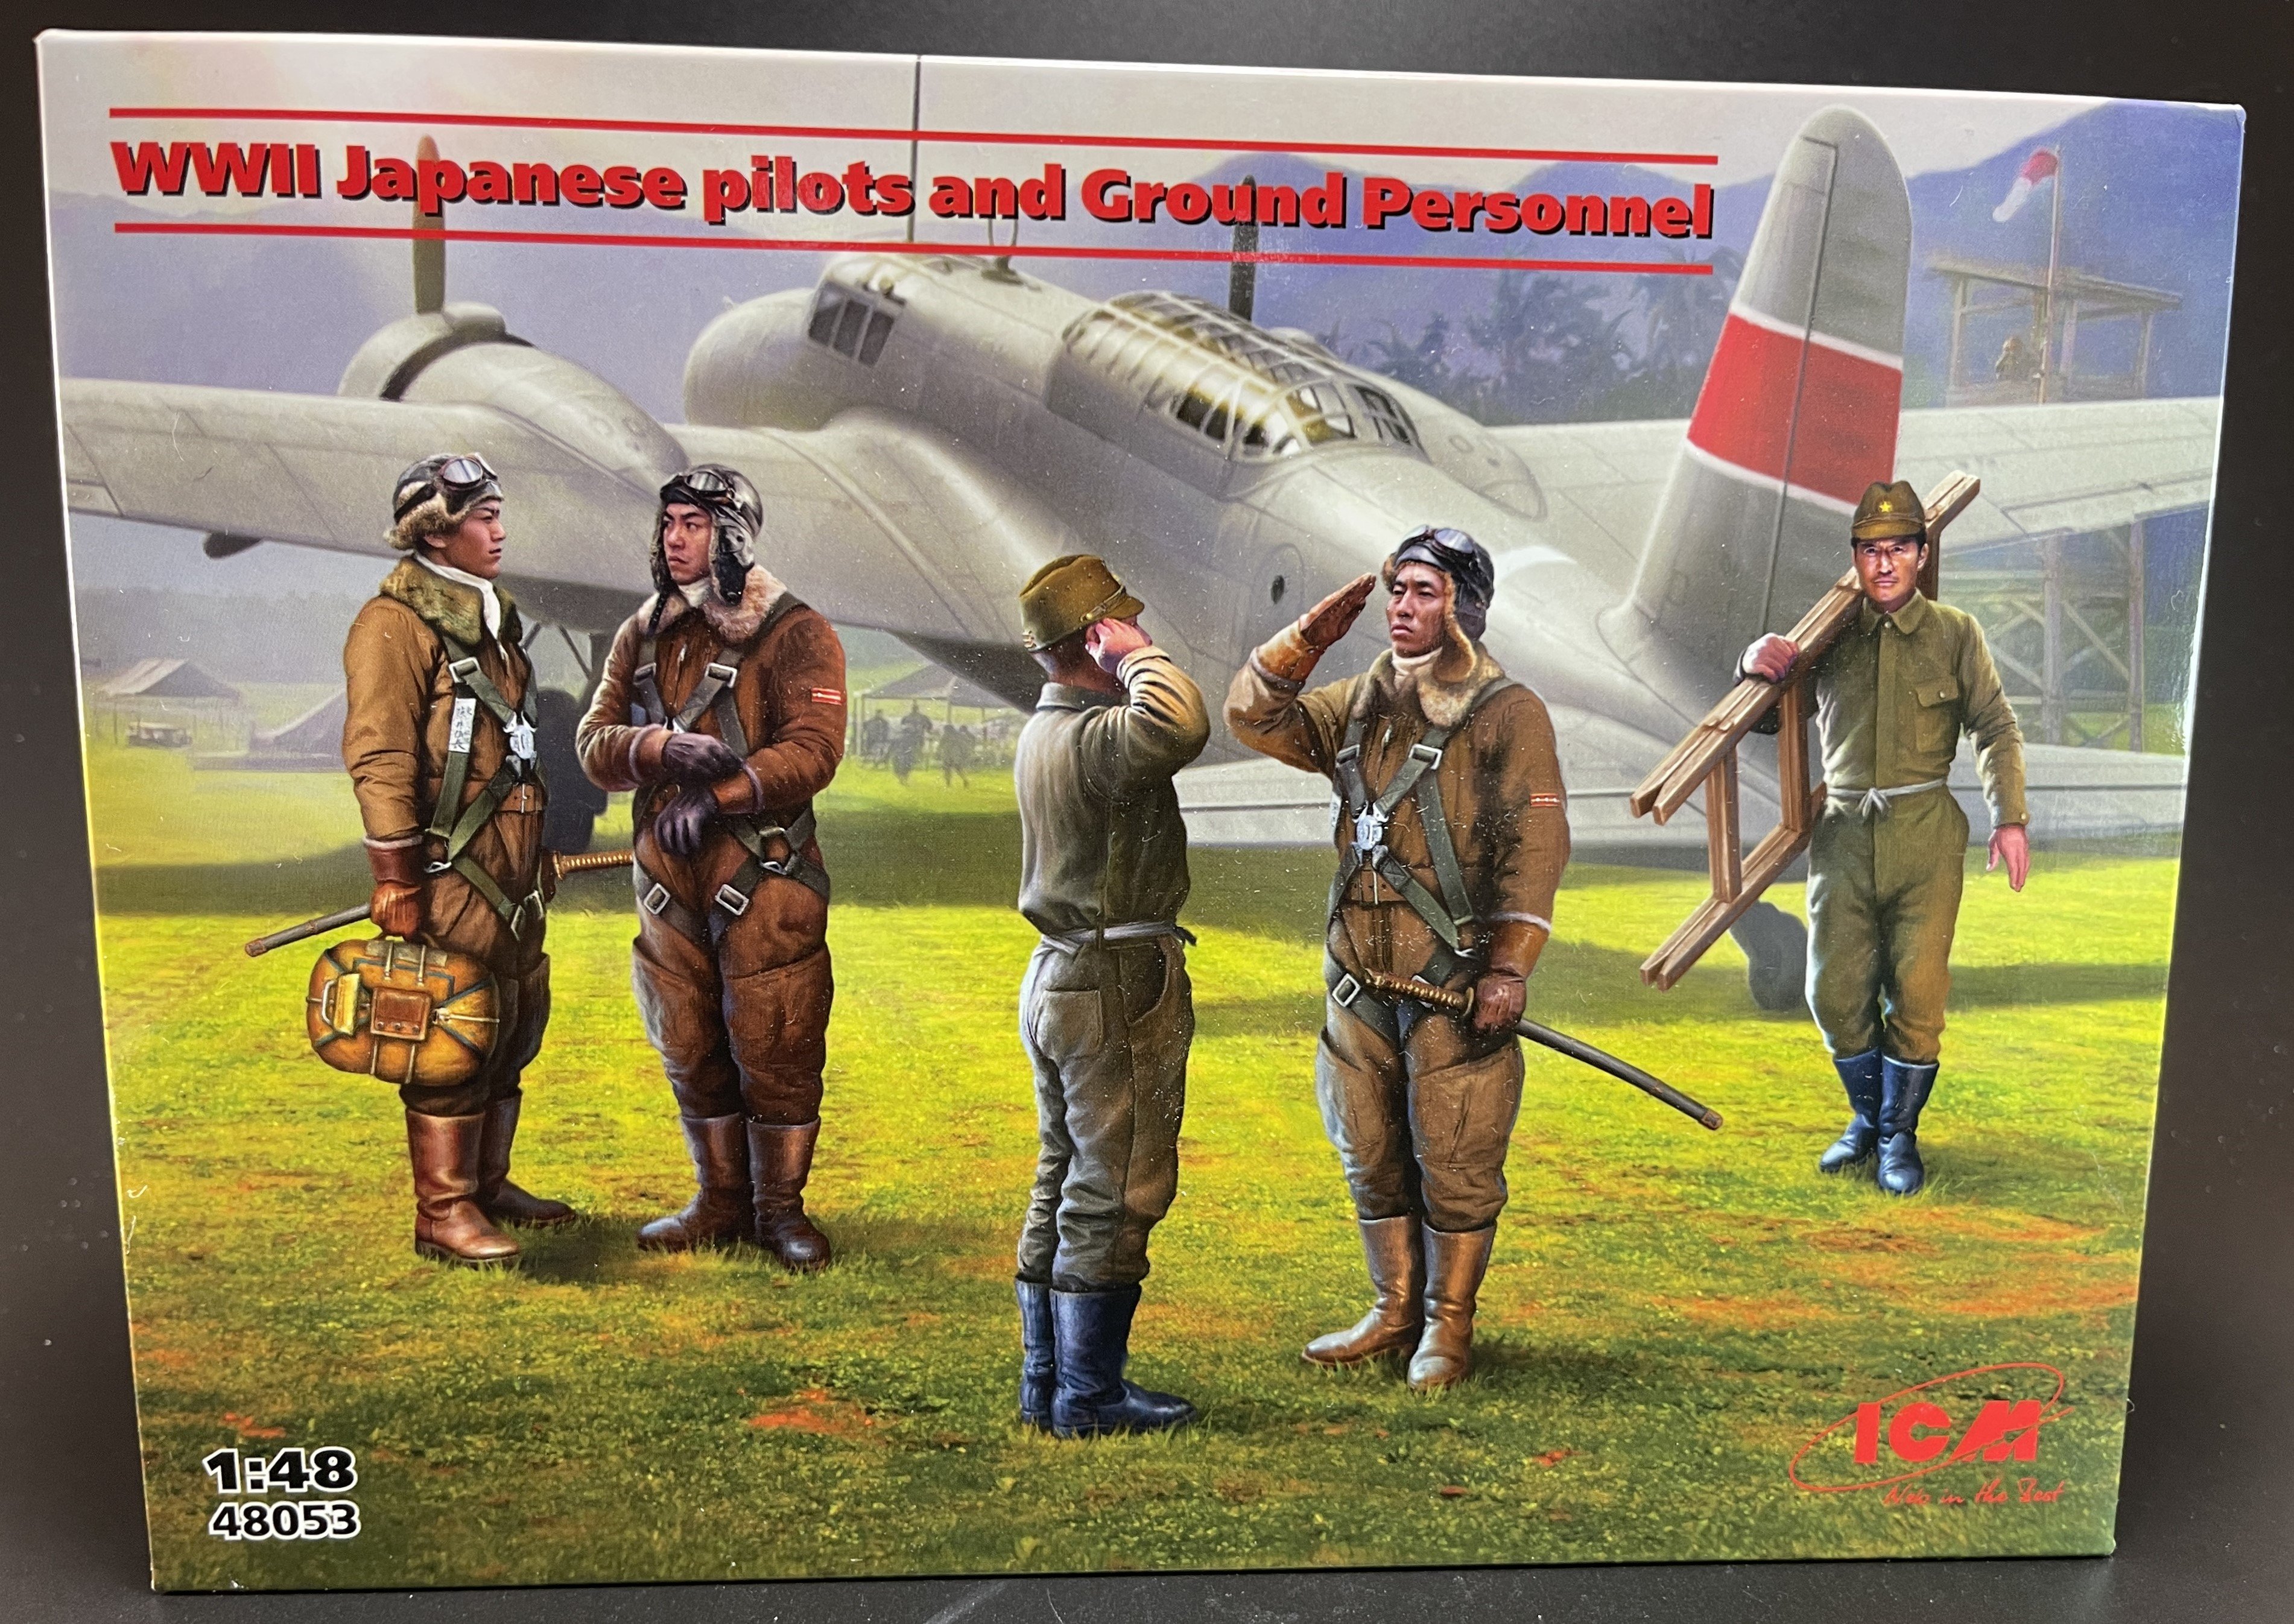
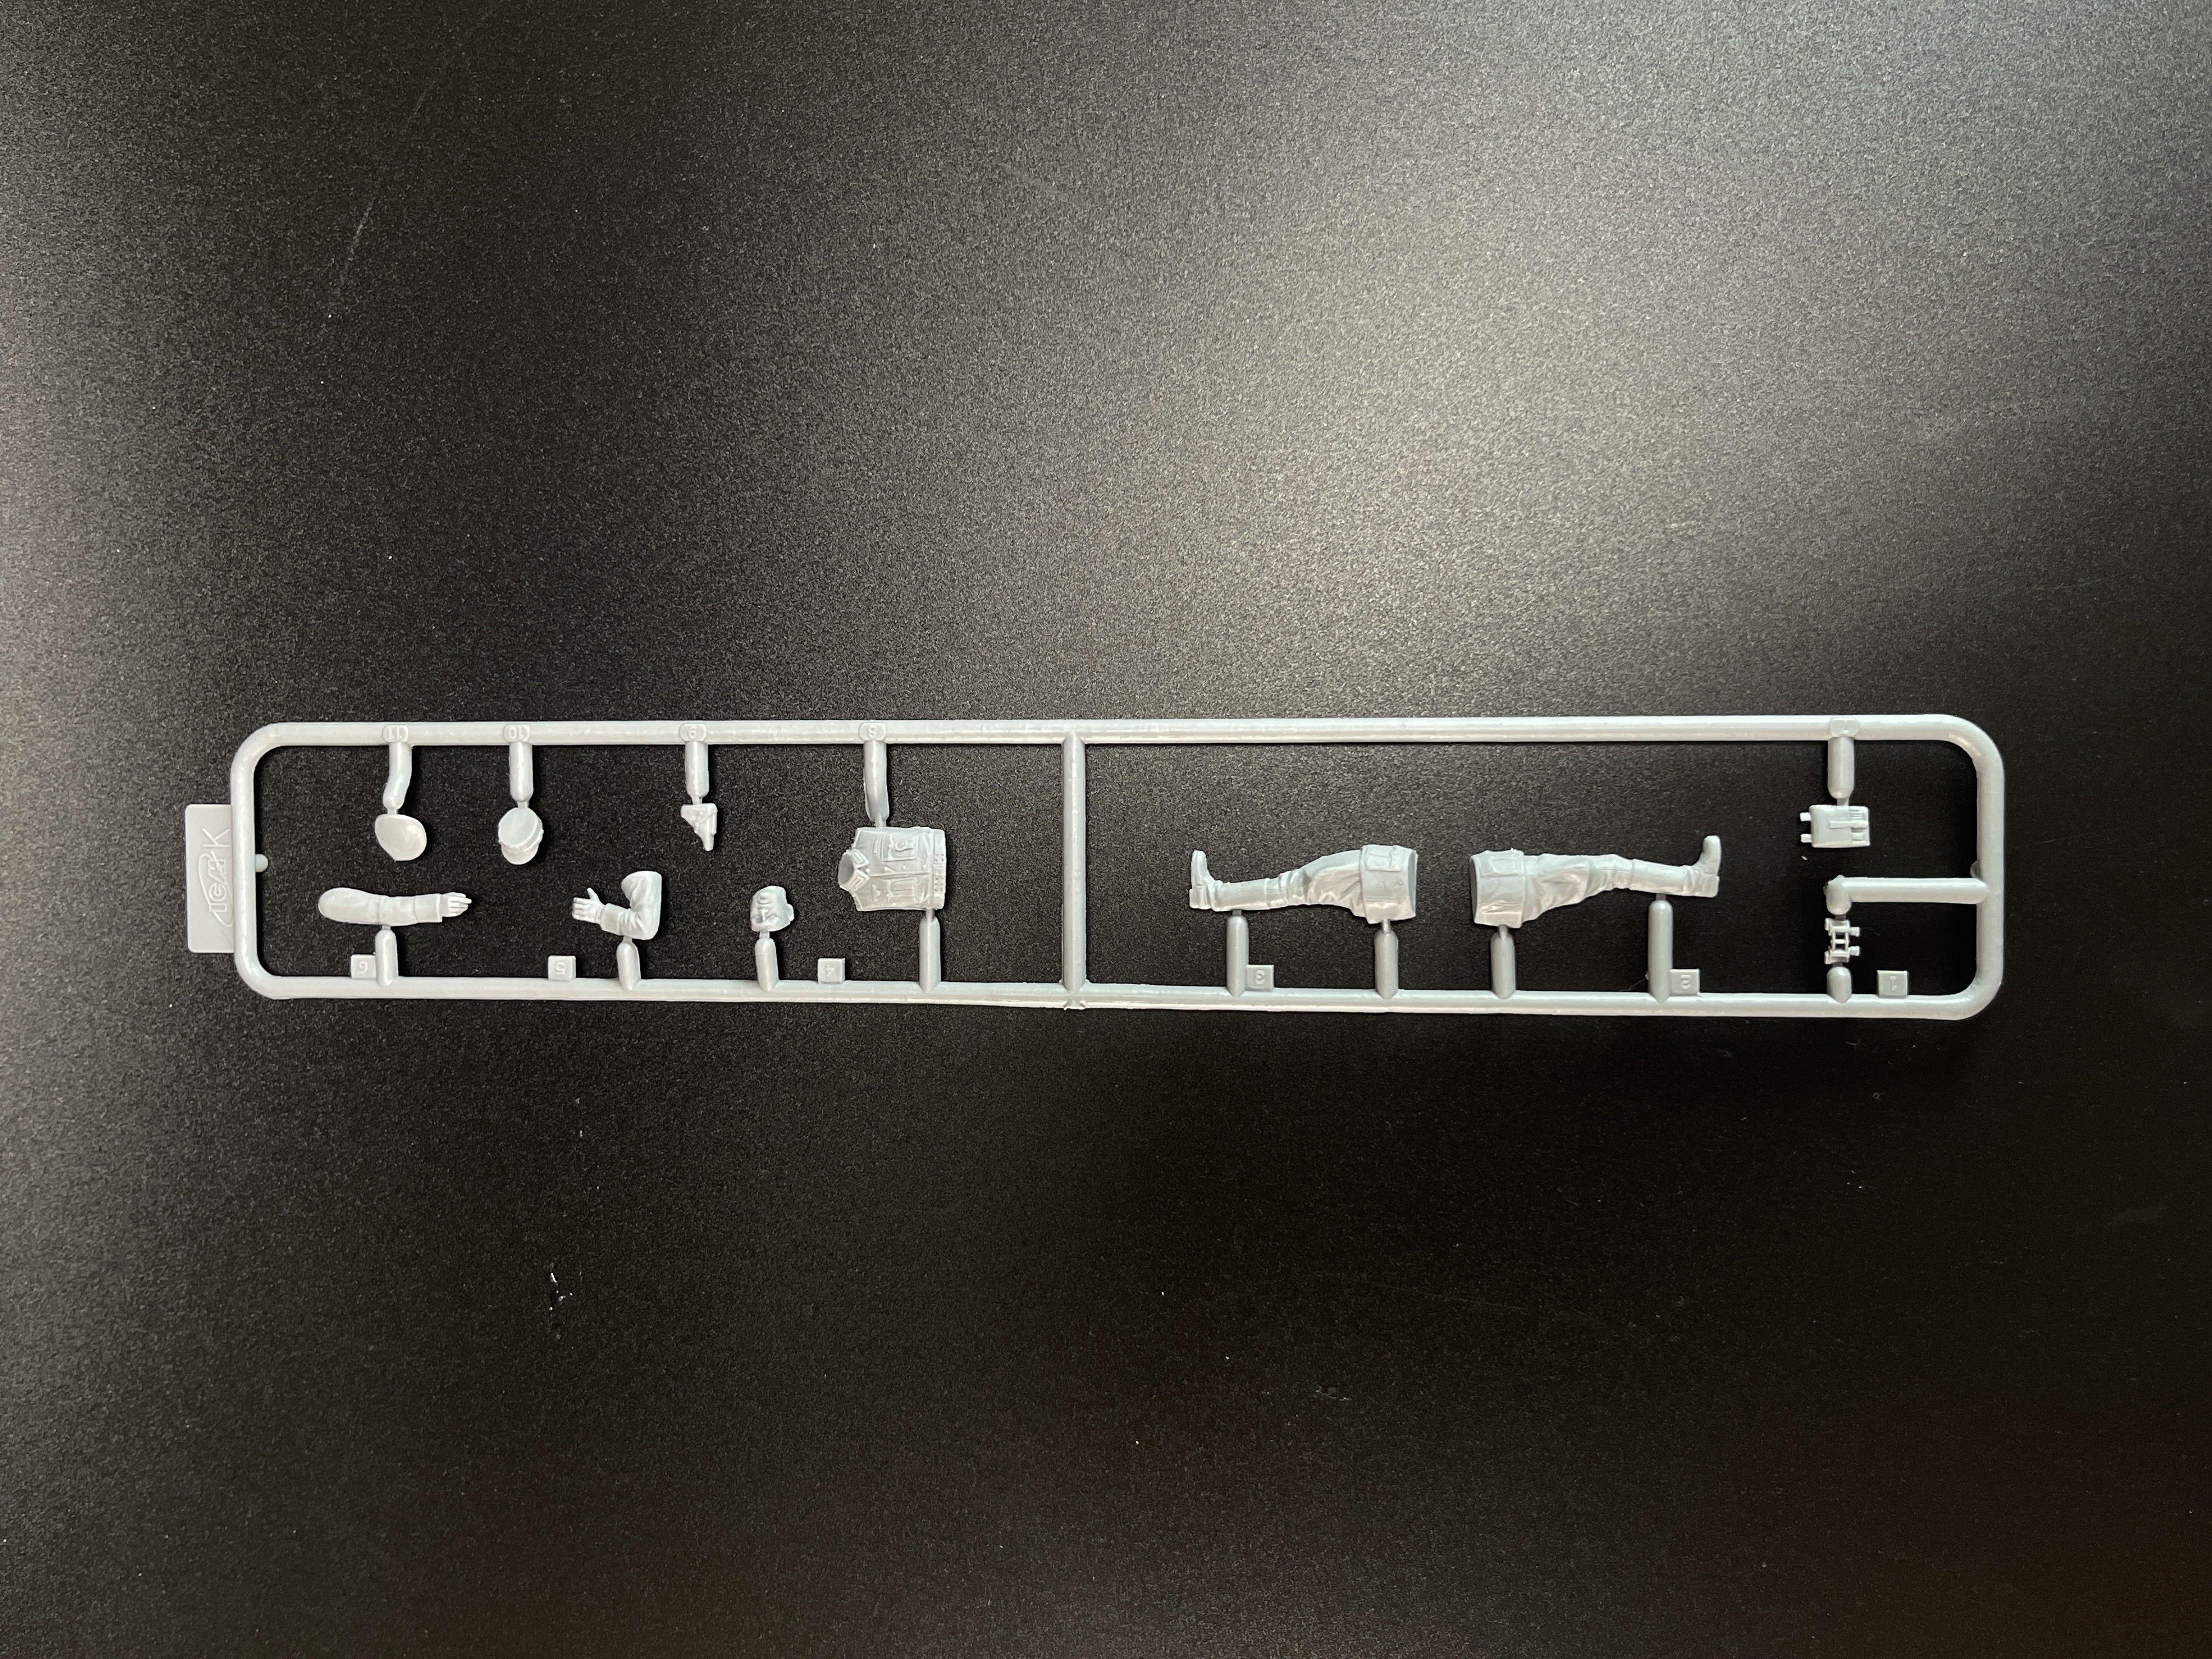
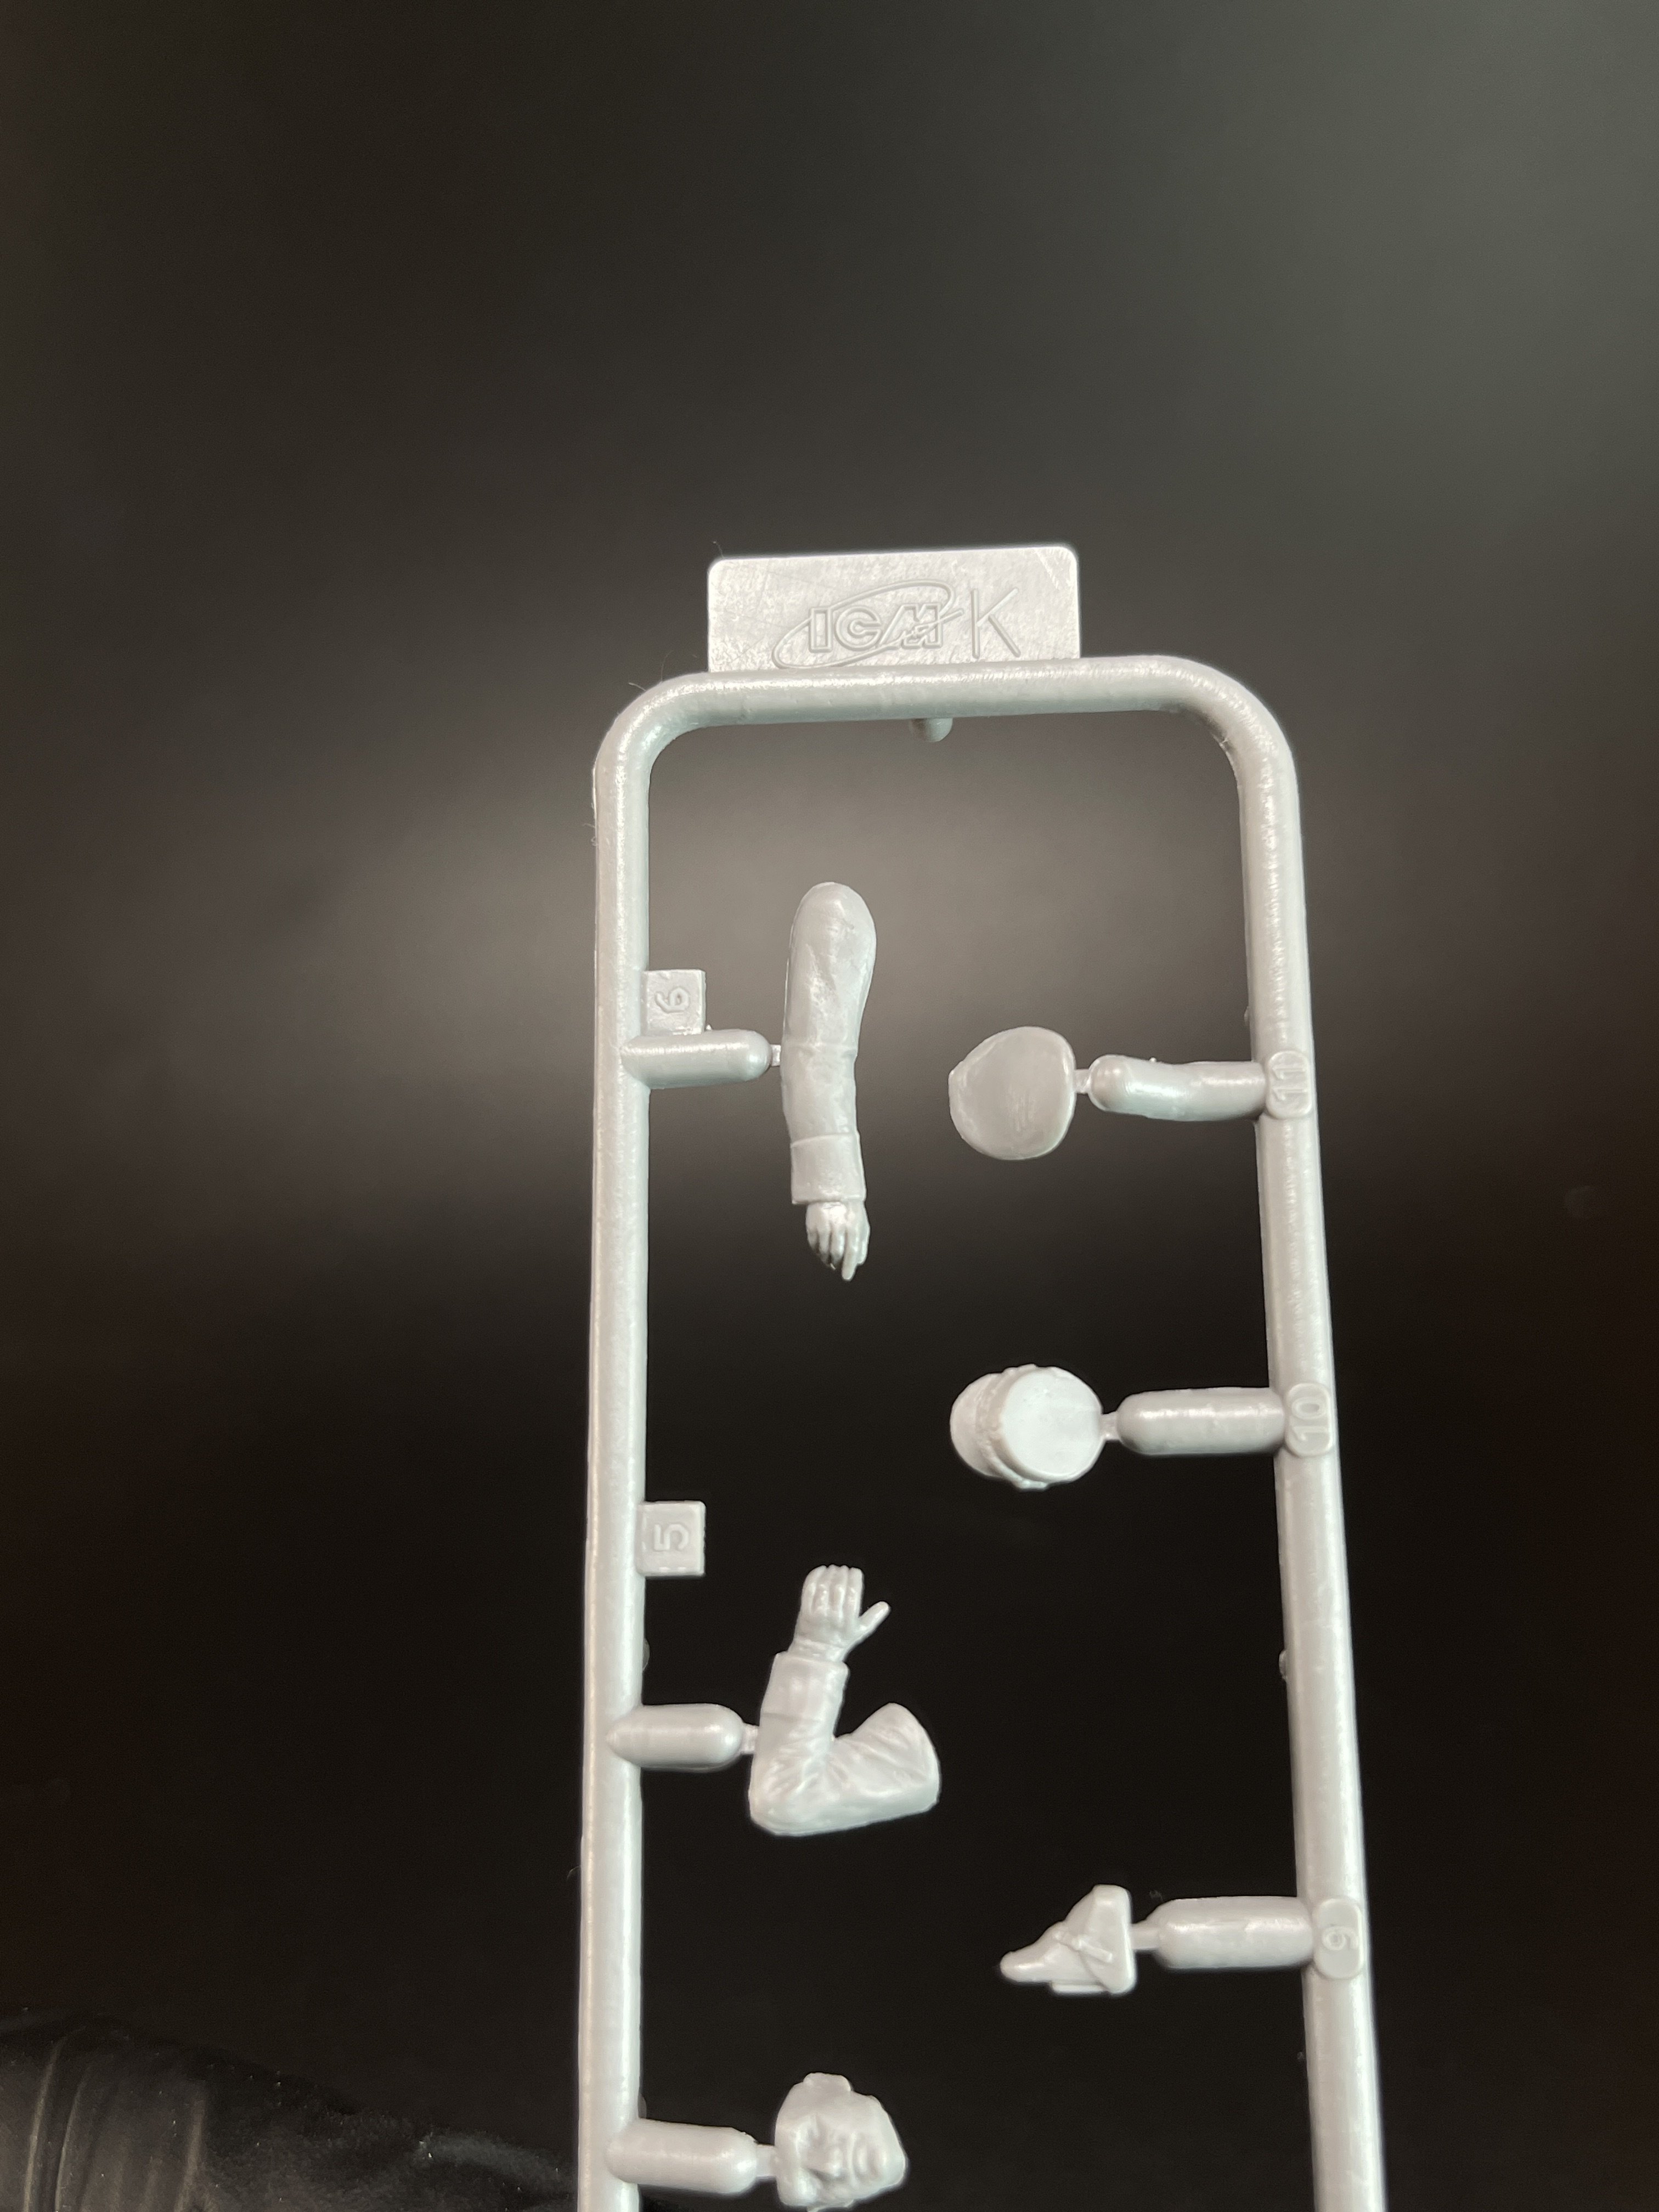
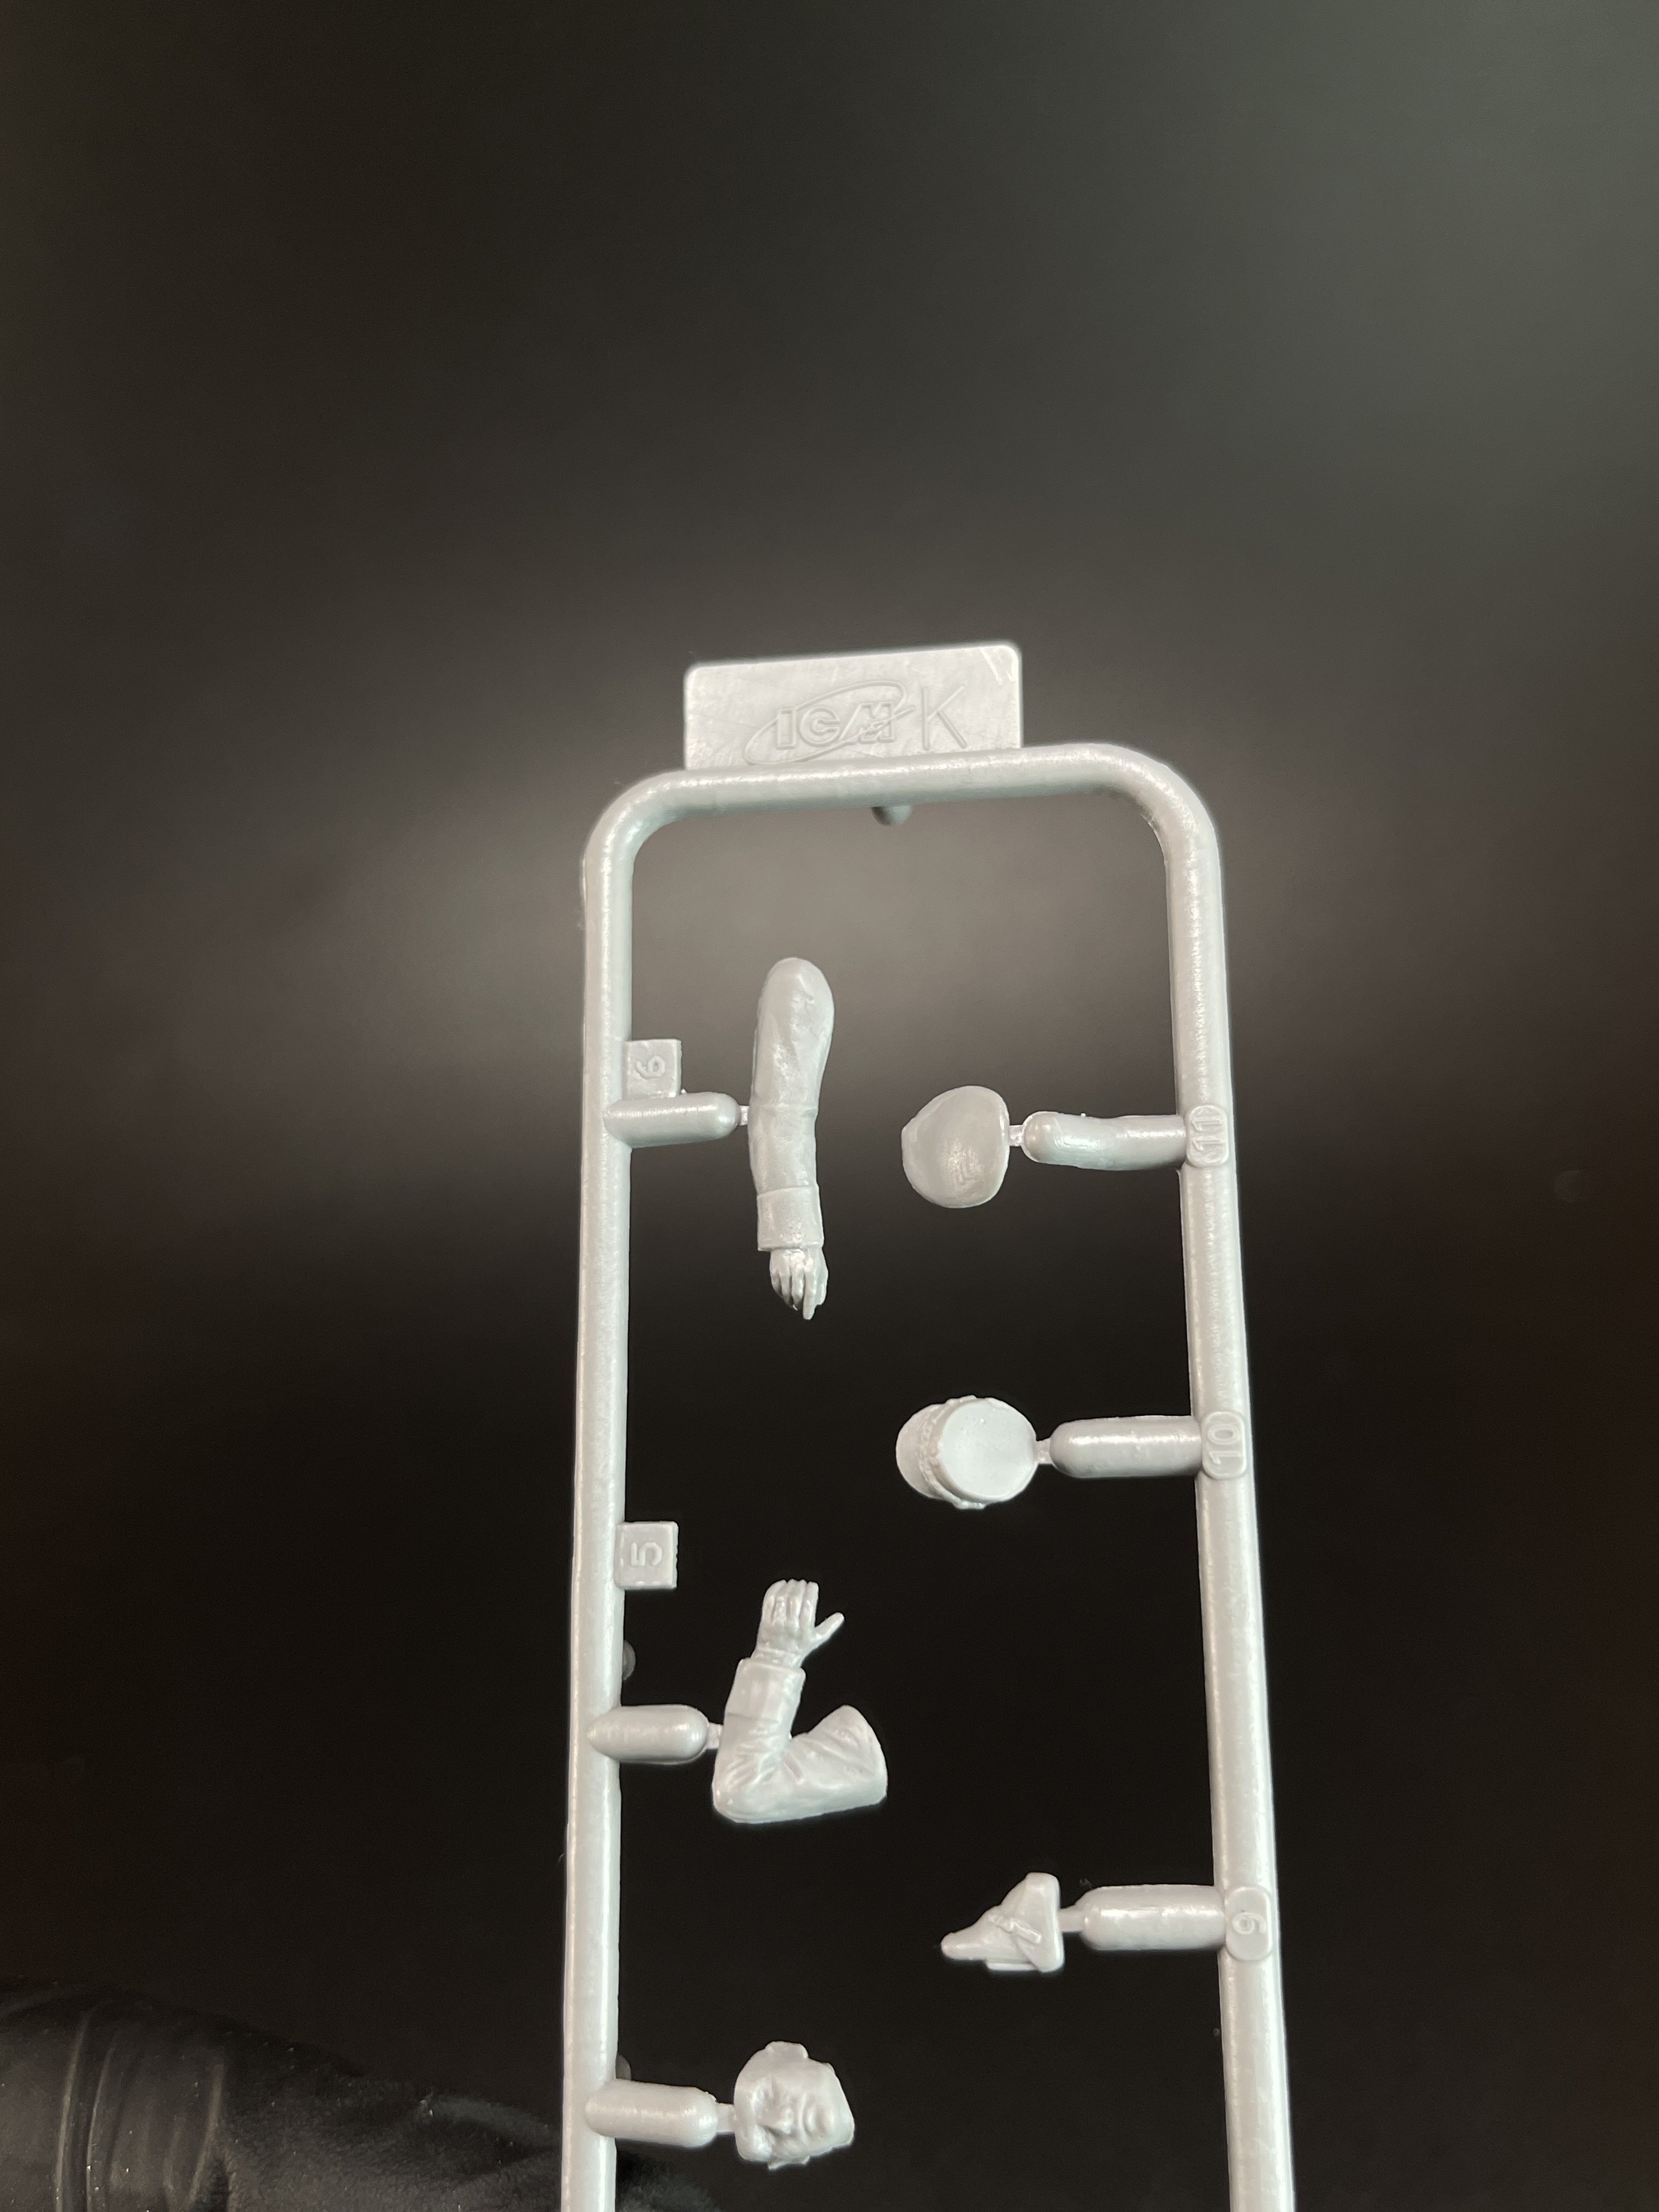
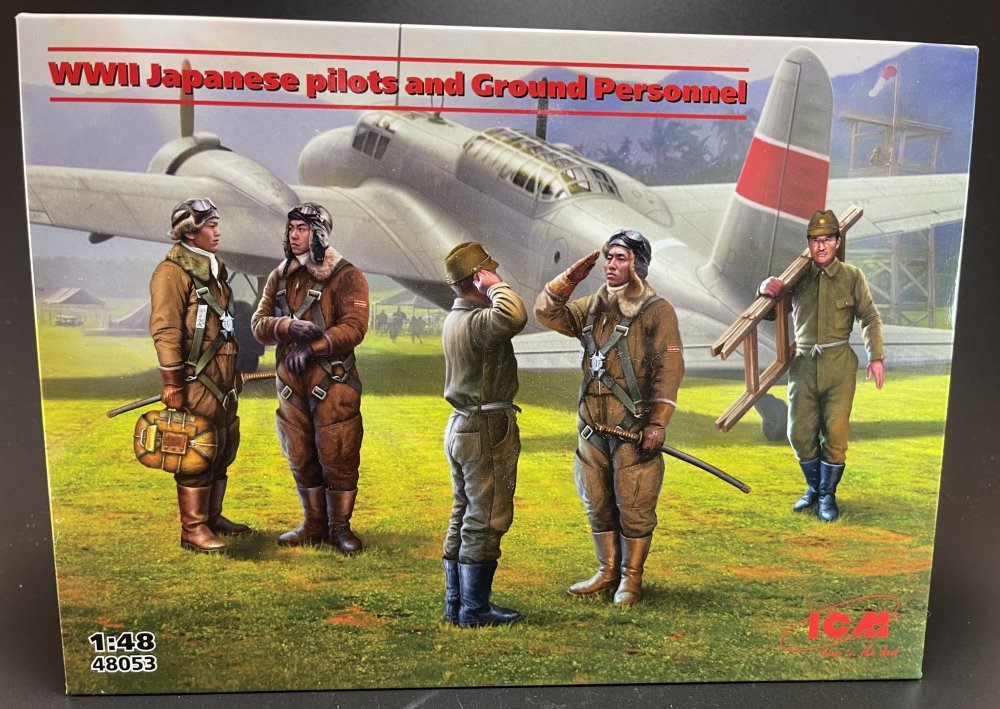
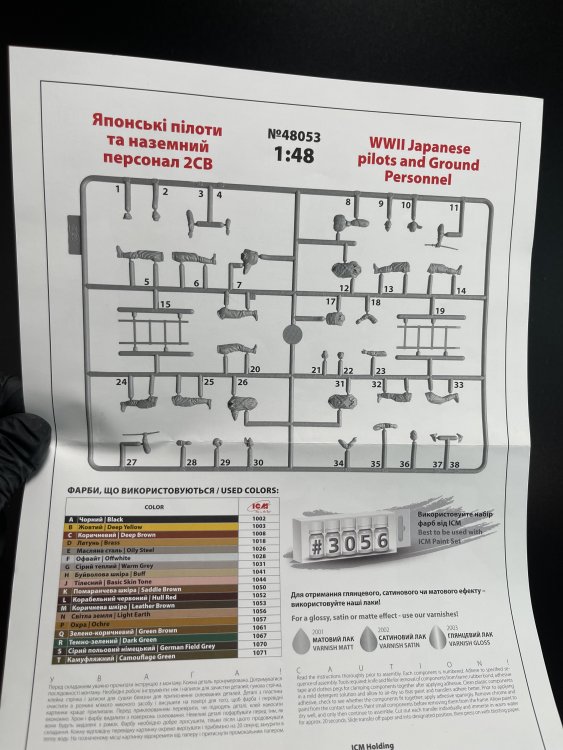
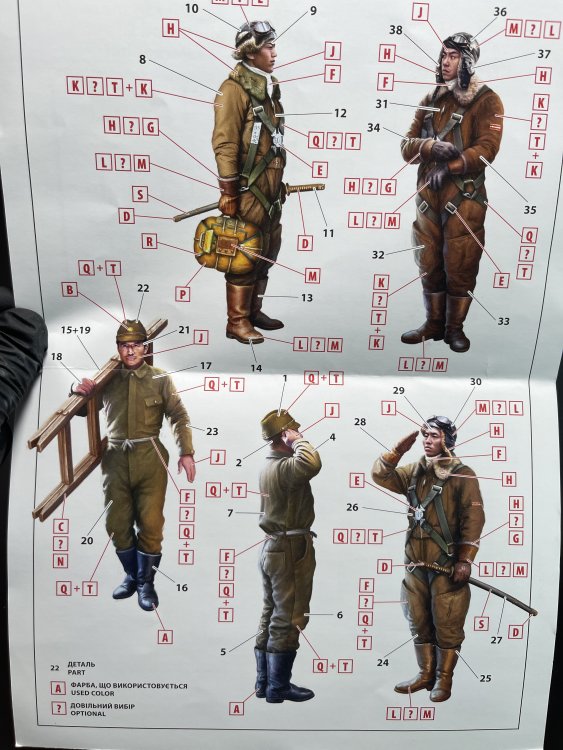
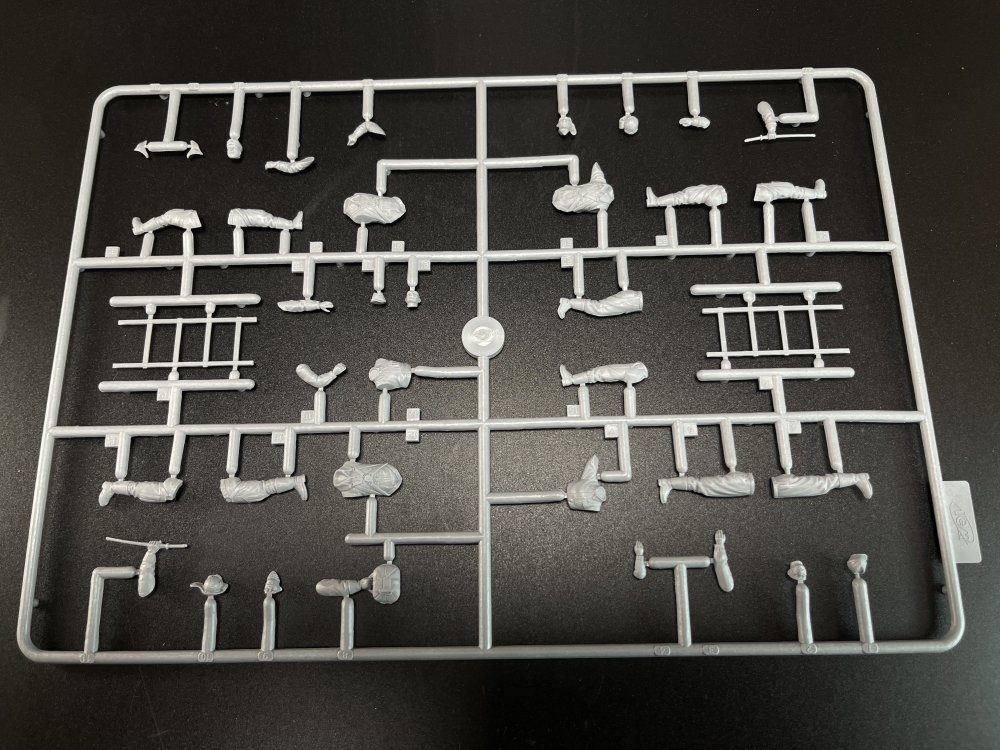
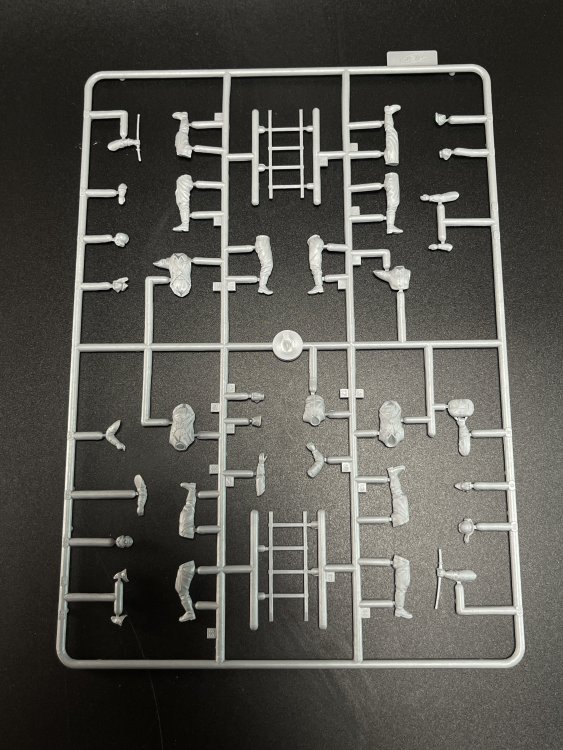
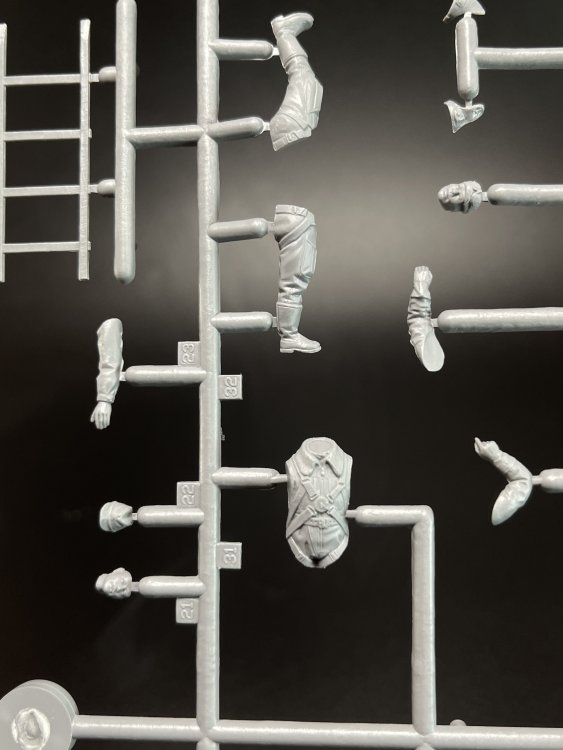
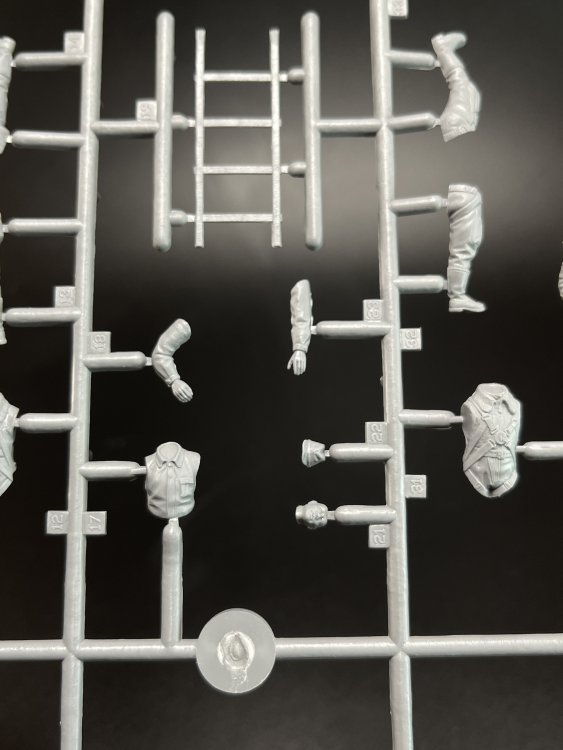
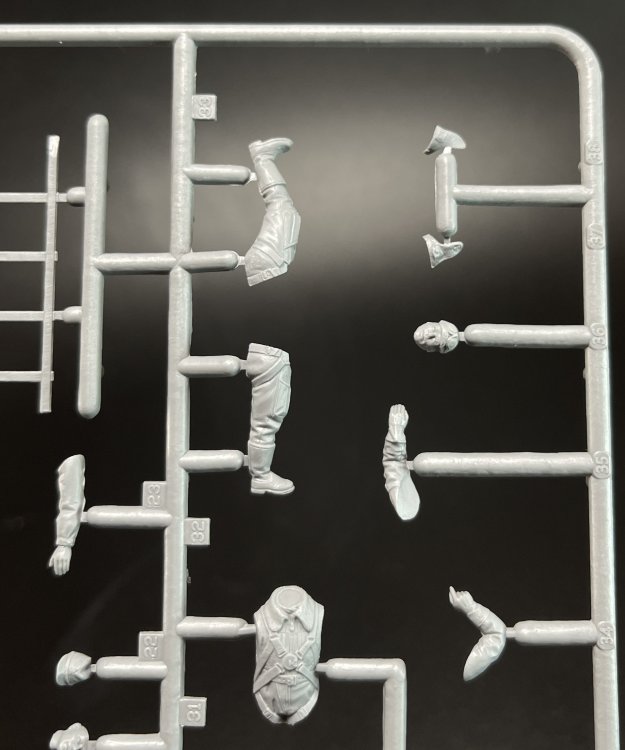
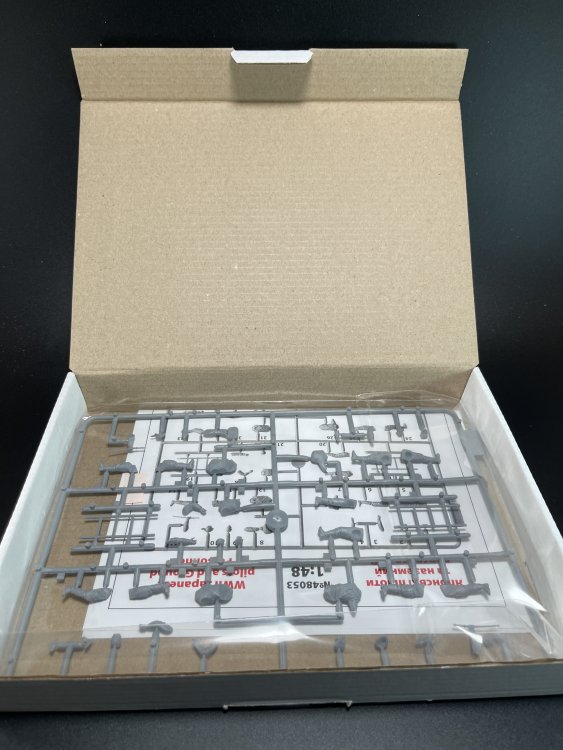
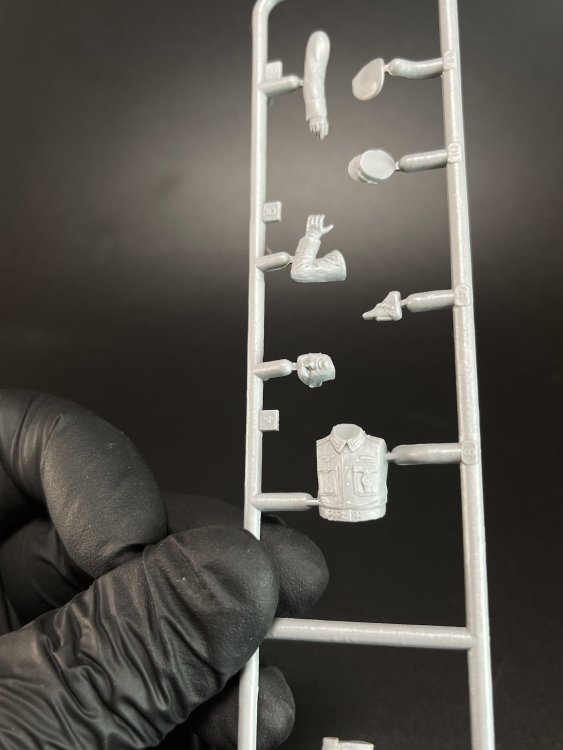
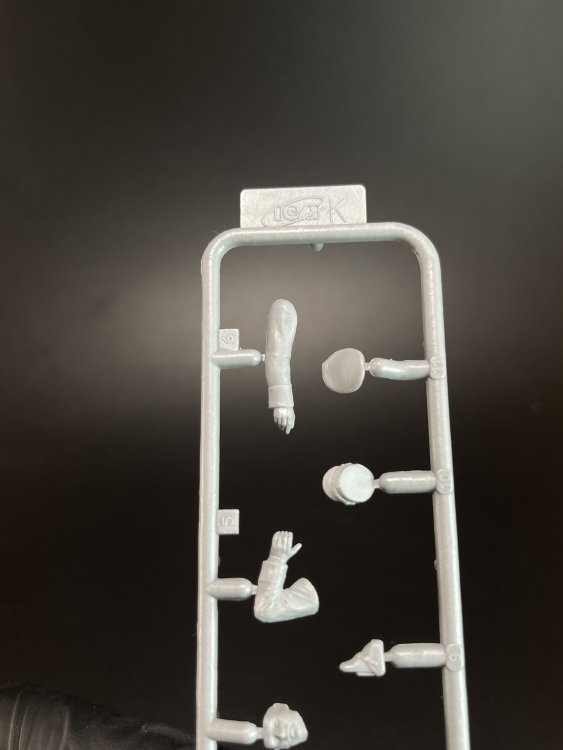
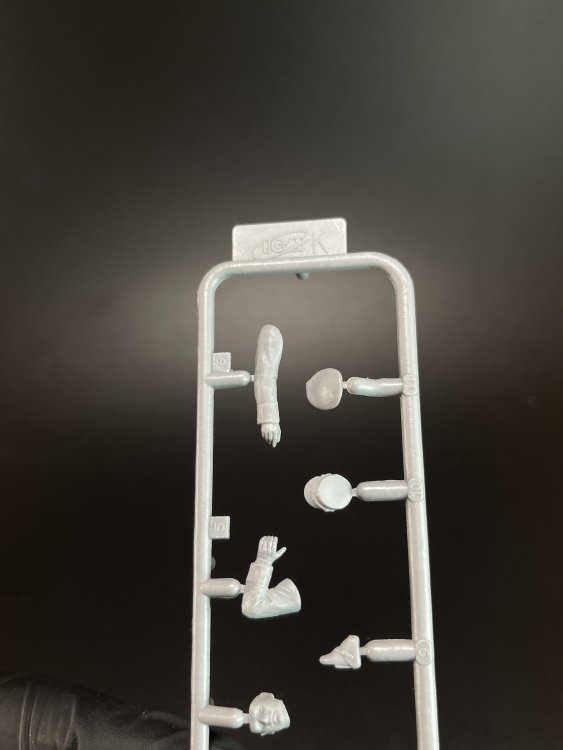
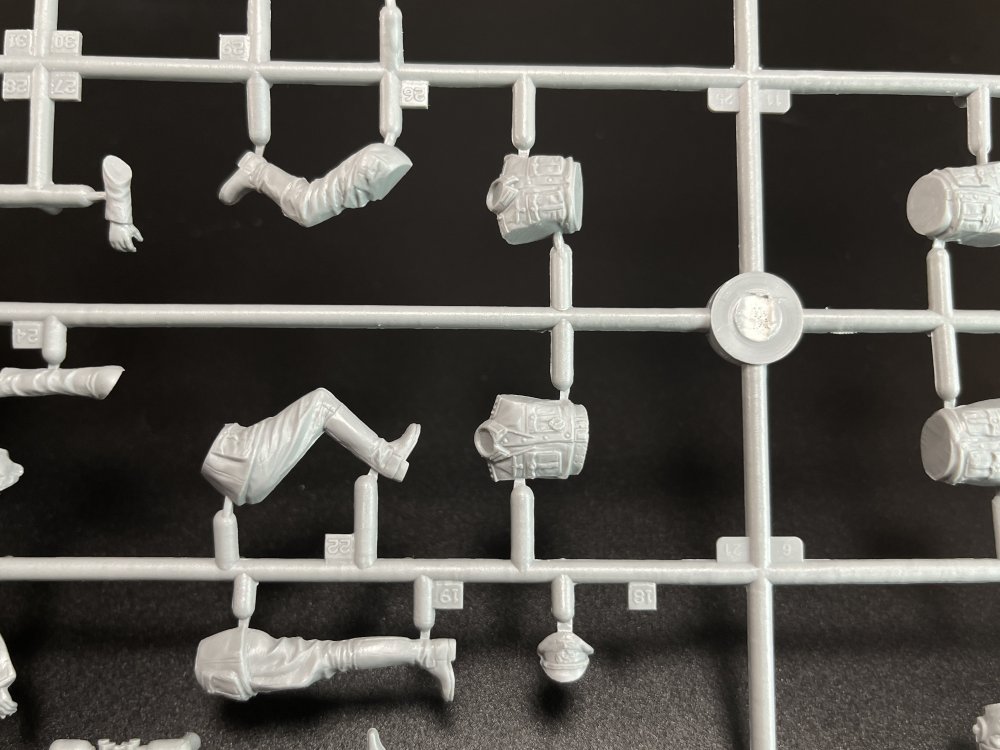
ICM 1:48 WWII Japanese Pilots and Ground Personnel (Catalogue number: 48053) Price Tag: 11€ ICM is a quite prolific model manufacture, releasing AFV, Airplane and figures and now in 1:48. This set is n 1:48, perfect to be aside their Ki-21 that appear on the box art of this set. This set gives you five figures, in the poses that you can see in the box, and a small ladder. All parts have no flash at all, and the surface detail is the best I ever seen from ICM This set is brand new and you can tell te improment of the mold work with very sutble details on the cloths and on the faces with less seam line from the mold. It´s quite notice the improvement work made form ICM! The figures have the torso in one piece without arms or legs as they are separated Well done ICM! No assembly instructions are given… but if you look carefully we see the parts numbers on the figures. So there´s is assembly instructions. Conclusion You can really get a very good figure from this set, using all together or just one as the posture could be used in several other scenario with their Ki-21 Sally or any other 1:48 Japanese aircraft. There a lot of possibilities with this set to make your 1:48 Japanese aircraft stand on the next model show or week meeting club. Great Work ICM! Keep Then coming! HIGHLY RECOMMEND. Our sincere thanks to ICM for making this fantastic figure set. Francisco Guedes www.largescalemodeller.com


-
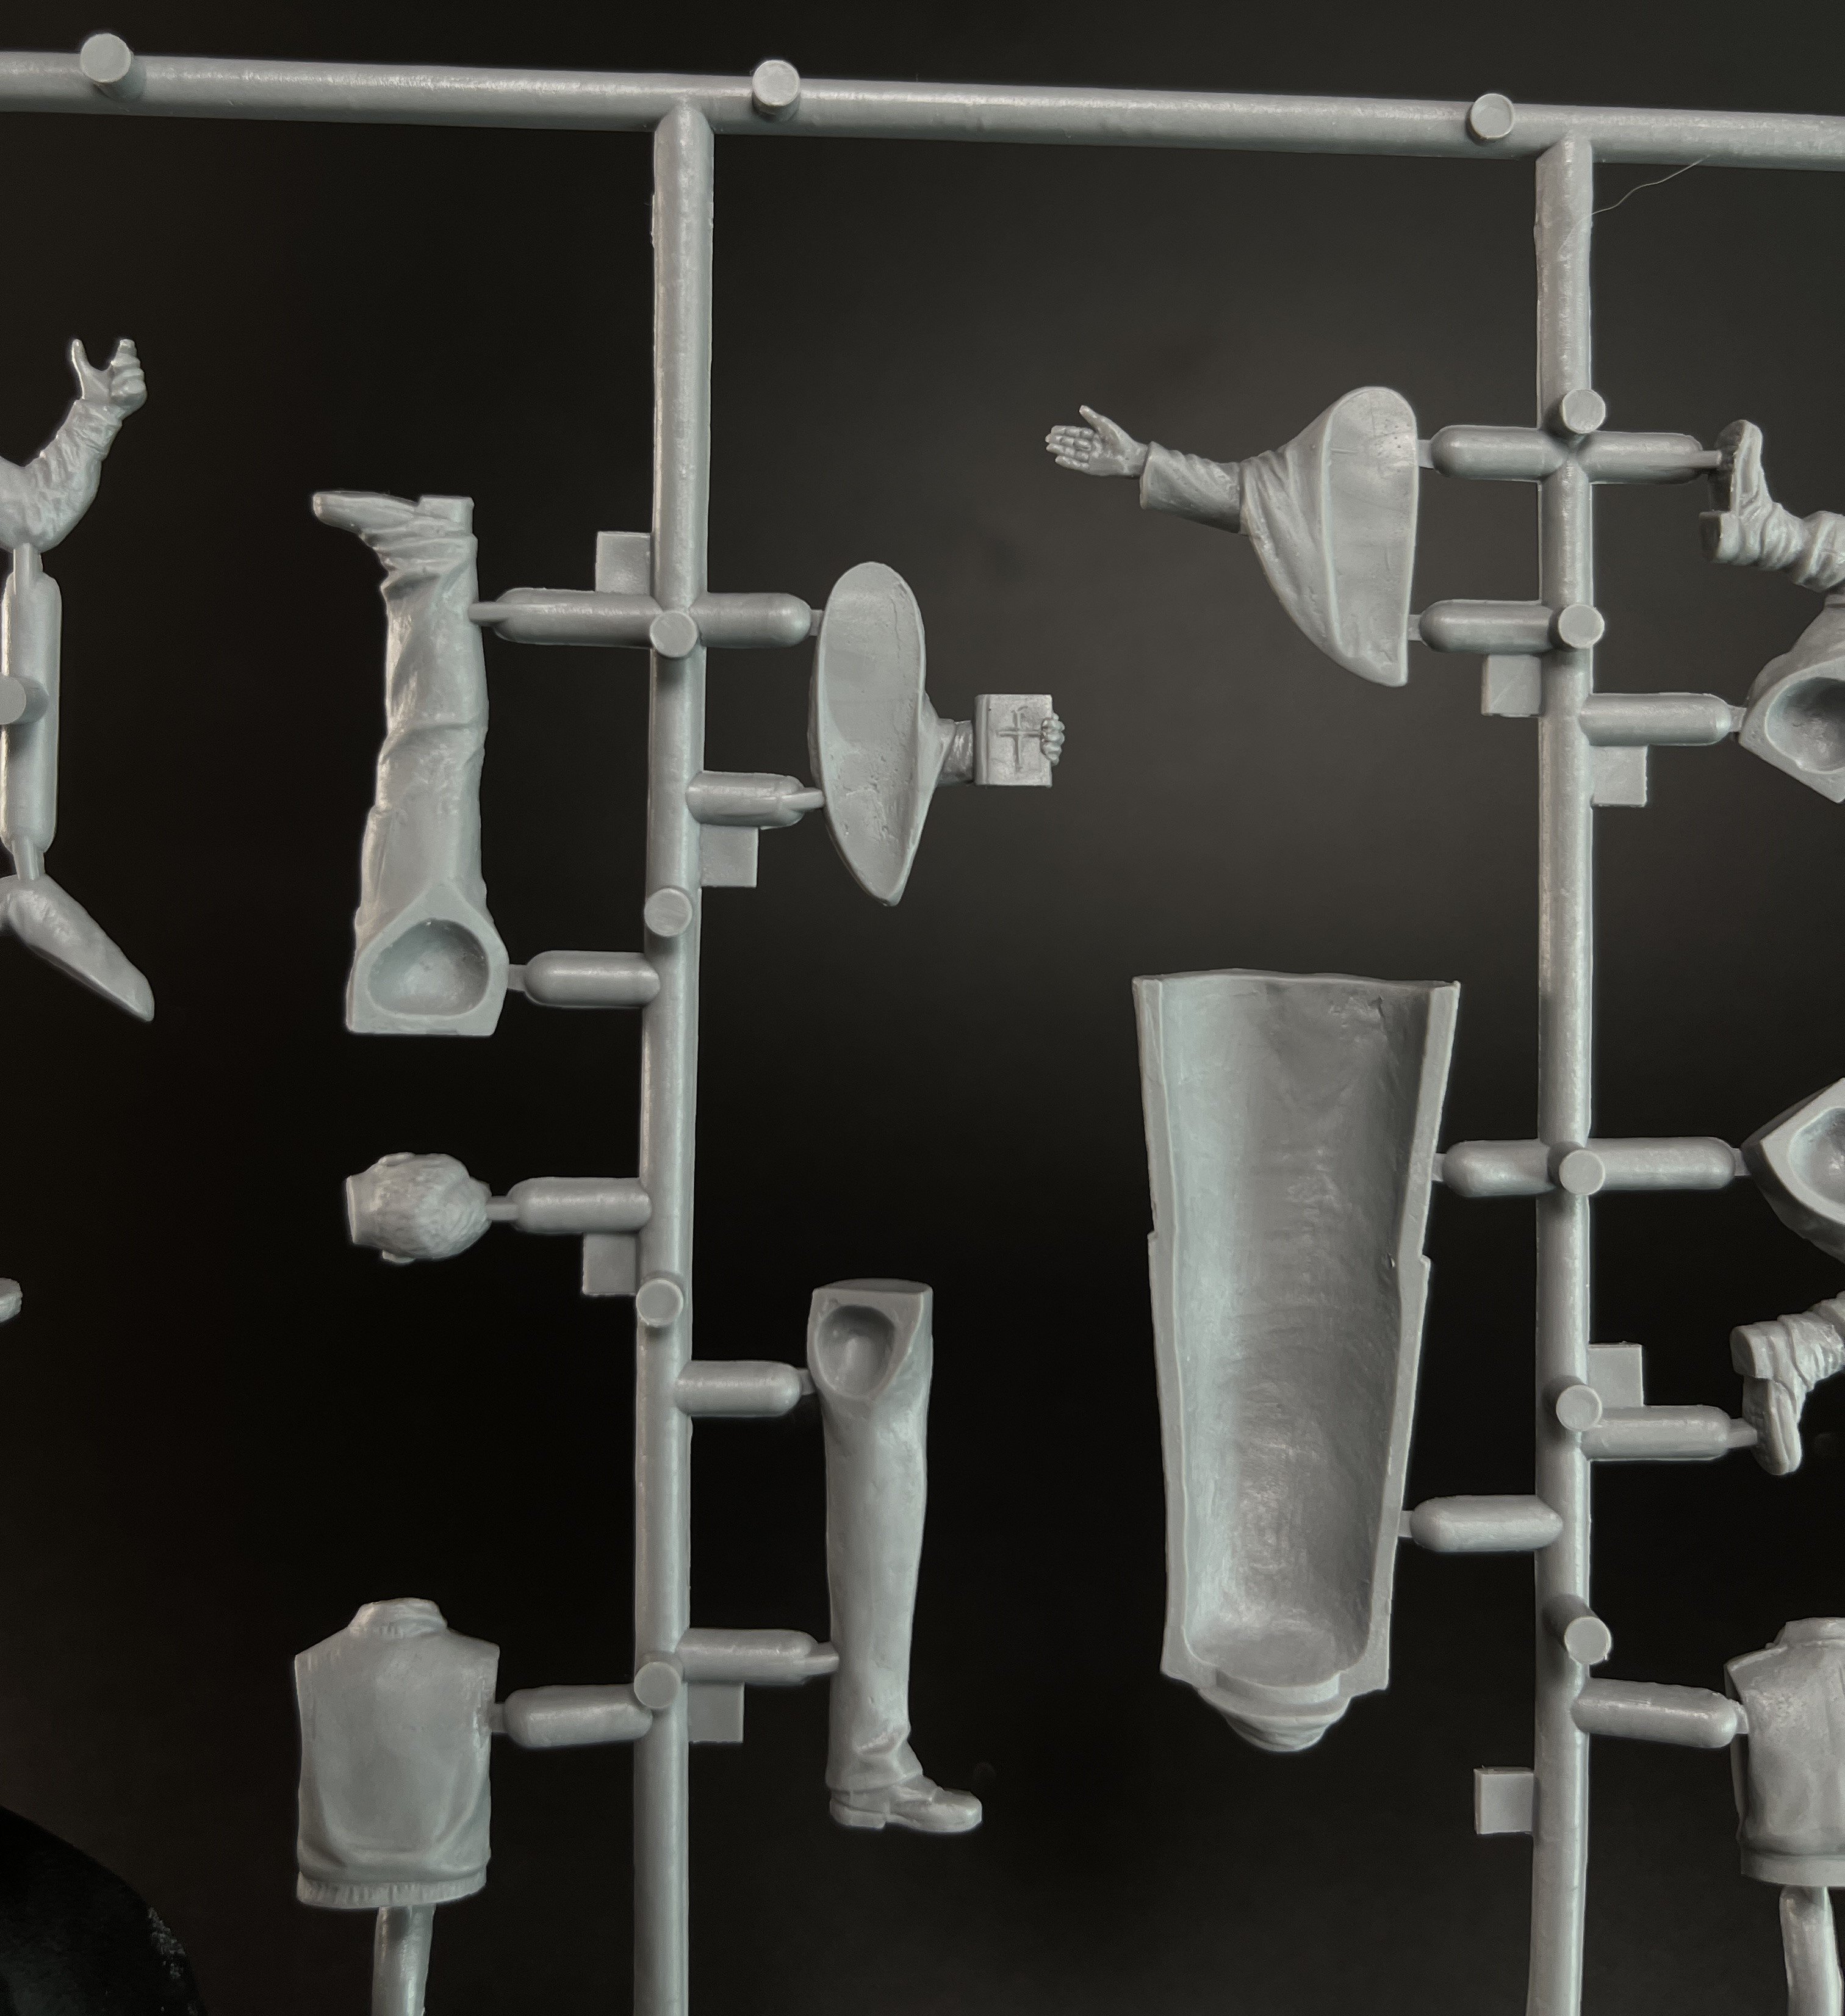
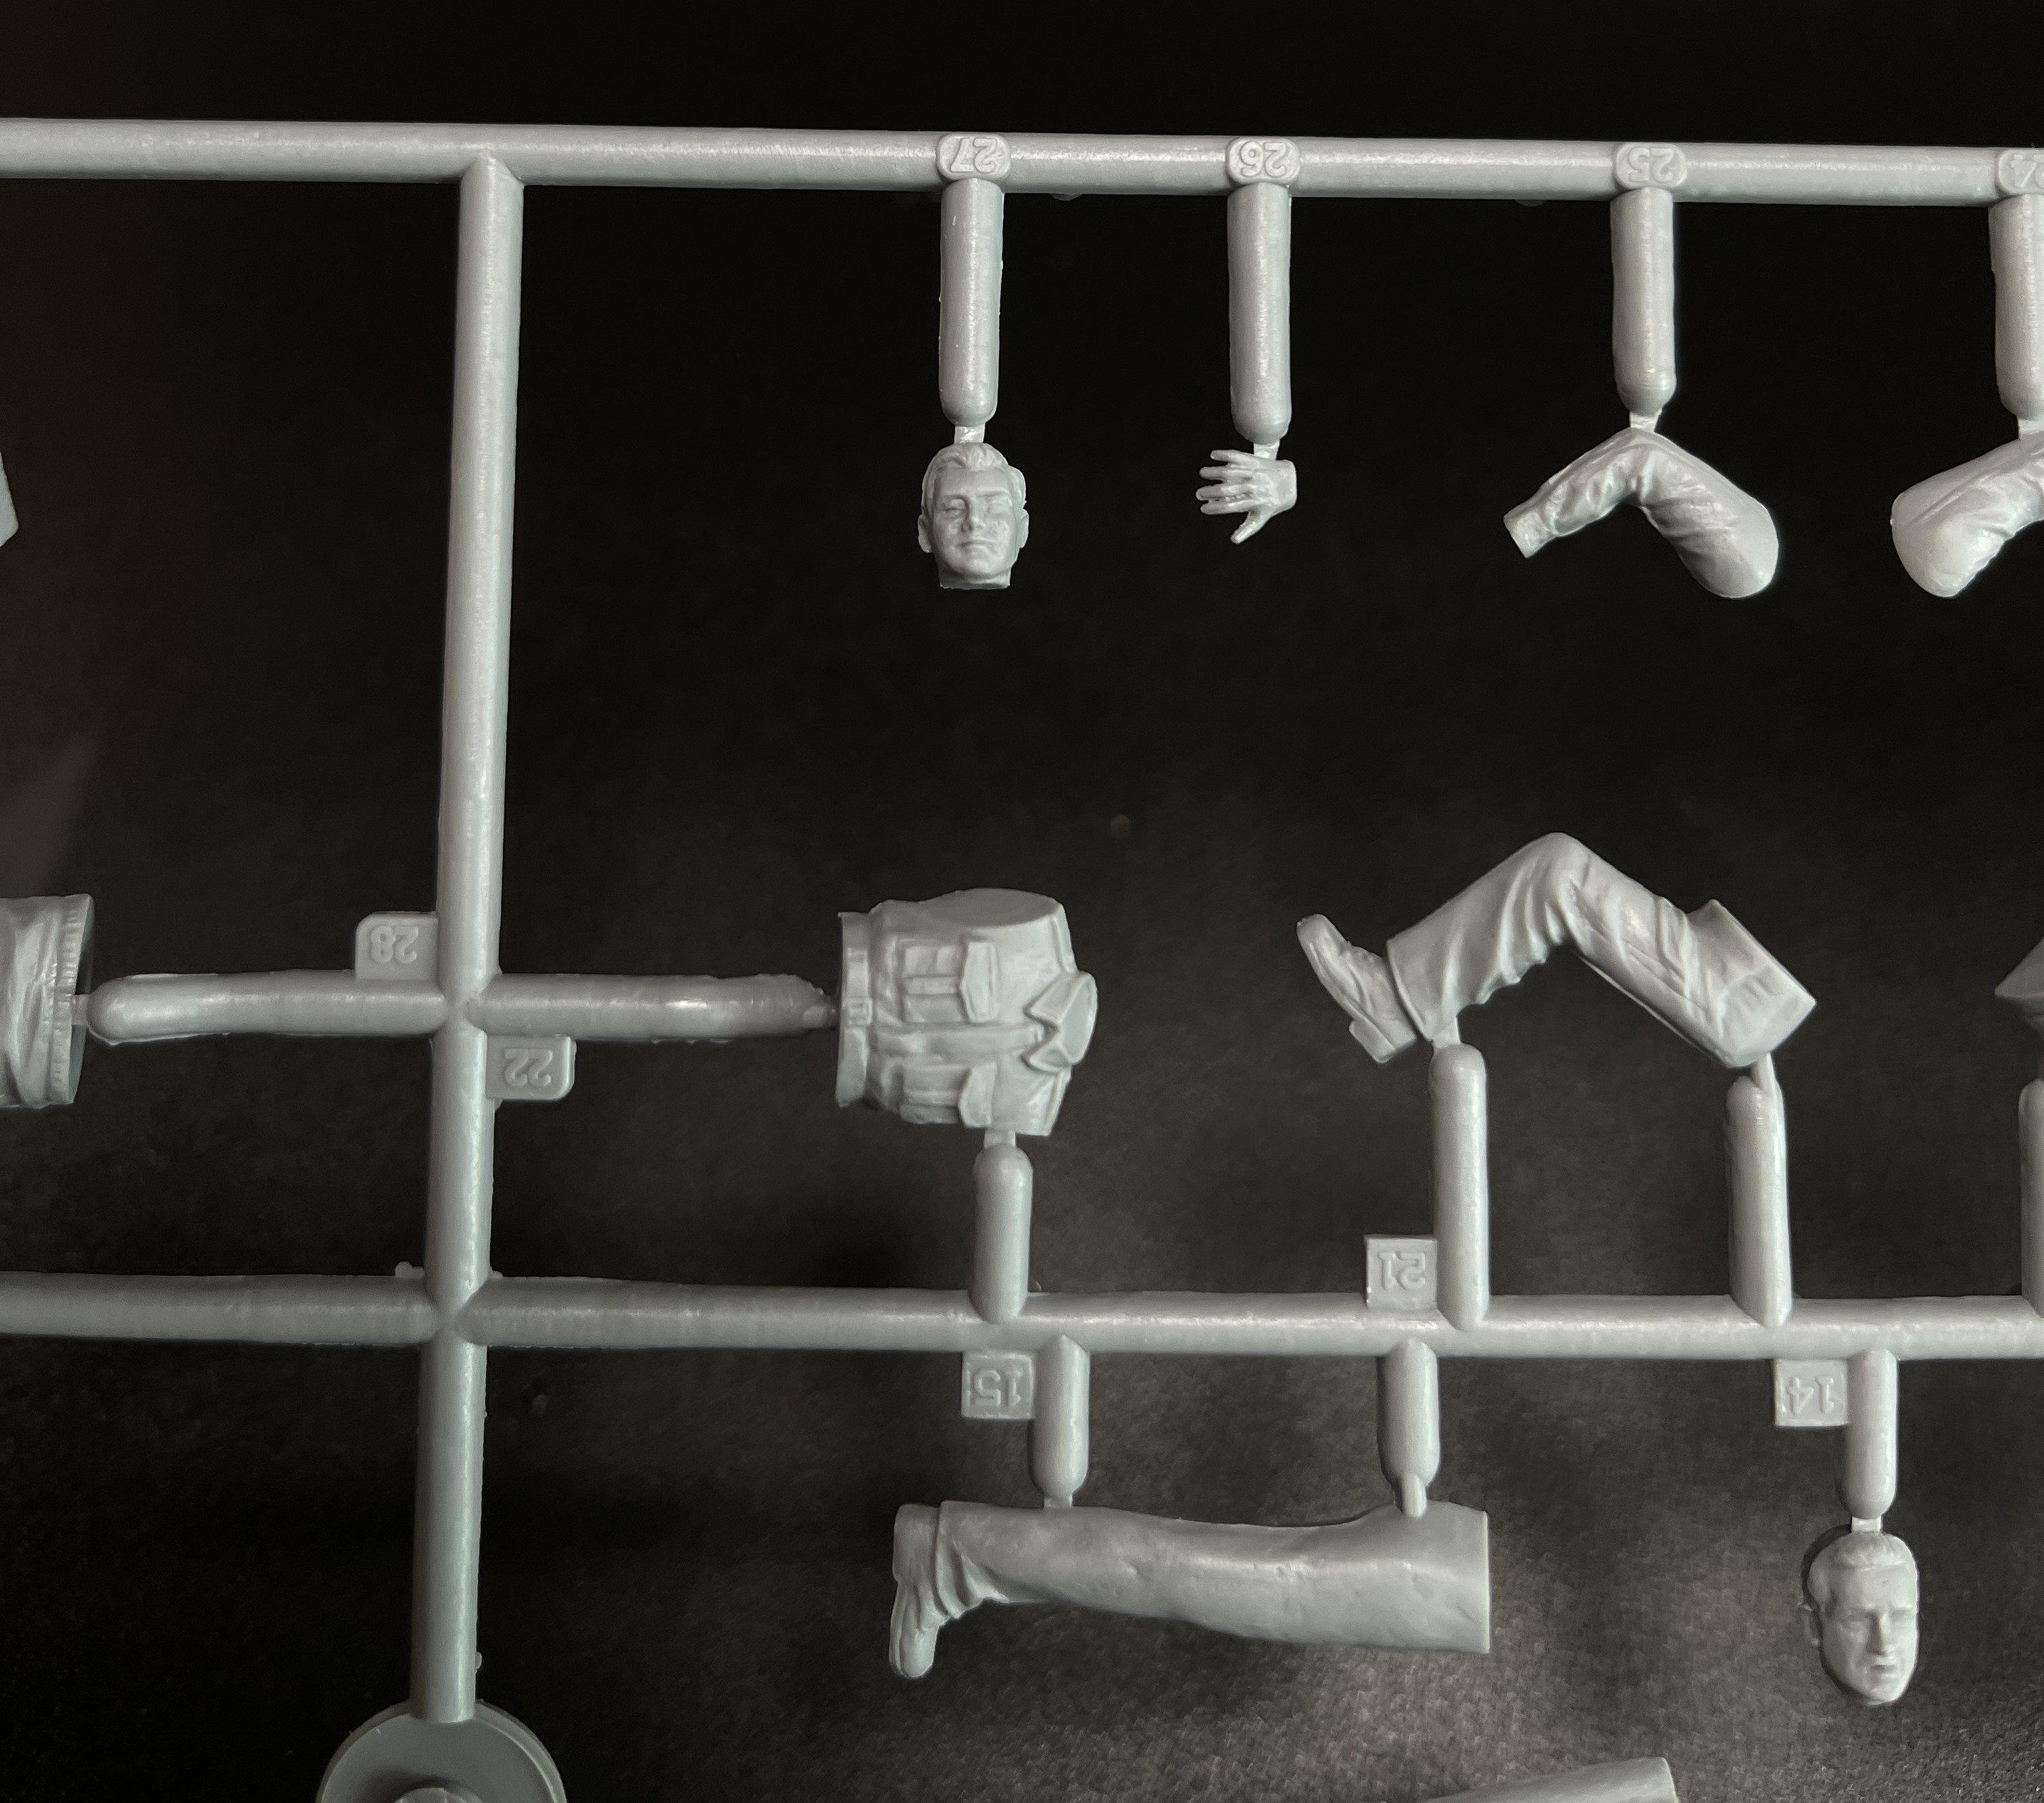
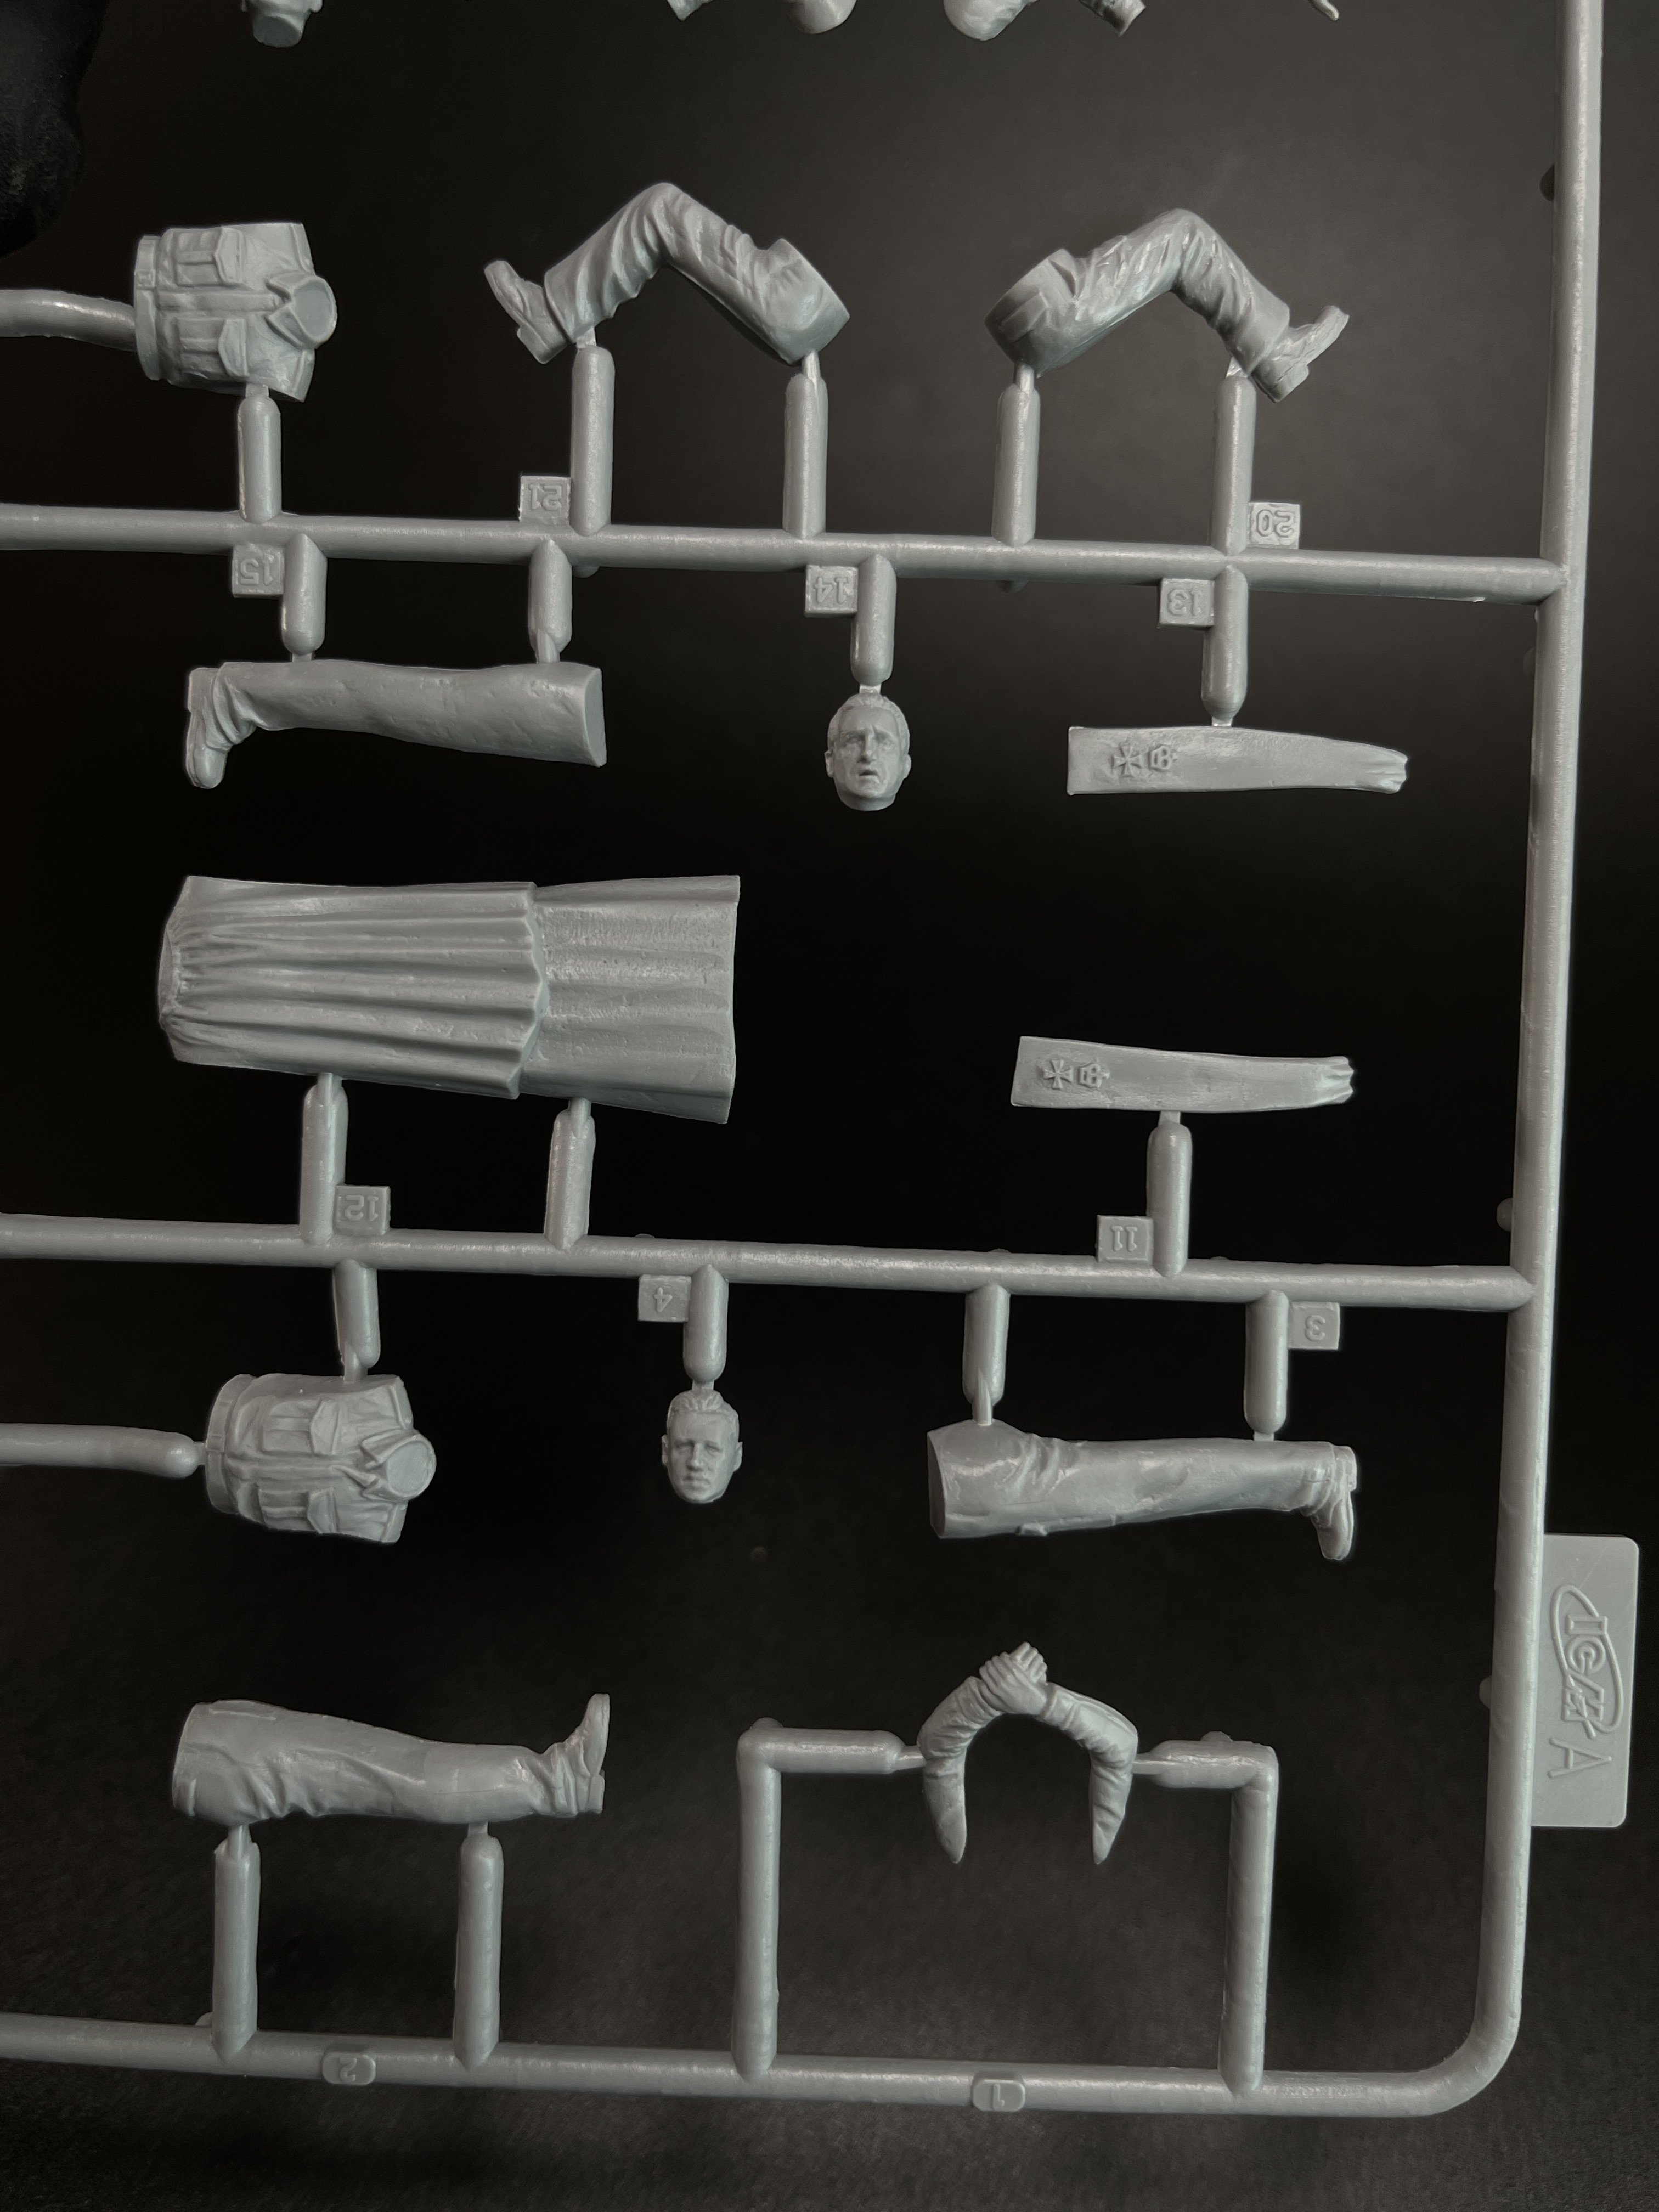
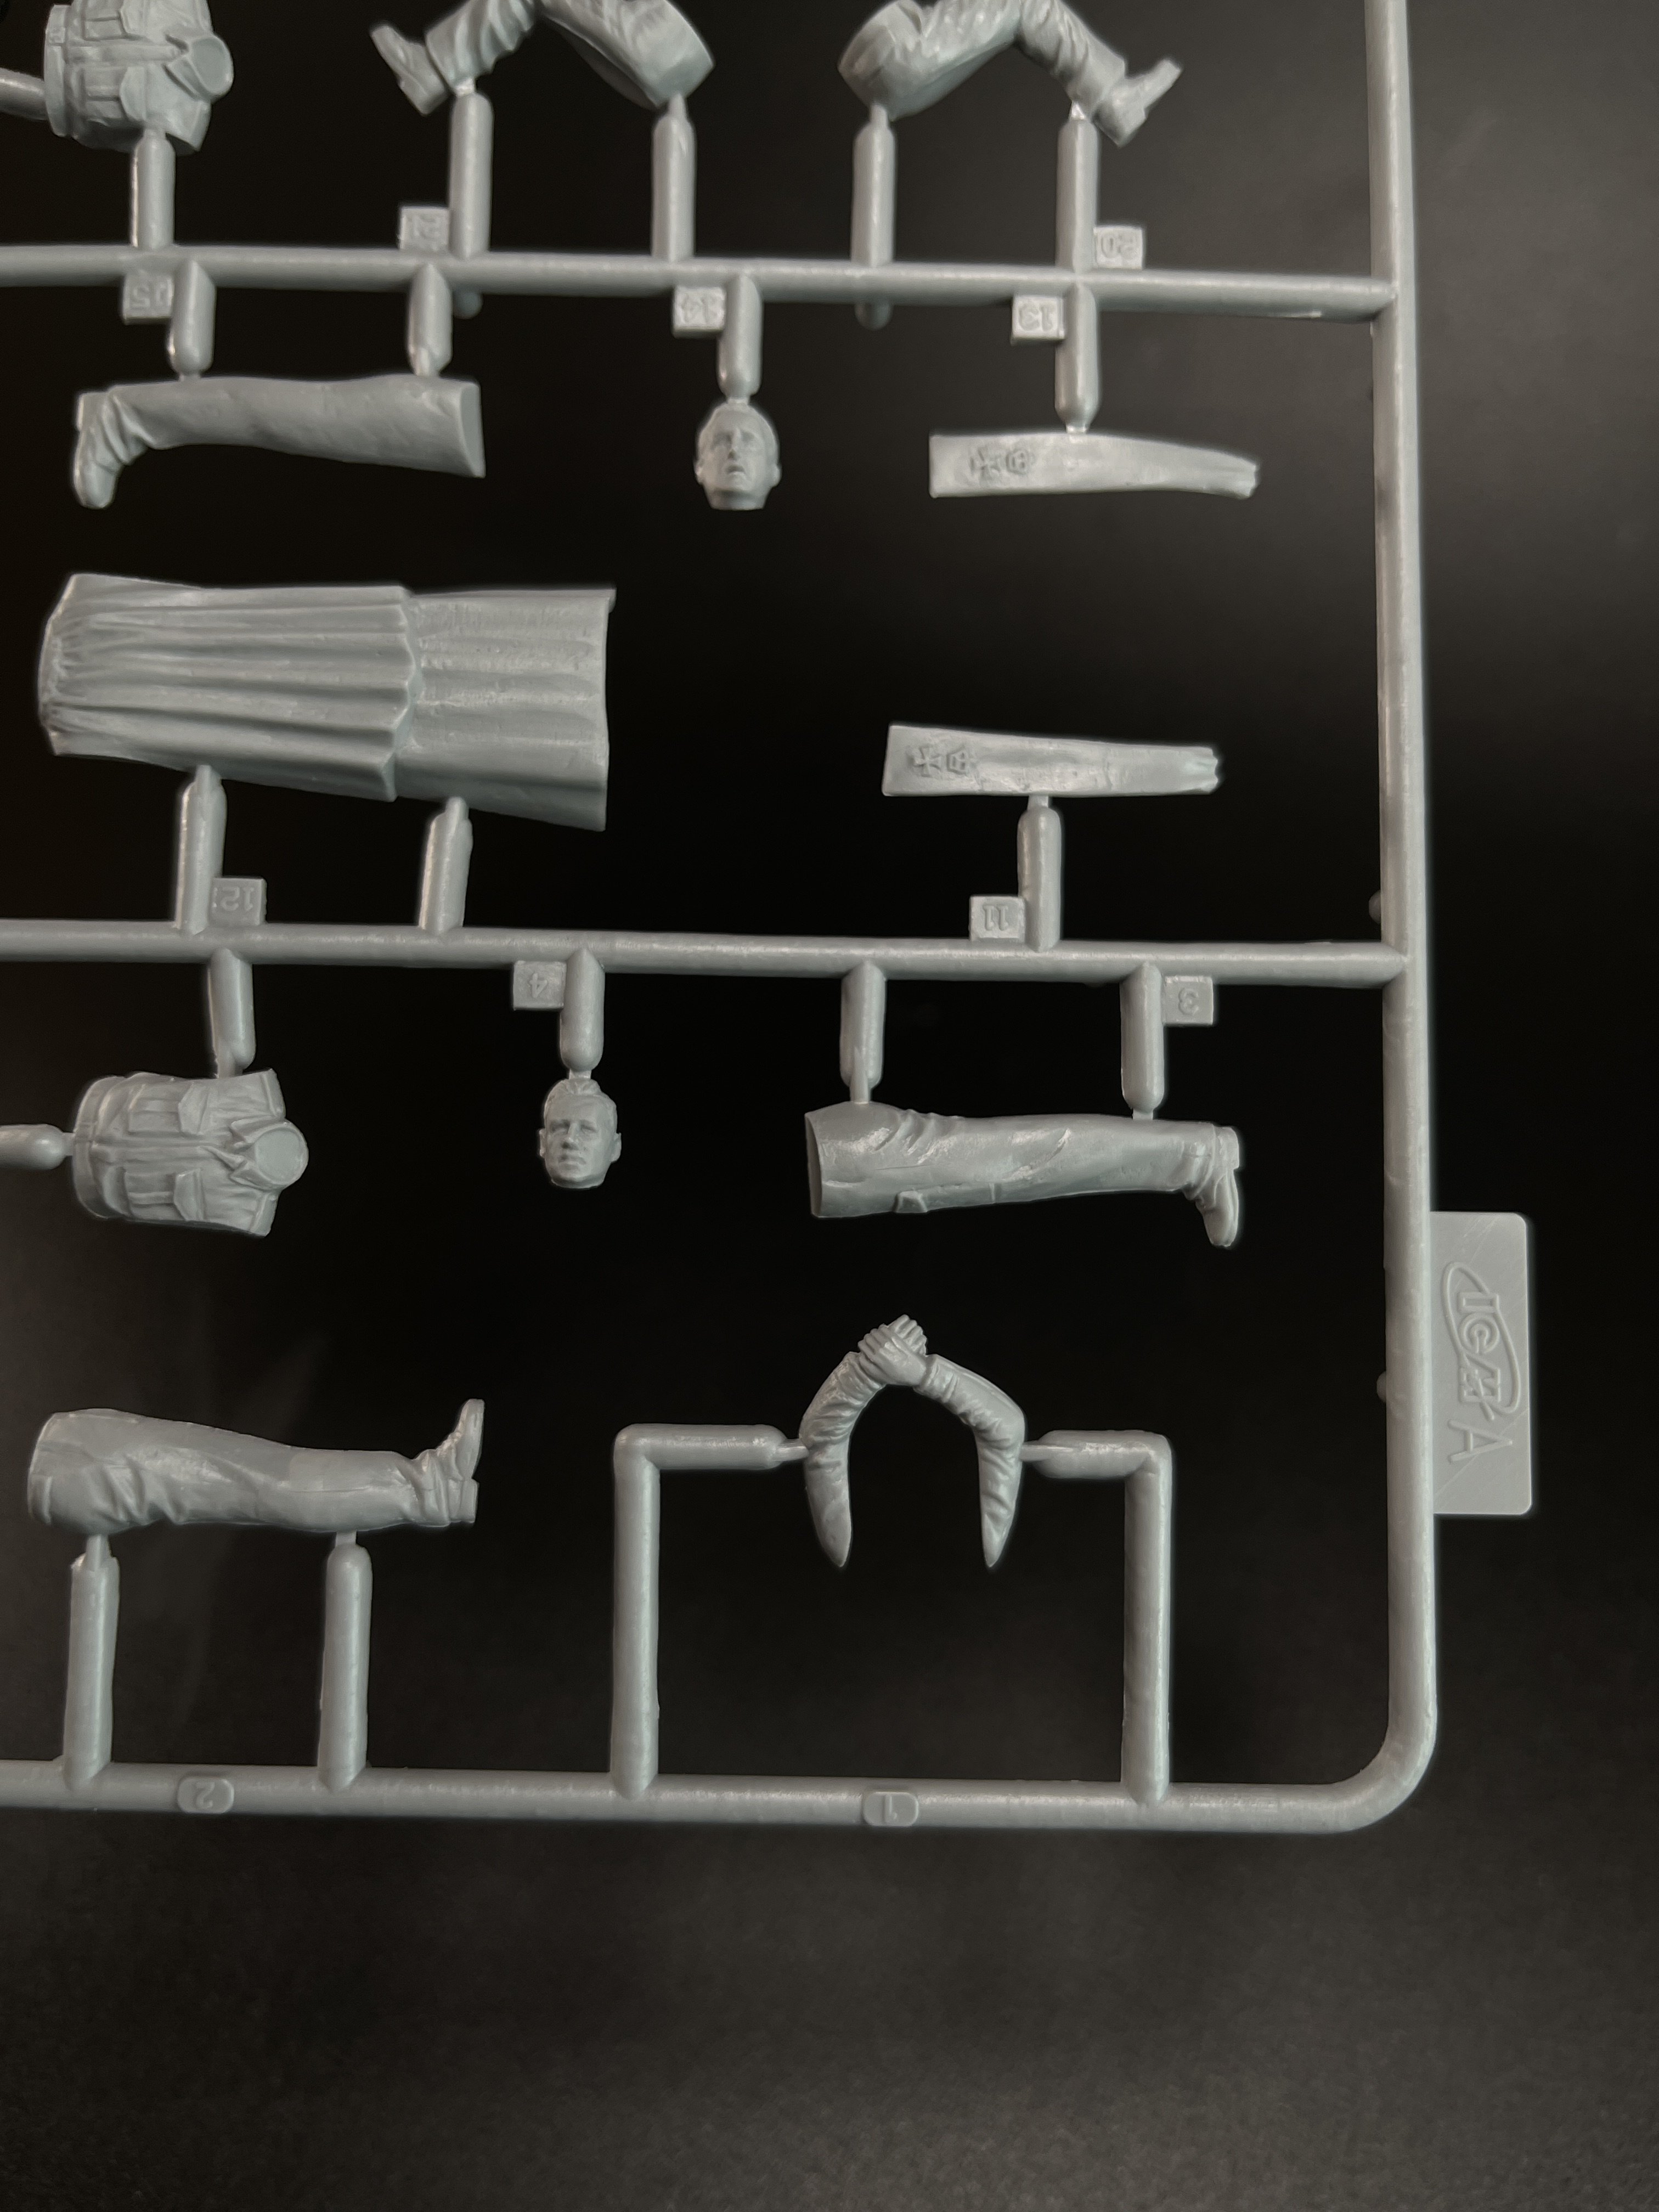
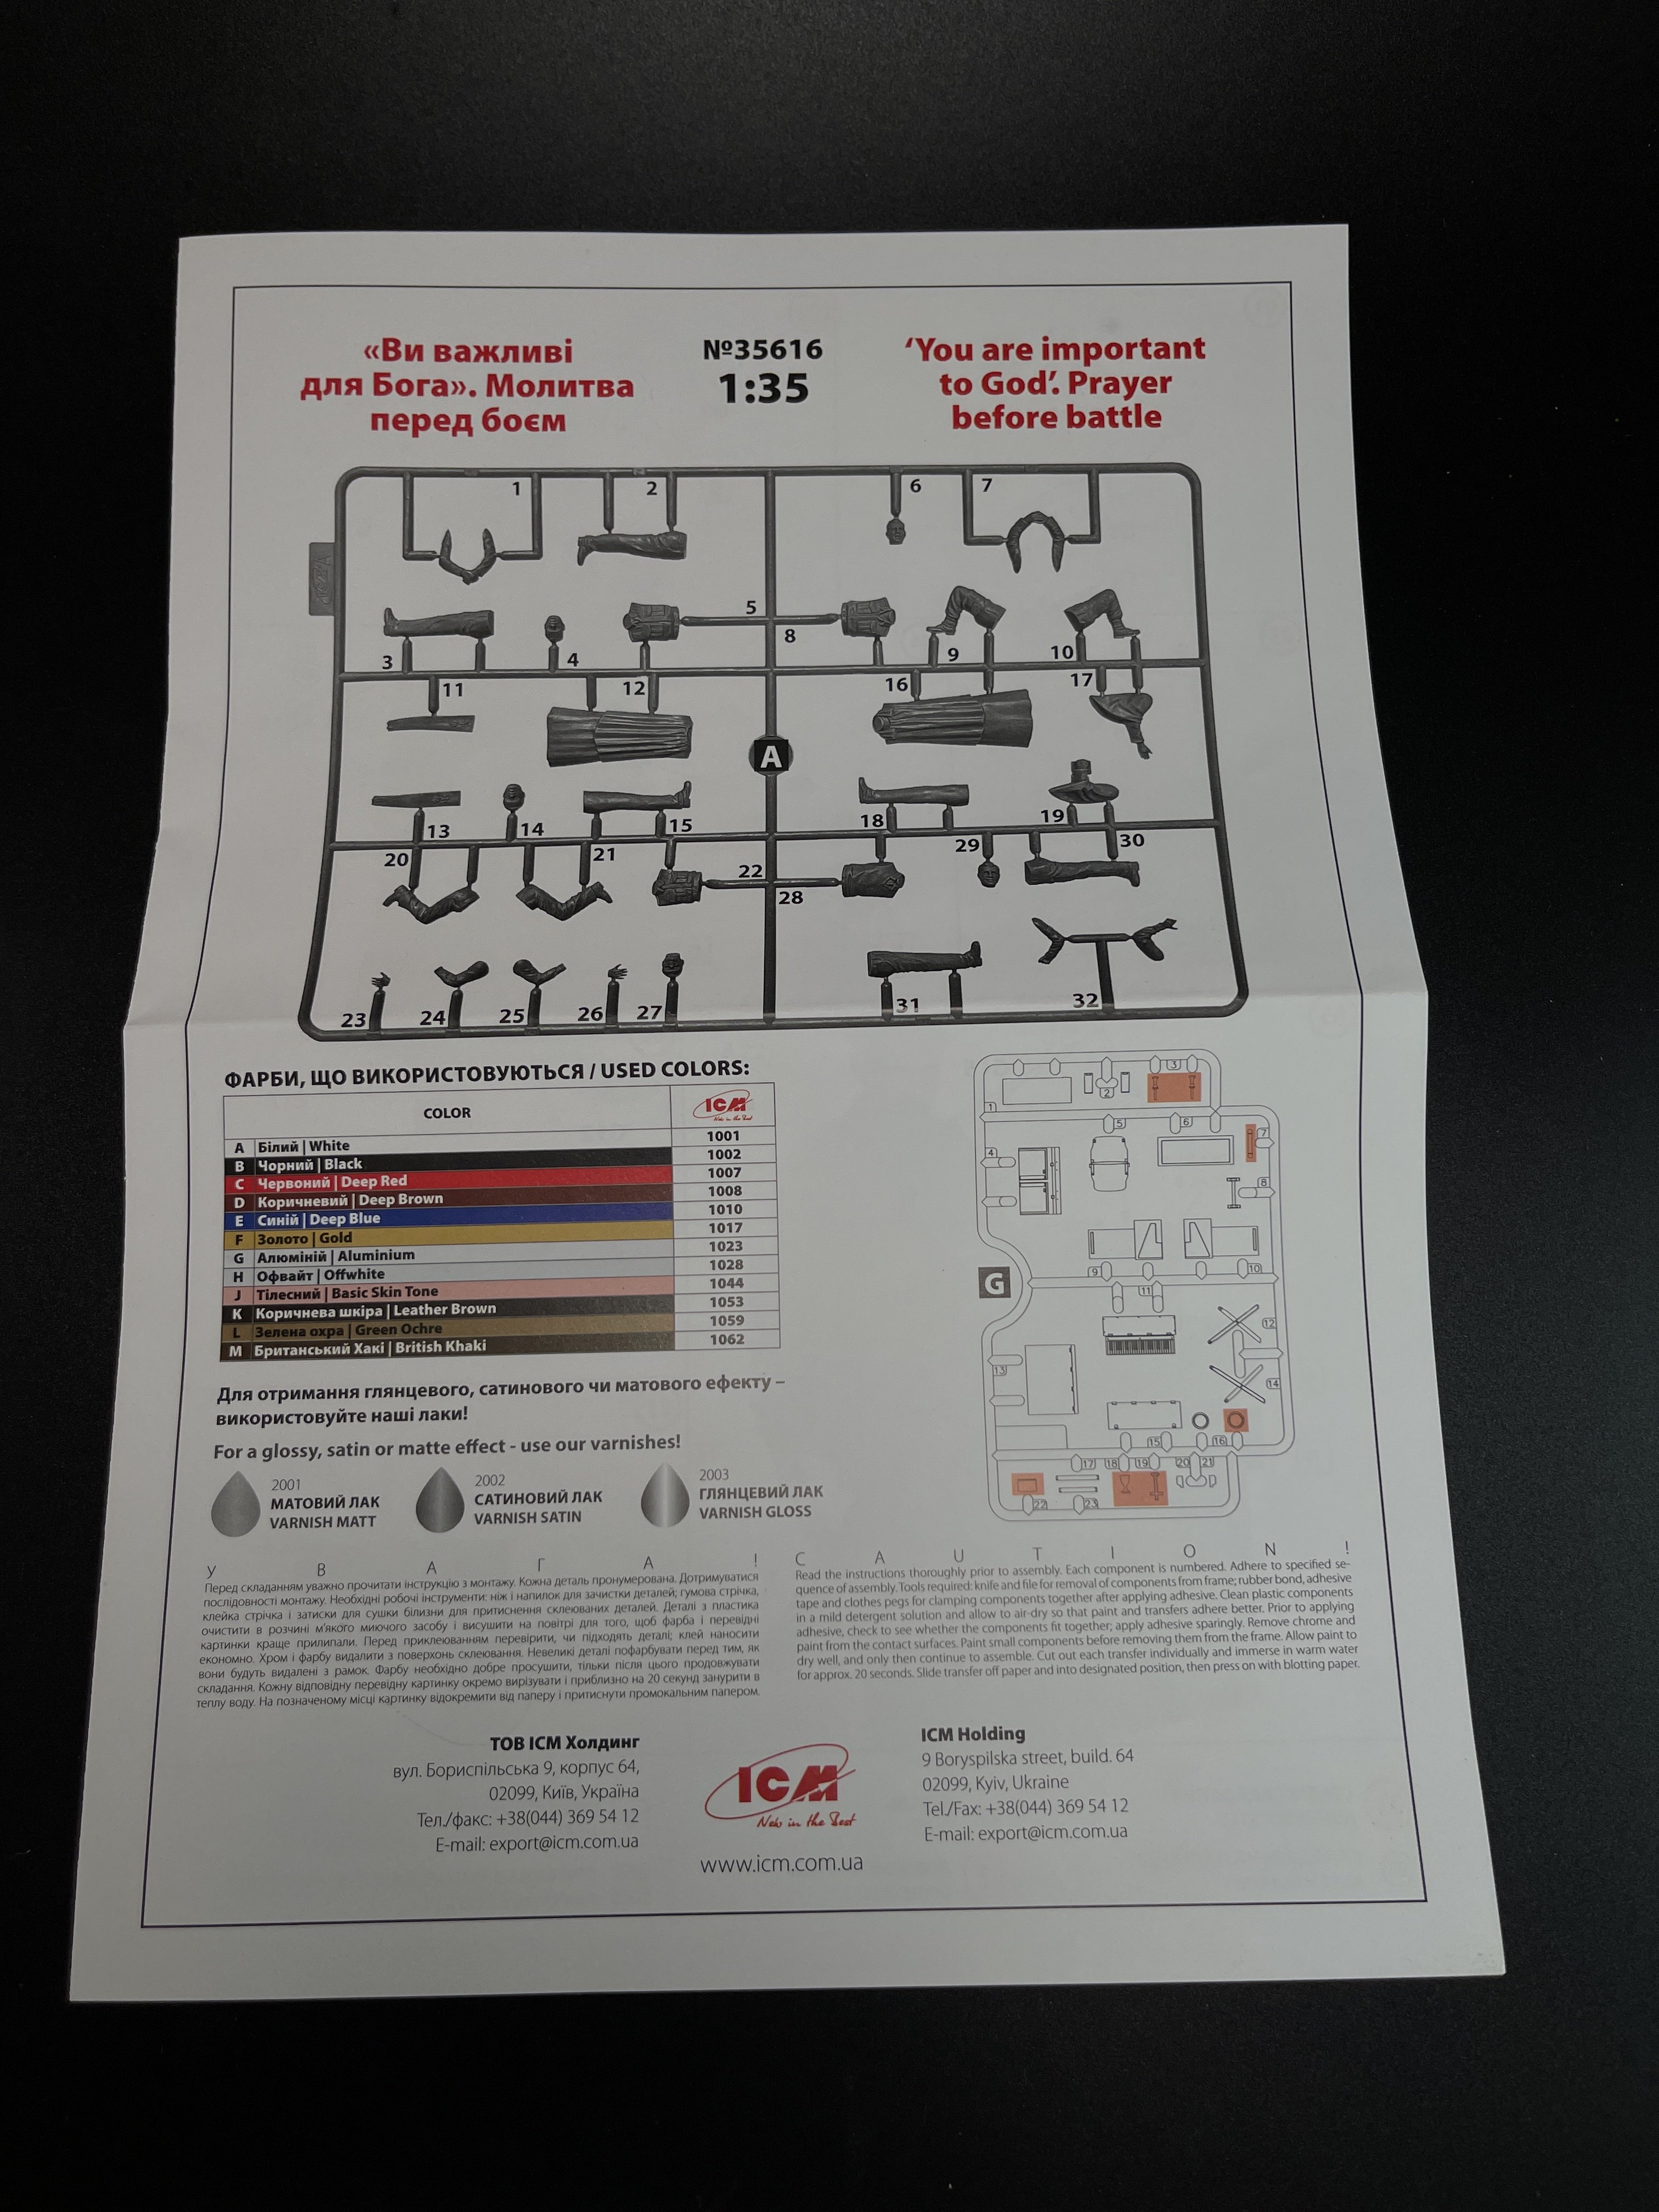
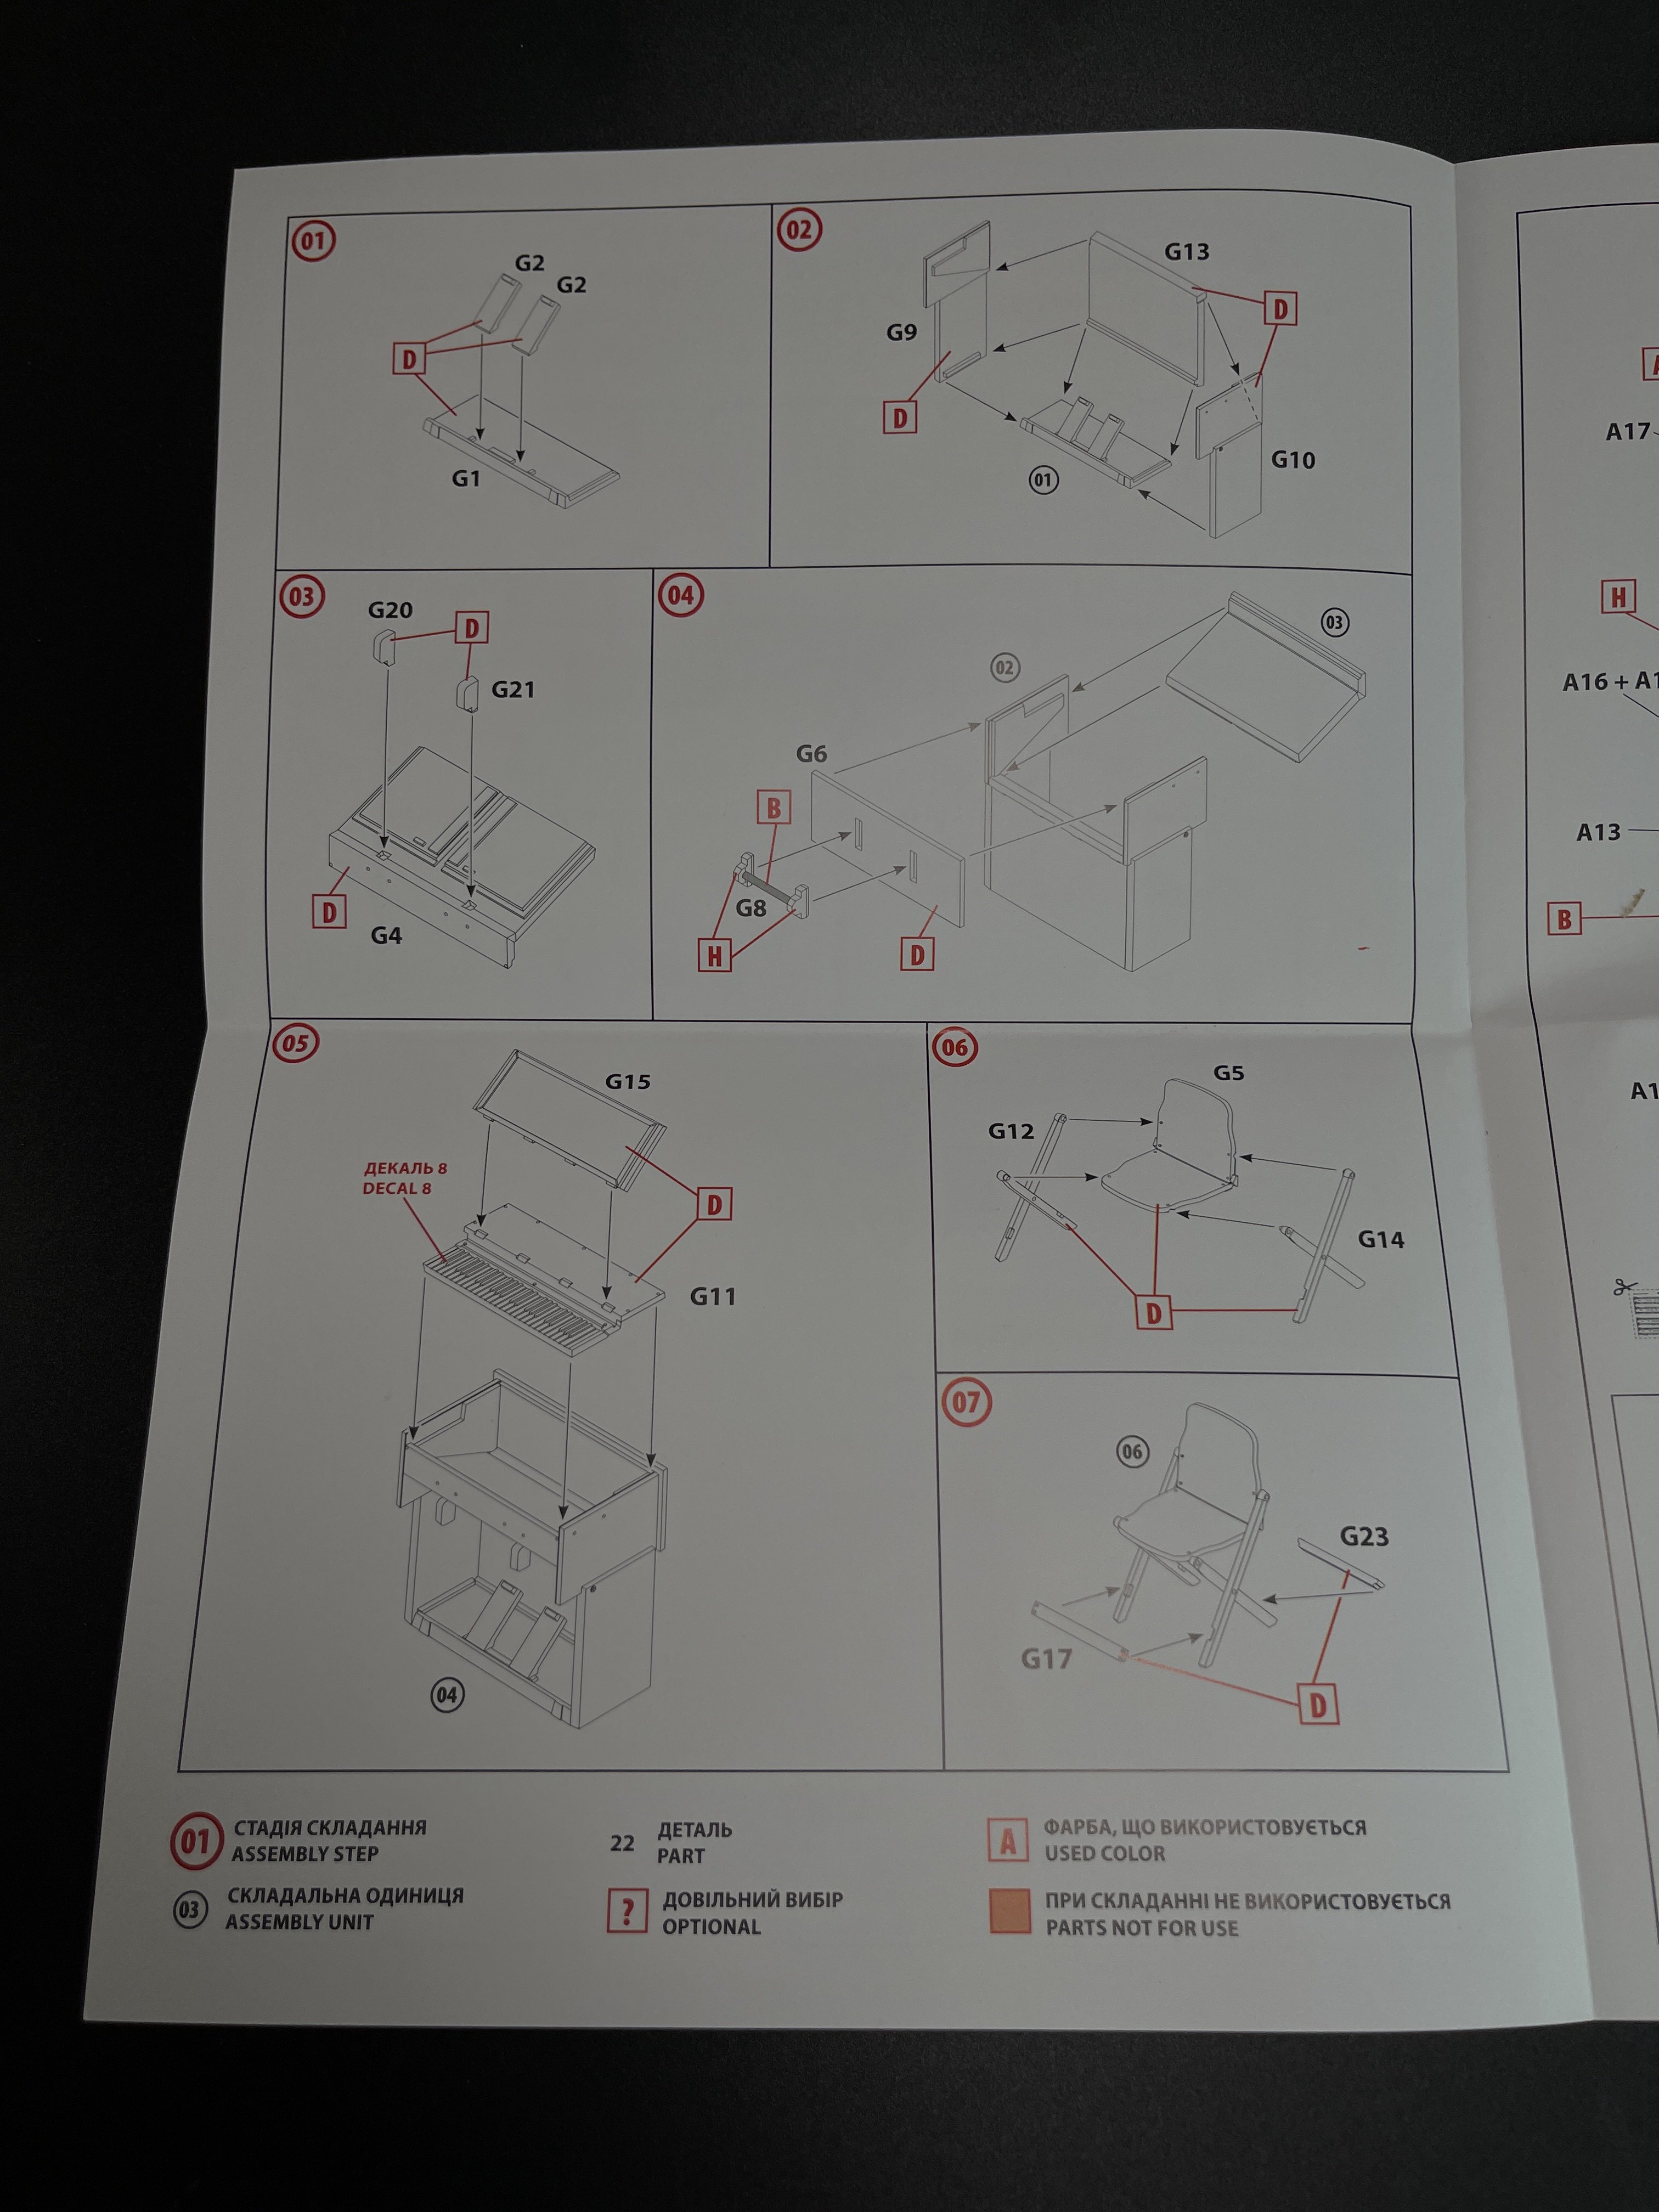
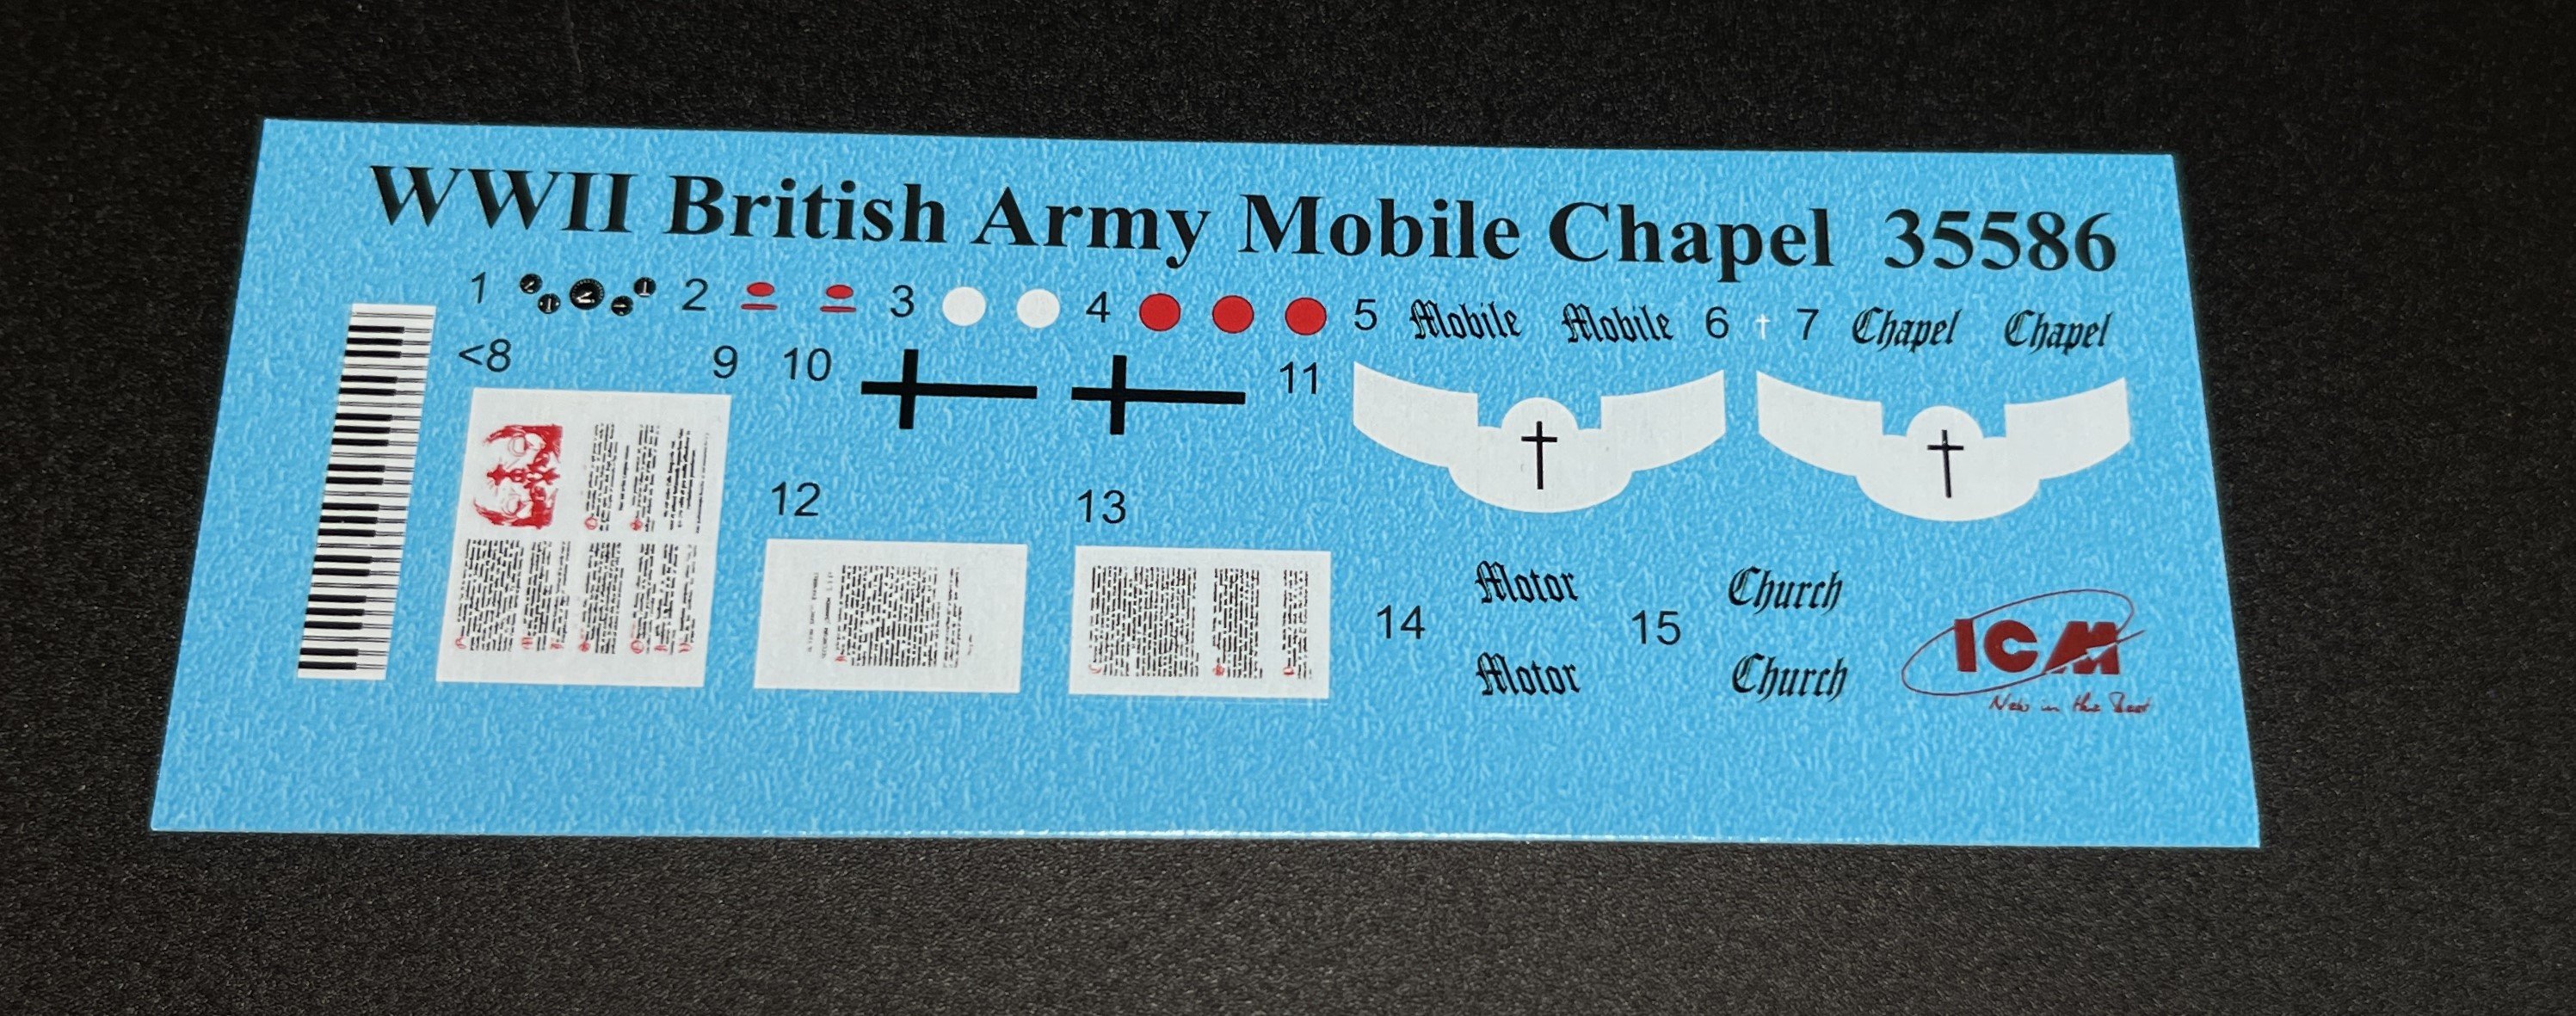
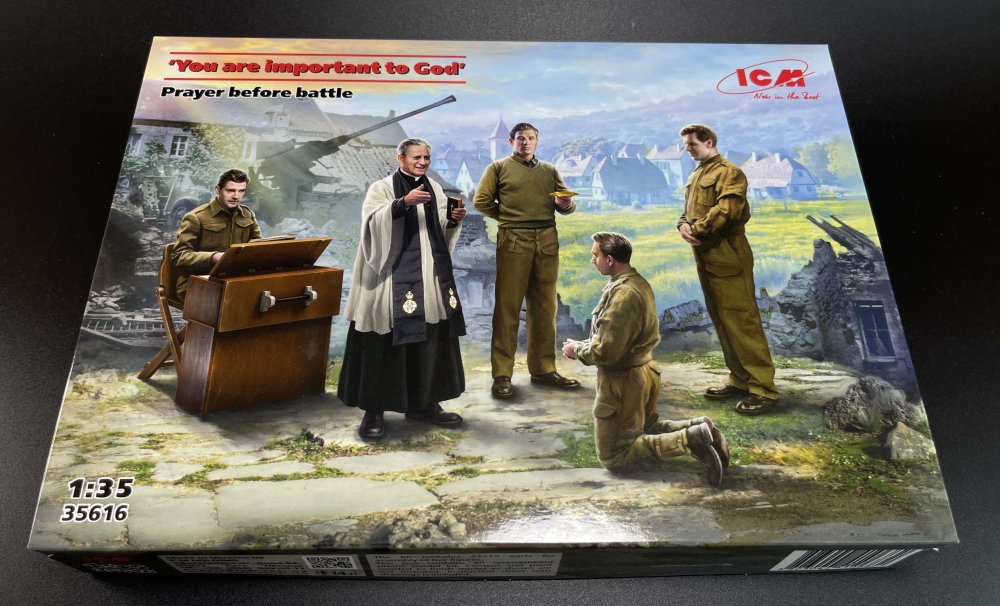
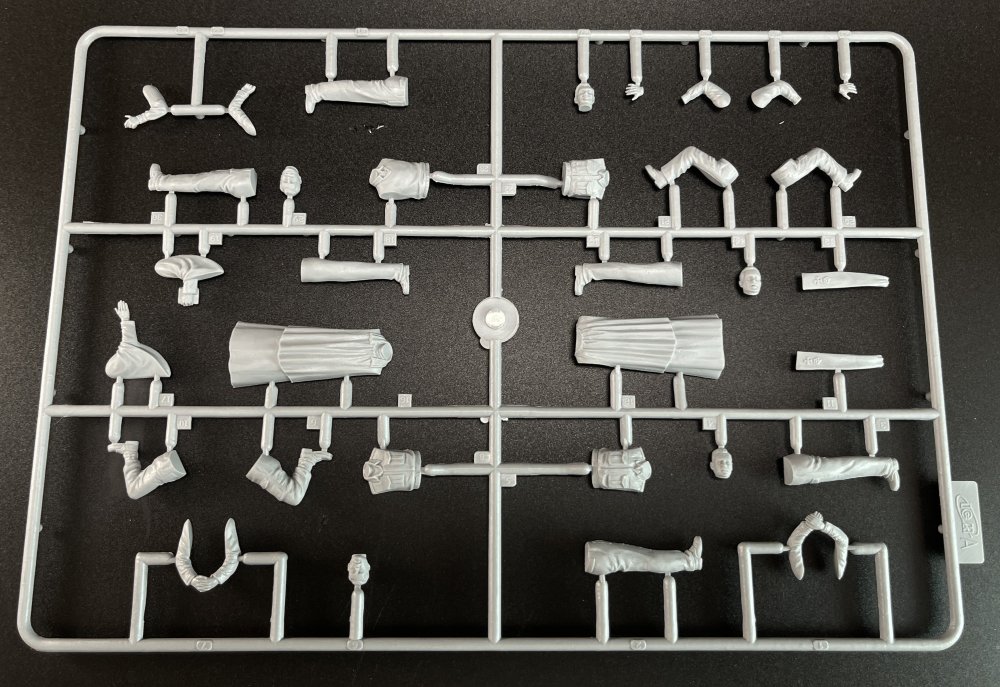
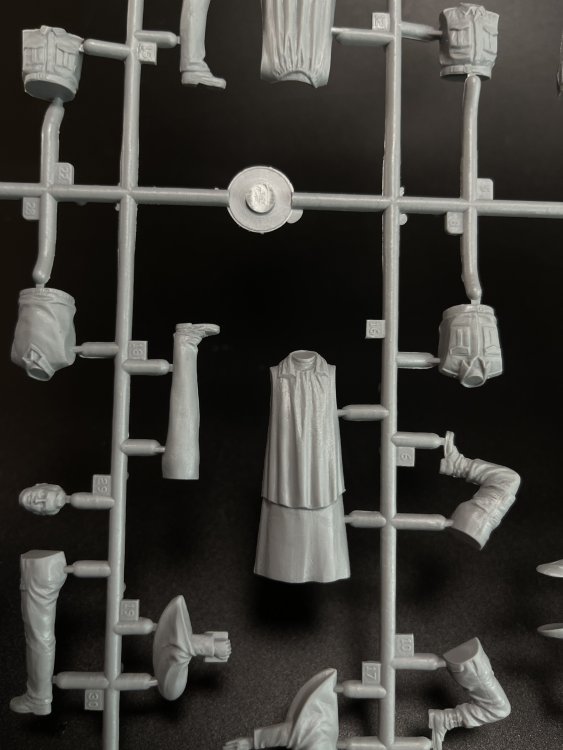
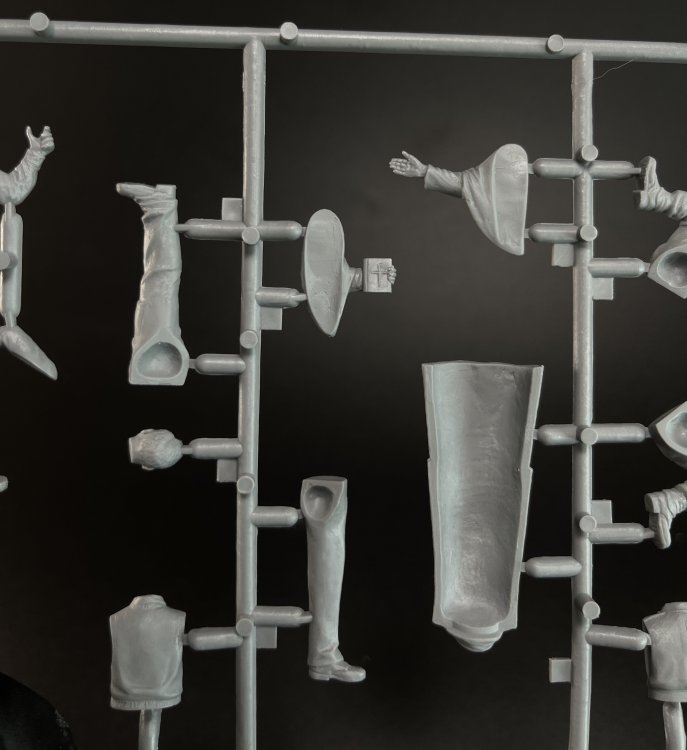
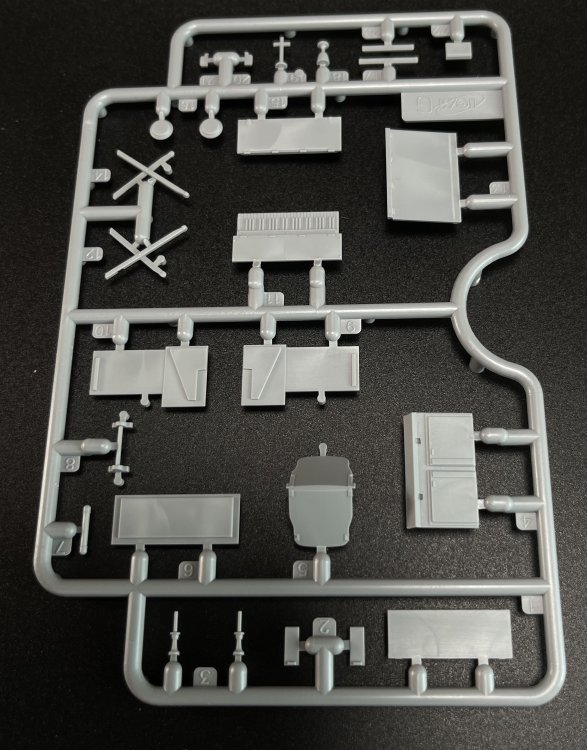
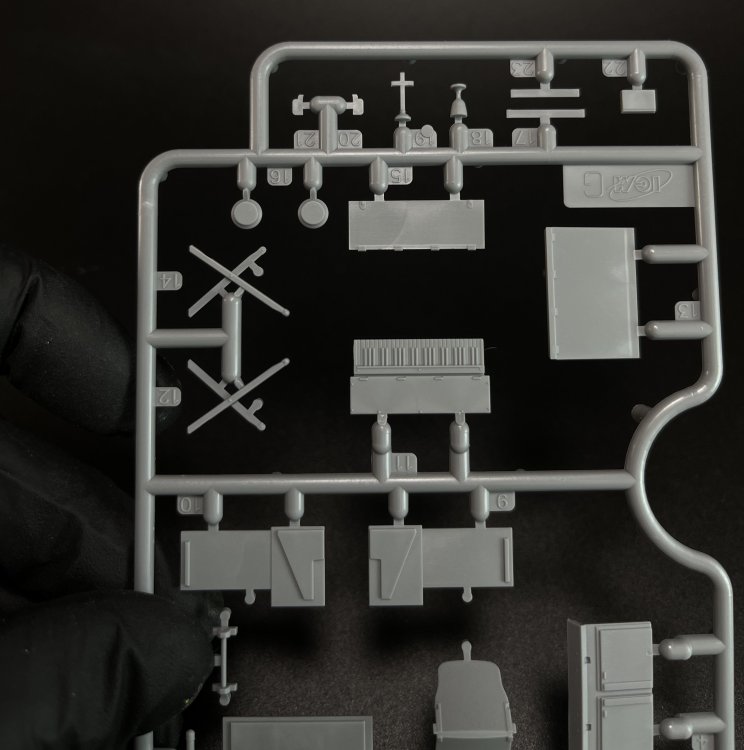
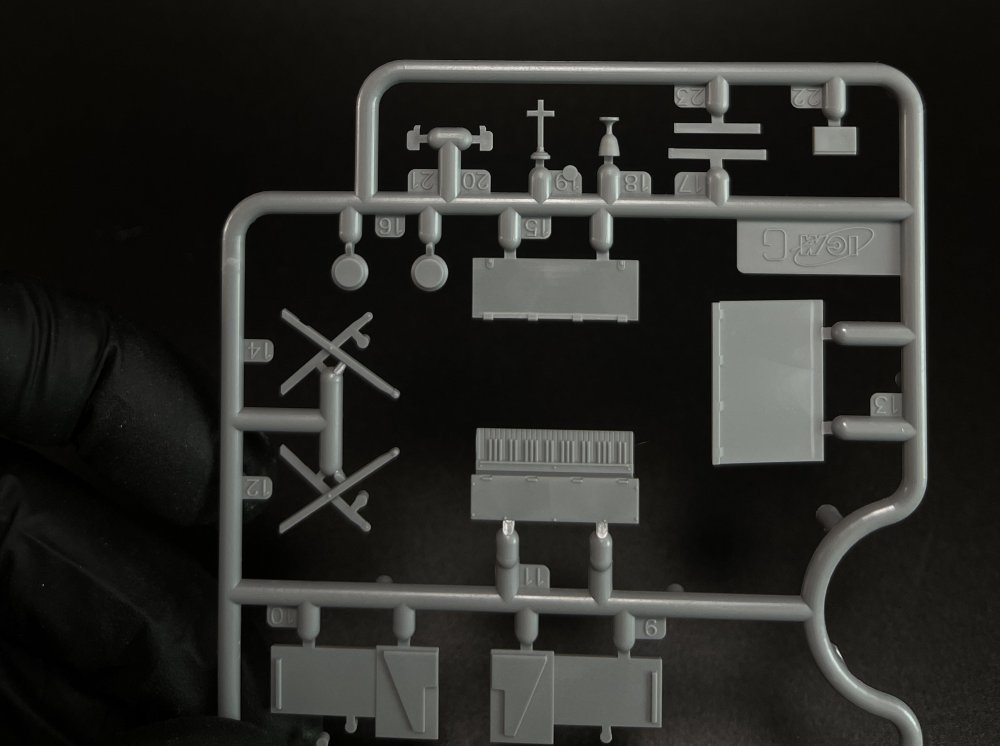
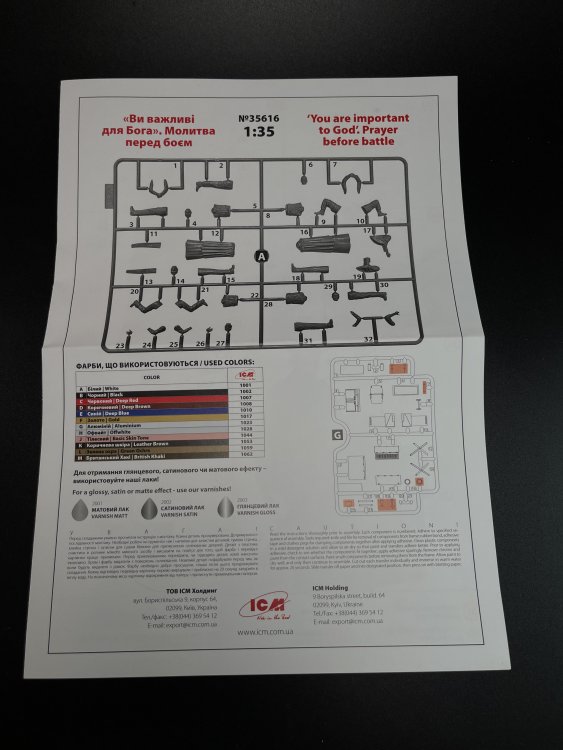
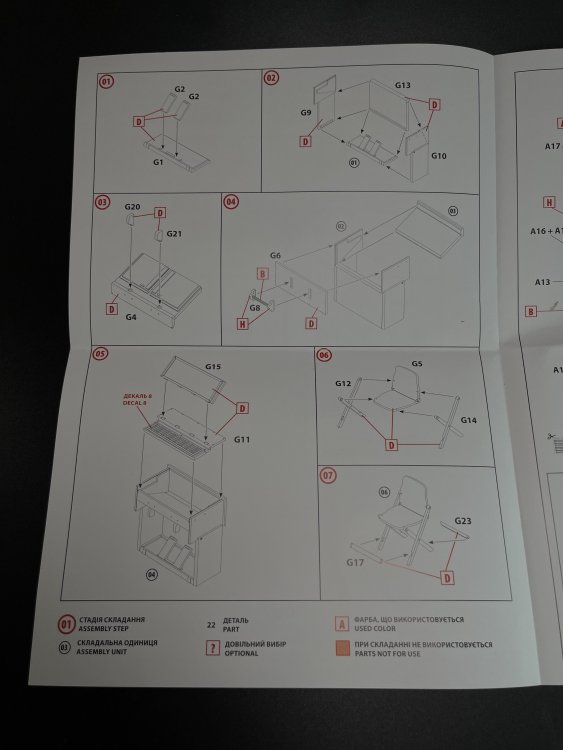
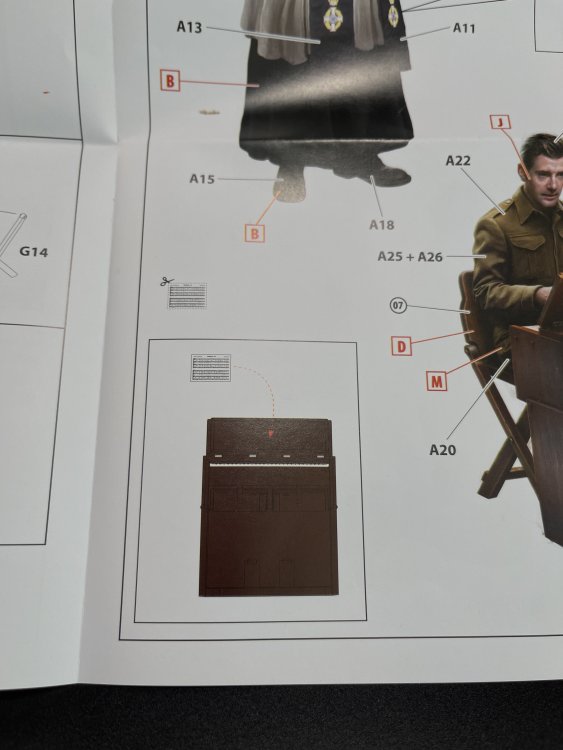
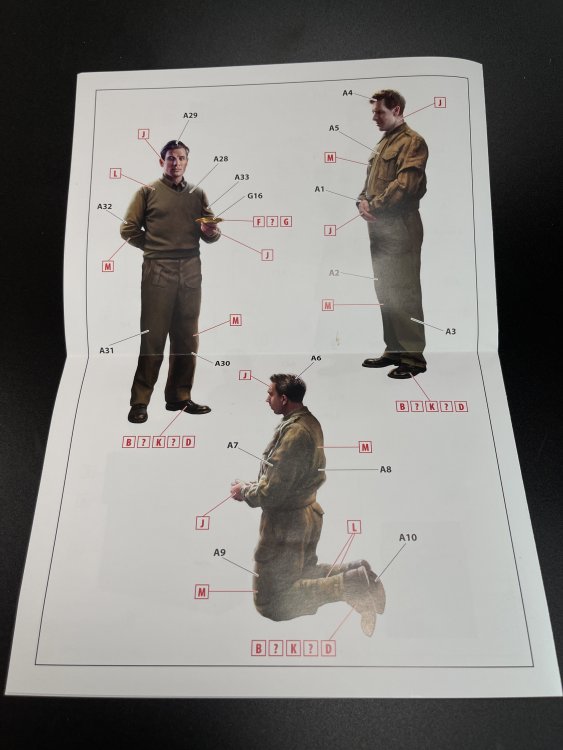
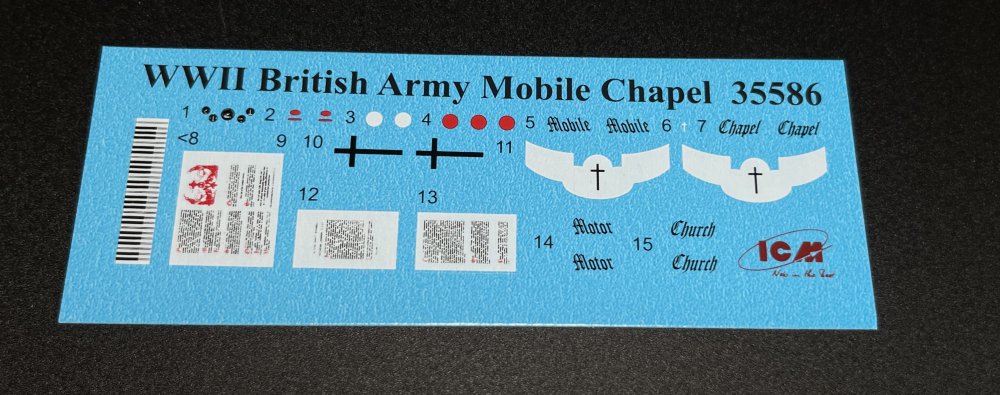
ICM 1:35 Prayer before Battle “You are important to God” (Catalogue number: 35616) Price Tag: 17€ ICM is a quite prolific model manufacture, releasing AFV, Airplane and figures. For me is the first figure set I review (not counting the combo ones) from ICM but Its not the first time I see an ICM figure. This set gives you five figures, in the poses that you can see in the box art, a piano, the bench and some religious artifacts. All parts have no flash at all, and the surface detail is quite good so you can really get a very good figure from this set, using all together or just one as the posture could be used in several other scenario. The figures have the torso in one piece without arms or legs as they are separated with the exception of the Priest. This one only has the feet separated as the priest cassock is in one piece and very well molded. The facial expression is appropriate for the prayer moment. The overall detail of all figures is very good but I will have to stand out the priest. The general approach is very interesting and well done. The clothing detail with ecclesiastical coat of arms on lapels in a surface detail and the Bible in the other hands are fantastic details. But to complete these details a gorgeous decal sheet with very good coloration with religious symbols is just the top notch for detail. Wel done ICM! The piano looks great (I´m not a piano expert at all) and if you don’t to paint the 1:35 piano keys, a perfect decal is given for that dauting task. 😊 The instructions is one sheet A3 size with color indication for the figures with a complete figure with the parts indicated. Not my favourite option of instruction but it will do for the intermediate modeller. Conclusion It´s a great five figure set that it would be perfect with the 1:35 ICM WW2 British Army Mobile Chapel (35586) (that we reviewed here) or with other 1:35 vehicle or even an 1:35 airplane. Or simply make a vignette with it! There`s tons of possibilities with this set and none of those possibilities are common scene in the modelling world until now! Great Work ICM! Keep Then coming! HIGHLY RECOMMEND. Our sincere thanks to ICM for making this fantastic figure set. Fran www.largescalemodeller.com


-
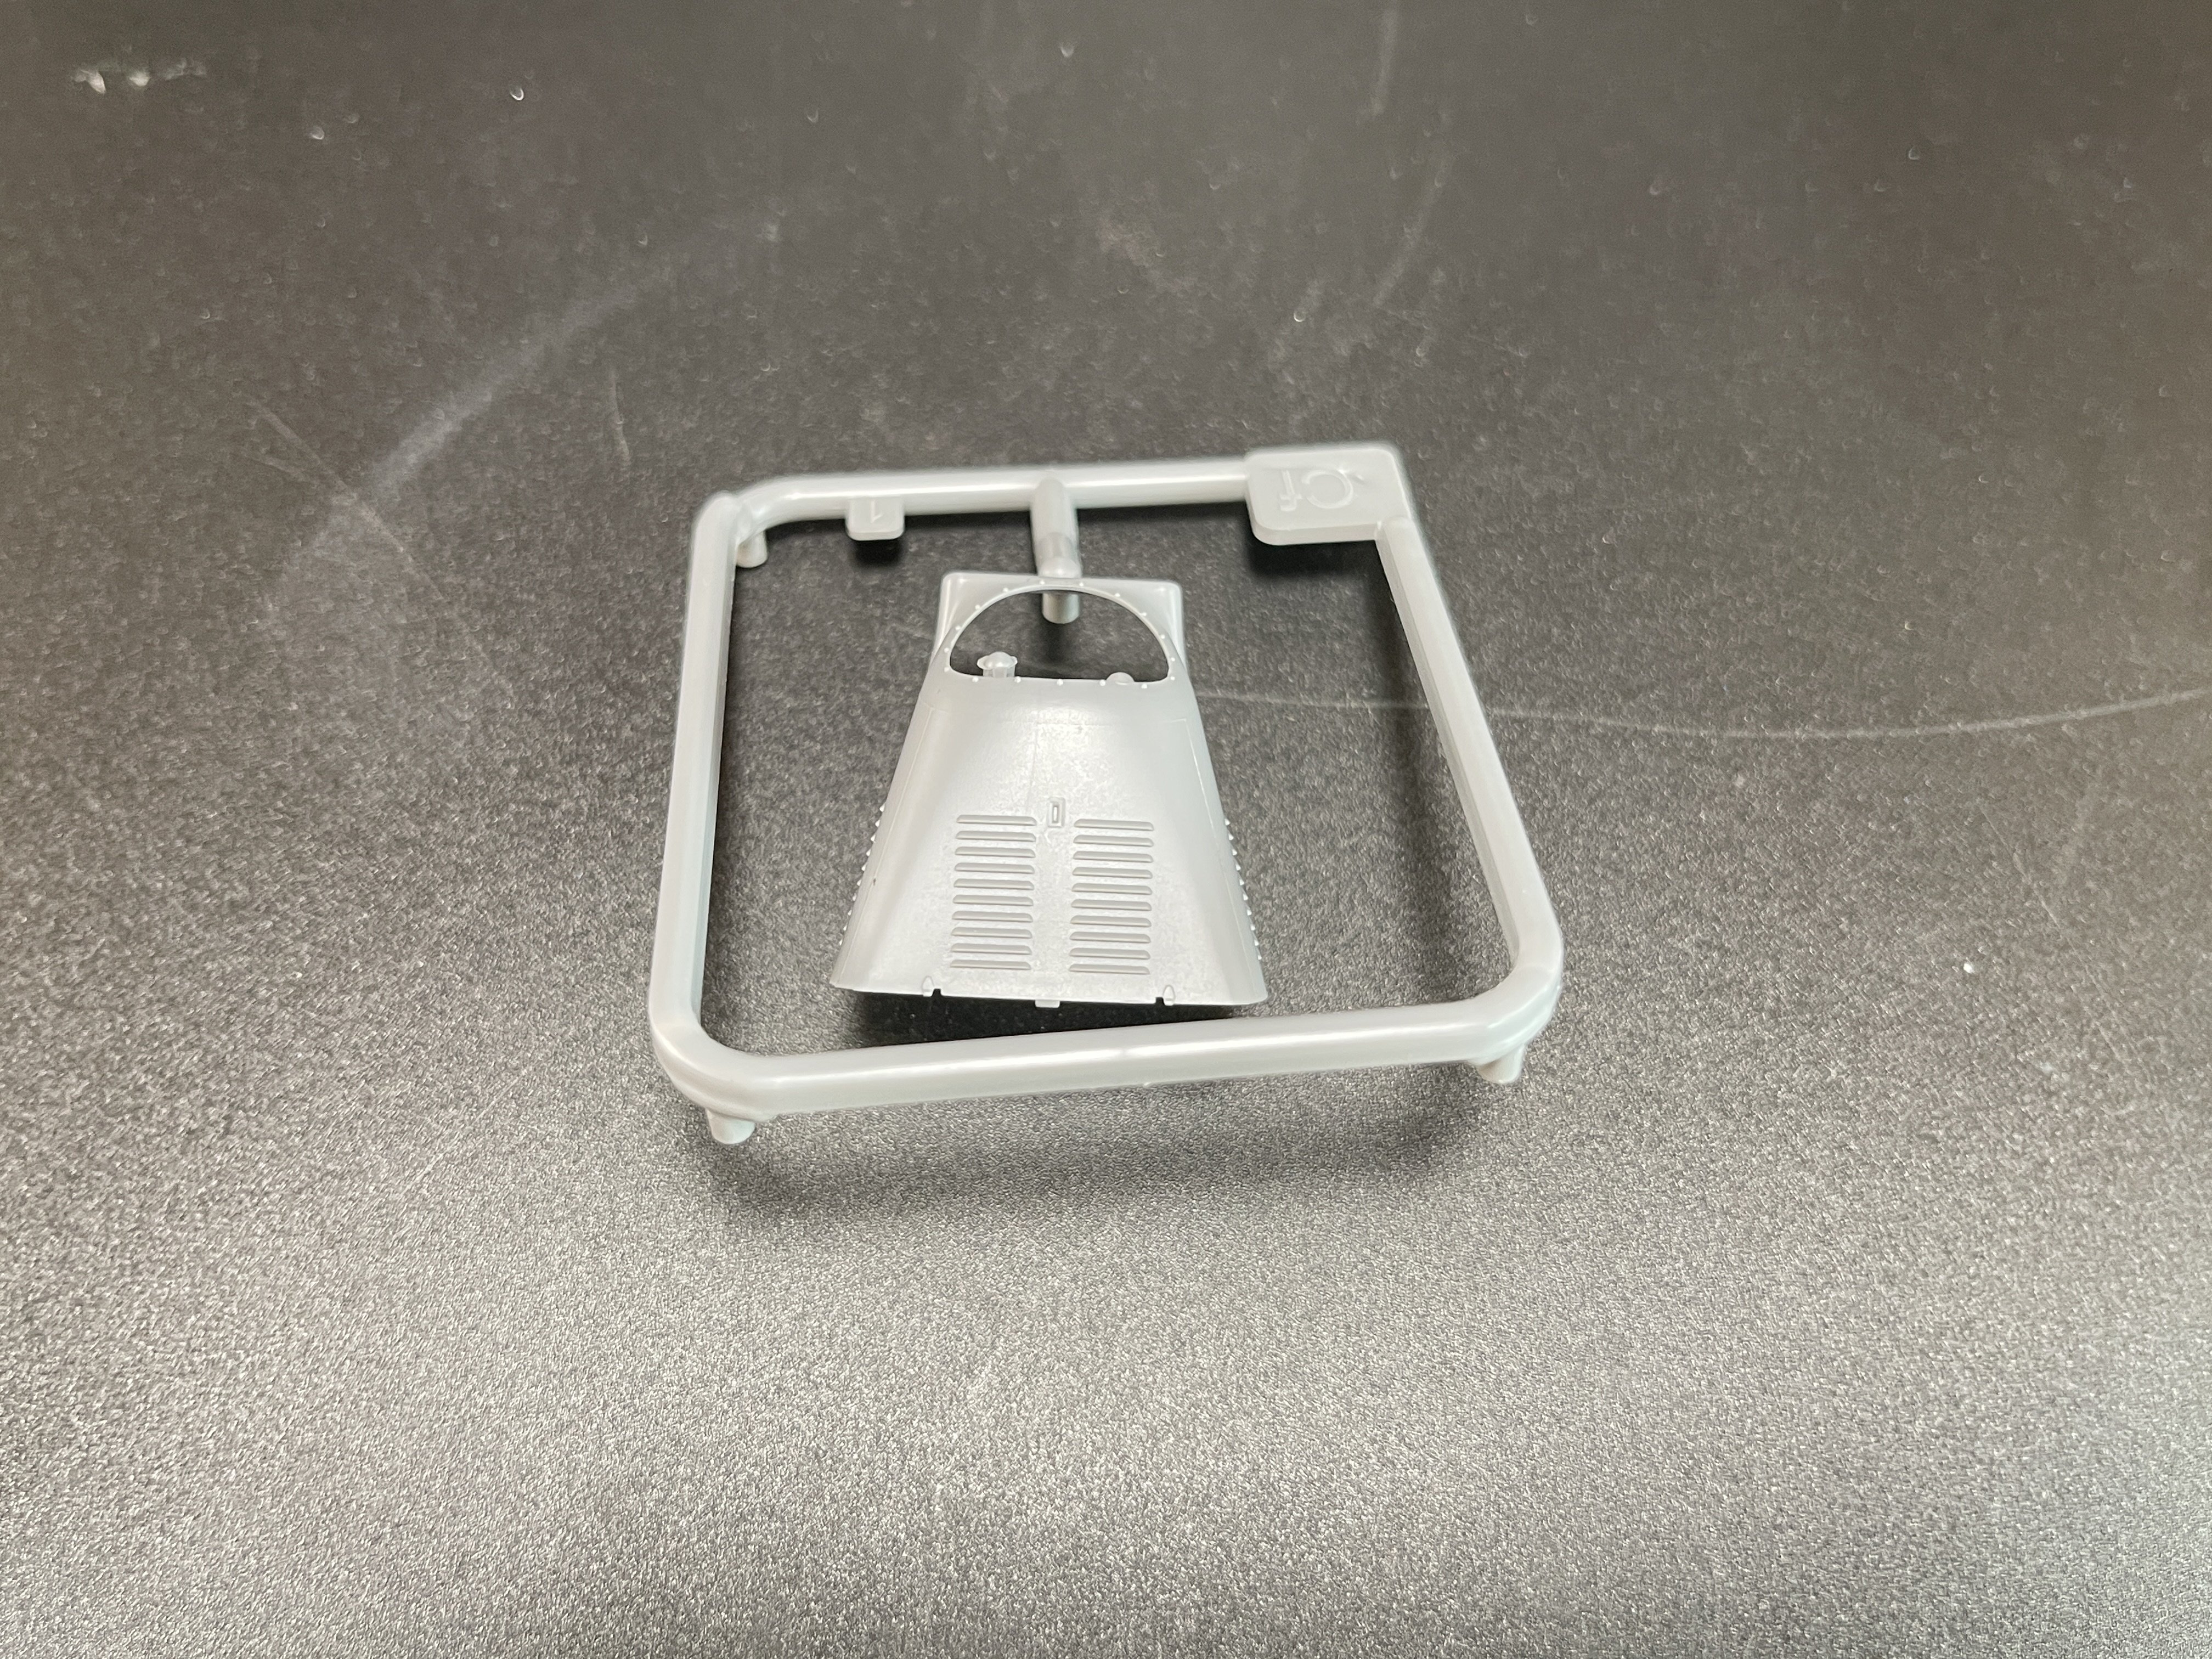
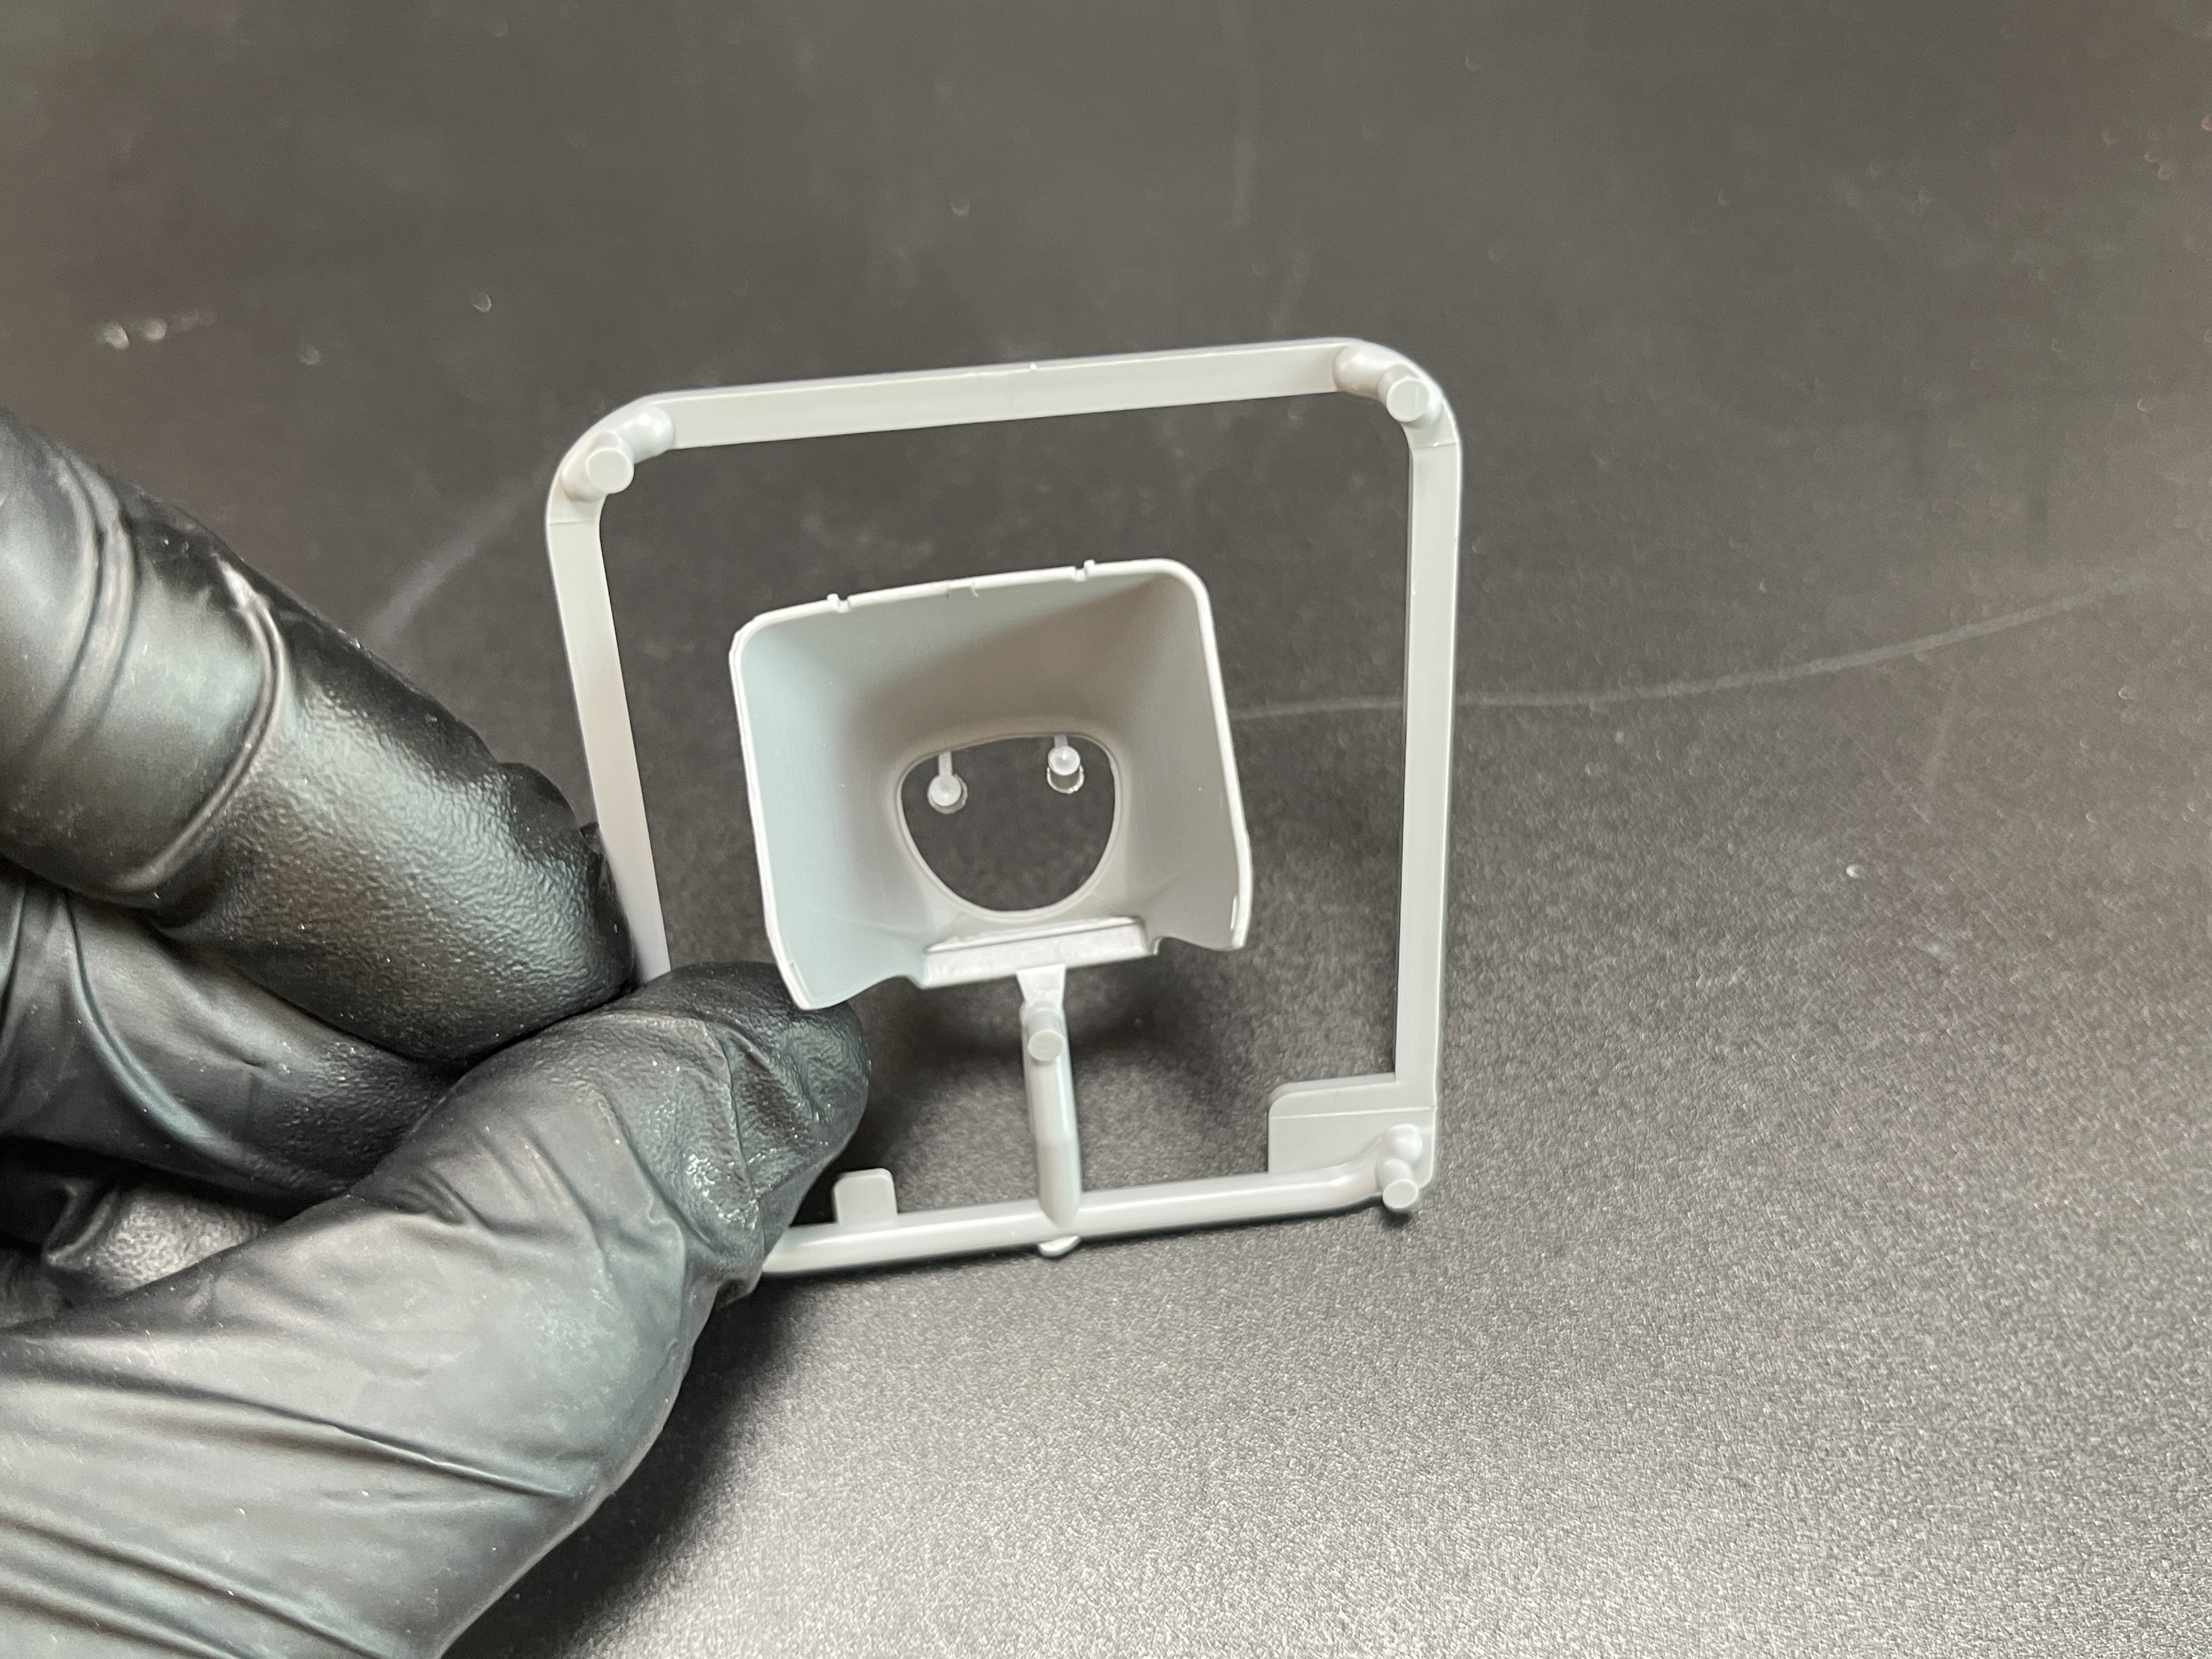
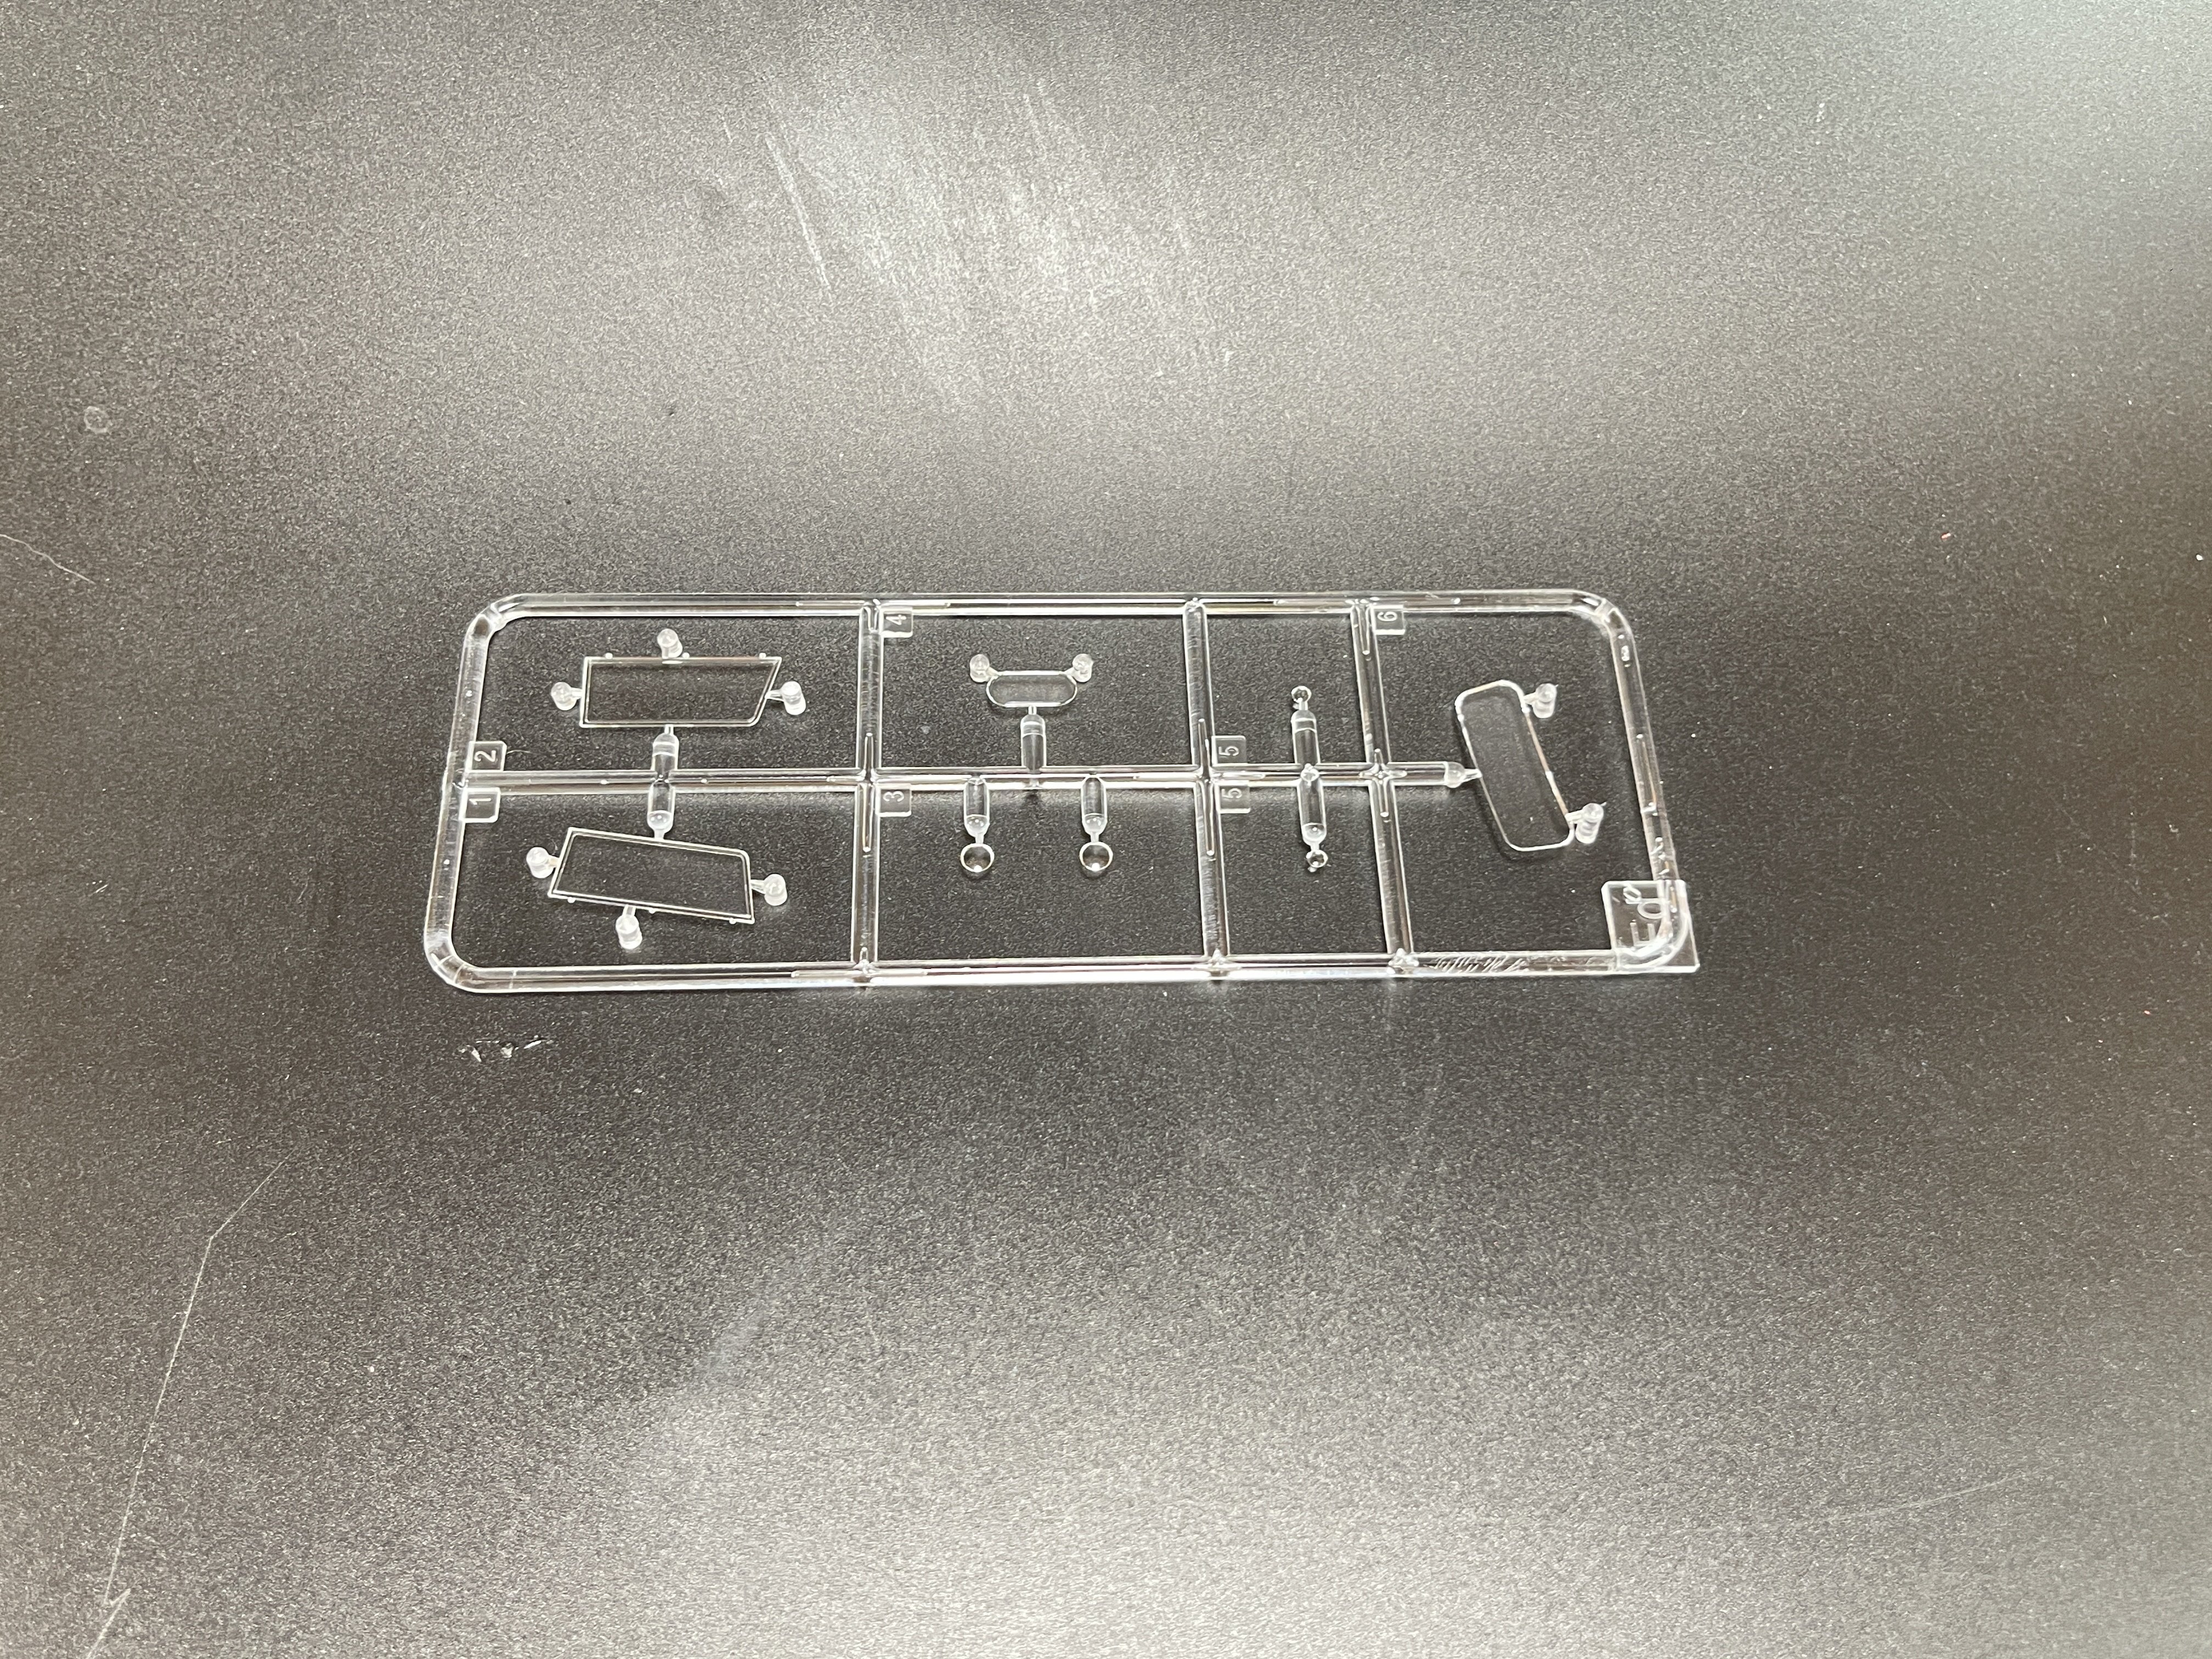
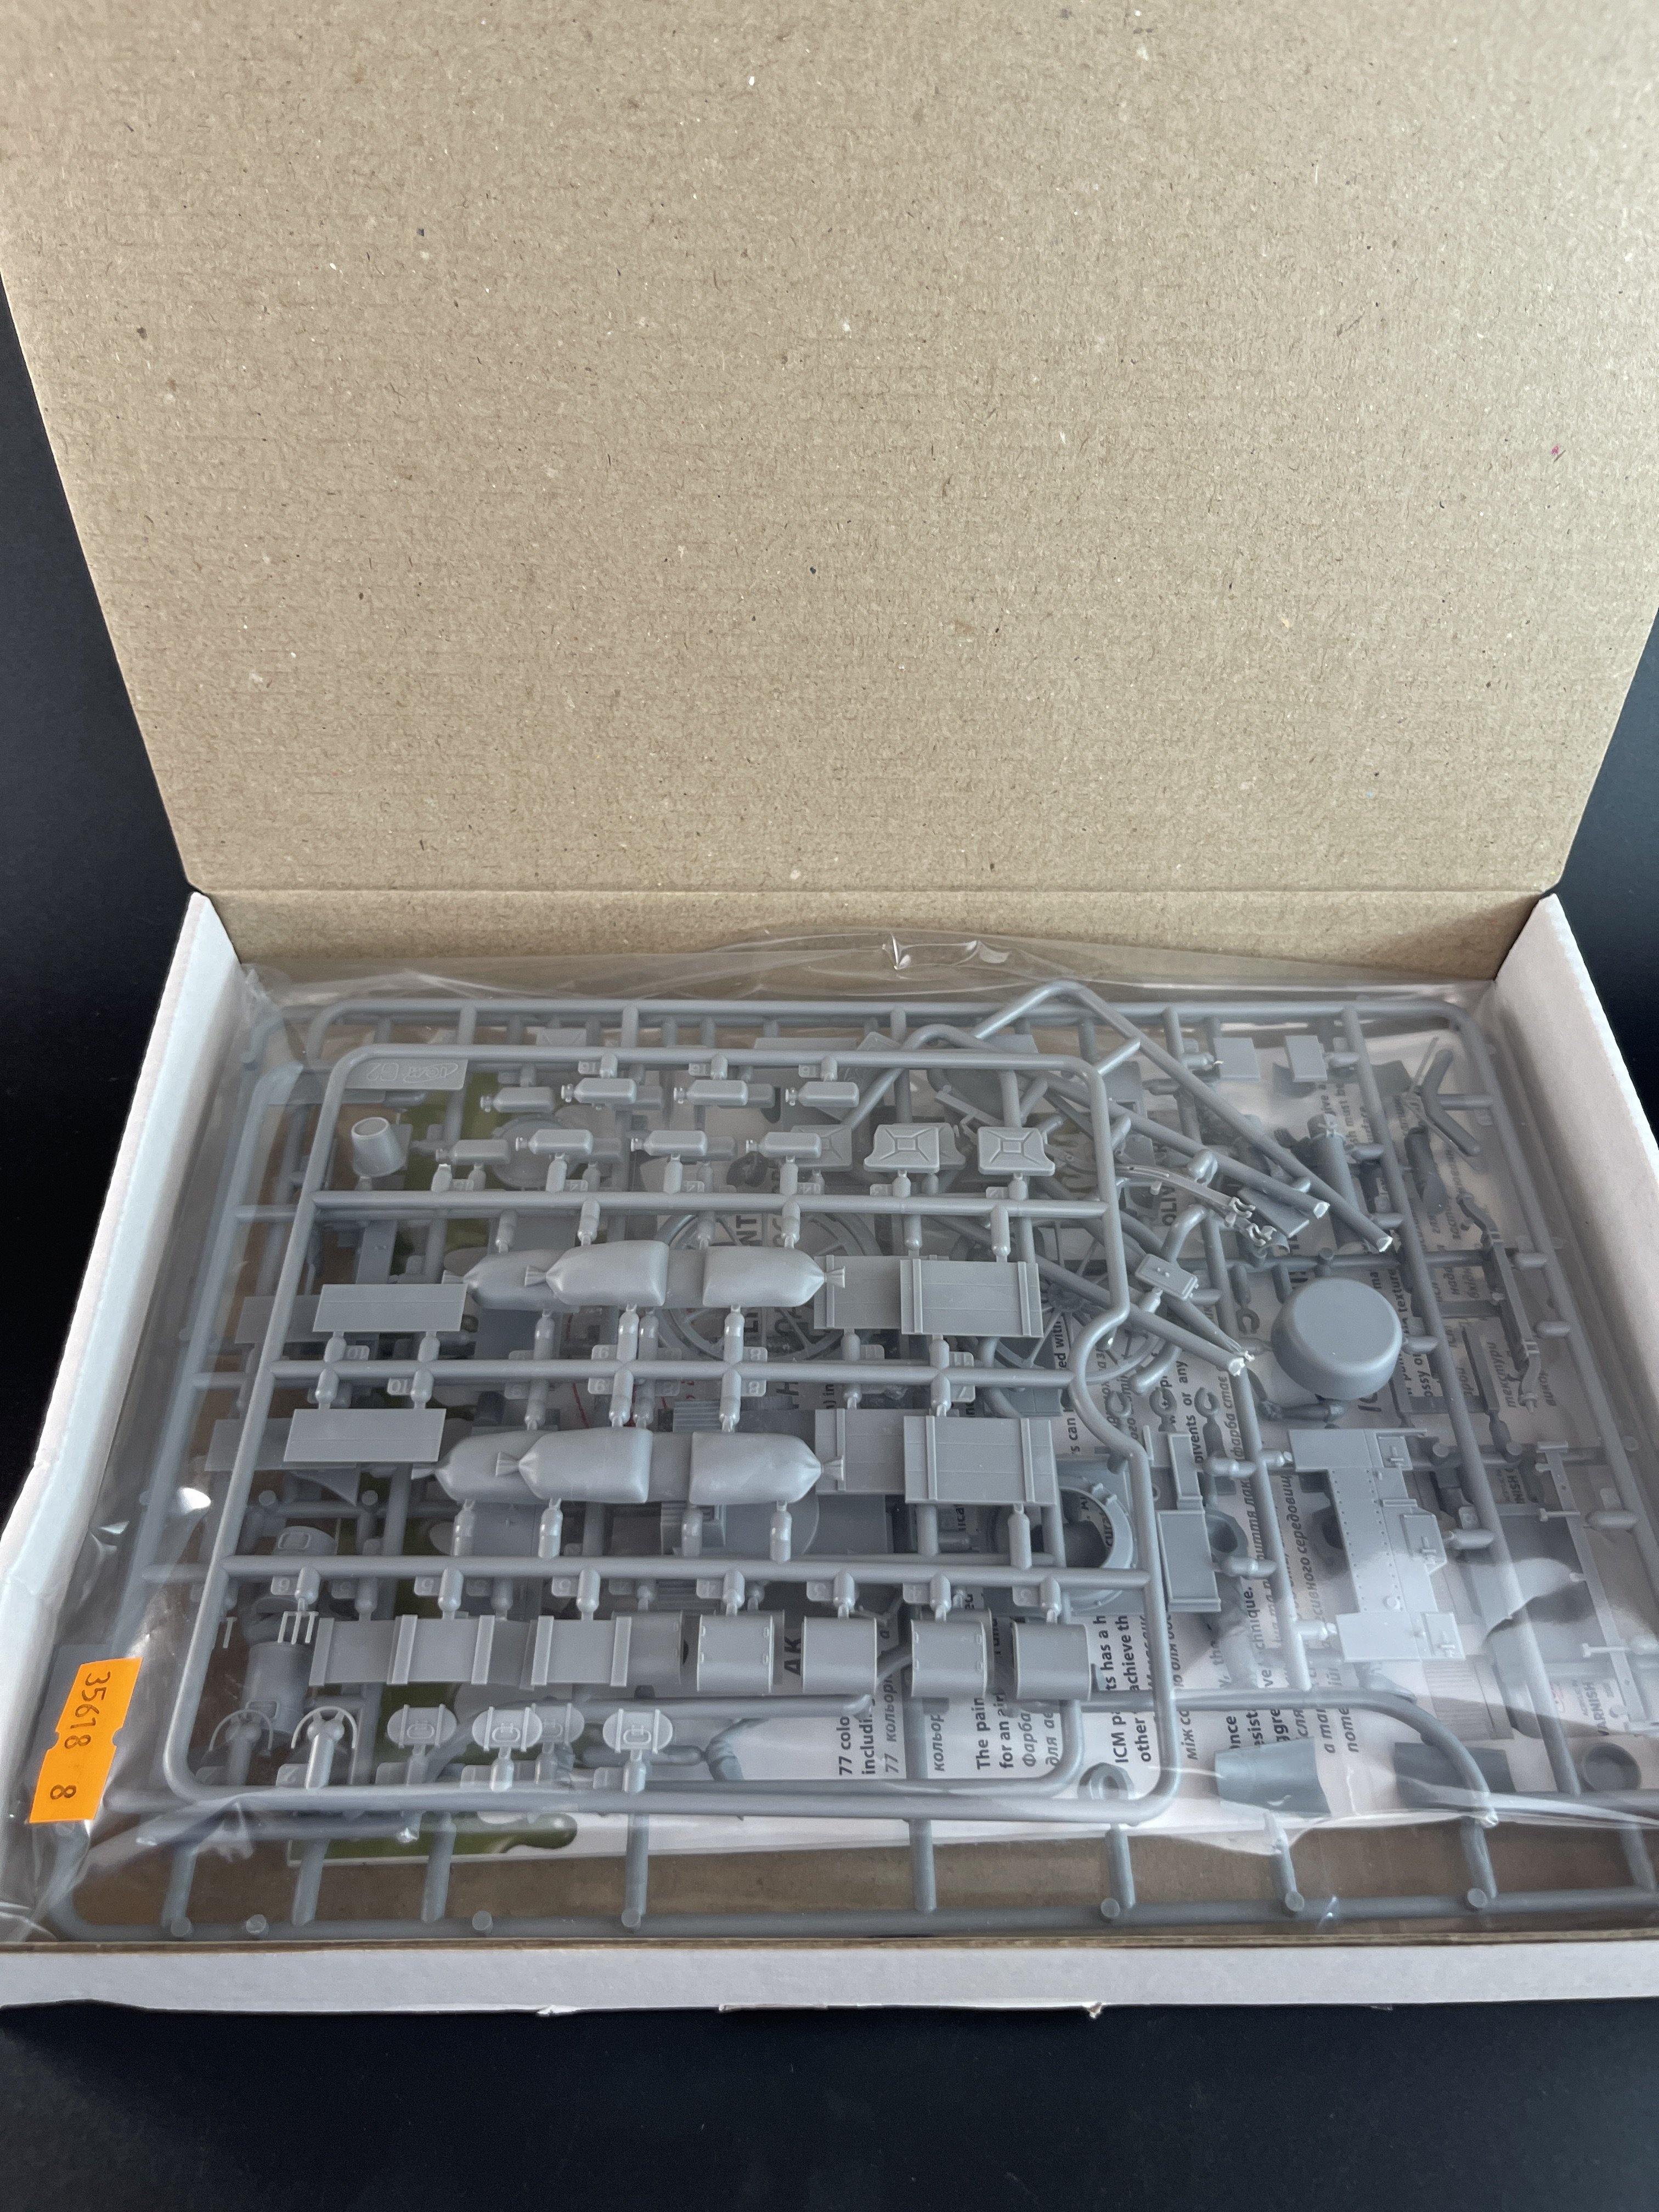
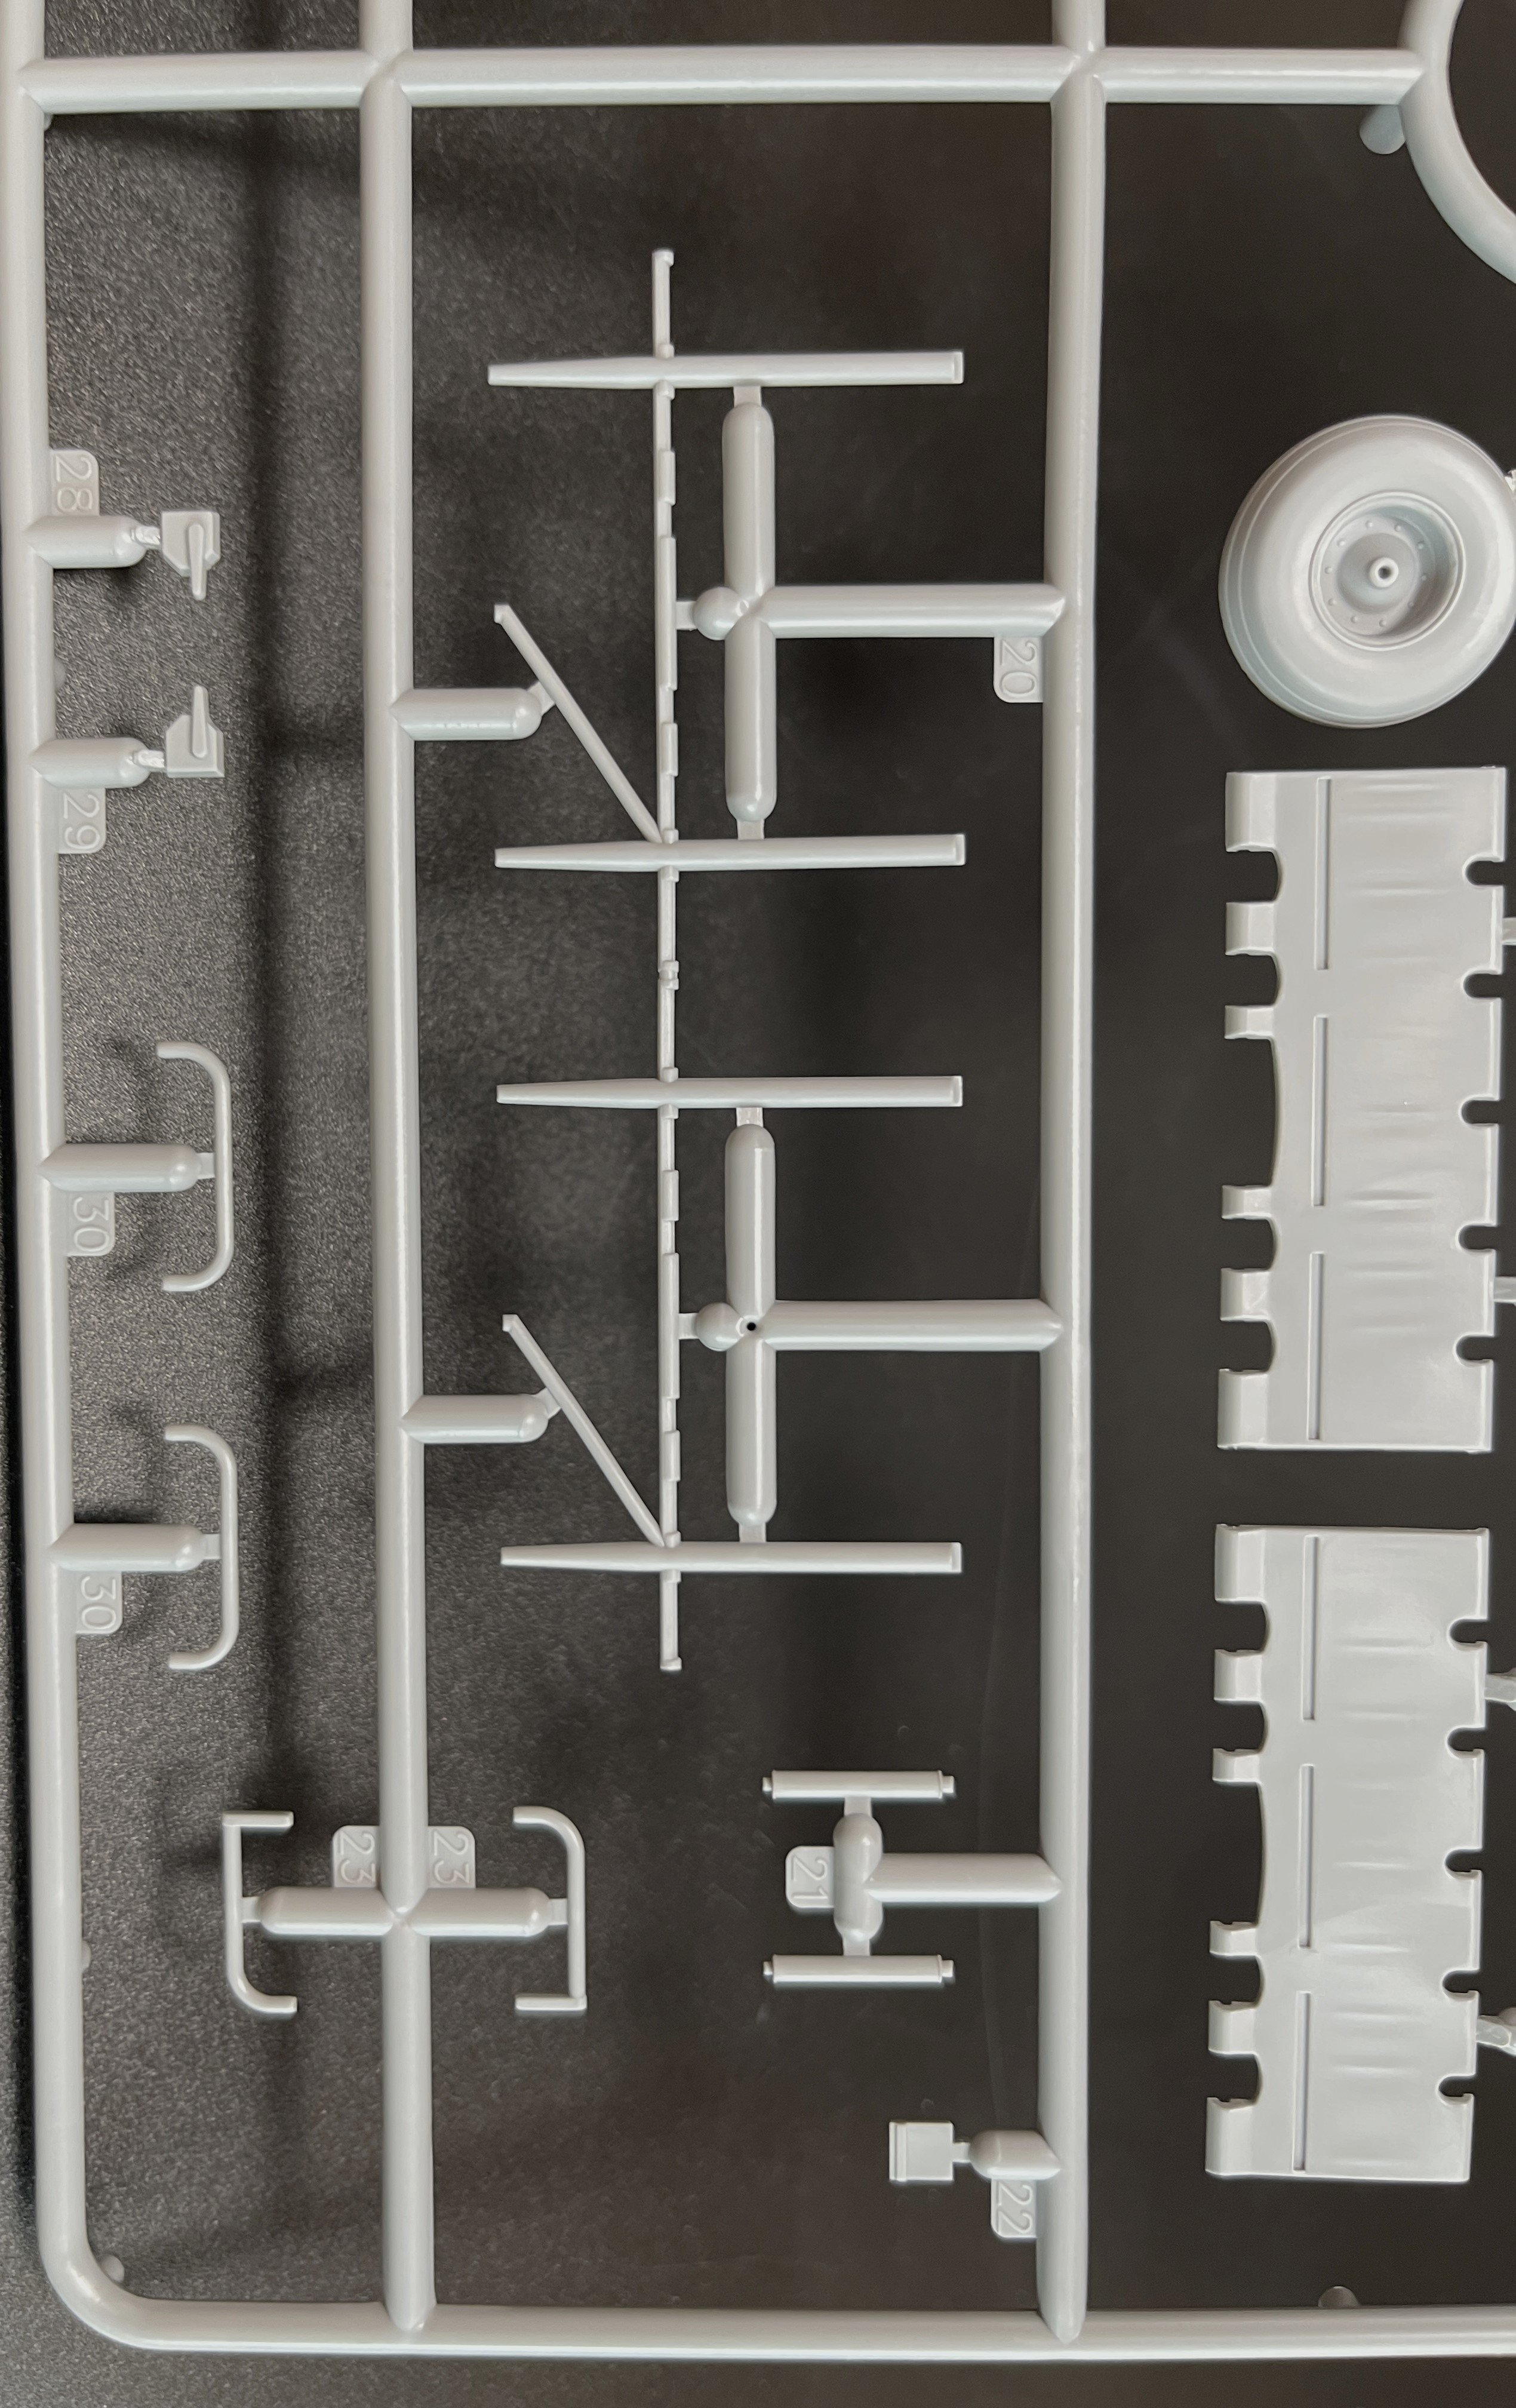
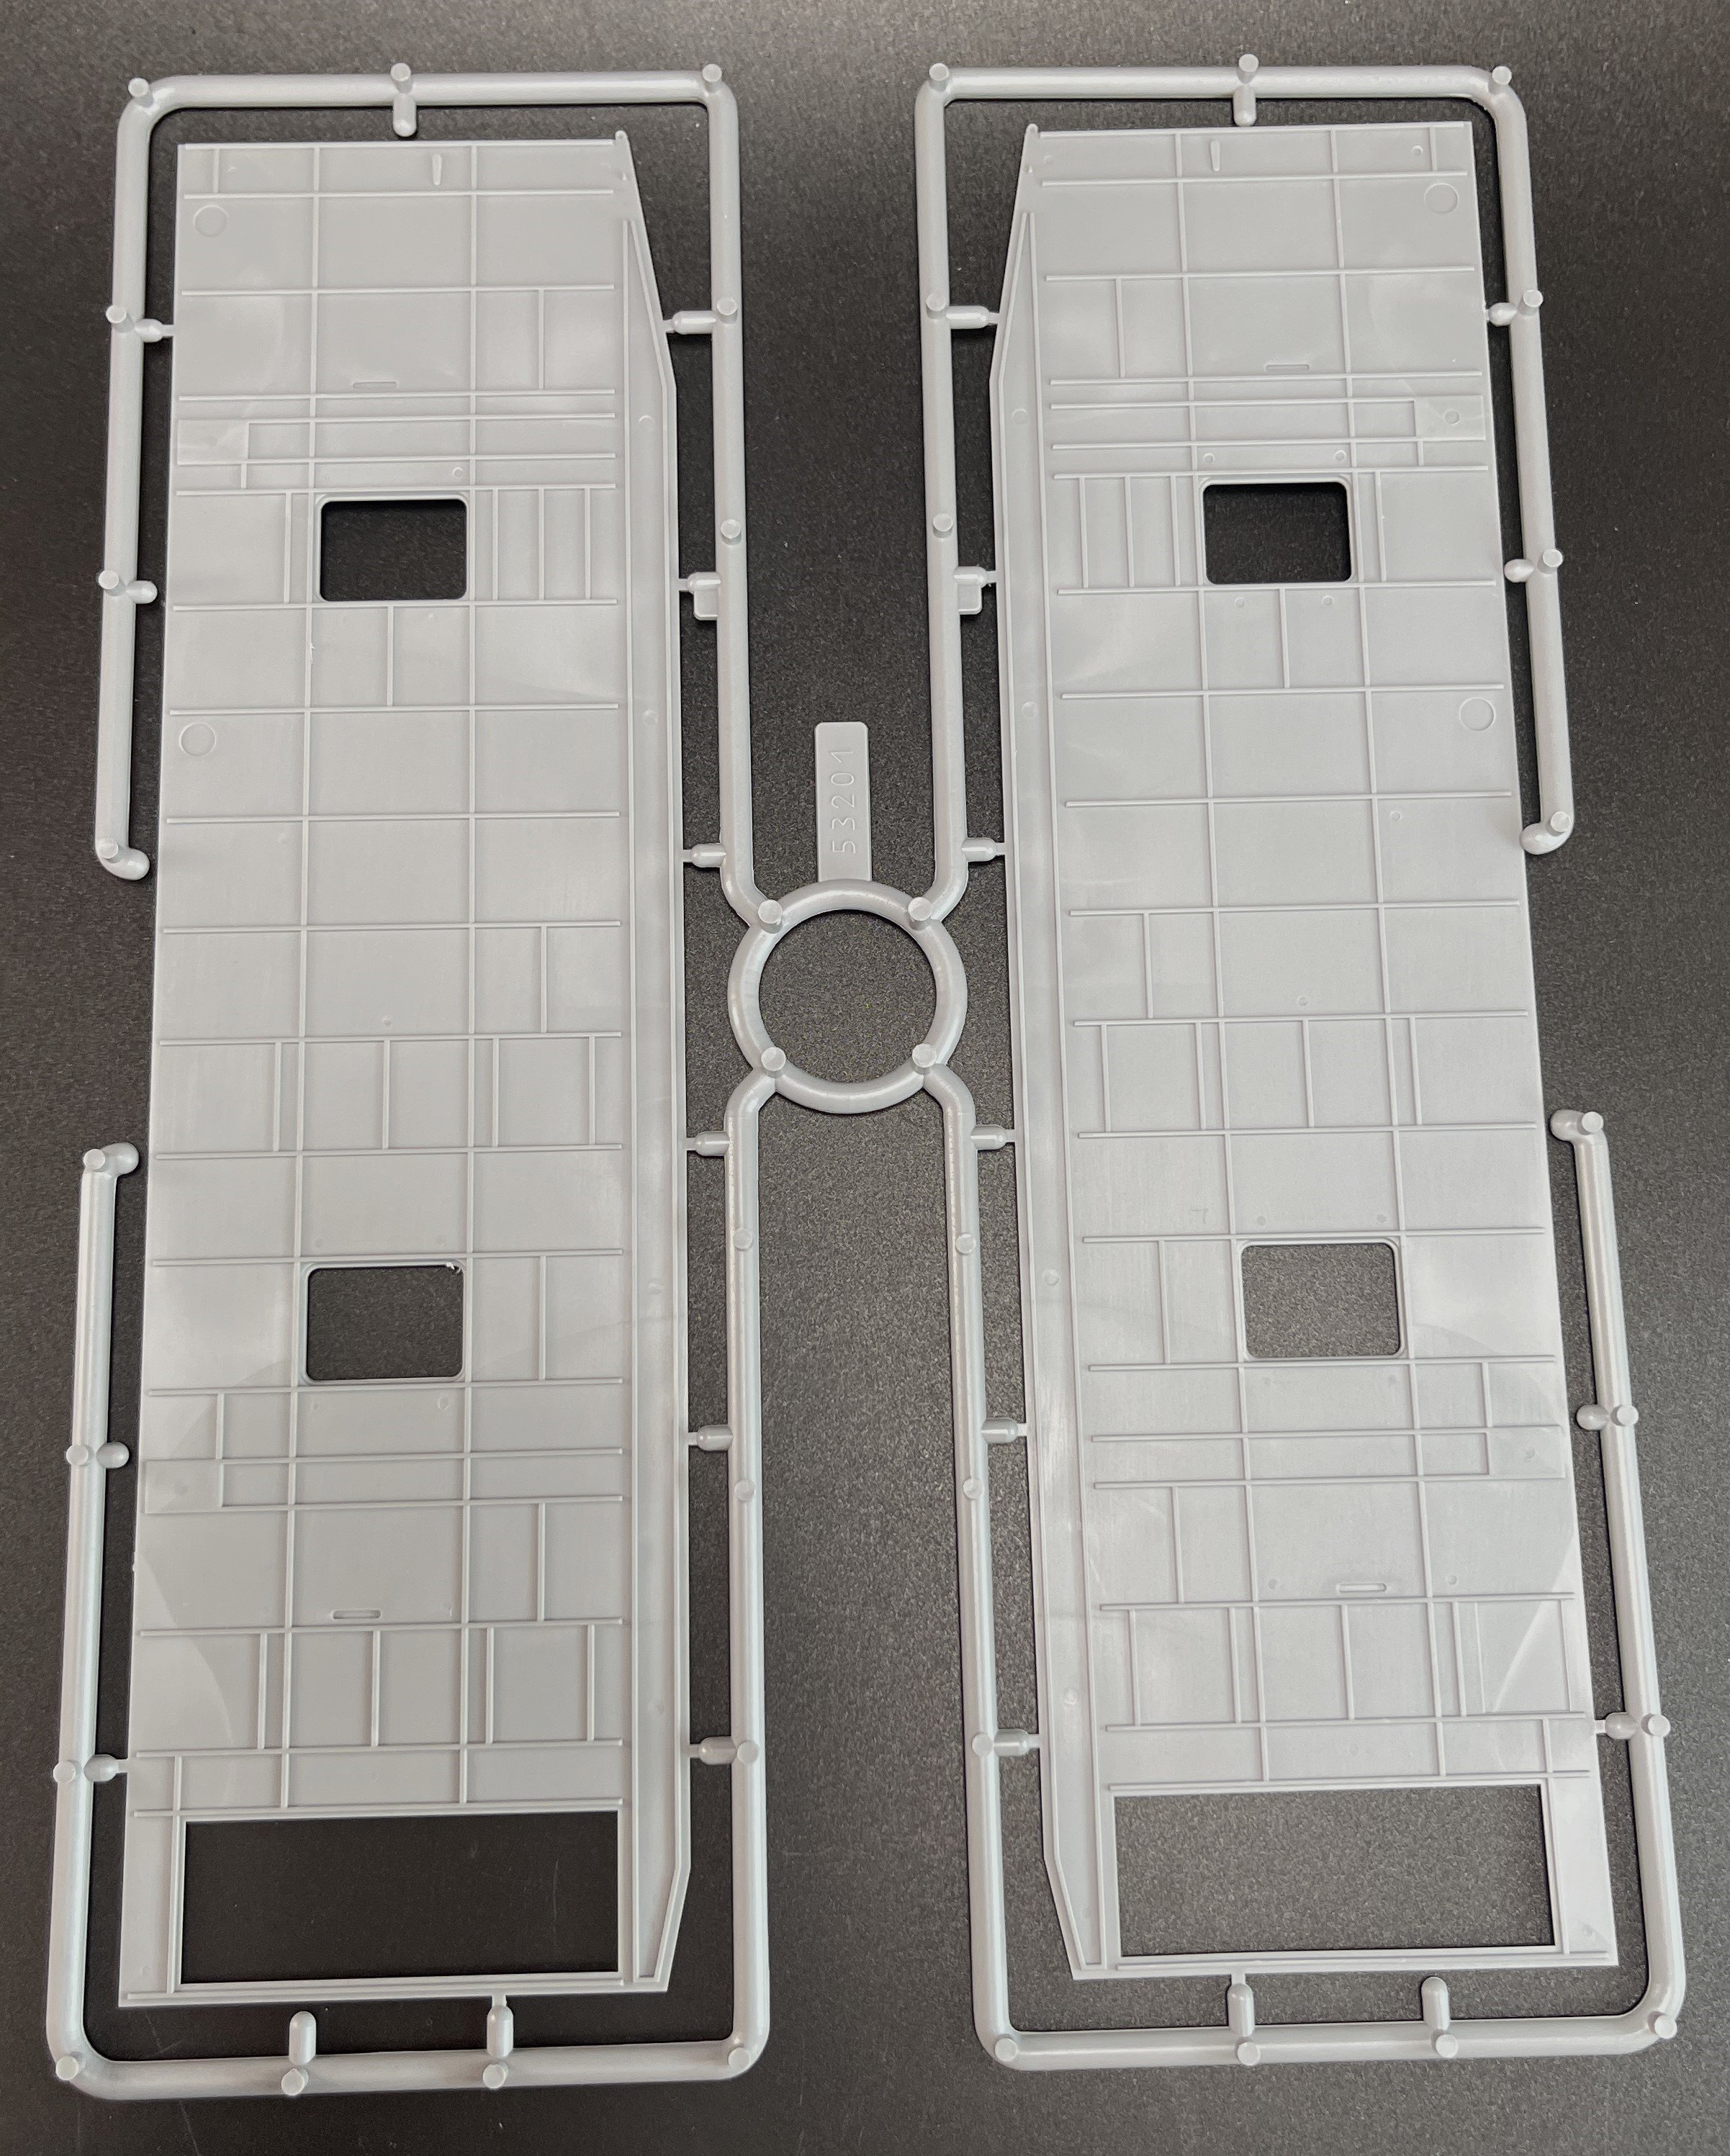
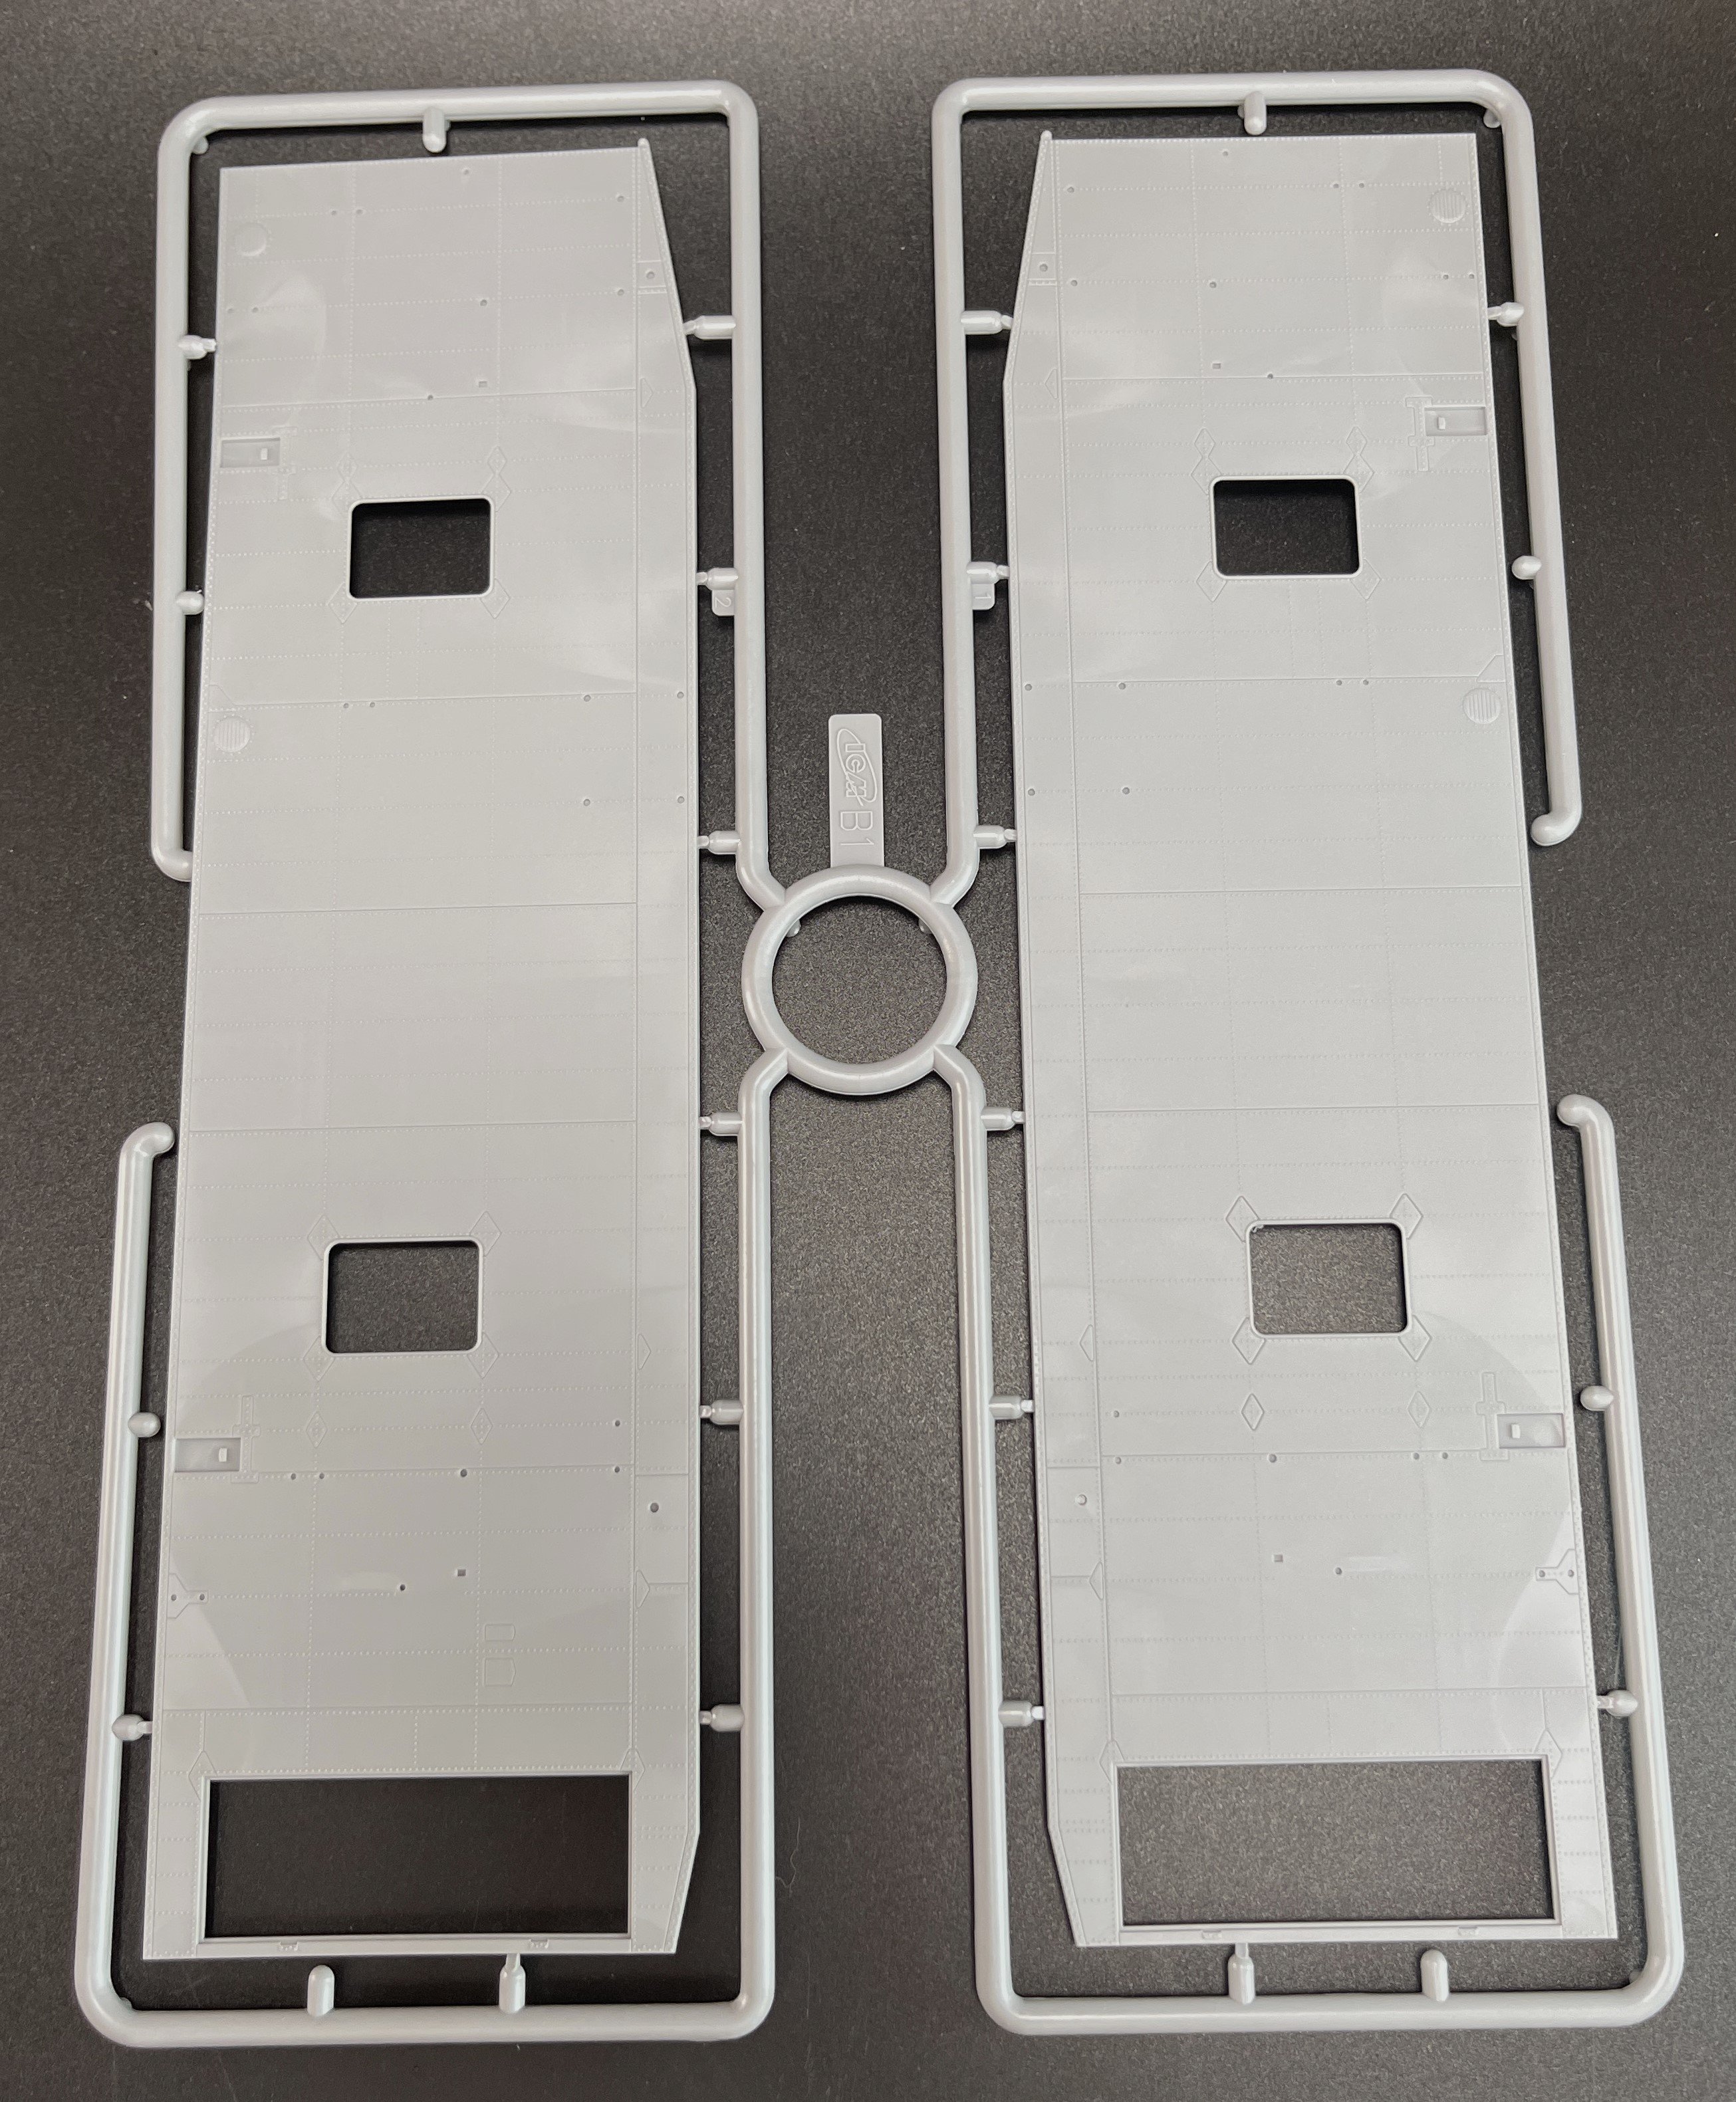
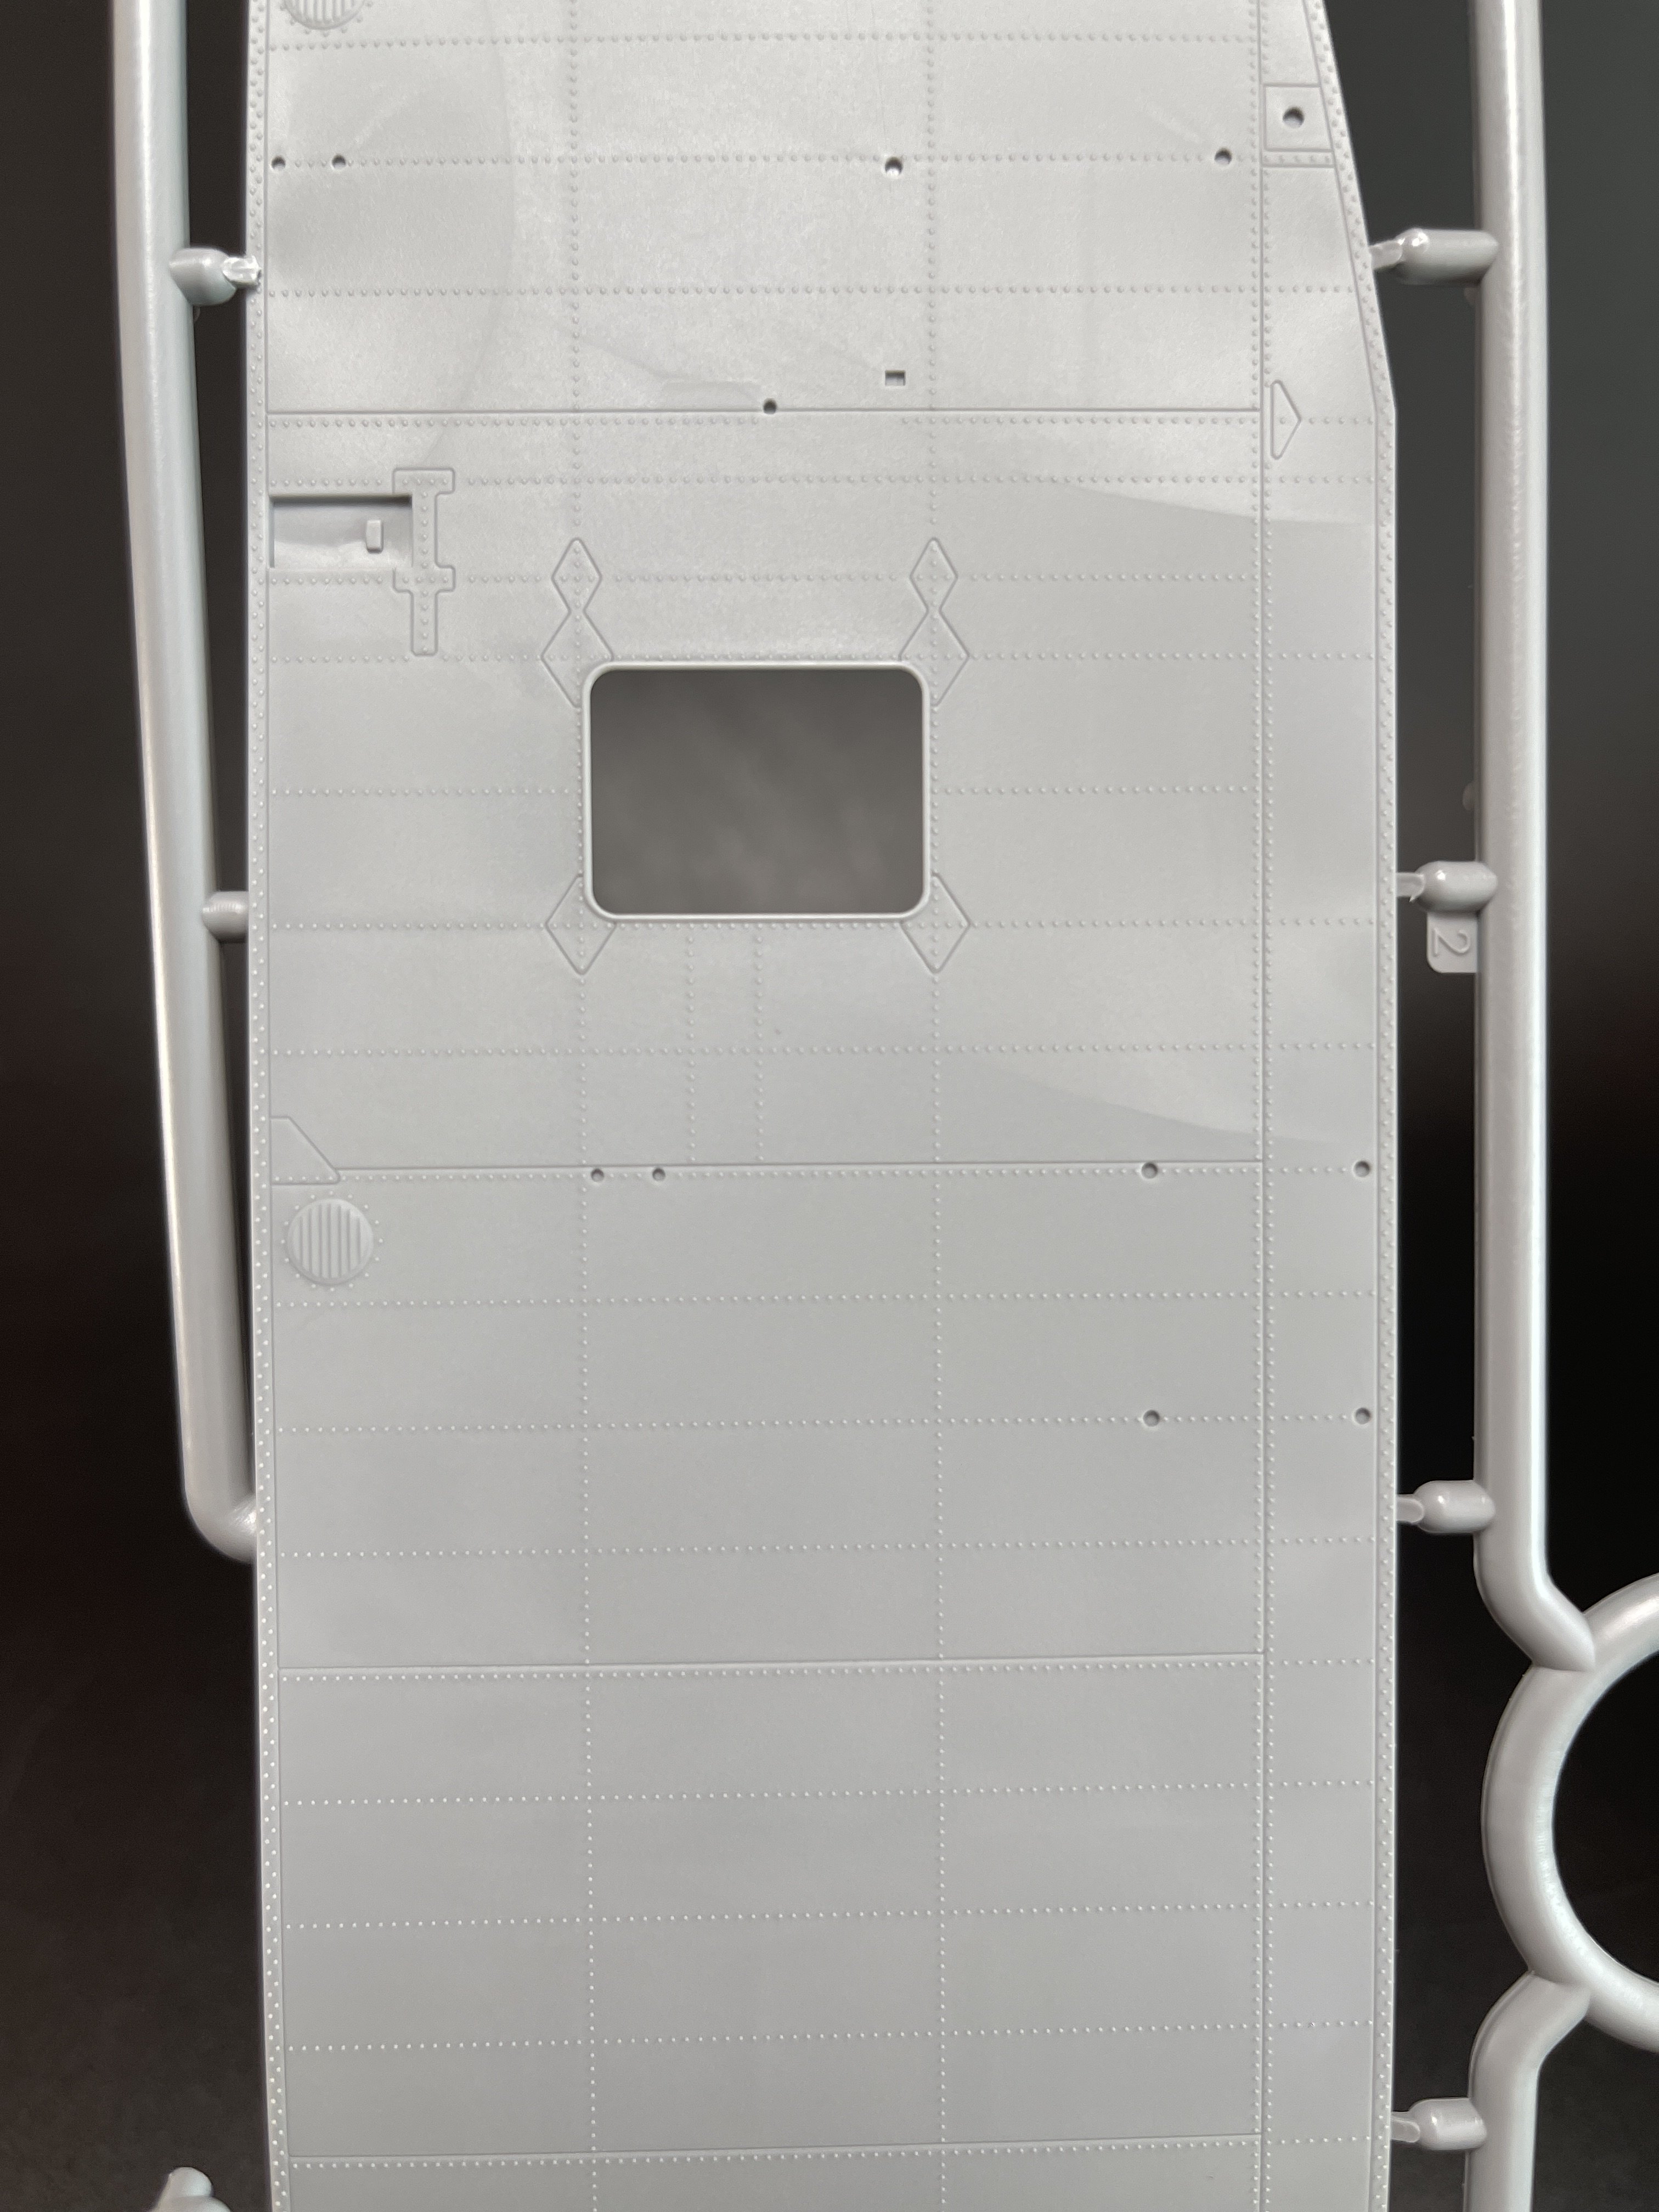
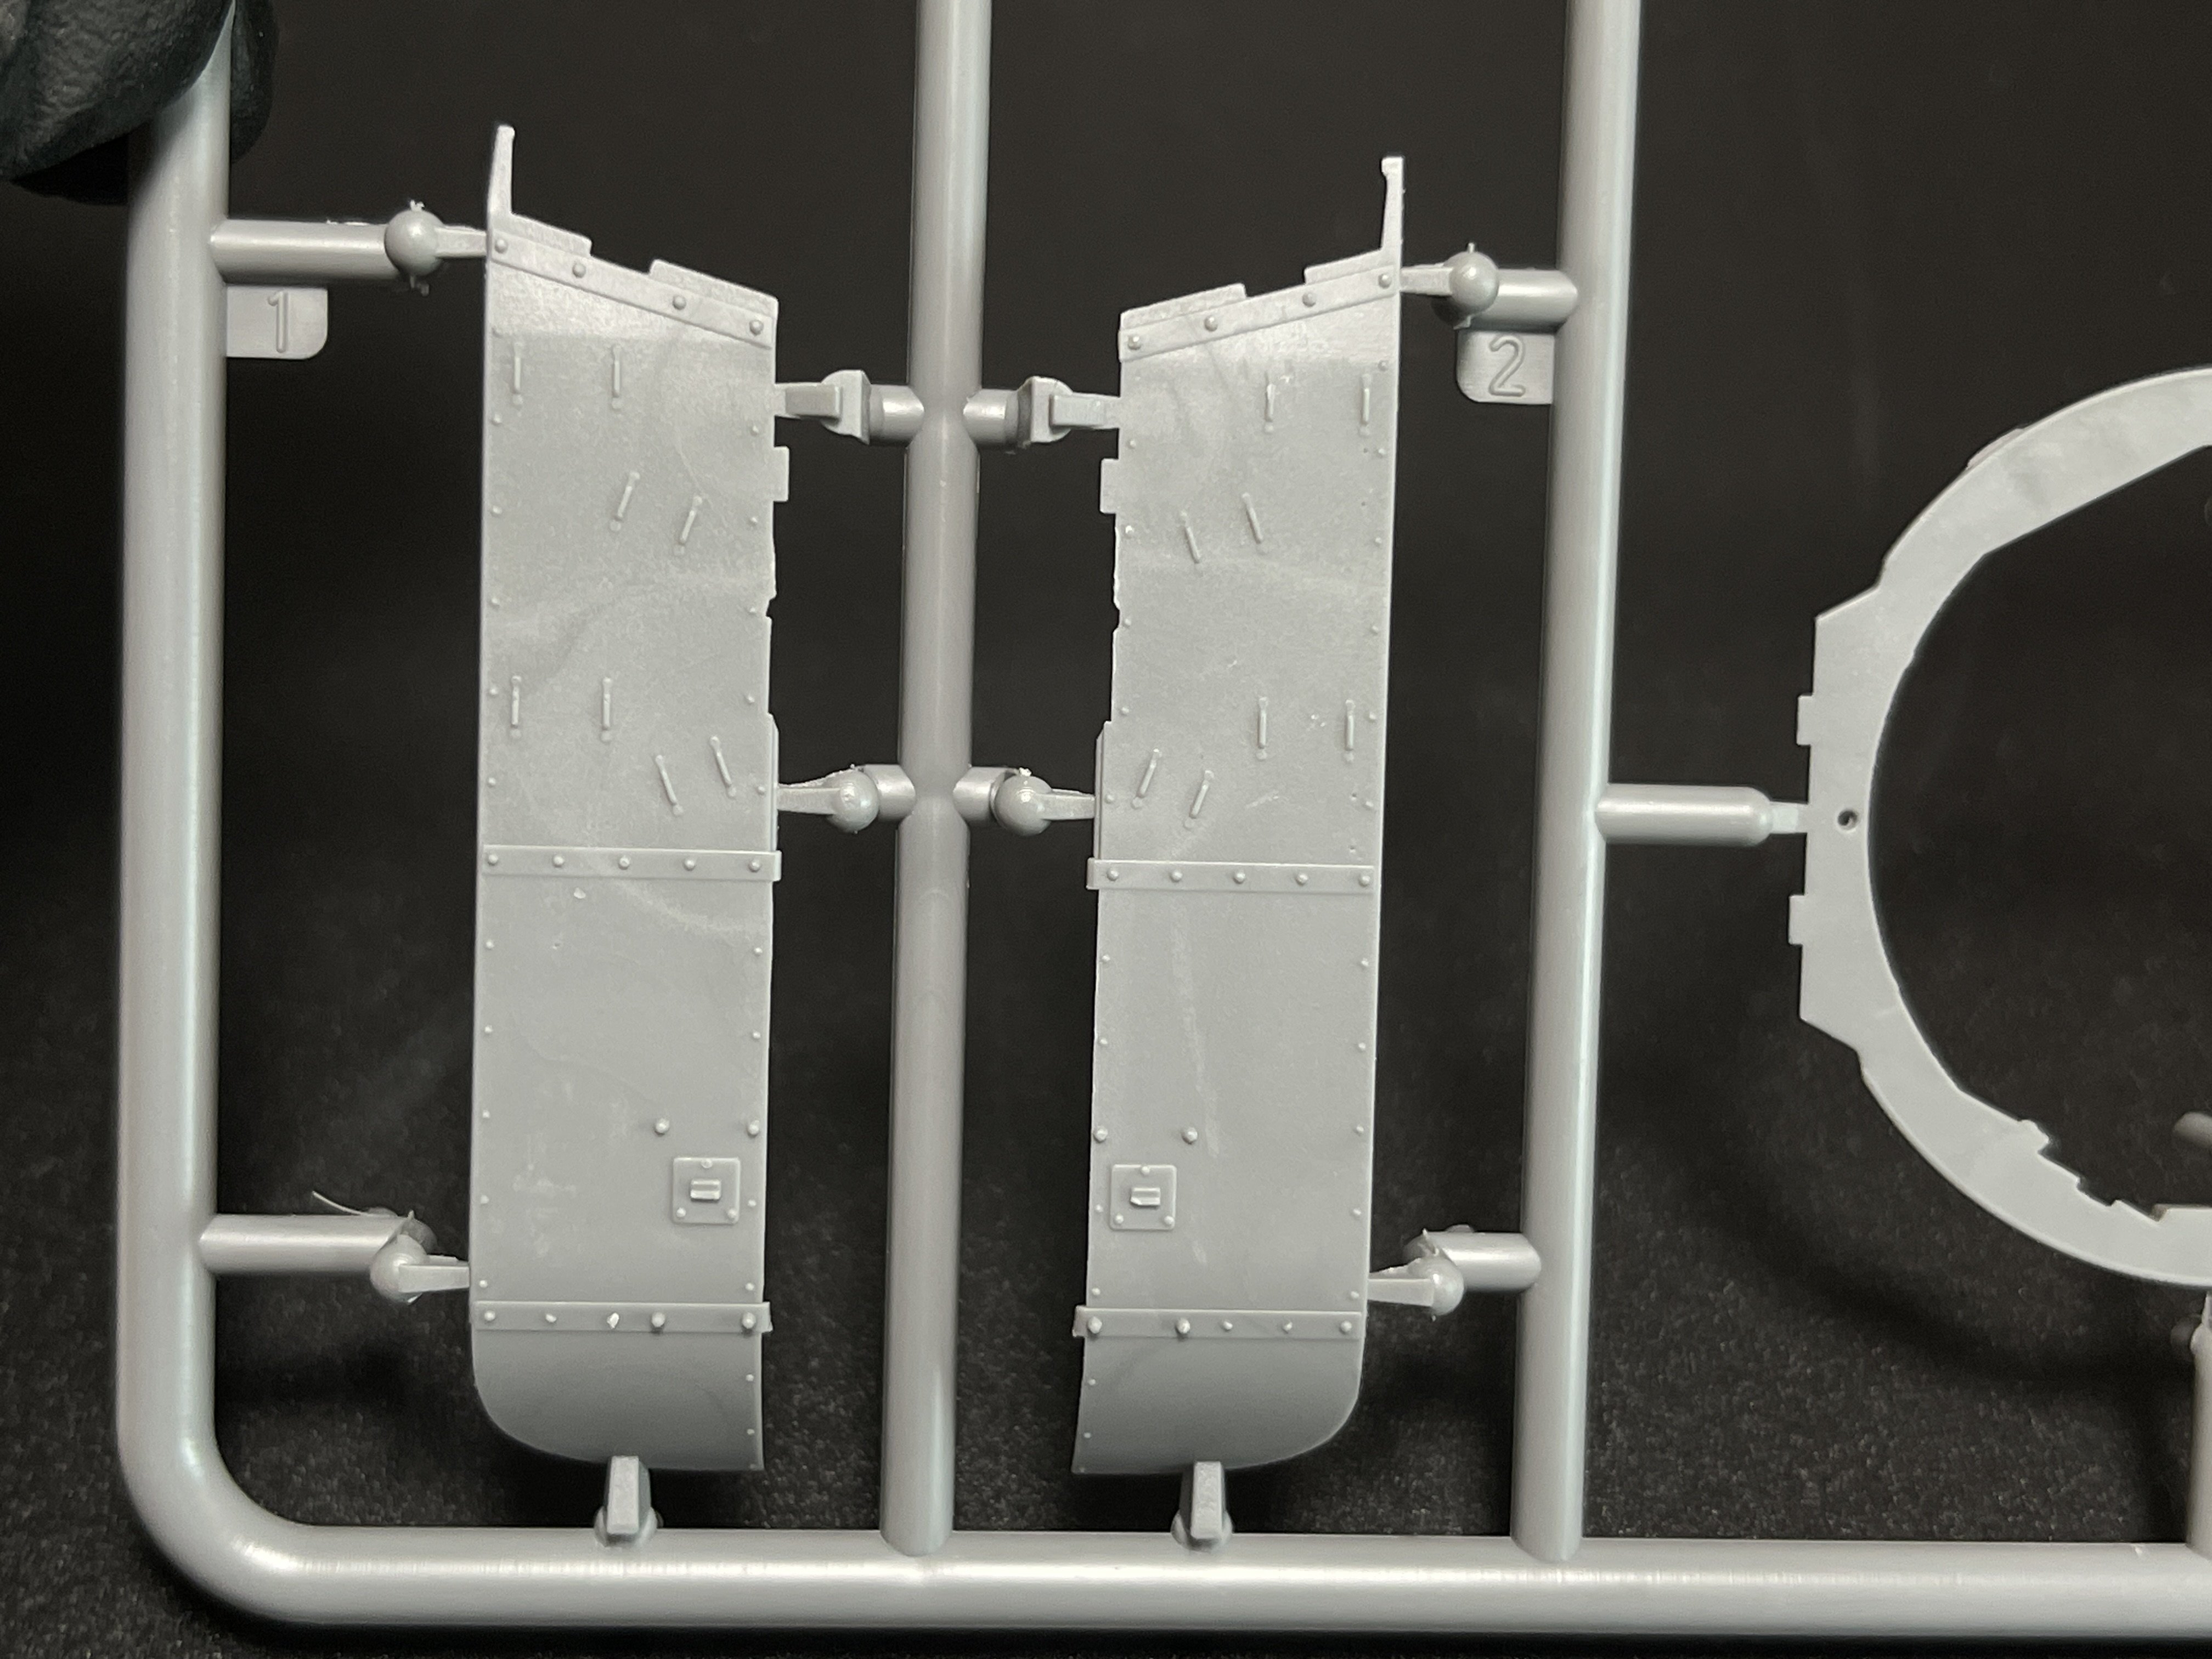
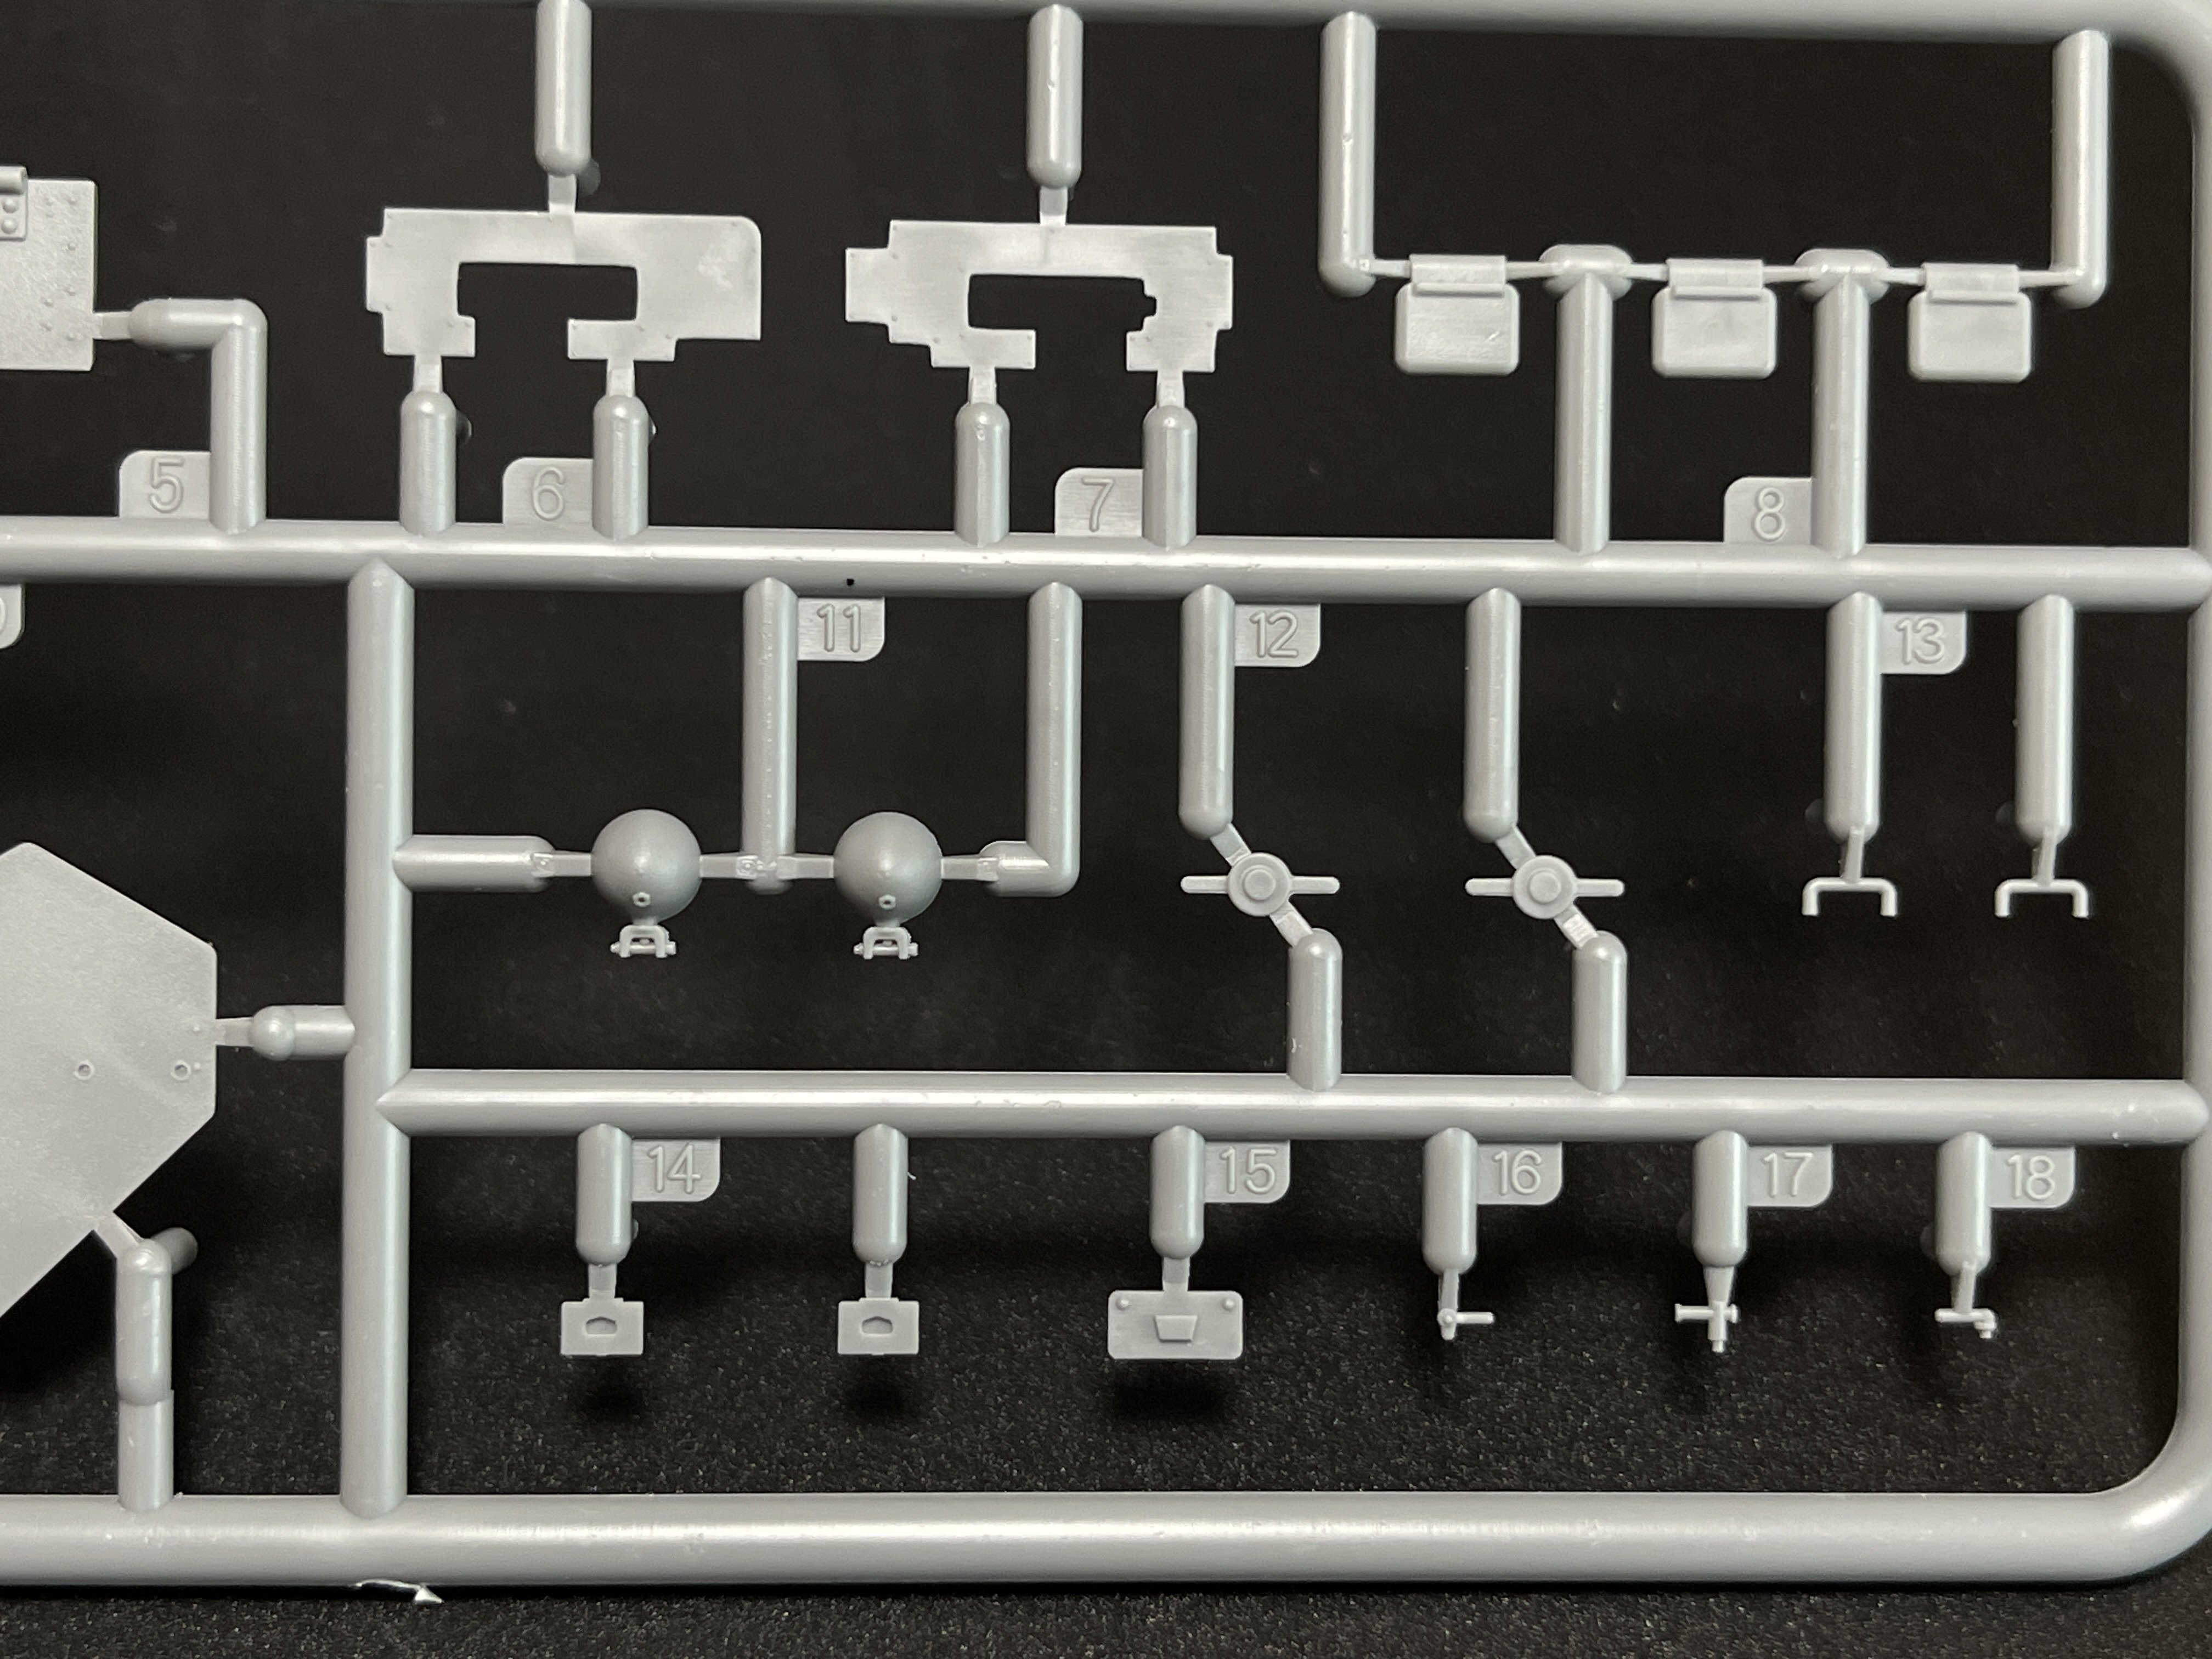
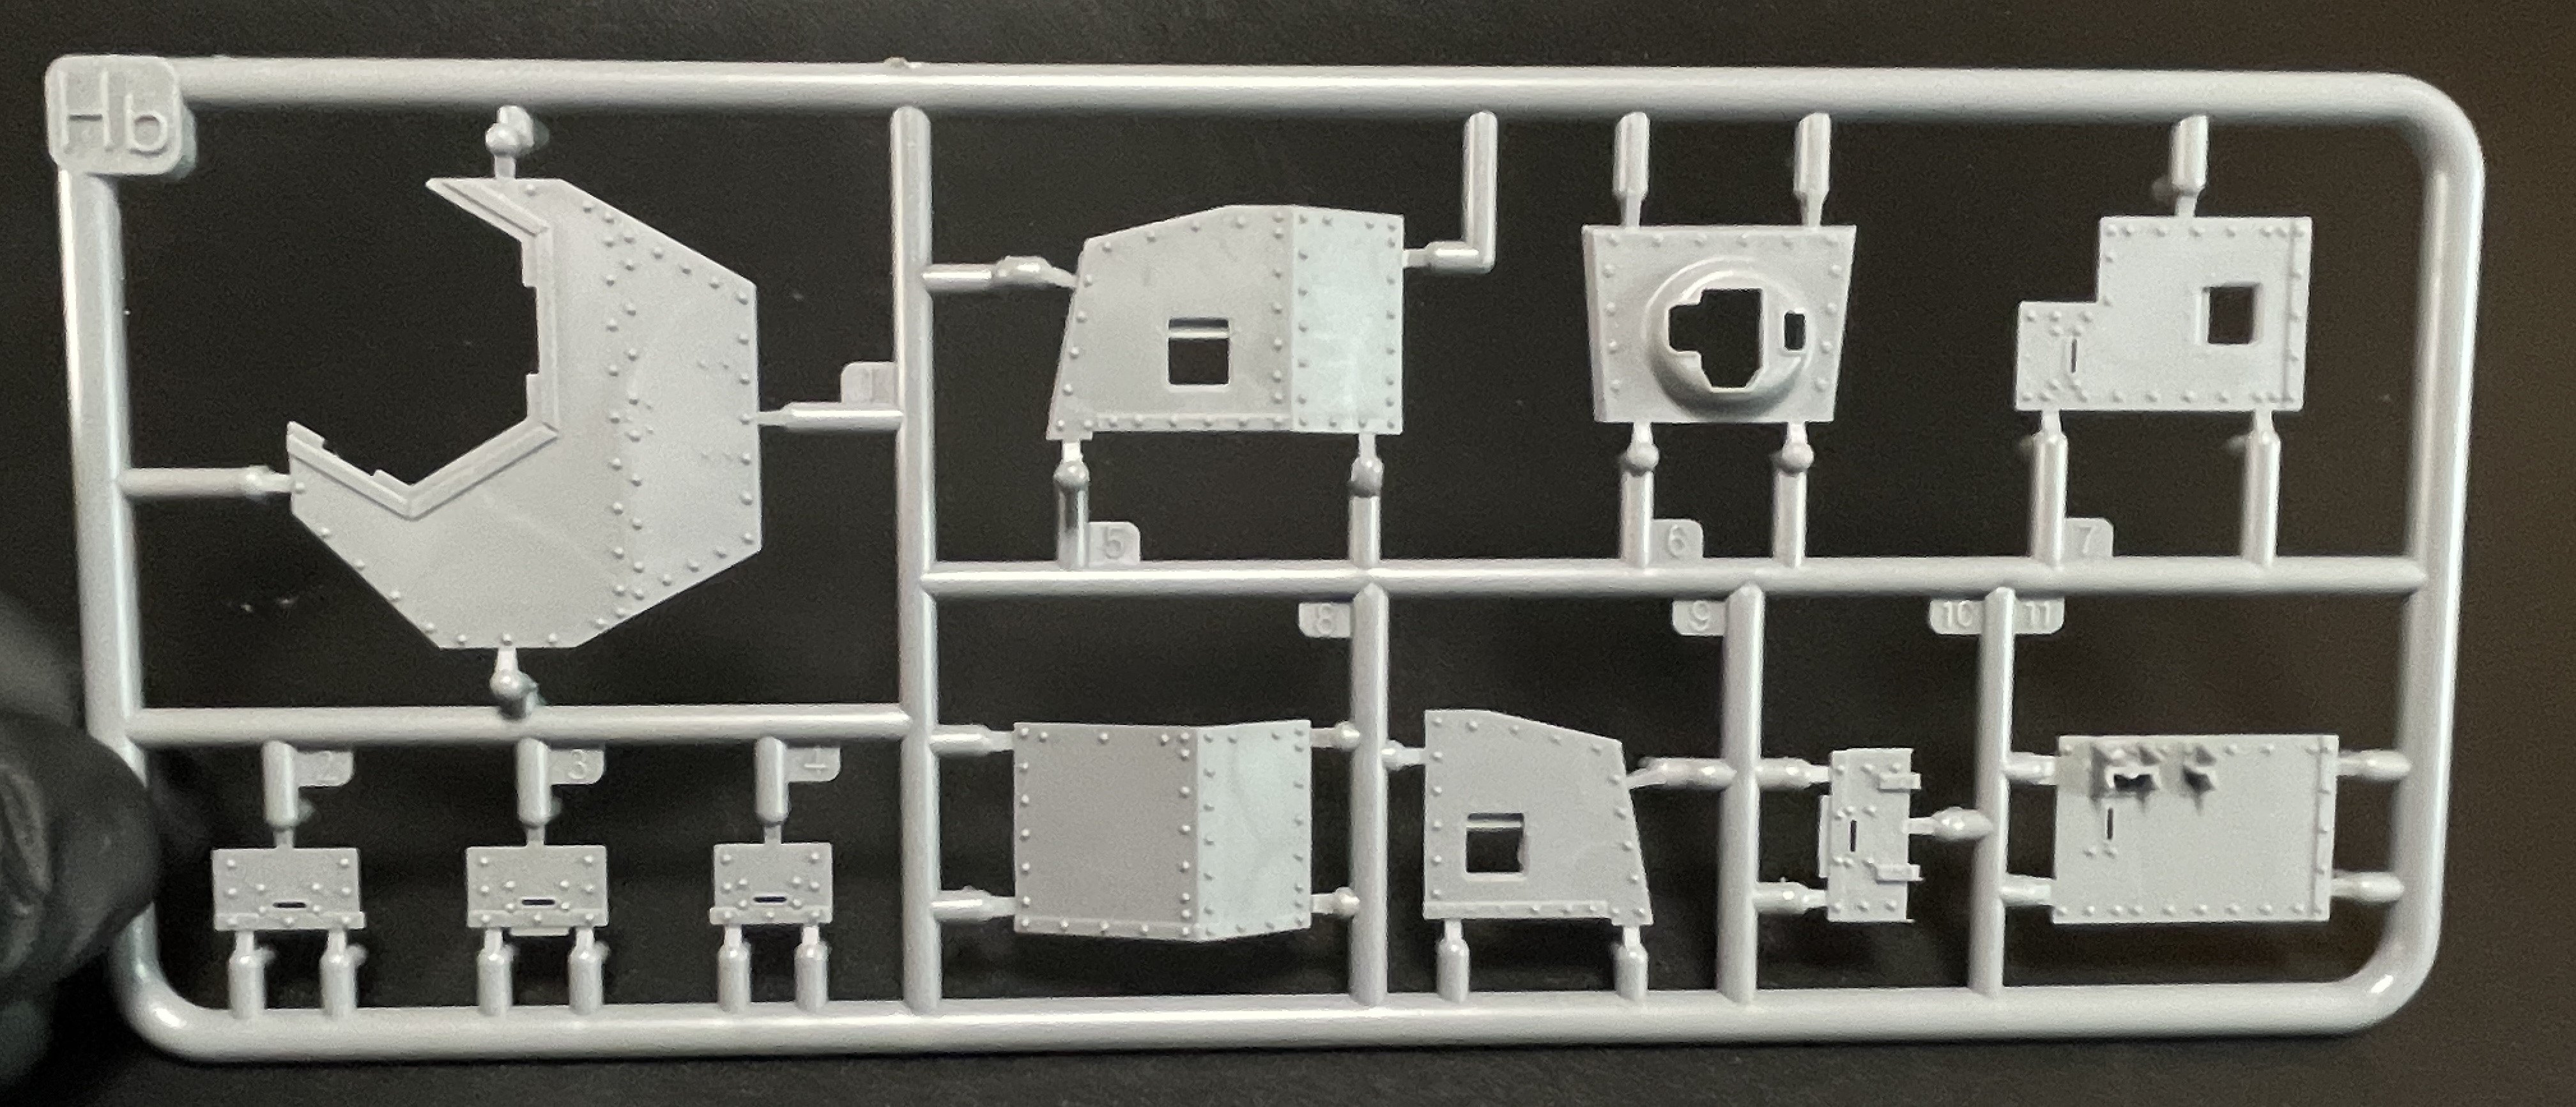
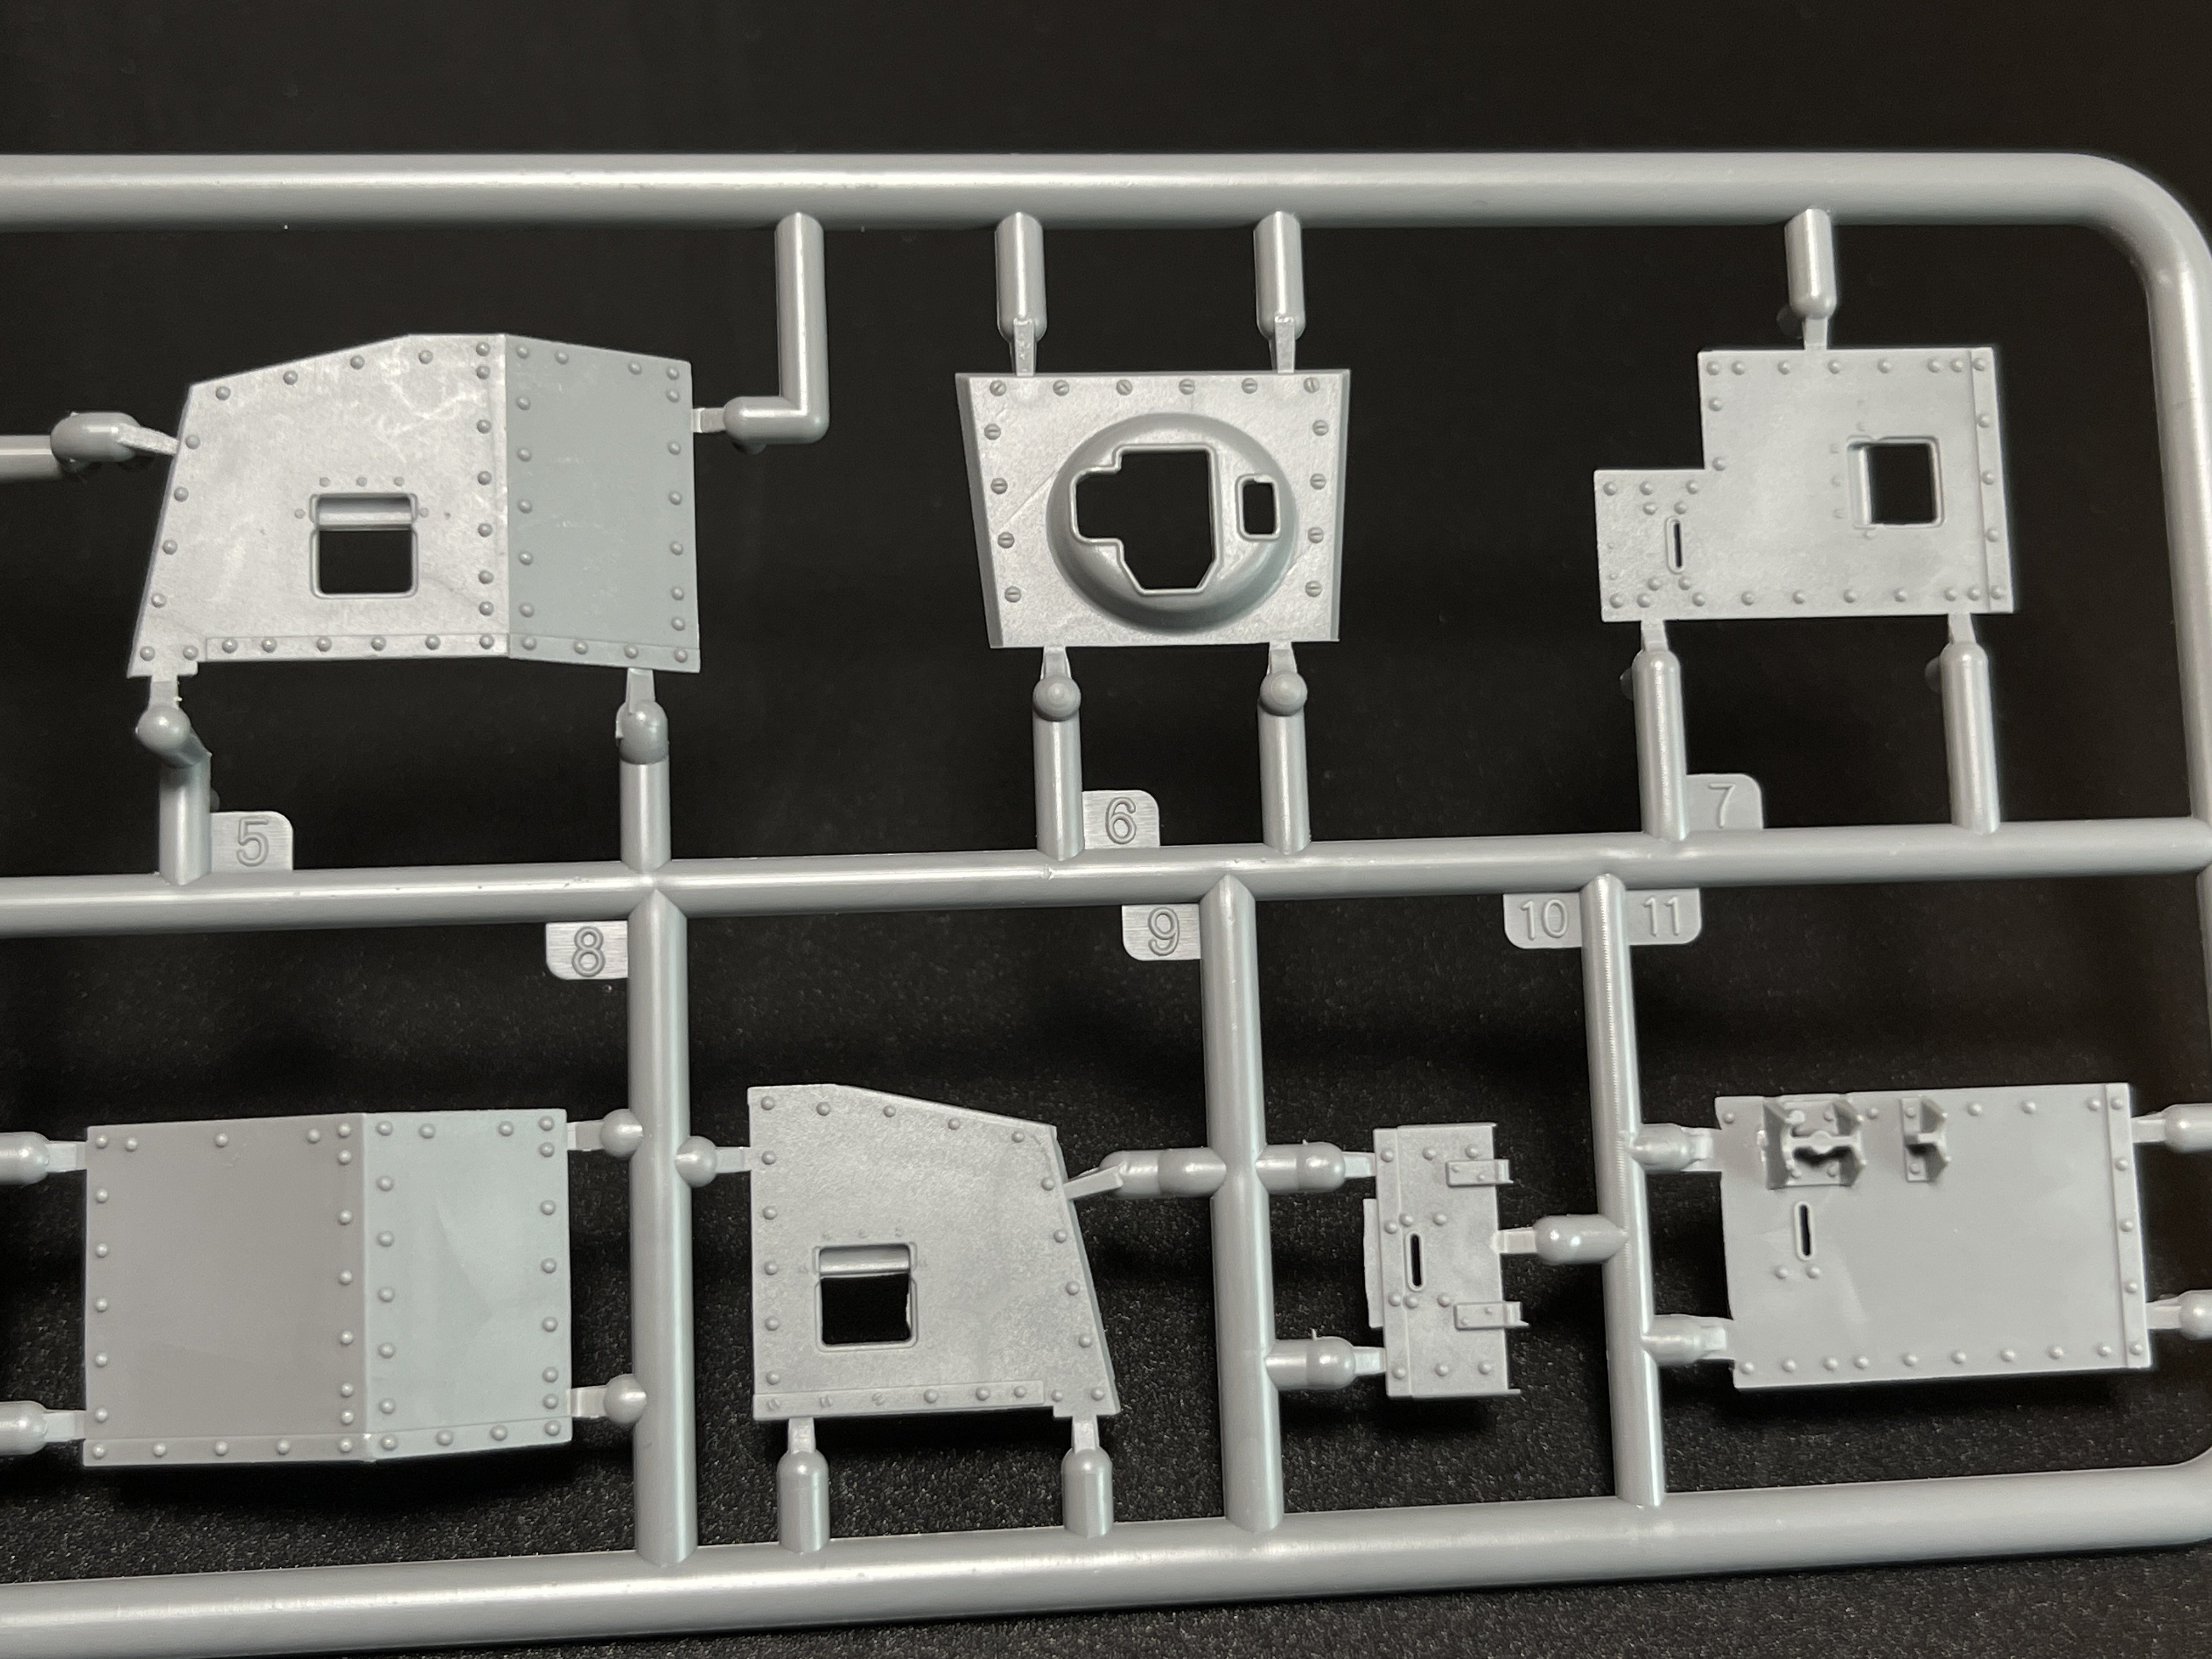
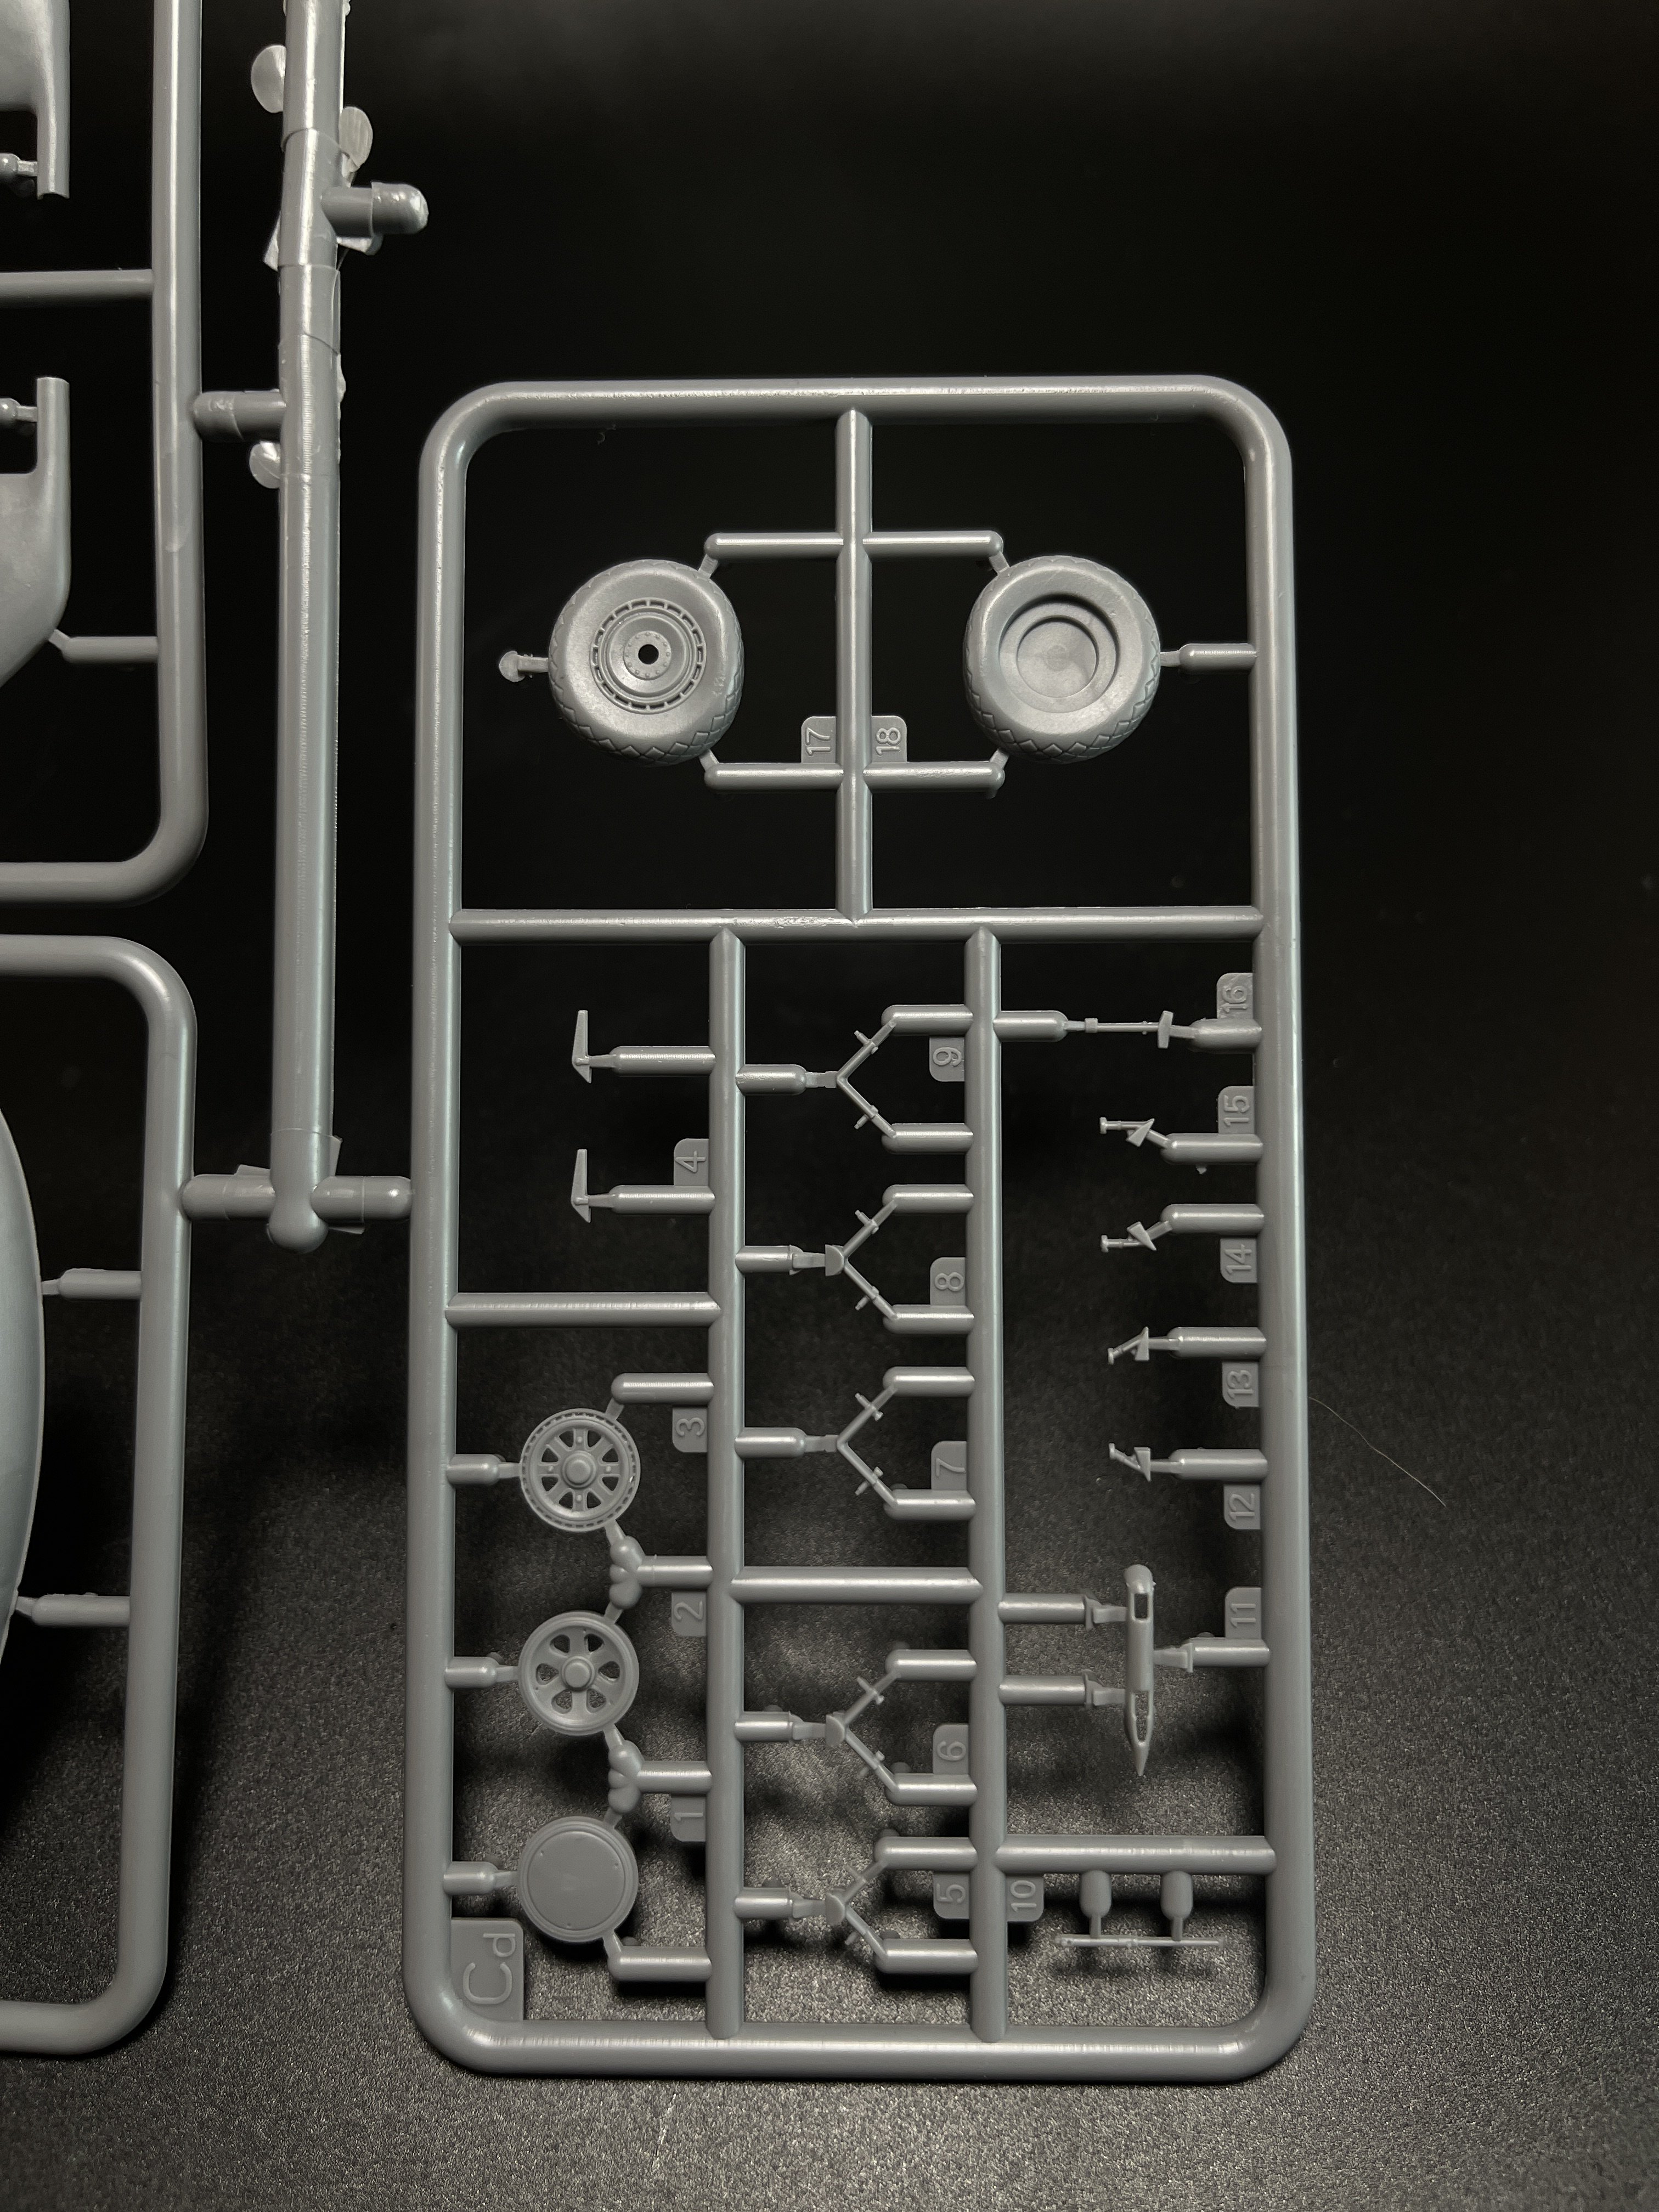
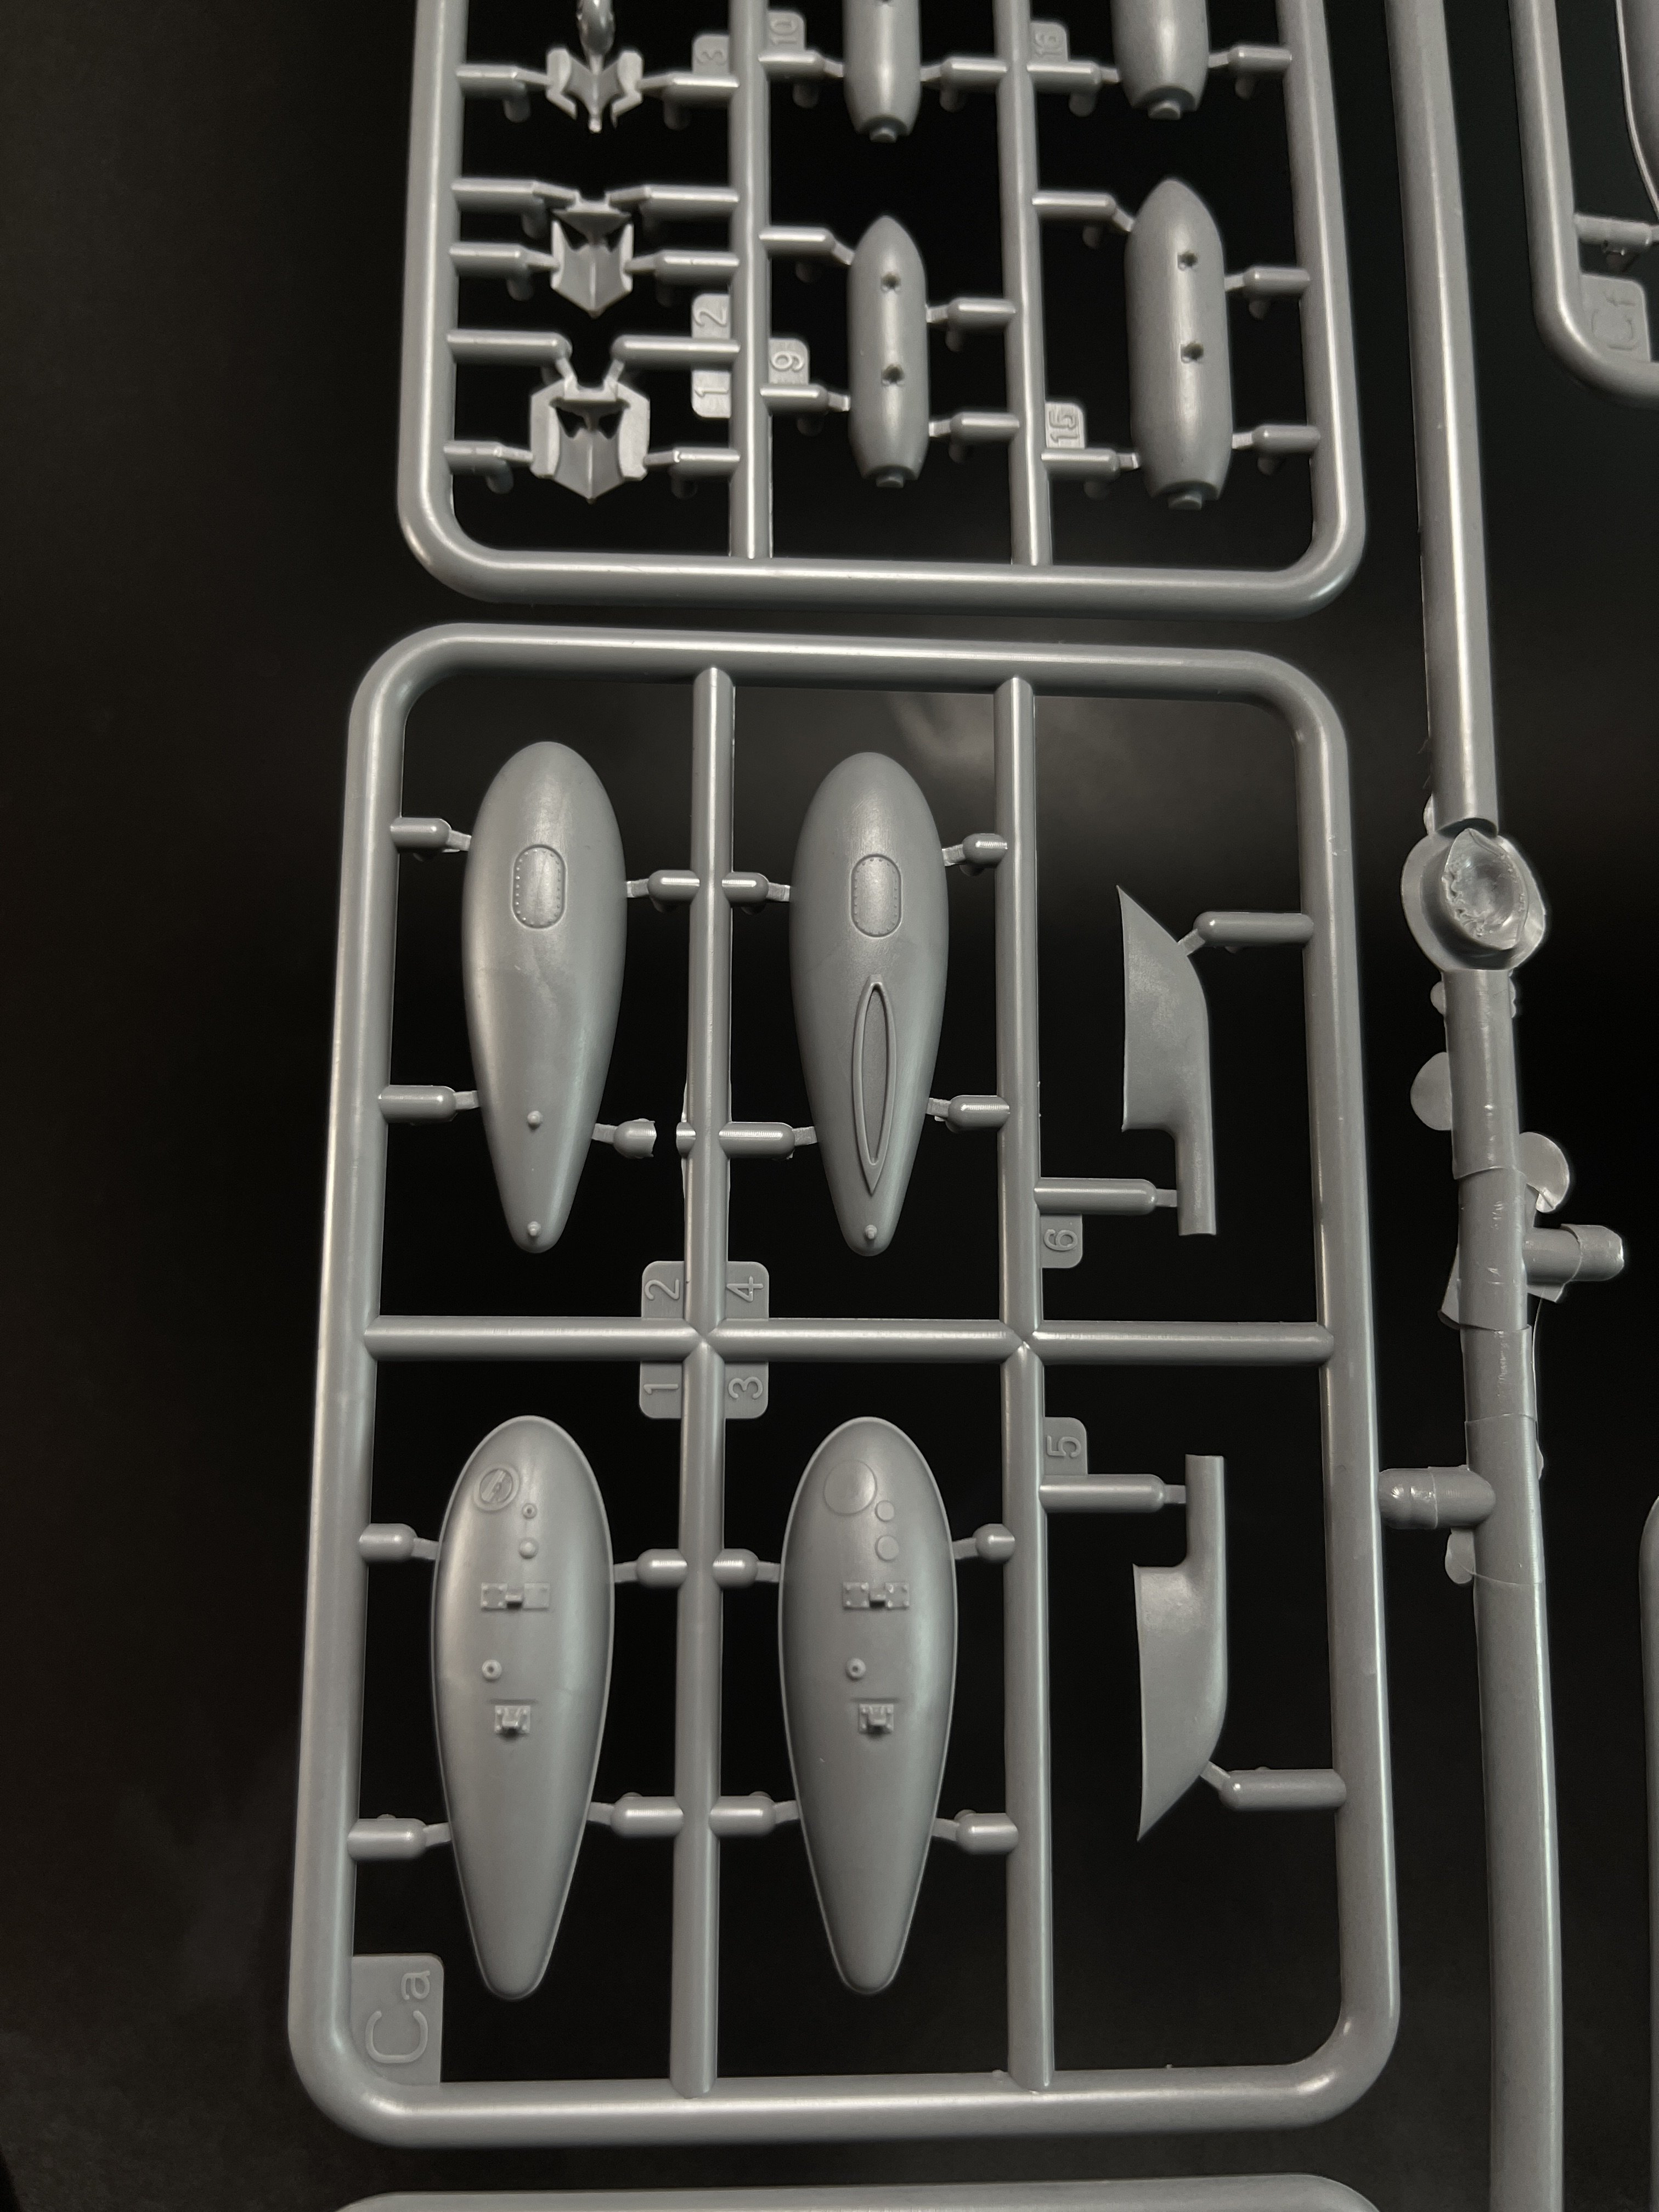
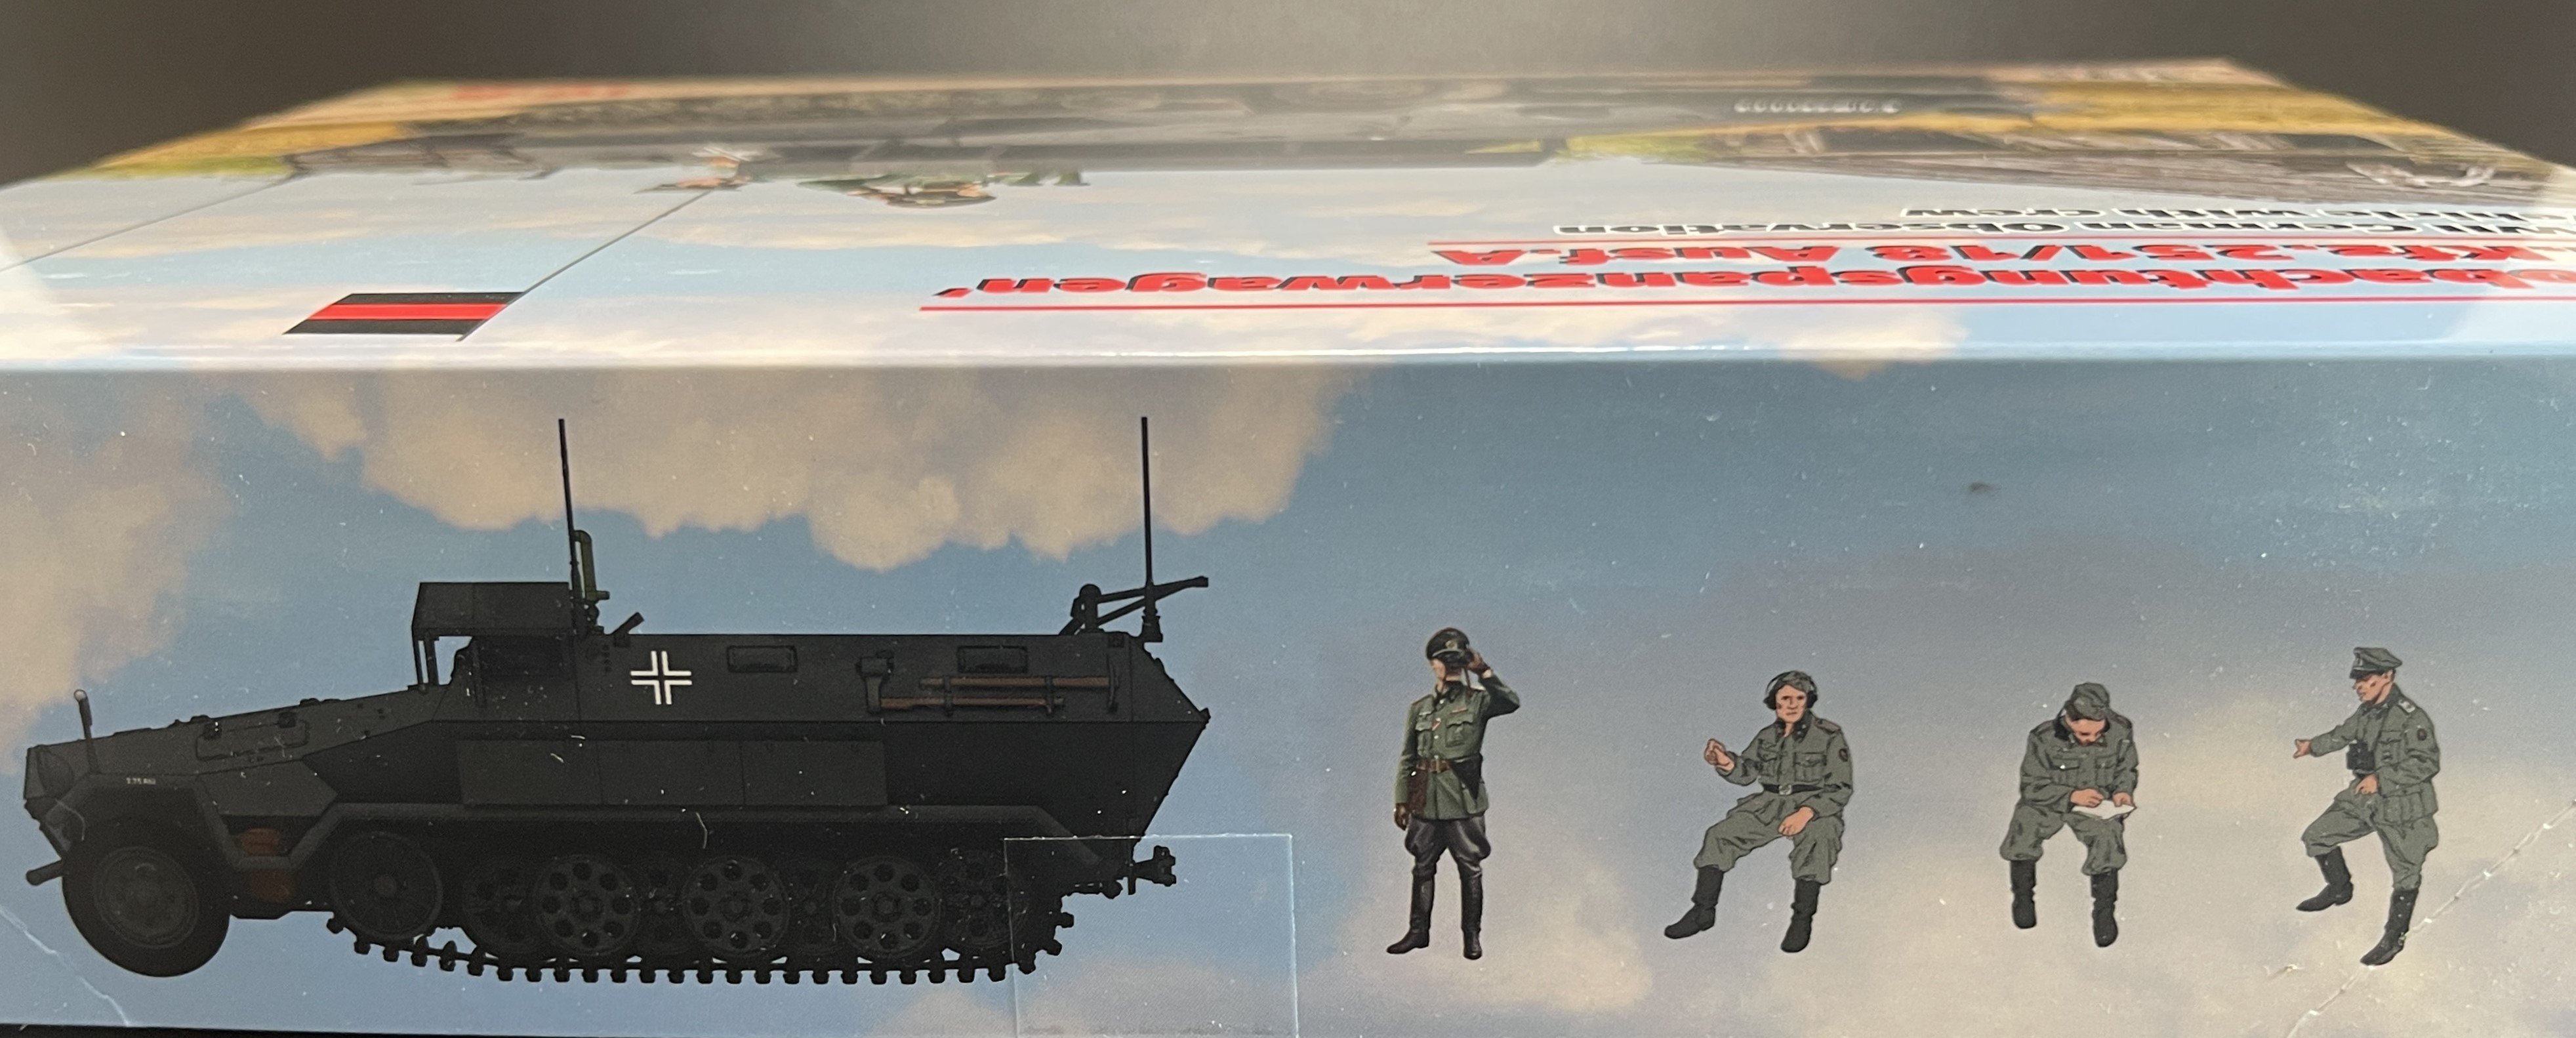
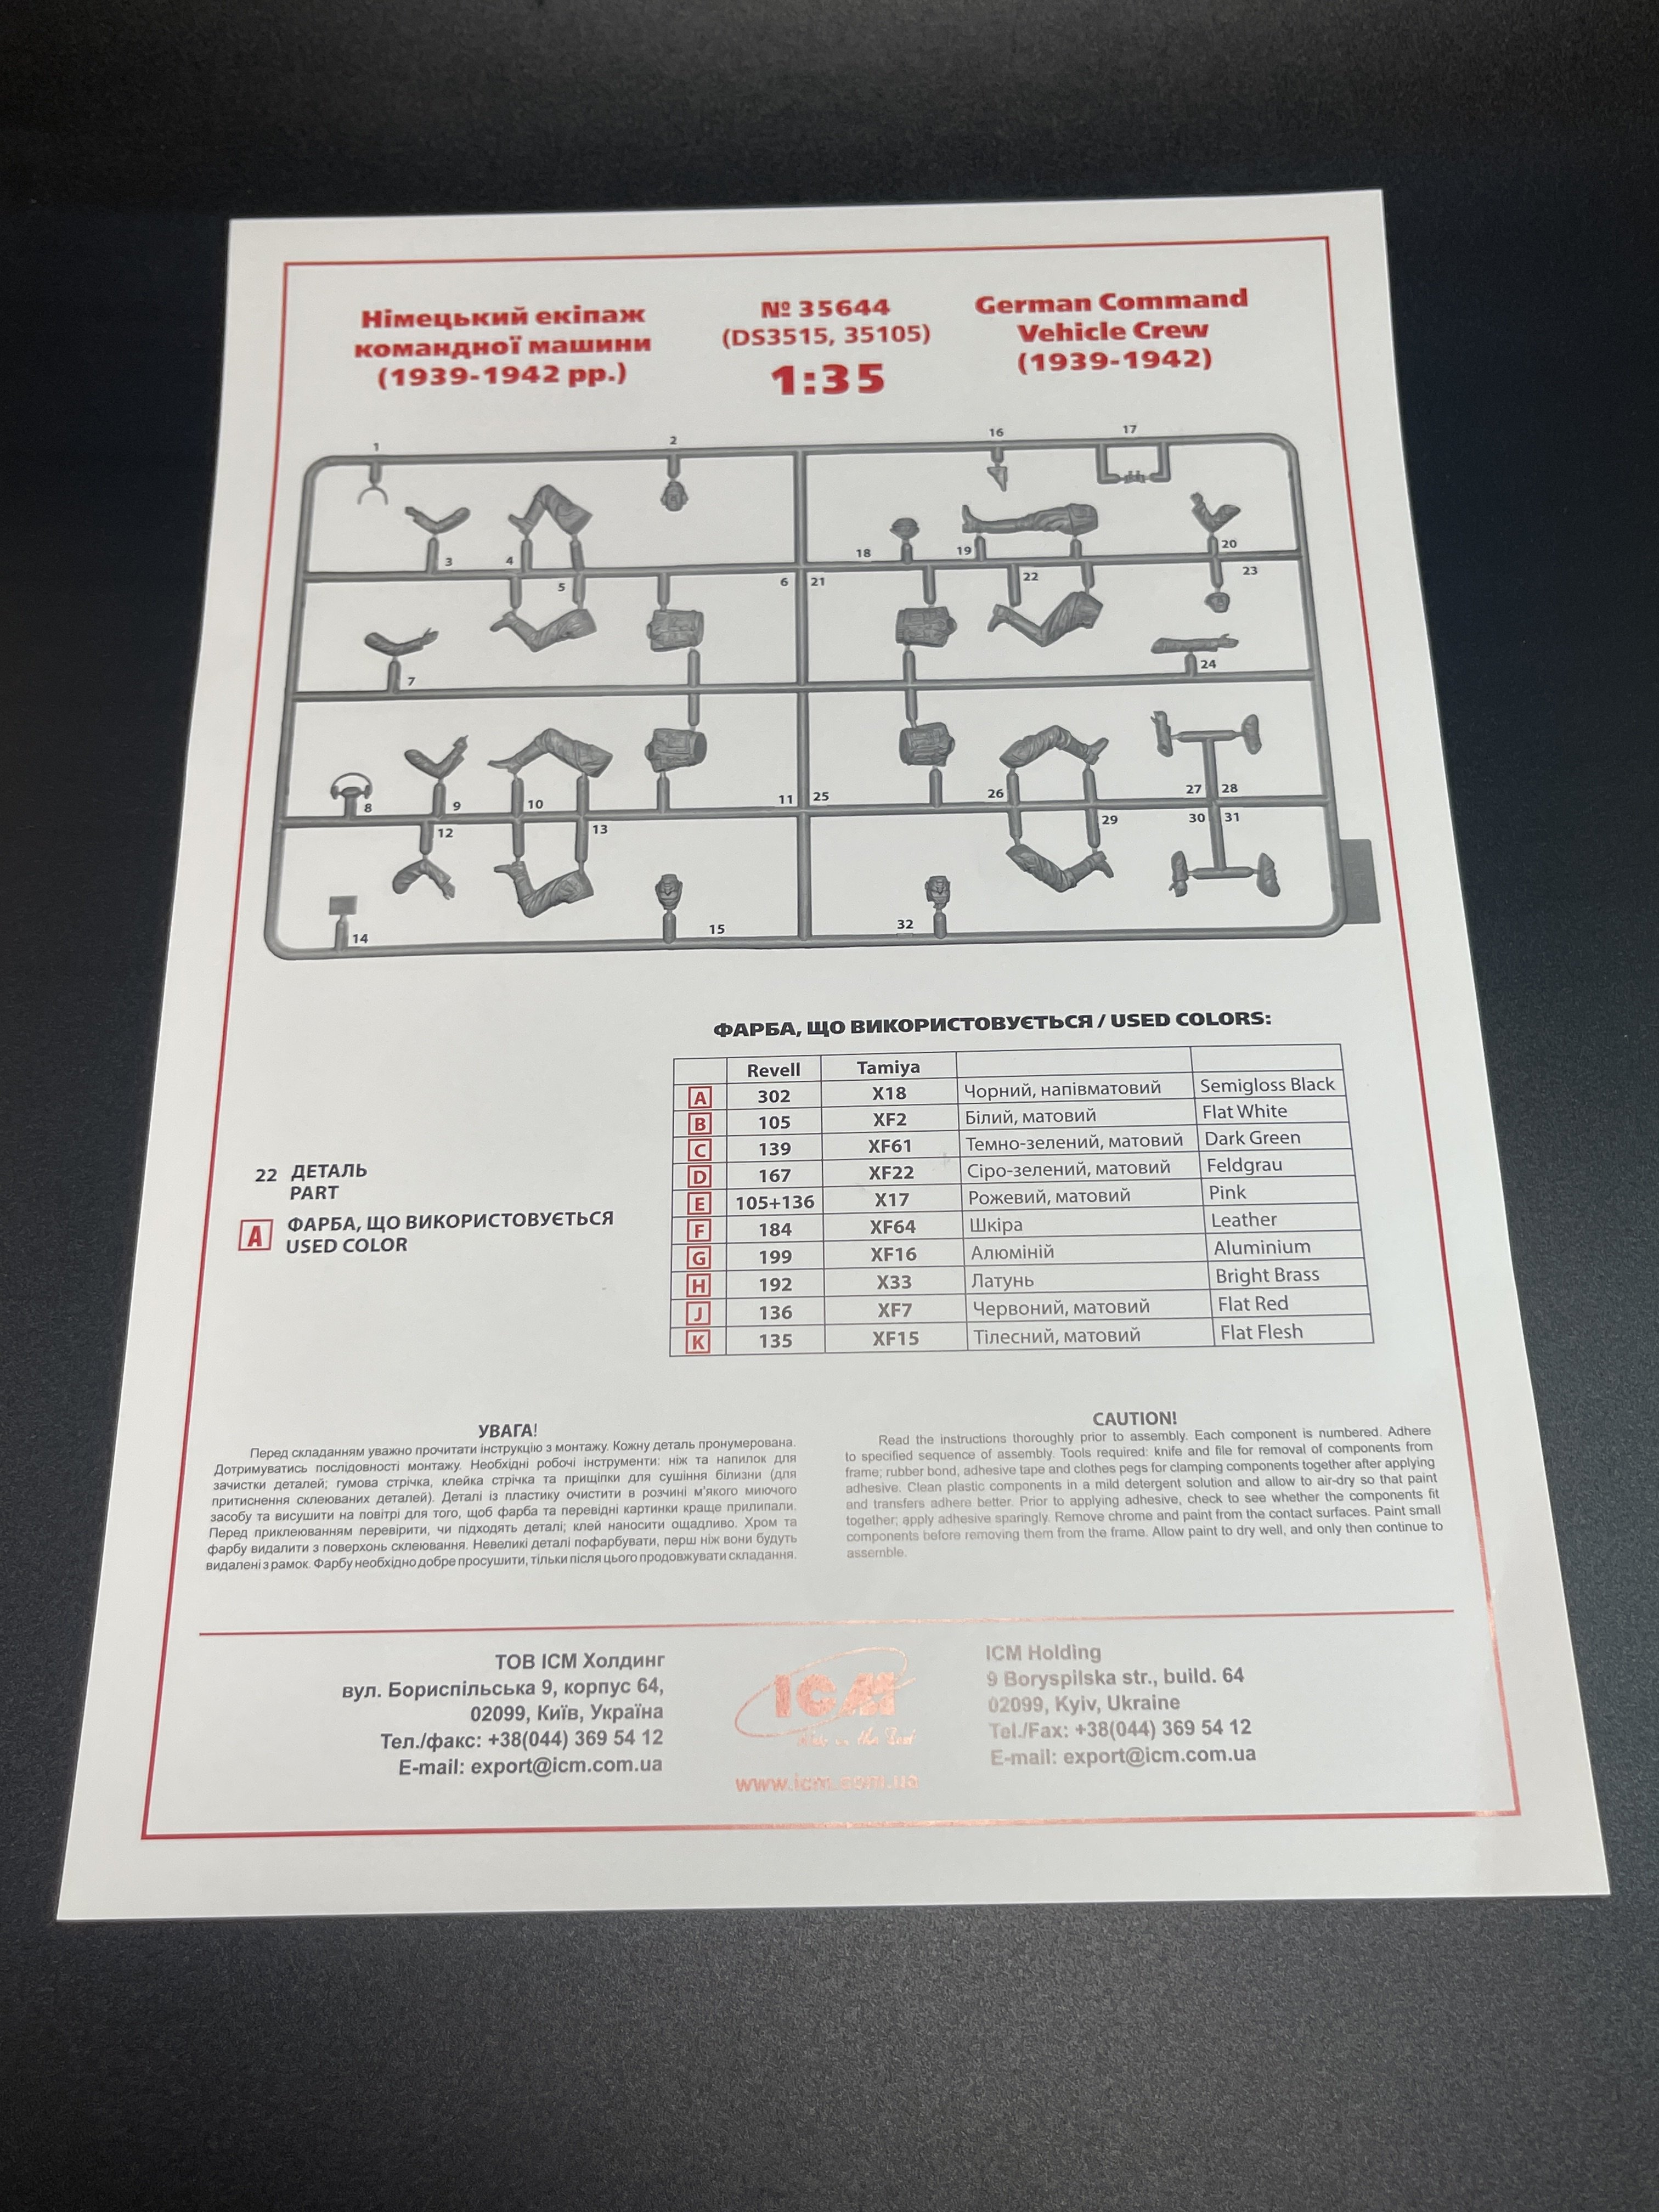
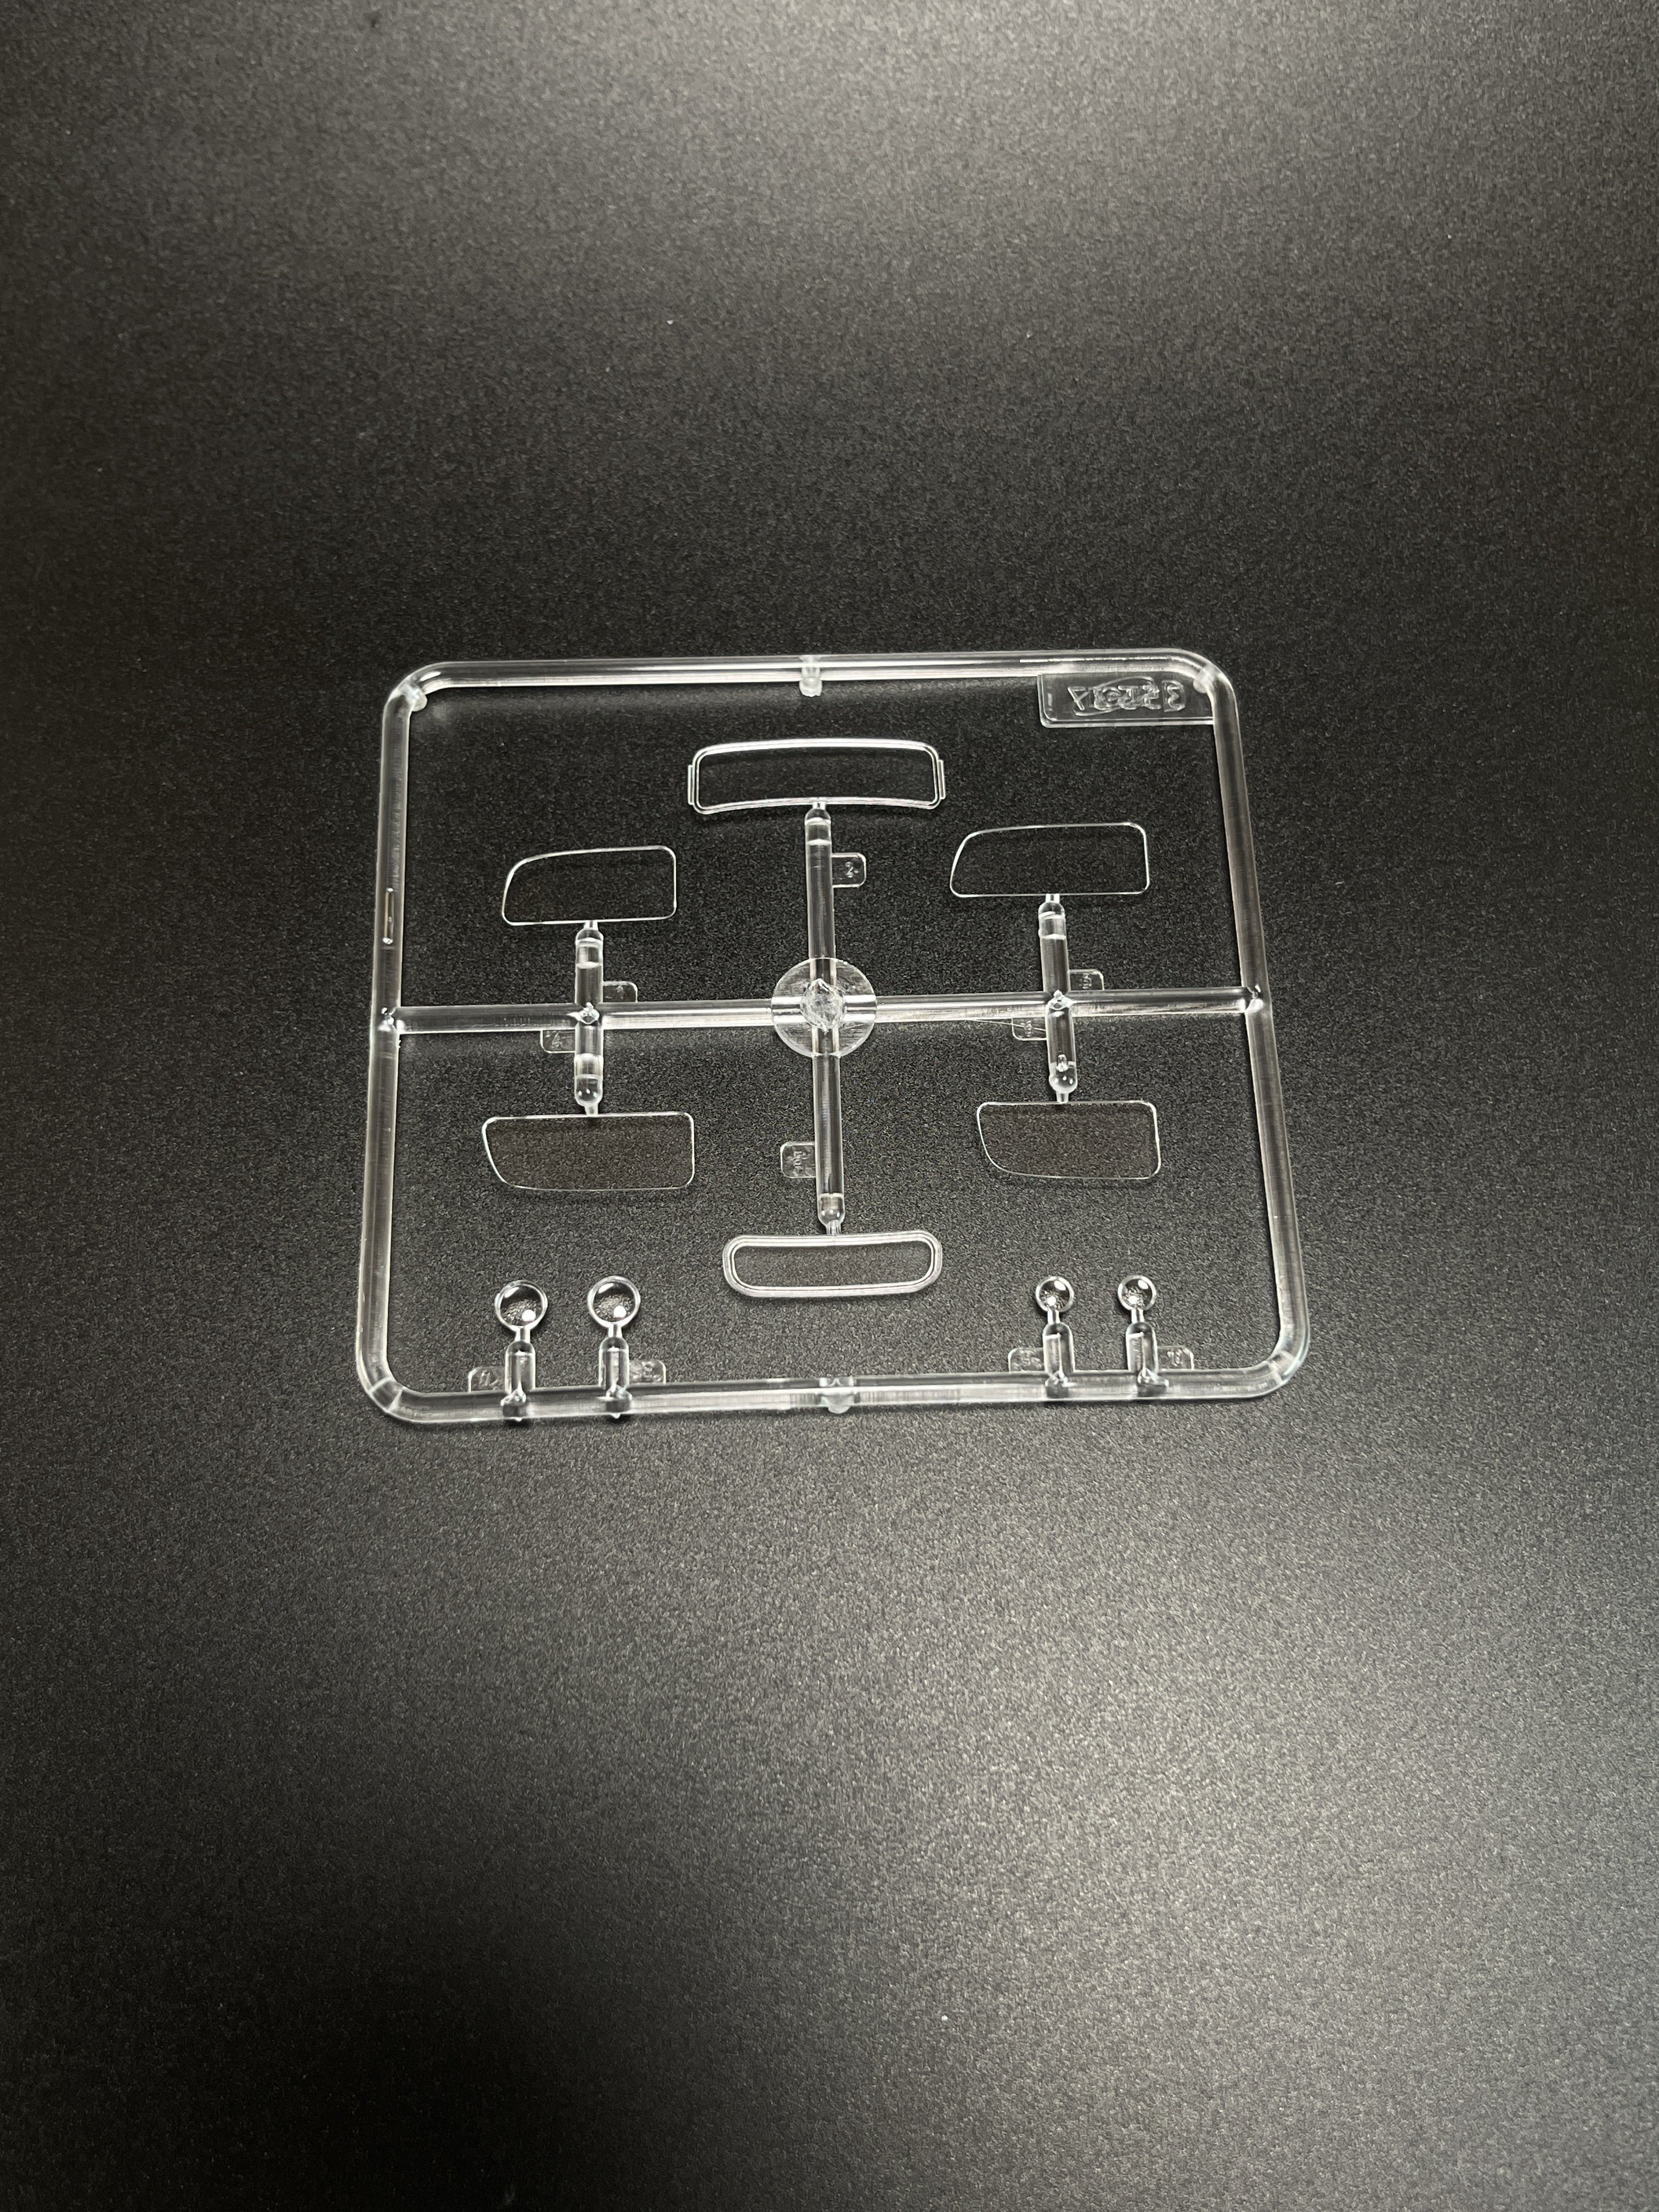
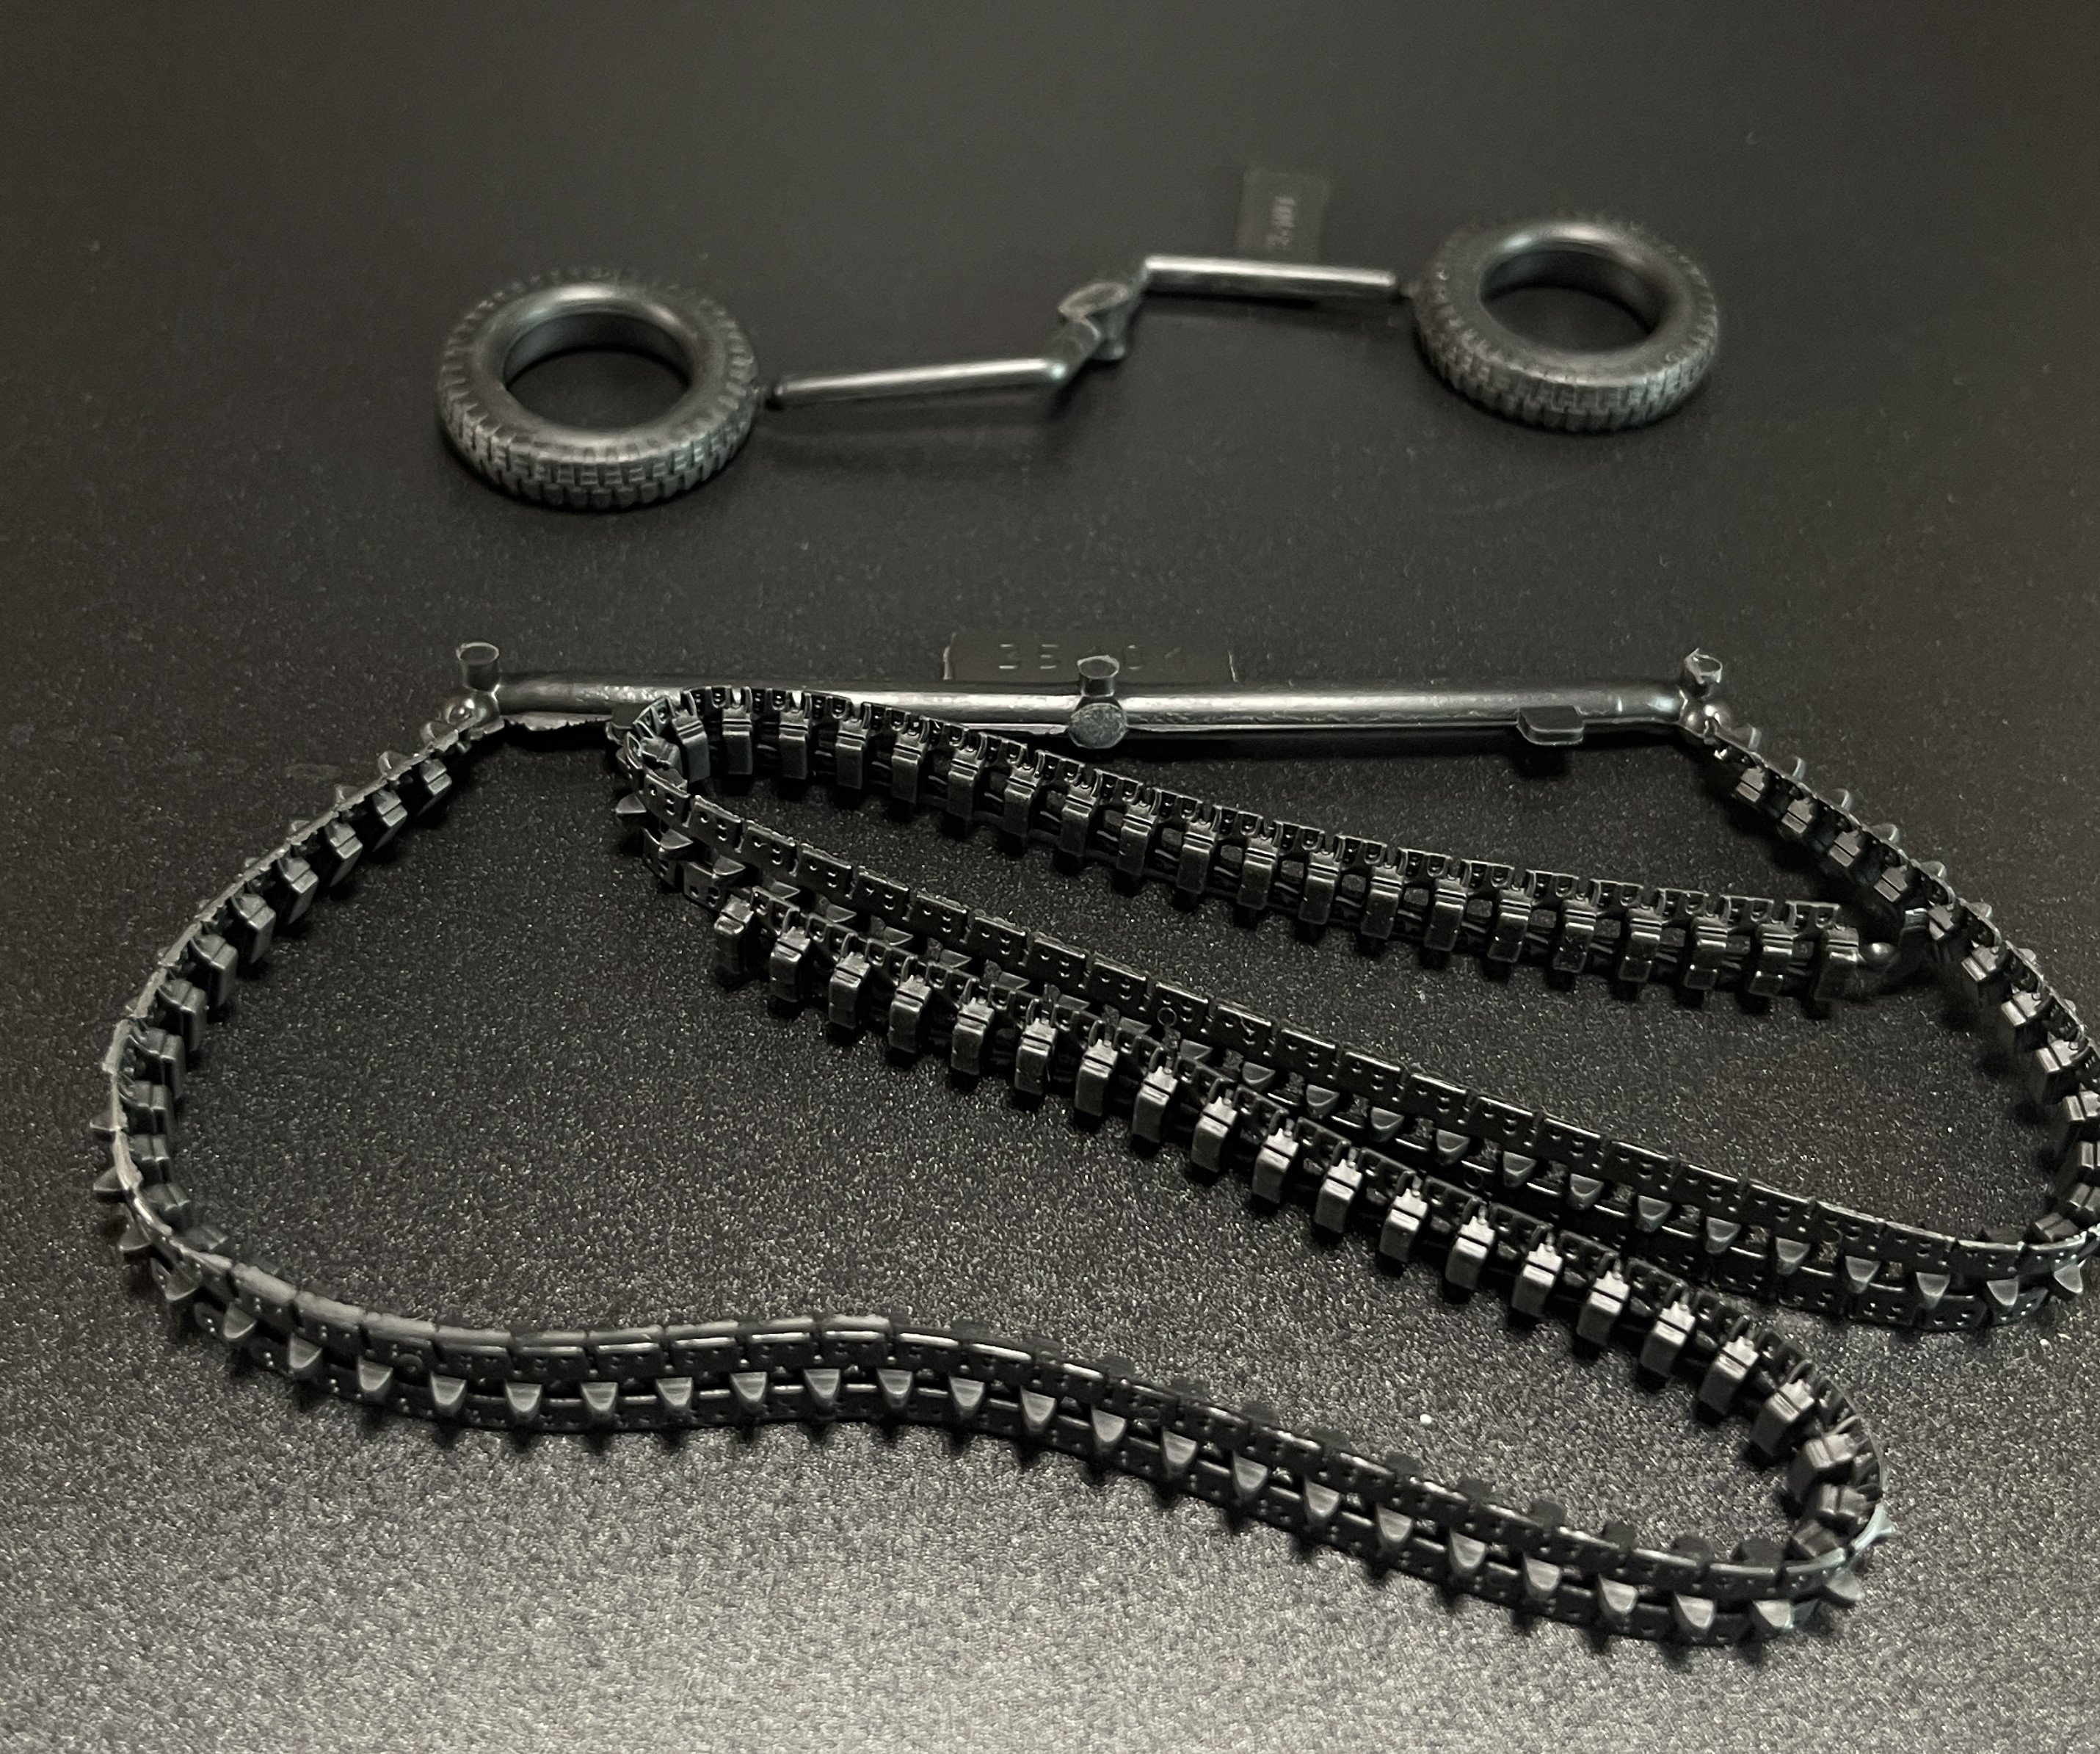
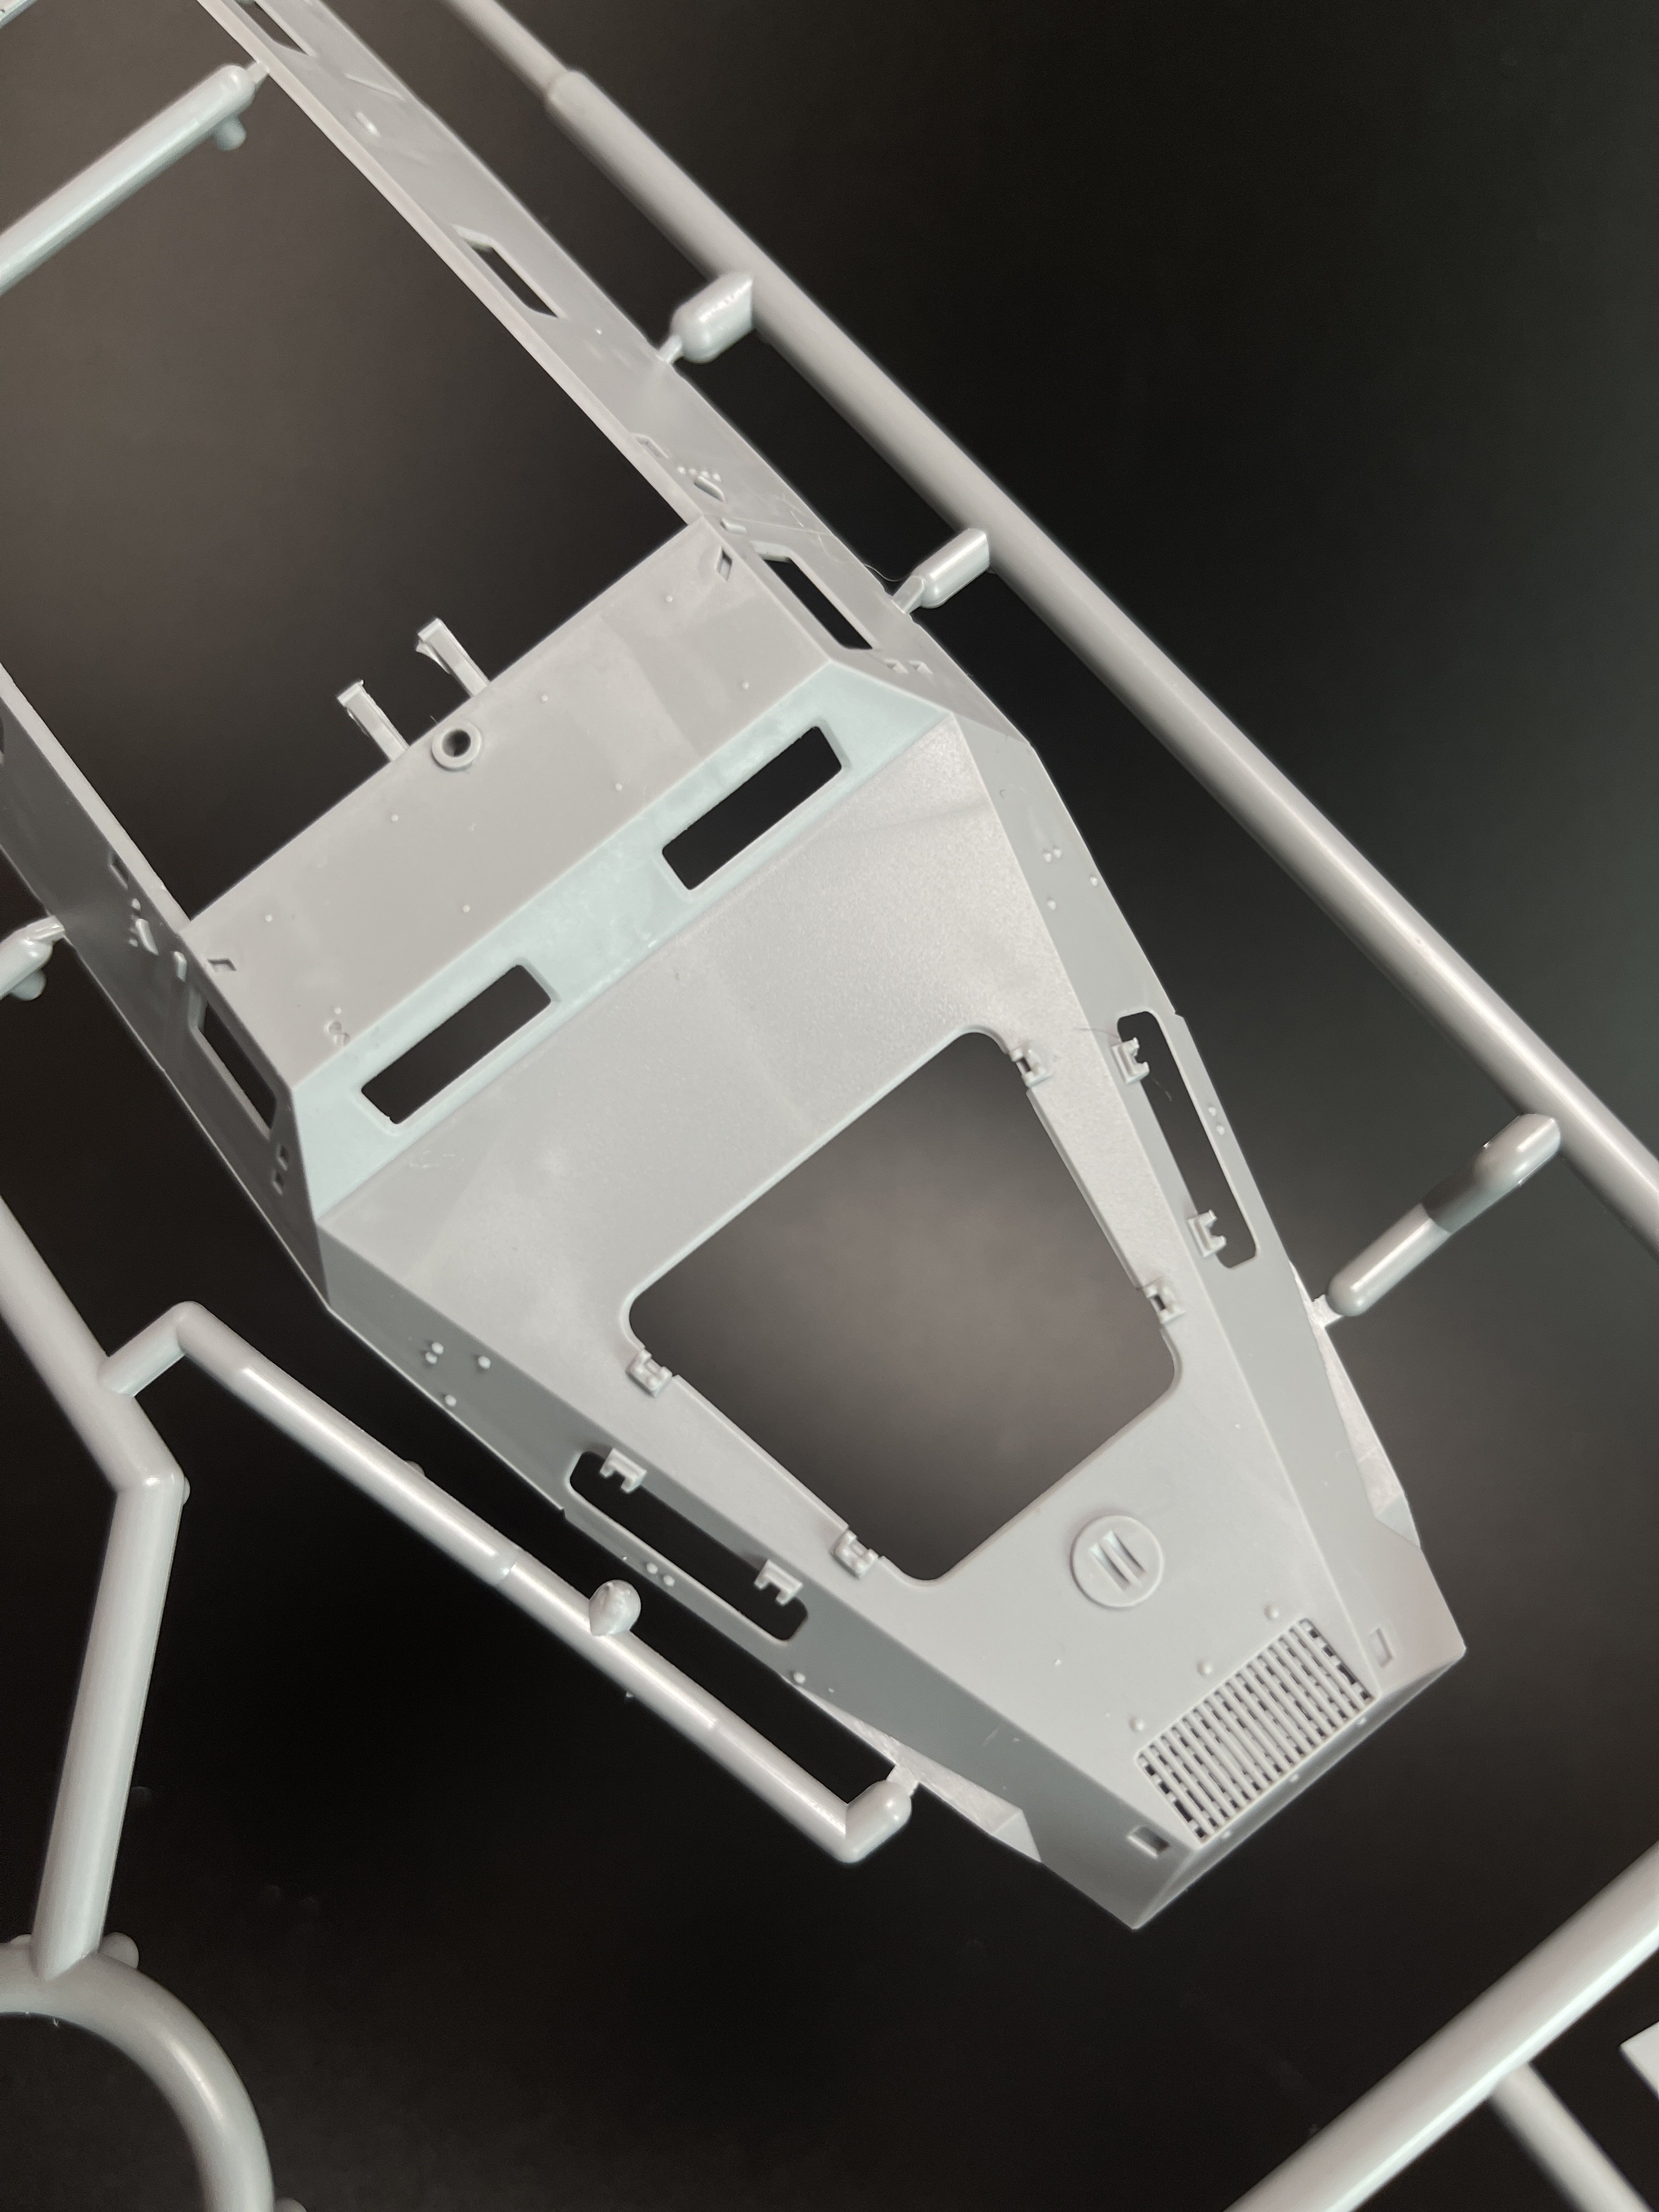
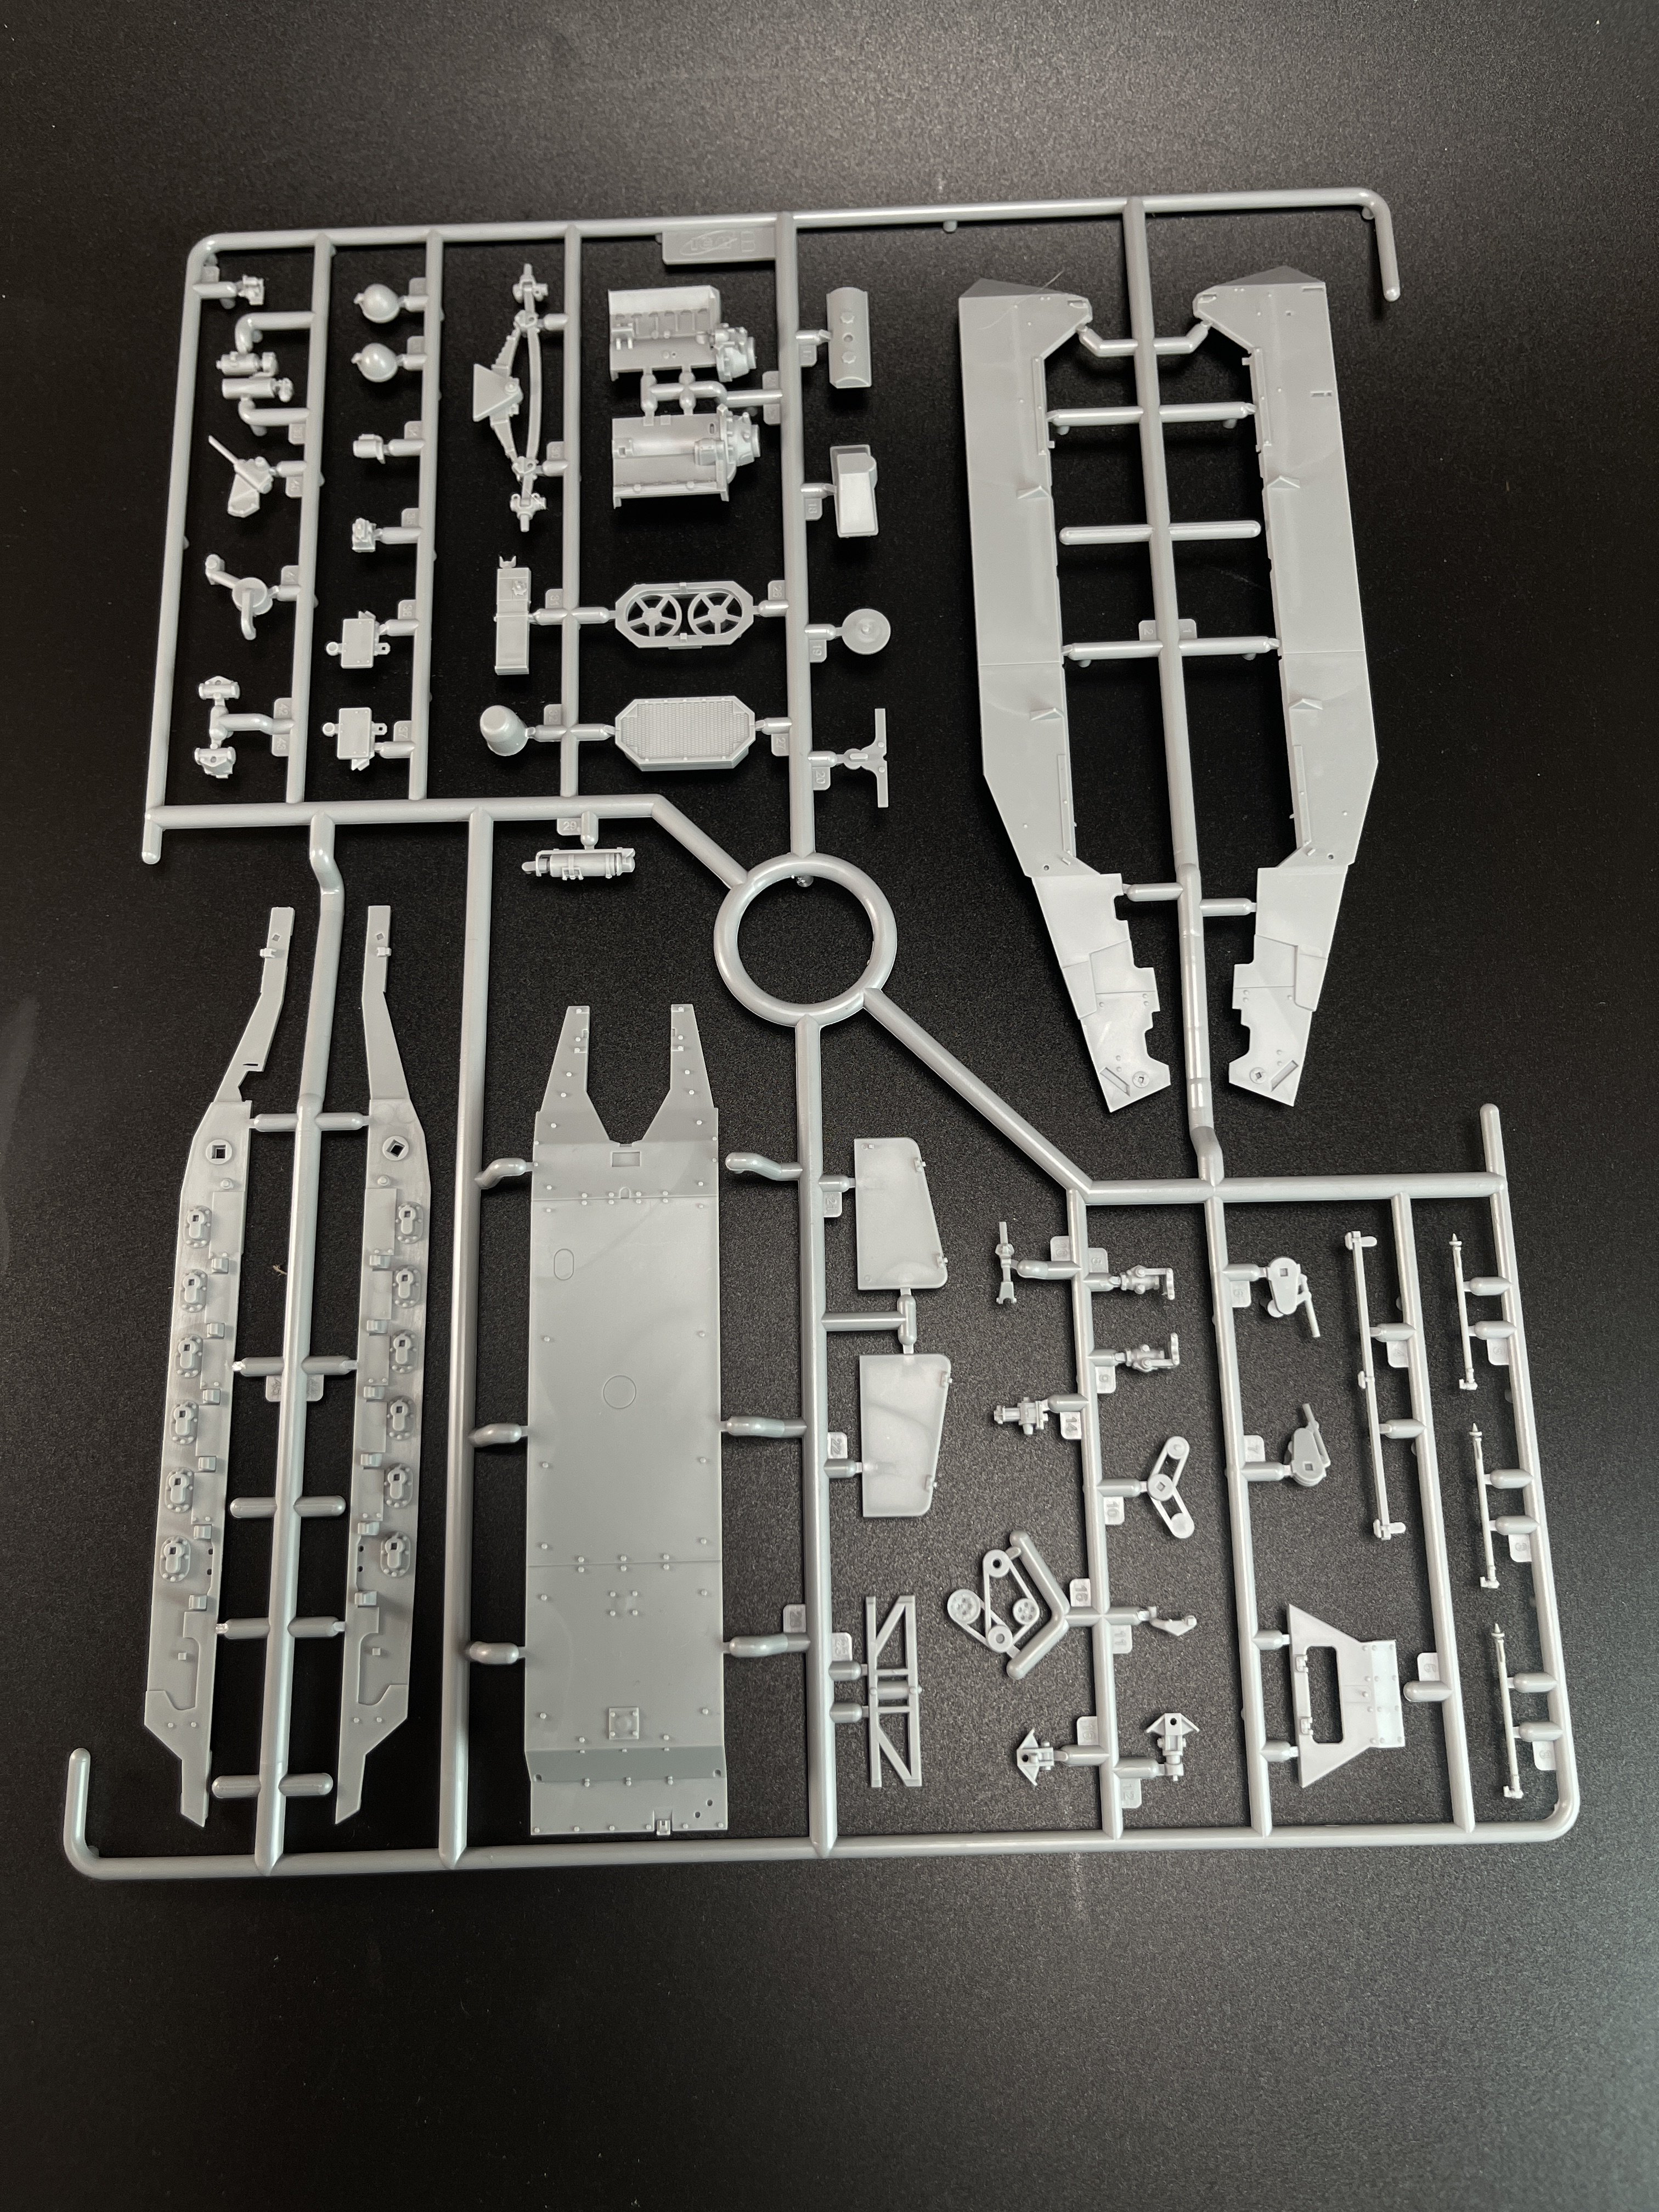
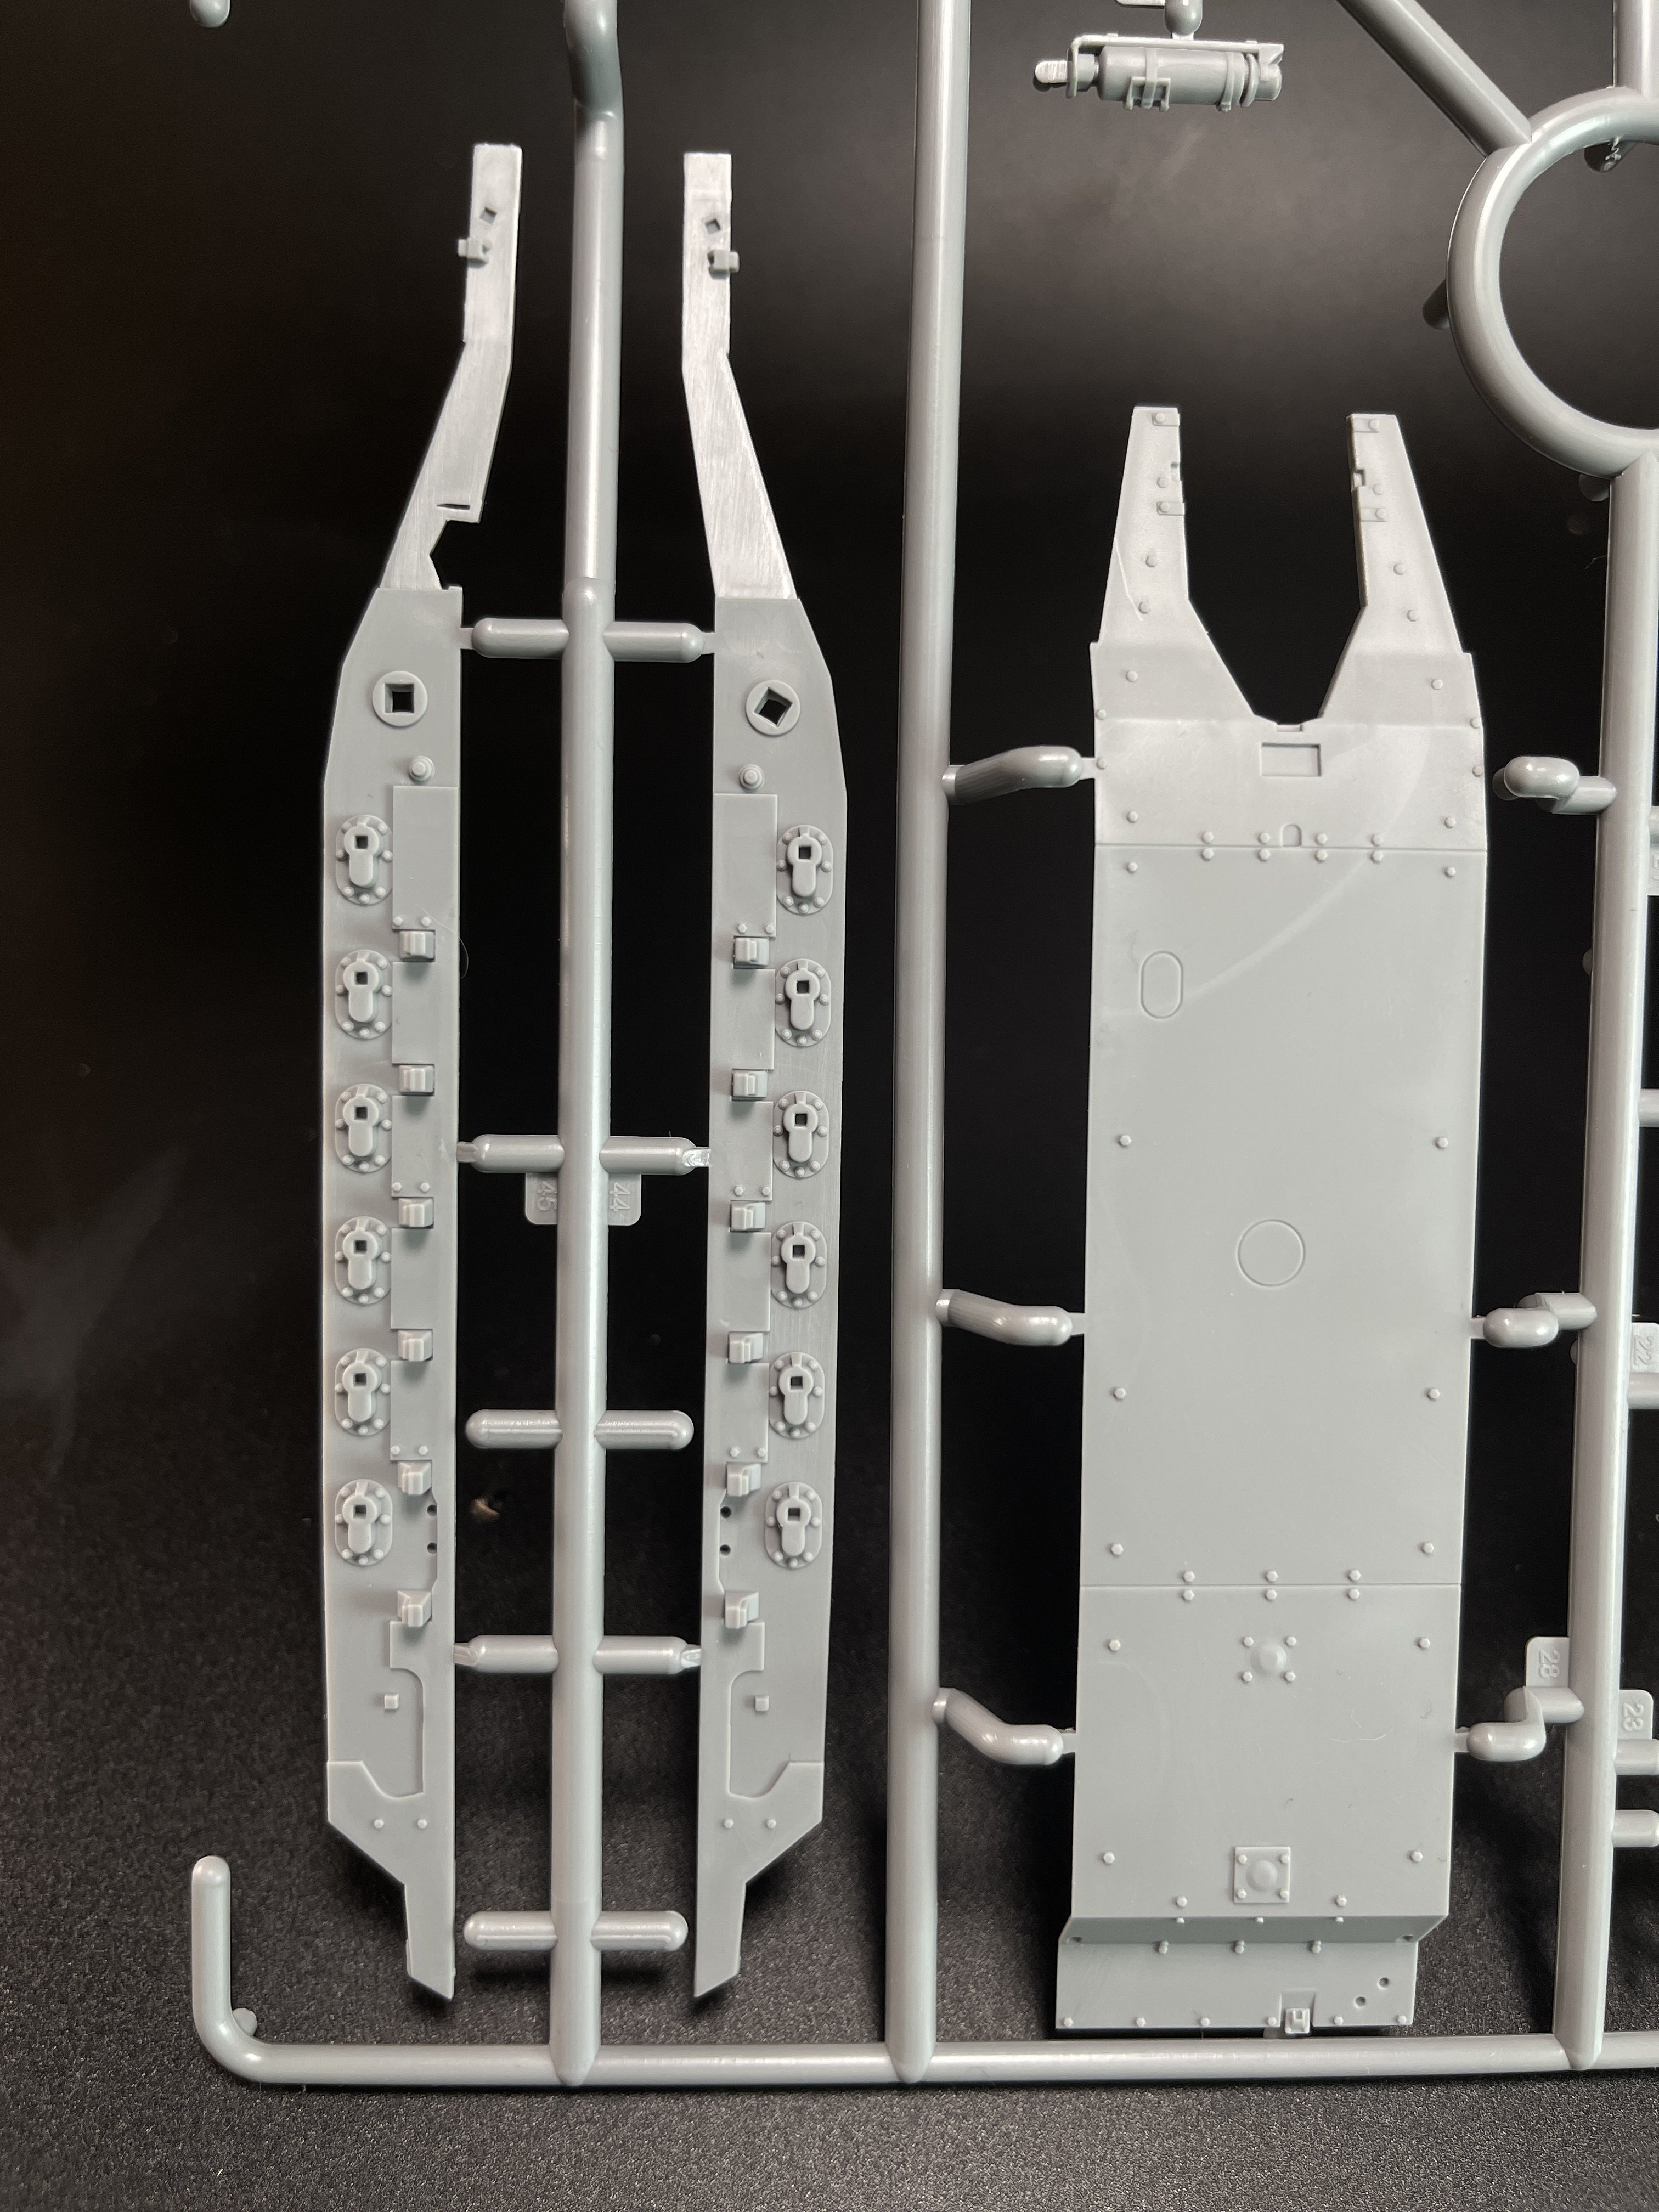
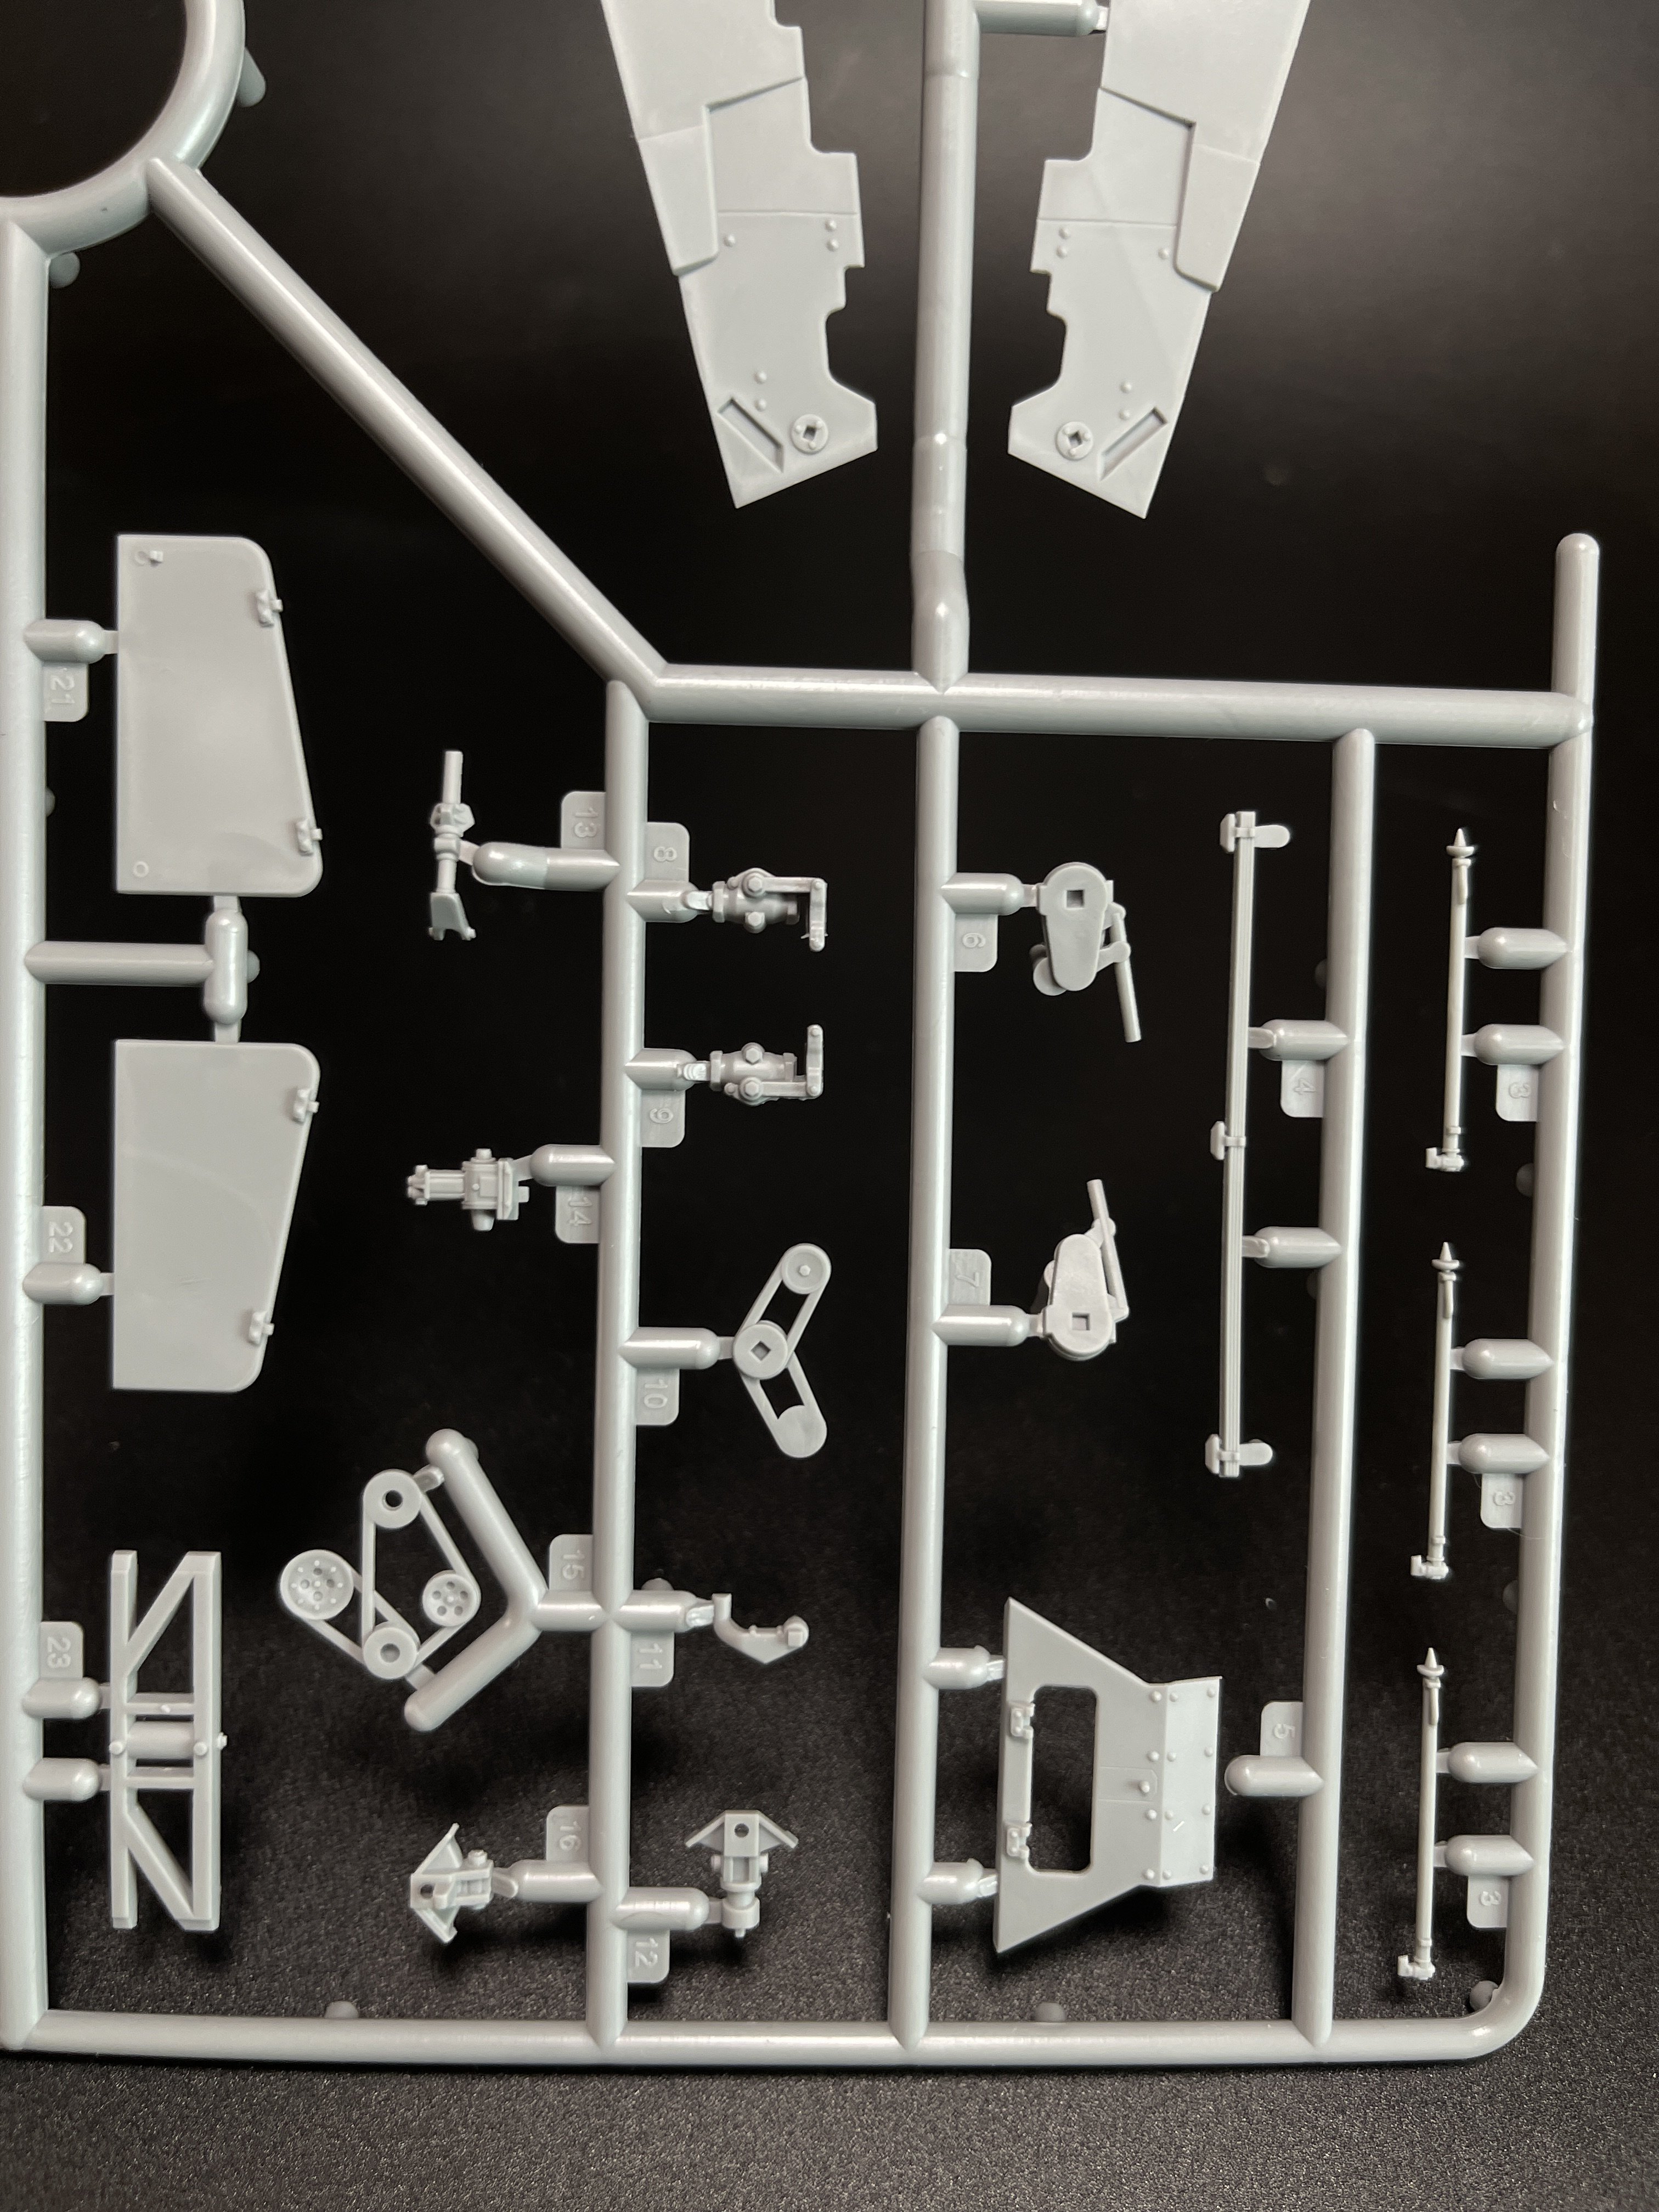
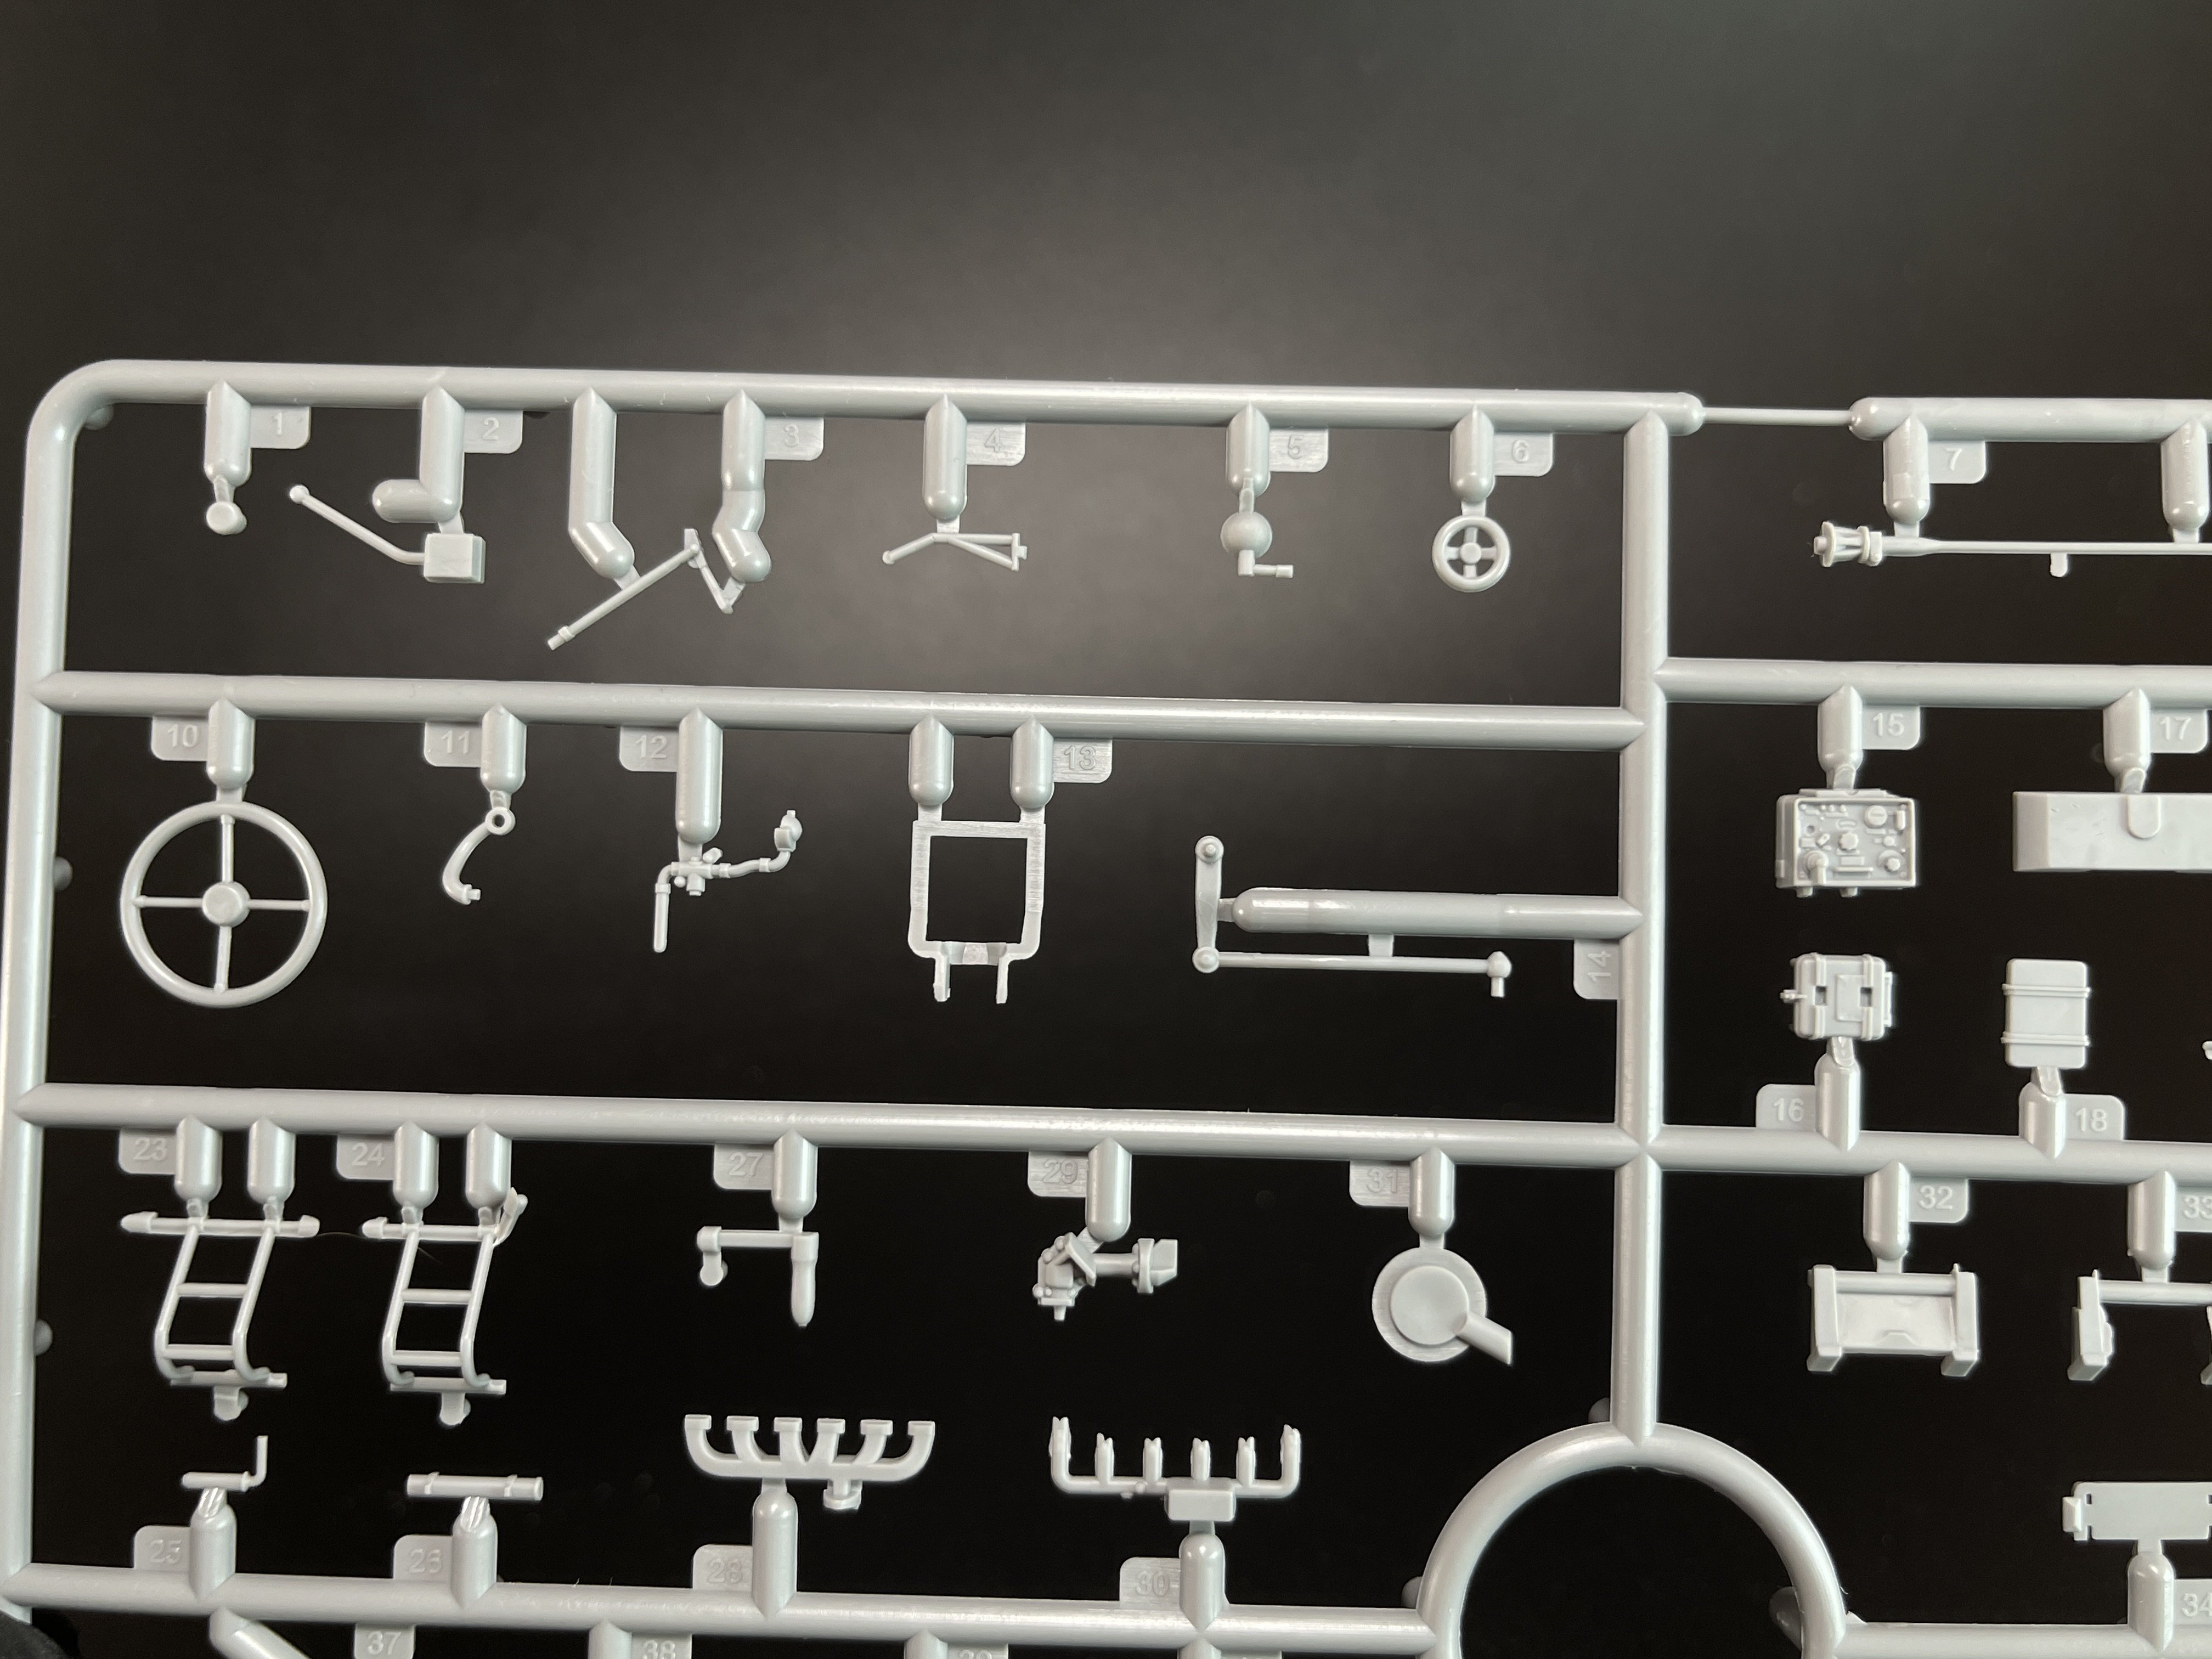
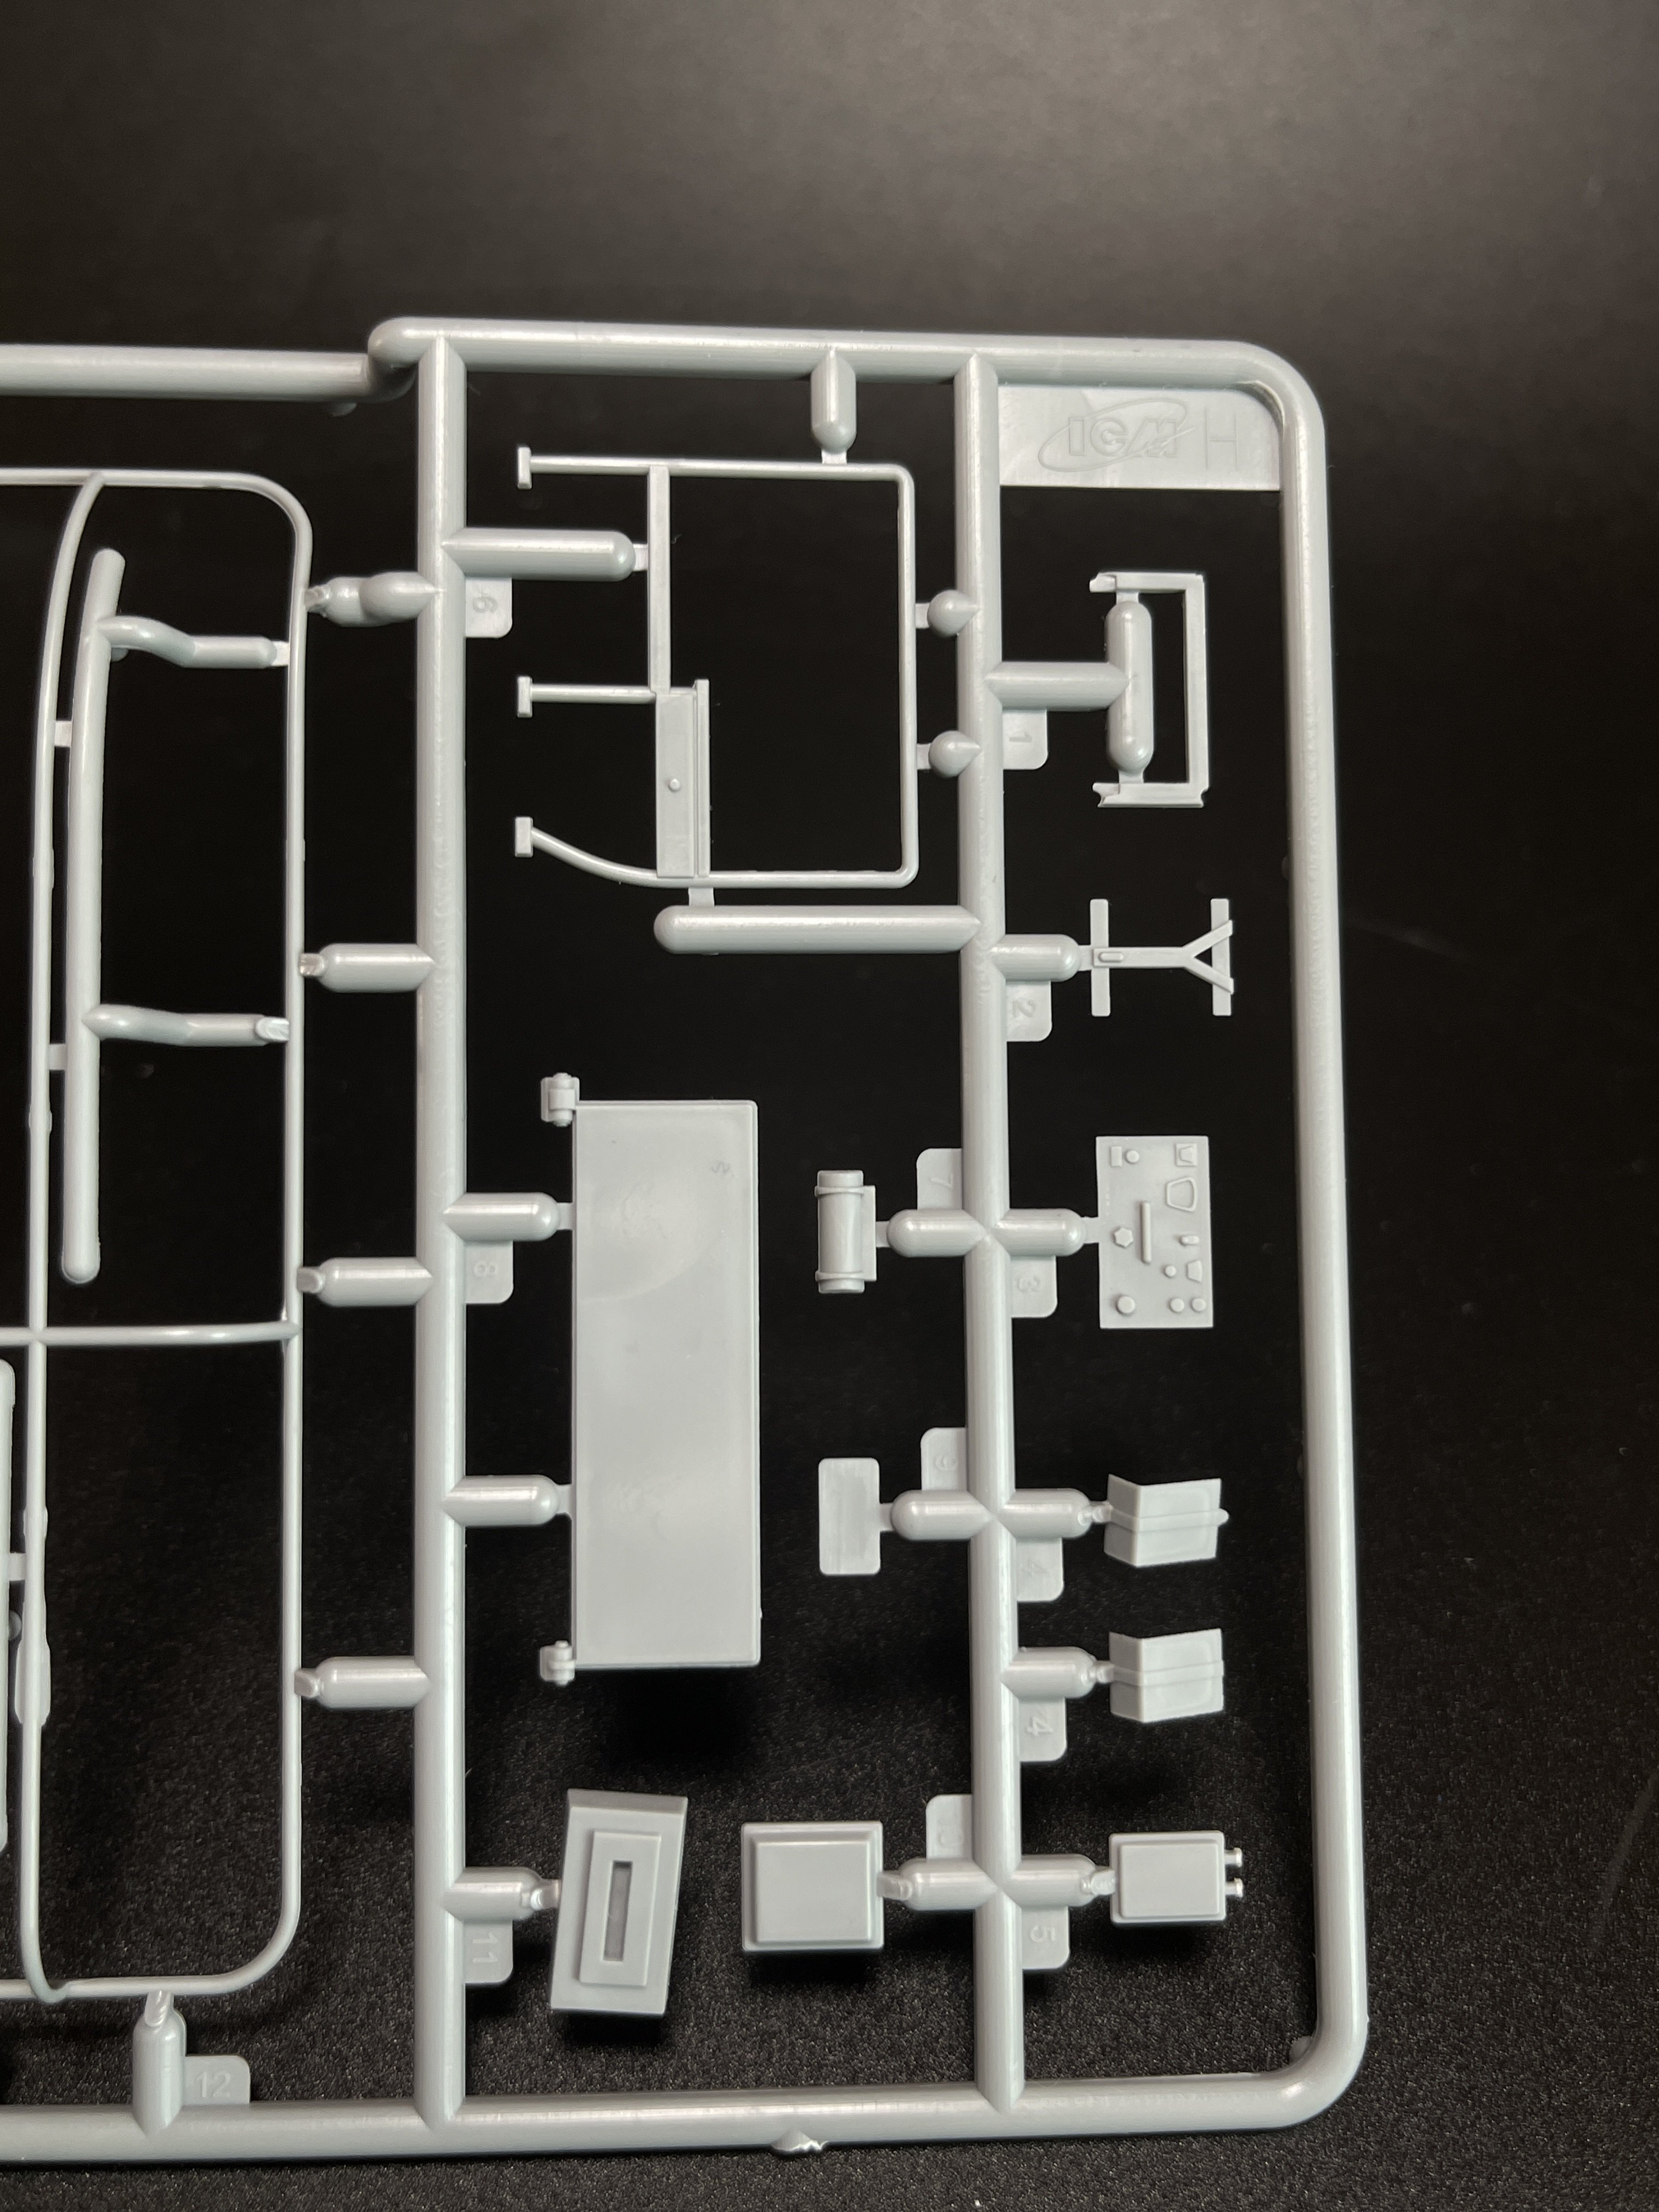
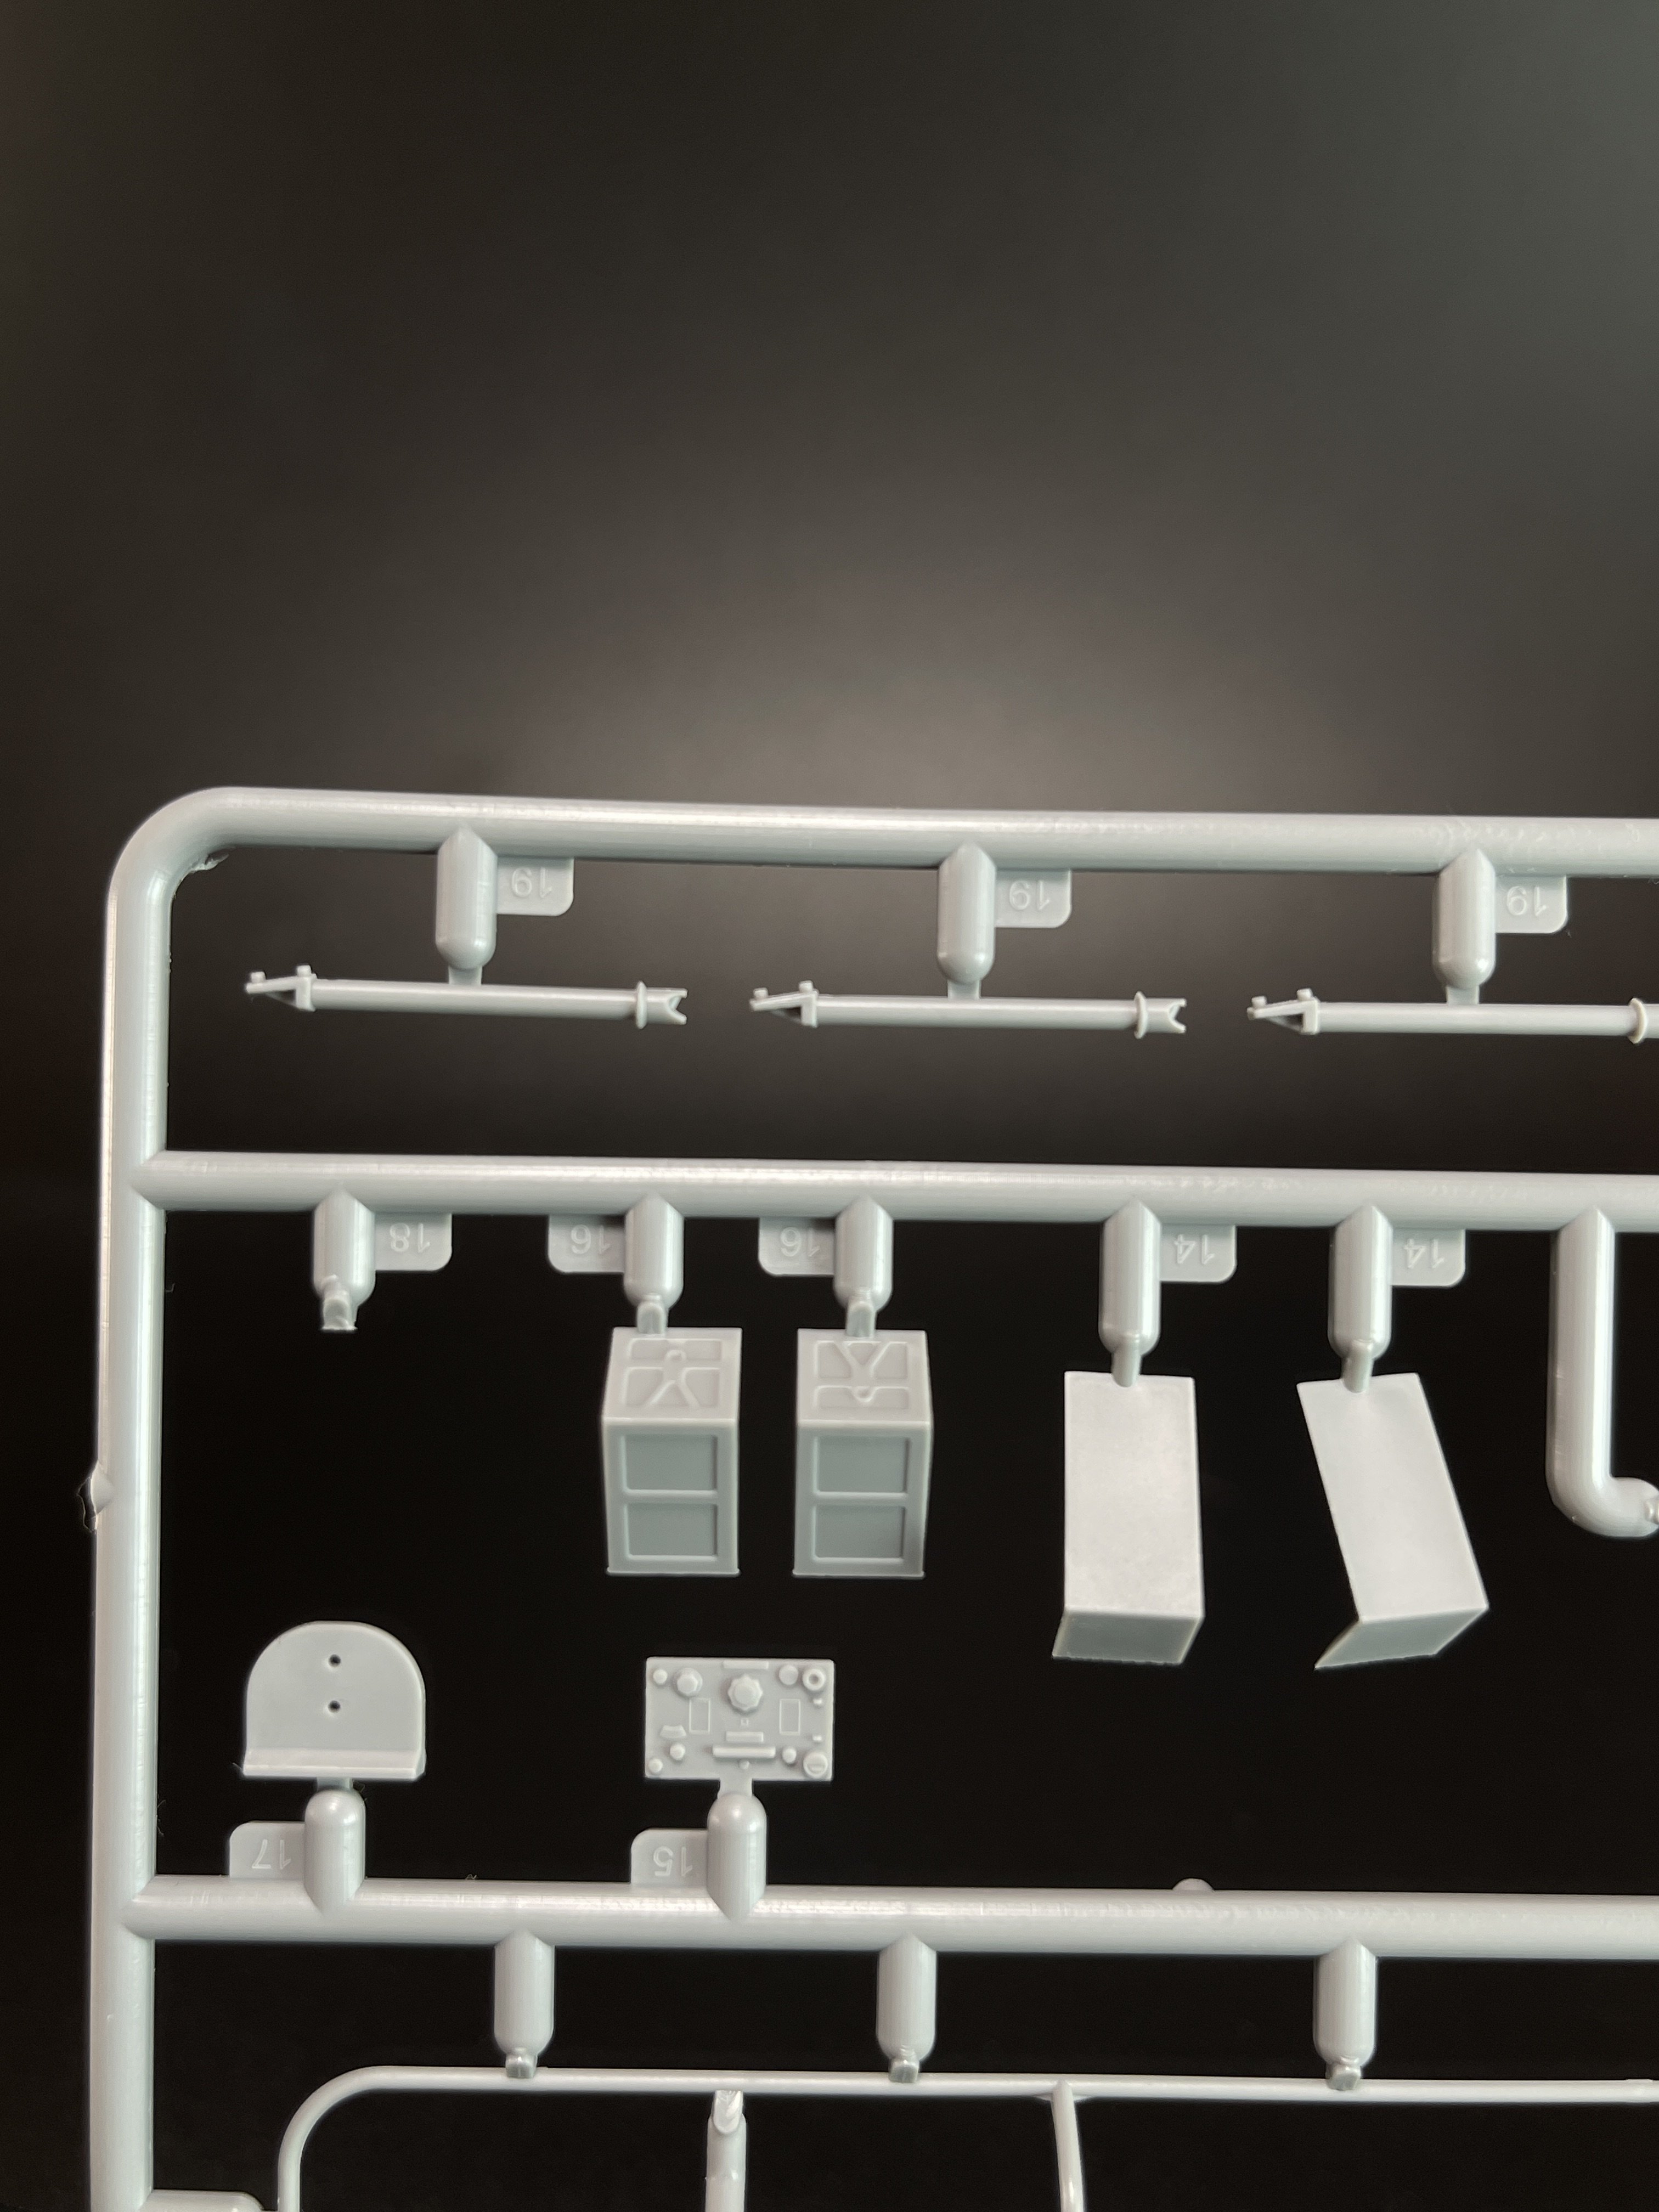
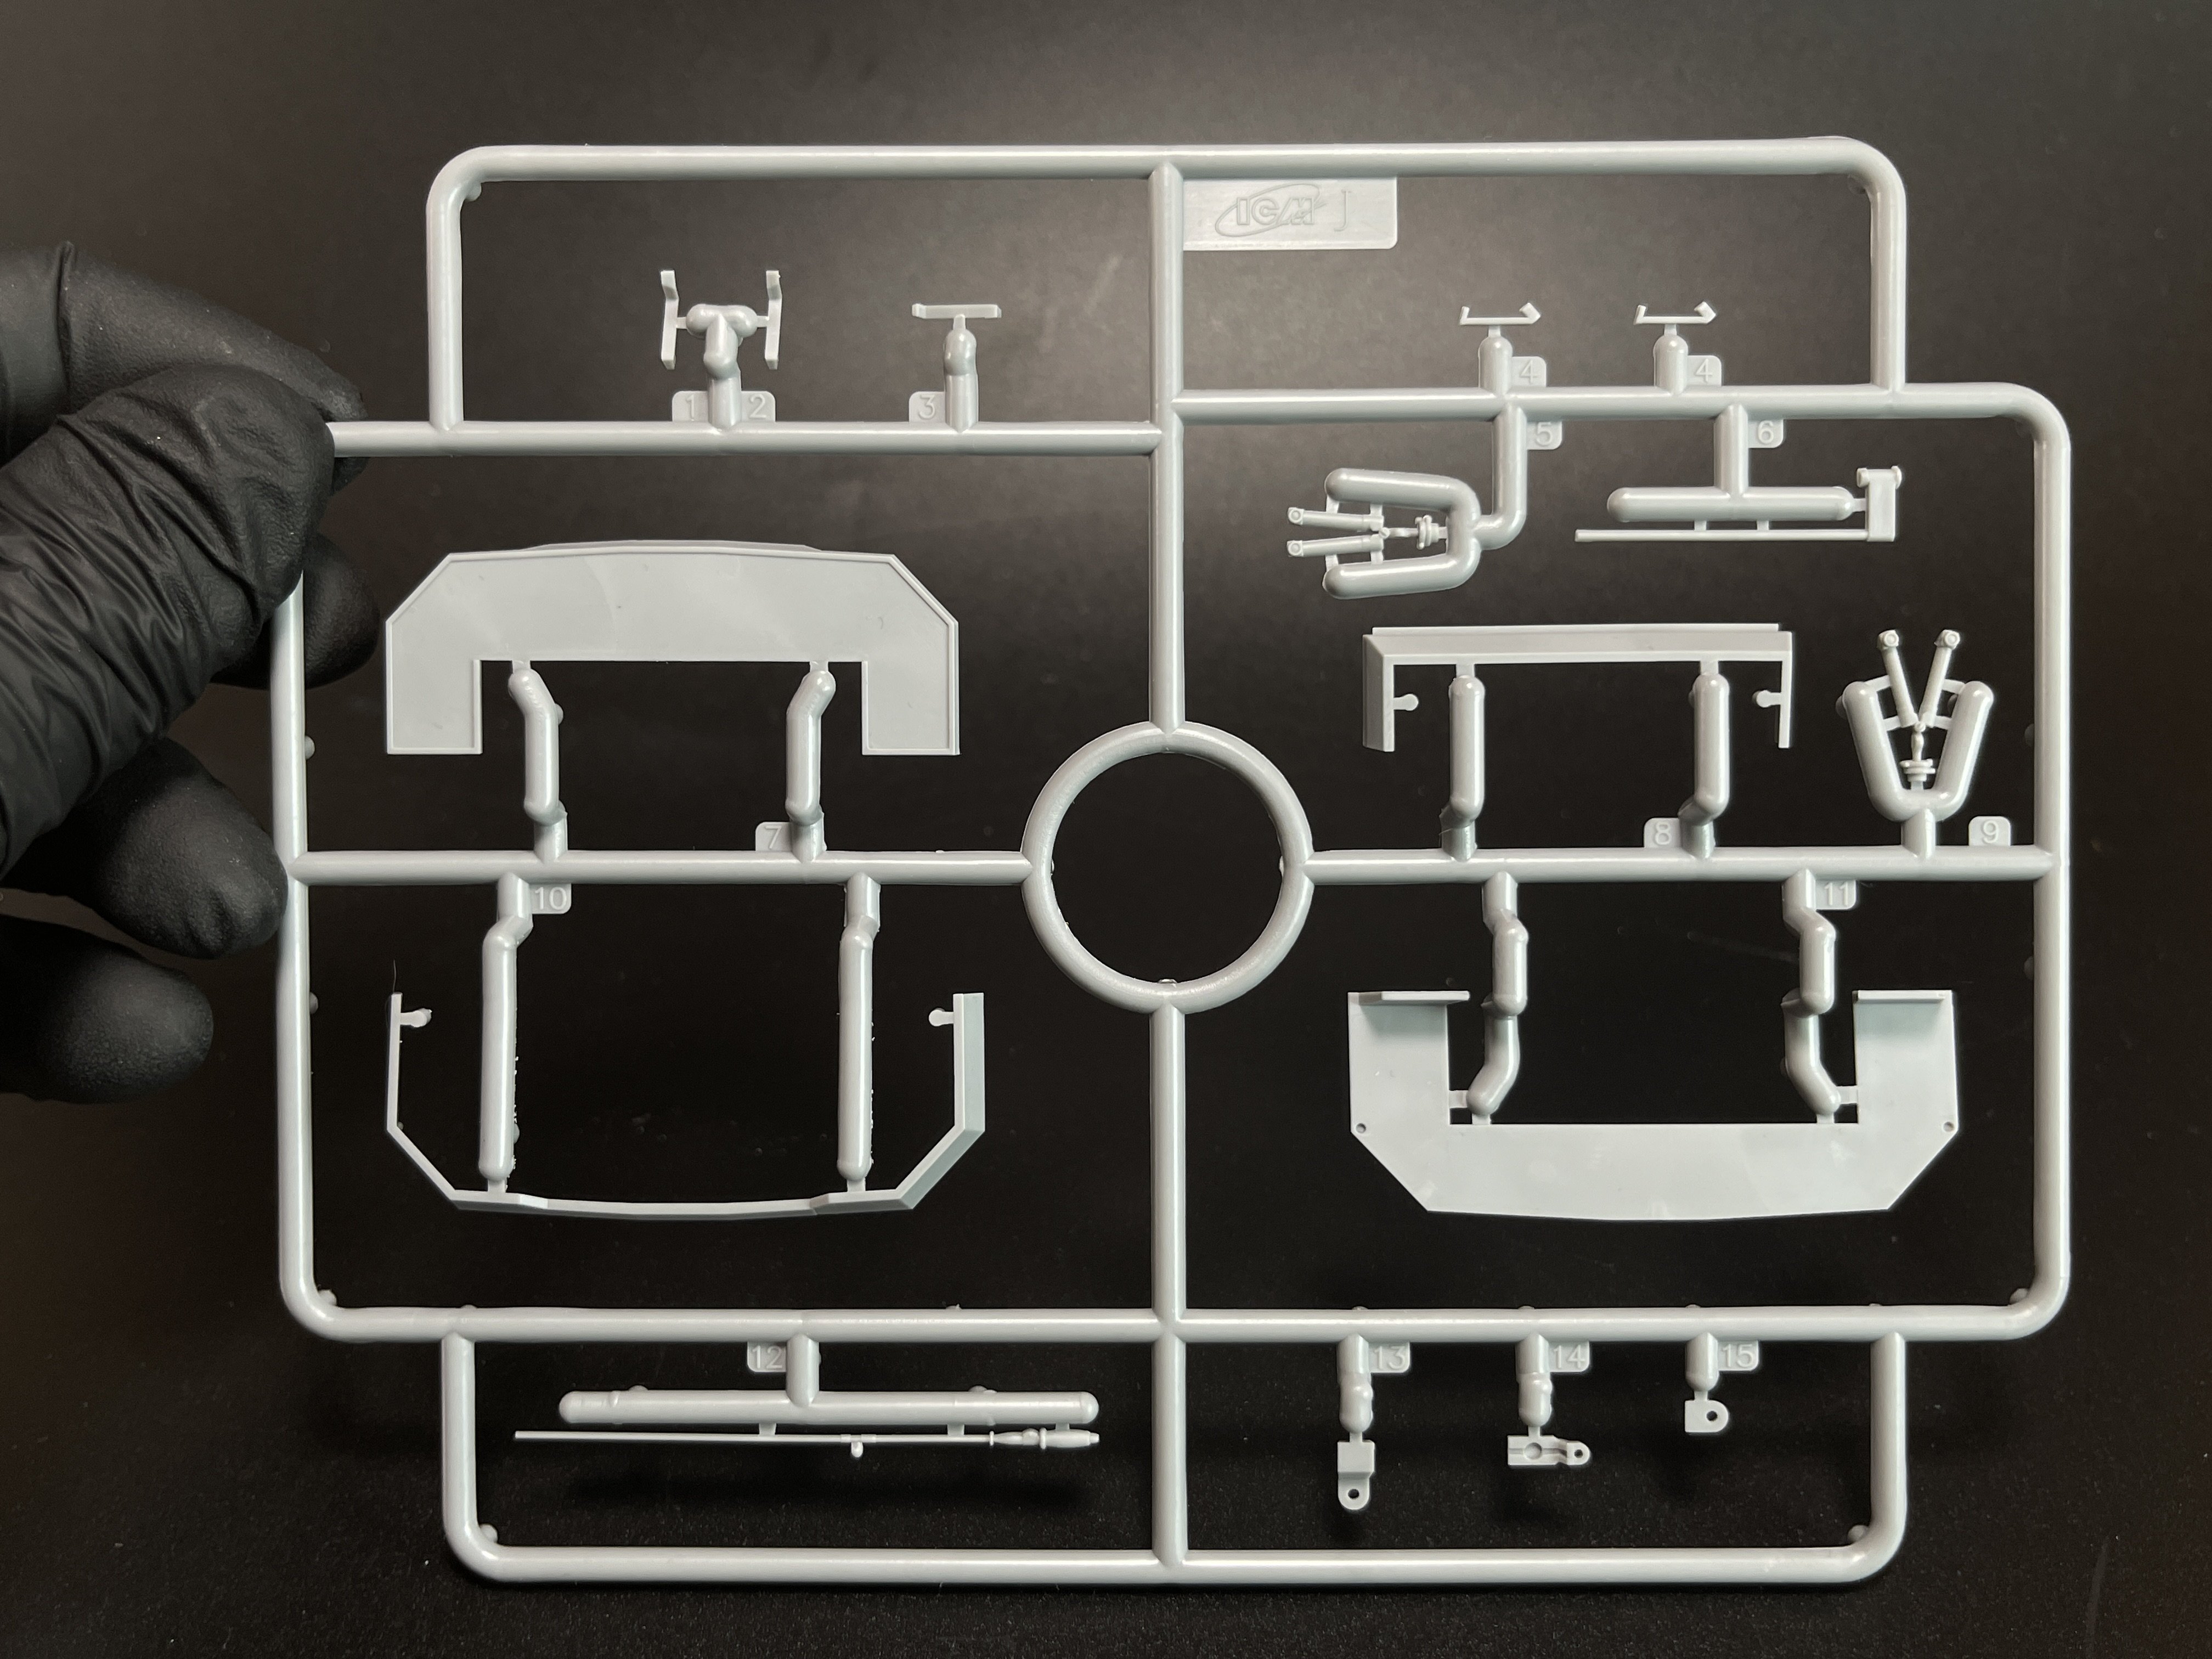
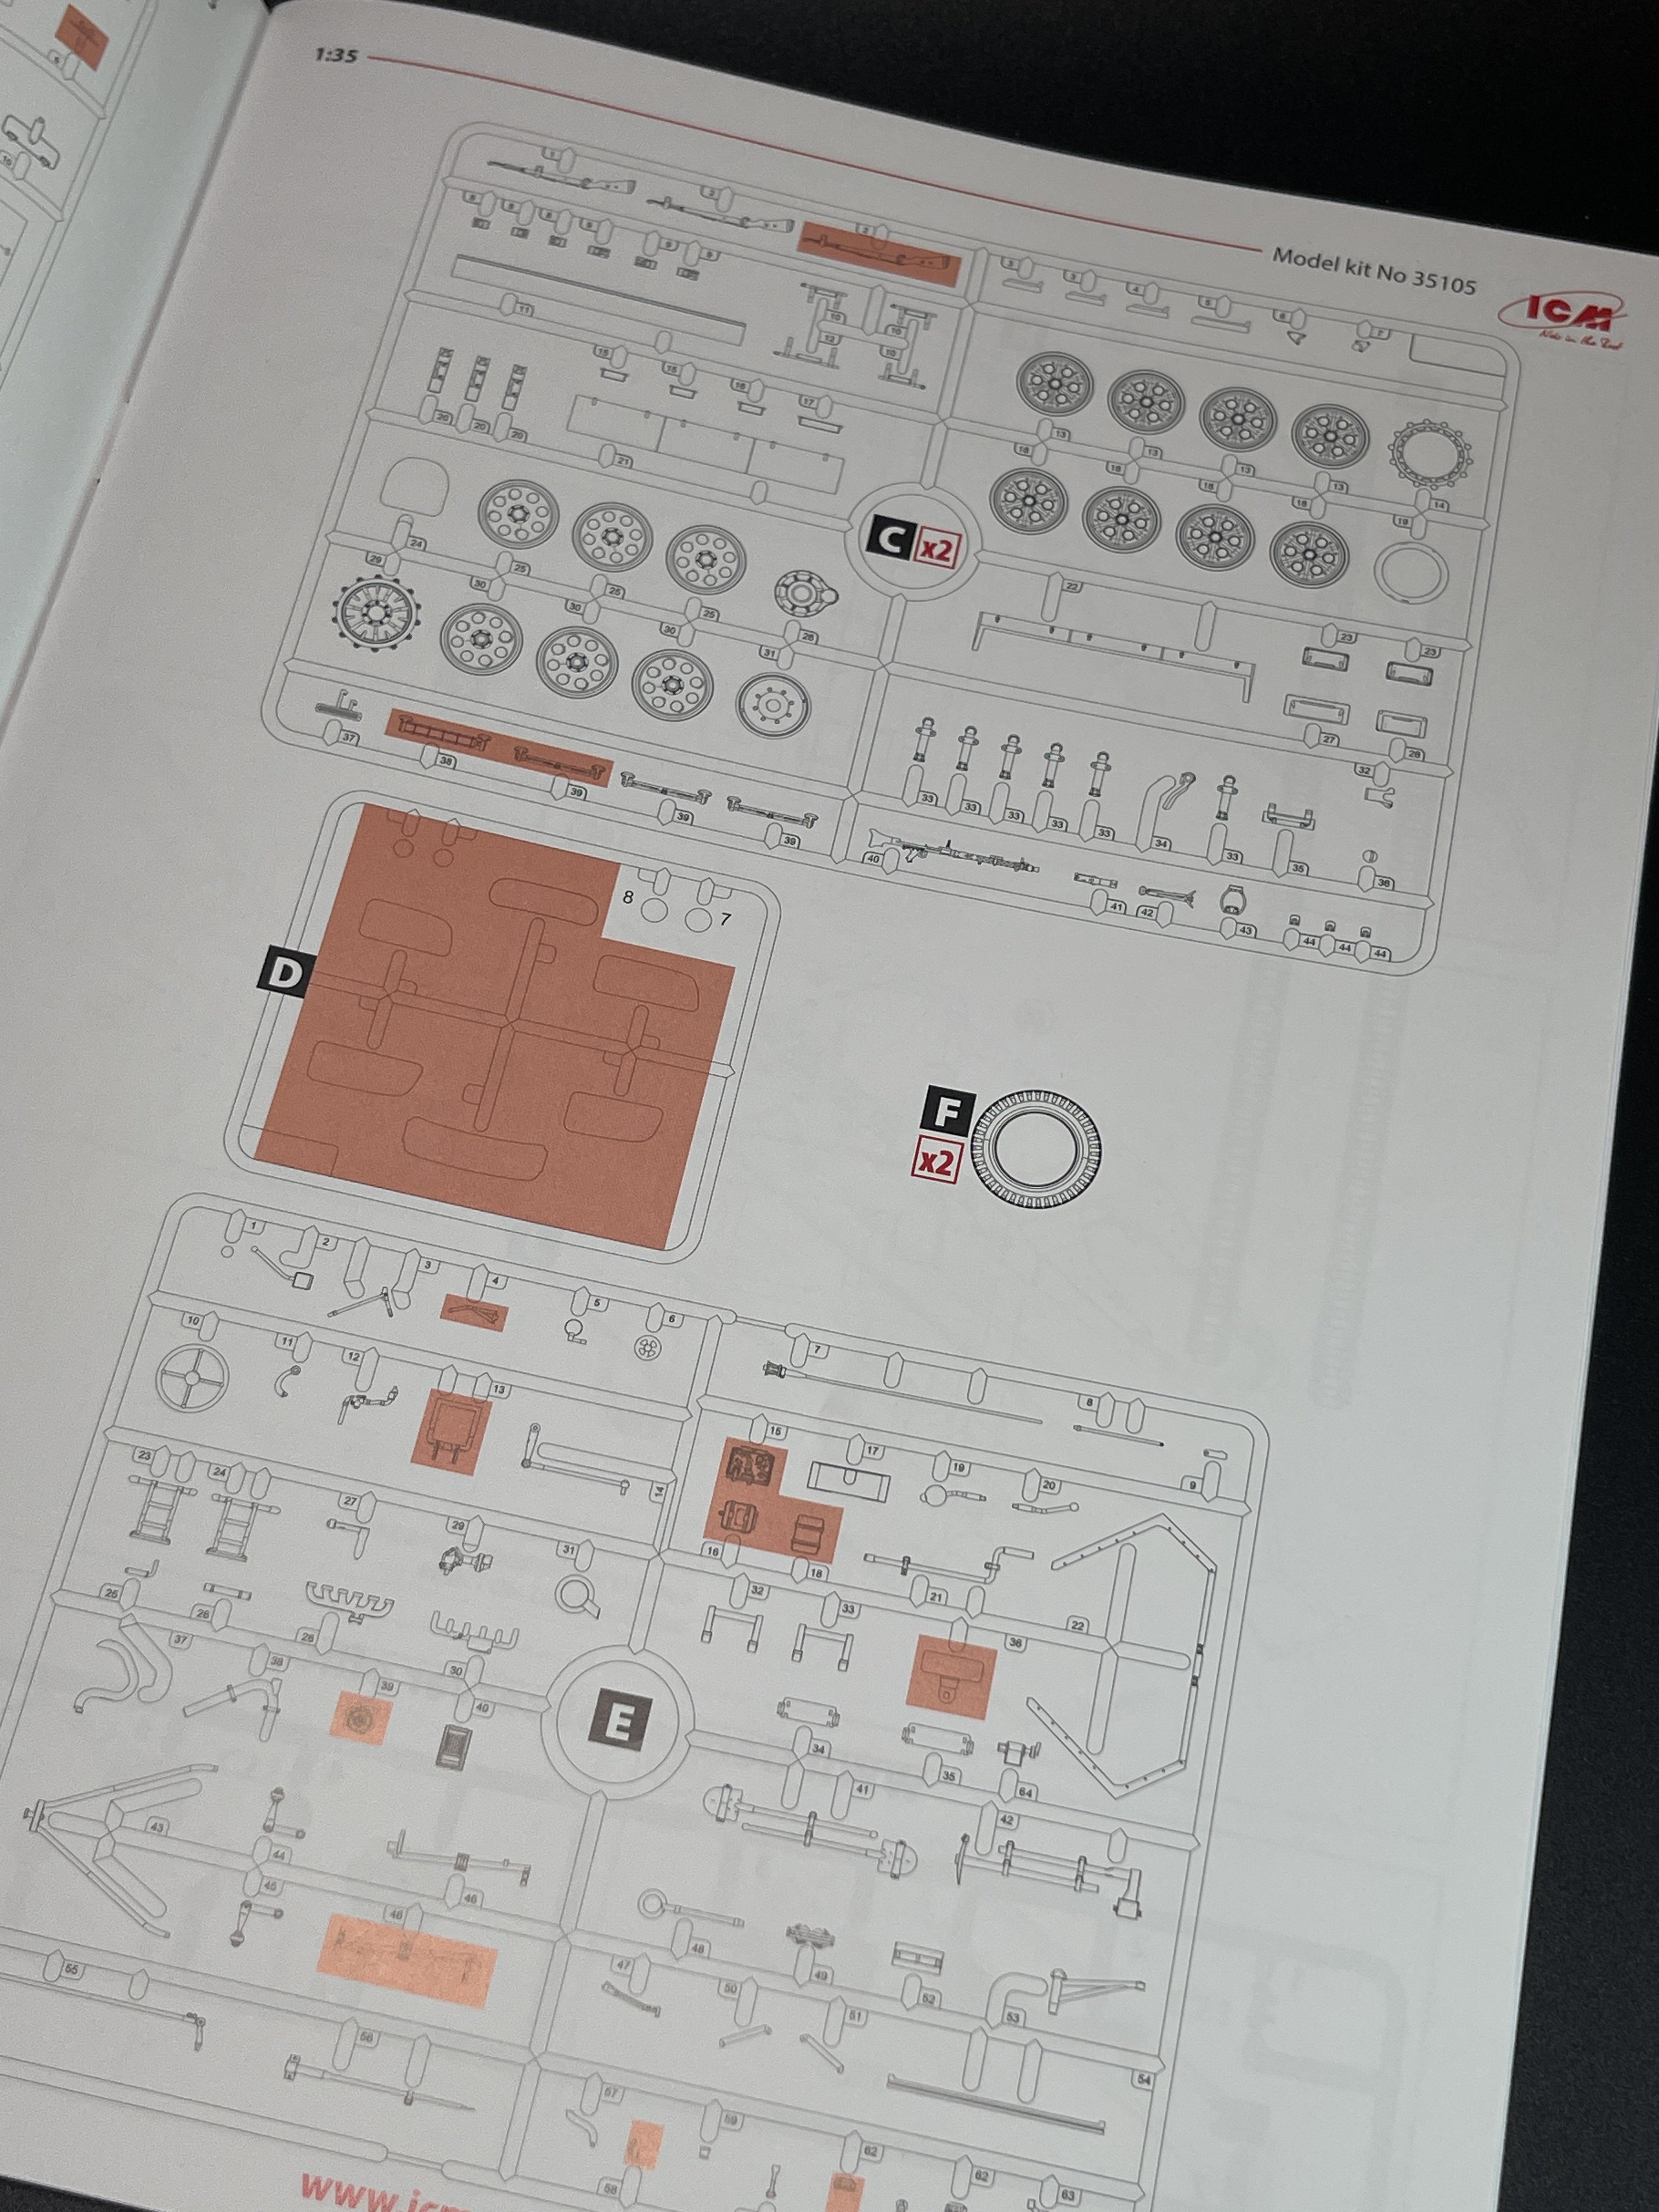
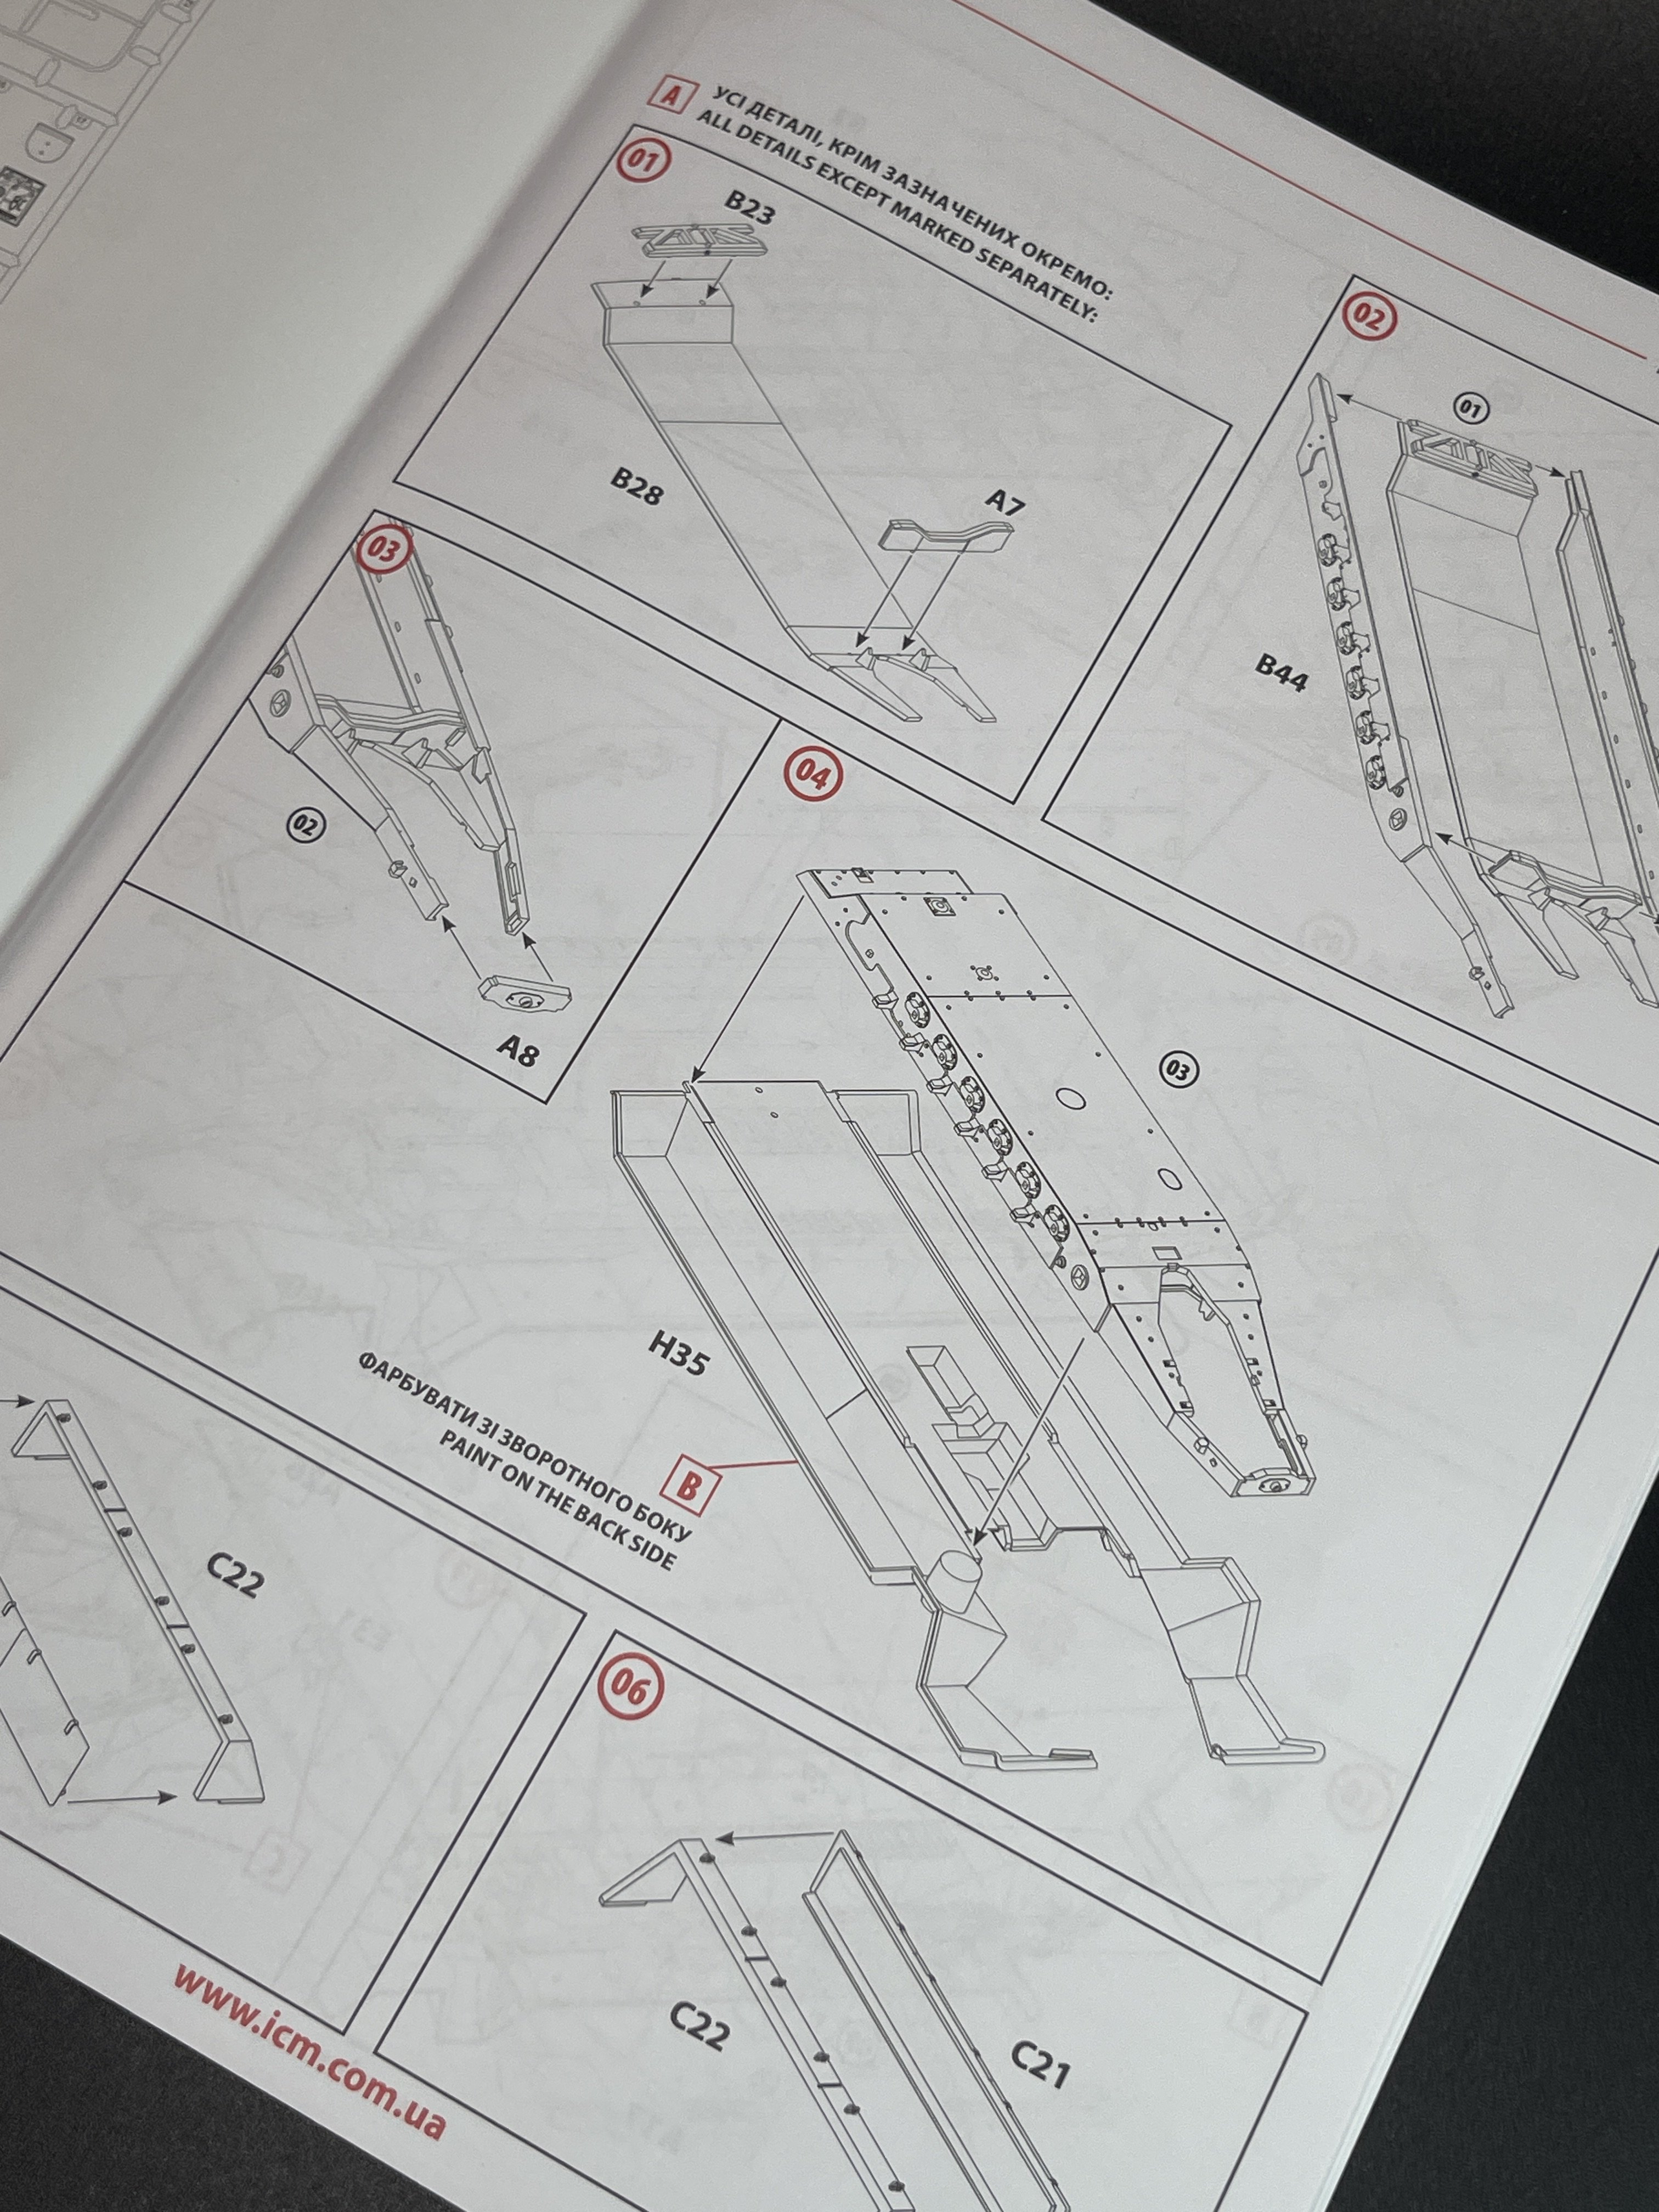
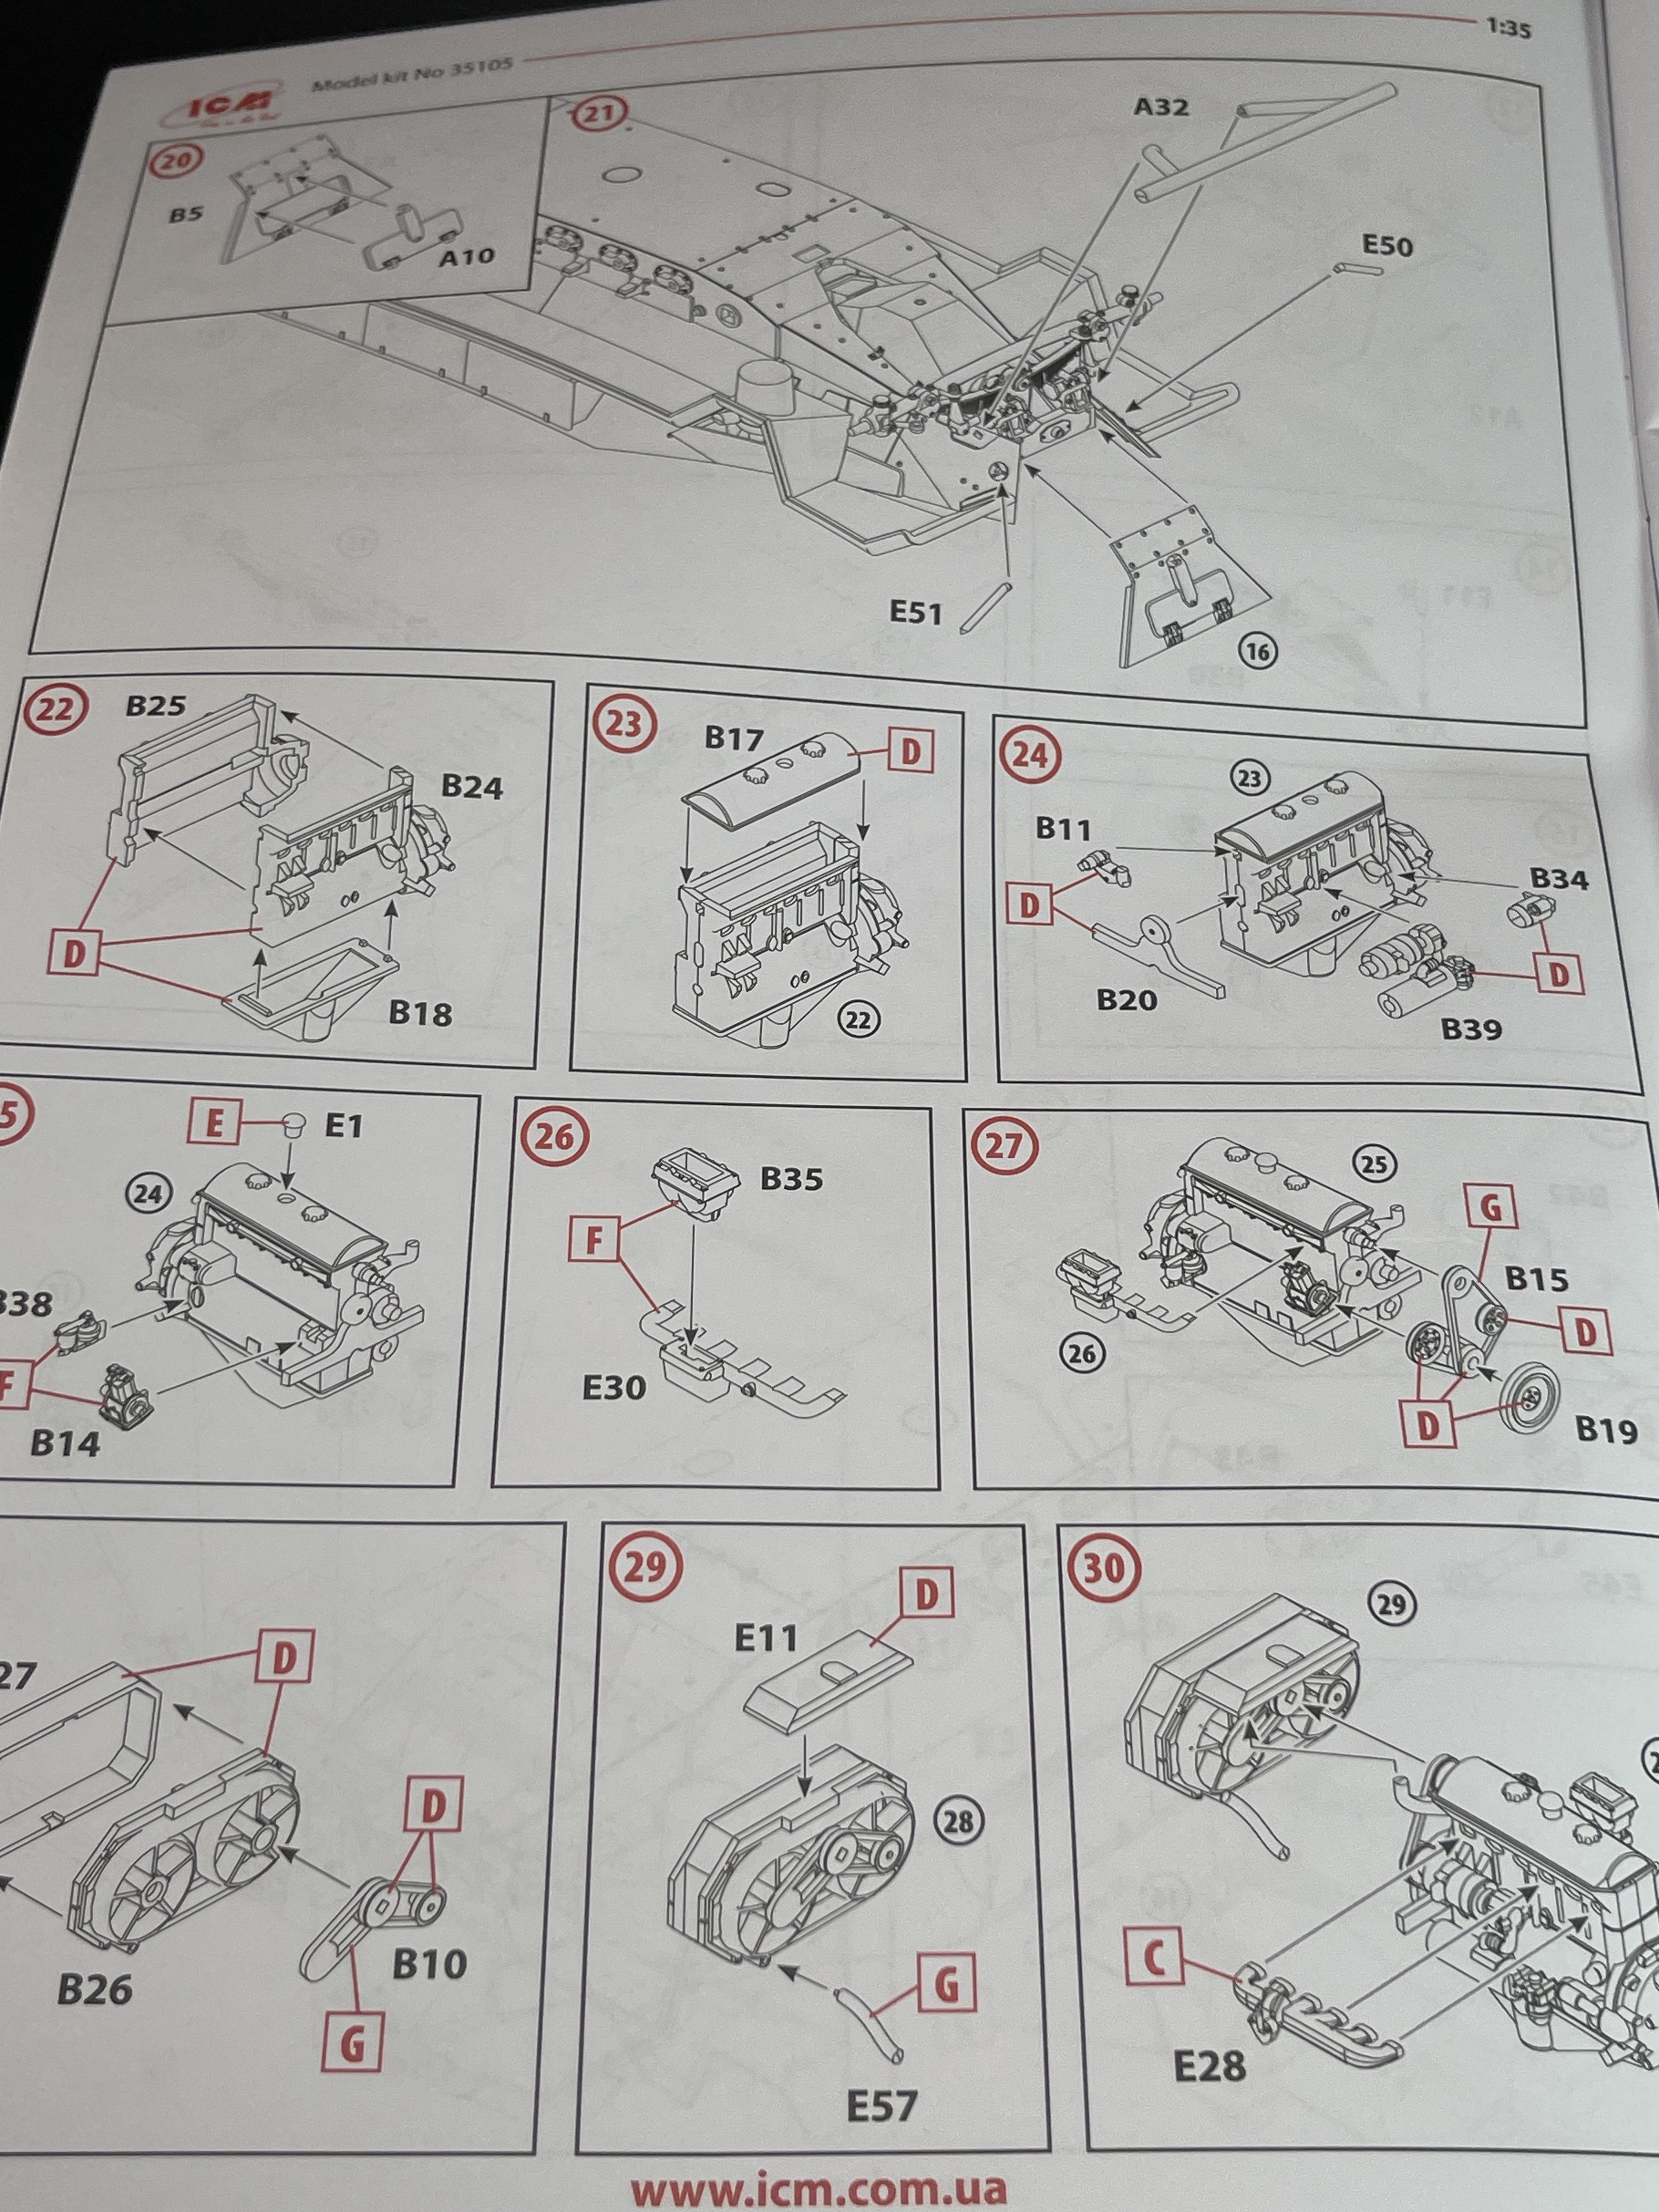
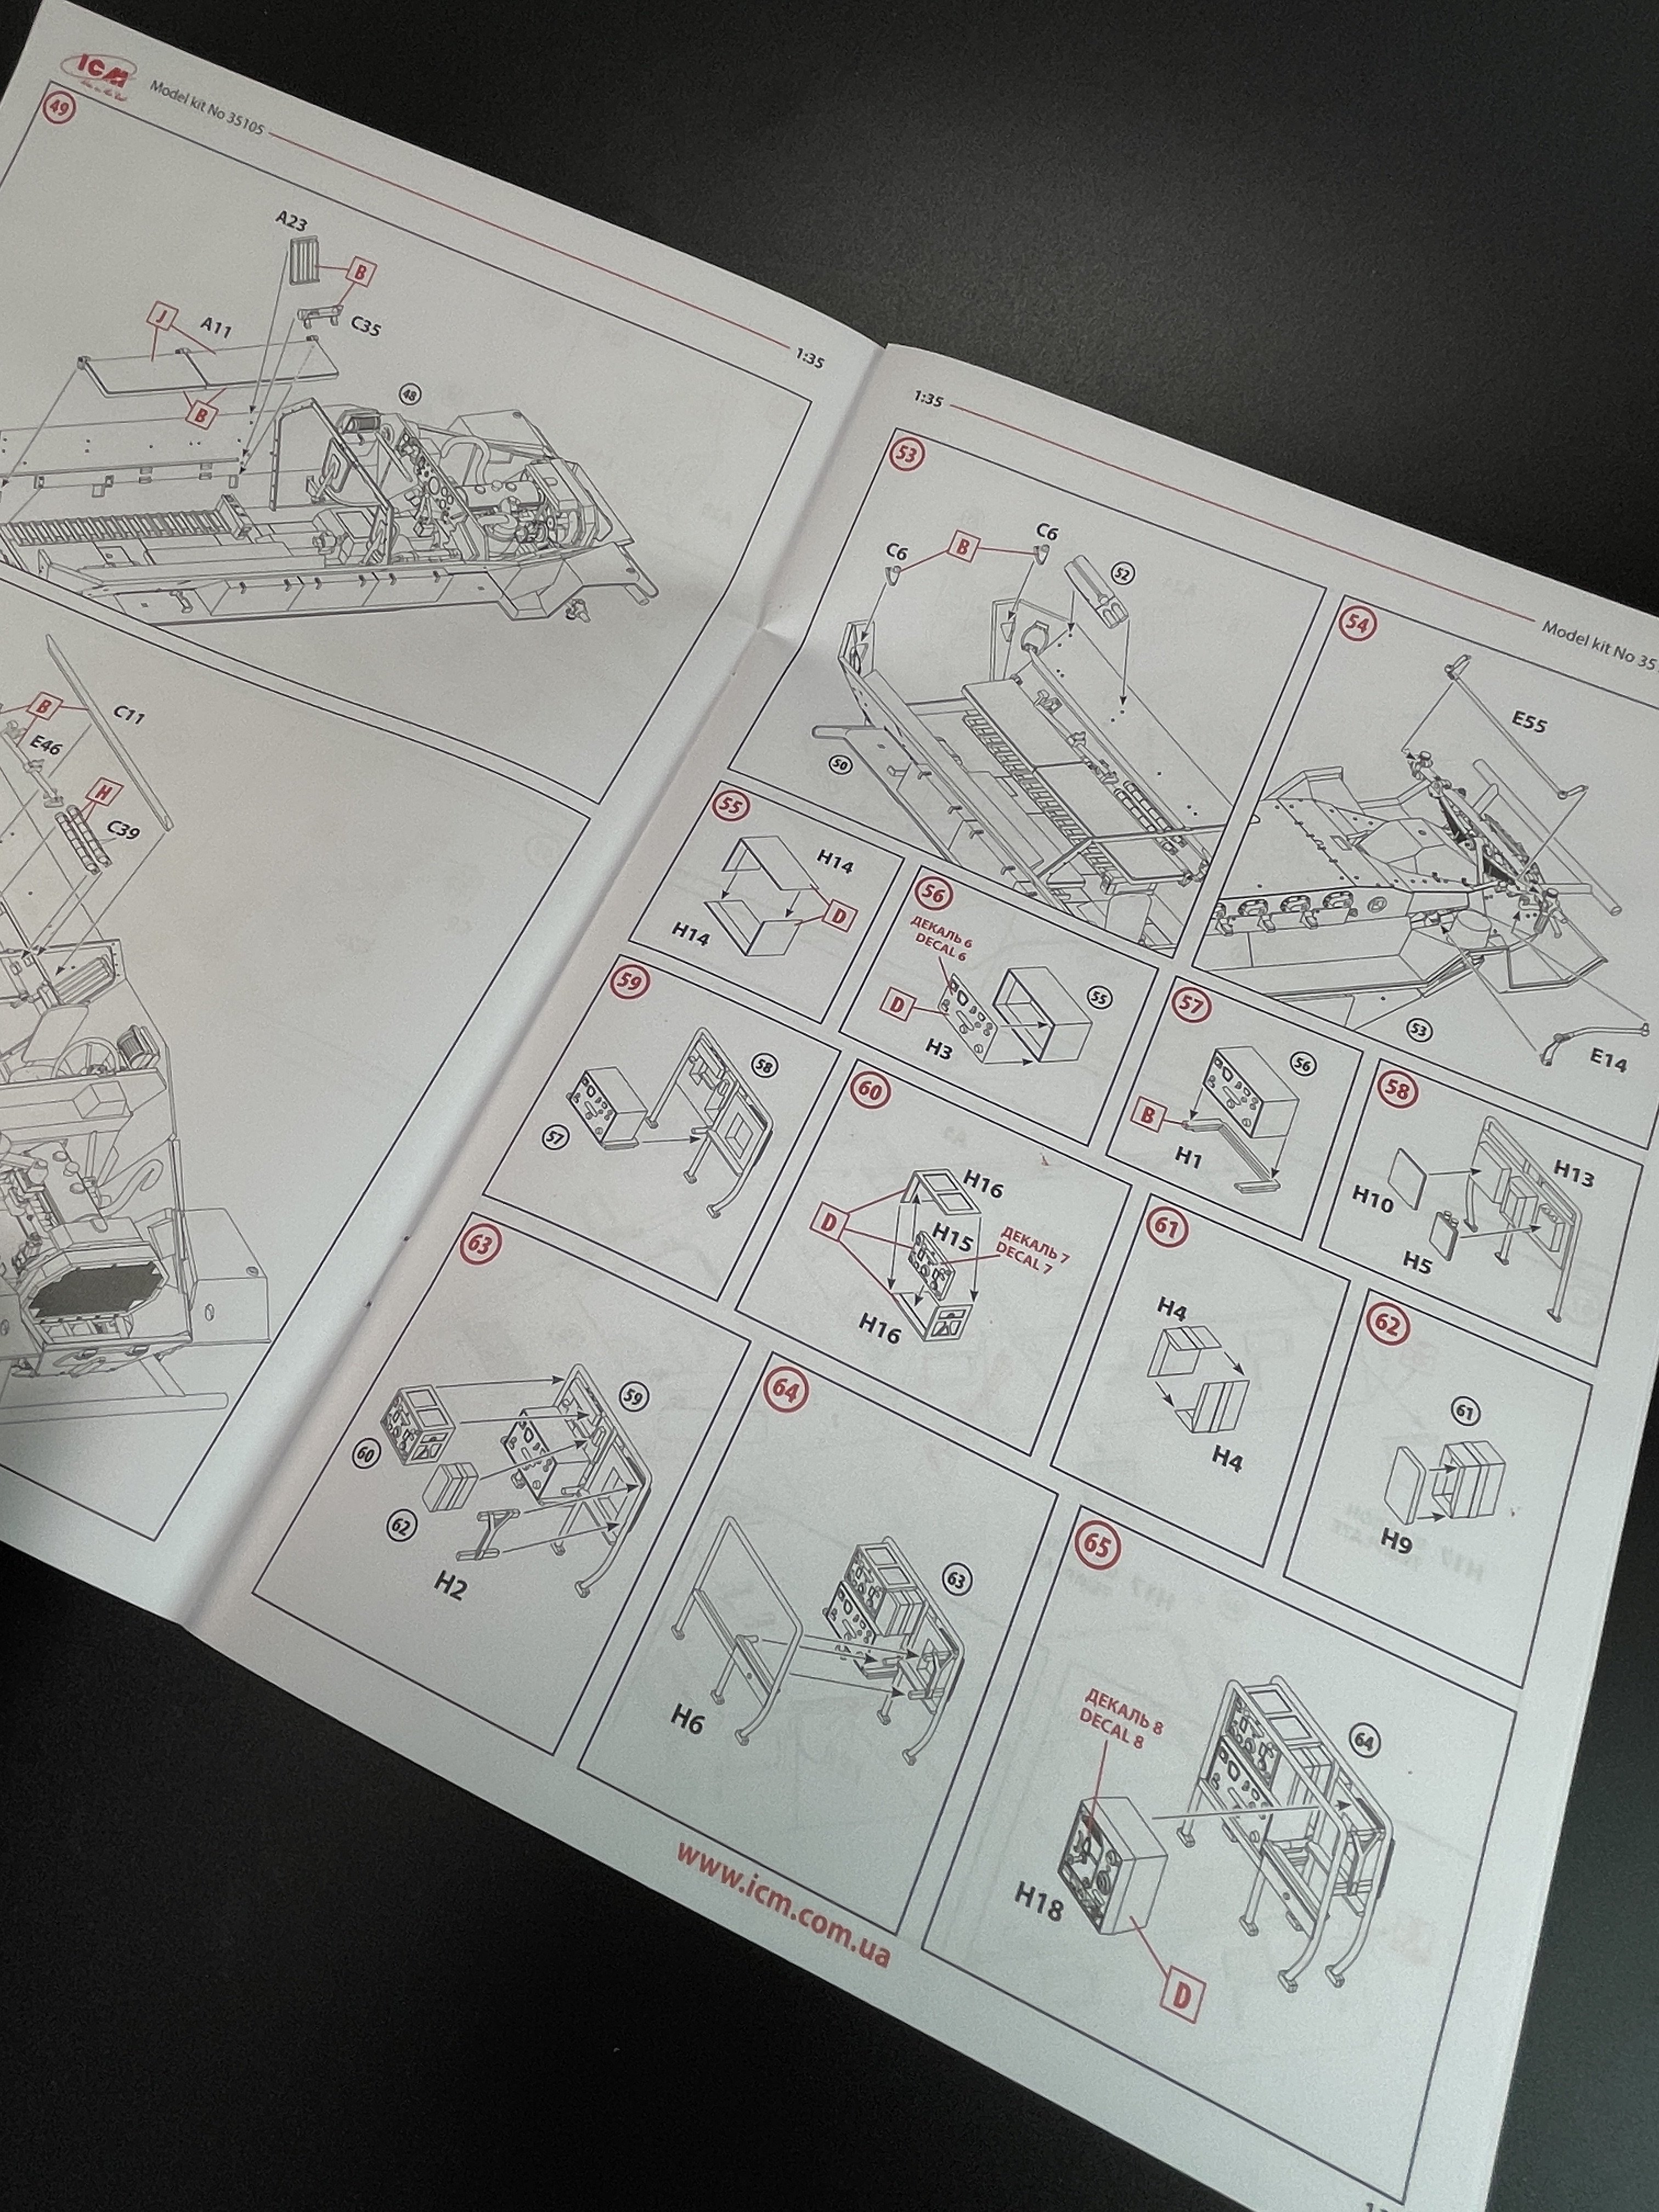
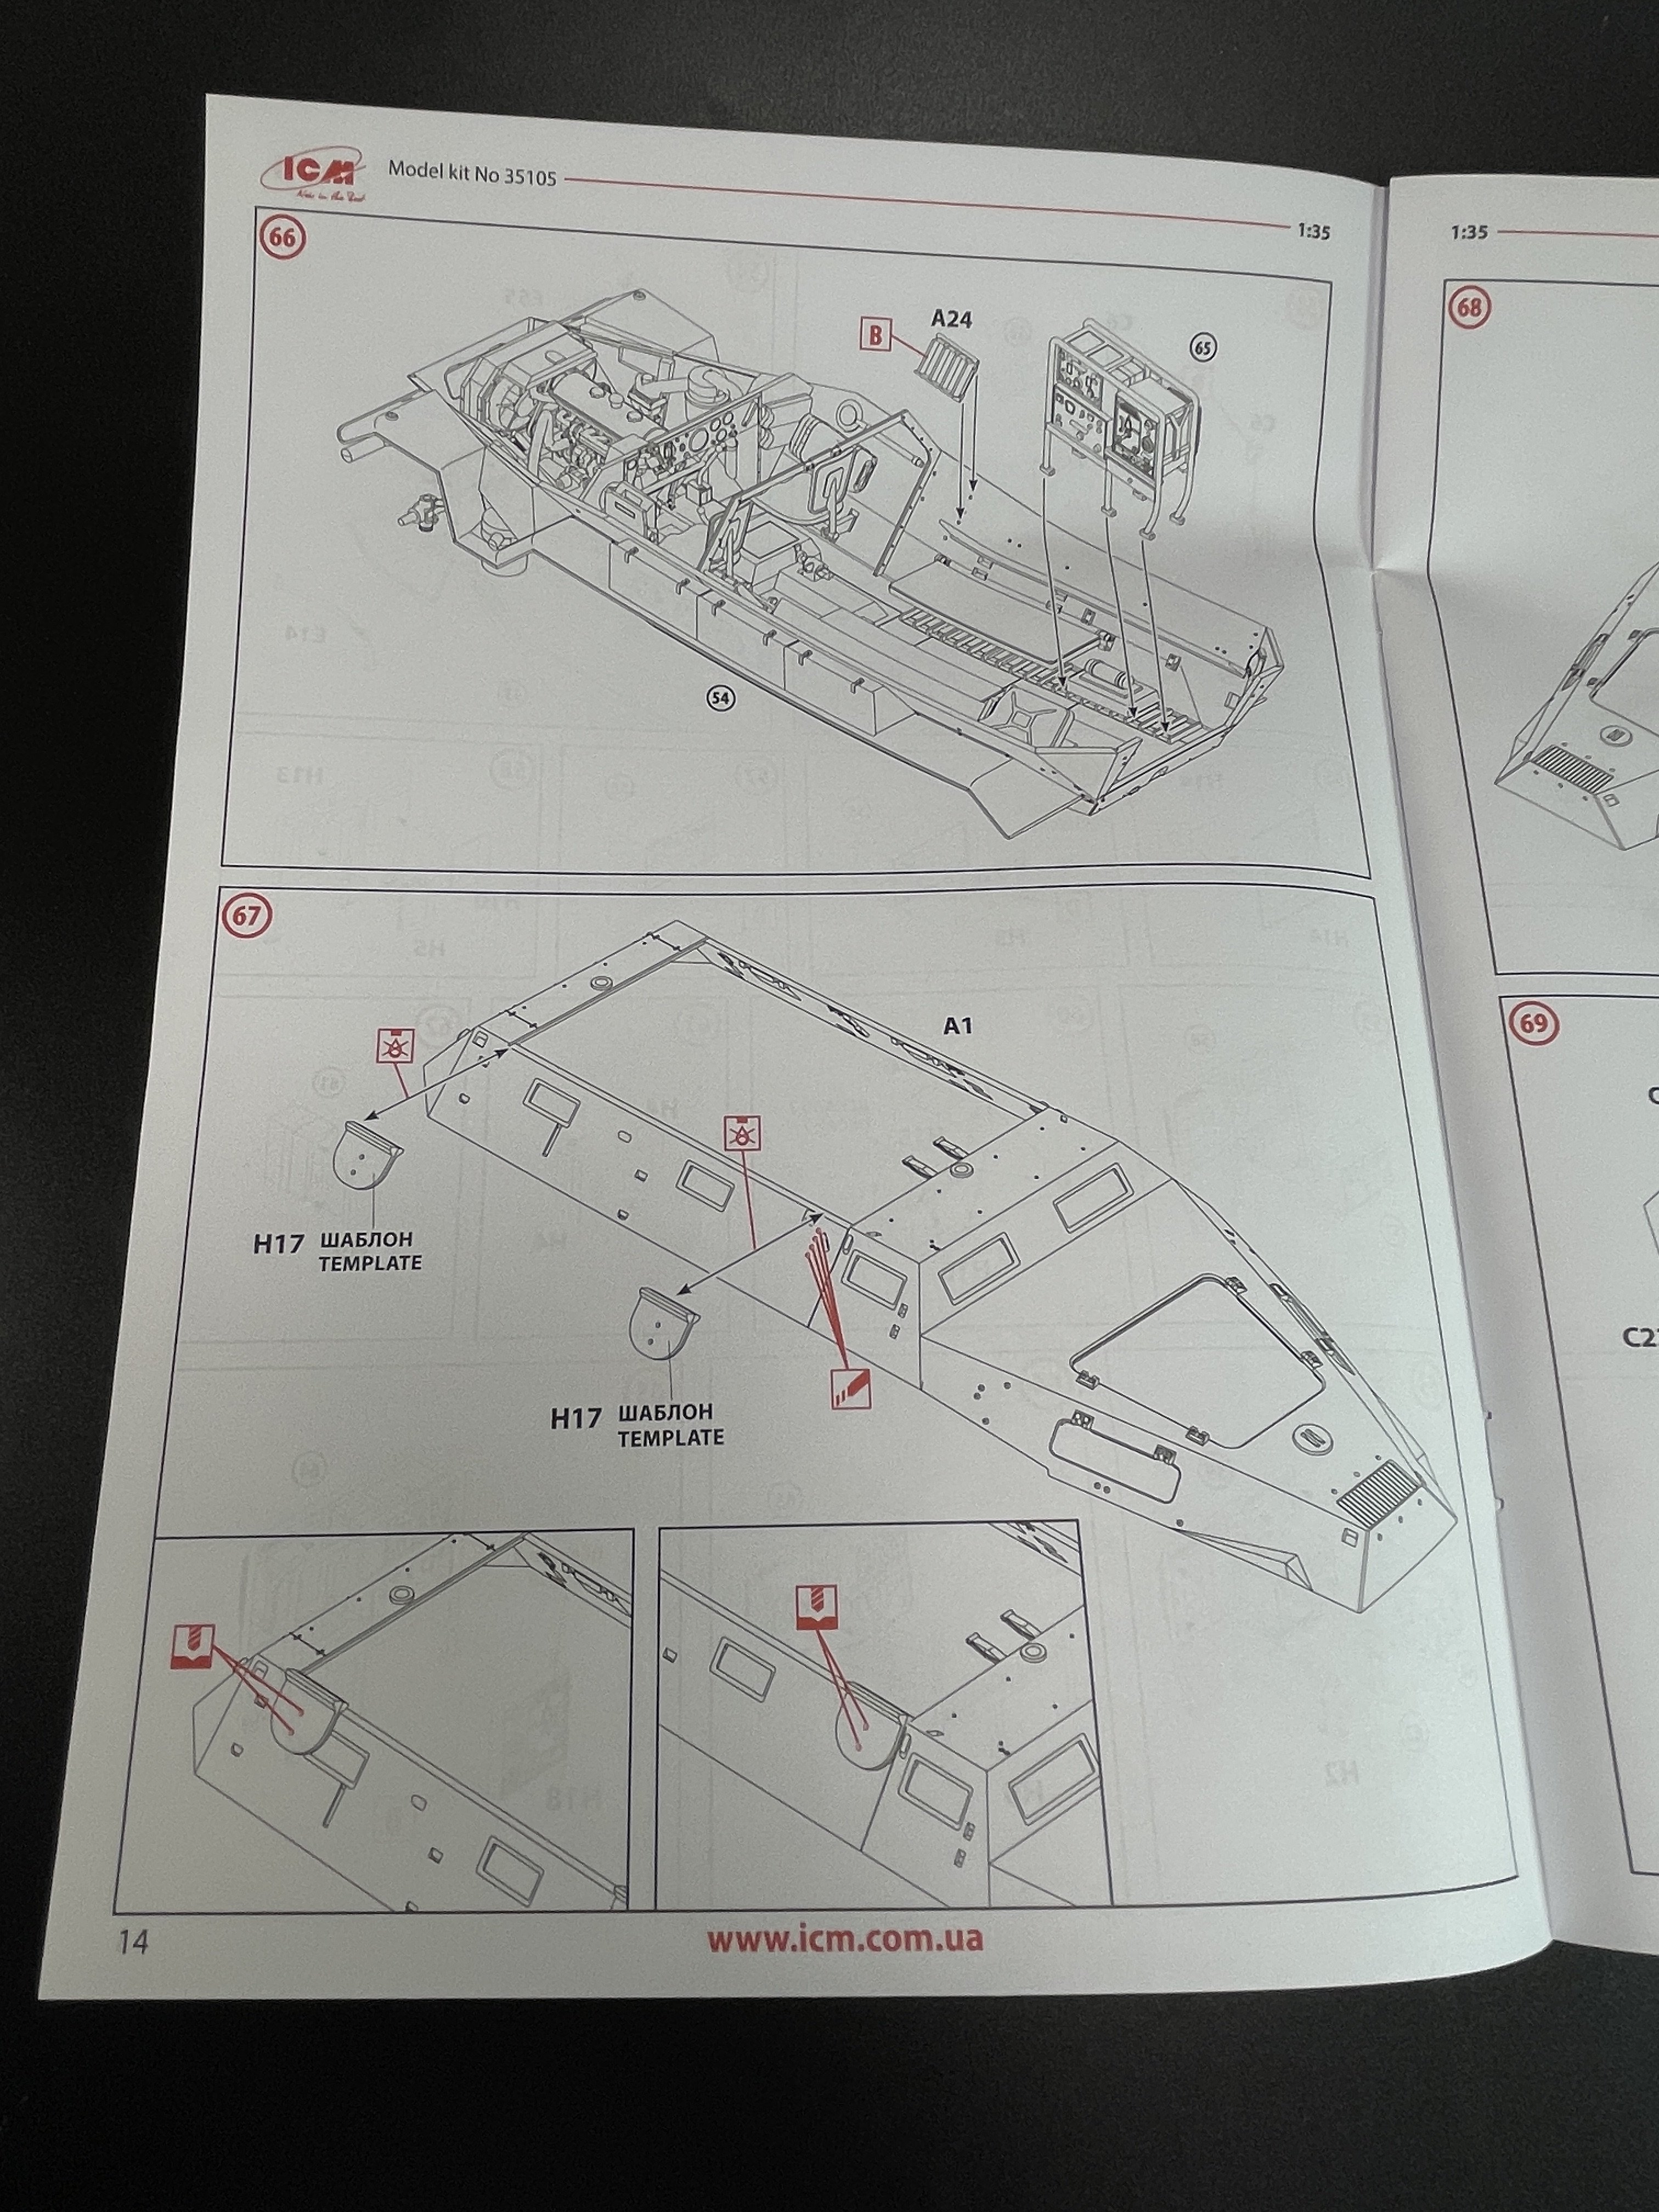
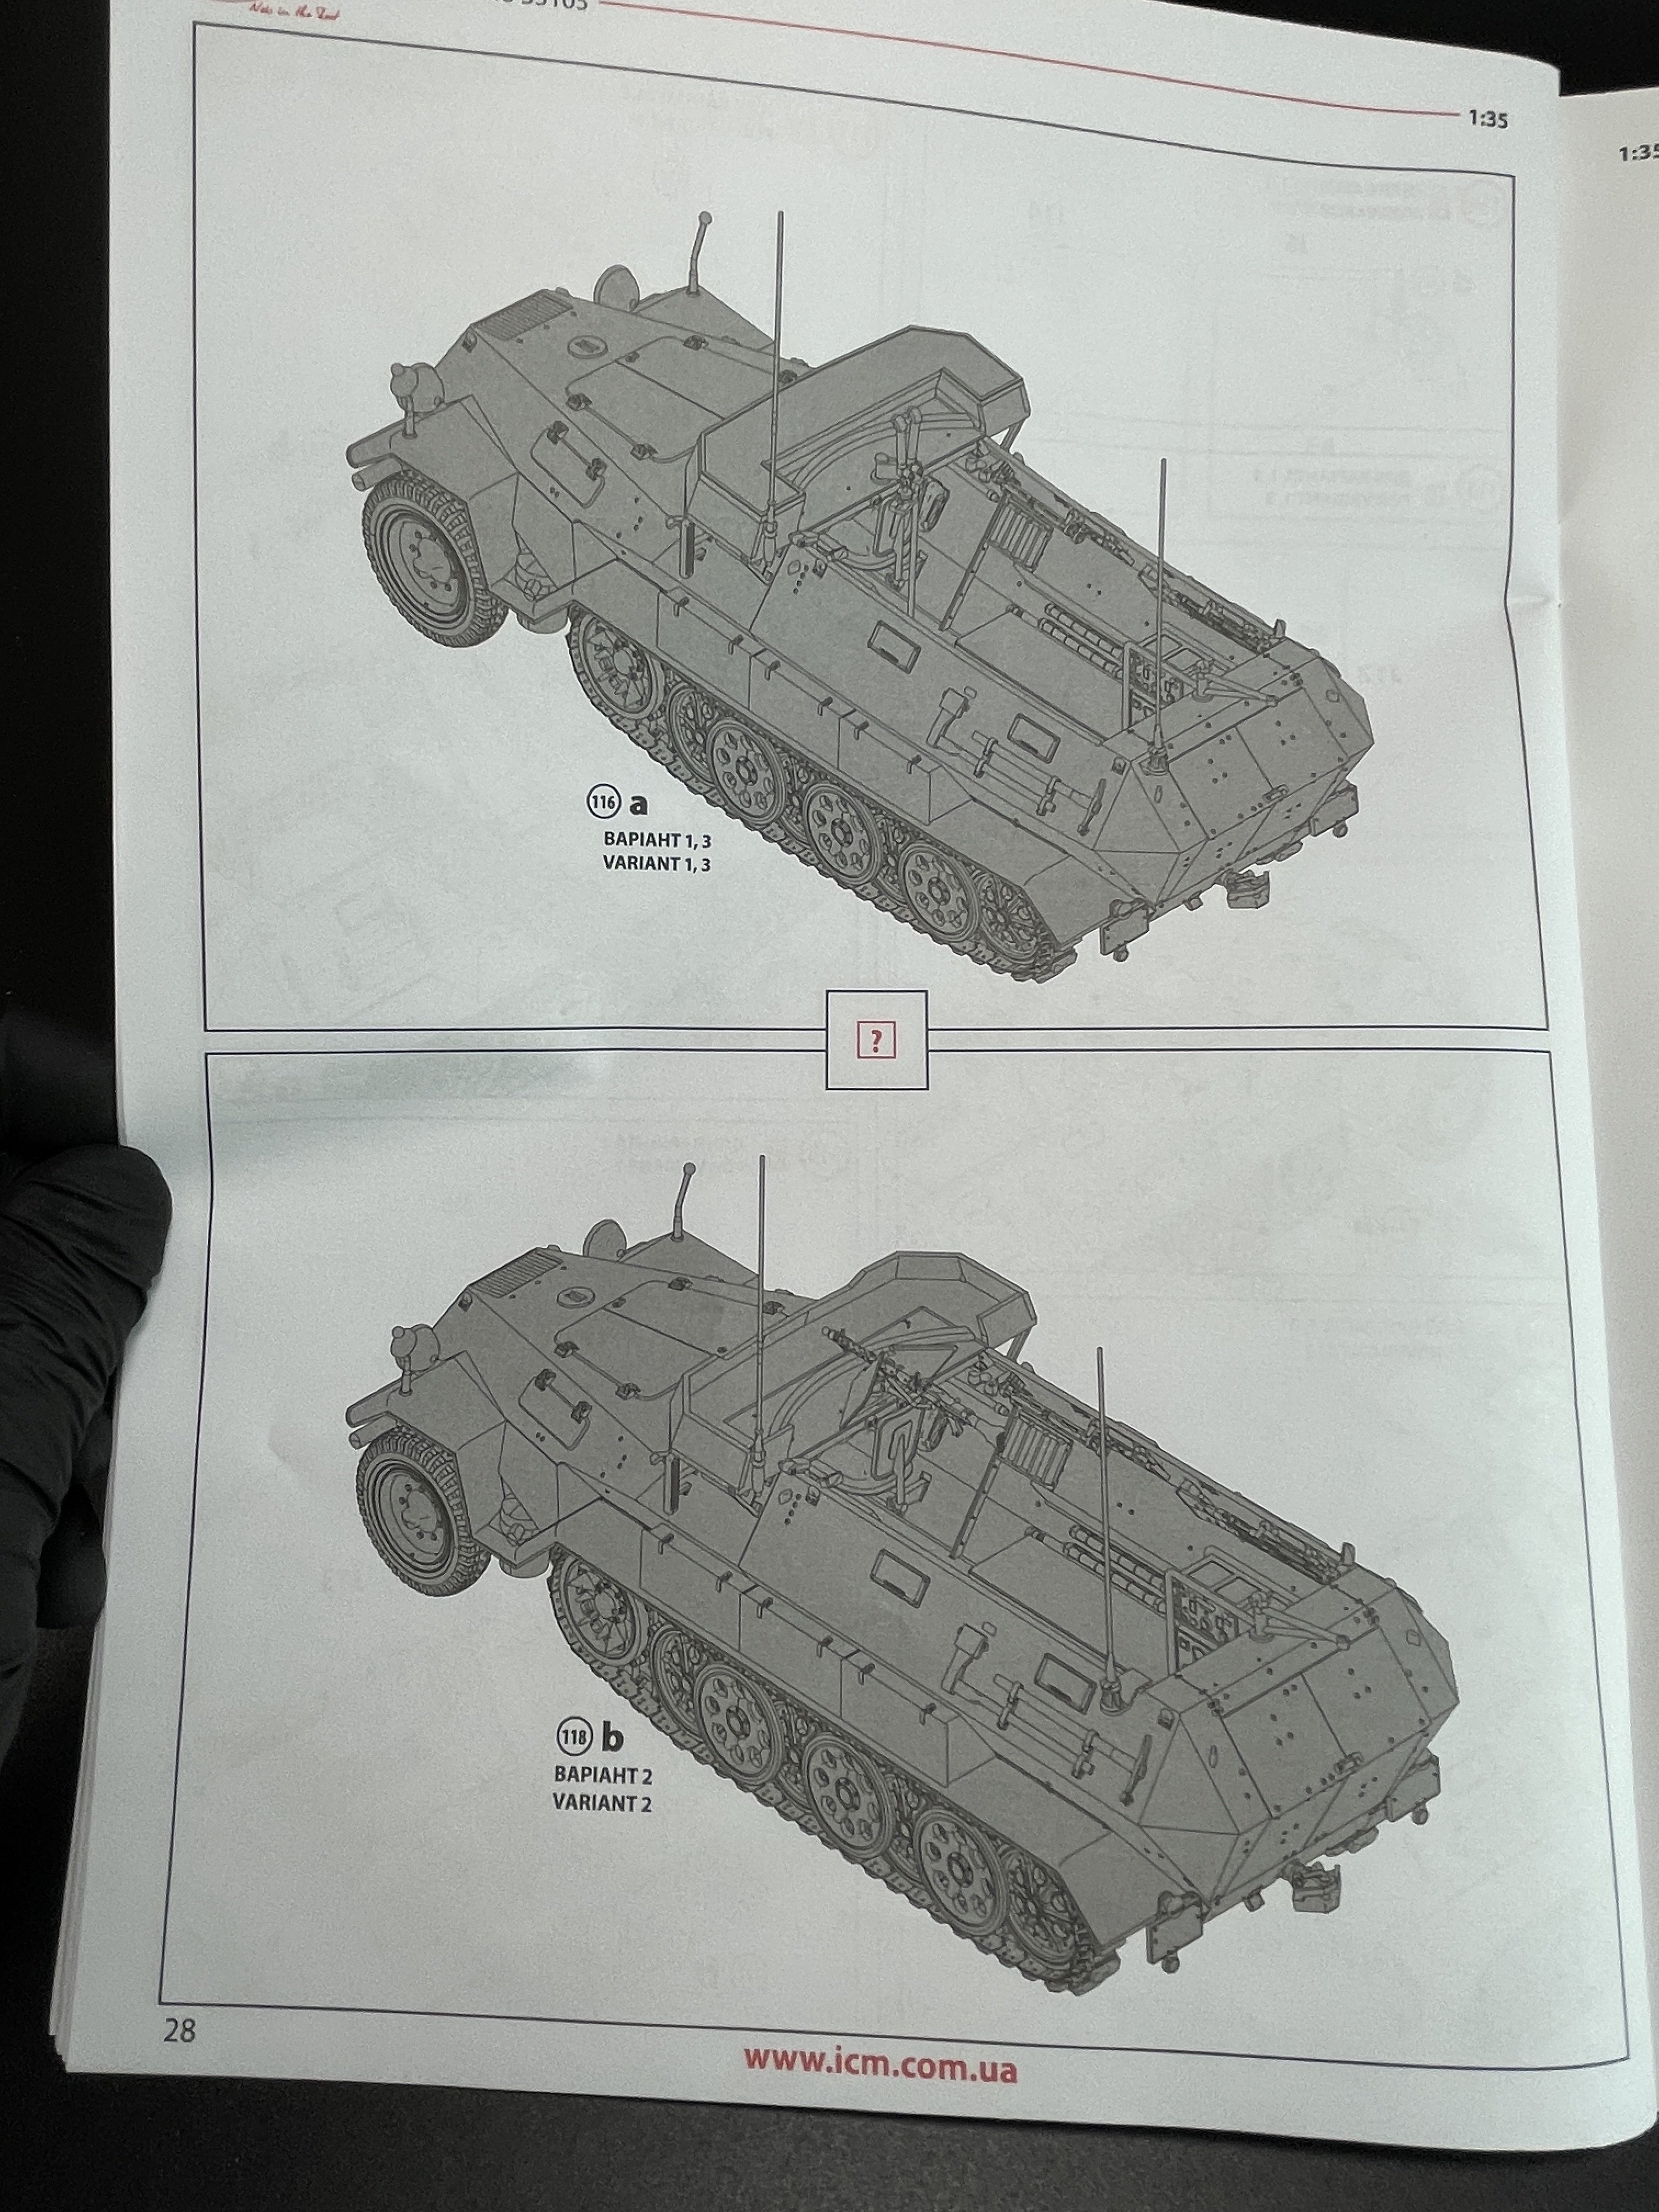
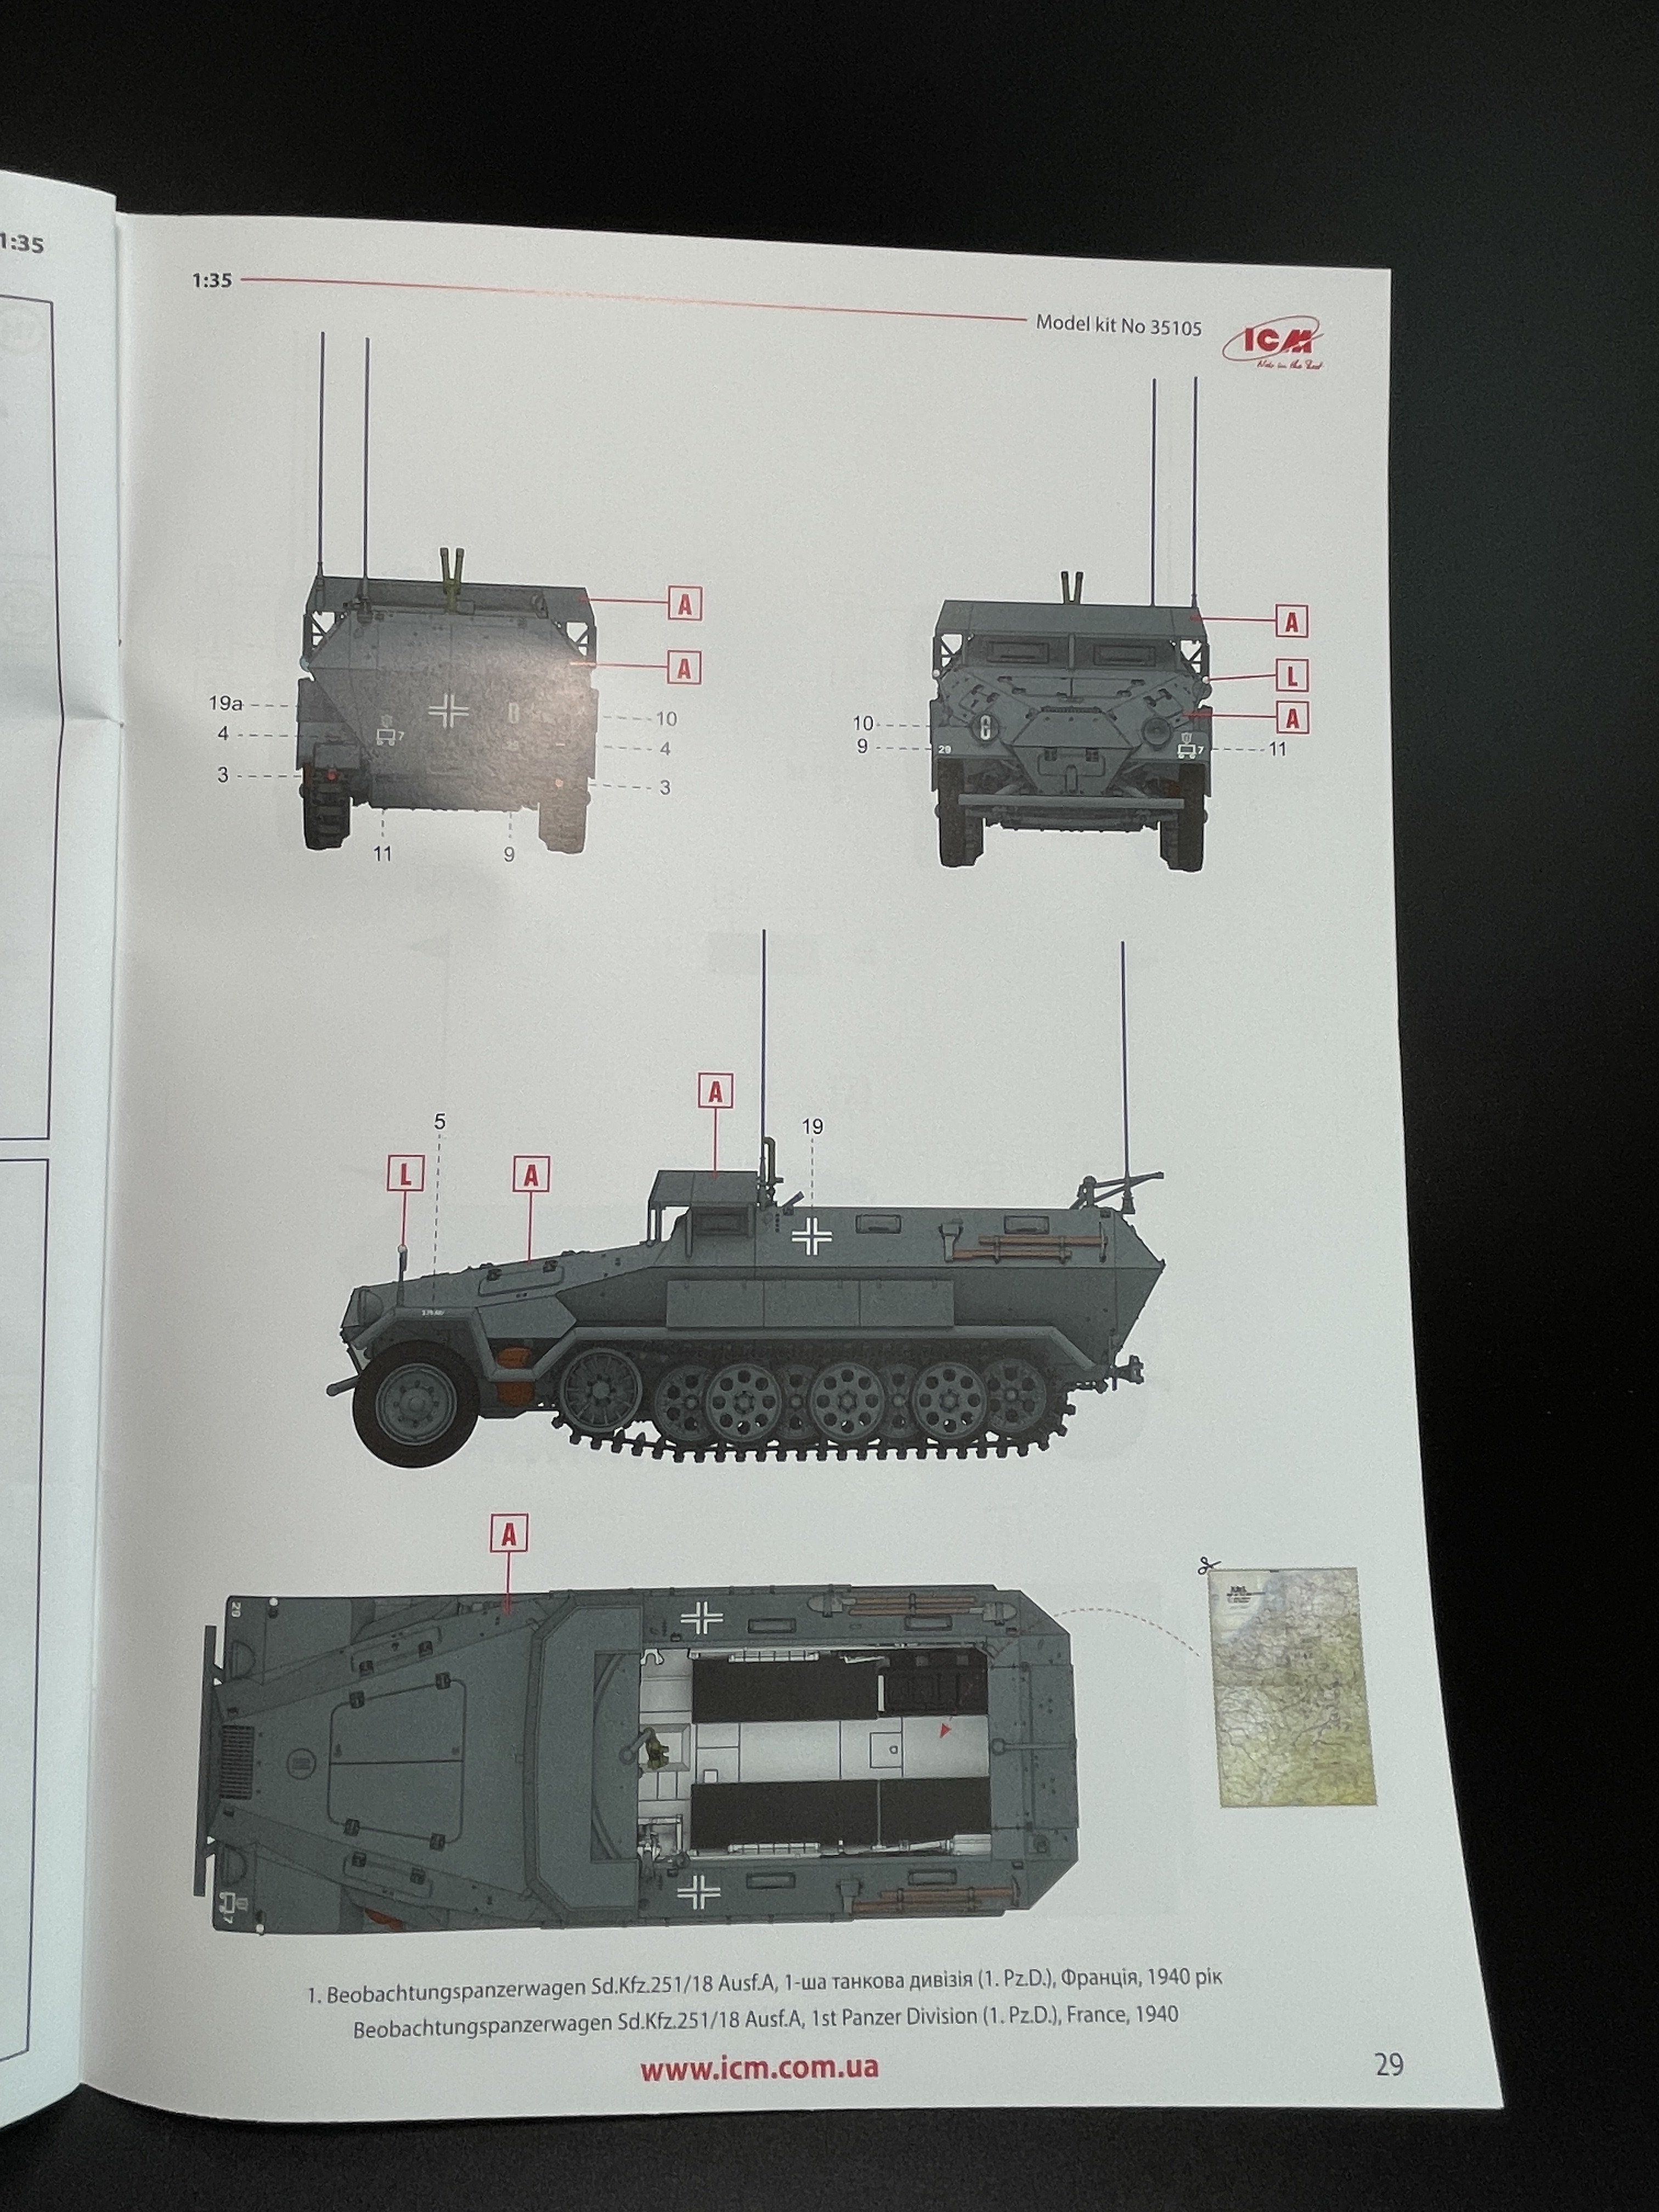
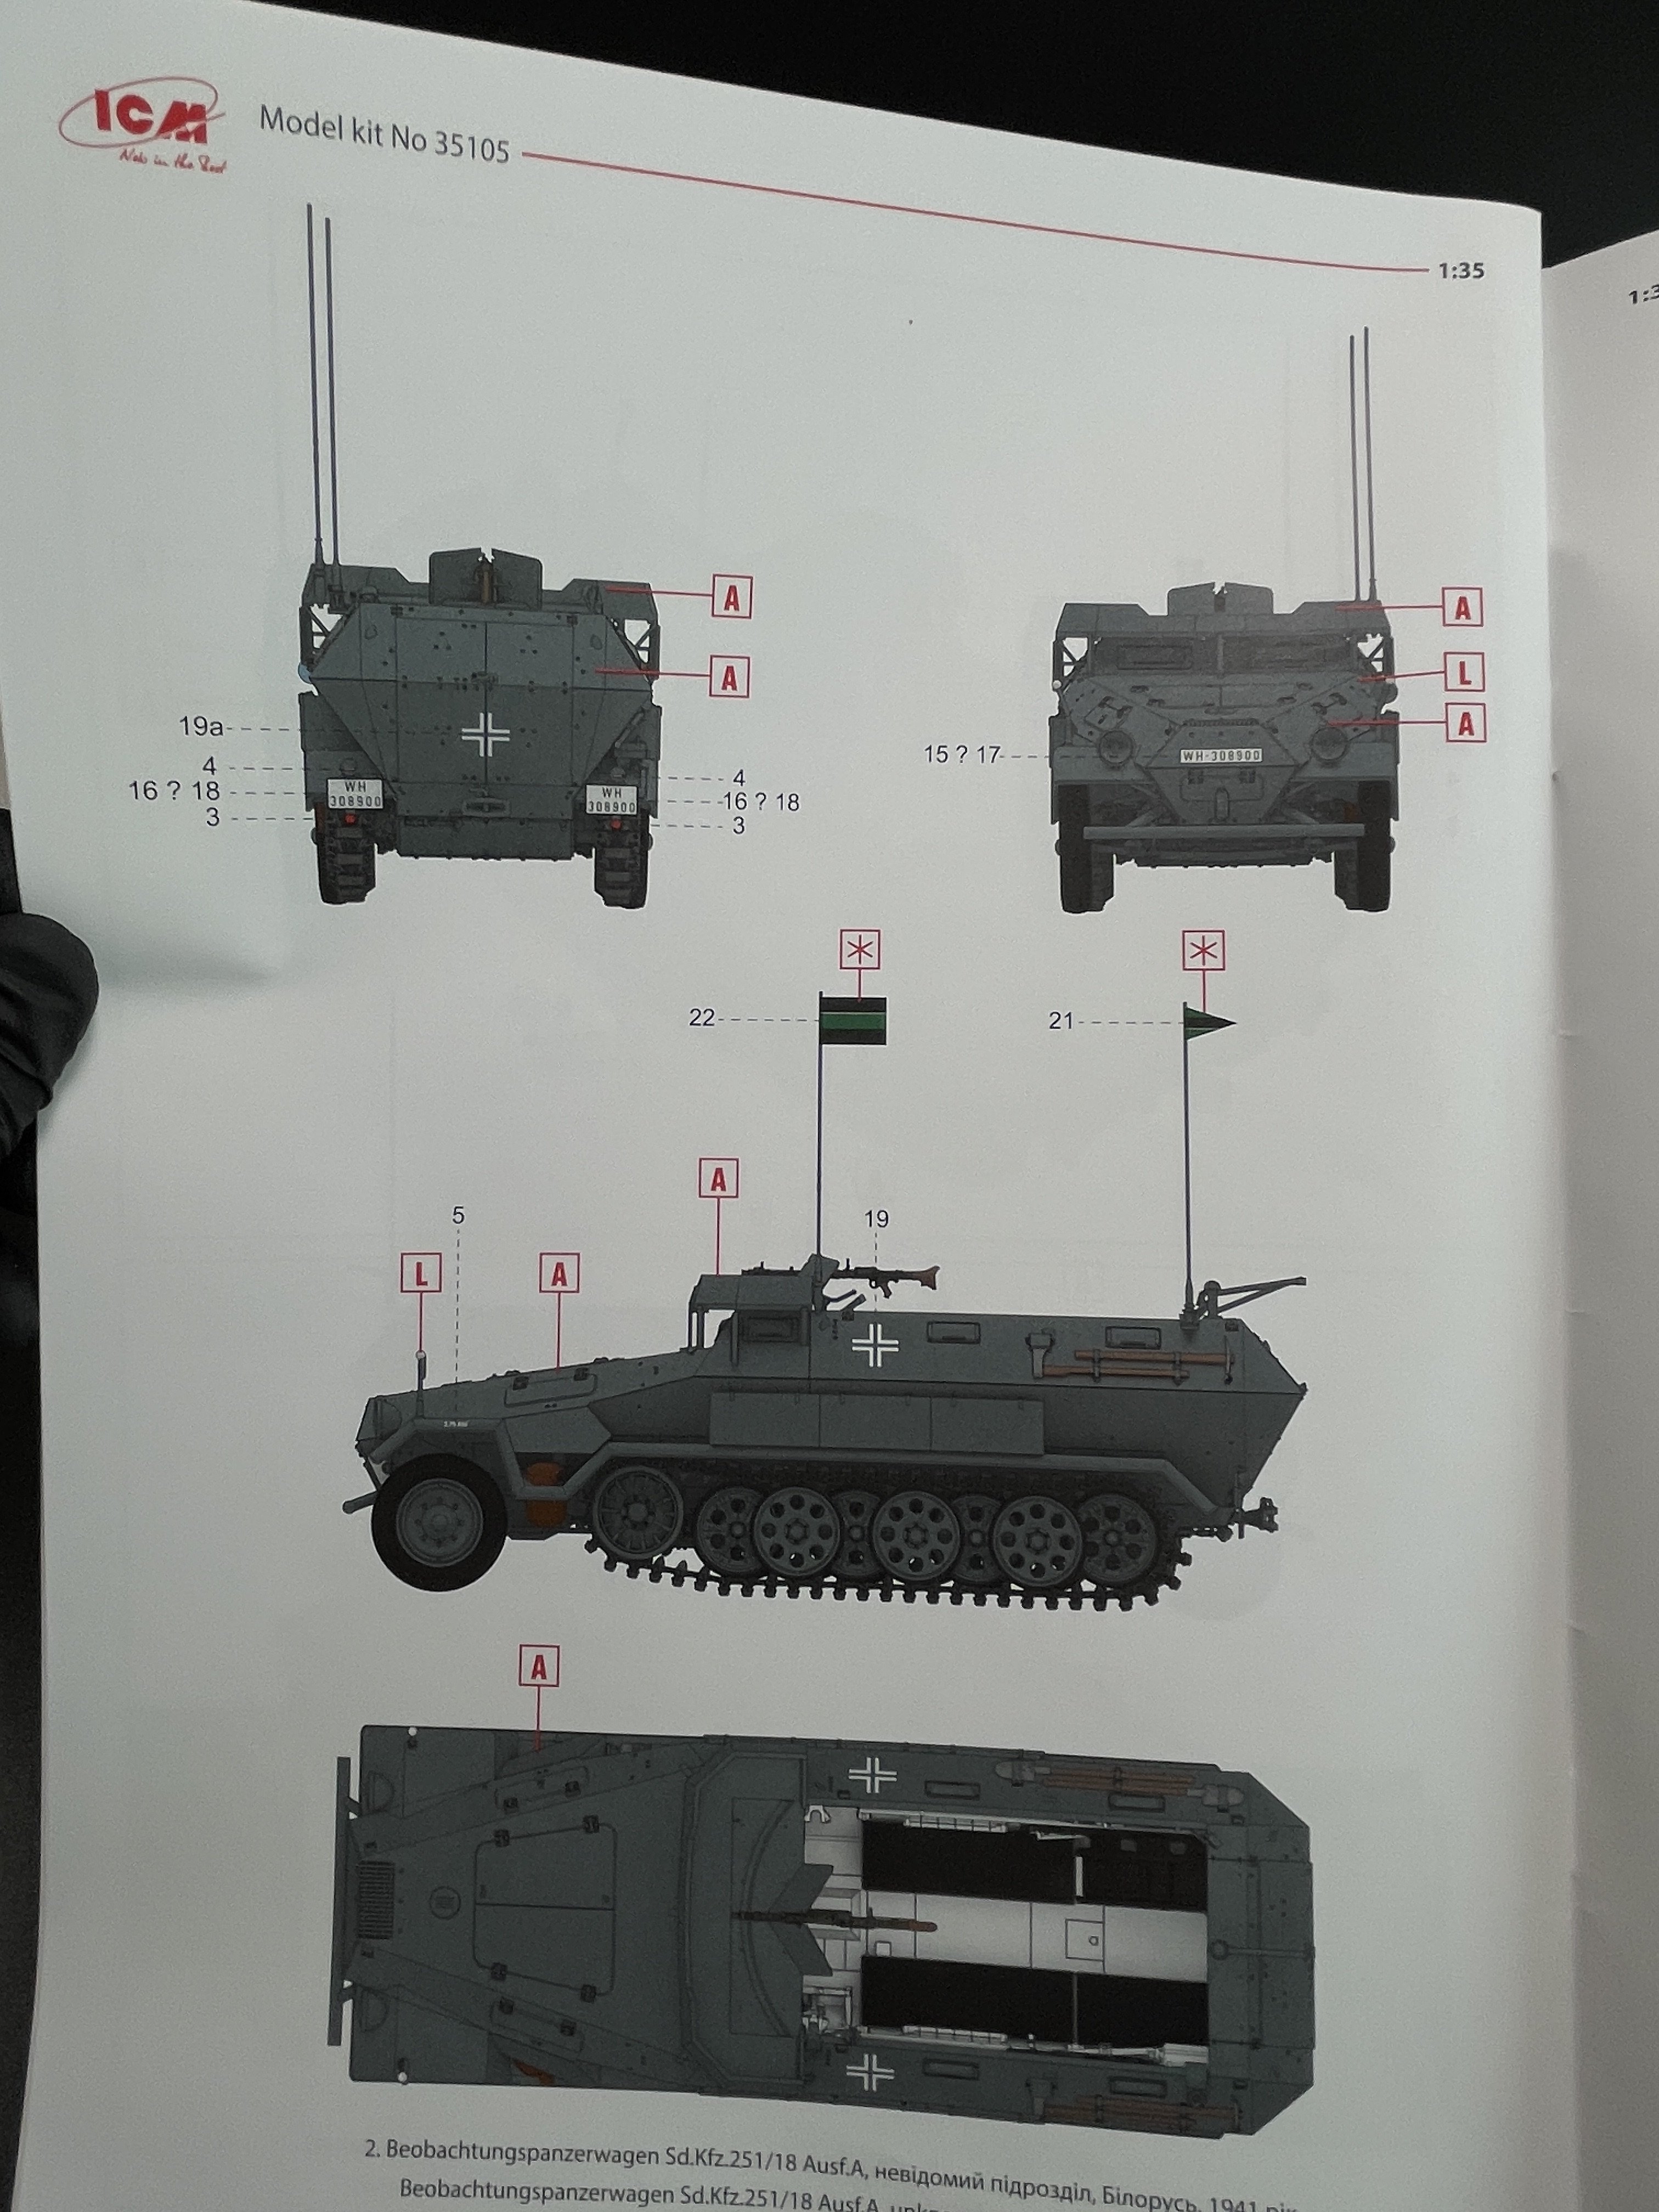
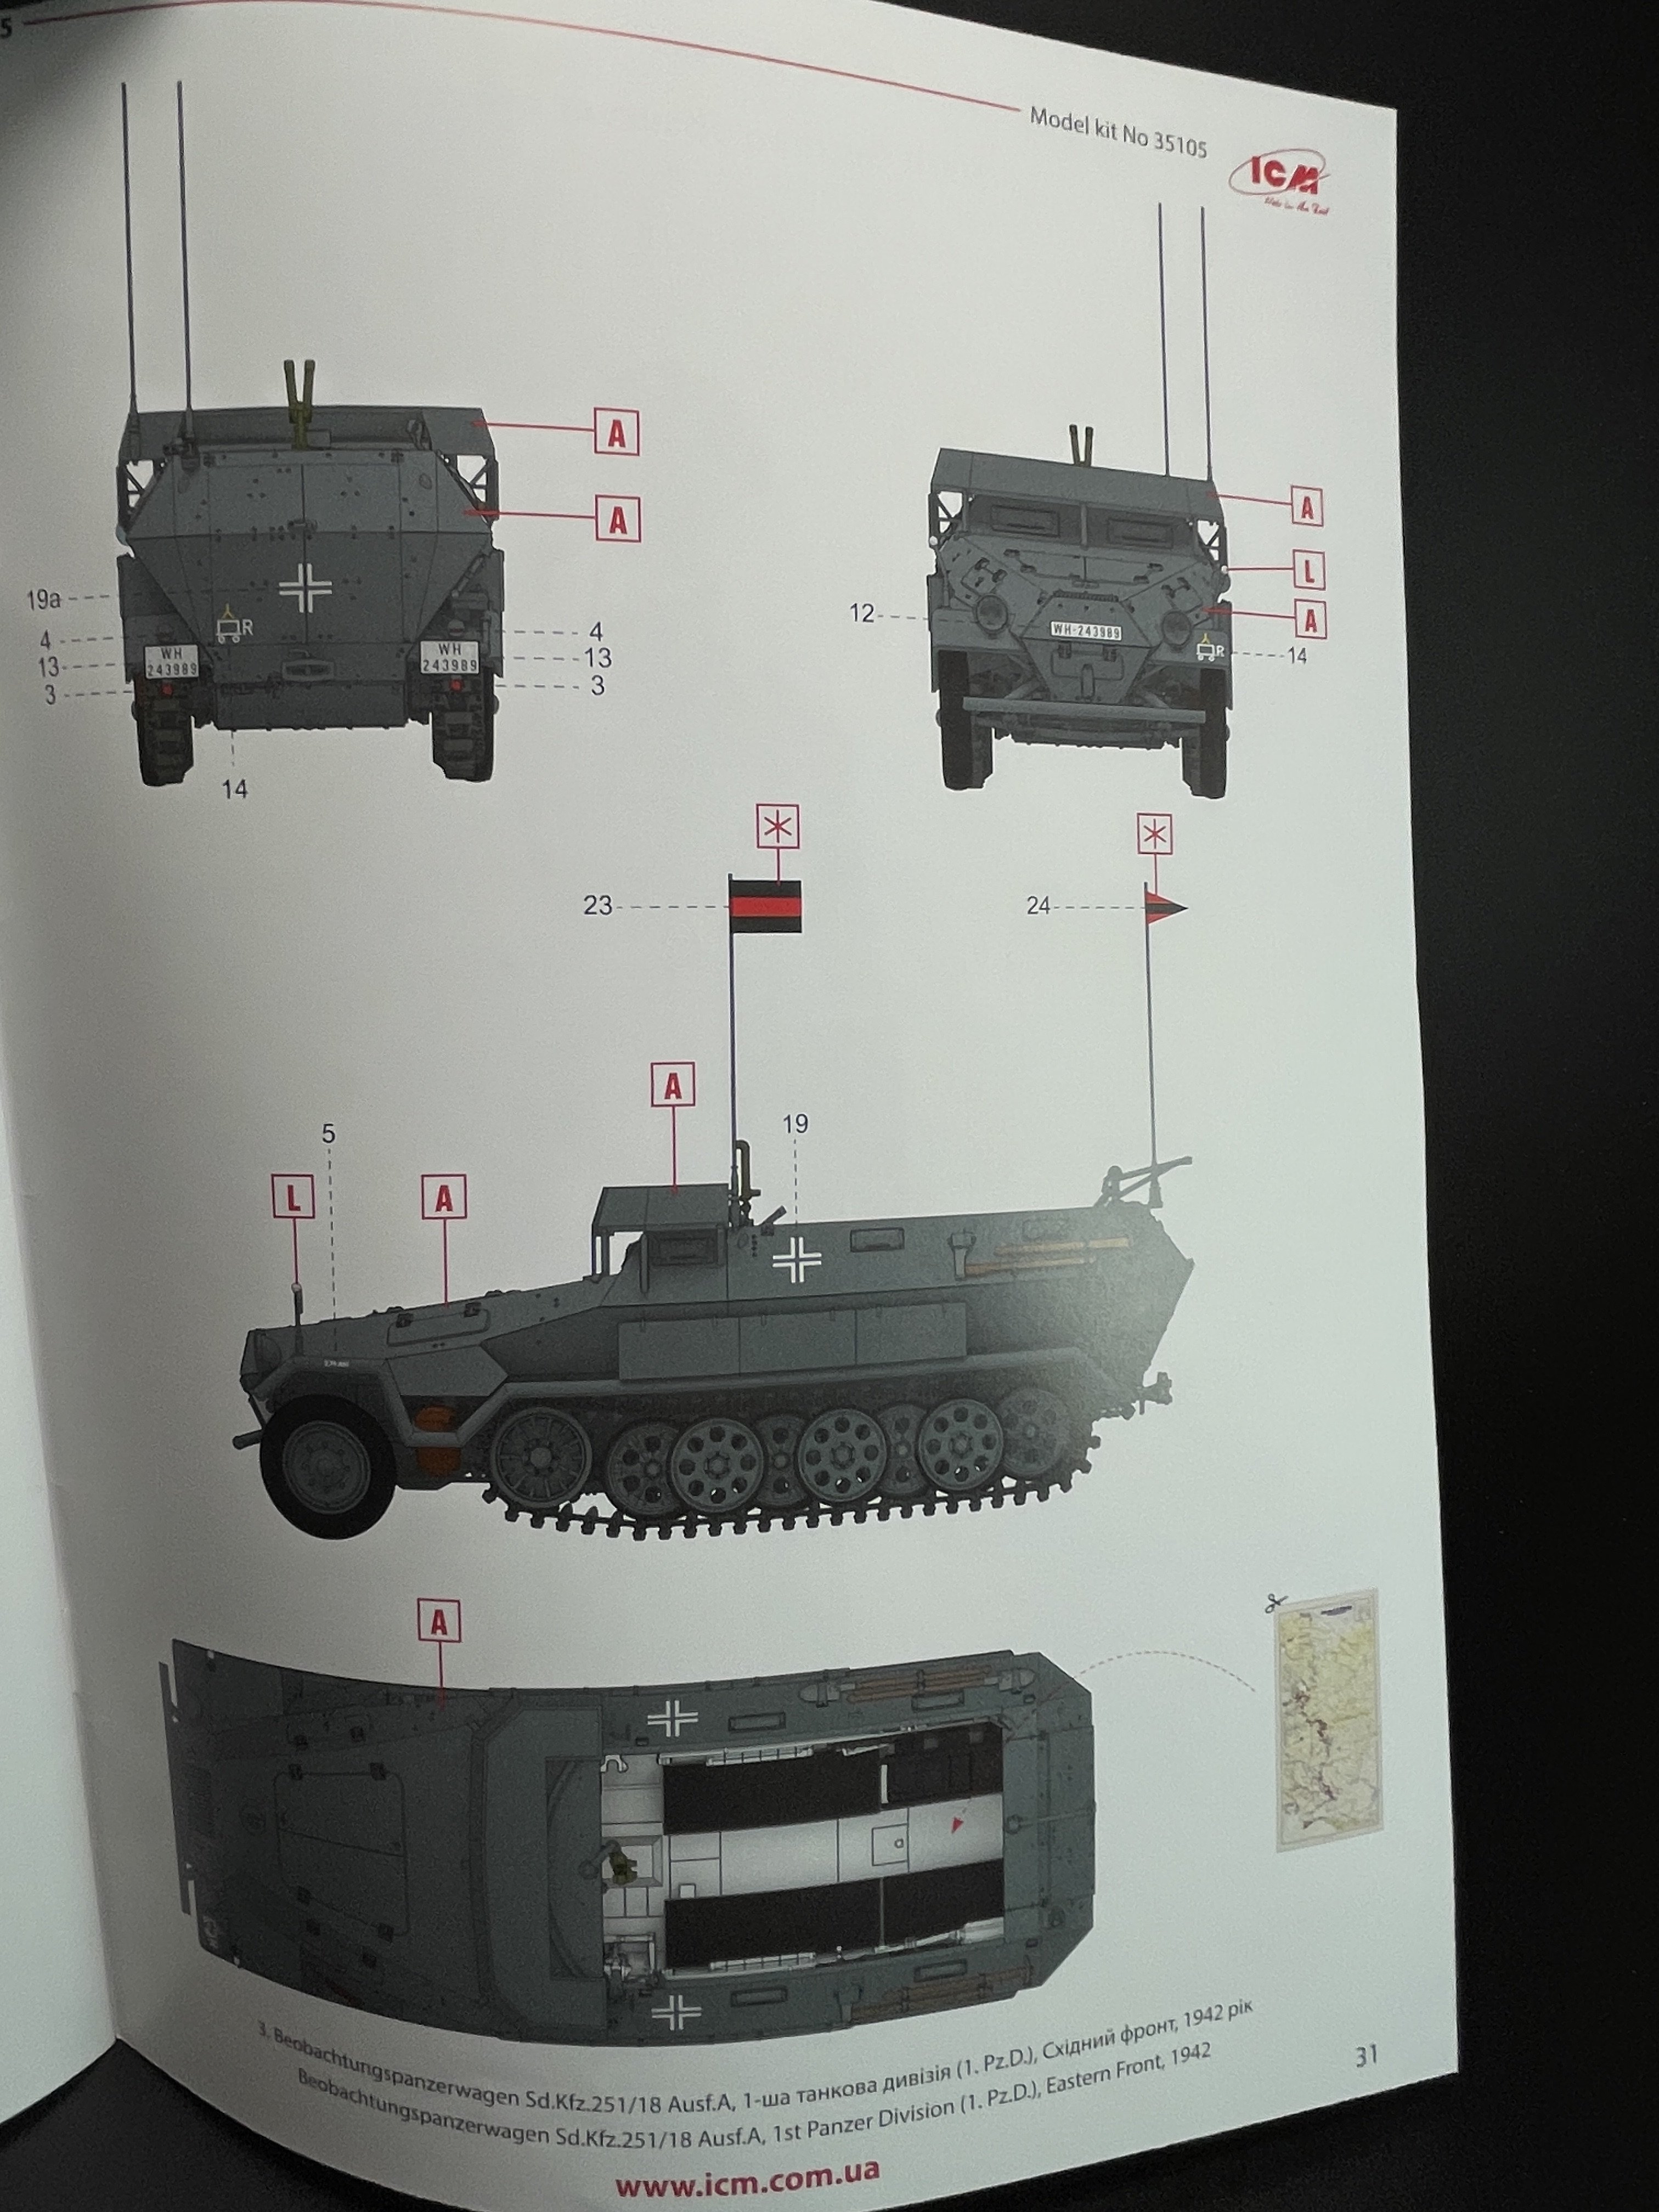
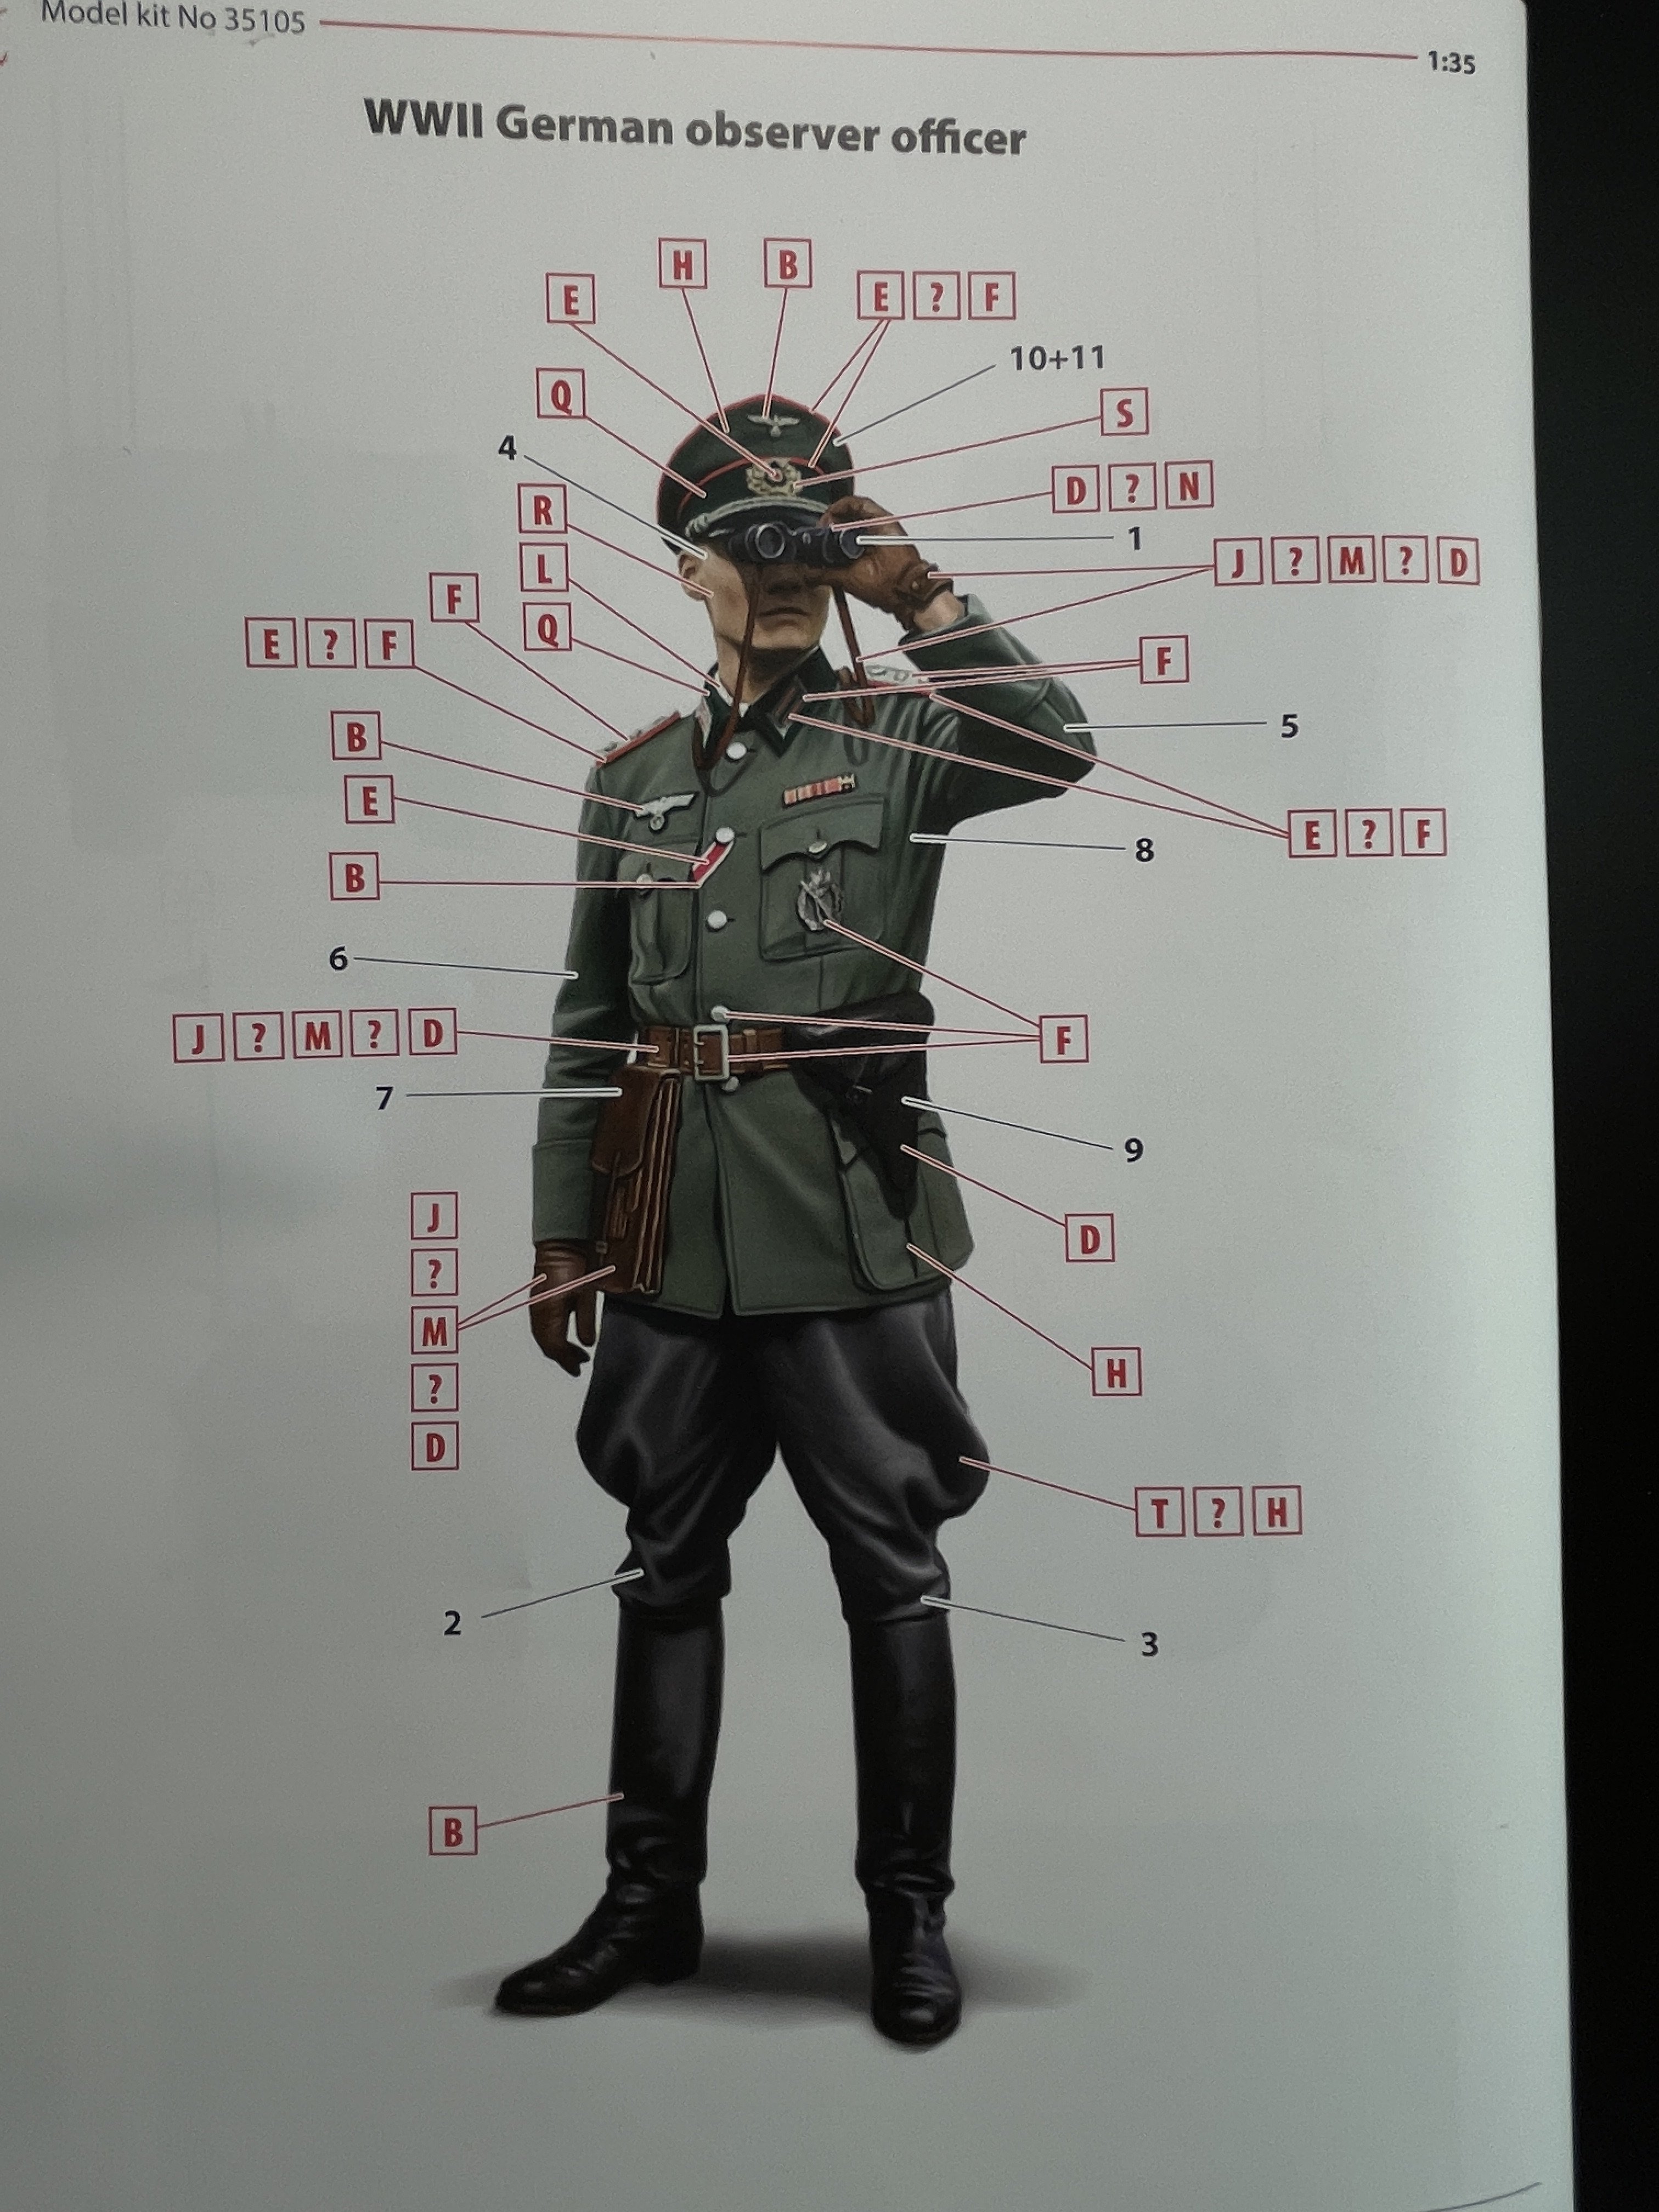
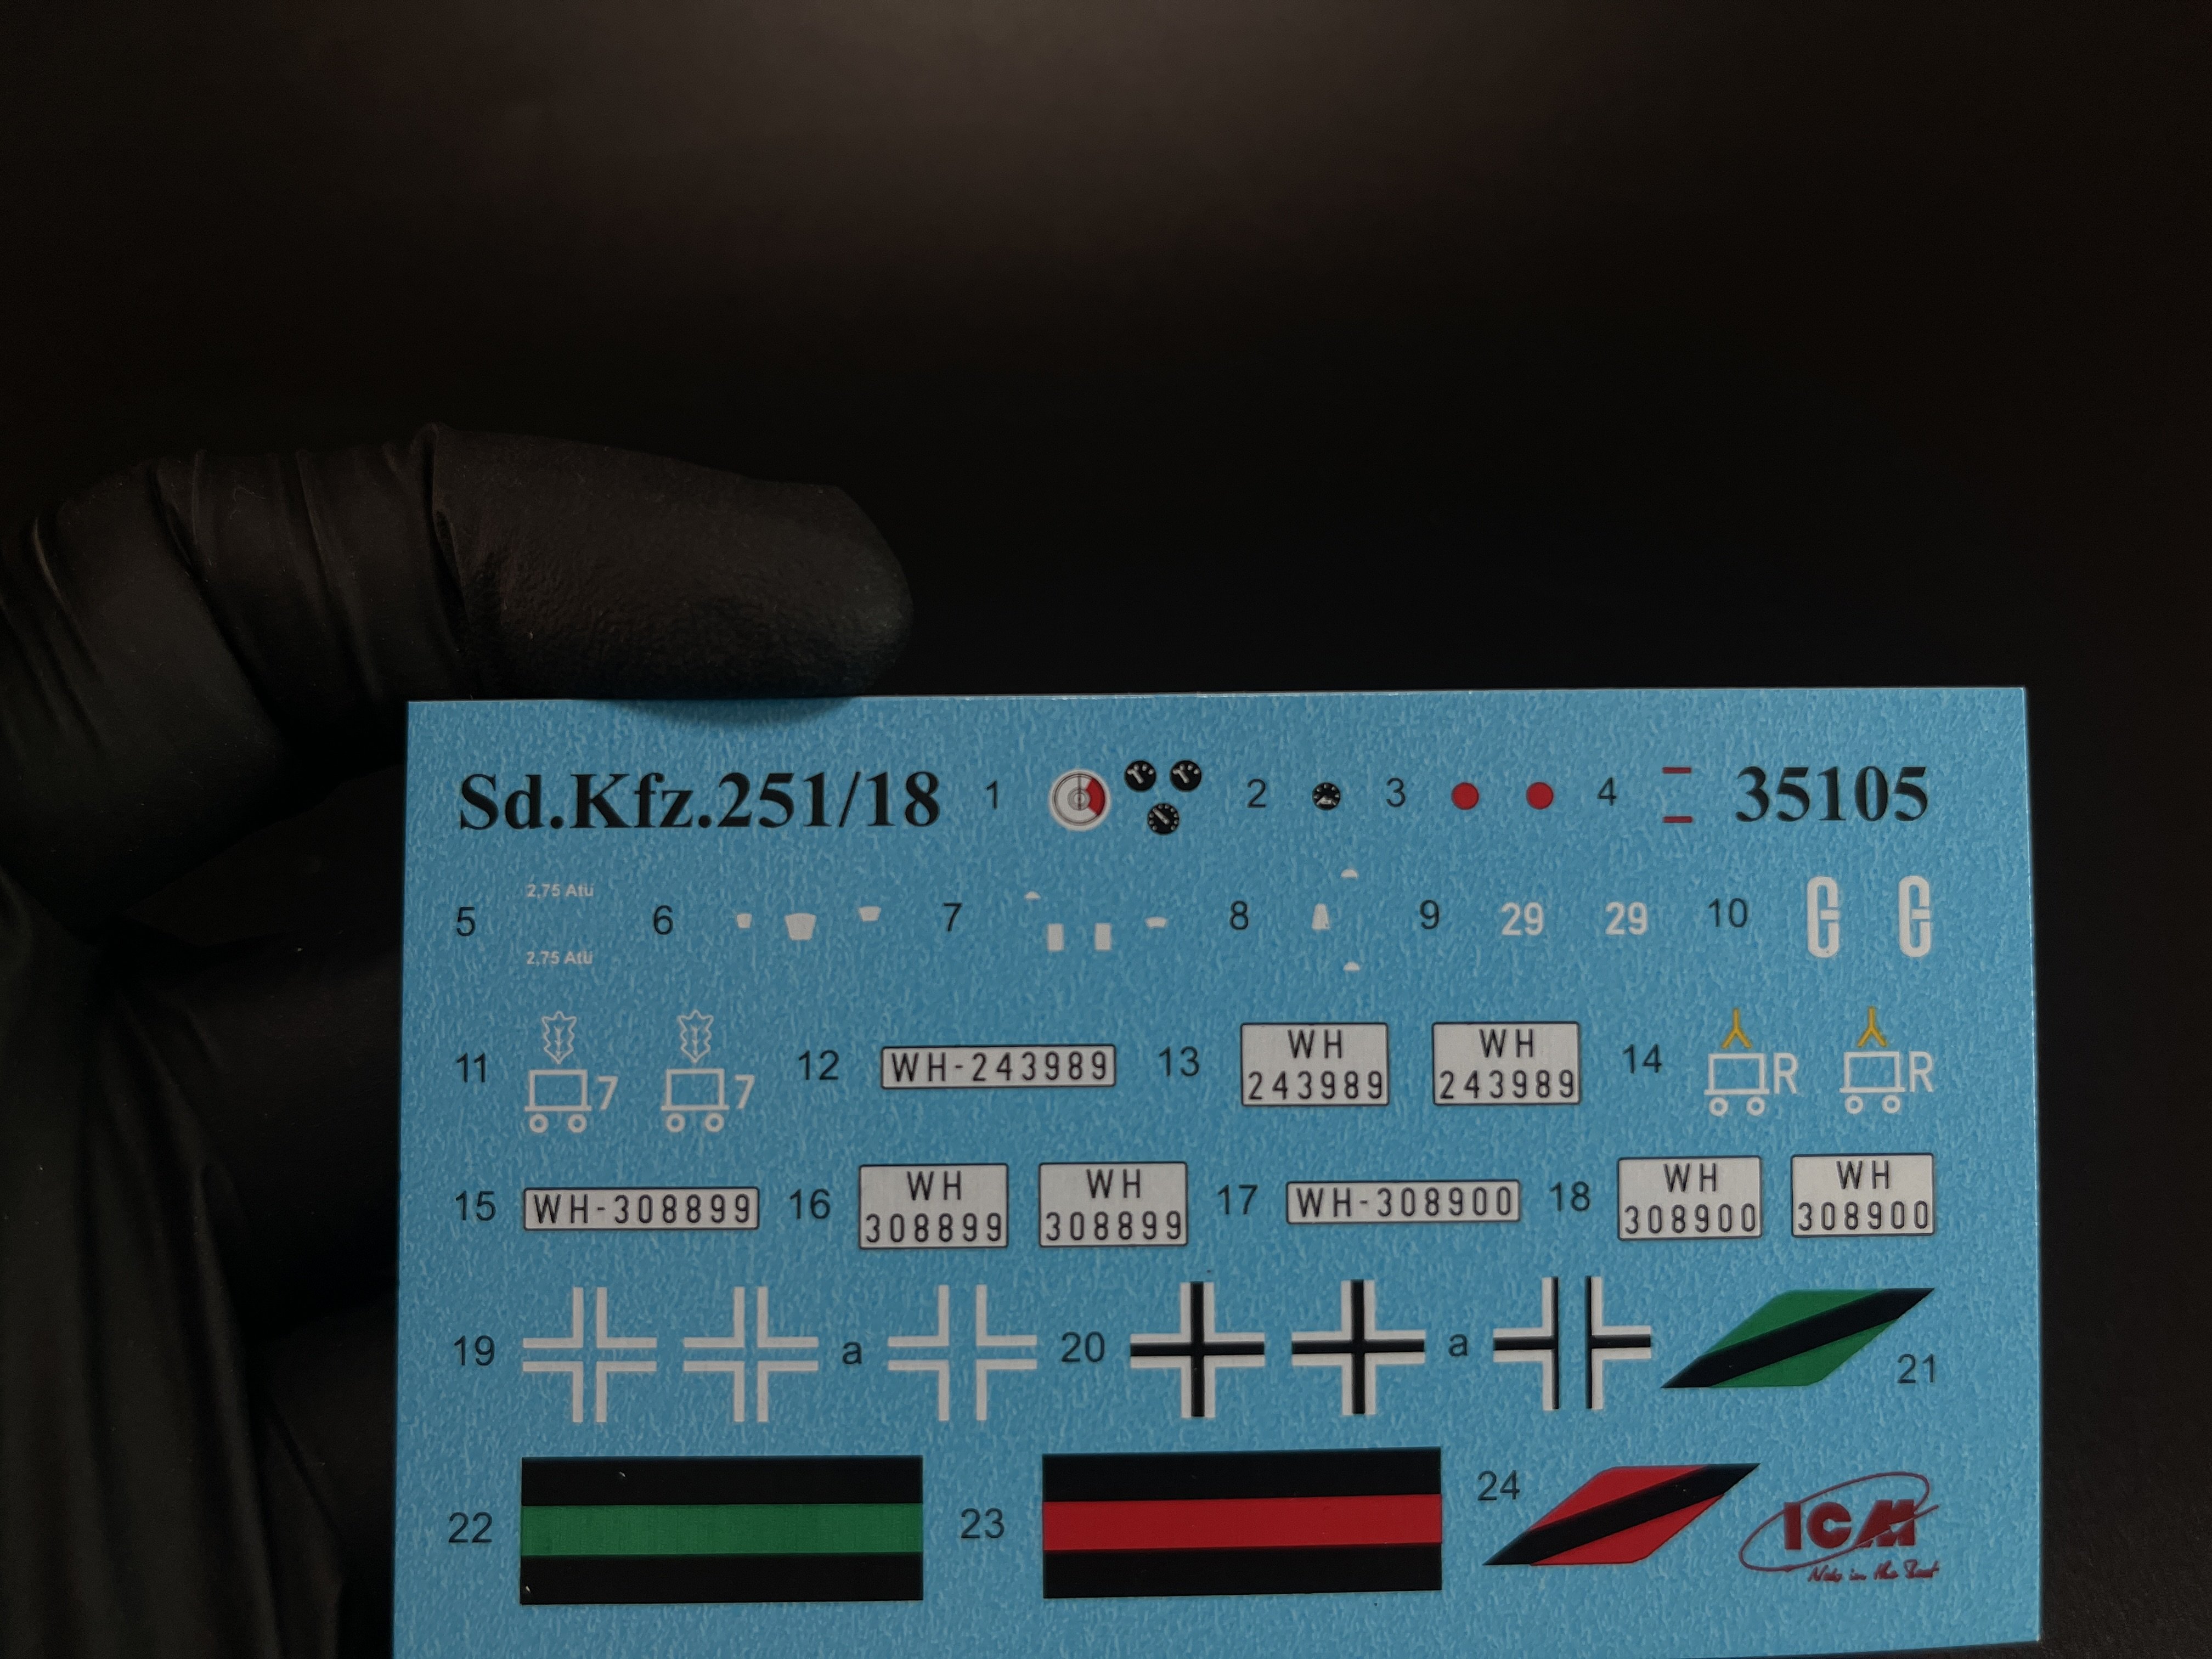
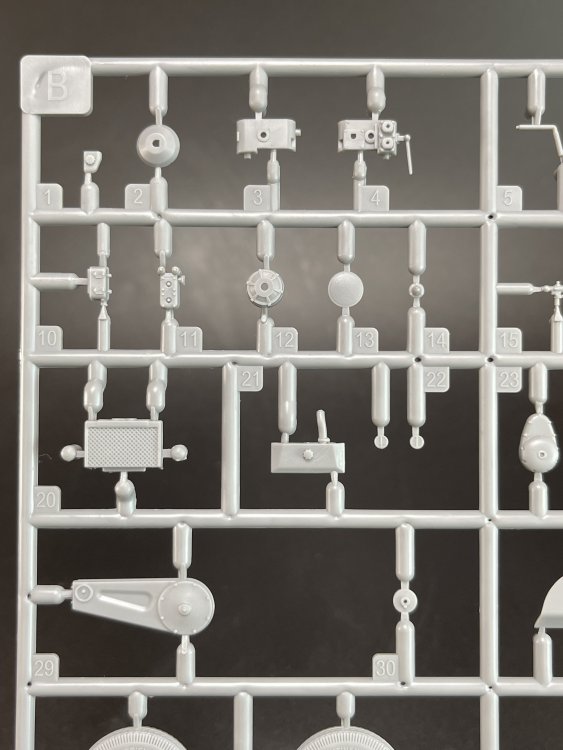
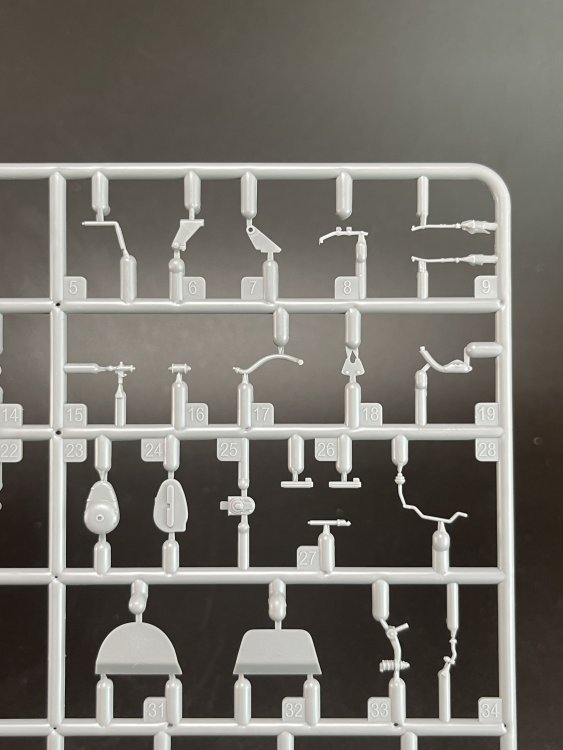
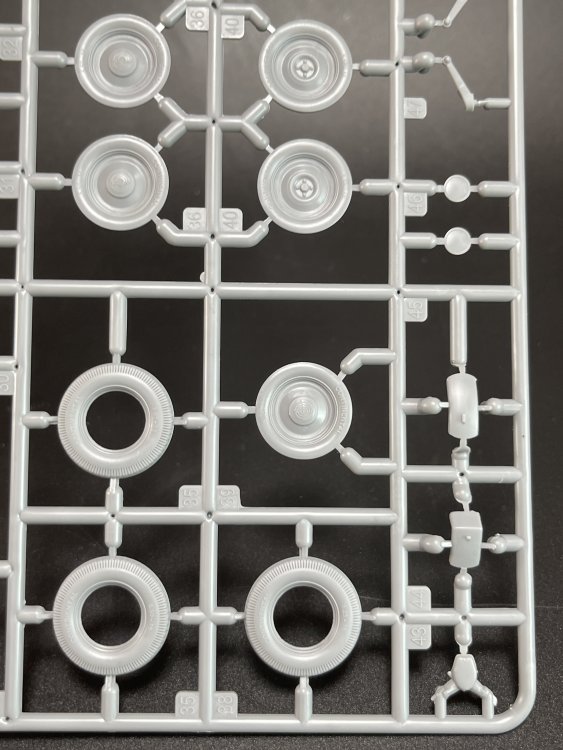
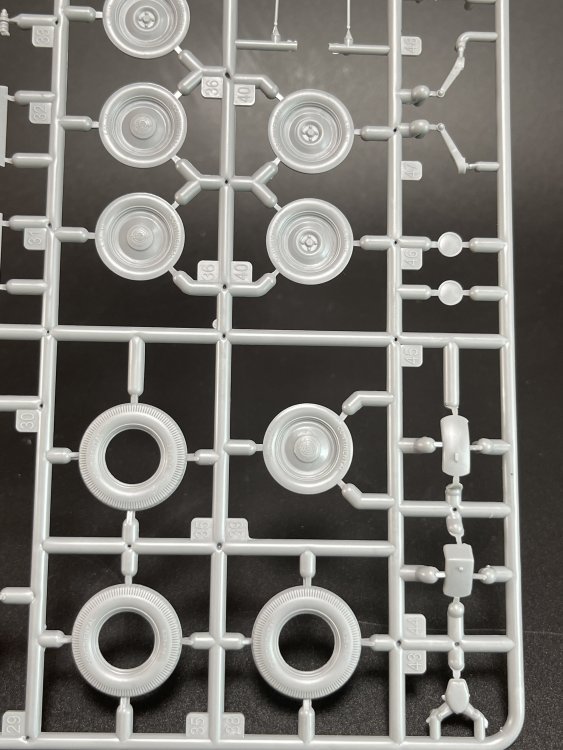
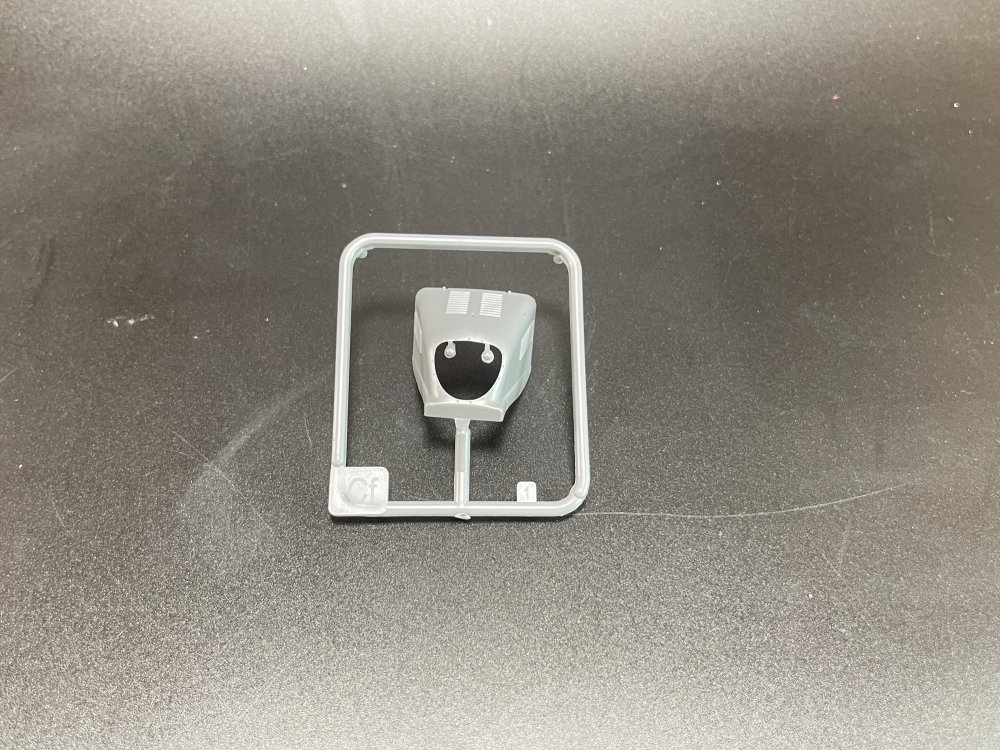
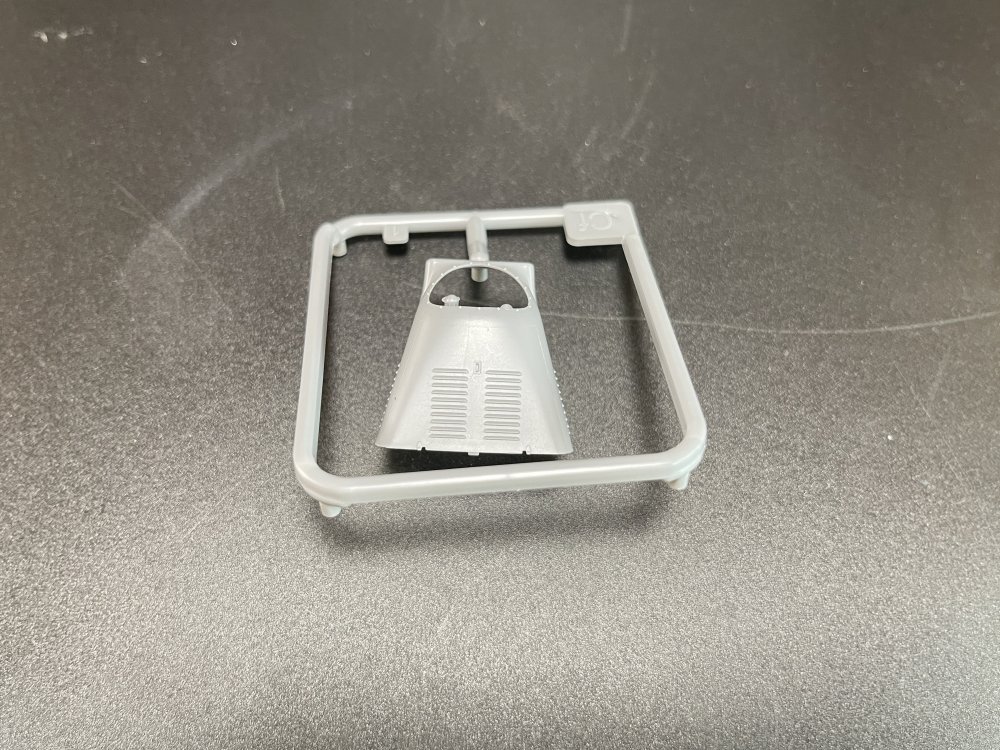
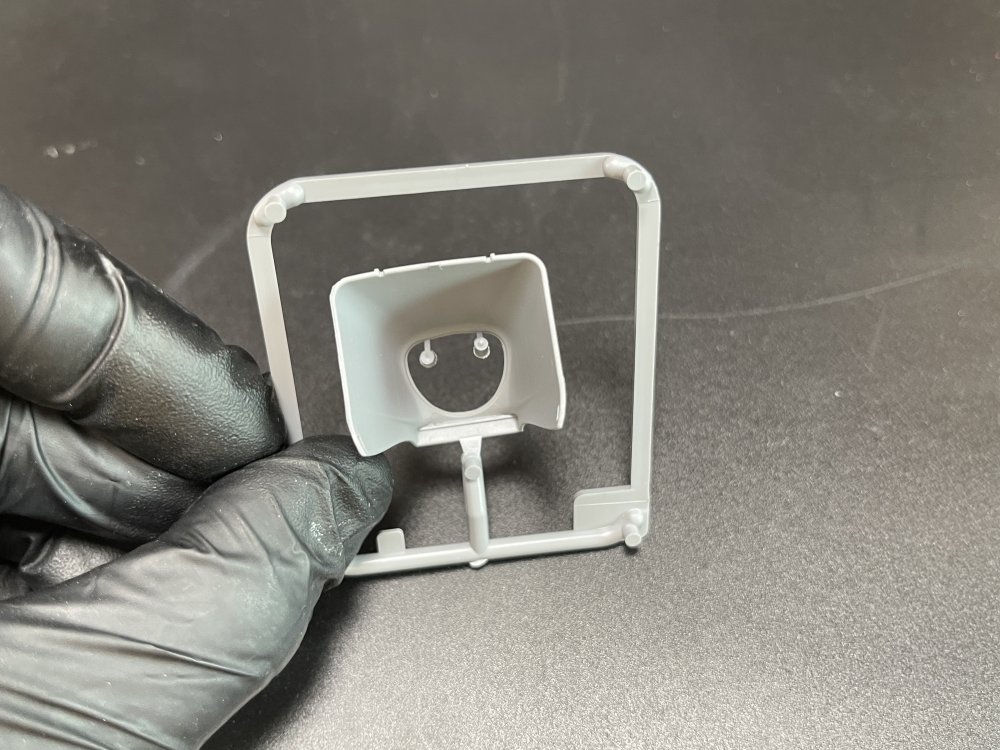
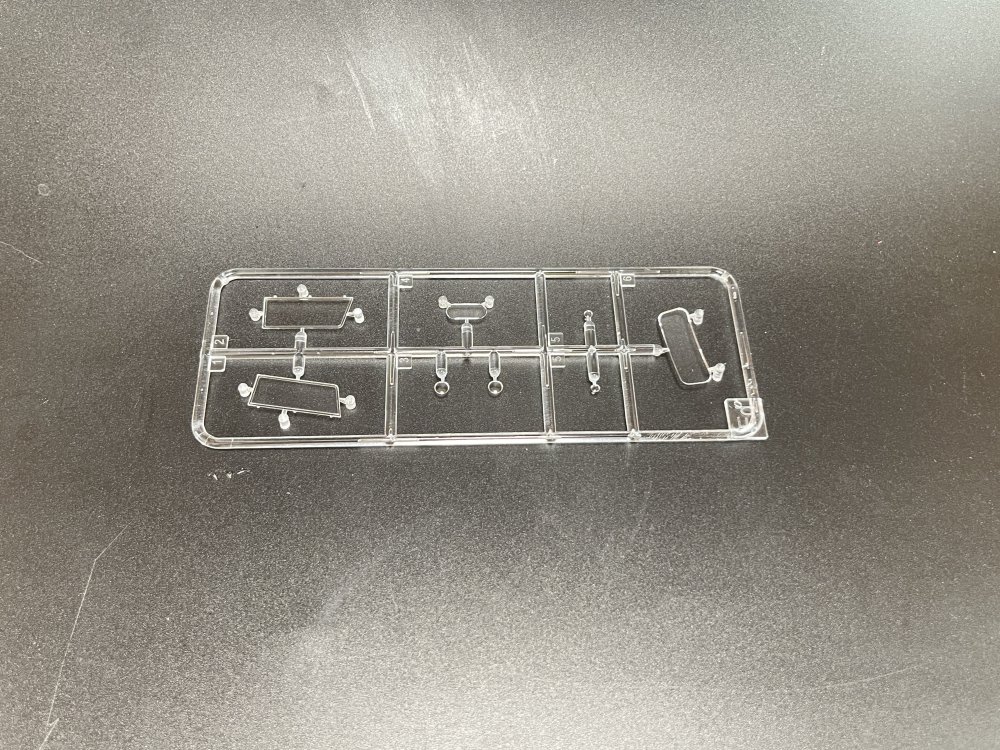
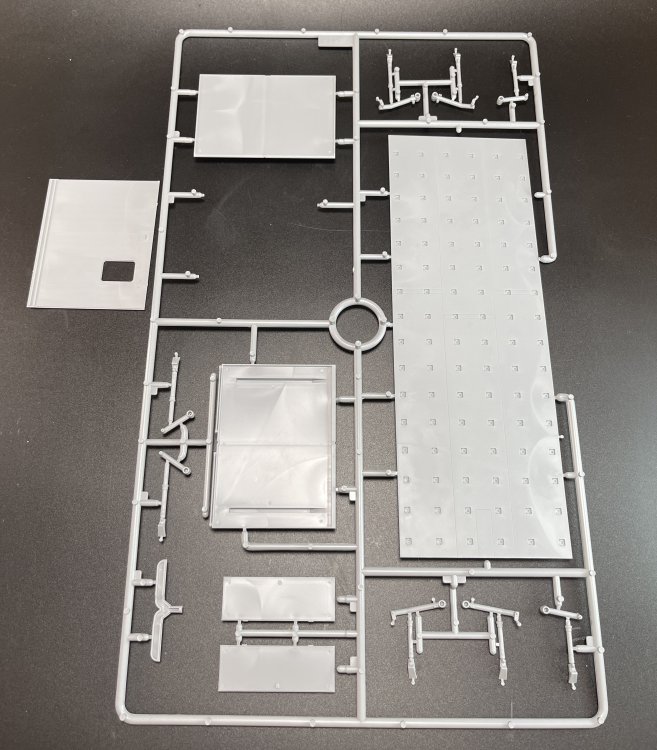
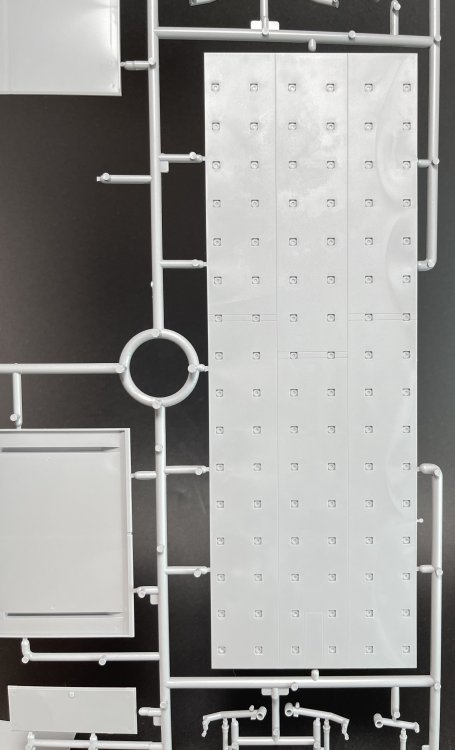
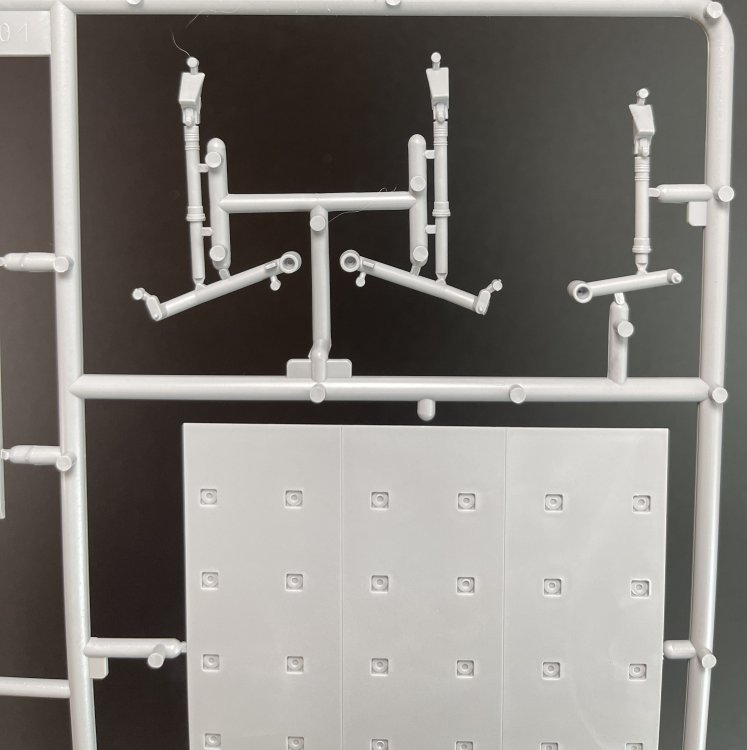
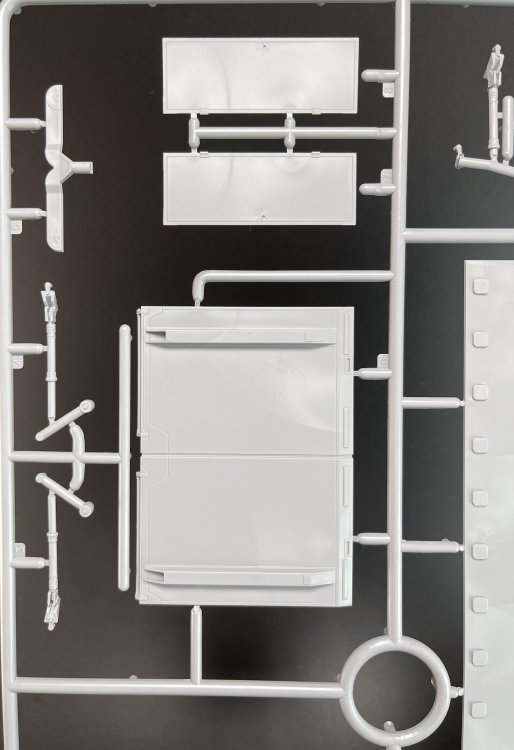
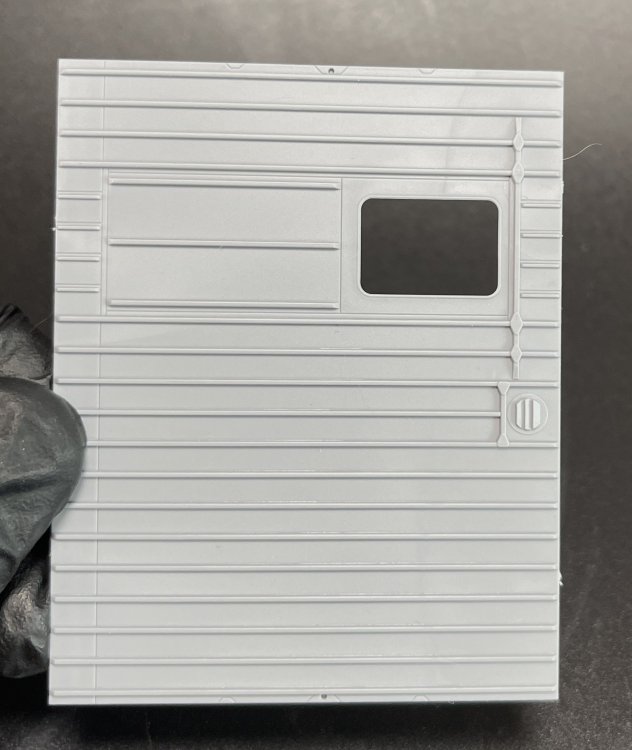
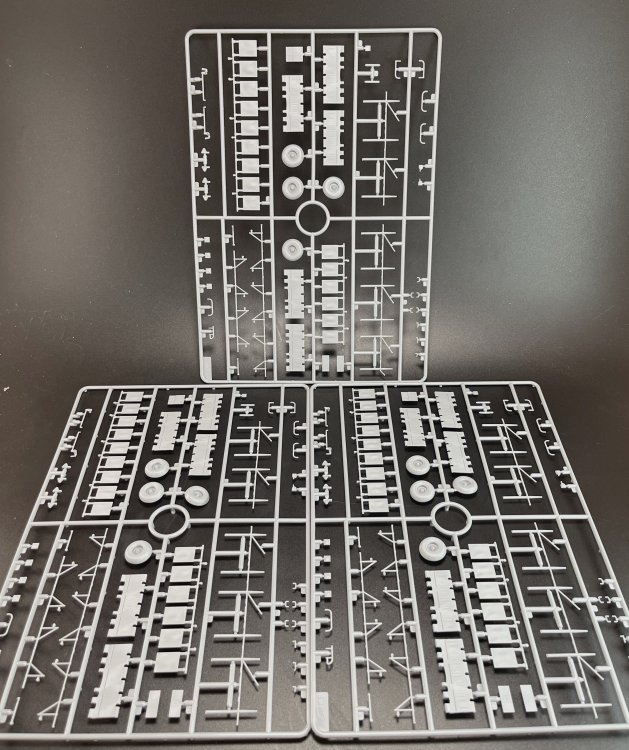
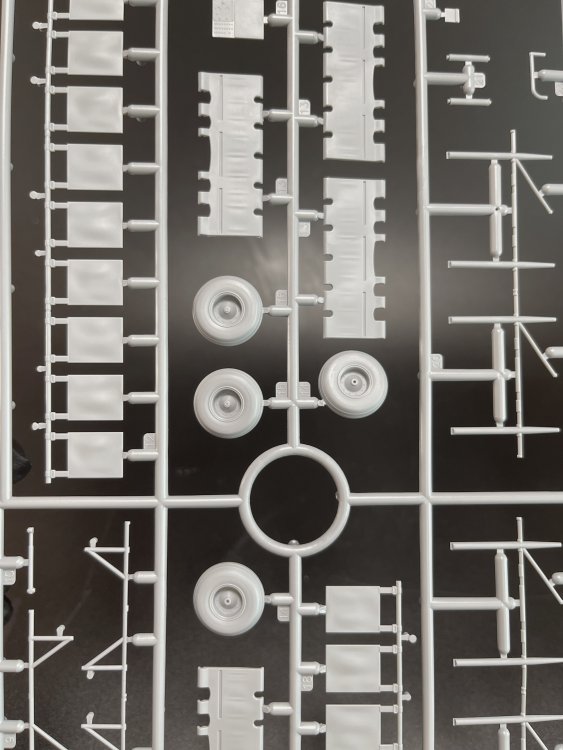
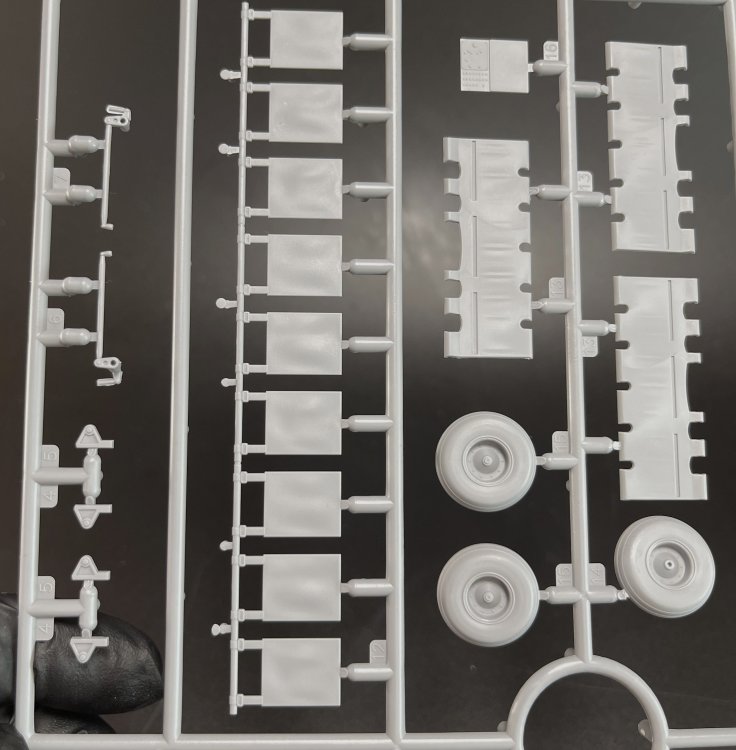
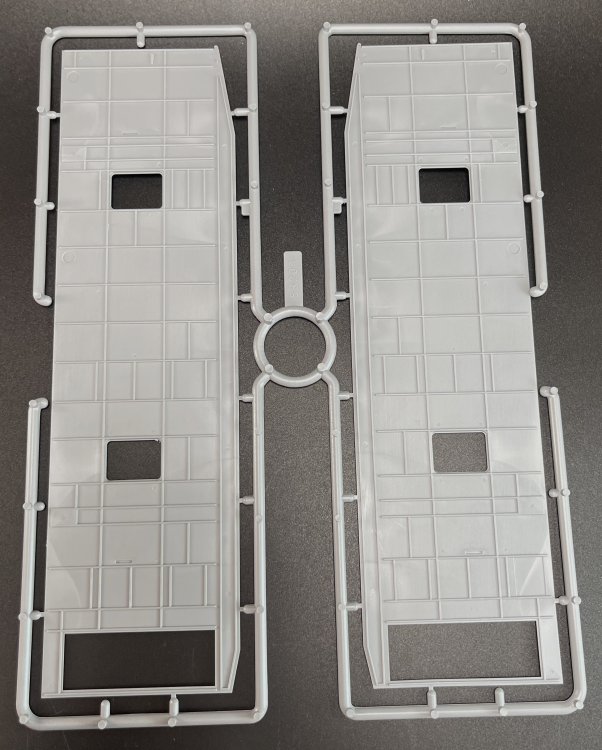
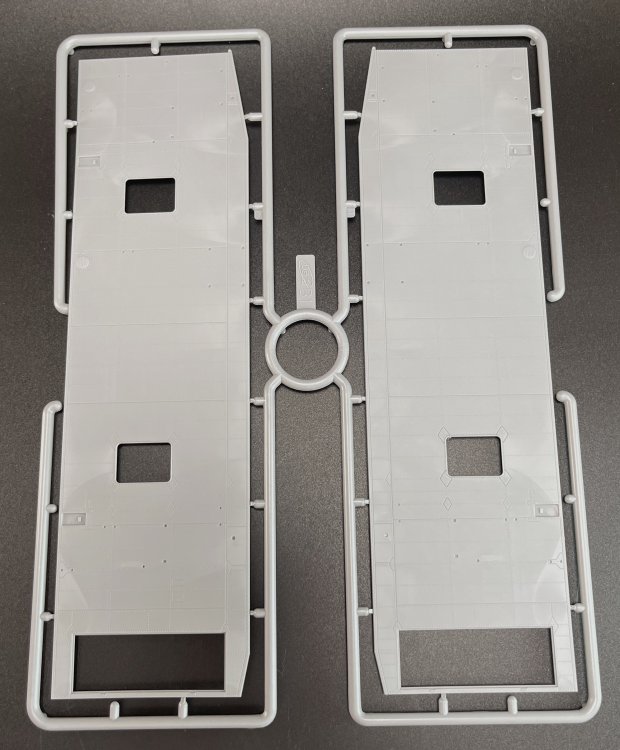
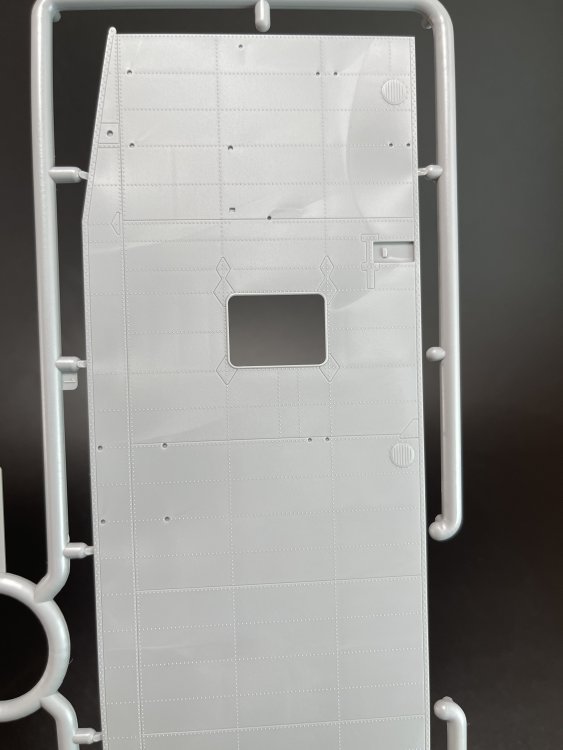
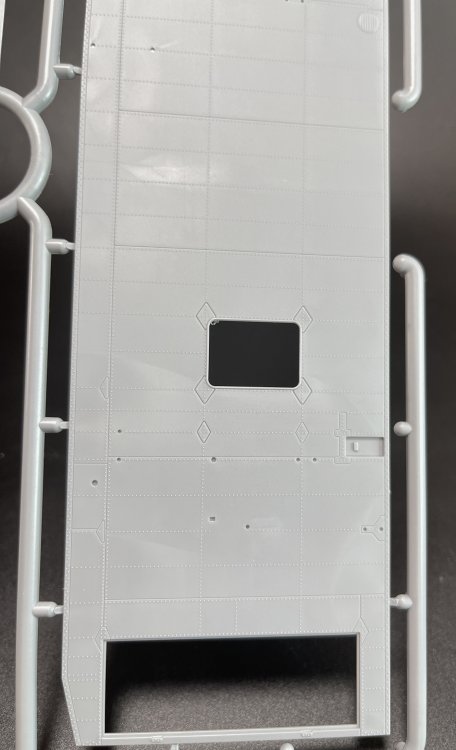
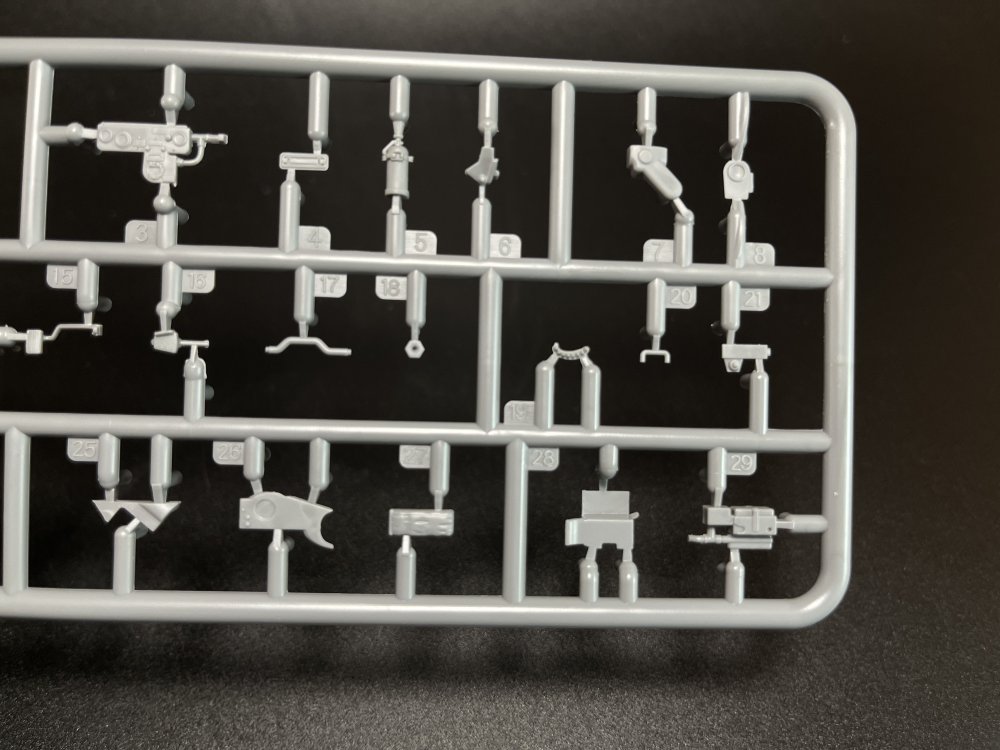
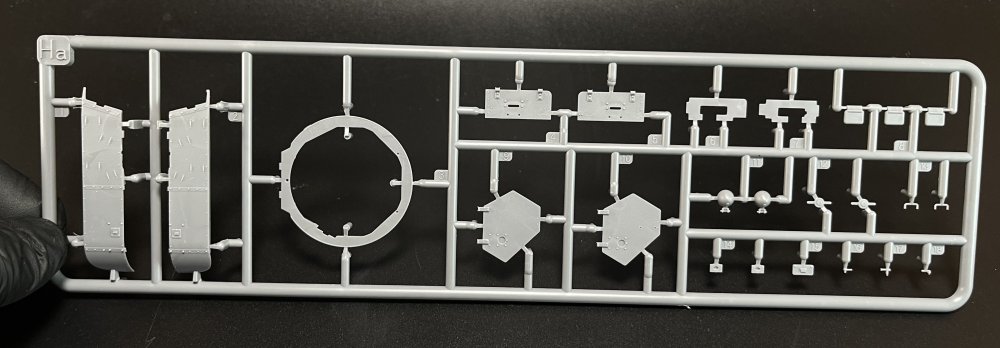
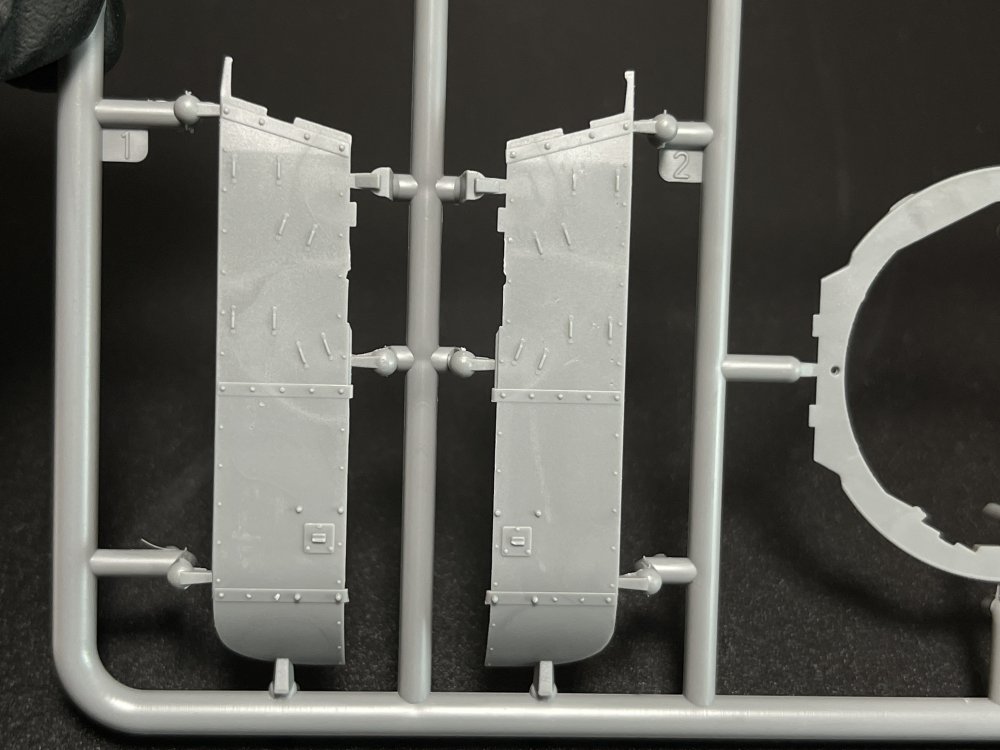
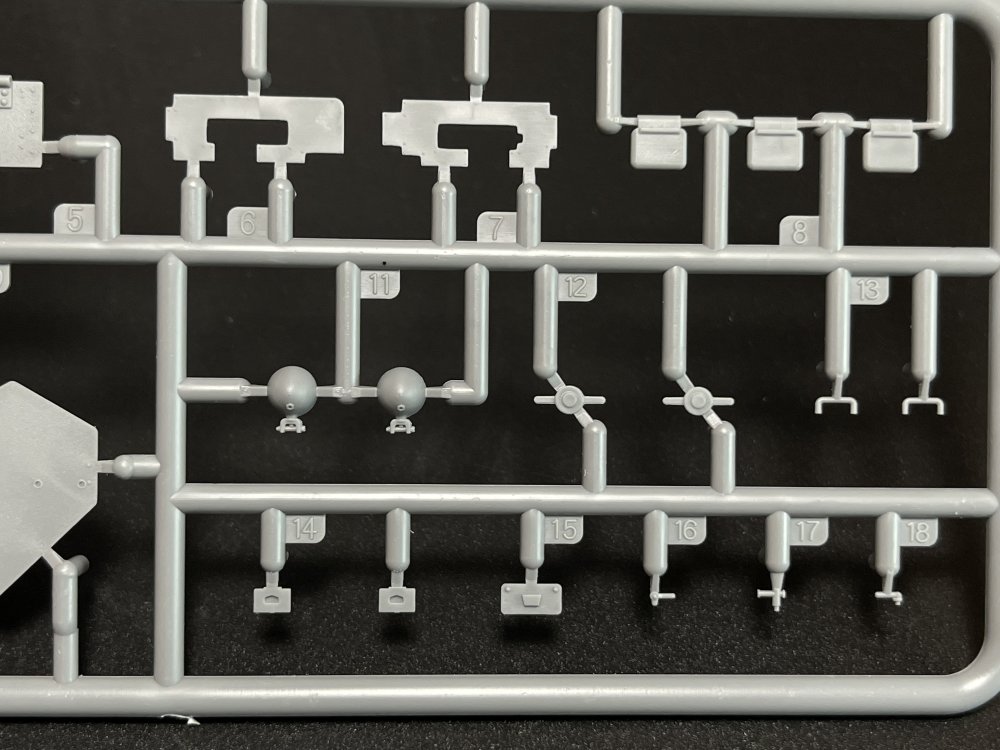
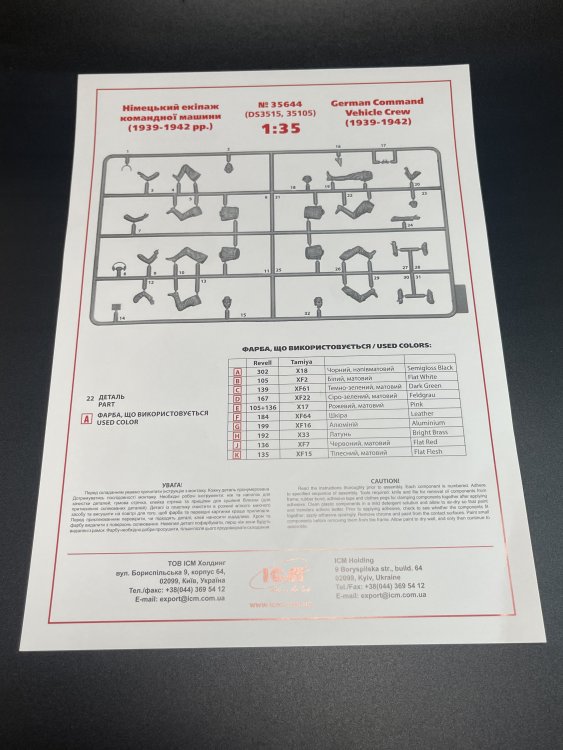
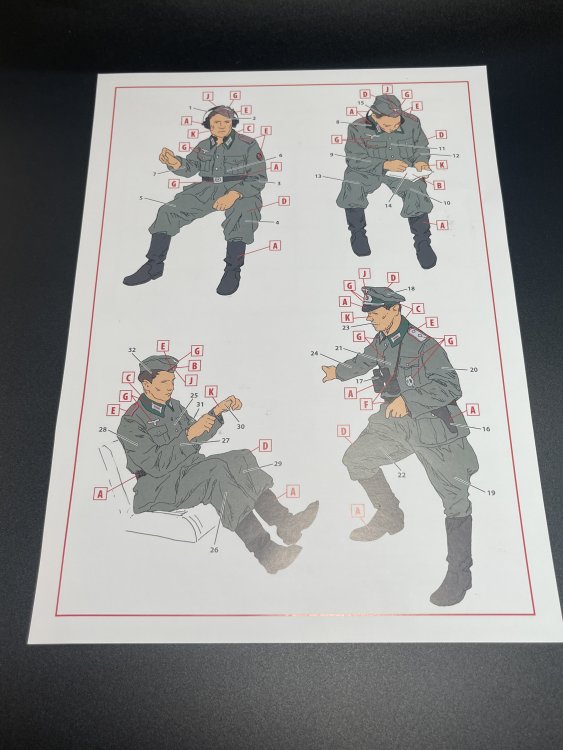
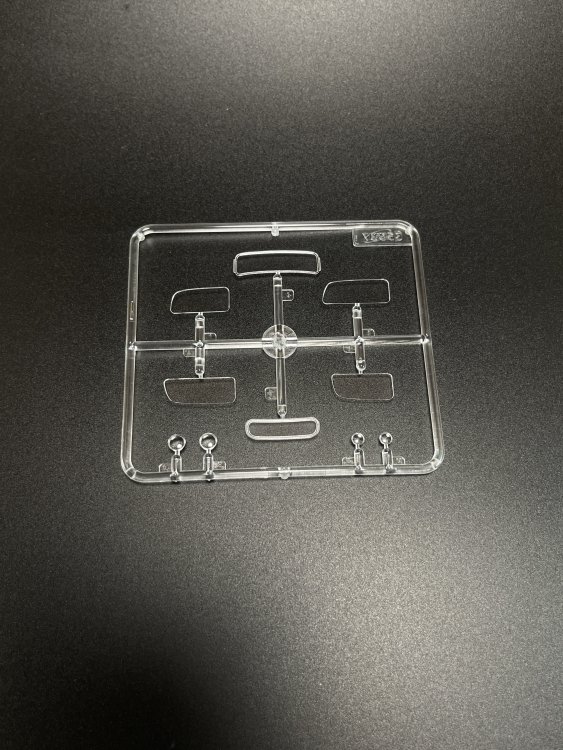
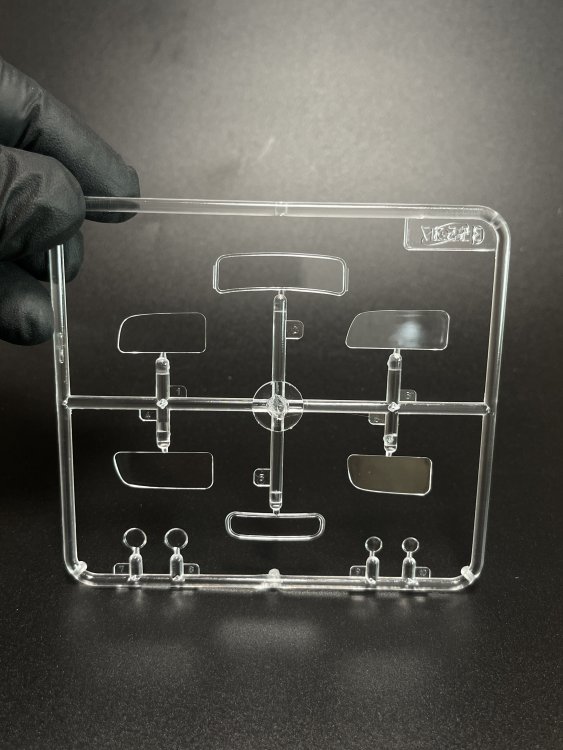
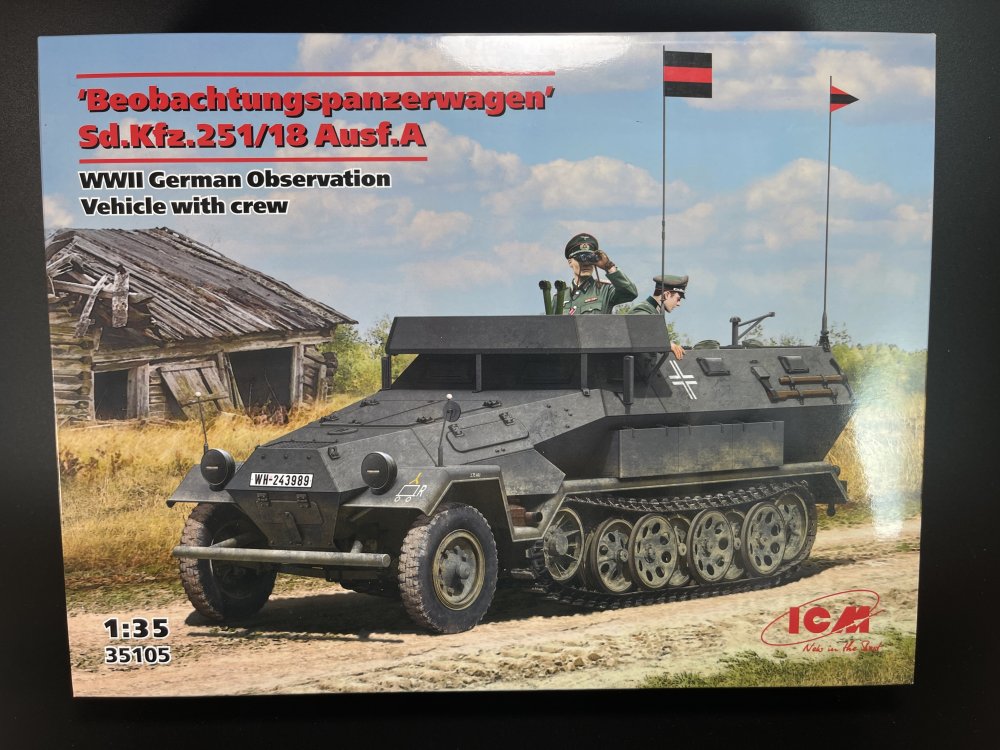
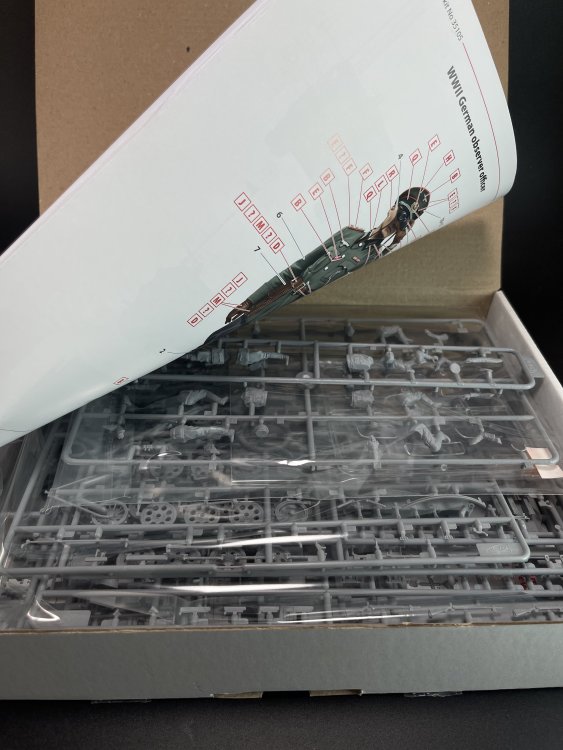
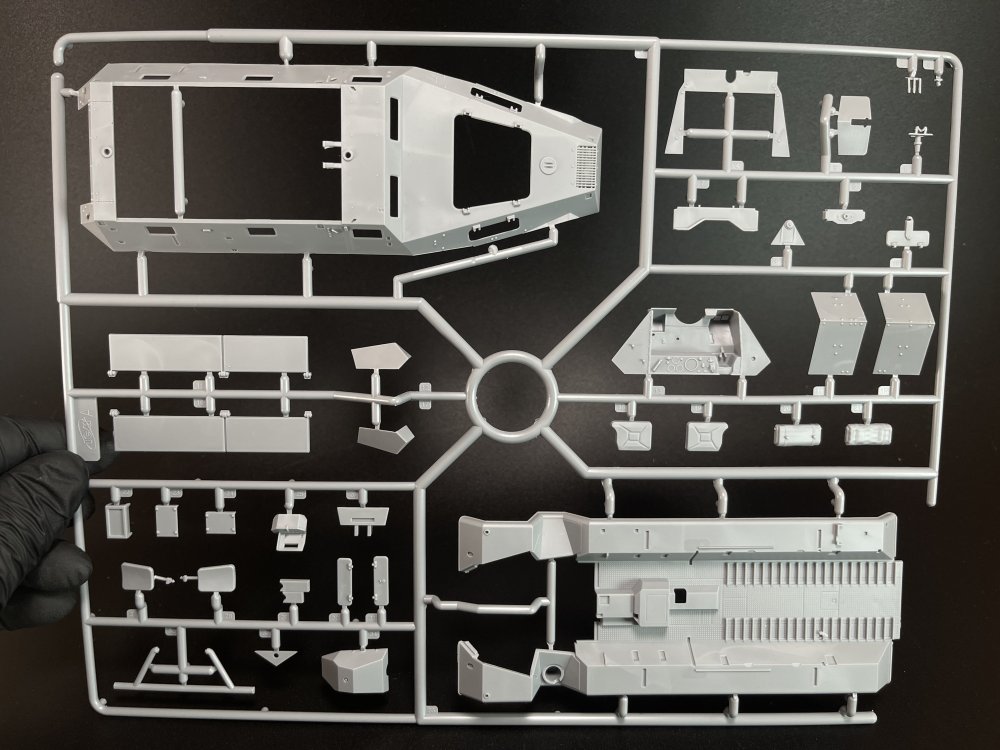
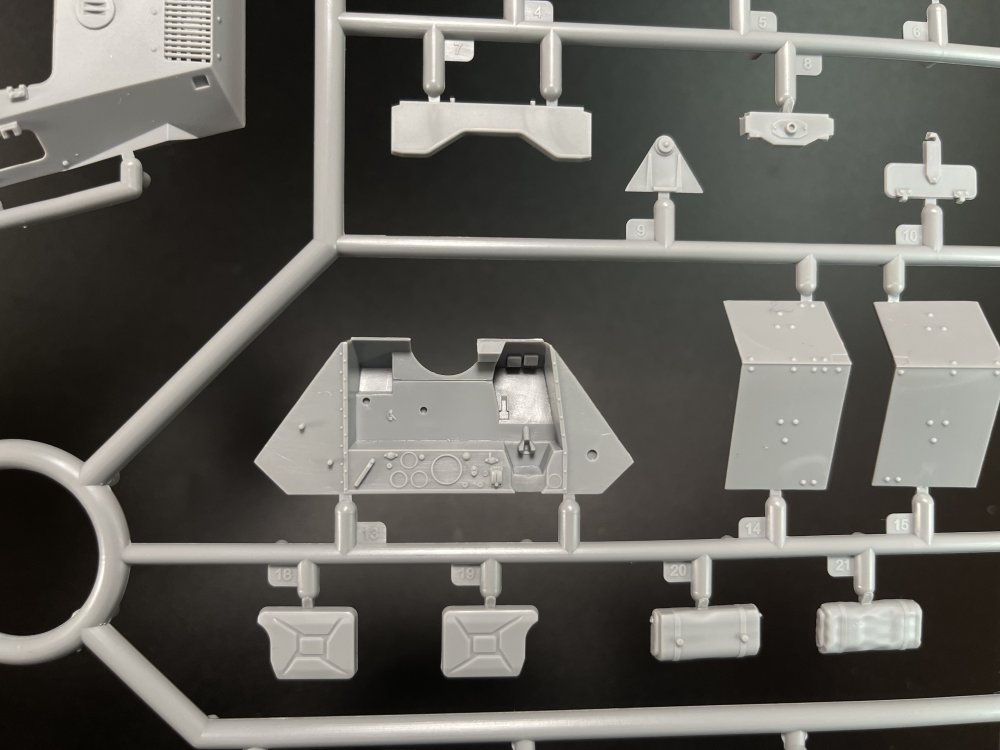
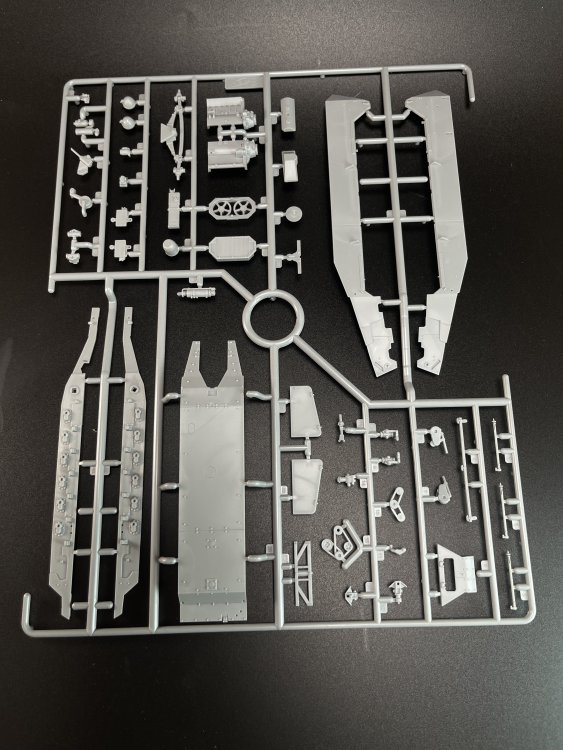
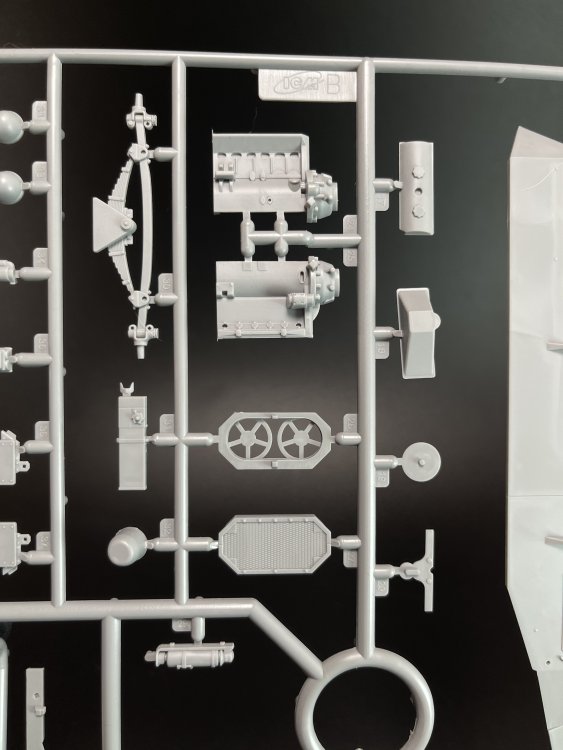
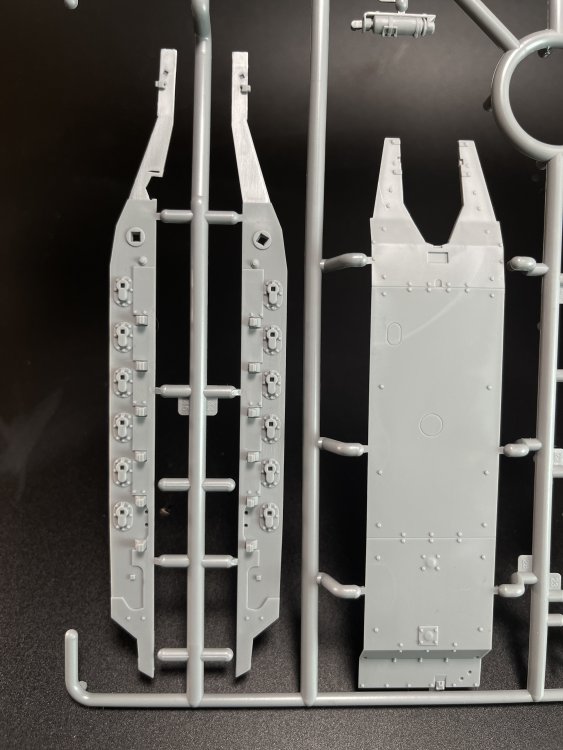
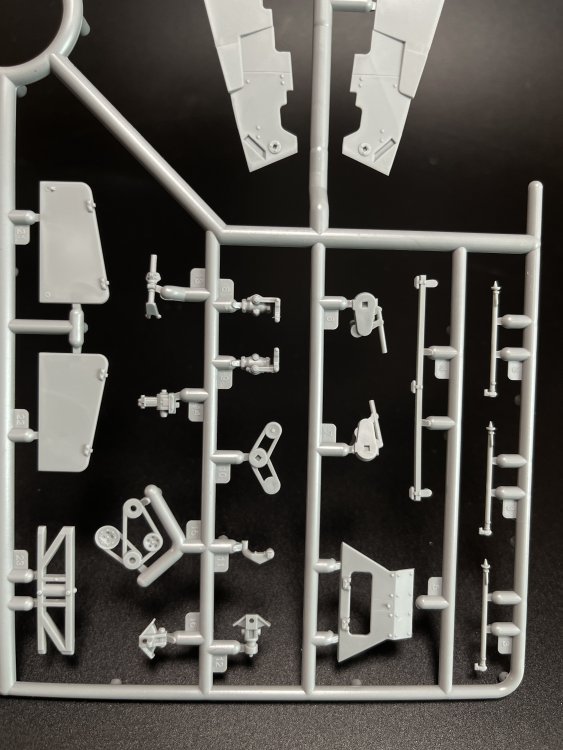
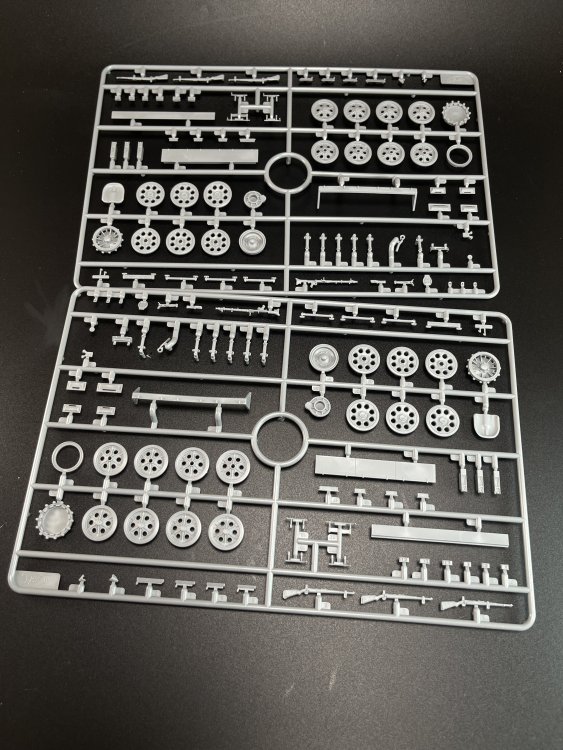
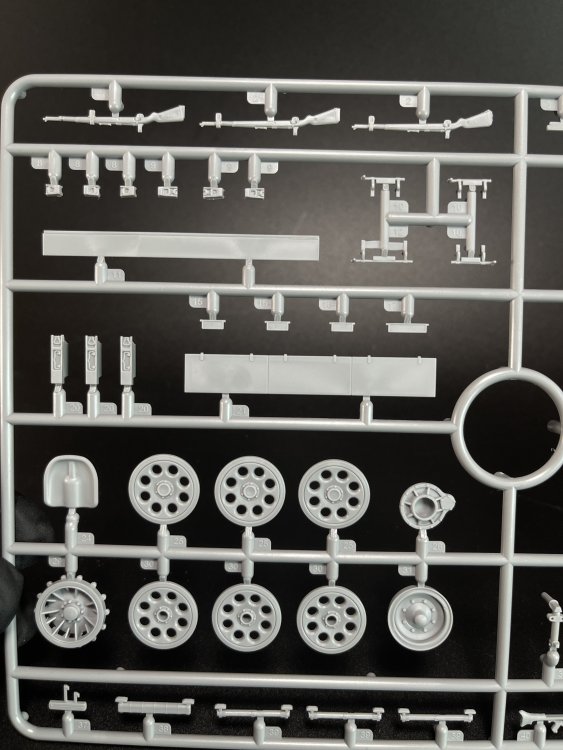
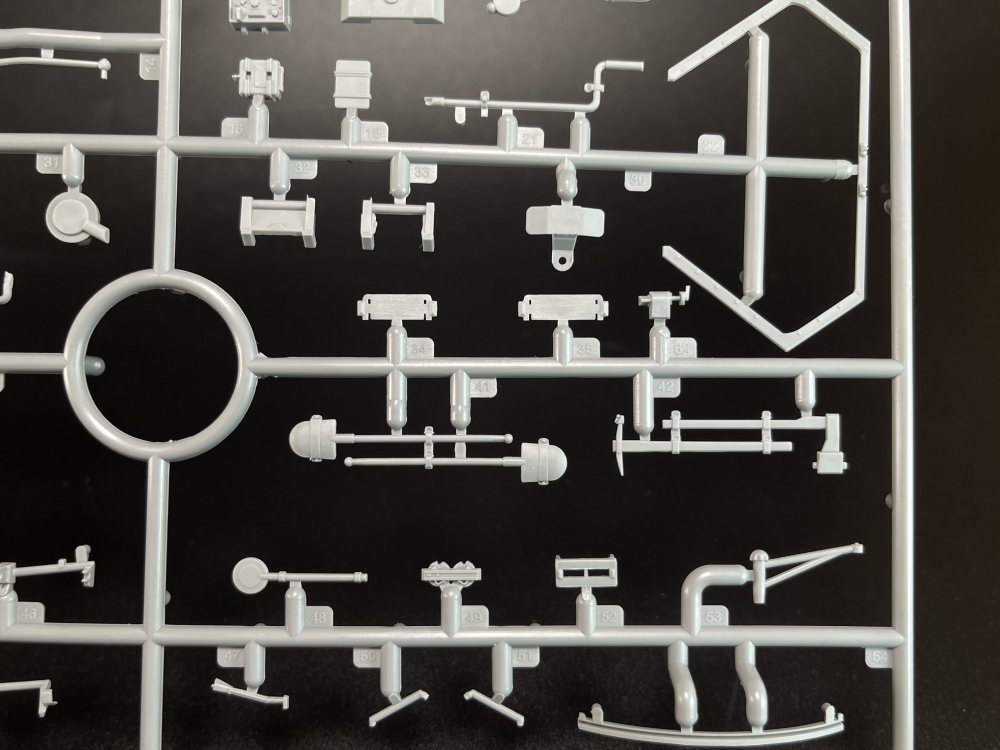
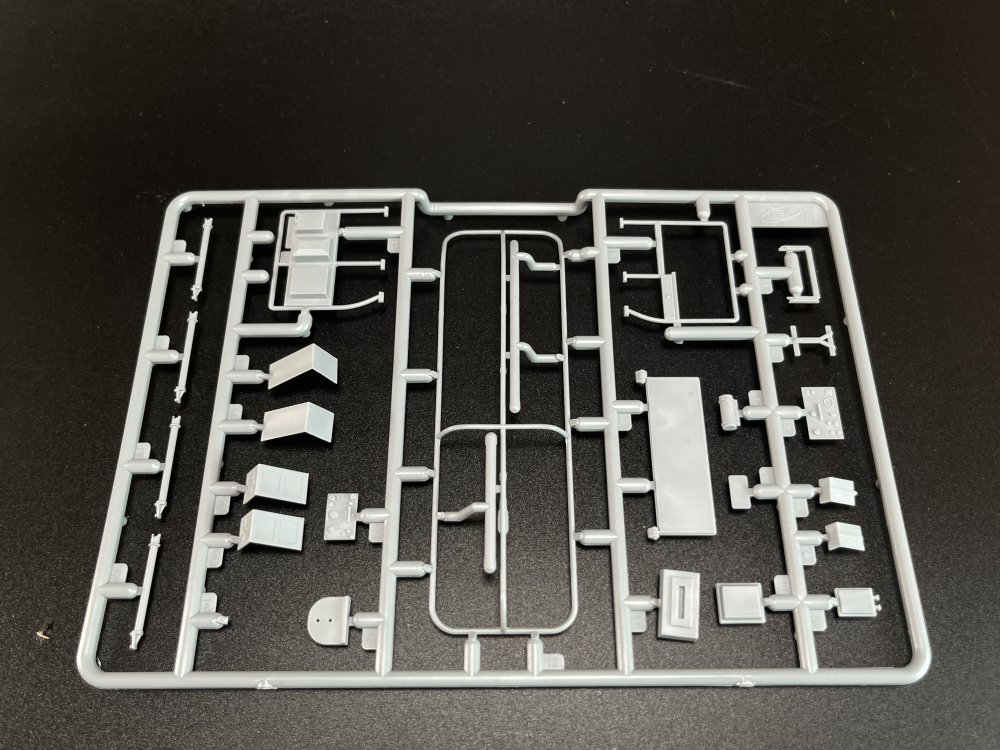
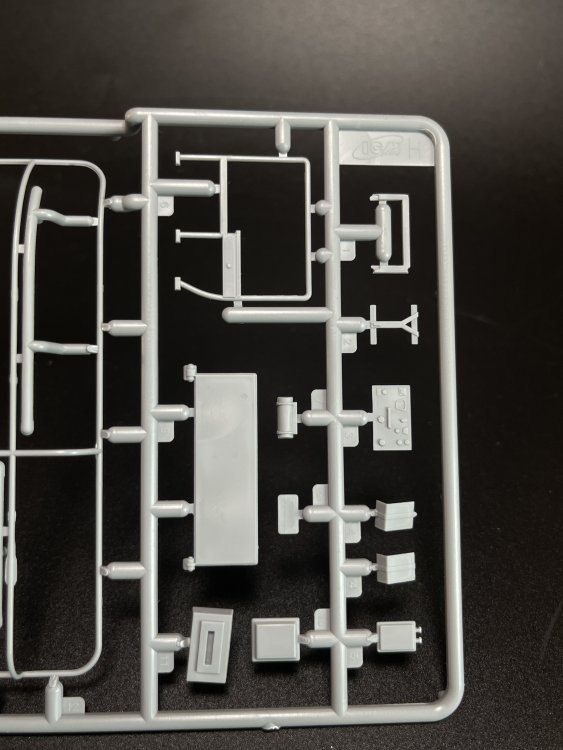
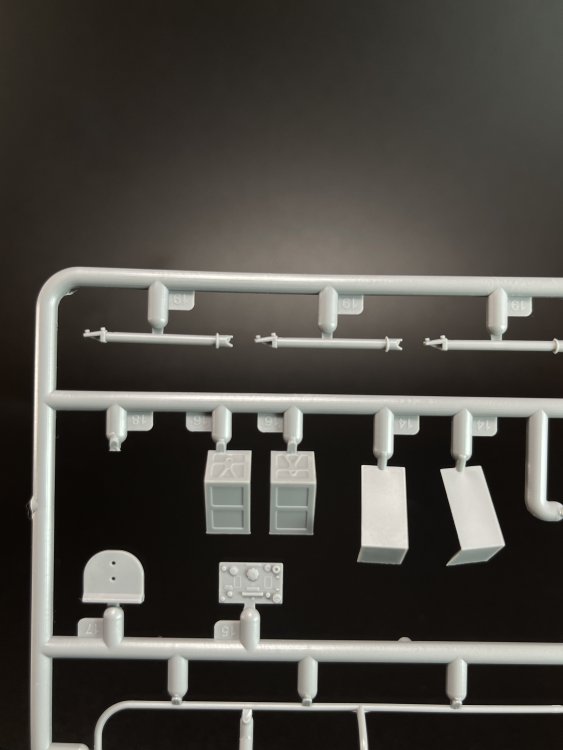
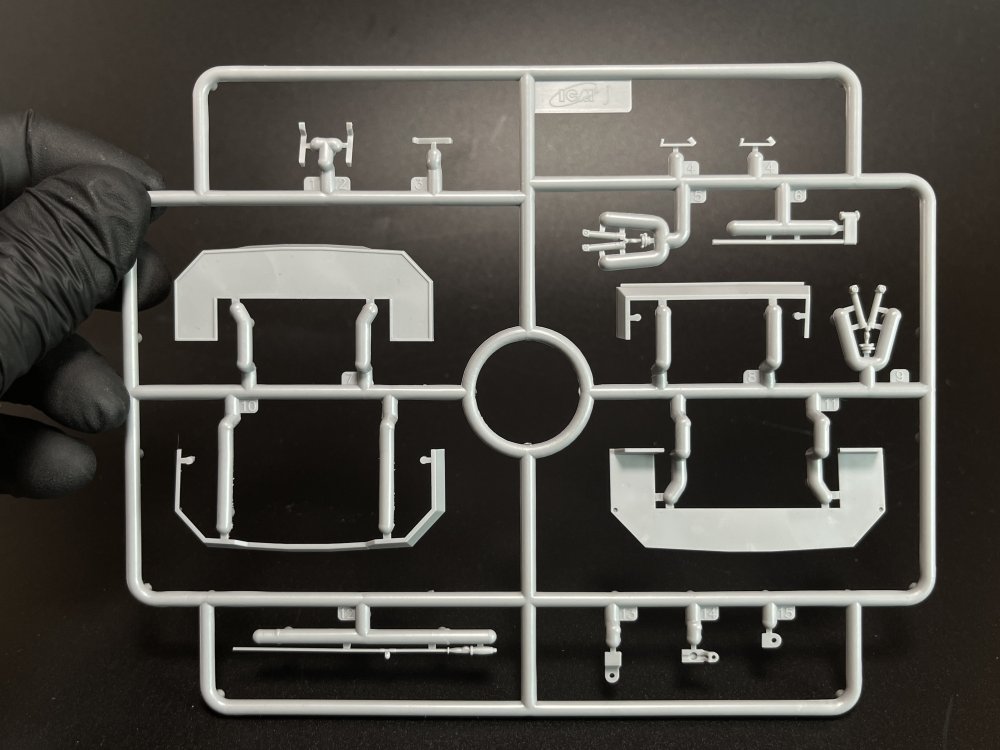
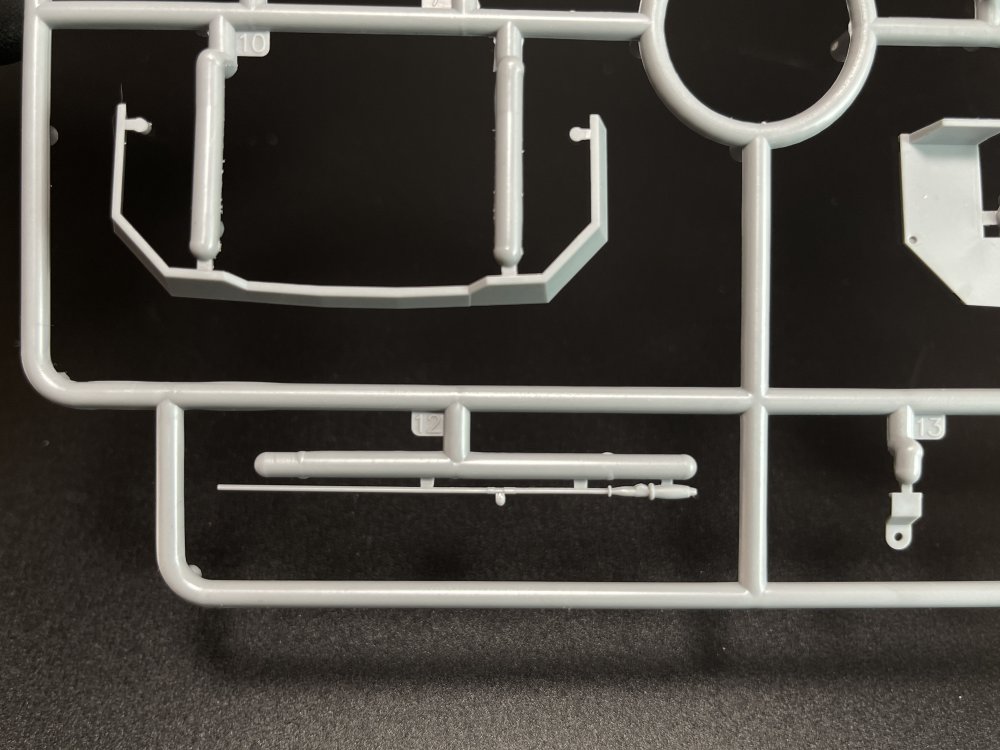
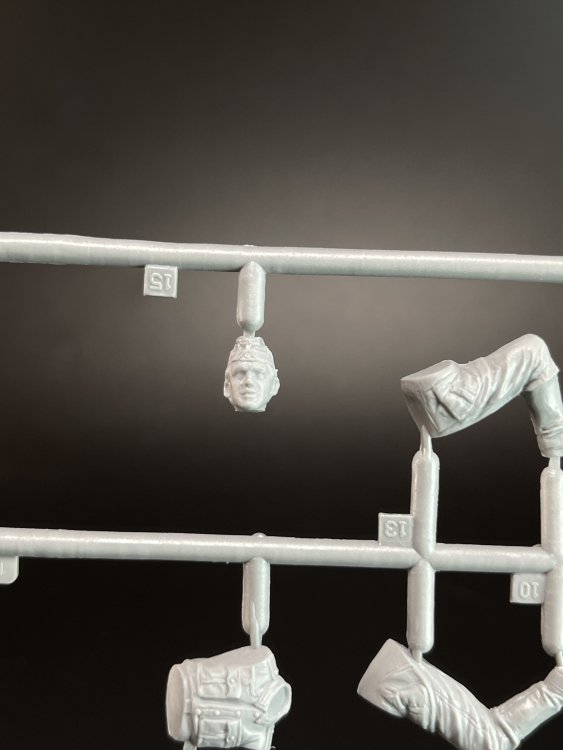
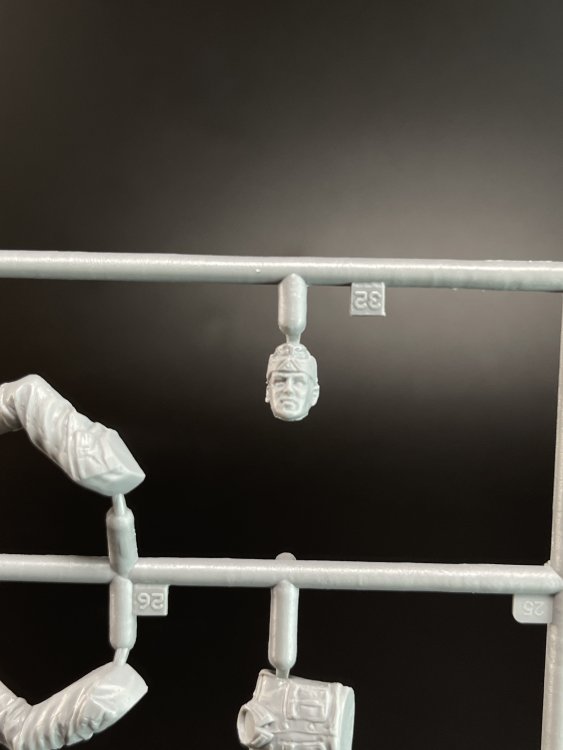
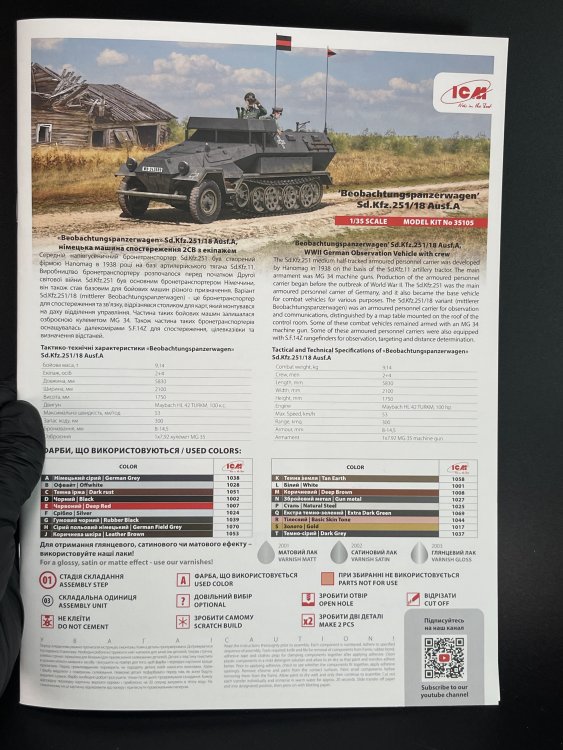
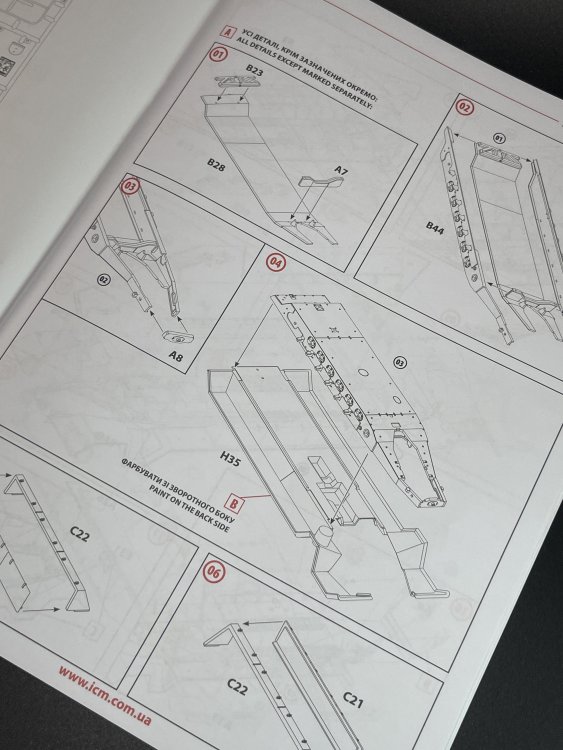
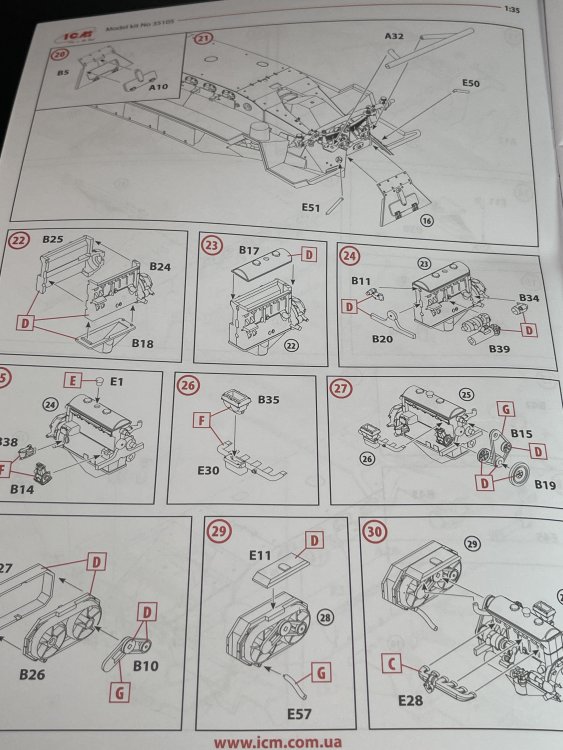
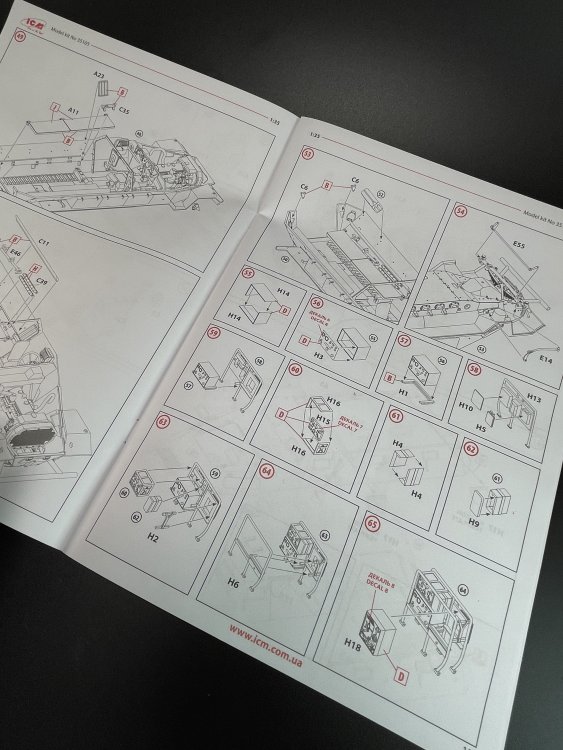
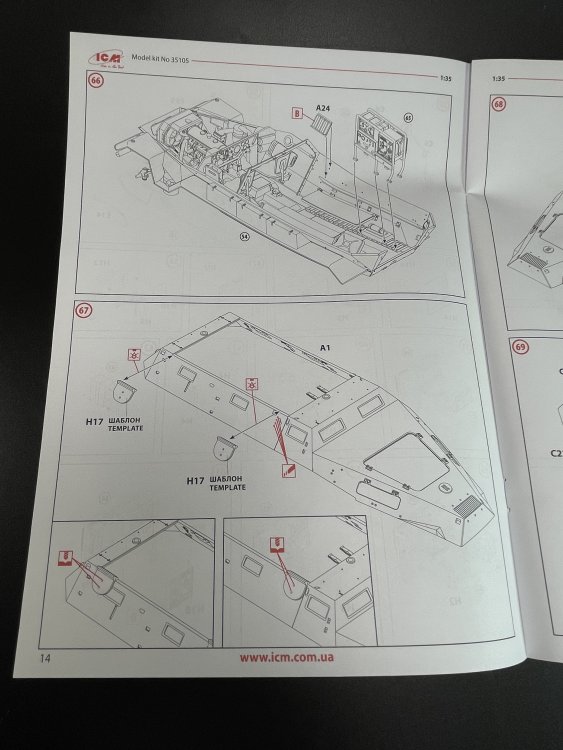
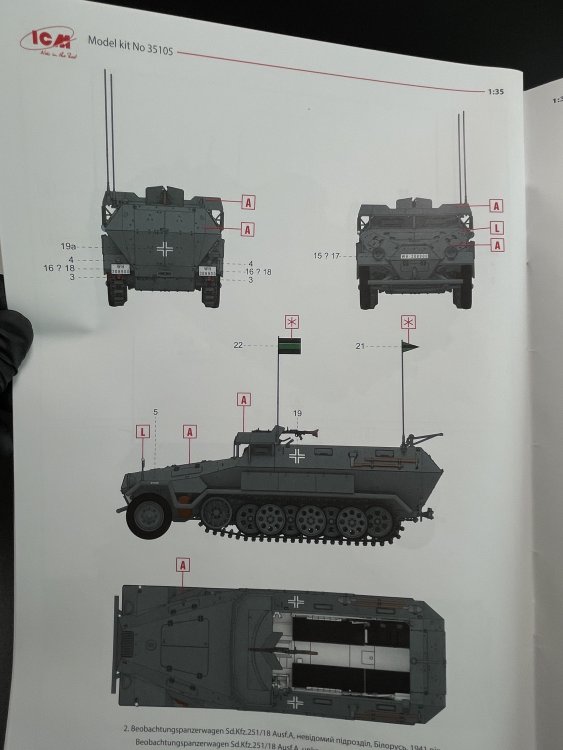
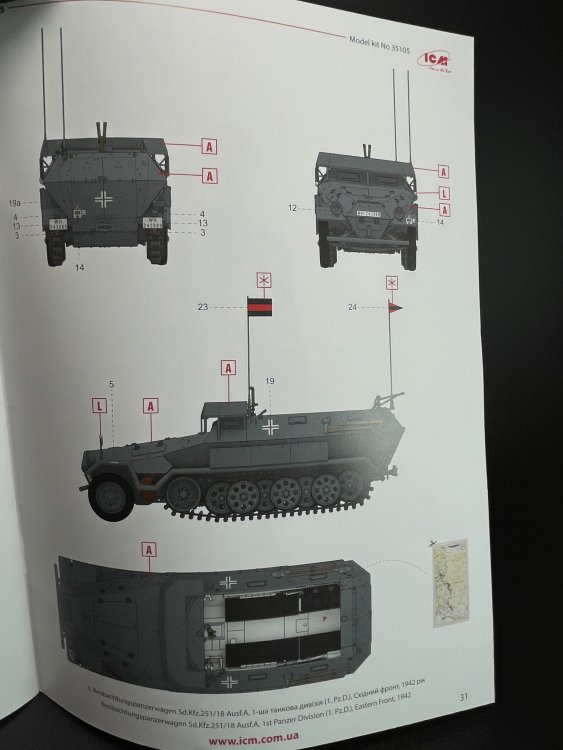
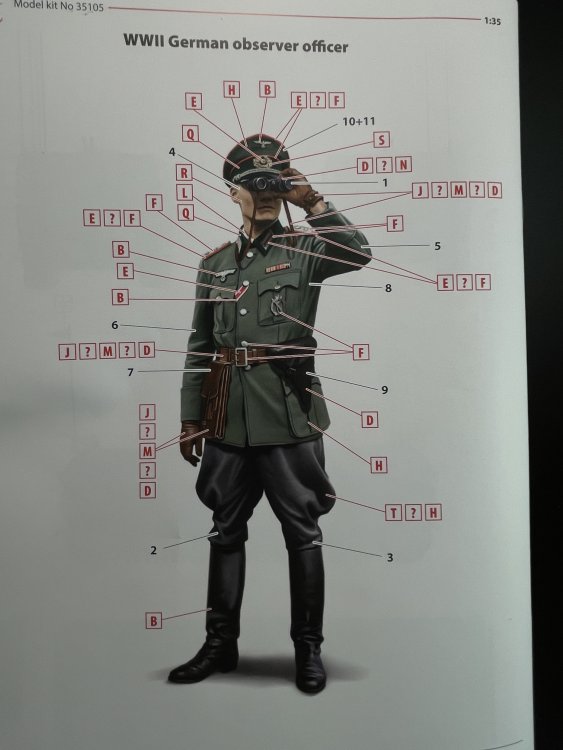
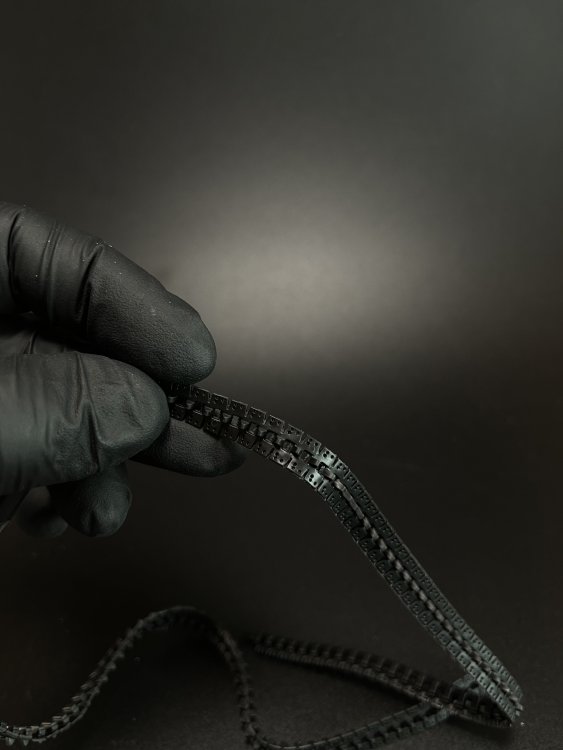
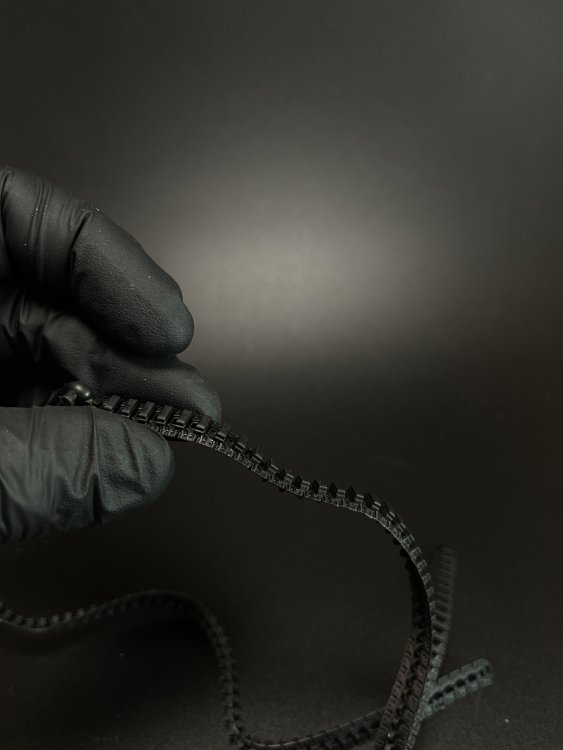
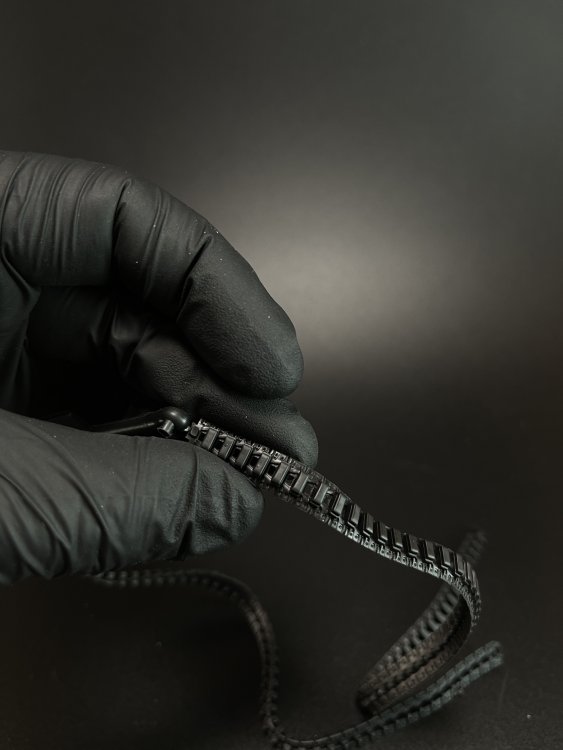
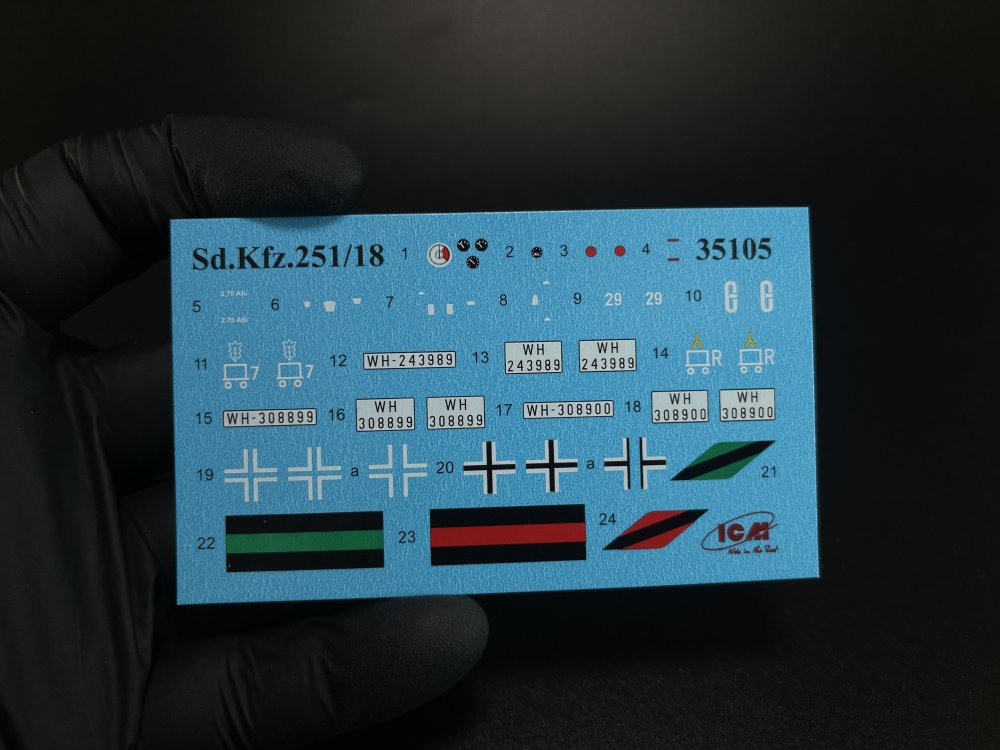
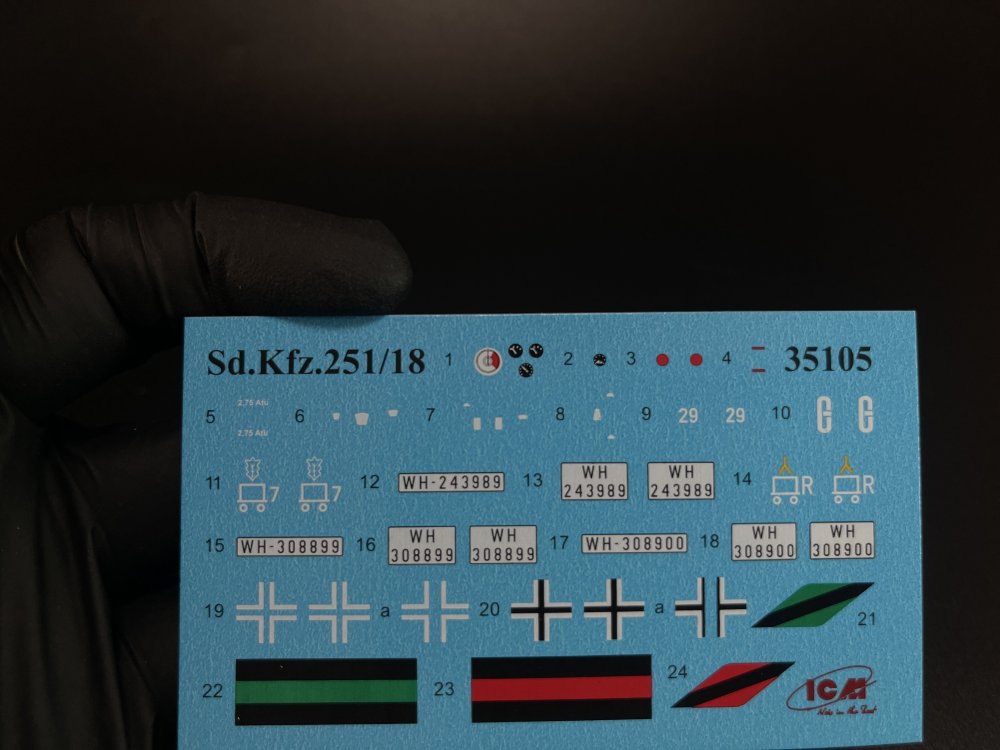
1:35 Beobachtungspanzerwagen Sd.Kfz 251/18 Ausf.A ICM Catalogue number 35105 Price: around 41,50€ ICM keeps launching new kits every month, or new variants of their pre-existing kits. If we just review a brand new 1:48 B-26, now a new variante a Sd.Kfz 251/18, the Beobachtungspanzerwagen, which means “Observation armored car” And that is explicit by the boxart. So another model kit that is original and kudos to ICM to not be afraid of releasing these more unusual model kit. As I said, this is base on the ICM released in 2018 and was review back then by our Jim Hatch, here. So I don’t have much to say beside that but here it goes. But, as usual, let`s crack the box. The package is the usual from ICM, with flip top cardboard with a separate card lid showing the artwork, a lovely artworks as usual. I don’t know who makes the ICM box arts but I do like them. Not my favourites but I do like them. First of all, this model kit is in fact, a sort of combo kit as you have the Beobachtungspanzerwagen Sd.Kfz 251/18 Ausf.A and a set of figures, more specific, the German Command Vehicle Crew (1939 to 1942) - set n.º 35644 and WWII German observer officer. So you got 5 figures inside this combo. The sprues come as usual in resealable plastic bag and they are seven ones. The original release seen on Jim`s review had only 5. So the extra two new sprue for the Sd.Kfz 251/18, are the J and H. Checking the plastic, which is quite good to work with, as is consistent and not brittle at all. The total parts are 315 but not all will be used I reckon. Before I check the new sprues, let me waddle around the sprues. As usual, the surface detail on ICM is quite good, and this model as a full interior… Also as usual, you can make a very nice replica straight from the box. The ones who would like some extra detail can get PE and resin but straight from the box you already get a very nice detailed replica. And this is the ICM is looking forward and they are consistent making it. Kudos to them. I really the Maybach HL 42 6-cylinder petrol engine. This is an AFV model kit but it does have quite a few clear parts. ICM clear parts are one of the best in the modelling world (just check the clear parts on the He-111 or on the Ki-21 Sally), so these one are no exception. The tracks and wheels. The front drive wheels and the tracks are in black vinyl. It`s not the first I said this, but I don’t like vinyl track and wheels only because of painting and weathering but it`s me. Although these ones have good detail and the tracks are not link by link. However, for me, it`s not a break deal, but I would try to get some new metal/resin tracks and new wheels. The construction is quite straightforward and I like how the lower section is made, giving much less room to mistake in the alignment. In fact, the same thing can be said about the upper section! There’s not much to say as Jim`s hasn`t said… Now checking the new kit parts to make the observation version. The J sprue is the observation deck on the top of the vehicle. It´s in fact what same the vehicle profile. So you get some “deck” steel platform, some binoculars (those fix on the vehicle) and a large antenna. Now you are thinking…and the H sprue is for what? Radio station! A radio console to be in back on the vehicle. The detail on the dials and buttons and for the isntruments ICM give some white decals to put. Here I think the detail on the decals could be a little better with some detail on the dials (sort of number, indicator) than just plain white. But this is a very minor detail and you, as I already said a very good replica form the box. The decal sheet is design by ICM, produce outsourcing. but has a good colour registration and all the plates and symbols to make the three version of the box which are: - Beobachtungspanzerwagen Sd.Kfz 251/18 Ausf.A, 1st Panzer Division (1.Pz.D.) France, 1940; - Beobachtungspanzerwagen Sd.Kfz 251/18 Ausf.A, 1st Panzer Division (1.Pz.D.), unknow subdivision, Belarus, 1941 - Beobachtungspanzerwagen Sd.Kfz 251/18 Ausf.A, 1st Panzer Division (1.Pz.D.) Eastern Front, 1942; The instructions booklet with 32 pages, is typical ICM instructions, very clear. Only ICM colour chart, but these paitns are coming more available and I already try with a brush and I was surprised with the pigmentation. I will make more tests and with airbrush. Next, the figures. There`s no box whatsoever as this is a combo. You got five figures and there`s sprues diagram and painting instructions. Not assembly instructions are given… but if you look carefully we see the parts numbers on the figures. So there´s is assembly instructions and it shouldn’t be hard to do… The figures in plastic from ICM are very good. ICM plastic is very good Even the faces are very detail, which is quite difficult in injection plastic. There`s the seam line mould that is need to be removed but with care and patience you get a good result. That seams line is from the moulding so is inevitable. But if it easy to be remove on legs, arms, is not that easy on the face and specially on hands. So take your time… or if you want to get the best of the best of these figures, just get hands and faces in resin (Hornet are the best ones for me). As for the detail, and starting with the clothes I think that are quite well reproduced, but not being a Vietnam clothes specialist, I `m quite happy with the detail. Not as sharp and clear detail as resin but still, very good for plastic. The posture and body positions are quite convincing and very well reproduce making all the figures in a natural pose which is a quite hard task to do. The hands of all figures are very well made for injection and as I already said, with care and patience to remove the seam line you will get a good result Also, these figures are independent of each other, so you can chose to use all or only one or two. Conclusion Well, another great model kit from ICM!! It’s a super AFV model, superblydetail with full interior with trew option to the modeler. The construction is well thought to help the modeler with the alignment. This combo is begging to be put in a little diorama. You just need to make a base! It`s a superb kit! Highly recommend It`s 9,8 out of 10. My sincere thanks to ICM for making this fantastic model kit.


-
(WIP) Curtiss A-8 „SHRIKE” 1:48 Czech Model
Fran replied to Kriss's topic in LSM 1/48 Work in Progress
I have this one on my stash so i will be watching closely. -
ICM read, as usual, this review. And Alina (from ICM) send me an email regarding the pitot option, and allow me to share their reply. Its fantastic to have an ICM official reply: "Regarding the pitot option, there are two possible design options - either mold the part together with the fuselage (cutting it off if necessary) or make the part separately (by adding a seat under it). Both options have their advantages and disadvantages. We decided to go with the first option, as we believe that it simplifies the assembly. Moreover, the Pitot tube under the fuselage is difficult to align correctly after the model is assembled. If the modeler is afraid of damage to these parts, they can be cut off during fuselage assembly and glued to the final stage." Absolutely, you are welcome to share our explanation as an official option from ICM. It's always great to contribute to the community's understanding. Regarding the second pito of the wing - maybe it will be used in the next modefications."
-
Good question... I never tried then and I`m quite curious about then as they have several great schemes sheets.