JeroenPeters
-
Posts
4,875 -
Joined
-
Last visited
Content Type
Profiles
Forums
Events
Gallery
Everything posted by JeroenPeters
-
 Oh wow... i see what you're doing here. Really cool!
 -
done!
-
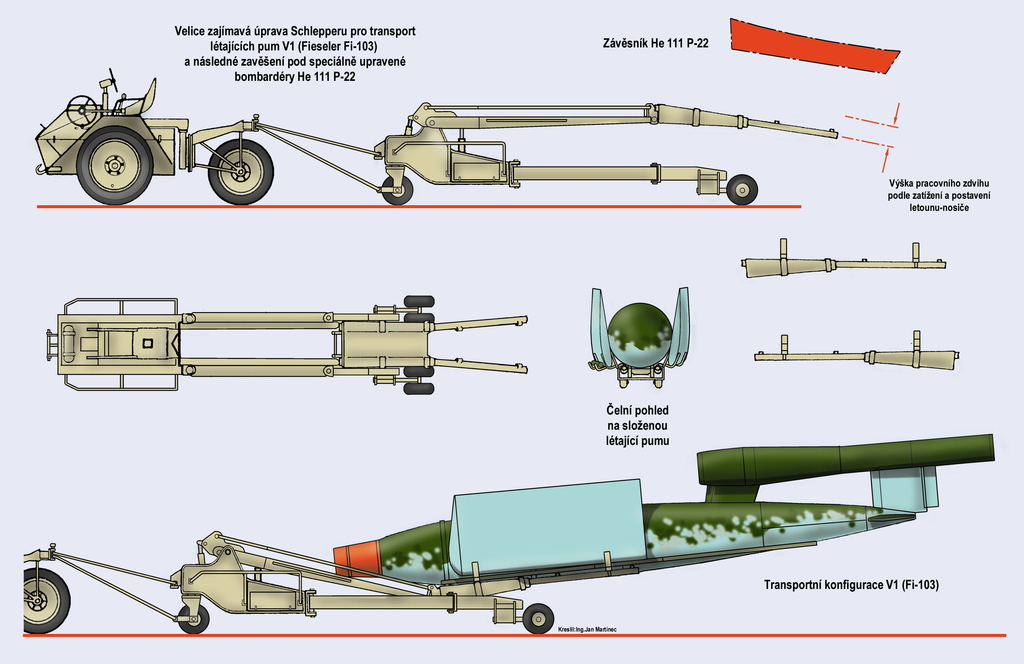
Profimodeller Fi103 V1
JeroenPeters replied to JeroenPeters's topic in LSM 1/35 and Larger Work In Progress
Another pic saved from FB...
-
Profimodeller Fi103 V1
JeroenPeters replied to JeroenPeters's topic in LSM 1/35 and Larger Work In Progress
After months of work the first paint is on. and yes. i still pre shade -
Lovely!!
-
Profimodeller Fi103 V1
JeroenPeters replied to JeroenPeters's topic in LSM 1/35 and Larger Work In Progress
Thnx and yes. I still have all the pics and might delete many of my previous posts and replace them with one post with most of the pics -
Profimodeller Fi103 V1
JeroenPeters replied to JeroenPeters's topic in LSM 1/35 and Larger Work In Progress
I think it's almost ready for paint. Few small parts to go on the trailer and V1.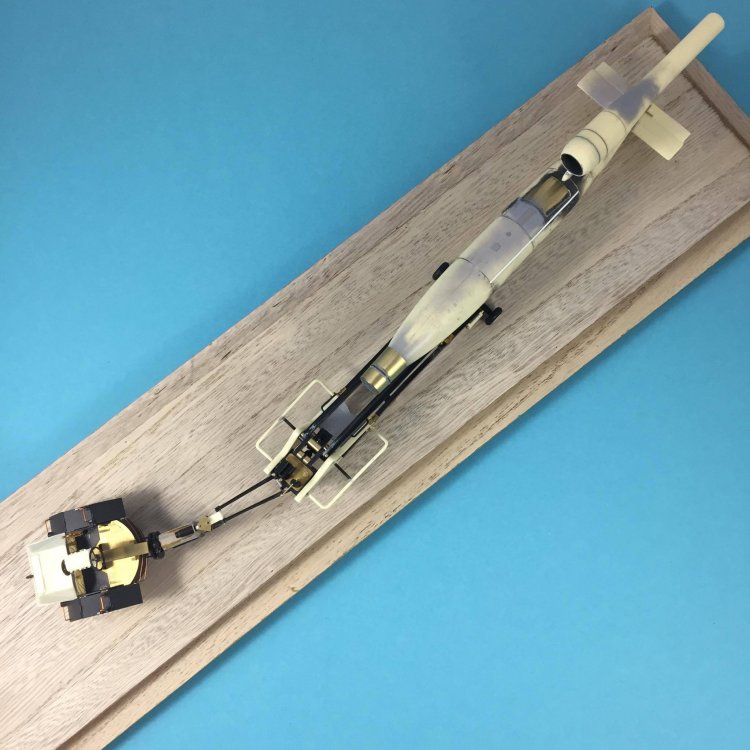
-
1/32 Tamiya Spitfire MkIXc WD-W EN354
JeroenPeters replied to Mauricio_1971's topic in LSM 1/35 and Larger Work In Progress
North star Wheels. Haven't seen those before.... Looking forward to seeing them up close.. -
1:32 Trumpeter F4F-4 Wildcat
JeroenPeters replied to Mish's topic in LSM 1/35 and Larger Work In Progress
Nice! You just don't see too many of these being built. -
1:32 scale Fokker DR.1
JeroenPeters replied to sandbagger's topic in LSM 1/32 and Larger Aircraft Ready for Inspection
Lovely! -
special hobby 1/32 Tempest Mk.V “HI-TECH”
JeroenPeters replied to JayDee's topic in Aircraft Reviews
Wow.... seriously impressed with this kit!!! Lovely!! -
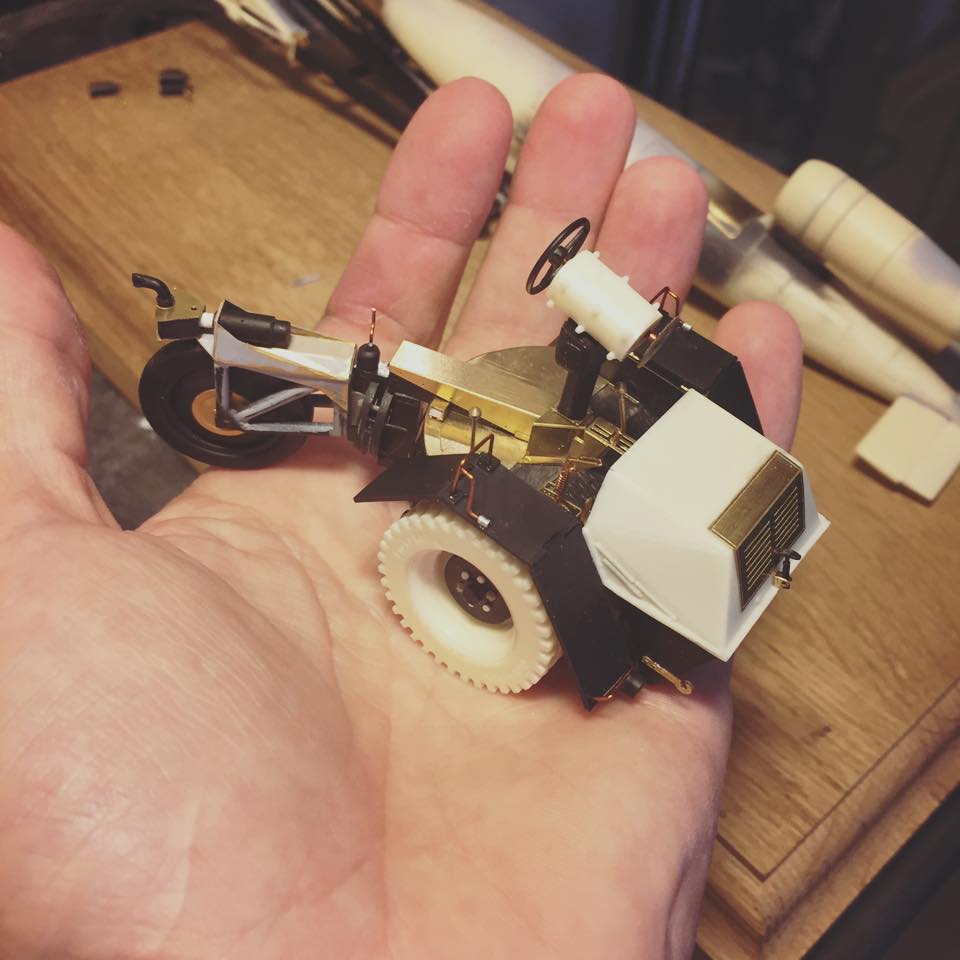
Profimodeller Fi103 V1
JeroenPeters replied to JeroenPeters's topic in LSM 1/35 and Larger Work In Progress
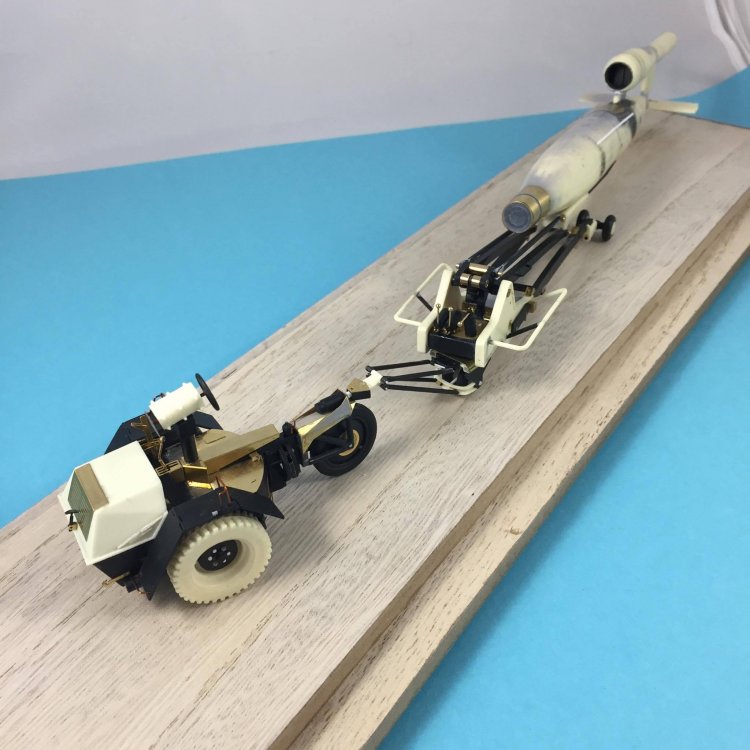
Absolutely hating Photo Bucket... Here's a direct upload to the forum and shows the finished Schlepper. The only part I'll install later is the seat, to make painting easier.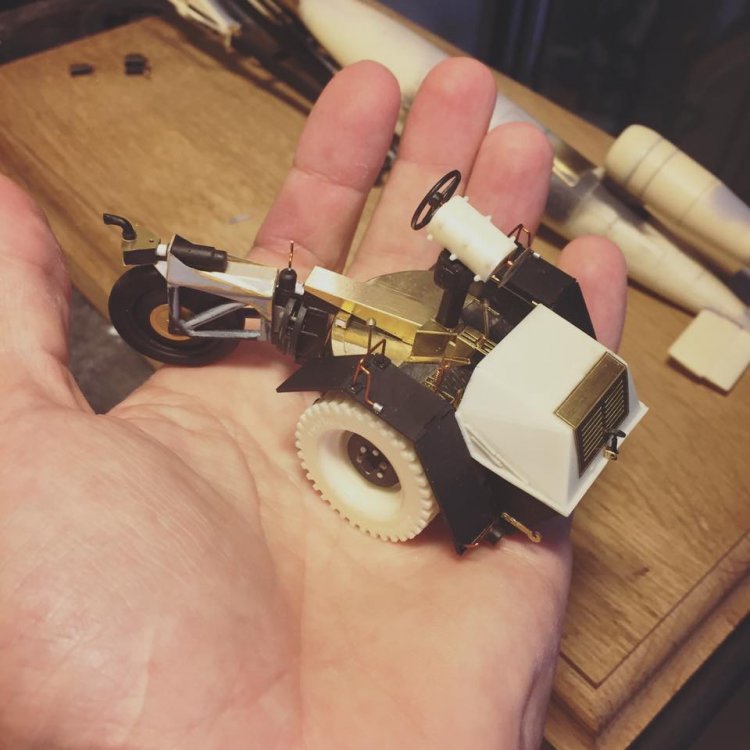
-
Cheers! Tried downloading all my albums from PB but even that is proving to be a pain....
-
I think so!
-
Oh wow!!
-
Diorama accessories from Plusmodel in 1:35
JeroenPeters replied to Fran's topic in LSM-Related Reviews (military figures etc)
Lovely stuff! -
Italeri 1/35 Crusader mark I late
JeroenPeters replied to Drdave's topic in LSM Armour Finished Work
I love Black Dog resin... Lovely.. -
3D Printing Anyone doing their own?
JeroenPeters replied to Douglas_H's topic in Modelling Discussion
I always use Shapeways. Pretty happy with them in terms of speed, detail and price... -
Italeri 1/35 Crusader mark I late
JeroenPeters replied to Drdave's topic in LSM Armour Finished Work
oh wow. Very cool. Did you use any aftermarket? -
1:35 Steyr K2670 Profimodeller Kit No. P35006 Available from Profimodeller for €56,- Introduction Another exotic subject from Profimodeller. This time some railway armour! Lately it’s been mostly Trumpeter covering german and soviet armoured railway subjects. From the amazing BR52, various panzer locomotives and a whole range of transport and armoured Canon- and Flakwagons. One even bigger than the other and often displayed in huge diorama’s. Like this: And even bigger: And bigger... But today we’re looking at a rather small, machine gunned armoured personell wagon. The Steyr K2670. The subject has been covered before by Hauler in 48th scale in resin, and in 72th scale by Planet Models. It even has been done in 35th scale before. Modellbau-Schmidt did a version in Vacu-form. Even more challenging than your normal resin kit. In the past you could also obtain a resin offering of the subject by the brand X-Project. It costed €43 at the time, and was only available through internet but I don’t think it’s available anymore. Here's the X-Project one: And here's the Vacu-form Modellbau-Schmidt one, with figures for size reference: This little armoured wagon could carry four MG’s, six soldiers and was powered by a Steyr engine with 72HP. That’s right: it was a self-powered vehicle. It had 14,5mm thick (or thin if you like) armour and weight 8 tonnes. The Steyr K 2670 (known also in German as: "leichte Schienenpanzer" - le.SP or "Panzersicherungswagen") was designed by the Austrian brand Steyr-Daimler-Puch AG in 1943, and at least 40 were built and delivered up to 1944. They were used for anti-partisan service in the Balkans. Due to the light axle pressure (4.7 t) they could operate on tracks in bad condition that were common in those areas. The Germans used these Steyr’s in train combinations of 10 coupled units. After WW2 one these Steyr’s was used by Poland. It is not known, how it got there. Possibly it was left in the German armoured train training center in Rembertów. It remained in service until the 1950’s. Very little reference material is left to date. But one K2670 survives to this day. Most likely the only survivor worldwide, and it belongs to Museo Diego de Henriquez, but it's on loan to the Railway Museum in Triëste, Italy. Check this link for a good reference walkaround: http://www.fahrzeuge-der-wehrmacht.de/Artikel/Panzerdraisine_Steyr_K2670.html Here's how it looks today (chipping fluid anyone?): The kit As always Profimodeller managed to cramp all the parts in neat little white boxes and fit these with all the photo etch in a small box, making it hard to re-pack after my review J. I’m glad to see a lot of typical Profimodeller black resin (I keep calling it resin, because I honestly don’t know whether this is plastic, resin or even Bakelite), since it never warps, shrinks or droops after a long period on the shelf. It’s strong, can carry a lot of weight and has crisp details. The base of the K2670 is made from standard yellow resin. The whole armoured cab is built up from the black resin walls (which require no clean-up), and so is the suspension and the beams for the track. Yes. A section of railroad track is included. Nicely detailed wooden beams with a lovely wood texture. I’ve seen wood textures before from Profimodeller that were sometimes a bit crude, but these beams are lovely. The tracks themselves are found curved in the box, made from another foreign material. I’d guess they’re plastic and they bend straight with little effort. Basic parts: I love this stuff: The chassis: More black resin parts for the cab, wheels and chassis: Let me lay them out so you can see better: Wheels: MG-port: Once the basic structure of the cab and the suspension is built a whole lot of details enter the scene. Exhausts, two armoured superstructures, a variety of hatches for looking and shooting through, handles, tools, etc… What I really love is the inclusion of weld beats. 10 long strips of very flexible, thin and detailed weld beats that follow the edges of the armour on the cab. The amount of photo etch is quite daunting. A huge sheet with all the hatches, handholds and toolclamps. The only small downside is the fact the kit isn’t designed to build with a troop-door posed open. Ofcourse you can, but you’ll have to cut a hole in the cab and scratch build details on the inside of the armoured door. Track beams: Array of resin details: Machine gun (four included): Tools: Exhaust can with lovely thin open ends: 10 strips of flexible weld beats: Two sheets of PE: Decals for three schemes are included. German yellow, Panzer grey and one with a camo pattern combination of these two colours. On the decal sheet you’ll notice WG1 through WG10 stencils. As mentioned before these Steyr’s travelled in a linked combination of 10. So these were to indicate their position in the pack. The decals: Schemes: Instruction booklet: Verdict Profimodeller never ceases to surprise. In a time where we are treated to a wide range of huge german railroad goodies this small armoured flea is a welcome addition. Great for a partisan diorama or just to add to your armoured railroad model collection. The multimedia parts offer lovely detail and obvious love for the subject, which appears to be very well researched. I know from experience that when you take your time and follow the instructions to the letter, these Profimodeller kits build up to real gems. The quality of the resin is forgiving and strong and the same goes for the Photo etch. VERY highly recommended. My sincere thanks to Profimodeller for this review sample. Jeroen Peters
-
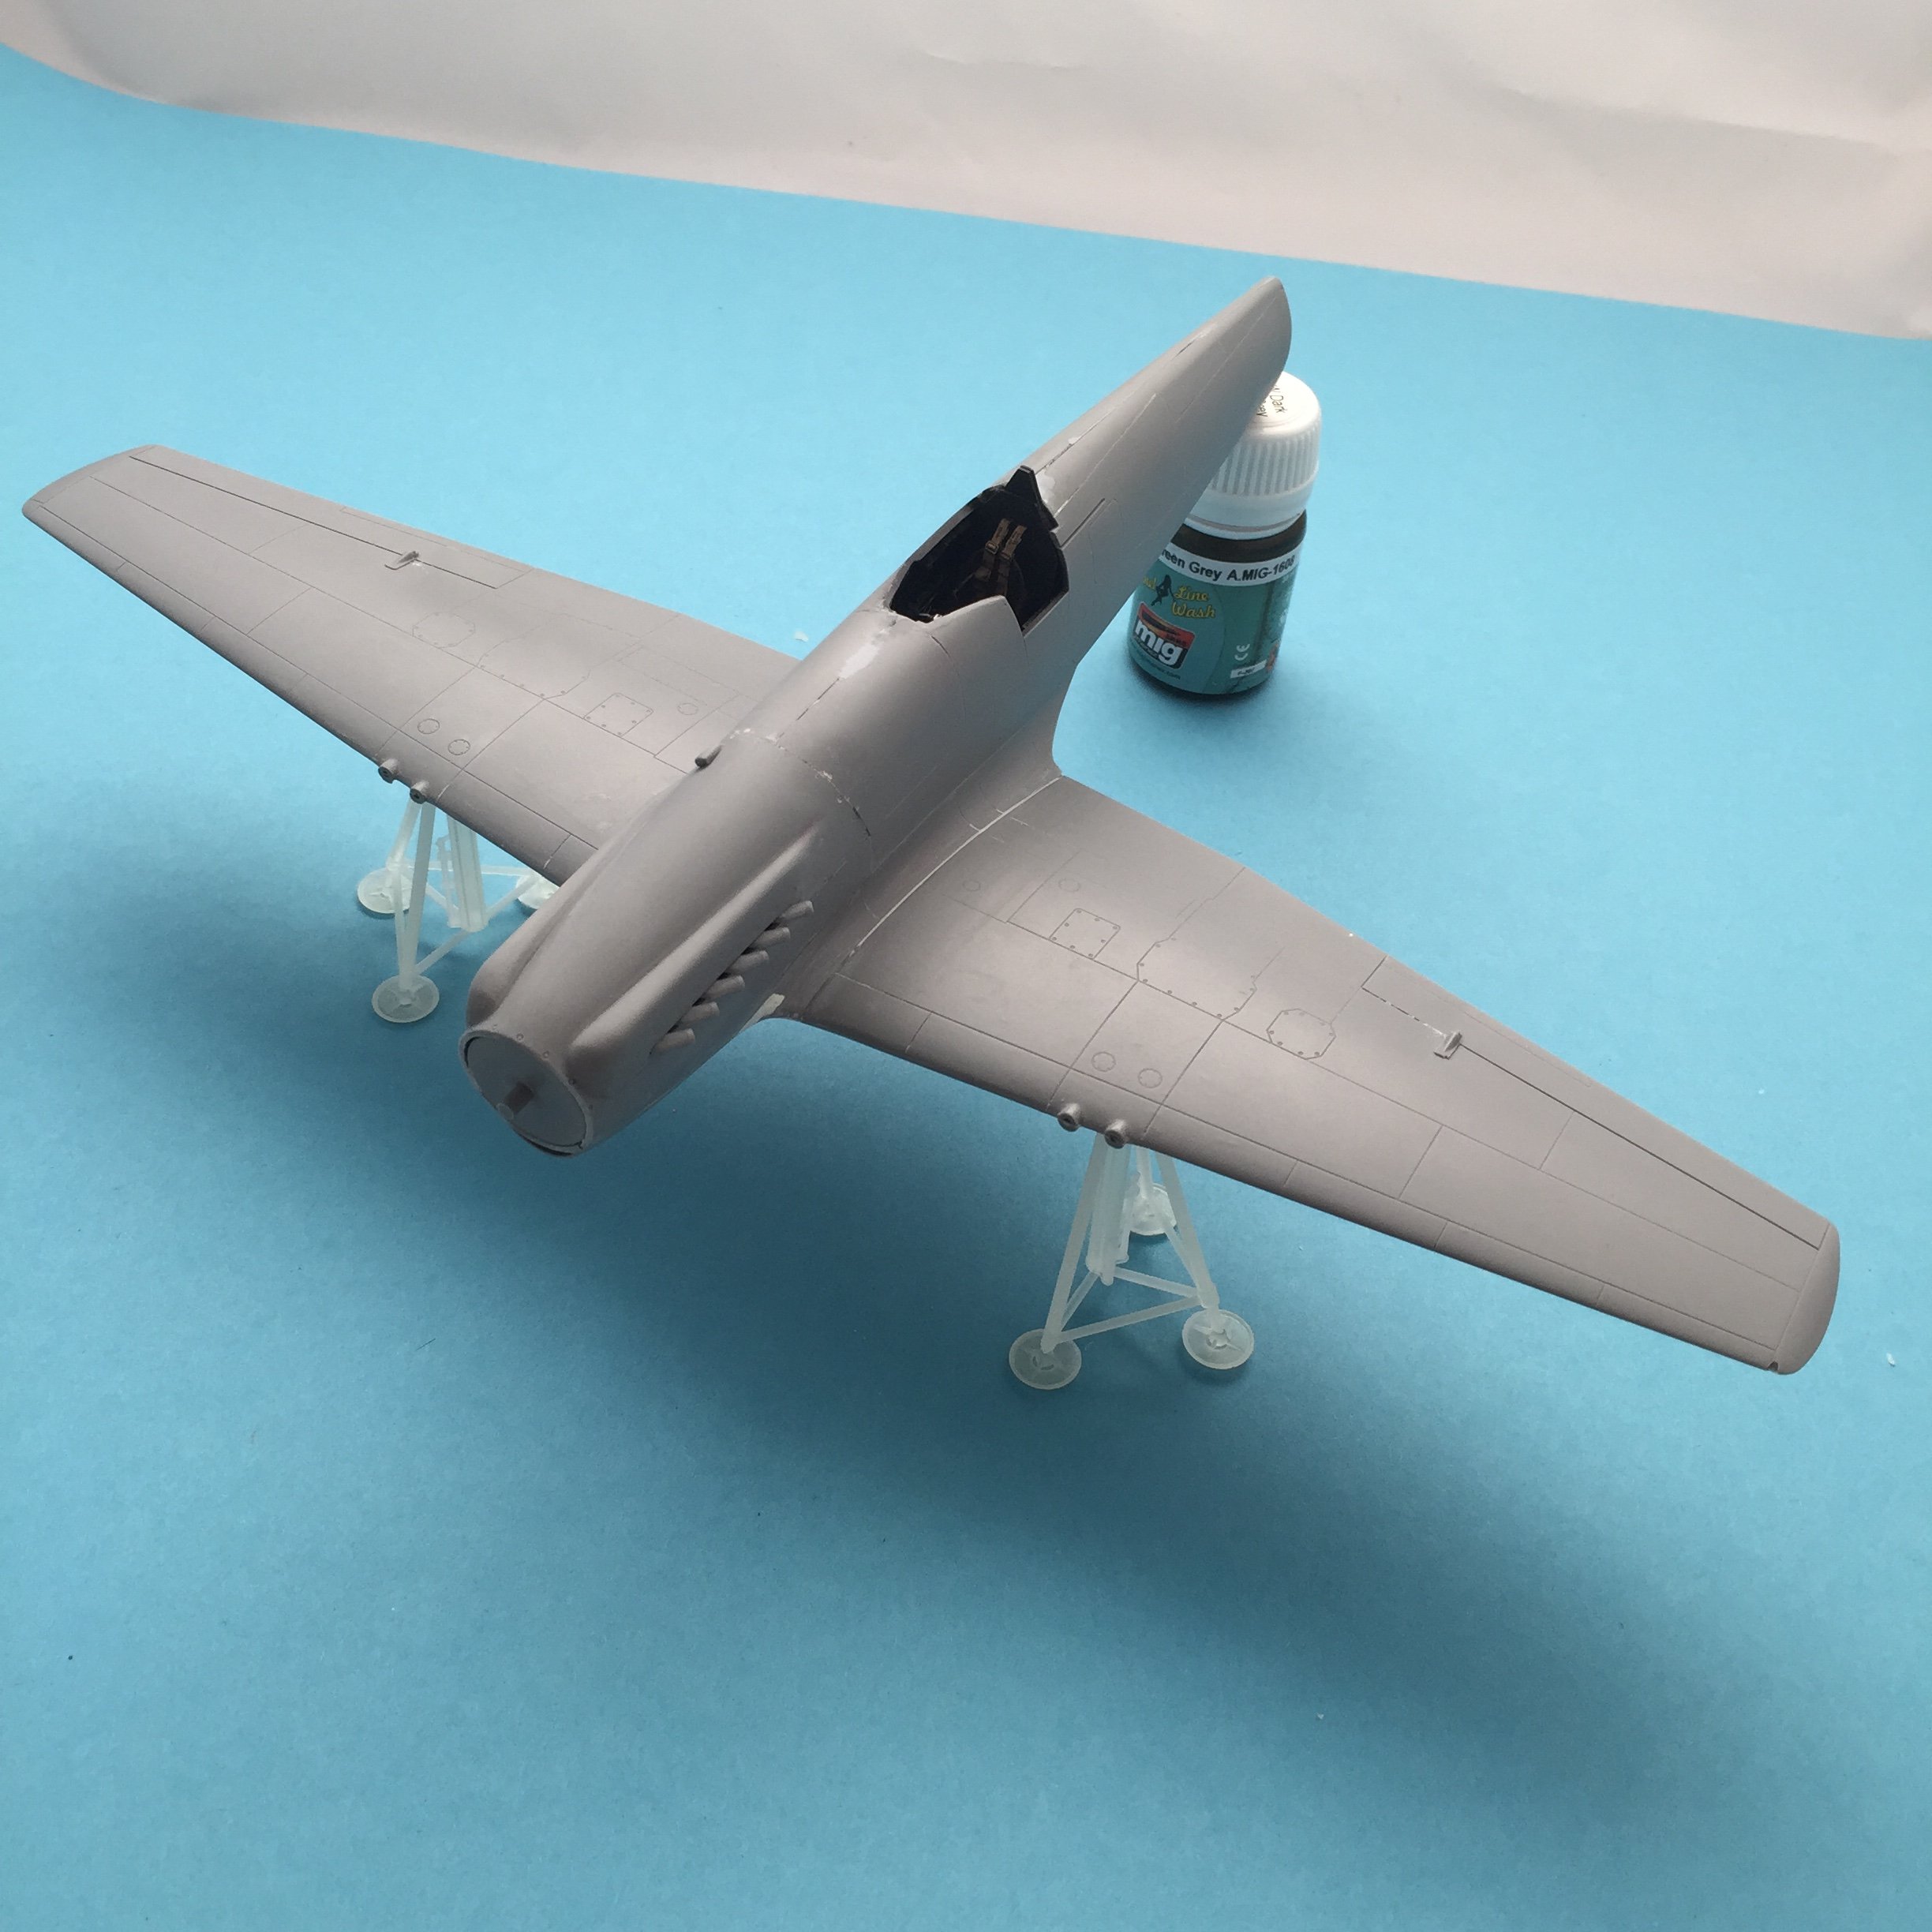
Iconicair Supermarine Spiteful
JeroenPeters replied to JeroenPeters's topic in LSM 1/35 and Larger Work In Progress
Hahahaha! Strange as it may sound, the wingless chickens take me more time to build than the winged ones'! This one however will have a semi retracted gear. I hope that counts for something! -
Iconicair Supermarine Spiteful
JeroenPeters replied to JeroenPeters's topic in LSM 1/35 and Larger Work In Progress
Up on her 'legs'
-
Iconicair Supermarine Spiteful
JeroenPeters replied to JeroenPeters's topic in LSM 1/35 and Larger Work In Progress
Visibly not a lot of progress but i spent long evenings careful dry fitting and sanding. Most challenging are the nose panels. Everything is smooth now but rescribing needs to be done. Resin is not my favourite material to work with, but I've learned to keep my patience... The wings fit nicely. That's a plus. The tail seems to slip on nicely too. The dark lines along the spine are not gaps but transparent superglue. -
Lovely camo work! Sweet..
-
Welcome back! Looking forward to see what you've done.