BevanBrooks Posted September 17, 2013 Posted September 17, 2013 Hi guy's this is the cockpit of the 219 from Revell. Paints used are Gunze acrylics with a little Tamiya as well. Details were picked out with Humbrol enamels. I replaced the molded levers with brass wire and white glue for knobs. I also added some fictitious wiring for added interest and used HGW's 219 belt set. I found them fairly fiddly but well worth the effort. Chips/scratches were done with Derwent coloured pencils as well as 2b grey lead. Washes with oils, dry brushing with oils as well. Testors Dull Coat for final finish. Hope you enjoy the pics cheers Bevan 2
efrick Posted September 17, 2013 Posted September 17, 2013 Beautiful! Your work on the cockpit out of the box makes any aftermarket pieces seem redundant! Very convincing! Ed
Jeroenveen1 Posted September 17, 2013 Posted September 17, 2013 Awesomeness. Great work Bevan! Glad to see it here and thanks for sharing, I will be on the lookout for more!
Dave J Posted September 17, 2013 Posted September 17, 2013 Great looking Pit! Looking forward to your build of this kit!
Artful69 Posted September 17, 2013 Posted September 17, 2013 Great looking Pit! Looking forward to your build of this kit! ... I agree ... I have the SWS version on the way, but I nice to see what will be achieved with the Revell job! btw - Dave ... please check your mailbox!! lol Rog
harvey boyer Posted September 18, 2013 Posted September 18, 2013 Good work. May I suggest a black or dark brown was on the leather bits ? Makes it pop.........Harv
BevanBrooks Posted September 18, 2013 Author Posted September 18, 2013 Thanks guys comments much appreciated. Harvy, good spot. Its only dry fitted at the moment so no biggy to pull the seats and add a wash to the headrests. Dave, Jeroen, dont hold your breath. Im a notoriously slow builder but will try to keep it moving at a reasonable pace.
nmayhew Posted September 18, 2013 Posted September 18, 2013 nice one Bevan looking very good the pros / cons of this vs the Z-m kit I think are well known now, but I still think the Revell offering will look the part once complete have you decided on a scheme yet (not that there is a whole lot of choice without doing a fair bit of digging and research...)? anyway, looking forward to seeing more! cheers Nick
BevanBrooks Posted September 18, 2013 Author Posted September 18, 2013 nice one Bevan looking very good the pros / cons of this vs the Z-m kit I think are well known now, but I still think the Revell offering will look the part once complete have you decided on a scheme yet (not that there is a whole lot of choice without doing a fair bit of digging and research...)? anyway, looking forward to seeing more! cheers Nick Hi Nick, a scheme out of the box I think. Thanks mate.
BevanBrooks Posted September 22, 2013 Author Posted September 22, 2013 Just added a wash to the leather headrests and while I was at it a wash also to the HGW belts. I let it settle into the detail then washed the excess off straight away as not to discolour the belts too much. Apologies for the photos, they were taken in the moment with my Samsung Cheers Bevan 2
Matt_ Posted September 28, 2013 Posted September 28, 2013 Good stuff.. I like the very fine grained weathering you've applied, particularly on the observer's seat... Matt
Grant Posted September 29, 2013 Posted September 29, 2013 Hells teeth Bevan, that's lovely work. I'm looking forward to watching this come together 1
BevanBrooks Posted September 30, 2013 Author Posted September 30, 2013 Cheers Matt and Grant. Work has progressed to the wheel bays, landing gear etc. RLM 02 was mixed 50/50 Tamiya xf22 and Gunze H70 thinned with gp thinner. Highlights are straight H70. Washed with a mix of black and burnt umber oil paint and dry brushed with humbrol enamel and white oil paint, I can't remember the humbrol number. You'd think I'd have learnt by now to jot down some notes lol. Scratches as usual for me are done with sharp Derwent coloured pencils as well as Prismacolour water colour pencils (black and umber). A little 2b grey lead for metal chips. 1
Wingco57 Posted September 30, 2013 Posted September 30, 2013 Bevan, Your weathering skills are evident. Did you shorten the legs? Cees
Jamme Posted September 30, 2013 Posted September 30, 2013 Beautiful job. I really like your weathering. Cheers, Jamme
Administrators JeroenPeters Posted September 30, 2013 Administrators Posted September 30, 2013 That looks great. Are those weld beads on the model?? Or did you make them yourself? Cheers, Jeroen
Dave J Posted September 30, 2013 Posted September 30, 2013 What fantastic weathering! Some of the best I have seen! Really looking forward to your next update!
BevanBrooks Posted October 1, 2013 Author Posted October 1, 2013 Thanks guy's..... Hi Wingco, no I didn't shorten the gear legs, not that concerned about it, as long as it looks like a 219 I'm a happy camper! Hi Jeroen, funny thing, the gear legs come in two halves and when I glued them I thought "How am I going to sand the seem line out?" Well some of the glue seeped out so got a number 11 blade and stabbed at it to produce the "weld" line you see in the pictures beats sanding in my book and adds a little more interest. 4
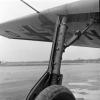
BevanBrooks Posted November 6, 2013 Author Posted November 6, 2013 Small update but a milestone none the less. Airframe is pretty much complete, little bit of tidy up around the vertical stabilisers and tailplane joint but nothing major. The lower nacelle to wing joint was pretty good I used liquid polly to fill the small gaps which worked a treat. The only annoying thing was a join going straight through some hatches on the top join. The joint itself was a bit of a pain but I got there. Re scribed the hatches and tore a little filler out.... don't you just love that when it happens!! Used some brass tube for the cannon barrels with BMF around the ends.... probably not the best solution but should look better than the kit ones under some paint. All in all this has been a pleasure to build so far. 2
nmayhew Posted November 6, 2013 Posted November 6, 2013 looking good not sure if you know, but gFactor has released metal gear for this kit -they had them in at Sprue Bros, but not sure they have hit elsewhere yet i understand you are happy with it as it is, but thought you might as well have the heads up and all that
DougN Posted November 6, 2013 Posted November 6, 2013 Looking good! Can't wait to see some paint on this beastie!Doug

Recommended Posts
Create an account or sign in to comment
You need to be a member in order to leave a comment
Create an account
Sign up for a new account in our community. It's easy!
Register a new accountSign in
Already have an account? Sign in here.
Sign In Now