JayDee
-
Posts
3,272 -
Joined
-
Last visited
Content Type
Profiles
Forums
Events
Gallery
Everything posted by JayDee
-
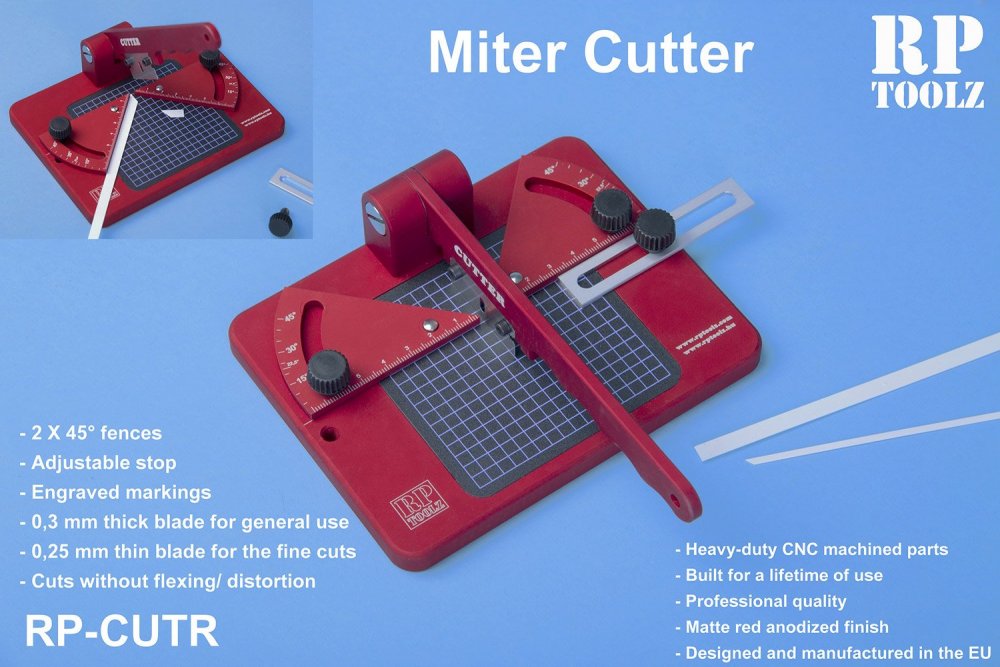
I've seen decent mitre tools and really cruddy ones. IMHO, this is the best, beyond doubt.
-
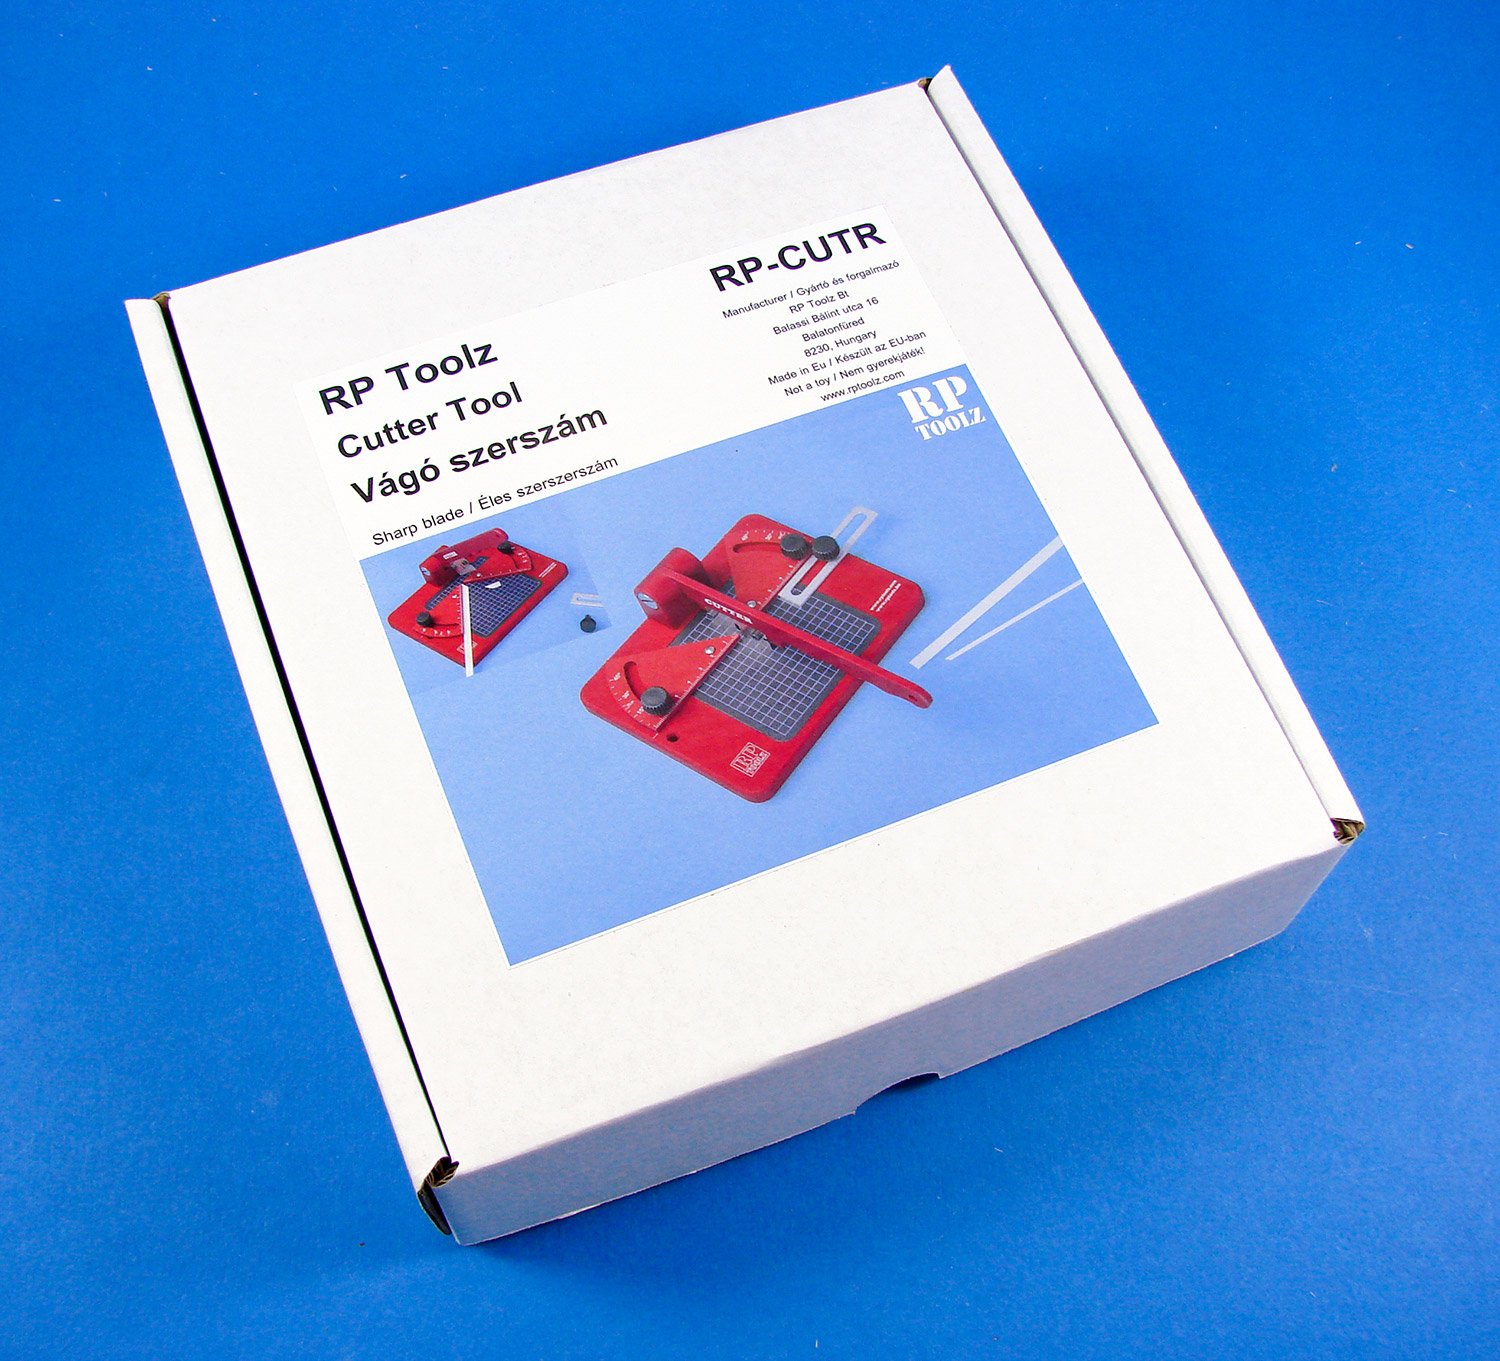
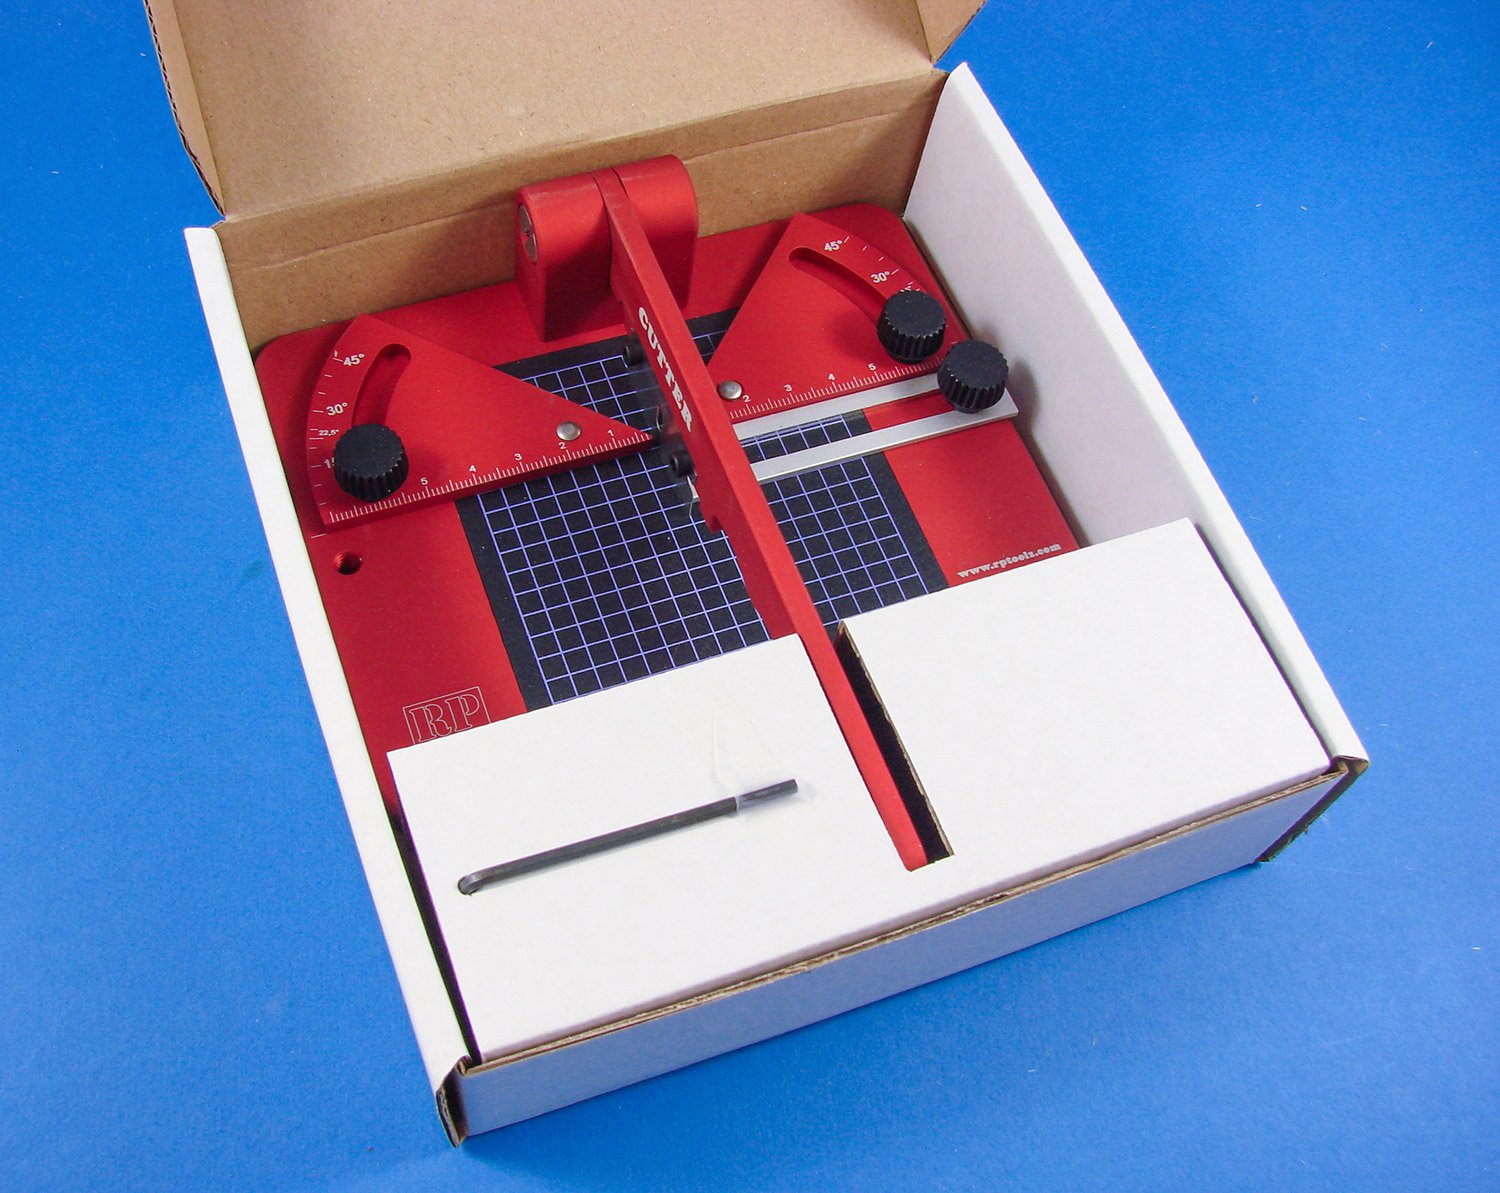
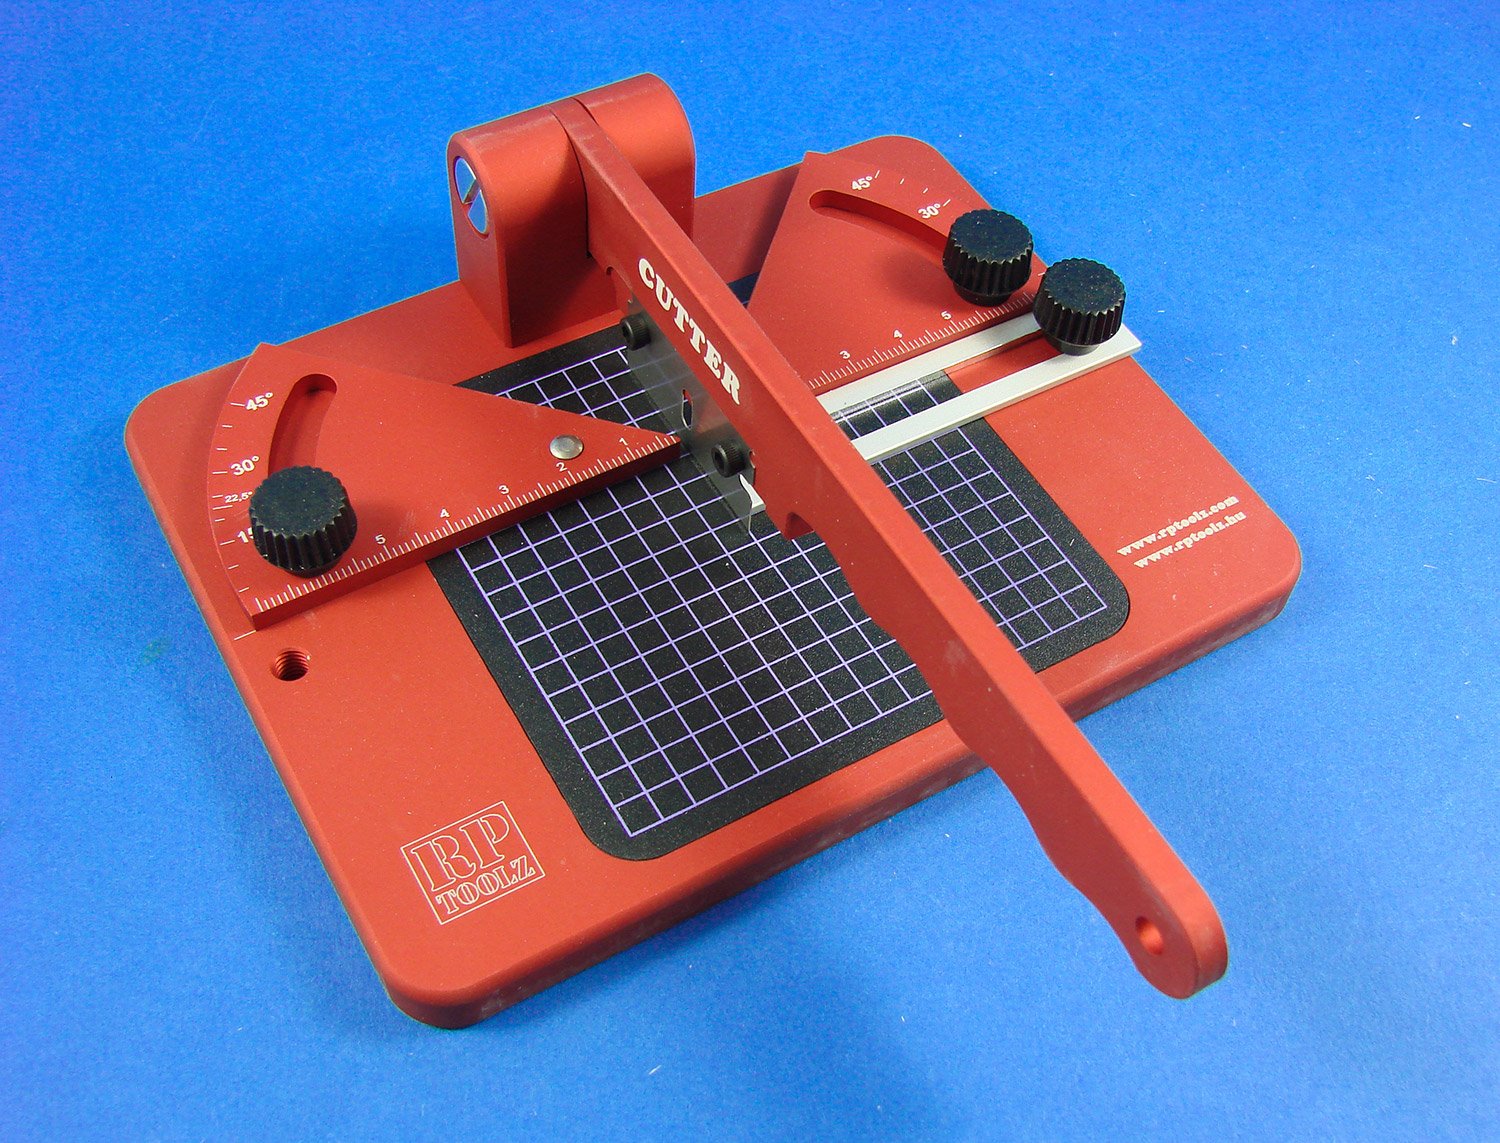
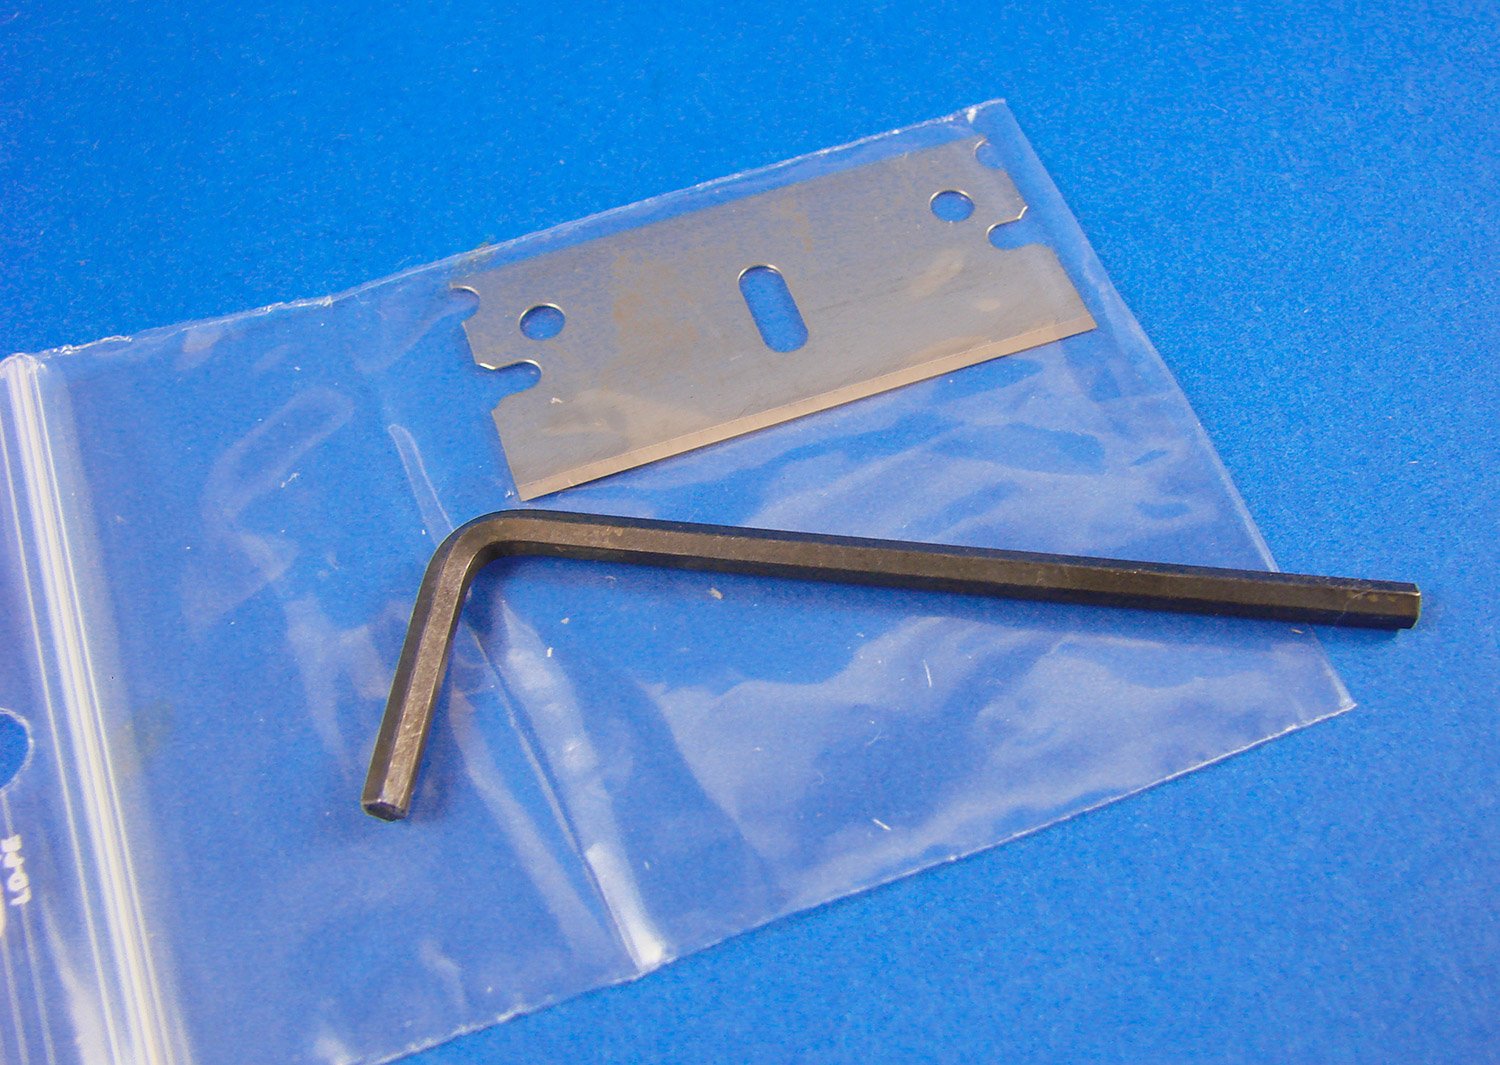
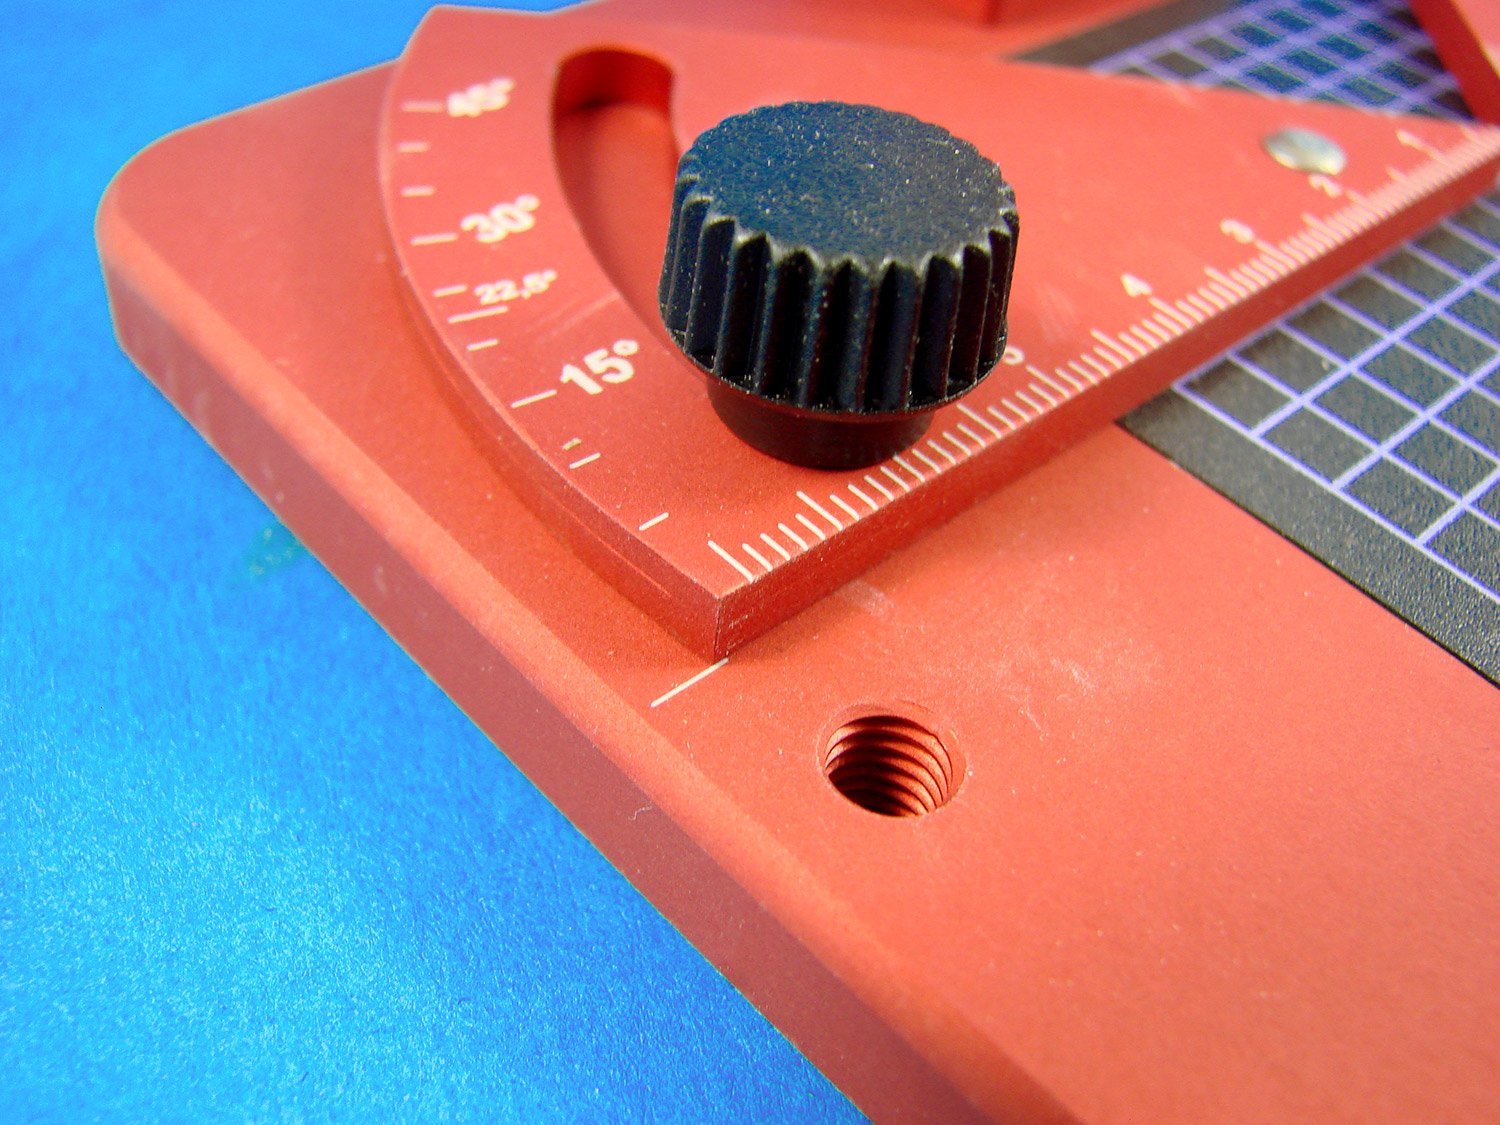
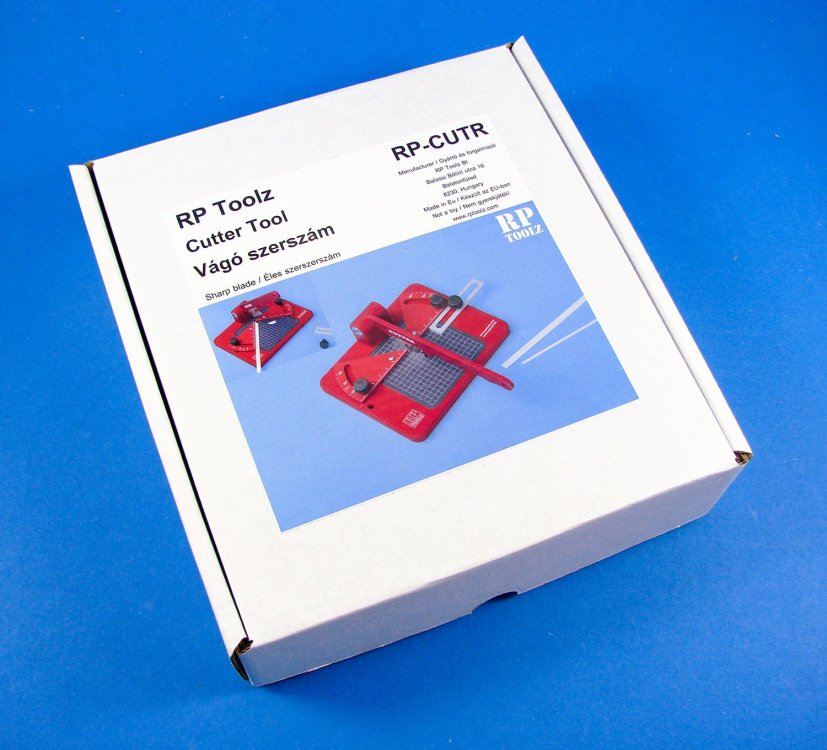
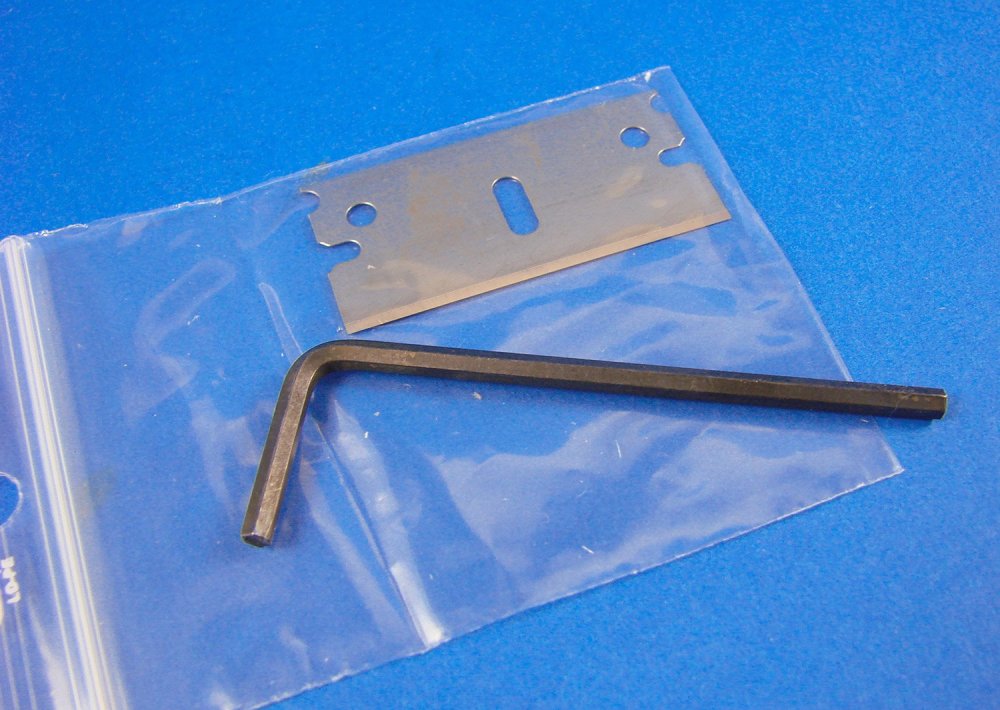
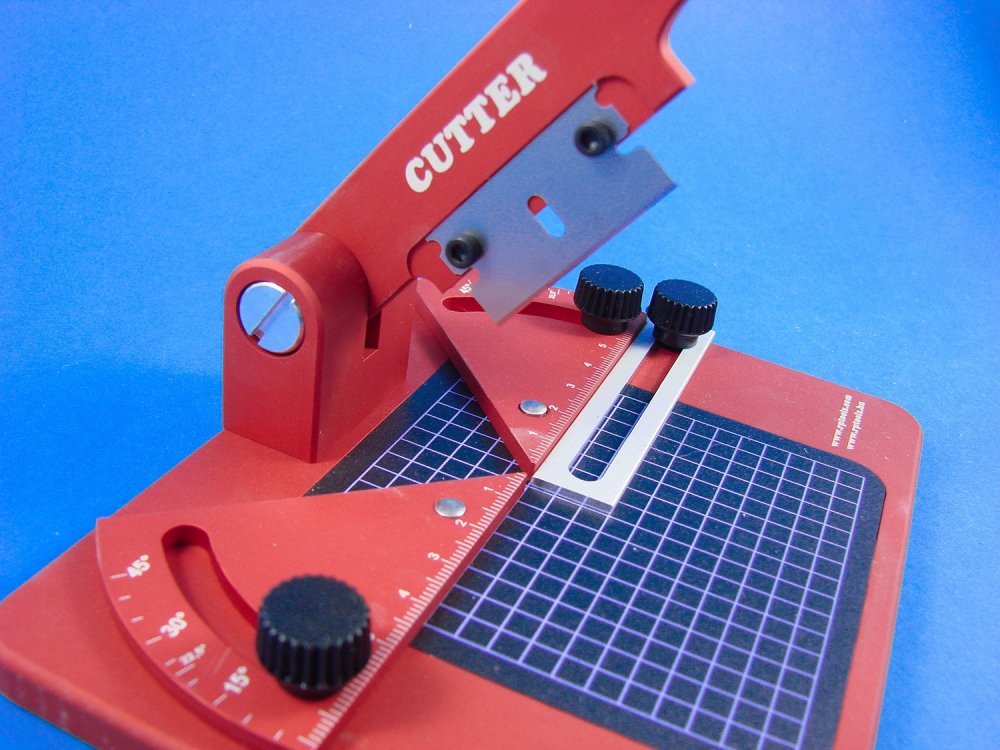
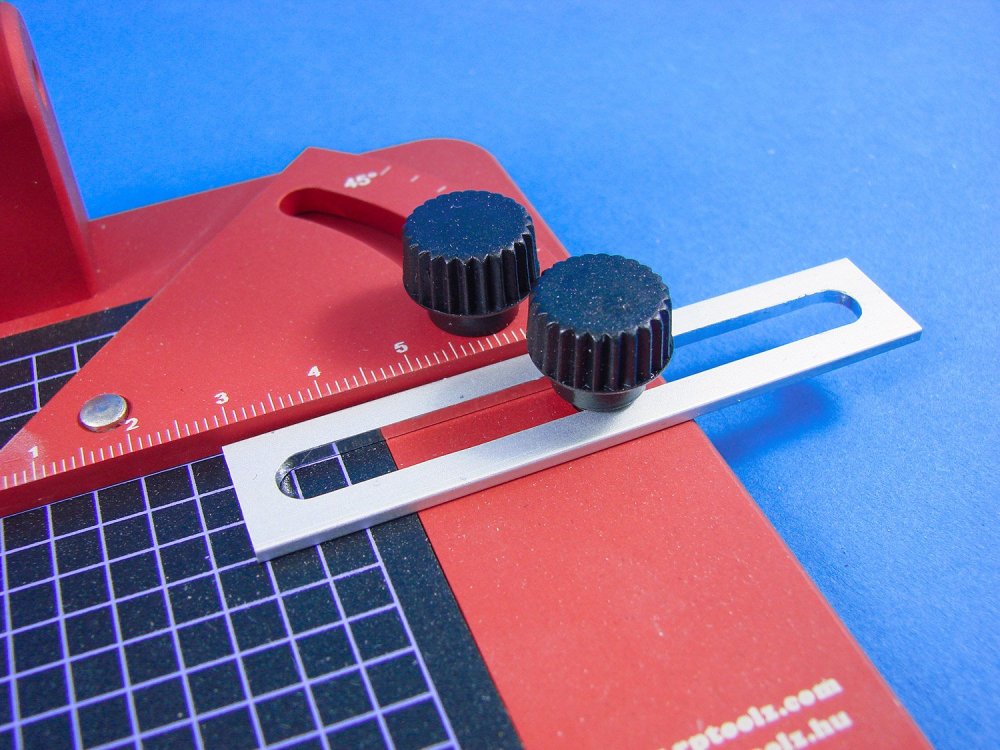
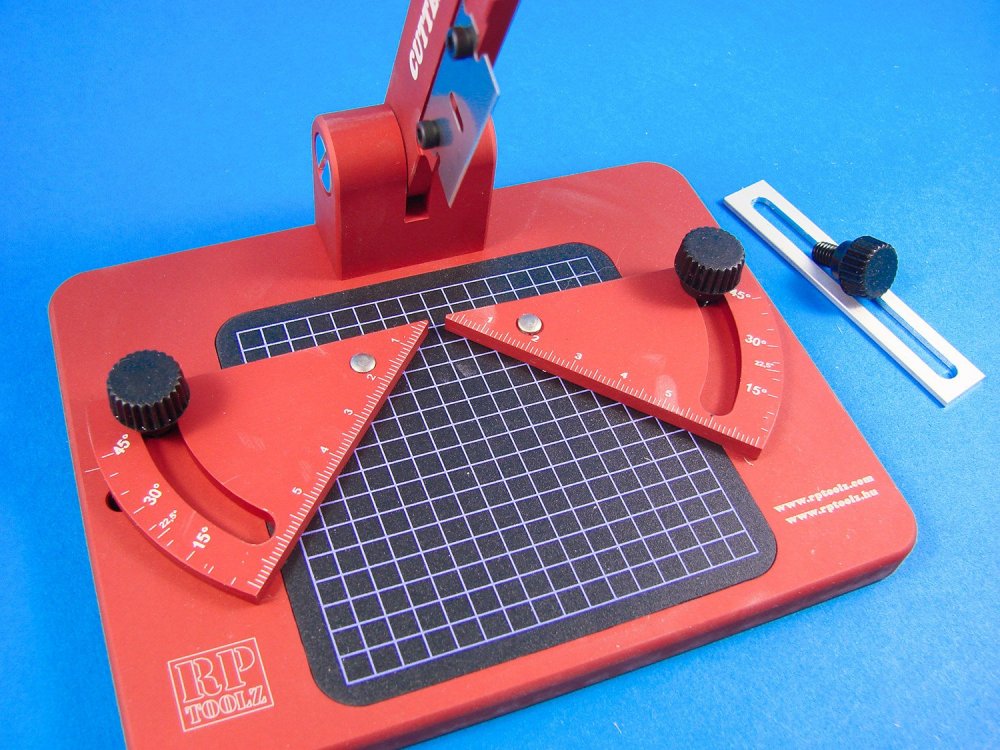
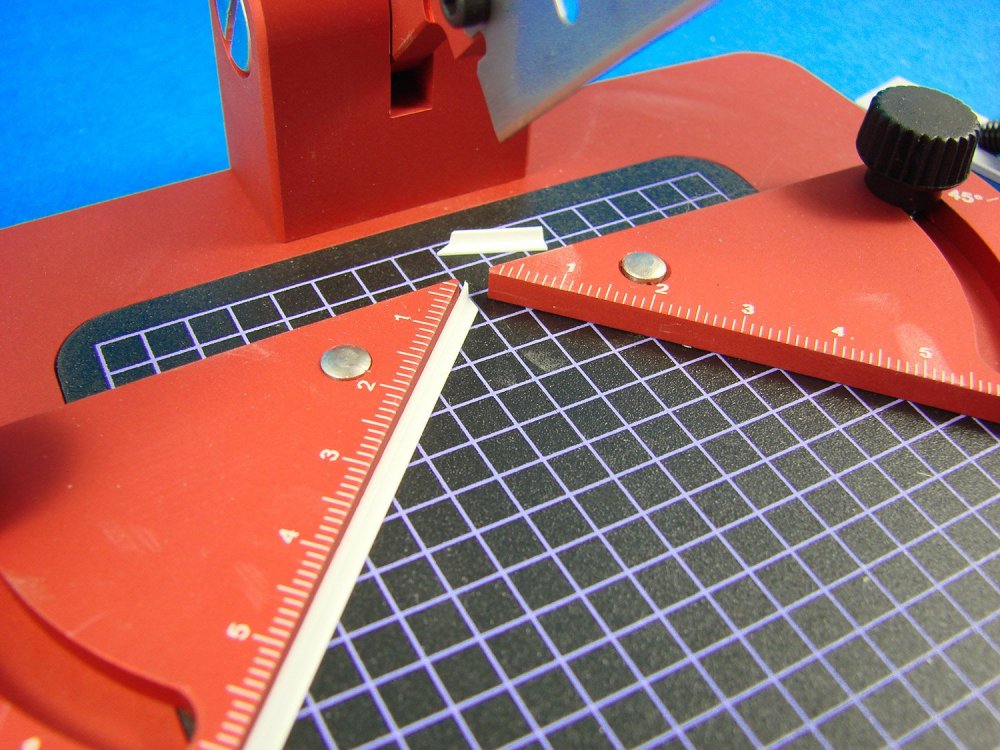
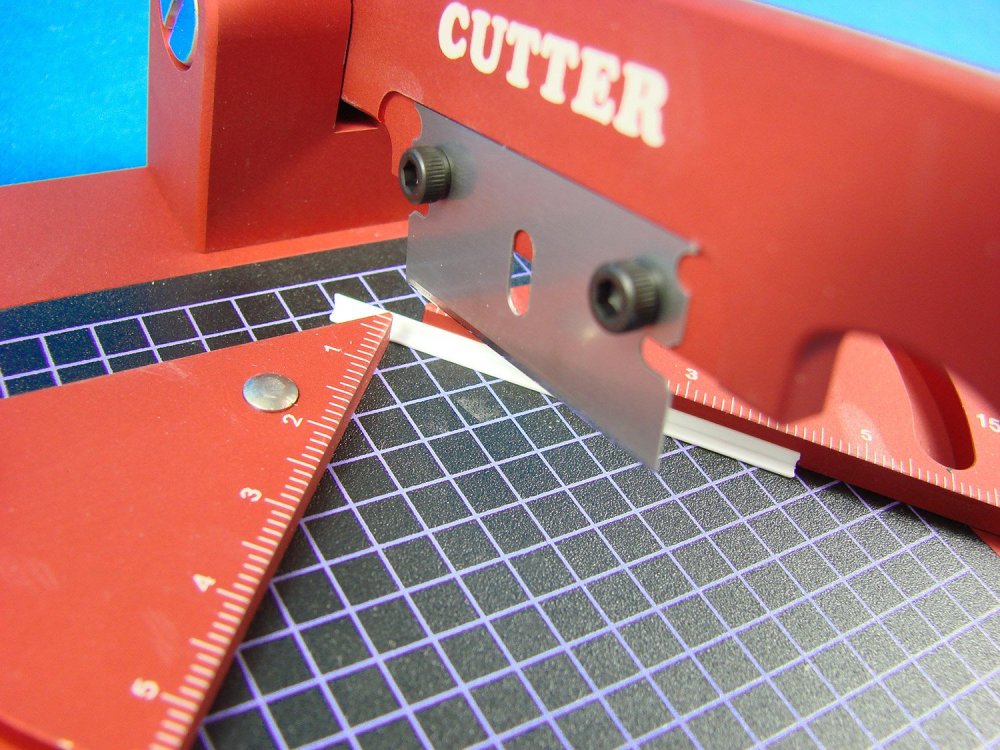
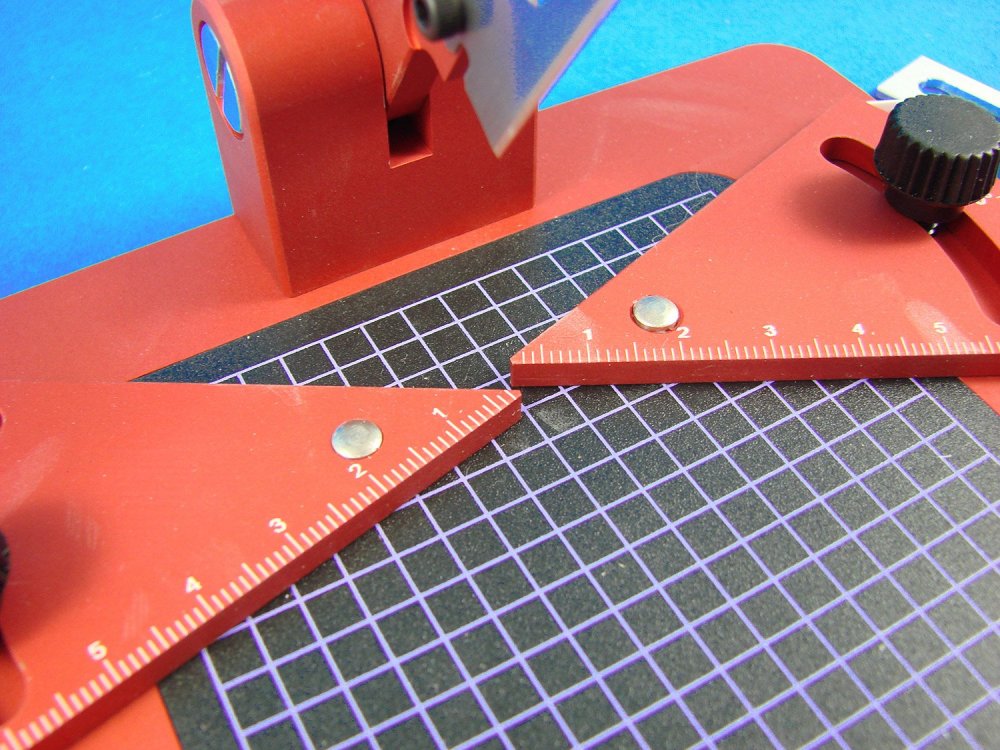
Cutter/Mitre Tool RP Toolz Catalogue # RP-CUTR Available from RP Toolz for €85,00 RP Toolz’ Cutter Tool (or Mitre Tool) isn’t really a new idea. There are of course a few manufacturers out there who produce fairly similar tools, and I used to have one of them myself, so when RP Toolz announced that they were releasing their own, I was pretty keen to see it for myself. A mitre tool is designed so that the modeller can produce mitred plastic junctions of specific angles on strips of either flat styrene or shaped section stock. If you’ve ever tried to make a 90-degree angle frame, you’ll know how difficult it is to get right if you don’t have the correct tools. The Cutter Tool is designed to ease all of your woes. This tool is packaged into a robust, corrugated box with a colour product label on the lid. You’ll also notice the weight. There’s some heavy metal in here, and some of the best you’ll see from a tool manufacturer. Unlike some contemporaries who may mould their cutters in some form of plastic, this one is precisely CNC-machined from a very hard grade aluminium, which has also been given a tough matte red anodised finish. The box fits the tool almost perfectly, with an insert used to support the cutter arm. A hex key is provided for changing the blade, as is a second blade with a finer cut. The tool is fitted with a 0.3mm thick blade for regular cutting tasks, with a slightly thinner (0.25mm) blade for something a little finer. The first thing you notice when exploring this tool is that there is no playin any of the parts. That is, there is no looseness or wobble in either the arm pivot or the two adjustable fences. Those fences are also neatly engraved with degree graduations and the base is marked with a reference point too, in order to align the fences. The bottom edge of the fences is also marked, but in centimetres, with ZERO being at the actual cutting point of the blade. With the fences in their neutral position, an end stop can be positioned so you can cut precise and equal straight-edged lengths of strip. This stop can be removed of course so the fences can be adjusted. It can also be switched to the opposite side of the cutter for maximum flexibility. The stop and both fences are tightened using plastic thumbscrews that cover the metal fixing bolt. Now, a cutting area really needs a cutting mat, and this is what is fitted to this tool. A self-healing and graduated mat, sits flush with the upper surface of the tool, and proved a hard yet non-damaging surface to the cutting blade. I made a small number of cut tests with this tool and found it both precise and effortless. Conclusion RP Toolz’ arsenal of quality modelling tools is certainly expanding, and like those before it, the sheer quality of this really does demand the price asked of it. This is no flimsy or inaccurate tool, but one with which you can work with total precision in producing either angled lengths of styrene, or equal, multiple lengths too. If you like to scratch-build or even just improve on what a kit supplies, then this could well be of interest to you. This is the very best of the mitre cutting tools that I have ever seen, without a doubt. My sincere thanks to RP Toolz for the review sample seen here. To purchase directly, click the link at the top of the article.


-
That sort of reminds me this botched fox taxidermy.

-
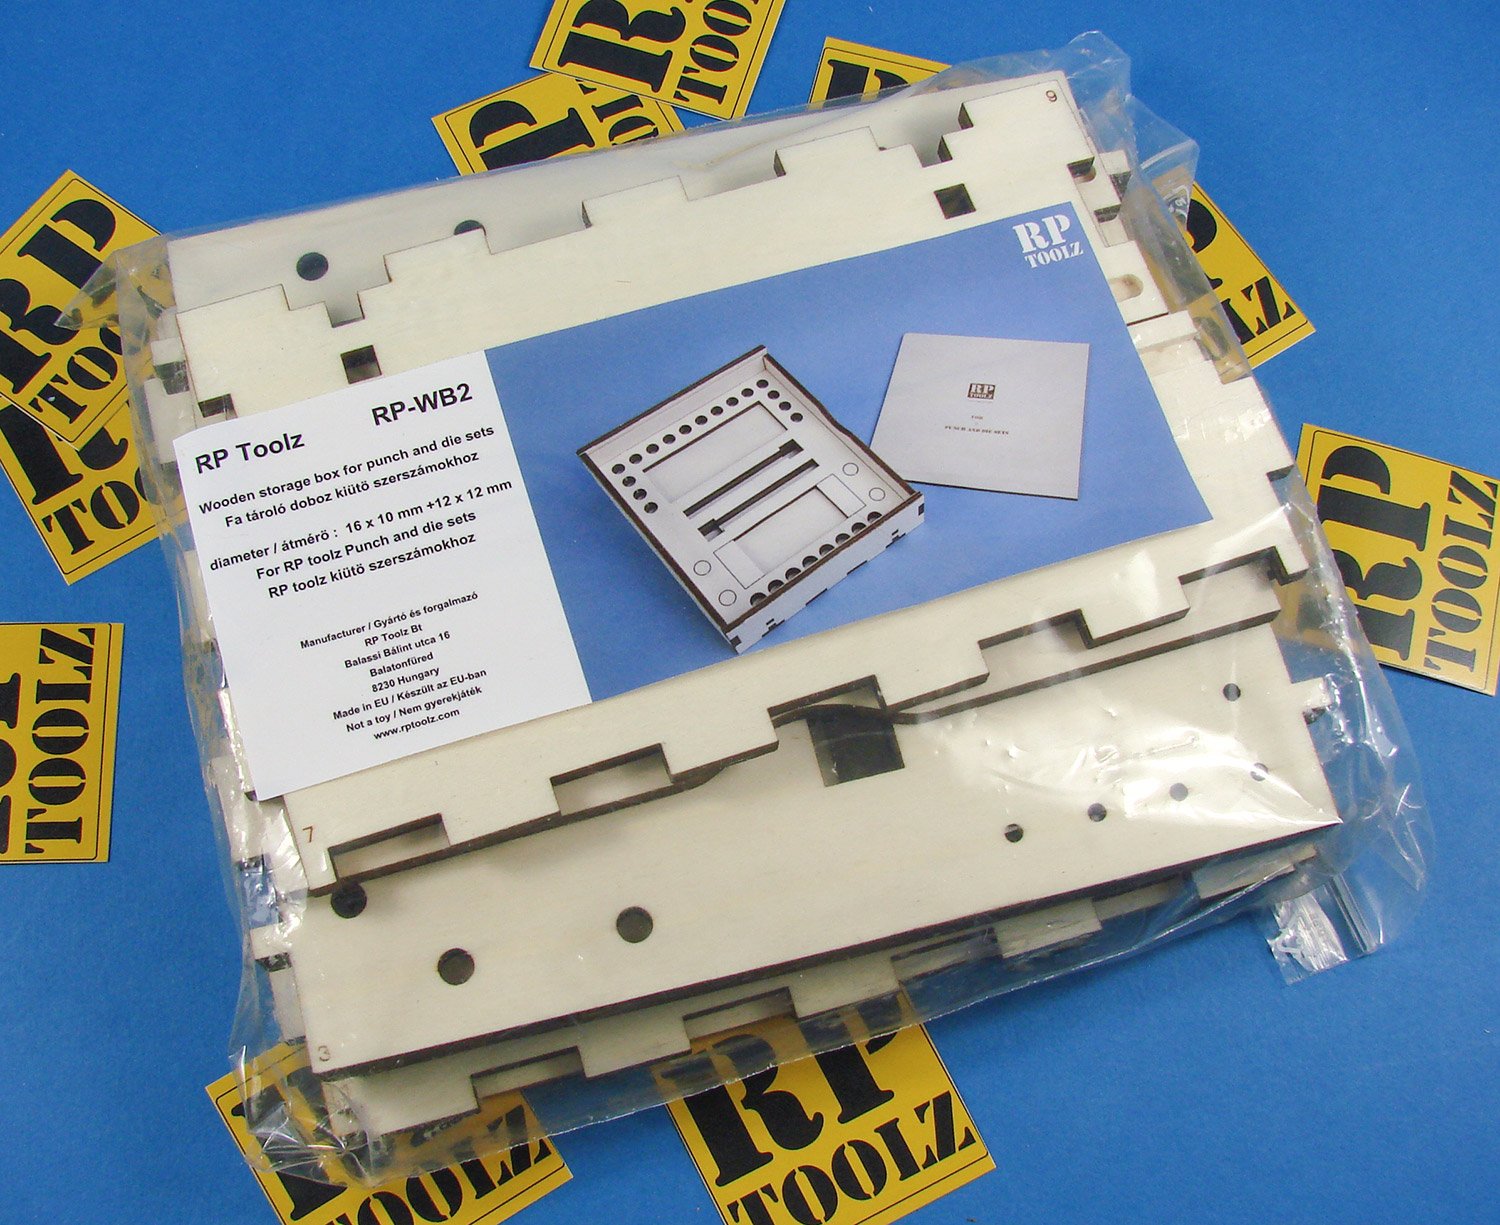
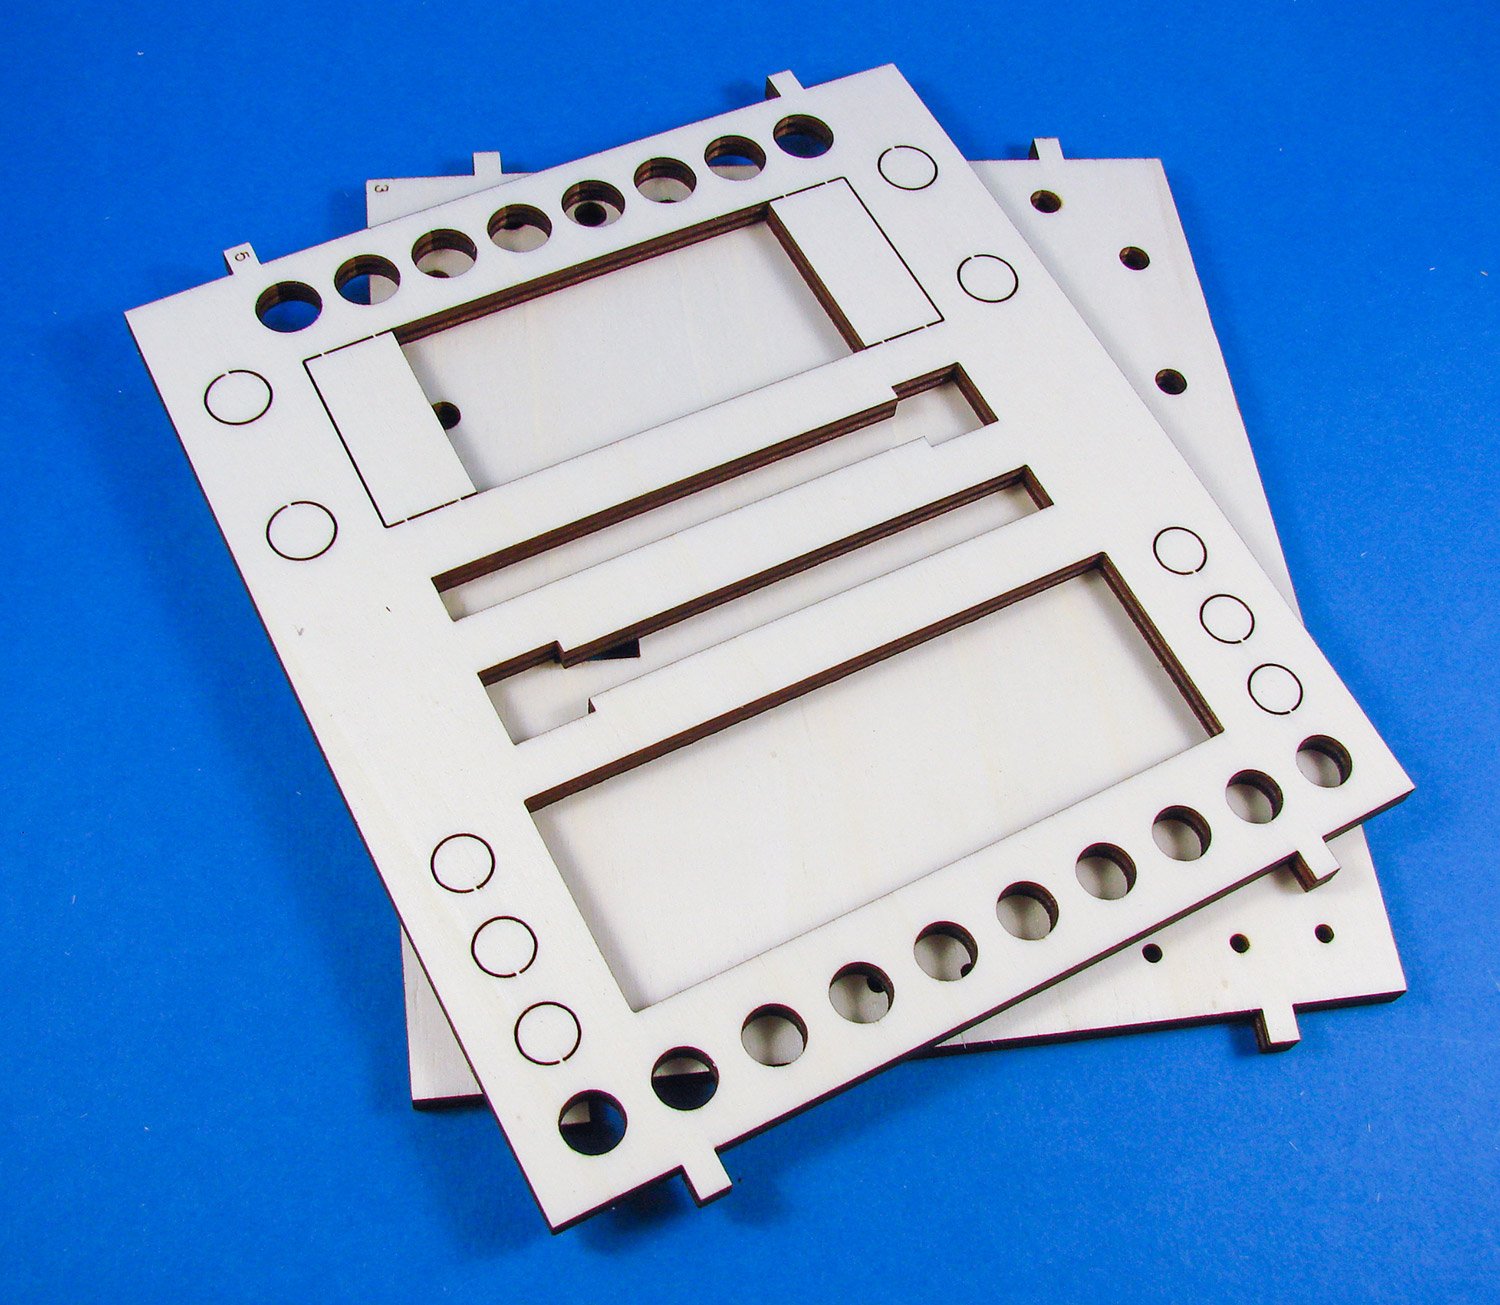
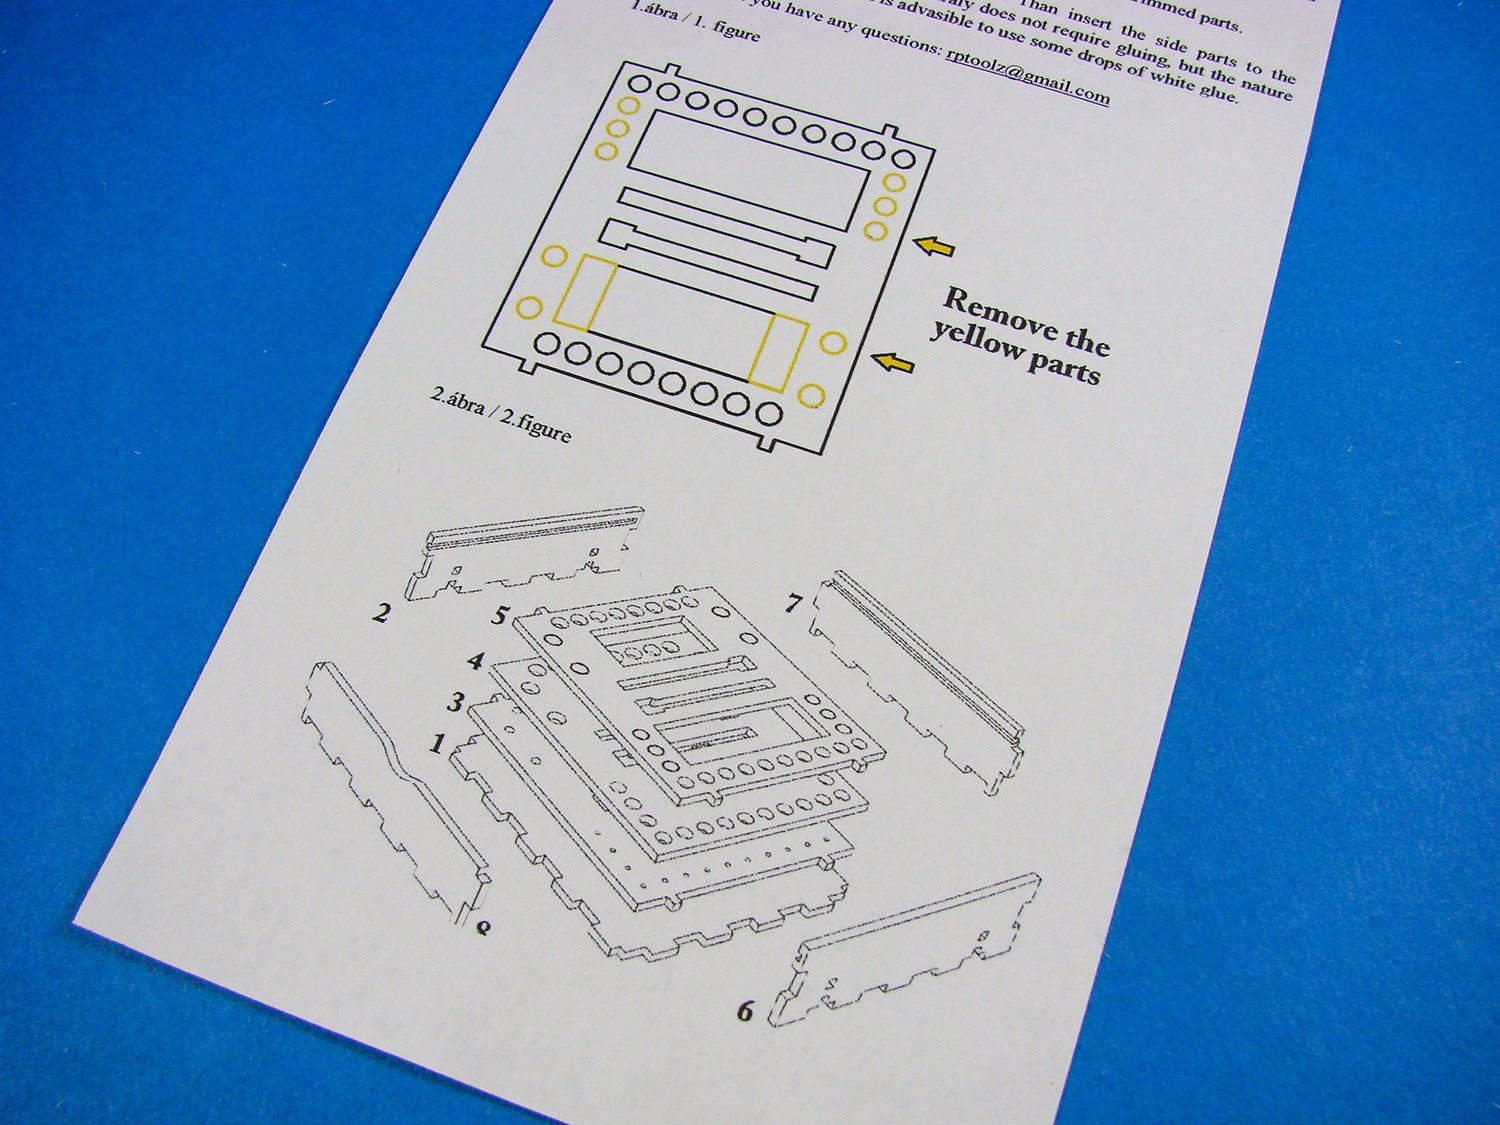
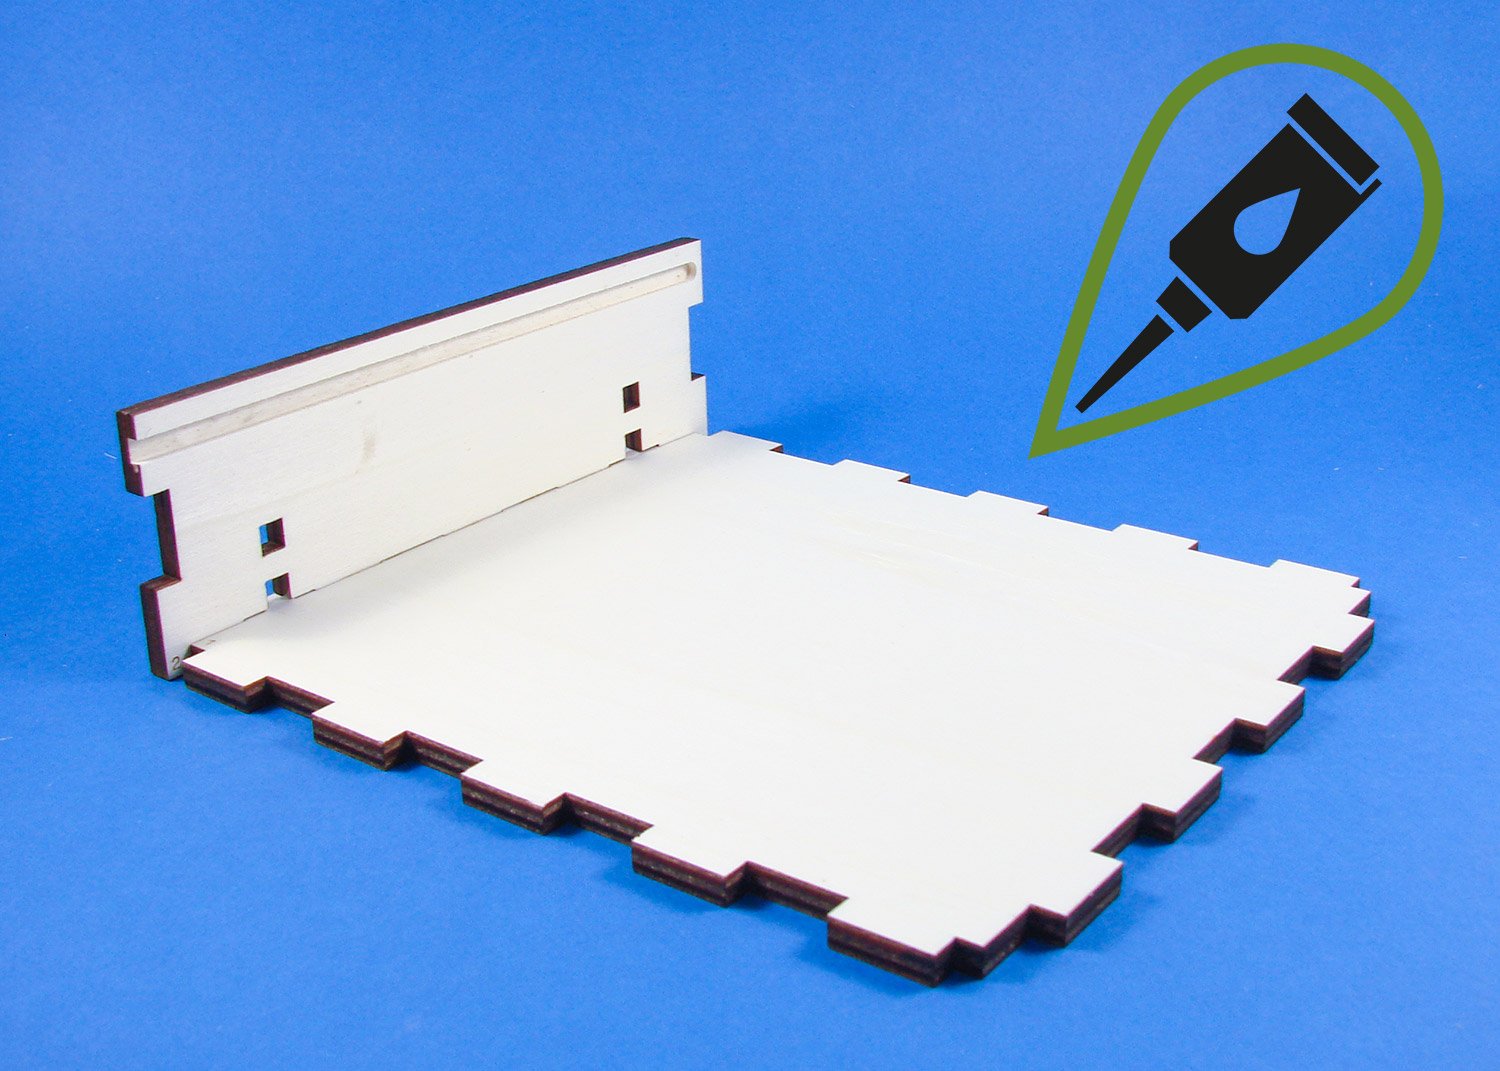
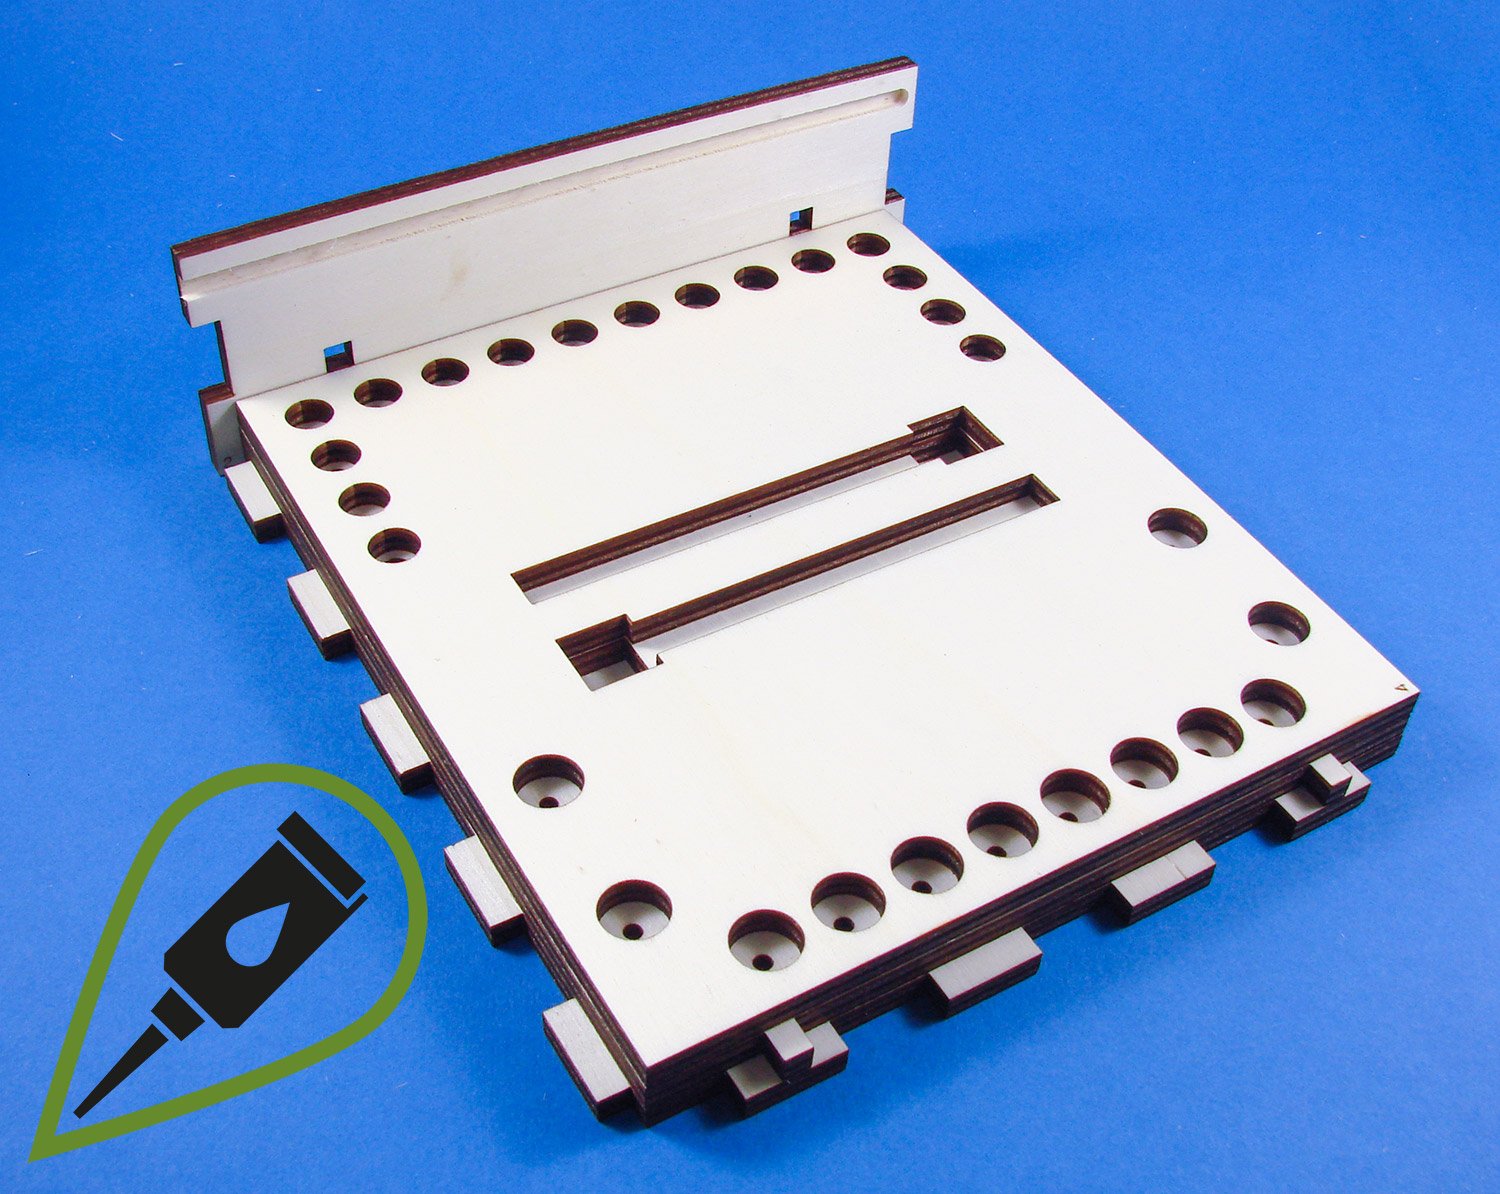
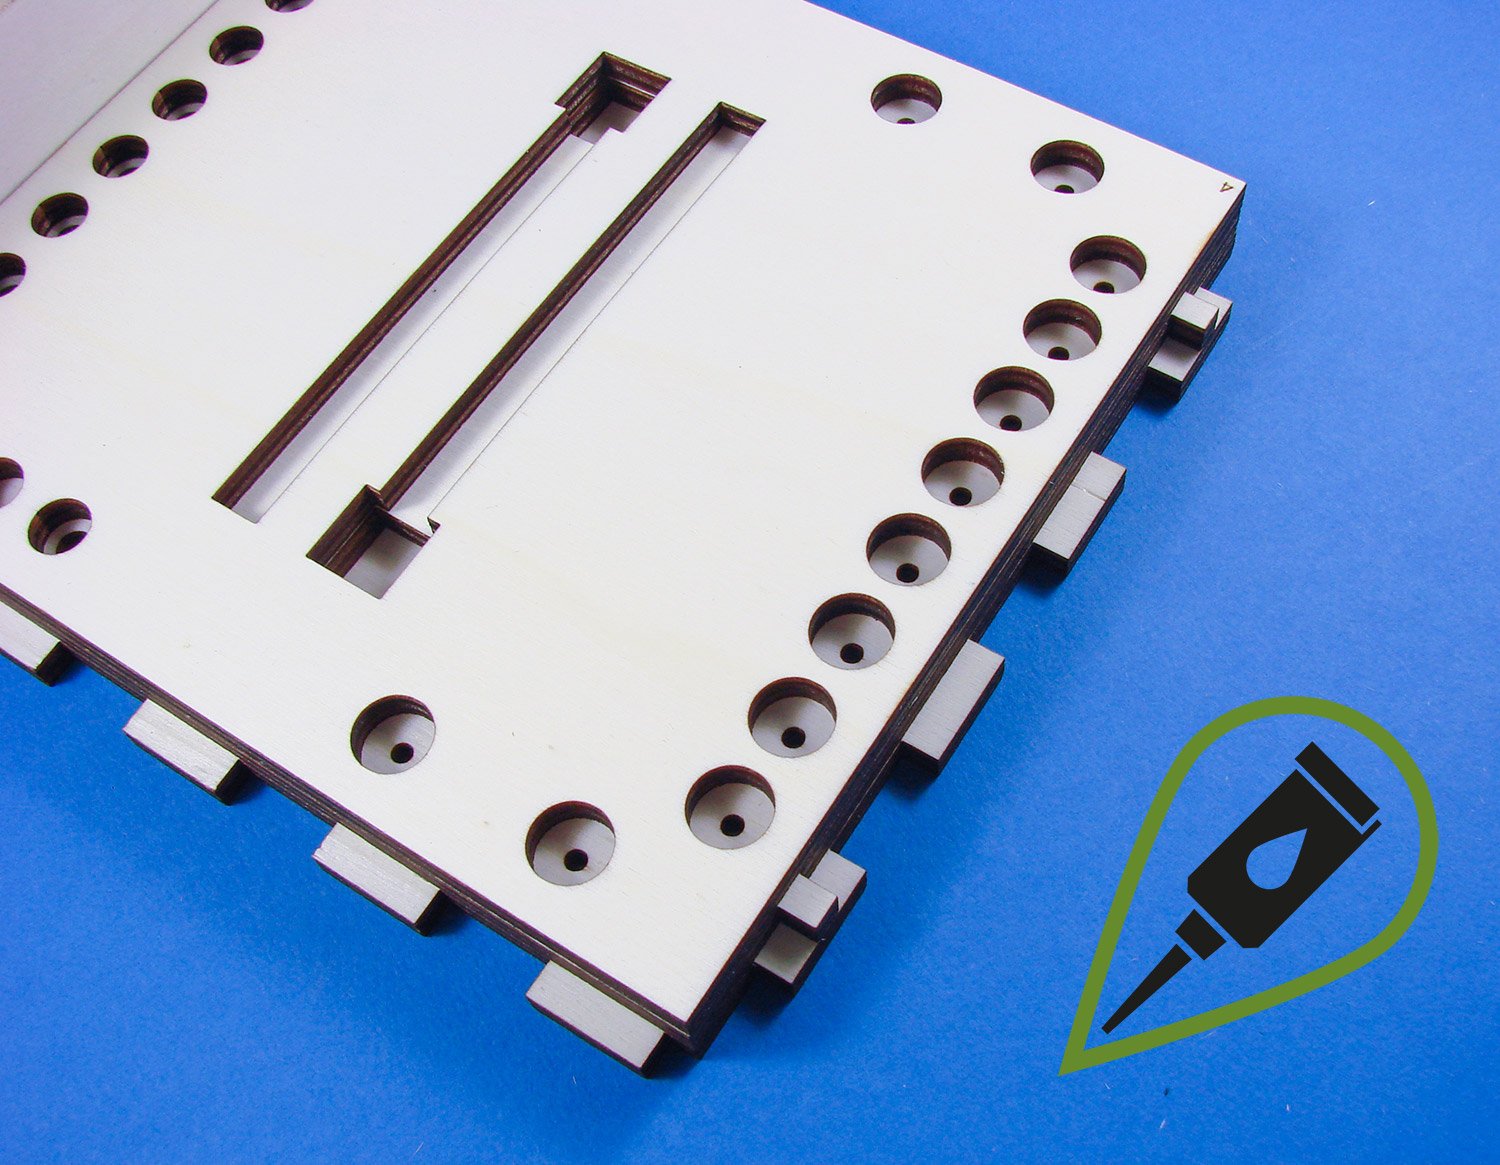
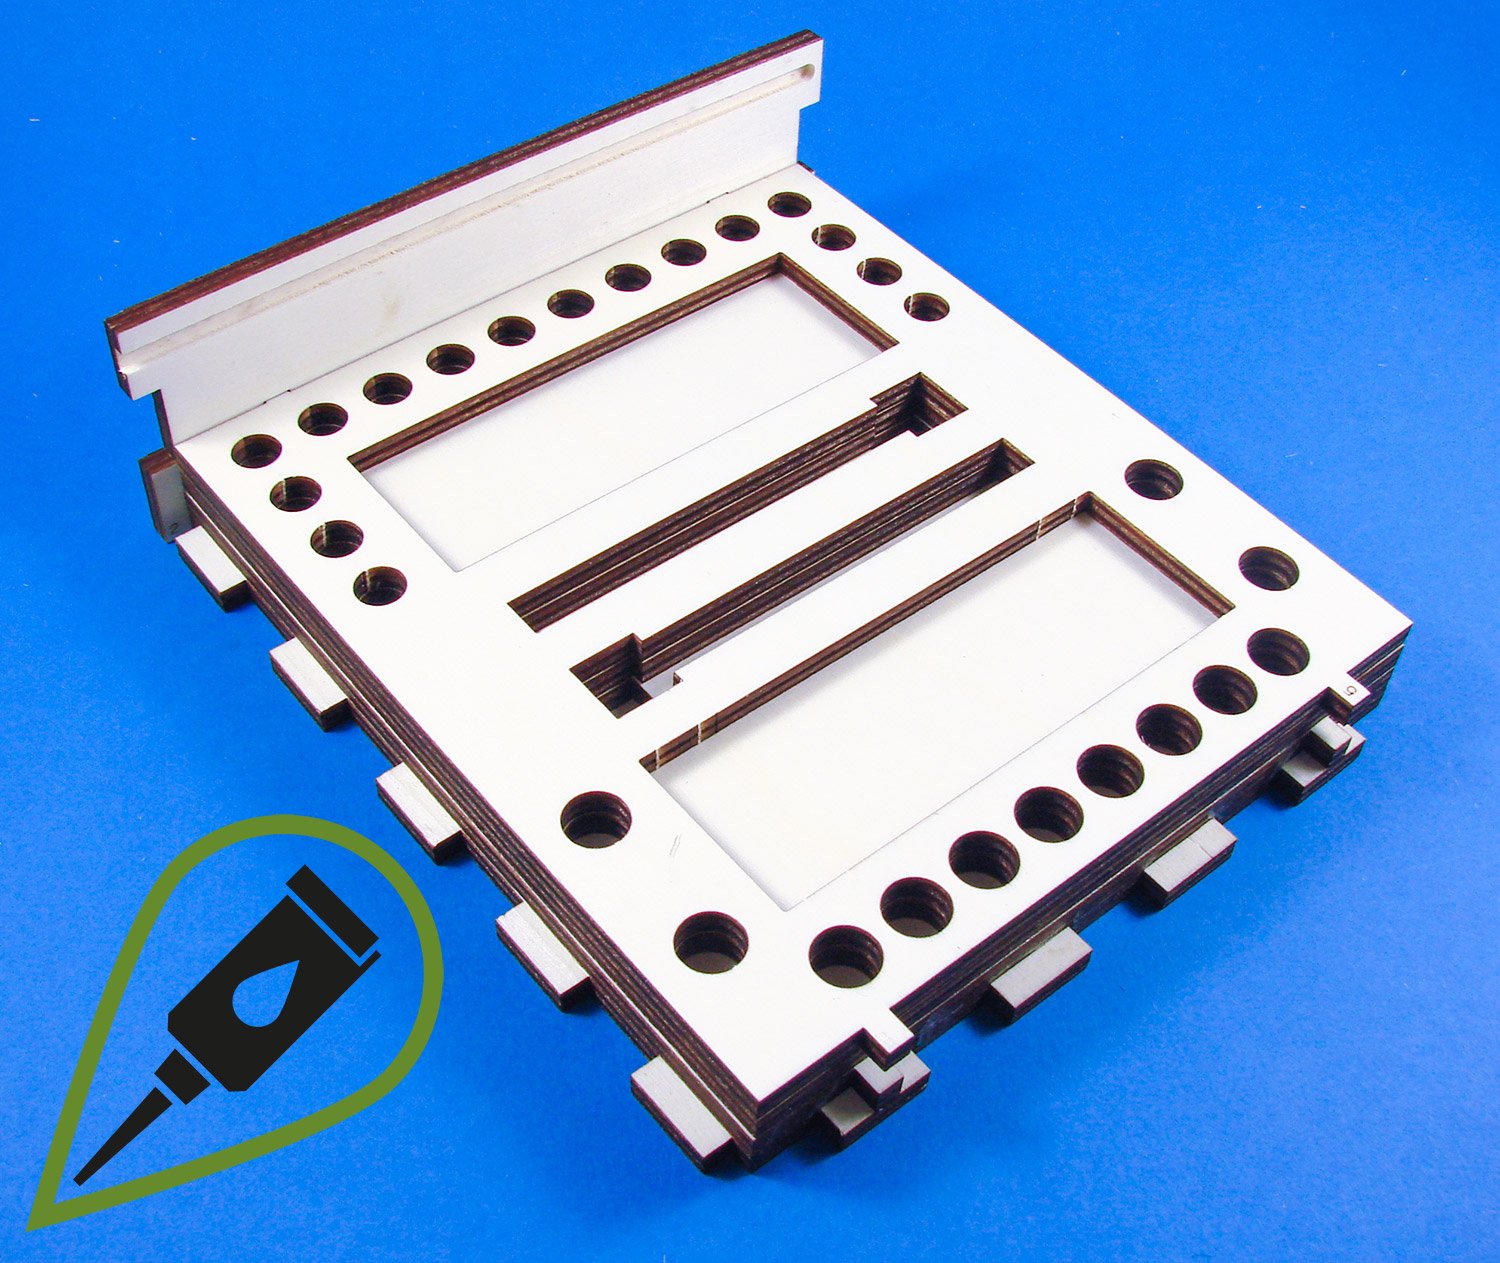
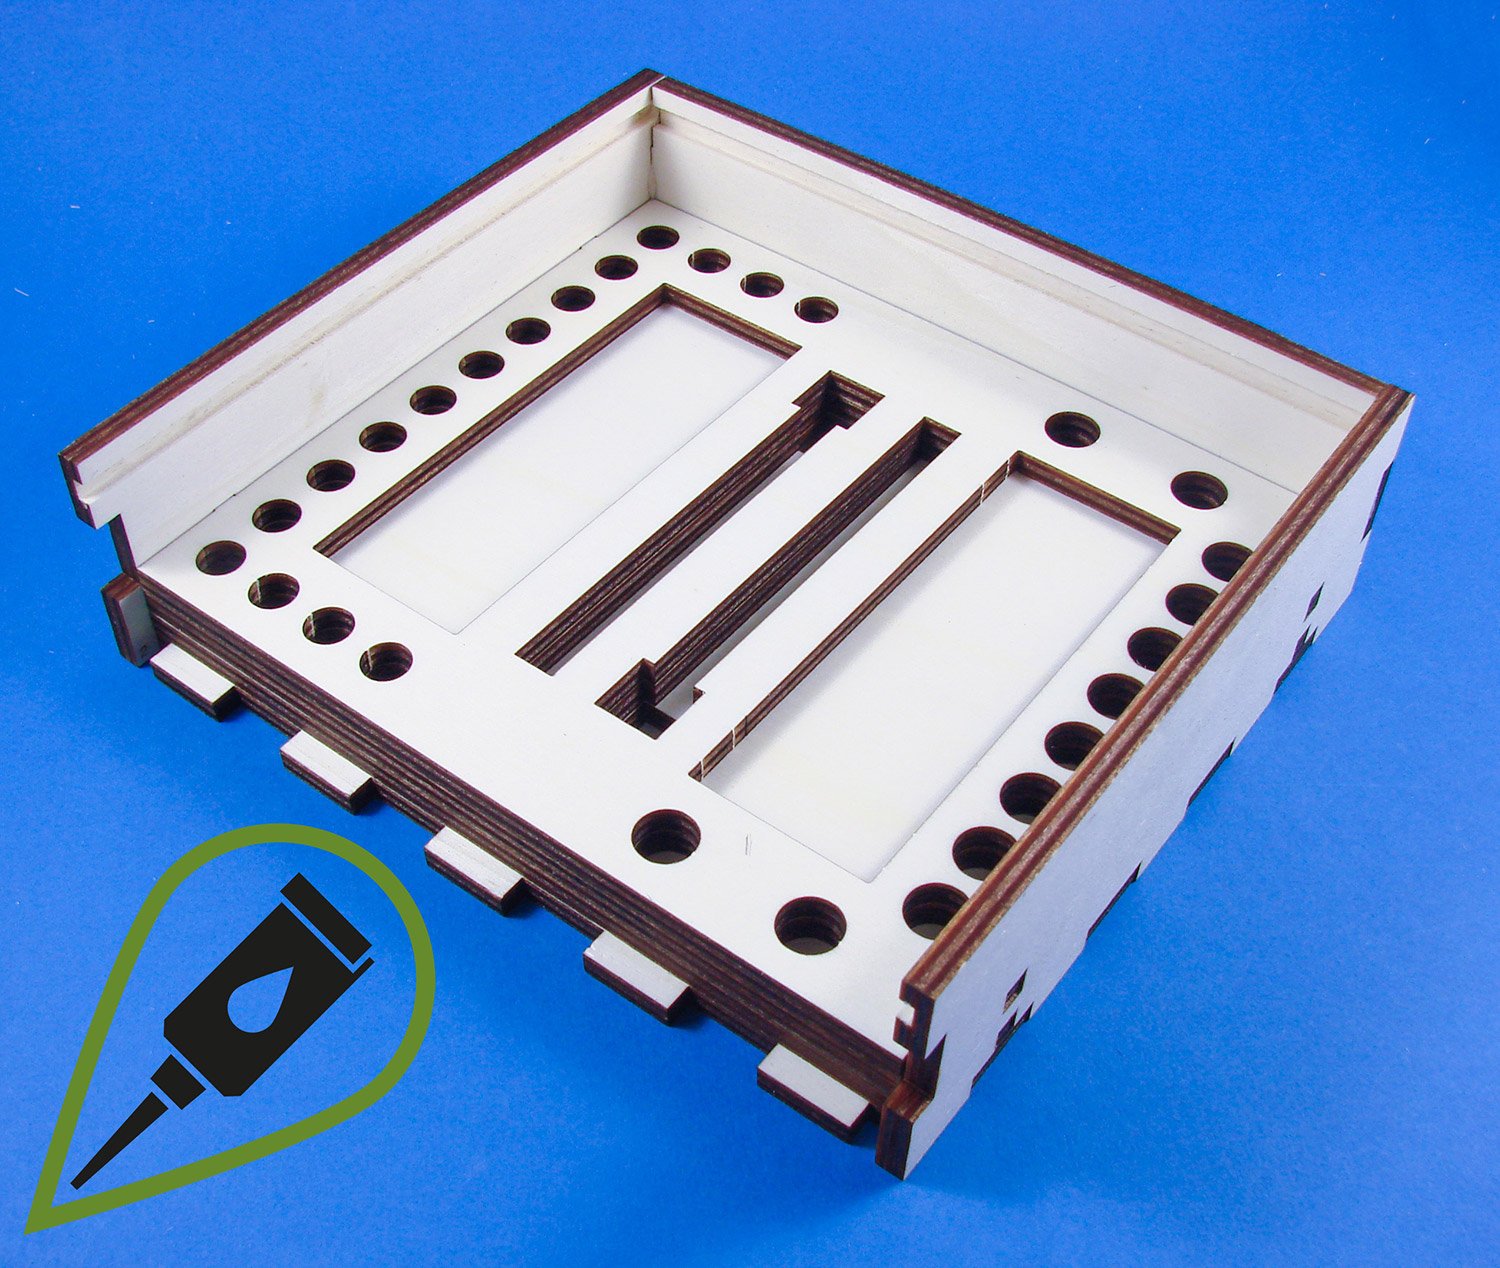
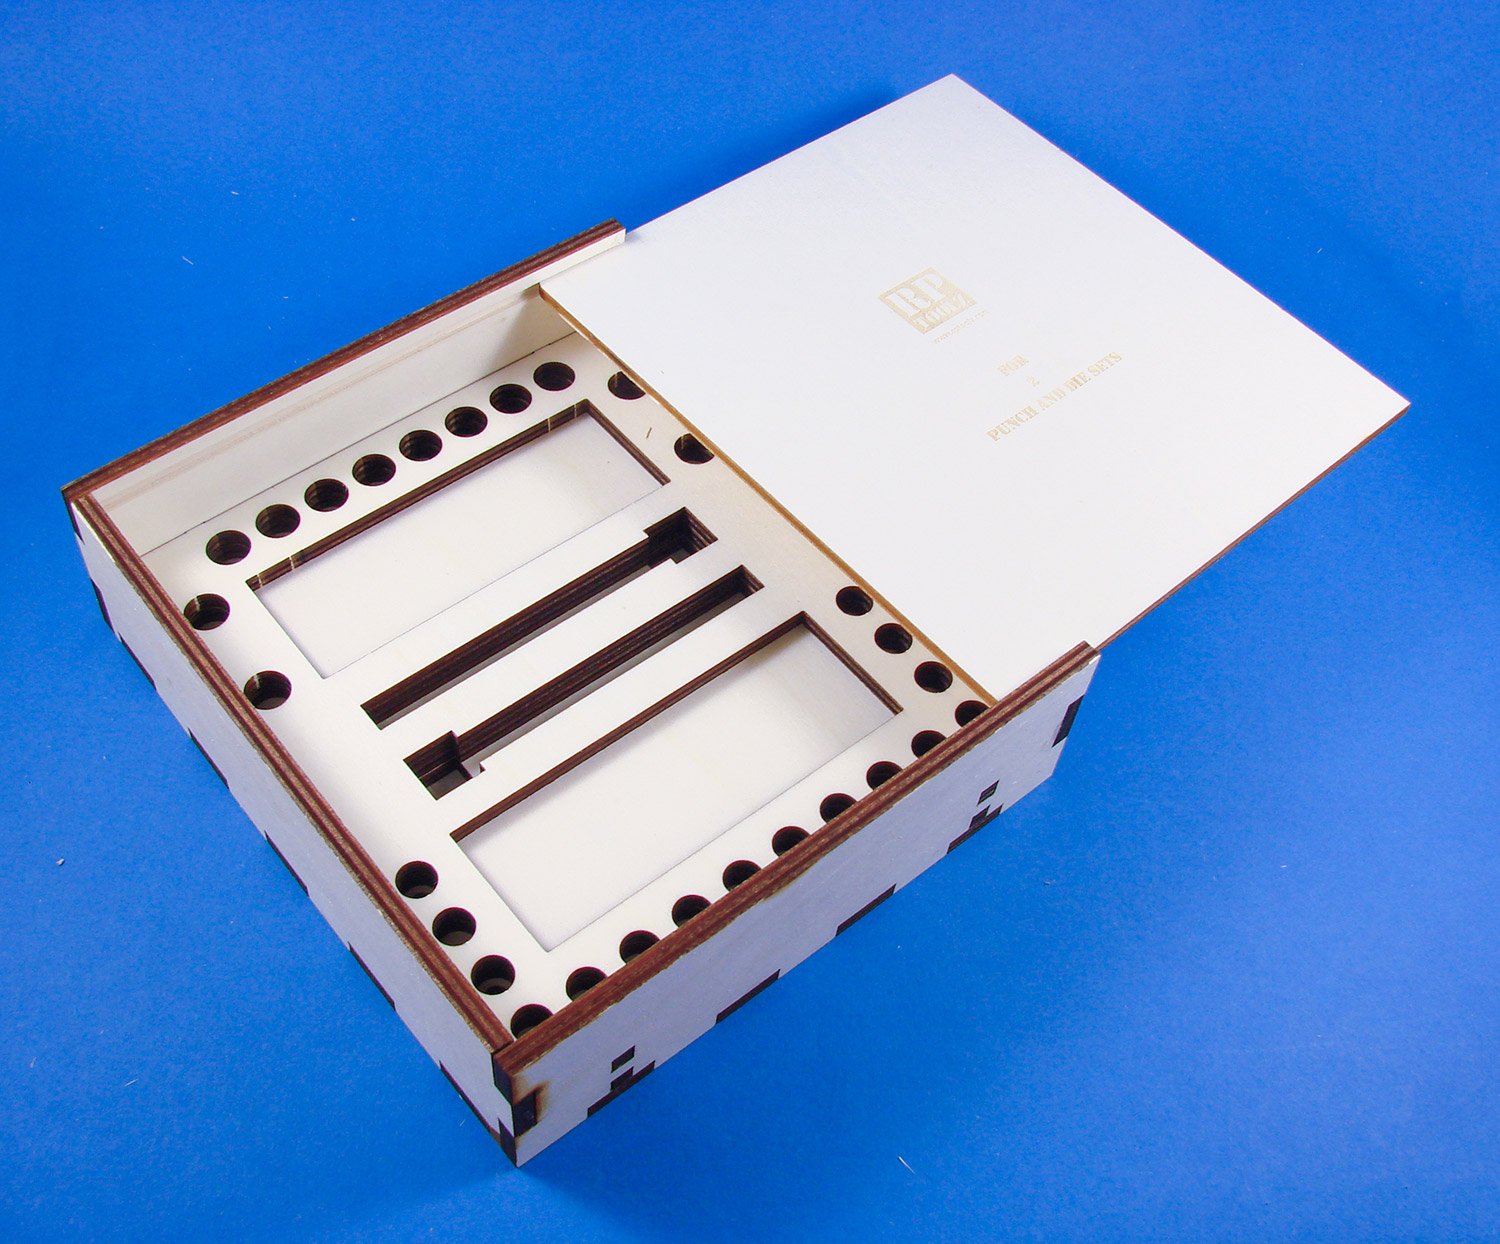
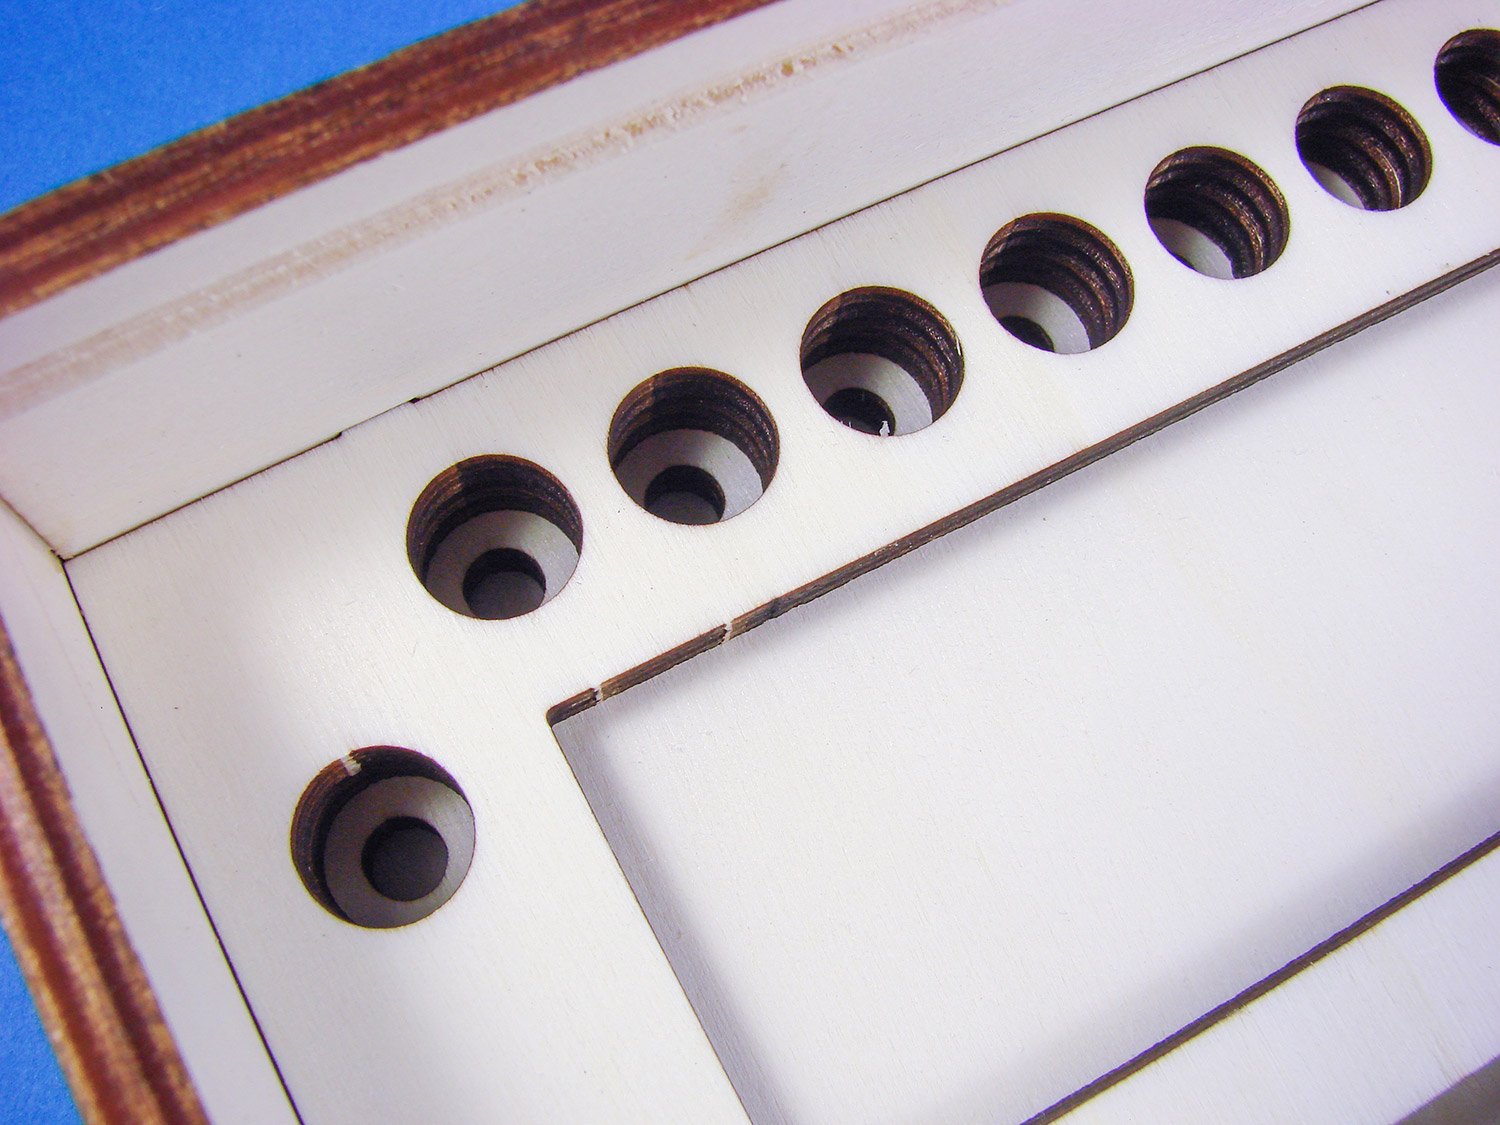
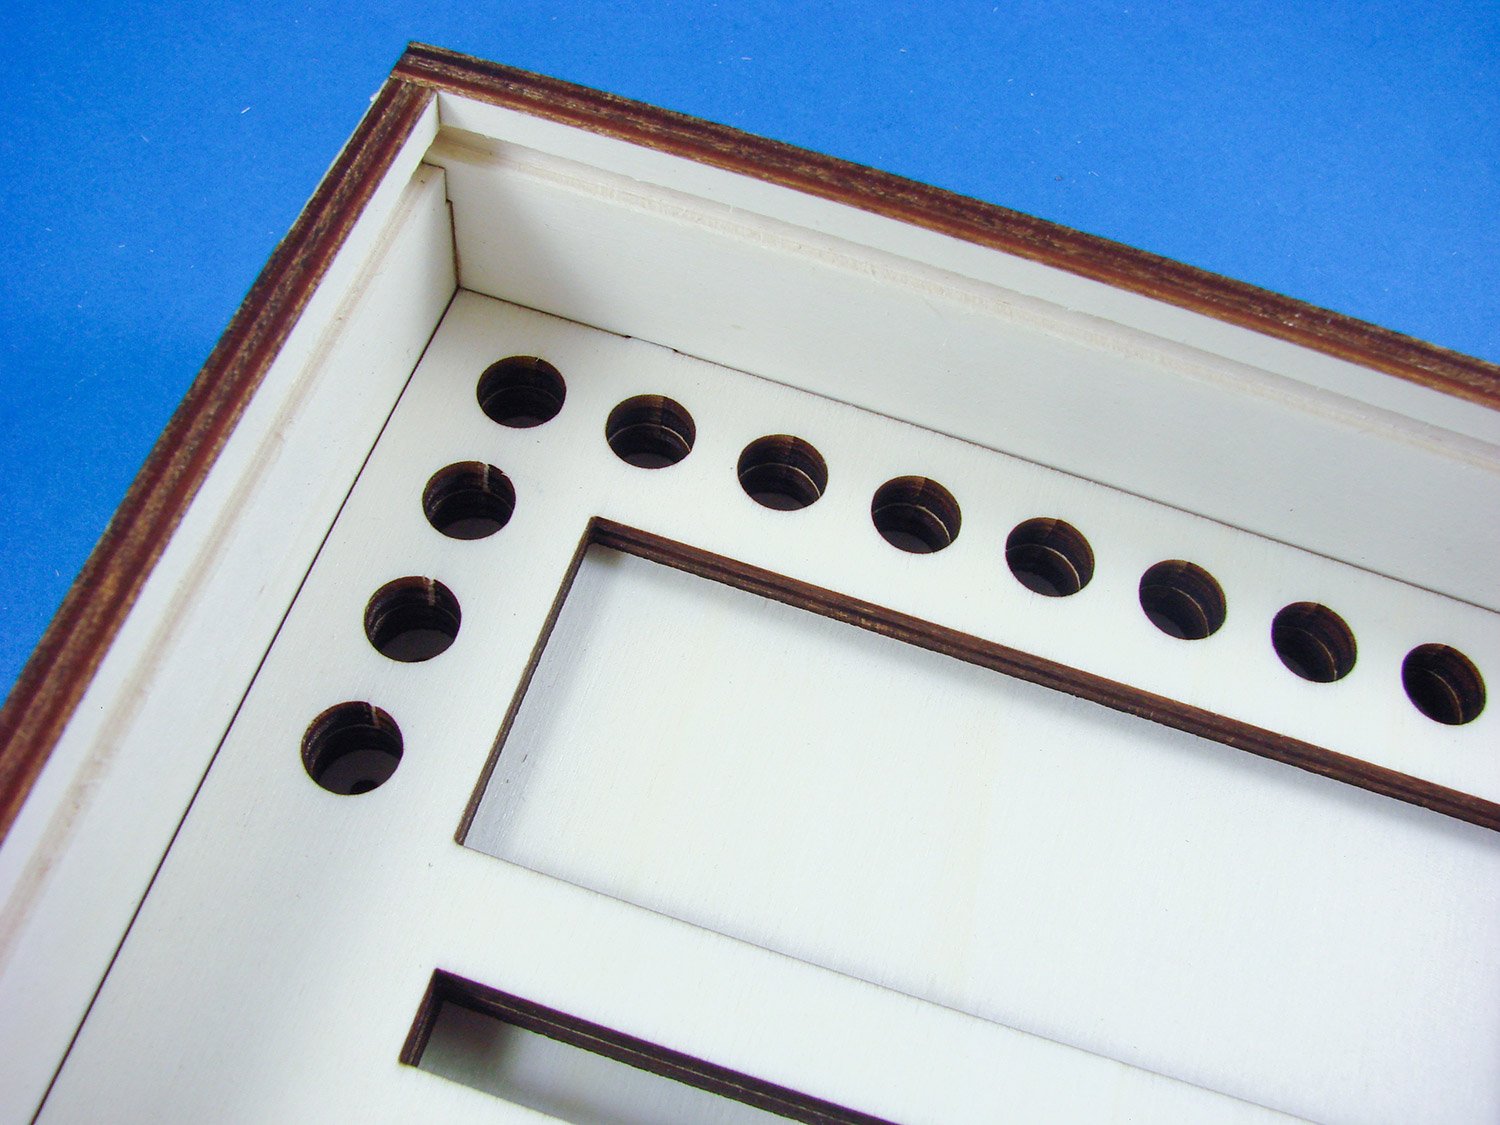
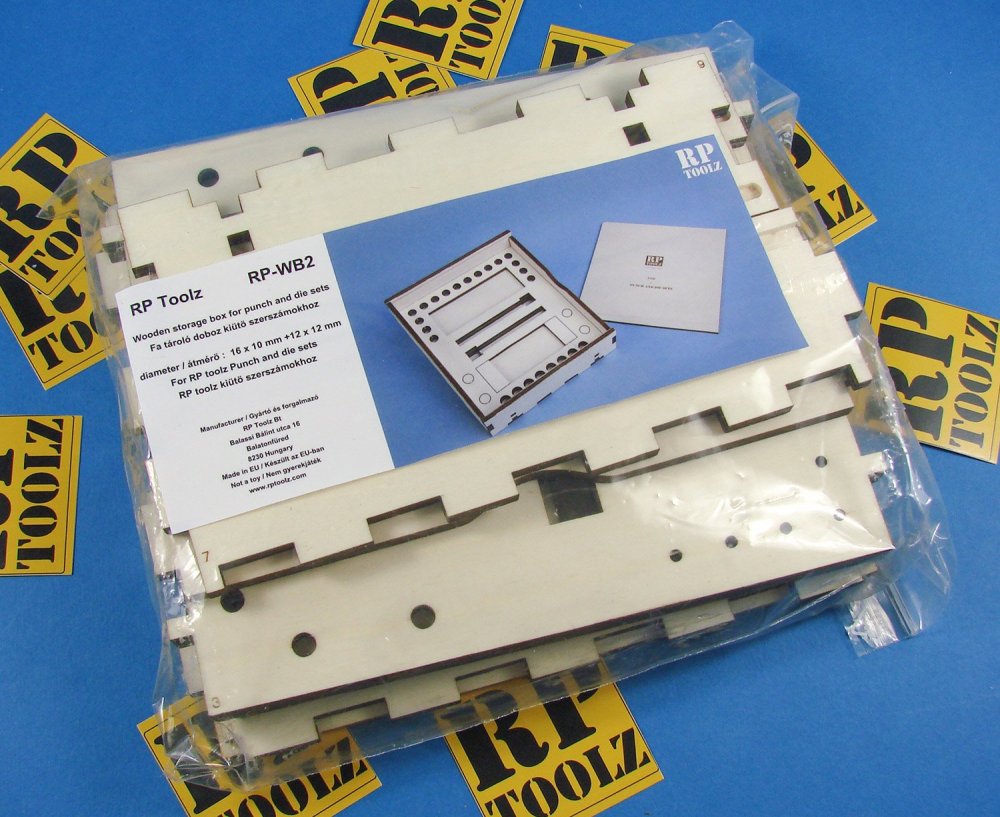
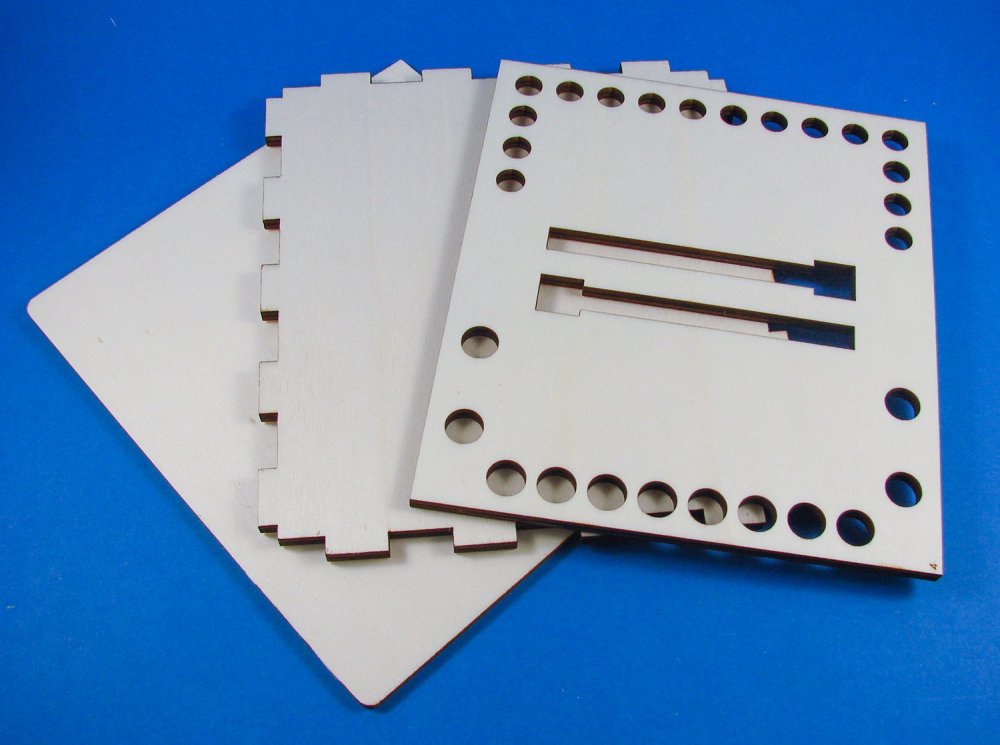
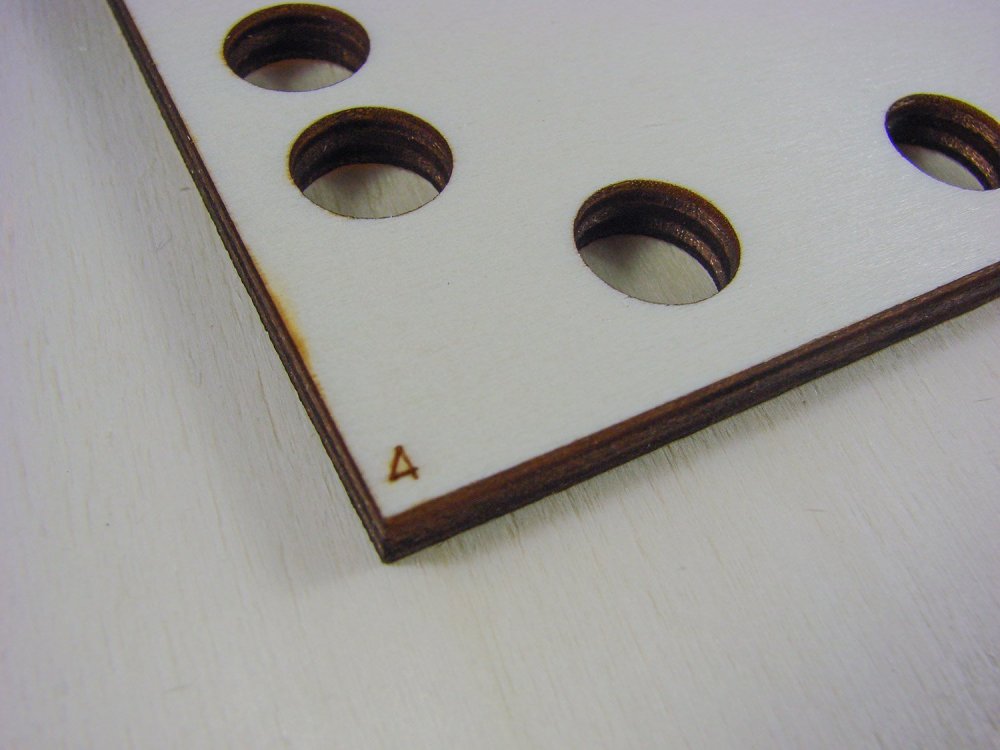
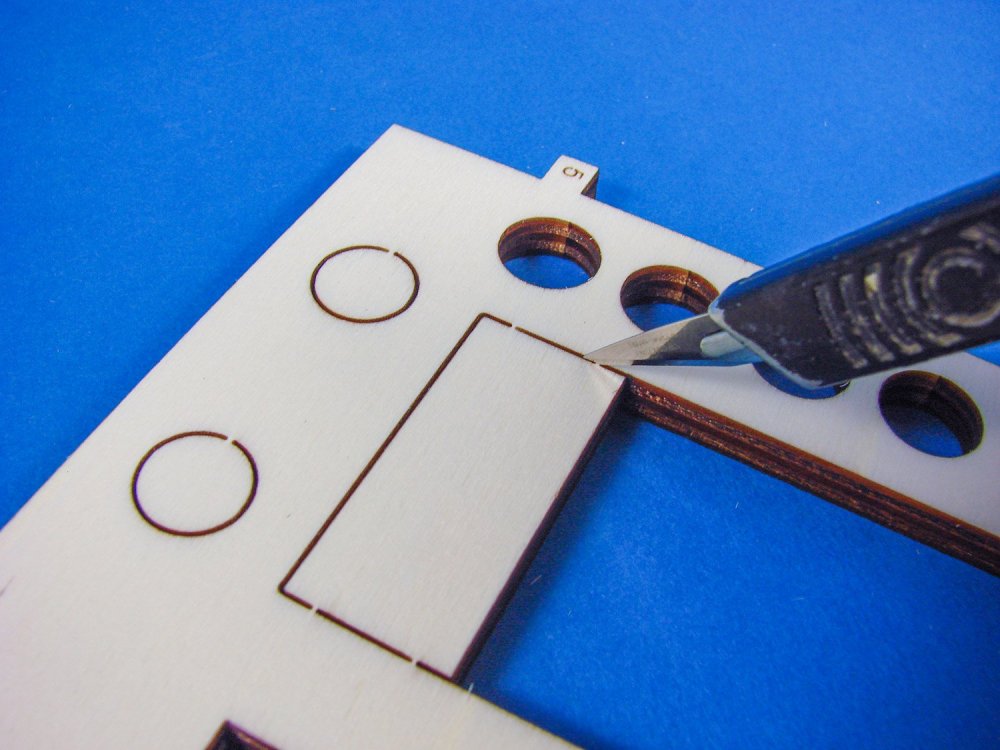
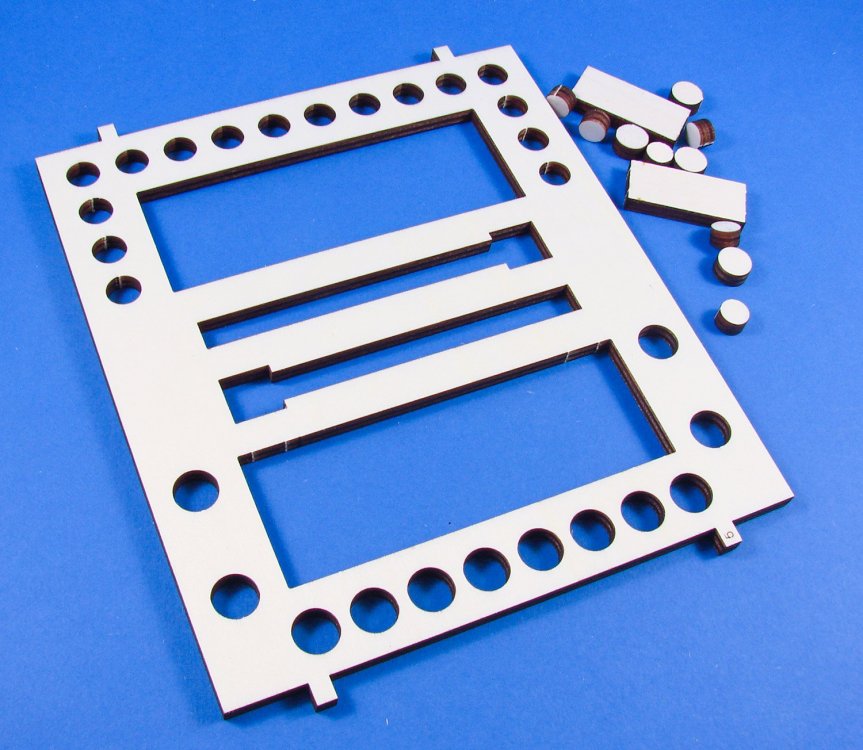
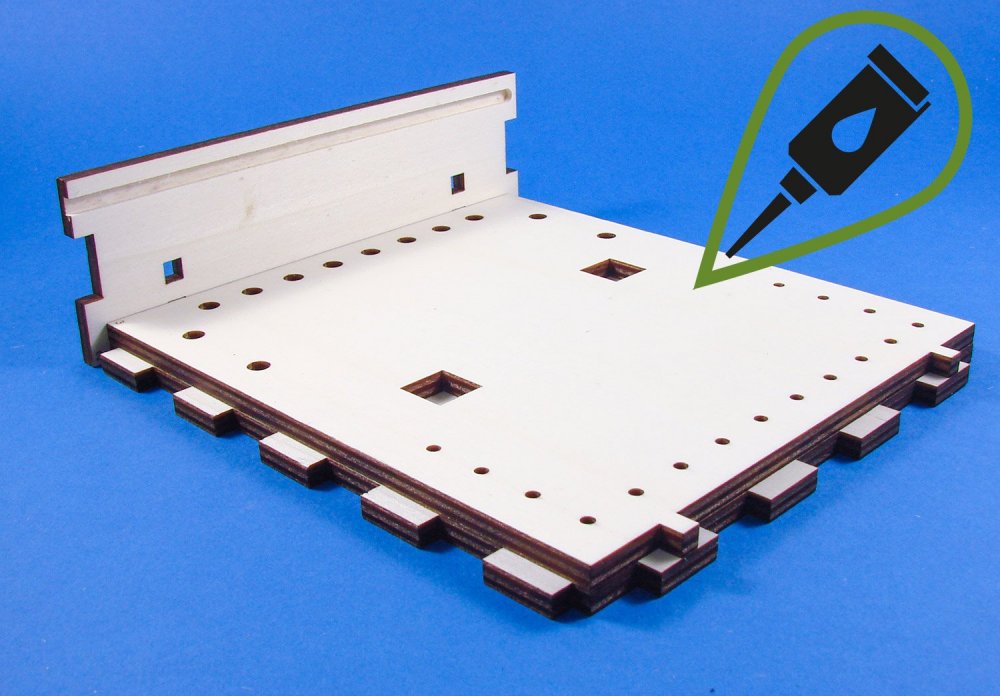
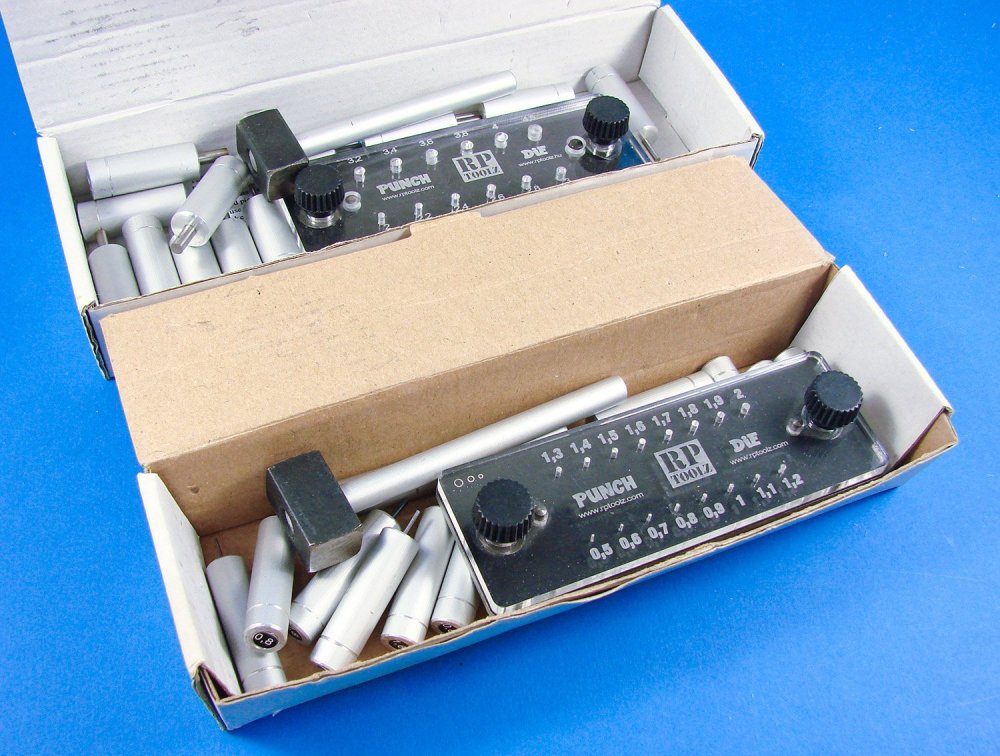
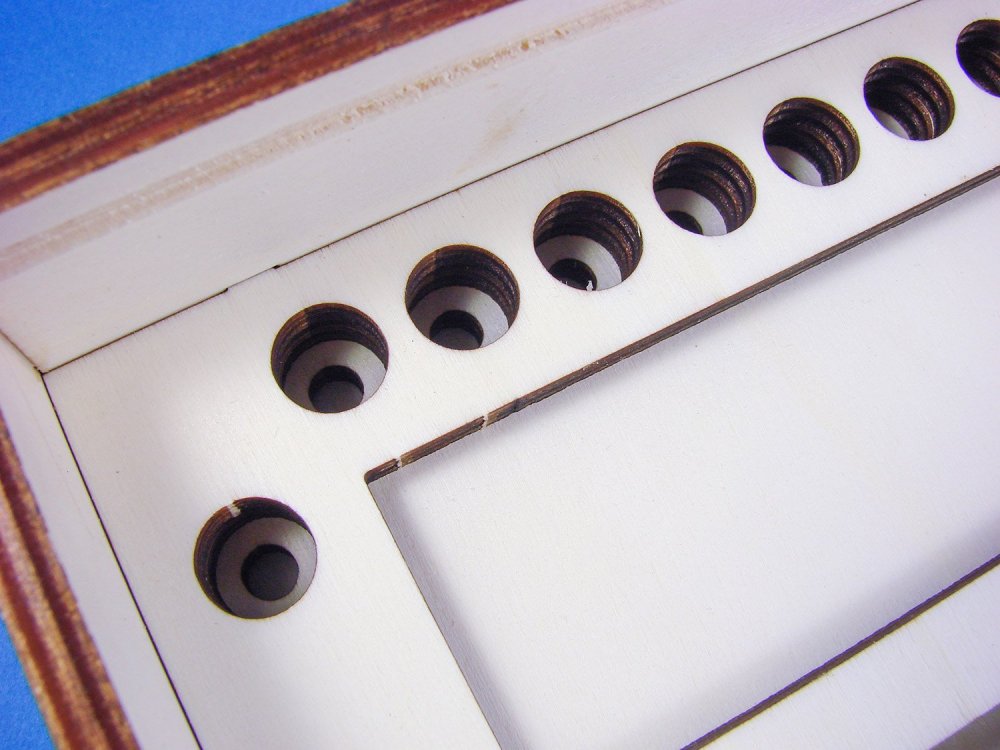
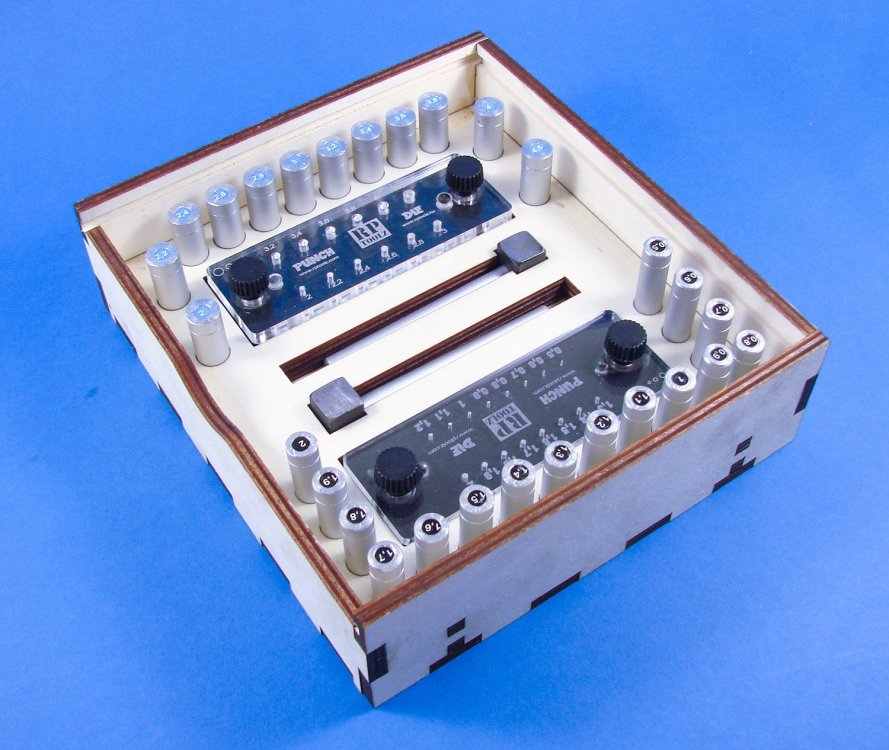
Double Punch & Die Storage Box RP Toolz Catalogue # RP-WB2 Available from RP Toolz for €22,00 RP Toolz make some of the best Punch & Die sets that you can buy. These include the regular large, small and hexagonal sets. When you buy these products, they are packed into a small cardboard box, with a plastic bag containing the punches and hammer. Whilst it’s hardly an elegant solution, this is fairly typical of the market, but RP Toolz has realised that you may want something a little better and organised, especially if you have multiple sets of punches hanging around on your workbench. To this end, they have now released a number of laser-cut plywood boxes that are specifically designed to hold the components for their own releases. Today, we take a look at the twin punch storage box. The old look! The Double Punch & Die Storage Box is flat-packed into a large zip-lock sleeve with a product label attached. Inside the box, there are NONE laser-cut parts of creamy-pale ply, and a single sheet of instructions. This set has also been designed so that the laser-numbered parts are assembled in part number order, which is a nice touch. A sliding lid, emblazoned with the company logo, will keep your punches nice and dust free. First of all, we need to remove the parts indicated in yellow on the instructions sheet. These are several discs and the ends of one of the die storage slots. A scalpel makes clean work of this. Part 1 (base) is now glued to Part 2 (side panel), using Titebond adhesive. Make sure the side panel is square to the base using a right-angle tool. Part 3 is now located into the notched side panel and glued in position. Part 4 simply sits on top of Part 3 and is glued into position. Make sure you get the orientation correct with regards to the large/small punch sides. Part 5 is the last internal floor and again sits in the side wall notches. Again, I glue this in place. Parts 6 & 7 are the side panels with the routed slots. These fit nicely together with a little push (and a few spots of glue) Part 8 is the last side panel and has a scalloped top edge to make it easier for your fingers to slide out the lid (Part 9). That is it! So simple to build. Here you can see what a difference it makes to have all your punches in order. It certainly helps those of us who like a little order in our lives. Conclusion A very nicely designed and produced box that is easy to assemble and really helps to restore karma to an untidy tool storage area I have. These are keenly priced and, in my opinion, very much worth the investment. Functionality and beauty rolled into one. My sincere thanks to RP Toolz for the review sample seen here. To order directly, click the link at the top of the article.


-
Haha! Fantastic!
-
If you uploaded them here, then you can delete from iPhotos with no problems. I would maybe, just for your own reassurance (if the photos are important to you), still back them up elsewhere. I back mine up to iCloud.
-
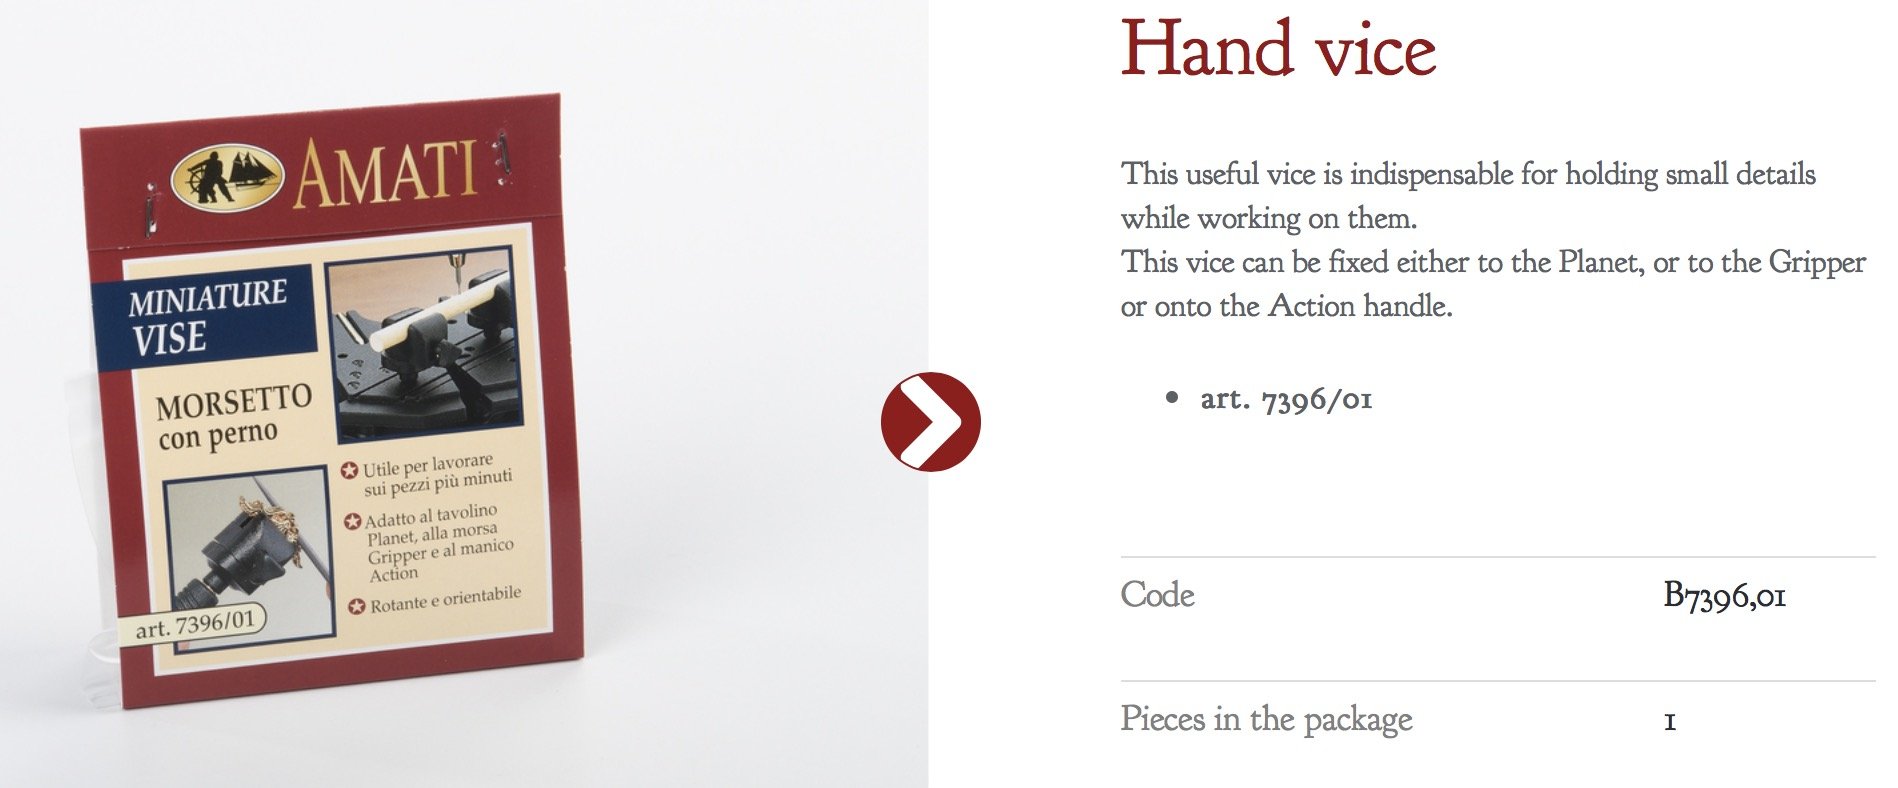
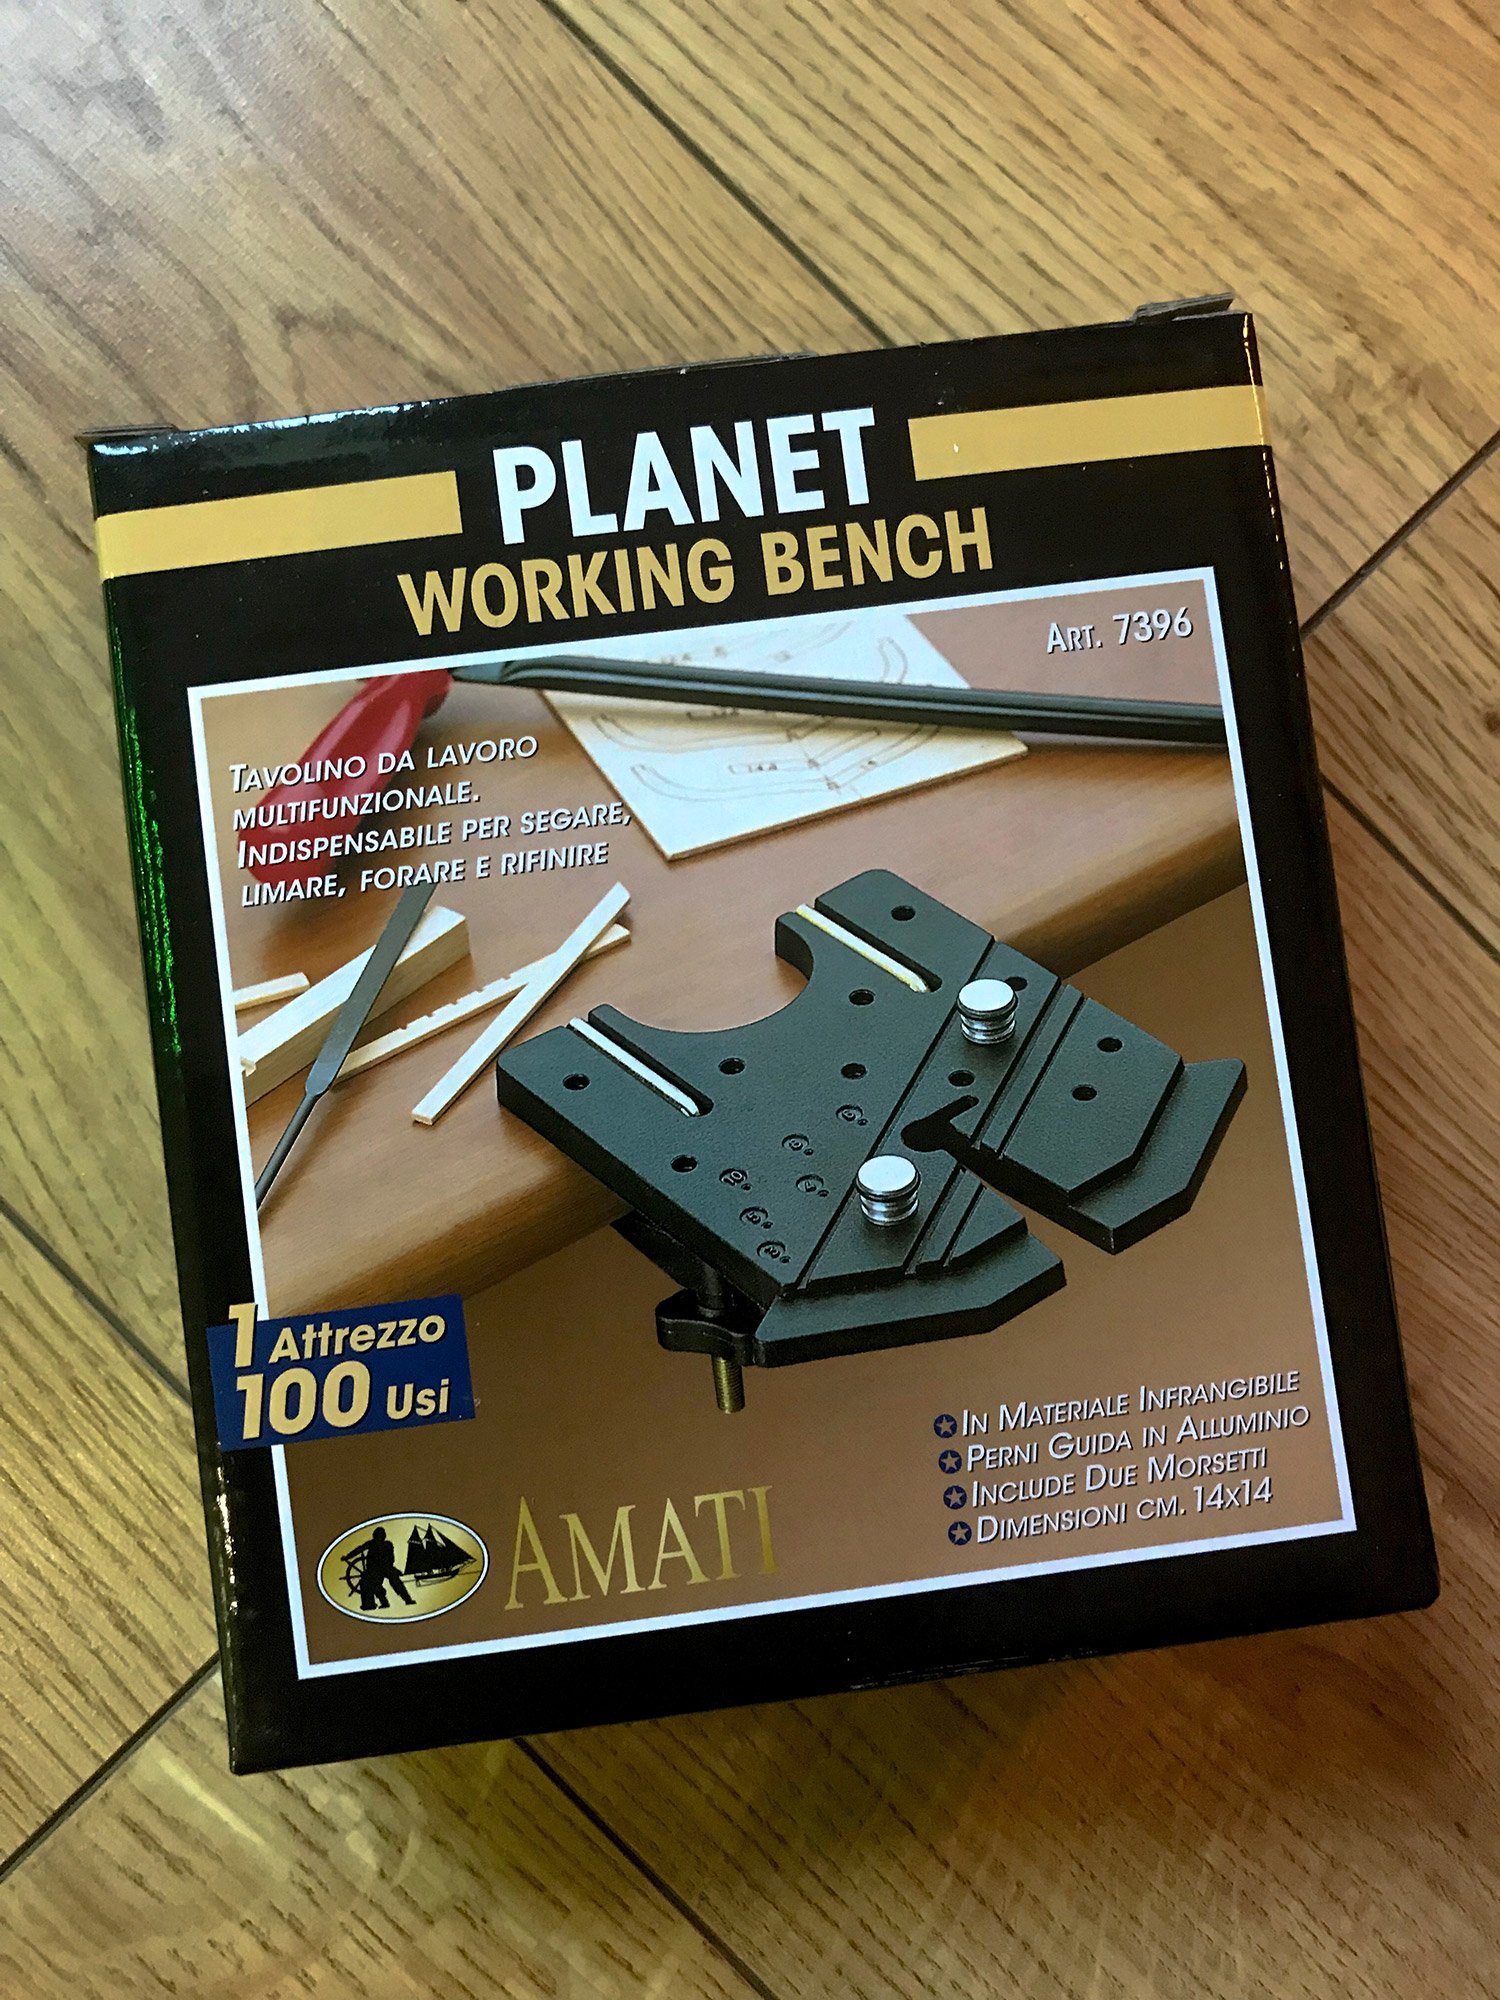
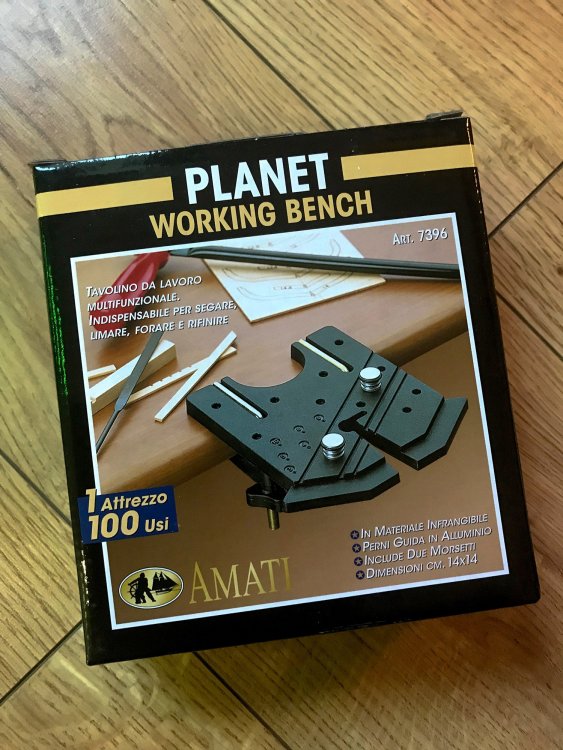
Planet Working Bench Amati Catalogue # 7396 Available from Cornwall Model Boats for £10.58 Having worked in plastic modelling for a while now, where I’m having to remove casting blocks from larger components but doing that either on my cutting mat or between my fingers, a tool like this appears to be very useful. When it comes to ship modelling too, the ability to be able to lay some small timber sheet flat whilst you use a fine saw on smaller components, without sawing tracts into your worktop (ask me how I know!), definitely helps. Amati’s Planet Working Bench is a tool that is designed for work on small components and materials, helping you hold items whilst you saw, file and drill. Let’s take a closer look. Amati’s Planet tool is packed into an attractive, sturdy and glossy box with an image of the tool clamped to a desktop. The back of the box is a little more illustrative, with examples of how this tool can be used with your work. All writing is in Italian, but we can grasp what’s happening fairly easily. Although Amati are generally known for their wooden model ships etc. this tool can of course be used for other areas of modelling where basic tools such as saws, files, and drills, are used. Inside the box, two thick plastic sleeves contain the components. In the largest is the Planet Working Bench itself, complete with two small aluminium bollards plugged into it. These bollards have a rubber O-ring fitted to them to prevent the metal scuffing any delicate work that you will use with the tool. The main part is moulded from a very tough plastic that still does have a little give in it, but it certainly rigid enough for the tasks that it’s designed for. It also has various channels moulded within in as well as holes to reposition the bollards, and a series of small, numbered holes which I’ll come back to very soon. The front slot is there to help you cut into materials, without a risk of cutting into your actual workbench. Just be careful not to start sawing into the Planet itself. The second wallet contains the two clamps which will secure the Planet to the desk. These are formed from two angled, threaded rods onto which a locking nut and the part which forms the lower side of the clamping jaw. To fit these to the Planet, you insert them from the underside and lay the angled part of the metal rod in the moulded channels. Slacken the nut off and then fit to the edge of your workbench, securely tightening the nuts to lock everything in place. Now, those small numbered holes. These refer to a moulded sleeve in the underside of the Planet, into which you will fit a wooden dowel or metal rod into which you wish to drill a hole centrally within the diameter. The hole of course aligns with the dead centre of the sleeve into which you will plug the wood or metal rod. Conclusion This is a very handy little gadget for working on those small model parts, but sold as it is, the full potential of the tool isn’t realised. To really get your money’s worth from it, I really do advise that you also purchase the small clamps which are designed to plug into it. These is called the ‘hand vice’ on Amati’s catalogue page and contains one single unit. Better still, a couple of these would be immensely useful. The Planet itself is very reasonably prices, nicely constructed and is a cinch to fit to your bench. I’ve already started to use it whilst building my Amati Orient Express Sleeping Car. My sincere thanks to Amati for sending this tool out for review. To purchase directly, click the link at the top of this article.

-
 O U T S T A N D I N G ! ! !
 -
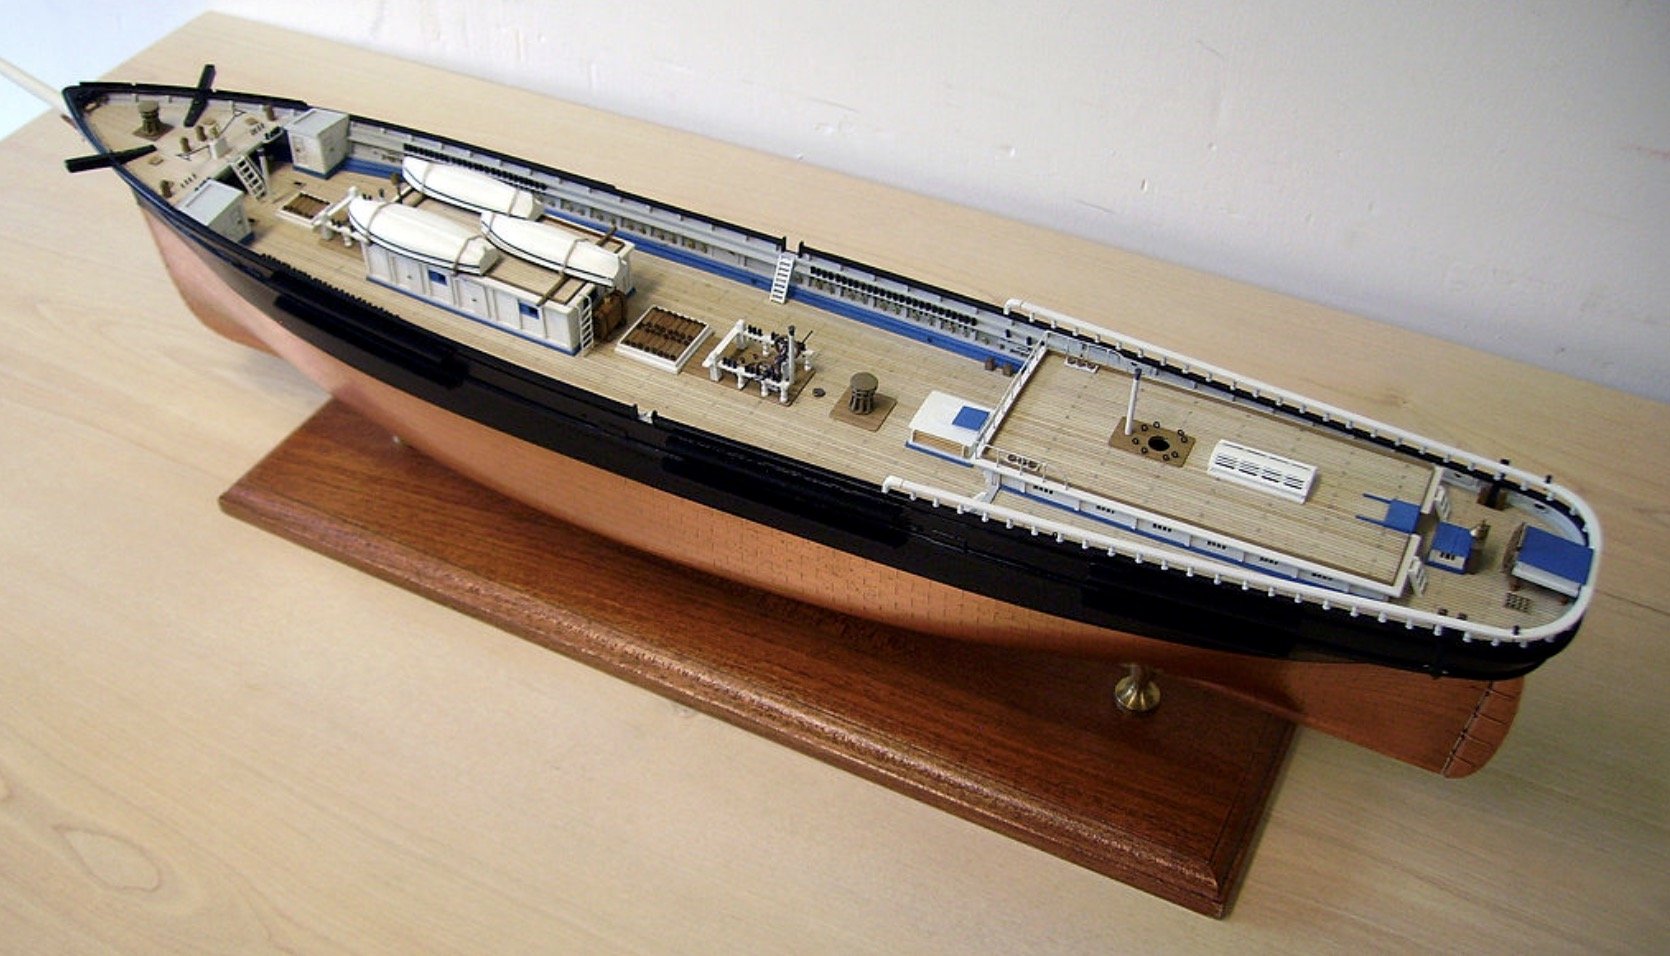
This one has an ABS hull. You'll built up a ply skeleton and then add the deck planking and fittings. FAR easier than a regular wooden boat/ship.
-
Scratch built Spitfire in 1:5 scale
JayDee replied to David Glen's topic in LSM 1/32 and Larger Aircraft Ready for Inspection
WHY have I only just seen this? Er.... -
These two bad boys dropped in via DHL today, direct from Amati.

-
Airbrush Painting Clips Holder HobbyZone Catalogue # HZ-AC1 Available from HobbyZonefor £13.54 (at current rates) Modellers tend to be quite resourceful and innovative folks, from scratch-building parts, to fabricating things to make their hobby a little easier. One such fabrication, for me, is a polystyrene foam block with cocktail sticks to hold parts whilst I airbrush them. I also stick parts to steel rules that have been covered in masking tape, plus I’m always using bits of Blue-Tack to mount parts to whilst I paint. It just seems to be the way I’ve always worked. Doubtless, you do the same, or have your own bespoke solution. HobbyZone have quite a nice solution to this that you may just be interested in. I’ve actually been sitting on this review for a couple of months now, pending the release of this new product from HobbyZone. Today, they asked me to publish it for you. The concept is very simple. It’s essentially a magnetic box with a series of holes in the lid. Into these will fit stiff wires that are furnished with a shrouded crocodile clip on one end. You pop your model part into the jaws and then paint. Whilst drying, you can stand the wire upright in the lid. After your work, all the wires sit neatly in the box, out of the way. This product, like all those from HobbyZone, are machine cut from MDF, and require assembly. This one is packed into a sturdy corrugated box with a simple product label. Upon opening the box, you’ll note that all parts are protected with a covering of bubble-wrap. Upon removing that, you’ll note that the box itself is built up from five layers of MDF. These form the base with a white plastic outside coating, and two frame parts, one of which glues to the base, and another recessed frame which glues to the top of this. The two-part lid then sits in this and is held via magnets. To complete the package, a series of nine neodymium (rare earth) magnets are included, as are nine croc-clip wires and a set of instructions. The instructions are nice and simple to follow and I had no issue with understanding them at all, but for the ease of explaining this product to you, I’ve built this up as a guide for you. Here we go! 1.I start with the lid. Using TiteBond adhesive, I run a line of this around the non-recessed face of this part, and add some spots between the holes, being careful not to put too much glue there, or get too close to the holes. 2.The white, plastic-coated lid is now fitted to the previous part and held with clamps until fully cured. 3.The base is now clued to the lower frame section (the one without the holes) and clamped until fully set. 4.Now we can glue the upper frame in situ, being careful of alignment. Again, clamps hold this until filly set. Note the frames are slightly scalloped on each of the long edges. This is to give your fingers something to hold whilst you remove the lid. 5.Now, this part is VERYimportant. We need to ensure that the magnets all fit into the holes, so the same pole is facing upwards on each one. This is dead easy. Keeping the stack of magnets upright, and keeping the same orientation, remove two of them and push into the one of the corner holes. Do the same with the others, again, without changing the orientation of your stack of magnets. These push in quite easy, but you know they won’t come out afterwards! Now fit the lid to the box so that the magnets align with the holes in the lid. Push firmly down, and if necessary, gently tap the lid into place with a small hammer, being careful to protect the surface of the product. That’s it! The lid will now come off with magnets and will reattach in the same way. Job complete! 6.After your work, store the wires/clips in the box and replace the lid. There’s plenty of room in there for more, in case you want to make your own clip holders. Conclusion A superbly simple idea, carried off very nicely. As with all of HobbyZone’s products, this is designed to keep your workbench in tidy order, and of course, this has the functionality added to it. I’m quite a fan of HobbyZone, with my workshop being fitted out with all of their various storage modules, so I’m more than happy to stay true to the brand and its style/quality, with this addition. My sincere thanks to HobbyZonefor the review sample seen here. To purchase directly, click the link at the top of the article.
-
I totally agree. A front page is something that's been mooted since we began. Maybe I can Wordpress something and link the forum, and vice versa. Please add your ideas to this topic and I can look at them.
-
Seeking recommendations for best 1/32 F-86 cockpit sets
JayDee replied to seiran01's topic in Modelling Discussion
The AMS pit is excellent.. -
I've something lined up for next year, along that very line
-
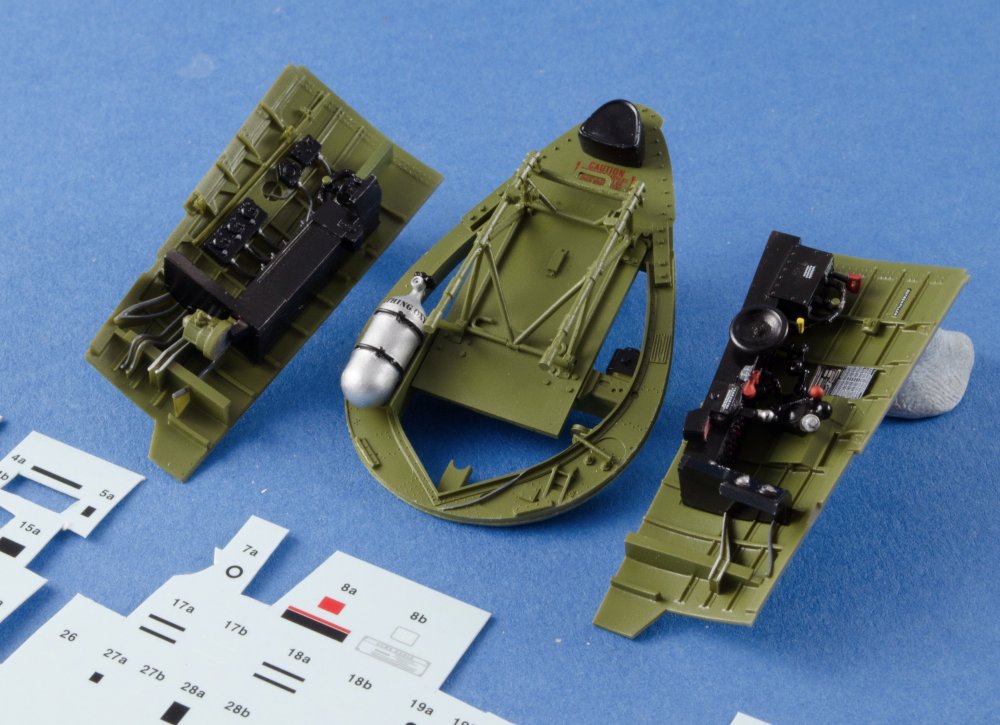
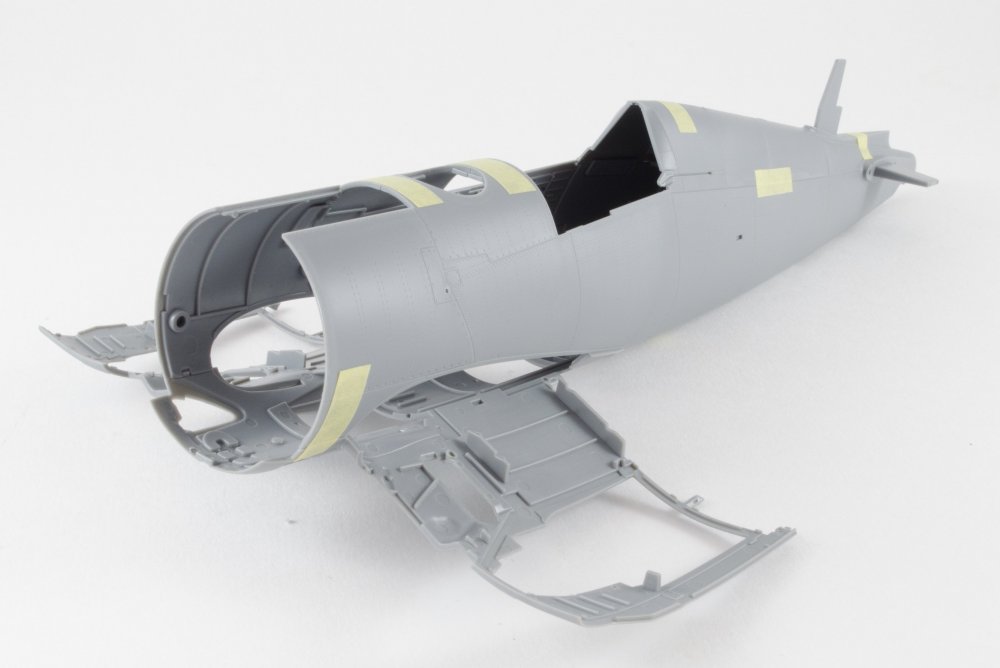
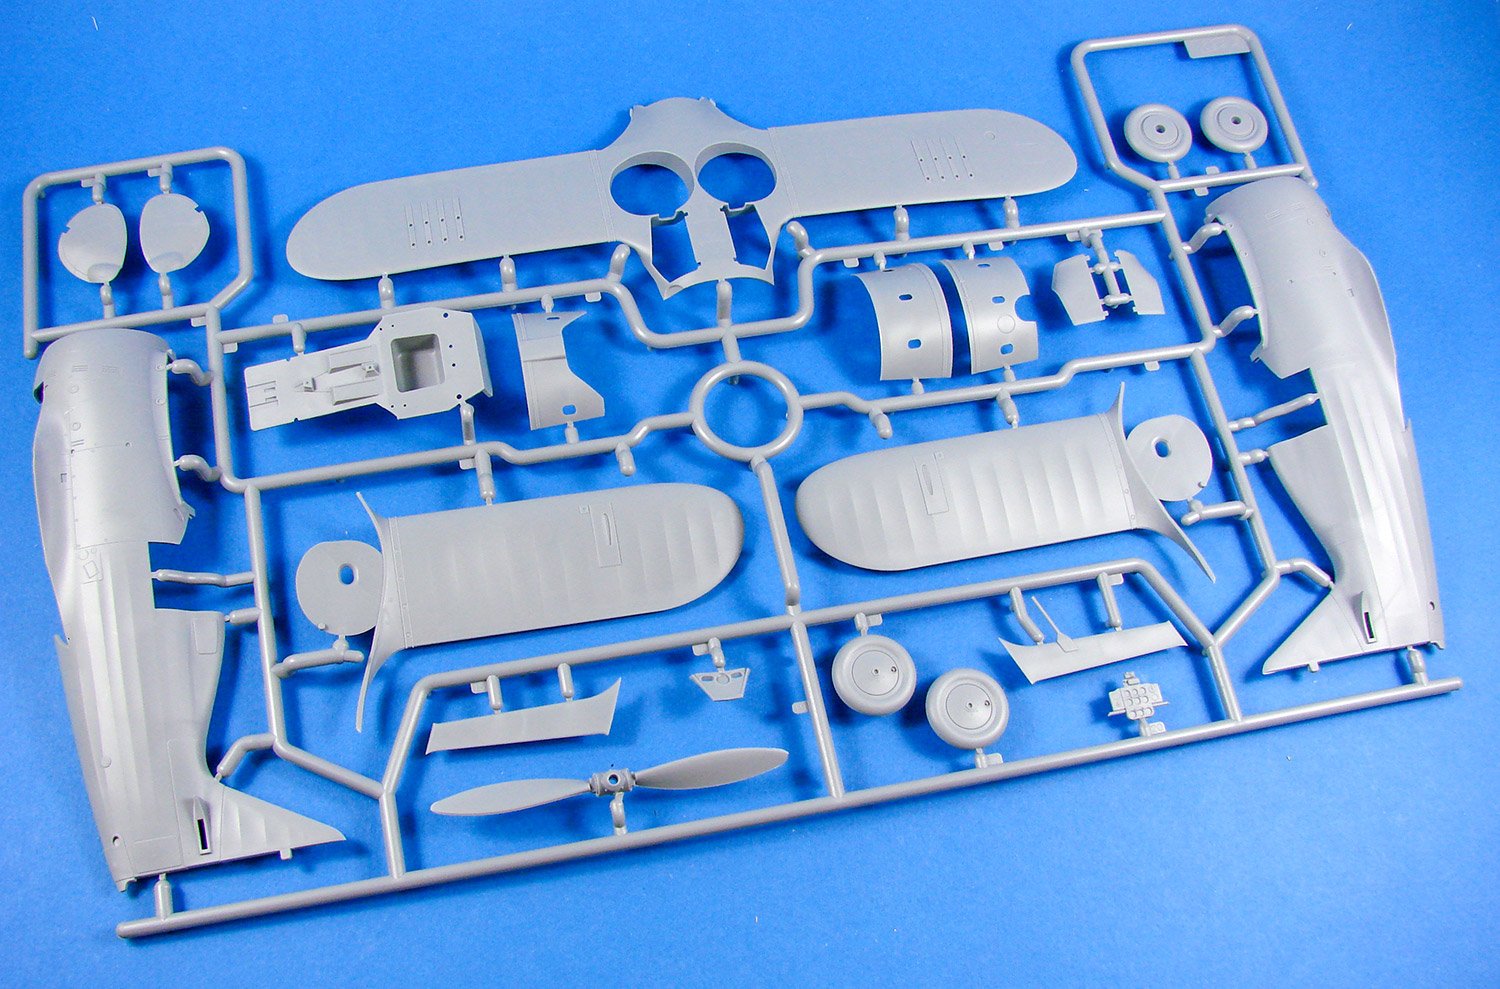
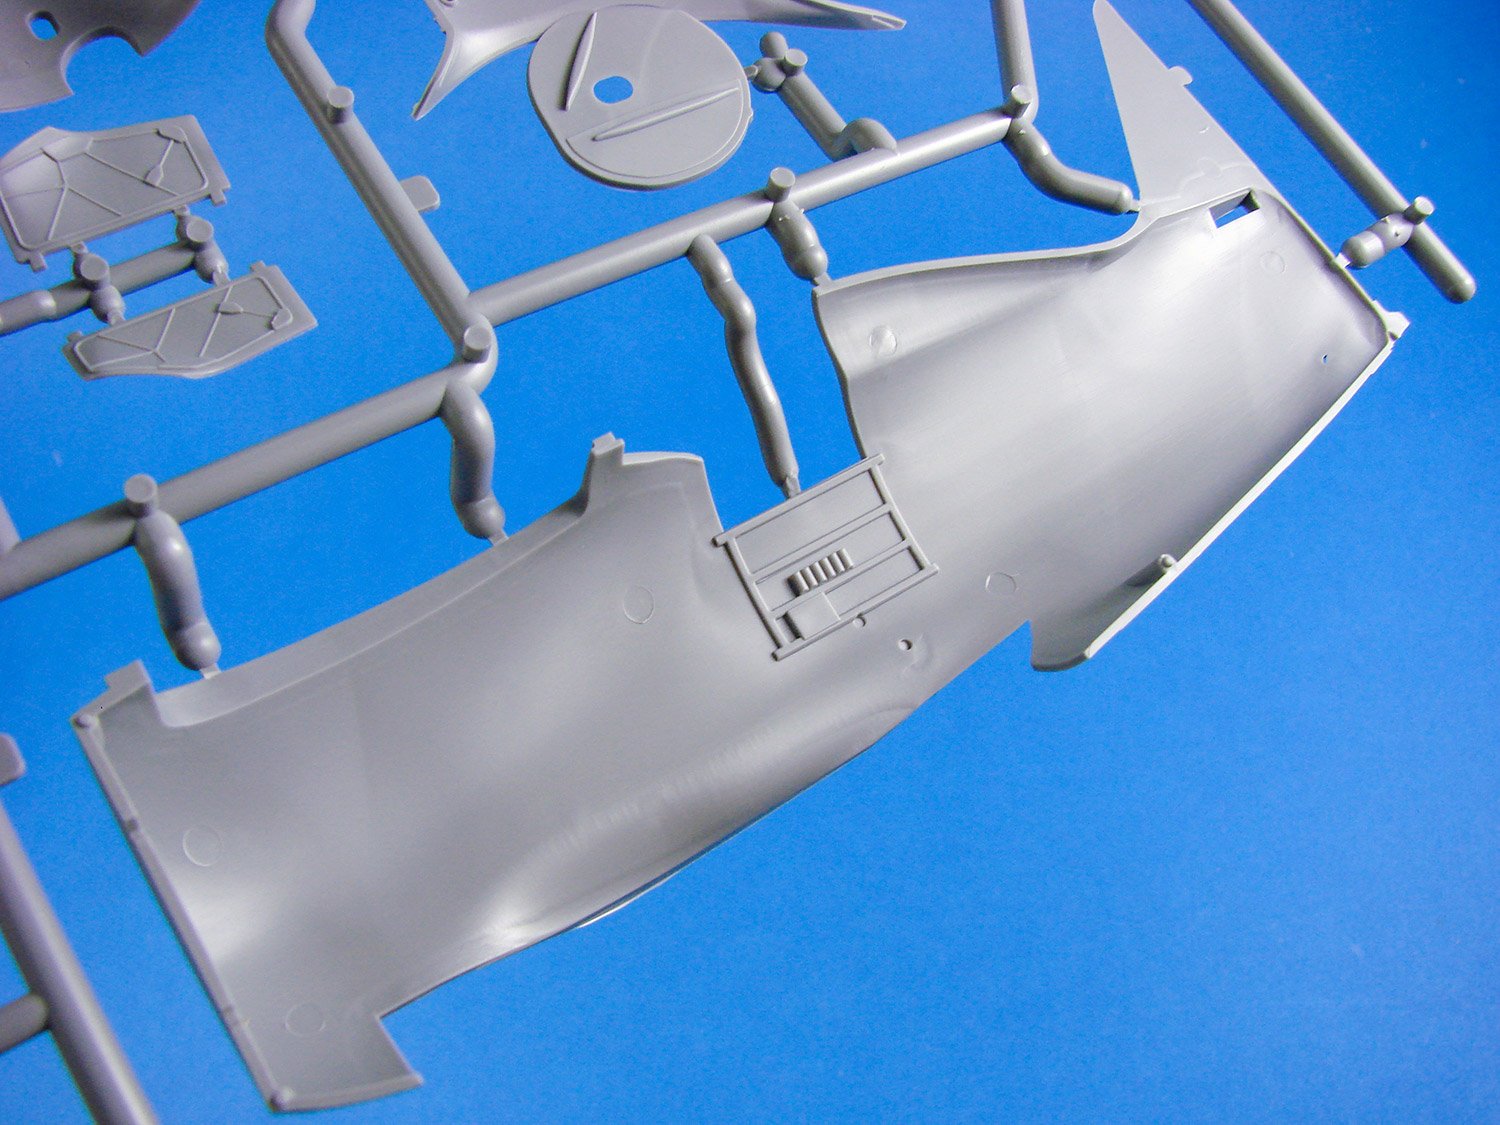
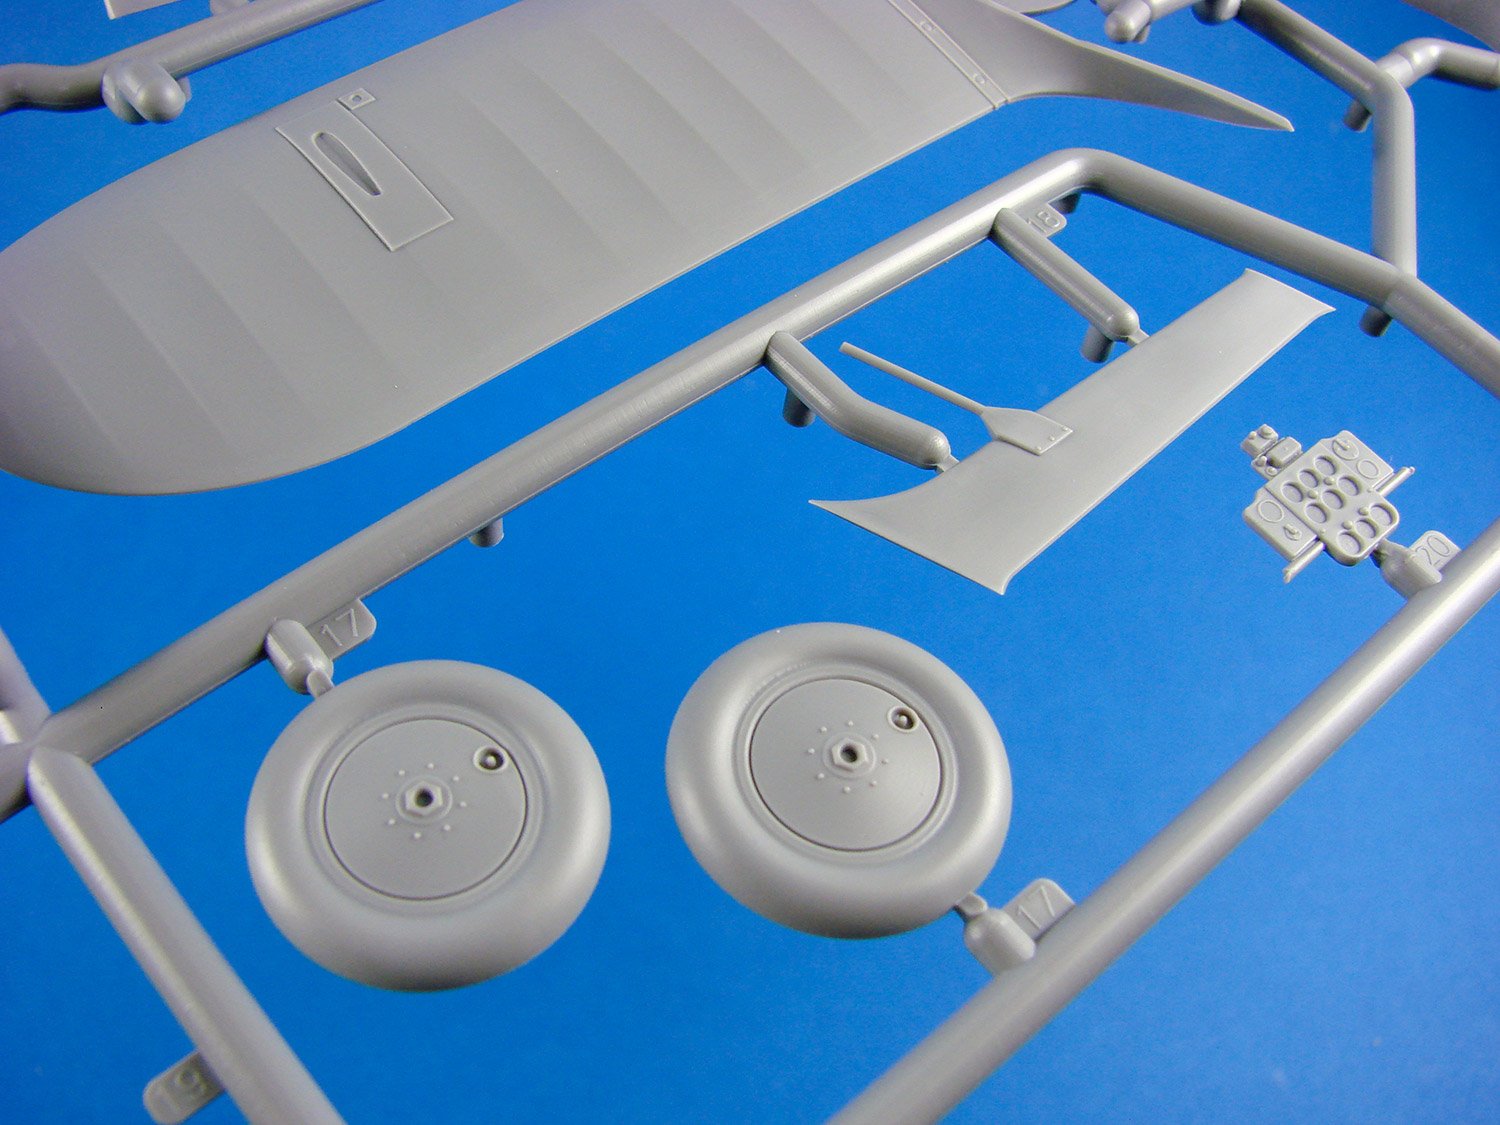
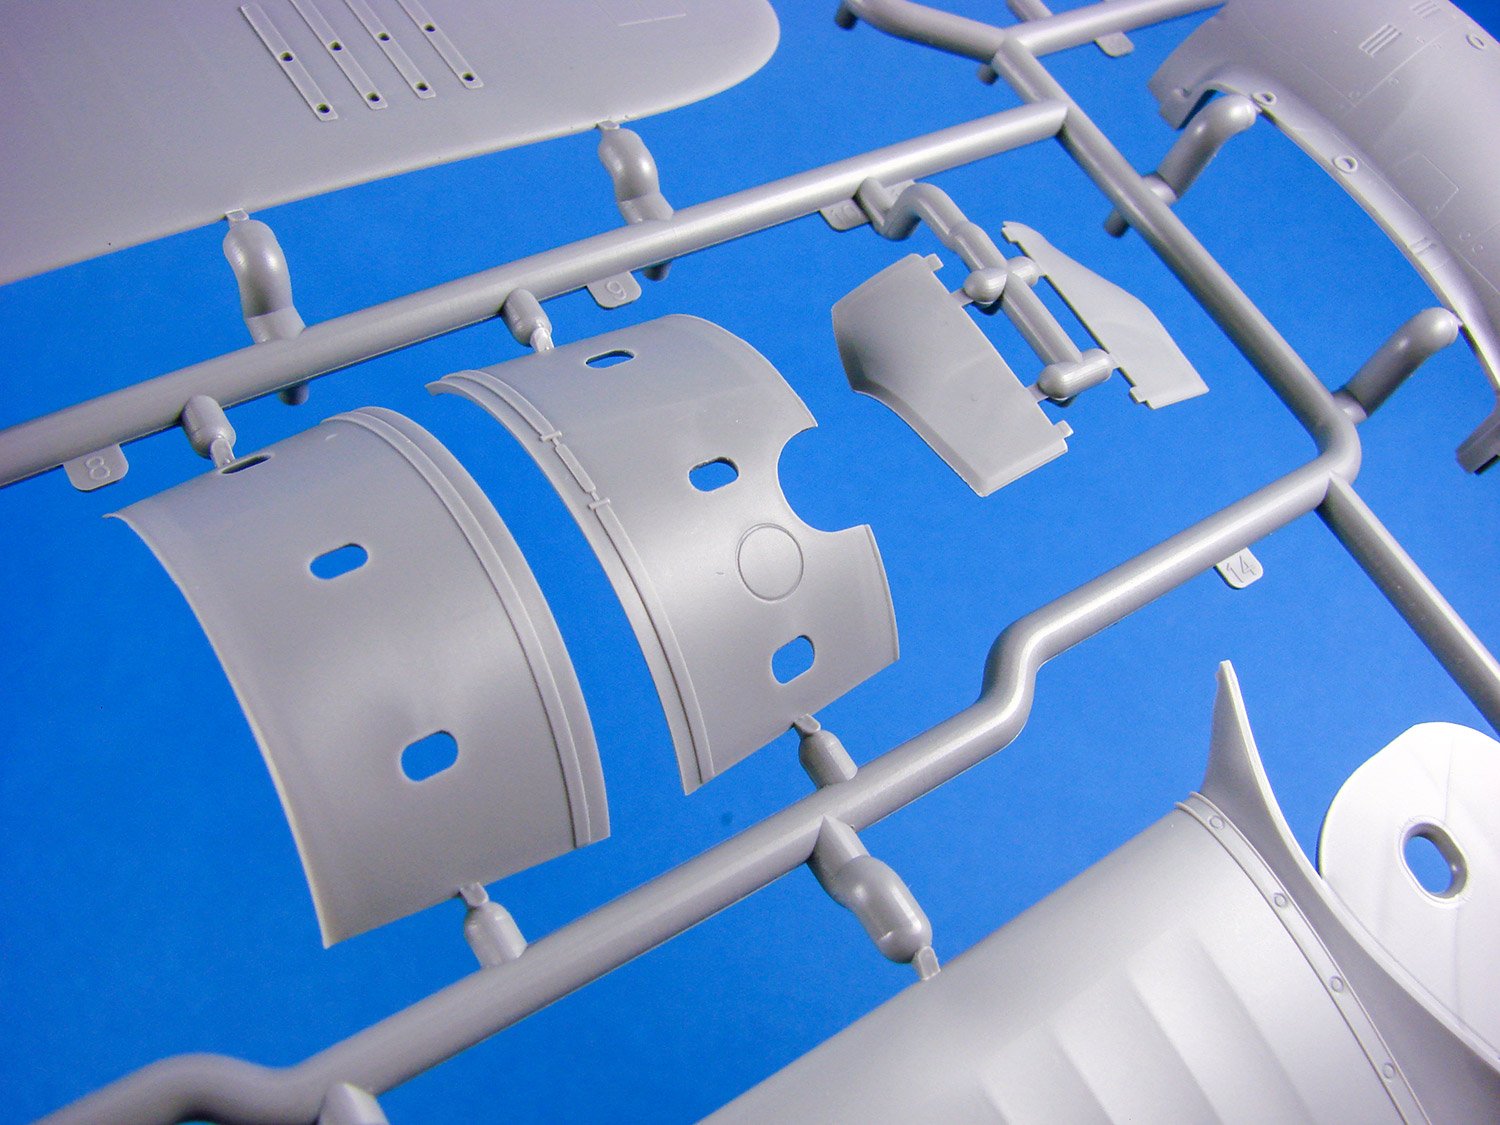
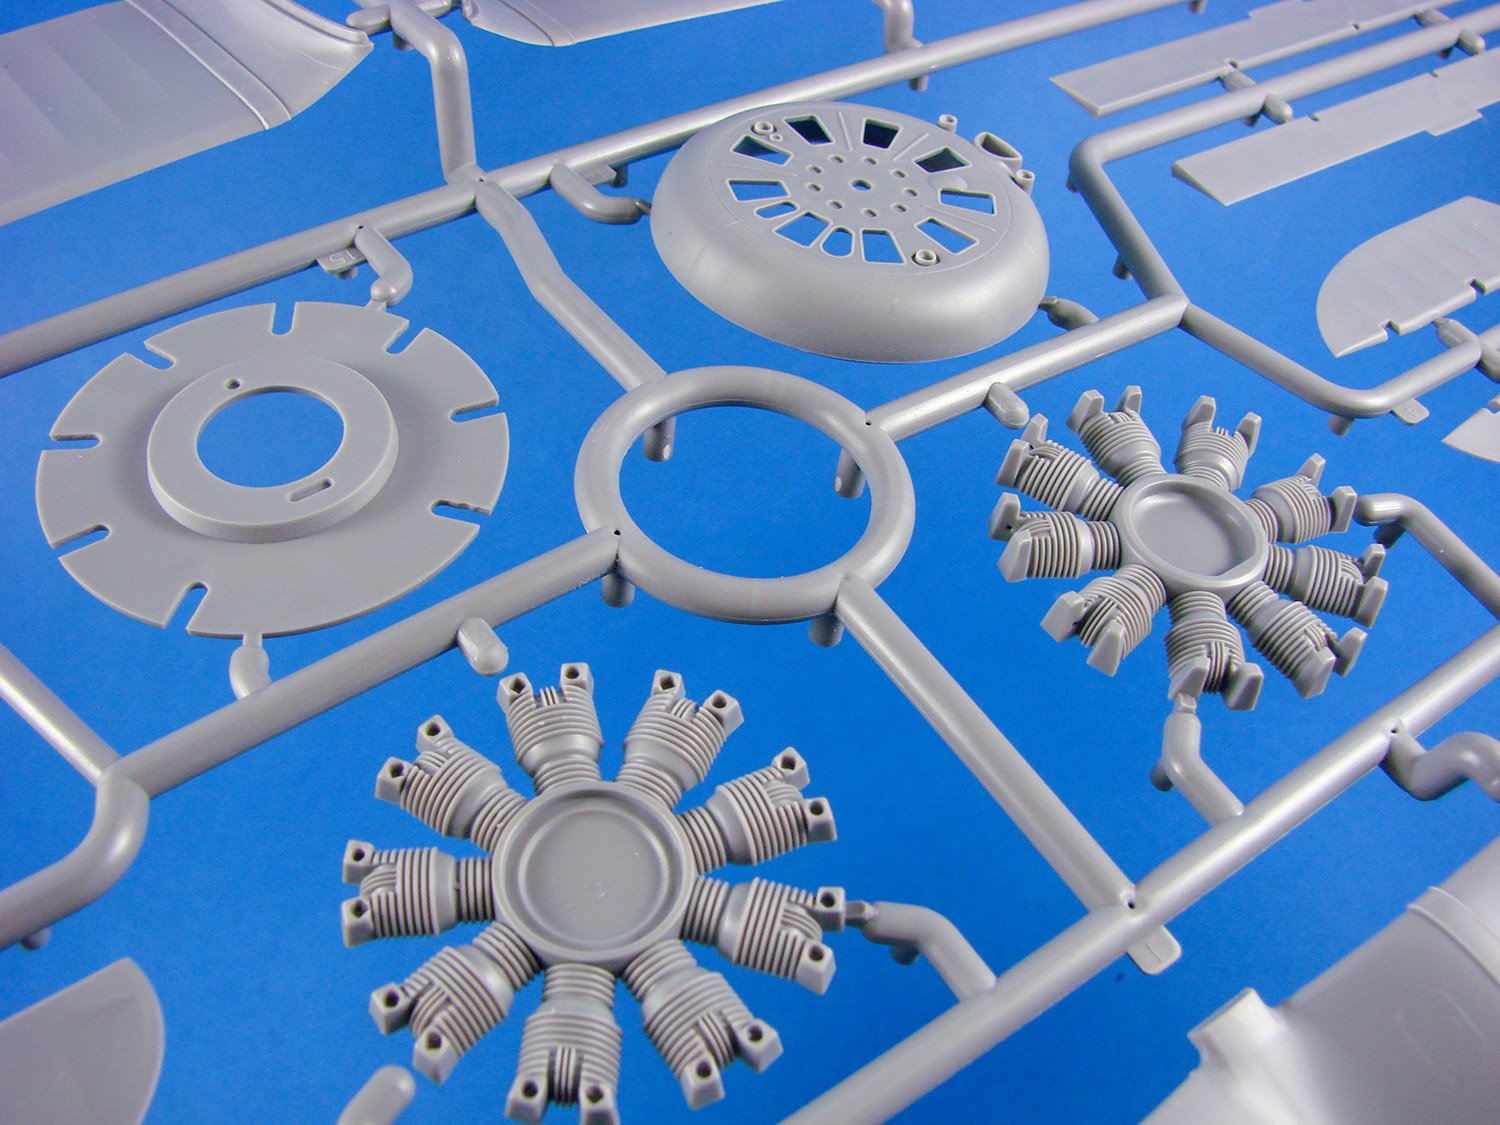
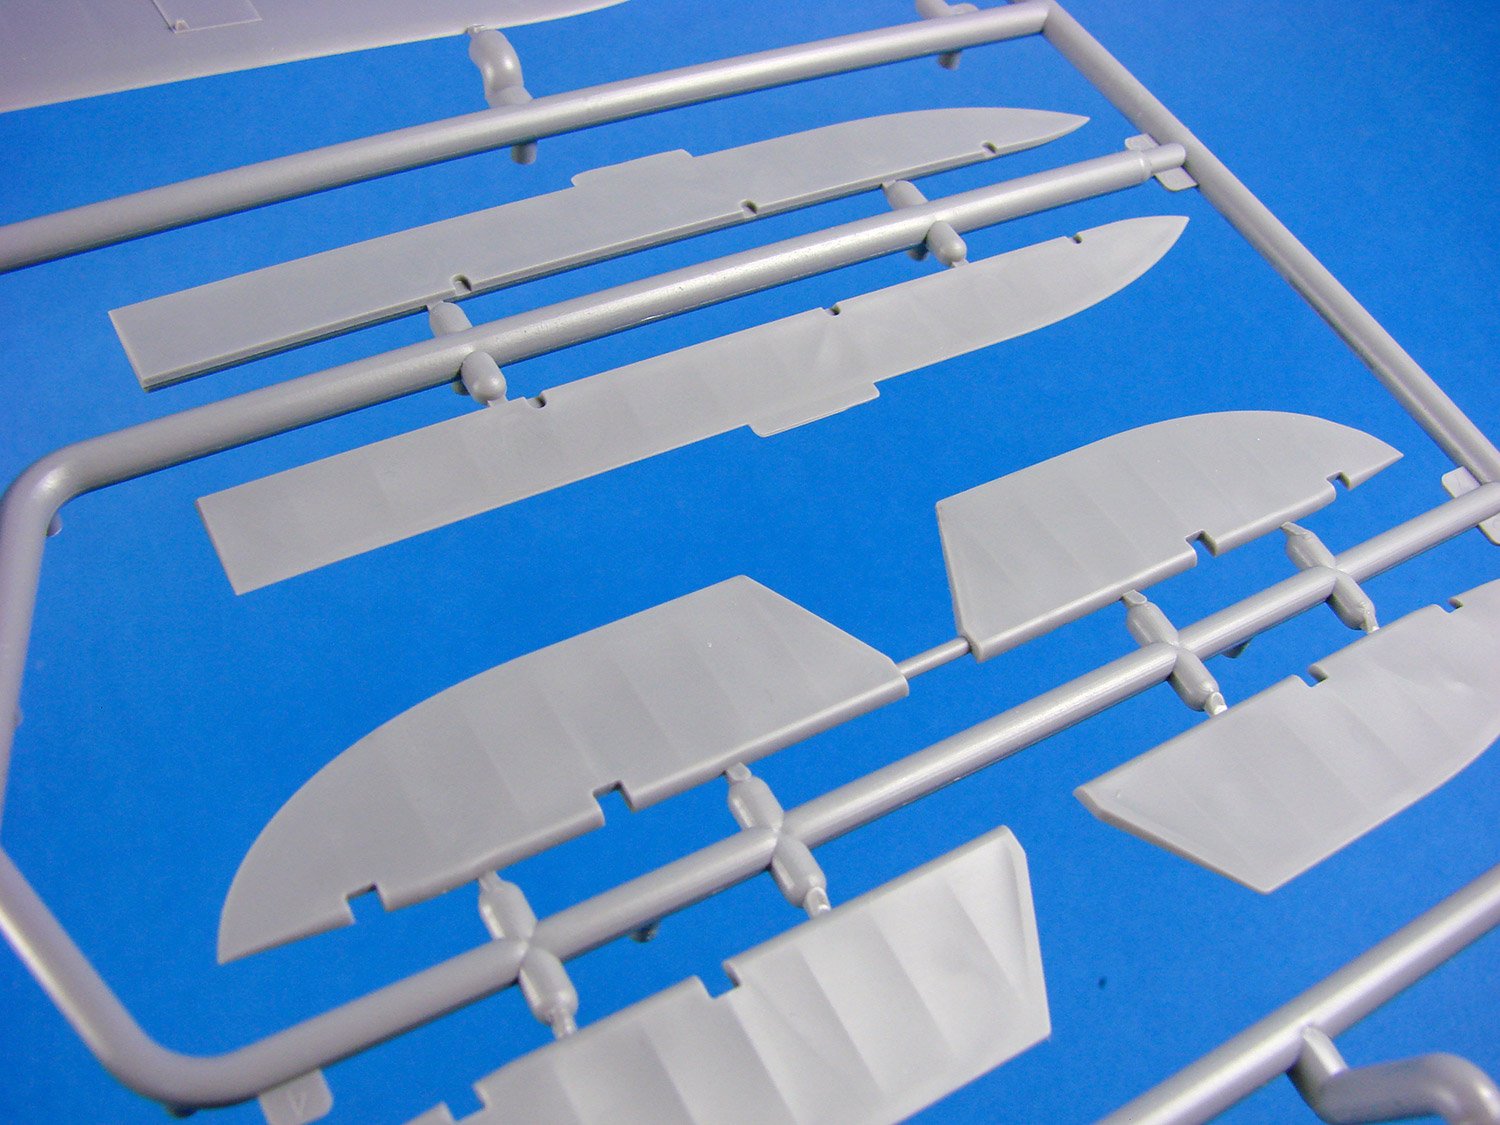
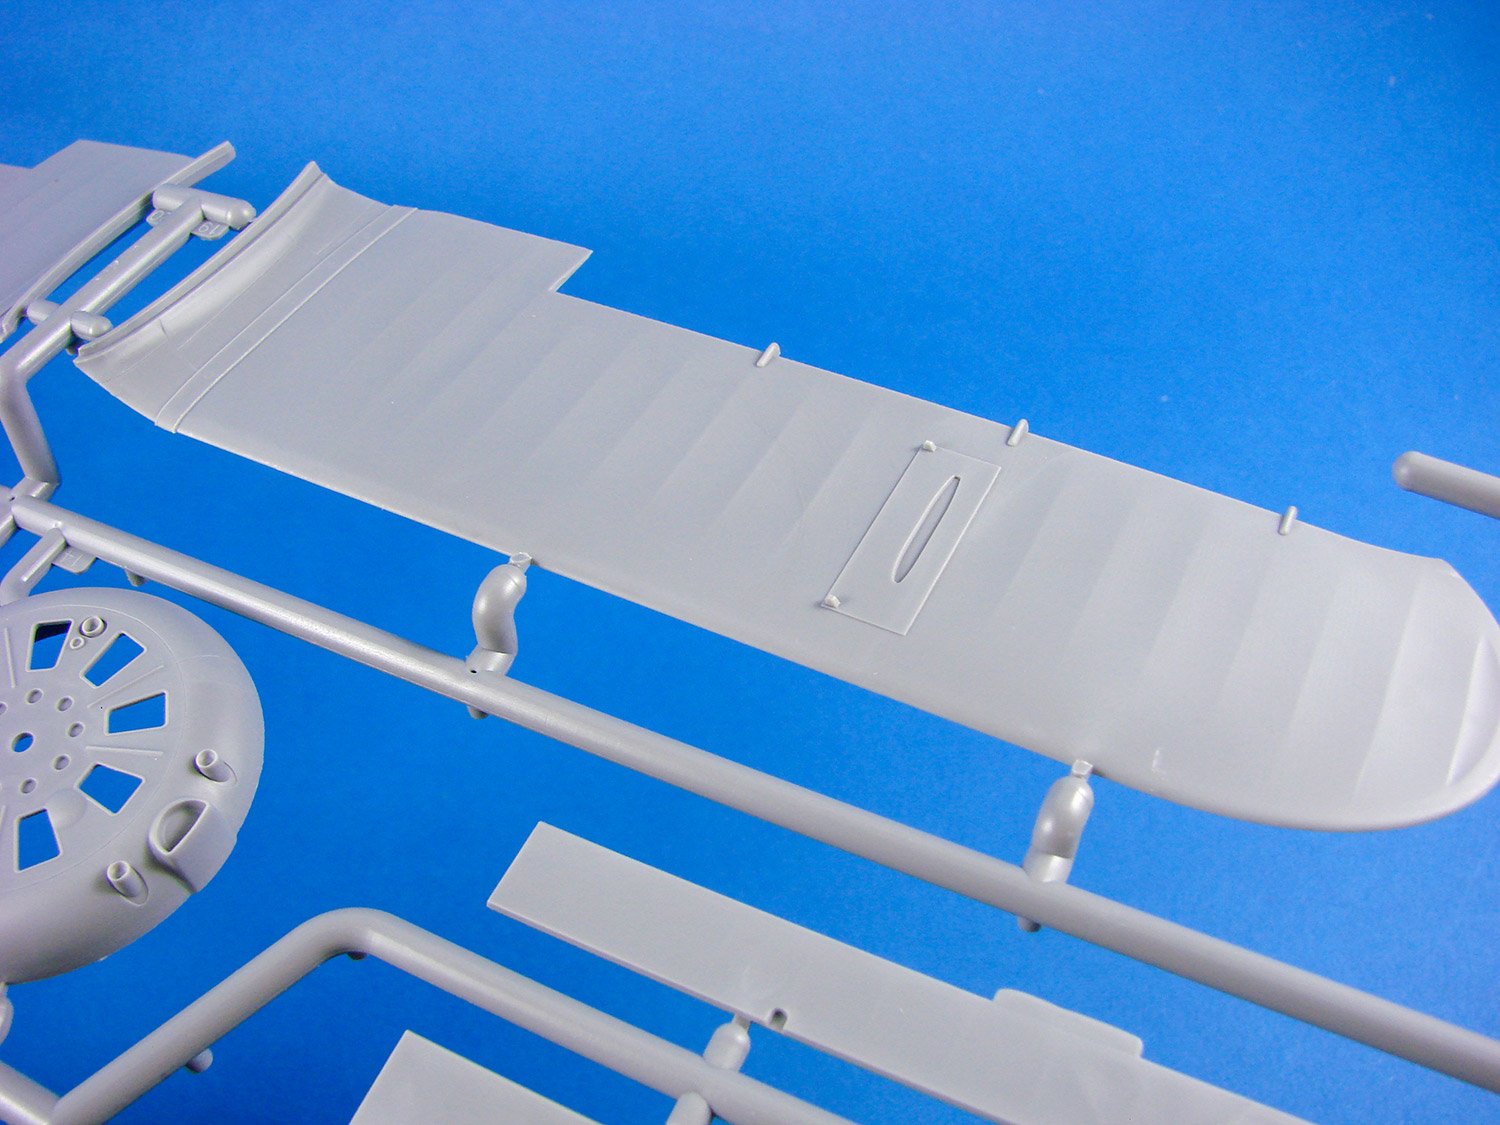
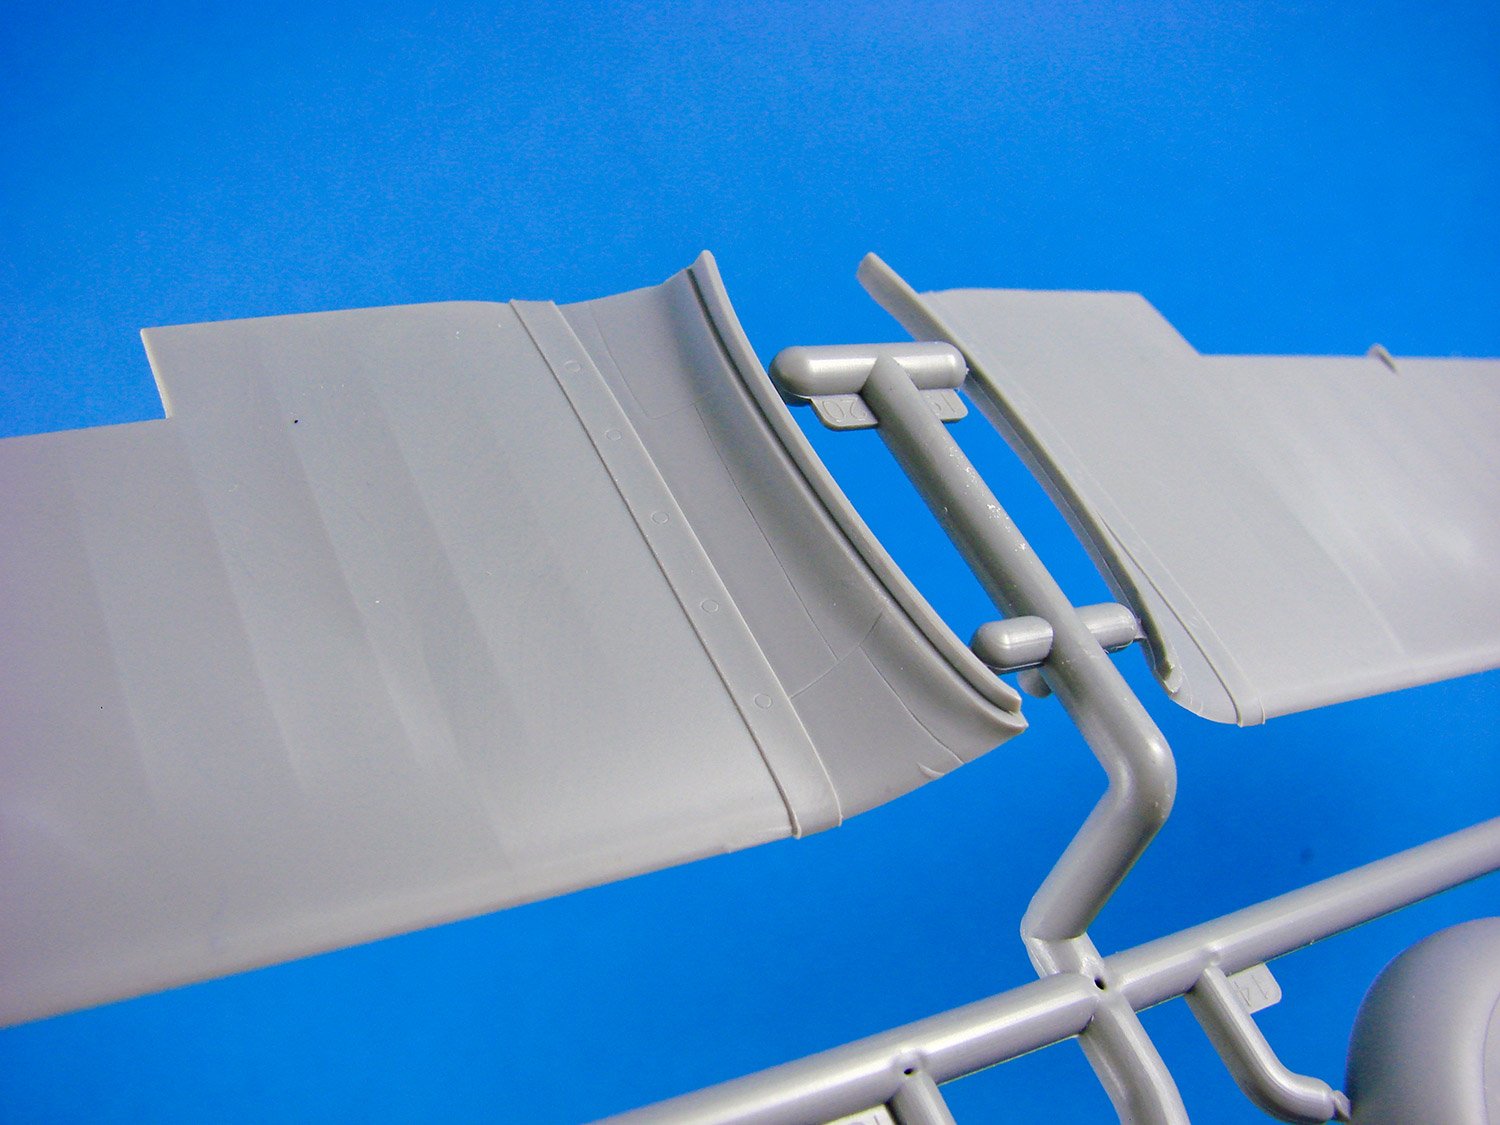
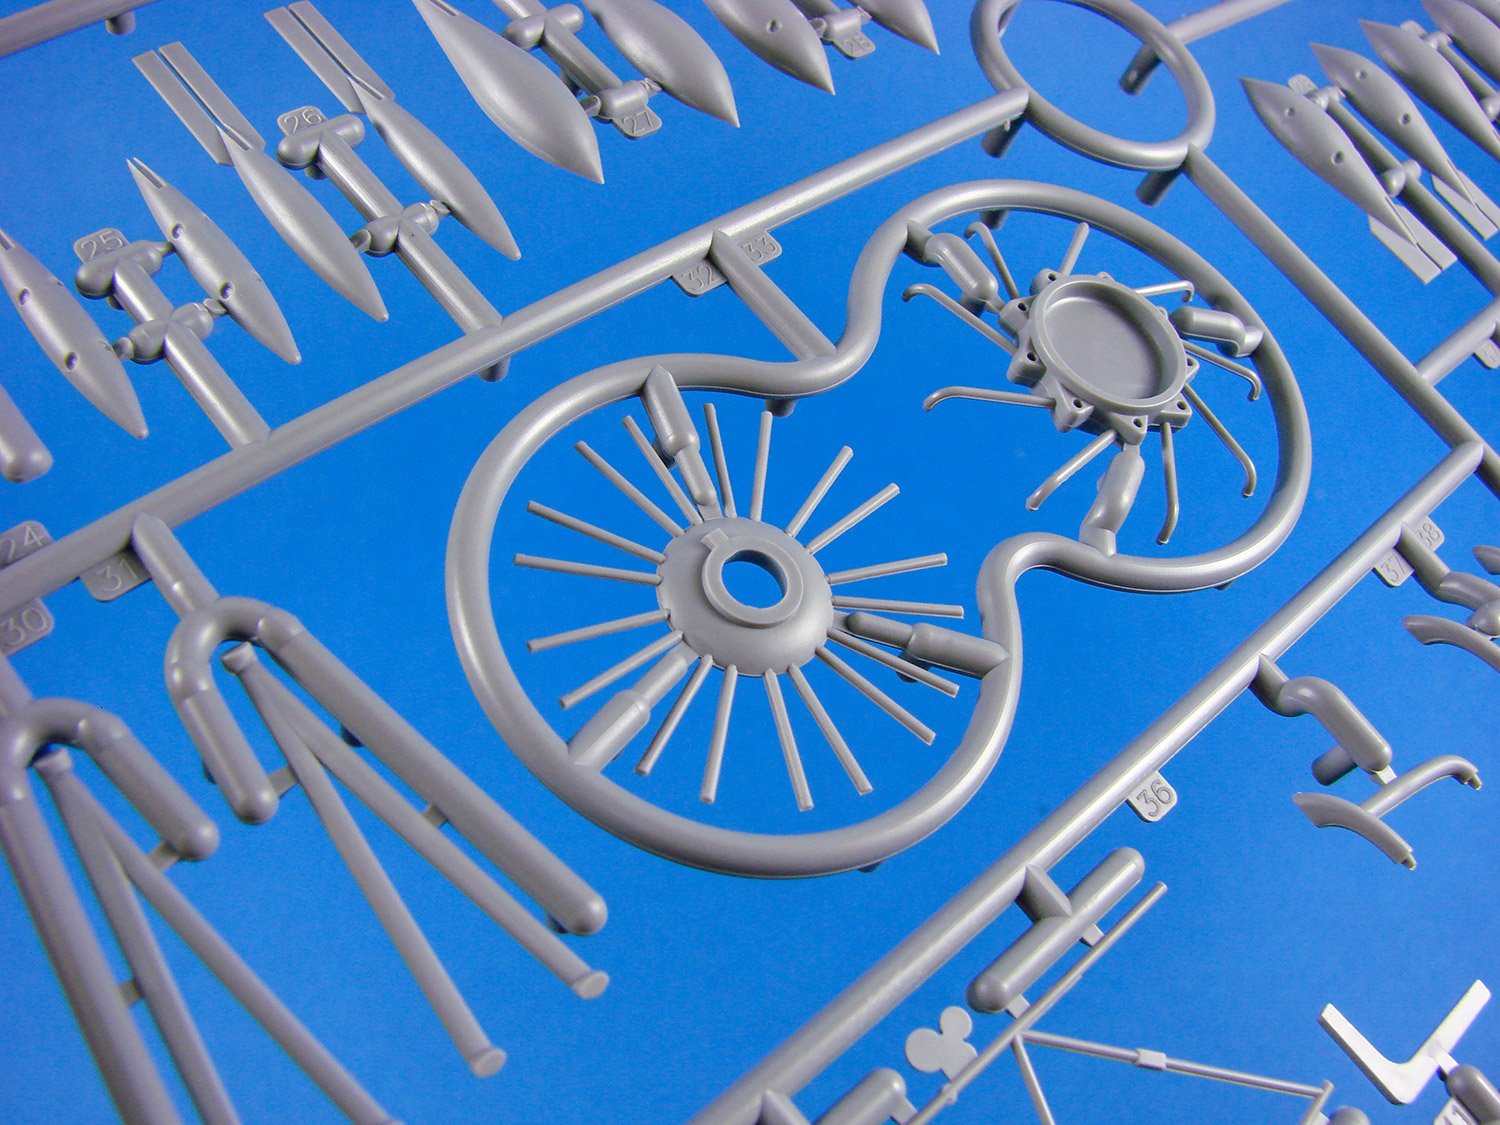
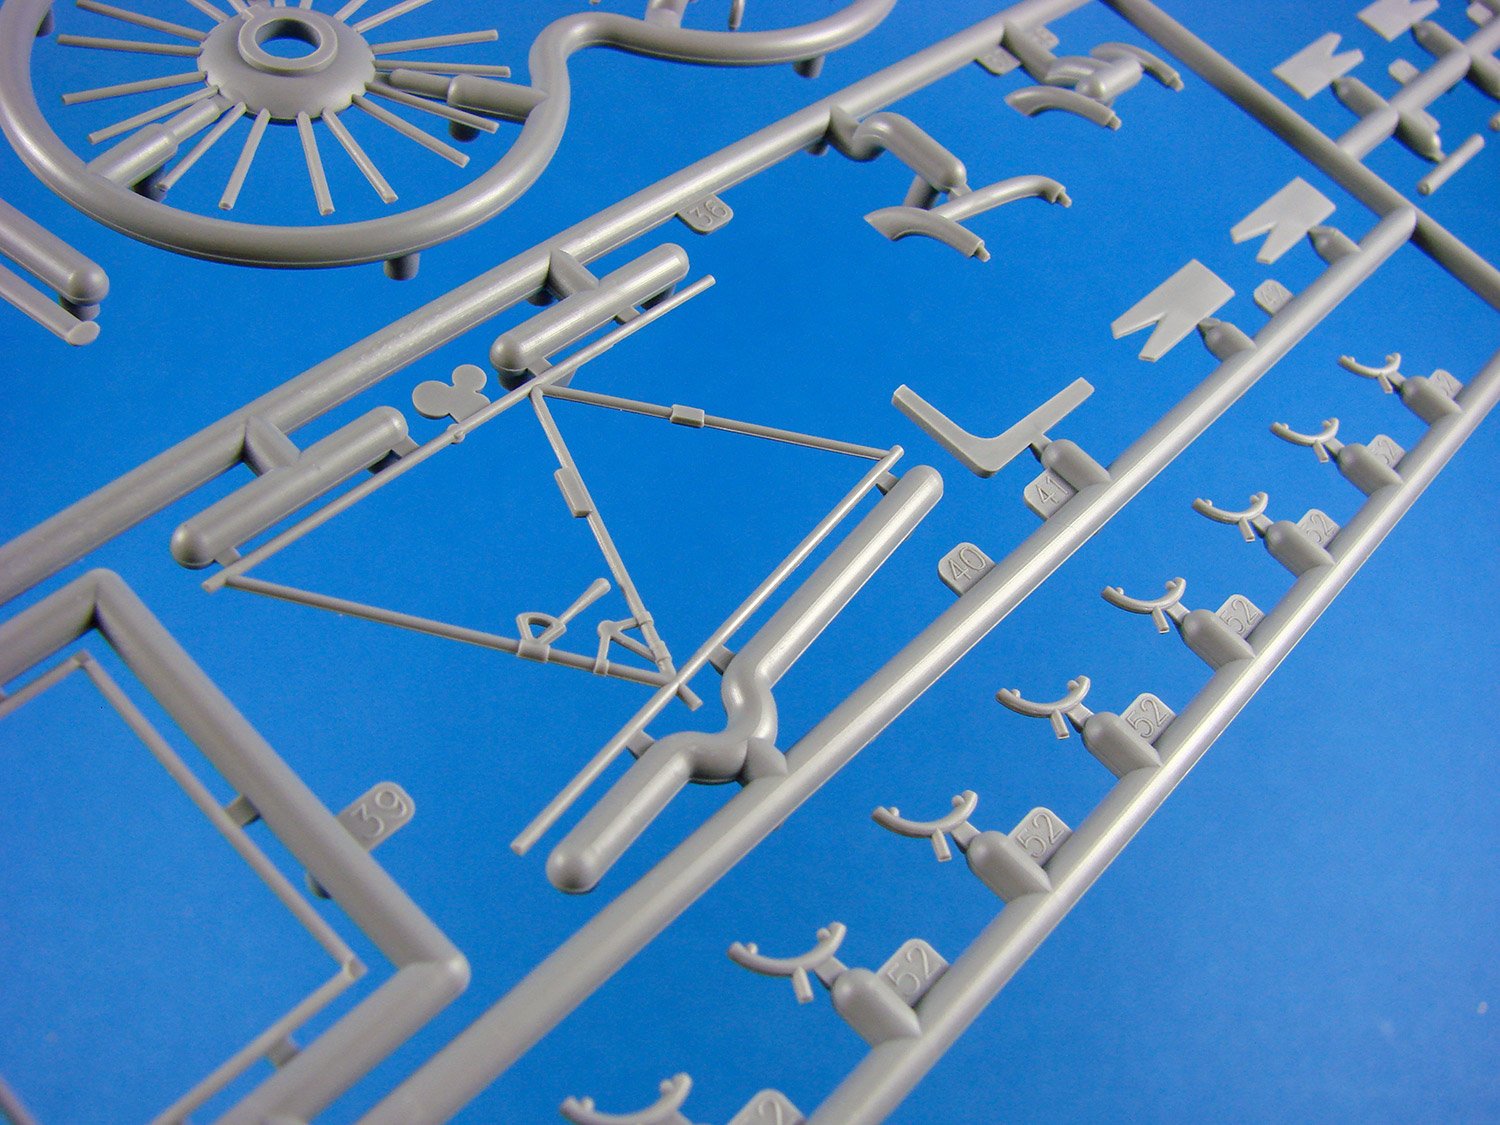
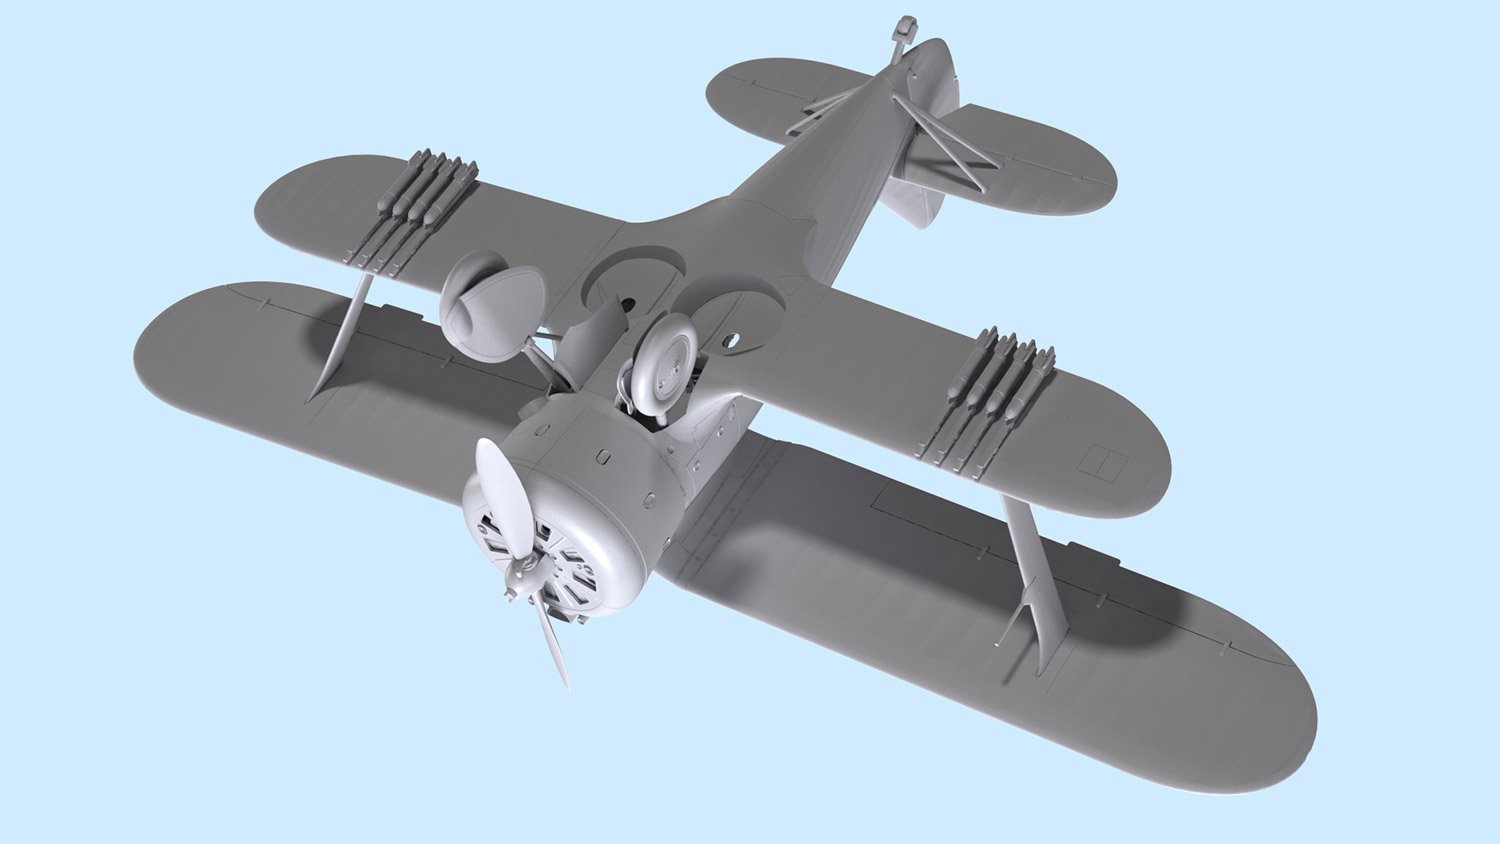
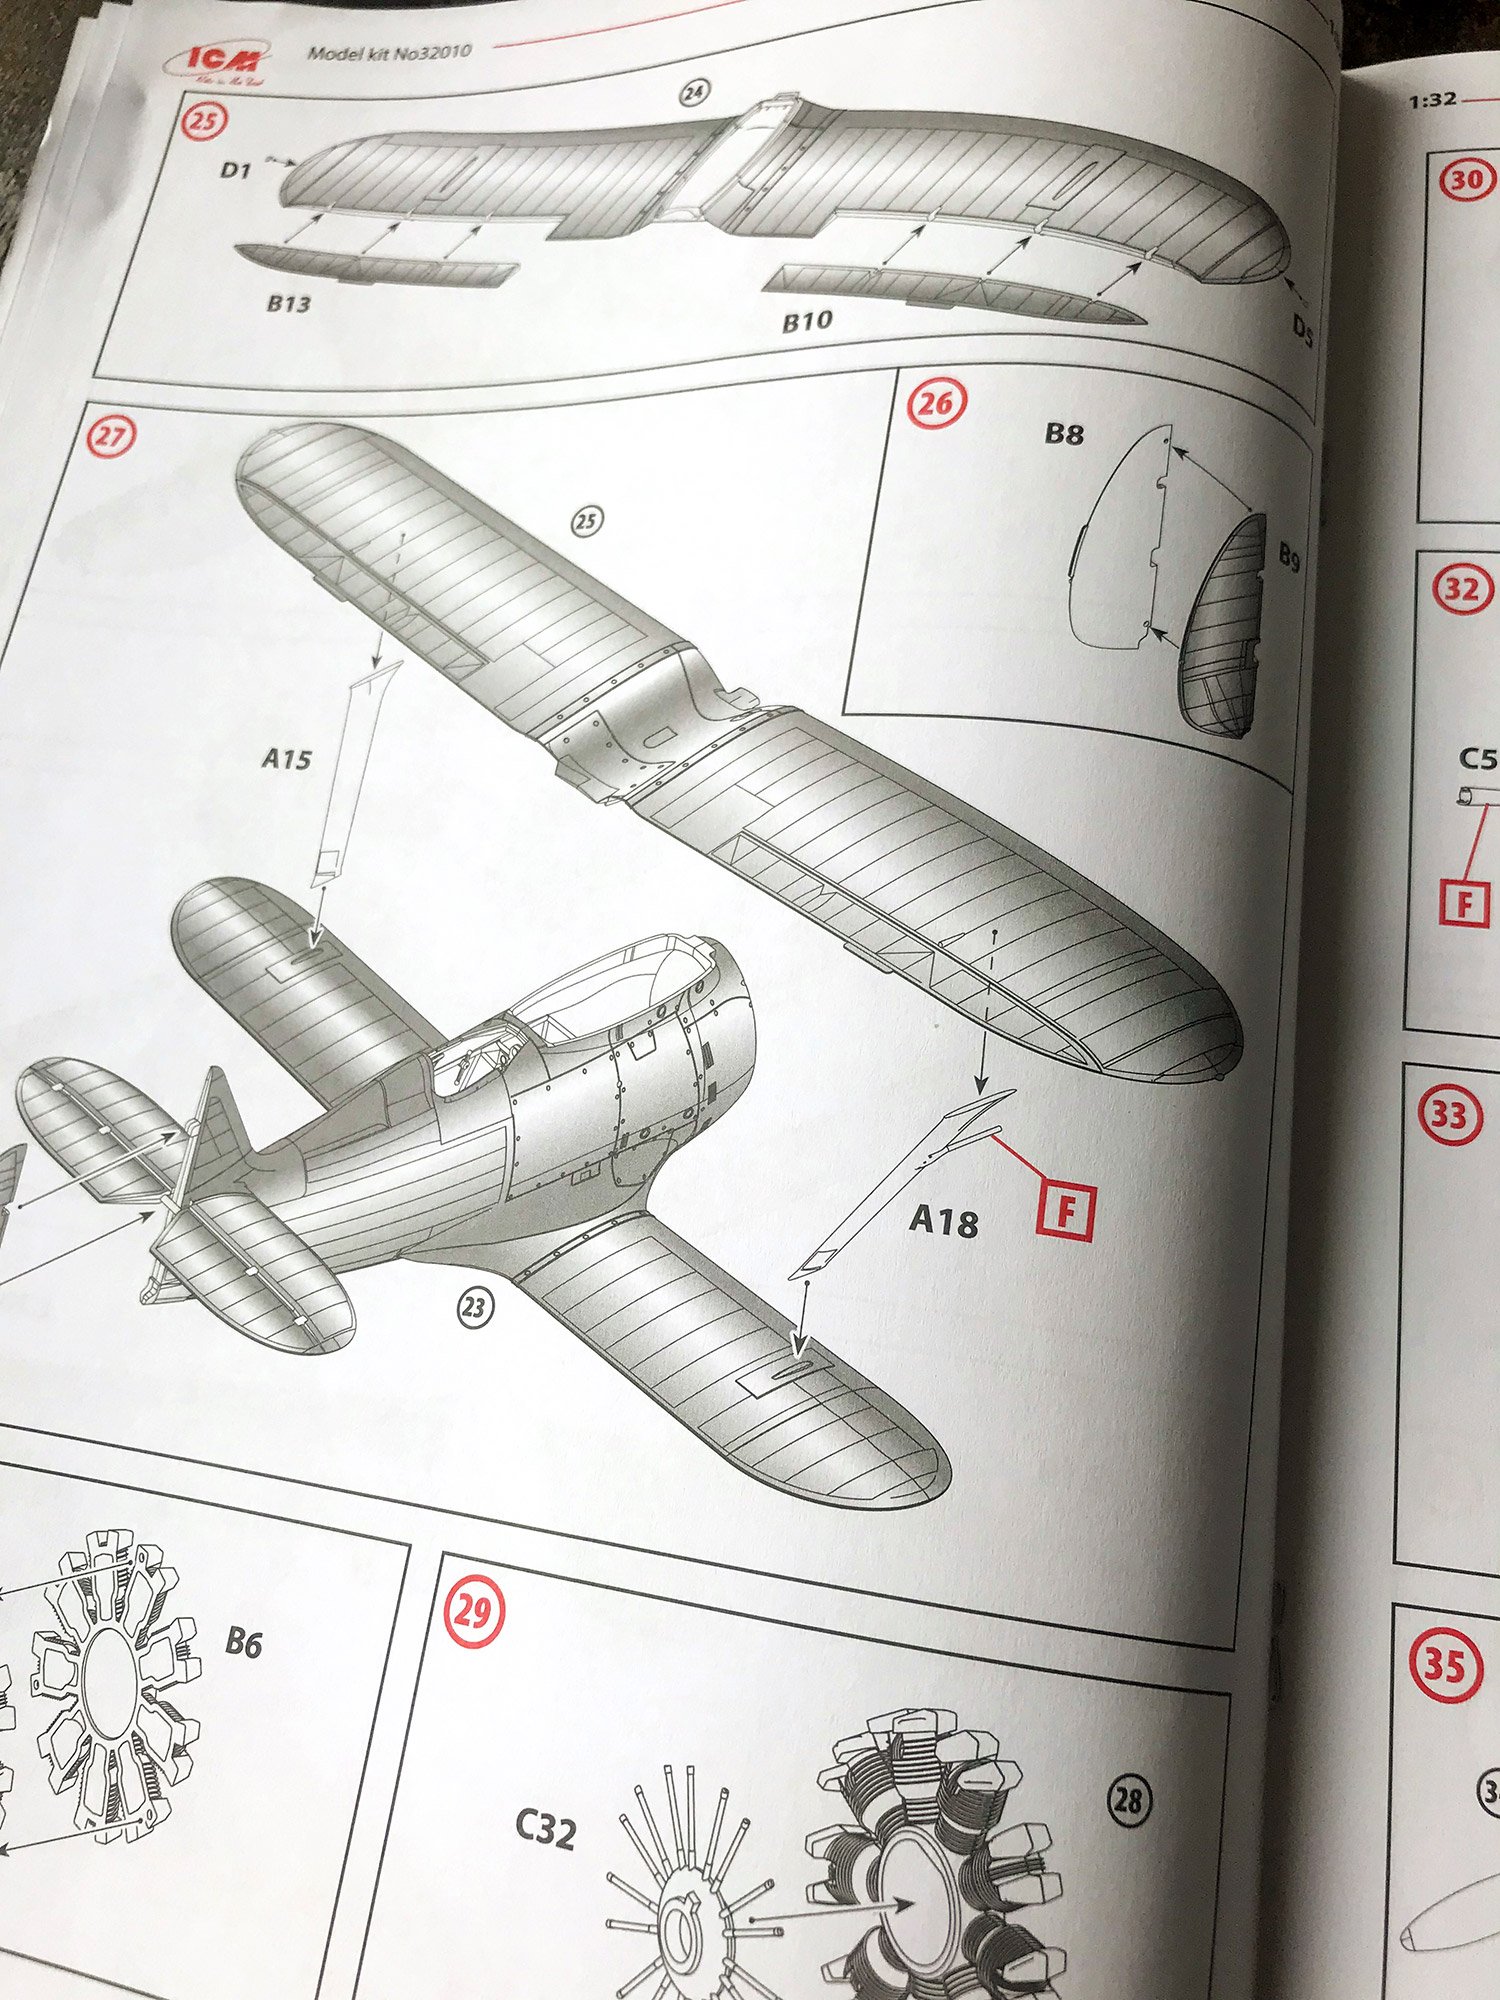
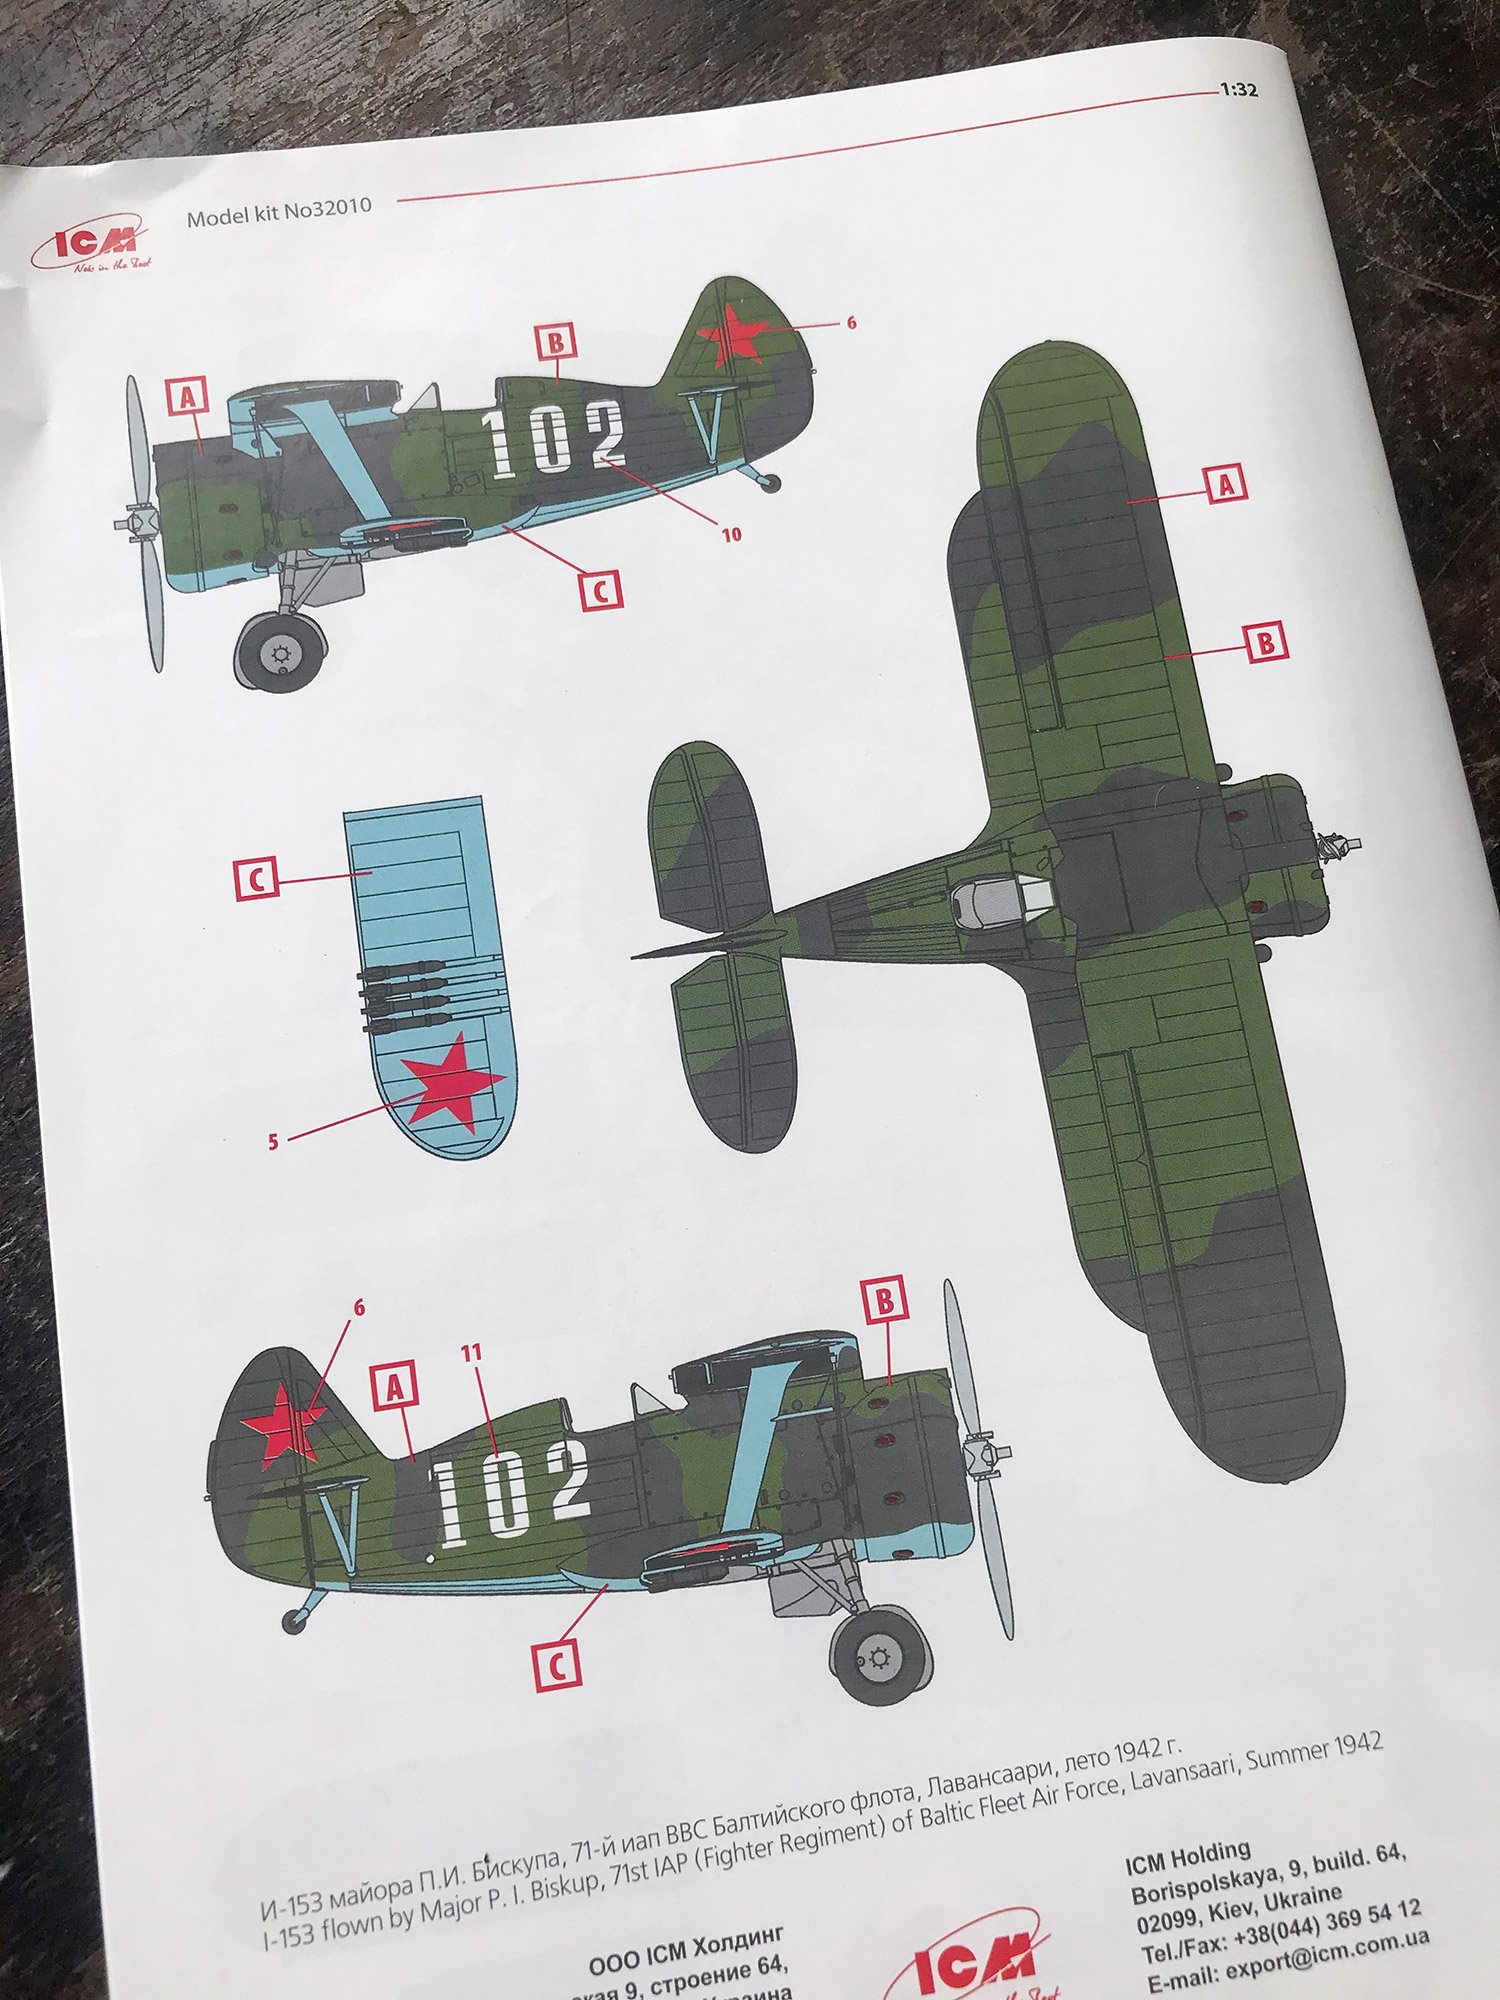
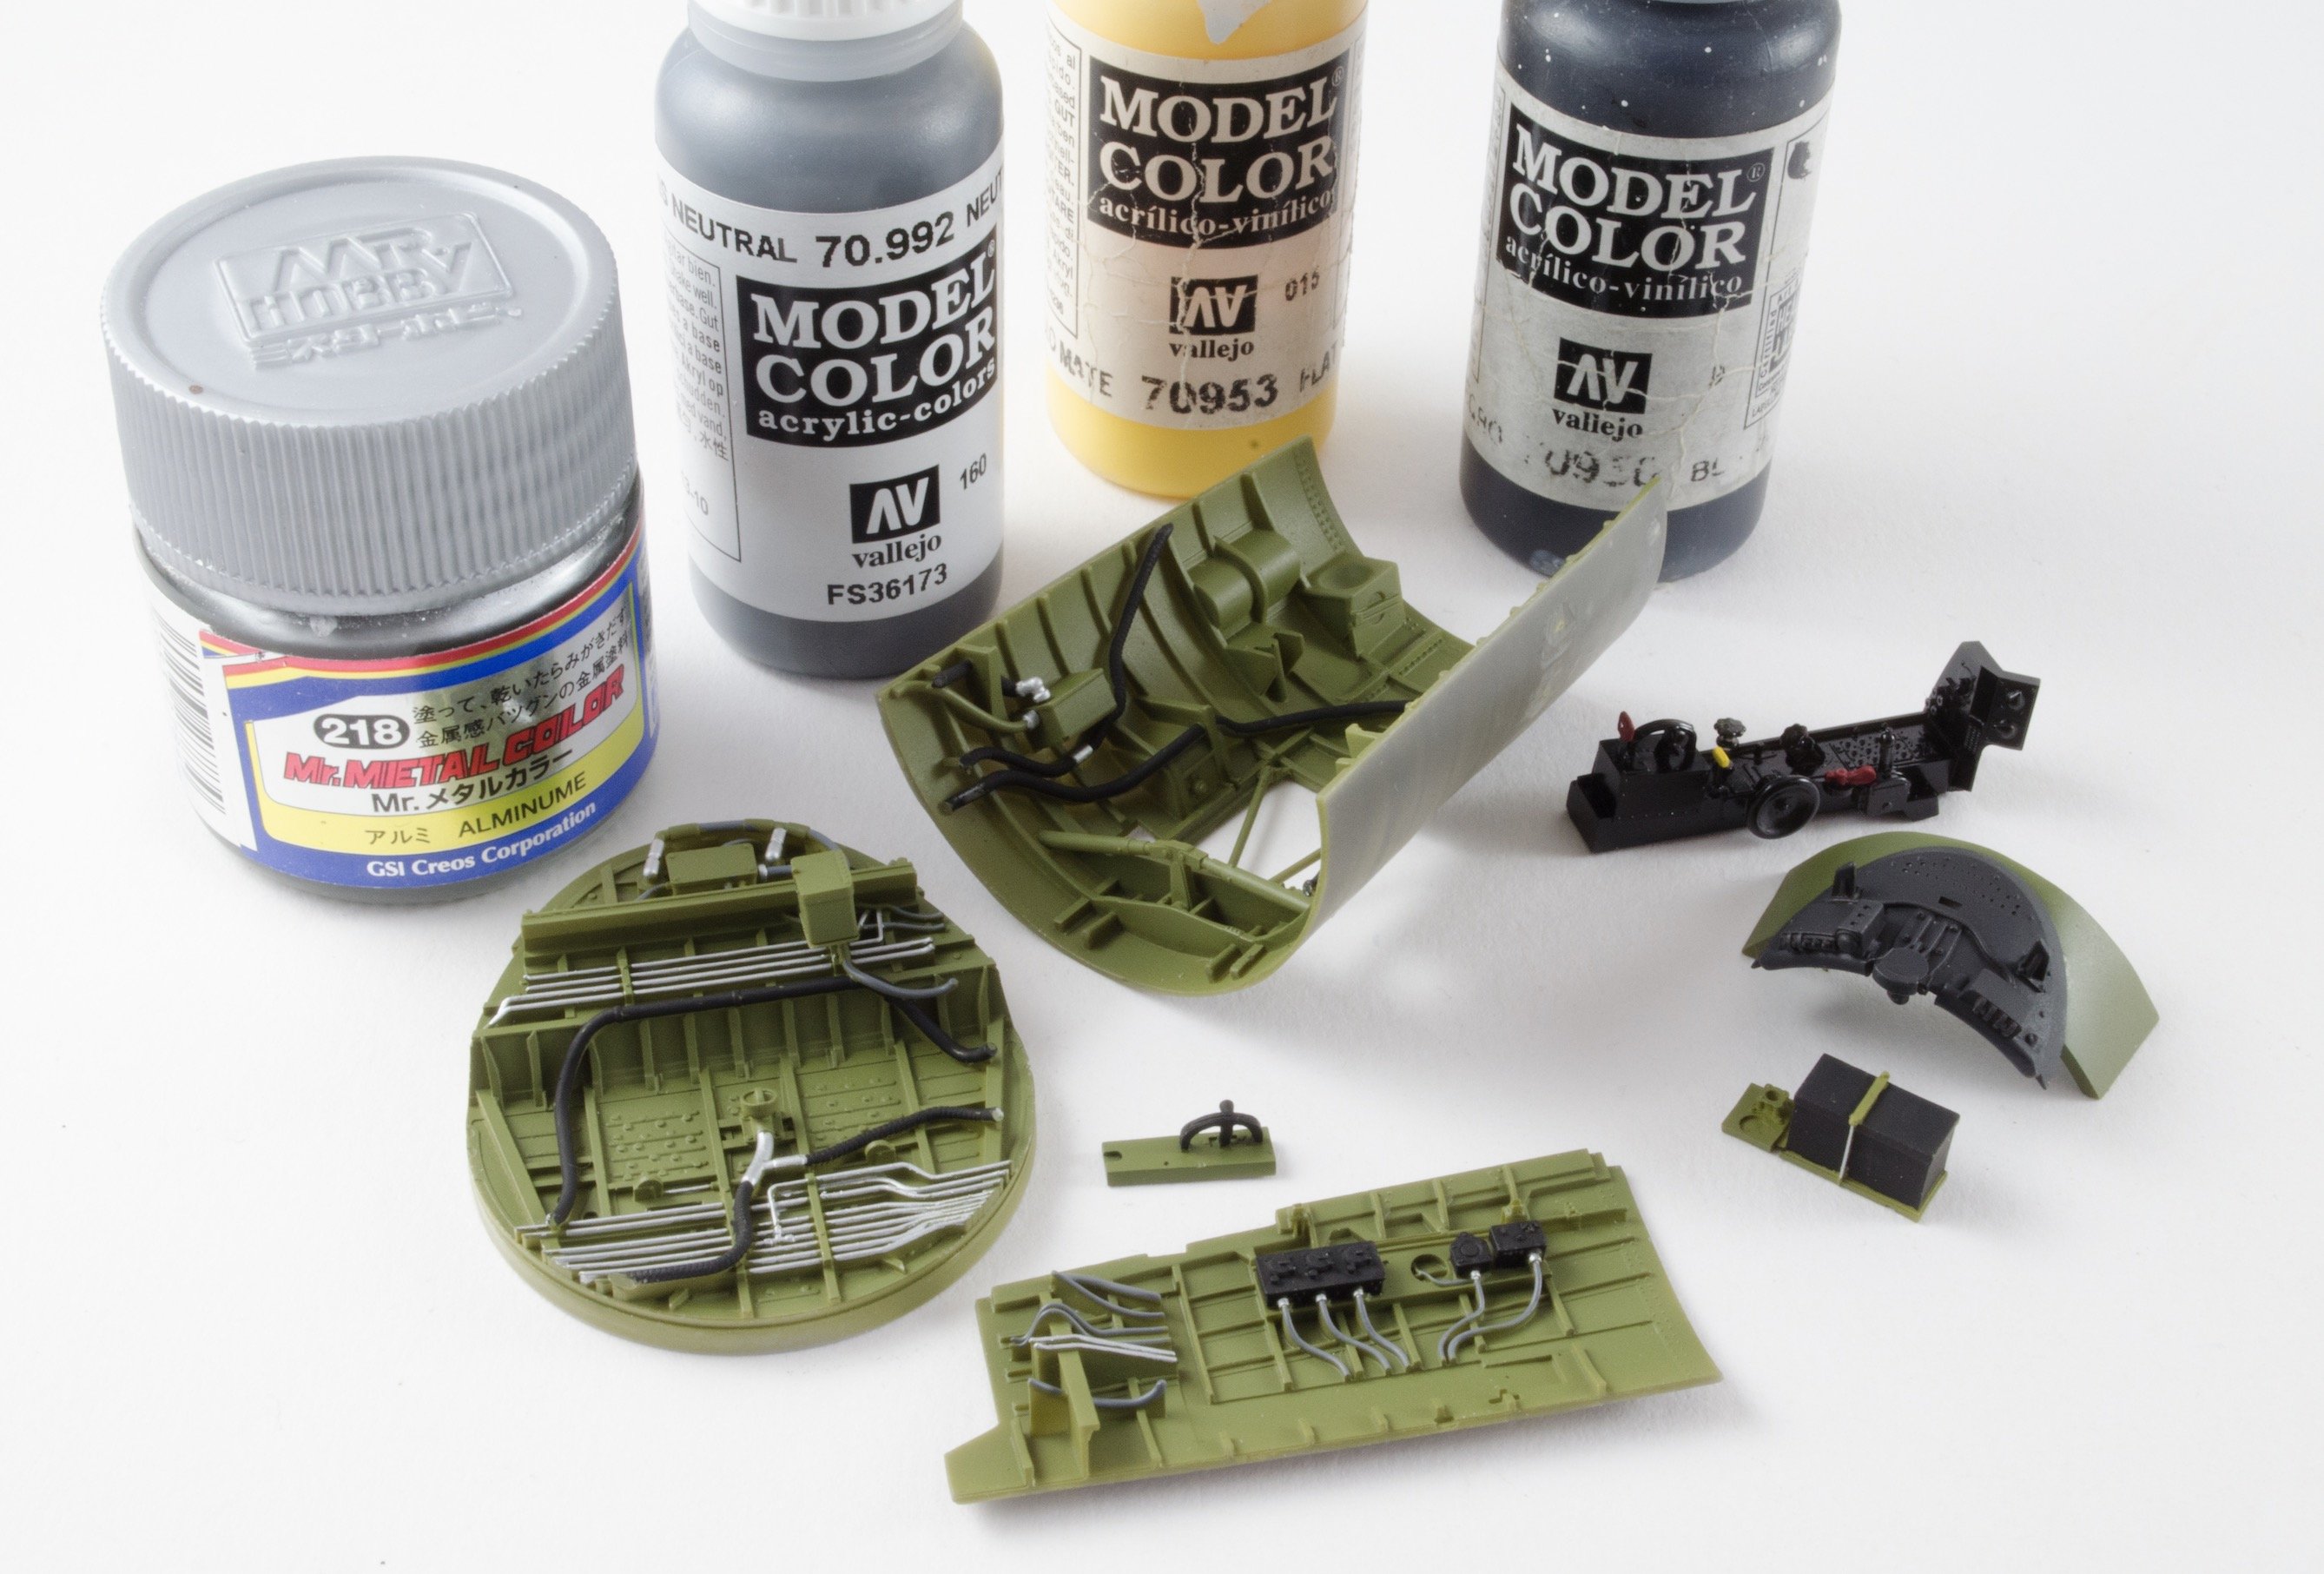
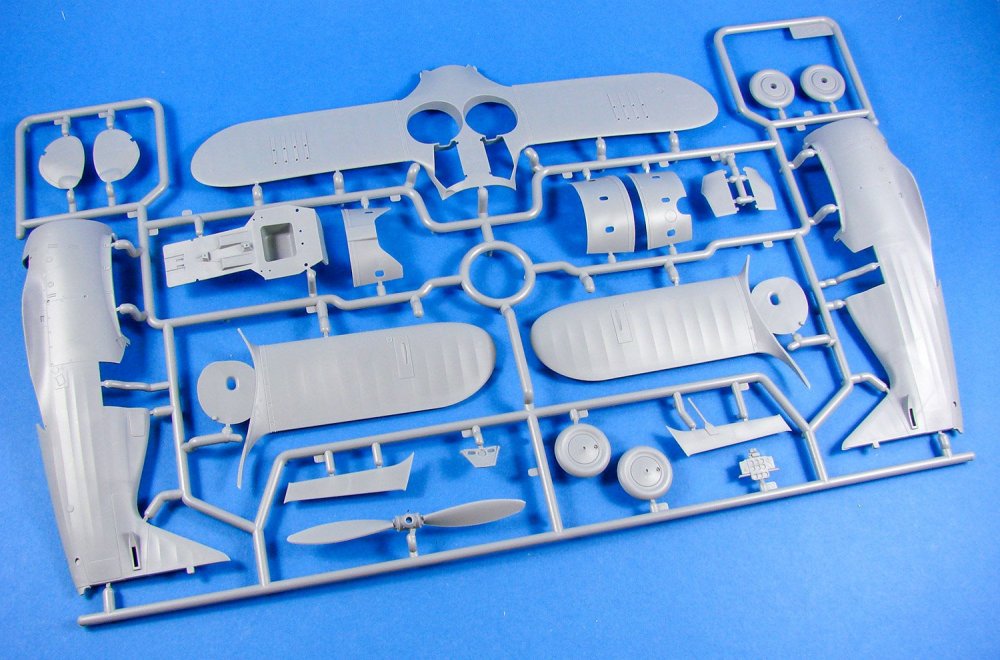
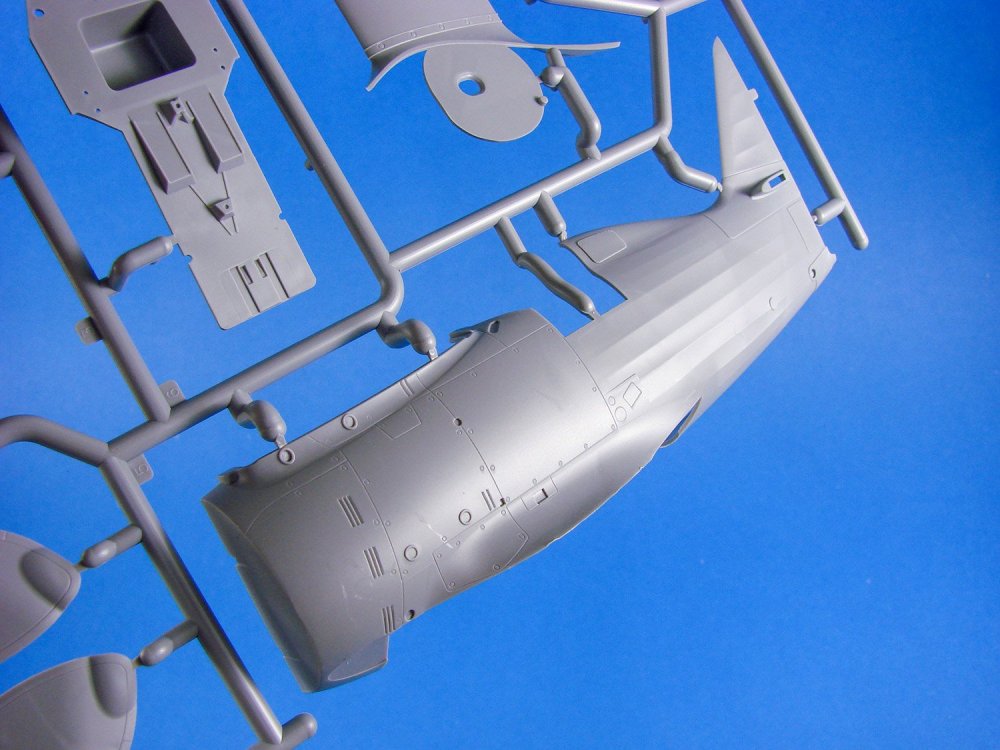
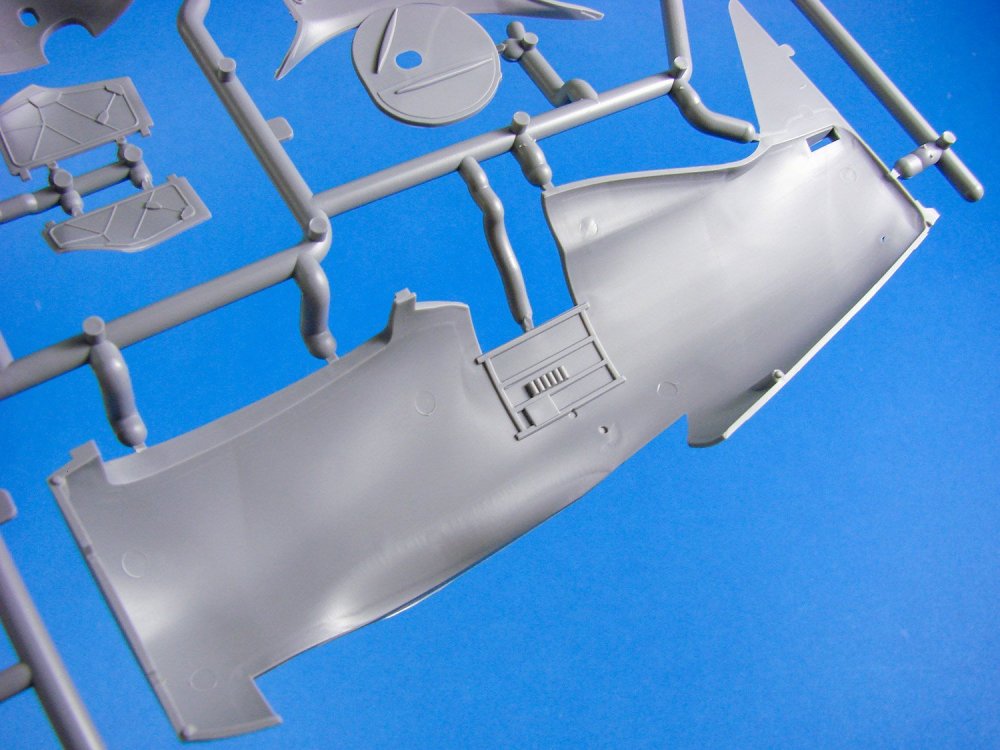
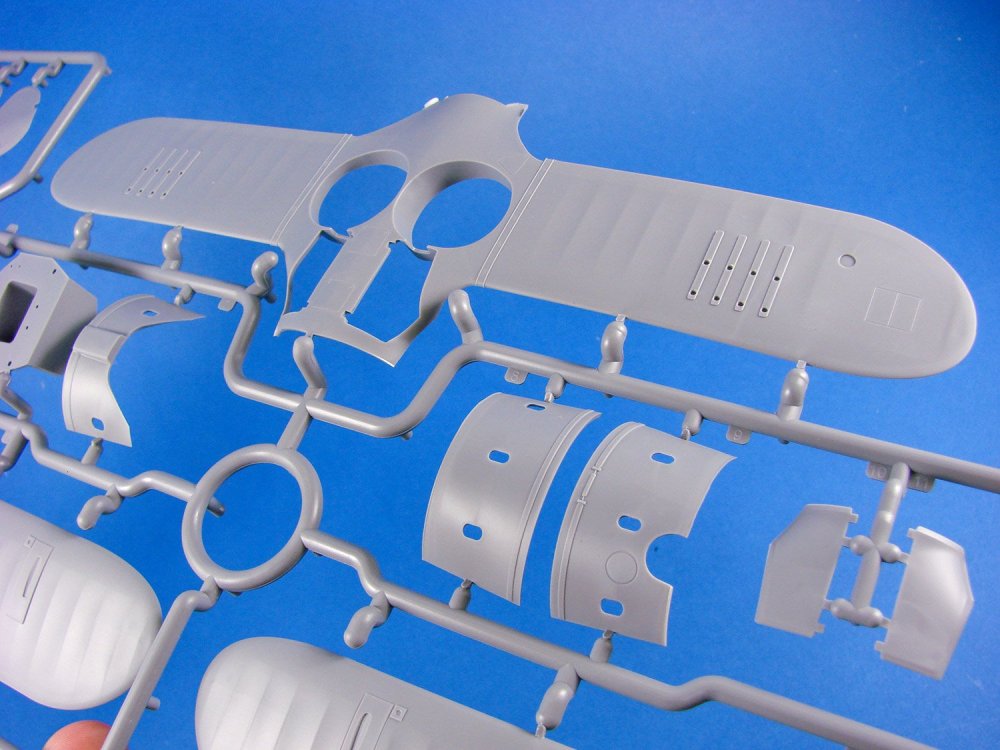
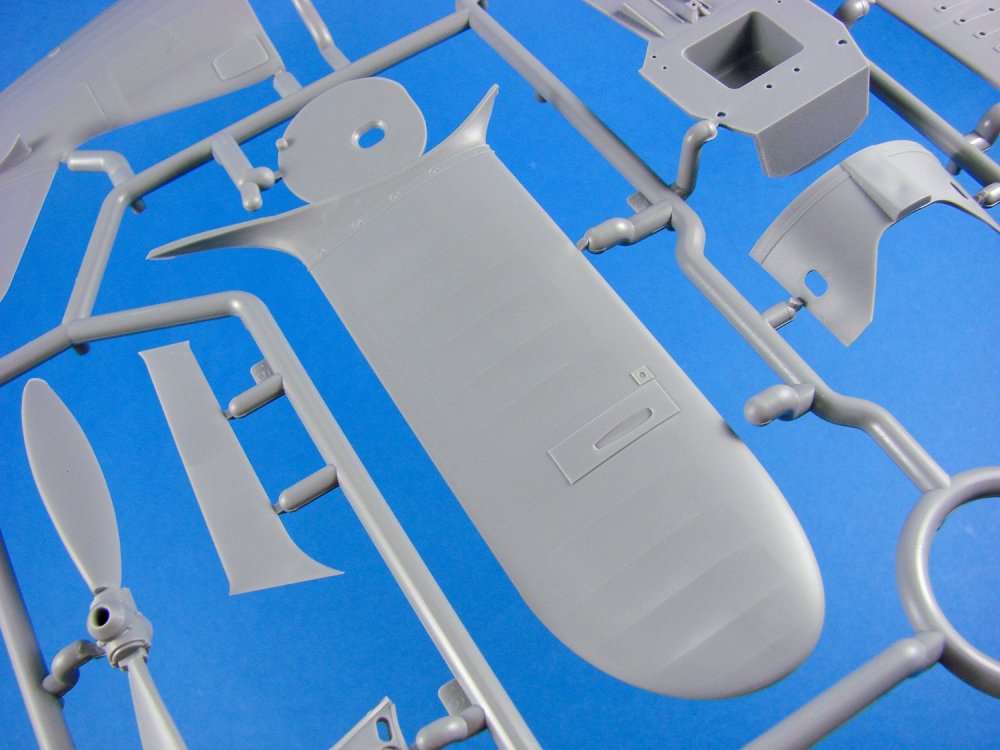
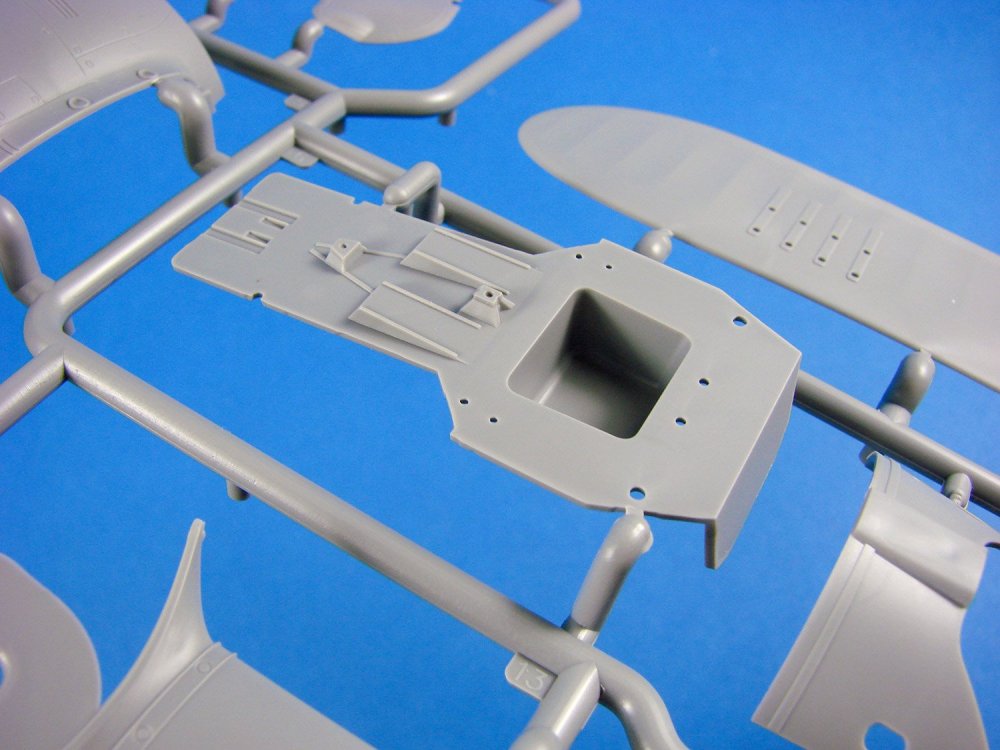
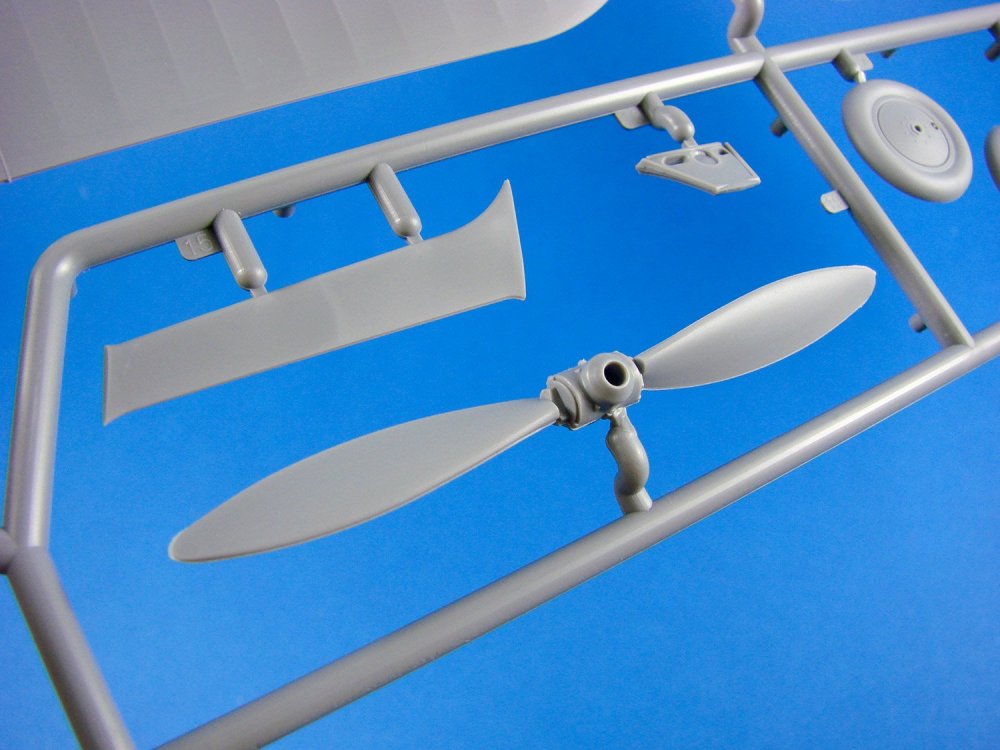
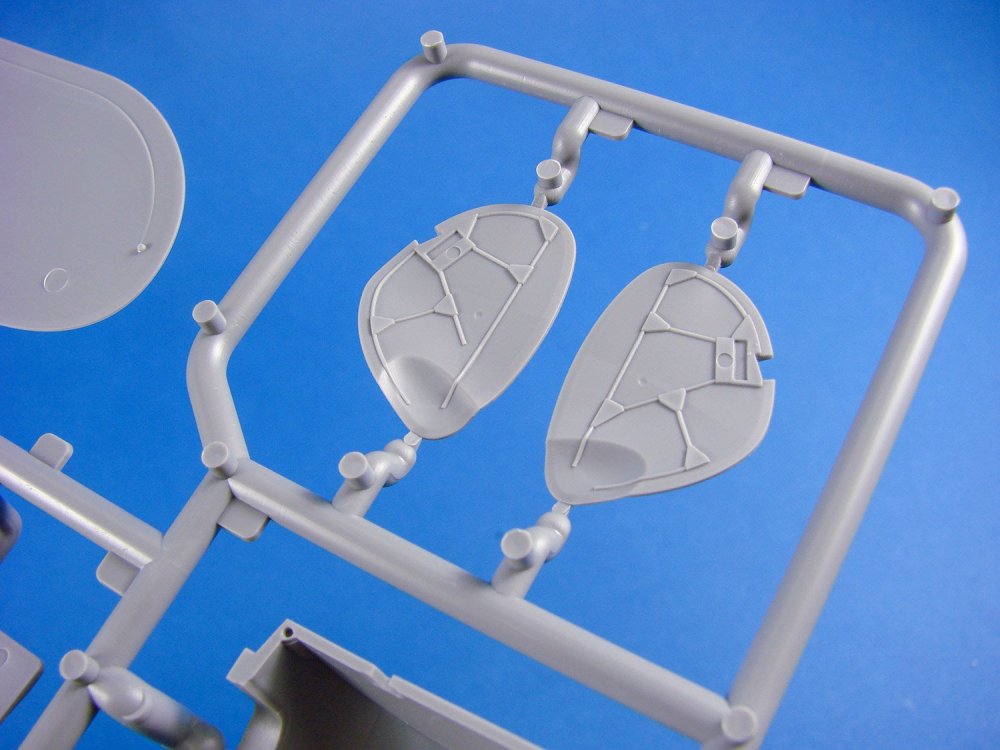
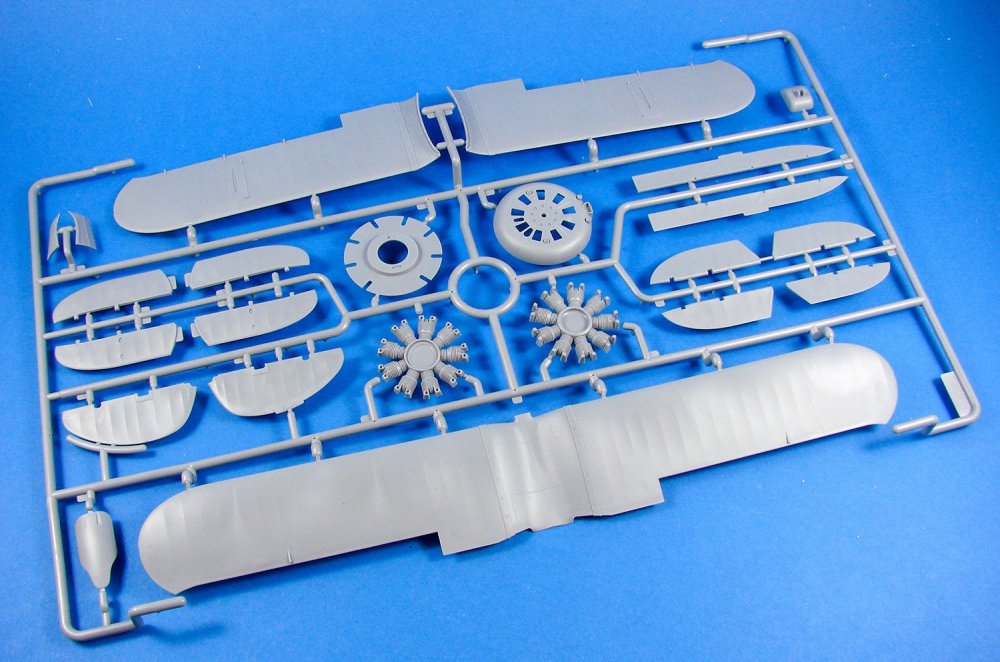
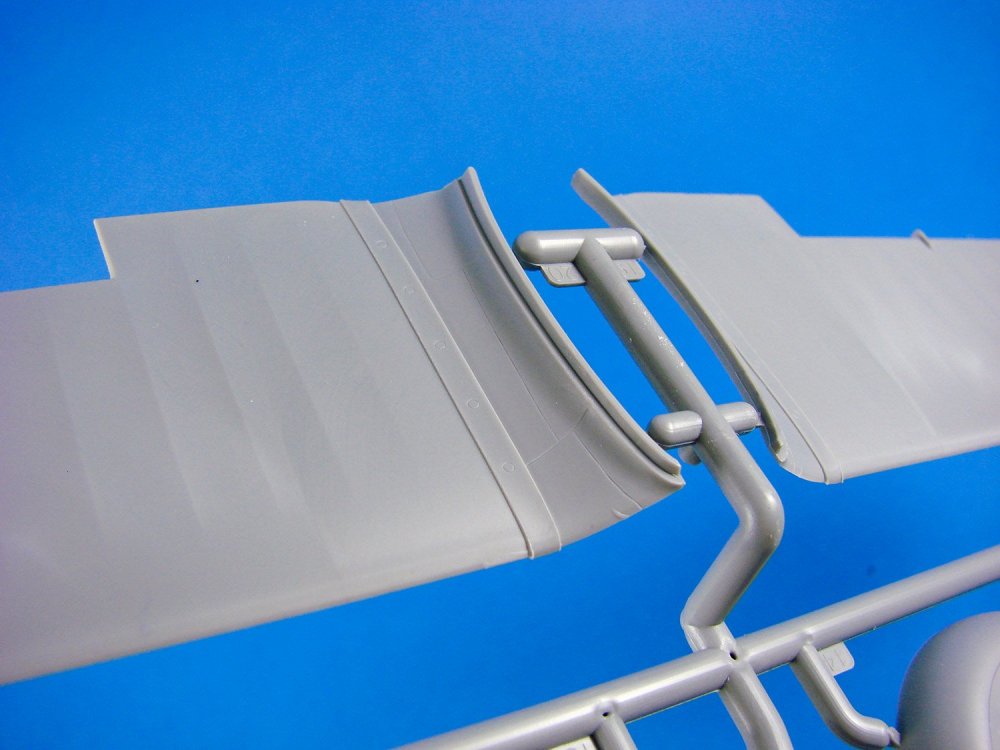
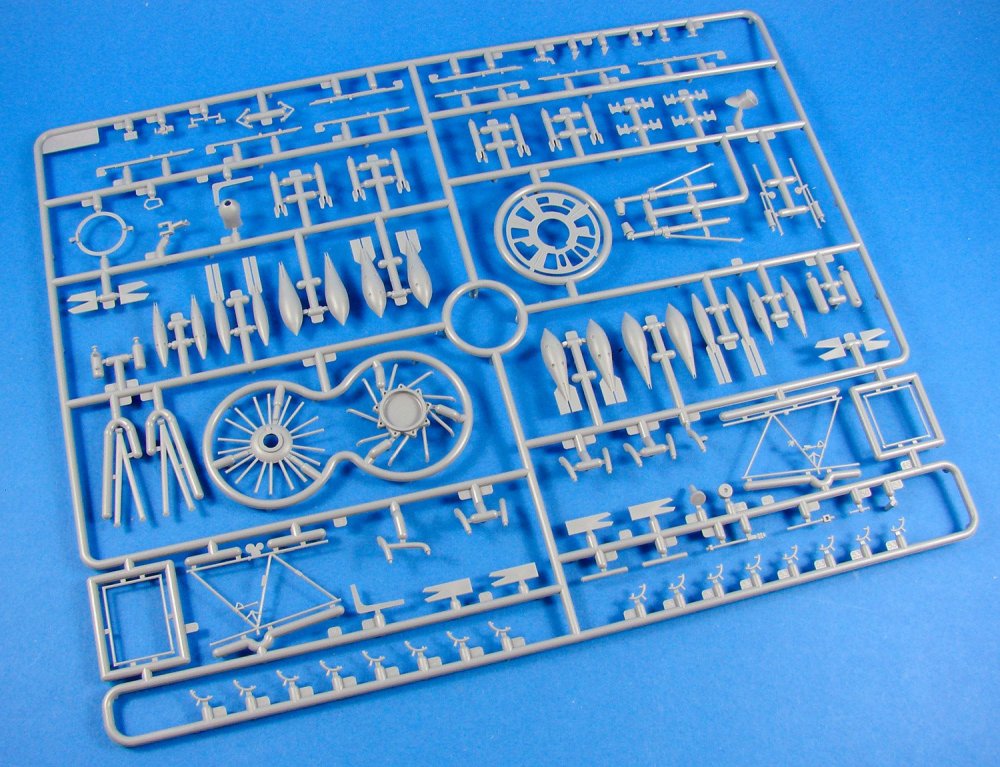
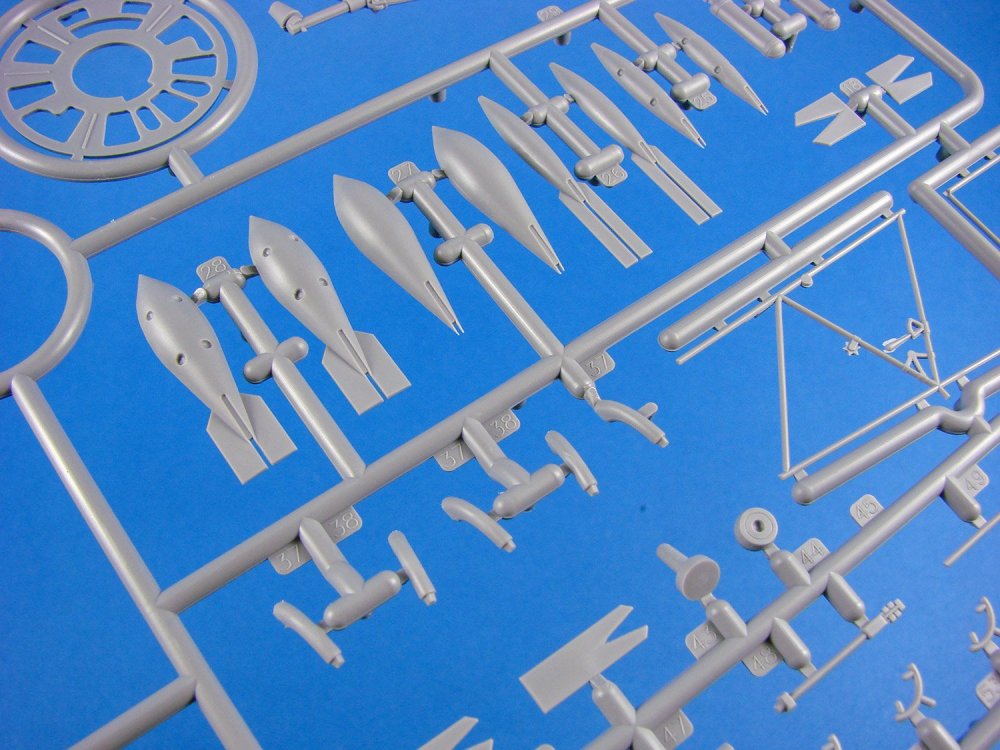
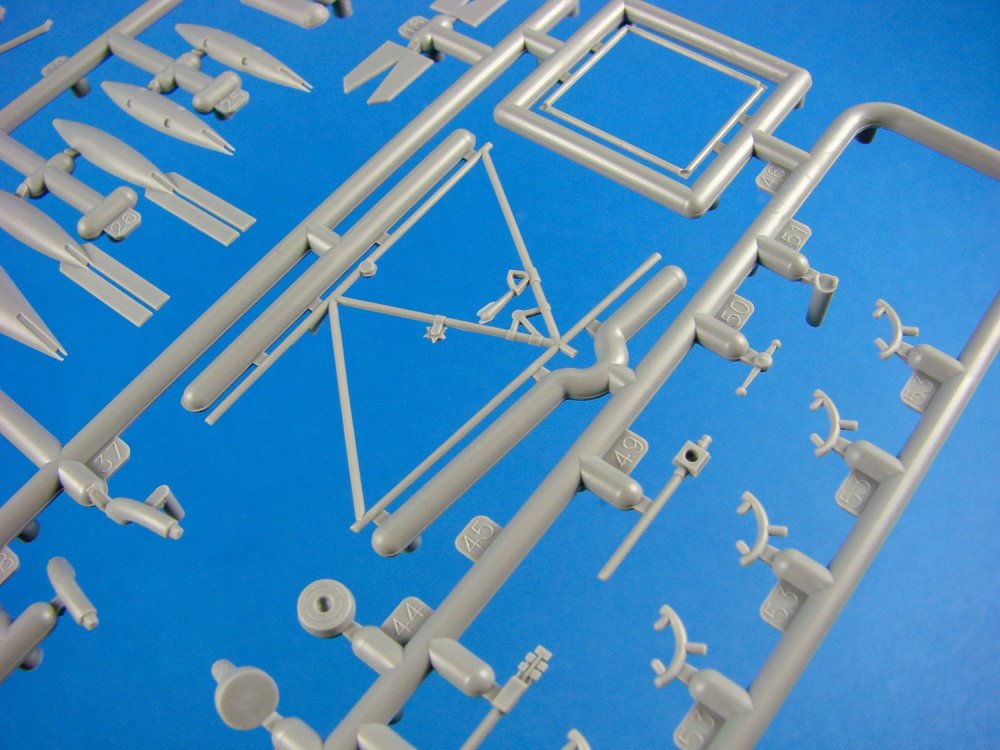
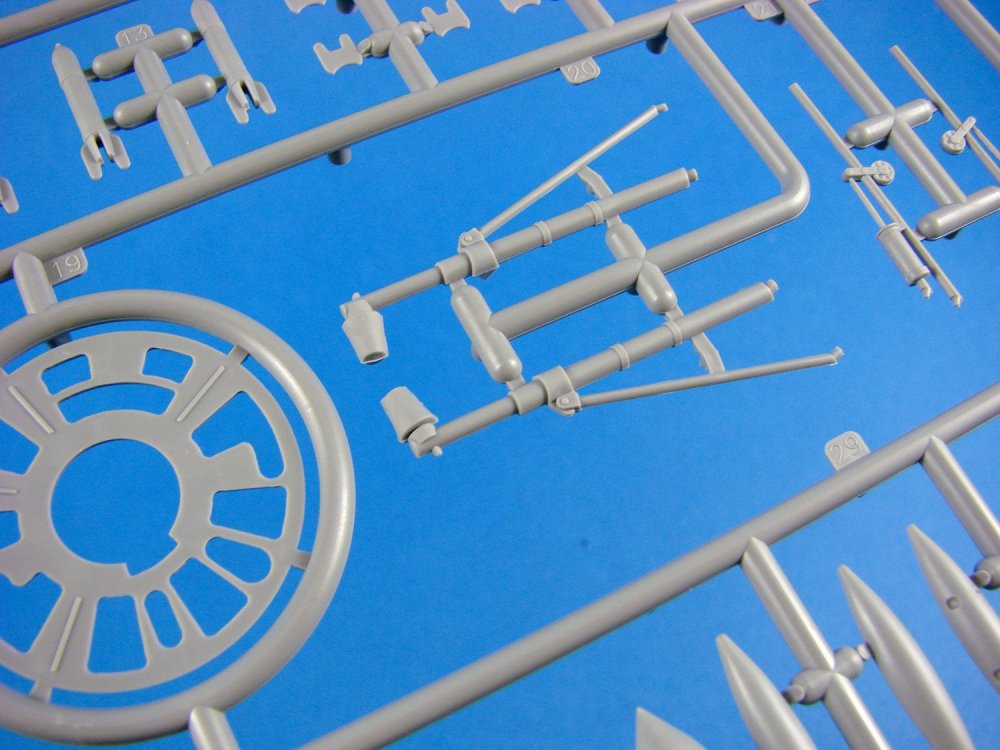
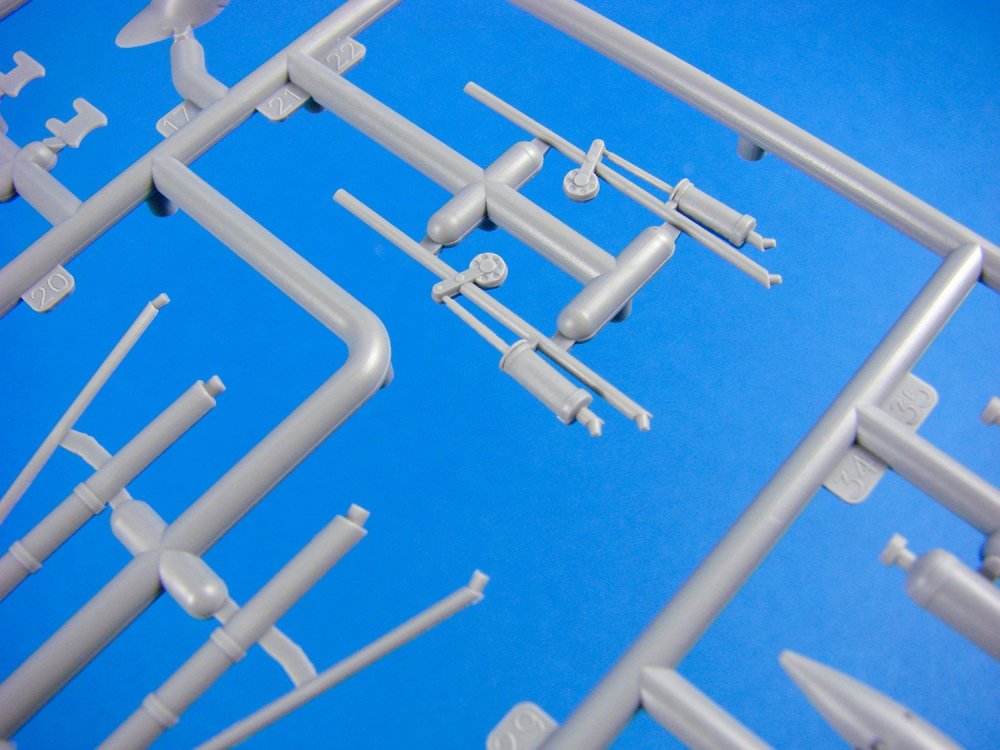
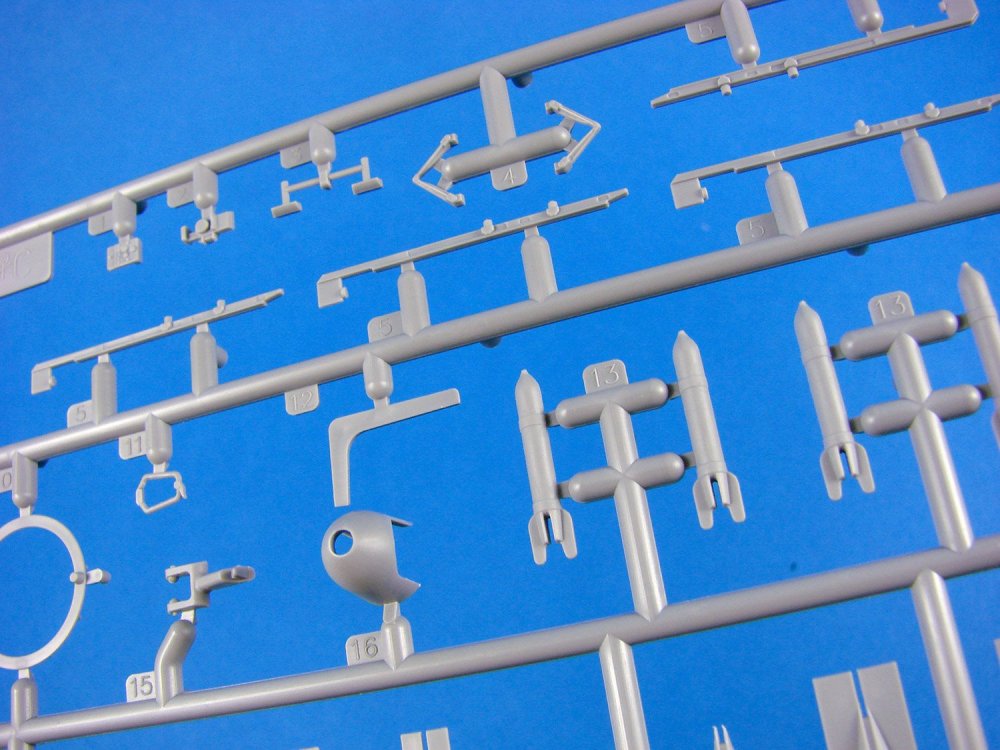
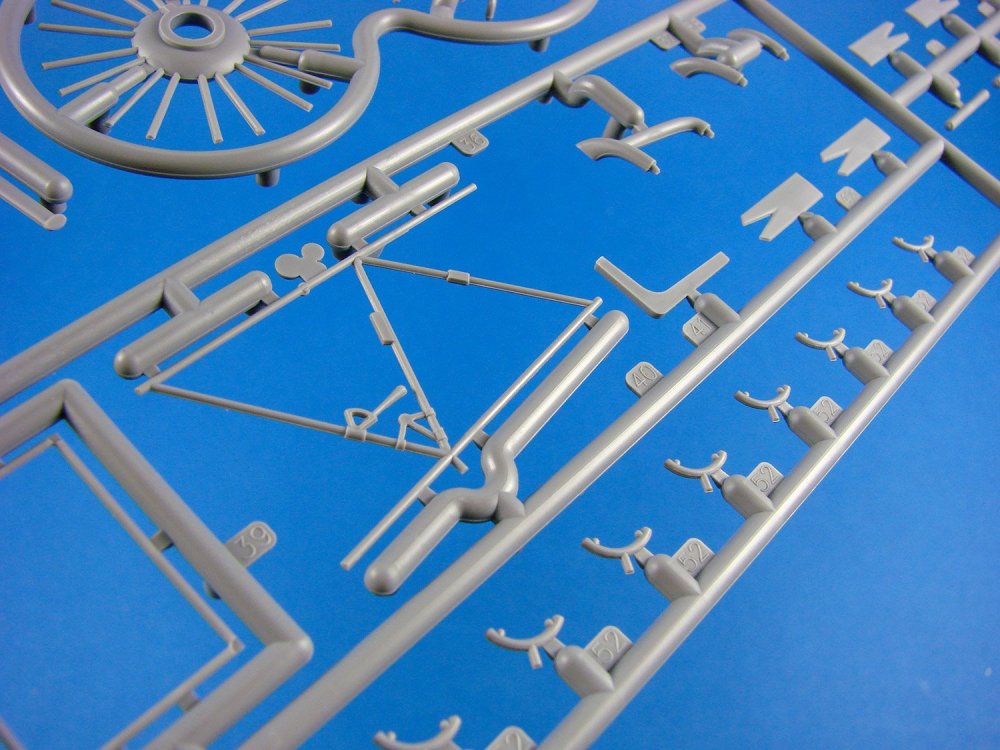
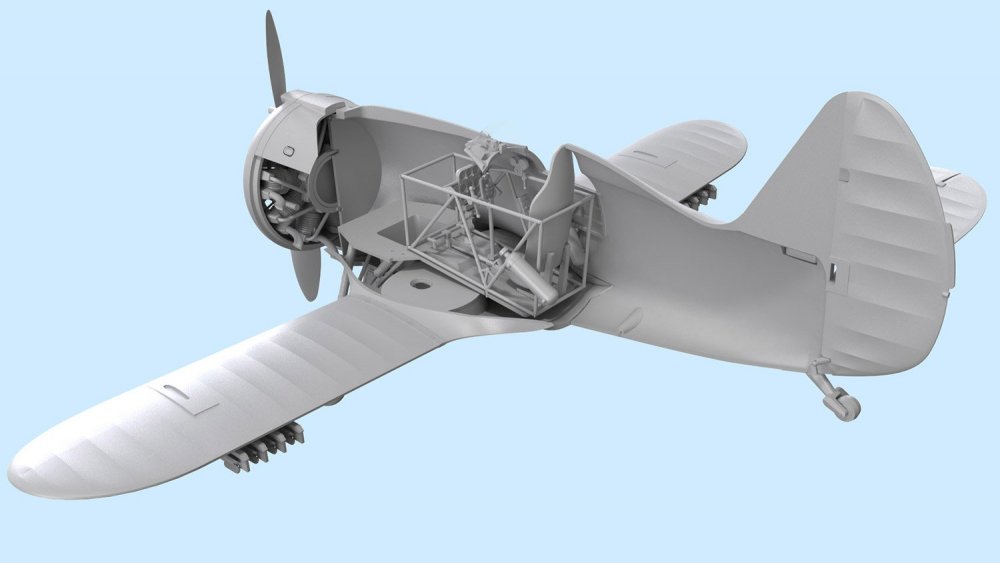
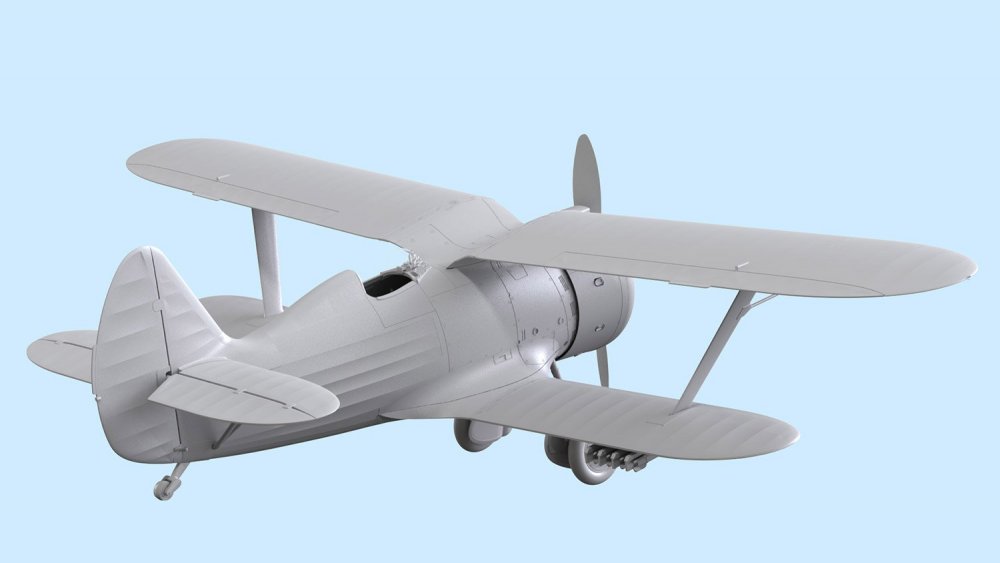
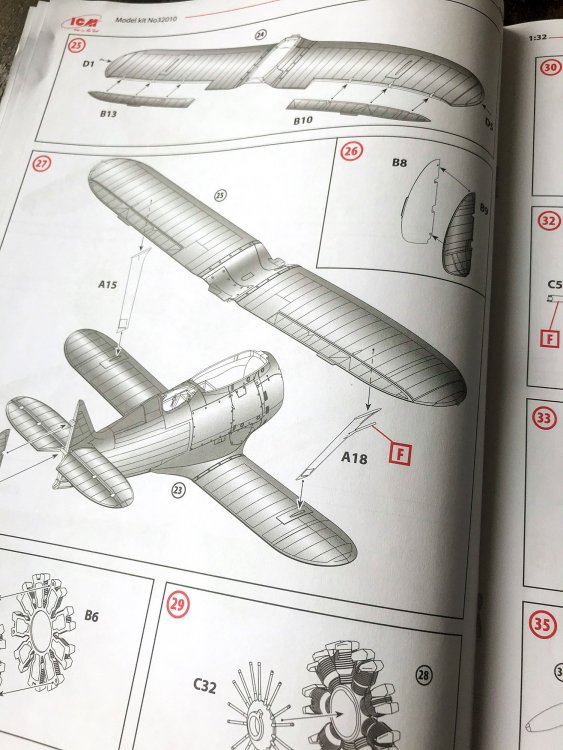
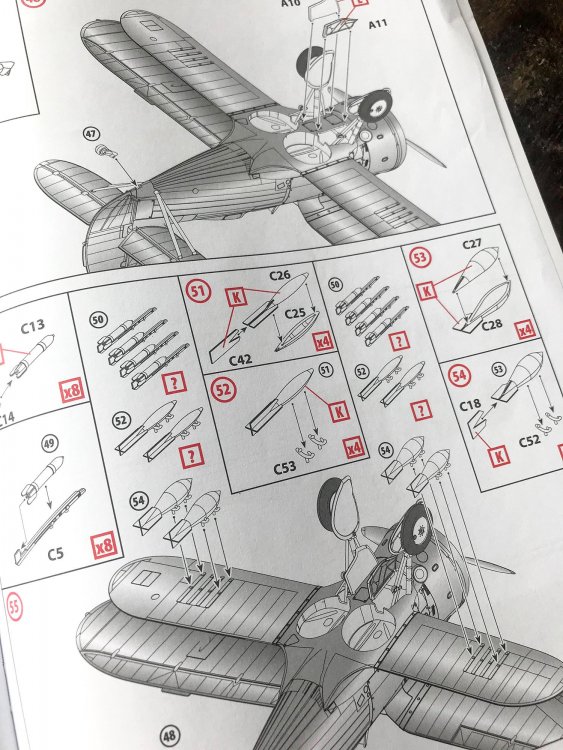
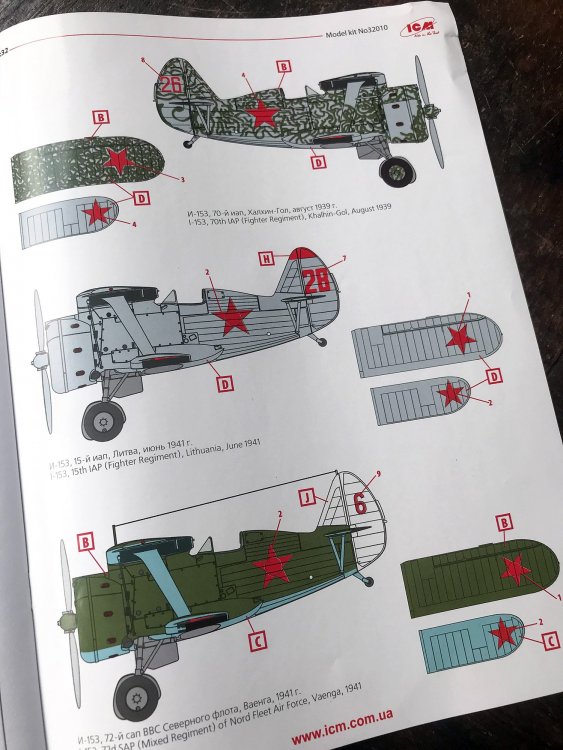
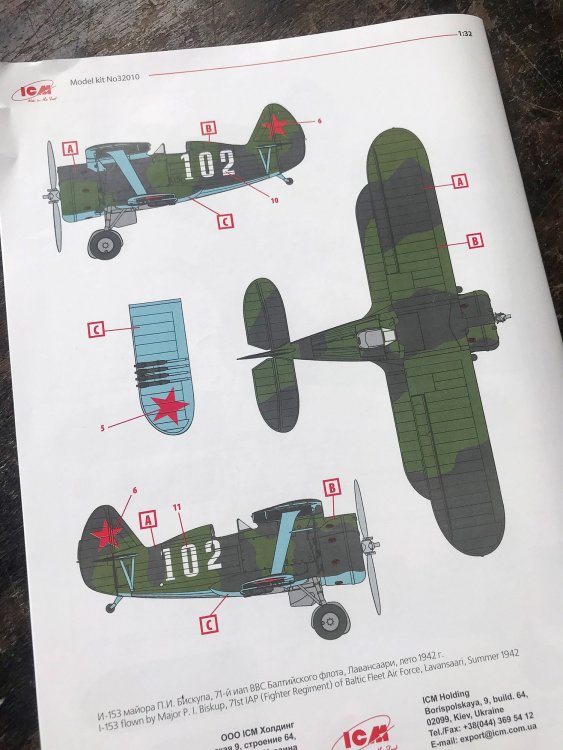
1:32 Polikarpov I-153 ‘Chaika’ ICM Catalogue # 32010 Available from Hannants for £35.99 The Polikarpov I-153 Chaika (Russian Чайка, "Seagull") was a late 1930s Soviet biplane fighter. Developed as an advanced version of the I-15 with a retractable undercarriage, the I-153 fought in the Soviet-Japanese combats in Mongolia and was one of the Soviets' major fighter types in the early years of the Second World War. The aircraft was of mixed metal and wood construction, with the fuselage structure being based on chromium-molybdenum steel with duralumin skinning on the forward fuselage, and fabric covering on the fuselage aft of the front of the cockpit. The aircraft's wings were made of fabric covered wood, while the tail surfaces were of fabric covered duralumin. The aircraft was fitted with a tailwheel undercarriage, with the mainwheels retracting rearwards, rotating through 90 degrees to lie flat in the wing roots, being actuated by cables operated by a pilot-driven handwheel. The solid rubber tailwheel did not retract but moved in conjunction with the rudder. The I-153 first saw combat in 1939 during the Soviet-Japanese Battle of Khalkin Gol in Mongolia. The Japanese Army Air Forces' Type 97 Fighter (Nakajima Ki-27) Nate proved a formidable opponent for the I-15bis and I-16 but was more evenly matched with the I-153, which retained agility inherent to biplanes while featuring improved performance. While the overall I-153 performance was satisfactory, some significant problems were revealed. Most troublesome was the absence of a firewall between the fuel tank mounted in front of the cockpit and the pilot. Combined with strong draft coming in through the wheel wells, fuel tank fires invariably resulted in rapid engulfment of the cockpit and severe burns to the pilot. In addition, the M-62 engine suffered from a service life of only 60–80 hours due to failures of the two-speed supercharger. The Polikarpov I-153 Chaika never flew with any Spanish Air Force units during or after the Spanish Civil War. Two earlier variants of this aircraft, the I-15 and the I-15bis, did fly with the Republican Air Force during the conflict and, later, captured examples of both types were used by the Fuerzas Aéreas till the early 1950s. Three I-153s are still flying. Extract courtesy of Wikipedia The kit Well, we weren’t expecting this in 1/32! ICM are rapidly becoming well known for their excellent choice of kit subject, coupled with some rather nice engineering and kit production standards. Some will hark to the old days when kit fit may have been less than stellar, but it’s time for those to move on a little. ICM, as with many of their peers, now use CAD to assist them in design. I’ve partially constructed their 1:48 He 111 and mostly built their Ju 88C-6 kit with nothing to report on in terms of some of the mud I recently saw flung at them on one forum. Anyway, I digress. This release is packaged into ICM’s now familiar single-piece corrugated box that is extremely robust, and has a glossy product box top lid depicting a low-flying Chaika with all guns ablaze. Lifting the lid reveals a large, clear and resealable sleeve containing THREE large sprues of light grey styrene. Also in there is a single sprue of clear plastic, packed into another protective sleeve. In the bottom of the box lies the instruction manual and within this, a single decal sheet is tucked. Sprue A We’re straight into the action with this sprue, containing the fuselage halves and three-part lower wings, amongst other components. Looking at the fuselage first, the external textures are nicely refined with a very realistic fabric and stringer representation of the rear fuselage, along with details such as the spring-loaded footstep cover plate, plus delicate panel lining at the forward half, including fastener and louvre detail. The latter aren’t moulded as open slots, but they are so fine that a simple wash will be all that’s needed here. To facilitate the upper wing fixture, the upper forward fuselage is an open area that will accept the full-span wing section. Note that the rudder is also moulded separately, therefore can be posed dynamically. Some cockpit sidewall detail is moulded within the fuselage, such as rib and stringer details, and this will of course be supplemented by the tubular cockpit tub. ICM has moulded the lower wing also as a full span unit, and all parts of this are to be found on this sprue. External wing surfaces are also resplendent in the same realistic and subtle fabric and rub textures as seen on the fuselage, with munition mounting hardpoints also present. The fuselage centre section is moulded with the openings for the main gear wells and retract channels. When it comes to the upper wing panels, recesses are moulded within the strut hardpoints, and should provide good, clean and positive strut placement. Those struts on the I-153 are broad, single units, and are delicately moulded on this sprue. Rigging points are also moulded, but I think these are best being drilled out before you reach that stage. Note that the main gear well ceilings are moulded onto the inboard edge of the upper wing panels. Also on this sprue are the cockpit floor, two-blade propeller, two-part wheels with integral hubs, a superbly defined instrument panel with empty gauges for affixing the instrument decals, multipart engine cowl panels, and landing gear doors with nicely detailed interiors. I note that some minor clean-up of seams will be required on some parts, but nothing at all onerous. Sprue B The second sprue holds the last of the major airframe parts, such as the three-part upper wing. As with the lower wing, the main panel is moulded full-span, sans ailerons. As well as the subtle rib and fabric detail, and external wing stiffening strip. A separate full-span elevator is provided, and the construction of this and the stabilisers is quite traditional, with a tab to fit to the fuselage. Ailerons are moulded as one-part items, with a nice, thin trailing edge. As with the previous I-16 kit, the Shvetsov M-62 radial engine is very nicely moulded as front and rear halves. Cooling fin detail is nicely defined, but of course, that seam runs right through it. If it’s anything like the I-16 kit, you’ll barely able to see the joint when assembled. Also remember that the engine is buried deep in the cowl, and unless you have a panel or so removed, you’ll hardly see anything in there. The forward cowl and engine firewall are also moulded here, as is the pilot seat. Sprue C This really is the detail parts sprue, with components here for the tubular cockpit tub (seat brackets, two-part control stick, pistol, consoles and oxygen tank etc) There are a variety of underwing munitions choices, and this is where you’ll find them. The engineering of the bombs is so that the fins remain thin, and the seams minimal. Also note in the exhaust parts in this photo. You will need to hollow out the ends though. A number of other engine parts are moulded here, but you will need to be super careful in cutting them from the sprue in some cases. Almost surgical precision will be needed. The munitions rails are also nice and sharp and have positive wing attachment points. Some of the finer parts will still require a little paring of the seam lines, with the edge of a fresh scalpel, but the details are sharp. Just a little lead wire added to these cockpit frames, will be all that you really need, unless you want to go the further mile and utilise Eduard’s new sets for this specific kit. I must admit that they do actually look very good. Undercarriage struts are also nicely depicted and sharp in detail. The angled plunger axle will ensure a nice snug fit to the wheels. Sprue D A very small, clear sprue holds just 6 parts. The main one of course being the windscreen. Other parts here include the wingtip and rudder lights, plus the windows in each of the main gear bays. Clarity of the parts is excellent, and no mould flaws are to be seen. Decals The decals for this model are a very simple but well-presented affair. A single sheet contains the markings for three machines, with these being no more than a variety of red stars, some with borders and circles, and the various numbers. No stencils are provided, but a single instrument decal is. I’m not actually too keen on that and would look at using something from an aftermarket sheet. At the very least, you would need to punch the dials out. Printing is very good, being nice and thin, plus with minimal carrier film. Colour is also solid and registration is perfect. The four schemes are: I-153, 70thIAP (Fighter Regiment), Khalhin-Gol, August 1939 I-153, 72ndSAP (Mixed Regiment) of Nord Fleet Air Force, Vaenga, 1941 I-153, 15thIAP (Fighter Regiment), Lithuania, June 1941 I-153, flown by Major P.I. Biskup, 71stIAP (Fighter Regiment) of Baltic Fleet Air Force, Lavansaari, Summer 1942 Instructions ICM’s instructions style is unfussy and clear to follow. This A4-size manual has construction broken down into 55 stages with shaded line drawings and good reference to painting. Paint codes are given for Model Master paints, as well as the colour name so you can check your stash of other manufacturer’s colours. A very small amount of rigging is needed, but this is so simple that it really shouldn’t be a concern for those who would normally shy away from a biplane. The last pages of the manual are taken over with the colour schemes, which are all reasonably different, and there should be something there to suit most modellers. Conclusion Whilst our hobby had been waiting for a new-tool I-16, perhaps we didn’t know that we were equally waiting for the I-153 too! If you are into Soviet WW2 aviation, and even if you aren’t, I think this is one of those releases that you’d seriously enjoy building and would look equally as good in your completed collection. Even though this is a biplane, this is no flimsy model. Both the upper and lower wings are secured firmly to the fuse, and the two struts are broad not particularly fragile. Rigging is also a cinch, with about 6 lines in total. Detail is also particularly good in terms of surface renderings and internal representation. At around £35, this should be one to consider. Build something a little different! My sincere thanks to ICM for the review sample seen here. To purchase, click the link at the top of the article.


- 4 replies
-
- 5
-

-
- chaika
- polikarpov
- (and 1 more)
-
Idea... missing the large scale ships here. ...
JayDee replied to elmarriachi's topic in Problems? Suggestions? Tell us!
I hope you'll sign up there too for your ship work! -
HPH PBY-5A Catalina (Cutaway)
JayDee replied to kkarlsen's topic in LSM 1/32 and Larger Aircraft Ready for Inspection
Sweet Jesus! -
It works!!!
-
Pretty sure you can. You can upload directly to the site and insert them in your posts without the need for third-party hosting.
-
Idea... missing the large scale ships here. ...
JayDee replied to elmarriachi's topic in Problems? Suggestions? Tell us!
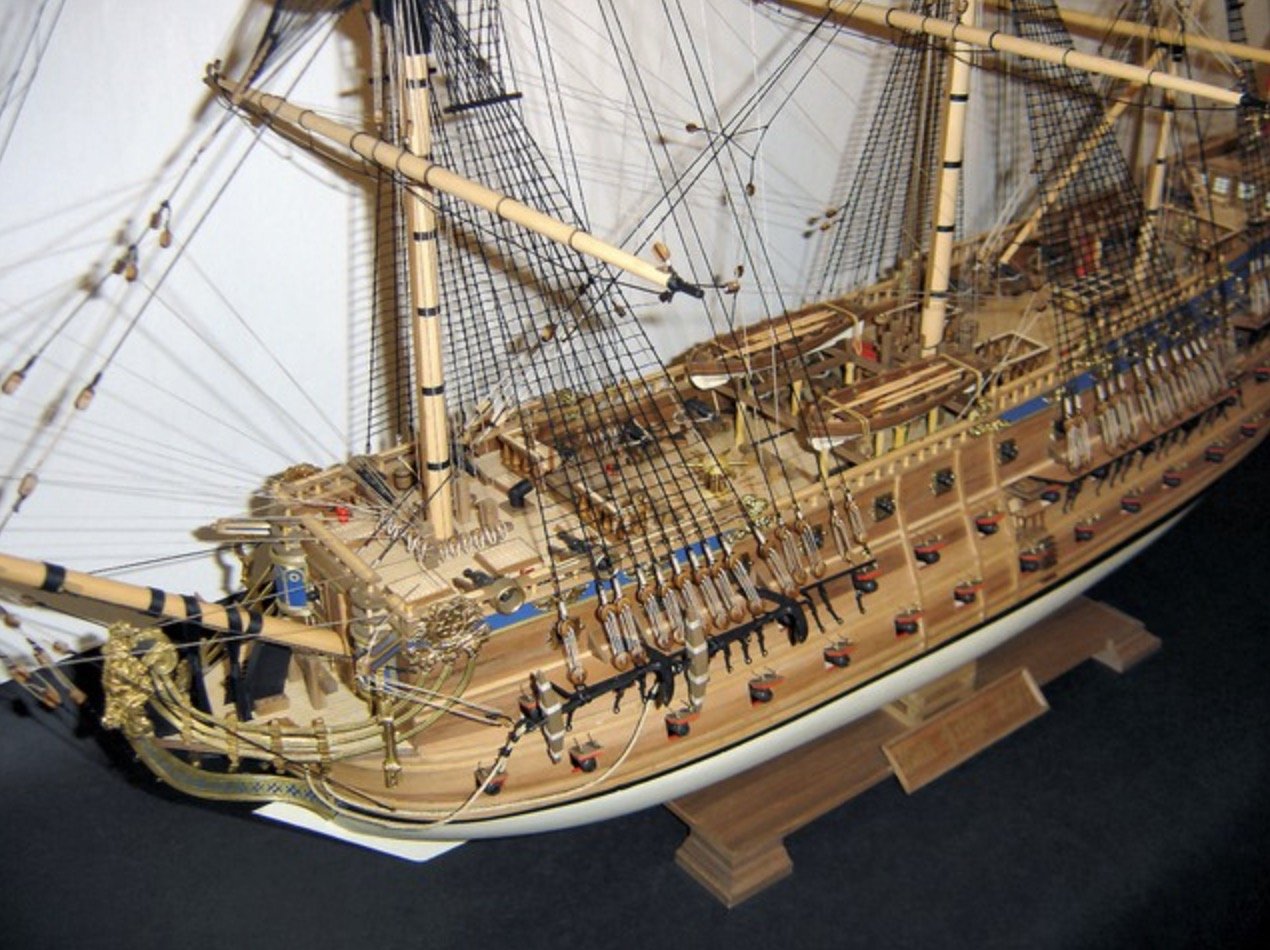
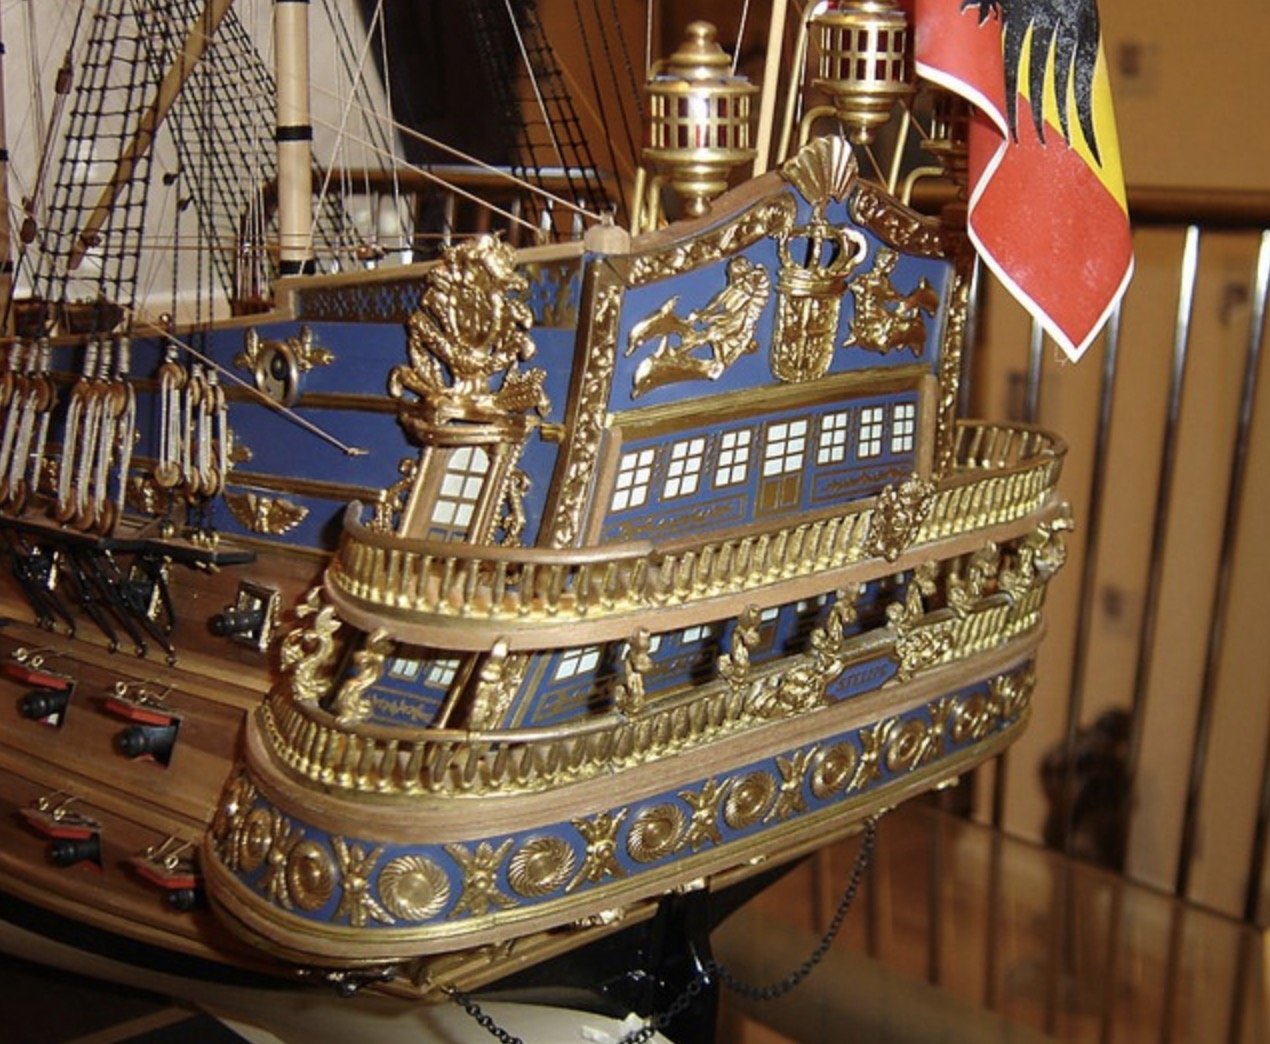
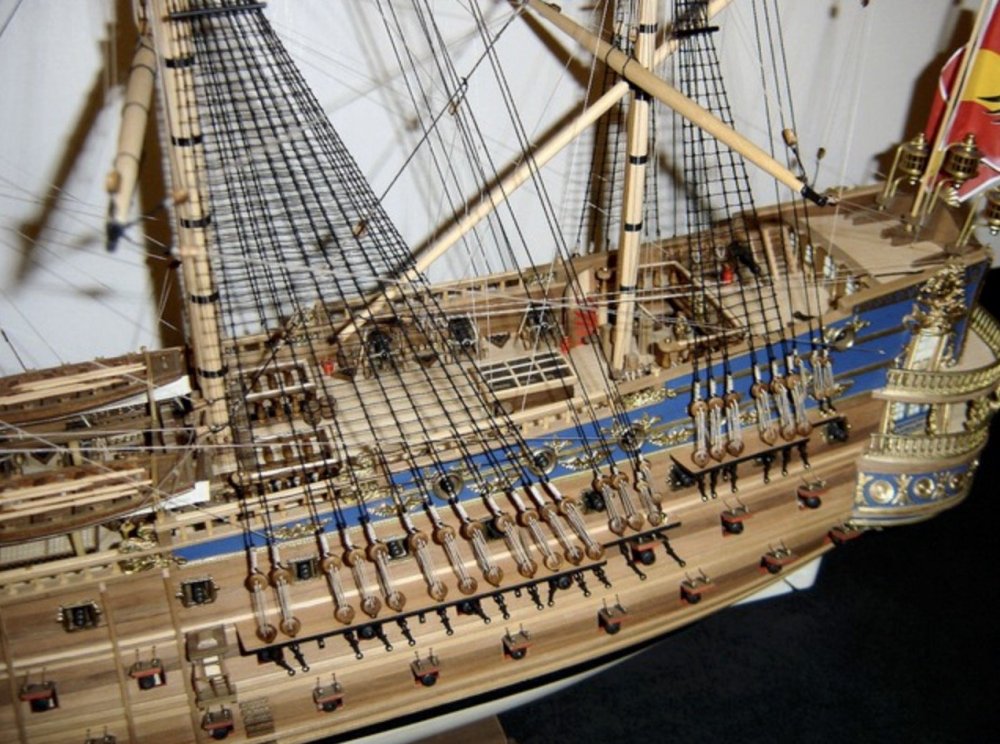
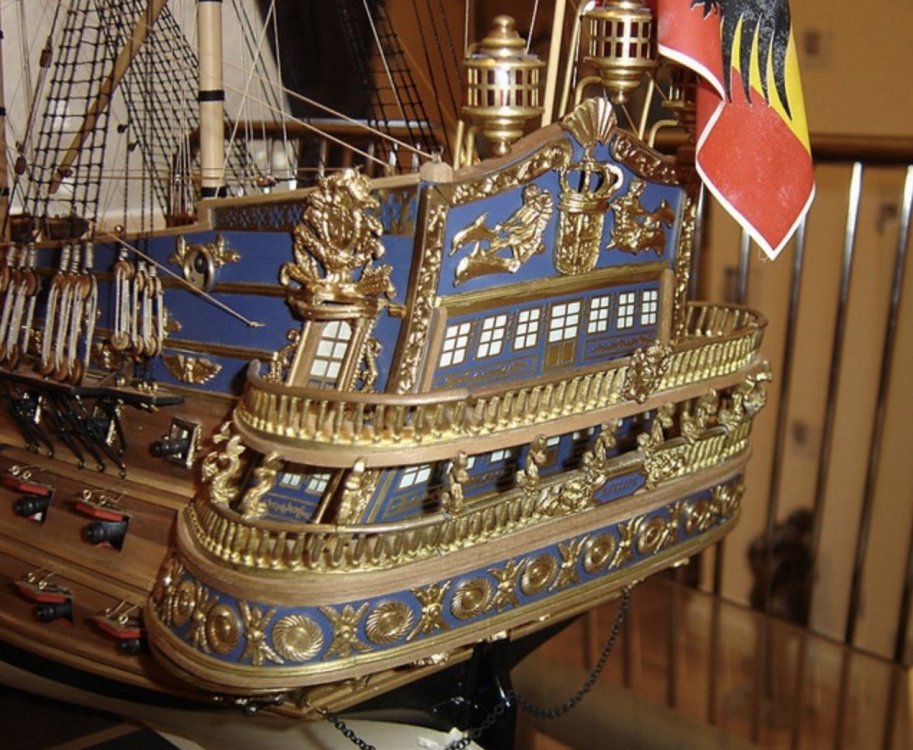
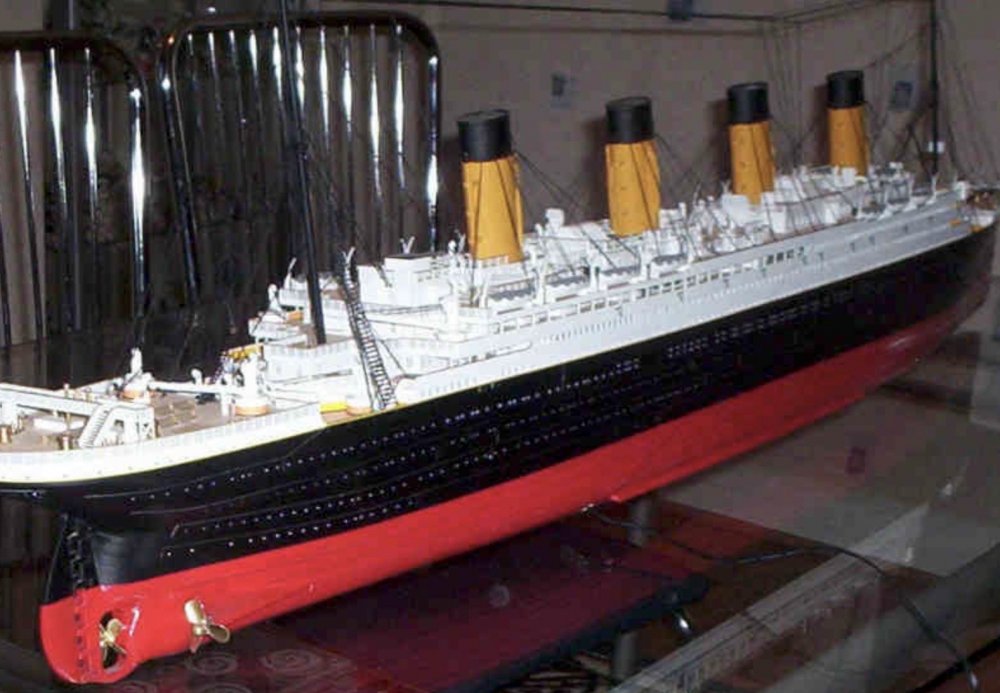
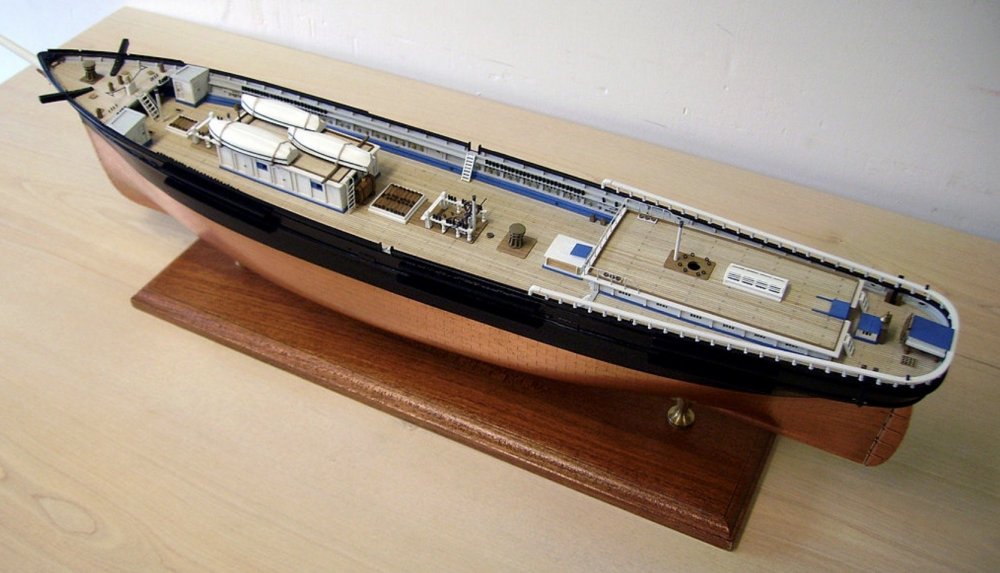
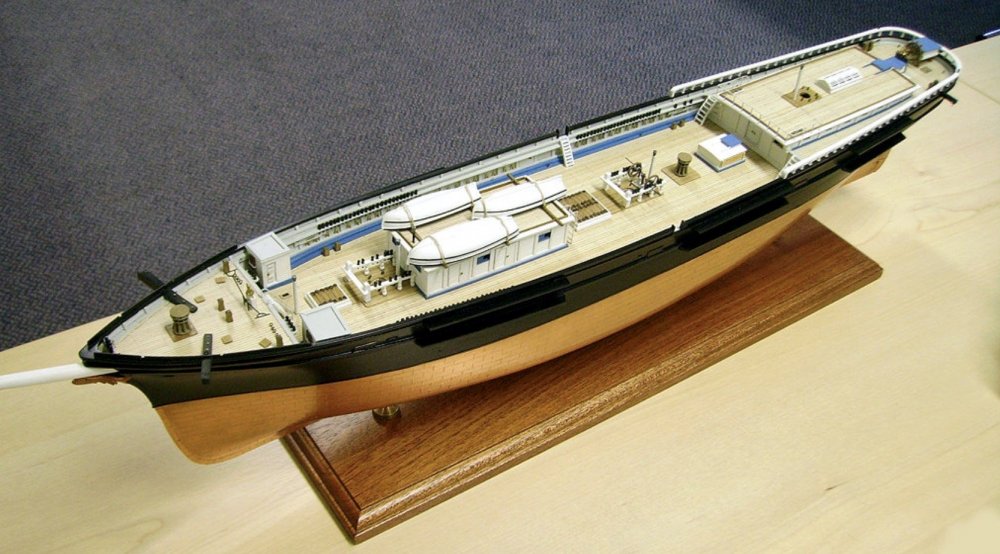
Perhaps one of the lesser known things about me is that I also model in wood. Have you ever visited Model Ship World? I'm actually the founder of that site, and it's one of my proudest achievements. It's a great hobby and very relaxing. If I bust something, I can remake it without needing to send off for spare parts. These pics are pretty old now from when I first started, but they are examples of what I built.

-
Jerry Rutman P-51B build
JayDee replied to Clunkmeister's topic in LSM 1/35 and Larger Work In Progress
Looking good!! -
Newbie here, saying hello to old friends ...
JayDee replied to HubertB's topic in General Discussion
Hi Hubert, Welcome to LSM! Nice job on the detective work. Save others the hassle of searching, and spread the word! Looking woodward to your prolific-ness! -
A very cool kit. I should finish mine.