

Spitfire
-
Posts
982 -
Joined
-
Last visited
Content Type
Profiles
Forums
Events
Gallery
Everything posted by Spitfire
-
What is on your bench right now ? Share a picture :)
Spitfire replied to Martinnfb's topic in Modelling Discussion
I'm with you on that one, I clear my bench after every modelling session and still lose parts. Cheers Dennis -
Special Hobby 1/32 -Tempest Mk.VI -Egypt 1949-Finnished
Spitfire replied to KevinM's topic in The Sandbox Group Build.
Great job, that really does look like metal. Cheers Dennis -
Now that's a name I have not heard in a long time, I remember the Ghost Brigade and Sagan Diary. Cheers Dennis
-
Nice one John, having built one of those I can appreciate the effort that you have put into the build, looks great. Cheers Dennis
-
Old mold Revell FW-190F8 next
Spitfire replied to JohnB's topic in LSM 1/35 and Larger Work In Progress
Sonething about a silk purse comes to mind, nice work. Cheers Dennis -
What is on your bench right now ? Share a picture :)
Spitfire replied to Martinnfb's topic in Modelling Discussion
This should be interesting I have the Spiteful and Seafang so will be interested in how it goes together. Cheers Dennis -
That sounds good, thank you. Cheers Dennis
-
What is on your bench right now ? Share a picture :)
Spitfire replied to Martinnfb's topic in Modelling Discussion
Thank you Peter, I just love my Xtracolor, it airbrushes nicely and you can skip the gloss coat for decals as well. Cheers Dennis -
Old mold Revell FW-190F8 next
Spitfire replied to JohnB's topic in LSM 1/35 and Larger Work In Progress
You are doing a fine job there John, keep up the good work. Cheers Dennis -
What is on your bench right now ? Share a picture :)
Spitfire replied to Martinnfb's topic in Modelling Discussion
Slowly getting there, I will finish this one. Masking And topside done, next up mottling. This is what I am aiming for Cheers Dennis -
Old mold Revell FW-190F8 next
Spitfire replied to JohnB's topic in LSM 1/35 and Larger Work In Progress
God I remember building one of those many years ago, not fun but it turned out well, I have no doubt you can work your magic on it and turn out a fine model. Cheers Dennis -
Guy Martin's Fighter Jet Adventure :Guy Martin: Top Gun !
Spitfire replied to MARU 5137's topic in General Discussion
Very enjoyable, we watch all his stuff. Cheers Dennis -
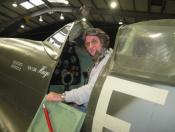
The postie just gave me this. Cheers Dennis
-
Hawker Tempest Mk. II MW763 First Flight
Spitfire replied to MARU 5137's topic in General Discussion
No problem Maru, as to the Tempest I think it was the same aircraft that featured in a Warplane Workshop that I watched earlier on in the year, fascinating stuff. Cheers Dennis -
Hawker Tempest Mk. II MW763 First Flight
Spitfire replied to MARU 5137's topic in General Discussion
This reminds me of seeing this abandoned C47 on the roadside, we were on the way to Bangkok in 1997 and this is what we saw in the middle of nowhere. Cheers Dennis -
Great photos, any details for them and is there more from the same photo session. Cheers Dennis
-
Great photos, any details of the unit ? I already have two Revell P51B's in the display cabinet, one US and one RAF, so regardless of accuracy issues I will not be buying an Eduard one. But I am pleased that there will hopefully be a modern, accurate kit available of such a historically important aircraft type for others to enjoy. Cheers Dennis
-
Thank you for taking the time to post the photos, they look great. Cheers Dennis
-
That certainly rolls back the years for me. Cheers Dennis
-
Hasegawa 1/32 Bf-109 F-4-Finished
Spitfire replied to KevinM's topic in The Sandbox Ready for Inspection.
Very attractive finish, I like that a lot and I am not a Luftwaffe fan. Cheers Dennis -
What is on your bench right now ? Share a picture :)
Spitfire replied to Martinnfb's topic in Modelling Discussion
This is what is happening on my bench, first up I cleared it of anything that was getting in my way, so the plastic drawers with my paint in had to go, all eight of them. These were relegated to shelving units behind my chair, so a quick swivel in my chair and I can access them. Then I bought what looked like a more compact set of modelling drawers from a UK based company called EBMA Hobby and Craft, these arrive in kit form, see below. Out with the wood glue and this emerged after one hour, probably the fastest build that my desk has ever seen. It is szed for Humbrol tinlets, so my Humbrol, Xtracolor, Revell and Sovereign Colour coats can live in them. The company also does shelves and storage for other makes of paint and makes other useful model related items. Cheer Dennis -
Hasegawa 1/32 Bf-109F for the GB RFI
Spitfire replied to JohnB's topic in The Sandbox Ready for Inspection.
Beautifully done John, another great build. Cheers Dennis -
Hasegawa Bf-109F-4 RFI
Spitfire replied to JohnB's topic in LSM 1/32 and Larger Aircraft Ready for Inspection
Impressive build as usual John, I will use it as inspiration when I get around to building mine, but I doubt it will be built as fast. Cheer Dennis -
Nice one John, many years ago I built the Hasegawa 109G after a long string of ancient Revell kits and I could not believe what an enjoyable build it was, I must get around to build another some time, I have a few in the stash. Cheers Dennis
-
Gosh that sounds really scary, it would frighten me to death, glad to hear that you know what it is and you are getting treatment. Cheers Dennis
