
Kaireckstadt
-
Posts
1,705 -
Joined
-
Last visited
Everything posted by Kaireckstadt
-
Copy that! Nothing more to add!
-
 Sounds nice Gary but sending is no option. Would be better if I picked them up at your homeplace. I always wanted to visit Australia and the Gold Coast. Great place where you live. I‘m really envious! The quality of the RFM-kits is really good. Crisp details. Do you have more RFM-kits in your stash in addition to the one you won? Did you already build a RFM-kit?
 -
Hurri's X3 1/48 Mediterranean Theater Finished
Kaireckstadt replied to KevinM's topic in Non LSM 'WIP
Great models and woodwork Kevin! I especially like the English desert camouflage. Have never seen a Hurricane in overall bluish-grey with desert camo tail. Awesome work! -
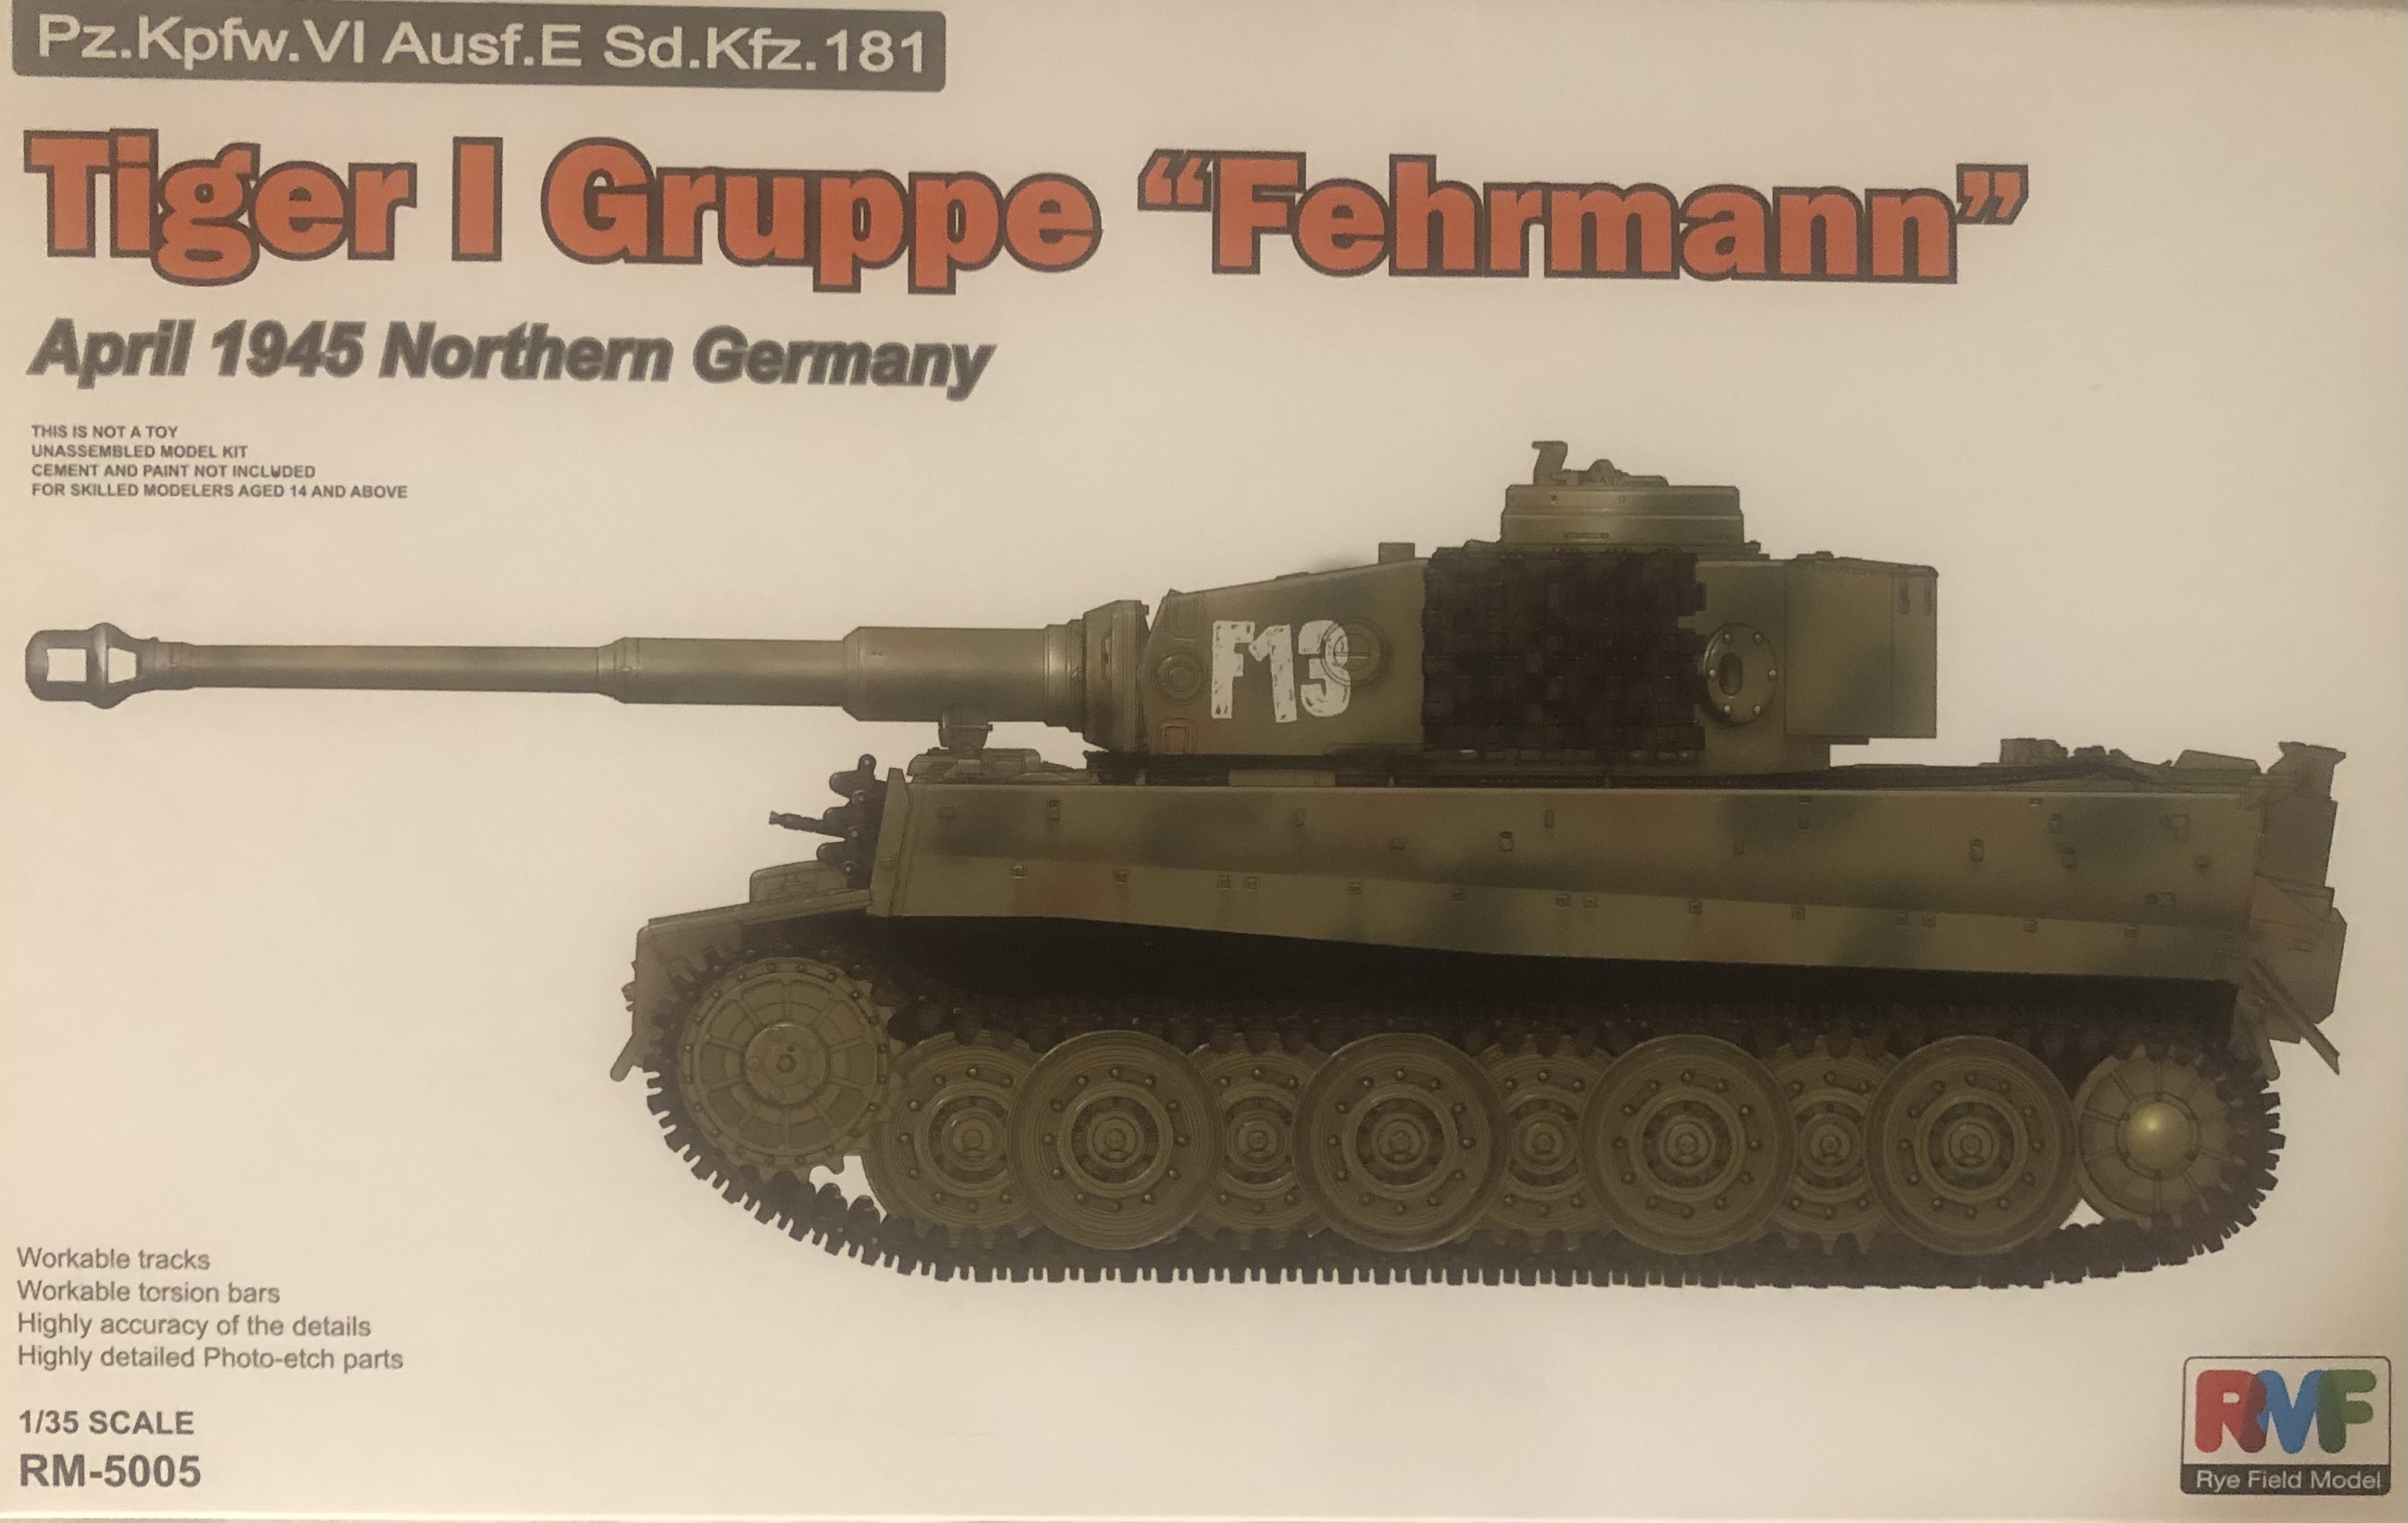
Thanks for explaining your track-painting method Gary! At first glance I wasn’t able to tell if the second picture was from the real thing or a model. Looks stunning! Can’t be done better in my eyes. I will for sure use your method for the only tank I have in my stash. It’s a RFM Tiger I Gruppe Fehrmann:

-
RFM Panzer IV Ausf H (Early)
Kaireckstadt replied to Bomber_County's topic in LSM 1/35 and Larger Work In Progress
Copy Gary! The engine compartment looks really nice! Is the engine already glued into the hull?I wonder how one can manage the detail painting then? -
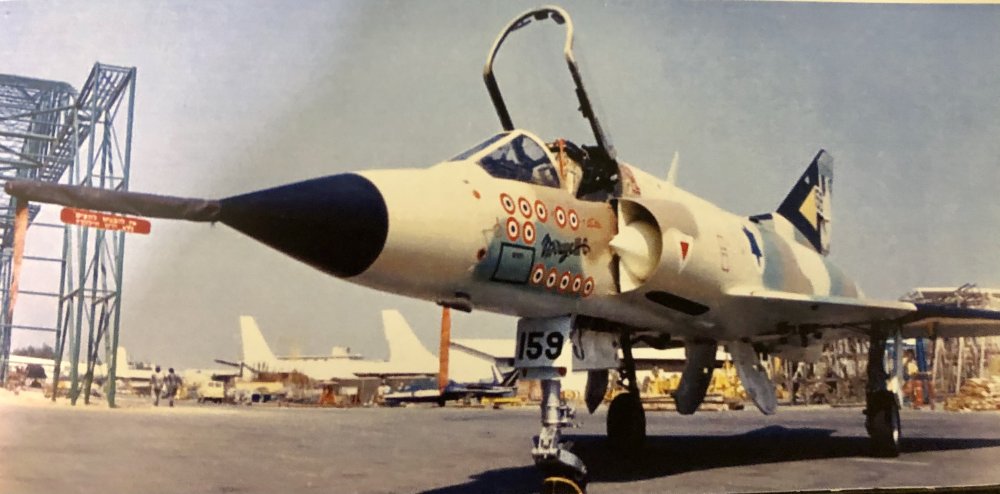
Israeli Mirage III C with Atar9C
Kaireckstadt replied to Kaireckstadt's topic in LSM 1/35 and Larger Work In Progress
Thank you for your nice feedback Anthony! You are completely right: The basis for a flawless build is the preparation. Takes its time but (hopefully) pays off in the end. Cheers Kai -
Wow Peter, Nice to see that you are also building 72nd scale models! And what a model! Beautiful pit with awesome detail! You‘ve already gone very far with it! Good choice for an in between the F-4 and the P-39 build!
-
Didn’t think they were plastic. Looks like treated metal. Great painting! Will you replace the pins by metal ones? Curious how they will look like when finished!
-
Israeli Mirage III C with Atar9C
Kaireckstadt replied to Kaireckstadt's topic in LSM 1/35 and Larger Work In Progress
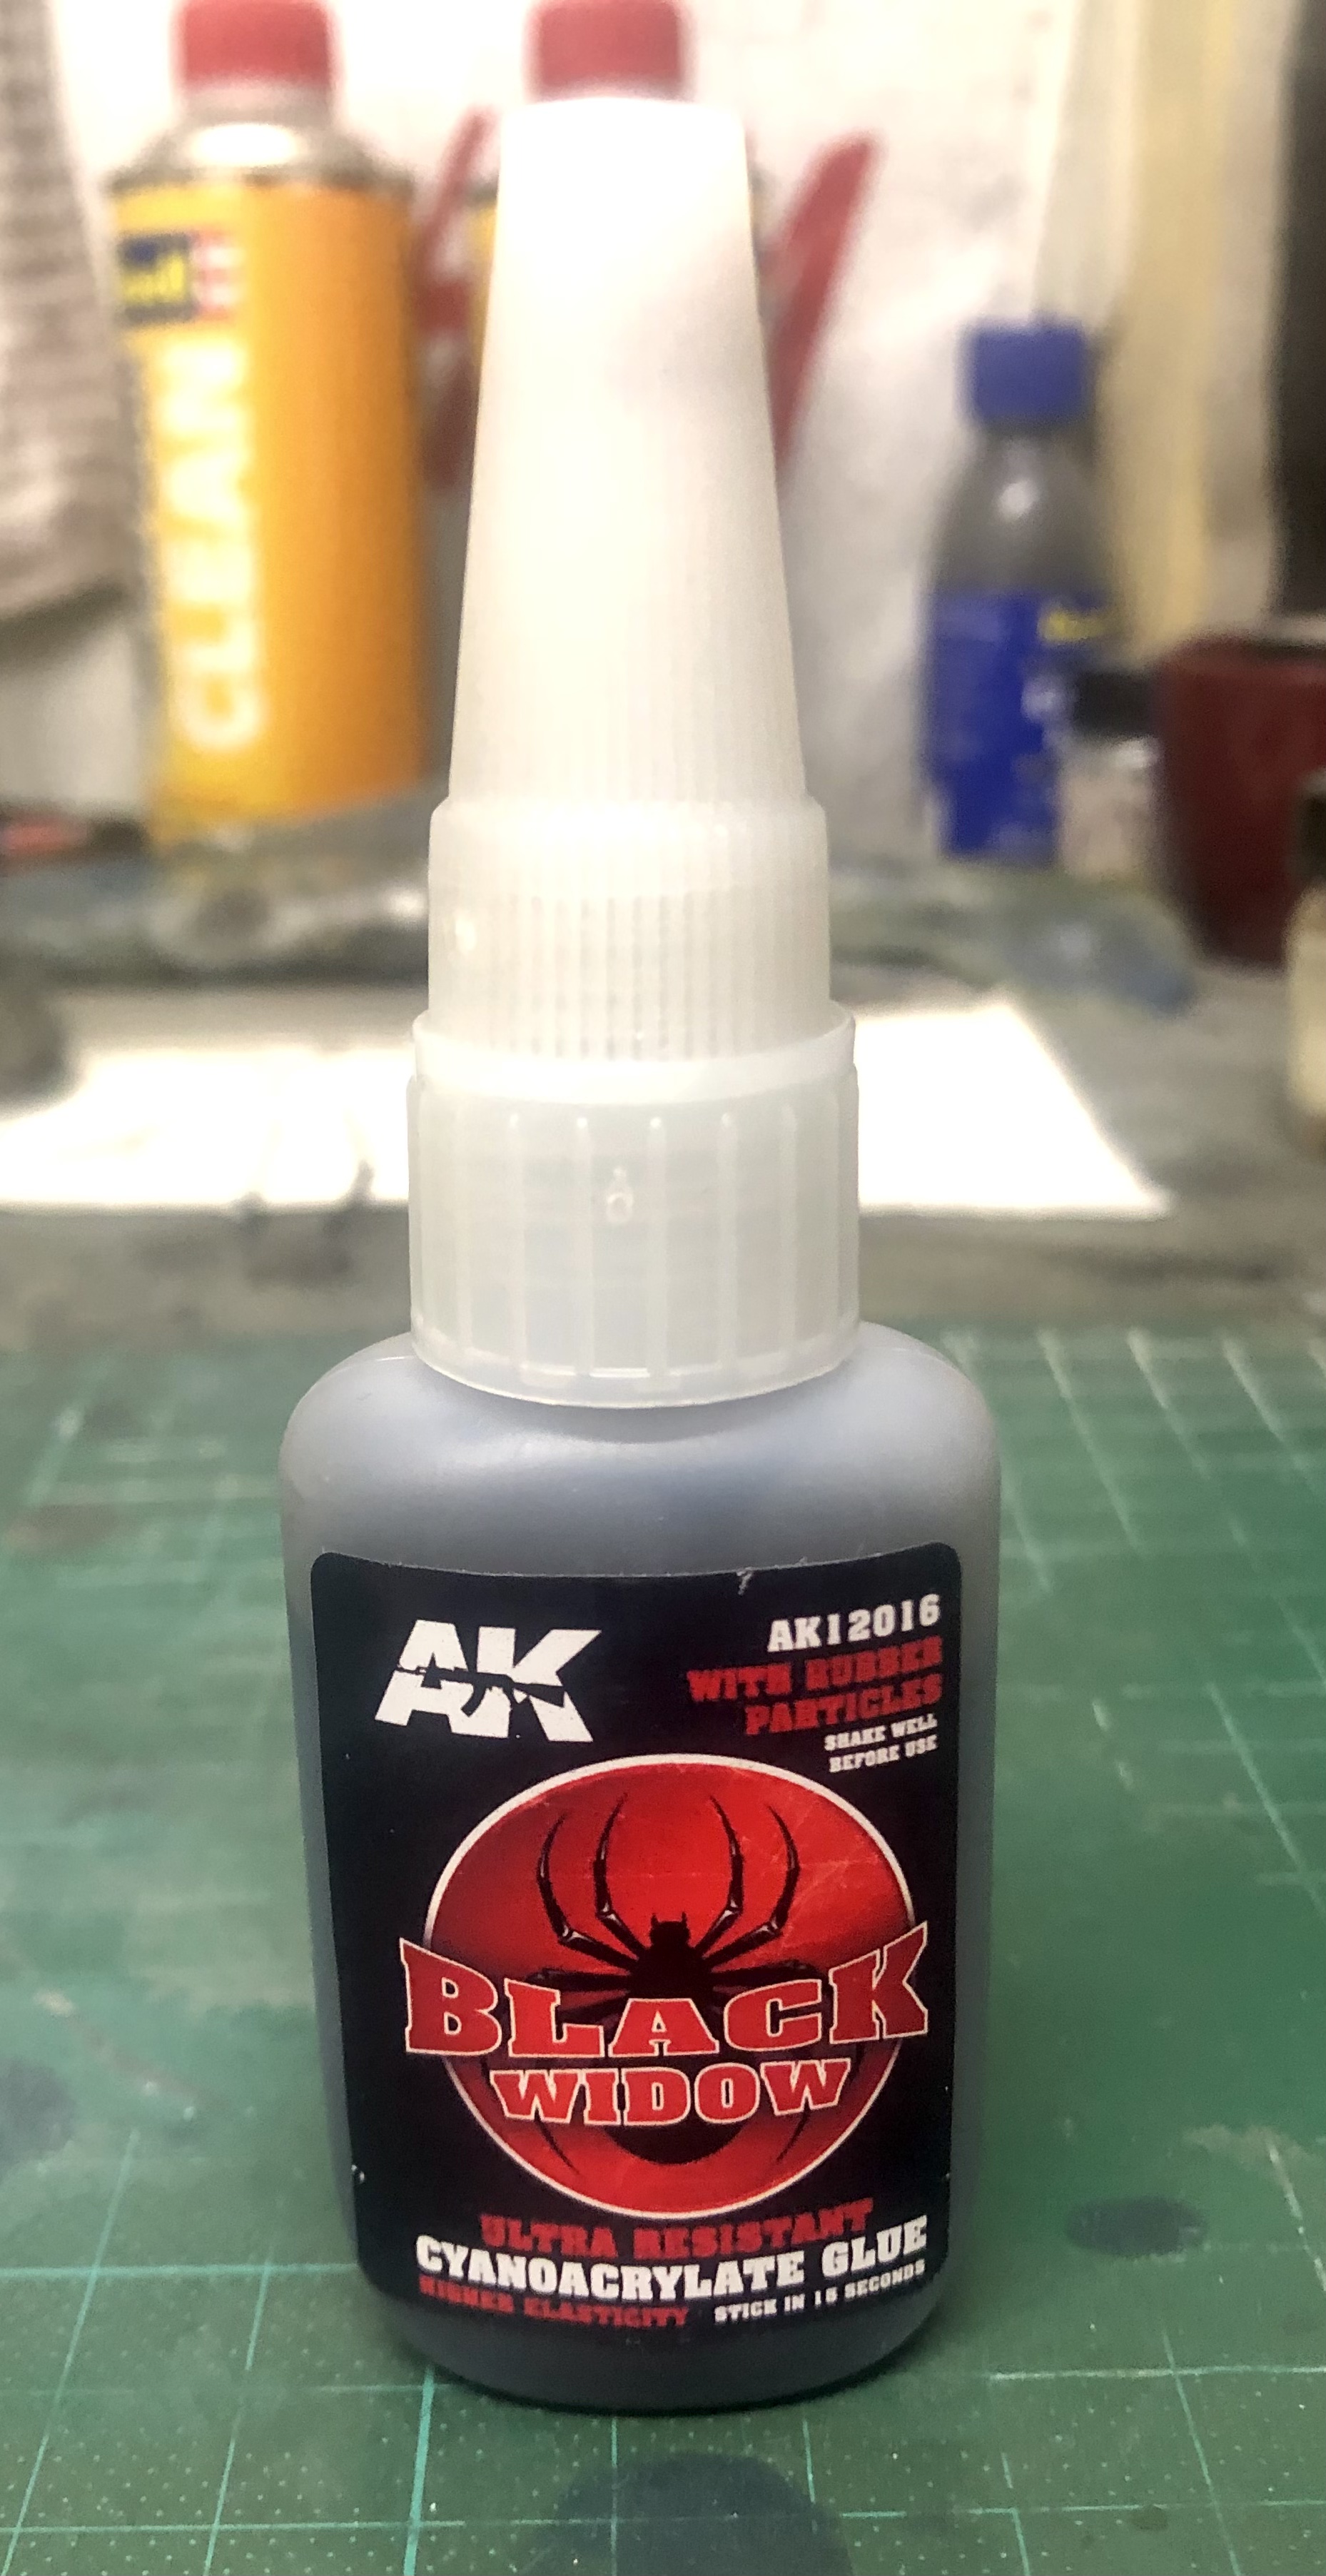
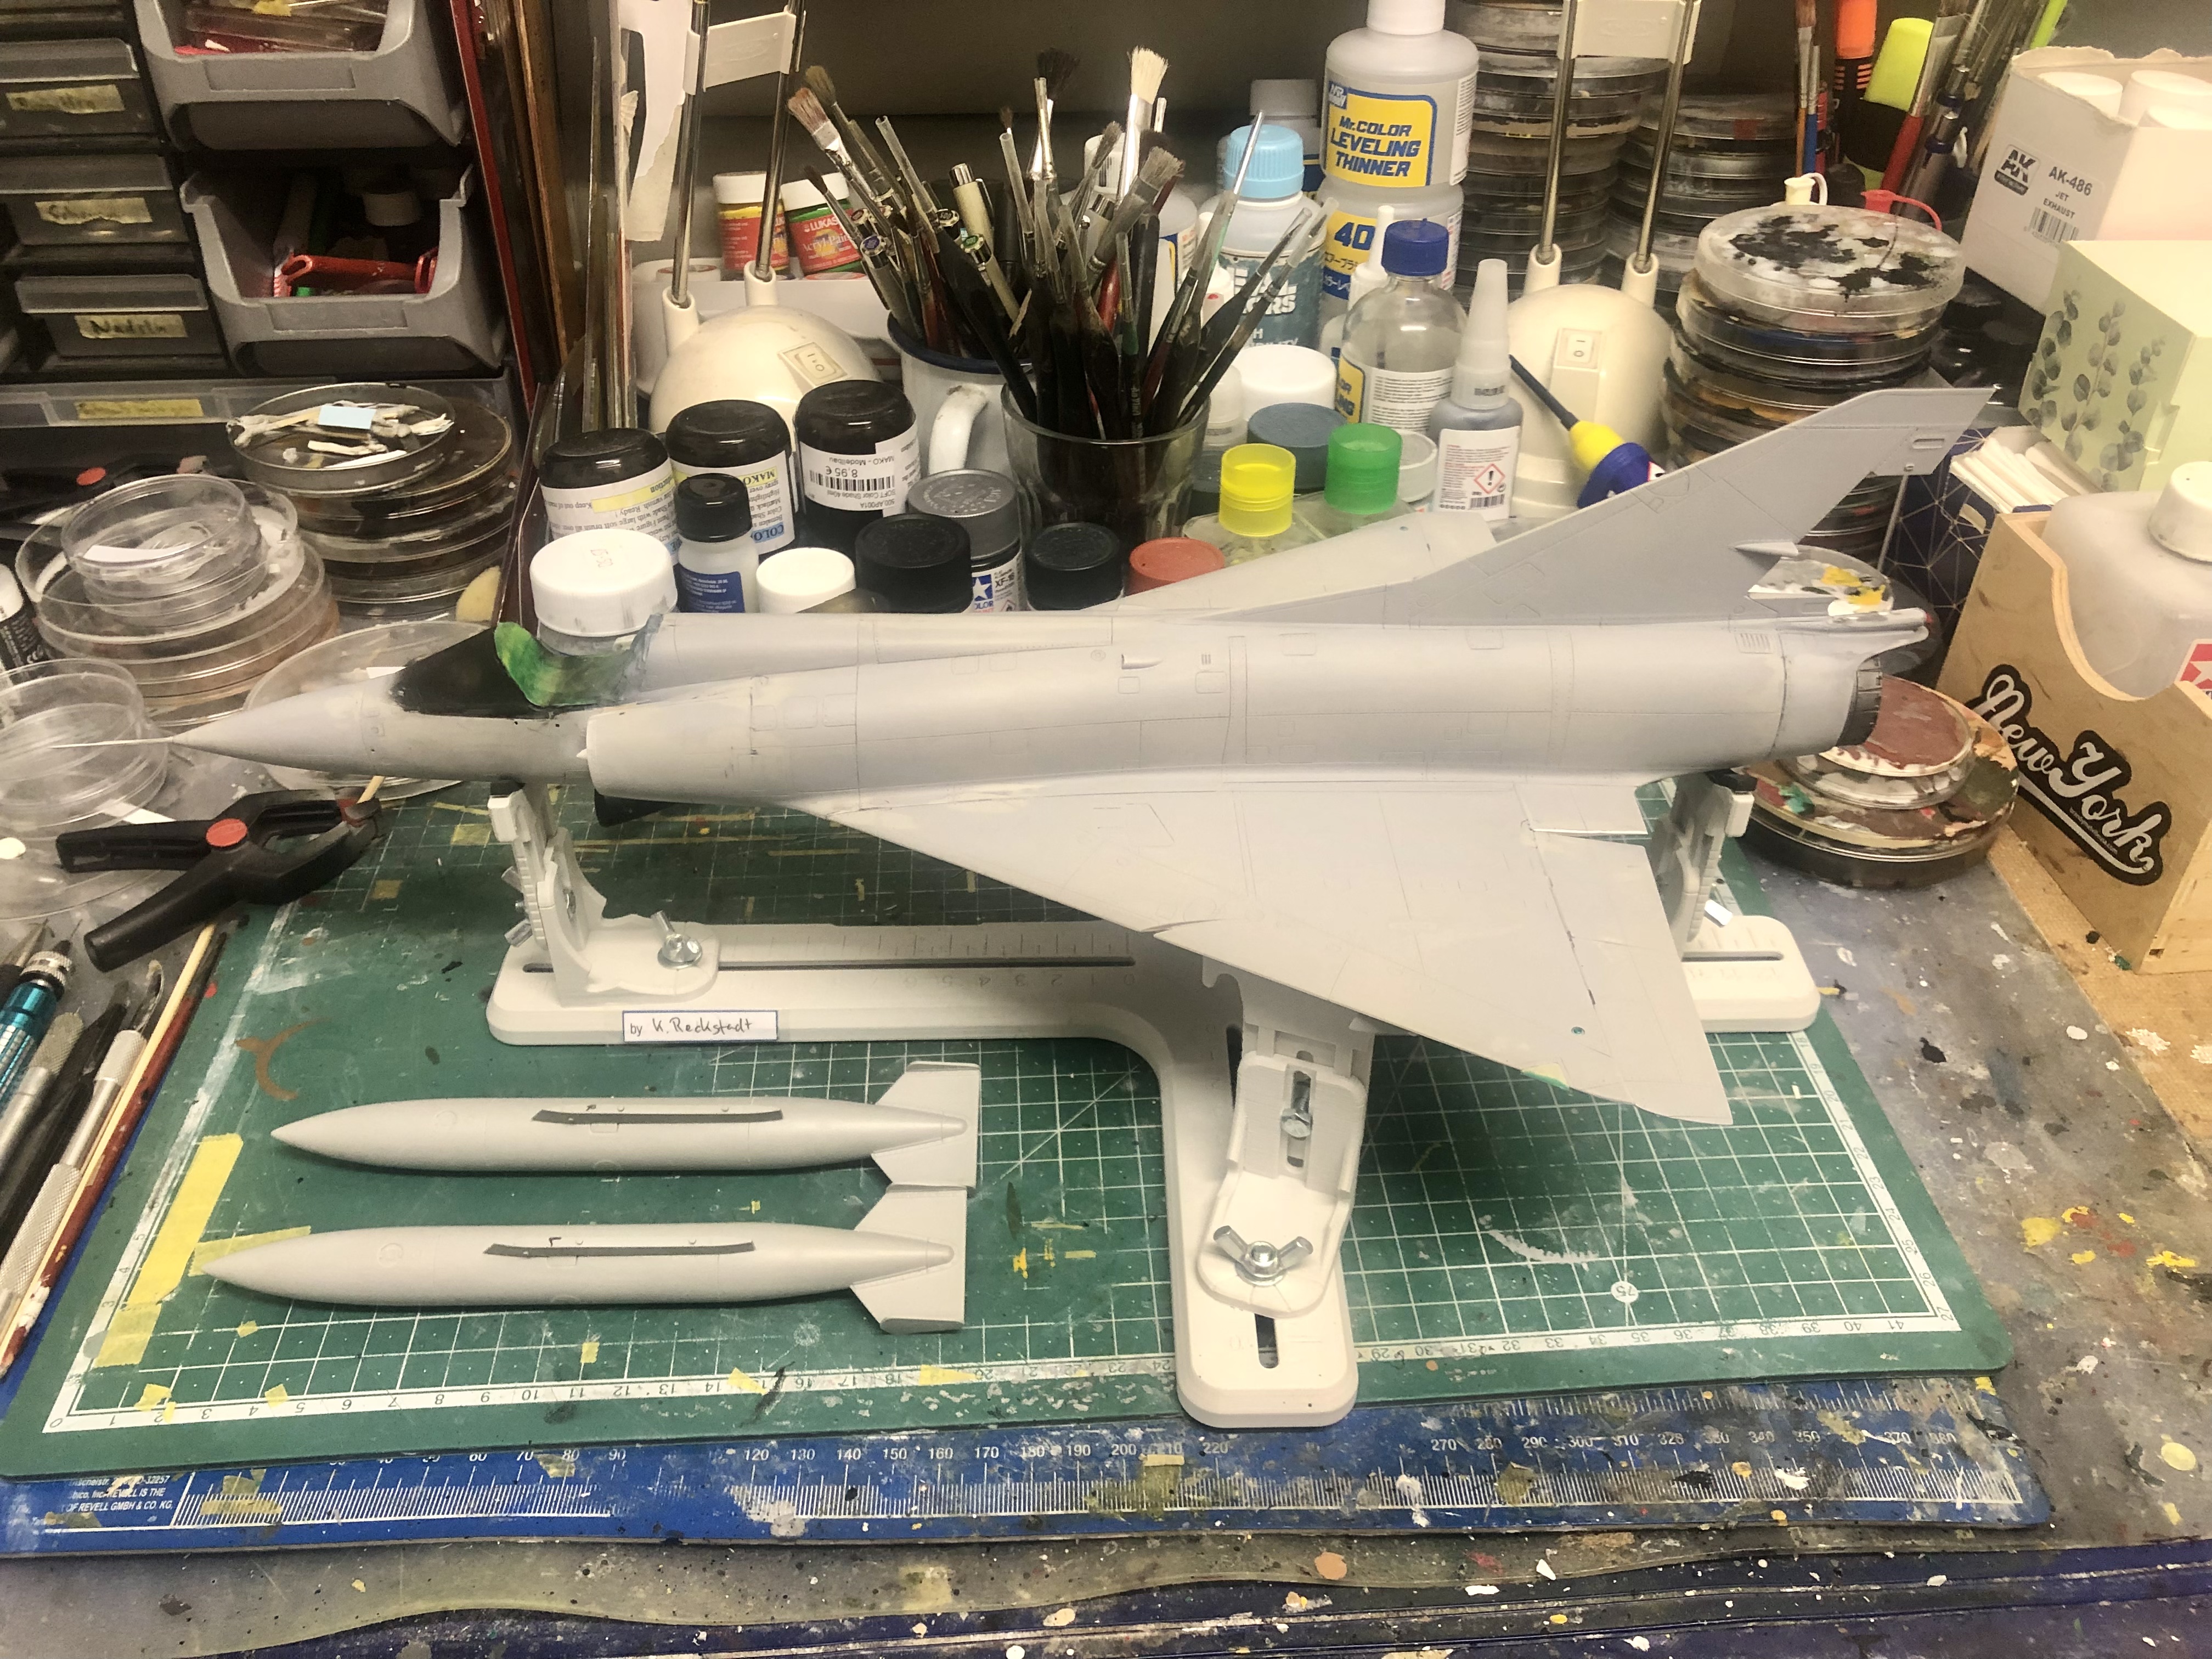
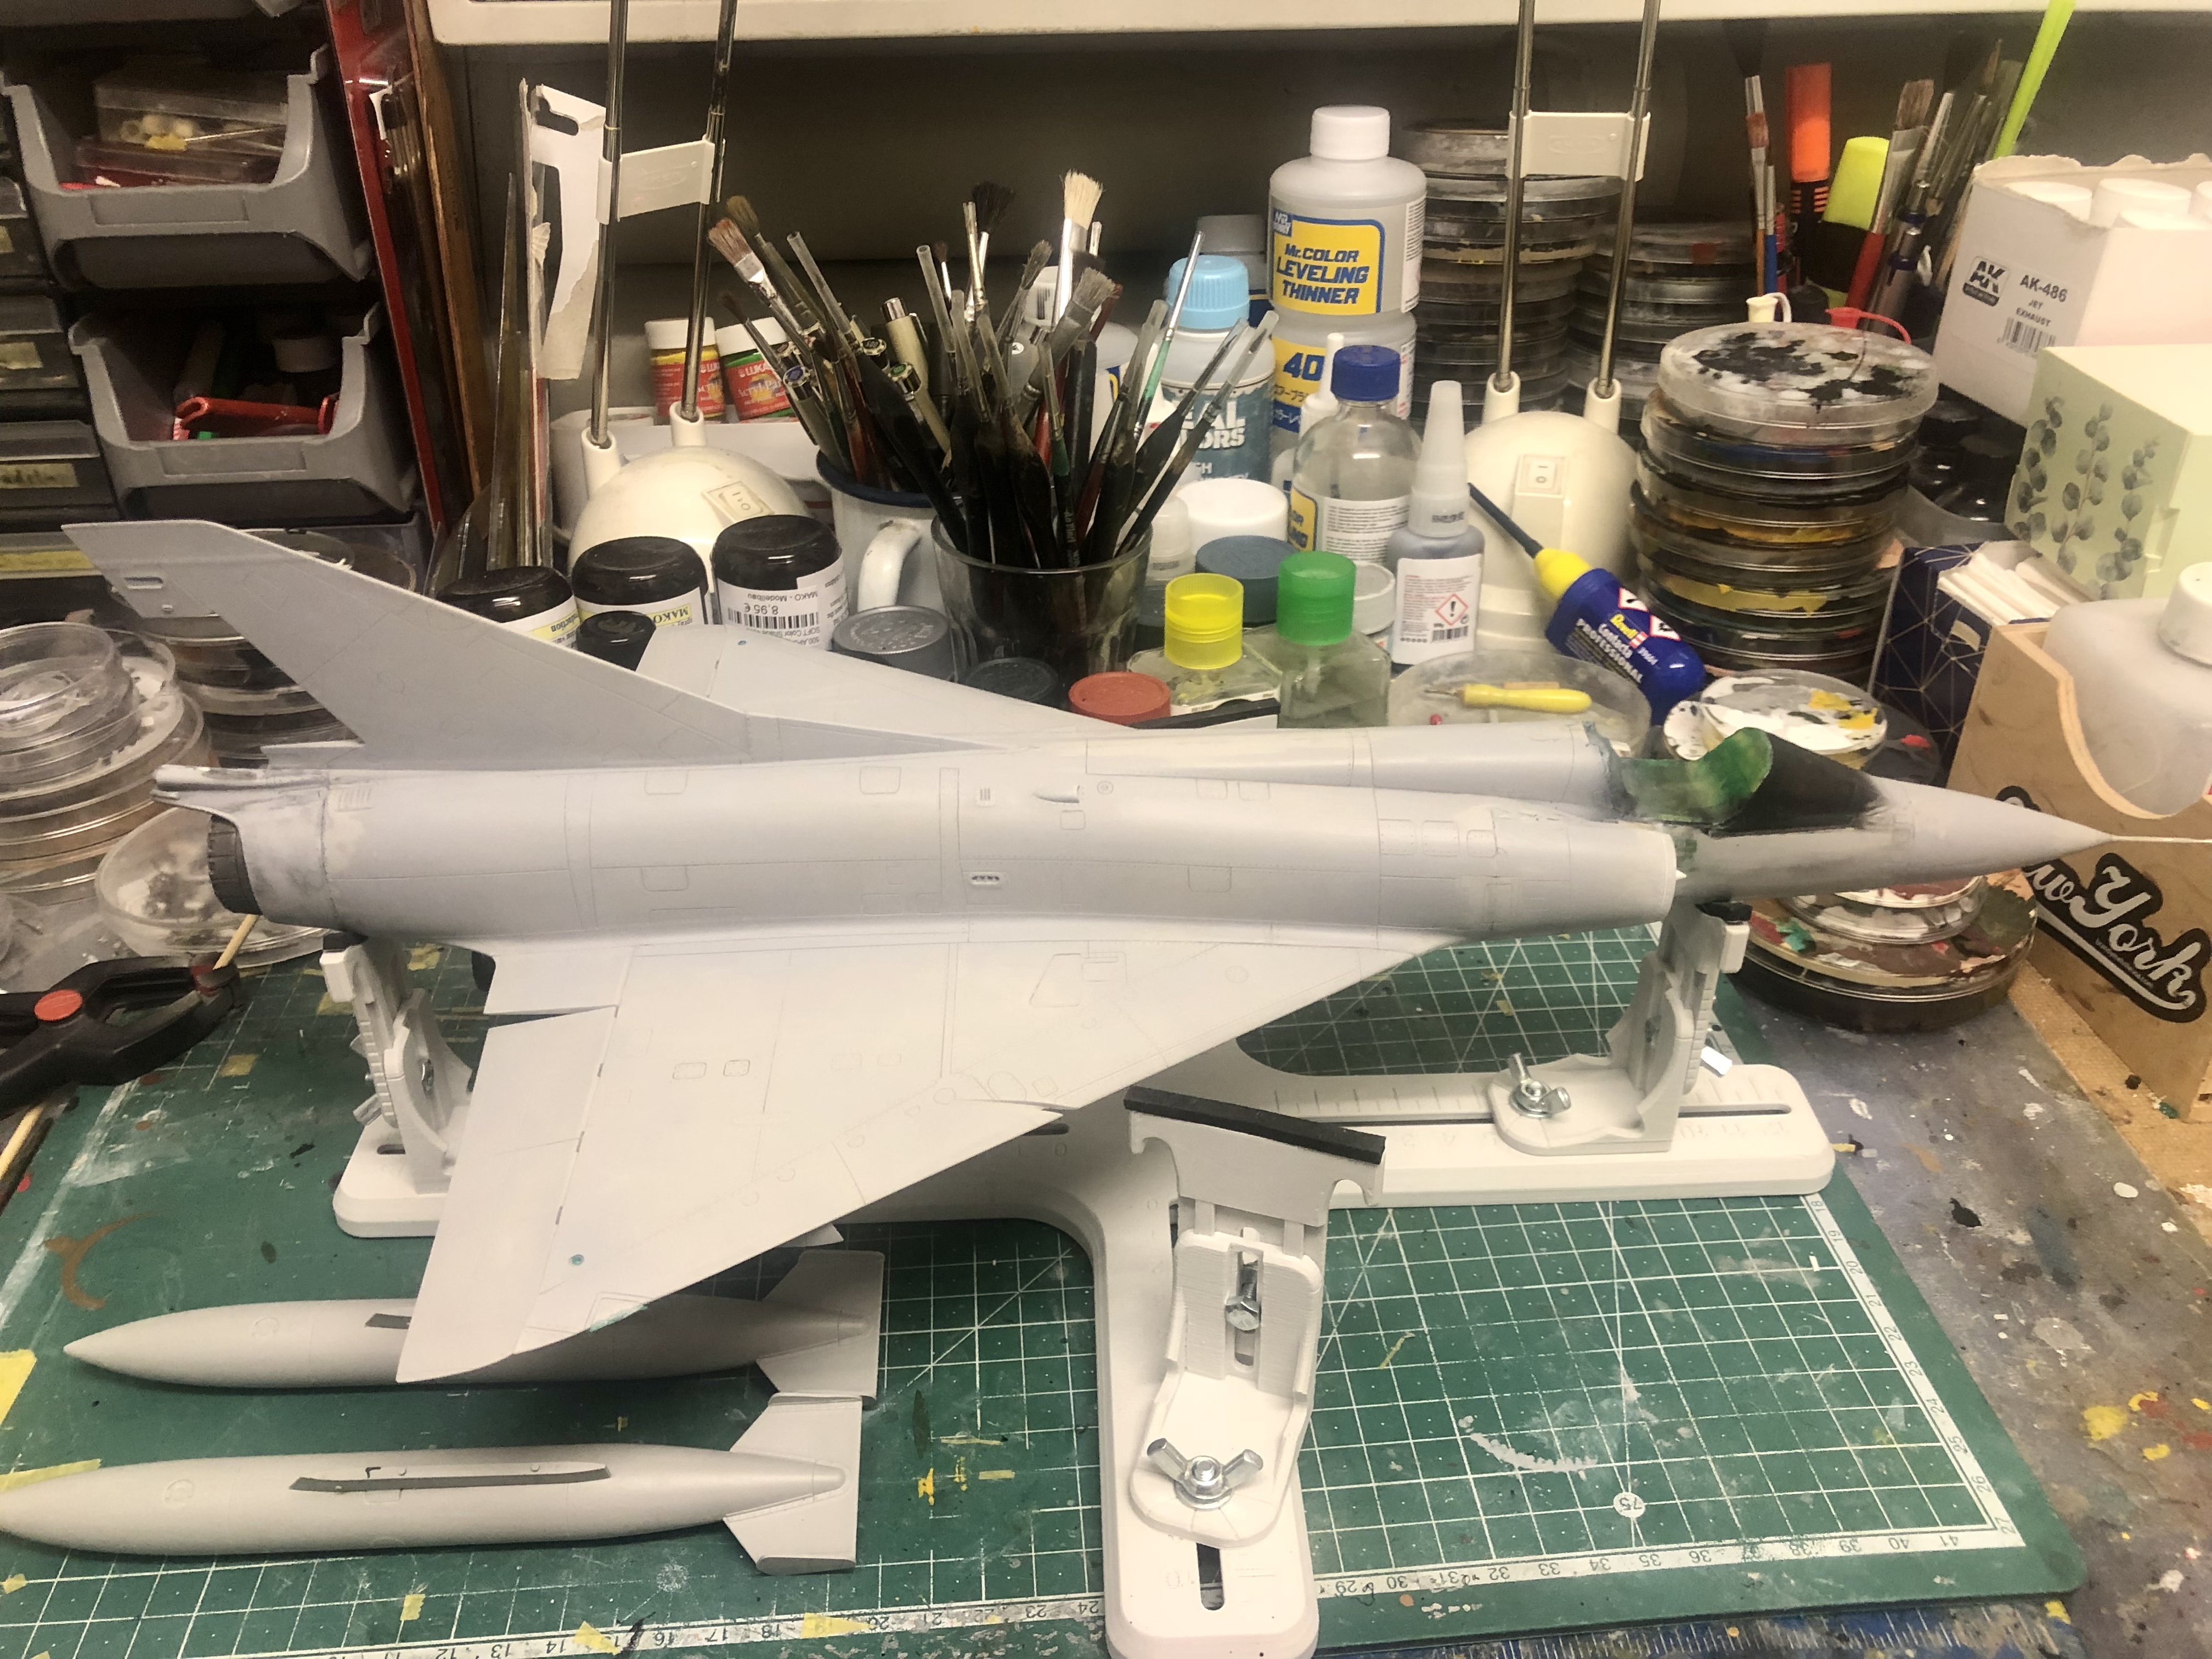
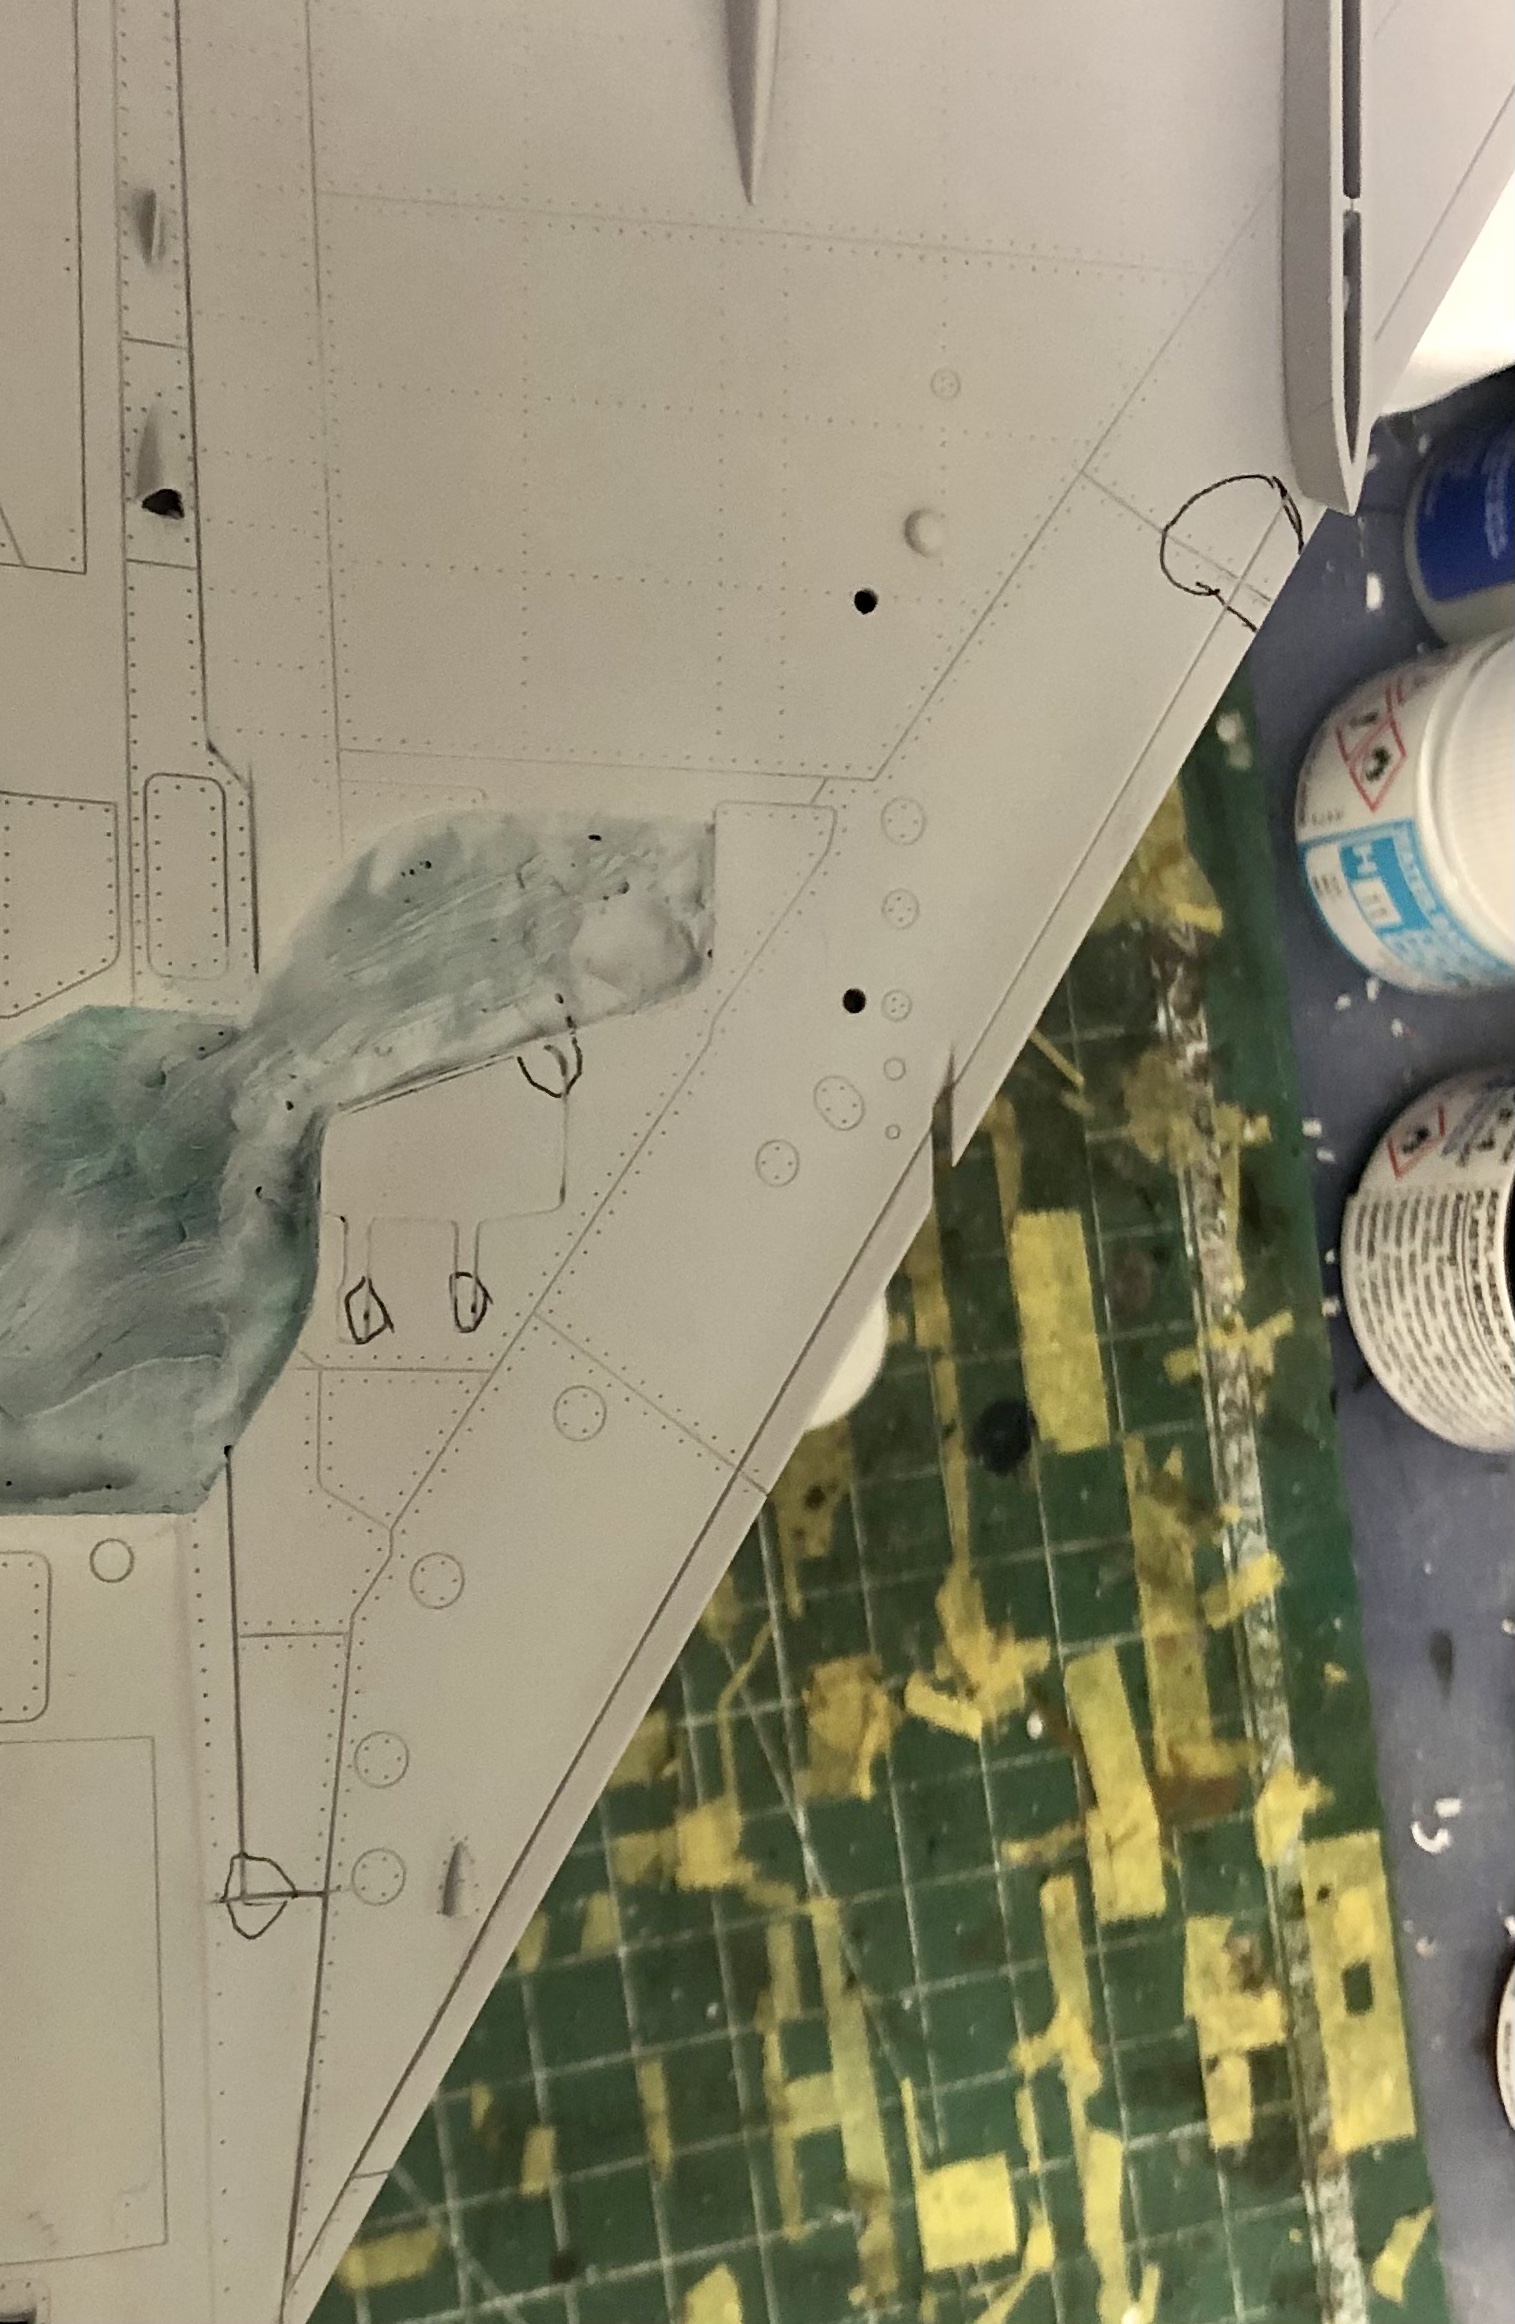
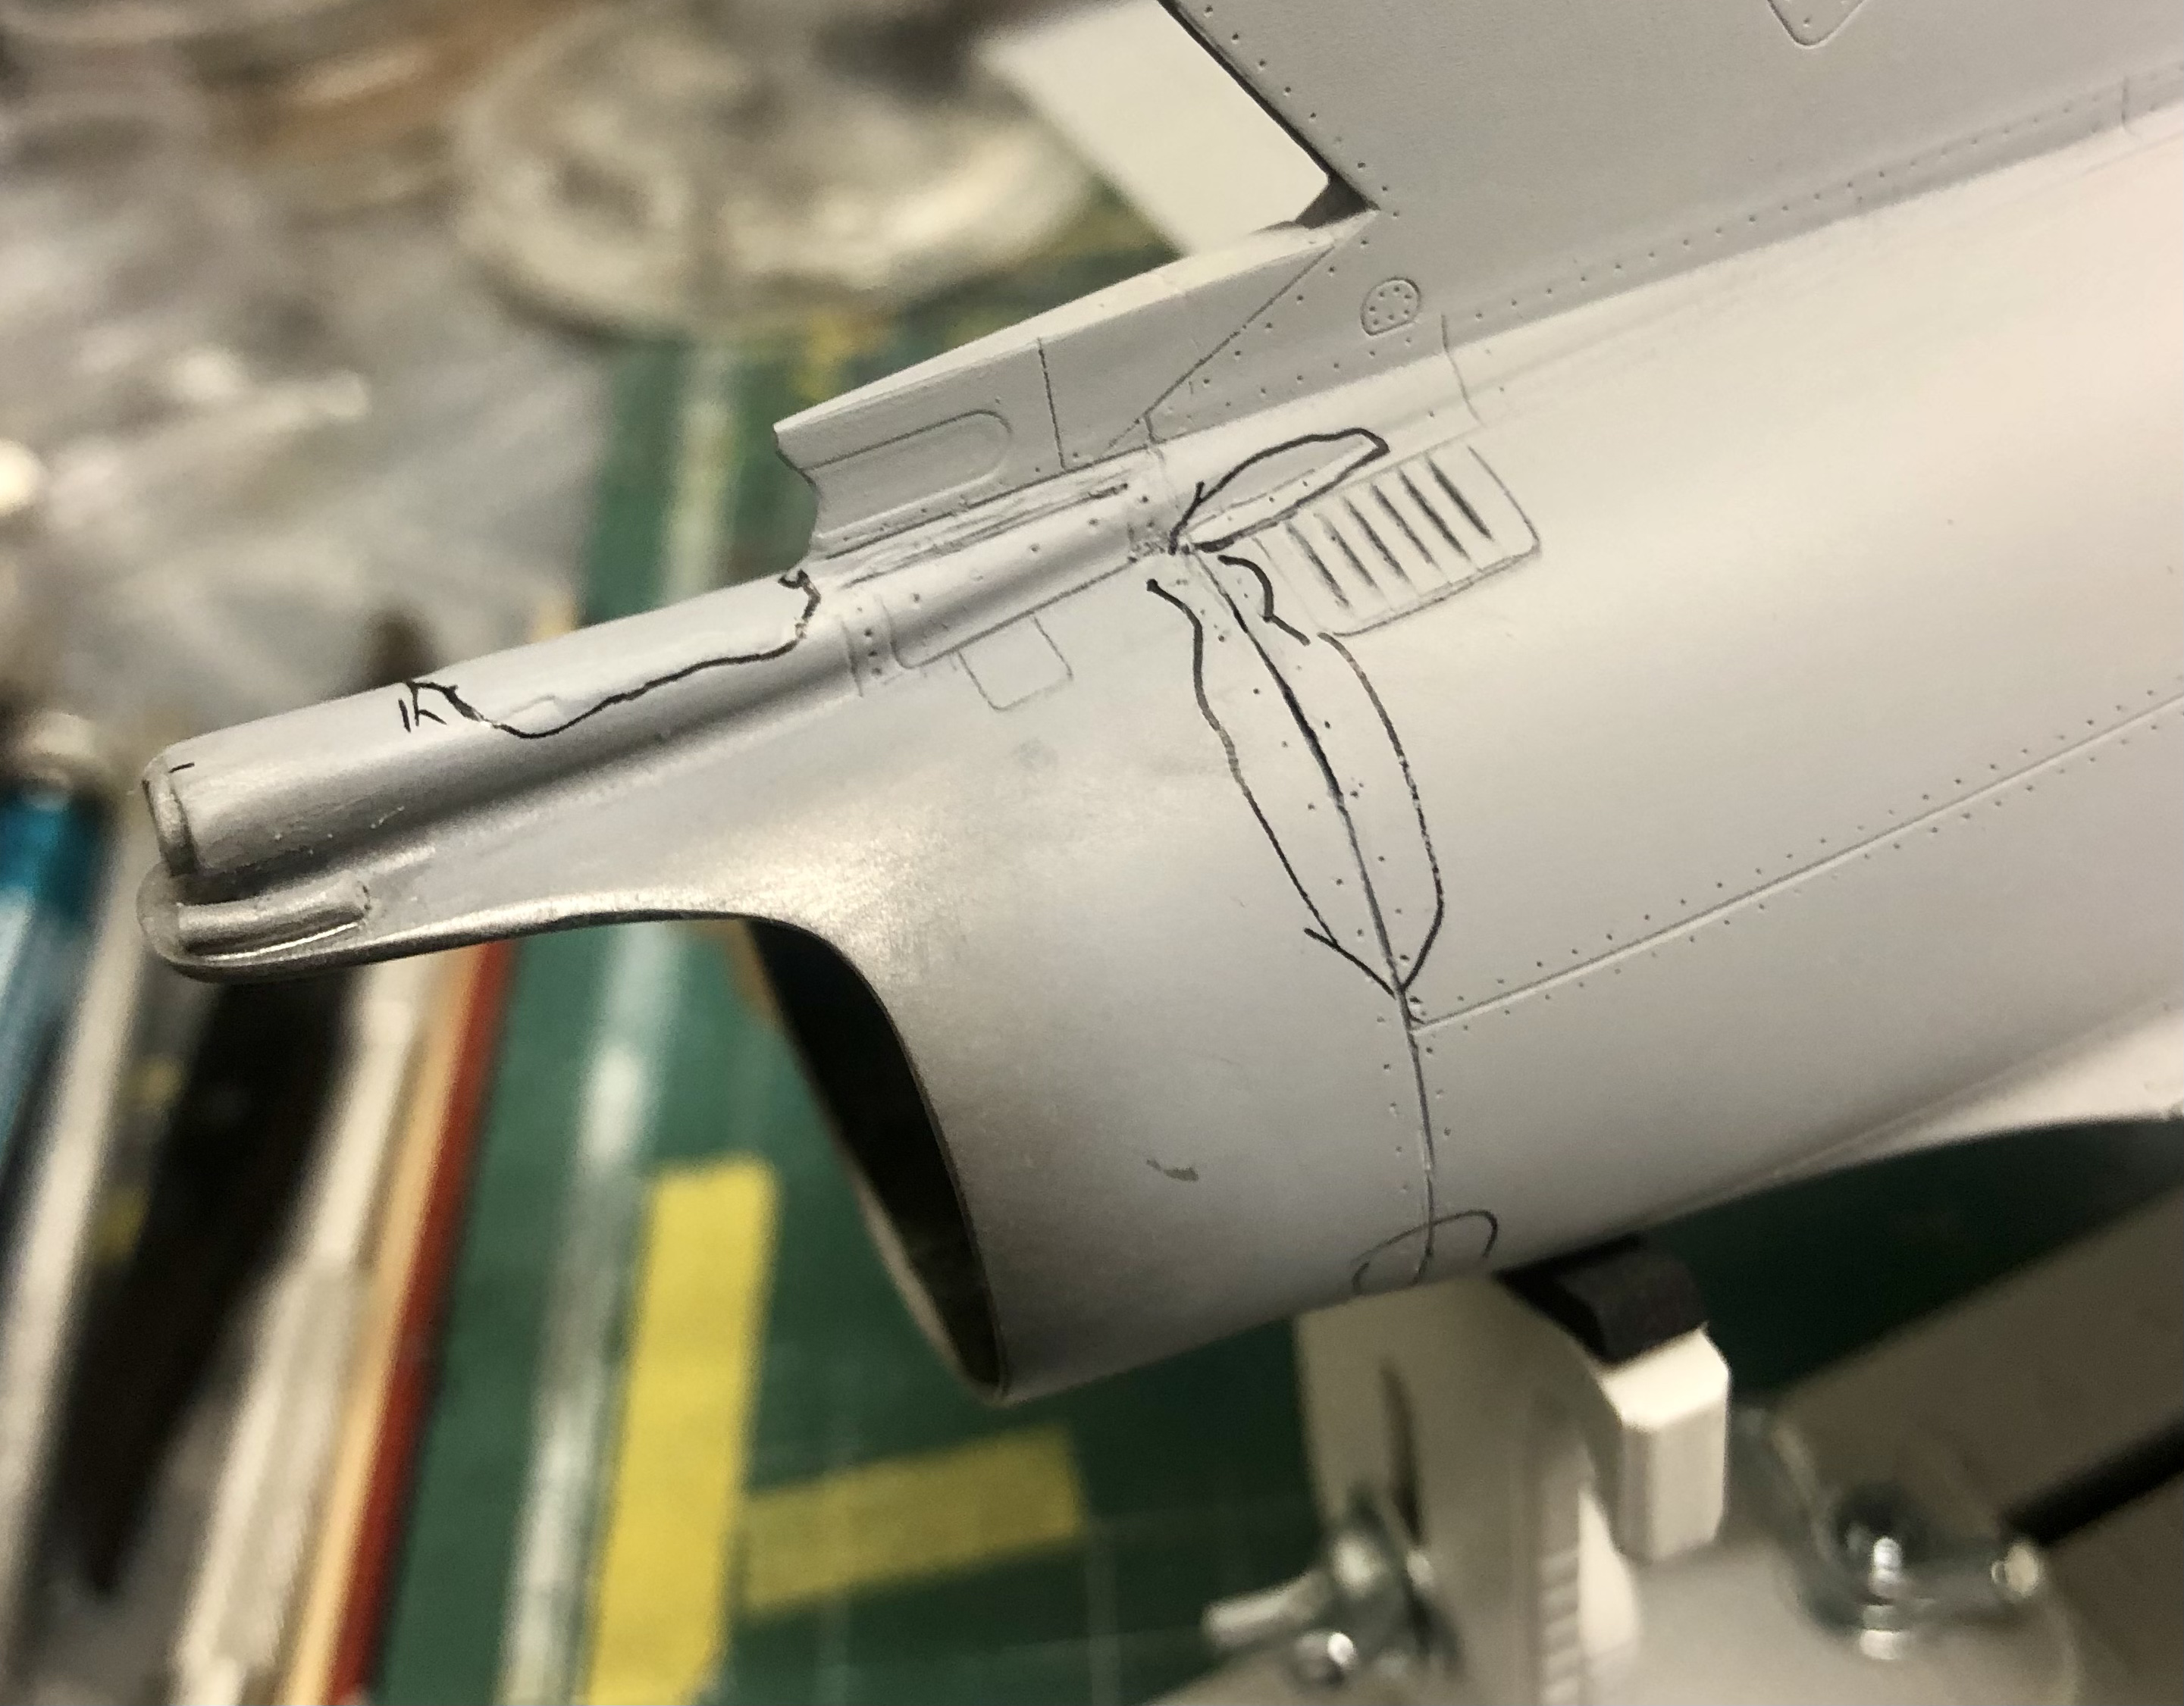
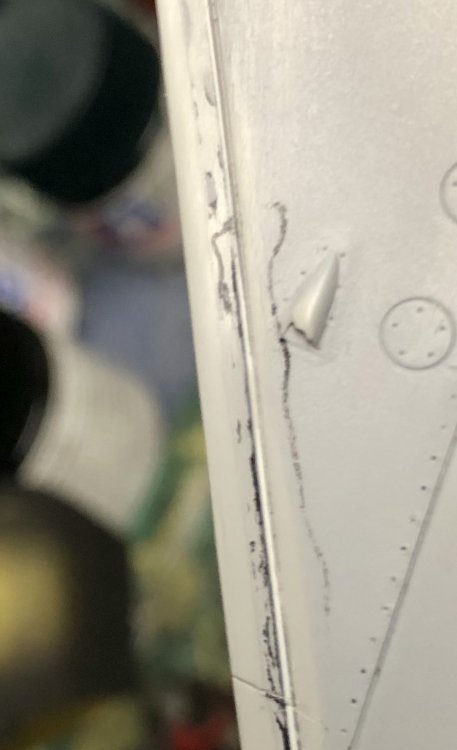
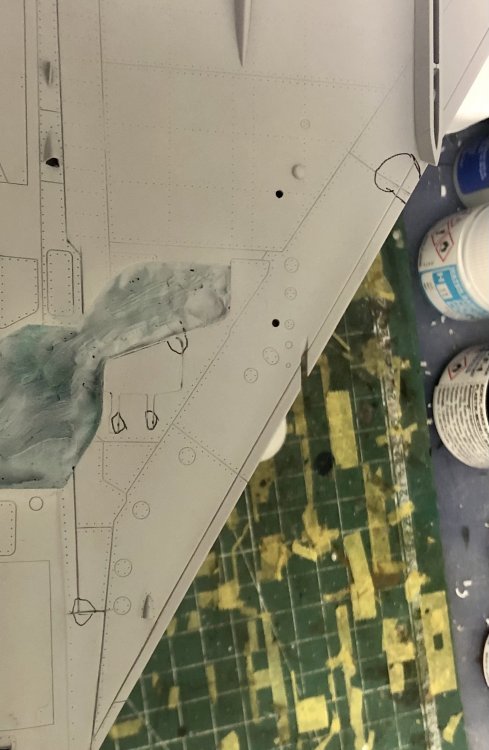
For the rework I used for the first time black superglue from AK: This is really an awesome stuff since you see exactly where you apply it and when sanding you clearly can locate if the sanding can be finished: Now back to the paintshop to repriming to see if everything is ok now.


- 719 replies
-
- 10
-

-

-
Spot on weathering of the tub Gary! Looks quite convincing! With the modeling knife close to the tub one can really imagine how big this Tank is! Where do you put all these models when finished? Seems like the track-assembly isn’t one of the easiest jobs. They are metal aren’t they?
-
KH P-39 Airacobra
Kaireckstadt replied to Peterpools's topic in LSM 1/35 and Larger Work In Progress
Great progress on your P-39 Peter! I really like the way you weathered the parts. How did you do it? Is it a wash? You really will have a KH collectors item when finished! Looking forward to seeing the next update! -
I hope that you can continue soon Harv!
-
dambuster Hong Kong Models 1/32 Avro Lancaster Dambuster
Kaireckstadt replied to JeroenPeters's topic in Aircraft Reviews
There is no other bombload than the upkeep mine in the Dambuster kit. -
Israeli Mirage III C with Atar9C
Kaireckstadt replied to Kaireckstadt's topic in LSM 1/35 and Larger Work In Progress
Thanks Peter, these were exactly my thoughts. All flaws are easy to fix and then I can go on. You’re right Gary. I even don’t like it especially when you already had so much rework. I should build a Tamiya- or a WNW-kit next. On the Corsair I had no rework at all. Great kit! -
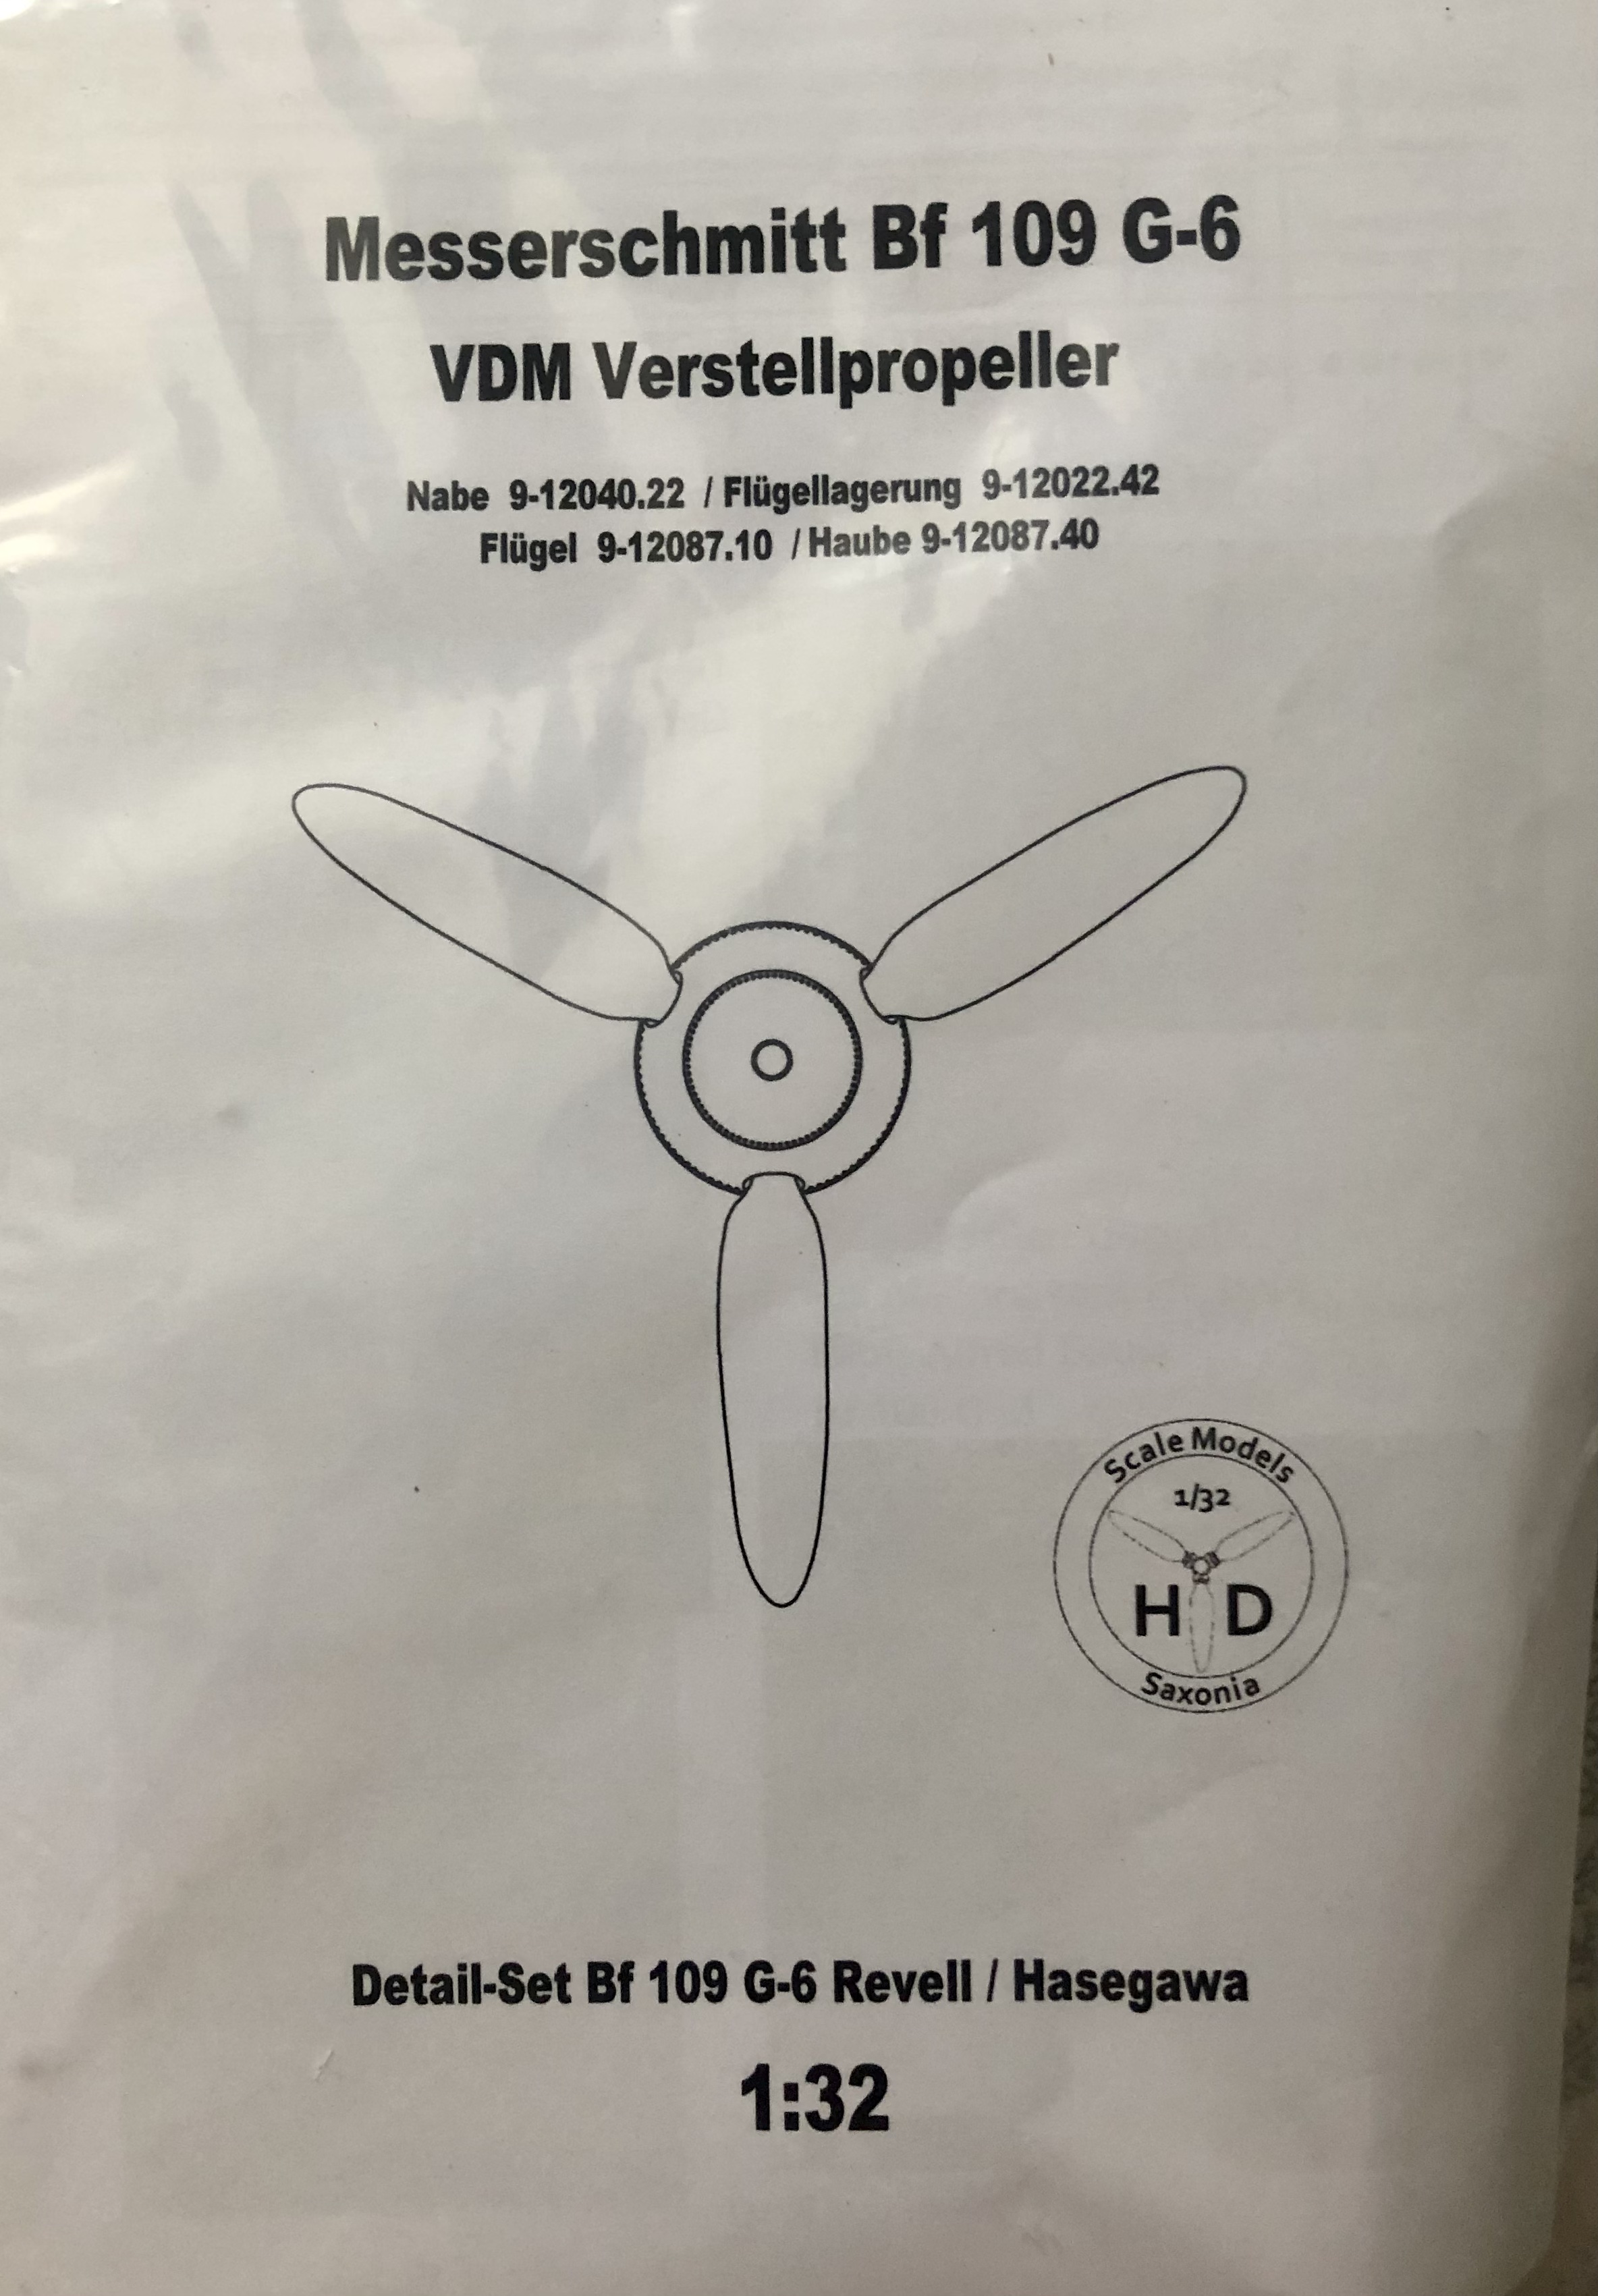
Gottfreid Weiroster Bf 109G6 R6 Revell 1/32
Kaireckstadt replied to GazzaS's topic in LSM 1/35 and Larger Work In Progress
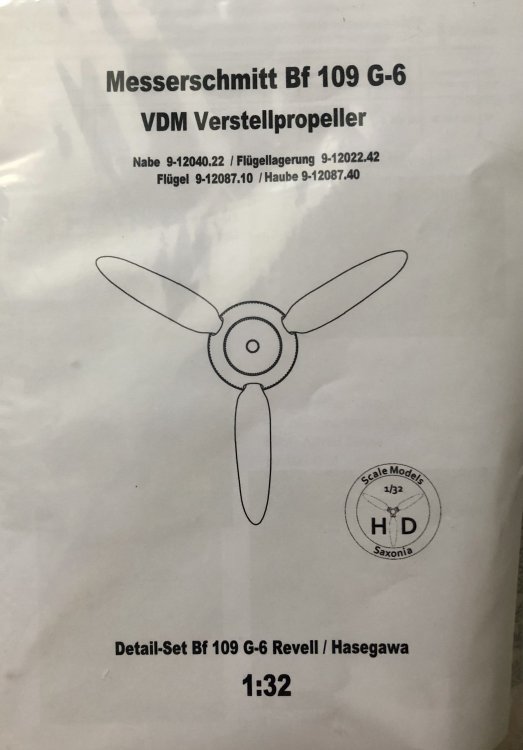
Gary, There is a beautiful upgrade set for the Revell-kit from Alley Cat: It contains all parts you mentioned to correct the flaws of the Revell kit. If you want an awesome propeller you should buy one at Henry Dähne. But I don’t know if you can still get some from him: Hope this helps you a little bit! Cheers Kai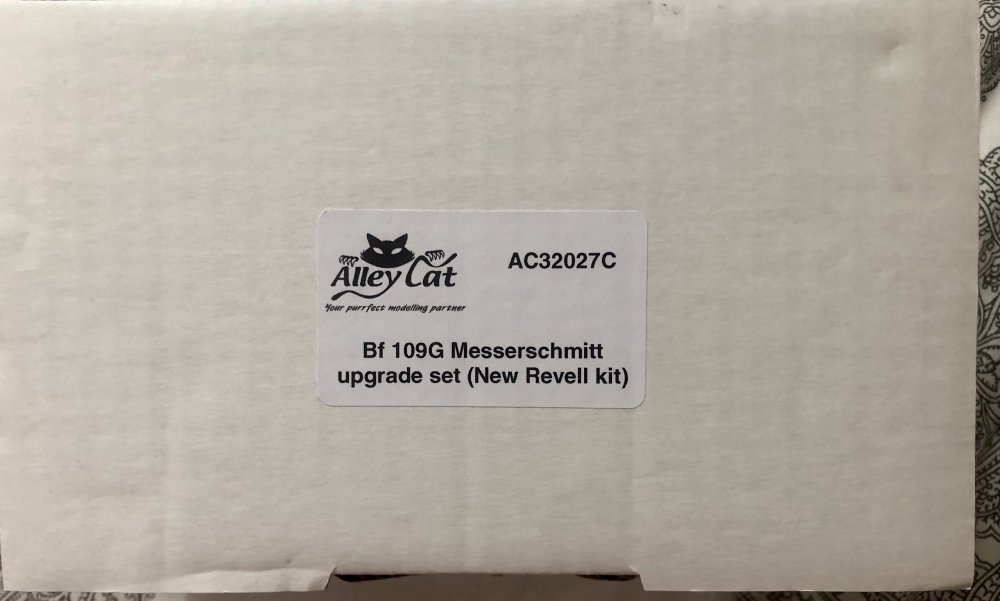

-
Israeli Mirage III C with Atar9C
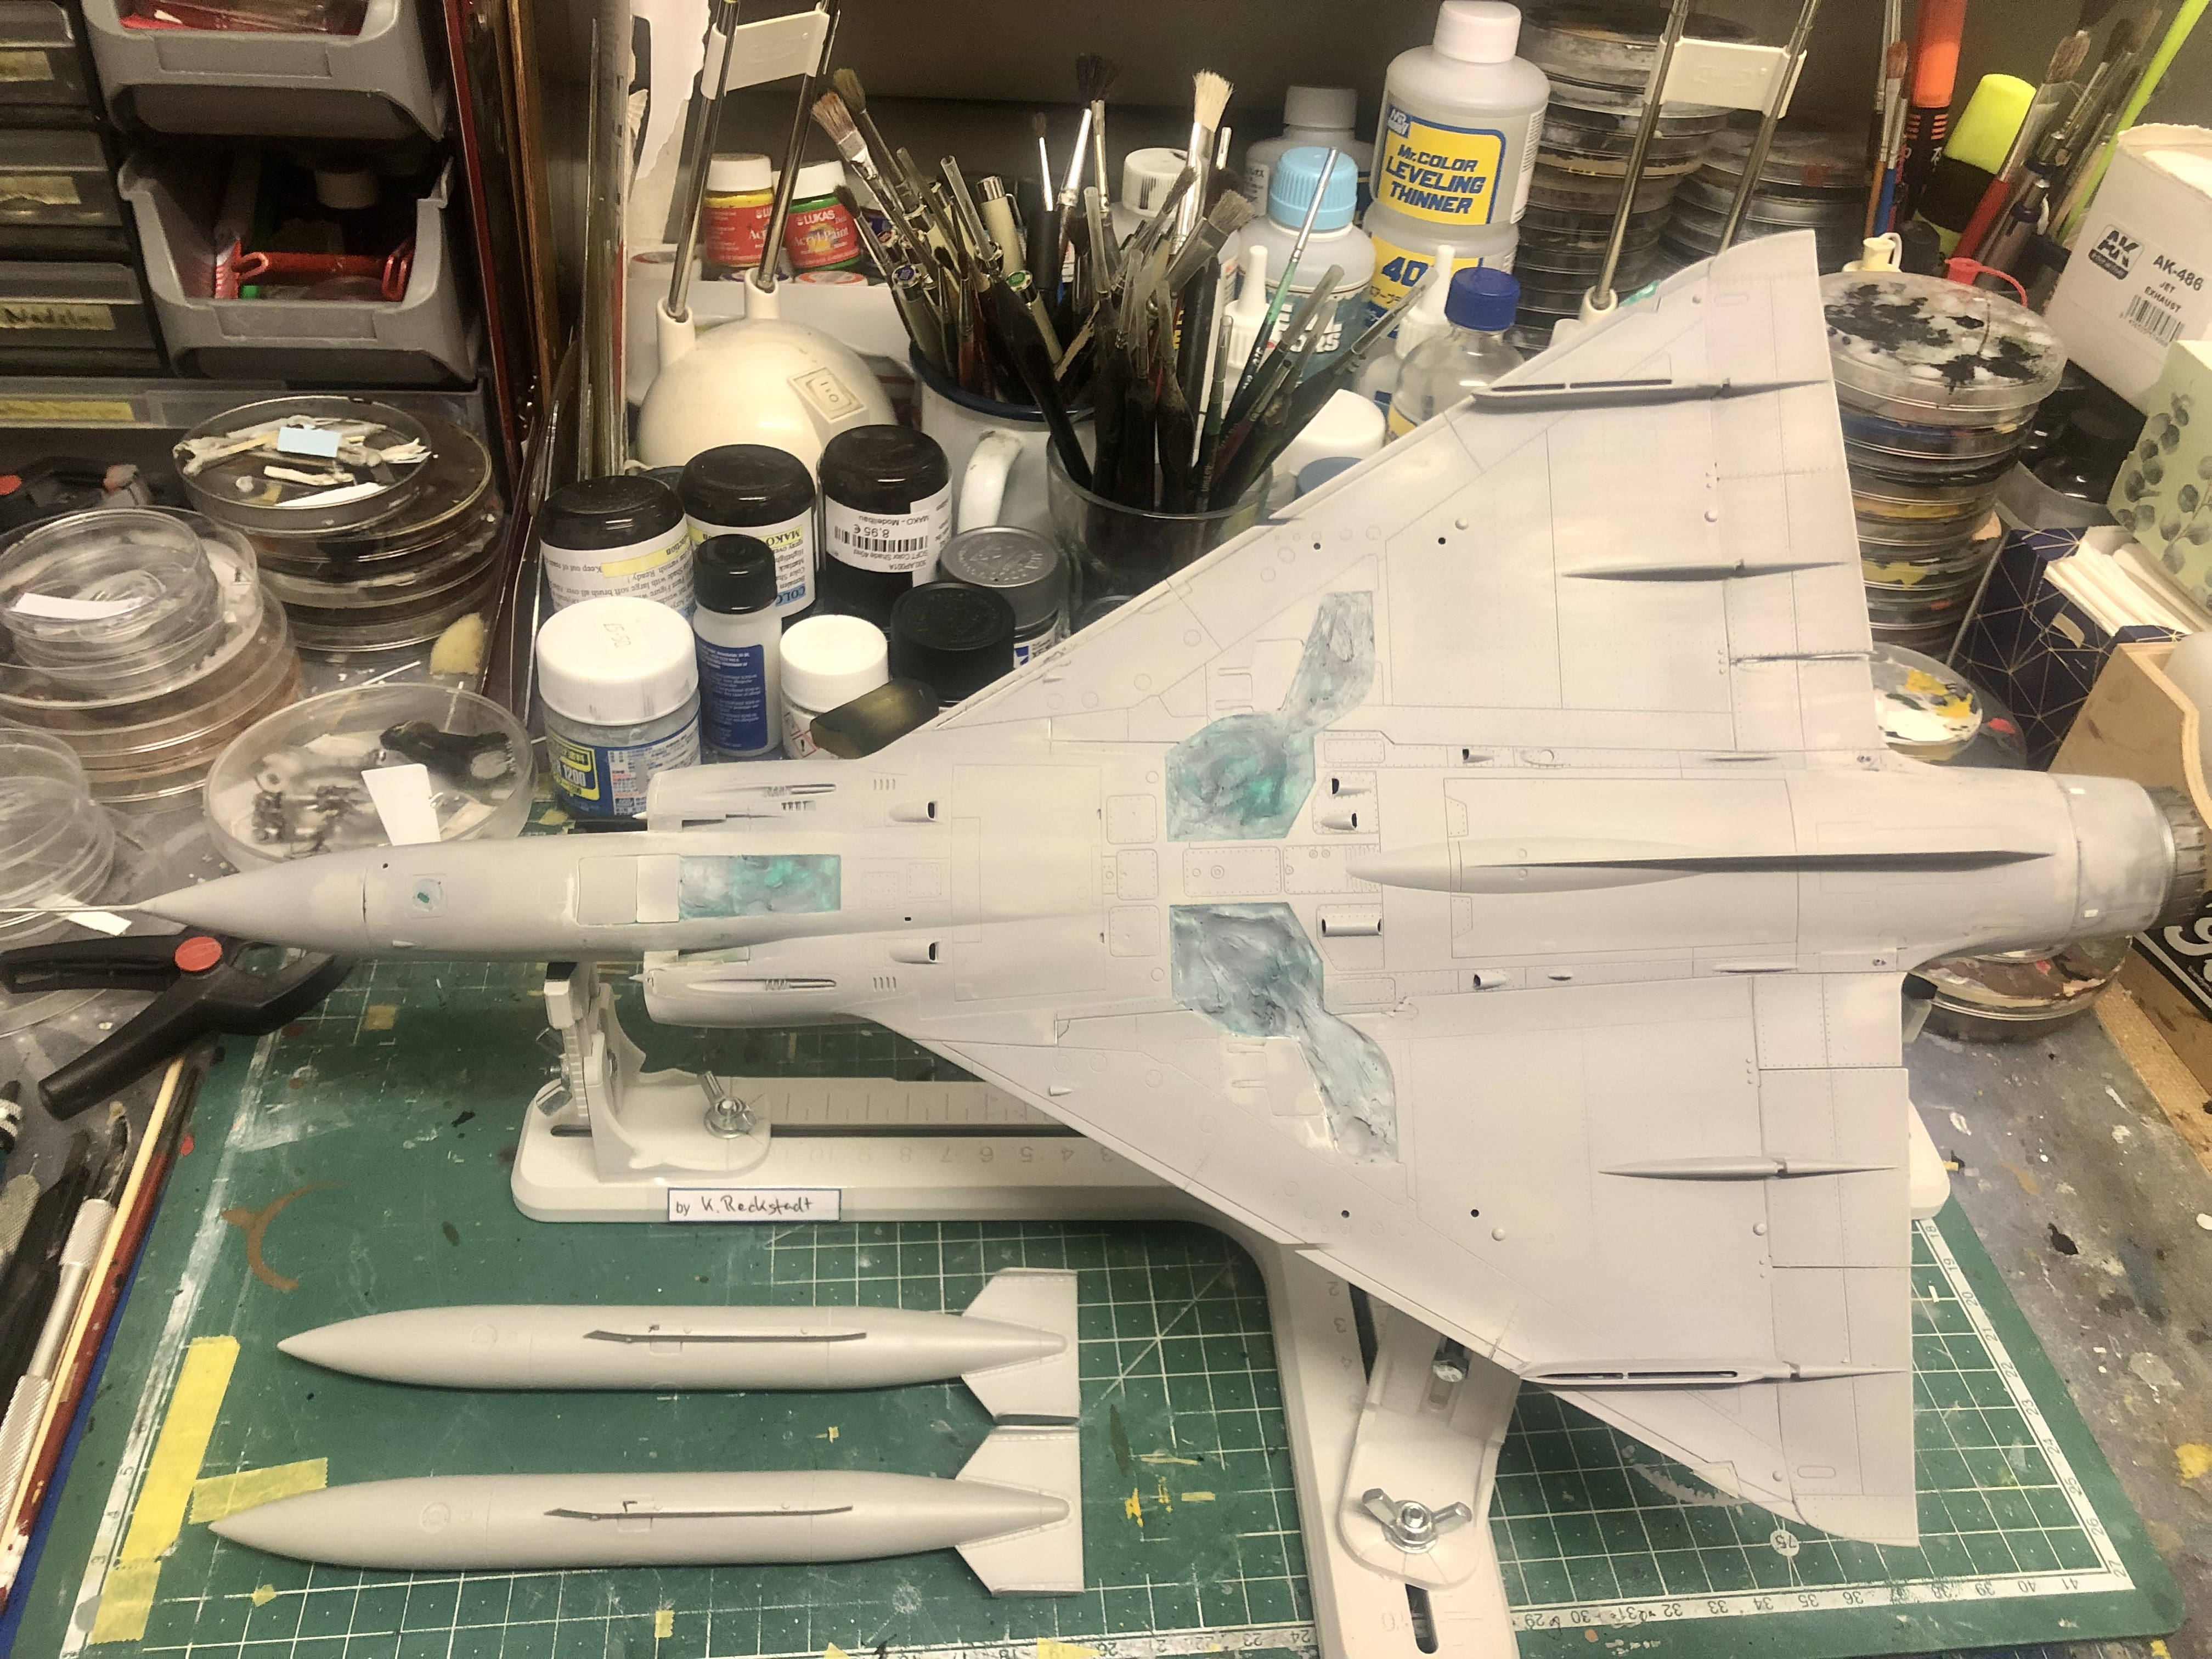
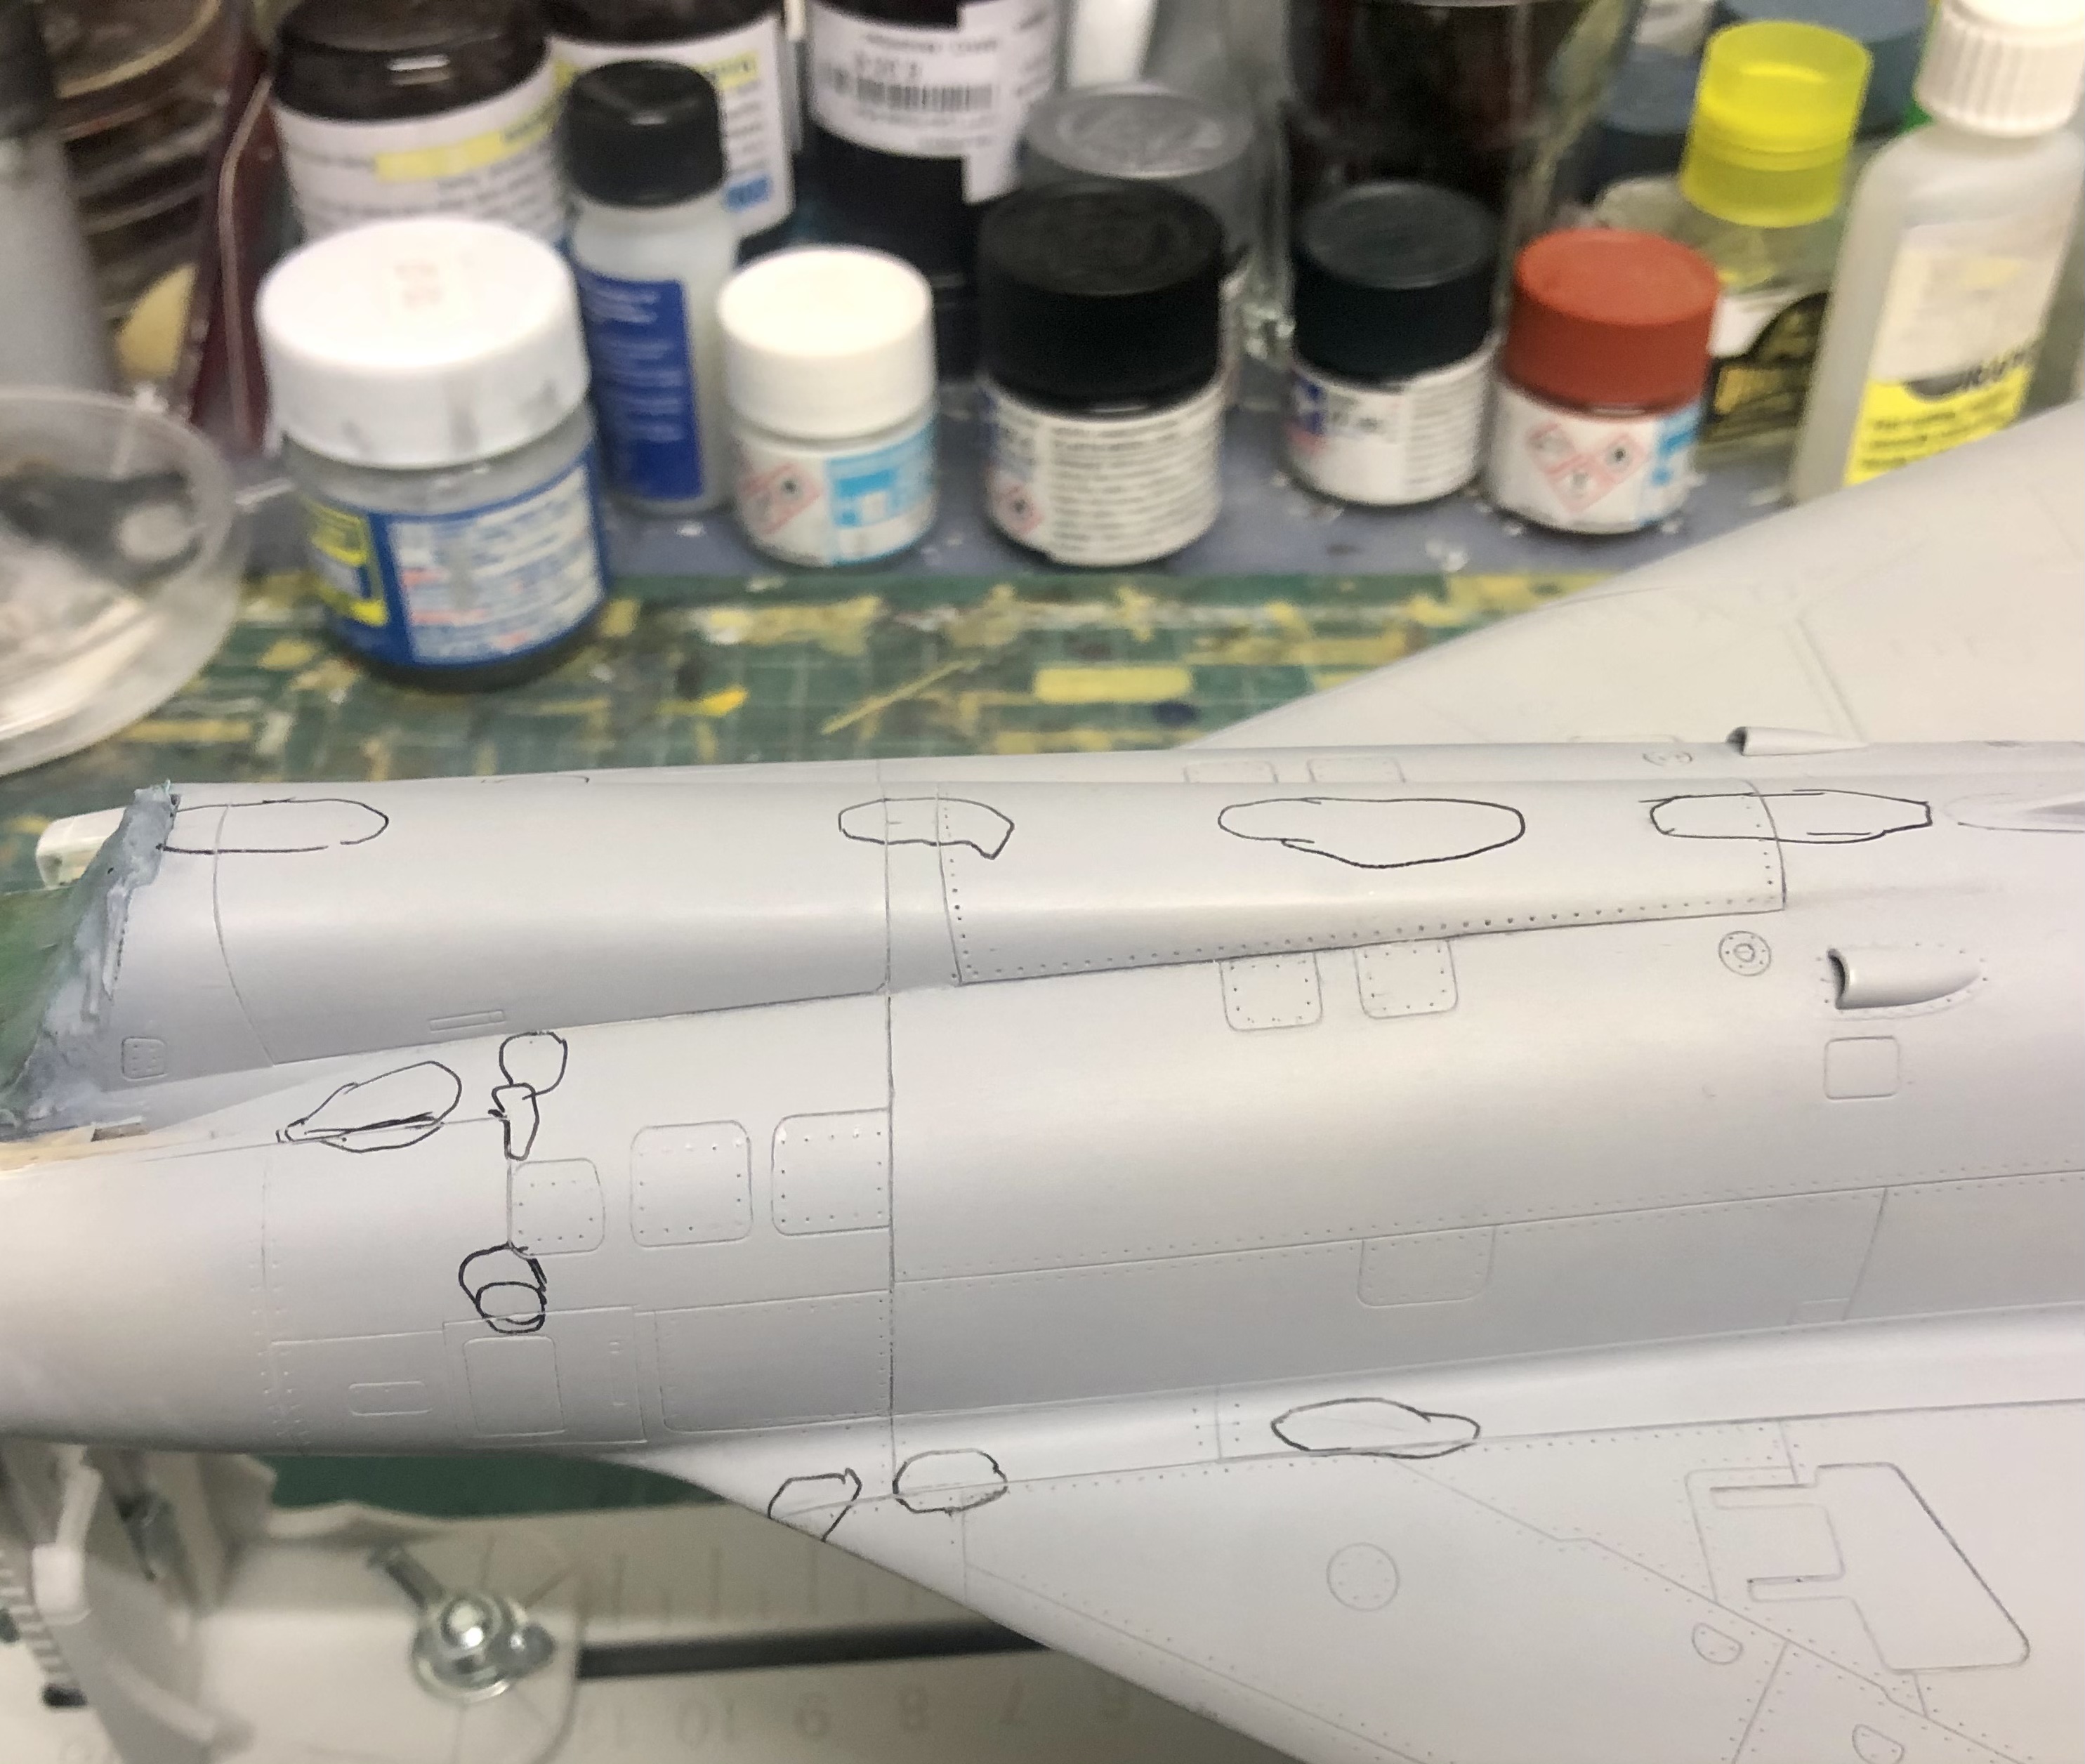
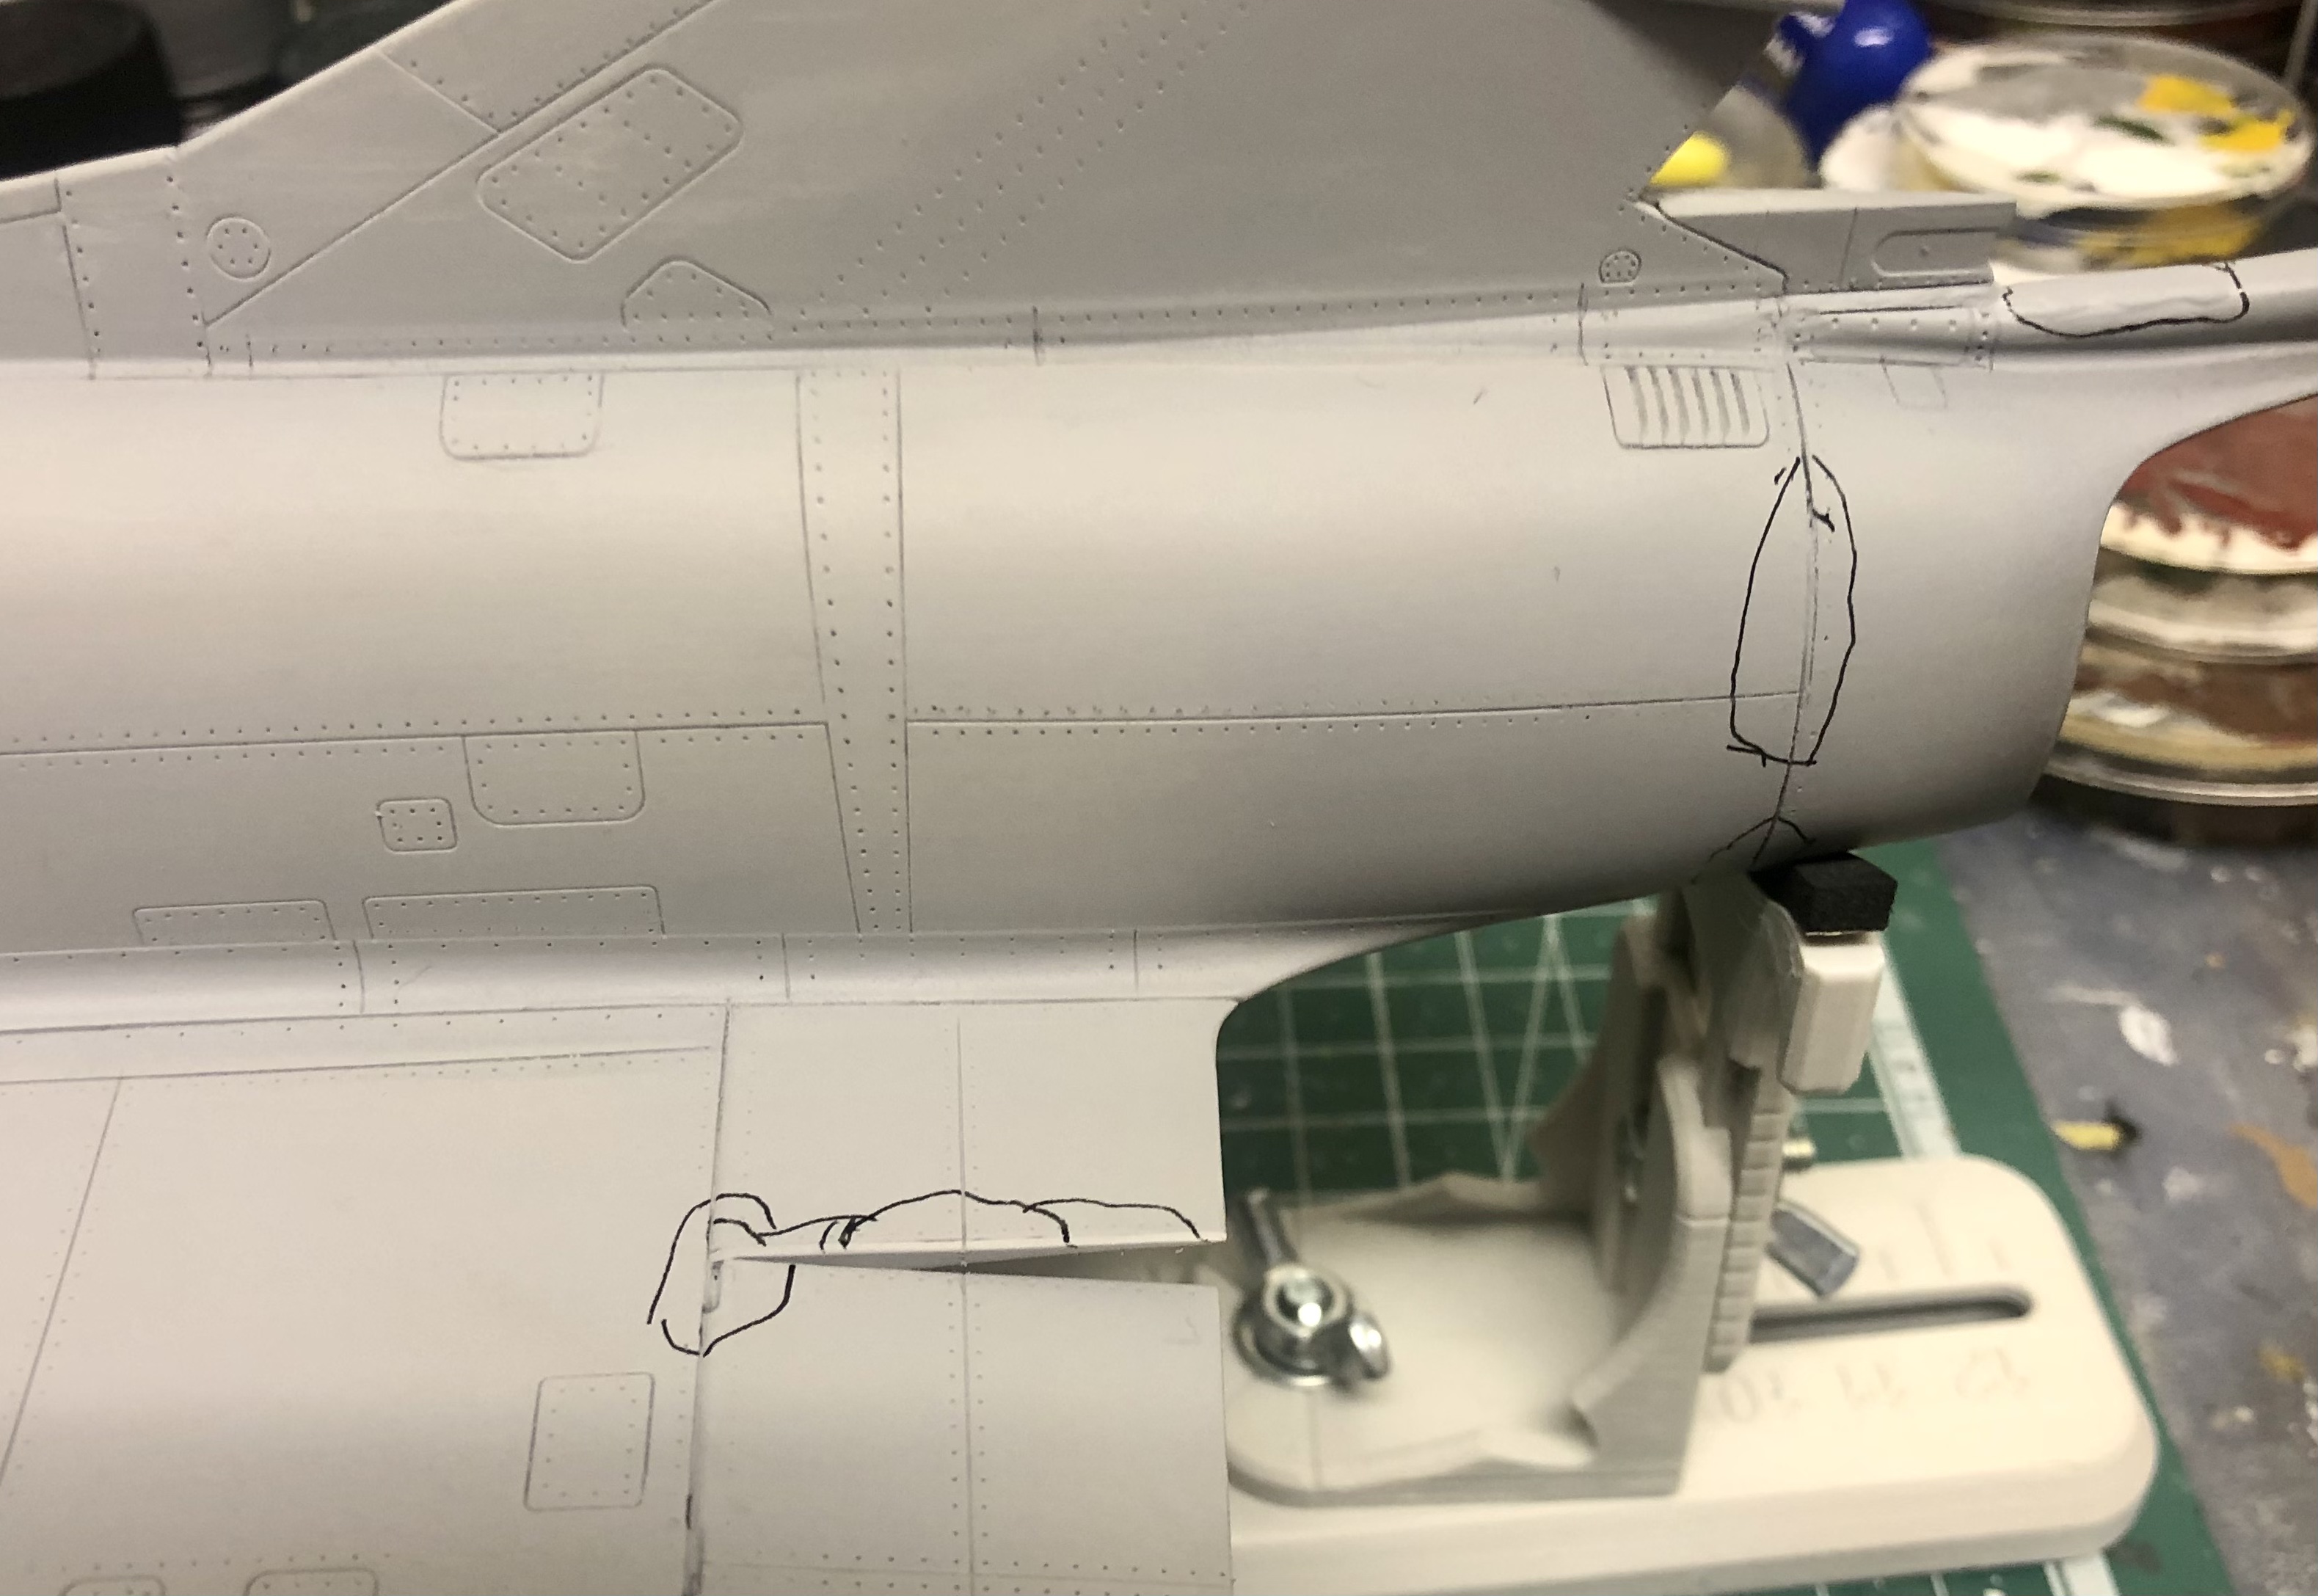
Kaireckstadt replied to Kaireckstadt's topic in LSM 1/35 and Larger Work In Progress
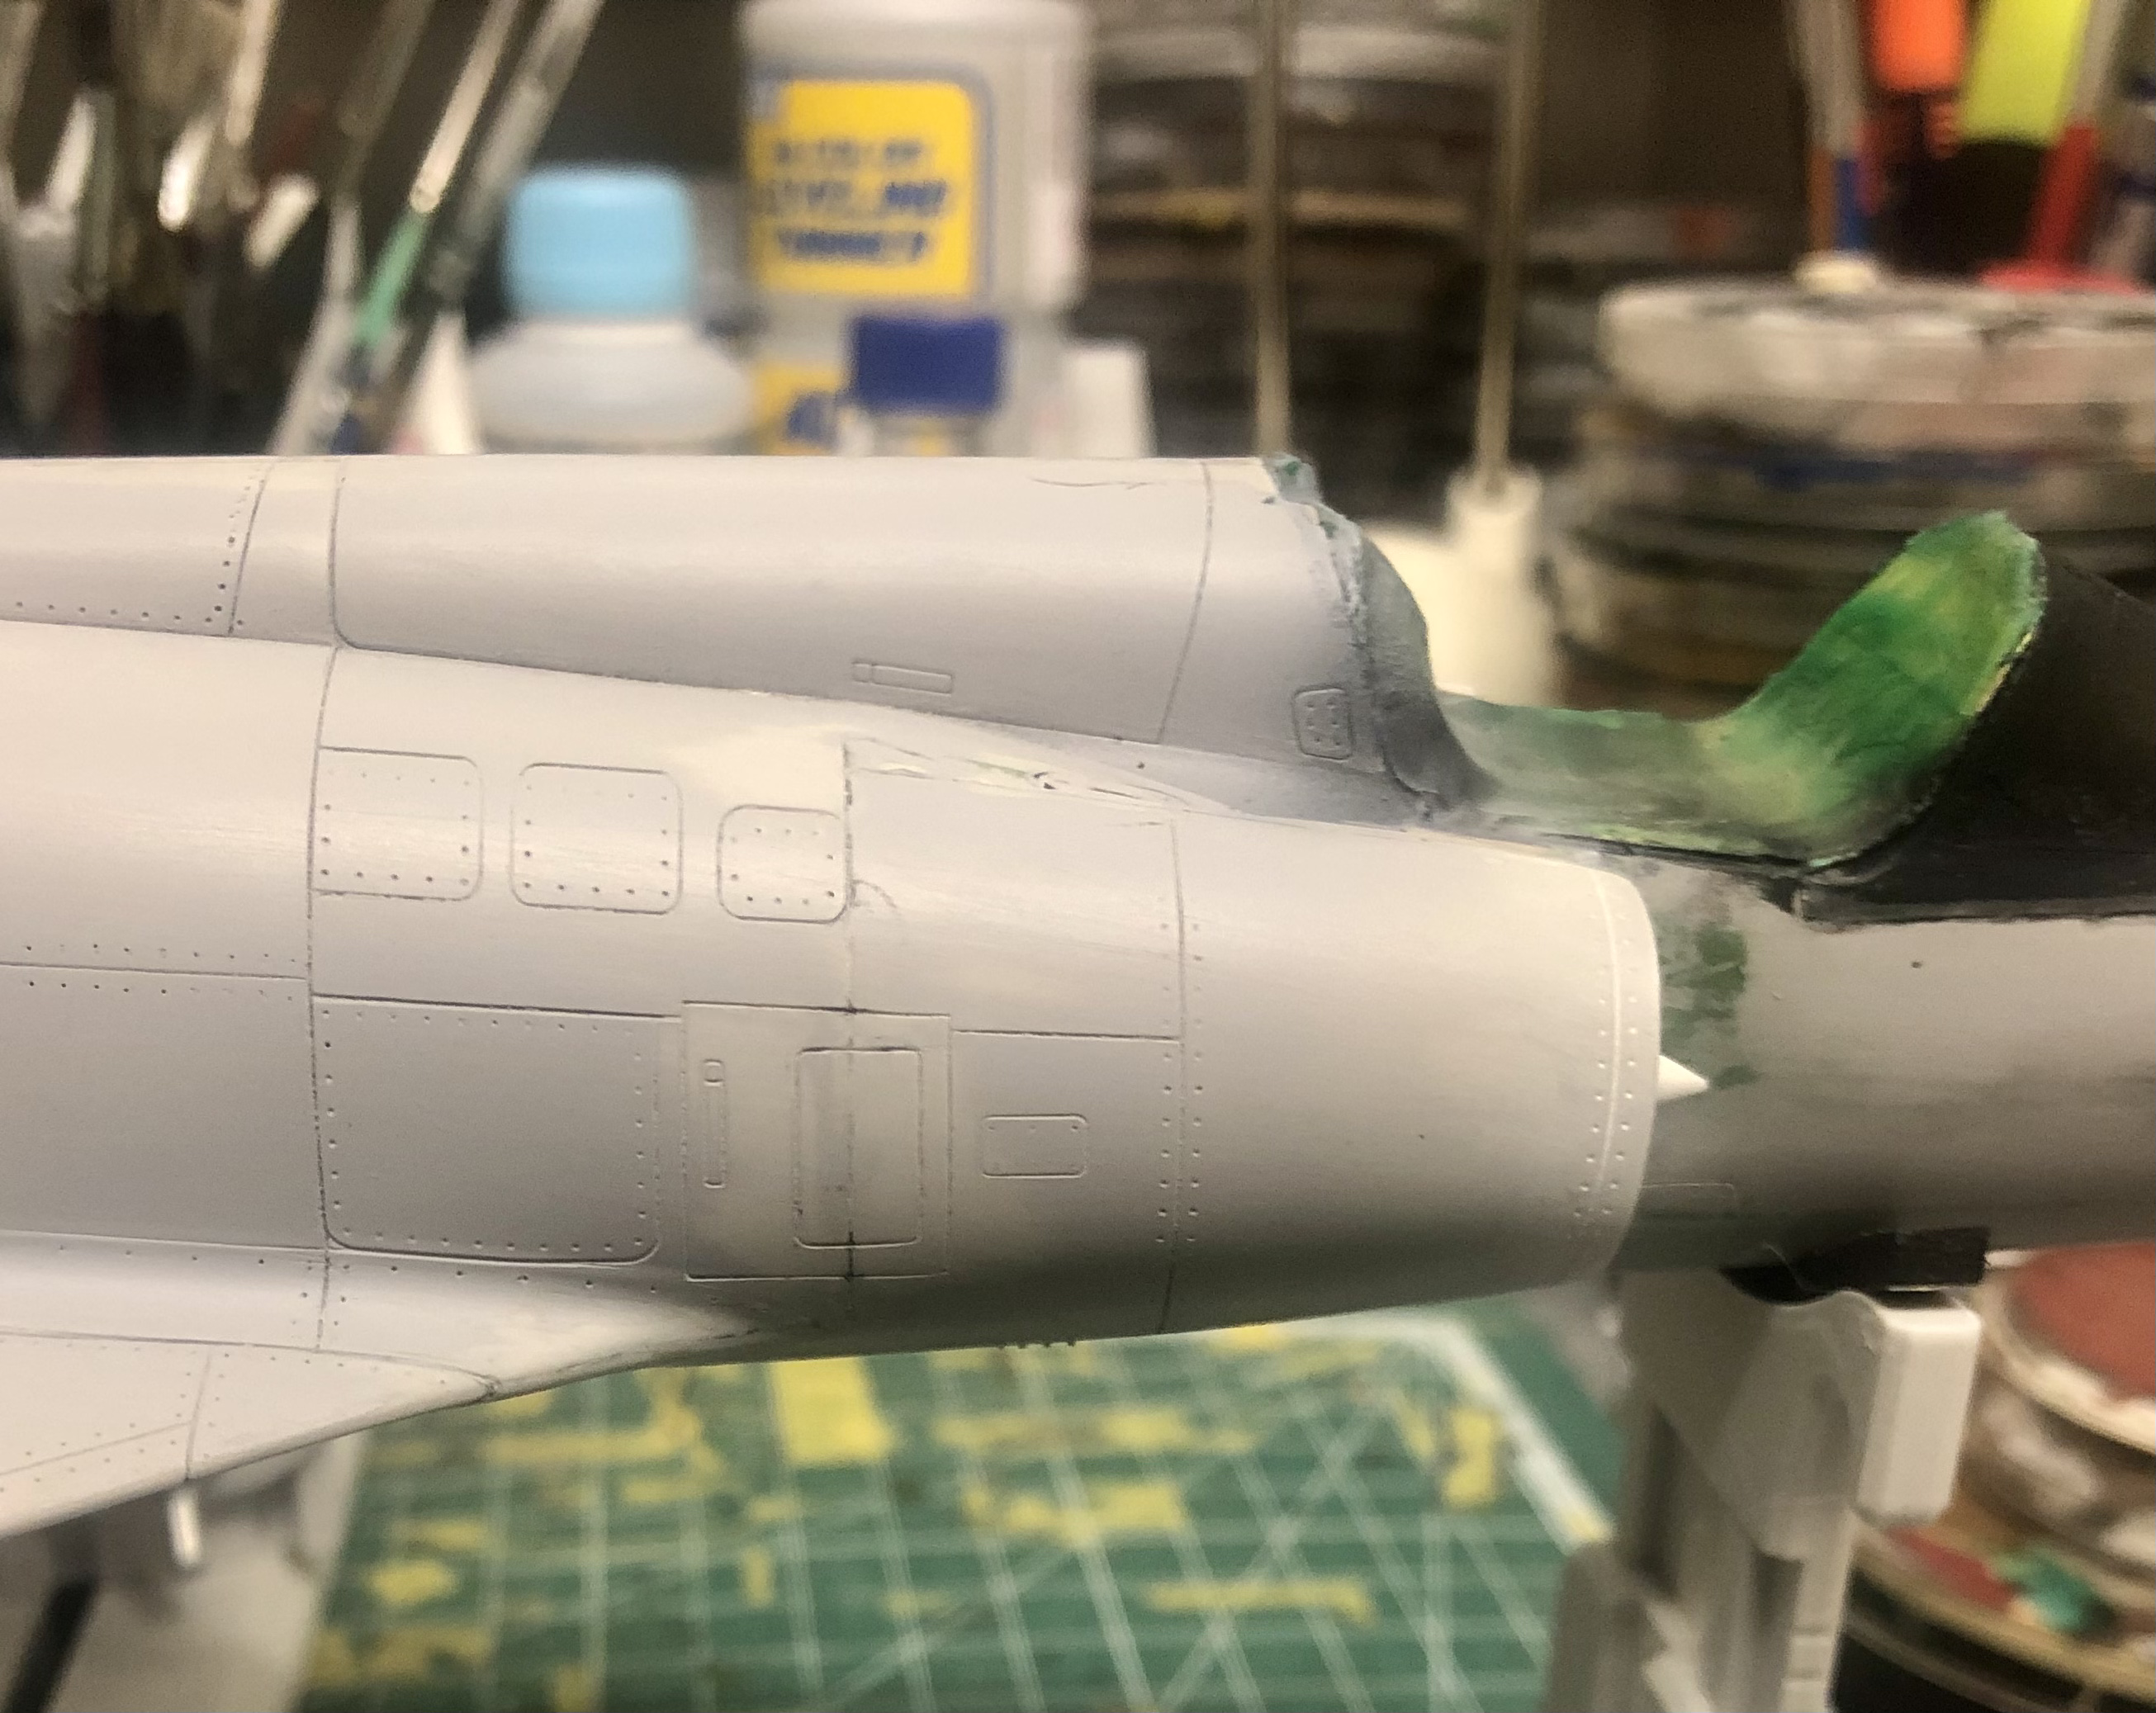
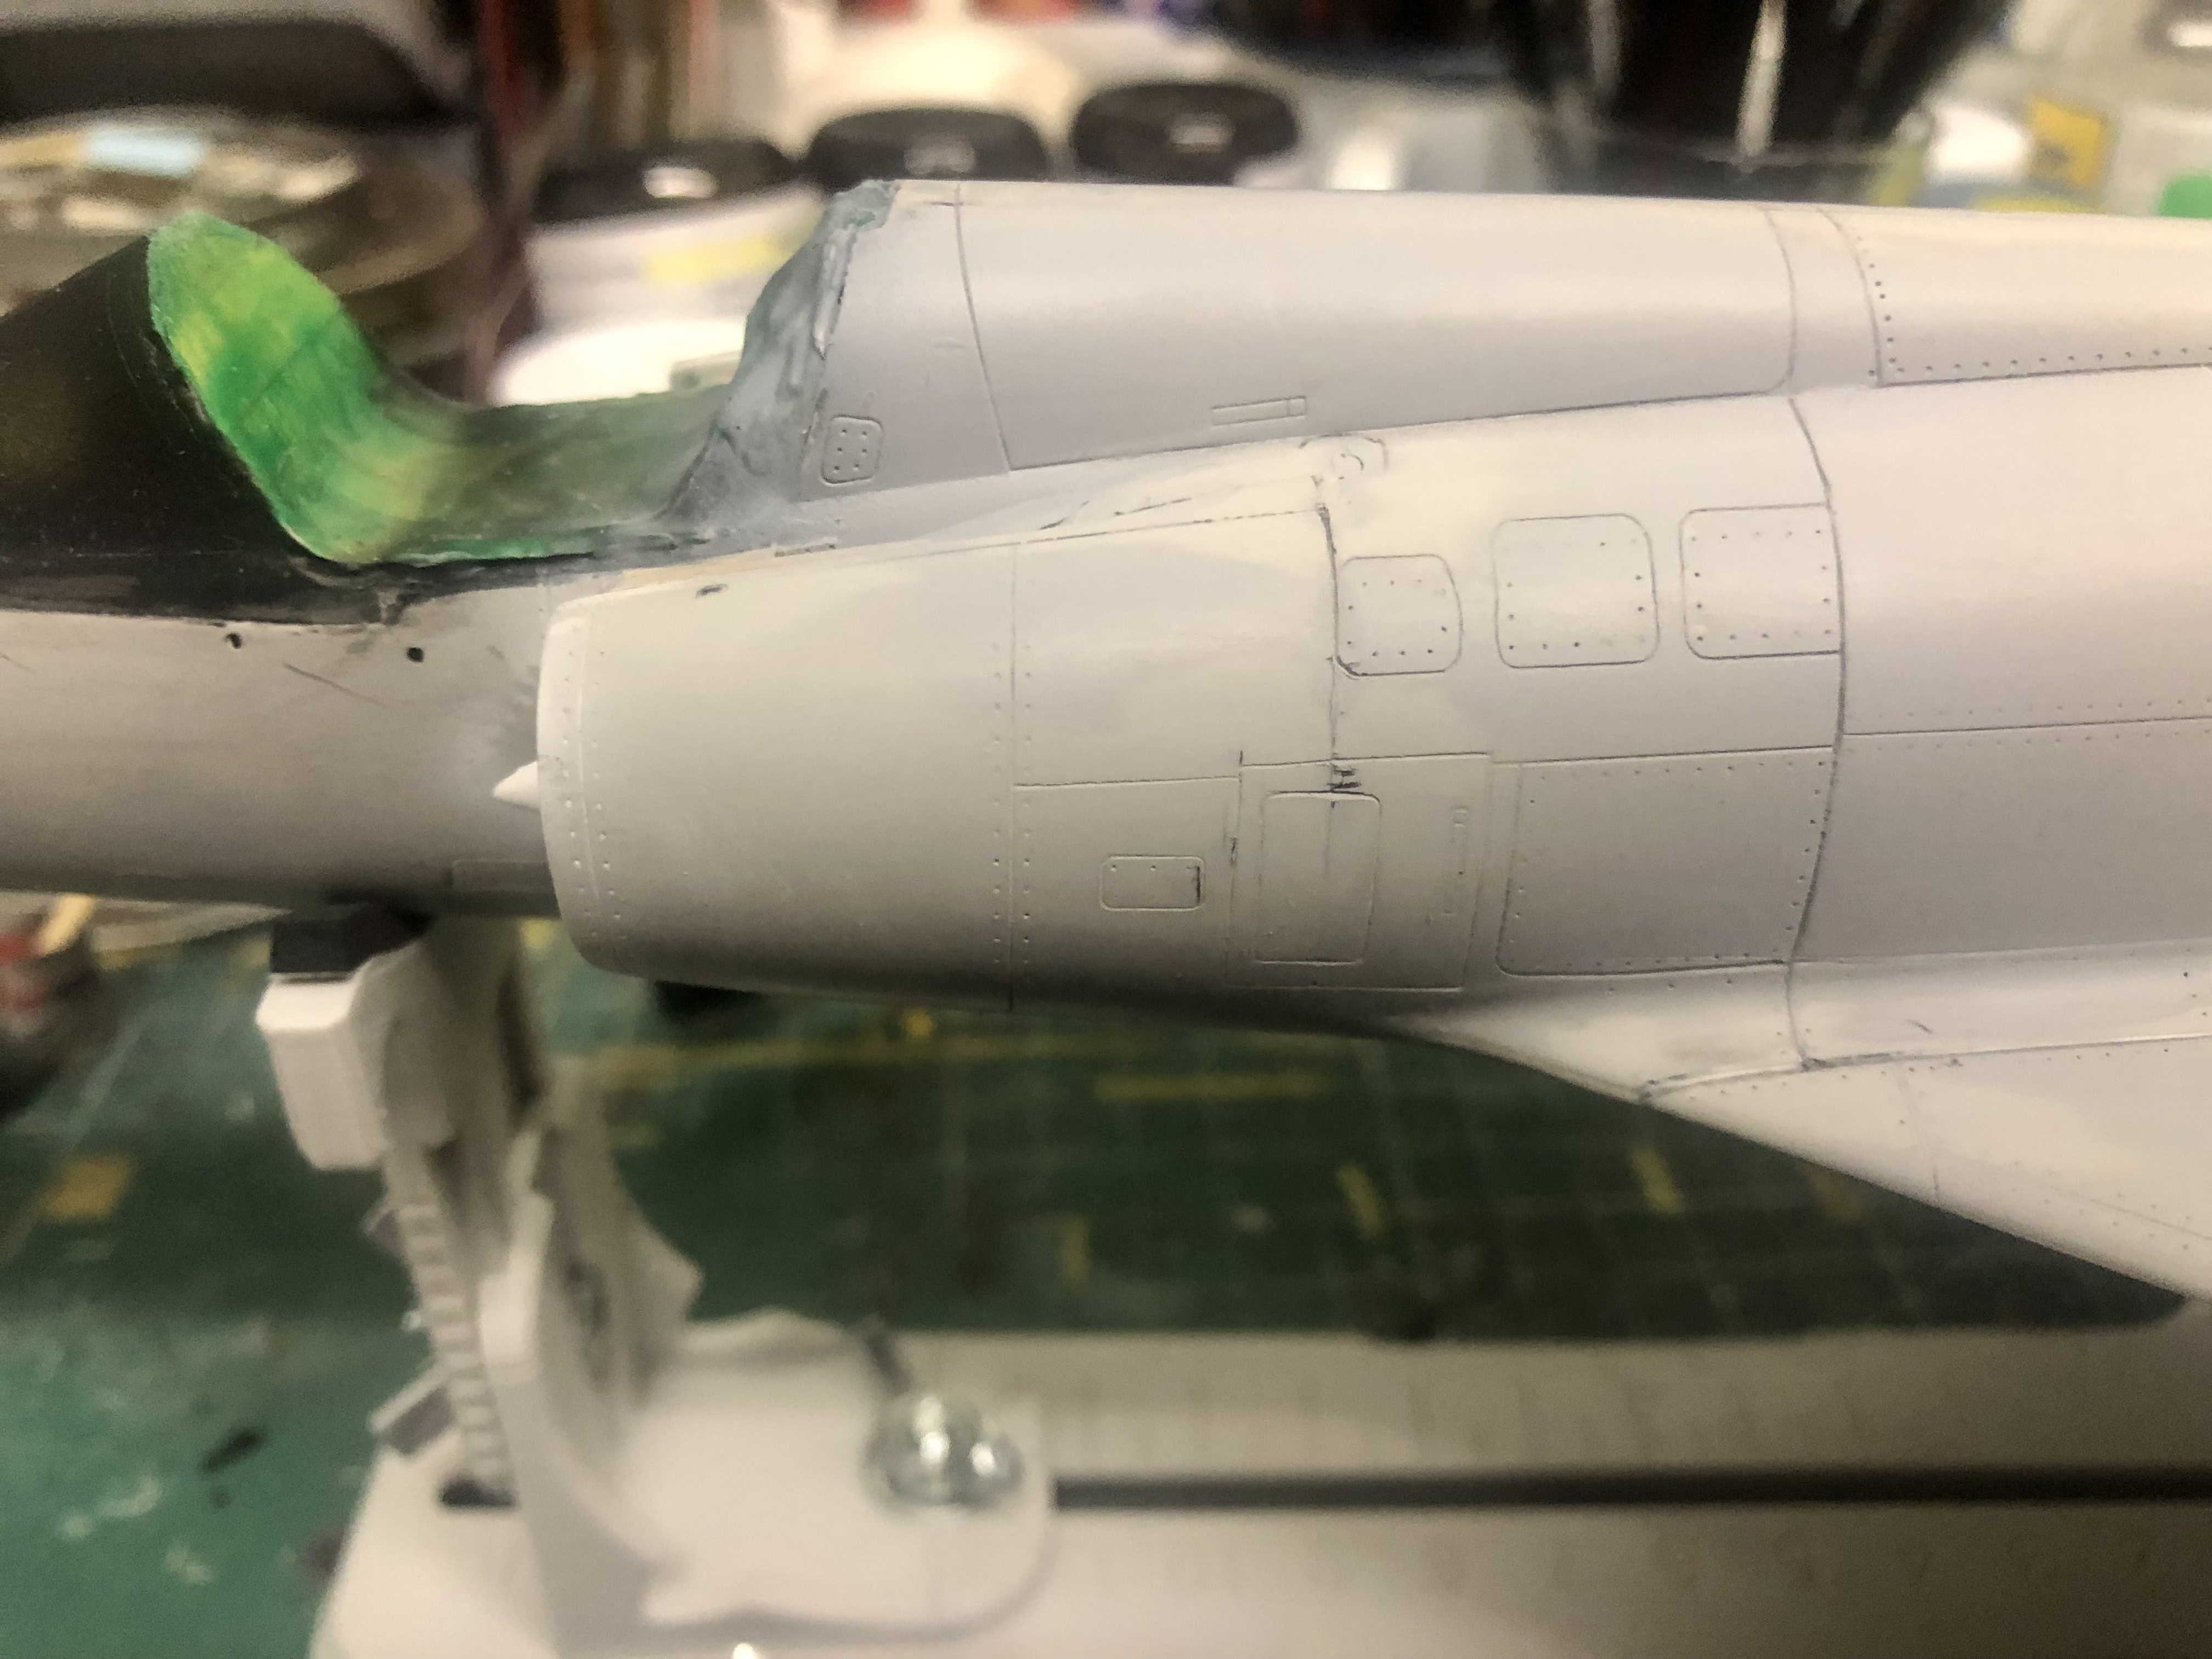
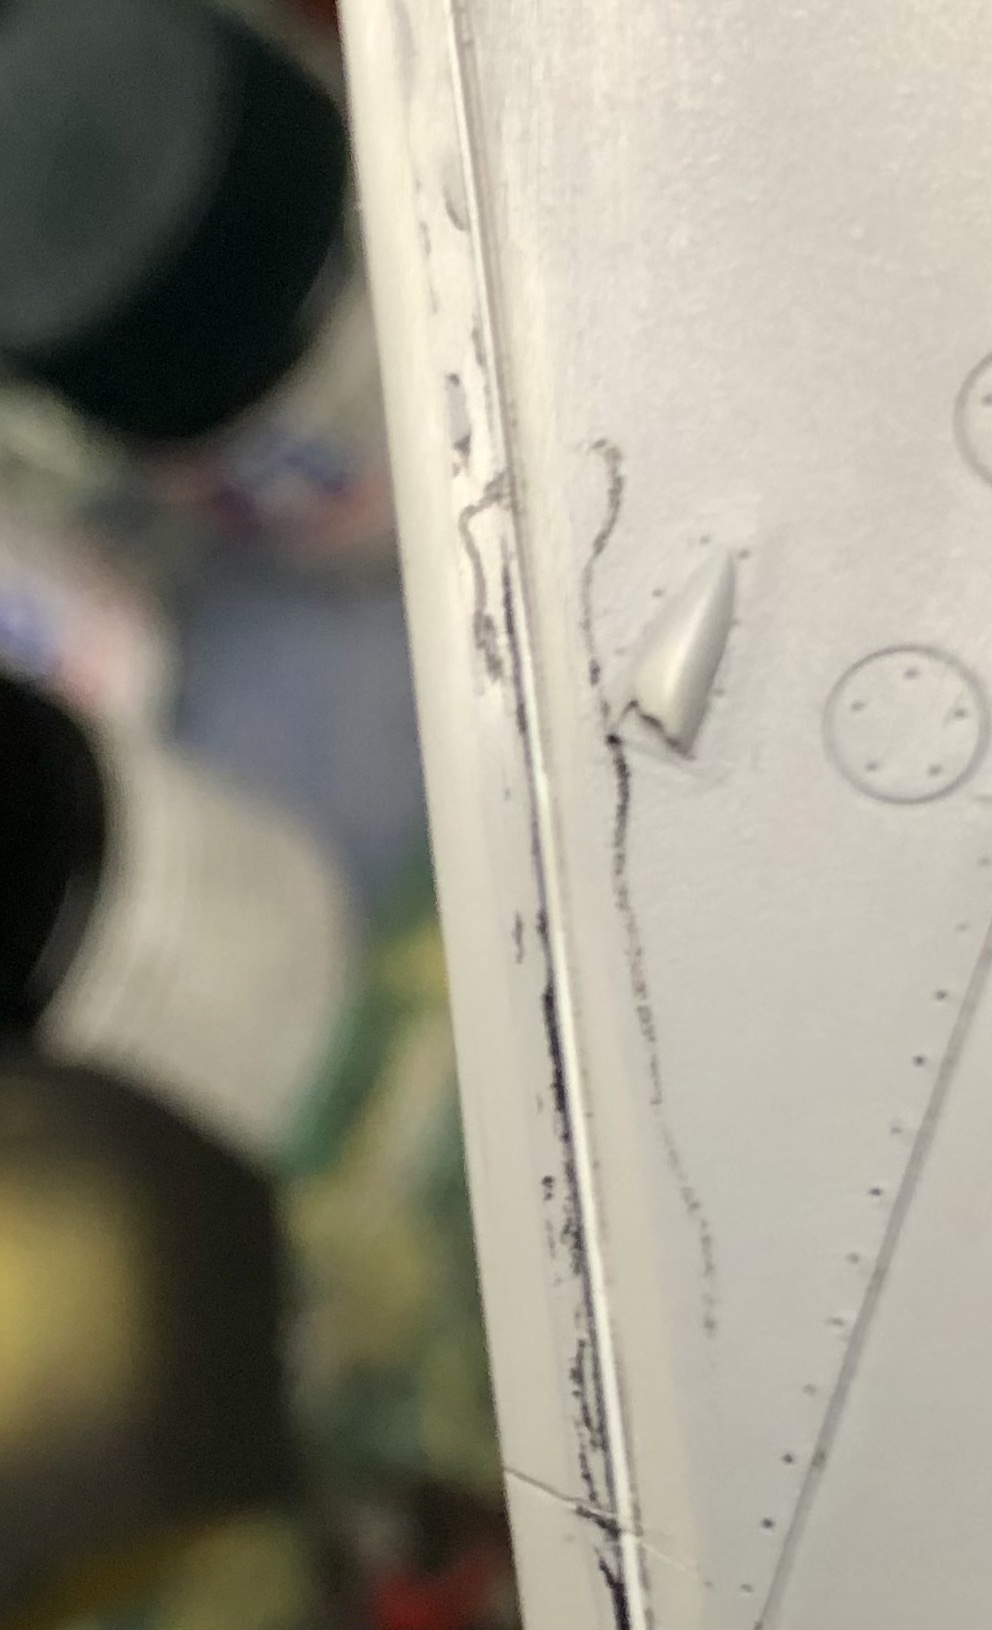
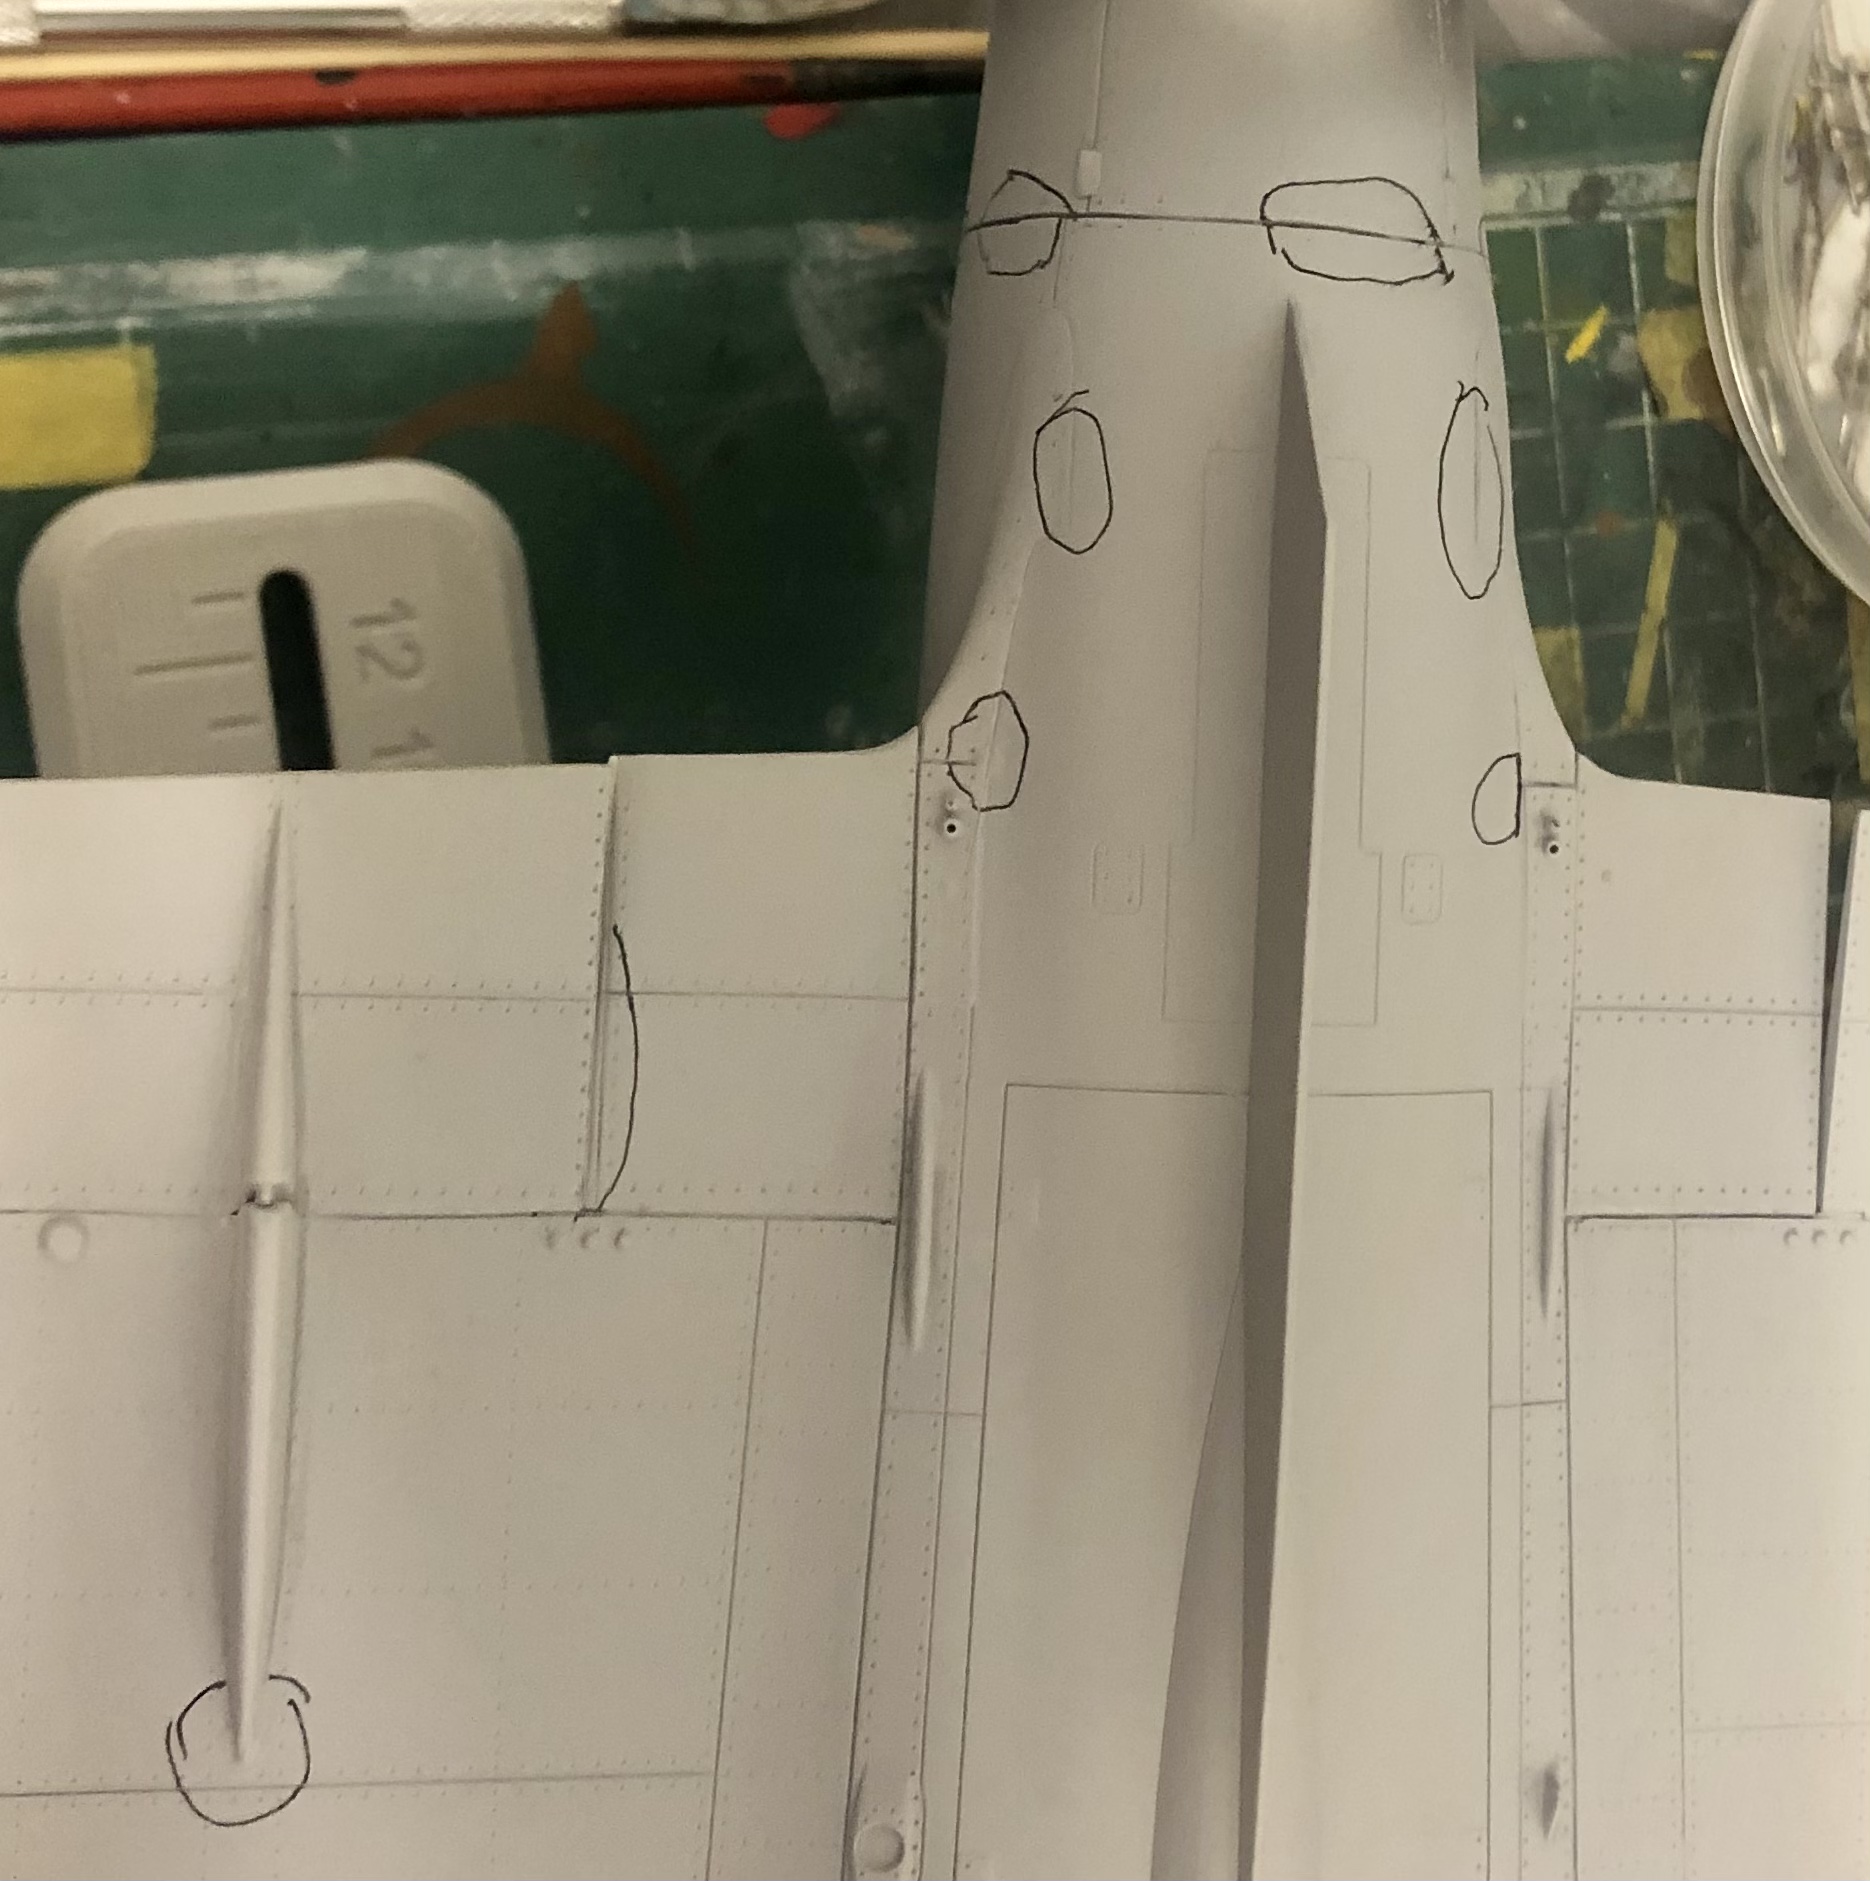
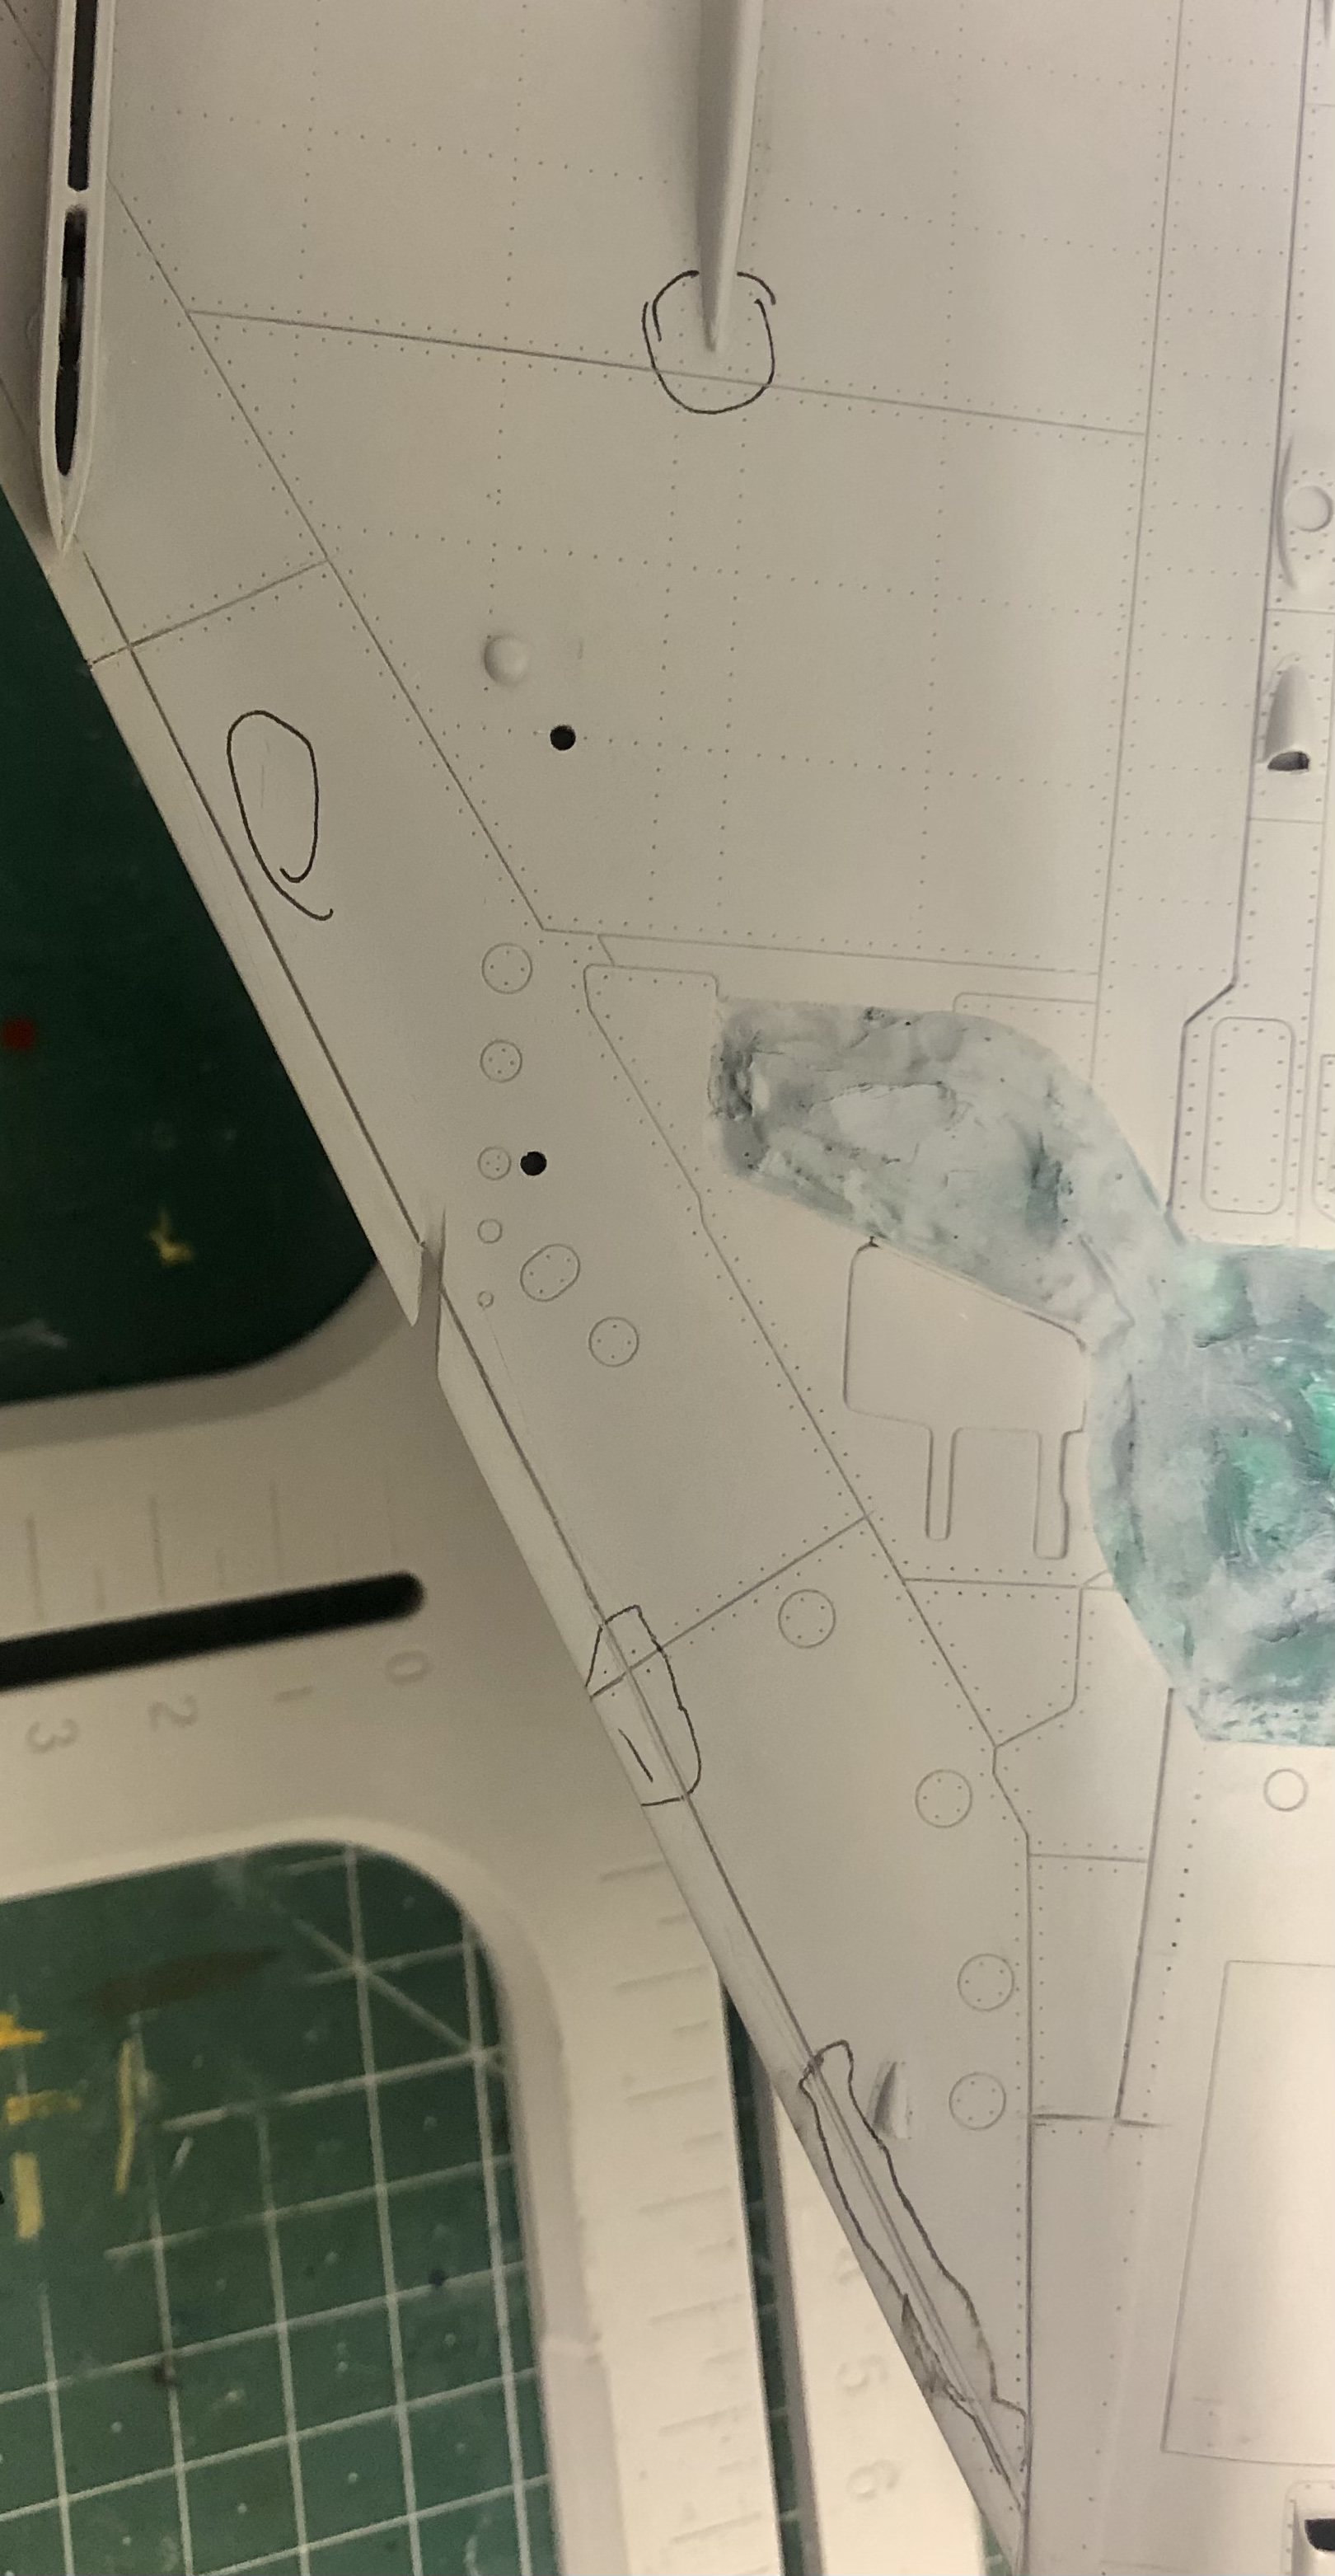
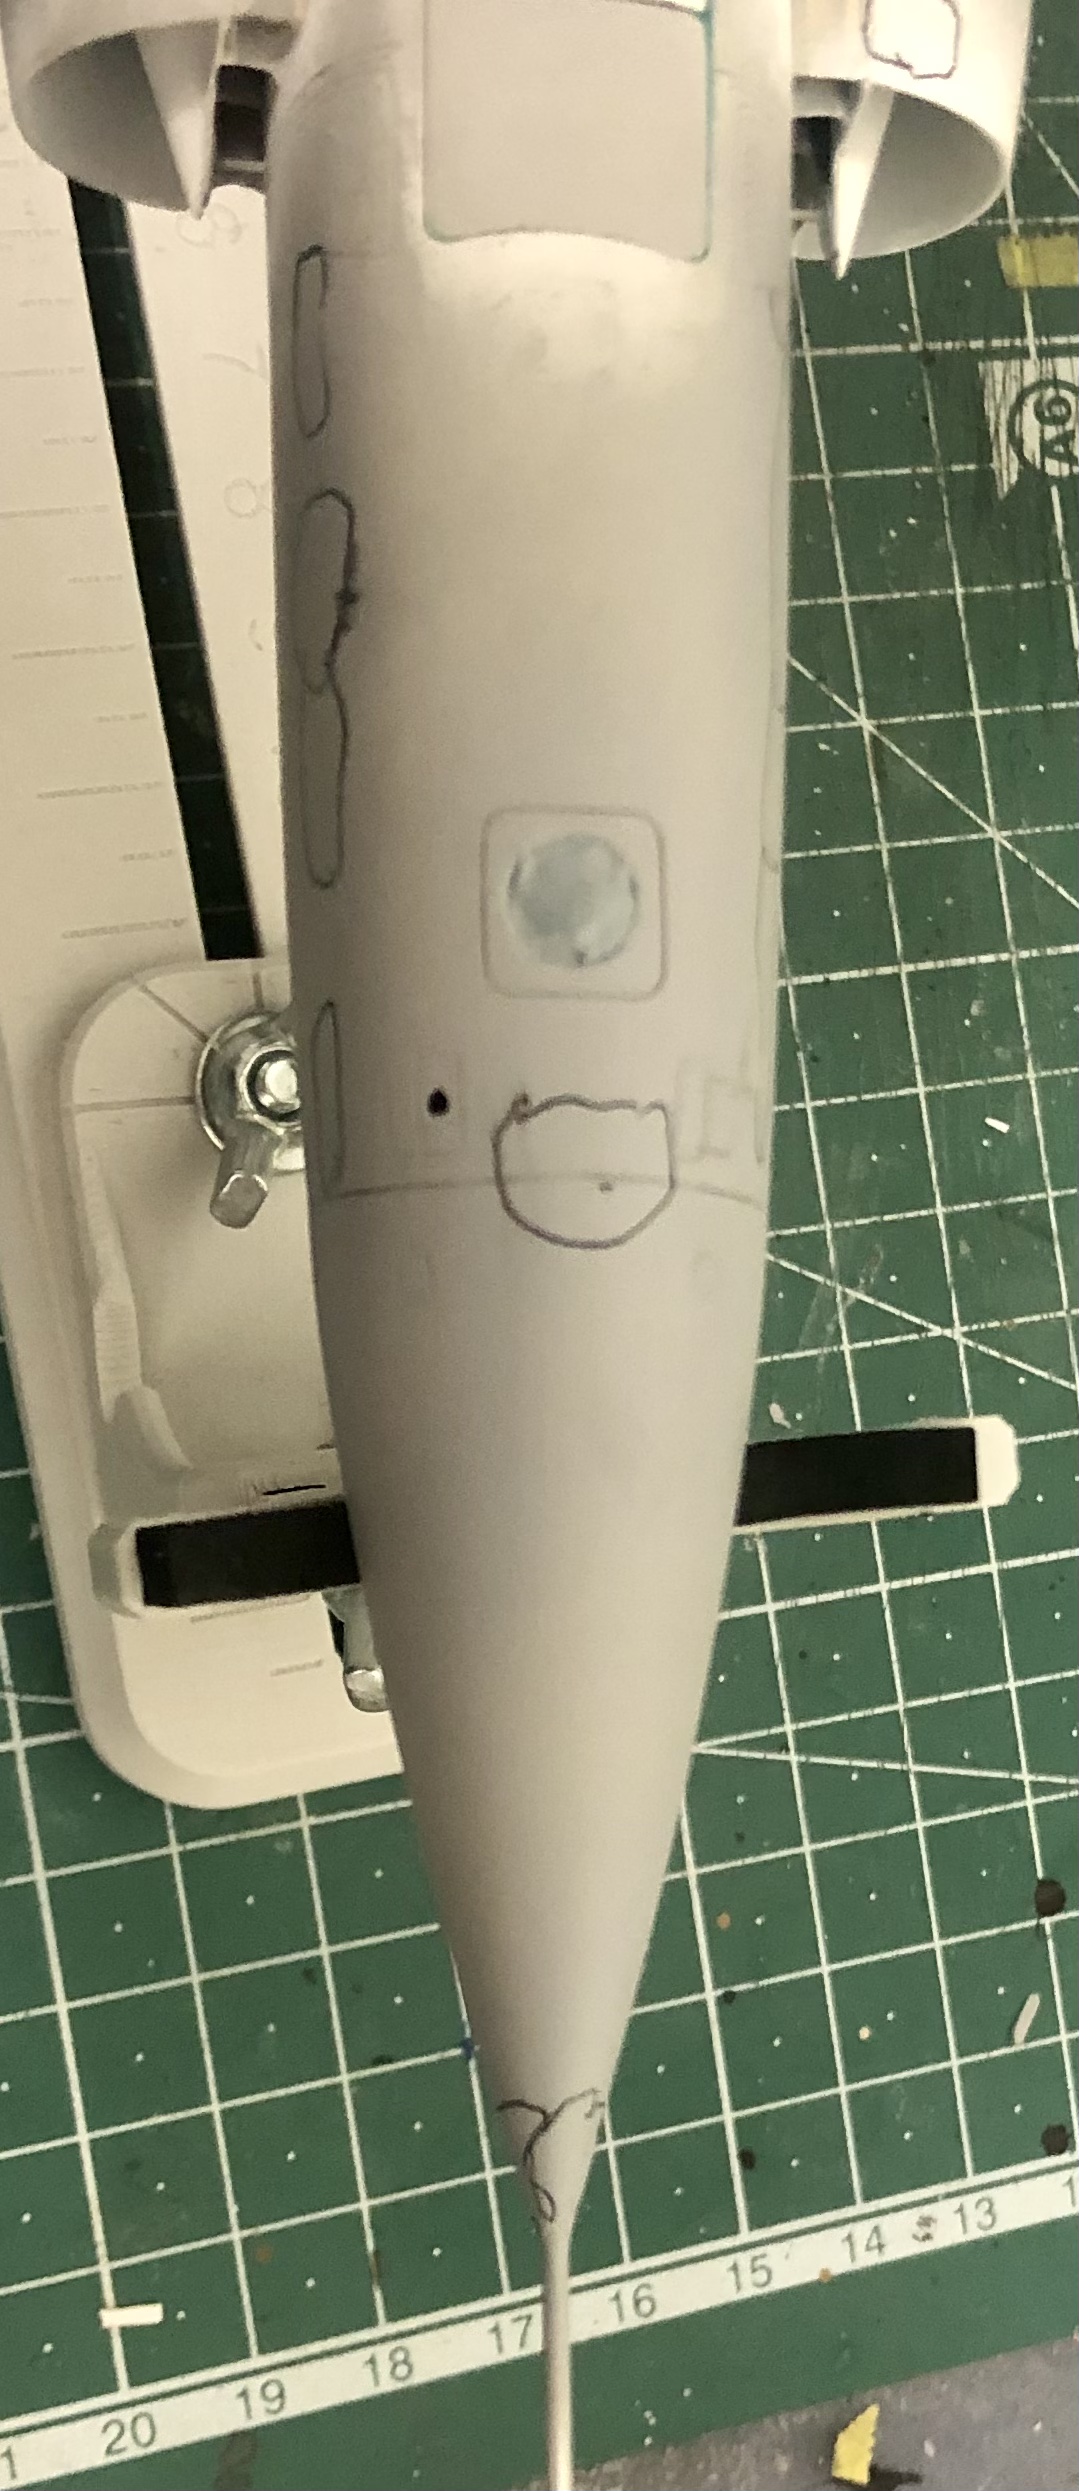
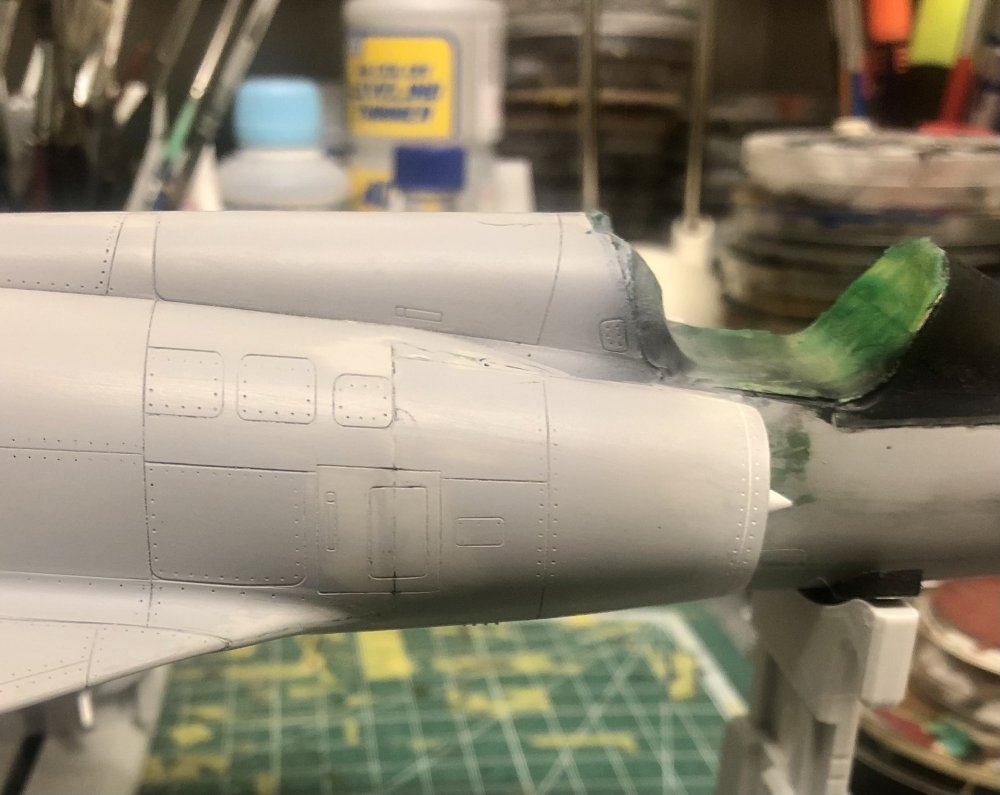
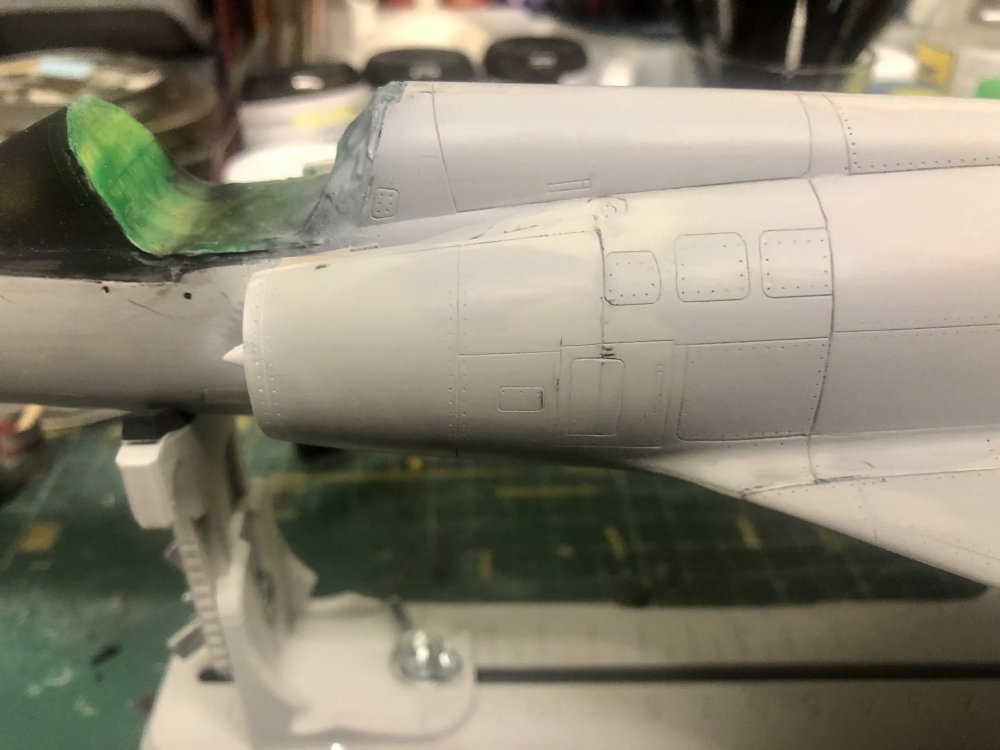
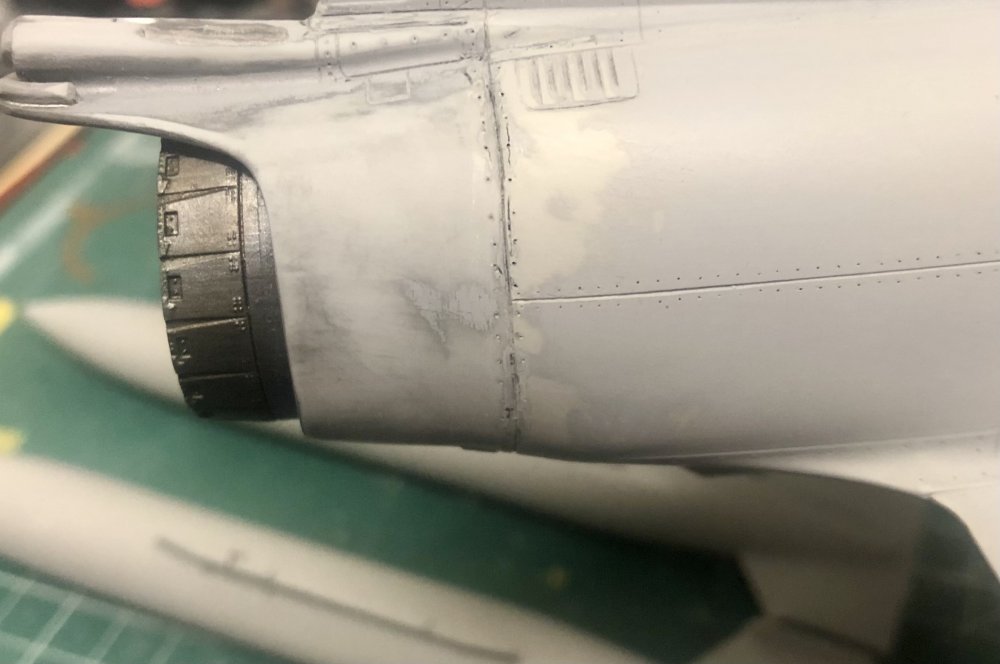
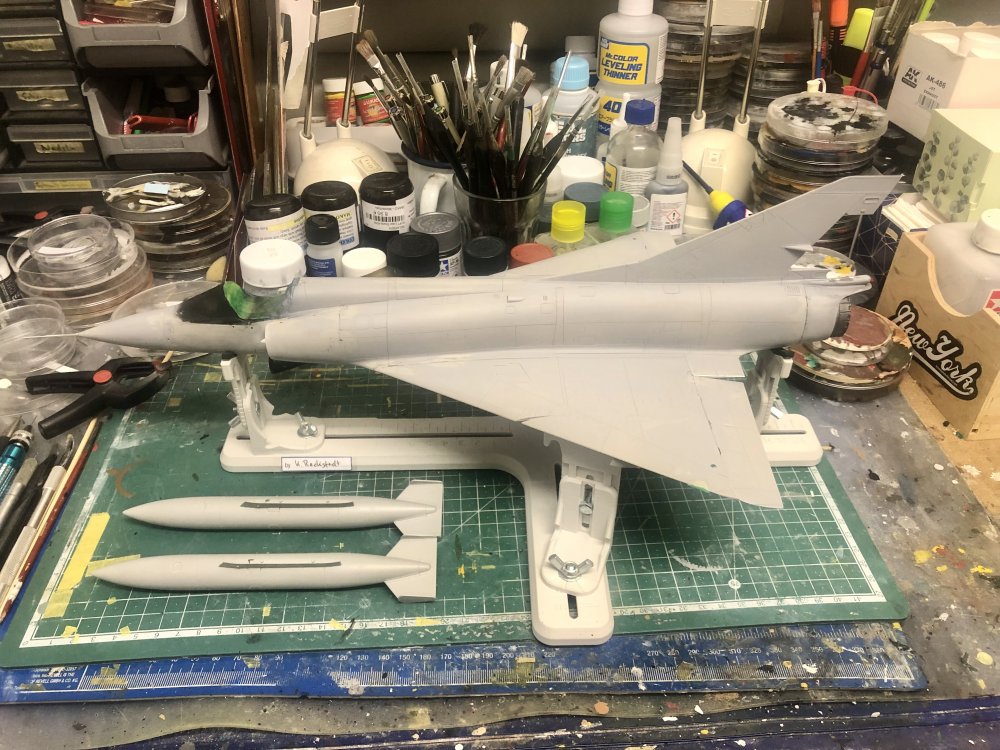
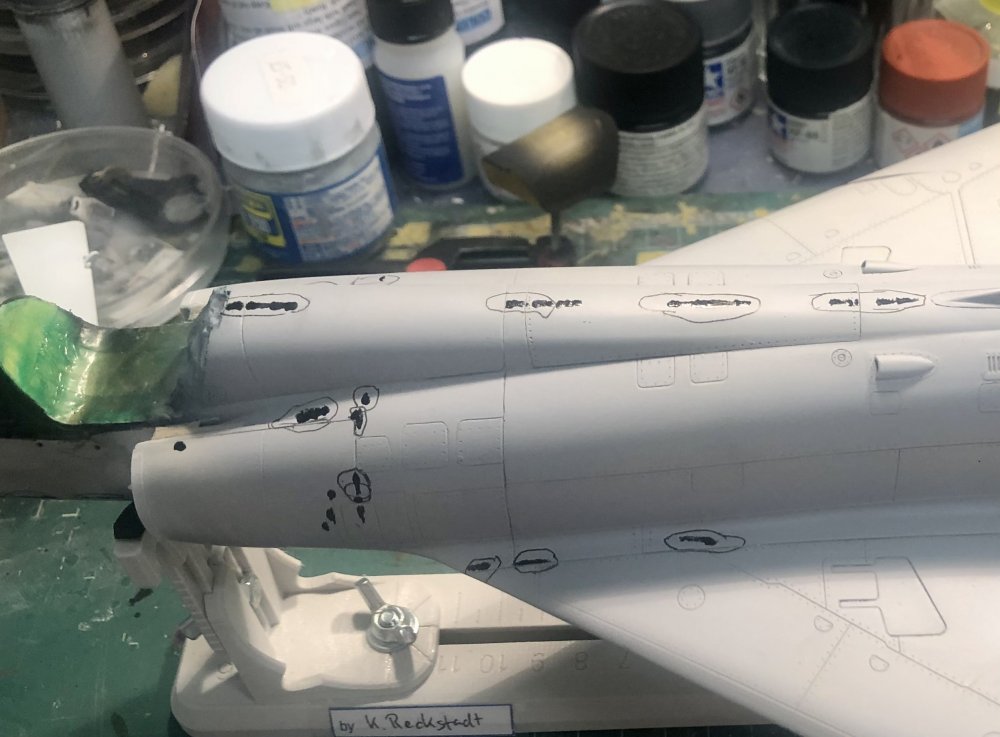
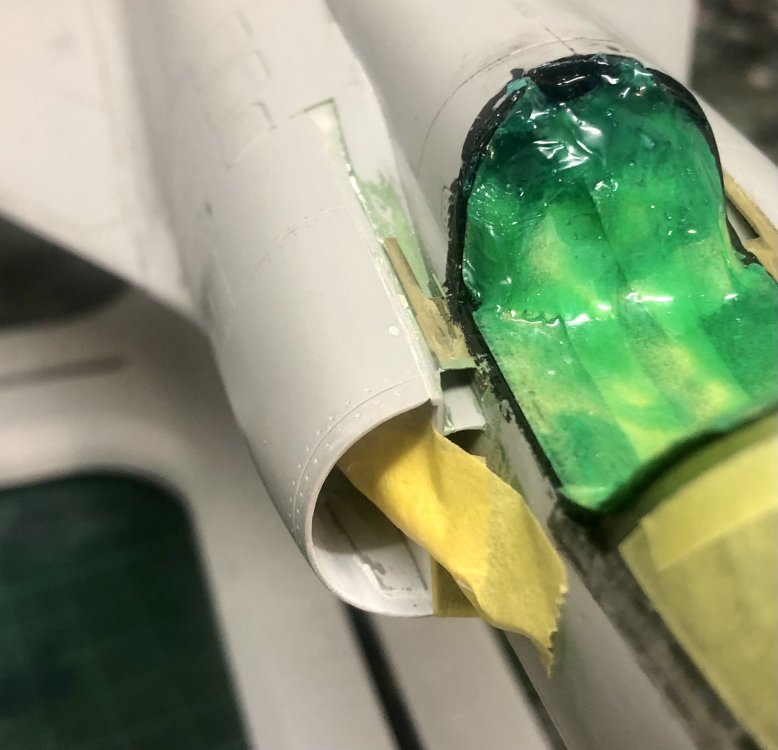
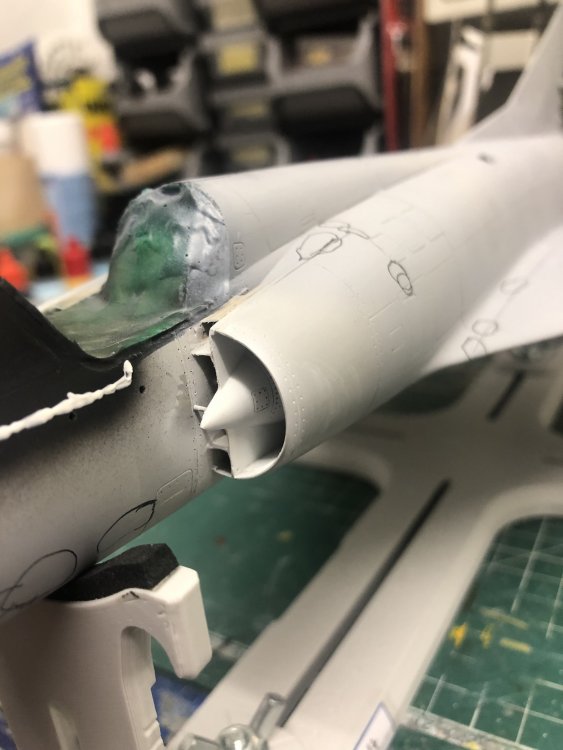
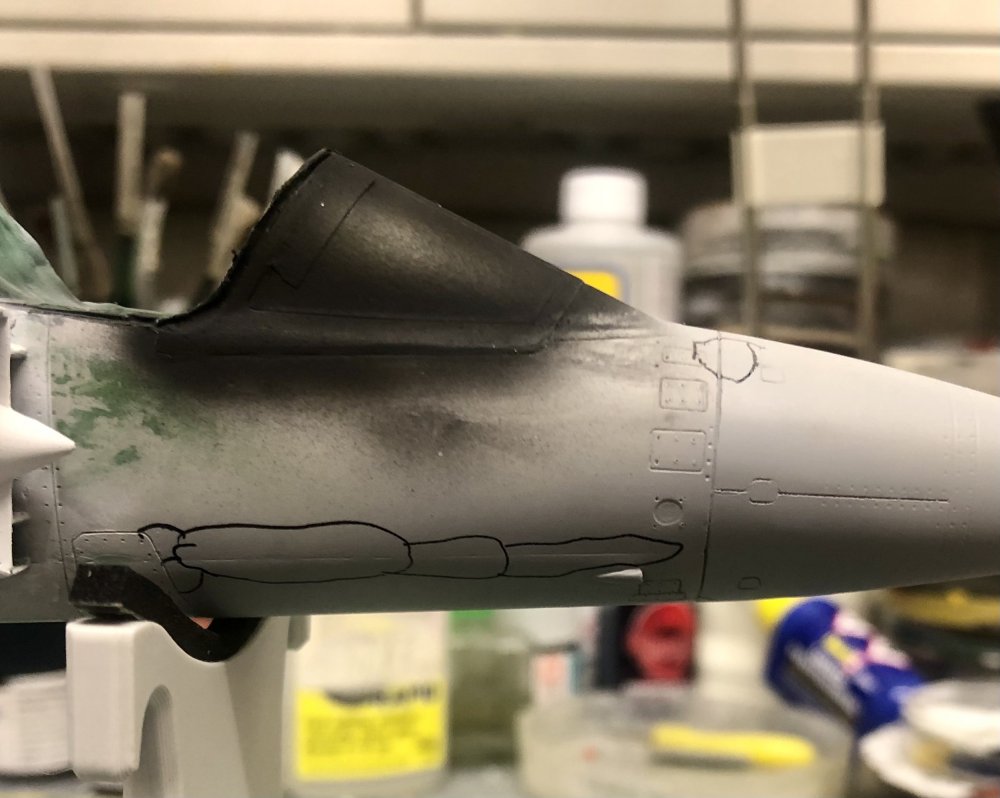
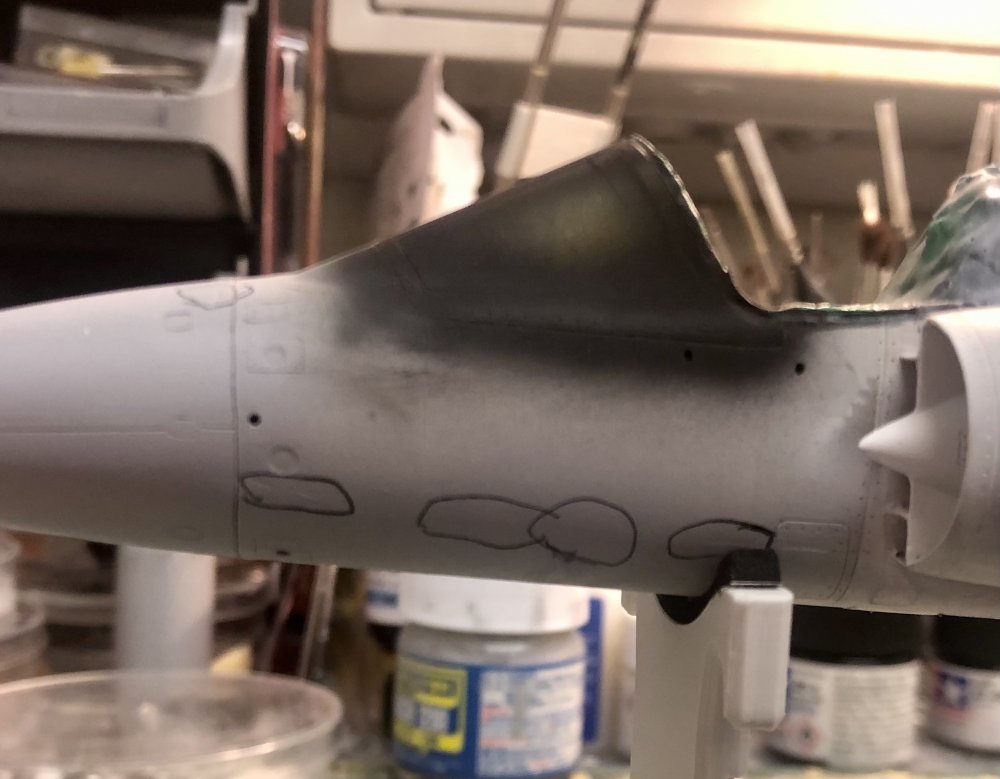
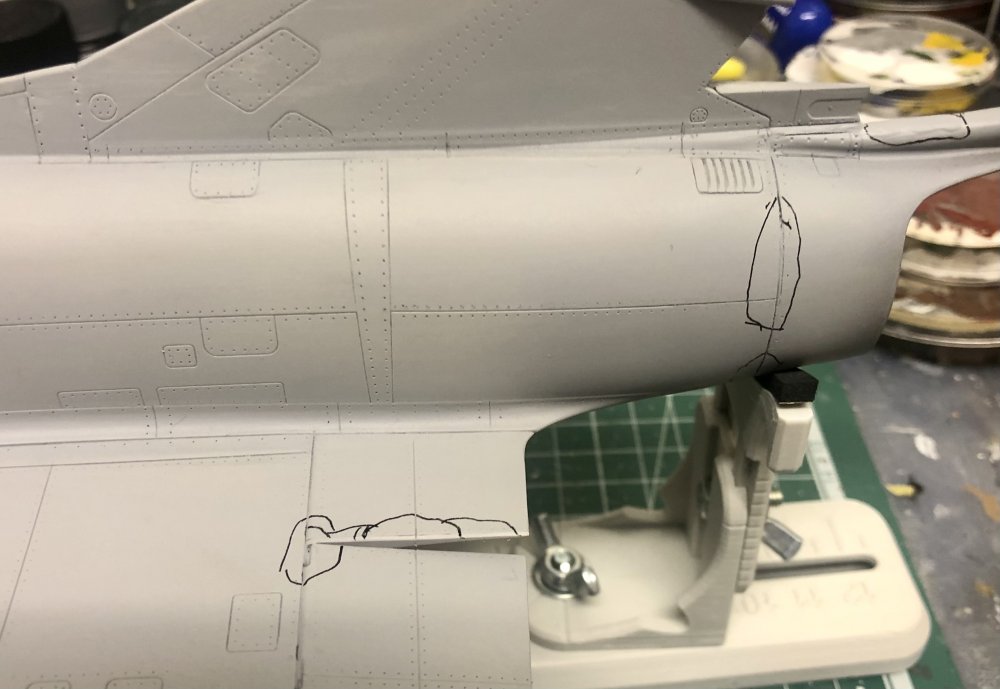
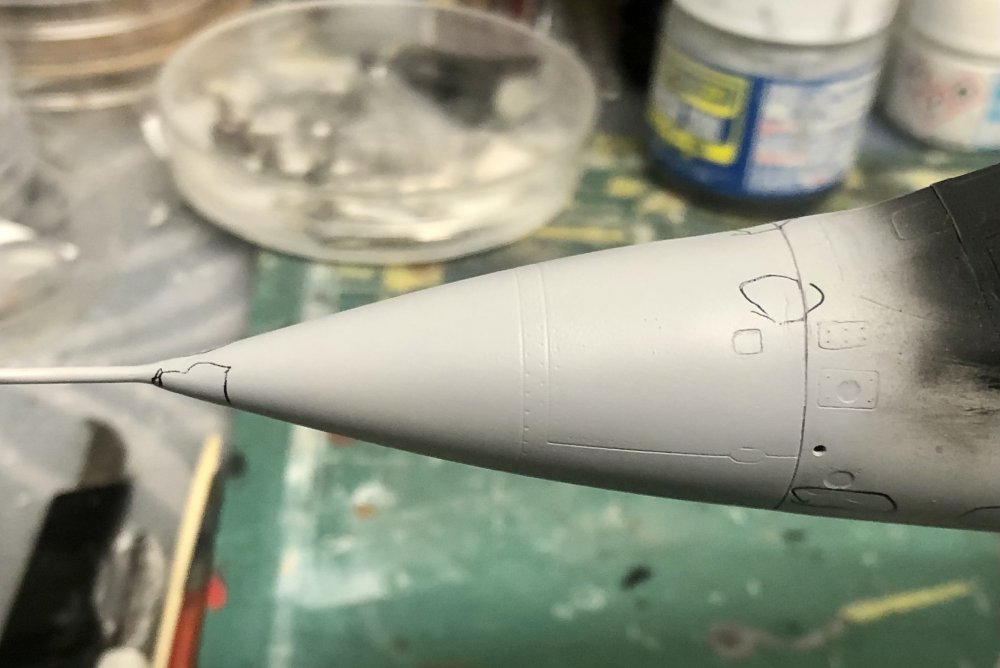
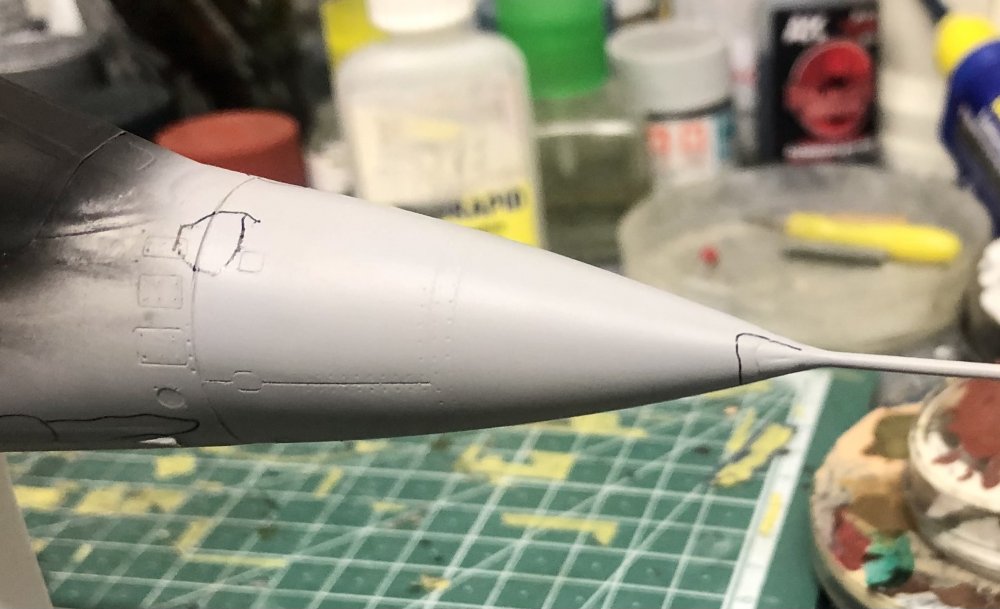
Before I started with the priming process I first reworked and airbrushed the inside of the intakes: I had to mask the cone due to the weathering on it. Now it is repainted and I can mask it tomorrow: This was followed by painting the windshield and canopy black: Then I primed the plane with Mr. Surfacer 1200 to find out the flaws which have to be reworked. As expected there were several that occurred: As expected most of the rework has to be done on the tail cone and the intake areas where the fit was worst. So back to the bench for reworking of the marked areas and then back to the paintshop.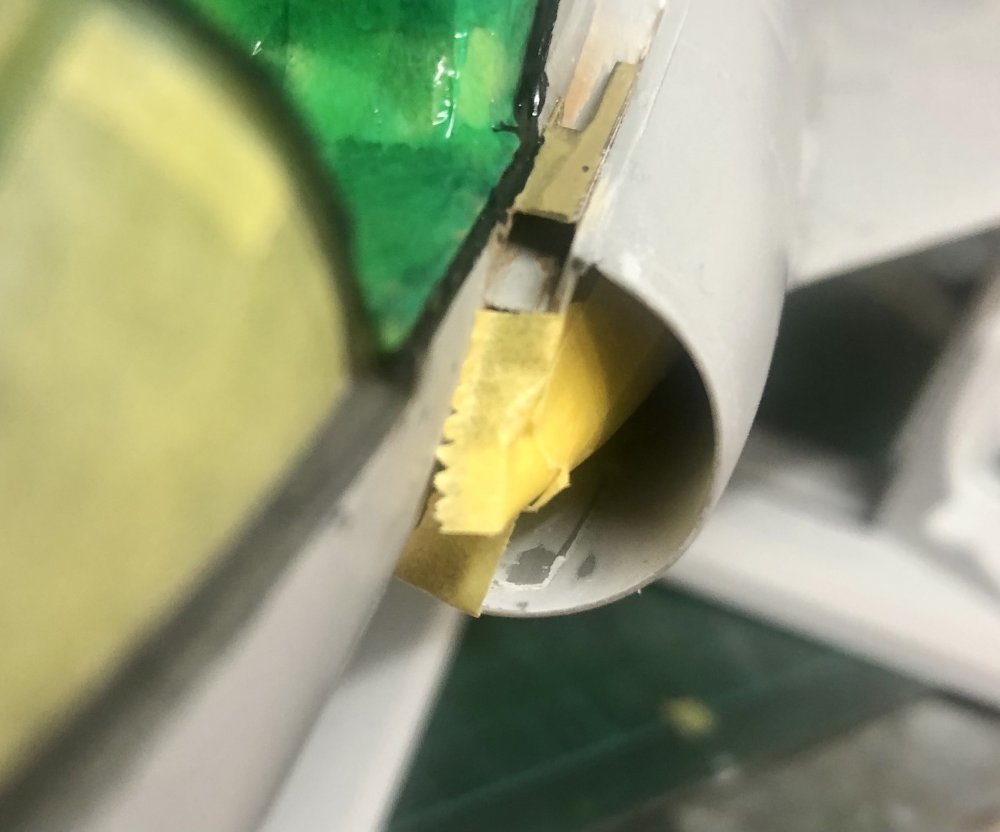


-
Gottfreid Weiroster Bf 109G6 R6 Revell 1/32
Kaireckstadt replied to GazzaS's topic in LSM 1/35 and Larger Work In Progress
Hope you enjoyed the 5th birthday of your granddaughter Gary! The fit of the kit looks really nice. If you don’t find something for the worksno. come back to me. I‘ll check if I have them in my stash and if yes I can send them to you. -
Israeli Mirage III C with Atar9C
Kaireckstadt replied to Kaireckstadt's topic in LSM 1/35 and Larger Work In Progress
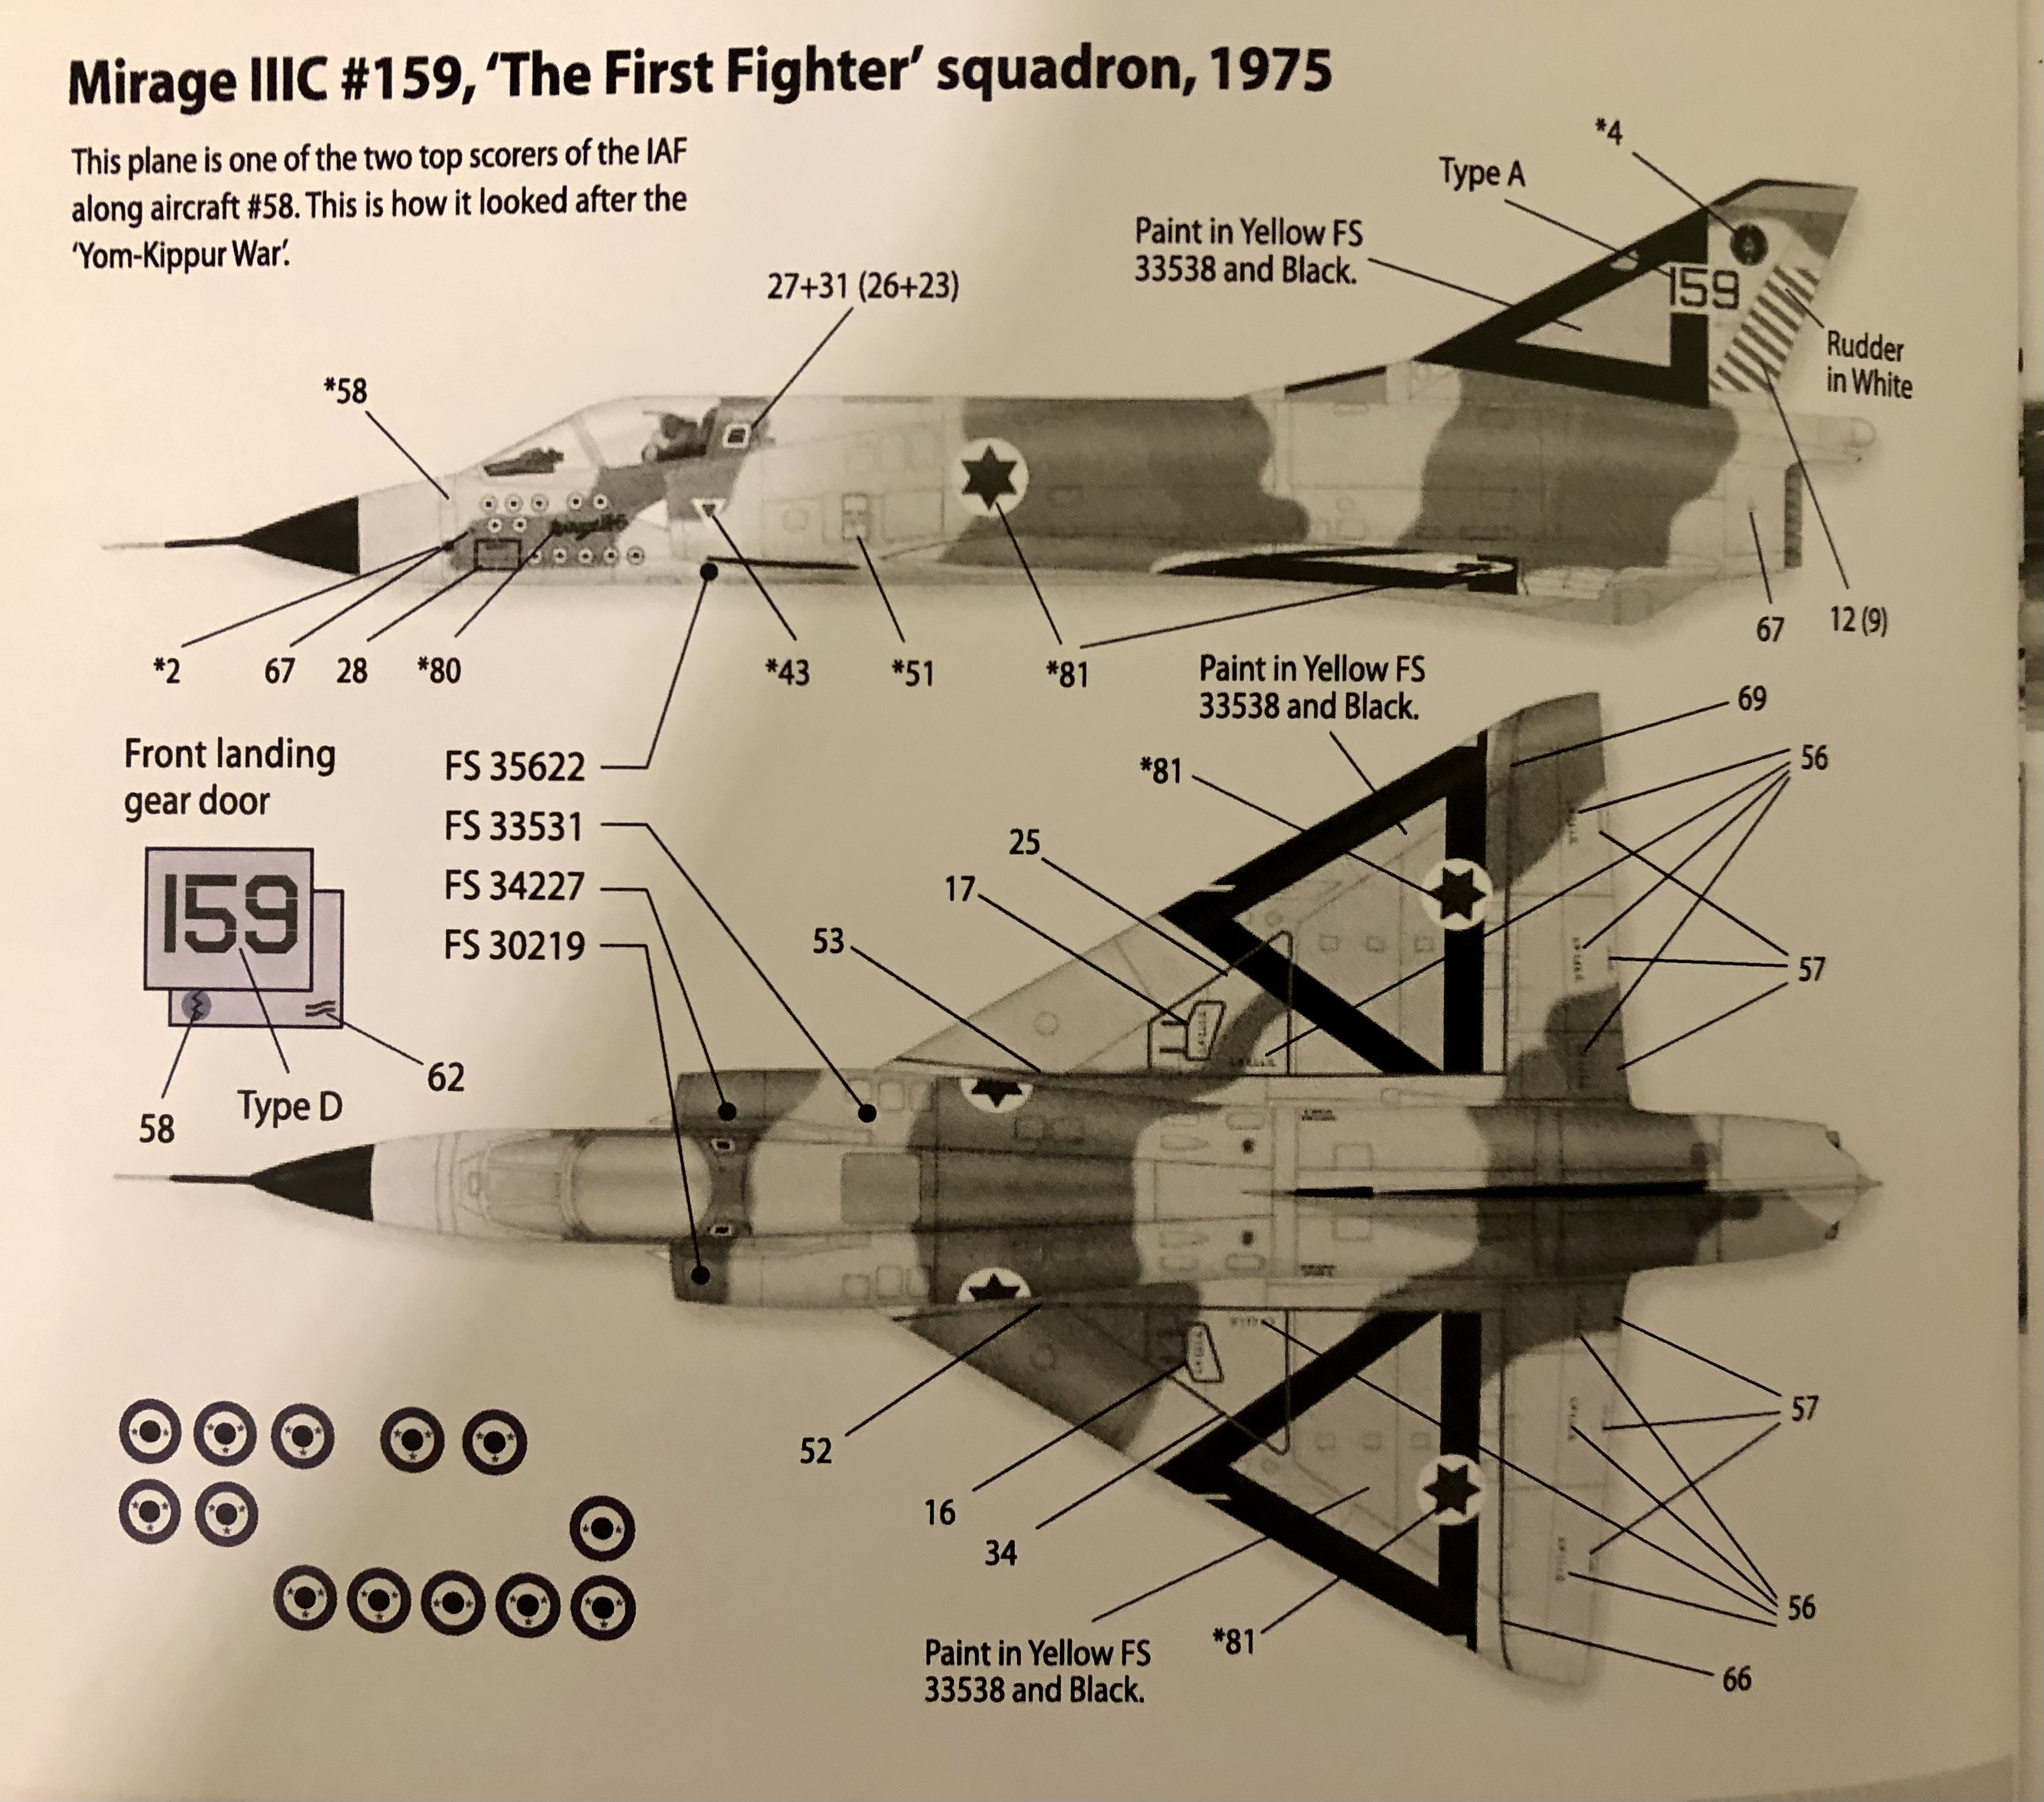
Great looking Kfir, Peter! The combination of a Mirage and a J79-engine is stunning! Do you also have a photo from the underside? I really love the color scheme! Hope that mine will turn out as beautiful as yours. My color scheme is quite close to yours but has the yellow-orange triangles with black edges on the wings and the vertical tail: Cheers Kai
-
But regarding the building quality it could easily be yours Gary!
-
Stunning looking Boeing Gary! Love the livery!
-
Israeli Mirage III C with Atar9C
Kaireckstadt replied to Kaireckstadt's topic in LSM 1/35 and Larger Work In Progress
That’s good to hear Gus! Are yours also so thin? Thanks also for your tipp with the masking fluid. I will search for it. Today I will start the painting process. Since you already primed yours: Have you gone further with the painting process? I‘m really curious to see your Cheetah in her stunning livery! -
1:32nd scale Ponnier M.1
Kaireckstadt replied to sandbagger's topic in LSM 1/35 and Larger Work In Progress
Awesome to the smallest detail including the paintwork! -
Great progress John ! Missed your last posts. The pit is really awesome!
-
As usual: absolutely stunning
-
Gottfreid Weiroster Bf 109G6 R6 Revell 1/32
Kaireckstadt replied to GazzaS's topic in LSM 1/35 and Larger Work In Progress
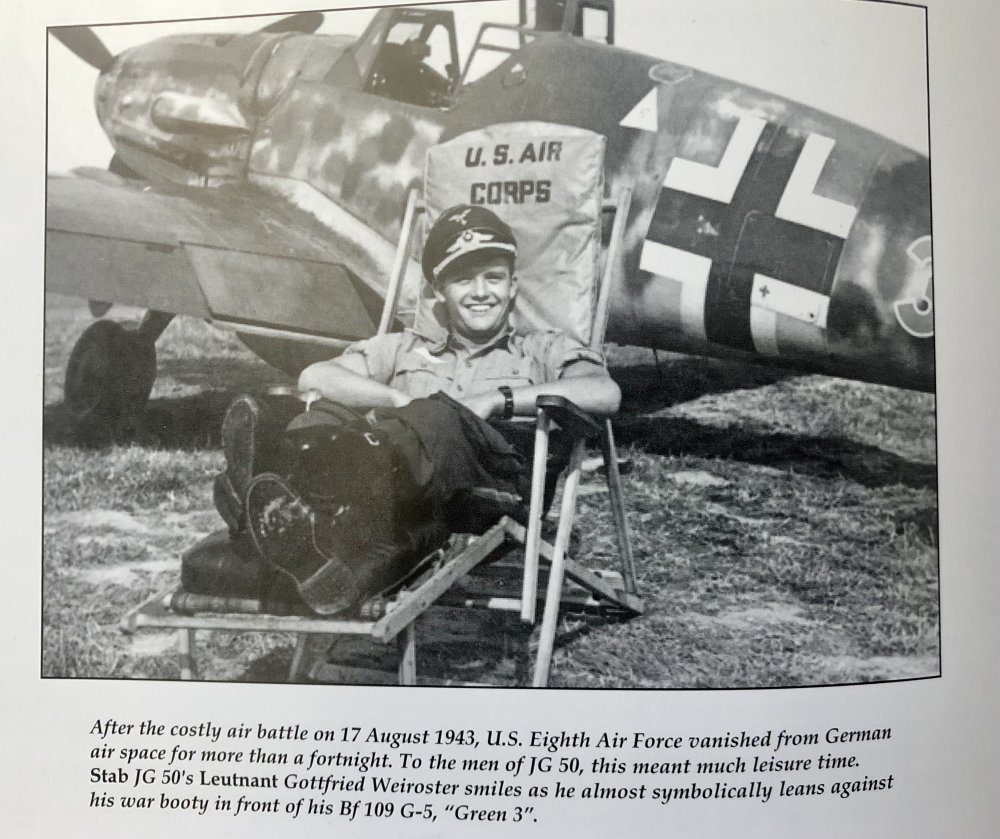
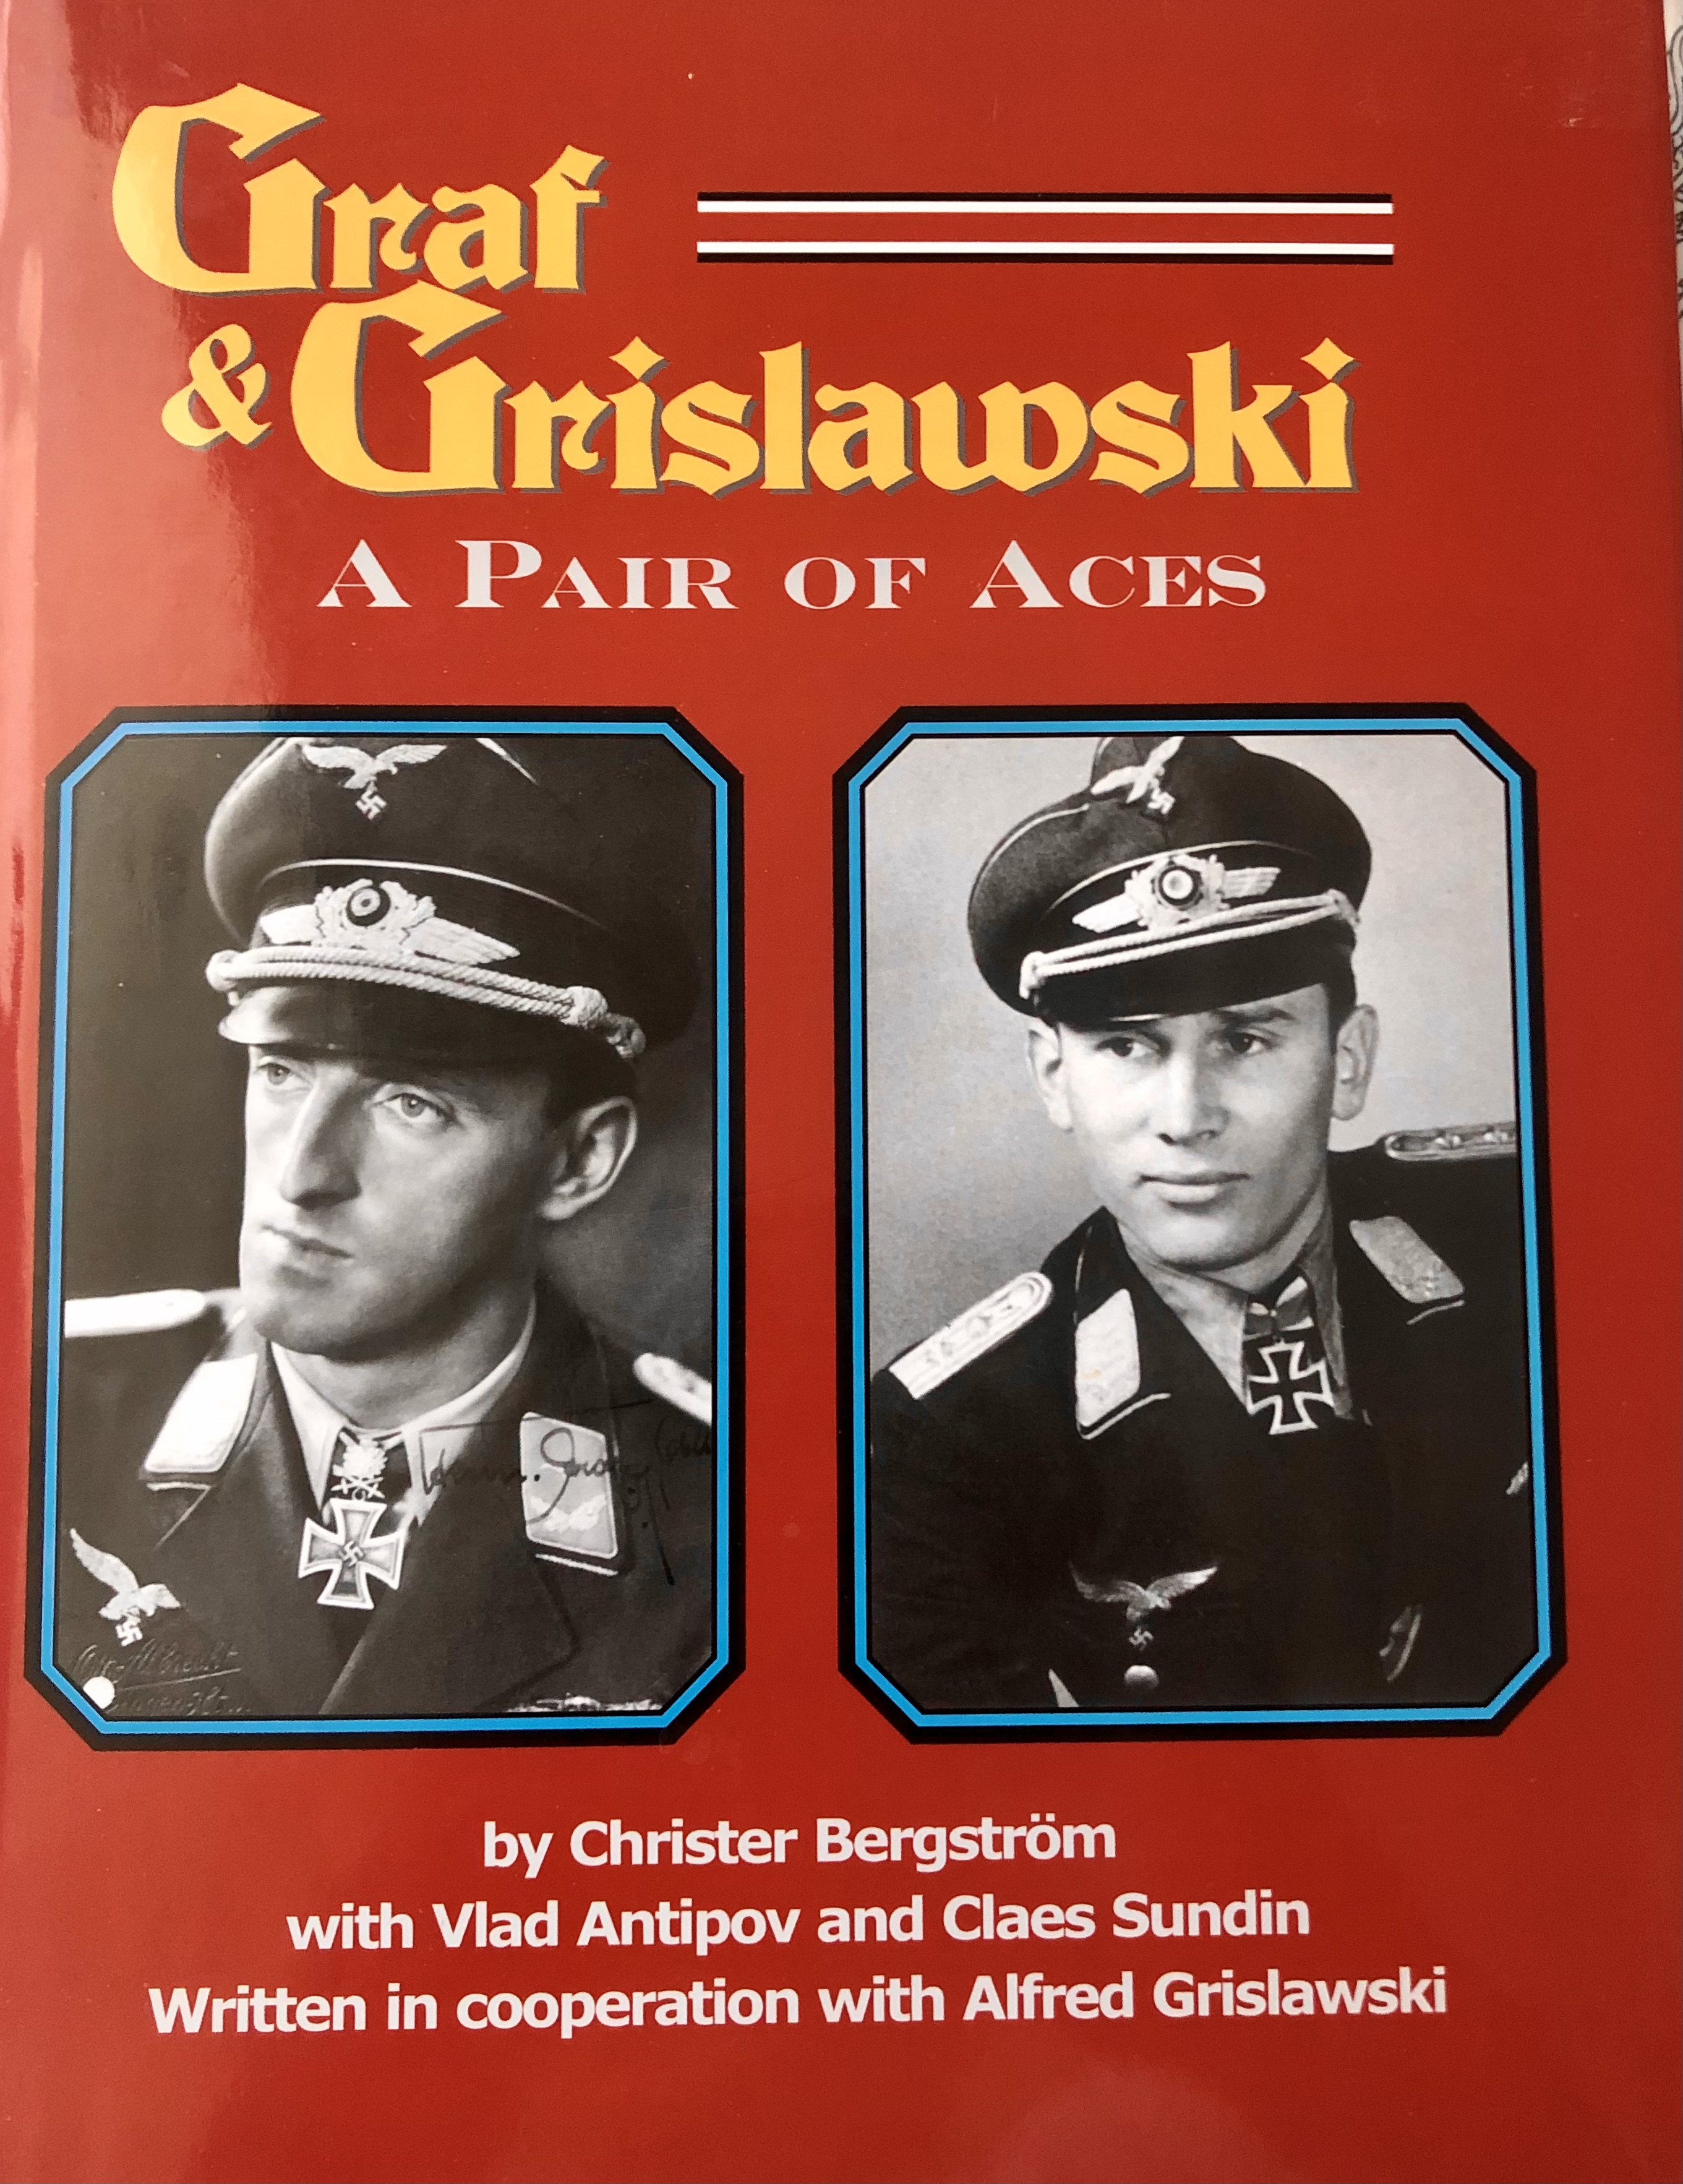
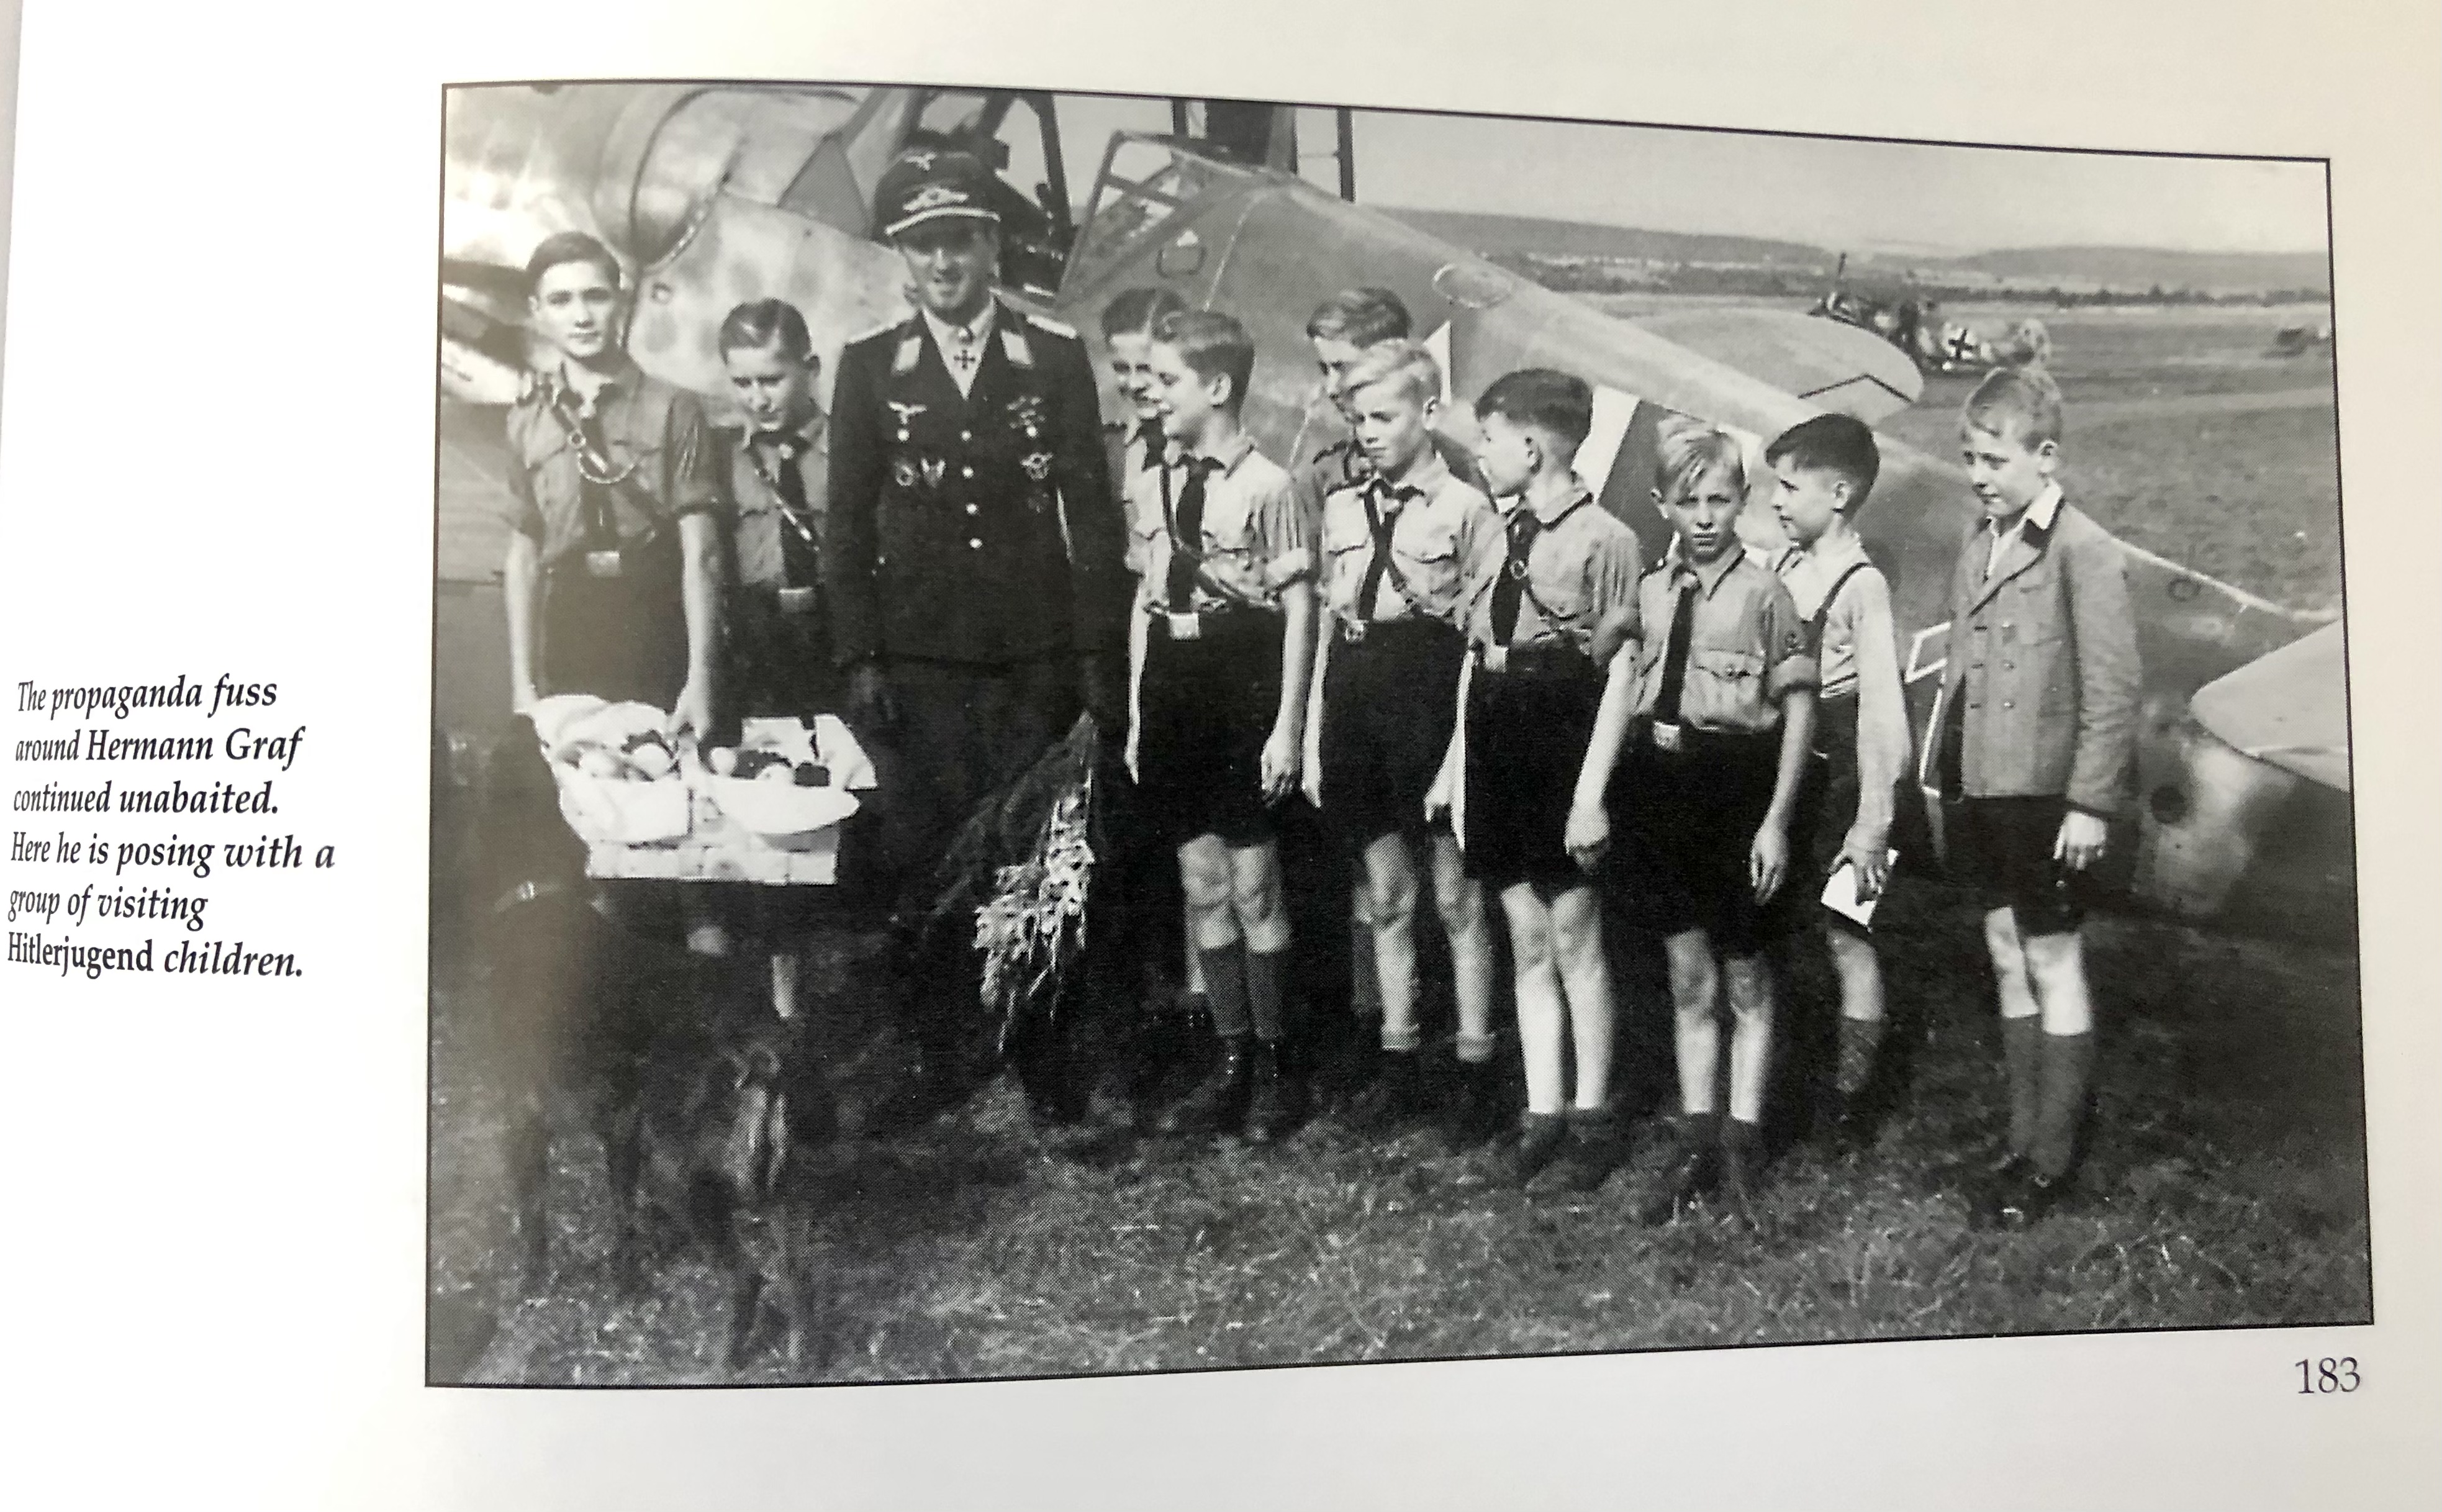
Quite an interesting topic and model Gary. I‘m a 109 fan (have decals in my stash of Grafs green 1 in 1/24 Scale and Barkhorns G in 1/32 Scale) and will closely follow your build. 1st row and place in the middle is occupied by me ! I have a nice book about Graf&Grislawski. Major Graf was the commanding officer of Jagdgruppe 50 and Weiroster was one of his pilots. I found the same fotos in the book indicating the 3 on his aircraft was green (like on Grafs „1“). But the sources I know also state, that it is not sure. It may also have been red. Since red is more eyecatching than green your choice is ok. Also a challenging camo scheme, especially on the fuselage sides. Does Weirosters plane also have the zigzag camo on the wings and tailplanes? Do you also plan to include the Gondola Weapons under the wings? The G-6/R-6 was one of the most build variants of the 109. Saw no AM stuff in your picture). Or are they included in the Revell kit (should know it because I also have the G-6 like you and the G-10 in my stash)? Cheers Kai