
Kaireckstadt
-
Posts
1,705 -
Joined
-
Last visited
Content Type
Profiles
Forums
Events
Gallery
Everything posted by Kaireckstadt
-

1:32nd scale Hansa-Brandenburg W.20
Kaireckstadt replied to sandbagger's topic in LSM 1/35 and Larger Work In Progress
Stunning beautiful work as usual Mike. Your attention to detail and the way you realize it is unrevaled. -
Israeli Mirage III C with Atar9C
Kaireckstadt replied to Kaireckstadt's topic in LSM 1/35 and Larger Work In Progress
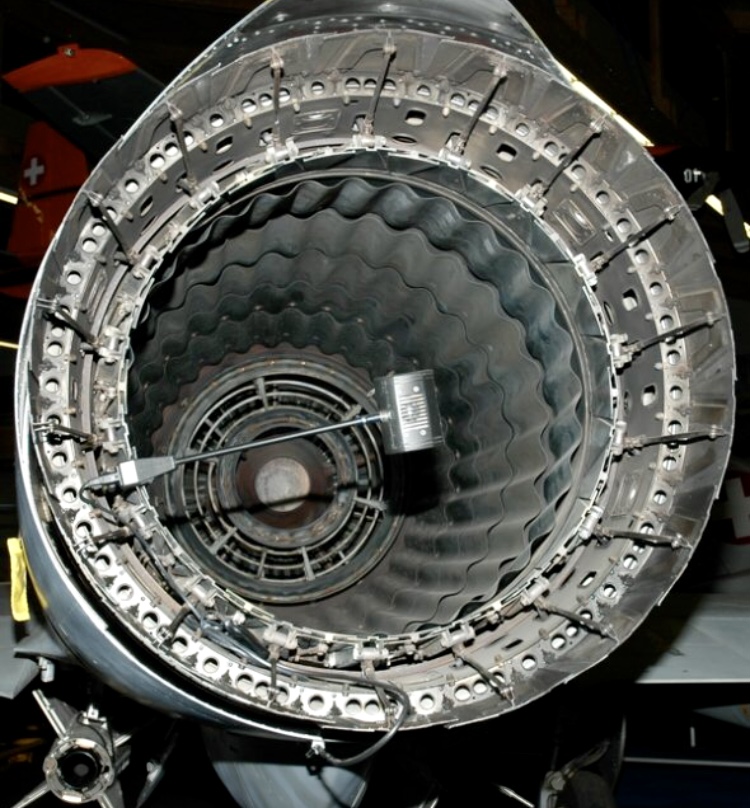
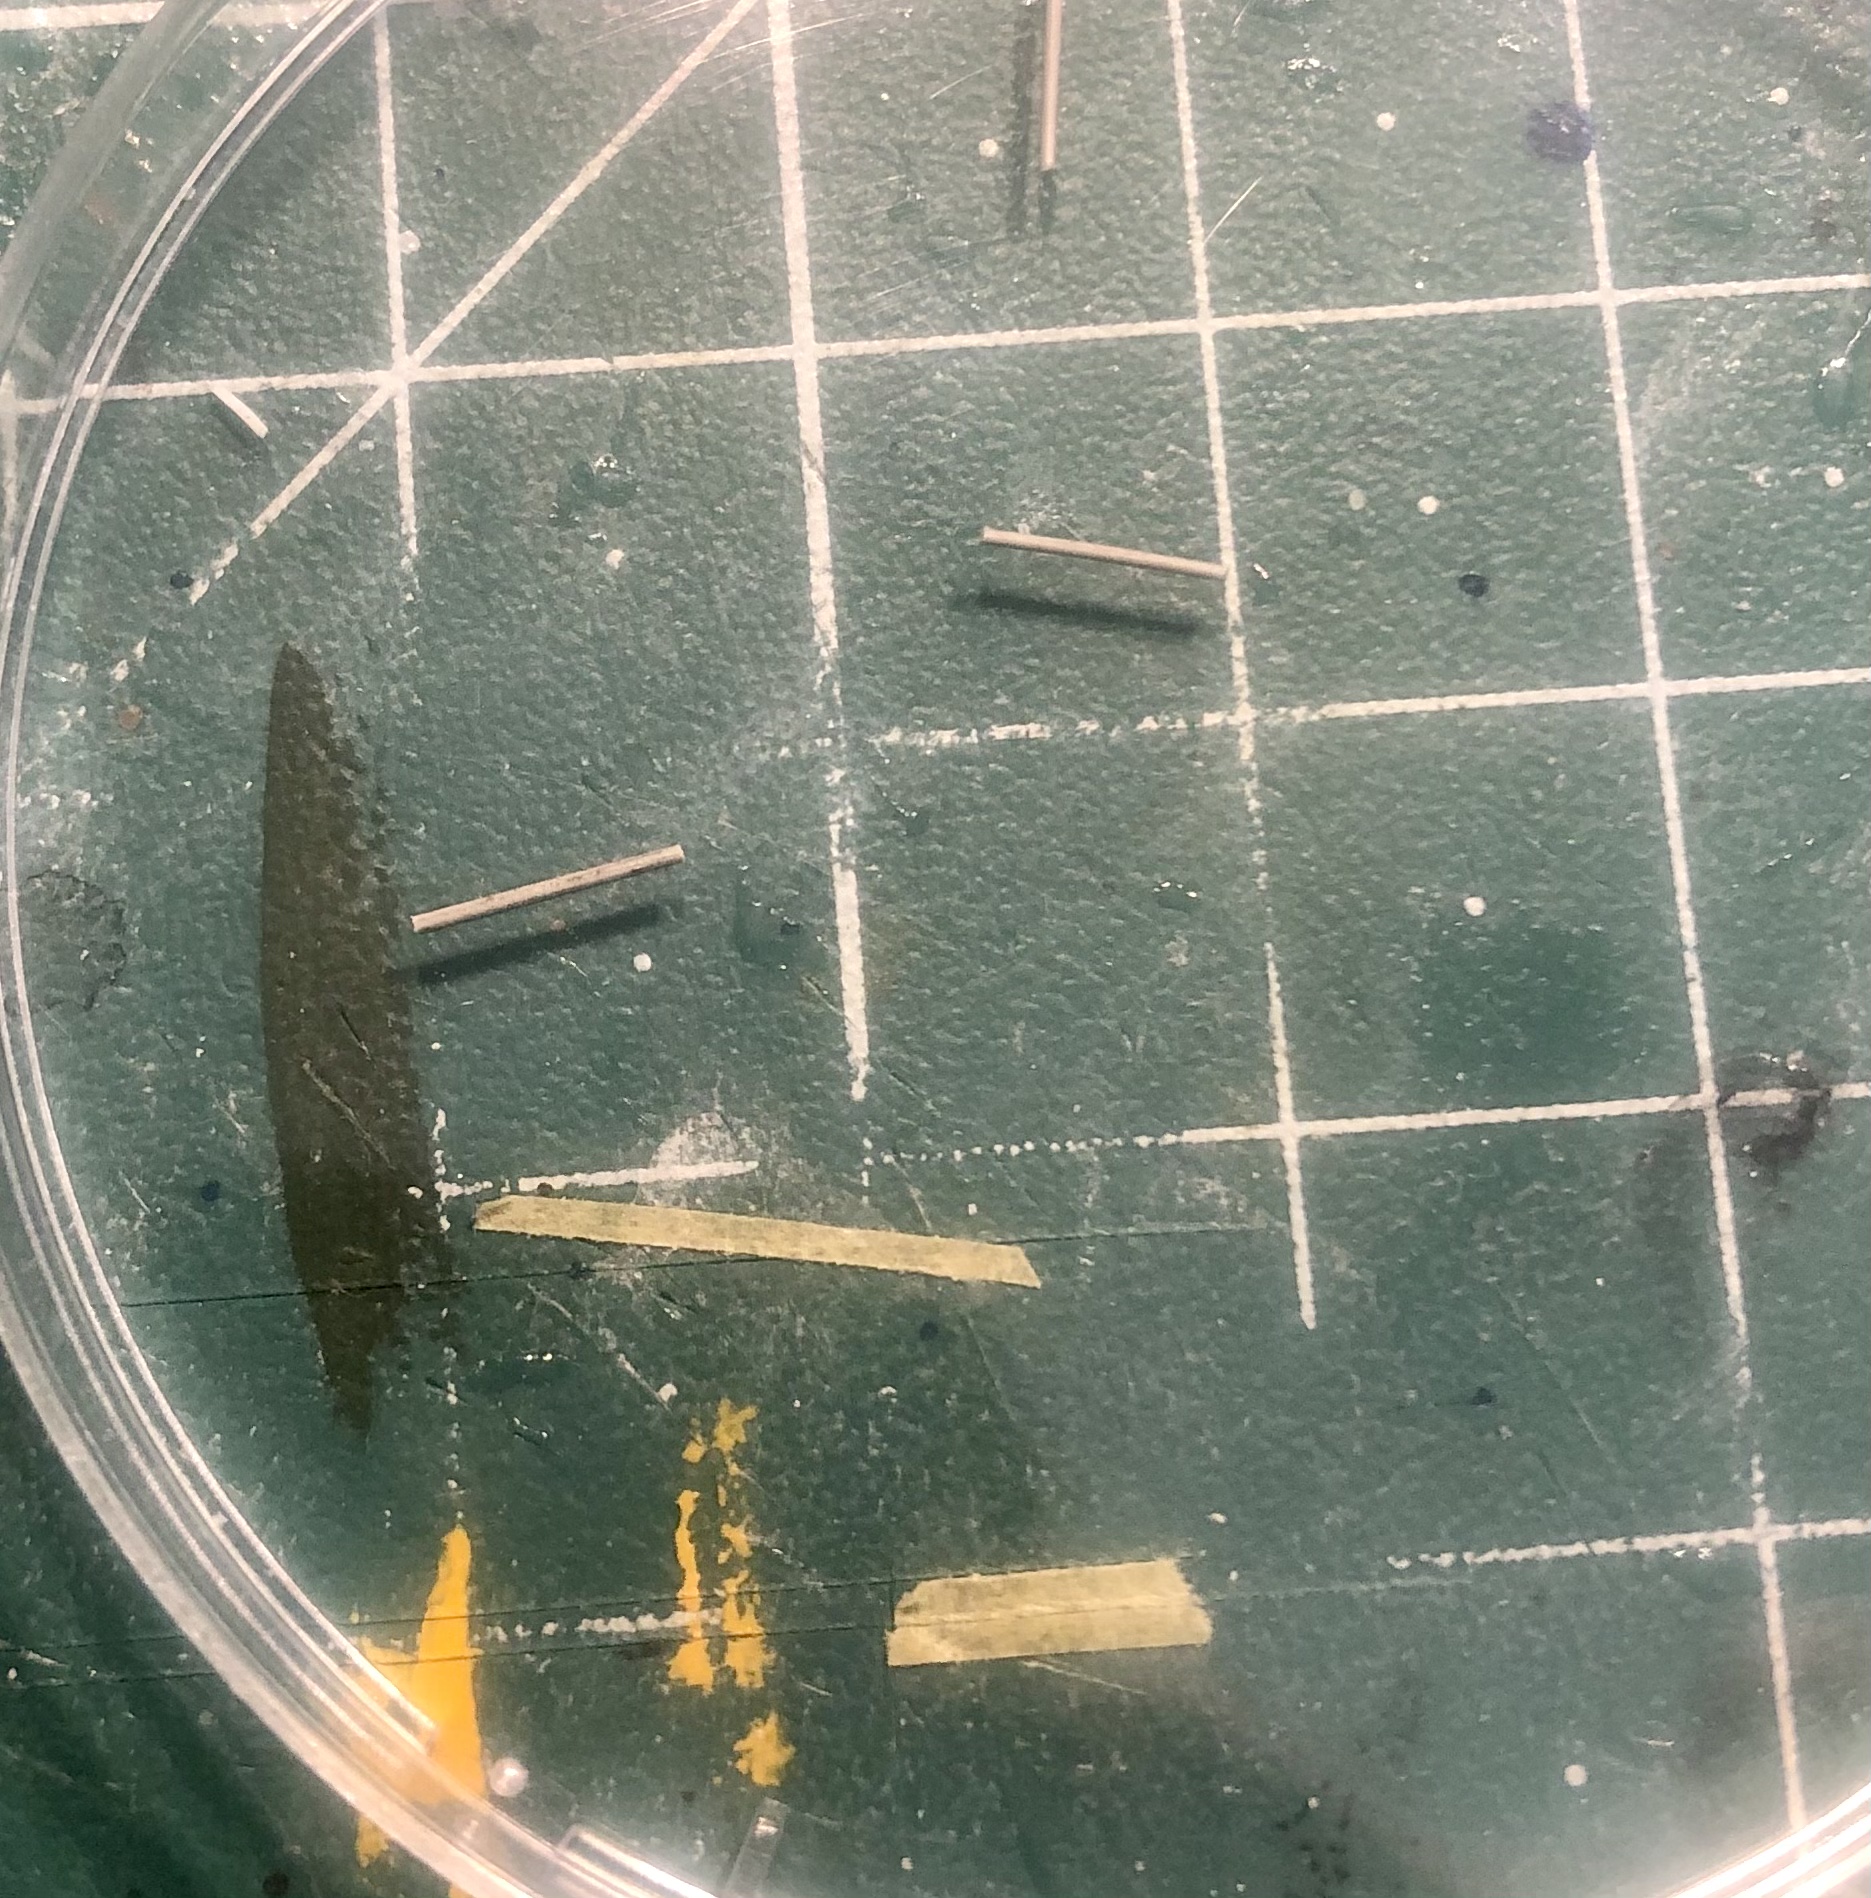
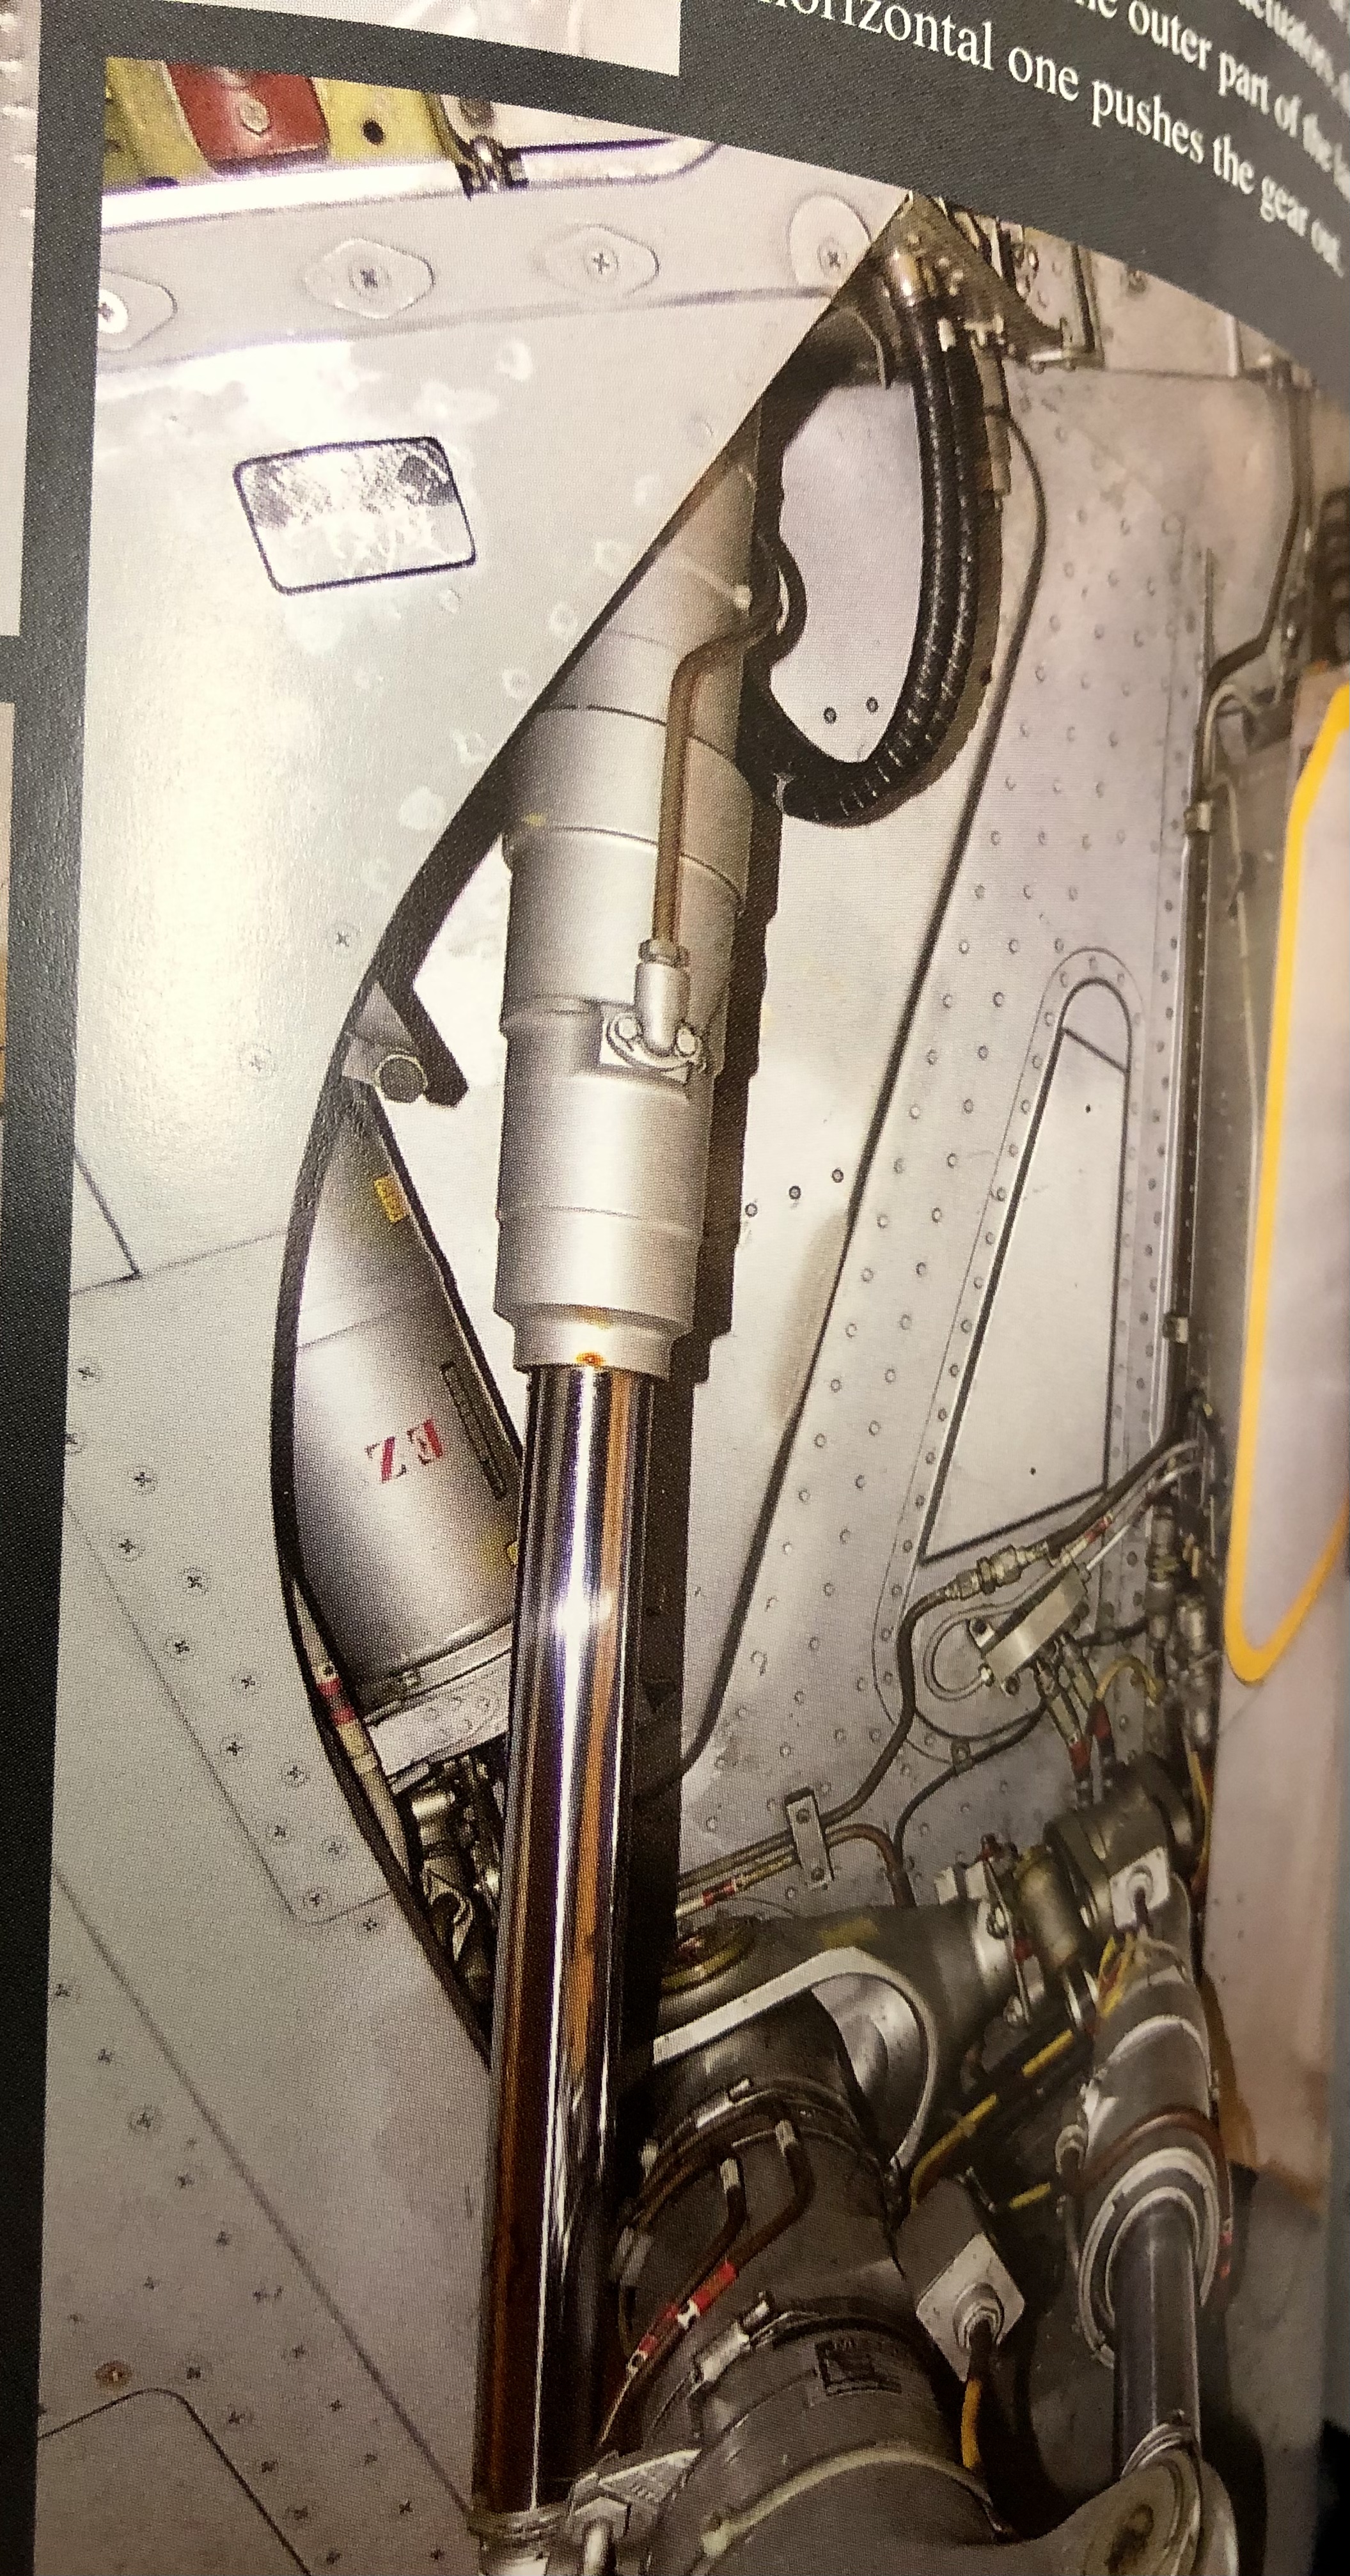
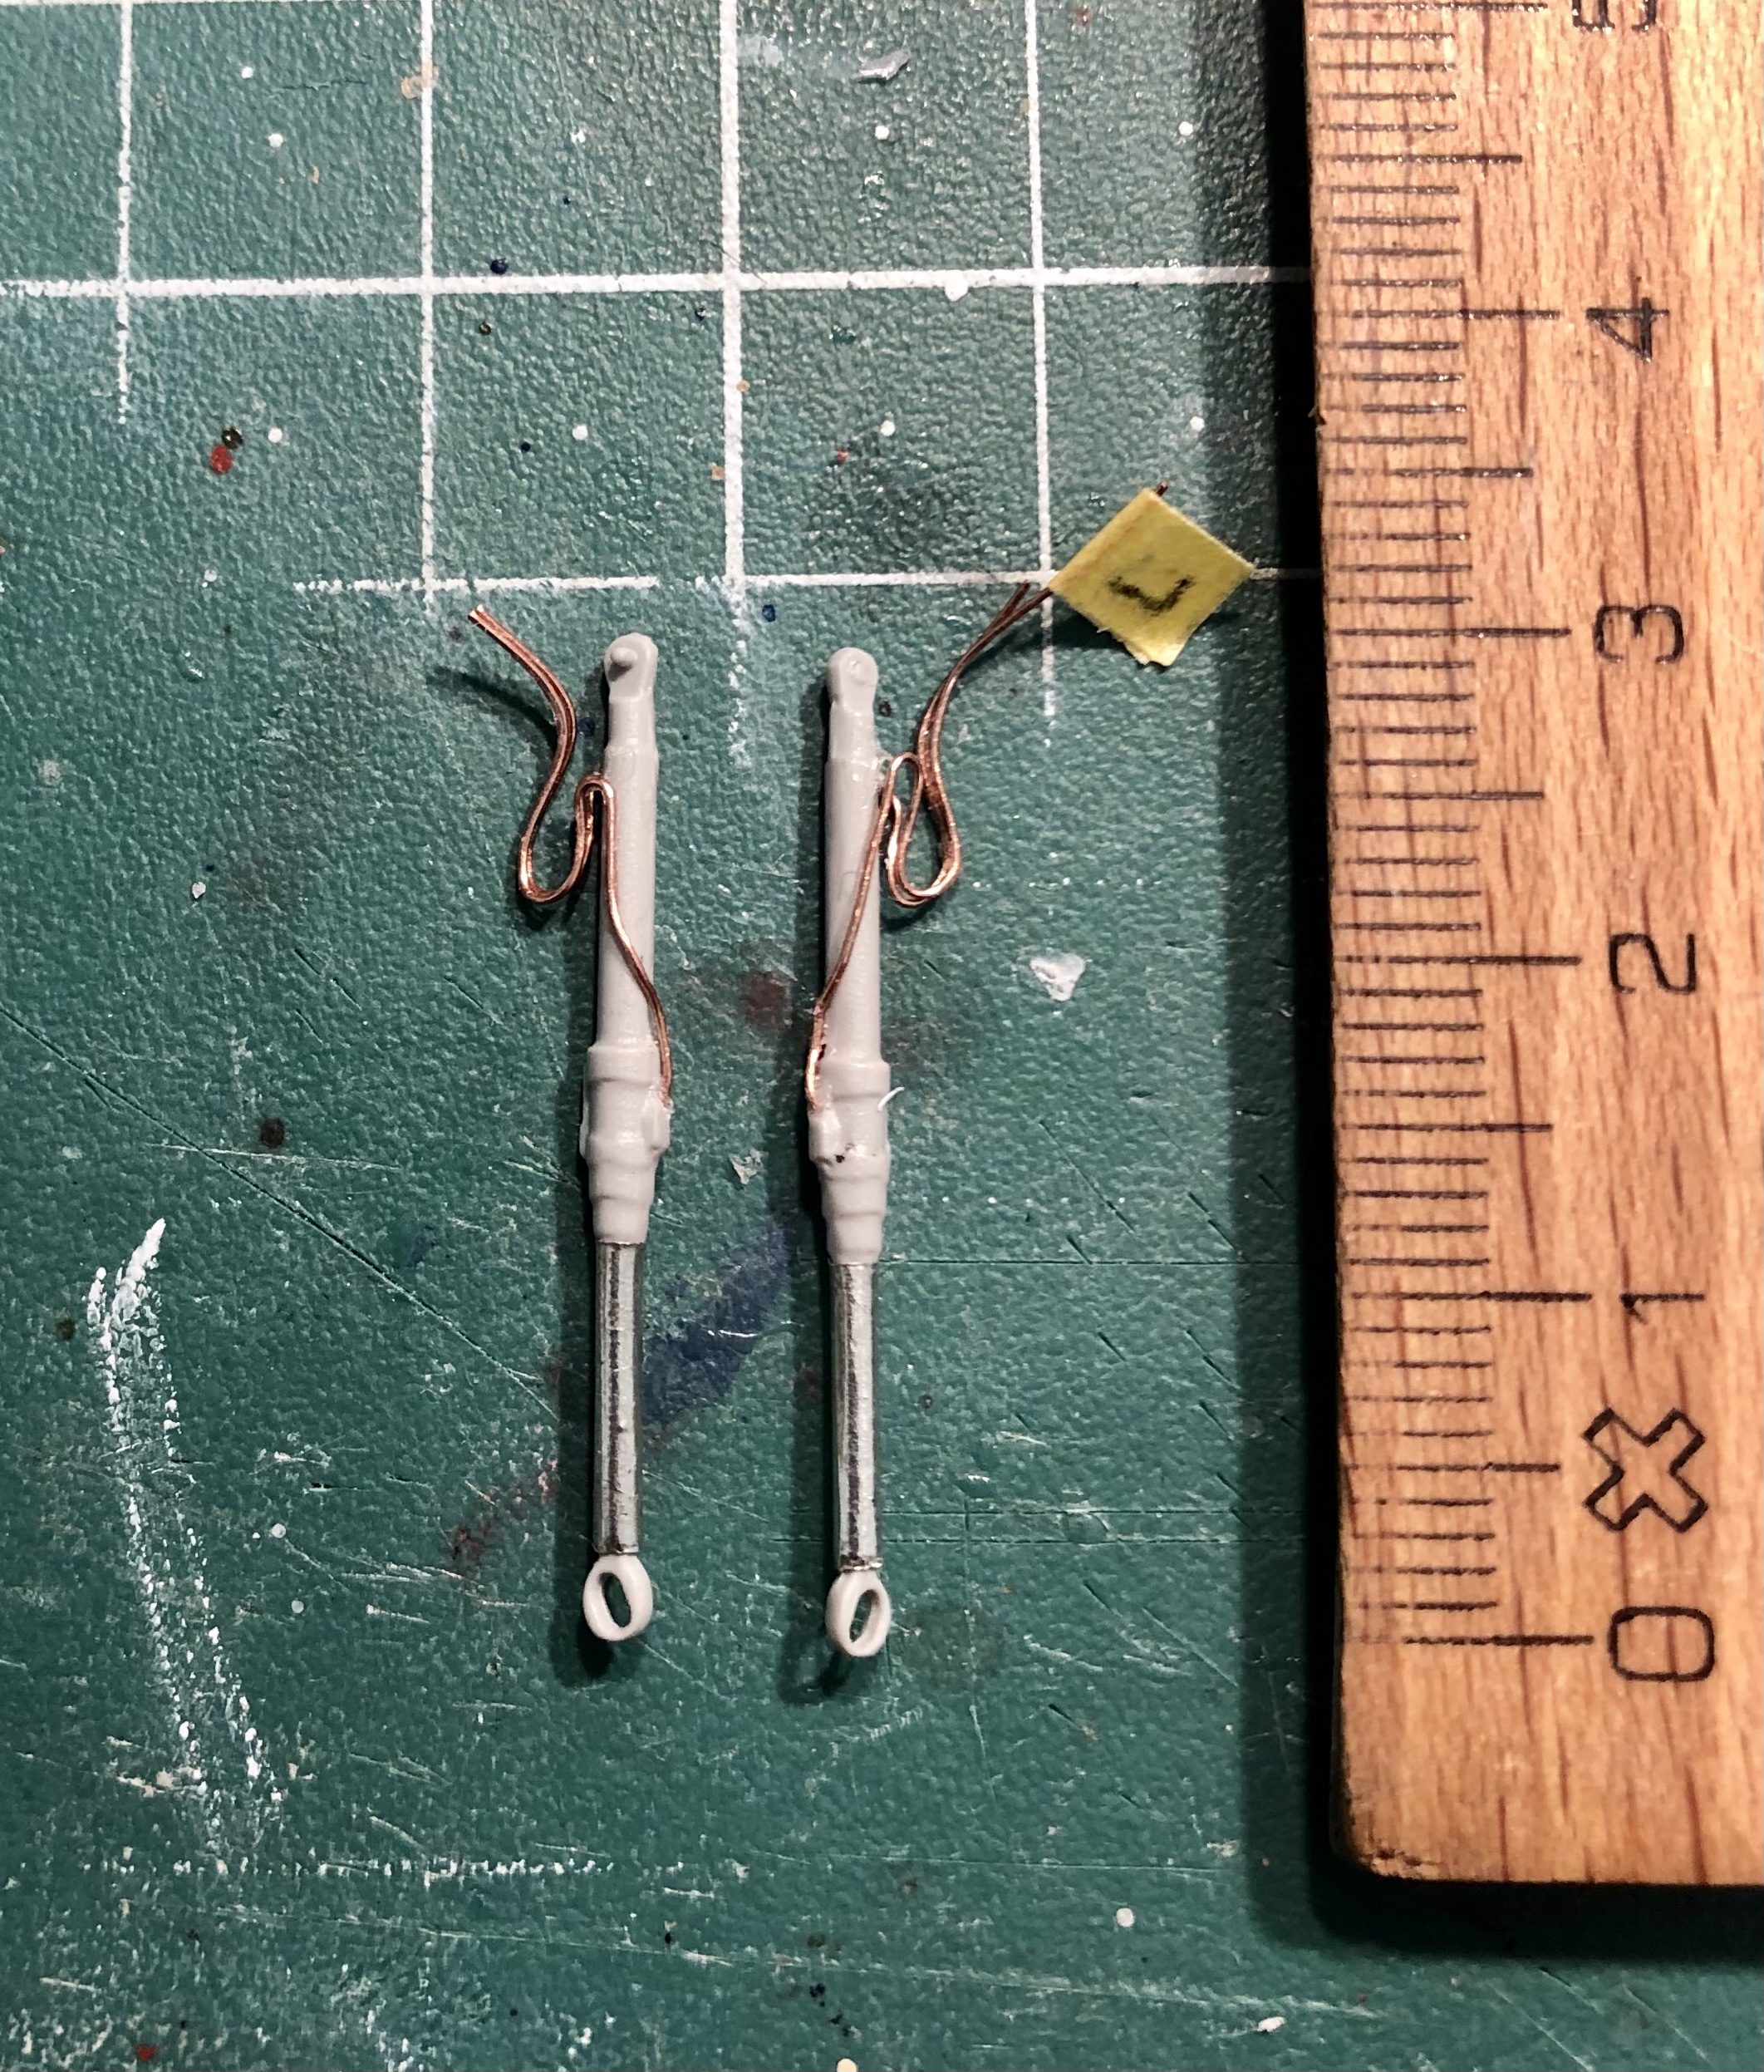
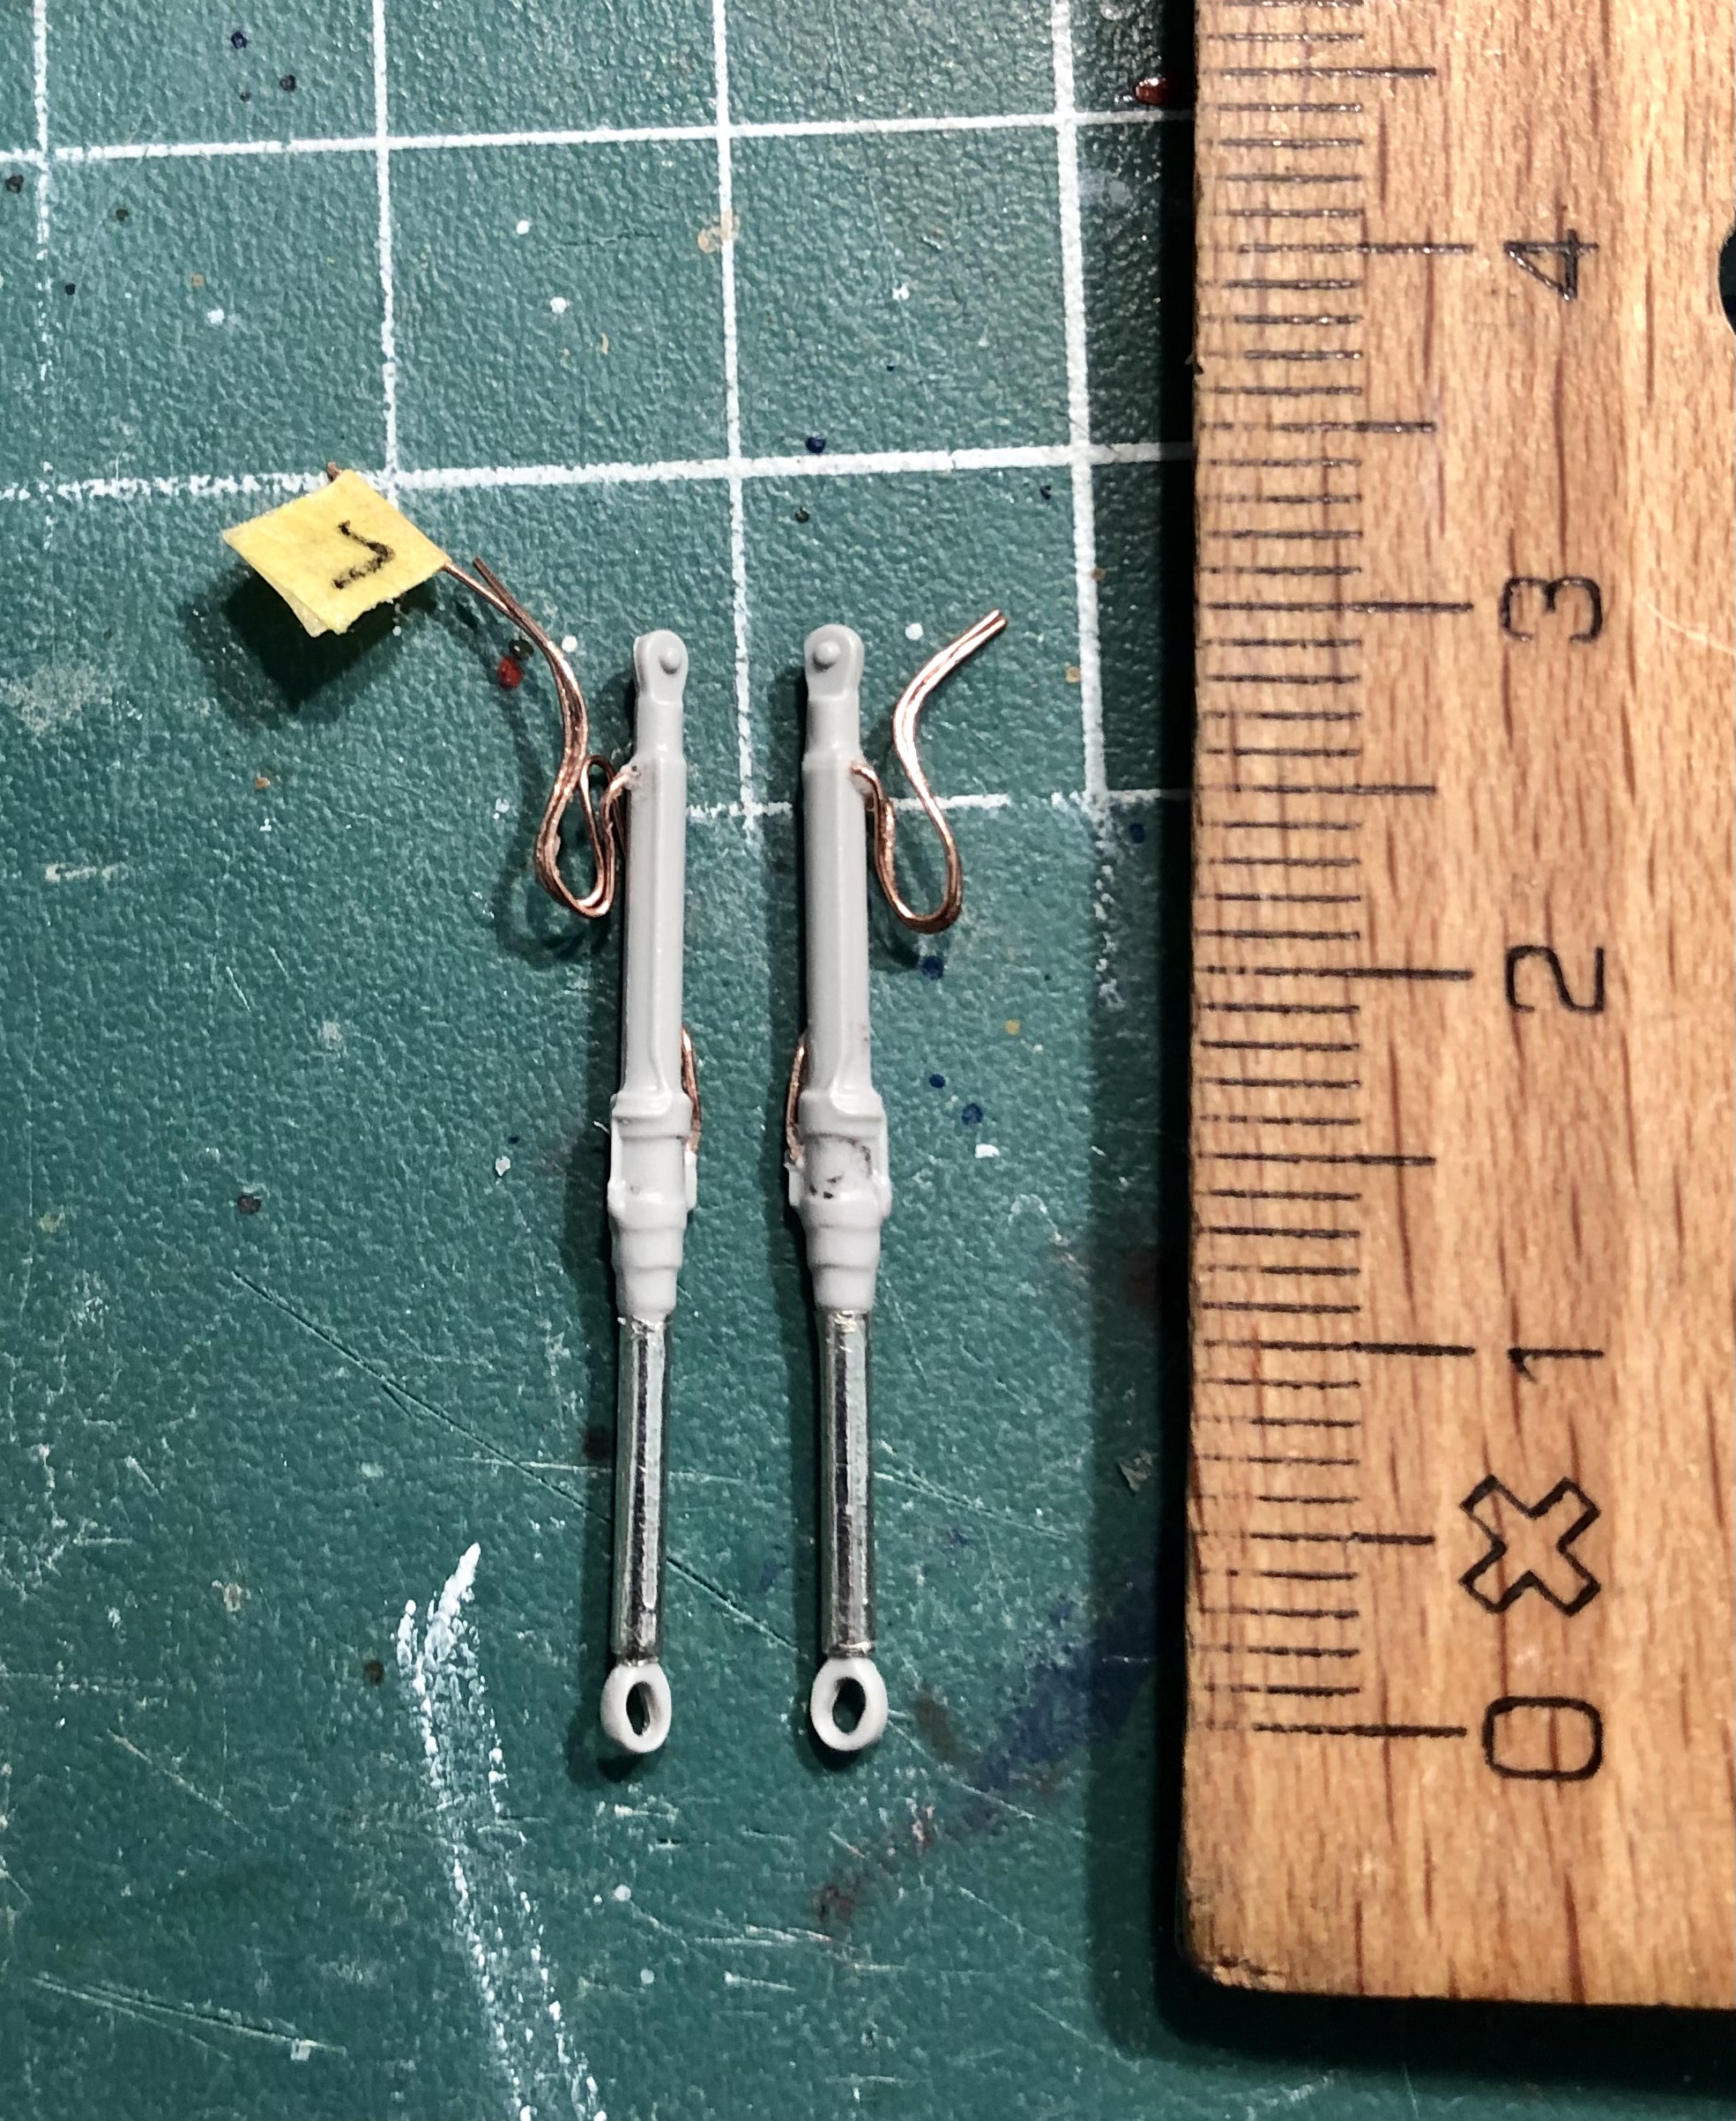
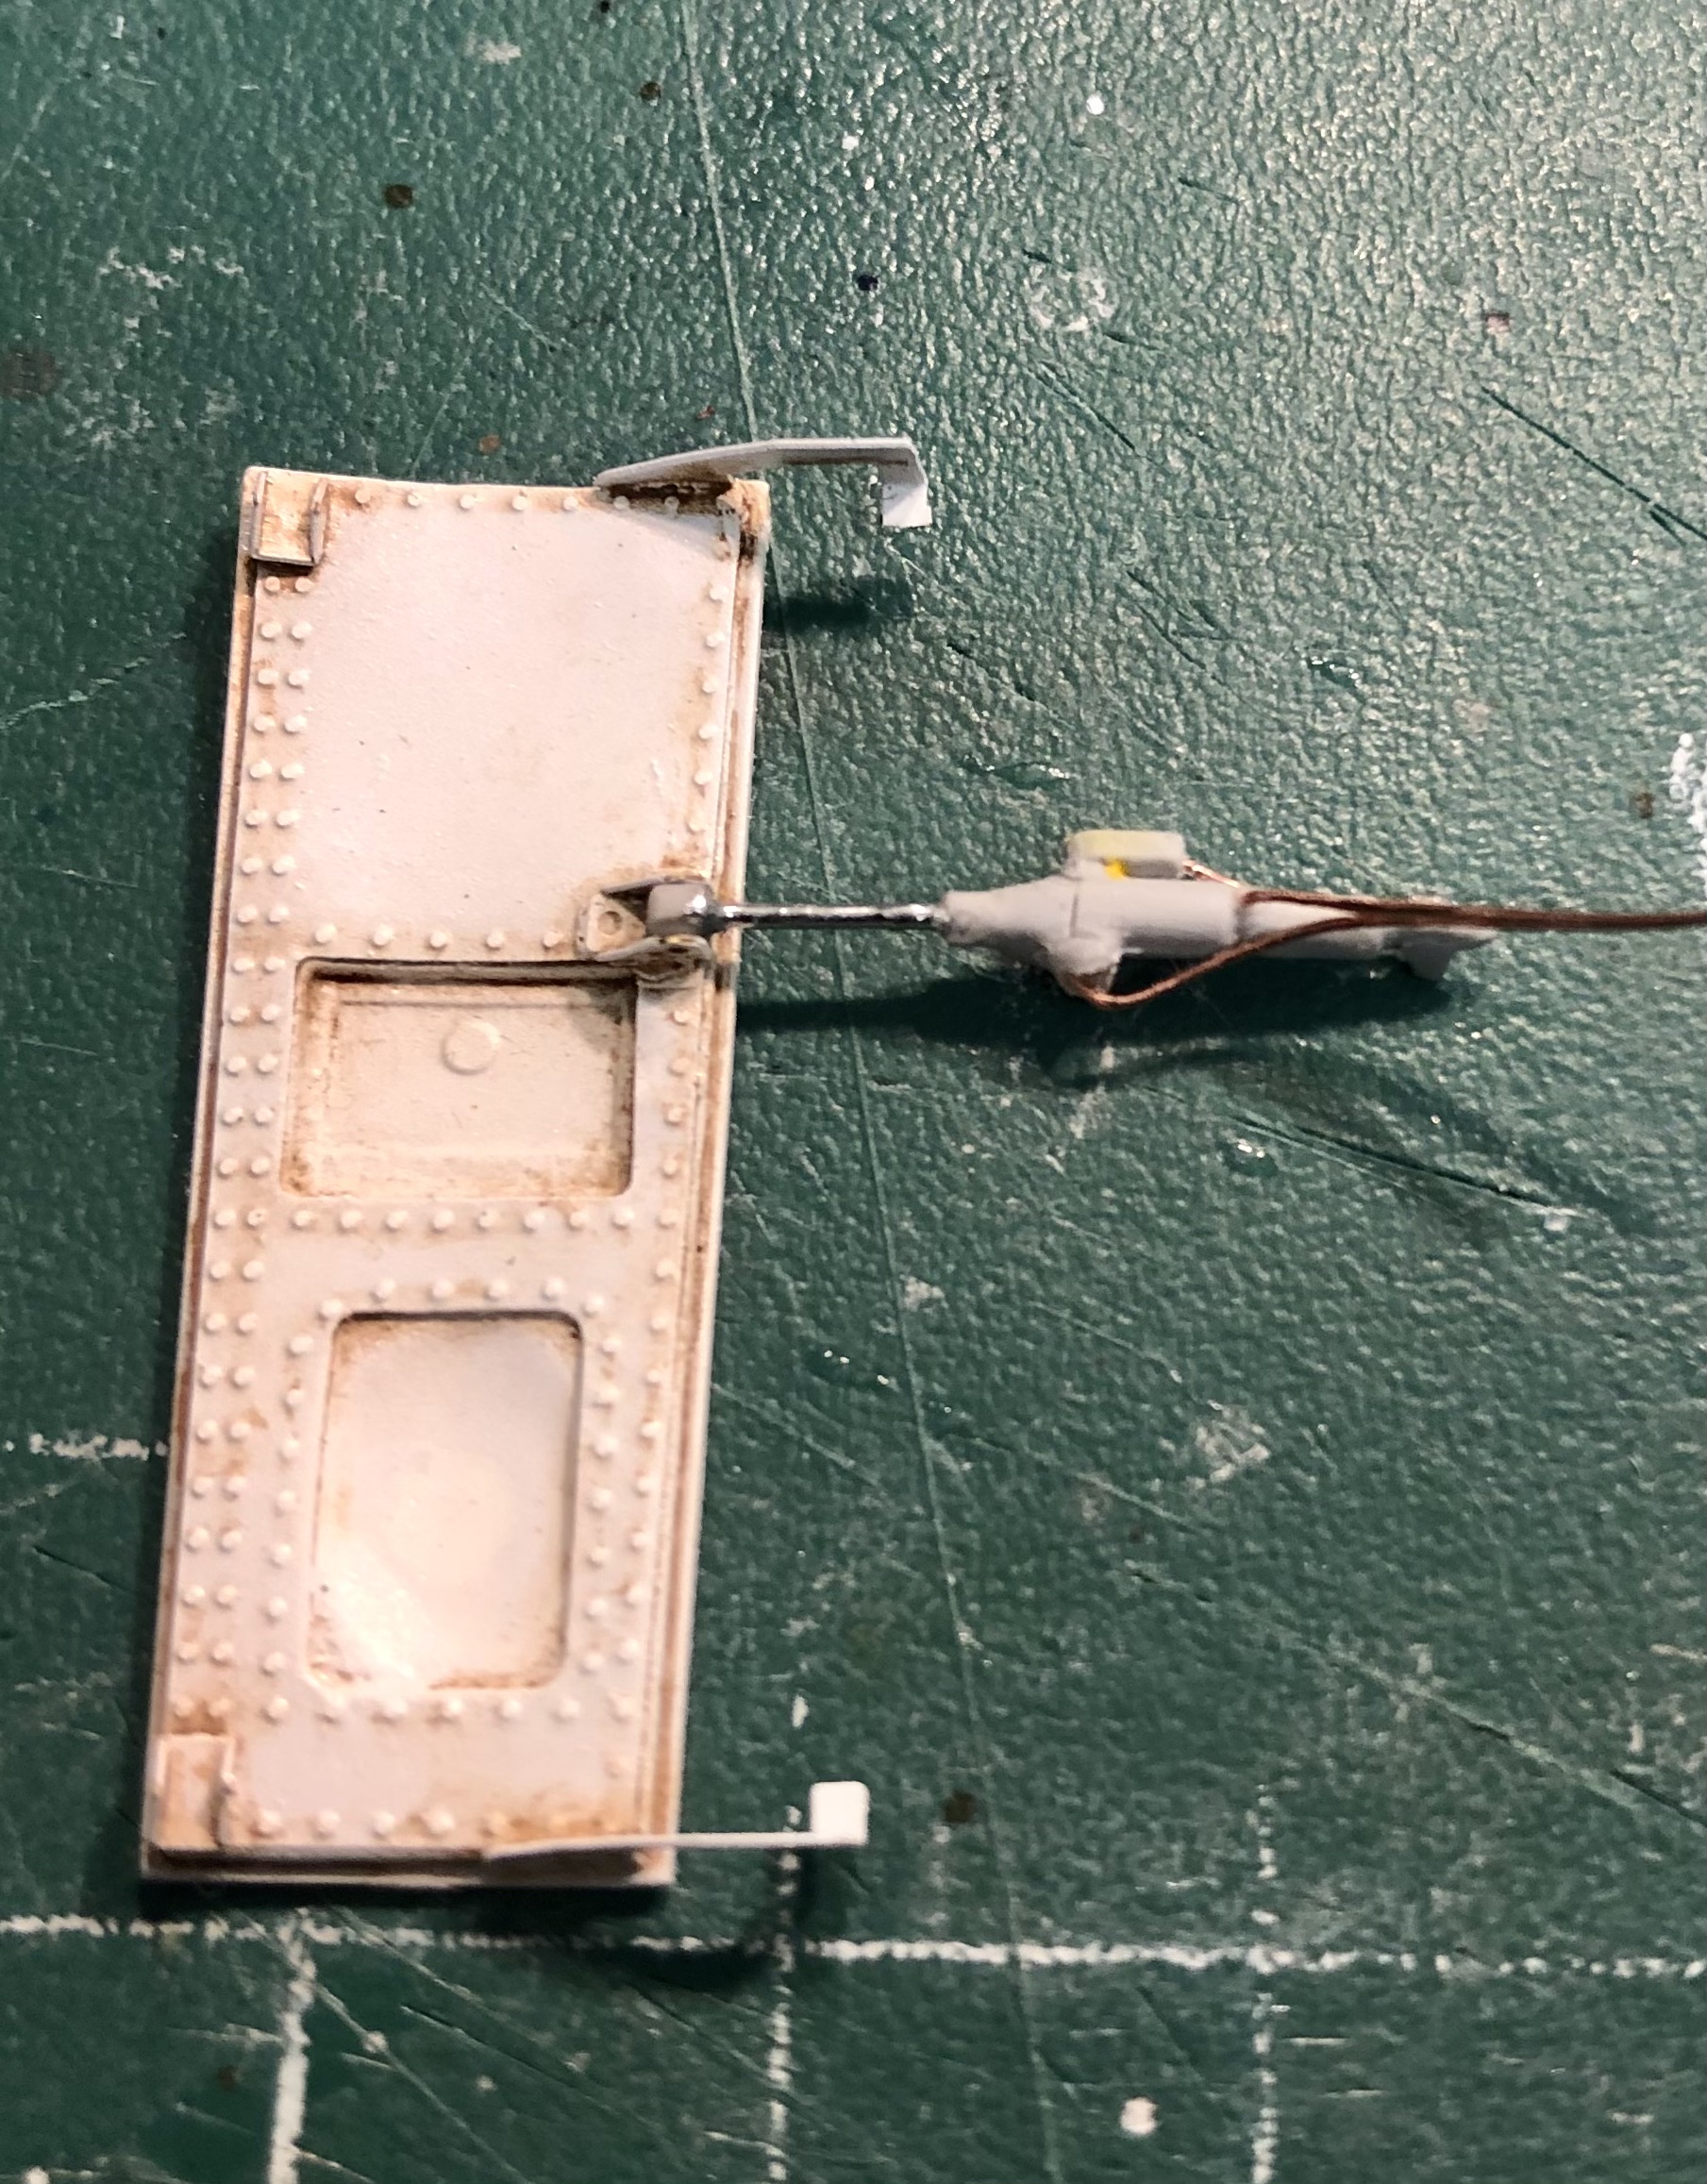
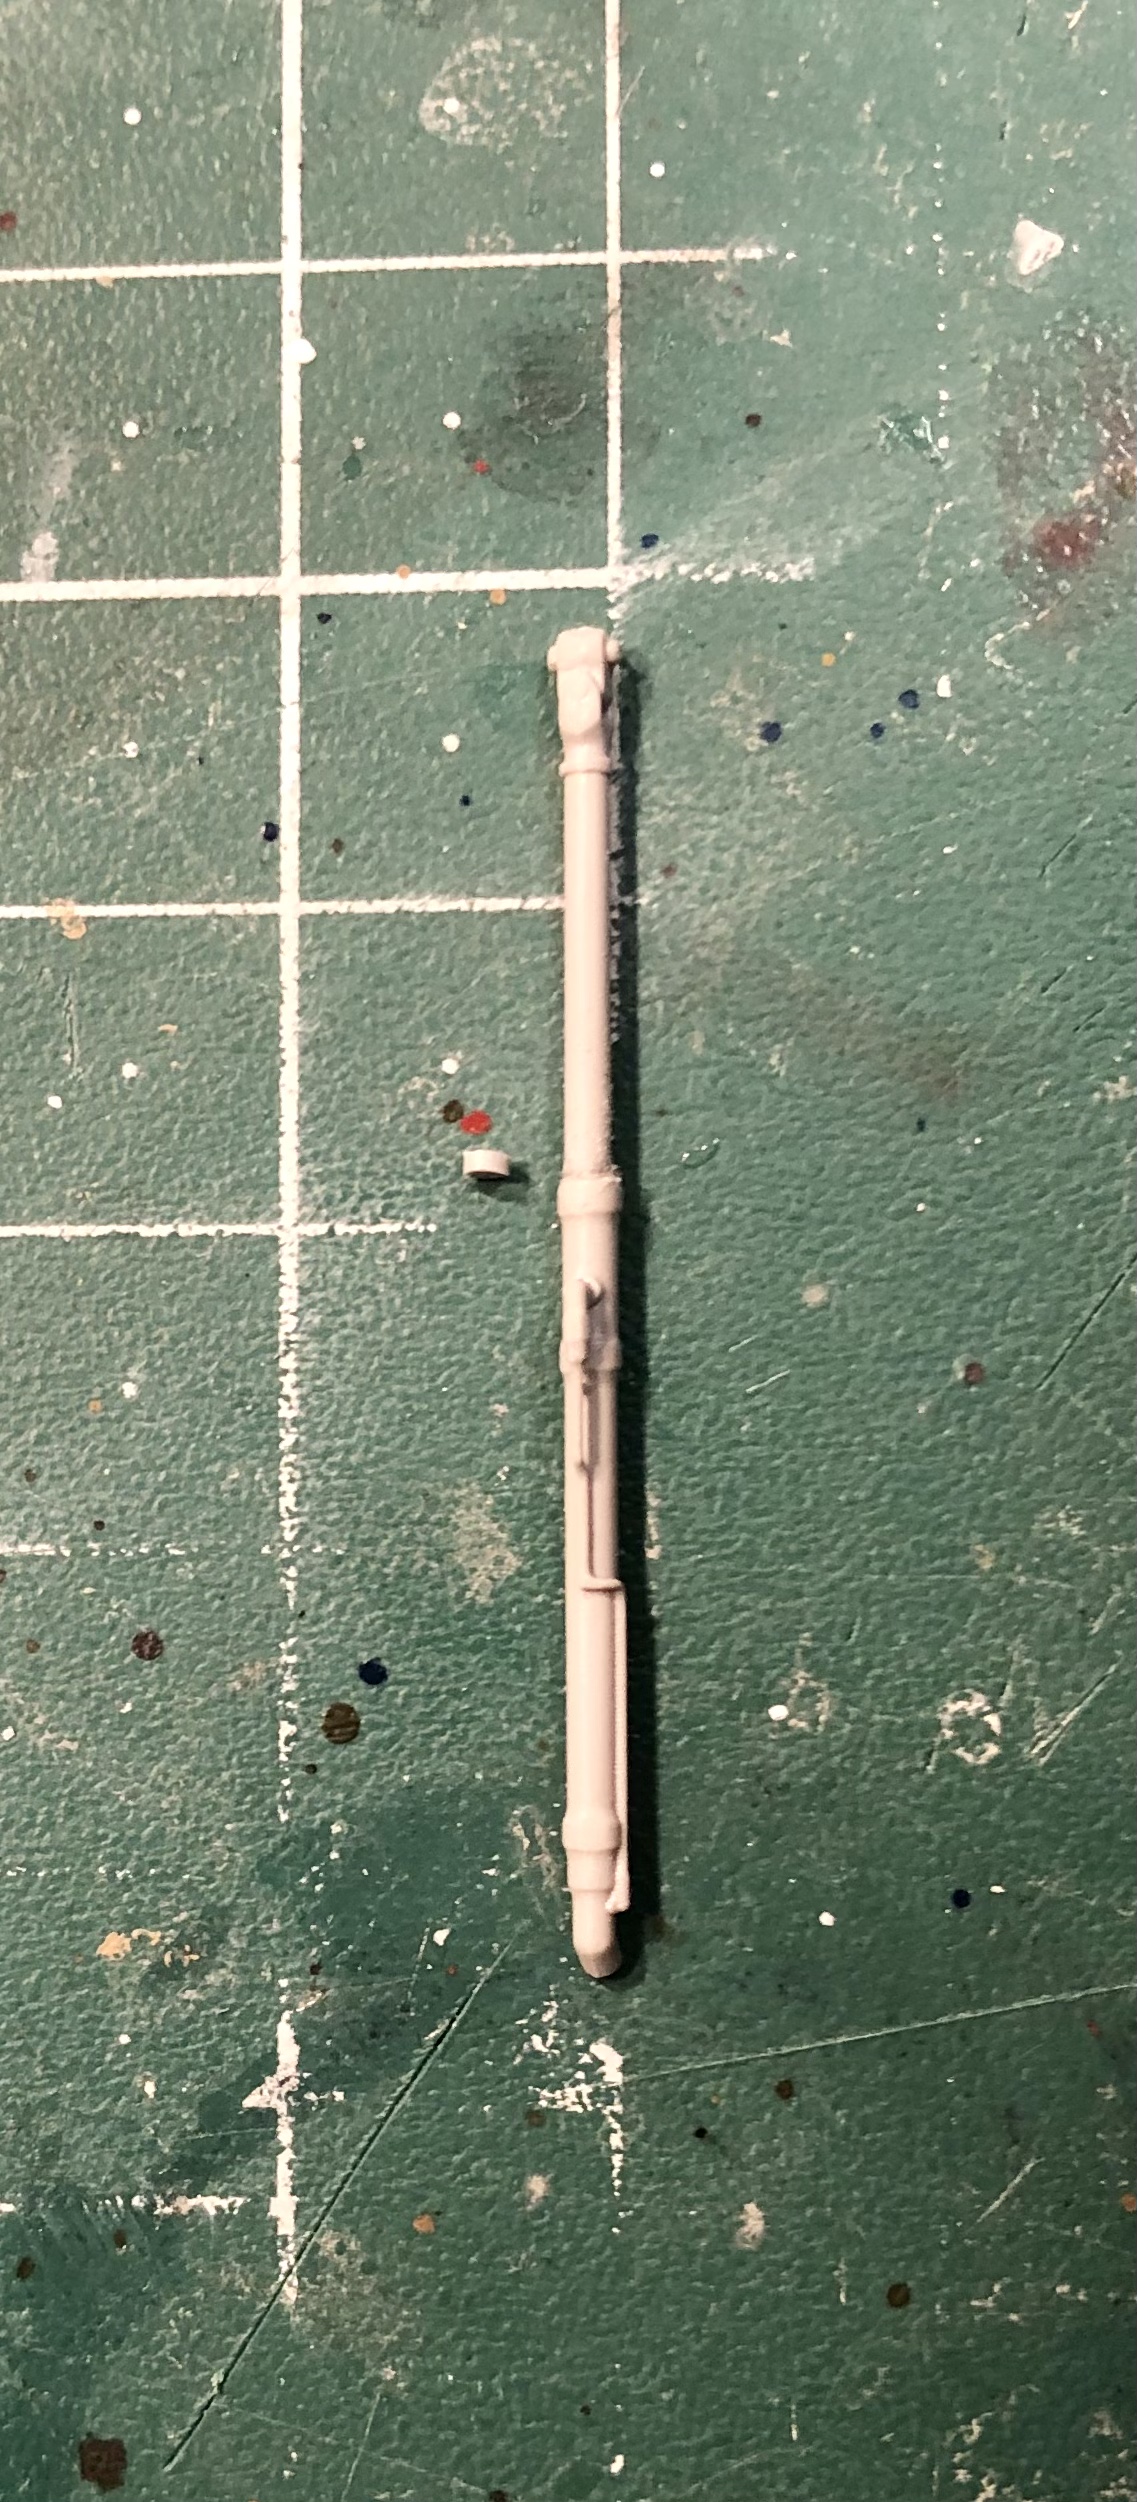
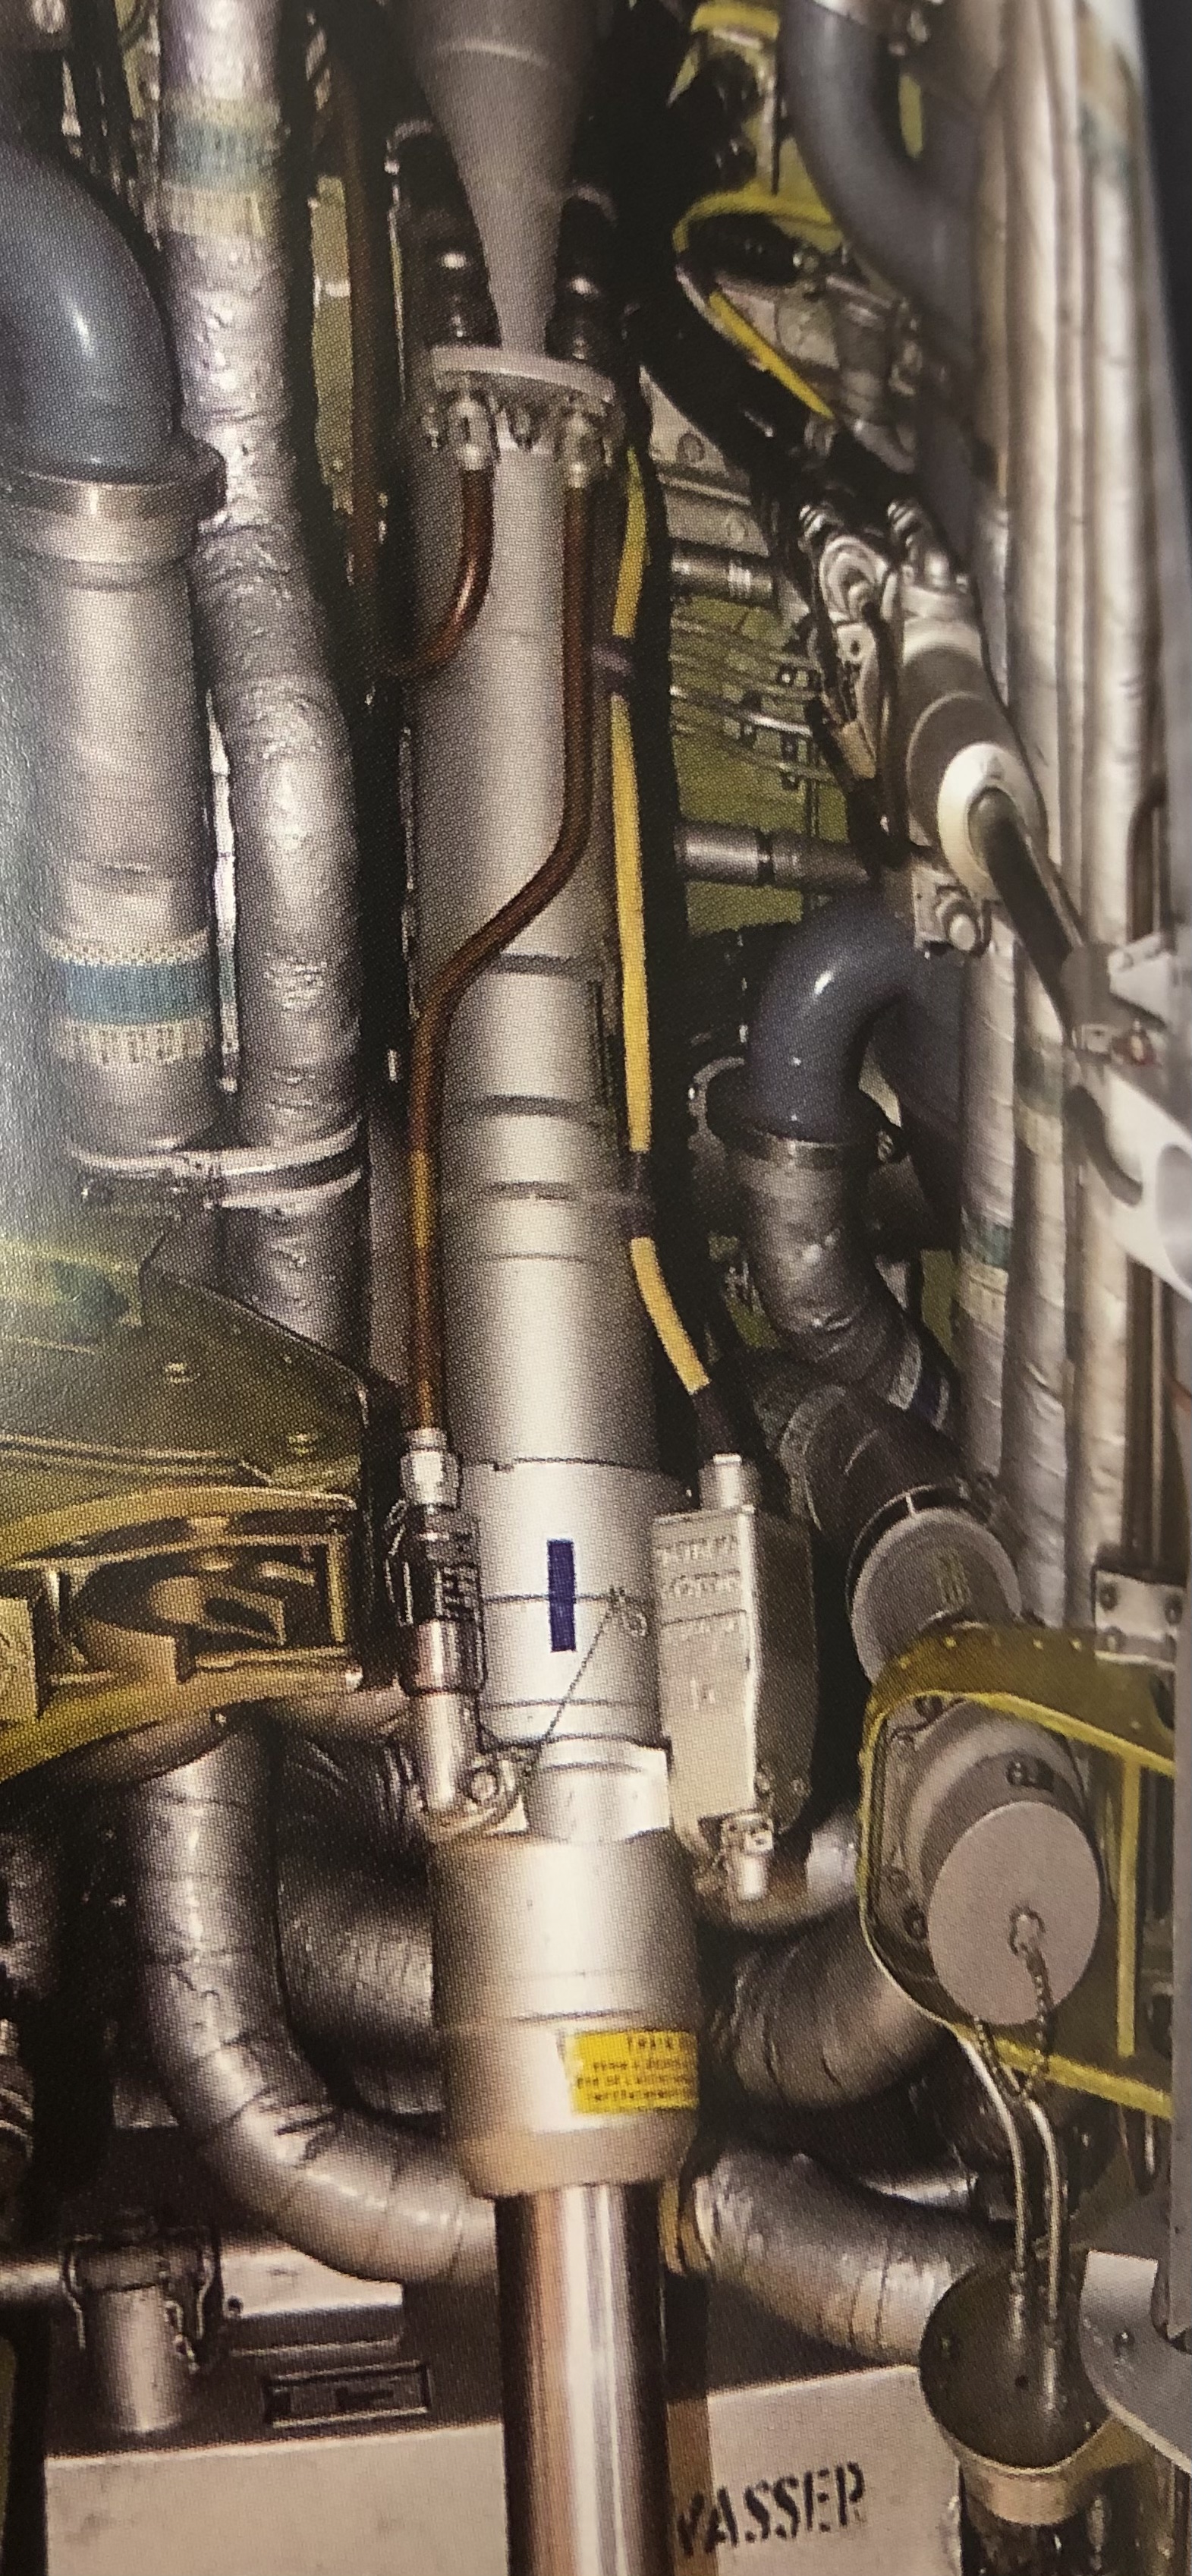
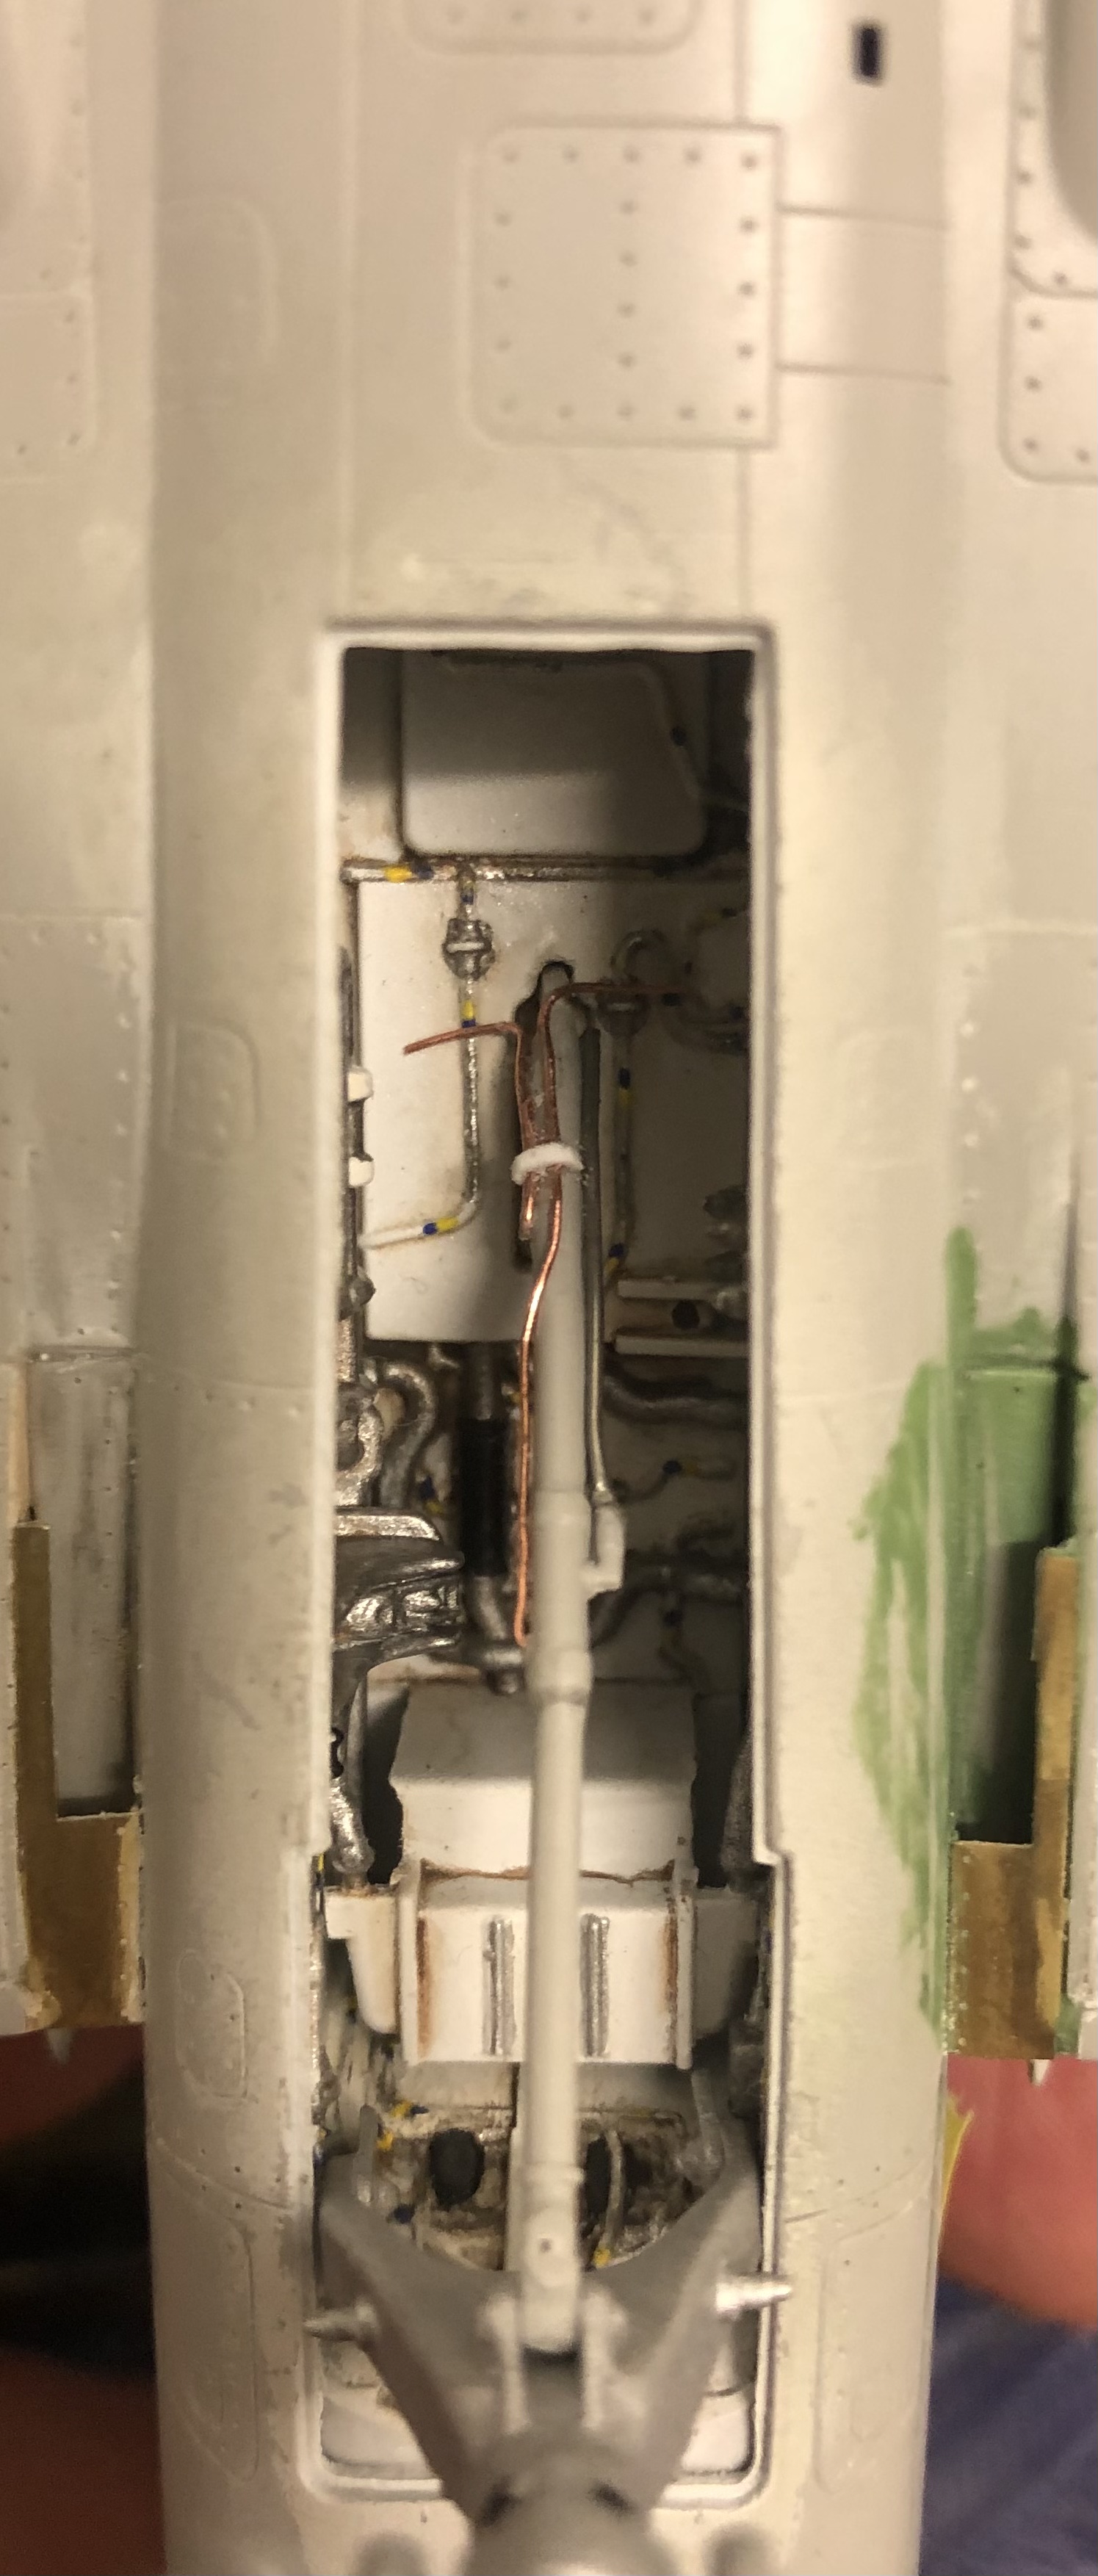
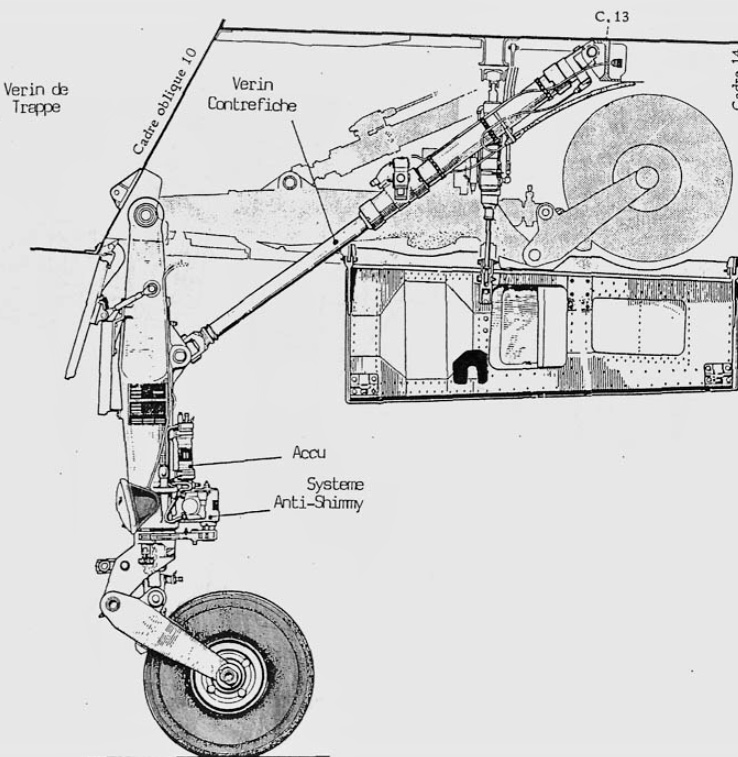
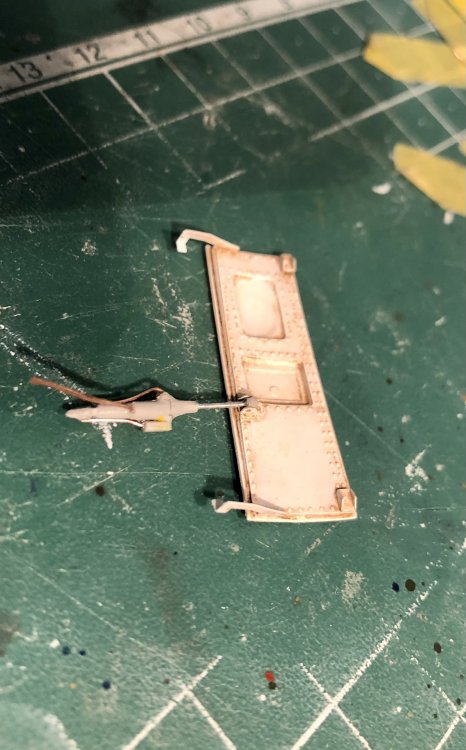
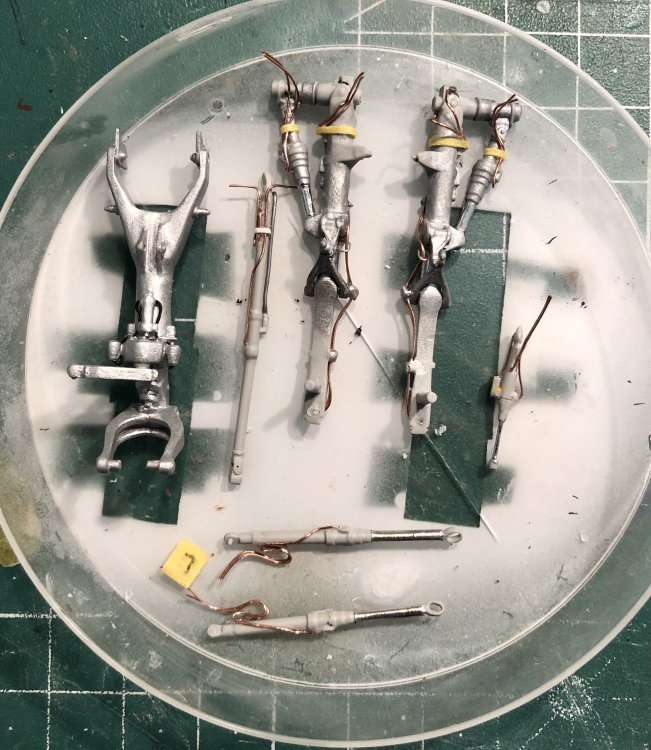
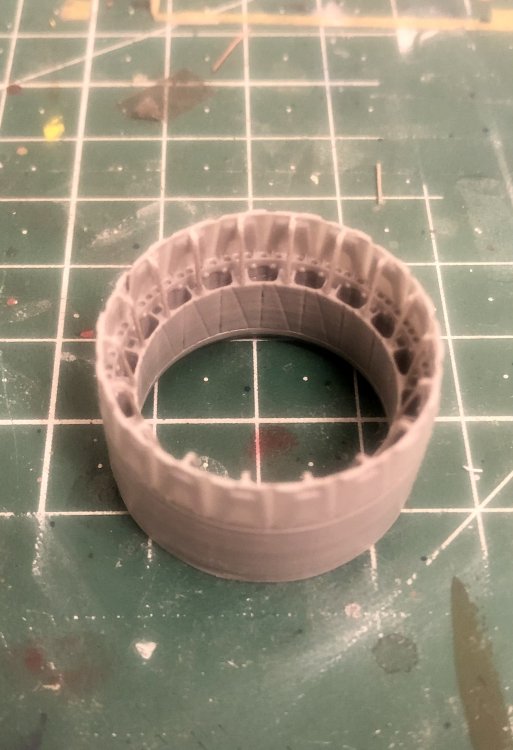
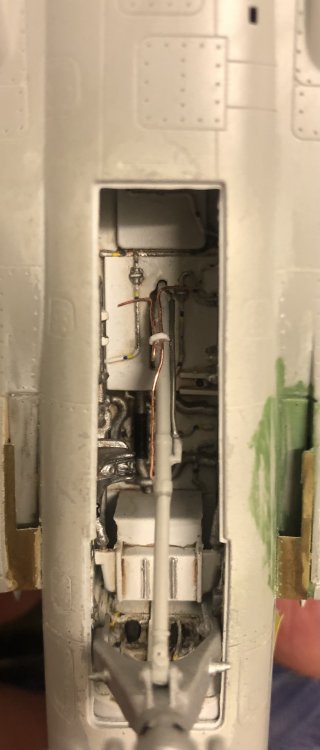
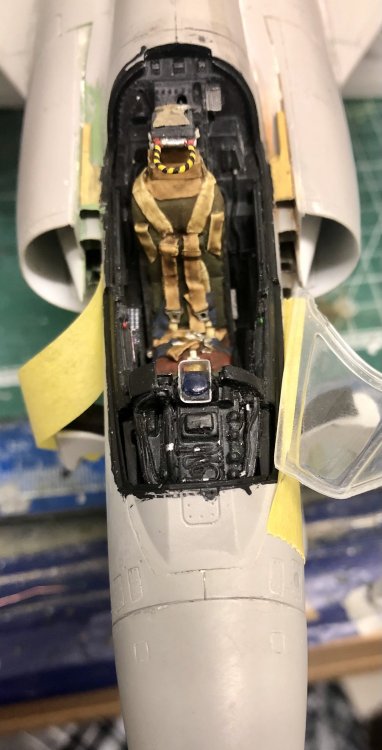
This evening I finished the detailing of the kit parts. First part was the exhaust nozzle from Isracast. The prominent levers for opening and closing the nozzle are missing. I added 18 rods made of stretched sprue and 6mm length to each nozzle part: Next were the hydraulic cylinders for the retraction of the main gear. I added all necessary hydraulic lines: The last hydraulic cylinder to be detailed was the one retracting the nosegear-door: Plastic rod replaced by metal one. And here all detailed landing gear parts are together: Now I can go on with the painting and weathering of them and then I can start with the preparation for the painting process.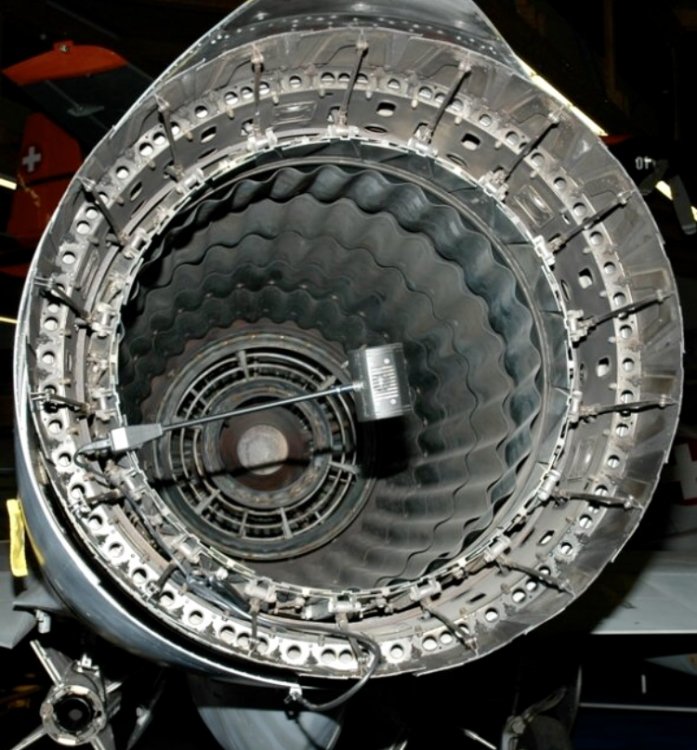


- 719 replies
-
- 11
-

-

-
I can only underline what Rob already stated: The details and your work make a real stunner out of it! Great looking model Gaz! I personally love the prop with the skull on the spinner!
-
KH P-39 Airacobra
Kaireckstadt replied to Peterpools's topic in LSM 1/35 and Larger Work In Progress
Great description of your steps and awesome start especially with all the brass parts. The cockpit looks great as does the engine! I will follow your build in the first row! -
Atlas Cheetah E Scaleworx Conversion
Kaireckstadt replied to GusMac's topic in LSM 1/35 and Larger Work In Progress
I‘m waiting for this for years too. Why does no kit manufacturer make a new 32nd Scale F-4 family? Would have been much better from Tamiya if they started their new F-4 family with a 32nd Scale F-4B...and then later on with a Spey Phantom...(and an F-4F)... -
Tamiya F4F-4 built as FM-1 Wildcat - 1/48 - FINISHED
Kaireckstadt replied to Landlubber Mike's topic in Non LSM 'WIP
I didn’t realize that someone else already mentioned that method. You can test if it works for you and then maybe give it a try on your beautiful Wildcat. -
ME 109 E4 1/18 scale
Kaireckstadt replied to Trigger's topic in LSM 1/35 and Larger Work In Progress
Beautiful progress and everything looks spot on! The leather cover looks really convincing as does the plumbing and the tank. Is this the Tamiya RLM02? I‘m curious to see your scratchbuilding of the lower firewall. -
Great looking scratchbuilding! Most of it will also be seen when finished!
-
Simply beautiful and stunning camo!
-
Great work so far Phil!
-
Tamiya F4F-4 built as FM-1 Wildcat - 1/48 - FINISHED
Kaireckstadt replied to Landlubber Mike's topic in Non LSM 'WIP
Mike, you can achieve a blurred transition between the 2 colors when you use a piece of a fine sponge fixed between tweezers. When you dip it in the color and then on a piece of paper you can control the color which remains in the sponge. With this it should be possible to create a blurred line. I used this technique for years until I finally got an airbrush. Maybe you can give it a try. And: Awesome builds of the 2 planes so far! -
Atlas Cheetah E Scaleworx Conversion
Kaireckstadt replied to GusMac's topic in LSM 1/35 and Larger Work In Progress
All AM parts fit better than the kit parts... To be honest: I also build 2 F-104G and a friend of mine already 2 Tornados. The 104s had some minor issues and the Tornado seems to go together very smooth and has really nice detail. I think that Italeri saved money with the injection molds. I can’t imagine any other reason for the bad injection quality. Regarding engineering: this kit wasn’t designed by someone who builds models when I look at the parts breakdown. Nevetheless my next model will be the Italeri Tonka with build in electronics and I will build a special livery from 617 Sqn. Then I will see... -
Israeli Mirage III C with Atar9C
Kaireckstadt replied to Kaireckstadt's topic in LSM 1/35 and Larger Work In Progress
Thank Kev! Even if not much of it is visible when she’s on her legs I know it is there or display her upside down... -
Atlas Cheetah E Scaleworx Conversion
Kaireckstadt replied to GusMac's topic in LSM 1/35 and Larger Work In Progress
That really looks awesome! I admire your work because fitting a conversion set to this kit is a nightmare. None of the tricks I used can be used (wing-attachment, vertical fin attachment...)for your build! I can imagine the vocabulary you used during all the necessary rework. But it really paid off so far!! Will turn into a great looking Cheetah! -
That looks great! I will for sure follow part 2 of your build!
-
Israeli Mirage III C with Atar9C
Kaireckstadt replied to Kaireckstadt's topic in LSM 1/35 and Larger Work In Progress
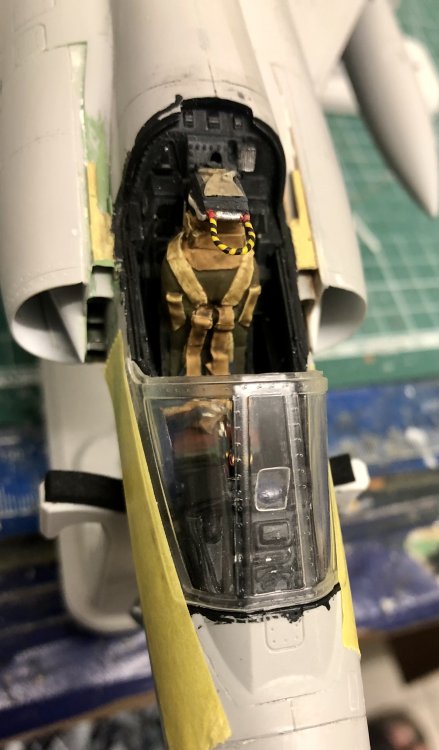
Thanks Frank, The seat is only plugged with Bluetech. Would be more complicated to mask for painting. -
Israeli Mirage III C with Atar9C
Kaireckstadt replied to Kaireckstadt's topic in LSM 1/35 and Larger Work In Progress
Thanks Gaz! Like all cockpits of that time very colorful IPs and I like ejection-seats with the yellow-black handles on top. -
Israeli Mirage III C with Atar9C
Kaireckstadt replied to Kaireckstadt's topic in LSM 1/35 and Larger Work In Progress
Thank you Harv! Still a long way to go but the end is in sight!... -
Tamiya Spit IX JE-J finished
Kaireckstadt replied to JohnB's topic in LSM 1/32 and Larger Aircraft Ready for Inspection
Great looking replica of Johnnie Johnsons‘ Spitfire! I like the clean look and the invasion stripes are real eyecatchers. Very well done John! So what’s next on your bench? Cheers Kai -
Israeli Mirage III C with Atar9C
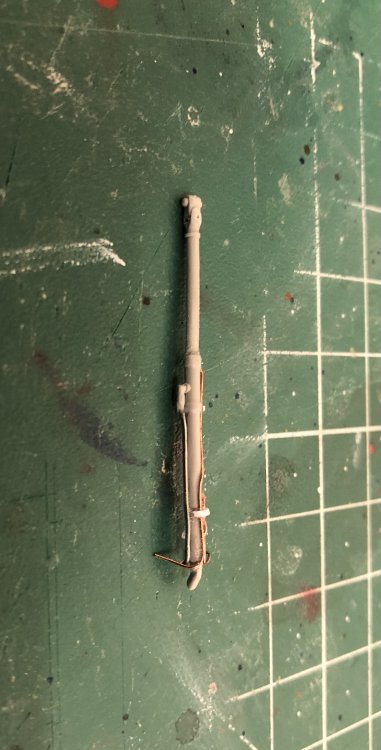
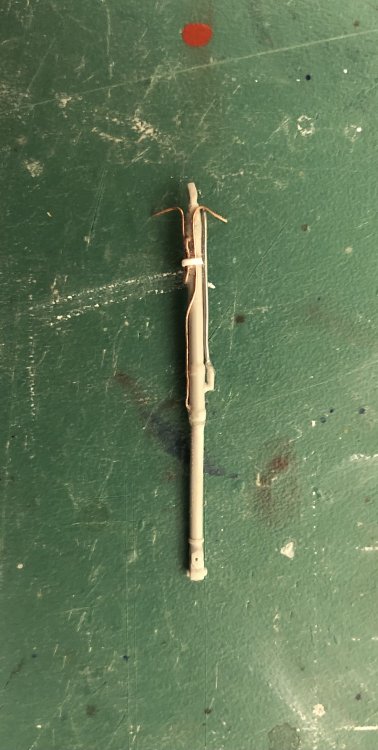
Kaireckstadt replied to Kaireckstadt's topic in LSM 1/35 and Larger Work In Progress
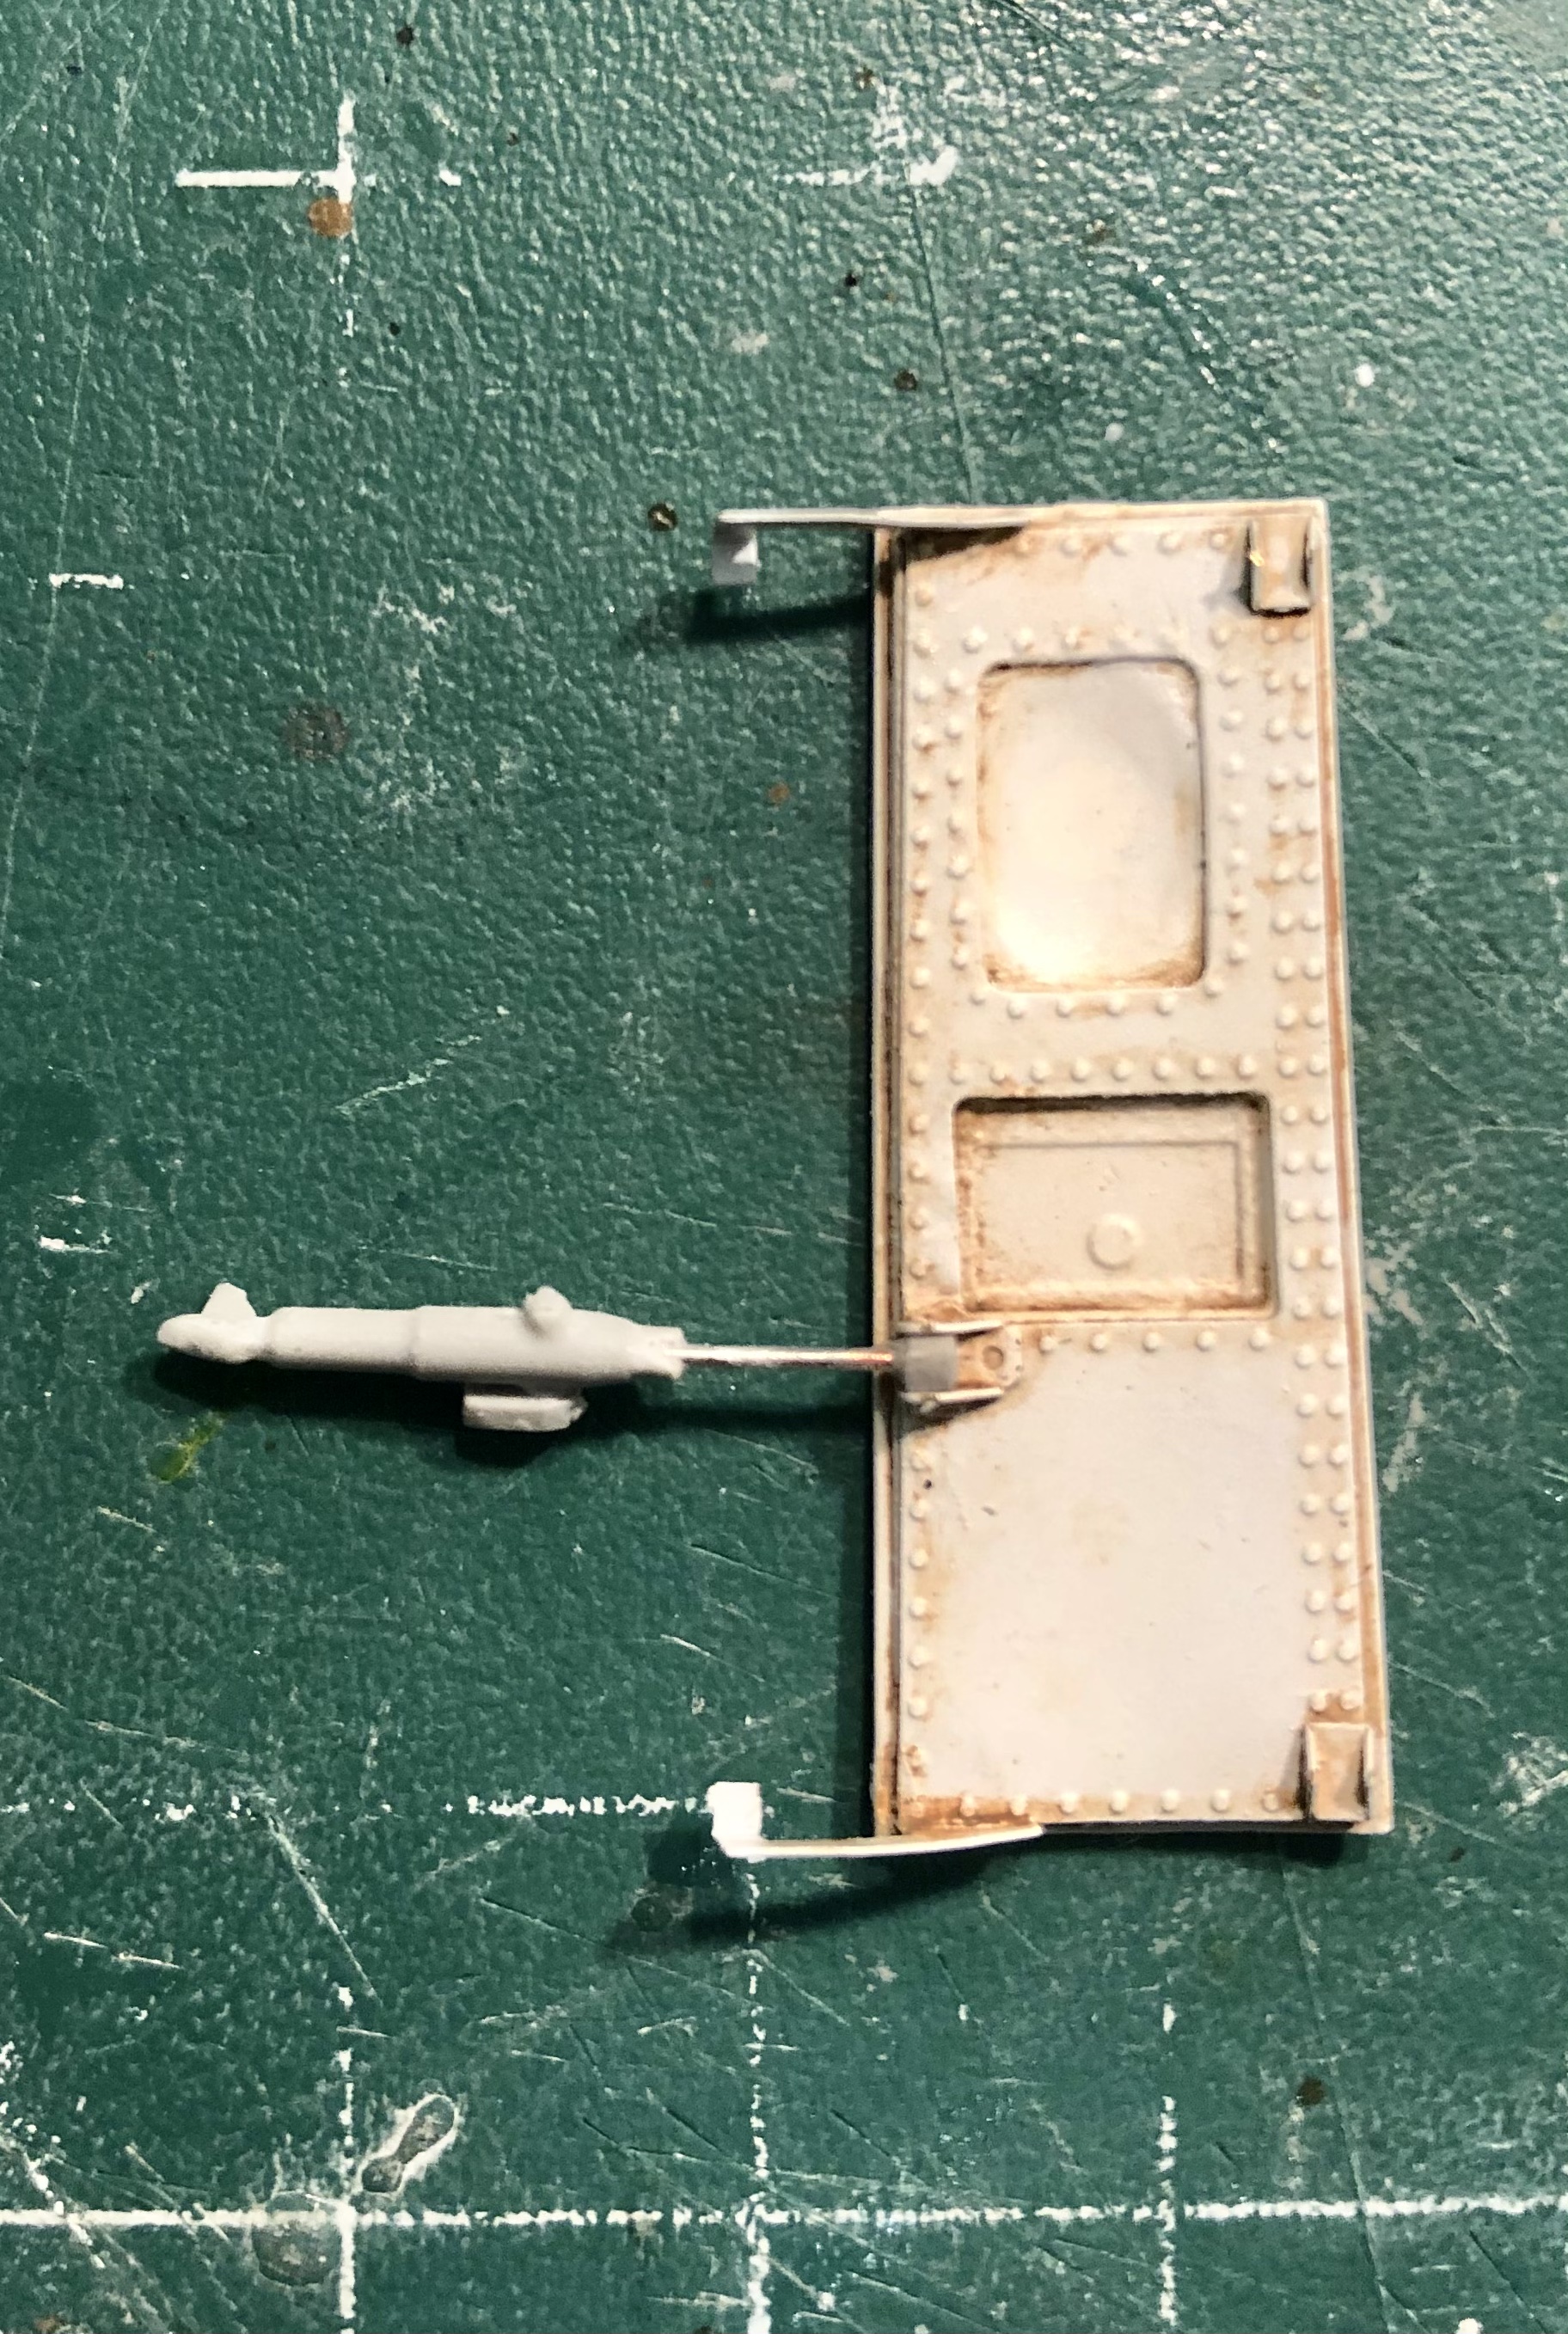
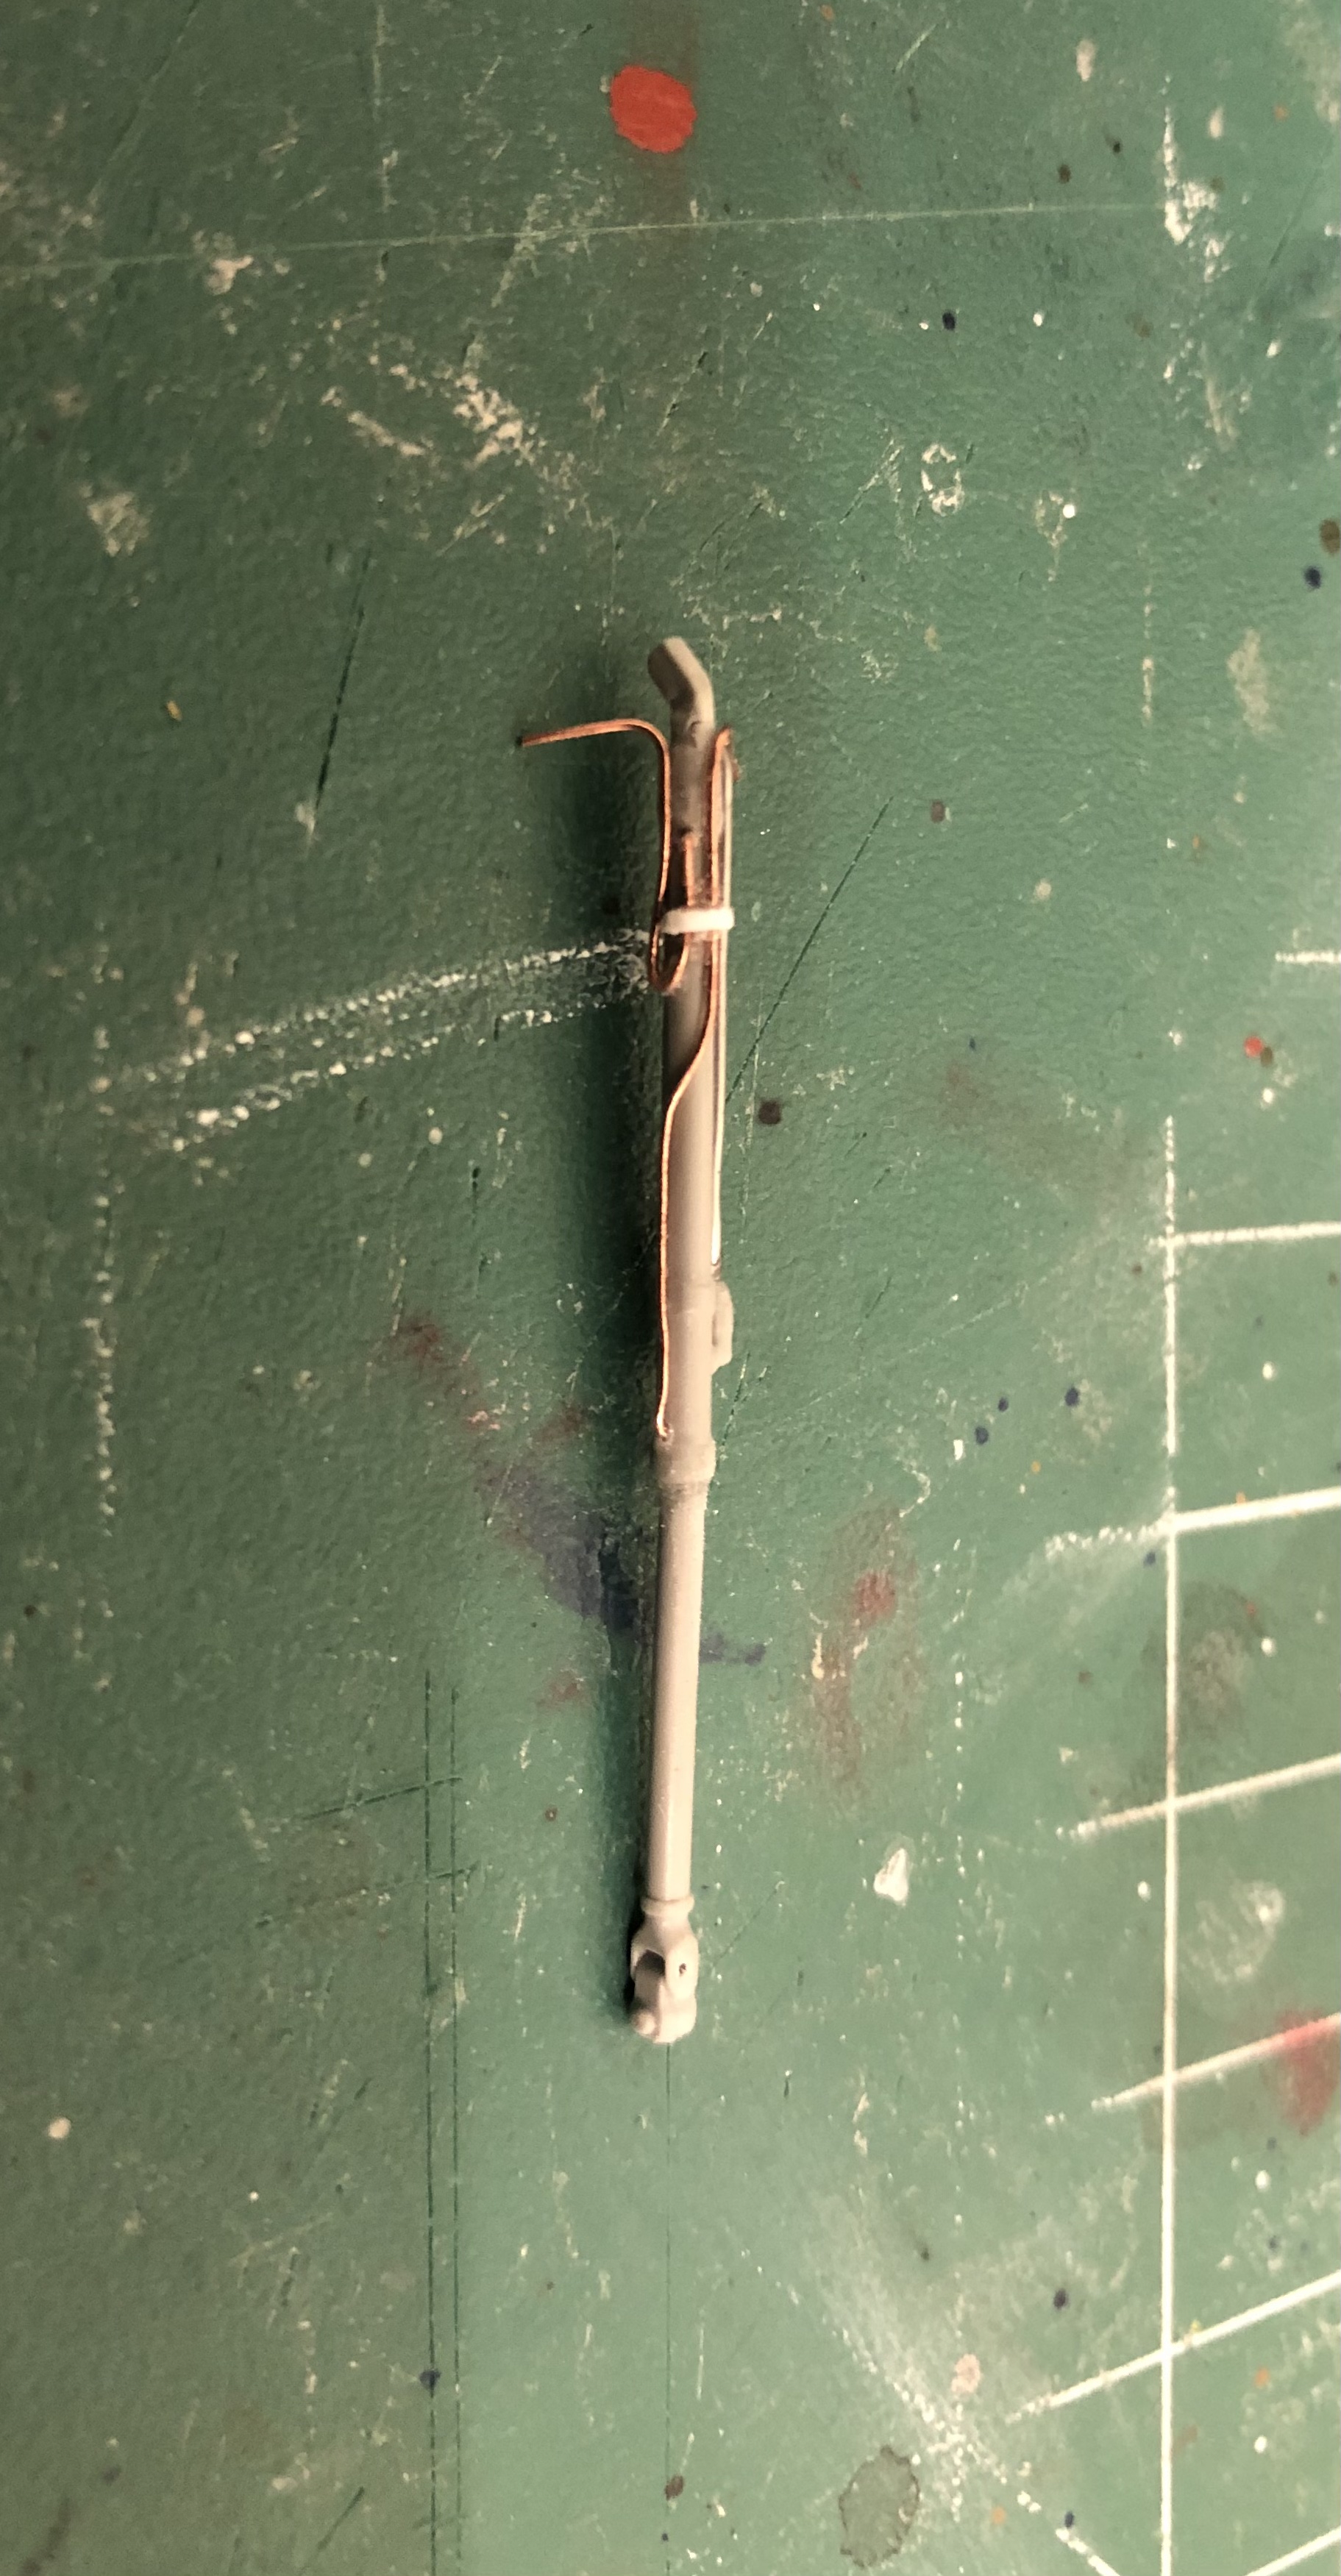
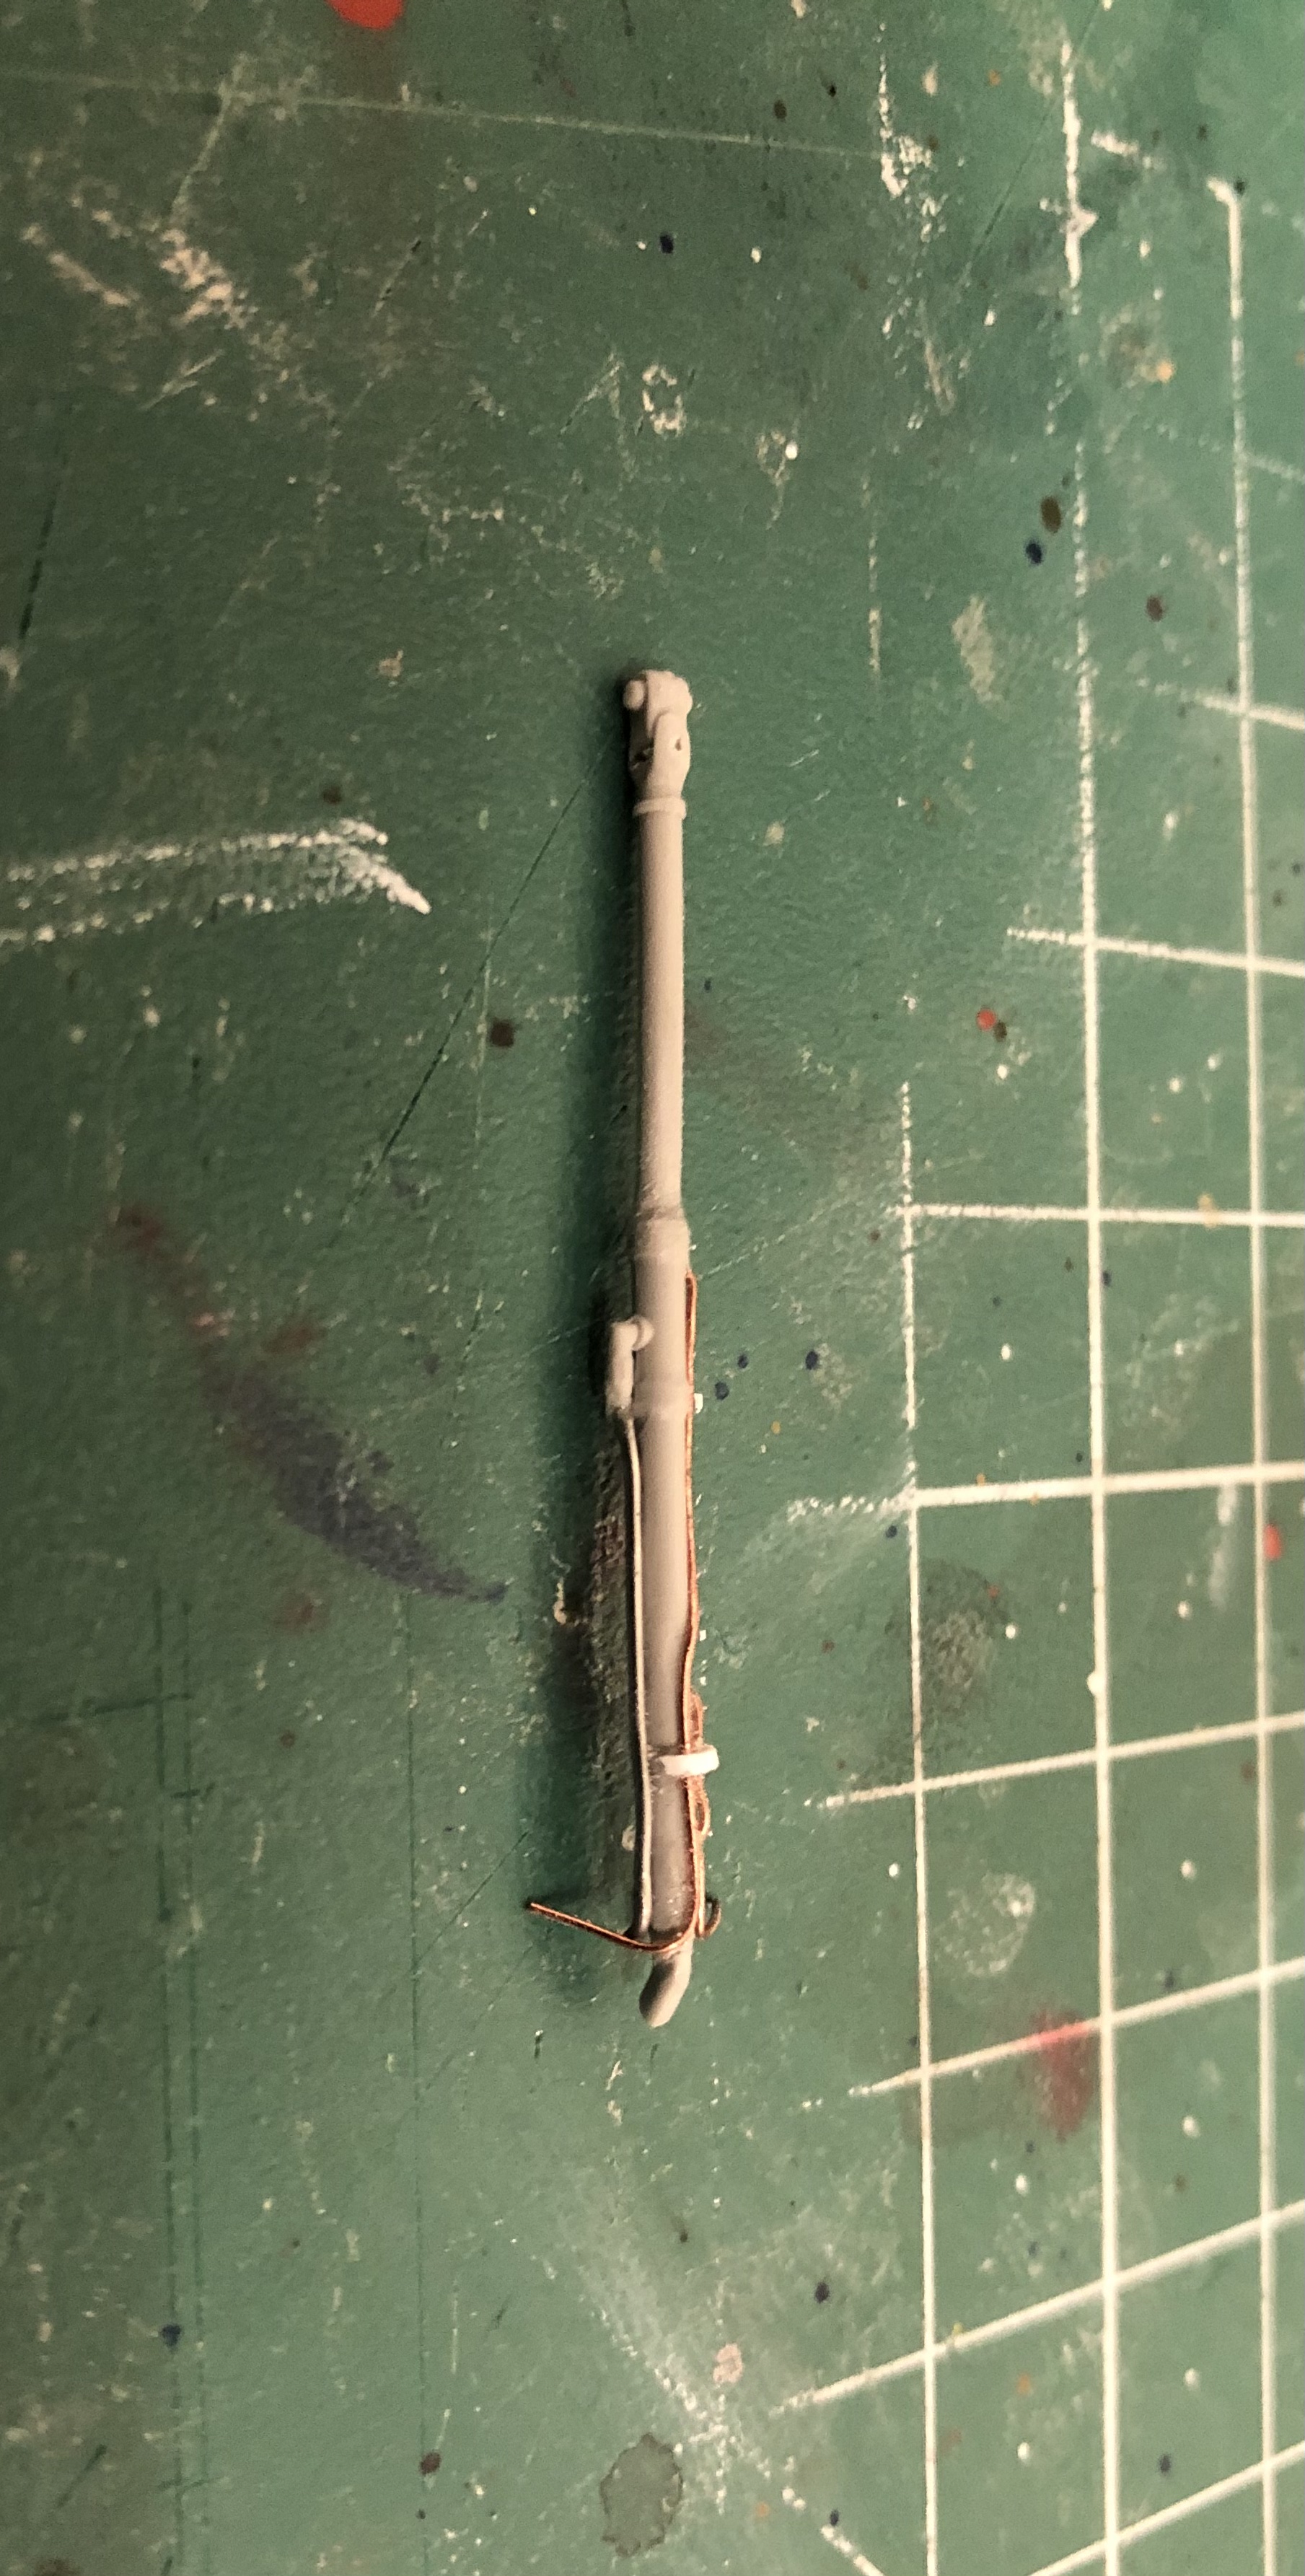
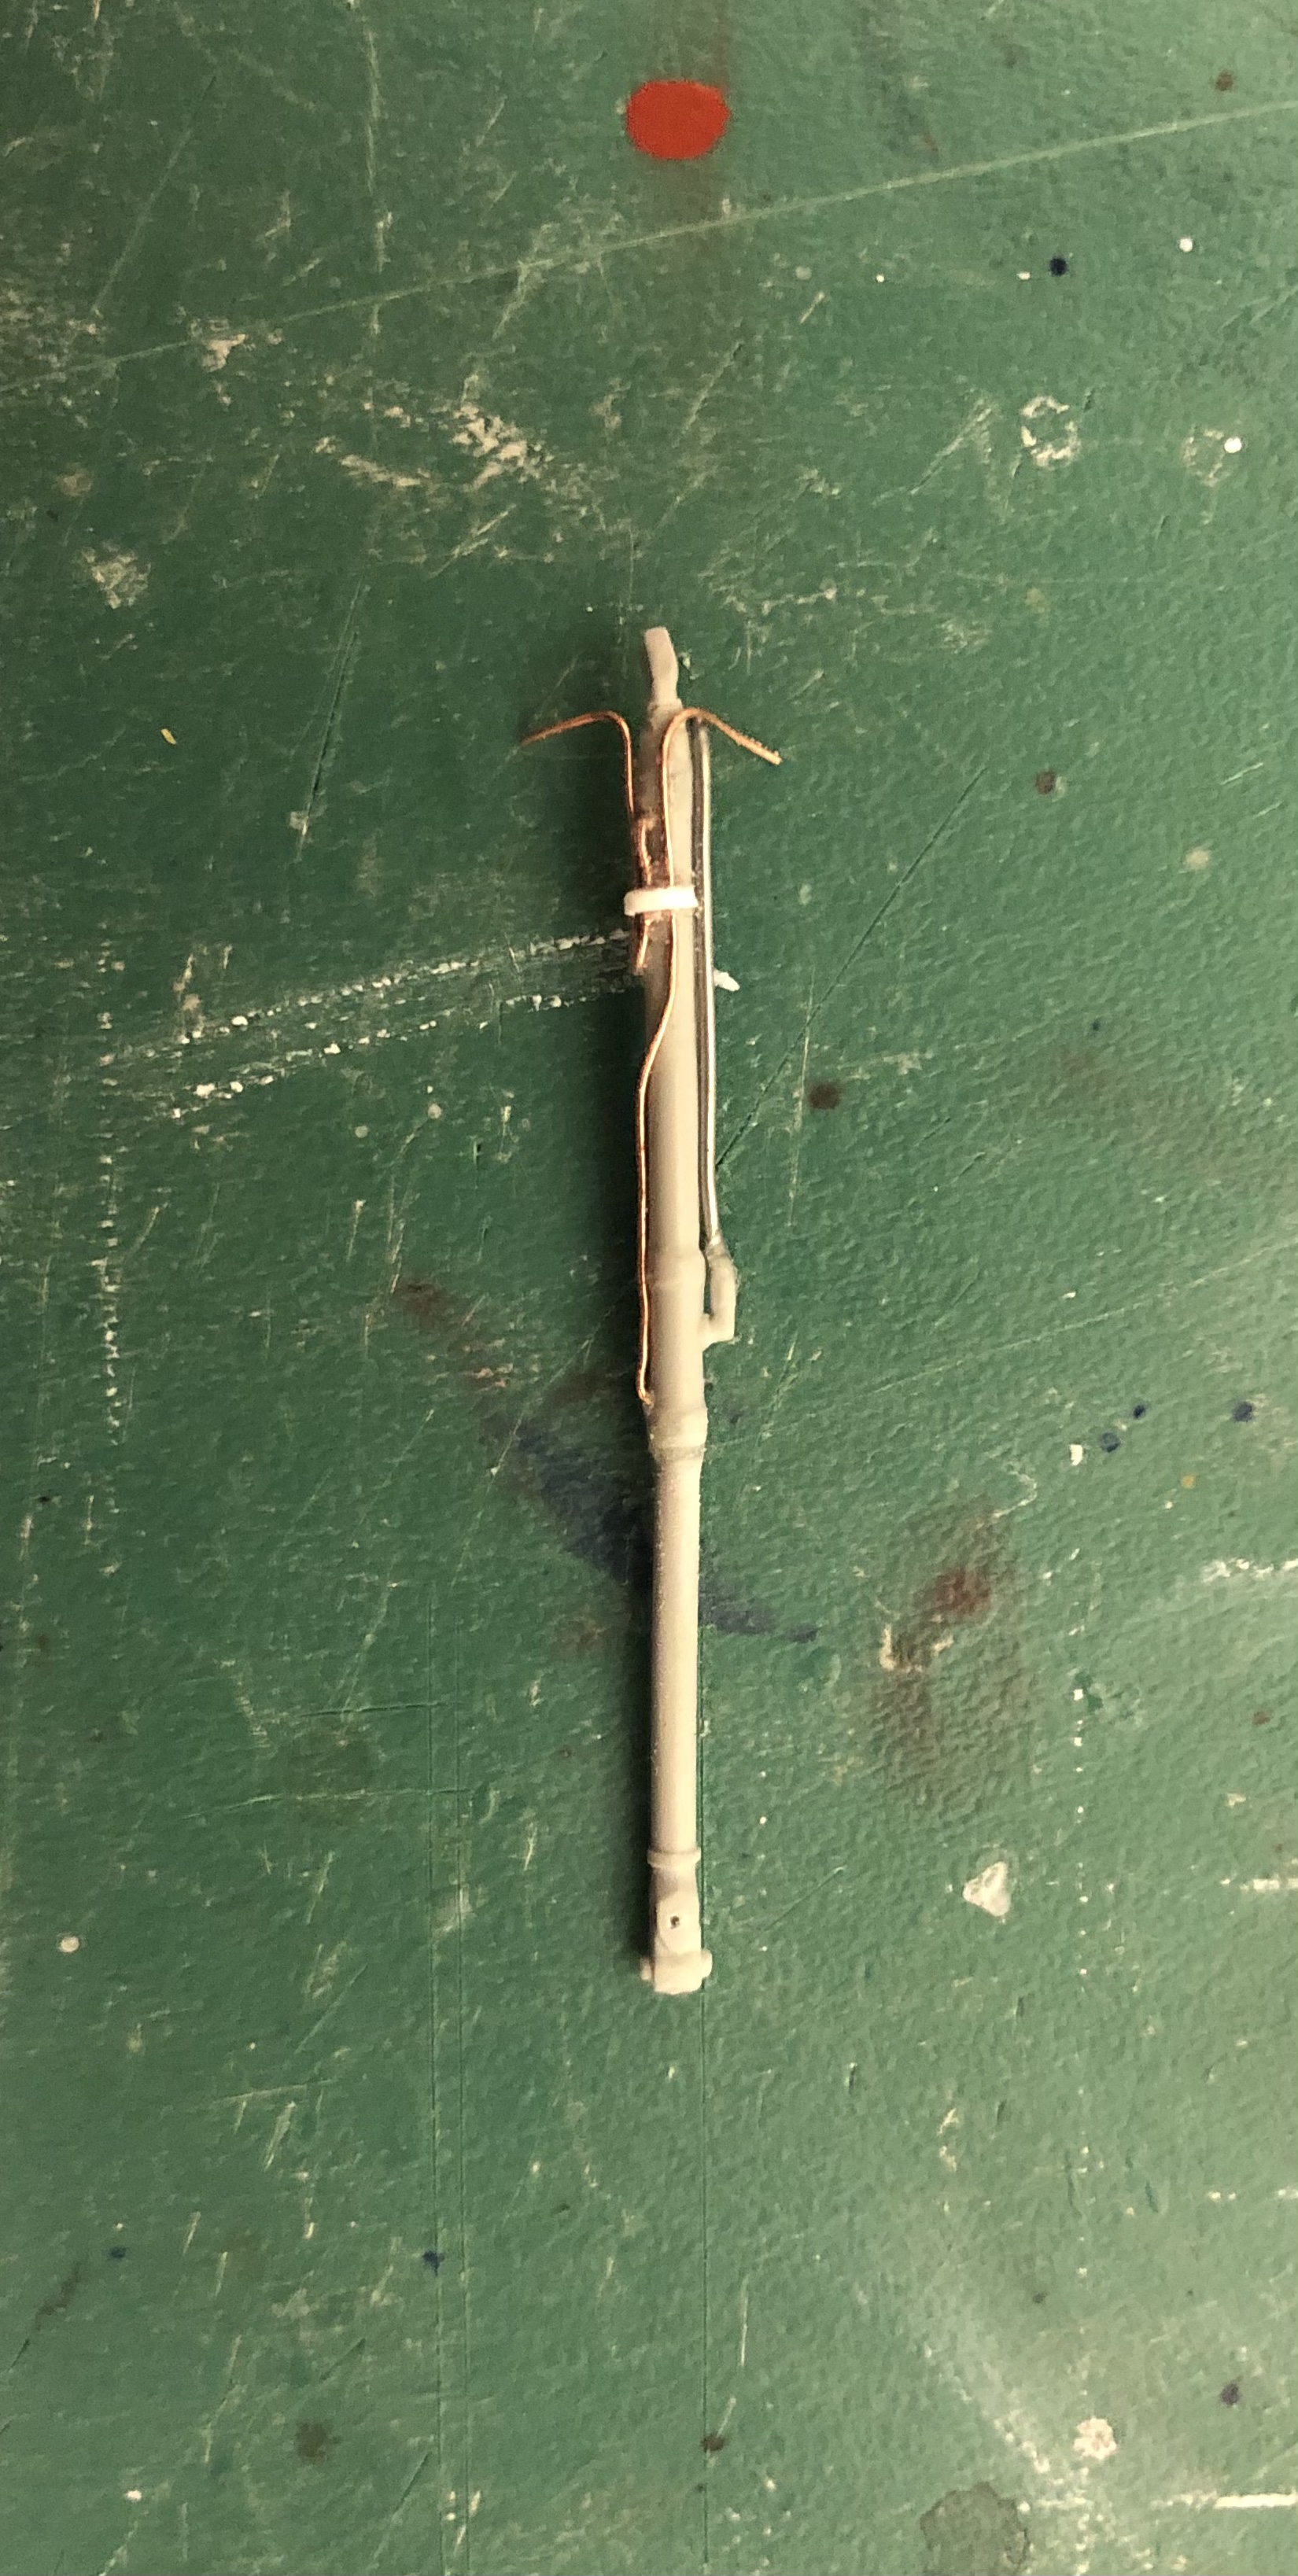
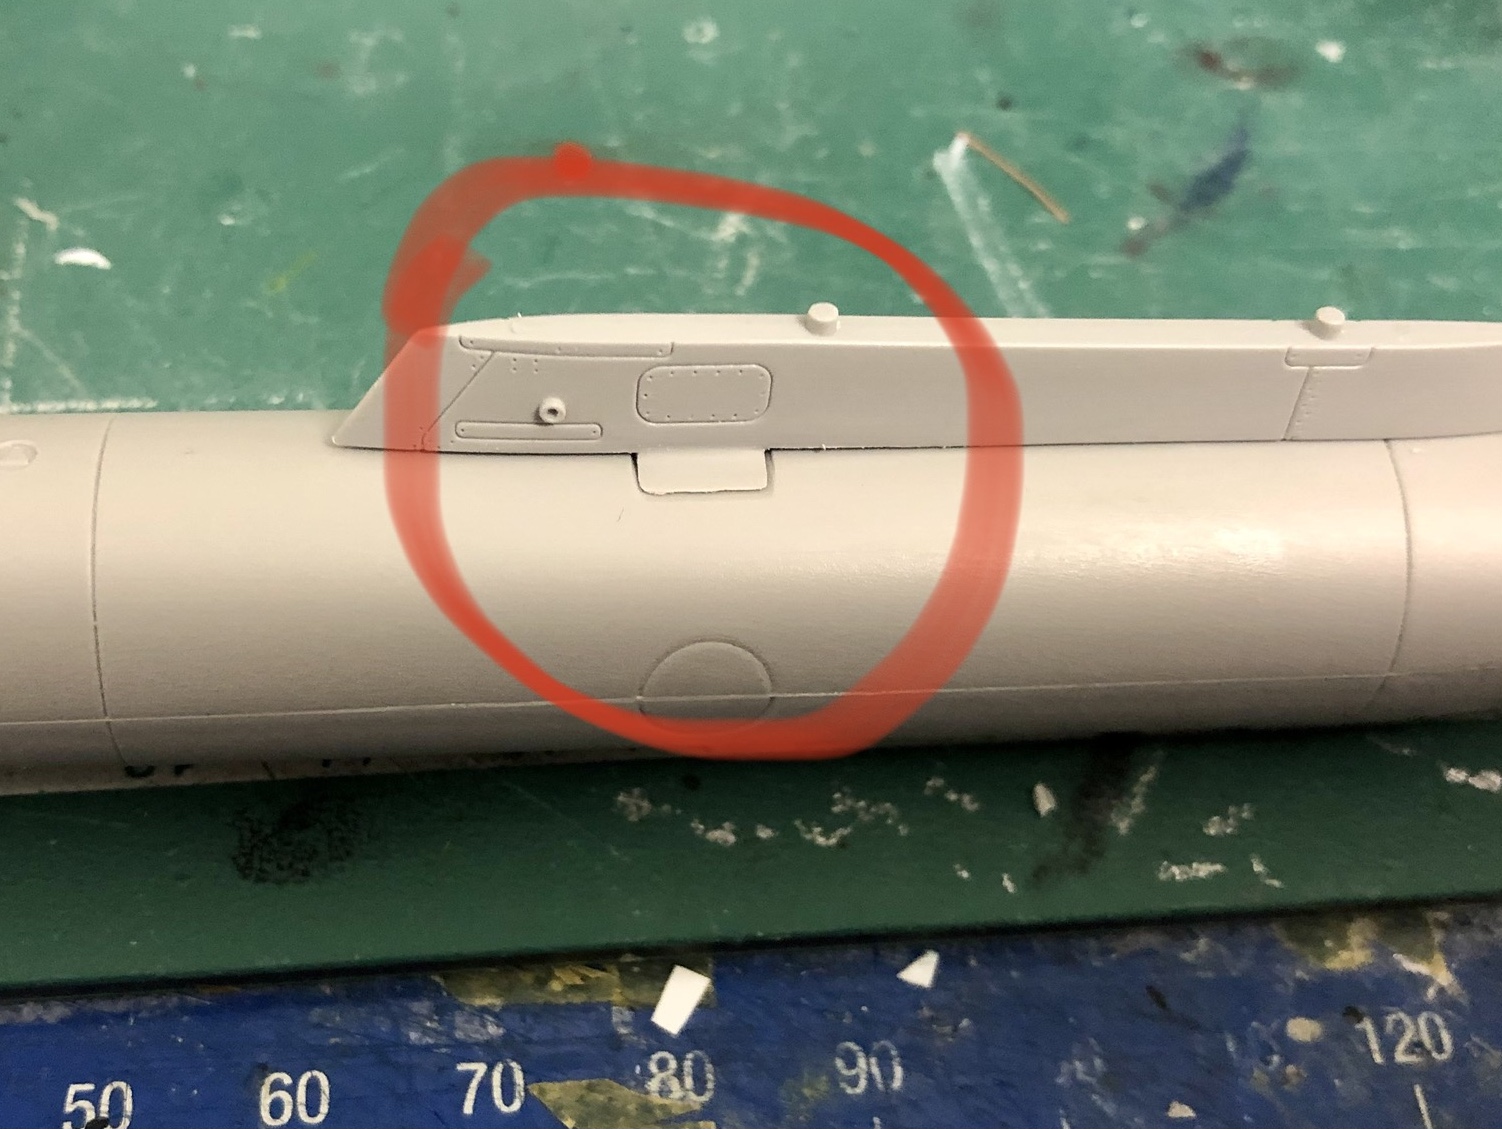
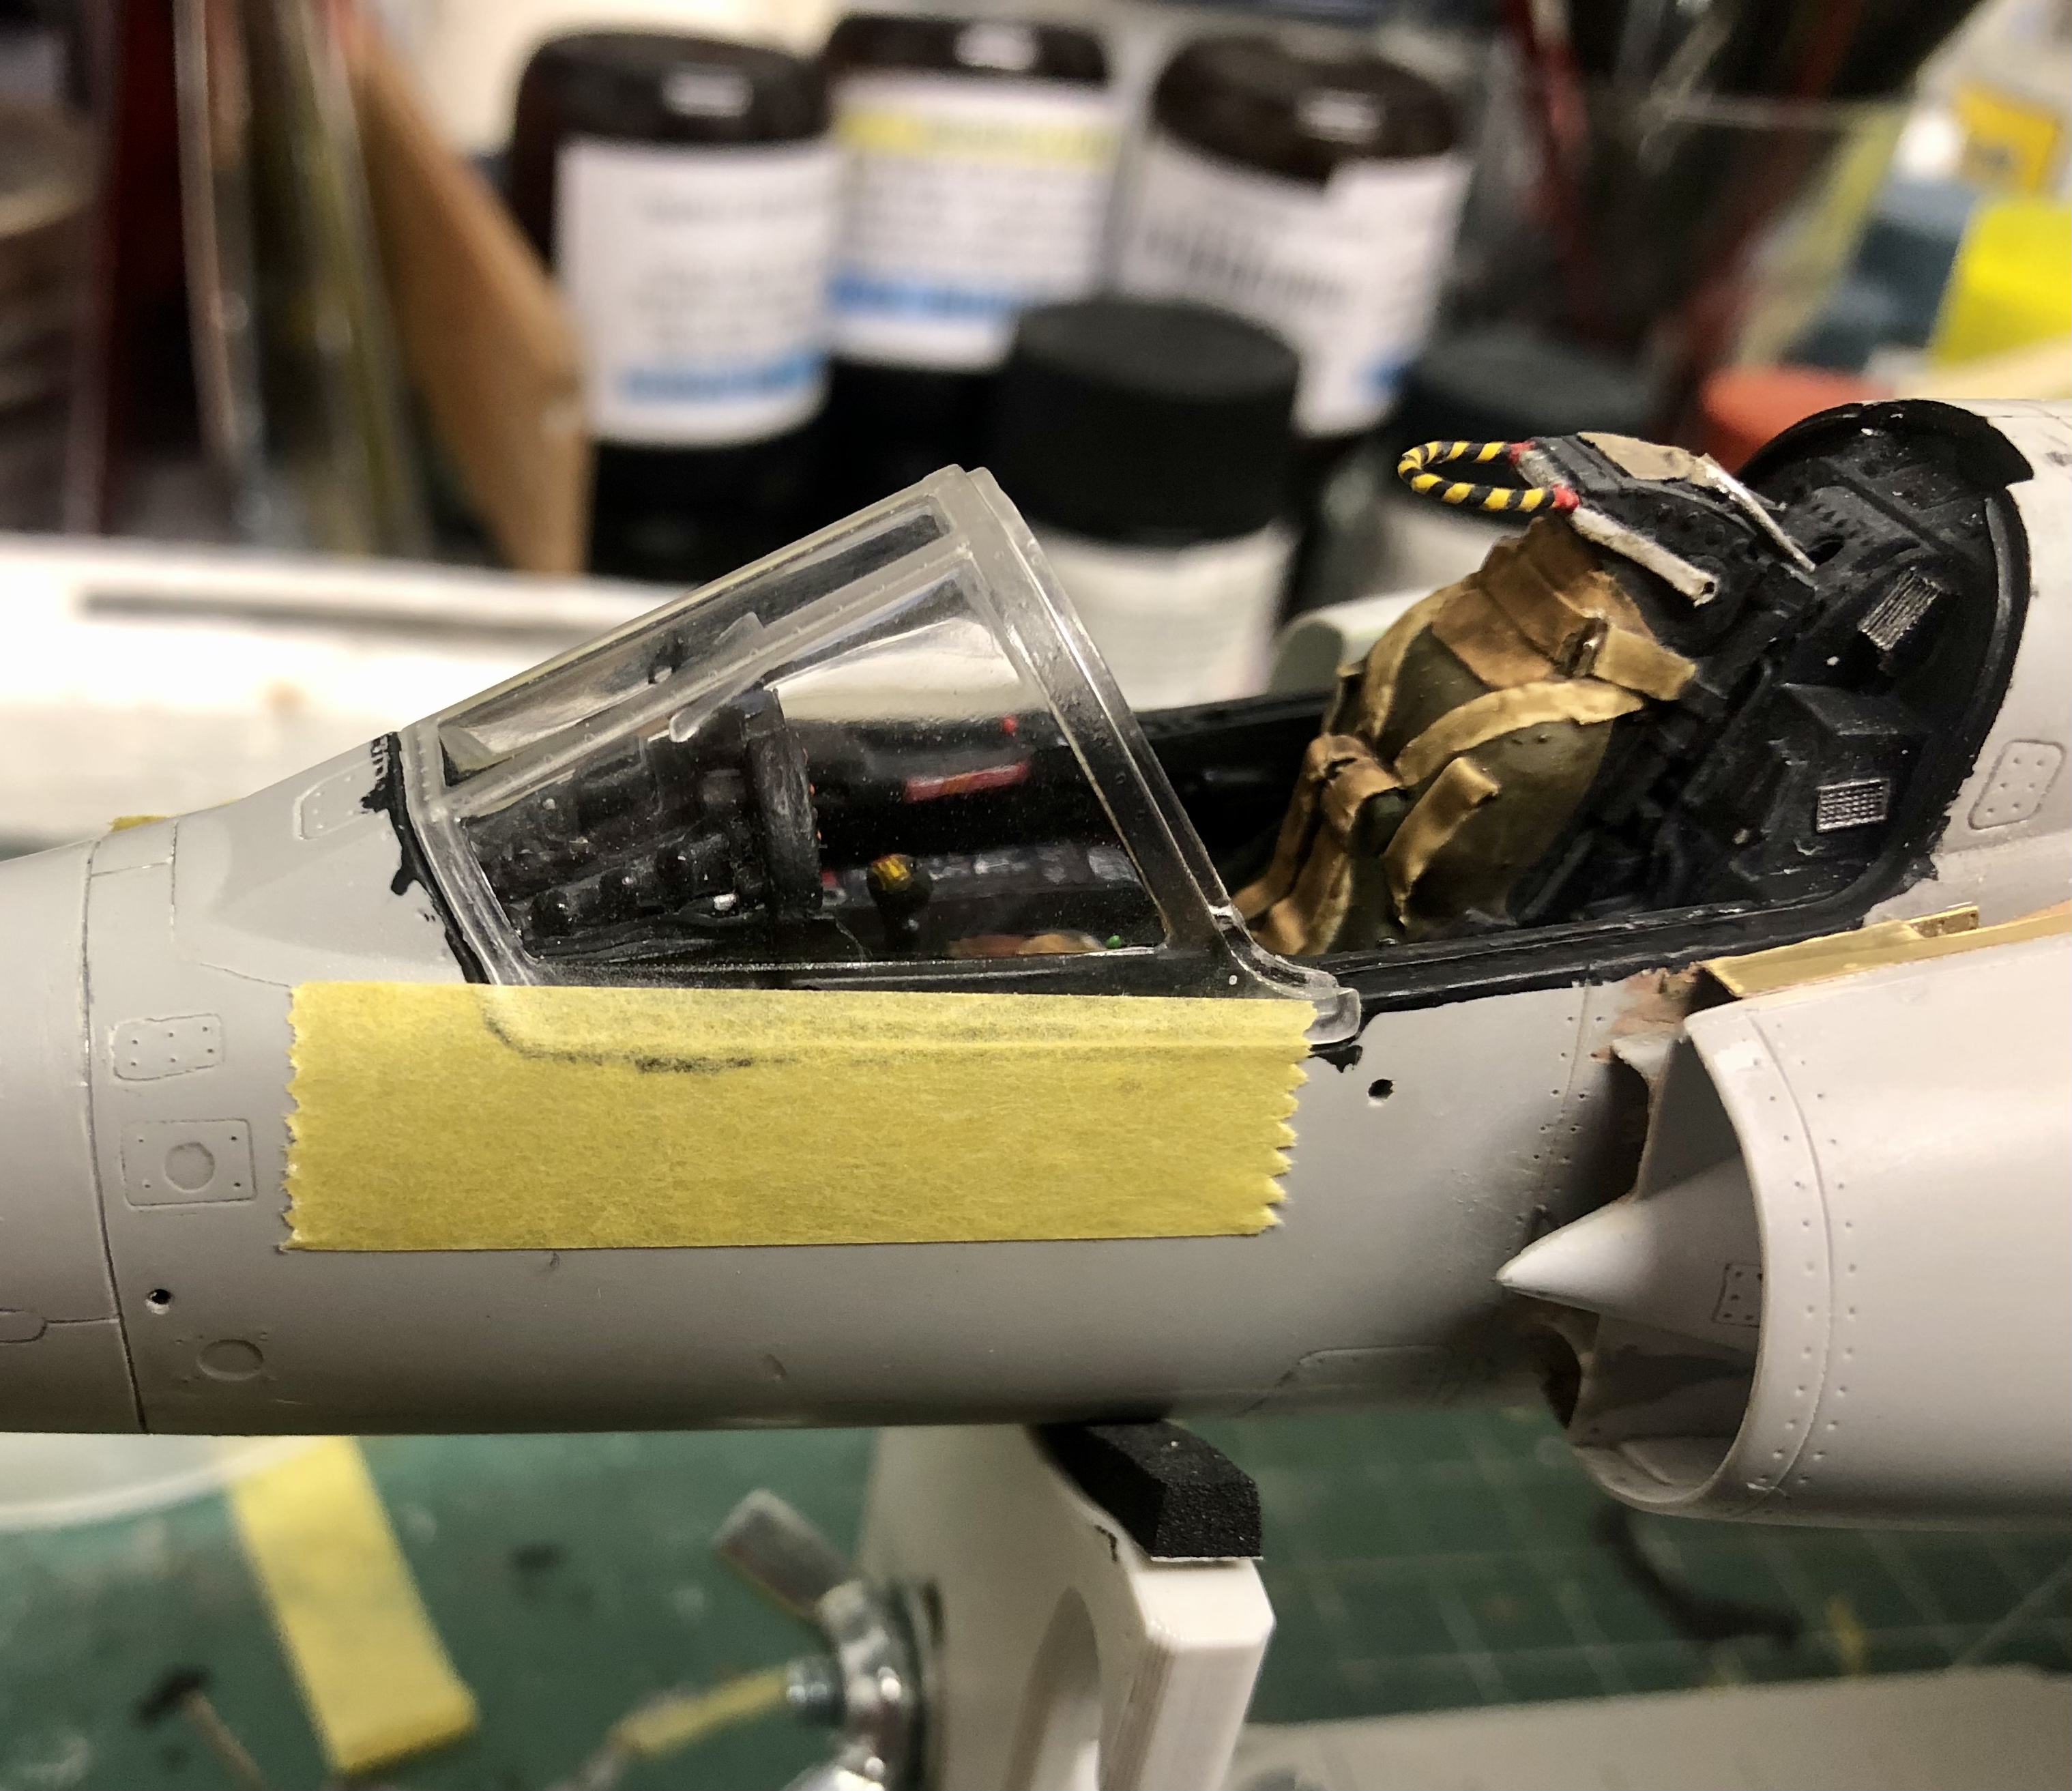
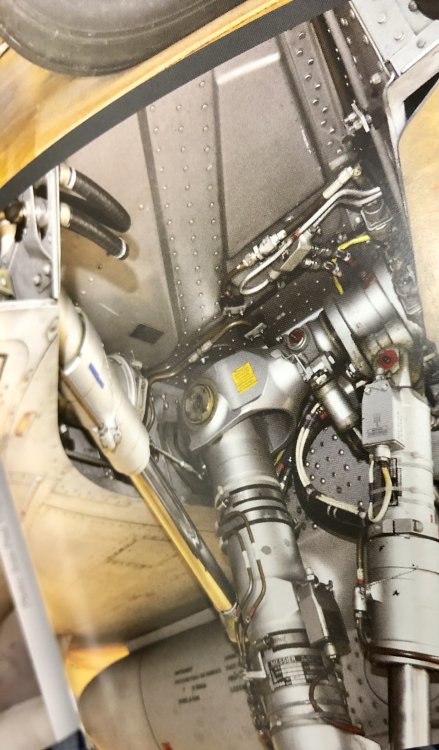
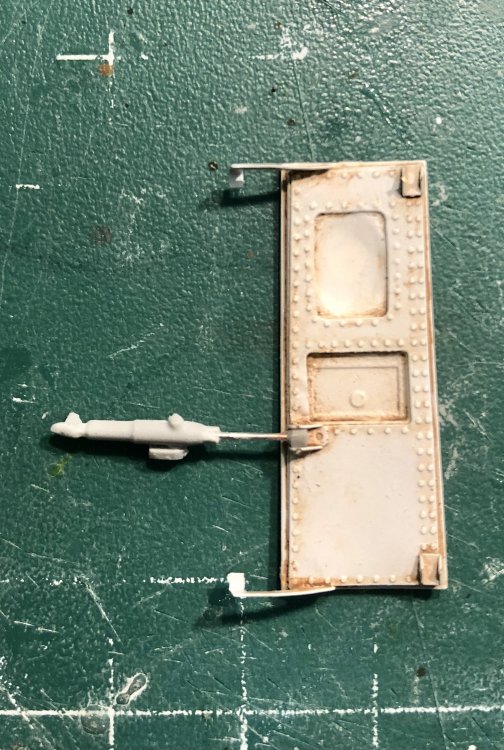
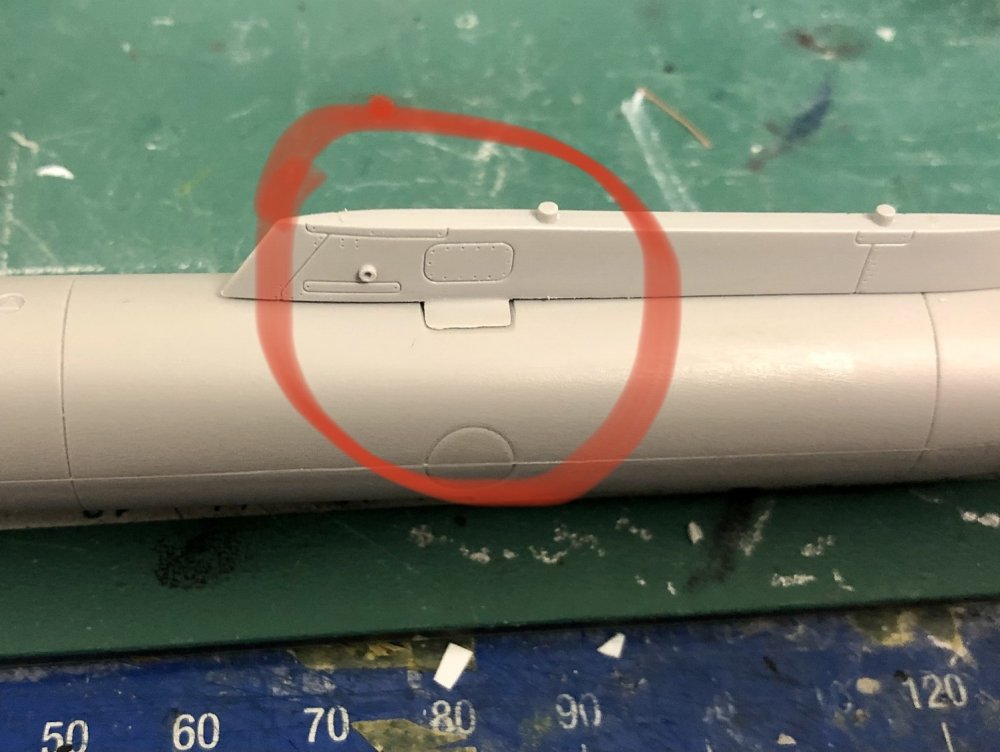
Tonight I took care about the HUD, improved the fit of the windshield, reworked the fit of the pylon to the tanks and finally corrected and detailed the NLG-retraction-cylinder. The HUD fitted well within the brackets for it: Then I reworked the windshield for a correct fit: The connection of the tanks to the pylons had also to be sanded for a better fit: The last thing I reworked and detailed was the NLG-hydraulic-retraction-cylinder. I shortened it about 1mm to get the correct angle of the leg in relation to the fuselage: Then I added wiring and hydraulic lines: That’s all for this time. See you soon!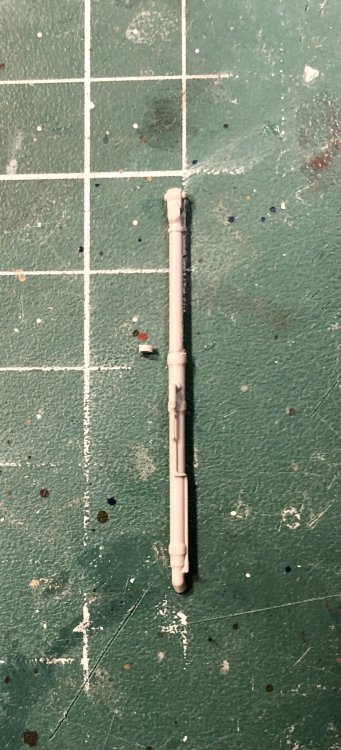


- 719 replies
-
- 10
-
-
Absolutely like Harv said: This is an awesome Lotus! Great details!
-
The skull on the fuselage and the spinner will be an eyecatcher in addition to the camo!
-
Tamiya Sturmgeschutze IIIG with Ostketten
Kaireckstadt replied to GazzaS's topic in LSM Armour Finished Work
Awesome tank Gaz! The camo really turned out beautiful! The figure brings life to it. -
Very nice build of a subject not often seen.
-
Great progress Gaz. Nice looking camouflage and the painted on markings are really much better than any decal. Did you mix the camo-colors by yourself? Colorful bird!