
Kaireckstadt
-
Posts
1,705 -
Joined
-
Last visited
Content Type
Profiles
Forums
Events
Gallery
Everything posted by Kaireckstadt
-

Israeli Mirage III C with Atar9C
Kaireckstadt replied to Kaireckstadt's topic in LSM 1/35 and Larger Work In Progress
Thanks Rob! Some of it may even be seen when she’s standing on her wheels... -
Israeli Mirage III C with Atar9C
Kaireckstadt replied to Kaireckstadt's topic in LSM 1/35 and Larger Work In Progress
Thank you for your feedback Peter! I‘m really looking forward to the painting stage now. That’s the work I like most... -
Stunning progress! It is unbelievable for me to scratchbuild really every item of a kit. I adore your patience and capabilities!
-
This is really an ugly frog and you make a prince out of it with you beautiful work! Would be nice to see it soon back on your bench...
-
Wow, did you rescribe it completely? Awesome work!
-
ME 109 E4 1/18 scale
Kaireckstadt replied to Trigger's topic in LSM 1/35 and Larger Work In Progress
Harv is completely right Frank: Awesome work and even if you think it’s not much I can fully understand you (I’ve never sanded and fitted so much as with my Mirage build): It IS much! -
Israeli Mirage III C with Atar9C
Kaireckstadt replied to Kaireckstadt's topic in LSM 1/35 and Larger Work In Progress
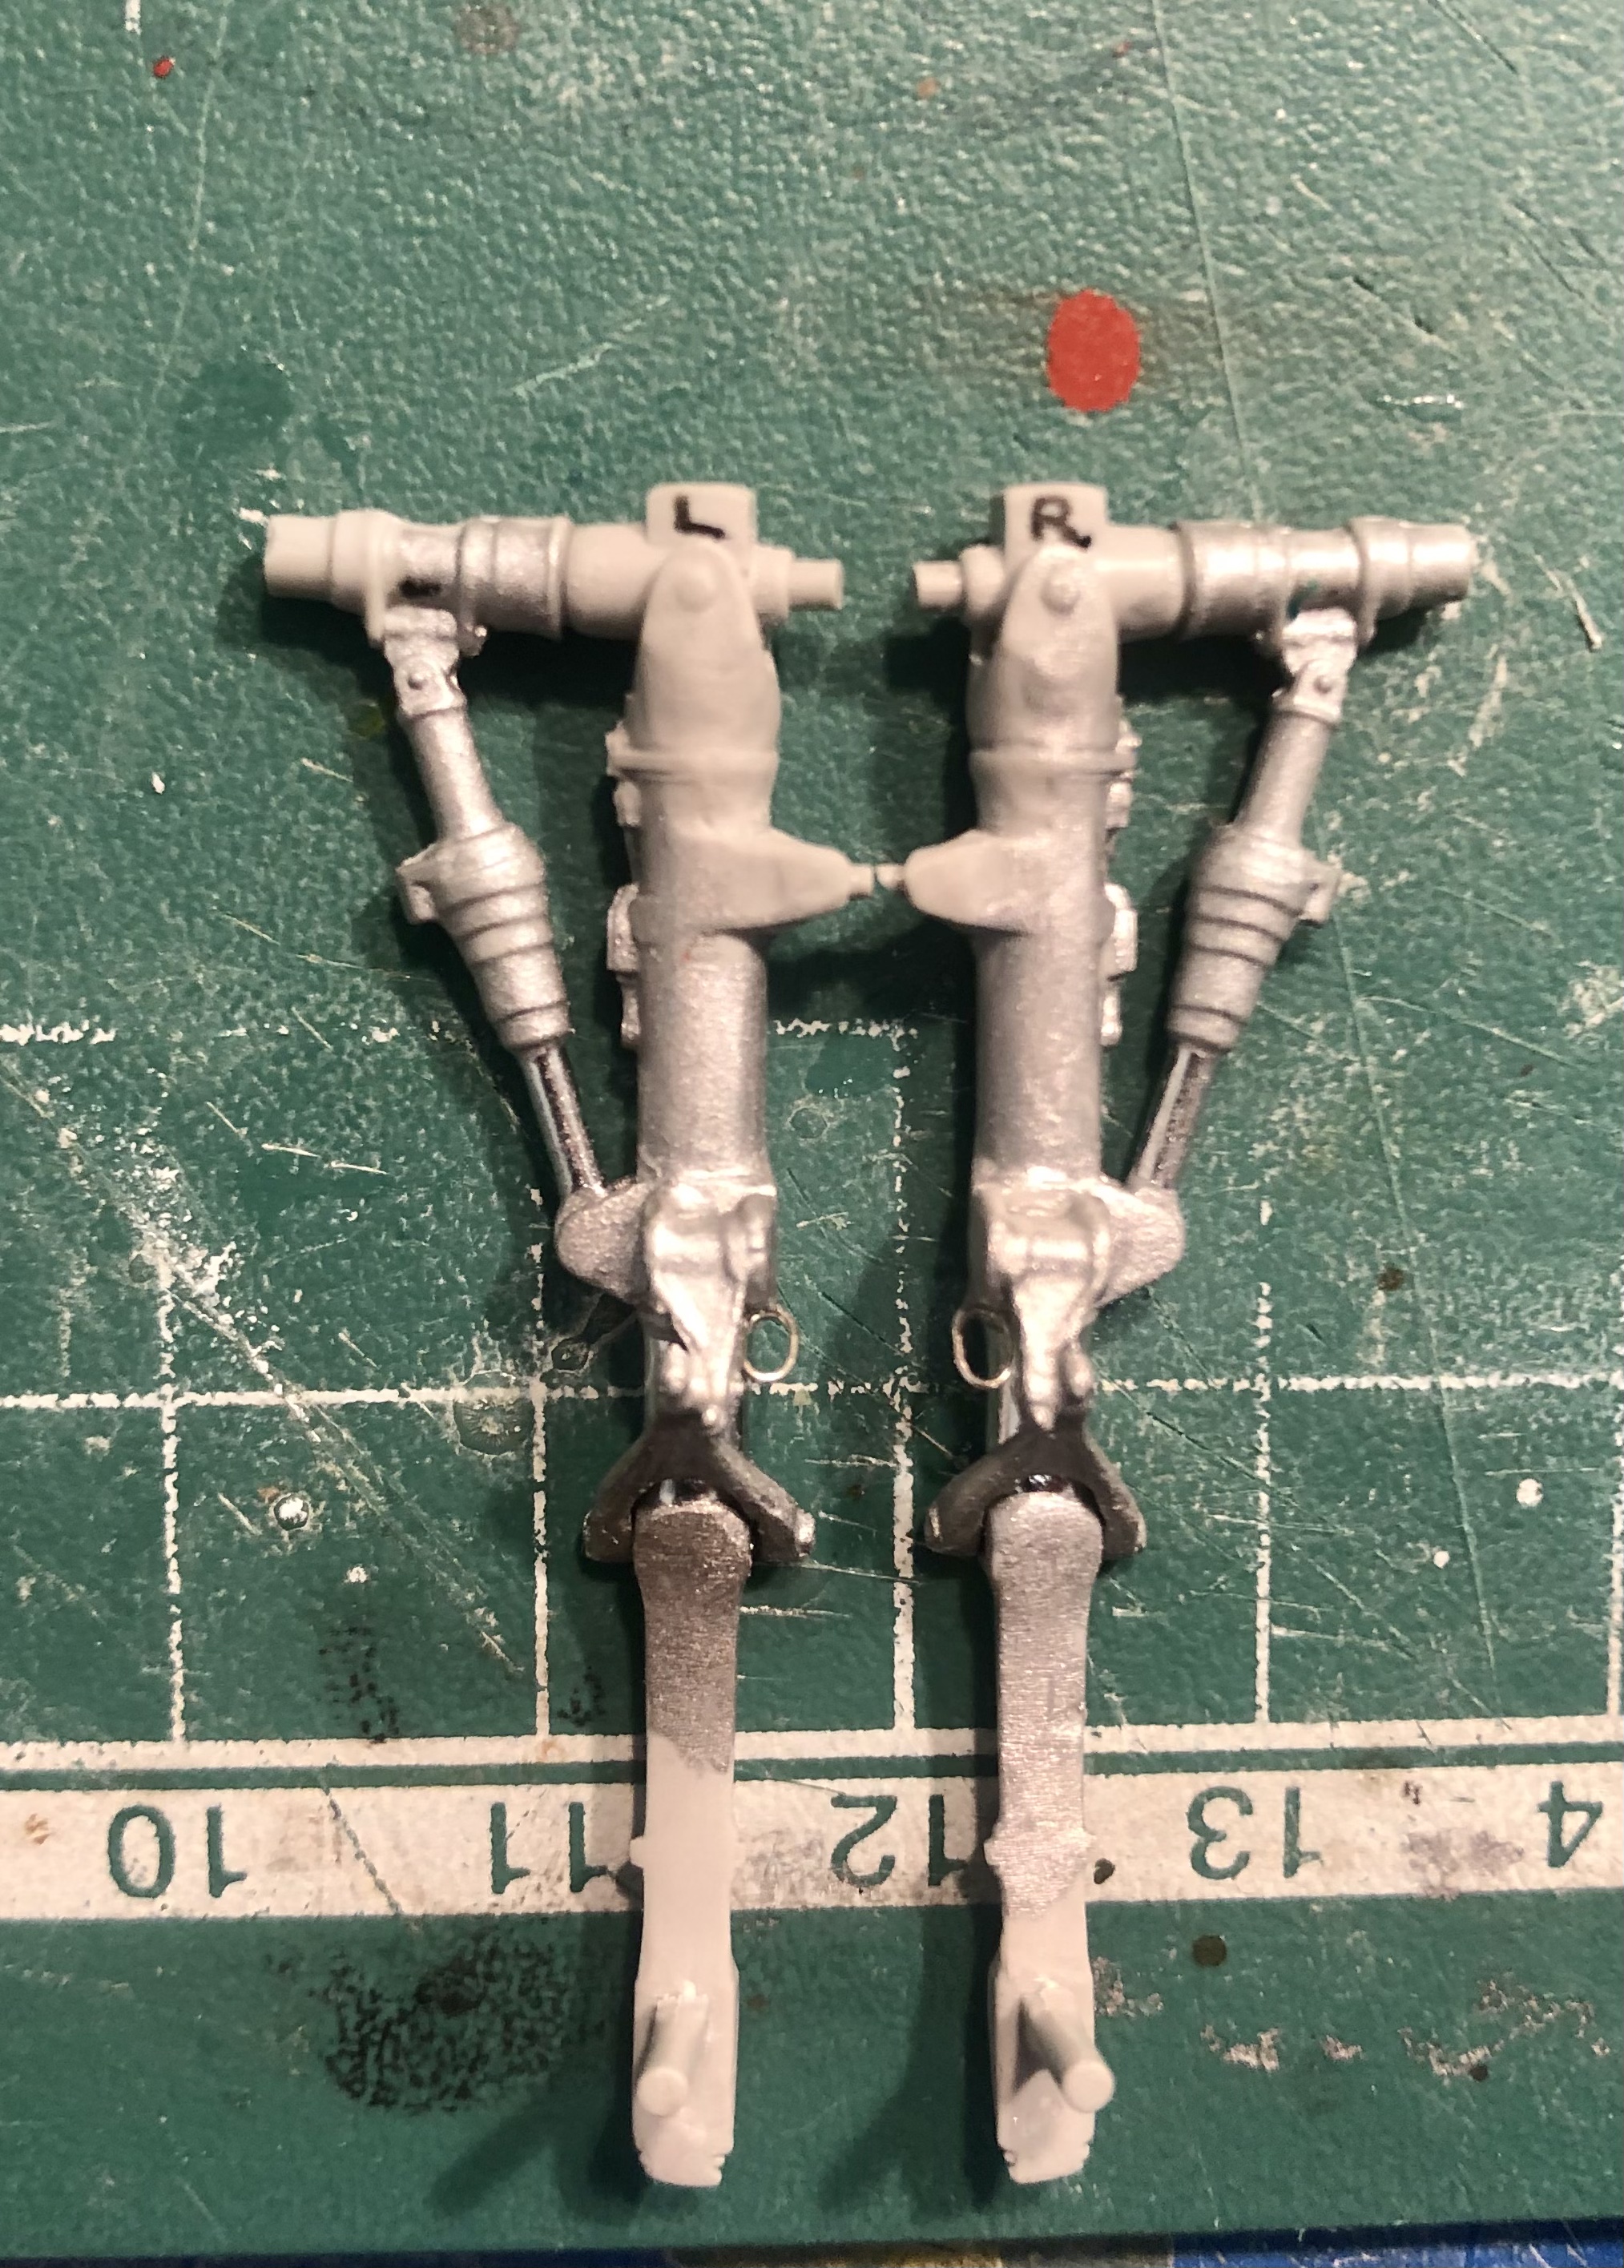
Thank you Gaz! Me sometimes too. Took 4 hours to apply them. The legs are not that big: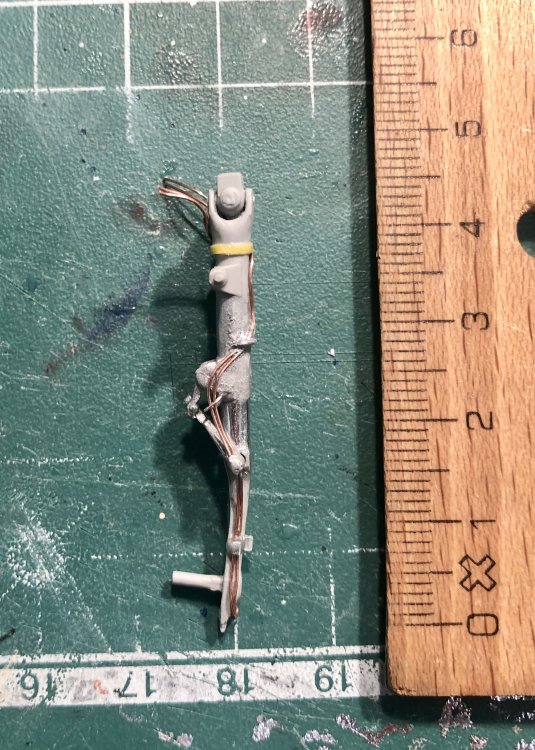
-
Israeli Mirage III C with Atar9C
Kaireckstadt replied to Kaireckstadt's topic in LSM 1/35 and Larger Work In Progress
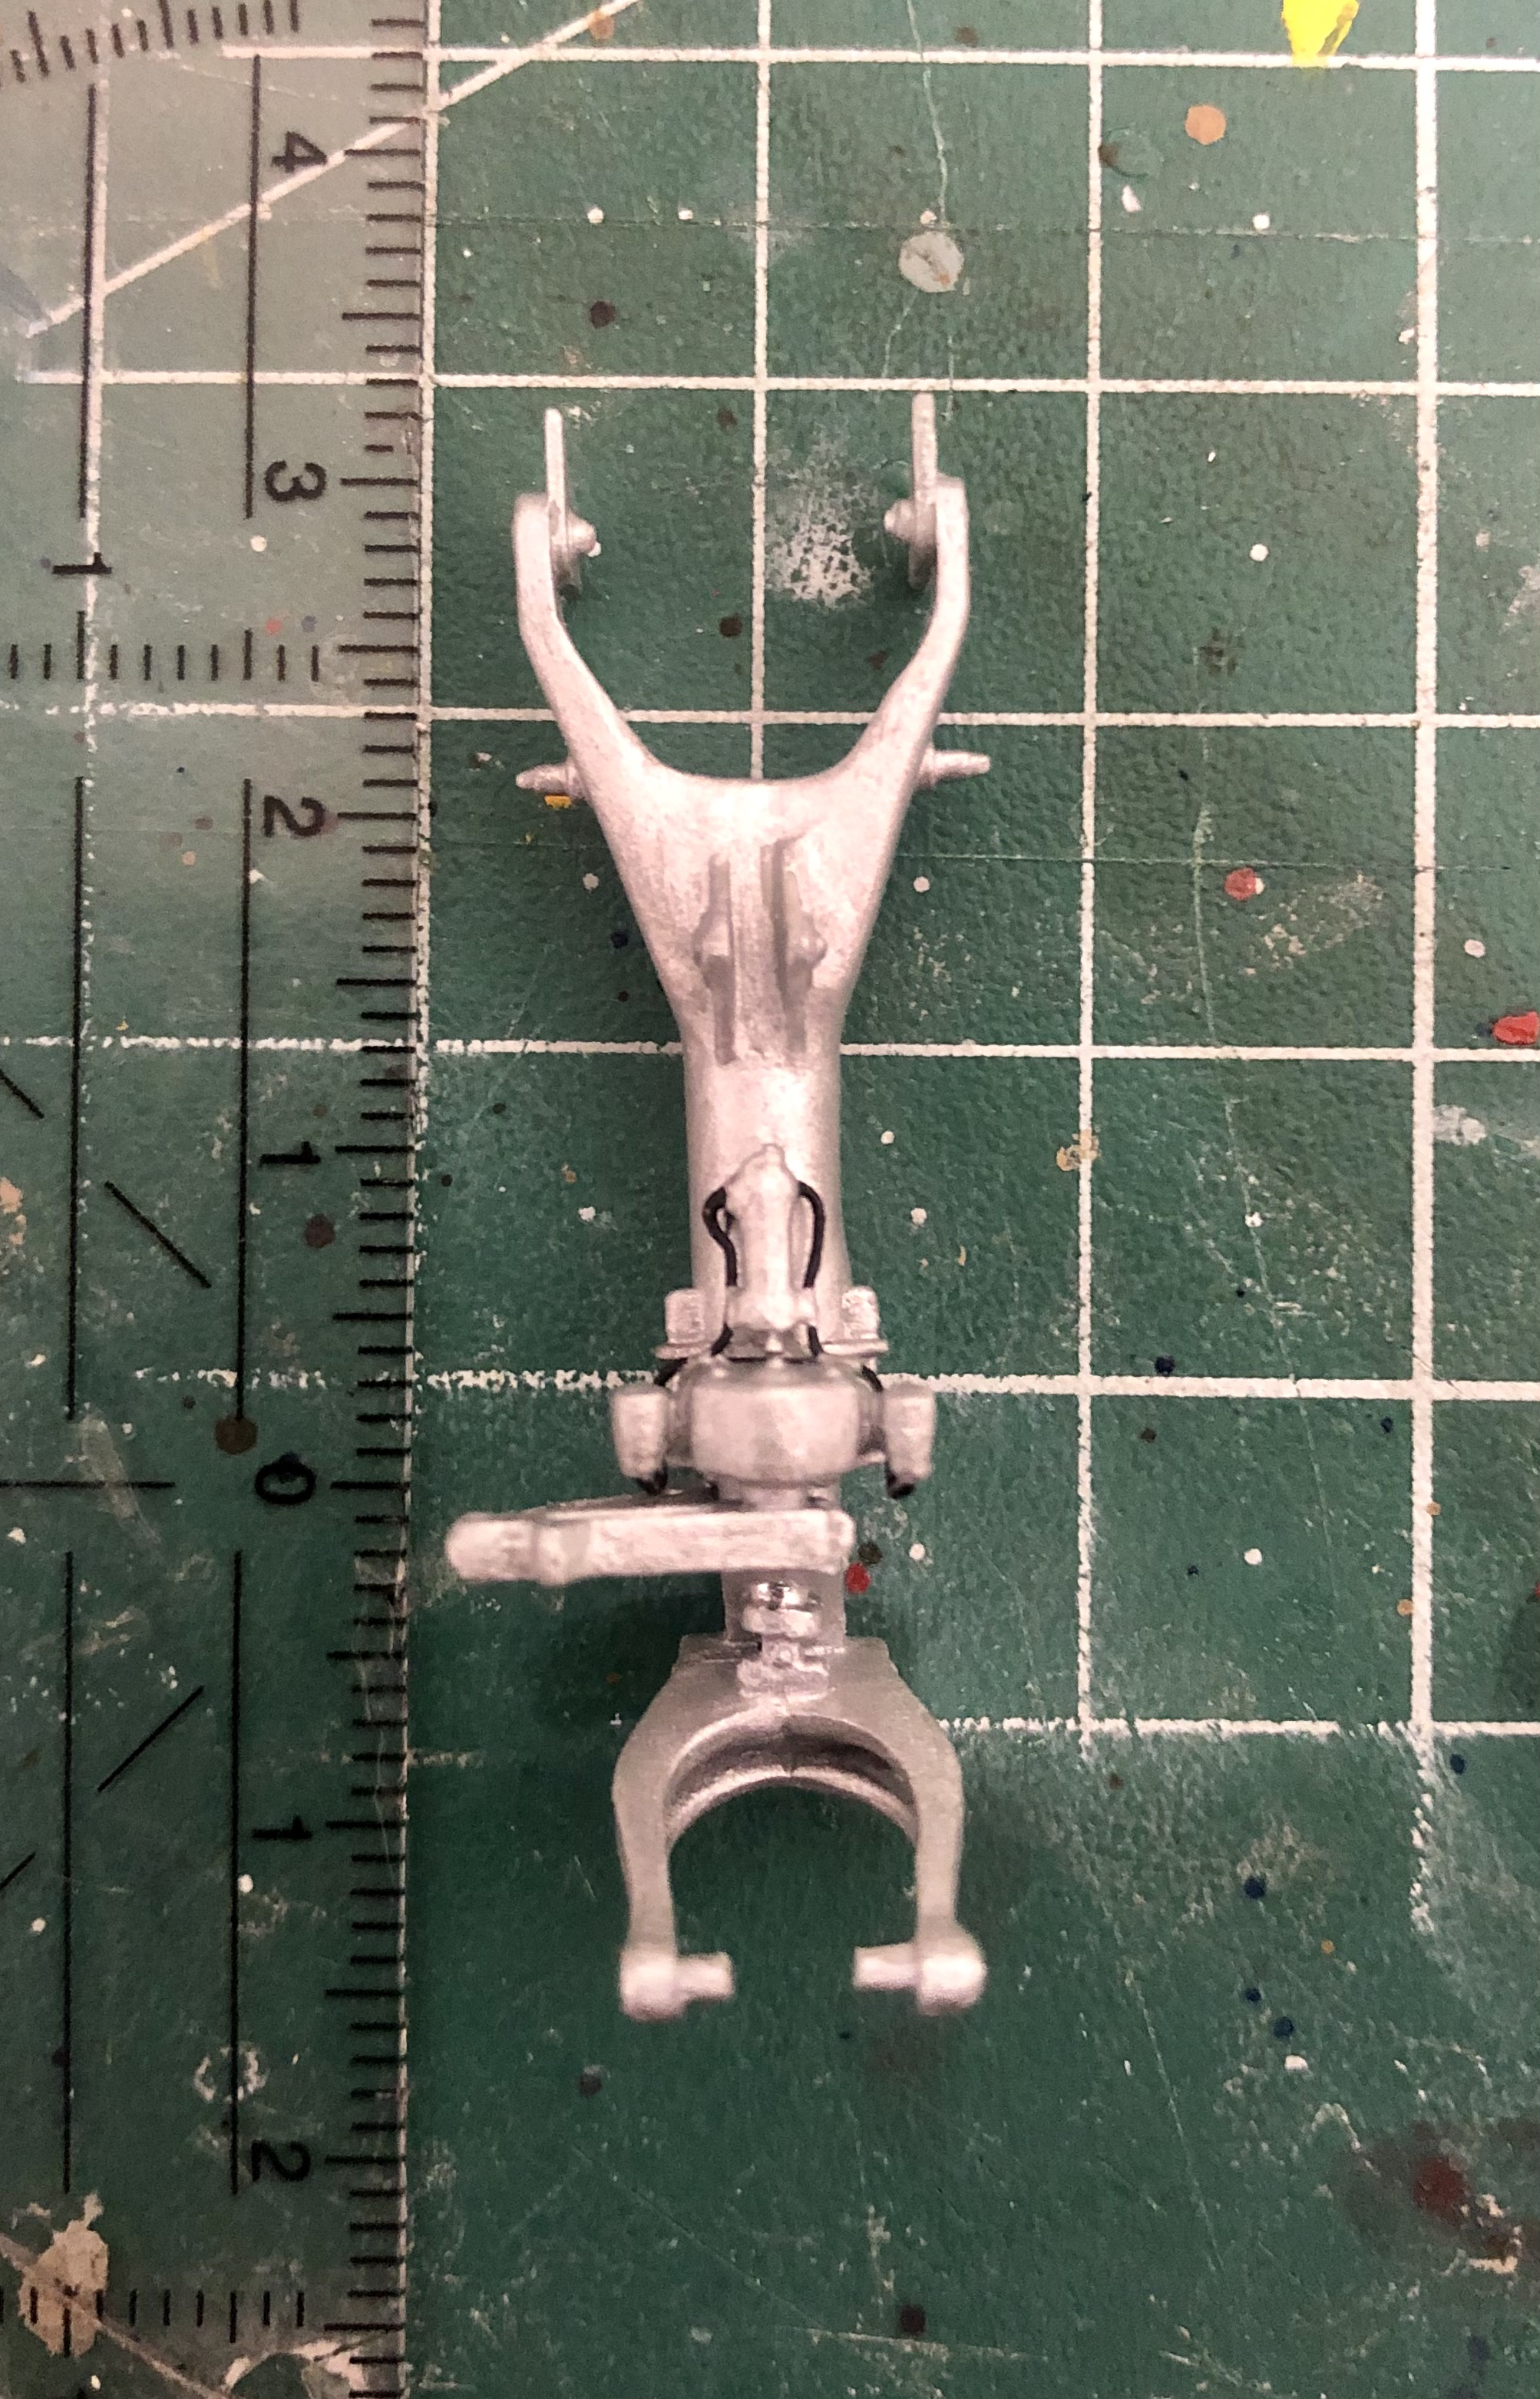
Thank you Harv! Finished with the lines now on the legs. Still some to do for the retraction cylinders. -
Realistic looking prop Gaz! I will keep your method in mind when I do the prop for my D VII. The Skull on the spinner is THE eyecatcher! Also nice result with the skulls on the fuselage. Don‘t put it aside Gaz. Please continue. Will be an awesome bird when finished!
-
Israeli Mirage III C with Atar9C
Kaireckstadt replied to Kaireckstadt's topic in LSM 1/35 and Larger Work In Progress
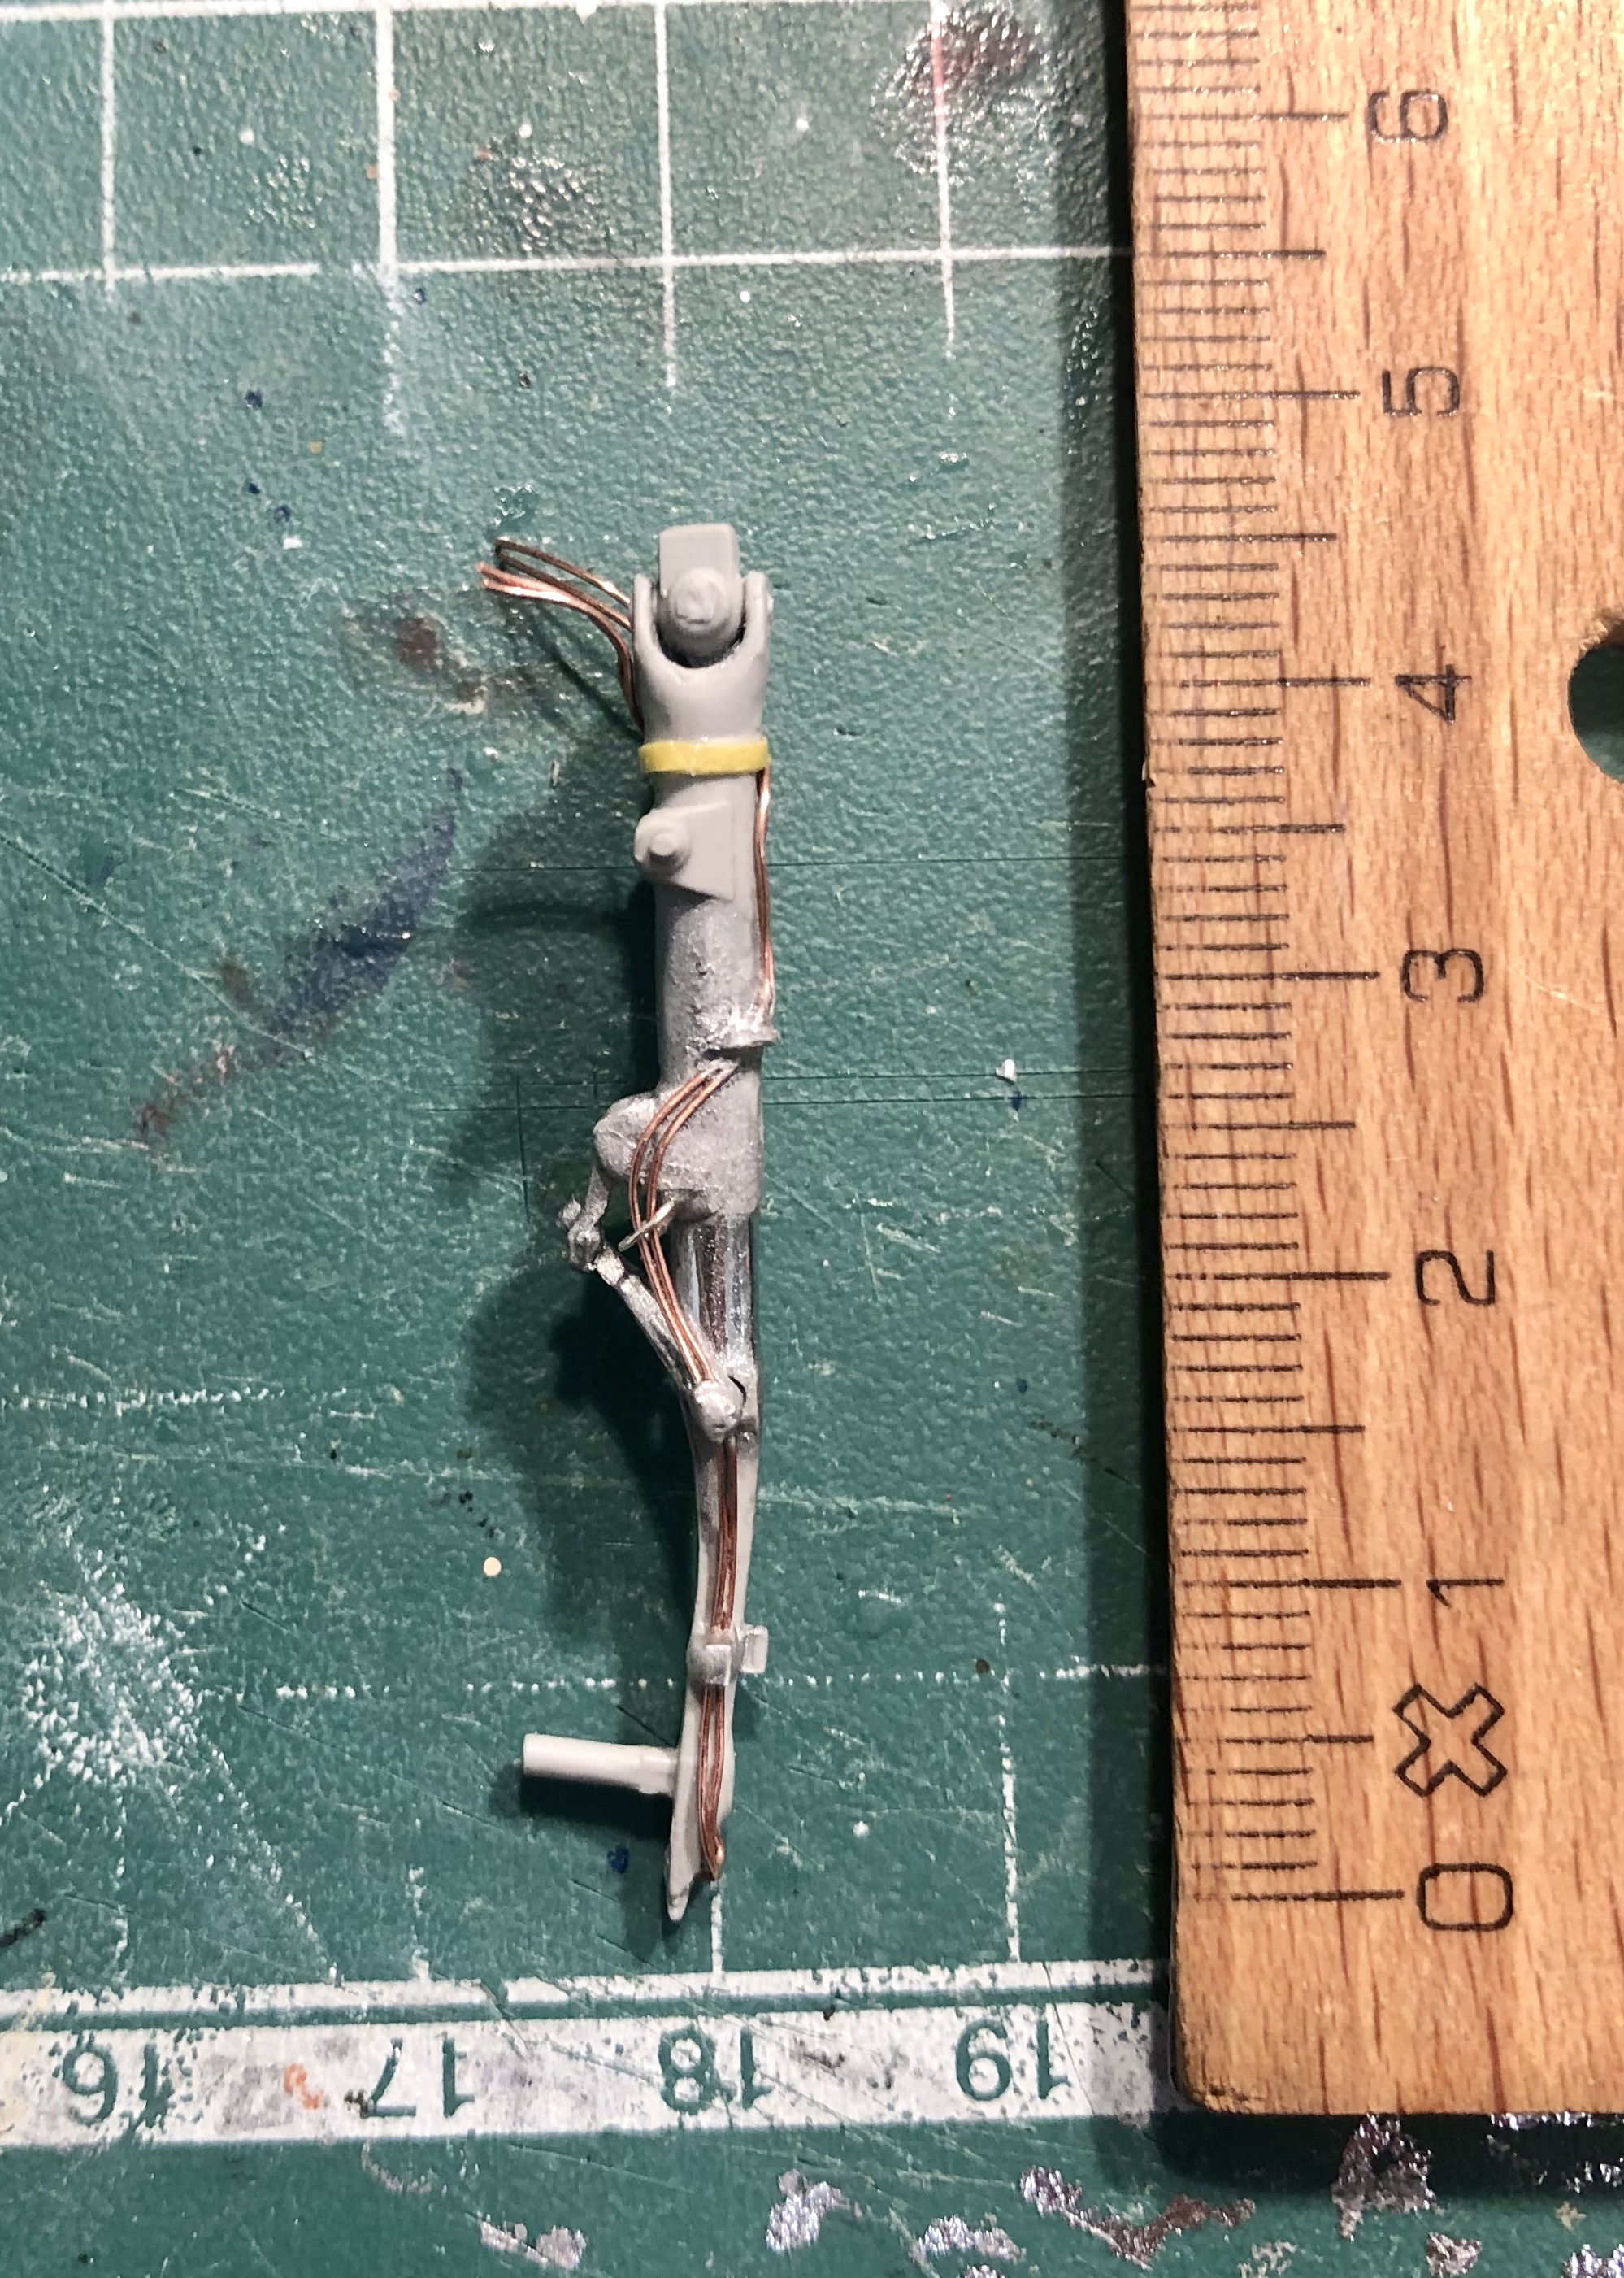
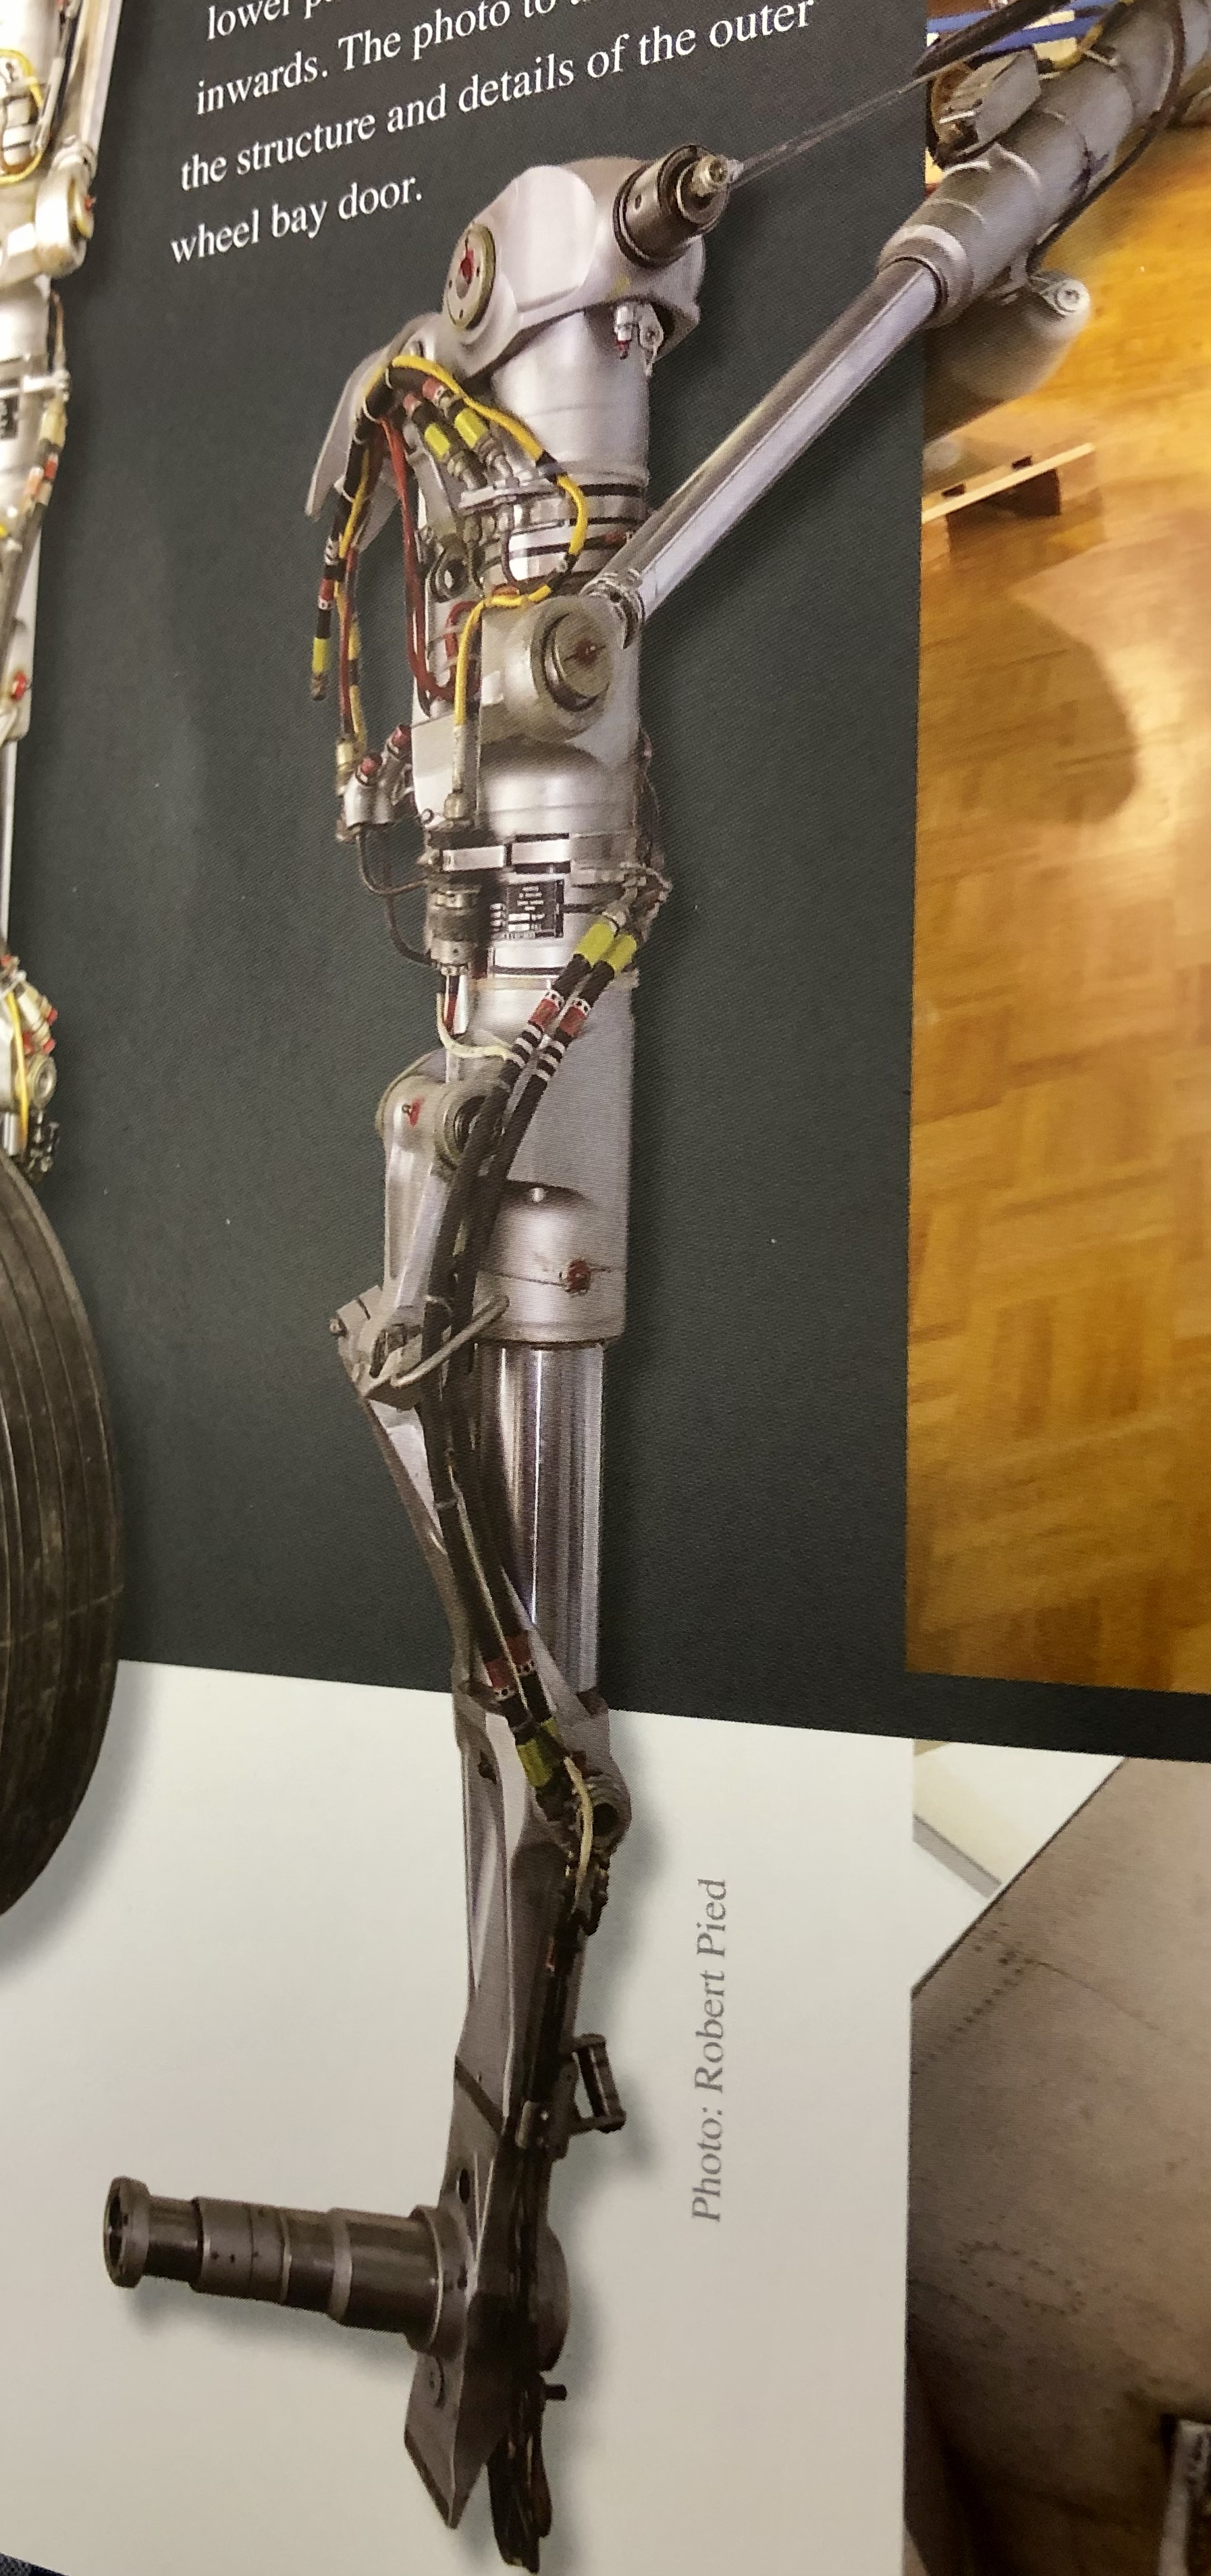
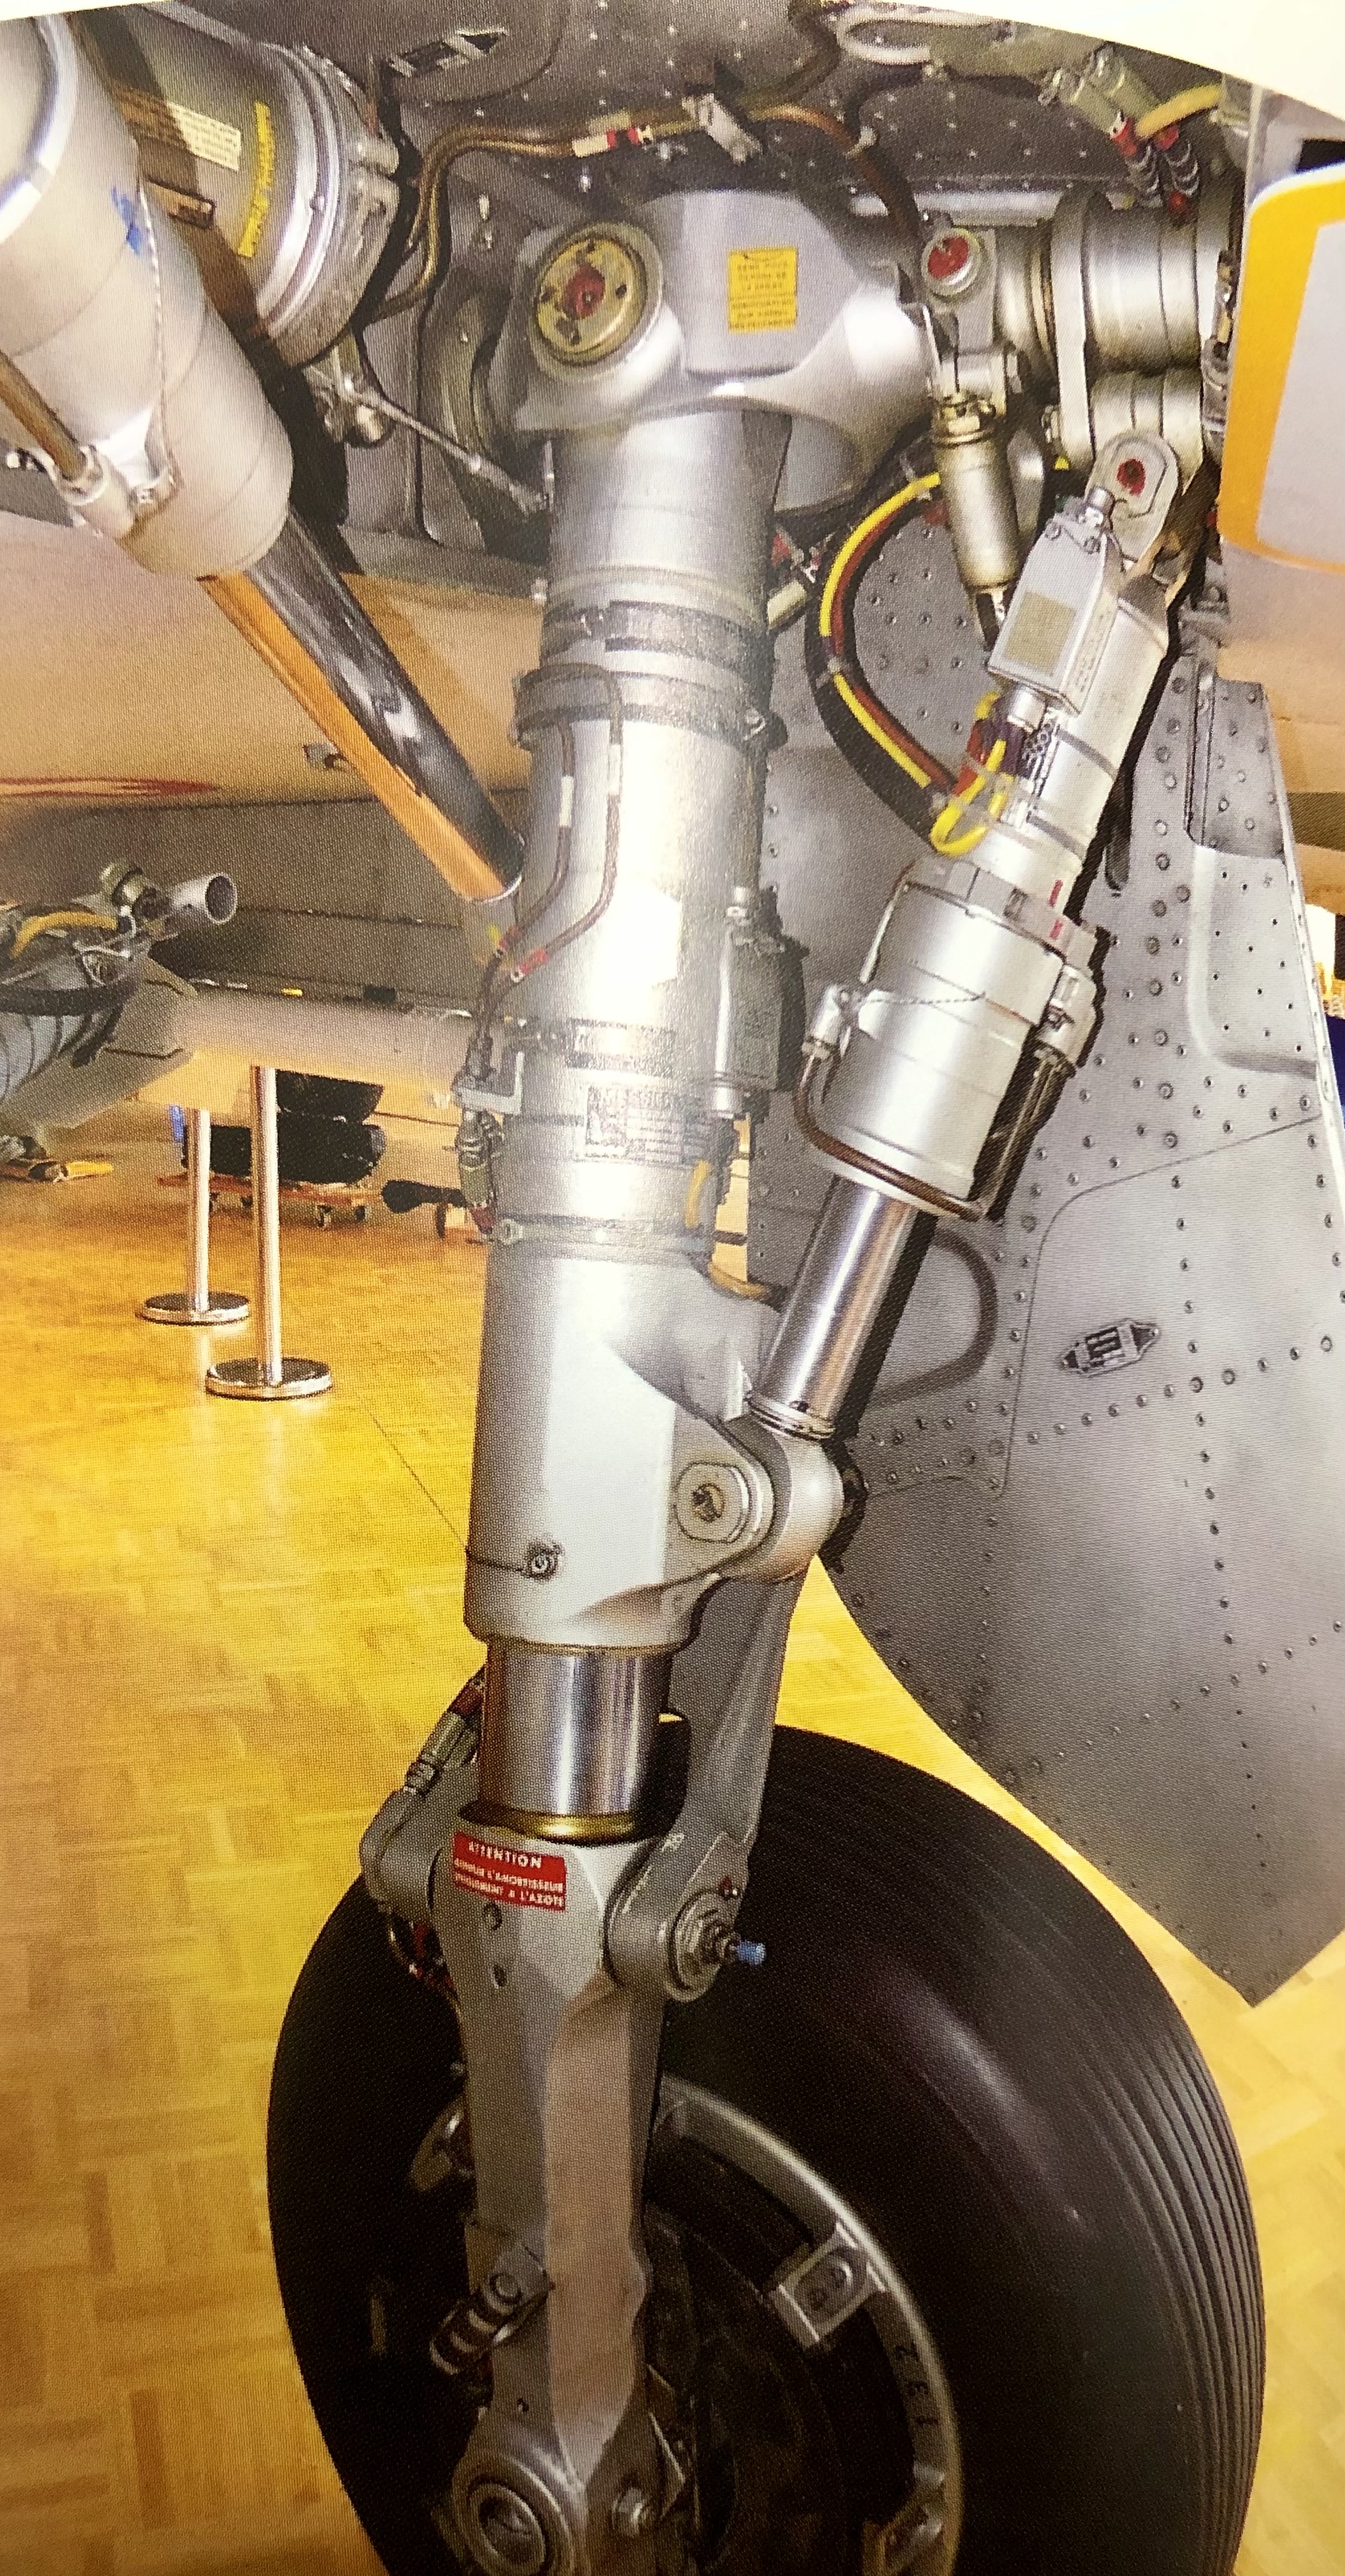
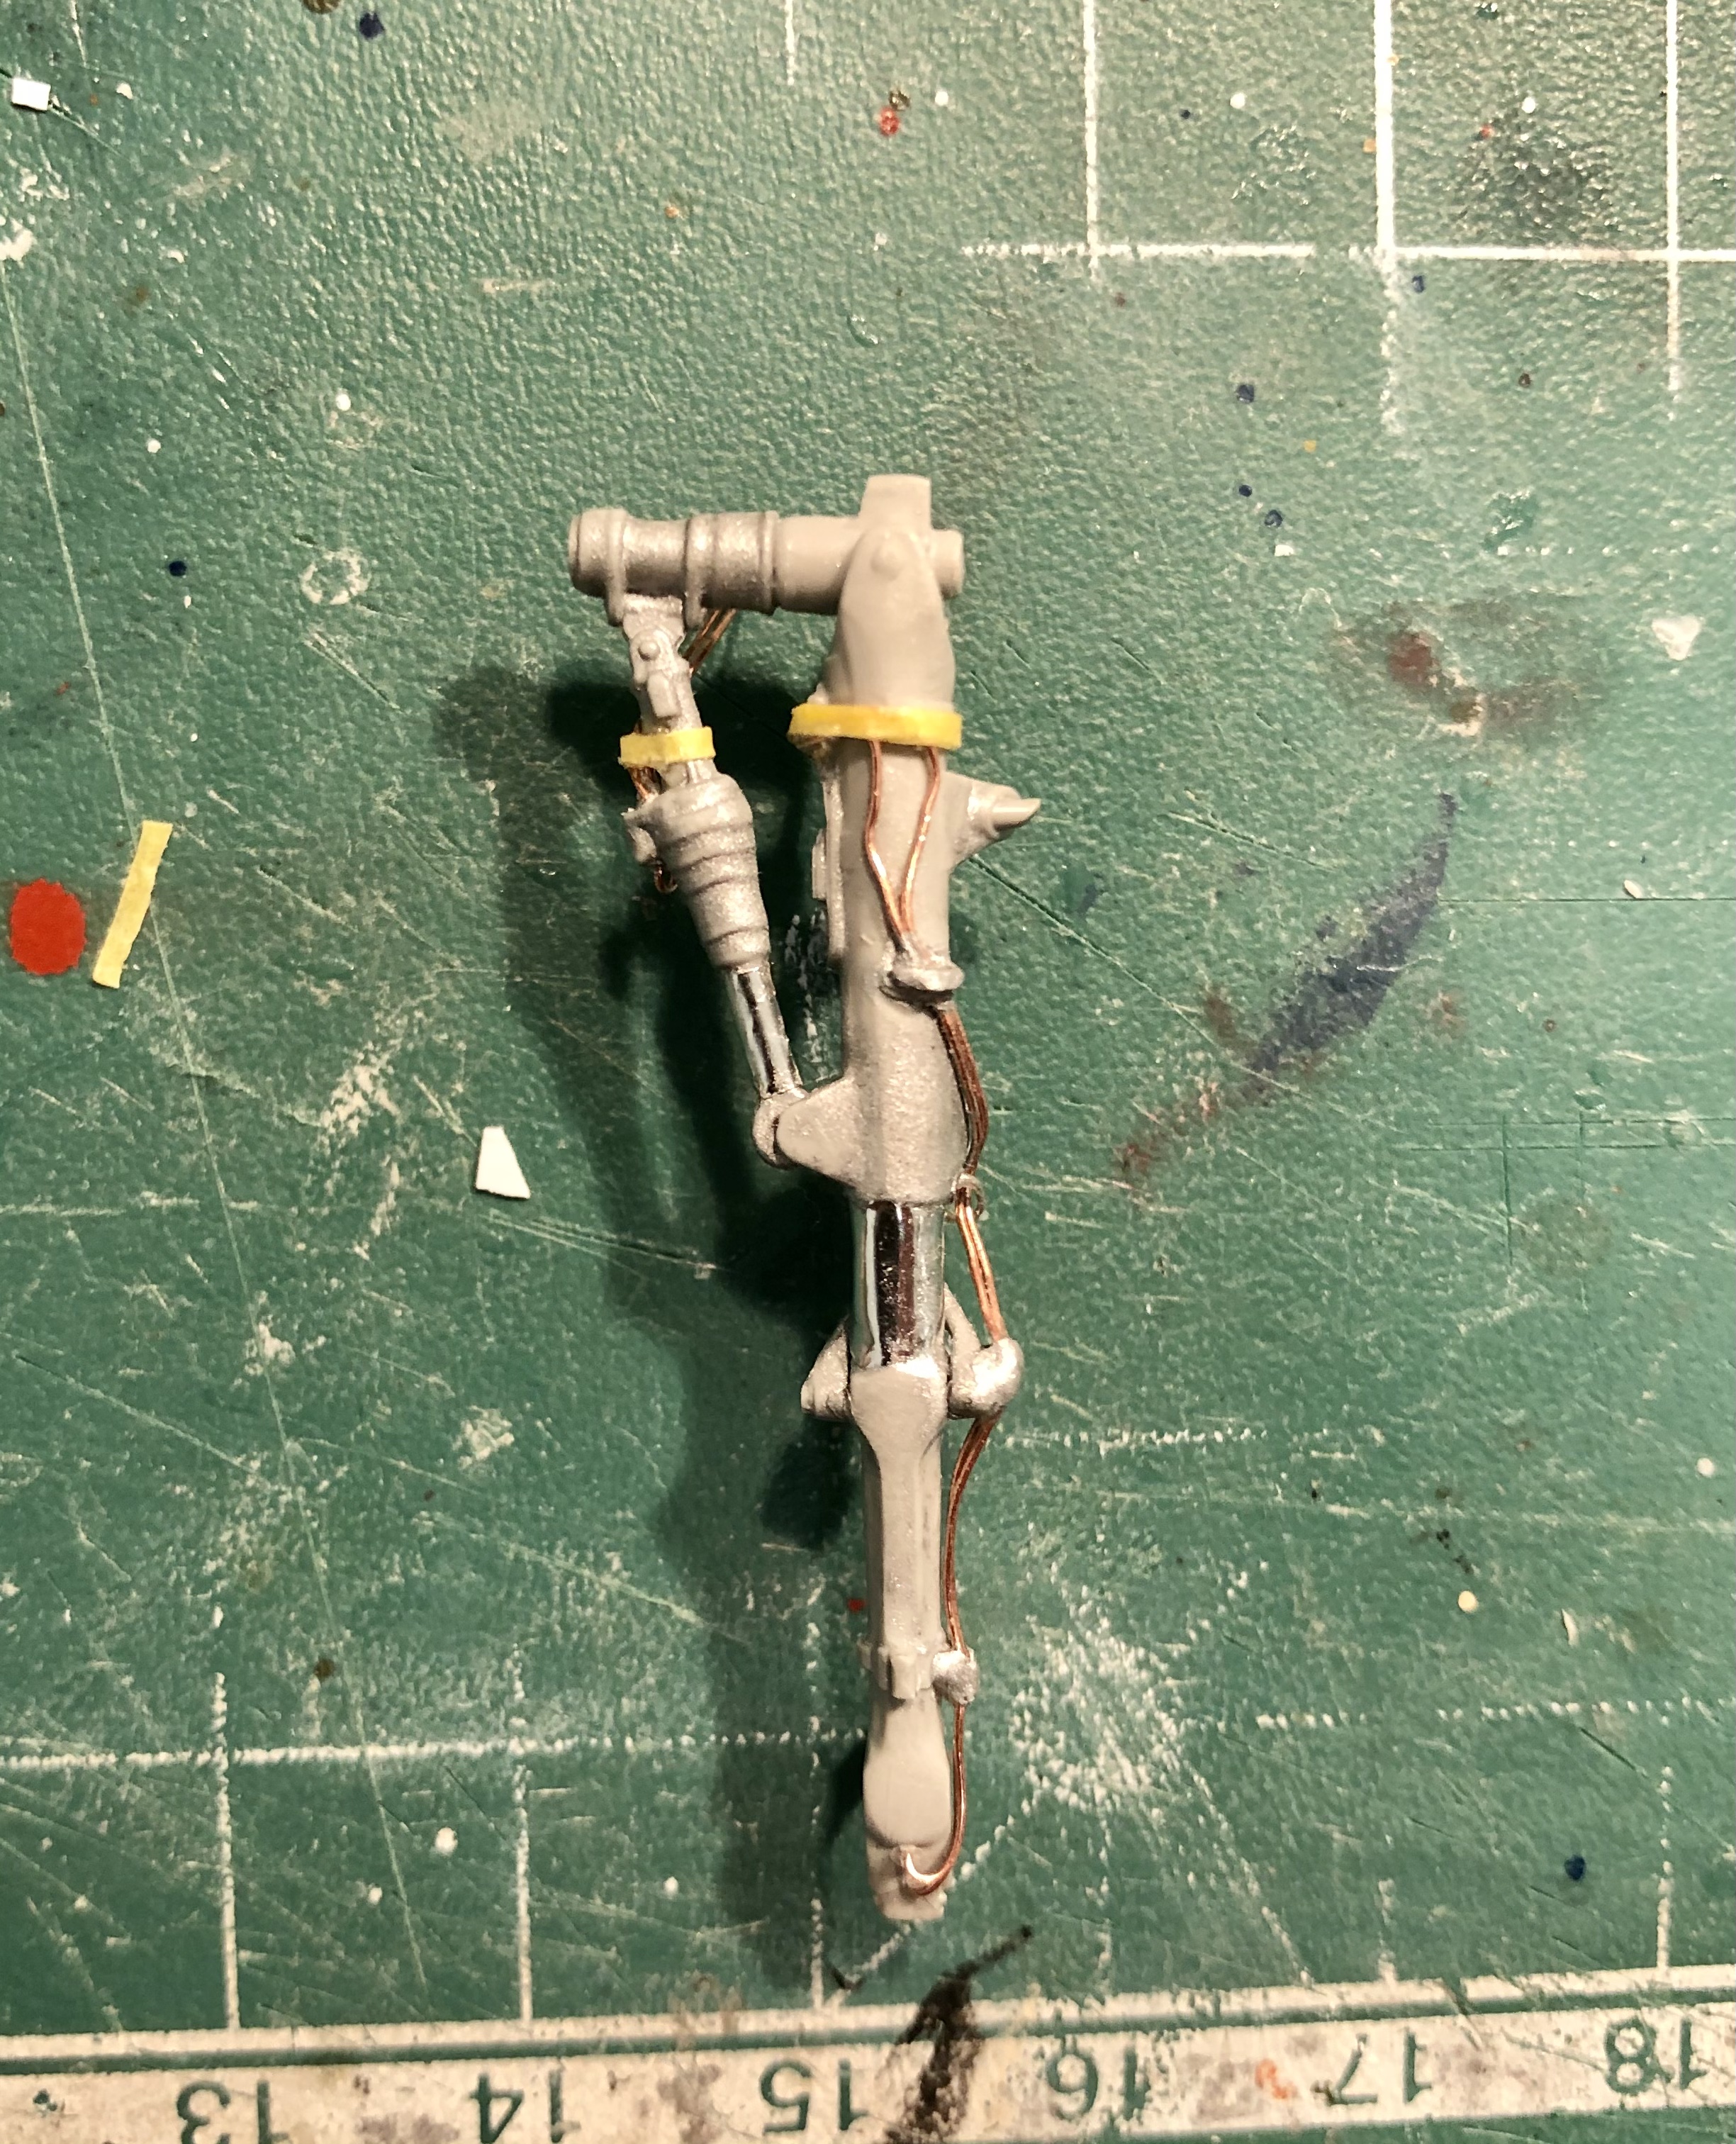
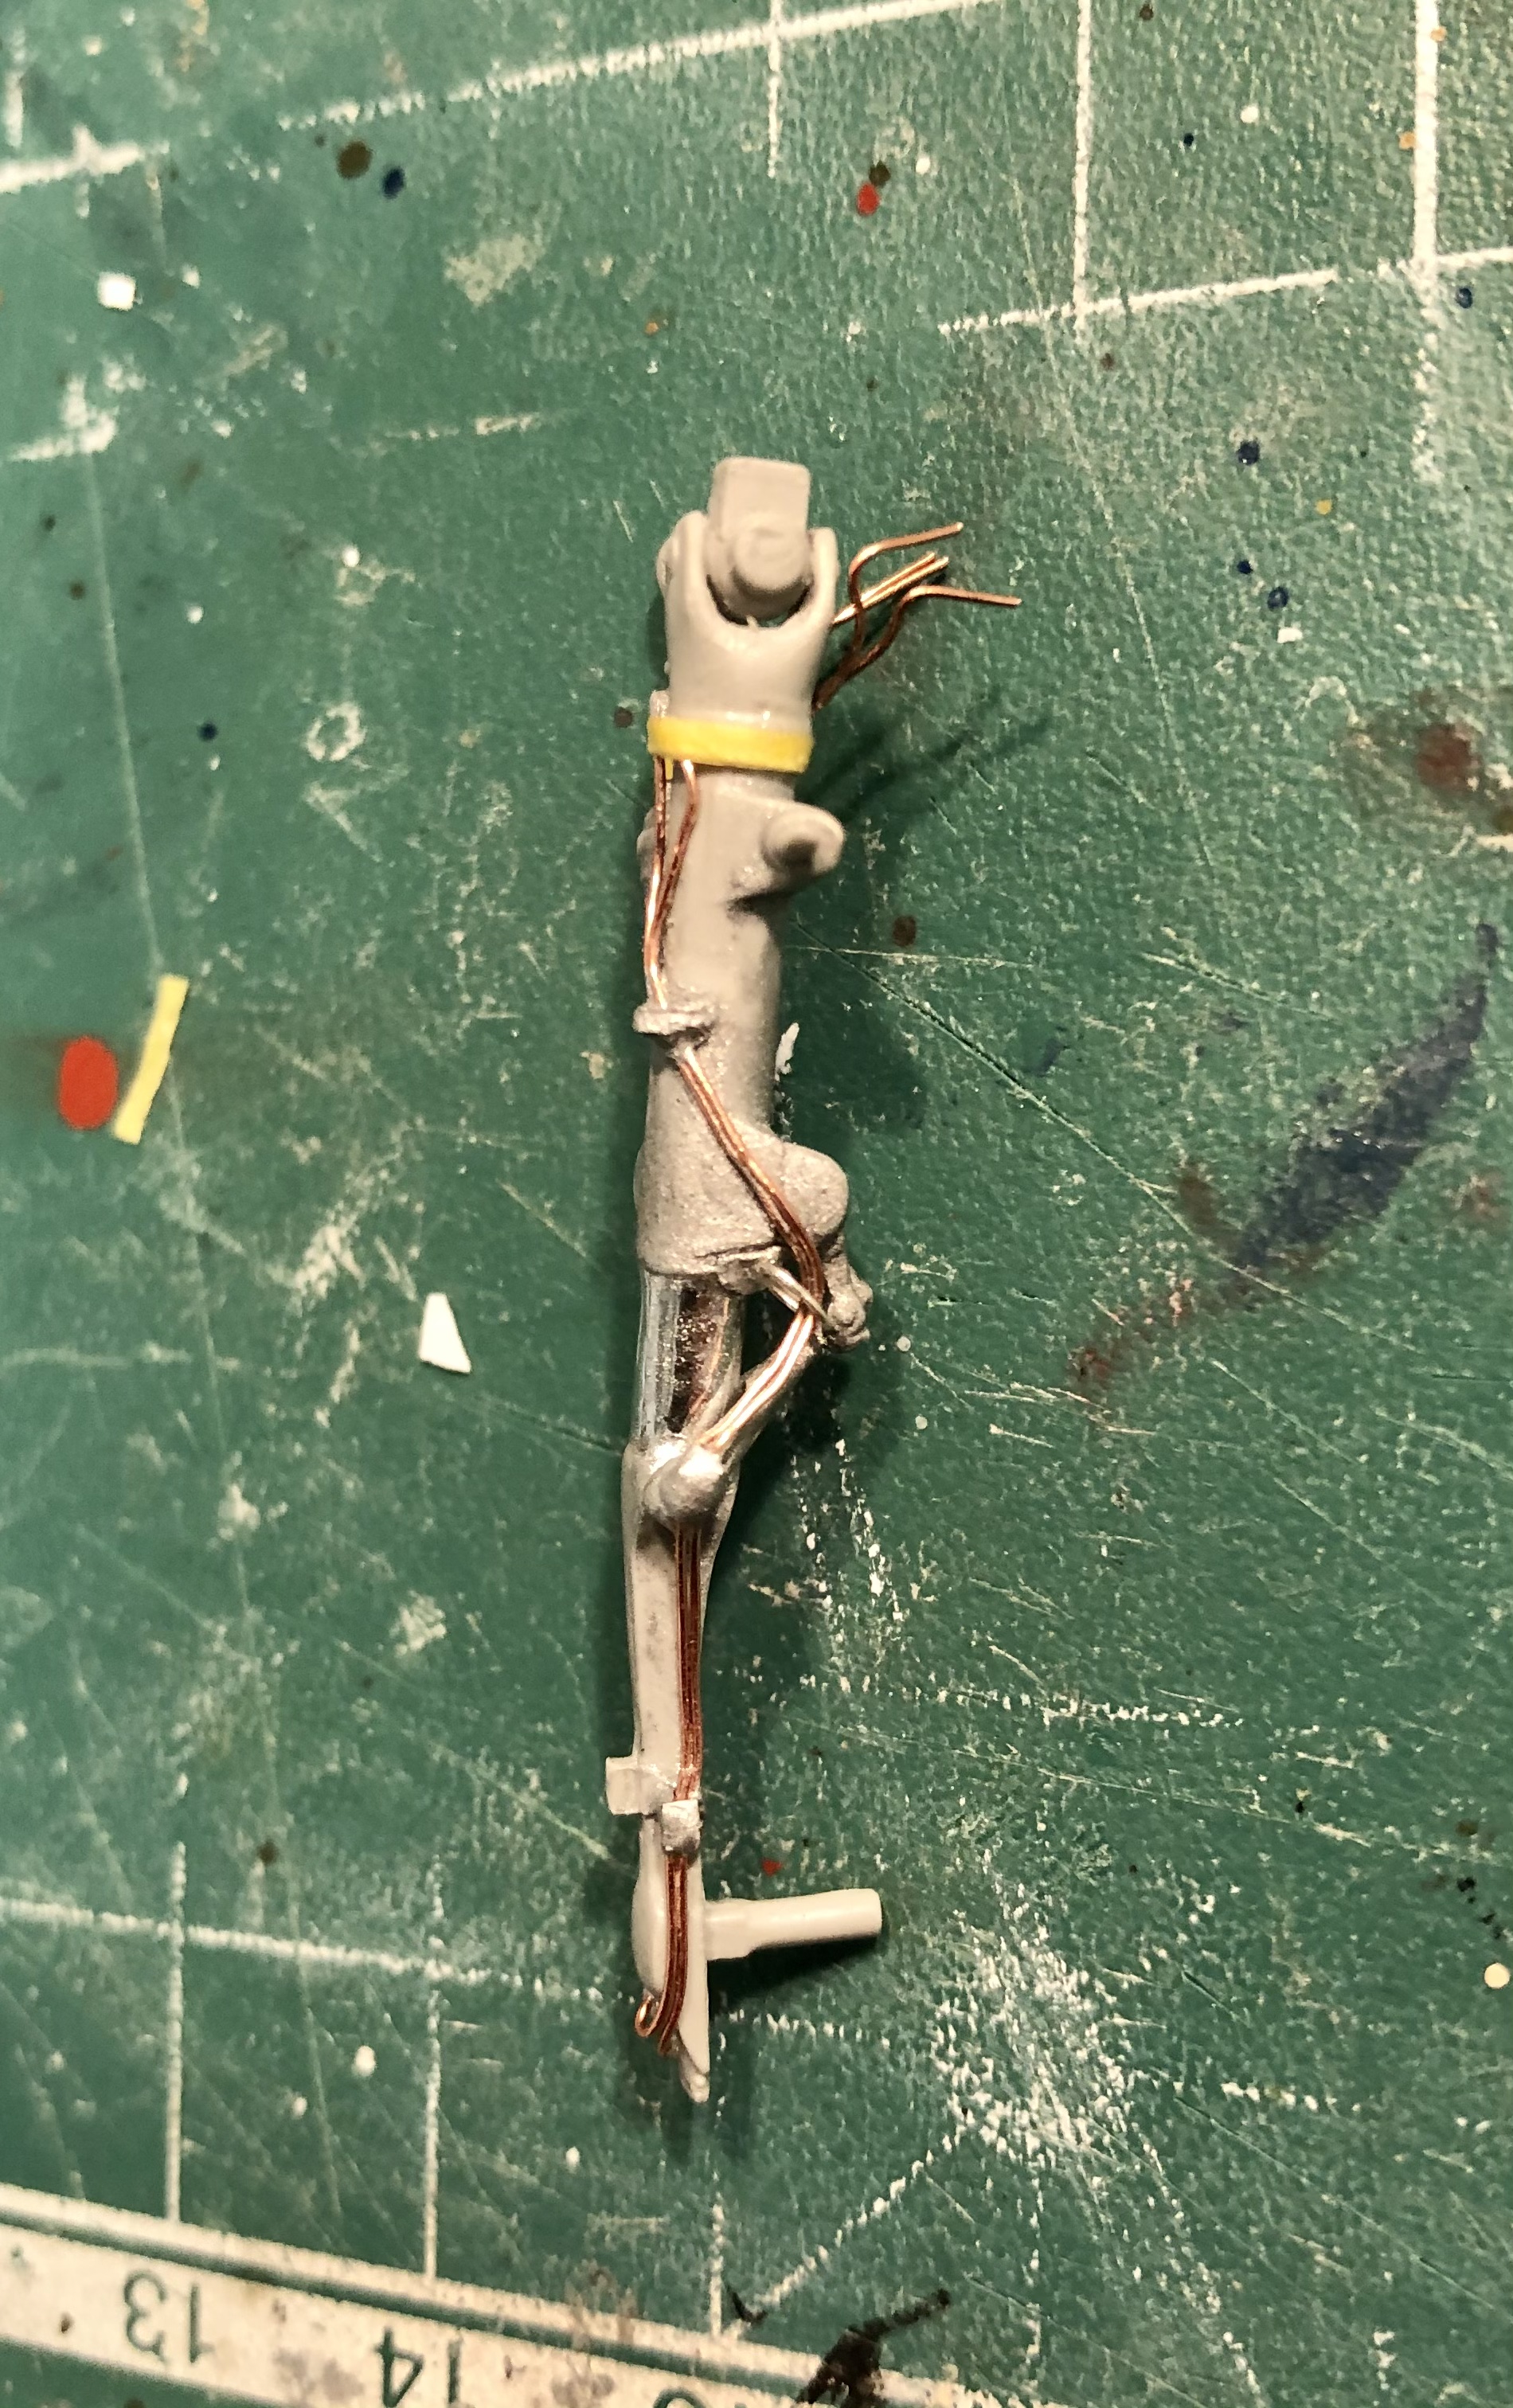
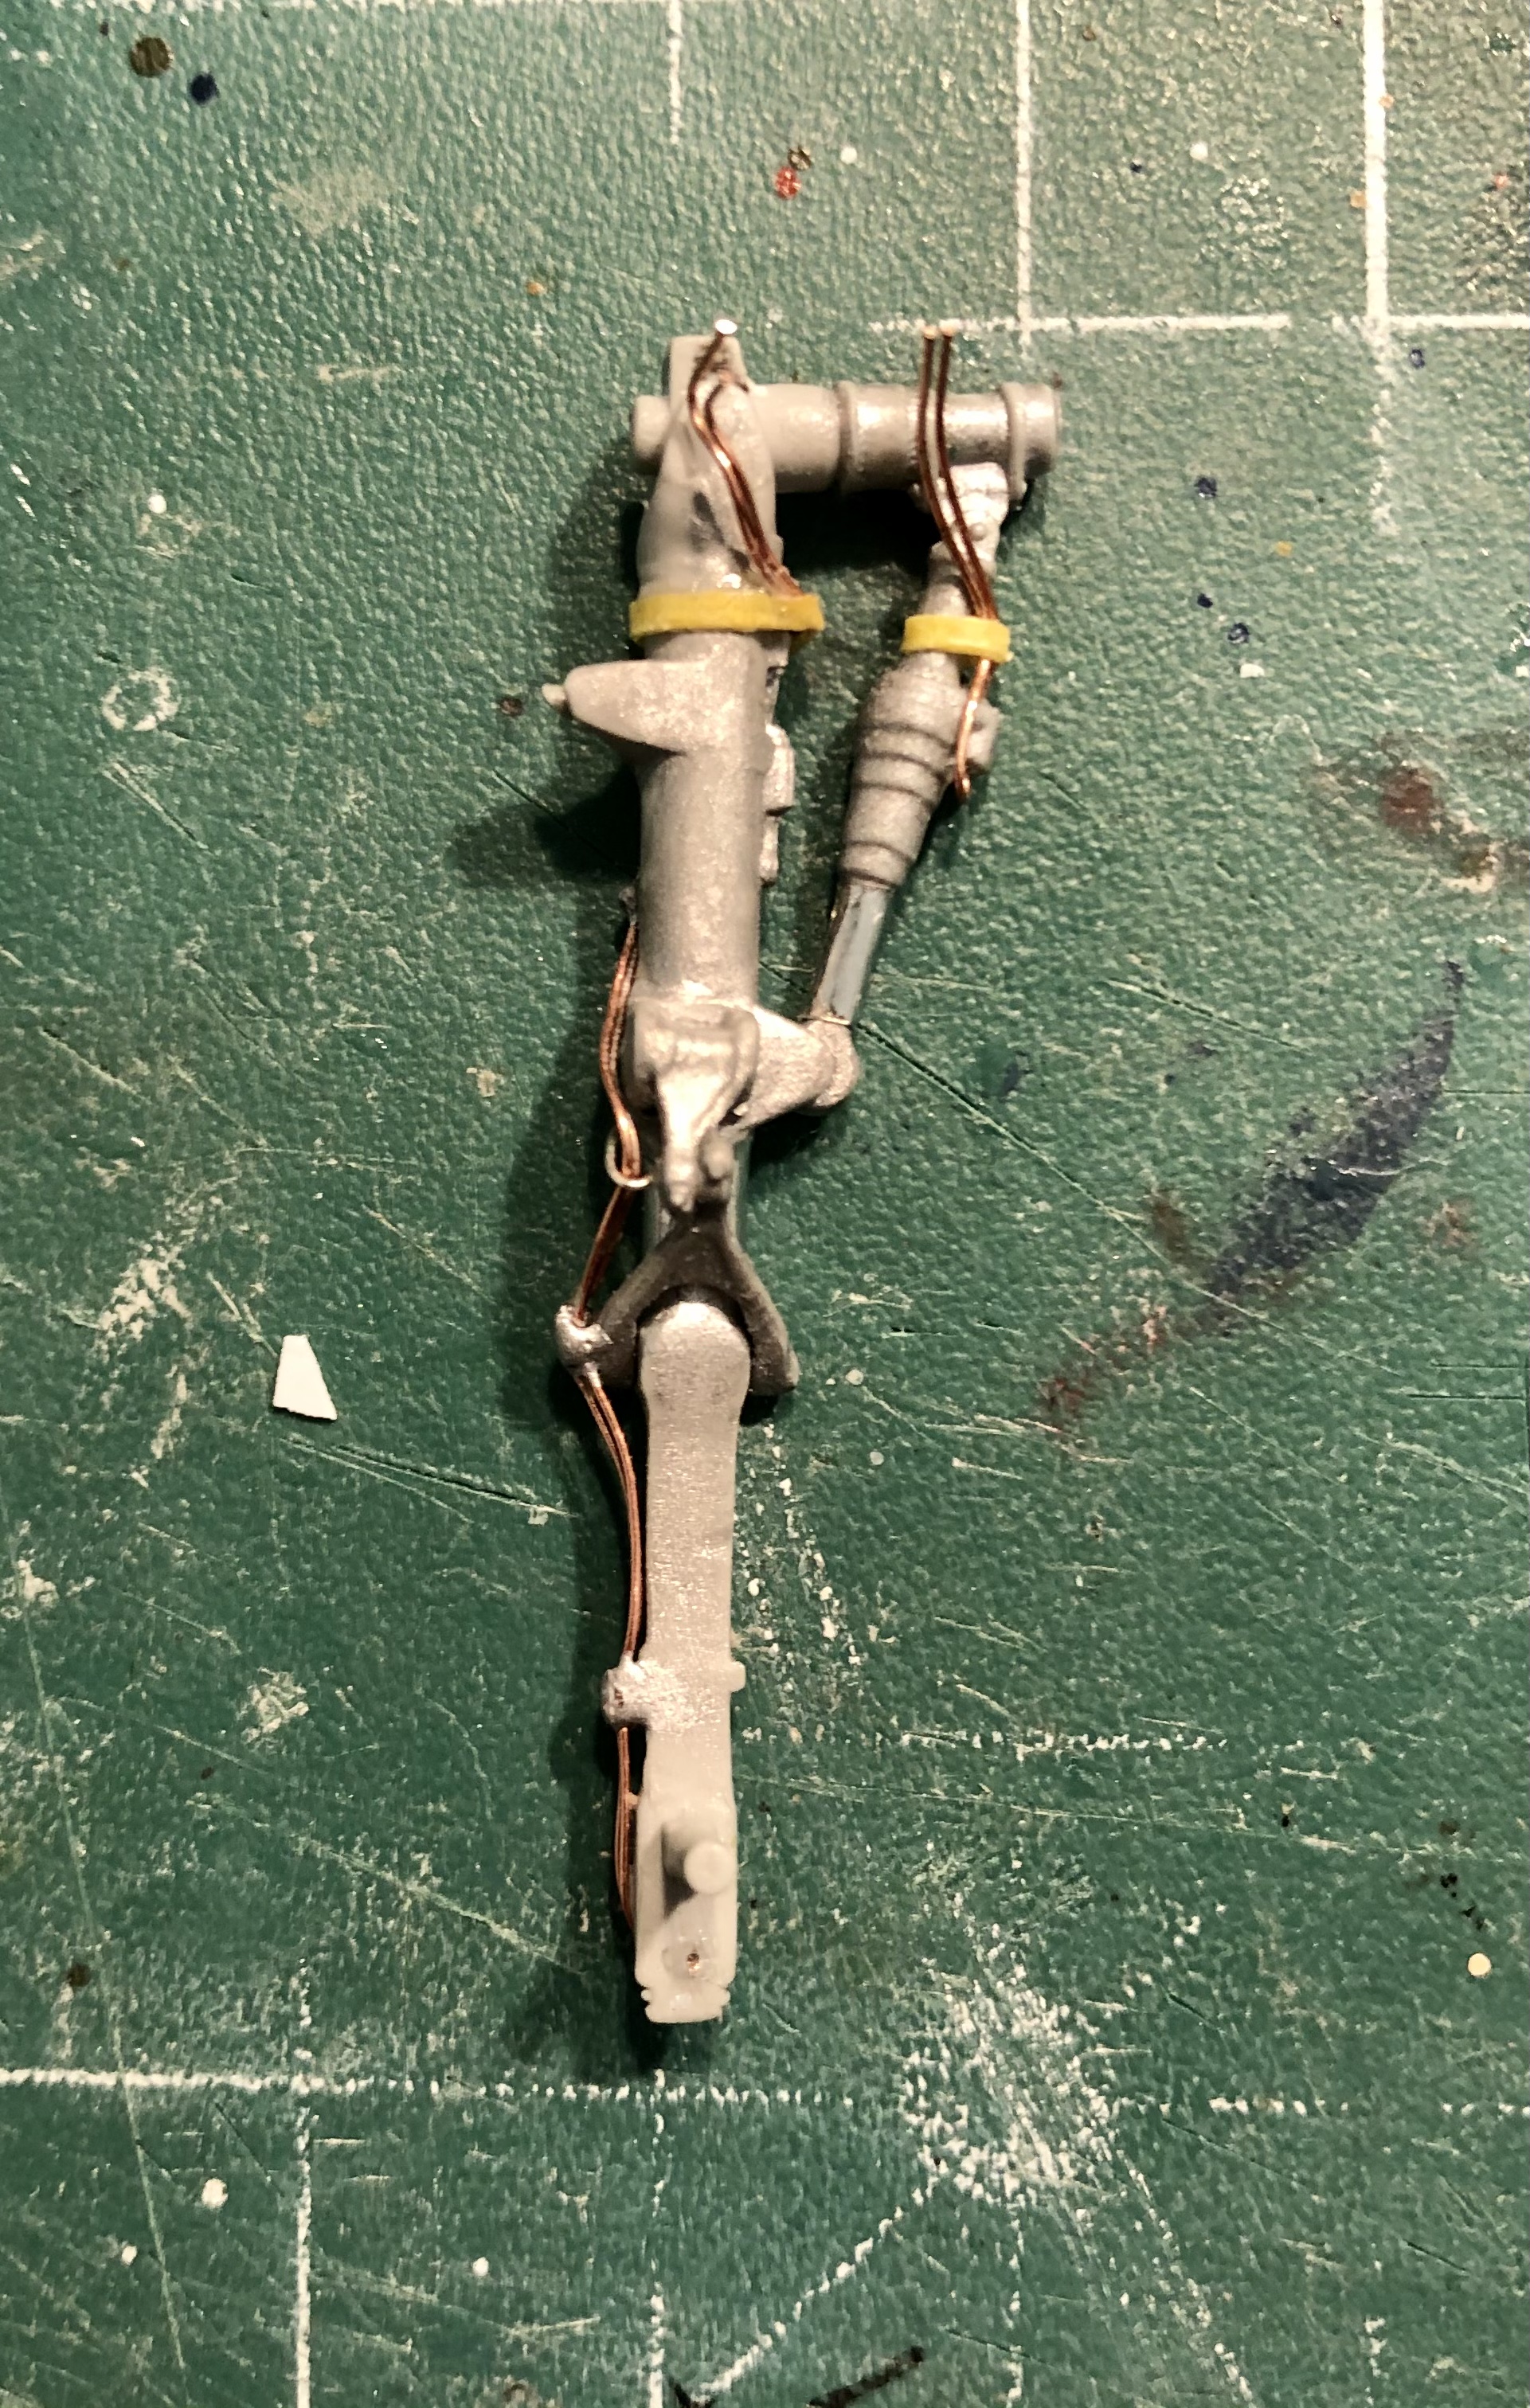
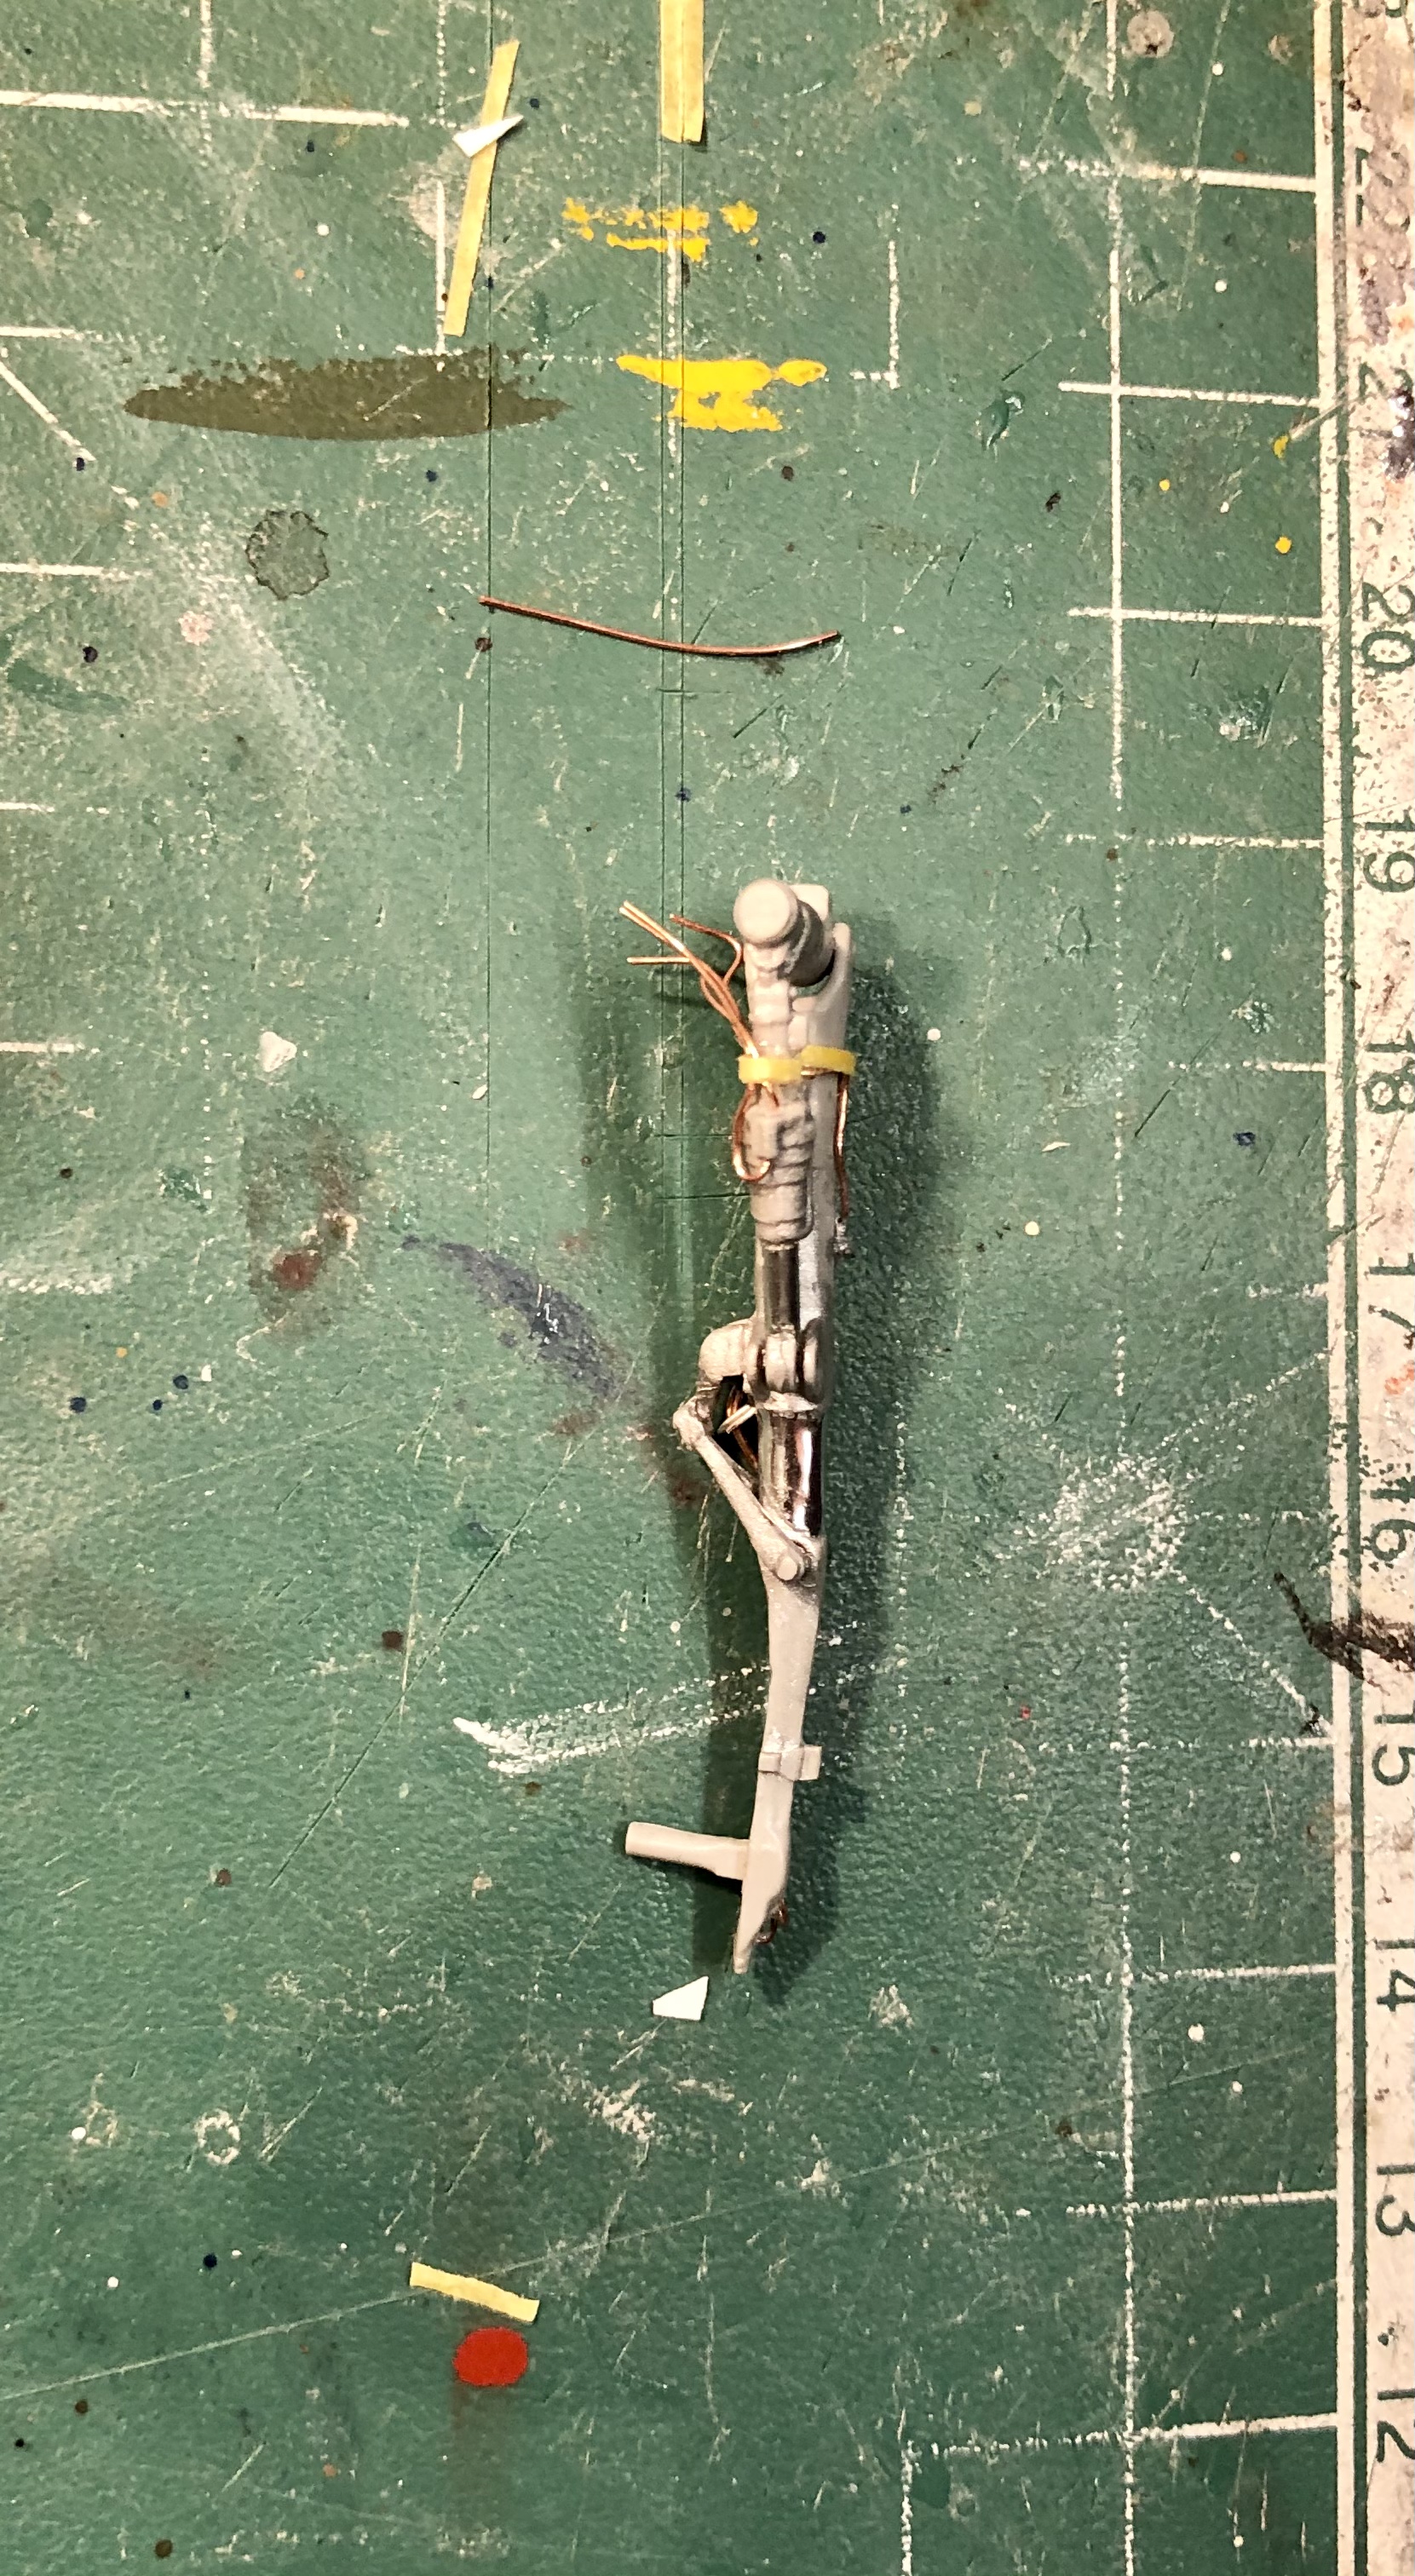
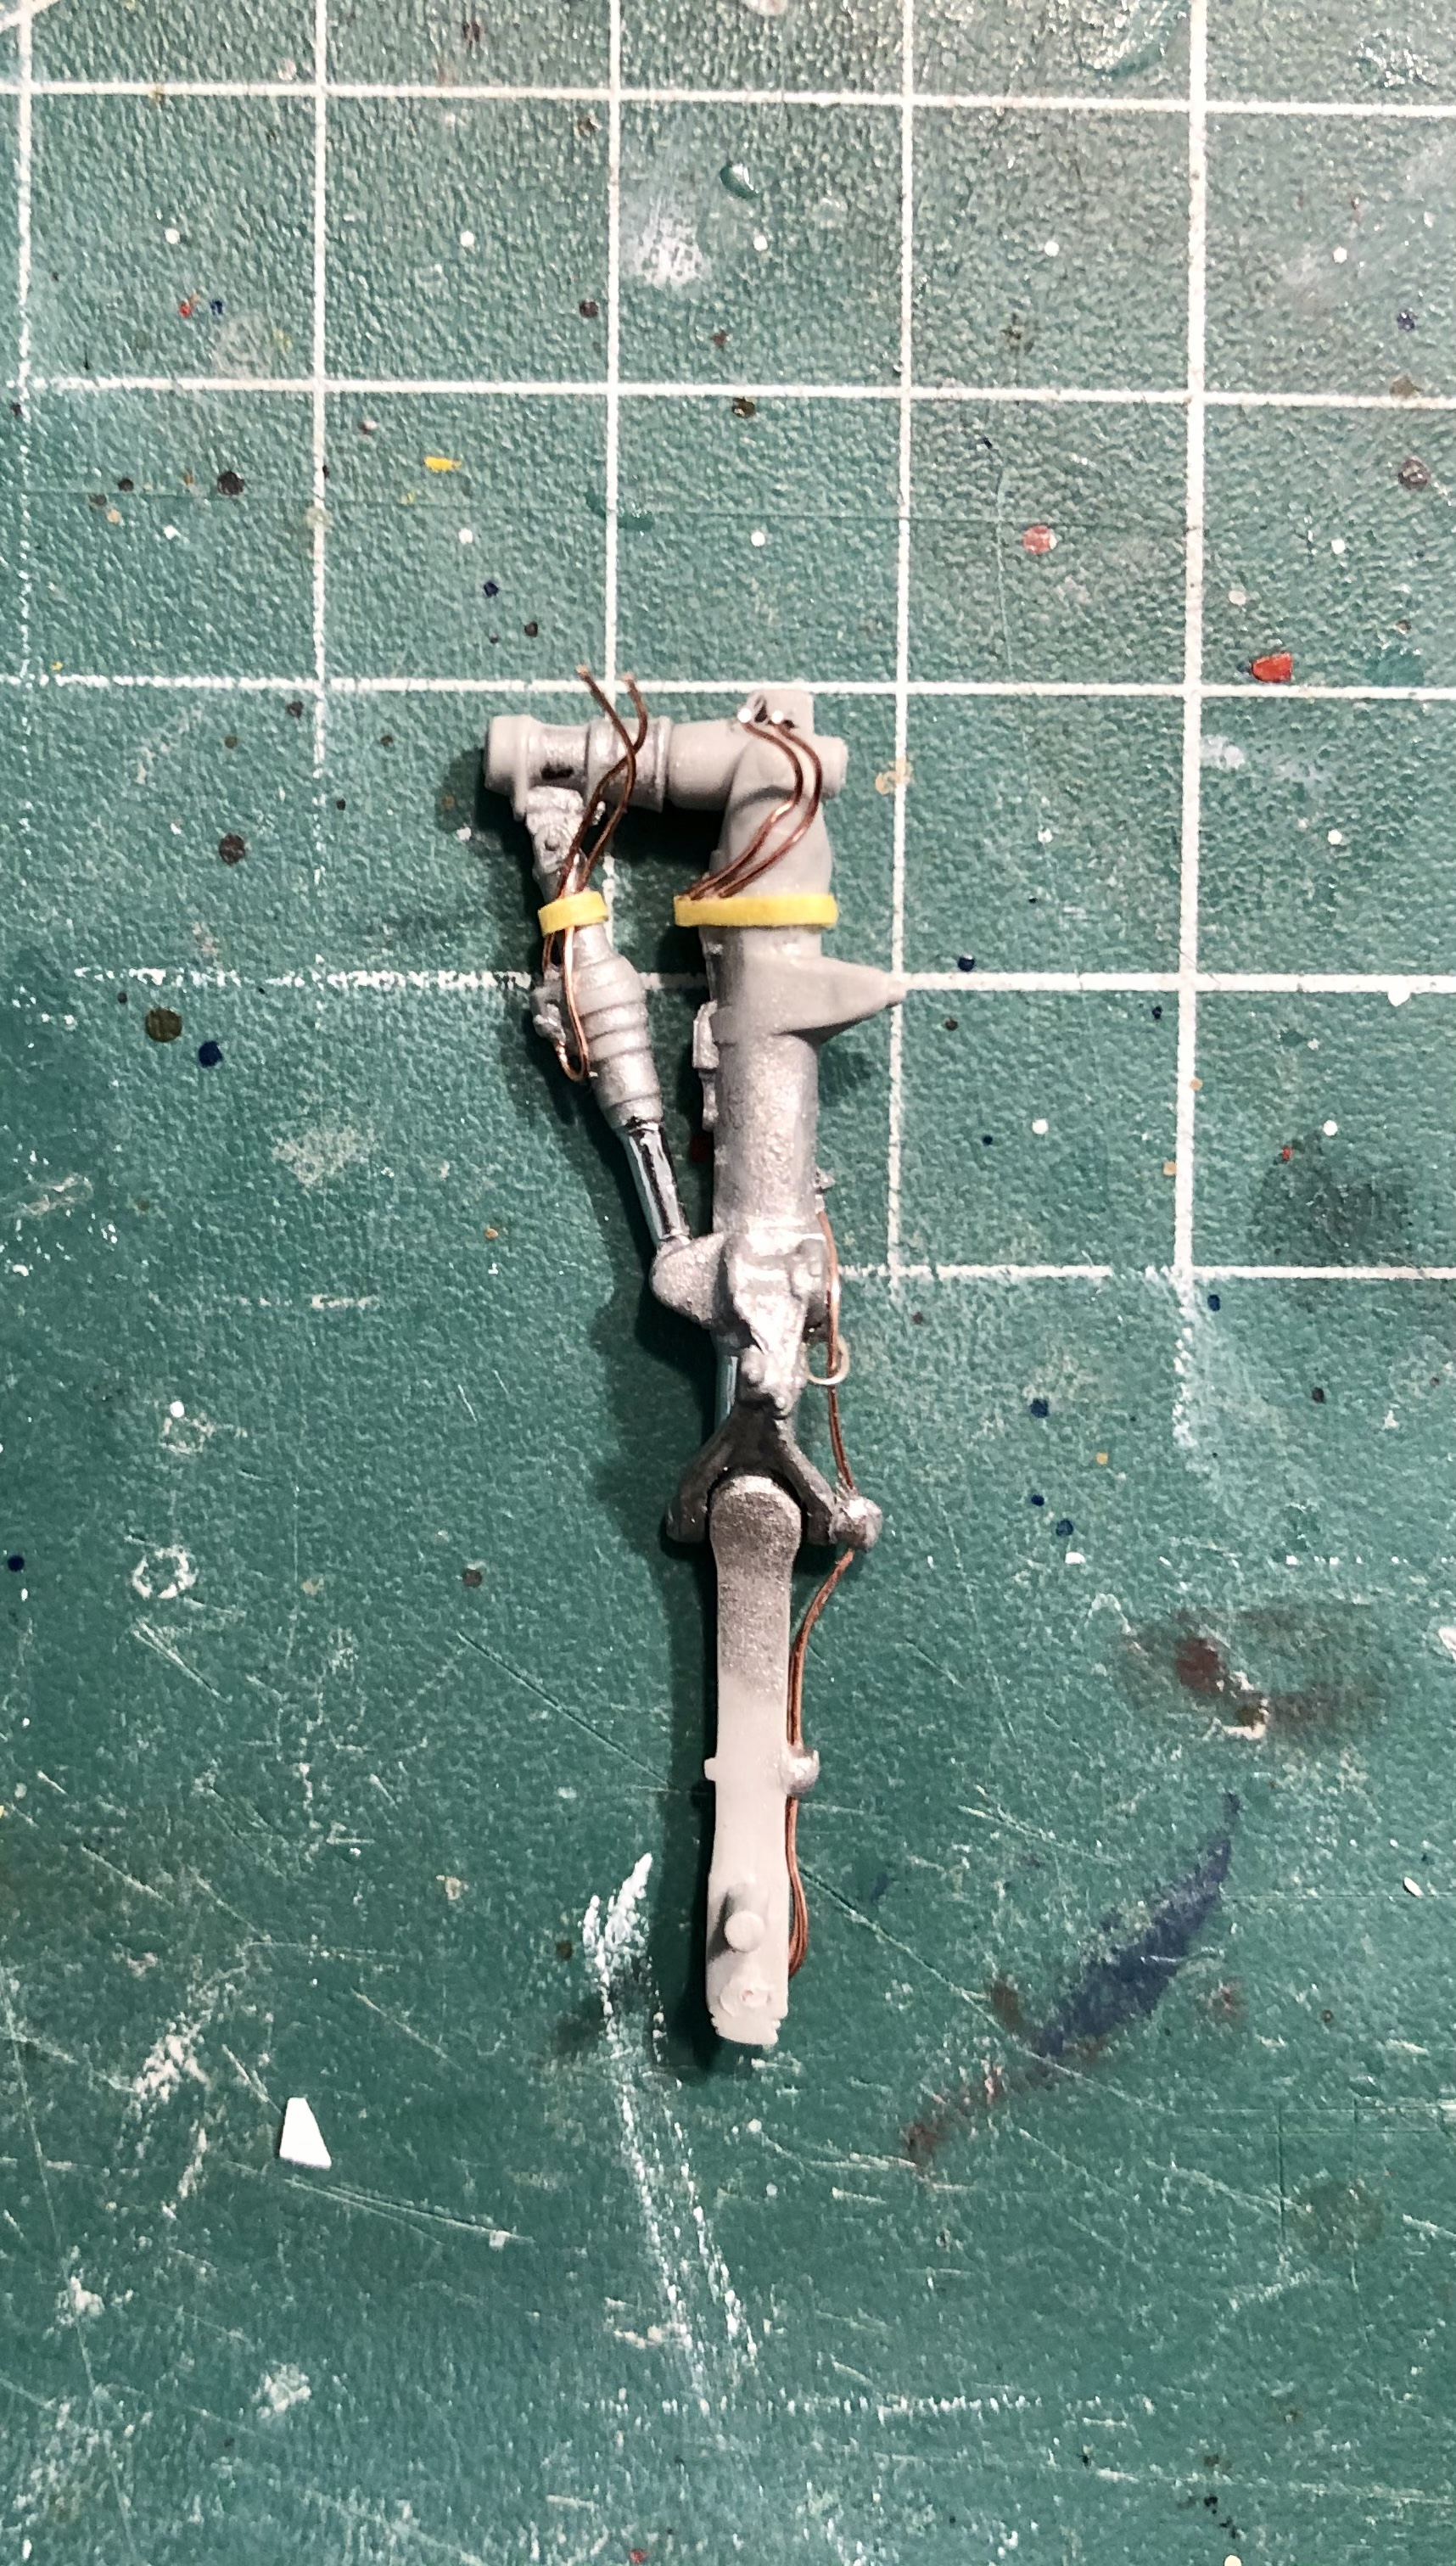
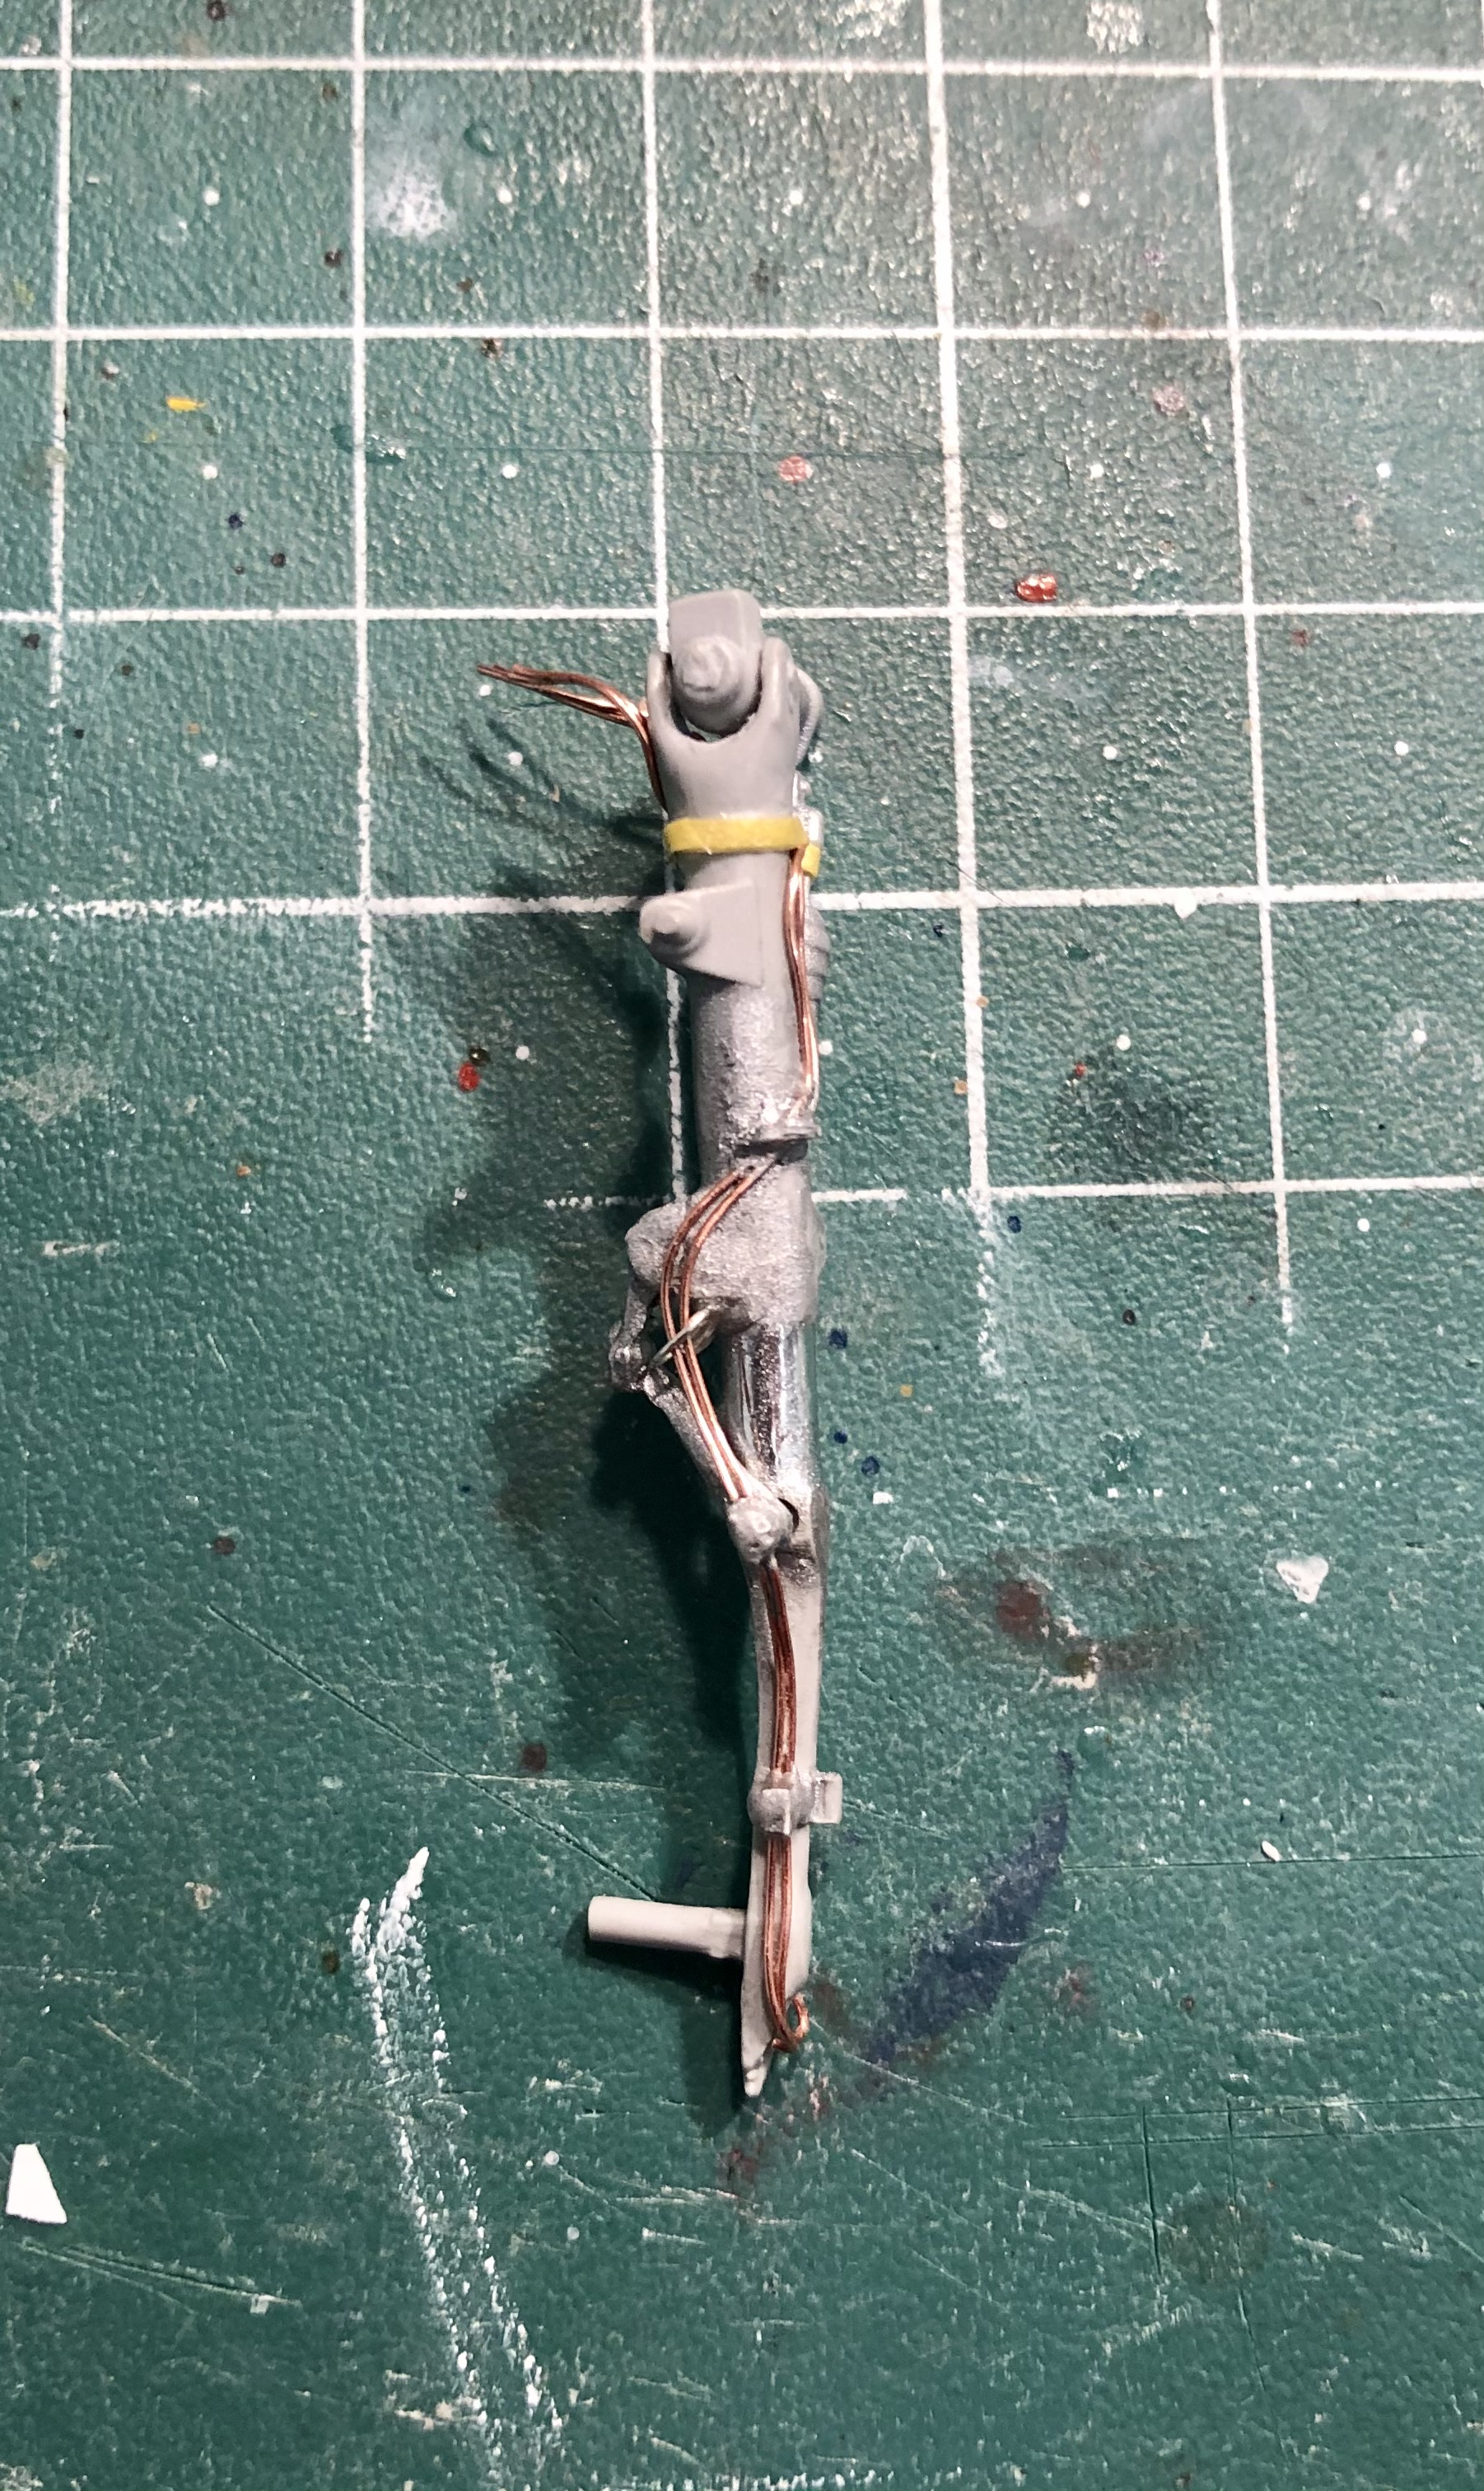
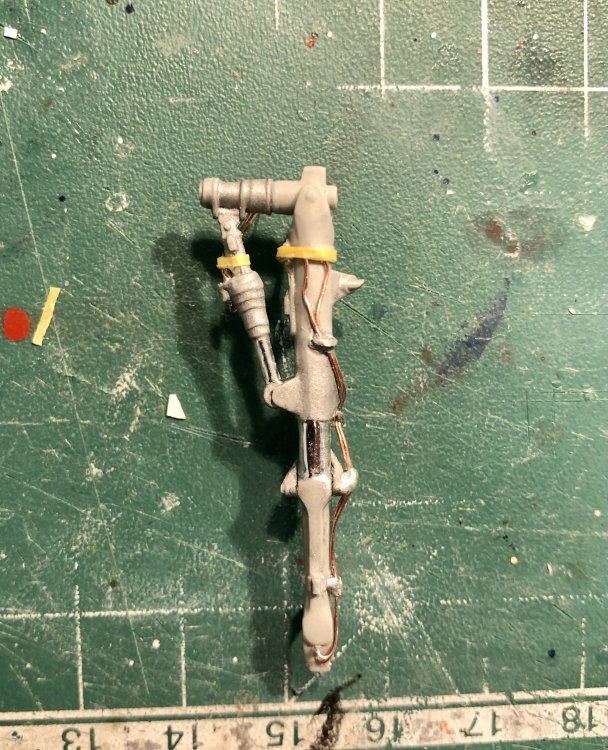
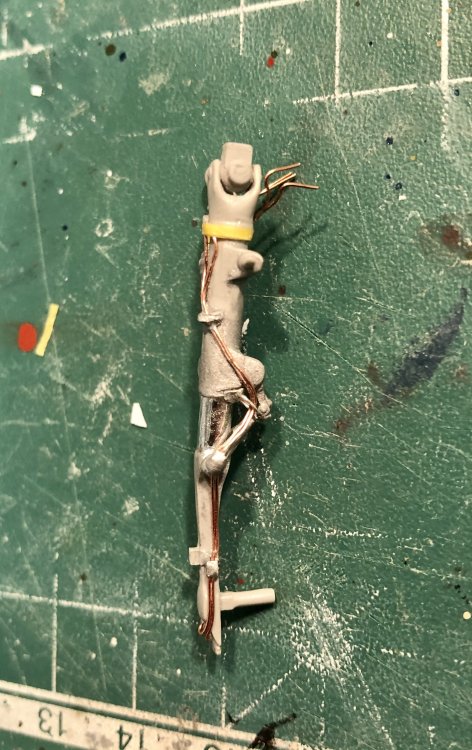
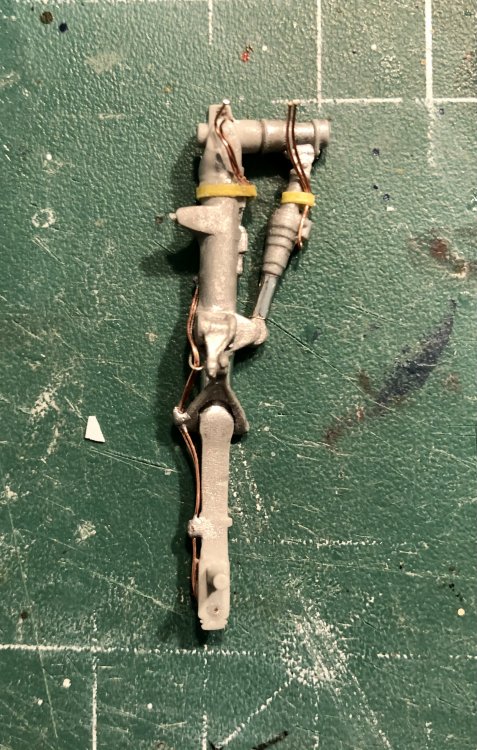
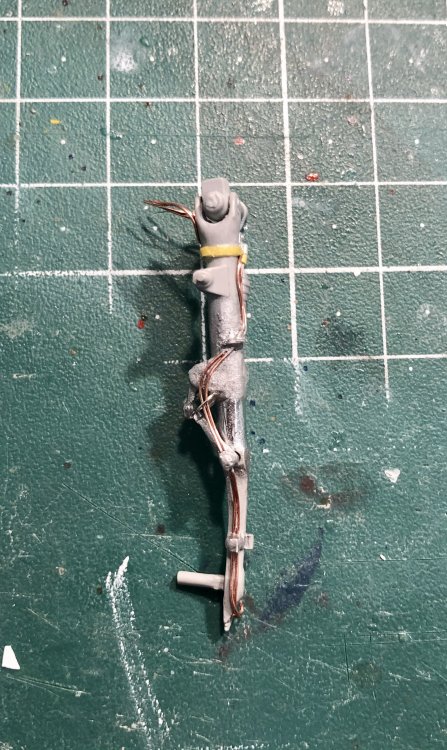
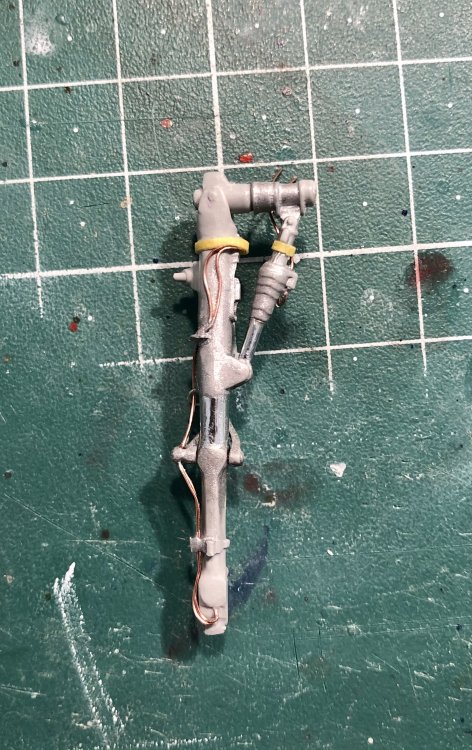
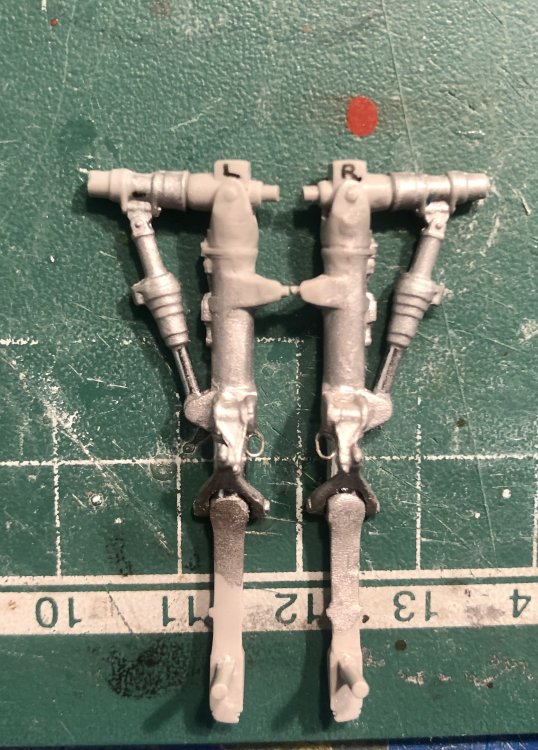
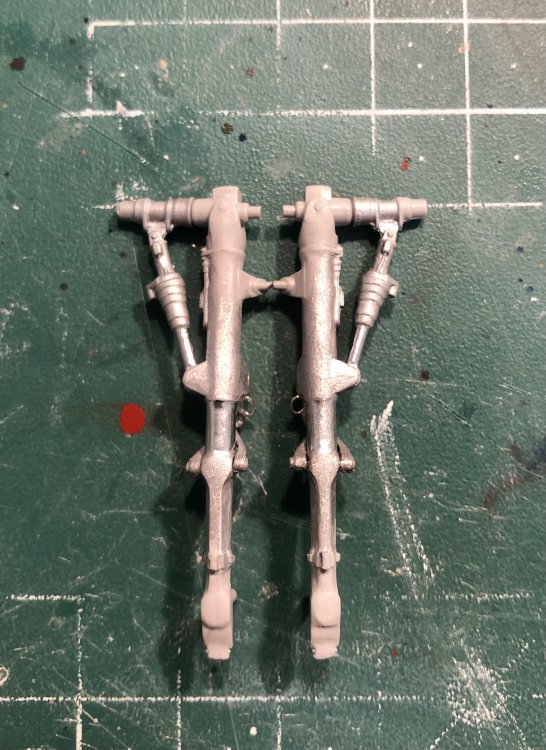
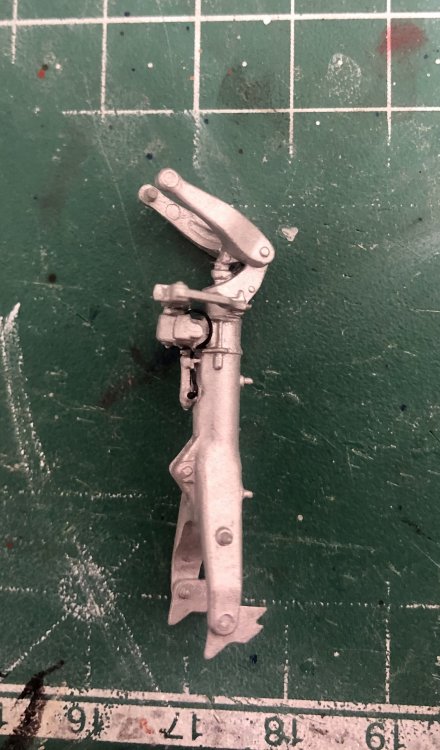
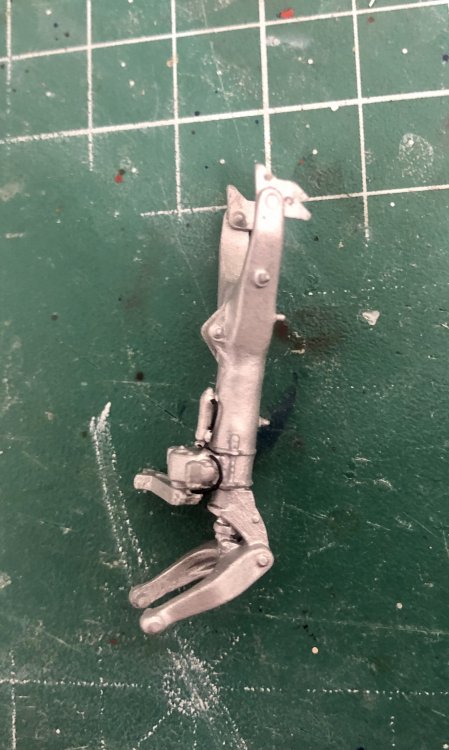
Yesterday evening I detailed the main landing-gear legs with hydraulic pipes. These were my reference pics: and this is how the legs of the model look like: I didn’t add any electrical wires since they would have been too small. Now their painting can be finished and then weathered.


- 719 replies
-
- 10
-

-
Great start and lots of improvements to do. This one will be really big! You can reserve a place for me in the first row for following your build I also like the Huey very much. The 32nd Scale from Revell was the first chopper I build when I was young...
-
Your speed is amazing Gaz! Looks as if the skull wasn’t that easy to apply. Very nice work!
-
You should post some pictures of the build here!
-
Thanks for the explanations! Interesting story behind your build. Nice new project and not the smallest one! From which model company is the Huey?
-
Israeli Mirage III C with Atar9C
Kaireckstadt replied to Kaireckstadt's topic in LSM 1/35 and Larger Work In Progress
Thank you Peter. This is a good idea. Maybe I can send a photostory to Italeri when I‘ve finished the build... -
Israeli Mirage III C with Atar9C
Kaireckstadt replied to Kaireckstadt's topic in LSM 1/35 and Larger Work In Progress
Thank you Harv! BTW: What about your F-16 and the japanese fighter ? Did I miss some of your updates? -
Israeli Mirage III C with Atar9C
Kaireckstadt replied to Kaireckstadt's topic in LSM 1/35 and Larger Work In Progress
Thanks Gaz. That’s one of the next things to follow! I know what you mean. It‘s really impressive when you are standing in the last-chance-area of an airfield and a huge Phantom is rolling towards you... -
Nice work and beautiful pics Gaz! Whenever I build my only WWI plane in my stash (Fokker D VII WNW) and have problems I will come back to you...
-
Israeli Mirage III C with Atar9C
Kaireckstadt replied to Kaireckstadt's topic in LSM 1/35 and Larger Work In Progress
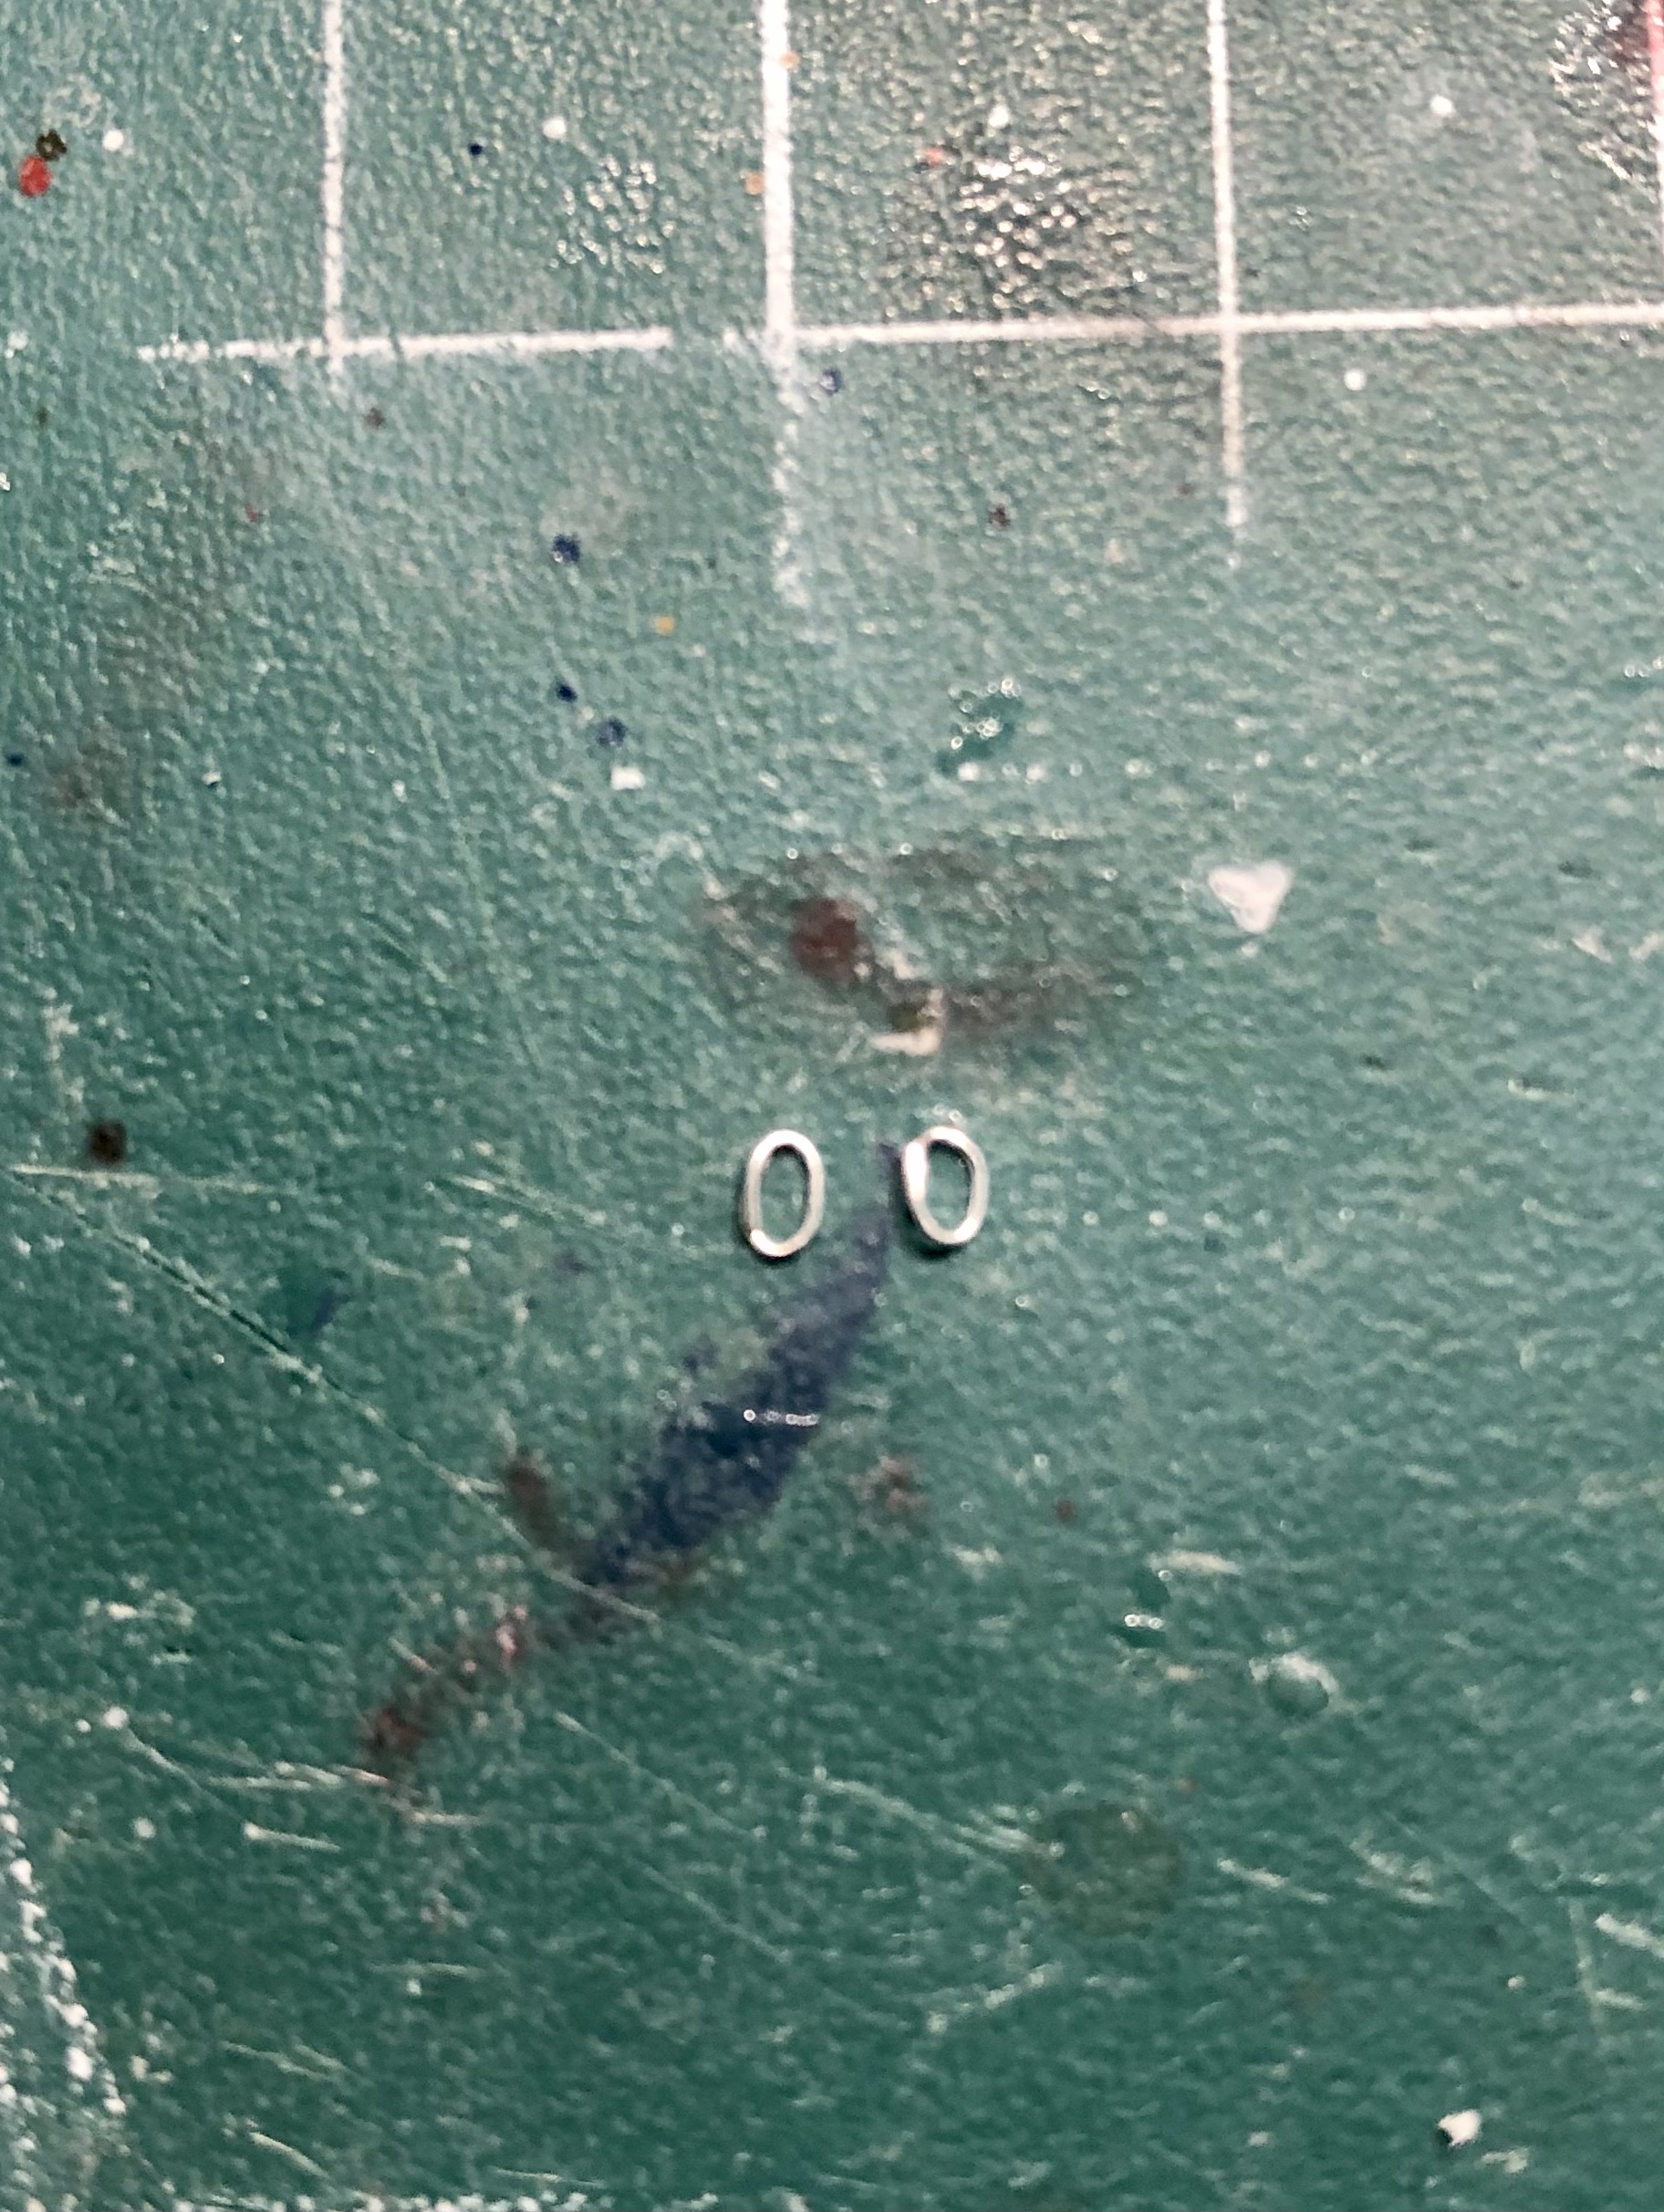
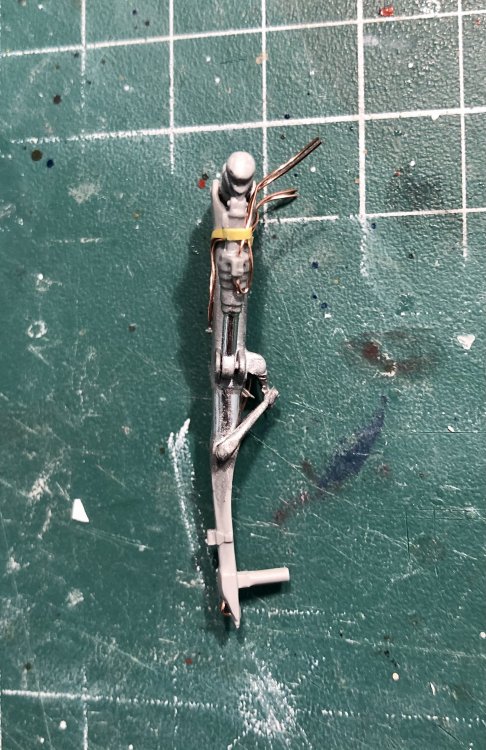
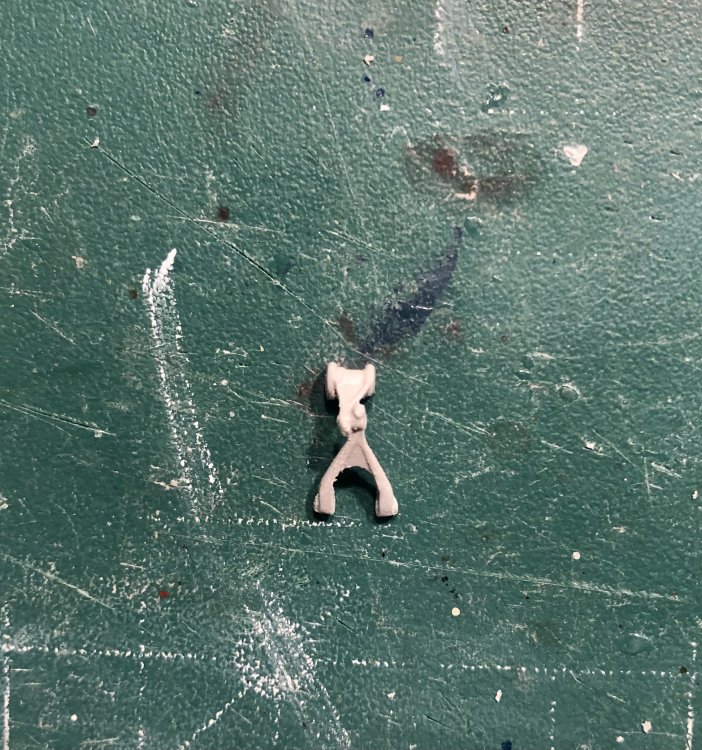
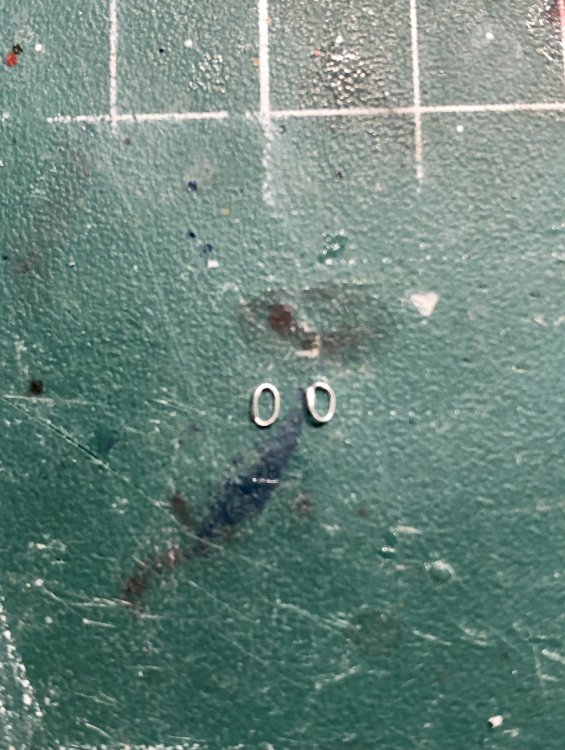
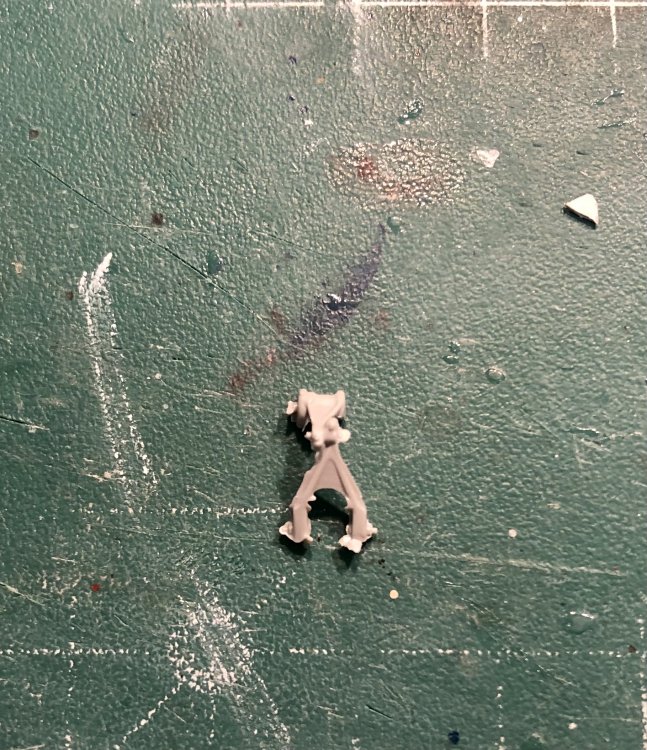
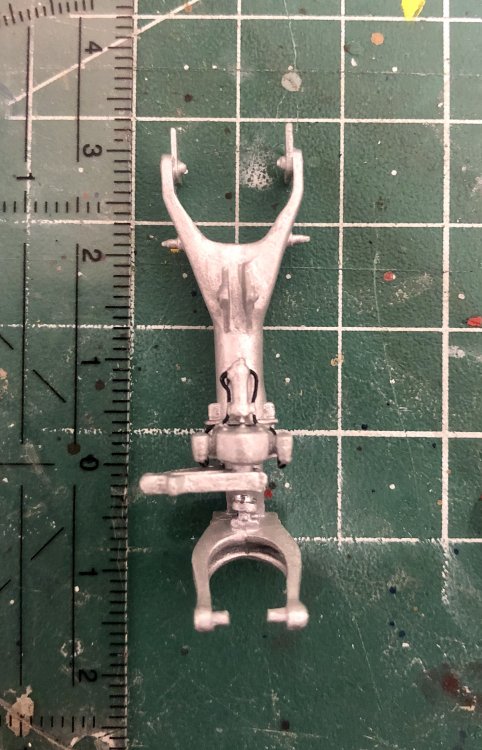
This evening I added two prominent filler caps to the upper fuselage. Italeri simply left them out: Then I painted the flexible hydraulic hoses of the front landing gear: Not that big...It‘s now ready for weathering. Finally I prepainted the main landing gear legs and added the scissors. The casting quality of them was really bad: fresh from the sprue... reworked ... Finally I scratched 2 rings which I glued to the legs and which are used to guide hydraulic lines to the brakes: Next step will be to add the hydraulic lines to them.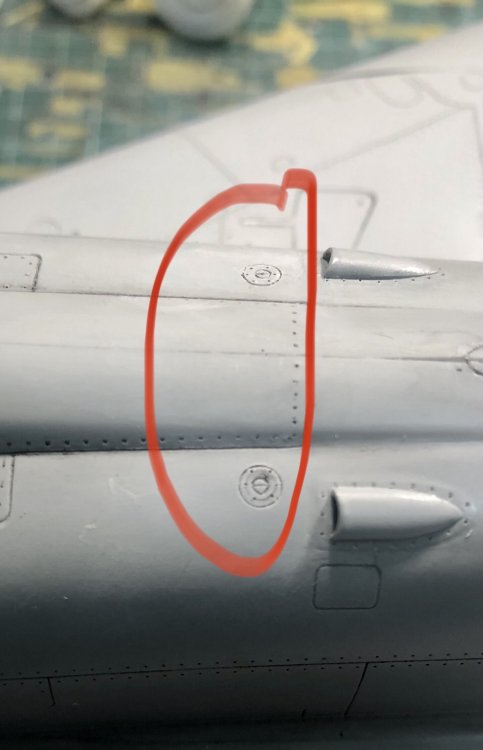

-
Lots of decalwork done Mark! Awesome looking cover!
-
Great work on the windscreen and canopies Peter. Your extra efforts really paid off: perfect fit now! Also very nice painting and weathering of the landing-gear legs. The painting is also my favorite part of a build. Looking forward to seeing the pictures of your painting progress.
-
Also a good tipp Peter! Thanks!
-
ME 109 E4 1/18 scale
Kaireckstadt replied to Trigger's topic in LSM 1/35 and Larger Work In Progress
What a progress Frank! That‘s a lot of things you managed within the last update. The wheel-wells caused a lot of work but this paid off. Looks beautiful now! Also the stick and the gunsight look really nice with crisp details. You are really fast and straightforward with this build! Will be in the first row to see the progress! -
Congratulations to this stunning model! Perfect build and presentation. Since my eyes are better than Gaz I was able to read the plaque. (I just enlarged the picture). Interesting that the build was already started in 2011 by another modeler. Also the german text (with the english translation) is a nice touch! And my final question: What‘s next on your bench?
-
The PE parts you chose to install really improve the model. I like your statement about these little bastards. Can only underline it! I have a little trick for them: I use white glue to place them on the model. So it is possible to even move them a little or even remove them if necessary. Also removing of the white glue from the part is easy. When alignment is correct I apply a little bit of superglue with a needle to the edge and let it dry. The capillary effect tears the glue under the part. Then I do this for the rest of the edge. Works really nice.