DocRob
-
Posts
7,045 -
Joined
-
Last visited
Content Type
Profiles
Forums
Events
Gallery
Everything posted by DocRob
-

McLaren MP4/6 Ayrton Senna Fujimi 1/20
DocRob replied to DocRob's topic in LSM 1/35 and Larger Work In Progress
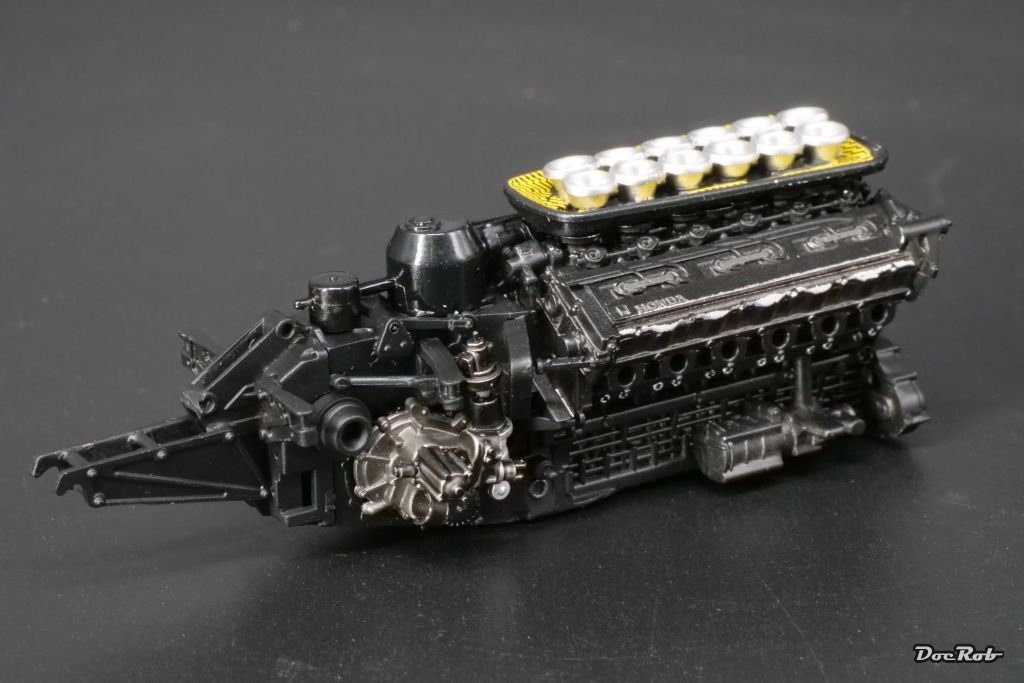
Thank you Peter, I looked at some photos of real engines and they mostly had a slightly used look. That goes as well for the exhausts, which look to be made from stainless steel. I have to find the right color for these. Cheers Rob -
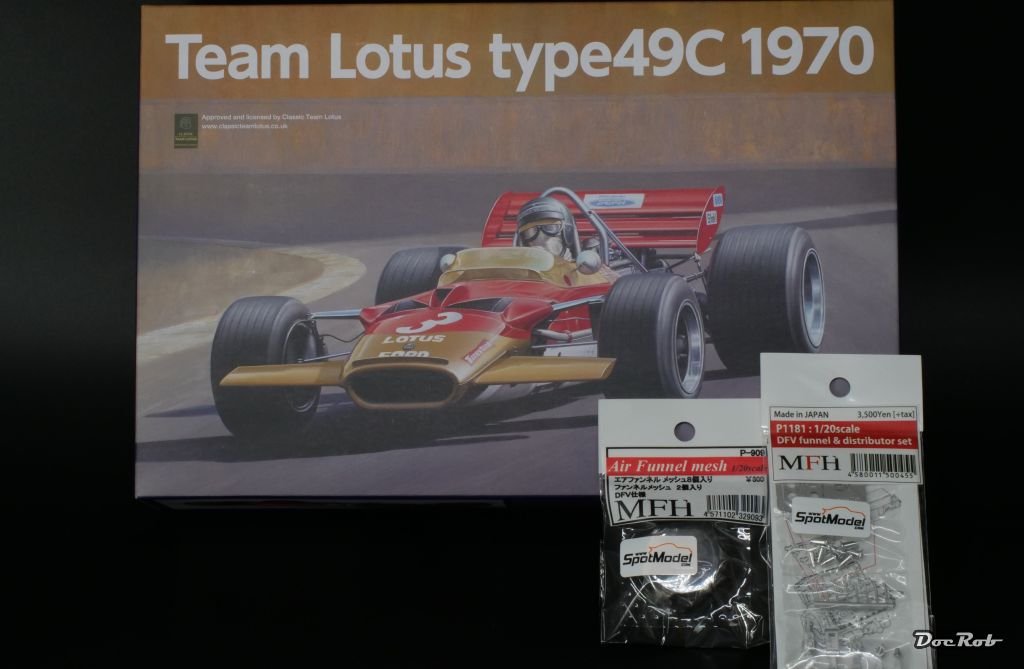
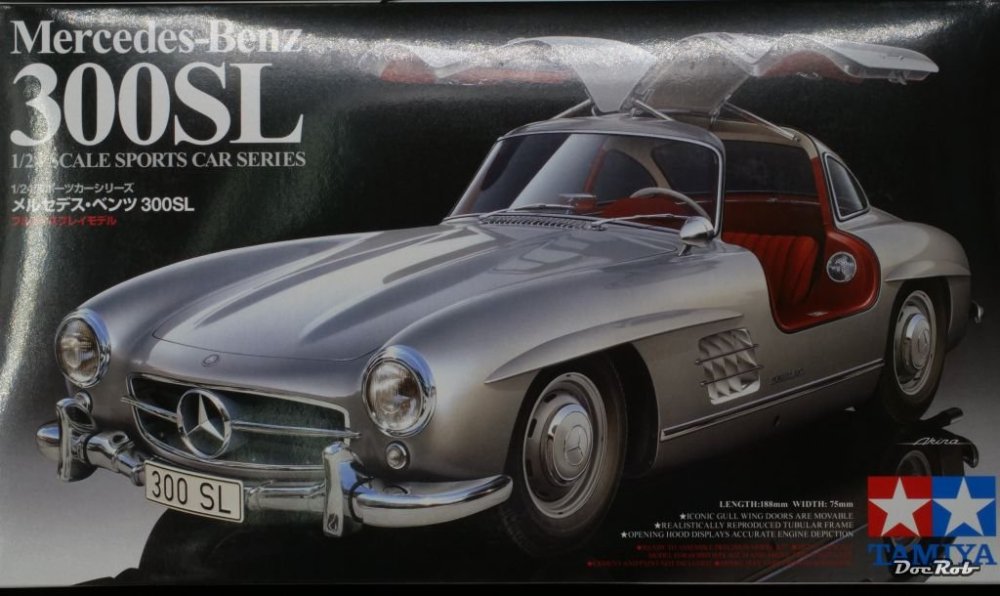
Some more car kits from Japan: Ebbro´s Lotus Type 49c, a nice 1/20 kit and as a highlight has tyres with printed pinstripe and Firestone logo included. Looks a lot like a Tamiya kit. I added MFH aluminum funnels and MFH meshes for the funnels. These will be very prominent on the finished model. I couldn´t resist the Tamiya Mercedes 300 SL, which will be build oob or maybe heavily pimped. Cheers Rob

-
McLaren MP4/6 Ayrton Senna Fujimi 1/20
DocRob replied to DocRob's topic in LSM 1/35 and Larger Work In Progress
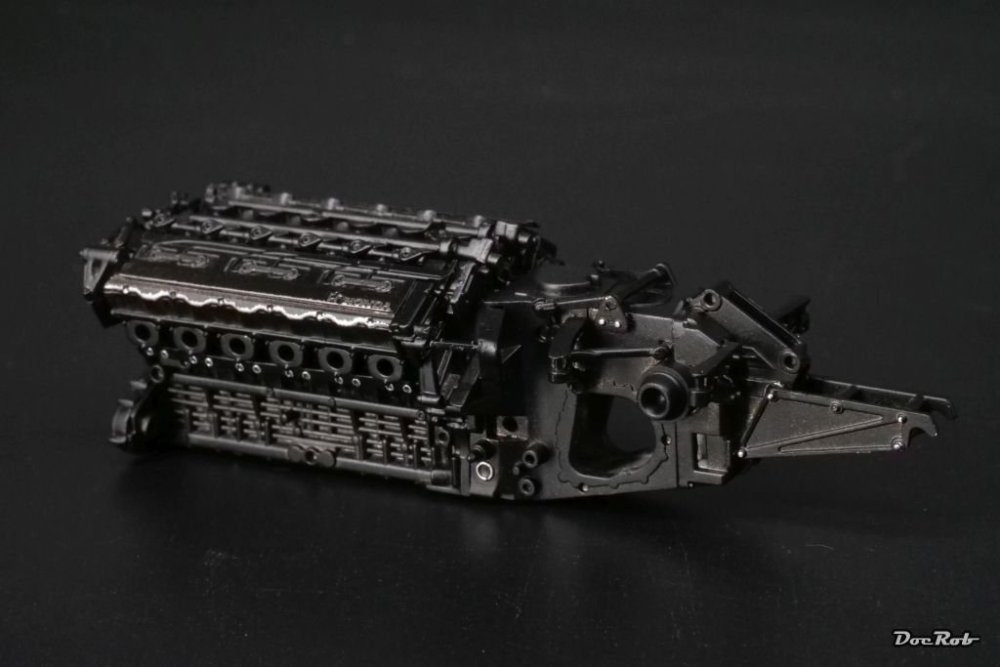
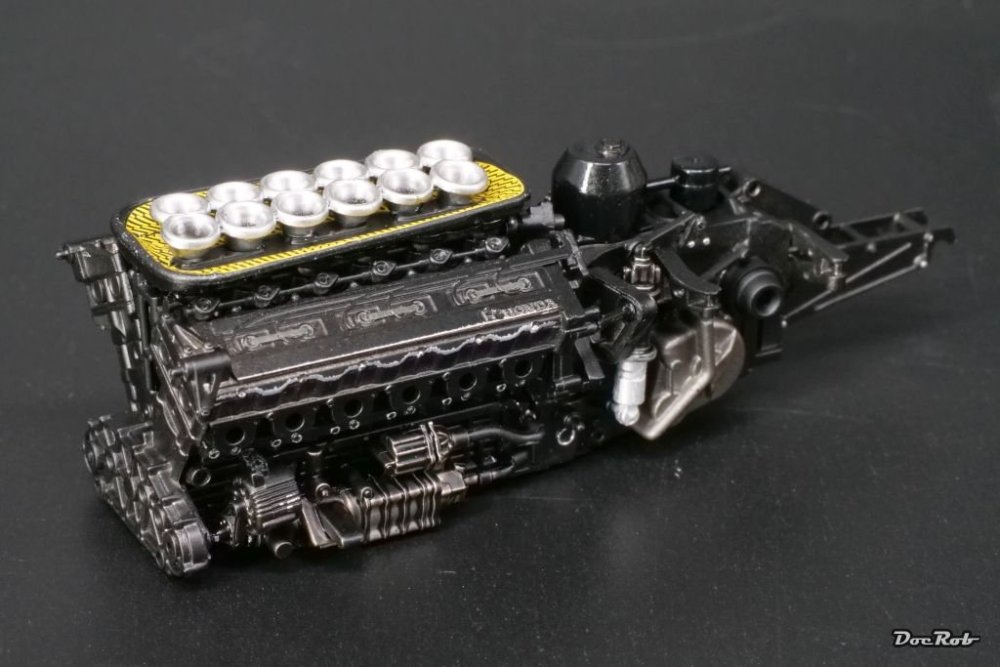
My work with the engine continued. After a lot of cleanup, I sprayed the block with Tamiya LP5 semi matte black and added some details here and there. I thought about using the plating to my advantage, after it caused so many irritations and scratched the black color away to let some details show through in silver. I think, I will omit wiring and tubing with this build. 1/12 kits are better suited for that, so on with adding engine details. The cover under the cylinder trumpets, was decaled with one of the Top Studio carbon decals, which unfortunately broke and I have to do some re touching. The engine without the exhausts is more or less ready now. Cheers Rob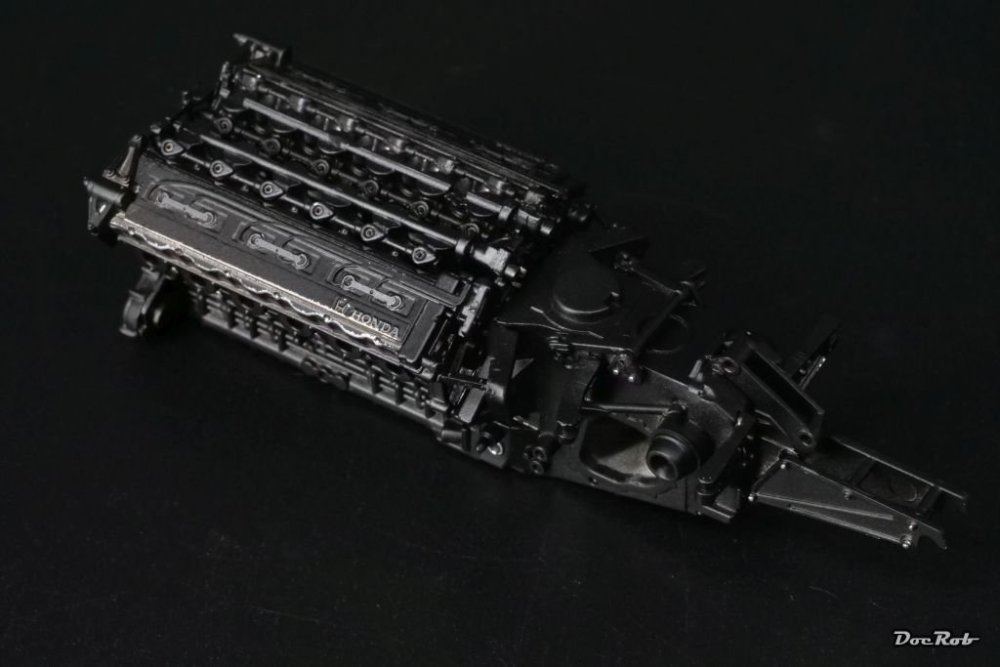

-
Nice little Birdie, Peter. Your interior work looks spotless. Sometimes quintaed cokpits look a bit strange to my eye, but that's not the case with yours. All blends in perfectly. I also use self made oil washes more and more, as the effect is much more controllable. With Tamiya's panel liner, I sometimes had problems with removing unwanted stains. Cheers Rob
-
The Scharnhorst 1/200 by Trumpter-Operation Paderborn
DocRob replied to KevinM's topic in Non LSM 'WIP
Your superstructure looks fantastic, Kevin. so many details to attract the eye. Cheers Rob -
1/18 Supermarine S6B - S1595
DocRob replied to airscale's topic in LSM 1/35 and Larger Work In Progress
Fantastic work and a great how to, but I won't do, because I lack the talent . Chapeaux -
McLaren MP4/6 Ayrton Senna Fujimi 1/20
DocRob replied to DocRob's topic in LSM 1/35 and Larger Work In Progress
I read somewhere, that the coming NUNU MP4/4 should have normal AND rain tyres. -
McLaren MP4/6 Ayrton Senna Fujimi 1/20
DocRob replied to DocRob's topic in LSM 1/35 and Larger Work In Progress
Thanks for your confidence Andy, I'm not so sure about the outcome of this build after the frustrating beginning. I start to scratch some planned detail options in my head . Cheers Rob -
McLaren MP4/6 Ayrton Senna Fujimi 1/20
DocRob replied to DocRob's topic in LSM 1/35 and Larger Work In Progress
This book is actually available with one of my retailers. Maybe I will bite. Unfortunately the shipping usually takes two weeks. Cheers Rob -
McLaren MP4/6 Ayrton Senna Fujimi 1/20
DocRob replied to DocRob's topic in LSM 1/35 and Larger Work In Progress
Thank you Peter and Carl, you are both absolutely right, I should have stripped the plating, but I naively anticipated a reasonable fit. The opposite was the case, not one single part fitted like it should, without some manipulation. Carl, I hope mine will not take that long, earnestly, I have to get it from my bench fast, one way or another to stop the annoyance. The Top Studio stuff looks very nice, it's the first time, I use it. The manual for the PE is tiny and bad copied though. Placement is therefore a bit of guessing. I know about the recent 1/12 incarnations, but had the Fujimi kit in my stah for a while. Model Factory Hiro has produced some tyres for the 1/12 Tamiya MP4/6. I have no idea, if they are still available, but they go with the number P-1158. Cheers Rob -
Nice Carl, I'm still toying with the 1/35 Tamiya kit, but not before I built their Archer. Cheers Rob
-
McLaren MP4/6 Ayrton Senna Fujimi 1/20
DocRob posted a topic in LSM 1/35 and Larger Work In Progress
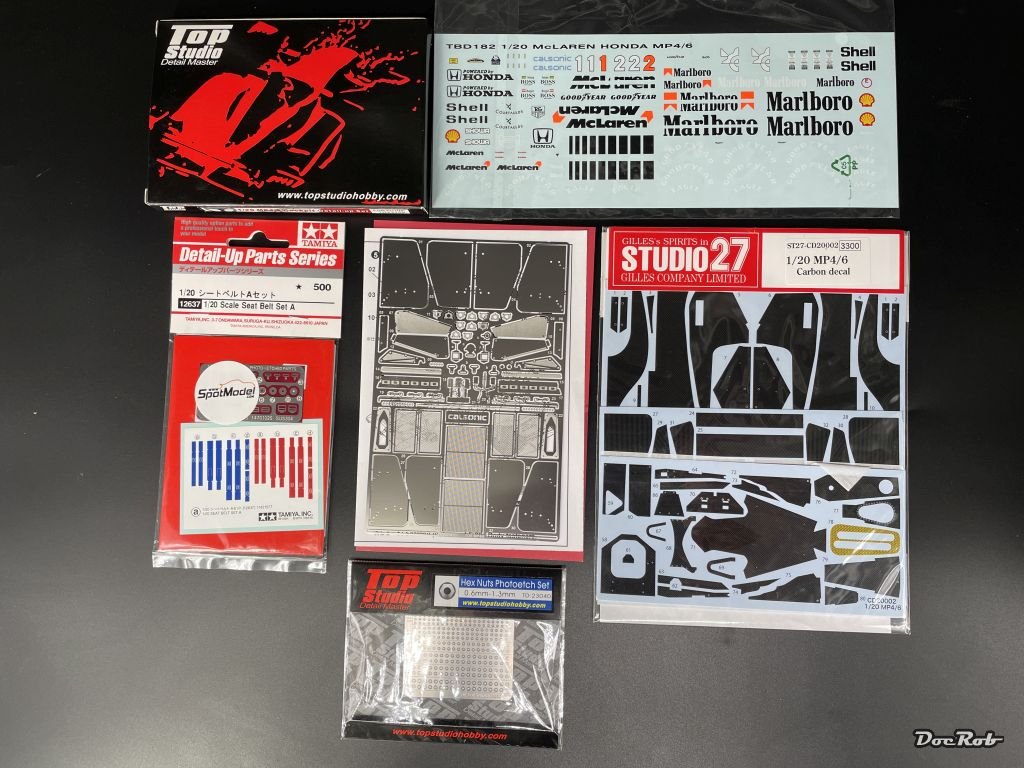
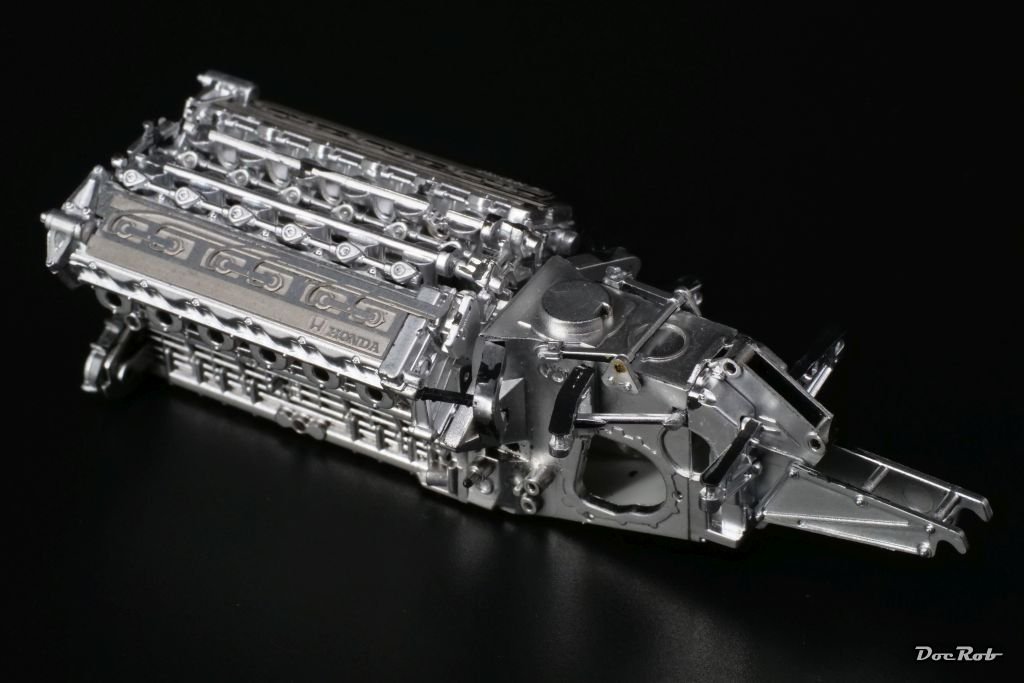
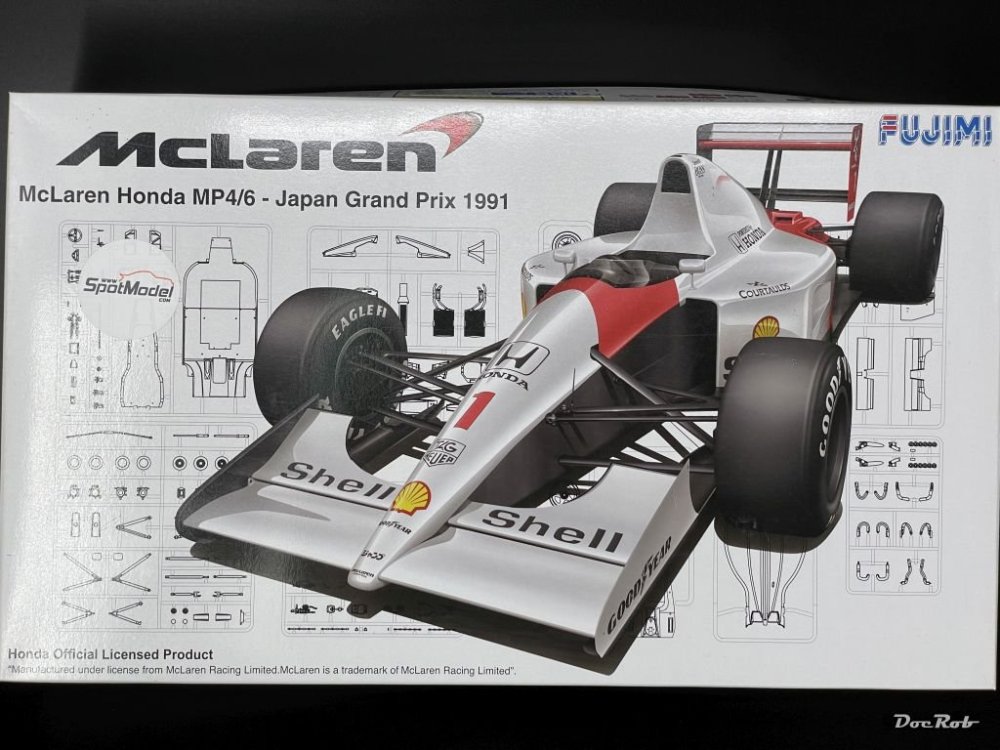
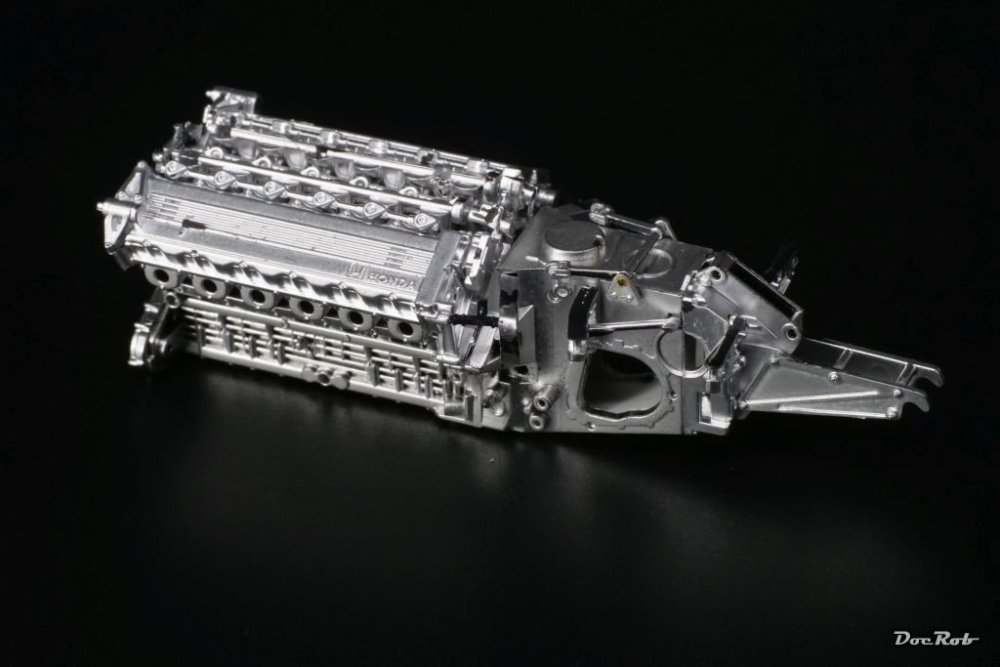
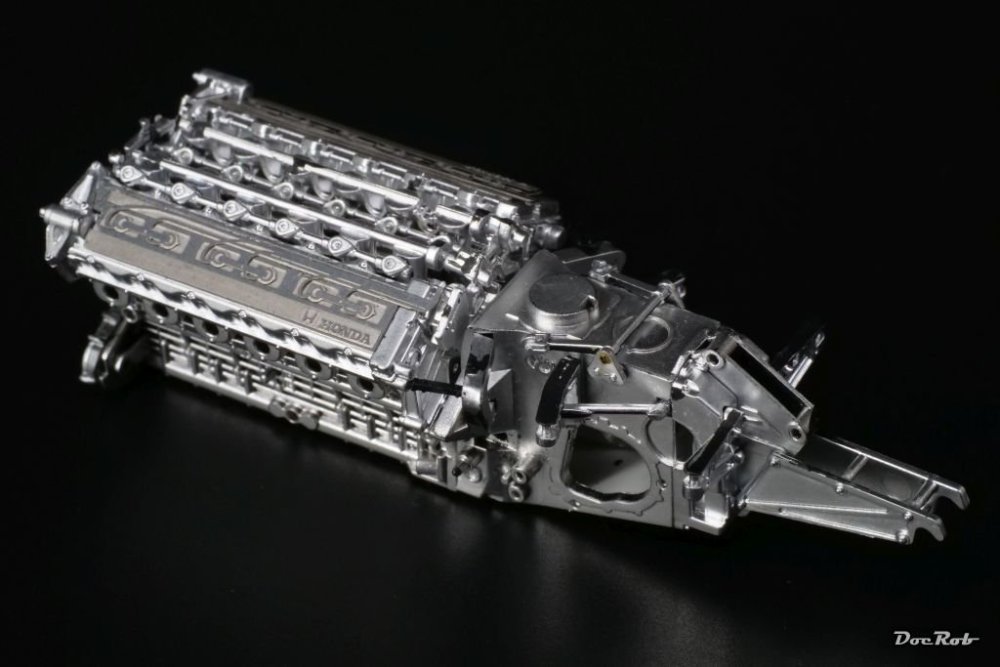
Hola fellow modelistas, due to different reasons, I neglected my bench and LSM for some weeks and the next weeks won't be much better. Despite all obstacles, I wanted to start a new feel good build to motivate myself and so I chose my favorite F1 car for the task. Since a while, I accumulated some goodies for this project and since some weeks everything arrived at my doorstep. The kit: The goodies: - Top Studio Cockpit detail set - Top Studio PE-set - Top Studio carbon decal set (was the hardest to find) - TBDecals sponsor decals - Tamiya seat belts - PE rivets - Colors from Zero Paints (a first for me) I considered starting with the body, but decided to start, like the manual suggests, with the engine. Big mistake, at least motivational. As you can see on the pictures, the parts are metal plated in an aluminum finish, what's not to like about it. First of all the plating has spots and foremost it's completely superfluos, because nearly the whole engine is BLACK. You might say, no biggie, but it is, because of the plating no part fits how it should, you have to scratch, grind, and re drill all holes. Beside this, you can't use normal modeling cement, so I was forced to use CA. That's not all. The engine parts sport all known types of plastic abnormalities, like prominent parting lines, ejector marks, burr and flash and the silver plating doesn't enhance general visibility. Strange thing, that other versions of the kit seem to include the engine on black sprues. In all the beginning was utterly frustrating, we don't speak about an ancient short run kit, cast in some garage, it's a relatively modern incarnation, Fujimi what have you done. This will not be a fast build, other than I sod the kit, if it continues to fight me back. Oh, I haven't spoken about detail. The positive so far, the engine is very detailed and has a large part count. On the pictures, only half of the parts are added for better painting If you look at the picture above, you can see the cylinder heads with very prominent cooling ribs, which unfortunately doesn't exist on the real thing. This is how it looks, with the added PE parts from Top Studio. Fujimi, are you the Japanese Italeri? I'm still hoping the best for the non plated sprues and will not instantly bin the kit, but it's definitely on probation. Cheers Rob
-
I second your verdict: an absolute gem you build and painted there Peter. Nice to have this kind of feelgood kits, where you can fully concentrate on painting and weathering, which in your case looks spot on. BTW: I ordered the limited Brian Lane boxing and guess who is responsible... . Cheers Rob
-
Definite must buys, the Sea king, because it's my favorite Heli and the Gannet, well for quirkyness. The Gannet looks like a cross breeding, between an Avenger and a Skyshark, what's not to like about that. Cheers Rob
-
Great result Peter, good to see that there were no issues with the decals. Today, I thought for the first time, that it might be the time for building my first Spitfire and guess who inspired me. Cheers Rob
-
Well, if an issue turns into a no issue due to great research work of the producing company. Capeaux to Kotare for getting it right and letting you continue in good faith. Can't wait to see how the finished Spitfire will look under your knowing hands. Cheers Rob
-
Camo looks very nice Peter and I like your decision about the toned down lower side. Your masking method looks tedious, I might have cut most camo masks from Kabuki sheet with a rotating blade and might have added some thin layers of Panzer putty in difficult spots. Cheers Rob
-
Zoukeimoura Bf 109 G-14
DocRob replied to MADZ's topic in LSM 1/32 and Larger Aircraft Ready for Inspection
Very nice weathering and paintjob, it all looks so well blended in. Cheers Rob -
You'll like the Flory washes, I found them extremely pleasant to work with. As recommended, you should use a separate jar with a drop of liquid soap added for application. Cheers Rob
-
What is on your bench right now ? Share a picture :)
DocRob replied to Martinnfb's topic in Modelling Discussion
Leave it as is, Carl. Nice little thingy. Cheers Rob -
Land Rover Defender 110 from Spectre
DocRob replied to BlrwestSiR's topic in LSM 1/35 and Larger Work In Progress
That's an interesting conversion, Carl. I will follow your build along. Hopefully the kit parts fit the C1 body. The lack of a manual is somewhat irritating. I'm actually thinking about buying a Citroen SM resin kit from USCP, one of my favorites. It's a full resin kit and I'm not sure, if I'm up to it. It's not my first resin car kit, but looks delicate. Cheers Rob -
Tamiya F4U-1 Birdcage Corsair 1:32
DocRob replied to shadowmare's topic in LSM 1/32 and Larger Aircraft Ready for Inspection
Fantastic looking Corsair. I really like the paintjob and weathering with the hidden 13. I build the exactly same airframe many years ago as my first plane kit, re-entering the hobby and enjoyed the build a lot. Cheers Rob -
Thank you Bryan and Harv, with the great Tamiya kit, I could fully concentrate on NMF finish and riveting, which was the main goal of that little exercise. Cheers Rob
-
What is on your bench right now ? Share a picture :)
DocRob replied to Martinnfb's topic in Modelling Discussion
The non working suspensions are a bit of a letdown, I think. Even my 1/35 Meng Sherman has metal coils for the suspension system. You are absolutely right Paul, about the Takom sprue connections. There are plenty and they are relatively strong, but it's easy to clean them, at least it was on my 1/16 tankette. Cheers Rob -
Ok, my wife found one of us, but I edited her away (her wish). It was taken two month ago at a little spontaneous street fiesta in front near our house. Well it was a long night. Cheers Rob