DocRob
-
Posts
7,043 -
Joined
-
Last visited
Content Type
Profiles
Forums
Events
Gallery
Everything posted by DocRob
-
I‘ve built the Eduard Hellcat a while ago, using some goodies. It‘s a good fitting kit with lots of potential for enhancement, when wanted. The base kit is decently detailed and can be build oob as well. Cheers Rob
-
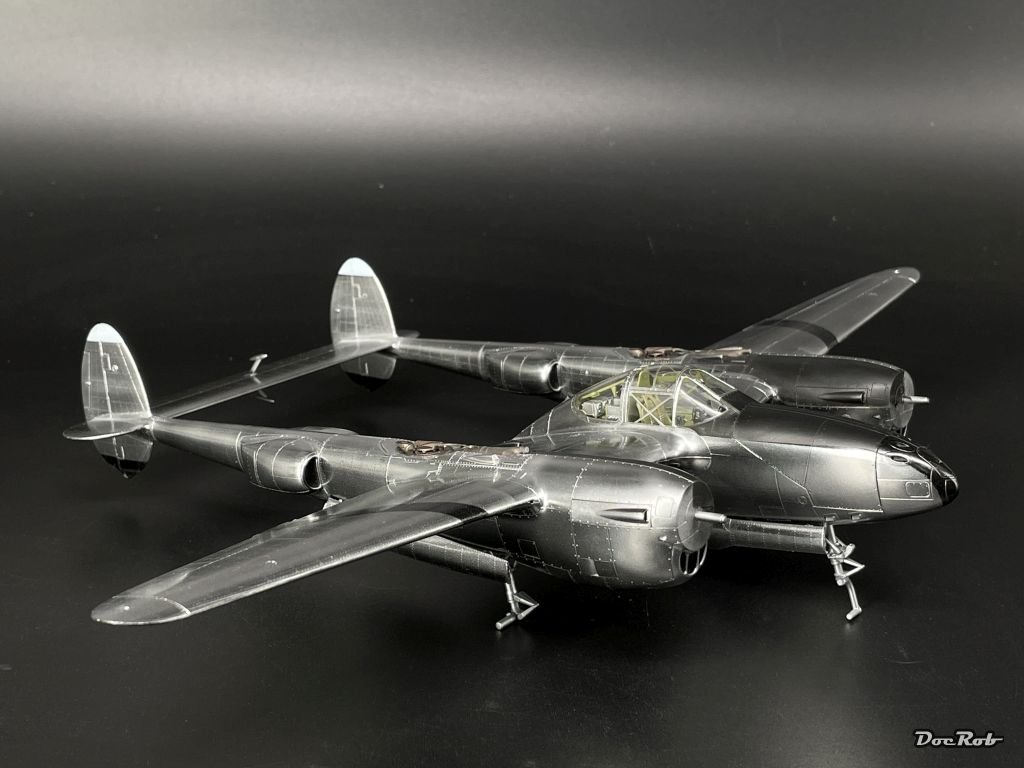
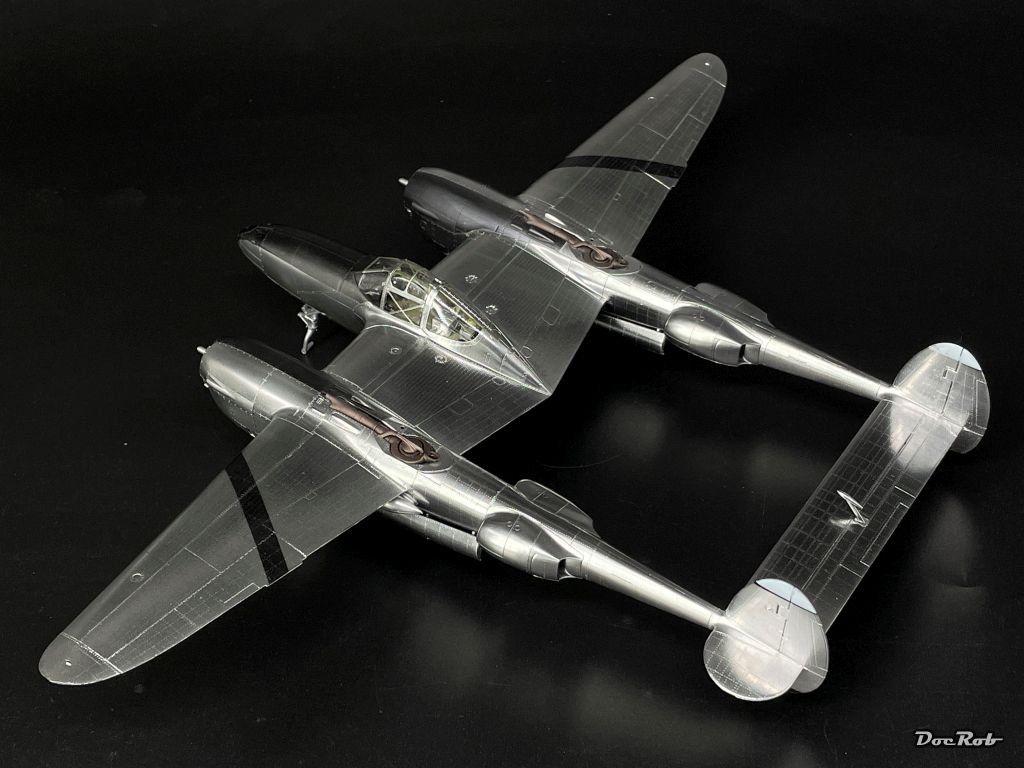
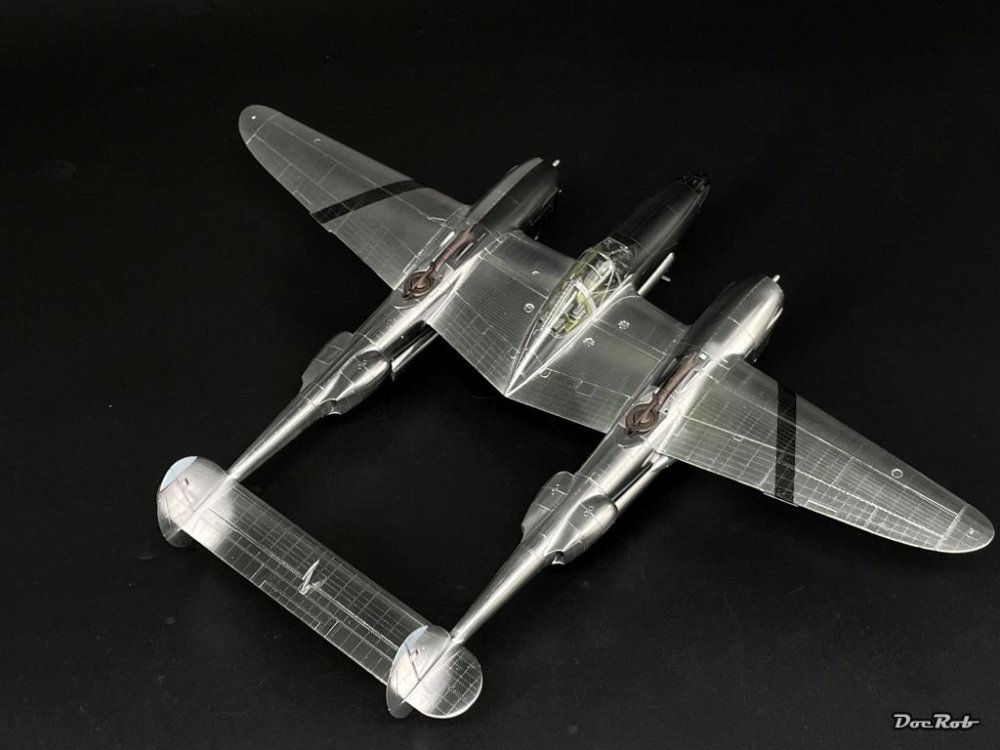
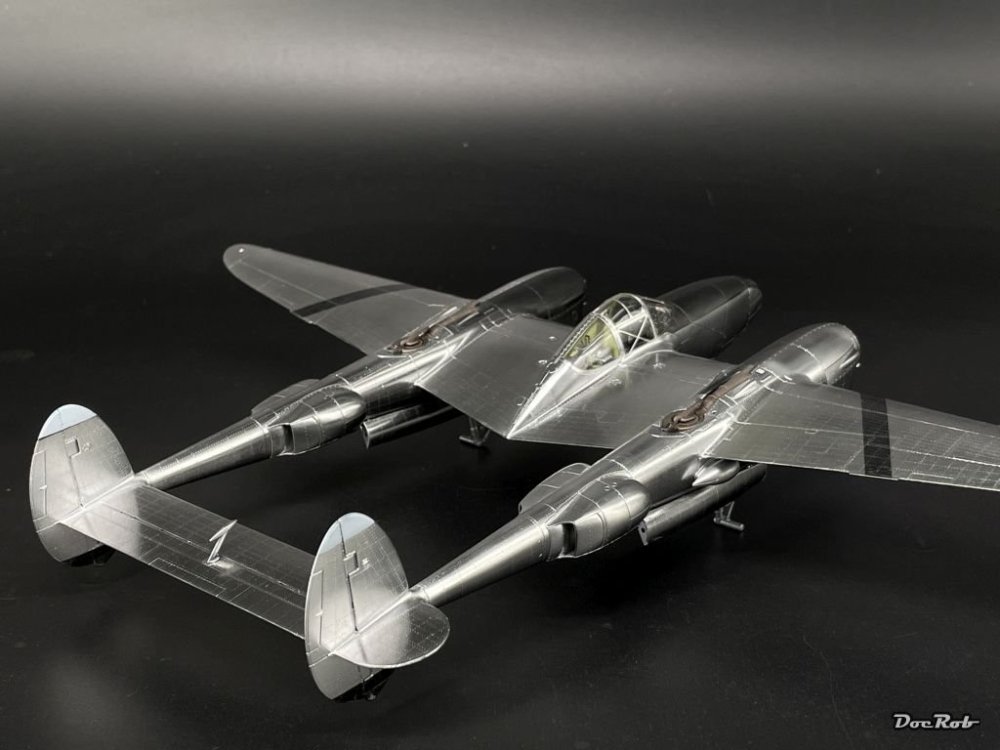
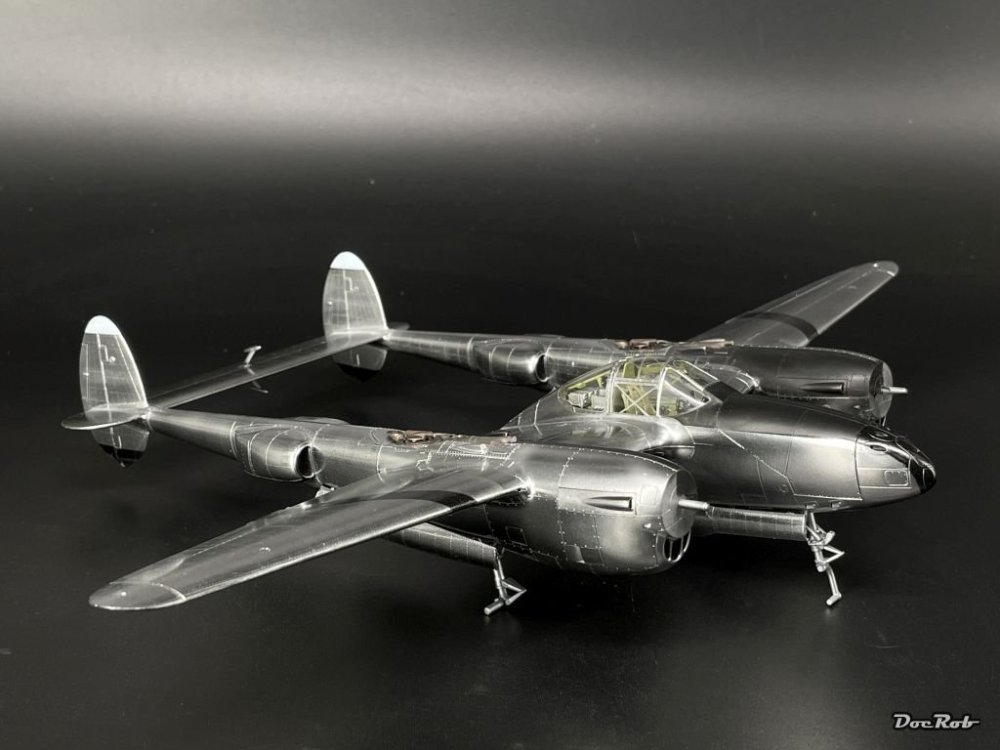
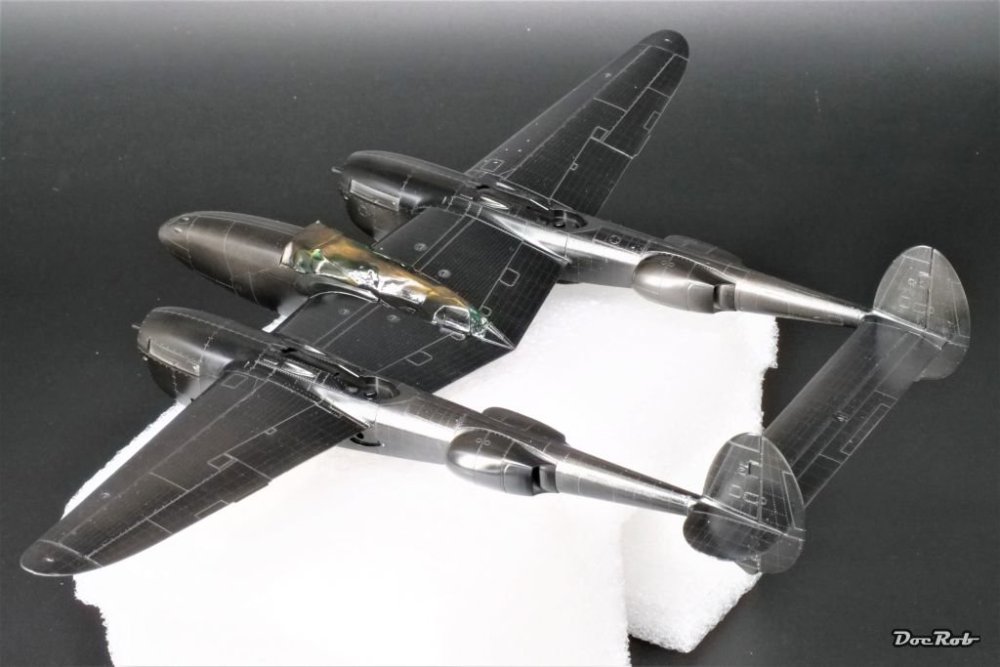
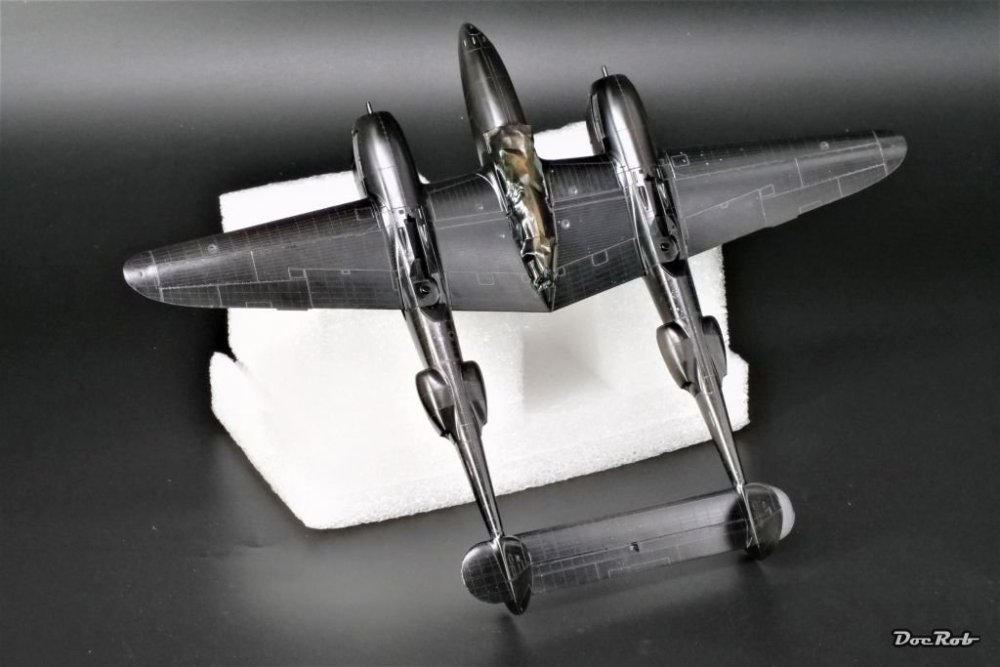
Thank you amigos, imho the best appearance for a P-38J. The shiny aluminum fits the sleek and powerful design best and yes, I wear gloves and sunglasses . Cheers Rob
-
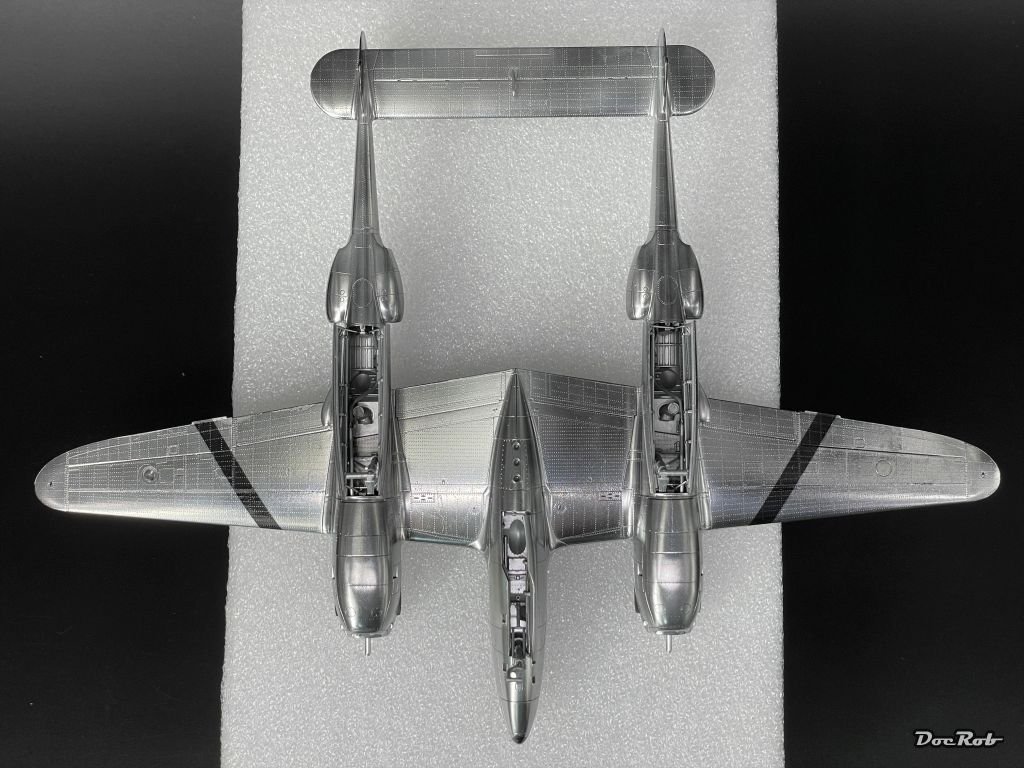
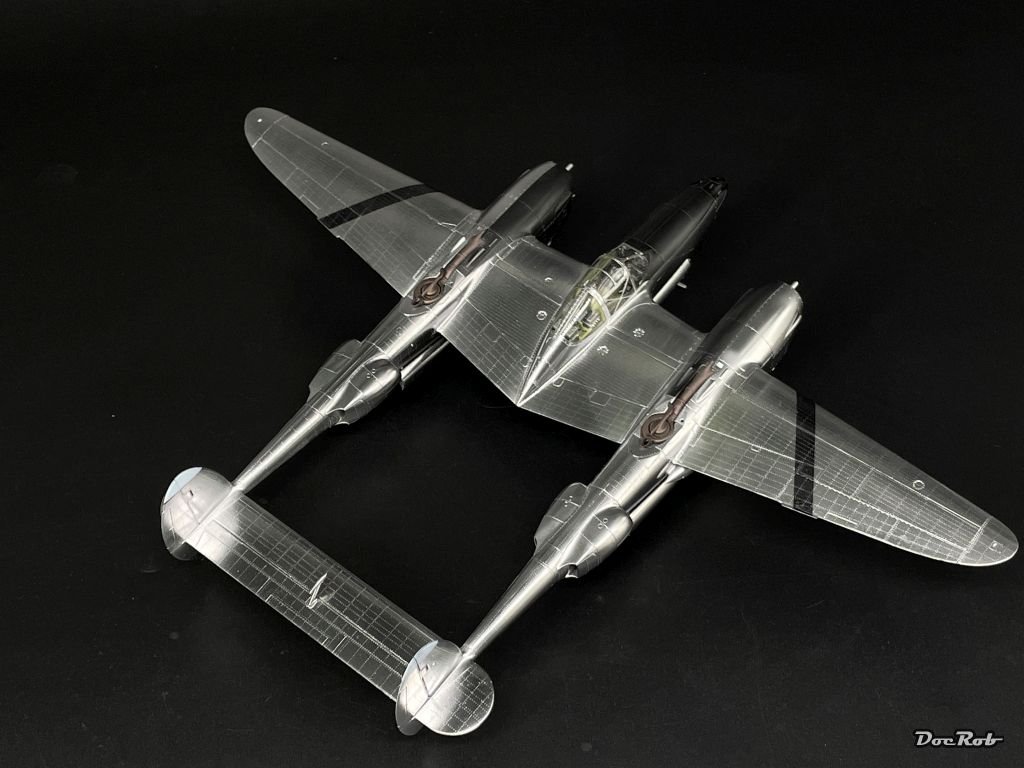
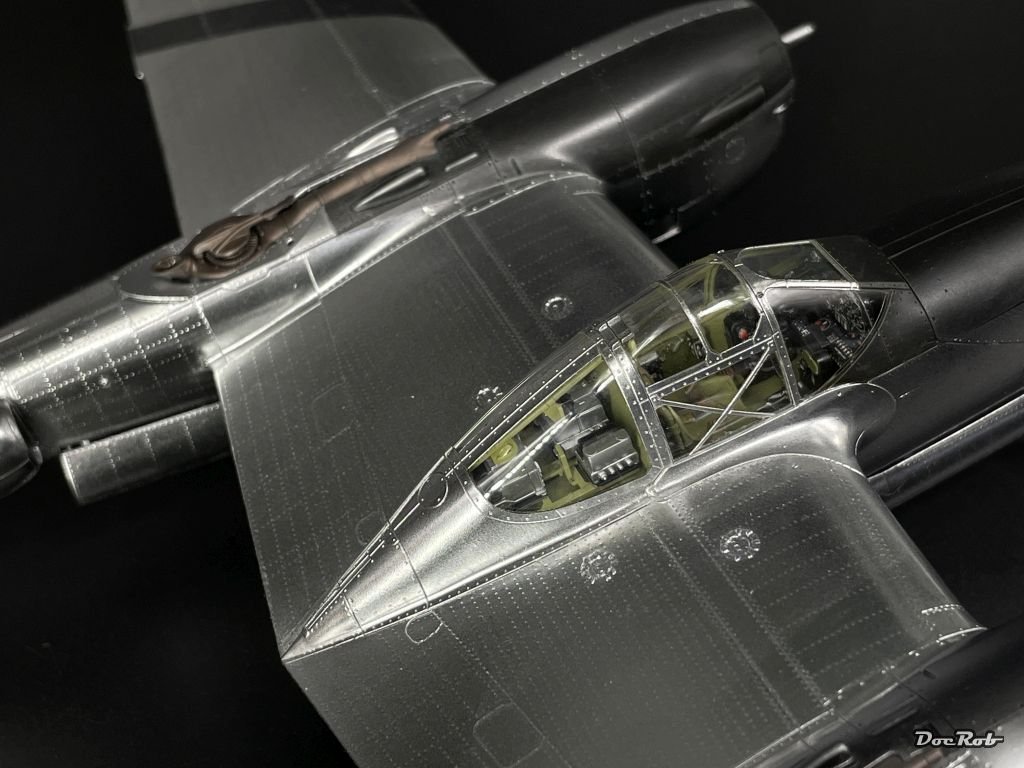
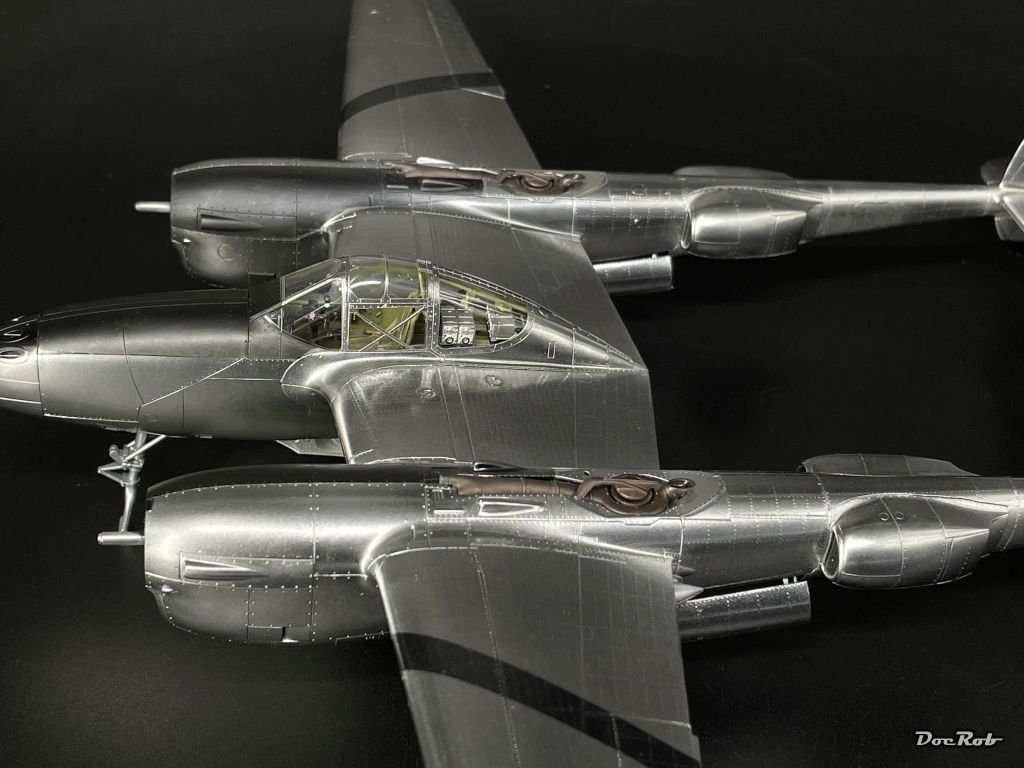
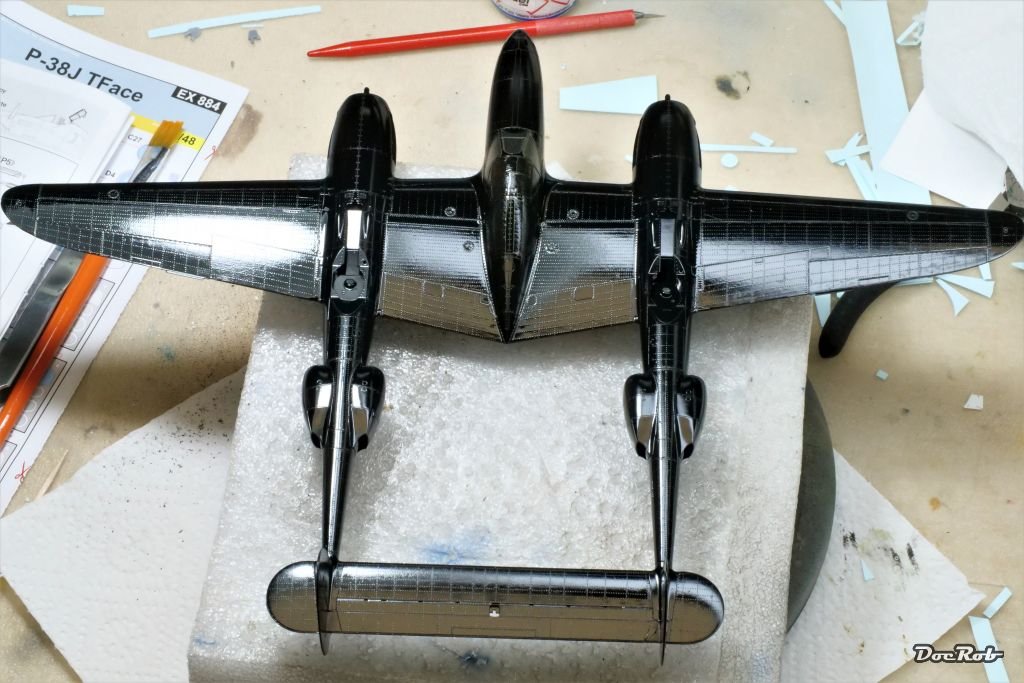
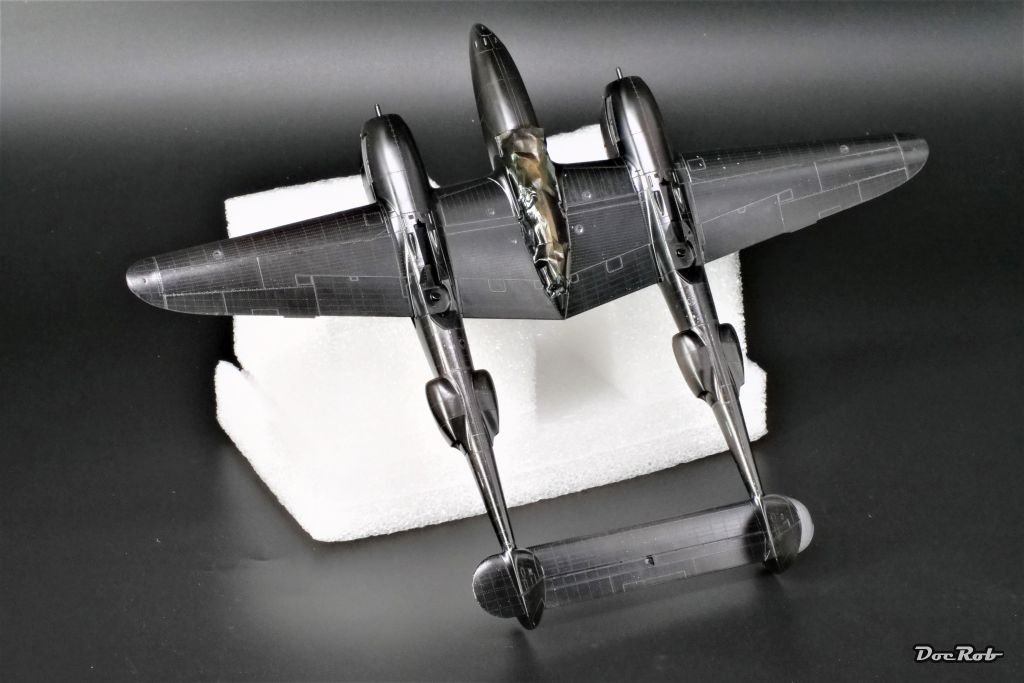
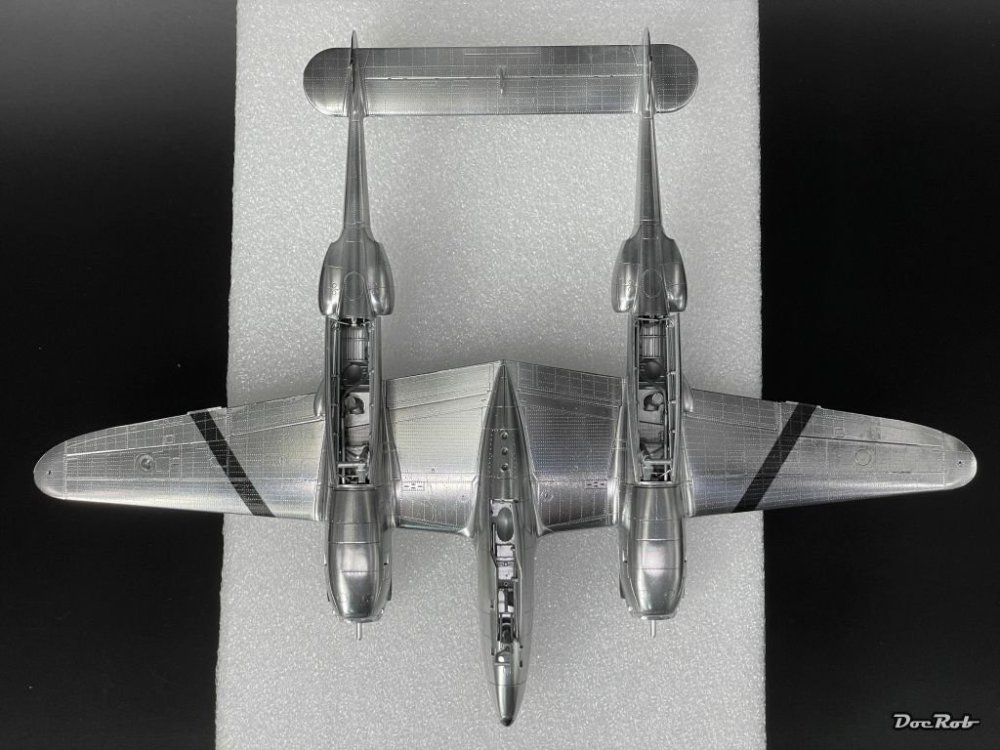
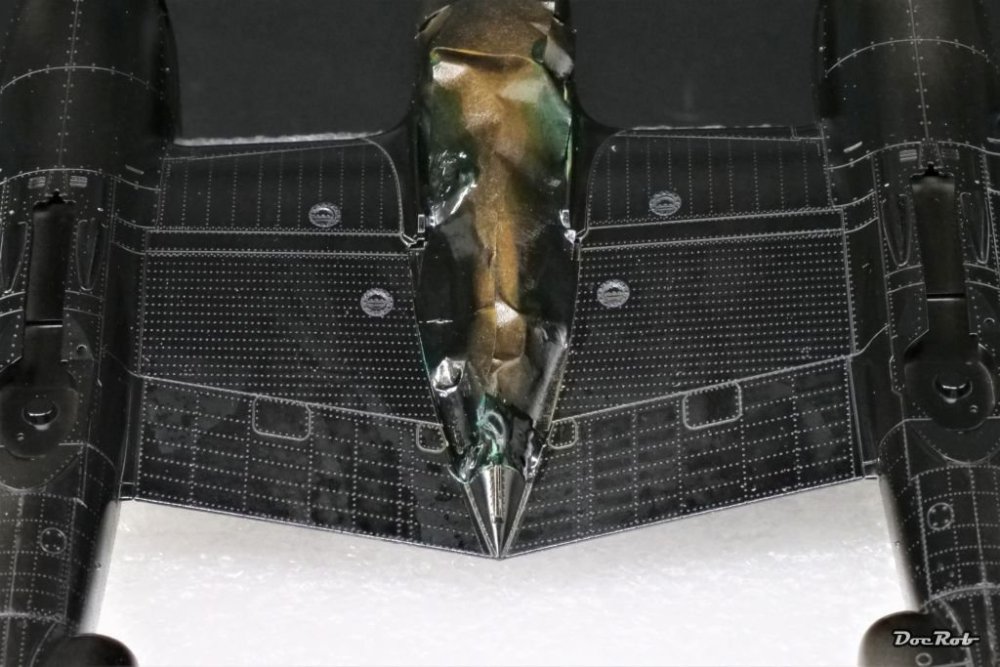
I added a lot of bits and pieces, like landing gear, landing bay doors, counterweights, air intakes and the turbo chargers, which were sprayed with Alclad's exhaust manifold beforehand. Now there are only missing guns, props and wheels and foremost decaling of course, but this is for after my vacations. The canopy masks were removed and there is only one slight spot, where the paint fumes stained the clear part from the inside. I decided to close the canopy, because I don't like the looks of the open one, totally disturbing the slender shapes of the P-38 Interestingly, my Iphone was able to capture the shining Lightning better than my camera. Cheers Rob
- 72 replies
-
- 13
-

-

-
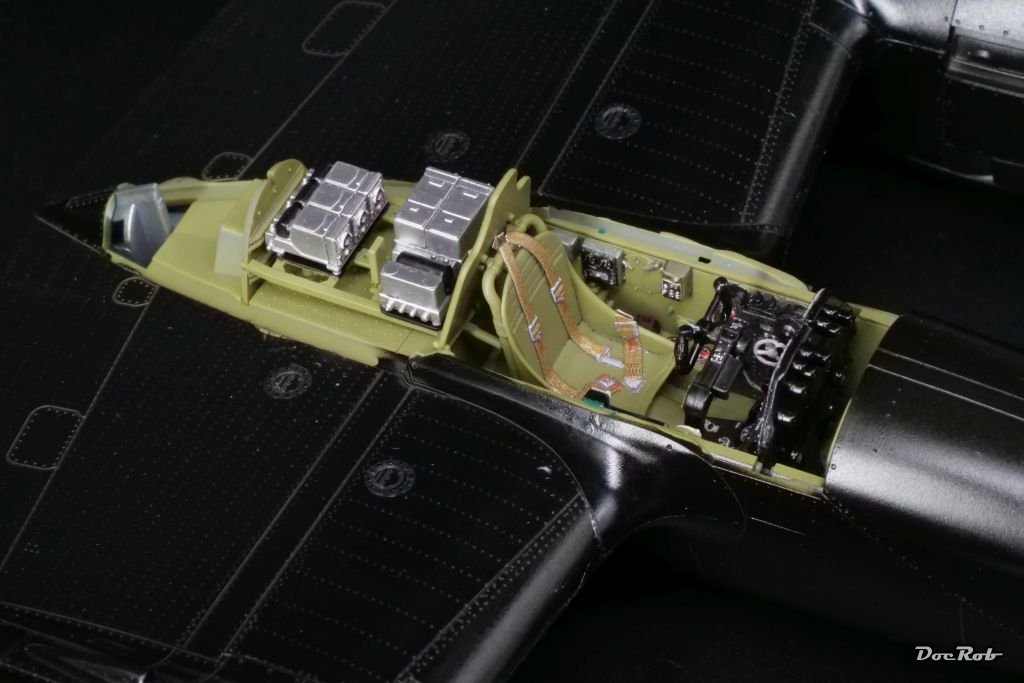
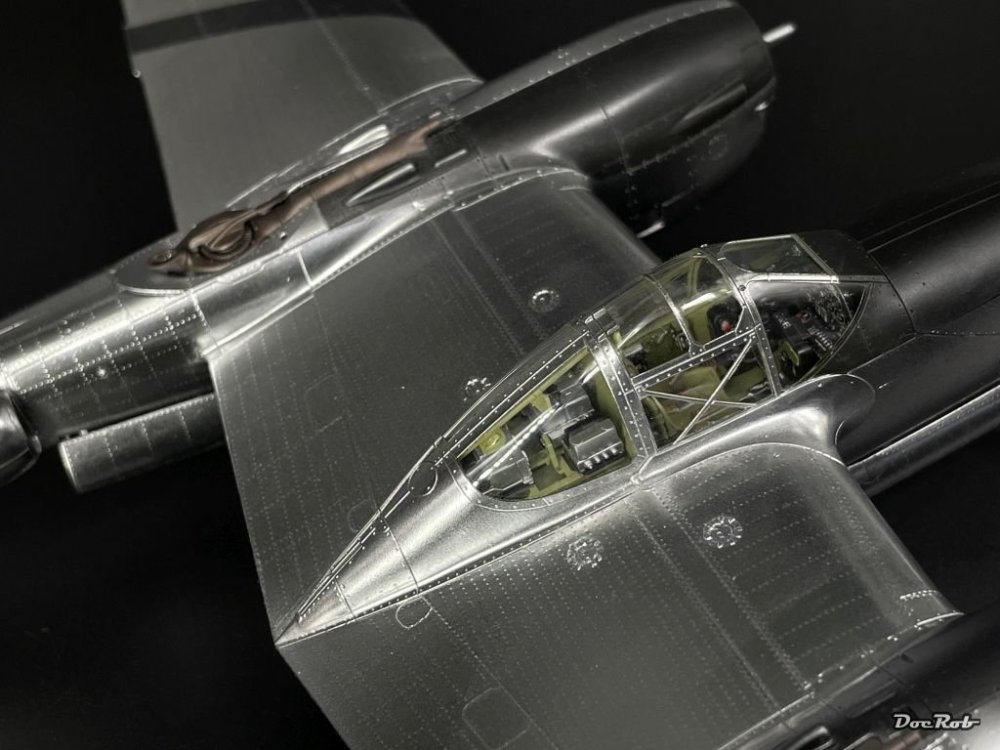
Thank you Peter, the NMF looks spectacular, but there are some tiny flaws as well. I managed to overspray the fingerprint, I found and polished over it, to blend the color. There are tiny imperfections here and there, but in all, I'm satisfied with the outcome. The Quinta sets are good, better than most of the Eduard IP's ,but I prefer Yahu IP's, at least, when they are correct (not always the case) The belts look a bit like what they are, plastic. To be fair, without a macro lens and through the canopy they look ok. Cheers Rob
-
Thanks Martin, the look is even better to the real eye, I tried to capture it under different light settings, but got meh. Unfortunately, I found a fingerprint, which was hidden onto the base layer. I tried to rub it away with some chrome pigments, but failed. I will try to overspray the area gently. Cheers Rob
-
Came out great Kevin, I like the unusual markings and the mottling looks good too. Cheers Rob
-

Renault RE20 Turbo - Tamiya - 1/12
DocRob replied to DocRob's topic in LSM 1/35 and Larger Work In Progress
Thank you Phil, you should do yourself the favor and build one. Some are available as re-pops with fantastic Cartograph decals. It's an interesting project for a change. Cheers Rob -
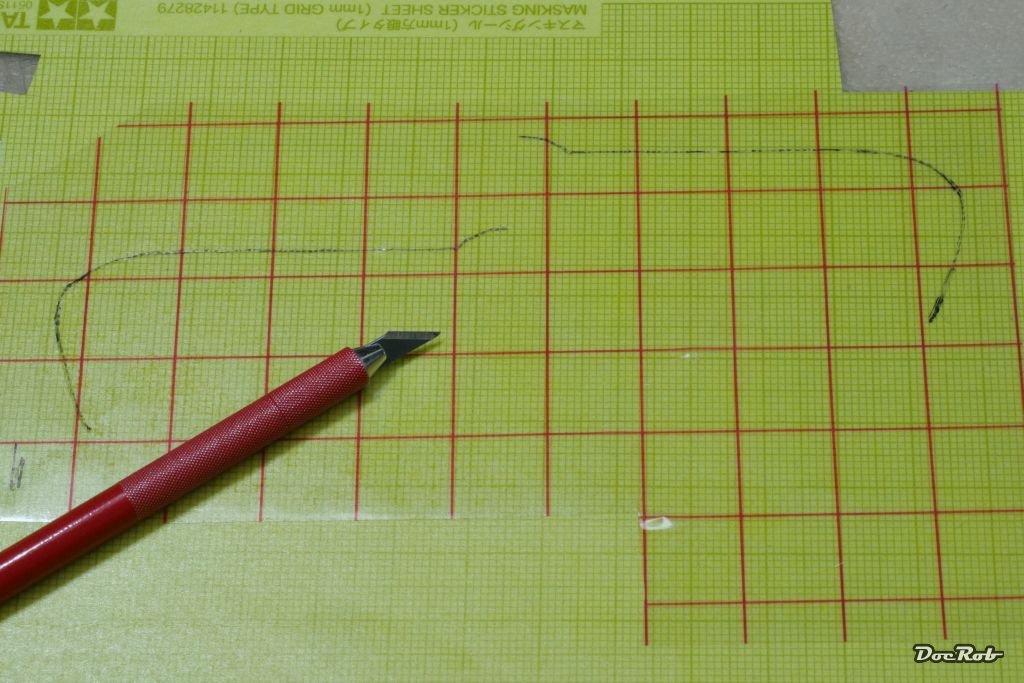
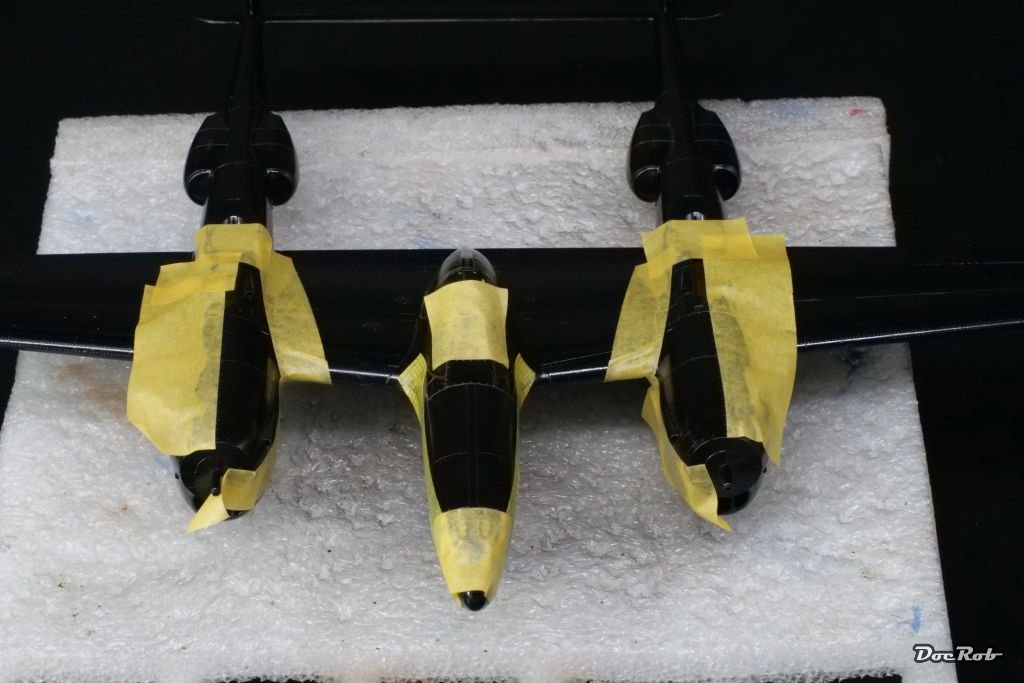
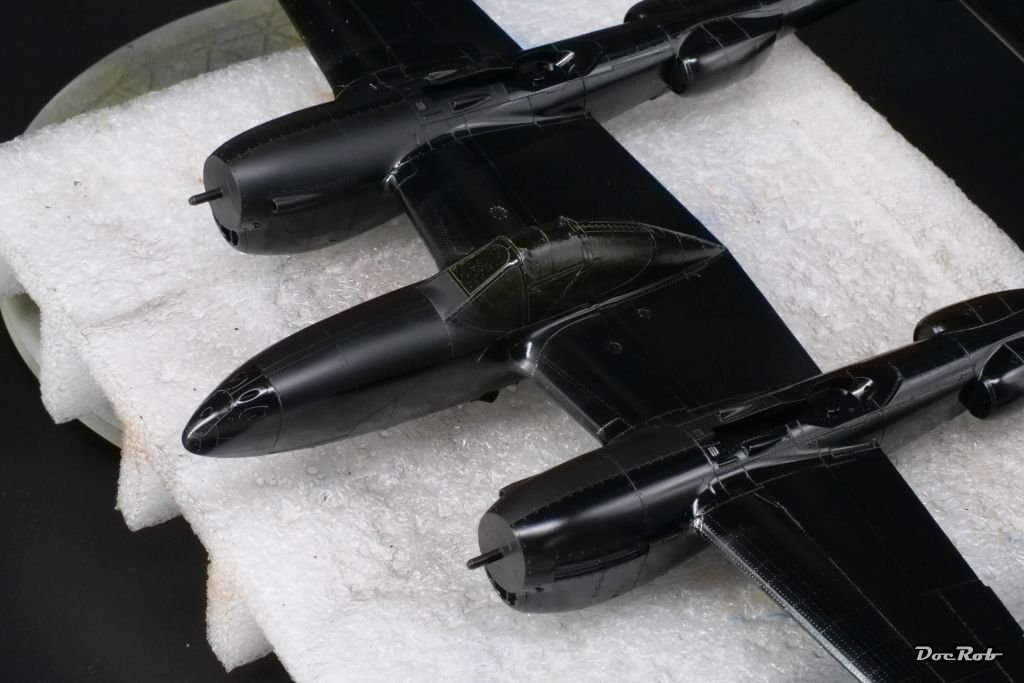
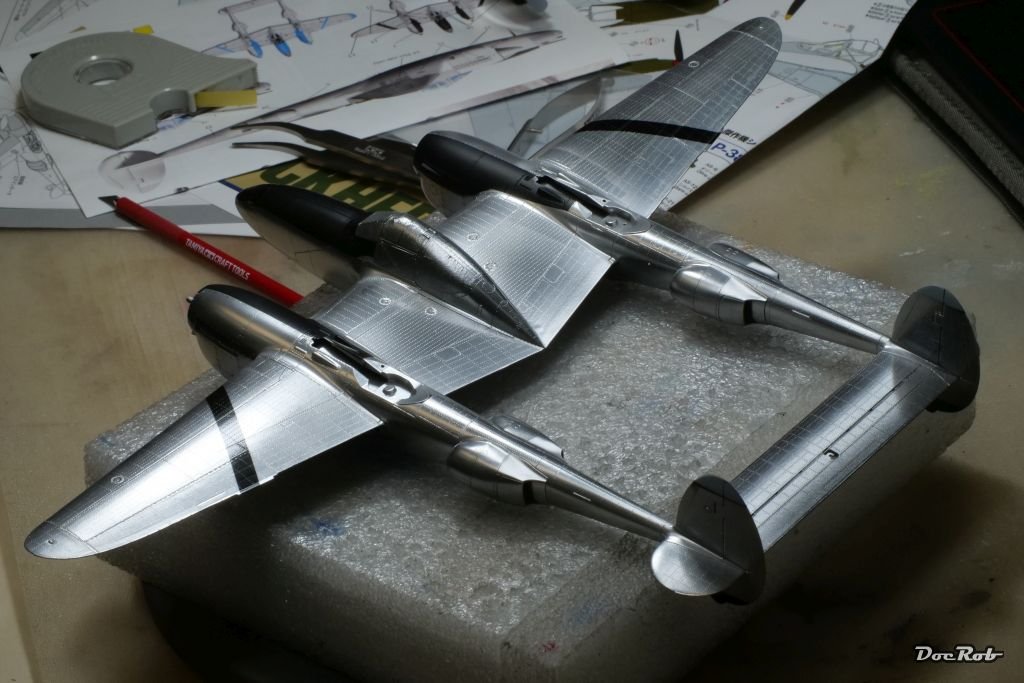
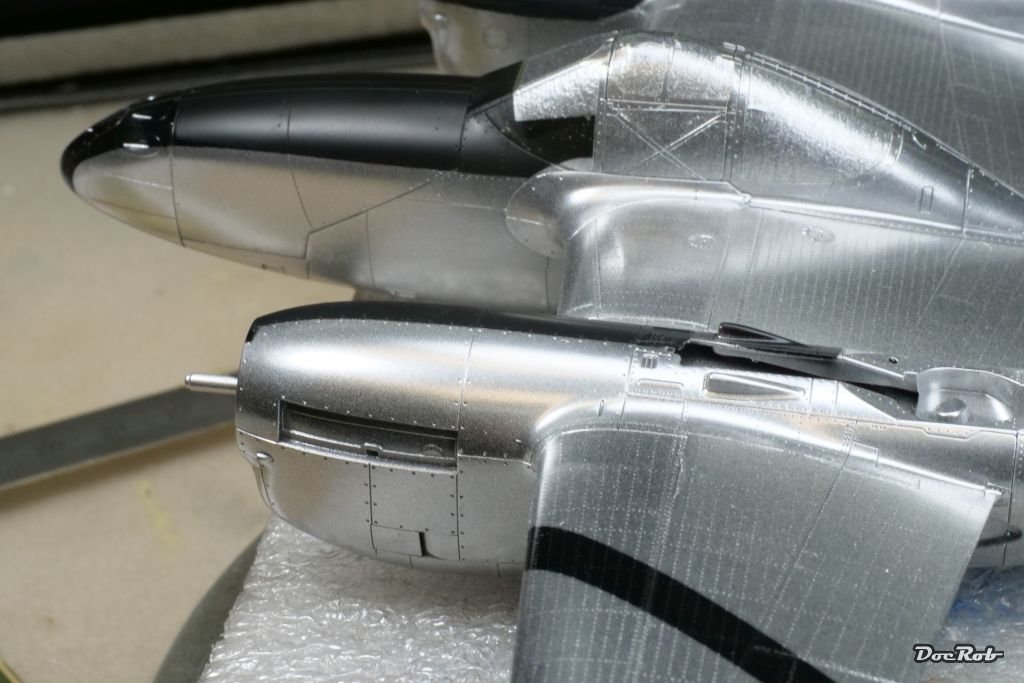
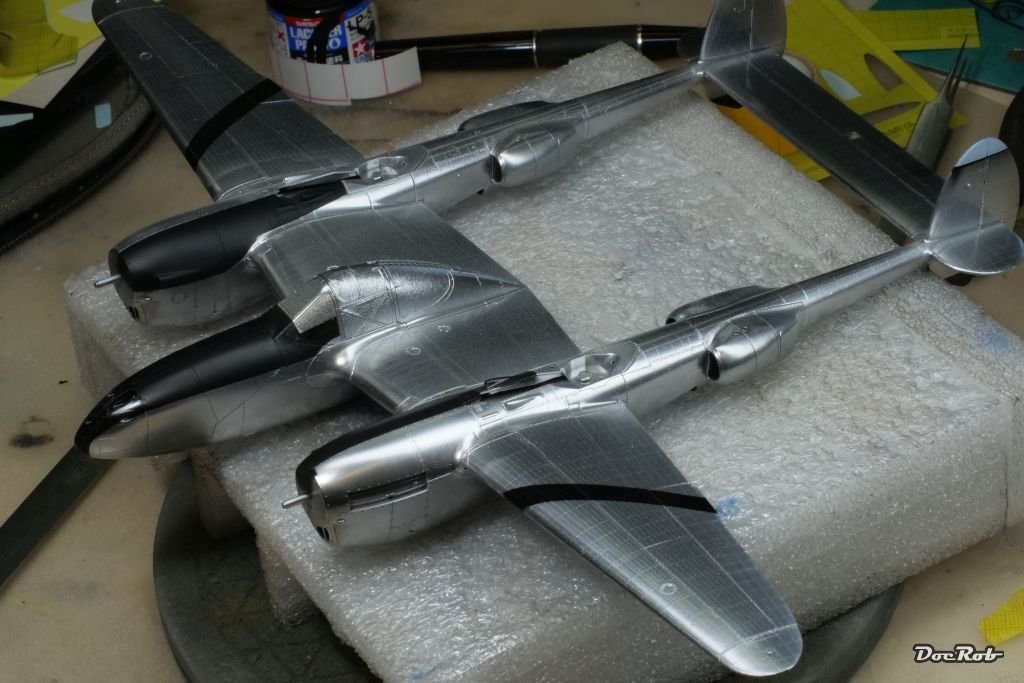
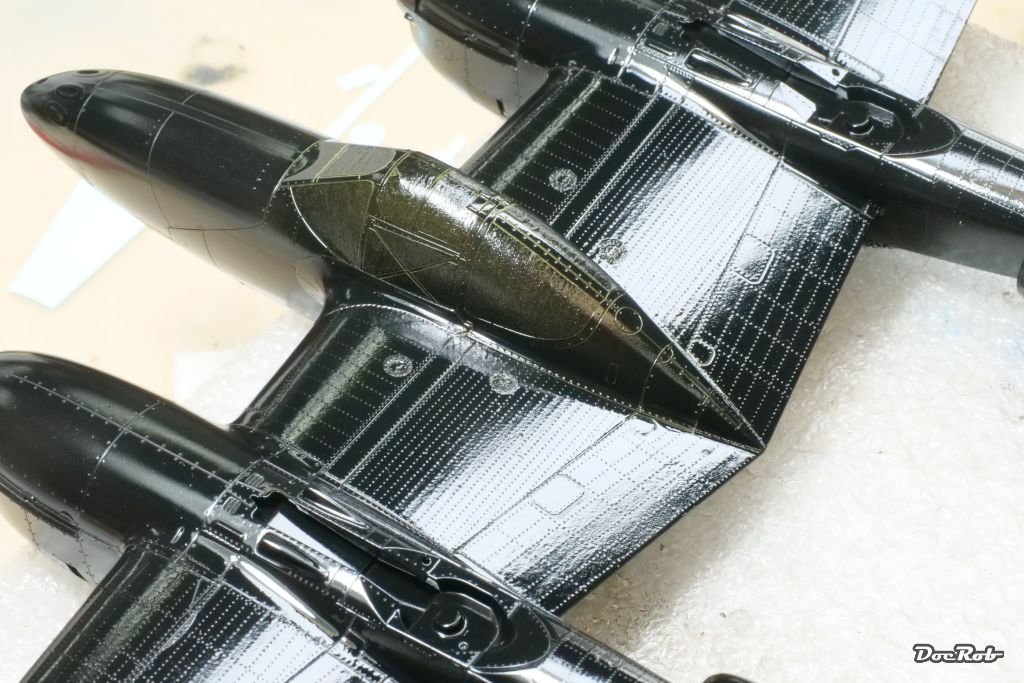
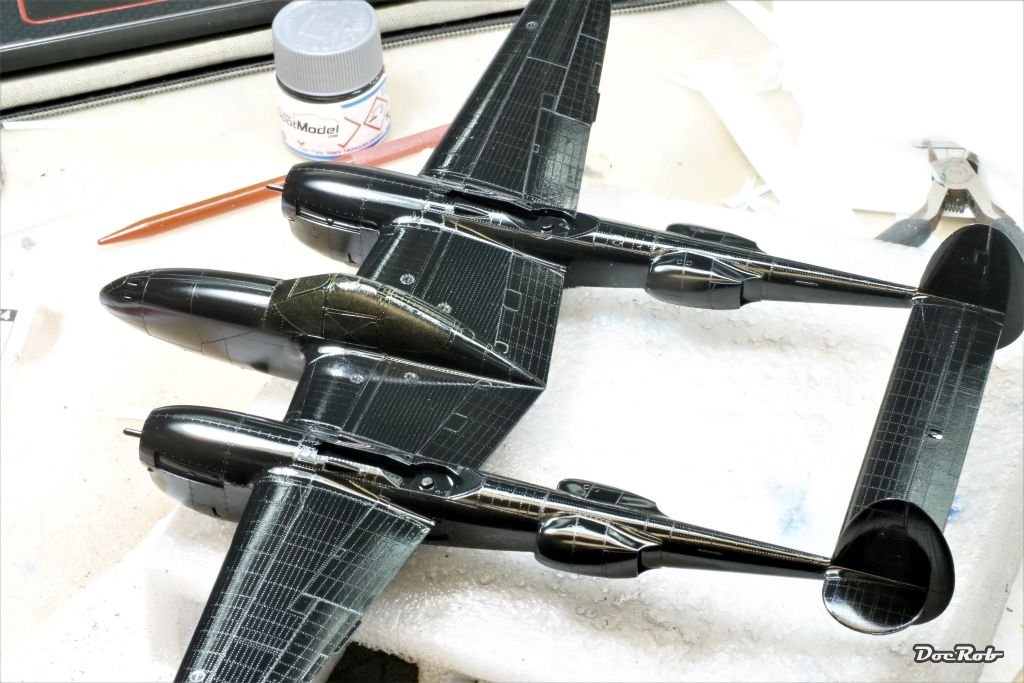
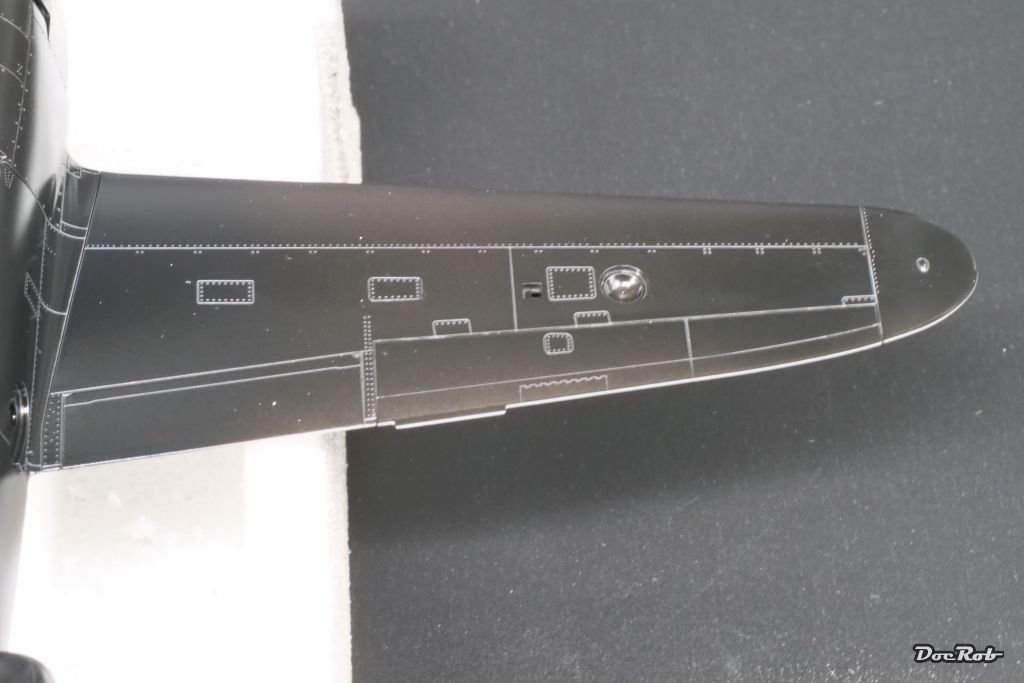
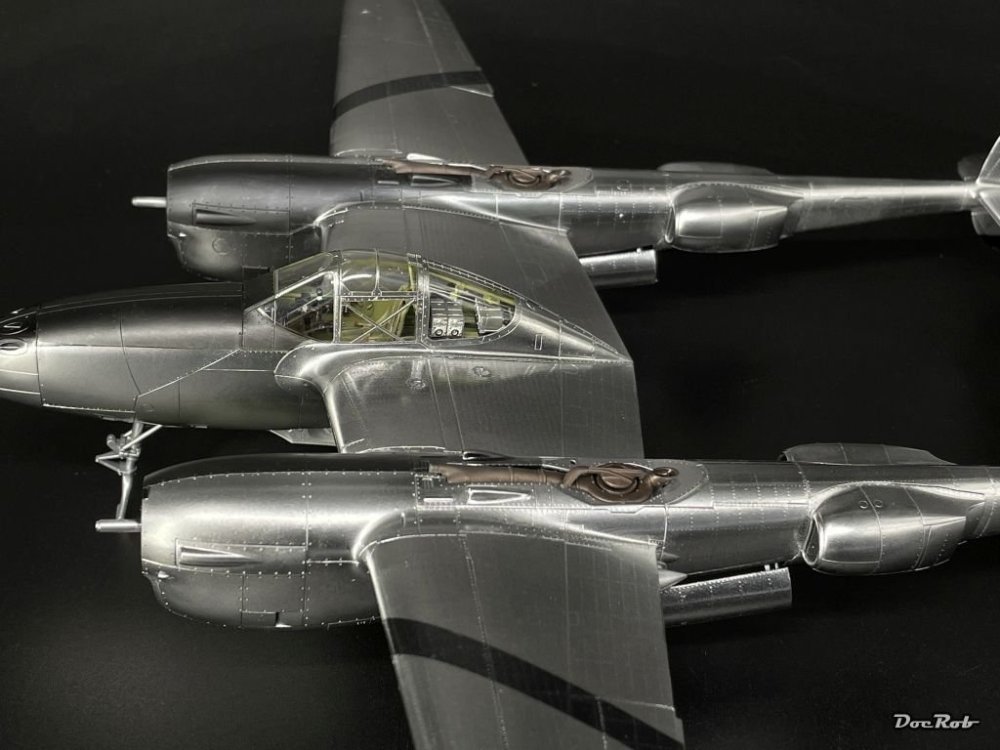
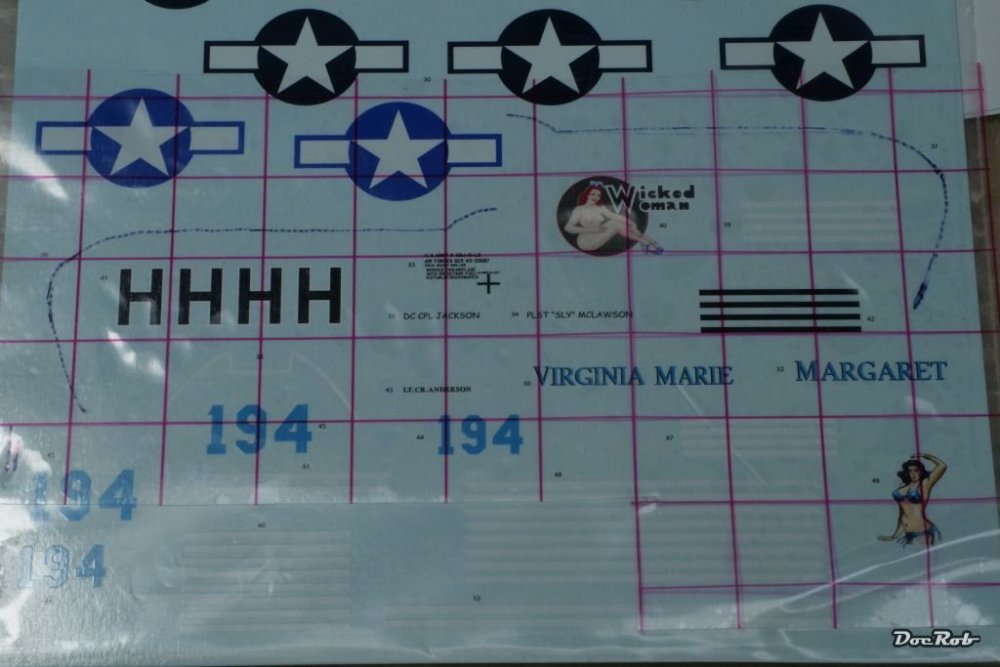
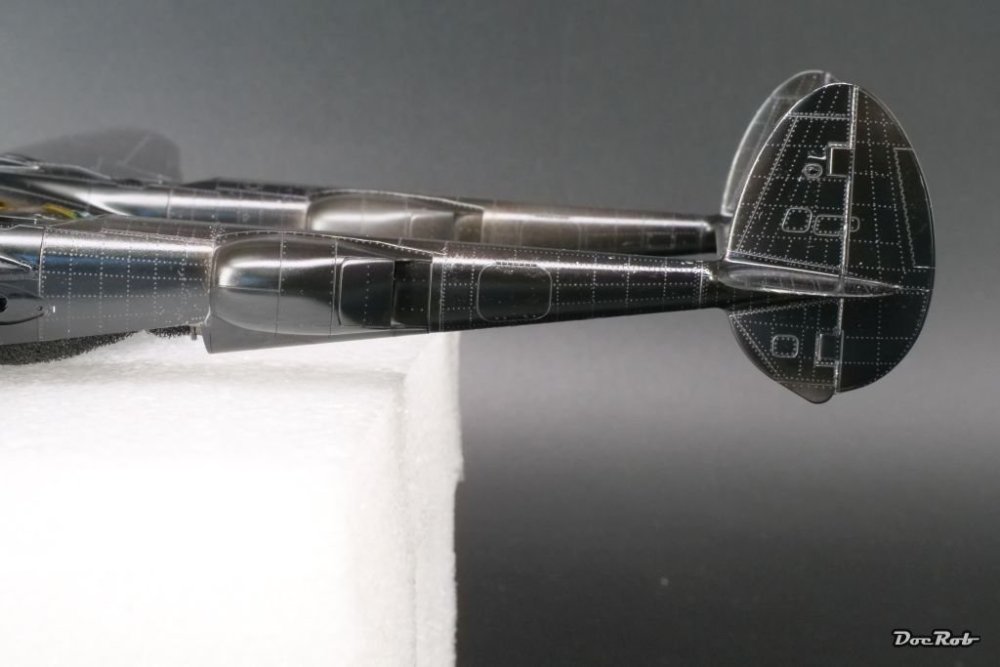
It's getting serios now, with the gloss black base cured, it was time for the polished Aluminum, but not before I airbrushed the anti glare panels. I went the hard way of double masking, first the outside, to not spoil the gloss surface and after spraying Tamiya LP flat black, again the flat black areas in preparation for the polished aluminum. The mask for the front area was particular delicate and I used the bordering white decal as a master and marked the contour with a pen onto transparent foil. This was transferred onto a sheet of Kabuki and traced with a scalpel blade. Now I had a positive and negative mask for both sides. Masking of the matte black anti glare panels. Finished anti glare panels Everything was masked again (anti glare panels, wing stripes and tailwing stripes) and then sprayed the whole airframe with Alclad's polished aluminum, which I liked a little better than AK's after some testing. Similar to chrome finish, I carefully misted the polished aluminum on with a pressure of about 1 bar. There is a point, where the blackness of the base disappeared and after that the look will get worse. I had minimal amounts of overspray from the anti glare panels, also black, but barely visible (black on black ) , but the Alclad finishes a tiny bit different. I can'd o anything about it, but to remember, to have a absolute equal shiny base layer for future projects. The high shine polished aluminum is hard to capture, I tried it in the booth, on the bench and outside, but none of the pics comes close. I will try to capture better pics soon, but here is where I am. Cheers Rob


- 72 replies
-
- 13
-
-
-
1:32nd scale Hansa-Brandenburg W.12
DocRob replied to sandbagger's topic in WW1 1/48 and larger Ready for Inspection
Very nice build and display again Mike. The Hansa Brandenburg is a very attractive plane with the naval hex camo and your dynamic figures add to the setting. That reminds me, I have to make the dio plate for mine, plane and figures (one of them is the same like one of yours) are ready since a long time... Cheers Rob -
Nice choice, I hope you do a WIP Paul. I have a SU-85 from MiniArt, which has over 700 parts and 100 more in PE, but in 1/35 . I had difficulties to get the many sprues back into the box. Cheers Rob
-
Renault RE20 Turbo - Tamiya - 1/12
DocRob replied to DocRob's topic in LSM 1/35 and Larger Work In Progress
Thank you Paul, the paint scheme was not overly difficult, but involved a lot of masking. I don't like the car itself too much, but the paint scheme adds a nice vivid spot in the display shelf. The old Tamiya kits are demanding, but not overly hard to build. You only need some patience for clean up and finish. Only yesterday, I added the last missing part to the body. There was a blister, I somehow mislayed, but found it recently. It was nagging me, but now I can shelf the Renault. Cheers Rob -
What is on your bench right now ? Share a picture :)
DocRob replied to Martinnfb's topic in Modelling Discussion
Nice Carl, battleships, or something like it and no PE railings to fiddle with . Cheers Rob -
Muchas gracias Chris, air or water bubbles wer not really a problem. You have to work 'wet in wet', meaning, let the decal on the soaked carrier film slide carefully into position onto a film of water. The detergent helps, that the water does not pool and cover the entire surface, where the decal has to sit. A damp flat brush helps to press the small amount of bubbles away, along with a rubber decal applicator. The problem is sometimes, to see the bubbles, with black rivets over gloss black surface, but if you plan other than NMF, you can chose another base color. Cheers Rob
-
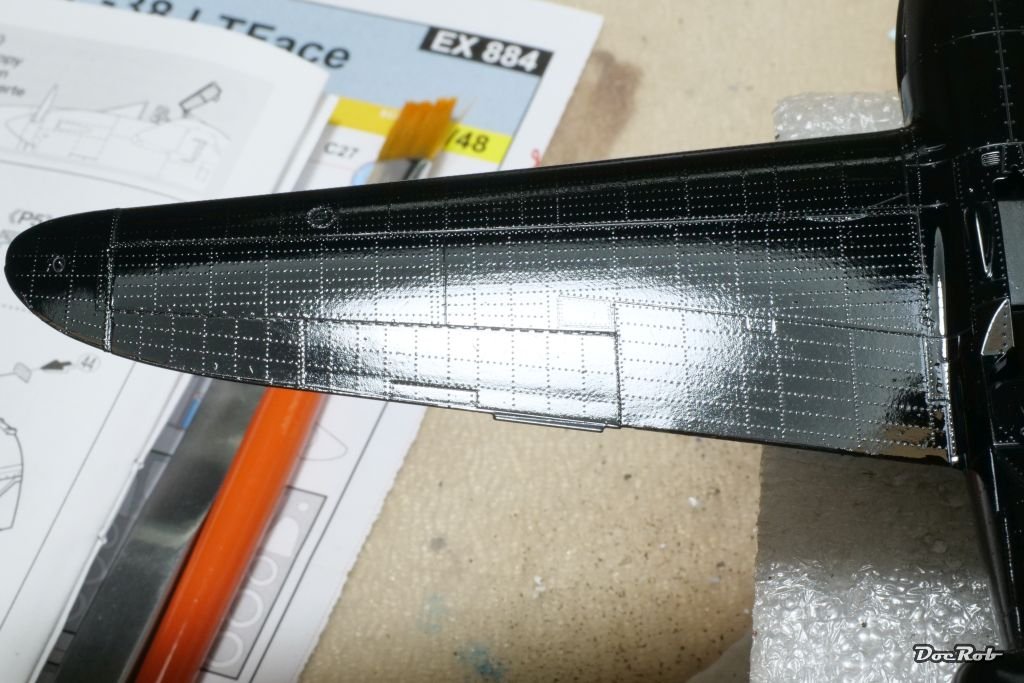
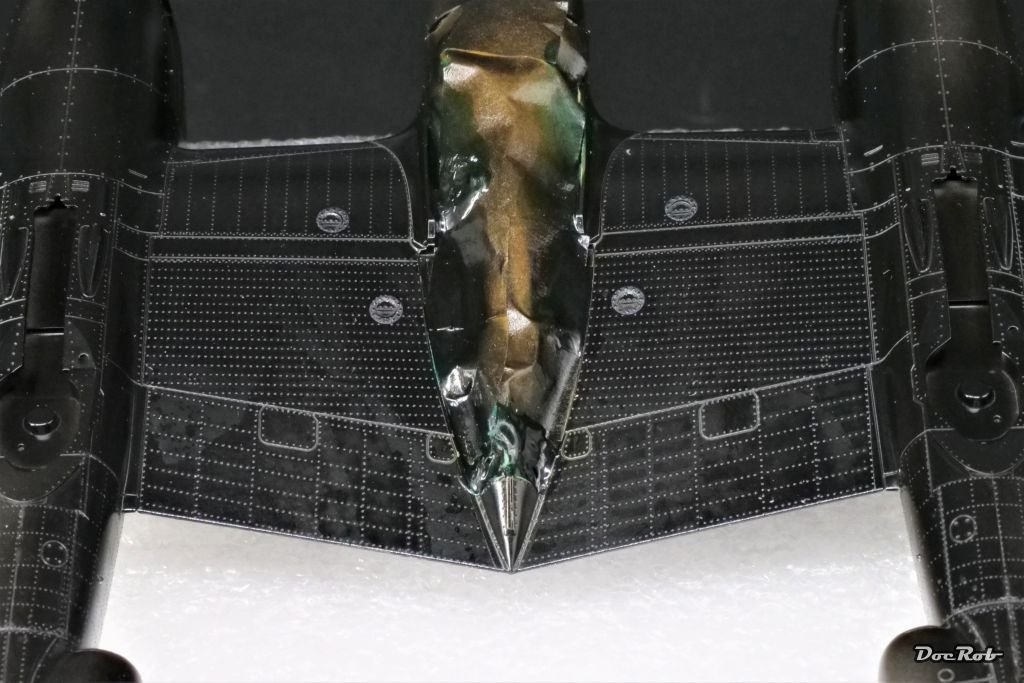
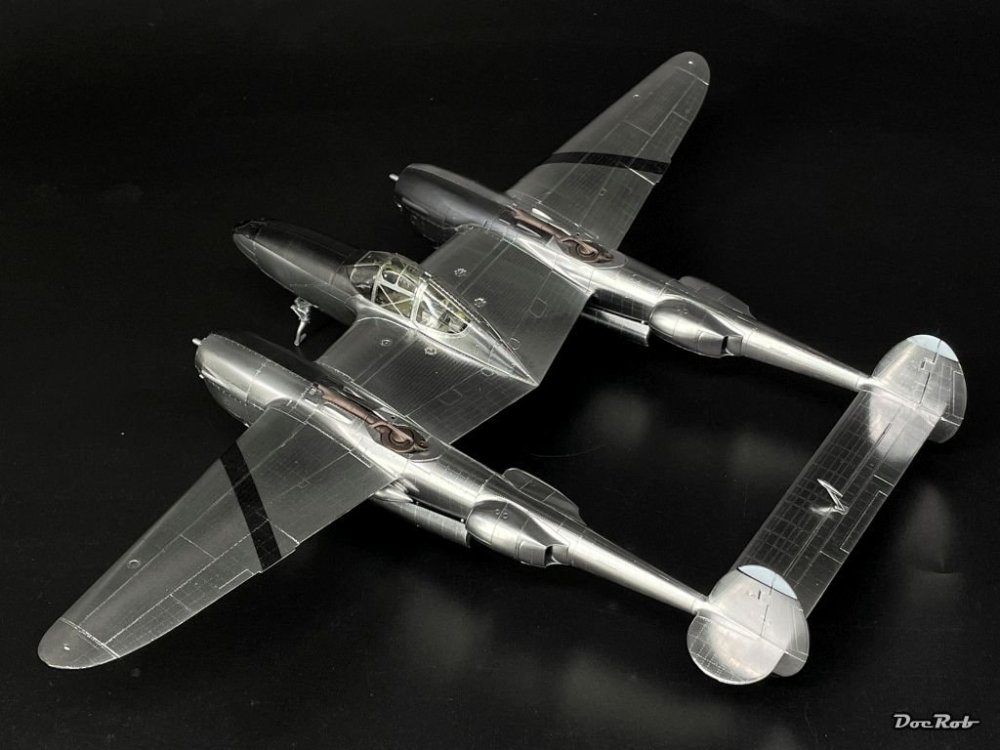
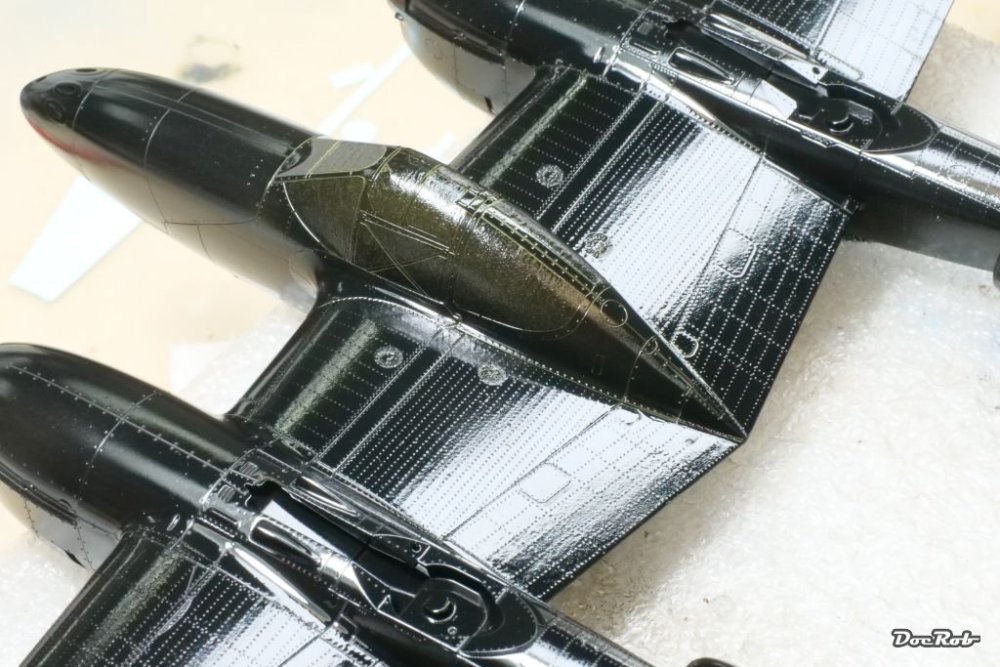
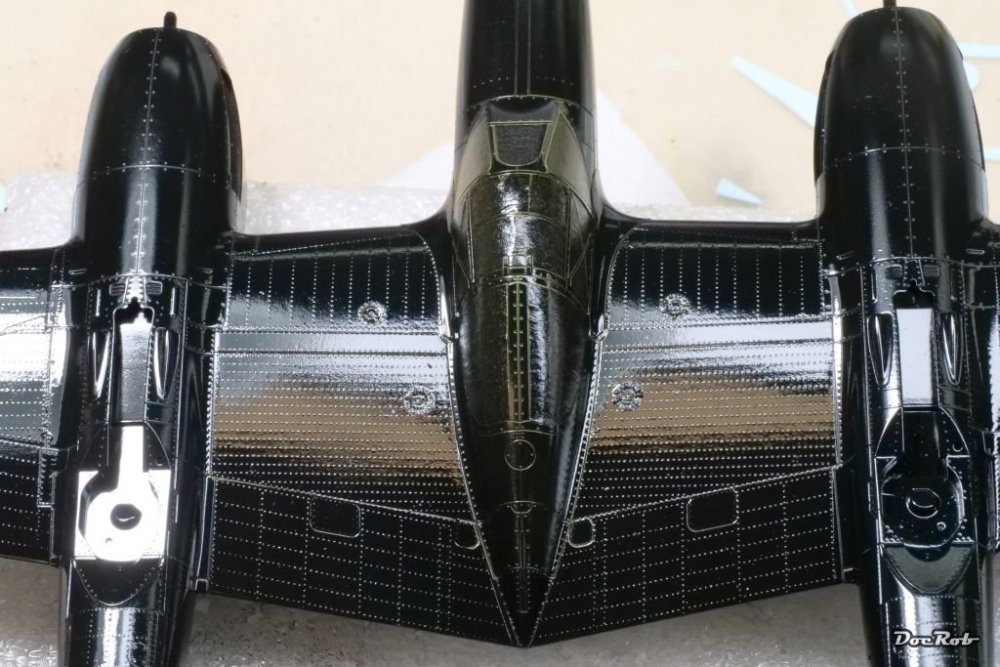
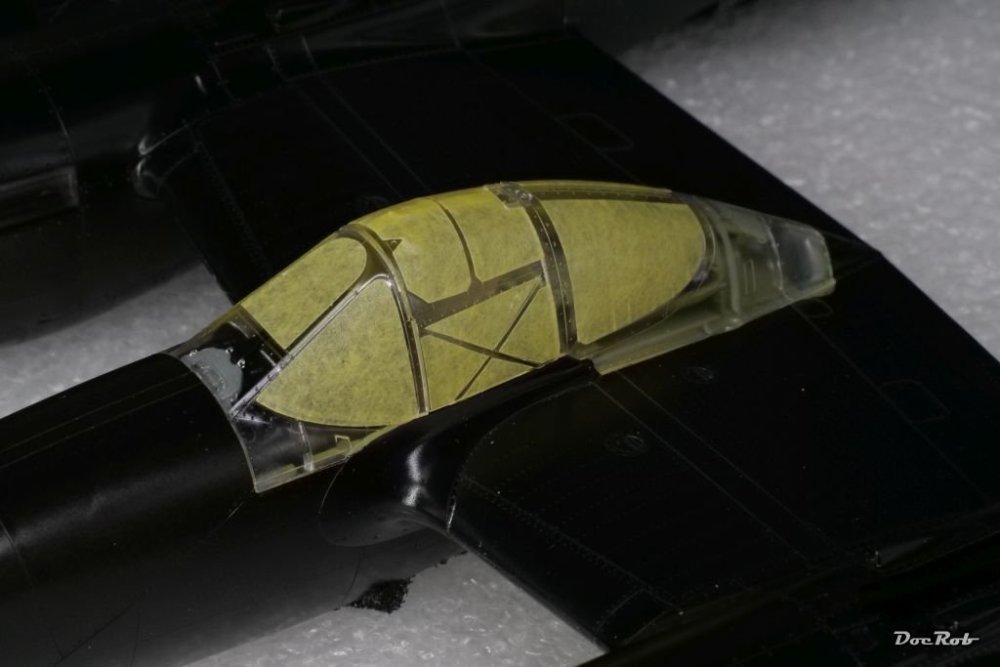
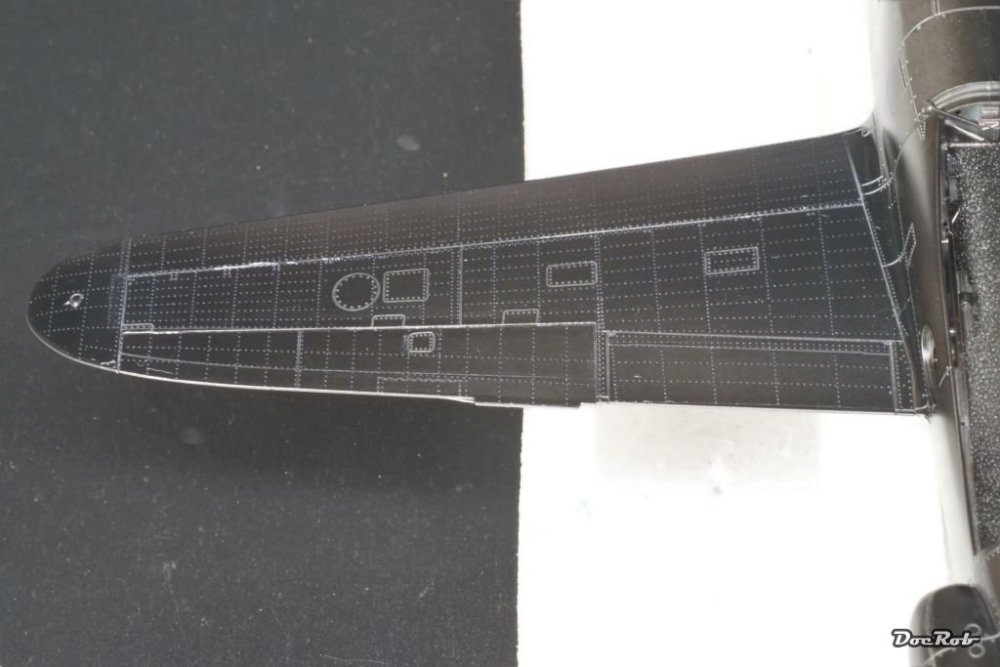
I prepared the P-38 for polished aluminum with a coat of gloss black over the rivets. Tamiya's LP-1 worked again flawless, highly thinned sprayed with about one bar of pressure. Luckily the Eduard rivet decals seem to withstand the sprayed on chemicals. The plane has some gloss black stripes on tail and wings, which will be masked before spraying polished aluminum. Same goes for the matte black anti glare panels, which will be tedious to mask. Luckily those are in areas without rivet decals under them, so masking will be a bit less of a risk. In any case, polished aluminum should be the last layer, before decaling, I will not risk and harm the shiny surface. Before airbrushing black, the canopy received a coat of interior green and I hope, I will have no fogging issues due to lacquer fumes, always a risk. It's hard to capture the high gloss surface with rivets on photos. Cheers Rob


-
Thank you Chris, I think, the kit can be build without extra rivets beautifully, especially under olive drab and grey. For me it is more of an experiment, how riveting looks under polished aluminum. The Quinta seatbelts are not up to HGW, but to be fair, without a macro lens they look ok at least. Cheers Rob
-
Thank you Phil and Peter. The riveting changed the appearance of the plane a lot. Let's see, how the color layers on top will show. Phil, I only used lukewarm water with some drops of detergent mixed in, like Eduard suggests. I pushed the cut decals onto a sponge soaked with the mix and after a few seconds, the decal moves easily. The plastic surface was brushed with the same mix and the detergent hindered the water to pool. After application, I used another dry sponge to press water and air bubbles out, followed by passes with a wet flat brush and rubber decal applicator. I will never use AK's black base again, as it never really dries. Even after days, it is still tacky on the surface, in one word, the stuff is crap. I use Tamiya LP-1 gloss black instead, which sprays perfectly and dries fast and rock hard, mixed with about two thirds of leveling thinner. Cheers Rob
-
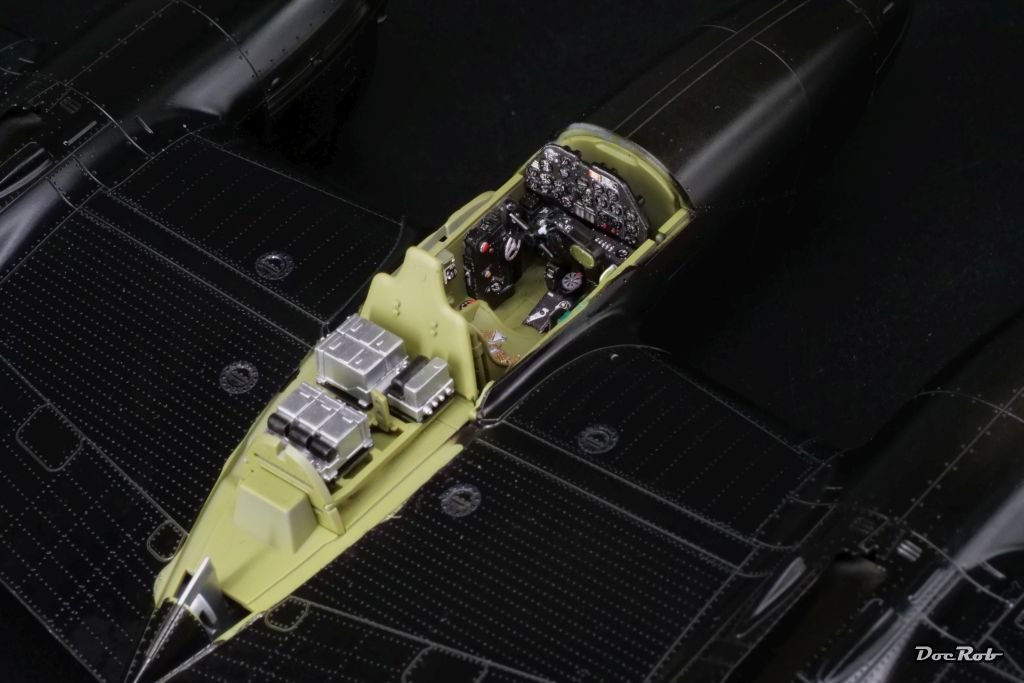
I finished the riveting today and have to say, fitting of the rivet decals is near perfect. I ran into a bit of trouble on one of the tail booms, where two decals met on the upper and lower side. They overlapped a tiny bit, which made ugly wrinkles, which I couldn't sort out completely. I will see, what I can do about it after they are thoroughly dried. The good preparation payed off, the decals glided lightly onto the surfaces in general. Tomorrow, before spraying a new black base layer, I check for tiny bubbles, which I take out by stabbing into them with a needle. I added seat, radios and armor plate into the cockpit, before gluing the canopy in place. The Eduard masks fitted like a glove and before mounting the clear parts, there needed to be glued some parts to their inside, like the gunsight and structural bar Last unobstructed view into the cockpit: Canopy glued in place: Cheers Rob


-
I looked for my P-38's supplied decals and you are absolutely right Peter, they look thick and the carrier film is very visible. Tamiya started to work with Cartograph for motorbike and car decals, luckily and it's about time, to do so with planes. I read that the Eduard decals from 23.06.2020 on are of the new type and have only used them once with USS Arizona, where it was hard to peel off the carrier film and the decals were partly lifted doing so. The preparation might not have been meticulous. Before I use them again, I would test them thoroughly on a well prepared spare part. For my -F/G, I bought a set of decals from Xtradecal (#48214), which looks well printed by Microscale Decals. I never used decals from this company and have to add stencils from another set. Cheers Rob
-
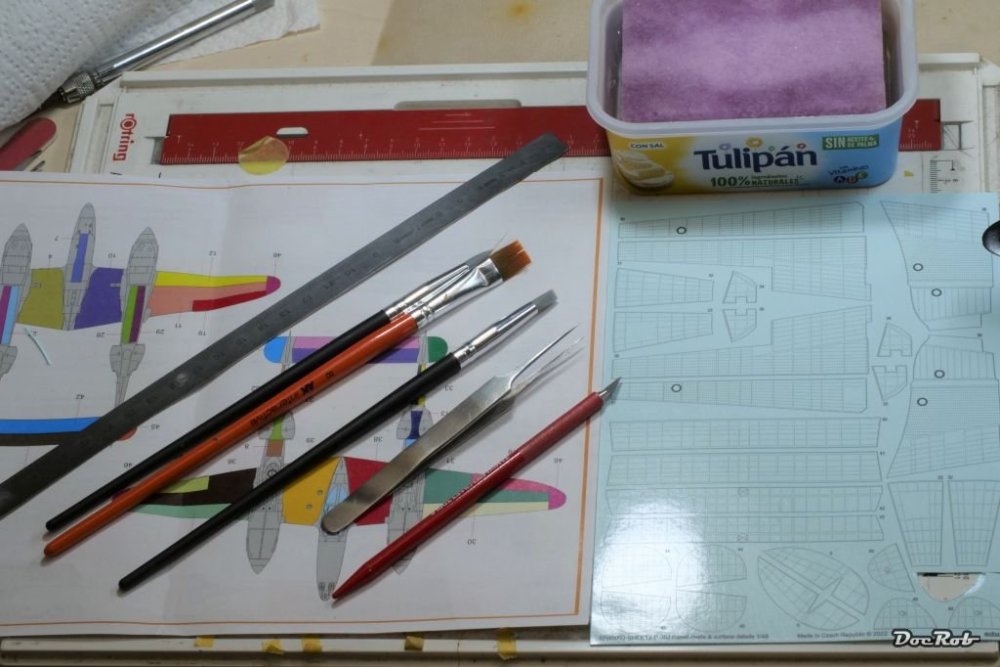
Thank you Peter, now, after having the wings and tail finished, I have a kind of routine with the rivet decals. You have to cut precisely and take a lot of care, while placing the decals. Thy are relatively robust, but they fold over easily on corners and around cutouts. The large flat brush is my best friend, pushing out bubbles of air or water. tiny air bubbles were removed, by pinching them with a sharp blade tip and push down with the said damp brush. I have to say, the rivets are the main reason, I chose to build the P-38, because I was curios how they would be to work with. Cheers Rob
-
Thank you Gary, I hope they will come out flawless with my planned glossy NMF paintjob. Cheers Rob
-
A beauty Peter, seeing yours, make me want to build my -H soon after the -J. Your paintwork looks stellar. I hope, the Eduard decals do the job, are these of the new type? Was there a reason to glue in the turbo chargers. with the -J it was easier to leave them off until finalizing the paintjob. Cheers Rob
-
Well, thank you Martin, I knew it . I was somehow sure, that the pattern of rivets is not perfect and it would be pointed out, but I'm no rivet counter, literally and doesn't even have researched. if the rivets are layed out correctly. I'm more of a 'if it looks about right, it is right' type of guy. Cheers Rob
-
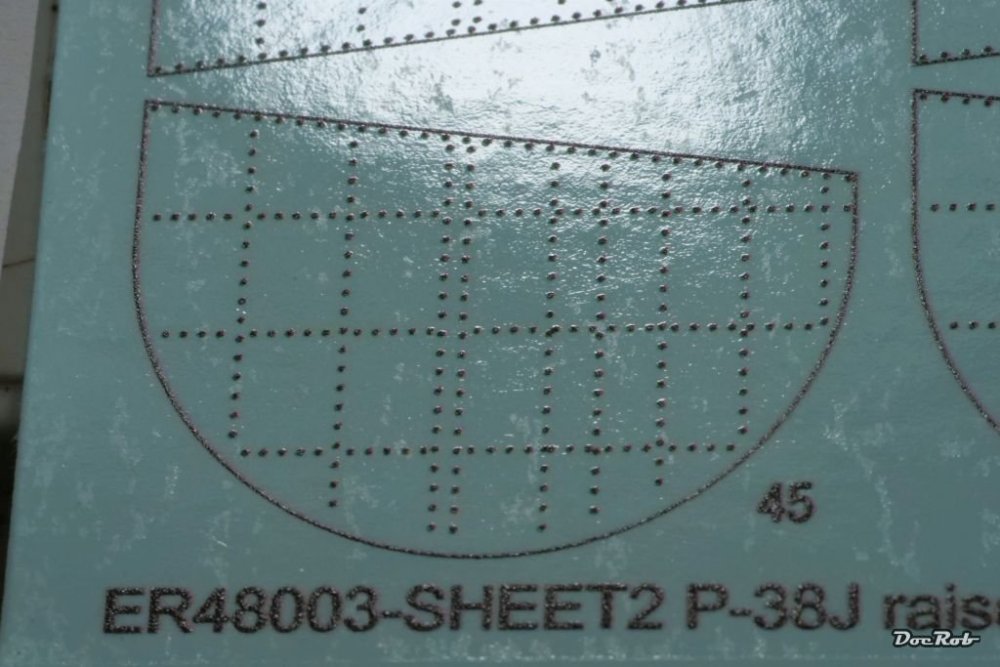
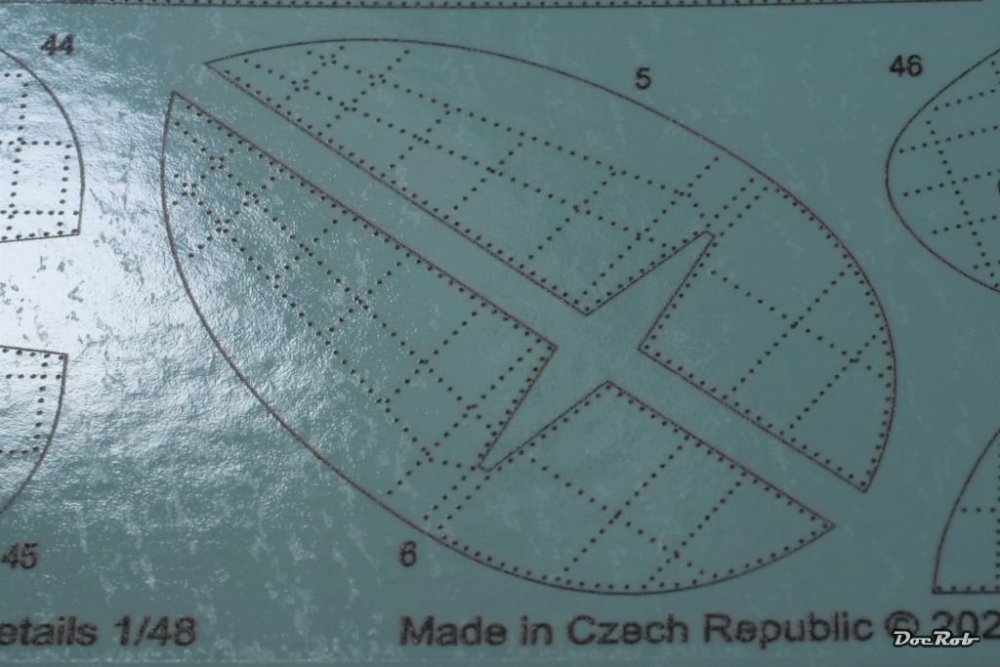
Rob the riveter has been starting to work . I followed the process, described in Info Eduard' May 2022 issue. You have to cut the decal precisely, as the carrier film is covering the whole sheet. Some parts needed to be cut out, where raised details or similar are onto the plastic part. Then the decal is pressed onto the sponge, soaked with water with some drops of detergent mixed in. A few seconds are sufficient and the decal slides off the backing sheet very easily. Placement on the model is critical, but the decals are generally forgiving, except for wrinkles, which are not so easy to remove. After placement, I used a dry sponge to press onto the decal without movement, followed by checking it and pressing more refined with a damp flat brush and rubber decal applicators. Workplace: Before (right wing underside) After (left wing underside) The photo was taken some minutes after application, recommended drying time is 24 hours. The decals with slightly raised rivets, which you can see and feel with the fingertip. In case of the Eduard rivet decals, there is no later lift off the carrier film, like I think is the case with HGW's rivets. Nearly the whole plane is covered with decal in the end and needs another base layer of very fine finishing primer, in my case again Tamiya LP gloss black. Cheers Rob

-
I always hate to see, when bad personal news enter our sweet bubble of modeling madness. I wish you all the best and a speedy recovery Harv. Cheers Rob
-
I checked the decal sheets and manual and there is no HGW branding whatsoever. The manual looks different from the HGW ones I know, but you can't be sure. Eduard explained a bit more thorough, how to work with the rivet decals in their May 2022 issue of Info Eduard. info-eduard-2022-05en-ma.pdf Cheers Rob