DocRob
-
Posts
7,043 -
Joined
-
Last visited
Content Type
Profiles
Forums
Events
Gallery
Everything posted by DocRob
-
Two weeks ago, we had our share of the Canadian fires here on the Canary islands. The jet stream was working perfectly and we had a burning smell in the air and lots of dark particles on the ground. Since then, there was a large fire on my neighbor island, but the situation is going for the better slowly. Cheers Rob
-
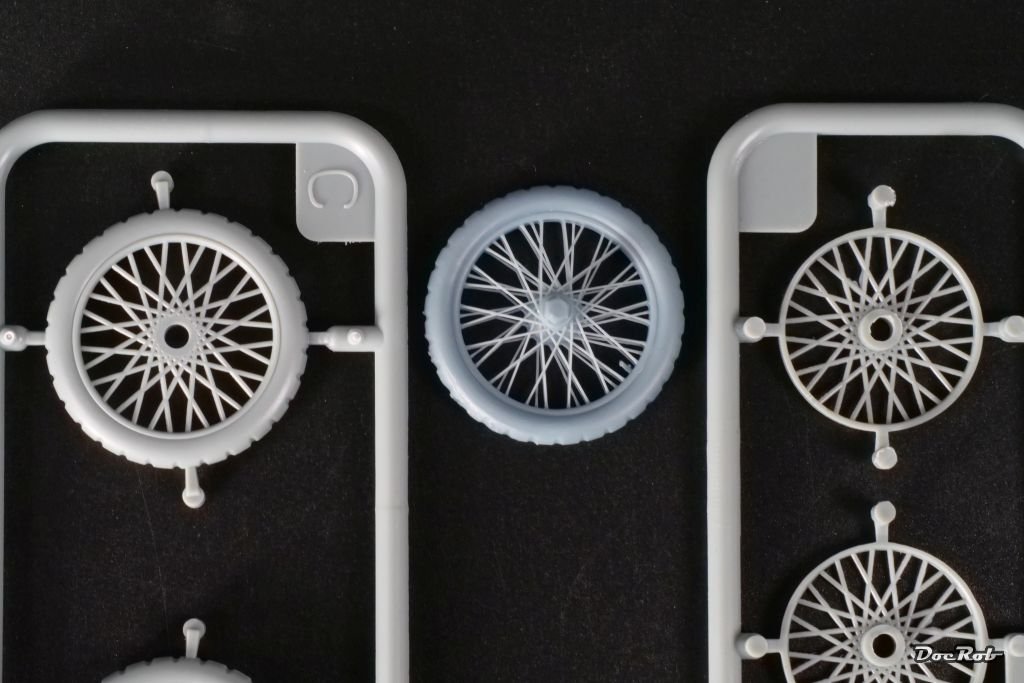
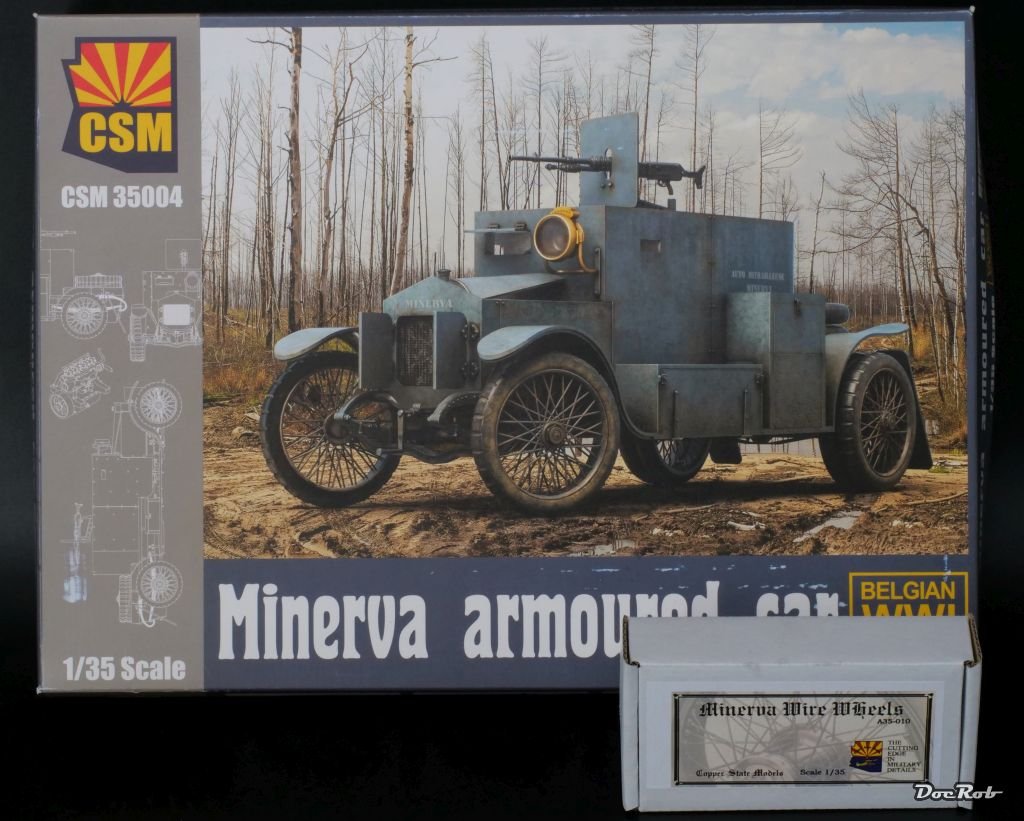
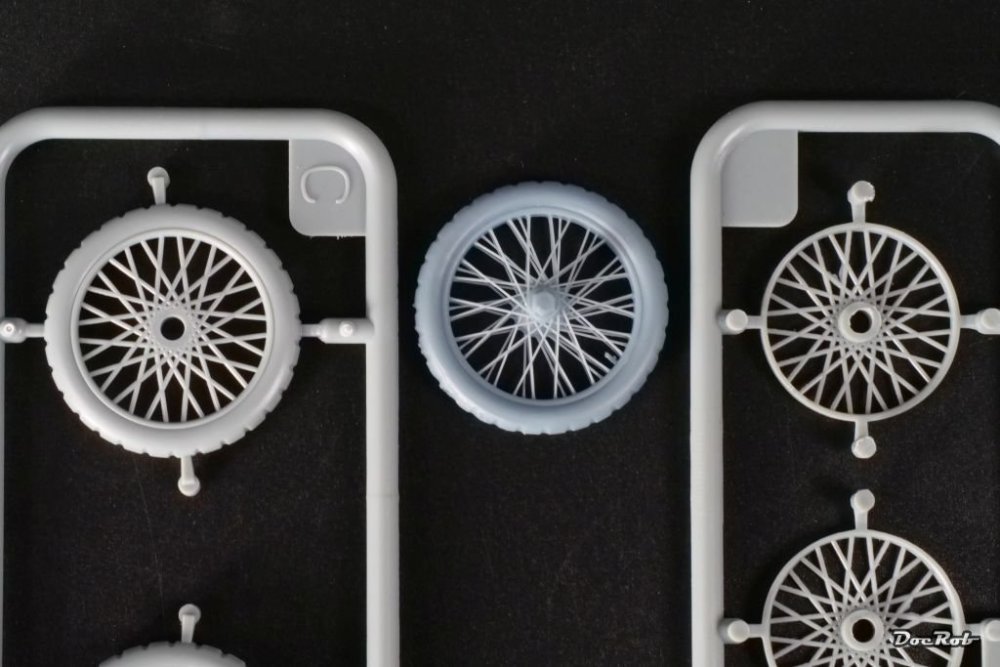
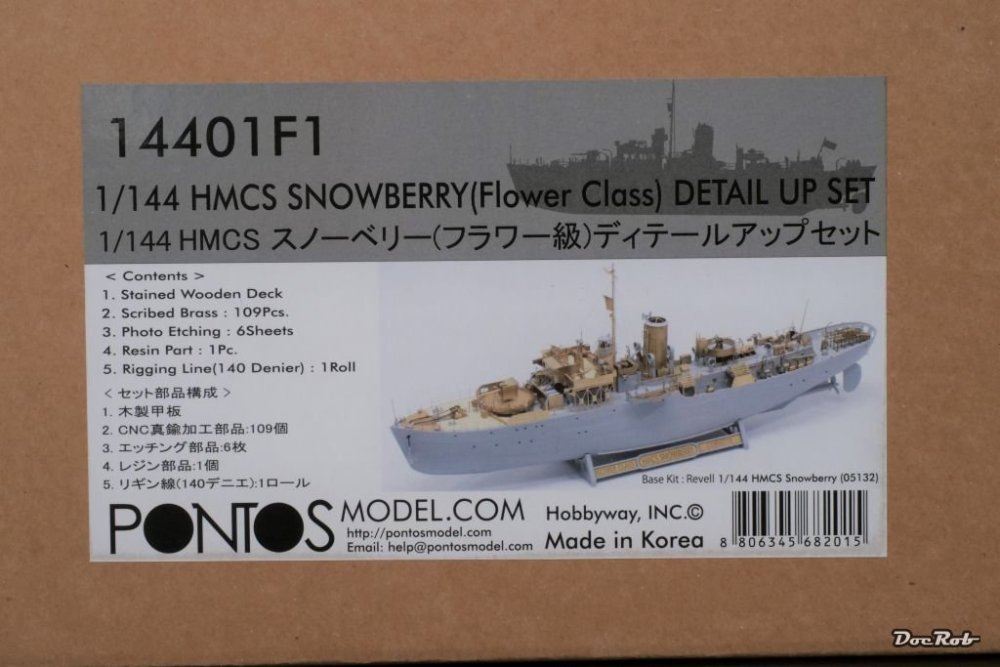
Today, the postwoman cared to stop in front of our house and cared to leave some long awaited deliveries. I own the Revell HMS Snowberry Flower Class Corvette kit since some time and tried to lay my hand onto a Pontos detail set. After two month, it finally arrived and since my sanity is halfway rebuild, after the delicate USS Arizona build, this will be a new adventure in brass-land. Do you need extra resin wheels for your Copper State Minerva car, you have to decide for yourself. For me it was easy, since adding the wheels to the Pontos set, made the shipping free, which about equals the price of the wheels, but they are gorgeous. Comparison with the kit supplied wheels, which are not bad for styrene molding. Cheers Rob

-

Renault RE20 Turbo - Tamiya - 1/12
DocRob replied to DocRob's topic in LSM 1/35 and Larger Work In Progress
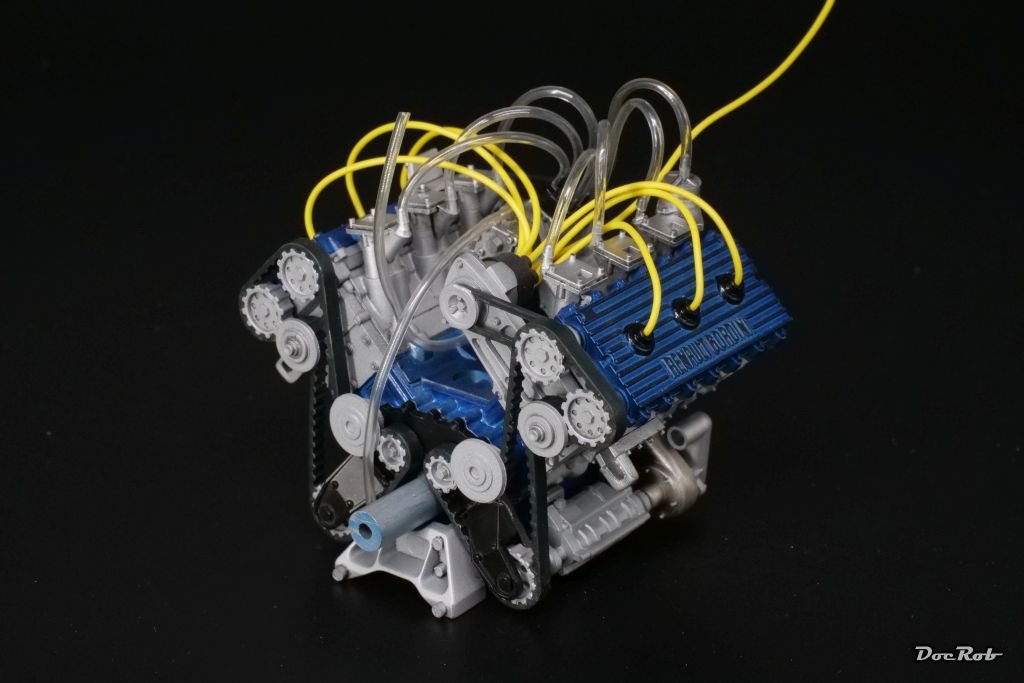
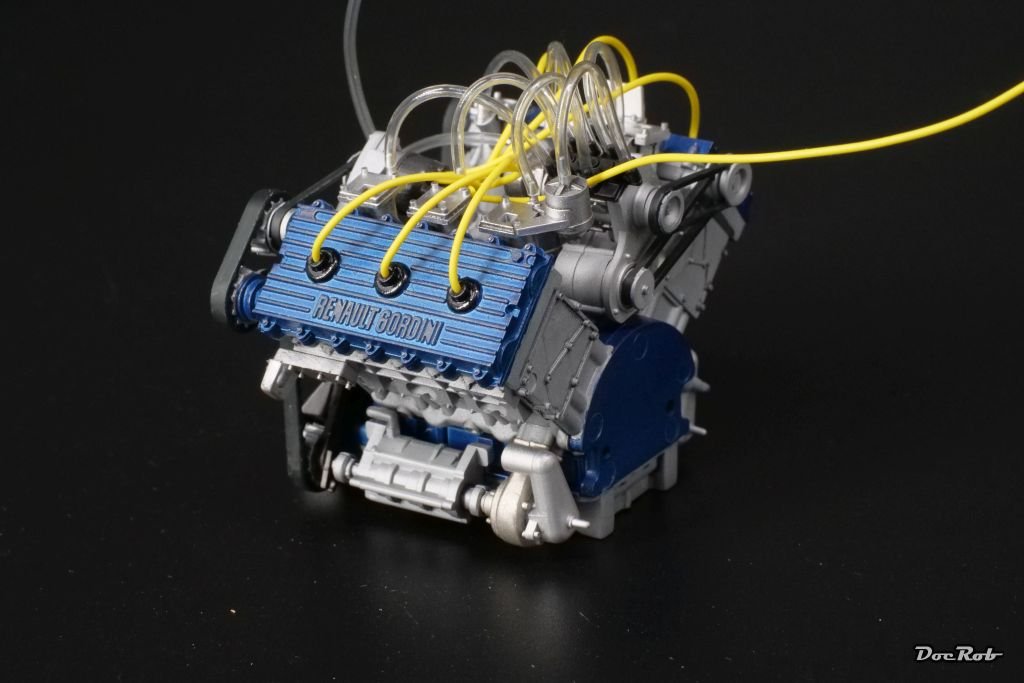
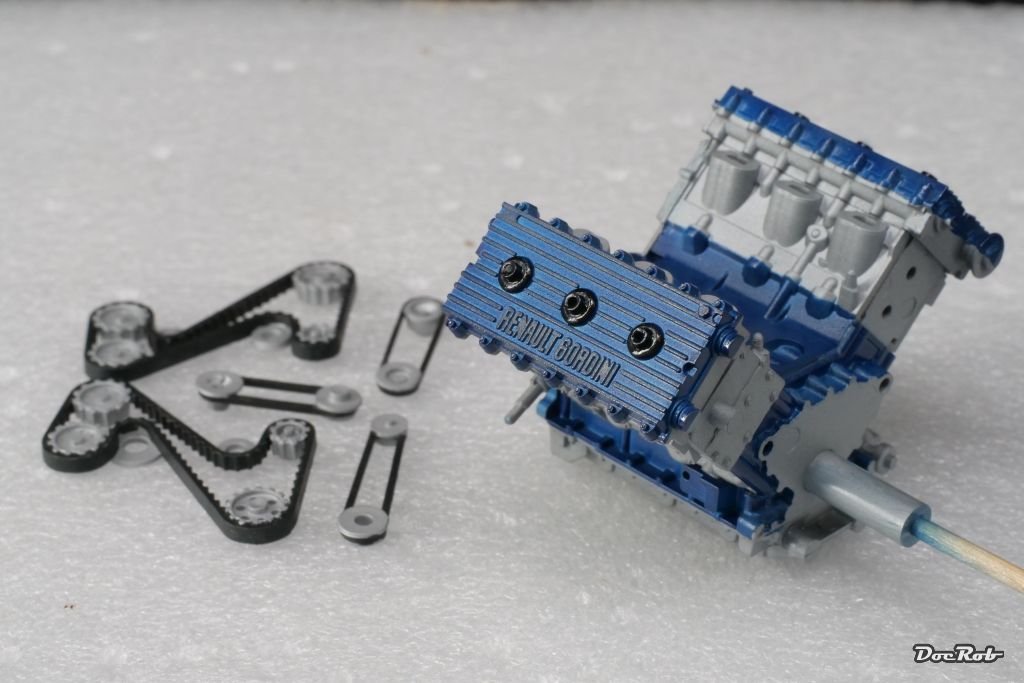
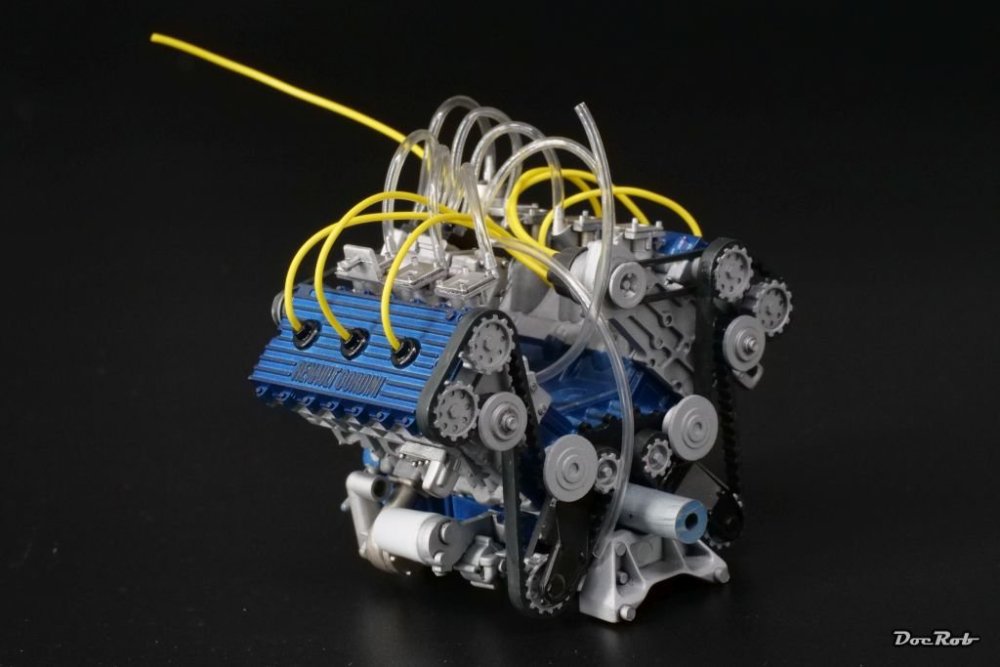
There was a lot of work involved for it replicating only a 1,5 liter engine. The turbo chargers which will push the engine to about 500 PS are not even included. Cables and wires are not finally attached, as I may add some resin connectors later, if my parcel ever arrives. I added a thin black oil color/white spirit wash, to enhance the details a bit. Before, I tried Tamiya and AK panel liner, but didn't like, how difficult they were to remove and found the oil color mix much mor controllable and noted for the future, to mix my own washes preferably. Fit of the parts was not brilliant, but in most cases sufficient. I had to cut some connector lugs for the belts and few other smaller parts, but no major complaints. Cheers Rob

- 99 replies
-
- 10
-

-

-
Cool, Carl, I didn't know about the existence of this kit, but browsed through the manual on Scalemates. Looks like an equally demanding build, like the Fly kit, but it's a single seater without antlers and the canopy can be build open without cutting the clear parts, which will help a bit. Can't wait to see you wip-ing this. Cheers Rob
-
Renault RE20 Turbo - Tamiya - 1/12
DocRob replied to DocRob's topic in LSM 1/35 and Larger Work In Progress
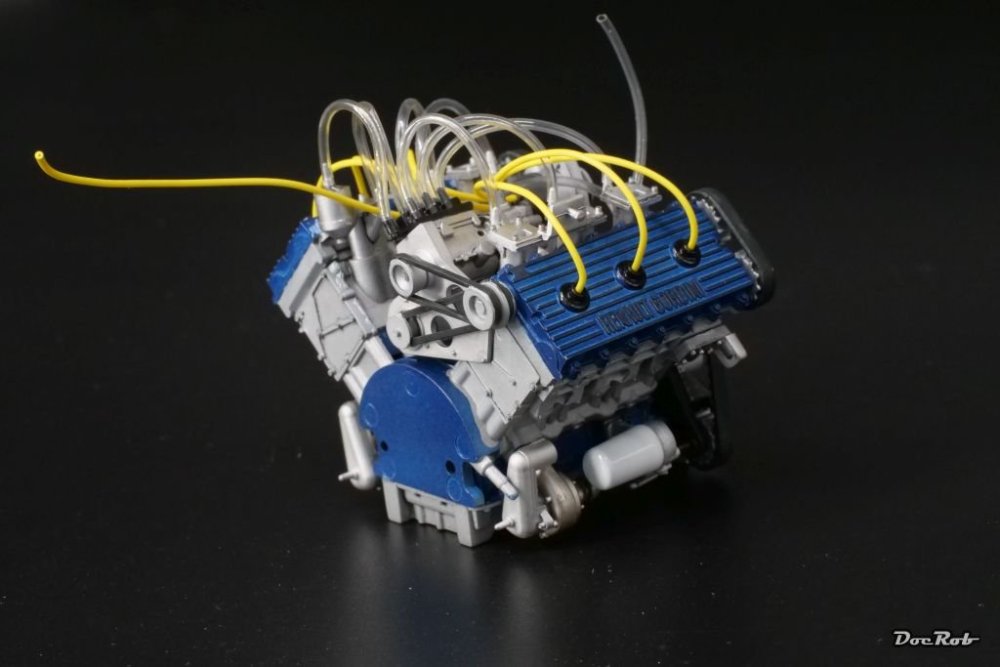
Continuing with the engine, all parts were sprayed with Tamiya LP matte aluminum per manual. After masking, I applied Tamiya X-3 Royal blue, which I left a bit translucent, to have a nice anodized appearance. Next, I picked of the ribs and branding with a soft lead pencil. The AK weathering pencil silver was not found suitable after testing. After some detail painting, I assembled the engine so far and decided to give it a coat of Tamiya LP semi matte clear, as the matte aluminum was too matte for my liking. I plan to use a very thin oil wash next, where the clear coat will be a good base for. Another test of patience were the numerous belts, which were sprayed in matte aluminum entirely and then the belts were painted with Tamiya LP Nato black. Various parts, which will be added to the engine block soon, were painted with AK's Extreme Metals dark aluminum, polished aluminum and duraluminum. Cheers Rob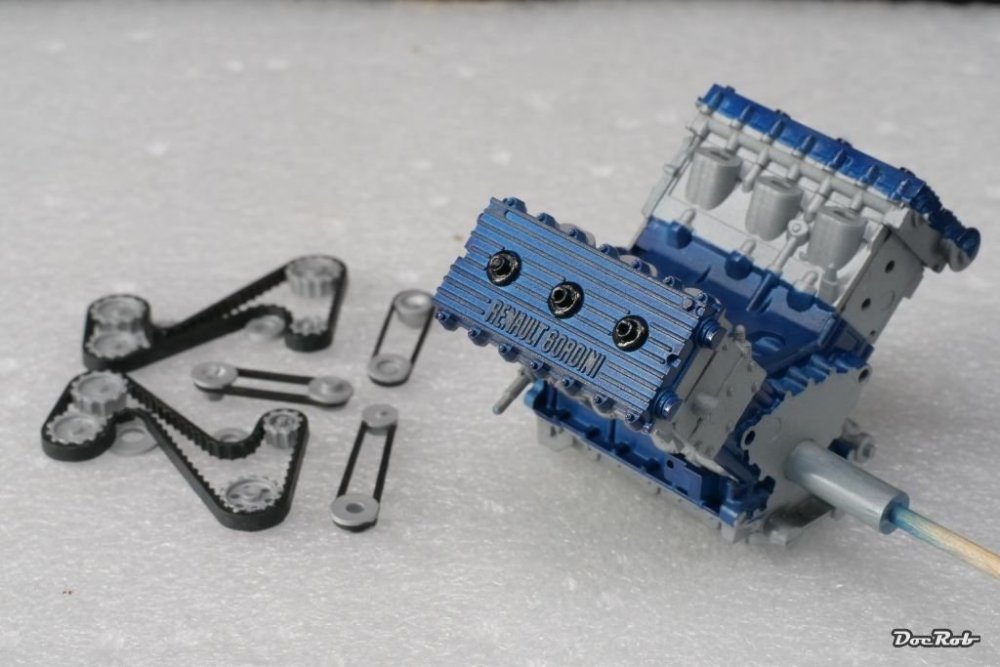
-
Renault RE20 Turbo - Tamiya - 1/12
DocRob replied to DocRob's topic in LSM 1/35 and Larger Work In Progress
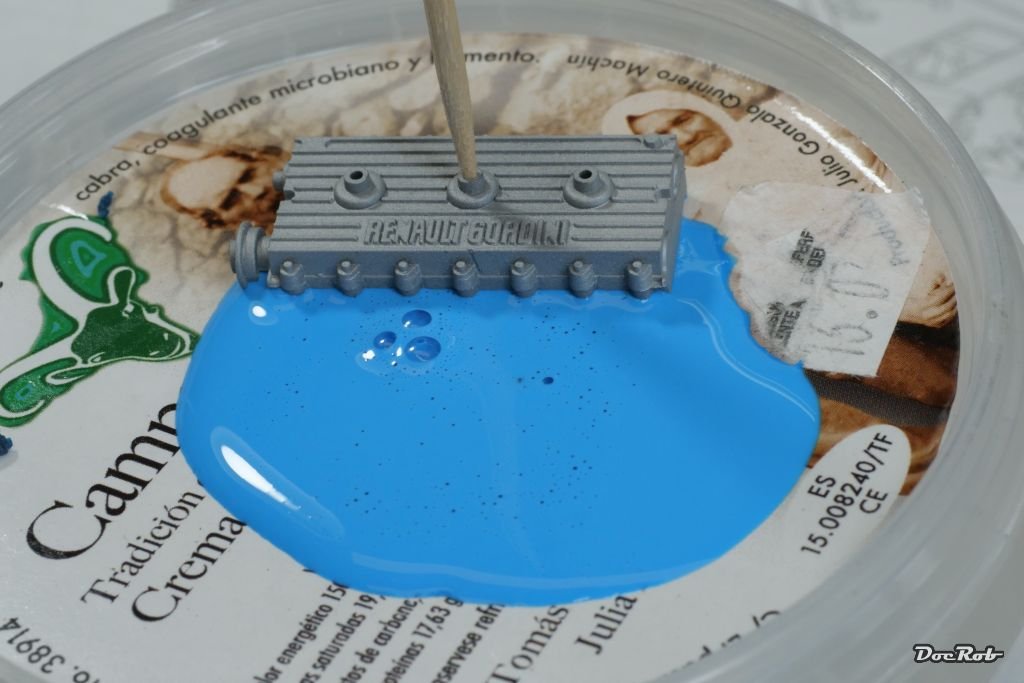
We had a heat wave here, combined with a heavy storm and a humidity under 15%, definitely no weather for airbrushing, but as my cave is relatively cool, I managed to prepare a zillion parts for the engine and suspension, which is a really time consuming task with this dinosaur. Lots of flash and burr, every part had to be inspected closely. I filled all the gaps and ejection marks on the wing with Perfect Putty, as best as I could, which is hopefully sufficient. I really suck at filling. The engine parts, of which there are many, got a coat of Tamiya LP flat aluminum as a base color. The next step, I pondered in my small brain. The cylinder covers as well as some other parts of the engine block, where in a blue paint, originally. I tried to mask the demarcation line with tape, but was unable to get a perfect masking with the difficult shape of the part. Tamiy coul have parted the cylinder covers for easier painting. During my siesta, I had an idea. I once bought a big bottle of semi viscous masking fluid from Moiotow for a special paintjob, which never worked out. Here it came to rescue. I spilled an amount of masking fluid onto some plastic and moved the part in the fluid, et voila, it worked. Siestas are no wasted time it seems. Cheers Rob


-
I think I’m getting into my work a little too deep.
DocRob replied to ScottsGT's topic in General Discussion
Better some decal backing paper, than a fuselage half of the Tomcat . Cheers Rob -
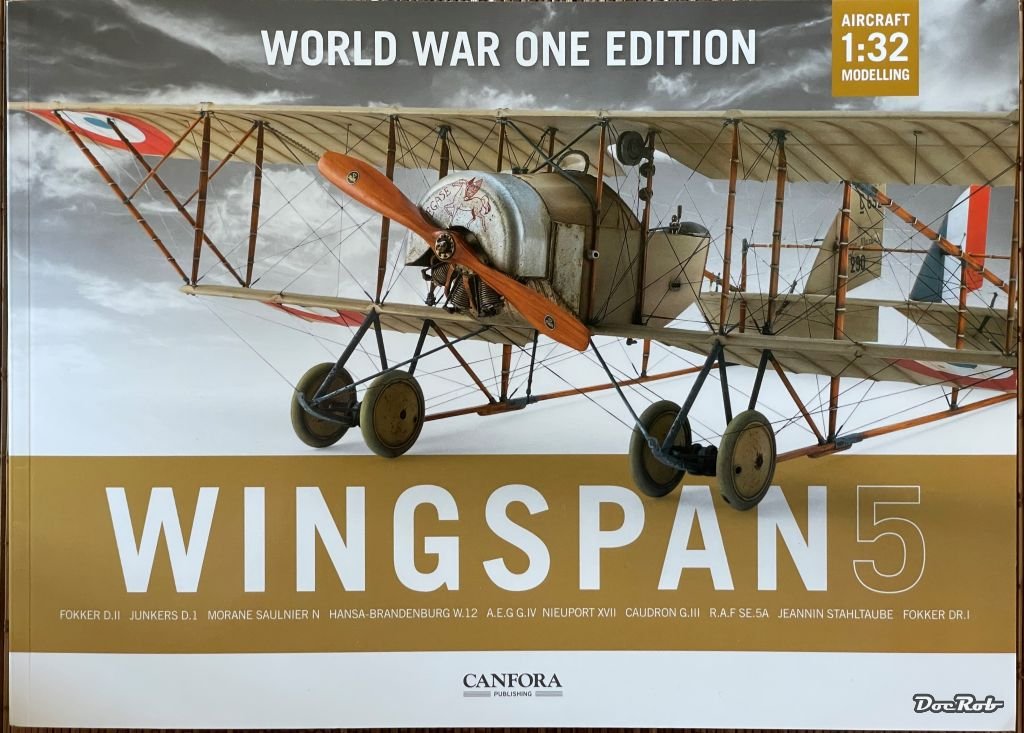
Today I received the WW1 edition from Canfora. On first inspection , it seems to be well written and photographed and the best thing, except the Roden SE.5a and the Special Hobby Fokker D.II, I own all the kits and some are on my immideately to build list, like the huge AEG night bomber or the Stahltaube, maybe the Caudron G.III. Cheers Rob

-
Another gem for the display shelf, Kevin. Cheers Rob
-
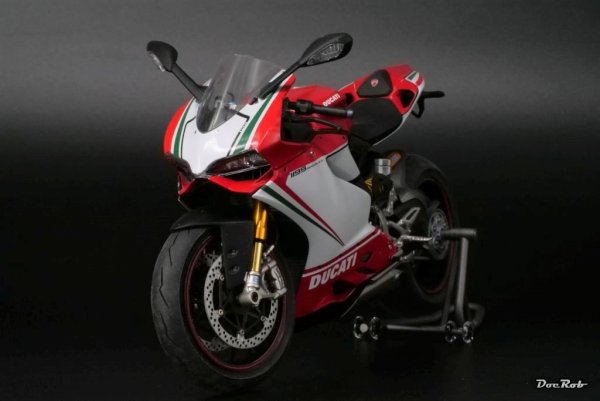 Thank you Paul, the Ducati was a n easy build, a near perfect kit, but the magic comes with representing all the different metals used and a solid glossed paintjob. I have the Monkey kit as well and will soon build it in a very special livery. Looking forward seeing a WIP about your police honda. I guess it's a 70's kit, so there will be a lot of cleanup needed, besides some extra detailing.. I may buy one of the 1/6 Tamiya's, but doesn't like most of the bikes. Maybe a Honda CB 750 early or a Suzuki Katana, only for sentimental reasons. Cheers Rob
 -
We have 35 degrees Celsius and a storm out there. No airbrushing at the moment. Humidity, which is normally between 70% and 90% dropped to 15% Cheers Rob
-
I'm no expert on flat rigging, but I'm pretty sure, the orientation of the wires is in the direction of the airflow, to give maximum stability with minimal drag. Looking at pictures on page one of your thread, seem to underline that, but it' hard to spot. I never used PE flat rigging, but will do on my 1/72 Gee Bee racer soon. I often read, the problem with PE rigging is temperature driven expansion, which logically increases with the length of the wire. I feel save enough for my 1/72 racer. PRYM of Germany makes a flat elastic white thread, which could be used as well. I have some, but have to admit, I never used it. If I'm right, EZ-Line also carries flat elastic thread. Cheers Rob
-
DRAGON Sd.Kfz.251/16 Ausf. C FLAMMPANZERWAGEN 1:35
DocRob replied to Bomber_County's topic in LSM Armour Finished Work
The completion of your Halbkette, nearly skipped by me as time is a bit sparse at the moment, Phil. I really like what you did with painting and weathering and yes, these open topped vehicles can be a challenge to paint. Cheers Rob -
Wow, another detail outburst. I have to raise my hat to your abilities, be it scratch building or painting, absolutely jaw dropping. Colors looking great, though I'm with Peter about the AK real colors. They spray absolutely fantastic, thinned with about two thirds of leveling thinner. I never had consistent results with AK acrylics, but never tried the 3rd generation ones, you tested. Cheers Rob
-
Your decaling looks perfect, masking would have been risky, with the corrugated metal surface. I built the 1/32 PZL and found the IBG decals very good to work with. Cheers Rob
-
Eduard 1/48 Spitfire Mk XVI "French 1945"
DocRob replied to KevinM's topic in LSM 1/48 Work in Progress
The XVI looks fantastic, Kevin, nice work with the camo and decaling. I have to of these in my stash, my only Spitfires. One will be in NMF, one in camo and I have all the Brassin stuff for one. Cheers Rob -
Hard to imagine, how you accomplished the great progress and bug hunting with the Tomcat given the lawn issues you had . Our huge garden is more like a jungle, needs a lot of work too, but you can hide a lot and our grass part isn't anywhere near a golf lawn, but a paradise for our dog. Cheers Rob
-
Renault RE20 Turbo - Tamiya - 1/12
DocRob replied to DocRob's topic in LSM 1/35 and Larger Work In Progress
I was never a devoted fan of car racing in general but the formula one attracted me a bit in the 80's, but the actual F1 scene is downright boring to me as well. Supporting systems for everything, why not sparing the drivers and put in artificial intelligence, at least that would be a technical challenge. Many of the past drivers wer icons, like you mentioned and it was fun to follow them a bit. The Renault RE20 to me in the time was the first nail in the coffin of F1 with it's tiny 1,5 liter engine, turbo blasted to nirvana, but it was effective. It lacked the esthetics of other cars like many MCLaren's, some Ferraris and Lotus cars. Speaking about icons. I would welcome a decent 1/12 kit from a Lancia Stratos, one of my favorite cars, beside the Ciroen DS and my Jeep. Cheers Rob -
Renault RE20 Turbo - Tamiya - 1/12
DocRob replied to DocRob's topic in LSM 1/35 and Larger Work In Progress
It's hard to believe, these kits are about 40 years old and may are ahead of modern Italeri kits, Peter. Preparation is the key, like you mentioned, as the finish of car models is the goal to accomplish. I'm still not decided about de-chroming or not. I've never done it before and the plating doesn't look to bad. On the rear wing, there are lots of rivets all over, which I don't want to loose or replicate. Luckily, I have some time left to make the decision. Cheers Rob -
Renault RE20 Turbo - Tamiya - 1/12
DocRob replied to DocRob's topic in LSM 1/35 and Larger Work In Progress
Thank you Mark, I will take my time with this one, it's a summer build and has to share my attention with other activities. These old Tamiya kits are a solid base for a bright spot to delight the showcase. Cheers Rob -
Muchas gracias mi amigo, After all the abuse, I did to the canopy glazing during the years of building the Arado, I'm really satisfied, that there are only minor blemishes to see. A shabby canopy would have made the Arado a bin diver, as this is clearly the focal point. Luckily, I got spared, but removing the masks in the end let my fingers tremble. Cheers Rob
-
Trumpeter TBD-1 Devastator
DocRob replied to Clunkmeister's topic in LSM 1/35 and Larger Work In Progress
However great your pain is about the oob-approach. It looks like a Devastator to me and a fine one btw. Cheers Rob -
Thank you Mike, the Arado was a bit like a thorn in the foot, it hurt as long as it was not finished somehow. Now I'm glad the Nachtigall is done and looks at least decent. Cheers Rob
-
Renault RE20 Turbo - Tamiya - 1/12
DocRob replied to DocRob's topic in LSM 1/35 and Larger Work In Progress
It's newish for me too, Phil, but I have a the 1/24 Ford GT II and a 1/12 Ducati Panigale under my belt. Building and painting sequence is quite different from planes and armor and I have to study the manual closely to find my own approach. The Ducati was a bit similar with building it from the inside to the outside and the inside is not a mere cockpit. I choose the Renault out of my brief 1/12 stash, because I never liked the Turbo philosophy a lot. Tiny engines superblown, but somehow this weird machine appeals to me. Cheers Rob -
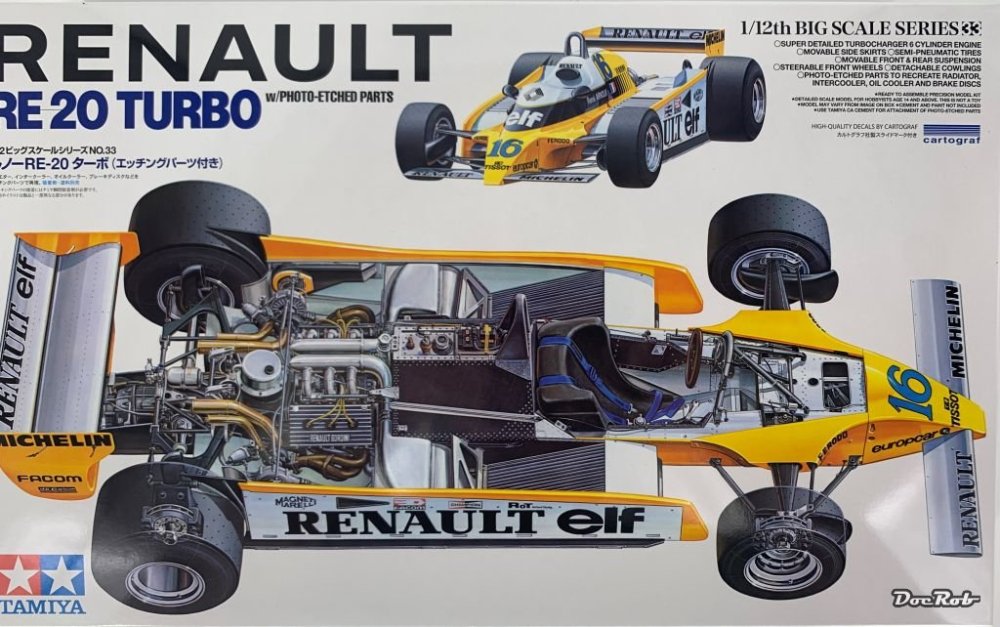
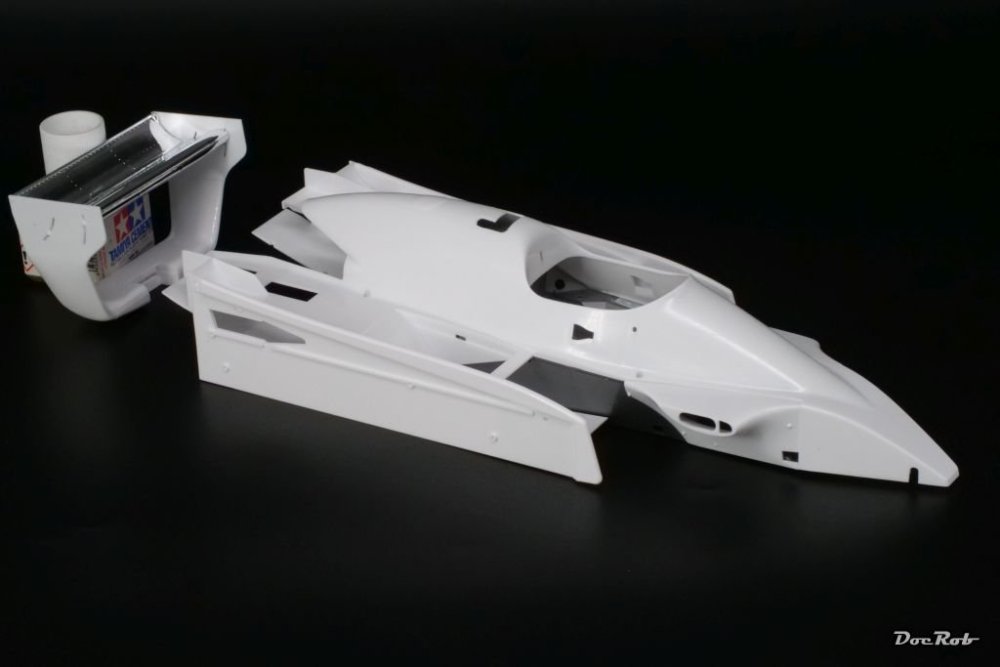
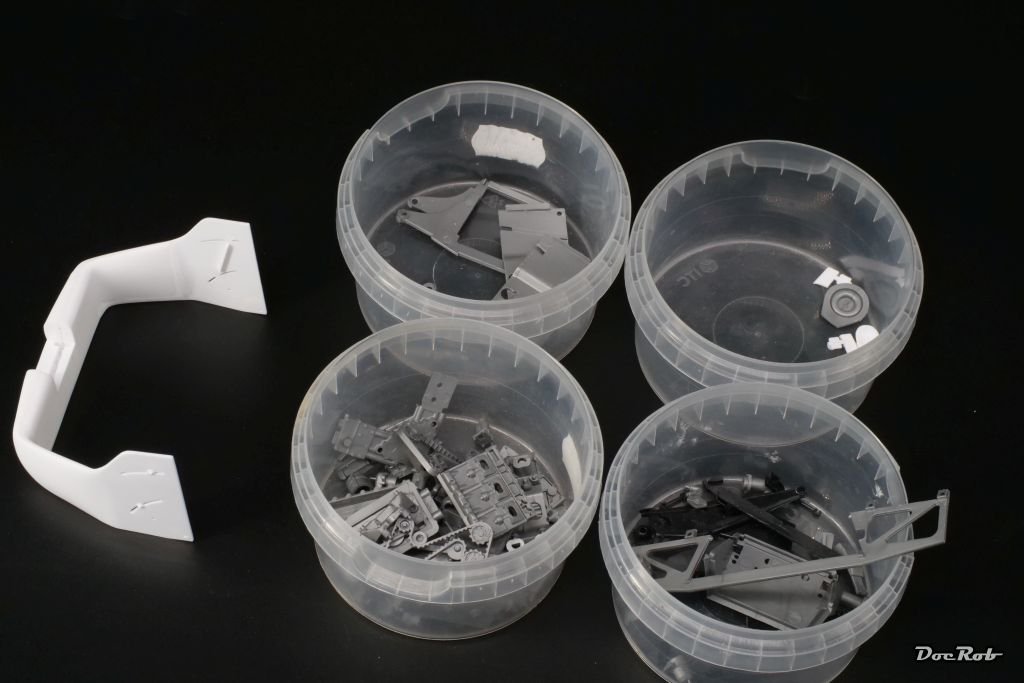
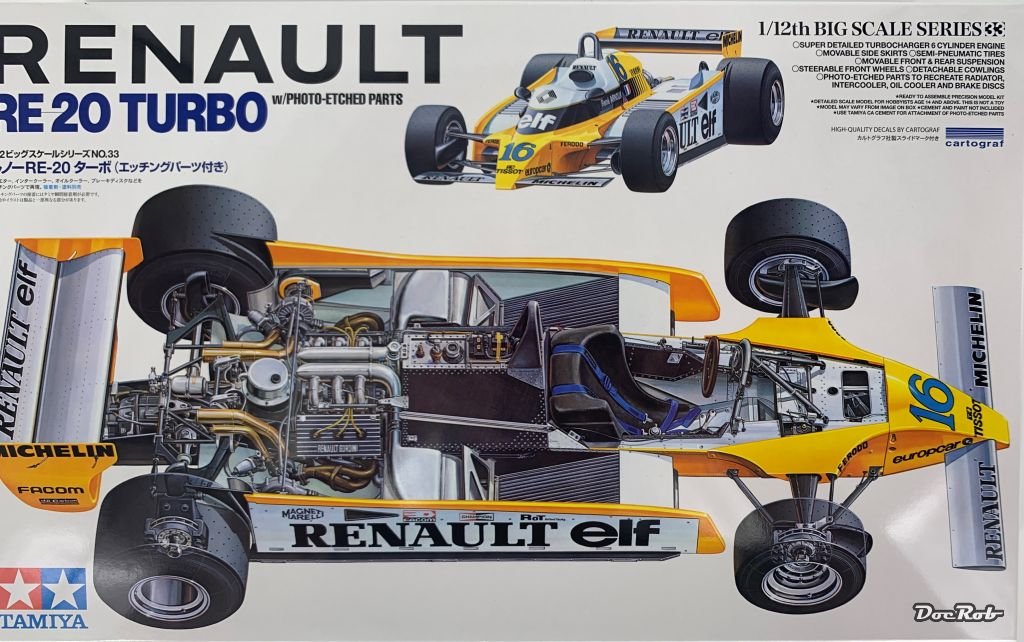
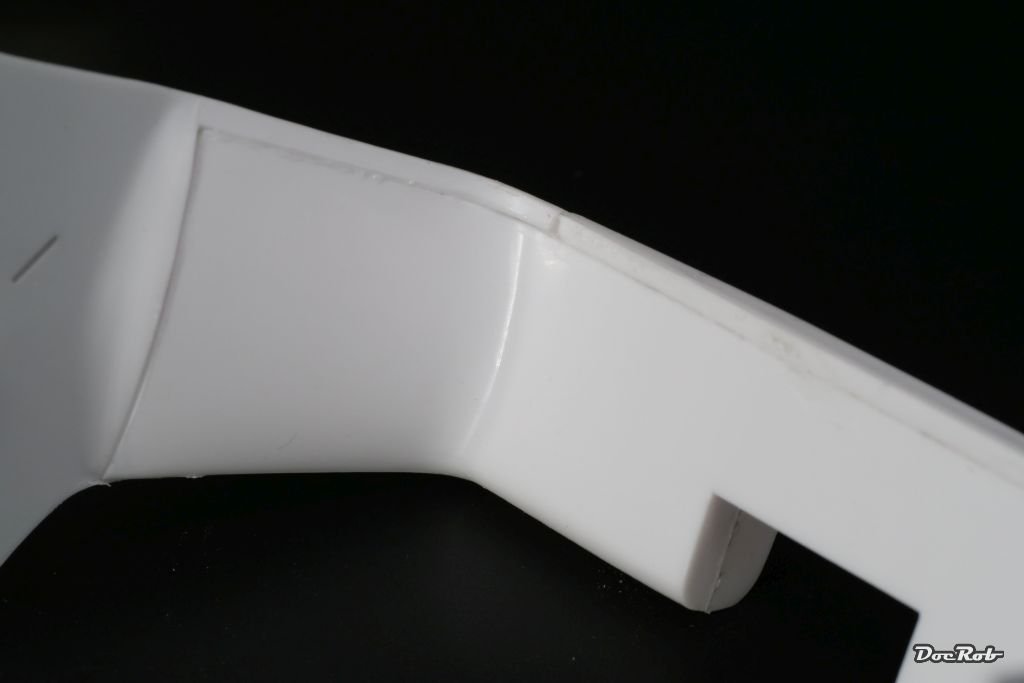
...and now to something completely different. While choosing my actual summer build, I opened a lot of stashed boxes lately and got stuck with the large colorful ones. I have three of the old Tamiya 1/12 car kits and the Renault was picked over the Porsche 935 and the Brabham BT44, because I liked it less than the others. Large scale car modeling is new to me, so if I disappoint myself, the damage is easier to cope with. I wanted to have this kit, even if I disliked these turbo testosteroned mini engines, as the Renault looks like a gentle Frankenstein in formula one standards. The yellow and white paintjob does enough of a job, to conceal that a bit, The kit dates back to 1981 and this is clearly visible, while inspecting the parts. There is flash, parting lines, burr and crude looking parts. This kit for sure is not up to standards of modern Tamiya kits and needs some extra attention. Don't get me wrong, it doesn't look like a bad kit, but I guess, there will be some unwanted surprises hidden on the sprues. The ancient kit received PE for grills and brake disks and decals printed by Cartograph. First, I cleaned the main body parts and this was not done in a blast. It took some hours with the blade, chisel and sanding sticks to get rid off the multiple burrs all around. I want to paint the body parts early, that in case of failure, the expense in time and effort wouldn't be too great. The rear wing base construction is a four part U-shaped affair, which I guess should be flush all over. To reach that goal, there will be needed a lot of filler, as you can see on the picture. Another decision to make son, is about the chromed parts for the wings and rims. The provided chrome doesn't look too bad, but I will compare it with photos of the real thing and decide then, if I strip and repaint these parts. Cheers Rob