DocRob
-
Posts
7,043 -
Joined
-
Last visited
Content Type
Profiles
Forums
Events
Gallery
Everything posted by DocRob
-
Just do it Ernie, it's good to do something different from time to time, helps to be alive modeling wise. I have only a few 1/72 kits, but one, I'm especially looking forward to, is the Special Hobby late Helldiver with an Eduard Big Set, with flaps and all. I know, it will be crazy, but hey, a world without crazyness would be boring. Cheers Rob
-
Thanks Gary, that's about what the Eduard manual states and more or less, what I will use. One difference is with the superstructures above funnel level, which are often described to have been painted white. I've read some comments from surviving sailors, which are not completely coherent about the coloring. One factor might be, that many things were changed painting wise during an overhaul in October only weeks before the attack. Possibly not all the paintwork was finished by then. Be it as it is, I will use the above scheme except for insignia white on the tops. Cheers Rob
- 329 replies
-
- 3
-

-
- uss arizona
- eduard
- (and 1 more)
-

Revell 1/32 Spitfire Mk IIa
DocRob replied to Peterpools's topic in LSM 1/35 and Larger Work In Progress
Camo looks great Peter and the colors seem to have the right tone. Like you, I like the Real Colors a lot, they spray trouble free, very fine and cover well. Cheers Rob -
GWH Hawk 81C AVG decals. 02/18/23
DocRob replied to Clunkmeister's topic in LSM 1/35 and Larger Work In Progress
The Hawk is looking great along the Helldiver Ernie. A bit more weathering would be more to my liking in case of the Hawk, but maybe, the fading you plan will be enough. If overdone, it doesn't appeal that much anymore. I will build one of those out of my HKM Mitchell. I got the conversion kit for the cockpit and radar and some rockets to do the trick. A blue gray Mitchell, a dream comes through. Cheers Rob -
Seems to be not so easy Gary, the USS Arizona had a very bluish tinted grey and there seem to be dozens of theories about the correct one, ranging from nearly deep blue to grey with a tint of blue. Cheers Rob
- 329 replies
-
- 1
-
-
- uss arizona
- eduard
- (and 1 more)
-
On the colorized photo, it seems to me. like there are five guys wearing white 'Matrosenmützen' (like the black one of the first pic) and two wear black 'Schiffchen' (forage caps) or just black hair, which is unlikely. I don't know a lot about the Reichsmarine or Kriegsmarine, but maybe the colorized pic is one of a military parade and therefore the white caps. On a very quick research, I read, the Matrosenmützen where white in domestic areas, dark blue in others and in tropical areas, it depended on the season. It seems like there where white Teller- or Matrosenmützen and only whit covers for the blue ones. The tradition of the Mützenband (tally band) seems to point back to the mourning of the death of Admiral Nelson and the band has a total length of 1,16 m and is 3,2 cm wide and has the ends cut like a swallowtail. Other sources claim, the band was worn as a substitute for the then forbidden pigtails of the sailors. The collar of the sailors shirts was developed to keep those pigtails of the early days from spoiling the white shirts from the grease or tar of the pigtails. The three stripes of the collar remind of Nelsons victories, as can be seen on your first pick. It was only a brief search, because of spontaneous interest, so all is not absolutely verified, it's only quick view. Cheers Rob Cheers Rob
-
ProModeler 1/48 PBY-5A Catalina + Goodies, RFI
DocRob replied to CANicoll's topic in Let’s Get Wet Group Build.
What's not to like about a Cat. It's build for purpose and that shows with lots of interesting details, blisters, turret, radar, wheels and floats, along with endless weathering possibilities. The way your build develops, all this will show and display a great model with lots of detail to please the eye. I can't wait to see your progress on this great project. Cheers Rob -
Fantastic progress, I like the mottling effect and I'm with you, to try something new with every build. I even put projects on my schedule only to learn certain techniques. I think under a matte coat and some post weathering the mottling will look exactly perfect. It's good to see one of these Brit Phantoms being built. Cheers Rob
-
How cool is that Gary, these figures look great and the tally bands are a nice touch, never seen before. You made a jewel out of that dinosaur kit. I still hope to find my lost parts from my S-38 kit, as I urge to build one or maybe I have to buy a new one. Cheers Rob
-
Thank you Gary, paint has still to be applied and I have to choose the colors, another step of head scratching. Cheers Rob
- 329 replies
-
- 2
-
-
- uss arizona
- eduard
- (and 1 more)
-
Thank you Hubert, it would indeed be very interesting to have a second build, only with the base kit to compare. I would have done so, only for fun, if there wouldn't have been the cleanup issue, which is too time consuming for being only a joke. I considered making comparative photos of kit parts, vs. enhanced parts, but found it too frustrating. No I hope to achieve a solid result with the kit on good terms and again have learned a lot of new stuff during the build. Cheers Rob
- 329 replies
-
- 1
-
-
- uss arizona
- eduard
- (and 1 more)
-
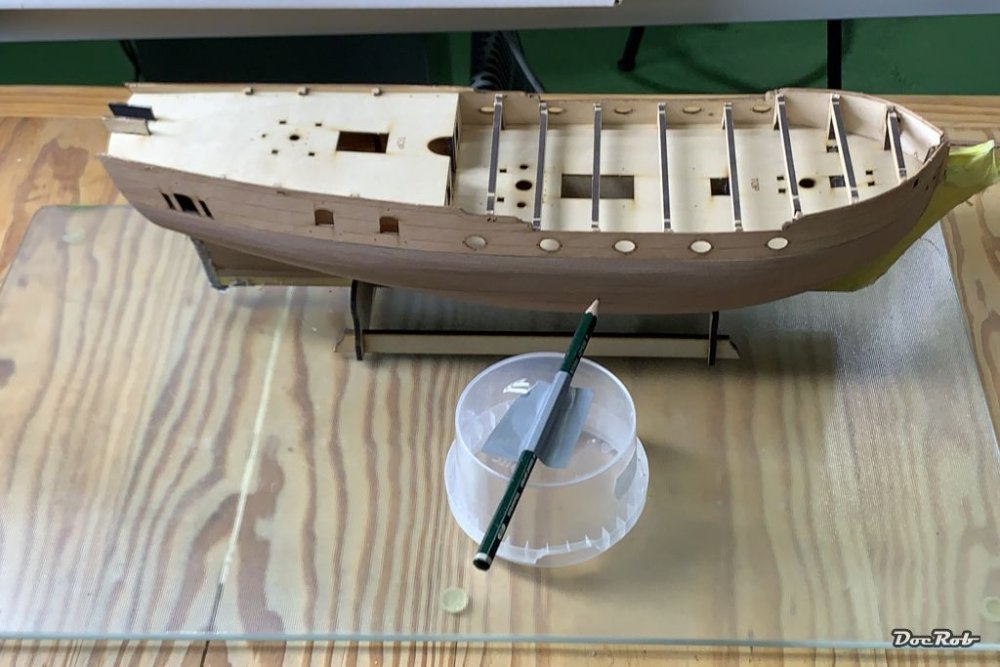
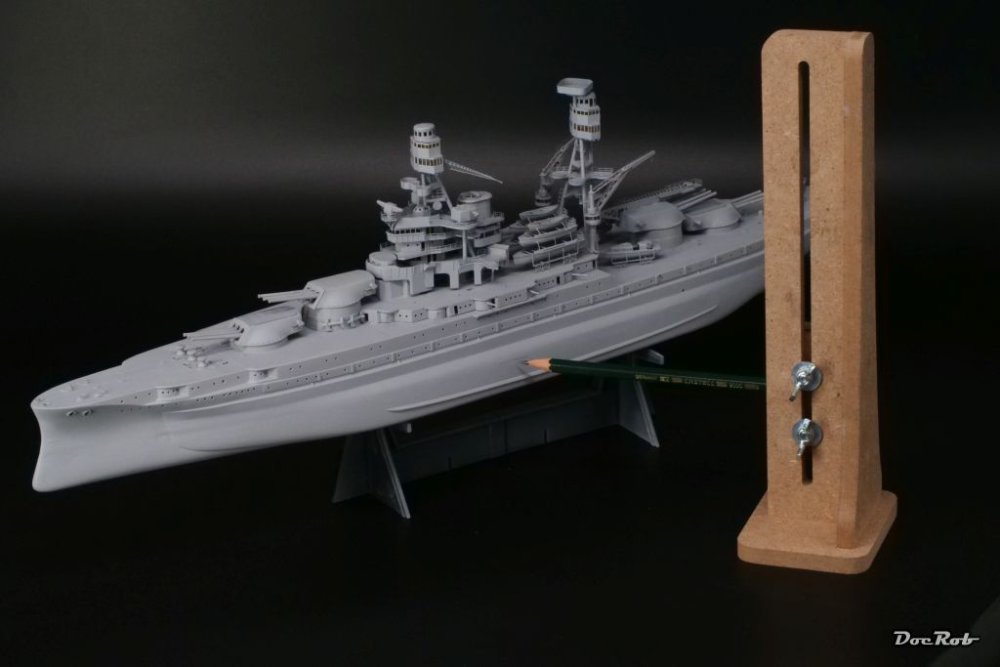
Thank you Peter, that's good advice about limiting the filling area with masking. I will go to the primary school of filling soon and will train that process a bit. Ah, yes, the waterline tool. When I build my first wooden sailing ship, I needed to mark the waterline and developed a high tech tool for doing so, which looked like this I decided, I need a better tool for future builds and invested in further advanced technology . This one costed under ten Euros and is made by HobbyZone from Poland. Cheers Rob
- 329 replies
-
- 6
-
-

-
- uss arizona
- eduard
- (and 1 more)
-
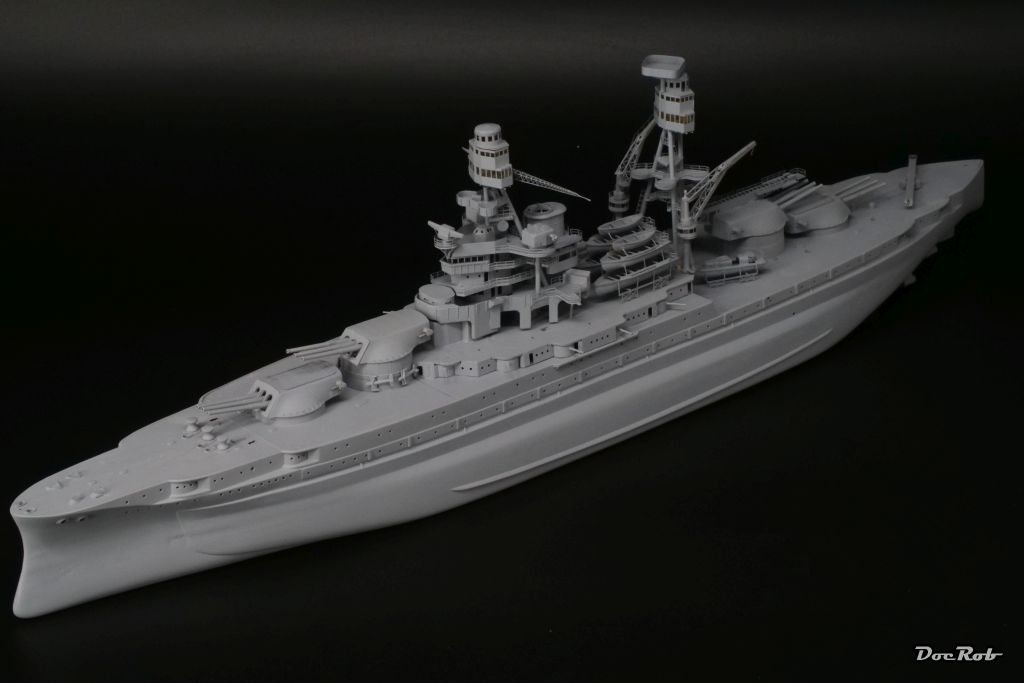
Now, entering the painting stage, I have to clean up my bench and remove all the sanding dust, PE snips, and 3D-print supports. The weather is so nice at the moment, that there will be slow progress for some days, as we have lots of sun, no wind and a beautiful vista of the sea and surrounding islands. So it's time for outdoor sports, work in the garden and having a cocktail on the terrace before a barbecue. I will try to continue, with painting the hull and decks, to be able to install the wooden deck planking. Cheers Rob
- 329 replies
-
- 1
-
-
- uss arizona
- eduard
- (and 1 more)
-
I already did Chris or at least primed the ship, but I'm with you, all the shiny brass looks interesting, but if you look closely, there are residues of CA or coloring from annealing, and there are some ugly plastic parts left as well . You not only need patience, but you have the whole bench cluttered with dozens of tools, which all need to be at hand, so this stage of work is a bit chaotic. Like you, I'm still fascinated, how much the PE and printed parts elevate the quality the kit. Prim (er) Time - I used Mr. Surfacer 1200 for the job and used a bit more pressure than usual for the superstructures, to get the primer in the tiniest hidden spots. Next will be painting the hull, but before, I mark the waterline with my waterline tool, easy, because the bottom of the hull is completely flat. Cheers Rob

- 329 replies
-
- 8
-
-
- uss arizona
- eduard
- (and 1 more)
-
Hehe, got you Peter, I'm really bad at filling especially. Sanding abilities are not so bad, but I generally try to build as precise as possible to avoid filling where I can. If there is only the tiniest gap, I normally glue the parts and sand down the surrounding surfaces a tiny bit, until it looks good. I know, have to proper learn these things and I will use your advices as a guideline. Cheers Rob
- 329 replies
-
- 1
-
-
- uss arizona
- eduard
- (and 1 more)
-
Starts to look extremely good Gus, I always liked the high-viz-schemes better. You achieved a nice contrast, where it belongs and modulation looks great. Have a nice time off work and off the bench. We have kind of an unusual heat wave for the time after a rough and cold winter, so bench time is a bit reduced, due to surfing, mountain biking and running with the dog. You have to take it, when it's there . Cheers Rob
-
Thank you PW, my perseverance is wearing and not because of hundreds of tiny PE parts, but because I suck at filling and sanding. I tried to get rid of the parting line of the hull with putty and after priming it looked not good enough to me. So out with the putty again, only to discover after priming, it was worse than before. Now I puttied and sanded a third time, and now I will leave it in it's suboptimal state. The whole model is primed and ready for painting, pics will follow. Cheers Rob
- 329 replies
-
- 4
-
-
- uss arizona
- eduard
- (and 1 more)
-
Thanks for reviewing this gem, Fran. I have this boxing in my stash and although I'm not a heli man, will build it soon. You're absolutely right about the fantastic complete package, which I got for the same price like the less equipped ICM kit. Carl already built the ICM kit here and, it went together fairly good, if I remember right. Cheers Rob
-
ProModeler 1/48 PBY-5A Catalina + Goodies, RFI
DocRob replied to CANicoll's topic in Let’s Get Wet Group Build.
Very fine progress with the big Cat Chris. I was a fan of the Cousteau films and I started to snorkle, after I saw some of his footage. I was well aware that his son died in a PBY and was very sad at the time. Cousteaus Cat was my first encounter with the plane and I immediately fell in love with it and part of my juvenile thinking was enjoying the spirit of freedom, this plane and the adventures of their owners emanated. Your work on the blisters will pay, as they are the focal point of every Catalina build. Cheers Rob -
I put my finger on the tube and made very gentle moves with the saw. Try to relax and feel the flow of the saw, it's so easy to jam it, due to the narrow slit in the mitre. Uh, sounds a bit raunchy, but I mean it . I use the finer toothed blade and not a lot of pressure. Sawing tubes is always delicate, when it comes to the middle part, the start and end is easier. Cheers Rob
-
Hi Phil, I generally avoid vinyl masks, wherever I can. Shrinking is an issue and Kabuki is easier to glue into tight cornered spots. It also helps, that they are less flexible. I never had issues with residues though with vinyl masks, maybe, because I never used lacquers on them. I like the products from Eduard, Maketar (you can choose between Kabuki and vinyl here) and 1ManArmy best. The latter produces a set for the Mossie, which includes the unbelievable fine cut stencils as well. They provide the basic markings and roundels, so you have to check if everything you need is there. They are generally sold by Hannants for example, but the Mossie set is out at the moment. I have some HGW transfers for my Mossie, a hit and miss product, but I will try them, when time comes. If they work, they look like tattooed on. Cheers Rob
-
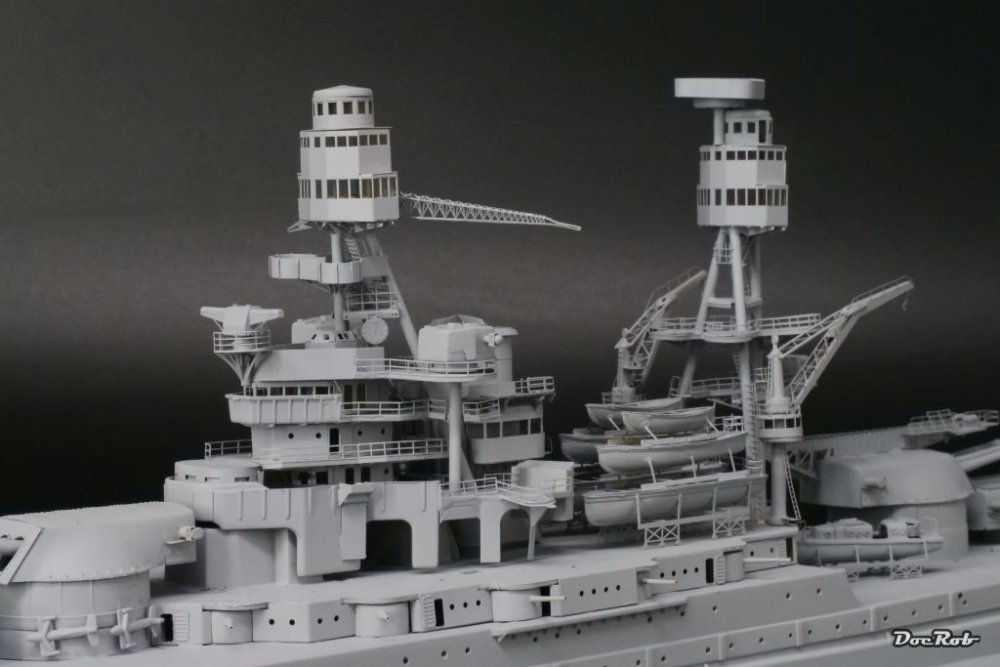
Thank you amigos, these 3D-printed parts add a lot of detail to the build. There will be more, searchlights, AA-guns, winches and fire extinguish guns along the Kingfishers and hopefully the bollards, which still need to be sent from Eduard, as some where missing in the kit. Thanks Kevin, I always reduce the resolution of my pics, normally only to not use so much resources and have fast opening pages, but in this case, it's also to hide the imperfections . Cheers Rob
- 329 replies
-
- 2
-

-
-
- uss arizona
- eduard
- (and 1 more)
-
Revell 1/32 Spitfire Mk IIa
DocRob replied to Peterpools's topic in LSM 1/35 and Larger Work In Progress
Like always, the extra work needed, performed by your skilled hands doesn't show in the results. That's what modelling is all about. Good that you changed the spinner, a part, falsely contoured can easily ruin the whole appearance. I'm a bit with Gary about Revell kits, but do own some and yes, all of them with a lot of AM. At last we are modelers and there is only a handful of near perfect kits out there and our hobby is not so much about to find these precious jewels, but to build, what we want to have built, no matter of the kit quality. Cheers Rob -
Fantastic result Kevin, your Schnellboot is a beauty, there are so many details, catching the eye. Cheers Rob
-
Great work on the stanchions. These slide fit brass tubes are a gift for modelling. The result looks very convincing. I have to look, if my mini mitre also provides a plastic length adjusting stop. At least mine worked without moving. Cheers Rob